When someone mentions “survival food”, what do you think of? Many of us envision shelves full of cans, jars, vacuum-packed pouches, and large bags of dry beans and rice. These shelf-stable items are all great foods to have on hand for emergencies. However, a small sustainable garden can add a much-needed dose of freshness to your recipes — all you’ll need is some kitchen scraps, water, and sunlight.
We often think that growing food is a difficult and painstaking process. But if you’ve ever left a potato in the back of a cupboard, or forgot about half an onion in the recesses of your fridge, you’ll know that growth tends to happen on its own. The little green sprouts may be a nuisance if you’re looking for a quick snack, but they’ll pay dividends in the long run if you’re patient. Vegetable scraps can be re-planted in soil or water to promote new growth, and before you know it you’ll have a miniature garden.
Even pineapples can be regrown, though they’ll require patience, as they take several years to produce fruit.
The following infographic from JerryJamesStone.com shows methods for regrowing fruits and veggies from trimmings and kitchen waste. This is financially smart since it can save you money on groceries, but it’s also a good skill to learn in case SHTF and grocery stores are no longer an option. Click here for a full-size version of this infographic.
Other fruits and veggies can be regrown using similar methods. One notable addition that’s left out by the above guide is the avocado. With a few toothpicks and a jar of water, you can grow an avocado tree:
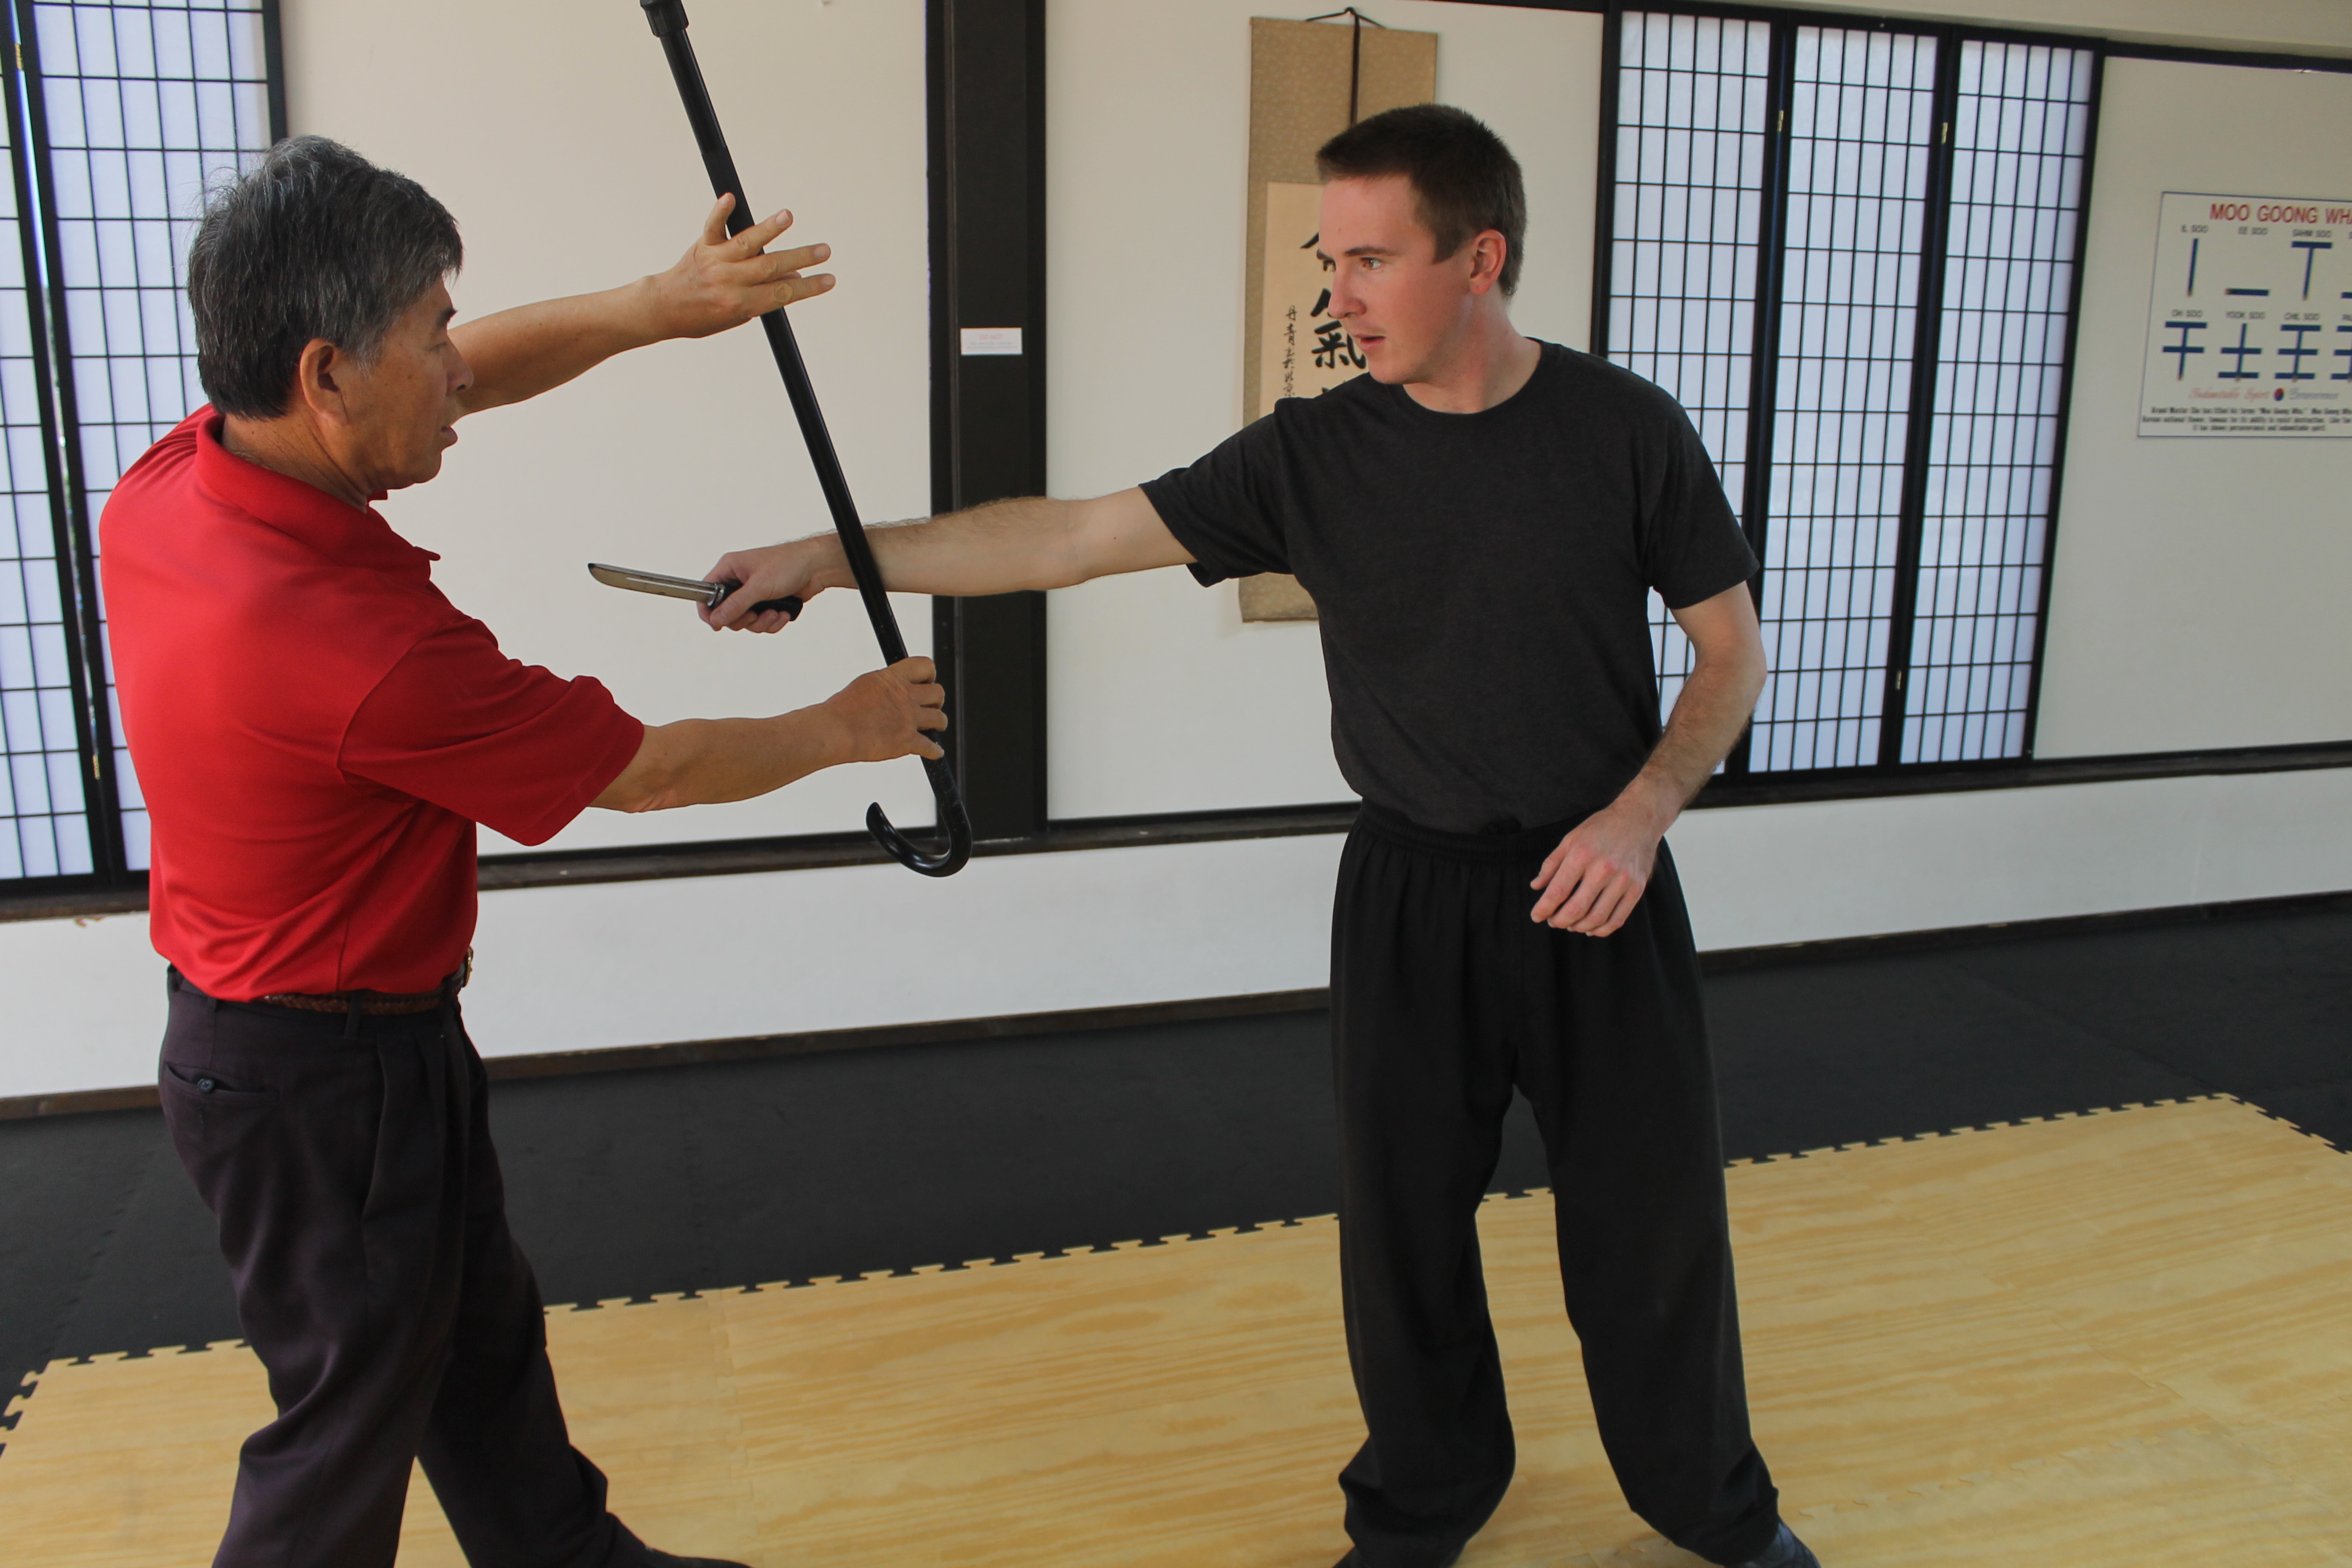
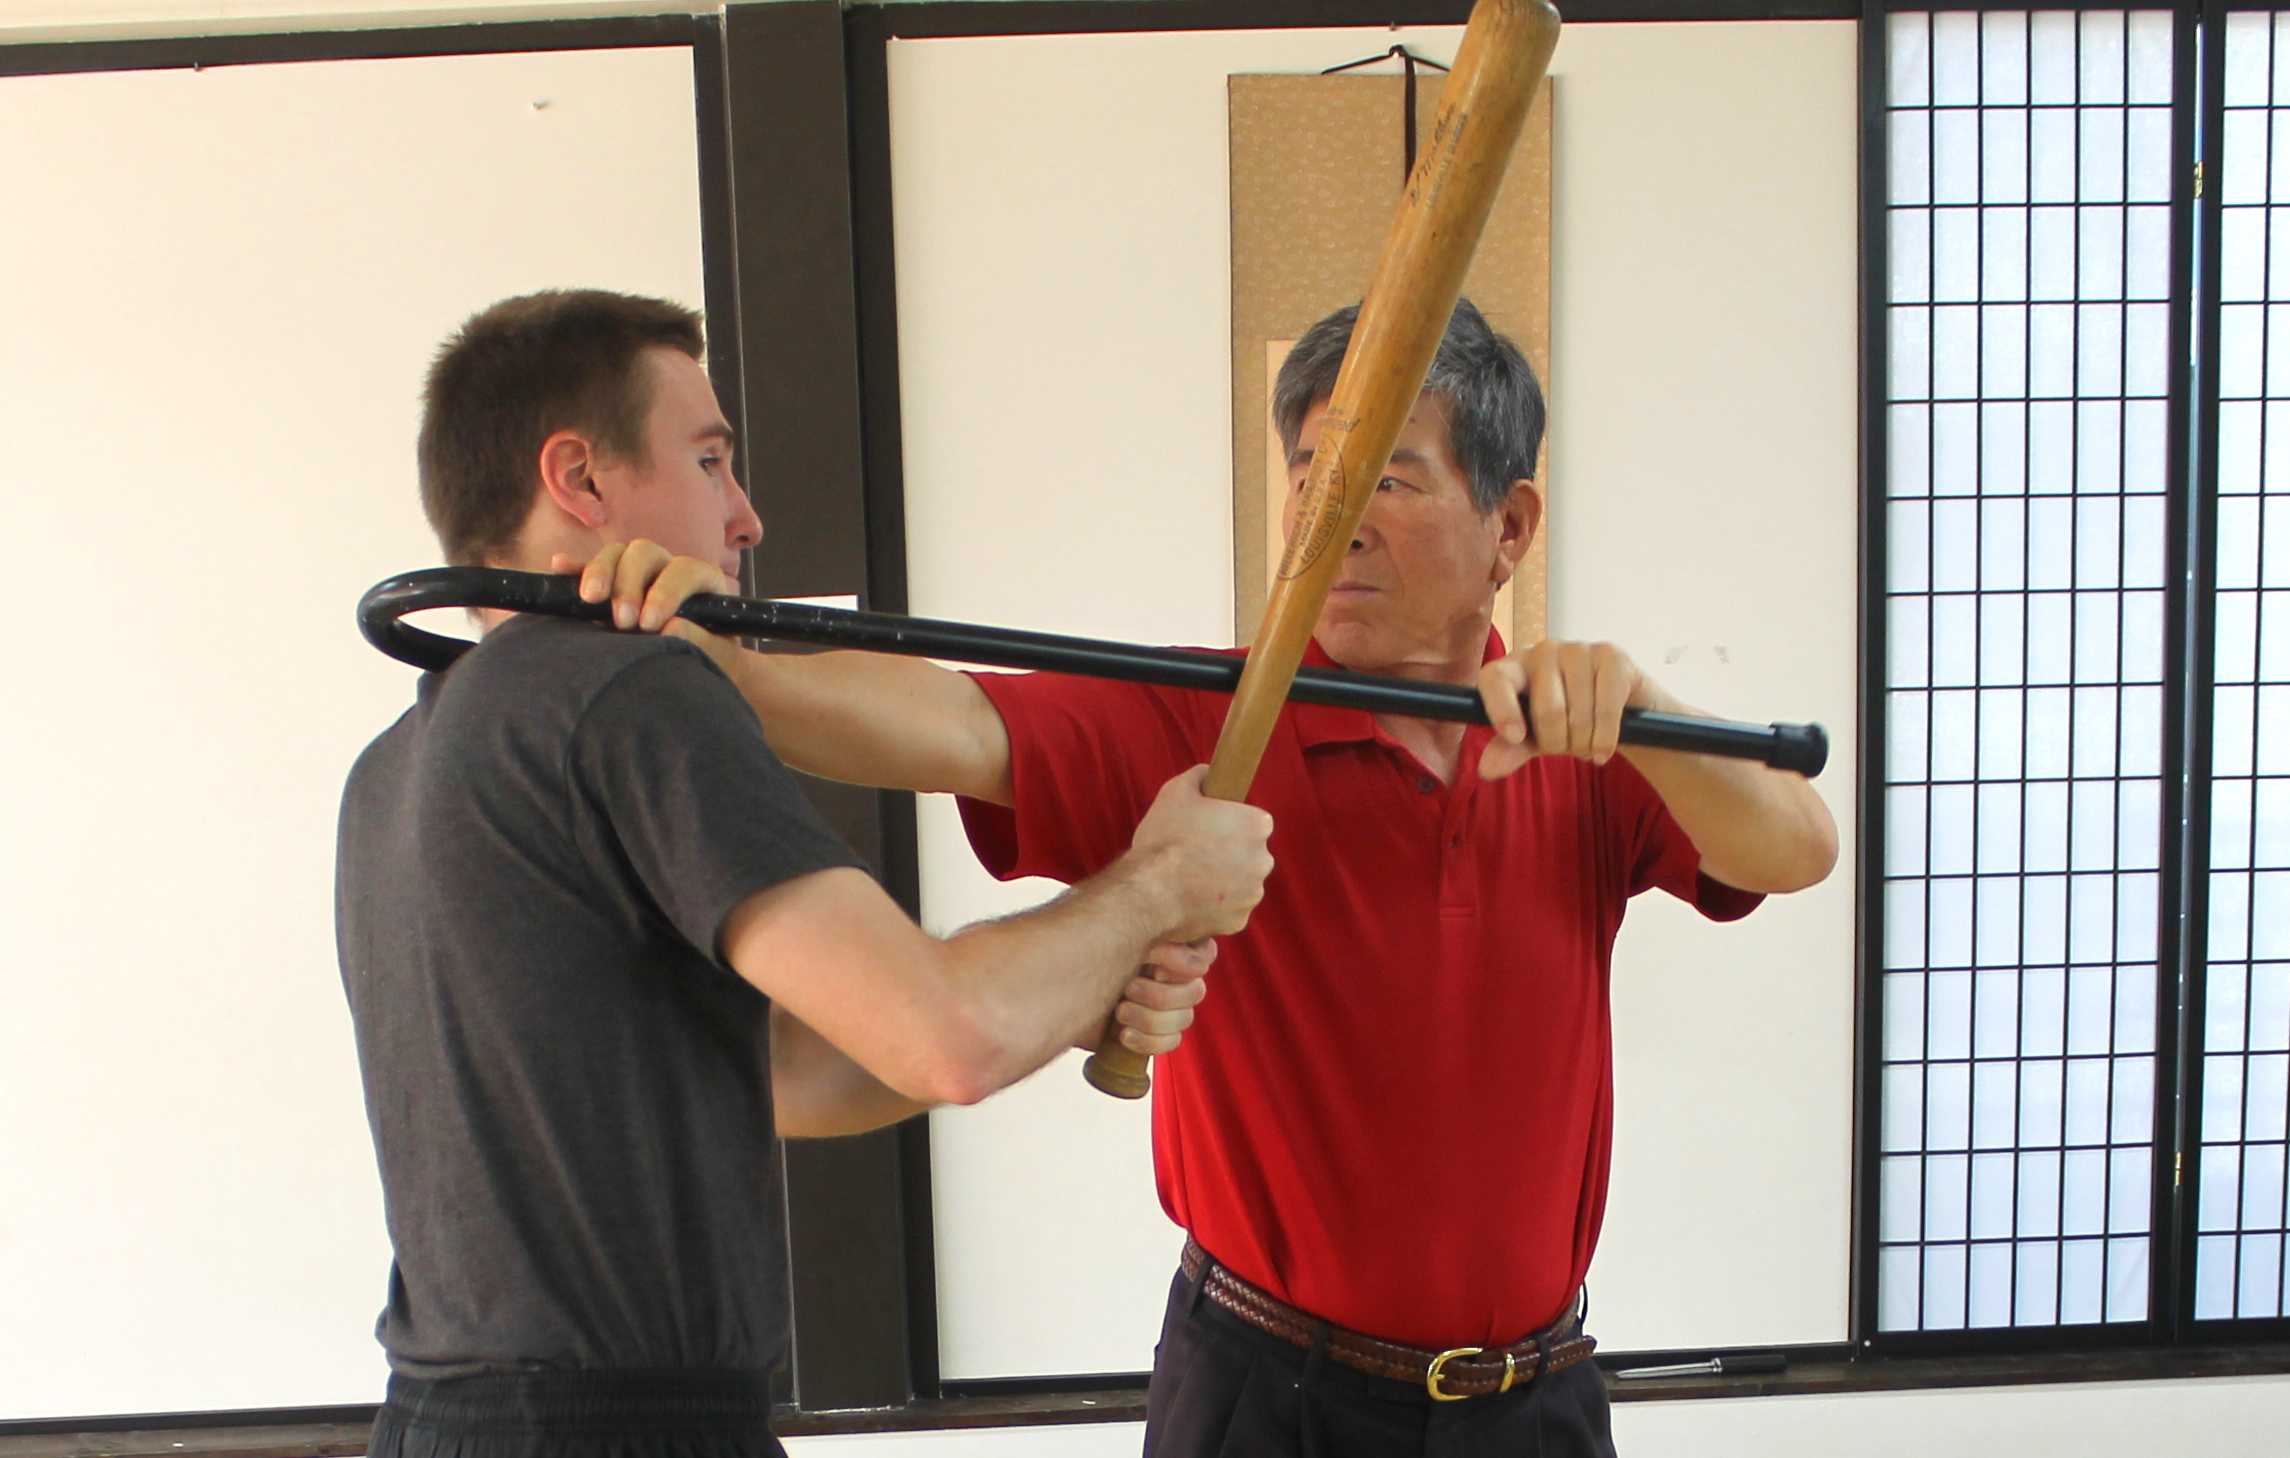
A cane is an excellent self-defense weapon, even if you don’t need one to walk. Most passersby won’t give you a second glance when you carry a cane, but if you’re under attack, you can immediately use this curved stick to distance yourself from threats or swiftly disable them. It’s also ideal for defending yourself in non-permissive environments where other weapons may be banned.
In Part 1 of our self-defense cane series of web-exclusive articles, we discussed the technical aspects of fighting with a cane. Part 2 focused on 10 rookie mistakes to avoid while carrying a self-defense cane. Today, the third and final part of this series will address how to make your own cane from scratch.
Cutting and carving a “walking stick” is an immediate confidence-builder and among the first tasks those journeying into the wilds often undertake for many benefits, ranging from safely negotiating trails to doubling as a self-defense tool. The cane can easily be rigged as a spear or splint and can be used to probe stream water depths. It can also poke ahead of each step in snake country, especially in low-light bug-out conditions. Even in a semi-urban environment, a stout hand staff can keep the strays at bay.
As stated in our previous features on the use of a self-defense cane, this tool is often associated with the old and infirm, so it may help you avoid attention in some cases. In other cases, it may make you a target for those who look to prey upon easy targets, but they won’t know what hit them when your cane becomes a formidable weapon. In sparsely-populated wilderness, your appearance won’t matter as much, so the cane’s function will take precedence over its form.
Choosing a Stick
In a bug-out scenario, a serviceable walking self-defense cane can be crafted with a knife by first selecting a fairly straight and knot free limb about 1-inch thick. Local knowledge of hardwoods pays off when you are able to spot white oak, hickory, walnut, ash, or cypress, but the availability of choice woods is not always as important as getting it done, especially if a member of your party needs a cane for walking following an injury. Just be careful not to mess with trees you can’t identify, lest you become the victim of poisonous flora.
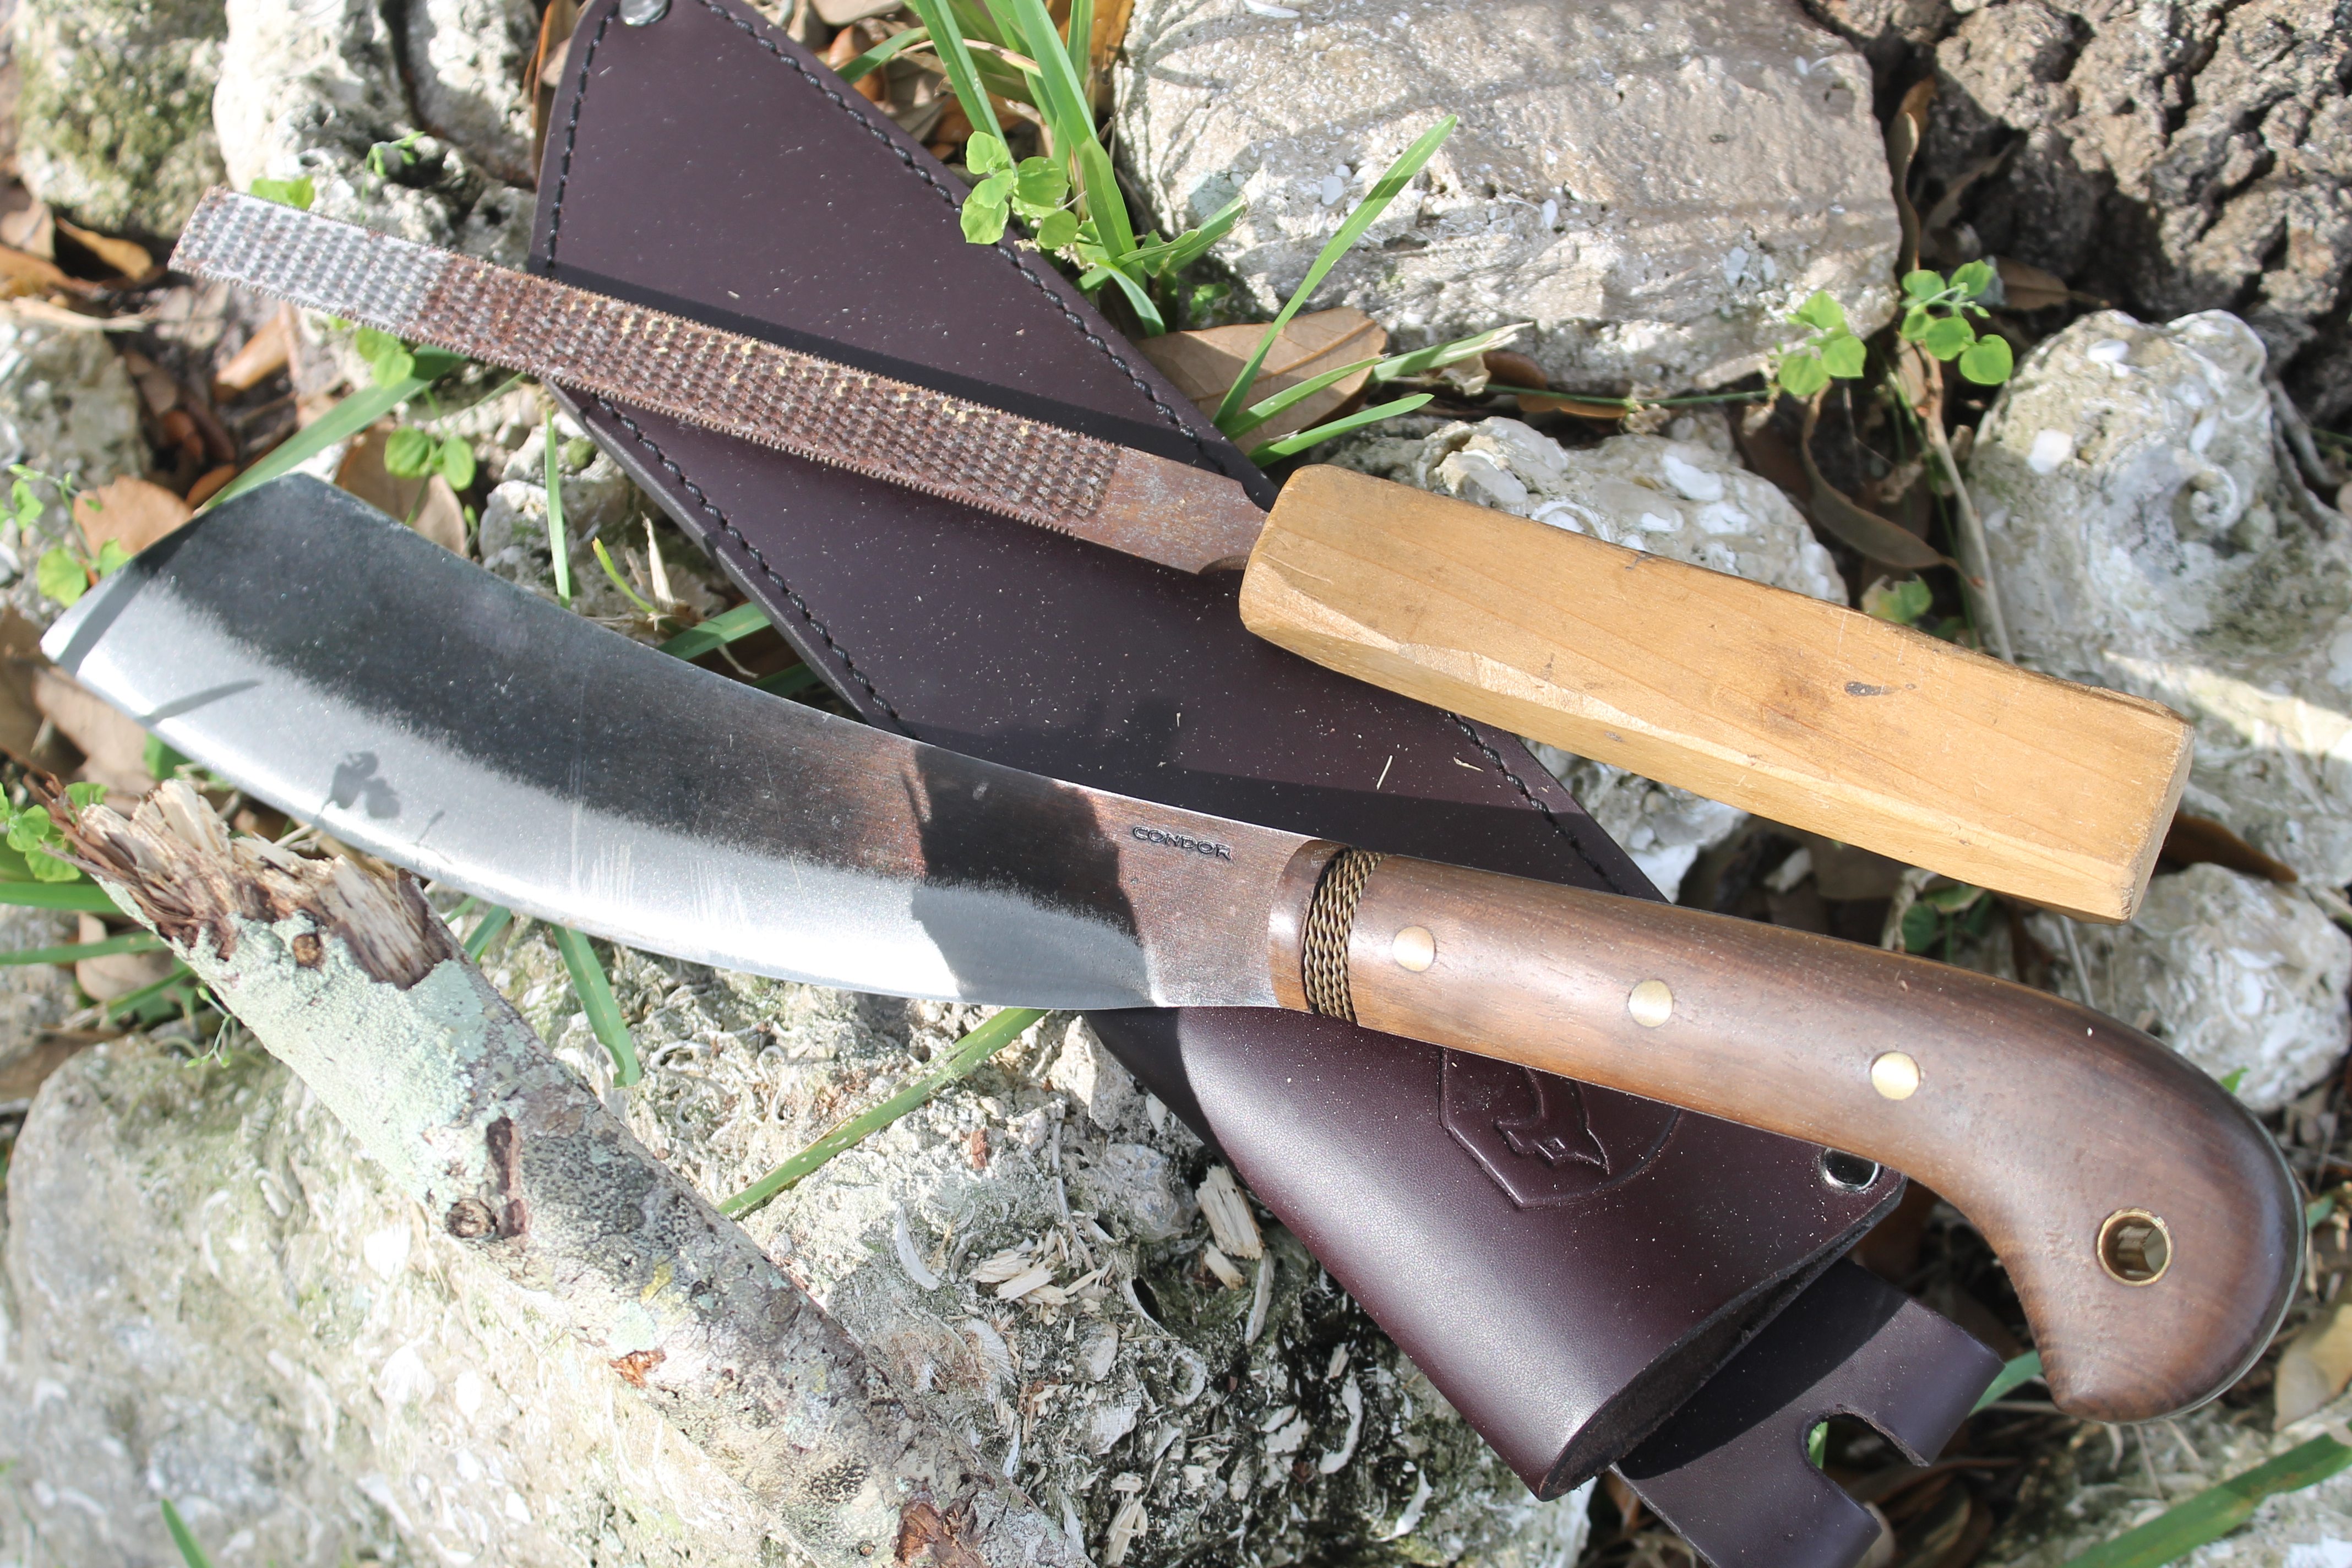
Sculpting a Bushcraft Cane
A sharp parang, wood rasp, and some paracord were used to form a cane.
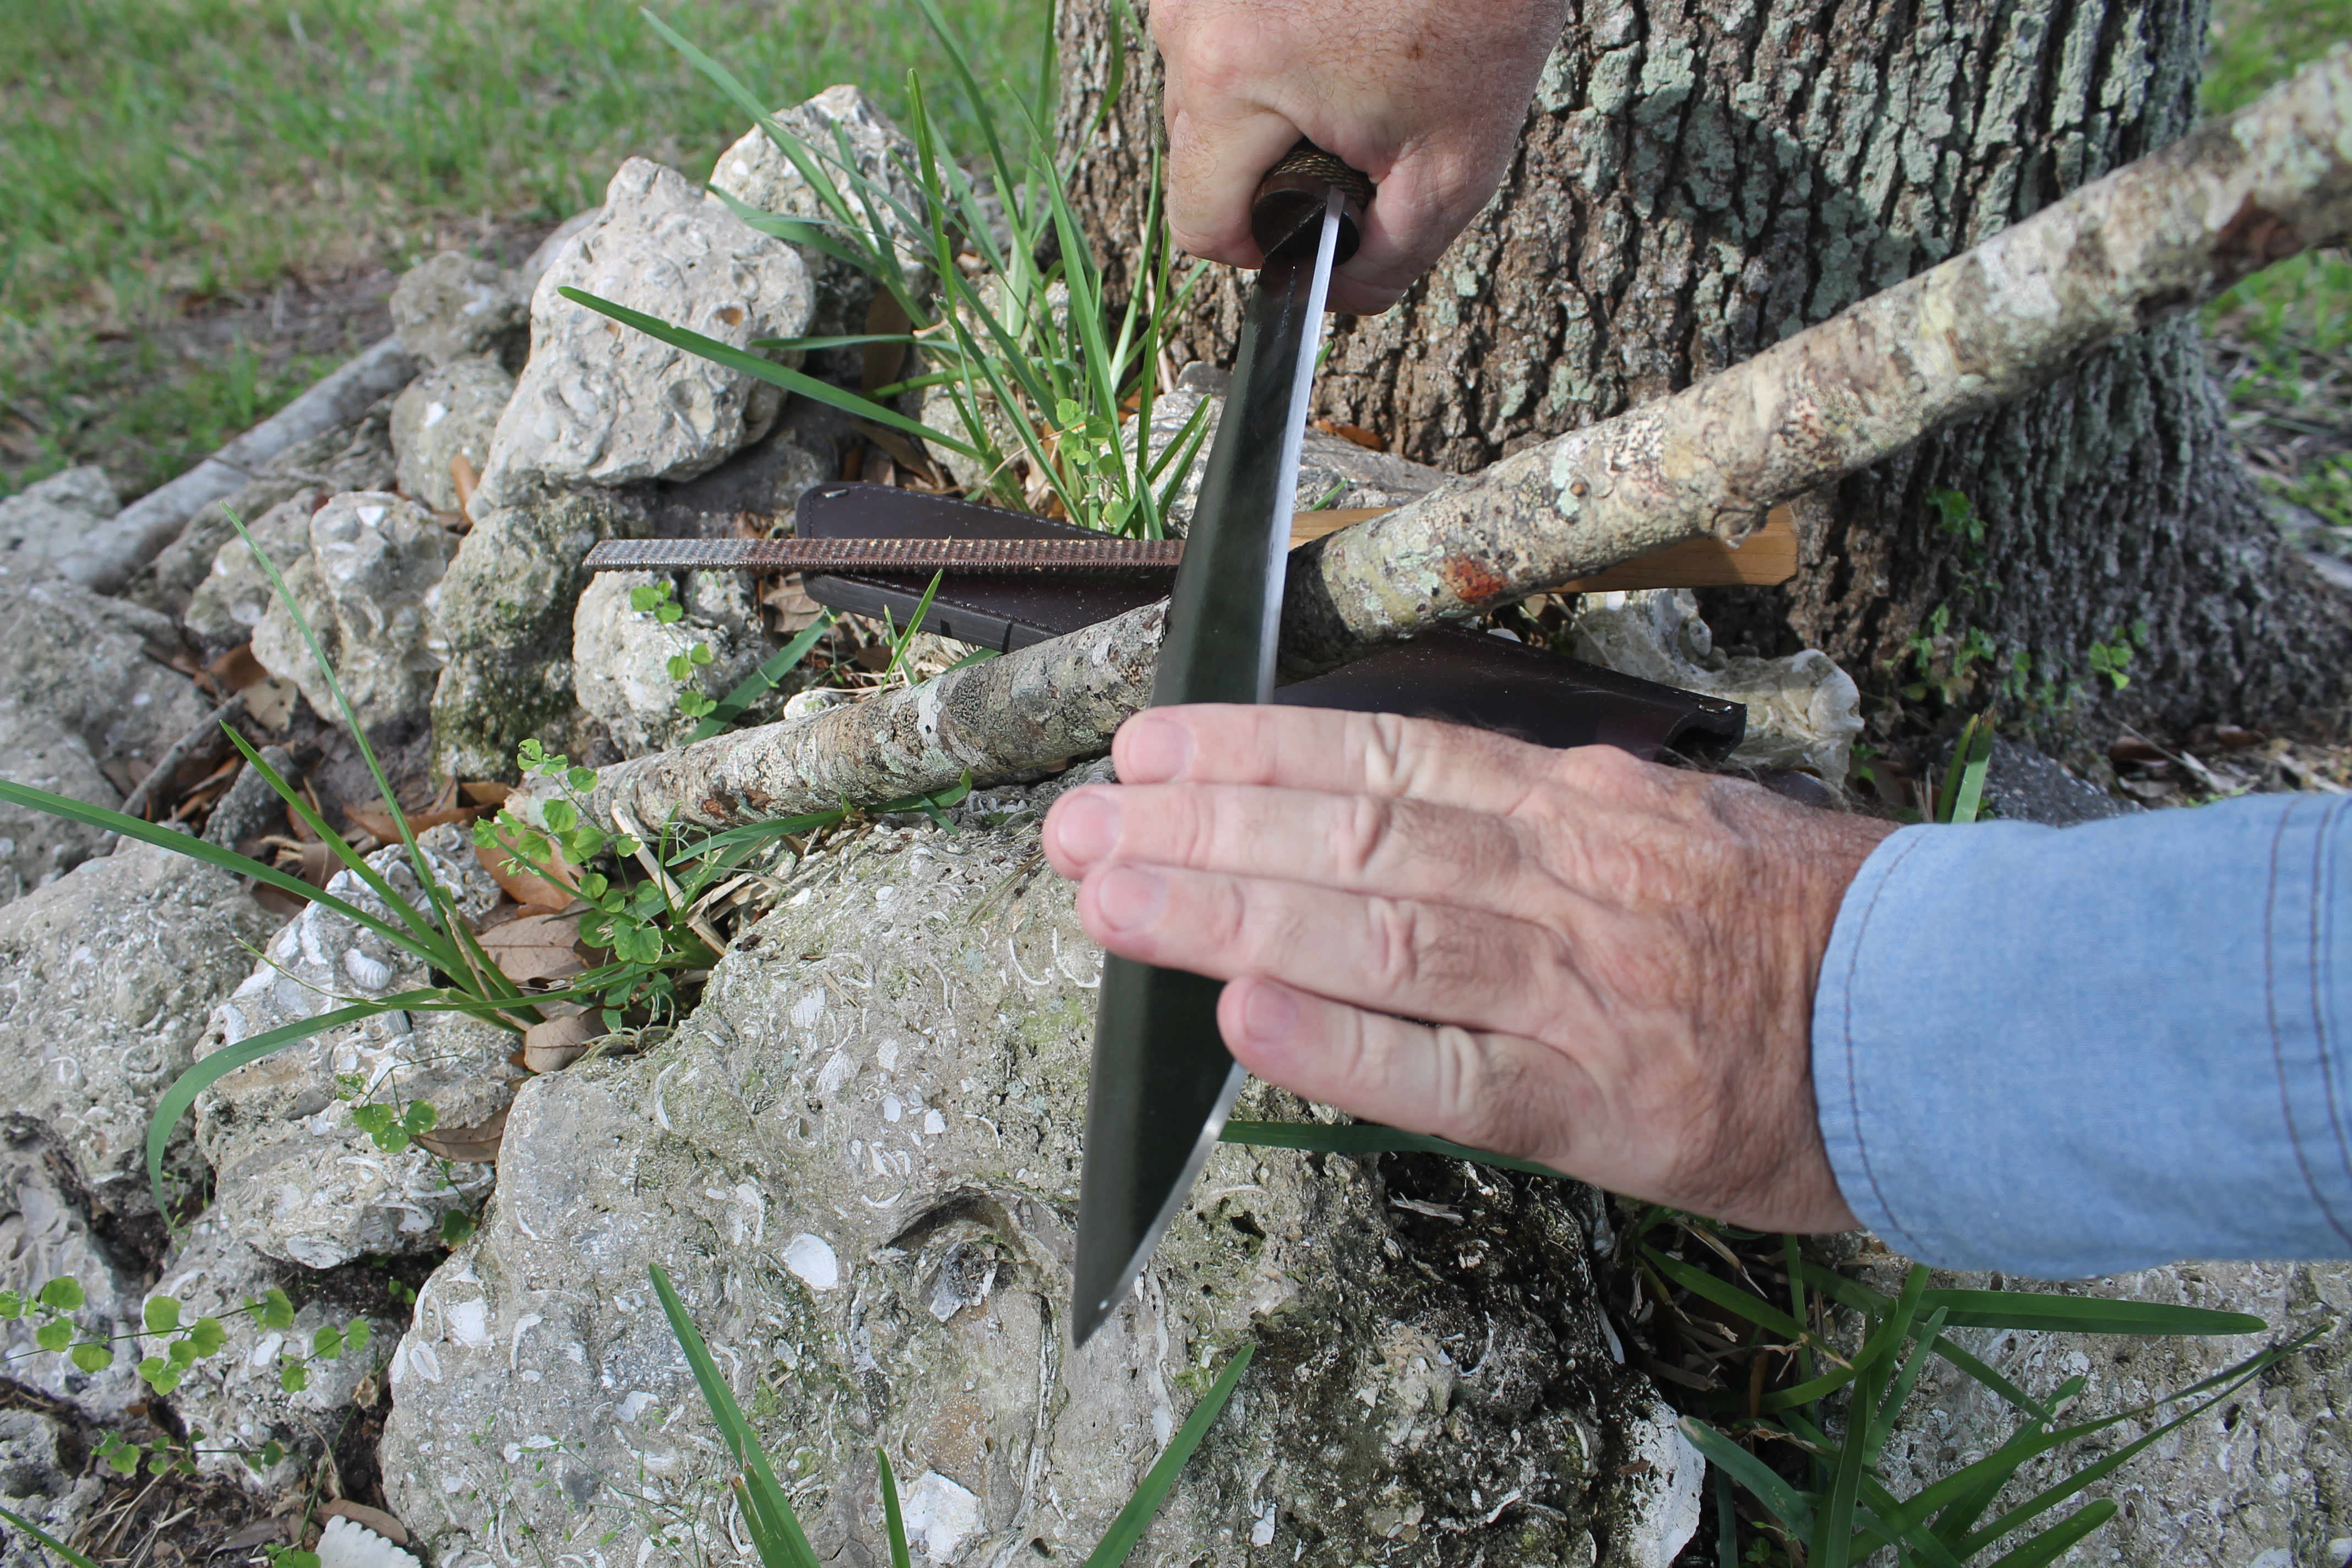
Before you cut a branch full length to your estimated hand-grip height, be sure to add an additional foot or more to allow for the curvature of the crook or hooked handle. Firmly anchor the cut limb. Using a sheath knife as a two-handed draw blade, remove the bark exposing the fresh white wood. While the branch is still green, immediately soak in available stream, pond, or ditch water, or dig a shallow trench and bury in shallow moist soil to prevent the wood from drying out, especially if you plan to remain in one location for a few days or darkness falls.
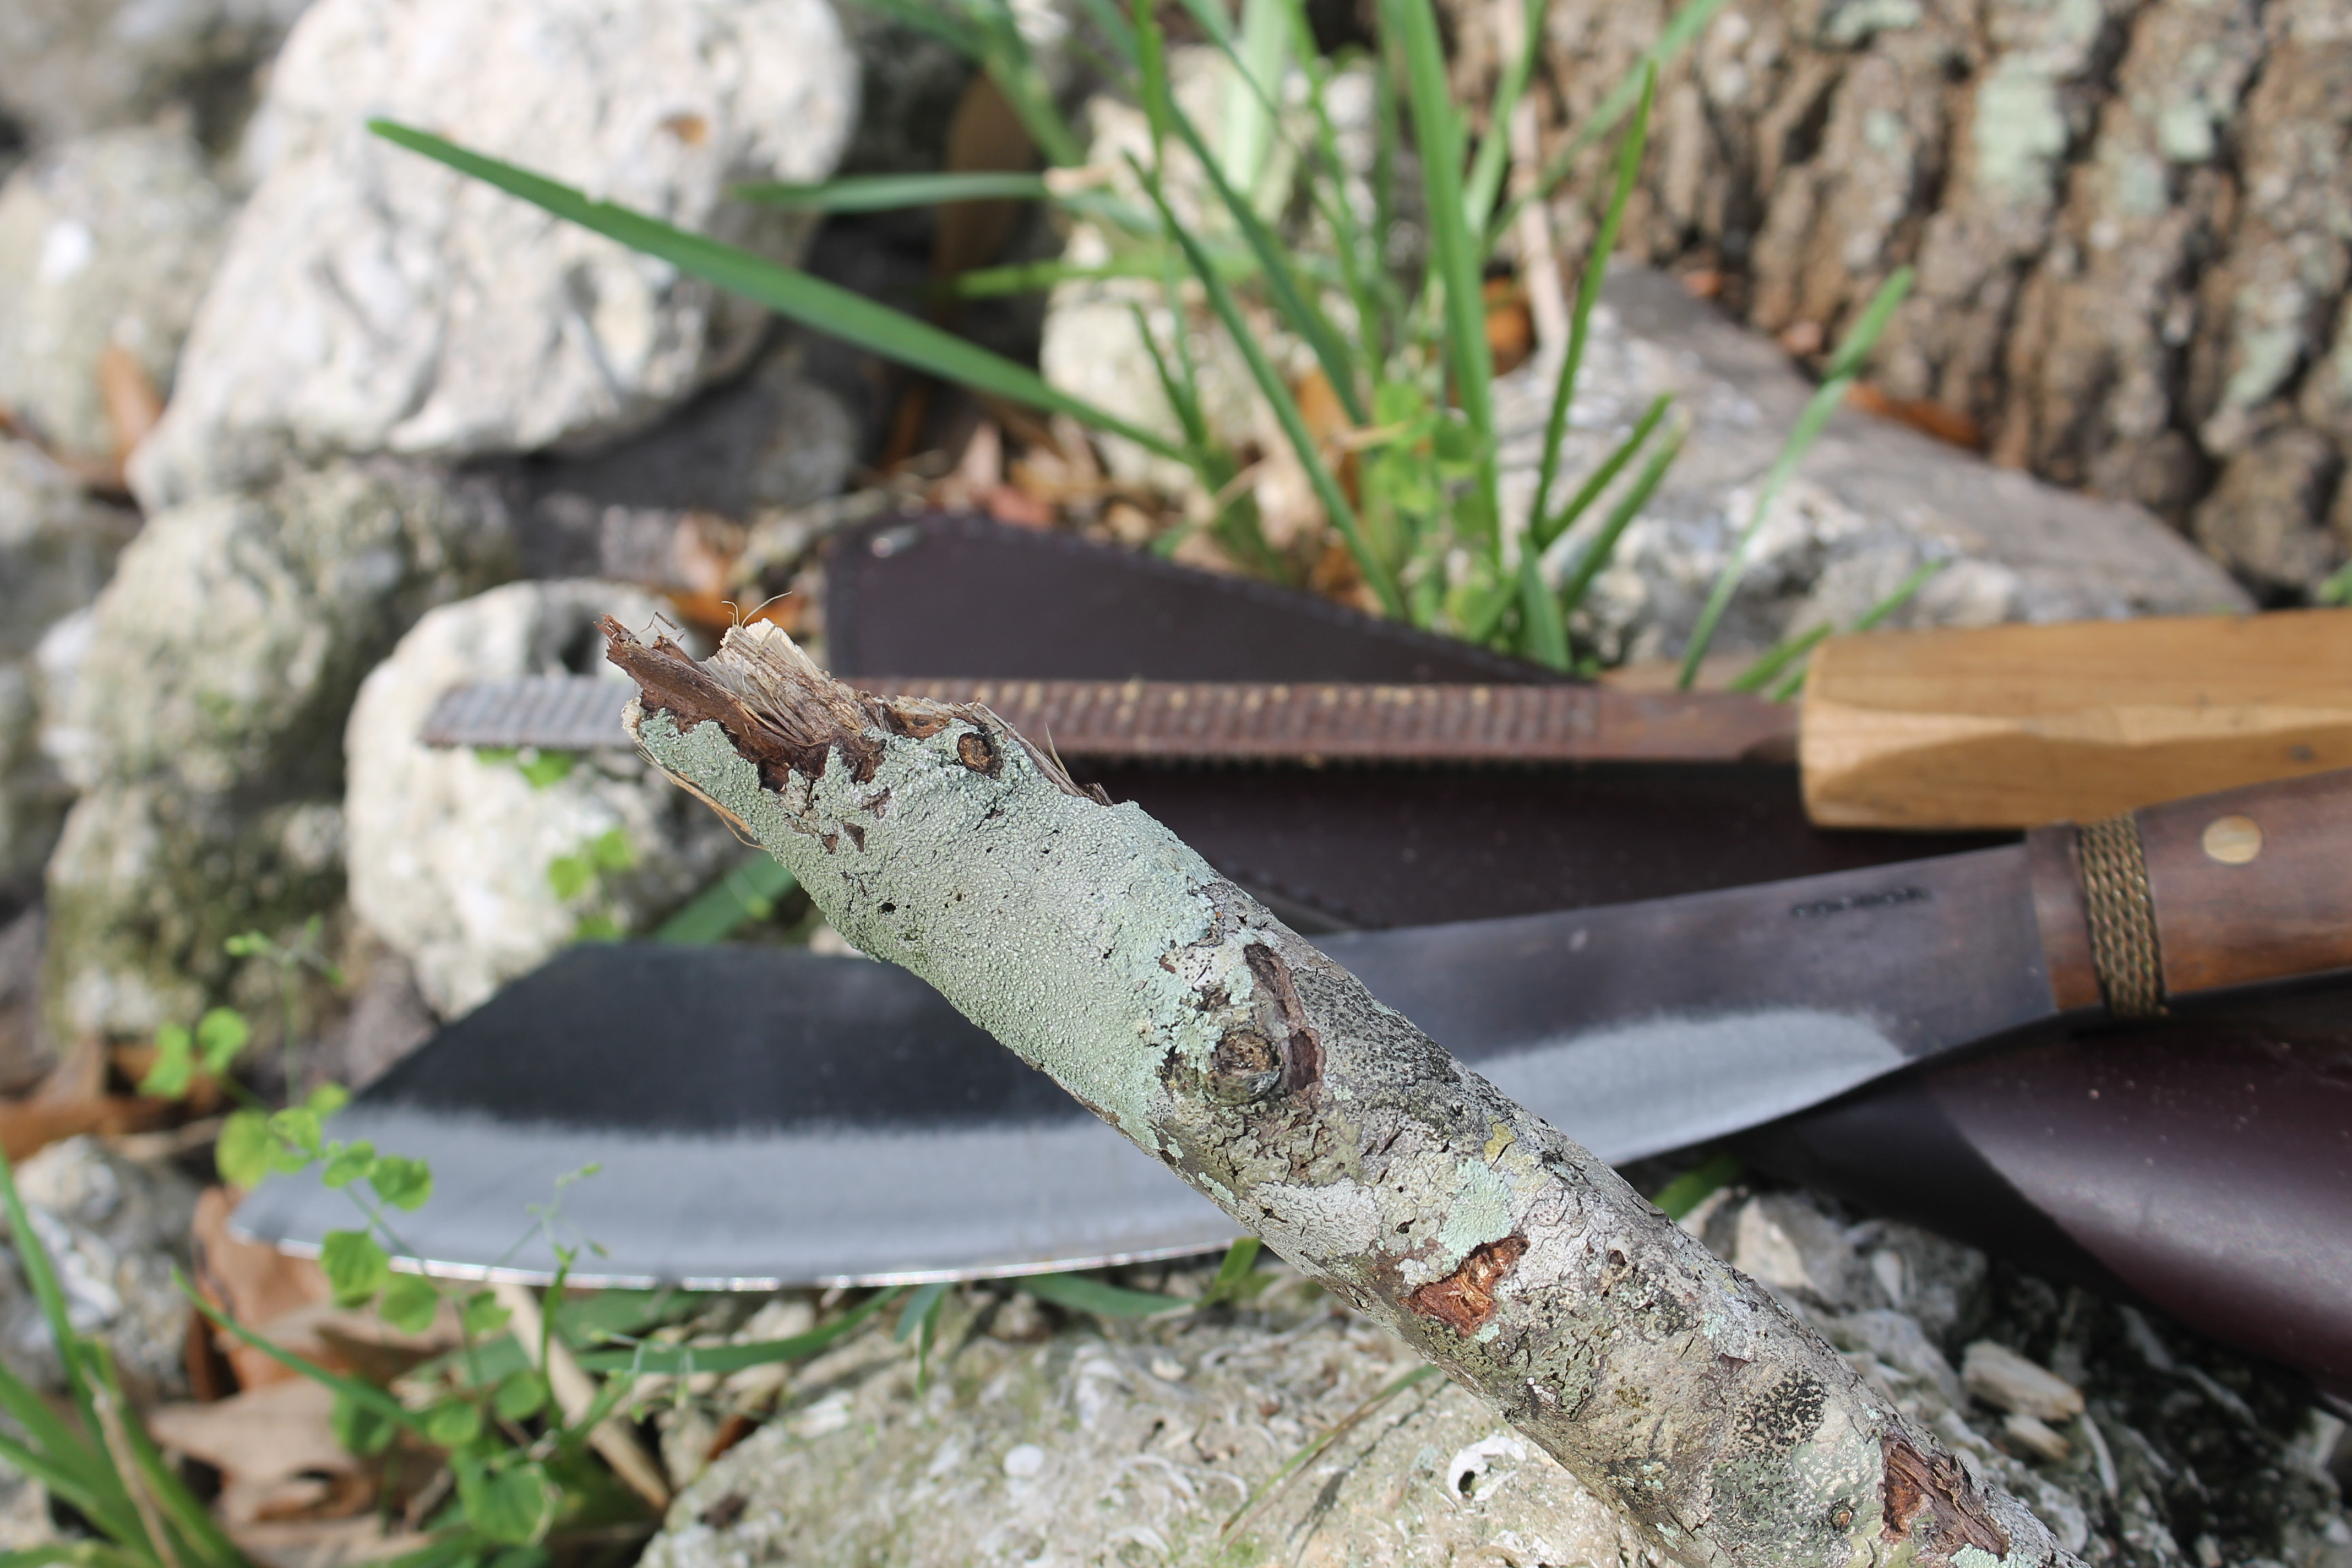
A straight and relatively smooth branch will be formed into our cane.
Using the knife, shape and taper the branch into the thickness you desire, flattening slightly the inner and outer crook handle. To impart the bend to the handle, first locate a tree or pipe of about 4 inches in diameter that you will use as a form to wrap the handle and securing with paracord or wire.
The parang was used in a two-handed grip to shave away bark.
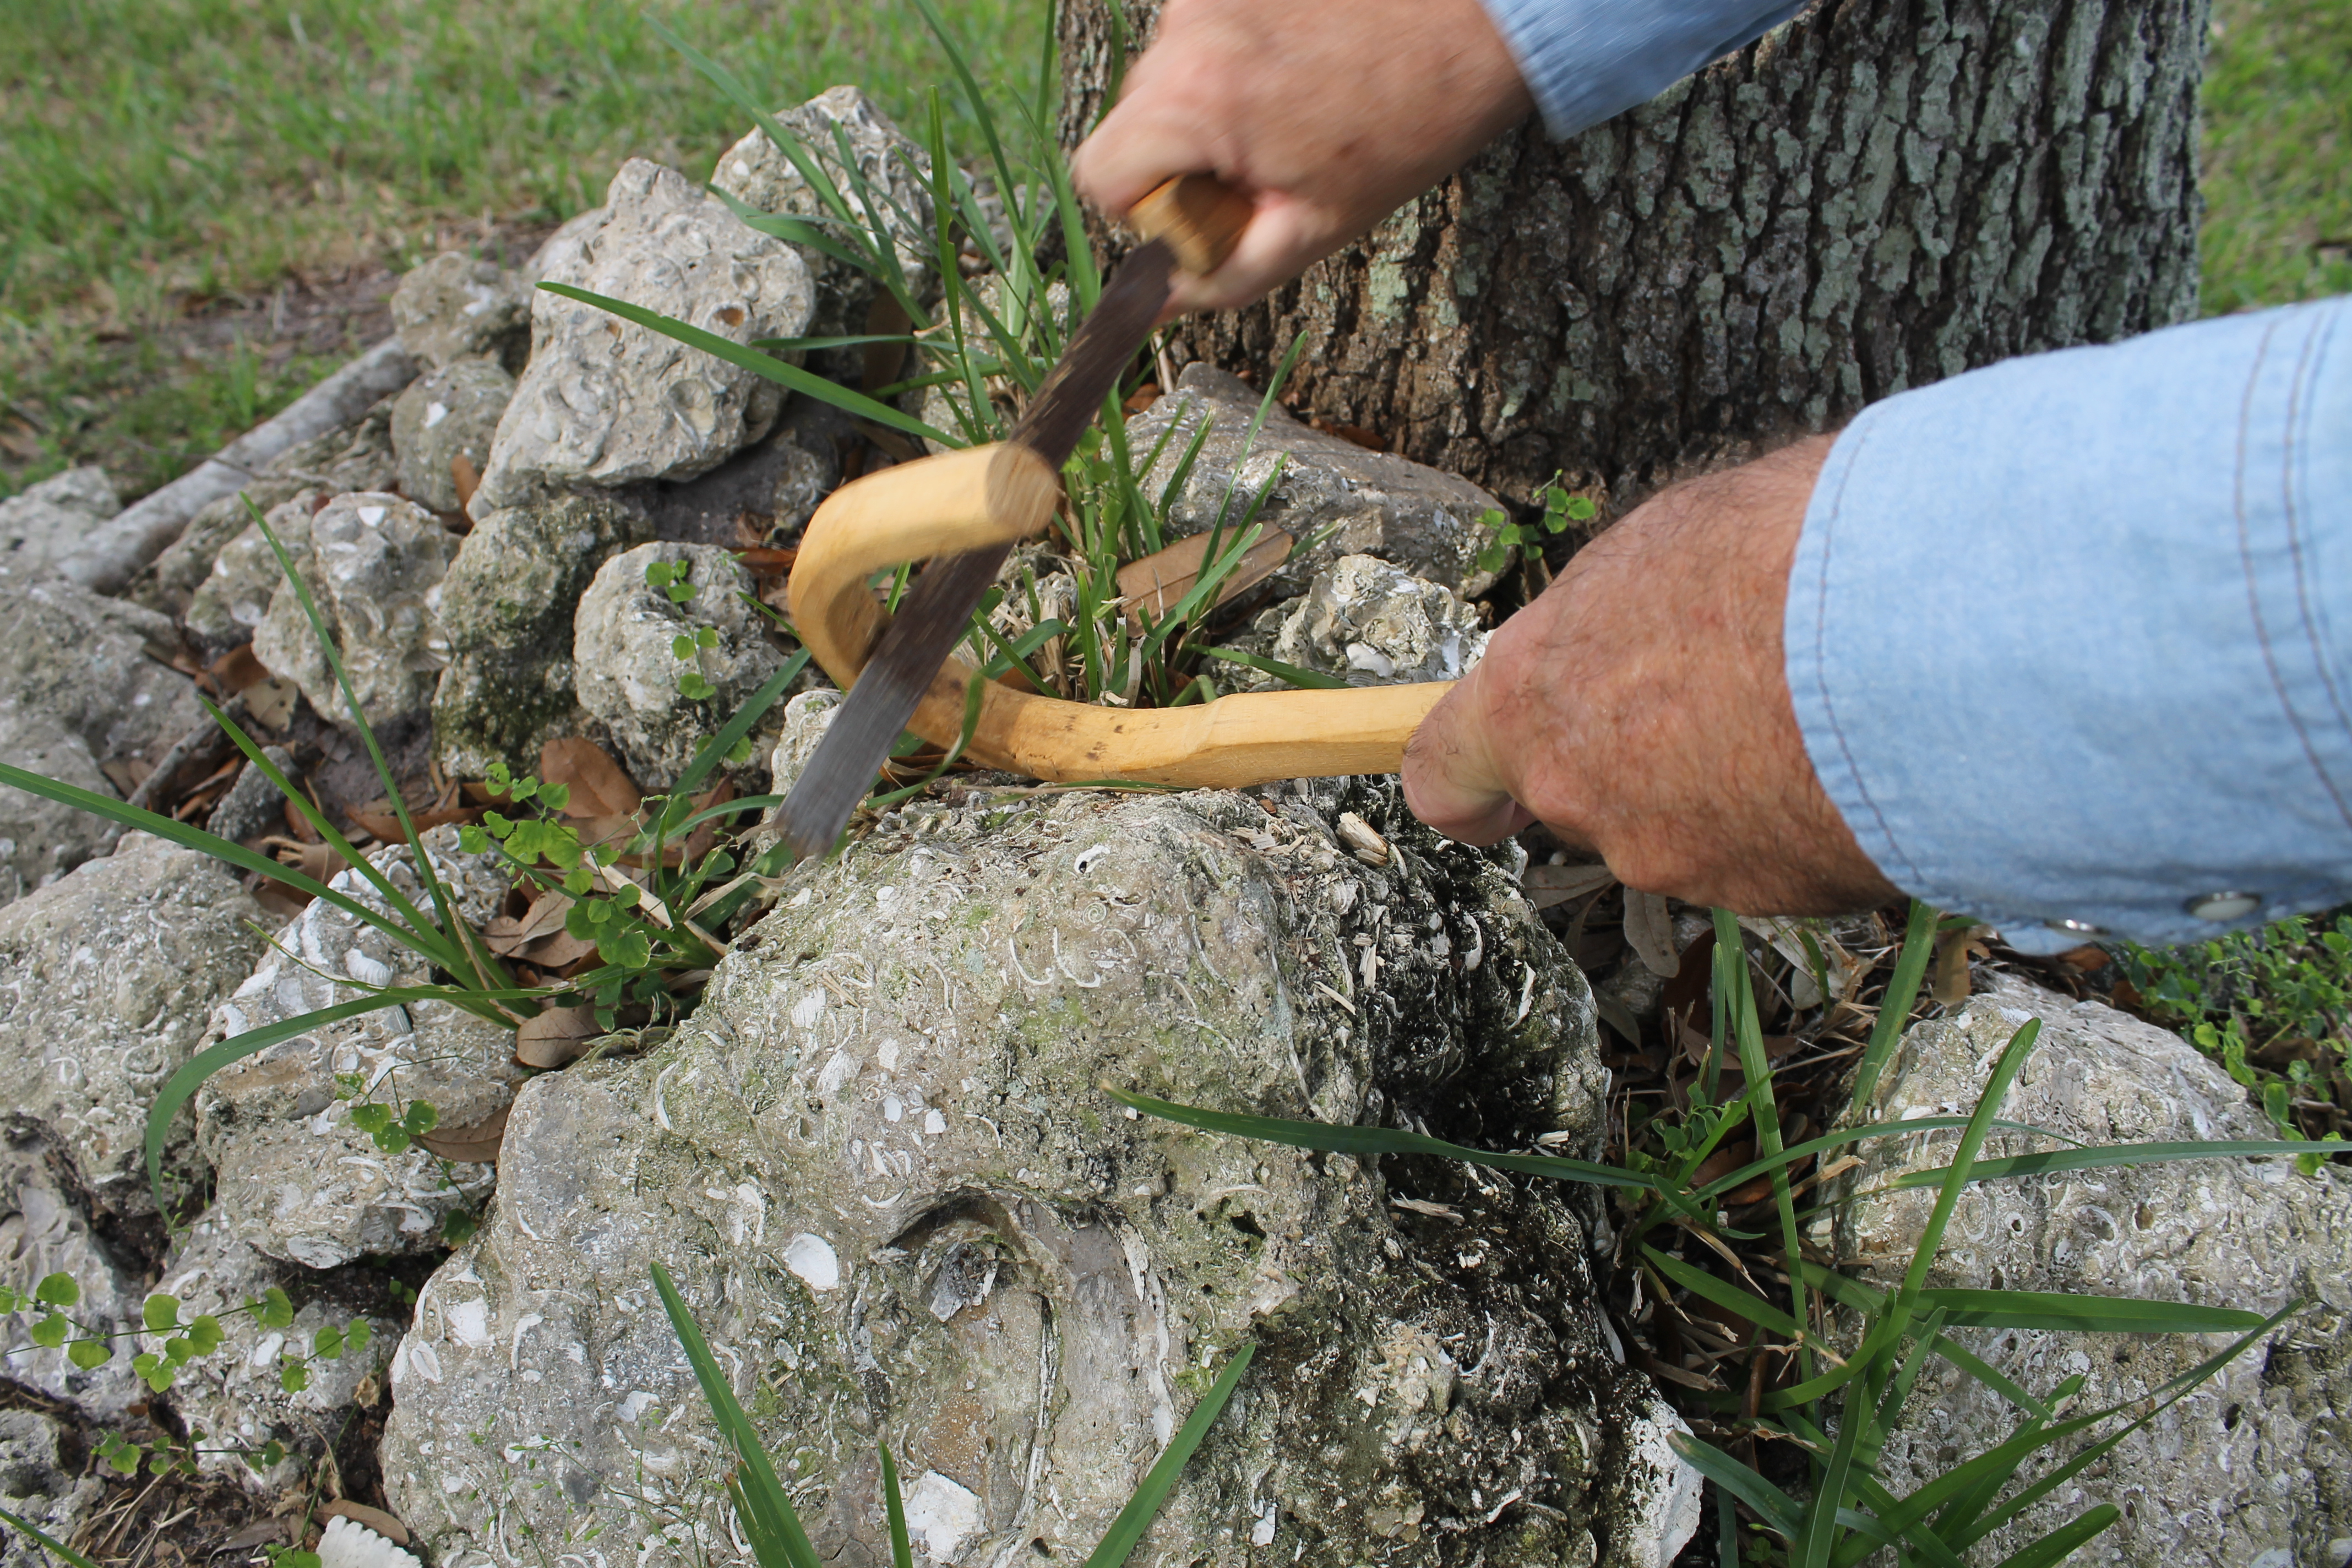
To tenderize the wood fibers for the bend, and if you have a cook pot or bucket, you may submerge the handle end in boiling water. Or you may use the same kettle technique we use to shape wood stems for wood-strip canoe building. To form the handle, the wood branch may be sleeved in a length of pipe. Plug the upper end of the pipe with a rag and place the lower end over the spout of a teakettle or other vessel of boiling water, allowing the rising steam to saturate the wood end until it is soft enough to be pliable.
After soaking and bending the cane handle, a rasp was used to smooth its shape.
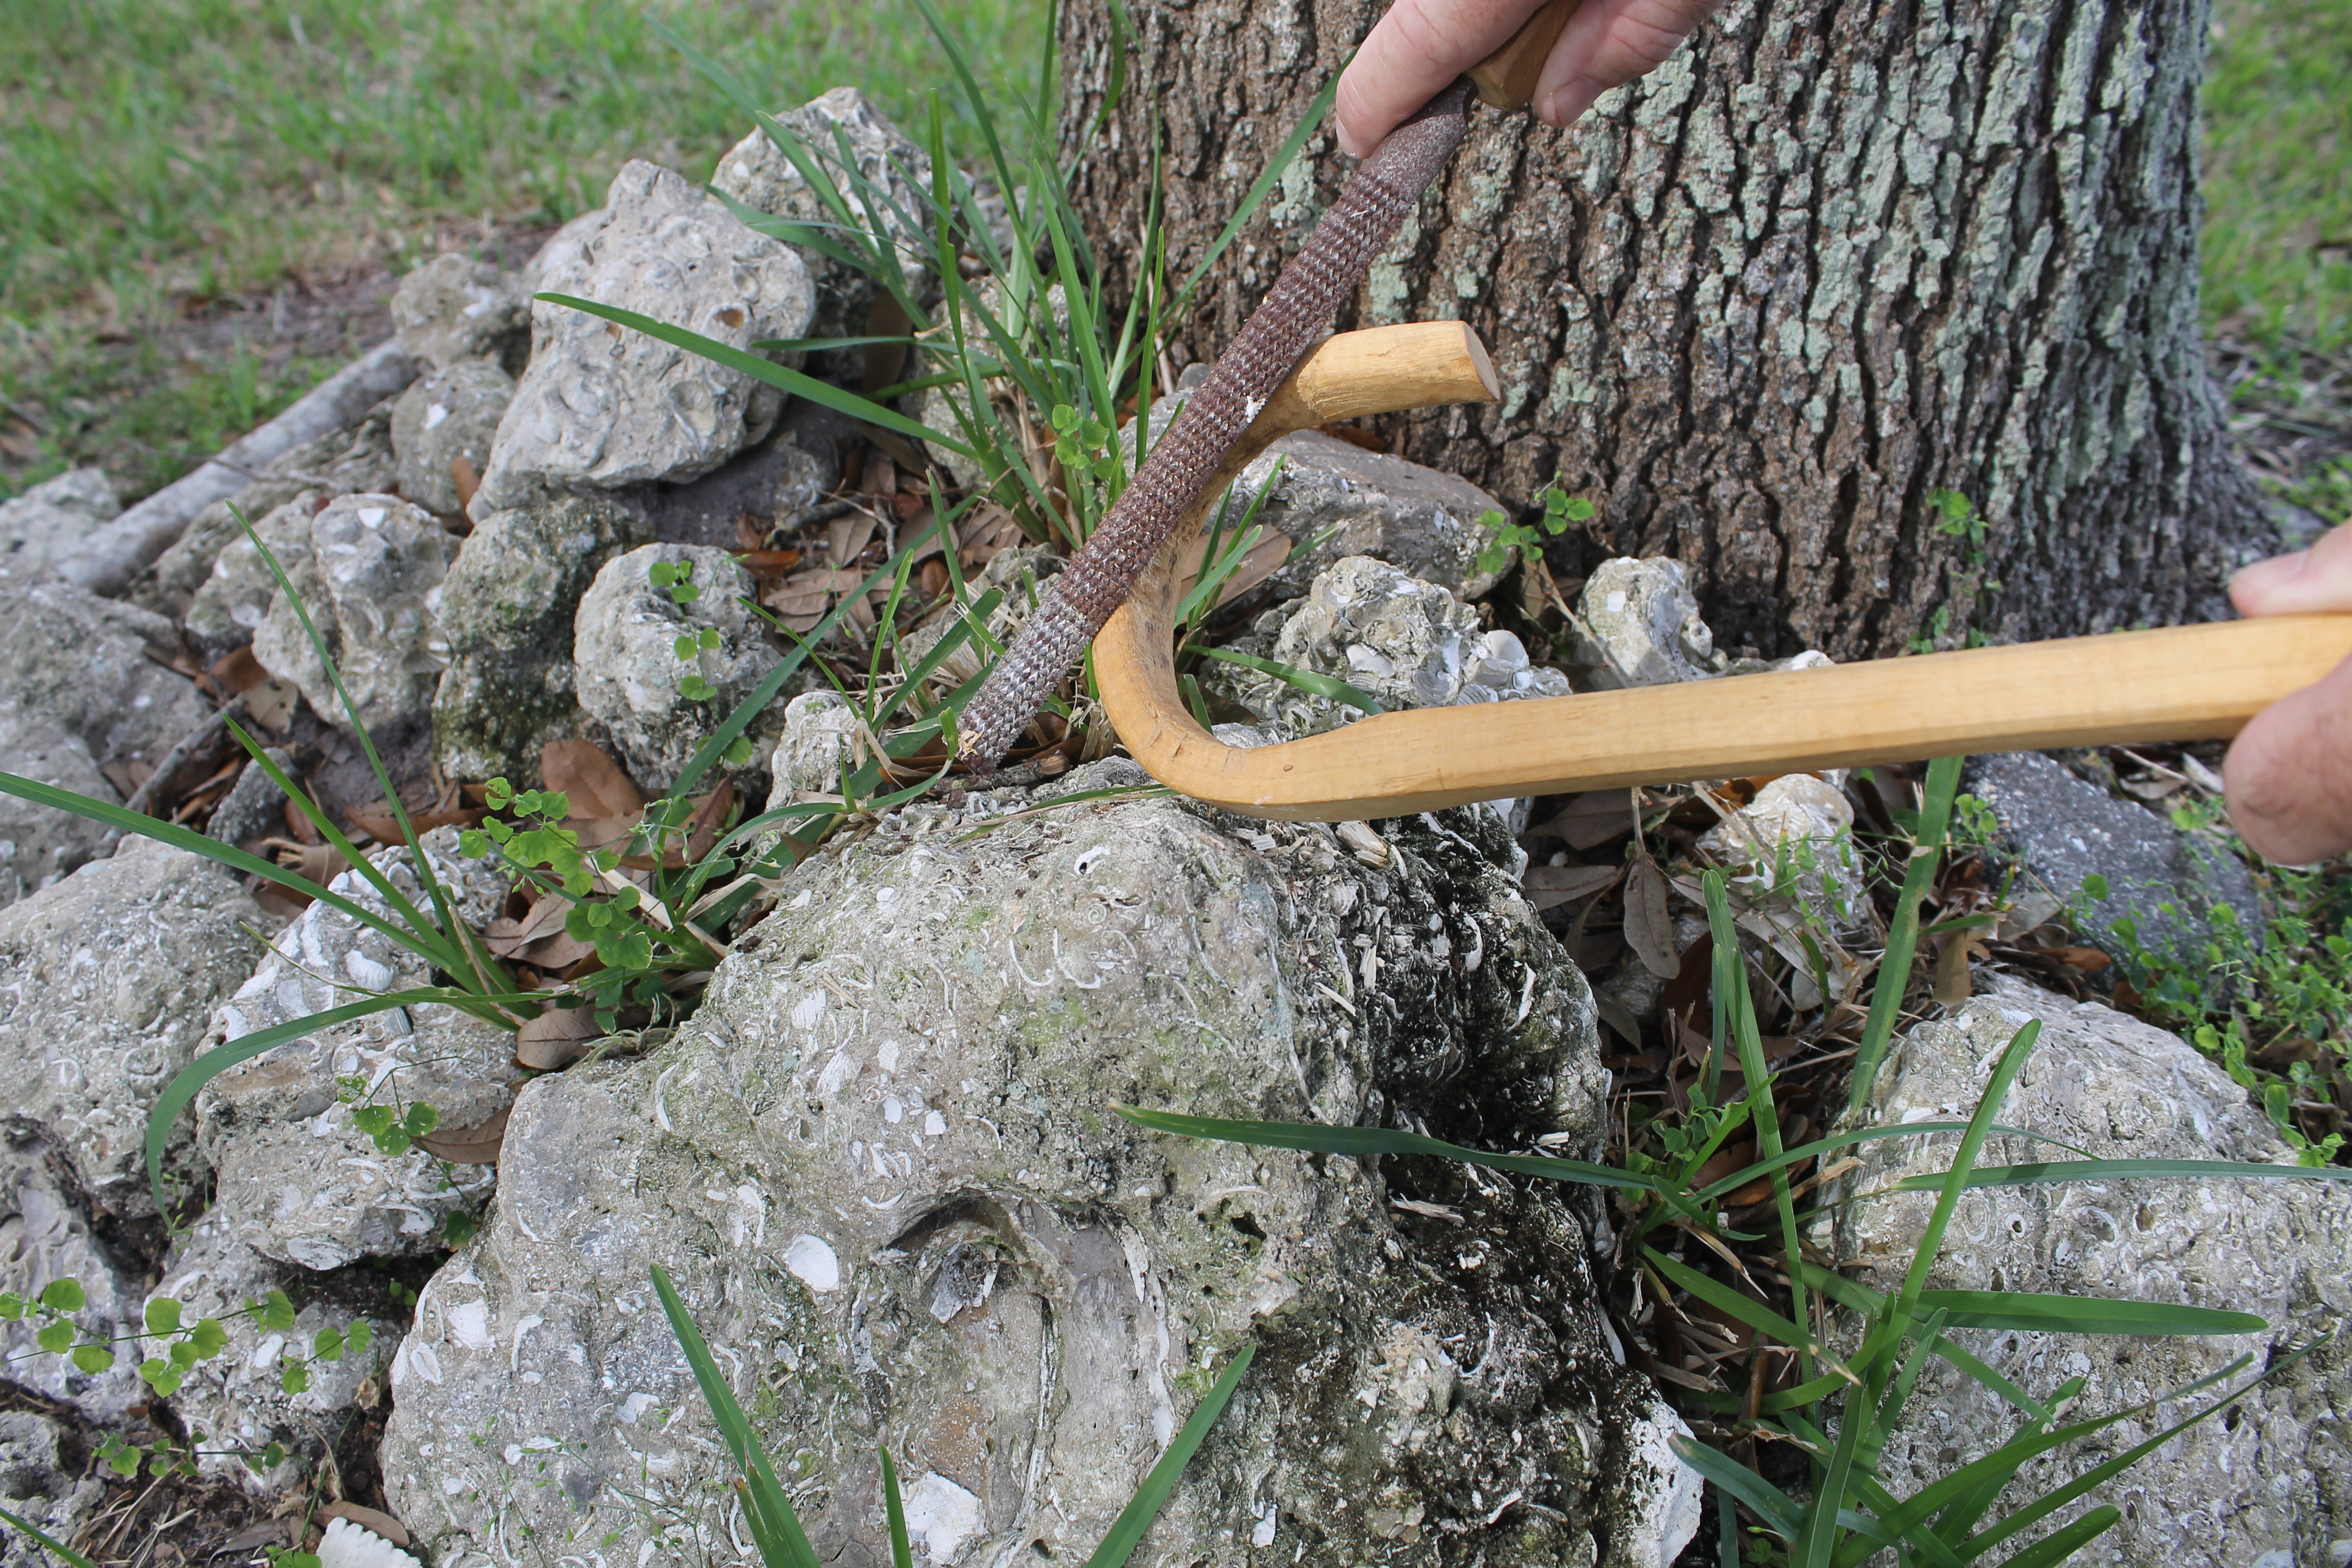
Using heavy gloves, immediately wrap the cane handle around the pipe or small tree, securing with wire or paracord. Allow the limb to set overnight or longer and to dry slightly. Once the cane is removed, shape-sand with any available stones or rasps, and rub or finish with wax, varnish, oils or what you may have available to preserve and to protect the branch. A paracord wrap makes a good handle.
The finished cane is now ready for a coat of protective wax or varnish.
Alternatively, a walking cane can be cut from a straight limb with a 90-degree branch forking from the limb to form the handle. A crutch is formed from a Y-fork in a longer branch or small sapling. Whether you spend many hours crafting the perfect bushcraft cane or settle for something quick and dirty, you’ll be thankful for this walking stick on long trails. And if trouble ever comes your way, you’ll be able to respond swiftly and put some distance between yourself and your attacker.
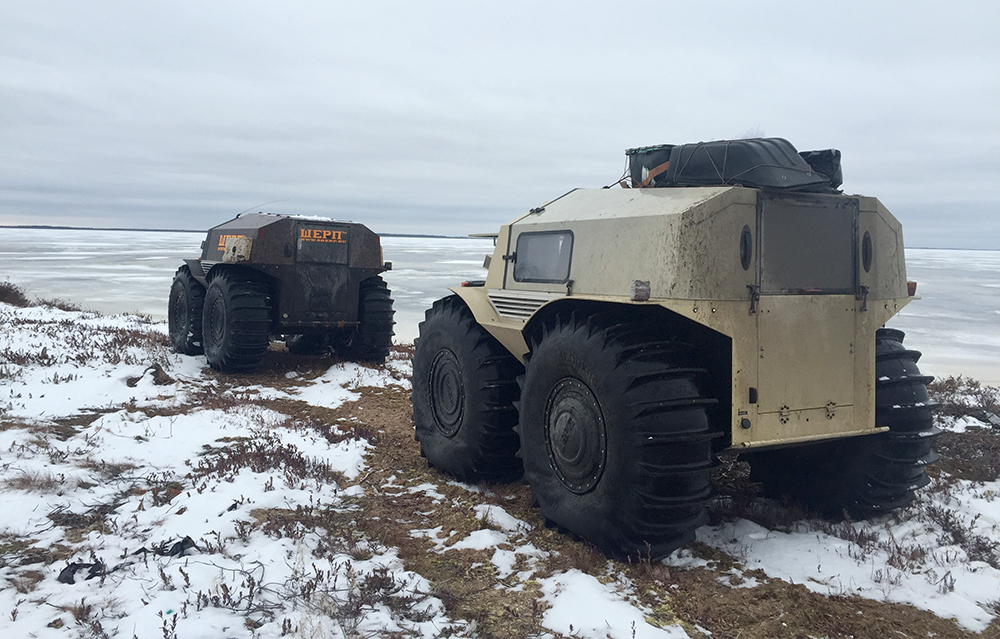
Russia is a truly gigantic land mass, and its vast wilderness areas are full of treacherous obstacles. From bone-chilling expanses of ice and snow in Siberia to steep mountains, muddy swamps, and large bodies of water, Russia has the terrain to put any vehicle to the test. That’s why Russians have developed some seriously impressive off-road vehicles to cope with these obstacles.
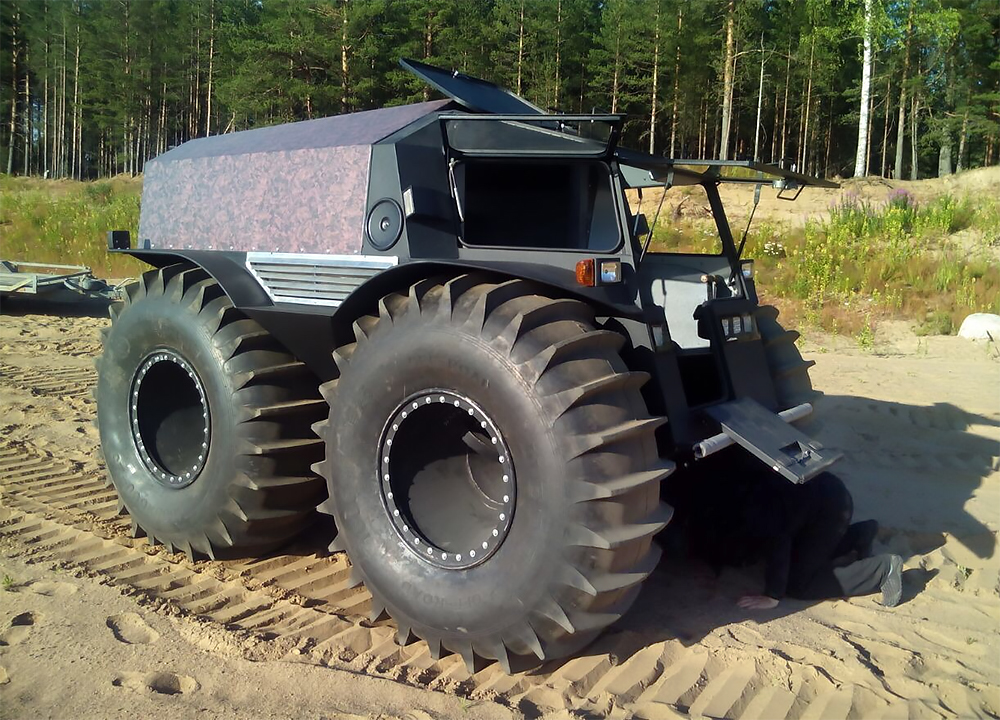
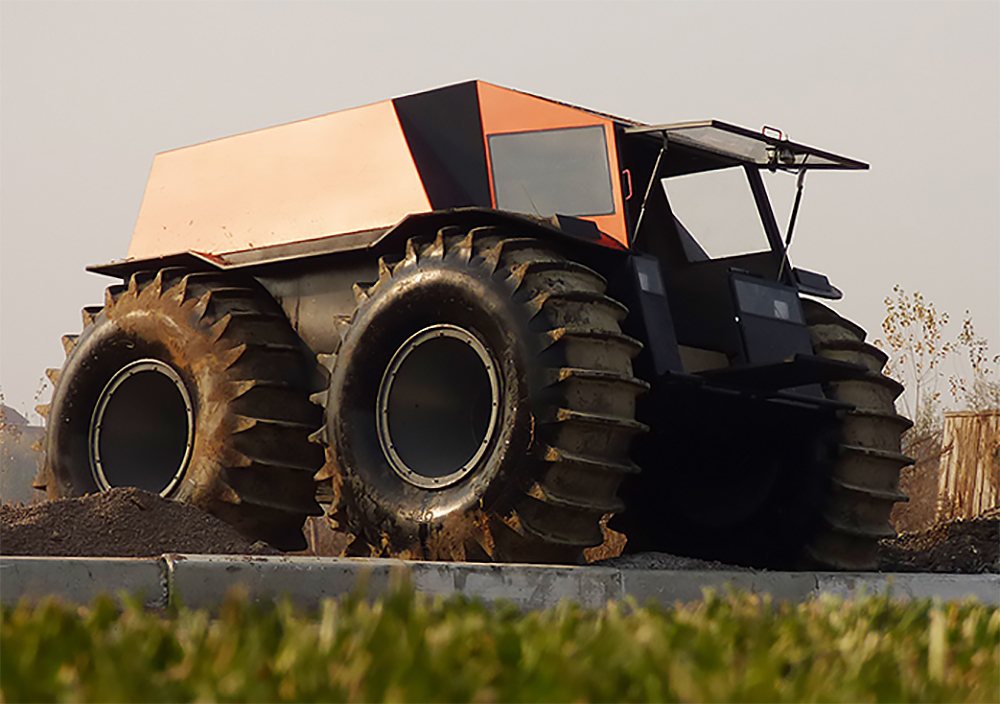
We recently learned about a new Russian off-roader simply called the Sherp, and it’s quite different from the massive 8-wheeled Avtoros Shaman we featured in the past. The Sherp is rather small, all things considered. At 11.1 feet long, it’s shorter than a Honda Civic, or about half the length of a full-size pickup truck. It’s also 8.3 feet wide and 8.3 feet tall, so it appears to almost be a cube on wheels.
Speaking of wheels, the Sherp rides on enormous 5.3-foot-tall tubeless ultra-low-pressure tires. Combined with the Sherp’s short wheelbase, these tires can pull the vehicle over enormous objects and ascend hills at a 35-degree incline. They also provide enough buoyancy to make the Sherp fully amphibious — it can literally drive straight across a lake or river, with the tires serving as giant paddle wheels.
The Sherp is powered by a Japanese Kubota-V1505-t turbo-diesel engine, paired to a 5-speed manual transmission. This 1.5L 4-cylinder only produces 44 horsepower, but about 88 ft-lbs of torque, and it can propel the Sherp to a top speed of 25 mph (40 km/h). On water, it’ll do 4 mph (6 km/h) flat out. That doesn’t sound like much, but it’s sure better than going around a lake or river.
This ATV is especially interesting as a bug-out vehicle platform, due to the following features:
Reliabile Japanese diesel engine
Long-range fuel supply — 14.8-gallon built-in gas tank, with four optional 15.3-gallon gas cans which fit into the centers of the wheels
Skid-steering four-wheel-drive with tight turning radius
Pneumatic circulating suspension with adjustable tire inflation for varying terrain
2,200-pound cargo capacity
Enclosed and heated cabin can accomodate 4 beds
Designed to continue running on three wheels, or even two wheels
Pricing is not directly listed on the manufacturer’s site, but the base-model Sherp starts at $100,000 US with a soft-top, no windshield wipers, and no heater. Leasing periods of 24 and 36 months are also available.
For more information on the Sherp Russian amphibious off-road vehicle, visit Sherp.ru/en.
Tools require maintenance and cleaning — this is a fact of life. You wouldn’t drive your car for 100,000 miles without changing the oil, and your guns would surely jam and malfunction if you fired them every day for years without disassembling and maintaining the moving parts. It’s also common knowledge that a knife is one of the most important tools you can have in a survival situation. So why not maintain it accordingly?
To most of us, knife maintenance means maintaining the cutting edge. That’s obviously an important element, but there’s more to it than just keeping the edge sharp. For folding knives, it’s important to remove grit, dirt, and pocket lint from the handle cavity, lock, and pivot. In order to retain smooth opening and closing motion, oil should also be applied to the bearing and pivot. Finally, if you care about keeping your knife looking good, a solvent should be used to clean off grease, adhesive, and other gunk. These steps will keep your folding knife looking and feeling like new.
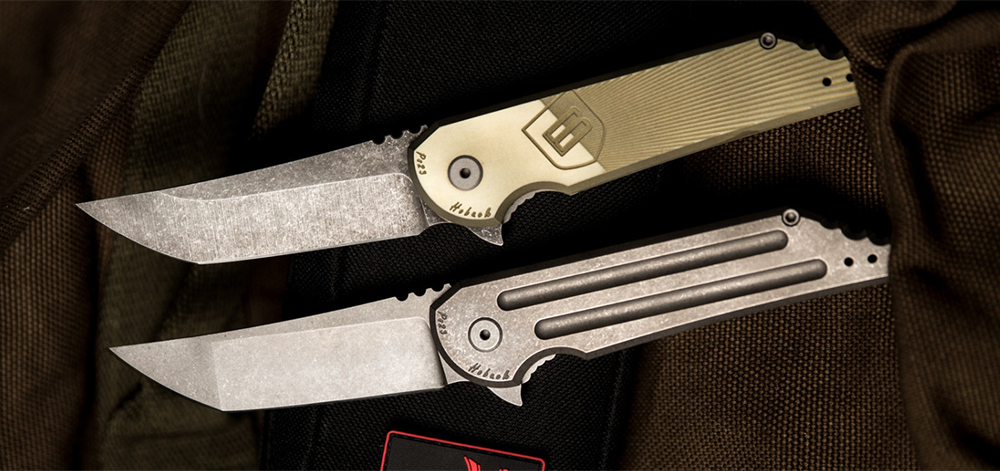
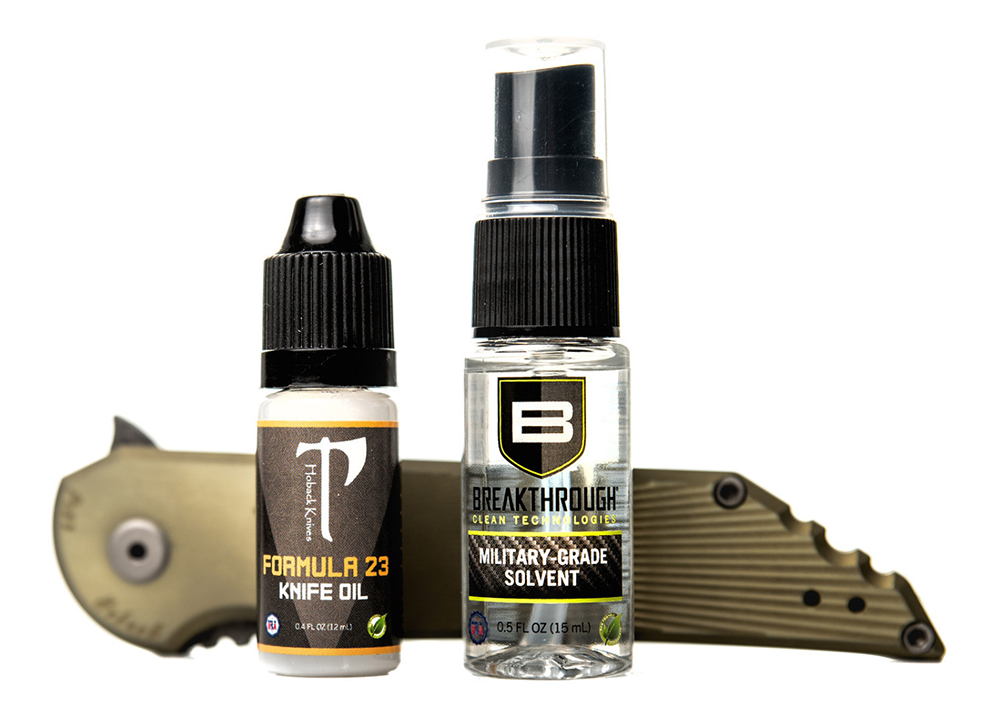
Jake Hoback Knives simplified the knife maintenance process with the release of the F23 Knife Maintenance Kit. This kit was developed in conjunction with Breakthrough Clean Technologies, and includes a proprietary lubricant designed especially for folding knives. Hoback and Breakthrough Clean reportedly spent months testing different formulations and additives in search of an effective, long-lasting lubricant that won’t evaporate when used on an every-day carry knife.
The Formula 23 Knife Oil lubricates and protects steel, with a special “boundary additive” which repels dirt. Hoback writes, “Special attention was also paid to the capillary effect that is present when joining two pieces of steel together; it is critical to provide and retain sufficient lubrication in those capillary spaces.” This sounds technical, but it’s important to choose the right lubricant for a tool as essential (and expensive) as your knife.
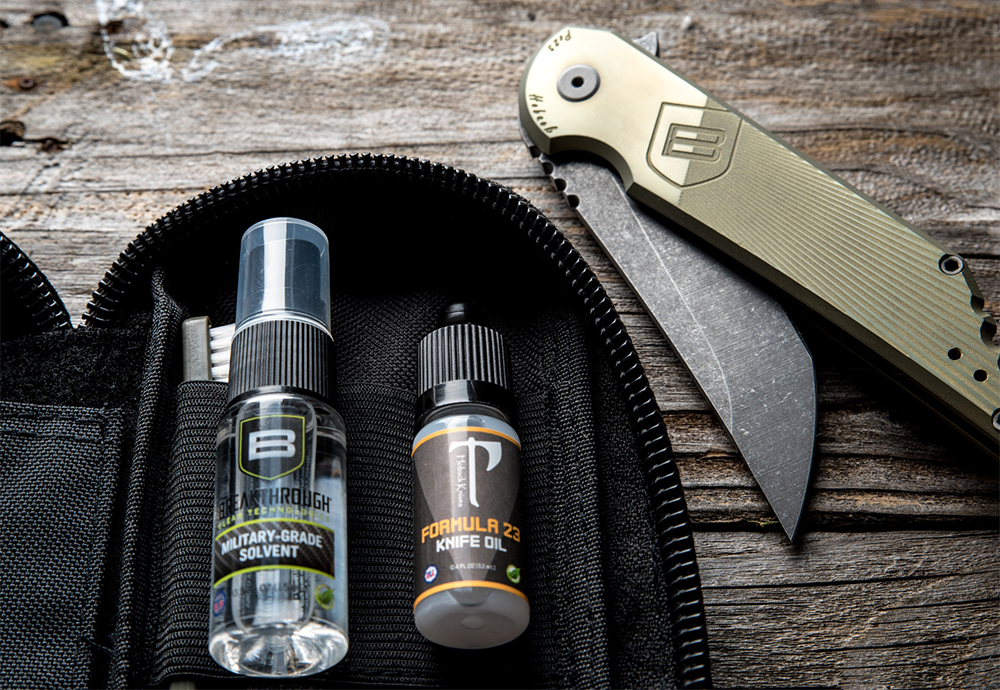
Soft foam-backed knife cleaning mat with Hoback Knives lubrication diagram
Formula 23 Knife Oil
Breakthrough Clean Solvent
Allen wrench set
Double-sided cleaning brush
Microfiber cleaning cloth
This is everything you’d need to disassemble and clean one of Jake Hoback’s folding knives, although we’d recommend picking up some Torx keys if you plan to use it on other knives you own. Fortunately, there’s plenty of space in the kit for these and other tools you may need, including a small whetstone and even spare parts.
The F23 Knife Maintenance kit will be available to the public in March 2017, but is currently available for pre-order at $35. For more information on this cleaning kit and the knives seen here, visit JakeHobackKnives.com.
We’ve said many times in the past that a mindset of emergency preparedness is often looked down upon as paranoid — until a real emergency arrives. When that day comes, preparation, training, and stockpiled gear can save lives. A recent story from WSPA 7 News demonstrates the tragic consequences of a flaw in the preparedness plan at an Anderson County, South Carolina school district.
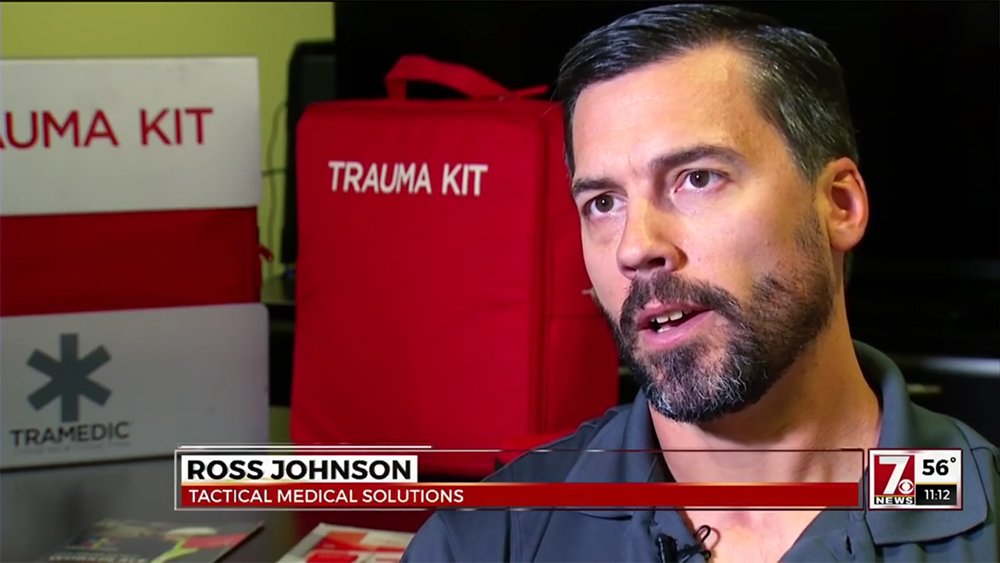
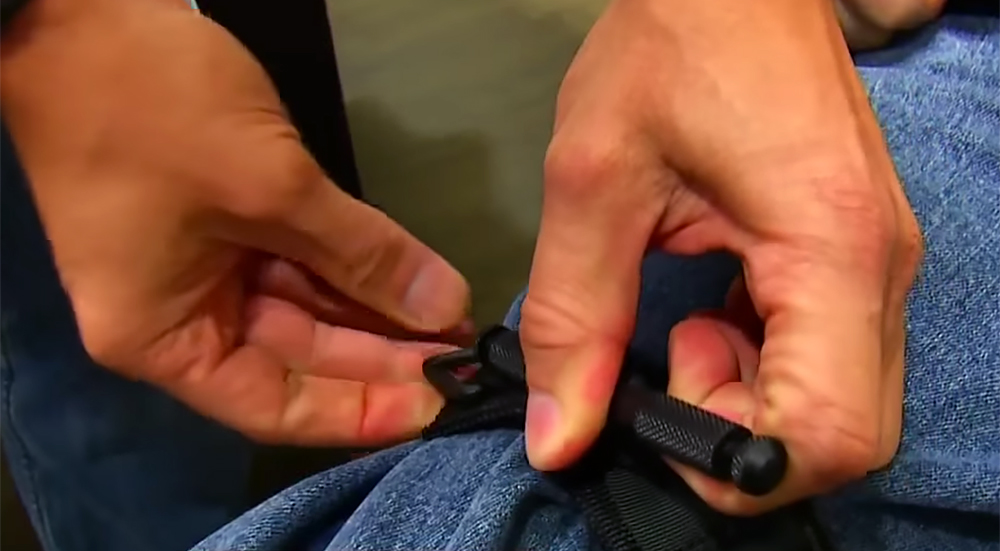
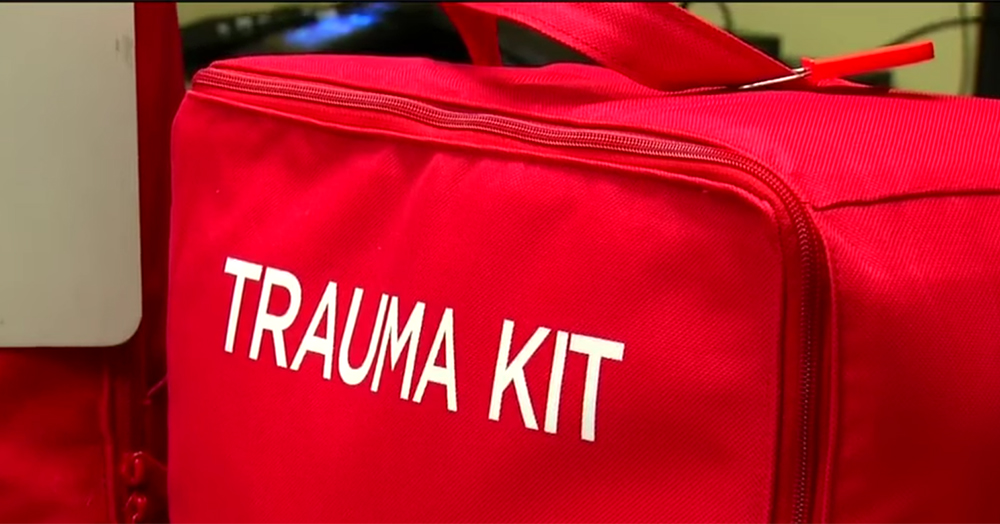
Ross Johnson, a former combat medic, generously donated trauma kits to Anderson County schools.
The story starts out with a reasonable premise: Anderson County school officials realized the need for emergency medical trauma kits for quick response to life-threatening injuries. Better yet, concerned father and former Special Operations combat medic Ross Johnson offered to donate trauma kits made by his company, Tactical Medical Solutions, to every school in the county. Unfortunately, bureaucracy within the county Emergency Management Board allegedly stalled the process, and temporarily withheld the donated kits from schools.
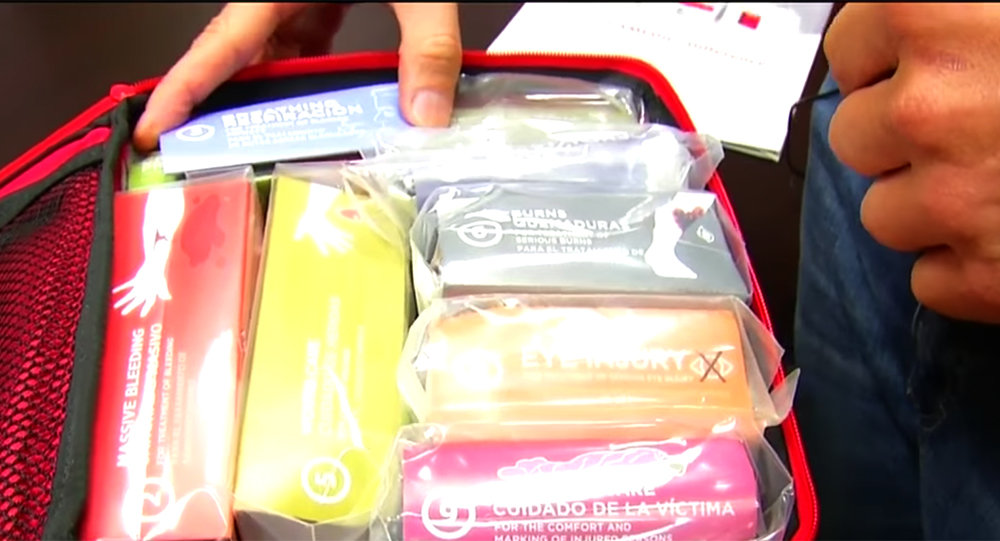
Two years later, the kits Johnson donated still hadn’t been distributed to the schools. Tragically, an active shooter incident occurred at Townville Elementary School, leaving three students injured. One student, six-year-old Jacob Hall, was shot in the leg and lost significant amounts of blood. A nurse reportedly attempted to improvise a tourniquet to stop the blood flow, but Hall would later die of his injuries. The donated trauma kits may have made a difference during this emergency, but they were nowhere to be found.
A WSPA 7 News video summarizes the situation:
So, what can we learn from these events? First of all, the situation emphasizes the general importance of medical trauma kits and tourniquets in every home, business, and government building. These supplies can save lives, and slow blood flow until emergency services arrive. Preemptive training on how to use this gear is also essential.
Secondly, these events reinforce the importance of personal and family preparedness. It’s understandable to feel frustrated by the alleged oversights of the Emergency Management Board in Anderson County, but this should also serve as a reminder to prepare your family to deal with medical trauma. Each member of the family (including children, if they’re old enough) should be trained to respond quickly and slow blood flow with pressure and/or a tourniquet.
It may also be necessary to meet with your kids’ teachers and school administrators to confirm the presence of trauma kits, staff training, and emergency response plans. If you find that your kids’ schools lack the supplies or planning they need, pursue this issue with the school board, and consider providing these tools directly to teachers or your own children — a tourniquet won’t take up much space in a backpack or desk drawer. While the school board, emergency management board, and other government agencies should certainly do everything in their power to prepare for these emergencies, so should you. While some may see your preparedness as paranoia, it can save lives.
Thanks to contributor Andy Schrader for the tip about this news story.
Each of your senses is a priceless asset, whether you’re going about your daily routine or struggling through a survival situation. Therefore, it’s only logical to do your best to protect these senses. Hearing is especially fragile, and can be damaged easily by the sound of gunfire if adequate protective gear is not used. This is why quality ear protection is essential for indoor and outdoor shooting — it preserves your hearing for when you need it most.
However, when it comes to ear protection, there is such a thing as too much noise reduction. If virtually all sound is cut off, it becomes frustrating to have conversations or hear commands, resulting in a lot of quizzical looks and utterances of “What did you say?” The solution to this is adaptive noise reduction, which intelligently blocks gunshot sounds and other dangerously-loud noises, while allowing voices and communication to come through clearly.
3M introduced two new PELTOR electronic hearing protectors at SHOT Show last month. The PELTOR Sport Tactical 300 and 500 feature new proprietary 3M SMART technology, which automatically adjusts to a shooter’s environment and firearm sound. According to the company, this SMART technology “measures the energy in gunshot noise as well as echoes in the environment and automatically sets suppression time for optimized comfort and communication.” Any gunshot noise above 82 dBA is attenuated, while low-level sounds are amplified.
The Tactical 300 and 500 are designed for extended wear and maximum comfort. Both feature foldable vented headbands for heat release, and low-profile cups with rubber bumpers and cushioned cutouts for use while shouldering long guns. The SMART microphones are recessed to reduce wind noise on the range or in the field, and the interface offers voice guidance for safe operation without removing the headset.
The PELTOR Sport Tactical 300 is mobile device compatible, and offers a 24 Noise Reduction Rating (NRR). MSRP for the 300 model is $150.
The PELTOR Sport Tactical 500 includes Bluetooth to enable two-way communication and use with cell phone functions. This headset also offers a slightly higher 26 Noise Reduction Rating. MSRP for the 500 is $200.
For more information on the new 3M PELTOR Sport Tactical ear protectors, or to find a local retailer, visit 3Msafety.com.
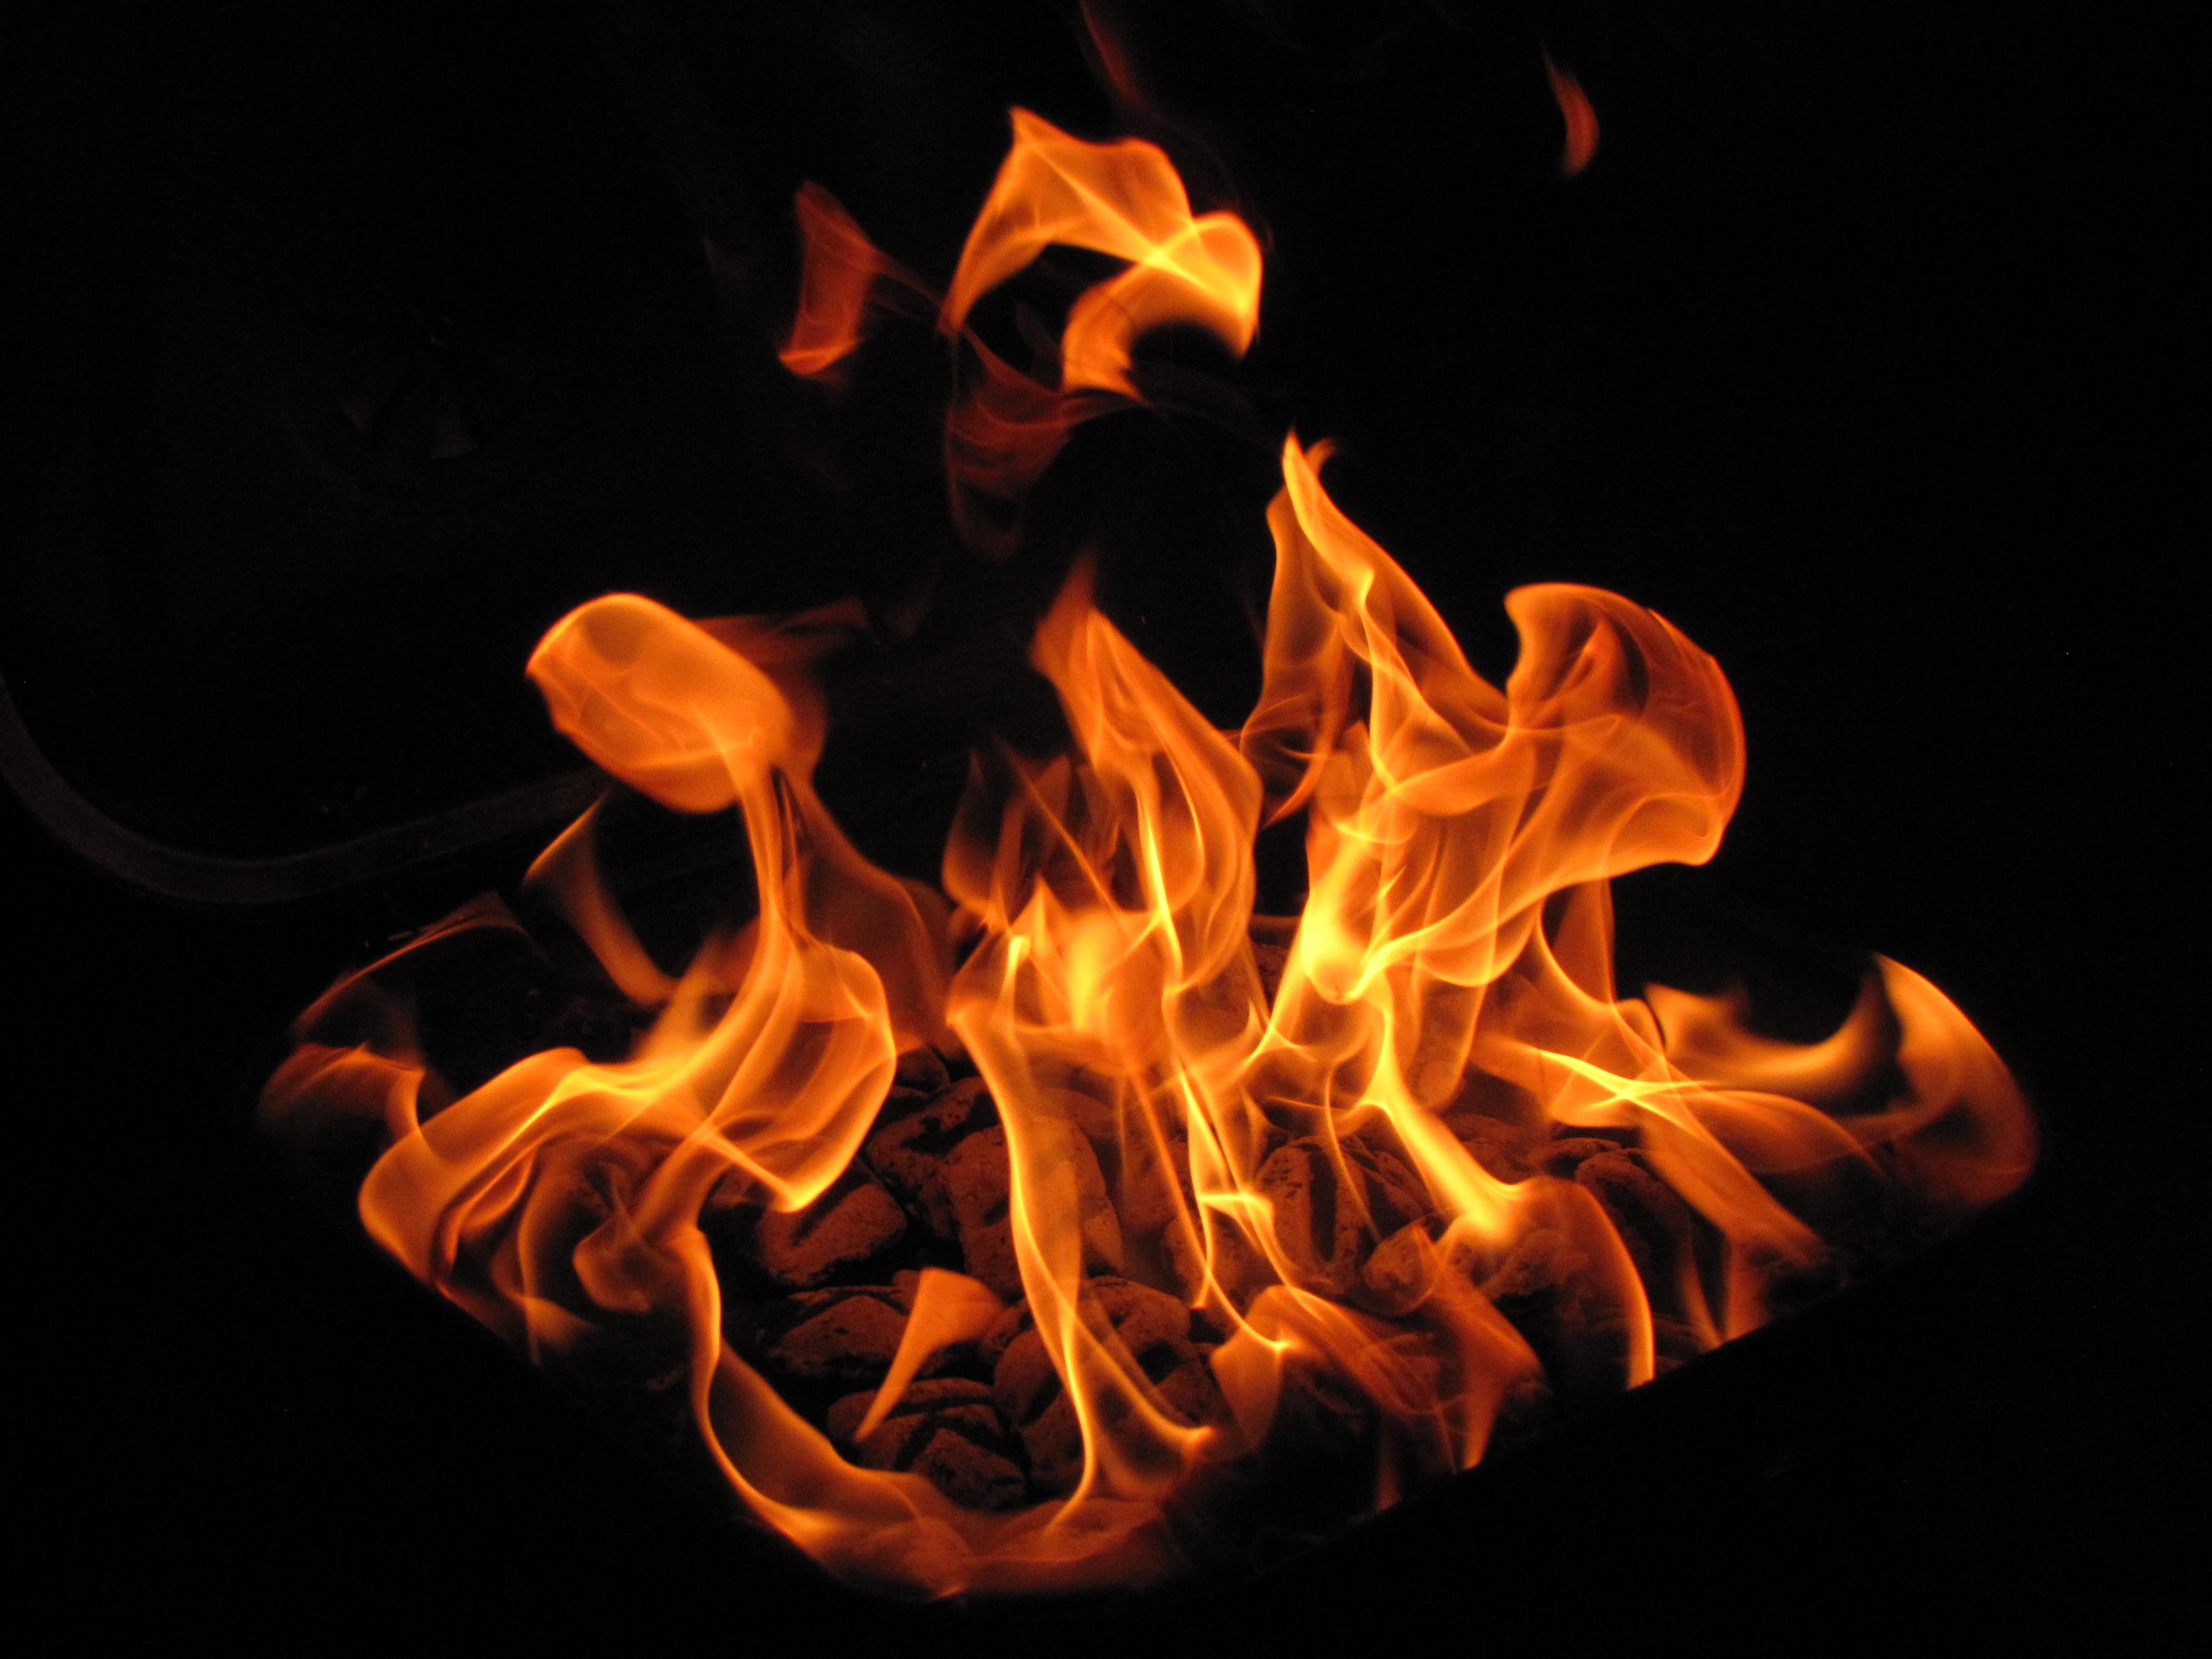
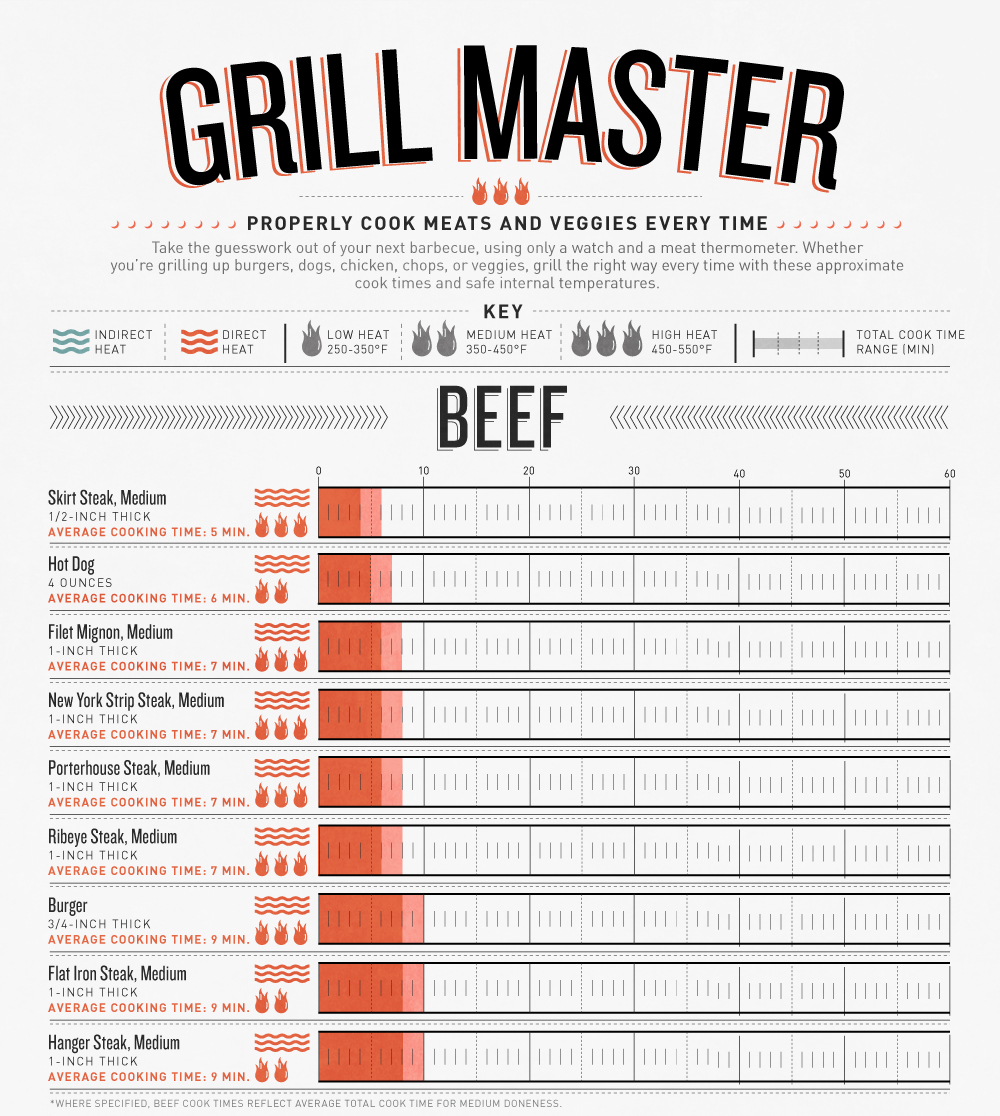
Grilling a piece of meat or fish to the point where it’s edible is easy enough. Grilling that same meat or fish to tender, mouth-watering perfection is extremely difficult to master. Too far towards one end of the spectrum, and you’ll end up with a bloody mess, and you’ll look like Gollum as you chew on meat that’s practically raw and wriggling. On the other end of the spectrum, you’ll be left with a charred hockey puck that resembles the coal it was cooked over more than the animal it came from. Both extremes are less than optimal, especially when you’re out at a remote campsite.
In order to hit the sweet spot with your meat, fish, or even veggies, there are three factors to consider:
Heat level – How big and how close is the fire to your food?
Direct or indirect heat – Are you cooking the food over the flame, off to the side, over a tray, or wrapped in foil?
Cook time – How long are you cooking the food, given its size?
If any of these factors are out of balance, your food will end up overcooked and unappetizing, or undercooked and potentially dangerous. Either way, the following infographic from Visual News can help you learn the appropriate grilling formula for a variety of types of beef, pork, chicken, seafood, and vegetables. Check it out:
For more tips on meal prep and cooking off the grid, check out our previous article, Grid-Down Chef.
CRKT has announced a new addition to its Forged by War program, which assists combat veterans on the path to becoming knife designers. We previously wrote about the first three blades in the Forged by War line — check out that article for a summary of how the program works, and how it assists veterans with creating the tools they wished they had on the battlefield. In addition to helping these individuals deal with PTSD and find an outlet for their skills, the program donates 10% of its net profits to charities of each designer’s choice.
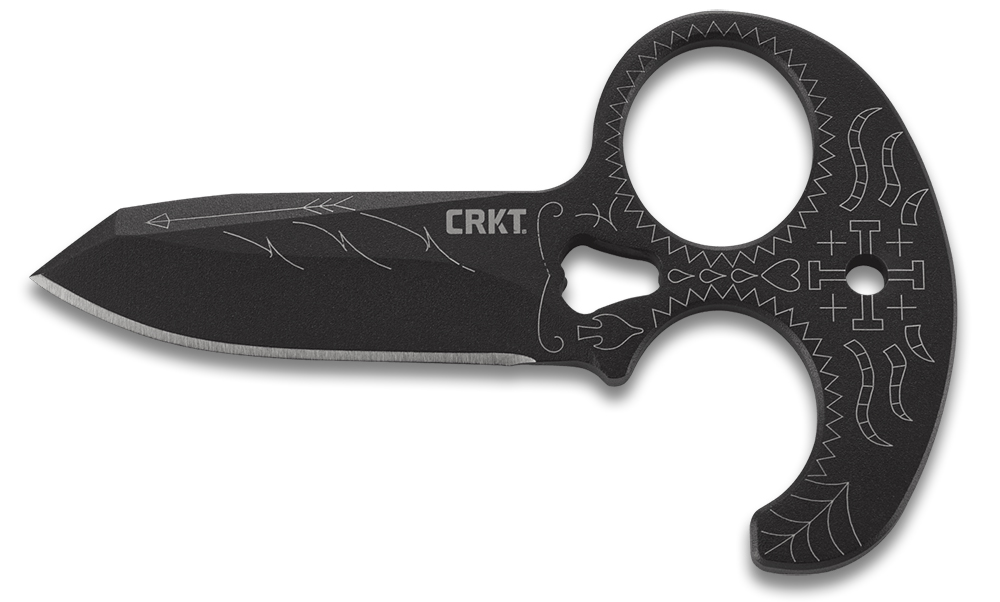
The latest knife in the Forged by War series is the Tecpatl push dagger. It was designed by Michael R. Rodriguez, who joined the U.S. Army at age 17 and continued to serve for 21 years. Fifteen of those years were spent as a Green Beret in the 7th Special Forces Group. He was an 18 Delta Special Forces Medic, a role held by some of the finest trauma medical technicians in the entire U.S. Armed Forces.
During his military career, Michael participated in more than 9 deployments, including locales in Central and South America, Haiti, Somalia, and Afghanistan. After his final combat deployment, he was assigned as a Sniper Instructor for the 1st Special Warfare Training Group.
As a result of his extensive combat experience, Michael suffered multiple traumatic brain injuries (TBIs), lost vision in his left eye, and was diagnosed with severe PTSD. This forced him to medically retire from his role as a Green Beret, but he continued on to become the Chief Ambassador for the Green Beret Foundation, and sits on the Advisory Council for President George W. Bush’s Military Service Initiative.
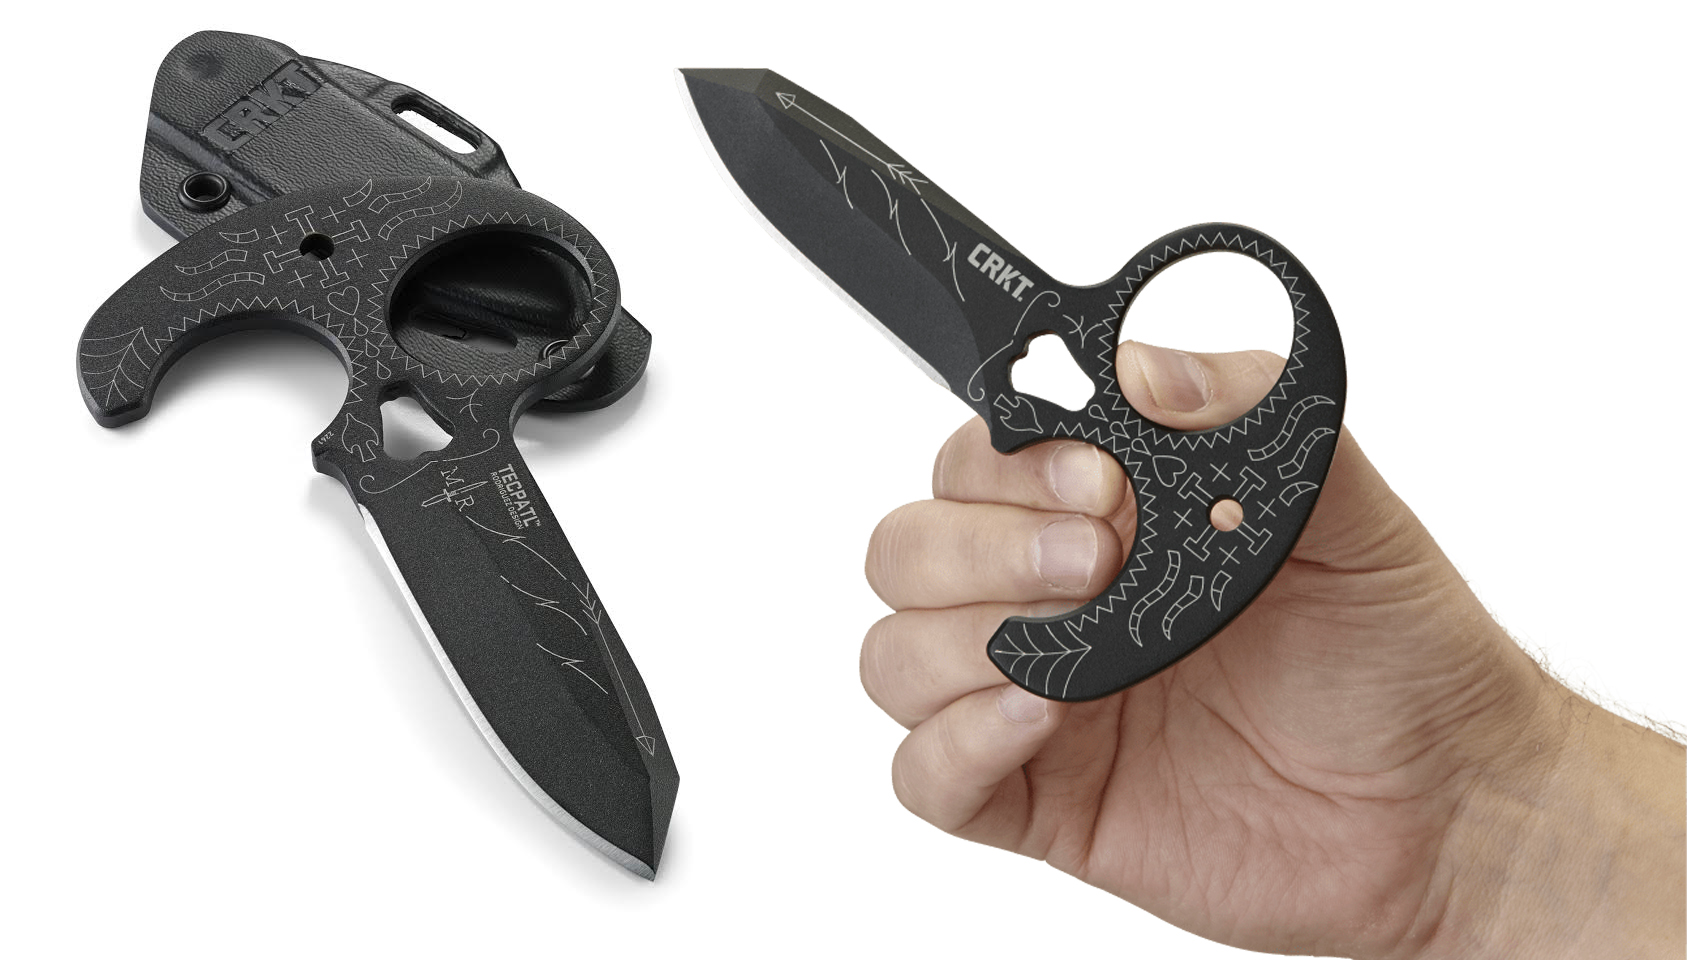
Michael partnered with CRKT to produce the Tecpatl push dagger, which features a sugar skull motif inspired by Michael’s New Mexico heritage. The Tecpatl is constructed from tough SK5 carbon steel, and its black powder-coated finish is laser-etched with various symbols. To the ordinary viewer, these symbols look like nothing more than artistic design, but Michael put deep meaning into the engraved markings.
Here are a few of the significant symbols:
Horns inspired by the Devil’s Brigade, also known as the First Special Service Force. This unit joined elite soldiers from America and Canada during World War II.
A Crusader’s cross around the lanyard hole
Office of Strategic Services insignia
“7” to commemorate the 7th Special Forces Group
Arrow to represent the crossed arrows of the Special Forces
Three lighting bolts to represent the Green Beret shoulder patch
Even the word Tecpatl is significant — it’s the name of a type of obsidian blade once carried by elite Aztec jaguar warriors, and used as a backup weapon for close-quarters combat.
The CRKT Tecpatl push dagger includes a black Kydex sheath, and is available at an MSRP of $90. As with all Forged by War blades, 10% of the proceeds of this knife’s sales will go to Michael’s charities of choice: The Special Operations Care Fund and the George W. Bush Institute.
For more information on the Tecpatl and other Forged by War blades, visit CRKT.com.
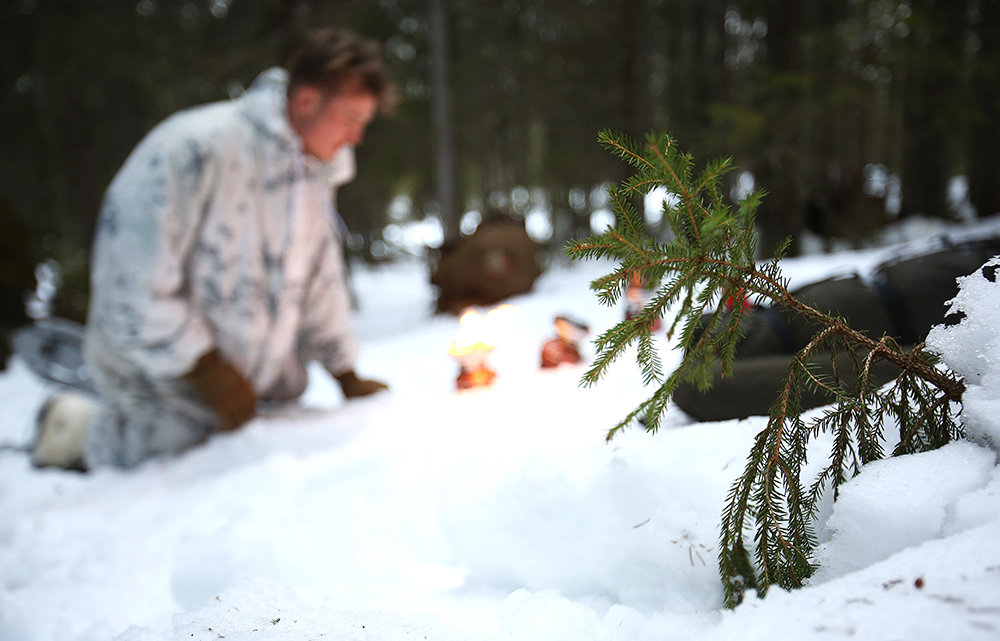
When it comes to life-threatening low temperatures from inbound blizzards, we often have some advance warning that we’re about to get blasted. So we stay inside, we secretly drink the hot chamomile tea that our wives bought, and we download Jocko Willink podcasts before the WiFi cuts off. It’s fine. We’ll wait it out.
The problem is, when polar weather patterns decide to clog our roads with snow, we might have to get out and help our under-prepared family and friends. Or we may just be visiting, for work or on vacation, and we’re not very well prepared because we’re only in town for 48 hours, and how much can the weather really change in 48 hours? “Come on. Don’t be the crazy prepper person. We don’t need all of that.”
Just like it matters what fluids you run in your vehicle during extreme cold, you also must consider the freezing points of firearms lubricants. For example, the Army’s Cleaner Lubricant Preservative (CLP) solution will freeze at -35˚F. An arctic weapons lubricant is available, but if you don’t have that, then just completely clean the weapon and fire it dry.
Photo by Spc. Liliana S. Magers, U.S. Army Alaska Public Affairs
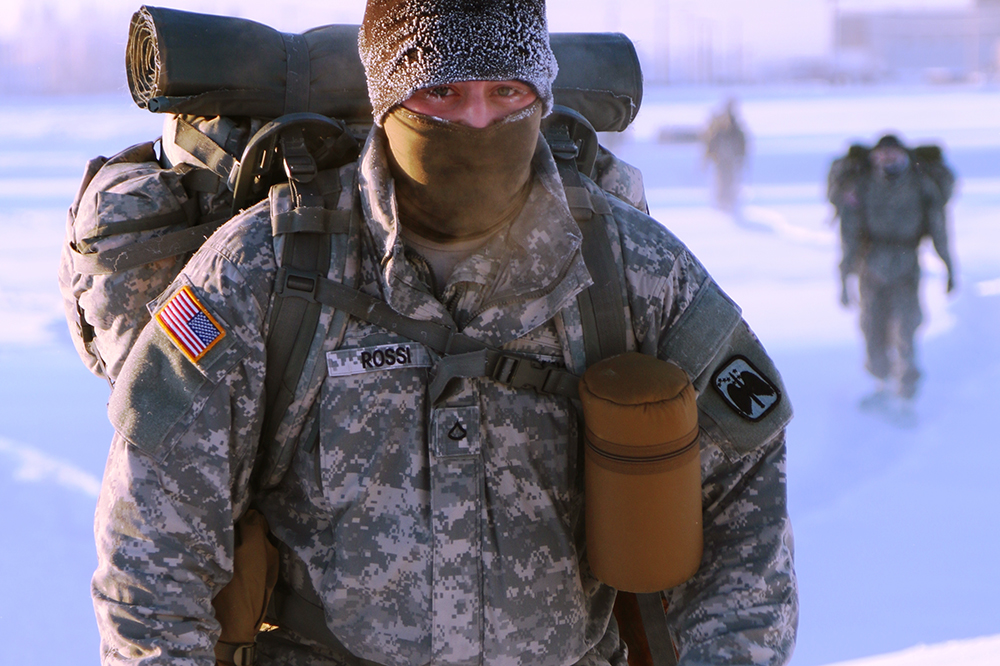
To prevent your weapons from freezing, consider using a deicer like windshield wiper fluid. Also, try to cycle the weapon or operate the action periodically to identify issues as they come up. Use a muzzle cover if possible to keep snow and ice out of the barrel. Almost anything will do: plastic bags, tape, and of course the infantry’s gold standard muzzle cover for over 100 years, condoms.
Remember that while running your weapons dry is better than letting them freeze and seize, it’s still going to increase wear on moving parts. If you plan to put lots of rounds down range, especially with a semi-auto weapon with tight tolerances, be sure to clean and inspect the action regularly.
U.S. Army photo by Staff Sgt. Michael O’Brien / Released
If you’re entering a warm indoor space and it’s below freezing outside, leave your guns out there in a place sheltered from snow. As much as you might love that old Savage 99, it’s not a pet. It’ll do just fine on the porch without you. Leaving it cold will help prevent “sweating” on the rifle which can lead to ice if it’s brought back outside without cleaning.
You did make sure that your weapons were concealed and secured against theft or inquisitive kids, right? If not, we have a great solution. Sell your guns back to the FFL where you bought ‘em. You are no longer qualified to own a firearm.
Try not to breathe on the scope. Even the proximity of your face could cause it to cloud so leave a space between your eye and the sight. If taking the scoped rifle indoors, make sure to give the optics time to adjust to the indoor temperature to avoid cracking the lens—another reason to just leave weapons outside if tactically feasible.
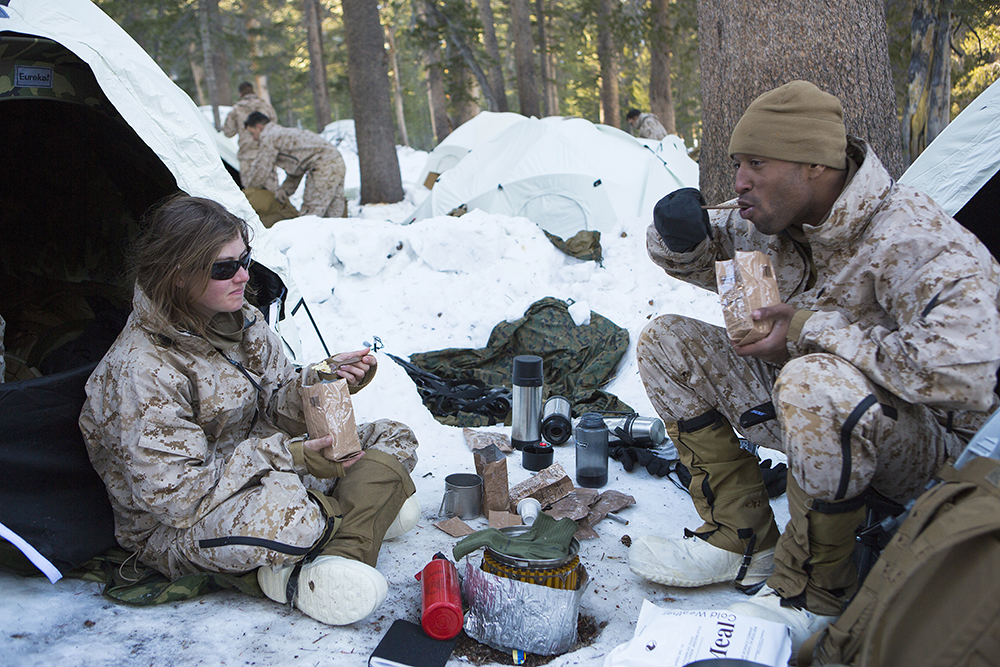
Nutrition
U.S. Marine Corps photo by Sgt. Anthony L. Ortiz / Released
Generally speaking, as it gets really cold we need to eat more. Most foods including standard MREs will do just fine until it gets below the freezing point. Once it becomes colder than that a Meal, Cold Weather (MCW) ration is more appropriate. The MCW contains more calories and won’t freeze like a standard MRE will. The catch is, they require a lot of boiling water to prepare them—34oz per meal. If you’re planning on two hot meals per day that’s an additional ½ gallon of water required just to prepare the food.
U.S. Marine Corps photo by Sgt. Anthony L. Ortiz / Released
Although your body’s hydration requirements don’t necessarily go up as the temperature decreases, you also don’t have the same thirst for water as you would during temperate conditions. Dehydration becomes an issue not because you need more but because you’re drinking less. Try to hydrate with at least one gallon of water per person per day. Add that to the water required for preparing MCWs and you’re looking at 1.5 gallons or 12.5 pounds of water per person per day. You weren’t planning on carrying that water with you, right?
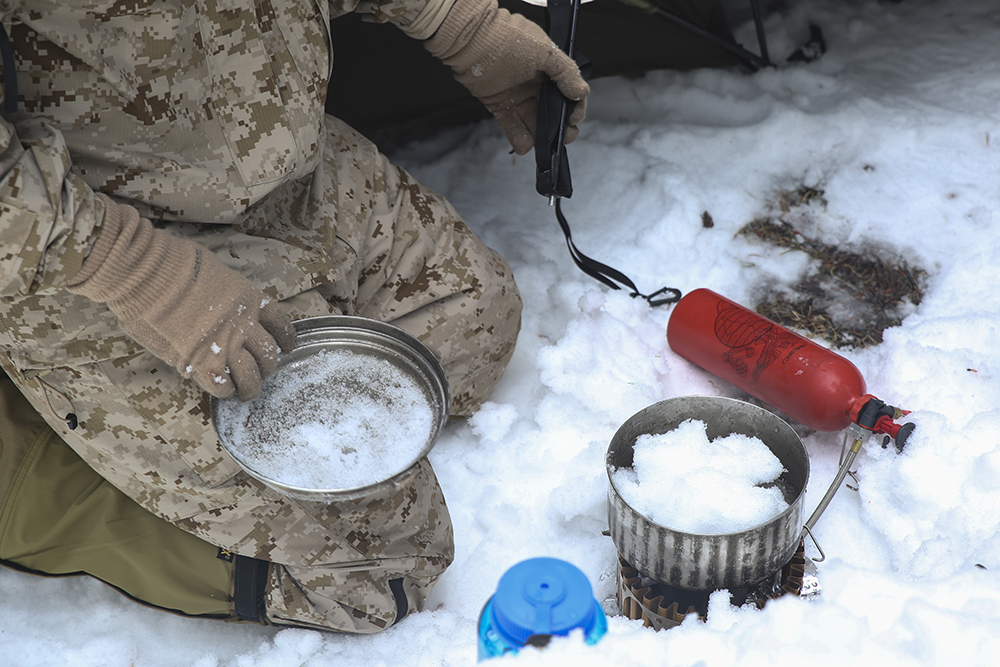
Fortunately, the one good thing about blizzards is there’s usually lots of frozen water on the ground in the form of snow. Eating snow to hydrate, however, is a bad idea. Your body loses too much heat when it melts snow inside your body. You’ll end up hypothermic. Instead, plan on melting snow with your stove.
U.S. Marine Corps photo by Lance Cpl. Kaitlyn Klein / Released
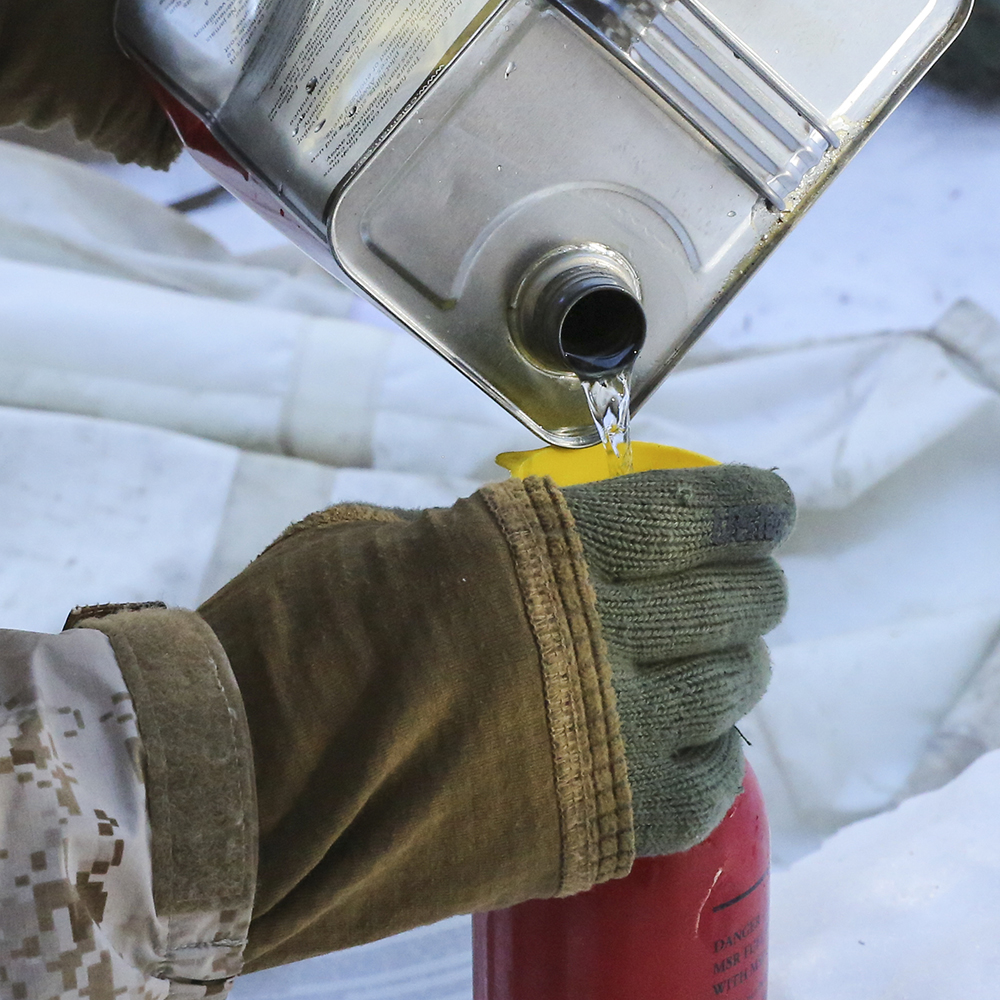
The U.S. Army will not endorse specific companies or aftermarket products, though in a few cases they have acknowledged that certain aftermarket products work better than anything else. The Mountain Safety Research (MSR) XGK-EX stove is one such product. It’s favored because of its legendary toughness as well as its ability to use all kinds of non-specialized fuels—including white gas, kerosene, unleaded auto gas, and even diesel.
U.S. Marine Corps photo by Lance Cpl. Kaitlyn Klein / Released
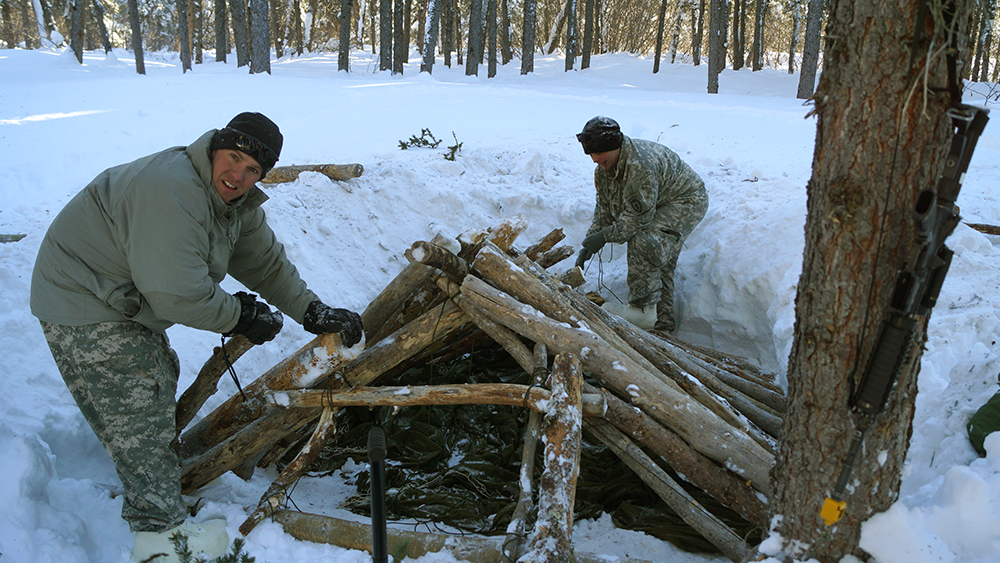
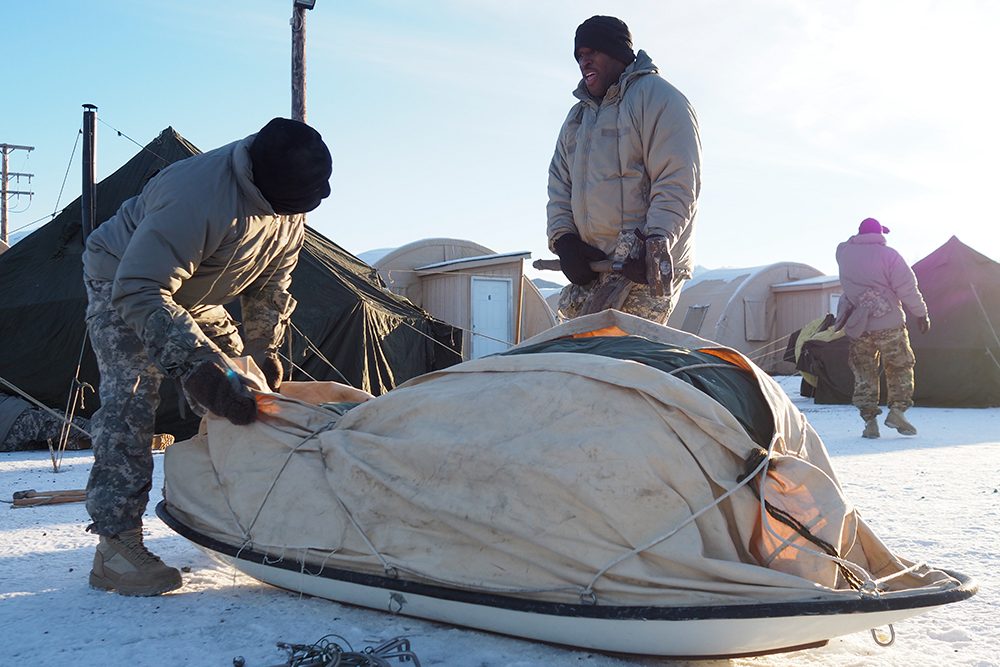
Clothing
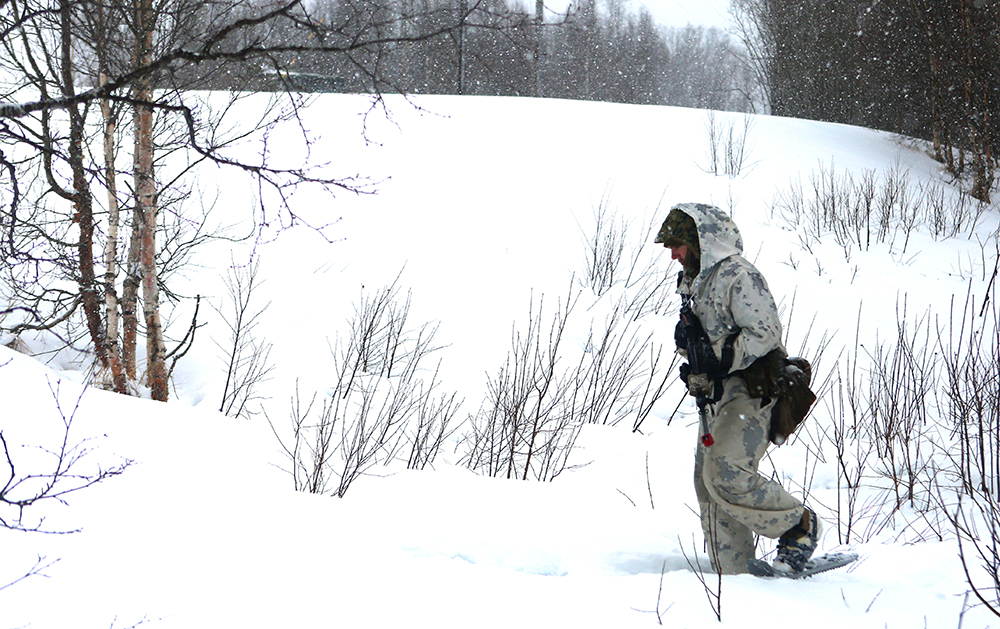
Clothing selection for extreme cold weather could take up its own series of articles. In general, however, the key is loose-fitting layers of clothing and moisture-wicking layers close to the body.
Once the temperature drops below -20˚F, all exposed skin must be covered. Not like, pretty much most of your skin but all of your skin. If you must stay outside be aware that you will need to keep moving. And if your life just truly sucks and you must remain in a static position, at least try to stand on insulating materials such as pine boughs or even a flat piece of wood.
Mittens aren’t just for schoolyard kids in A Christmas Story with their tongues stuck to the flagpole. In extreme environments, plan to wear mittens with lanyards, gloves underneath that, and then silk liner gloves under that. And you never, ever take off your silk liners unless you’re in a shelter. Chemical heater packs stuffed into your gloves work well—plan on using two to three sets per 12 hour working day.
U.S. Air Force photo by Justin Connaher
Usually the average soldier doesn’t get to select their own gear. In some cases, however, specialized units have some influence on what they use. One of the products specifically mentioned to us by members of said units was the Enforcer Glove from Black Diamond Equipment.
Last, Carhartt products like their quilt-lined biberalls also received positive feedback.
Electronics and Gear
If you’re using a hand-held GPS or other electronics like a cell phone to navigate, be aware of their operating temperature constraints. Carry it close to your body inside your clothing, or keep it inside the heated vehicle when not in use. Also, avoid breathing on the screen or else it will quickly ice over.
If the work you’re doing requires you to have your face in front of an LCD screen or other optics for an extended period, wearing a full face respirator or Powered Air Purifying Respirator (PAPR) mask can help prevent your moist breath from affecting the device. Yes, it looks dumb. Until you realize that it allows you to do your job.
Just like with your firearms, bringing a laptop computer in from the cold outside to the warm inside can cause issues. Let the laptop warm up on its own before trying to use it. Don’t even open up the screen. Consider a laptop heating pad which will help maintain battery life and keep the LCD screen bright and readable.
U.S. Marine Corps photo by Sgt. Anthony L. Ortiz / Released
Battery-operated equipment will constantly drain. Make sure there’s a way to charge your batteries, or at least have a supply well in excess of what you think you’ll need. Dry batteries must be stored at temperatures above 10 degrees F and must be warmed gradually before use. Bring spares. Bring spares of spares.
Andrew Schrader is a licensed professional engineer and is certified by the U.S. Army Corps of Engineers as an Urban Search and Rescue (USAR) Structures Specialist. His company, Recon Response Engineering LLC, advises state and federal government organizations on the subject of urban search and rescue and building collapse. He recently assisted the U.S. Department of State’s Italian Consulate in the development of their post-earthquake response and rescue protocol. You can follow him on Instagram at @reconresponse.
If the grid goes down, having a mobile and renewable power source can keep you in the 21st century while everyone else is reverting to the 18th. Electronics are usually not an absolute necessity for survival, but they sure do make it easier. Even something as simple as a fully-charged flashlight or handheld radio can make a huge difference in an emergency.
Solar power is an excellent source of electricity for everything from casual camping to long-term survival scenarios. Solar panels passively soak up sunlight to produce a charge, and pairing them with a battery improves versatility by allowing you to recharge your devices at any time.
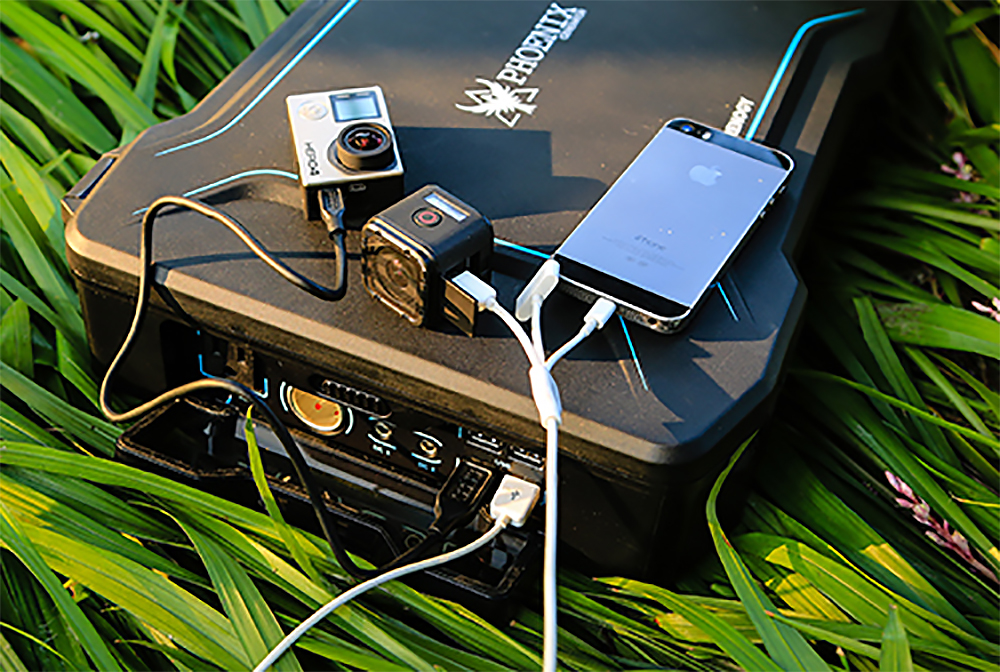
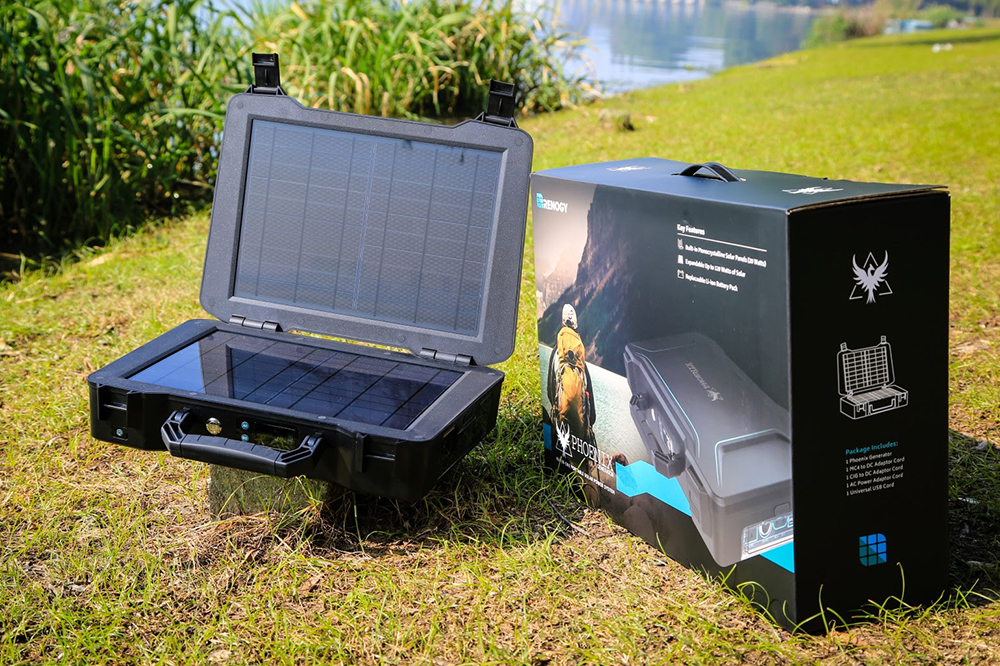
Renogy recently announced the all-new Phoenix, a device which combines solar panels and a battery into a convenient briefcase-style unit. The lid of the Renogy Phoenix opens to reveal two efficient 10-watt solar panels, and offers expansion ports for up to 120 watts. The device can also be charged via an AC wall charger or a 12V car charger.
The Renogy Phoenix contains a replaceable 16,000 mAh (milliamp-hour) lithium-ion battery. This provides enough capacity to fully recharge a laptop up to 5 times, or an iPhone 6S up to 32 times. Outputs include a 110V AC wall-style outlet, a 12V cigarette lighter output, two 12V DC ports, and four 6A USB ports. There’s also a built-in multi-mode 3W LED light.
The new Renogy Phoenix solar generator is currently available for $589. For more information, visit Renogy.com.