Knife-making runs in Robert Carter’s blood. He’s the son of skilled knife-maker Joe Pardue, and the grandson of an absolute legend in the knife world, Mel Pardue. Carter has attained his own success while working with Ontario Knife Company to develop the Carter Prime. The Prime is one of OKC’s most popular designs, and it has now led to a second Ontario knife: the Carter 2quared.
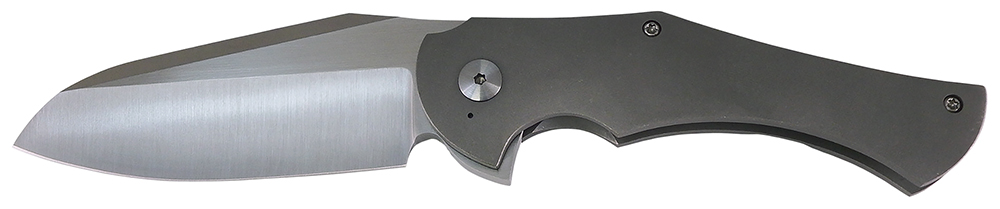
An early custom prototype of the Carter 2quared design. Source: @robertcarterknives / Instagram
OKC says the name 2quared is pronounced “squared” rather than “two-quared”, but however you choose to read it, it looks to be a pretty cool blade. Carter came up with this design as a custom model, and partnered with Ontario Knife Company to bring it into production on a larger scale.
Another photo of the early custom design by Carter. Source: @robertcarterknives / Instagram
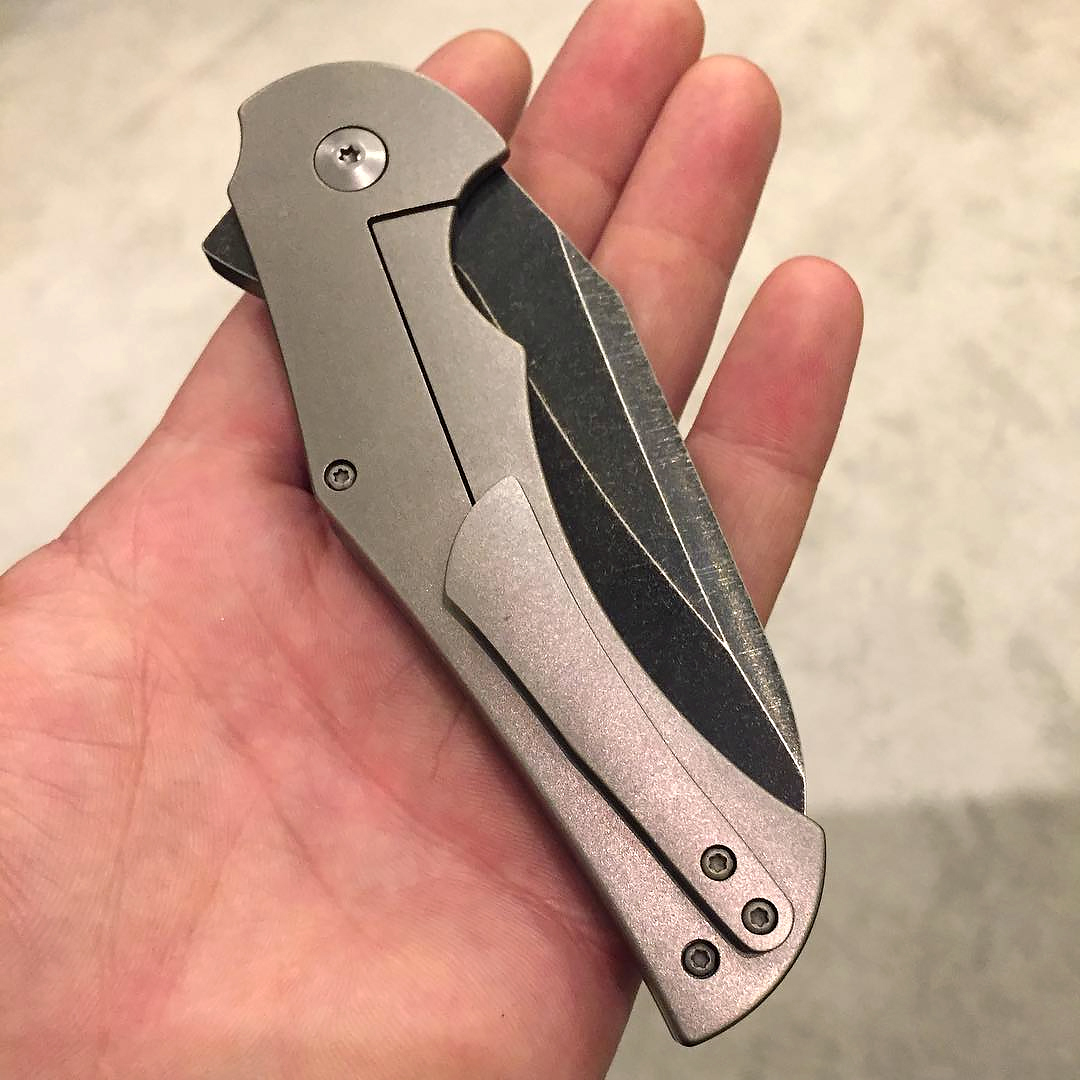
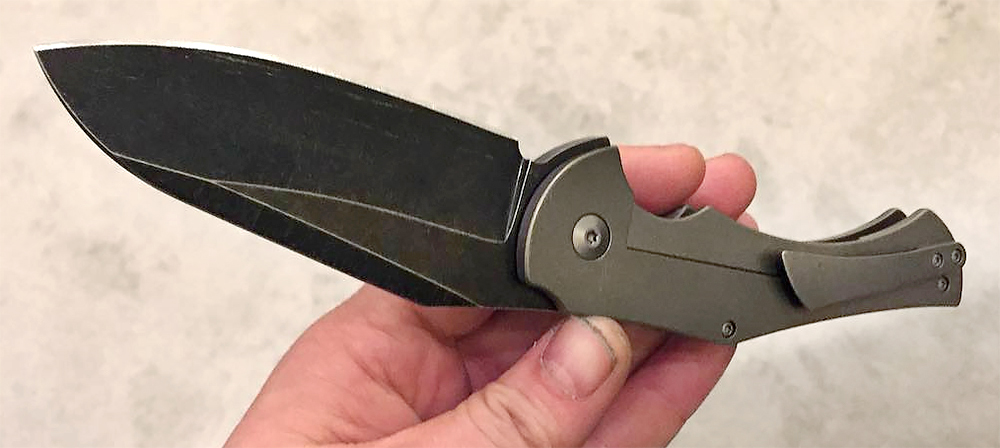
The production OKC Carter 2quared consists of a lightweight titanium handle, with a large forefinger groove, sturdy frame lock, and sculpted pocket clip. The drop-point flipper blade is constructed of natural D2 tool steel, rather than the blackwash finish seen on the custom version above (though we hope that finish will be available later from OKC). This D2 steel includes chromium for tough corrosion resistance, and is hardened to 59-60 HRC.
Here’s a photo of the final production version of the OKC Carter 2quared knife.
The knife’s overall length is 8.375 inches, while the blade is 3.55 inches. The OKC Carter 2quared is made in Taiwan. The company has not yet announced an official retail price, or listed the Carter 2quared on its web site, but keep an eye on the OKC Robert Carter Series page for more information in the future.
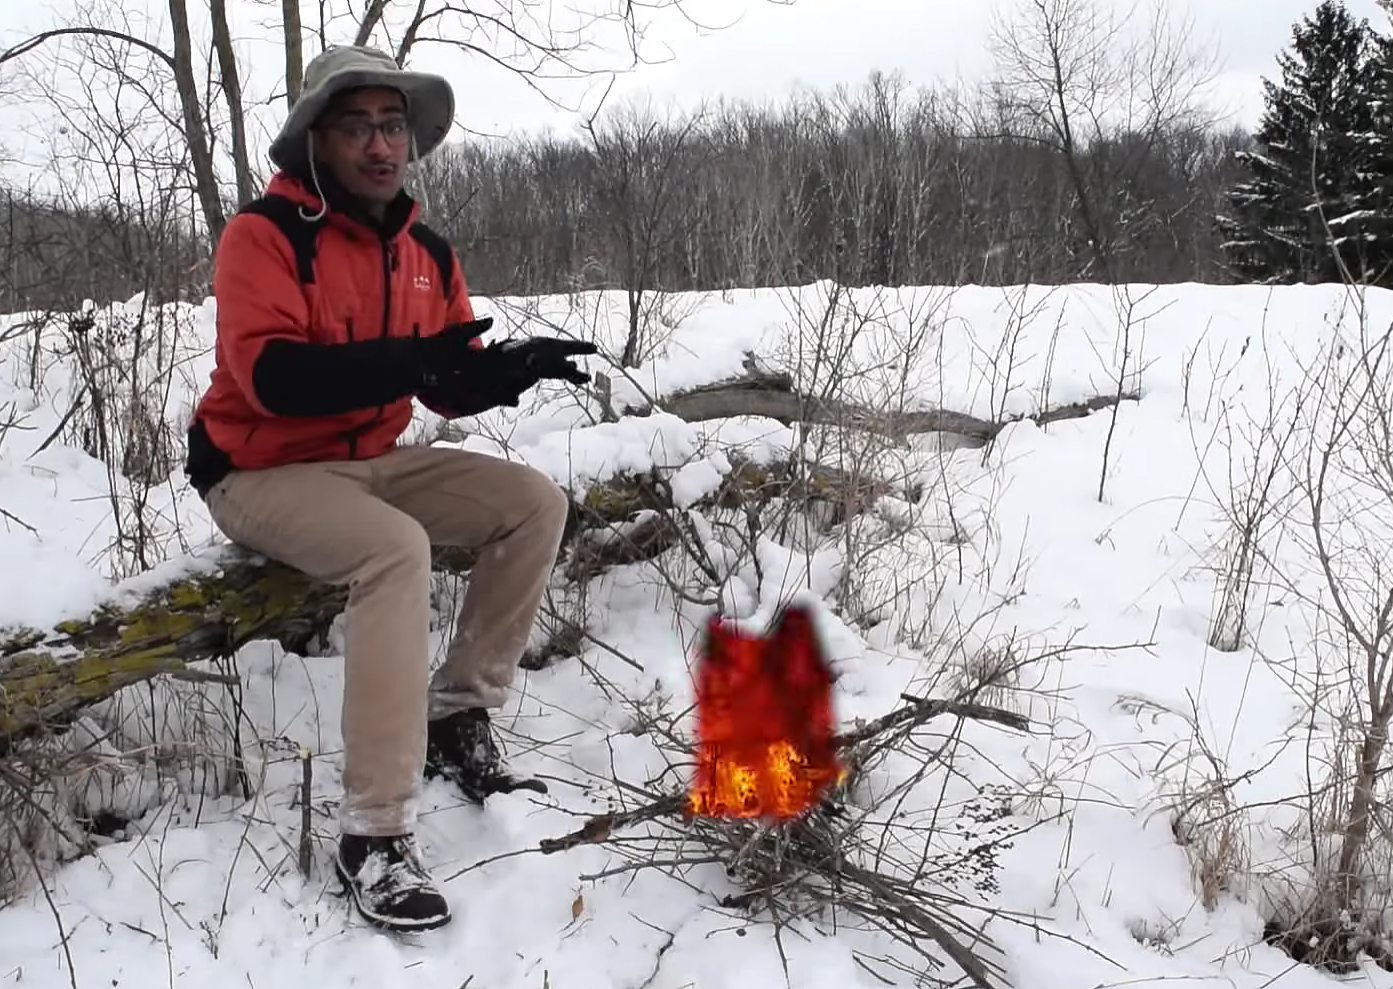
YouTube videos can be a great resource for survival tips. But, as is often true on the internet, finding these helpful tidbits often requires navigating an enormous minefield of bad advice and absurd misconceptions. From drinking your own urine through a LifeStraw to starting fires with a lemon, we’ve pointed out a number of these ridiculous survival videos in the past.
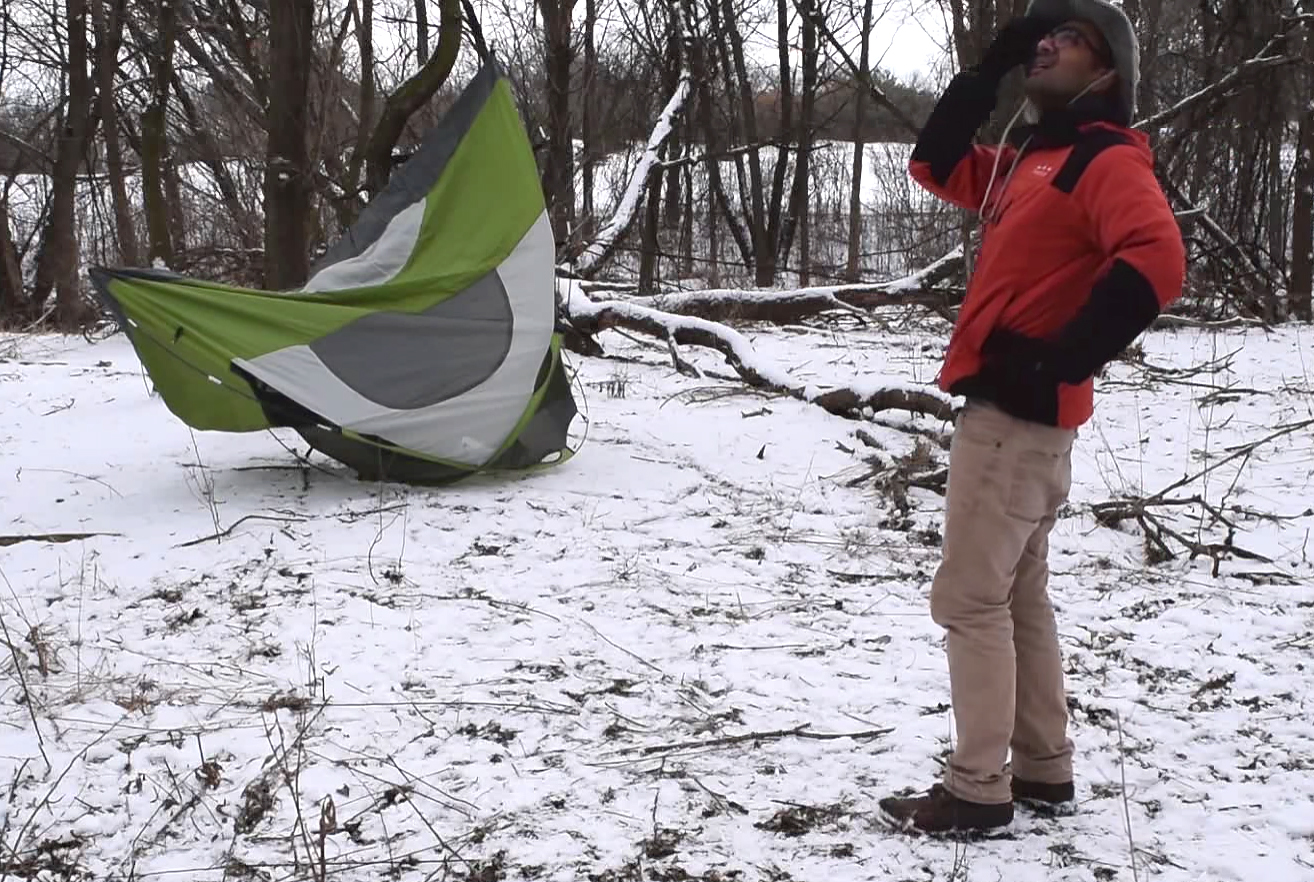
In his latest video, Ashwin pokes fun at some winter survival techniques.
It would appear that Ashwin Ramdas, the host of YouTube channel Ashwin Enjoys Nature, has also noticed these absurd “pro tips”. His channel uses satire to poke fun at the vast array of bad survival advice on the internet, finding humor by providing the worst possible survival tips. It’s certainly not advice you’d want to follow, but it’s pretty funny to watch.
We’ll say it again: The following video intentionally presents bad survival advice for the purposes of satire and humor. Don’t try any of this at home.
In case you’re wondering, we’ll put on our Captain Obvious uniform and recap why these techniques are not advisable:
Packing snow inside your jacket can lead to hypothermia.
Boosting your metabolism will cause you to burn calories and starve faster.
Eating a habañero will make you feel warm, as it draws warm blood away from your core to flush/redden the surface of your skin. This is the opposite of what you want, and may lead to your core temperature falling drastically into hypothermia. The profuse sweating caused by spicy food just compounds this effect. See also: slathering yourself in capsaicin and drinking habañero water.
Consult anatomy and zoology textbooks if you need an explanation why you can’t walk anywhere an animal can.
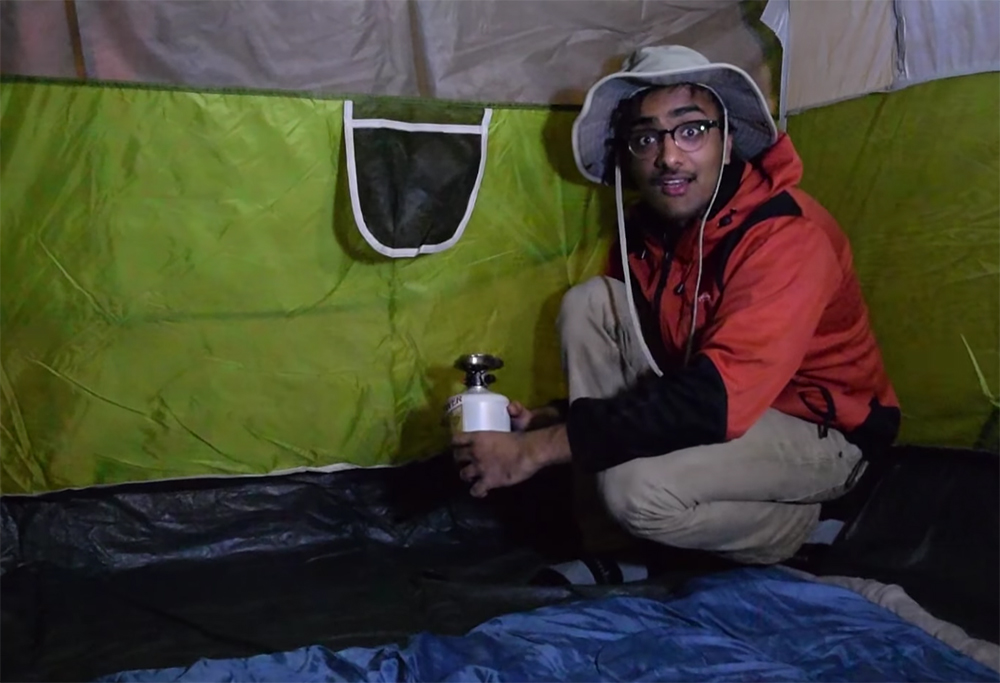
Sadly, CGI fire won’t keep you warm. Lighting a fire in your sealed tent will put you to sleep… and also kill you due to carbon monoxide poisoning.
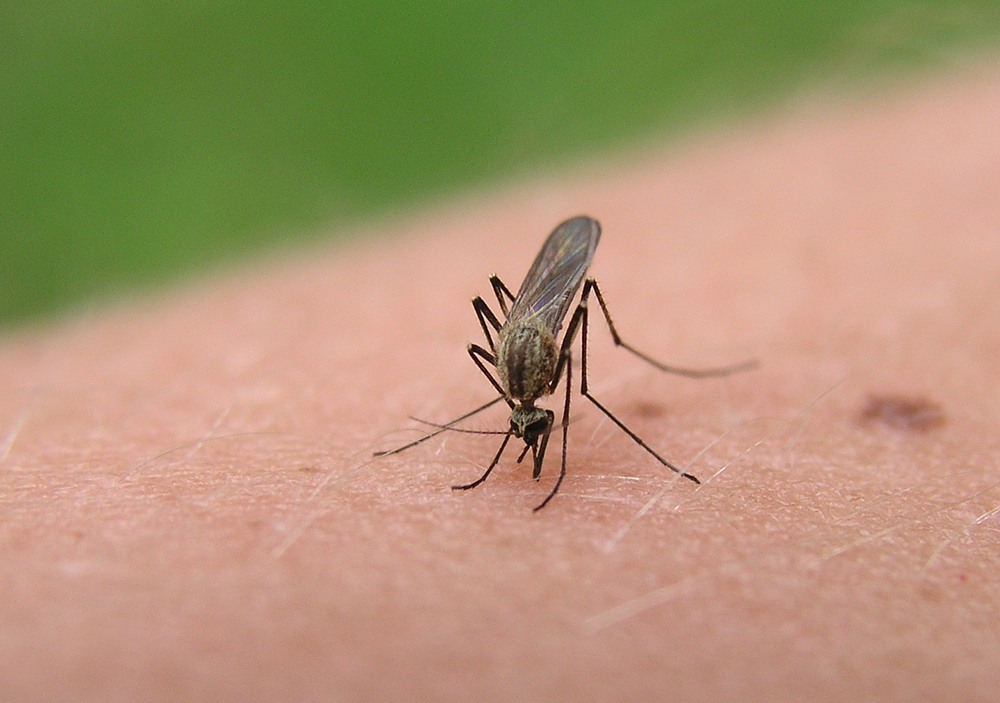
Nobody likes mosquitoes. These buzzing, blood-sucking scourges of the air seem to exist only to spread misery and disease. They’re surprisingly resilient, annoyingly persistent, and for every one you kill, more take its place. Statistically, they’re the single most deadly organism on Earth, killing hundreds of thousands of people each year. Some biologists have even advocated “specicide” — that is, completely wiping out the most dangerous disease-carrying species.
Putting aside the global impact of mosquitoes for a moment, how can we deal with these pests on a smaller scale? Ceasing the spread of malaria, zika, and dengue fever around the world is an admirable goal, but stopping mosquitoes in your own backyard is more practical and attainable. As we approach springtime, the mosquitoes will be coming, if they haven’t already arrived.
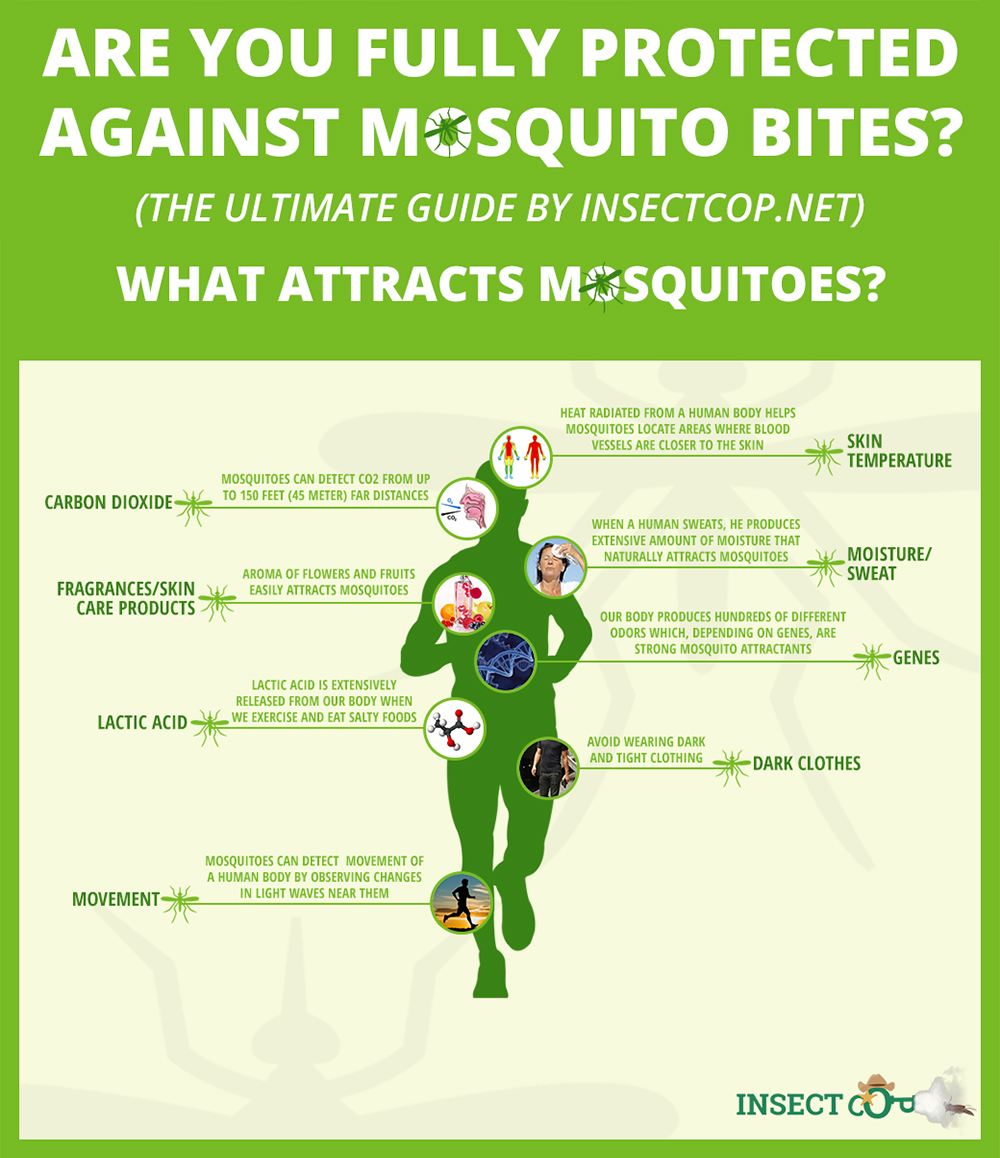
In order to help you prepare for mosquito season, we’ve collected a few helpful infographics on the topic. First, here’s a map of the time frame when mosquitoes start becoming active:
If you live in the southern United States, mosquitoes are likely already buzzing around. Central and northern states may have a few more weeks before the pests arrive. The peak of mosquito season varies based on region and mosquito species, but mid-summer is generally regarded as the height of the activity.
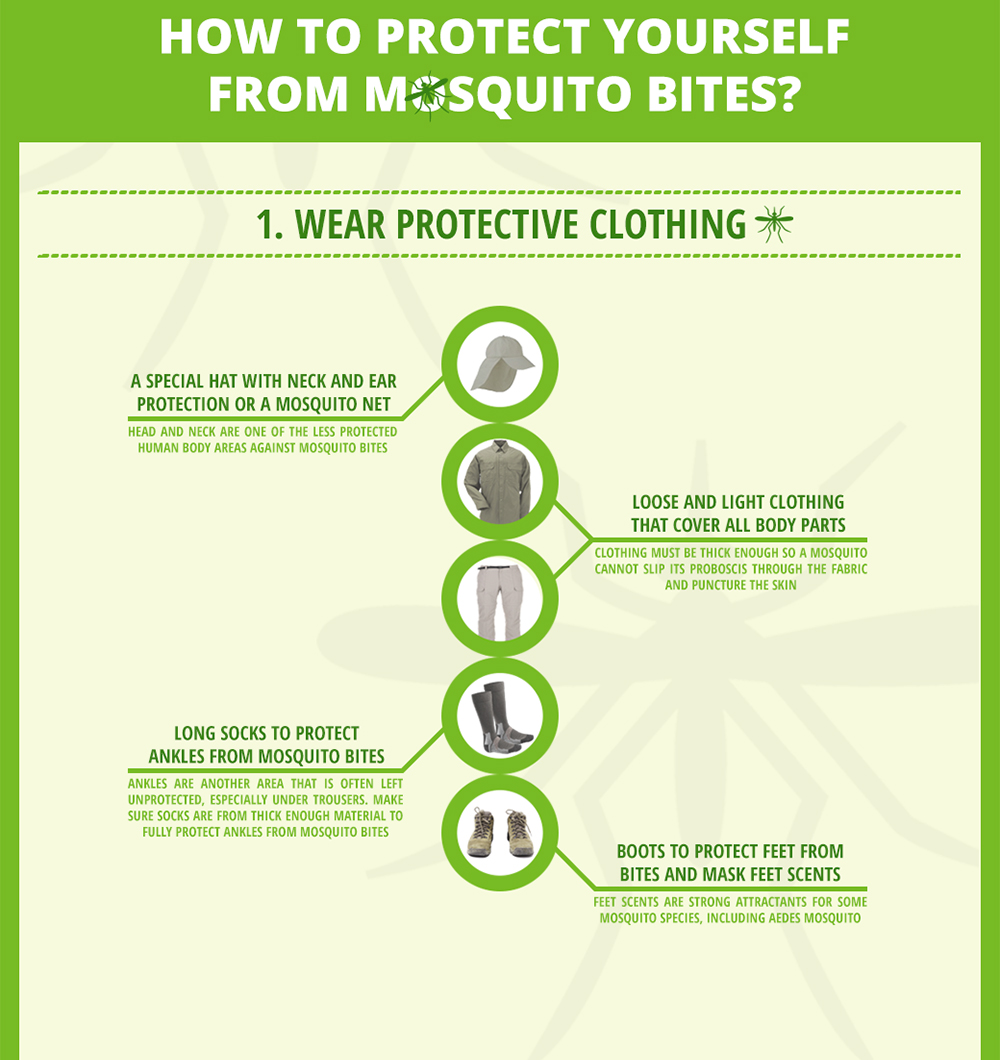
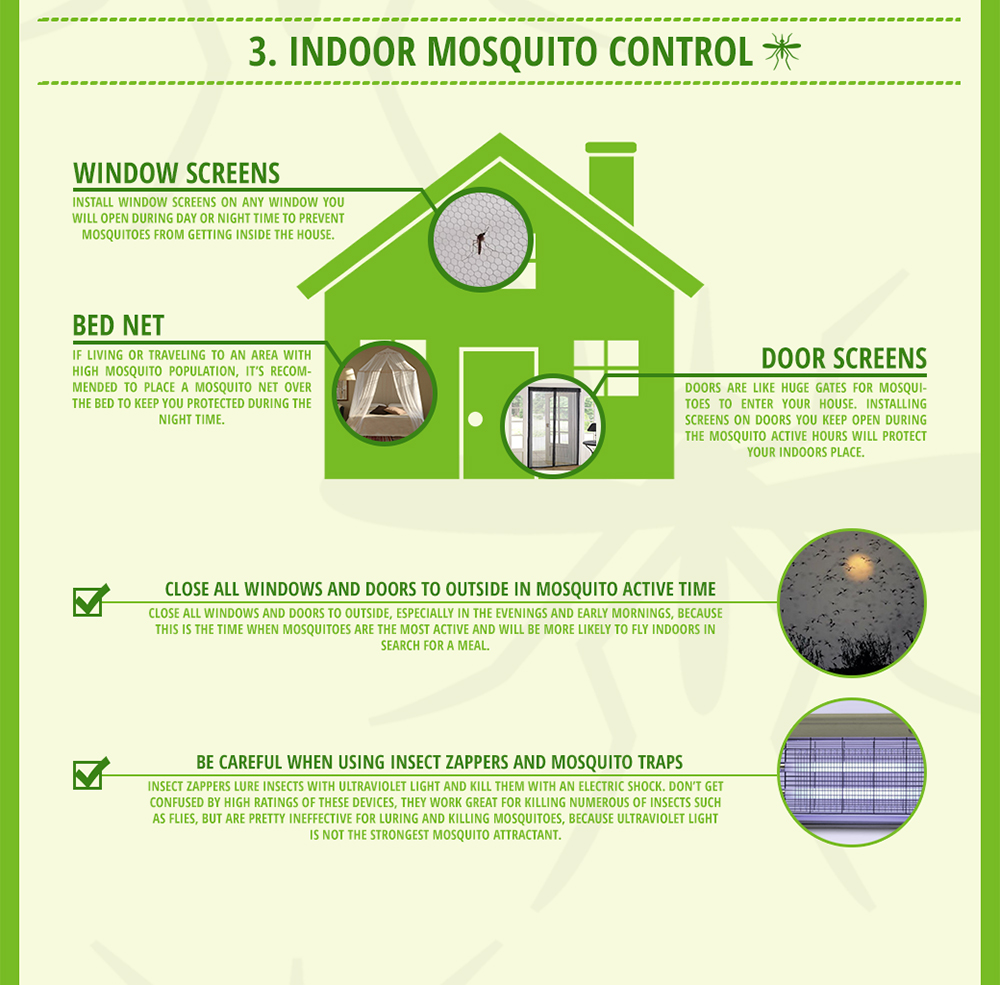
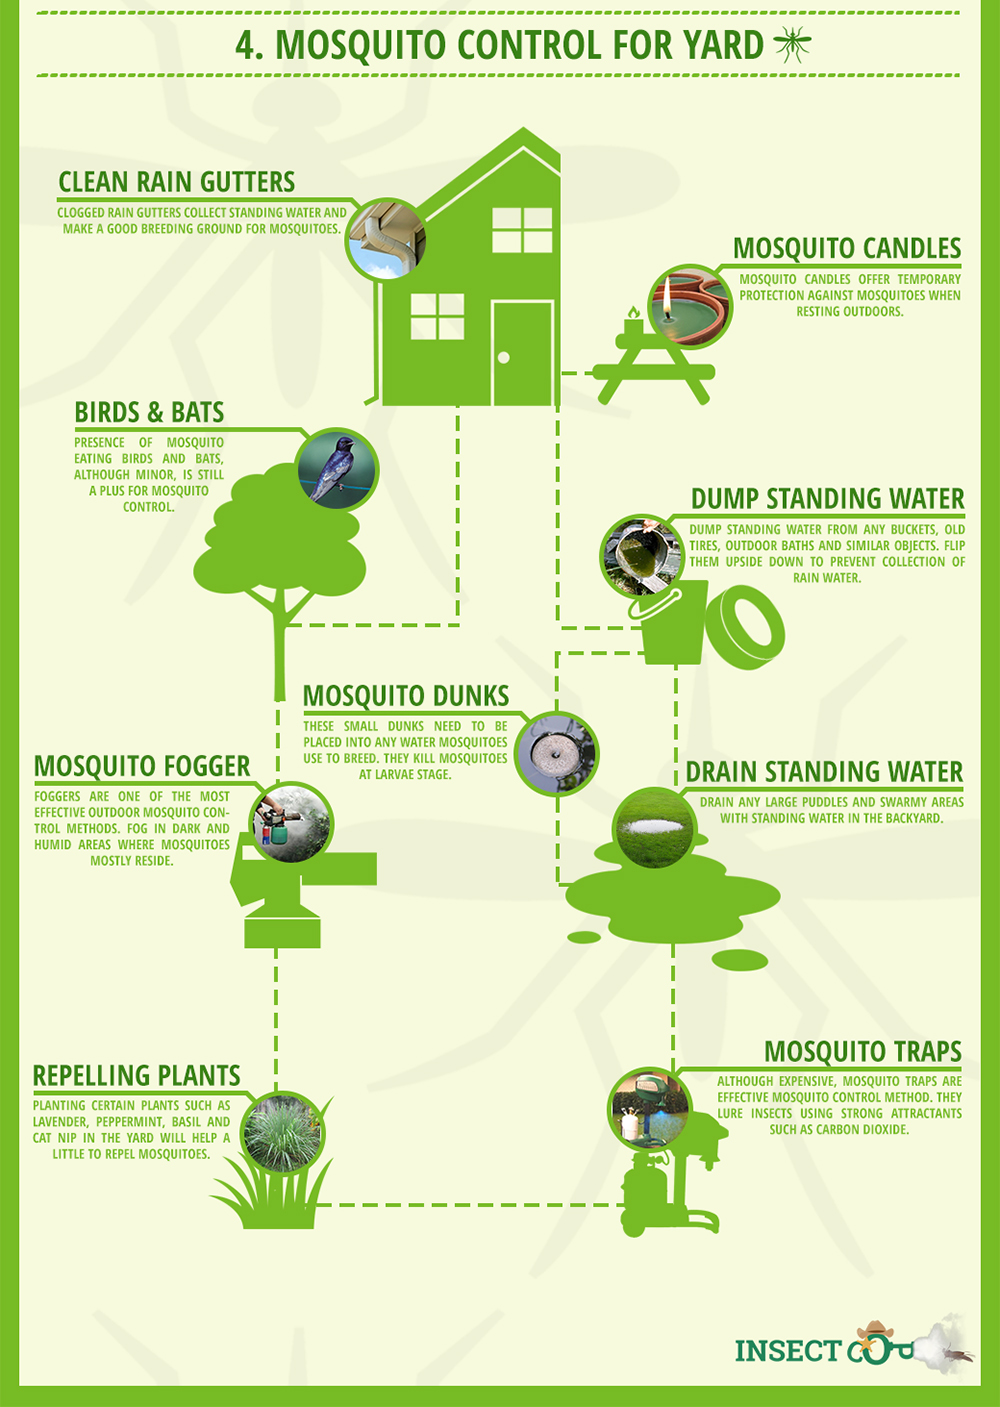
Since stagnant water breeding grounds are a primary cause of the problem, we’ll share another infographic from the World Health Organization. It covers a few more locations where mosquitoes reside and breed around your home. Click here to view a full-size version.
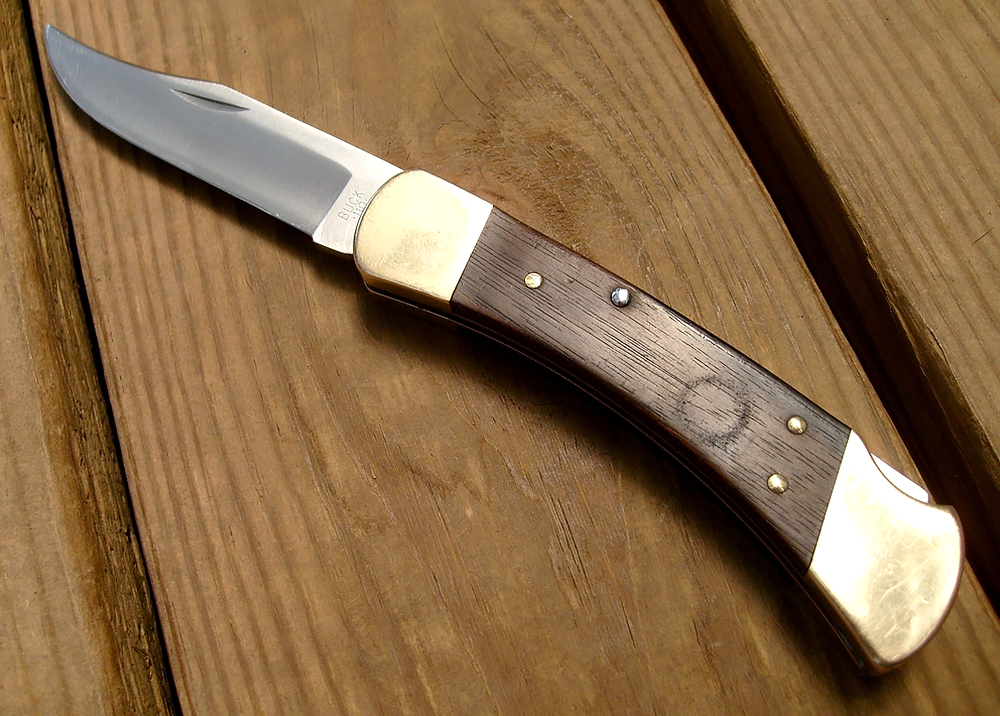
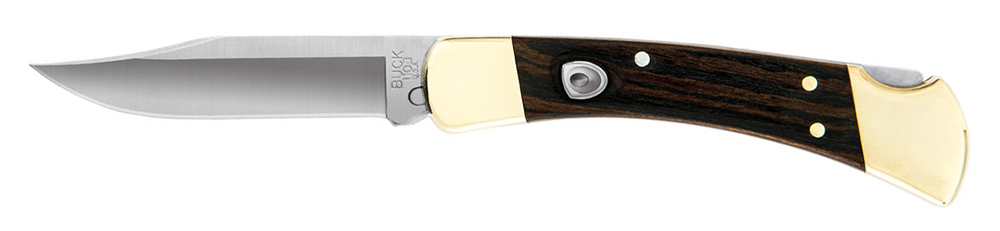
Do you remember the first knife you ever used? Thinking back to my own childhood, my father had what I now recognize as a Buck 110 Folding Hunter in the glovebox of his car. It was scuffed and scratched, and its cutting edge was well-worn, but it was one of the first folding knives I ever laid my hands on. That memory has stuck with me. Even though I now own many modern knives decked out with titanium and carbon fiber, the Buck 110 has a classic look that will never feel old to me.
My dad’s old Buck knife looked much like this one, with what some might call “patina”. Photo: CapCase / BladeForums
More than 50 years after the debut of the Buck 110 in 1963, the company still offers the traditional design, complete with the wood handle, nail nick, and lockback. However, Buck has recently announced a new version of this iconic folding knife. This time, it’s available as an automatic.
Buck’s new 110 Auto model has a button-release mechanism, and a traditional lockback.
The Buck 110 Auto closely resembles the original Folding Hunter, and still has the wood scales with brass pins and bolsters. You’ll likely notice the push-button on the handle, and also that the 420HC stainless blade is missing its nail nick. Pressing the button releases the blade; to close it again, depress the lockback like you would on a manual-opening Buck 110.
Here’s a video clip we recorded at SHOT Show 2017 of the knife opening:
Like the original, the new Buck 110 Auto is made in the USA, and includes a leather sheath. This knife is available at an MSRP of $200. For more information on the 110 Auto, visit BuckKnives.com.
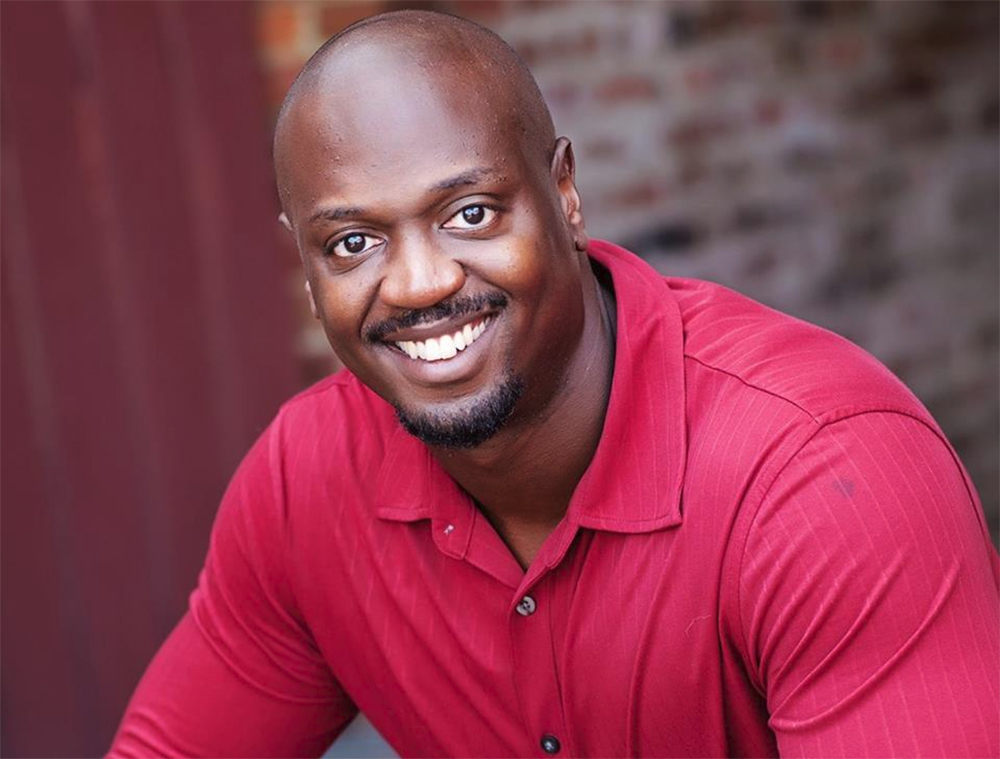
Hakim Isler is a man of many talents — hence his nickname, “Black MacGyver“. He’s an Iraq war veteran and former member of the Army Special Operations community, where he served as a Psychological Operations (PSYOPS) Sergeant. Hakim also has extensive experience as a practitioner and teacher of martial arts — he’s a fourth-degree black belt in To-Shin Do under Black Belt Hall of Fame member Stephen K. Hayes, and is an instructor in the Filipino combat system of FCS Kali.
Hakim passes these martial arts skills on to students through Elevo Dynamics, the 24-hour family gym and combatives training facility he founded in Fayetteville, North Carolina.
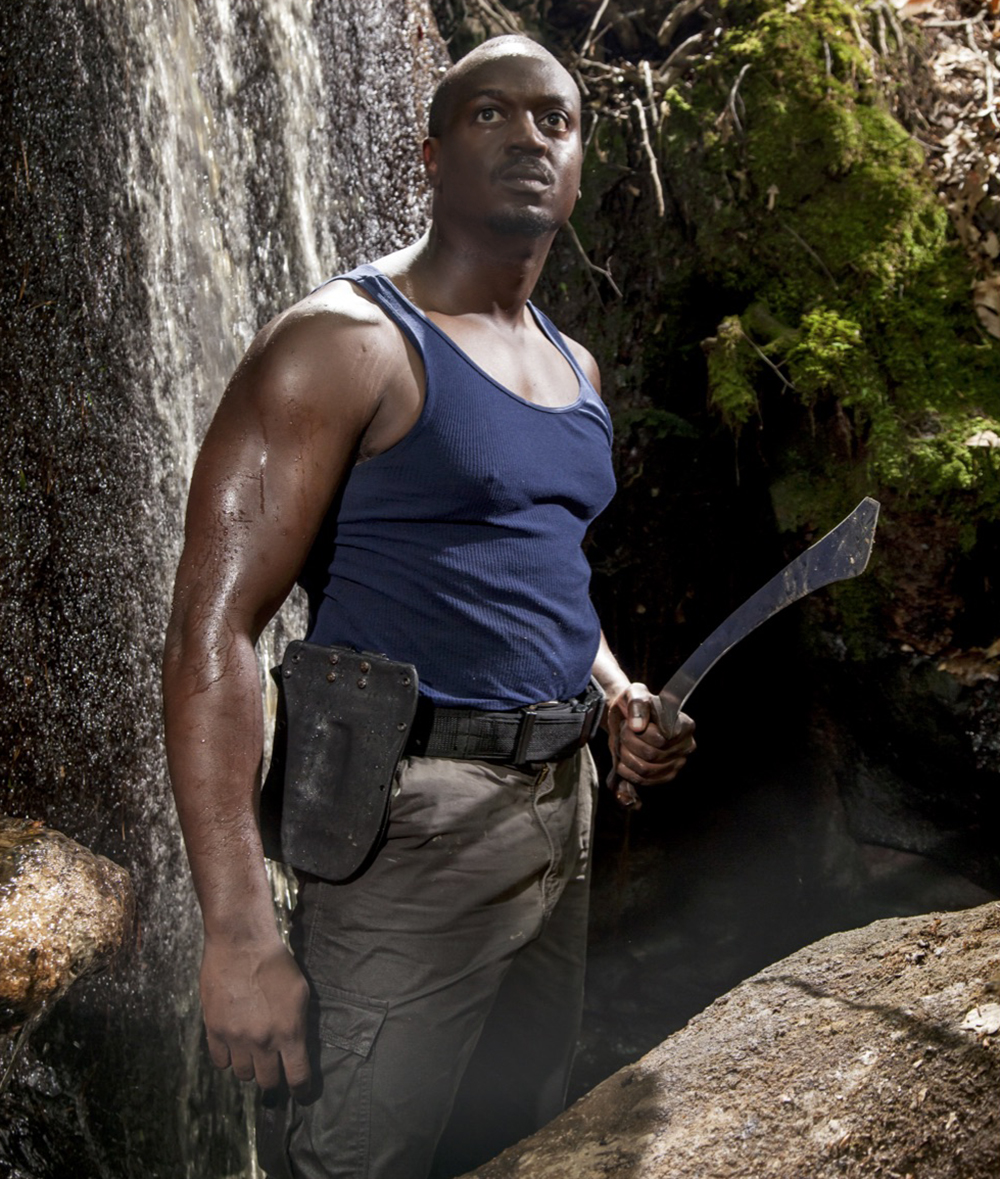
Hakim is also the founder of The SOIL Foundation, a nonprofit that offers off-grid training and excursions to to help veterans, law enforcement, and civilians recover from anxiety, depression, and PTSD. On top of all this, Hakim is the author of Modern Hand to Hand Combat, a contributor to our print magazine (see “Plan of Action” in Issue 16), and a TV personality. In 2014, he tested his wilderness survival skills on Discovery’s Naked and Afraid, and later made another appearance on Naked and Afraid XL in 2015.
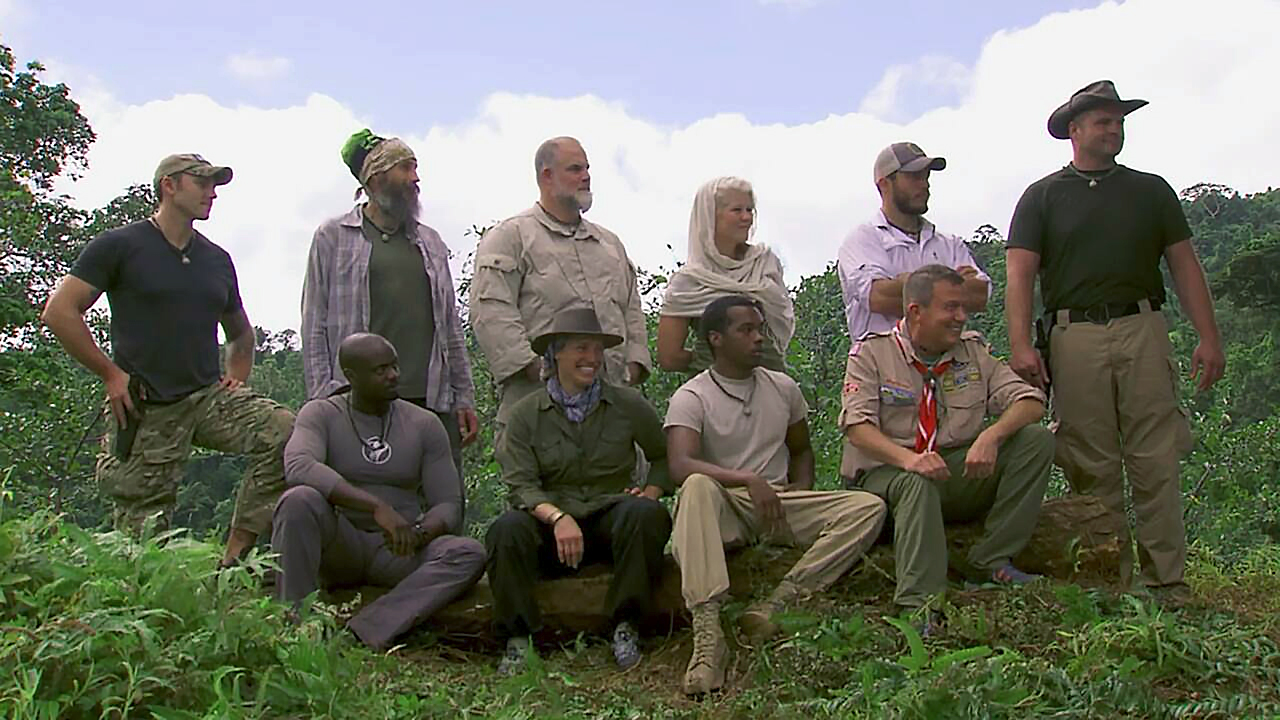
Hakim with the rest of the cast of “Naked & Afraid XL” Season 1.
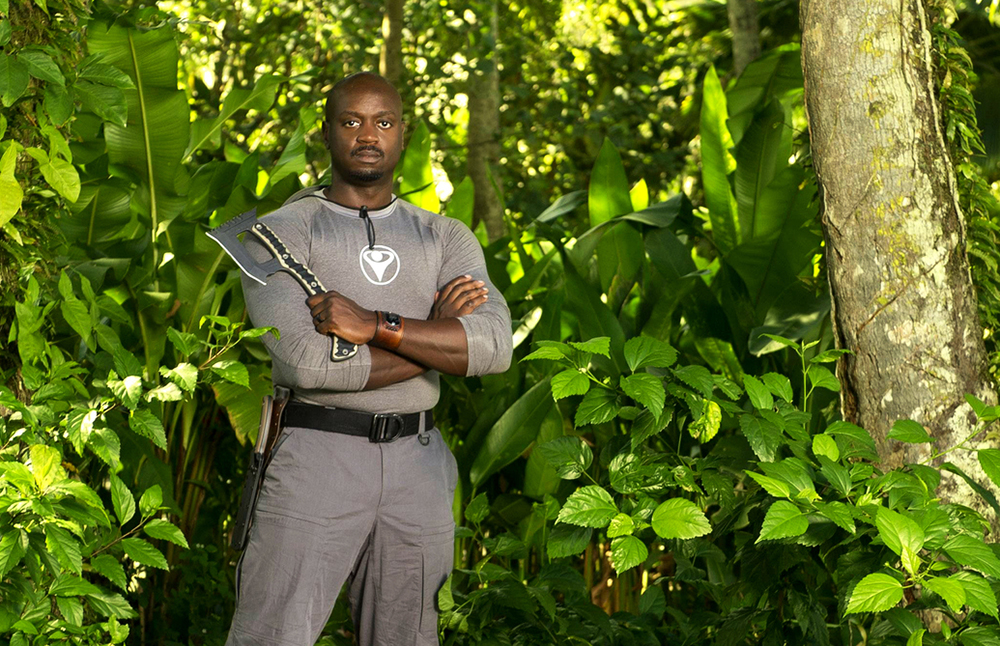
His latest project is with the all-new FOX TV series Kicking & Screaming, which debuts next Thursday, March 9th at 9/8C. The show pairs experienced survivalists like Hakim with high-maintenance city dwellers and survival novices:
In anticipation of this TV appearance, we took some time to talk with Hakim about his time on the show, as well as his every-day survival philosophy.
OG: Hey Hakim, thanks for talking with us today. What initially led you to take an interest in survival and self-reliance?
My first awakening to the power of nature was in the Army SERE-C course. Most who know what that is would think that would be the worst place to learn it — while on the run with your team trying to escape capture — but it was not for me. There was a moment surrendering to nature while I laid drenched in heavy rain trying to avoid capture. I had to accept that I wasn’t in control and in that moment I felt a freedom like I had never felt before. Some call it “embracing the suck,” but this was different for me. It was more like embracing the power of nature, and finding solace in letting go and becoming more than I was before.
OG: We imagine there’s a story of ingenuity behind your nickname, “Black MacGyver”. How did that name come about?
I came to be called this in the military because I was always thinking and creating. I would often come up with outside-the-box solutions for issues, and they would work. In layman’s terms, people would call what I do ingenuity, but I call what I do Ninjanuity. Since I am a fourth-degree Black Belt in Ninja Self Protection (To-Shin Do) a.k.a a Ninja, the idea of adapt and overcome is the way I see things. It is that mindset that drives my art of Ninjanuity.
OG: Some of our readers will recognize you from your 21-day survival scenario in India on “Naked and Afraid”. What lessons did you learn from that experience?
The greatest lesson I learned from the Himalayan Mountains while on Naked and Afraid was that war changed me. My last deployment ended in 2007 and I thought I came home in decent shape. The truth was there was a lot I had buried under the mission of work and life. During the 21-day challenge I found that beyond my challenges with my partner, the more depleted I became the less I could suppress the side of me that I had not faced. I had an awakening out there that was never caught on camera, and it was that awakening that caused me to start The Soil Foundation in Robbins, North Carolina. It’s a wilderness therapy and retreat for military, civil servants and youth struggling with emotional challenges such as anxiety, depression, and PTSD.
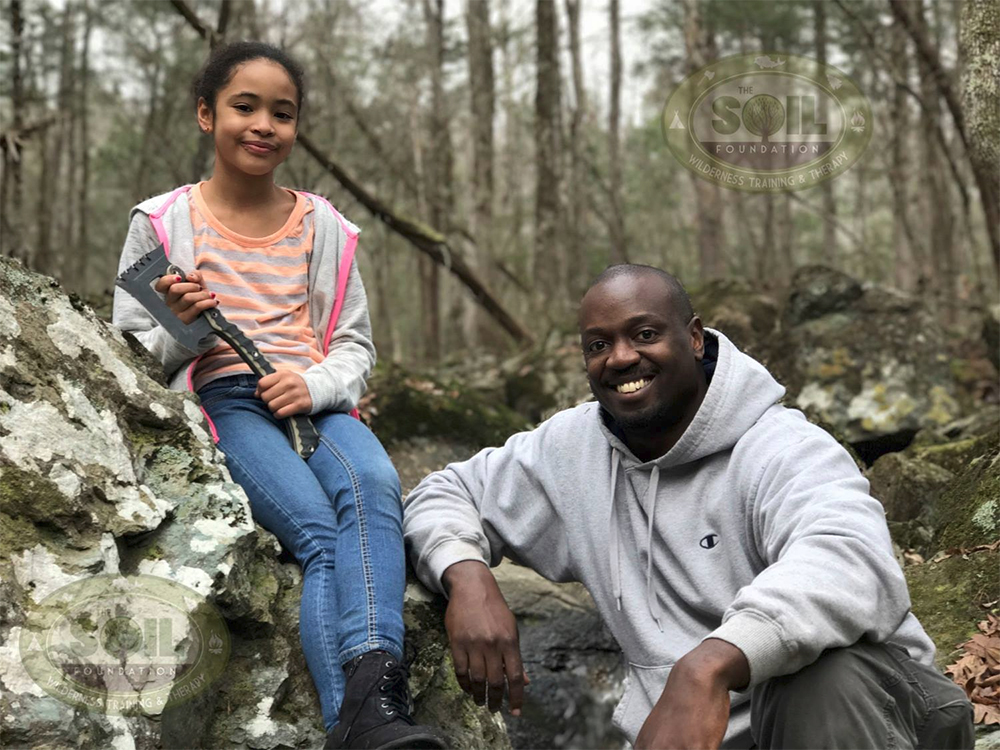
“Beautiful day off the grid yesterday showing my little girl the wonders of outdoors.” Photo: The SOIL Foundation
OG: We’re excited to check out your latest TV appearance on Kicking & Screaming next week. Tell us a little about the premise of the show, and how you got involved.
This show is going to be epic! The show is about ten survivalists paired with ten pampered high-society individuals with little to no outdoor experience. We survivalists have to help the pampered novices survive, thrive, and win a series of challenges until one group remains and claims $500,000.
OG: It has to be stressful dealing with a survival situation alongside someone totally inexperienced. What have been the biggest physical and psychological challenges you’ve faced?
Dealing with a novice when you are trying to win a prize that big was a little stressful, but it wasn’t because my partner was a novice. My partner is Angelica Bridges and she was a Baywatch star. She is an amazing person and she was awesome out there for someone with little experience. Since I am a survival instructor that teaches kids, I had no problem working with a novice overall.
OG: How has your past military and martial arts training experience prepared you to guide a novice partner on “Kicking & Screaming”?
This is a great question. My military experience really beat into me the idea that “team work makes the dream work”. It was both my Ninja training and my PSYOP training that helped me mentally and emotionally. To be a true instructor, you have to understand how people operate and then how to use that knowledge to help them reach their potential. In addition to this skill you have to understand how you operate — knowing self is the foundation to knowing and connecting with others. We operate physically in this world based on our mental and emotional platform, understanding this is one of the main skills of the Ninja and of course an Psychological Operations specialist.
Hakim alongside some of the cast of “Kicking & Screaming”.
OG: When you’re not busy filming for TV or writing for our magazine, how do you spend your time?
When I am not busy filming TV shows I am serving my family and community. I own the worlds first DOJYM, a hybrid Ninja martial arts facility and 24-hour gym called Elevo Dynamics. I am also the founder of The Soil Foundation, a nonprofit wilderness therapy and retreat organization we are developing on 60 acres of land in Robbins, NC. We are currently trying to build a community center out of shipping containers. There we can house those we serve for three day or week long events. We currently offer outdoor camping retreats for military, civil servants, and youth that struggle with emotional challenges such as depression, anxiety and PTSD. Our community center will help us serve those in need and their families. We are currently trying to raise funds on our Indegogo and at our website www.thesoilfoundation.org if anyone reading would like to help support.
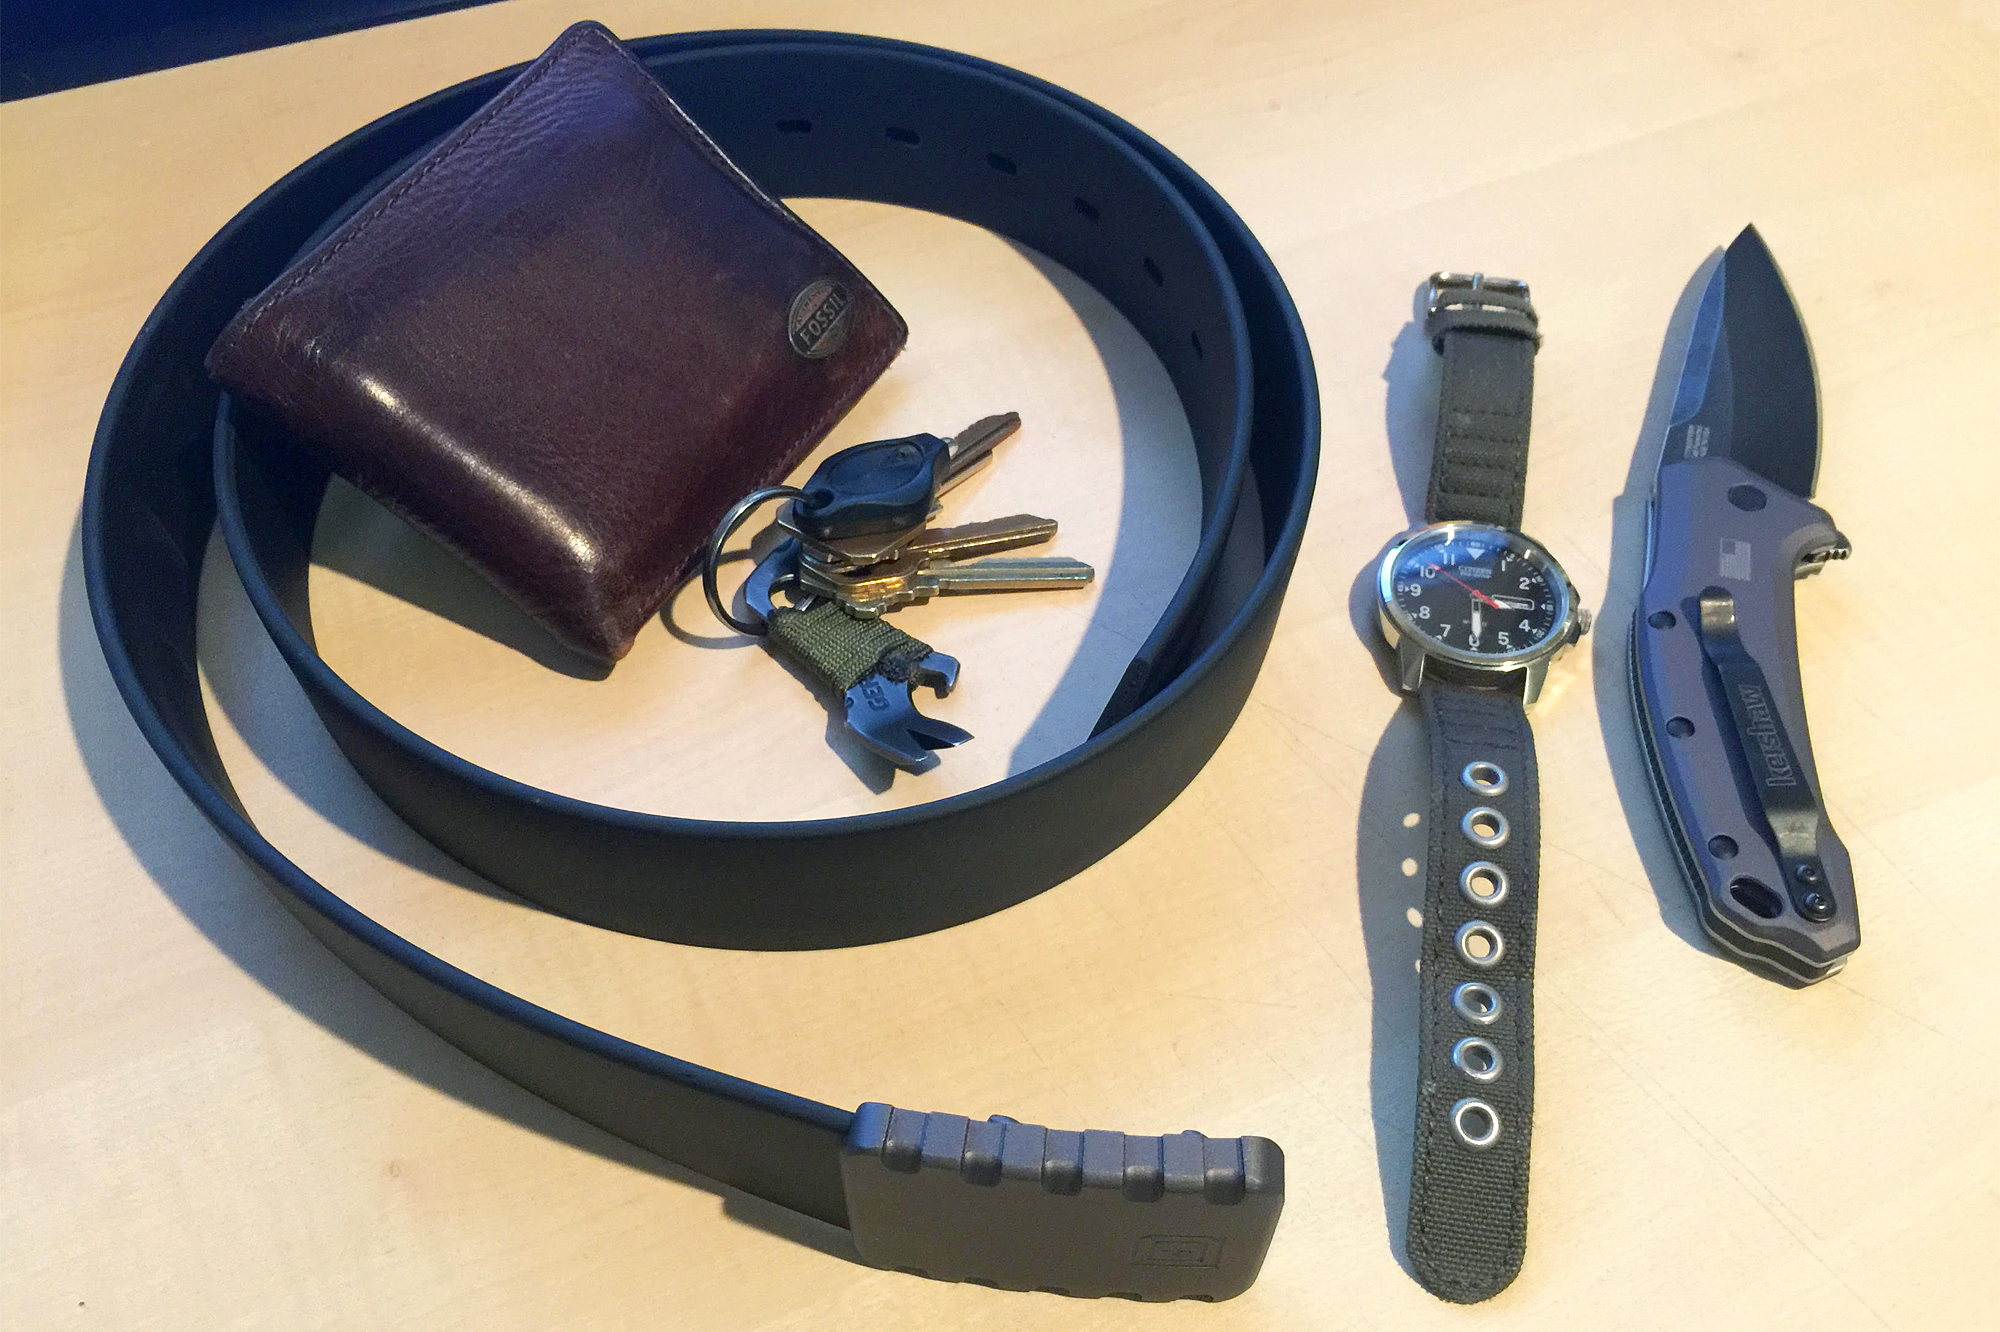
OG: Every survivalist we meet has a different take on every-day-carry gear. What sort of EDC items do you normally carry during your daily routine?
Hmm the everyday carry item for a Ninja? Ahh, my mask and my sword! (laughs) Not really. I have two things I carry with me. The first is what I call The C.M.S. — the challenge mindset. This is the mindset that forces me to think outside of the box. I never carry the same items consistently because I don’t want to become reliant or complacent. I am always challenging myself with “what ifs” and “how would I…” This way, if I go somewhere where I can’t have an item like a knife or a gun, I don’t feel lost or naked. Life is constantly changing therefore so am I.
There is one physical thing I carry in my car or my bag, and that is a creation I made called the Life Baton. It’s a survival kit that has everything I would need to survive outdoors. So the simple answer is C.M.S and the Life Baton. Most of the time being a instructor in FCS Kali and Black Tiger Kali, I also carry a knife, but not all the time.
OG: Thanks again for taking the time to talk with us. For those of our fans who’d like to stay up-to-date on your latest projects, what’s the best way to follow you?
In a survival scenario, freeze-dried camping meals and dry staples are great food resources. These items should be stockpiled in your home, vehicle, and bug-out bag. However, it’s also important to understand ways to generate renewable food, since your stockpiles will inevitably run out. One easy way is to regrow fruits and vegetables from scraps, as we mentioned earlier this week. A more advanced method is to gather wild flora and create an improvised garden.
In his latest YouTube video, the Australian survivalist behind Primitive Technology demonstrates how to cultivate two forms of starchy root vegetable: cassava and yams.
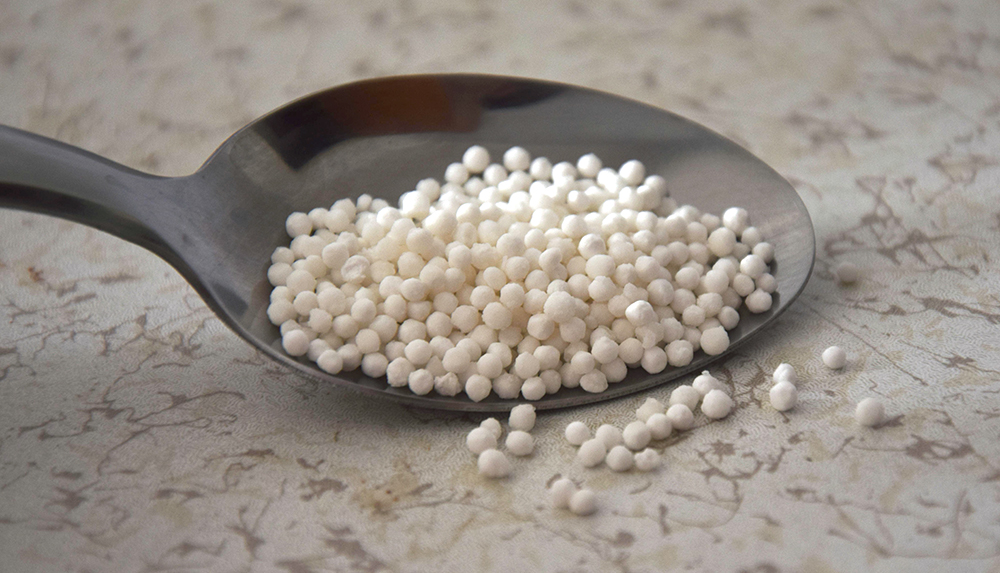
Americans may not be entirely familiar with cassava, also known as yuca, manioc, or Brazilian arrowroot. Then again, it’s likely that we’re all familiar with its most common form of preparation, tapioca. Tapioca is a powder extracted from the root of the cassava, and formed into pearls. The roots themselves are edible, but must be cooked thoroughly and prepared carefully, as certain varieties contain high levels of cyanide. (In other words, don’t eat wild cassava if you’re not positive which variety you have.) Yams, of course, can be boiled and treated like potatoes.
Tapioca pearls are a form of prepared cassava root.
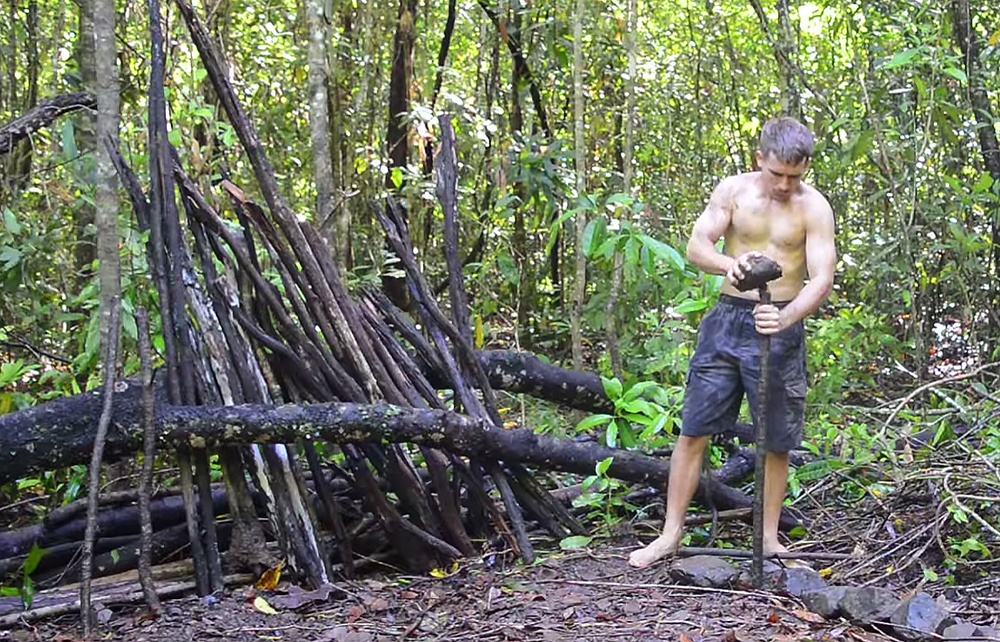
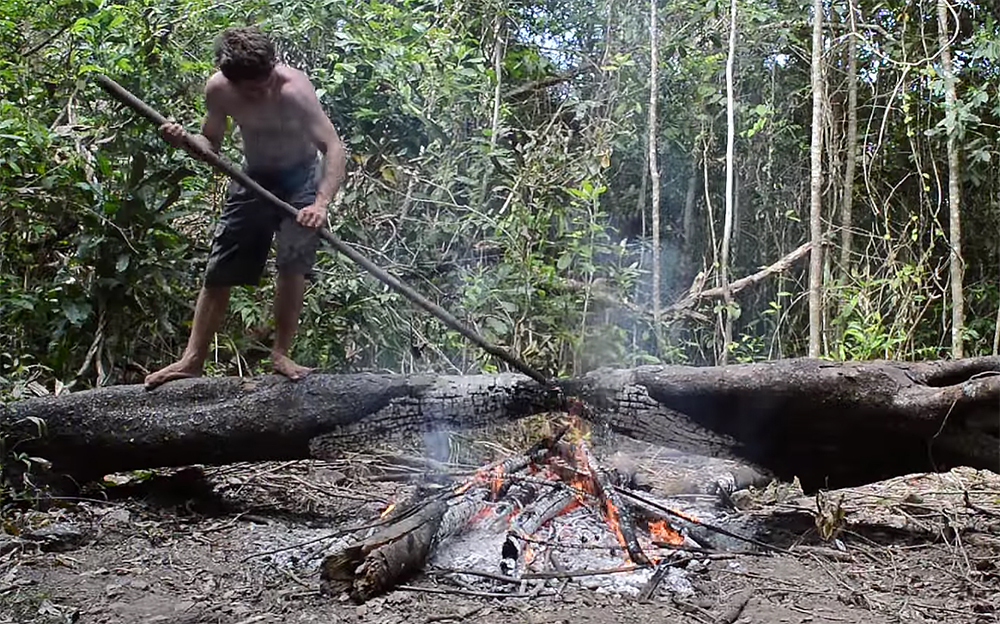
The host of Primitive Technology begins by making a clearing in the woods, which requires removing a huge fallen tree. Since he doesn’t have a chainsaw, an ax, or any modern tools, he uses a strategically-placed fire to create a weak point in the tree trunk, then hacks through the rest with a sharp rock.
Stakes are collected and pounded into the ground to form a fence around his farming plot, and vines are interwoven to keep out roving animals (including a wild turkey). He tills and turns the topsoil with a stick, then moves on to collect some wild yams and cassava to cultivate. Here’s the full video:
Cassava grows from budding segments of the plant’s stem, which the host buries in his soil mounds. The yams are plucked and buried, and will sprout into new growth much like potatoes would. With some patience, these two crops should yield a healthy harvest — the video’s description states, “Cassava produces the most calories per time and space of any plant apart from sugar cane and sugar beet. But it requires much less fertilizer and effort. A hectare of cassava produces enough calories in 2 days to sustain a person for 1 year.”
For a thorough analysis of the benefits (and potential dangers) of cassava, check out this article from the Food and Agriculture Organization of the United Nations.
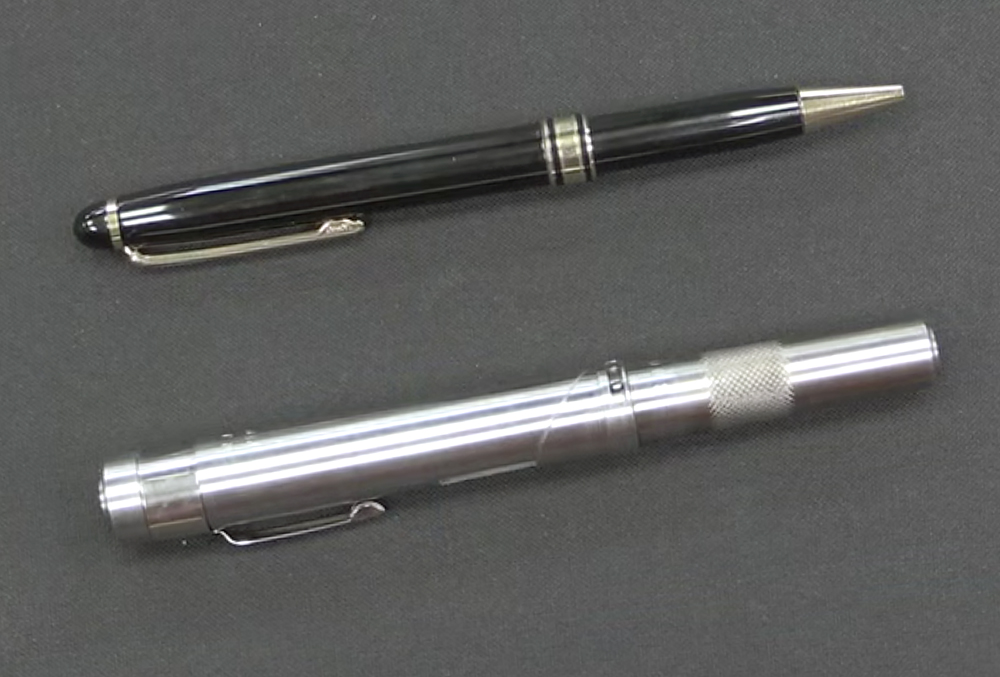
They say the pen is mightier than the sword, but everyone knows that’s not a literal statement. In this case, however, it might be. The “pen” seen here is actually a single-shot pistol, which folds open like a Transformers toy to reveal a tiny trigger. It’s called the Braverman Stinger, and it was produced by R.J. Braverman from approximately 1993 to 1997.
Despite the obscurity of this miniature firearm, its mechanism is interesting to say the least. It was supposedly designed with this folding mechanism in order to avoid being categorized as an AOW (“any other weapon”) under the National Firearms Act (NFA). By folding open at an angle before it can be fired, the ATF ruled that it resembled an actual firearm enough to be classified as an ordinary pistol. This makes it much easier to obtain than other disguised weapons, like cane guns — or it would, if more of these Braverman Stinger guns ever made it to the market before the parent company went out of business.
The Braverman Stinger was available in several calibers. .22 LR, .22 Magnum, .25 ACP, .32 ACP, and .380 ACP. There was even a rare factory gold-plated model for the James Bond fans. Ian of the YouTube channel Forgotten Weapons got his hands on a .25 caliber model for the video below, and discusses the gun’s interesting history and quirks. True to form, he also disassembles the gun and shows its functionality.
Unfortunately, the pen gun above was up for auction, so it couldn’t be fired. Based on other YouTube videos, they do in fact fire, but only about as well as you’d expect from a bent tube without a proper pistol grip, sights, or trigger. So, what do you think of this non-NFA pen gun? Is it a cool real-life spy gadget, or something that doesn’t have much use beyond the silver screen?
Have you ever tried to lift the full weight of one of your friends? It’s a difficult task. Due to the awkward distribution of weight and flexible nature of the human body, it’s nothing like deadlifting weights in a gym. This difficulty only increases if your friend is out cold, completely limp, and unable to assist you. In that case, you’re essentially trying to lift a 150- to 200-pound sack of potatoes off the ground.
Now imagine you’re being shot at while you attempt this task, and your friend is wearing 75 pounds of additional armor and gear.
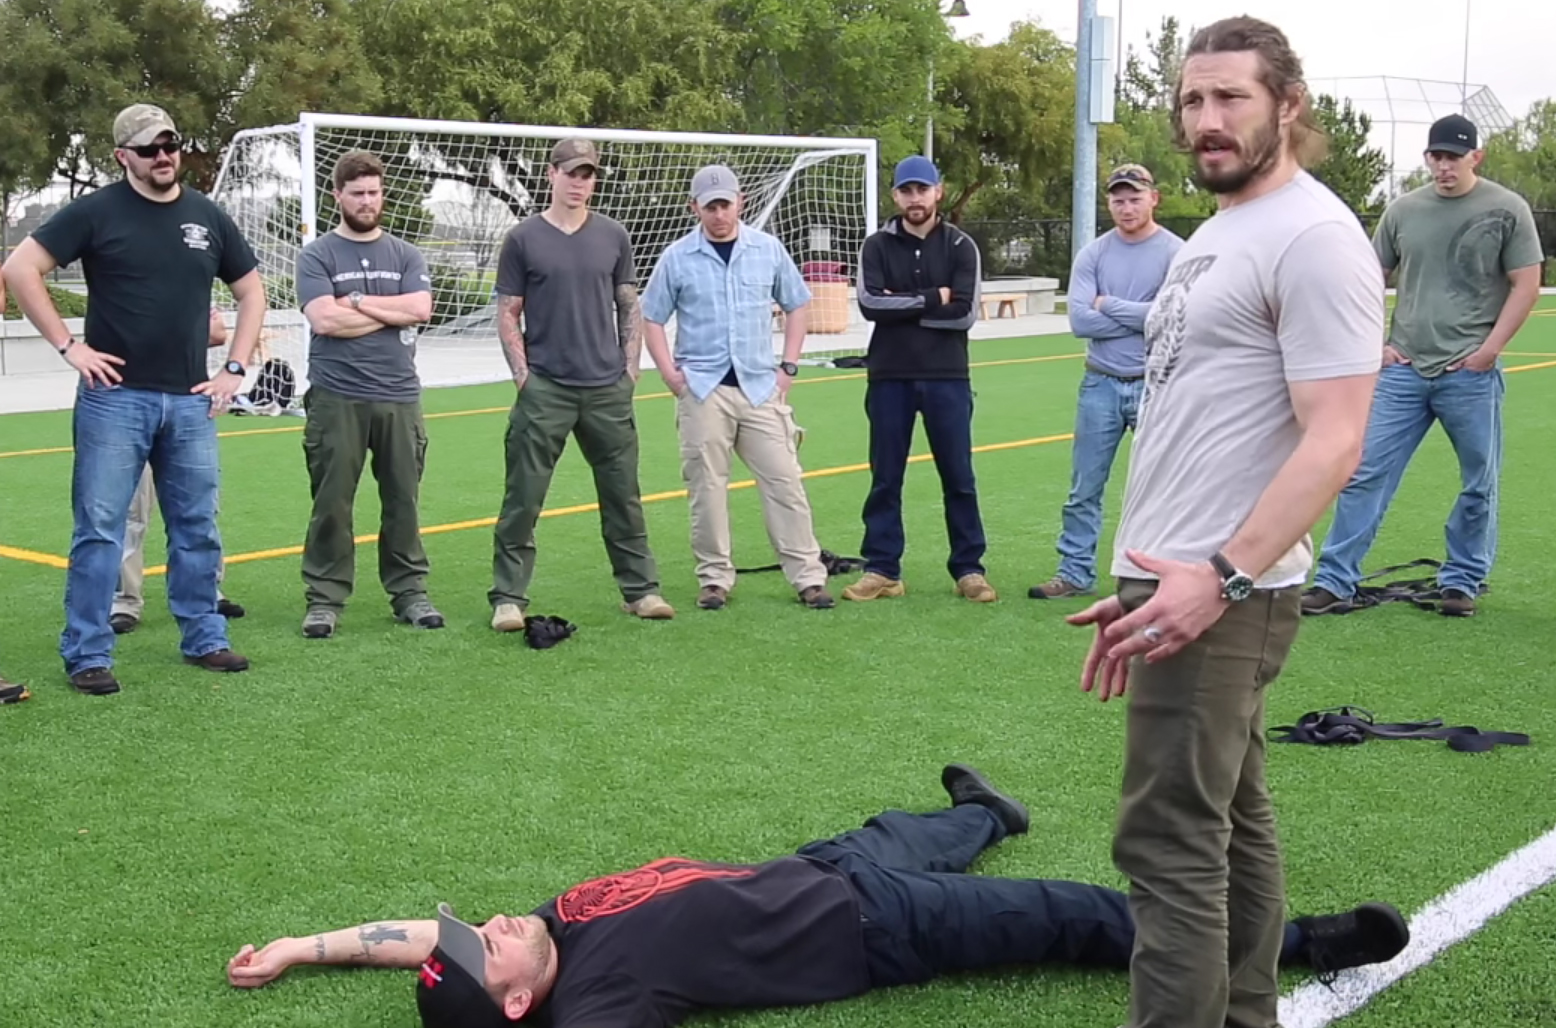
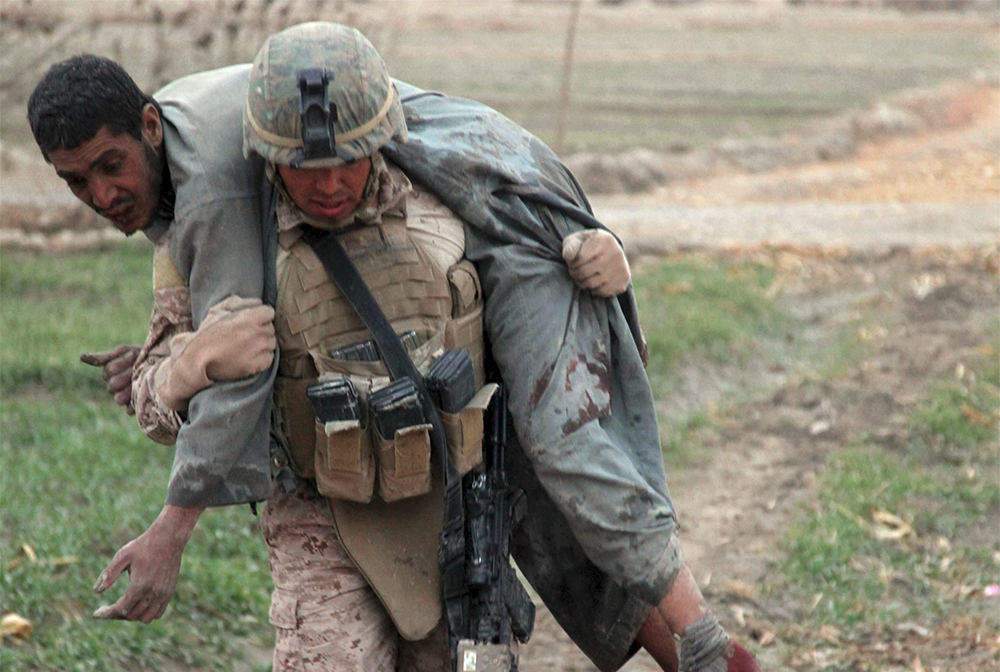
Former Army Ranger and Air Force Pararescueman Wil Willis shows how to lift an unconscious casualty.
This extreme scenario can be a reality for members of the military, and it led to the development of a rescue technique called the ranger roll. Rather than attempting to drag the battlefield casualty slowly to shelter, or employing a second person to help with the weight, the ranger roll lets a single individual lift an unconscious casualty into a fireman’s carry position.
The fireman’s carry positions a casualty’s torso across your shoulders. Photo: Lance Cpl. Jorge A. Ortiz, U.S. Marine Corps
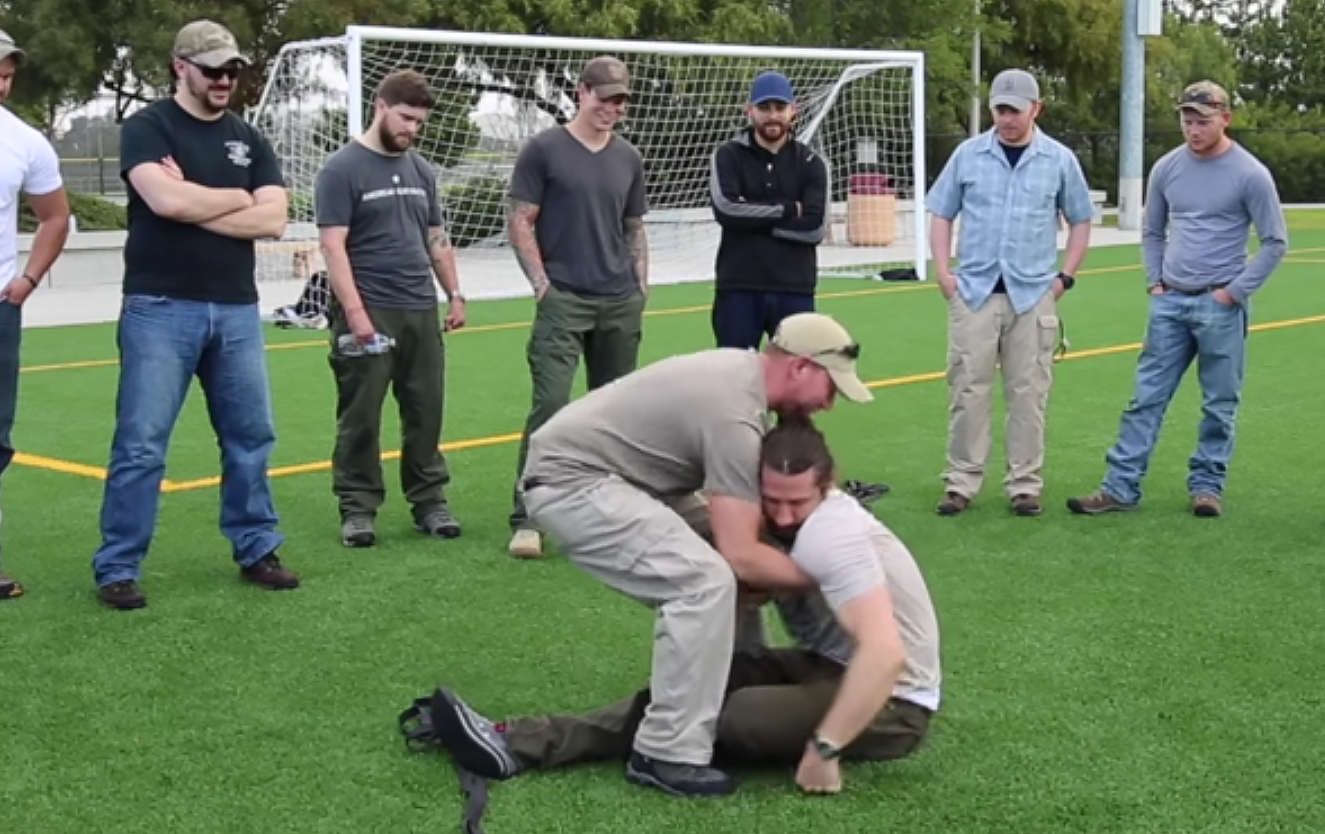
Wil Willis spent four years as an Army Ranger and about ten years as an Air Force Pararescueman. He’s also the host of History TV show Forged in Fire. When he’s not on a TV set, he works as a personal trainer and tactical emergency trauma specialist, teaching students how to deal with major medical issues during intense combat situations.
A student attempts to lift Wil, but struggles with the unwieldy weight.
In the video below, Wil illustrates two concepts to his students. First, he proves how difficult it is to lift a limp body off the ground and onto your shoulders. Second, he demonstrates the ranger roll technique, and shows how it uses momentum to roll the body onto his shoulders. It’s 7 minutes long, but certainly worth watching (and pretty humorous, too). Note: Video contains some NSFW language.
As noted by one of Wil’s students, if you pull off this move on video during a real emergency, you’ll be a YouTube sensation. Seriously though, if you think you may need to use this technique someday, find a patient friend and start practicing. It sure beats trying to dead-lift 200 pounds of “pudding with sticks in it”.
Thanks to Cameron C. for sending us a link to this video.
For many, buying made-in-the-USA products can be a difficult decision as a result of limited finances. Of course, it’s nice to buy locally-made products and support American businesses, but the bottom line is that these items must first be affordable.
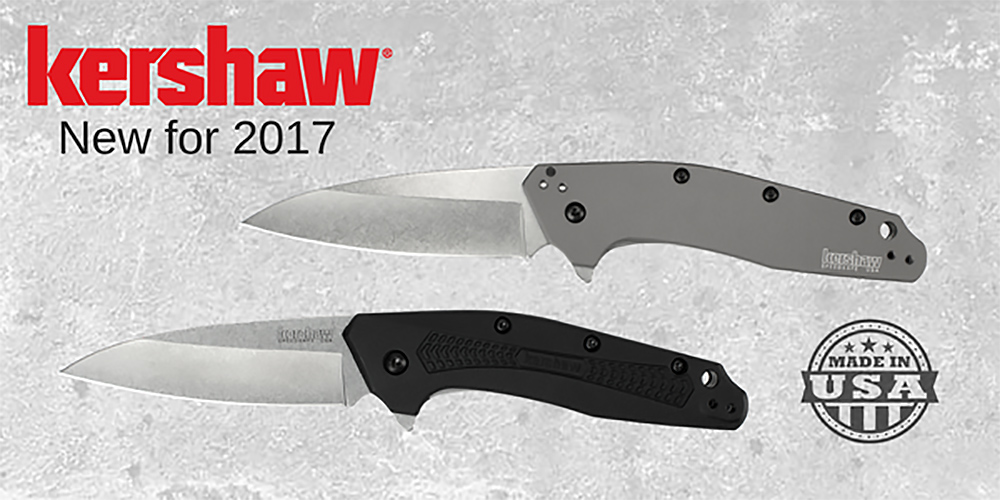
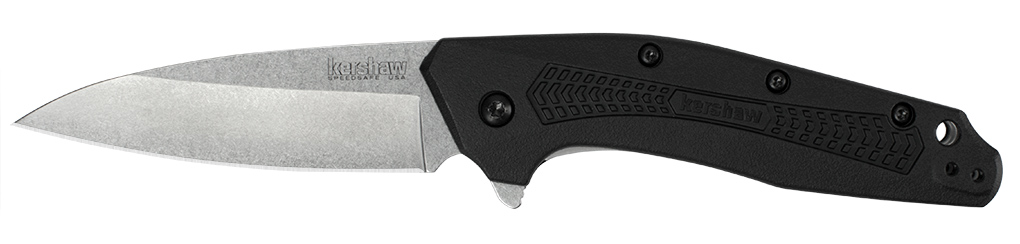
If an item is made in the USA, but it’s far outside your budget, you may have to compromise and settle for a more affordable option. Fortunately, Kershaw has recently introduced some new EDC folding knives that make this purchasing decision easier. They’re made in the USA, but also affordably-priced, starting at $60.
The American-made Kershaw Link (right) led to the development of the new Dividend.
The first knife in this series was the Link, which we tested and carried as part of our EDC. We liked this blade a lot, and apparently so did others — the success of the Link model has led Kershaw to release a follow-up design. This all-new folding knife is called the Dividend, and like the Link, it’s made at Kershaw’s Tualatin, Oregon factory.
The Kershaw Dividend is a slim and sleek design, intended for comfortable pocket carry. Its 3-inch blade has a simple drop-point design with a broad belly, which looks to be ideal for slicing packages and other daily tasks. The blade is constructed from Kershaw’s reliable 420HC steel, the same material used on the Link, as well as the tried-and-true Chive and Scallion blades.
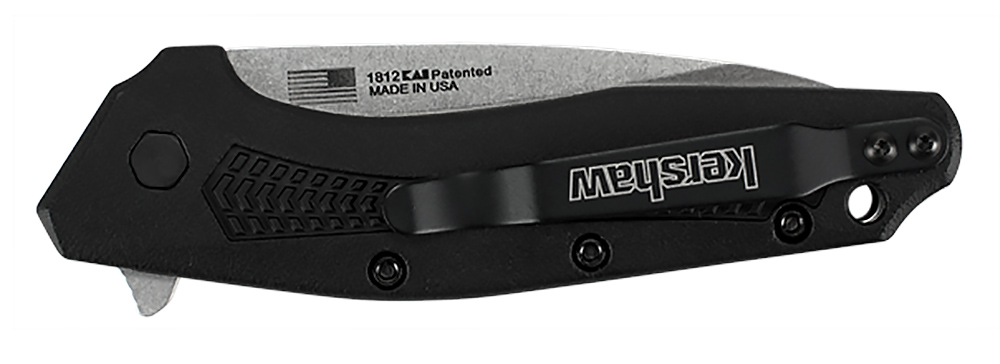
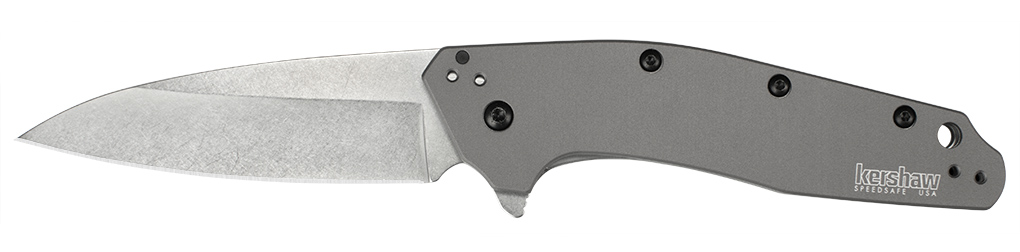
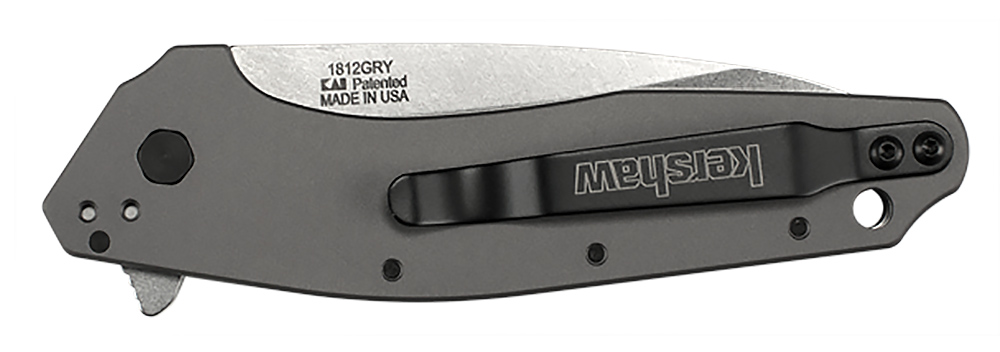
The Dividend is a flipper design, with Kershaw’s SpeedSafe assisted-opening tech and a simple liner lock mechanism. The standard Dividend model is priced at $60, and features a textured glass-filled nylon handle. For $10 extra, buyers can opt for the Dividend Gray, which has matte gray anodized aluminum handle scales for a sleeker appearance and heavier feel.
Kershaw snuck some nods to American heritage into this knife series — the Link is Model 1776, while the Dividend is Model 1812. We can only hope the Alamo 1836 or Emancipator 1860 are up next.
For residents of low-lying coastal cities and islands, a tsunami is a worst-nightmare scenario. In the face of an incoming surge of water, there are only two possible options: evacuate to higher ground within minutes or get caught in the deadly flood. If early warning systems fail or escape routes become overly congested, coastal residents may become trapped within minutes, with nowhere to go.
The raw footage above from the 2011 Japanese tsunami demonstrates how quickly seawater can flood coastal areas. Despite sophisticated early warning systems and evacuation plans, 16,000 people died in this tragic event.
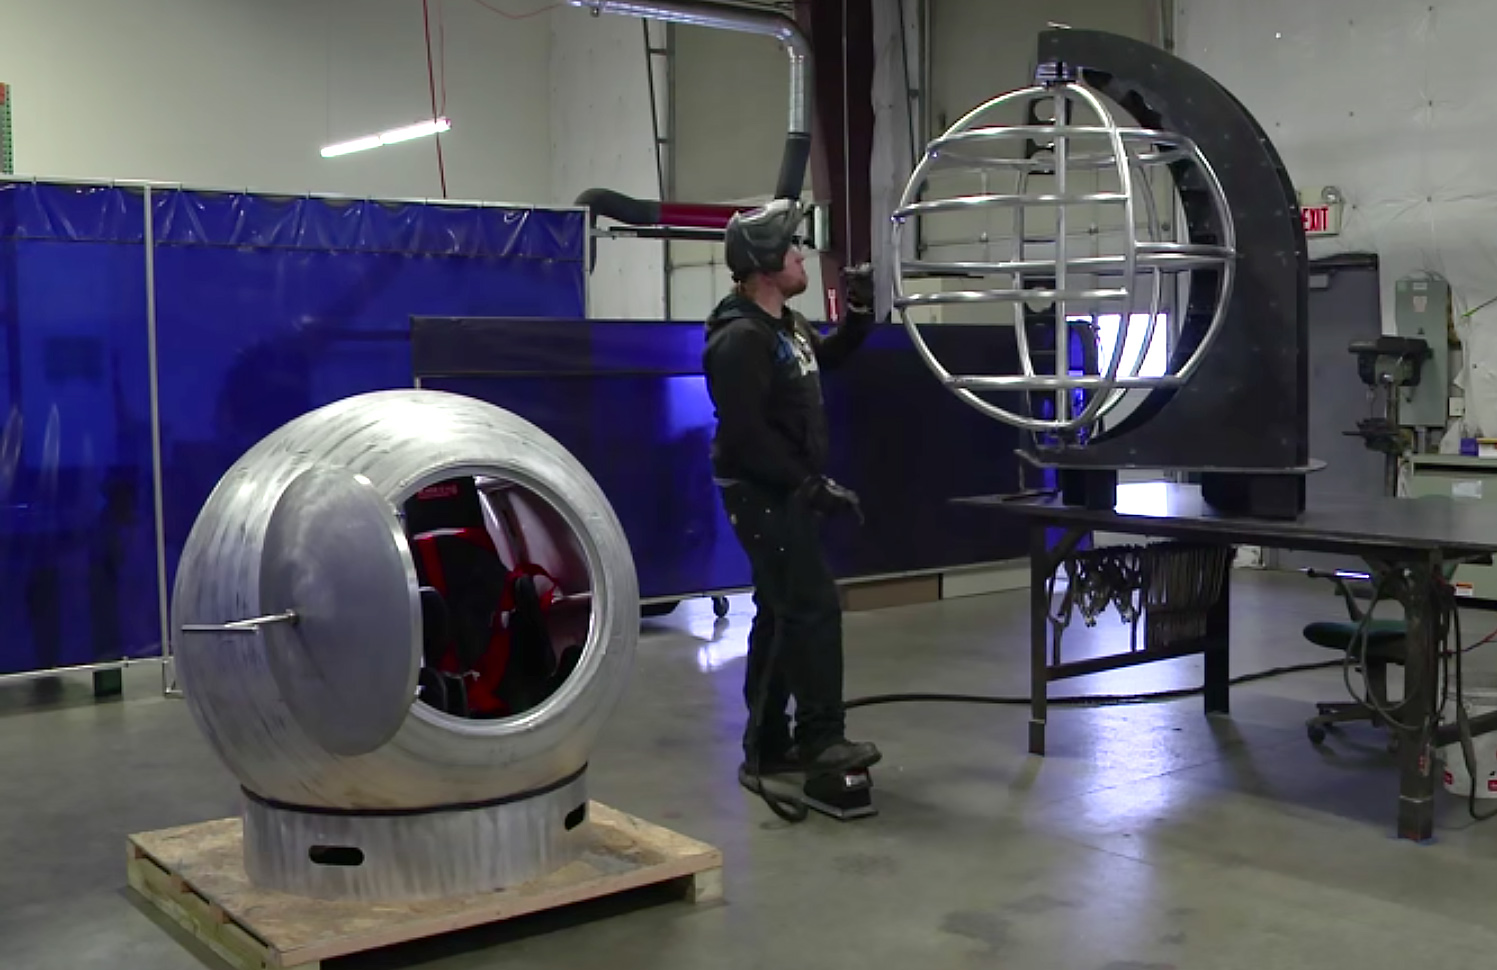
After learning of the damage caused by this and other recent tsunamis, aeronautical engineer Julian Sharpe had an idea. He decided to create his vision for a spherical tsunami escape pod, which would float atop the waves and protect those who are unable to evacuate in time. The device is called the Survival Capsule, and it’s built by Sharpe’s company in Mukilteo, Washington.
The Survival Capsule is formed from welded aircraft-grade aluminum with a watertight marine hatch. The porthole windows are built from bulletproof glass, the interior is lined with ceramic insulation, and there’s a built-in GPS locator beacon. Onboard air tanks and sealable vents provide oxygen to passengers, and there is storage space for food, drinking water, and other supplies.
Safety seats with four-point harnesses keeps passengers securely seated. The standard model seats two adults, but other models are planned with a capacity of up to 10 individuals.
Sharpe is also the owner of IDEA International, a company which stress-tests aerospace products, so the Survival Capsule has been tested accordingly. The Survival Capsule site states, “The sphere will withstand the initial impact of a natural disaster, as well as sharp object penetration, heat exposure, blunt object impact, and rapid deceleration.” Drop and penetration test footage can be seen in the video below:
However, some disaster experts question the safety of a spherical tsunami pod. In a recent article by the Seattle Times, regional emergency management director Chuck Wallace stated, “What if you get stuck under debris, or something tears it and it leaks? You’re just not going to convince me they’re safe.” Also, all this protection comes at a price — $13,500 for a two-person Survival Capsule. The four-person model will reportedly cost $17,500 when it becomes available.


