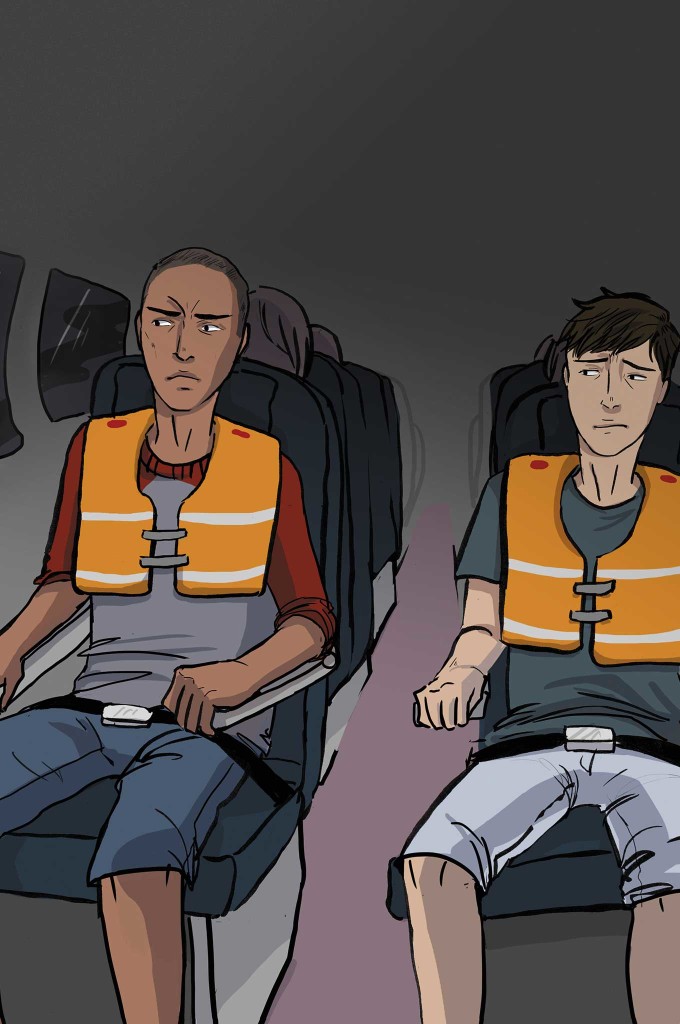
Just seconds ago you were joking with your two buddies aboard a perfectly functional aircraft. Now you sit in shock, unable to move, speak, or process the information flooding your senses and your mind. The plane’s engine died, and so may you in a few seconds. The only thing that tugs at your attention now is the fear rising in your gut like vomit trying to escape an ill stomach. What just happened? What’s about to happen? Your mind reels at the possibilities, and at the inevitable truth — the plane is going down.
The yelling snaps you out of your haze slowly and you fumble to put on your PFD in sluggish obedience of the shouting pilot. You bend forward and hug your knees, and then the dying plane hits the aqua-blue water.
In this edition of What If?, we pose the question, what if your commuter airplane crash-lands in the ocean? For answers, OFFGRID asked three different writers for their unique approaches to this survival-at-sea scenario. With us is Patrick McCarthy, a freelance journalist, lifelong outdoor enthusiast, and OFFGRID contributor. Erik Lund is a federal law enforcement agent with a vast array of tactical and survival expertise. And myself, I have been a survival instructor for the past 19 years and am the author of a new book on survival and emergency preparedness, How To Survive Anything.
With our varied backgrounds, we each provide different ways to solve the same desperate situation. Read on to find out which one of our tales of dodging a watery grave would fit in with your SHTF prep.
The Scenario
Survival Situation
Commuter plane crash that leads to short-term survival scenario
Your Crew
Your two best friends, Chris and Marcus
Location
Off the coast of the Big Island of Hawaii
Season
Summer
Weather
Highs in the mid-80s F and lows in the high 60s F
The Setup: You’re a fit male in your 20s on vacation in Hawaii for your friend’s wedding. As the best man, you held a raucous bachelor party in Honolulu, Oahu. After a half day of recovery, you head to Kailua-Kona on the Big Island of Hawaii with two groomsmen, Chris and Marcus, for the wedding ceremony itself. The groom has gone on ahead of you with his bride to be, so it’s you three — along with seven other passengers on this little “island hopper.” Your 8 p.m. flight is one of the last ones off Oahu.
Your Gear: You checked in your luggage, but you’re wearing T-shirt, shorts, flip-flops, a sports watch, and a paracord bracelet. In your pockets you have a pen, a smartphone, and a wallet with cash and credit cards
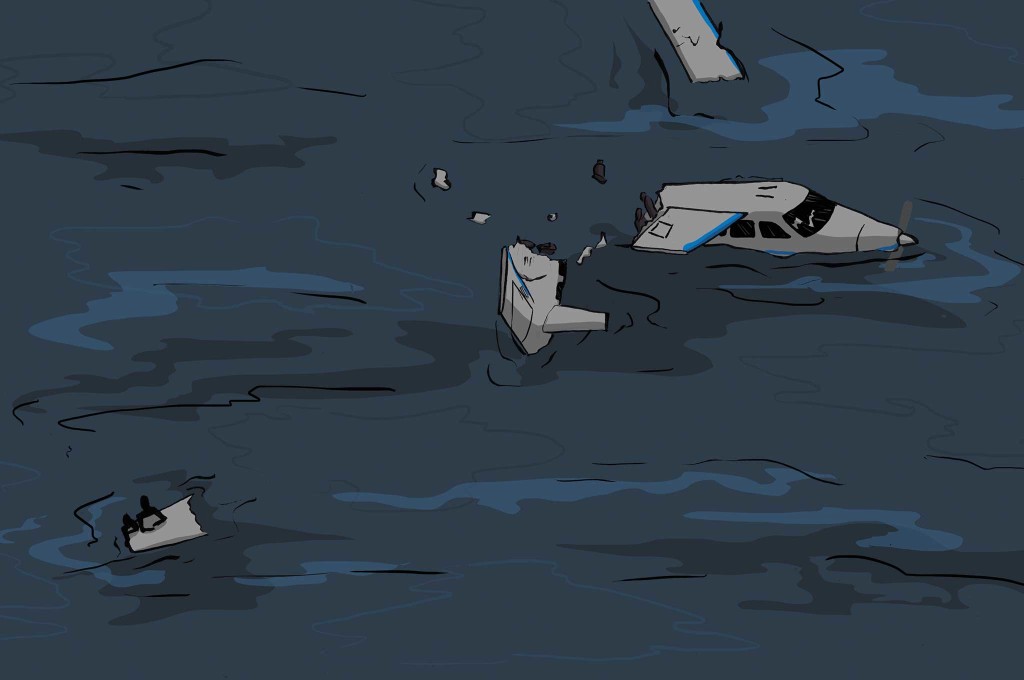
The Complication: About two-thirds into your 40-minute, 167-mile flight, there’s a loud bang! Then a total loss of power. The pilot tells everyone to put on their life preservers and prepare for an open-ocean ditching. After a short glide, the plane hits the water violently. Loose items inside the cabin turn into deadly projectiles. After a brief moment, you come to and realize a chunk of the plane is missing, but most of it is still holding, relatively speaking. Unfortunately, the plane’s taking on water. You instantly realize you need to take action and scan the cabin. You’re OK — save for some minor cuts and bruises — but sadly Chris is dead and Marcus has a big gash on his head and what appears to be a dislocated collar bone. Of the seven other passengers, only three are conscious. You’re unsure about the other four, the pilot, or the one attendant.
Average Joe: Patrick McCarthy’s Approach
They say flying is one of the safest modes of transportation; that you’re more likely to die in a car, a boat, or even a train. Logically, I knew this. But it still didn’t change the facts. The statistics I had studied to mask my fear of flying were meaningless now. Ears ringing from the violent impact, my brain was still struggling to register what had just happened. My movements seemed slow, disconnected, and almost robotic as I felt my hand reach for my lap belt in the darkness. As I leaned forward, I noticed the water was lapping at my calves already.
Now was the time to take action if I wanted to live through this.
Choosing to sit at the back of the plane had insulated me somewhat — I guess that’s one piece of knowledge about plane crashes that did prove useful. I pulled my smartphone from my pocket, tapped on the flashlight app, and took stock of my surroundings. Across the aisle, I noticed Marcus slumped over in his seat with blood running down his forehead. Mere minutes ago, he had been right there next to me, cracking jokes about last night at the bar. “Marcus, can you hear me?” I struggled to form words as I dragged myself out of the seat toward him. He didn’t reply. I turned to the seat in front of mine to ask Chris for help, and instantly felt sick to my stomach. His neck was unnaturally twisted, and his body motionless — Chris was already gone.
Only then did I notice the sound of sobbing from the front of the cabin. At least I wasn’t the only one still conscious. Stumbling down the aisle through debris and knee-high water, I found the source of the sounds: a woman in her 40s, trying desperately to remove her seatbelt.
Her garish Hawaiian shirt and noticeable accent suggested she was a tourist from Europe. I helped free her from her seat, and asked her to help me with the others. The woman’s husband, Stefan, was conscious, but appeared to have a broken arm. She began to help him, while I waded back to Marcus, who was now moving in his seat. Thanks to his law enforcement experience, he appeared calm and focused, but clutched his collarbone in pain as I helped him up. I told him about Chris and asked him to help me with the others.
With the help of Marcus and the European couple, the other five passengers were quickly unbuckled. Only one was responsive, the other four were still out cold. The pilot was another casualty, his body pinned grotesquely between the fuselage and the instrument panel. The flight attendant had two badly broken legs, but was able to tell us about the emergency raft next to her seat. I grabbed the bright red raft container, labeled “4 TO 6 PASSENGERS.” It turns out this flight was cheap for more reasons than one. Knowing some of us would have to rely solely on our life vests, I handed Marcus the raft container and kicked open the side door.
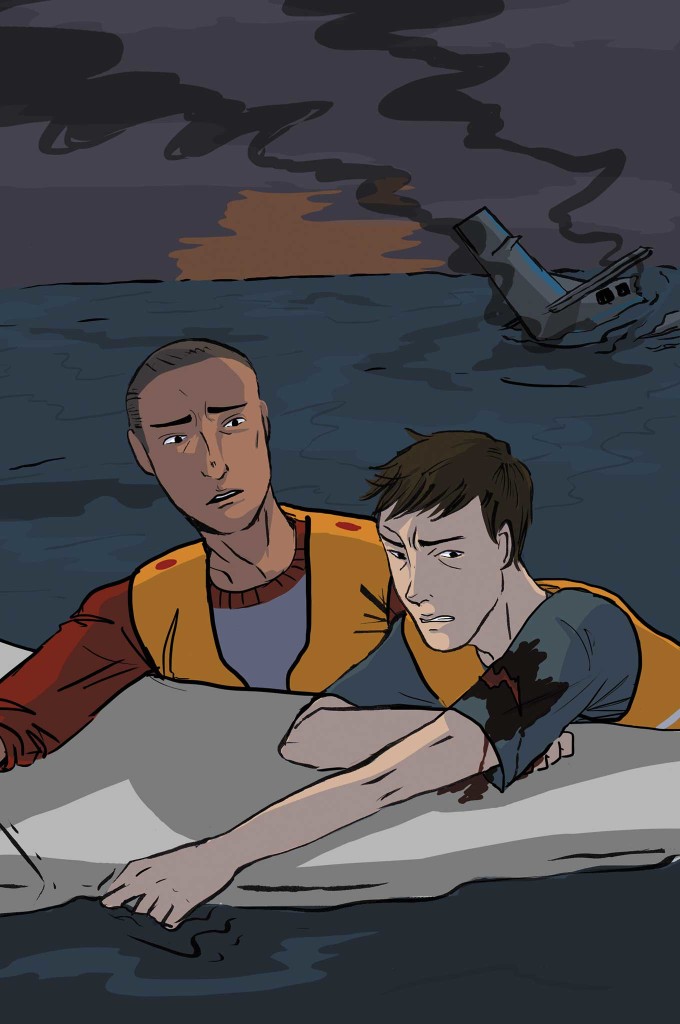
Water rushed in as Marcus lunged away from the plane and pulled the inflation tab on the raft. The tourist couple and I began dragging the unconscious passengers out of the wreckage, but the plane was taking on water quickly now. We managed to get the last passenger clear just in time. The reality of our situation hit me as I watched most of the plane disappear under the surface, the lifeless bodies of Chris and our pilot still inside.
Swimming to the raft, I found Marcus and the others helping the panicked flight attendant into the tiny inflated vessel. Both her legs were bleeding badly, and we needed to get her out of the water. Given Marcus’s head wound and other injuries, I insisted that he stay in the raft as well. That way, he could also apply pressure to the flight attendant’s wounds, and slow her bleeding. In the scattered moonlight, the other four unconscious passengers were pulled up over the side of the raft.
This left four of us treading water — me, Stefan and Karin (the tourist couple), and the only other responsive passenger (a man in his late 60s named Paul). None of us in the water had serious lacerations, so we hoped that we would go unnoticed by sharks.
Based on the pilot’s final distress call, I knew the Coast Guard would be looking for us, but I had no idea how long it might take to be rescued. Glowing brightly in the faint moonlight, the illuminated face of my watch read 8:53 p.m. I could see distant lights from both Maui and the Big Island on the horizon, but knew based on our flight plan that we had to be at least 20 miles from either. In my injured and exhausted state, there was no way I could swim that far, and our life raft had no paddle. We were all scared, but our best chance would be to stay with the high-visibility raft, and wait for rescue to come. Clinging to the other survivors in the darkness and silence, I realized how helpless we really were at the mercy of the ocean.
The night seemed endless. Three of the other passengers in the raft had regained consciousness after the crash, while the last never woke up. Floating in the water, I tried to put the idea of sharks out of my mind, but it’s nearly impossible when you’re in the middle of the Pacific with nowhere else to go. I swear I felt something bump my leg shortly after midnight, but the subsequent bite never came. Marcus had done his best to slow the flight attendant’s bleeding, but we all knew she wasn’t going to make it much longer without medical care.
It had only been a few hours, and a deep sense of fear had already set in. I couldn’t possibly imagine the desperation of being stranded at sea for days … or longer.
Shortly after sunrise, a faint rumble became audible — a helicopter! The noise grew almost deafening, and soon the chopper was circling overhead. Minutes later, a Coast Guard cruiser had arrived, and relief overcame us as we climbed aboard. The medics said they got to the flight attendant just in time, while Marcus ended up needing 18 stitches on his head and a brace for his collarbone.
As for me, let’s just say I’ll be sticking to solid ground from now on.
Federal Agent: Erik Lund’s Approach
I’m not sure how long I stared at Chris not wanting to believe he was dead, but the head injury he suffered left no doubt. Marcus snapped me out of my daze when he grabbed my arm, yelling for me to help him. A quick look around the cabin of the plane told me all I needed to know.
The plane was taking on water fast, and we needed to get out — now! A few of the passengers were starting to move while others sat motionless. A quick look at Marcus told me something was seriously wrong with his collar bone and he needed help getting out of the sinking plane. I yelled to the other passengers who were in various states of panic and disarray, “Find the life raft!” I grabbed my life vest and put it on, but I did not pull the inflation cord. A fully inflated life vest would restrict my movement getting Marcus out of the plane. I would inflate it once I was in the water.
I grabbed a life vest for Marcus and scanned the plane. I noticed when we boarded this little “puddle jumper” that it had a large left rear cargo door. That would be the easiest way I could get Marcus off the plane quickly. I grabbed Marcus and threw his good arm over my shoulder and started dragging him to the back of the plane. Marcus started screaming in pain as I wasn’t being gentle moving him about, but I had no choice. The water was rushing in; we only had seconds to get out. I grabbed the emergency release and the cargo door opened. I dragged Marcus out of the opening and into the water. We both went under, but I was able to get us back to the surface with a few strong leg kicks. I pulled the cord and my preserver inflated. I put the vest over Marcus’ head and got his attached around his waist and pulled his cord, which also inflated.
I looked back to the plane. The tail was high in the air and the cargo door was now underwater. The tail hung there for a second and then quickly slipped under the surface. The plane went under in less than a minute. The sudden sound of silence was almost overwhelming.
An explosion of water erupted next to me, jarring me out of my stupor. One of the passengers had managed to get out of the plane while it was under water and barely made it to the surface. He was gasping for air and in full panic mode. He instantly grabbed onto me and Marcus, trying to climb on top of us to get to safety. In doing so, he pushed both of us under water. I had to let go of Marcus, if I didn’t do something soon, this guy would drown both of us. I fought my way back to the surface. The passenger was screaming and flailing about trying to climb back on top of me, trying to use me as his flotation device. I only had one option. I mustered all the strength I could and punched him. The punch caught him right in his jaw. I didn’t knock him out like in the movies, but my shot disoriented him enough that I could get behind him and underneath his arms.
I kept telling him “I’ve got you! You’re safe!” As his head slowly cleared from the punch, with my words reassuring him, he stopped flailing and starting calming down. He finally said, “Don’t let me go. I don’t have a vest.” I assured him I wouldn’t. I looked around and saw Marcus floating a few yards away. I asked the passenger for his name. “Tim,” he barely mustered to say.
I told Tim I needed to swim us over to my friend, as he was hurt and needed our help. Tim understood. A few quick side strokes and I had a hold of both Marcus and Tim. I was finally able to catch my breath and I felt totally exhausted. From the crash until now, probably only two minutes passed by, but I felt like I had just run a marathon. I don’t know how long we floated there, but the yell came from behind us. I managed to get all of us spun around and saw the most beautiful sight a man in my situation could see: a life raft.
The flight attendant had grabbed the life raft on her way out of the plane and inflated it. Inside the raft were two other passengers. Using their hands as paddles they swam the raft over to us. They pulled Tim in first and then I helped them with Marcus before climbing in myself. I thanked the attendant who introduced herself as Sara. I looked around the raft and asked, “Is this all?” Sara just nodded, no words needed be said. The gravity of the moment caught up with me. Not only was Chris dead, but his body was on the ocean floor. How many were dead on impact and how many drowned? I wanted to help, but it was all I could do to save myself and Marcus. The guilt of not doing more gnawed at me.
The situation was bad. All of us were banged up and bleeding to one degree or another. We had no food, no water, no communications, and Marcus was still bleeding.
I felt overwhelmed, but I thought to myself, OK, let’s solve one problem at a time, let’s take care of Marcus and the other injured folks. I ripped my T-shirt into a long strip and tied a pressure bandage around Marcus’ head to stop the bleeding. I grabbed a belt off one of the passengers and was able to secure Marcus’ arm around his waist and stabilize his collarbone by immobilizing it. The rest of the survivors were able to clean their wounds with the remaining pieces of my T-shirt. As a small way of expressing his gratitude for helping him, Tim handed me his button-down Hawaiian shirt to cover my now shirtless body as he had on an undershirt. As darkness began to fall, we all stared at Sara for guidance as to what came next, but Sara’s blank stare told me all I needed to know — she had no idea what to do.
Knowing the importance of hope and having a plan, I spoke first: “We’ll be OK. It’s a relatively short flight, and we’re expected at our destination very soon. We were on radar and in contact with the flight tower. Even if the pilot didn’t have time to declare an emergency, which he most likely did, disappearing from radar and the lack of radio contact will initiate a search. This is a very well-travelled flight corridor, and we’re on a direct path to the airport. Search and rescue will be up very soon looking for us. We should only be about 60 miles from the airport. It shouldn’t take too long for them to get here.”
Everyone seemed to take some measure of comfort from my assessment. I started unbraiding my paracord bracelet, which caught Tim’s interest. “What are you doing?” he asked. “I’m going to take Sara’s bright red vest and attach it to the end of the paracord,” I replied. “I’ll use it to swing around in the air if any aircraft approaches to help them see us.”
I could see Tim wanted to help, so I handed him my water-damaged and inoperable smartphone. He looked surprised and said, “You want me to call someone?” I laughed. “No, I want you to use the screen like a mirror,” I said. “Try to reflect the moonlight toward any aircraft so they can see the flash reflection. Since I can’t do everything myself, you’re gonna have to help.”
“Sure, I can do that.” Tim said. “Just don’t hit me again.” I smiled back. Our plan in place, everyone settled into the raft for the long night and the hope of rescue.
Survival Expert: Tim MacWelch’s Approach
When the small, toy-like plane finally stopped tumbling across the surface of the water, I still had the sensation of movement. The waves rocked the broken craft and the water rushed in, seeming to push me deeper into my seat. I also felt the plane sinking. Marcus scrambled to my right. He unfastened his seatbelt and then held his hand over the wound on his forehead. The gash was trickling blood into his eye, but he was up and moving.
After unbuckling my seatbelt, I moved through the hip-deep churning water to see why Chris wasn’t moving. Chris had sat down directly in front of me when we boarded. He had been joking and shooting quips back at us the entire flight. When I reached him, I saw his head slumped down, with his chin on his chest. Through the lapping reddish water and orange life vest, I saw something coming from his torso that did not belong. A jagged piece of aluminum had pierced the center of his chest. When I lifted Chris’s head, his eyes were open and lifeless. I tried to find his seatbelt buckle under the bloody water, my hands refusing to believe what my eyes had seen. Then I felt pain and something else that shouldn’t be there. I had cut my hand on another piece of metal that was protruding from his abdomen. While the salt water stung my new injury, I screamed at him to “Wake up!” but I knew he couldn’t, not with the size and the placement of that metal barb in his chest. It had hit him right in the heart.
I stood frozen in shock for a moment, the water climbed higher up my body. The waters had risen over Chris’ head when Marcus bumped into me, half blinded from the blood in his eye. “We’ve got to get out of here!” he cried. “Get Chris. We have to swim for it!” I looked at Marcus and said, “He’s gone. It’s just us.” The water was up to our shoulders when we heard a call from another survivor. “This way!” the voice shouted, and we were too stunned to argue. The plane door was open and a man in a life vest bobbed in the water beside it. “Hurry!” he screamed, “It’s going down fast!”
Marcus was in front of me and it dawned on me that he was only using one arm to swim. It wasn’t far to the plane door, but he needed help. I felt around with my feet to find a seat or armrest, or anything I could brace against. My feet dug into a seat back. Then I grabbed Marcus and pushed him forward and out the door. The water had reached the top of the plane door as we went under the arch. The buoyancy of the vest almost prevented me from getting under the doorway to escape. Only a few square feet of the plane’s fuselage were still above the water.
Though it was difficult to hear over the bubbling and the water slapping against the plane’s shell, I still heard a muffled scream of “Help!” It sounded like a woman’s cry. Marcus, the man at the door, and I looked back and forth. Marcus was in no shape to help, and the other man looked banged up as well. I was the only one who could help, and I knew what I had to do.
I unhooked the buckle on my life vest and handed it to Marcus. “Hold onto this for me?” I asked. He looked at me questioningly, but as soon as he had the vest, I dove through the plane door. After a few seconds, I found the air bubble where the woman was still screaming. There was only enough room for our heads, and only enough time for a few words. “You have to take off the vest to be able to swim out!” I yelled. She was still screaming and trying to hang onto me at this point. “Can you swim?!?” I asked. She continued to let out a scream after each breath she took. Neither one of us had time for this. I felt for her vest buckle, popped it open, and began taking it off her. Panicked further, she hit me in side of the head and continued screaming. Enough was enough. I grabbed hold of her and got right in her face. “I’m here to help!” I shouted. “Take a deep breath and swim out of here with me!”
She finally showed some slight sign of understanding in her eyes and took a deep gasp of air. I did, too, and I caught her by the hand. Half grabbing chair backs and pulling us forward, half-swimming, we moved toward the door. I felt a hand in front of me and grabbed it. No sooner than I was tugged forward, I lost the woman’s hand from my grip. Once my head was above water again, I saw that it was the man who had helped us before. He looked familiar, and I thought he was the pilot. He stuck his face under water in front of me and pulled up the formerly screaming woman. She was no longer screaming, but still scrambling to hang onto me.
“It’s OK now,” I said. “Here, I have something for you.” I took the life vest from Marcus’ hand and helped her into it. As I clicked the buckle, she moved her hands to the fastener and held it. She was protecting the buckle, as if I would undo it again. I managed a half-hearted smile, for her sake not mine, and asked if I could hang onto her to stay afloat. She said, “Yes.” Exhausted, and with no life vest, I held onto Marcus’ vest with one hand and the woman’s new vest with the other hand.
The middle-aged pilot swam over to the three of us, as did an older woman. She was towing an older man bobbing in his life vest. He appeared unconscious, but he could have been worse off than that. The plane was completely under water and sunken from view by the time our group of survivors had assembled.
Marcus and I looked at the pilot, who seemed to be scanning the few bits of floating debris from the crash. “What do we do now?” Marcus asked the pilot. “Look for anything useful” was the aviator’s reply. Since I was unfettered by the bulky life vest and a passable swimmer, I swam around inspecting odd bits of flotsam and covering more water than the others. I found a soggy foam seat cushion, but not the right kind to act as a flotation device for me. I found a half filled water bottle, a bikini top, and one of the flip-flops I had lost in the crash. Others were luckier. Once we all circled up again with our buoyant treasures in our midst, there were two bags of snack chips, half bottle of soda, half bottle of water, and a few bits of clothing. While the able-bodied survivors were looking for anything they could scavenge, the pilot had confirmed that the older man was still alive. He could not, however, figure out what was wrong with him.
“Now what?” the older woman asked. The pilot said his name was Sam, and he asked for everyone’s names. The older couple was Jackie and John. The woman I had helped was named Mindy. I could tell the pilot was trying to figure out who was here and who was lost. “Does anyone still have their phone?” Sam asked. I pulled mine from the pocket of my shorts. The screen was still lit, but the touch screen was unresponsive from its time under water. No one produced a working phone. We could tell by Sam’s face that wasn’t the answer he was hoping to hear. “I couldn’t complete the mayday call,” he said. “They don’t know we’re in the water.” This wasn’t the answer I had been hoping to hear. I knew people would miss us, and at some point they’d come looking. But the ocean is a big place, and we had no way to communicate or signal for help.
To calm everyone and boost morale, Sam said we should go ahead and have the snacks and drinks. Mindy objected, saying “We need to save those. Who knows how long we’ll be stuck out here.” But then Sam explained that they would do us more good in our bellies than still in the packages. “We’ll need every bit to stay warm,” he explained. Even though the water felt comfortable, as soon as I started thinking about nighttime temperatures I could tell that I was getting colder. We ate the chips, one at a time, passing the bag around in a circle. We drank the drinks with little baby sips, until the bottles were drained.
My waterproof watch still worked. I made note of the time we crashed, and the time that the last glow of dusk disappeared. We had no lights to signal our position, and we were forced to huddle for warmth in the dark water. I unwound my paracord bracelet to give us the cordage to bundle all of the life vests together. I ran a loop under my arms and lashed myself to the makeshift pontoon of people. The stars were miraculously bright, and several of us napped for a few minutes at a time. John woke up and mumbled something in the night before drifting off again. His wife smiled and wept after that.
The sky was beginning to lighten and my watch read 5:15 a.m. when our relative peace was shattered. “Something just bumped my leg!” Mindy screamed. Sam snapped to attention and asked, “Who’s got something sharp?” I handed him the pen from my shirt pocket, which I thought was utterly useless out here in the ocean. He held the pen tightly and stuck his face under the water. When he popped back up, we asked nervously what was going on. “Shark” he said quietly and grim-faced. He slipped out of his live vest and stuck his face underwater again. He lay still in the water, face down like a dead man. Then the water exploded in a large splash. I saw the tip of a fin in the boiling water. Sam came up for a huge breath and dove completely under this time. It seemed like ages had passed, though my watch said only a minute had elapsed. My fellow survivors were on the verge of panic when Sam surfaced.
“We’re OK for the moment” he stated, looking quite pleased with himself. “I stabbed him in the eye.” I marveled at this strange man, as did the others. Sam explained that these islands and these waters were his home. And the elders told him how to fight sharks, eat sharks, and even use their dried skin like sandpaper to make traditional surf boards. This humble yet amazing man had just fought off a shark with my stupid little Bic pen. Unbelievable.
But soon greater wonders were to be seen. It was just after 7 a.m. when we heard the engine. Shortly after, we spotted a small ship near us. We desperately waved our arms, swung clothing bits in the air, and yelled as loudly as we could. The ship’s crew must have spotted us, as they changed course and started coming straight toward us. No sweeter sight had I ever seen that the Coast Guard ship that was pulling up beside us. After we were hauled aboard, the real shock of all the events settled in. It took all the strength I had to not collapse on the ship’s deck.
Mindy must have seen the inner turmoil on my face. She changed seats and sat down slowly and quietly beside me. She took my hand. “You were put here to save me,” she said. “I know you were. Thank you.” She laid her head on my shoulder. What she said gave me some sense of peace I hadn’t felt before. Despite the bright morning light, we both fell asleep.
Conclusion
A plane crash in the ocean is one of the worst catastrophes for travelers. If you could manage to crawl away from the wreckage on land, at least you’d have somewhere to go. But in the water, you have nowhere to go. Without a lift raft, your resources are limited to what you have in your pockets and what you can find floating in the sea. And it’s not like they’ll let you on the plane with a parachute or a bunch of gear.
To be in compliance with the TSA rules that have emerged since Sept. 11, you’ll be left with very little in the way of “flight approved” survival gear. You are allowed to fly commercial airlines with one book of paper safety matches, your phone and all of the survival apps it might contain, a paracord bracelet, a metal cup, a compass, and a few other odds and ends. These could all be useful, but they don’t exactly constitute a proper survival kit. In the event of a crash in the water or another austere setting, your skills and knowledge end up being your real “survival kit.” And this mental emergency kit does have some advantages. It weighs nothing, you cannot lose it, and the TSA agents can’t give you any shit about it or confiscate it.
Before your next trip, brush up on your survival skills. Learn some new knots, practice your fire-starting, do some signaling exercises. Best case scenario, you had fun with the topics you practiced, and worst case, you’re ready when that emergency hits.
How would you react to the same scenario as played out by our panel? Share your plan with us on our Facebook page.
Related Posts
[meetourpanel]