Home Blog Page 224

Survival Story: Mozambique Mayhem

0
Thanks to his work training boat crews, CJ had connections to local military officials.

We often share hypothetical “What If?” survival scenarios in order to convey lessons about self-defense and preparedness. However, we recently received an email from a reader who shared a real-life story about a potentially dangerous scenario he dealt with while working overseas. His name is CJ Lozano, and he works for a boat-building company that often works under contract with the U.S. government and armed forces.

A photo of Maputo, the capital of Mozambique, taken from the International Space Station.
A photo of Maputo, the capital of Mozambique, taken from the International Space Station. Source: NASA / Chris Hadfield

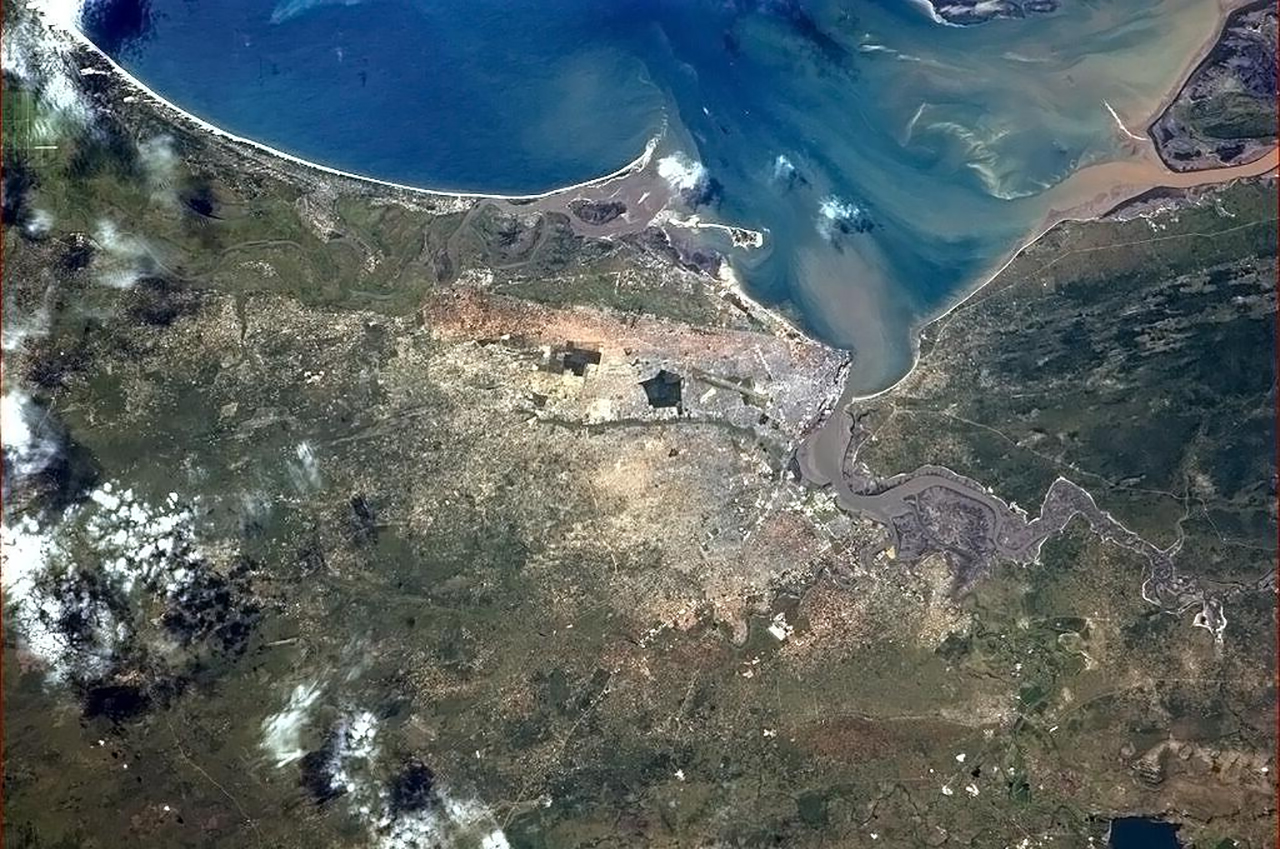
One particular contract led CJ to Mozambique, a nation located on the southeastern coast of Africa. Mozambique was formerly a Portuguese colony, and the official spoken language there is still Portuguese to this day. After gaining its independence in 1975, the country underwent a violent civil war from 1977 through 1992. Crime and corruption remain major issues in Mozambique, according to the U.S. Agency of International Development, and CJ’s story illustrates how these factors can directly impact foreigners.

Mozambique mayhem mountain field 4
Tea plantations in rural northern Mozambique. Source: Paulo Oliveira / Wikipedia

Here is CJ’s story, which he recounted to us via email. It may prove valuable to those who travel overseas to locales where corruption is a serious threat, whether that’s Rio de Janeiro for the Olympics, or any number of seemingly-safe tourist destinations. Be aware, plan ahead, and learn from CJ’s survival story.


Thank you for the invitation to share my story. I am a salesman/trainer in a small boat building company, and I sell boats to the U.S. government. When we get contracted to go overseas, we are pretty much on our own unless there is a high threat level. Then we get to tag on to the government employees who may be traveling with us.

Mozambique mayhem survival story 2
CJ (center) training a local Mozambican naval crew.

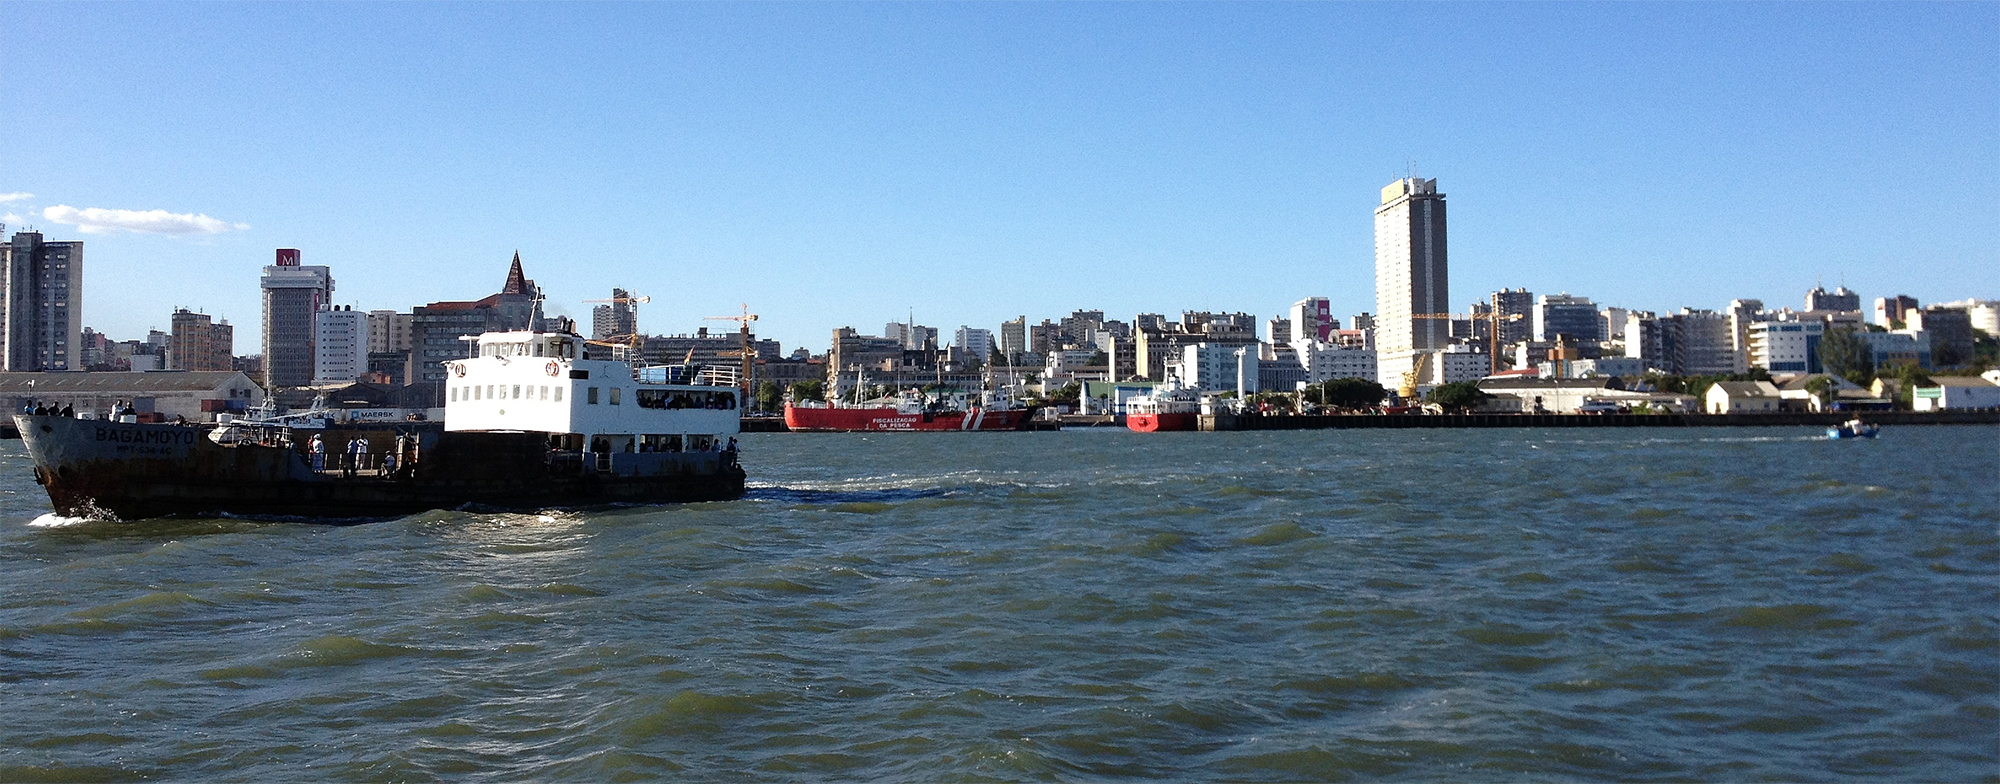
In my story, I was traveling with a government employee, who is a good friend of mine. He stayed in-country one week and I was scheduled for two weeks. During the first week we traveled from the hotel to the waterfront in Maputo a number of times. On one occasion, after visiting the U.S. Embassy, we basically got held up by police in front of the embassy for making an illegal U-turn. After being intimidated by the police, who were armed with AK-47s, I paid a “fine” of about $20 US and we were on our merry way.

The day after my friend left, I was down at the port working on the boats, and decided to walk into town a few blocks away to look for a place to eat. I found myself in a neighborhood with typical street scenes, women carrying baskets on their heads, et cetera. So, I took out my camera to get some photos. There also happened to be four local police officers conducting “traffic stops” a block away. I noticed them, but thought nothing of it.

Maputo, the capital of Mozambique, is located alongside a large bay and estuary.
Maputo, the capital of Mozambique, is located alongside a large bay and estuary. Source: Gustavo Sugahara / Wikipedia

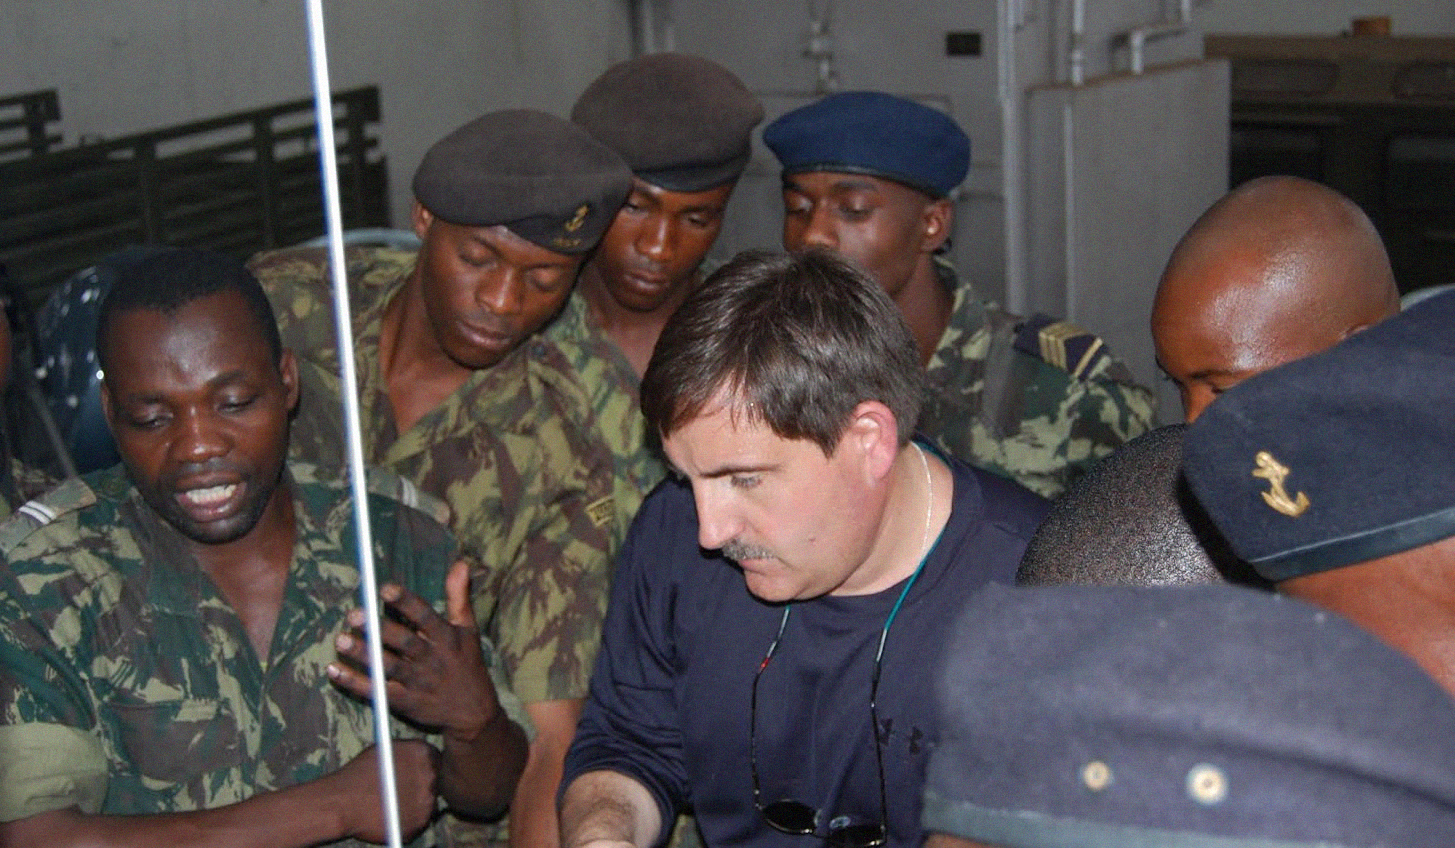
After taking a few photos, I noticed citizens yelling over to the cops. I was walking back towards the port when they stopped conducting their traffic stops, and basically surrounded me. Now understand, all of this was being done in Portuguese, which I do not speak. Here I found myself behind a building, surrounded by four police officers armed with AKs, all of whom were probably no older than 25 and carrying weapons that weighed probably a tenth of their body weight.

They made it very clear that they wanted $150 US, as I had broken a law for taking “illegal” pictures. Otherwise, they would throw me in jail. Now, I had been warned about taking photos around the presidential palace or government buildings, but nothing of the sort was anywhere close to where I was currently standing. I tried to make them understand that I was with the U.S. Embassy/Military. When that did not work, I pulled out a cellphone given to me by the colonel at the embassy to contact him if needed.

Thanks to his work training boat crews, CJ had connections to local military officials.

I got the colonel on the line and explained the situation to him. He advised me not to pay them a dime and to hand the phone over to the head police officer, which I gladly did. Now if anyone has ever been in a situation like this, they understand when I say my mind was racing. It occurred to me that any photo on my camera would be considered “illegal”, so I very quietly slipped the memory card out of my camera and hid it in a pocket in my pants. Then, as the phone conversation continued between the police and colonel, I began what I call my Jason Bourne evaluation of the policemen, and how I could do some serious harm to them before being beat down or killed. After zoning out on that for a few seconds, I realized I was being stupid, and tried to pay attention to what was happening. At least I had a plan of action if things went downhill fast.

The officers eventually handed the phone back to me, and the colonel advised me again not to pay them anything and to try to keep from being taken to jail. Basically, the cavalry was on the way. After hanging up, the bribe money demands suddenly started being reduced, but I continued to refuse them all. Finally, they decided they wanted to see my camera. Aha! I expected it to be destroyed in front of me but they only wanted to see the photos. Aha again! After turning it on, NO PICTURES on the magic box! Finally, they realized they had nothing on me, and that they weren’t going to get anything, so they told me to leave.

Hiding his camera's memory card was a dangerous gamble, but proved to be a wise choice.
Hiding the camera’s memory card was a dangerous gamble, but proved to be a wise choice.

Knowing that the colonel was on the way and could ruin their lives and jobs, they scattered to the wind. I immediately phoned the colonel again and he called the troops off. I made my way back to my car, making sure no one was following me (I still had a week to work in that area), and returned to the hotel. Once there, after letting everything sink in, I proceeded to drink a bottle of rum just to calm my nerves.

The moral of the story, and my lessons learned when traveling overseas:

  • Always stay in contact with your local consulate or embassy, or at least be aware of where it is.
  • Always be aware of your surroundings.
  • Always try to be aware of local customs and laws.
  • Never wear anything that will give you away as an American.
  • Never show expensive equipment.
  • When possible, keep your head about you, and try to think ahead.
  • Don’t make matters worse by trying to be a hero—or Jason Bourne.
  • Always try to have a “what if “ Plan B. In my case, I always plan to get to the boats if possible, and take to the open ocean.

I hope this helps someone when the rubber meets the road. The information you provide is not just for situations in a movie. This stuff really does happen on a daily basis, and the better prepared you are, the better chances you have of coming out on the good end.

All the best, and God Bless America. – CJ Lozano


Do you have your own real-life survival story to tell? We’d like to hear it. Message us on Facebook, or click here to contact me directly.

Custom Knife-Making: The Bushcrafter’s Dream

0

We’ve always had an appreciation for real craftsmanship, especially bladesmithing. There’s something powerful about carefully cutting, grinding, and refining a plain piece of steel into a razor-sharp knife. The knife is also a quintessential survival tool, so being able to make your own custom knife can be a fun and valuable skill. We’ve previously posted about making improvised knives from a wrench or a metal file, but the following project is in a different league.

Custom knife making Bushcrafters Dream 1
The creation of this Bushcrafter’s Dream blade was filmed from start to finish. Check out the videos below to see how it was made.

While browsing the wilderness survival subreddit, we recently came across a post where a user showed off a custom knife he made. According to his post, he had initially asked some members of the bushcraft community on Reddit about design features they’d like to see on a fixed blade knife. He received suggestions on the following design considerations:

  • Length of blade
  • Size and shape of handle
  • Steel choice, carbon steel
  • The placement of the point of the knife (center of axis)
  • Jimping on the tip, as well as on the handle/blade transition
  • Recessed handle for batoning without handle damage
  • Simple yet interesting handle material/execution
  • Lanyard hole/tube

Custom knife making Bushcrafters Dream 2

Based on the feedback he received, he sketched the knife on paper, and used it as a template to create the blade from scratch. The entire process was filmed and edited into a two-part video series on his YouTube channel, Eternal Improvement. The videos are definitely worth watching if you’re interested in learning to make a knife, or if you just like watching a skillful craftsman in action.

Here’s part one, where the host completes the blade of the knife:

Here’s part two, where the handle is sculpted and added to the knife:

Finally, if you’re curious about the cost and materials used, here’s a rundown from the video description:

  • Steel: 80CRV2 carbon steel tempered to 60 HRC
  • Handle: Alumilite handle scale material by 5th Arrow
  • Build time: TOO LONG I have no clue hours
  • Video time: 35 hours
  • Material cost: $78

To see more custom knife builds like this one, check out the Eternal Improvement YouTube channel or follow @eternalknives on Instagram.

Sharkbanz Shark Repellent Wristbands

0

Ever go swimming in the ocean and wonder what might be swimming underneath you? It’s a common fear, and has only become more widespread due to the popularity of films like Jaws. However, shark attacks are not just confined to works of fiction. In fact, according to the International Shark Attack File, 2015 set a record high for unprovoked shark attacks around the world. Shark attacks are a growing problem, so it’s understandable that researchers have been looking into ways to prevent them.

The bull shark is an aggressive species responsible for many near-shore attacks on humans. Source: Wikipedia

One method that has proven effective at deterring sharks is the use of magnetic fields. This works due to a sensory organ found on the nose of sharks, known as the Ampullae of Lorenzini. These jelly-filled pores allow a shark to sense electric fields in water, and the shark uses them to pick up the muscle contractions of prey, and also to navigate based on the earth’s natural magnetic fields. Scientists eventually determined that strong magnets can interfere with this organ at close range, much like staring directly into a bright spotlight would interfere with your vision.

Sharkbanz shark repellent wristbands 1

Sharkbanz, a father-son company based in Charleston, South Carolina, applied this technology to wearable wristbands. It may sound hard to believe that a magnetic wristband could really scare away a shark, but the company has done quite a bit of research and testing to prove that it works. They even partnered with Dr. Patrick Rice, a marine biologist, and Dr. Eric Stroud, a chemist, to validate the technology against various shark species.

Essentially, Sharkbanz is a 3-ounce rubberized device, similar in size and shape to a large wristwatch. It’s worn like a wristwatch, too, or can be strapped to your ankle if you prefer. It uses no electricity or batteries, and is designed to fit wrist and ankle sizes between 5.5 to 14 inches in circumference. Currently, three colors are available, each at an MSRP of $65.

Sharkbanz shark repellent wristbands 4

Obviously, this is not a fail-safe technology, so you should still be careful when and where you swim, and maintain good situational awareness in the water. However, it appears that these Sharkbanz may provide an effective and non-lethal way to deter sharks from swimmers. For more information on Sharkbanz wristbands and other products, visit Sharkbanz.com.

Infographic: Snake Bite First Aid

0

Venomous snakes are found throughout the United States, and the CDC estimates that between 7,000 and 8,000 individuals are bitten by venomous snakes each year. Most snakes will only bite humans if they feel threatened, but hikers, backpackers, and those who spend considerable time outdoors may unknowingly enter a snake’s path. If this interaction results in a bite, it’s important to know what to do immediately. Otherwise, the venom of several common American snakes (such as rattlesnakes, cottonmouths, and copperheads) can cause serious injury, limb loss, or even death.

Animal Attack 2-1

Unfortunately, many misconceptions about snake bites still exist. Possibly the most pervasive is that the venom should be sucked out of the wound immediately by mouth, to prevent it from entering the bloodstream. Other myths state that applying a tourniquet will slow the spread of venom, or even that cutting away the affected tissue will save the victim. None of these claims are true—in fact, they’ll generally make things worse.

The infographic below summarizes the basics of snake bite first aid:

Infographic snake bite first aid 1

Seems simple enough, right? That’s because it is. If you can conceivably get the victim of a snakebite to a hospital, immobilizing the affected limb and doing so should be the first priority. Again, go immediately to a hospital. This is the only effective option for venomous snake bites.

carrying-person-on-gerney-to-medical

Now, you may be thinking: what if there isn’t a hospital nearby? When professional medical care is absolutely not a possibility, the situation gets grim. There really isn’t much you can do to fix a snakebite without antivenom, but you can at least slow the spread of the toxin.

Here’s what you can do if hospital care is not available:

  • Immobilize the wound, and wash with soap and water as seen above.
  • Keep the victim calm and stationary—minimize heart rate and stop all physical activity.
  • If possible, call the National Poison Control Center at 1-800-222-1222. It is open 24/7 and an adviser can provide help over the phone.
  • Do not apply ice or a tourniquet. Do not give the victim alcohol, caffeine, or painkillers.
  • Do NOT elevate the wound—in fact, do the opposite. Have the victim sit or lie down with the bite site BELOW the level of the heart.
  • Apply a clean bandage to the wound, and hope for the best. Some snake bites are “dry bites” with no venom injection, so they may be survivable without professional treatment.
  • If neurotoxic venom has been injected, and you are certain no medical care or antivenom is available, there is very little that can be done. Get comfortable and try to signal for rescue.

Infographic: Unlikely Causes of Death

0

When faced with the slim chance of navigating safely through a dangerous asteroid field in The Empire Strikes Back, Han Solo famously says “never tell me the odds”. In a Hollywood film, this fearless gung-ho mentality seems pretty cool—but in real life, it’s wise to be cautious and know what sort of situation you’re getting into. After all, when you’re not the protagonist in a movie, the odds of something bad happening to you tend to increase dramatically.

"Never tell me the odds!"
“Never tell me the odds!”

As boring as they may seem on the surface, statistics can help us to understand day-to-day risks, and to use this analysis to improve our odds of survival. And honestly, some statistics and probabilities can be pretty interesting in the right context. For example, the following infographic compares several unlikely causes of death, so you can properly understand the actual risk involved.

When floating in the ocean, many of us fear shark attacks. Bungee-jumping and skydiving seem like extremely dangerous activities. Death from food poisoning sounds like a reasonably-common problem. However, all of these risks are minimal compared to much more ordinary dangers. Check it out:

Infographic causes of death 1
Infographic causes of death 2
Infographic causes of death 3
Infographic causes of death 4

Obviously, take all of these unlikely causes of death with a grain of salt. If you never go skydiving, your risk of death from skydiving is zero. If you swim 50 laps every day, your risk of drowning in the pool skyrockets. If you drink in excess constantly, your risk of alcohol poisoning will inevitably rise. So, don’t just assume that you can speed around on a motorcycle 24/7 because it’s much “safer” statistically than walking. Many other factors come into play here.

Nevertheless, it’s useful to remember that some activities we assume are extremely dangerous are actually quite safe. On the other hand, activities that seem mundane—like scarfing down a burrito for lunch—could easily lead to your untimely demise.

Wasatch Outdoors Survival Laces

0

Shoelaces are an often-overlooked component of any outdoor gear loadout. Virtually all shoes and boots already come with laces, and for many of us, they get the job done. As long as they stay tied and don’t fray or snap, we tend to forget they’re even there.

Survival shoe boot laces 3

Some experienced survivalists replace their boot laces with 550 paracord, as it provides an accessible source of emergency cordage. Others will take it a step further, and use flammable Fire Cord as laces—this special paracord contains a waxed internal wick that can easily be ignited with a ferrocerium rod or flint and steel. However, Wasatch Outdoors has combined all of these concepts into a single purpose-built pair of survival laces.

These second-generation Survival Laces from Wasatch Outdoors are composed primarily of 550 paracord, but with some important additions. Each set of specially-made laces contains all of the following items:

Survival shoe boot laces 2

  • Standard paracord with 550lb tensile strength, 7 braided nylon strands, and an outer sheath
  • Metal aglets sealing each end of the laces
  • Inside one lace: fishing line running the entire length
  • Inside the other lace: red waxed tinder strand running the entire length, plus a 1-inch ferro rod

The survival laces can be ordered in sizes from 48 inches to 84 inches, and in your choice of black or olive drab coloration.  Wasatch Outdoors also offers a survival lace for hoodie sweatshirts, so you can replace the rarely-used hood pull cord with something much more useful. The MSRP of the boot laces is currently $18, and the hoodie lace is available for $12.

Survival shoe boot laces 1

Our only concern about the design of these laces is the glaring omission of a striker for the ferro rod. Sure, most users will already have a knife on hand to generate sparks, but if you ended up stranded with only the clothes on your back, you’d have a hard time finding a suitable striker in the wild. A sharp rock fragment or piece of glass or ceramic would get the job done, but you’d still have to search for it. A hard edge on one of the metal aglets would work well, but the current design appears to lack this element.

Aside from this one potential issue, we could see these survival laces serving as a useful backup tool in your loadout. They take traditional paracord or Fire Cord laces to the next level. To learn more about these laces, visit WasatchOutdoors.com.

Emergency Rappelling Techniques

0

Ever look down from the balcony or roof of a tall building and feel uncomfortable? Your palms might sweat, and your stomach might churn, but from a logical standpoint you remain perfectly safe. In order to get back to terra firma, you need only walk down some stairs or push an elevator button. Nevertheless, acrophobia (the fear of heights) remains one of the most common personal anxieties of Americans.

Falling injuries skyscraper

However, what if taking the stairs or elevator was not an option? What if a structure fire, earthquake, or other dangerous event made it impossible to escape a building by normal means?

This sort of scenario may be unlikely, but it would be ideal to know how to descend to safety from that aforementioned balcony or roof. Unless you have some form of emergency rappelling device already prepared, you’ll need to improvise with simpler materials. As with any other emergency survival technique, you’ll want to be prepared and know what to do ahead of time.

Note: The techniques listed here are intended for emergency scenarios only, and should not be taken lightly. Climbing and rappelling are inherently dangerous, and if you think you may need to do either, you should consult with experienced climbers beforehand. Proper training and professional-grade gear is always your best option. We are not responsible if you fall and hurt yourself.

The Best-Case Scenario

Emergency rescue backpack rappelling
Looks easy, right? It is …as long as you’re on a rock wall and supported by a guy off-camera holding the rope.

In an ideal world, you’ll be 100-percent prepared when disaster strikes. If you need to escape a tall building via the window, you’d whip out your complete climbing rig (you know, the one you stashed for this exact scenario), strap on protective gear, and effortlessly descend the exterior of the building like a scene from Mission Impossible. Onlookers on the street below will applaud, and a beautiful woman in a red dress will be so impressed she’ll hand you her phone number. Cue upbeat music, roll credits.

Outside of Hollywood fantasy land, you’re likely not going to be an experienced mountaineer, and you won’t have a complete climbing rig in your closet. If you’re trapped on the third floor of an office complex, and some form of disaster has made the lower floors inaccessible, you’ll need to find another way out.

If you’re willing to spend several hundred dollars, you can look into a pre-made personal escape system, such as the Petzl EXO seen in the video above. These systems are specifically-designed as a compact and quick way to escape from a burning building. However, they still require mandatory training from an authorized source, and are generally designed specifically for firefighters. We’re discussing emergency rappelling techniques, so we’ll move on to some improvised methods instead.

Swiss Seat Harness

A good climbing rig starts with a good harness. The harness makes sure your body stays attached to the rope, rather than plummeting to the ground.

Swiss seat rappelling harness 1
The Swiss Seat is a DIY rappelling harness that can be assembled from about 12 feet of rope. Source: ITS Tactical

Speaking of rope, it is the only resource you absolutely cannot do without in an emergency rappelling scenario (aside from a strong anchor point, obviously). As you’ll see later, you can even get away without a harness or carabiner in a pinch, but having a surplus of strong climbing rope on hand is mandatory. If you think there’s any chance you might have to use these emergency techniques in your apartment or office, stow a substantial length of climbing rope in these locations.

Additionally, it’s not unreasonable to stash a few carabiners with this rope. Get the real weight-rated kind, not the flimsy keychain kind. Unlike a climbing harness, both rope and carabiners can be used for other day-to-day purposes, so they won’t just sit collecting dust in case of a specific scenario. In fact, we generally recommend including at least one large carabiner in a go-bag or bug-out bag—it has many uses, from self-defense to simply retaining your keys.

Carabiner self defense weapon 2

With only your rope and a few climbing carabiners, it is possible to rappel (aka abseil) and descend from a high place. One common method begins with tying a Swiss Seat rappelling harness. It’s simple enough—all you’ll need is a section of approximately 12 feet of climbing rope, and one large locking carabiner.

This video from ITS Tactical shows how to tie a Swiss Seat harness:

Improvised Braking

Now you have the harness, but you’ll still need a way to descend in a controlled manner. Wrapping your rope haphazardly around a carabiner or your waist will result in one of two things:

  1. Too much friction – You won’t budge, and will be stuck dangling in the air helplessly.
  2. Not enough friction – The rope will slip through your grasp, give you a rope burn, and you’ll fall.

If you can stash a real rappelling brake (aka belay), that’s ideal. It will improve safety, and be much easier to use than any improvised system. However, here’s what to do if you don’t have a proper brake:

This “biner brake” just requires four more climbing-rated non-locking carabiners. This system allows you to slow your descent to a safe rate, even if you don’t have a purpose-built brake on hand. Add two of these carabiners to your Swiss Seat rig or harness, slot two more around the first two, and work your rope through all four. If you’re interested in learning more on how the carabiner rappelling brake works, check out this article on Climbing.com.

So, with the Swiss Seat, carabiner brake, and plenty of practice in a safe environment, you could rappel to safety. You’d need only the following items:

  • Climbing rope (for both the harness and actual descent)
  • One locking carabiner
  • Four identical non-locking carabiners

Last Resort: Dülfersitz Method

Remember how we said it’s possible to rappel with only a rope? Here’s what to do if you don’t even have carabiners.

A vintage photo shows a climber using the Dülfersitz method.

The Dülfersitz technique, named after German mountain climber Hans Dülfer, can serve as a last resort. It’s pretty much guaranteed to cause some pain, but it can get you to safety in a pinch. It uses doubled-up rope wrapped in a “Z” along your groin, around your thigh, and over your shoulder.

Wrap the midpoint of the rope around a sturdy anchor, then feed the rope through your hands as you rappel to the ground. Your dominant hand grip and non-dominant arm positioning can regulate your speed. Once you’re on the ground, you can pull on one end of the rope to recover it.

Note that you’ll definitely want to wear gloves if possible, as the heat and friction can quickly blister your skin otherwise. Long sleeves and padding stuffed around your groin and collarbone can also help reduce the discomfort. Also note that this method can be quite dangerous—if your hand releases for any reason, you’ll inevitably fall.

Final Thoughts

Mountain Climbing

Whether you’re using a complete rappelling rig, improvised Swiss Seat with carabiner brake, or the Dülfersitz technique with no gear whatsoever, you’ll have some options for escaping an elevated location. Learning these emergency rappelling techniques may not eliminate the fear of heights, but it can greatly increase your chances of survival in a structure fire or other dangerous scenario.

Infographic: America’s Top Fears

0

What are you afraid of? In a very general sense, many of us might say “death” or “pain”. However, the true nature of fear comes down to something more esoteric. We’re often afraid of things that pose little risk of harm, or things that pose no physical threat whatsoever. You might be terrified of public speaking, but it’s not going to kill you—unless you somehow manage to literally die of embarrassment.

Black widow spider
Many people are afraid of spiders, despite the fact that most arachnids are timid and harmless.

Regardless of actual danger, fear is a powerful motivator, so understanding it provides valuable insight into the human psyche. This is helpful from a survivalist standpoint, both for conquering your own fears and for dealing with (or even exploiting) the fears of others.

Last year, Chapman University took a random sample of 1,541 adults throughout the United States, and asked them to rank their level of fear about various topics. These topics from the Survey of American Fears fell into 10 categories, which Chapman researchers called the Domains of Fear. Here’s how they separated them:

Top fears infographic 2

Then, the researchers established which of these categories was most terrifying on average. The results indicated the following Average Fear Scores for each domain, on a scale of 1 (not afraid) to 4 (very afraid):

  • Man-Made Disasters – 2.15
  • Technology – 2.07
  • Government – 2.06
  • Environment – 1.97
  • Personal Future – 1.95
  • Natural Disasters – 1.95
  • Crime – 1.72
  • Personal Anxieties – 1.63
  • Daily Life – 1.51
  • Judgment of Others – 1.31

Beyond these categorized results, the survey showed specific fears that were most common, regardless of domain. According to this survey, here are America’s top fears:

Top fears infographic 1

These are only the top 10, but a complete list is available on the Chapman University survey page. Interestingly, the individuals surveyed were more afraid of reptiles and public speaking than of actually dying. Also, those surveyed were on a whole far more afraid of financial crimes like identity theft than of physical crimes (murder, rape, theft, break-ins, etc.).

For comparison purposes, here are the ten least common fears, followed by percentage of individuals who were “afraid” or “very afraid” of them.

  • Gossip – 9.6%
  • Dark – 9.3%
  • Appearance – 8.7%
  • Zombies – 8.5%
  • Vaccines – 8.4%
  • Clowns – 6.8%
  • Age – 5.9%
  • Race – 5.6%
  • Gender – 4.5%
  • Dress – 4.2%

DIY Fire Piston

0

Fire-starting is just like any other survival skill—if you don’t have multiple methods to fall back on, you probably won’t be able to make it happen reliably. Your lighter could break or run out of fuel, your matches could get soaking wet, and you could lose your ferrocerium rod. Given the essential nature of fire in survival situations, it’s wise to have at least two or three fire-starting methods prepared ahead of time.

A modern aluminum fire piston from Sims Tactical Solutions. Photo: Dangerang / Wikipedia
A modern 6061-T6 aluminum fire piston manufactured by Sims Tactical Solutions. Photo: Dangerang / Wikipedia

One simple fire-starter that is often overlooked is the fire piston. This device uses a piston in a cylinder to compress air rapidly, creating heat as a byproduct. The tip of the piston is packed with a small amount of tinder material, such as char cloth, which ignites easily under pressure. The process works much like one of the cylinders in an engine, using the piston to quickly squeeze air into a tight space, creating the optimal conditions for combustion.

Fire piston DIY 2
The materials used in a DIY fire piston. Check the video below to see how it goes together.

You can purchase pre-made fire pistons from various retailers, or you can make your own with simple tools for only a few bucks. Here’s a list of what you’ll need, as well as how each item is used:

  • Wooden rod or dowel – This will form your piston. The video uses a 12mm-diameter rod.
  • Wooden knob and wood glue – Provides a handle for your piston.
  • Copper tube – This will form your cylinder, and should be slightly larger than the piston. The video uses a 15mm tube.
  • Copper tube end cap, soldering flux and tin, and blowtorch – To seal one end of your cylinder tube.
  • Small hacksaw – For cutting the tube and rod, as well as adding O-ring notches to the rod.
  • 2 rubber O-rings and petroleum jelly – These form the air-tight seal in your cylinder.
  • Tinder material – Stuffed into the end of your piston. Char cloth (aka carbonized cotton) works especially well.

Once you have the necessary materials, here’s how it all goes together:

Should you carry a fire piston as your only source of ignition? Of course not. However, it does serve as an inexpensive tool to add to your survival tool kit or bug-out bag, and it can provide a much-needed fallback plan in case other fire-starting methods fail.

Looking Back: Gurkha Bourbon-Infused Cigars

0

After a long and hard day, few things boost morale more than a cool glass of bourbon and a smooth cigar. These two items seem to be made to go together, like a grown-up version of cookies and milk. And even if you don’t smoke or drink, it’s easy to look like a cultured gentleman with a rocks glass full of amber liquor in one hand and a stogie in the other. Also, from a practical standpoint, these two substances will be worth their weight in gold when SHTF.

Sir Winston Churchill waving to the crowds, seen with his signature cigar.
Sir Winston Churchill was famous for his taste in cigars and hard liquor.

Given the undeniable connection between bourbon and cigars, it’s unsurprising to see the two blended into a single item. The new Gurkha “Bourbon Collection” combines a premium cigar with small-batch bourbon from the Hartfield & Co. distillery in Kentucky.

The caramel, vanilla, and oak flavors of the bourbon are said to be imbued into each cigar—sounds pretty delicious to us. According to Hartfield & Co. founder Andrew Buchanan, “[these flavors] combine with smoke and leather from the barley, pepper from the rye and sweetness from the corn that results in a new style of bourbon from the home of bourbon: Bourbon County, KY.”

Gurkha Hartfield bourbon whiskey cigar alcohol 2

Of course, the tobacco in these cigars also brings plenty of flavor to the table. Kaizad Hansotia, Founder and CEO of Gurkha Cigars, writes, “This union provides an incredible sensory experience that releases the rich taste of the leaf and the smoothness of handcrafted bourbon like no other.”

Gurkha Hartfield bourbon cigar 1

The new Bourbon Collection cigars will be offered in two sizes: the Churchill and the Toro. The Churchill is priced at $12, crafted with a Maduro wrapper, and measures 7 x 47 (seven inches long, 47/64ths of an inch in diameter). The Toro is priced at $10, crafted with a natural wrapper, and measures 6.5 x 52.

For more information on the Bourbon Collection cigars, check out GurkhaCigars.com.