In This Article
When it comes to how you can carry a weapon, variety isn’t just the spice of life, it’s a measure of responsible carry. Few things are worse for your credibility than forcing a carry option to apply in a situation where it shouldn’t … or just can’t. In my work, well-done concealed carry is far more prudent and professional than the alternative. As a result, I have firearms and holsters for nearly every occasion and type of dress I’d likely need. That being said, I realized that despite trying to cover as many bases as possible, I was missing an off-body carry (OBC) option.
Off-Body Carry: A Controversial Topic
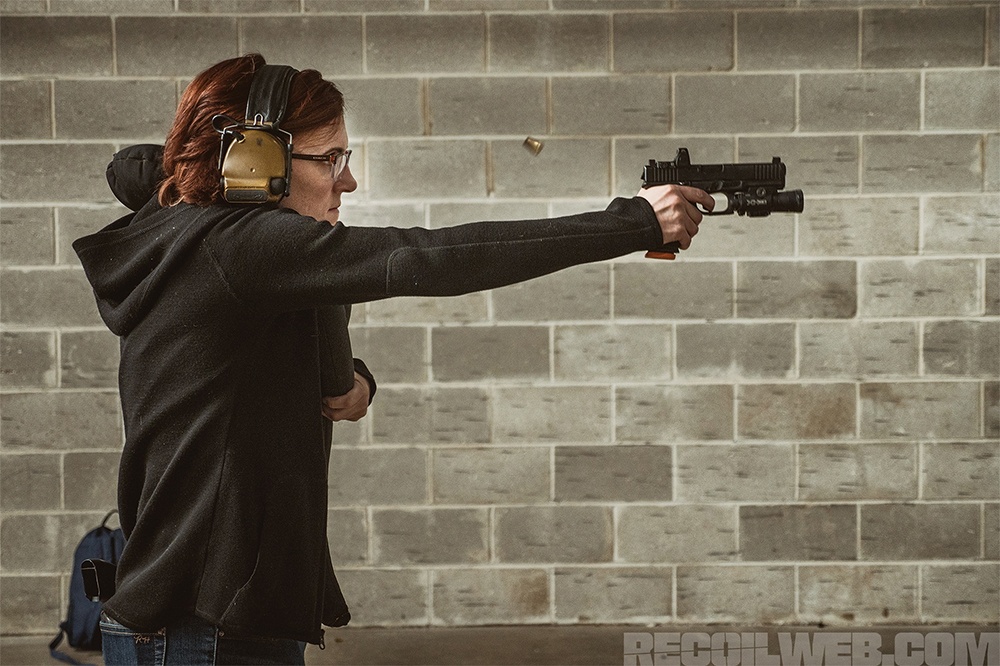
OBC is somewhat controversial and has its fair share of critics. Opposition usually breaks down to one thing — inaccessibility of the weapon resulting in long response times, especially inside the venerable “21-foot zone.” I agree with the critics on this point, there’s little chance a person will dig a weapon out of a bag in time to save themselves from that type of direct threat.
Above: Keeping your firearm concealed on your body is usually preferable, but off-body carry can be a viable option for secondary weapons to supplement your conventional CCW firearm.
To be fair though, the same concerns critics of OBC have can be said for pretty much all concealed carry options. Inside your reactionary zone (which is different for everyone, 21 feet is a general guideline based on a number of different factors and scenarios) it really makes no difference how you carry if someone else has an action/distance/position advantage on you to begin with.
If you decide to carry off-body, it’s absolutely critical to understand the narrow, but necessary, role this carry option best fits. Unless you’re using OBC to augment your EDC, off-body carry is most applicable when a situation dictates that the accuracy, caliber, and higher capacity of a braced pistol or SBR would offer a significant defensive advantage over a more conventional CCW firearm and a semi-immediate threat exists that allows the user time to safely ready the weapon to engage the threat.
Note that I said “semi-immediate threat,” not a “direct threat.” A direct threat (think staring down the muzzle of a firearm or the point of a blade inside your reactionary zone) puts you on the wrong side of that action/distance/position equation. There’s no way you’re safely getting to any off-body weapon under those circumstances. However, a semi-immediate threat (think hearing shots at the receptionist’s desk down the hall or at a park with your family) is where this system fits. It allows you to access a more accurate and higher-capacity defensive weapon, thus increasing your ability to get yourself and others away safely. That’s its role, period. Making it fit anywhere else is like trying to haul a family of four around on a motorcycle. Even though the bike could hypothetically get you all there, that’s definitely not what it’s made for. In other words, you have to be reasonable and responsible enough to know your equipped carry option, its role, and its limitations.
Deciding on the Ruger PC Charger
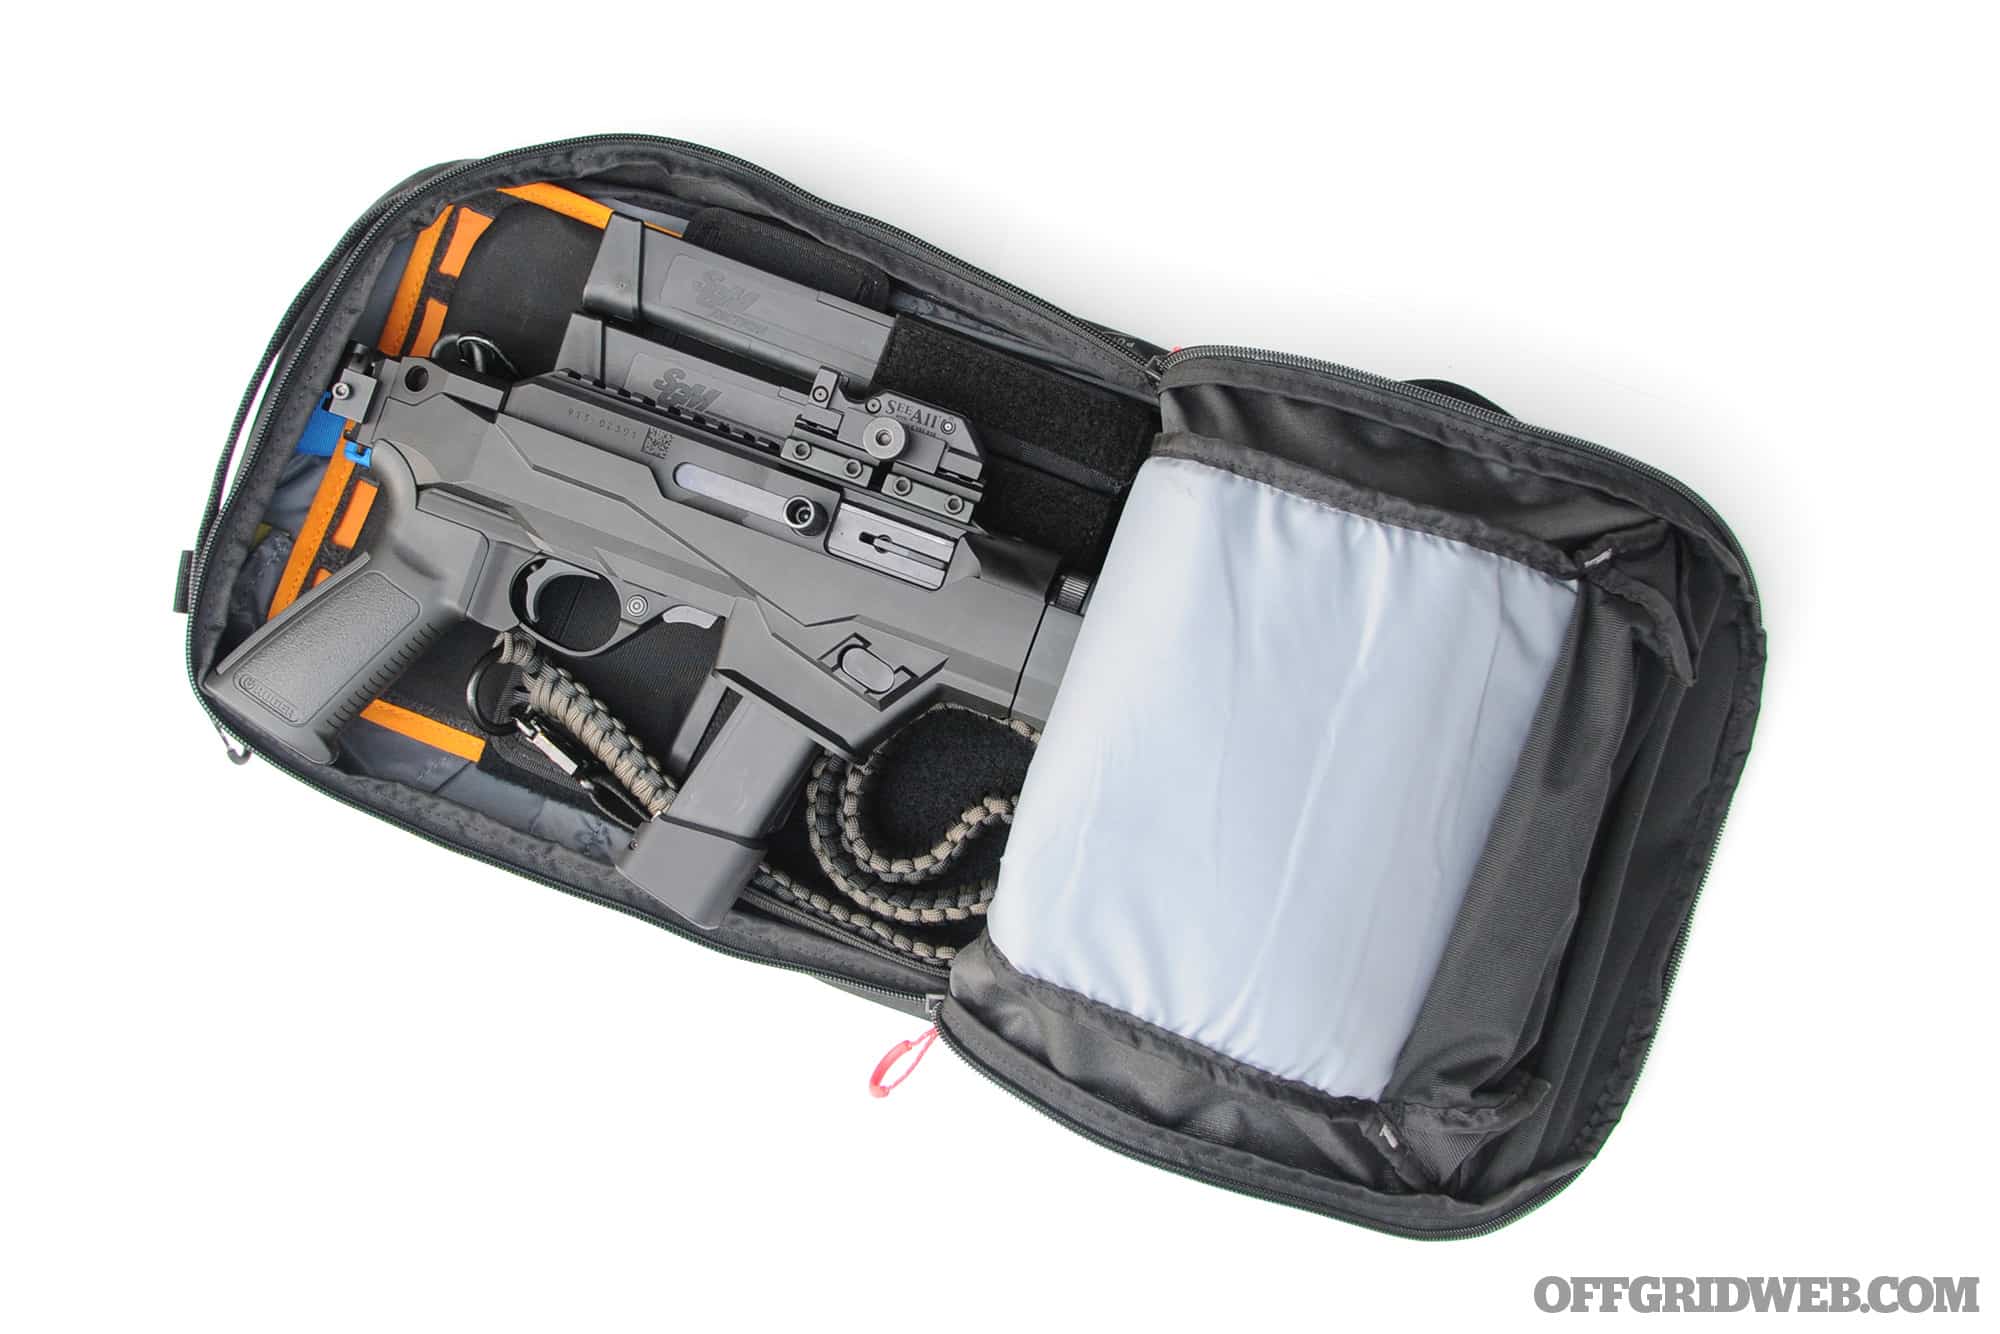
When I was planning the off-body option I decided it had to check these boxes. First, it had to appear as innocuous as possible. Second, it had to be as compact as I could make it. Third, the dedicated firearm I chose had to conform to what I could legally carry both for work and personal use. With minor exceptions, OBC is comprised of two major components, the bag itself and the weapon you choose to put in it.
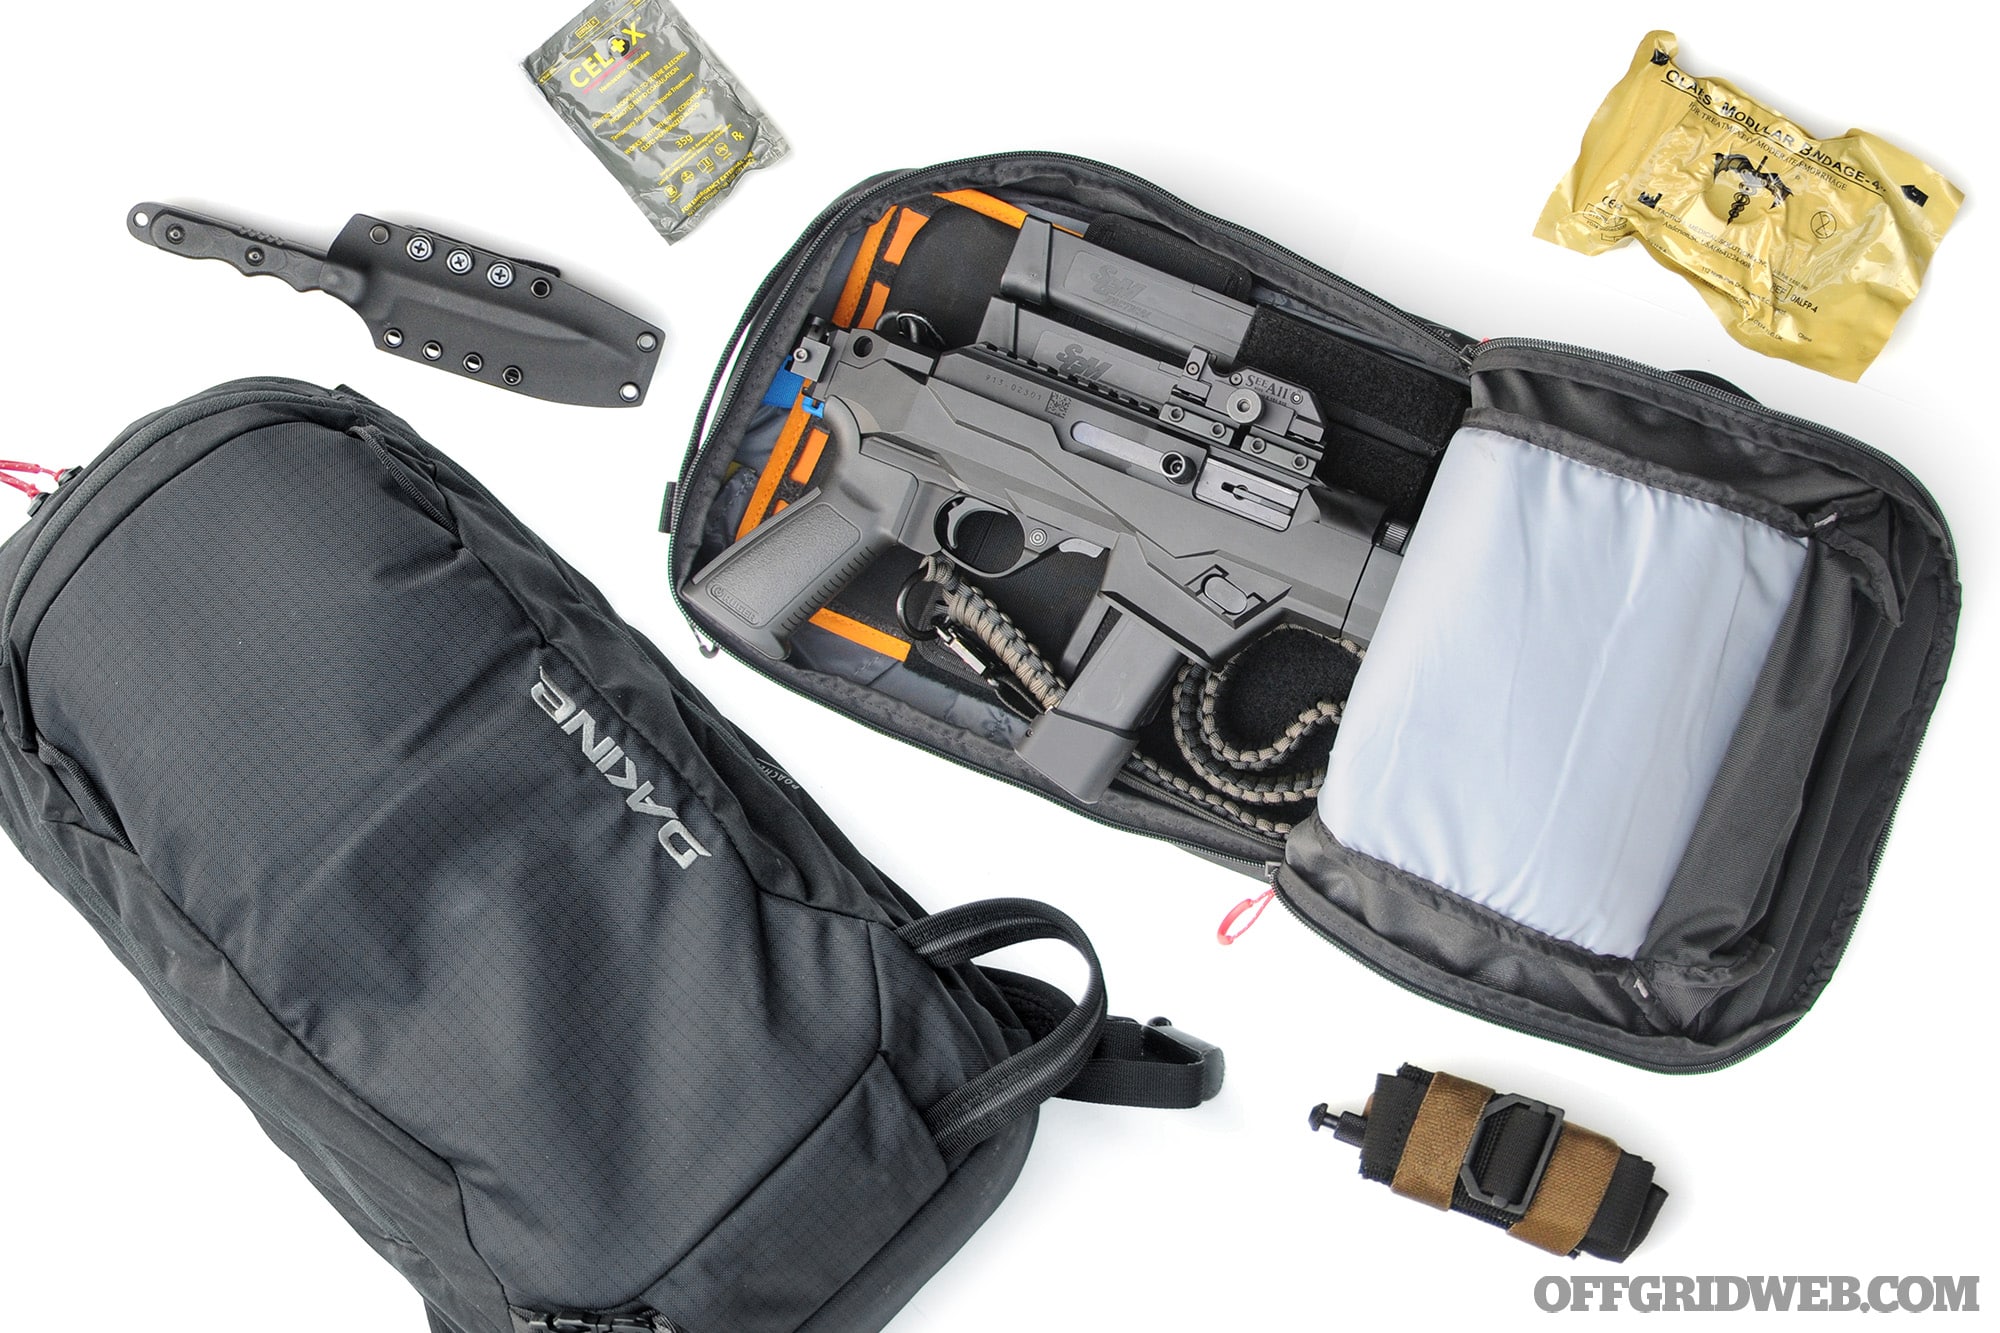
For this project, I went with the Ruger PC Charger 9mm, which, thanks to its extremely compact size and adaptability, is quickly becoming an industry front runner for pistol-caliber pack guns. The weapon came with a SB tactical brace, and when folded measures about 17 inches overall.
The Charger is a takedown gun, separating into barrel/forend and action subassemblies. While it’s a nice feature, I wouldn’t recommend it for this application. Putting together the two subassemblies, especially under stress, isn’t a reasonable plan. Besides, when equipped with the brace, the gun doesn’t benefit much from the reduced take-down length, as the folded brace is longer than the receiver component.
The Ruger PC Charger is well-made, accurate, and has some other useful features as well. The reversible mag release and charging handle are nice if you’re a lefty. I have it configured the way most people probably would, with the mag release on the left and charging handle on the right (a left-side charging handle keeps the brace from folding flat). This setup somewhat replicates the mechanics of operating an AK pattern weapon.
The tungsten dead blow weight definitely reduces felt recoil — a PlayStation controller probably kicks harder — but it does make the small weapon (and consequently the whole carry package) relatively heavy. Most importantly, it can accept Glock mags with an included adapter (which I had installed before I even left the store).
My Charger is fitted with a SeeAll Mk2 Night Sight. The SeeAll is a tritium-equipped non-electric sight that’s designed to gather as much light as possible, ensuring full reticle visibility from full light to practically no light. Its low profile and small size has the added benefit of lessening the chance it will snag when pulling the weapon. While the sight picture does take some getting used to over a more conventional optic, I like it and have a couple on different weapons.
Finding the Right Pack
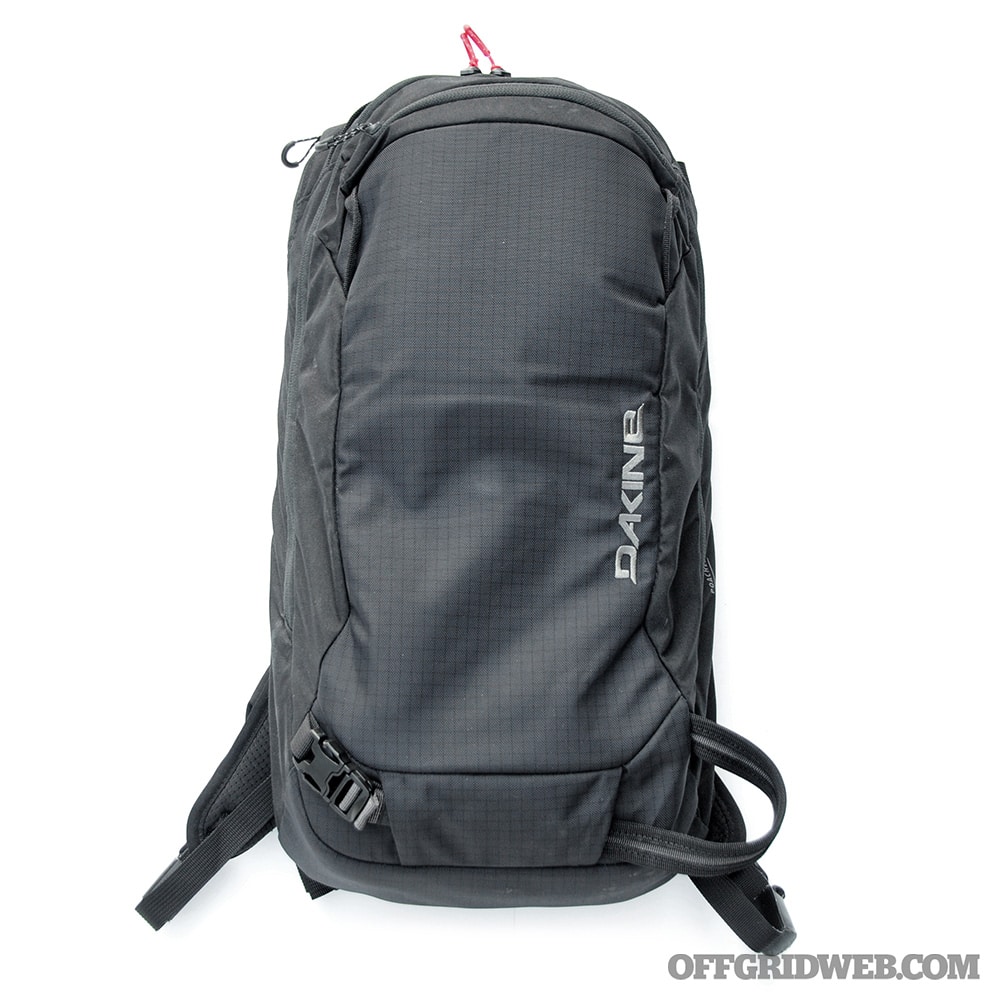
For pack selection, I purposely avoided anything with MOLLE webbing, Velcro panels, and offerings from traditionally “tactical” manufacturers (even their low-key models) in favor of generally recognized outdoors brands. While there are purpose-built concealed carry bags out there with some great features, I wanted to get as far off the mark as possible. The goal was to go unnoticed by the general public and those who are knowledgeable on industry gear … hence none of the usual players.
After looking at Oakley, Merrell, The North Face, and the like, I went with a Dakine Poacher 14L. At 850 cubic inches (14L) and measuring 20 by 12 by 4 inches, it was ideal. The pack is marketed by Dakine as a “minimalist backcountry pack for riding the lifts” and designed as a close fitting, low-profile pack for aggressive skiing. With one main compartment that fit my weapon nicely and being only 4 inches deep, it was exactly what I wanted. It holds the weapon snugly against me and doesn’t allow the weight to shift, even at a good run. It’s very well built, and I like the contrasting red zipper pulls — a nice little feature for easy visibility in a pinch.
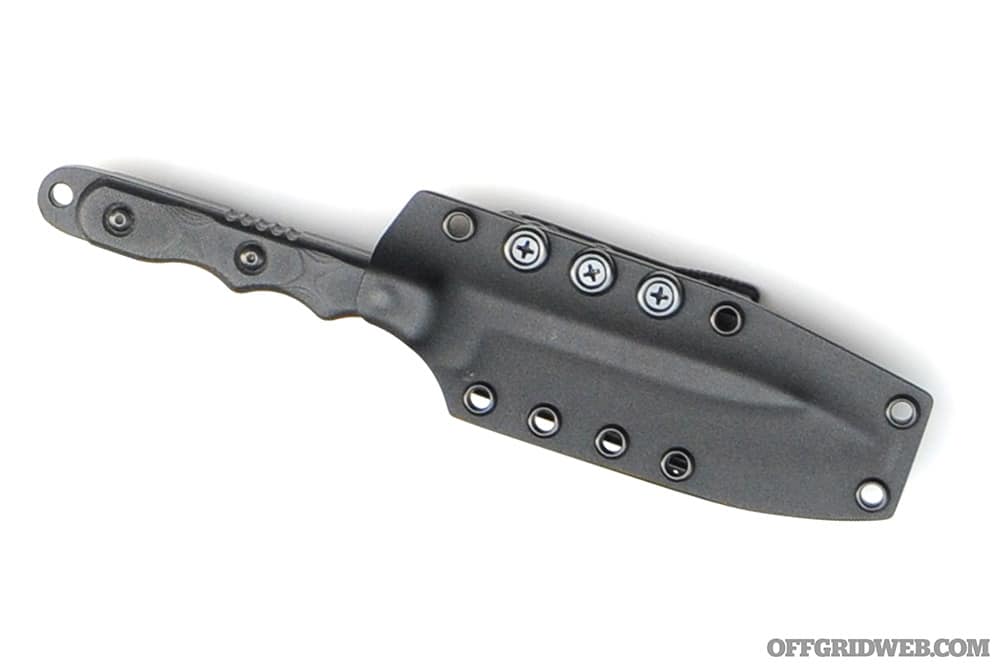
Above: A fixed blade is a good tool to include in almost any backpack. In this case, I chose a TOPS Knives Ranger Bootlegger.
I made a few minor tweaks to turn the bag from a “minimalist backcountry pack” into a reliable concealed-carry platform. First, I cut out two inner snow tool organization pockets that tended to snag the weapon and removed an extraneous strap inside a small pocket designed to carry a snowboard. Next, I secured a stretch fit magazine holder and level IIIa universal ballistic backpack panel inside the hydration pocket of the main compartment. The panel is positioned center mass when wearing the pack backward as a better-than-nothing modicum of ballistic protection.
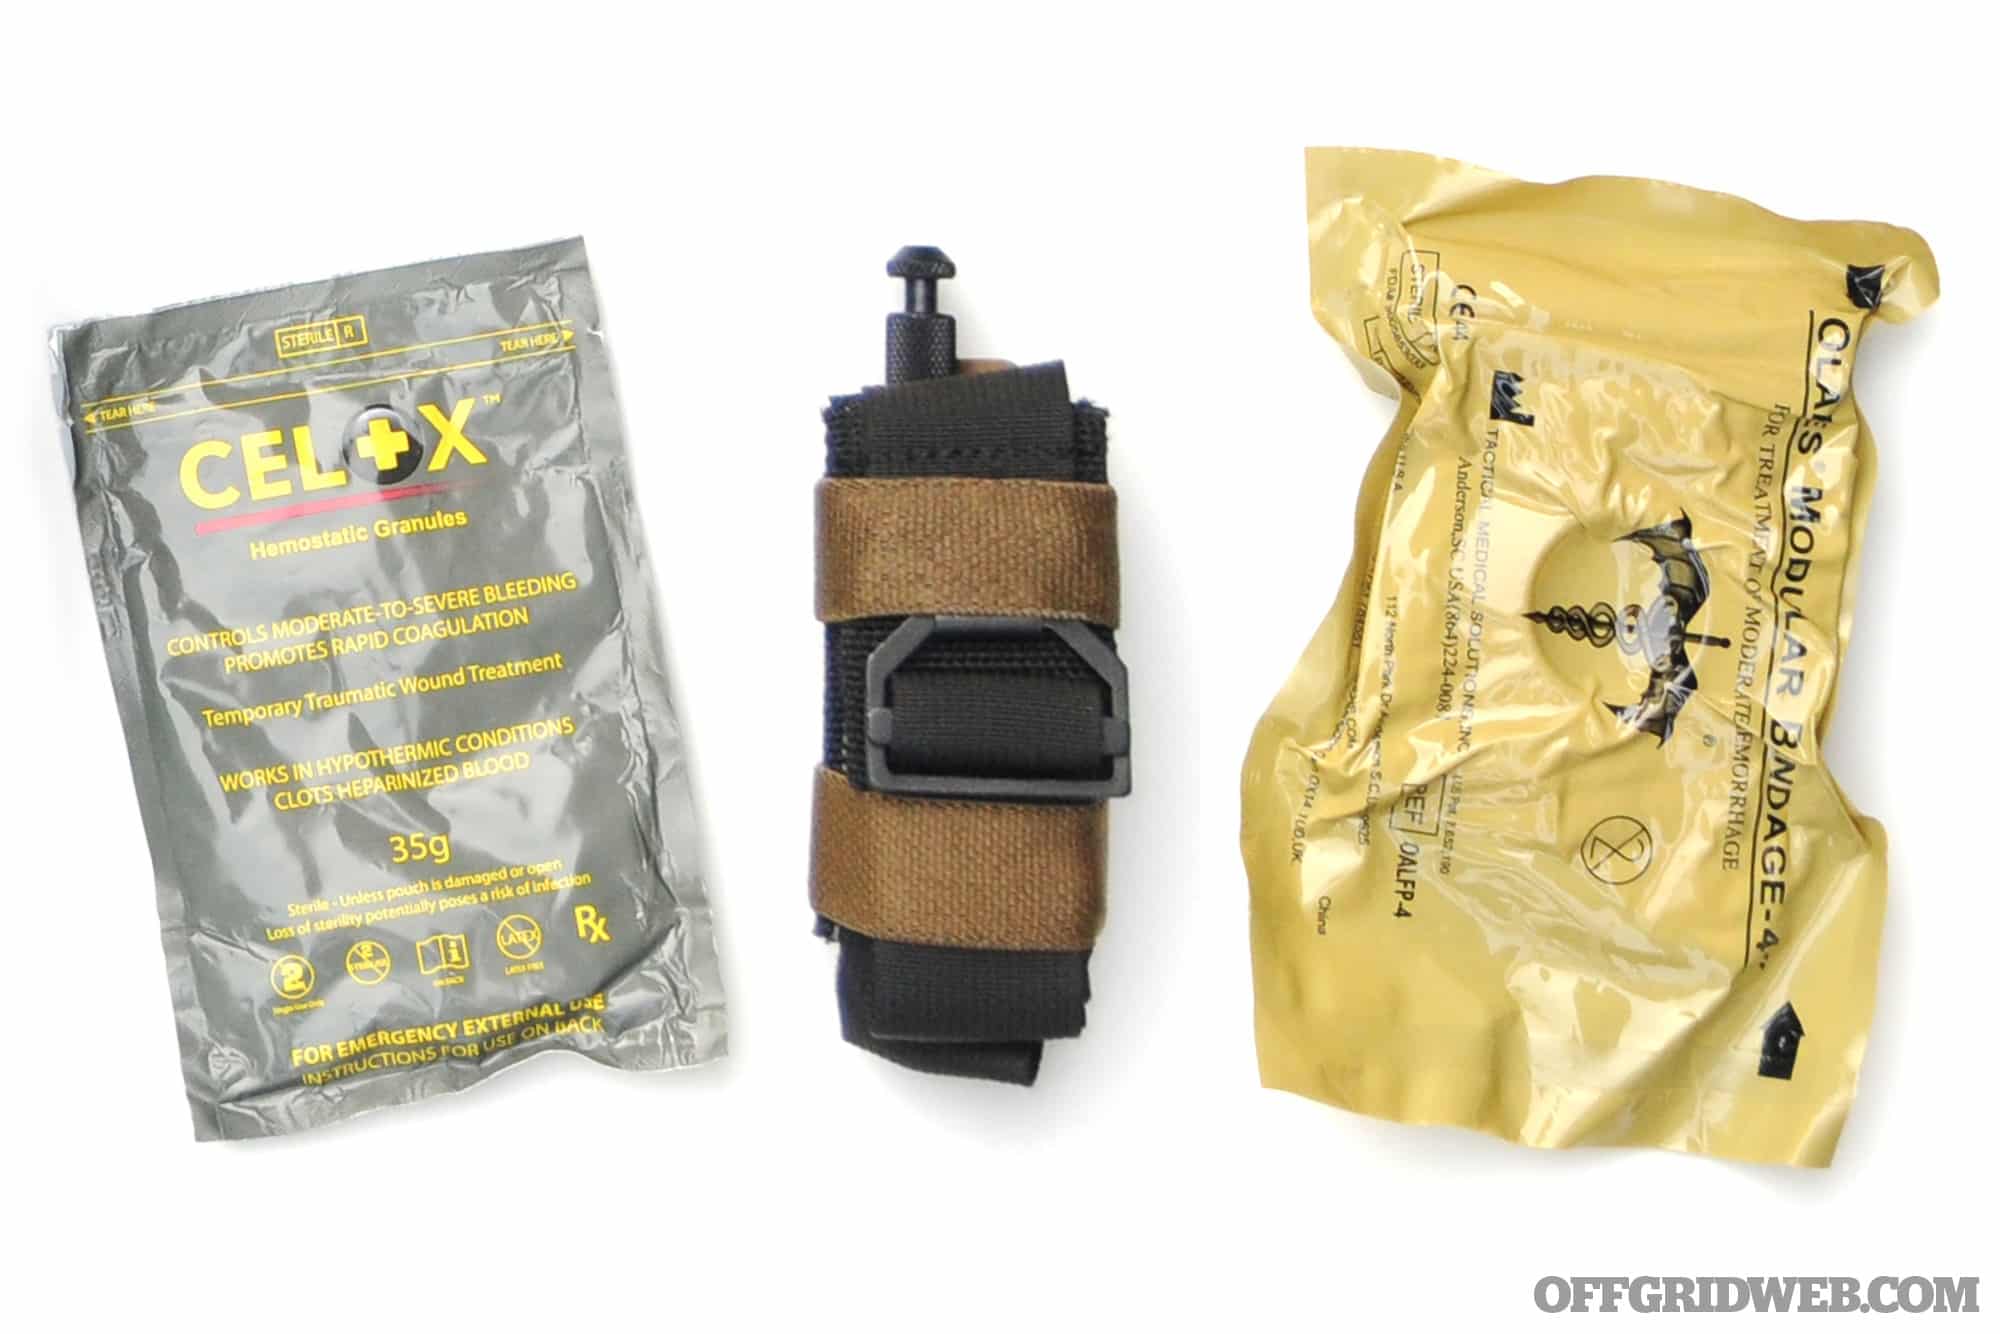
It has an outer goggle pocket just large enough to hold a pressure dressing, a Celox pack, and a CAT tourniquet. One other unique feature that’s worth mentioning is that Dakine built one shoulder strap with a zippered access to run your hydration tube through it. Since I’m not running a water bladder, it’s been repurposed, and is large enough to conceal my TOPS Knives Bootlegger in easy reach.
Advice for building your own:
- Keep it small. One universal truth I’ve noticed after years of hiking and messing around with packs is that if you have extra space, you’ll try to fill it with something. For the sake of comfort, weight, and subtlety, pick a bag that’s just big enough for what you need and nothing else.
- Keep it focused. It’s important to remember the role of this kit. This carry option isn’t going to pull double duty as a get home bag, or anything else. You don’t want to dig through a bunch of extraneous junk to find your weapon or have it all fly out like a busted piñata when you pull it.
- Keep it with you. Build something that you want to carry. All of this thought, money, and time won’t do you any good if it’s not at hand when you need it.
Build it, wear it, refine it.
Above: The pack’s contents are simple a Ruger PC Charger, spare magazines, fixed blade knife, and medical kit.
About the Dakine Poacher Backpack
Make & Model
Dakine Poacher 14L Backpack
MSRP
$110
URL
www.dakine.com