Emergency Communication 101 sets out to solve a simple problem that becomes massive in a disaster. When the grid goes down and cell towers fail, most people have no clue how to talk to anyone beyond shouting distance. Creek Stewart and Joe Bassett aim this book squarely at beginners who need a foundation in off-grid communication. They walk the reader through why emergency communication matters, how radios work at the most basic level, and what kinds of tools can keep a family connected when everything modern society depends on suddenly flickers out.
The Breakdown
The book begins by highlighting the fragility of modern communication systems. Stewart and Bassett explain what happens when cell networks fail in a disaster, why traditional internet-based messaging collapses, and how this immediate loss of information affects rescue efforts and family reunification. This section reinforces a core survival truth. You cannot rely on infrastructure that depends on countless external systems to function. From there, the authors introduce the concept of resilient communication using radios and satellite tools that operate independently of everyday networks.
A significant portion of the book focuses on types of radios and their practical uses. The authors cover ham, CB, GMRS, and simple walkie-talkies, giving readers the who, what, and when for each option. For beginners, this makes the overwhelming radio landscape feel manageable. They explain licensing requirements, effective range, portability, and the basic etiquette needed to operate responsibly. This is where the book shines for newcomers. It removes mystery and presents radio communication as an accessible skill rather than an intimidating technical hobby.
The authors also explore emergency power solutions. Solar generators, portable battery banks, small panels, and backup power stations all receive straightforward treatment. Instead of deep electrical theory, readers get scenario-driven advice that helps them match tools to their expected disaster conditions. For anyone unfamiliar with off-grid power but eager to protect their communication capability, these explanations provide a solid introduction.
Another key topic is building an emergency communication plan. Stewart and Bassett outline how to identify communication priorities, designate meeting points, assign responsibilities, and incorporate backup methods. They encourage redundancy and simple drills to ensure family members actually know how to use the equipment. Again, the level is introductory but practical, leaning more toward checklists and easy wins than advanced strategies.
The Verdict
Emergency Communication 101 is an excellent on ramp for those who have never touched a radio or considered how fragile modern communication systems truly are. Its value drops for anyone with even modest experience in ham, GMRS, or off-grid power setups because the content remains intentionally basic. This is not a deep dive into advanced radio theory or high-level preparedness communication practices. It is a guided tour for beginners who need clarity, confidence, and a starting point. For that audience, it succeeds. For intermediate readers, there will be little new ground. Overall, the book delivers on its promise. It teaches foundational skills and encourages readers to take the first tangible steps toward reliable communication in emergencies.
About the Book
Book & Author: Emergency Communication 101 By Creek Stewart & Joe Bassett Publisher: Adams Media MSRP: $19 paperback Pages: 224 Rating: Thrive | Survive | Die
I often meet people in my day-to-day life who do not understand why I spend my time, money, and energy constantly improving upon my family’s preparedness and self-sufficiency. The question I always get asked is, “Why do you do this?” For a long time, my answers consisted of a list of technical reasons why preparedness makes sense — but I found this never really had the impact on people I thought it would. This took me down the road of looking at the reasons why I embarked upon this preparedness journey in the first place — the why.
My passion for preparedness began well before I was born, starting with my grandfather in the World War II era. My grandfather was born and raised in Italy. He was a passionate and intelligent man who actively spoke out against the rise of Mussolini’s fascist regime. His activism quickly made him a target of the oppressive regime, resulting in threats of imprisonment and death. He spent time hiding and traveling between monasteries before he was finally able to flee to America. When he arrived in the United States, he could have simply lived his life in peace, but he instead chose to join the U.S. Army and fight for what he believed in. That tenacity for standing up for his beliefs and will to survive resulted in the creation of my family, and while my father and his brothers did not grow up living as preppers, my grandfather always instilled the importance of critical thinking, utilizing outside-the-box ideas to overcome obstacles, and the importance of protecting the family.
My grandfather was a big part of my life when I was growing up, and he instilled upon me the same values he taught his children through the stories of his life experiences. My father taught me the importance of hard work and doing everything to the best of my ability. He also shared with me his love of the great outdoors, physical fitness, healthy eating, and growing our own food in the limited space we had available to us in urban New York. Our shared love of wild places allowed me to experience the wonders of the wilderness around the country.
When I was 12 years old, I embarked on an adventure with my uncle and his family to Olympic National Park in Washington. As young people often do, I had a fight with one of my cousins while on a hike and decided to head back to the cabin we were staying in to cool off. After some time, I got bored and decided to hike back out to catch up with the group. What started with a few wrong turns ended with me wandering the expansive wilderness alone and hopelessly lost for hours.
After the water I brought along with me was exhausted, I had to rely on natural water sources to stay cool and hydrated. I utilized the knowledge I had learned in Boy Scouts and from my father to source water from the fast-moving rivers to stay hydrated and continued along the trails until I heard vehicles from a road and eventually went off trail toward the road until I came across the dirt road. I followed the road for a while until a park ranger vehicle went zooming past me. About 100 feet ahead, that ranger vehicle slammed on the brakes and threw it in reverse until reaching me. He asked my name, and when I answered, he promptly responded, “We’ve been looking for you, get in!” He took me back to my family. I spent the rest of the trip sick, as despite trying to source potable water I ingested parasites that caused gastrointestinal illness.
This was a defining moment for me. I realized how fortunate I was to be alive and decided it was important for me to learn all I could about wilderness survival. Throughout the rest of my youth and early adult life, my experiences continued to shape my preparedness, mindset, and skills. As a teenager, I worked for a taxidermist, where I learned the importance of hunting in providing protein and usable resources from animals. When I got engaged to my wife, my father-in-law — a Marine and retired NYPD police officer — taught me firearms skills and tactics to defend myself and my family. I experienced living through natural disasters, grid outages, supply chain disruptions, and lived in the New York City area during 9/11.
The culmination of all these experiences and people in my life was the realization that preparedness is not just a single set of skills or an array of cool gear — it was a state of mind and the blending of practical ancestral practices, general modern know-how, tactical skills, and the appropriate equipment that I knew how to use. It was more than being prepared in an emergency — it was living a self-sufficient lifestyle and building a community around me, both to teach and to learn from.
As you read through this issue, you will see a variety of topics, ranging from practical self-sufficiency for everyday life to tactical skills and equipment that can help all of us in an emergency. Each article was selected based on the important lessons I learned throughout my life. As you read through each of article, I encourage you to look back on your own experiences and ask yourself what shaped you into the preparedness-minded person you are today — so that the next time someone asks you why you do what you do, you can explain your why.
In Part 1 of this two-part series, a group of everyday civilians is dropped into a completely unknown environment with one objective… learn how to think, move, and act when systems fail and help is not coming. Hosted by RECOIL and OFFGRID, UNDISCLOSED is not a typical training weekend. There are no spectators. No phones guiding the way. No prior warning of what comes next.
Participants are pushed through compressed, high-intensity instruction designed to build real-world capability under stress. This episode sets the foundation. You will see participants arrive with zero context, form teams, and immediately begin training across critical disciplines including tactical medicine using the MARCH algorithm, close-quarters battle fundamentals with sim munitions, surveillance and intelligence gathering, shelter construction and camouflage, land navigation through terrain association, low-light decision making, and precision rifle problem solving under unknown variables.
The day culminates with the reveal of the scenario that drives the entire exercise… a simulated hostage situation that requires teams to move undetected, establish observation posts, collect intelligence, and prepare for a coordinated rescue operation at first light. This is about mindset as much as mechanics. Ordinary people learning how to respond when chaos replaces comfort. When leadership matters. When hesitation has consequences. Then prepare for what comes next.
Winter months bring serious threats for anyone spending time outdoors. Snow, wind, and freezing temperatures cause a host of complications, including an increased risk of hypothermia. This threat is generally understood by those with an adventurous spirit venturing in the frozen outdoors. However, even a small lack of understanding can cause an inconvenient situation to quickly turn into an emergency.
Ultimately, it doesn’t matter if you are an intrepid adventurer or a preparedness-minded individual just going about your daily life. Understanding how hypothermia can occur, what can be done to prevent it, and how to treat someone in a hypothermic state can go a long way to helping us stay healthy and prepared through the winter months.
Thermoregulation
To understand how hypothermia occurs and the impact it has on our body, we must first look at how the human body maintains an ideal temperature. The human body employs a process called thermoregulation to ensure our core body temperature is maintained at roughly 98.8 degrees F, a level that will keep our organ systems functioning at peak capacity. We experience some of these natural processes on a regular basis. When we become too warm our body will produce sweat to cool us down, and when we are cold we will shiver to produce more heat. These two examples are just a small part of the complex processes the human body employs to maintain our ideal body temperature. While efficient, extreme environmental conditions can overwhelm the body’s thermoregulation process.
Falling into cold water in the winter months can rapidly cause life-threatening hypothermia.
Hypothermia
Simply defined, Hypothermia is caused by a drop in core body temperature below 95 degrees F. This loss of core body temperature negatively impacts several essential systems in our bodies, including our cardiovascular, nervous, and respiratory systems. If left untreated, hypothermia can lead to a total failure of one or all these systems resulting in death. In most cases, if treated properly, hypothermia does not cause long-term damage; however, severe cases can cause long-term damage to body systems due to the reduction of blood flow. Long-term damage is most common in the extremities including arms, legs, hands, and feet.
Familiar trails and walking paths can easily become alien when snow is covering the ground, signs, and markers. Icy walkways can also result in slip and fall injuries. Both these situations can result in being stuck outside in the elements longer than expected.
How Hypothermia Occurs
Hypothermia can occur when the human body loses heat faster than it can produce heat. People can succumb to hypothermia in rural, urban, and wilderness environments — even while in a vehicle or building in certain conditions. Hypothermia most commonly occurs in freezing temperatures, but there are several other factors that can lead to hypothermia in temperatures of up to 50 degrees F.
Water: The body will rapidly lose heat when exposed to cold water, making falling into icy waters a common cause for hypothermia. Submersion in water that is 32.5 degrees can lead severe hypothermia and death in under 15 minutes, but water temperatures up to 70 degrees can cause hypothermia in as little as 2 hours. Wet snowfall, and rain can also lead to hypothermia when the temperatures are above freezing.
Wind: Our body is constantly surrounded by a thin layer of warm air that is generated by our body heat. This is an important part of our natural thermoregulation, and our skin is even adapted to trap more warm air when exposed to the cold by producing goose bumps. The reason the wind feels colder than the air around us is because it is blowing our protective layer of warm air away from us, leading to rapid heat loss.
Skin Exposure: Ninety percent of our body heat is lost through our skin, and much of the rest is lost through respiration. Exposed skin in cold temperatures will result in rapid cooling of our body. Exposed extremities can not only cause heat loss but also cool the blood in those areas that will circulate back to our major organs, reducing core body temperature.
Sweat: Even in the colder months, physical exertion and clothing will produce more body heat and cause us to sweat. In the moment, that sweat is doing an important job of preventing us from overheating. But it can quickly become a problem if our clothing absorbs that moisture, producing effects similar to being submerged in cold water.
Alcohol and Caffeine: Part of the human body’s response to rapid heat loss is vasoconstriction, which is the narrowing of blood vessels to slow blood flow to slow heat loss and reduce cooler blood returning to key organs. Alcohol, caffeine, and similar compounds cause vasodilation, which opens blood vessels increasing loss of core body heat.
The weight of snow and ice can bring down large tree branches, taking down power lines or blocking roadways, causing detours that can keep you out in the cold longer.
Sensitive Groups
Young children and older adults are more susceptible to hypothermia than other groups. Individuals with medical conditions such as diabetes, heart disease, and circulation disorders are also more prone to developing hypothermia. These groups can enter hypothermic states faster than others and even develop hypothermia in temperatures of 50 degrees when combined with some of the other factors mentioned above.
Children are one of the sensitive groups that can succumb to hypothermia faster than a healthy adult. Ensuring sensitive individuals have the appropriate winter gear is vital to preventing hypothermia.
Signs and Symptoms
Hypothermia occurs over multiple stages, each with unique signs and symptoms.
Moderate Hypothermia: Shivering diminishes. Loss of coordination, fine motor control, and confusion. Bluing of lips possible.
Severe Hypothermia: No shivering, Unconsciousness, rigid muscles, heart arrhythmias, and cardiac arrest.
Keeping a winter survival kit with extra dry clothing, blankets, and a fire kit can help keep you warm in the event of a vehicle breakdown. A reliable get-home bag like this Vanquest Ibex will allow you to transport all your warming essentials on foot should you need to abandon your vehicle.
Prevention
In most cases, hypothermia is a treatable condition, but prevention is the best method to keep ourselves safe in the colder months
Avoiding extreme cold is the best prevention method. While this is not always possible, there are often reasons why schools and businesses close during extreme winter weather. The best way to avoid a cold weather emergency is to stay indoors during active storms. This reduces the likelihood of being stranded in a vehicle or receiving an injury that can slow or stop our ability to get to shelter.
If you can’t avoid the cold, making sure you have the appropriate clothing and outerwear is very important. Creating layers that will help insulate our body is vital for any long-term cold exposure. Even if you aren’t planning on being outdoors for long, winter conditions can quickly shift, impacting roadways and vehicles that can lead to extended exposure to the elements.
Base Layer: Base layers typically go beneath your other clothing, wool or synthetic base layers can reduce heat loss from sweat. Wool is a natural material that animals use to help regulate their body temperature. Unlike cotton, wool retains the ability to keep you warm when wet. Wool socks are especially important, as they will keep your feet warm and reduce the absorption of sweat and help prevent damage to your foot tissue. While not as efficient as wool, synthetic materials can help wick sweat and dry quickly.
Mid Layer: This layer consists of your regular clothes, pants, shirt, etc. Again, avoiding standard cotton is a good idea, especially if you may get wet or plan on being very active and generating sweat. Materials that can absorb water from rain of melting snow will diminish our ability to stay warm, especially if facing declining temperatures throughout the day. Water resistant or waterproof pants can help prevent the loss of body heat. Keeping your core warm is vital. Your heart will be pumping blood from your core through your body, and cooler blood will be returning from your extremities. In extreme temperatures, including a fleece or insulated vest will go a long way to keeping your core warm.
Outer Layer: This consists of your coat, hat, gloves, and shoes or boots. It is important that you get the appropriate outer layers, as most “fashion” hats, gloves, and coats will do very little to protect you from the elements. An insulated water-resistant coat or parka is a great option for dealing with cold wet environments. Wool beanies and gloves can serve as a good outer layer for your head and hands or be placed under a thicker hat and glove. Insulated waterproof footwear can help keep your feet warm and dry.
Winter Ready Vehicle
People often mistakenly view their vehicles as a potential shelter from the extreme cold. While a vehicle can provide shelter from wind and snow, it will not retain heat for very long if not running. While sheltering in a vehicle may not be an ideal long-term solution, keeping some basic supplies can help reduce the risk of hypothermia.
Blankets: Keeping blankets in your vehicle, especially wool blankets, can provide a much-needed form of insulation in a cold weather emergency.
Spare Clothing: Travel with a spare set of appropriate winter clothing. That spare set of warm and dry clothing can potentially save your life.
Survival Kit: Having a survival kit, especially one that provides a means of making fire and the tools you may need to build a makeshift shelter is very valuable in an extreme cold survival situation.
Fuel: It is important to ensure your vehicle has as close to a full tank of gas as possible during the cold months as the ability to keep your heat running as long as possible is vital in an emergency.
Maintenance: Just as the winter is hard on our bodies, it is also hard on our vehicles. Making sure maintenance is up to date will help prevent unexpected vehicle breakdowns in extreme cold conditions.
Fire is a great way to produce warmth and light that can be used to signal for help. A basic fire kit with multiple fire-starting tools and some man-made tinder can help you get a fire started even in wet conditions. This kit is stored in a Tuff Possum Personal Survival Kit pouch that is made from waterproof XPac material to ensure the contents stay dry.
Treating Hypothermia
While prevention is the best option, there are things you can do to treat individuals with moderate and severe cases of hypothermia until help arrives, or you can transport the individual to the care of a medical professional.
If possible, bring the person indoors; if not, do your best to insulate them from the cold ground.
Remove any wet clothing and replace it with warm, dry clothing if possible.
Warm the person, focusing on their core using extra clothing and blankets.
Do not warm extremities first (arms and legs), as this can cause arrhythmia (irregular heartbeat).
Do not put in a warm bath, as this can cause arrhythmia.
If conscious, offer warm fluids without caffeine or alcohol as they can speed heat loss.
If the person is unconscious, begin CPR and contact emergency medical personnel immediately.
Having an insulated water-resistant coat or parka, a wool hat, and insulated water-resistant gloves will help retain more body heat for longer periods of time and help prevent hypothermia.
Final Thoughts
Hypothermia is a very serious threat during colder months, but it is something that can easily be prevented with some common sense and planning. The rapid pace of modern life often leads to people putting themselves in dangerous situations when traveling to work or running errands during extreme winter weather despite the warning systems we have in place to reduce the risk.
A synthetic mid-layer can help keep you warm and reduce moisture that may permeate your outer layers from getting to your base layers.
There are other steps we can take to stay safe beyond just paying attention to extreme weather warnings and staying indoors during severe winter weather. Ensuring your home is supplied with essentials can reduce the need for travel during winter storms. Keeping your vehicle maintained and fueled up will reduce the likelihood of breakdown when traveling in the winter. Building and keeping a winter survival kit in your vehicle can ensure you have what you need if stranded to stay warm.
Insulated waterproof boots like the Garmont Extreme Evo T8 can help keep feet warm when out in wet, snowy, and icy conditions.
The best option for preventing hypothermia is avoiding conditions that cause hypothermia. But if you can’t avoid being outdoors it extreme winter weather, then you must be prepared with the appropriate cold weather gear and armed with the knowledge and skills to keep yourself and those around you safe.
When FN America extends an invitation, you don’t decline. We were brought to the Sawmill Training Complex in South Carolina for a full day of field testing the company’s newest offerings. These products are set to be revealed at SHOT Show 2026, and FN let us get hands-on time ahead of the public release. What we found was a trio of platforms that speak directly to customer demand, whether you’re a new buyer or a seasoned professional.
With the release of their product line at SHOT Show 2026, we are now able to release details to the public! Enjoy!
FN 309 MRD: A Pistol for Everyone
The first firearm on the line was the FN 309 MRD, built from the ground up with the first-time owner in mind. It’s approachable, affordable, and surprisingly refined.
The 309 MRD features a ~5-pound trigger, a 15-degree grip angle, and polymer magazines available in 16, 20, or 10 rounds. It’s optics-ready, has a light rail for accessories, and includes a holster designed in-house by FN, removing the guesswork for buyers.
Where it really shines is in the mechanics. Racking force is reduced by 25 percent compared to most tactical pistols, and the loading process is forgiving even if a round is inserted in the wrong direction. The result is a pistol that is easy to run, maintain, and trust.
On the range, the 309 MRD felt like it came pre-broken-in. Cycling was smooth, disassembly was simple, and magazine servicing was straightforward. The slide release was a bit stiff, but it’s nothing training won’t address. Best of all, the pistol is expected to retail for under $500, an impressive value for its feature set.
The Next SCAR Evolution
FN’s SCAR rifle family has long been the crown jewel of its lineup. The new SCAR models add meaningful improvements without losing what made the platform iconic.
The bolt carrier is now a two-piece unit with a built-in hydraulic buffer. In the 7.62 variant, that translated to softer recoil and more consistent shot placement. We were pushing hits at 1,385 meters with confidence. The 5.56 version was arguably the star of the day, the hydraulic system virtually eliminated muzzle climb, so maintaining sight picture between shots was effortless.
Other updates include an extended forearm that covers the gas block, a longer integrated M-LOK rail, ambidextrous controls, QD sling mounts, and compatibility with mil-spec AR-15 stocks. The safety selector can be configured 24 different ways, letting shooters fine-tune the controls to their preference. Even better, these upgrades are backwards-compatible with earlier SCARs. FN estimates they represent about $900 in added value, without increasing the rifle’s price.
QD 556 and QD 762 Suppressors
FN also introduced two suppressors, the QD 556 and QD 762, both 3D-printed from Inconel and built to exceed SURG-cycle durability standards. They feature forward-venting (flowthrough) designs, are magnum-rated, and ship with HUB-compatible QD mounts and muzzle brakes.
The mounting system includes a tactile ratchet that confirms proper lockup. FN added wrench flats and spanner cutouts so you can attach or remove them with whatever tools are on hand, a thoughtful touch that shows the design team has spent time in the field. During testing on the SCAR rifles, performance was excellent, with no blowback issues and reliable consistency.
Final Thoughts
After a day at the Sawmill, one takeaway was clear: FN is paying attention to its audience. The 309 MRD lowers the barrier for first-time pistol buyers. The next-generation SCAR brings refinements that serious users will notice immediately. And the QD suppressors offer practical design choices that shooters will appreciate in real conditions.
FN is definitely listening to their customers, whether it’s your everyday Joe buying his first pistol or a Tier 1 operator taking care of business abroad.
For this edition of Offgrid Adventures, we’re setting our sights on two landscapes that tell very different stories of wild America. First is Jack Creek Preserve, an expansive stretch of Montana wilderness tucked between Ennis and Big Sky, where mountain trails lead deep into country still shaped by the hands of its original stewards. Then, we’ll move west to California’s Pinnacles National Park, a place born of fire and fracture, where ancient volcanic rock towers above caves and canyons. Together, these two destinations offer a study in contrast, one rooted in alpine forests and conservation, the other in shifting geology and survival of the land itself.
Jack Creek Preserve, Montana
Adventure Appeal: Jack Creek Preserve offers a rare wilderness experience in Montana’s Madison Mountains, where 4,500 acres of protected land serve as both a recreational destination and a vital wildlife corridor. Nestled between Ennis and Big Sky, the preserve connects two sections of the Lee Metcalf Wilderness, allowing elk, bear, and other wildlife to thrive in their natural habitat. Visitors can hike along the Jack Creek Trail, which provides year-round access to Forest Service land and deeper wilderness terrain. For those seeking adventure, the preserve offers opportunities to learn traditional outdoor skills, from bowhunting to wilderness tracking. Its rugged terrain, alpine lakes, and sweeping mountain views create an immersive setting for explorers who want more than just a scenic stop, but instead a living classroom in conservation and ecology.
Few places afford such an abundance of panoramic views.
Survival Readiness: Travelers to Jack Creek Preserve should be prepared for a semi-remote experience, where natural beauty comes with inherent challenges. Weather in the Madison Mountains can change rapidly, with sudden snow or storms even in summer months, so proper layering and navigation tools are essential. Wildlife encounters are likely, as grizzly bears, moose, and mountain lions inhabit the area, making bear spray and situational awareness critical. Since access is controlled by a private road requiring a permit, visitors must plan ahead to avoid being turned away. Trail users should expect rugged conditions with limited cell service, carrying sufficient food, water, and first aid. Hunters and camp participants are provided structured resources, but independent visitors need to approach the preserve as an off-grid zone where self-reliance and outdoor competency are key to both safety and enjoyment.
Montana is known for its great hunting opportunities, but it is also a dream come true for winter sports enthusiasts.
Getting There: Access to Jack Creek Preserve is unique, as it requires navigating the gated Jack Creek Road, owned and managed by Moonlight Basin. Visitors need a road pass to use this route, so planning with the preserve or affiliated organizations is essential. Those without permits can still reach the area by hiking along Jack Creek Trail (6317), which has a Forest Service easement ensuring public access throughout the year. The preserve lies between the communities of Ennis and Big Sky, making Bozeman Yellowstone International Airport the most convenient air gateway, followed by a scenic drive through the Madison Valley. Travelers should be prepared for limited signage and mountain driving conditions, especially in winter. For those attending educational programs, transportation details are often coordinated in advance, but independent explorers will need reliable vehicles and maps.
Local Perks: Beyond its rugged wilderness appeal, Jack Creek Preserve offers cultural and community connections that enrich the visit. The preserve lies within the ancestral homelands of the Salish, Shoshone-Bannock, Apsáalooke, Tséstho’e, Niitsitapi, Cayuse, Umatilla, and Walla Walla peoples, whose stewardship of the land is honored through ongoing conservation efforts. Modern visitors can engage in camps, workshops, and field schools designed to foster outdoor skills and environmental education. Hunting opportunities, offered in partnership with organizations like the Rocky Mountain Elk Foundation, emphasize the role of hunters in conservation. For those staying overnight, log cabins and structured camps provide a blend of comfort and rustic immersion. The nearby towns of Ennis and Big Sky add to the experience with small-town hospitality, western culture, and access to local Montana cuisine, making the preserve both an outdoor adventure and a cultural journey.
Pinnacles National Park, California
Tucked beneath ancient rock formations, a network of caves offers cool relief from the heat of the day.
Adventure Appeal: Pinnacles delivers a rare mix of serrated spires, condor country, and flashlight-in-hand cave crawling. Lace up for the High Peaks, where steps and handrails thread narrow ridgelines with thousand-foot perspectives over oak woodlands and chaparral. Duck into talus caves at Bear Gulch or Balconies where house-sized boulders roof cool passages and water voices echo after storms. Seasoned climbers find volcanic breccia with pockets and knobs, while wildlife watchers scan thermals for the unmistakable silhouette of California condors managed here with neighboring partners. Spring paints the slopes with wildflowers and raptor displays, winter brings clear air and quiet trails, and long golden evenings land softly on the spires.
Paths wind through narrow craigs, opening again to stunning views.
Survival Readiness: Heat is the big hazard. Summer and early fall often exceed 100 degrees with no water on trails, so plan at least one liter per person per hiking hour and favor dawn starts. Shoes with real tread matter because volcanic rubble rolls underfoot and cave floors can be slick. Carry a light for any cave route and check seasonal closures for bats and flood risk. Watch for poison oak on nearly every trail edge and rattlesnakes sunning on warm rock. Winter storms can swell creeks and trigger rockfall that lingers after rain. Cell coverage is spotty, so leave an itinerary and bring a paper map. Developed water is limited to visitor areas and the campground.
There are routes for all levels of difficulty, from well-marked trails to near-vertical technical climbs.
Getting There: There is no road through the park. Choose your side before you drive. From the Bay Area, the East Entrance comes via US 101 to CA 25 then CA 146 to the campground and visitor center. The West Entrance reaches trailheads above Chaparral from Soledad via CA 146, which narrows to one lane in places. East side trails are open 24 hours for day use, while the west gate operates daytime hours only. Expect heavy spring visitation with parking filling by mid-morning. A seasonal shuttle runs on the east side from the campground area during busy periods which helps bypass full lots near Bear Gulch. Use the official entrance coordinates when navigating.
Wildlife abounds in the park; the observant will have the opportunity to spot many species, like this Steller’s jay.
Local Perks: Base on the east for camping near the park store and showers or day trip from Salinas Valley towns with farm stands and simple taquerias. West side access pairs nicely with Soledad tasting rooms and Mission-era history along the valley. Birders can combine condor watching with wintering raptors over fields, while families enjoy short scenic loops like Moses Spring to the Bear Gulch Reservoir when caves are open. Spring wildflowers and fall grape harvest shape the vibe, yet even busy days quiet down by late afternoon as shadows climb the pinnacles. Clear nights favor stargazing once heat fades, and cool mornings carry woodpecker calls across chaparral and oak woodland. Bring patience during peak seasons and you will be rewarded.
Your Next Adventure Awaits
Have you been to Ennis, Montana, the caves at Pinnacles, or found another off-the-grid gem? We want to hear about it! Tag @RECOILOFFGRID on social media or send an email to offgrid@recoilweb.com with your stories and recommendations. Your adventure could be featured in our next issue!
Being able to rappel is an often overlooked and underappreciated skill. In a lot of scenarios, like in the mountains, burning buildings, clandestine operations or anywhere high up where things could go wrong fast, sometimes the best direction to go is down. However, falling is not an option.
The problem with rappelling kits — or abseiling as they call it across the pond — is that they are often large, expensive, and heavy. But what if a person had something that is the opposite of all these things? A rappelling kit that is practical in size, reasonable in cost and lighter than most other backcountry gear? Well, I’ve been on a mission to accomplish just that.
The kit packs into a Condor MOLLE water bottle pouch and includes two sling harnesses, three Black Diamond carabiners, a Sterling Technora escape rope, Sterling accessory cord (tied into large and small loops), a compact figure-eight descender, and a length of 550 paracord.
This DIY kit I created weighs less than 3 pounds, contains enough rope for a single-line 45-foot rappel, and costs roughly $250. For context, the average climbing rope is around $150. That is for about 65 feet of rope the width of a thumb. The average cost of a so-called “micro rappelling kit,” prebuilt and intended for military or first responder use, is often $600 to $1,000, depending on the setup. These kits are also usually designed for a specific application. An example of this would be escape kits (we will get to these later), which are oriented toward firefighters. The cost of these kits is in the high $500 range. They are built specifically to escape from building windows and not for much else. Plus, they are not retrievable from the bottom.
Kits like these are fine, but they tick only two of the three boxes I mentioned above: size, weight, and cost. My kit beat out all the commercial kits, not just in size, weight, and cost, but in every possible category.
The Plan
As someone who has been climbing for many years, and an avid outdoorsman and survivalist, possessing something like Batman’s toolbelt is an appealing prospect. (Batman was always able to get himself out of any situation.) You might not be able to carry everything Batman strapped to his belt, but a kit like this — lightweight, fast to deploy, and practical — is within reach, and one I think even Batman would be proud of.
Regarding climbing and rope systems, the standard measurement is the Kilonewton (kN). This is weight measured in a quick loading session, such as a fall. However, it also applies statically (under consistent load). In rescue, the safety margin is often 10:1, meaning a system must be built to withstand over 10 times the load intended to be put into it. That really is overkill, but unlike many kits on the market, I wanted to beat that standard as well and build my system as close to that standard as possible.
To rappel, a person needs five things: a descending device, carabiners, a harness, a rope and an anchor. First, a person needs a device to descend to the ground with, usually by creating friction. Second, a person needs devices that create attachment points, such as carabiners. Third, a person needs the ability to attach him or herself to the system. Fourth, a person needs a rope, cord or wire to travel down as the medium of travel (other than the air). Finally, a person needs the ability to attach the rope to the top. This kit contains all of these essential pieces to affect a rappel.
Kilonewtons
kN, or Kilonewtons, are the standard measurement in climbing. They symbolize 1,000 newtons of force and are used because they measure the peak load applied to equipment during a fall. A newton is equivalent to the force required to accelerate one kilogram of mass one meter per second, squared.
The Descender
The Micro-Rappel kit uses a micro rescue figure eight, certified to hold 30kN. The one shown is an Amazon special, $17, but I would recommend the Rock Exotica MiniEight. The only problem with the Rock Exotica is this would drop the final minimum breaking strength (MBS) estimate because it is “only” rated to 14kN. For those nervous, that is still plenty.
Most descending gear has trouble using smaller ropes. This is because small ropes create less friction in the device. Since these pieces of equipment are designed for standard rope widths, the utilization of a figure eight or similar tool was necessitated. These devices are often used by canyoneers and rescue teams because friction can be added on the fly, during a rappel. They also seem to work better with smaller and slicker rope, even when the rope is wet.
The Carabiners
The climbing carabiners I used in the kit come with the standard climbing carabiner rating of around 25kN. Considering that a person in a system is generalized to be 1kN, or around 224 pounds (remember that number for our 10:1 comparison later), 25kN is more than enough. I went with the tried-and-true Black Diamond HotForge Screwgate light-weight carabiners. These are CE EN 12275 certified to 24kN, horizontally when they are closed. They are UIAA confirmed to be 25kN.
Equipment ratings are important to understand when building a kit like this, or when purchasing any gear. In the world of climbers, arborists, and alpinists the standard rating system for gear is the UIAA (International Climbing and Mountaineering Federation). Gear with a UIAA certification that is up to date means that the specific equipment has passed tests that meet safety standards set by UIAA. Each individual product line must pass, and ratings do expire. These ratings confirm what levels the manufacturers claim their equipment to test at. Products that are certified can be searched on the UIAA website.
The Harness
The second bulkiest part of a rope system is the harness, and I needed one that would fold up super small into the kit. To do this, I employ a nifty quick-fitting hasty-field-harness technique, utilizing about 11 feet of tubular webbing tied into a loop with a backup enforced water knot. Rock-N-Rescue certifies their tubular webbing at about 17kN. When doubled up, that is often the strongest anchor a person can create, getting up to almost 40kN.
The water knot is the strongest and simplest way to tie webbing end to end or around an anchor. Tie a loose overhand in one end, then thread the other end back through, tracing the knot. Cinch it tight, keeping both strands flat. Finish with safety overhands on each tail for added security and a clean look.
This hasty field harness is fast to set up and comfortable to wear. Start with a sling of tubular webbing held in front. Bite one end to free your hands, then run the bottom of the sling between your legs (avoiding a painful cross-through for men). Bring each side around your waist so a single strand rests across your lower back. Join the two waist loops in front, split the bite held in your teeth, and thread each side through the waist loops. Release the bite and pull the new loops together to form the tie-in point. Clip in with a carabiner or basket hitch, and the harness is secure under tension.
Water Knot
Water knots are used specifically for flat webbing or tubular material. They can be used to create gear loops, building anchors, and other outdoor and camping tasks. When using a water knot, it is essential to leave long, 3- to 6-inch tails on both ends to prevent slipping.
ope is not only the weakest point, but the bulkiest item in most rope systems. To reduce bulk, the kit needed a small rope, but that would inevitably make it even more vulnerable. Smaller ropes are weaker and less durable under tension. There were two options: dynamic and static. In the climbing rope world, these two varieties translate to stretchy rope and non-stretchy rope, respectively. Climbers use dynamic rope because it stretches during a fall, lessening the forces on the climber.
Dynamic ropes are rated weaker than static ropes since they are designed to spread all the force across their length. This means the longer the fall, the less force is present in the entire system, and the rating does not need to be that high. While this is good for a high wall climber, it also makes rappelling and working statically on a rope more difficult. It can be frustrating to rappel free hanging, especially if it stretches under tension — it tends to bounce. It also means that, once at the bottom, the user has difficulty getting their equipment to disengage the rope. That rope will spring back up into the air as it tries to return to its regular length. None of these are good qualities. For the Micro-Rappel kit, static was the better option: stronger and with less stretch.
After clipping in, toss the bag down after the main rope. The 550 cord will pay out as it falls, laying neatly in the rappel path. While descending, be prepared to clear the cord from any branches or obstacles it snagged on the way down.
The challenge was finding a rope small enough to fit in a sock, yet strong and durable enough to meet safety standards. Standard 6mm accessory cord, rated at only 7–8kN, was inadequate for single-line rappels — usable in a pinch, but far from reliable. Doubling it met strength requirements but cut range and bulked the kit. The breakthrough came from firefighter escape systems, which use advanced materials like Technora, a Kevlar variant that is incredibly strong, heat resistant, and abrasion resistant. Technora ropes are two to three times stronger than nylon of larger size, making them ideal for this kit. I eventually found a 6mm, 50-foot Sterling Technora rope rated at 21 kN, perfect for compact carry and far stronger than accessory cord. To round out the kit, I added an extended rappel system with a loop of standard 6mm cord, basket hitched through the harness, for comfort and stability during rappels with a heavy pack.
Solving the retrieving conundrum was easy. 550 paracord would be super slim and easily used as a pull cord. The only weight it would ever be put under was pulling down the top end of the rope. It is also cheap.
To use the pull cord, I pull the coiled main rope out, wrap it around something as my anchor, then throw the rope down. Then, I hook the end of the 550 cord to the carabiner in the anchor and throw the bag containing the cord down. At the bottom, I just pull the line, and it will carry the carabiner and the rope down with it.
550 paracord is often advertised as (hypothetically) holding 550 pounds. In the case of climbing, there is a reason kN is used, instead of pounds. The actual weight on equipment in a system multiplies significantly when any velocity is added. 550 may hold a person’s weight statically (hanging still), but if a person hops on the cord, it can snap. As a pull cord, there is no weight, other than pulling the system from the other end. 550 pounds are usually more than enough to pull free a blocking knot at the top, from the bottom.
Harness Setup
Having a secure harness is of the utmost importance in regards to safety. If you feel uncertain about any of these steps, reach out to your local climbing community for proper hands-on instruction.
For the anchor, the kit uses the rope itself in a “beaner-block” technique, to save space and weight, and allow retrieval of the line, at the cost of strength. This technique is where the top end of the rope is tied to a carabiner and wrapped around the object being used as an anchor, whatever it is. Then, the carabiner is clipped back to the rope, creating a tightening loop, or slipknot, around the anchor. By tying the paracord to the carabiner, I could use the line to pull the rope down from the bottom.
One end of the paracord is tied inside the bag through the drain hole, while the other is finished with a figure eight knot.
Technora is an aramid fiber, meaning it is highly heat resistant; it does not melt together with itself. Therefore, ropes made with it should never be cut to length unless the user knows how to properly seal the ends. If the rope is not properly sealed, or “whipped,” the core and the sheath of the rope can slip. This can result in reduced strength and durability of the rope, and potentially failure to function as advertised.
The cord is then “coiled” into the bag — stuffed in loosely by handfuls — until fully packed. The free end with the knot is clipped to the anchor carabiner.
This kit also utilizes a small loop of that accessory cord as a prusik. Prusiks are loops of cord, or rope, usually thinner than the actual climbing or rappelling rope being used. These range from a foot or so in length, to several feet, and are basically climbing multi-tools. I used this for a “safety,” or a third hand, under the rappelling device. As the prusik isn’t weight bearing, it doesn’t factor into our final safety ratio calculations.
To retrieve the rope from the bottom, the paracord is pulled, from the bag end.
Bringing It Together
Considering all the ratings in the system, the last thing to do was to look at every piece, find the weakest link, then divide to find my safety ratio. For those following along at home, the accessory cord is easily the weakest. However, I said I doubled this up and utilized a basket hitch. Mathematically, this tends to almost double the strength of the cord, bringing the strength to about 16kN, the last number in my system. This means that the kit’s technical weakest point (other than the knots) is about 16kN. 16 divided by 1 is 16. I was not very good at math in school, but to me that sounds like a 16:1 safety ratio. Better than the standard 10:1. I like those odds.
There are a few important considerations to note after assembling this kit. First, many ropes lose significant strength at the knot, and Technora is especially prone to this — sometimes by as much as 40 percent. Factoring that in, the rope’s strength drops to around 10–11kN, still 10 to 11 times the expected load.
It may take some force to break the anchor loop free from being cinched onto the tree or solid point at the top.
Second, this is a homemade kit built from individually sourced parts. Prices, availability, and setup may vary, so anyone attempting a similar build should research their gear carefully, understand its limitations, and consider the situations in which they expect to use it. Anchor systems are another variable. In urban settings, investing in a firefighter-style anchor hook designed for doorjambs or window corners may be worthwhile. Rope length is also critical: even if the rappel itself is less than 45 feet, additional rope may be needed to secure anchors around solid structures or to reach an ideal tie-off point.
I also added a spare harness to the kit so I can belay or lower another person in an emergency. In that case, my own harness would serve as the anchor. Rescue knots such as the munter-mule-overhand are useful here, since they allow you to lock off and then lower a person from a carabiner or a descender. Using the same rappel gear, I can clip someone else into the system for lowering, or reconfigure it mid-descent into a 3:1 haul system to raise a person or heavy gear.
For carrying the kit, I found a Condor MOLLE water bottle pouch worked perfectly. It’s roomy enough to avoid cramming gear inside, includes a drain hole at the bottom, and with a length of 550 cord tied off through the hole, it doubles as a throw bag.
Lastly, I wanted extra durability for the rope. Since this is an emergency kit that won’t see frequent use, I still needed peace of mind for when it is called upon. A 6-foot length of spare tubular webbing solved that problem. By threading the rope through the webbing, I created a movable protective sheath that can be slid into place over edges or rough surfaces, adding an extra barrier where abrasion is most likely.
The Prusik Knot
The prusik knot is an adjustable hitch that grips the rope, often used as a “third hand” for rappelling. To tie it, wrap a loop of cord around the rope two or three times, passing it through itself each time. More wraps create more friction. Cinch and dress the knot, then clip it with a carabiner. When attached below the descender, it locks the rope if the rappeler goes hands-free.
The basket hitch is one of the simplest and strongest climbing hitches, since it uses no knots beyond the sling ends. To tie it, pass the sling through the harness tie-in point and clip both ends into a carabiner.
Basket Hitch – Step 1Basket Hitch – Step 2
The Figure-Eight Knot
The figure-eight knot is the standard tie-in knot for climbing, used to secure a rope to carabiners or harness points. To tie it, form a bight, wrap it around itself, and pass the end back through the loop. Cinch and dress the knot for maximum strength. I use it to attach the rope to the anchor carabiner.
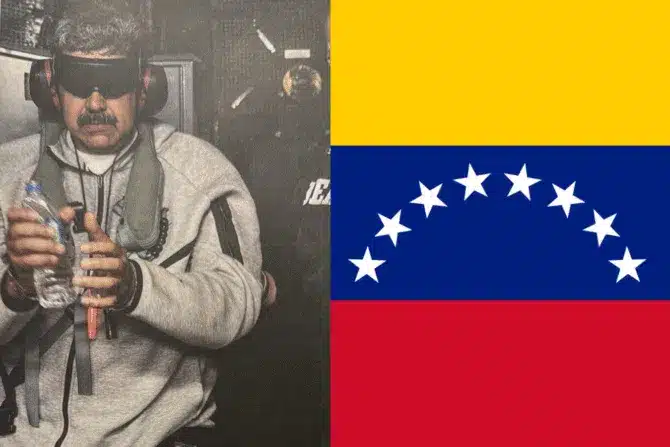
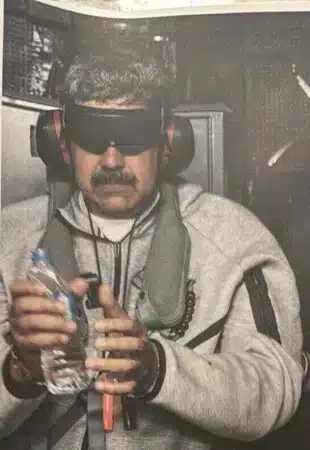
On the first sleepy Saturday of 2026, the world woke up to news that was surprising if not totally unexpected. Venezuelan leader Nicolas Maduro and his wife were captured in a daring overnight raid into that nation’s capital, executed by US military and law enforcement personnel following a weeks-long buildup of American power in the region.
As we write this, the Maduros are being escorted to New York per a recently unsealed indictment filed with the US Justice Department.
While the ripple effects of this maneuver are bound to be complex and polarizing, it is—from a technical and tactical standpoint—worth taking some time to examine what goes into planning and executing an operation like this, the equivalent of geopolitical open-heart surgery.
The decision to simply “cut the head off the snake” offers some advantages over a large-scale invasion but requires precise planning and bold execution. Tying this to a criminal charge meant integrating elements of the Justice Department, in this case the DEA, with the military elements in charge of conducting the raid.
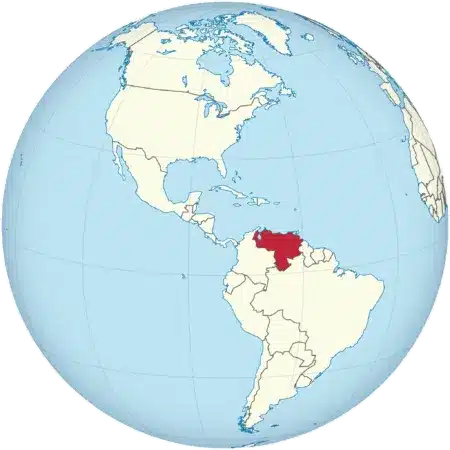
Venezuela marked in red
It also required a premium on bringing the Maduros out alive to face their charges, as opposed to a counterterrorism operation under traditional military rules of engagement which may not require capture. Having said that, there is some preliminary information circulating that indicates Trump left open the option of killing Maduro, if the situation required.
Bringing in a fugitive, regardless of where they are, mandates that you know a few key pieces of information. Foremost among them is where your target will be when you intend to pick them up. In the case of a criminal here in the US, law enforcement establishes known associates and familiar hangouts, often utilizing a combination of surveillance techniques from tracking cell phones to old-school stakeouts to identify routines and patterns-of-life. This allows officers and agents to determine the best place to make an arrest.
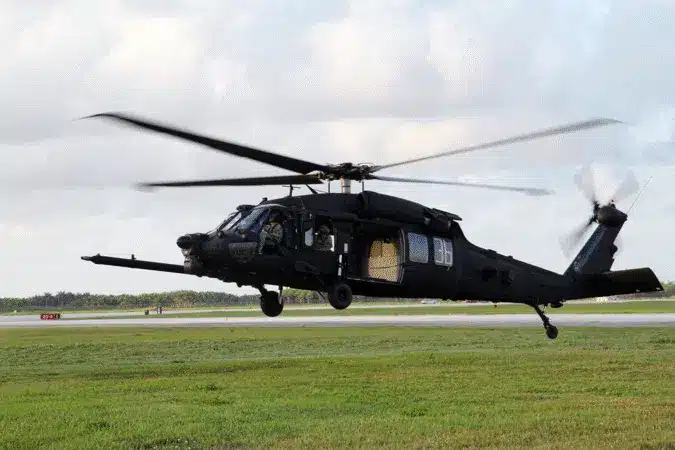
Black Hawk from the 160th SOAR
But, when targeting foreign heads of state, the process is exponentially more complicated. There are well-documented cases in recent history of world leaders using body doubles, secret bunkers, and large contingents of armed guards to protect themselves. This requires an intensive intelligence effort leaning heavily on a combination of strategic intelligence assets.
Examples of this include satellite imagery, electronic surveillance of cellular and digital activity, drone flyovers for real-time photo and video collection, and we suspect heavy use of human informants from within Maduro’s inner circle.
But mission success requires more than getting your target. It requires protecting your own forces in the process. An airborne incursion is usually the fastest way to reach your objective. Moving overland on foot or in vehicles through hostile terrain equates to an increased risk of exposure or capture for the raid team. Again, maximum information is key. In military parlance, the process is referred to as IPB – Intelligence Preparation of the Battlespace.
Intelligence Preparation of the Battlespace (IPB)
Identify target patterns of life
Validate location using multi-source intelligence
Assess terrain, airspace, and weather constraints
Identify enemy air defense and early warning systems
Establish abort criteria and contingency plans
The multi-purpose amphibious assault ship USS Iwo Jima transported Venezuelan President Nicolás Maduro back to the USA
The IPB process is a methodical analysis of myriad planning factors. Some of these might be obvious, such as the number of enemy soldiers in an area, or what kind of weapons they have. But operational planning requires knowing far more than just the enemy. Are there high mountain peaks that helicopters will have to account for in their flight plan? How much moonlight will there be – enough to illuminate ships on the water or aircraft in the night sky?
Once a rigorous intelligence process has been completed, surgical precision is paramount during the mission itself. In this case, helicopters carrying special operators were required to approach over open water to reach a coastal city equipped with anti-aircraft weapons.
This posed a significant risk to the raid force that was mitigated by a multi-phase execution prioritizing the destruction of those anti-aircraft batteries. Electronic warfare planes flying overhead could disrupt RADAR, radios, and other electronic warning equipment, allowing a package of strike aircraft to get close enough to physically destroy anti-aircraft sites. This SEAD/DEAD mission would be tasked with destroying anything that could either shoot at or ‘see’ approaching helicopters.
Once the AA weapons themselves are neutralized, helicopters carrying the raid team, blocking force (to secure the ground around the target building), and/or quick reaction force (backup for the raid team if they encounter heavy resistance) could reach the target location, hit the ground, and apprehend the Maduros.
It is likely that the raid team was receiving real-time intelligence updates in the helicopter while en route to the target location, with parameters established to abort the operation, or use an alternate plan, if the situation changed substantially during the approach.
There are multiple fine details of the Venezuela plan and its execution that we may never find out. But it’s clear to see that months of planning and intelligence collection, along with the work of hundreds-if-not-thousands of highly skilled Americans in the military and intelligence community, enabled an incredibly bold, seemingly smooth operation that single-handedly changed the course of a country in several hours without any loss of American life reported at time of writing.
This operation puts a fine point on exactly what’s possible when the right people and the right technology are unified by an effective plan carried out with precision and daring.
Old ammo cans are the Tupperware of the emergency preparedness world. Although they were originally intended to carry loose ammunition or machine gun belts, we’ve seen these inexpensive stamped steel boxes repurposed to contain everything from tools and camp cooking utensils to fishing tackle, portable radios, and medical gear. Some DIYers even outfit them with batteries and USB ports to function as a portable charging station, or with speakers to serve as a boombox. Washington-based gear company Ignik Outdoors came up with their own ammo can contraption — a portable propane fire pit called the Ignik FireCan — and has continued to develop and upgrade it with some clever features.
FireCan: Bringing the Heat
The concept of converting an ammo can into a mini propane fire pit is nothing new. If you’re handy, you can make one by drilling a hole in the side of an ammo can, inserting a capped piece of pipe with some smaller holes drilled in it, and adding a fitting on the end to attach a propane tank. You can buy these cans in the form of DIY kits or complete units from a variety of vendors. You can also make a shotgun with some pipe, a roofing nail, and a 2×4 from the hardware store… but a Beretta 1301 it ain’t.
The moral of the story is that DIY projects are fun and can save you some money, but sometimes it’s preferable to have a thoughtfully-engineered product with added features and quality-of-life improvements. Such is the case for the Ignik FireCan, especially its Deluxe package.
Ignik’s standard FireCan is a powdercoated steel can with mesh grates cut into each side to increase airflow, heat transmission, and visibility of the flames. It also has heat-resistant silicone carry handles and four folding legs that lift the can off the ground, reducing the risk of your fire scorching the ground or spreading out of control. Rather than a basic screw-on propane connector, it has a locking quick-release fitting and includes a matching 5-foot hose with adjustable regulator. After removing the can’s lid and unfolding its legs, just connect the regulator to your propane tank (or one of Ignik’s convenient Gas Growlers — more on that later), click the other end onto your FireCan, light it through the included access hole, and enjoy your portable heat source.
For more radiant heat, you can fill the can with some fire rocks to increase its thermal mass. Ignik offers tumbled lava rocks (5 pounds) as well as ultra-lightweight ceramic “Moon Rocks” (1 pound) that can be used to fill your FireCan. Each of these also varies the flame pattern to create a more natural fire pit experience, as opposed to the propane burner’s symmetrical jets.
A Note About Fire Restrictions I live in wildfire country, and it’s normal for the local forestry service to issue bans on open campfires during the dry months. This is a major bummer for anyone who’s planning a camping trip, because sitting around an LED lantern doesn’t have the same appeal as sitting around a warm fire. Thankfully, there are usually exemptions for propane-fueled fire pits and stoves — this means that the FireCan is one of the few ways to safely and legally have a fire at the campsite during wildfire season. Check your local laws to see if this is also true in your area, but if it is, it’s a major selling point for the FireCan (and other propane fire pits).
The FireCan Deluxe
Recently, Ignik introduced the FireCan Deluxe, which improves upon the regular FireCan in several areas. The first thing you’ll notice is its brushed silver finish, which indicates stainless steel construction. This should be more corrosion-resistant than the black powdercoated carbon steel, even if it gets a little scratched and banged up over time. But its biggest difference is revealed when you open the lid.
Beneath its lid, the FireCan Deluxe features a removable grill insert that’s constructed from stamped stainless steel. Its inner surface is ramped and slotted to funnel drippings down gutters and into a removable drip tray that sits in a slot at the base of the unit. Four hooks in the corners of the grill insert hold a 5 by 10-inch rectangular wire grill — the perfect size for hotdogs, hamburgers, chicken breasts, veggies, and other small items. Granted, you won’t be making a meal for the whole family on this setup, but it’s perfect for cooking a quick meal for one or two people.
Tony Peel doesn’t look like your typical radio operator. No uniform, no government badge, just a guy who knows his stuff. He’s the founder of Wyoming Survival, a former survival instructor, a blacksmith, and a licensed General HAM operator. That last bit matters because, in the world of radio communications, a General HAM license is your gateway to operating on high-frequency (HF) bands — a skillset that stretches far beyond the limits of the popular Baofeng handheld radios many preppers stash in their bug-out bags.
On day one of the HF Operations class, Peel wasted no time breaking down the fundamentals, starting with a question: What is HF? Short for “high frequency,” it refers to the spectrum of radio frequencies between 3 and 30 MHz. Unlike UHF and VHF radios, which require line-of-sight to communicate and often struggle through dense vegetation, HF can reach across continents. With the right setup, it’s entirely possible to connect with someone 5,000 miles away. That’s not just theoretical, it’s a reality for pilots, NGOs, military units, and even banks that use HF for secure, long-distance communication.
Most handheld radios, like the Baofeng, operate on UHF and VHF bands. If you’ve used one before, you’ve probably noticed that getting any kind of range without a clear line of sight is a struggle. Trees, hills, and buildings devour those signals, and if you’re lucky, you might hit one mile without special gear. With a jungle antenna, a specialty setup for denser environments, you can push it to two miles, but that’s still a far cry from the kind of distance HF is capable of. Peel laid it out bluntly, HF isn’t just different; it’s a whole new ballgame.
HF Radio setups come in many flavors — from base stations that require more permanent fixed positions, to some rigs as small as a deck of cards. Each with their own strengths and weaknesses.
Understanding the Waves
When you key the mic on an HF rig, it sends out a frequency that propagates as a wave. Imagine ripples spreading out in water. The space between the peaks of those ripples is the wavelength. On higher frequencies, the peaks are closer together, and on lower frequencies, they spread out. This matters because antennas are built to match those wavelengths, specifically, half-wavelength antennas for optimal transmission.
Peel dove into how HF propagates and explained the difference between ground wave versus sky wave. While ground wave travels along the Earth’s surface, sky wave bounces off the ionosphere, an atmospheric layer charged by the sun. This is where HF shines. Its signal can reflect off the sky and hit far-flung locations, sometimes across entire continents. That’s the kind of range that makes HF indispensable when infrastructure becomes inoperable.
A student deciphers a transmission utilizing a one-time pad key.
Solar Maximum & the Ionosphere
The ionosphere is key to HF operations. It’s made up of four main layers: D, E, F1, and F2. During the day, all four layers are active, but at night only D and F2 remain. That shift impacts how far your signal travels and which frequencies work best. Peel also explained the role of the solar maximum, an 11-year cycle where sunspots pepper the surface of the sun, charging up the ionosphere and boosting radio propagation. During this period, HF signals reach farther and with more consistency. But it’s a double-edged sword. Solar flares, those massive bursts of energy from the sun, can disrupt communications entirely, almost like someone flipping the off switch.
Despite the damage of this coax cable, it is still more than capable of sending and receiving HF transmissions.
The 80- to 40-meter bands are where things get really interesting. These frequencies are the most stable and reliable, especially once the solar maximum wanes. Peel pointed out that while the 40m band typically gets you around 700 miles during the day, it can stretch to 1,500 to 2,000 miles at night. For anyone relying on HF for critical communication, understanding these cycles is important survival knowledge.
Tony Peel illustrates how radio frequencies can be bounced off the ionosphere to achieve incredibly far transmission distances.
Band Breakdown & NVIS
Peel also covered the different HF bands:
80m Band: Ideal for nighttime communication
40m Band: Great for daytime local communication and nighttime long-distance (DX) communication
20m Band: The go-to for long-distance (DX) communication
He then explained Near Vertical Incident Skywave (NVIS), a method that uses steep takeoff angles to bounce signals almost straight up and back down, perfect for regional communication. NVIS works on the 40m band during the day and the 80m band at night. It requires a horizontal antenna placed low to the ground, sometimes directly on it. Inverted V antennas also work for this setup. To find the right frequency for NVIS, Peel recommended using prop.kc2g.com.
Peel also reminded the class that HF isn’t your cell phone; there’s no trillion-dollar infrastructure guaranteeing you’ll get through. It’s just you, your radio, and the atmosphere.
By using a device called an antenna analyzer, the antenna can be shortened or lengthened, fine tuning it for whichever band is being used for transmission.
Setting Up for Success
Before setting up our own NVIS system and testing it out, we went over the gear required to make HF work:
Transceiver: Japanese-made models are recommended. A 100W transceiver with MARS modification can operate during solar minimums. Built-in tuners and sound card interfaces are a must.
Antenna: Di-pole antennas are the standard. Multi-band options exist, but a simple dipole is often the most effective. Common configurations include inverted V, upside-down L, and NVIS.
Coax Cable: Less than 100 feet of 50-ohm cable is ideal.
Tuner: Essential for matching your antenna to the radio
Power Source: 12-volt systems, solar with a charge controller, or battery with an inverter
Grounding: Critical for stability and safety
Lightning Arrestor: Installs between antenna and coax to prevent damage
SWR Meter: Used to measure signal efficiency
Midway through day one, the class tuned into the Noontime Net, checking in with call signs and running tests. Digital versus SSB communication was also covered. Digital is more reliable, offering encrypted messaging, low power consumption, and even inbox-style messaging. Peel demonstrated WinLink for sending texts and weather reports, VARAC for mesh networking, and FLDIGI for real-time chat and Morse code translation.
Insulated wire is being measured to the appropriate antenna length.
The day wrapped up with a hands-on exercise, setting up radios, deploying antennas, and sending digital messages across the airwaves. The class got a taste of SOTA (Summits on the Air) and POTA (Parks on the Air), two international amateur radio programs designed to push the limits of field-based HF communication.
Stealth, Security & the Dark Side of HF
The second day opened with a discussion on tactical communications planning. For the uninitiated, this means creating a step-by-step guide for how a team or group will communicate during operations, emergencies, or grid-down events. It outlines which frequencies to use, when to switch channels, call signs, fallback plans, and how to keep messages clear but secure. Without one, teams risk confusion, missed messages, and potentially dangerous delays.
HF has what Peel called a “dark side.” Anyone listening on the same band can hear your transmission. That makes security a real concern, especially if you’re passing sensitive information. Encryption might seem like the obvious answer, but it’s illegal on amateur bands in most countries, including the United States. That’s because the amateur radio service is meant to be open and non-commercial. Only licensed entities, like businesses or government agencies, can legally encrypt their transmissions.
Even if encryption were legal, there’s another hurdle: the key. Encryption only works if everyone has the same key, and if that key is compromised, your messages might as well be public.
One workaround is the one-time pad — an old-school cryptographic method invented in the early 1900s and still considered unbreakable if used correctly. It involves pairing your message with a random key that is used only once and then destroyed. Each letter or character in the message is shifted by a corresponding character in the key. Without that exact key, deciphering the message is virtually impossible. But the catch remains, both sender and receiver must have matching pads ahead of time.
Peel also mentioned PTE (Paranoid Text Encryption), a software tool that can encrypt text files on a separate device before they’re sent over radio. While still operating in the legal gray area on HAM bands, it’s a tool worth knowing for emergency use.
Many metallic wires can be used as an antenna, including this scrap electrical wire taped to the frayed end of a coax cable.
From a hardware perspective, antenna placement was another key topic. An HF antenna should be oriented broadside to the direction you want to transmit or receive. This positioning aligns with how radio waves radiate, strongest perpendicular to the wire, weakest off the ends. The class also covered the Wilderness Protocol, a practice where radio operators periodically monitor emergency frequencies (especially at the top of each hour) to give lost or stranded individuals a chance to reach help. It’s a grassroots system, not a formal emergency service, but can be a lifesaver when cell towers are far away. Another critical point, without specialized gear, you can’t determine where an HF signal is coming from. That’s where direction-finding equipment comes in. Peel introduced tools like the KrakenSDR, a multi-antenna software-defined radio that triangulates signals based on time-difference of arrival. There are also simpler setups using rotating directional antennas or signal-strength meters, but these require skill, space, and patience.
Then came the build. We were shown how almost any metal wire — speaker wire, house wire, even barbed wire — can be used to make a functioning antenna. The class assembled a half-wave antenna, which is cut to half the wavelength of the frequency you’re using. This length allows the antenna to resonate efficiently, sending out a stronger, clearer signal. Power conservation was also emphasized. Transmitting at high power makes you easier to locate via direction-finding. Running at the lowest effective wattage helps you stay off the radar. And as for antenna insulators? Peel debunked the myth that you need ceramic or fancy gear. Dry paracord works just fine.
The day ended with a practical test: sending and receiving messages between two groups on opposite sides of a mountain in Wyoming. One group used a traditional HF radio and antenna. The other used what Peel called “disaster wire,” which in our case was scraps of electric fence strung up with a frayed coax cable. Using NVIS, the groups successfully transmitted voice and digital messages over a 15-mile stretch of terrain. No cell service. No towers. Just raw capability.
Final Thoughts
Although the idea of operating an HF radio can seem intimidating, with a knowledgeable instructor like Peel, the process turns out to be pretty straightforward. It’s also reassuring to know that the ability to communicate is only a few steps away. This class brought together a wide range of students — from licensed radio operators looking to fine-tune their setups to complete newcomers like myself. Every one of us walked away with new skills and a better understanding of how radios can be used effectively.