We might like to believe we’ve encircled ourselves with people we can trust, but is there really an accurate way to identify those attempting to hustle you? We deal with liars on a daily basis. Some are easy to spot, while others are like the Ernest Hemingways of bullsh*t, and catch us completely off-guard. If you know what to look for, however, the odds of being able to sniff out the fakes go up exponentially. We’ve all heard the popular lore about eye contact and various other rumored honesty tests, but the art of professional lie detection is an area of study with its own unique rules of engagement. One name that stands out in this field is David Matsumoto. Not only has he created a scientific basis for lie detection and threat assessment, but he’s also backed it up with years of fieldwork and credentials to prove he’s one of the most reliable resources out there. David spoke to us about the techniques he teaches agencies around the country to uncloak the bad actors and keep people safe. We walked away from our discussion not only a bit more cognizant about ourselves, but also very leery about what the prospects of human interaction are shaping up to become.
Our Interview with Dr. David Matsumoto
RECOIL OFFGRID: Tell us about your company and what you do.
David Matsumoto: Humintell is a company that does consulting, training, and applied research on behavioral indicators associated with deception detection, interviews and interrogations, social influence, and threat assessment. We do a lot of applied research for government customers in those areas and a lot of training for intelligence, security personnel, and law enforcement all around the country.

Above: David’s company offers numerous online courses and live workshops on reading people, threat assessment, micro-expressions, and a variety of other topics at www.humintell.com. (Photos by Conrad Bui)
How did you get into this field of study?
DM: Like most things in my life, it was happenstance. Basically, when I was an undergrad at the University of Michigan, I was asked to be part of the honors program in psychology, which required me to do research that I had no idea how to do. I did a study on how young kids can understand the emotional content of what their caretakers are saying, even though they don’t understand the words. That led me to further research on nonverbal behavior. Over the last 40 years, I’ve been doing that kind of research which has led me to the various kinds of things I do today.
What led me to my company was, even before Sept. 11, myself and other colleagues in my field were often asked by the government to opine on various videos of individuals around the world and whether they were lying or not. They asked us to discern what kinds of things may be going on in their minds. That went on and off for a good 10 to 15 years until Sept. 11 happened. When it did, behavioral detection-related things for security became a very hot topic. We were asked to do more stuff, so we set up the company to deal with requests that were coming to us from the government to be able to handle that kind of information.
What’s your educational background?
DM: I have a bachelor’s degree from the University of Michigan in two majors, psychology and Japanese, and I have a master’s degree and PhD in psychology from UC Berkeley.
You are a college professor as well, right?
DM: [Laughs] That’s what they keep telling me. Until they fire my ass or something like that.
What sort of courses does your company offer to the general public?
DM: We have stand-alone online courses on how to basically read facial expressions of emotion, and other topics like reading people. There are also general topics about deception detection, threat assessment, and things like that, so we have a menu of online general courses for people who come to our site. For certain customers, we have more customized, in-person training where we go and teach people how to use these techniques and knowledge in interviews and interrogations.
What kinds of companies/agencies typically utilize your services and for what purpose?
DM: We do a lot of work with law enforcement. They’re probably our biggest customer. They learn about the latest behavioral indicators related to mental states. Our stuff is quite different than what others in this field purport to do. We base what we do on indicators that are validated in science and vetted in the field because we’ve been doing this kind of training of operators for a long time and we know a lot of the science.
Law enforcement learns how to apply and read various behavior indicators in terms of when they’re conducting an interview or interrogation with anybody — suspects, witnesses, informants, assets, victims, etc. We’re very fortunate to work with the State Department, diplomatic security, Marine Corps, and different areas of the federal government. In the past, we were doing a lot of work with intelligence operators as well. In fact, we’ve also done a lot of applied research for intelligence agencies to find what the best practices are in behavioral indicators associated with certain types of mental states to help information solicitation. We have a lot of customers in that area of work.
What specific behaviors do you teach people to identify and interpret?
DM: The content of our work runs the gamut of all kinds of behaviors. With regard to deception detection, we focus on two specific areas. The first is facial expressions of emotion, how to read those, and how to read what are called micro-expressions. And a large part of our work is also focused on linguistic and grammatical features of speech. There are certain types of linguistic and grammatical features of speech that our research has shown are consistent across cultures and languages to be indicative of deception and veracity. So, a large part of our research and training is in those two buckets of content.
Within the nonverbal, whenever we have the ability, and given the customer requirements, we train on other kinds of nonverbal behaviors like gestures, whole body movements, postures, voice, and other things.
Are there any well-known cases you’ve worked on you can tell us about?
DM: There are well-known bad actors who’ve been in the news where we’ve played a very small part because, as you know, there’s a large number of excellent operators who are hard at work tracking them down. A lot of our original work in this area was done for an intelligence agency, in which someone we worked with was one of the chief interrogators at Guantanamo. As we all know, there they have detainees who are being interrogated quite often.
Although we are never fully debriefed, we have been told that based upon some of our modest contributions, we played a small part in helping individuals get information that led to successes in the field that eventually involved some pretty big names, the outcome of which many of your readers likely have seen on television news. Where and how our stuff was used and with whom is a mystery to me because they don’t tell us that stuff, but I know our work played a role in dealing with those kinds of people.

Above: David’s been doing judo continuously for 55 years and was a former train-the-trainer instructor for the U.S. Marine Corps Combat Hunter program. Here, he’s standing in front of a traditional Japanese drum (taiko) at his dojo, the East Bay Judo Institute. The drum was a gift from the Kodokan Judo Institute in Japan in commemoration of an official U.S.-Japan high school exchange program.
What are key indicators of deception or threats?
DM: Those are two related, but different things. With deception, here’s the issue — there is no “key indicator.” That’s one of the problems with deception detection. Research and fieldwork have shown that the best indicators of deception are not one or two things, but are a cluster of things. There’s not one indicator that occurs with everybody and not even one for the same person. Like, I don’t believe people have a usual “tell” in general. When you talk about clusters of things, that can run the gamut from being a facial expression of emotion combined with a certain type linguistic or grammatical feature of speech, combined with a certain type of gesture or head movement. That’s why there’s no one key feature and that’s part of what makes it very difficult.
Given the constellation of indicators out there, the two most important ones are facial expressions of emotion, especially micro-expressions, and certain types of grammatical features of speech. The problem is that a lot of people want to think there are certain conclusive key features. These things have been popularized in the public over the last 50 years or more. I think that’s why behavioral indicators have gotten a bad rap in some quarters. One of the reasons is a lot of training that occurred in the past was based on indicators that were not validated or vetted in the field. That’s a big problem.
For example, there’s a myth out there that, when people are lying to you, they don’t look you in the eye. That has never been shown to be true in research, despite the fact that there’s a big myth out there about it. When people are trained on that, they look for that, and then they make the wrong interpretation. That has led to difficulties in using behavioral indicators. So, when we’re talking about key indicators, we always focus on groups or clusters of different types of behaviors. They exist, but it’s not one or two.
With regard to threat indicators, they’re different. There are different phases of a threat cycle. If you’re talking about a person being indoctrinated and radicalized along a pipeline of extremism, there are certain types of indicators that exist that are different than when a person is an active bad actor conducting an op. Even when they’re in an operational cycle, the indicators are different when they are planning an op, preparing for the op, doing surveillance and recon, or hidden in an area of operation. So different phases of what we’re calling threats are associated with different types of indicators. That’s the way we approach both our applied research and training in this area because the indicators about threats are just different at different points in time along the threat cycle.
How is nonverbal communication built into human emotion?
DM: First of all, people have evolved along a phylogenetic line. Words are relatively recent and with humans only. Nonhuman primates and other animals, along their phylogenetic lines, have certain types of emotions. Even before nonhuman primates, you had animals with very basic types of emotional states like pleasure, pain, and whatnot. When you look along their phylogenetic lines, those emotional states are increasingly being differentiated given the social complexity of the animal we’re talking about.
So, nonhuman primates have certain emotions, but humans have even more differentiating emotions. I say that because, when you look to animals prior to humans, all of the emotions are embedded in a nonverbal expressive signaling system, whether it’s gestures in their faces or in their actions. Humans are the only ones that have the words that make everything more complex, but emotions in general are encoded in a nonverbal expressive system well before humans along a phylogenetic line.
How are things like facial expression, body language, perspiration, and pulse tied into human behaviors and emotions?
DM: All of those things you mentioned are basically a part of this expressive behavioral repertoire that’s part of a package of events that occurs when people are emotional. The whole point about emotions is that they prime individuals for action. They prime people for behaving or thinking a certain way. The nonverbal behaviors that we’re seeing are output signals of this important system. Emotions actually drive a lot of behaviors and thoughts. That’s how emotions serve as the basic motivation for all kinds of behaviors. When we’re talking about nonverbal behaviors, we’re reading outputs of that internal system and this gives us insight into other people’s motivations, personalities, intentions, etc.
Are these behaviors always autonomic?
DM: No. Some of them are autonomic, but things like facial expressions are created by the movements of the muscles in our face. Those are skeletal muscles. That’s all CNS (central nervous system) related, not ANS (autonomic nervous system). Perspiration, heart rate, etc. — those are being driven by ANS. What’s going on when people are emotional is that those ANS and CNS systems are firing in different ways and that’s why you can see different outputs from two very different systems.
How controllable are these behaviors? Are they involuntary or can someone be taught to control them?
DM: The initiation of a lot of the expressive behaviors you’re talking about, like immediate facial expressions, the start of sweating, and the impulse to act a certain way, a lot of them are uncontrollable because they’re initiated by what I call a central command system in our brain. The further in time you get — and we’re talking about fractions of a second — once things become more conscious to people, they become more controllable. In general, what we’re talking about is the farther away from the initiation of the response you’re talking about, the more controllable things become.
Of course, this is all influenced by how strong the emotion is in the first place. If people are enraged, they’re less controllable than when they’re just a little ticked off. And then there’s a lot of individual differences in this because people are very different. People are born very differently with regard to their emotional systems. Some people get very expressive and are unable to control themselves, whereas some people are just more reserved to begin with. So, it’s a combination of things that are uncontrollable with a lot of things that are controllable. It depends on where in the process you’re talking about.
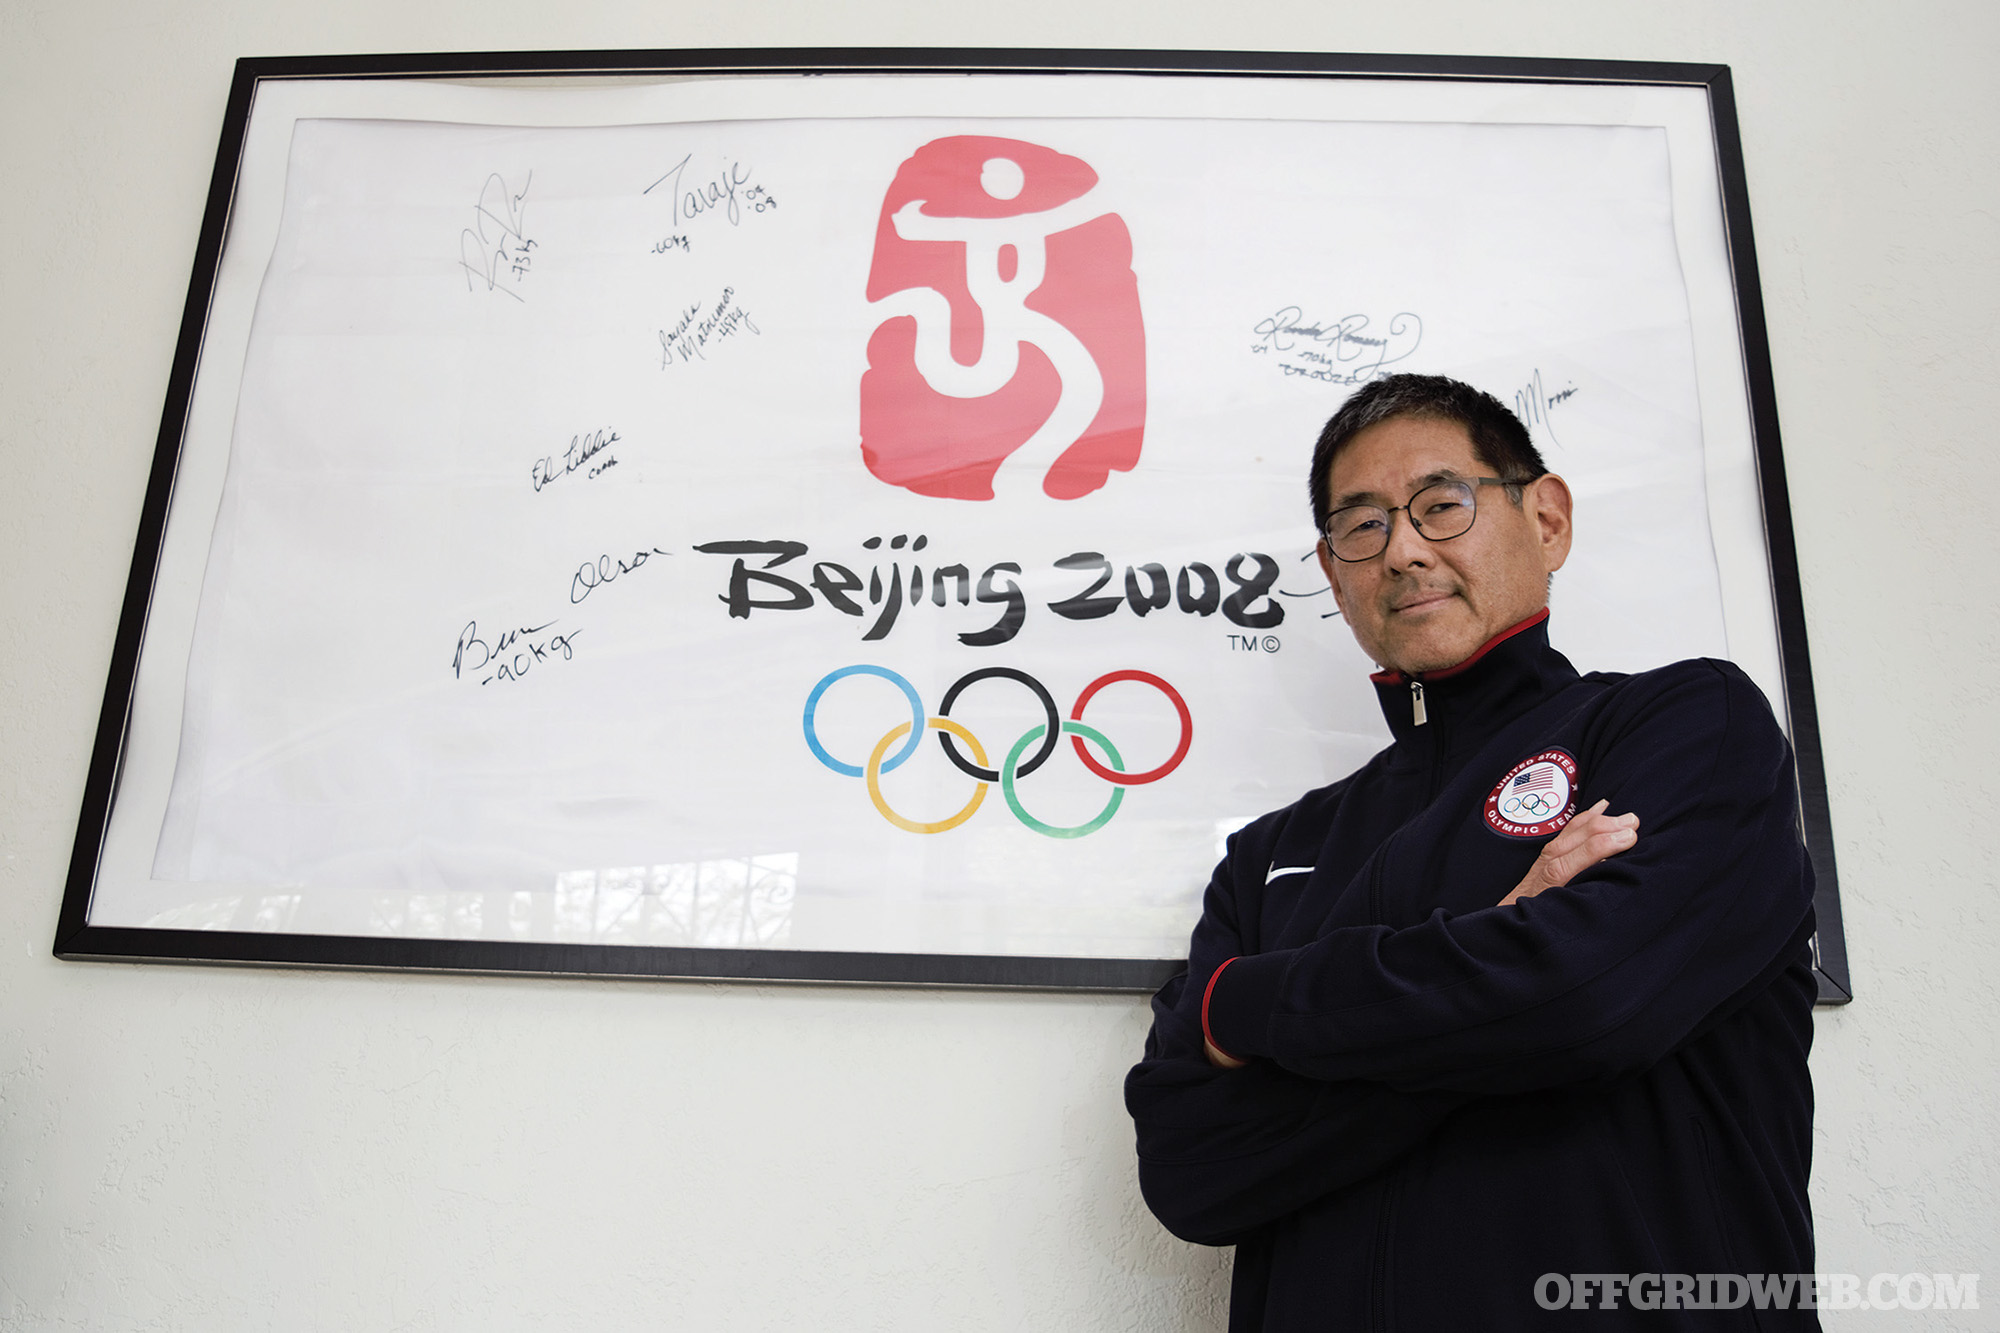
Above: David’s been to four Olympic Games: 1996 in Atlanta, 2000 in Sydney, 2004 in Athens, and 2008 in Beijing. Here he stands in front of the 2008 Olympic flag signed by the U.S. judo team, of which his daughter Sayaka was a member.
Why, when we lie, does our body produce a physiological reaction differently than when we’re honest?
DM: There are several reasons why, but essentially it comes down to this: When people lie, especially when stakes are involved, liars lie about their thinking, and think about their lying; and liars lie about their feelings, and have feelings about the fact that they’re lying. All these varied cognitions and emotions are tied together neurologically and produce physiological reactions and expressive behaviors, many of which are observable.
What are the biggest reasons you think people fall victim to deception?
DM: It’s very clear we all have a truth bias, which means that we all want to believe whoever we’re talking to and whatever we’re talking about. We are also born with the inability to detect deception. Human societies, as we know them, are built upon some degree of ignorance about others’ true feelings and thoughts. They’re based on our ability to not know what everybody else is thinking and feeling and for us to always be regulating whatever we are thinking and feeling.
I think a lot of it is biologically innate, but because of those pressures, I think there’s a lot of us who have that truth bias. We are ignorant to a lot of the deception around us. On top of that are all our individual biases. We just have a difficult time believing when someone is lying to us and I think that blinds us in a lot of ways. On the other hand, there’s the opposite bias where some people just don’t believe anybody. So, there’s individual biases that affect this entire thing, but it’s all overlaid upon a truth bias that I think we all have.
How effectively do you think people can be taught to mask their innate emotions?
DM: I think people are very good at learning how to mask their emotional reactions. I think we all do that as part of everyday social life. Another thing that I think that is related to a lot of what I think your work does is we also then learn to ignore our emotional reactions. What I mean by that is I think, especially in society today where things are so comfortable for so many people, that we’ve learned to downplay and ignore whatever visceral reactions are occurring around us. Part of that is because most of us live in such a comfortable world that, even when we feel that there may be something going on, we’re able to argue it away that nothing has happened. I think in our world today we are being desensitized to various emotional reactions which, in the past, would’ve helped us survive. Human society today has become so managed with regard to how people survive without that reaction and response. I think that’s a big thing that’s happened over the last 120 years.
What are the most popular misconceptions about lying and lie detection?
DM: That there’s a key indicator that you can always use to tell when a person is lying, like when they don’t look at you in the eye while they’re answering. It’s a big myth out there that’s had policy implications, training implications, and all kinds of other implications in the real world. I think that’s a big issue.
I understand that judo is also big part of your life. Do you feel it’s helped you with your chosen area of study or vice versa?
DM: You know, I don’t know whether it’s helped or been helped by my chosen area of study. I do think that judo has been such a big contributor in other ways in my life. There are people who are very good at what I do and don’t necessarily do judo. They’re very good observers of behavior and whatnot. I do think judo has grounded me to appreciate people with skills who can react in dangerous situations, especially those who’ve chosen to do so on behalf of others in a group, in a society, or in a country. Judo is so physical and humbling that it’s given me much greater appreciation of those who do that, and it makes me much more motivated to do what I do really well for them.
Whether it’s helped me to be a better observer of micro-expressions, I don’t know — probably not. But it’s grounded me in these other ways that are so much more important to me. I’m truly grateful for having done judo all these years.
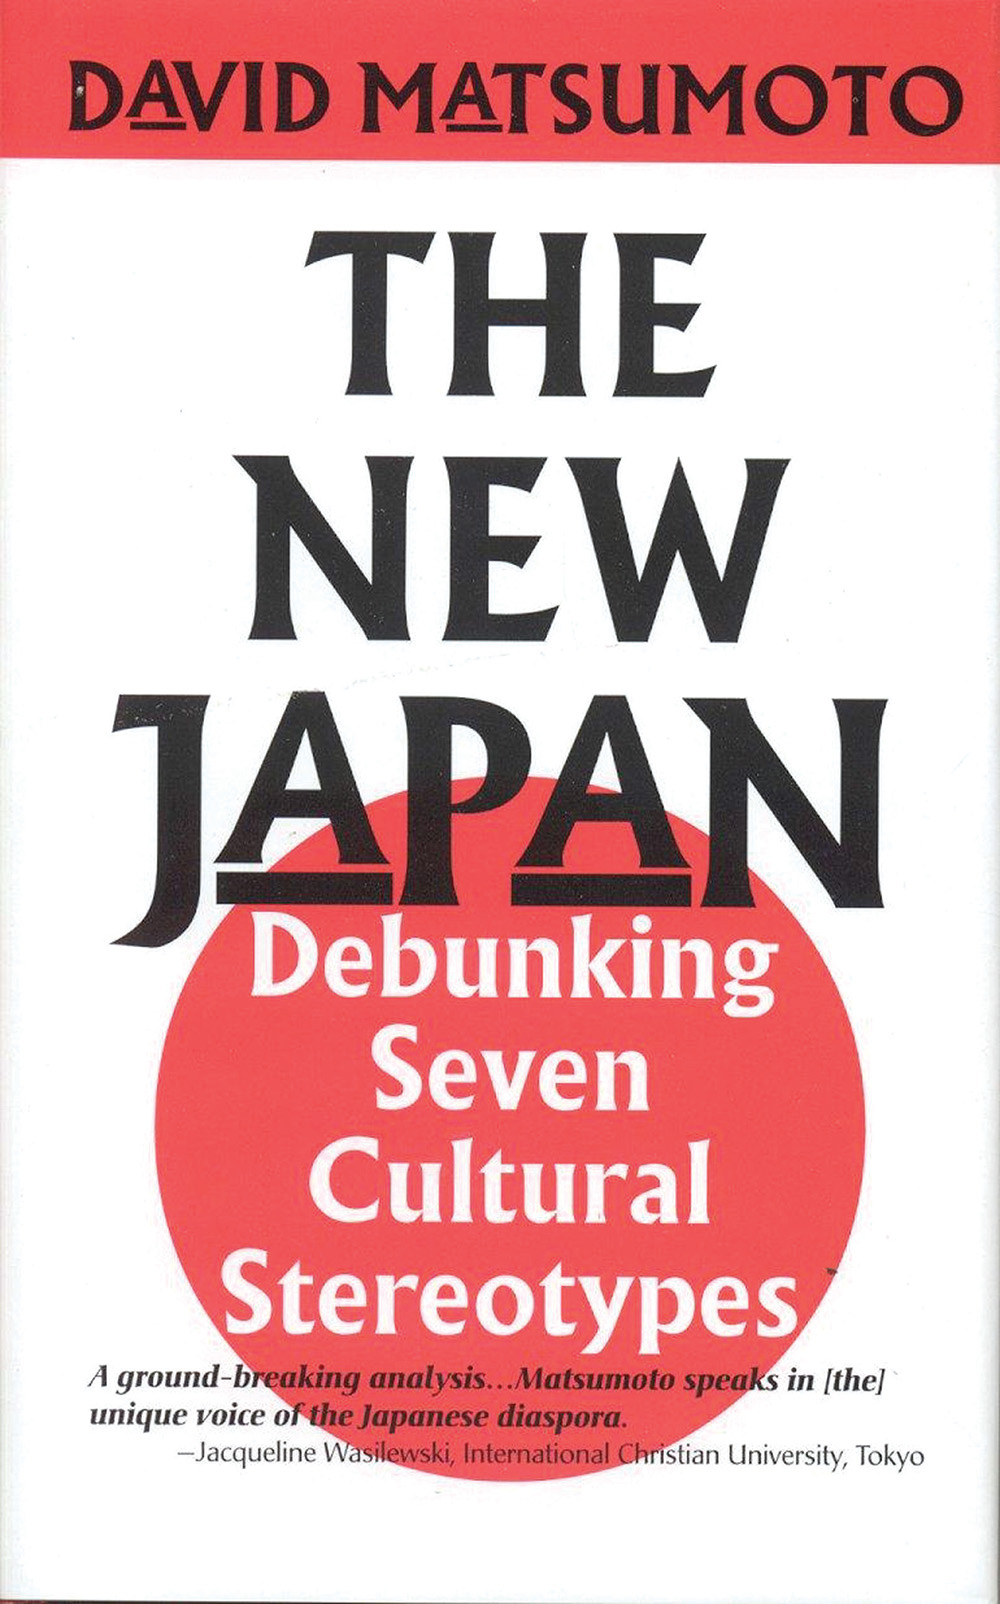
Above: David has authored numerous books on culture and psychology.
Do you think all humans are born with basically the same emotional baseline?
DM: No, everyone is really different in their emotional baselines. Some people are very emotional and some are much more reserved, so where people are on a baseline of reactivity is very different. People are similar, however, in the fact that we all have the same ability to have the same set of emotions.
How are these emotions affected by nurture and environment?
DM: I think nurture plays a large role in helping people learn what to be emotional about, what to attach that emotional system to, and what to do with it when emotional. Nurture doesn’t affect what they’re starting with. It’s like a color palette. We all start with the same color palette. Nurture tells us when to color, what to color, and what to do about it once we color, but it doesn’t change the fact that all humans have that same coloring palette. So, in that sense, nurture is huge. The effect of nurture is so large that it sometimes allows people to discount the impact of nature. But I also happen to believe that nature has a profound effect on our emotions.
Please explain the differences between behavior and emotion.
DM: Emotion, to me, is a package of events that’s a reaction to certain types of stimuli that we perceive. It involves certain types of cognitive changes, certain kinds of physiological changes, and certain kinds of changes in expressive behavior, like facial expressions, how we use our voices, and things like that.
For behavior, I’d like to differentiate between what I call expressive behavior, which is an immediate reaction, and what’s known as instrumental behavior, like hitting something or taking a walk — those are the outputs of an emotional reaction. So, behavior is a component of emotion, but it’s not an emotion in and of itself. Emotion is an internal reaction that’s a result of an information processing system in our brain.
How does one’s foundation of what’s right and wrong get formed?
DM: The research theorizes that there are universal aspects of morality across different people. There are cultural differences on specific types of morality, but there’s some universal basis for it. What we don’t know is the innate basis of that versus the learned basis of it. People think that all humans are learning what is good and bad, right and wrong, and base their moral system on nurture. We’re learning this as we’re enculturated and growing up as infants and young children.
When we learn as infants and young children what’s appropriate to do for ourselves, which is what our parents are teaching us all the time, we’re by default learning how to understand the behaviors of others and whether they’re right or wrong, good or bad, etc. Morality and right or wrong is largely learned, but it’s learned because we have the ability to have emotions, the ability to have language, and the ability to have thoughts. It’s those innate abilities that allow us to have nurture that leads us to that morality.
How much do genetics play into behavioral traits?
DM: They’re large, but let’s be clear. It’s called trait tendencies. There’ve been estimates of the impact of genetics on trait tendencies. The studies have shown that the impact of genetics on the tendencies to have certain traits is about 50 percent. So, 50 percent of the value inherent in our behaviors is largely driven by some aspect of genetics that’s been encoded in our DNA. Another 50 percent of our behaviors, in general, tends to occur because of whatever we’ve learned and whatever our individual differences are.
How consistent are emotional traits and nonverbal behaviors across different cultures?
DM: Some are very consistent. With facial expressions of emotion, research over the last half century has demonstrated that there’s six or seven facial expressions of emotion that are universal across all cultures. That is, when people have those emotions, they produce it on their faces in the same facial configurations. Then there are cultural differences on when to express them, how to express them, how much to express them, etc. And there are cultural differences on other aspects of emotion, like your attitudes about emotion and your values about emotion. For example, there are big cultural differences in whether certain cultures value happy emotions versus some cultures that value more sad emotions. So, there are cultural differences in attitudes, values, opinions, and world views about emotions. There are more cultural similarities in the actual reactions that occur when people are emotional.

Above: Aside from being an expert on reading people, David is a longtime practitioner of judo. Here he demonstrates some of his skills as an 8th-degree black belt on Tiga Tactics’ Conrad Bui.
How does culture affect personality?
DM: It depends upon what aspect of personality we’re talking about. If we’re talking about the traits we mentioned earlier, which are behavioral dispositions or tendencies, it seems that culture doesn’t affect that very much. Now there are big cultural differences in aggregate levels of traits, but it’s not known whether people with those traits maybe migrated to those areas back in history or whether people living in those certain environments created those personality traits. That’s not known, but it’s clear that culture doesn’t necessarily impact personality traits as much.
When we’re talking about aspects of other personality like roles, role identities, and the kinds of things we should do in certain roles, then clearly culture has much more impact there. For example, there’s a role that I play here in this culture today called “father.” What I learned in the role of father is a certain understanding of father, which is different than the role of father in, let’s say, the Middle East. If I’m in Afghanistan, the role of father may mean something slightly different or largely different. So, there’s a lot more cultural differences on those aspects of personality that go beyond the traits.
How does one’s sex affect emotional traits and nonverbal behaviors?
DM: Many people think men and women are very different in their emotionality. I actually don’t believe that. I believe that men and women are very similar in their emotionality. Where there are differences is in the context in which men and women generally learned how and what to express. One stereotype is that women are more emotional within the home talking with the man, whereas the men are less emotional. In that context, those kinds of contextual differences may exist.
However, there’ve been studies that’ve shown that if you just measure or assess the amount of the emotions expressed by men and women throughout the day across all contexts, there are no differences. What that means is that whatever differences we think exist between men and women, they’re all contextual. In terms of emotionality, I think men and women are very similar. I think where men and women differ is the contexts men and women have learned to be expressive and what kinds of emotions we have in those contexts.
Does mental illness, such as psychopathy, affect these behaviors since there are people who may believe their own lies?
DM: Mental conditions, drugs, and brain injuries are all the wild cards of the emotional system. They can throw things off in many different ways. Today, it’s thought that psychopaths don’t have emotions and are not empathetic. I don’t believe that. I believe that they’re not empathetic and don’t show emotions in certain contexts, but they are certainly emotional. They’re just emotional about different things. You and I may not be happy that we ruined someone else’s life and took advantage of them. However, a psychopath would be happy about that. They have happiness; it’s just attached to different and certain weird things.
The question is why are they attached to different things? I don’t think we have a good answer. I think there’s some faulty biological wiring that’s occurred because research has shown that there’s very little that can change psychopaths. I also think that’s true for sex offenders, child molesters, and certain groups of individuals who clearly have an emotion system and are just wired differently. That’s why they’re hard to change.
Do you feel polygraphs have value anymore? There’ve been cases where people committed a crime and passed their polygraph exam without triggering any indications they were lying.
DM: The research says that the use of a polygraph with a skilled examiner is very effective in differentiating truth from lies. The research is very clear about that. It’s also clear that there’s cases in which convicted individuals have later been exonerated. To me, it’s impossible to take individual examples of the opposite effect and to then say that the effect on the entire group of findings is inaccurate. If we understand the way research is done, it’s all group based. If I’m going to establish the efficacy of a polygraph, a vaccine, or whatever, I’m going to establish its efficacy based on a group tendency, like an average, a large percentage, or something like that.
Given that, there are always going to be false positives. Of course, we want to minimize those kinds of false positives and negatives. No question about it. But the existence of false positives and false negatives don’t argue, to me necessarily, that something may or may not be effective as a whole. The question is how do we adjudicate the ones that are slipping through? Public viewpoints today may often say, well, look at that one case over there. No question that those are travesties if they turned out to be correct, but that doesn’t necessarily suggest we have to throw out the entire system that’s done it correctly for 95 or 99 percent of the time. I think there are different ways to ask those questions.

What does the research say about how the internet has affected human behavior and emotions thus far?
DM: Well, I’ll tell you, the biggest effect of the internet, social media, and other kinds of electronically mediated communication is all bad in terms of what it’s done to society. It’s created greater senses of isolation, depression, and loneliness. In that constellation of anxiety and emotion, it’s very clear that research over the last 20, 30 years of internet and social media use has produced more negative effects on a population level. And of course, those are all affecting our emotions.
Wow …
DM: Yeah, it’s huge and I feel like it’s counterintuitive. You get on Facebook, Twitter, or whatever it is and think you’re connecting with your friends, but then the question is who becomes your friend, right? We’re all wanting to get the “like” and this kind of stuff, which turns out to be unfulfilling for us in terms of our psychology. The other side of that says something about what our humanity requires — people interacting with each other and trying to get some sense of satisfaction, fulfillment, or worth about ourselves from actual interactions. I think that the internet in general, and social media in particular, has done a disservice in that area because it’s helping to decrease actual human interaction.
I remember when I first started thinking about this back in the ’80s when the Walkman came out. When kids got into the car to go someplace with their family and put on their Walkman headphones, that cut off their interaction with the family. When I saw that I was like, wow, that’s really not cool. You see that more and more today where people are together, but not really together. They’re physically around each other, but not really communicating. And there’s something to be said about people actually interacting with others — humans are wired to do that and need to do it. We’re seeing the effects of that not occurring in this population research we’re talking about. The detrimental effects of it are very clear.
I would think it’s probably somewhat difficult to quantify all that. We live in a world where most people think that, if you can’t see it and can’t measure it, then it doesn’t exist. We’re social beings and we know something ethereal happens when we interact in person as opposed to through an electronic device. How do you calculate the ethereal effects of human interaction versus the effects via electronic devices?
DM: You’re probably right; it’s very difficult to capture those ethereal effects, but what you can capture are the effects of not having that. For example, it’s relatively easy to assess people’s levels of self-esteem, self-worth, self-confidence, depression, anxiety, or whatever psychological variable you want to throw at it. I think how the research is addressing your question is by examining how those psychological effects have changed in the absence of that kind of interaction.
You can compare what the data looked like before and after the imposition of the internet and social media. It’s very clear. Where the internet and social media are occurring, it’s having negative effects on people. The interpretation is that those ethereal effects you mentioned, which are not measured, must exist. There’s an interpretation by proof of negation of the opposite kind of thing. But it’s very clear and research has been going on for like 20, 30 years about these negative effects.
About David Matsumoto
Age: 62
Hometown: Richmond, California (originally from Honolulu, Hawaii)
Children: Four children
Martial arts rank: Hachidan (8th degree black belt in judo)
Recommended reading list:
- The Bible
- The Four Agreements: A Practical Guide to Personal Freedom (A Toltec Wisdom Book) by Don Miguel Ruiz
- The Origin of Species and The Expression of Emotions in Man and Animals by Charles Darwin
Favorite quote: “It matters not whether you’re better than someone else. The only thing that matters is that you’re better than who you were yesterday.” — Jigoro Kano
Website: humintell.com, davidmatsumoto.com