When COVID-19 hit, it drastically affected the work environment for many Americans. Some began working remotely, while others were forced into reduced hours or lost their jobs entirely. Mark Pankey had been working as a first officer (copilot) for Southwest Airlines since 2016. Prior to that job, he spent 20 years in the U.S. Air Force, most of which was as a fighter pilot flying F-16s. After transitioning to civilian life, Pankey felt a lingering desire for independence and adventure in the great outdoors. Strangely, COVID presented the opportunity he had been waiting for — a sudden reduction in demand for flights caused Southwest to seek volunteers who were willing to take up to five years off with partial pay. Pankey accepted the offer and used this sabbatical to tackle a project he had daydreamed about for years: building a DIY off-grid home on a commercial truck chassis.
Photos by Zack Podell
This article was originally published in Issue 64 of our sister publication Recoil magazine.
An Off-Grid Home Like No Other
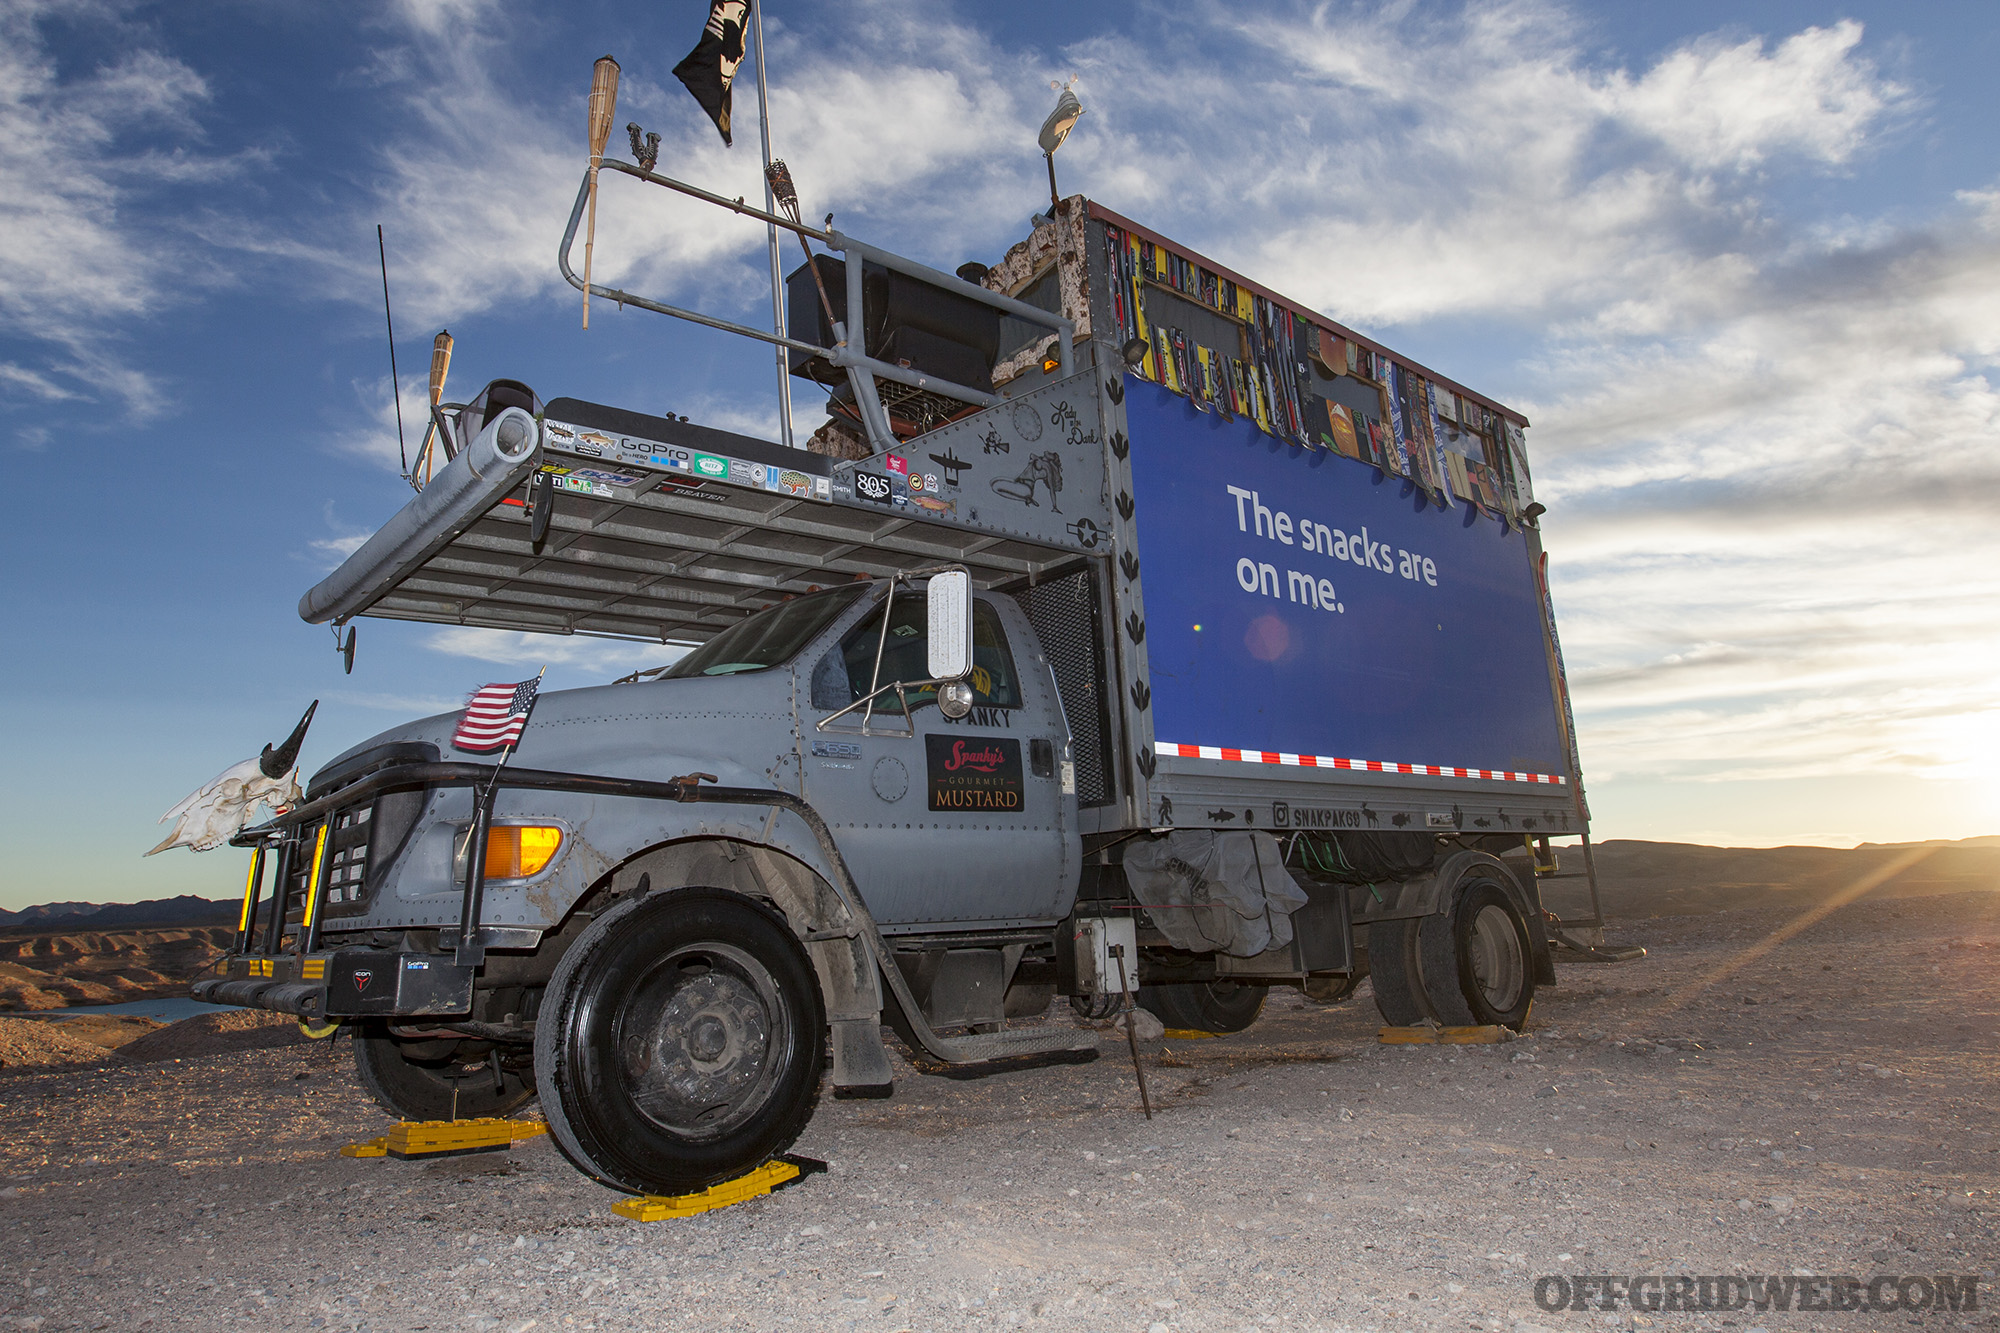
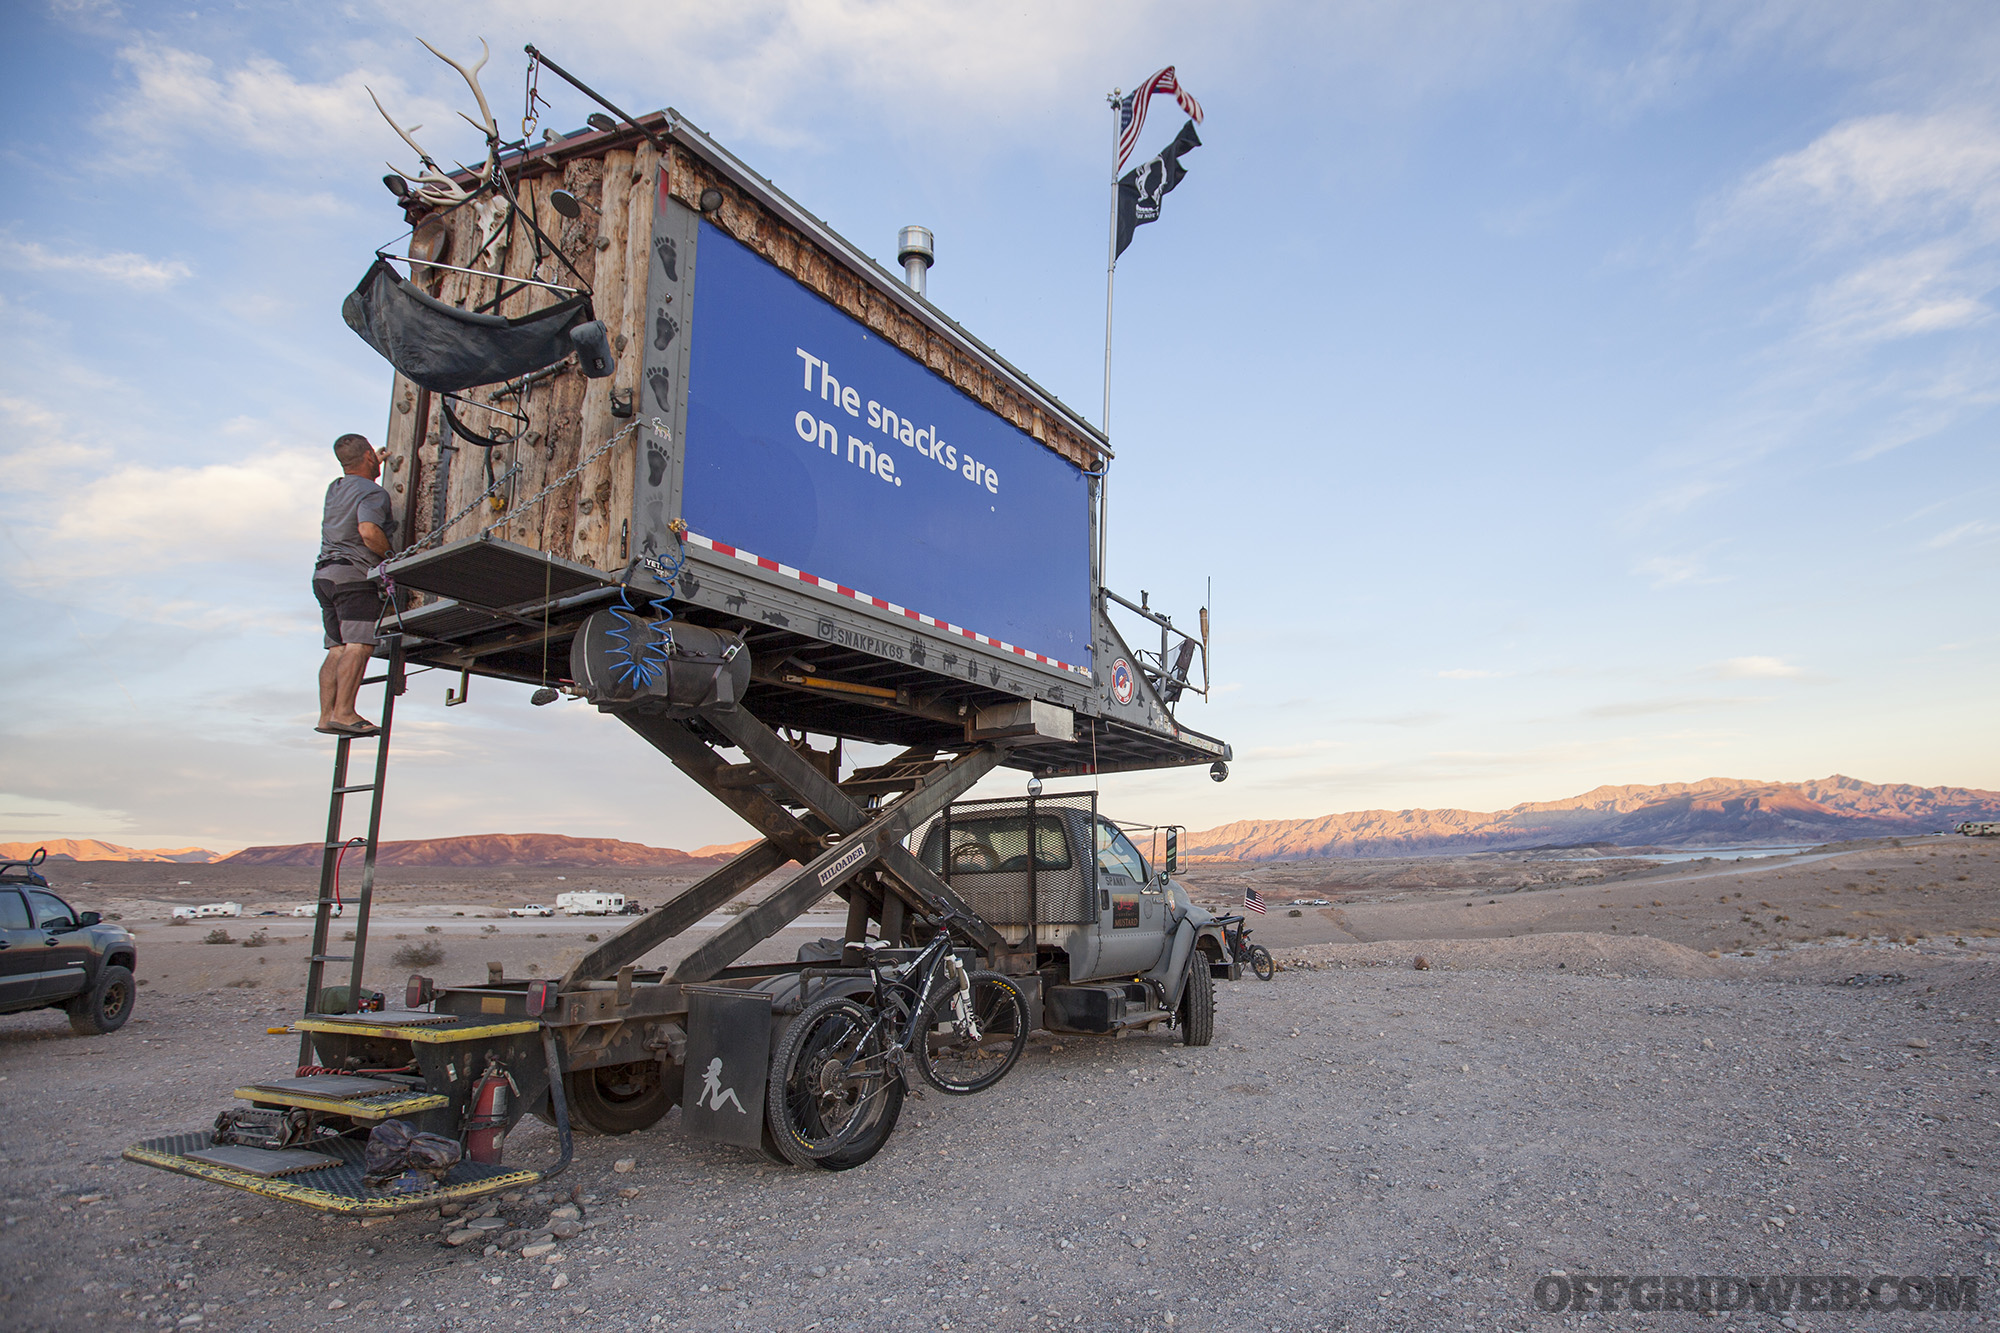
The seed for this idea was planted after Pankey’s first year flying for Southwest. Like many pilots, he commuted to the nearest major city (Denver) before work and spent much of his time between flights in hotels. In order to save some money, he bought a Ford Econoline cargo van and converted it into a “crash pad” he could sleep comfortably in. It worked but wasn’t ideal. Pankey recalls, “I was leaning toward something a little bigger that I could stay in much longer — possibly full time. I wanted to be able to live completely off-grid and be totally self-sustaining.” He discussed this plan with one of his pilot friends, and that friend soon sent him a screenshot of a Ford F-650 box truck that was up for auction. In an almost-poetic twist, it was a retired provisioning truck that had been used to load snacks and beverages into Southwest Airlines flights. As a result, this unusual vehicle included a built-in hydraulic scissor lift that raises the box and deck roughly 20 feet in the air.
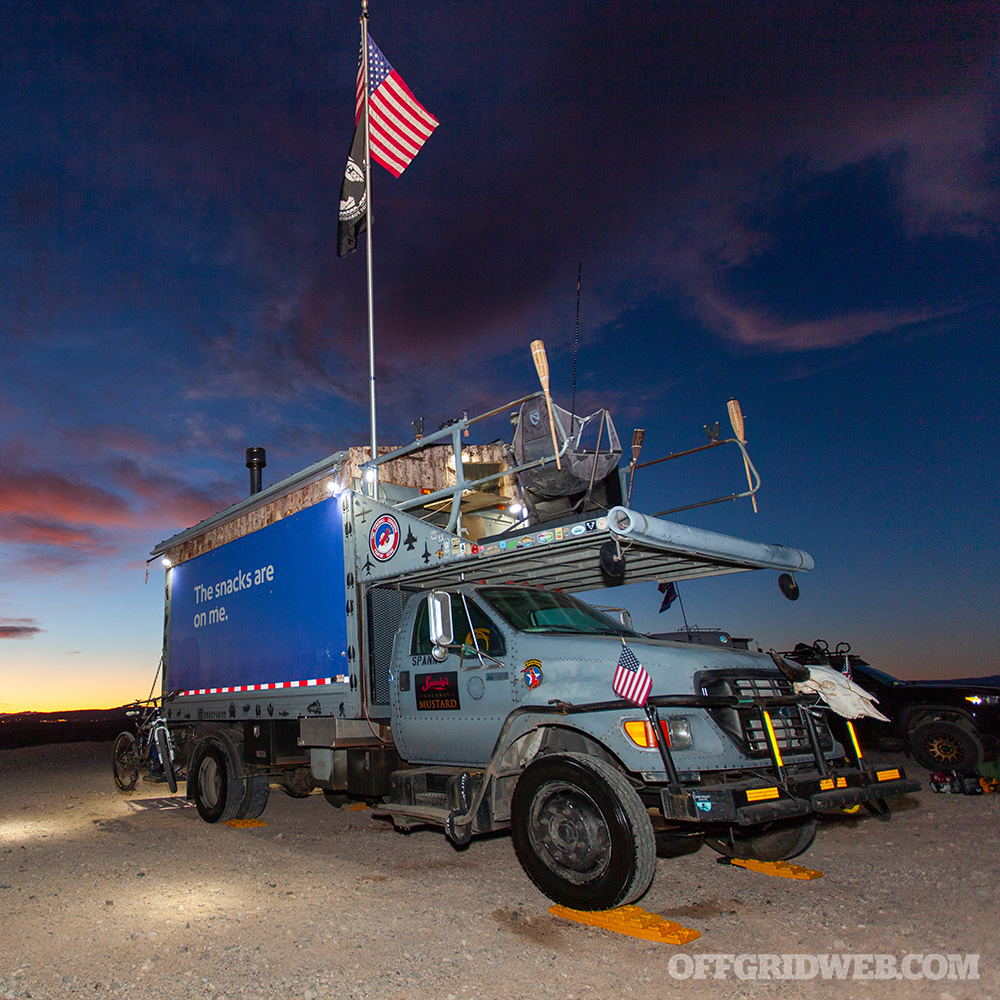
Above: The front deck created a perfect patio for taking in stunning views, especially once it’s raised to its maximum height.
After bidding against only one other person, Pankey won the auction in April 2020 for a mere $3,300. Two days later, he flew to Seattle-Tacoma airport to pick it up … wearing his full work uniform. A supervisor in a fluorescent vest was baffled to see a Southwest pilot picking up a Southwest provisioning truck, but eventually handed over the keys and paperwork.
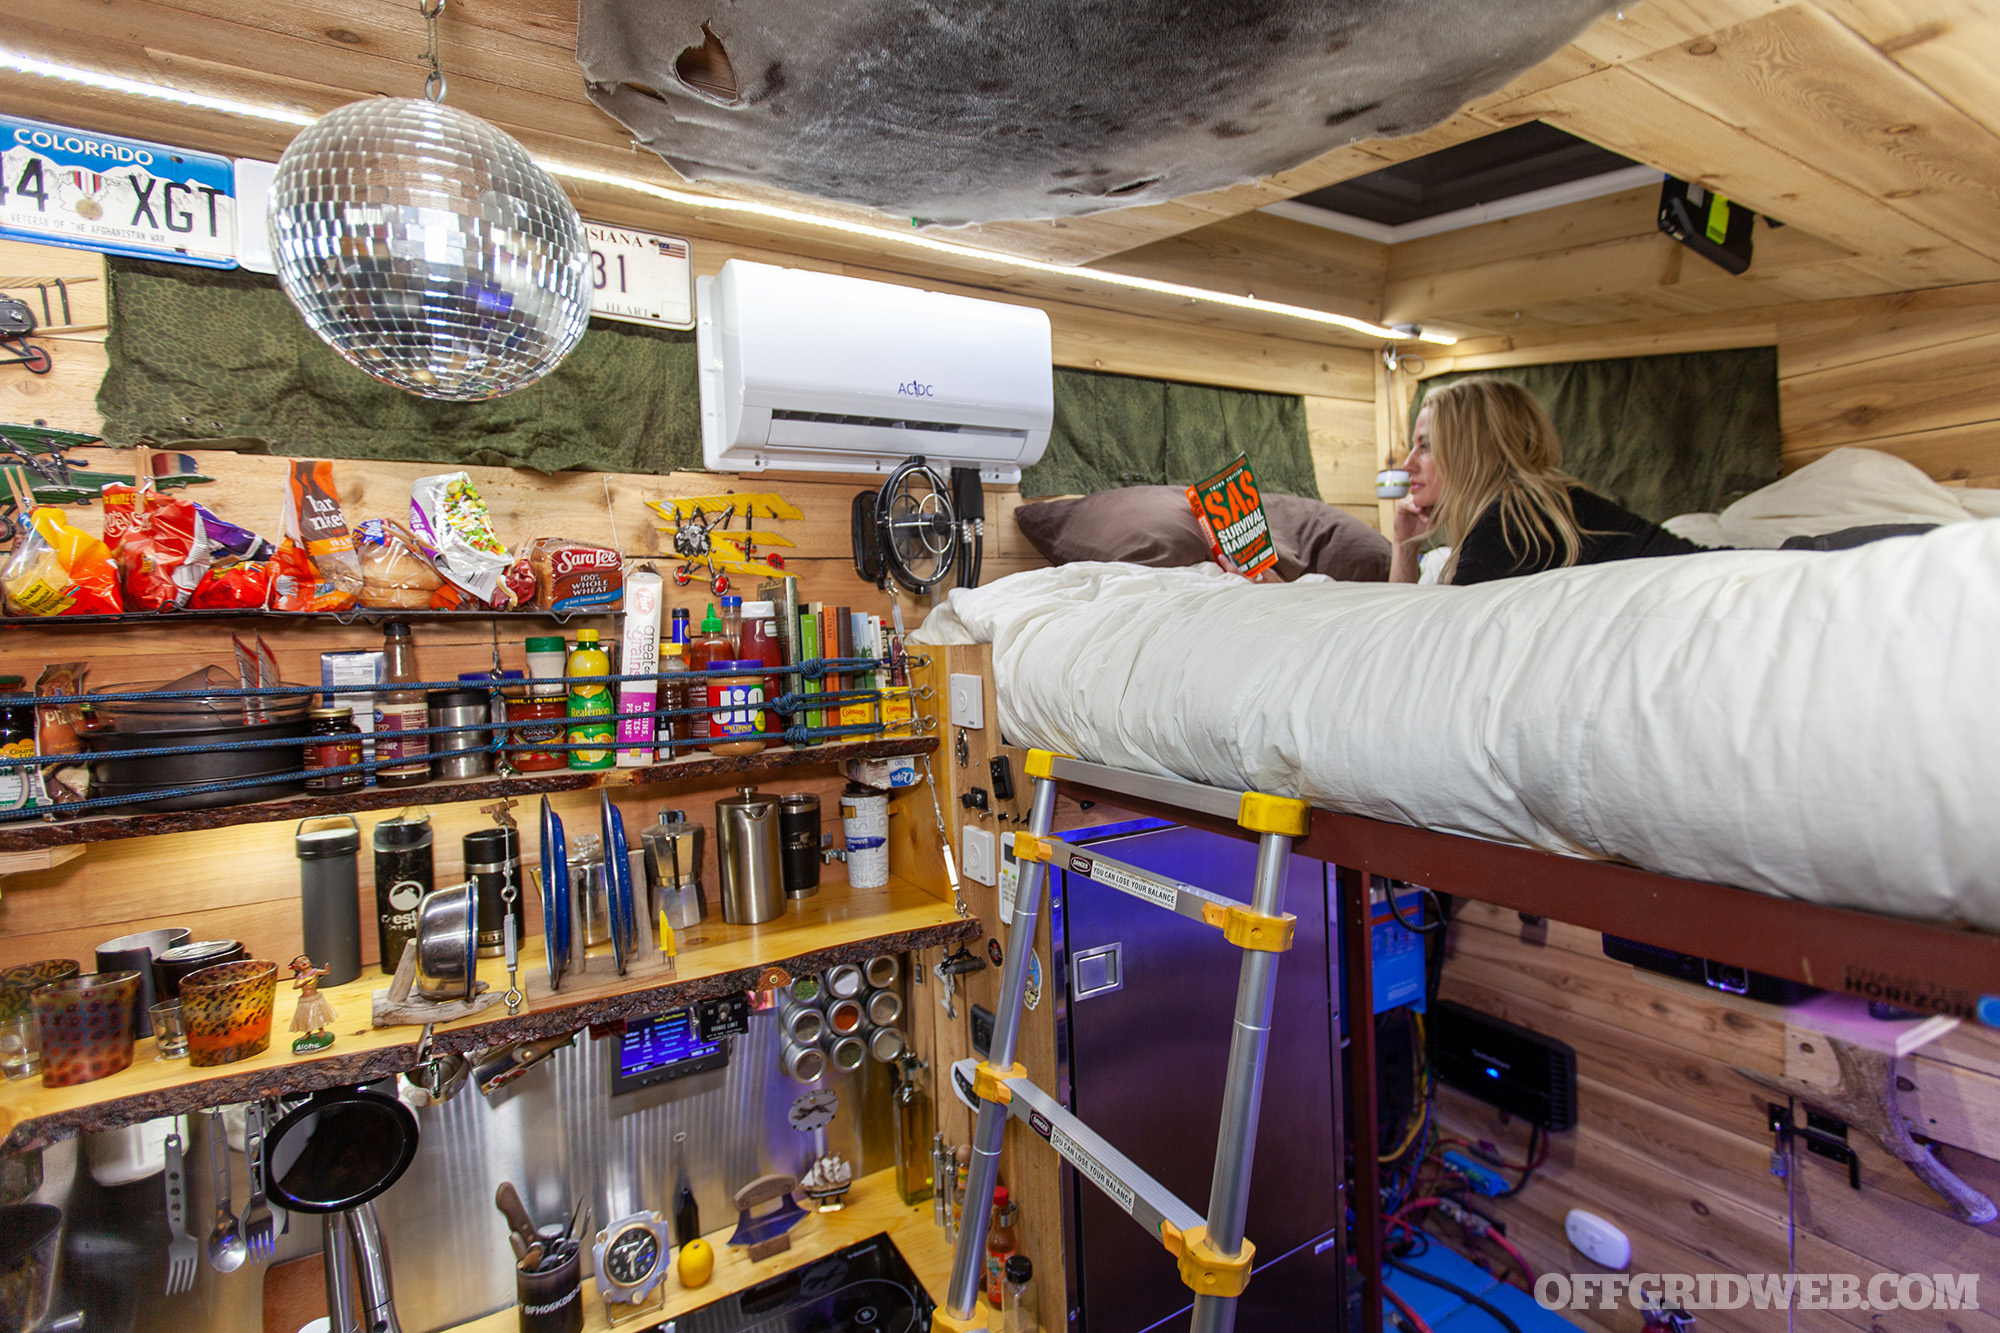
Above: Pankey put a new roof on the box that’s 2 feet higher on one side and 10 inches higher on the other. This provided room for side windows and a queen-sized loft bed.
Back home in Colorado, Pankey’s neighbors dubbed the truck SnakPak due to the Southwest slogan emblazoned on the sides of the box, so he decided to leave the lettering in place. However, its flat fiberglass roof was replaced with a single-slant metal roof and a support structure Pankey custom-fabricated. Logs were milled to create a rear wall with a rustic cabin look, and skis and snowboards were cut up to fill gaps around the new taller roof. Water runs through a gutter into a rain-harvesting filtration system; there’s also a 55-gallon freshwater tank on-board. At the front of the box, Pankey converted the 9×8-foot deck into a comfy patio, complete with custom-made French doors, artificial turf, a removable table, tiki torches, and a Traeger 575 smoker.
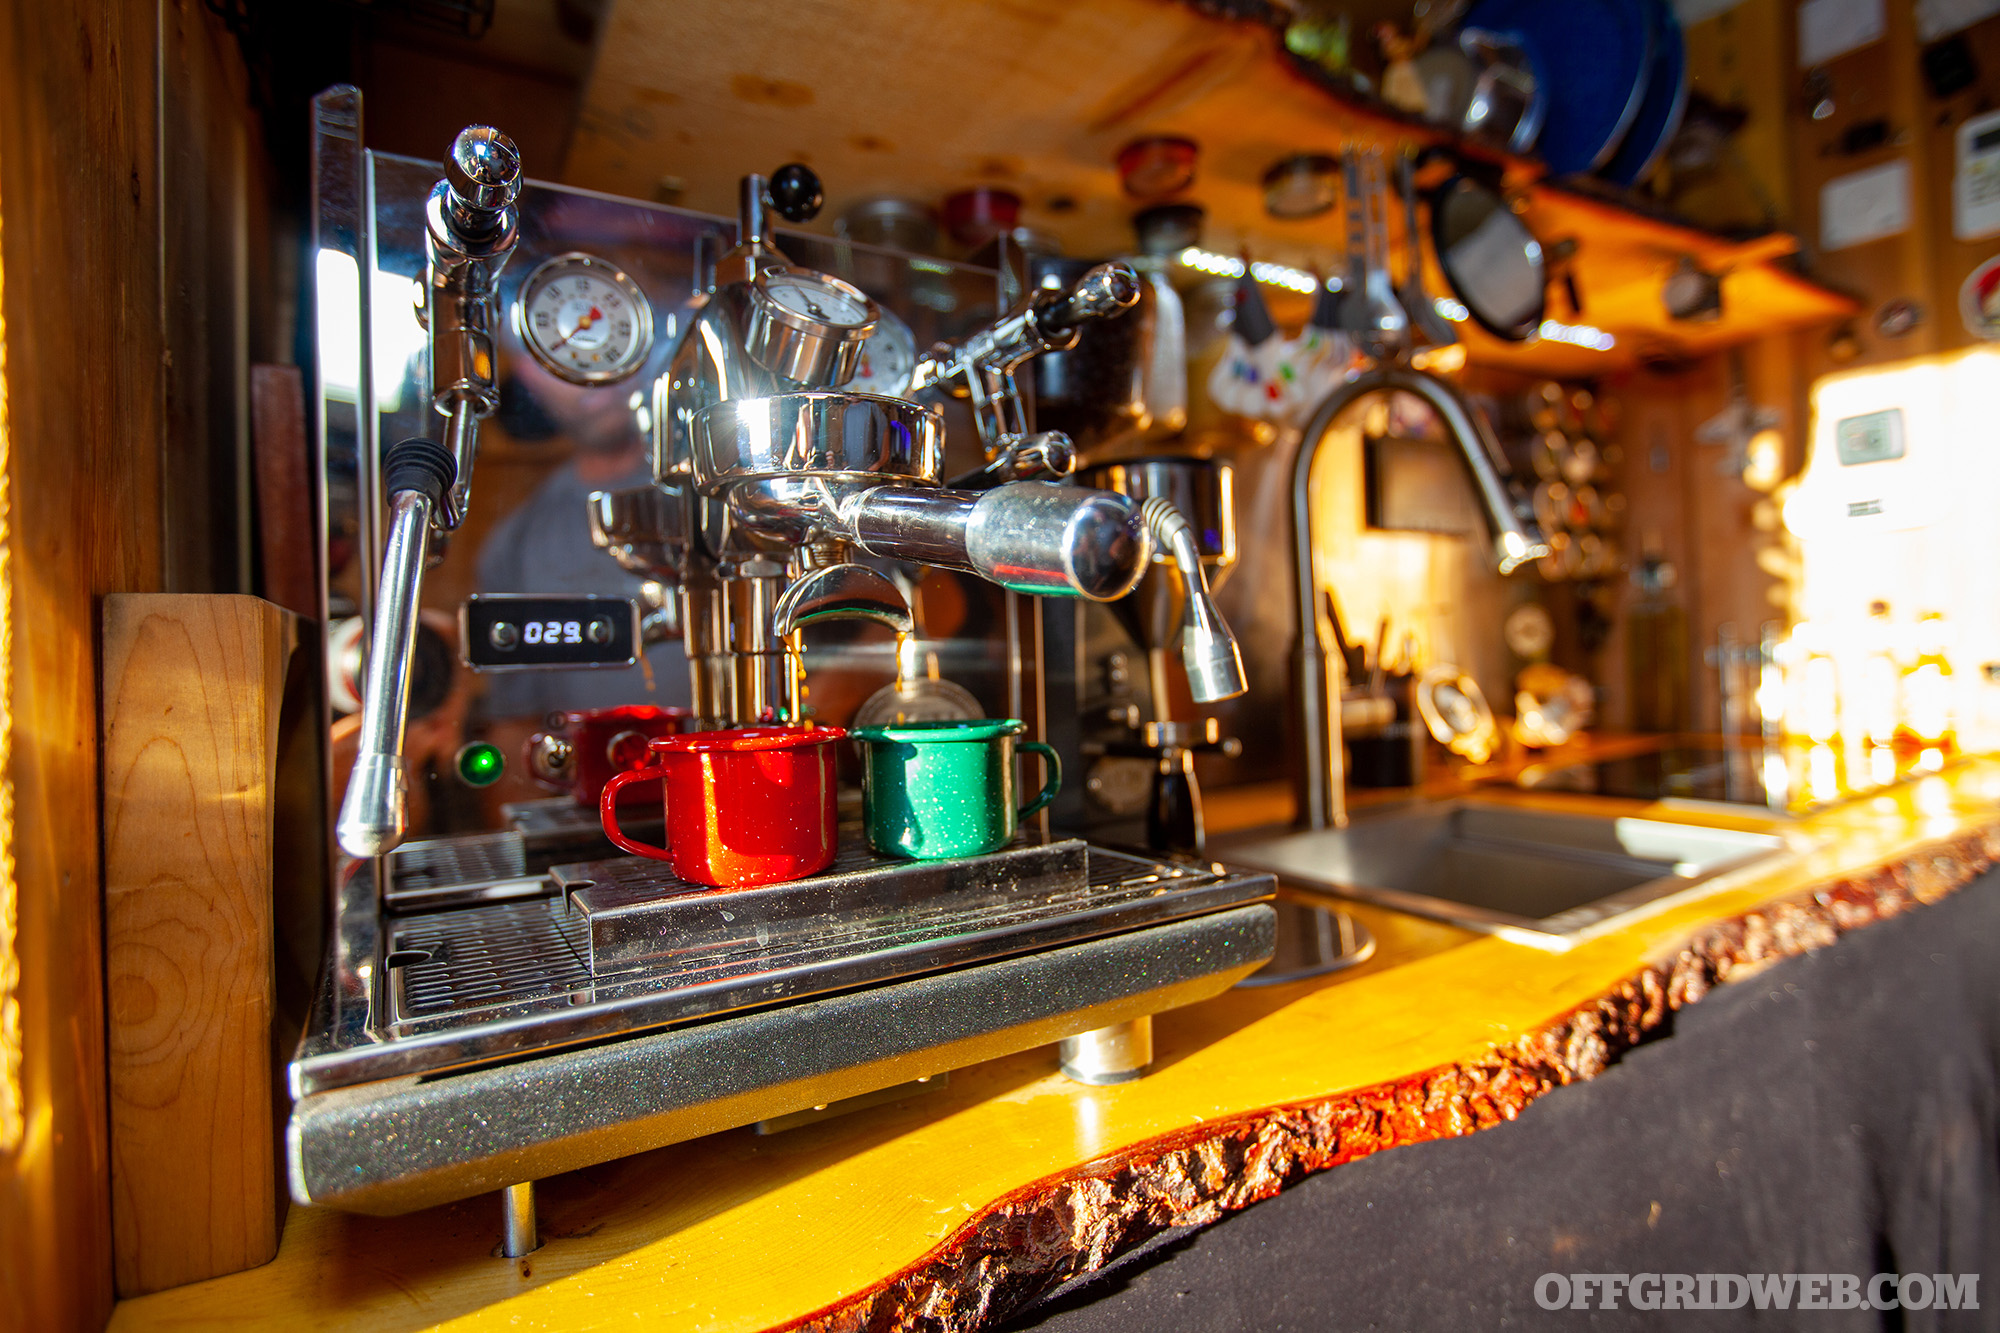
Above: An ECM Synchronika espresso machine and V-Titan 64 grinder sit atop the custom live-edge kitchen countertop.
Pankey gutted the interior of the box and lined it with closed-cell foam insulation, then added stained and sealed aspen wood flooring, rough cedar plank walls and ceiling, and a natural flagstone entryway. A shoe and coat rack near the entrance is flanked by a spacious kitchen with a live-edge wood countertop and shelves. The kitchen contains a deep sink, Webasto diesel/kerosene stove, 6.9-cubic-foot fridge/freezer, and high-end espresso machine. Opposite this area, there’s a frameless all-glass shower and composting toilet. A large loft area contains a queen-sized Tempurpedic bed beneath the remote-controlled skylight.
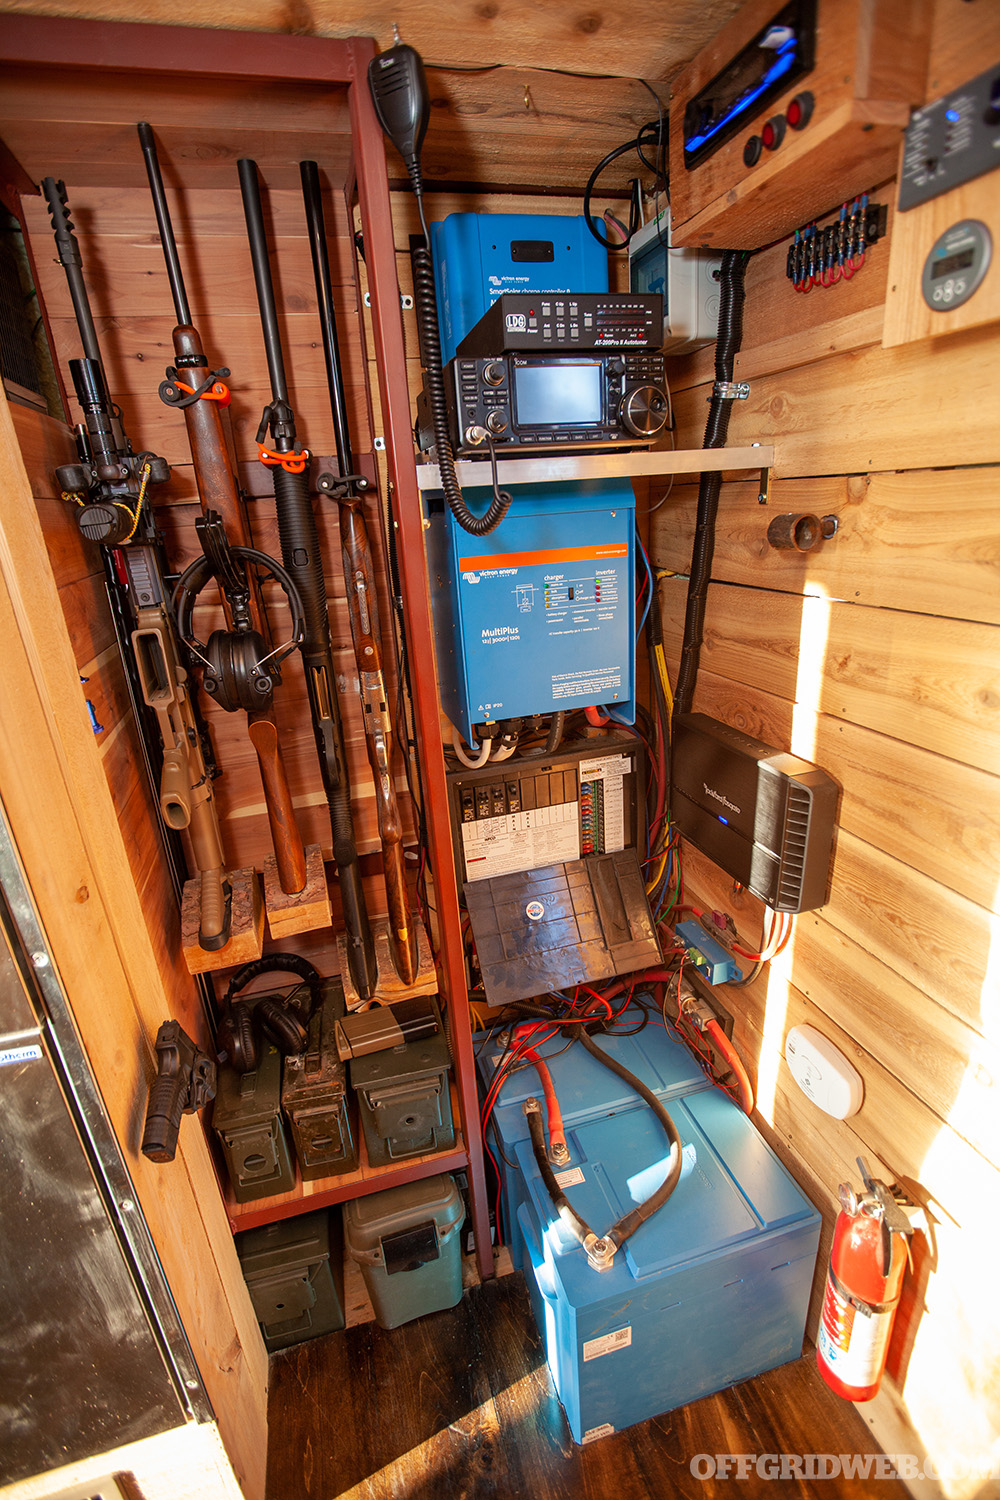
Above: This corner contains Pankey’s gun safe as well as the Icom 7300 ham radio and Victron Energy solar power system.
The truck is equipped with an Espar Hydronic M12 heater/boiler, Isotemp 4-gallon water heater, radiant heated flooring, a Dwarf 3kw tiny wood stove, and a DC mini split air conditioner. Other highlights include a gun safe, mini bar with humidor, JVC/Rockford Fosgate sound system, movie projector with pull-down screen, CB and ham radios, and a sophisticated power system with three 375W roof-mounted solar panels, two 300Ah lithium batteries, and a Champion 4500 generator.
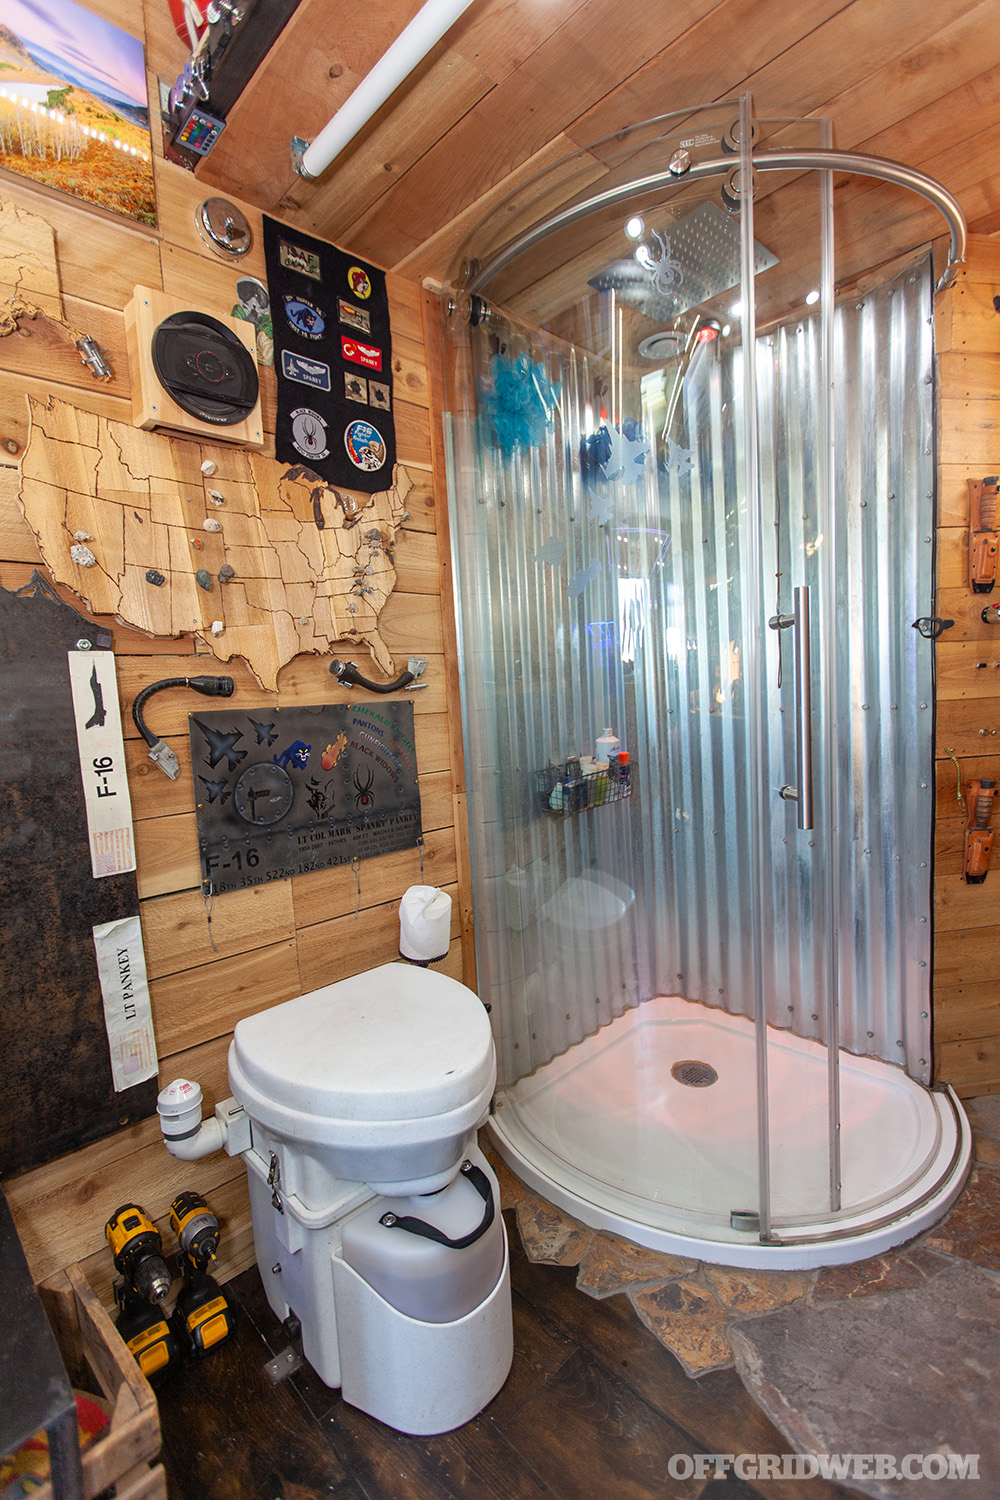
Above: A Nature’s Head composting toilet and Aston Orbitus frameless shower provide all the comfort of a proper bathroom. There’s a second exterior shower head for rinsing off on the back deck.
Pankey says he did 99.9 percent of the work on this truck himself, and it certainly wasn’t easy. “I worked on this project from 5 a.m. to midnight (on average) every day for a total of seven months and lost about 20 pounds … I sold and gave away pretty much everything I owned minus all my fun stuff — mountain bike, skis, kayak, a few guns, fishing gear, camera equipment, etc.”
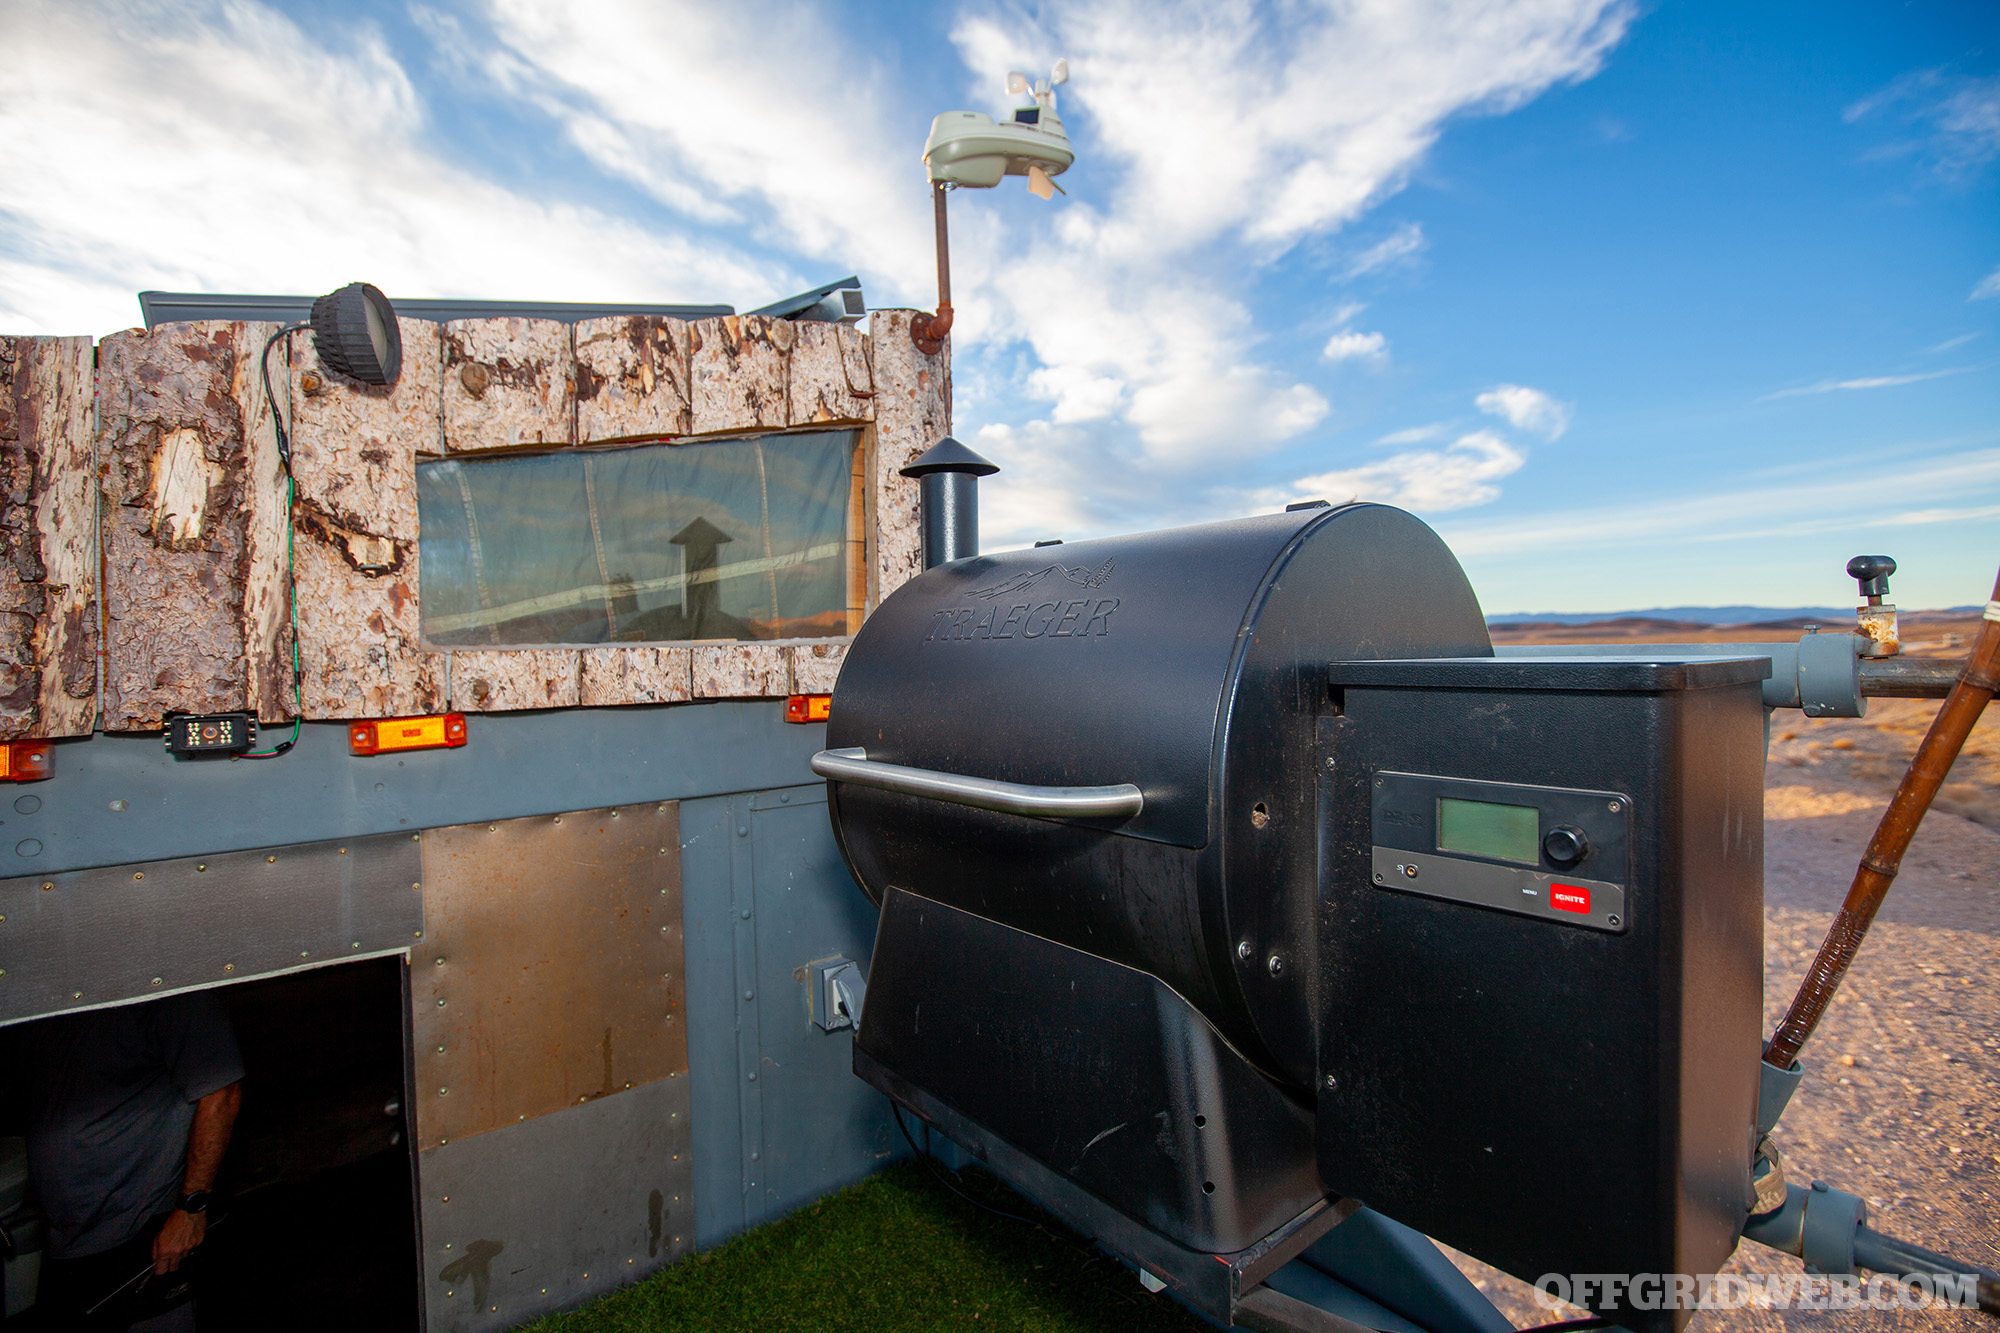
Above: There’s a Traeger smoker, artificial turf, and a seating area on the front patio. This area is level with the floor of the box when it’s fully raised.
He estimates total cost for the project was roughly $40,000. But after living in SnakPak and traveling the western U.S. for the last two years, he says it was all worth it. “This entire journey has been the most incredible time of my life. You really learn who you are when you do something you’ve never done before and challenge yourself to be uncomfortable in the unknown. I would not change a thing if I had to do it all over.”
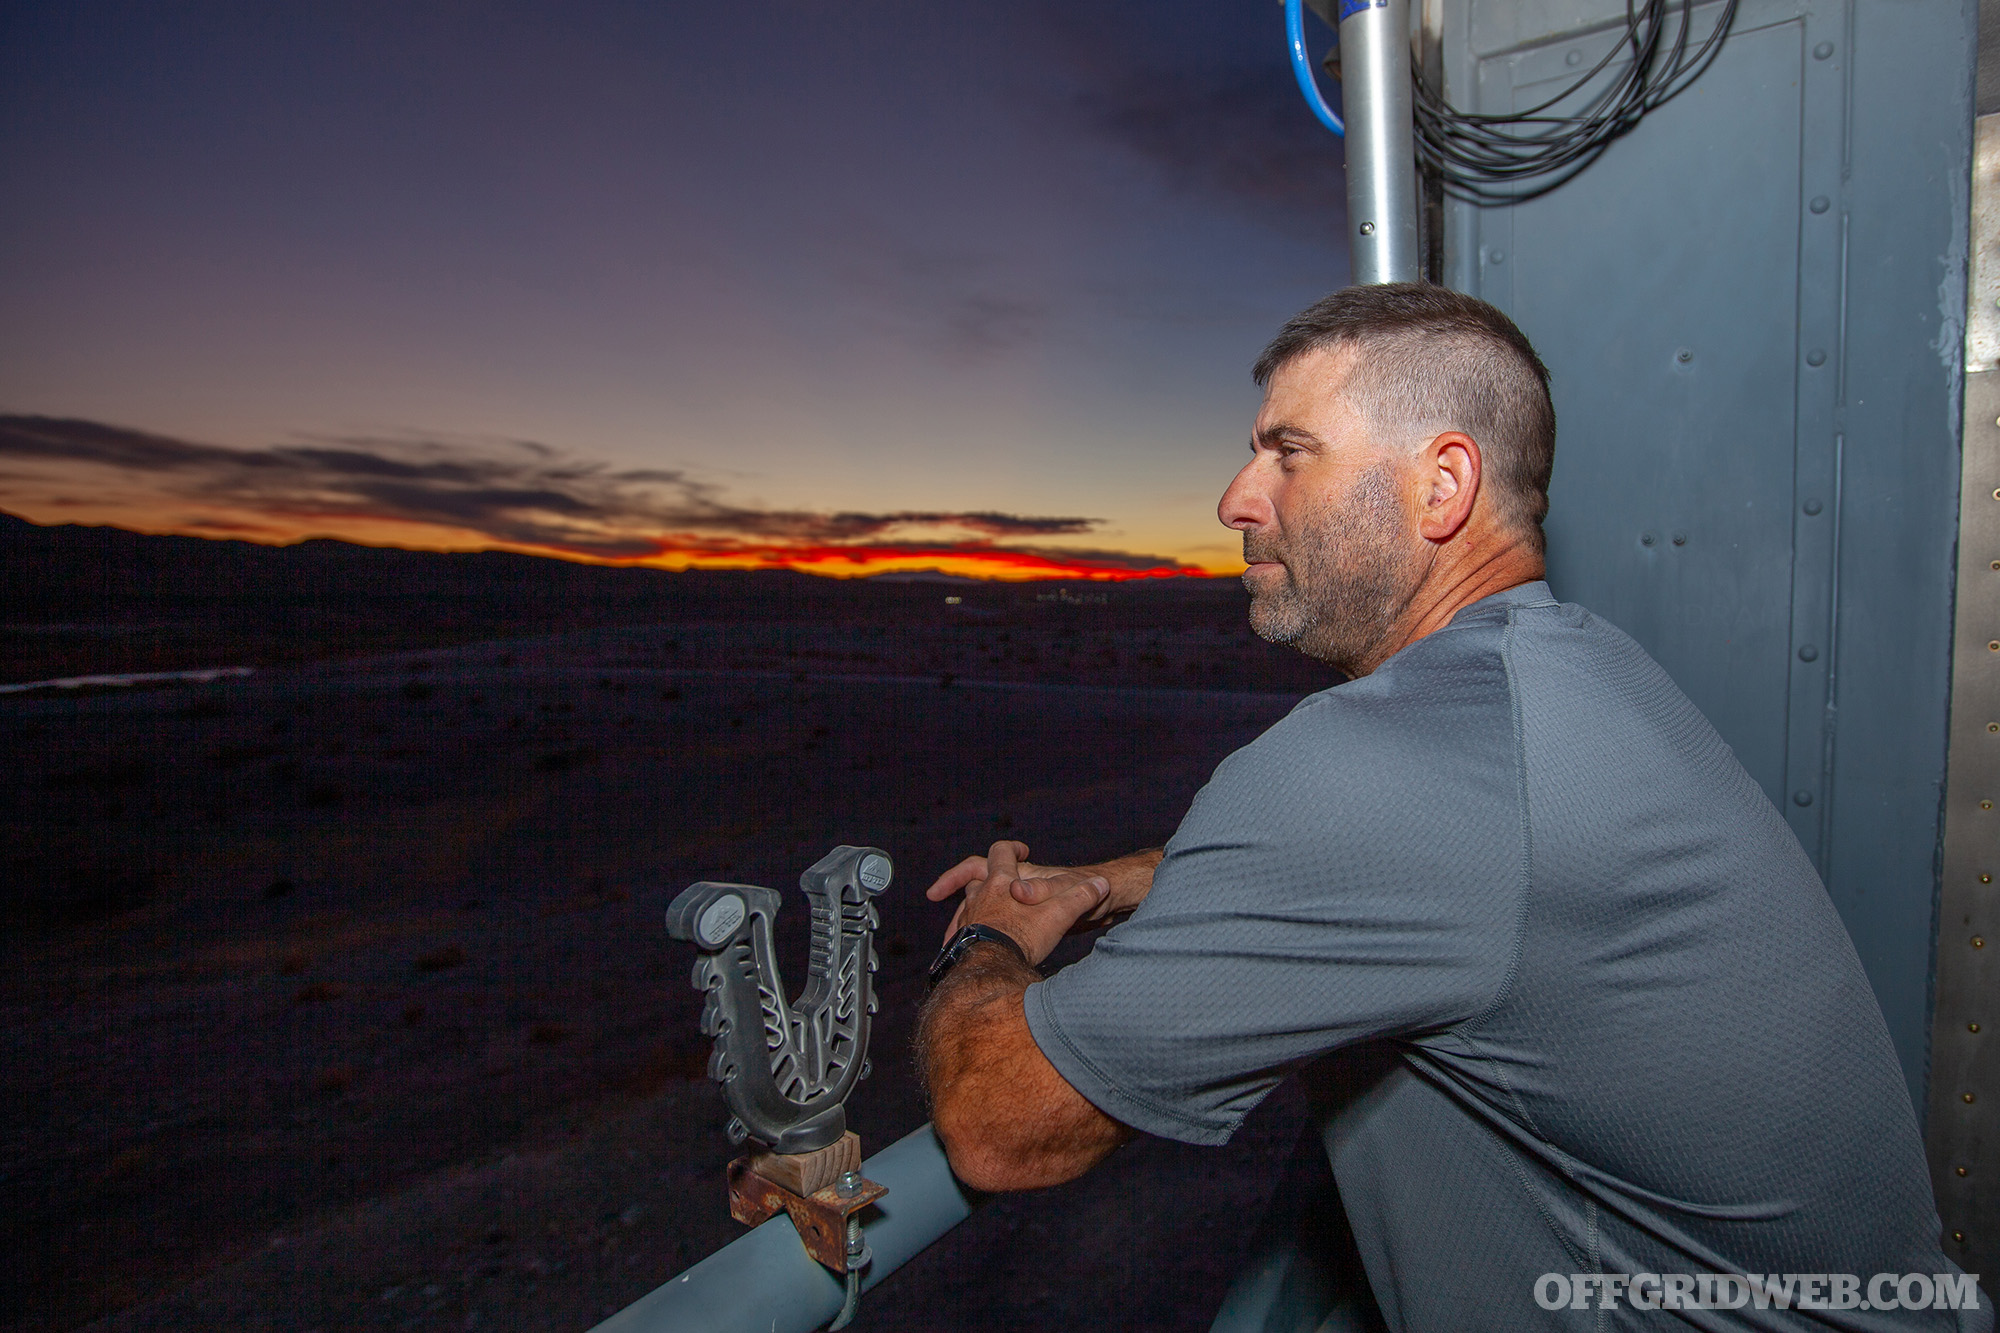
“In spring of 2021, I camped out at Shadow Mountain. I parked with the deck facing the Tetons and raised the box up. Every morning, I would conjure up two shots of espresso, sit out in my swing chair, and listen to the wind through the aspen trees, thinking about how lucky I am to be alive.” – Mark Pankey
2000 Ford F-650 Aircraft Provisioning Truck
Drivetrain: Cummins 5.9L 24-valve diesel with Allison 643 4-speed automatic transmission

Above: SnakPak carries a mountain bike and Sur Ron e-bike on-board for shorter outings. The F-650 is also set up to tow Pankey’s Toyota Tacoma via a heavy-duty trailer hitch and tow bar.
Build Time: 7 months for initial build, upgrades are ongoing
Build Cost: $3,300 for truck / $40,000 total
Owner & Builder: Lt. Col. Mark “Spanky” Pankey, USAF, Ret.
Instagram Accounts: @snakpak20 / @spanky301
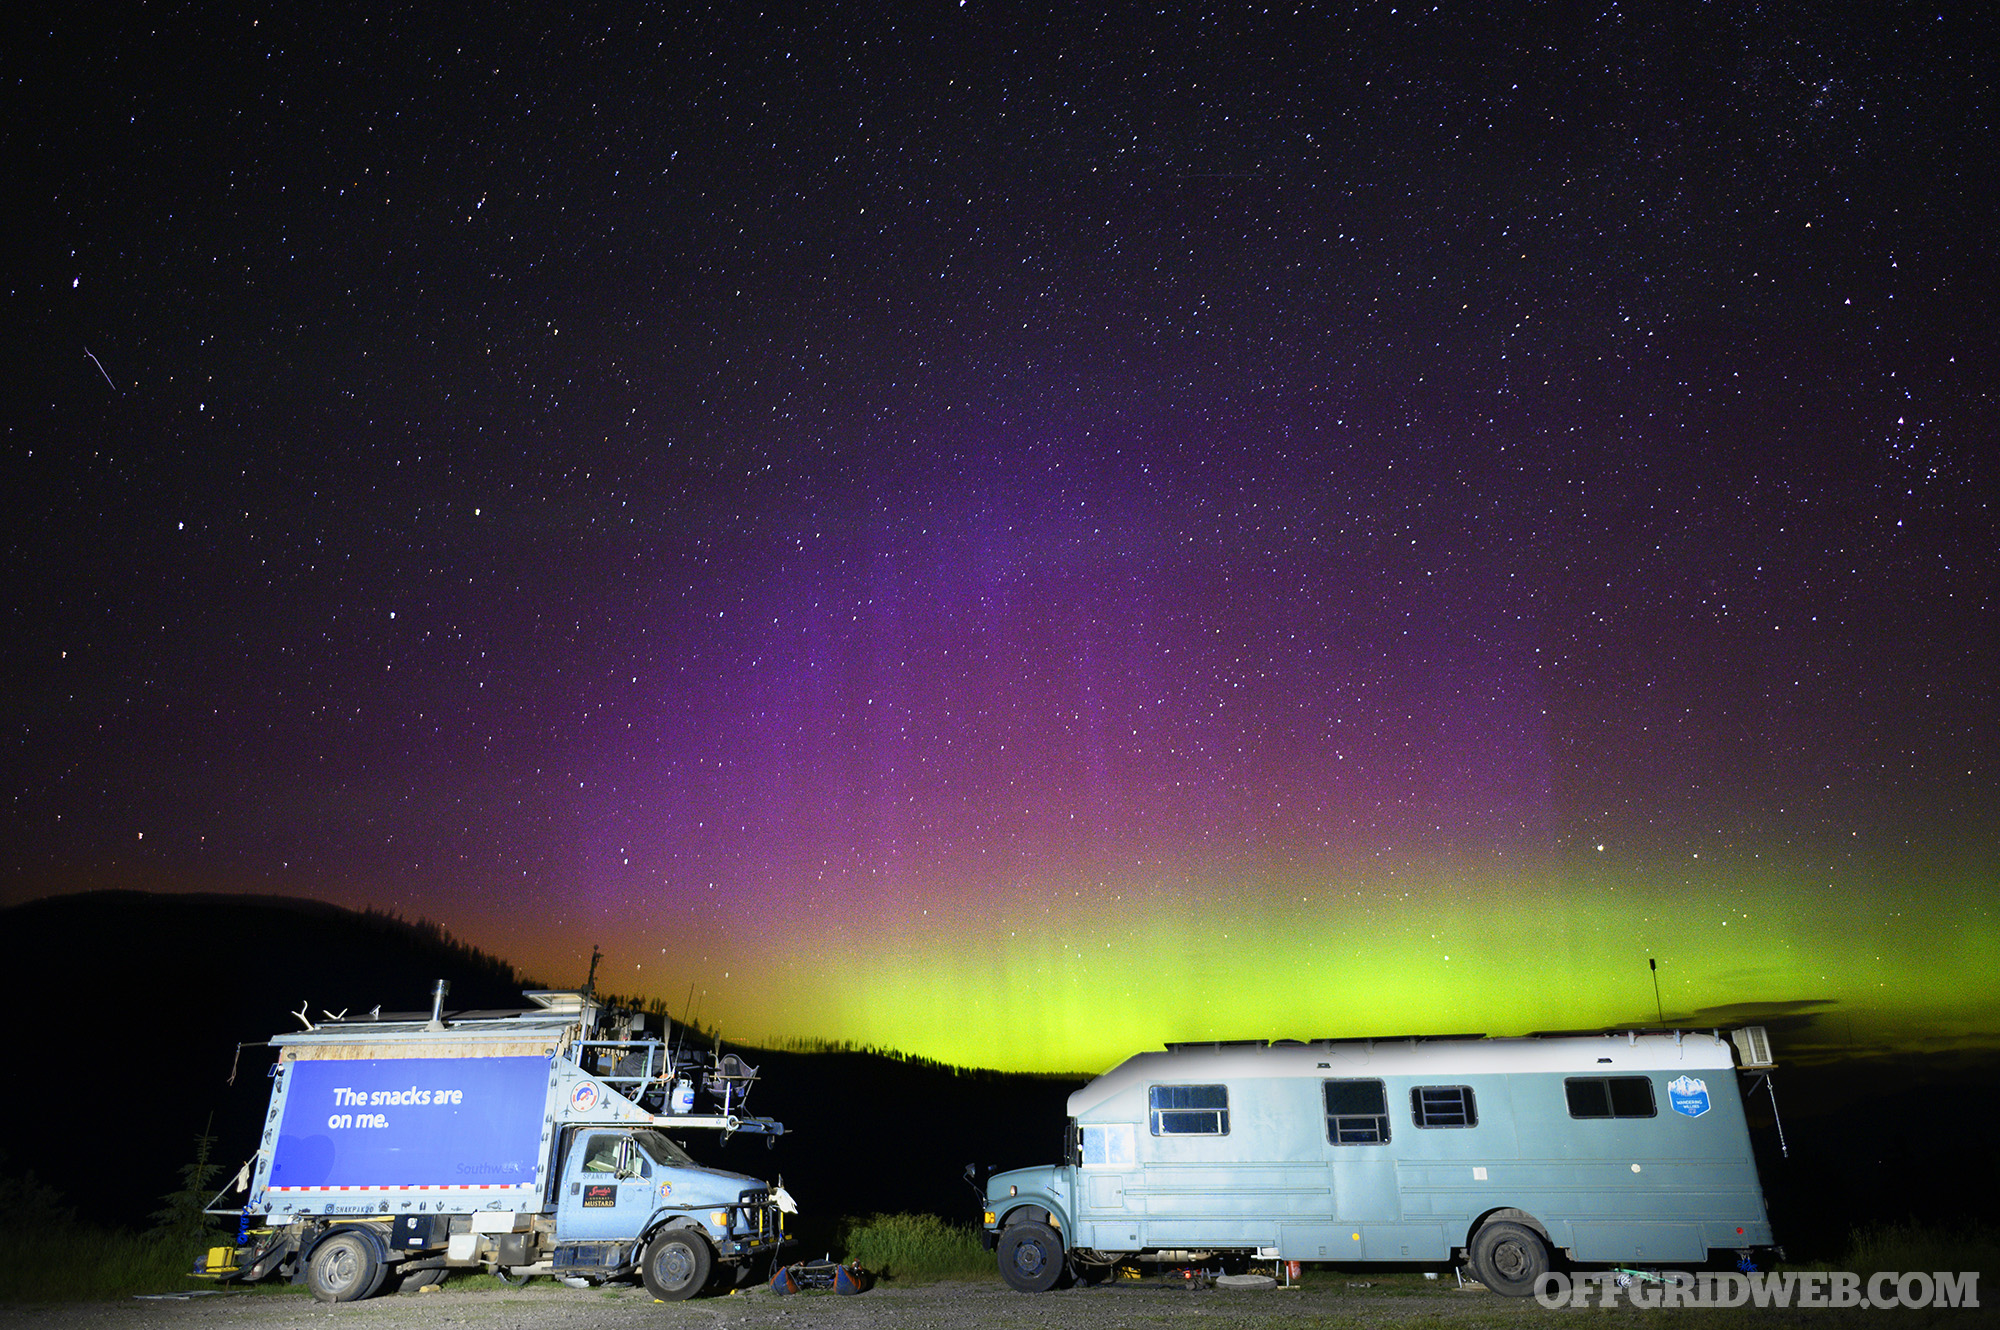
Above: Basking in the Northern Lights at a campsite in Montana. Photo by Anna Wilbur (@thescenicroutewest).