Illustrations by Ced Nocon
This article originally appeared in Issue 3 of our magazine.
City dwellers are well accustomed to — and largely spoiled by — the conveniences and wonders of modern plumbing. A twist of the wrist unleashes a never-ending flow of the wet stuff for drinking, cooking, bathing, cleaning, and more. The benefits and convenience of having large quantities of fresh water available to you at an instant are obvious. However, in an environment where clean water may not flow freely from the tap, those benefits become a necessary luxury and rare commodity.
On January 9, 2014, a massive chemical spill near a water treatment facility in West Virginia affected roughly 300,000 people spanning nine counties. The root of that spill came from a single source, a company that produces chemicals used in the mining, steel, and cement industries. The chemical spilled was toxic enough that warnings went out to not use the contaminated water even after it was boiled.
Government officials immediately ruled area tap water off limits, bottled drinking water disappeared from store shelves just a couple of hours later, and the National Guard was called upon to truck in fresh water. Although the water was ruled safe to use about a week later, the effects of a regional water disruption were clearly felt. Considering the spill was an accident that originated from a single source, the consequences of a more widespread event would be more devastating. Surely the effects of a deliberate attack or large-scale environmental disaster on water resources in multiple areas would cause much more strain on clean water supplies.
This is where being prepared for the unimaginable comes into play. Unless you’re blessed with a sixth sense, you don’t have a crystal ball that tells you what calamities will fall upon you. You do, however, have the benefit of foresight and the ability to be proactive. There’s no question that having extra water stored for a rainy day (bad pun intended) can be a lifesaver. Sure, storing water in bottles in your closet or garage are viable options, but if you want to store water in real quantities (like 55 gallons at a time) you’ll need a viable alternative.
Rainwater Diverter Kits
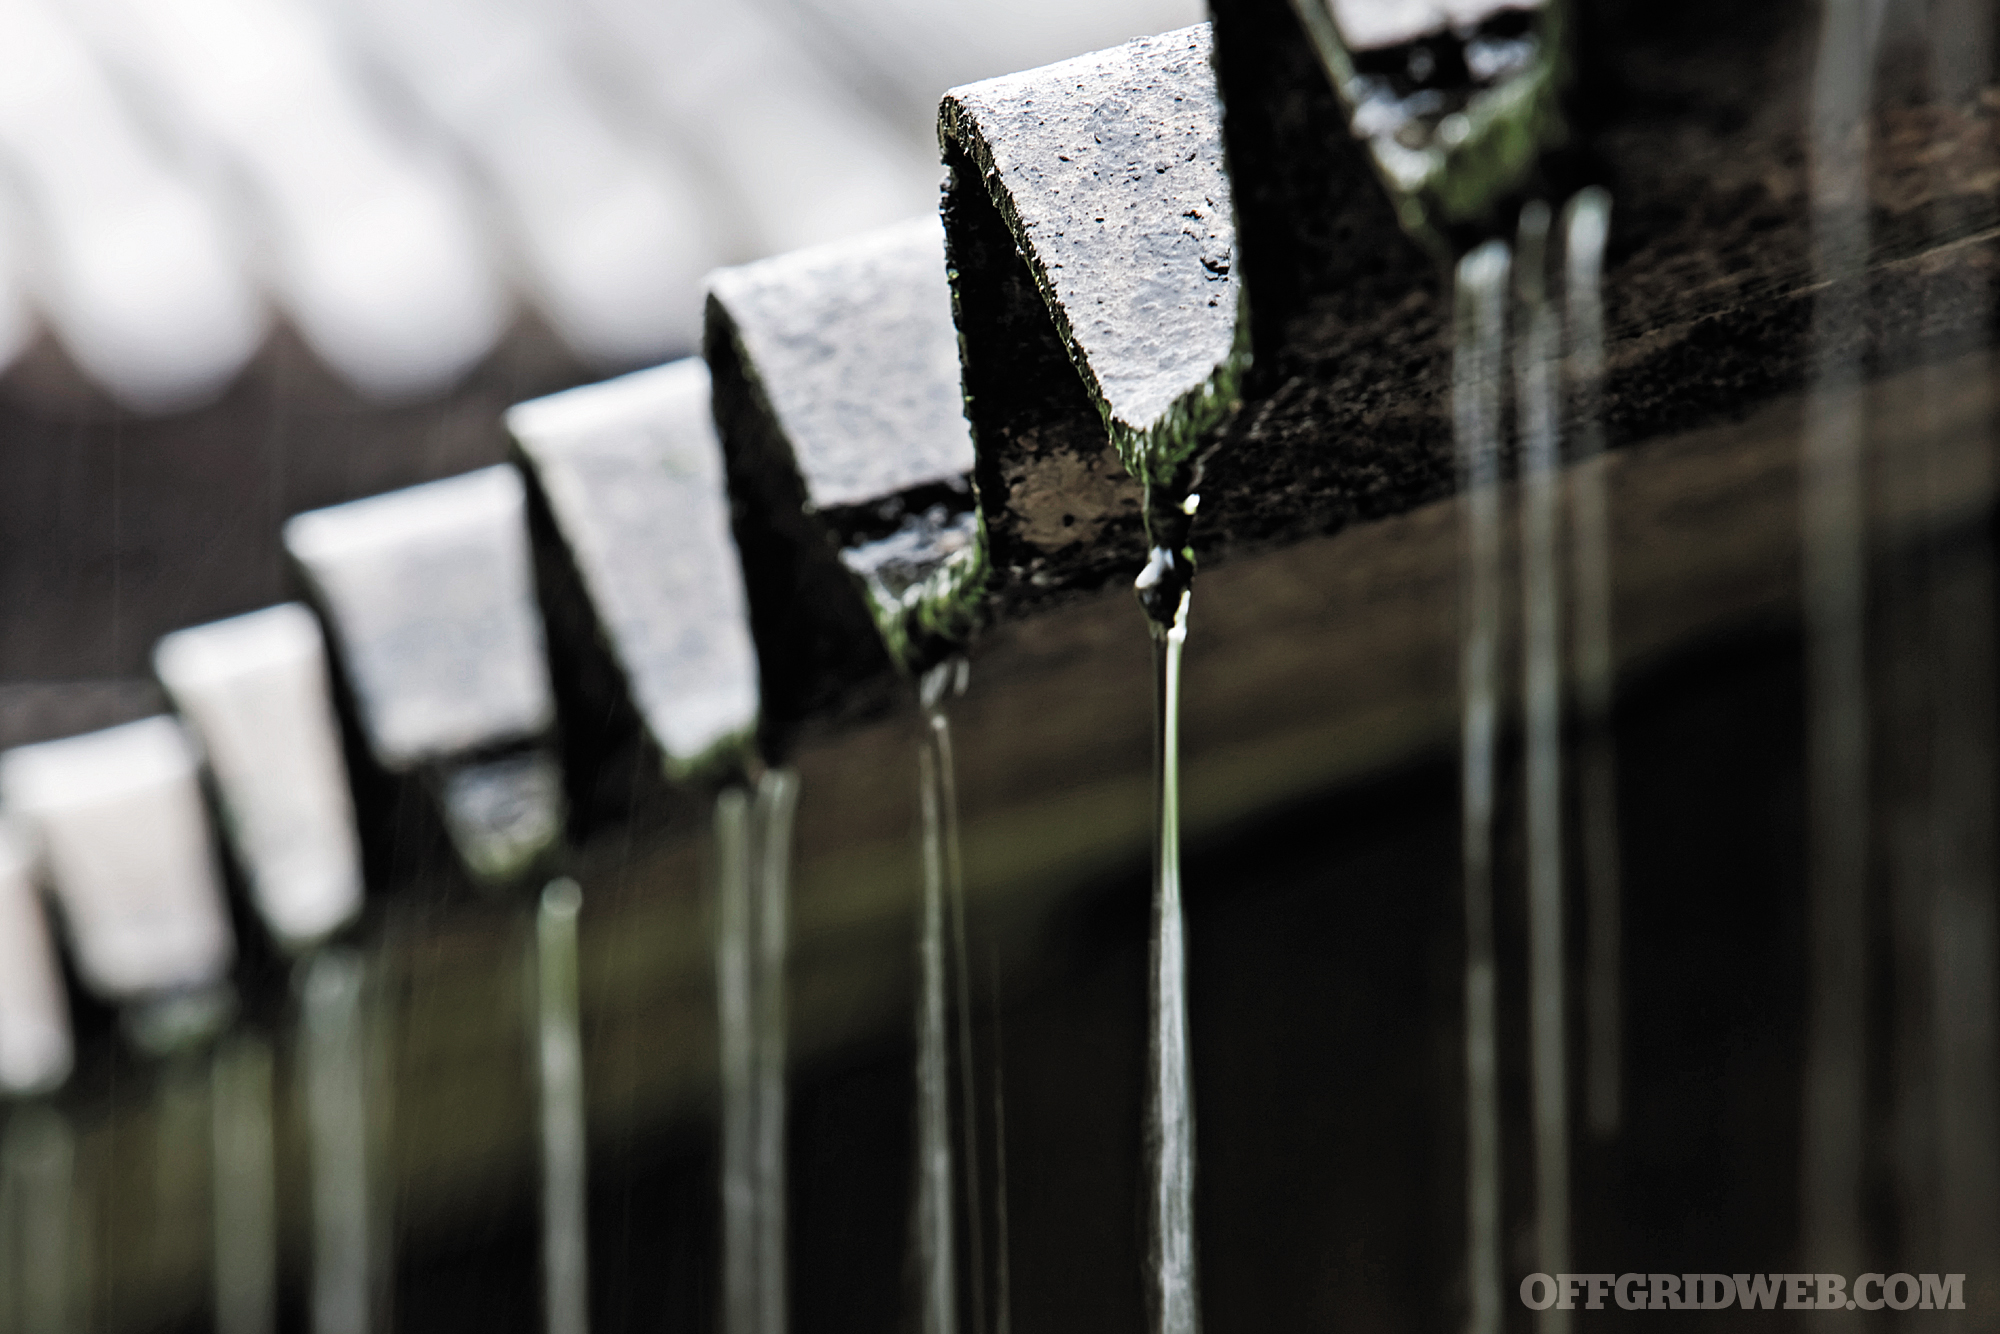
Our gardening friends have long discovered the easy answer to storing respectable quantities of water — best of all, the water is free. Rain barrels can be set up to trap and hold rain water. The water comes from rain collected on your home’s rooftop and funneled directly into storage barrels. Garden aficionados store rainwater during the rainy months and use this water to keep their gardens watered — and their water bills down — during drier seasons. Adapting this concept to fit the survival mindset is simple enough.
Rain barrel kits are readily available at hardware and gardening supply stores. The methods of installation for our purposes are the same, with a couple of exceptions. While gardening water doesn’t need to be potable, we need to take into consideration the drinkability of the water for survival purposes. Instead of using any old barrel, we want to use food-grade barrels, which can be found at restaurant supply stores and at various online retailers. Make sure you get one where the top can be removed so that it is easier to work on and clean.
Most rain barrel kits come with filters that take out large debris, but we want to add finer filters or mesh to further keep debris out. After all, the water is rolling down your roof into your rain gutter and finally into your barrel. If the water is being used to wash up or to do the dishes with, you should be good to go. If you intend on drinking or cooking with it, you’ll want a separate water filtration system too. Boiling works, or you can get fancier with the many water filtration methods and gizmos on the market.
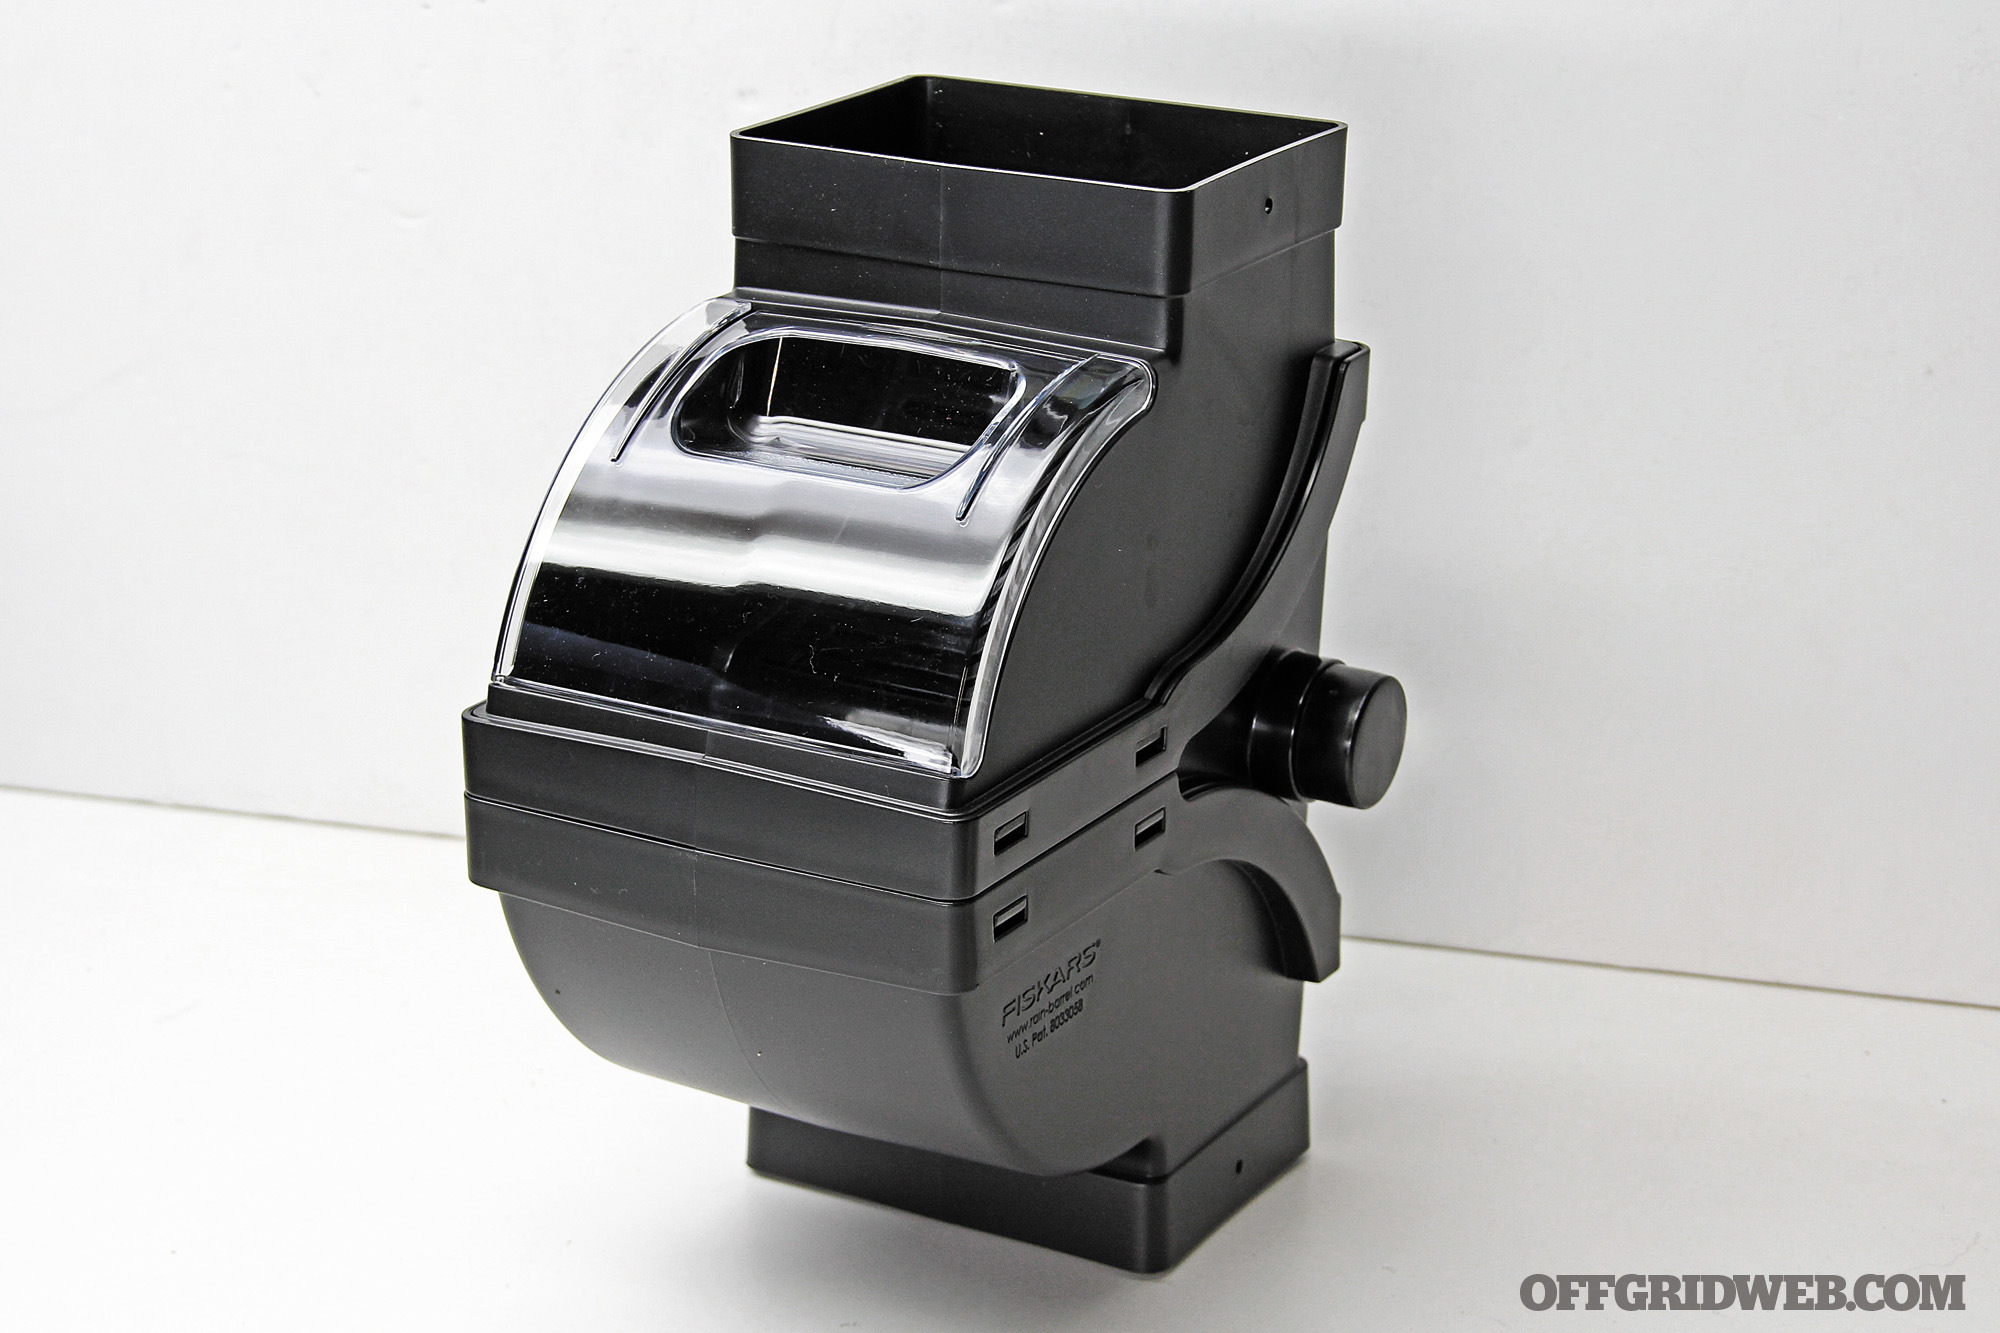
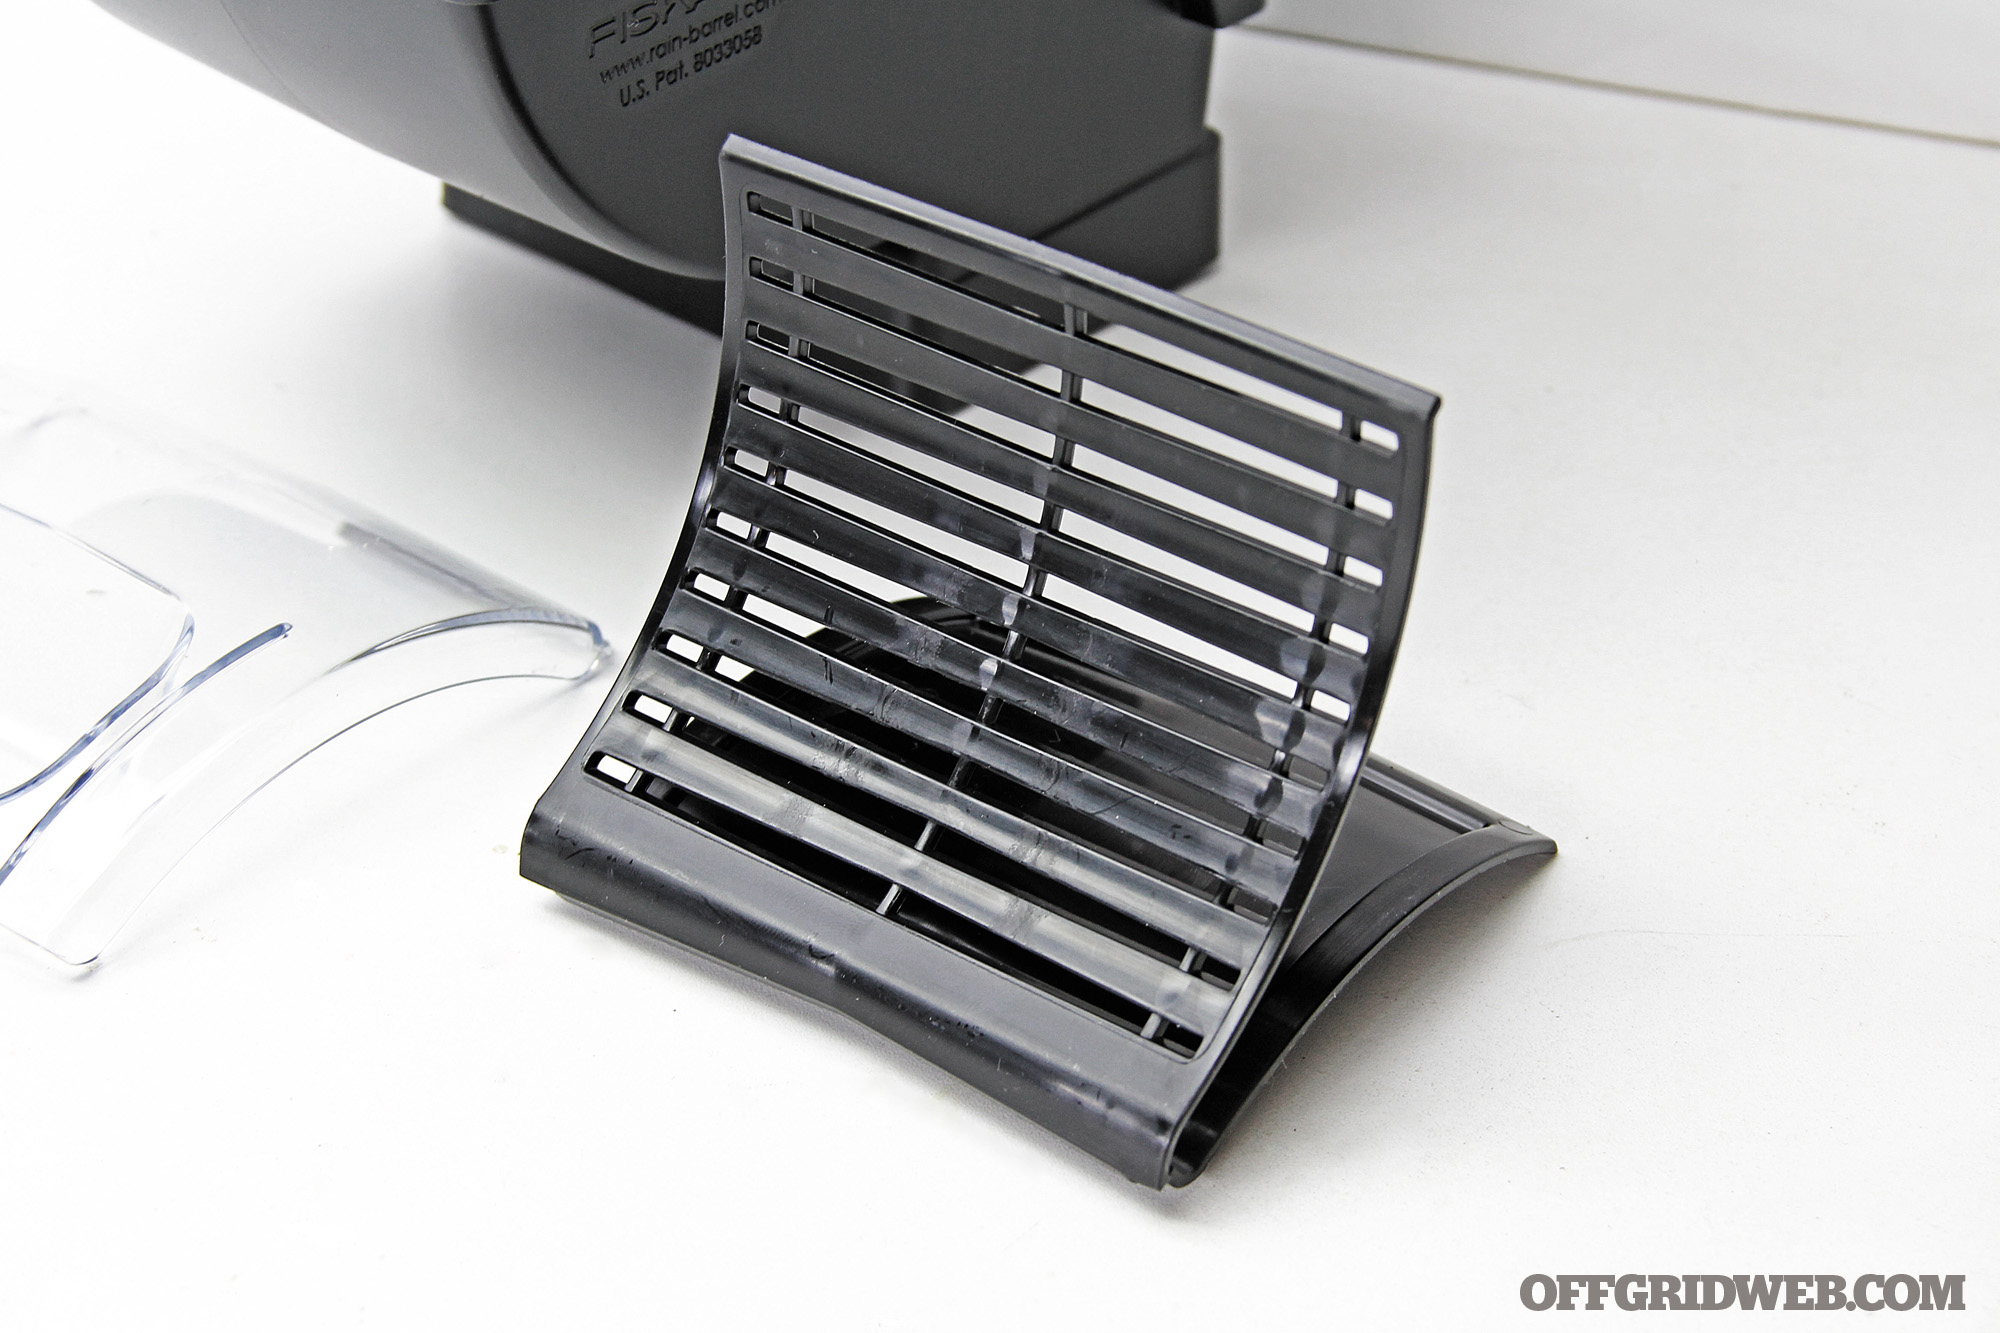
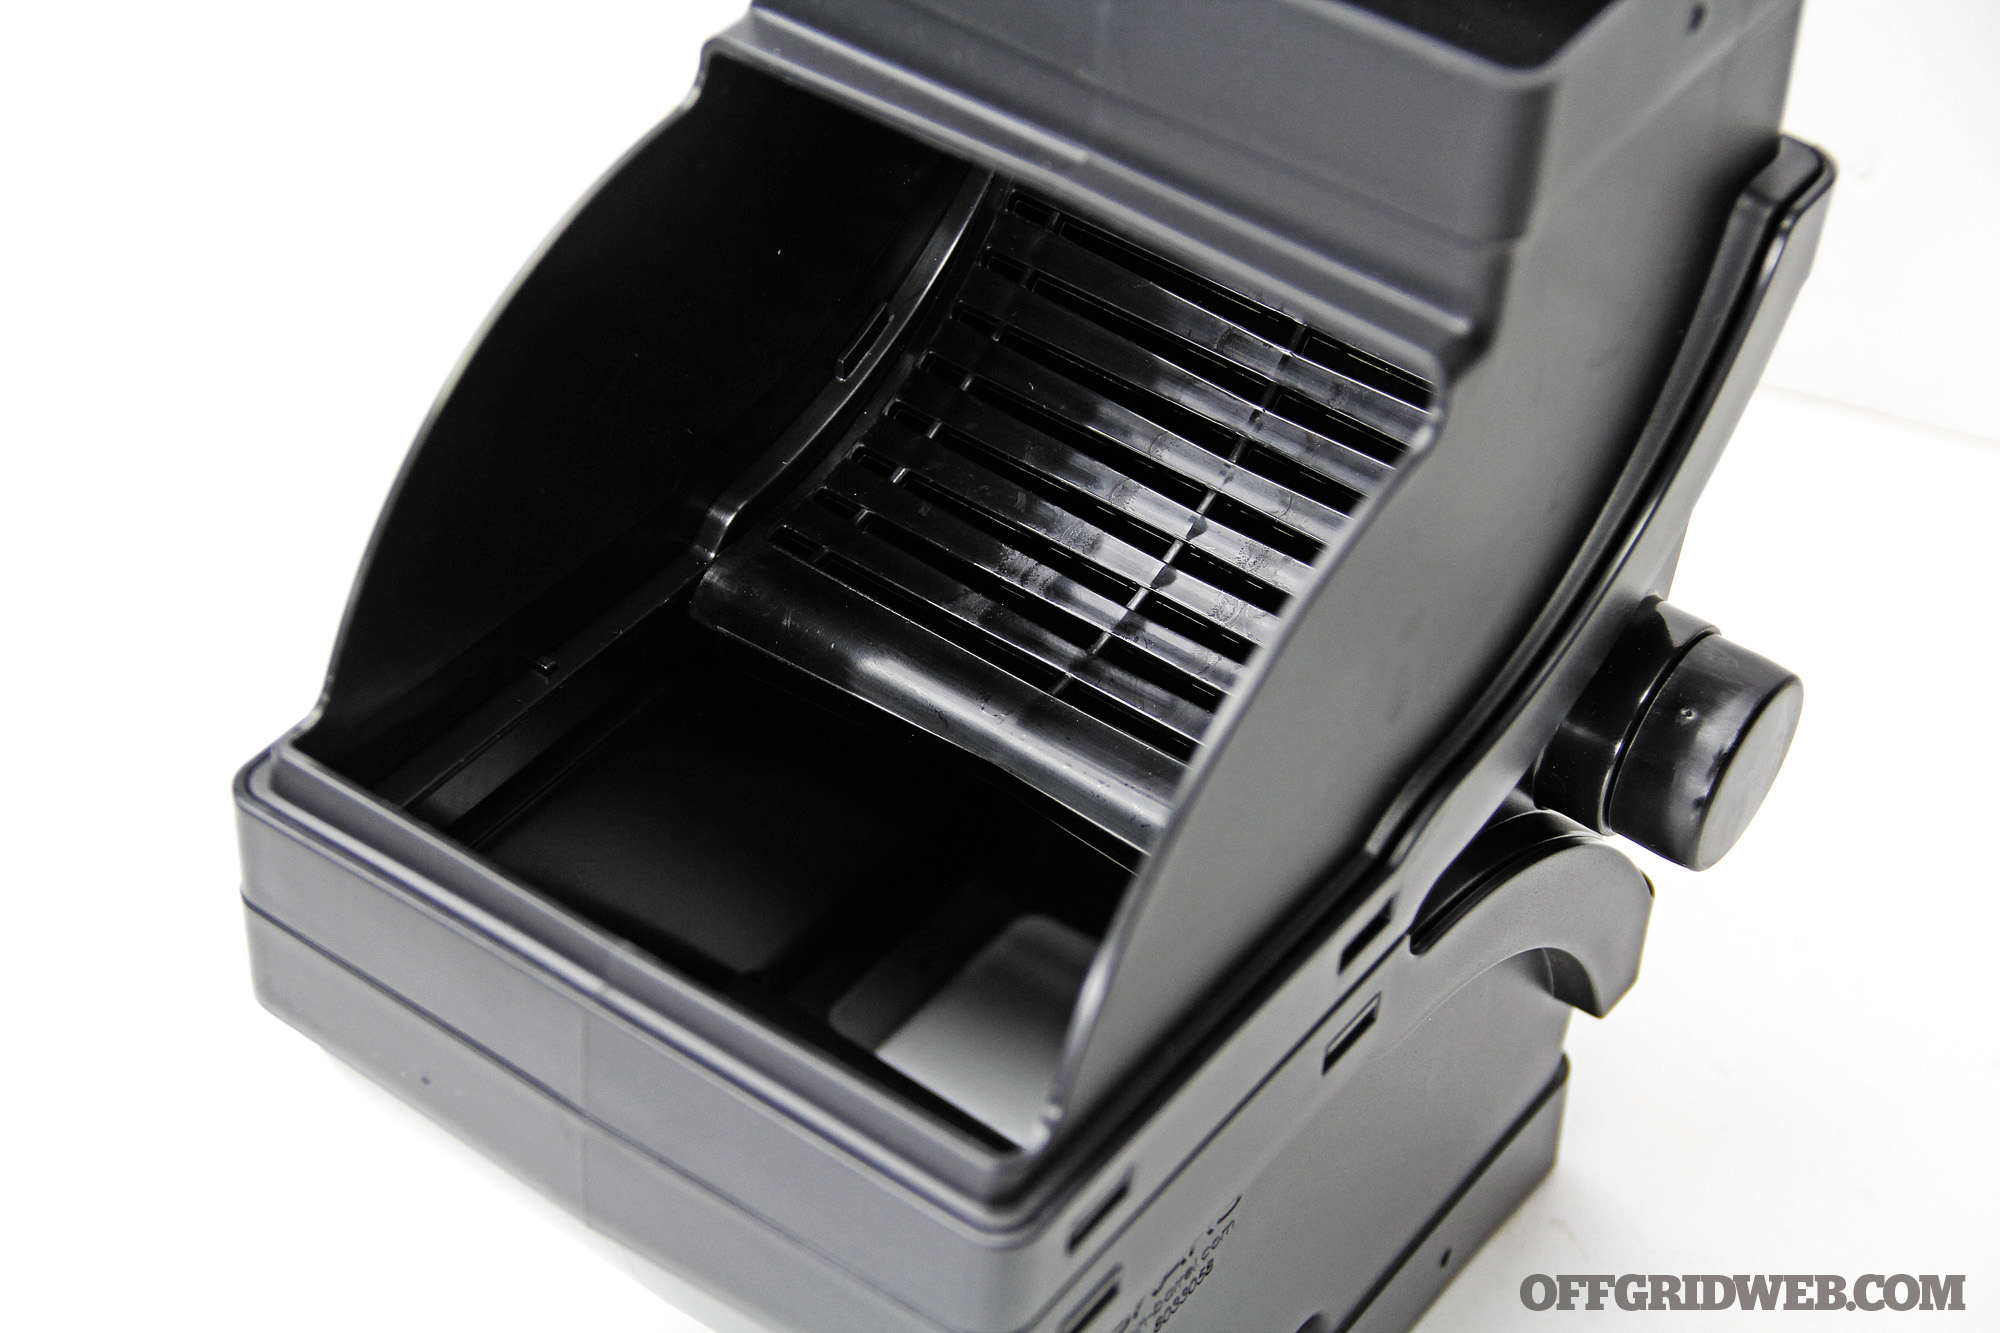
We took a look at the many rain barrel kits on the market and decided to go with a unit by Fiskars. We like how the Fiskars DiverterPro Rainwater Diverter fits different-sized rain gutters and especially liked the built-in filter that is easy to view, access, and clean. The filter’s slats are pretty fine so we didn’t need to enhance it any further. Also, when the rain barrel fills up, the water diverts back into the downspout and is directed away from your home as usual.
Fiskars DiverterPro Rainwater Diverter
MSRP
$40
URL
www.fiskars.com
Barrel Preparation
Each kit differs slightly, so make sure you go through the instructions of your chosen kit carefully. Here, we detail the installation of the Fiskars diverter kit. We begin by preparing our food-grade barrel. You can choose a size that best fits your needs; we chose a larger 55-gallon size to maximize the amount of stored water.
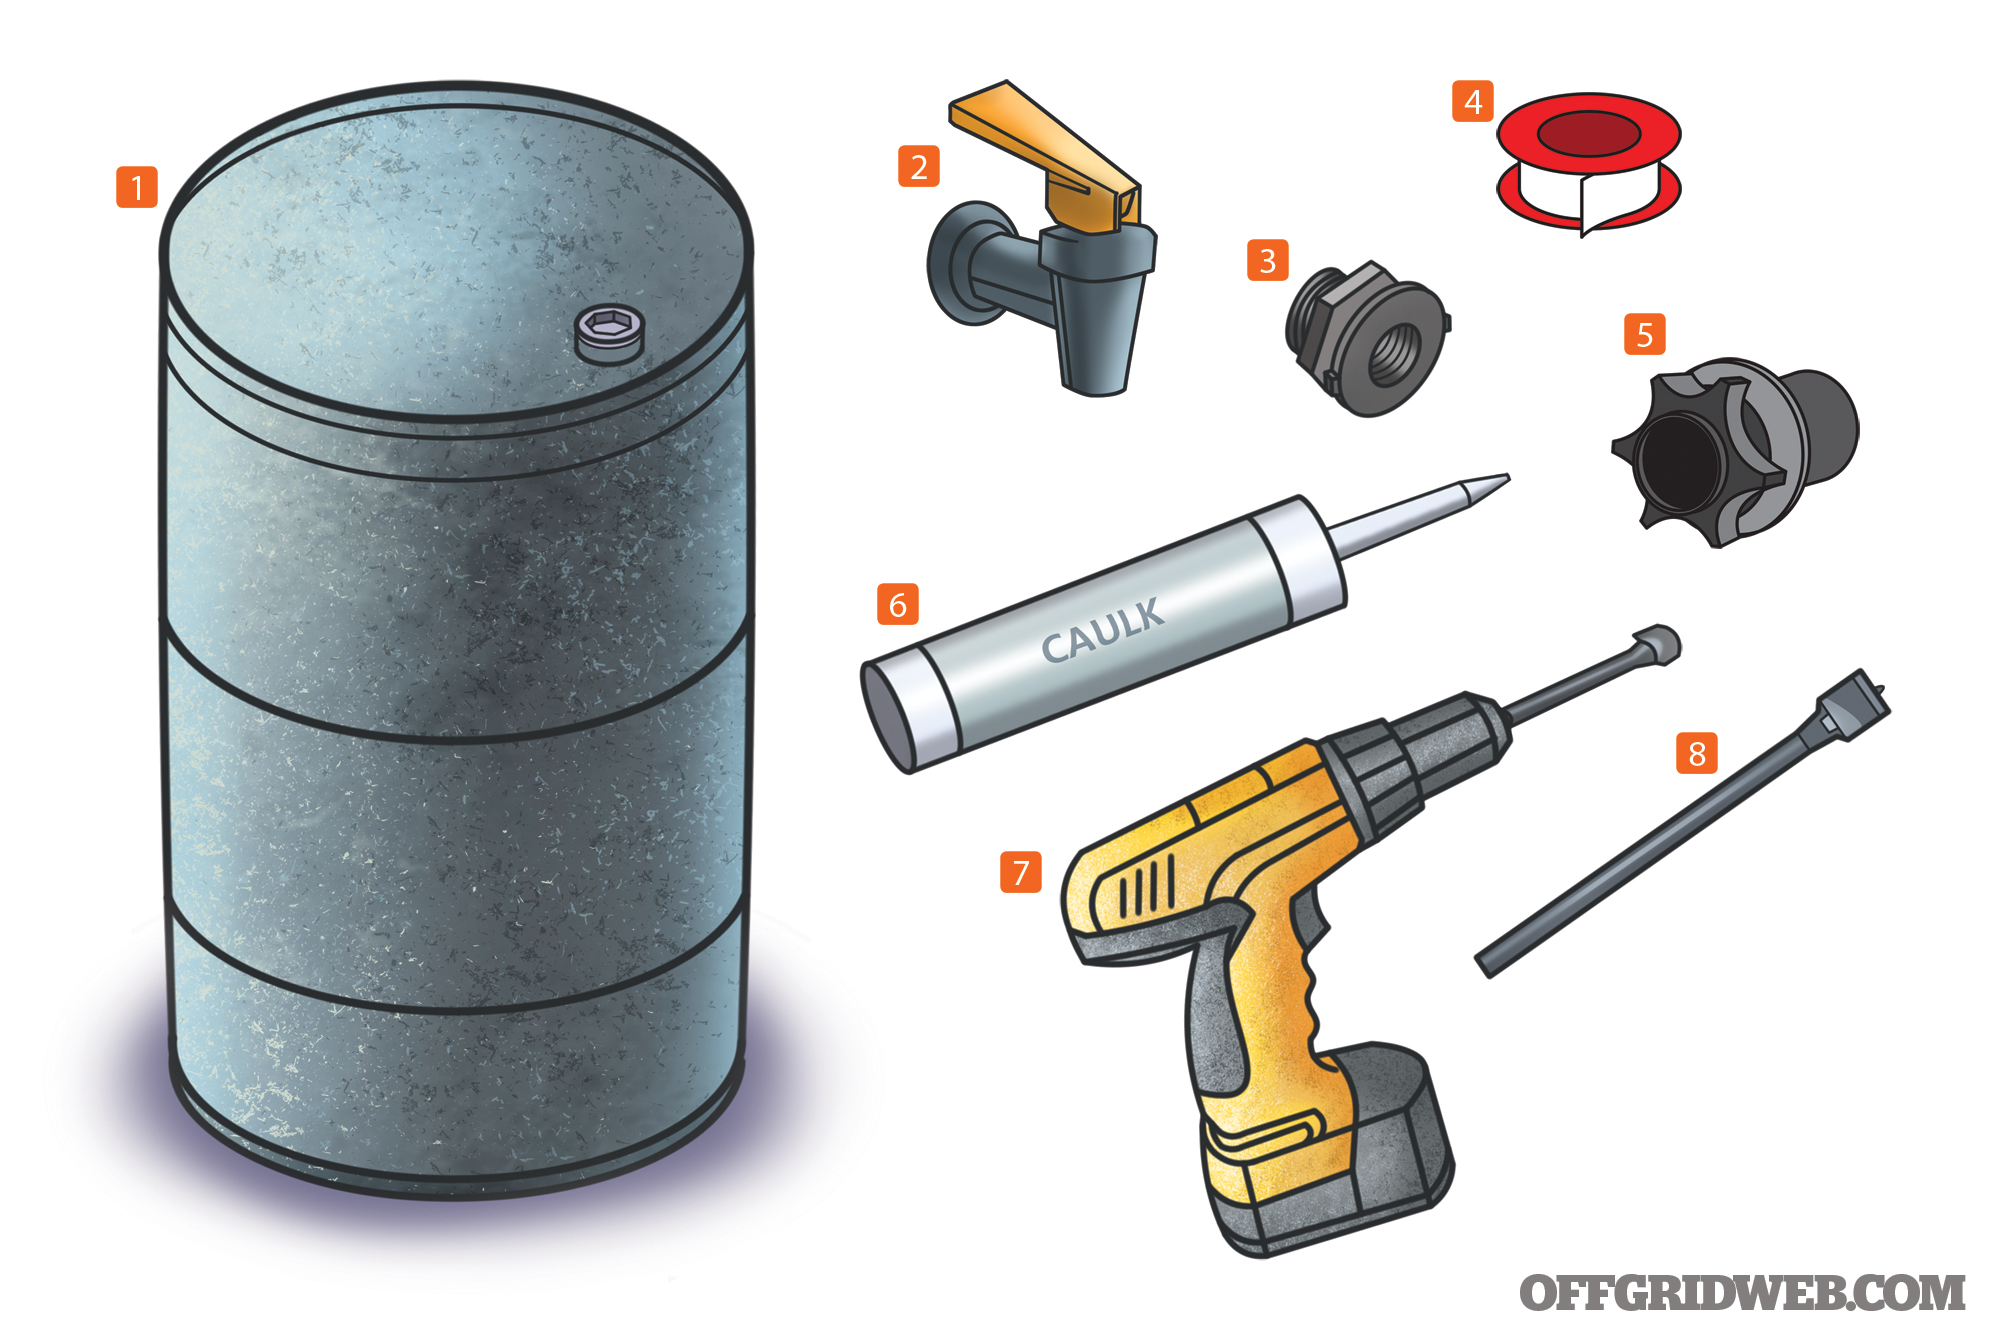
What you’ll need:
- Food-grade barrel
- Water spigot for 3⁄4-inch opening
- Trap adapter with nut
- Teflon tape
- Hose connector from Fiskars kit
- Caulking
- Power drill
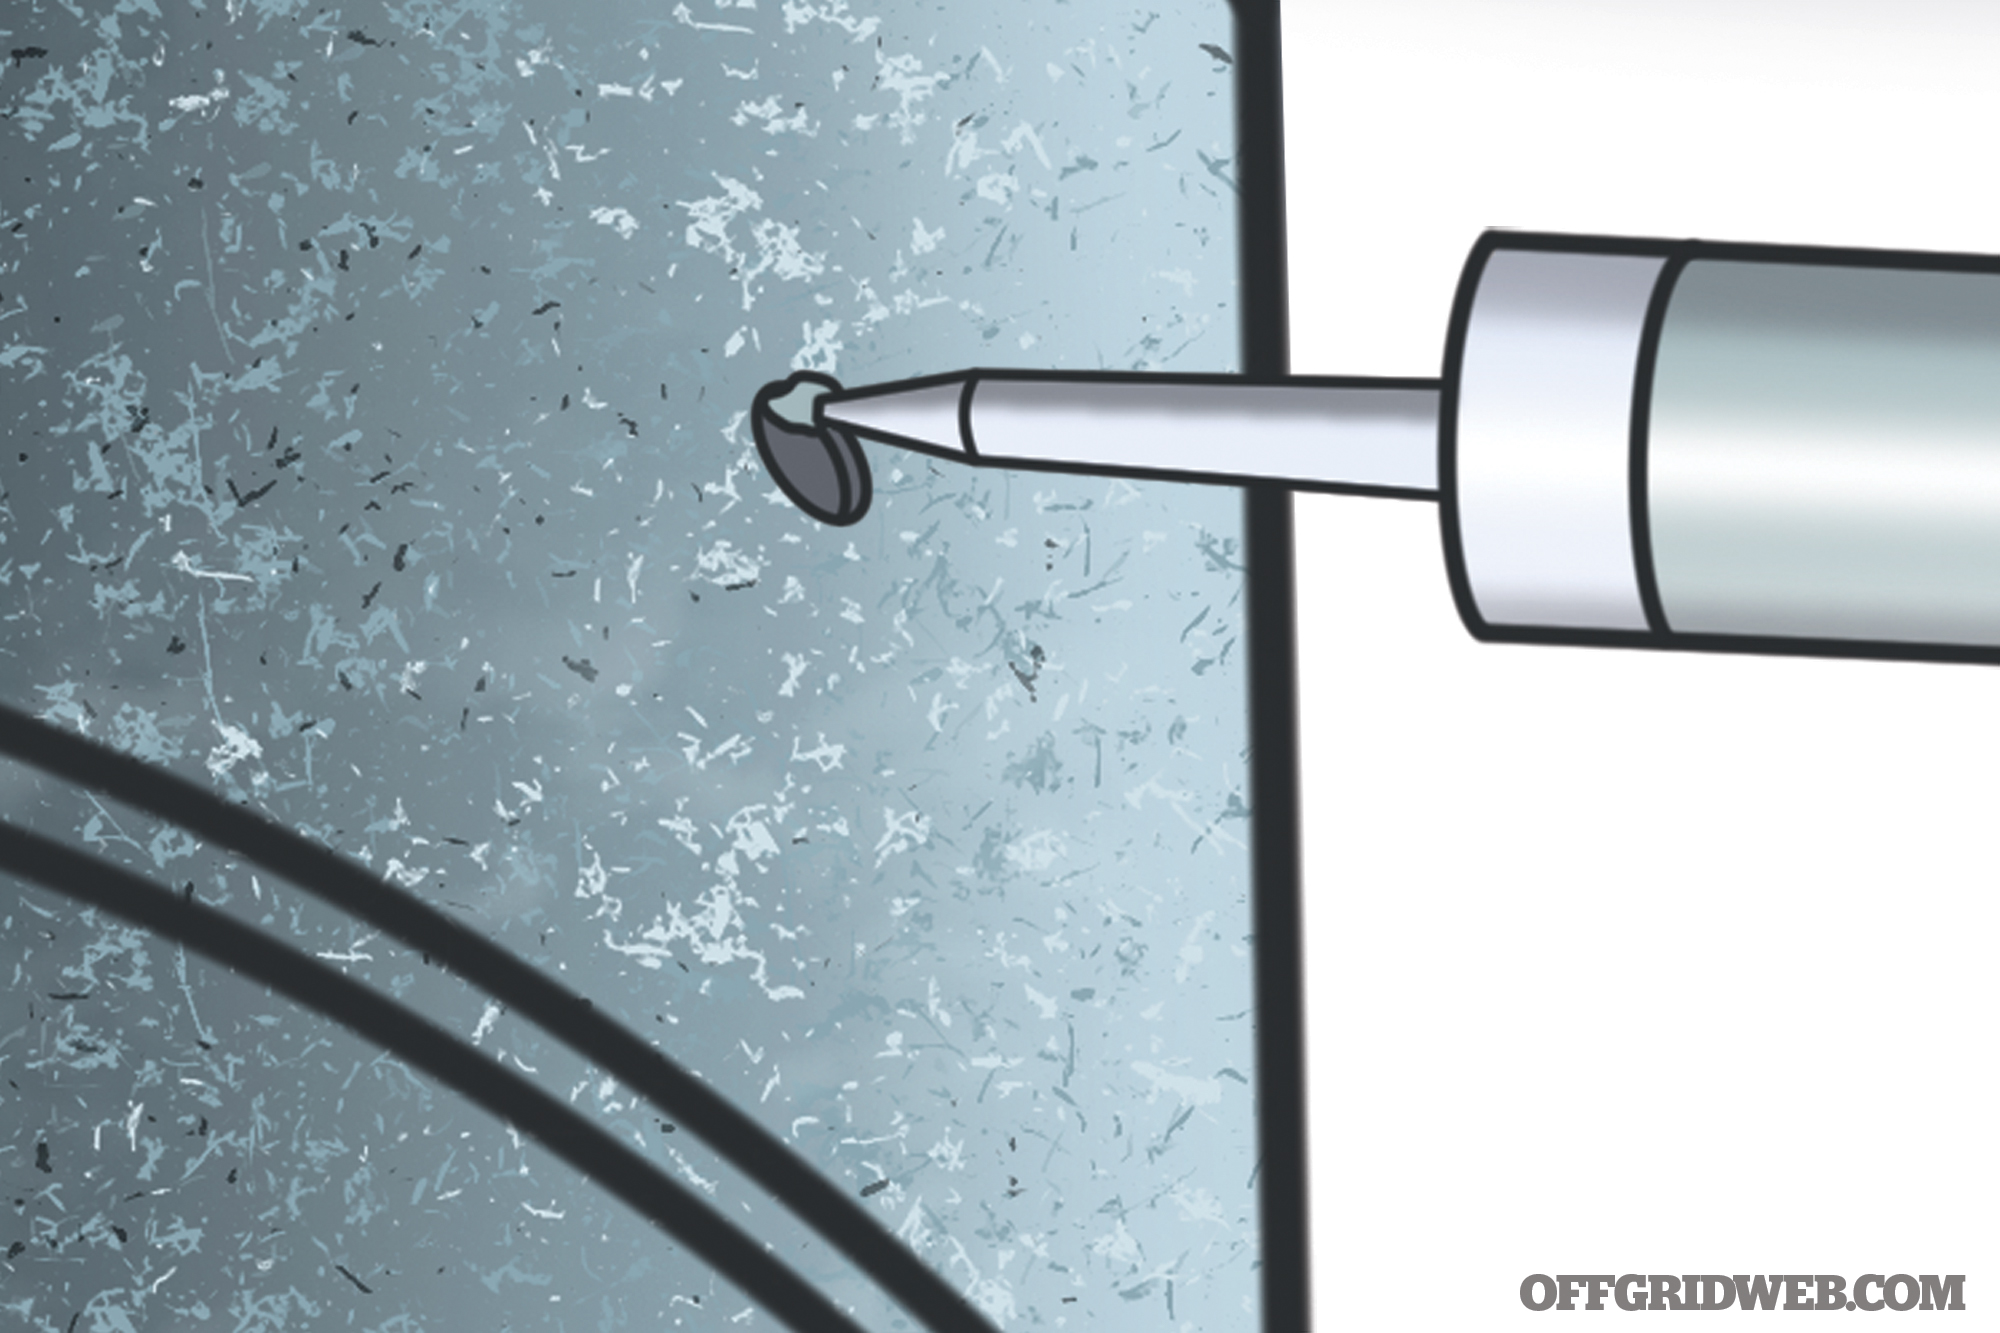
- 3⁄4-inch spade drill bit
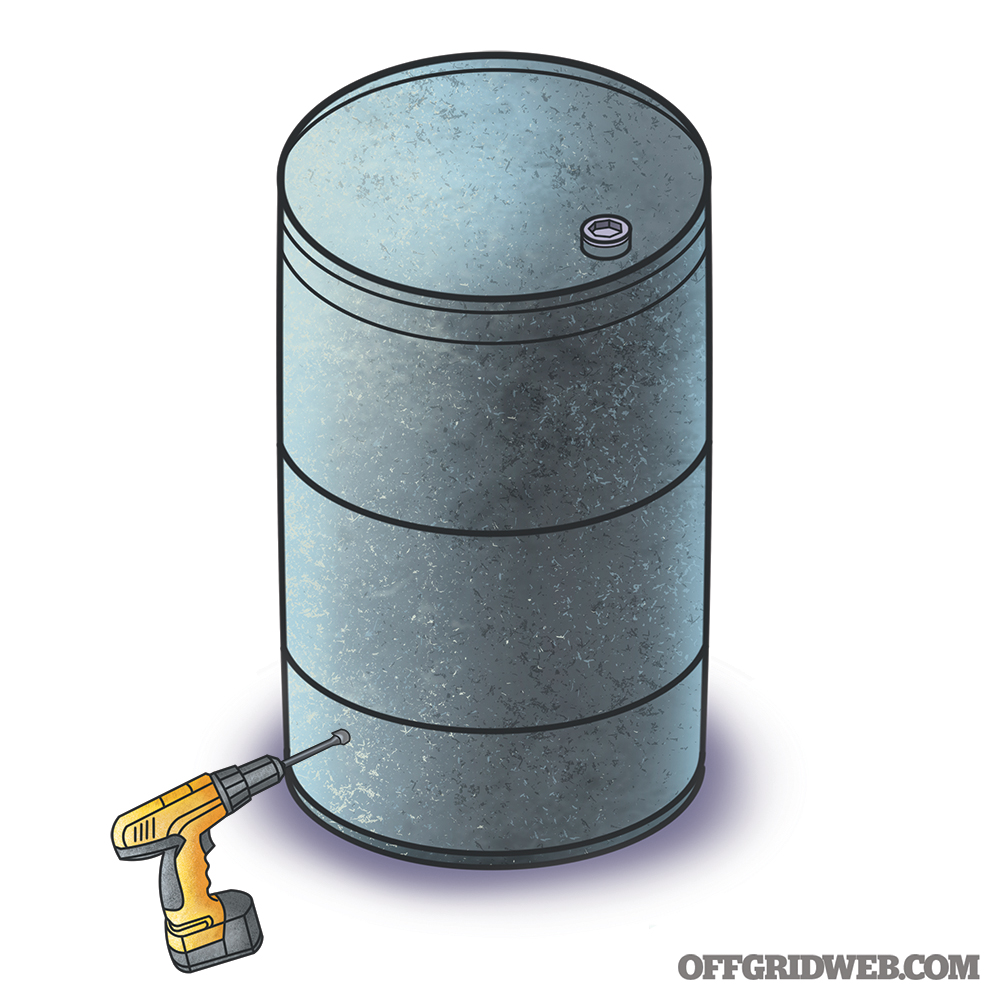
1. Being mindful of how much room you will need under the spigot to fill a water container such as a pitcher or bottle, use the ¾-inch spade drill bit to drill a hole at the bottom of the barrel for the water spigot. We drill our hole about a foot from the bottom.
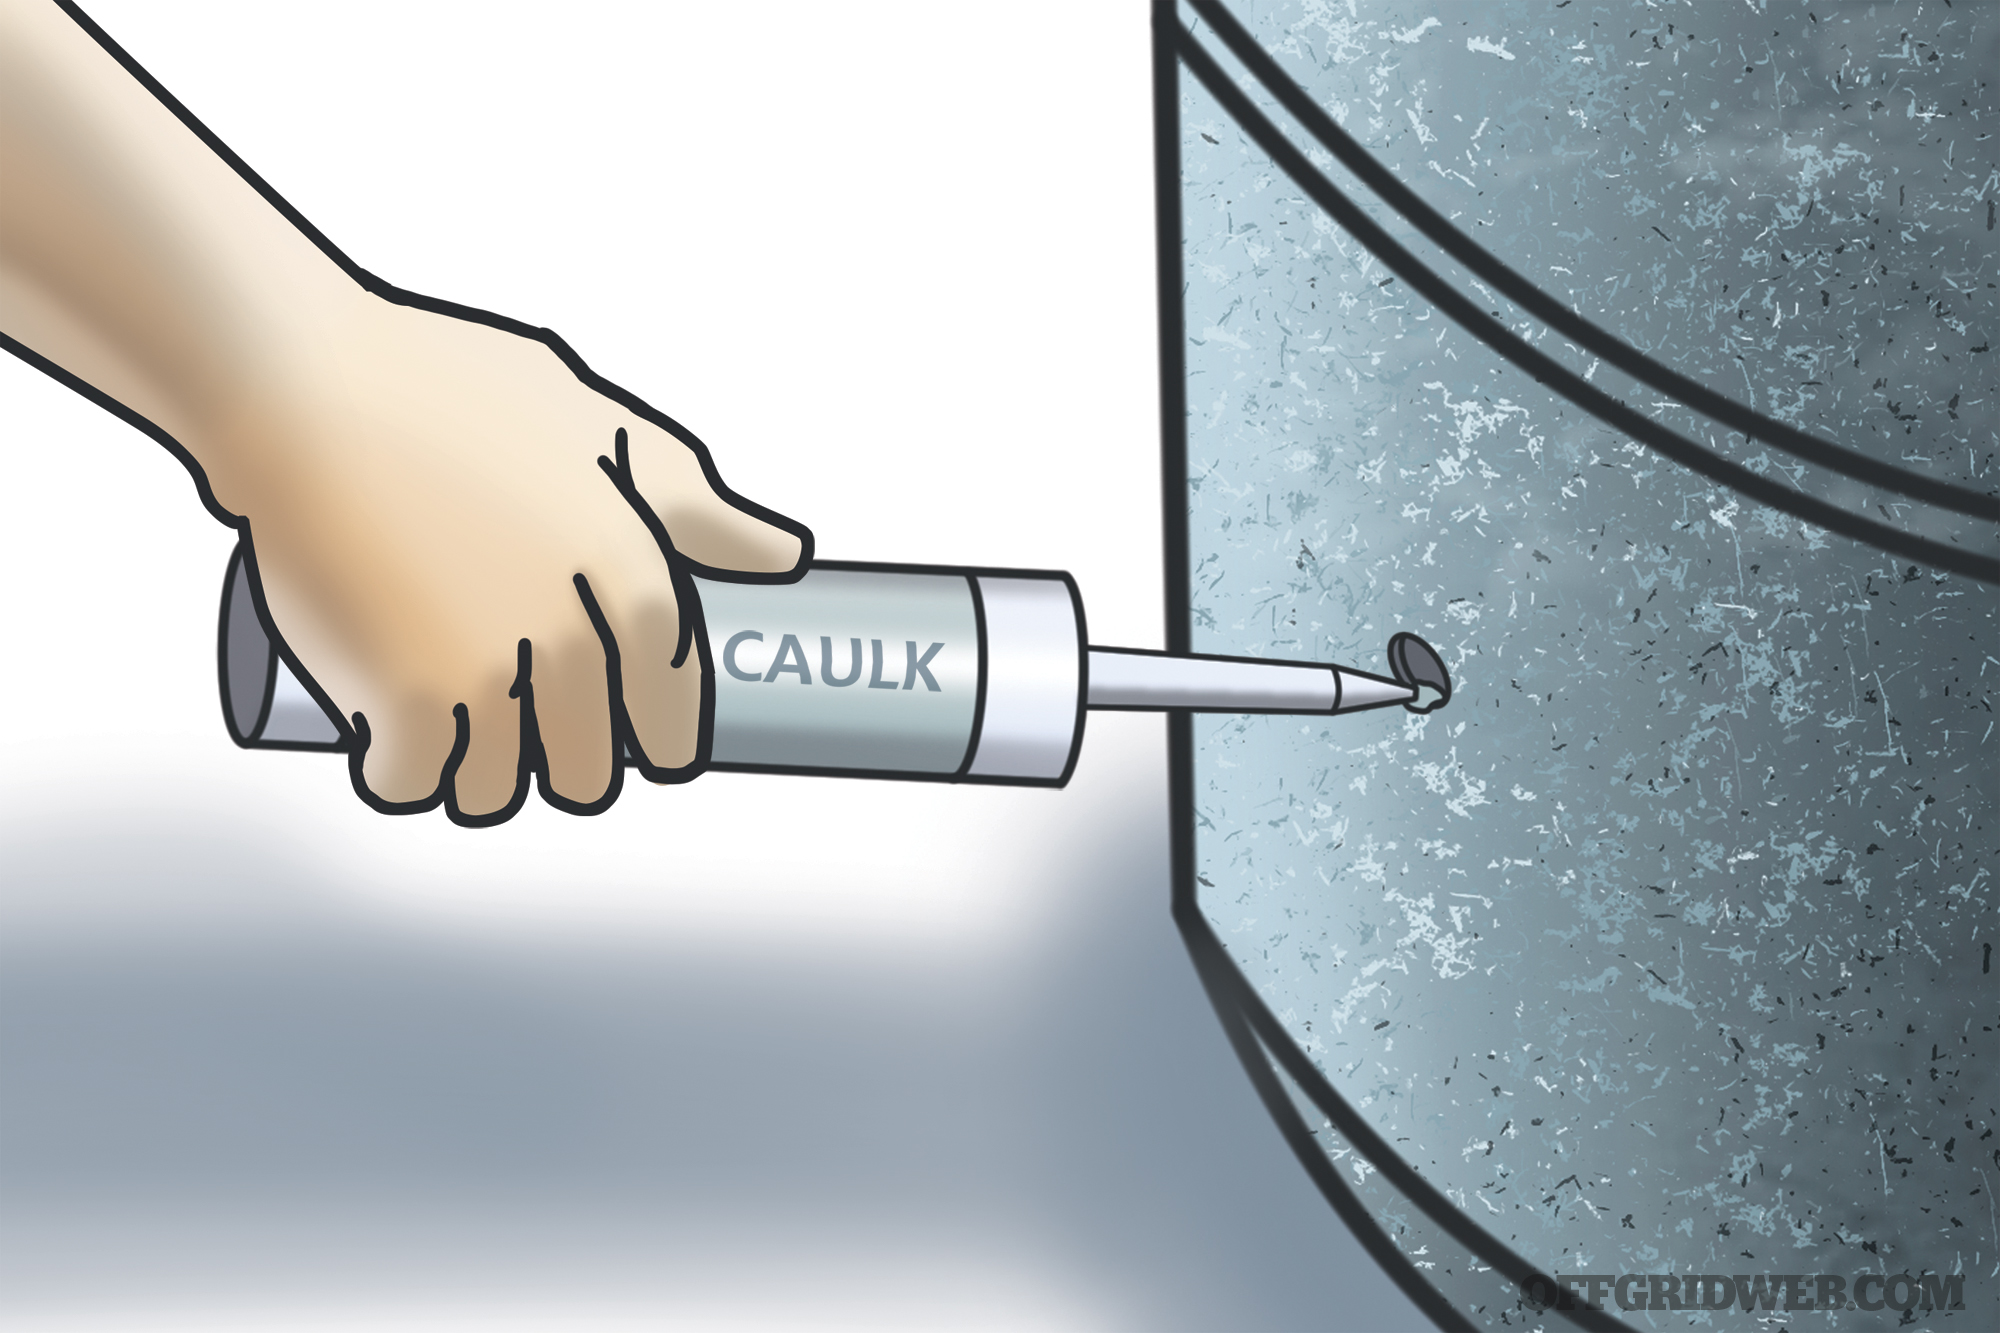
2. Spread caulk around the hole inside and outside of the barrel. Apply Teflon tape to the trap adapter’s threads and attach the spigot to the coupling.
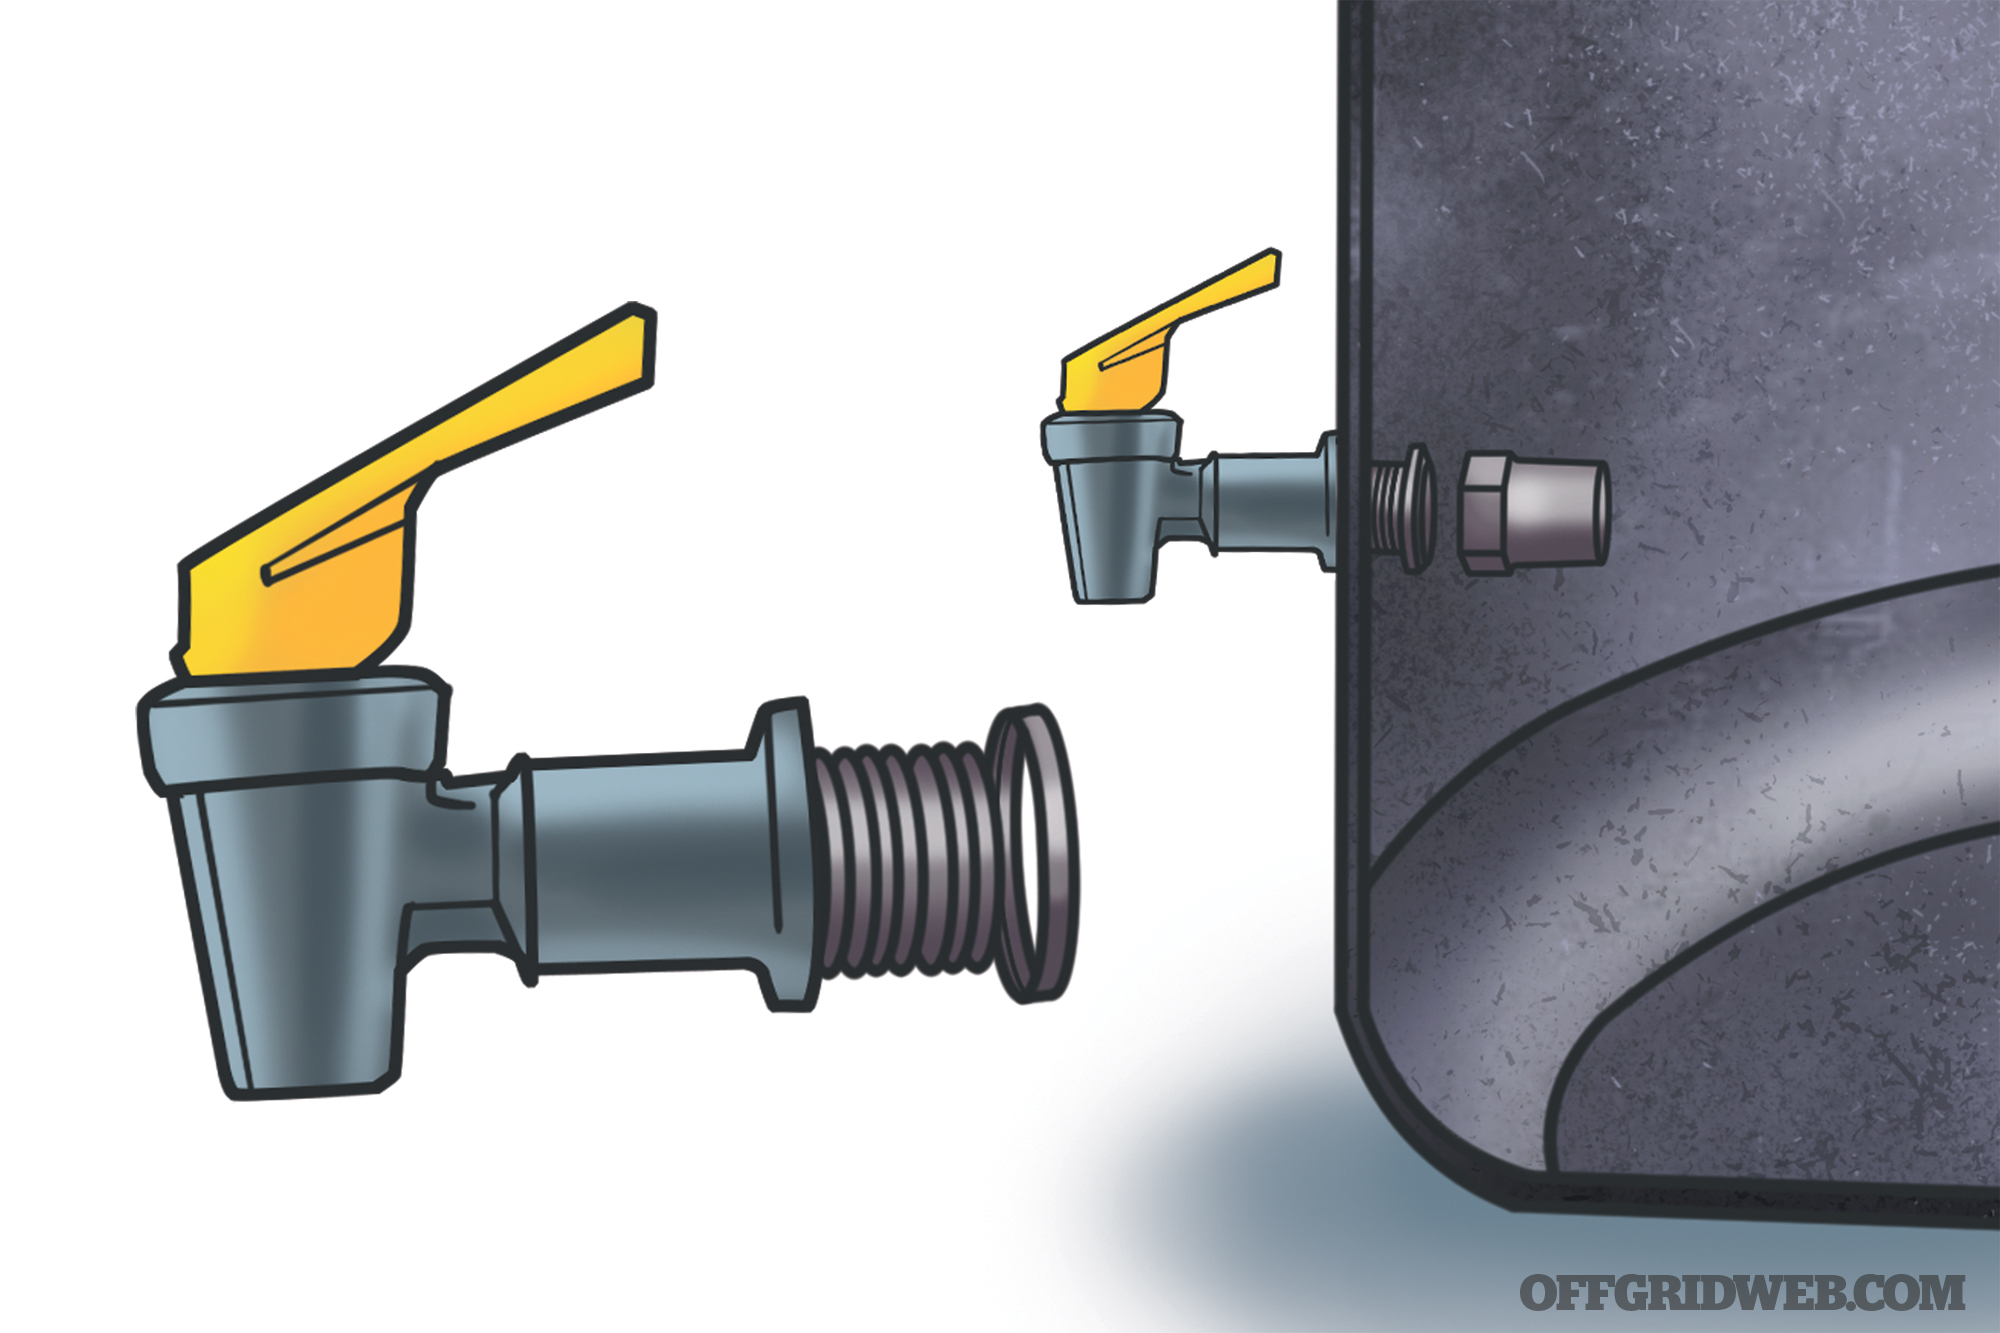
3. Install the water spigot onto the barrel and secure it on the inside with the trap adapter nut. You may need a wrench to get it on tight enough to avoid water leakage.
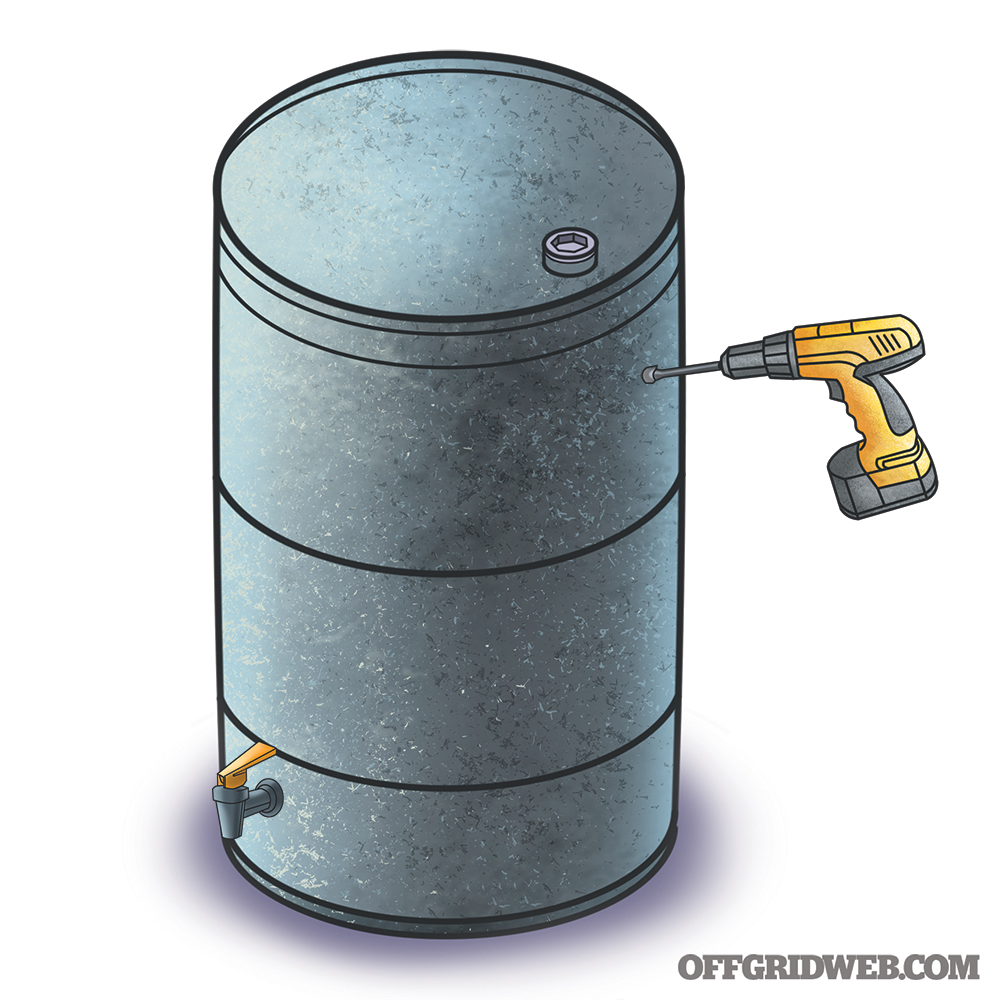
4. Near the top of the barrel, about 2 inches down from the lid, drill another hole for the kit’s hose connector.
5. Again, spread caulk around the holes inside and out.
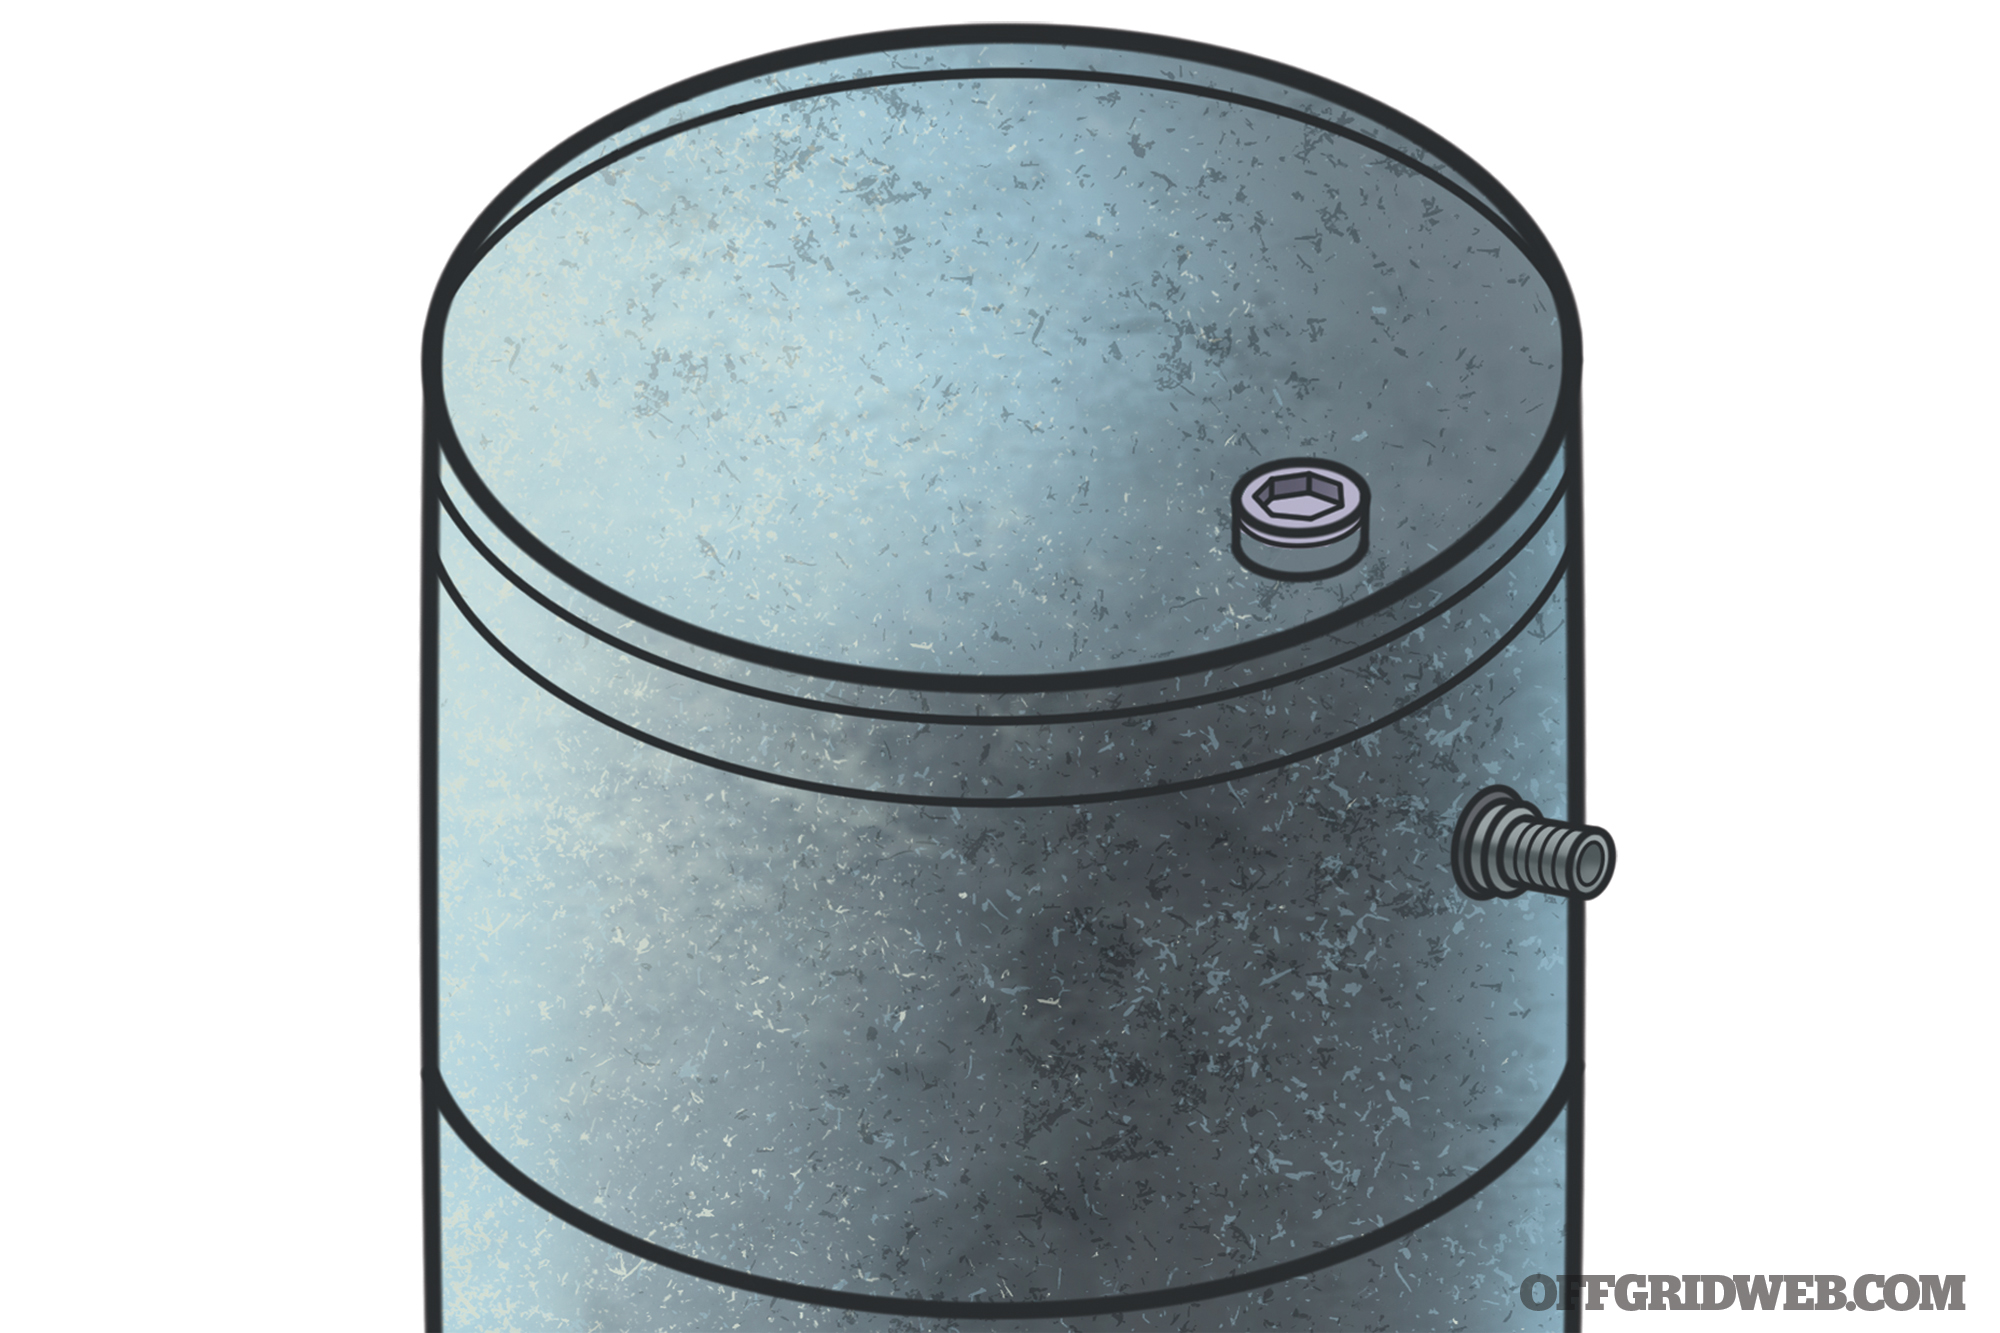
6. Install the hose connector according to the kit’s instructions. (Basically, screw it onto the barrel snugly.)
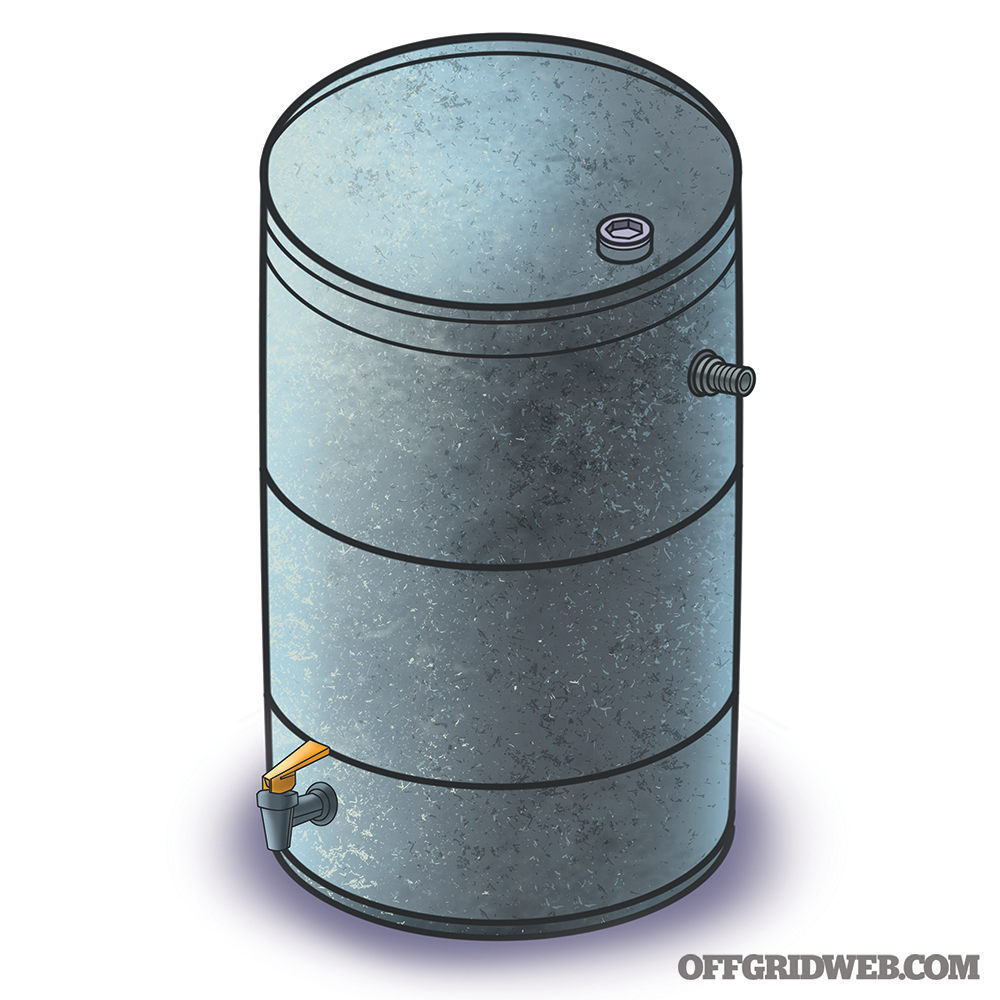
7. Your barrel is ready.
Location Prep and Installation
Select a location near your rain gutter’s downspout. Rain barrels are very heavy when full of water, so you want to make sure the area is flat and firm.
What you’ll need:
- Fiskars DiverterPro Rainwater Diverter Kit
- Concrete tiles
- Marker
- Tape measure
- Shovel
- Hacksaw
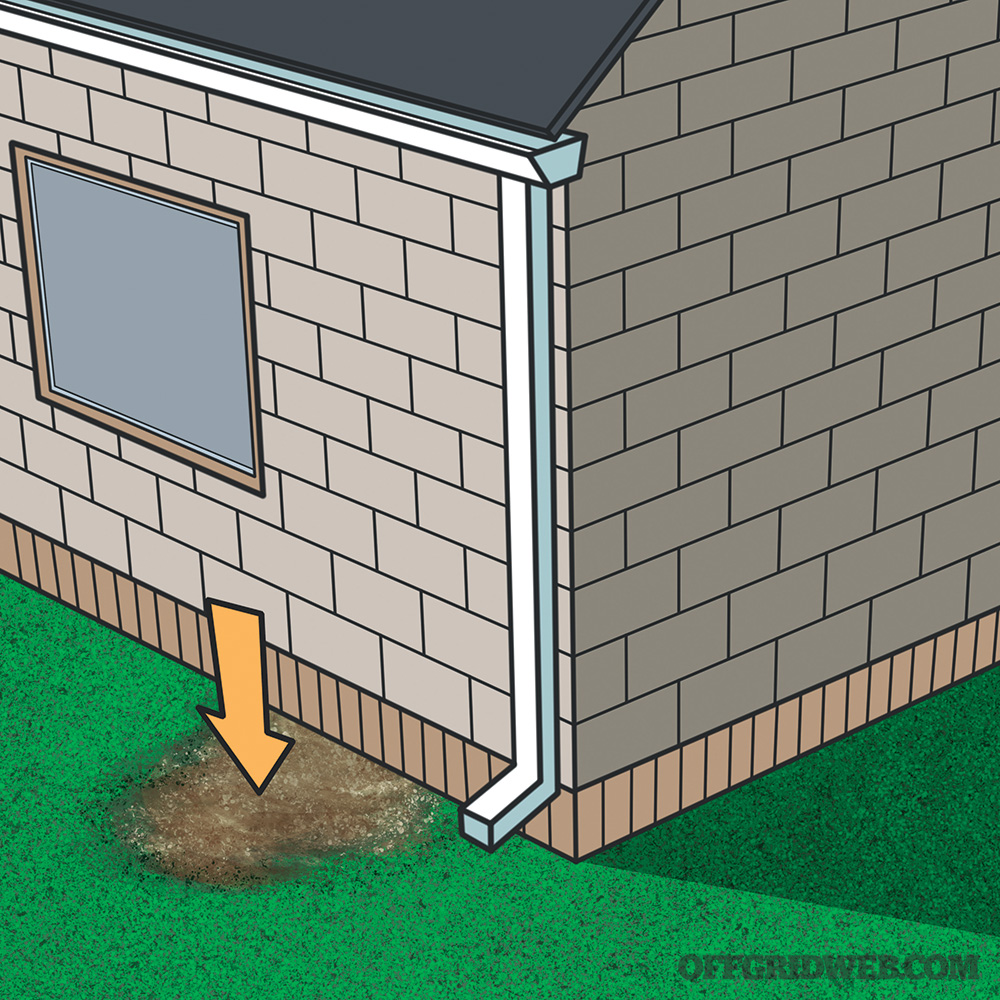
8. If the surface isn’t flat, take the time to prepare the ground so that it is.
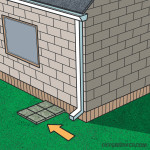
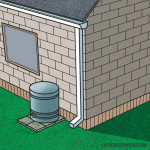
9. You want the barrel to sit on a firm surface. If the area isn’t, lay down some hard material such as concrete tiles. It’s a good idea to have your barrel slightly higher than ground level to allow gravity to help the water flow out, especially when the water level is low. If you want to put your barrel on a higher surface such as a platform, now’s the time to do it.
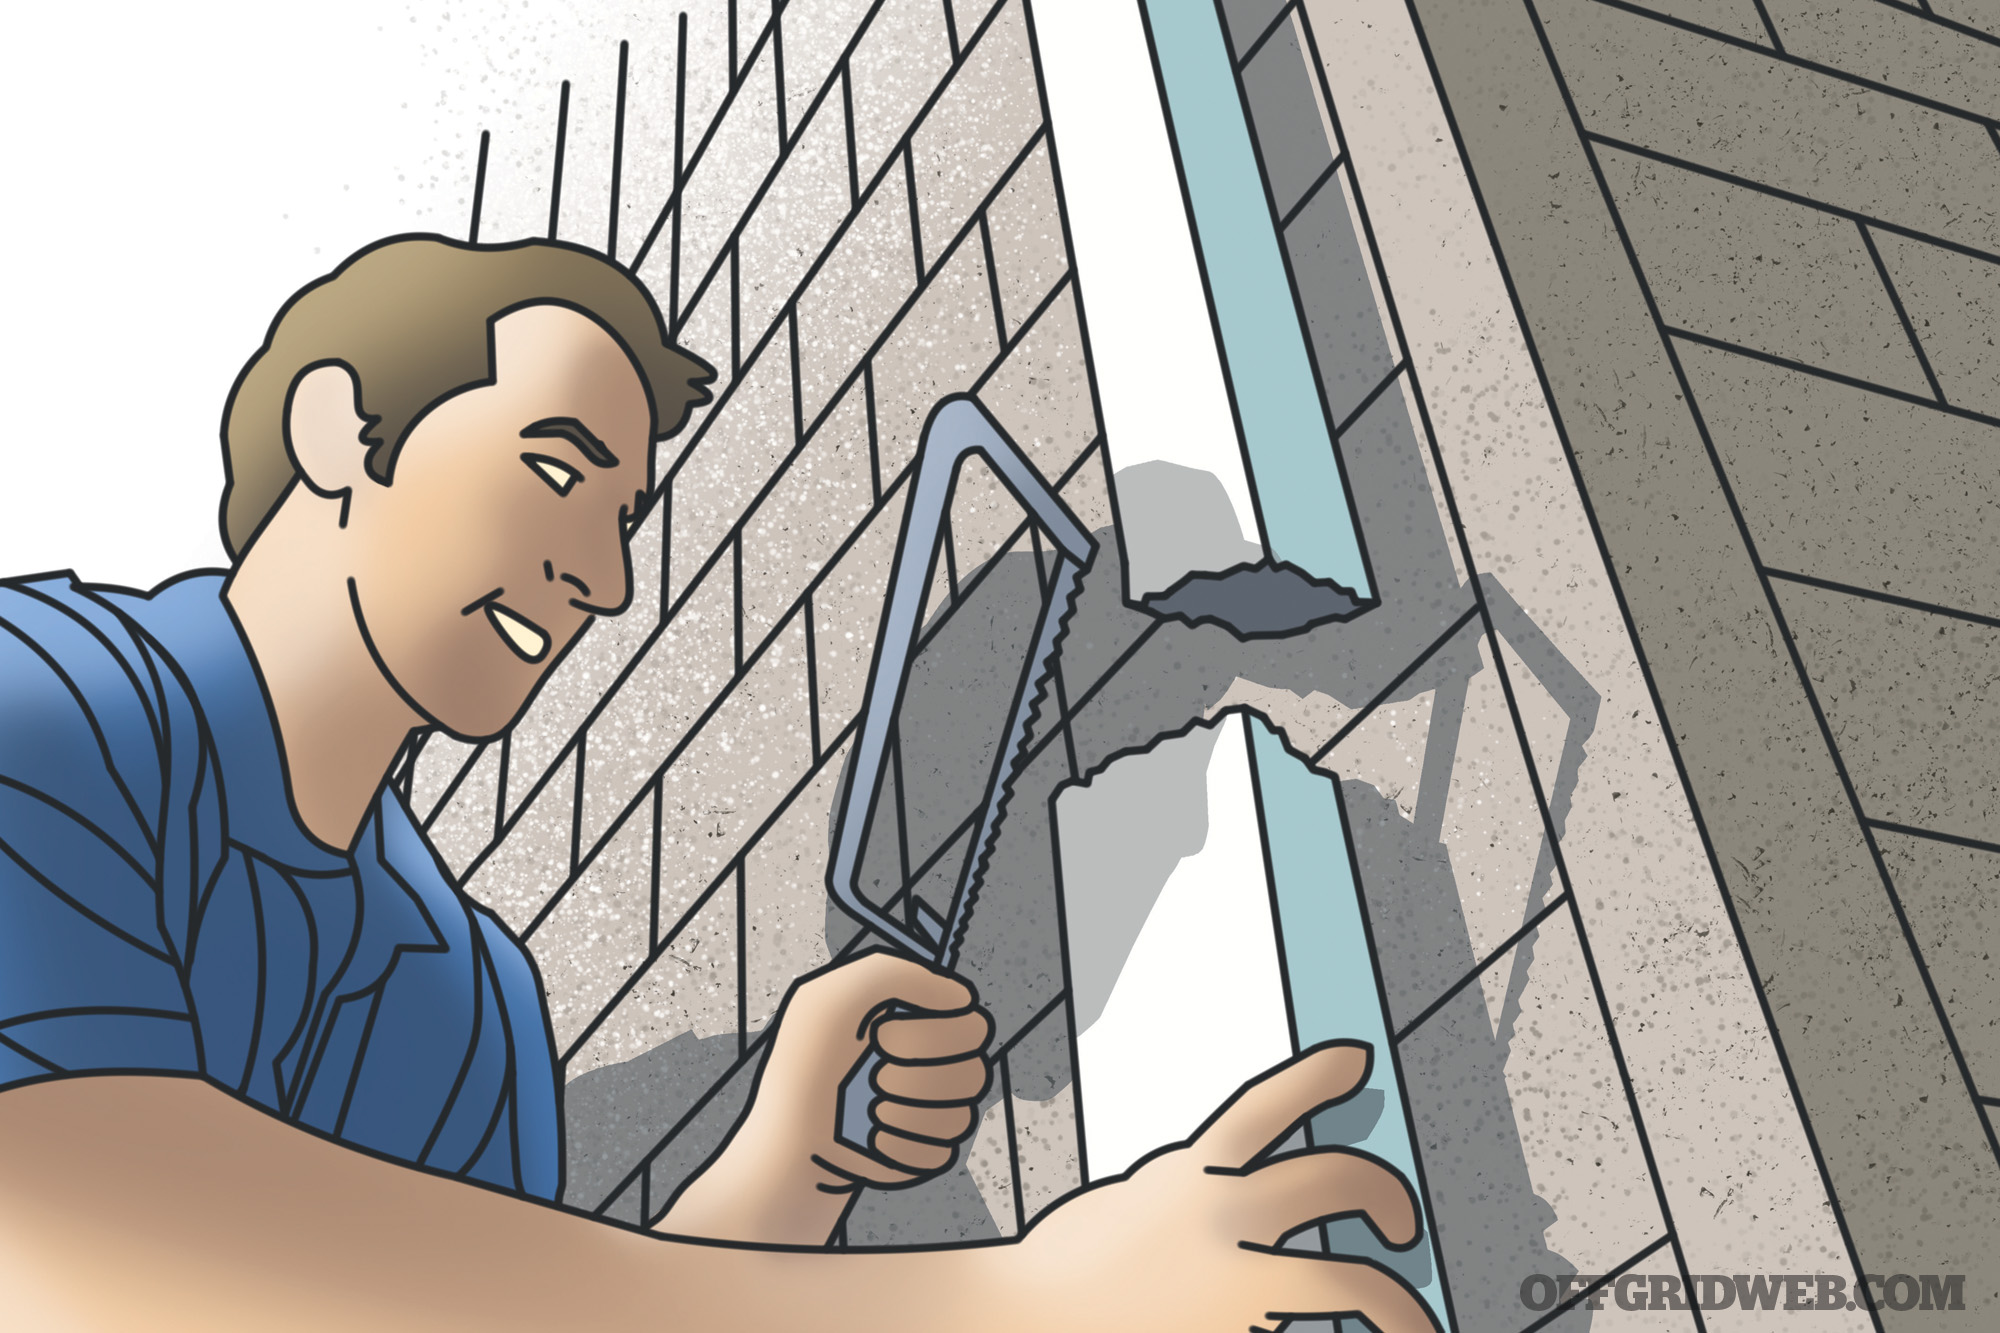
10. Now saw the downspout at the same height as the barrel. (You might want to measure and mark the height before you begin sawing.)
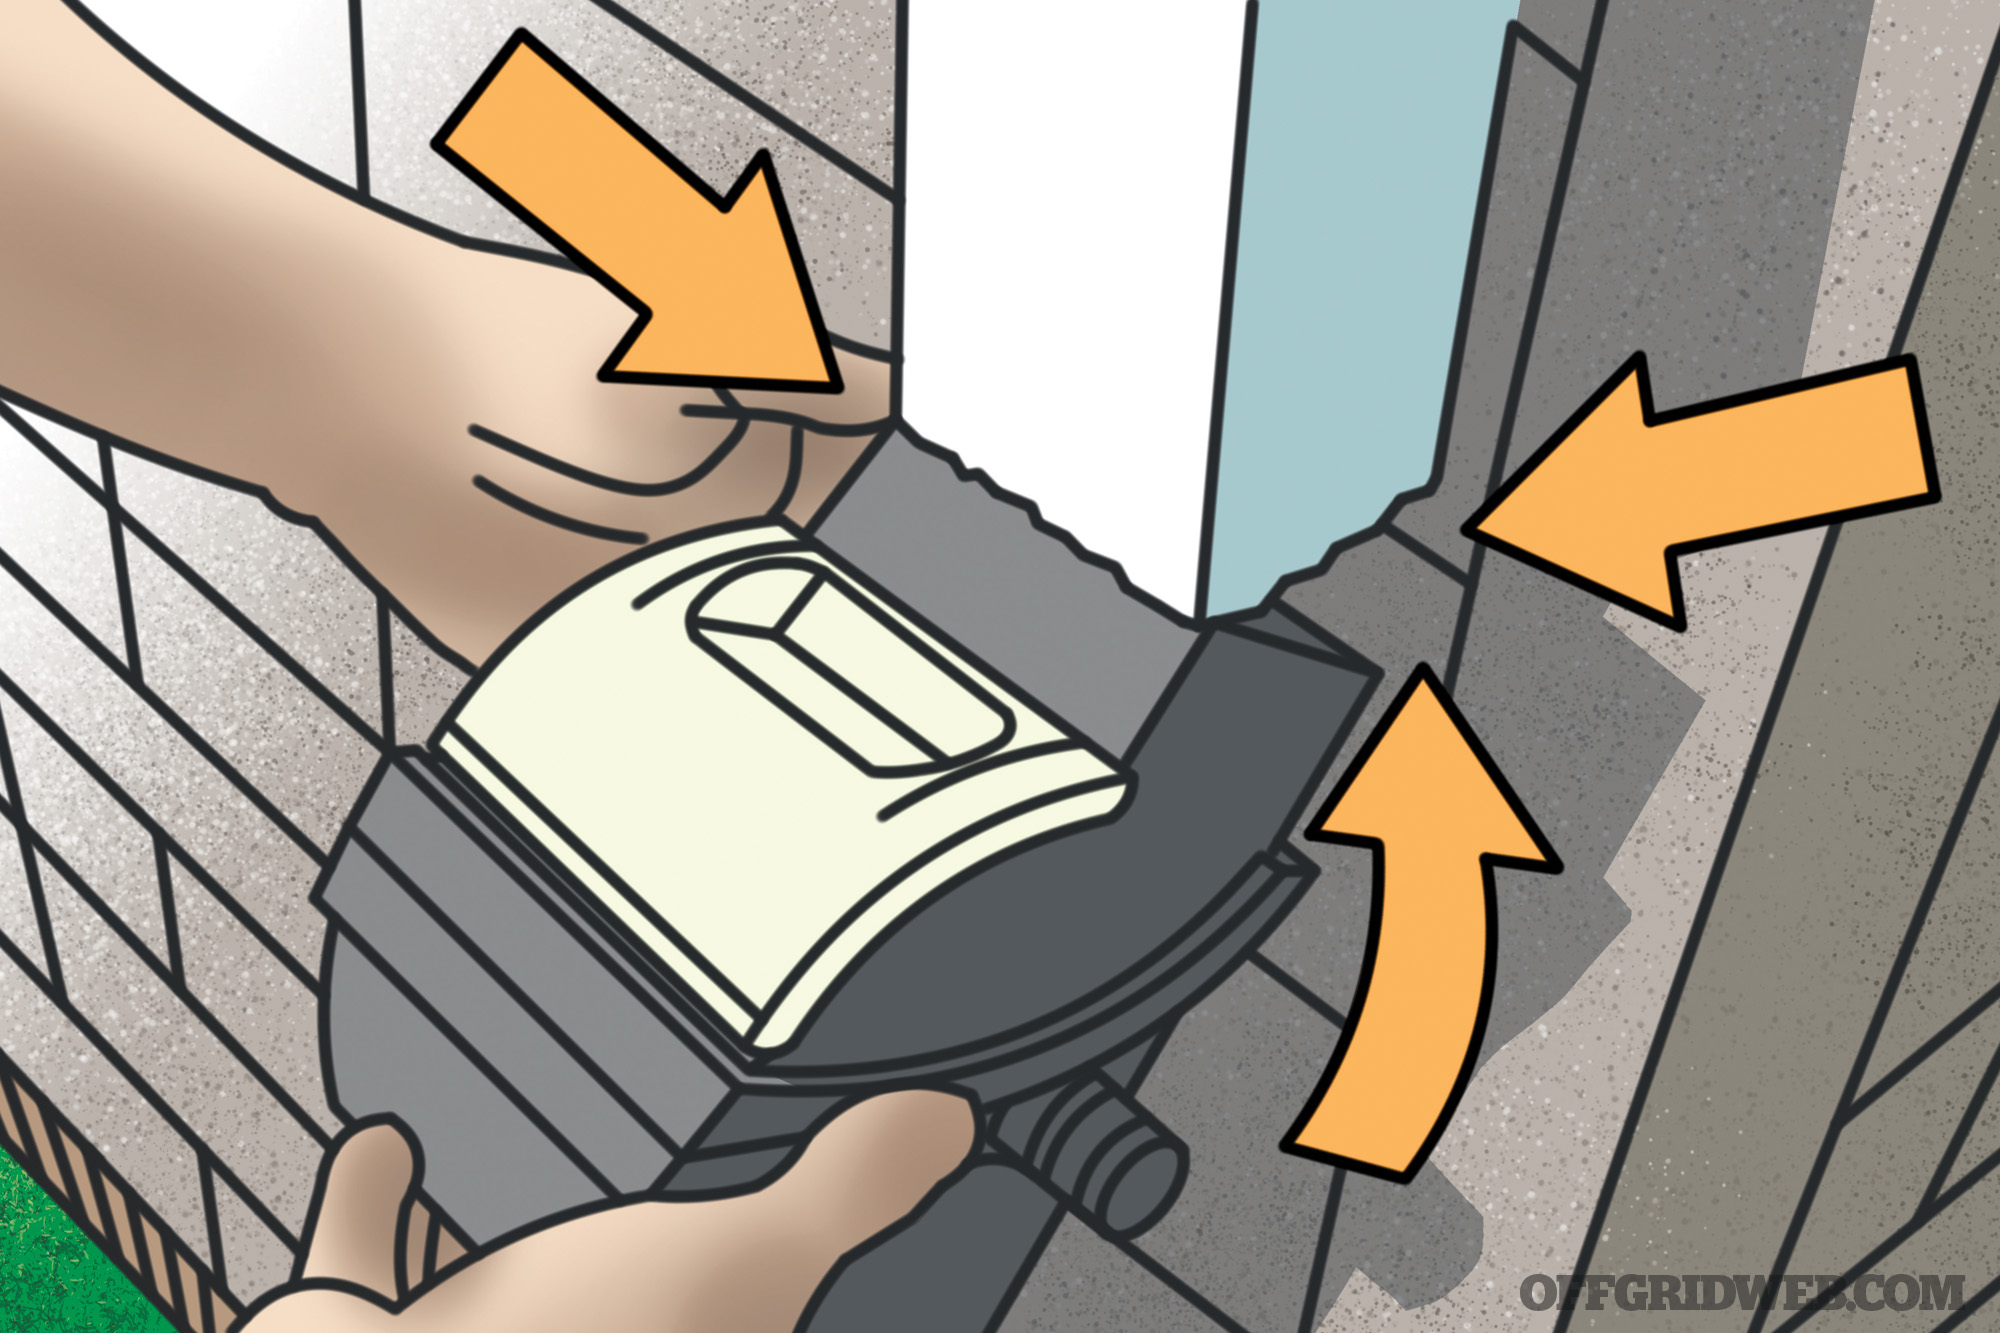
11. Next, slide the Fiskars diverter up onto the upper piece of the downspout. Measure and cut the lower downspout piece to make room for the diverter. Reattach the remainder of the lower downspout.
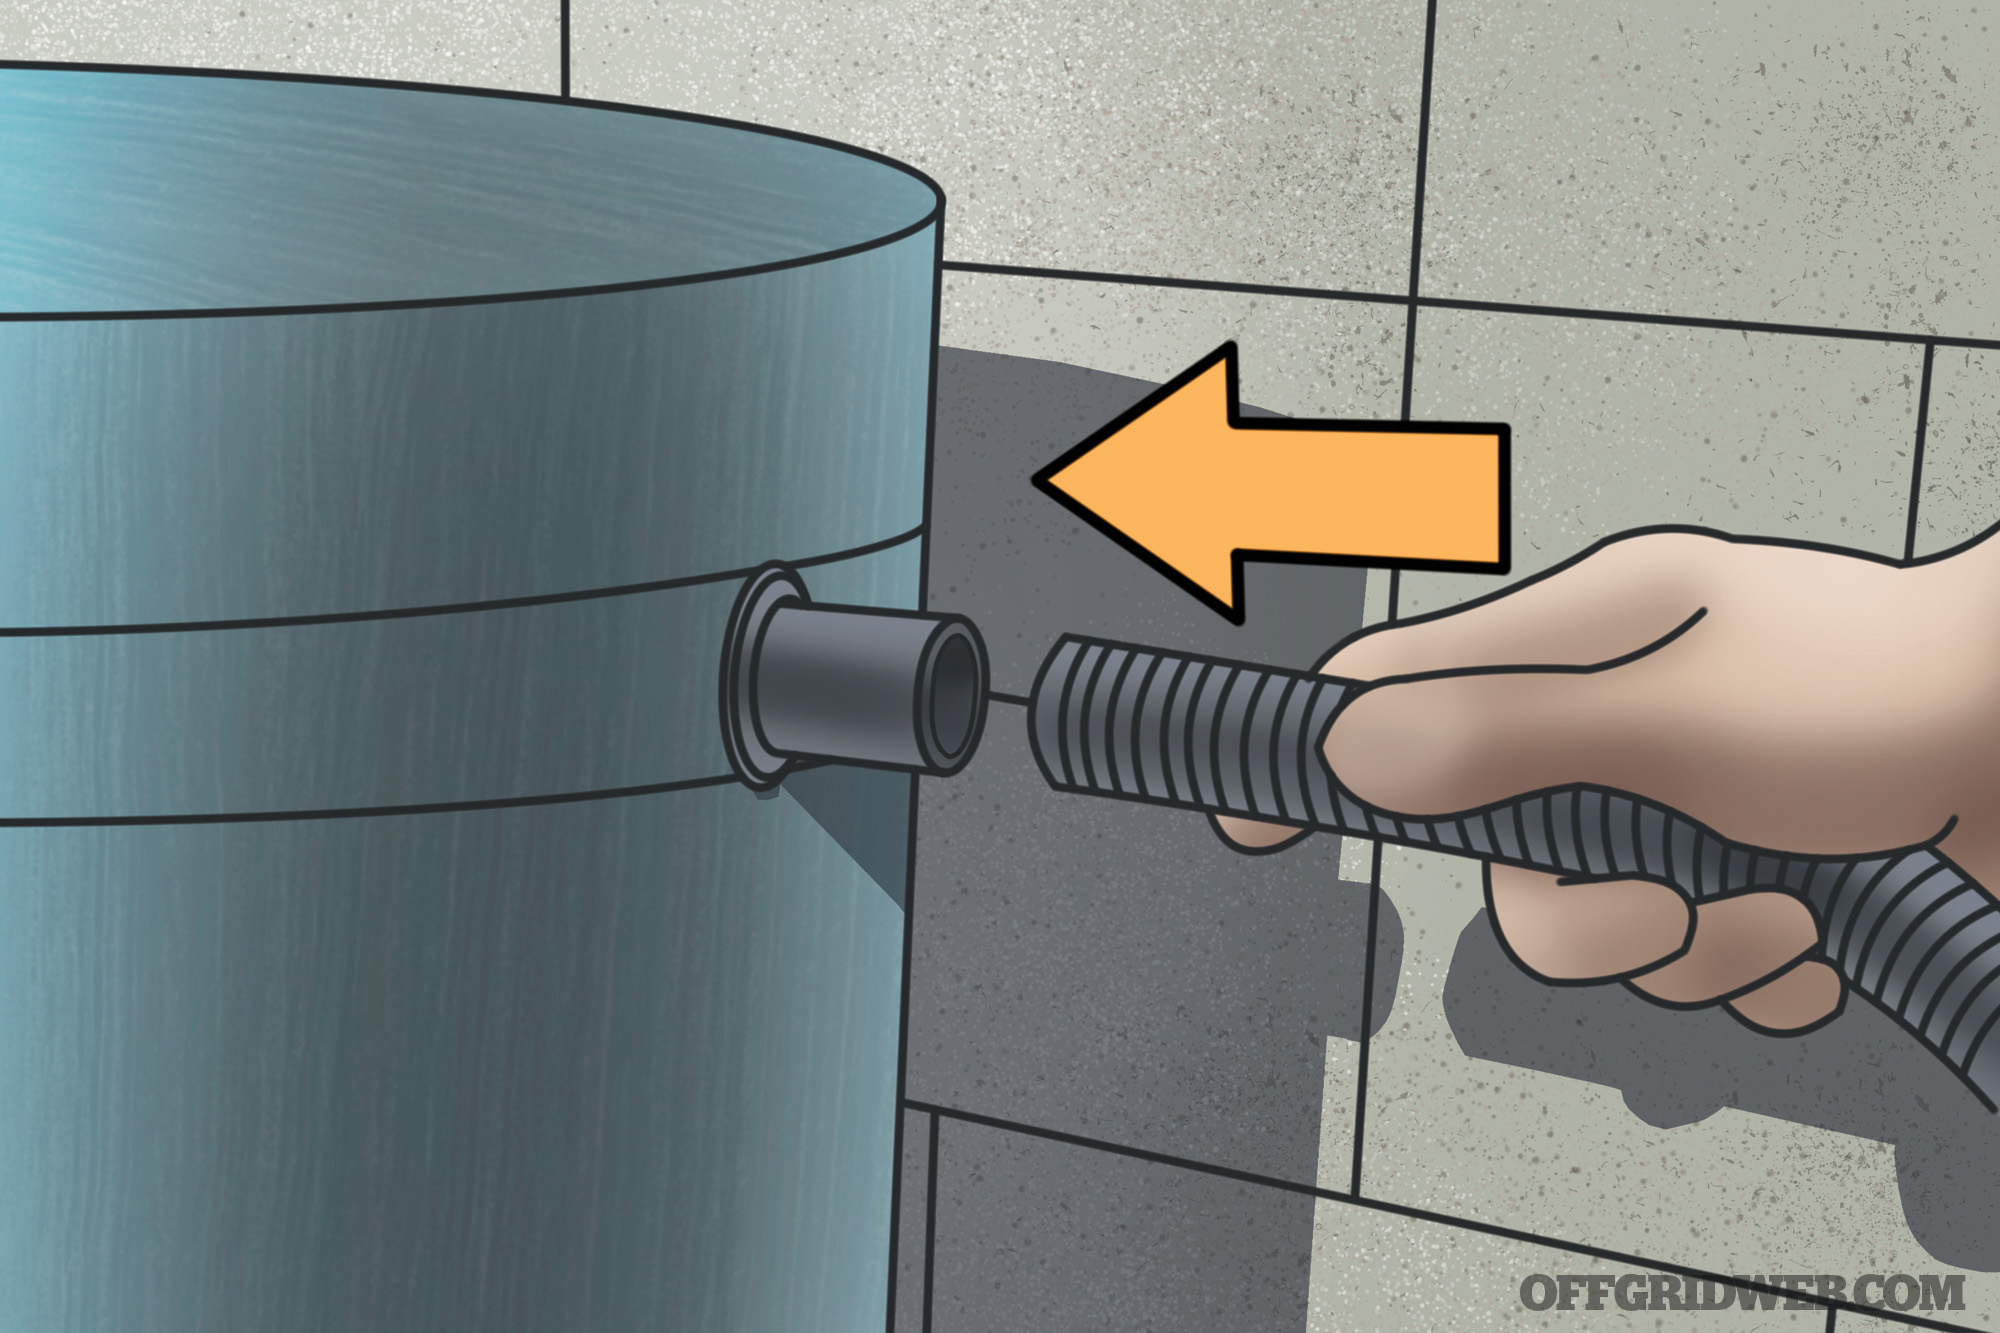
12. Measure, cut, and connect the connector hose to the barrel.
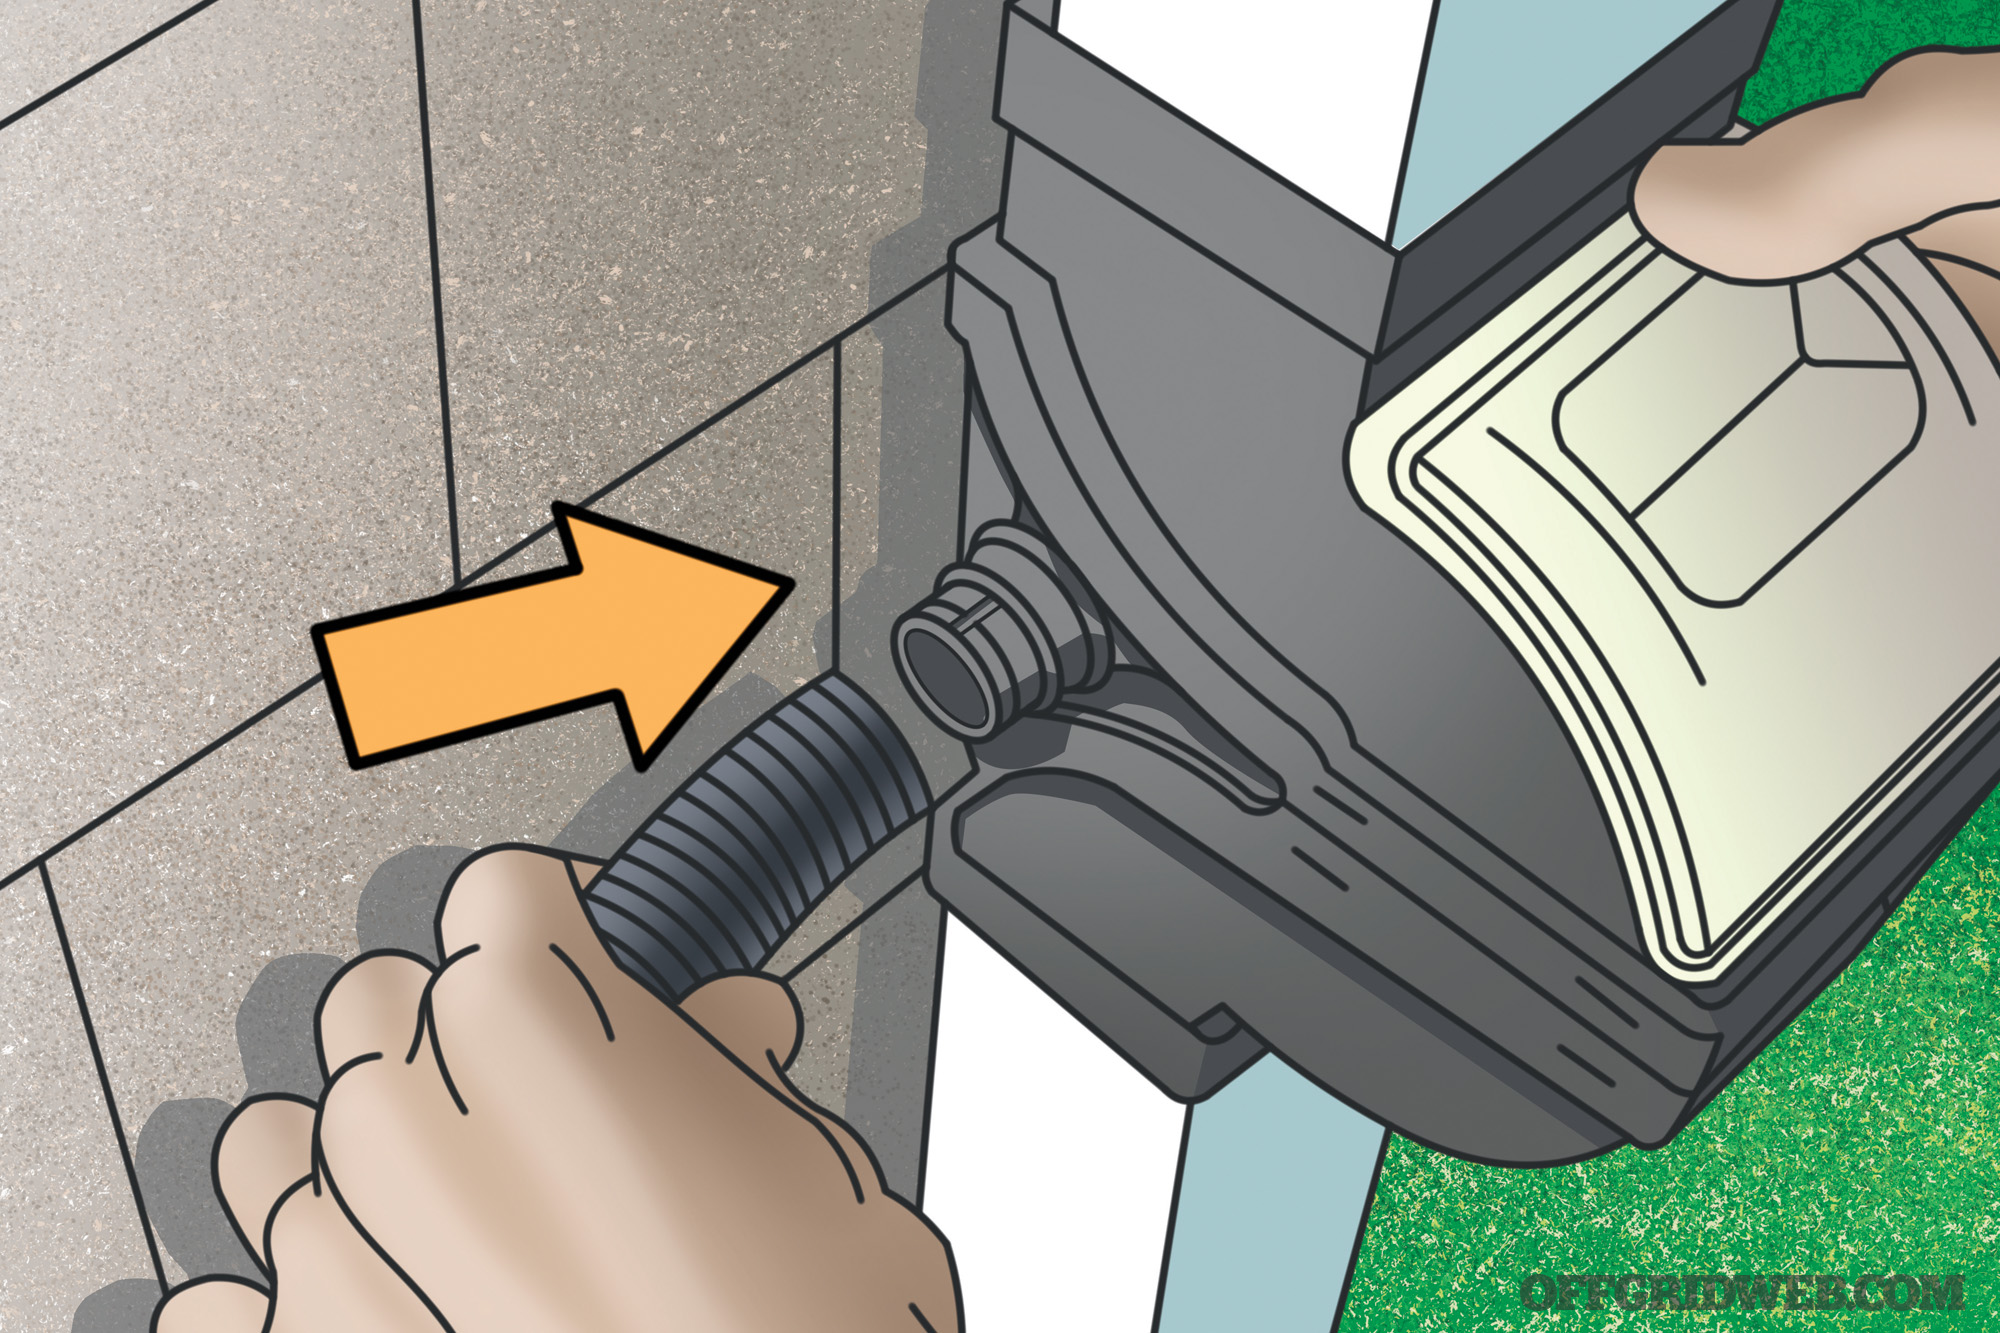
13. Then connect the hose to the diverter.
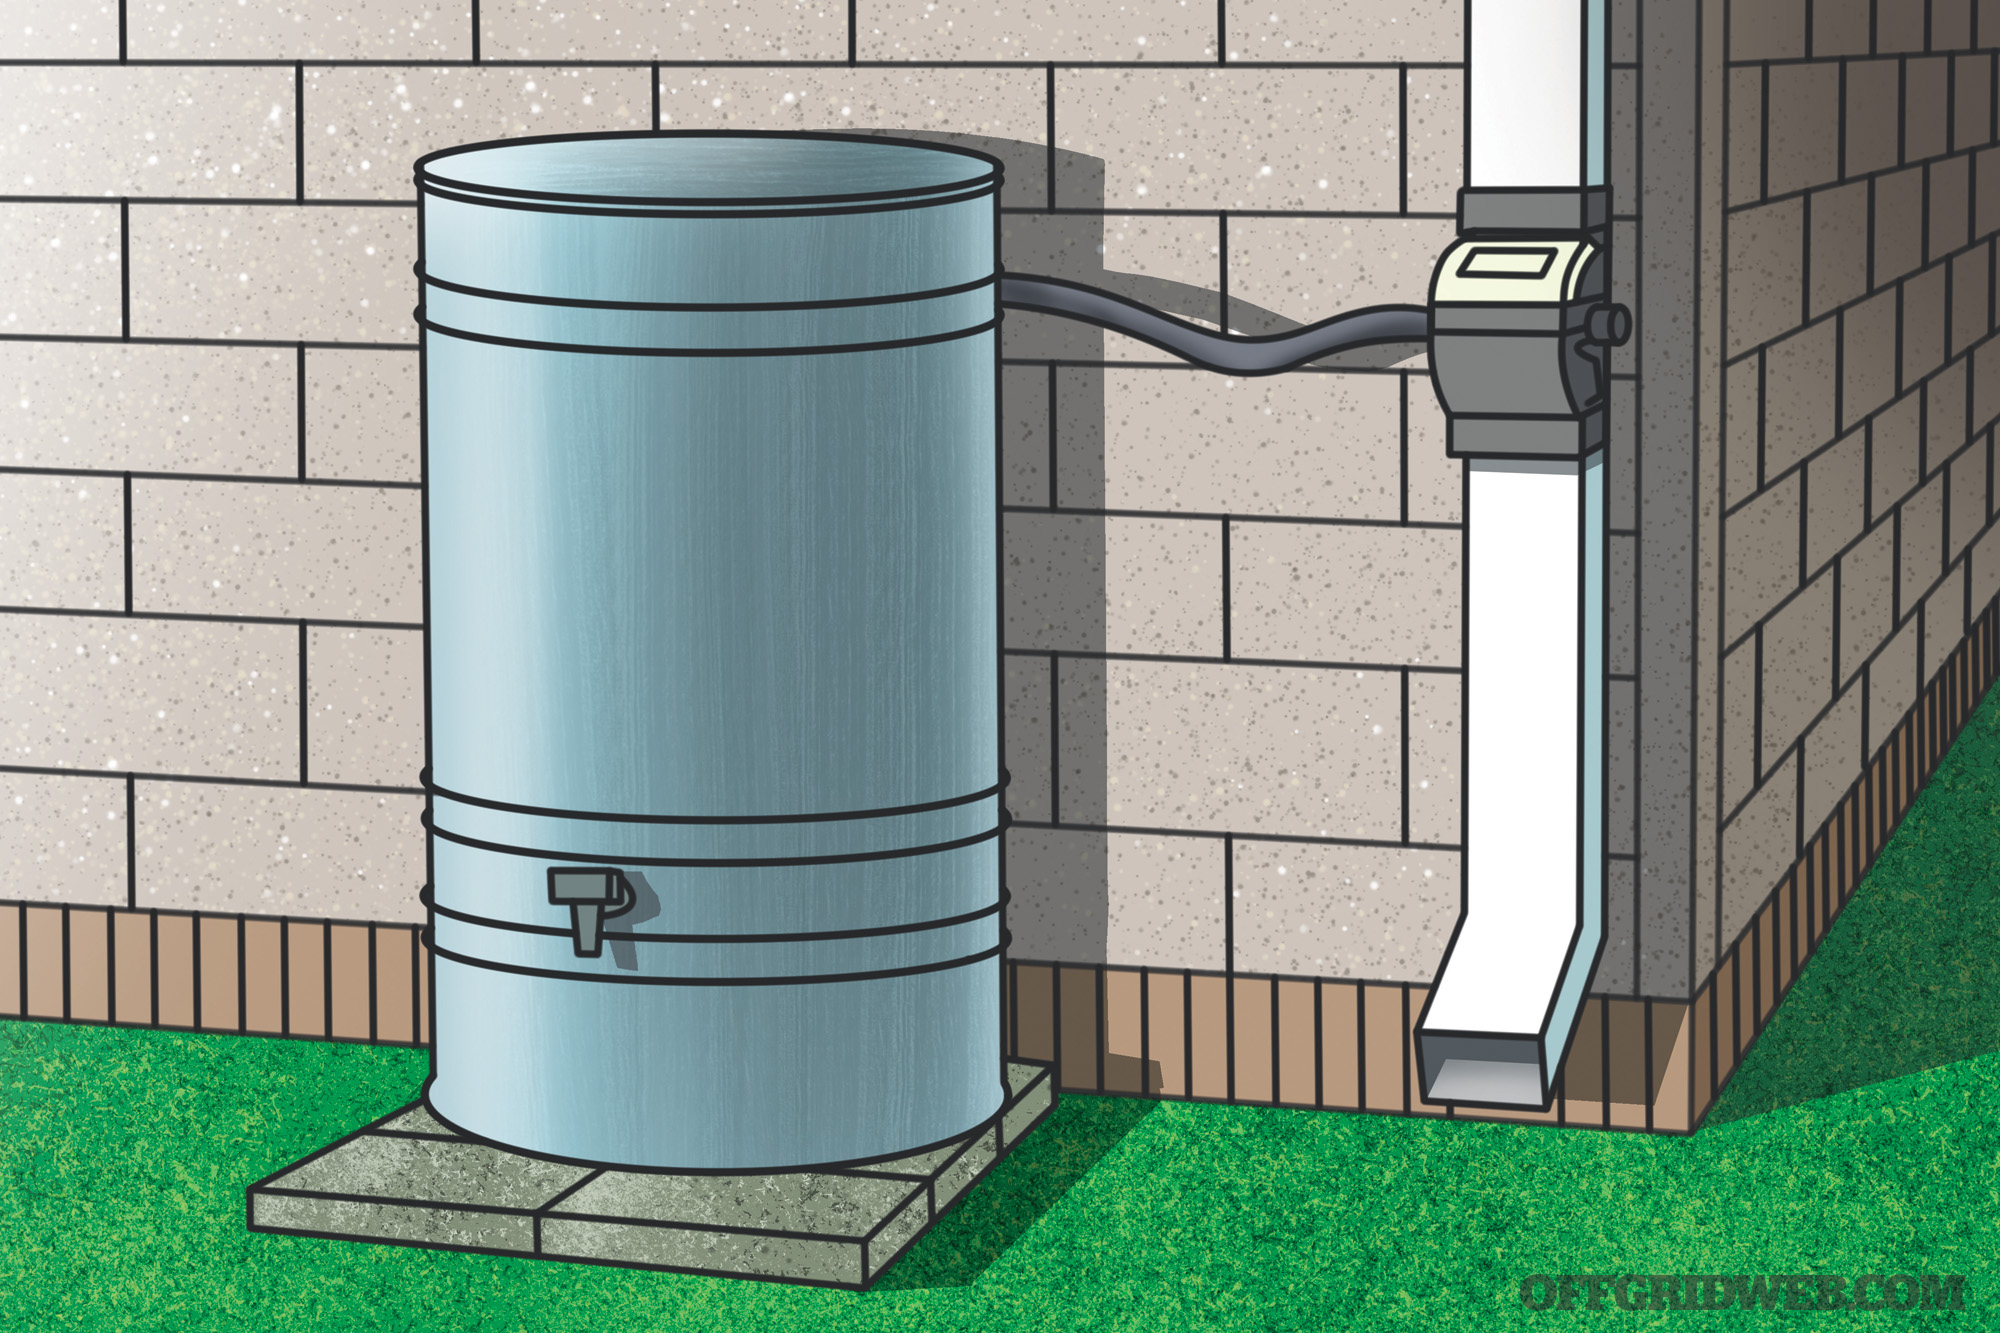
14. You’re done. Now all you need is some rain.
More Storage
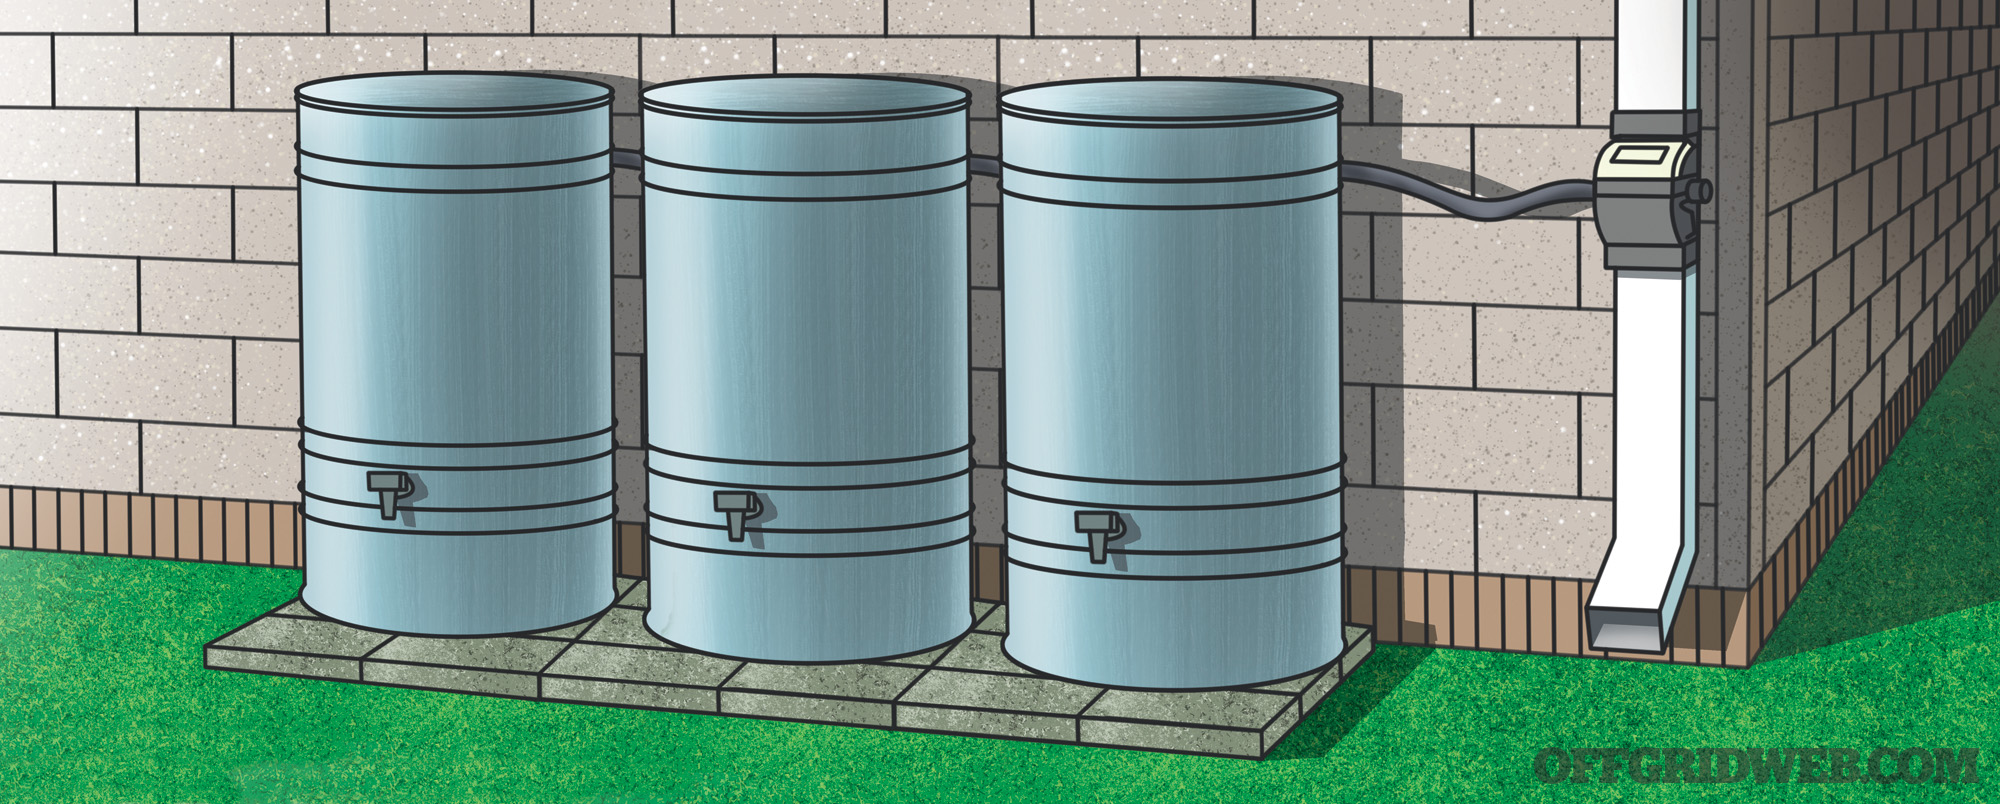
If you want to collect even more rainwater, you can daisy chain barrels together by attaching them together on their opposite sides with connector hoses. When one barrel gets full, it will overflow to the next.

 and replenish it continuously, you'll want to install a rain barrel kit at home.)