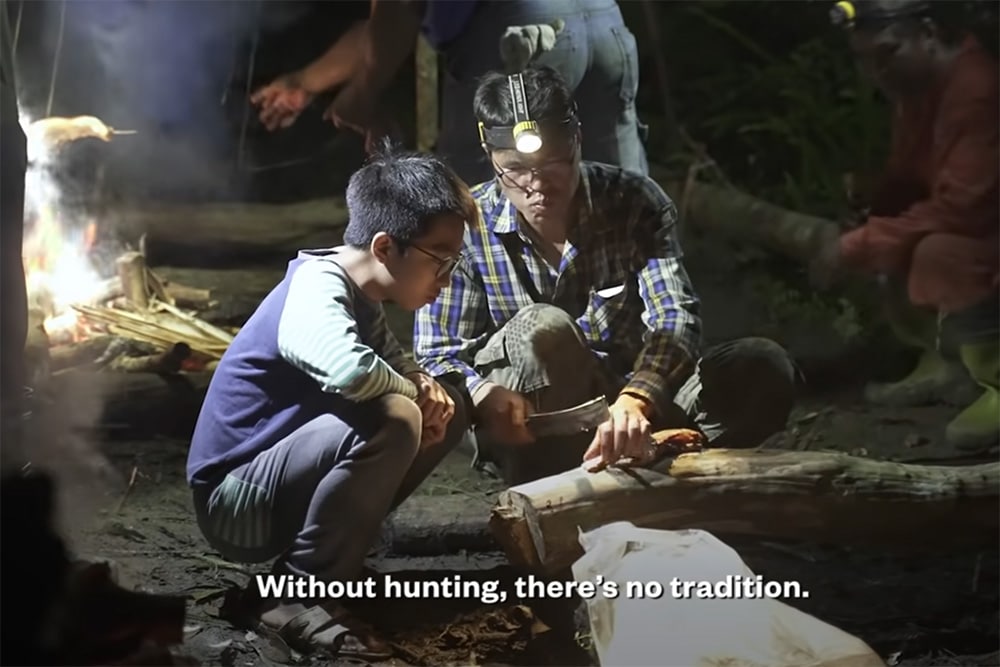
“It was in the ’80s that the government told us to hand in our guns for safekeeping, and we never got them back.” This quote from an indigenous Taiwanese man named Talum Suqluman sets the scene for the story of how Taiwan’s native population has nearly lost its ability to legally use firearms to hunt. A film crew from VICE News helped tell the story of how Suqluman was arrested and sentenced to prison after using a factory-made hunting rifle to shoot animals for food.
In Taiwan, civilian gun ownership is almost entirely banned, with the only exception being homemade guns for members of the island’s native tribes. However, there’s a catch: these weapons cannot be mass-produced or bought from stores. They must be hand-built by each individual hunter, and can only be used by their creator.
“Eventually, [the government] told us we had to make our own guns. We don’t really have the proper equipment, so we use whatever metal and welding equipment we can find,” Suqluman tells the film crew. Unsurprisingly, this leads to many preventable injuries. “Instead of shooting animals, we ourselves get shot. Either the barrel bursts or the bullets are discharged accidentally.” Since ammunition isn’t readily-available for the homemade guns, many Taiwanese backyard gunsmiths have resorted to using improvised ammo. One hunter showed off his muzzle-loader, which fires a 10mm steel ball bearing propelled by a nail gun cartridge.
There appears to be a growing movement to restore hunting rights and legalize factory-built rifles in Taiwan. This movement is motivated by hunter safety, conservation, and the preservation of cultural heritage.
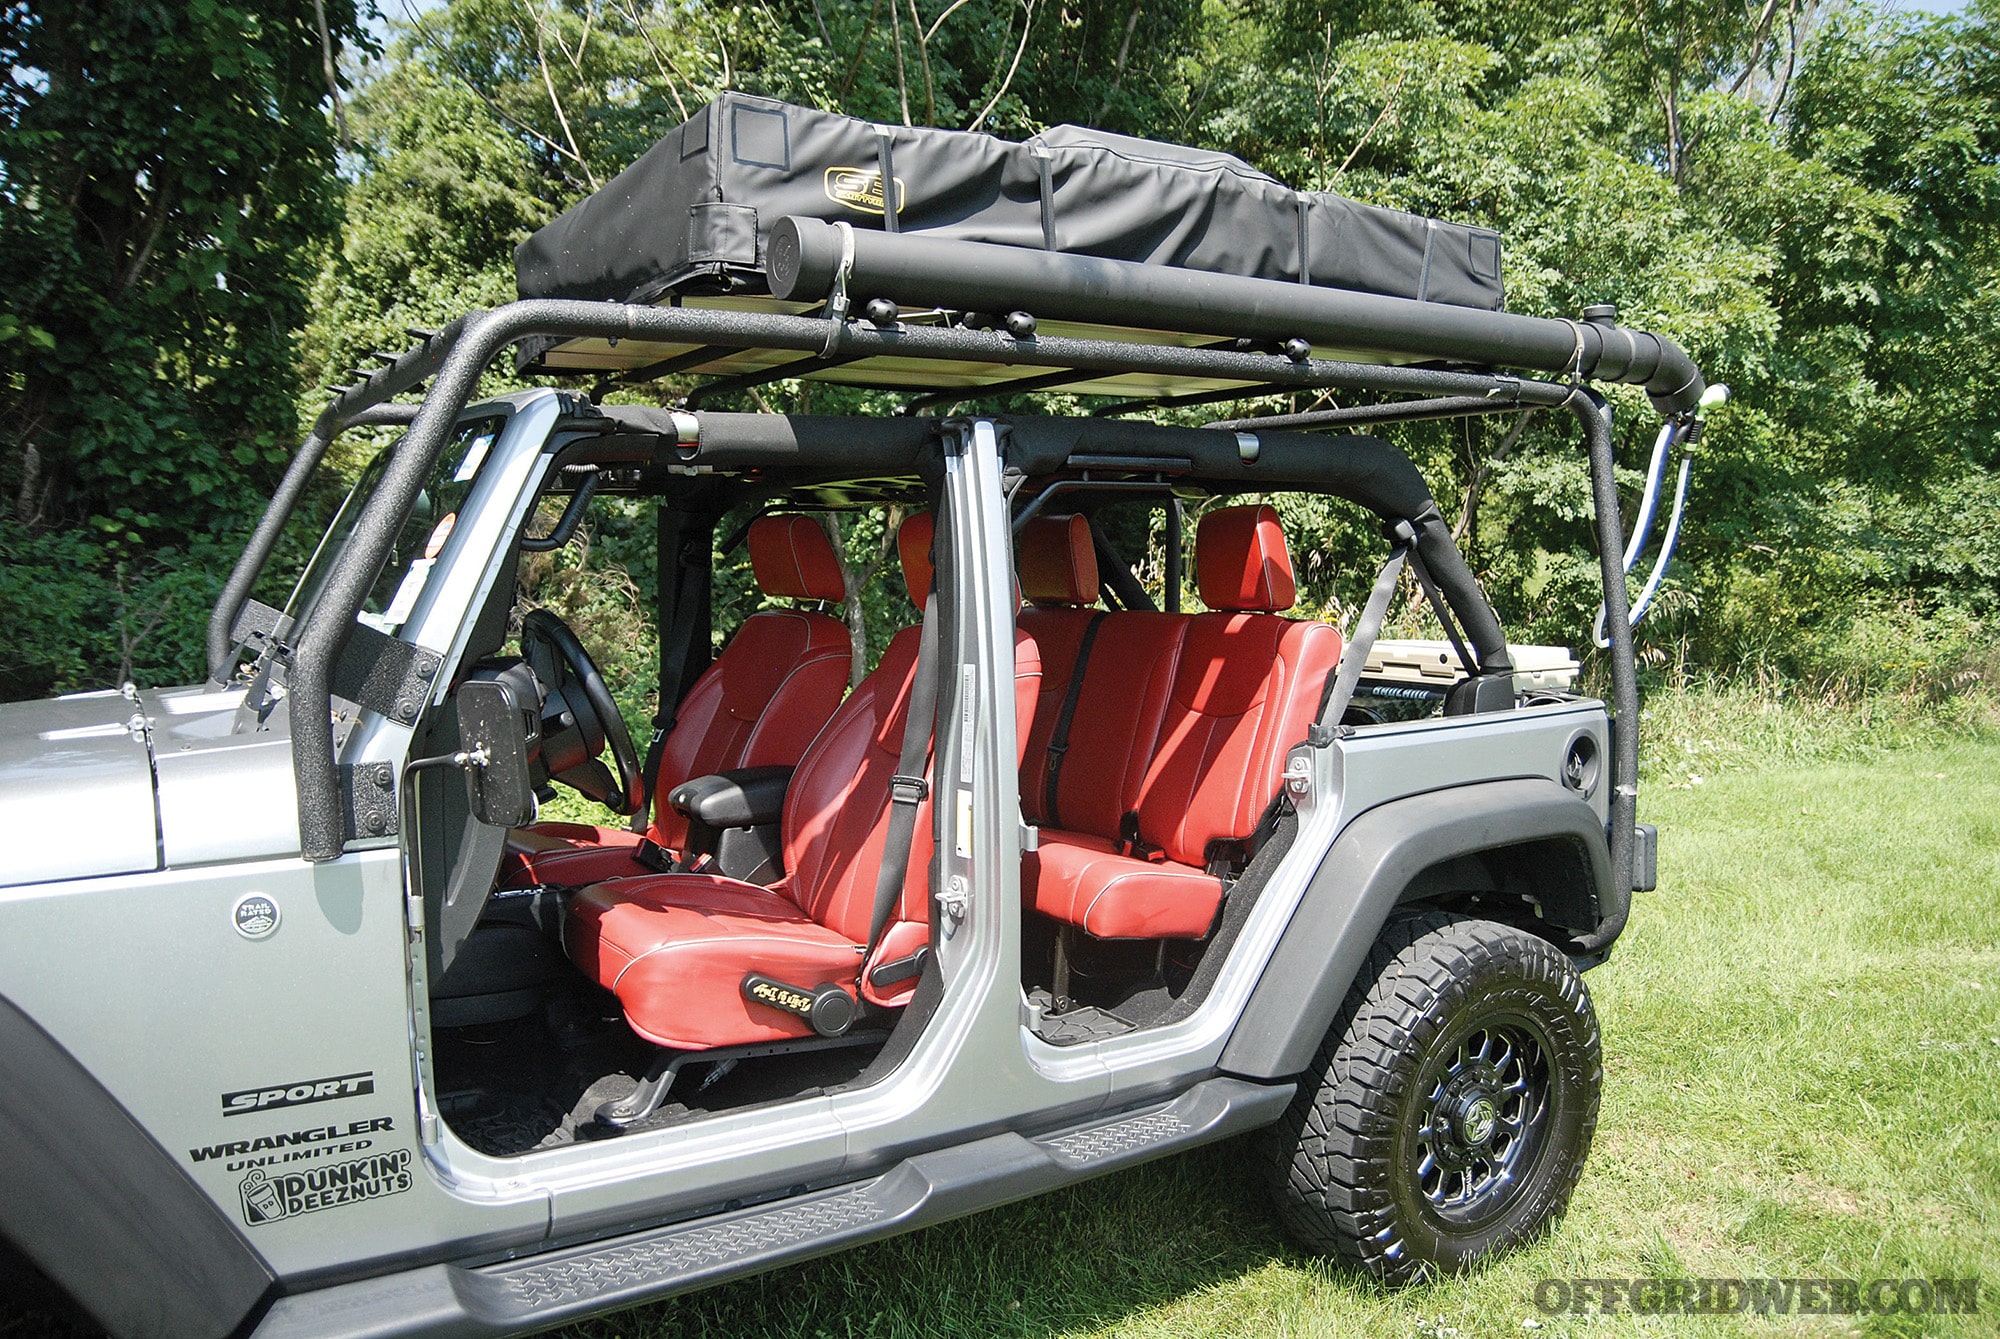
Back in the ’90s, I was an avid hiker and camper. My day hikes tended to be in the 4- to 8-mile range and my camping trips were usually three days and two nights of roughing it with the guys after a long, strenuous hike to places with scenic vistas. And, once a year, there would be a large weeklong camping trip, on a large parcel of private property, but it would be a car trip. While there were zero amenities, not even a bathroom, you could drive the average four-wheel drive vehicle through the woods to our spot. It was a beautiful place, several hundred acres in the Catskills with a mix of forest and open field, and a medium-sized stream running through it.
These trips were primarily a guys’ trip of shooting, four wheeling, open-fire cooking, and a lot of drinking. Needless to say, as sweaty and dirty as we got, with a shower unavailable and the stream water averaging around 50 degrees F year-round, bathing wasn’t something done often enough. To help with the situation, some of us started leaving our Scepter 5-gallon water jugs in the sunny field to warm up a bit, and it really helped. While it was still inconvenient, at least we could splash warm water on ourselves. We soon discovered that we could prop up the jugs on the rooves of our cars and crack open the cap to get a trickle-type shower. While still less than ideal, it was a big step up from super chilly stream water. But, there had to be a way to have a better field-expedient solar shower. One year, over the course of the weeklong camping trip, we worked out a solution.
Initially, we started with a 4-inch- diameter PVC tube with a cap on one end, a fill tube in the middle and an on-off valve at the other end. It was just gravity fed and it was OK. But, as we worked through the best ideas of our group, we made a few improvements. For starters, we added a short piece of garden hose so we could get that water where we wanted it and quickly added a sprayer. Then, we painted it black and that really upped the speed the water heated, as well as raising the upper temperature. And while this worked well, the pressure left a lot to be desired. The final incarnation added air pressure through a standard female air hose fitting, and the difference was awesome. We could actually take a couple of showers over the course of the day as the water refills heated up in the sun. We went from roughing it to “glamping,” and we were happy.
I eventually gave my PVC solar shower away to one of the guys when he started taking his kids on car trips. Plus, I had upgraded my ride to a “Class B” RV, with a built-in on-demand water heater, so I no longer had need for the PVC one. Over the course of many years, I saw online that others had come up with the same basic design we had. And eventually, upgraded commercial versions of the rooftop solar water heater began to be produced, and they are now also known as an overland shower. These durable, portable water heaters start at just over $100 and go all the way up to the $500 range. And while there are soft-sided, bag-style solar showers available for camping, they’re relatively delicate and have the downside that you must set it up and wait for it to heat up. The durable roof-type style can be heating up even while you’re driving to your destination.
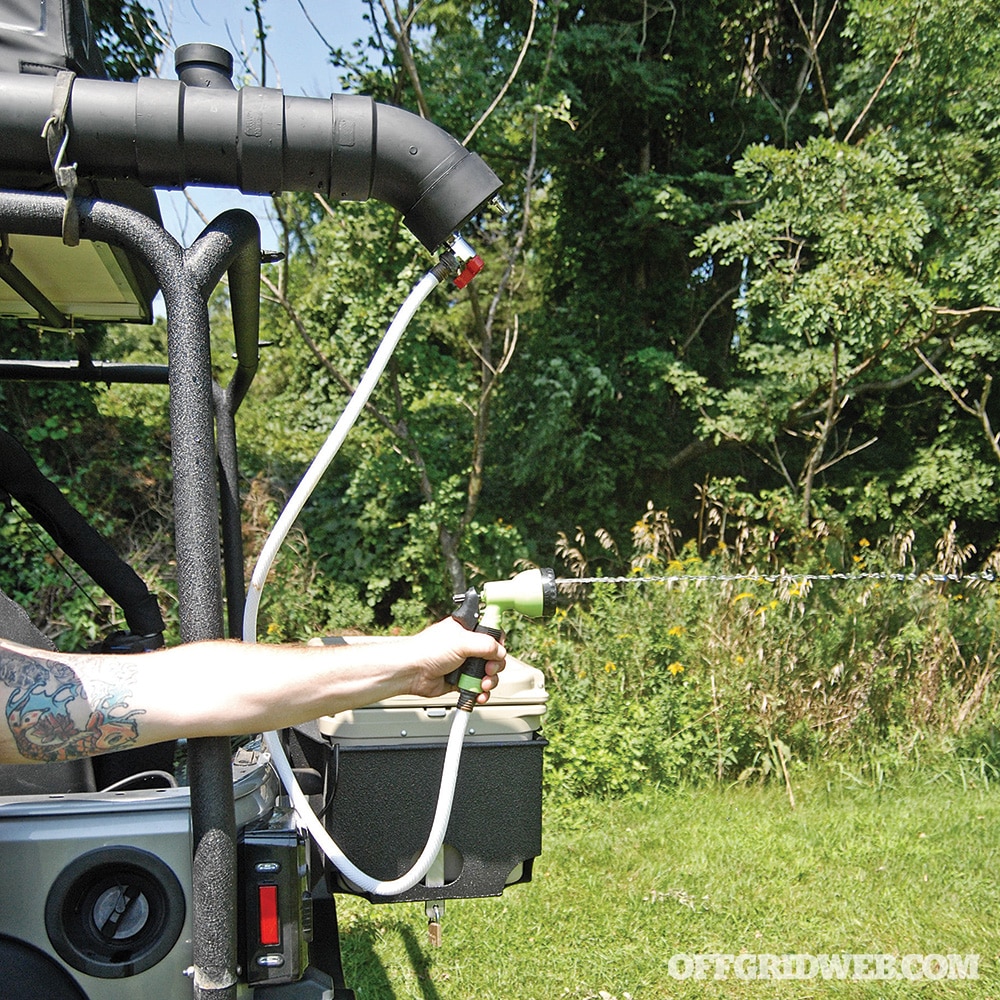
In testing over the summer, I was able to get the water temperature up to a maximum of 111 degrees F on a 90-degree day of full sun, while the pipe itself hit 115 degrees. On a partially sunny 80-degree day, the water hit 95 degrees. That’s more than adequate for a warm to hot shower that requires zero electricity. If you’re in need of a similar rooftop solar shower for your off-road adventures, ocean surfing, car camping, road trips, or off-grid living, here’s how you can build one.
How to Build a Rooftop Solar Shower
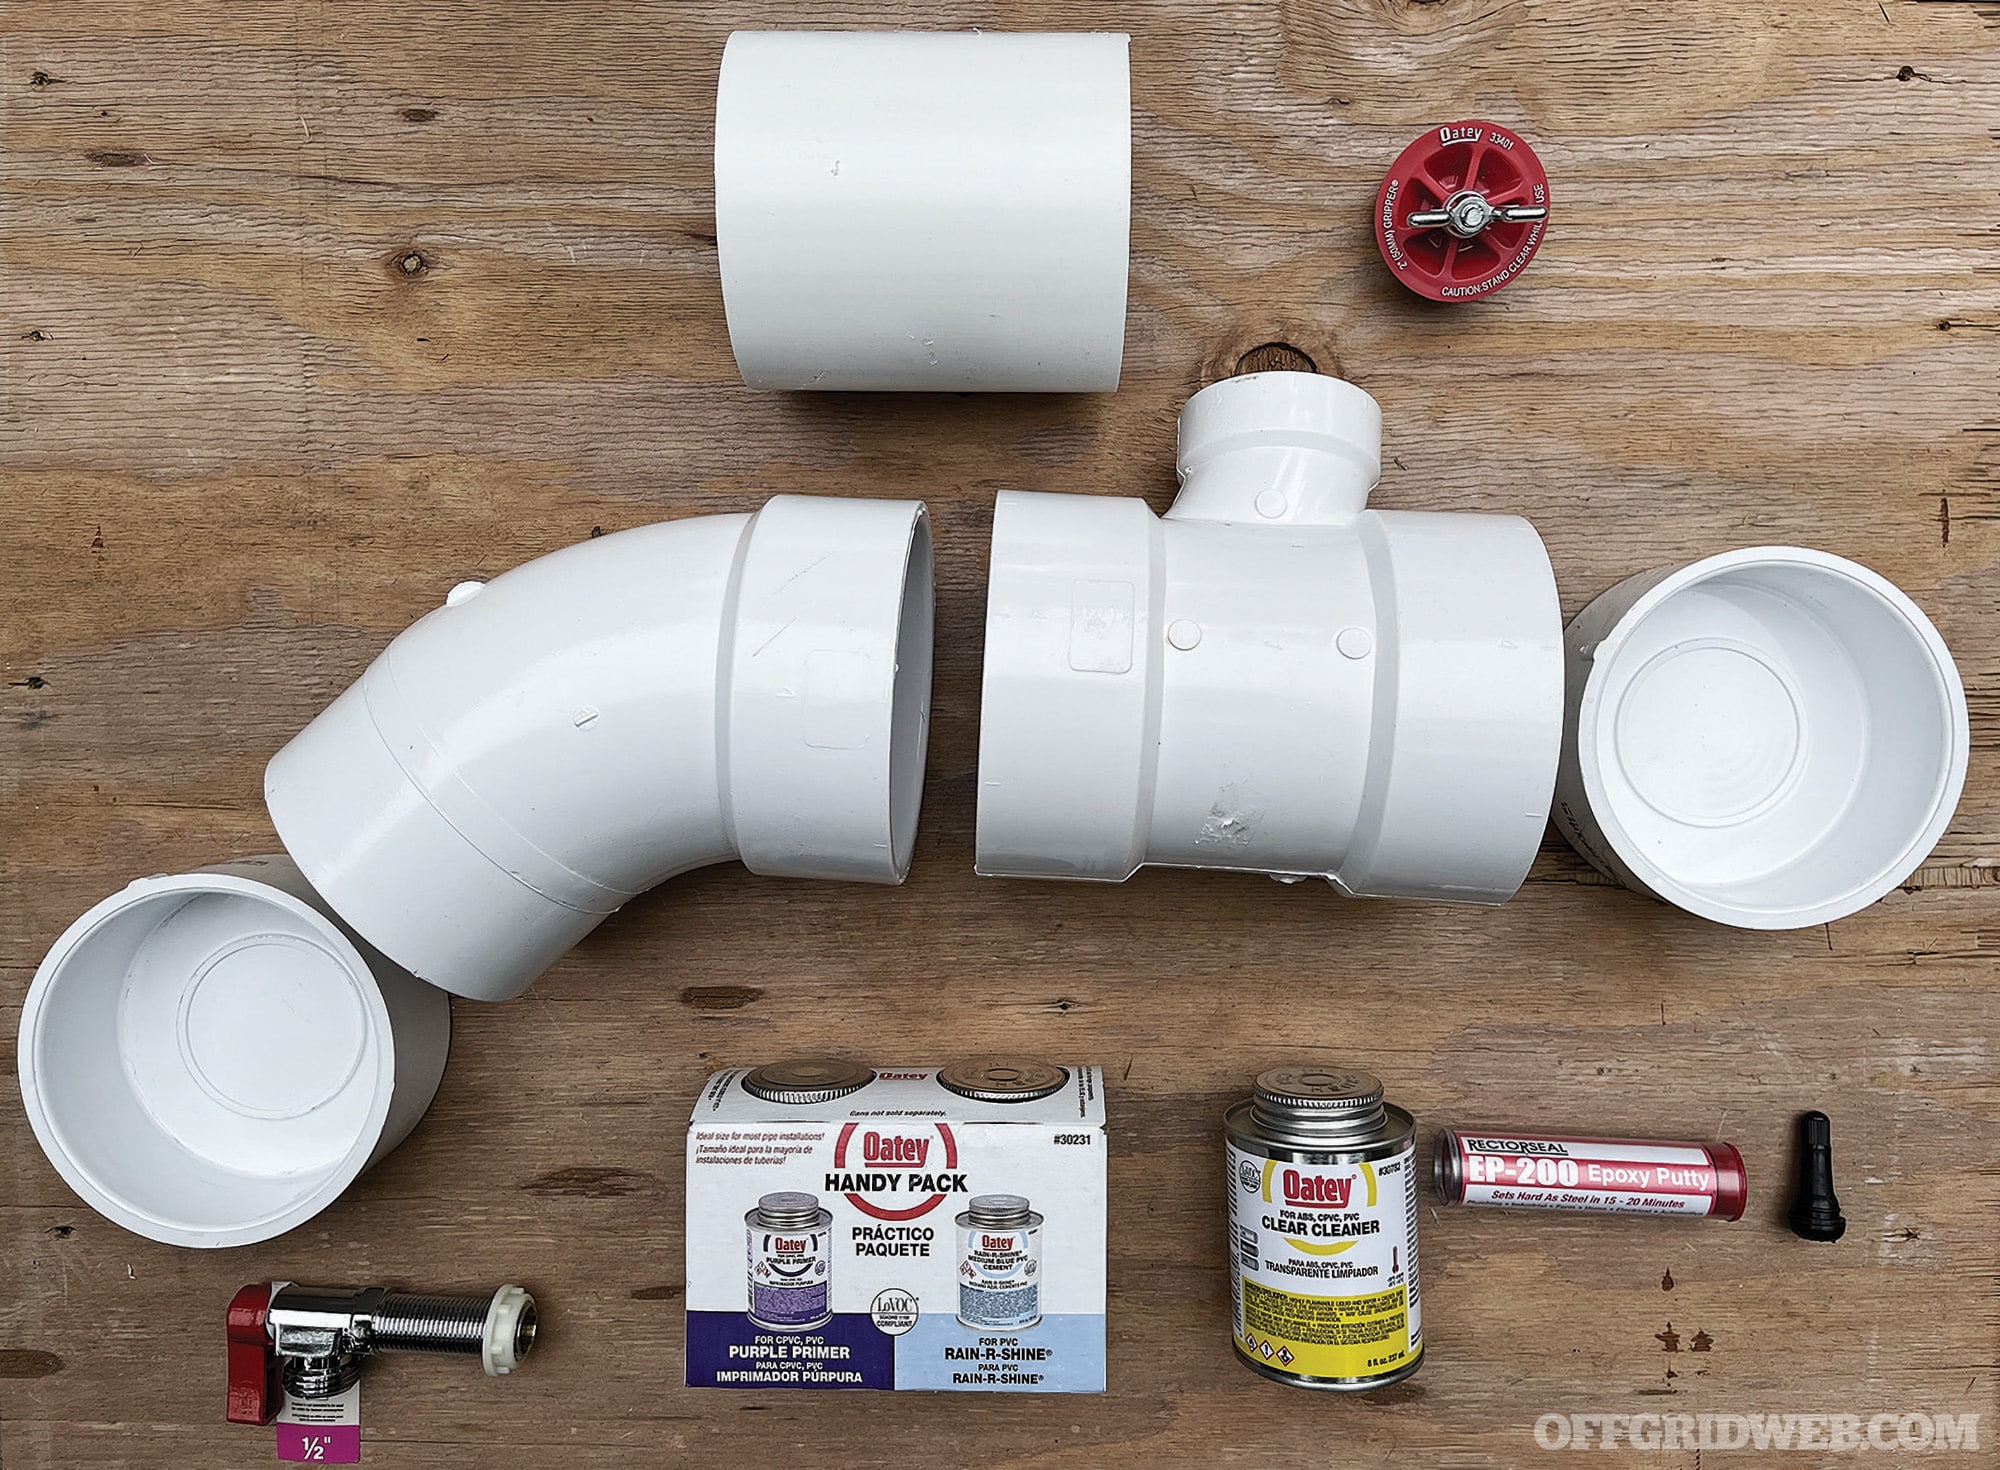
STEP 0: Select your components.
I decided to go with 4-inch diameter pipe, which needs 7.659 total feet to get me to my desired 5 gallons. You’ll also need two endcaps, a 45-degree elbow, a T fitting (mine was 4- to 2-inch T), a test plug to fit the top of the T fitting opening, a spigot with a threaded inside connection, some epoxy that will bond with both the PVC and the metal spigot, a Schrader valve that bolts in and PVC cleaner, primer, and adhesive.
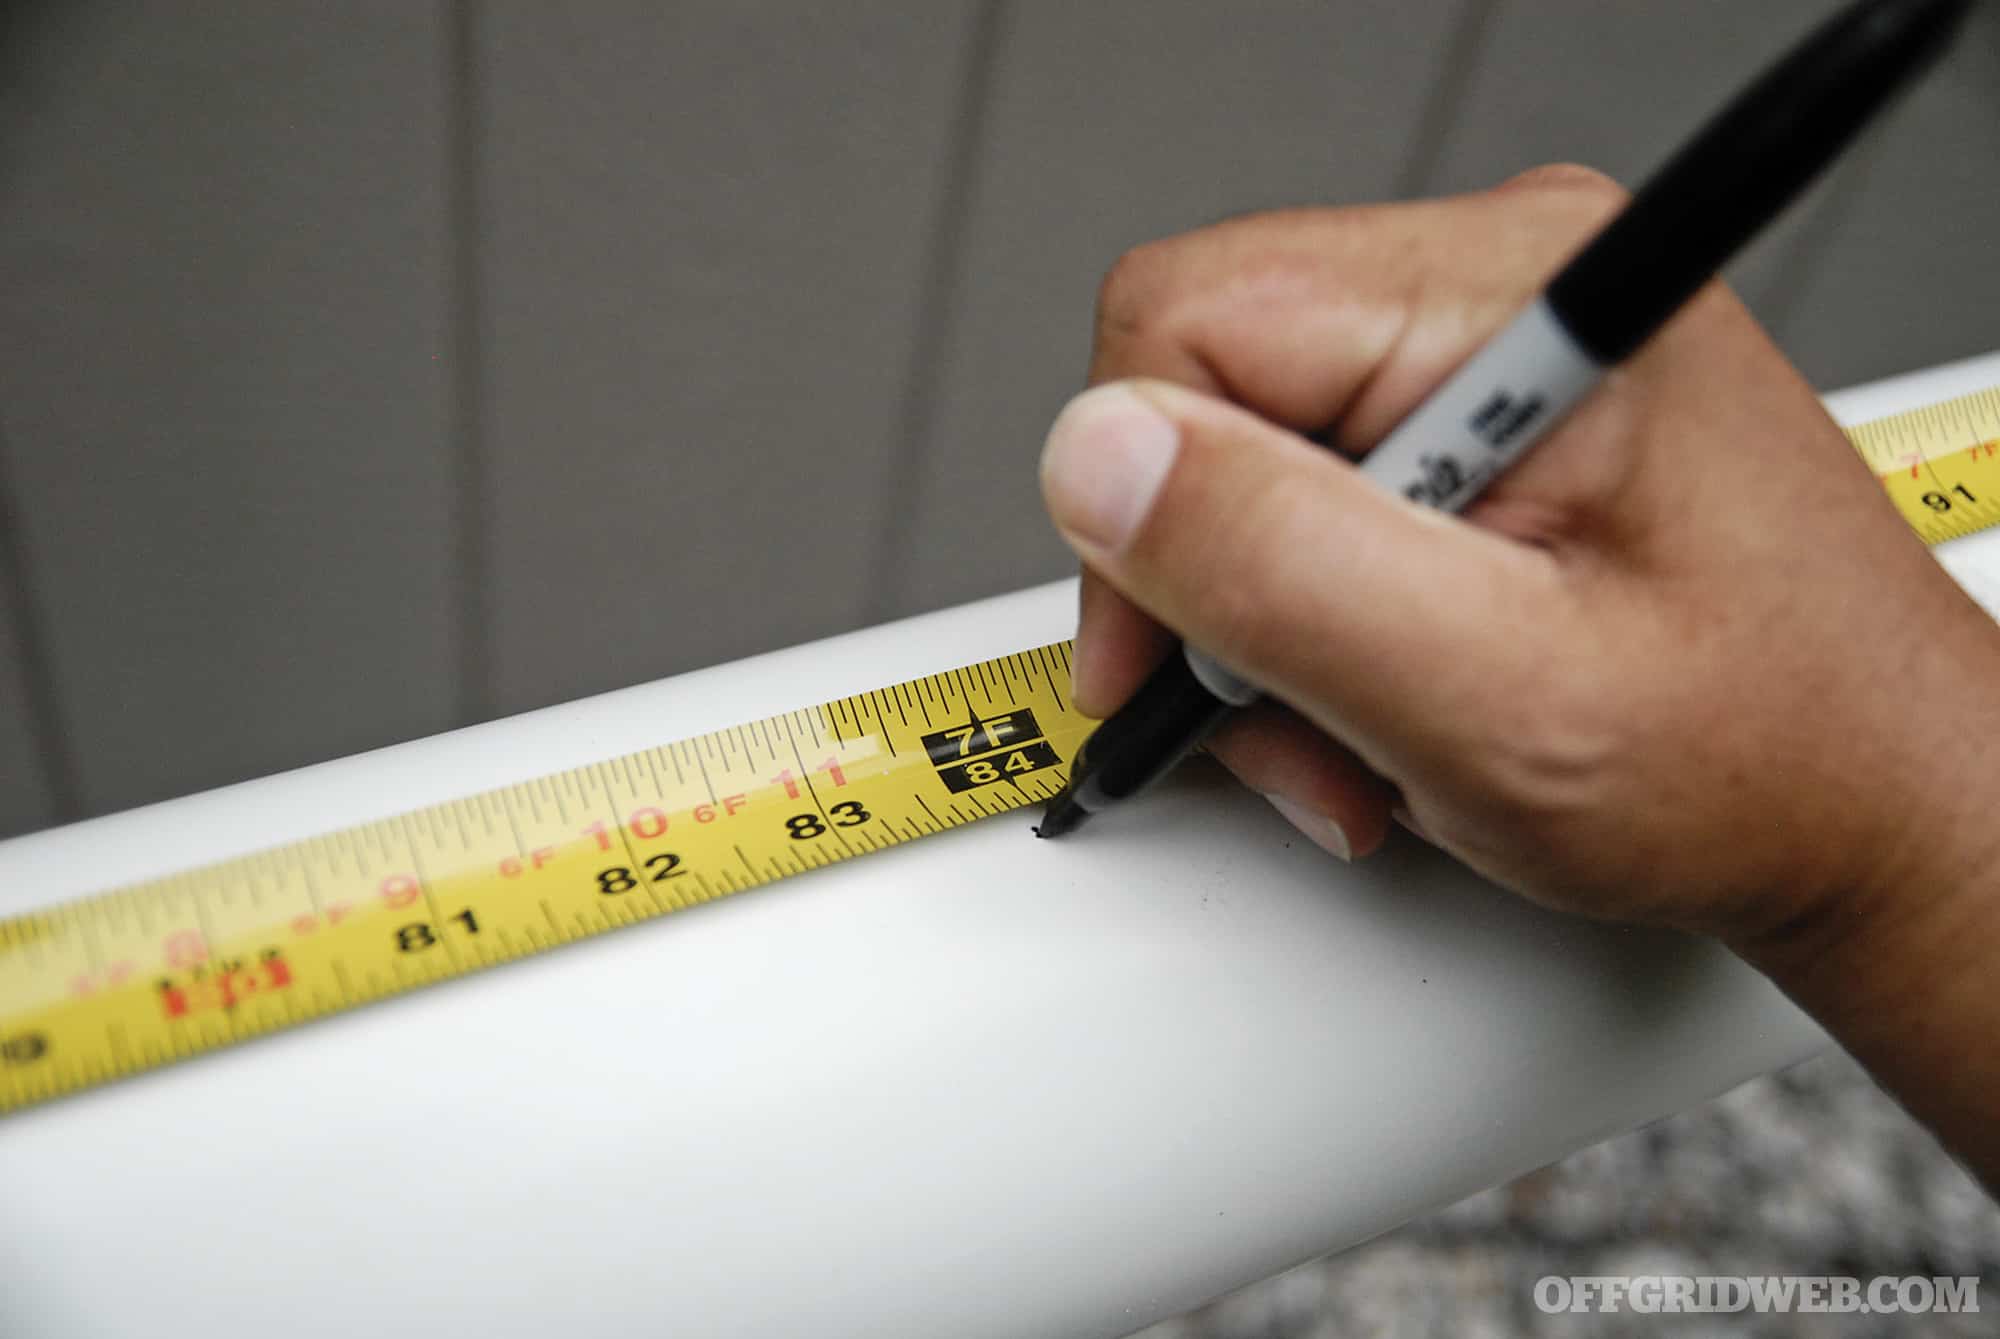
STEP 1: Mark your pipe at the desired length.
I needed 7.659 feet total length to get me to the desired capacity of 5 gallons. My first cut was to 7 feet in length, knowing the length of my fittings would bring me just over the needed length.
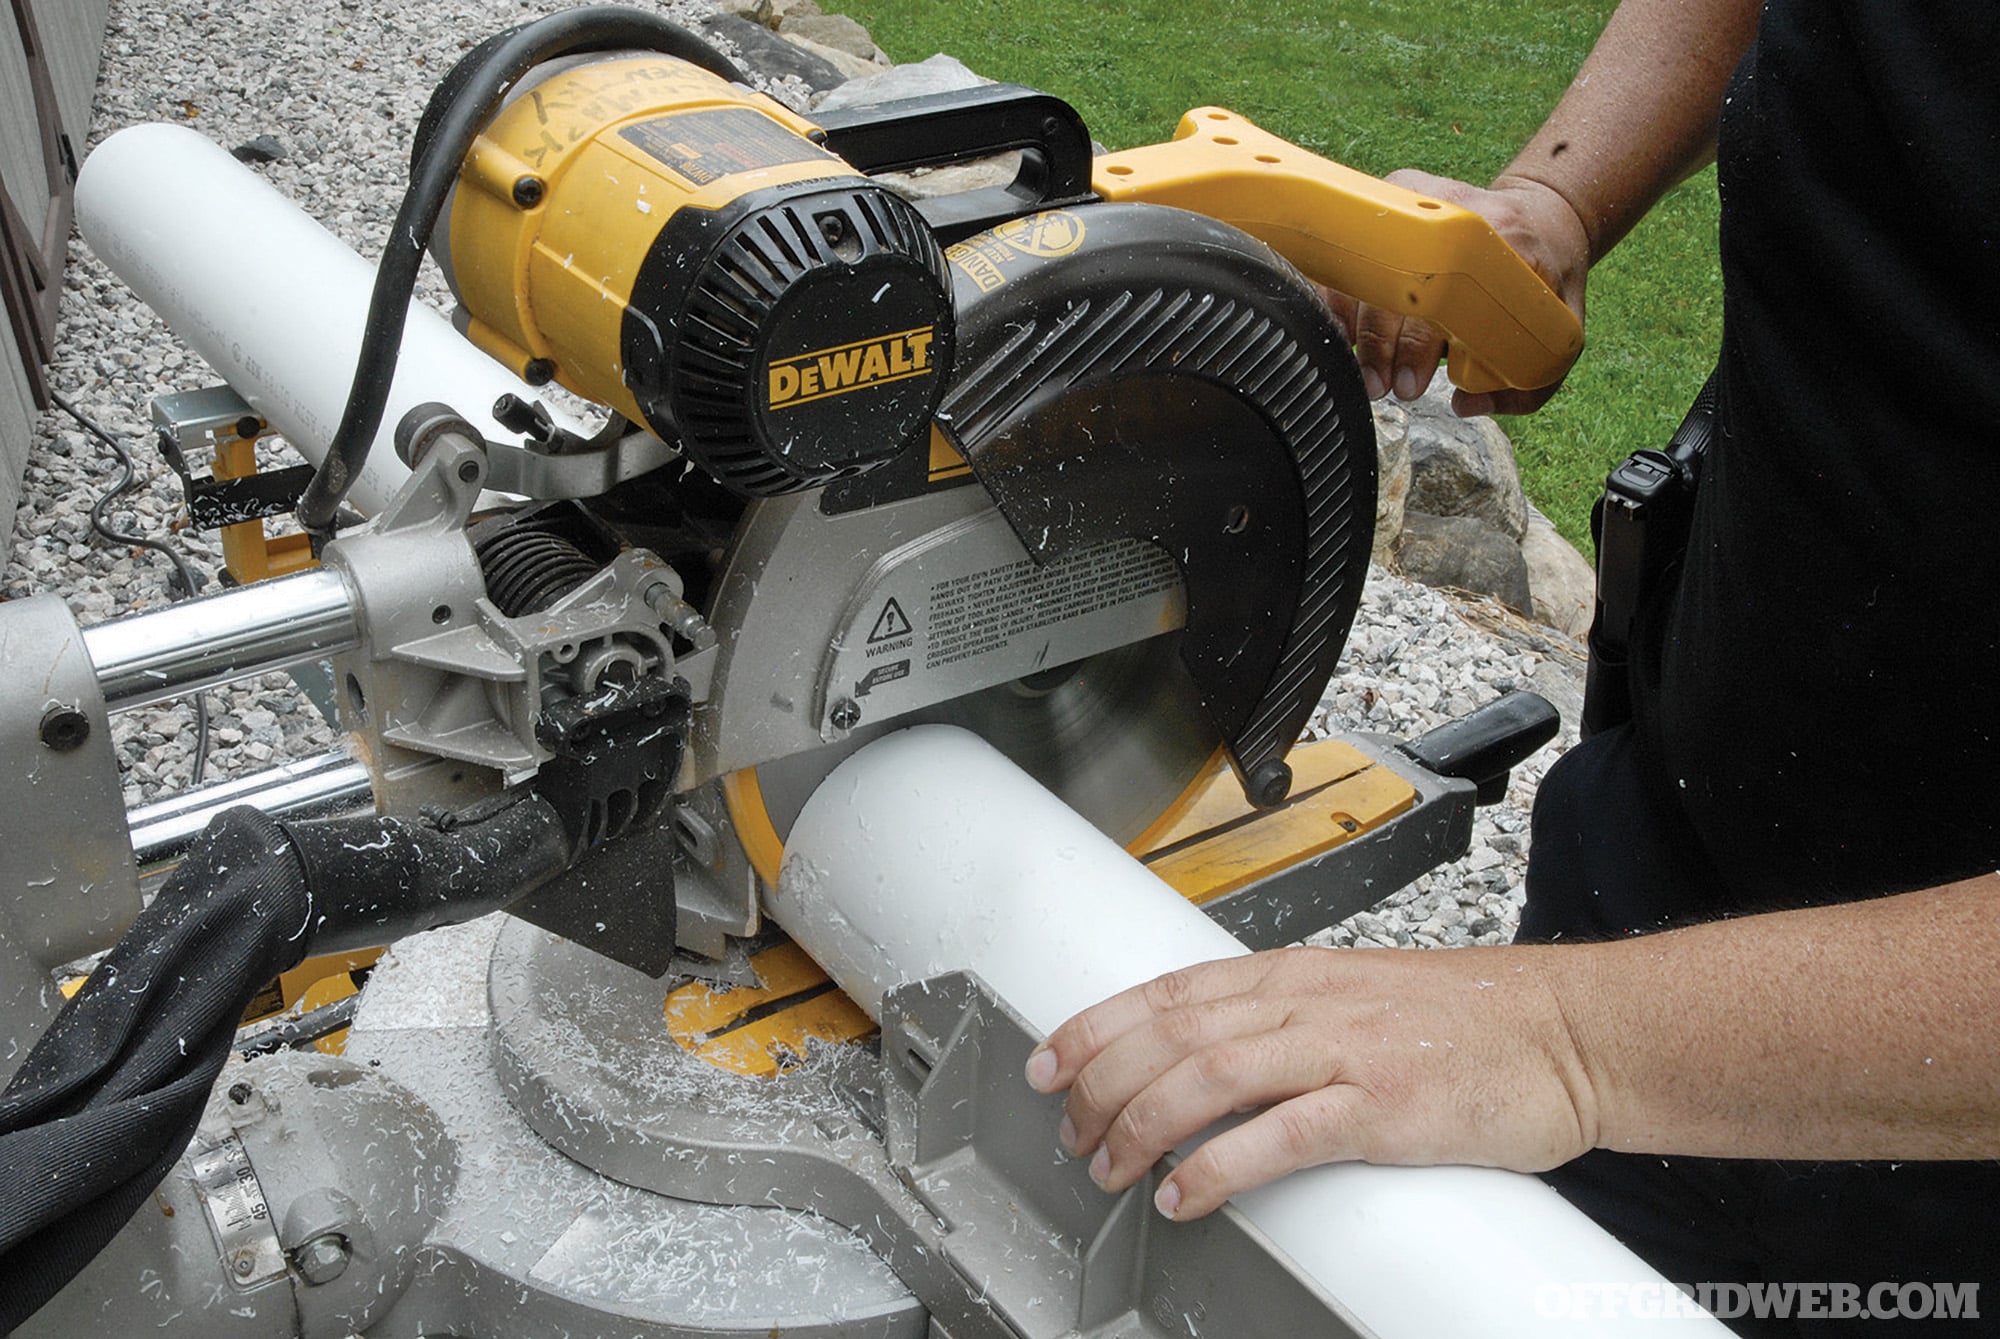
STEP 2: Cut the PVC pipe to the desired length.
While I used a miter saw, you can easily cut it with a hacksaw or PVC cutter.
STEP 3: Make a spacer.
I then cut about 8 inches off of the 7-foot piece to give me the required spacer piece between the T fitting and the 45-degree elbow. If you find any burrs on the pipe, now is the time to file or sand it off to help ensure a leak free seal.
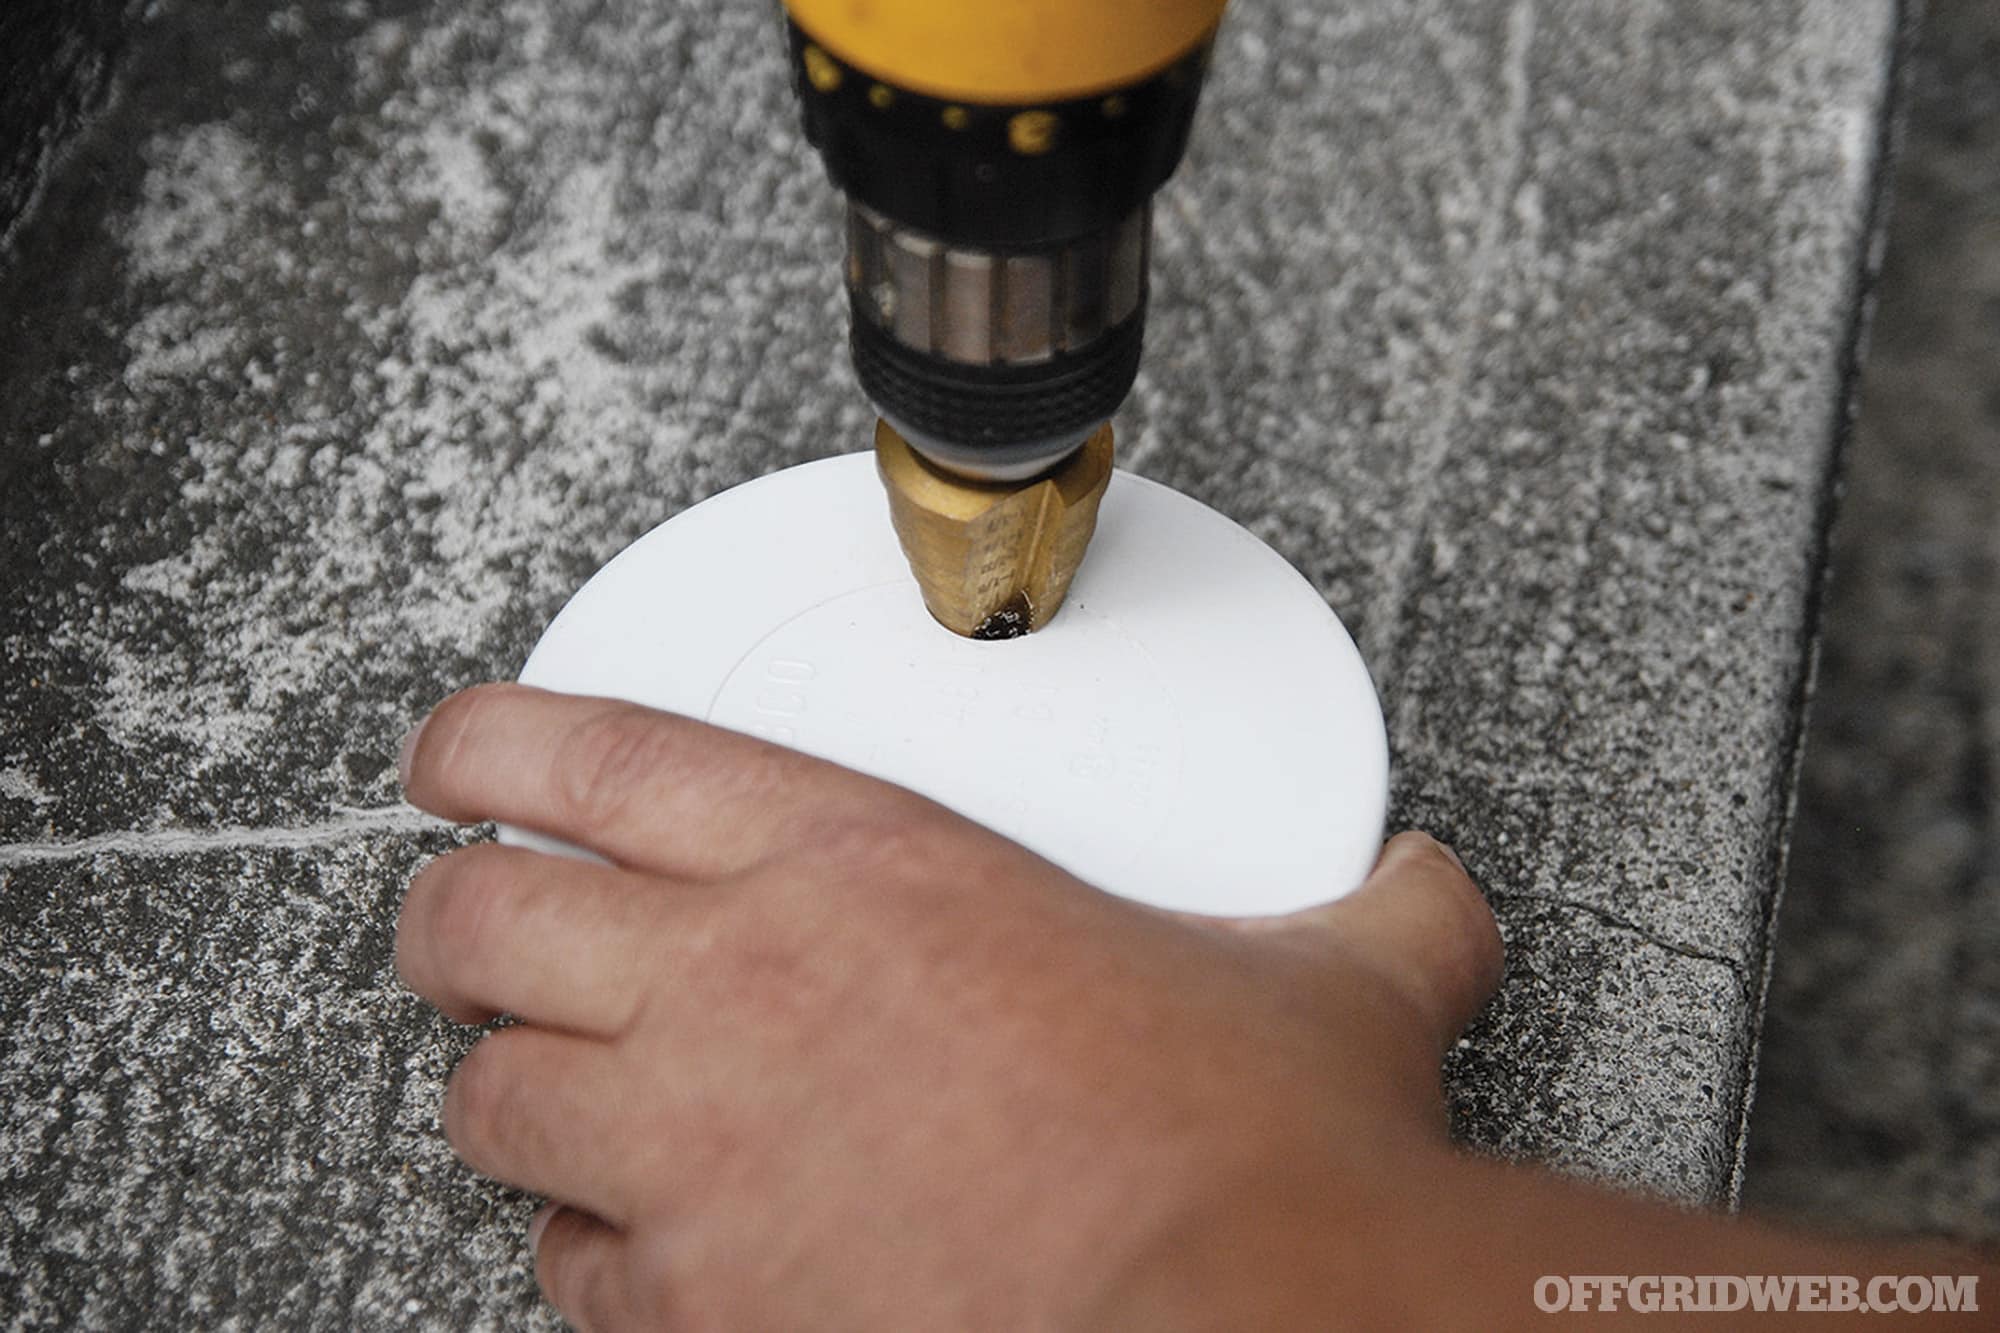
STEP 4: Drill some holes.
You’ll need to drill two appropriate size holes in one of the endcaps. One will be for the spigot and one will be for the Schrader valve. Don’t oversize the holes. We want them to be as tight as possible. I practically had to thread the spigot into position.
STEP 5: Attach and seal the valve.
Attach the Schrader valve and fully tighten. Then, attach the spigot without the retaining nut. Once the spigot is in place and aligned, put some epoxy around the connection point to seal the fitting.
STEP 6: Tighten the nut quickly.
Before the epoxy has a chance to start hardening, tighten the spigot retaining nut.
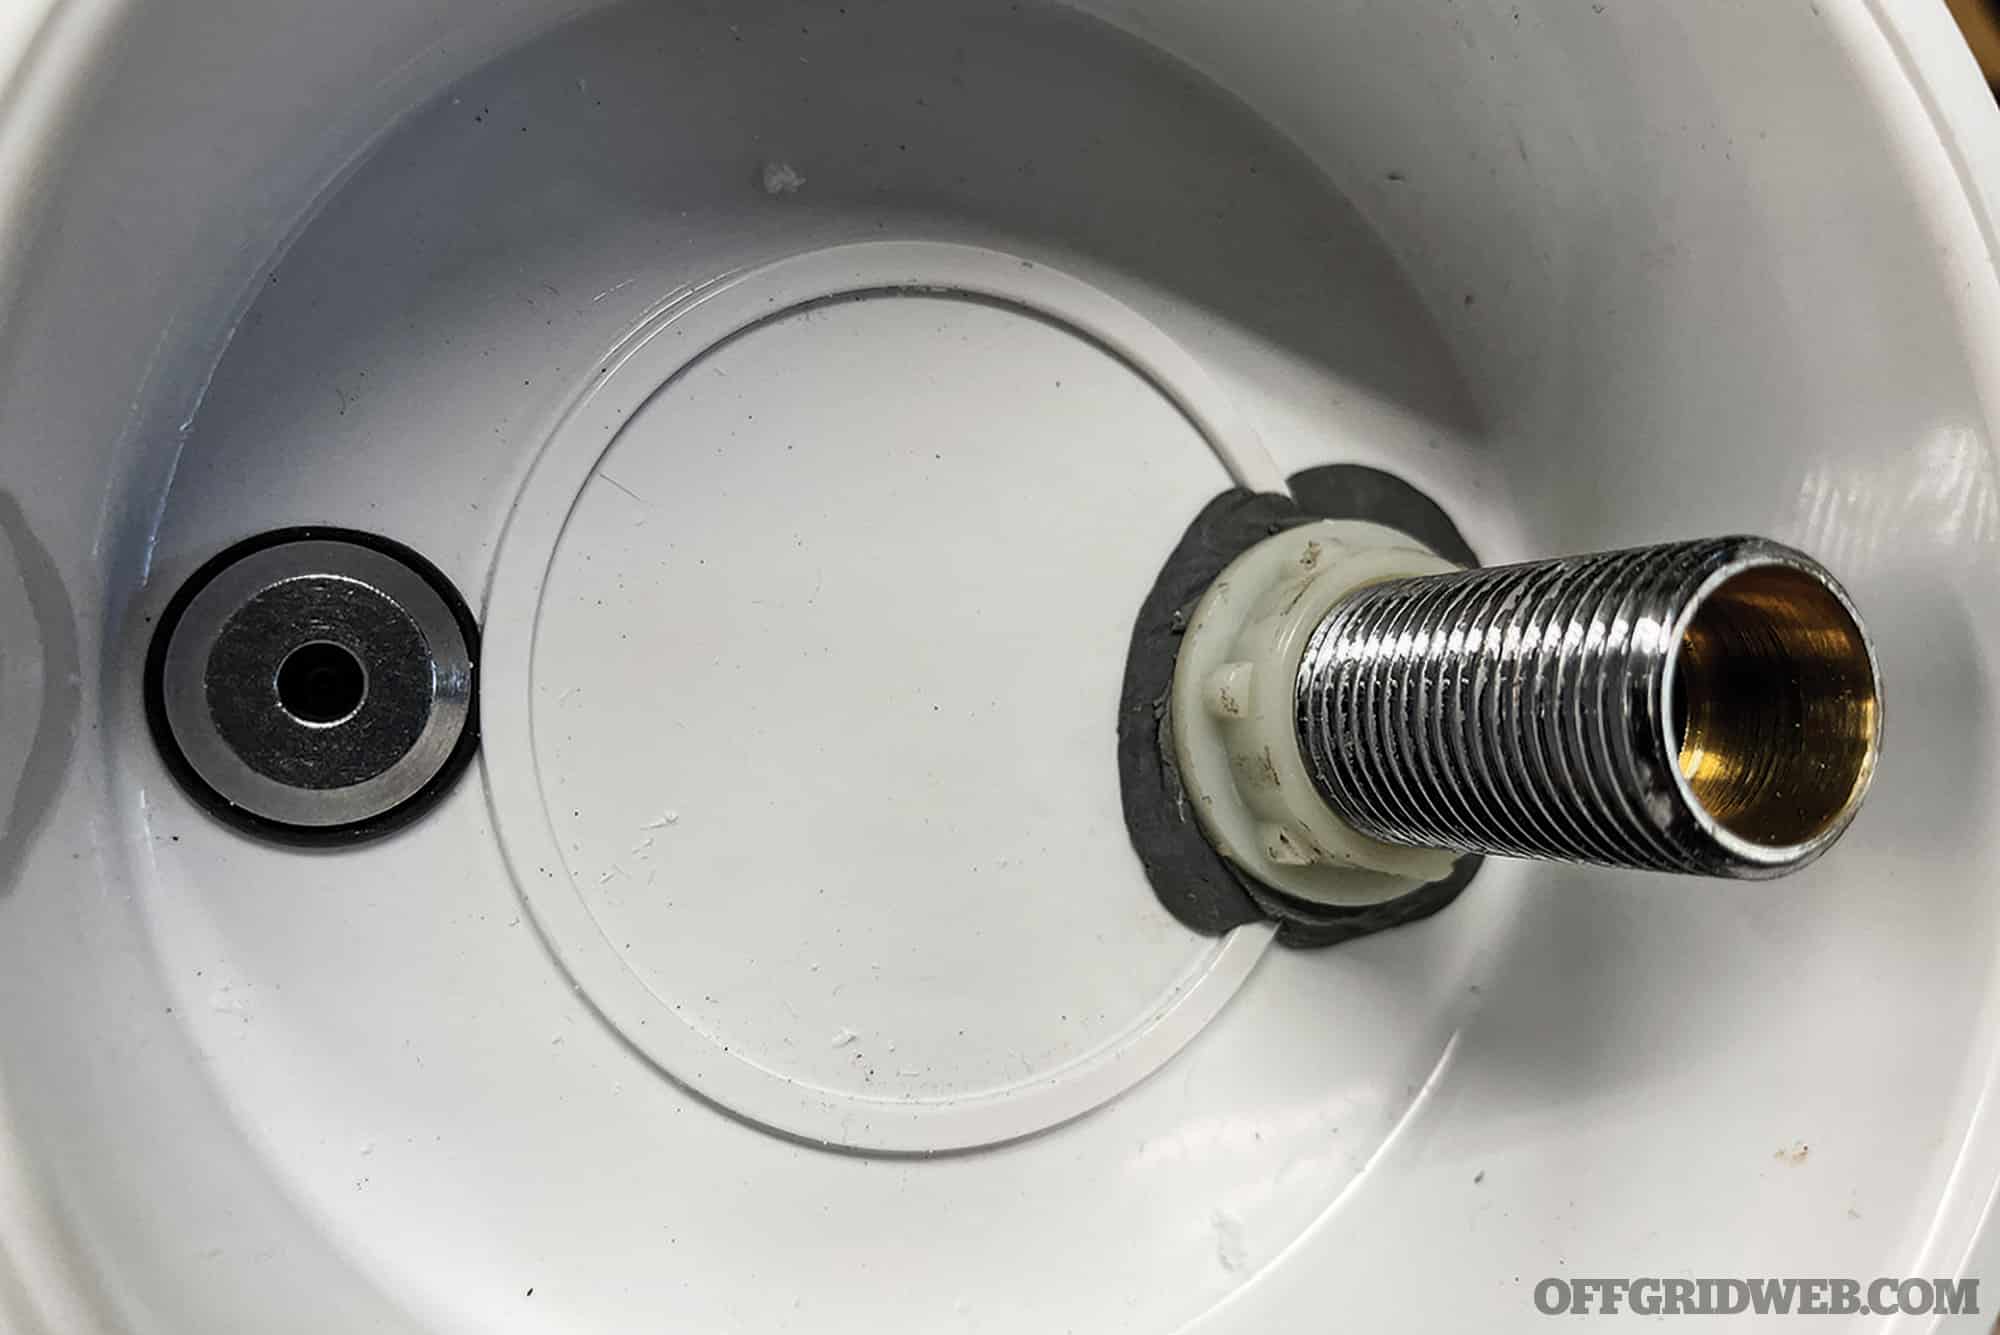
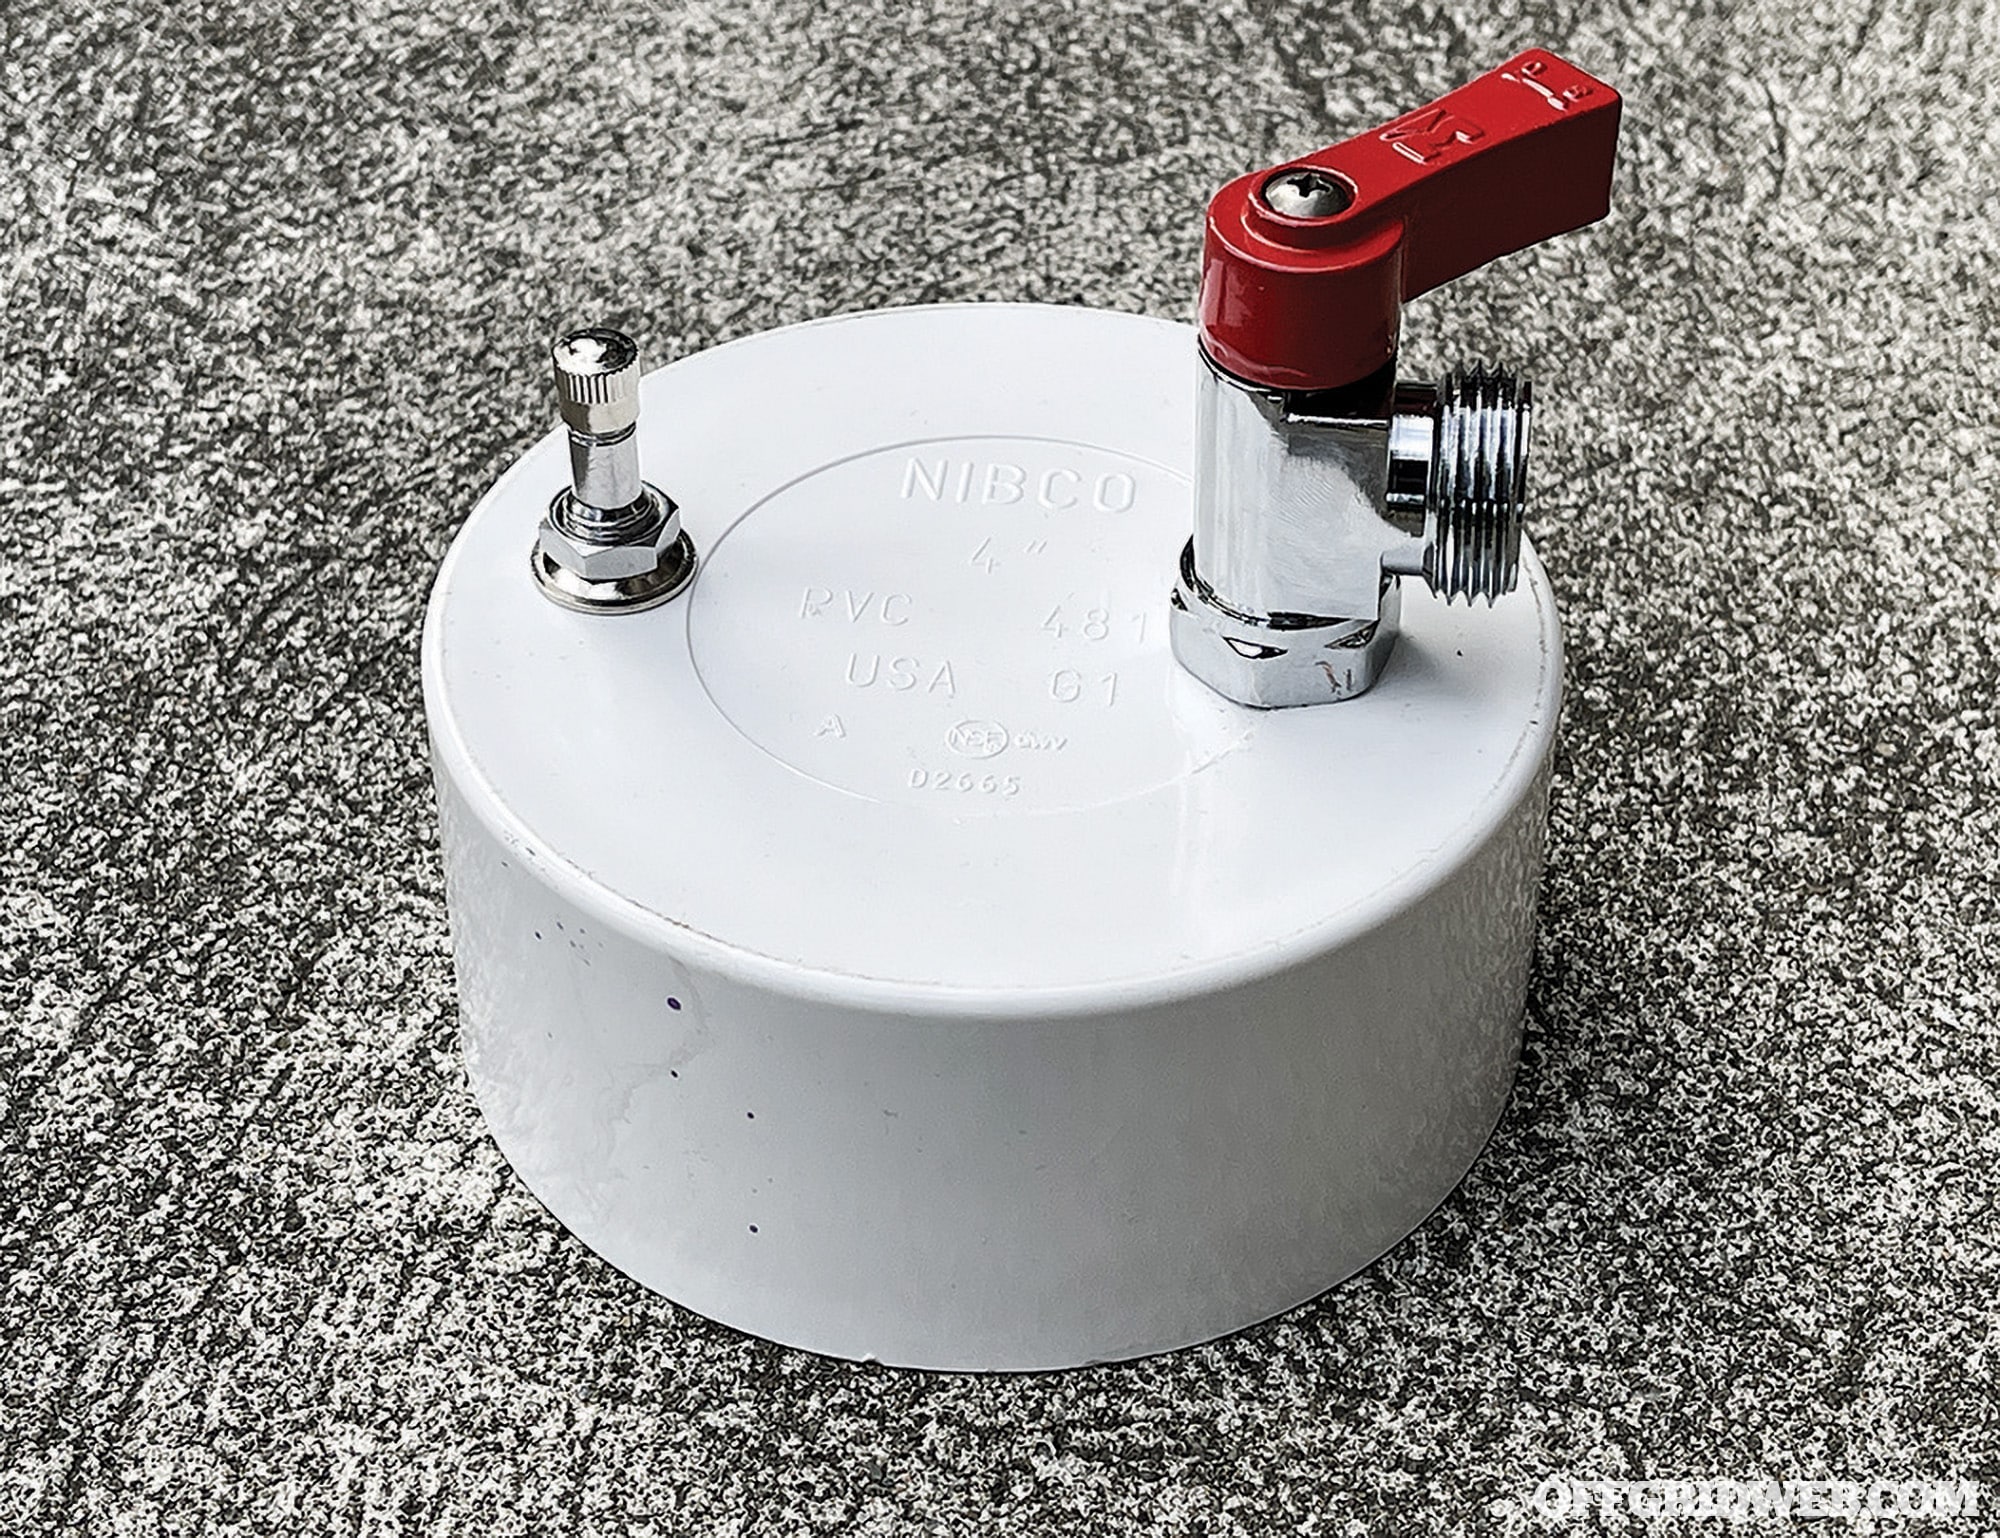
STEP 7: Examine your end cap.
Once the Schrader valve and spigot have been attached, your endcap should look like this.
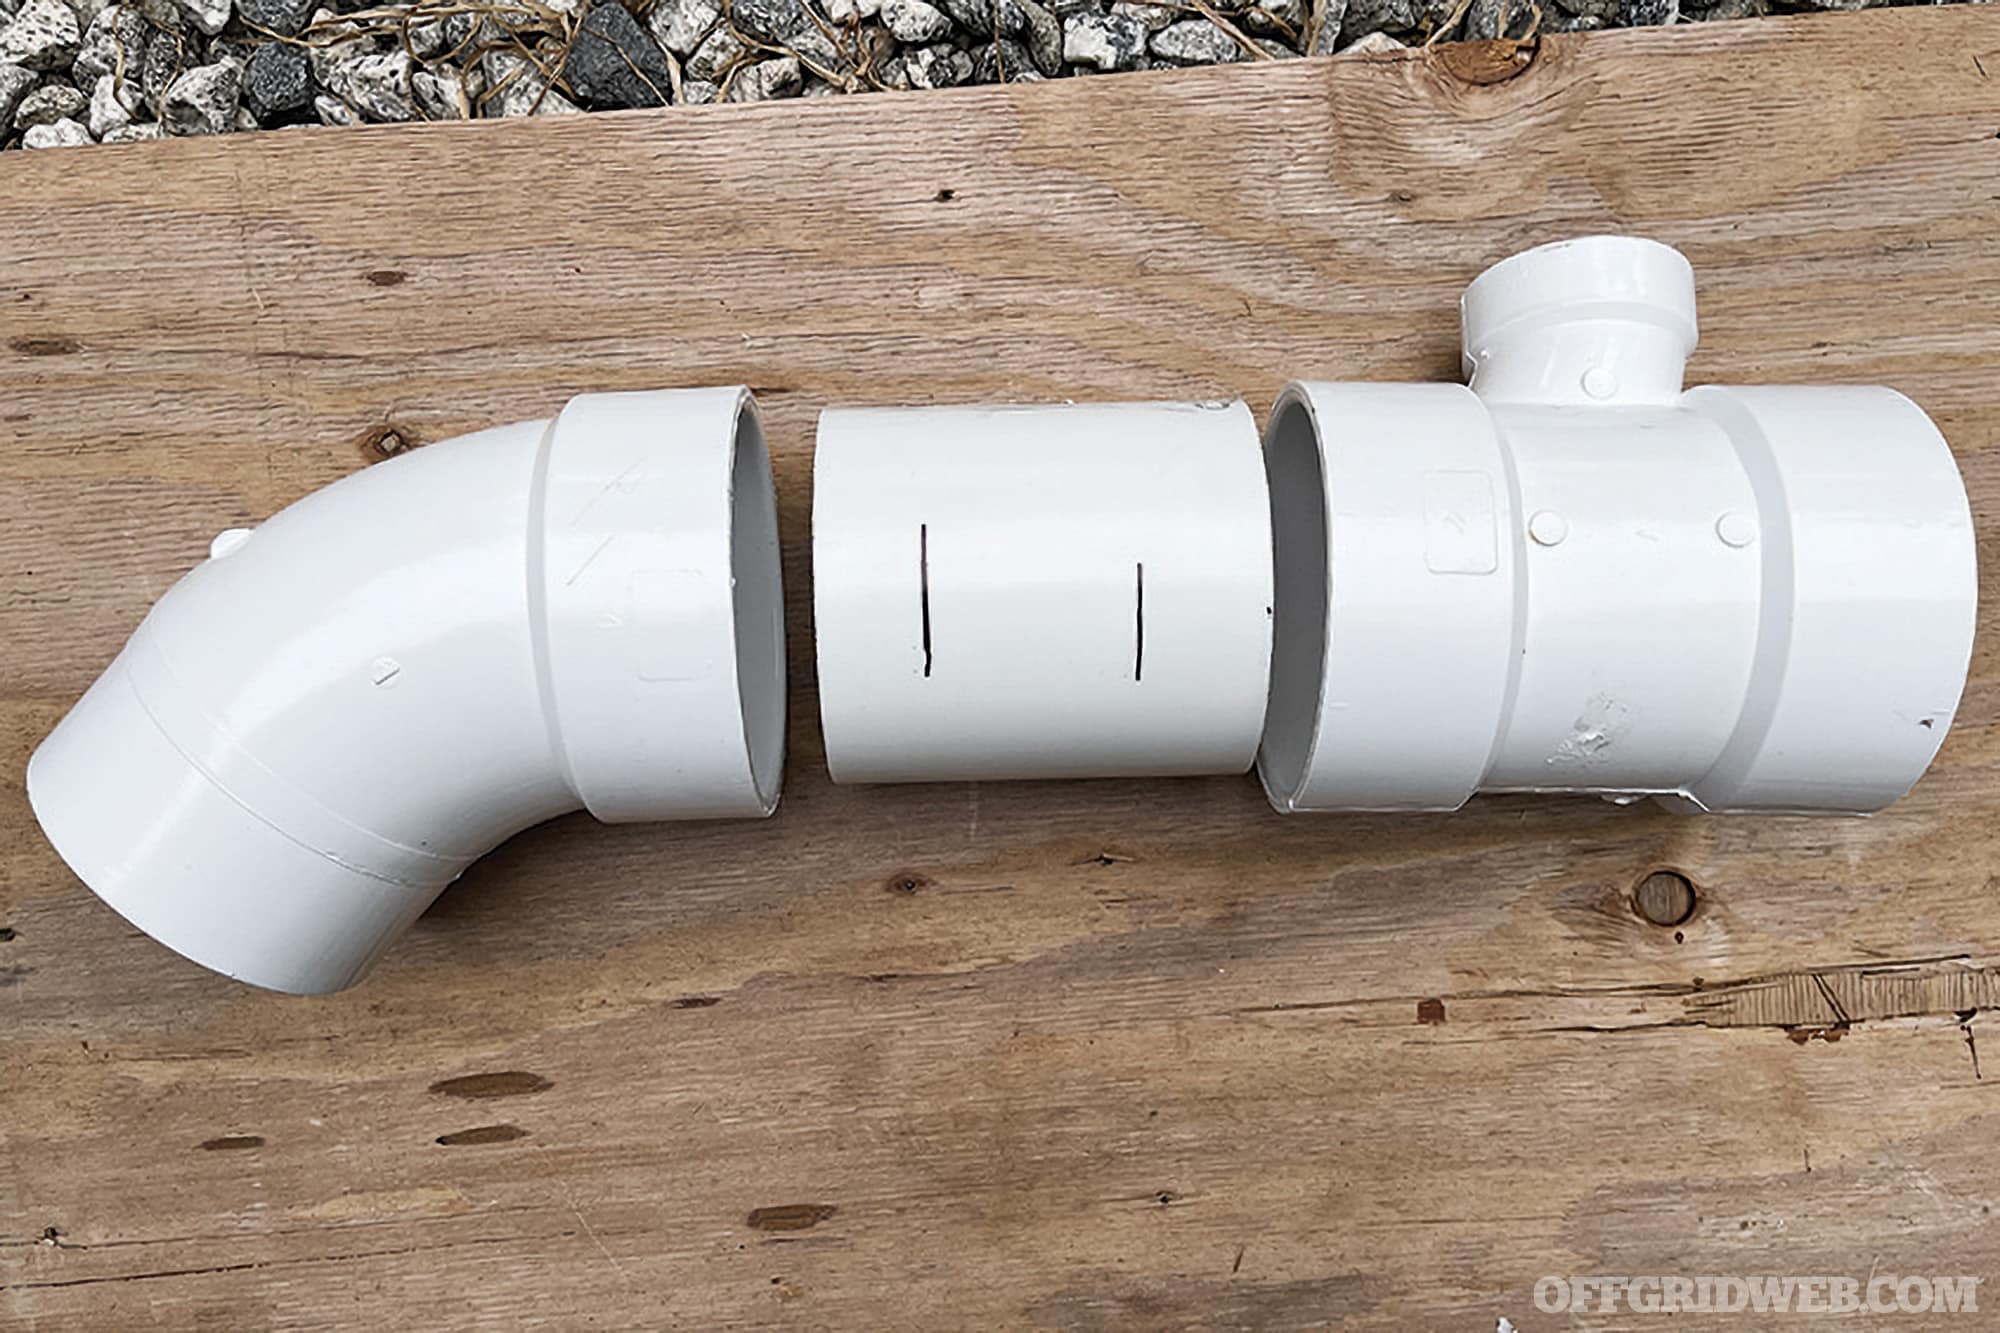
STEP 8: Dry-fit and mark all the parts.
Don’t apply glue yet! Use a marker or pencil to make vertical reference lines as to how deeply the parts will need to be pressed together. You should also make an alignment mark horizontally for the parts that need to fit together in desired orientation.
STEP 9: Disassemble and check your markings.
When you pull the unglued pieces apart, you’ll see your vertical reference lines. You’ll need to clean, primer, and glue 100 percent of this area to ensure a good seal.
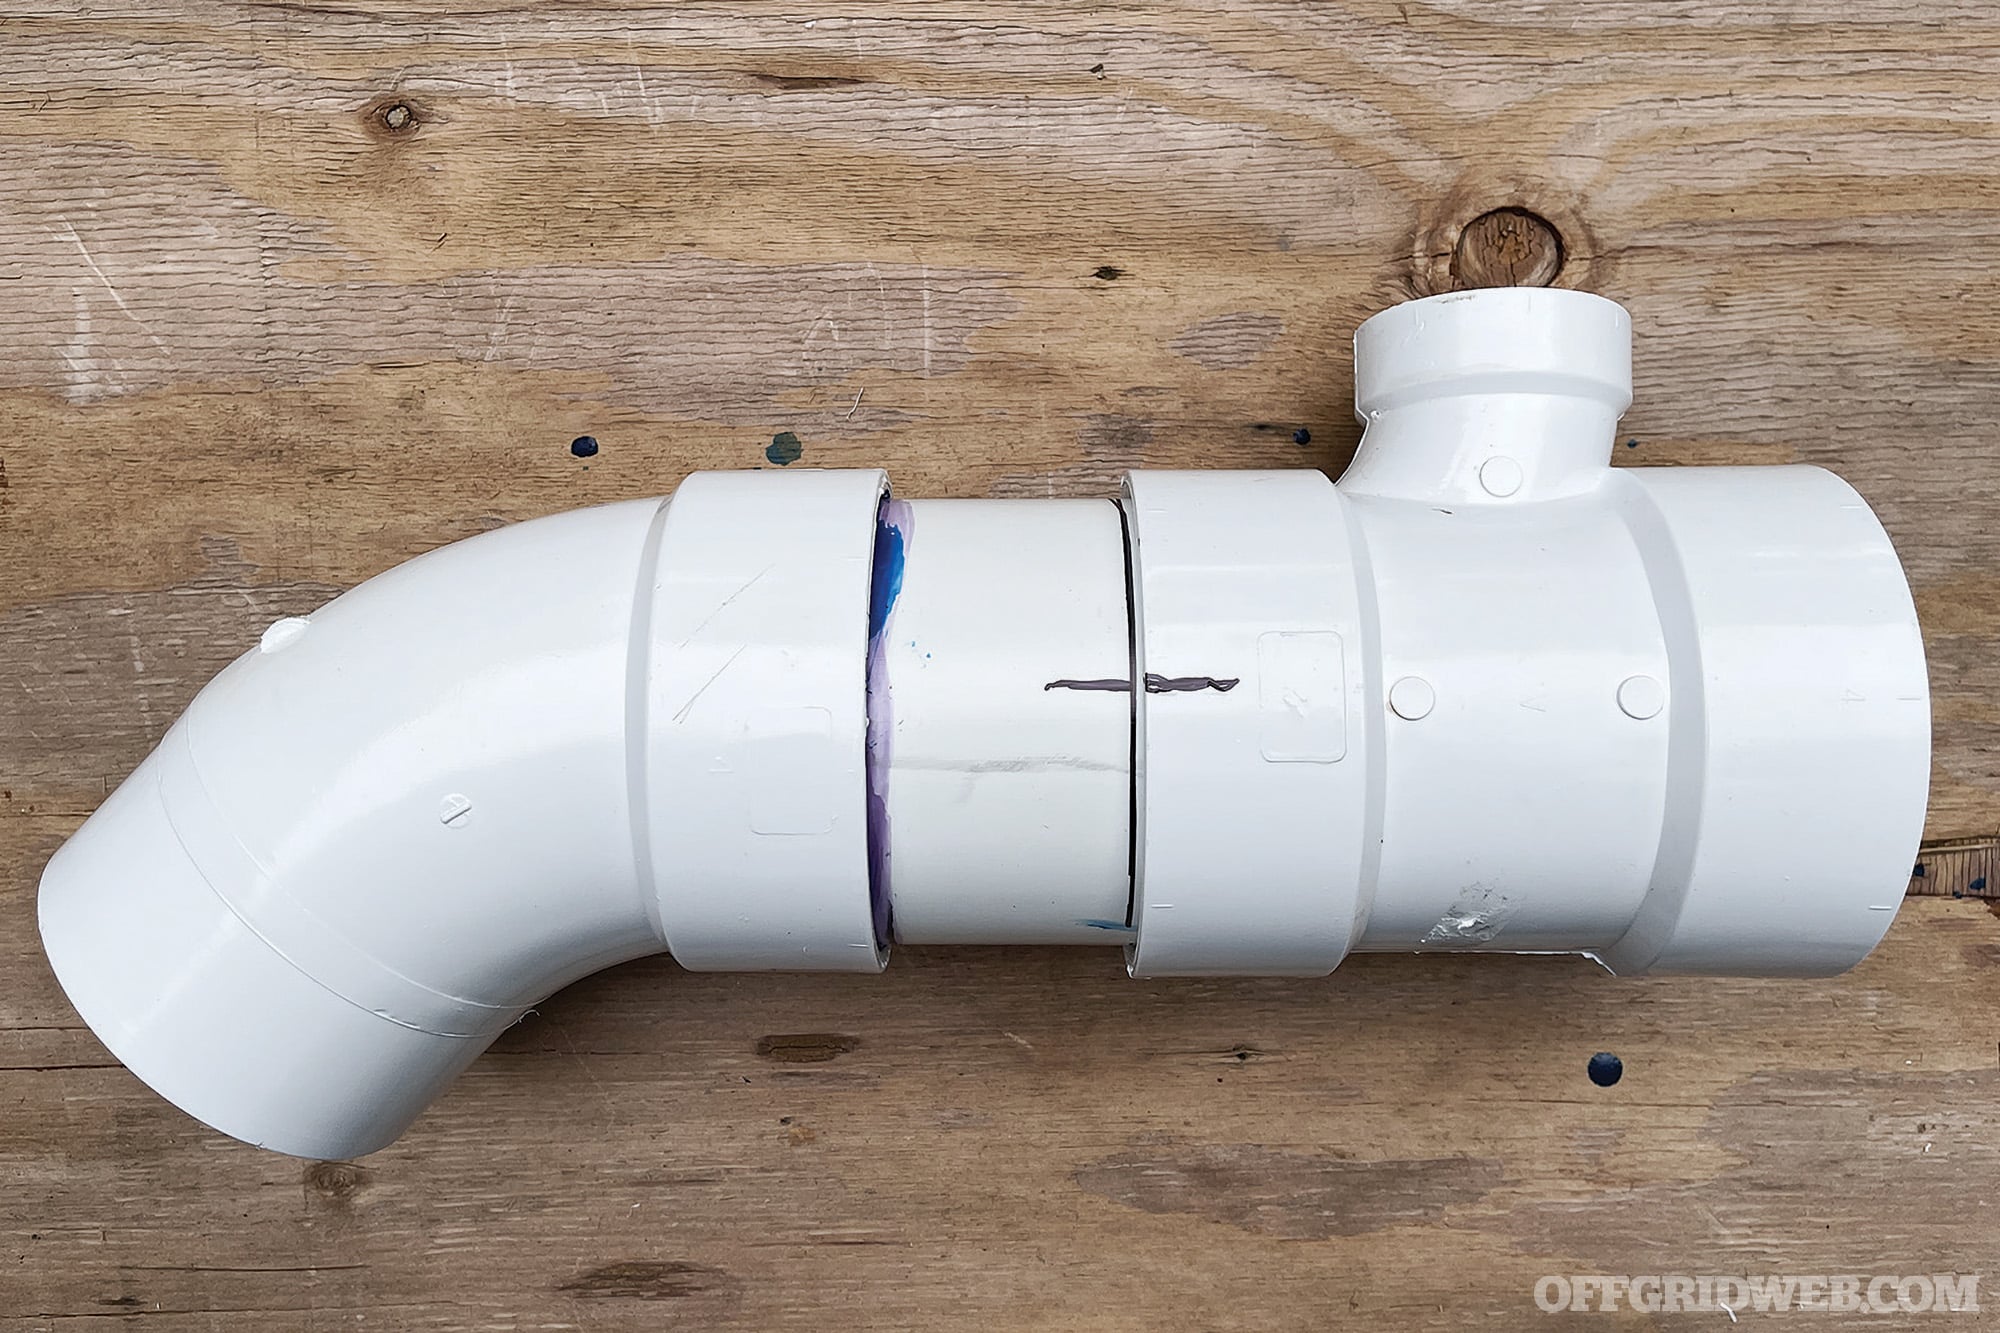
STEP 10: Clean, prime, and glue.
First clean the pipes with the appropriate chemical cleaner. Then, apply the primer. In this photo, my primer is purple. You’ll need to do this to both the outer male portion and the inner female portion — anywhere the pipes will be in contact. And do only one piece at a time, as the primer and glue dry very, very quickly.
STEP 11: Assemble each glued piece quickly!
Apply glue to both the outer male portion and the inner female portion and quickly fit the pieces together. You only have a few seconds before the glue starts to harden. Note the horizontal alignment line and vertical reference lines.
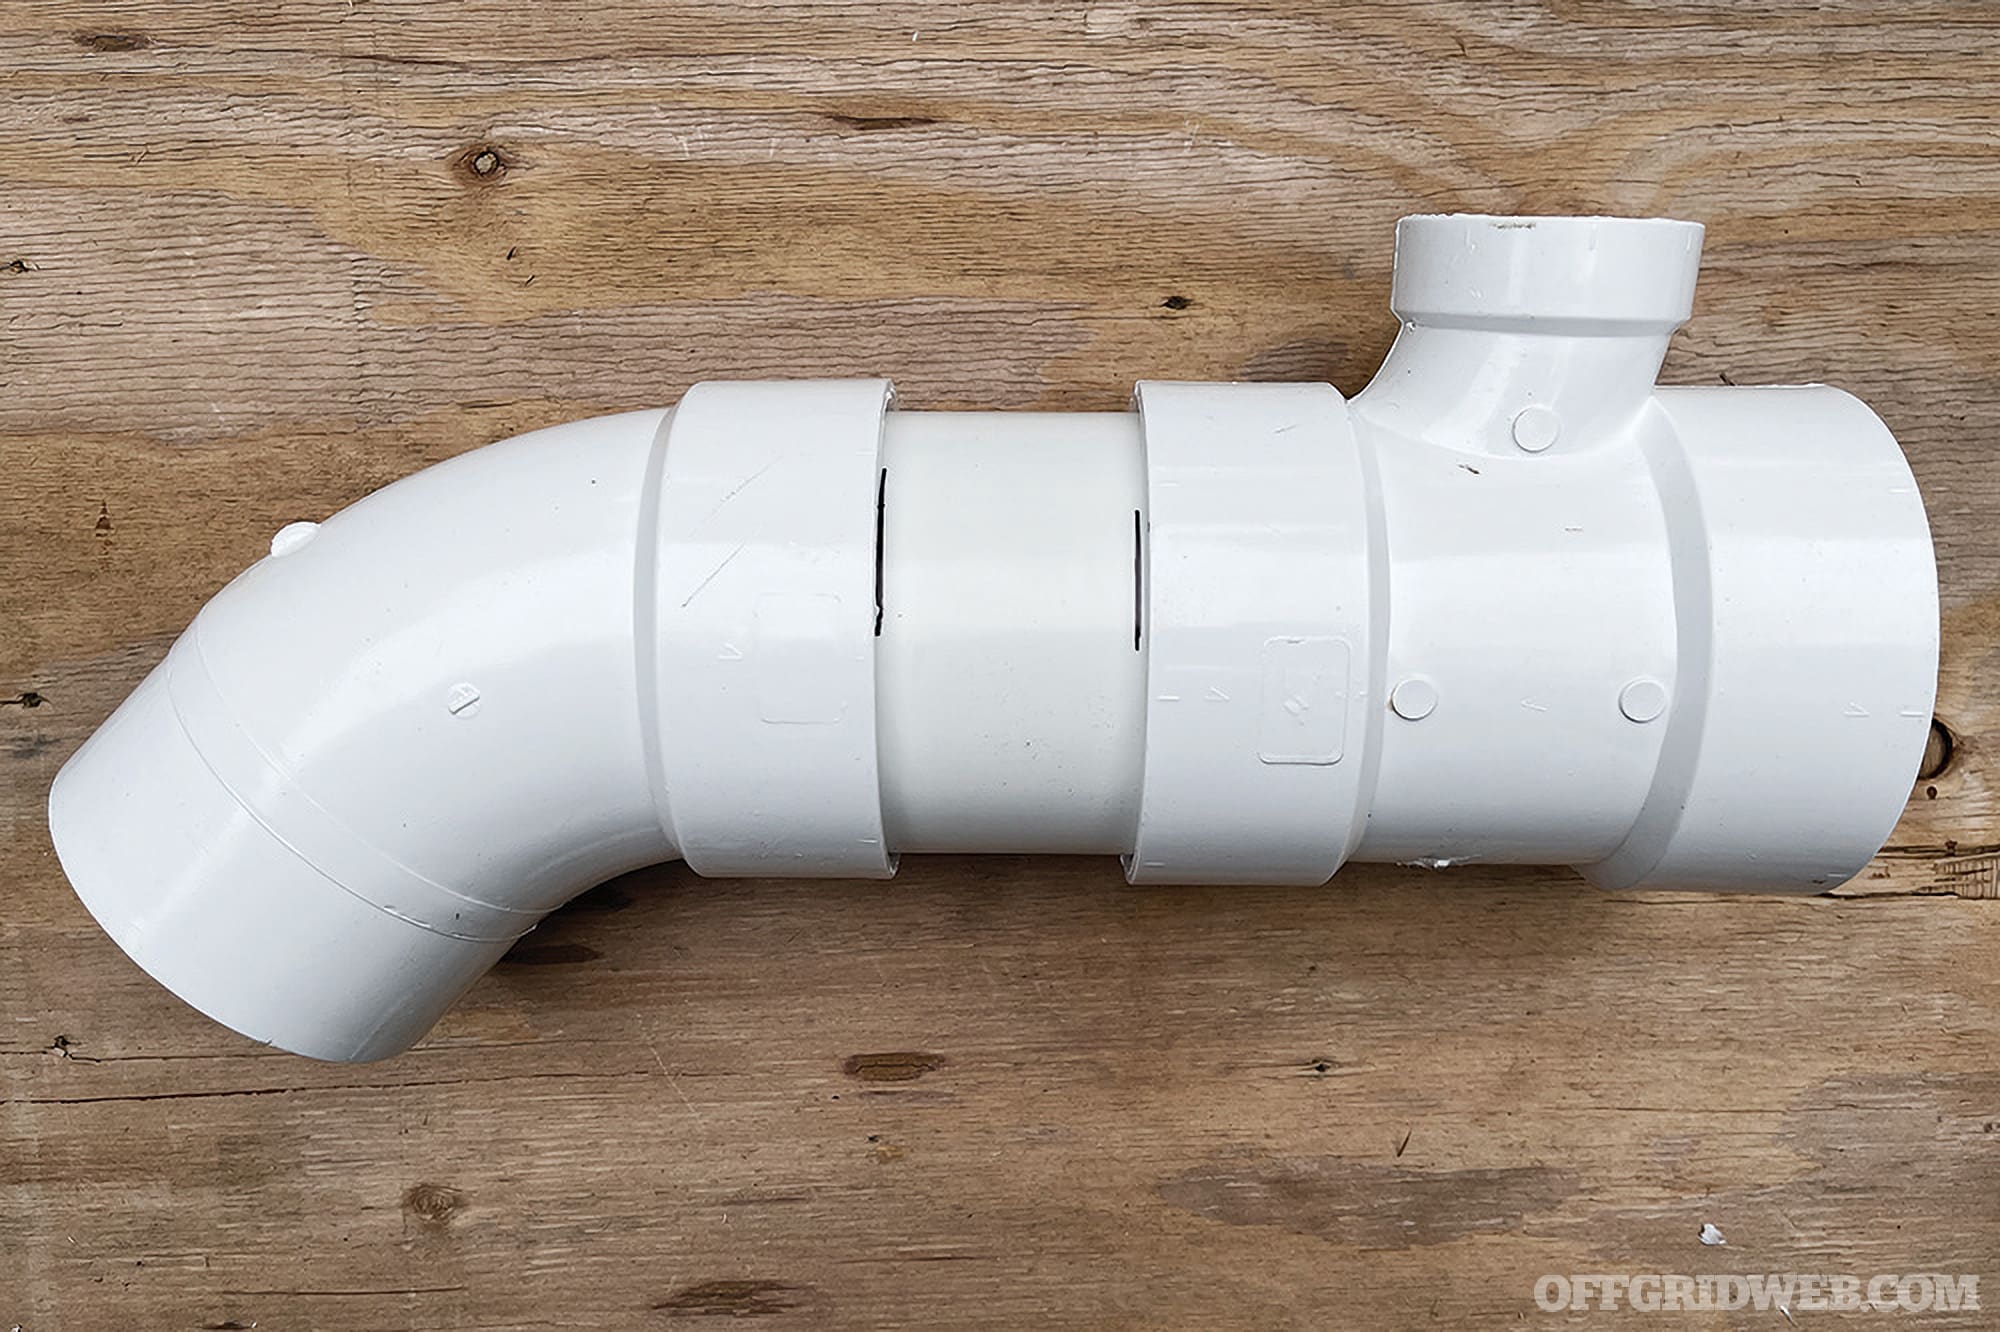
STEP 12: Stand back and observe your DIY road shower.
The completed assembly. From left to right: endcap with Schrader valve and spigot, 45-degree elbow, 8-inch spacer piece, T fitting, remainder of 7-foot pipe, endcap.
Pressure-Testing & Finishing
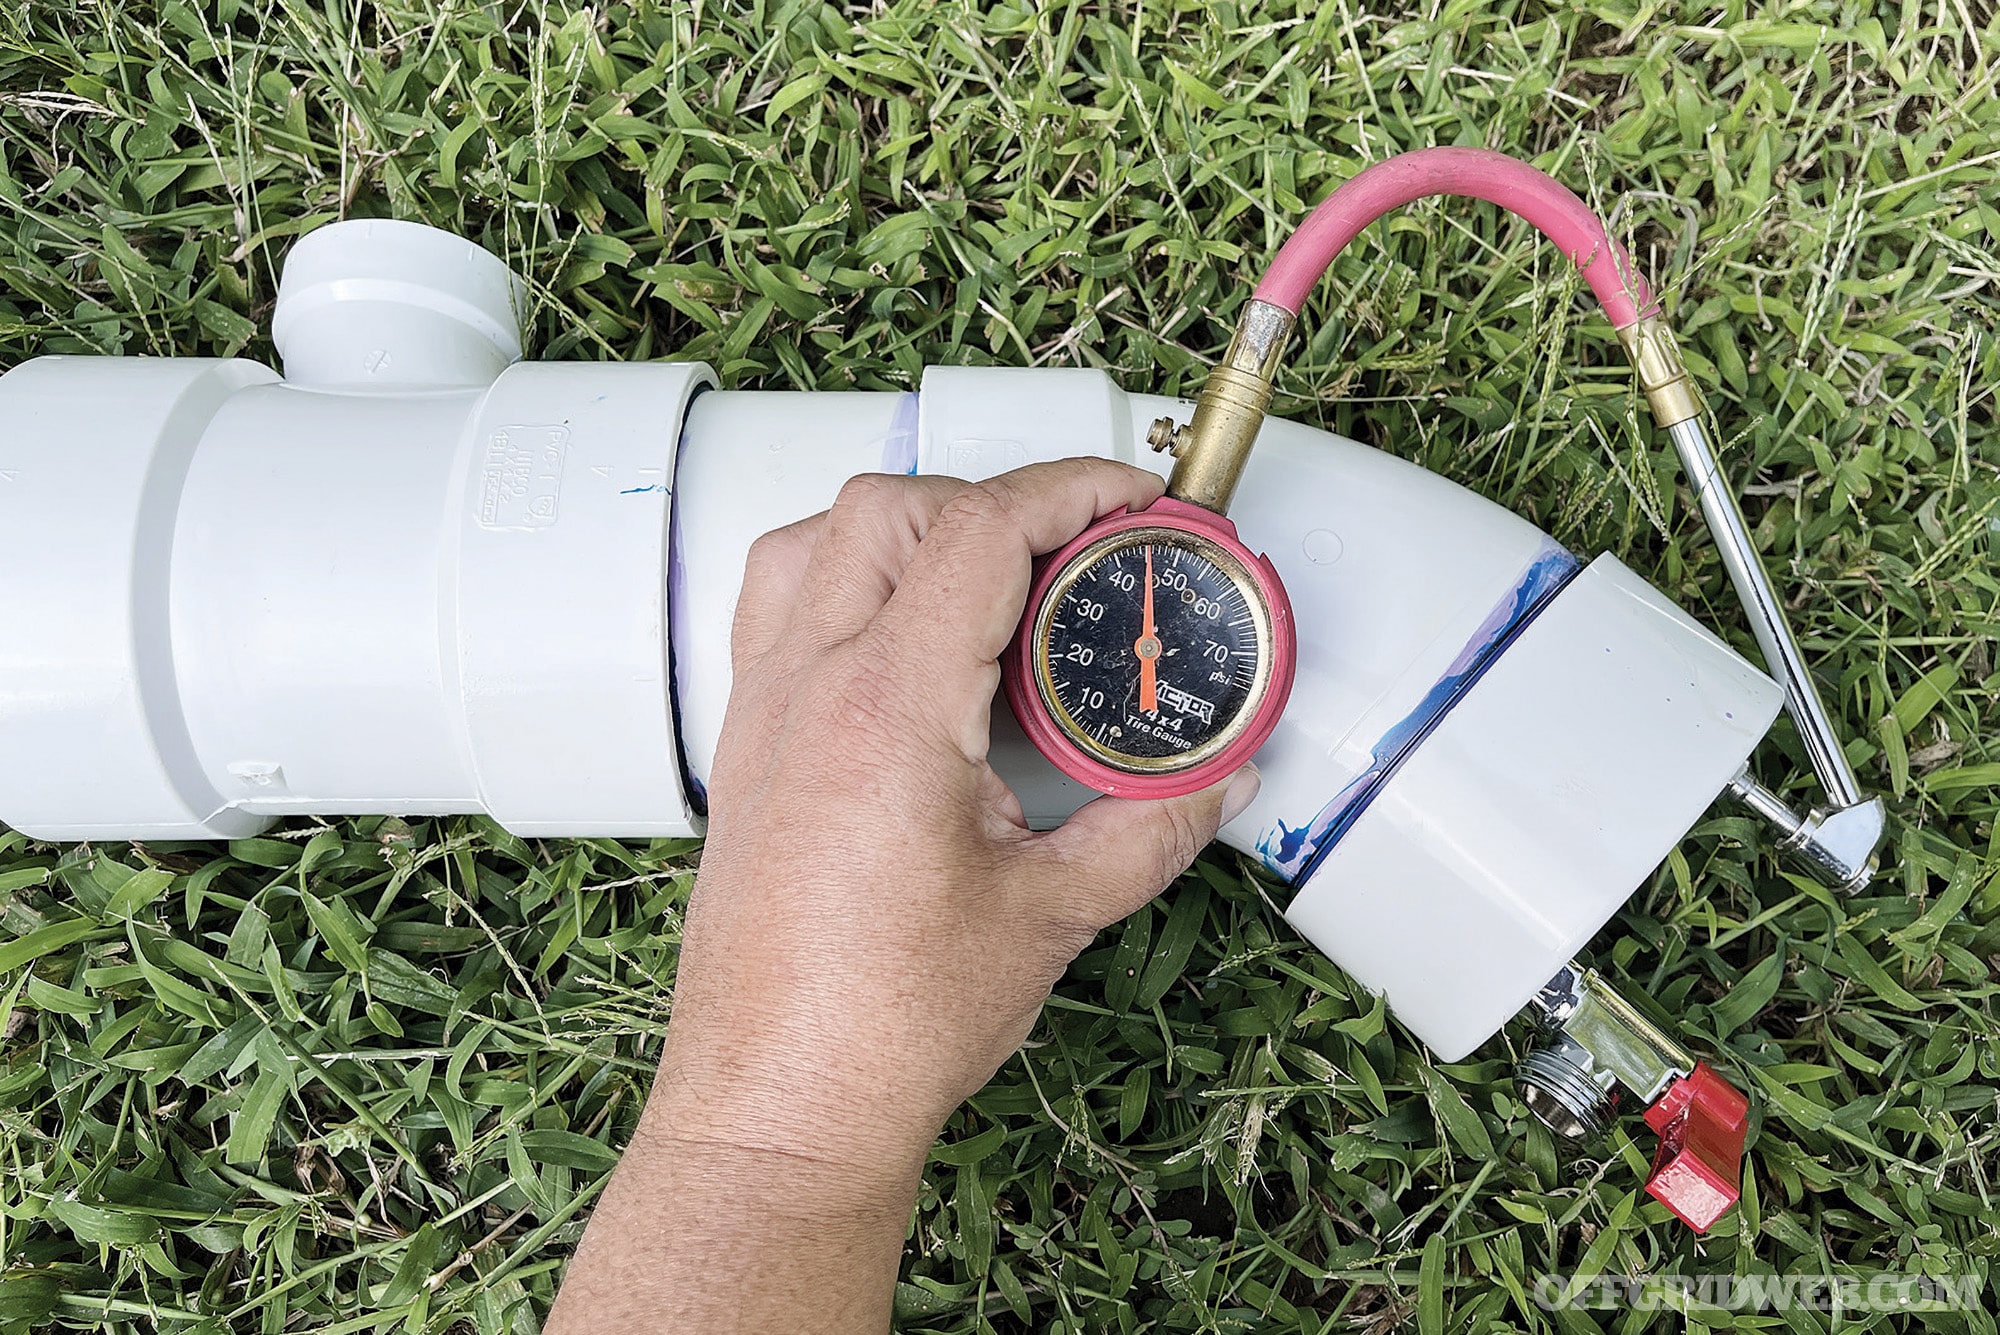
STEP 13: Check for leaks.
Once all the glue had dried, I put the 2-inch test plug tightly into the top of the T fitting and slowly pressurized the pipe to 45 to 50 pounds. I left it pressurized to almost 24 hours to ensure it was leak-free.
STEP 14: Prepare for paint.
Sand the entire outer area of the pipe so that the paint will adhere better. Then, mask off any parts that you don’t want to get painted, like the spigot, Schrader valve, and inner portion of the 2-inch T fitting.
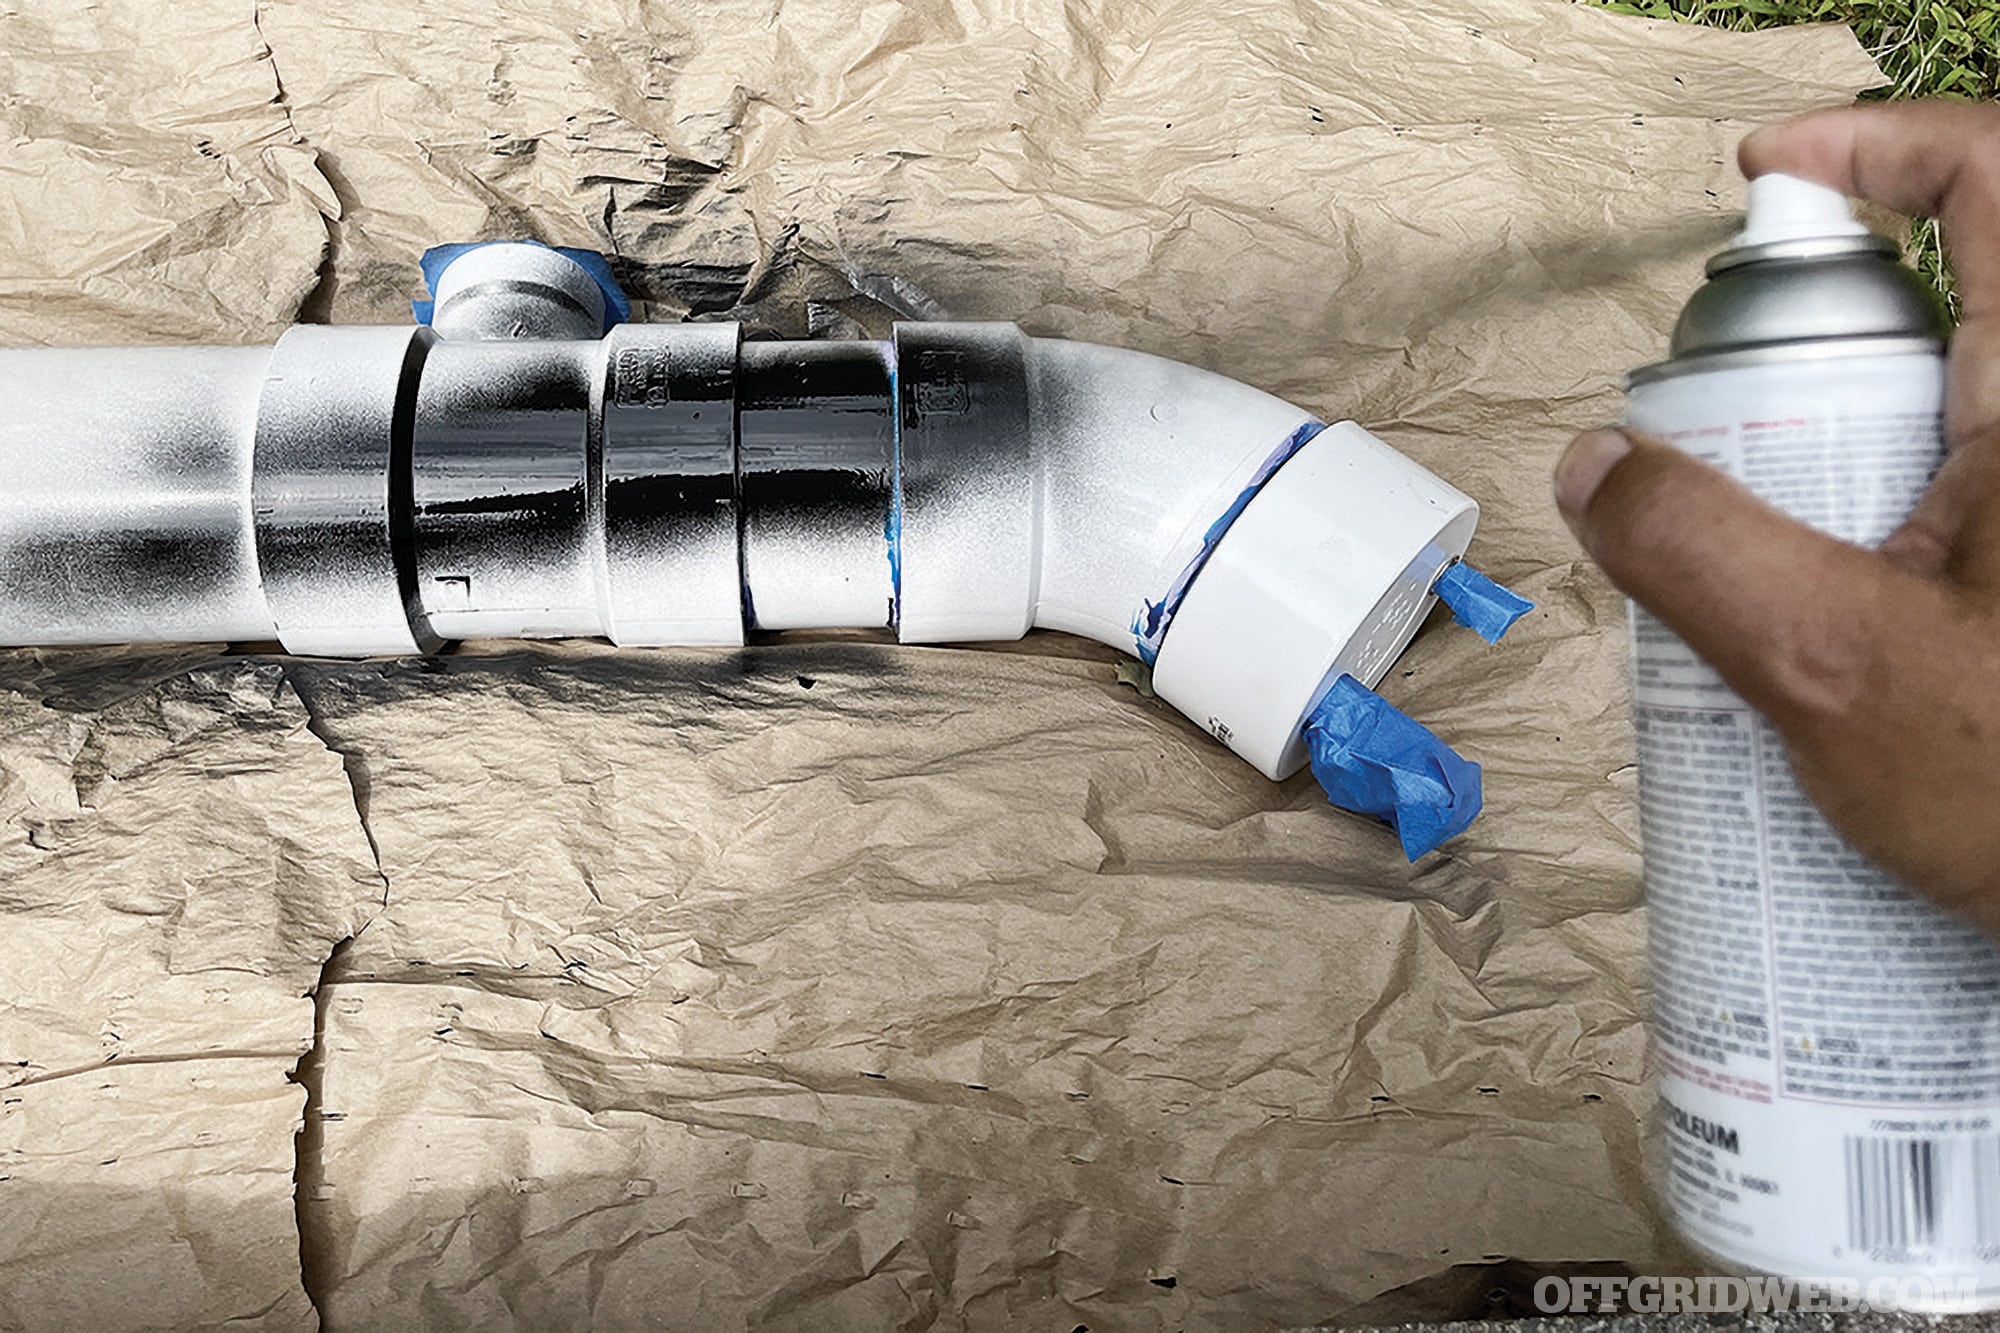
STEP 15: Apply black paint.
Paint with a flat-black paint, appropriate for painting plastic. Regular spray paint will scratch off very easily. You might also be able to use one of the rubberized spray paints for a textured/rubberized finish. Note that the paint protects the PVC from UV degradation, as well as helps it to heat up.
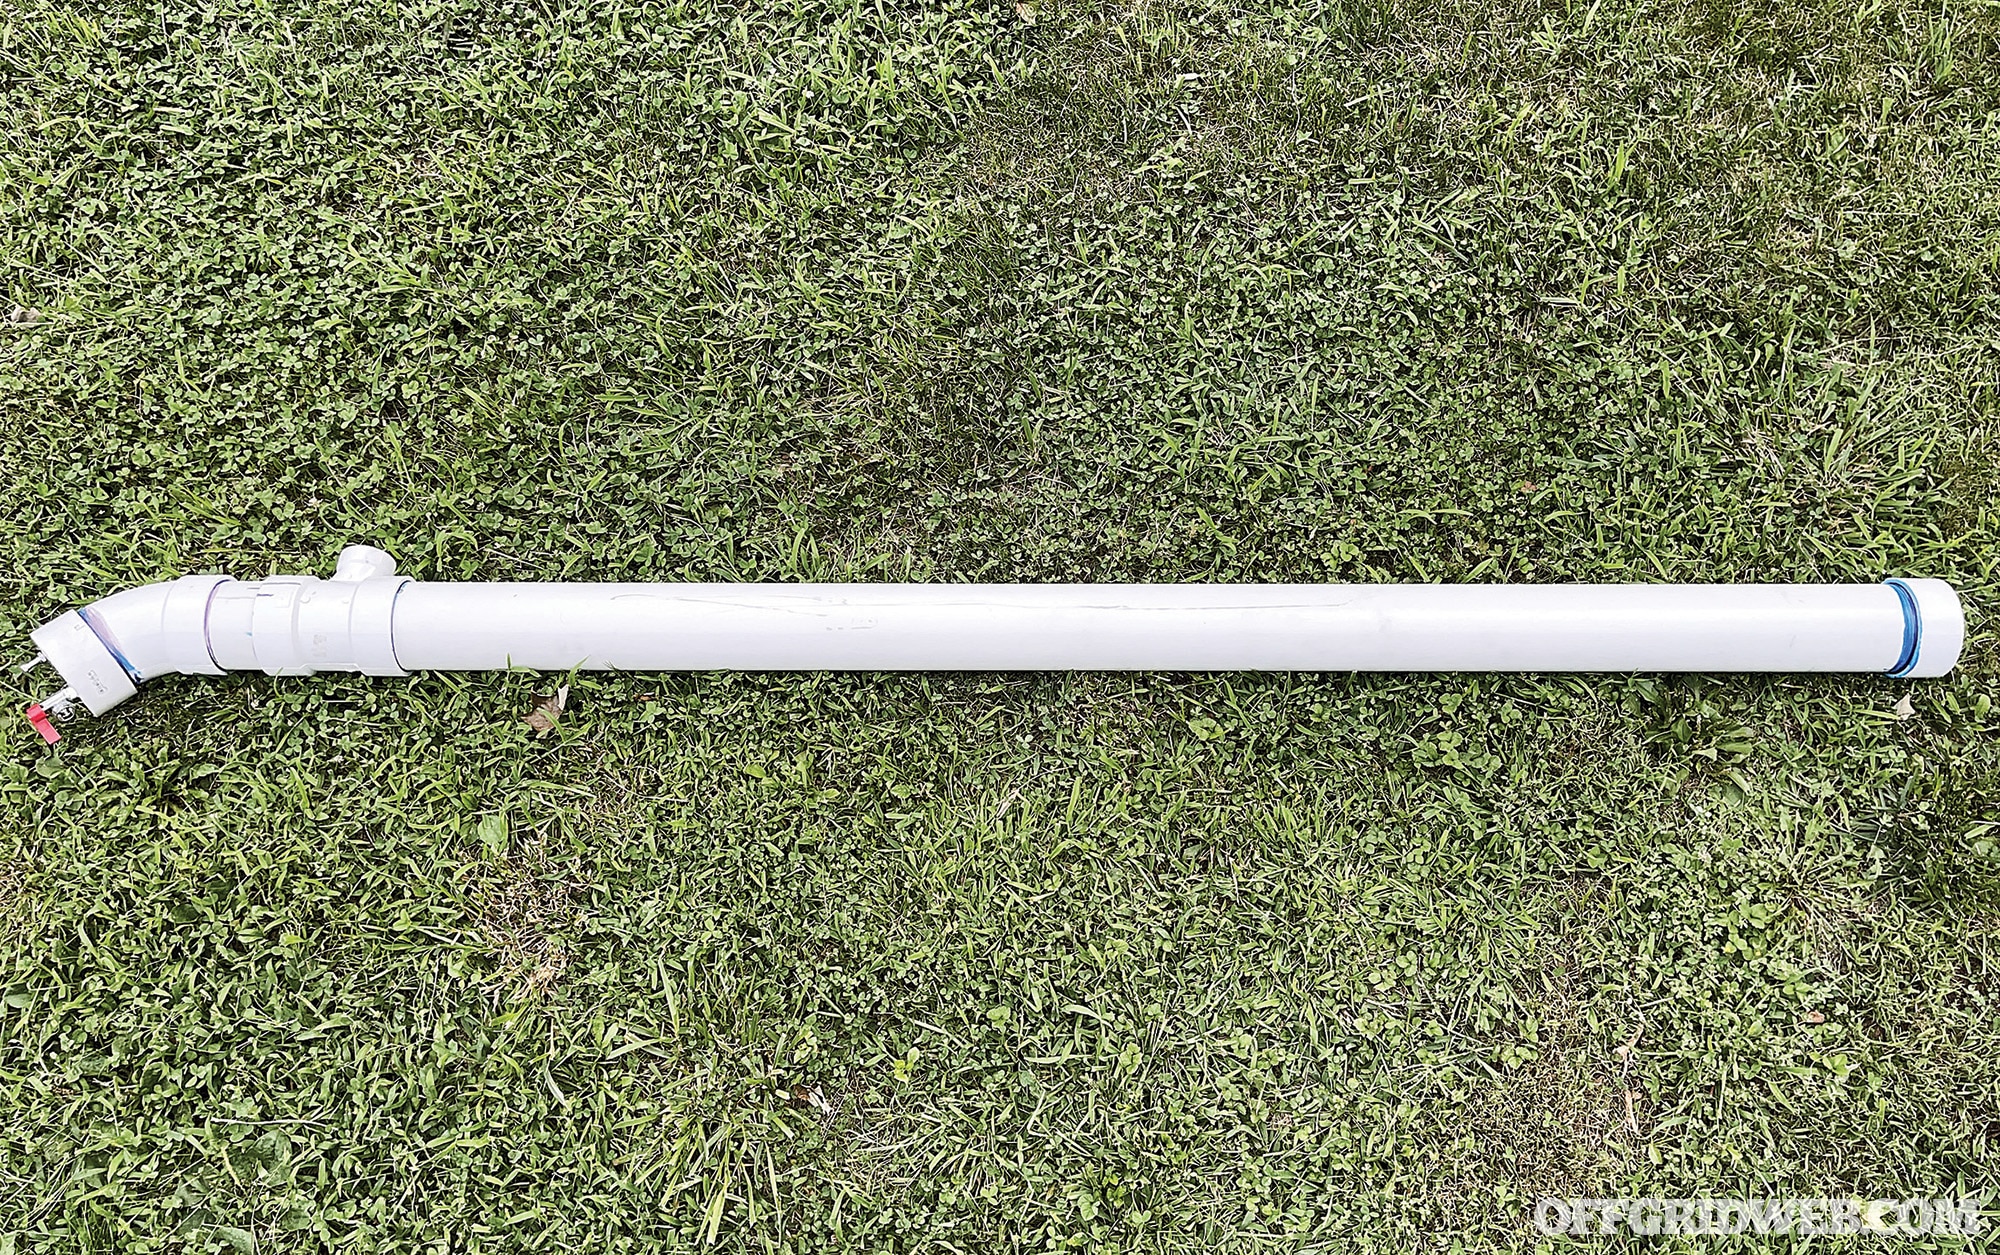
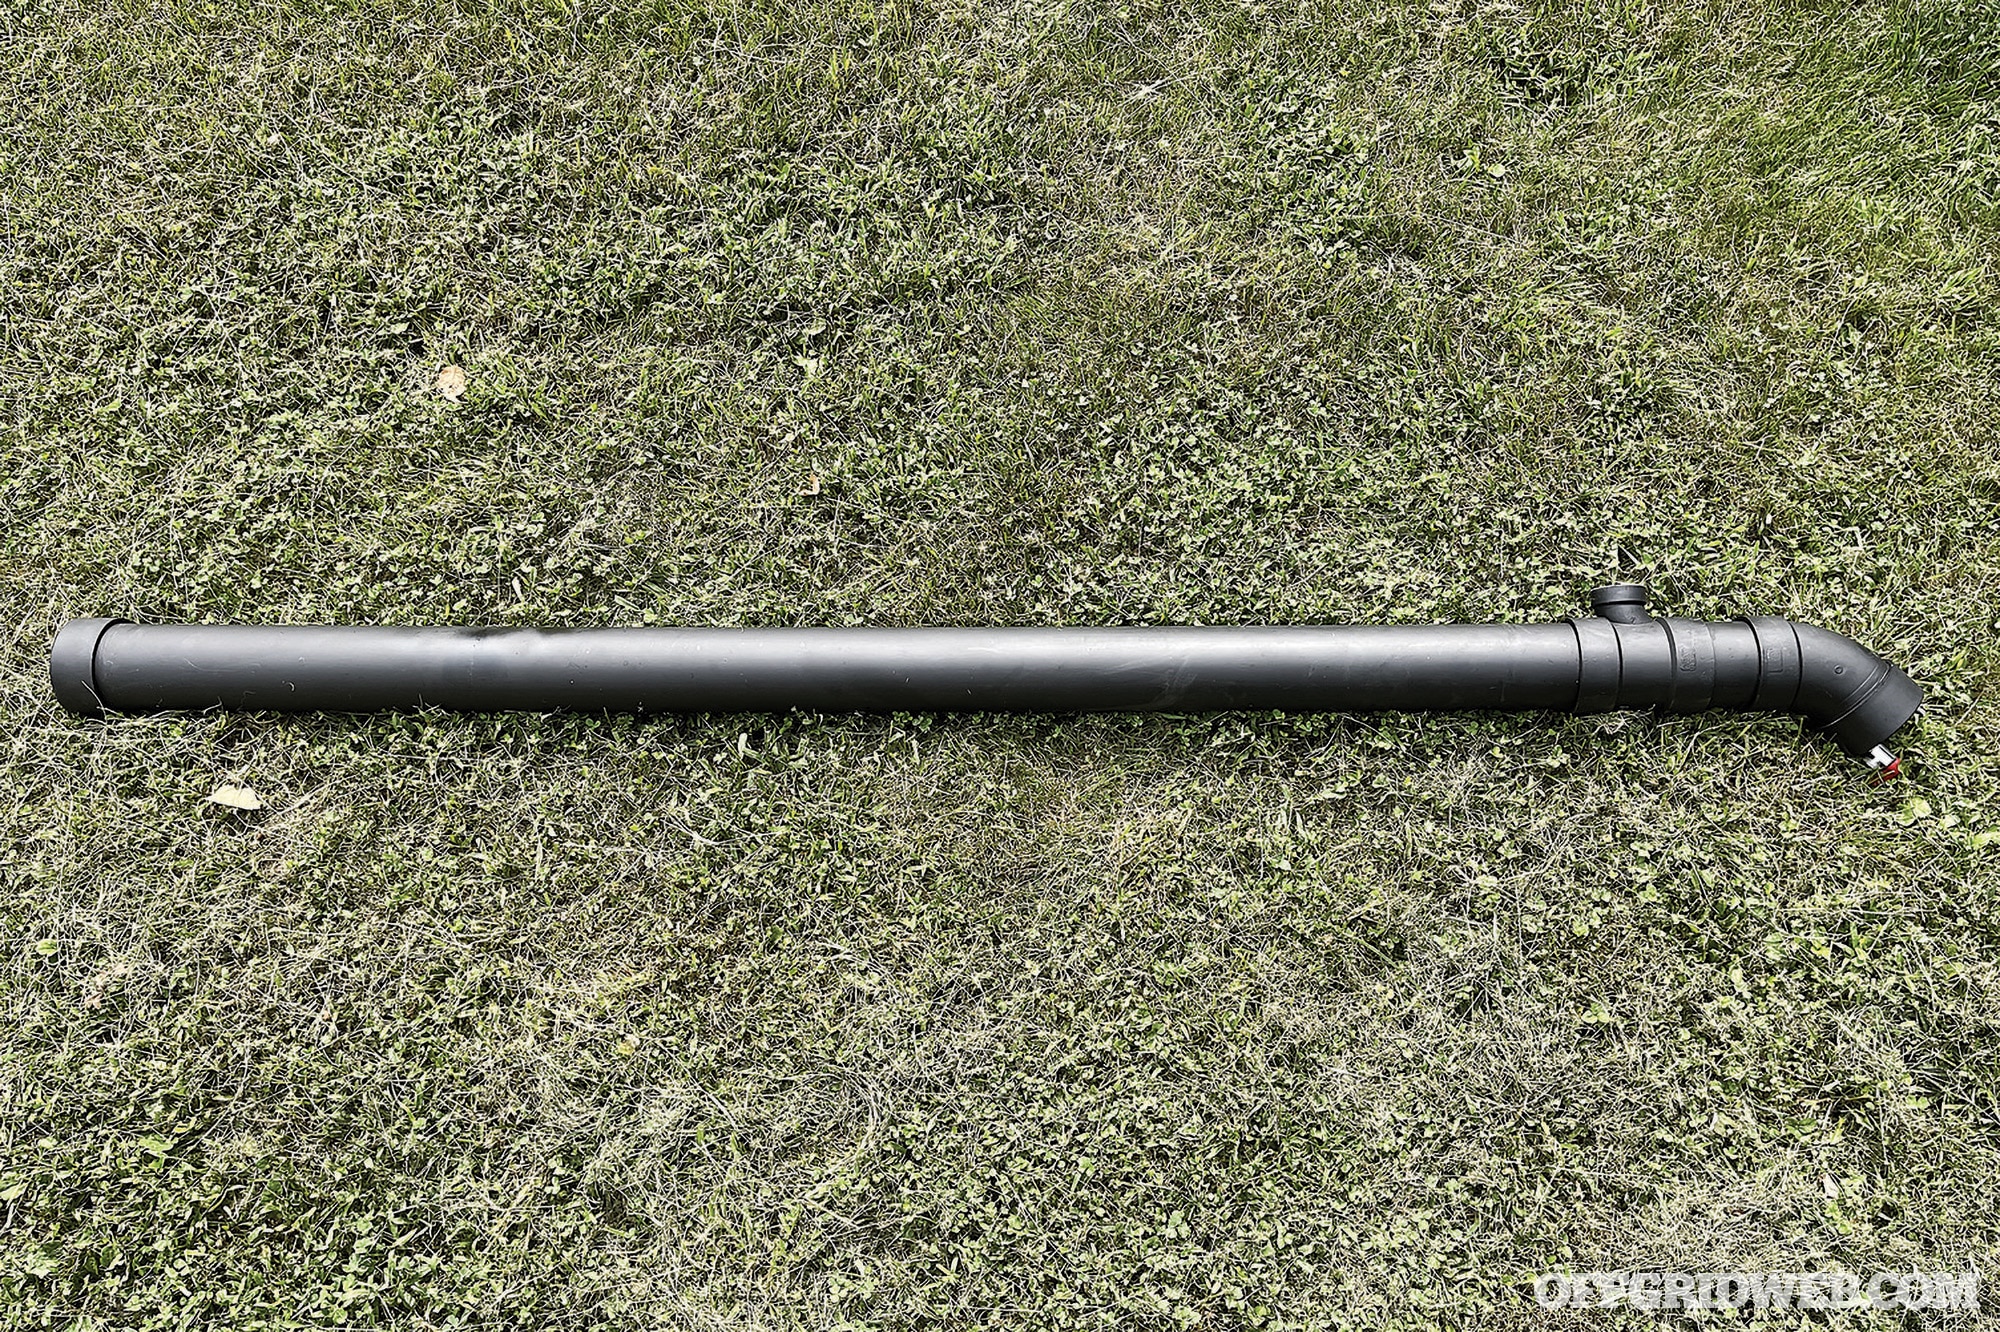
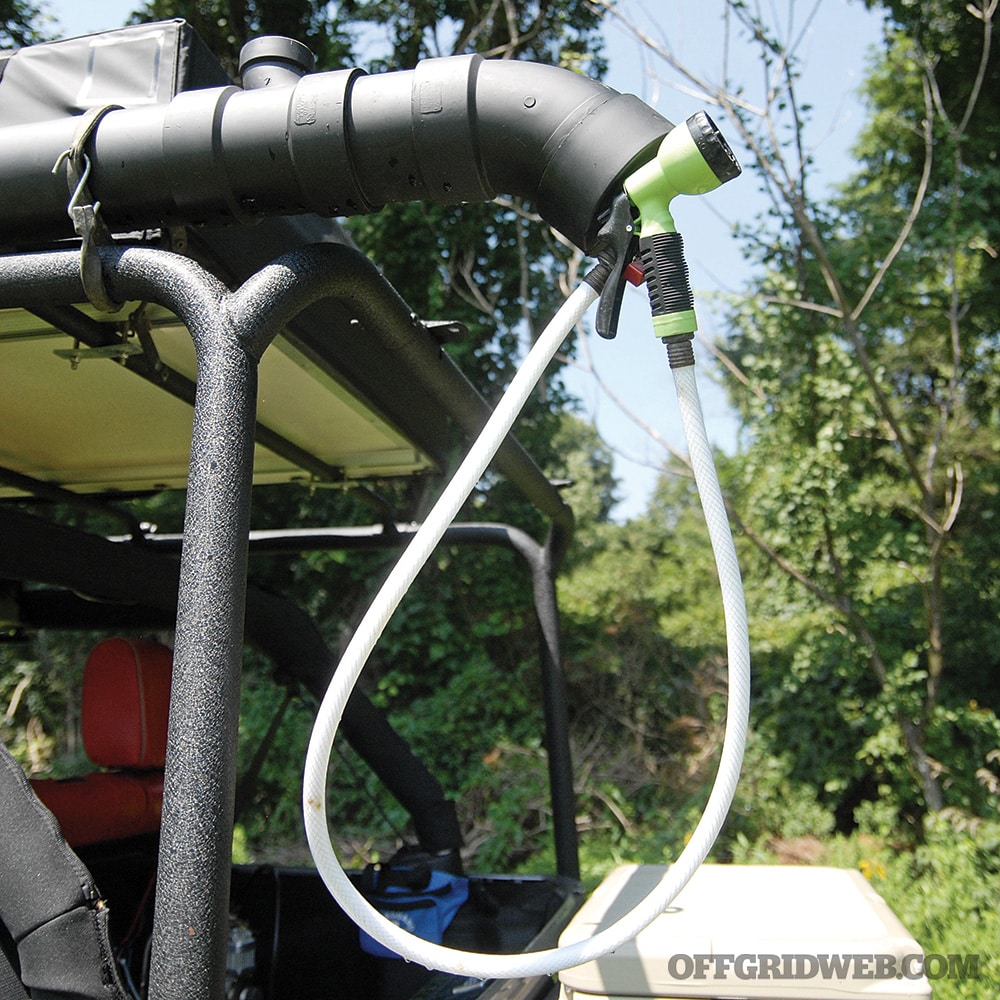
STEP 16: Mount your new solar shower.
Once the paint dries, your assembly is finished. Add your preferred hose length and nozzle for convenience. I recommend you securely mount the solar water heater before filling it with water.
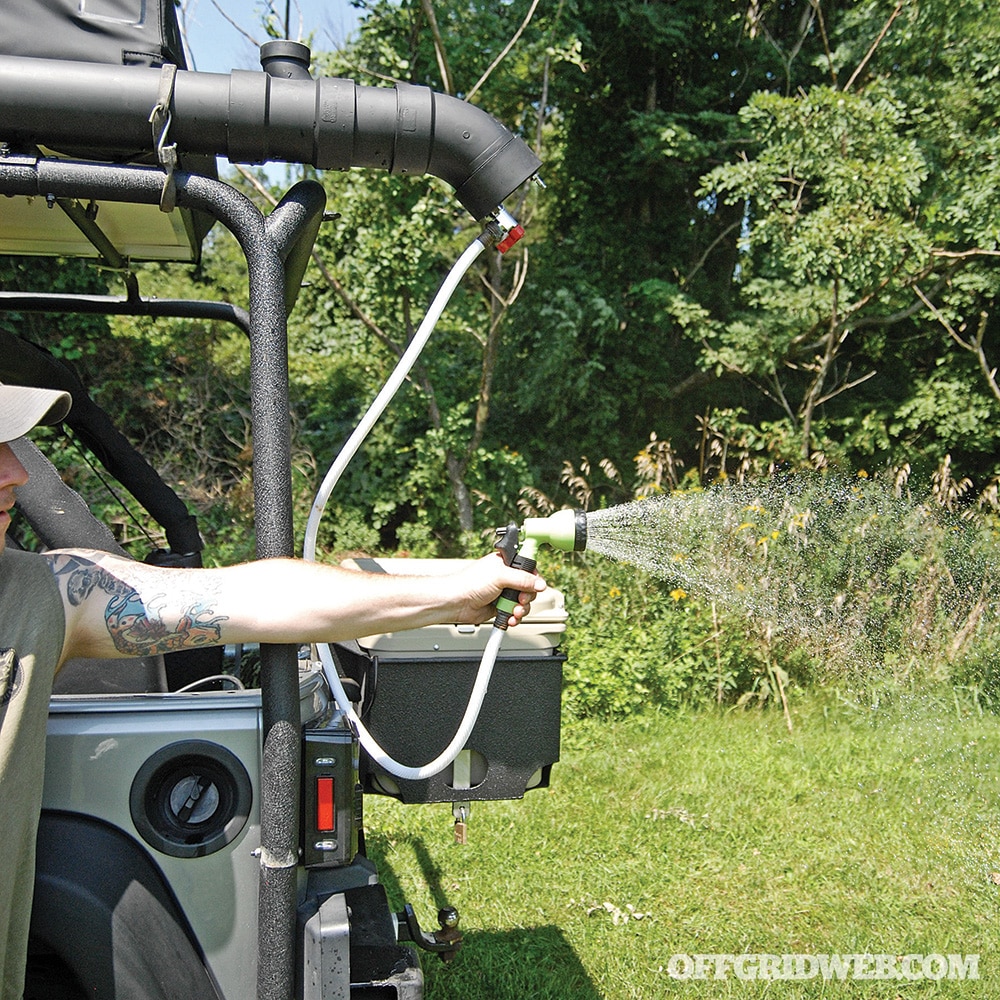
Above: When the unit is pressurized, you can use it for bathing, rinsing off cookware, or drinking. And the best part is it doesn’t require electricity.
Additional Tips
If you’re going to use the gravity feed method, get the solar shower pipe up as high as possible to get a little more water pressure at the nozzle. It doesn’t take much air to pressurize the tank. Keep it to about 40 psi. And if you’re using an electric pump, it will only need to be on for a few seconds to get adequate pressure. After you use some water, you can add a little more air to keep the pressure to the desired level.
If you put the air fill valve at the highest point, it’ll be easy to relieve air pressure without a stream of water coming out. If you’re going to use different pipe dimensions, make sure it’ll have enough water for your application. A 4-inch pipe holds 0.6528 gallon per foot, 5 inches is 1.02 gallons, and 6 inches is 1.469 gallons.
When you attach the test plug to the fill port, make it really tight. You’ll want to use a wrench to keep the plug from launching like a rocket ship once you apply the air pressure.
Our greatest fears don’t always correspond to the greatest threats to our safety. In fact, more often than not, they’re the opposite of what statistics tell us. For example, most people are far more worried about being murdered than they are about car crashes, but car crashes are more than three times more likely to actually kill us. The same is true of animal attacks. While movies and TV shows depict bears, sharks, and alligators as the most bloodthirsty and deadliest animals, the data tells a different story. Of course, you certainly wouldn’t want to get attacked by any of those animals — this gruesome example of a grizzly bear attack proves the point — but you’re much more likely to be killed by animals we perceive as cute or harmless.
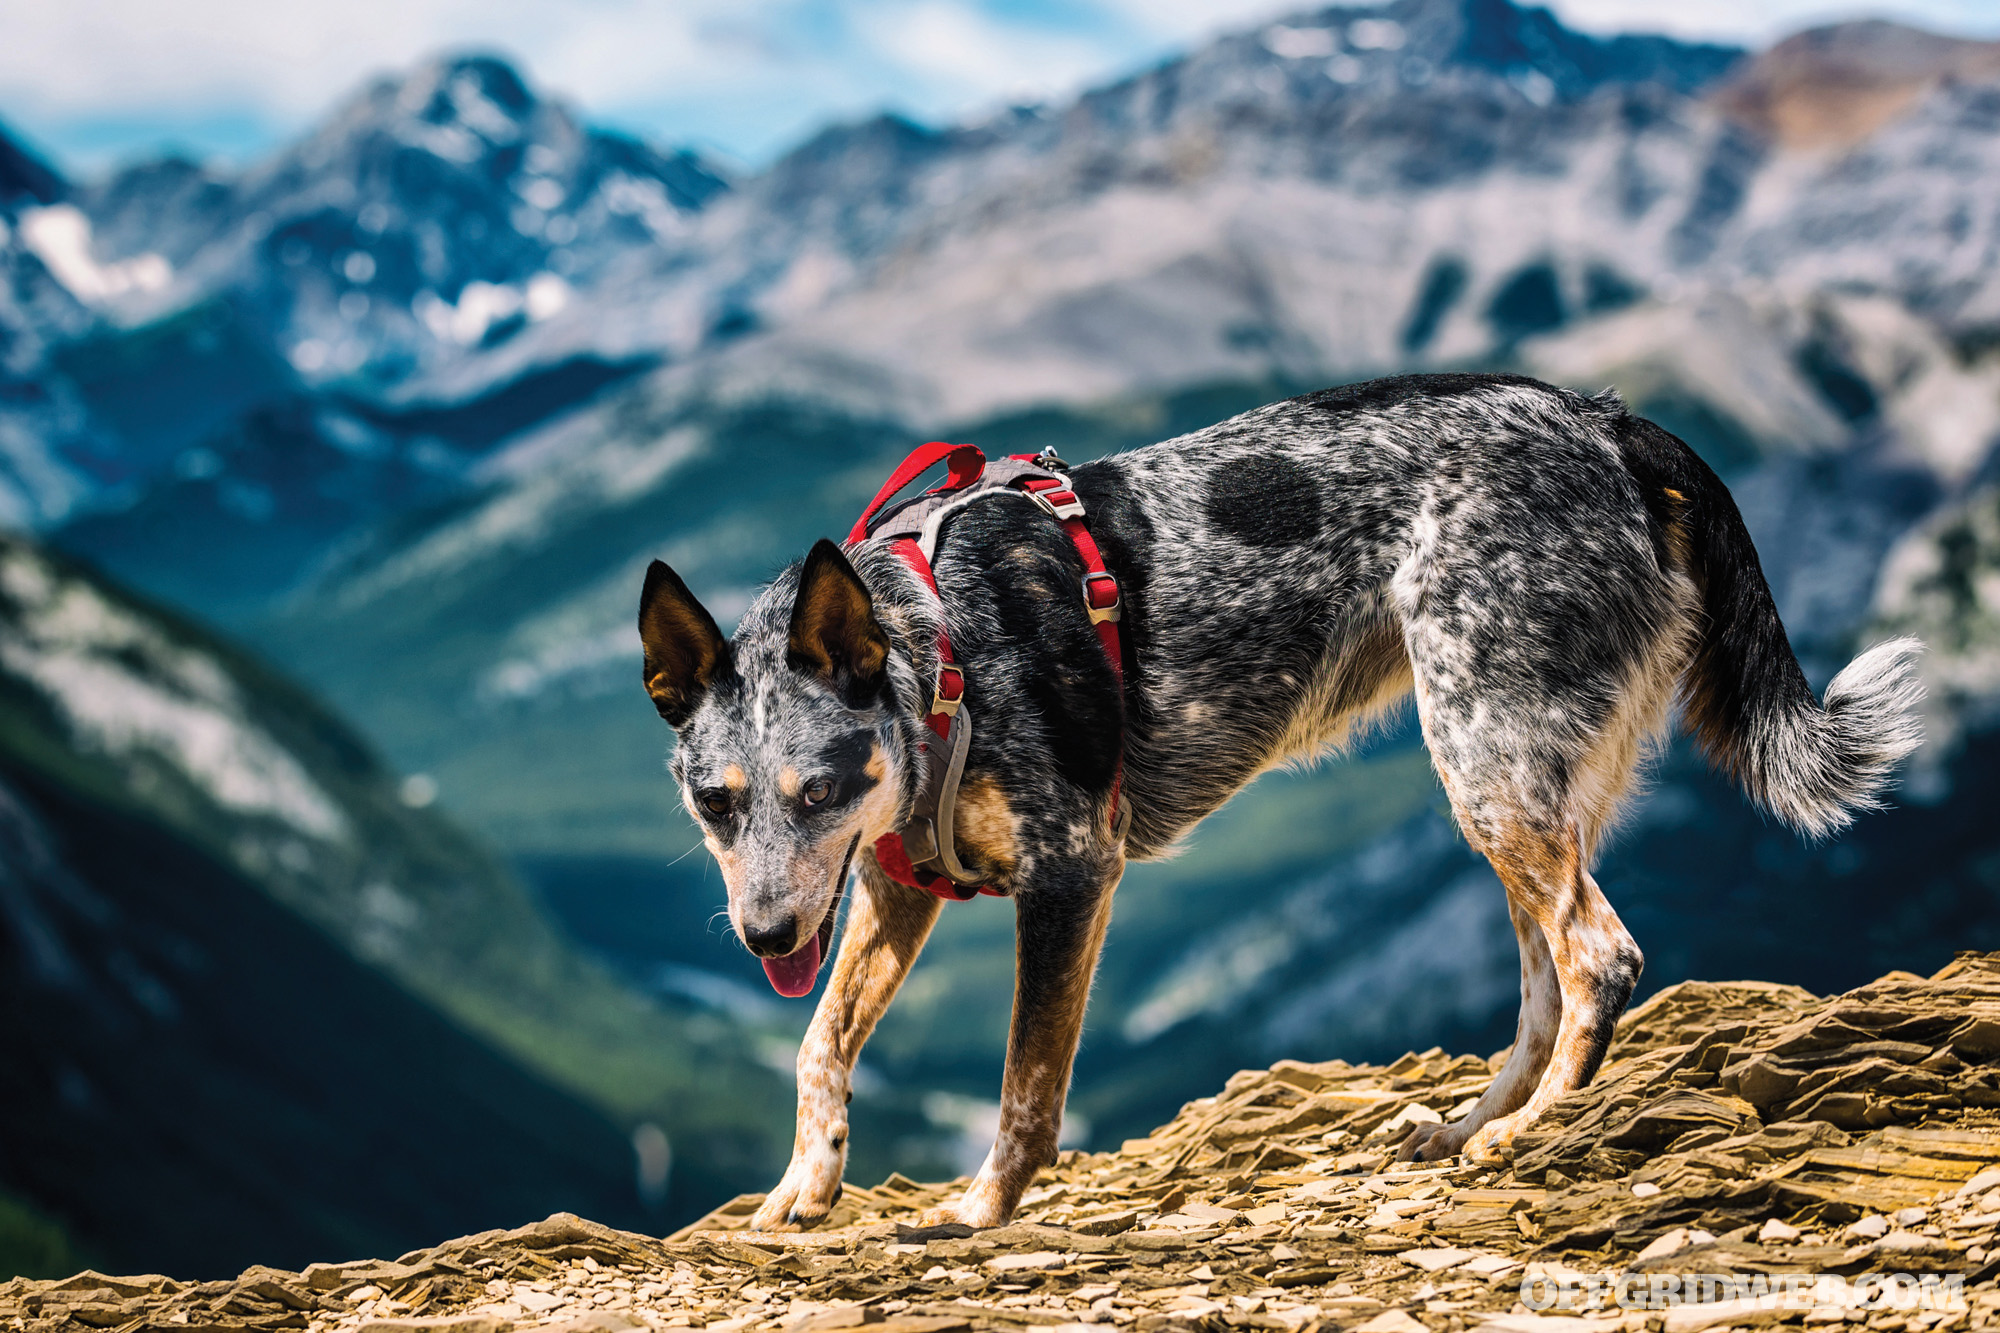
Above: Dog bites account for a substantial number of deaths each year, more than snakes and spiders combined. That doesn’t mean we should be scared of dogs, but it’s a good idea to be cautious in the presence of unfamiliar and/or aggressive ones. This advice is even more important for small children, who are much more susceptible to fatal attacks.
The following infographic created by Zoology Degree Online shows a quick visual comparison between the deadliest animals in the United States over the course of a decade. Each full row represents 100 fatalities over that 10-year period. Deer are the most serious threat, primarily due to their propensity for running into traffic. Horseback-riding accidents are also a substantial risk, followed by stings from bees, wasps, and hornets. Mountain lions/cougars almost didn’t make the list at all, and sharks barely killed more than one person per year, despite the Jaws-induced fears surrounding them.
For more infographics along these lines, check out our previous articles:
On more than one occasion, I heard the story about a guy who was using a chainsaw in his backyard to clean up some storm debris. As he was cutting a few of the fallen branches, he lost his footing and the running chainsaw came down on his leg, causing a tremendous wound. While his wife quickly called 9-1-1 and helped apply direct pressure, the femoral artery was cut and he died before the ambulance arrived. A tourniquet would’ve likely saved his life.
Tourniquet use goes back to at least the 4th century BC, when Alexander the Great had troops using tourniquets of leather and bronze. There are other documented uses during the Middle Ages with battlefield tourniquets, which were simple garrotes. In 1785, Sir Gilbert Blane advocated that, in battle, each Royal Navy sailor should carry a tourniquet: “It frequently happens that men bleed to death before assistance can be procured, or lose so much blood as not to be able to go through an operation. In order to prevent this, it has been proposed, and on some occasions practiced, to make each man carry about him a garter, or piece of rope yarn, in order to bind up a limb in case of profuse bleeding.”
The use of tourniquets waned after World War II, with much documented misapplication, plus lag time between application and subsequent receiving of proper medical attention, causing them to fall out of favor. But their military use continued to rise through the Korean War, Vietnam, Iraq, and Afghanistan.
Today, after much scientific study, their use has become mainstream. A set of established clinical practice guidelines direct the appropriate use of tourniquets. The present doctrine used by the U.S. Military is that every soldier in the field has a tourniquet and knows how to use it. This has carried over to the civilian sector, where police officers, firefighters, and EMTs routinely carry them. There are also an untold number of schools and businesses across the country that have trauma kits stockpiled with numerous tourniquets in case of a dire emergency.
Understand this: Tourniquets are not just for soldiers and gunshot wounds. Automobile accidents, athletic events, and home improvement projects can all lead to unforeseen trauma where a tourniquet can mean the difference between life and death. Whether you’re a soldier on the front lines or a well-prepared mom shuttling kids between activities, emergencies happen, and there’s something you can do about it. Be prepared and enroll in a Stop the Bleed or Tactical Emergency Casualty Care (TECC) course to learn the proper way to control bleeding in a severely injured person.
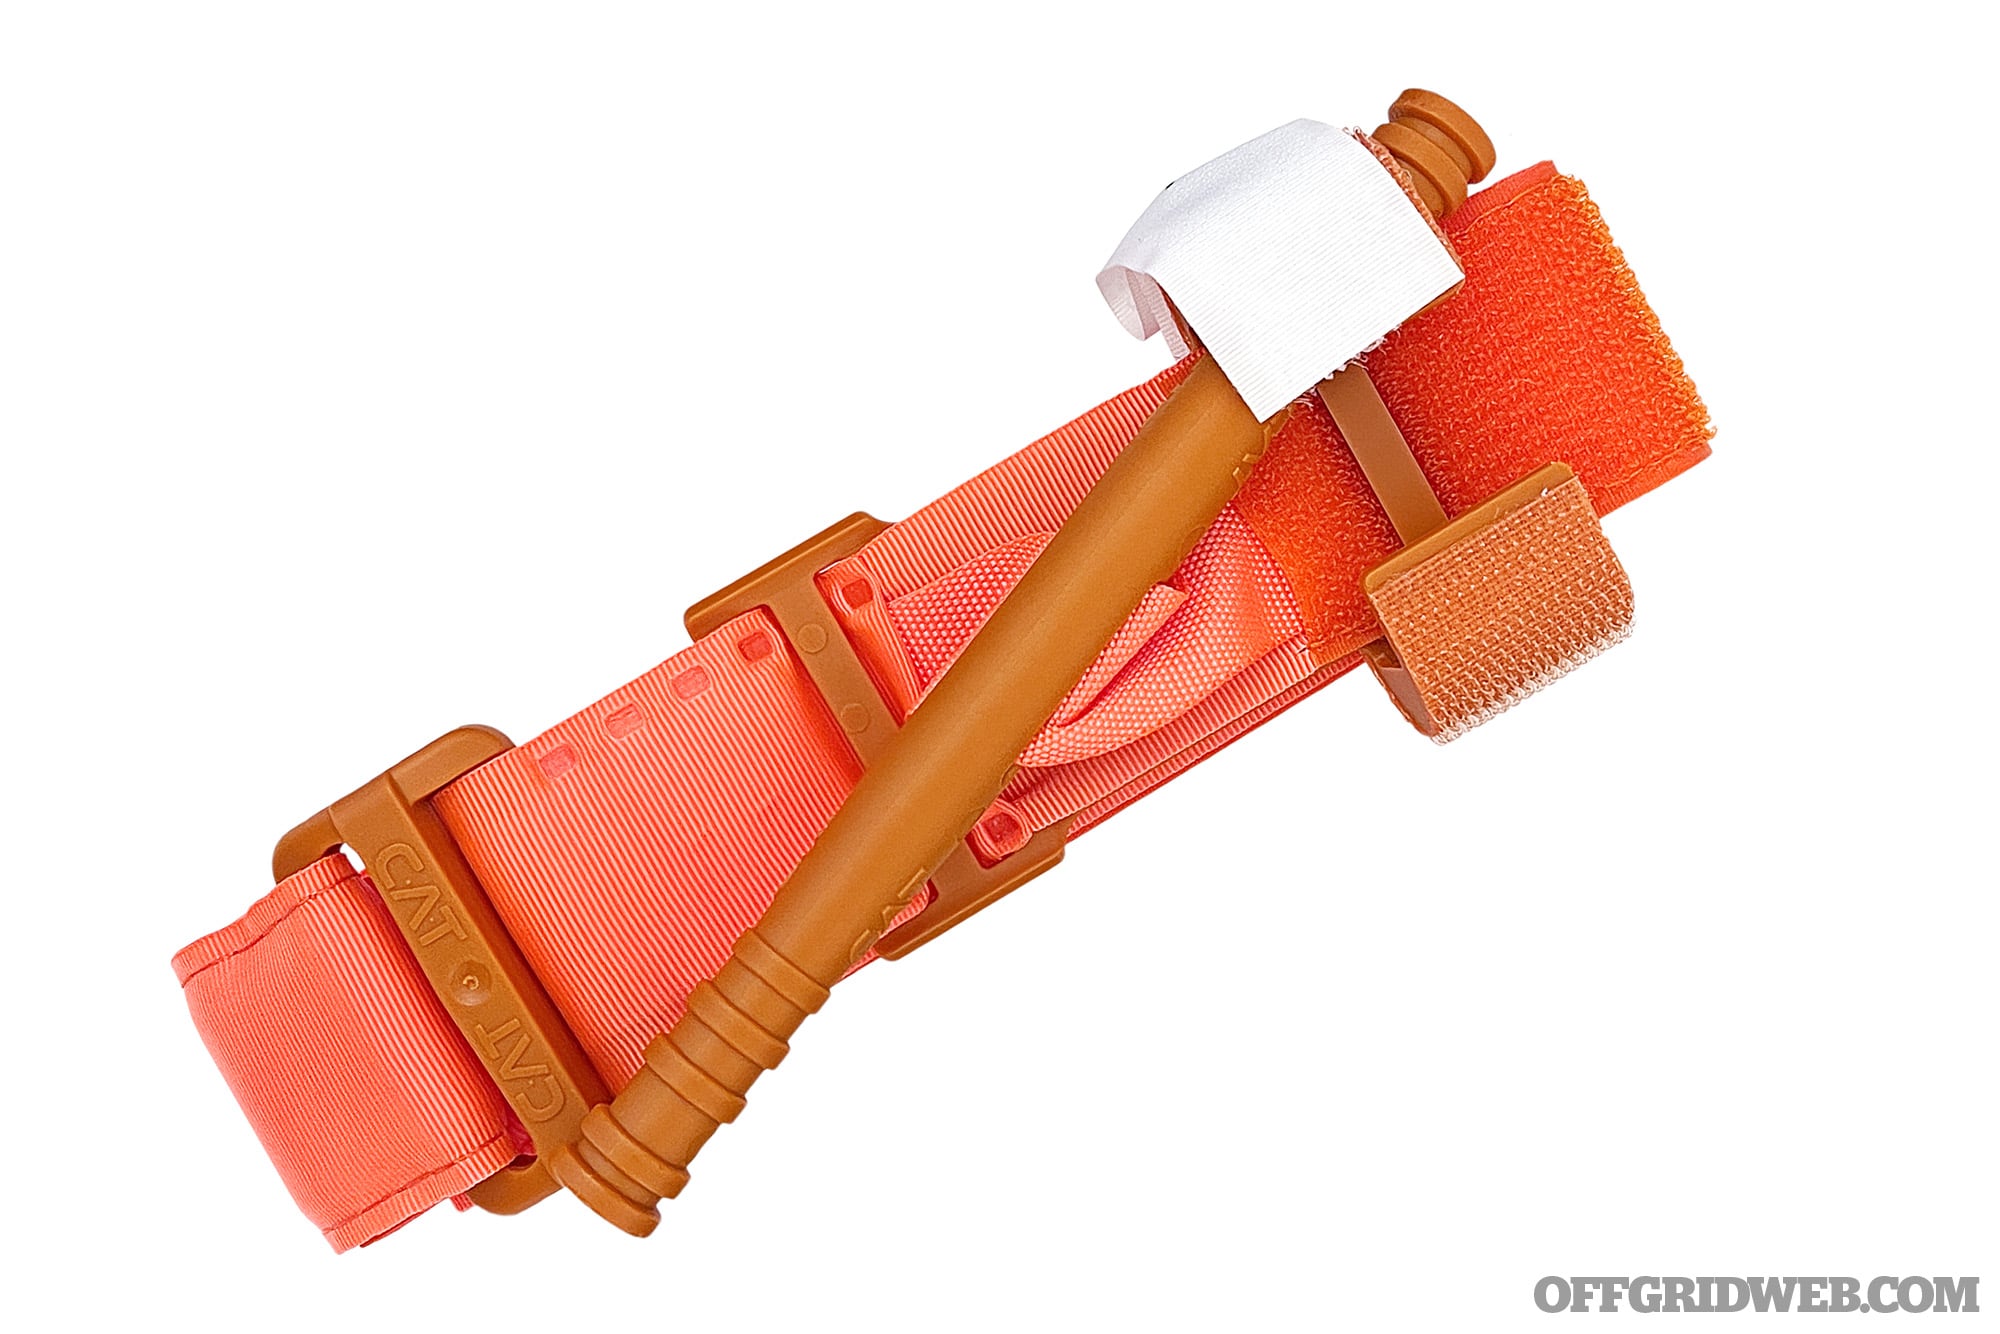
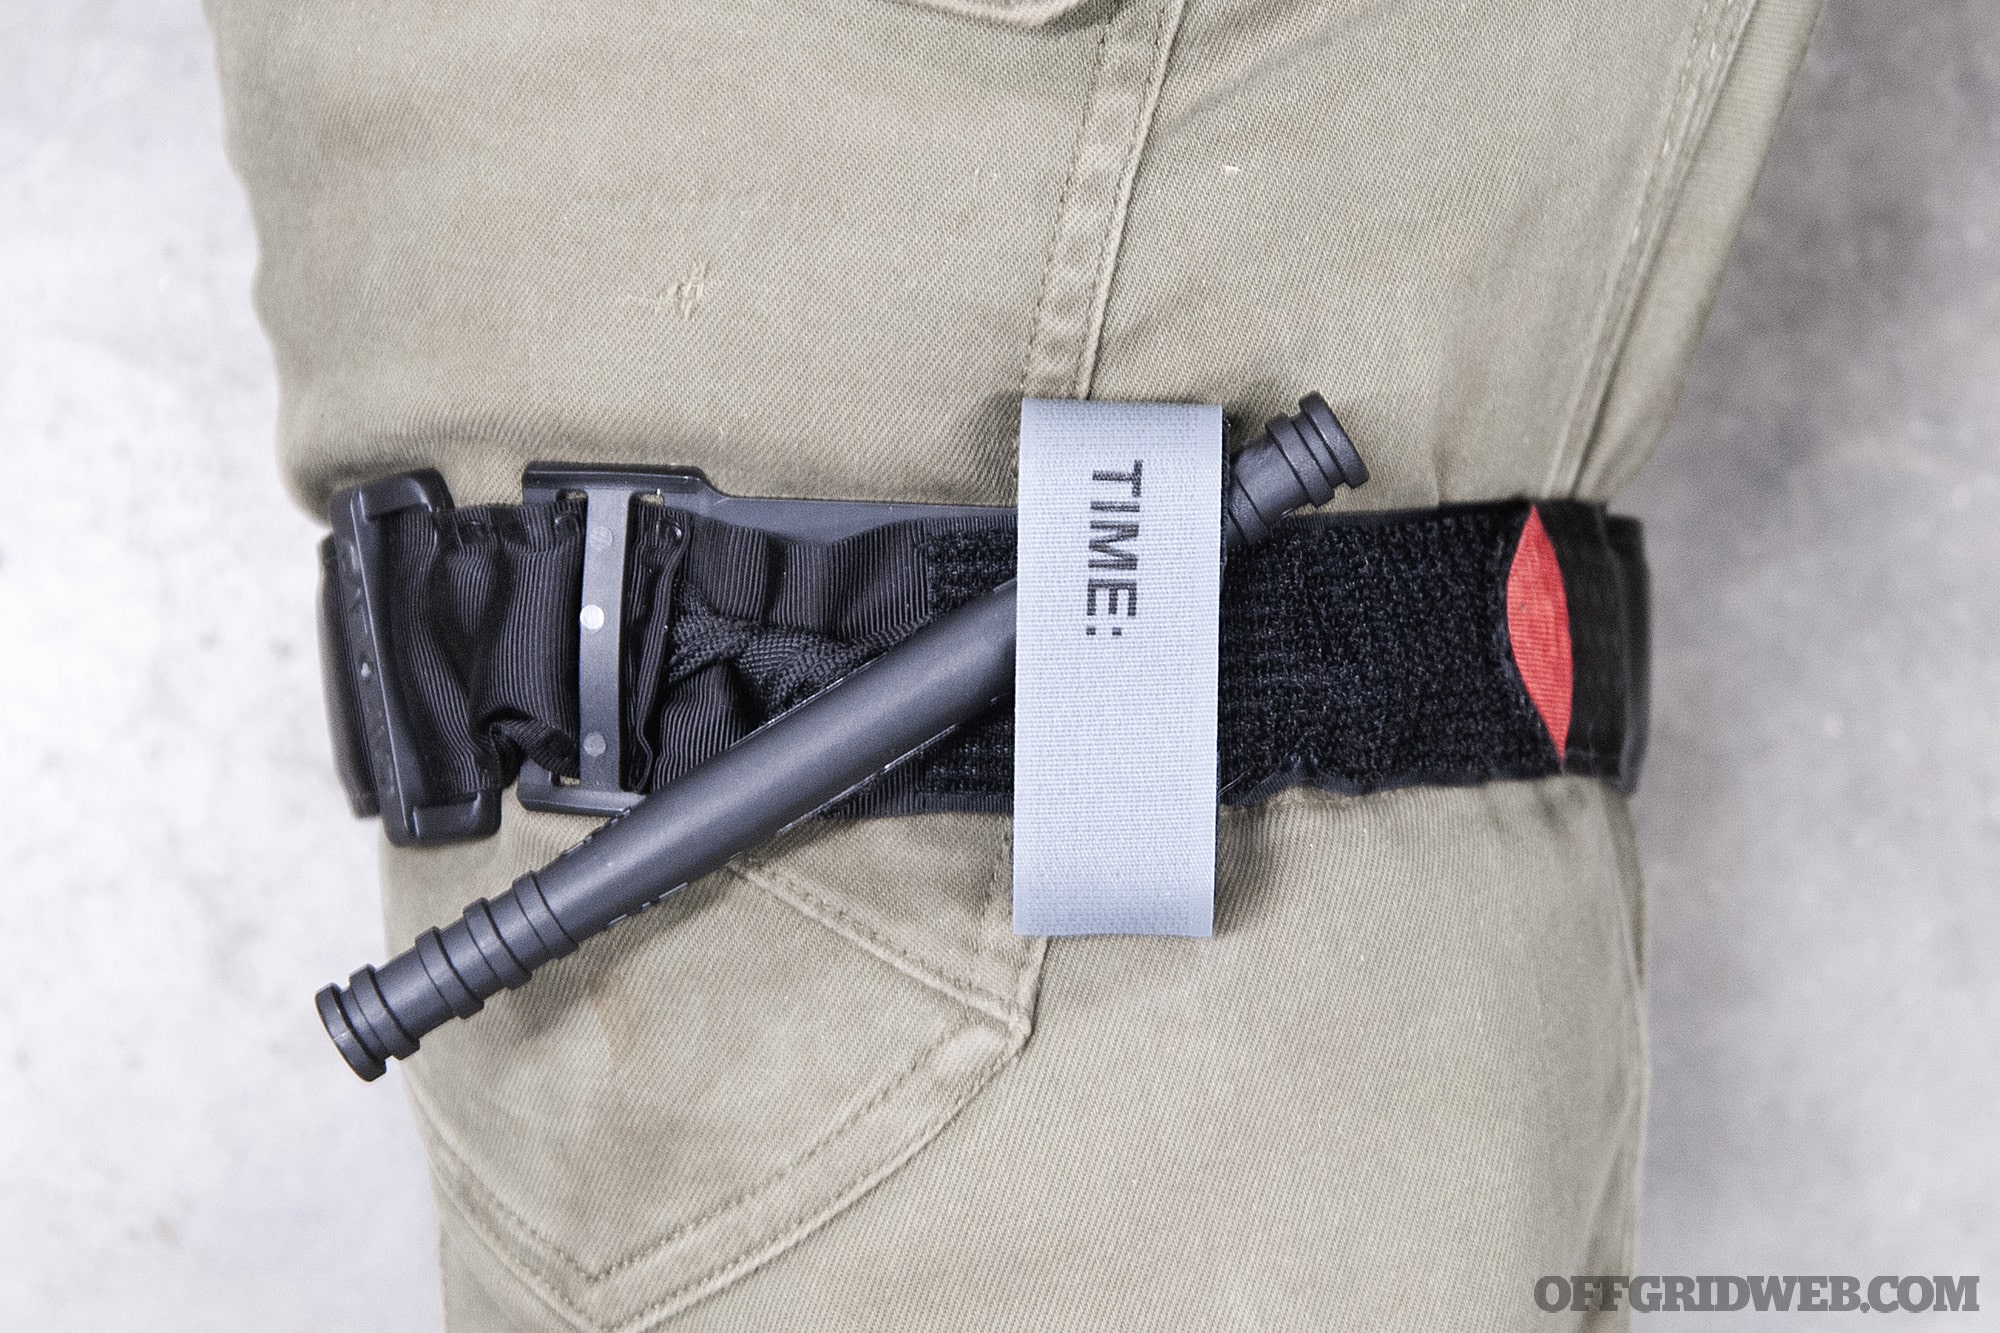
Notes As one of the first modern tourniquets on the market, this is the style the vast majority of people are familiar with. Noted as the best pre-hospital tourniquet in the February 2008 supplement of The Journal of Trauma, the patented C-A-T is a true one-handed tourniquet proven to be fully effective by the U.S. Army’s Institute of Surgical Research. Currently in Gen 7, this is a windlass system where you use the stick to wind up or tighten the tourniquet. The rotation tightening of the windlass gives you a mechanical advantage to apply more pressure. Once the blood flow is occluded, the windlass is pressed into a retaining clip to maintain pressure. Be sure to buy the genuine C-A-T product from a trusted retailer (not a third-party Amazon reseller). There are a lot of dangerous counterfeits on the market. The C-A-T is approved by the Committee on Tactical Combat Casualty Care (CoTCCC) and carries NSN 6515-01-521-7976.
Pros:
The de-facto standard in tourniquets
Virtually all tourniquet users are trained on this model
Cons:
Hook-and-loop attracts lint and can snag on other gear if left exposed
TacMed Solutions SOF Tourniquet
Colors: Black, Blue, Orange, Red, Tan
Size: Packaged L 5.5 by W 2 by D 1.75 inches; open length 44 inches
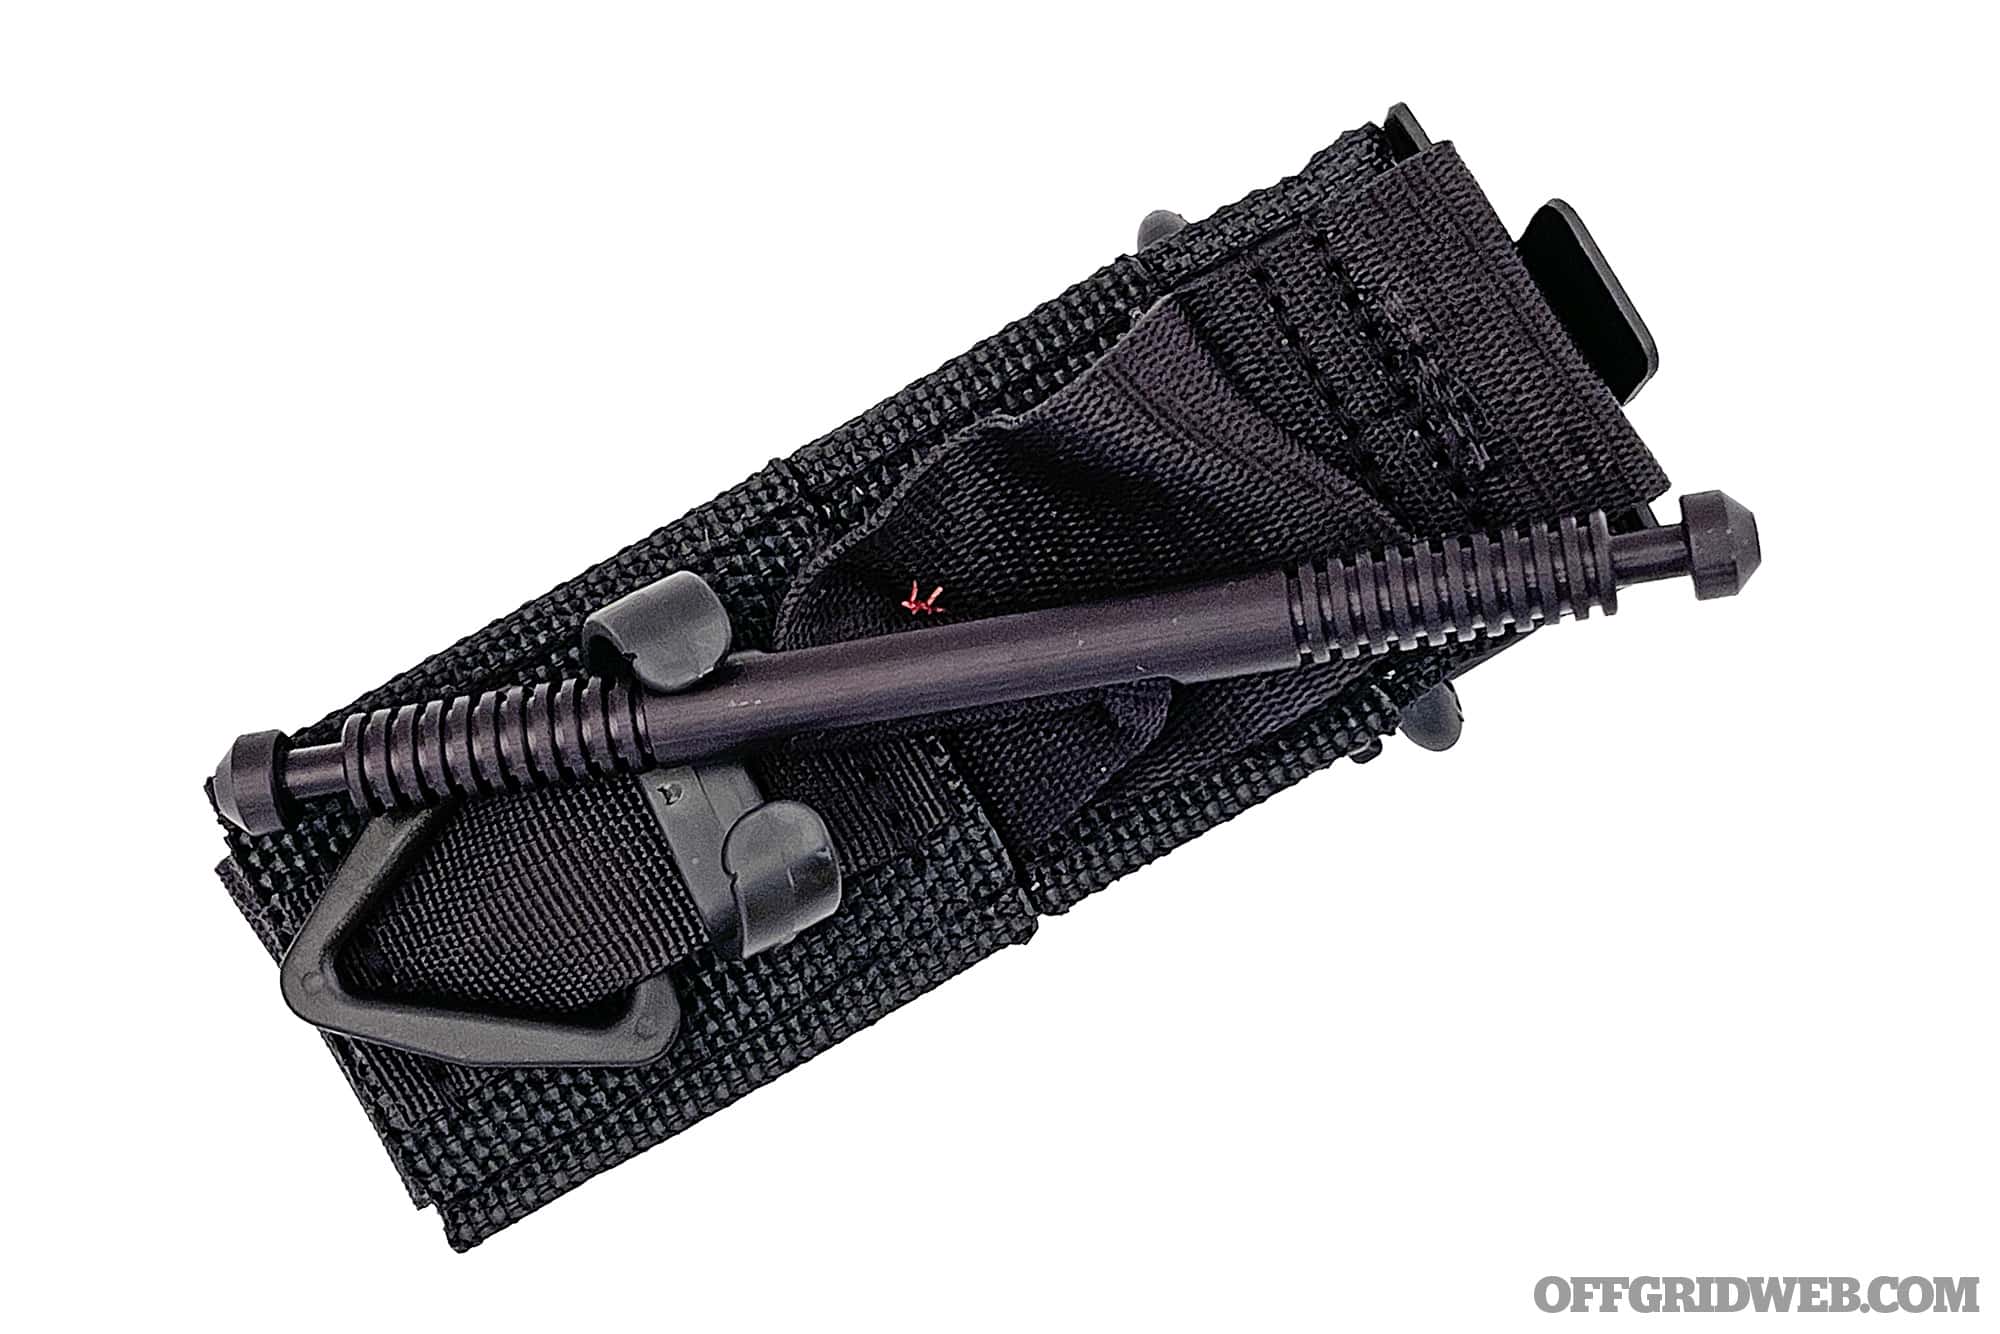
Notes Designed by a Special Forces medic while on deployment to Afghanistan in 2003, the SOF-T is a well-refined tourniquet. This is a tried-and-true windlass design with several improved features. The first is that the windlass is made from aluminum, rather than polymer. It also has a buckle for fast application around a limb, using only gross motor functions, versus rethreading a strap through a buckle. I find it to be a little more supple than most of the other tourniquets, which gives it a nice feel and is quieter than the hook-and-loop types when carried. It has seen adoption by many large organizations including NYPD, LAPD, and the American Red Cross. I keep this tourniquet as part of my EDC. It’s CoTCCC approved and is available for purchase by the Department of Defense under NSN 6515-01-696-4522.
Pros:
Aluminum windlass
Packs flat and lacks hook-and-loop, making it convenient for on-body carry
Cons:
Time tag not on top
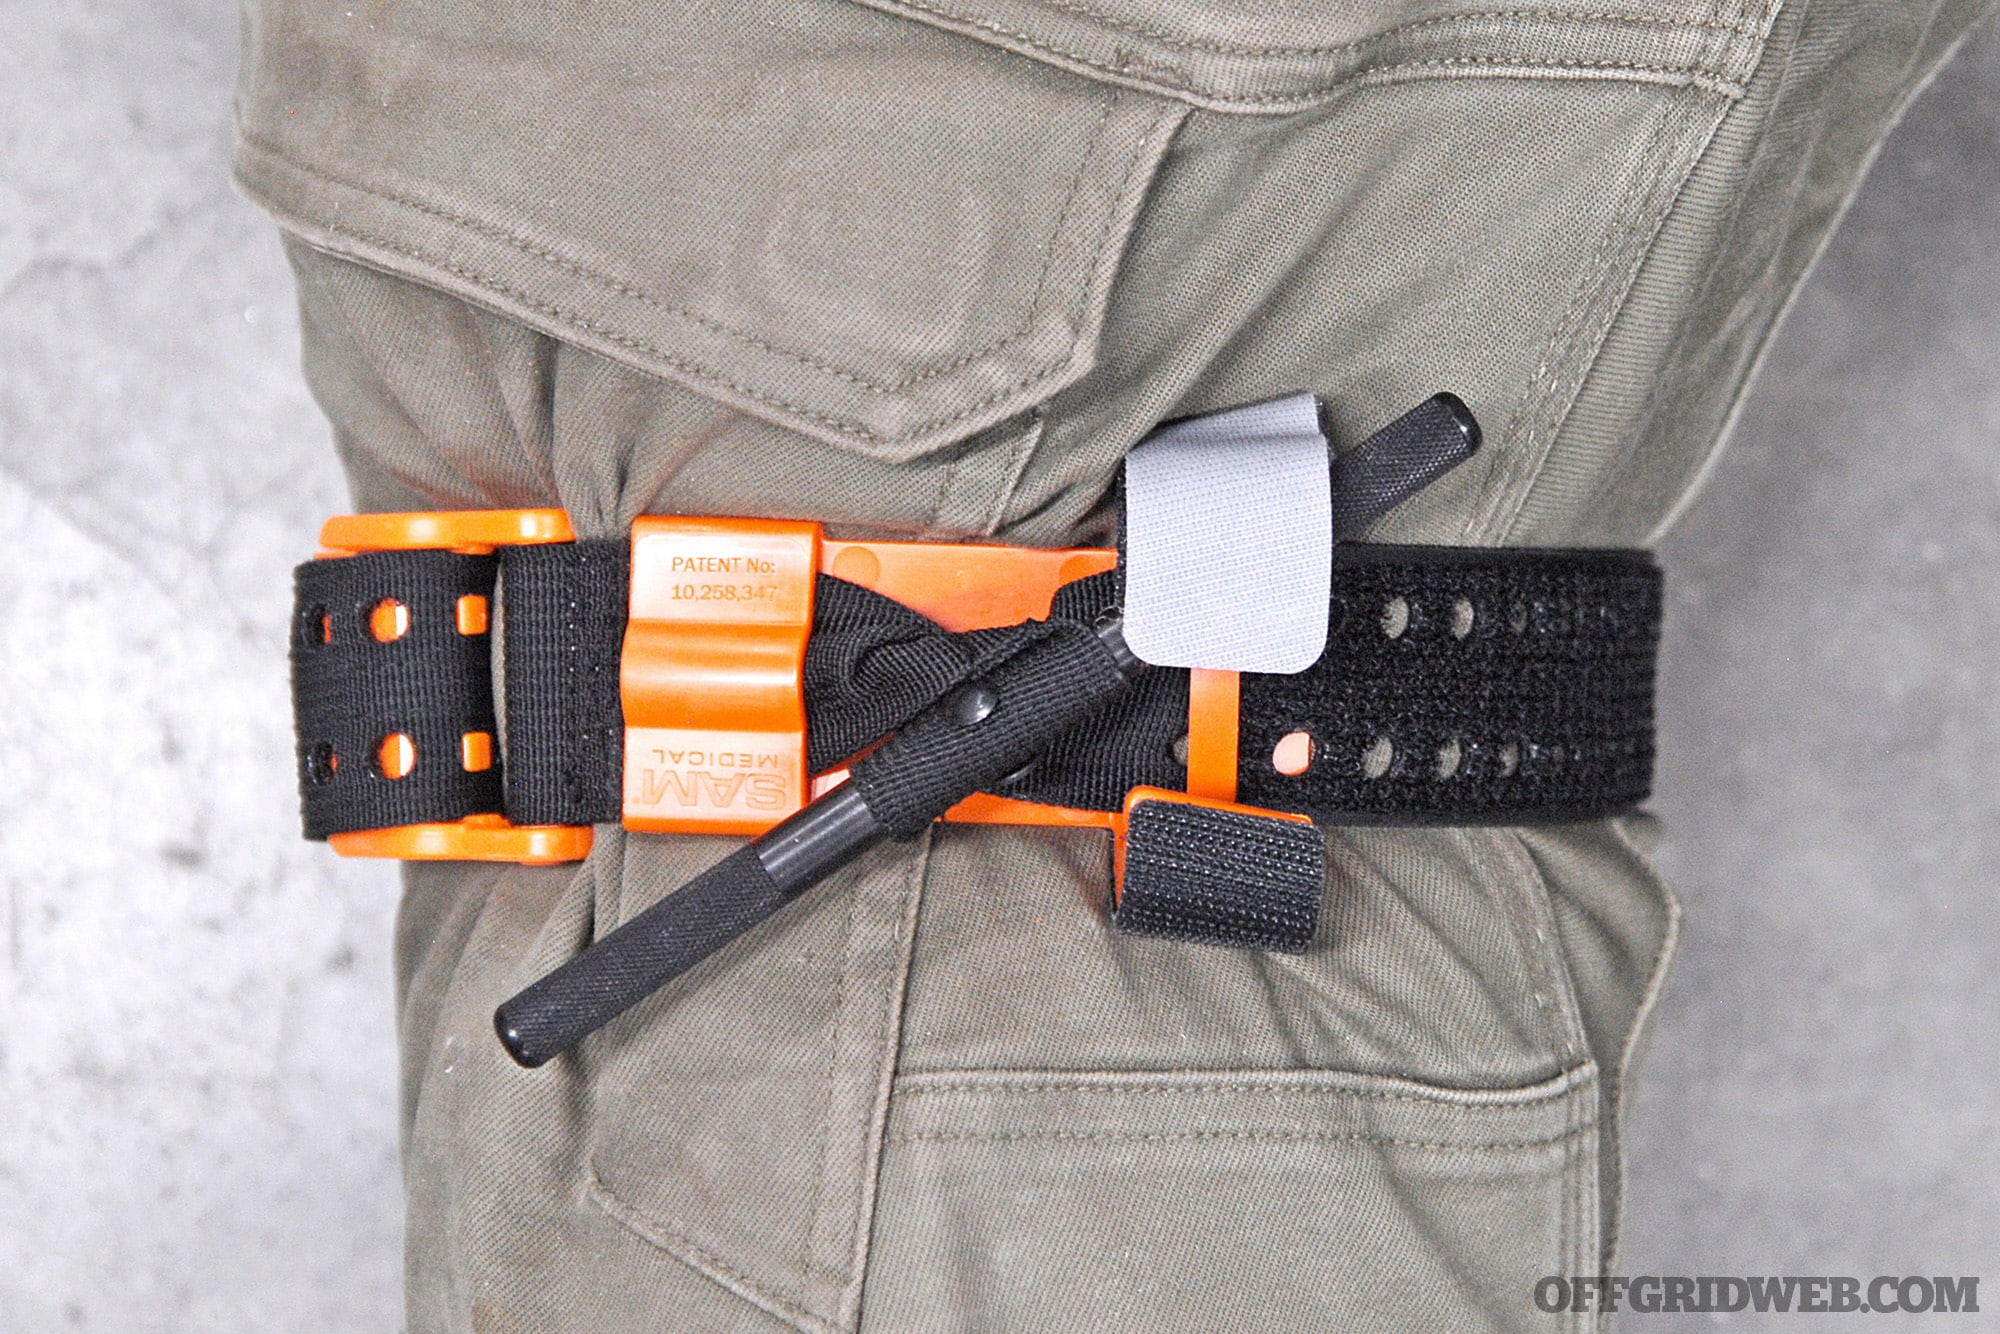
SAM Medical SAM XT Tourniquet
Colors: Black, Blue, Orange
Size: Packaged L 7.25 by W 2.5 by D 1.5 inches; open length 36 inches
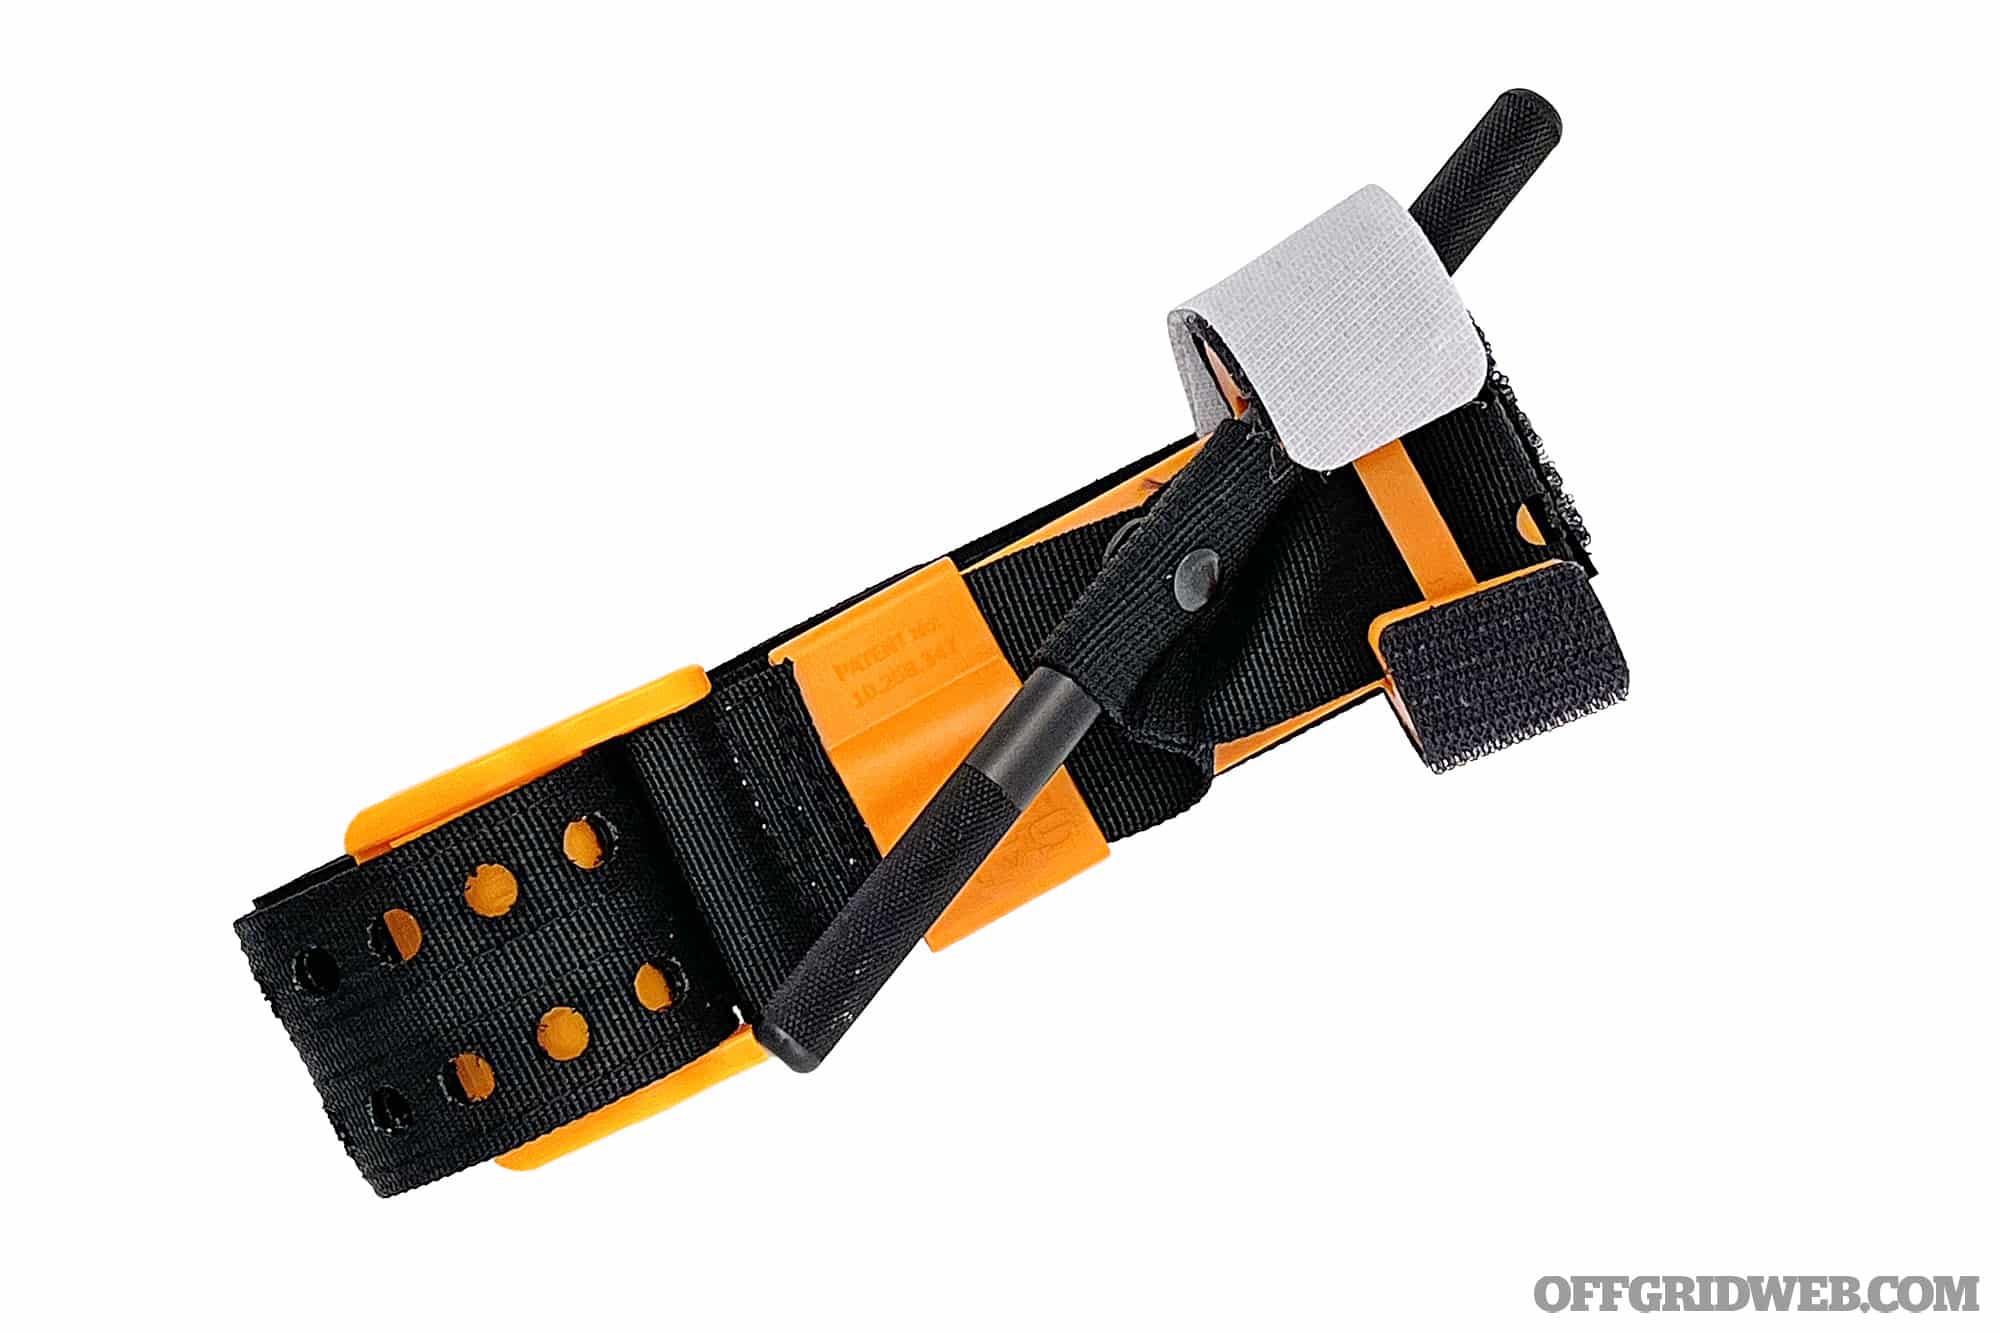
Notes The SAM XT is a windlass design tourniquet with an obvious physical difference, as the hook-and-loop strap has two rows of holes in it. These holes work in conjunction with the unique TRUFORCE buckle that’ll help lock the strap in place when a predetermined amount of force is applied. When you pull the strap hard enough, the buckle will lock into the holes. The tourniquet has a good feel to it, not too stiff and not too soft, I had no problem securing it one-handed. Anybody who has ever used the C-A-T or SOF-T will intuitively understand how to use this tourniquet. It’s approved by the CoTCCC and carries NSN 6515-01-670-2240.
Pros:
Aluminum windlass
TRUFORCE buckle helps you know when the strap is tight enough
Cons:
The buckle makes it bulkier than most.
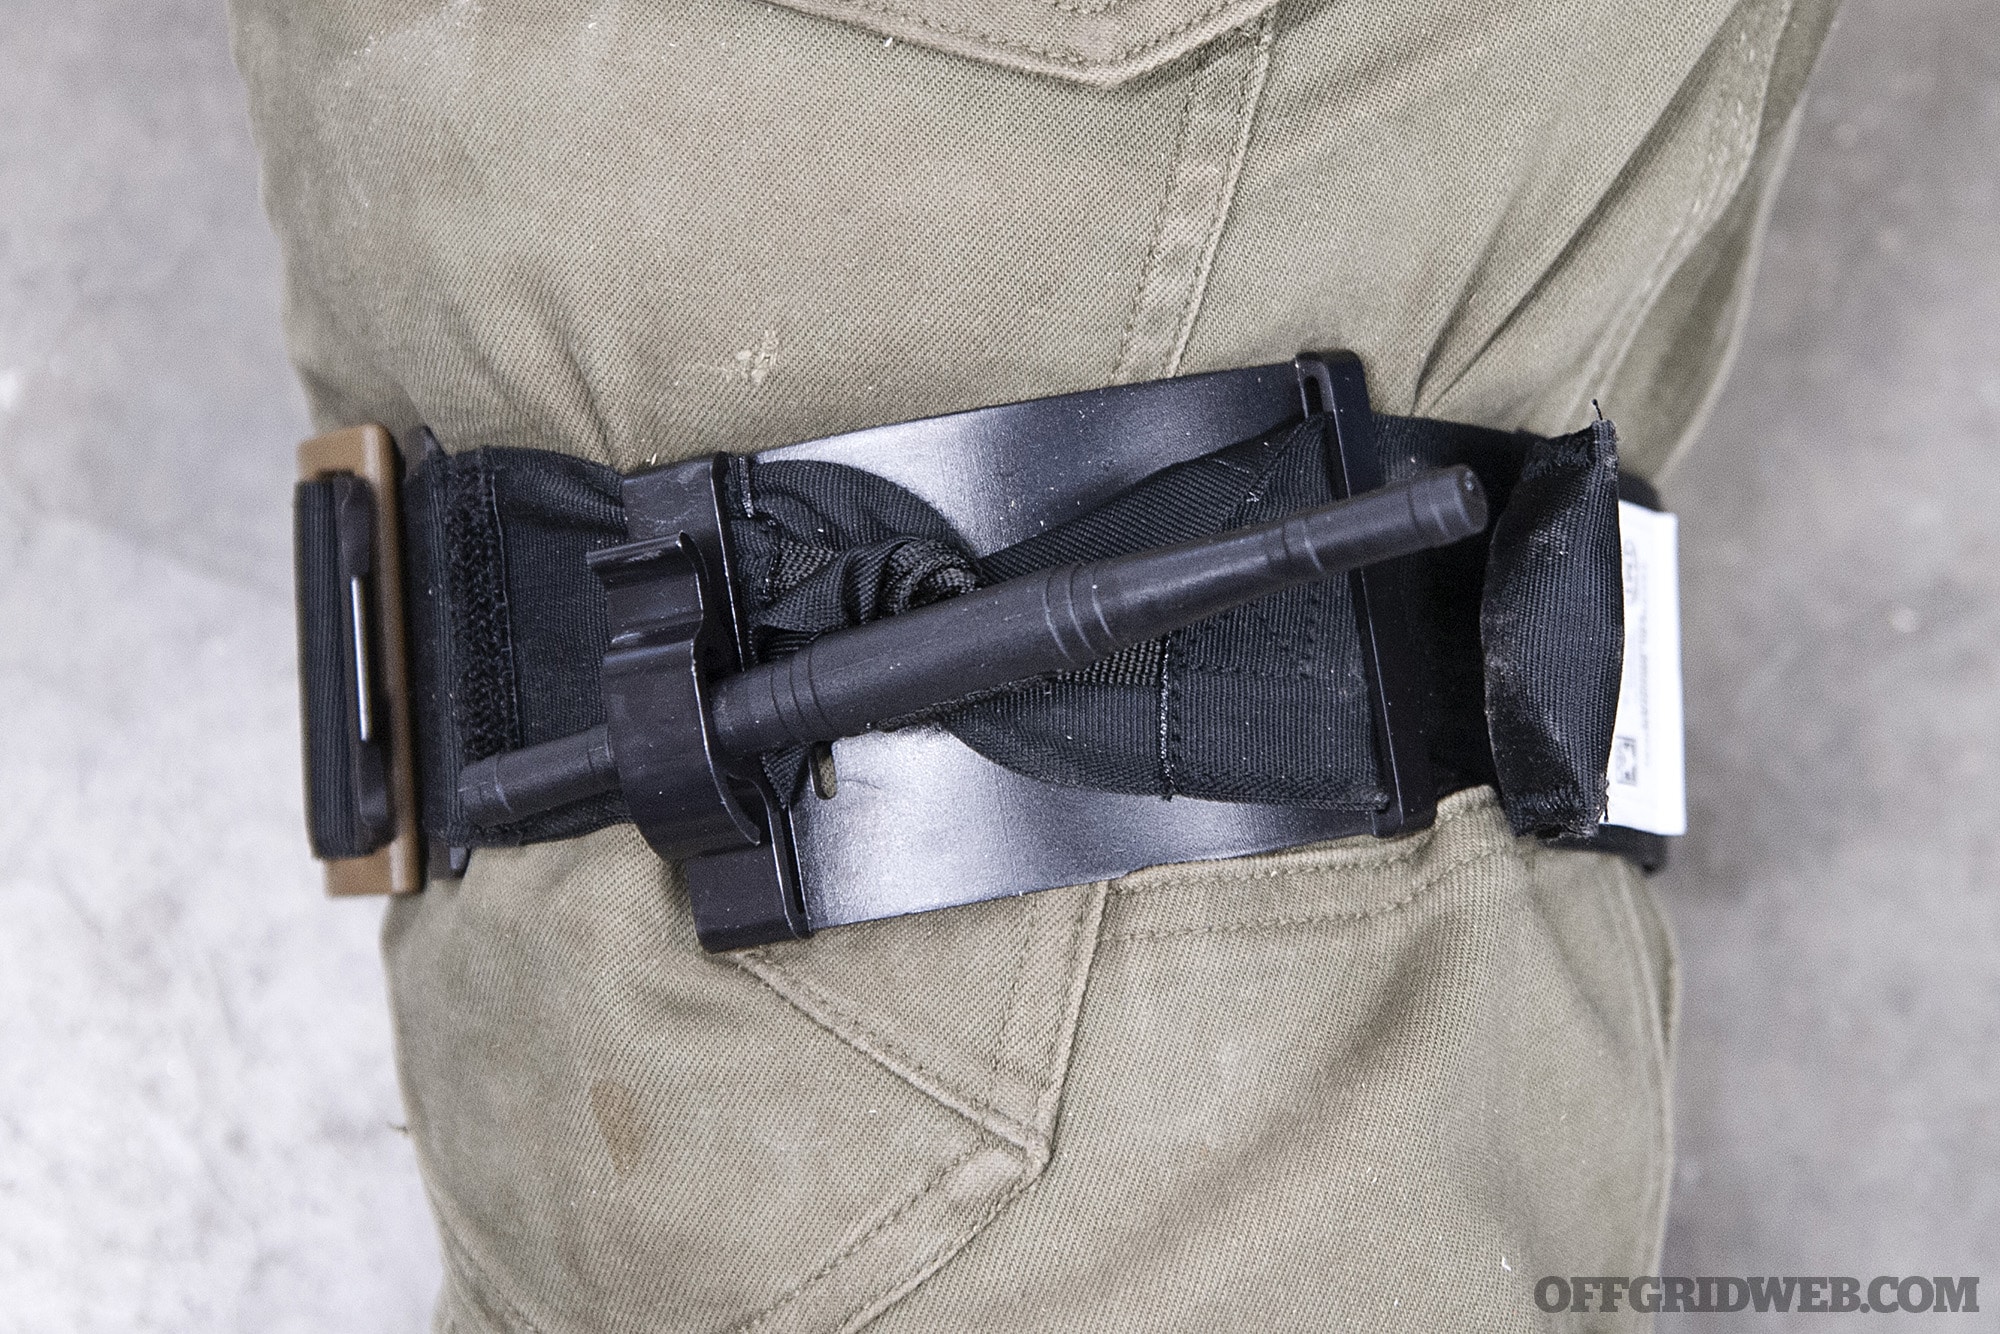
Combat Medical TMT
Colors: Black
Size: Packaged L 4.5 by W 2.5 by D 1.85 inches; open length 38 inches
Notes I found the TMT to be especially challenging to apply one-handed. On top of that, I found that if you twist the windlass counterclockwise, it’s counter-intuitive to get it into the retaining clip. Instead of letting the windlass settle back into the clip, like on all the other windlass tourniquets, you actually have to push it forward. This counter-intuitiveness can cost you a lot of blood under pressure. Additionally, when tightening the windlass in a clockwise direction, you lose a little tightness. The Naval Medical Research Unit came to the same conclusion in 2015 on the clockwise tightening. The buckle is nice, though. I expected to have to thread the strap through it but found that’s not possible. Instead, you simply unhook the buckle. These issues are easily remedied through proper training. It’s approved by the CoTCCC and carries NSN 6515-01-656-6191.
Pros:
Smooth windlass action
Fast to apply once trained
Wide 2-inch band
Cons:
I found it to be slow and difficult to secure one-handed.
Not intuitive to use
RevMedx TX2 Tourniquet
Colors: Tan
Size: Packaged L 8.5 by W 2 by D 1.5 inches; open length 39 inches
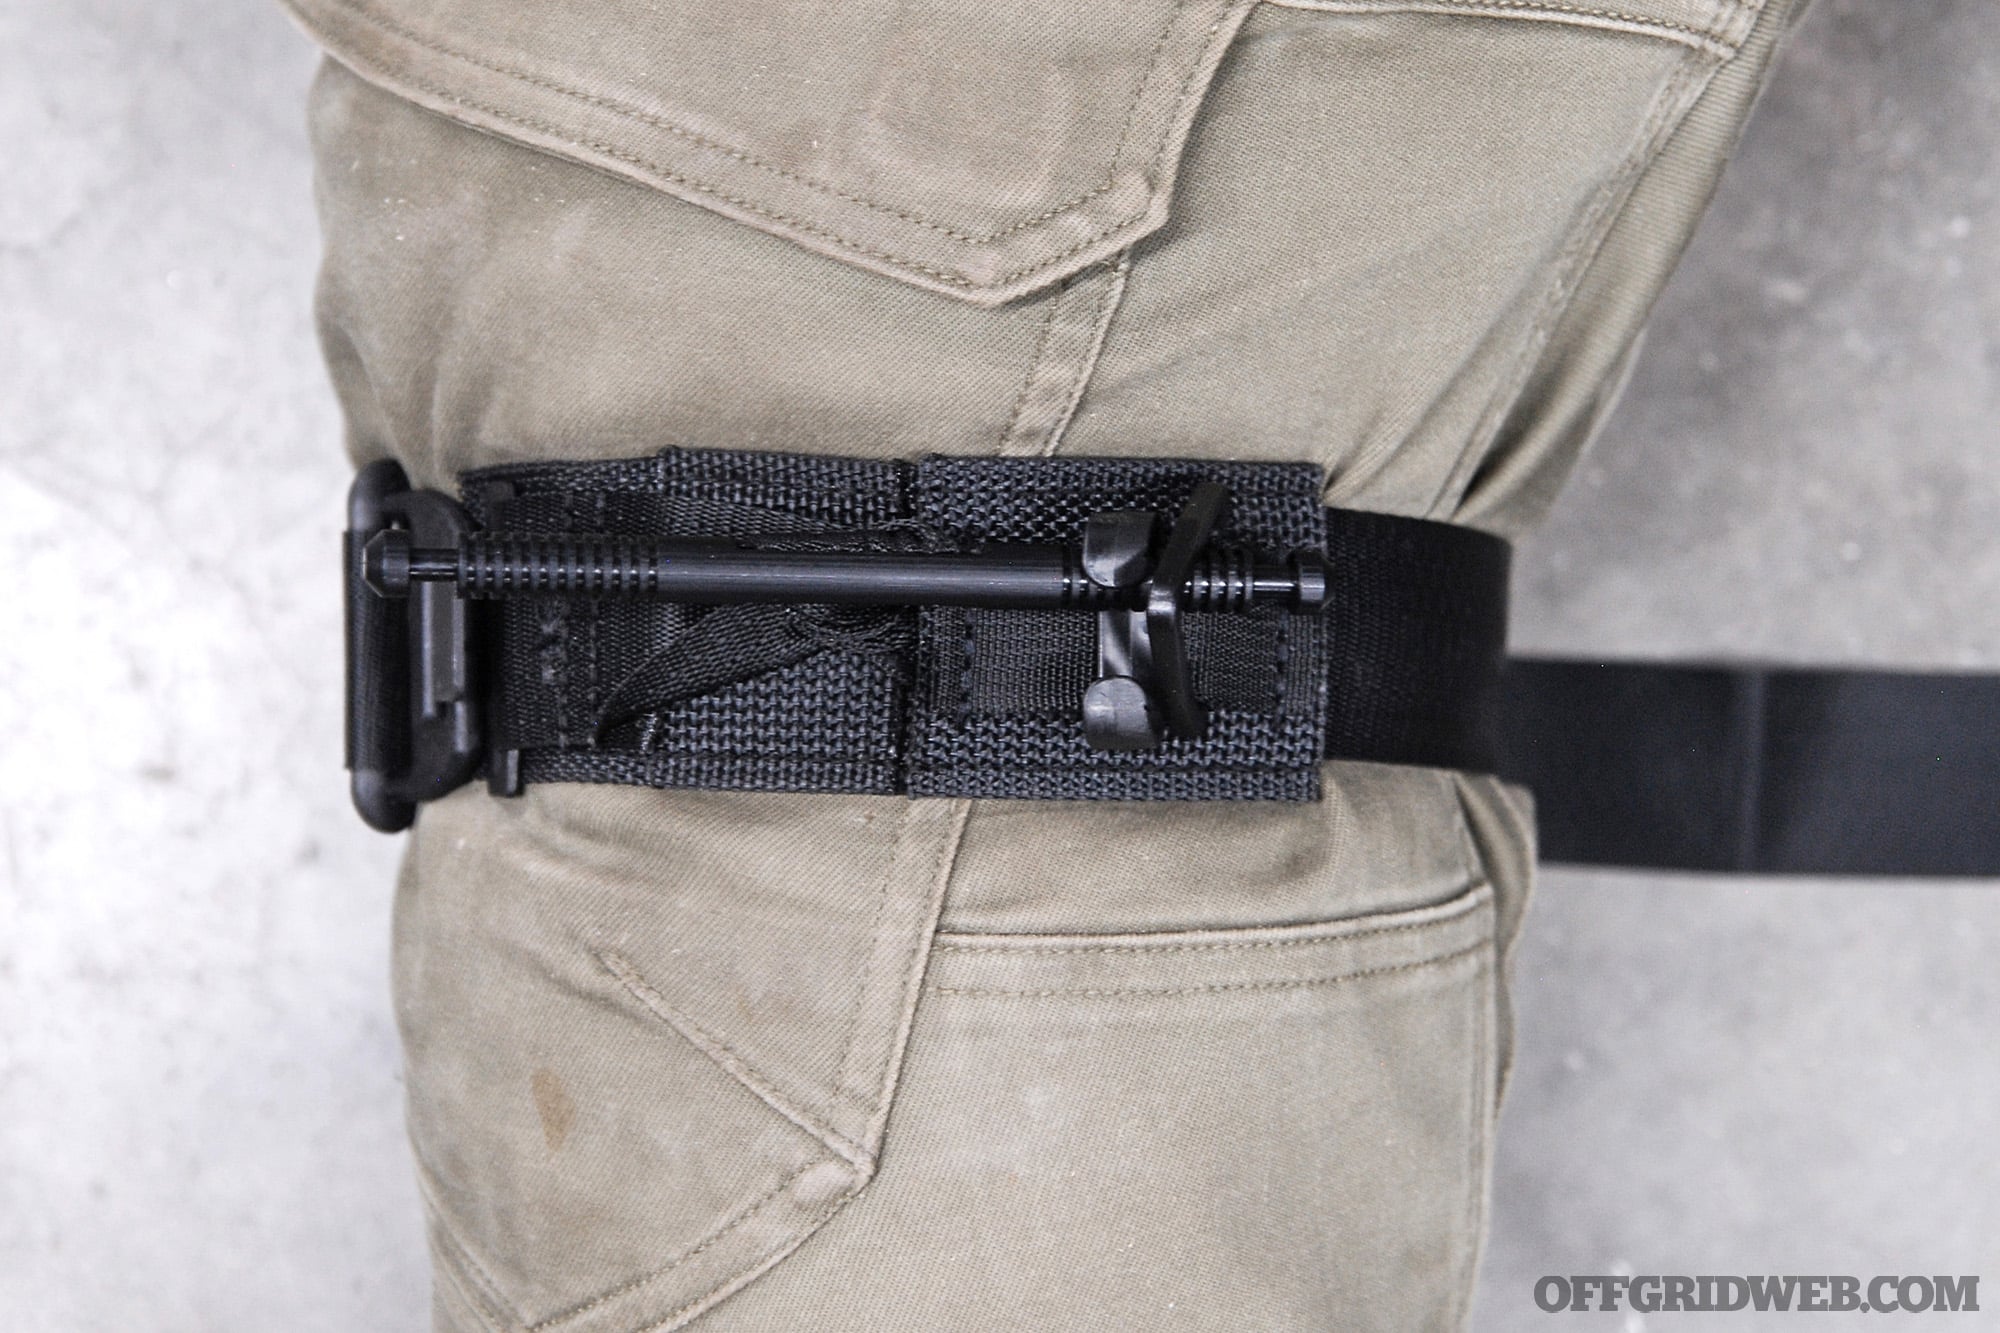
A departure from the traditional windlass design, the RevMedx TX2, and its big brother the TX3, utilize a ratcheting mechanism to achieve the final tightening on the tourniquet. It’s a lot like using a ratchet strap — simply wrap it around the limb, pull tight, and start ratcheting. Knowing how superbly tight a ratchet strap can get, I had high hopes, and this tourniquet didn’t disappoint. The 1-inch-wide ratchet design works smoothly and the tourniquet can be left in service after using it for training. In fact, it’s encouraged in the product literature. The 2-inch-wide strap allows for better bleeding control. The TX3 is another inch wider and 21 inches longer, fitting even the burliest of people. A Naval Medical Research Unit study found that the TX tourniquets outperformed the windlass-style tourniquets in multiple categories. Both are approved by the CoTCCC and carry NSN 6515-01-667-6027 and 6208.
Pros:
Wide 2-inch strap allows for better bleeding control
Convenient ratcheting mechanism
Cons:
No time tag on top of mechanism
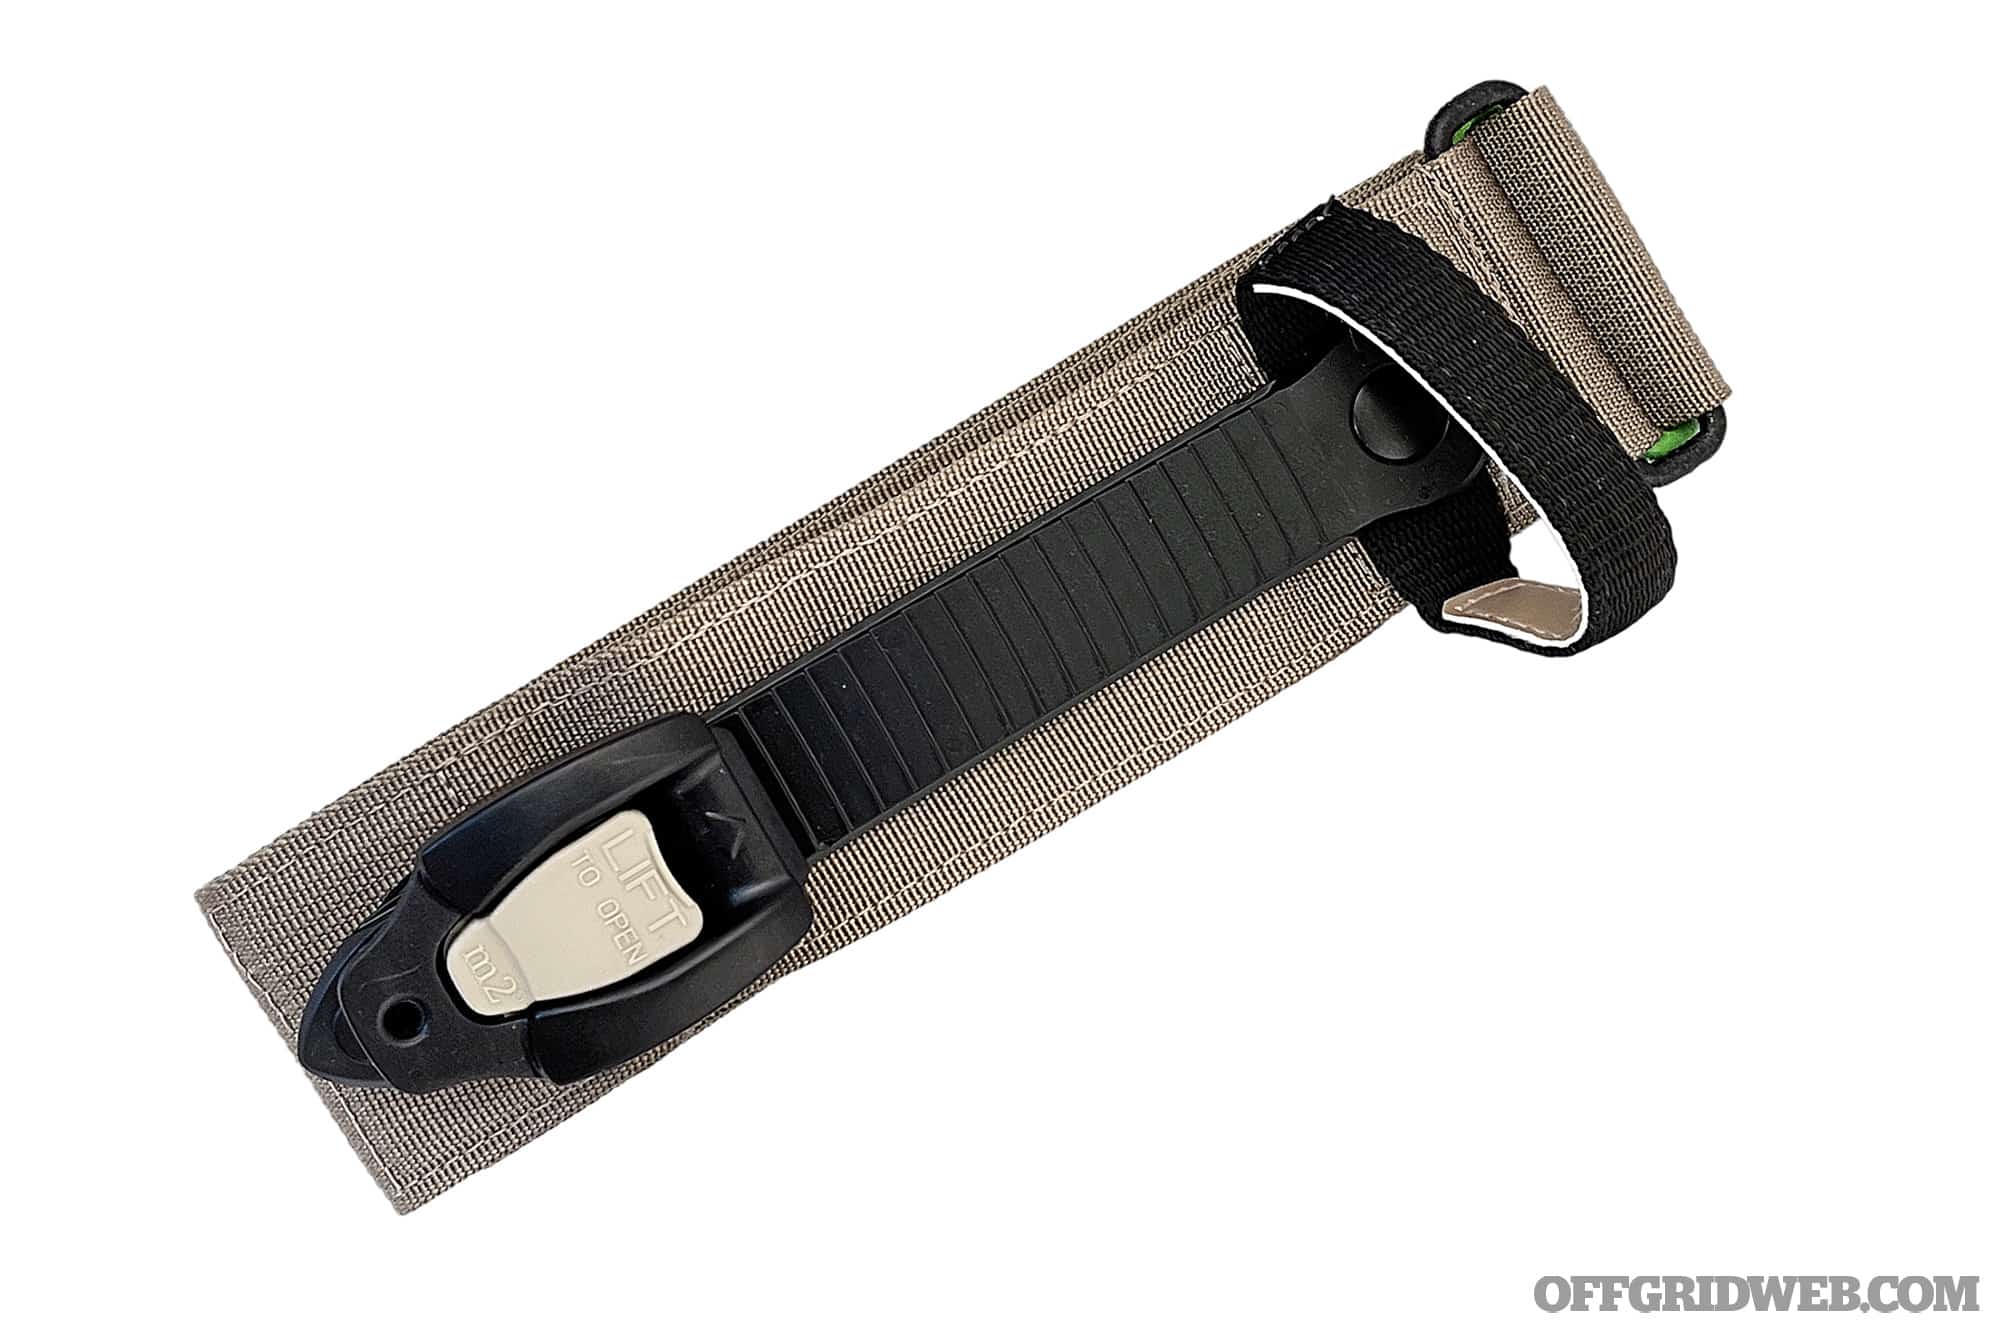
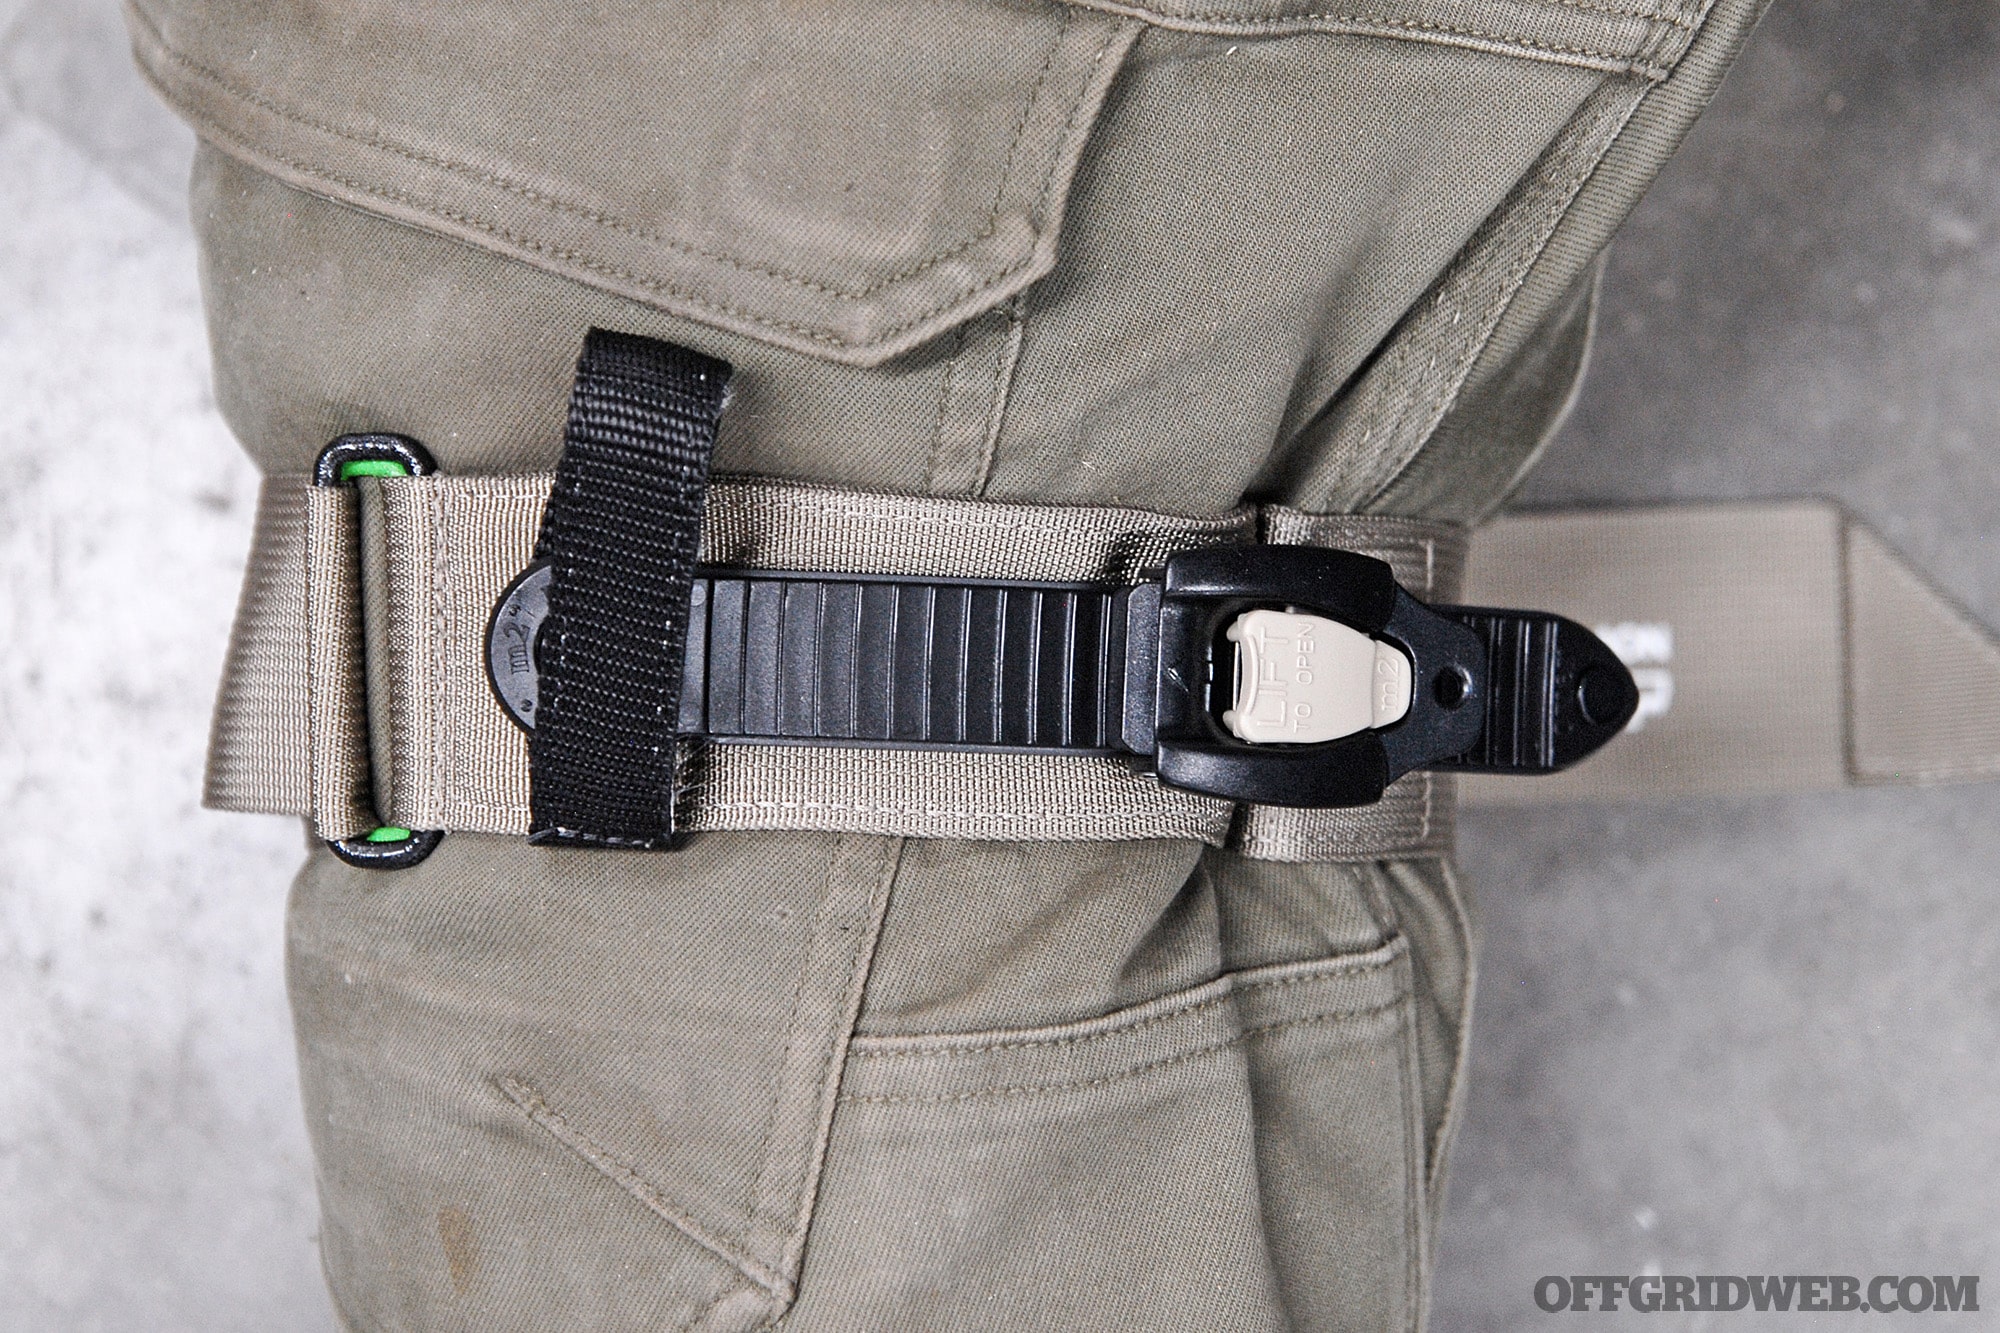
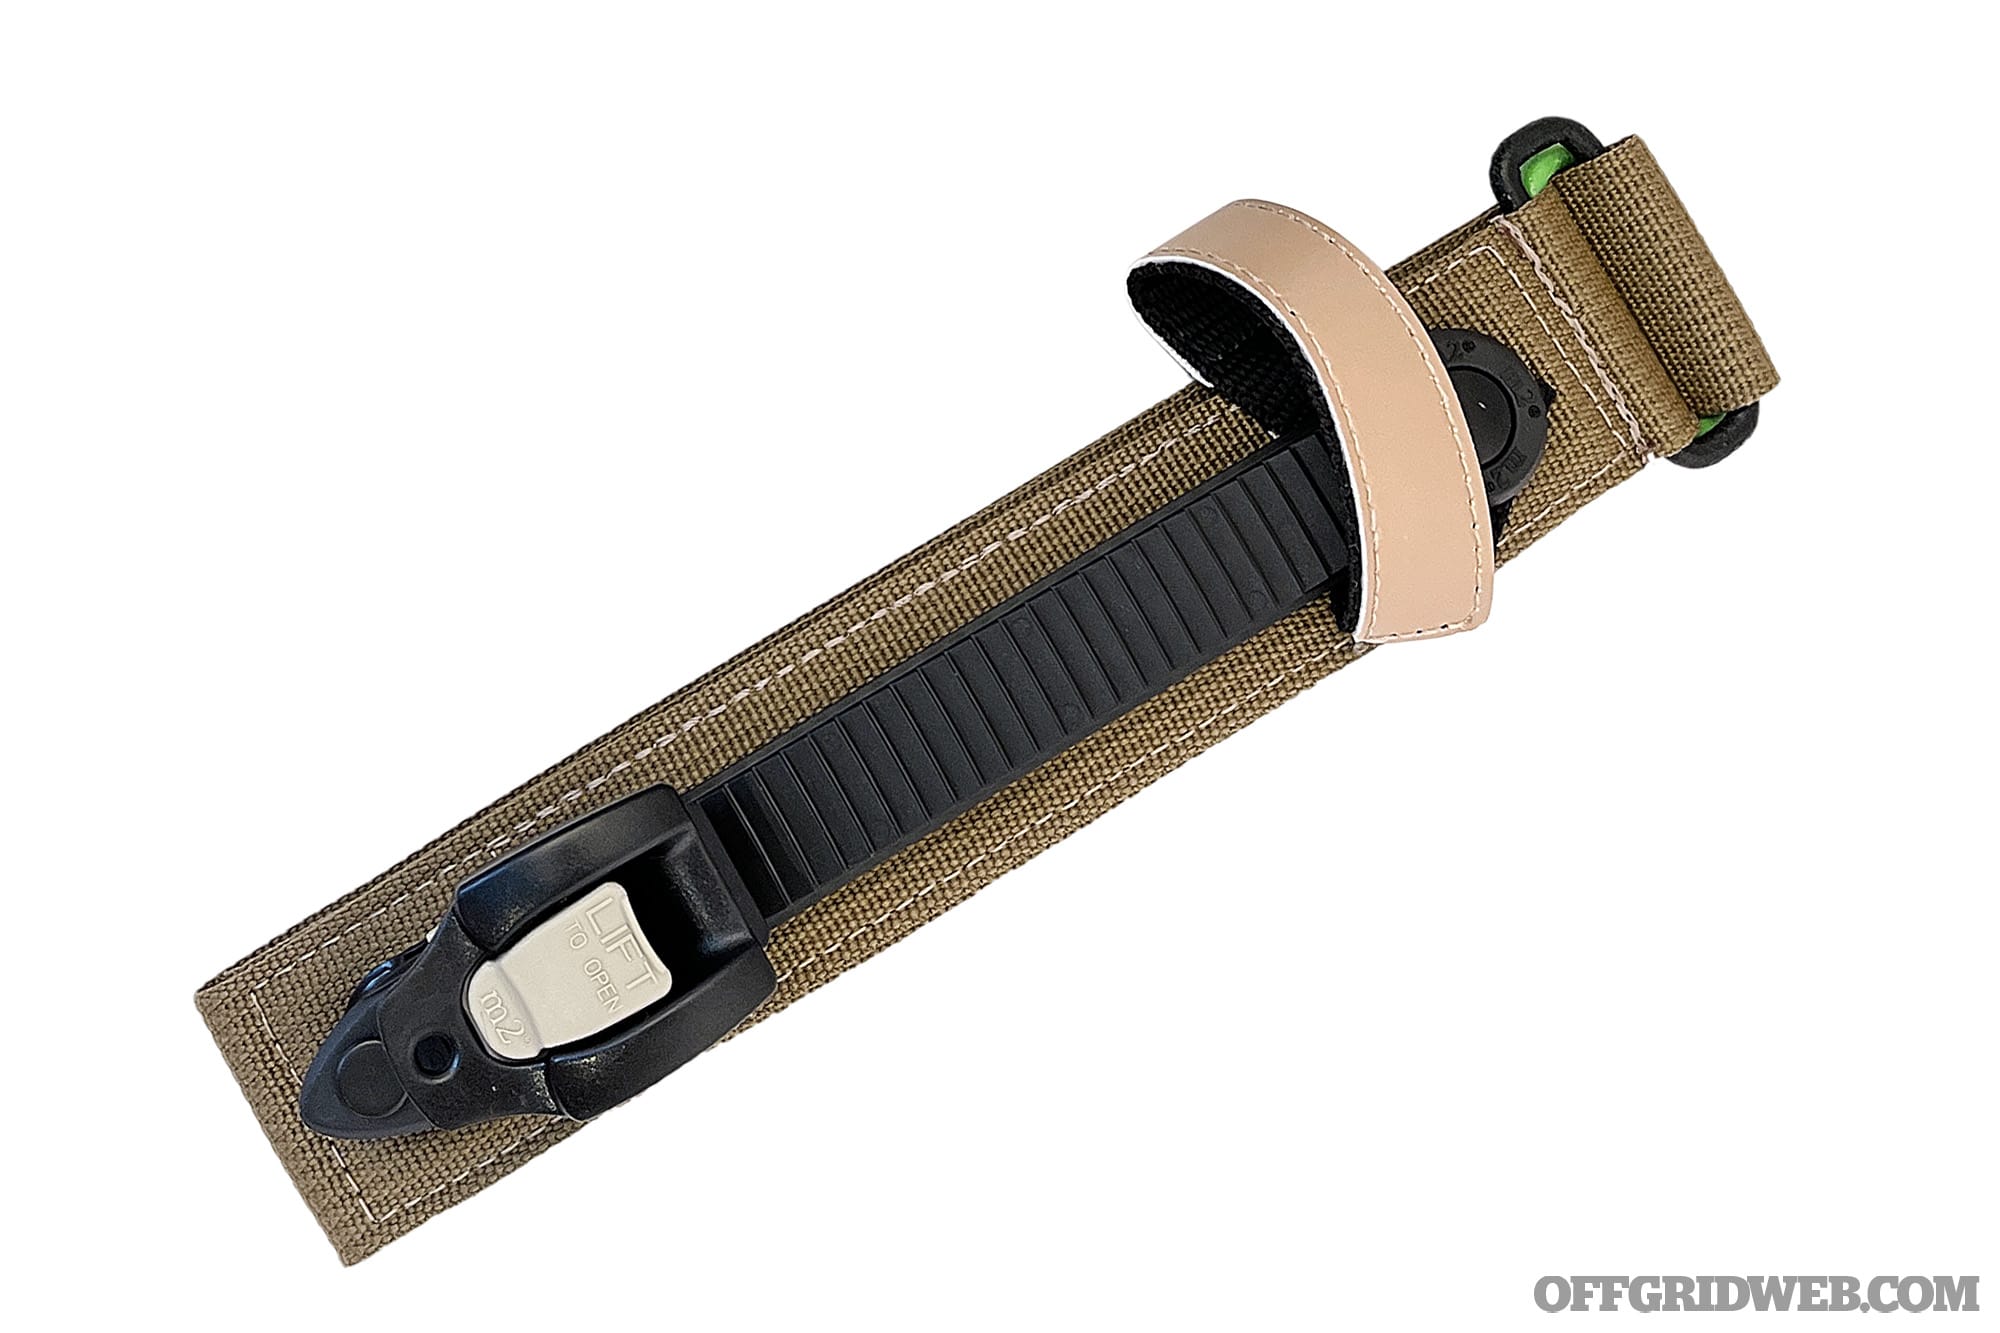
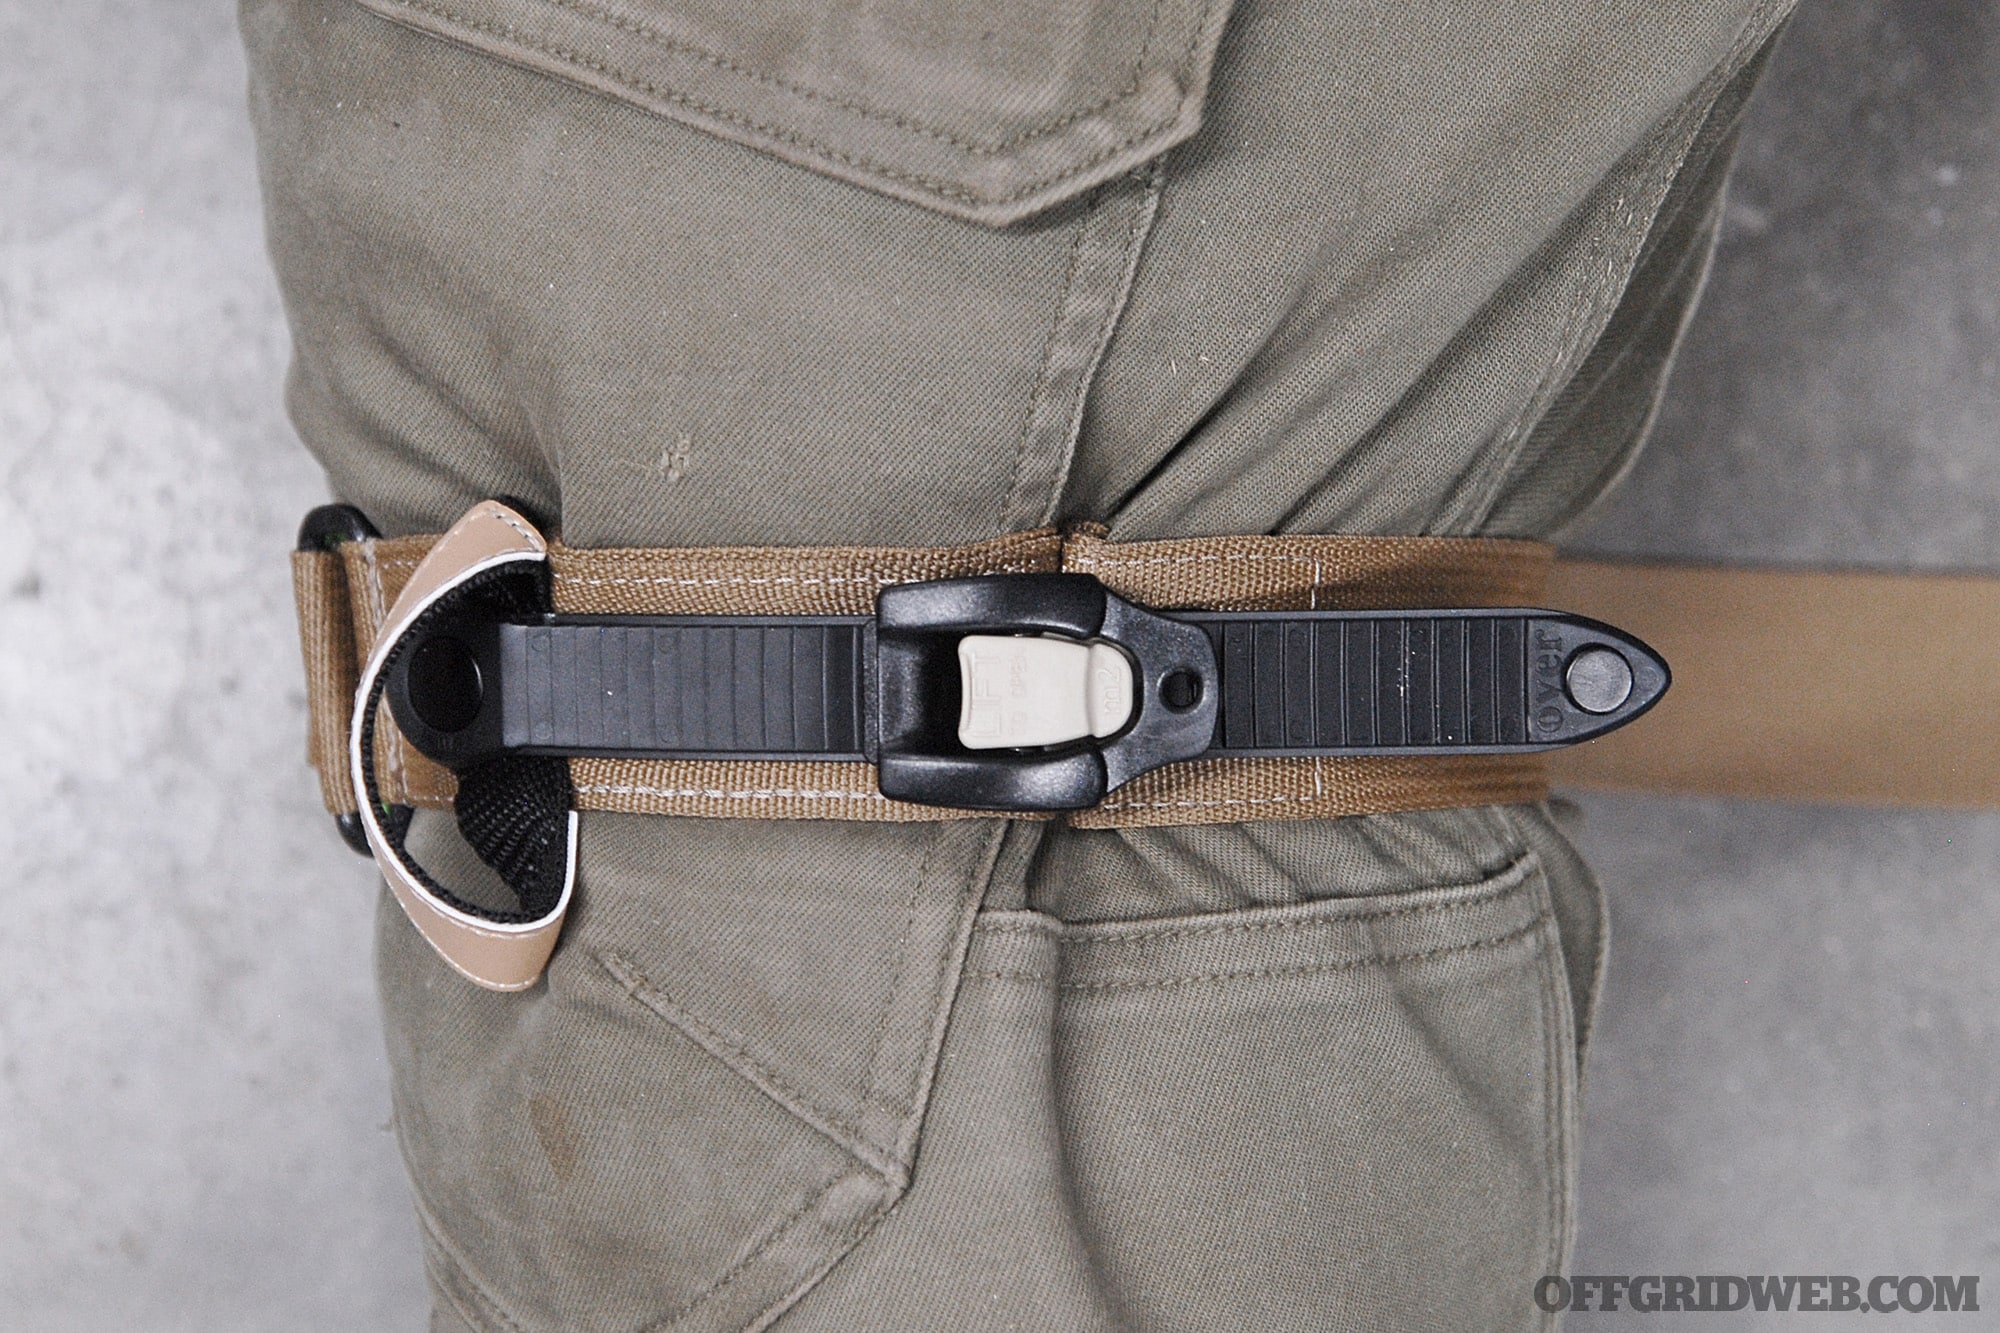
m2 inc. Ratcheting Medical Tourniquet (RMT) Tactical
Colors: Black, Tan
Size: Packaged L 8.5 by W 1.5 by D 1.25 inches; open length 37.5 inches
Notes The Ratcheting Medical Tourniquet is made by m2 inc., a leading manufacturer of industrial-strength mechanical closure technologies. Besides this Thermo Plastic Ratcheting Buckle, they also make surgical, industrial, marine, and military items. The RMT is the cousin to the REV MED TX2 and TX3, but somewhat smaller. The buckle comes in at ¾ inch, allowing it to be readily used on narrow tourniquets. It also features a tactical loop that doubles as a bite loop for easier application with one hand or gloves. While this is the military tactical tan version, it also comes in three civilian versions of XL, greater than 120 pounds, and less than 120 pounds (pediatric), as well as three military versions of tactical, paramedic, and 2-inch, with various colors. It’s approved by the CoTCCC and carries NSN 6515-01-527-3841.
Pros:
Versatile with numerous application-specific variants
Many color and size choices
Cons:
No time tag on top of mechanism
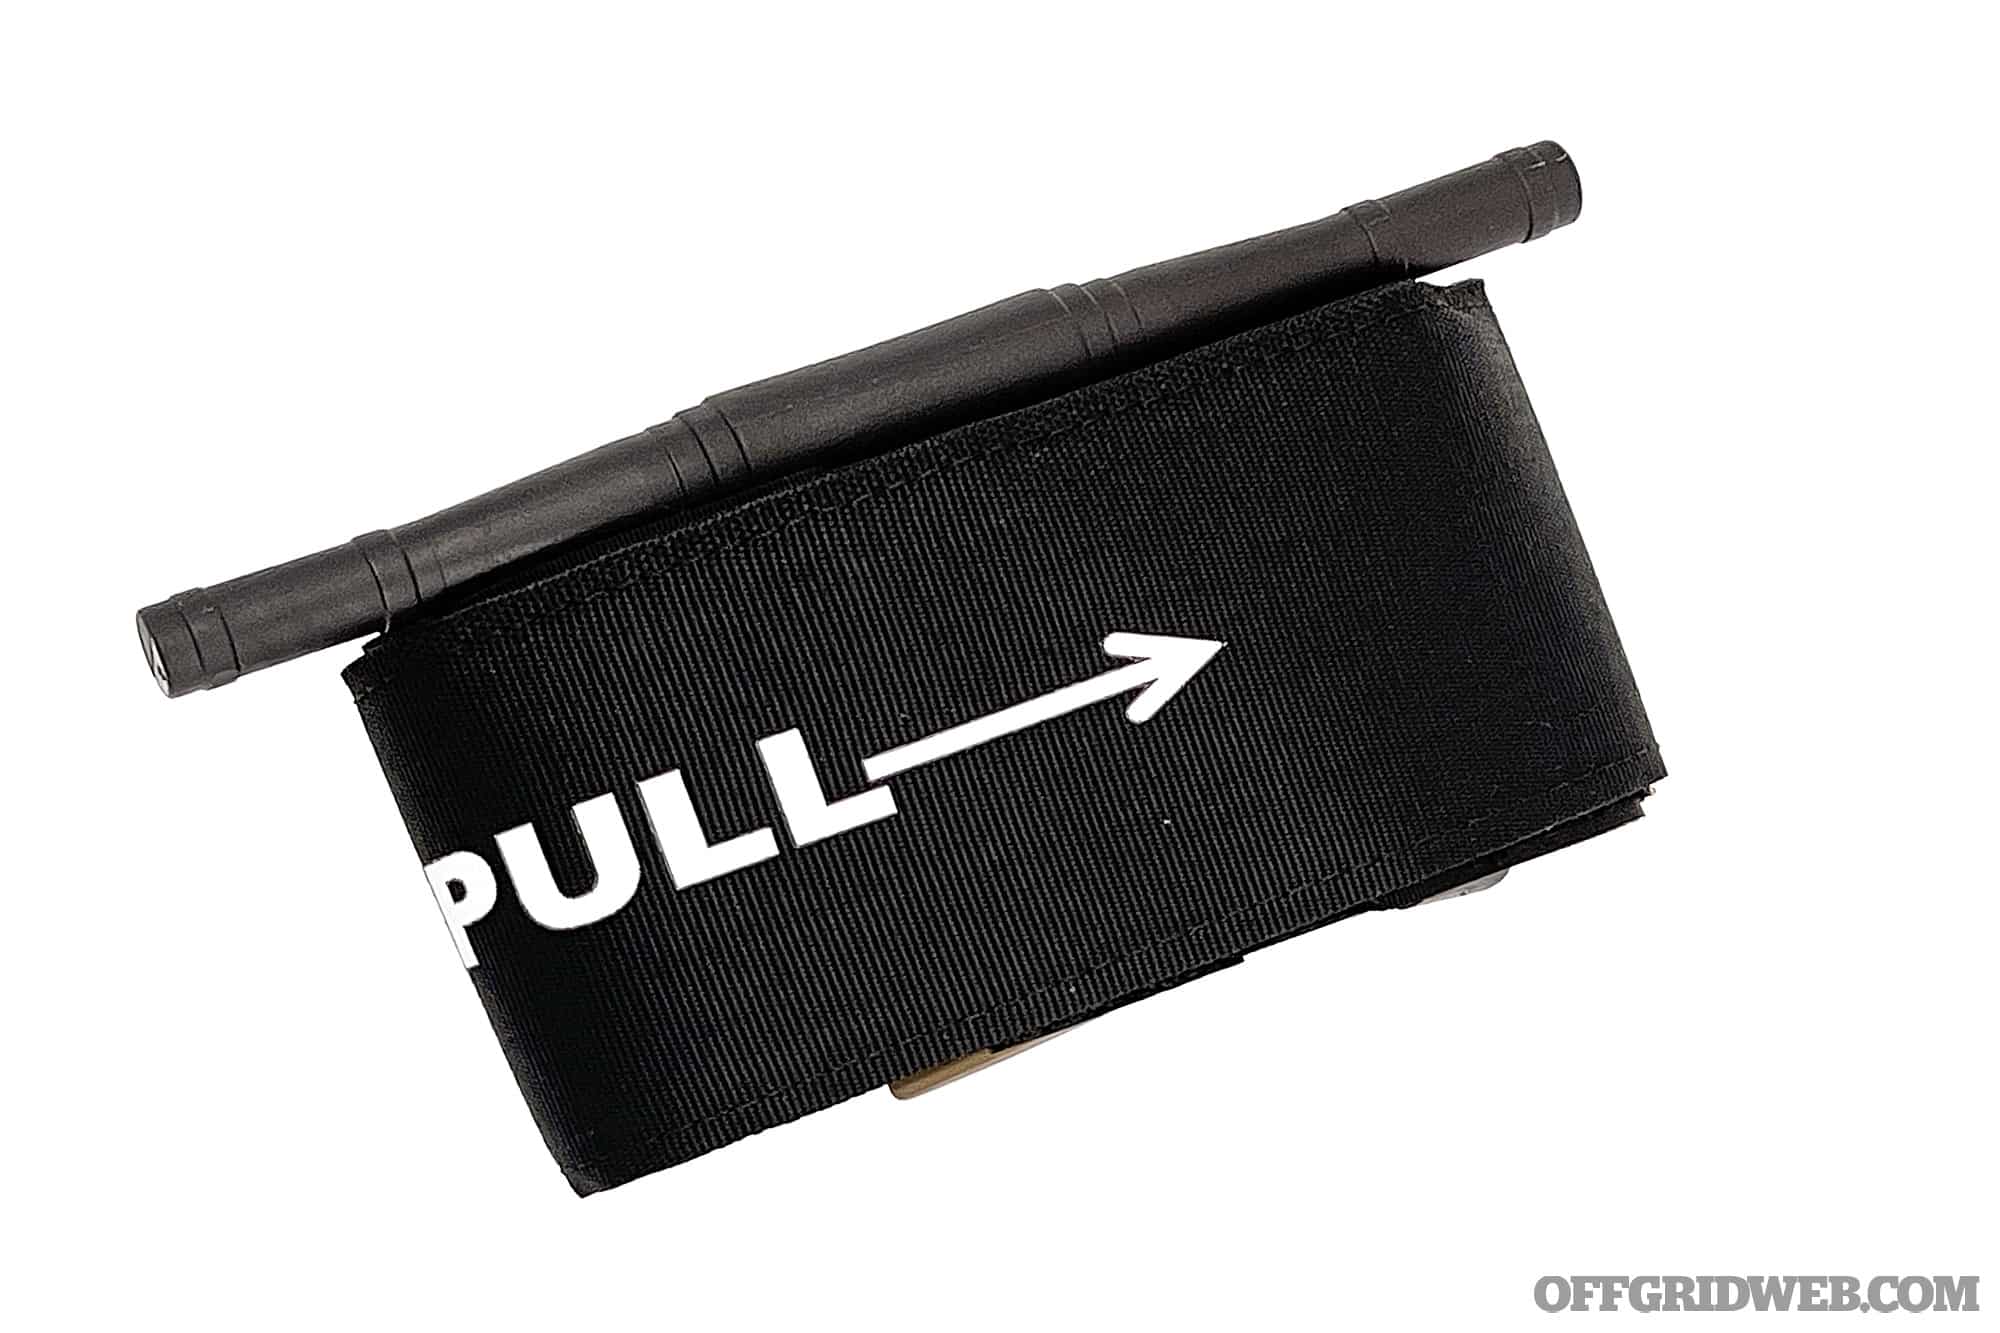
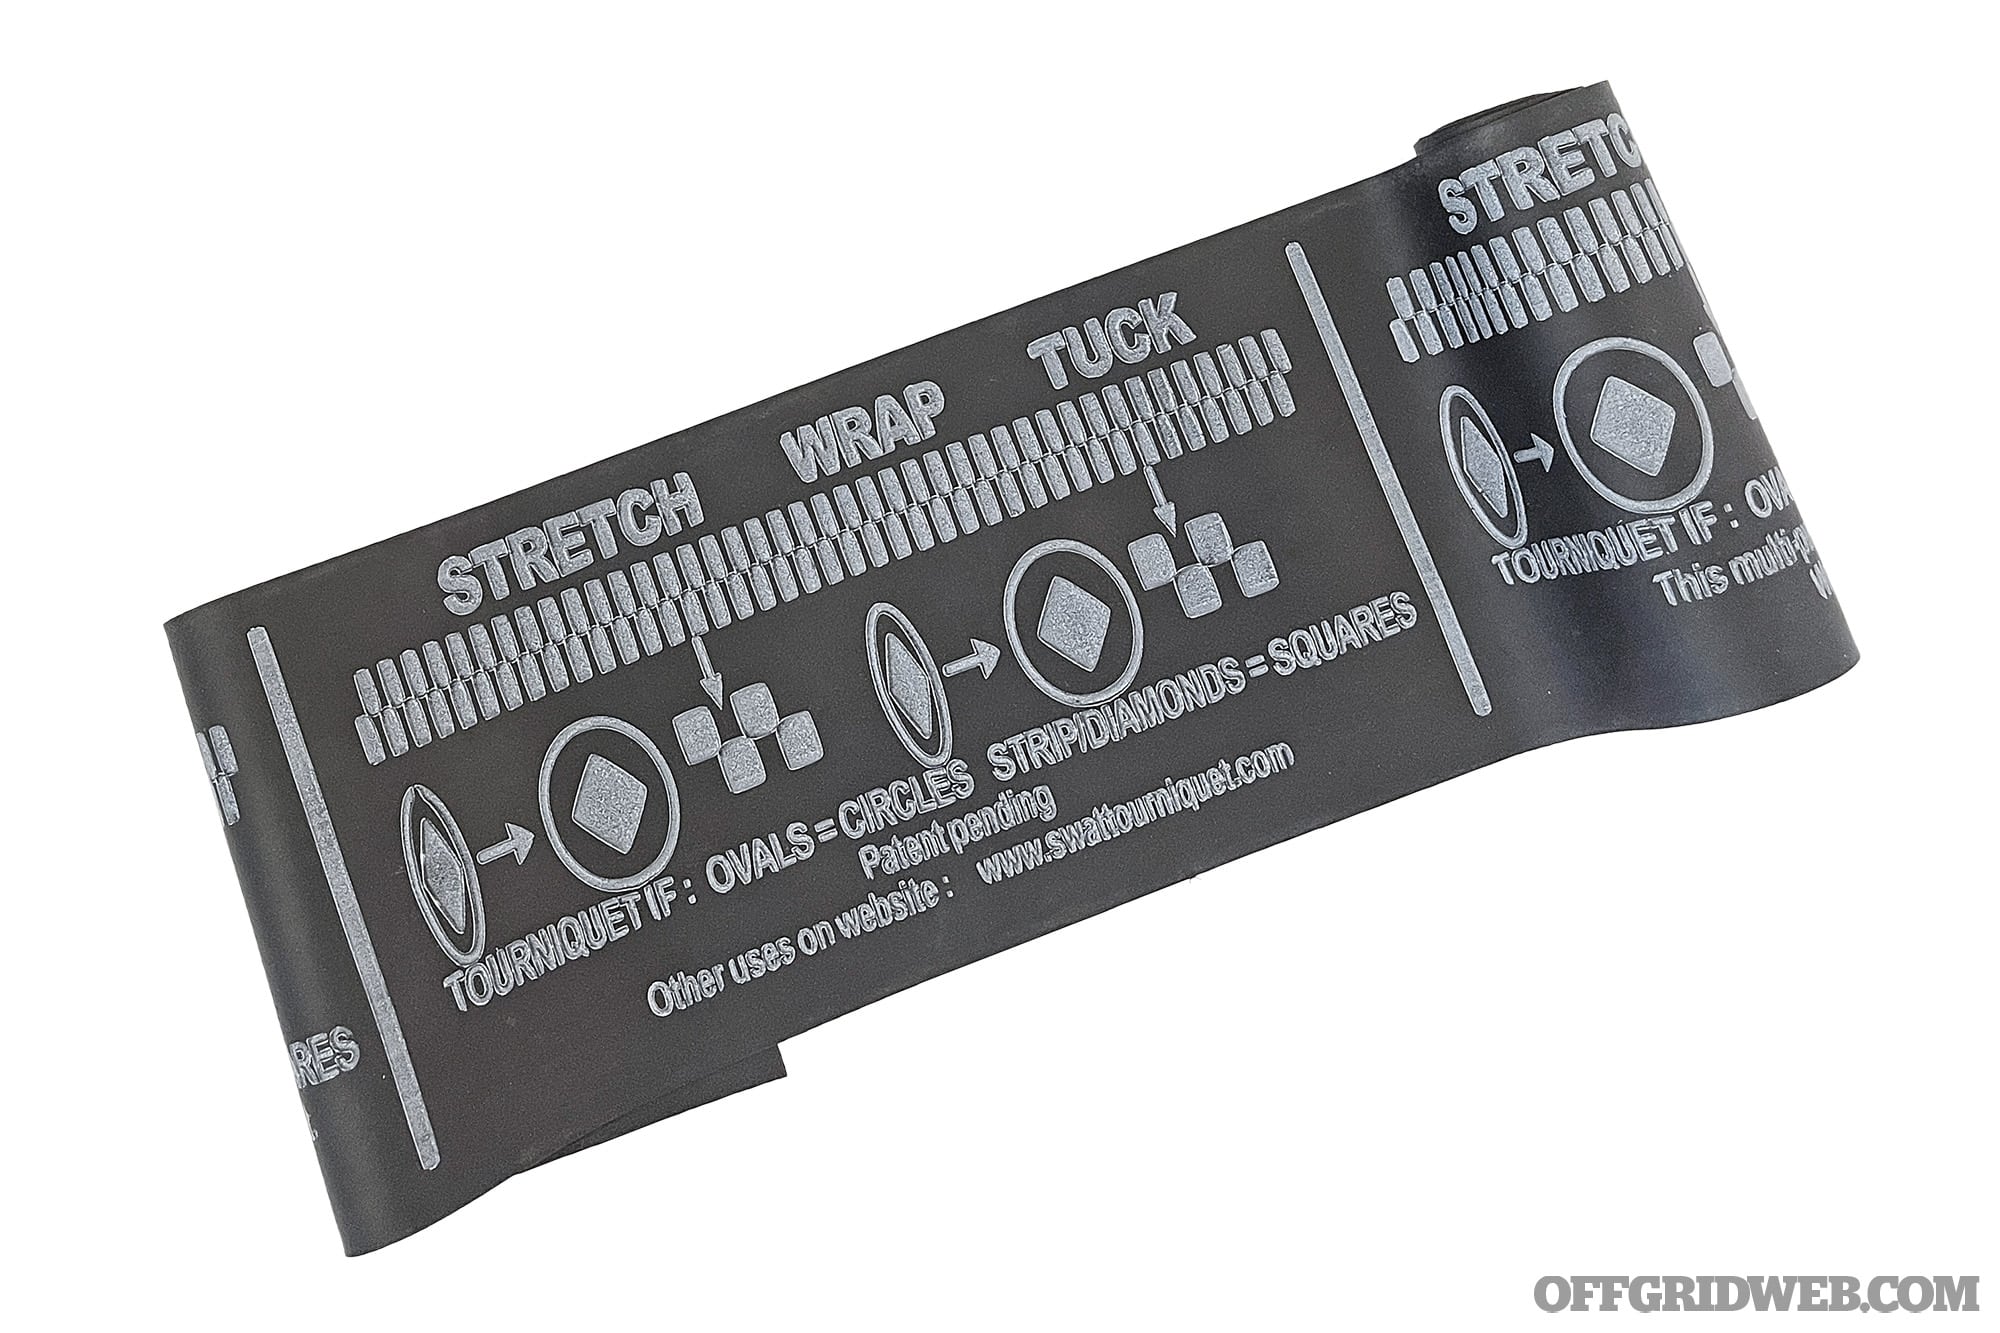
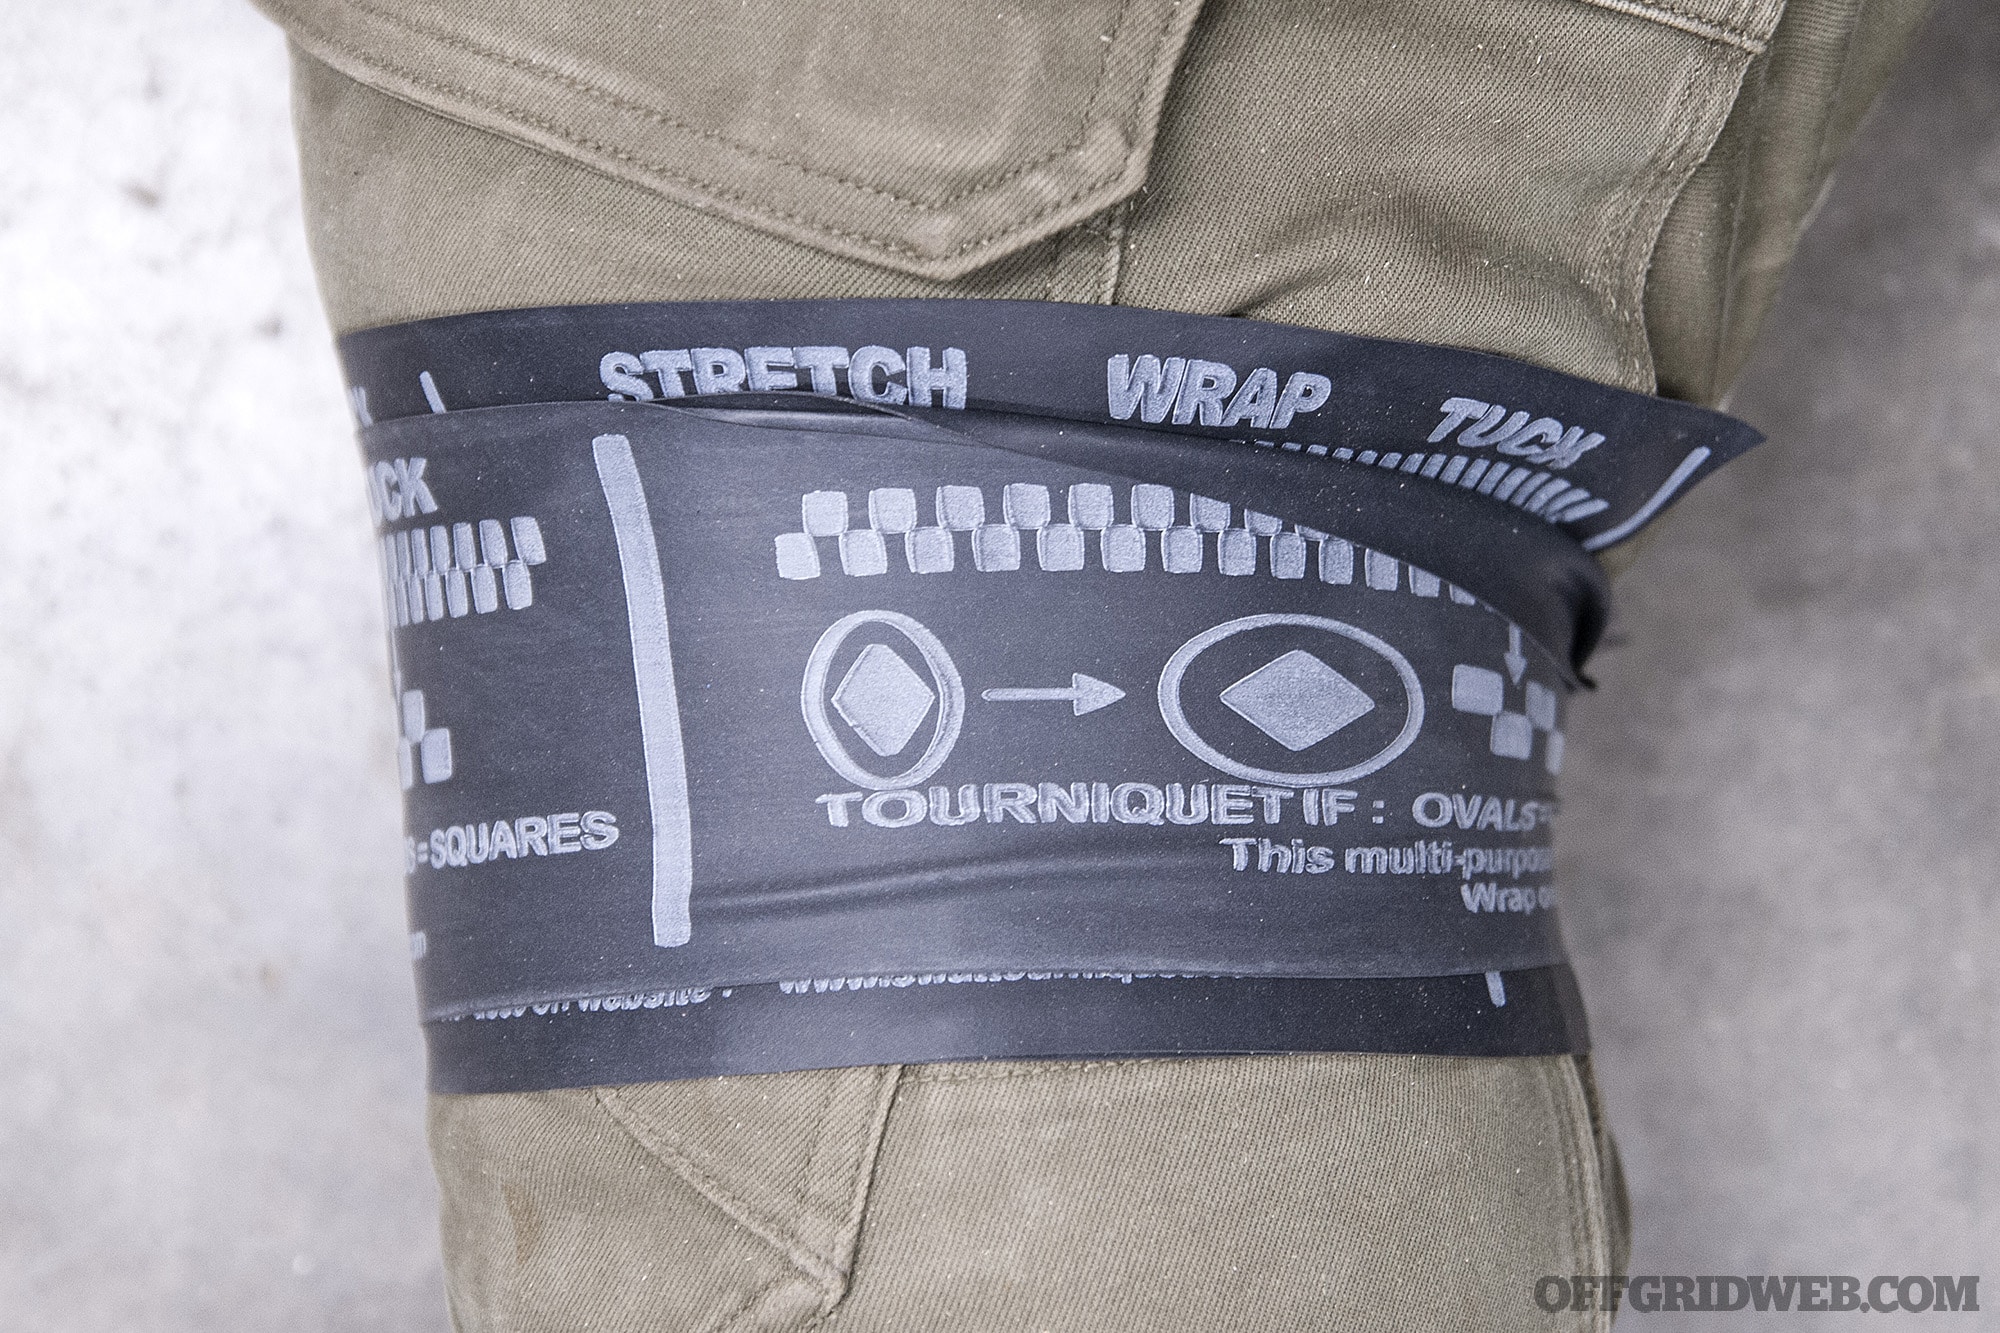
H&H Med Corp. SWAT-T
Colors: Black, Blue, Orange
Size: Packaged L 4.5 by W 3 by D 0.75 inches; open length 37.5 inches
Notes The Stretch Wrap and Tuck Tourniquet is often disregarded because it has never gotten CoTCCC approval. That said, it does its job when properly applied. It’s a rubber strap with instructions printed on one side. To apply it, stretch the band firmly until the printed oval and diamond shapes stretch into circles and squares. This is how you know you’re applying it with enough force to occlude blood flow. Wrap as many times as you can and tuck the end in. For some, tucking the end in can be difficult. A big upside is it’ll work just as well on children as adults. The SWAT-T can also be used to apply pressure to a packed wound, and can be used as a K9 tourniquet or sling. It truly is the multi-tool of the tourniquet world. The SWAT-T comes packaged in a plastic pouch, with pre-cut tear notches every 2 inches on each side. Even wet, it tears open readily with a two-handed grip or your teeth.
Pros:
Very affordable
Doubles as a pressure dressing or even a canine TQ
Cons:
Not as easy to apply one-handed
Not CoTCCC approved, making it more of an “honorable mention” than a top-tier contender
About the Author
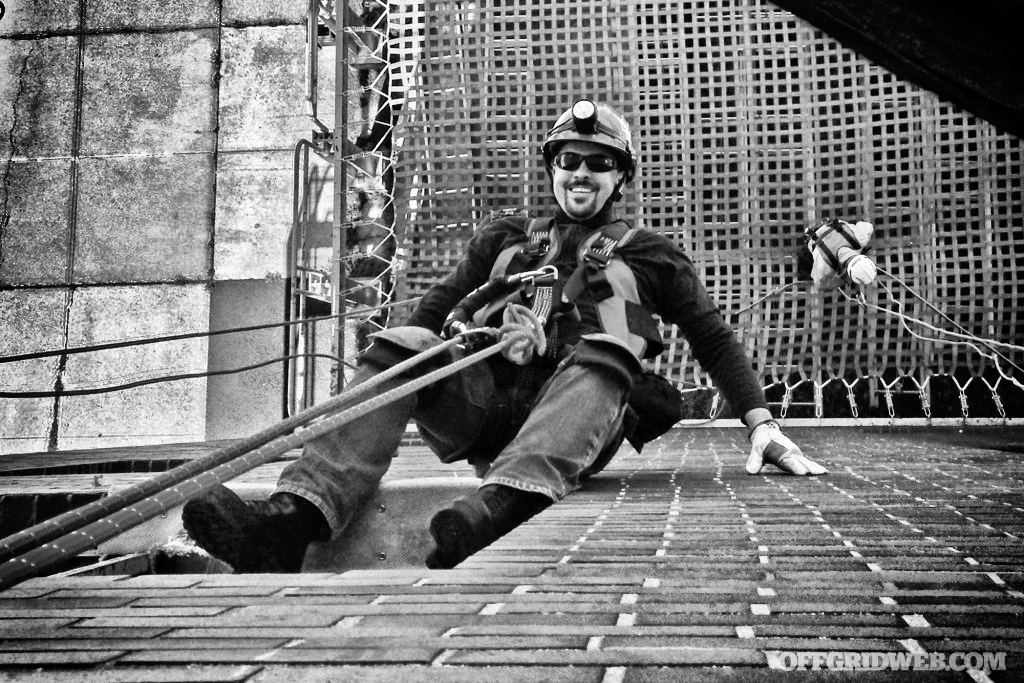
Joey Nickischer is a retired detective with the New York City Police Department. He currently works as a lead technical rescue instructor with several different companies covering topics from wilderness search, high angle rope, mine rescue, and off-road operations. He serves as a team leader with the Westchester County Technical Rescue Team and is the commander of the Putnam County Technical Rescue Team, as well as serving as chief of department with the Patterson Fire Department.
We’d love to say that Enrique “Ric” Prado is a man who needs no introduction. But that’s not true. On the contrary, Ric has dedicated his life to secrecy and security. A life-long veteran of America’s clandestine fight to suppress oppression, Ric has never actively sought fame or glory. The fruits of his labor remain, by and large, entombed in a casket of red tape and rubber stamps marked “Classified” or “Top Secret.” The scourge of Communism — real Communism, not the white-washed ideal praised in coffee shops and collegiate lecture halls — stained his life at a young age and set him on a five-decade mission that carried him literally around the world. From the streets of Miami during the dawn of the Cocaine Cowboys, to the jungles of Latin America, to the skies over Baghdad, Ric has cashed in his shot at the American dream to defend all of ours.
We recently sat down with him, following the release of his book Black Ops: The Life of a CIA Shadow Warrior, to discuss his life in the sequestered and oft-misunderstood world of covert operations.
This article was originally published in our sister publication, RECOIL magazine. Photos by John Jackson.
Ric Prado Interview
RECOIL: Tell us why and how you and your family emigrated to the U.S. from Cuba.
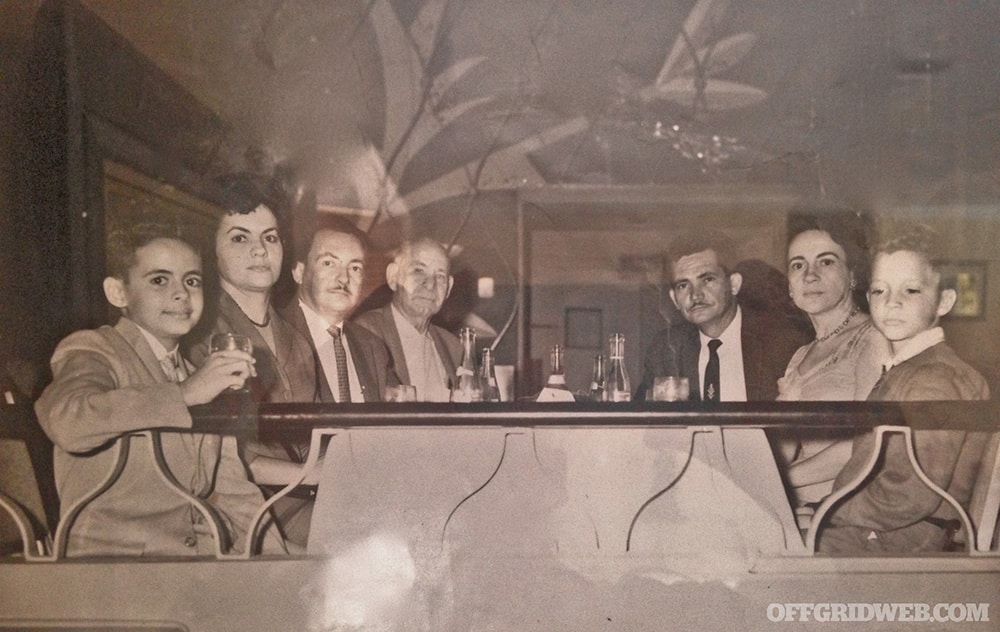
Ric Prado: By the age of 7 or 8, during the culmination of the Castro Revolution, I saw the consequences of a firefight two feet in front of me. Shortly after Castro gaining power on January 9, 1959, I witnessed the atrocities being committed in the name of the Revolution: three men hanging from trees with signs around their necks which read “Counter-Revolutionaries.”
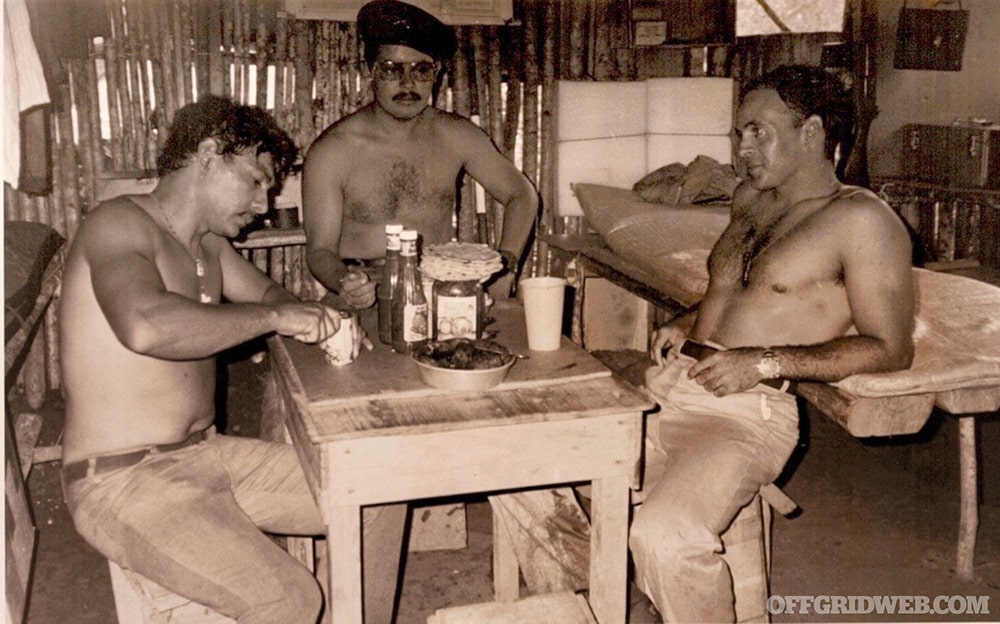
Above: Ric’s last supper with his family in Cuba before his solo voyage to the US.
All businesses, including my dad’s modest coffee roasting company, were confiscated by Castro. My dad saw the writing on the wall and decided to flee the island for freedom (which only the U.S. provides). Because of corrupt political machinations, my parents were not granted the mandatory exit permit (U.S. visas were not the problem). So, my dad found the “Peter Pan” program, which was facilitating the departure of kids under the age of 15 via the Catholic church.
As an only child, I flew solo to the U.S. at the age of 10. I immediately was sent to a Catholic orphanage in Pueblo, Colorado. My parents were able to flee the communist yoke eight months later. I truly believe that these three experiences — war, solo departure, orphanage — “forged my metal” for what would be my path in life.
What was your childhood like in Miami? What were some people or events that influenced you to take your current path?
RP: I got mixed up with a rough crowd in high school — no drugs but lots of fighting. I had decent grades in school, but my conduct was not. The tipping point for my course correction happened in my first year of college in Miami Dade: 1971, hippies protesting the Vietnam war announced the intention to burn the American flag the following day. “Not on my watch!” I said to myself. So, I called a few of my fellow street rats, and when the 15 to 20 hippies showed up to take down the flag, the five of us plowed right through them. Torn T-shirts and beads all over the place, but the American flag yet waved. It was the first time in my life that I felt proud of my violence. Four months later, I joined an elite Air Force unit with the solemn intent of fighting in Vietnam.
What did you do in the military?
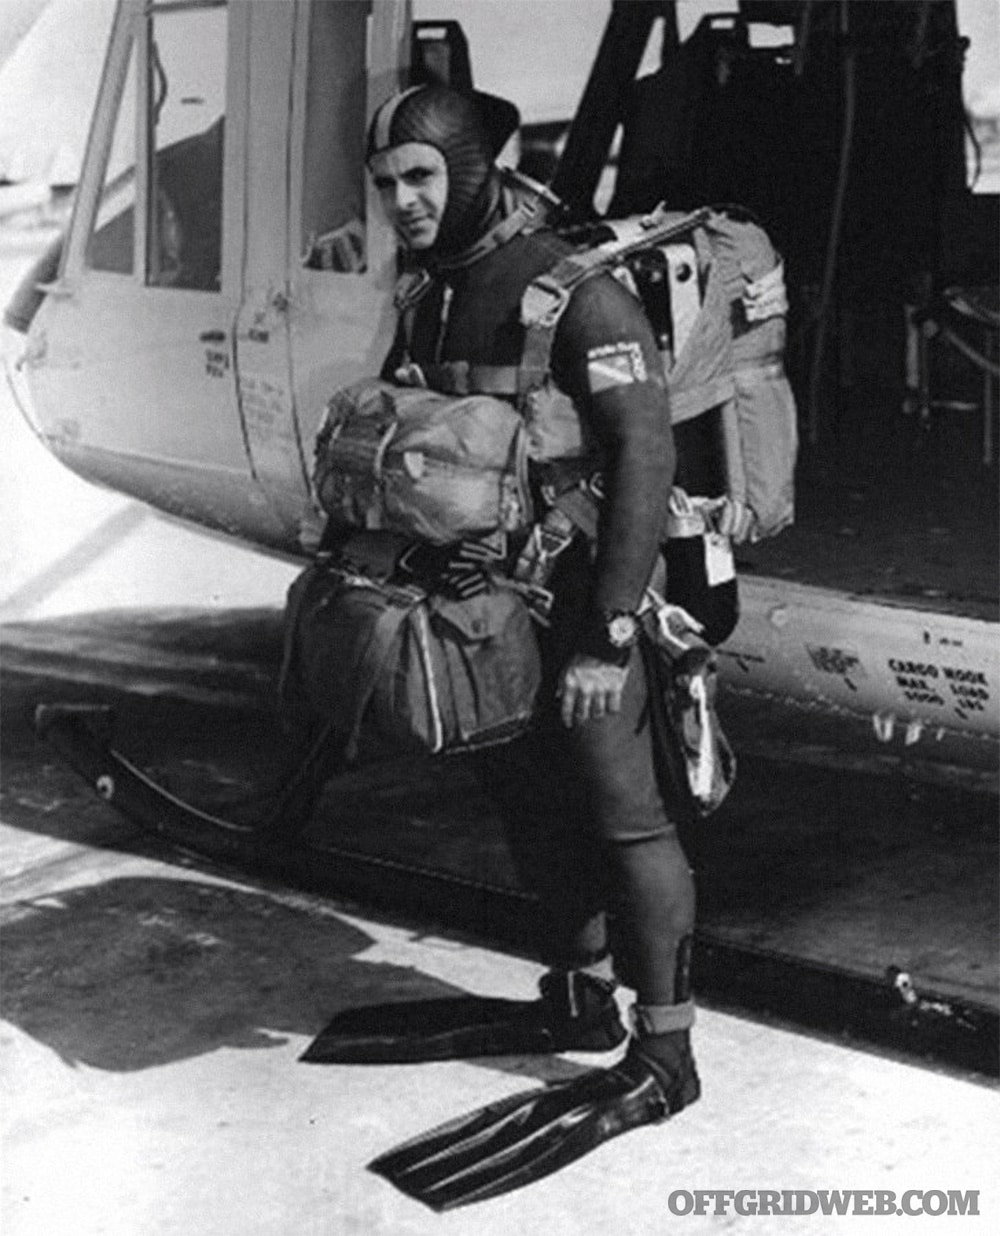
RP: I qualified to enter the pararescue pipeline in 1971. I thought I was a tough, fit kid but the initial experience was humbling. Still, under the “ain’t dead, can’t quit” mantra, I gutted it through and got my coveted maroon beret in late 1972.
Can you talk a little about what the pararescue training was like?
RP: Pararescue was one of the final hammer-strikes forging my character. During the six-week selection, we did two-a-days (pool and PT) six days a week. Like most SOF units, our attrition rate was 80 percent. Not only was the physical training brutal, but the mental load of eventually becoming an EMT-2 was also quite a challenge.
We did EMT-1 training and simultaneously pre-SCUBA preparation at Sheppard AFB, Texas — that was brutal! SCUBA school is arguably the most demanding course of most SOF pipelines. I had the slight advantage that I was already advanced SCUBA qualified (a passion that started in ninth grade), and that allowed me to sleep a little more, while my teammates had to study Boyle’s law, nitrogen-narcosis, decompression tables, and related illnesses.
It was still a beast of a challenge. Then, Jump School at Fort Benning was relatively “easy day.” But S.E.R.E school was no joke. We then entered what was then referred to as “Transition School,” which encompassed EMT-2 medical training, goat-labs, advanced parachuting — which included SCUBA jumps with about 130 pounds of gear — mountain climbing, and lots of PT … at altitude.
First time this Cuban kid from Miami saw snow was on a four-day trekking exercise through 3 feet of snow, in snowshoes. Last was a frosty night SCUBA jump into the dark abyss of a lake in Utah in 38-degree weather. That night we donned our berets for the first time.
How did you wind up at the CIA? Did you apply, or were you recruited?
RP: Like most things in my life, it was preordained. I was loving pararescue but with Vietnam winding down and no hope to test my skills, I lacked a sense of purpose. Yes, I was jumping almost weekly and doing great waterwork, but training only for training’s sake. In 1974, I applied to the Agency. “Not hiring, firing” was their blunt response.
I tried again in 1980 and was brought in on periodic contract as a paramedic supporting CIA’s elite Special Activities Division, Ground Branch. I represented myself well, I was “fit as a firetruck,” and when President Reagan declared war on Latin American communism, I was recruited into the ranks of SAD/GB, where I was home-based for over 10 years.
What was your first assignment for the Agency, and what was the onboarding process like?
RP: Like your first kiss, your first assignment is always unforgettable. Mine was arguably the most rewarding adventure of my career. In early 1981, I was PCS’d to Honduras, in alias, to support the anti-Sandinista “Contras” in their fight to regain their freedom. For the first 14 months of that program, I was the only CIA officer allowed in the Contra camps — this in order to hide the U.S. hand (covert action equals black ops).
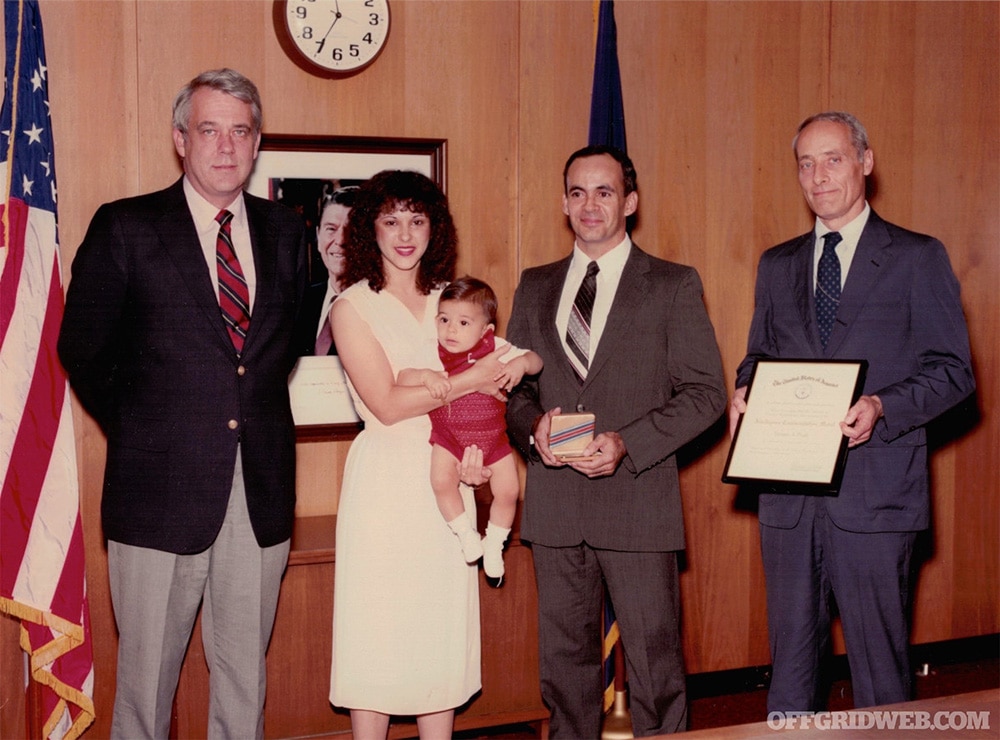
Above: Ric and his family while receiving his first CIA medal for leading a team of native combat divers to blow up a port facility controlled by Sandinistas.
I slept in a jungle hammock for 3.3 years and loved every minute. Here, I lost my cherry in my first firefight, a Sandinista ambush, which we countered and subsequently leveled their camp using my new mortar class, via 82mm mortars. These were Soviet stock, again to hide U.S. involvement.
After the Contra program, did your Cuban heritage and language ability “corner” you to Latin and South American postings?
RP: My next two assignments after the Hondo/Nica deployment were to Latin America. First, Costa Rica covertly running the Contra program from the south. The third was to a country in South America (unnamed). This was my first counterterrorism gig, and where I recruited a Maoist terrorist. However, although I was a PMO (paramilitary officer), I was also a fully qualified ops officer/intel. So, being SAD, I was not constrained by geographical boundaries.
Above: Photos from Ric’s first assignment with the CIA, training Nicaraguan anti-communist freedom fighters.
I subsequently PCS’d to the Philippines, Korea, and “Shangri-La,” a radical Muslim country in East Africa. I was the Chief of Station (COS). I returned to headquarters and was awarded the coveted Chief of Operations at our Counterterrorist Center (CTC).
How was the transition from being a full-time paramilitary officer to being a “traditional” operations officer, relying more on tradecraft than battlefield tactics?
RP: With the copious tradecraft training we receive at “The Farm,” our PMOs are well-prepared for the transition. In fact, it is mandatory for PMOs to first and foremost be intel-collecting ops officers. I had the added advantage that I worked in a men’s haberdashery in my junior and senior high school years, so I learned to “clean up well.”
As much as I loved my kinetic PM days, I found the primary CIA mission — collect intel and conduct covert ops (black ops) — the most exciting. Nothing like swimming in dangerous waters undetected. My recruitment of a Maoist terrorist and my surviving a Philippine New People’s Army (NPA) “Sparrow” hit team attack really floated my boat.
You were one of the original members of the Agency’s Bin Laden task force. How did you wind up there, and what made the CIA dedicate a whole station to one individual?
RP: Yes, I am Plank Owner of that task force, better known as Alec Station. I had just returned from my Chief Liaison job in Korea and had taken OpCon of CTC’s Palestinian Branch when the C/Ops pitched me about being the Deputy Chief of Station for this effort. I had just gotten my GS-15, and this was heaven sent.
Above: Ric at First Coast Firearms with an M240B, which he carried while assigned to 20th SFG.
Mike Scheuer, the COS, was a senior analyst, and he is the first to develop the theory that Bin Laden was a major organizer of radical Islamic terrorism. We started with a small crew of about eight, all but two analysts.
Within 10 months, we had uncovered 10 times the intel we had prior. And we had him under extreme vigilance, while he was in Khartoum, Sudan. Special Forces legend Billy Waugh was the chief of surveillance for the station, working for my great boss and friend, Cofer Black. Billy had “made book” on UBL and had full documentation of his patterns of life.
Billy, via Cofer and Alec Station, kept proposing that we bring Bin Laden to justice based on the copious amount of intelligence that was pouring in from multiple sources, including unilateral and liaison. Unfortunately, that administration did not have the political will to approve such a venture. Mind you, Billy could have killed him with a pencil (his quote), but we were confident that we could render him to justice with minimal resistance.
We all enjoy 20/20 hindsight, but if we would have been allowed to do the deed, the USS Cole, our two embassies in Africa, and perhaps even September 11th could have been disrupted.
You also worked at the CTC — the Agency’s Counter-Terrorism Center. How did that assignment differ from your field postings, and how did the CIA’s focus on terrorism change over the years you spent there?
RP: Well, my South America tour was under CTC’s mandate. Same with my time in the Alec Station. After my tenure as East Asia Deputy Division Chief for the community’s Korea program, I returned to the fold of CTC in May of 2000, first as Chief of International Terrorism and subsequently as Cofer’s Deputy for Operations (referred to as Chief/Ops).
CTC was cutting-edge CIA. It was the epicenter of all source intelligence gathering and operational initiatives dealing with the Global War on Terrorism. It was a dynamic place to work with a plethora of dedicated professionals, operators, and analysts alike. And yes, terrorism became the “flash bang grenade” that shifted the focus of the whole community toward the global onslaught. After Sept. 11, CTC was the biggest entity in the CIA.
What was your final posting before retirement? And when did you transition out of active service with the Agency?
RP: After my year as CTC C/Ops, I developed an operational concept that Cofer and Jose Rodriguez loved, for going after the soft underbelly of any terrorist organization: their worldwide support mechanisms! The idea, which I briefed to then Vice President Dick Cheney and Condi Rice, was to establish patterns of life of two to three senior support elements for every terrorist group who could threaten us.
The concept was disruption — if we were receiving major indicators that target group was planning an attack against the U.S. or its allies, we could neutralize those pre-established targets for rendition, local police intervention, or whatever else the president of the U.S. would approve under CIA’s Title 50 Authorities.
After senior CTC management, which included me, realized that we were never going to be allowed anything more than long-term surveillance, we decided to disband the team, as it had become nothing more than a “paper tiger” that briefed well.
Shortly thereafter, in the early part of 2004, I retired from the CIA. I received the Distinguished Career Intelligence medal and the George Bush medal for Excellence in Counterterrorism, among others.
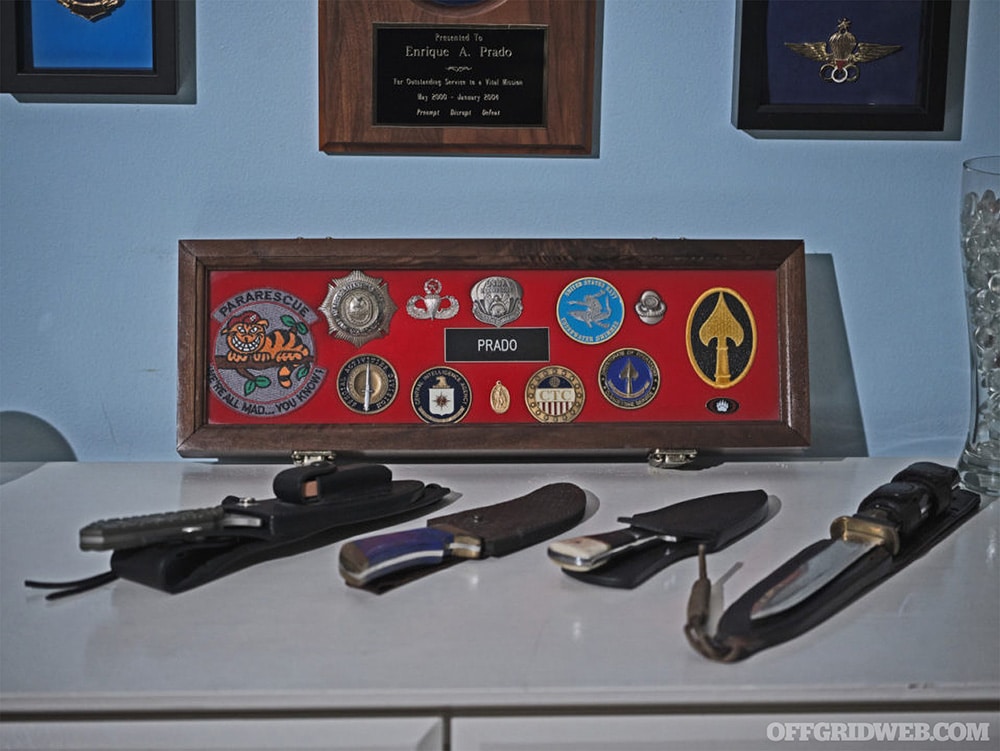
Above: A sampling of career tokens, encased in a shadow box, including an assortment of carry knives. “I fear knives, so I figure so does everyone else. I always carry two.”
We understand that you also spent some time working for Blackwater after retirement. How did that opportunity come about, and what did you do for them?
RP: I had met and befriended Erik Prince while I was Chief/Ops. When I started my “special program” described above, I asked Erik to facilitate the kinetic training me and my crew needed to carry out the missions.
I chose Blackwater because we could train there anonymously and with the best of the best instructors. Shortly after my retirement, Erik pitched me to come work for him. His patriotic idea was to allow me to bring my talents and my networks to the intel/CT community writ large.
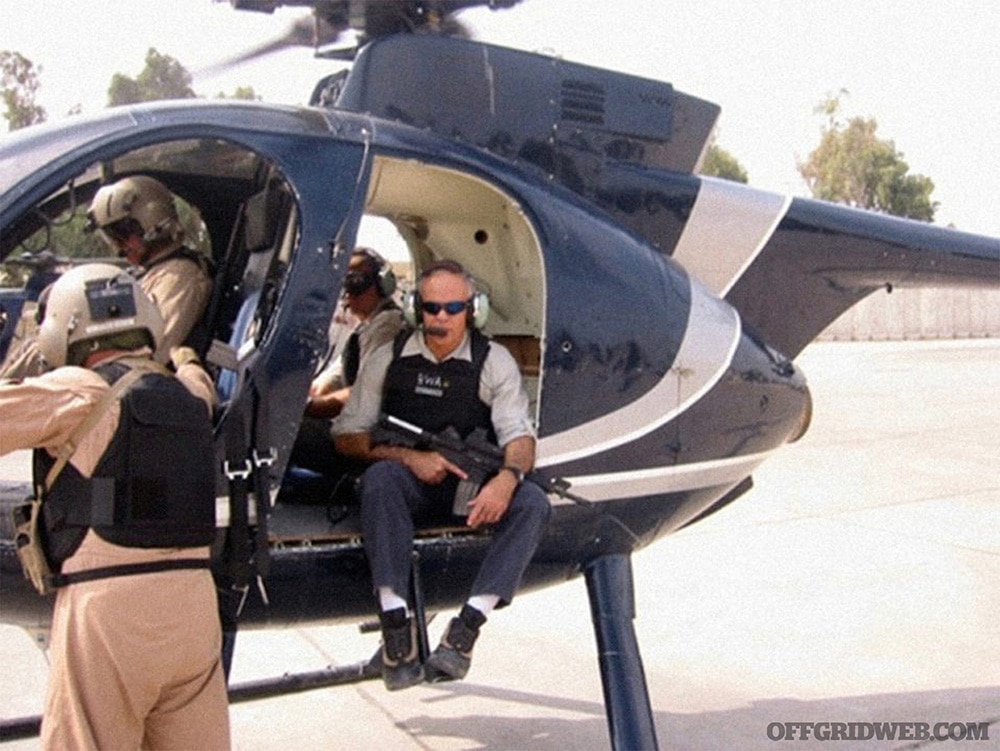
Above: Serving as a fill-in door gunner on a Little Bird in Iraq, during his time with Blackwater.
My title was VP for Special Government Programs (wink!). I cannot go into much detail because black ops was fully vetted and cleared by CIA up to and including my CIA tenure. The rest of what we did in Blackwater for the community, which was a lot, remains classified, although some things have leaked maliciously. I had the best time of my career working at Blackwater. And enjoying the fact that Erik would train with us in all aspects of the trade. Great times indeed.
Have you had the opportunity to pursue any other consulting or private sector work since then?
RP: Yes, I taught at Advance Special Operations & Techniques (ASOT) at Fort Bragg for seven years. There I worked with some of the best SOF elements and instructor cadre. I am very proud of my time supporting the ASOT and ASOT Managers Course.
Earlier this year, your book Black Ops: The Life Of A CIA Shadow Warrior was released and has since become a New York Times bestseller. Who or what prompted you to tell your story?
RP: The idea started via my former boss, Cofer Black, whom I had recruited for Blackwater. He would harp at me incessantly about using my life story as platform to tell the story of the real CIA and the true ethos of our colleagues. I did not listen.
Then, my oldest son insisted I write my memoirs for the family, and that is when I started writing. Like all things in my life, I did not plan for it, but the Good Lord guided me, sometimes with a 2×4, toward publishing. First, Steve Coll (Pulitzer Prize winner) and then Annie Jacobson both interviewed me for books they were working on, and both encouraged me to make the leap.
Two things were catalysts: 1) My name and special projects were maliciously leaked in 2009. My name appeared in the front page of the news, tying me to CIA death squads. The importance of this is that my “fig leaf” had been ripped off and in a very negative way. 2) Post-retirement, I had time for introspection. The fact that we, a tiny Agency, have 139 stars on our Wall of Honor, and about a third of those are post Sept. 11, I realized that I needed to take up defending their honor and sacrifices and make them public knowledge.
After all is said and done, that was the driving force for finally pulling the trigger on Black Ops. By the way, it also made Amazon Books Editor’s number-one pick last month.
From an emotional/psychological standpoint, how were you able to reconcile the prospective publicity you would likely receive from this book with the inherent desire to remain anonymous and private, a staple requirement for intelligence officers?
RP: Men like us enjoy a passion and conviction that makes us who we are. The old saying “if you’re going to be a bear, be a grizzly” comes to mind. The leaking of my name and the terrible picture that Hollywood paints about my colleagues and what the Agency does is always portrayed as treasonous, treacherous, corrupt. Those men and women who adorn our Wall of Honor deserve better representation. Names like Mike Spann and Jennifer Mathews, the latter an early UBL/Alec Station member, deserve a better history, especially for their offspring.
Was there a formalized review or approval process with the CIA to get your manuscript published?
RP: Absolutely! My book underwent a thorough scrub for protecting sources and methods. It took six months to get it through, but what I wrote was fully vetted and approved by CIA reviewers.
In television and movies, intelligence officers are always using far-flung gadgets and tech to accomplish their missions. Did your experience as an Operations Officer involve anything like this?
RP: Unadulterated “Bravo Sierra” (BS)! In Black Ops, I document real sexy CIA ops, conducted by committed patriots in places most people never even visit. We get no Aston Martins or clothing allowance for Brioni suits, but the men and women of the CIA deliver, in spite of the politics that often hamstring us.
While gadgets and disguises and diplomatic wine mixers are a part of legacy case work, you spent much of your career in paramilitary covert action — the “pointy end” of intelligence operations. What was that equipment like, especially in the early 1980s when you started out?
RP: Well, while supporting the Contra project, I carried an AR-15, a Browning High Power 9mm pistol on my hip, a straight-blade knife, a pair of golf-ball grenades (V-40s I think they were called), and my trusty Walther PPK/S in an ankle holster. In other danger tours, like in the Philippines, I carried an MP5K in my armored vehicle, first a Browning HP then a Glock 19, a knife (or two), and again, an ankle piece.
When I serviced “walk-ins” (volunteers) in the PI, during the first Gulf War, I would make my meeting at the high-end hotels. They screened everybody for weapons, but I noticed (awareness rules in our business) that they only used the metal-detecting wand above the knee. Ergo, I carried two five-shot Lady Smith revolvers, one on each ankle, with a backup ammo strip. No gun for all seasons!
How did the Agency itself evolve or change over the course of your career?
RP: Well, in my case, it started with an elite military posture while working in and out of our 10 Contra camps on the Nica border. Tradecraft was not always employed, but situational alertness was mandatory. This was PMO work at its finest. The transition to fighting the Cold War under U.S. Embassy cover was definitely tradecraft-based and, of course, armed in EDC mode.
Then came terrorism, and our operational world changed dramatically from diplomatic and business circles to dealing with rougher characters. In contrast to solo operations of the Cold War, we now often had to employ “shadow surveillance” by our highly trained cadre. I used to refer to them as my ghosts with teeth.
By the way, counterterrorism is the best thing that ever happened to our PMOs — from second-class citizens in the late ’70s and early ’80s to fast trackers and Chiefs of Station in the many danger posts.
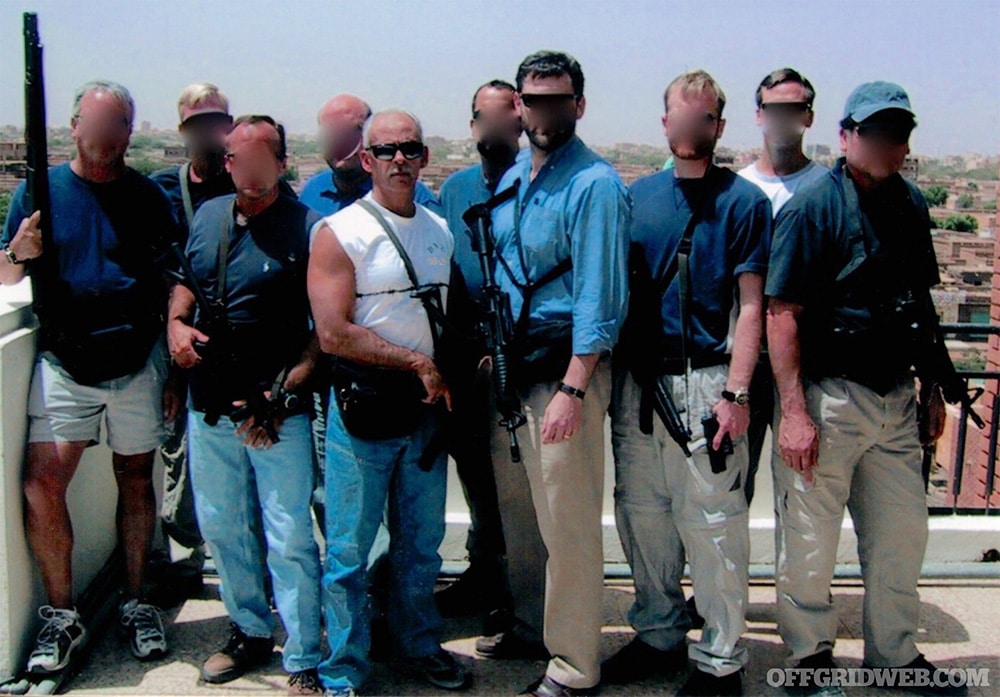
Above: Ric and his elite close-surveillance team in an undisclosed African country where he served as Chief of Station.
After decades of high-tempo operations, how do you spend your time nowadays?
RP: Well, currently, I am omni-focused on the promotion of Black Ops. Next, however, I plan to ride my horse, my motorbike, and spoil my wife any way I can. After 51 years of “God and country,” I am looking forward to some me time. Don’t get me wrong, this dog can still hunt and will if I must.
Do you still get out and shoot?
RP: Religiously! Like physical training, fighting skills are a way of life you just don’t leave behind upon retirement. Because of my extensive training and temperament, I could not ignore a woman or child being abused or a cop being overwhelmed. Like Jack Paladin used to say: Have gun, will travel!
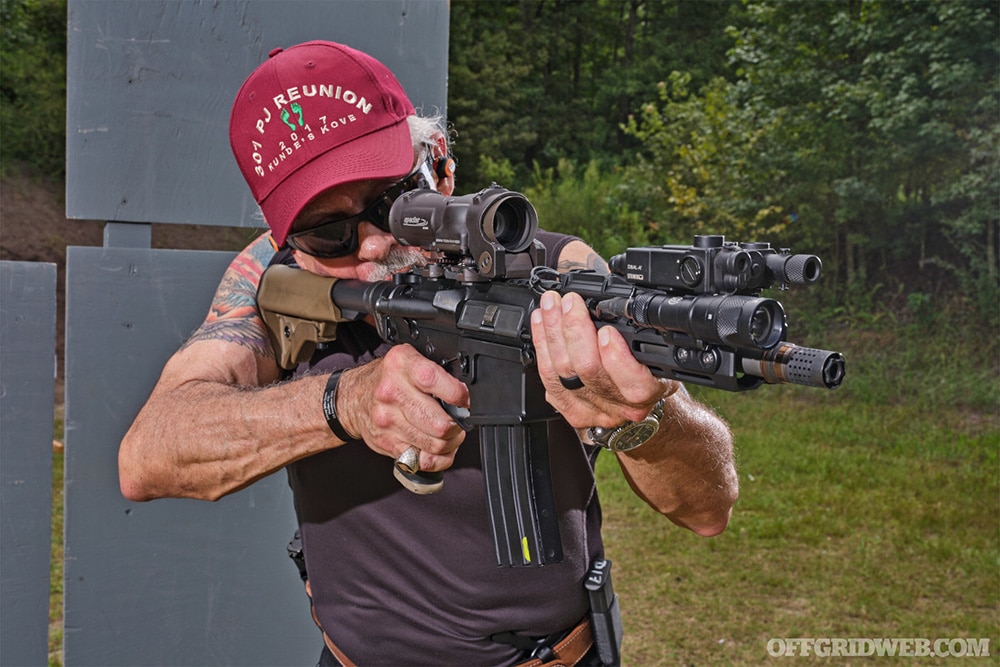
Above: Ric at the range with a kitted-for-duty carbine, courtesy of First Coast Firearms. The PJ hat worn in memory of teammate Cliff Kunde.
Based on your experience in countries where citizens could not defend themselves from the threat of terrorism or communism, what are your thoughts on the relevance of the 2nd Amendment?
RP: The 2nd Amendment is the backbone of democracy, along with our 1st Amendment. There’s not a single communist country in the world that allows their civilian population to be armed. Like in many of our cities, the states with the strongest anti-gun rules produce the most violent and dangerous cities.
Evil exists at every level. Whether the long tentacles of communism, the bloody outcome of terrorism, or just street survival, we are living with the presence of evil. It’s not a police officer’s job to protect your family, home, and life. They are deterrents when present or investigators of the crimes committed against you. It’s our personal responsibility to take care of our own, first.
You spent some of your childhood and the first half of your career face-to-face with the threat of communism. What are your thoughts on the current situation in Ukraine and how it might affect the U.S.?
RP: Ah, leaving the best for last! The one and only goal of both Russia and China is world domination. Radical Islam has similar intentions but using a different excuse, religion. We, the U.S. of A, are the primary enemy of those predators.
We — our military, intel, and police forces — are the sheepdogs. Feared by the wolves and unappreciated by the sheep. The Western world needs to wake up and realize that socialism is only a mask communism wears to lure you into their lair and devour your freedom. God knows we have ample examples that it does not work for any democracy. See Ukraine, Cuba, Nicaragua, Venezuela, and many others. All once thriving countries now reduced to fourth world status.
What’s your current EDC?
RP: Ah, there is no gun for all seasons or holster for all reasons. It all depends on what I can get away with — with no one knowing I am carrying. If I am in my summer three-piece-suit (shorts, T-shirt, and flip-flops), I often carry my SIG 365 SAS. With jeans and an ample shirt, I conceal my Glock 43 with Shield Arms 10-round mags.
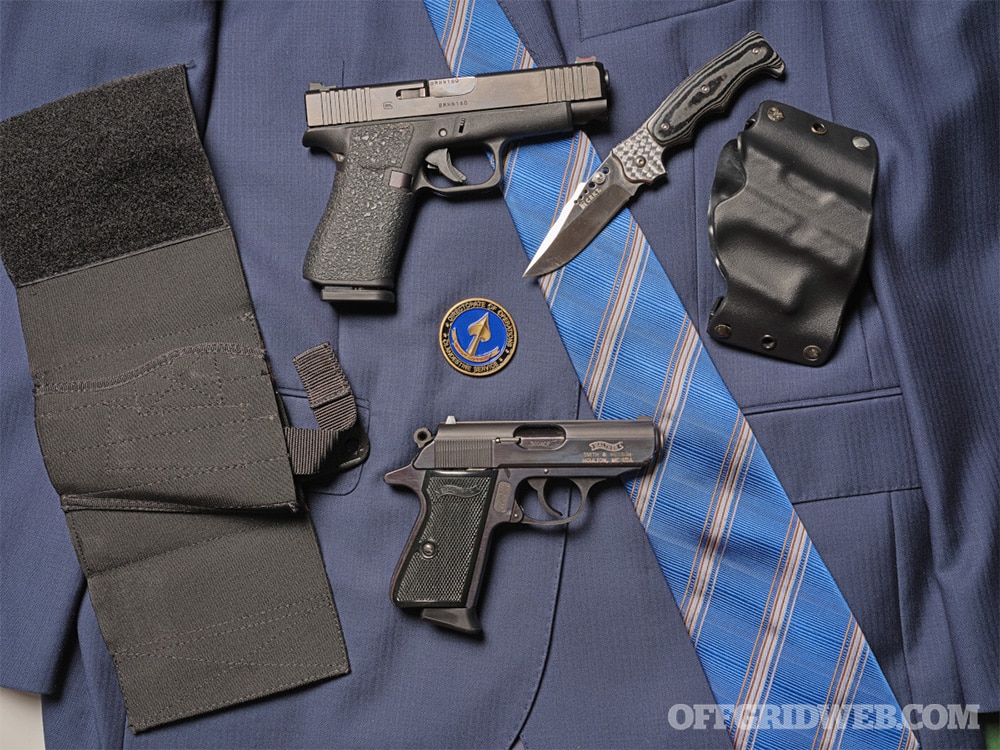
Above: A sampling of Ric’s carry gear, including the Walther PPK, an iconic spy sidearm. In Ric’s words, “no gun for all seasons, nor holster for all reasons.”
Jacket viable? Glock 48, again with a Shield Arms 15-round mags. In every option, I always carry a spare magazine and a knife. I wear my knife on my left side. Why? Because at a fit 71 years of age, if I am attacked, my pistol (appendix or strong-side carry) is my go-to option. If that is negated, then my left hand comes into “sharp” play.
About Ric Prado
Ric enjoying an Arturo Fuente Opus X maduro cigar.
Name: Enrique “Ric” Prado
Age: 71 years young
Hometown: Hialeah, FL
Family: Married 40 years to Carmen; we have three grown offspring.
Unless it’s your first day on the internet, you’re probably aware that downloading certain files can be a serious mistake. It doesn’t take a cybersecurity expert to know that double-clicking the TotallyNotAVirus.exe file that mysteriously appeared in your downloads folder is a bad idea. If you’re a bit more security conscious, you probably also know that PDF files, Excel spreadsheets, and Word documents can also contain malicious code. But how many times have you considered the possibility of malware hidden inside an image file? A sophisticated hacking group known as Worok has developed a new type of malware that can be concealed in innocuous-looking PNG images, and they’ve been using it to target governments and large corporations around the world.
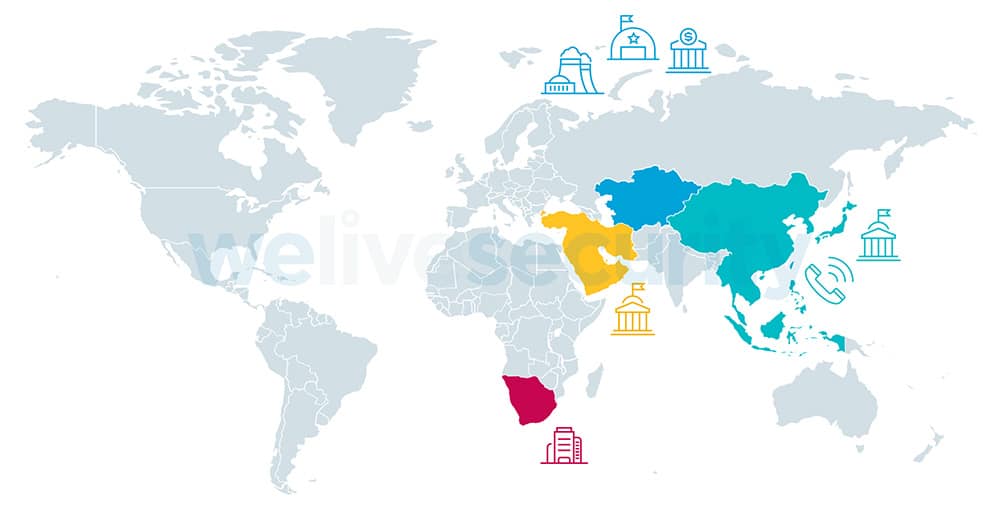
Take a look at the soothing blue abstract image above. This is one of the actual PNG images that was used to distribute Worok’s info-stealer malware payload. According to ESET’s We Live Security blog, the PNG malware has been used to attack the following high-value targets:
A telecommunications company in East Asia
A bank in Central Asia
A maritime industry company in Southeast Asia
A government entity in The Middle East
A private company in southern Africa
An energy company in Central Asia
A public sector entity in Southeast Asia
Above: This map from ESET’s We Live Security offers a quick look at some of the countries where cybersecurity researchers have found Worok’s malicious PNG files.
How is Malware Hidden in PNG Images?
This question gets very technical very quickly, so we’ll give you the short version. If you want the full explanation, go read the We Live Security article or the Avast article.
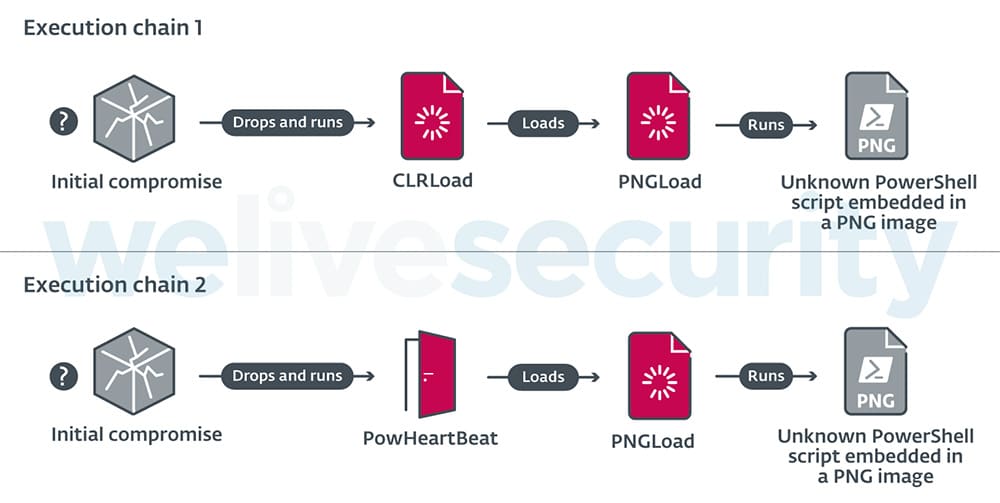
Neither ESET nor Avast have determined the exact initial compromise point, but it’s known that the infection starts when some code is executed to create a few malicious DLL files in the Windows System32 folder. Those DLLs then execute one of two malware loaders: CLRLoad or PowHeartBeat. Next, a second-stage DLL known as PNGLoad extracts the final PowerShell script payload that’s hidden inside a PNG file.
Above: A flowchart of the two known execution chains for the PNG malware. (Source: We Live Security)
Worok used a process called LSB (least significant bit) encoding which “embeds small chunks of the malicious code in the least important bits of the image’s pixels,” according to BleepingComputer. This is actually a form of steganography (i.e. hiding data inside an image file), a topic we’ve discussed in our previous article Steganography: More than Meets the Eye.
Above: Through LSB encoding, two pixels in an image can conceal one byte of hidden data. The center image shows Worok’s RGB bit planes without hidden data, and the right image shows LSB bit planes alongside a visual representation of their embedded data. (Source: Avast)
Once this complex infection process is complete, the PNG file payload installs “a custom .NET C# info-stealer” called DropBoxControl. This abuses DropBox accounts created by Worok hackers to upload or download files and execute commands remotely on the infected machine.
What Can Worok’s PNG Malware Do?
According to Avast, the DropBoxControl backdoor can perform the following commands:
cmd — Run a command prompt with parameters given by the attackers
exe — Execute a .exe file with parameters given by the attackers
FileUpload — Download files from the attackers’ DropBox onto the victim’s computer
FileDownload — Upload (i.e. steal) files from the victim’s computer
FileDelete — Delete any file from the victim’s computer
FileRename — Rename a file from the victim’s computer
FileView — Send info on the properties (i.e. name, size, last access time) of all files inside a selected directory
ChangeDir — Select a different directory on the victim’s computer
Info — Send computer information (including hostname, IP address, explorer.exe version, and available hard drive space) to the attackers
Config — Update the encrypted DropBoxControl backdoor settings (a file called ieproxy.dat located in C:\Program Files\Internet Explorer)
In other words, the attackers essentially have complete remote control over the victim’s computer and all of its files at this point.
Who is Worok?
Above: Much like the destructive ransomware known as Petya, some have speculated that Worok’s malicious PNG files are a state-sponsored form of cyber-warfare.
Cybersecurity experts don’t know exactly who is behind these attacks. However, based on the high-profile nature of the targets, the espionage-oriented functions of the malware, and the sophistication of its delivery method, it appears likely that Worok is a state-level (or state-sponsored) hacking group. According to Avast, “one of the DropBoxControl connections was monitored from an IP associated with the Ministry of Economic Development of Russia.”
Avast also noted that the authors of CLRLoad and PNGLoad are likely a different, more experienced entity than the authors of the final stage, DropBoxControl. They noted that “the code quality [of DropBoxControl] is debatable at best,” explaining that it “contains a lot of redundant code” and even saying it “looks like a school project.”
You’re unlikely to encounter one of Worok’s malicious PNG files unless you work for a government entity or Fortune 500 company, but it’s still worth remembering that even ordinary-looking image files can contain malware. Download with care.
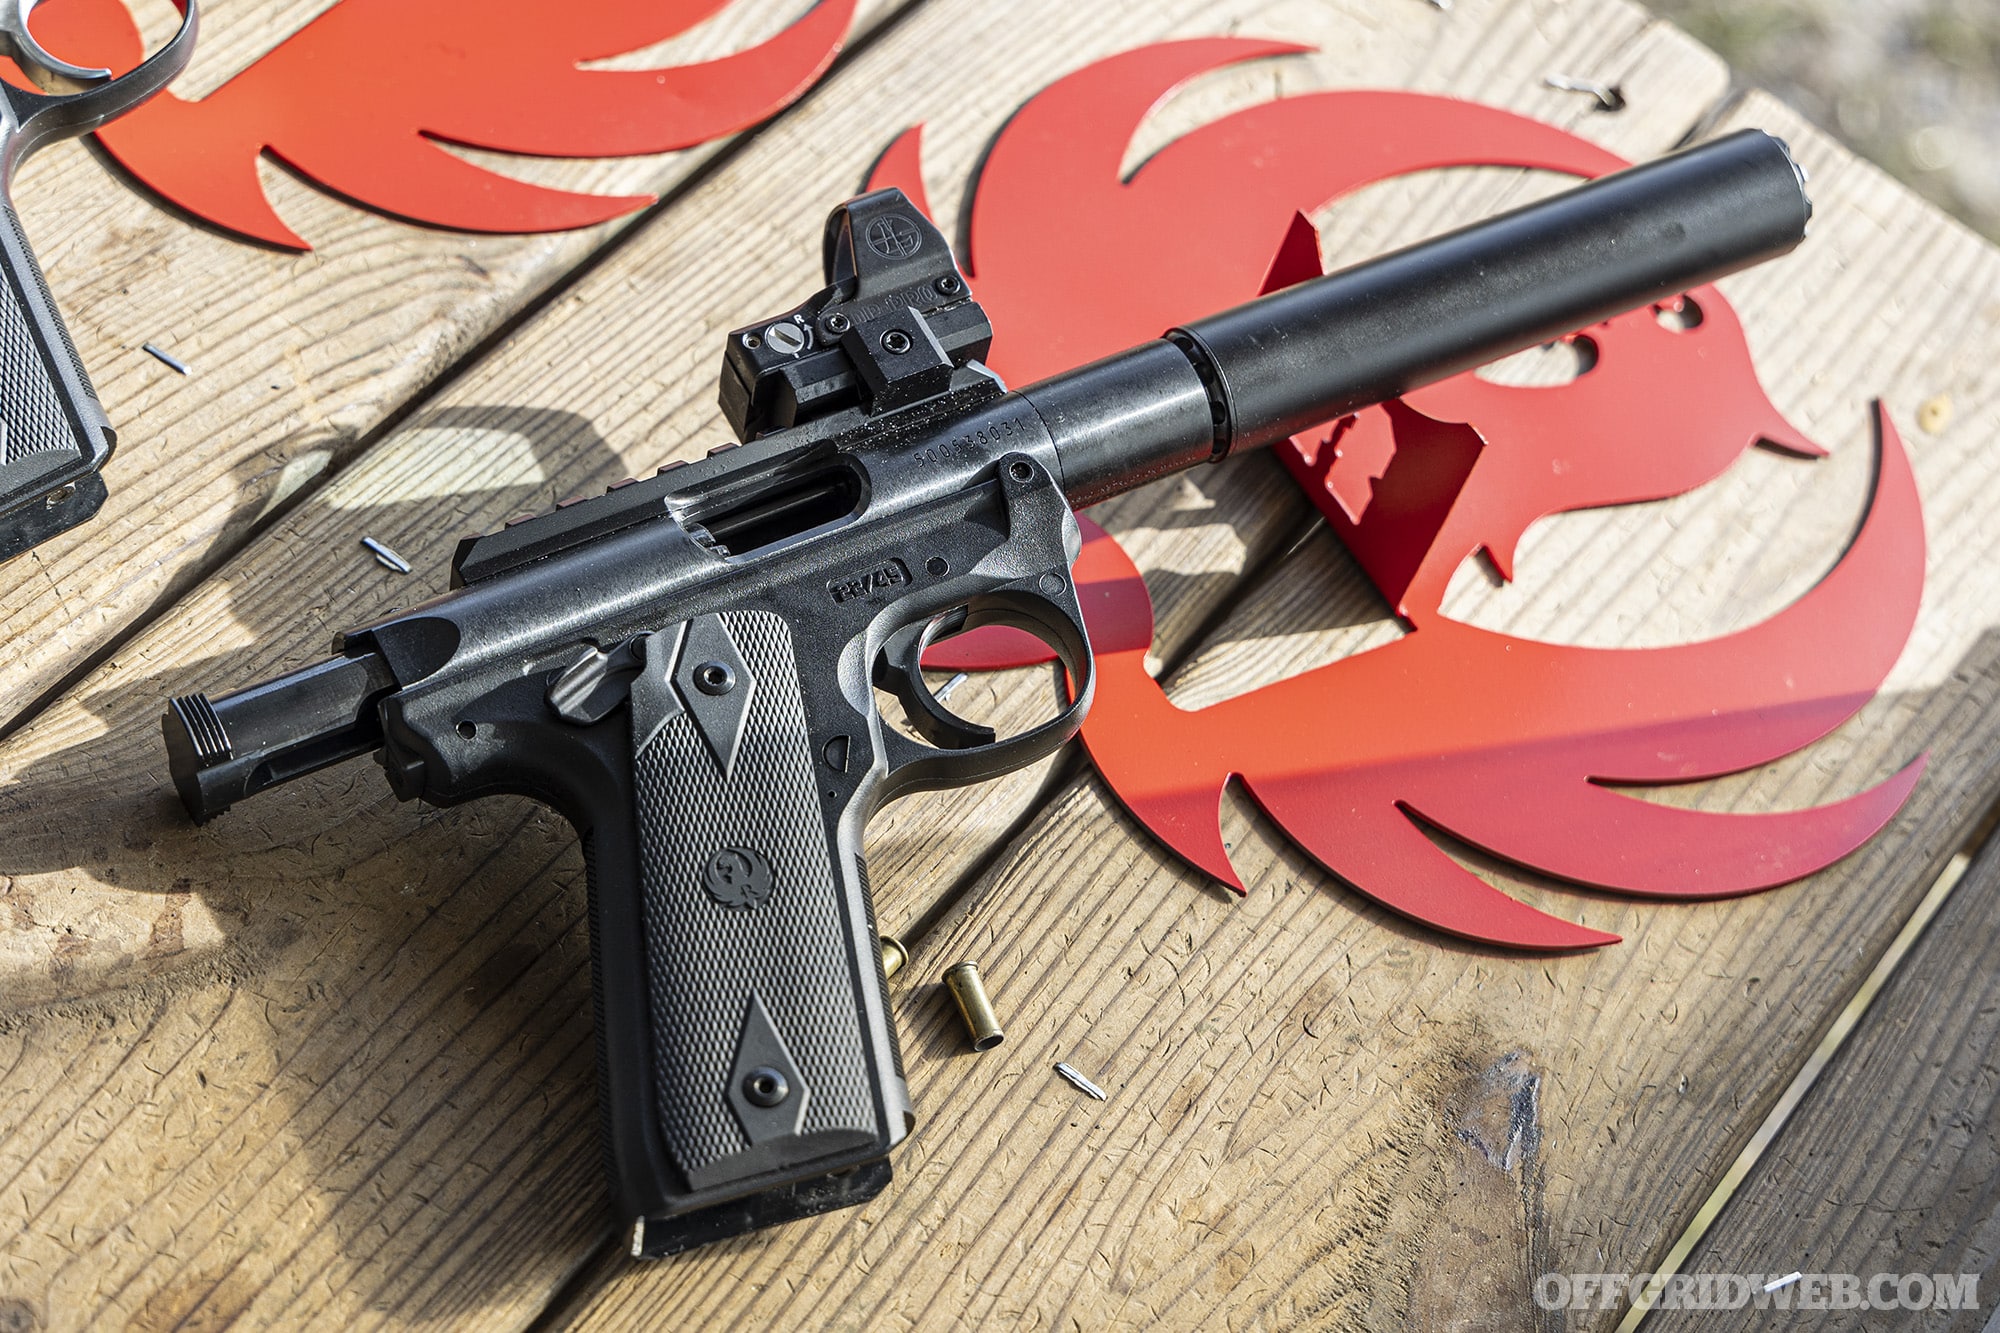
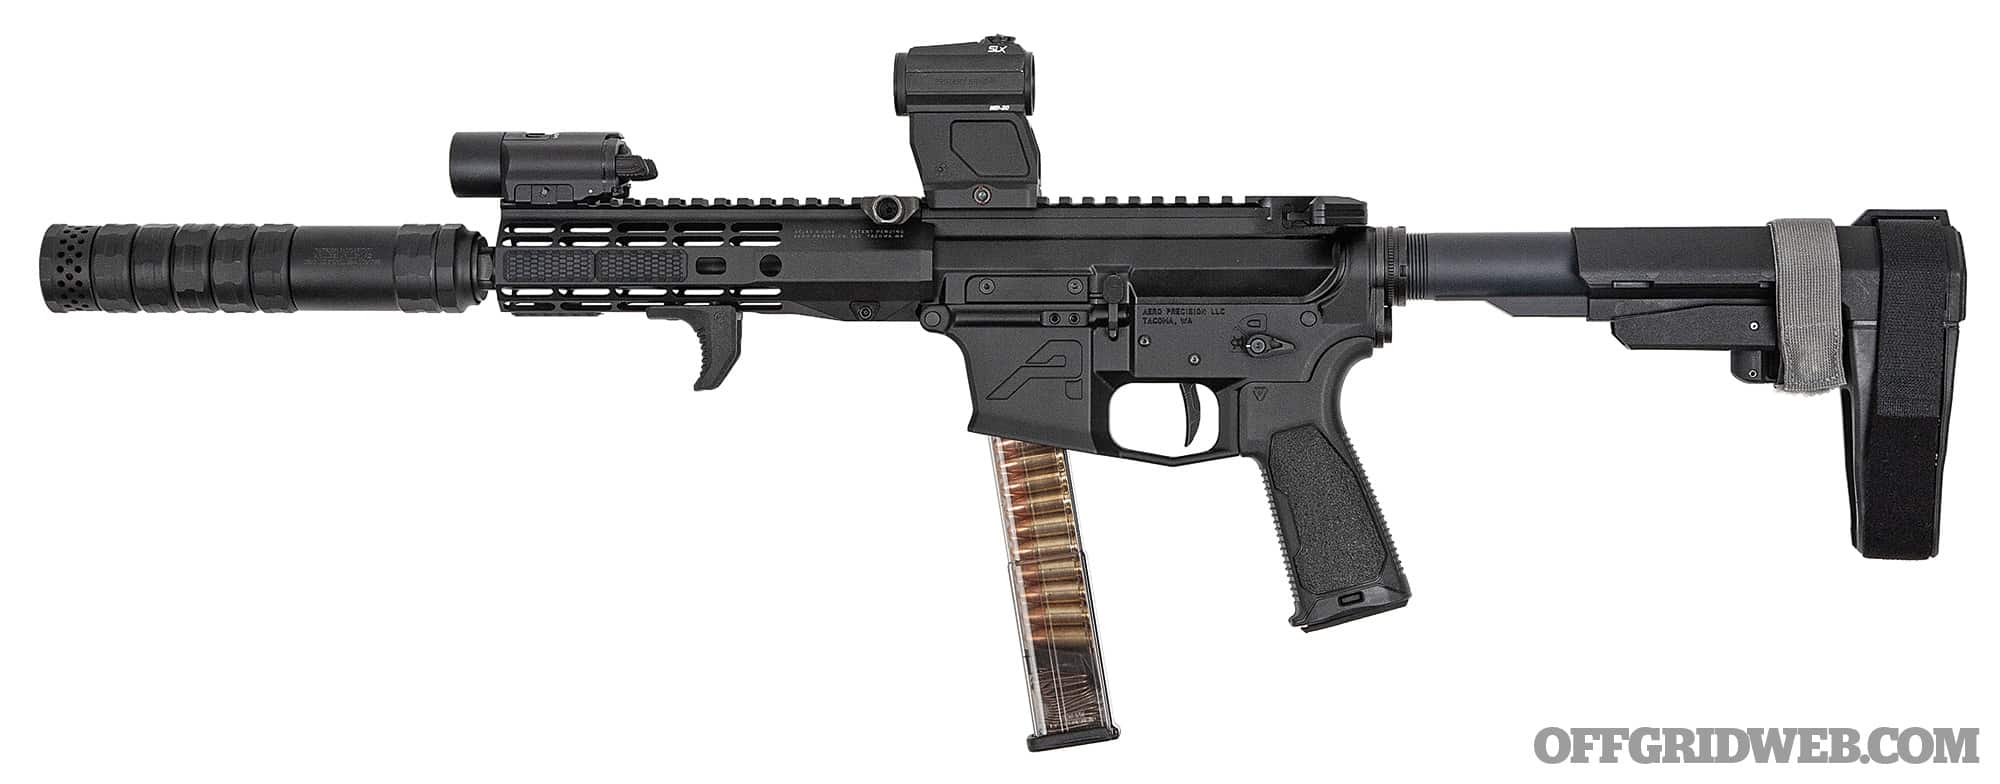
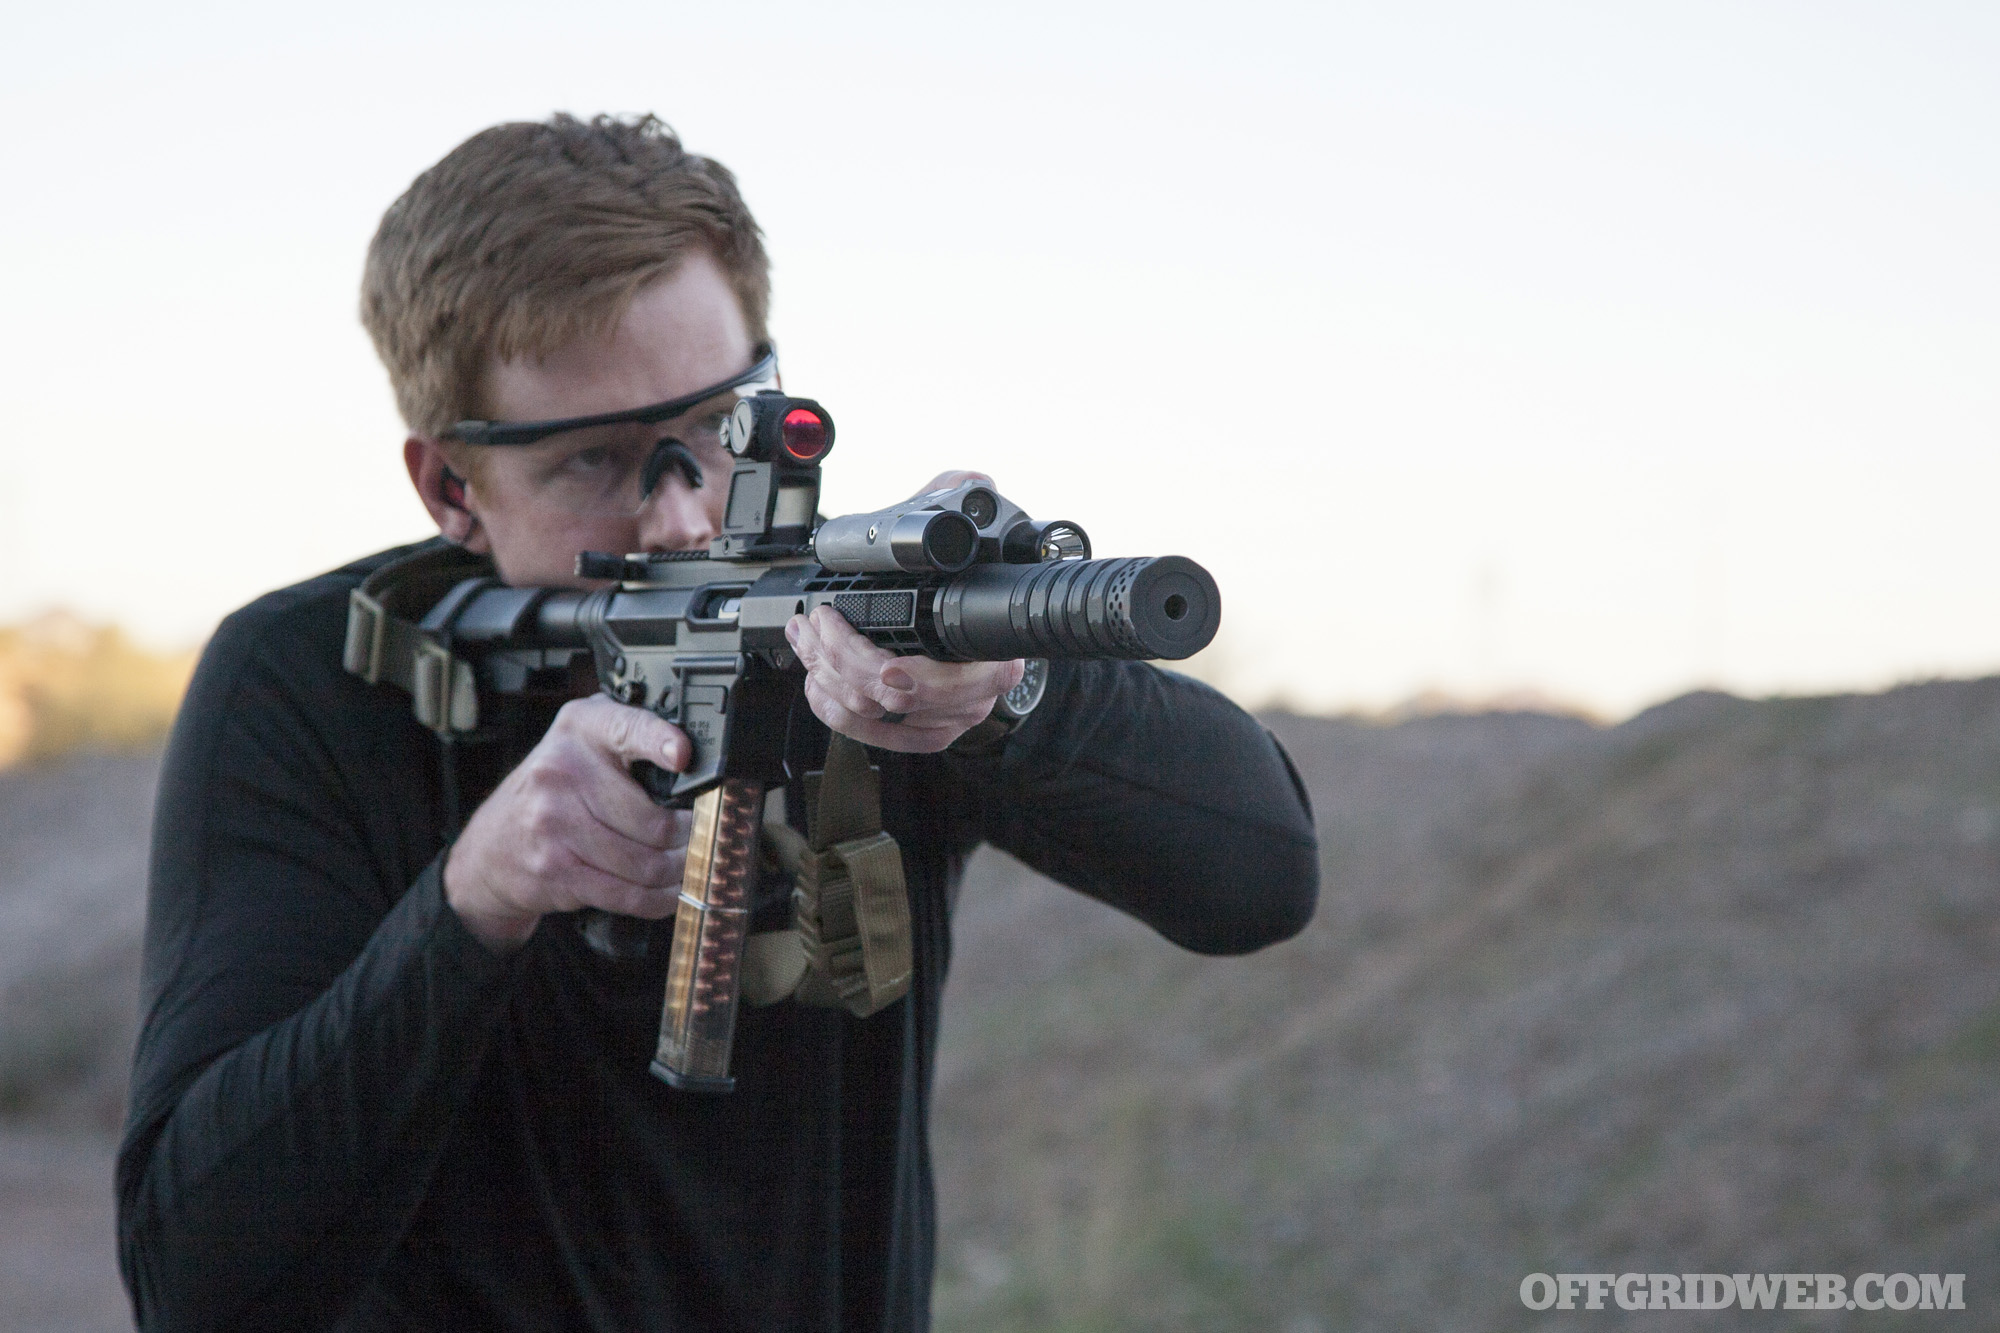
Last weekend in Georgia, our sister publication RECOIL hosted the first ever CANCON event — a fully-suppressed range day that included a wide variety of firearms and silencers for the general public to try out. During our time at CANCON 2022, we shot quite a few different rifles, carbines, and pistols, but one of our favorites was found in the Ruger booth. The Ruger Mark IV 22/45 seen here is a new short-barreled variant. We’re told this should be officially announced at SHOT Show in January, but we got an early sneak peek at one of the handful of early-production samples currently in existence.
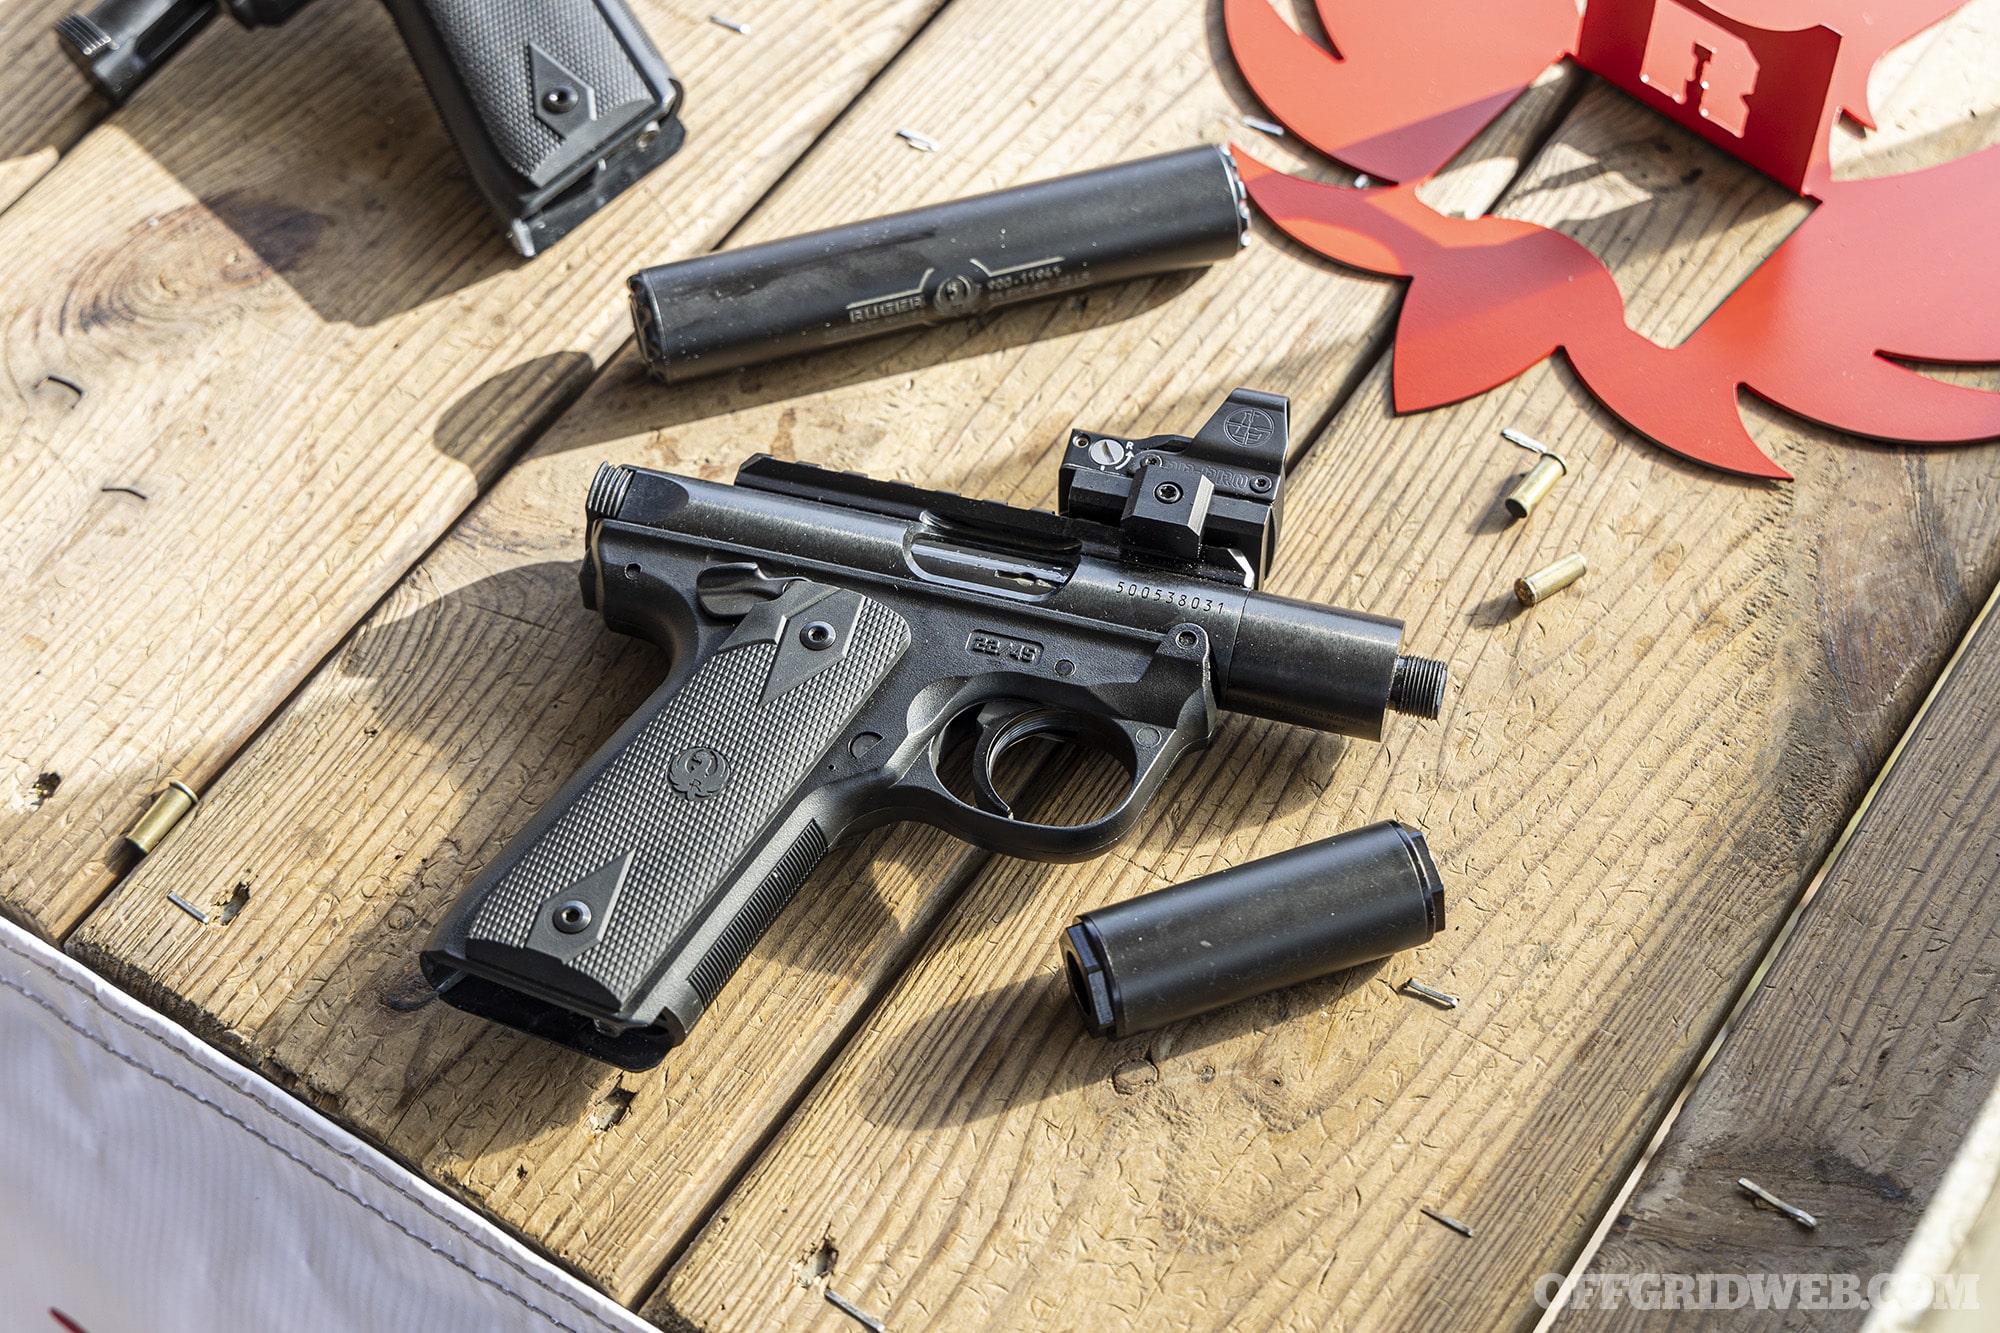
The new unnamed Ruger Mark IV variant features a short threaded barrel that’s ready to accept your suppressor of choice (including Ruger’s own Silent-SR). How short is it? We weren’t given an exact number, but by our estimation, it appears to be approximately 3 inches long. A Ruger representative said it’s “as short as engineering would allow us to make it while maintaining reliability with a variety of ammo.”
Granted, there are third-party gunsmiths who will chop barrels down shorter than this, but Ruger says those modified guns tend to be finicky and will only cycle on hot .22LR ammo. We’re glad to see this option become available straight from the factory with a full warranty.
Above: Even with the 5.4-inch Ruger Silent-SR attached, this rimfire pistol is still quite compact.
On the range, this short-barreled Mark IV 22/45 was whisper-quiet, even with ultra-compact .22 suppressors. We could see it being a great tool to quietly take out varmints and other small game, and it’s also a ton of fun for target shooting. We’ll keep you posted once we have more information at SHOT Show in a few months. In the mean time, keep an eye on Ruger’s web site for any other updates.
Above: We also tested this pistol with a 2.8-inch Bowers Bitty suppressor that Silencer Shop brought to CANCON. This seems like a great match for its barrel length.
Documentaries such as The Tinder Swindler, The Craigslist Killer, Catfish, and Murder on the Internet have gained a great deal of attention recently because they all boil down to one lesson — interacting with others online doesn’t come without risk. The individuals you may come into contact with run the gamut from just plain dishonest to seriously disturbed. When it comes to finding companionship, many consider online dating to be the best resource. However, reading the virtues someone listed on their profile page is in no way, shape, or form a thorough assessment of their level of honesty. Whether you’re meeting someone to purchase an item you saw for sale online or taking a chance on a potential love interest you met on a dating site, you need to have a plan in mind in case this person tries to lure you into a trap.
The Online Dating Scenario
Situation Type Internet dating
Your Crew You
Location Your hometown
Season Fall
Weather Normal
The Setup: Let’s face it, you can pretend to be whoever you want over the internet, and lots of people do. The days of placing a personal ad in the newspaper to find love have evolved into a slew of dating sites, all with their own supposed formulas for pairing you up with Mr. or Mrs. Right. Even if you’ve never signed up for online dating, social media profiles allow a certain amount of sensitive info to be disclosed to the prying eyes of unknown people. Strangers who send private messages and friend requests may have a legitimate interest in meeting someone special, or might be completely nefarious in their intentions. If you’ve decided you want to find companionship by looking for love on the internet, it doesn’t come without risks. How do you vet someone you met over the internet and get them to prove their intentions are honorable, without completely shutting yourself off from online interaction with people you haven’t met face to face?
The Complication: You use the typical social media outlets such as Facebook, Twitter, and Instagram, but it has been a few years since your divorce and you’re looking to meet new people. So, after some persuasion from your friends, you’ve also decided to try a dating website to solicit interest in finding someone special. You create a profile and immediately start getting hits from people who want to meet you. Some are immediate throwaways because of the vulgarity of their messages, profile info, photos, and overall approach. After narrowing it down to a couple of individuals who seem like they might be worth meeting, you decide it’s time to start making arrangements to meet in person. What should you do to mitigate the risks involved in meeting a potential love interest for the first time? How can you determine they’re not dangerous without ruining your shot at romance, and what will you do if you start seeing possible red flags?
Firearms Blogger Monica Newman’s Approach
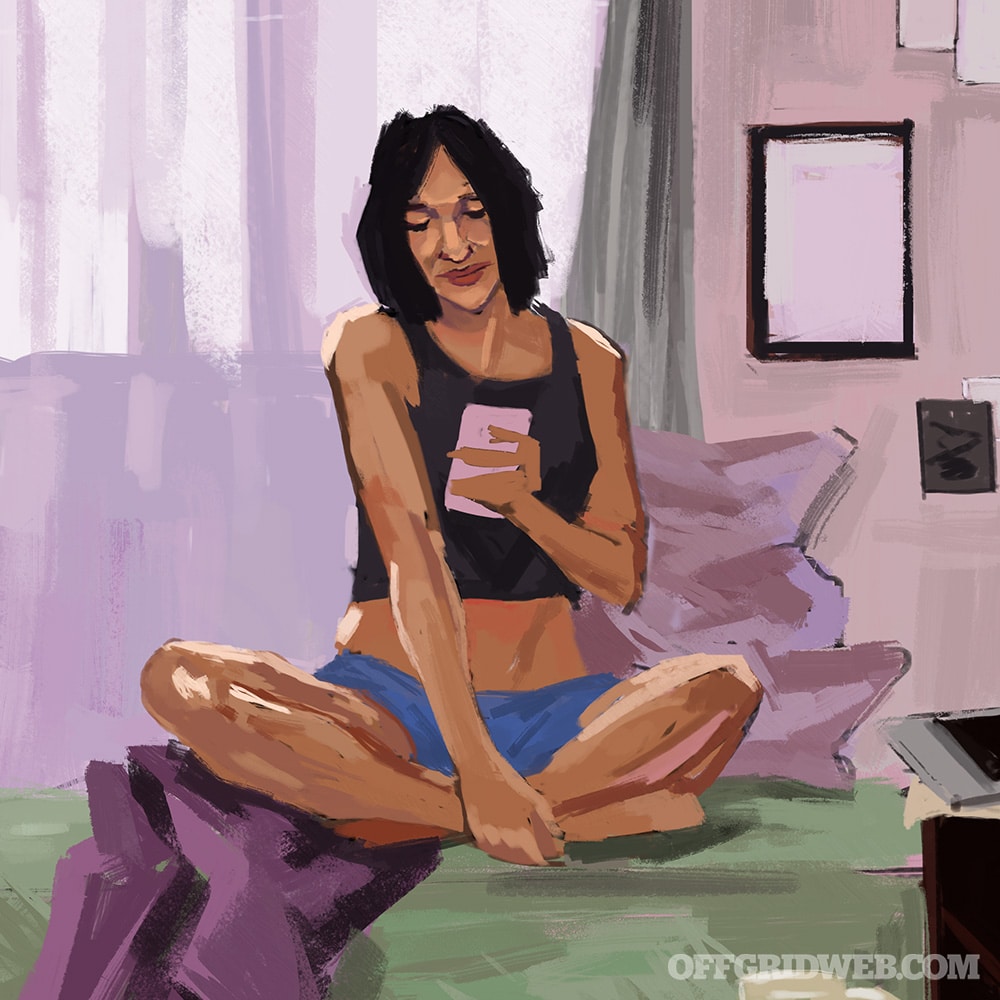
In most situations in life, I aim to strike a balance between being my authentic self and ensuring my own safety. The same goes for online dating — it can be a fine and complex line, but is easily approached with intuition, situational awareness, and a few boundaries. Online dating requires the right mindset to be successful and to keep myself safe. Each time I’ve approached online dating, I make sure I’m going into it with a clear mind and a clear intention. Knowing what I want and what I don’t want is essential.
My online dating profile provides just enough information to show a potential suitor what kind of person I am without divulging anything too personal. I make sure my dating profile doesn’t include my full name, where I work or go to school, the specific area I live in, any establishments that I frequent, or my social media profiles. I also make sure not to include any information or photos of my friends and family. Many dating apps provide the option to link to Instagram, Spotify, or other social media accounts — this is a no-go for me, as this provides the opportunity for a stranger to collect even more information about me. While these precautions should prevent someone from finding my social media profiles, I also ensure that those other social media profiles are private, don’t have the same username or photo as my dating profile, and don’t include any public-facing information about myself, my friends, or my family.
Following setting up my own profile, I establish rules and boundaries regarding my interactions on dating apps to help protect myself and more easily rule out those who won’t be a good fit. For example, if someone’s profile includes references to drugs, illegal activities, or a lifestyle that doesn’t align with mine, it’s an automatic pass. If someone demonstrates aggressive behavior or lack of respect in messages, it’s an automatic pass. If someone shows no interest in meeting in person or too much interest in meeting in person, it’s an automatic pass. And so on.
I surely do a little research on a potential suitor, but rather than extensively vetting someone I’ve met online (which can prove to be quite difficult if they’re ensuring their own online safety, as I am), I look for clues about the person based on how they present themselves and how they communicate with me. If someone is being disingenuous, misrepresenting themselves, or seeking information I’m not willing to give, there are usually indicators, even if they’re subtle. Sometimes this can present in the way they communicate, or by way of inconsistent or contradictory information or behavior. Sometimes it’s simply a gut feeling that something isn’t quite right. If something feels off, it probably is, and it’s important to listen to that feeling. In any situation where I feel like something isn’t right or if I feel my online match won’t be a good fit for any reason, I immediately excuse myself from the conversation by unmatching or blocking that person. There’s no need to waste my time or energy on that situation.
If I feel compelled to meet someone in person, I approach the situation as a “zero date.” This is a concept I came across in a TED Talk years ago, and I find it quite brilliant. I interpret a zero date as a short, casual meeting intended to evaluate if I jive with this person in real life, if I want a real first date with this person, and if I feel safe with this person (keep in mind, chemistry and feeling safe don’t always match). My approach to the zero date allows me to safeguard myself and my time.
I have a few requirements for a zero date, with my safety in mind:
I time-block a zero date to one hour. This gives me enough time to achieve the goal of a zero date and also gives me an easy out if it goes south — I’m not committed to a whole meal, event, or evening with someone.
I schedule the date during daylight hours. Not only does this take a lot of pressure off, but it also removes the safety concerns that come with darkness.
I make sure alcohol is not a factor. Happy hour or wine tasting can be fun with the right person, but introducing mind-altering substances on a first meeting is a recipe for disaster. I keep a clear mind so I can maintain situational awareness and tap into my intuition during the date.
I pick the location. More on this below.
I’ve found the process of making plans is when someone’s true colors start to show, so I pay close attention to how they handle the situation. There are a few red flags that I look out for:
Being extra difficult about making plans. Everyone’s busy and it can be hard to find a time to meet, but it shouldn’t be too hard. If someone is extra difficult when making plans, it can be an indicator that something isn’t right.
Insisting upon meeting at a particular location of their choosing or not being open to my suggestions.
Getting upset when I won’t let them pick me up. A chivalrous gentleman will want to pick a lady up for a date, but he will also be understanding when I want to meet there instead.
Changing the agreed upon-location last-minute. Absolutely a no-go for me. If a date tries to change the location last minute, I politely bow out. Things happen and this isn’t always a red flag (in which case, we can reschedule) … but it certainly can be.
Not being OK with an alcohol-free date (like meeting for coffee) or insisting upon getting drinks. This leads me to wonder about their intentions (among other things), and I don’t want any part of that.
I can usually weed out a lot of the creepers with the strategies above, but you never know what you’re going to get when it comes to online dating. I proceed with caution and a plan, but I typically don’t go into a zero date with a list of interview questions. I find that it’s easier to really get a sense of who a person is if the conversation is less scripted. I do, however, make sure we are on the same page about what we want out of dating and aligned on what we want out of life, in broad strokes. Those details can shine light on the type of person someone is, what they value, and what their intentions are.
To continue to maintain my safety on a zero date, as well as the first few dates after that, I employ a few more strategies in addition to what I mentioned above.
I don’t exchange contact information and keep all communications isolated to the dating app until I know for sure I want to continue dating someone beyond the first few dates. If something goes wrong, if I don’t feel comfortable with the person, or if I don’t want to see them again for any reason, not exchanging contact information makes it easy to cut ties, as well as maintain my privacy and safety. If the situation calls for it, keeping all communications within the app makes it easier to report the person to the dating app or the authorities.
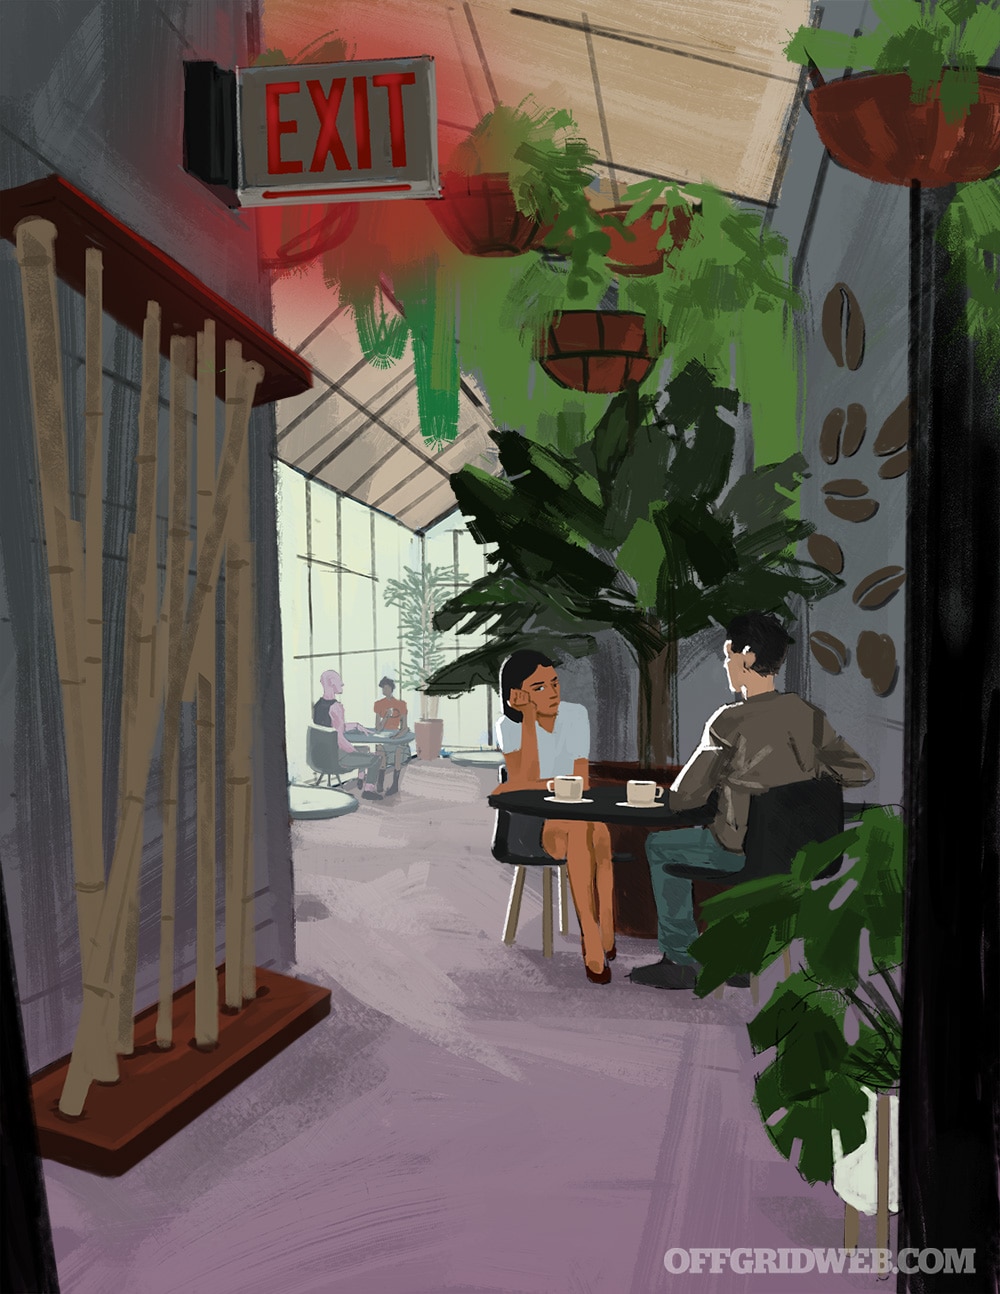
I choose the location for the first few dates, and I make sure it’s a populated place that I am familiar with, but not one that is a part of my usual daily routine — for example, a cafe across town that I like to go to, but not one that is in my immediate neighborhood or where I stop for coffee on my way to work. Bonus points if I know the staff and am familiar with a back exit. I avoid secluded locations, parts of town I’m unfamiliar with or don’t feel safe in, and outdoor locations like parks where there aren’t employees around that can help if something goes wrong.
I tell at least one local friend or family member the time and place of the meeting, and when they should expect to hear back from me. I also send them screenshots of my date’s profile and photos, along with any other pertinent information that may come in handy, just in case. I let them know once the date is over and once I am home safely.
I always meet the person at the agreed-upon location and I don’t move the date to a second location, even if it’s going well. I do not ever let someone pick me up or give me a ride home for the first few dates, and I won’t pick them up or give them a ride either. Again, this is a privacy and safety measure, gives me some control over the situation, and enables me to quickly get out if I need to.
I’m intentional about my parking strategy. I park in a place where I can make a quick and easy getaway if I need to, and always back into the parking space to make it easier to leave. I try not to park directly in front of the establishment where I’m meeting my date so that my vehicle isn’t visible from the date, but I do try to park in front of a neighboring establishment where there are witnesses and/or surveillance. As always, I avoid parking garages and make sure to park in well-lit, populated areas.
In addition to the parking strategy, I don’t let my date walk me to my car. Again, a gentleman will want to do so, but this can also put me in a very vulnerable position. I say goodbye at the door of the establishment where we met, and am on my way. This also helps me avoid the painfully awkward car-side goodbye.
I always carry a concealed self-defense tool on my person that I am trained and prepared to use (another reason to go sans-alcohol). I hope to never have to use my defense tool, but I absolutely won’t go without it when meeting up with a stranger from the internet.
All of this to say, my most important strategy for online dating is to listen to my intuition, use my situational awareness skills, and respond accordingly. There are almost always signs if something is off, and we simply cannot ignore those signs!
International Traveler Micah McQueen’s Approach
I remember the stigma that was attached to internet dating when I first tried it out. It has come a long way since its debut in 1995 when it was often considered “cringe” and “unsavory.” Even when I first tried it, about 10 years ago, everyone was leery and told me to be careful I didn’t wake up in a bathtub of ice missing a kidney. Back then, we were cautioned not to get into cars with strangers or to meet up with people we had met online. I got lucky — I didn’t lose a kidney. But I did meet a woman who spent the whole night trying to convince me her cat was psychic. However, the very fabric of our societal norms has shifted with the proliferation of the internet and easier access to technology. In fact, most of us get into strangers’ cars every weekend using ride-share apps to meet up with strangers from the internet. There’s no denying it, the landscape of dating has changed with the use of social media and our digital identity. In fact, most of my friends have met their significant others through some social media platform or dating app.
Our lives lately consist of being constantly “plugged in” through apps, email, and constant news updates. So, anyone hunting for love or companionship in this modern age will find themselves in the digital watering hole that is social media and dating apps. Online dating is a great way to meet new potential mates and form new friendships. But these people are still strangers. The instant intimacy we can feel in a small period of time can be exciting, but if we don’t protect ourselves, it can also be dangerous. But don’t fear, I am here to help. I’m going to highlight several things you can do to protect yourself, your privacy, and your loved ones, on this grand adventure of digital love.
There are over 1,500 different dating apps now. Some of the bigger ones are Bumble and Tinder, depending on what you’re looking for. So, first of all, when you’re creating your profile, make sure you’re being honest with what you want and maintain that congruence to ensure you find someone who has similar expectations. Here are some steps you should take to assure your safety from anyone who is looking to take advantage of this interesting love-seeking process.
1. Protect Your Personal Information
In this day and age of modern technology, a first and last name and general geographical area can yield an uncomfortable amount of information for less than $10. Make sure that you aren’t using your full name in any of your dating profiles. Be intentionally vague about what you do and where you live. You should never post your company’s name or pictures of yourself wearing a name badge or shirt with your work logo embossed across the front. The last thing you need is a missed connection showing up to your job with the undeniable proof that her cat is truly psychic. In addition, I know you want to flex with your shiny new car, but make sure you’re blurring out the license plate and cropping out any street signs that might show your residence or neighborhood. These sites have built-in communication platforms, so you should always wait until you have met in person before exchanging phone numbers. Another added layer of personal security is making sure you’ve disabled your phone camera’s location-tracking feature before uploading photos to the internet. Go to your privacy settings, then go to camera and disable the geo tag, which can show where the picture was taken.
2. Do Your Due Diligence
There’s a difference between stalking and doing some light research to catch any obvious red flags before you meet up and invest your time, money, and energy. A simple search can make sure the person isn’t misrepresenting themselves or hiding things like a secret family or a criminal record. Just like you might check up on an ex-lover after a break-up, do the same digging before you even meet up with a stranger.
When meeting anyone new, it’s important to share your location with a friend or family member just in case. Furthermore, communication to a friend about your plans will allow you the opportunity for an exit strategy if the date is off, dangerous, or just not going how you would like it to. Set up a call or text an hour into the date that gives you the opportunity to leave due to an “emergency.”
3. The Meetup
So, you finally found someone you click with and feel that there’s potential for something more. Pick a spot that’s public and central to your location. Bring a book or have some work with you while you wait, that way if they no-show it’s not a total waste of your time. Always have your own transportation. You never want to be at the mercy of someone else and potentially get stuck somewhere if a dangerous situation arises.
A local coffee shop is a safe and great place for an initial meetup. This is an inexpensive, low-pressure scenario that’s perfect for making sure your date is who they say they are and that you can carry over that online chemistry in person. If this is the case, take the initiative by having a second spot in mind (like a local bar), where you can escalate the evening. That way, you don’t leave yourself open to the pressure of going to his/her favorite bar that you may not be familiar with. At the second spot, you can get into the delicate details of each other’s lives, such as toxic personal relationships with a crazy ex, or delve deeper into your connection.
Alcohol is a fantastic social lubricant that can help you and your date relax and open up more freely and often more honestly. That being said, never drink to the point where your judgment is impaired. Remember, you’re still in a “yellow zone” as far as your safety is concerned. Drinking too much can jeopardize the date, as well as your safety and ability to react if something does happen. Once you get to the bar and have built a rapport, this is when you can start pre-screening to make sure they are who they said they are. Pay attention to how they treat the servers or bartenders. People like to represent themselves to you as who they think you want to see. But how they treat other people is a real measure of character and can be a red flag for safety. A lot of people don’t mention kids at first, so this is a good time to ask.
4. Trust Your Gut
If something feels off, it usually is. Don’t wait around and give in to the social pressure to hang out if something doesn’t feel right. People forget that we are animals first and have an innate ability to sense when something is wrong, even if we can’t quite nail down what it is. If you catch them in a lie about something small, this may be an indicator of other manipulations and deceit. Don’t be afraid to politely, yet firmly, end the encounter in a friendly manner. If you get the feeling your date might get unreasonably upset, use the trusty Irish Exit (for those who don’t know what that is, it means leave without saying goodbye). It isn’t anything personal, and your safety is the most important factor here. This is why not giving out your number or address, and using your own transportation is imperative if the person is not someone you are interested in getting further involved with. Again, safety over everything.
5. Slow and Steady
If the date is going well and the vibe is there, the first inclination is often to take it to the next level physically and emotionally. Everyone can be charming and personable the first time you meet them. You’re essentially meeting their best representation of who they want to be. Slow it down. Instead of jumping in, inviting them to your house, and exposing yourself to the potential danger of them knowing where you live, hold off for a second date. This will help you be certain that you’re really seeing them for who they are. In this day and age of instant gratification and connection, taking your time and really getting to know someone will not only protect you from physical harm, but can also protect you from emotional catastrophe. If it’s a real connection, you’ll have plenty of time to get to know each other. In terms of your safety, this is a solid strategy. Set up a second date constructed around your shared commonalities and make sure they are someone that’s well-balanced and safe.
If you follow these simple steps, they will secure your safety, and that of your loved ones, from people who have ulterior motives or that you just don’t vibe with. Bottom line is if you are congruent with what you want and make safety a priority, there’s plenty of fun to be had in the world of online dating.
Conclusion
We all want to make a good first impression with someone we’re dating, but don’t be in a hurry to do too much too soon. Let them prove themselves to you as well. Think of it like a job interview. Sure, you want the job, but you also want to make sure you’re getting what you want out of the deal. Ask pointed questions, don’t be afraid to say no, and hold out until you feel like your requirements are being met. If you feel like the only way you’ll get someone to like you is to capitulate to their conditions, all you’re doing is showing the world how naïve you are. In doing so, predators will descend on that vulnerability like a plague of locusts.
Setting boundaries should never provoke shame, guilt, and pressure from someone you’ve met online. Anyone reacting like that is likely trying to take advantage of you. Would you allow a friend to treat you like that? We didn’t think so. If you would, you don’t need to be dating anyone — you need to be in therapy. Be your own advocate and make safety your number-one priority. People with honest intentions will respect your desire to maintain those precautions. If you let your guard down too soon, you might find that the people you’re attracting are the ones who have anything but romance on their mind.
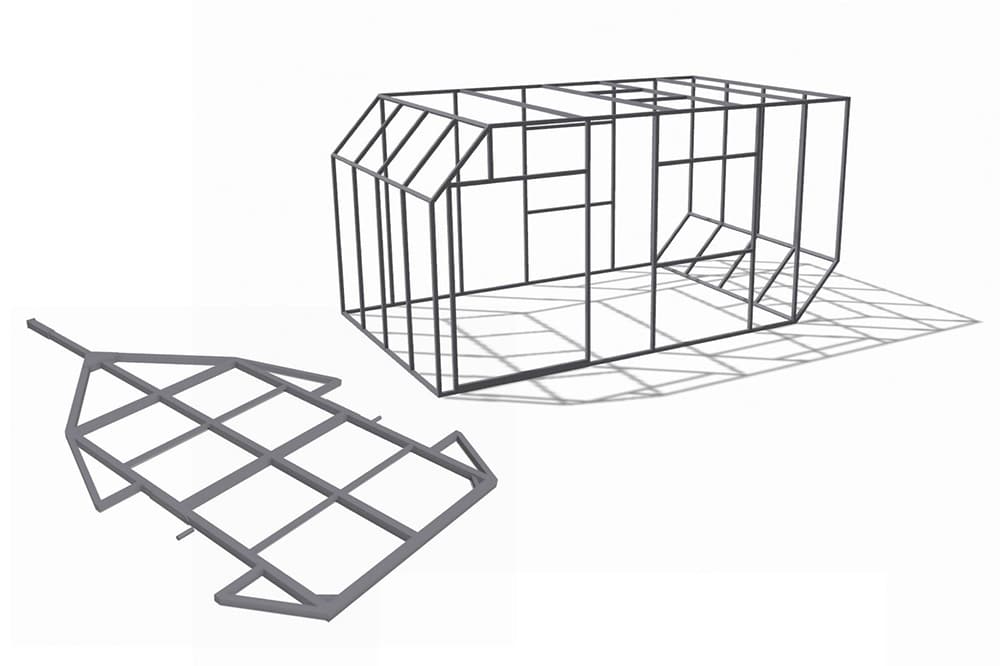
We love a good DIY project, and the internet has made these projects much more approachable. Whether you’re 3D printing a small plastic component, wiring or soldering electronics, woodworking, or metalworking, you can find all sorts of diagrams and downloadable blueprints online. John Brochu, the founder of a company in Virginia called ADV4x4, recently posted a video on his YouTube channel that shows a 10-minute time lapse of the DIY overland camper he made from nothing but raw materials and a set of custom blueprints. The result is pretty impressive.
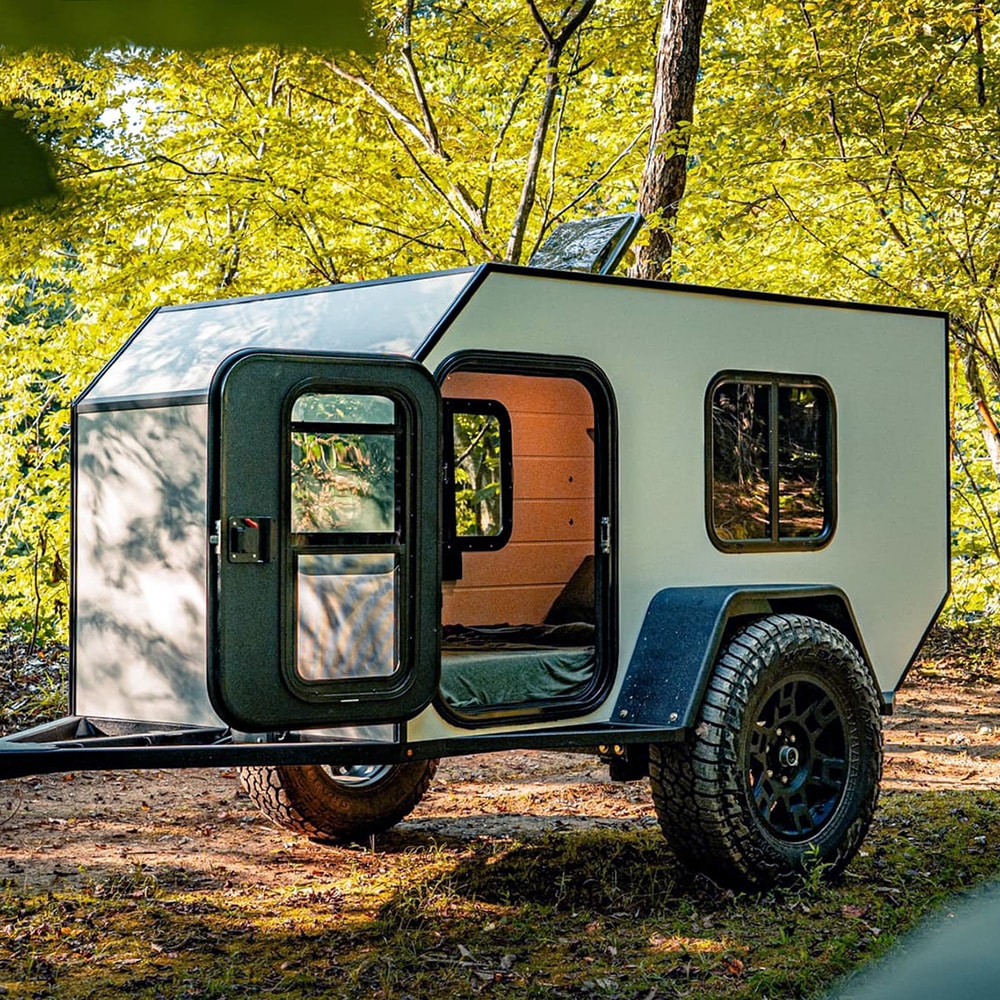
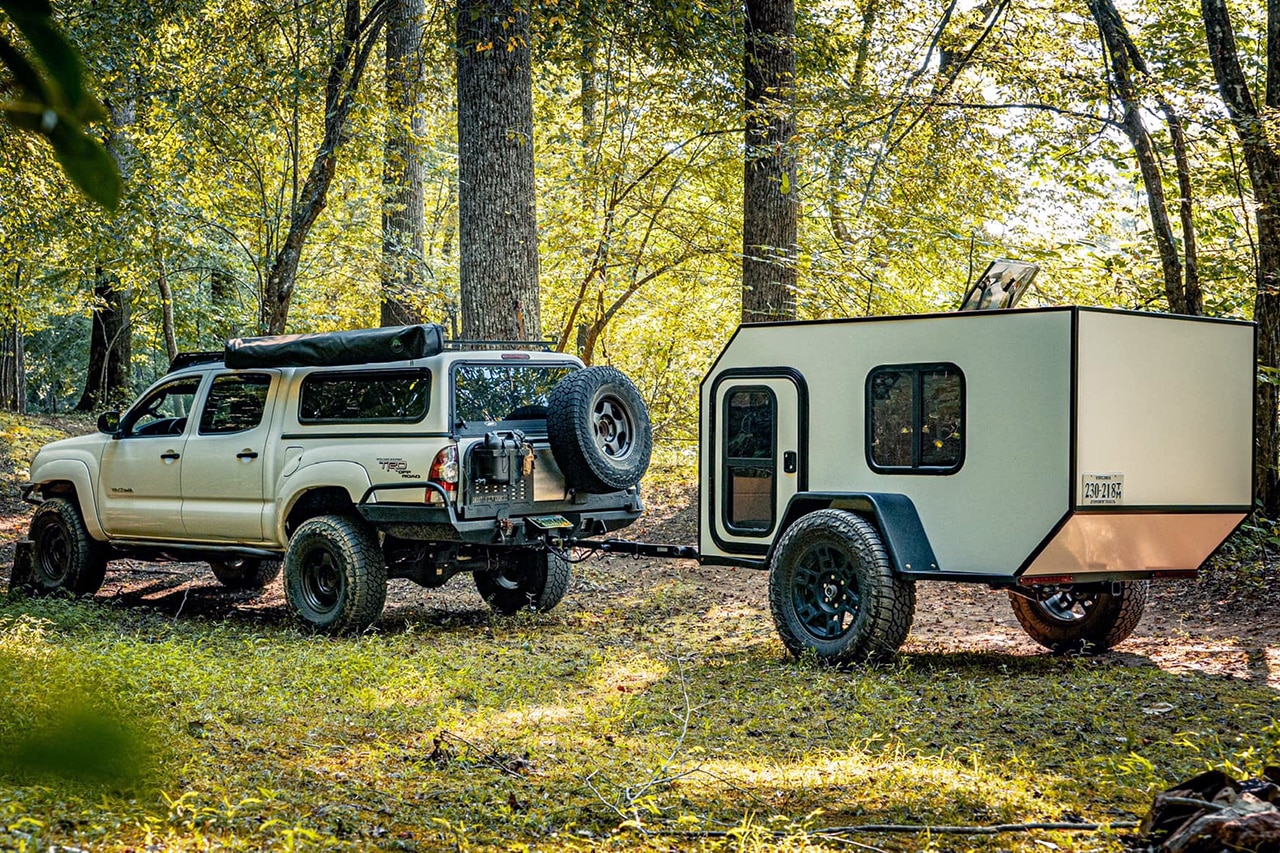
John offers the blueprint files he created, in either metric or imperial format, as downloads on his website for a small fee. On its own, this wouldn’t catch our interest, but the video he posted with a complete time-lapse of the project certainly did. It shows how he welded the frame, installed Timbren suspension and wheels, finished it in bedliner, added lights and a wiring junction box, and then built the camper itself on top. In another video, he estimates he spent a grand total of $6,000 in materials and about 100 hours of his time on the project — that’s a lot, but it’s also a lot less than it would be for a pre-built camper.
The DIY overland camper has custom flooring, ceiling, and wall panels, LED lighting with dimmer switches, shelving, a coat rack, two sliding windows, a locking door, a powerful vent fan, and more. He also went on to add a motorcycle rack to the front of the trailer, and a roof rack with a pull-out awning.
The results of this build are pretty cool, and we appreciate how thorough John was with documenting the process. He even made a comprehensive list of the tools he used during the build, from a miter saw to a caulk gun. Check out the video below to watch the trailer build time-lapse, or head to ADV4x4.us for the blueprint files.
The concept of a 9mm AR is nothing new. In the early 1980s, Colt began developing 9mm prototypes based on this platform, the earliest of which was an open-bolt submachine gun that fed from a modified Uzi magazine. In subsequent prototypes, the design switched to a closed-bolt direct blowback system — this would carry through to Colt’s first production version, the 10.5-inch-barreled R0635 SMG. Since then, direct blowback has become the industry standard for 9mm ARs, with a few notable exceptions (for example, the radial-delayed CMMG Banshee featured in Concealment Issue 16 and the roller-delayed JP-5 we reviewed in RECOIL Issue 57). If we’re being generous, we’ll just call direct blowback simple. Otherwise, we might call it downright crude. Either way, rather than relying on a mechanical delay mechanism to slow down the bolt, it relies on the mass of the bolt and buffer system. This translates to a recoil impulse that can feel a bit jarring despite the pistol caliber — it’s noticeably more harsh than a 5.56mm AR. Thankfully, there are ways to mitigate this. We built a 9mm AR pistol using components from the Aero Precision EPC (Enhanced Pistol Caliber) line, and then modified it using aftermarket parts. The end result is a smooth-shooting, compact weapon that can be used for a variety of tasks, from competition to defense.
Above: With the brace compressed and the JK Armament suppressor removed, this EPC-9 can fit into a small backpack with ease.
Editor’s Note: This article originally appeared in Issue 29 of our sister publication Concealment magazine. | Photos by Nate Gerhart and Patrick McCarthy
Aero Precision EPC-9 Review
The EPC line is Aero Precision’s take on an optimized pistol-caliber AR and it consists of mix-and-match uppers, lowers, and builder kits, rather than complete carbines or pistols. At time of publication, it’s only available in 9mm/.40S&W, but a 10mm/.45ACP variant is in the works. Yes, both versions accept Glock mags.
Much like Aero’s popular M4E1 rifle-caliber receivers, the EPC receivers are machined from 7075-T6 forged aluminum, with an enlarged trigger guard and flared magwell. A last-round bolt hold-open mechanism — a feature many 9mm ARs lack — is built-in. The bolt catch and takedown pin channel are both threaded for ease of assembly, and there’s a tensioning set screw to ensure a tight fit between the upper and lower. An extended mag release is also pre-installed.
Above: Aero Precision sells EPC-9 lowers with various stocks and braces, and uppers ranging from 5.5 to 16 inches with several handguard styles. We ordered an EPC-9 pistol lower and complete upper, then added this black nitride BCG and charging handle to finish it off.
We started our build with an EPC-9 complete pistol lower with SBA3 brace. This includes a Mil-spec trigger and selector, Magpul MOE grip, EPC 7.7-ounce buffer, and Aero M5 .308 carbine spring. Aero notes that special hardened trigger pins are installed to withstand the “high demands of blowback AR platforms.” We paired it with an EPC-9 8.3-inch complete upper equipped with Aero’s Atlas R-ONE 7.3-inch M-LOK handguard. To complete the setup, we picked up a nitride-finished 9mm bolt carrier group and a Breach ambidextrous charging handle, both from Aero. Total MSRP for these items was $1,095, and they were assembled into a functional AR pistol seconds after unboxing.
Initial Impressions
To test the EPC-9 pistol in standard form we loaded up some 30-round Glock mags from GunMag Warehouse, mounted a Primary Arms MD-20 SLx red dot on an Arisaka Defense riser, and headed to the range. Aero’s modifications to the 9mm blowback AR formula — namely the heavier 7.7-ounce buffer and stronger .308 buffer spring — create a weapon that’s definitely softer-shooting than an old-school 9mm carbine with 5.5-ounce buffer. The 8.3-inch barrel makes this pistol light and easy to maneuver, and it’s small enough to fit into a backpack. Reloads were fluid thanks to the bolt hold-open feature, easy-to-reach mag release, and flared magwell.
However, as is often the case with these projects, we began wondering if there were more improvements to be had with aftermarket parts. Before long, we were shopping around, and down the rabbit hole we went.
Modifications
Above: When the Arbor Arms sling isn’t in use, the excess slack can be stowed neatly against the brace using this magnetic Haley Strategic Sentry Strap.
The first focal point was reduction of felt recoil, since the Aero EPC buffer system helps but doesn’t completely overcome the punchy direct-blowback recoil. For this, we turned to a buffer system we’ve used in many of our rifle-caliber ARs over the years: the VLTOR A5. The A5 uses a buffer and tube that’s ¾-inch longer than a standard carbine system, as well as a rifle-length spring. It allows the buffer — and therefore the heavy 9mm BCG — to slow down more gradually. The A5 SP-PCC kit we picked up is designed specifically for pistol-caliber applications. In addition to the extra travel, its A5SH2 stainless buffer is slightly heavier than the EPC buffer at 8 ounces. Shooters who want to fine-tune the recoil impulse more can try an A5SH3 (8.8 ounces) or A5SH4 (9.6 ounces).
While we were at it, we swapped the nitride BCG to a RedMohawk 3.0 Copperhead 9mm BCG from Iron City Rifleworks. It’s coated in a slick copper PVD finish with an extremely low coefficient of friction for easier cleaning, and it uses a standard AR-15 extractor. If copper isn’t your style, variants of this BCG are also offered in black, tungsten gray, and gold finishes.
Above: It’s not hard to see why Iron City Rifleworks calls this BCG the RedMohawk. On this Copperhead edition, the carrier is finished in a high-gloss, copper-colored PVD coating.
We replaced the Mil-spec trigger with a RISE Armament Blitz drop-in unit, which features a 3-pound pull, crisp break, and fast reset. It uses springs rather than set screws for tension against the included anti-walk pins and is suitable for PCC applications (Aero Precision even sells it directly as an EPC upgrade). We also installed a Strike Industries 60-degree selector switch and more-upright 15-degree pistol grip on the lower.
Above: The RISE Armament Blitz trigger blade has a faint curvature and chamfered edges we found to be very comfortable. It’s also lightning-fast with a short reset.
As for the upper, the handguard is clad in textured M-LOK rail covers from Strike Industries and a Magpul hand stop. We stuck with the optic setup and charging handle mentioned previously but added a compact Streamlight TLR-VIR II unit that toggles from a white light to an infrared laser and illuminator for shooting under night vision. It also features a prototype TLR-1 Paddle Shifter switch from Emissary Development. When we installed a sling loop into the built-in front QD socket, we noticed it interfered with a full grip around the handguard, so we opted to attach our Arbor Arms Dual-Adjust sling to the top rail via a Strike Industries Ambush sling mount. The other end of the sling is attached to a PWS Ratchet Lock end plate, which also eliminates the need to stake a castle nut after installing the A5 buffer tube.
The final element of this build is a JK Armament suppressor built with five baffles and a “strainer” compensator endcap. It threads onto a War Eagle 9mm comp/flash hider, attached to the 1/2×28 threads on the Aero Precision barrel.
On the Range
With all these parts installed, we returned to the range to check the results. The A5 buffer system provided a noticeable improvement to felt recoil, changing the impulse from an abrupt thwack to a softer push. Granted, this direct blowback recoil is still nowhere near the buttery smoothness of a gas-operated gun like a SIG MPX, and no amount of aftermarket parts is going to change that. However, it’s close enough to shoot quickly and comfortably. Plus, it maintains the familiar manual of arms and accessory compatibility of an AR-pattern firearm. The Blitz drop-in trigger is also quite good, with none of the slack and vagueness that’s present in many 9mm SMGs and PDWs. This is a big advantage of a 9mm AR — trigger options are plentiful, easy to install, and well-suited to semi-auto precision.
The reduced-angle pistol grip and handguard add-ons provide improved control, and of course, the suppressor makes shooting much more enjoyable all-around. With the suppressor removed, the War Eagle comp doesn’t make much difference in felt recoil — 9mm muzzle devices rarely do — but it dissipates muzzle flash and acts as a convenient mount for the suppressor. Combined with the tall optic mount and IR light/laser, this EPC-9 build is excellent for active or passive aiming under night vision as well.