In This Article
From a medical standpoint, dehydration is never your friend, but when it comes to nutrition, dehydrating food can extend life instead of ending it. Long before the age of refrigeration and freezers, our ancestors figured out that if you remove moisture from food, it’ll last longer. This has been observed all over the world, from seeds and fruits to meat and fish, proving this an effective method. As a prepared citizen, you should already be familiarizing yourself with growing, hunting, and gathering some of your own food.
Previous articles on OFFGRIDweb have covered ways to grow your own food, and some on ways to preserve it, such as canning, pickling, and, of course, freezing. In many states, hunting seasons change throughout the year, allowing you to harvest different types of game, most of which can be stored for future use through the dehydration process. Even if you’re not a hunter, finding a good sale at the grocery store allows you to bulk buy and store the excess somewhere other than the freezer. Having a variety of foods on hand, particularly ones that are stored without the need for constant electricity, is a major advantage during any emergency.
Necessary Equipment
Maximizing these bounties will require some tools to make the process easier — and more importantly, safer — than what our ancestors could manage. The most obvious prerequisite will be a dehydrator. A purpose-built dehydrator is relatively inexpensive (some can be had for $40) and makes it much easier to control the proper temperature for various types of foods. Entry-level dehydrators usually come with a few trays that can stack on top of each other, allowing the warm air to circulate around the food. This allows the food to dry at a constant rate for uniformity. Larger and more expensive dehydrating food tools will look like miniature ovens, and have built-in timers and more precise temperature control.
You can use your kitchen oven for dehydrating food, but the process is much less efficient than a dedicated piece of equipment. Most kitchen ovens can’t produce a low enough temperature for herbs or fruits and vegetables. Really you can only use a kitchen oven for meats, so long as it can be set to about 165 to 175 degrees F.
Fruits
Once the dehydrator is acquired, getting started is straightforward for most food items.
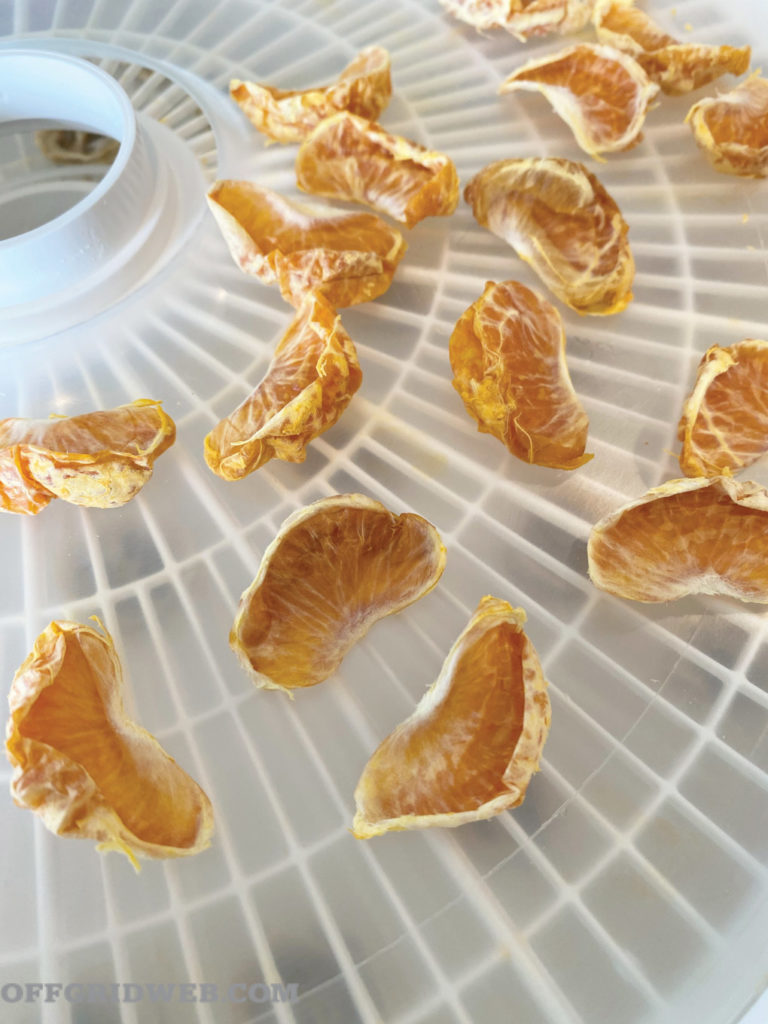
Above: Dehydrated oranges, bananas, and strawberries ready for eating or storage.
Here we’ll start with fruit — a survivalist’s friend for vitamins, minerals, carbohydrates, and, of course, sugar. One of the most popular garden staples is the tomato, and yes, it’s a fruit, not a vegetable. You may have seen our previous web-exclusive article on making your own DIY tomato powder back in March 2018. There we outline how to make your own dehydrated tomato powder and the various uses, like instant tomato paste. The paste can then be transformed into pizza sauce, because everyone loves pizza, especially when times are tough.
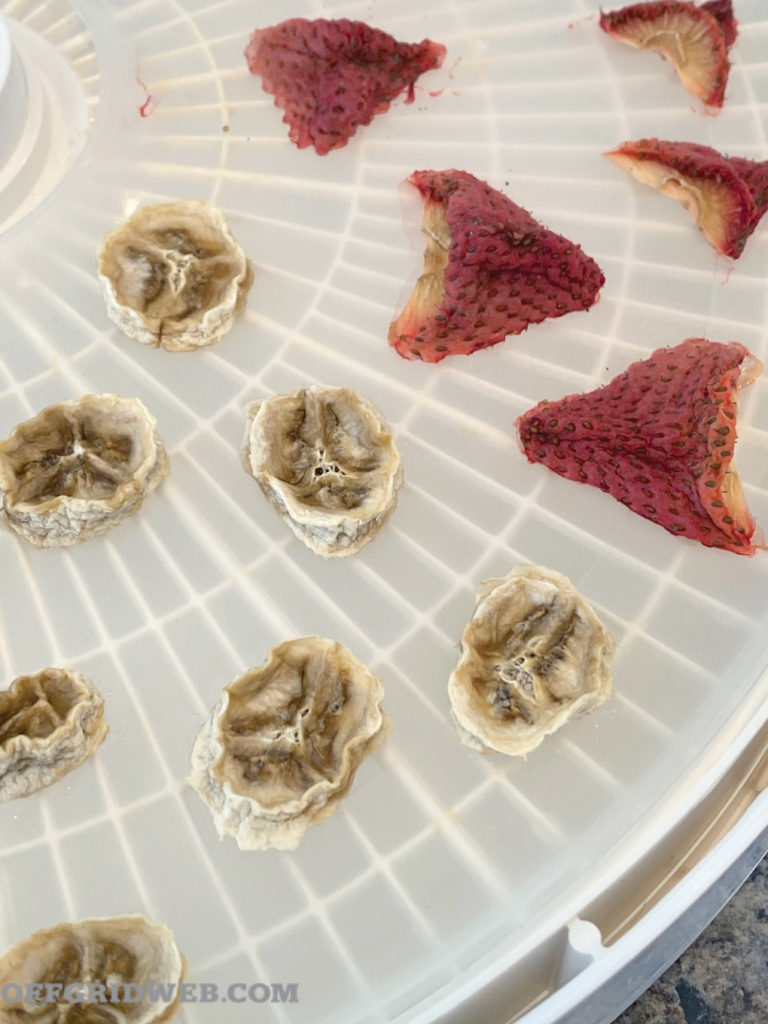
Similar to the tomato, dehydrating food like apples, pears, and peaches requires you to pick the best fruit available and give it a good wash. Slice the fruits uniformly in ¼- to ½-inch-thick sections, removing the cores/pits and place them on the drying racks of your dehydrator. Set it to 135 degrees F and forget it — let the machine do its job and check on the fruits in a few hours. They should be dried and shriveled or dehydrated to your liking. The less moisture, the longer these will last. If fruits feel stiff and brittle, they’ve been thoroughly dehydrated; if they bend, they may need more time. Citrus fruits, bananas, and berries are similar in that you want them to be as uniform as possible, cleaned, and in the best condition.
Fruit Leather
Fruit leather, commonly known as fruit rolls, can be a crowd pleaser, especially for younger members of the family. These are simply made from fruit puree and can be crafted from some of the less desirable fruits that are bruised, slightly past their prime, or irregularly shaped. Many find that using blueberries for fruit leather is better than dehydrating individual berries. Combining fruits that have more pectin (like apples) with fruits that have more juice (like citrus) can create great flavors and still have the desired consistency.
Start by washing the fruits and cutting away any bruised areas. Combine the pieces into a blender and puree until smooth — it may be necessary to add water or juice, but do so sparingly. Be sure to taste the mixture before moving on to the drying portion. Purees that are too tart can be augmented using honey, but avoid using granulated sugar if possible. Once the puree tastes the way you want, coat your drying tray lightly with vegetable oil to prevent sticking, then pour on your mixture. Drying the leather is similar to drying most other fruits.
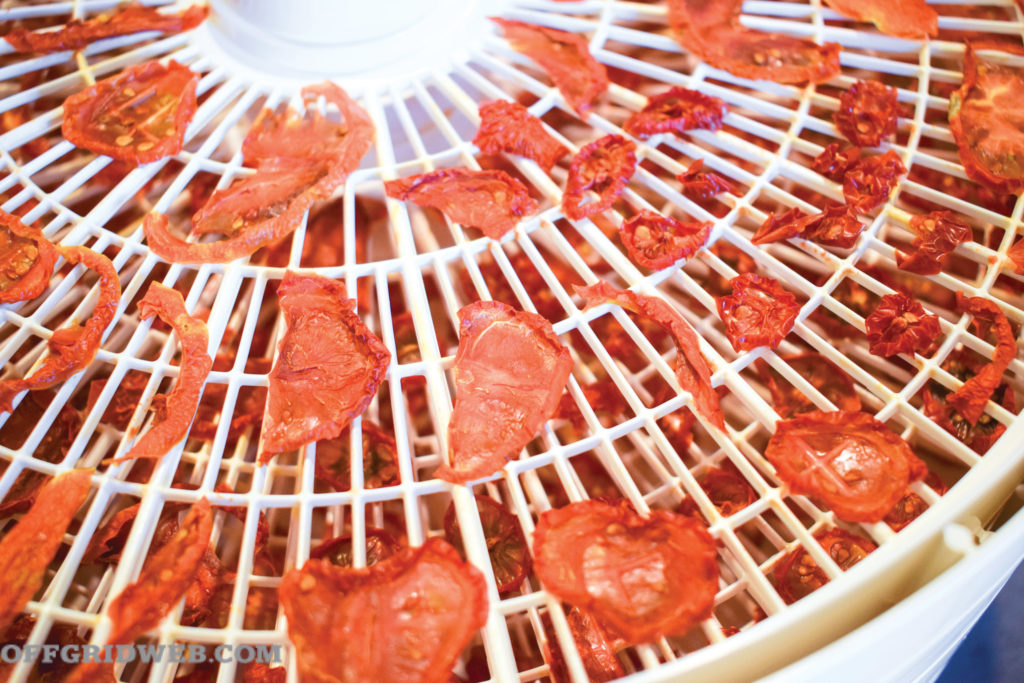
Above: Dehydrated tomatoes can be pulverized into powder, and later reconstituted with water.
Vegetables
Vegetables aren’t as forgiving as fruit when it comes to dehydration. Special care needs to take place in order to maximize the effectiveness of the process. Many vegetables will require the extra step of blanching. Blanching is similar to steaming; this is a process to break down (soften) the cell wall of the vegetable, which will allow moisture to escape more easily during the dehydration process. See the sidebar for the blanching process.
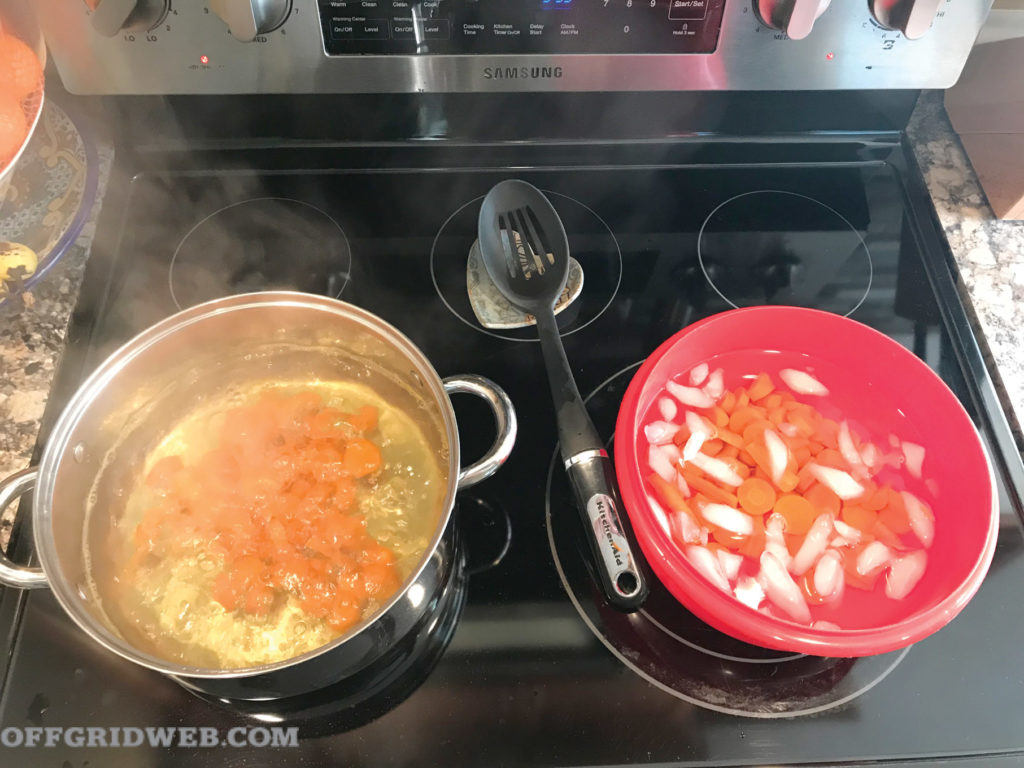
Above: Blanching is an extra step needed for some vegetables to dehydrate properly.
Vegetables that should be blanched include artichoke, asparagus, green beans, carrots, celery, corn, eggplant, peas, and potatoes — this isn’t an all-inclusive list, but more of a guideline. Beets, onions, garlic, peppers, and mushrooms (we know this isn’t a vegetable, but the process is close enough) are some of the vegetables that don’t require blanching.
Blanching
- Prepare the vegetables by washing, removing any bruised portions, and cutting to desired size.
- Have a large bowl of ice water available, a slotted spoon, and a drying area.
- Bring a large pot of water to a rolling boil.
- Place the vegetables into the boiling water for about 30
seconds, or until tender. - Remove the vegetables and immediately submerge them into the ice water to stop the cooking process.
- Once the vegetables are cooled, remove them from the water and place them on the drying area. You can pat them dry before moving them to the dehydrator.
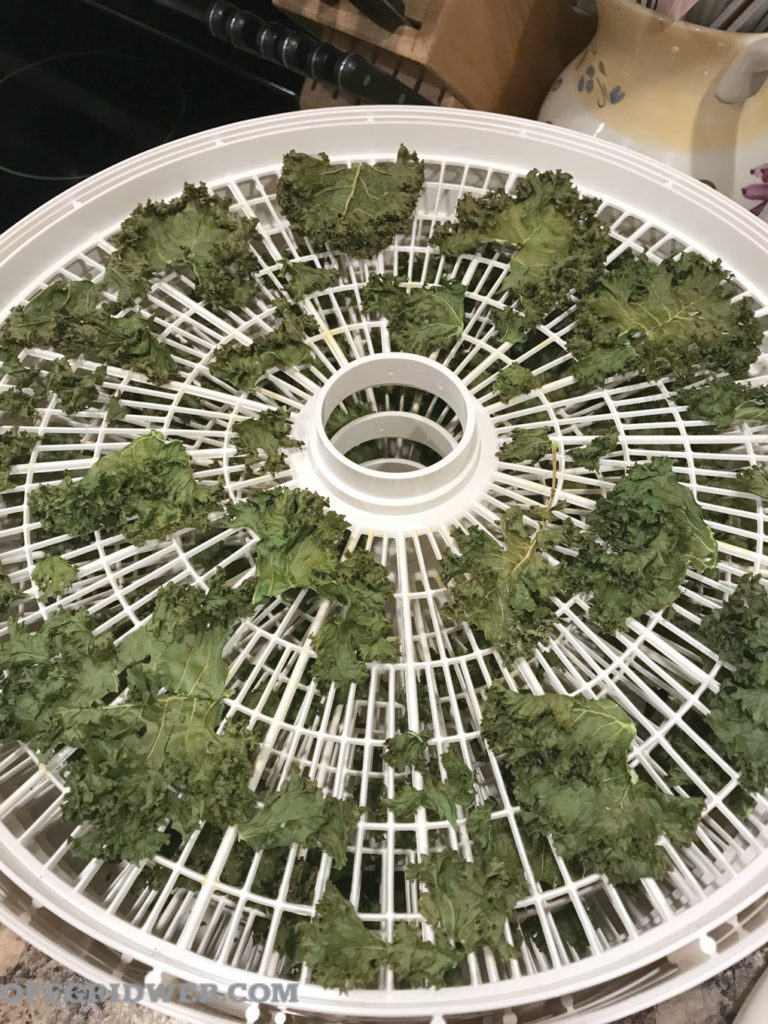
Delicate greens such as lettuce and arugula don’t take well to dehydrating, but others such as kale, spinach, and chard are heartier and dehydrate well. Making kale chips from a harvest is a great way to get fiber into your diet. These don’t require blanching.
Aside from blanching, the process is similar to fruit. Place the uniform pieces onto the drying tray, set it to 135 degrees F and forget it for at least six to 12 hours. You can check that the vegetables are fully dried by trying to snap a piece between your fingers — if it bends, leave it in longer.
Above: Blanching is an extra step needed for some vegetables to dehydrate properly.
Many of the vegetables can be ground into a powder, such as tomatoes. Peppers, particularly hot ones, are excellent in powdered form, and can be used as a flavoring agent by themselves or mixed with salt and other dry seasonings to bring a dish to flavor town.
Herbs & Flowers
Having a fully stocked spice cabinet can help break the food monotony often found during trying times. Therefore, you should have several pounds of salt in storage, but also plenty of different herbs. The process of dehydrating herbs depends on the size of the leaf. Broad-leafed herbs such as basil and sage require you to split the leaf down the middle, along the stem. This allows air to penetrate the leaf more easily and makes drying time quicker. Small-leaf herbs such as thyme and rosemary can be dried directly on the stem. This will prevent the leaves from flying around in the dehydrator with the air current. Once dry, the leaves will come off the stems easily. As with all the other methods, wash the herbs prior to dehydrating them.
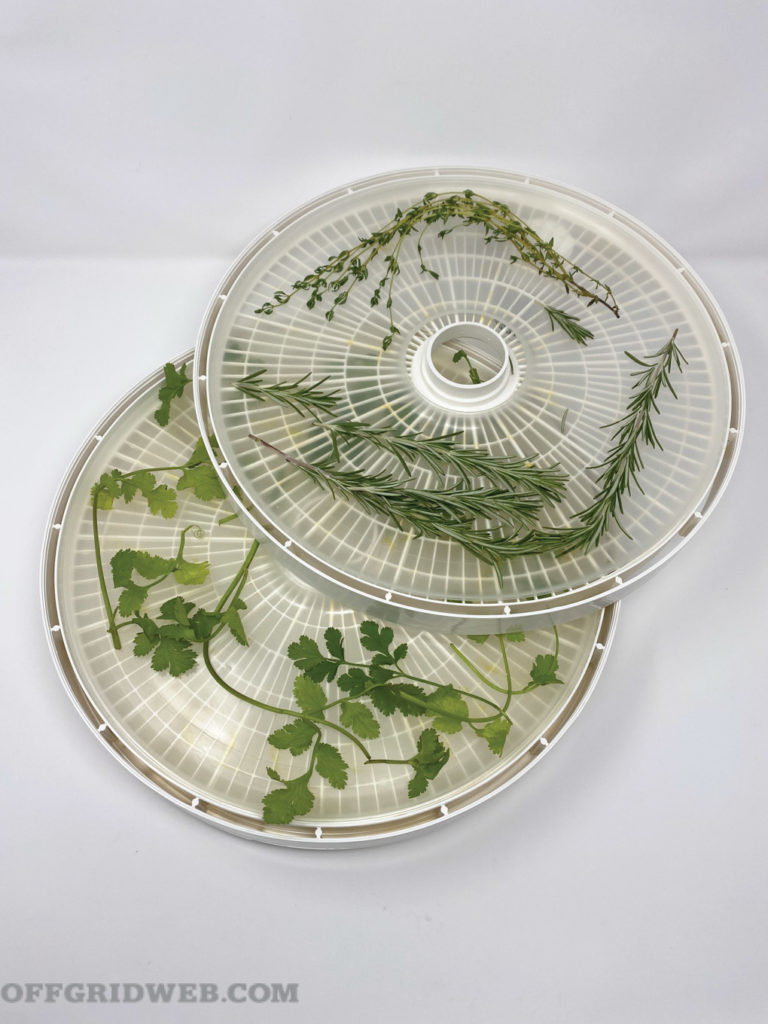
Broad-leaf herbs may require up to 24 hours to dry while others may be finished in three to four hours. It’s important to check these periodically. If the leaves or stems bend, they aren’t ready. If they snap or crack, they should be good to go. Herbs require the lowest temperature setting of the dehydrator, or roughly 95 degrees F, and should be dried by themselves, separate from fruits and vegetables. Drying herbs concentrates their flavor and potency, so bear this in mind when using them to cook. You may need less than you think.

Above: Herbs can be dried, making for a longer-lasting and more flavorful addition to your meals.
Another method to dry herbs is to suspend them in bunches in a cool dark place, like a basement or pantry. Use a rubber band to keep the bunches together as they dry. Dry time will vary based on the environment and the size of the herb. Areas with high humidity may face mold issues, so be aware of that.
Meats
Preserving meats through drying is an ancient art. Archeologists have found dried meats in Egyptian tombs dating back to 3200 B.C. — probably a little past the “best by” date. The modern equivalent is the ever-popular gas station snack: jerky. Jerky can be made from practically any meat — beef, pork, chicken, turkey, wild birds, and some fish all produce a good product. The process for dehydrating meats is similar to vegetables and fruits, however the temperature is set much higher at 160 degrees F.
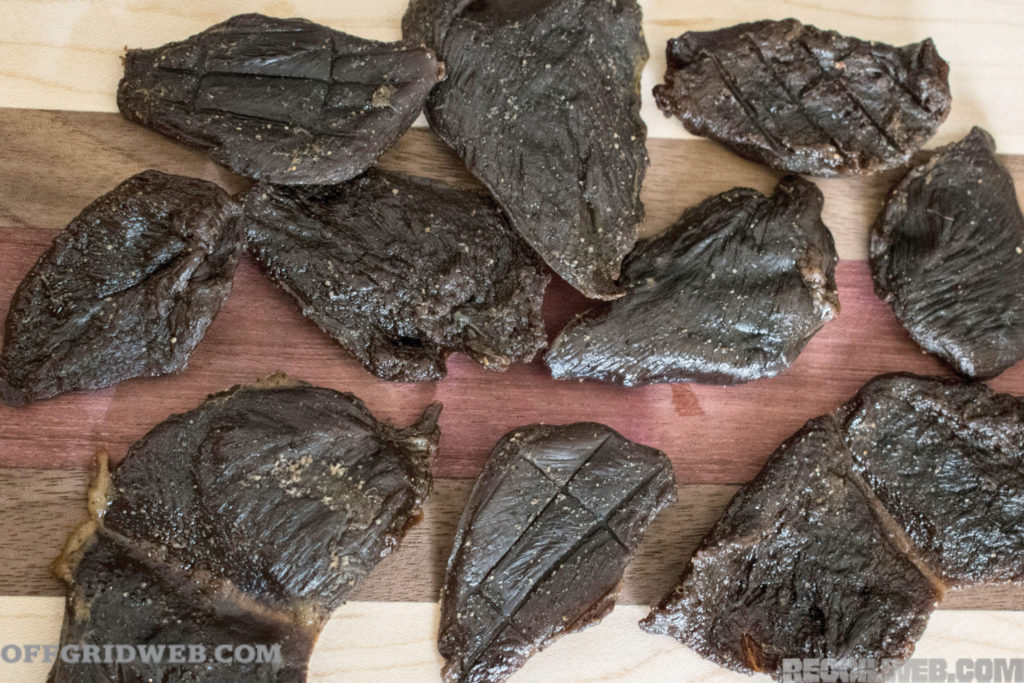
Above: Each piece of dove jerky is one dove breast, making perfect two-bite morsels.
Using your preferred cut of meat, begin by slicing it into uniform pieces and removing as much fat as possible, since fatty meat will spoil in storage much quicker. Cut across the grain to make the jerky easier to break apart and chew when finished. Try to keep slices about ¼- to 3/8-inch thick. You can use a simple spice rub if desired or marinate the meat. Check this recipe for Dove Jerky from RECOILweb.com that can be used for other meats as well.
Dove Jerky
- Dove breasts (the more the better)
- ¾ cup Worcestershire sauce
- ½ cup soy sauce
- ½ cup Dr. Pepper
- 1½ tsp. black pepper
- 1 tsp. onion powder
- 1 tsp. garlic powder
Special equipment: food dehydrator
Mix all ingredients in a large Ziploc bag. Add the breasts and place in the refrigerator for at least 12 hours. Pat them dry before placing them on your dehydrator. Set the dehydrator to 160 degrees F and allow several hours for dehydration. Dove jerky can be stored in plastic bags or Tupperware for several weeks.
See recoilweb.com for more Dove Recipies.
Jerky guns are another method to make jerky. This takes ground meats and lays them onto the dehydrator trays for a precise size and consistency. Choose ground meats that are low in fat, or about 85- to 90-percent lean. This is a great way to use game birds like dove that are low in fat and combine them with fattier meats like beef. Venison, bison, and turkey are also excellent choices for the jerky gun application. This method’s product is easier to chew than the sliced variety. It can also be less expensive if you’re using store-bought meats.
Dehydrating meat is a great way to extend the shelf life and produce a tasty snack. One slight downside is that it’s difficult to incorporate jerky into other foods. It’s mostly a stand-alone food instead of a recipe additive, but if the situation is dire, no one will complain about jerky as a protein source. It’s also important to note that meats such as pork, chicken, or turkey should be precooked and processed to limit the chances of salmonella. Some even recommend putting the finished jerky in the oven at 165 degrees F for 30 minutes just to be on the safe side.
Dehydrating Food: Using Your Bounty
The fruits you dehydrate can be eaten by themselves as a quick snack — our favorite is dehydrated apples sprinkled with cinnamon — but they really lend themselves well to incorporation into other meals. Many prepared individuals keep oats in their preps; adding your dehydrated fruits to oatmeal will give more flavor and nutrients to otherwise bland food. Dehydrated fruits can be rehydrated and cooked into pie fillings or added to bread and muffins (like bananas). You’re only limited by your imagination.
Above: Dehydrated soup greens create an easily prepared meal for the field and weigh next to nothing.
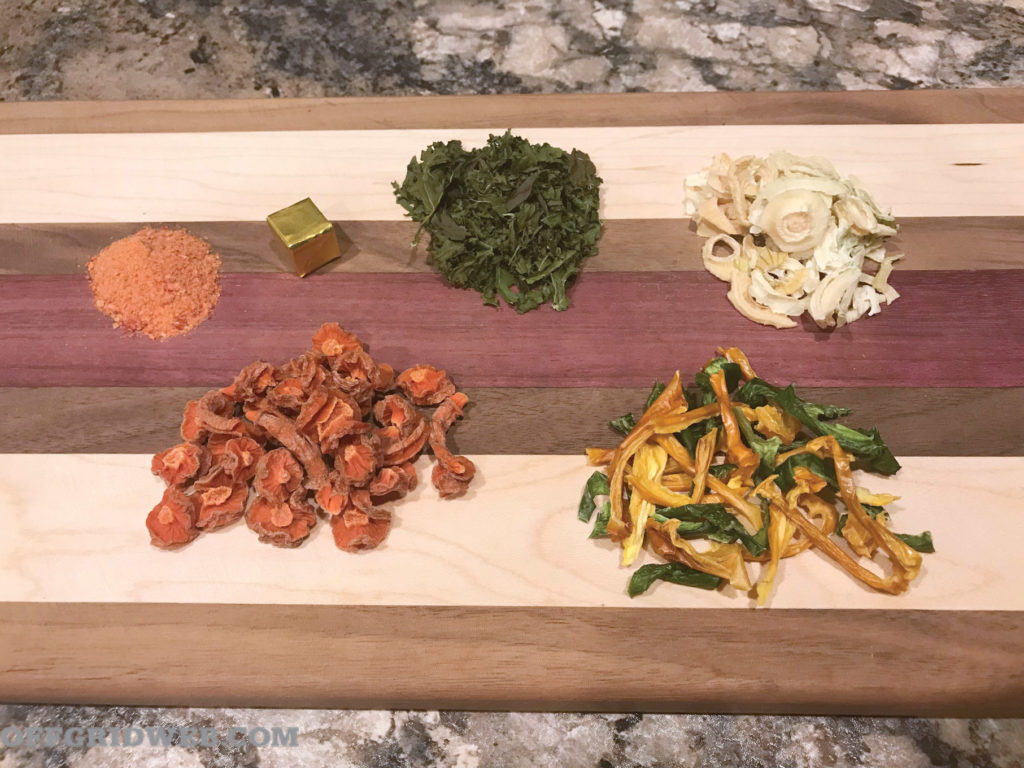
Dehydrated vegetables are excellent additions to soups and stews, either at home or in the field. You also get the fiber and nutrient bonus that many prepackaged or canned foods lack. Beyond soups, these vegetables can be added to casseroles, sauces, and even bread. See the sidebar for our DIY Dehydrated Soup Base recipe, as previously featured on OFFGRIDweb.com.
DIY Dehydrated Soup Base
- 1¾ cup water
- 1 chicken bouillon cube (or your desired flavor)
- 1 cup soup mix (adjust amounts to what’s available or preferred tastes)
- Dehydrated onion
- Dehydrated carrot
- Dehydrated bell pepper
- Dehydrated kale and chard mix
- Dehydrated tomato powder
- Pinch of pepper
- Pinch of garlic powder
Begin to heat water and add bouillon. As water heats, add soup mix and garlic powder. Boil for 10 minutes covered, stirring occasionally. Remove from heat and let steep for another five to 10 minutes. Stir and add pepper (and/or other spices) to taste and enjoy. This recipe can be prepared beforehand by adding all ingredients to a plastic bag for easy transport — just pour into a cup and add hot water.
For a thorough step-by-step guide to making dry soup base, see this Dehydrated Soup Base Guide on OFFGRIDweb.
Using herbs is pretty straightforward. Apply them to make food taste better. Keeping salt, pepper, and popular condiments in your stockpile can help make the difference between choking something down or feeling satiated and content. Combining herbs to make blends is a smart move for tailoring food to your specific taste.
Turning meat into jerky is a satisfying endeavor and enjoying the protein-packed fruit of your labor is worth the time spent. Homemade jerky will help keep you away from excessive sodium and preservatives found in the expensive store-bought varieties, and it lets you exercise your own judgment in the flavor. Jerky is a great on-the-go snack that has a place in anyone’s bugout bag.
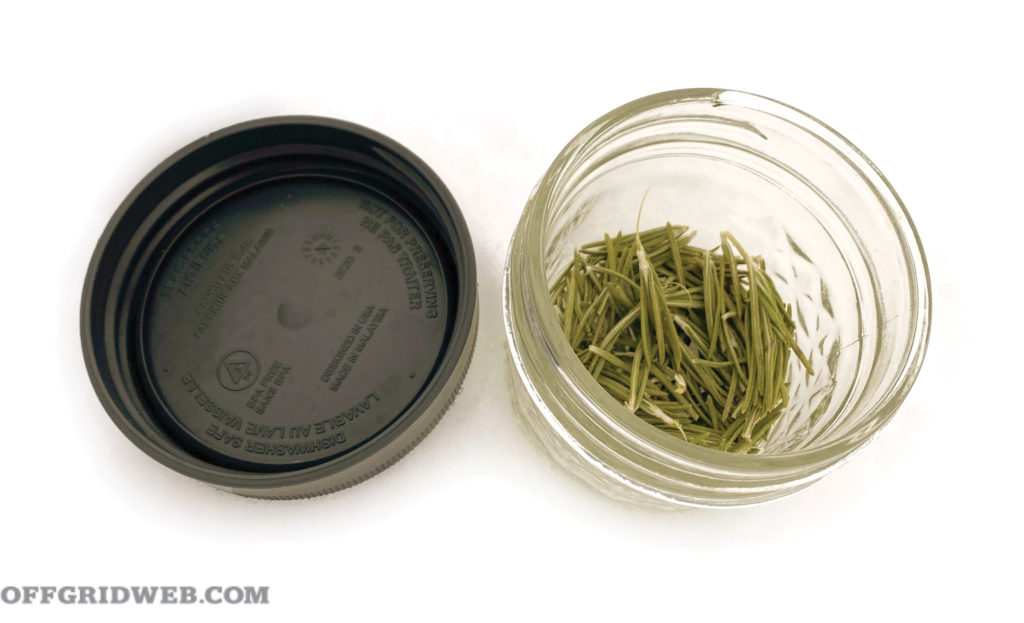
Above: Storage can be as easy as a mason jar and reusable lid.
Storing all of your hard work is similar to typical food storage best practices. Keep dehydrated foods in an airtight container and away from light. Mason jars with an added oxygen absorber and a vacuum seal attachment are our go-to, but Tupperware or a simple Ziploc bag can work too. These dehydrated goods should be rotated into your weekly routine, so they won’t stay in the pantry too long.
Closing and Other Considerations When Dehydrating Food
Dehydrating food is a great way to prevent surplus calories from being wasted and extending the shelf life for future use. Dehydrating your own herbs can also be a great way to save money, as some off-the-shelf spices can be awfully expensive compared to growing your own and preserving them. Even growing a little bit of your own food is a great step toward living a more prepared life, but being able to preserve that food is an often-overlooked next step. Dehydration is a simple procedure that doesn’t require as much time, effort, and investment as canning. The end result may not last as long as a canned product, but it does offer you a smorgasbord of tasty treats.
More on Survival Food
- Nutrient Survival: a healthy take on Survival Food
- Avoiding Poisonous Foods in a SHTF situation.
- How to Make 4 especially rugged survival foods. Here’s the Recipes.
- 10 Especially long-lasting Survival Foods you can stock up on.
- Prickly Pear Cactus turns out to be a surprisingly useful survival food.
- In the North Woods? Here’s how Acorns and Black Walnuts can keep you alive.
