Whether you’re in a survival situation without access to purpose-built workout gear or you simply can’t afford to spend money on expensive equipment or gym memberships, bodyweight exercises are a great way to stay in shape. Rather than using weights or machines, bodyweight workouts can be done with simple items such as a pull-up bar, bench, and stool. Many of these exercises require no equipment at all.
Photo credit: StartBodyweight.com
While bodyweight training has many advantages, it poses one challenge: when an exercise becomes too easy, progressing isn’t as simple as adding more weight to a barbell. The bodyweight exercise in question must be replaced with a more challenging one. This allows you to maintain a certain level of difficulty and gradually build endurance and strength.
To address this challenge, StartBodyweight.com compiled a large printable chart of more than 100 bodyweight exercises. Moving down each column increases difficulty, and moving left to right in each row changes the muscle group that’s emphasized. A basic workout routine is created by performing 3 sets of 4 reps for each of the six exercises in the first row, then a plank. Once this is manageable, the number of reps can be gradually increased until 3 sets of 8 reps is achieved — then it’s time to move down one row to a harder exercise.
Although the pliers-based multi-tool is ubiquitous these days, this concept was unheard of in the early 1980s. The idea struck Tim Leatherman while he was traveling through Europe in a particularly unreliable second-hand Fiat. After making multiple repairs using his pocket knife and small tool kit, he had a thought — why can’t these tools be combined into a single pocket-sized item?
After returning home to Oregon, Tim set out to make this idea a reality. But as is often true of innovative inventions, the road to production and profitability would not be an easy one. Tim struggled through eight long years and countless rejection letters to build a business and get his Leatherman multi-tool design into the hands of consumers.
A new 16-minute short film called Made of Mettle tells the story of Tim Leatherman, the Pocket Survival Tool he created, and some of the customers whose lives it impacted. The full documentary is available on YouTube below:
From a survival standpoint, we especially appreciate the parting quote from Tim: “There’s a fine line between perseverance and failure to accept reality… but if you’re going to err on one side or the other, err on failing to accept reality and being too perseverant rather than giving up too soon.”
We’re a strange breed. Anticipating natural and manmade disasters, we own a serious bug-out bag and actively hone every imaginable survival skill. Restless discontents? Nope. Guardians of the human race.
Our families are lucky to have us. Problem is our families don’t always feel that way when we’re in the zone. They’ll ask, “What’s up with this 25-pound bag of rice? These shelves of water, batteries, and knives? Why are you so worried about getting more guns and ammo? Can’t we just live like normal people?”
Actually, no. We can’t, because we know at some point in time the S will hit the fan. What we don’t know is when or how exactly. So, we prepare and practice. Ever wished there was a way to get the idea across without defaulting to the perilous preaching mode?
Guess what? There is! Games. Everyone loves to have fun, undertake challenges, meet goals, and win prizes. The best games require physical and mental strategies powered by a ruthless need to win. They teach hard-core truths about survival and integrity in the race for the prize and leave lasting impressions. They have a clear structure pointing to a tangible goal, like crossing a finish line or accruing the most points, while allowing room for innovative solutions.
You can choose any one of several themes from the list in our accompanying sidebar, and plug it into a template I call “Dispatch the Enemy and Head for Home.” Or, insert your own disaster scenario, line up the challenges at the various stations, and define the “home” goal. Major caveat: always end with prizes. We are a reward-driven species who revere medals, ribbons, and booty as proof of victory.
Setting Up the Game
“Dispatch the Enemy and Head for Home” can be played in spacious locations like a state park, your neighborhood, a campground, or a multi-level indoor stadium. The goal in this race is for each player is to hit prearranged stations, perform certain tasks, and make it “home.” However, the first to finish is not necessarily the winner of the grand prize, as the decisions made along the way and the supplies obtained play a factor. Here’s how to set it up.
Gather the Following Supplies:
Nametags for each player, attached to a single colored ribbon labeled with their name
Folding chairs or boxes to mark stations
Placards with that station’s task printed clearly
A poster (see “Starting the Game” section) outlining the goal of the game
Plastic grocery bags of varying supplies, one for each contestant, which vary greatly in value and quantity
A helper or two (or yourself) to play thugs who’ll waylay contestants near station five
A whistle or bell
The script
Optional (but way fun): “Unadvertised” water pistols loaded with water tinted by food coloring. Use various colors to identify who made the hits. Label them “free” and disperse them in random locations. Extra points awarded to players who claim a pistol and use it against thugs. Safe for all ages.
Set Up the Stations
Scope out a safe location and identify where you will set up roughly half a dozen stations, preferably 100 yards apart, with obscured views of each other. Six stations allow slow starters to catch up to sprinters as the challenges require increased levels of decision making.
Verify you have all your supplies packed and prepared, then assemble your stations on location. Ideally, you’ll do a walkthrough to confirm all is ready.
Each station should have a placard reminding the players what specific task they must complete before moving on. If they remember the instructions posted at station one, they will have an advantage and be able to complete their task quickly. In essence this is a race, but failure to complete a task “kills” them.
Don’t let any of the contestants see you shaping the game or they will have an unfair advantage.
Starting the Game
Once everything is ready, gather the contestants. Say, “This is a race and involves six stations. Each station has specific instructions describing the task you must complete before moving on to the next station. Make good decisions. The first to arrive home is not necessarily the winner of the grand prize. Don’t begin until I blow the whistle. The entire course is summed up here.” Point to your previously prepared poster that reads:
This is station one, “the Office.” Run to station two, “the Locker.”
At the Locker, gather nametags with ribbons from the Locker. Run to station three, “the Parking Garage.”
At the Parking Garage, drop nametag in box but keep the ribbon. The ribbon symbolizes cash. Run to station four, “the Store.”
At the Store, select a plastic bag by determining its value and the value of its contents. Pay for a bag by depositing ribbon in box. Run to station five, “the Well.”
At the Well, obtain jug of water. Race to station six, “Home.”
Arrive safely Home.
This particular game begins at the Office, but you can switch up the scenario based on your preferences. Now, read the game script aloud. Sound serious. Straight, stern face. Here’s an example: “Pay attention, employees. As your manager, I’ve been instructed to inform you of the nature of our situation. After I’m finished, you can ask questions.
“As you know, we’ve been without power for three hours. The computers have crashed and the phones are down. Now, we could sit in the dark and wait it out together but, due to health and safety regulations, I’ve been ordered to shut this place down. The National Guard is being deployed to maintain order and a curfew has been issued.
“You are to go home and remain there until further notice. So, gather your things from the Locker. Just a heads up: If you need a few things at the store, I suggest you get them sooner rather than later. However, it’ll only accept cash. Any questions?”
If not, say the following for added effect, “Before you leave, I want to thank everyone for your years of service. If I never see you again, it’s been a pleasure working with you. May God be with us all.”
Then blow the whistle and stand back. If you’ve decided to play the thug, don a mask and run to station five without being seen.
Game On!
Station two has a box holding nametags and ribbons, now intermingled to form a bit of chaos. Contestants should elbow in to snag theirs then sprint off to station three. At the Parking Garage, they must remove and retain the ribbon, then feed their nametag through a slot in a sealed box and race to station four. If they hastily forgot to remove the ribbon, they are now without “cash” and cannot “buy” supplies at the Store.
Maybe a loaded water pistol hidden in plain sight en route catches their attention?
At the Store, the ribbon is exchanged for one of several plastic grocery bags loaded with supplies. Careful! Players are allowed to peek before choosing a bag. Are the supplies useful? Is the bag solid? Extra points awarded to the one who chooses the best bag, yet doesn’t dally as thug(s) move in to prevent access to the Well.
Obstacles abound. Through water and mud, contestants hustle, jumping over logs and firing claimed water pistols. Clutching their solitary bag of supplies, each must grab a jug of water before the final stretch. Station six looms. The safe spot.
Have the participants wait with their bags intact until everyone completes the course. Then high five and gather in a circle. Thank them for playing and ask for feedback.
Check and evaluate the supplies in the grocery bags. How long would that last them? Did they feel frustrated, angry, confused?
Appoint a winner and bestow the grand prize. Remember, you can use this as a template for other disaster scenarios and make it more or less difficult based on the participants. You can award bug-out backpacks as consolation prizes for second and third place. These emergency backpacks will become the foundation for future games as your family and friends build skills and conspire to win the next round. Over time, you’ll find that you’ll convert more people to the prepper cause with fun and games than you ever could with preaching and lecturing.
Why It’s a Good Game
Involves decision making, both critical and spontaneous
Urgency amid competition
Equal opportunity to win (you may have to insert a handicap to stronger players)
Achievable, defined tasks
A definite goal
Prizes
Ideally, self-learning moments that can be shared in a relaxed fashion immediately after the game. This is when you listen for the message you hope to have conveyed.
Issues to Avoid
Preaching, ranting, or overselling your personal convictions: No one likes being talked at.
Making the tasks too easy: This can lead to boredom and indifference to the ultimate goal of encouraging prepping.
Letting everyone win: Don’t hand out participation ribbons or last place trophies. It defeats any sense of reality.
Disaster Scenarios to Consider
The “Dispatch the Enemy and Head for Home” game we explain in the main feature is a template that can be tweaked based on your preferences and circumstances. Here are just a few of the many situations you can build on:
Earthquake: A terrific rumble and a vibrating smartphone alert you to a giant earthquake. As the city disintegrates, you must collect your family, avoid looters, and rendezvous at the designated location.
Electromagnetic Pulse: While on vacation, the power goes out, the skies blacken and it’s every man and woman for themselves. Your paradise has been hit with an EMP attack. Make your way past road blocks, thugs, and car crashes to the safe zone. Collect extra points for finding cached food and water supplies by correctly using a tourist map to shopping districts.
Invasion: News flash — the baddies are coming. You must pack a bug-out bag, head to the woods, and build a stealth shelter. Within the hour, the enemy will attempt to find you. Extra points will be awarded to contestants who brought food and water or have caches.
Burnt airplane wreckage at end of runway in Uruyen, Auyantepuy, Venezuela
Plane Crash: Miraculously, you survive after an emergency landing in the middle of nowhere. Prepare a shelter, comfort the injured, and plan to signal for rescue. (Or play a variation by walking out with only the supplies you packed in preparation for a game entitled “On My Own.”) Hold this game in a semi-remote location where phone service may not exist. Extra points awarded for anyone who builds a fire or finds edible plants. Major points awarded for players who use a compass, show leadership, and maintain a calm comportment.
Cinematic Survival: An Indoor Game
Short on space, money, or manpower? Not enough time to plan an elaborate outdoor survival game? Try this.
Choose one of the many end-of-the-world movies to watch with the entire family. Inform them that a trivia contest will follow. Whoever supplies the most correct answers wins a juicy prize. As you watch, your job is to formulate at least 20 secret questions with corresponding answers in a private notebook. During the viewing, refrain from saying anything and outlaw any quips or wisecracks from all viewers. This no-comments rule keeps the game fair.
Here are some sample trivia questions: What color was the hero’s shirt? How often did the main female protagonist change clothes? What did they eat in the car? Over what span of time did the drama transpire?
Aim for fun questions with simple answers. Once the game is over and the prize awarded, cement the main themes of the grid-down apocalyptic drama by asking each member for their input. For instance, ask your son what he might have done differently. Ask your daughter if it was believable. There is no right or wrong answers.
Bottom line, don’t let movie night turn into an argument. The beauty of this indoor game is it can be played often with no overhead other than prizes, popcorn and drinks, and the purchase/rental of said movie. Plus, memory can be one of your most important tools to develop in a survival scenario. There won’t always be smart devices on hand or operable to save you from forgetfulness.
About the Author
A survival enthusiast for more than 20 years, Carol Wellman utilizes her passion for long-distance hiking on America’s most rugged trails to hone her wilderness skills and build mental, physical, and emotional stamina. Author, innovator, and backpacking guru, she designs much of her own equipment. Her latest accomplishments include an unsupported hike of the entire Appalachian trail in 133 days, and a 79-hour circumvention of Mount Rainier using the brutal Wonderland Trail. Her inspiration comes from the firm belief that women are masters of their own destiny, coupled with the fact that swift, stealthy migration is often the key to surviving a multitude of disasters.
Nobody ever thinks they’re going to be struck by lightning — we even use this event as an expression of rarity with phrases such as “lightning never strikes twice”. Although being struck during a thunderstorm is likely to be a once-in-a-lifetime event unless you’re extremely unlucky, it’s certainly something you never want to experience. It’s therefore wise to take reasonable precautions during summer storms to reduce this risk.
One easy way to gauge the proximity of a lightning strike is often referred to as the “flash to bang” method. This technique involves counting the time in seconds between a visible lightning bolt (flash) and the audible thunder clap (bang). Since we know light travels faster than sound waves, you’ll notice a delay between the two. This difference can be used to estimate roughly how far the lightning is from your current location.
Sound travels at about 1,088 feet per second, or about 0.2 miles per second (depending on air temperature and humidity). That means it’ll take the sound of thunder about 5 seconds to travel 1 mile. So, the “flash to bang” distance can be calculated as follows: (seconds between flash and bang) divided by 5. Five seconds is one mile, 10 seconds is two miles, and so on.
This may seem like little more than a cool piece of trivia, but it’s actually a valuable early-warning system. The National Oceanic and Atmospheric Administration (NOAA) warns, “Lightning can strike as far as 10 to 15 miles from the area where it is raining. That’s about the distance you can hear thunder. If you can hear thunder, you are within striking distance. Seek safe shelter immediately.”
So, there’s always some risk when you can hear thunder, but we can calculate it further to better gauge your actual risk. A study by the National Severe Storms Laboratory (NSSL) found that 80% of lightning strikes in a thunderstorm are 2 to 3 miles from each other, and that more typically strikes occur within 6 miles of each other. NOAA says that “bolts from the blue” in the 10- to 15-mile radius are rare, but they’re not entirely unheard of.
From this information, we can establish the following danger levels from the “flash to bang” method:
Less than 10 seconds: highest risk
10 to 15 seconds: high risk
15 to 30 seconds: moderate risk
30 to 50 seconds: low risk
More than 50 seconds: minimal risk (thunder will be difficult to hear clearly at this range)
For more information on the “flash to bang” method, refer to the NOAA page “Understanding Lightning”. For additional tips on general safety in thunderstorms and other risk factors, check out this PDF from the National Weather Service.
Before you spend the money burning a hole in your pocket on a hatchet that could cut a hole in your pocket, consider what you should look for in a compact ax. Weight, steel selection, overall design, spike versus hammer poll, and handle length and material are all important factors to evaluate.
You might be eager to practice all the cool skills shown in our Primer on Pocket Hatchets & Proper Technique, but that doesn’t mean you should rush into buying the first one-handed ax you come across. As we explain in that article, there are plenty of uses for this tool and many ways to carry it. Whether you’re headed into the woods for the weekend, loading out your car for an emergency, or strapping on some edged protection to your plate carrier, there’s always room in your kit for a pocket hatchet — but which one you buy will depend on your needs and circumstances.
Axes have a lot of character and — just like a good dog — the type should fit the owner’s lifestyle. Take a look at the models reviewed here; maybe one will give you the edge you’re looking for.
Editor’s Note: For this story, we consider a hatchet any short ax that’s used easily with one hand. Naturally, a pocket hatchet is one that can be placed in your pocket or conveniently carried on the body. Also, for the purposes of this buyer’s guide, we refer to small tomahawks and pocket hatchets synonymously.
This Scout Axe is in a category of its own. Sold without a handle, this pocket ax is carried in a Kydex edge guard (its smaller brother fits inside an Altoids tin). Primitive man used flint-knapped hand axes before he learned to haft sharpened rocks to sticks. This tool works along the same lines. It can be used on its own as a cutting edge similar to an ulu, or it can be paired with a hardwood shaft harvested from the field.
The idea is to avoid consuming space in a loadout if an ax isn’t immediately needed. Additionally, sometimes you want a hatchet, sometimes a two-handed chopper, or something in between. During testing, we fashioned the Scout Axe with the blade in line with the handle and on a forked branch with the blade perpendicular to the handle to make a carving ax. Using a Swiss Army Knife saw and a length of paracord, we had a functional chopping tool in about 30 minutes.
Even if a large piece of hardwood isn’t available, multiple saplings can be lashed together in a bundle to serve the same purpose. For those who want to make this Scout Axe even more compact, Kevlar-braided thread can serve as a substitute for paracord.
As the least expensive model in this gear guide, it serves as an entry-level pocket hatchet.
The polymer handle is molded around the steel head and didn’t separate under hard use. Gerber axes are made by Fiskars, which was established in 1649 (yes, the 17th century) and is known for producing full-size axes tough enough to endure the needs of Scandinavian foresters. We didn’t run over it with a truck, but we did use it to split wood for a backpacking titanium stove. With the aid of a baton, the hatchet worked well as a splitting wedge.
With a durable black coating on the blade and no gap between it and the handle, this hatchet is a good all-weather tool. Unlike wood handles, the nylon handle won’t absorb water, swell, or shrink as conditions change. Small emergency gear can be stuffed inside the hollow handle (be sure to empty it before use). Re-sharpening isn’t difficult, and its flat grind is easy to maintain, following the angle with a bastard file or various-grit sandpaper backed up by a two-by-four.
This Gerber will work well as a starter tool and become a great loaner when you’re ready to upgrade later.
Pros:
With street prices closer to $30, this hatchet is less than the cost of ammo for your average range day.
Lightweight handle will not loosen, shrink, or swell with changing weather.
Cons:
Thick edge geometry is similar to a sharpened wedge.
Bulky carrying case isn’t as streamlined as other scabbards.
Gransfors Bruk wins the prize for the most refined and polished pocket hatchet. Among bushcrafters, these axes are the pedigree all others are judged by.
We got several “that’s cute” remarks from onlookers — until they got a chance to test out the blade; no one could deny its cutting potential. It has enough weight to substitute for a larger camp knife meant for chopping. It also comes with a highly polished convex edge that can shave your arm hair. No, really, it can.
With the leather edge guard, it fits perfectly in your back pocket. It’s ideal for anyone looking to retain the non-threatening looks of a traditional hatchet in places where carrying anything but a small knife is frowned upon.
The Small Hatchet — sometimes referred to as “the Mini” — feels like a toy in the hand, but don’t play with it. In a matter of minutes, you can transform rounds of wood into the basic outline of a spoon, bowl, or digging tool. The fine work can be done by choking up on its handle. In fact, it carves better than some knives thanks to its edge geometry. It can be used to clean fish and game and create splitting wedges to crack open significantly larger logs than expected.
The wooden handle is warm in hand and creates no blistering when used for extended periods of time. The oval shape also prevents the blade from rolling in the palm of your hand. Just two reasons why wooden handles are still relevant in a world of paracord-wrapped and full-tang tomahawks.
This baby hatchet is the perfect blend of performance and class — if that’s what you’re looking for.
Pros:
Factory edge sharp enough to shave with
Look and feel of a traditional hatchet
Lightweight
Cons:
Two-piece design is inherently weaker than one-piece designs.
Ground for European softwoods, not American hardwoods
What started out as a model called the Active Shooter Tomahawk for police has morphed into and been rebranded as the Pathfinder. Who knew a product for the streets would turn out to be one of the best tomahawks for the backcountry to date? On the larger side of pocket hatchets, but in the spirit of scaled-down choppers, this one still works as a one-handed ax.
The Pathfinder has an incredibly comfortable textured grip with several hand-placement options, depending on your task. The slightly longer handle length helps it limb downed trees more easily than other hatchets in this guide, not to mention generating more power behind your swing. Plus, the wide cutting surface coupled with long grind lines makes quick work of wood.
This ’hawk excels at snapping locks, too. Simply put the spike through the gate of a padlock and pry away. (Not that we’re encouraging illegal entries. Strictly for legal emergency use, of course.)
You probably won’t haul this one in a pants pocket, but the scabbard is heavy-duty Kydex with multiple lashing points and carry configurations. In fact, it was our primary off-grid chopping tool during a five-week Alaska trek last summer. RMJ ’hawks are legendary in their performance, and the Pathfinder doesn’t disappoint.
Pros:
One-piece, full-exposed tang construction
Large cutting blade and “large enough” rear spike
Outstanding performance
Cons:
Barely fits into the “pocket hatchets” category
Multiple edges to accidentally self-cut under stress
If a Viking and MacGyver were to sit around a campfire, pass around a bottle of bourbon, and sketch a pocket tomahawk that’s equal parts multitool and fighter, the Wenger Blades Wiglaf is what they’d come up with.
This beautiful little mutt is capable of working well in a number of roles. Its design lends itself to fire-starting, foraging, shelter construction, and other bushcraft tasks. Its durability also makes it a great tactical tool for the armed professional who may need to construct hides, punch out shooting holes through walls, or deploy a backup weapon.
The Wiglaf’s unique head shape includes a bow-drill bearing block. Yes, it works. We made multiple coals while minding the sharpened edge. According to the maker, the production sheath will allow use of the bearing while the edge is covered.
The hammer poll is perfect for crushing. We used the top of the head like a potato masher to process wild harvested starches, including cattail. With 3/8-inch stock used in the full-tang construction, the Wiglaf has a significant amount of weight toward the head and great chopping balance. You’ll want a good forward lanyard on the handle, as this one is hungry for wood to cut.
From bushcraft to tactical operations, this tough-as-nails ’hawk is at home just about anywhere a chopping tool is needed.
Pros:
Highly versatile for a variety of tasks
Strong cutting edge and hammer poll retain traditional hatchet look
Paracord wrap reduces weight and is removable for emergency cordage.
Cons:
Conversely, the paracord wrap can cause blisters when gripped for extended carving sessions.
Prototype scabbard covers bow-drill bearing while edge is protected.
Master bladesmith Daniel Winkler collaborated with Sayoc Kali Tuhon (Master) Rafael Kayanan to create the RnD Hawk. This model is the baby brother version and has proven to be an excellent tomahawk for multiple applications.
Available with or without a front spike, this tomahawk draws inspiration from the headhunter tribes of the Philippines. “Wait, what? Front spike?” you might be asking with some confusion. This uncommon appendage is actually advanced technology with origins in the jungles and mountains. It helps guide the cutting edge into rounded objects and works like a shear. When the spike is placed on a piece of wood and the ax and wood is struck against a larger log simultaneously, the spike holds the wood being cut in place and the hard work is left up to gravity and inertia.
In our testing, the RnD Compact Hawk cleanly cut brown coconuts in half. Against tatami mats, it didn’t make cuts through and through. What it wasn’t able to cut cleanly, it ripped aggressively. The front spike also acted like a small blade of its own and was controllable for fine scoring, cutting, and scraping when using a choked-up grip directly under the head. The rear spike was as equally effective in penetration tests.
Pros:
Front spike designed for guiding cutting surface
Comfortable in multiple grip positions
Rubberized handle reduces vibration and provides traction in wet weather.
Cons:
On the flip side, rubberized handle tends to snag on clothing while concealed.
Bungee cord retention on sheath can accidentally release.
WARNING: The content in this story is provided for illustrative purposes only and not meant to be construed as advice or instruction. Any use of the information contained in this article shall be solely at the reader’s risk. This publication and its contributors are not responsible for any potential injuries.
“The ax is back!” Thanks to rally cries like this from neatly manscaped, mustachioed, flannelled hipsters, the average Joe might believe there’s a resurgence in this classic woodsman’s tool. The reality is the ax never went anywhere and has been used continuously for centuries in the hands of true professionals.
While the idea of the ax being the “latest and greatest” men’s fashion accessory (we’re not joking; there are lumbersexuals who buy “designer axes” now) is considered comical by the modern-day Ragnarok, an actual growing trend in the ax world is the emergence of more lightweight and compact pocket hatchets. Let’s face it, there are times when you can’t swing that full-sized ax, and you need something more practical. The pocket hatchet — and its combat-oriented brother, the pocket tomahawk — is the answer. (For the purpose of this article, the term “pocket hatchet” will be used interchangeably to reference both pocket hatchets and compact tomahawks.)
Though easily dismissed by those who think larger hatchets and two-handed axes as the only chopping tools worth a damn, these diminutive hatchets fit into a unique category of cutting tools and shouldn’t be overlooked. Sometimes referred to as sounding hatchets, these little guys are easily carried in a jacket pocket or your pants’ back pocket for light work.
Why carry them? You may not have room in your everyday-carry (EDC) gear for anything larger. And, when the need arises, you’ll certainly be thankful you have a pocket-sized chopper that’s more effective than your tactical folder or Swiss Army Knife.
Log Splitting
A common misconception of log splitting is that the round of wood must stand on one end and an ax must come down on it from the neatly sawn end. When you watch a skilled woodsman, they make it look easy. Assuming you only have a pocket hatchet and must access the dry wood found inside a piece of downed dry wood, there won’t be a cleanly cut stump to prop the log up on, and there won’t be a clean end on the other side to split in half.
How, then, do you access the dry wood when all you have is a baby hatchet?
Above: Small rounds of wood can be split with simple technique. The blade is placed parallel to the grain of the wood and both pocket hatchet and wooden round are pounded on a wooden log simultaneously.
The easiest way is to hold the hatchet in line with the grain of the wood and parallel to it and grasp the round of wood in your other hand. Both hands move the two objects in sync with one another onto a log or wooden stump. The force of the impact drives the blade into the round of wood more safely than swinging the pocket hatchet at the wood. Exercise care to keep your fingers free from the round of wood and make sure there’s clearance for your hand, lest you risk injury.
While on the topic of injuries, remember, the shorter the handle on an ax, the greater the chance of self-cutting from an errant follow-through.
Hatchet wounds are generally found in the quadriceps, while hand-and-a-half and felling axes are found in the shins and feet. Don’t be that guy. Exercise caution. When in doubt, simply kneel low to the ground when using one. If your axe ends up glancing off something, you’ll impact the soil instead of yourself.
Splitting Wedges
Look at a seasoned stack of wood. As it dries, natural cracks begin to separate the grain of the wood. These cracks compromise the strength of the wood and give the outdoorsman a reference point for splitting. The cracks in a log generally run the full-length of the grain and, unless they’re met by a knot in the wood, will split predictably along it.
Splitting mauls and large camp knives are generally swung or pounded through wood — both rely on the extra mass and strength of the tool to handle the stress of this normal use.
Above: The Gransfors Bruks Small Hatchet next to a wooden baton and hardwood wedges. With these tools, large rounds of wood can be split open exposing dry wood inside.
Batoning is a popular practice to split wood, incorporating a wooden baton to add heft to a smaller blade that lacks it. Pocket hatchets traditionally were never meant for large splitting tasks, but that doesn’t mean they aren’t capable with an application of a little lateral thinking.
Rather than using the hatchet head like a wedge to baton into the wood, exploit the natural cracks by creating wedges. Use hardwood branches to create wedge pegs you can drive into the wood with a wooden baton or rock. To create a baton, either saw or chop away a smaller diameter handle from a wide round of wood. As you pound your wedges into the log, you’ll hear it crack and then settle.
As wedges are added further down a crack, the previous wedges will become loose. You may find you have to create wider wedges depending on how stubborn the wood grain is. With practice, patience, and a decent amount of effort, an extremely large log can be split to the heartwood with a pocket hatchet a fraction of its size.
Choke-Grip and Fine Carving
Watch any seasoned hatchet user around a campfire, and you’ll notice how many times his or her grip changes while processing campfire wood. The most common grip while using a pocket hatchet is at the very bottom of the handle, called the “end knob,” but depending on the amount of force and pressure needed, the user may find his or her hand directly under the head and just behind the cutting edge, called the “shoulder.”
Held this way, you can use the pocket hatchet to finely carve, notch, and push cut with the blade. Since choking up on the blade in this manner puts the edge in line with the index and middle finger (depending on the size of the blade and profile), there’s less leverage placed on the wrist than a conventional knife blade.
This additional mechanical advantage gives the choked-up grip incredible strength.
Above: Numerous grips exist for pocket hatchets — the standard grip at the bottom of the handle, underneath the head, and cupping the poll of the pocket hatchet. The lightweight head makes handling easy and less fatiguing than using a much larger hatchet.
A pocket hatchet can be used to carve by holding it directly under the blade, just above the bottom of the end knob, or any point in between. If the pocket hatchet has a spike, it can be driven into a log and the user can move the wood being carved over the edge to create fine shavings for fire starting. If the pocket hatchet’s butt is equipped with a hammer (also called a poll) instead of a spike, you can also hold it by cupping the hammer, letting you use it in the same manner as an Eskimo ulu.
You’ll find that the pocket hatchet responds differently depending on where it’s held. You have a lot of handle (OK, as much as you can get with a pocket ax) to work with, so try it out.
Small-Game Processing
These compact tools can be used for cleaning small game and fish with ease. The upper corner of many pocket hatchet edges comes close to a 90-degree angle. With this “tip,” the user can pierce flesh and hide. A slicing motion is easily accomplished by holding the pocket hatchet in the ulu manner previously mentioned.
While cutting through bone isn’t advised for hunting knives with keen edges, especially hollow-ground edges, a heavier grind found on pocket hatchets can easily cleave a rainbow trout or squirrel head from the day’s catch. Depending on how thinly profiled the edge is, a pocket hatchet can easily gut a fish from vent to gills.
Generally, the poll end of a hunter’s ax can crack bone; with slightly more force, a pocket hatchet can do the same. Once the bone is cracked with the hammer, the sharpened end can cut through the muscle, fat, and flesh around it.
Above: Even a compact tomahawk like the Winkler Blades II RnD Compact Sayoc Tomahawk packs a serious punch. We used it to easily crack open coconuts with no deformation to the spike or edge. The front spike prevented glances on the round surface too.
Rescue
A pocket hatchet has many invaluable characteristics making it ideal for self-rescue or breaching doors and windows. With the correct pocket hatchet (full tang, synthetic handle, stout blade), a person can easily puncture metal without fear of damaging the edge. Axes, including some pocket hatchets, have a thicker profile and are ground to stronger edge geometry than knives of the same blade length. This means they can withstand the force of impact and stress of cutting steel with minimal deformation to the blade.
Historically, crash axes have been carried on aircraft as an emergency tool. A pocket hatchet can be stowed easily in a vehicle and pressed into service to break windows and pry open doors if environmental conditions warrant it.
The rear spike and sharpened beard of some compact ’hawks and pocket hatchets provide new capabilities in the hands of a law-enforcement officer, soldier, or prepared citizen.
Above: The RMJ Pathfinder spike can split locks. Insert the spike and crank the handle downward. Most locks will either flex or crack and then open under this pressure.
While traditionally used as a weapon, the rear spike (like that found on the RMJ Tactical Pathfinder) can crack open padlocks with the right technique and leverage afforded by its handle. All one needs to do is insert the spike and crank the handle downward. Most padlocks will either fracture at the gate or bend until they open. After testing this on various padlocks and trigger locks, we found no damage on the rear spike. Consider what resources may be chain locked in an emergency and how this breaching ability could come in handy. The Pathfinder’s sharpened beard can be used like a can opener on thin-skinned metal or fabric.
Self-Defense
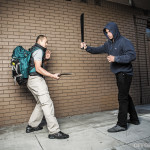
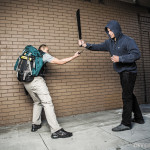
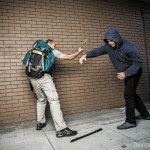
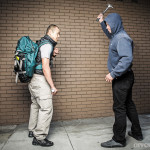
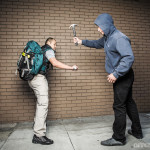
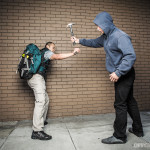
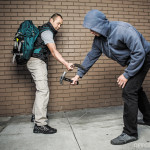
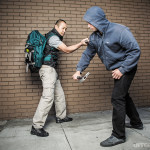
Anyone who can swing a hammer can learn to swing a pocket hatchet. The power generated by a 1-pound ball-peen hammer is not what an attacker wants to experience, let alone a 1-pound ax with a sharpened edge. Pocket hatchets are highly effective combative tools. With all the ways these puppies can be carried, there’s always a way to access one when SHTF. As a weapon-retention tool or a get-off-me device, no one will deny what can be done with a good pocket hatchet and some skill.
When used to supplement a sidearm or a rifle, the pocket hatchet becomes an effective backup in close quarters.
Above: Pistol punching with a front spike on the Winkler Blades II RnD Compact Sayoc Tomahawk puts a lot of force behind the front spike. This is just one of the many ways a pocket ’hawk can be used for defense.
The shape of its head allows the user to punch with it using a choked-up grip. To hook and pull, just hold it lower on the grip. The rear spike or hammer can puncture or crush without the need to flip your wrist over. A pocket ’hawk can parry inbound attacks and redirect energy back at the attacker. Less-lethal attacks can include hitting with the unsharpened top of the hatchet head or the bottom of the handle. The grip of most pocket hatchets makes applying stick grappling and restraint techniques possible too.
A word of warning to anyone using a pocket hatchet for defense — train with your ax while the edge guard is on. An ax carries a lot of momentum and can easily cause injury if the follow-through isn’t respected. In other words, learn to not miss and if you accidentally do, make sure your legs are out of the way.
Above: The Chuck Cook Scout Axe can be carried into the woods disassembled in its protective sheath. If a large hatchet is needed, one can be fashioned from the resources at hand.
Also, make sure your buddies aren’t too close as you can hurt them with a wild swing too. If you have some spare paracord around, creating a wrist thong will prevent your pocket hatchet from becoming a projectile if you lose your grip.
Methods of Carry
Inverted belt carry is one way to conceal the handle.
1. Inverted Belt Carry The problem with wearing a hatchet on your belt is that the handle hangs down your leg and gets in the way. If you’re on the go, it’s a no-go. Since many modern pocket hatchets have “bottom-eject” sheaths, turning the sheath upside down lets you run the handle up under your arm. It’s easy to extract, and the handle can be further held in place by a backpack strap. Want to see it in action? Check out former Navy SEAL Joel Lambert on Discovery’s Lone Target.
Pocket hatchets can be carried easily centerline on a chest rig or on a battle belt where they won’t interfere with firearm manipulations.
2. Chest Rig or Battle Belt From pocket hatchet to tactical tomahawk, centerline carry on your chest rig or on your battle belt are good options. Attached on MOLLE mag carriers, the full-length of the pocket hatchet fits within the length of the torso and the handle falls at the belt. The tool is accessible with either hand and won’t get in the way of magazine changes or other weapon manipulations. If you’re worried about the handle smacking you in the chin, pocket hatchet handles are generally short enough to prevent this. Worn on a battle belt, the pocket hatchet handle hangs to your side where it won’t smack your thigh as you run.
Pocket hatchets can be concealed in Kydex sheaths and worn like shoulder holsters. Pictured are rigs from Survival Sheath. Photo courtesy of Robert Humelbaugh
3. Inside-the-Jacket Carry Old timers will tell you to always warm your ax head before swinging it in the dead of winter. The cold can easily make your edge crack. To prevent this from happening, carry your pocket hatchet “bandoleer style” inside your jacket. That’ll keep it warm.
4. Ice-Ax Style Ice climbers know where to stash their tools when they’re not in use. The handle is passed through a loop on the bottom of their pack to the base of the pocket hatchet head. The handle is then flipped, on its head, to place it upright, and it’s lashed down. This method allows you to keep the ax’s weight low on the body instead of high up near the shoulders.
5. Vehicle Carry The pocket hatchet can fit easily in a glovebox, between or under the seat, or tucked in a seatback pocket. Should you need to cut yourself out of a wrecked car or access a trunk that’s crushed and locked closed, you’ll have the right tool in place. You’ll also be ready to help someone else if you stumble upon an emergency.
The author carries a compact tomahawk behind his canteen survival kit.
6. Canteen Carry Water bottle carriers are popular within the bushcraft and survival community. It makes sense to build a kit around an item that addresses a basic need of survival. Since canteens are carried with a shoulder strap, an additional pound of weight usually isn’t too burdensome. Carried behind the bottle, the only part of the pocket hatchet exposed is the handle. It’s an easy way to add extra cutting power to your woods-walking kit.
Newbs, Beware — Risks of Using a Hatchet
You know the guy who’s new to firearms when you see him at the range. His gear is crisp, he has every accessory under the sun, and he lasers you with his muzzle. The same goes for pocket hatchet users. Whereas the rookie at the range is more likely to hurt someone else, the rookie axman is most likely to hurt himself. Here are some helpful hints to prevent you from bleeding your own blood.
Mind the Follow Through The longer the ax, the safer the ax. A newbie with a 36-inch felling ax is less likely to self-cut than one with a pocket hatchet. If you’re cutting wood and question your ability, take a knee. If you glance, your pocket hatchet will impact the dirt instead of your kneecap.
Edges Should Be Covered Pocket hatchets cut. Don’t carry one without some sort of edge guard. Don’t leave your edge stuck in wood while in camp as the wood’s moisture can cause it to rust. If your pocket hatchet has a spike, burying one side leaves a pointy end exposed on the other.
Slice the Grain, Don’t Compress It Wood grain separates most easily when it is severed at an angle. Cut diagonally across it instead of down on it. Be careful, though; too shallow of an angle causes the cutting tool to glance.
Keep Your Edges Sharp Sharp is a relative term. Some guys like the ability to shave with their pocket hatchet while others want a “working edge” that’s broader and less likely to chip or roll. Whatever your preference, don’t let it dull. It’s easier to hone your edge after each use than re-profile it when it’s too late.
Never Lend Your Pocket Hatchet This doesn’t make you a jerk, it makes you smart. If you value your tool, you don’t trust anyone with it. This is old woodsman etiquette. If you do lend out your pocket hatchet, only lend it to people who would be willing to fix the edge, replace the handle, or buy you a new one. Ax repairs take time, and a friend wouldn’t want you to invest a lot into fixing a screw up.
Final Thoughts
Above: The Wiglaf by Wenger Blades can be used in every stage of fire preparation. Included in the design is an integral bow drill divot for use as a bearing block for friction fire starting.
Pocket hatchets may be small in stature, but they make up for it in character. Compact, concealable, multipurpose, plenty of bite — the reasons to pack, hell, even EDC a pocket hatchet far outnumber the reasons not to. Next time you venture off-grid or head into a rough part of town, pair a pocket hatchet with a pistol and knife, and you have an excellent loadout for just about any emergency. Throw one into your pocket, bag, or kit and improve your survivability.
It’s summer, and for most of us that means clear skies, warm weather, sunshine, and a plethora of outdoor activities. However, as with any other season, the summer weather brings certain risks we must prepare for. Exposure to the sun can lead to heat exhaustion, dehydration, and painful sunburns if you don’t take steps to protect yourself. On short excursions these can be problematic enough, but in a long-term survival situation where your mind is occupied with other urgent tasks, they can easily turn life-threatening.
Why Bother with Sun Protection?
Flickr.com/gamikun
Anyone who has gotten a particularly bad sunburn knows just how debilitating it can be. Even a moderate burn can lead to stinging, pain moving, and blisters that can open your skin to infections. More severe burns can lead to sun poisoning. This condition causes swelling, large blisters, headache, fever, nausea, dizziness, and dehydration, among other symptoms. Needless to say, this isn’t something you want to deal with on a camping or backpacking trip, much less in a challenging disaster situation.
There’s also the long-term cumulative danger of skin cancer. According to the Skin Cancer Foundation (SCF), more people are diagnosed with skin cancer each year in the U.S. than all other cancers combined, and one person dies of melanoma every hour. Additionally, men age 49 and under have a higher probability of developing melanoma than any other cancer.
A diagram of sunburn’s cause and effect, via the U.S. National Library of Medicine.
Genetics and ethnicity can affect your sensitivity to sun exposure — those of us with very fair skin undoubtedly need to take extra precautions. However, don’t think that these factors make you immune to the danger of sun exposure. While incidence of skin cancer is higher among Caucasians, the American Academy of Dermatology showed it is more deadly in people of color. No matter your skin tone or race, you should take precautions against sun exposure if you’re spending time outdoors.
General Best Practices
Before we start discussing protective gear, we should first touch on the mindset and techniques that go hand-in-hand with that gear.
Flickr.com/habibkaki
Obviously, staying inside or underneath a shelter is the easiest easy way to avoid over-exposure to sunlight. Your shelter might consist of a store-bought tent, a simple tarp on a ridgeline, or even an improvised shelter such as an A-frame or lean-to. However, the purpose of this article isn’t to discuss shelters at length — that’s a topic for a different day.
Another factor to consider is time. When are you most active? In a survival situation — especially one in a hot and sunny climate — it’s often wise to minimize your activity during peak daylight hours. By staying in your shelter most of the day and venturing outdoors in the morning and evening, you’ll avoid prolonged sun exposure.
Weather is also a factor. Clear, hot, and humid days increase the risks of sunburn and heat stroke. These risks are reduced slightly on cool and cloudy days, but the potential for sunburn is still there — UVA rays will penetrate clouds and can still harm you. If you’re at a high altitude, the danger is amplified since there’s less atmosphere protecting you from the sun.
However, there are many situations in which moving only during ideal weather, staying in a shelter most of the day, or building a shelter in the first place may not be feasible. You might be on a hike and need to move all day to reach your destination by nightfall, or you might be in a survival situation where stopping to rest and seek shelter during the day is impossible. In these and many other cases, gear can protect you while you’re on the move.
Store-Bought Sun Protection
Flickr.com/sworldguy
The first line of defense while you’re on the move is the gear you bring with you. The items in your pack or on your person should be purpose-built to block the sun, and they’ll offer superior protection to anything you can improvise.
Sunscreen
This is the default choice for short-term sun protection, and one of the few that can block harmful UV rays while leaving your skin exposed. For outdoor sports, day hikes, backpacking trips, and the like, bringing along sunscreen and applying it regularly is a must. Ensure you choose a “broad spectrum” sunscreen that’s rated for UVA and UVB and has a SPF rating of at least 30. Apply a substantial amount — about a shot glass full to cover your exposed skin — and reapply every few hours.
You might think wearing any long-sleeved shirt and long pants is all the protection you need, but that’s not necessarily the case. As mentioned above regarding clouds, ultraviolet light can pass easily through many natural materials. Clothing with a Ultraviolet Protection Factor (UPF) is specifically designed to protect your skin from the UV light that can penetrate normal fabrics. It uses denser weaves, thicker fabrics, and/or special dyes that block these rays, and is rated on a scale of 1 to 50.
You can read all about UPF fabrics and check out several reviews of sun-blocking apparel in our UPF Shirt Buyer’s Guide article.
Hats & Headwear
If you’re wearing UV-blocking clothing that covers your arms and legs, a hat or other head covering complements it to protect your face and neck. Most outdoor-oriented hats from reputable brands will be made from UV-blocking fabrics, but you should double-check this for maximum protection. Wide-brim hats that cast a 360-degree shadow across your entire face and neck are ideal — refer to our recent Wide-Brim Hat Buyer’s Guide for more details.
Speaking of your eyes, sunglasses also fall into this headwear category. Look for ANSI-rated glasses that block at least 99% of UV rays. Dark tint and polarization can also improve comfort by reducing eye strain, but UV blocking performance is independent of these features.
Improvised Sun Protection
If you don’t have access to purpose-built sun protection gear, it’s possible to improvise from other items you may be carrying.
Head Wrap or Neck Scarf
We mentioned headwear earlier, but that’s not restricted solely to hats. A simple bandanna or shemagh (or even a spare shirt) can be wrapped around your neck or head to protect your skin. Think Lawrence of Arabia and cover your forehead and entire neck — depending on the climate and how much light is reflecting off the terrain, you might want to cover everything but your eyes. Multiple layers of loose light-colored fabric will create an area of higher humidity around your skin to conserve sweat and keep you cooler longer.
Slit Goggles
If you left your shades at home or lost them at some point during the journey, you can cut a scrap of fabric or leather to make slit goggles. These have been used by native cultures and arctic explorers to prevent snow blindness in the winter, but they’ll be equally useful in bright summer sunlight. Various military survival manuals recommend their use in adverse conditions.
Sunblock from Natural Sources
Now, let’s say things have really gone downhill and you lost every bit of gear except the clothes on your back — what should you do as a last-ditch effort to avoid sunburn? There are some natural solutions, though they won’t be as comfortable or durable as man-made gear.
Mud
Flickr.com/bnorwood
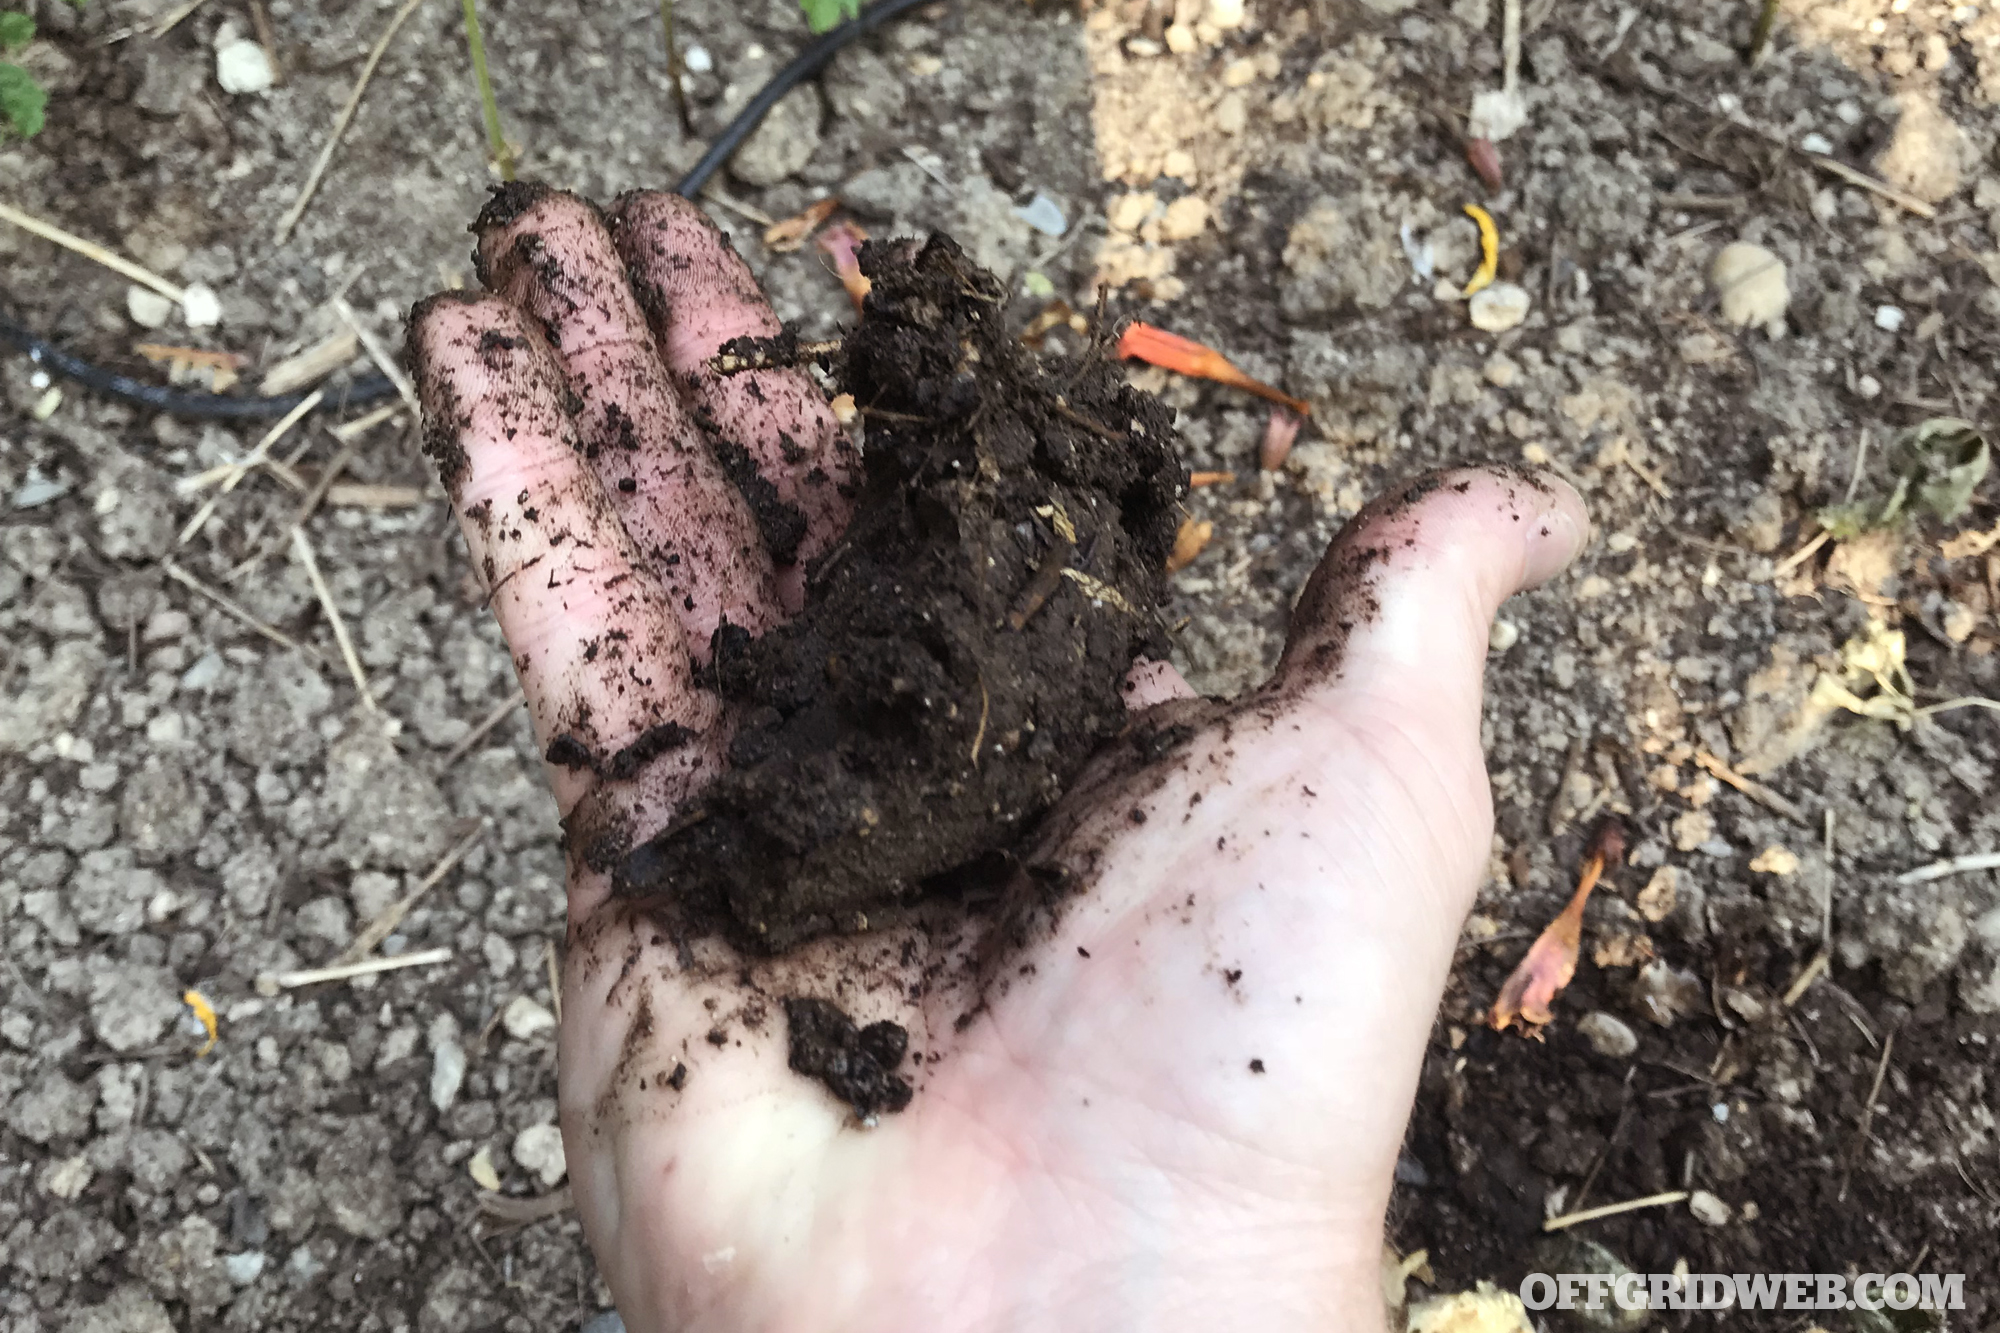
Ever wonder why pigs, elephants, and other animals love wallowing in mud? Scientists have found that the wet mud helps them to regulate body temperature, and once it dries, it serves as camouflage, bug repellent, and sunscreen. You, too, can use the mud to your advantage. Spread it on exposed skin and let it dry to form a natural barrier. It might be smelly and not-so-fashionable, but it’s better than getting sunburns day after day.
Aspen Powder
Populus tremuloides, also known as quaking aspen or American aspen. Photo: Famartin / Wikipedia
If you find yourself in a forested area where aspen trees are present, you’re in luck. The chalky white powder found on aspen bark has long been used as an improvised sunblock, although there isn’t adequate scientific research to show exactly how effective it is. You might double-up on natural sun protection by rubbing this powder onto a layer of mud and applying it to your exposed skin.
With some combination of the above techniques and store-bought, improvised, and natural sun protection, you should be able to stay sunburn-free all summer. And more importantly, you’ll avoid sun poisoning and other severe exposure-related health consequences.
When you need to boil water over an open campfire, it’s easy enough to set a single-walled metal pot or bottle directly at the base of the fire. Although this will get your water boiling quickly, it also has some downsides. The application of heat is too direct and extreme for more precise cooking, so you’ll be more likely to burn food if you cook this way. It also exposes open vessels to smoke and ash from the fire, and can make recovering your vessel without burning your hands tricky.
An easy solution to these issues is to suspend your pot or bottle above the fire, taking advantage of radiant heat rather than intense flames. A wire hanger, also known as a bail, allows the pot to be suspended from above without tipping over. However, many pots and bottles lack this feature.
Many camp cups, such as this one from GSI Outdoors, have side handles but no central bail hanger.
We’ve seen many methods of adding bail hangers to camp cookware. Some require drilling holes or soldering on tabs, while others require combinations of hooks and screwed-together clamps. The following video from Far North Bushcraft and Survival shows one of the simplest methods we’ve seen, and one that looks to be very effective with a variety of vessels.
Lonnie combines 3 feet of 1/16″ steel cable and two 1/16″ ferrules from the hardware store to create a removable pot bail hanger that will fit any vessel with a rolled rim. Once they’re clamped in place around the cable ends, the ferrules can adjust to fit various types of cookware. So, you’d likely only need one bail for your entire mess kit.
Editor’s Note: The following article was originally published by our sister publication RECOIL, and appears here in its entirety with permission. For more articles on guns, training, and gear, go to RECOILweb.com.
Photos by Dave Merrill
Amongst the cognoscenti, the popularity of a less-lethal option for EDC has been steadily increasing. Whether you use one to add to the force continuum, or because more deadly weapons are illegal in your locale, you need to know the why’s and how’s behind them.
So Why Carry Less Lethal in the First Place?
You can’t shoot every threat you run into — pulling or using a gun on a less-than-deadly-force threat can get you put in prison. The old saying “If all you have is a hammer, every problem gets treated like a nail” is in play here.
In my class lectures on this subject I often refer to the case of George Zimmerman. Change the dynamics of the case a bit; if George had sprayed Trayvon Martin in the face with OC spray when he was confronted, would we even know who George was? The answer is likely not, because this would’ve very likely ended the confrontation right there. And everybody involved would’ve been better off for it.
If not having to kill another human being if you don’t have to isn’t enough, less than lethal options also help you do things like not shoot someone’s dog when you get chased while jogging.
One can do a “take back” in effect with OC if the decision to use spray was hasty, whereas “oops, sorry” can’t be done with bullets.
The vast majority of the research done on the use of OC spray on humans has come from the police world for obvious reasons. Several things we know from observation of use of OC spray in law enforcement going way back to the 1980s is that OC tends to work very well (roughly 85 percent of the time, or better), and it tends to lower the level of violence involved in arrest scenarios. It “takes the fight out of the fighter” to steal a quote from one of my mentors.
In the non-LE context it tends to work even better. Why? Because what cops have to do that non-cop self-defenders don’t is arrest bad guys — to actually lay hands on them after spraying them.
We also know from numerous U.S. and Canadian law enforcement studies that OC spray lowers the injury rate for both the cops and the suspects involved. In fact, OC spray has proven to be the safest use of force option available for law enforcement, with injury rates being almost nil. This is safer for everyone involved, even when compared to empty hand tactics.
Lastly, OC is widely accepted in our society, so much so that it’s common to see spray in purses. It’s socially acceptable to do things like walk out to your car across the dreaded dark parking lot with your OC in hand. Doing so with a gun will likely cause alarm to bystanders, or even cause the police to be called. With OC, people don’t even bat an eye, if they even notice. This allows a defender to have a near-instantaneous response to an assailant.
No, you probably shouldn’t carry three OC dispensers, but any one of them should be fairly easy to integrate into your EDC.
What the Hell Should I Carry?
The non-LE tasers suck, period. Even in the LE world, tasers are an iffy thing. In my experience, about 50 percent of taser shots work the way we want tasers to work. Electronic “stun guns” are a jackass party favor at best and worthless for self-defense. Sorry, gun show vendors.
Expandable batons are a pain to carry and damn near completely ineffective even when used by someone who’s good with a baton. And if you aren’t? Good luck.
Of the less-lethal options that are viable for CCW carry, the two that stand out are OC spray and saps. Saps are illegal in many states, even for people who can legally carry a gun. Even though I think they’re a viable (and old-school awesome) choice, you may not have that option.
This leaves us with OC spray, aka pepper spray.
Buyer Beware…
A very real issue I discuss in training is smart purchasing. In the OC world, to use guns as an analogy, it’s very easy to buy a Hi-Point-quality spray, and often difficult for people to find a Glock/SIG/S&W quality of spray.
Many people are surprised to find there are no national standards for OC makers unless the OC spray in question is marketed as a bear or dog spray. For use on animals, OC spray is heavily regulated by the EPA; for use on people, there are no rules. Nothing exists for anti-bad-guy OC in the way we have SAAMI specifications for ammunition. If you had a blender to liquefy hot peppers, a supply of canisters, a way to pressurize the cans, and a label maker, you could become a defensive spray manufacturer in your garage tomorrow.
Skip the Scovilles — MCC content of 0.7 percent or higher is what you’re looking for.
What to Look For
Does your OC manufacturer have a MSDS/SDS (safety data sheet) available on their website? If not, do not buy. If they have a SDS, does it list things like known carcinogens in the ingredients list? Here’s a hint: Some do, and invariably they’re among the brands recommended.
Does the OC manufacturer list the Major Capsaicinoid Content (MCC) of the product? If not, then your product is likely bullsh*t.
A dirty little secret of many OC makers is that they use terms like “10%”, and “SHUs” (Scoville Heat Units) in advertising, but have no real idea how “hot” their product is, because they do no quality control testing on the peppers they use, or the product they extract from it.
One easily researched scientific paper on this subject will tell the reader, “Estimating the SHU value based on the total capsaicinoid concentration of the pepper sprays suggested that the labeled SHU values were sometimes overstated by a factor of 100 times.” This isn’t good.
Look for a product with a MCC content of at least 0.7 to 0.8. Less than this is literally weak sauce. A good top end is the common “police strength” 1.33% MCC.
Your OC spray canister should have some sort of safety built into it to avoid accidental discharge. Pocket or purse NDs are all too common with some of the smaller keychain-sized units due to not having a safety at all, or not having a robust safety.
As far as form type for non-cop-duty belt use, I greatly prefer the usability of the “MK6” sized units, or the mini baton/Kubaton-style sprayers that have a reloadable insert. Both of these types of spray units are easy to use under duress and are very safe from accidental discharge.
Now, if you have all of that taken care of, what next? You need to choose what type of spray you want to use, which breaks down to stream-type sprays, cone-shaped mist, or gels. As Pat Rogers famously said, “The mission drives the gear train.” The spray type you choose depends on your circumstances.
The flip-to-side safeties (on right) are easy to inadvertently discharge in your purse or pocket.
Cone-shaped mist sprays have the advantage of a “shotgun” type pattern that makes it very easy to hit a bad guy in the face on the first shot and gives good coverage in doing so. The mist easily gets into the eyes, even around glasses, and causes severe short-term coughing in most people. This pattern also makes it easier to affect multiple bad guys at once, or allow the spray to be used as a barrier while retreating. Disadvantages are that this type of spray is most affected by the wind, and most prone to cross-contamination of bystanders, or yourself if you spray into the wind.
Streamers have a longer range, but require the user to be much more accurate in placement of a burst to get a solid hit. This accuracy requirement is where more than a few “OC failure” cases stories have stemmed from. Risk of cross contamination is much lower than with cone, as aerosolization is far less, and respiratory effects to the bad guy are diminished.
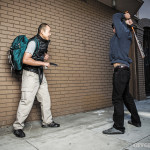
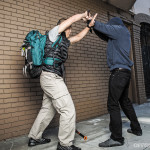
Gel sprays have a pattern much like a streamer, but are thicker and have as near to zero aerosolization as one can get in an OC spray. Respiratory effects are basically zero, so a hit to the bad guy’s eyes is a must for any useful effect. In my observation, both from being sprayed and from use on students in scenario training, the gels are noticeably slower to take effect versus cone- and stream-type sprays.
Something to shop for while you’re at it is inert training spray that matches what you’d like to carry. Inert spray is a valuable training adjunct to live OC and allows one to “target practice” safely and effectively, even at home.
I’ve seen more than one student change their mind as to what OC spray they thought they wanted to carry after getting some experience in class. Using the inert version against a live human being in practice drills makes all the difference. Trainers are readily available and inexpensive, especially compared to never spraying one at all until you need it.
Quick and Dirty Primer On Using Pepper Spray
After some years of playing with both strong-hand and weak-hand use of my spray, in both on- and off-duty scenarios, I strongly prefer using OC with my strong hand. This leaves me able to use a flashlight at the same time, and keep that light if I decide to ditch the spray and go to guns. Also, much of the time lately I am using a Kubaton-type “keystick” style sprayer while off-duty. Strong-hand use allows me to instantly transition to using the sprayer as an impact device, using the Pikal jab techniques taught by famed trainer Craig Douglas.
Another consideration is that when things go to guns, objects being carried in the strong hand are discarded when one goes for the draw; objects in the weak hand are often retained, and interfere with a good two-handed grip on the gun. Yes, this is a “training issue,” but it’s something I’ve noted several times in after action reviews of video of various confrontations.
From top down: Cone, stream, and gel shaped spray patterns.
Unlike other common aerosol products, OC spray should be used with a strong grip, allowing the thumb to activate the spray button, not the index finger. This is a fight, not a hair care event.
Use the spray in short one-second bursts. Just like with defensive pistol shooting, if you miss, or your shot doesn’t take effect, adjust your aim and give another burst. Overspraying your bad guy and using the whole can at once isn’t better. The OC that drips onto your assailant’s T-shirt is doing you very little good in a confrontation.
Having a plan B is key. OC spray works most of the time on most people, but just like anything else, including gunfire, it can fail. It’s best to be prepared for that, just in case.
Inert training spray
I commonly teach various empty hand skills, and transitioning to the pistol as appropriate. This is another place where drilling with a trainer, or training partner, can pay huge dividends when one uses inert OC and dummy guns.
Regardless of which particular OC you end up with — train with it. Try different carry methodologies, and consult your local laws as to when it’s time for spicy treats, and when it’s time for the iron.
Use your thumb, not your pointer, for the best control. You aren’t using hair spray. Proper deployment method is seen on the right, improper on the left.
If you’re a minimalist or simply prefer enjoying the open air on camping trips, a tarp can provide a functional and lightweight form of shelter. However, it also leaves you open to cross-breeze and insect pests. On the other hand, a tent provides a more secure enclosed shelter, but at the expense of weight and complexity. Many tents bridge this gap by including a small covered vestibule for stashing boots or gear outside the tent, but these areas are generally too small for any other purpose.
Snow Peak has released a new-for-2018 tent and tarp pack that combines the advantages of an open-air tarp with an enclosed sleeping area. The Snow Peak Entry Pack Tent & Tarp includes a four-person tent and entry-level tarp, plus all the poles, guy lines, and stakes you’ll need to set them up.
The tent is made of 75D polyester with water-resistant polyurethane, teflon, and UV coatings. The tarp is made from heavier 210D polyester with the same coatings, and overlaps the tent’s vestibule to create a continuous shelter.
Each component comes with its own carry bag — 24″ x 9″ x 9″ for the tent, 32″ x 7″ x 9″ for the tarp. Total weight for the two is just under 34 pounds (17.4 for the tent, 16.5 for the tarp), so this setup will be better-suited for car camping or setting up a family base camp than for backpacking or bug-out. MSRP for the entire system is $660. For more information on the Snow Peak Entry Pack Tent & Tarp, go to SnowPeak.com.