“Water, water everywhere, and not a drop to drink.” This classic proverb explains the conundrum of being surrounded by seawater — there’s more than enough to drown in, but none of can quench your thirst. The high salt content of seawater can cause the body to go into shock if it’s consumed, so it’s unwise to drink seawater, especially if you’re already dehydrated.
The other problem is that this salt is often extremely difficult to remove from water. Simple filters like the LifeStraw can remove bacteria and other pathogens, but are unable to trap the dissolved salt on a molecular basis. Seawater can be desalinated through distillation or reverse osmosis filtration, but both of these processes are time-consuming and require large amounts of energy input. However, researchers have recently announced the development of a graphene nano-membrane filter which can efficiently remove salt from seawater.
Graphene forms a single-layer hexagonal structure of carbon atoms. Source: University of Manchester
Graphene is a cutting-edge material composed of a flat hexagonal lattice of Carbon atoms. Each layer of graphene is two-dimensional on an atomic scale, meaning it’s only one atom thick. This structure generates some very interesting properties — it exhibits tensile strength higher than steel, it’s nearly transparent, and it’s a highly efficient conductor of heat and electricity. One form of graphene, graphene oxide, has a microscopic structure which enables it to form a filter with extremely small pores.
A depiction of water molecules passing through a graphene filter. Source: University of Manchester
Scientists at the University of Manchester recently announced research which demonstrates the effectiveness of graphene oxide for desalination. These filters can reportedly be produced easily in the lab, and the membrane pore size can be precisely controlled to less than one nanometer in size. Common salt molecules found in seawater are about one nanometer in size, so the membrane efficiently strips salt from water molecules while retaining a high flow rate.
Until now, this level of control over graphene membrane pore size was not possible. Researchers say more work needs to be done to prove these filters work on an industrial scale, and to document the filter cleaning or replacement intervals, but this study still represents a major step forward in seawater desalination. The initial testing shows these graphene oxide filters can reject 97% of common salt (NaCl) in water.
In layman’s terms, this presents the possibility of simple, portable, high-flow molecular filters which can convert seawater into drinkable water. For survivalists, especially those who live near the coast, that’s an exciting prospect. For more info, check out this article from the BBC or read this University of Manchester press release.
When we published our April Fool’s Day post last week, the Survival Fashion Buyer’s Guide, we got a few salty responses on social media because we didn’t actually spend days compiling and photographing 25 of the latest glamorous tacticool outfits. As much we would’ve liked to devote our resources to an in-depth satirical guide, our editorial team simply didn’t have the manpower to divert from our other serious projects. However, after much demand from their customers, the guys at 5.11 Tactical have decided to make their April Fool’s project a reality — and the results are pretty entertaining.
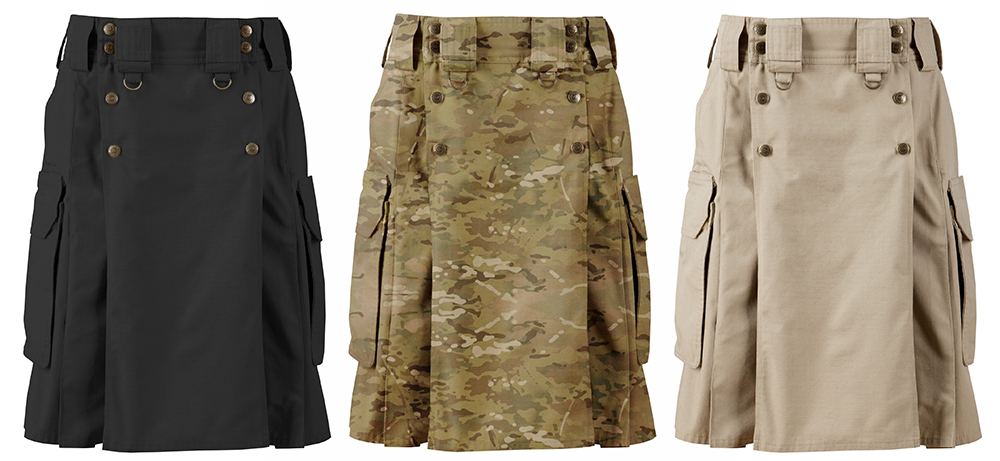
Back in 2012, 5.11 Tactical came up with an April Fool’s Day joke about offering a tactical kilt. Much like our post this year, it was just a joke at the time. But then the company started receiving purchase requests from paying customers. So, they set out to turn this Tactical Duty Kilt (TDK) into a real product. For a limited time each year, the once fictitious 5.11 Tactical Duty Kilt is actually offered for sale through the company’s web store.
“A standard kilt says you’re a man. A 5.11 Tactical Duty Kilt says you’re a bad man.”
The 5.11 Tactical Duty Kilt is designed for the man who’s not afraid to flaunt his undercarriage, free from the stifling constraints of traditional pants. It’s built from TACLITE polyester/cotton ripstop fabric with reinforced triple-stitching and a water-resistant Teflon coating. It features front slant pockets, as well as interchangeable TDU cargo pockets which can accommodate AR magazines.
The belt loops are sized for a 5.11 Tactical 1.75-inch Duty Belt, and they include dual fixed D-rings. The Tactical Duty Kilt is offered in six colors: black, moss green, MultiCam, khaki, stone grey, and burnt brown. Sizes range from 28-inch waist all the way to a 54-inch waist. MSRP starts at $75 for solid colors, or $80 for MultiCam.
“The hiiiills are alive with the sound of gunfire…”
Like previous years, the 5.11 Tactical Duty Kilt will only be available for purchase this year while supplies last. For more information on the 5.11 TDK, go to 511tactical.com/kilt.
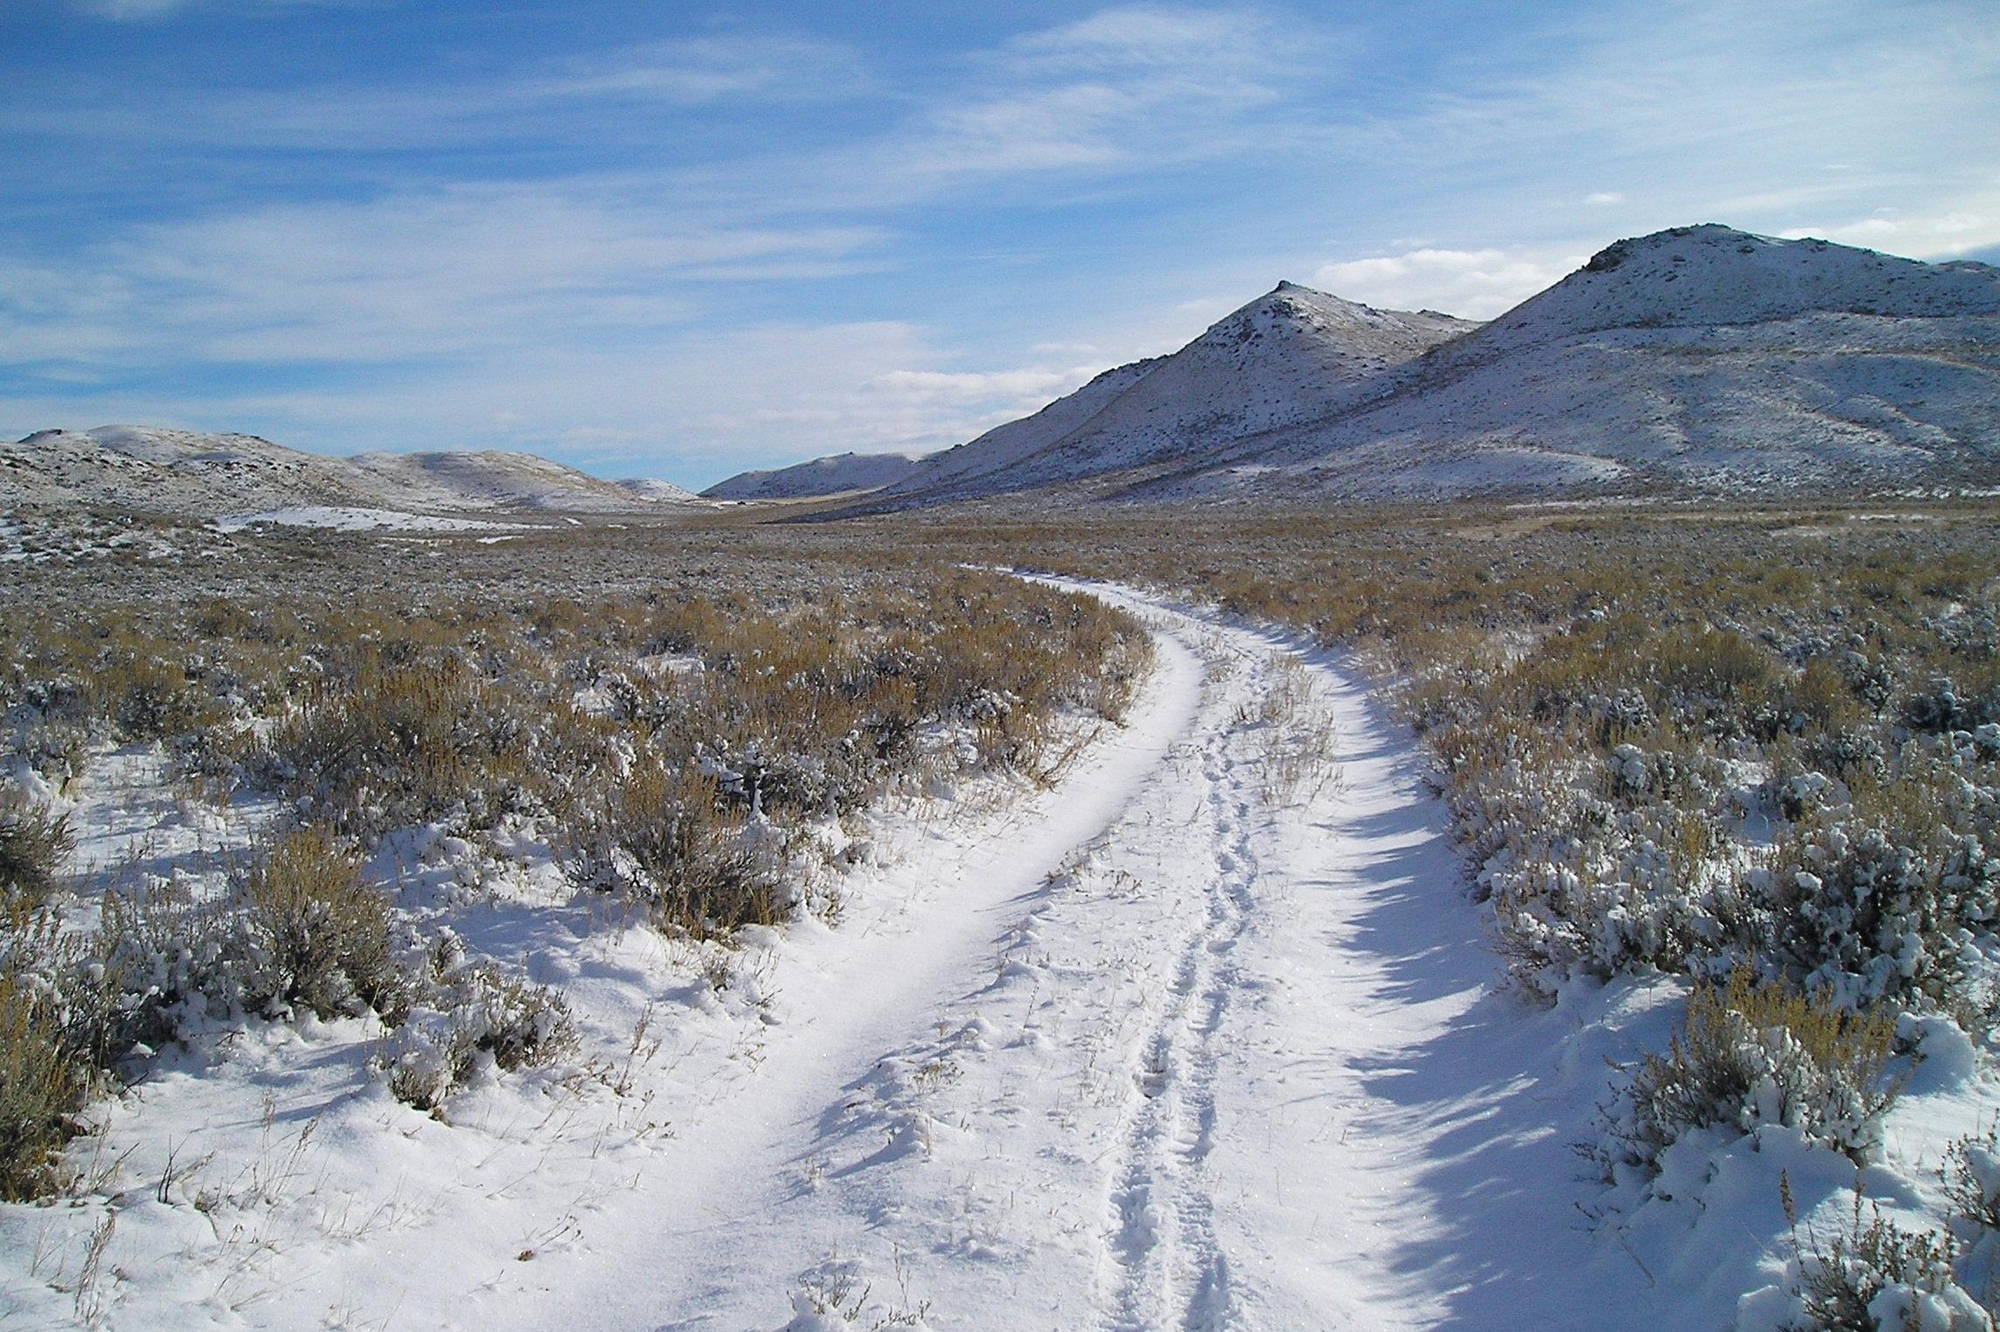
April is finally here, although freezing and sub-freezing temperatures persist in many states. This means that as much as we’d like to rock our Sky’s Out Thighs Out t-shirt we’re just not there. Not yet. We still need to consider helpful cold weather products and how to use them. And even if the weather has started to warm up where you live, it’s important to consider these items for the coming fall and winter months — preparation is predictive, not reactive.
As discussed in Part 2 of our Cold Weather Survival series, the U.S. Army cannot officially endorse any aftermarket products. However, through a combination of in-person interviews, reviews of feedback from Army testing, and studying its Mountain Warfare and Cold Weather Operations manual, we found some winter gear worth examining. In this article, we take a closer look at these items.
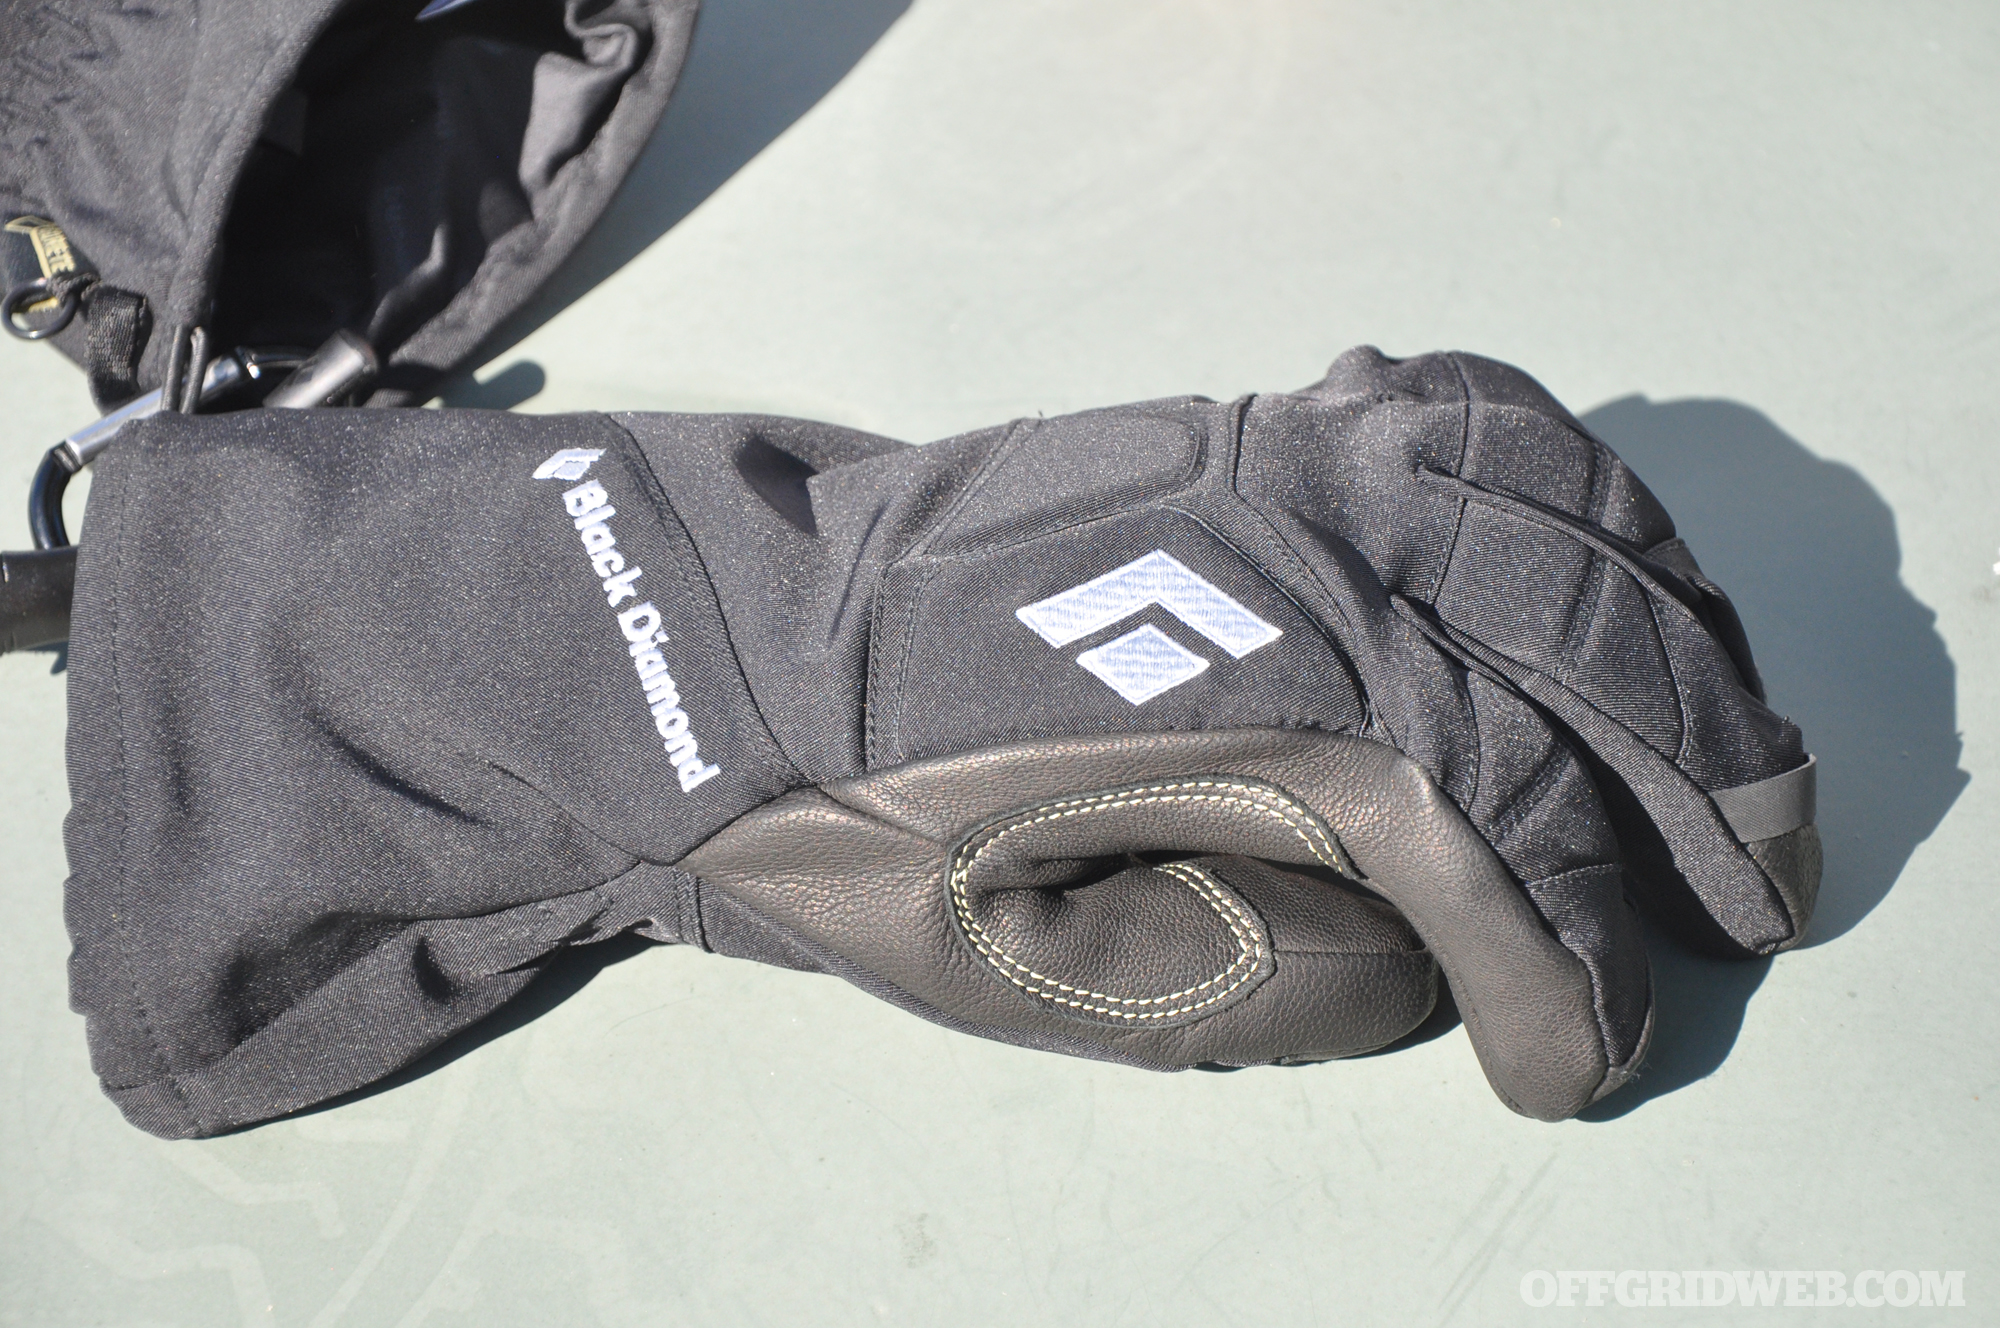
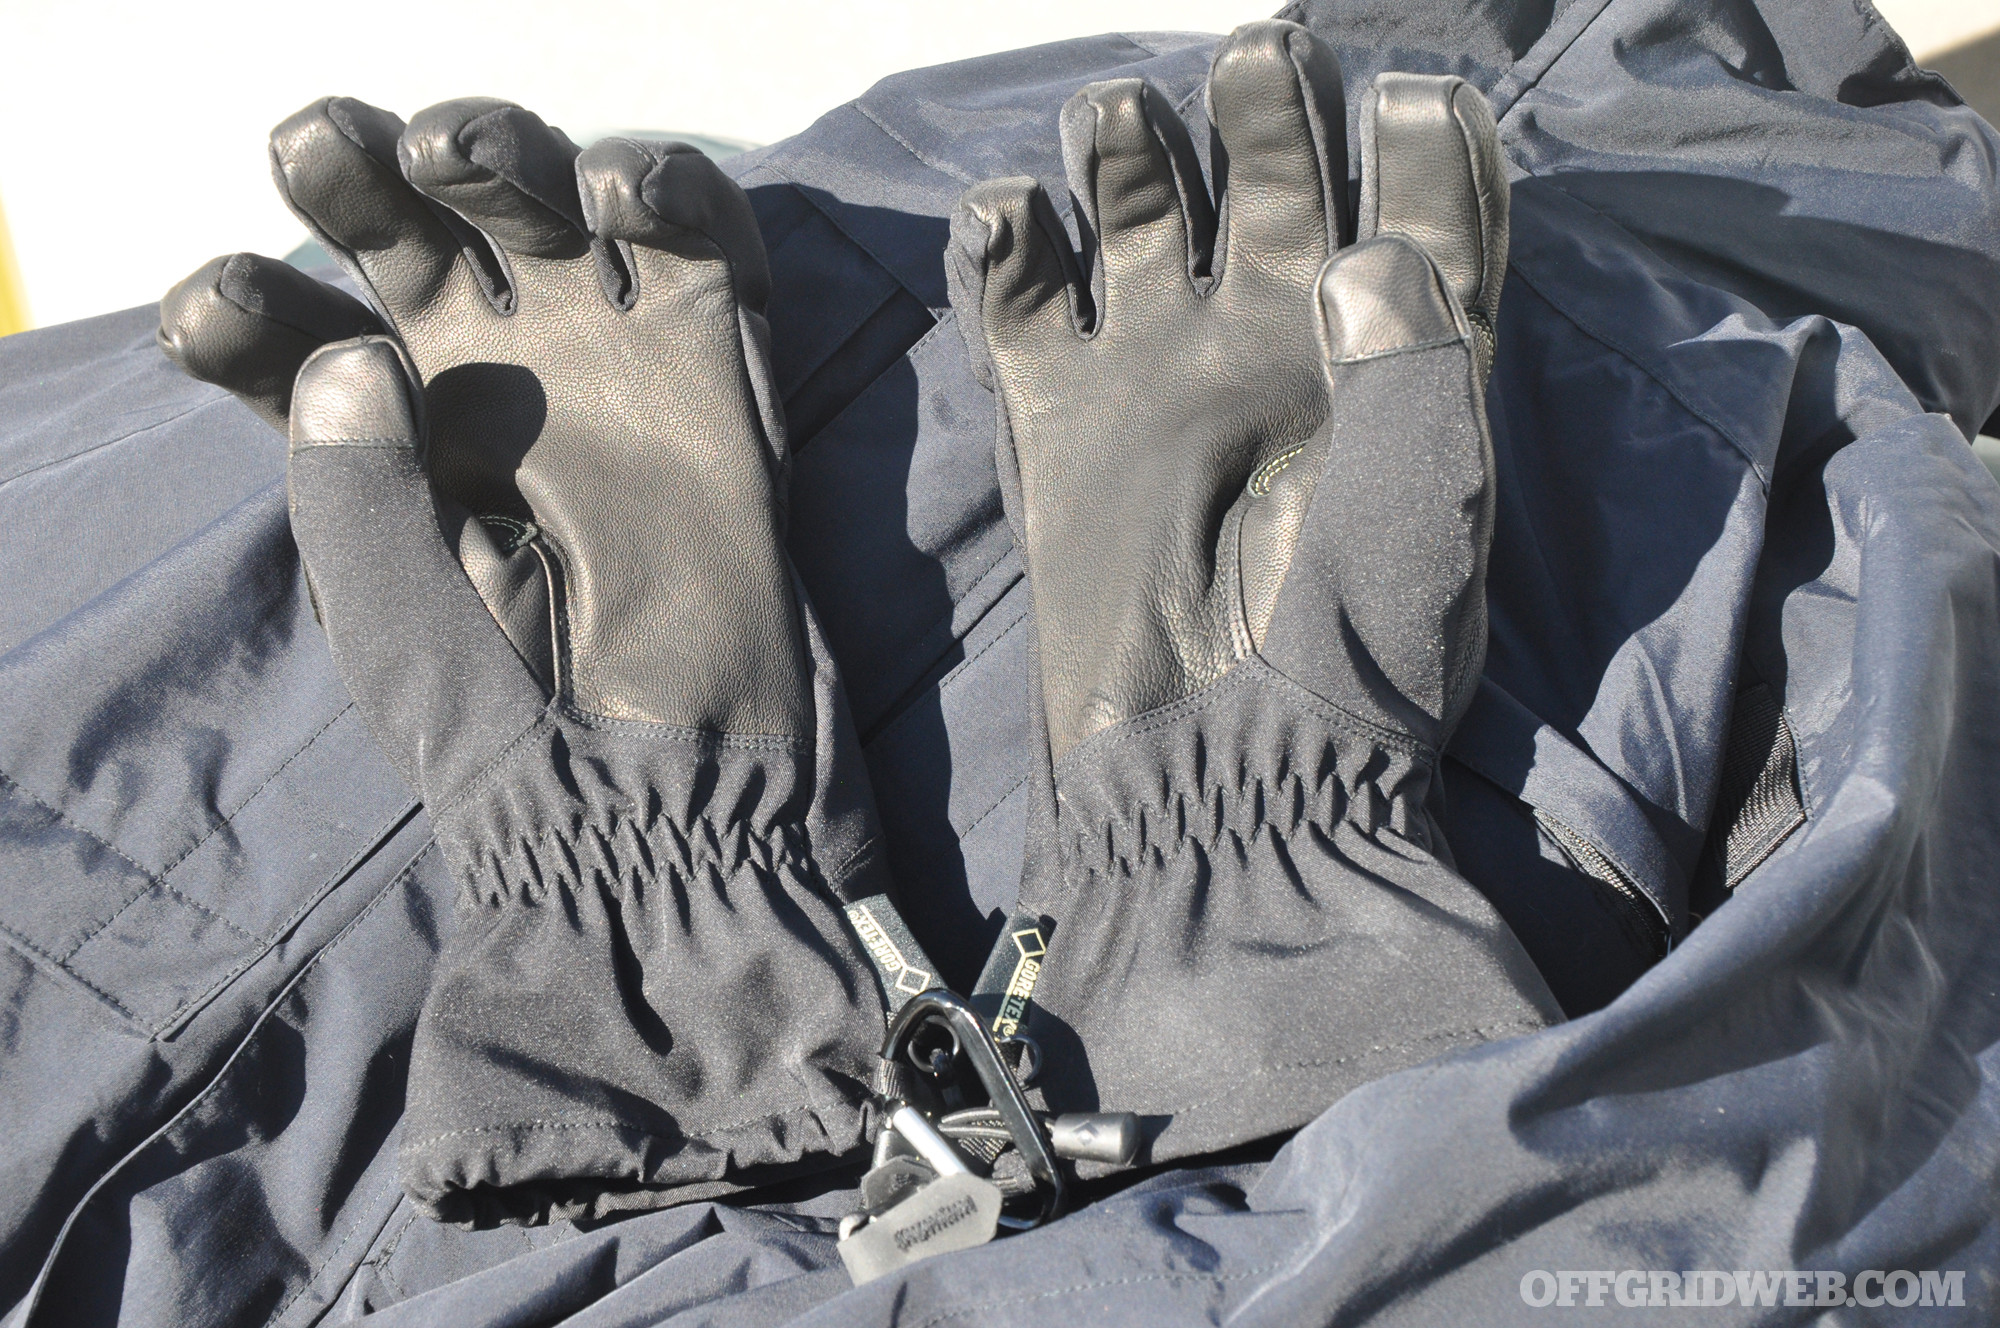
Black Diamond Enforcer Gloves
Gear from Black Diamond Equipment might not be standard issue for the average trooper, but it consistently appears in loadouts of Special Forces and Special Operations members. For example, Black Diamond Equipment’s Enforcer Gloves feature a waterproof shell and 170g PrimaLoft insulation. The gauntlet-style cuffs are long, cinching down past your wrist to maintain a consistent protected layer as they overlap your sleeves. Anyone who’s had a handful of snow shoved down their collar by an older sibling can attest to the benefit of keeping the frozen stuff outside your base layer.
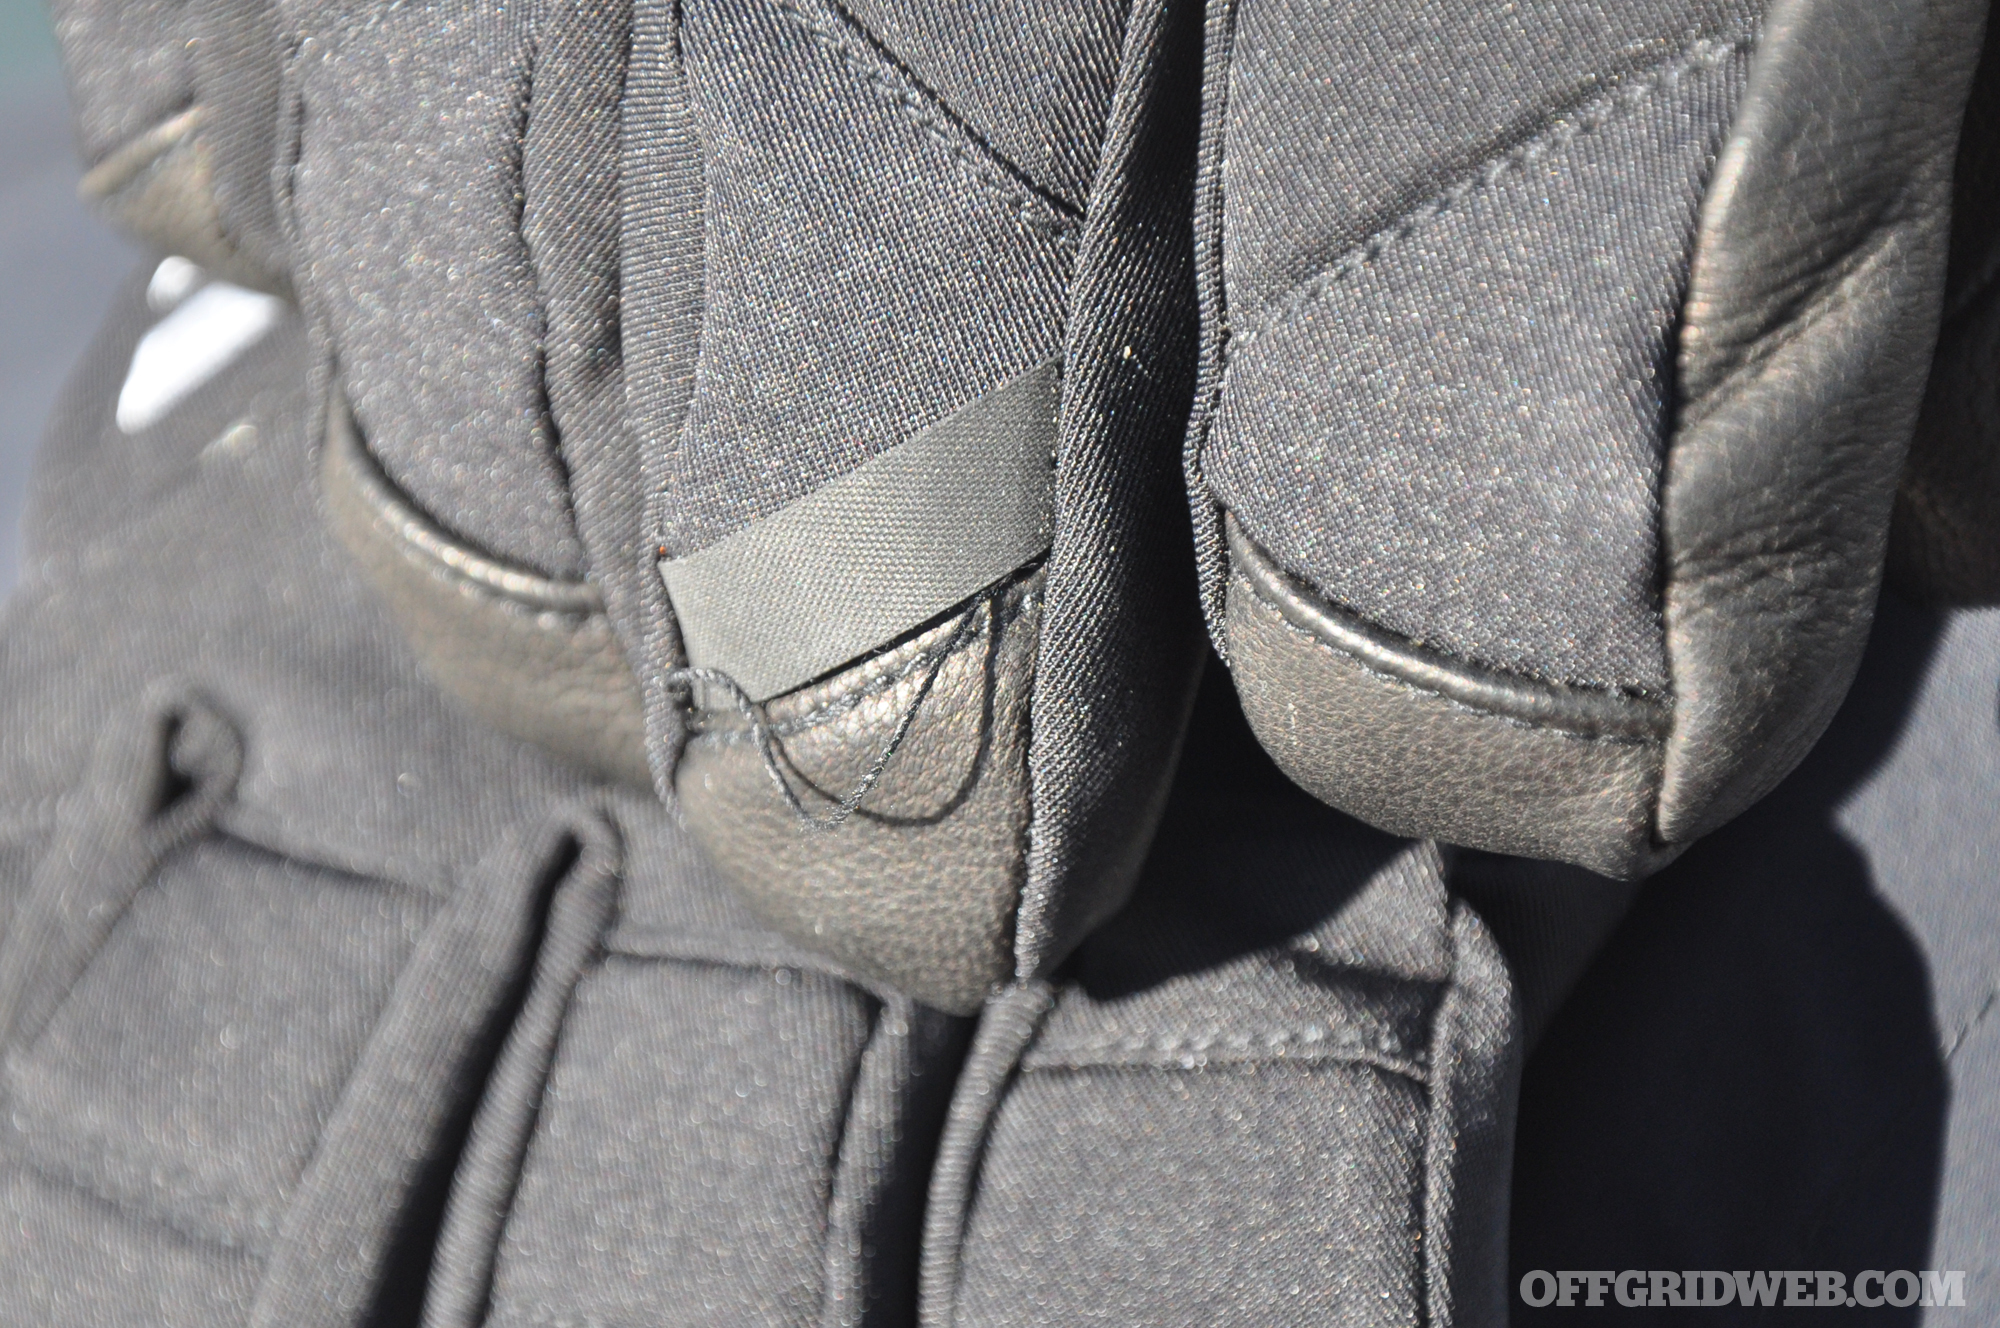
Upon closer inspection, we found that the seam finishing and stitching on these gloves wasn’t perfect. A loose thread was noticeable here and there, even before testing took place. Admittedly, we’re spoiled. We often have the opportunity to look at high-end gear sewn by expert tailors, and sometimes we get used to setting that bar pretty high. In this case, it’s possible that combining the glove’s premium materials with a flawless stitching program would have pushed its price point through the roof. At any rate, the stitching flaws did not appear to affect performance, and did not separate further during testing.
Close-up of one of the stitching defects we spotted on the Black Diamond Enforcer gloves.
Although thick to keep your hands warm, the gloves are pre-curved to accommodate holding a firearm or other tools. This reduced our hand fatigue for better long-term comfort. Gripping a steering wheel was also not a problem—a plus for when it takes half an hour for your diesel engine to warm up, and by that time you’re already at work. We loved the well-thought-out protective padding on the tops of the knuckles and fingers, including coverage for the delicate bones inside the hand.
Overall, the fit and feel of these gloves is among the best we’ve seen. We could tell that this is a product which has gone through more than one iteration, with obvious improvements made after years of customer feedback.
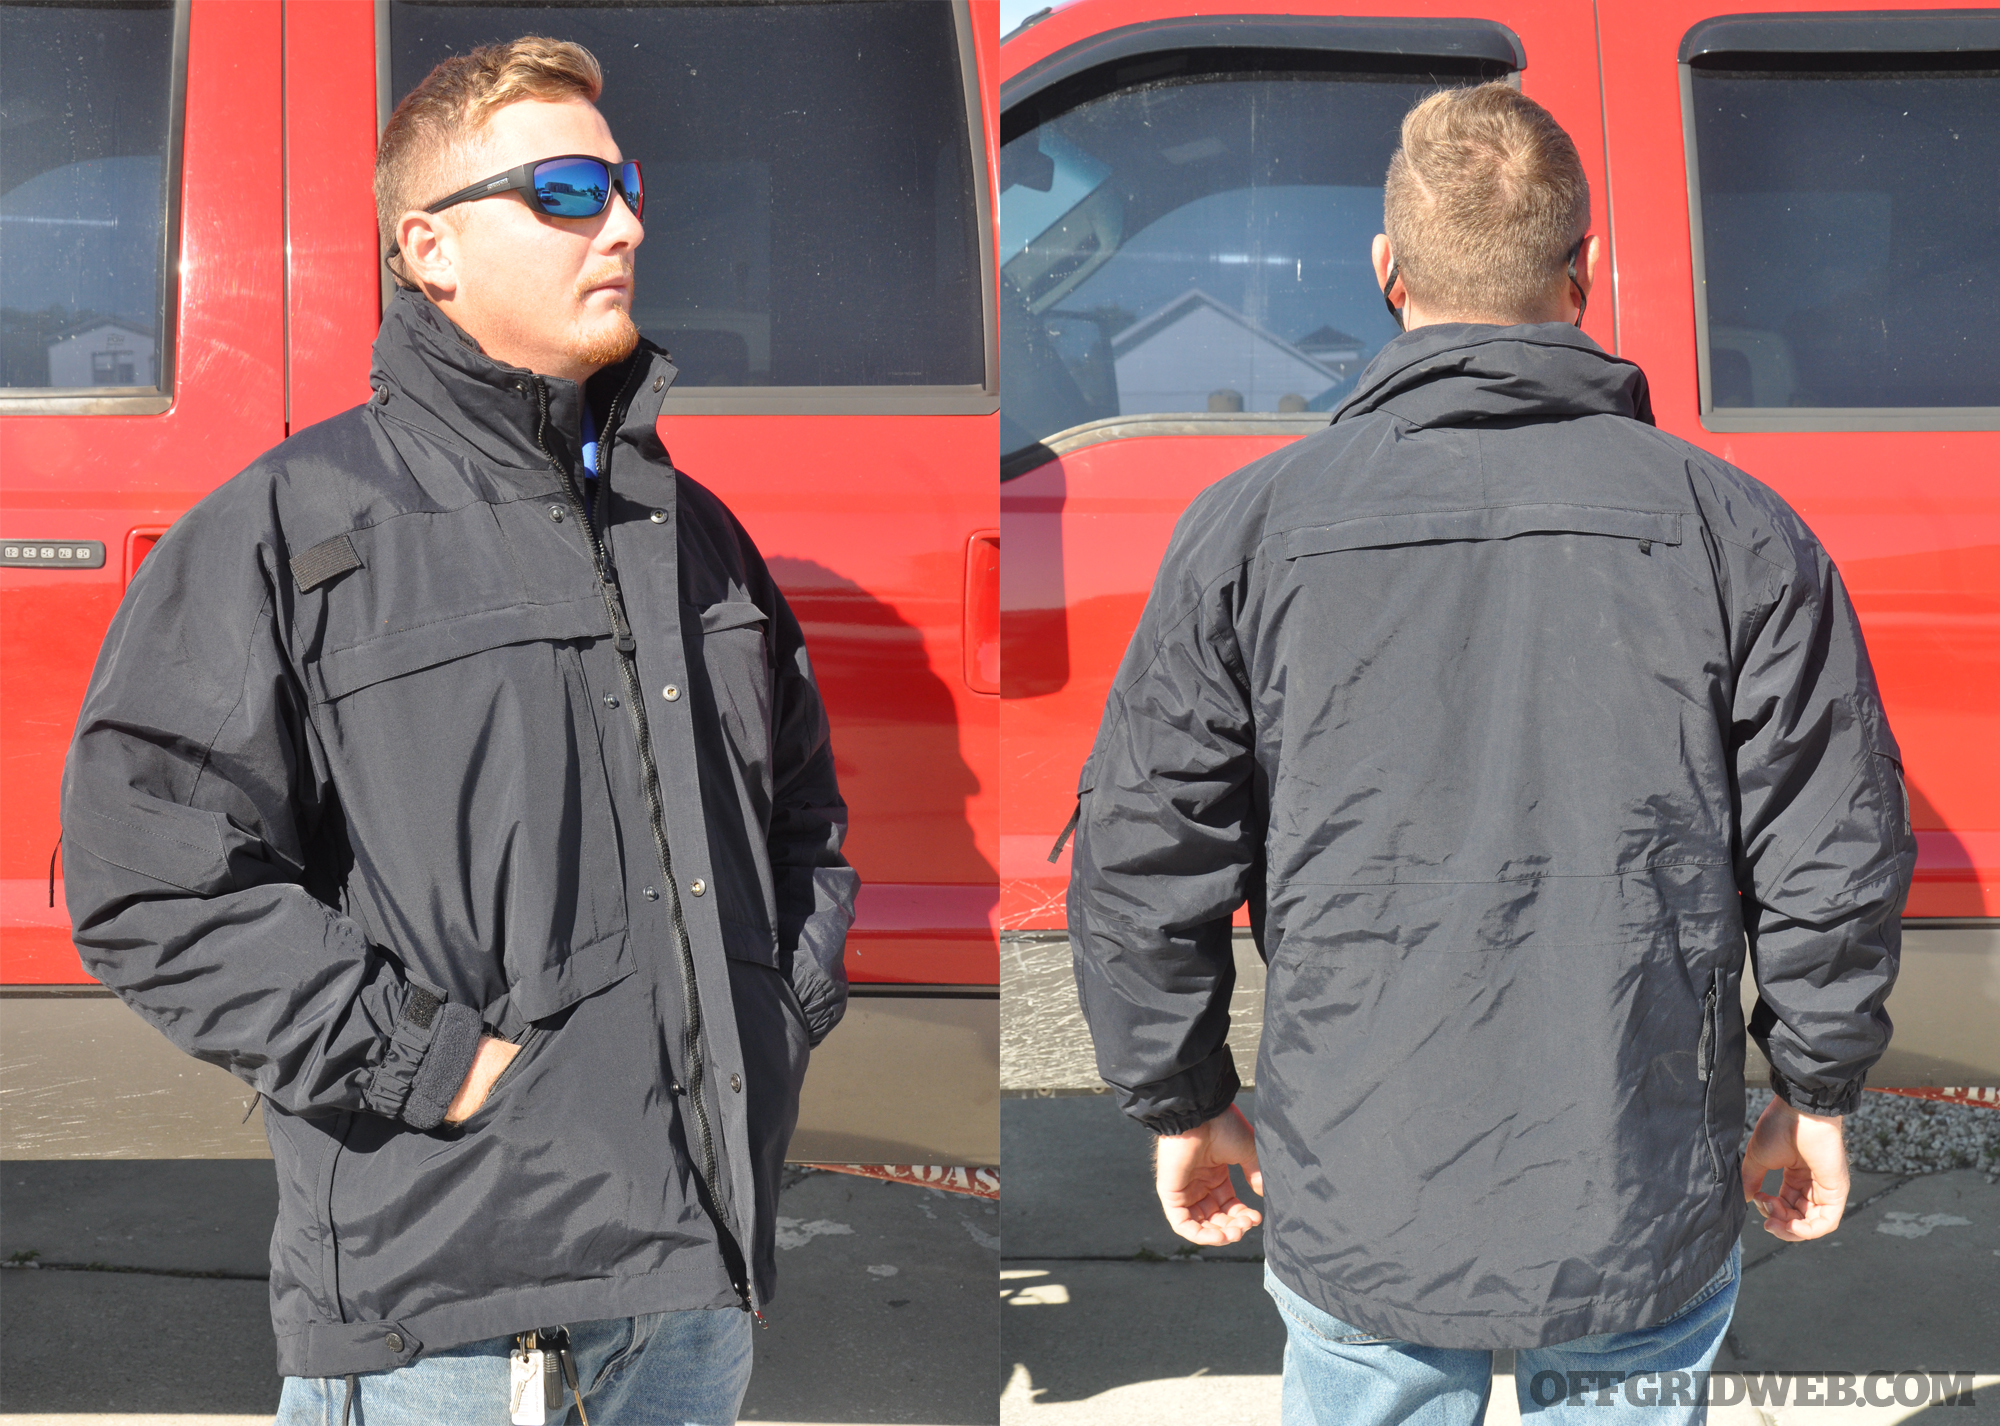
3-in-1 Parka by 5.11 Tactical
Some of our firefighter friends turn up their noses at 5.11 Tactical products, calling it “cop gear” due to its longstanding association with law enforcement. We’re going to chalk that up more to inter-service rivalry than actual hands-on experience, since some of our 5.11 EDC bags have been usedabused every single day for three years and counting without a hiccup. If you let your preconceived notions steer you away from a brand, you may be missing out on some excellent gear.
5.11 Tactical’s 3-in-1 Parka was designed as a patrol jacket, made for someone who has to work or stand outside in all conditions, no matter how cold or miserable the weather gets. It gets its name from the way it’s constructed, consisting of a thick fleece liner stuffed inside of a heavy-duty water-resistant shell. You can detach the fleece to wear on its own, or just use the shell if it’s raining but not cold. Otherwise, both jackets combine to make one substantial weather shield.
The complete system is noticeably heavy — a size large is just under 5 pounds (4 lbs. 13 oz. to be exact). We understand that extreme warmth, weather protection and durability can’t (reasonably) be attained using featherweight materials. But you definitely feel the difference when you’re putting this thing on. It feels sort of like a Snuggie combined with Level IIA body armor — in a good way.
Don’t expect high mobility while wearing this parka. In addition to being heavy it’s also bulky. This is fine as long as you’re mostly just walking or standing. But if you’re planning on extreme cold weather CrossFit or Antarctic 3-gun matches, you should probably re-evaluate your wardrobe.
We liked the dual concealed-carry pockets up front. They were large enough to accommodate a full-size 1911 pistol, and opened fully to let us reach it even with gloved hands. The hook-and-loop closures on these pockets made for fast access—just grab both sides and rip it open. Similar closures on the sleeves were also well received. This allowed us to cinch the sleeves down on our wrists, forming a weather-tight seal that retained our body heat while deflecting wind and light rain.
Extended zipper pulls on the front pockets make them easy to open and stash compact items. The only thing we didn’t like was that we had nowhere to put our hands. We found ourselves wishing for some generously over-sized hand-warmer pockets, like those found on Patagonia’s version of the 3-in-1 parka.
Overall? When we really don’t want to go outside but don’t have a choice in the matter, 5.11 Tactical’s parka is the jacket we’ll reach for.
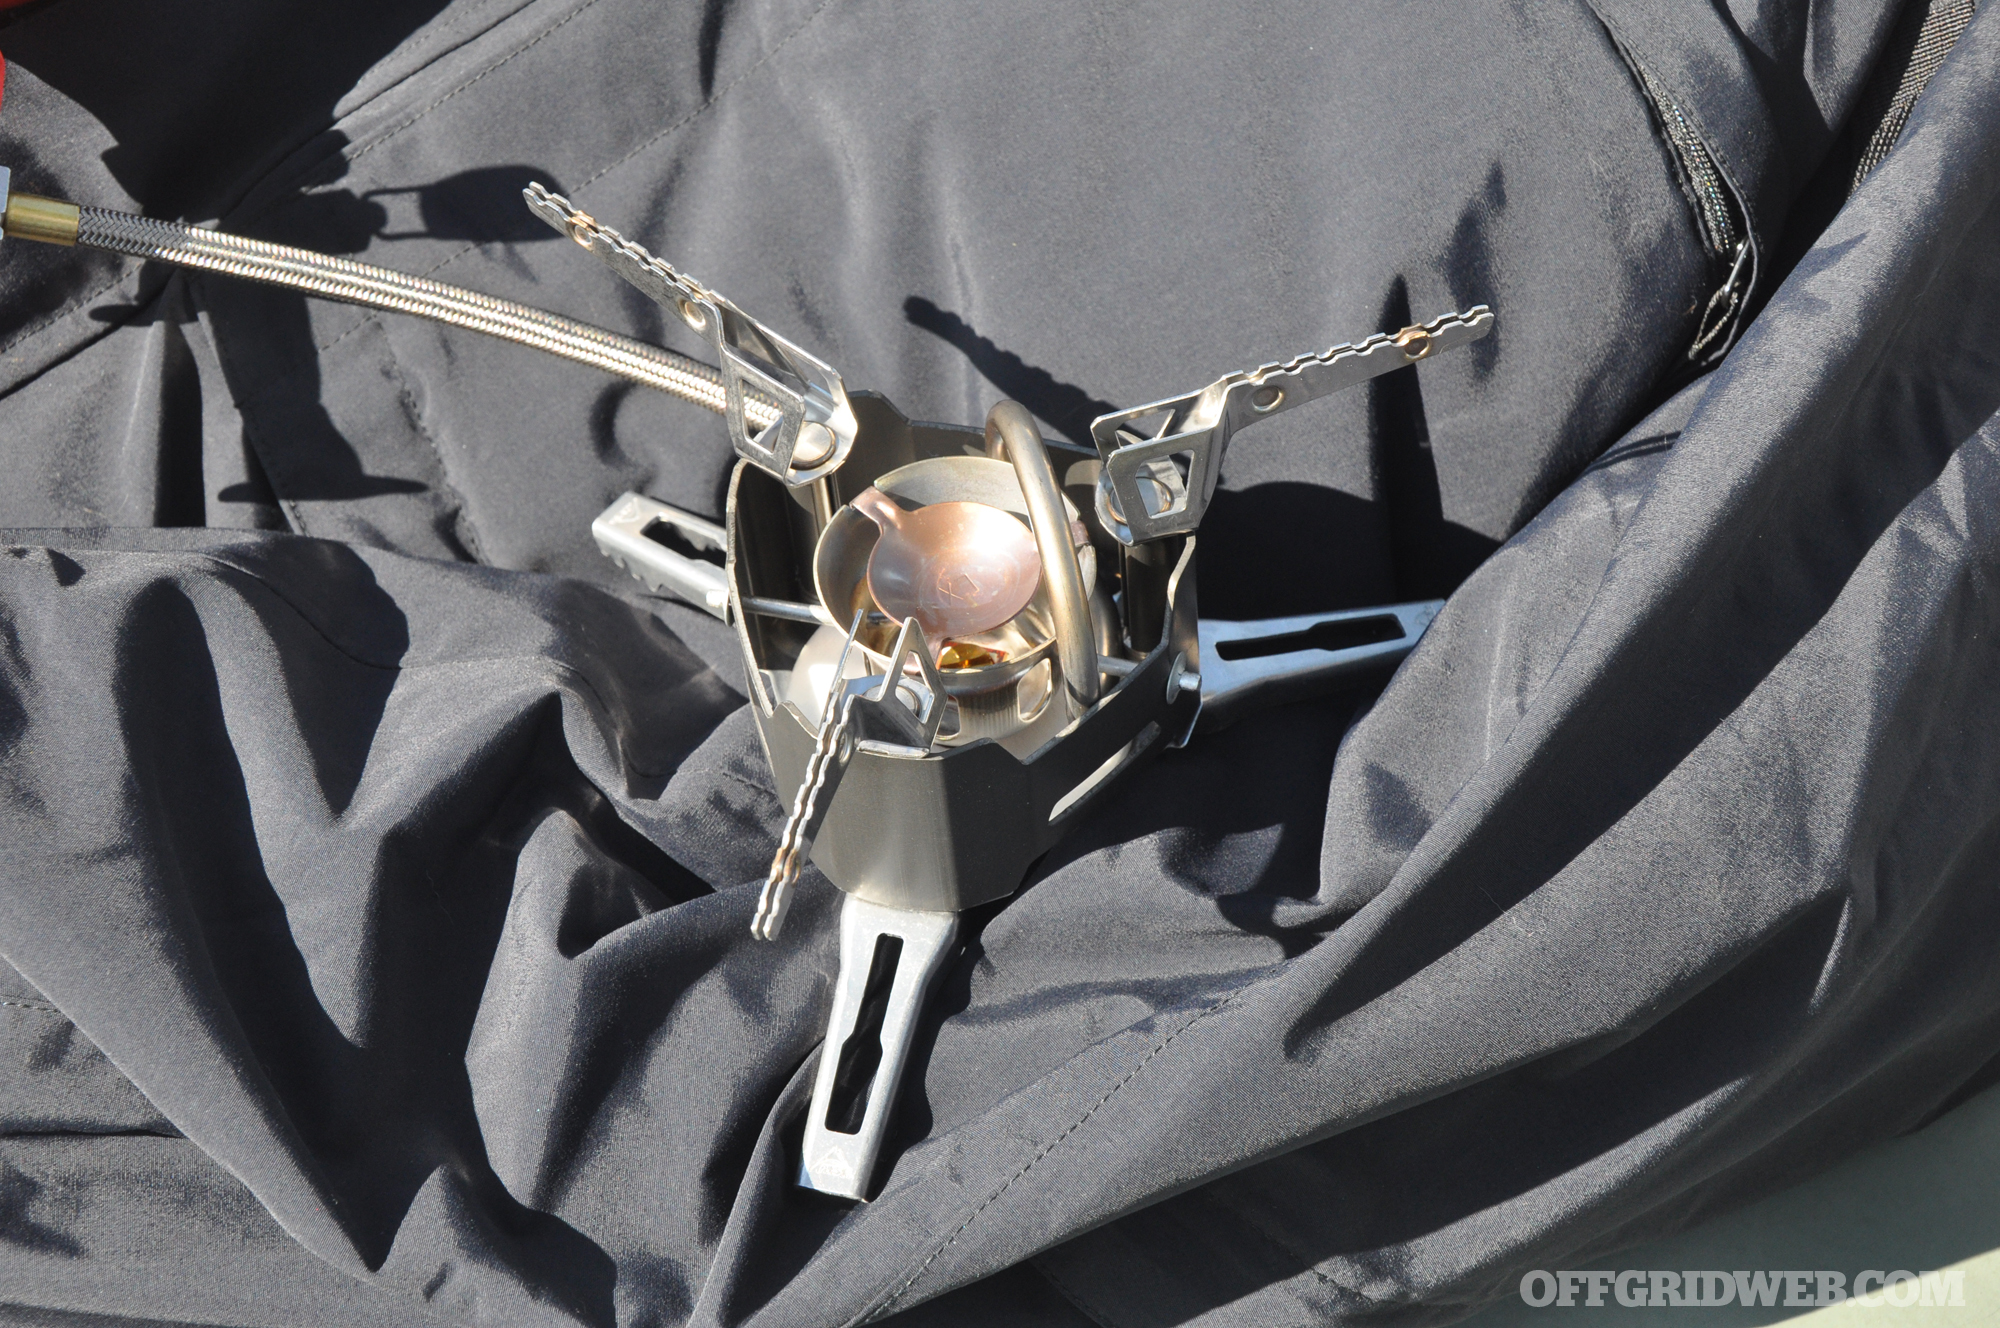
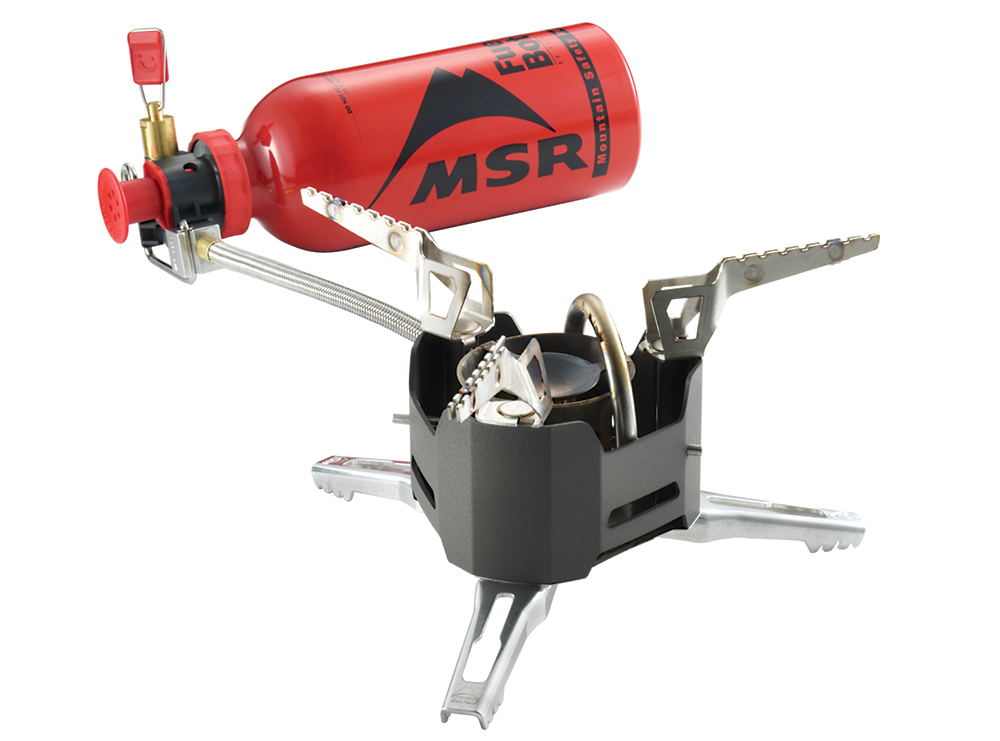
MSR Expedition Stove
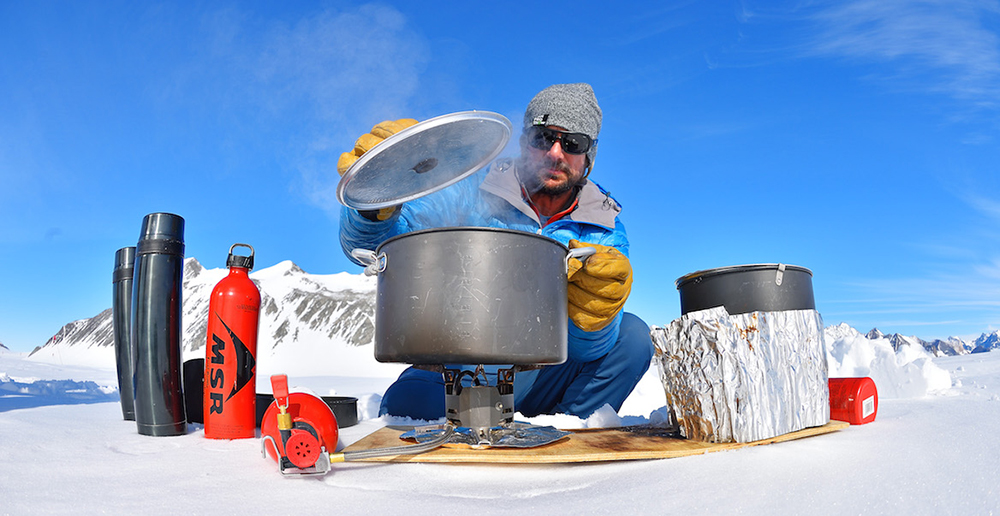
For anyone traveling long distances overland during extreme cold weather, melting snow becomes the primary means of obtaining drinking water. Boiling water to make meals out of dehydrated food is also common.
The XGK-EX stove from MSR (Mountain Safety Research) is a snow melting, water boiling juggernaut. It uses a 35-year-old classic design and is one of the only commercially-available aftermarket products mentioned by name in the Army manual. The stove has made its name by working through the worst possible conditions whether its cold, dirty, or dusty. It’s not finicky and is very dependable, even if you choose to abuse it by not cleaning it or by feeding it low-grade fuels. As just one example of its toughness, back in 2014 on an expedition to the North Pole, professional explorer Eric Larsen used an MSR XGK-EX for multiple hours every day for 53 days straight. If it can handle that scenario, it should be able to handle your backcountry excursions without breaking a sweat.
Using white gas for fuel will keep the stove running at its cleanest and into the lowest sub-freezing temperatures (down to about -50° F) . However, the stove will also happily digest kerosene, unleaded auto fuel, aviation gas, and even diesel. This feature has obvious benefits for use in survival situations, since the XGK-EX will happily consume just about any type of fuel you’re able to scrounge up.
Photography via MSR by Kristian Bogner. Copyright 2016. All Rights Reserved.
As with most other products which earn the label bulletproof, this stove is neither light nor overly compact compared to similar models. But it’s not made to be light or compact. It’s made to melt snow and boil water day-in and day-out with unquestionable reliability. As emergency room nurses are fond of saying: it’s there to save your ass, not kiss it!
Although winter is beginning to wind down, we hope you’re lucky enough to procure some great winter gear for your load-outs. This concludes Part 3 of our Cold Weather Survival series, but for more cold weather survival tips and gear check out Part 1 of the series, or past articles on winter sleeping bags or breathable winter insulation.
About the Author
Andrew Schrader is a licensed professional engineer and is certified by the U.S. Army Corps of Engineers as an Urban Search and Rescue (USAR) Structures Specialist. His company, Recon Response Engineering LLC, advises state and federal government organizations on the subject of urban search and rescue and building collapse. He recently assisted the U.S. Department of State’s Italian Consulate in the development of their post-earthquake response and rescue protocol. You can follow him on Instagram at @reconresponse.
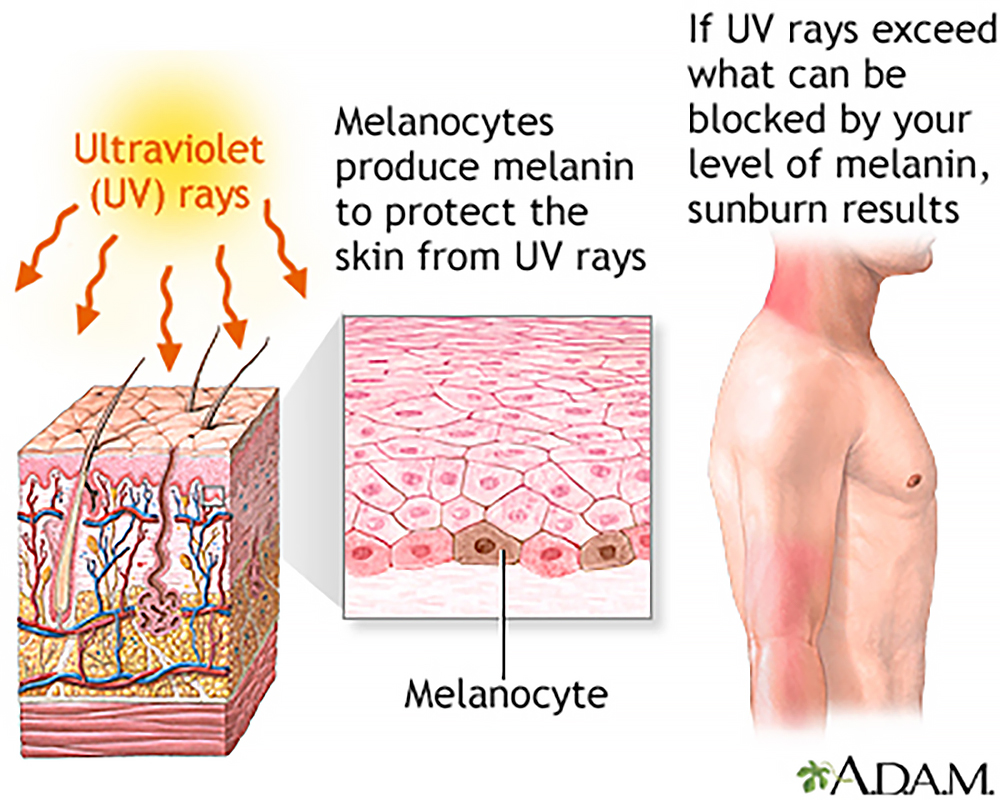
The sun is an incredible force of nature — its heat, light, and gravitational pull make life on this planet possible. Without the sun, there’d be no plant life, no animal life, and certainly no human life on Earth. However, the sheer power of this celestial body also has some unfortunate consequences. The sun generates ultraviolet (UV) radiation that has the potential to damage our skin cells, leading to painful redness, peeling, blisters, and even cancer.
A diagram of sunburn’s cause and effect, via the U.S. National Library of Medicine.
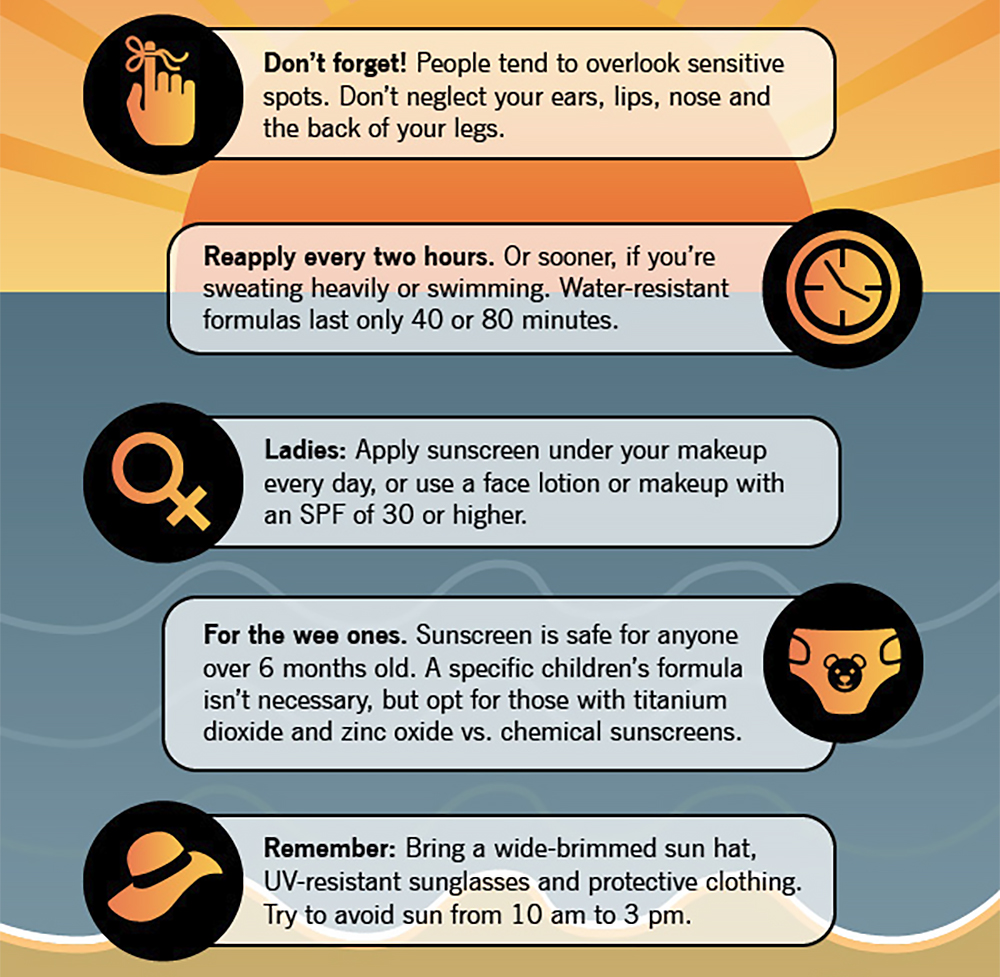
Those of us with fair or sensitive skin know the excruciating pain of a sunburn all too well. For some, being out in direct sunlight for a mere 30 minutes can lead to a visible sunburn. Other skin tones may be more resilient, but if you’re outdoors for an extended period, it catches up with most of us eventually. Under normal circumstances, a severe sunburn is uncomfortable and annoying; during a survival situation, this condition can be crippling.
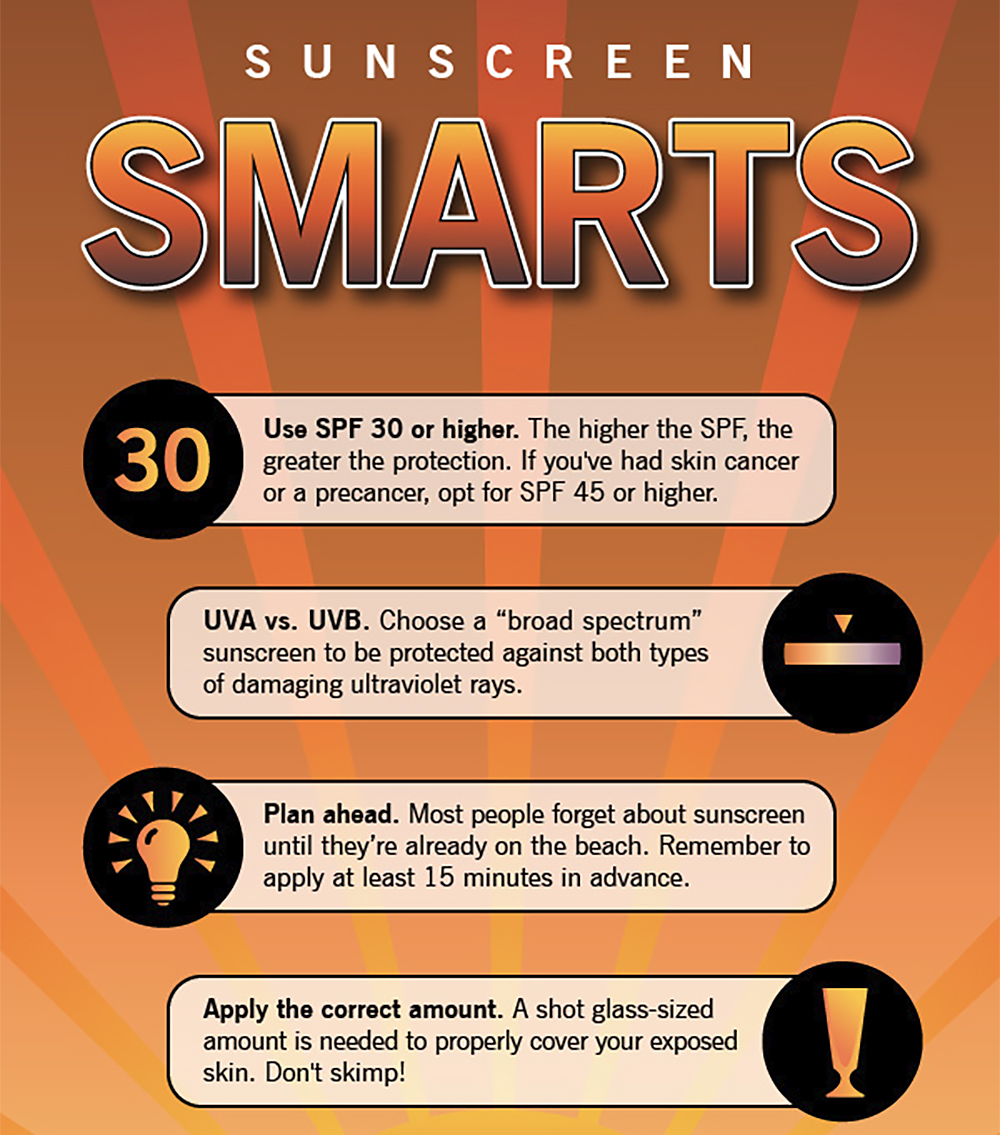
Sunscreen is the obvious choice for preventing sunburns, but there are many misconceptions regarding its use. For example, you’re probably not applying as much sunscreen as you should; studies show that it takes the equivalent of a shot glass full of it to protect your entire body. You also might think that the SPF (Sun Protection Factor) scale is simple enough, but it’s actually not as straightforward as it appears. A sunscreen with SPF 30 is not twice as effective as SPF 15 — the former blocks 97% of UVB rays, while the latter blocks 93%.
When you’re preparing for a survival situation, it’s essential to select the right gear. That means choosing items that are dependable and effective in a variety of scenarios — but most of all, it means choosing gear that’s totally fabulous. With the right post-apocalyptic ensemble, marauders will stop dead in their tracks to admire your outfit. That’s what we call survival fashion.
Unfortunately, picking the right gear to accentuate your SHTF style isn’t easy. There’s a fine line between mall ninja and hardcore operator. So, we’ve compiled a convenient guide of 25 super-glam looks for Spring 2017. Read on and get ready to shop, shop, shop!
In case it wasn’t already obvious: happy April Fool’s Day! Prepare a healthy dose of skepticism for anything you read today — like the announcement that Brownells is becoming the internet’s largest tactical falconry dealer.
When you’re preparing for any outdoor excursion or survival scenario, it’s wise to bring a generous supply of food with you. This ensures that under normal circumstances, you’ll have enough to eat until you can make it to safety and resupply. However, there are some cases when resupplying or scavenging is not an option. If you become stranded, or the food distribution network is interrupted, you’ll need to go hunt for food — and make it quick, because your food reserves will dwindle with every passing hour.
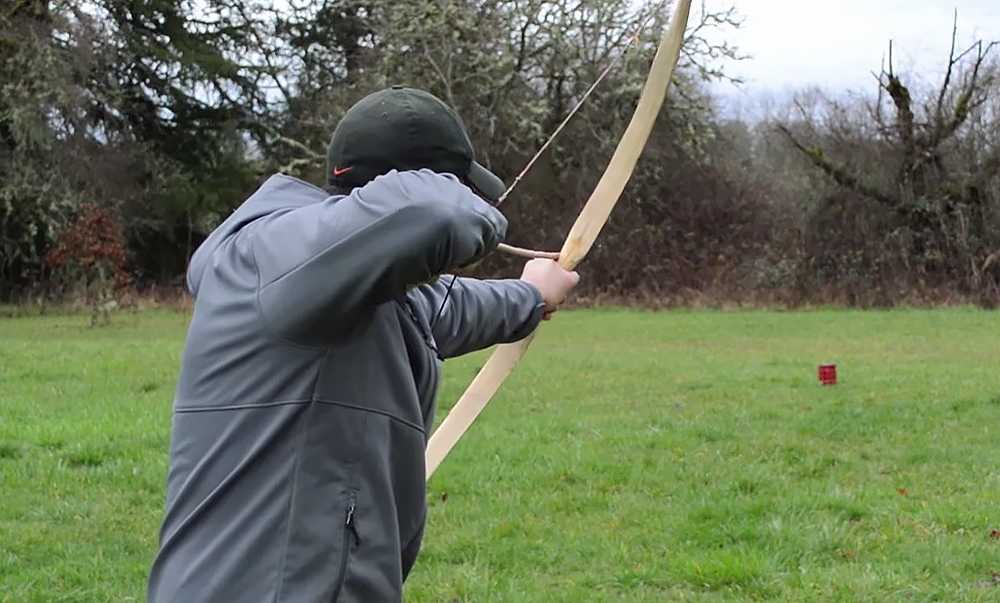
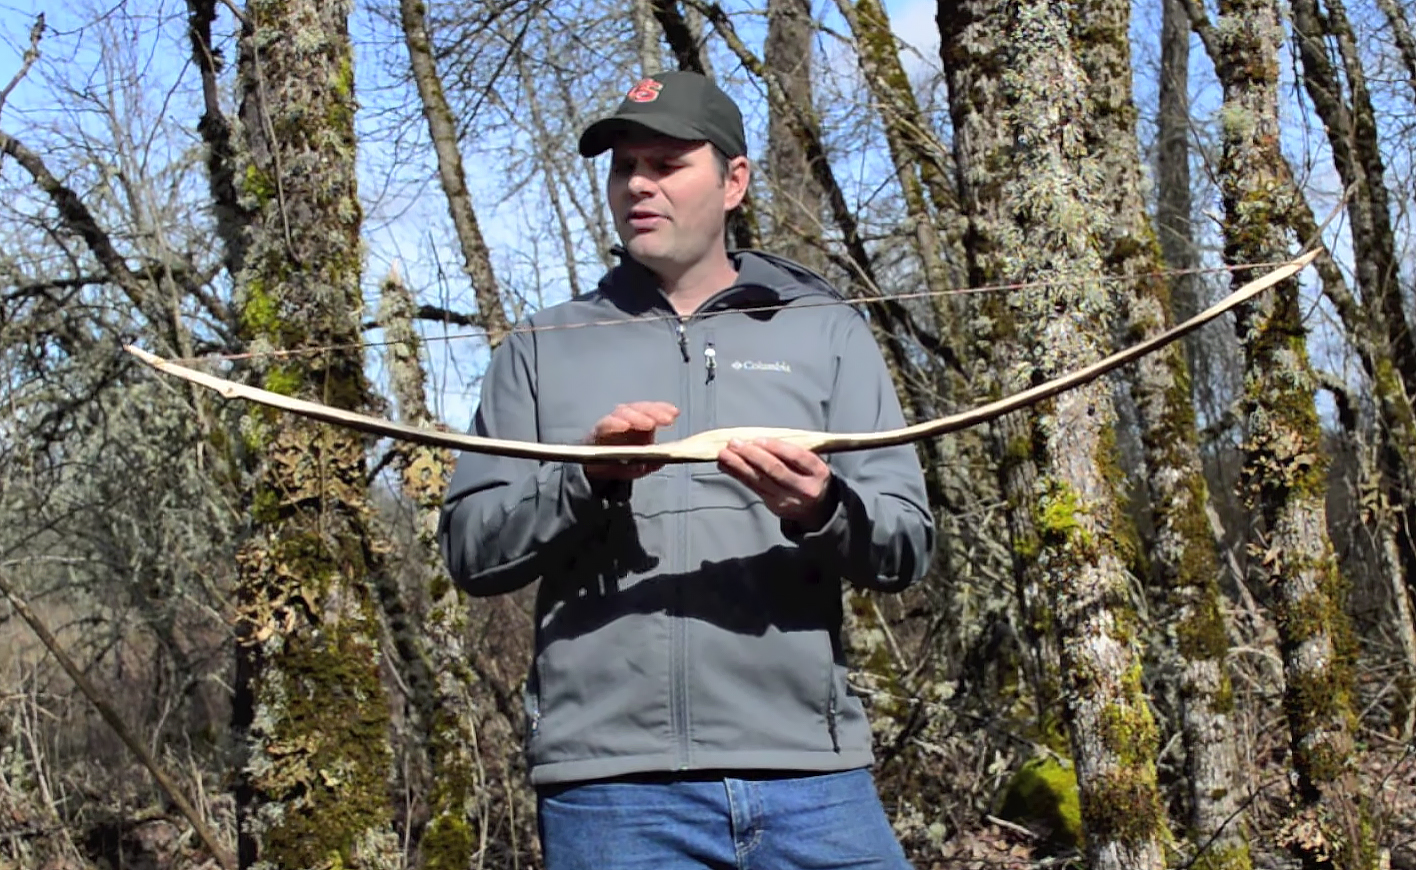
Obviously, having a hunting rifle and plenty of ammo is the best-case scenario. When you don’t have those items, you’ll need to improvise. One tool that can provide an effective means of hunting is a bow, and it’s possible to craft your own bow with some sturdy yet flexible wood and a sharp knife. Primitive cultures have been making simple wood hunting bows for centuries.
In the following 10-minute video, YouTube historic hunter Shawn Woods makes a minimalist survival bow out of ocean spray wood. The only tool he uses is a sharp knife, namely a square-tipped stainless fixed blade called a takenata hatchet. In an ideal world, you’d want to season and treat the bow wood for maximum longevity, but this simple bow works surprisingly well, even using living green wood.
Shawn selects a thick and pliable piece of ocean spray bush, also called creambush or ironwood, and cuts it into the bow stave. He intentionally leaves the bark intact on the back (outermost portion) of the bow, and shaves down the belly carefully to allow the thinner wood to bend. At first he works with a chopping motion, and then uses his blade as a draw knife to smooth out the limbs. After forming a tapered handle and adding notches, he can string the bow.
Paracord or any manmade cordage could work as a bow string, but if that’s not available, you’ll need to make your own. One traditional method uses animal sinew — in other words, dried tendons which can be broken down into individual fibers. These fibers are then moistened, and twisted together in a two-ply braid, with new fiber fed in gradually until the desired length is achieved. The video below shows the complete method:
Of course, you’ll also need arrows and arrowheads, but that’s yet another project. Shawn Woods covers numerous arrow designs on his channel, including Cherokee two-fletch arrows, Norwegian slate arrows, and ancient mesolithic microblade arrows. Check out his channel if you’re interested in learning more about survival bows and primitive archery.
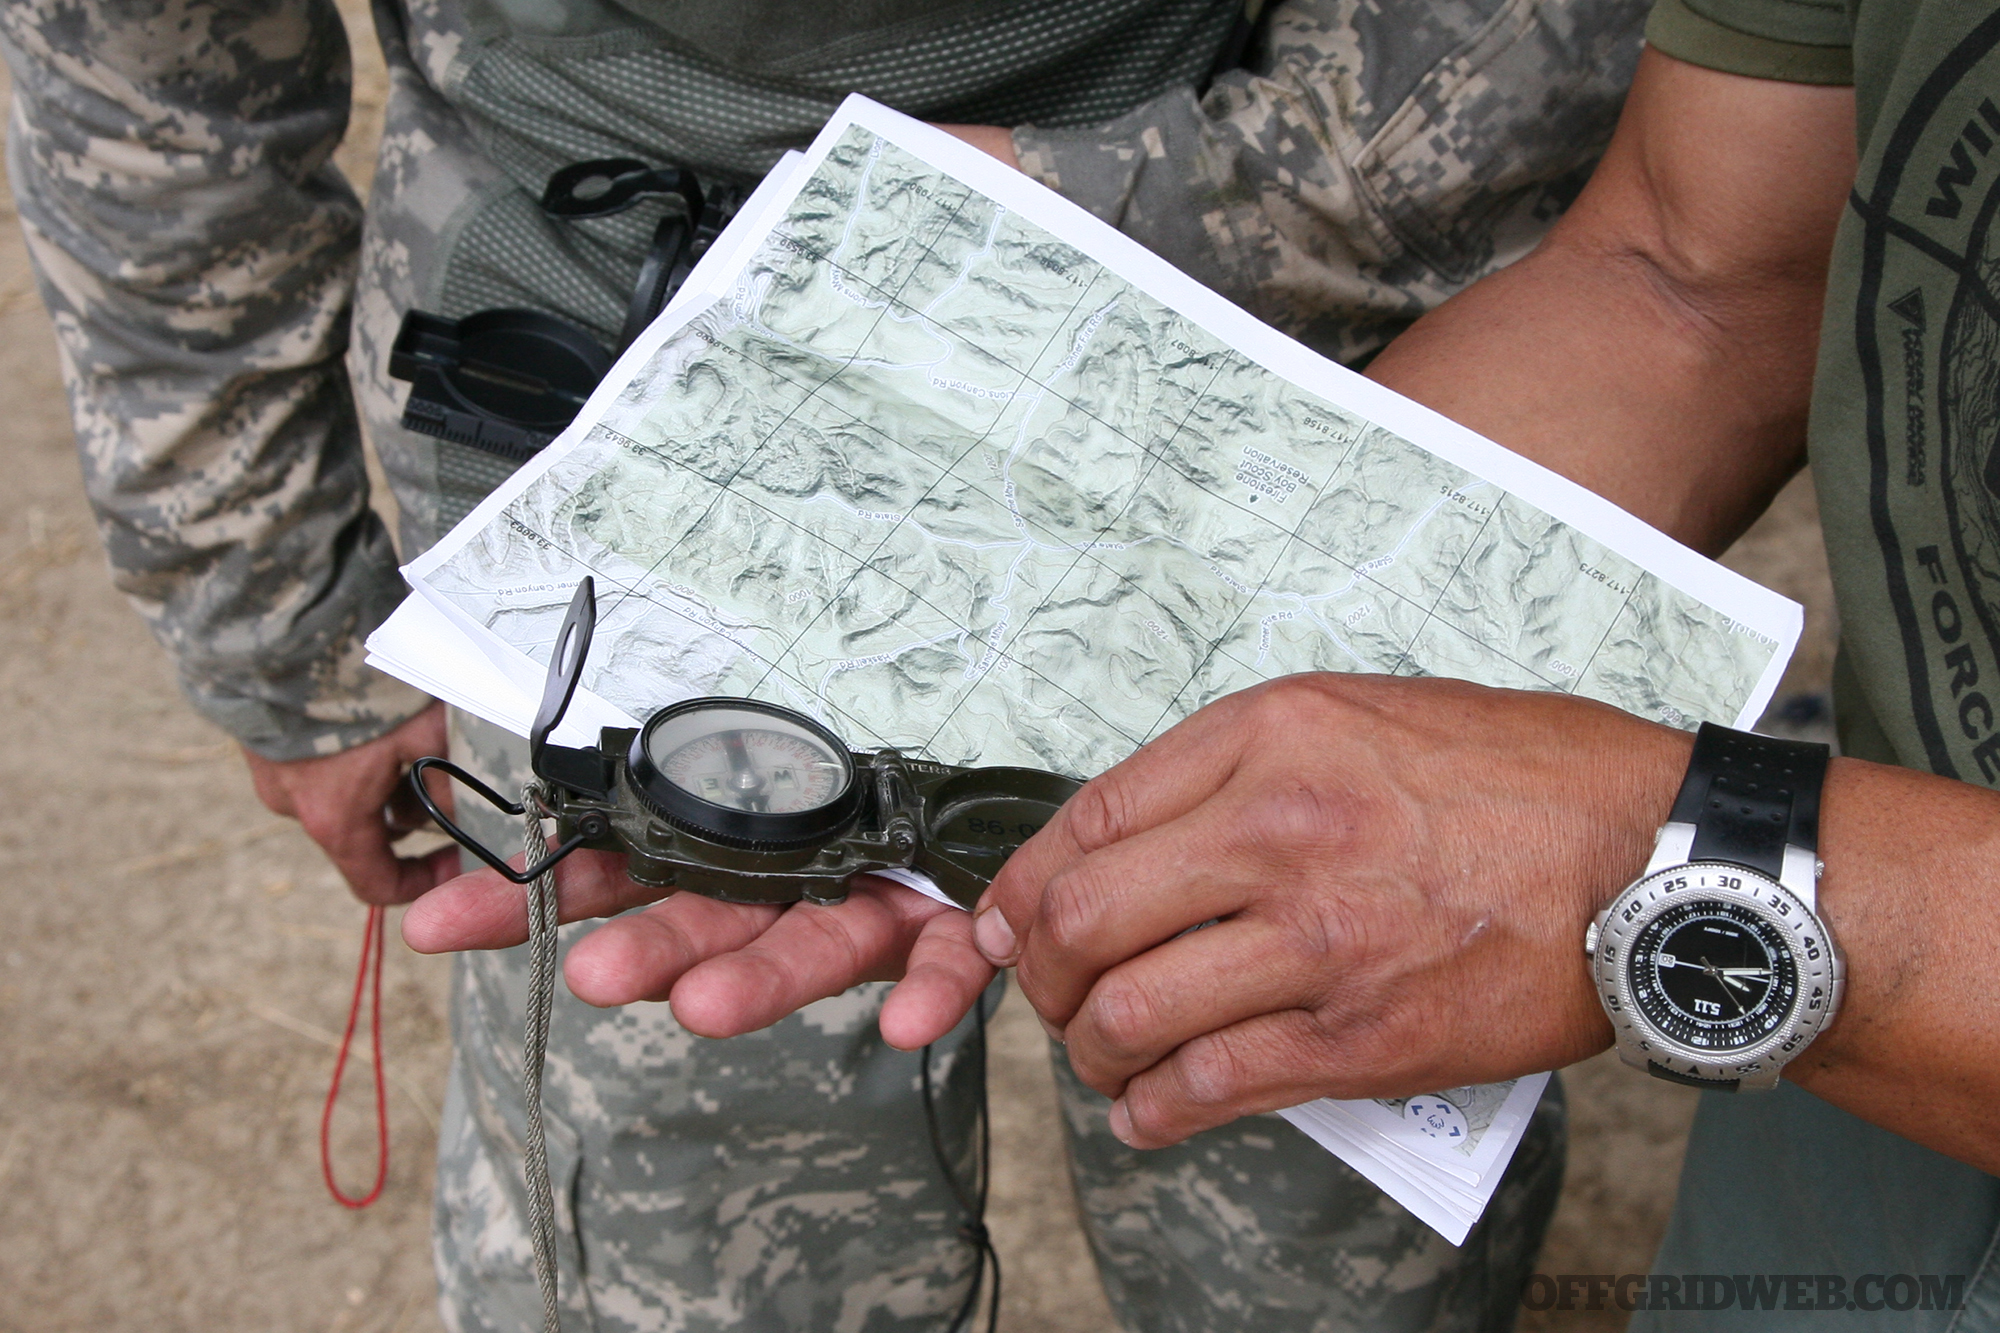
Navigation and communication are two essential survival skills — the first is necessary to travel safely from A to B without becoming hopelessly lost, the second is critical for any group or collaborative survival effort.
With sufficient training and knowledge, it’s possible to rely on primitive methods of orienteering and communication, such as celestial navigation and smoke signals. But we’ve come a long way since the days when those were the only options. Technology has made our lives much easier, so we might as well make use of it while it’s available. Obviously, if the grid goes down and electronics become useless, we can fall back on primitive methods — until then, it’s wise to use the best tech available.
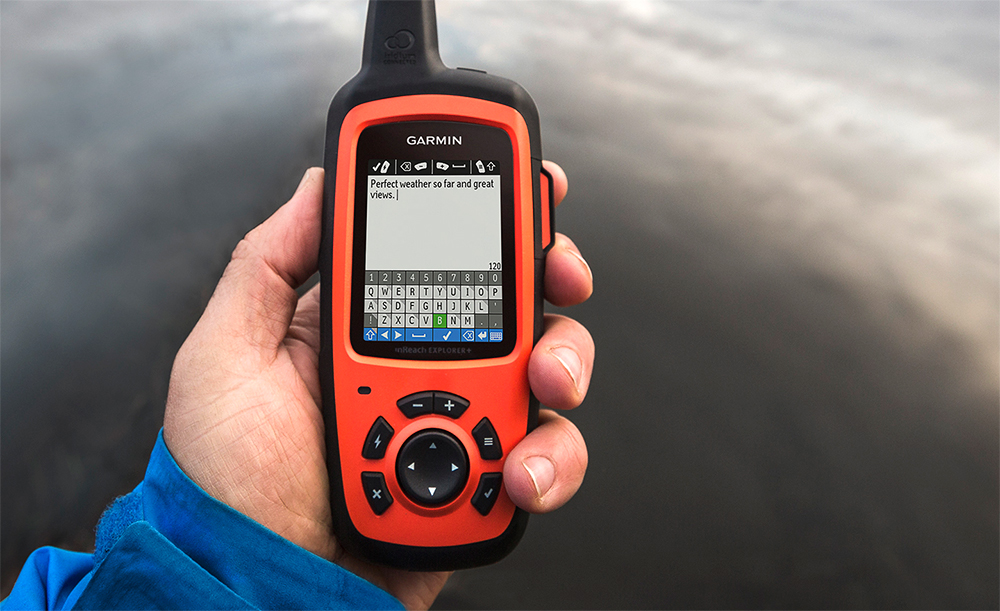
Left: the Garmin inReach SE+. Right: the inReach Explorer+ with TOPO maps and added sensors.
Early this year, Garmin announced the release of a new inReach line of devices which combine GPS navigation and two-way satellite communication. The Garmin inReach SE+ and inReach Explorer+ are the first Garmin devices with these capabilities, some of which were acquired through the company’s purchase of DeLorme in 2016. Both devices have Pole-to-Pole global Iridium satellite coverage for two-way text messaging and SOS alerting anywhere in the world.
Much like a smartphone, the Garmin inReach devices can send text messages to and receive replies from any cell phone number or email address. But, thanks to the network of 66 Iridium satellites, these devices can do so from anywhere in the world with 100 percent seamless coverage. Accessing this satellite network requires a monthly subscription, which ranges from $12 to $100 per month depending on usage level.
If something goes wrong, there’s also an interactive SOS feature — here’s how it works:
You press the SOS button to send an emergency alert.
The GEOS 24/7 search and rescue monitoring center responds quickly, confirming that help has been called.
You describe your emergency so responders know whom and what to send.
Responders advise you when to expect assistance — and suggest potentially life-saving actions to take in the meantime.
You communicate with friends and family, letting them know the situation and where to contact the rescue team.
Help arrives. You’re able to coordinate any logistics or medical care that may be needed upon your return.
Both the inReach models also include a built-in GPS for location tracking and basic navigation. For $50 more, the Explorer+ adds pre-loaded topographic maps, as well as a compass, barometric altimeter, and accelerometer for more sophisticated navigation capabilities. Both models offer location sharing, so your friends and family can follow your progress from a computer or smartphone if you enable the feature. You can even embed the GPS progress tracker on your Facebook page or blog.
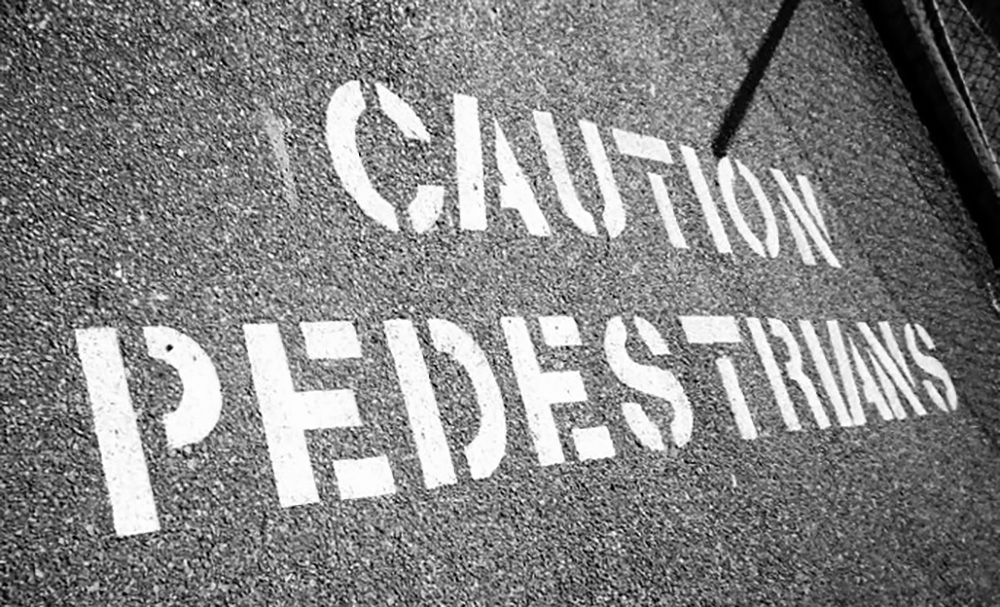
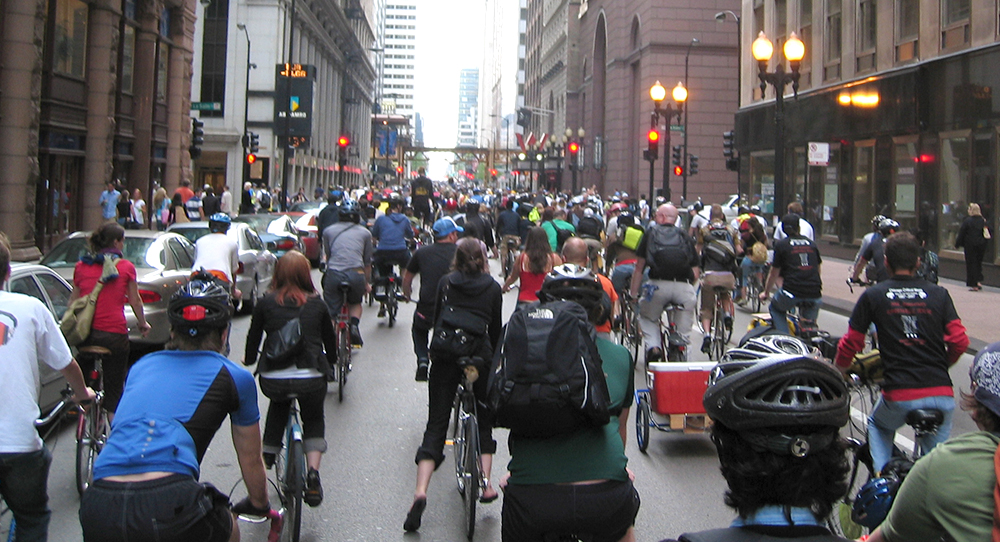
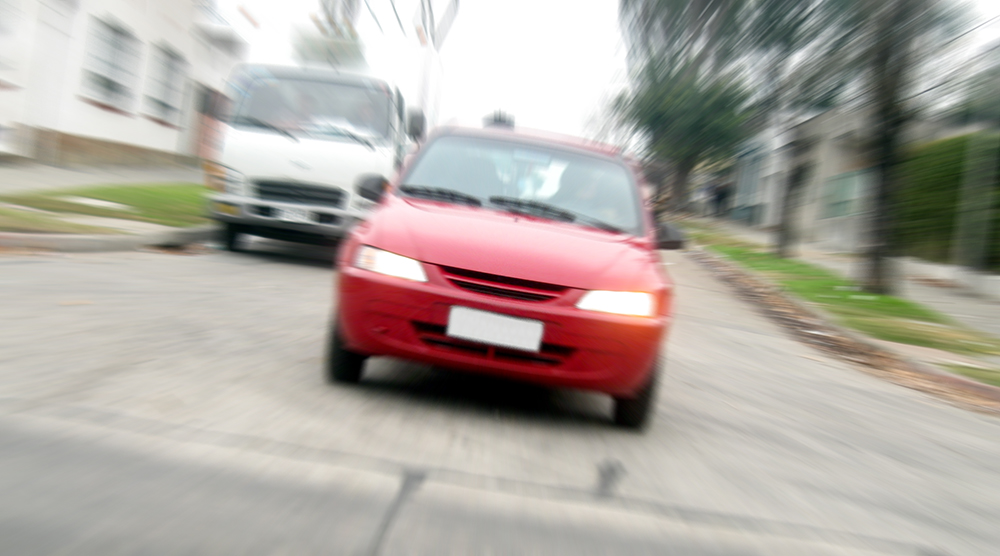
You can feel the energy and excitement in a crowd of revelers at festivals, parades and other large outdoor public gatherings. Whether it’s a day of sightseeing around popular landmarks or an evening of shared pride and patriotism at a fireworks display, being caught up in a crowd can be part of the fun. But in a flash, that energy and excitement can turn to horror punctuated by the sounds of screams, screeching tires, and the roaring engine of a car or truck used as a powerful weapon by a fanatic in a vehicular terrorist attack.
It is critical to your safety and survival to understand this emerging threat and have an action plan in mind. You can deprive the attacker of the element of surprise by keeping a high level of situational awareness and knowing what you will do to keep yourself and your loved ones safe. Read on for a roadmap to help you survive a vehicular terrorist attack.
The Poor Man’s Weapon of Mass Destruction
At holiday celebrations in France and Germany, on an ordinary day at Ohio State University, and most recently in London, violent extremists have used cars and trucks to plow into unsuspecting crowds in this low-tech form of terrorism. In some instances, the attackers have followed the ramming attack with knives or firearms to inflict more carnage. These individuals see crowds as target rich environments and an opportunity to conduct a terror attack on the cheap. While this tactic dates back to the early 1970s, vehicular terrorist attacks are now viewed by some as the poor man’s weapon of mass destruction, and they are on the rise.
The Terrorist’s Playbook
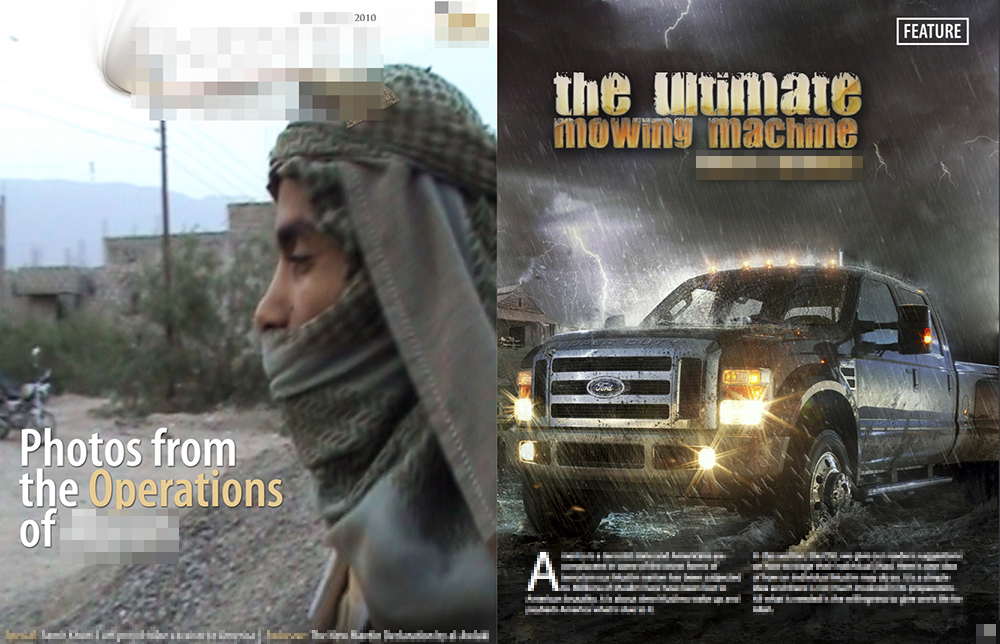
Propaganda and training materials from violent extremist groups such as ISIS and Al Qaeda provide inspiration and instructions for violent extremists to target public gatherings for vehicular assaults. One such publication featured a glossy, full-page photograph of a Ford F-350 pickup under a banner headline calling the truck “the ultimate mowing machine.”
Above: An article in a 2010 issue of a prominent terrorist propaganda publication encouraged the use of vehicles to attack crowds.
This sort of attack is very difficult to detect or deter. The skill level necessary to execute a successful vehicle attack is extremely low compared to operations using firearms and/or explosives. Accessing a vehicle does not raise the same red flags as attempting to acquire illegal firearms or bomb-building materials.
People are now more aware of the risks and the basic action steps to survive an active shooter incident, but far fewer know what they would do to protect themselves and their loved ones during a vehicular terrorist attack. Like active shooter incidents, most vehicular attacks are over in minutes. Your survival will depend on how quickly you can move from shock, denial and indecision to effective life-saving actions.
Four Pillars of Survival
Going to a large gathering alone or with a group, your best defense rests on four pillars of survival:
Planning
Pre-event reconnaissance
On-site situational awareness
Communications
Attackers start their planning long before the attack; your survival plan must also begin well before the day of the event.
Pre-Event Planning
Bad guys do their homework, and you must, too. Prior to the event, try to identify:
Peak times when the greatest numbers of people will be gathered.
Likely security or law enforcement posts or checkpoints.
Sections of roadway where the driver can build up speed before veering into a crowd.
The locations of barriers and bollards.
Areas that afford victims few routes of escape.
Choke points that can cause dangerous escape stampedes.
Good situational awareness involves identifying both risks and resources. Risks are those things that may hurt us; resources are the people, places and things that might help us if the going gets tough. We don’t do our best thinking during moments of terror, so having a plan and engaging in mental rehearsal of your response can make a big difference if things go wrong.
Before attending large public gatherings, consider:
Reviewing event maps or routes.
Visiting the location to get the lay of the land.
Bringing with you only what you really need for safety and comfort so that you have less gear to manage if you must move quickly.
Carrying a pocket-sized Individual First Aid Kit (IFAK) for self-care and care of others.
Having a discussion with your group of friends and family to develop contingency plans for communications and reunification if things go sideways.
Communication with your loved ones may be difficult in the immediate wake of an attack. It helps to have critical contact numbers in writing and tucked away in a wallet or pocket. You may not be able to recall these numbers under extreme stress, or if your phone is lost or damaged in the melee. Separation from loved ones is the greatest source of anxiety during a crisis, so develop a backup communications plan.
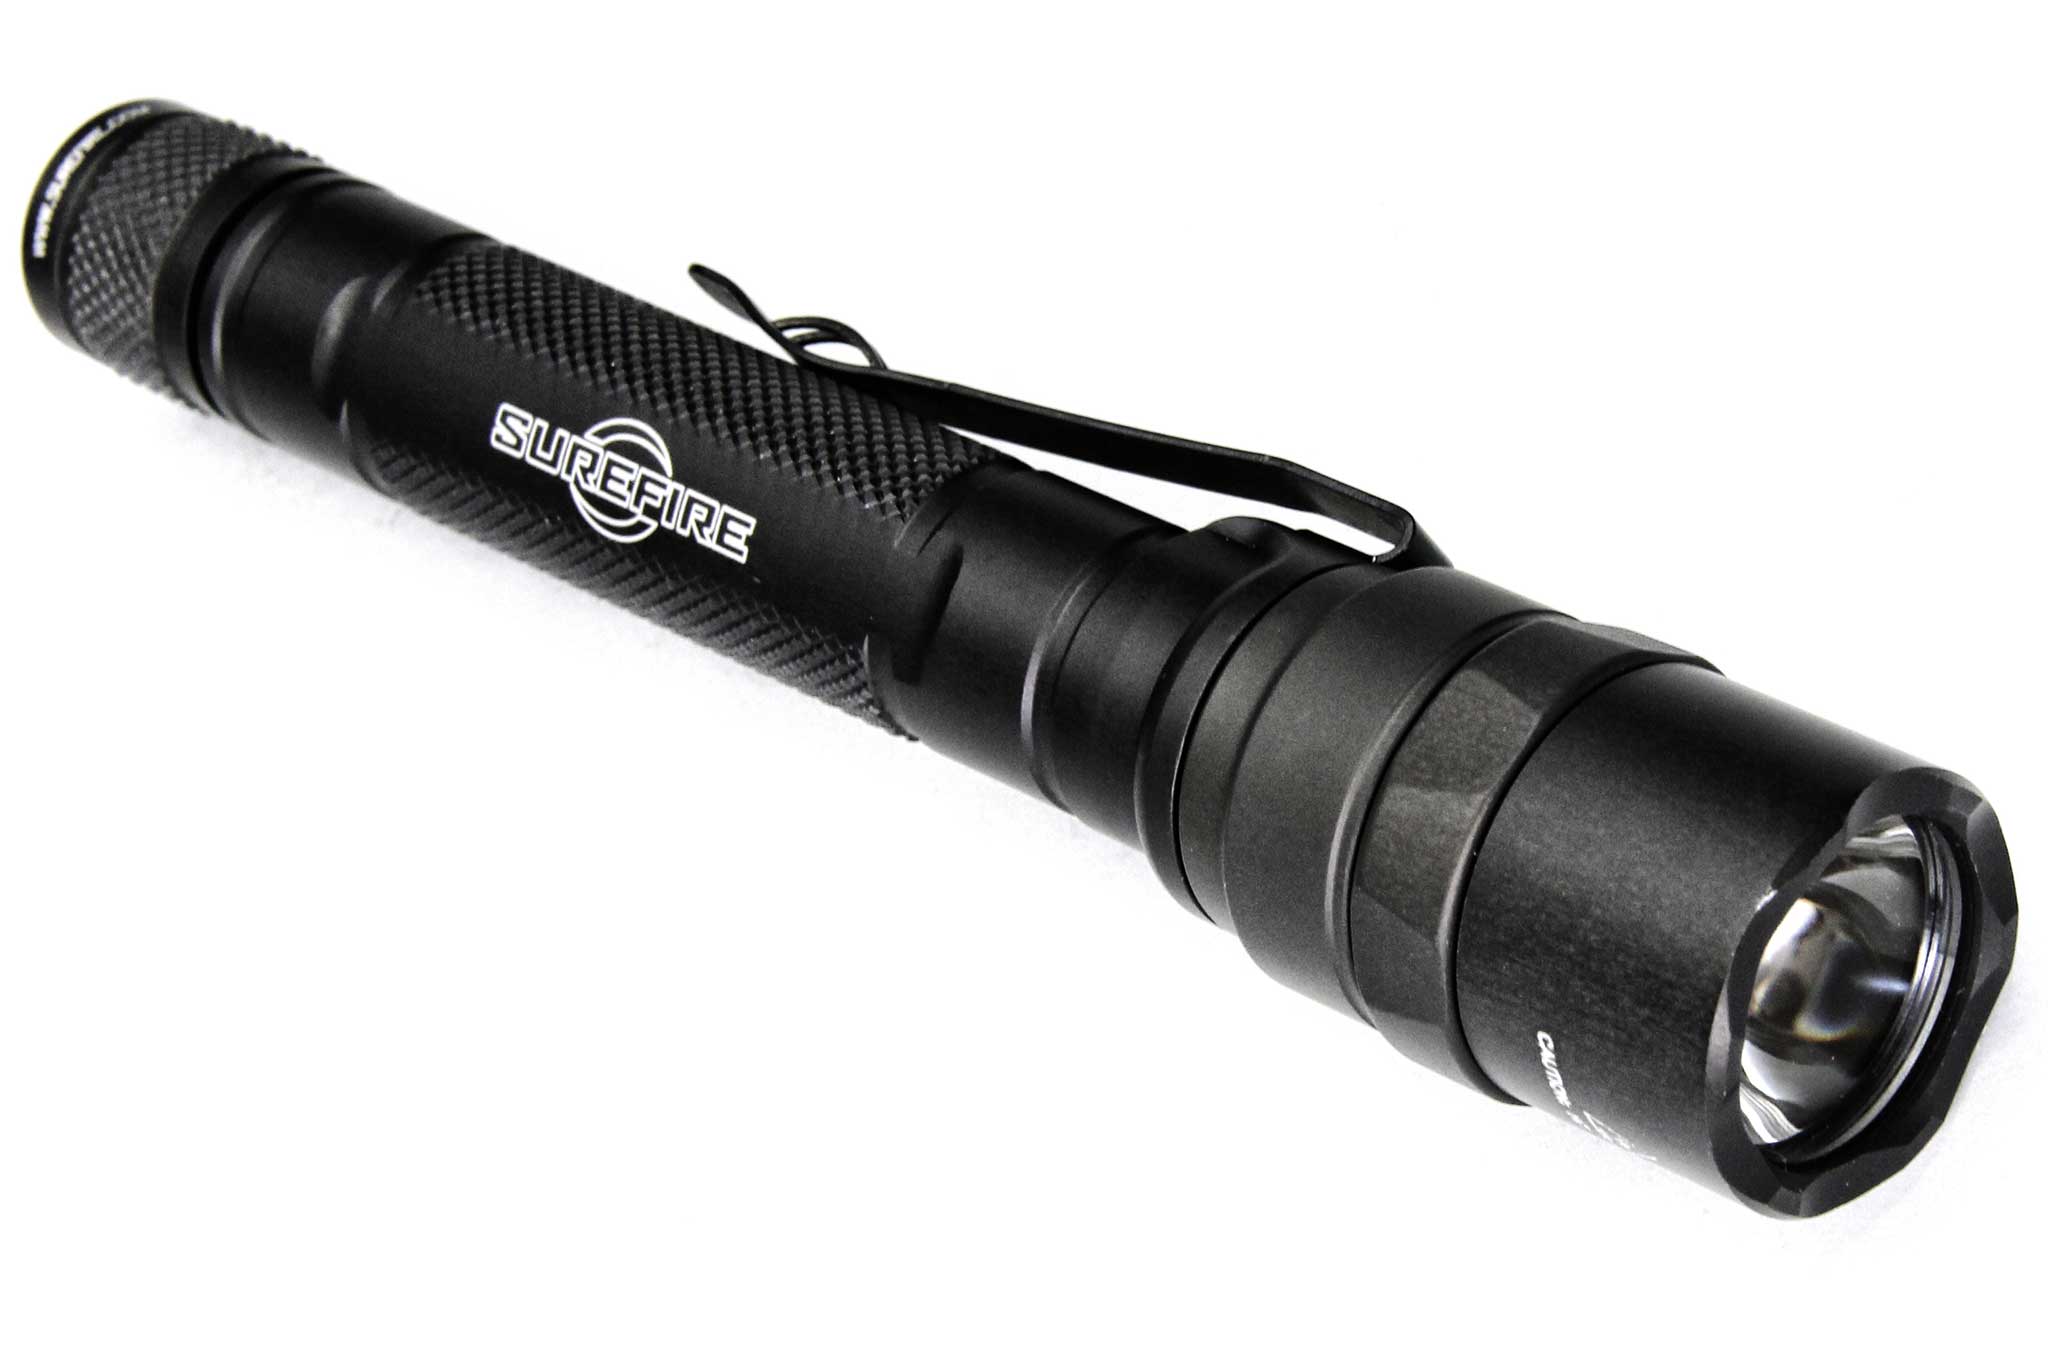
Pre-determine reunification spots by envisioning the direction you think most people will run to flee an attack, then establish your primary and secondary reunification points slightly outside of those high-volume routes. In the chaos, it may be impossible to hear each other calling out loud or by phone, so consider alternative means of signaling your location. A small, powerful flashlight can be seen in broad daylight. These lights, especially those with a strobe feature, are excellent tools for visually communicating your location if you are unable to do so by other means.
During the Event
Don’t worry about getting a front row spot at a special event. In vehicular terrorist attacks, those at curb side are the most vulnerable. Select your location based on safety, not simply on having a great view.
Avoid the center or densest parts of the crowd; try to stay on the fringe to allow yourself options for movement.
Stay near street corners rather than the middle of the block; this will allow for more avenues of retreat.
Don’t stand against walls, doors or other immovable objects where you could be pinned.
Avoid standing on, under, or around temporary structures like stages or viewing platforms. If struck by a hostile vehicle, the collapse of those structures and the people falling from them represent another source of danger.
Stay behind heavy security barriers or bollards, they can provide good cover and concealment from the vehicle attack, as well as shots fired by the attacker and/or the responding police.
Scout out places for cover and concealment, such as concrete walls or large trees.
Look for places of refuge, such as open stores or alleys that you can duck into if a hostile vehicle or frantic crowd passes by.
Pay attention to the roads for any vehicle which moves erratically or diverges from the normal traffic pattern.
If an erratically-moving vehicle veers toward you or the crowd, don’t just run from danger; run towards safety.
Act in Time
Bystander intervention can make a critical difference, but before providing care for others, make sure that it is safe to do so. In the initial post-attack environment, it is likely that:
There will be a great deal of chaos, confusion and panic, as well as stampede of people running for their lives.
There are likely to be multiple, if not overwhelming numbers of casualties.
Injuries will range from mild to catastrophic. Some may be extremely graphic or gruesome adding to the terrorizing effect of the attack.
Some injuries may involve the loss of limbs; many will result in severe bleeding.
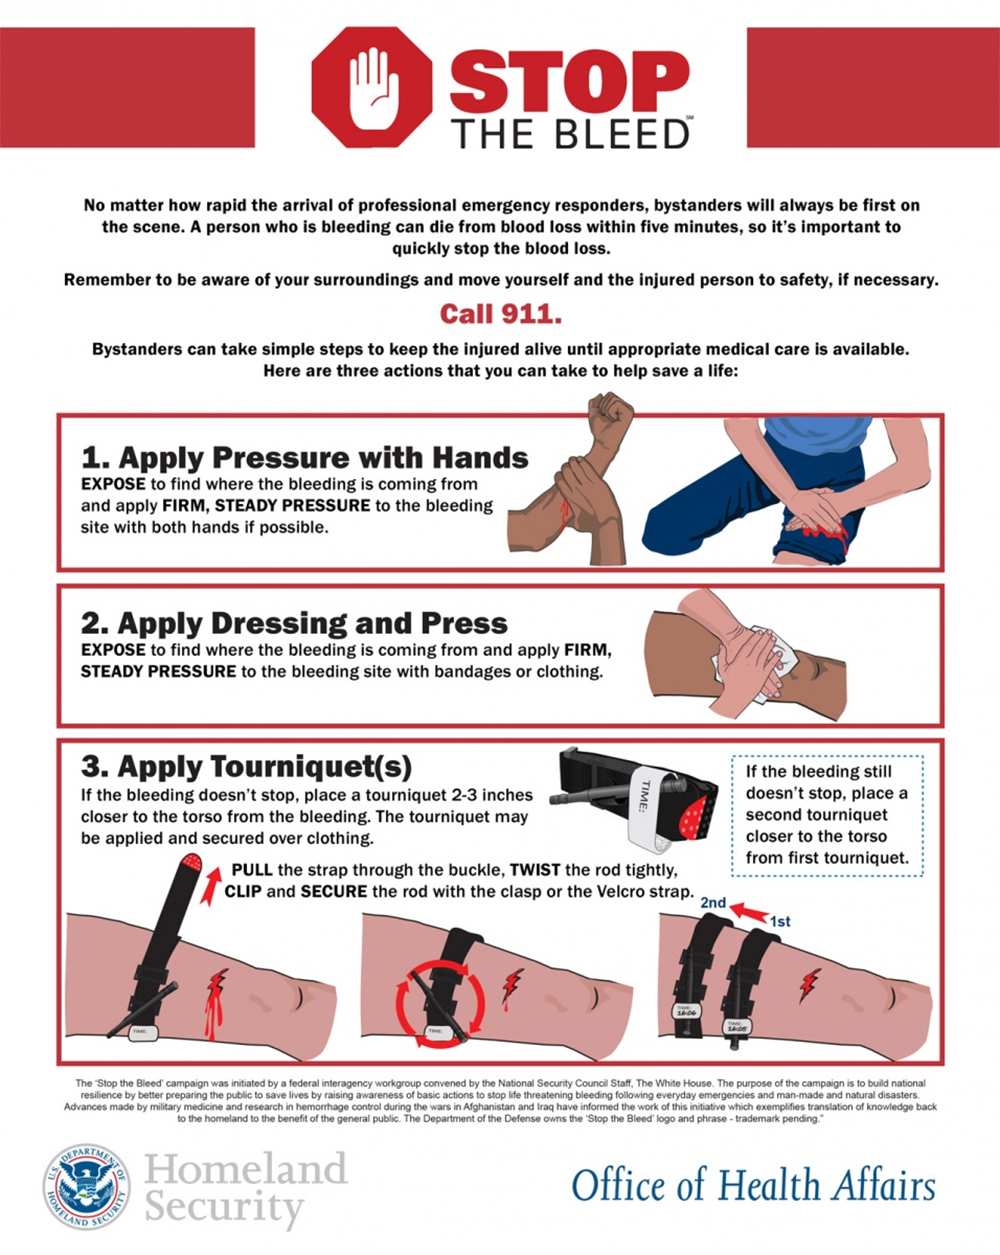
Individuals with severe blood loss can die within minutes without intervention. Bleeding control (B-CON) will be a high-priority.
While the action steps recommended during the event are intended to stop the killing, the steps recommended in the immediate aftermath of a vehicular attack are meant to stop the dying.
Once the vehicle comes to a halt, don’t be a hero and approach it or try to engage the attacker. If you are near where the attack vehicle has come to rest, move away. It is quite possible that the perpetrator can exit the vehicle and continue the attack with firearms and/or edged weapons.
Be aware of the risk of multiple attackers or explosives, as well as other harmful materials which may be onboard.
Prioritize your safety and survival, and that of your family or friends. You must use your judgement in these stressful moments to determine if it is safe enough initiate care for the injured or to put distance between you and the impact zone.
No matter how quickly professional emergency responders arrive, bystanders will always be first on the scene. The uninjured can initiate critical bleeding control and save lives by acting quickly and decisively. Check out the U.S. Department of Homeland Security’s “Stop the Bleed” campaign to learn more about this topic.
Kumbaya or Chaos
The same dynamics that make large public events fun and exciting also make them attractive targets for terrorists. Being aware of the risks, engaging in pre-event planning and preparedness, and knowing how to respond during and immediately following a vehicular terrorist attack can make participating in large public gatherings safer for you and your loved ones. Stay sharp, have fun, and let’s not let the bad guys drive a wedge of fear any further into our lives than necessary.
About the Author
Steve Crimando, MA, BCETS, CHS-V, is the founder and principal of Behavioral Science Applications, and an internationally-known expert in human factors in homeland security, violence prevention, and urban survival. He specializes in unconventional threats such as crowd violence, biological and radiological terrorism. With nearly 30 years of front-line experience, he was a responder to both the 1993 and 9/11 World Trade Center attacks. He coordinated on-site psychological operations at New Jersey’s Anthrax Screening Center, and has worked alongside authorities during many international kidnapping cases and other acts of terrorism.
If you’re interested in bushcraft and primitive survival skills, Primitive Technology never fails to entertain. This Aussie YouTuber continually produces videos that are as informative as they are impressive. In the past, we’ve followed along as he built a grass hut, trapped wild shrimp, and tilled a sustainable garden. As his miniature settlement evolves, he remains silent, and dutifully documents each step on camera.
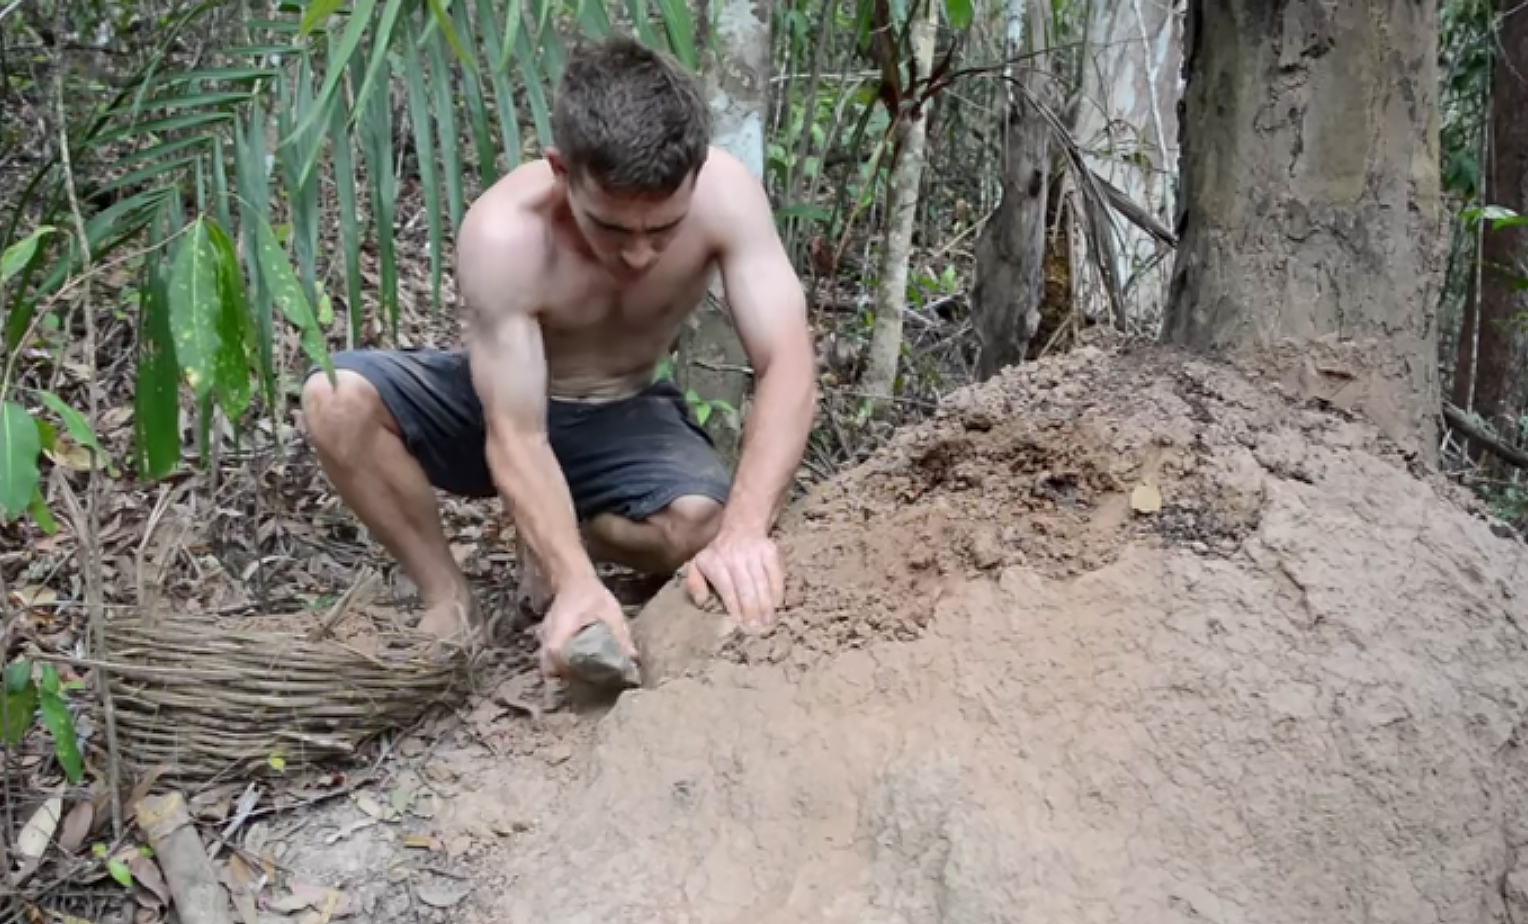
A termite mound provides the raw material necessary for clay production.
This week’s Primitive Technology video shows how to gather natural clay from termite mounds, dig out a kiln, and process the clay into several types of simple pottery.
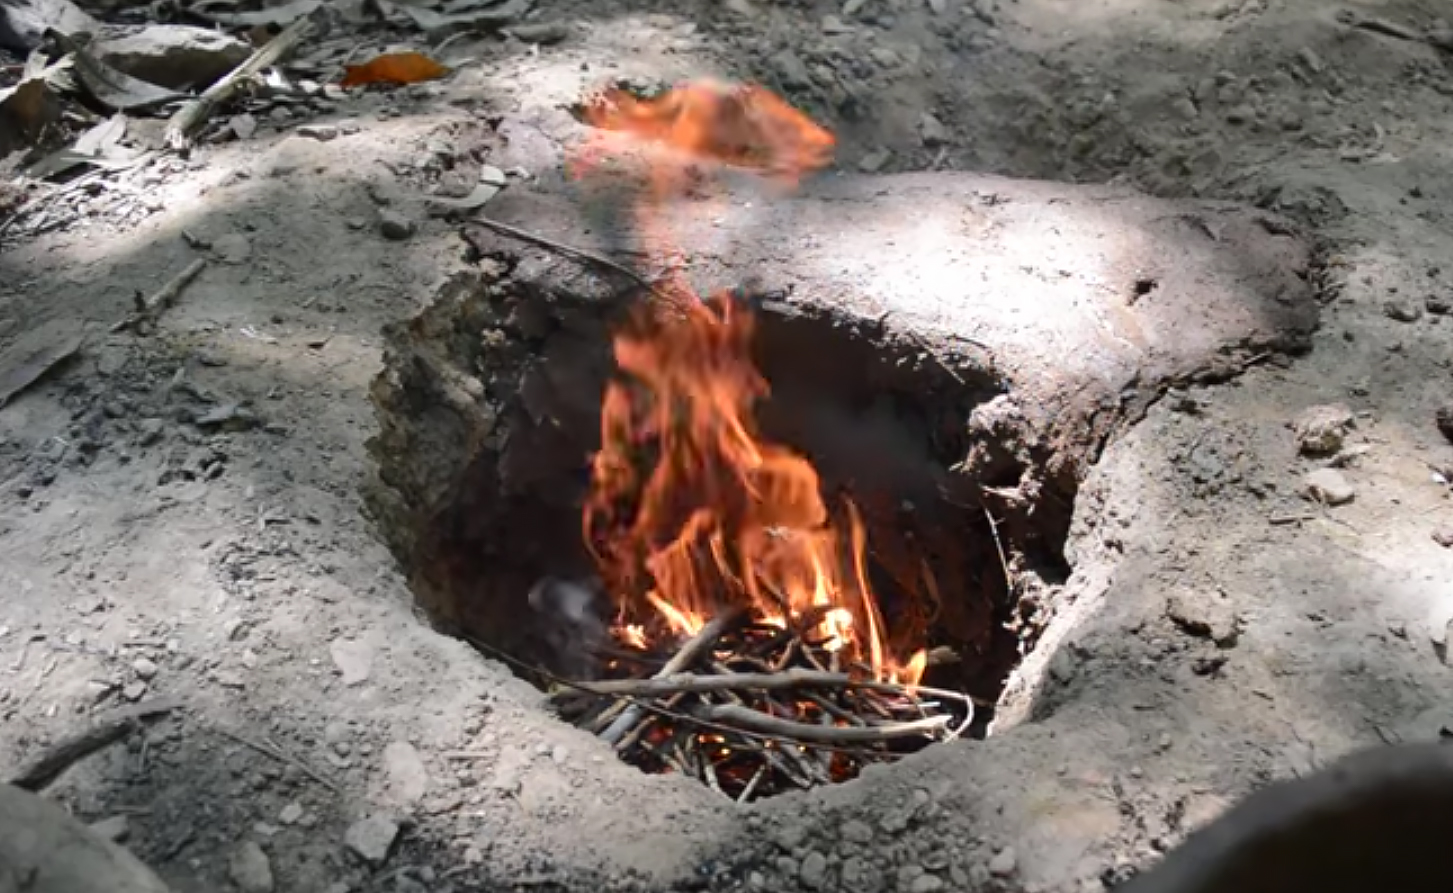
This hole in the ground was gradually built upward into a kiln.
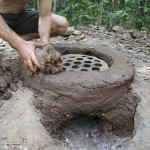
The process starts with breaking off pieces of termite mound, crushing them into smaller chunks, adding water, and working the mixture into a paste by stepping on it with bare feet. This new termite clay and some existing river clay were stacked around a fire pit in the ground, and sculpted into a kiln — that is, an insulated high-temperature oven used for hardening pottery, tiles, or bricks.
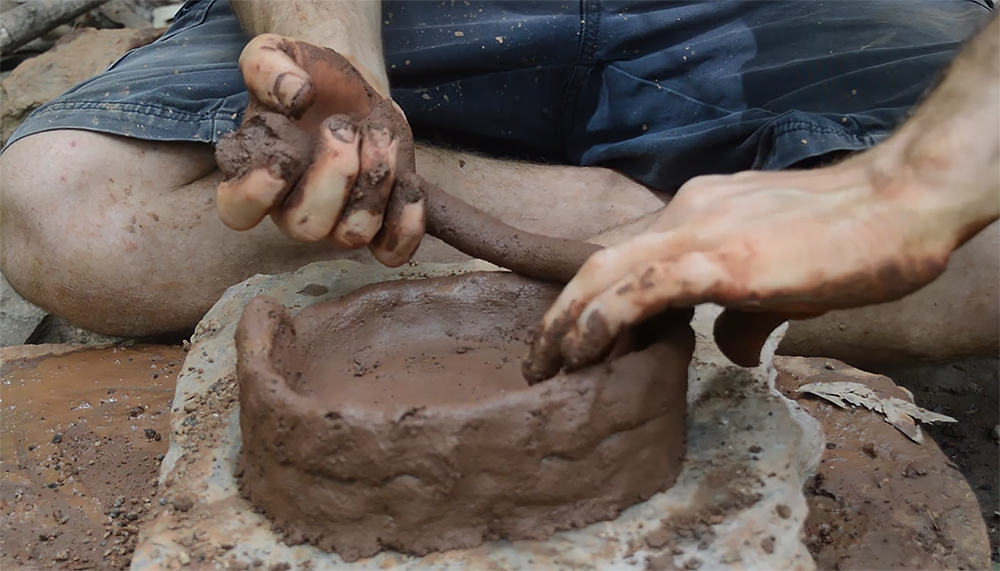
A clay base grate was installed atop the fire pit, and circular walls were built around it. Fire was used to periodically harden the structure. With the kiln complete, it was then time to gather more clay for pottery production. The host chose a red clay termite mound, crushing it and adding water once more.
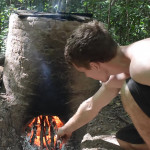
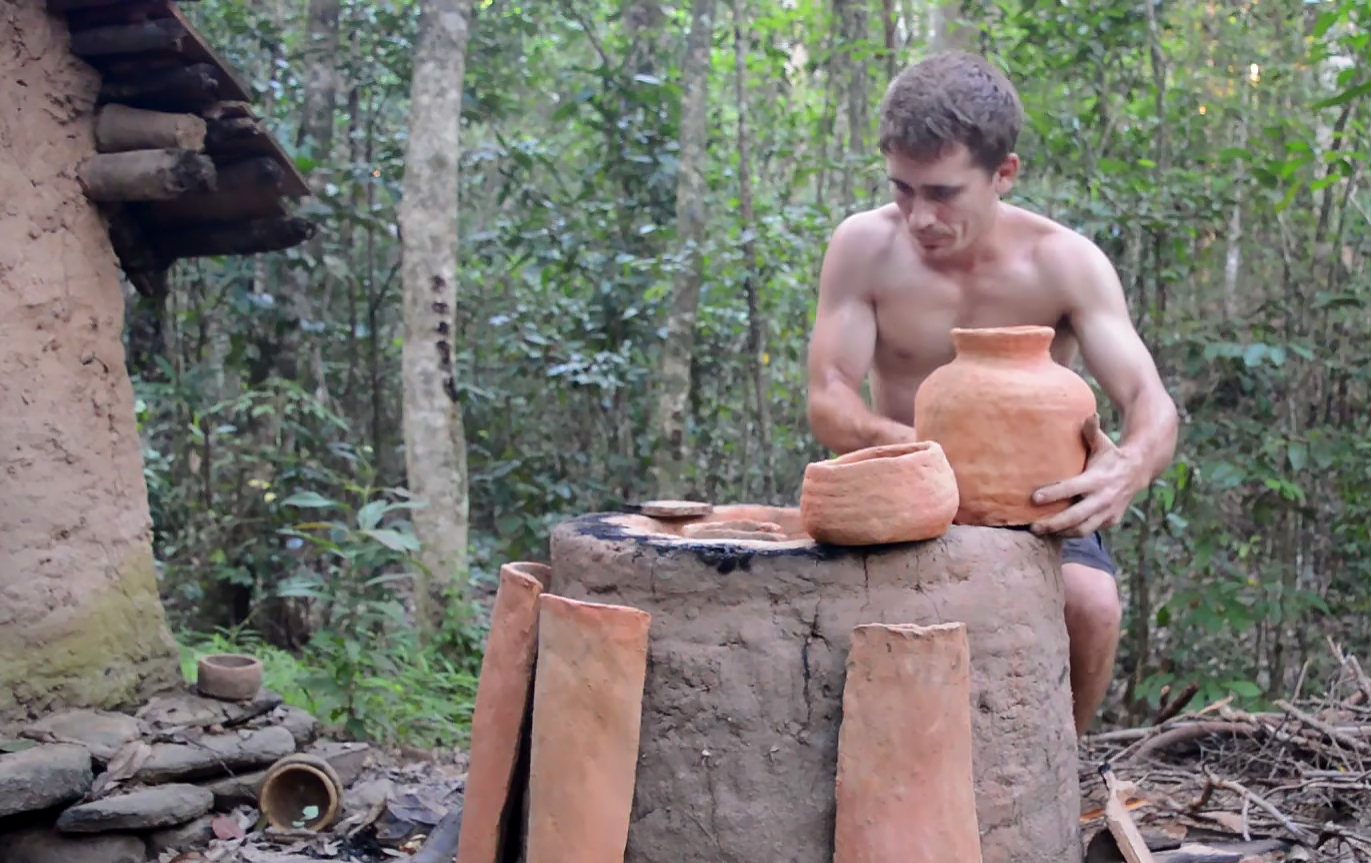
The red clay was formed into several items: a large urn, a small pot, a forge blower (no doubt for a future video), and some roof tiles. After heating the pottery to a dull glow in the kiln for a few hours and allowing it to cool, it was ready to remove and use. The urn was used to water the cassava and yam garden he built in his last video.
Watch the full 11-minute video below. Remember to turn on subtitles for added info as the video progresses, and check the video description for a highly-detailed analysis of each step.
At this rate, it seems like the host will be entering the Bronze Age within a few dozen more videos. We can’t wait to see him smelting ore and forging blades.
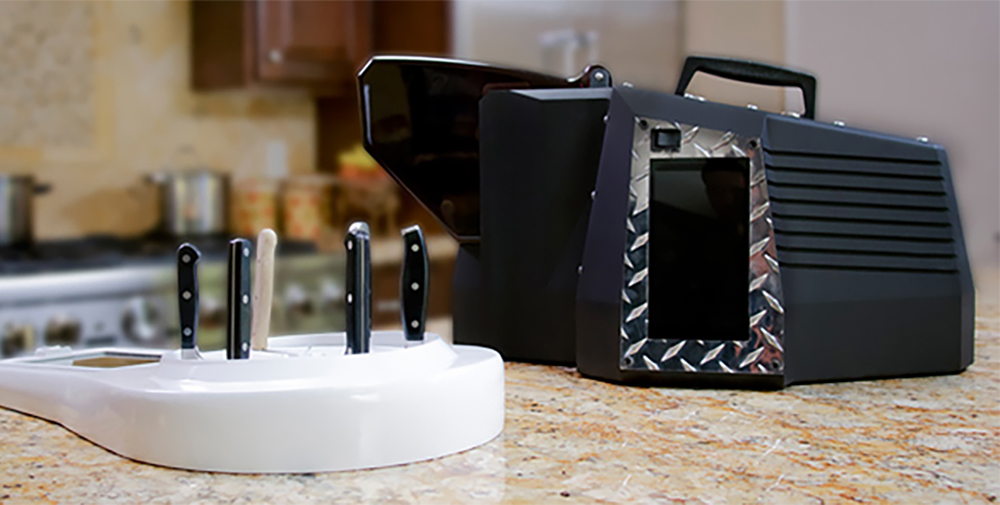
The day is finally upon us. A powerful robot is out there. It can’t be bargained with, can’t be reasoned with, it doesn’t feel pity or remorse or fear. It absolutely will not stop, ever… until your knives are sharp. Dull edges will be terminated. We can only hope it has the capacity to learn the value of human life.
Like the Cyberdyne Systems Model 101, the technology behind the KnifeRobot was born in the heart of Silicon Valley, California. Fortunately, unlike the Terminator, this machine is not designed to kill — it’s a helpful little robot. In fact, it’s claimed to be the world’s first patented automatic knife sharpening technology.
The KnifeRobot uses a complex array of sensors, motors, and abrasive belts to produce a razor-sharp edge in about 5 minutes (severely worn edges may take longer). It is said to work on fixed blades, folding knives, and even straight razors. Here’s a breakdown of how it works, based on info from the company’s IndieGoGo page:
Insert a knife into the machine. Blade length must be between 2 and 10 inches, width must be no more than 4 inches, and thickness must be no more than 3/8-inch. Inclusive grind angle must be less than 40 degrees. Aside from these limits, the KnifeRobot is said to handle “any shape up to +/- 30 degrees from horizontal position” including tanto grinds, and will even sharpen serrations on blades.
Press the start button. You can also customize grind angle, speed, and pressure if desired. Then walk away — the machine will handle the rest.
A shape sensor will run along the blade, detecting its size, shape, and profile.
The coarse belt will grind one side of the blade edge, then the other.
A microscopic camera will analyze the burr on the edge.
A fine grinding belt will remove the burr from each side of the knife.
Built-in auto storage can retain multiple knives until you return and remove them from the KnifeRobot.
See below for a scaled-up functional prototype of the machine in action.
The belts inside the KnifeRobot are said to last for about 100 sharpenings, and replacements can be purchased on Amazon for about $10. There are two versions of this machine: a portable consumer version (pictured here) suitable for the home or workshop, and a professional-grade version that can be built into a kitchen countertop. The professional built-in knife sharpener is designed for chefs, and will automatically sharpen knives based on how frequently they’re used.
KnifeRobot hasn’t hit full production yet, but the company has developed working prototypes, as well as the portable model design seen here. It is crowdfunding through IndieGoGo to head into production during mid-2017. For more info on this interesting new tech, check out KnifeRobot.com (this currently redirects to the IndieGoGo campaign). Backers of the campaign can pre-order a portable KnifeRobot for $299 with expected delivery in October 2017; the retail MSRP is expected to be $700. The built-in professional model will set you back $5000.