This article was originally published in Issue 2 of our magazine.
No matter where you live, natural disasters strike wherever and whenever they feel like it. When they do, don’t get caught flat-footed — be ready for anything that could happen. The best way to prepare for an impending disaster is to know what type of disasters occur in your area.
Here’s a map of major natural disasters that have occurred in the United States over 20 years between 1992 and 2012. Of course, in addition to these major disasters, there are numerous other disasters that have happened.
Keep Informed
For helpful tips on disaster preparedness for everything including drought, flooding, earthquakes, hurricanes, tornadoes, chemical spills, fires, volcanoes, and more, take a look at these government resources:
“When torrential water tosses boulders, it is because of its momentum. When the hawk breaks the body of its prey, it is because of timing,” wrote Chinese philosopher Sun Tzu.
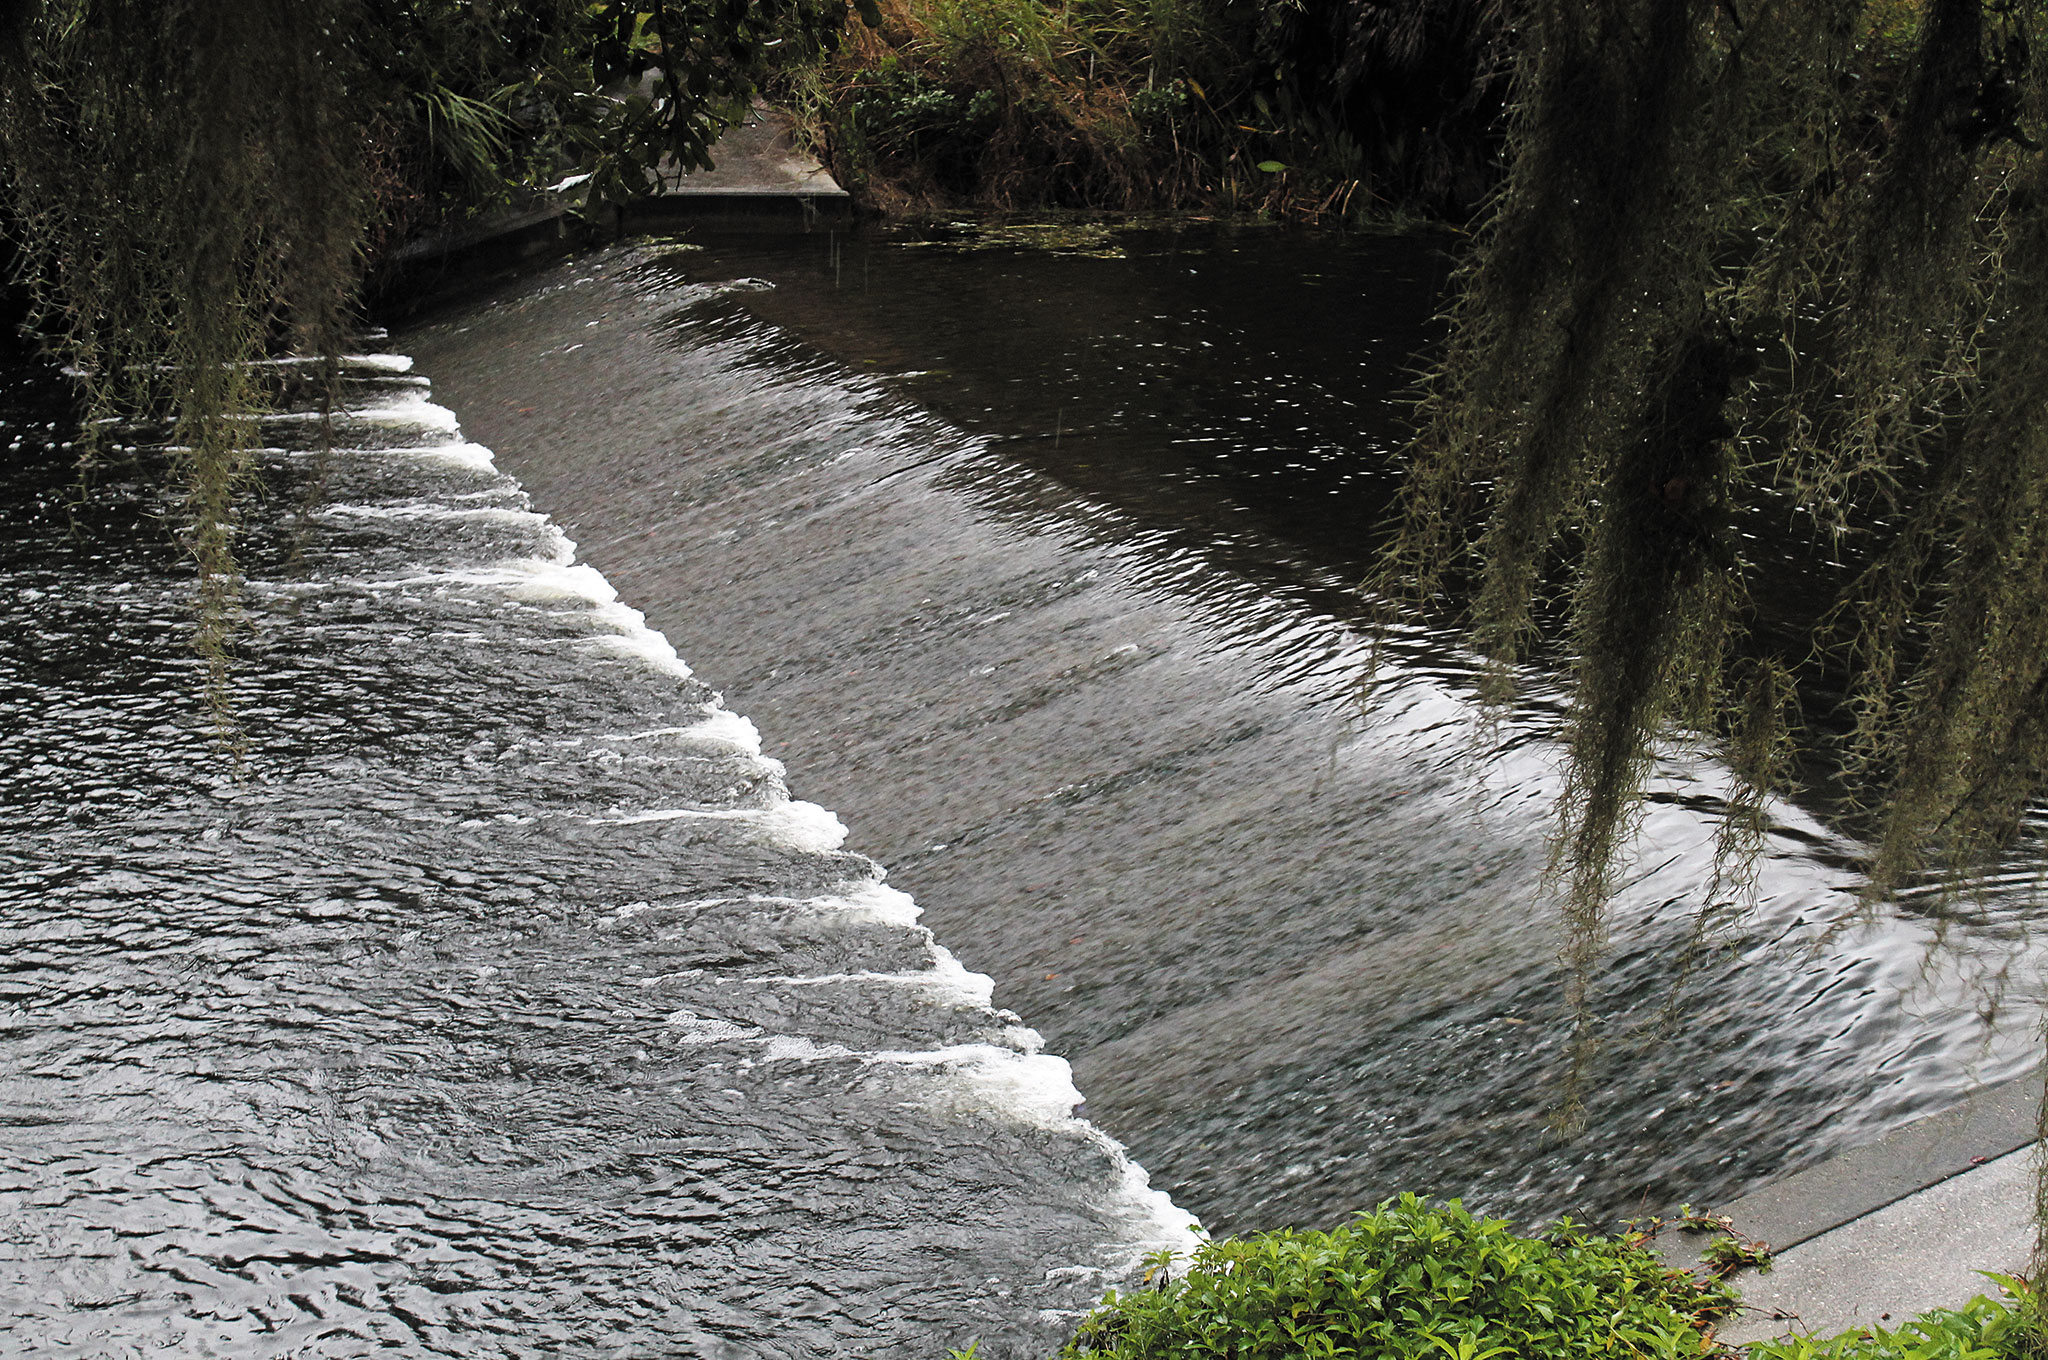
Writing allegorically about opposing forces, the author of The Art of War continues to offer ageless lessons for surviving widespread threats driven by flooding, the greatest weather-related cause of drowning deaths throughout the United States and the world. Whether it’s around your home or hits when you’re traveling on vacation, floods can happen in any terrain — coastal areas, mountain river valleys, or urban cityscapes.
By understanding the nature of water’s awesome momentum, and by learning to accurately gauge the timing of ever-changing flood speed conditions, OG readers can learn to adapt to a deceptive killer that destroys without regard for property or life.
Water Recognition
The first key in developing your own flood philosophy is to trust your eyes and judgment, recognizing the constantly changing reality before you and taking action.
Unlike the threat posed by terrorists, government emergency management officials have no problem defining flooding as the intrusion of water into historically dry areas. The form this takes can be broken down in several flooding challenges, depths, flows, and longevity depending on the season, topography, and infrastructure of the region and population density. Hazards include contamination of drinking water, power failures, commercial and governmental system interruption, overwhelmed hospital services, and limited transportation, fuel, and food supplies.
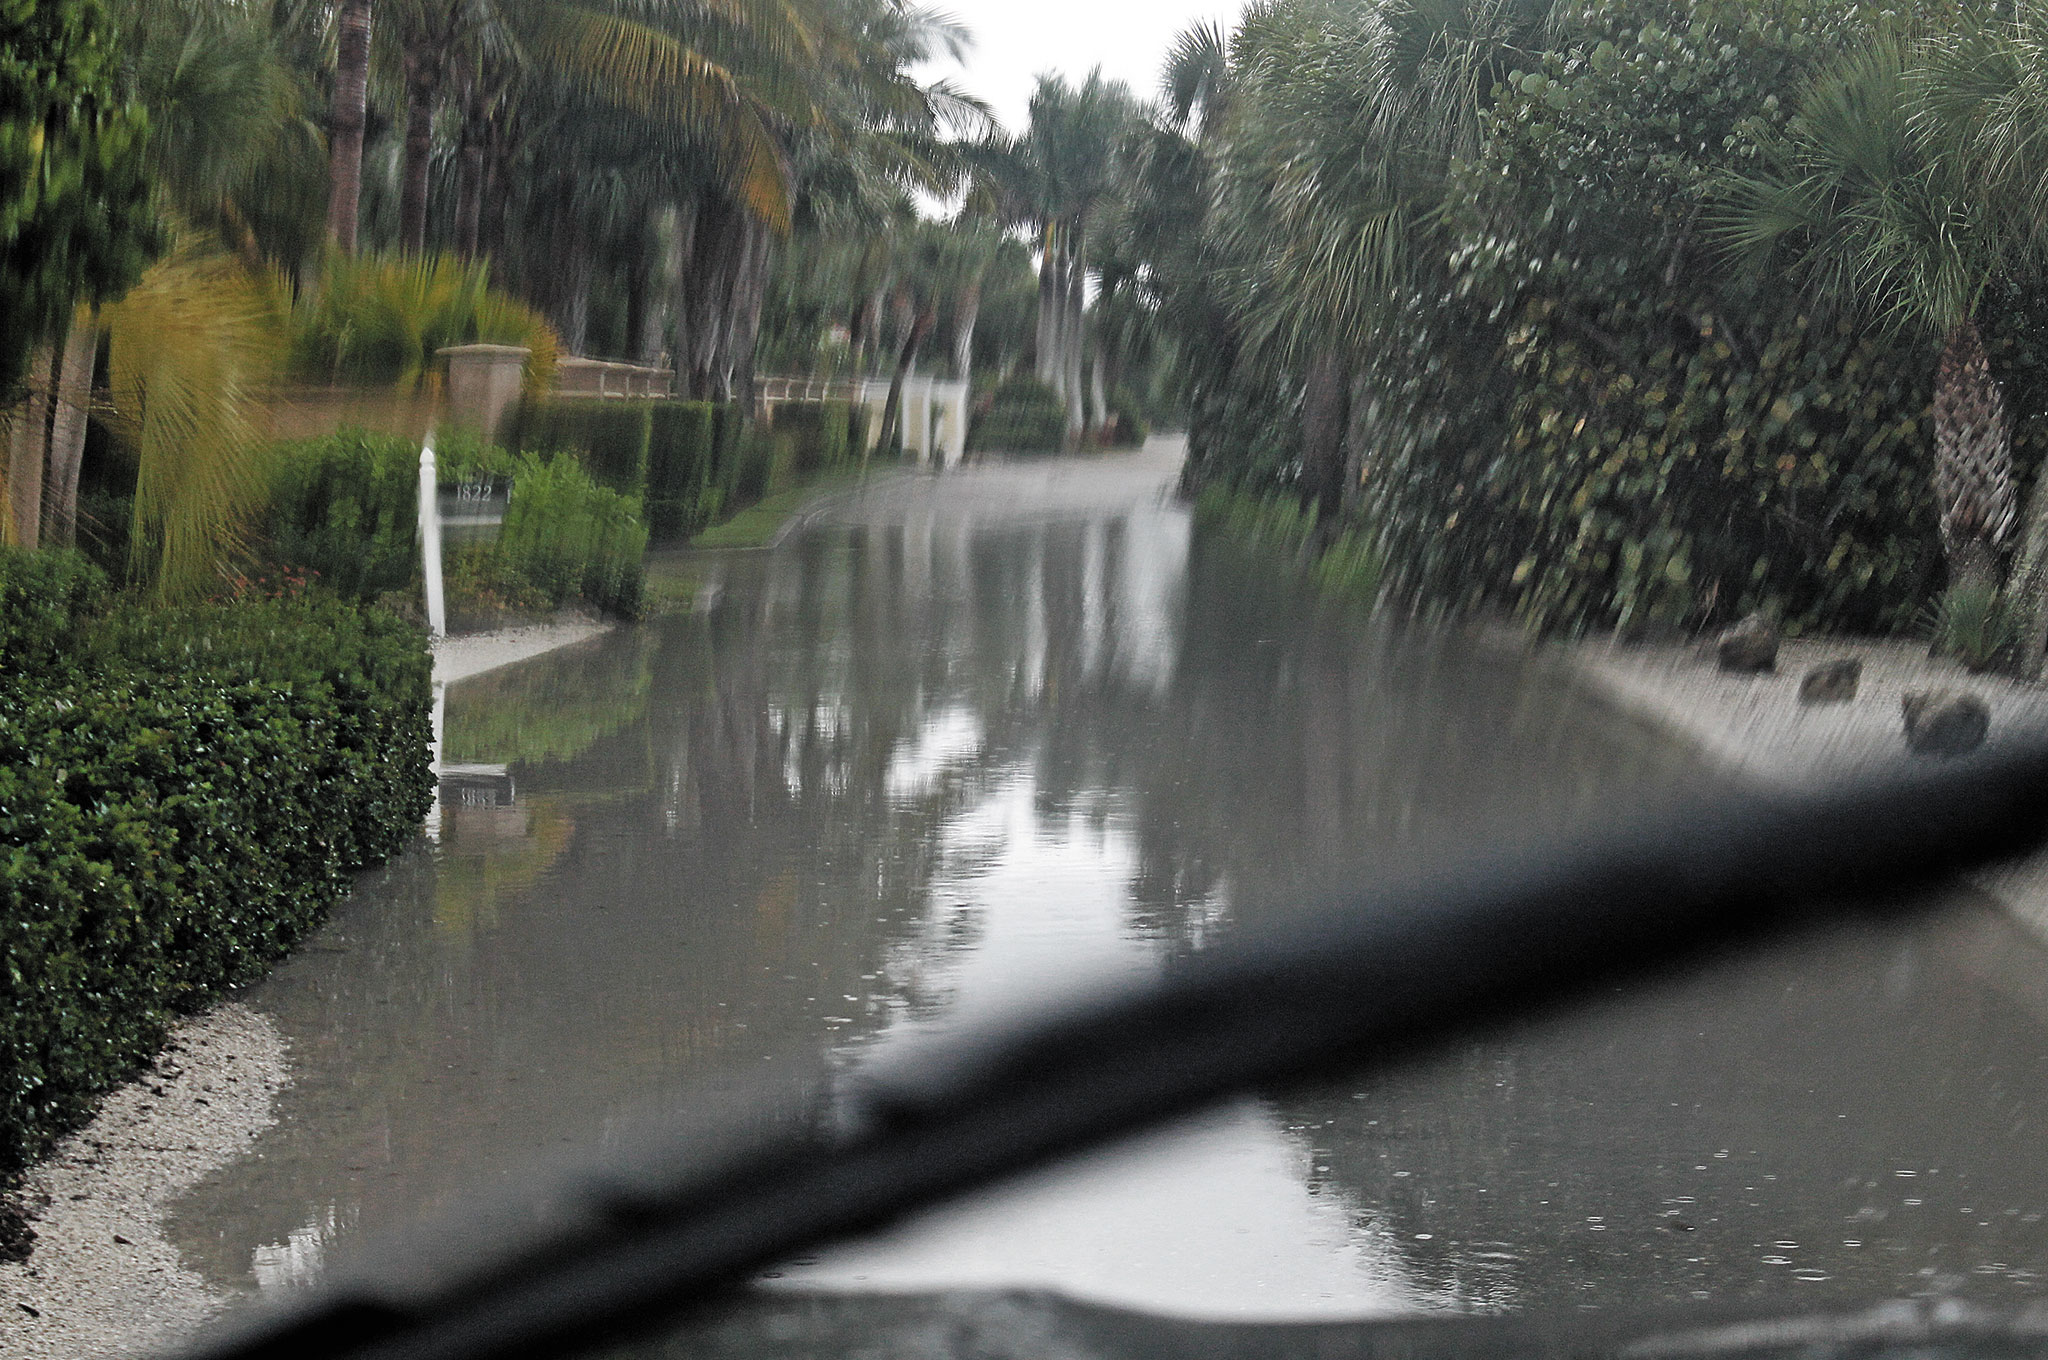
Don’t become complacent if your neighborhood appears high and dry. Small-scale flash floods and road washouts claimed the lion’s share of flood victims during 2015. Most U.S. flooding deaths this past year were from people attempting to drive or wade through slow-moving waters. Regardless of traffic lights, water will always claim the right of way against cars, trucks, and even trains. “Tossing boulders” is literally true.
As of press time, three major regions throughout the country are still recovering from a brutal series of late 2015 widespread flooding events, each illustrative of the complex dangers:
Utah: One-and-a-half inches of rain in a dry area near the Arizona border triggered a flash flood funneled through a recreational area, sweeping away two vehicles and resulting in the deaths of 12 members of a group who stopped to observe the rising waters. A flash flood warning had been issued hours earlier when the rain struck far upstream.
Missouri: Like a slow-moving train, a bulge of rainwater rolled down the Mississippi, challenging levies along Cape Girardeau and pulsing through the lowlands, claiming 14 lives, most of them in their vehicles. Four visiting foreign military members were lost near Fort Leonard Wood when their vehicle was swept away on a flooded roadway. Two were found in the vehicle and two downstream.
Texas: The nation’s fourth largest city, Houston, couldn’t soak up almost 3 feet of rain in less than one week. The outcome? Approximately 20,000 evacuees, $1 billion in damages across 28 counties, 20 deaths in Texas and Louisiana (where an additional 3,500 homes were damaged). A record 15 inches of rain was recorded in a single day in Texas on November 1, 2015, causing widespread flooding from a series of tornadoes.
Flood Categories
Flood conditions fall into eight categories, and may combine during storm events, depending on local topography and infrastructure:
Flash Flooding: This typically develops within six hours of the trigger event, causing a rapid rise of water — whether rain-related or by levy failure. This occurrence is especially notorious in the Western United States among the dry, hard-packed arroyos and coulees favored by campers and hikers. A dry, low-lying creek bed may barely trickle at sundown then surge to a raging torrent at night. In older urban areas, concrete spread above substandard storm drains can pool water for days, and multiple storms can compound the flooding with force sufficient to move cars.
River Flooding: The National Weather Service issues minor, moderate, and major flood warnings along areas prone to flooding from overflowing riverbanks caused by heavy rain, dam failures, snowmelt, or obstructions. A record flood is a historical event, often misunderstood in the media, and described as a 100-year event. That doesn’t mean it occurs once a century. Instead, this simply refers to the 1-percent chance that a record flood can occur in any given year.
Burn Scar Floods: In the dry, steep, arid western lands where wildfire burns off protective vegetation, soil properties may prevent rainfall from being absorbed and filtered like normal runoff before entering stream flows. These burn scars can occur anywhere, but are most often associated with the mudflows and debris-strewn storm water runoff once soils become saturated, sloughing off topsoil and placing those downstream at risk of damage or coverage.
Ice Jams or Dams: Rivers, streams, and creeks in the upper USA and Alaska may experience record floods resulting from frozen sections of river forming, breaking up and moving down current, combining with debris to obstruct or restrict flows into a strainer. The stop-and-go effect of these melting jams may also trigger surges or even flash floods downstream when the ice releases. Dangers associated with the unpredictable ice jams include environmental alteration of riverbanks, spreading of flows, and blockage of navigation. Paddlers take heed of these “strainers” (like fallen trees or rebar from broken concrete), which can block objects, but maintain the flow of water — they can pull a canoe sideways or keep you pinned underwater.
Snowmelt: Northern tier states and mountainous regions are most susceptible to snowmelt flooding, though the release can be more predictable when the spring thaw commences. Hunters and fishermen who cross creeks may return to find rivers waiting. Prepare to spend the night or work upstream or downstream until you locate a safe crossing point. Time to break out the contour maps and hope your fanny pack has overnight food and shelter.
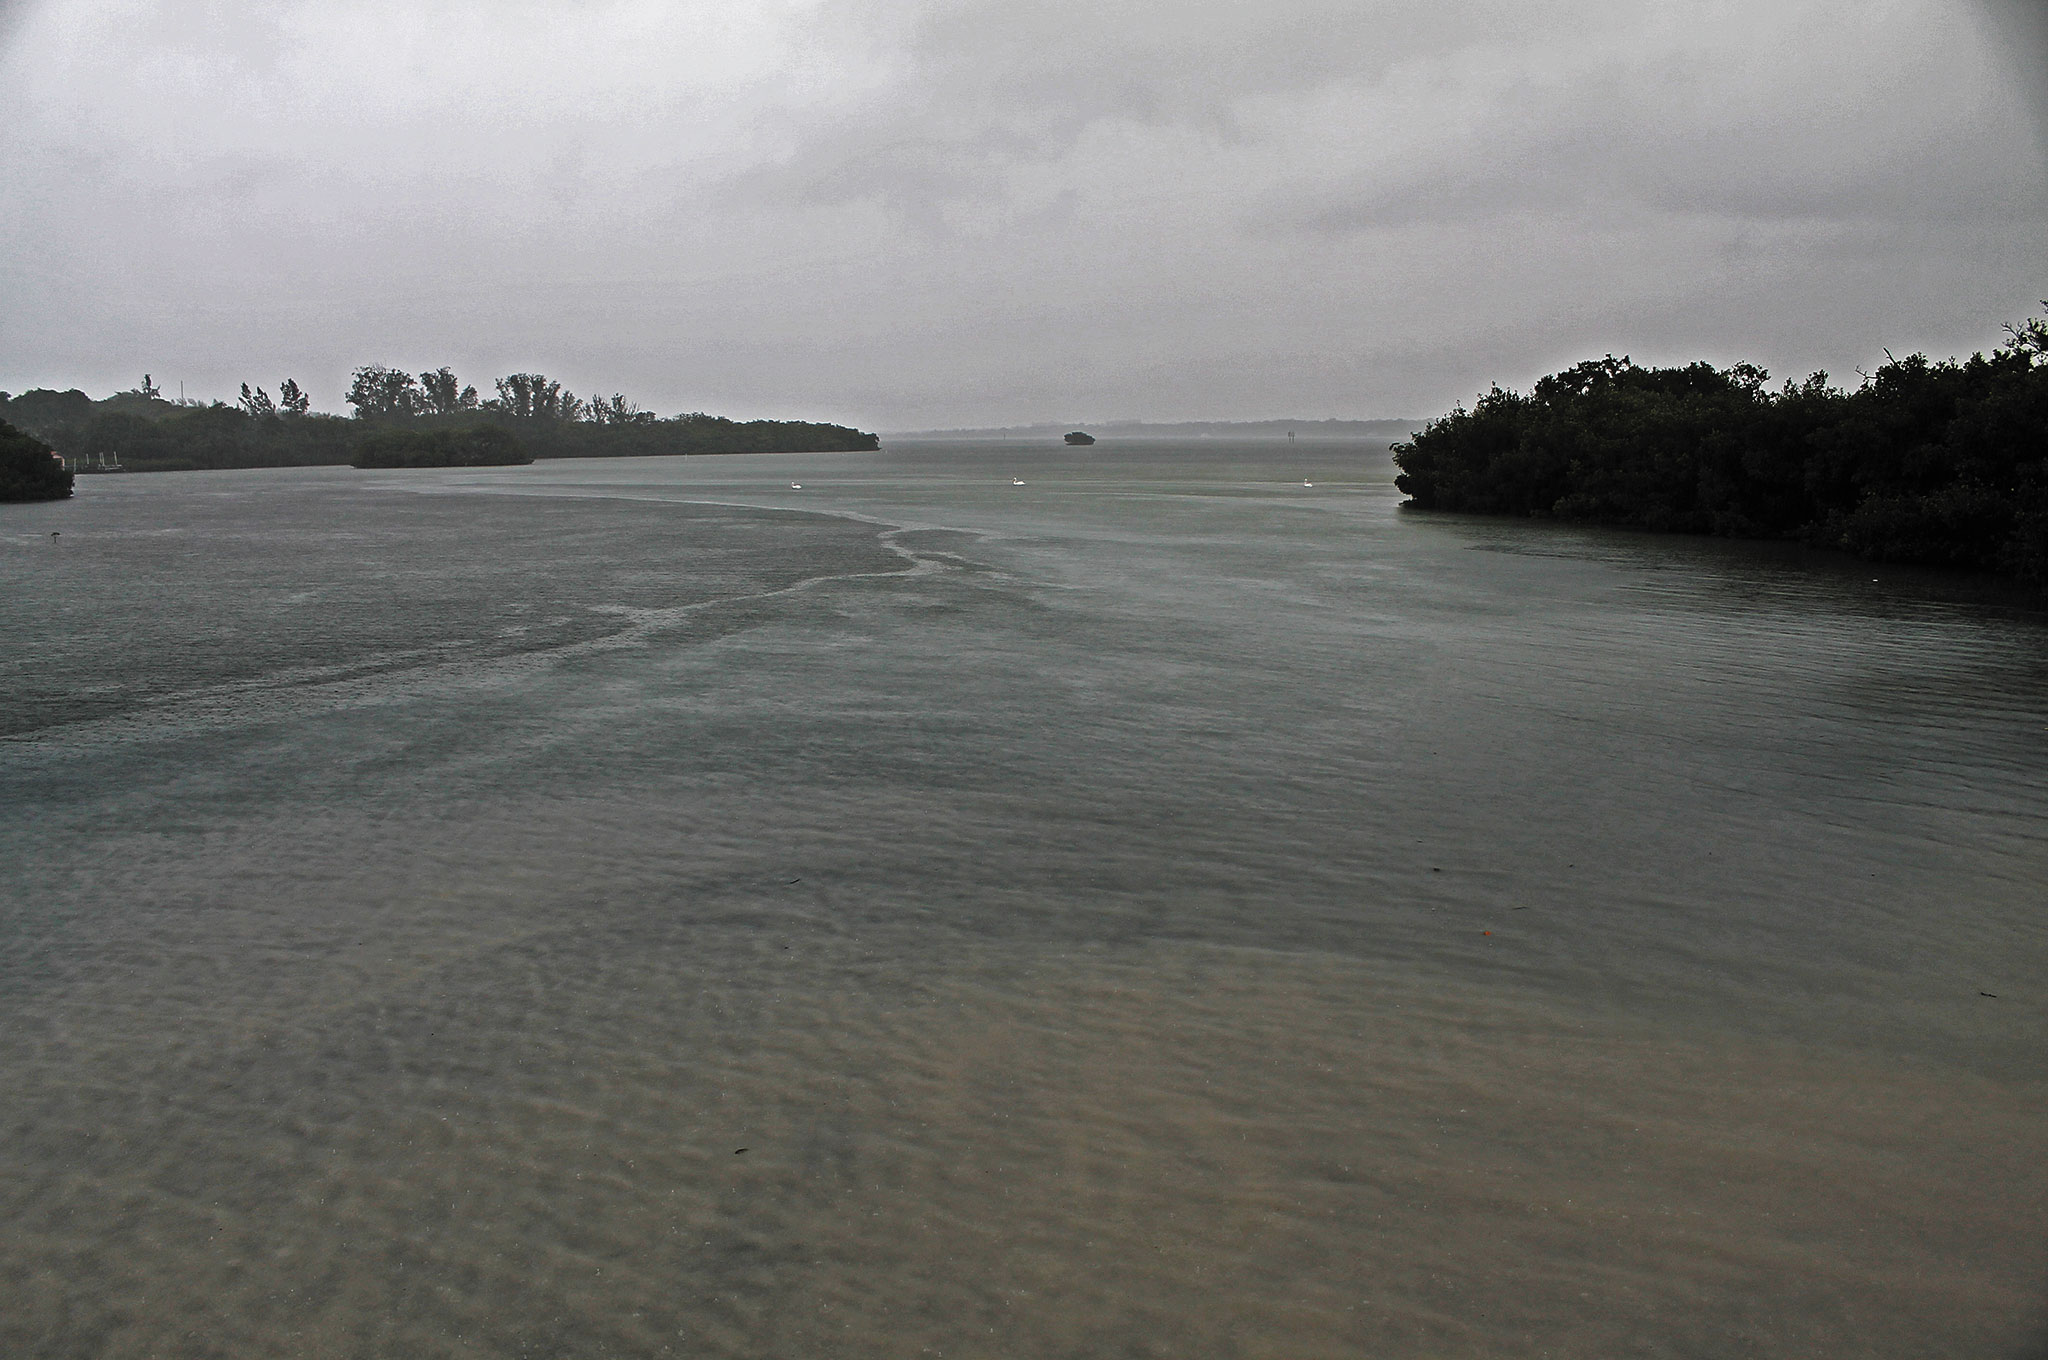
Coastal Floods: Cyclones, hurricanes, and tropical storms bring to mind high winds and destruction, yet the highest percentages of deaths are due to flooding, according to emergency management officials. Pacific storms target the Northwest during the May to November hurricane season, while Atlantic storms brew from June through November. Northern coastal areas can get hammered by nor’easters through the winter, driving floods across large coastal areas and inland where the threat of flooding is sometimes unexpected. Gulf Coast storms may track into interior eastern states before flows force the storms into the Atlantic, pounding inland coastal states with bands of rain.
Homeowners near the coast, and even boaters are at risk during heavy rains when visibility drops and tidal surges combine with a storm tide.
Storm Surge: Coastlines measuring hundreds of miles long can be inundated by storm surge and erosion, washing out familiar roads overnight and putting a nice pothole in your evacuation route. They are also known to chase you well inland, destroying coastal plains neighborhoods, creating mandatory evacuations and trapping those who choose to stay or were unable to get out.
Storm Tide: This increases water levels based on lunar pull, adding 4 feet or more depending on the region. This can increase the dam effect of high waters, trapping flood conditions. If a tidal surge can reach 10, 15, or even 20 feet, the storm tide will make a bad situation worse, and will cycle through on a four-a-day cycle in many Gulf coastal areas. The flow can cause saltwater intrusion within agricultural lands or upland freshwater reservoirs.
Dam Failure: The Federal Emergency Management Agency (FEMA) and national dam inventories identify more than 80,000 dams throughout the United States, with one-third of those posing a “high” or significant threat to life and property if failure occurs. While weather-related events offer some warning period to anticipate and evacuate downstream areas, others may fail with little warning from causes including prolonged rainfall, landslides, earthquakes, or erosion. Human causes include improper maintenance or design, negligent operation, sabotage, and terrorism.
Before the Flood
Acquire Intel: Take advantage of flood mapping information maintained by county, state, and federal offices. However, local knowledge is often best. Talk to the folks in your city works department or at your water management district. Identify your property in relation to flood zones and understand how the area’s warning systems are issued in public service announcements. Also, FEMA publishes a Flood Insurance Rate Map (FIRM) to show locations of low-, moderate-, and high-risk properties. Each year about 25 percent of flood claims come from areas outside of the high-risk area.
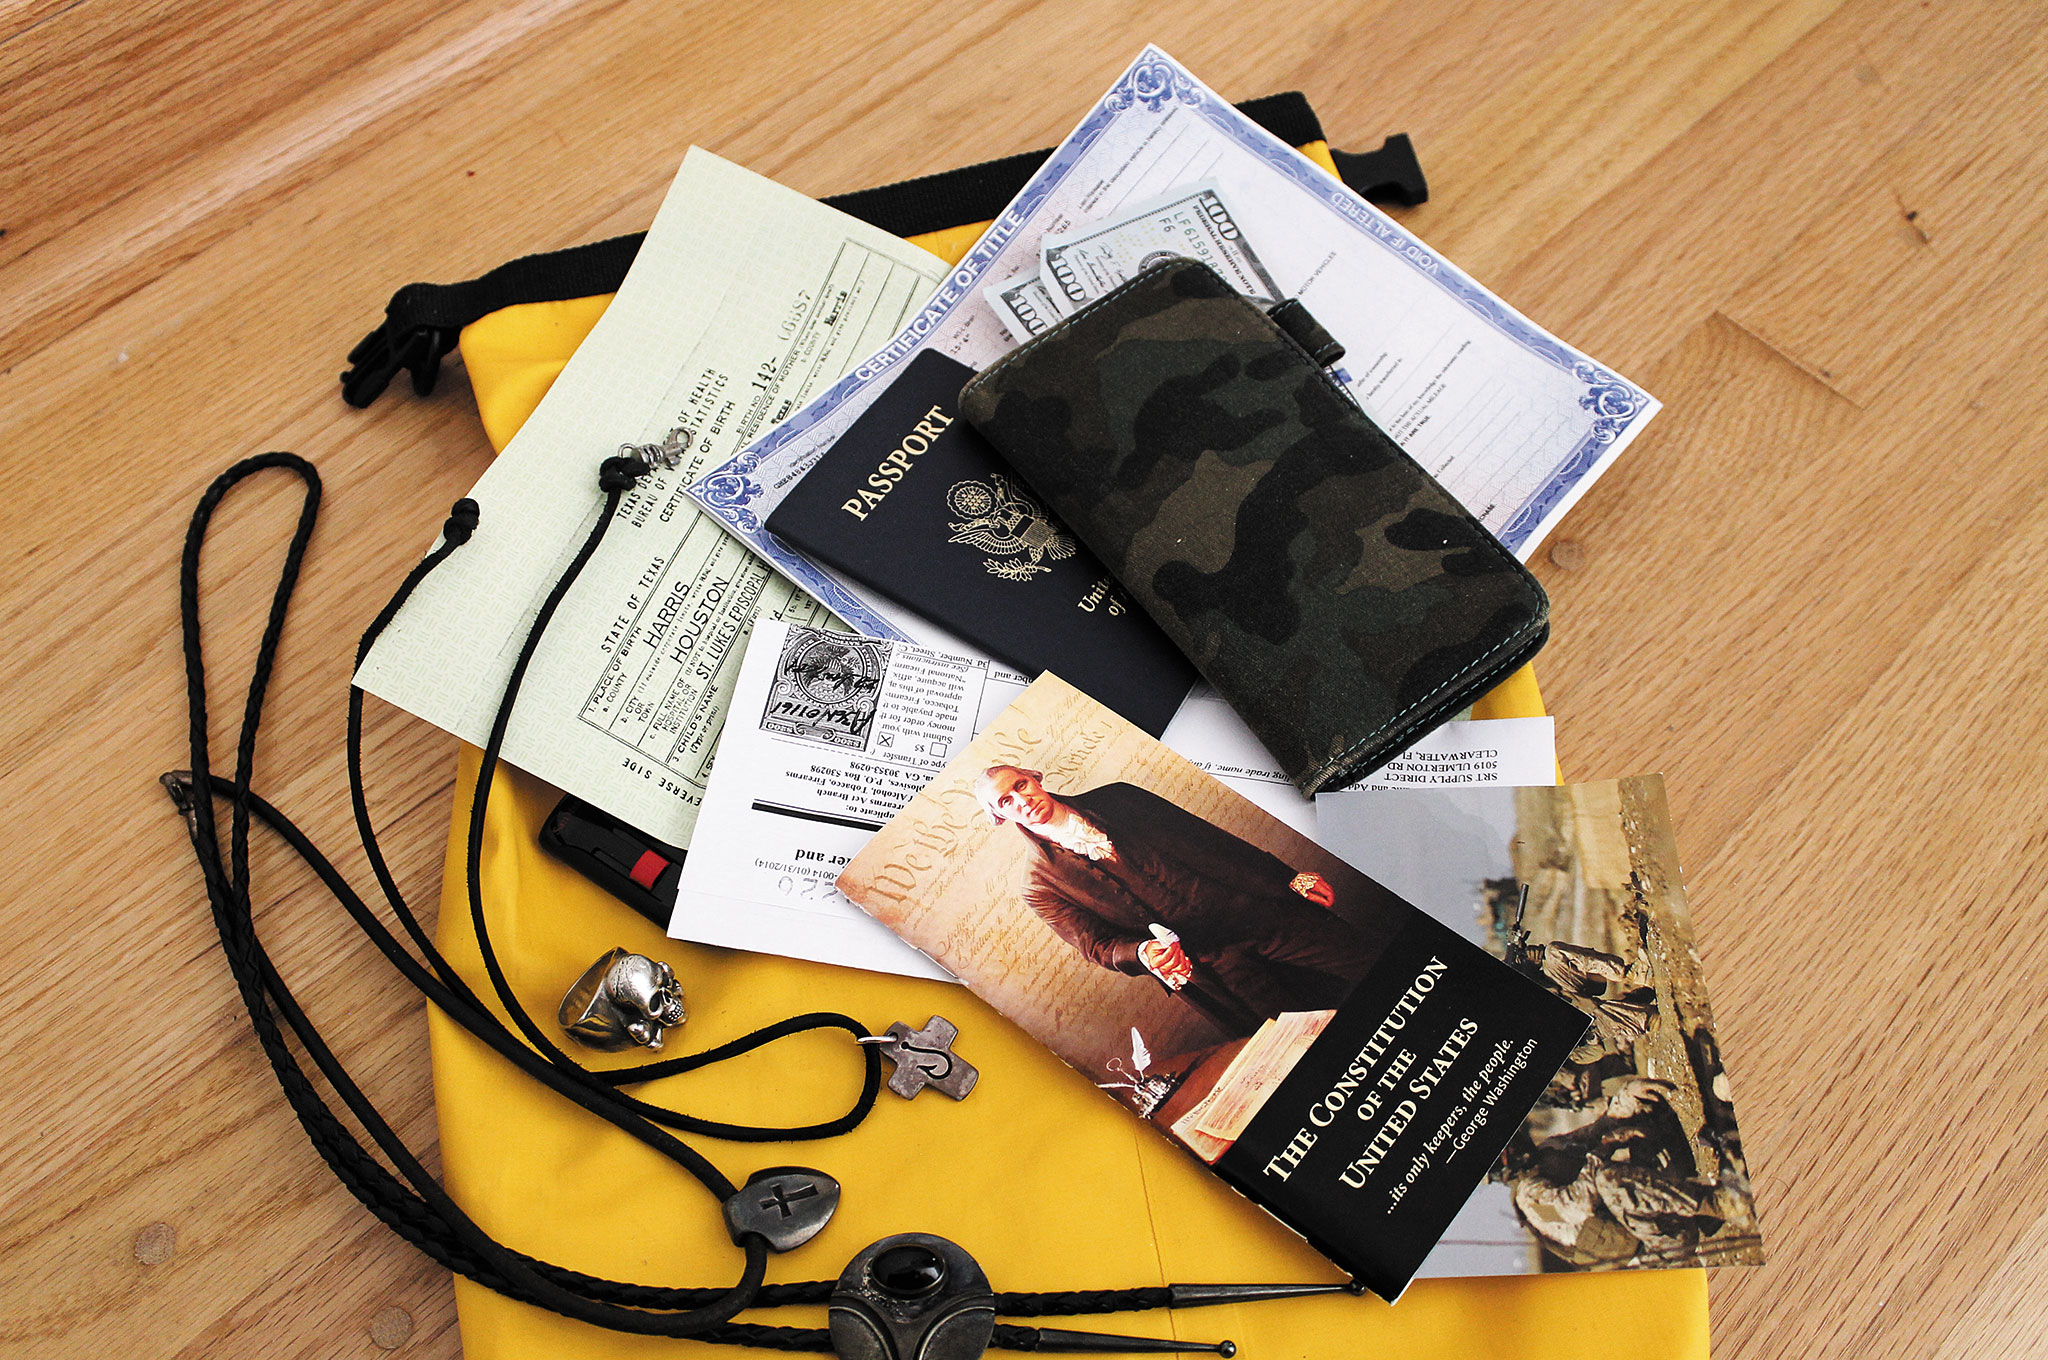
Cover Your Assets: Whether you have federal flood insurance through the National Flood Insurance Program or special homeowners or renters policy riders, identify the costs of this and review details of the coverage with your property manager, agent, or attorney. The object is to protect your possessions by documenting the value, descriptions, and serial numbers. Maintain this file electronically and in writing, and keep a copy in a separate location like a safe deposit box. Include photographic inventories of all valuables or video files with oral or written references to times.
If you’re bugging in during a flood, keep your family’s morale up and your minds occupied with your favorite books. This author prefers books that are both entertaining and provide survival wisdom.
Create a Plan: While everyone’s emergency response will be different, there are some general guidelines one must consider. The big important one is to develop a household flood preparation plan consisting of phased steps (e.g. waiting out a rain event, evacuating, and eventually returning home). Purchase handtools like saws, axes, and shovels. Stock up on items such as rope, empty sandbags, wind screenings, and heavy plastic tarps to deal with flood-related damages. Be sure to include primary and secondary evacuation routes.
Train, Train, Train: Like those fire drills we practiced in grade school, running through your emergency response plan with your loved ones is important. These dry runs should include educating your family about the dangers of driving in flood conditions and of stranger dangers — from “hitchhikers” in distress to looters looking for an easy score. Train accordingly.
Firearms can provide peace of mind, pest control, and the occasional meal. Pictured here are a 10-shot Smith & Wesson 617 revolver, a brick of .22 Short cartridges, a Ruger 10/22 rifle, and a nitrogen-sealed can of Federal .22LR ammo.
Get Comms: Clearly identify family communication plans and responsibilities, including remote meeting points and staging areas at school, shelters, and offices. Reliance on smartphones could end poorly in the event of widespread disaster, so radios pre-tuned to your family’s station are invaluable.
Stock Up: Any prepper worth his weight in MREs knows that your home should always have a long-term food cache. This should include safe drinking water, as well as sanitation kits for sterilization due to the potential for infection from contaminated flood waters.
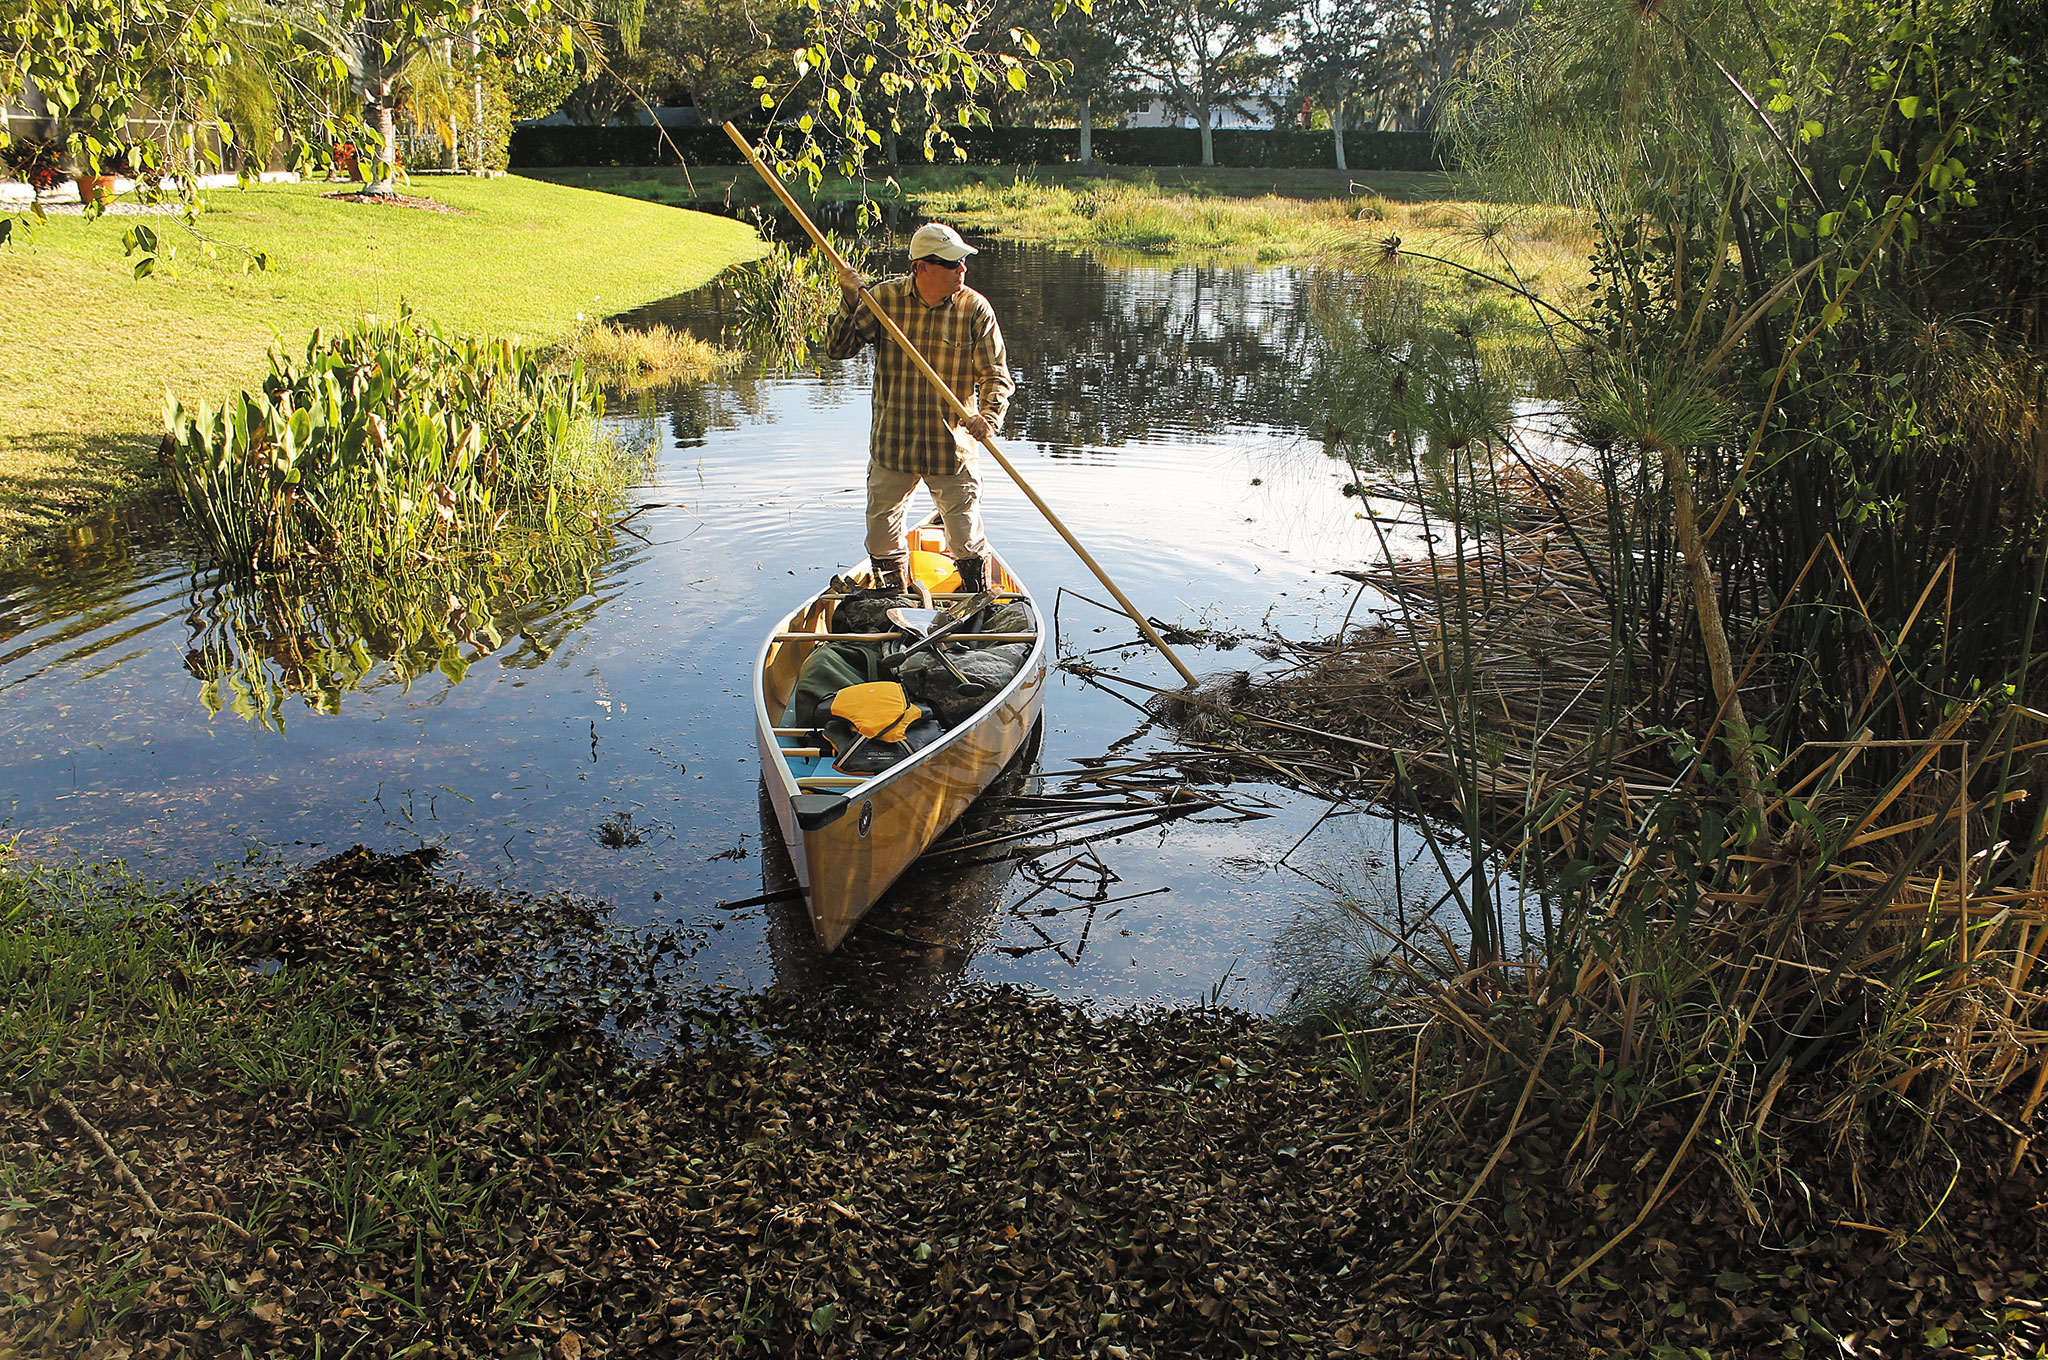
Grab a Paddle: Consider storing a canoe capable of ferrying relatives, injured neighbors, or pets to and from safe zones. This investment offers a last-ditch escape route. Equip the canoe with various essentials, such as spare paddles, flotation vests, and lengthy bow and stern lines. If there’s room, pack a bug-out kit that includes buckets, rubber gloves, an emergency alert radio, and hip waders (the more puncture-proof, the better).
Long-Term Mitigation: If you have the financial means, consider making permanent modifications to your home or business that include elevating electrical panels per code, waterproofing entryways or doors, anchoring fuel tanks, and installing pumps for basements or low-lying floors.
During the Flood
No amount of planning and practicing will be the same as the real deal, but if you’ve done the aforementioned prepping, you’ll be better prepared to deal with the flooding specific to your region.
Bugging In: If you’re waiting out high waters, put those sandbags to work. But be realistic about what you can accomplish, and pace yourself to prevent injury.
Maintain constant communication with friends and family members. Monitor weather bulletins and emergency broadcasts. Keep children calm through various means: place them in charge of pets, have them read their favorite books, give them small jobs to handle, and reassure them that those drills you practiced will reduce the risk of harm. Encourage positive thinking and celebrate minor successes. Get rest when possible.
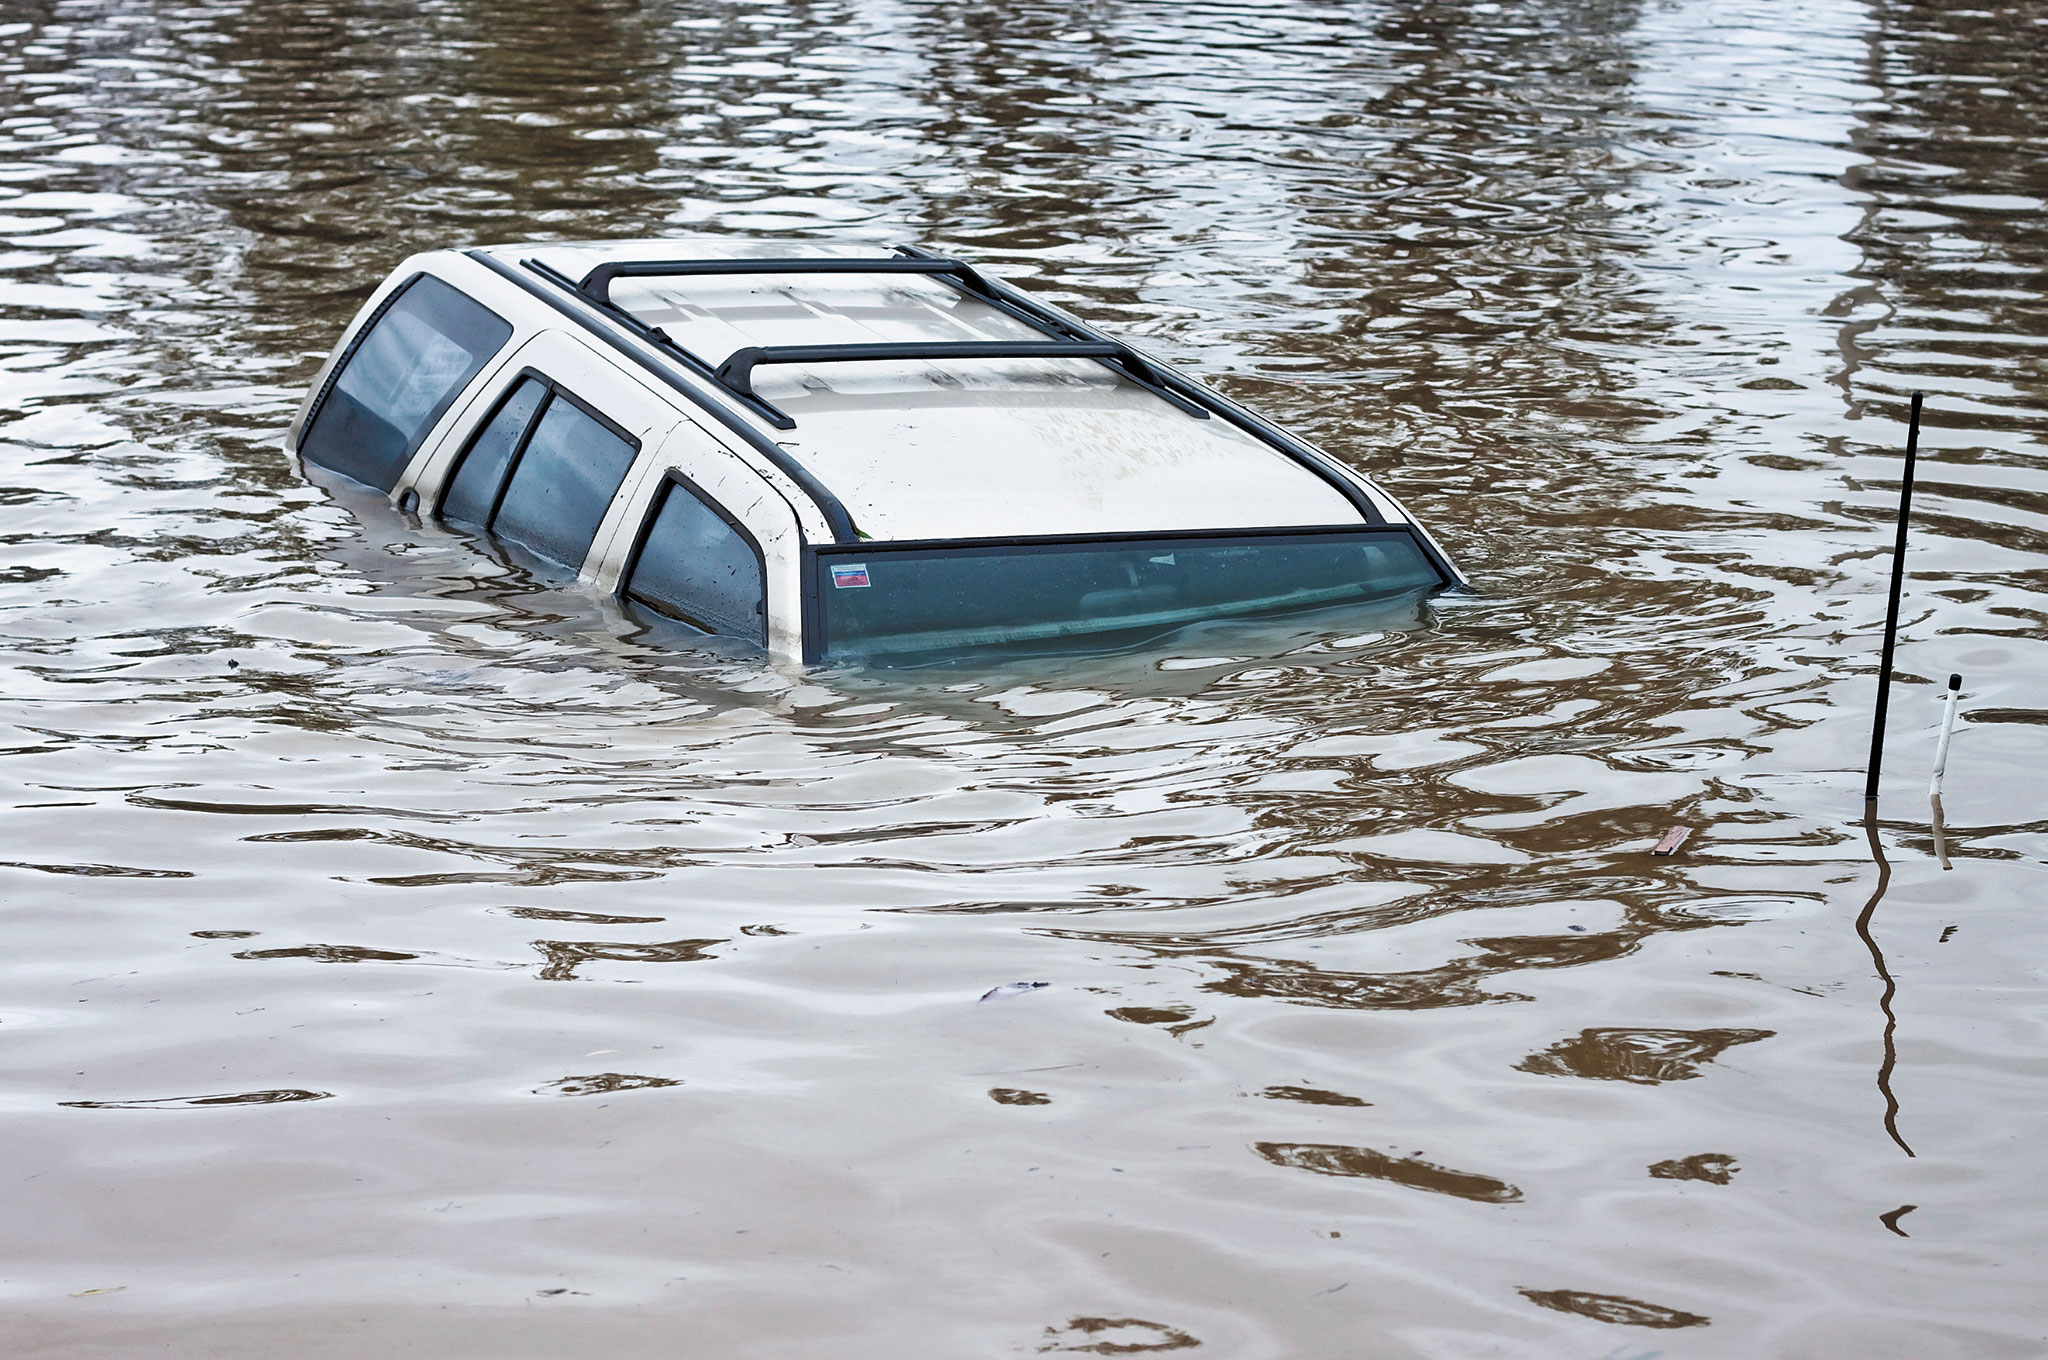
Bugging Out: If it appears that an evacuation order is pending or the situation has hit a stage in your exit plan that requires you to bug out, prepare to follow your family’s predetermined emergency response without waiting for visual confirmation of floodwaters. Disconnect power sources, shut off utilities, and plug sinks and drains to prevent sewage backups and contamination. Don’t attempt to drive through moving water
More than half of all flood-related drowning deaths involve vehicles, according to federal officials. Underestimating the water’s power, drivers stall out, lose control, or get swept away. Even a few inches of water can cause tires to lose contact with the road.
.
Trapped?: If you waited too long and are now trapped indoors, move to the highest level — but don’t climb into an enclosed space like an attic, as rapidly rising water can box you in. Climb to the roof as a last resort, but protect yourself with proper clothing, food, and drinking water. Bring lights or signage with you to alert search teams. Don’t attempt to operate any generators or stoves indoors.
If you’re trapped in a vehicle, get to the car’s roof and wait for the floodwaters to recede or a rescue team to come.
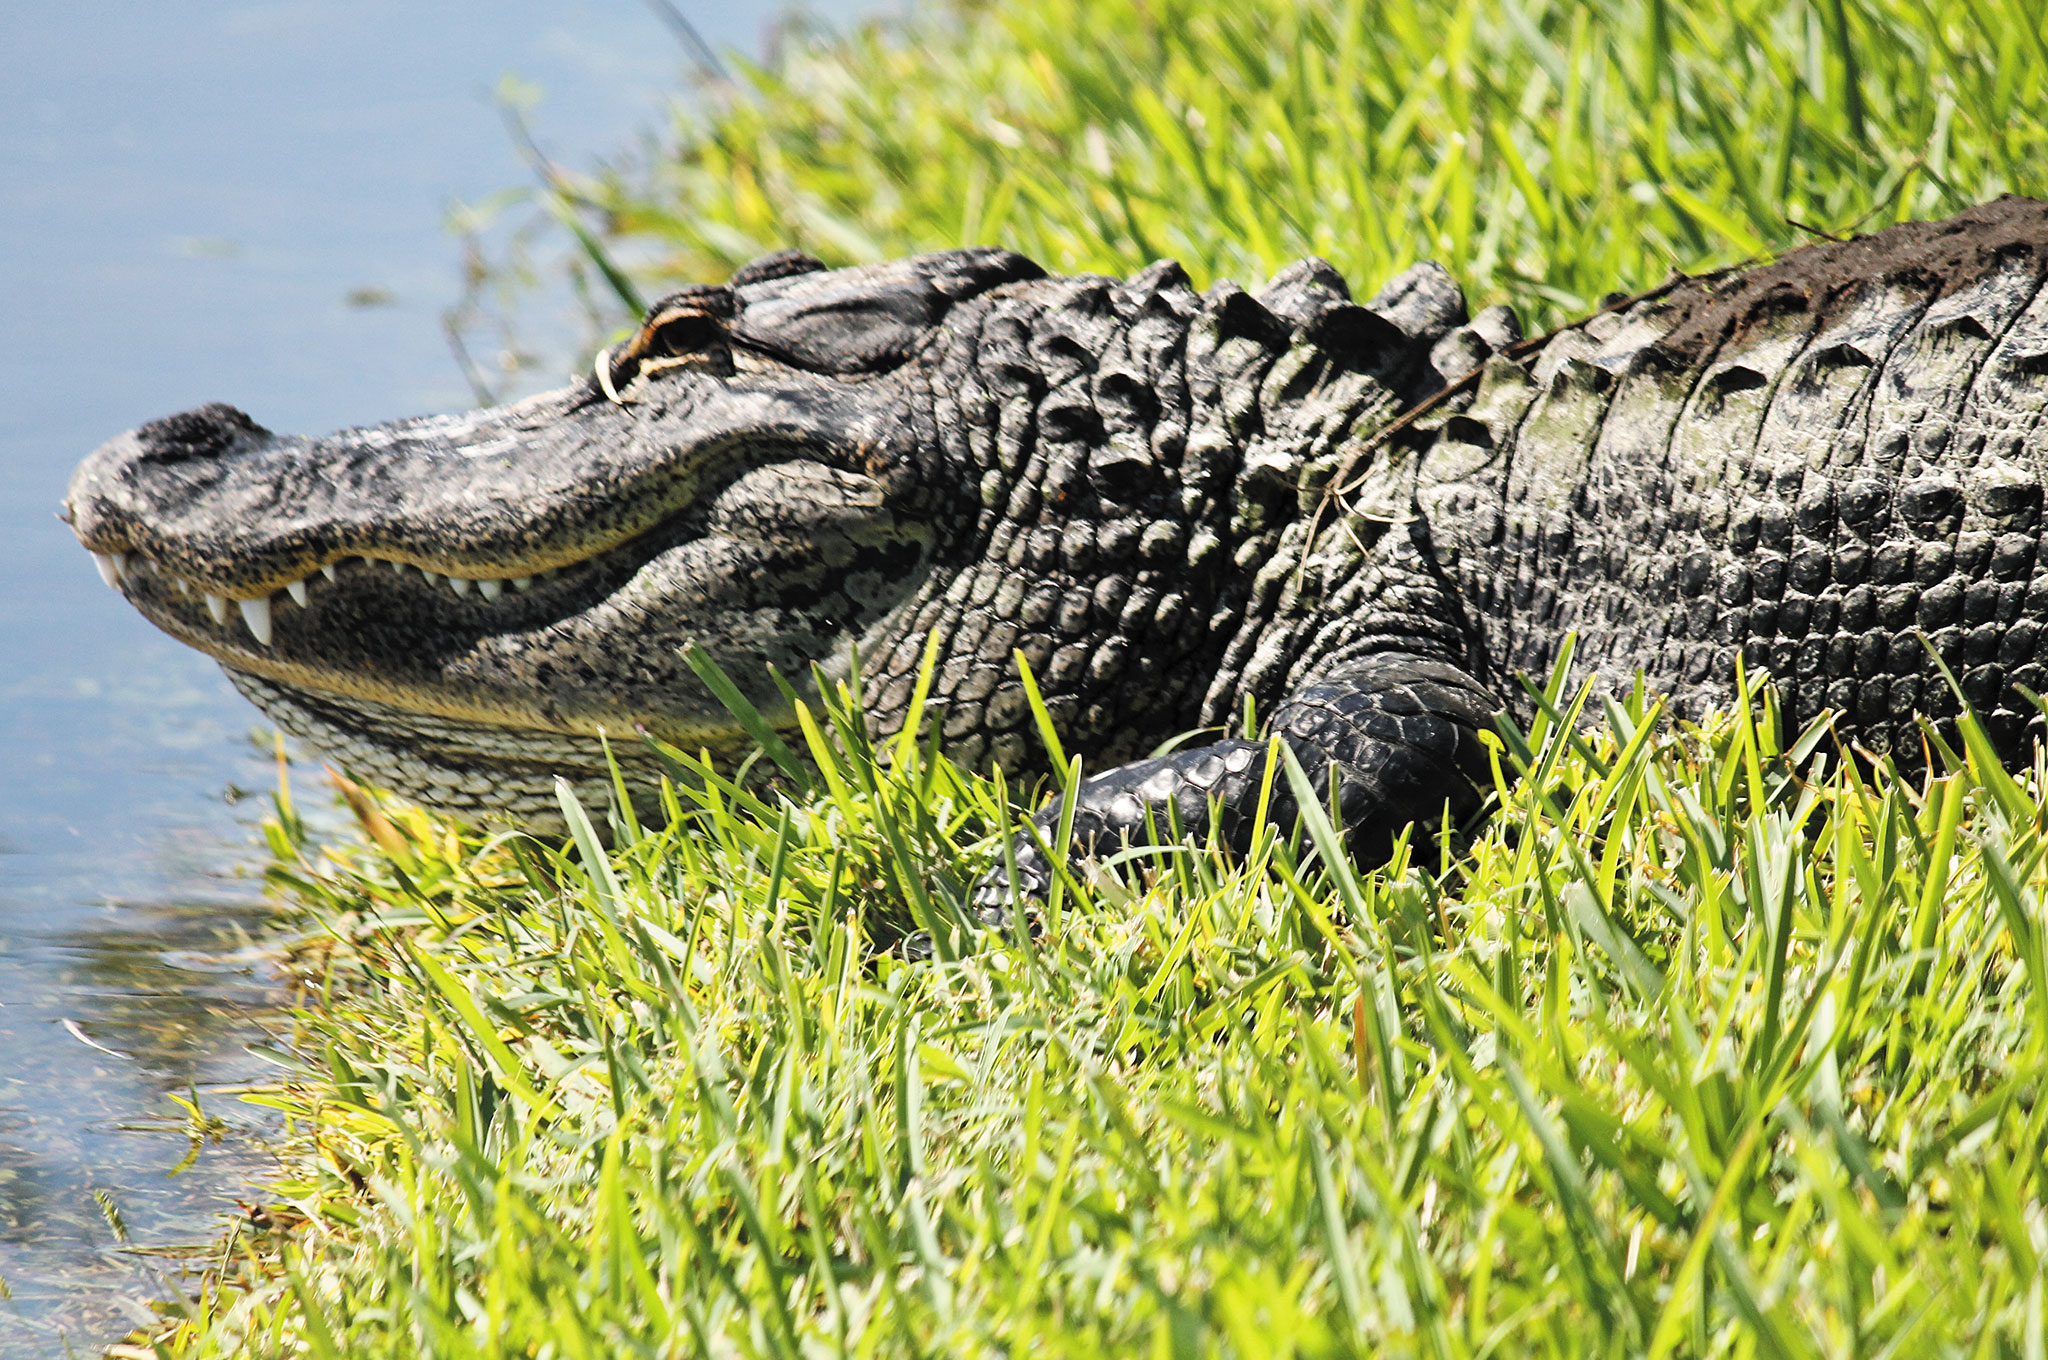
If trapped on open ground, seek the highest elevation and protection possible, watching for and reporting downed electrical lines and water-swept debris. Waters may be contaminated with fuel, sewage, or sharp objects. Also look out for hazardous wildlife, such gators, snakes, or strangers with ill intent.
Wildlife is driven to higher ground during flooding and even torrential rains. People evacuating from or returning to their homes should do so only when visibility is good.
After the Flood
What if you were hit with raging waters and preparations paid off? Let friends and family know your status. Don’t let people handle tools or repairs when unsafe or seemingly distracted. And be prepared to deal with unseen risks, such as anger, depression, and mental and physical exhaustion.
Depending on the damage, you’ll follow five steps: air out, move out, tear out, clean out, and dry out to safely prevent mold, mildew, and dangerous materials from posing a threat to your recovery plan. Continue to monitor the past storm status and disaster declaration status for your area in the event you are eligible for public disaster relief.
Approach your home with extreme caution, almost as a hazardous area, with proper rubber boots, gloves, protective goggles, and a respiratory mask, depending on conditions. Protect yourself from electrical shock, mold contamination, and any structural weakening or broken glass and debris. Identify areas for debris storage and a systematic plan for safe cleanup.
Don’t resume electrical or utility usage until deemed safe to do so. Avoid standing water, as well as using water utilities until given assurance by the authorities it’s OK to resume.
Document all damage prior to cleanup with photos and video and follow up your claims adviser to recover.
Conclusion
Amid the death and destruction throughout South Carolina last year, a North Charleston woman was trapped in her home by flood waters, only to go into labor with no way to drive or to be reached by paramedics. With more than 2 feet of rain washing out roadways, emergency rescue personnel responded with an open cockpit kayak, ferrying her to safety from her home to a waiting ambulance. Nine hours after arrival, the mother delivered baby Elijah before planning her return home.
Bug-Out Boats
When streets are waterlogged, the American Red Cross and many disaster response teams still rely on shallow watercraft to find victims and provide help. While a kayak can provide solo or even tandem transport, the openness of canoes have traditionally transported supplies and injured team members in flood conditions. Also, check out our feature “Up SHTF Creek Without a Paddle” in RECOIL OFFGRID Issue 11.
Consider an emergency radio. A simple turn of the crank keeps you informed of all weather and disaster info, while an integrated solar panel can keep your smartphone charged if the sun’s out.
Avoid the ultralight Wee Lassie-class boats for emergency transport and opt for recreational or even “freighter” canoes with substantial beam, good stability, and larger carrying capacity. Instruct passengers to stay centered and low in the canoe and to not step or stand on the gunnels when entering or exiting. Launched from a home, a truck bed, or a luggage rack, a canoe can be maneuvered with lightweight paddles or a push pole of at least 10 feet (against light or moderate wind and water currents). Also, bow and stern lines can be used to pass the canoe between two homes, like a clothesline.
Once on land, a canoe can be flipped for temporary waterproof shelter and used in combination with a tarp and a small campfire or mini-stove.
A canoe can also house a good bug-out kit; it should be stored centrally and trimmed for balance. A quick checklist should include:
Hip waders for entering and exiting
Food and drinking water
Disinfection/sanitization kit
Mini-tent, rain fly with mosquito netting, tarp, cot, and insect repellent
Toiletries, bucket, and bleach
Alternate layers of clothing, footwear, gloves, hat, and glasses
A backpack or duffle in the event gear must be stowed and the canoe portaged overland using the padded shoulder yoke
Headlamps, break chem lights, and illumination for low-light travel
A bundle of camp and handtools for entering or exiting your home and making a camp
Hand pump, sponge, and rubber gloves
Pocket knife, fixed blade, and compact firearm
Cash, family band radios, VHF radio, mobile phone, solar chargers, hand-crank NOAA weather radio
Turn Around
We said it before and we’ll say it again: Don’t try to drive through water. Drivers and car passengers now account for more than half of flood-related drownings, according to the Centers for Disease Control and Prevention. Because of this, federal officials launched the “Turn Around, Don’t Drown” campaign to warn people who might underestimate the power of water. Even a foot of moving water can sweep a car away.
Many deaths are attributed to drivers who bypass barricades to check on their property during a flood. Striking even moderately deep waters can cause temporary water blindness, panic, and loss of control. Disoriented drivers might also tragically attempt a wide K-turn or U-turn, which could lead them off the shoulder and into roadside ditches that are swollen with storm flow.
After many years spent crossing flooded pasturelands, where no roadway exists, this author advises getting quickly into reverse when safe to do so, then keeping the engine revving to prevent water from entering the exhaust. By reversing through the waters, the rear of his vehicle parts the waters, spreading out a bow-like wake and keeping his engine intake high and dry.
About the Author
David Martin is a Sarasota, Florida-based fishing guide, an NRA firearms training counselor, and a kayak and canoe survival skills pioneer. Holding disaster response certifications from the Department of Homeland Security, he’s worked in hurricane response, storm water environmental utility, and emergency management comprehensive planning. He can be reached at davidhmartin@me.com.
Finding multiple uses for a single item is a key tenet of preparing for an emergency. Sure, you can use a knife to cut things—but if you’re creative, you’ll also use it to spear fish, strike a ferro rod, clean game, and even carve other tools. If you can re-purpose an existing item in your bug-out bag, you’ll be able to lighten your pack and travel faster.
A brightly-colored bandana could be useful for signaling for help or marking paths.
One such item that can be re-used in a variety of ways is a bandana. No, not the tasty yellow fruit with a similar name, we’re talking about the square cotton rag that’s also called a bandanna (with two Ns) or kerchief. There’s probably already one of these in your pack, but if there isn’t, you might consider adding one.
The following video from SensiblePrepper on YouTube shows 40 different uses for bandanas:
We especially liked the survival ascot, in case you want to look like European nobility (or like Fred from Scooby Doo).
Seriously though, the video makes some good points. A 100% cotton bandana can be extremely useful, especially if you buy one with useful information printed on it. You can buy bandanas with some of the following information:
An example of an instructional bandana designed for use by paramedics.
Of course, we’d probably lean towards simply memorizing the information you need to survive, and sticking with an ordinary camouflage or solid-color bandana. However, we can see how the specialty pre-printed designs could come in handy.
This article was originally published in Issue 2 of our magazine.
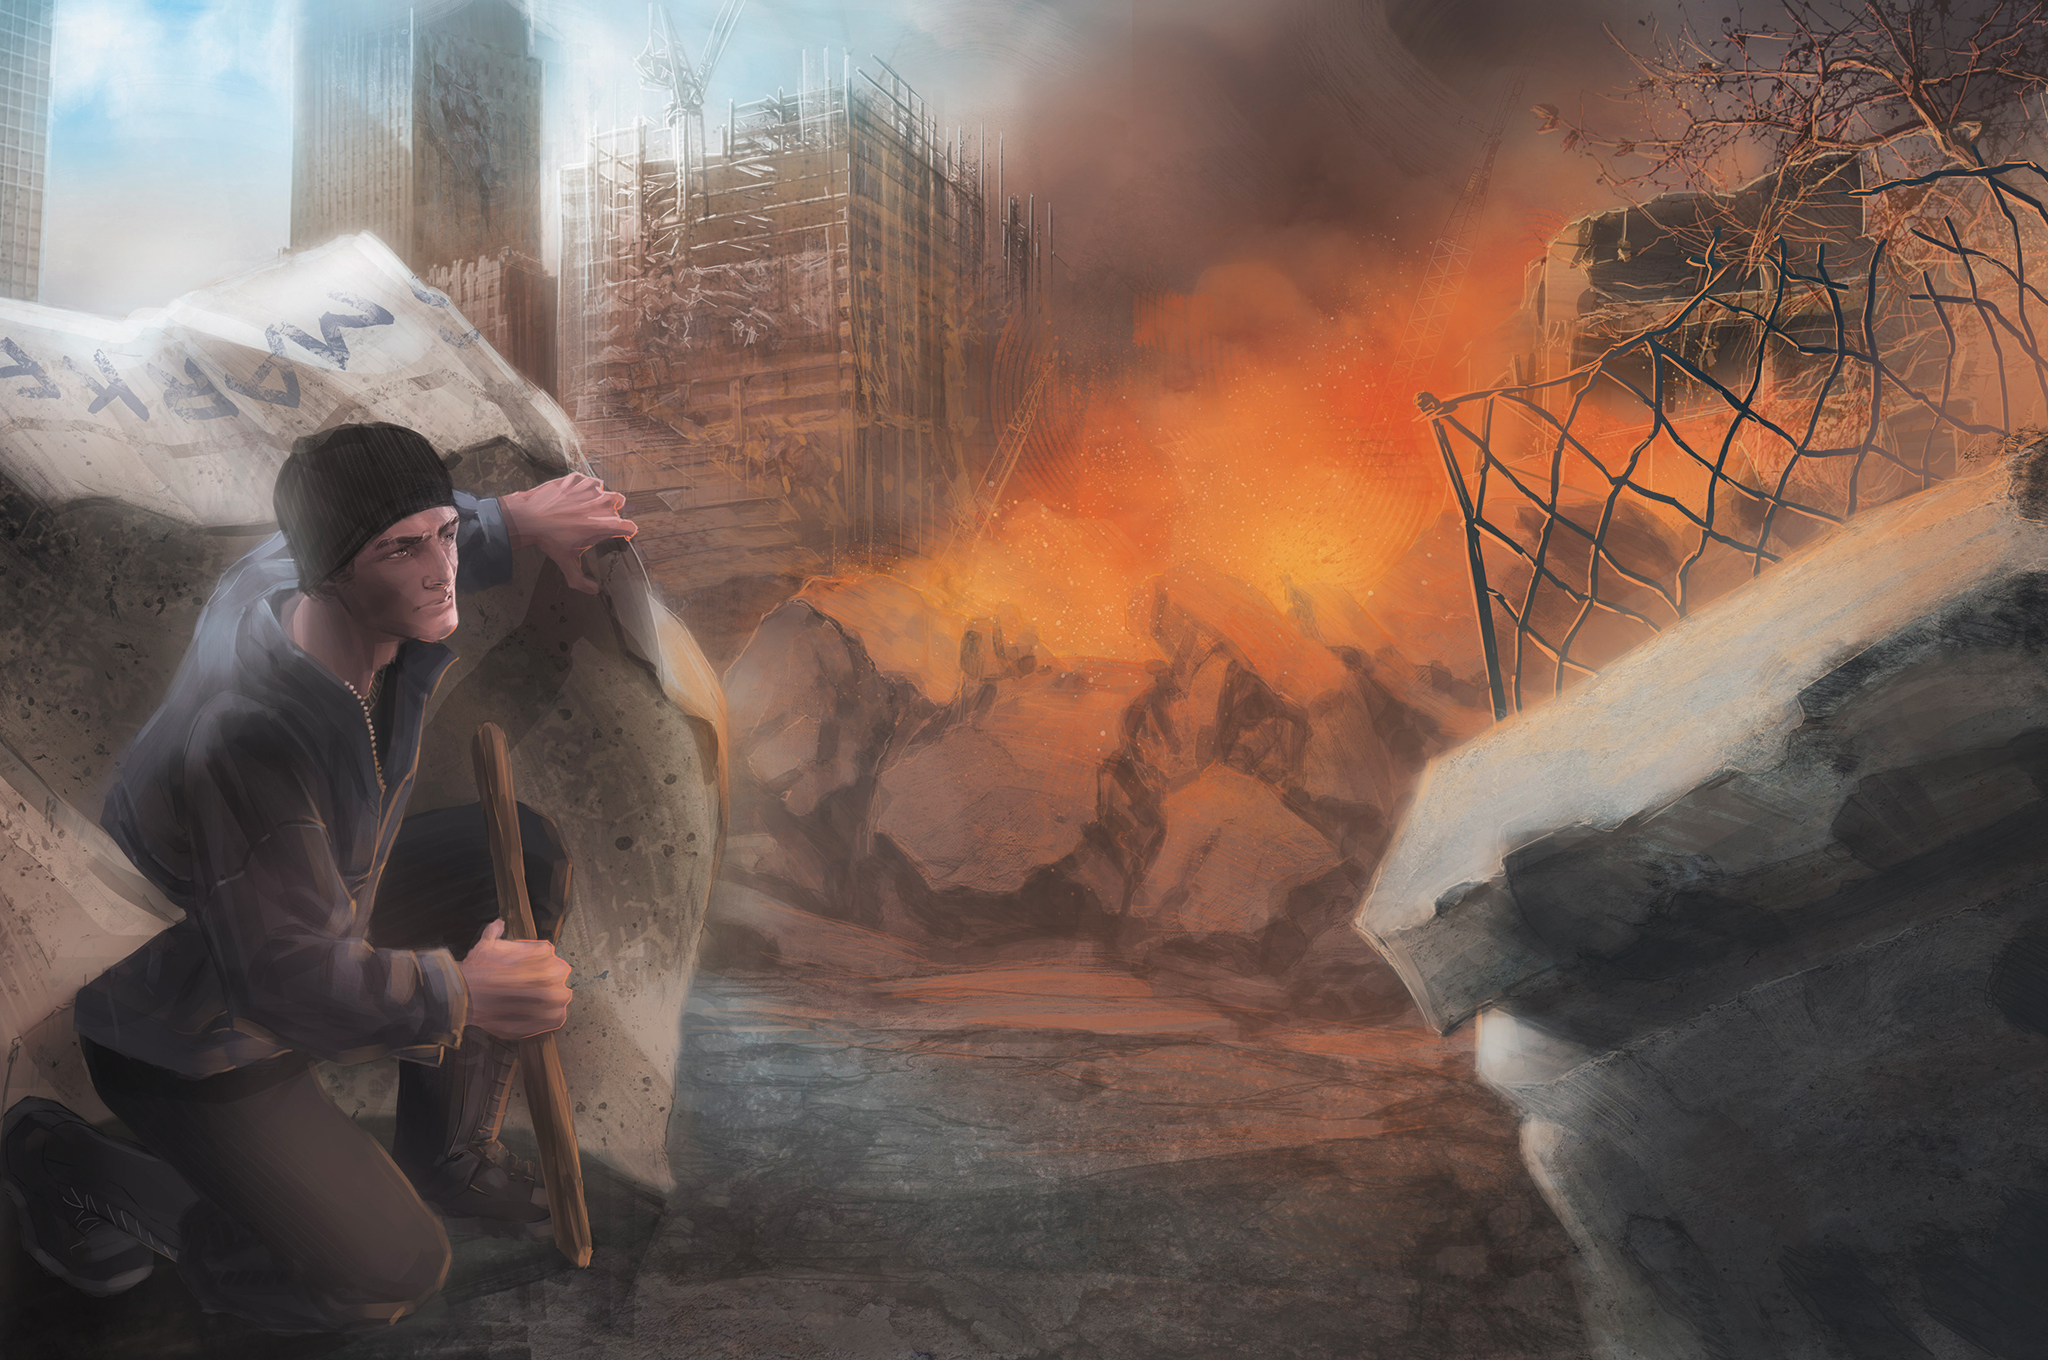
If you believe you are prepared for everything, here’s a little reality check to easily illustrate how your best laid plans can go straight to hell. Let’s say you’ve spent months of study and selection (not to mention hundreds of dollars) to assemble the finest bug-out bag ever conceived. Now let’s say that you had to evacuate your city due to some kind of calamity, such as a dirty bomb or other radiological event. Your world went from normal to nightmarish as you listened to that emergency radio broadcast stating that your home is now uninhabitable, perhaps forever. And if you thought things couldn’t go any more wrong, here’s the part when the worst day of your life gets even more horrific — you lose your bug-out bag. Now everything is gone.
It doesn’t matter how it happened. Maybe someone pulled the pack off your back in the press of evacuees. Or maybe it set off a Geiger counter at a checkpoint and the authorities wouldn’t let you proceed with the bag. The punch line to this cruel cosmic joke is the simple fact that you’ve just lost every piece of carefully chosen gear that was meant to sustain your life. While minimalists and primitive technology experts may keep their footing in the familiar territory of survival without supplies, this type of scenario would be (and should be) terrifying to the average person. So what do you do now?
Distance Yourself and Prioritize
The No. 1 priority in a bug-out scenario is to reach a safe distance away from the hazard. This will probably have to occur by foot, since most highways would be impassable to vehicles due to the post-disaster gridlock, assuming you had a vehicle in the first place. With your supplies gone, you will be in desperate need of the survival essentials you once carried. Security, shelter, first aid, water, fire, food, and communications are at the top of your list of priorities to stay alive, once you reach a safe distance from the danger that sent you packing. How do you source these survival basics from scratch? Our ancestors managed to pull it off in the wilderness on a regular basis, but it’s a crude and painful shock for the modern person to find themselves flung back into this ancestral, hand-to-mouth lifestyle. But, don’t lose hope. Trust me, you can survive this way by handling your survival priorities, one by one.
Gain Security
Once you have distanced yourself from the bug-out-inducing disturbance, security will be a very high priority. Since you no longer carry your bug-out bag, chances are good that the knives and other weapons are gone, too. If you find yourself unarmed in a disaster survival scenario, the weapons for personal security and hunting will be primitive at best.
At the onset of any survival situation, you can start off by finding a hardwood stick, a length of pipe, or some similar item to act as a club or bludgeon. This can be used as a baton for self-defense, and it can be thrown as a “rabbit stick” to dispatch rabbits (obviously), squirrels, pigeons, or any other small game. The best approach for throwing this stick is to swing it sidearm and release the stick so that it spins through the air like a helicopter blade. This generates enough force to shatter the eggshell-thin skull of a small animal, and the width of the spinning stick allows you a little margin for error on your aim. This amount of impact can also be discouraging to larger predatory creatures (people).
Another major point of security is to be off the radar of those who may harm you. In a very hostile survival setting, with looting, robbery, rape, and murder, avoiding detection can be your best form of security. Hide as best as you can. Find a place to barricade yourself until things calm down and make sure that you draw no attention to yourself, unless it is to seek rescue or assistance from likely search personnel.
Find Shelter
Your clothing will be your first line of defense from the elements now that your other gear is out of the picture. You’d be fortunate if you were wearing performance fabrics that wick away sweat and help to regulate body temperature. But, regardless of your wardrobe selection, you can enhance the shelter value of almost any clothes with an easy technique. If conditions are cold, you can add insulation to your clothing by stuffing grass, leaves, crumpled newspaper, Styrofoam, or any other type of insulating material into your clothing. These materials create a better layer of insulation between your skin and the environment. Yes, you will look like a fool, and you’ll be uncomfortable, but you’ll also be warmer than you were.
If this isn’t sufficient, you can build a full-sized shelter or shanty from sticks, boards, debris, and vegetative materials. Create a rigid frame from broken sticks, lumber, or branches, based on a long pole for a center beam. Heap a huge pile of material over this stick skeleton, and add some plastic into the roof to create a windproof and water-resistant layer. Then fill the interior with more vegetation or insulation for the bedding, and burrow down inside. If you make this kind of shelter with all natural materials, you’ll have a naturally camouflaged shelter. In sketchy bug-out circumstances, the less people who can spot you, the less they will bother you. This junk-pile style of shelter can also be adapted when using a vehicle as a shelter. Whether it’s your own car or an abandoned vehicle, use it as a waterproof and windproof shelter base, then fill it with insulating material if you find it to be too cold.
Render First Aid
Medical skills come through training prior to the medical emergency, not by flipping through a first-aid book after someone is hurt. Your medical assessments and treatments may not require much equipment, depending on the nature of the injuries and illnesses. But, what these assessments and treatments will require is knowledge, experience, and adaptability. If you should get caught without your medical gear, you’ll find that medical knowledge and improvisation will now be your strongest assets.
While no amount of creativity and know-how will match the right meds and clean dressings, there are a number of ways to render medical help to yourself and others. A great place to begin your training is by taking a first-aid class with your local branch of the Red Cross. This type of preparation gives you one of the most important skillsets that a person can acquire (medical); and the odds are good that throughout your life you’ll use your first-aid skills far more than any other survival skills.
Find Water
The importance of safe water in adequate amounts can never be overstated. In high heat with dry, windy conditions, a person can die of dehydration within one day’s time. Water can be very difficult to find in hot, dry climates like that. But, thankfully, fresh water is a little easier to come by in the rest of the world. Ground water, precipitation, and even water from vegetation can provide you with viable sources, but they are not without risk. The ground water in particular can be choked with pathogens that cannot be seen by the naked eye. Without a practical way to disinfect the water, your survival situation could move to a whole new level of danger if you consume biologically contaminated water or contract dysentery. A global killer, water-borne illnesses can aggravate dehydration and malnutrition, sapping the body’s energy reserves and leaving a person immobilized before they eventually die.
Catching rainwater is a great way to source clean water, unless you are downwind of a radiological event. And for once, it’s a good thing that people litter worldwide. A cast-off glass bottle or metal container will make a serviceable vessel to boil water, rendering it safe to drink, if you can build a fire to heat the water. If you cannot make a fire, or don’t want to attract attention, solar disinfection can be an option in sunny weather. Find a clear water bottle with a lid, fill it with the clearest water you can find, and place it in direct sunlight for six to eight hours. This is not 100-percent effective for disinfection, but the sun’s UV rays kill most normal pathogens in water.
If all else fails and you are unable to boil the water, you’ll have to take a gamble and drink the best-looking water available. This may make you ill, but at least you’ll stay alive longer than going without any water. It’s a far better choice to be alive and ill than to be dead and pathogen-free. If you can get to medical assistance at some point, your water-borne illness can likely be cured, but what they can’t cure is death.
Build a Fire?
This survival priority is vital to water disinfection, warmth, light, cooking, signaling for help, and tool manufacturing, to name just a few tasks. You may survive for a while without fire’s benefits, but don’t expect to prosper. This is the one place where redundancy can be an absolute game changer for your survival. You may have had several different ways to make a fire in your lost bug-out bag. That doesn’t matter anymore. What matters is that you have one lighter in your pants pocket all the time. Or you have a spark rod built into the paracord bracelet that you never take off.
The point is that you always have a way to make fire on your person and you practice fire building under adverse conditions. It is relatively easy to kindle a fire on a dry, pleasant day, but the time you will need fire the most is the time when it is wet, cold, and windy. These are the types of conditions during which you should train yourself in fire building, but at times like that, you should be smart enough to realize that some conditions are impossible for fire building.
Communicate
This broad category includes one-way communications, two-way communications, and general distress signals. These are hardly the blood-pumping survival skills that people enjoy practicing, but they are your ticket to be rescued and your means of gathering information. Without the technology to communicate in a modern way, the communications part of our low-tech survival skillset will be relegated to calls for help, whistling, signal fires, smoke signals, general distress signals, writing notes and signs, and talking with other survivors. Speak to people who you feel comfortable approaching. Find out what’s going on and try to get messages out to friends and family outside the effected disaster area.
Find Some Food
Something to eat may be the first thing on our minds while working our way through an emergency, but it’s usually a low priority in most survival situations. Most people will find that their bodies will begin devouring fat reserves and then muscle tissue within a few days of fasting. This process can continue for several weeks in the average person, until they are finally too weak to move.
Though wild food is abundant in most parts of the world, it’s best to only eat things that you can positively identify. The animal kingdom is an easy place to start. Healthy-looking birds, mammals, and reptiles are safe and nutritious, when cooked well-done. There are a few odd animals and parts that are to be avoided, like Gila monster lizards and polar bear livers. Just skip the nuts and berries unless you know what you are doing — beyond all shadow of doubt.
Keep Up Your Morale
Your bug-out has gone badly. Many things have happened that were way beyond your control. You tried to be prepared for these types of emergencies; you even had a nice BOB, but you still had your ass handed to you. When all your material goods are gone, the only things that you can really own are your attitude, your survivor mentality, and your morale. You are the only person in charge of your thoughts and feelings and the subsequent actions they lead you to take. Do whatever you have to do to maintain your morale, while continuing to face reality and staying on top of the emergency as best you can. Remember, people can survive with almost nothing. You are living proof that your ancestors survived (for a while, anyway).
There are many lifesaving skills that you may need to employ in an emergency. The ones that are the most useful and necessary will depend on the nature of the situation, but here are the top three skillsets that can be performed with little to no gear and are the most likely to increase your chances of survival.
Learn These 3 Skills
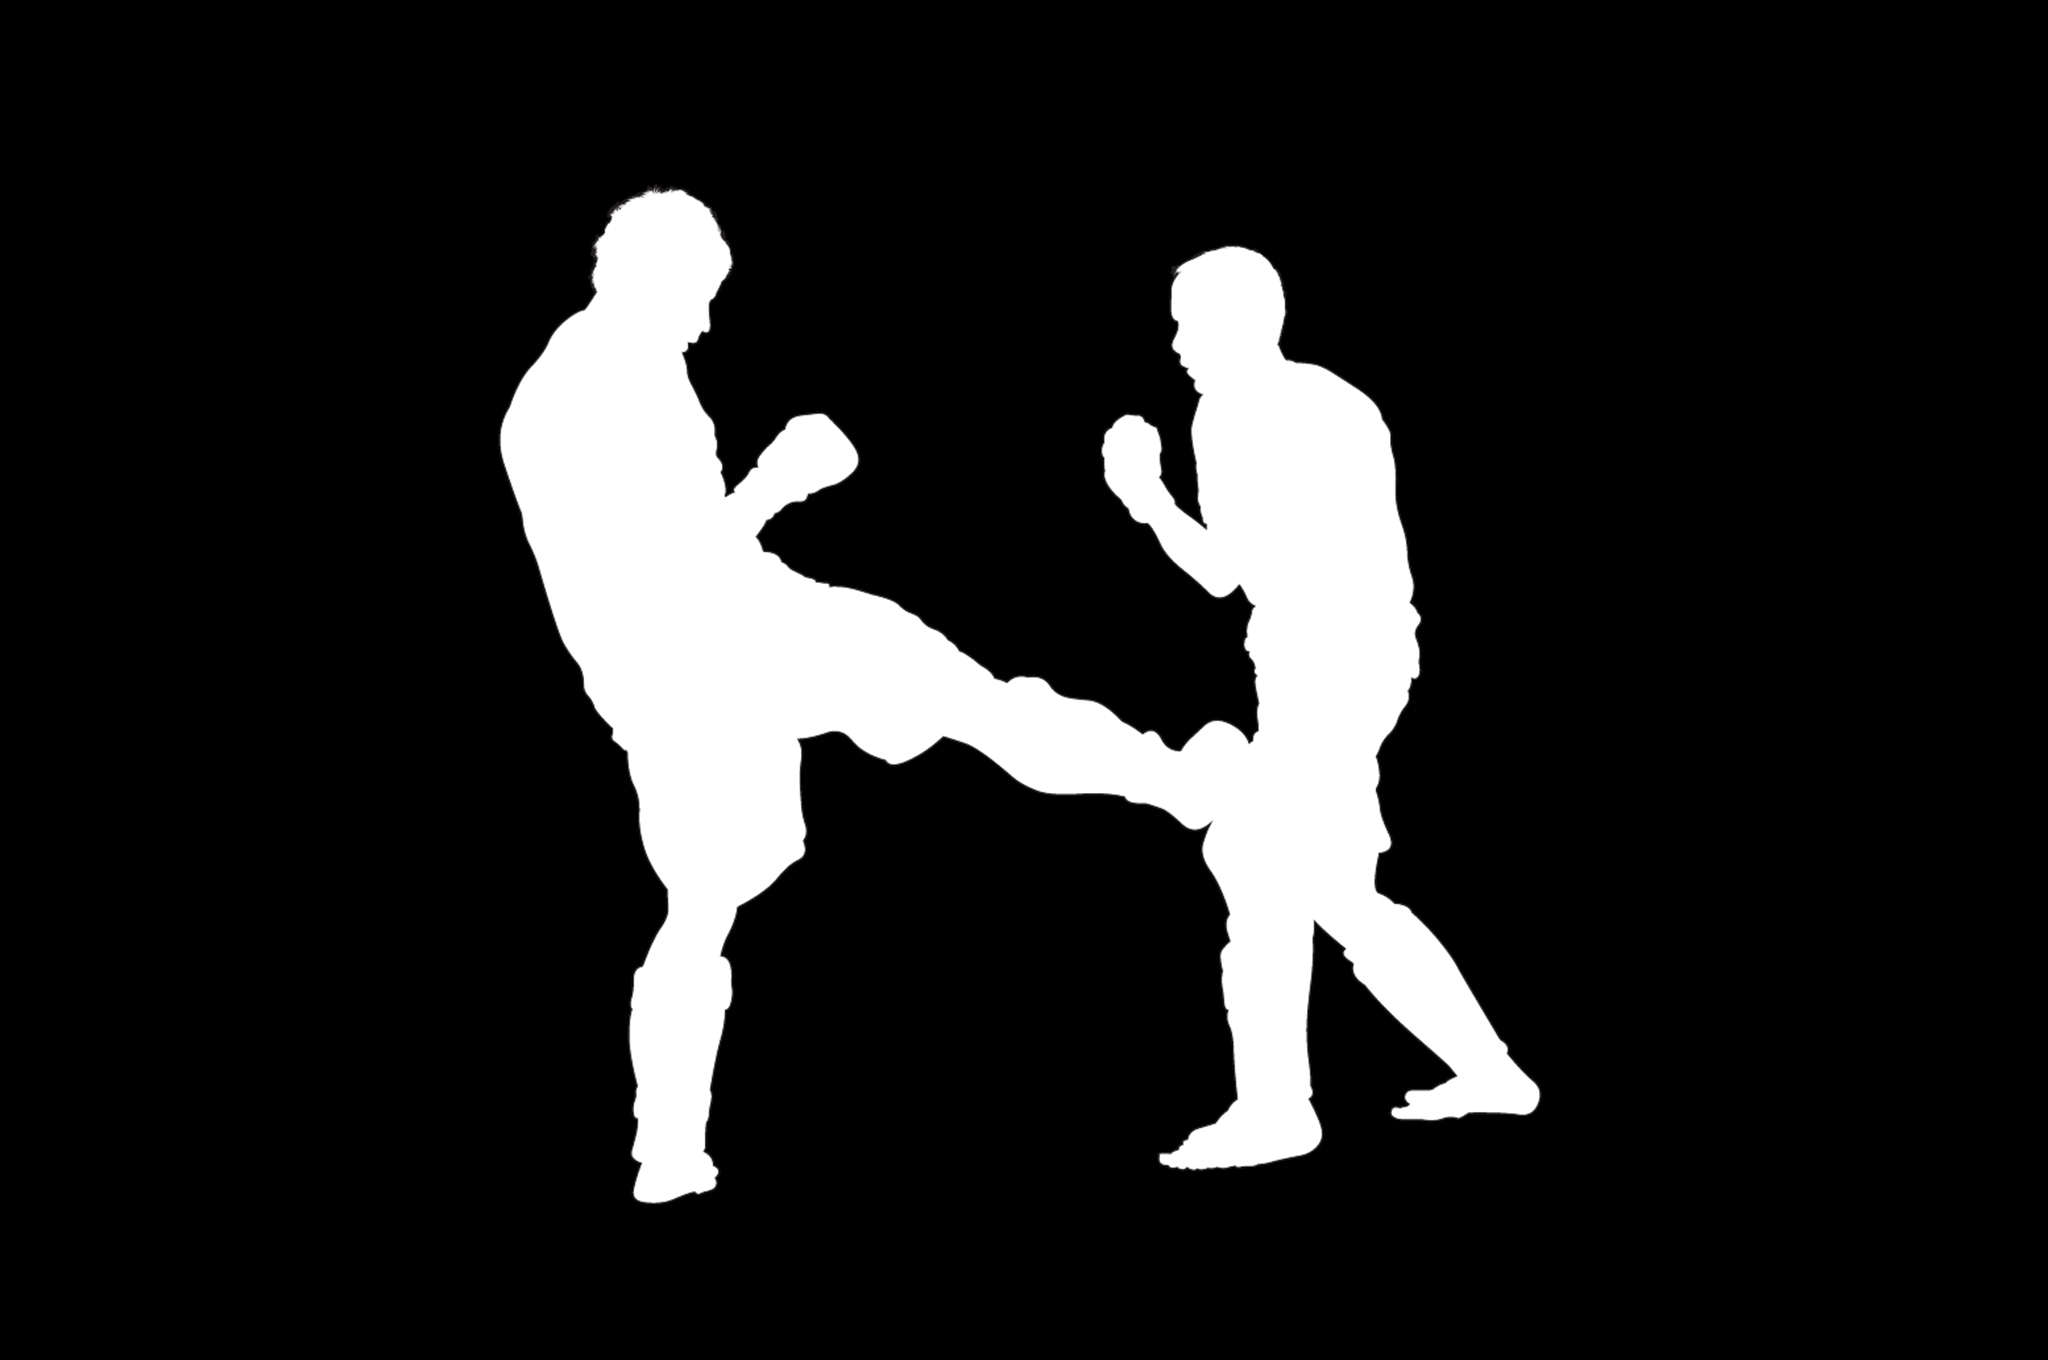
Unarmed Fighting
Don’t be a victim; be a victor. Learn some form of unarmed combat by taking martial arts and practicing them. Everyone is entitled to their opinion on the very polarizing world of martial arts and the idea of the “best” martial art will vary a lot. For our purposes, the best martial art is the one practiced at a dojo near your home or work, so that you can get in there and practice often.
Medicinal Plants
There are also numerous plants found worldwide that can be used as antiseptics, styptics, laxatives, analgesics, and for other medicinal uses. Yarrow, dandelion, burdock, plantain, and many other common “weeds” have made their way across the globe due in no small part to their highly medicinal properties. Before you go plastering potentially medicinal leaves all over yourself, know that all facets of medical training, including wild plant medicine, require prior training through a reputable business or organization.
Foraging
You don’t have to be a wild food expert to find a meal in the city park. Wild food is unbelievably abundant, even in urban and suburban environments. A reputable book on wild edible plants, or a hands-on class, can get you started on the path to find free food everywhere you go. (See page 150 in Recoil issue #8 for more on nature’s salad bar.)
About The Author
Tim MacWelch has been a survival skills and outdoor writer for numerous publications over the past 10 years. He has also been a professional wilderness survival instructor for the past 17 years and teaches classes year-round in Virginia. MacWelch has personally trained members from all branches of the U.S. Armed Forces, along with State Department, DOD, and DOJ personnel. He also offers a wide range of training to the public. For information about his school, visit http://www.advancedsurvivaltraining.com.
She’s bloody, upside down, unconscious, and behind a tinted window. Worse, you smell gasoline, and you have no cellphone signal to call 911 and no time to wait for help to arrive. Your choice is simple: extract her from the vehicle or watch the love of your life get barbecued under glass.
But all you have in your fisted and frustrated hands is the latest everyday-carry (EDC) tactical ninja tanto blade. Nothing about it will help you safely get into the vehicle and extract her from her seatbelt without putting you and her at risk.
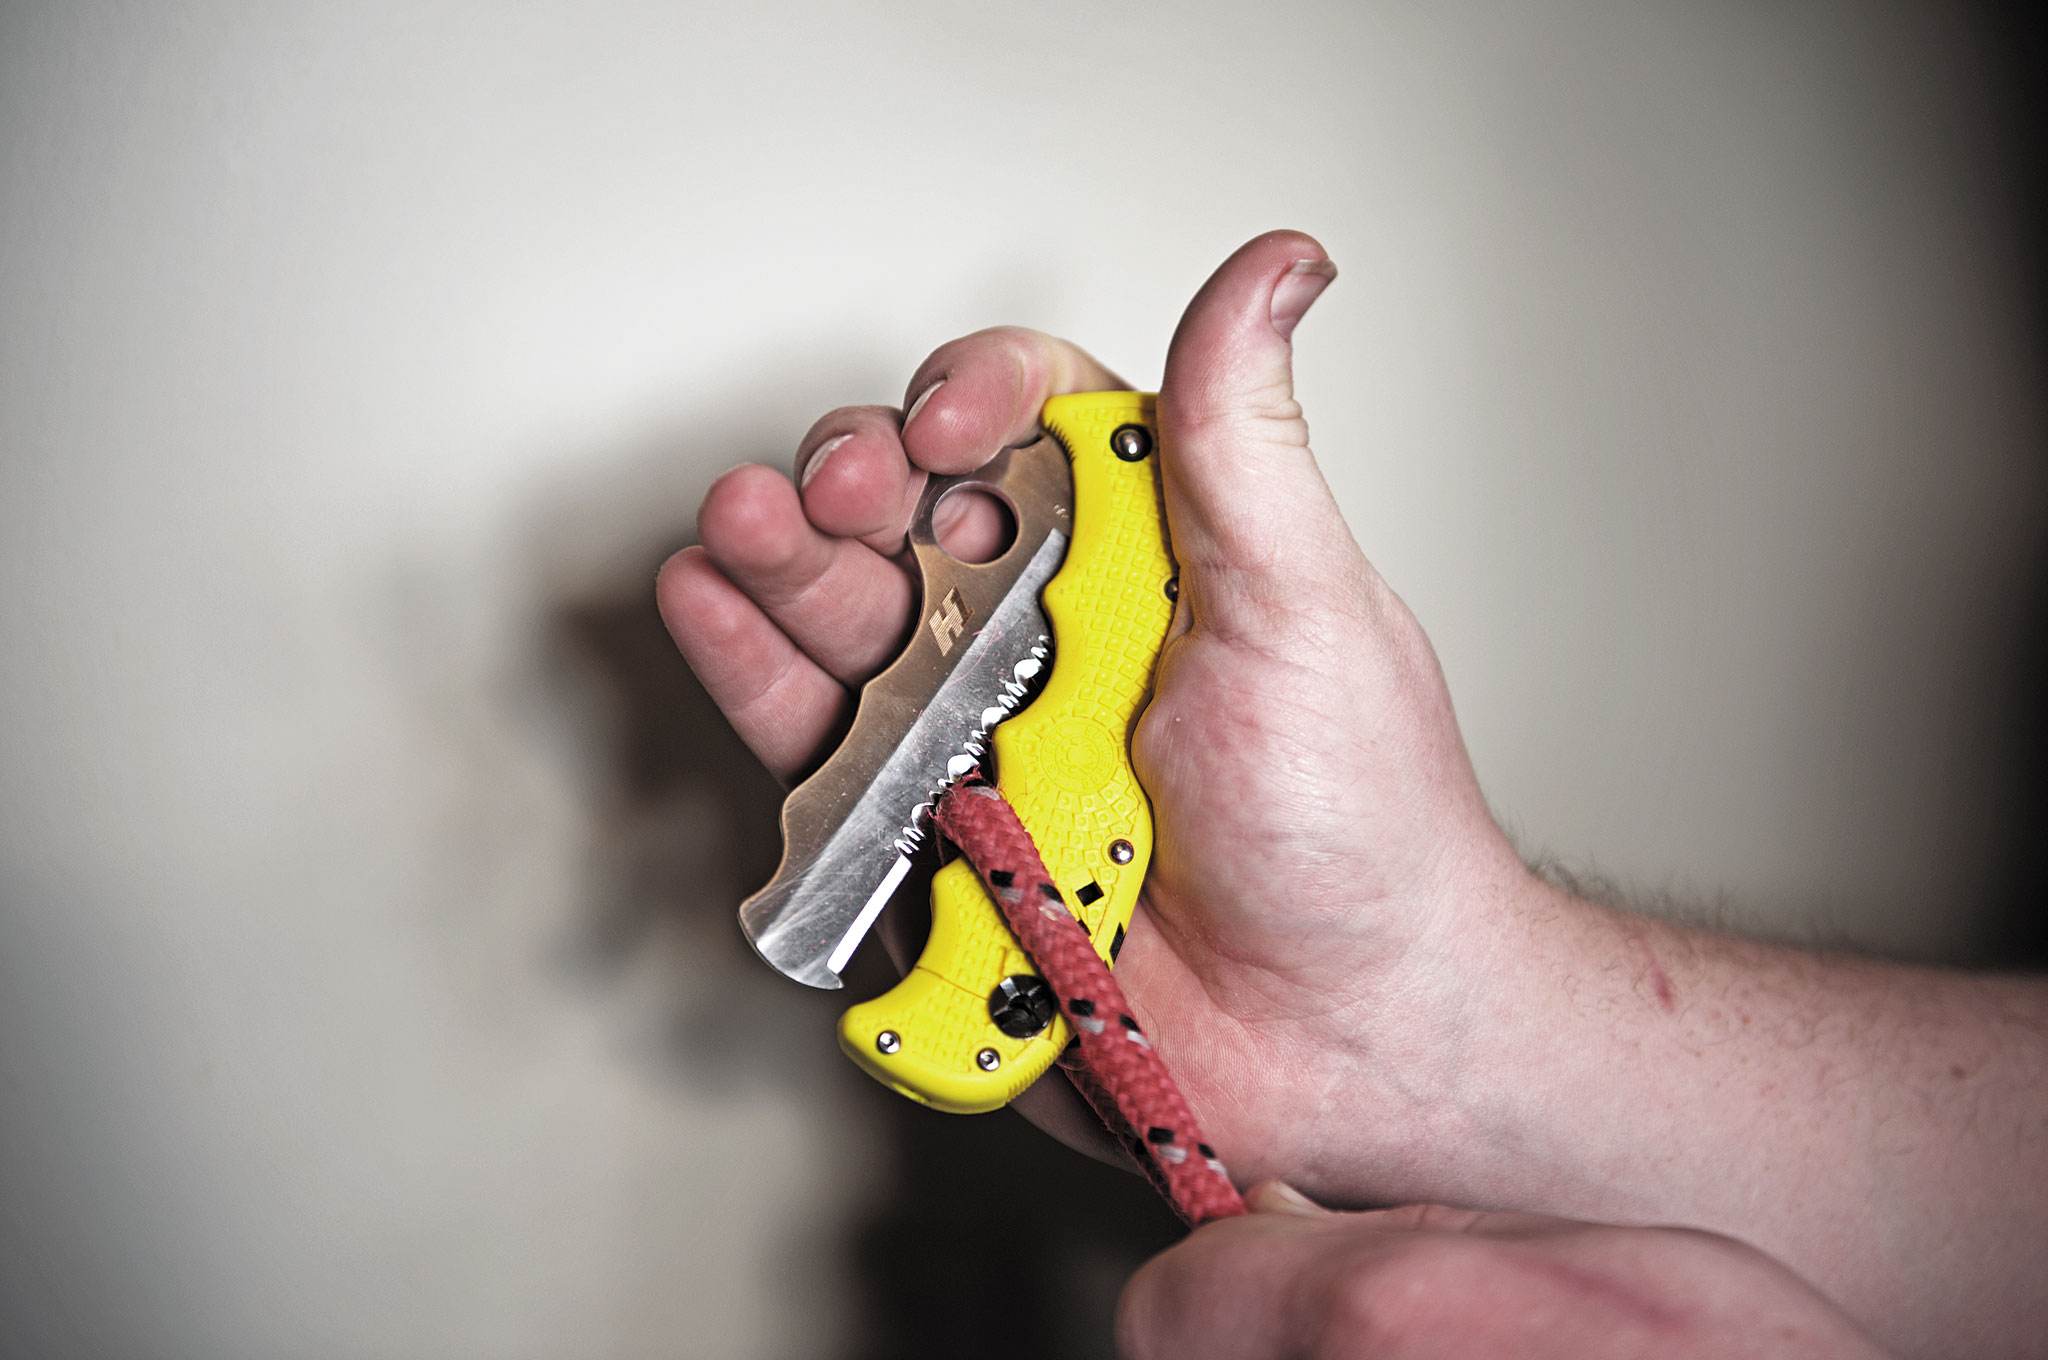
Saving your ass, or someone else’s, often comes down to preparing for what’s more likely (a car accident) rather than what’s not (a zombie outbreak). Enter the Spyderco Assist.
Both distinctive and utilitarian, Spyderco knives are a common sight clipped to the pockets of knowledgeable and practical people as EDC folding knives. But in the Assist, Spyderco founder Saul Glesser combined his decades of design experience and the best of modern materials to create an un-rustable, purpose-designed rescue and utility knife suited for both emergency professionals and the prepared of mind.
The “rescue knife” as a class of tools is intended primarily to extricate oneself or another person from a seatbelt or harness system …
The 411
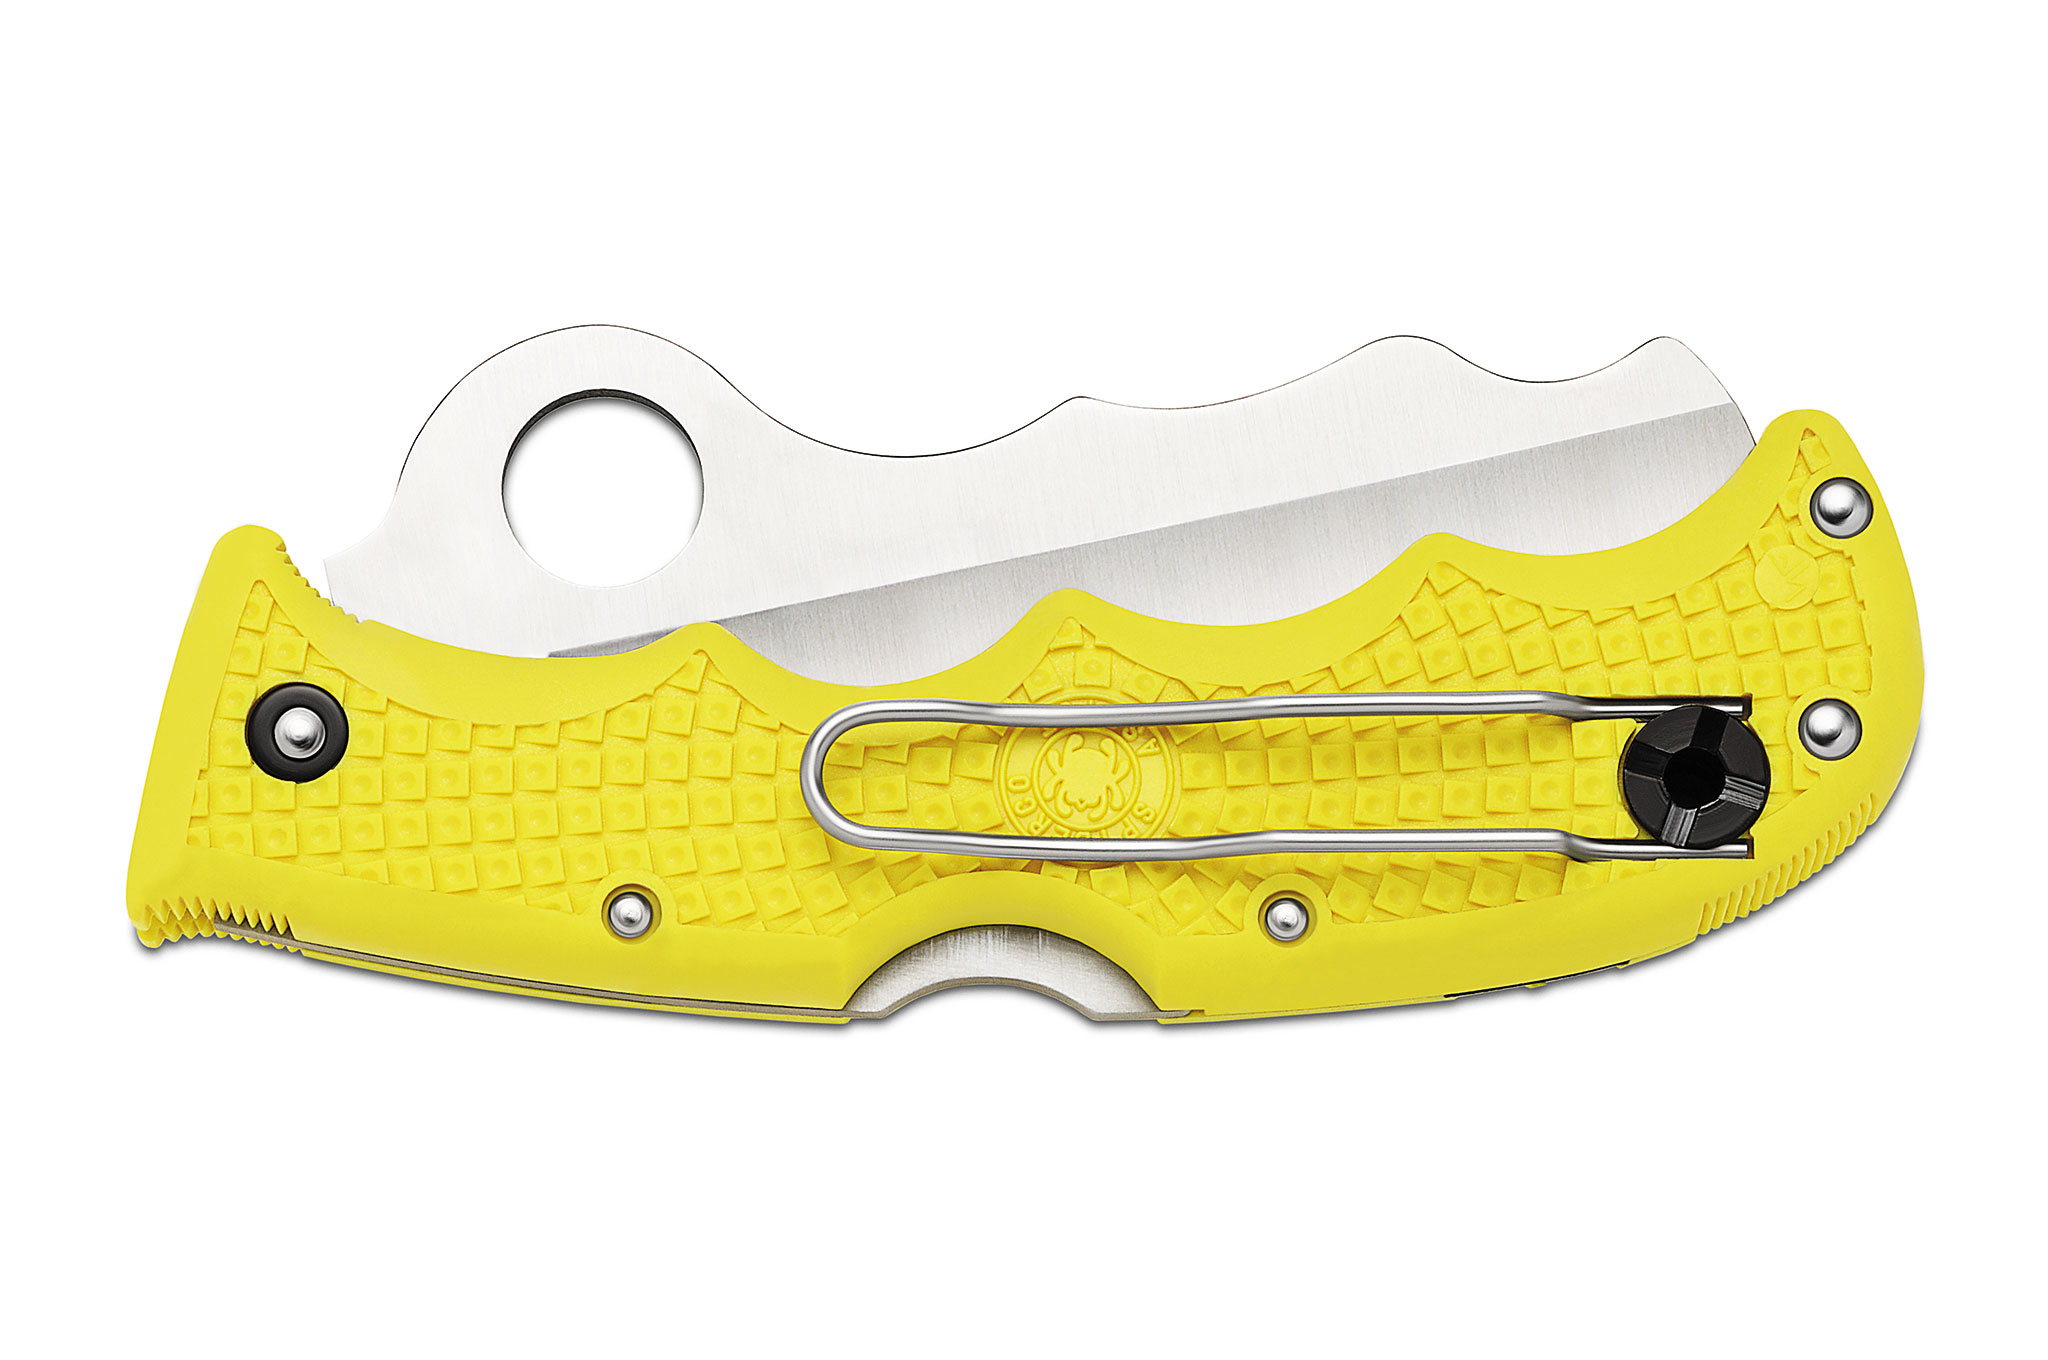
The “rescue knife” as a class of tools is intended primarily to extricate oneself or another person from a seatbelt or harness system, while also serving as an overall utility blade for the general cutting tasks encountered by first responders. So Saul applied several of the lessons learned from years of EDC knife design and incorporated them into the Assist. The knife’s controls are ambidextrous both in the one-handed opening features as well as the reversible clip that can be oriented for left or right and tip up or down carry.
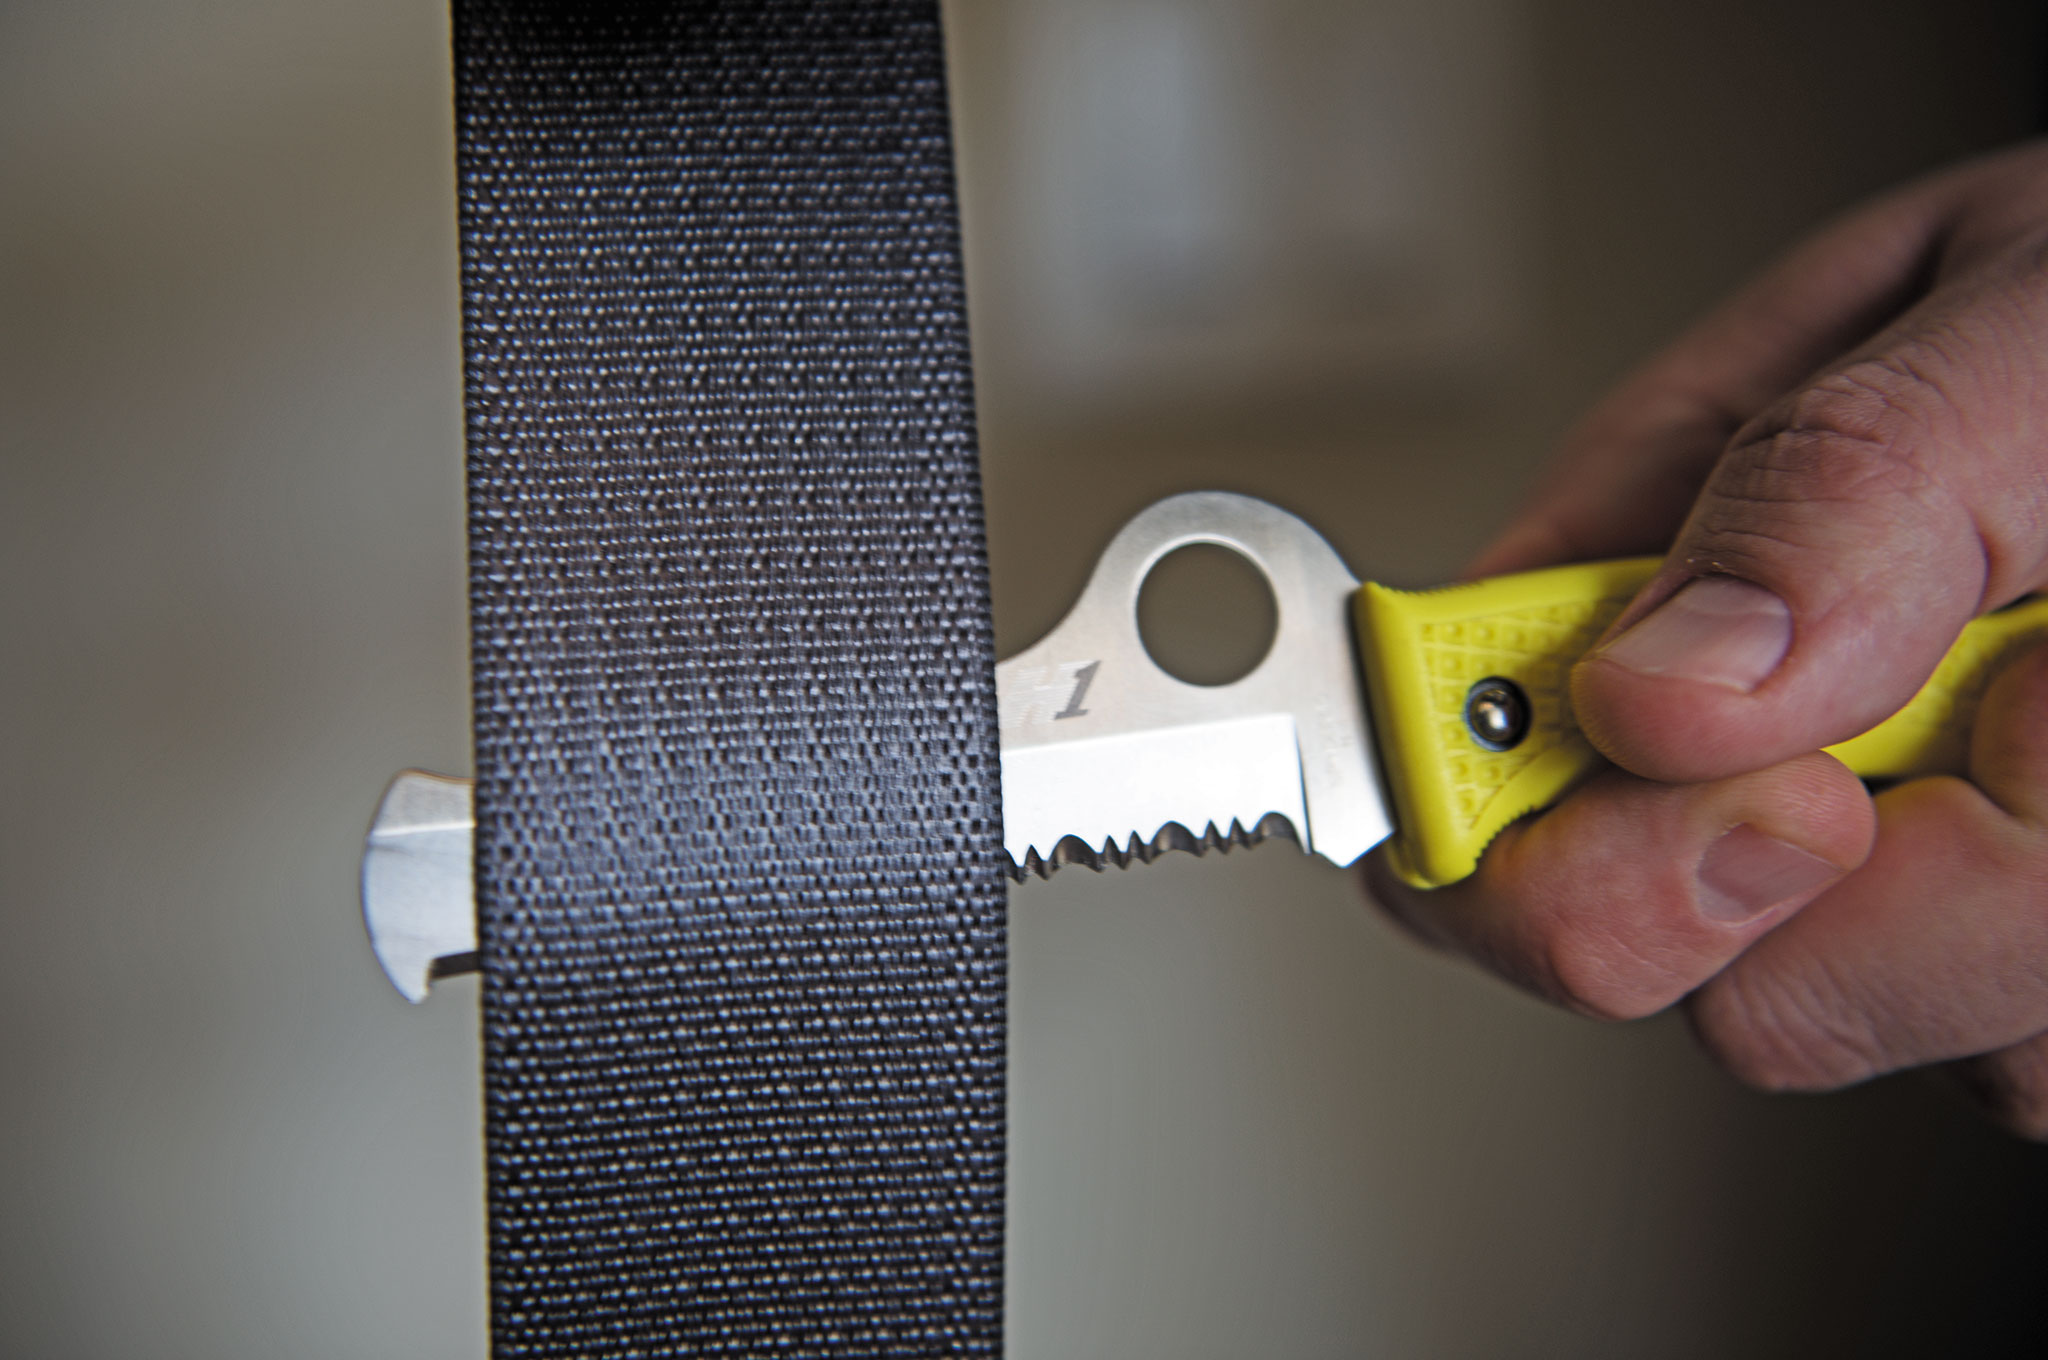
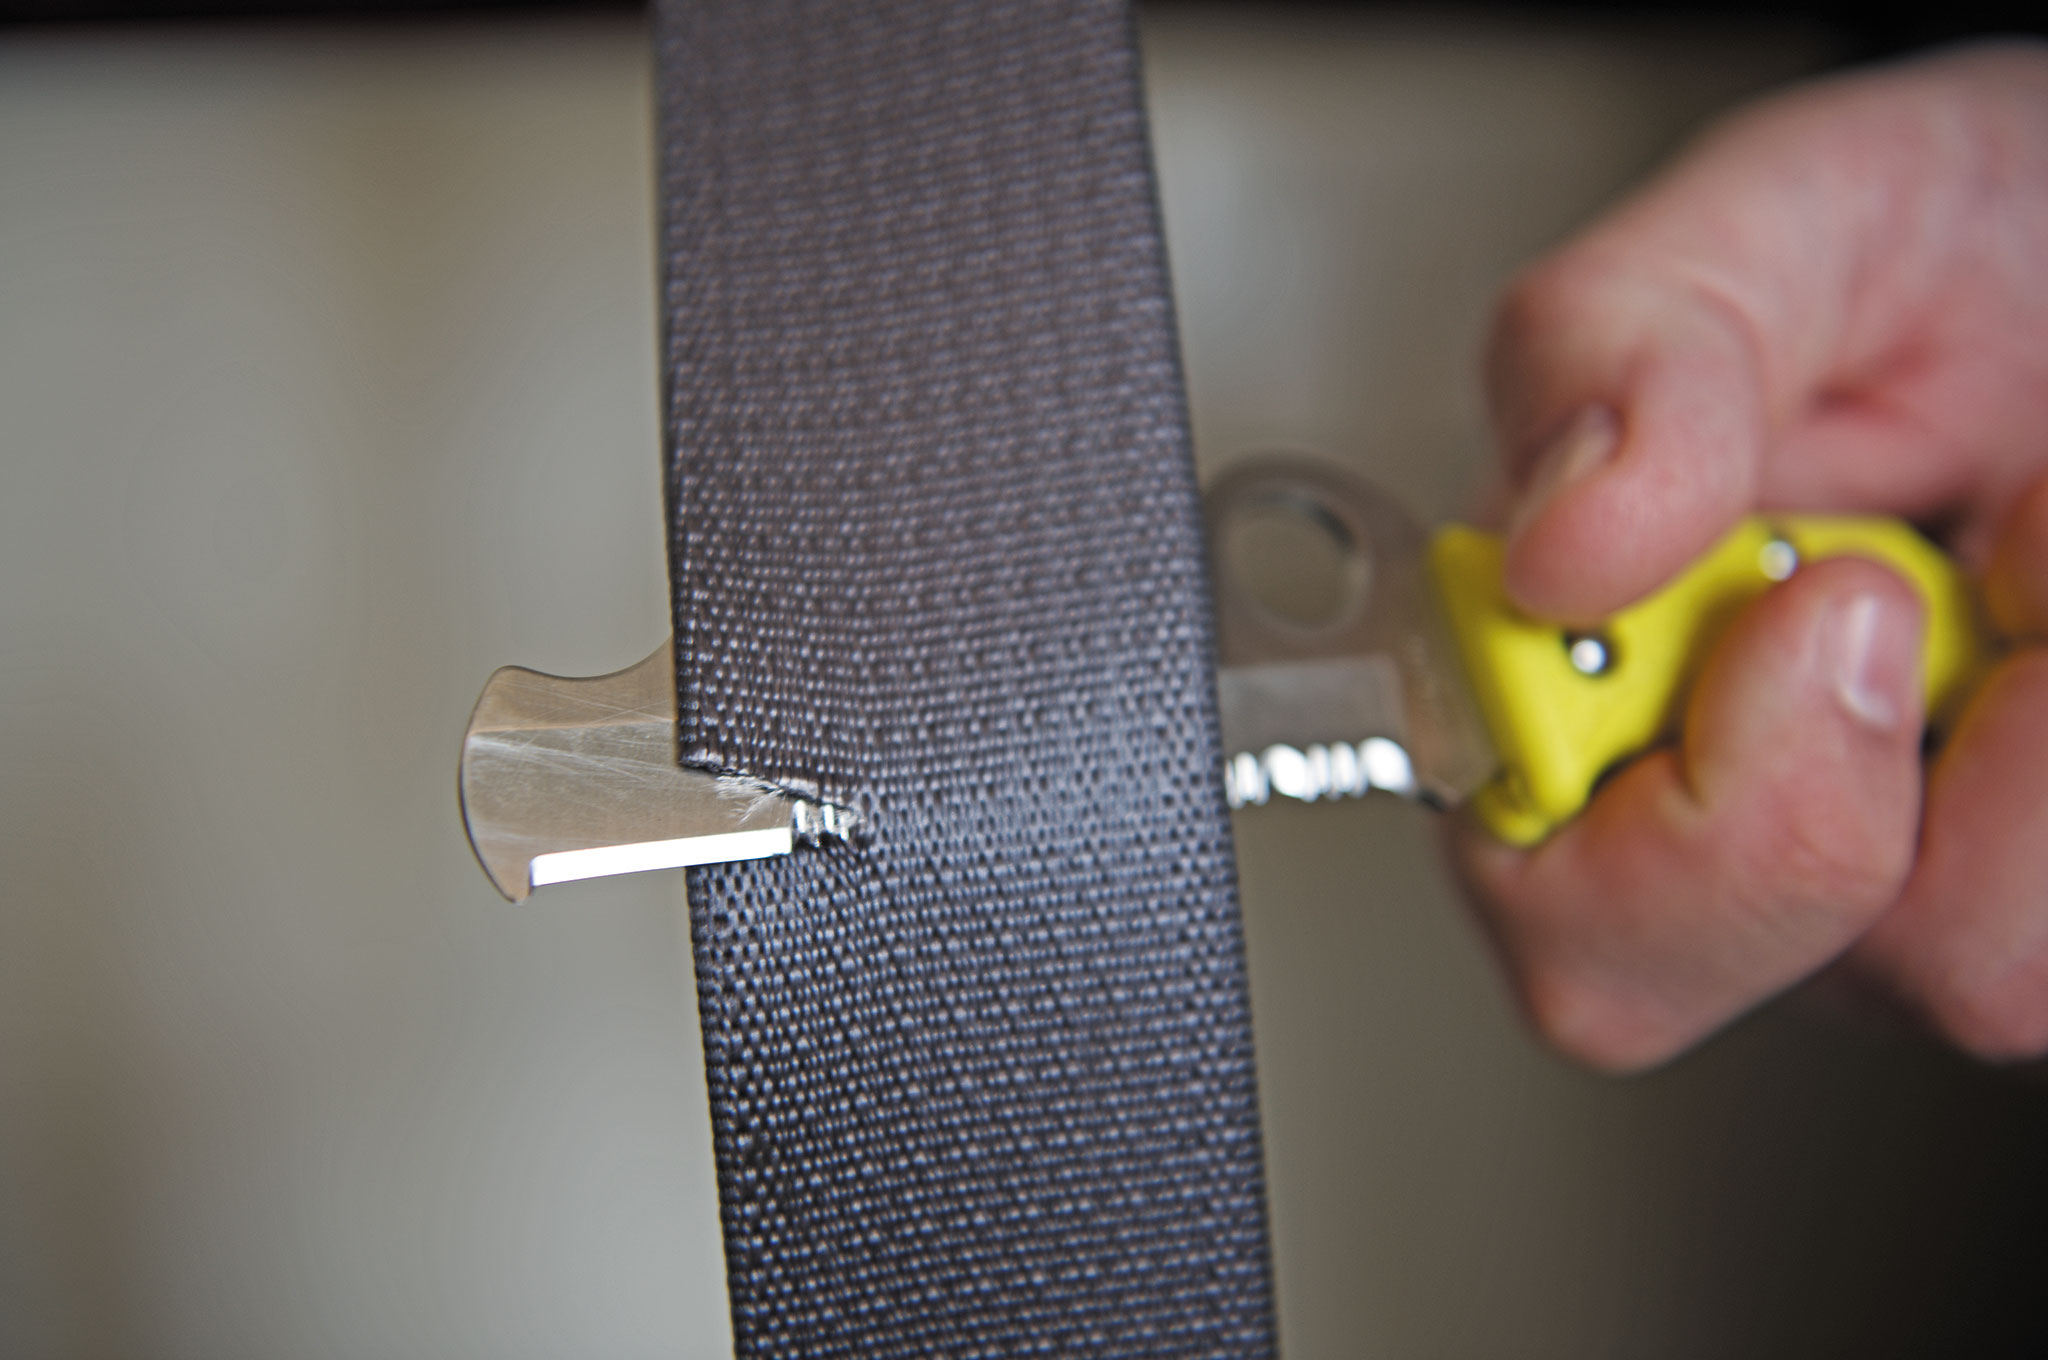
Folded, the back rocker-locked Assist is 8.43 inches long overall and weighs in at 4 ounces. The knife’s blade has a blunt tip designed to both prevent the puncture of a victim inside a strap as well as function as a safe physical index for the user when the knife has to be positioned by feel while out of sight. The blade’s 3.69 inches is serrated for the majority of its length, but has a 7/8-inch chisel-ground, plain-edge section just before the tip for initiating strap cuts.
In its 5-inch folded configuration, the Assist hides two unique features. First, a squeeze of the finger-choiled blade into the handle exposes a carbide-tipped glass-breaker embedded in the pommel. This gives the user the ability to break windows in a rescue situation without carrying an exposed, sharp-tipped tool in an outside pocket. This tip is replaceable if you somehow manage to dull the carbide. Additionally, Spyderco designed a hesitation notch at the 45-degree blade-to-handle position. This notch allows the user to easily stop the blade in a partially open position and use it in concert with the handle in a scissor technique.
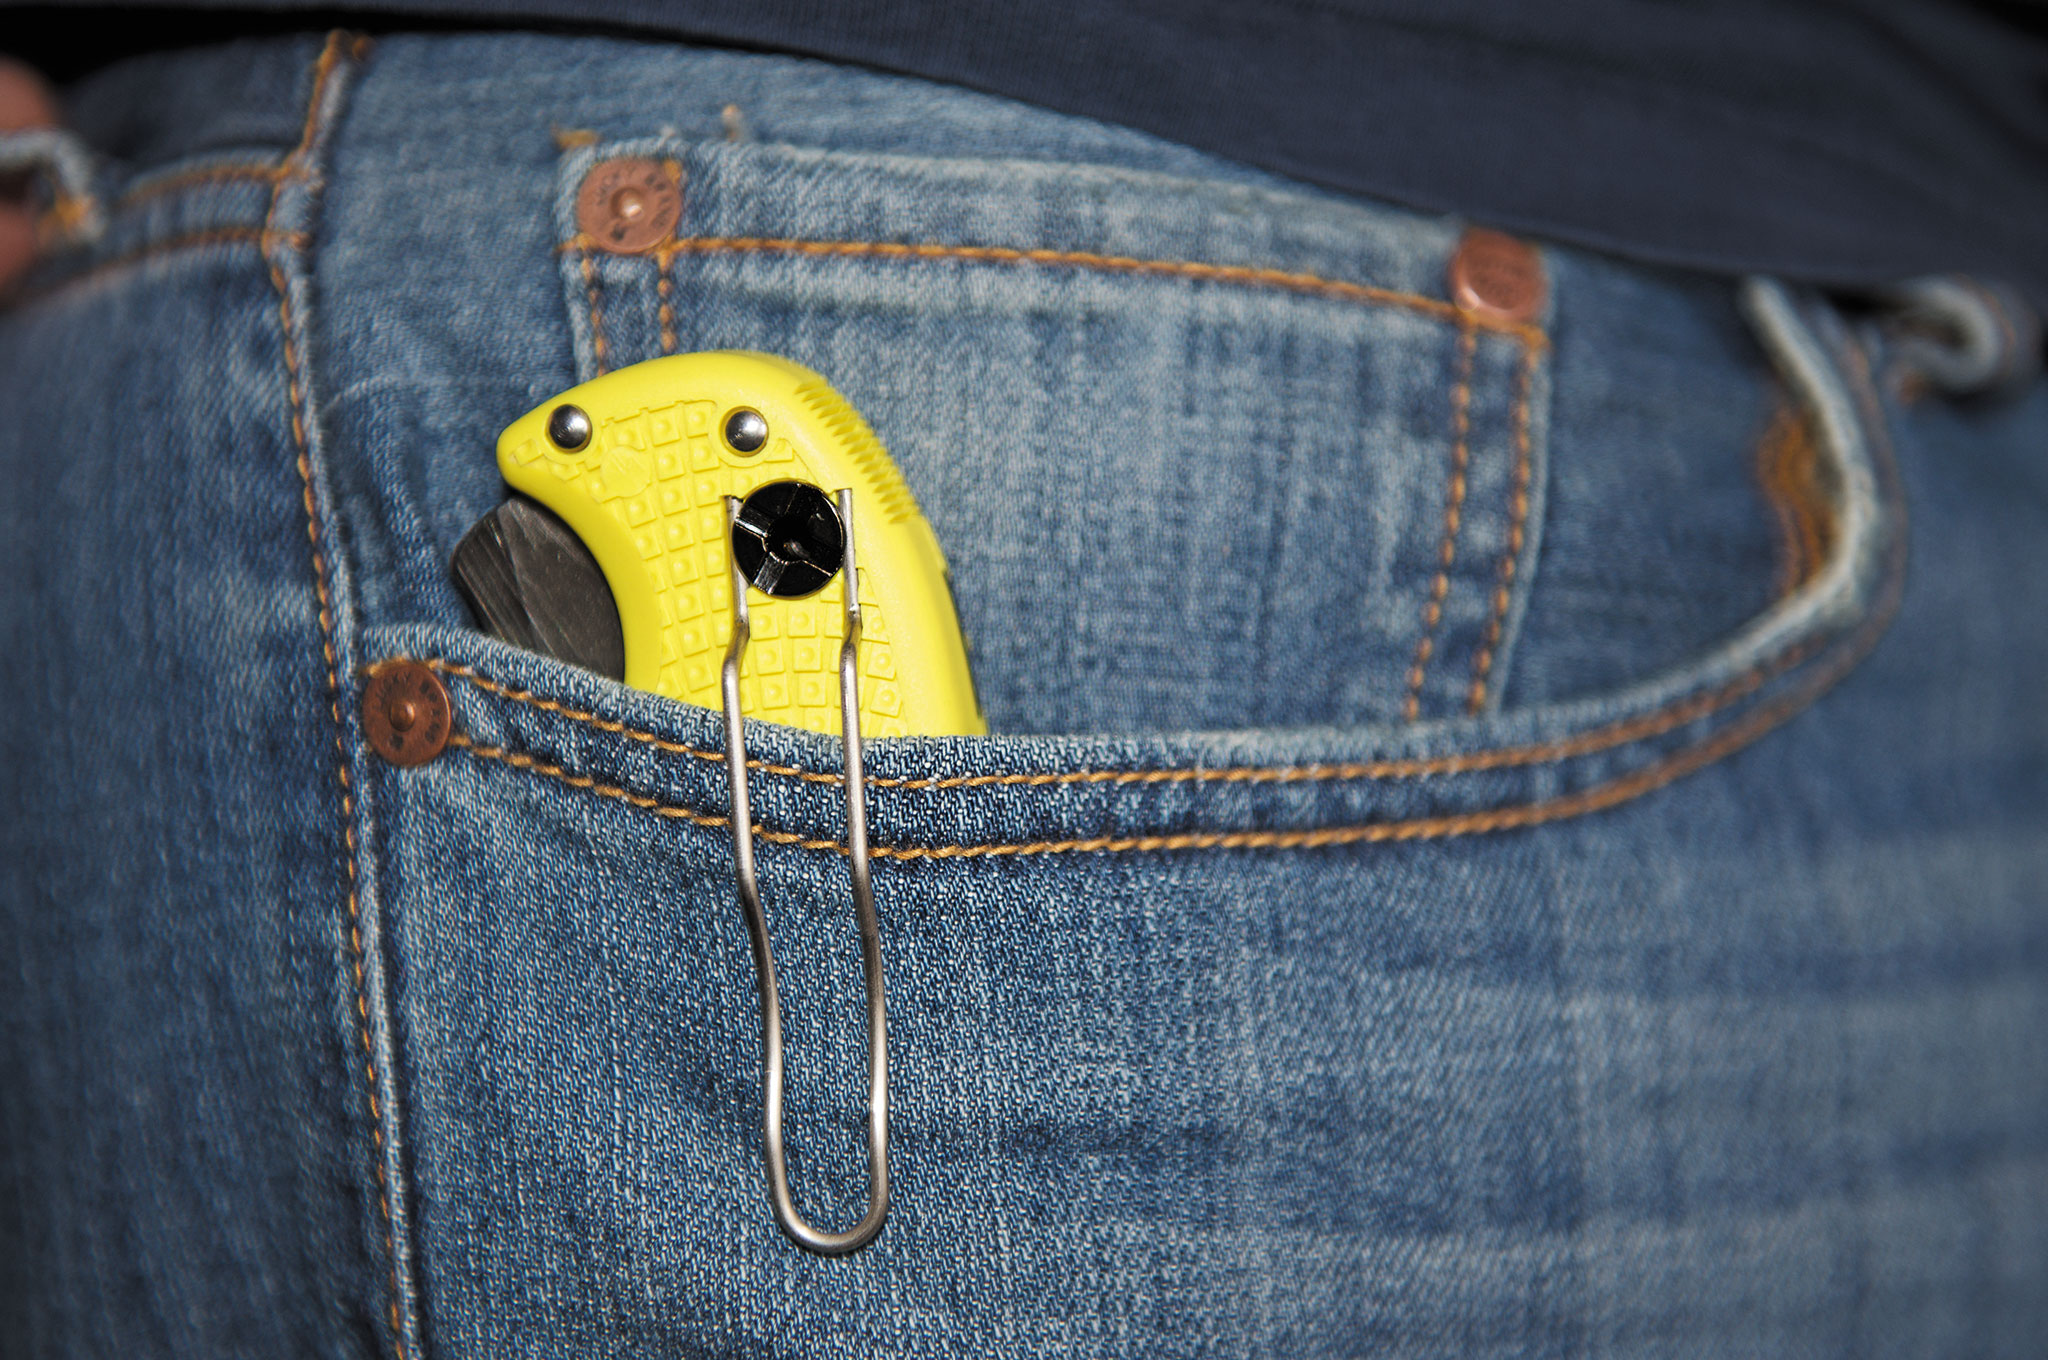
Though not a compact knife, it does fit comfortably in the pocket.
The Good
Thick rope gets chopped like celery, where thinner cordage (such as parachute cord) should be held taut across the handle for a crisp cut. The feature gives the user an option to cut line, straps, or hoses without a sawing motion or worrying the blade might cut the victim or rescuer as the material is severed. This function takes a bit of practice, but once quickly mastered, the technique allows for a faster and safer approach to many cutting tasks. The Assist also contains a small but loud whistle cut into the contour of the handle that the user can utilize for self-rescue.
Spyderco initially introduced the Assist with a black handle and coated VG-10 blade. But the popularity of the design and the appearance of its rustproof H1 steel in other designs demanded a marriage. Now the Assist can be found with Spyderdco’s bright rescue yellow SRN handles and the H1 steel.
Without carbon, the steel is physically incapable of rusting.
First introduced in its line of dive knives, the H1 steel is made with nitrogen rather than carbon. Without carbon, the steel is physically incapable of rusting. H1 is also an austenitic steel, which “work hardens” as the edge and serrations are ground, allowing for precise hardening of the cutting edges while leaving the thicker spine more flexible. And — though anathema as a formal test to most knife-makers, but infinitely practical to most end-users — the Assist gets an A+ as a box cutter. The curved tip and plain-edge section make for excellent controlled-depth cuts across tape and cardboard.
The Not As Good
Ultimately, the Spyderco Assist is a viable EDC for the emergency professional, but for the average person, it’s the knife you should have clipped to your vehicle’s sunvisor, tucked in the console, or at least within arm’s reach of the driver seat. Whether for self-rescue or to provide assistance to someone else, having the Assist in your vehicle will enable you to get through glass, seatbelts, and, if necessary, clothing to remove a victim in an extreme situation or when time or professional help is not available.
Will the Assist help you fight ninjas, zombies, or terrorists? Not likely — but in addition to its purpose-designed rescue features, it’ll do a very clean job of opening your latest Amazon Prime delivery without puncturing the contents.
Thick rope gets chopped like celery, where thinner cordage (such as parachute cord) should be held taut across the handle for a crisp cut.
We like tactical gear as much as the next guy, and there are many valid situations that call for it. However, in an urban survival setting, if your bag is covered in camouflage pattern, PALS webbing, and velcro morale patches, everyone is going to be able to spot your preparedness from a mile away. That’s why it’s important to remain discreet and fly under the radar with gear that doesn’t look overtly tactical or militaristic.
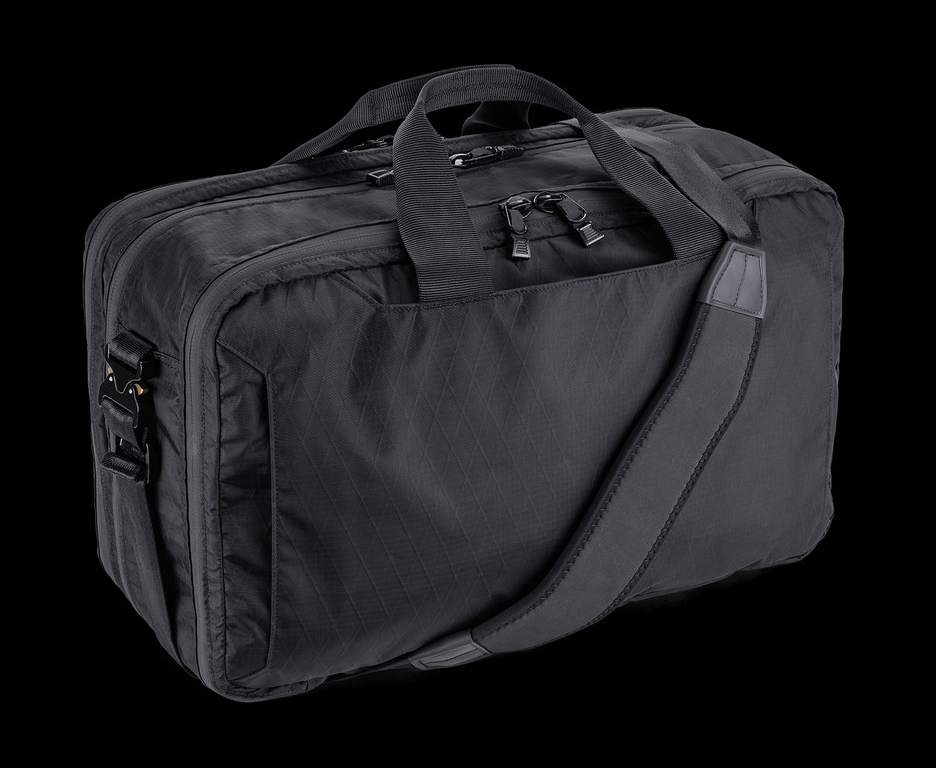
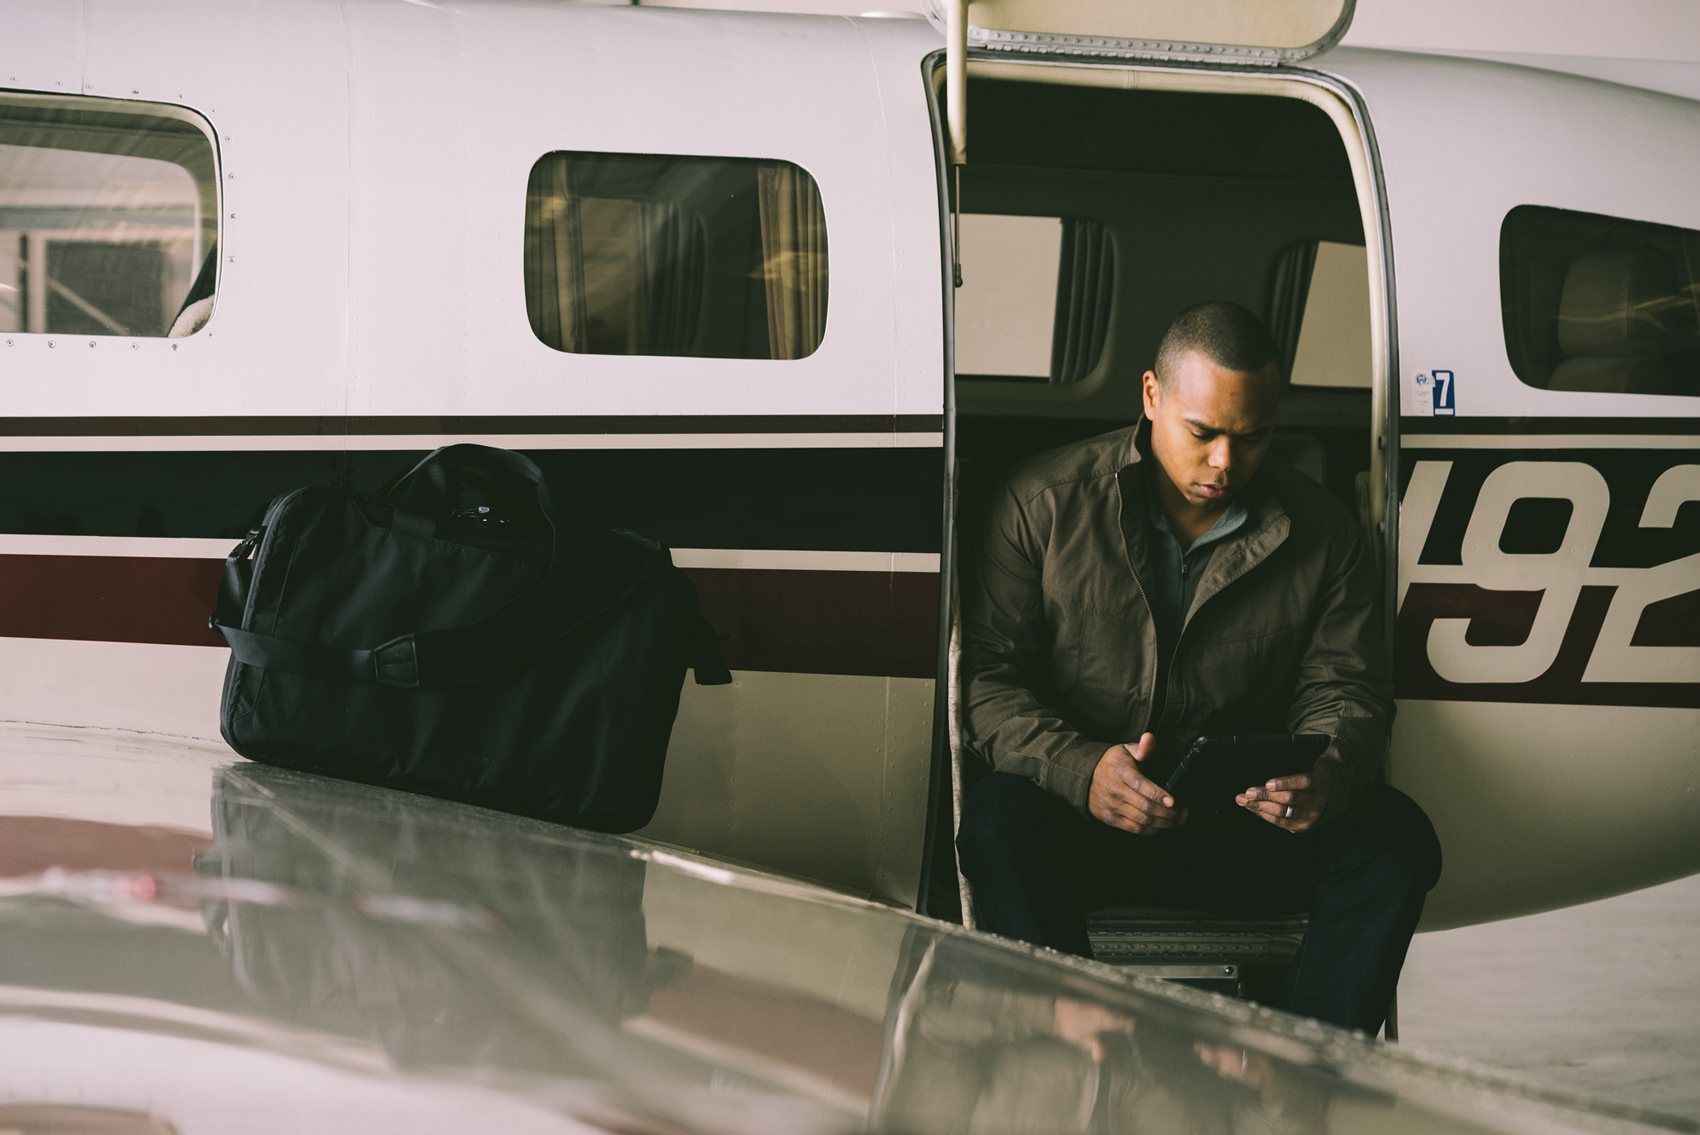
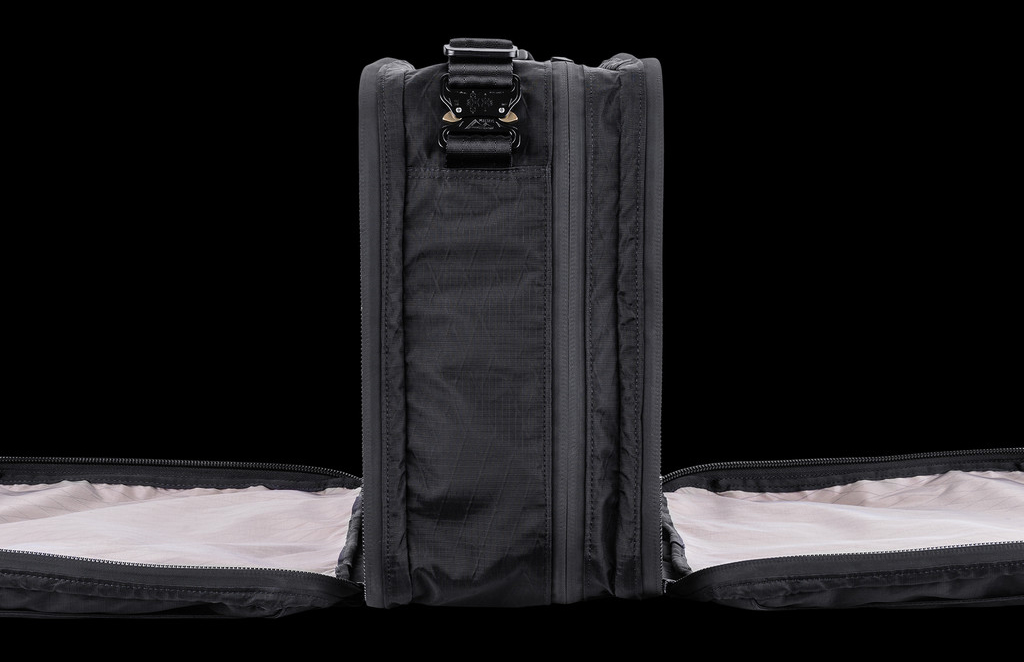
Triple Aught Design understands this point, and they’ve proven it with the release of an all-new EDC/get-home bag system called the Meridian Transport Case. This 21″ x 13″ x 8.5″ over-the-shoulder bag is just the right size for an airplane carry-on bag, and will can even fit under the seats for frequent travelers.
The Meridian case is constructed with strong VX-21 ripstop material, high-quality YKK water-resistant zippers, and tough ITW Ladderloc buckles. It also has a non-slip durable, semi-elastic nylon strap for carrying across your back or at your side comfortably. TAD also says they plan to offer backpack straps and other accessories.
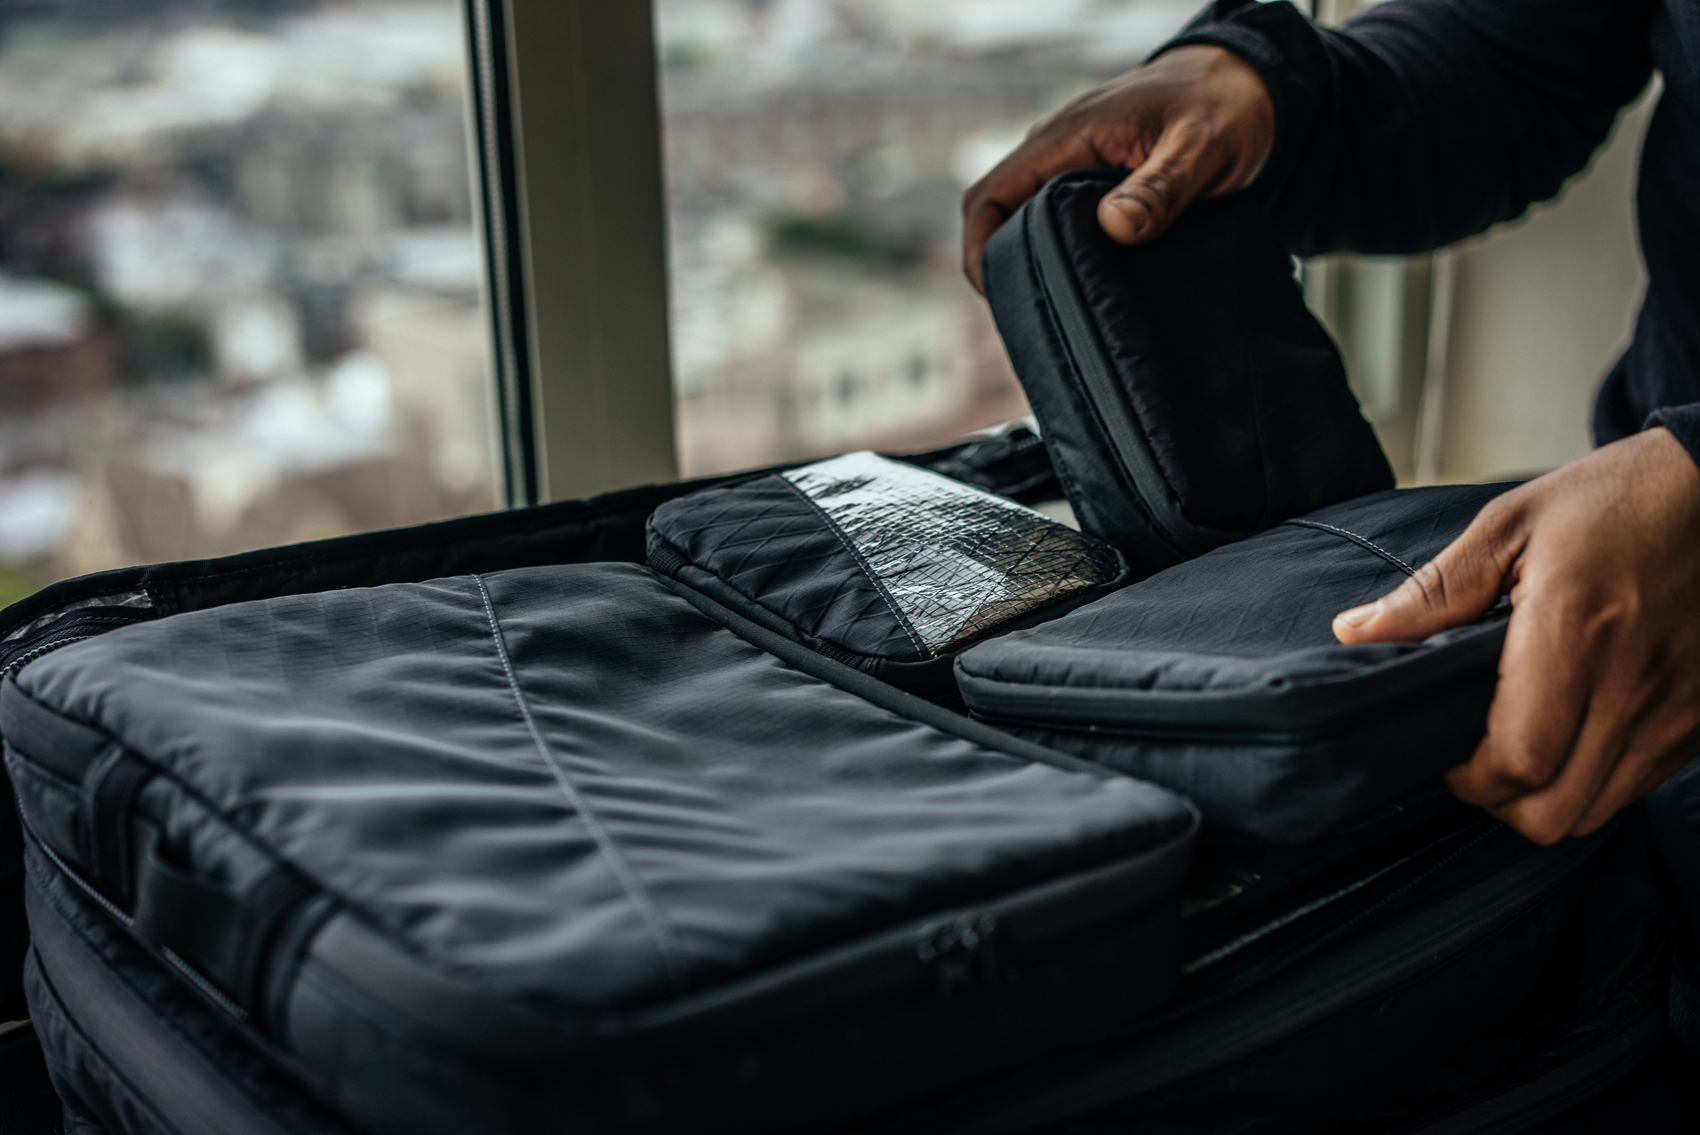
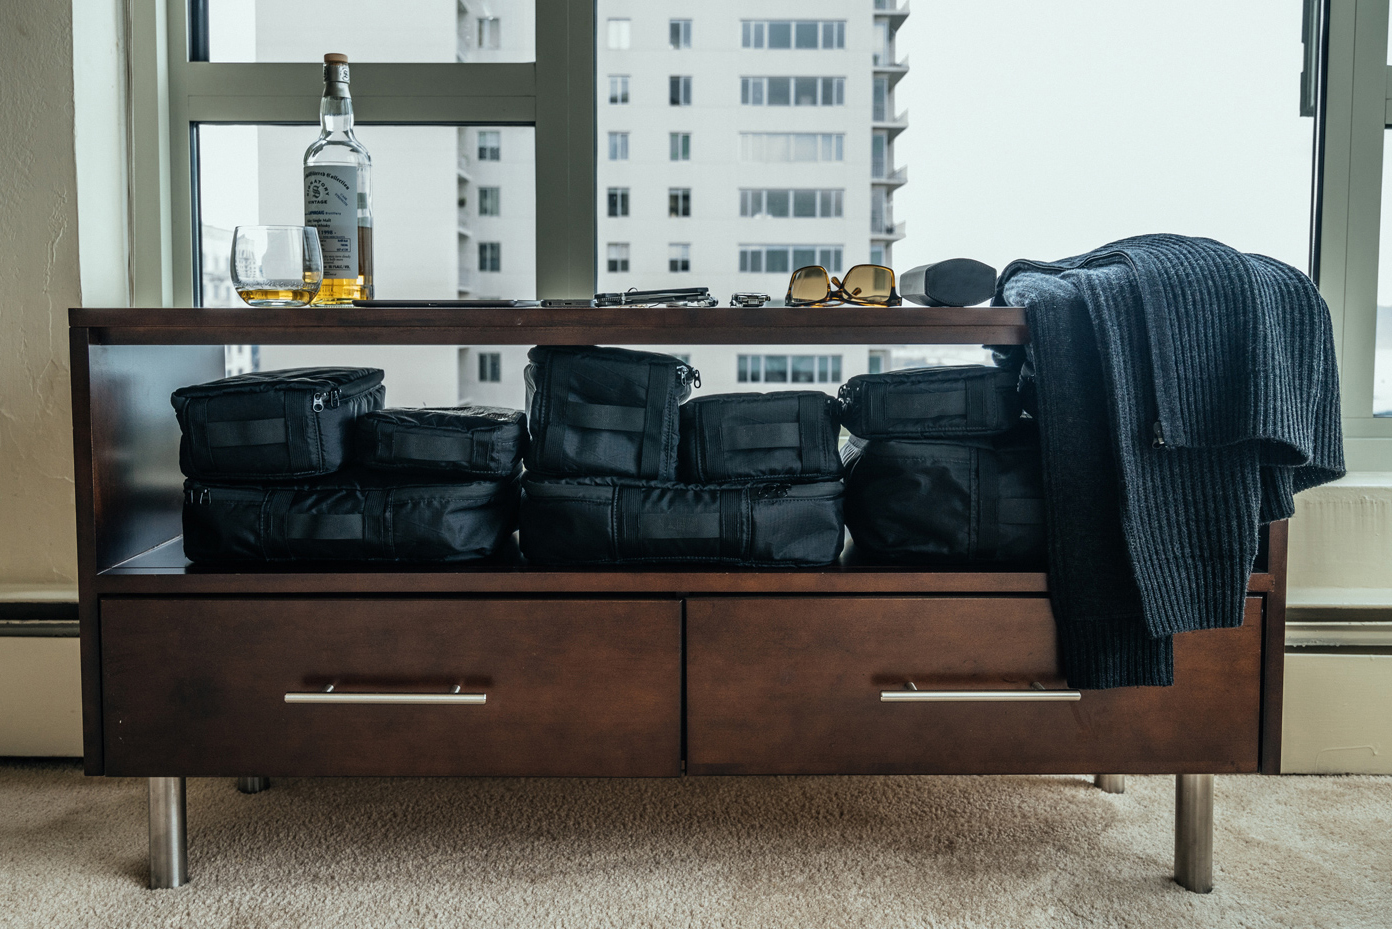
At this point, you might be thinking this is just another ordinary bag, but it’s what’s inside that counts. The Meridian Transport Case is designed with three clamshell-style primary compartments, to lay flat for quick loading of gear. Triple Aught Design’s Helix attachment system also makes the case fully modular, so you can swap in a variety of transport cubes and control panels.
We’ve always been proponents of this style of packing gear, whether it’s for daily travel or bugging out. The zippered transport cubes come in various sizes, and allow organized storage of key items. For example, you could have one cube with a medical kit, one with your food, one with spare clothing, and one with water purification gear. If you decide you need something like an NBC kit for a possible chemical weapons scenario, you can swap it into your bag at a moment’s notice.
This system also makes for easy packing and unpacking in hotel rooms, since you don’t have to dig through all your gear to find what you need. Everything in its place, and a place for everything.
Control panels can also be added in place of cubes, and they offer zippered mesh pockets for loose items. Also, elastic loops provide storage for pens, flashlights, and other tools.
The case retails for a premium price of $425, and the modular cubes and panels are $24 to $56 depending on size and type. For more information about the TAD Meridian Transport Case, check out TripleAughtDesign.com.
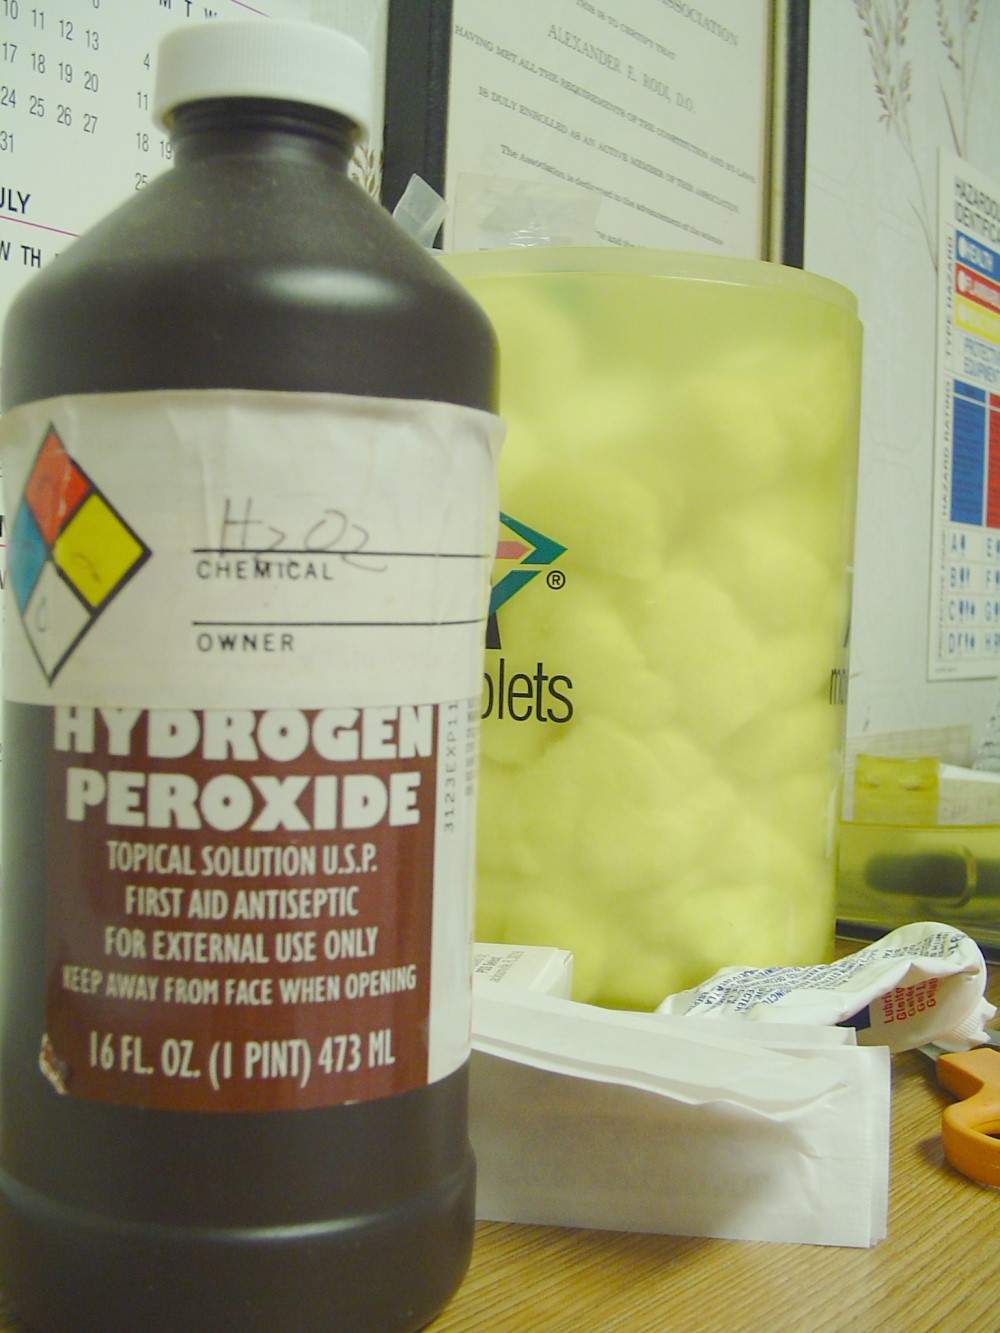
The field of medicine is always changing and evolving, thanks to new discoveries and improved research methods. As a result, medical techniques that were once thought to be beneficial have now been revealed to often do more harm than good. For example, it was once thought that applying hydrogen peroxide to wounds would kill bacteria and therefore promote healing. Although this belief persists somewhat today, it’s only half true.
It’s accurate to say that pouring hydrogen peroxide (H202) on wounds kills bacteria. However—and this is a major drawback—it also kills your own cells, including the cells that are already present in the wound fighting off bacteria and forming a scab. Here’s a video from SciShow on YouTube that explains what we mean:
In layman’s terms, dumping hydrogen peroxide on an open wound is the medical equivalent of dropping a nuclear bomb on the front lines of a battlefield. Sure, you may be wiping out the enemy, but you’re also wiping out most of your own troops at the same time.
Hydrogen peroxide is absorbed by skin cells on contact, resulting in a temporary whitening effect. Source: Wikipedia
On top of this, most of us know that hydrogen peroxide burns like crazy on a cut or scrape, and now you know why—it’s literally ripping your cells open on a microscopic level. Unless you enjoy experiencing searing pain, slowing down your body’s natural healing process, and increasing the likelihood of a gnarly scar, avoid applying H202 to wounds. It might even kill you as a result of an arterial oxygen embolism (introducing air bubbles into your blood stream).
Don’t just take our word for it—check out this Oxford study that states, “We emphasize that hydrogen peroxide is a dangerous and unsuitable agent for routine wound irrigation and debridement.”
Despite all this, H202 does have certain valid uses as a disinfectant. Although its powerful reaction with organic cells makes it harmful to your flesh, it’s excellent for sterilizing surfaces and surgical tools. Also, the U.S. Food and Drug Administration (FDA) has approved it for use as an antimicrobial agent, and as an environmentally safe alternative to chlorine-based bleaches.
In a life-or-death survival scenario, if there’s absolutely no other disinfectant available, H202 might be worth a shot as a last-ditch effort to stop a deadly infection. However, in any other circumstances, you’d be much better off using regular old H20 and soap.
In today’s world of slick TV meteorologists, instant Internet weather forecasts, high-tech radar systems, and satellite imagery, we can predict the weather more accurately than ever before. Mere decades ago, it was much more difficult to accurately analyze weather patterns and storm cells around the globe, and we have forecasting systems today that our ancestors never dreamed possible.
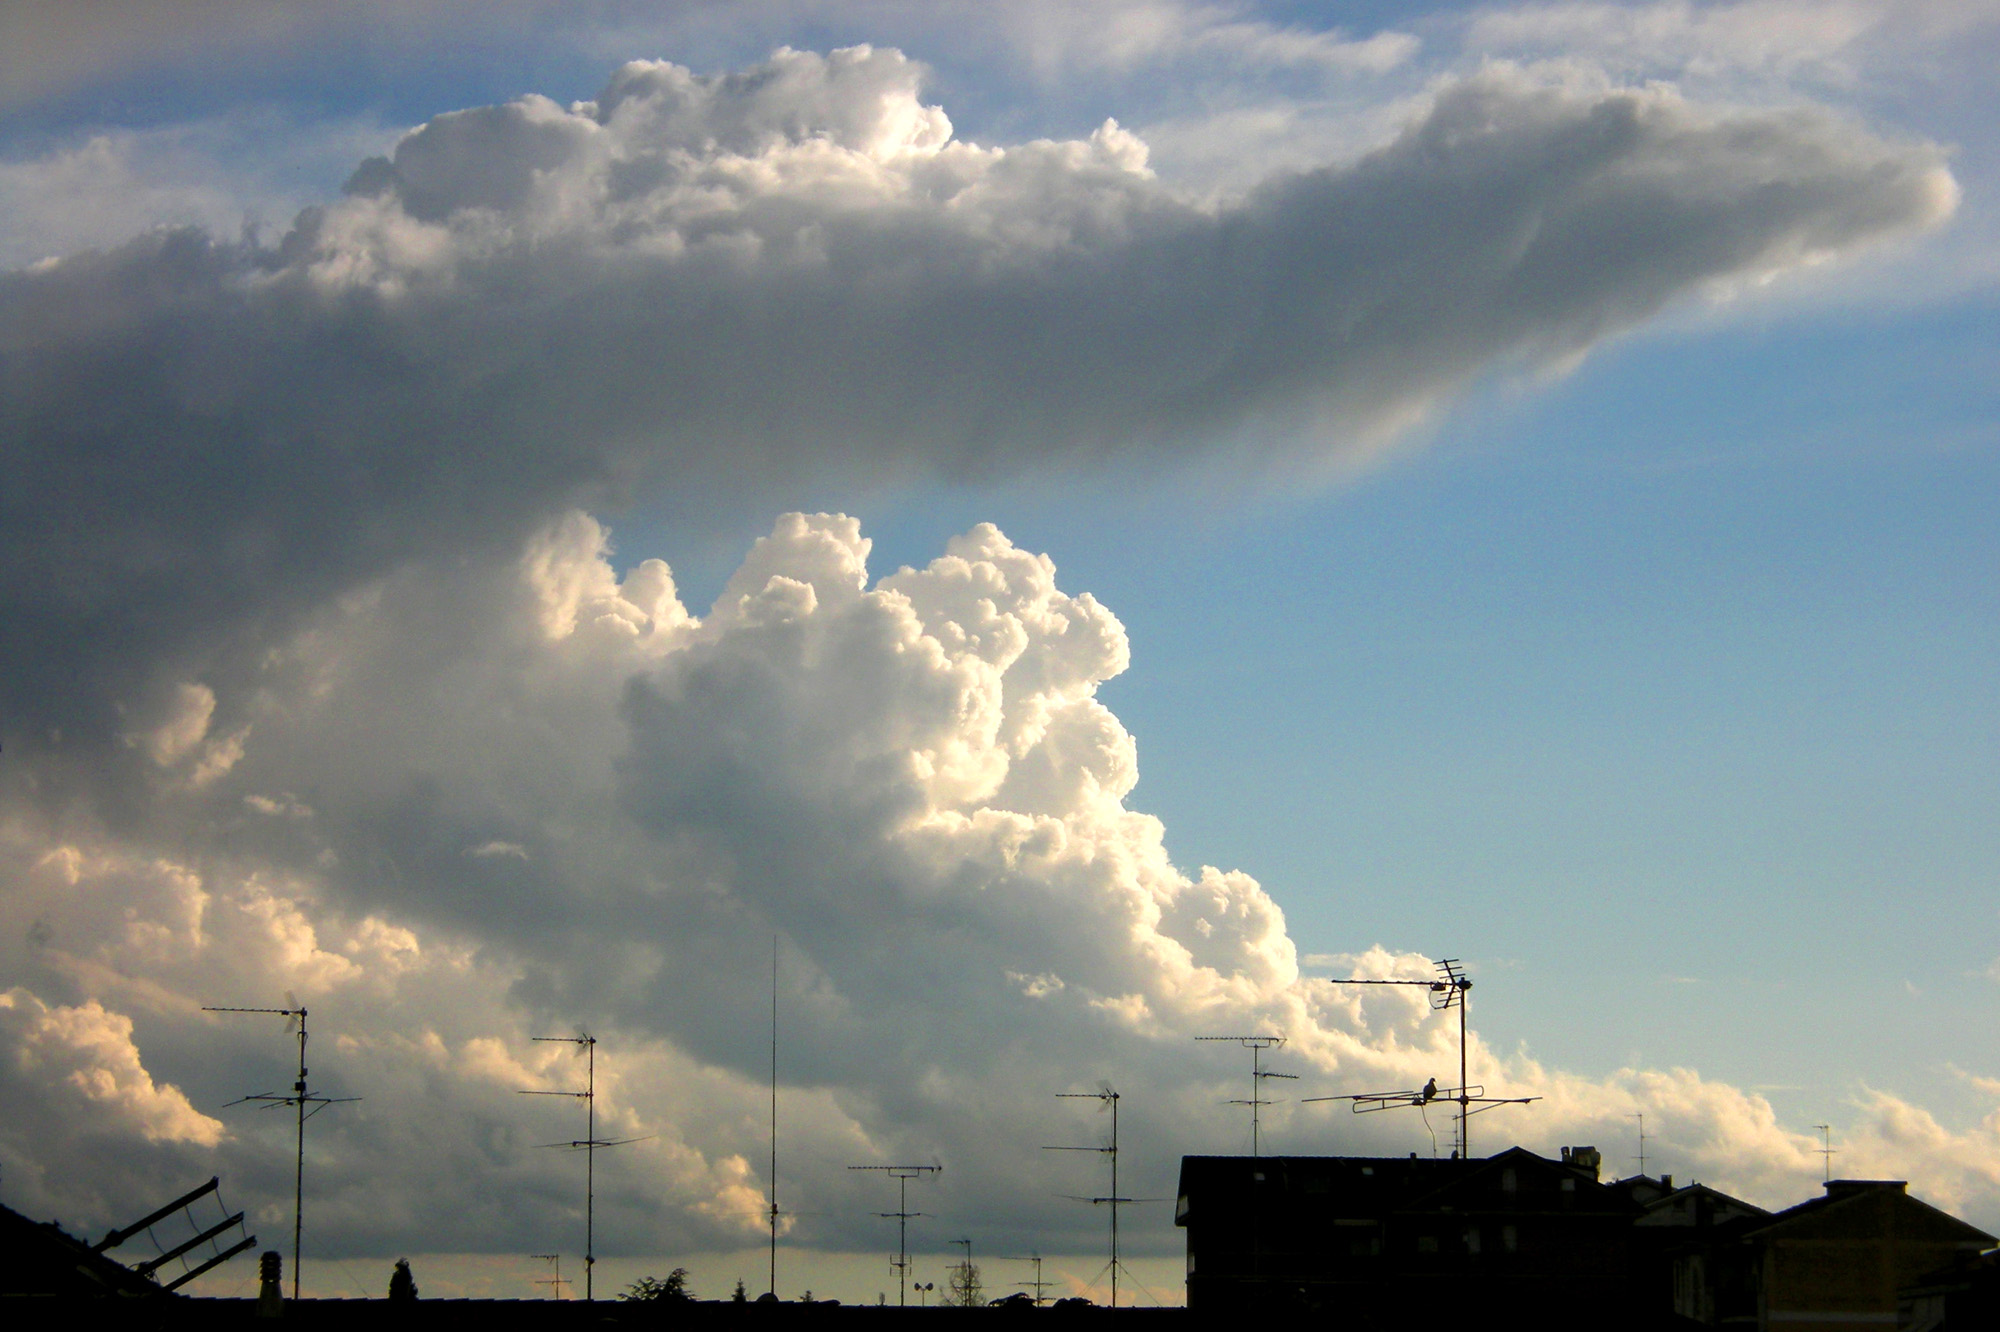
Towers of fluffy cumulus clouds usually indicate rain is on the way.
However, technology can fail, and let’s face it: in a survival situation, you’re not going to be able to flip on the local news and refer to Storm Raines and his Doppler 9000. You’re going to have to use the instruments you always have with you—your senses.
Dew drops on plants in the early morning usually indicate limited cloud cover and reduced chance of rain.
The infographic below from Visual.ly provides lots of practical methods to forecast the weather:
Obviously, some of these methods to predict weather visually are more reliable than others. If you happen to spot a cat cleaning behind its ears, or come across a particularly smelly swamp, don’t assume rain is on the way. However, with an alert and aware mindset, you may notice several of these warning signs, and be better prepared for a storm in case your prediction is accurate.
Bad weather can move fast, so you’ll have to move faster if you want to build a shelter or get a fire going ahead of time. It could mean the difference between staying warm and dry or fighting off hypothermia.
Style over substance, form over function, products that look “tacticool” but aren’t made for real work—we’ve heard these arguments used around the Internet in reference to various high-end survival gear manufacturers. Specifically, we’ve seen a few critical statements made about TOPS Knives on knife forums and Facebook pages, claiming that the blades look heavy-duty but are just for show. On the flipside, we all know that some people on the Internet often love to spread hate and misinformation. So, what’s the reality of the situation?
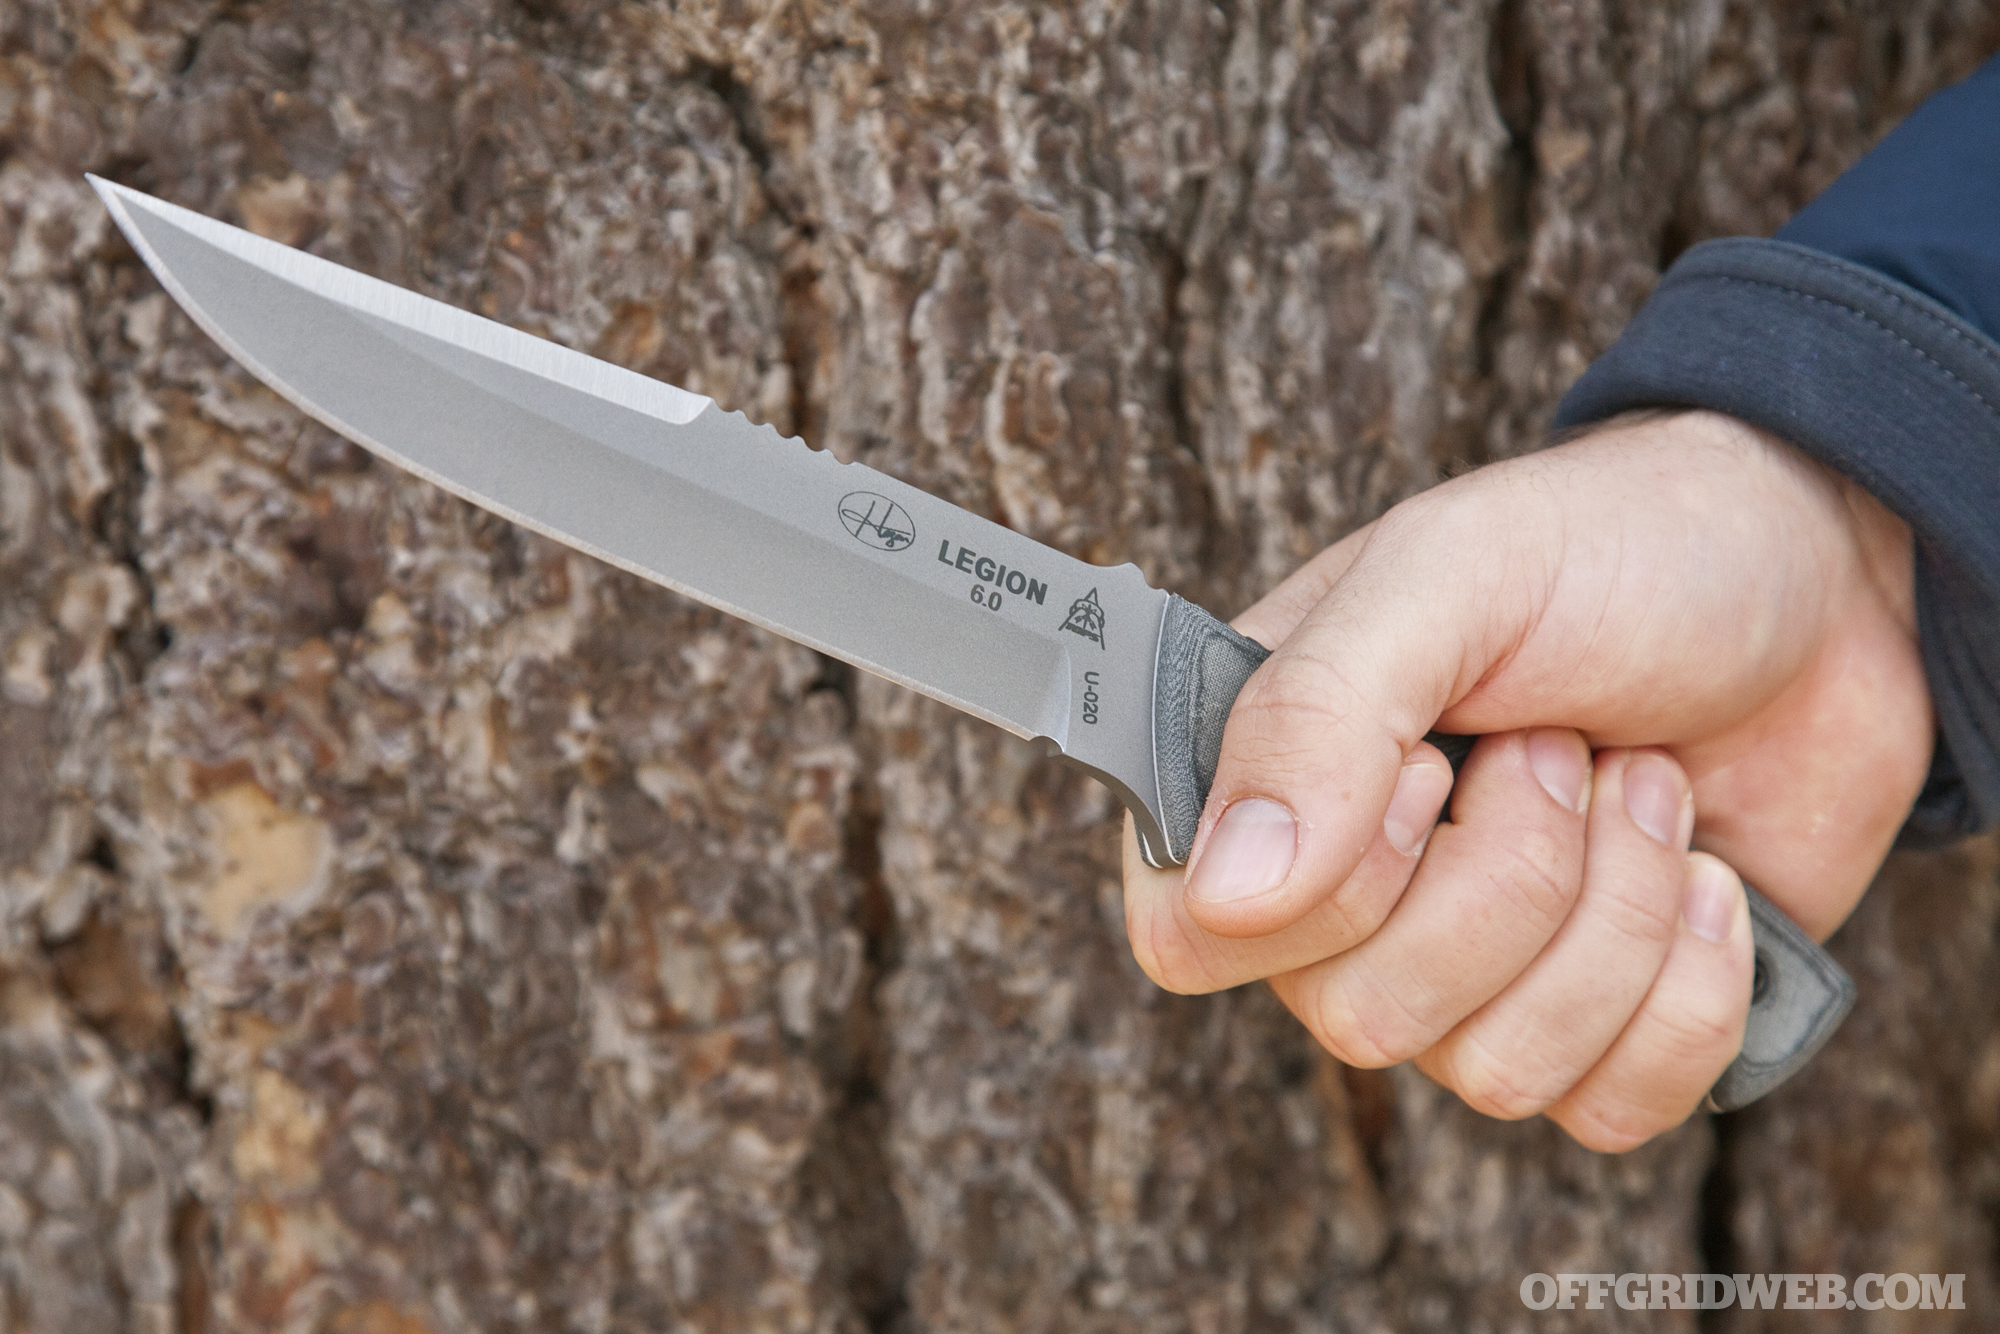
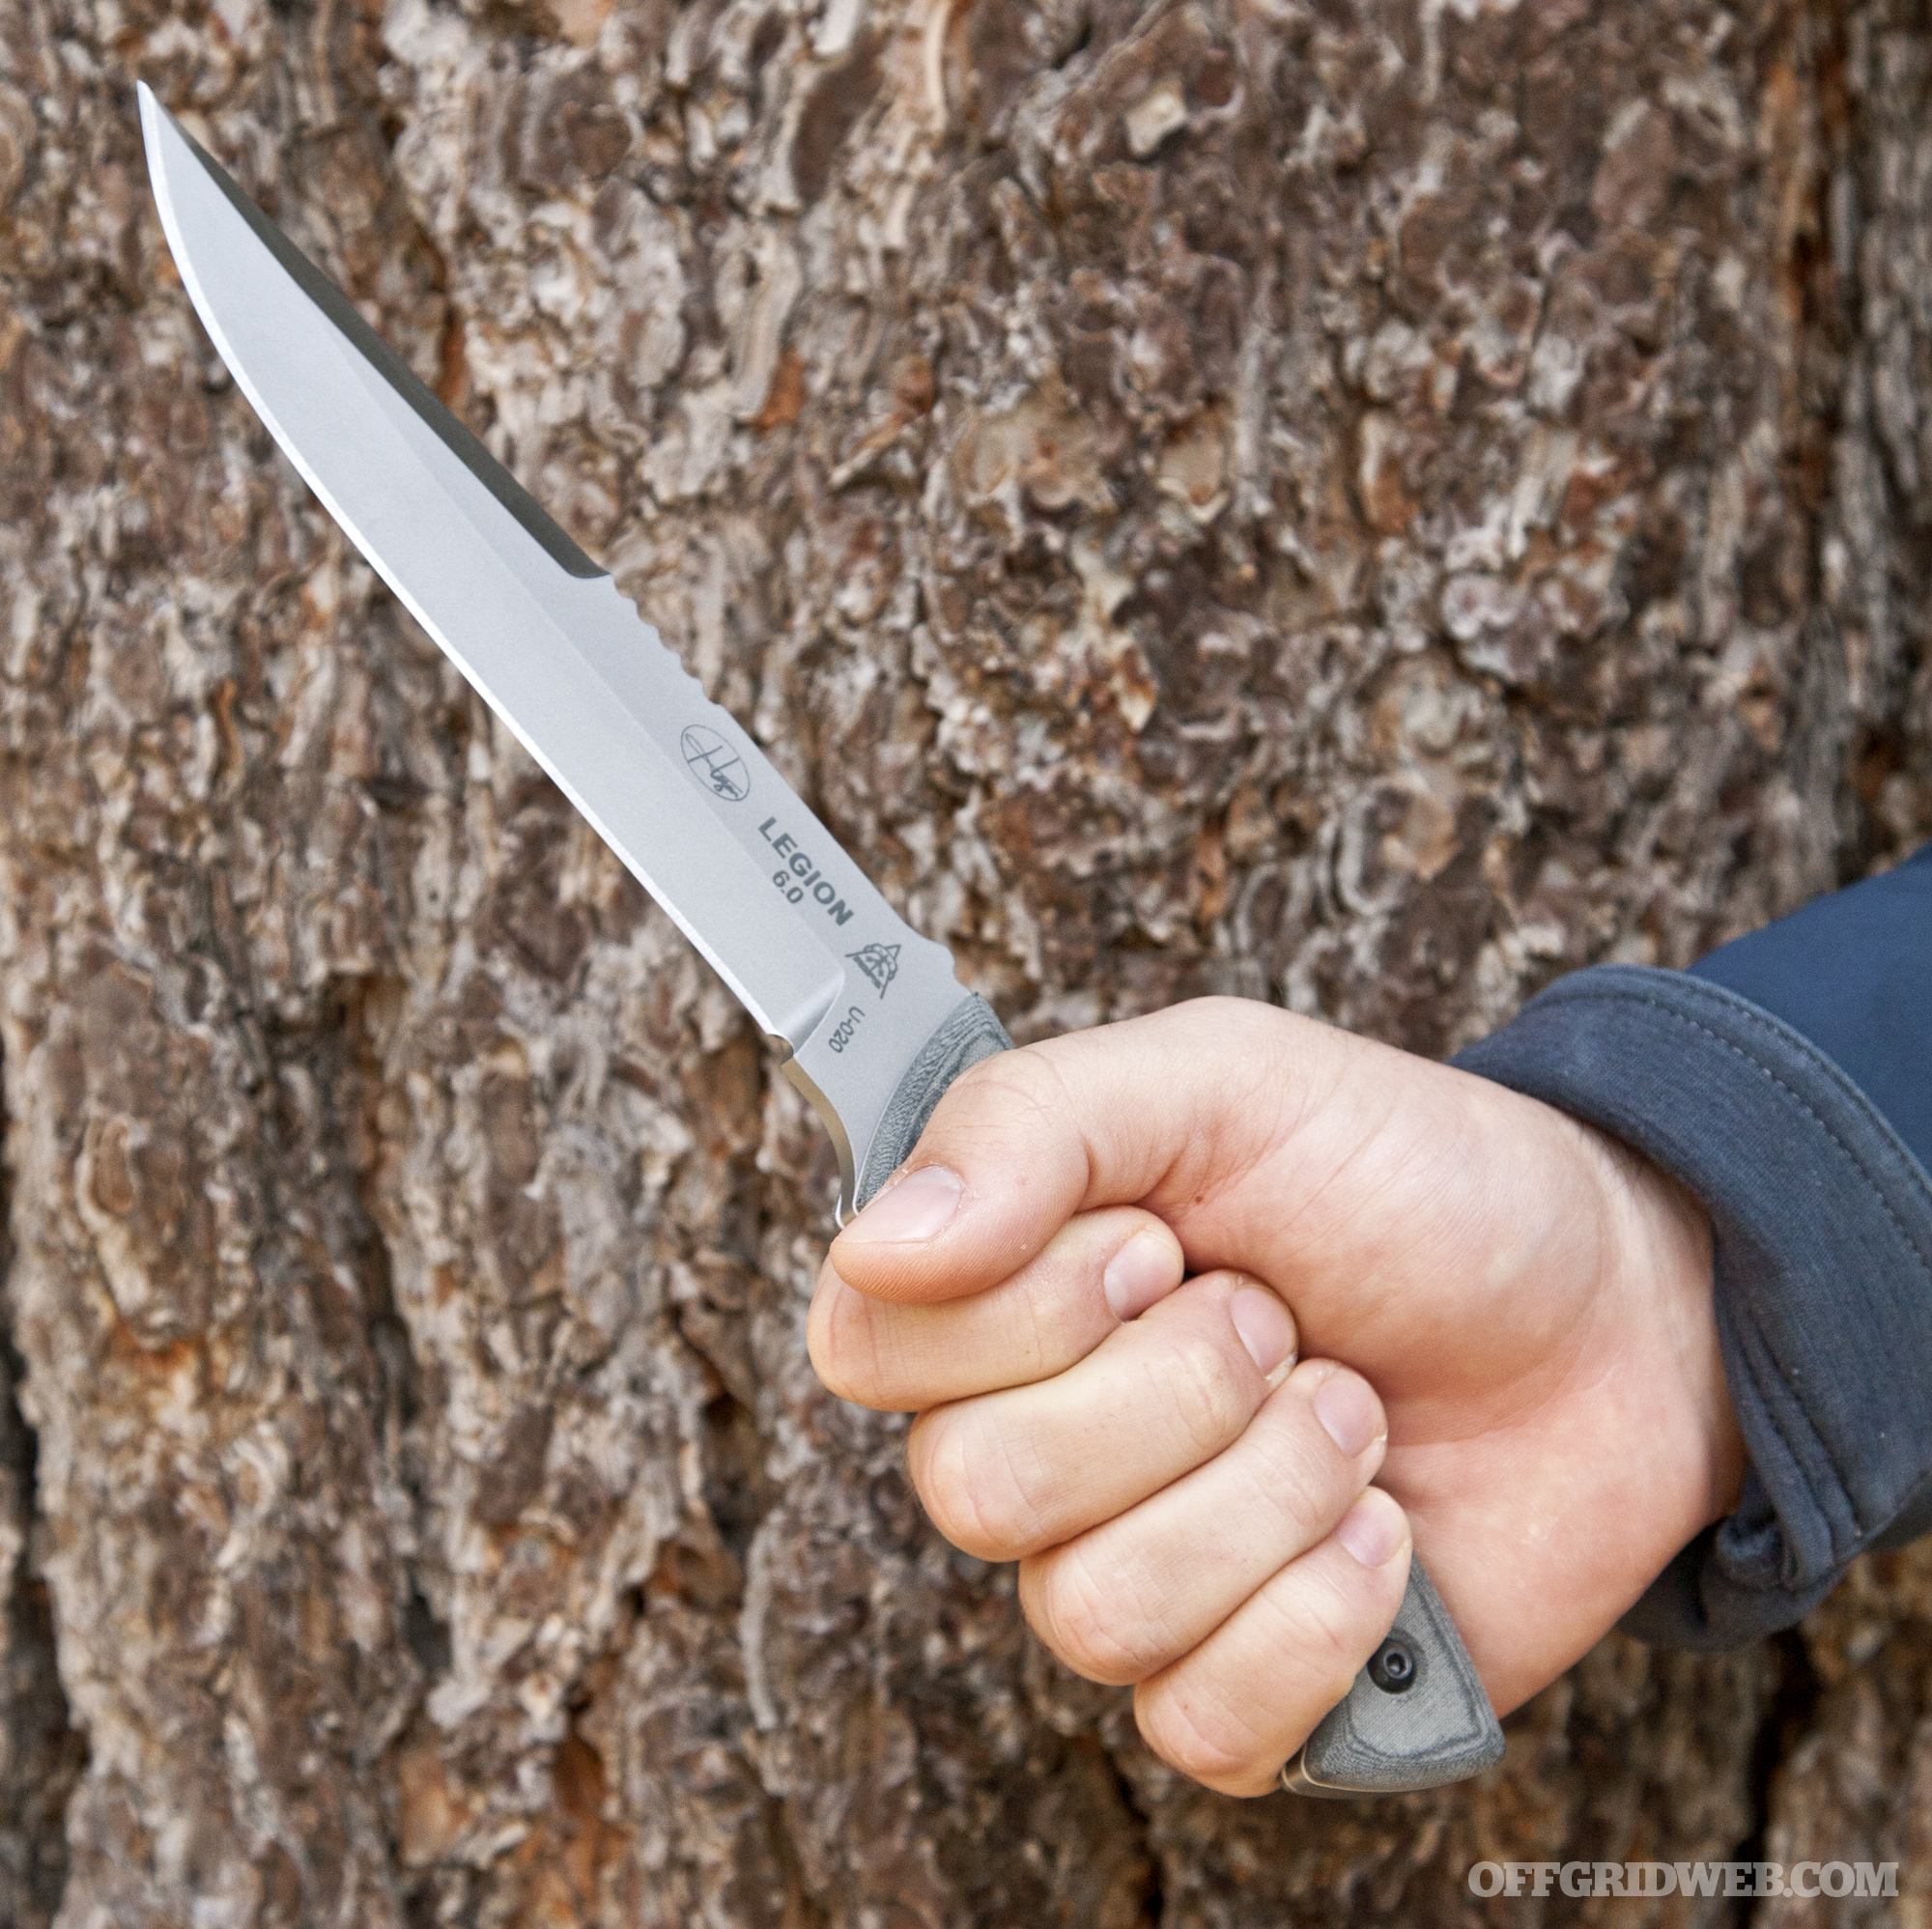
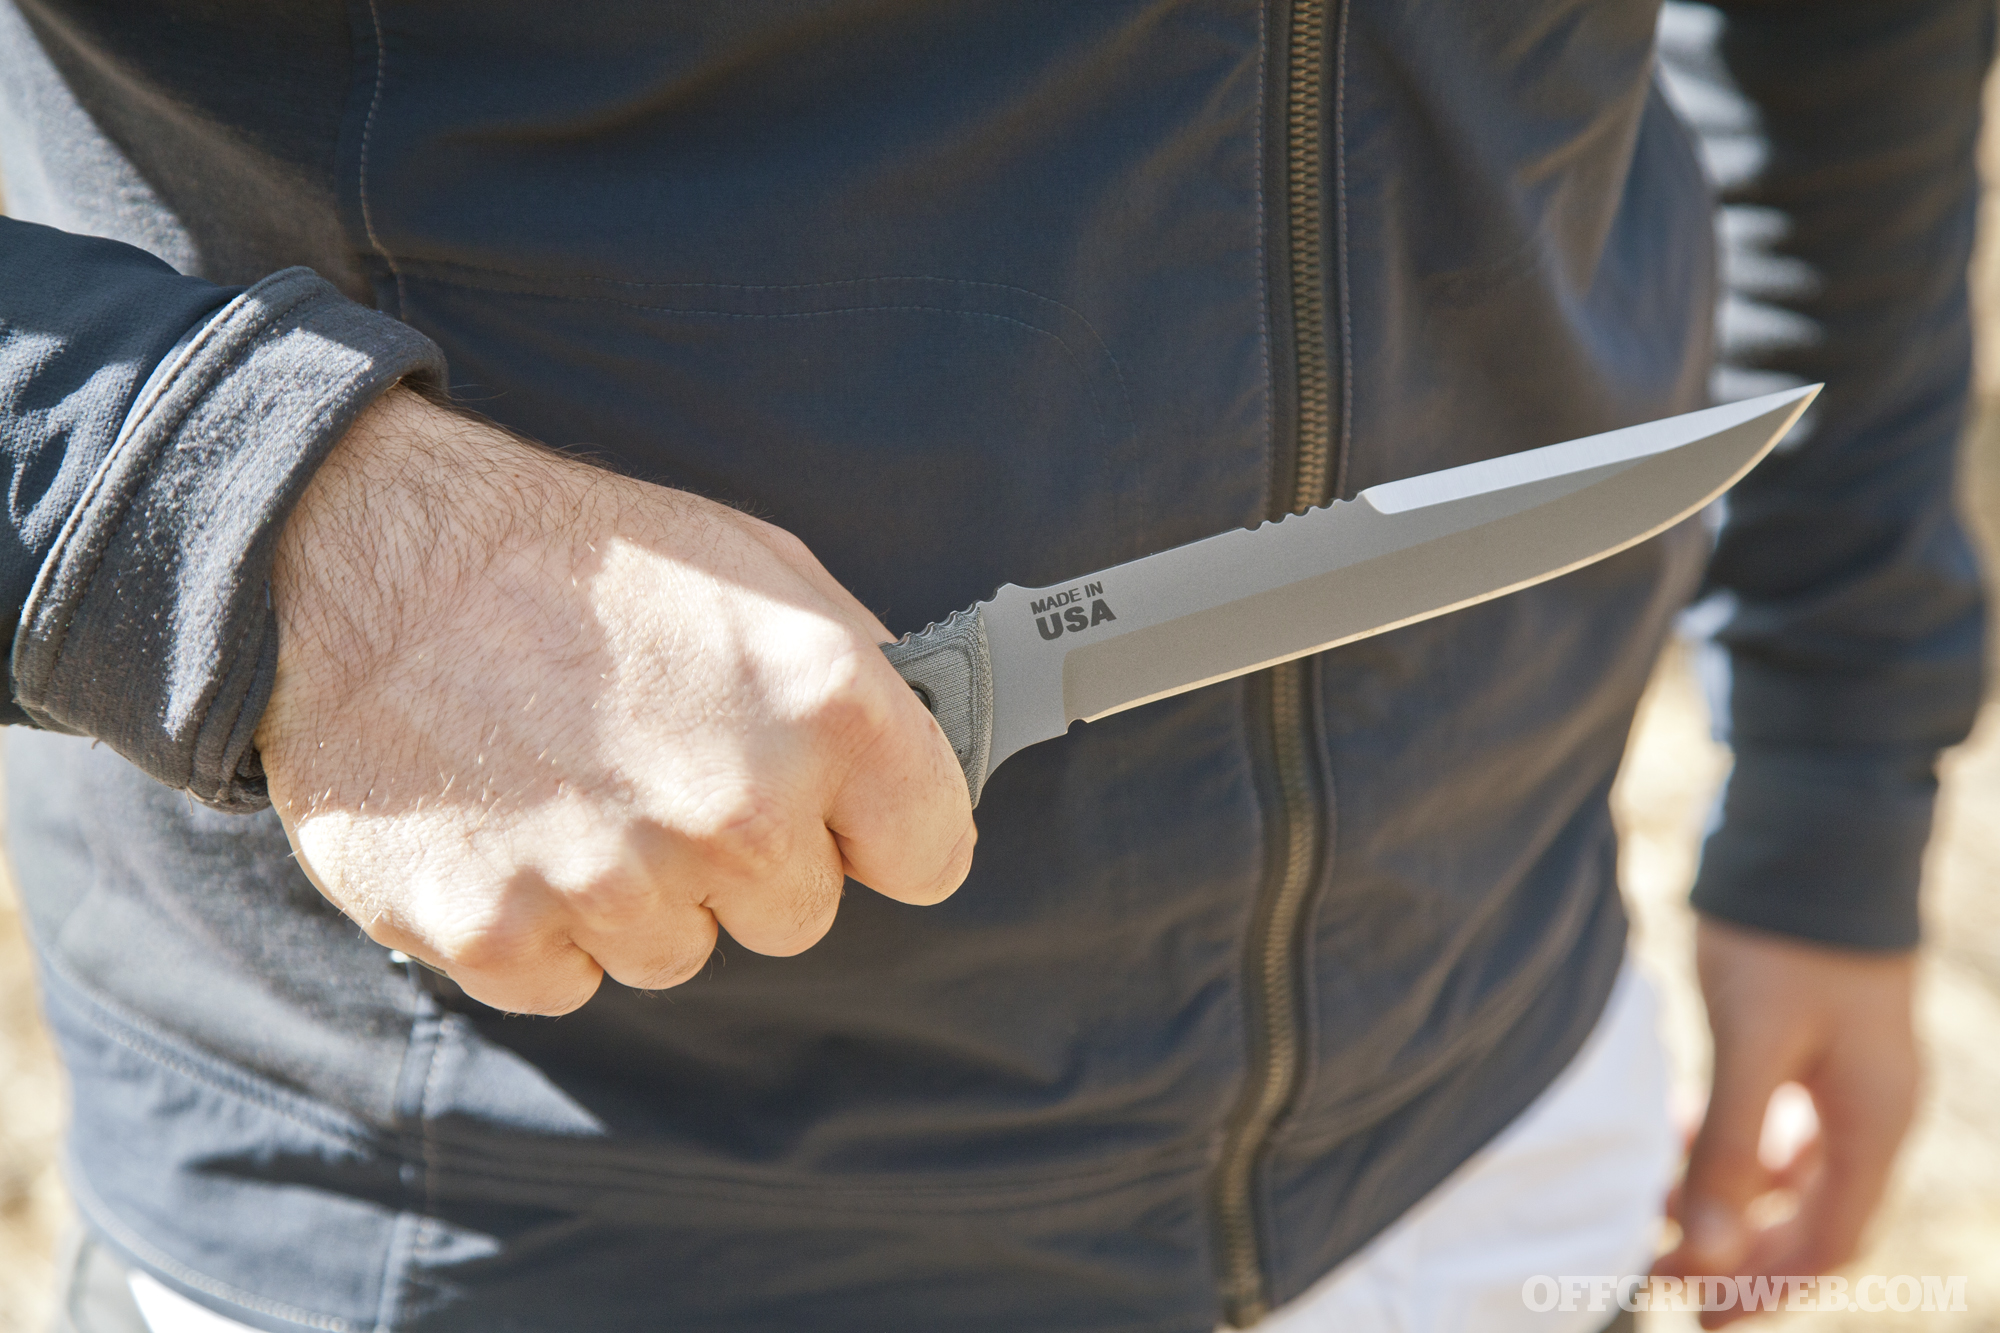
Most of us can agree that the Hazen Legion 6.0 looks cool. But, can you trust your life to this knife?
Are TOPS Knives average products propped up by clever marketing, or does the company make legitimate survival tools you can depend on? We decided to answer these questions by testing their latest knife design, the Hazen Legion 6.0. We hope this will shed some light on the truth, and will cut through the Internet back-and-forth on the subject once and for all.
“Spec Ops Trust TOPS”
Before we get into our review of this new knife, we’ll share a little background on the company. TOPS Knives was founded in 1998 by several Vietnam veterans, all of whom were dissatisfied with the quality of the knives they were issued during the war. Since then, the company has collaborated with numerous designers to produce hundreds of different knife models. The company states that many of their knives have seen real use by Field Operators in “hot spot” locales around the globe, hence their slogan “Spec Ops Trust TOPS”.
Over the years, TOPS Knives have also been featured in several high-profile movies. The company’s Tom Brown Tracker was used by Benicio del Toro in The Hunted, and Adrien Brody fought off intergalactic monsters with a Steel Eagle in Predators. Some claim this as evidence that the company has jumped the shark and gone all Hollywood on us, but we’d attribute it more to the fact that their knives simply look imposing, and therefore were chosen as movie props for the silver screen.
Despite this, it’s clear from their manufacturing process that TOPS Knives are much more than movie props. Every one of their blades is manufactured in the USA and hand-finished at their facility in Idaho. This video from InnerBark Outdoors gives a factory tour, and introduces a few of the American employees:
The New Hazen Legion 6.0
You may recognize this blade from a press release announcement we published a few weeks ago, shortly after the Hazen Legion 6.0 was released to the public on February 2nd, 2016. At that time, we hadn’t gotten our hands on it yet, but now that we have, we can share our complete review.
The TOPS Hazen Legion 6.0 is a straightforward fixed-blade with a slim design. This model was envisioned by Mark Hazen, a man with 40 years of experience in the field of knife design. In order to bring his design to a wider audience, Hazen partnered with TOPS to produce the knife for the general public, and make use of TOPS manufacturing experience and resources.
Technical Specs
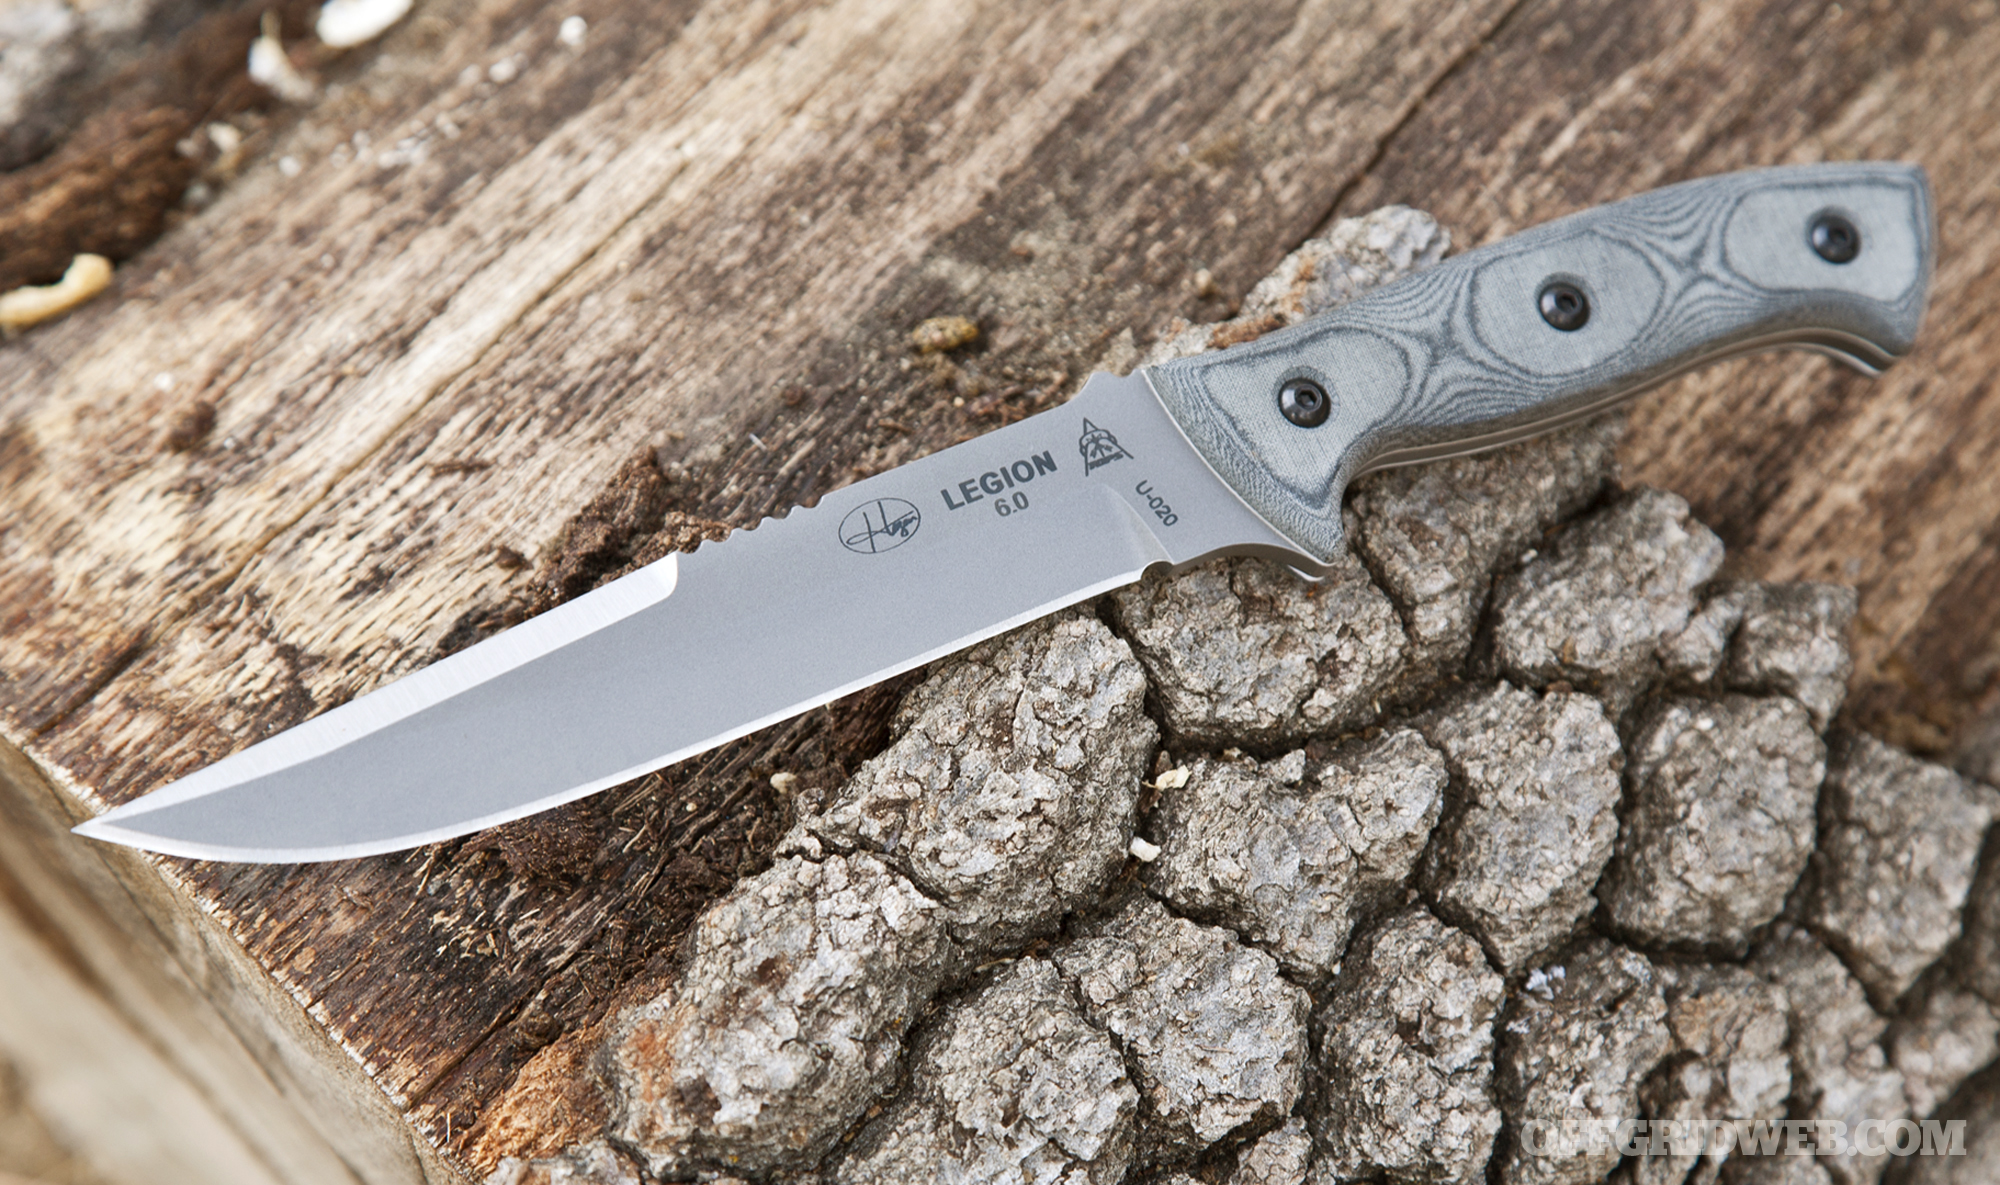
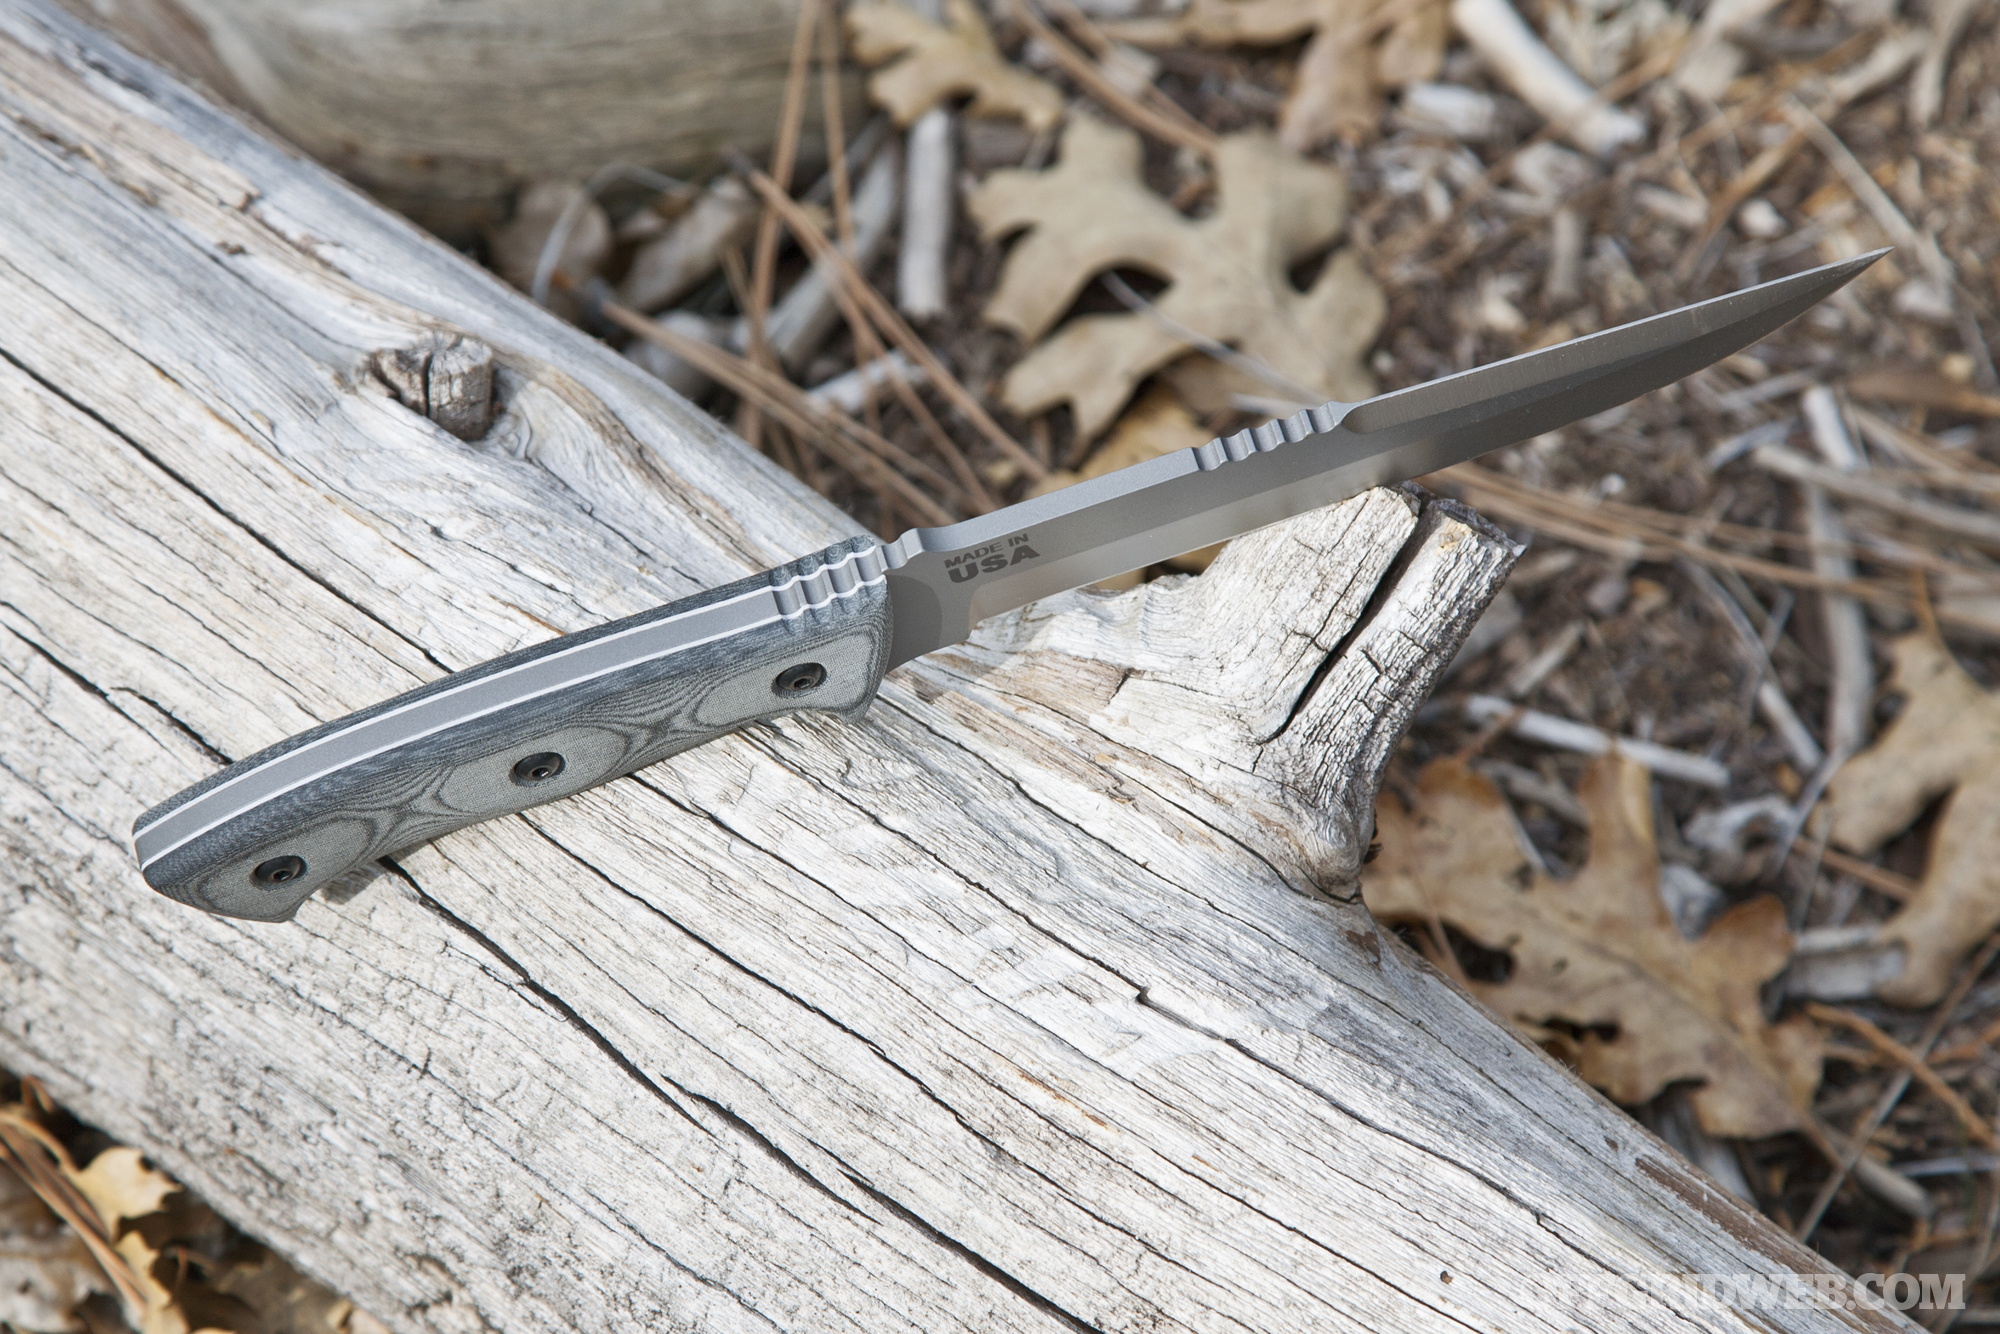
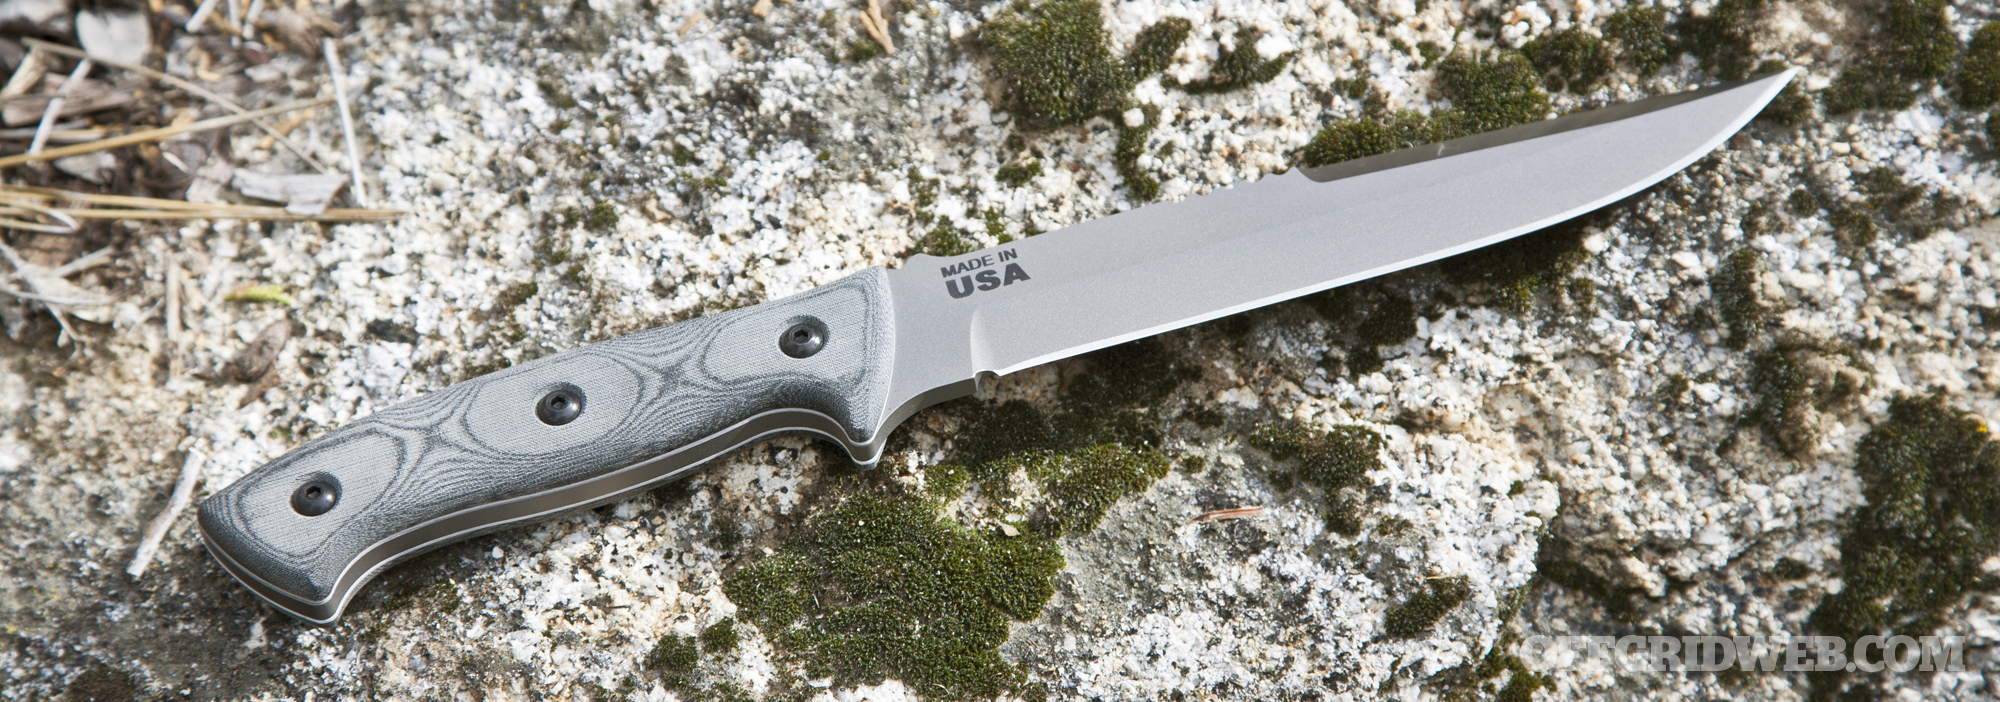
As with most TOPS Knives, the Hazen Legion 6.0 is formed from full-tang 1095 high-carbon steel with a 25-degree grind on each edge. The blade is also differential-heat-treated, meaning that the edge is hardened to 56-58 Rockwell while the spine is left softer to prevent breakage. This makes for an extremely tough and dependable survival blade, and also one that can be sharpened easily in the field. TOPS refers to their knives as tools, and 1095 steel is superb for this purpose—it’s not space-age tech, but it doesn’t need to be.
The Legion’s steel is finished in a subtle sandblasted matte grey. This knife isn’t overly flashy or aggressive-looking, but it certainly has a tasteful appeal that we can appreciate.
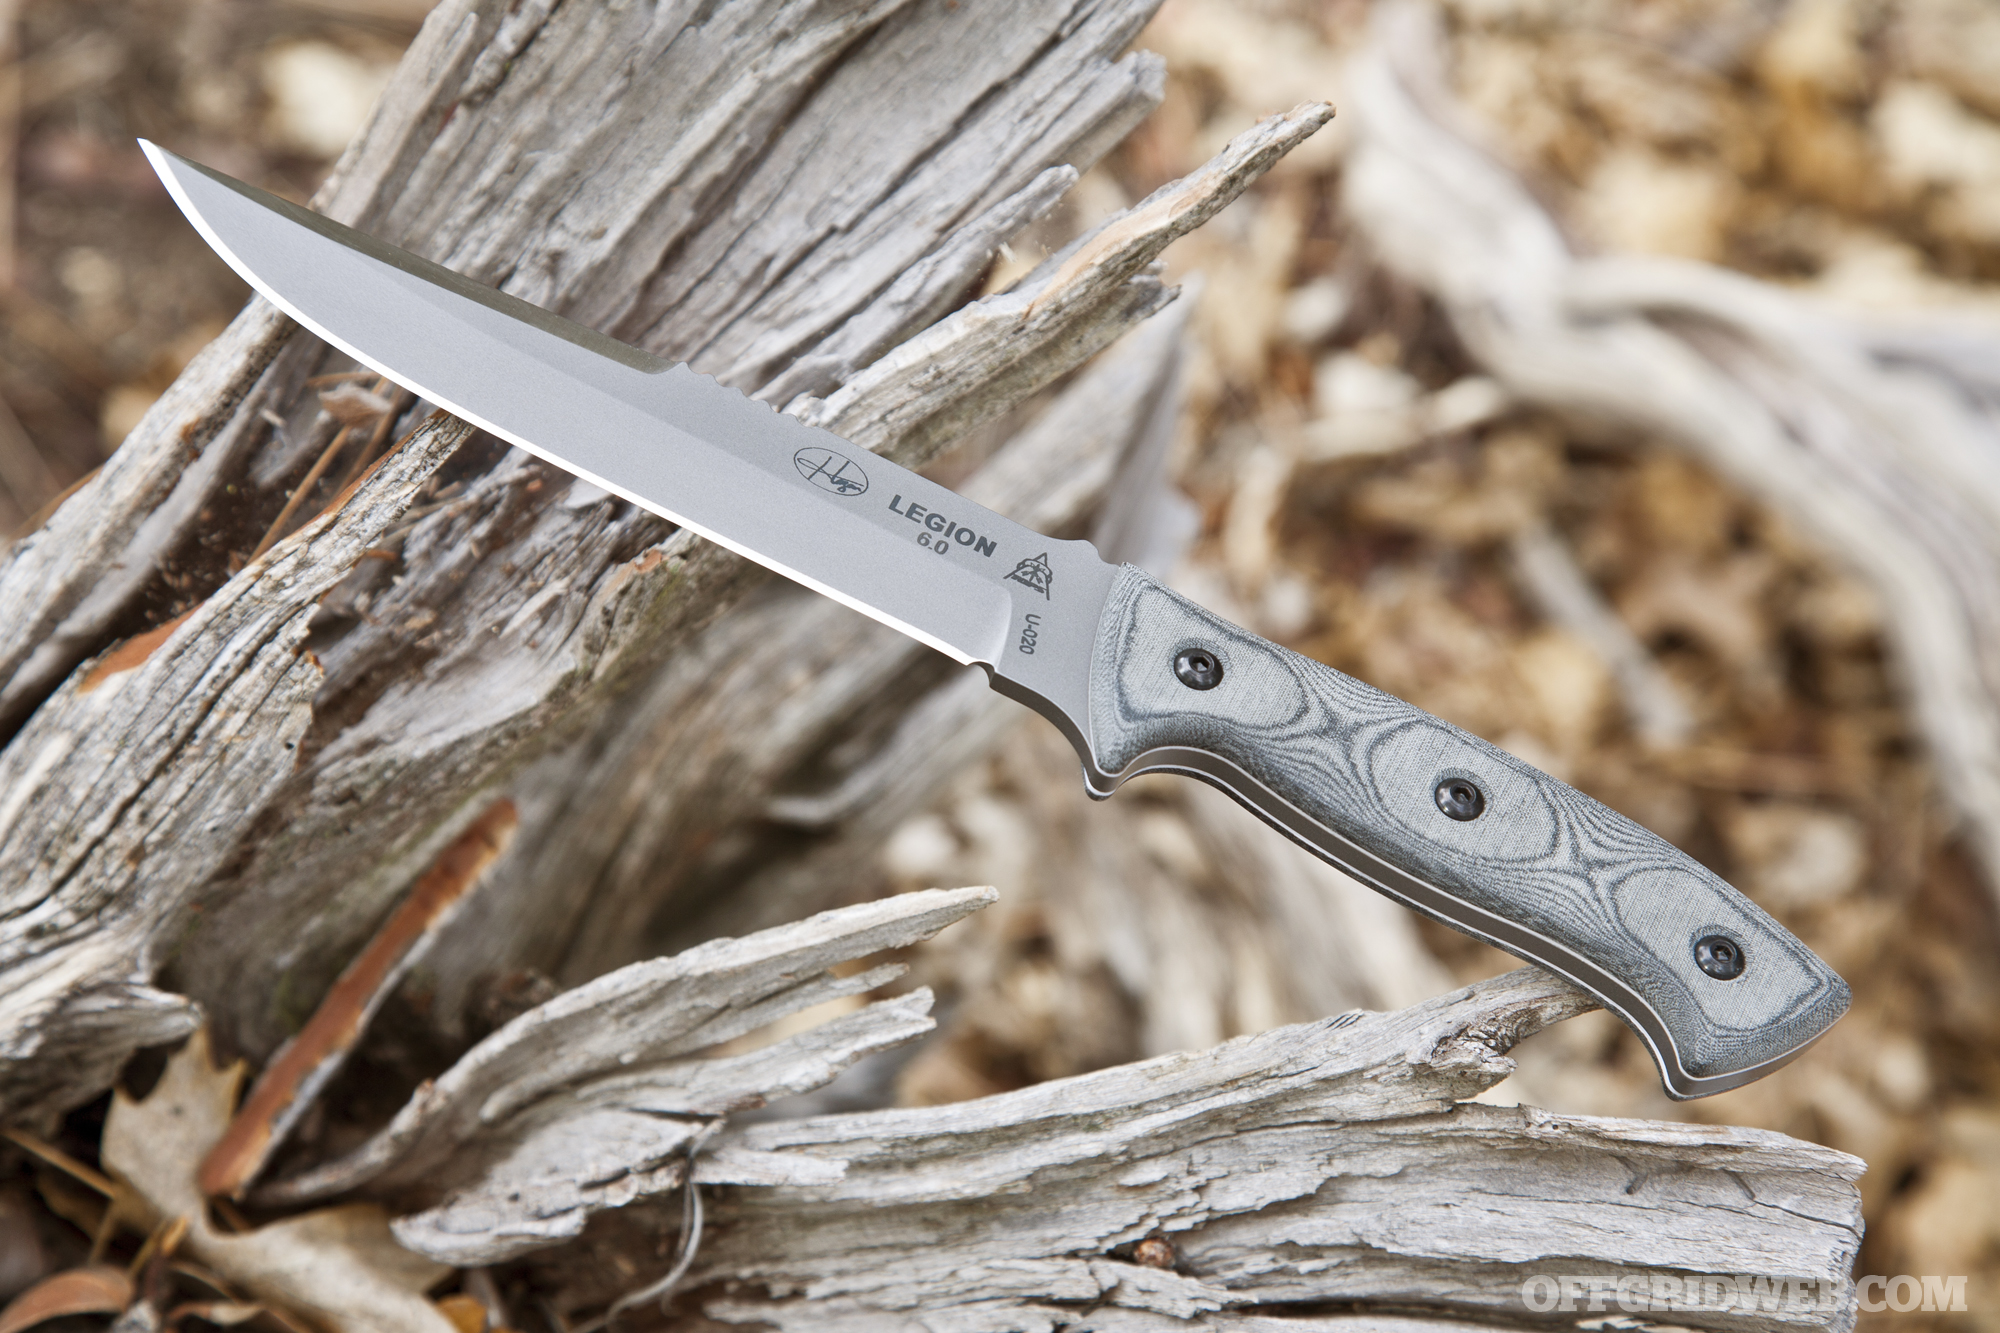
The thick full-tang steel features machined jimping along the top edge.
Despite its sleek design, the knife is a substantial 0.19 inches (4.8mm) thick. Paired with its 9.1oz weight, this reassures our impression that it’s made to take a beating.
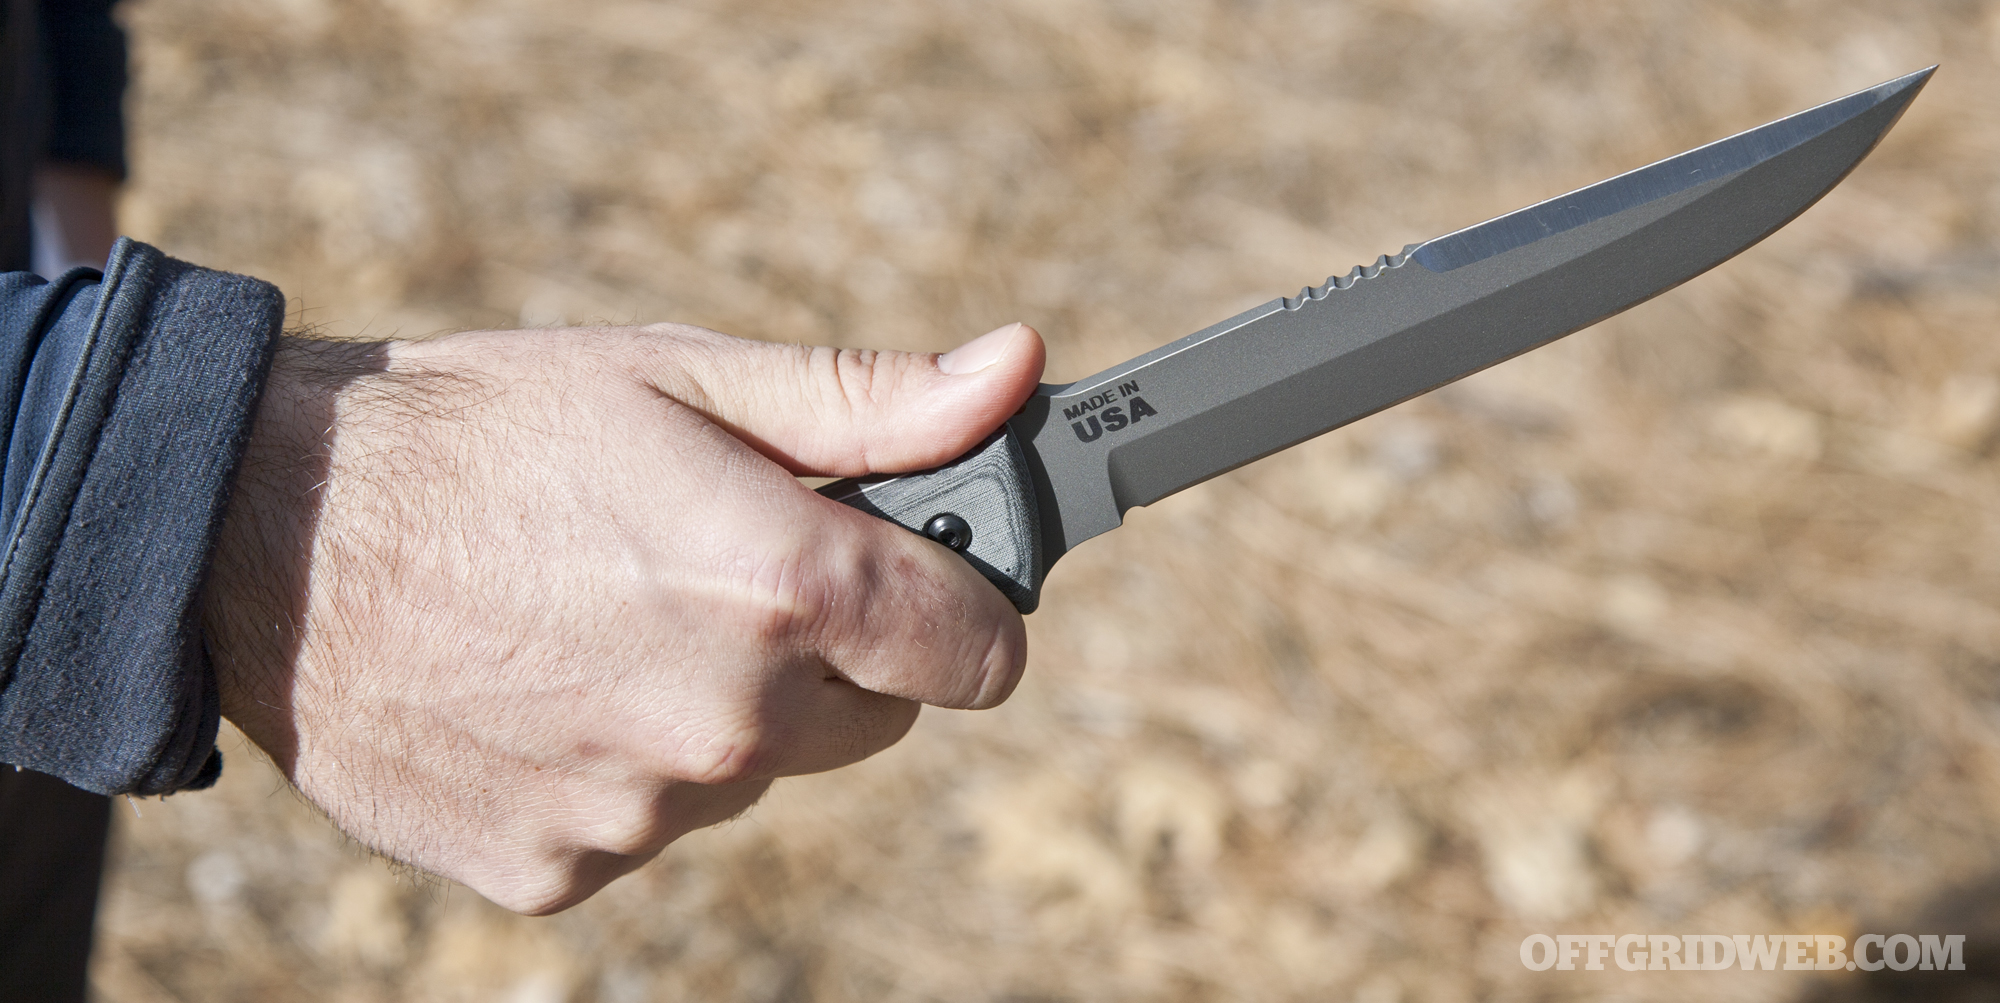
TOPS states that the Legion is designed for combat, and the beveled Hunter’s Point shows this influence. There’s also ridged jimping on the top edge and a prominent bolster on the grip, ensuring this fixed blade stays controllable while piercing or slicing.
Similar to the TOPS Anaconda 7B we tested in the past, the handles on the TOPS Hazen Legion 6.0 are made of a material called black linen micarta. This composite material uses laminated sheets of linen in a thermosetting polymer, meaning it has the durability of hard plastic with the textured grip and moisture-absorbing properties of fabric. It’s hand-sanded to show off the layers, and has a subtle faded greenish-grey coloration.
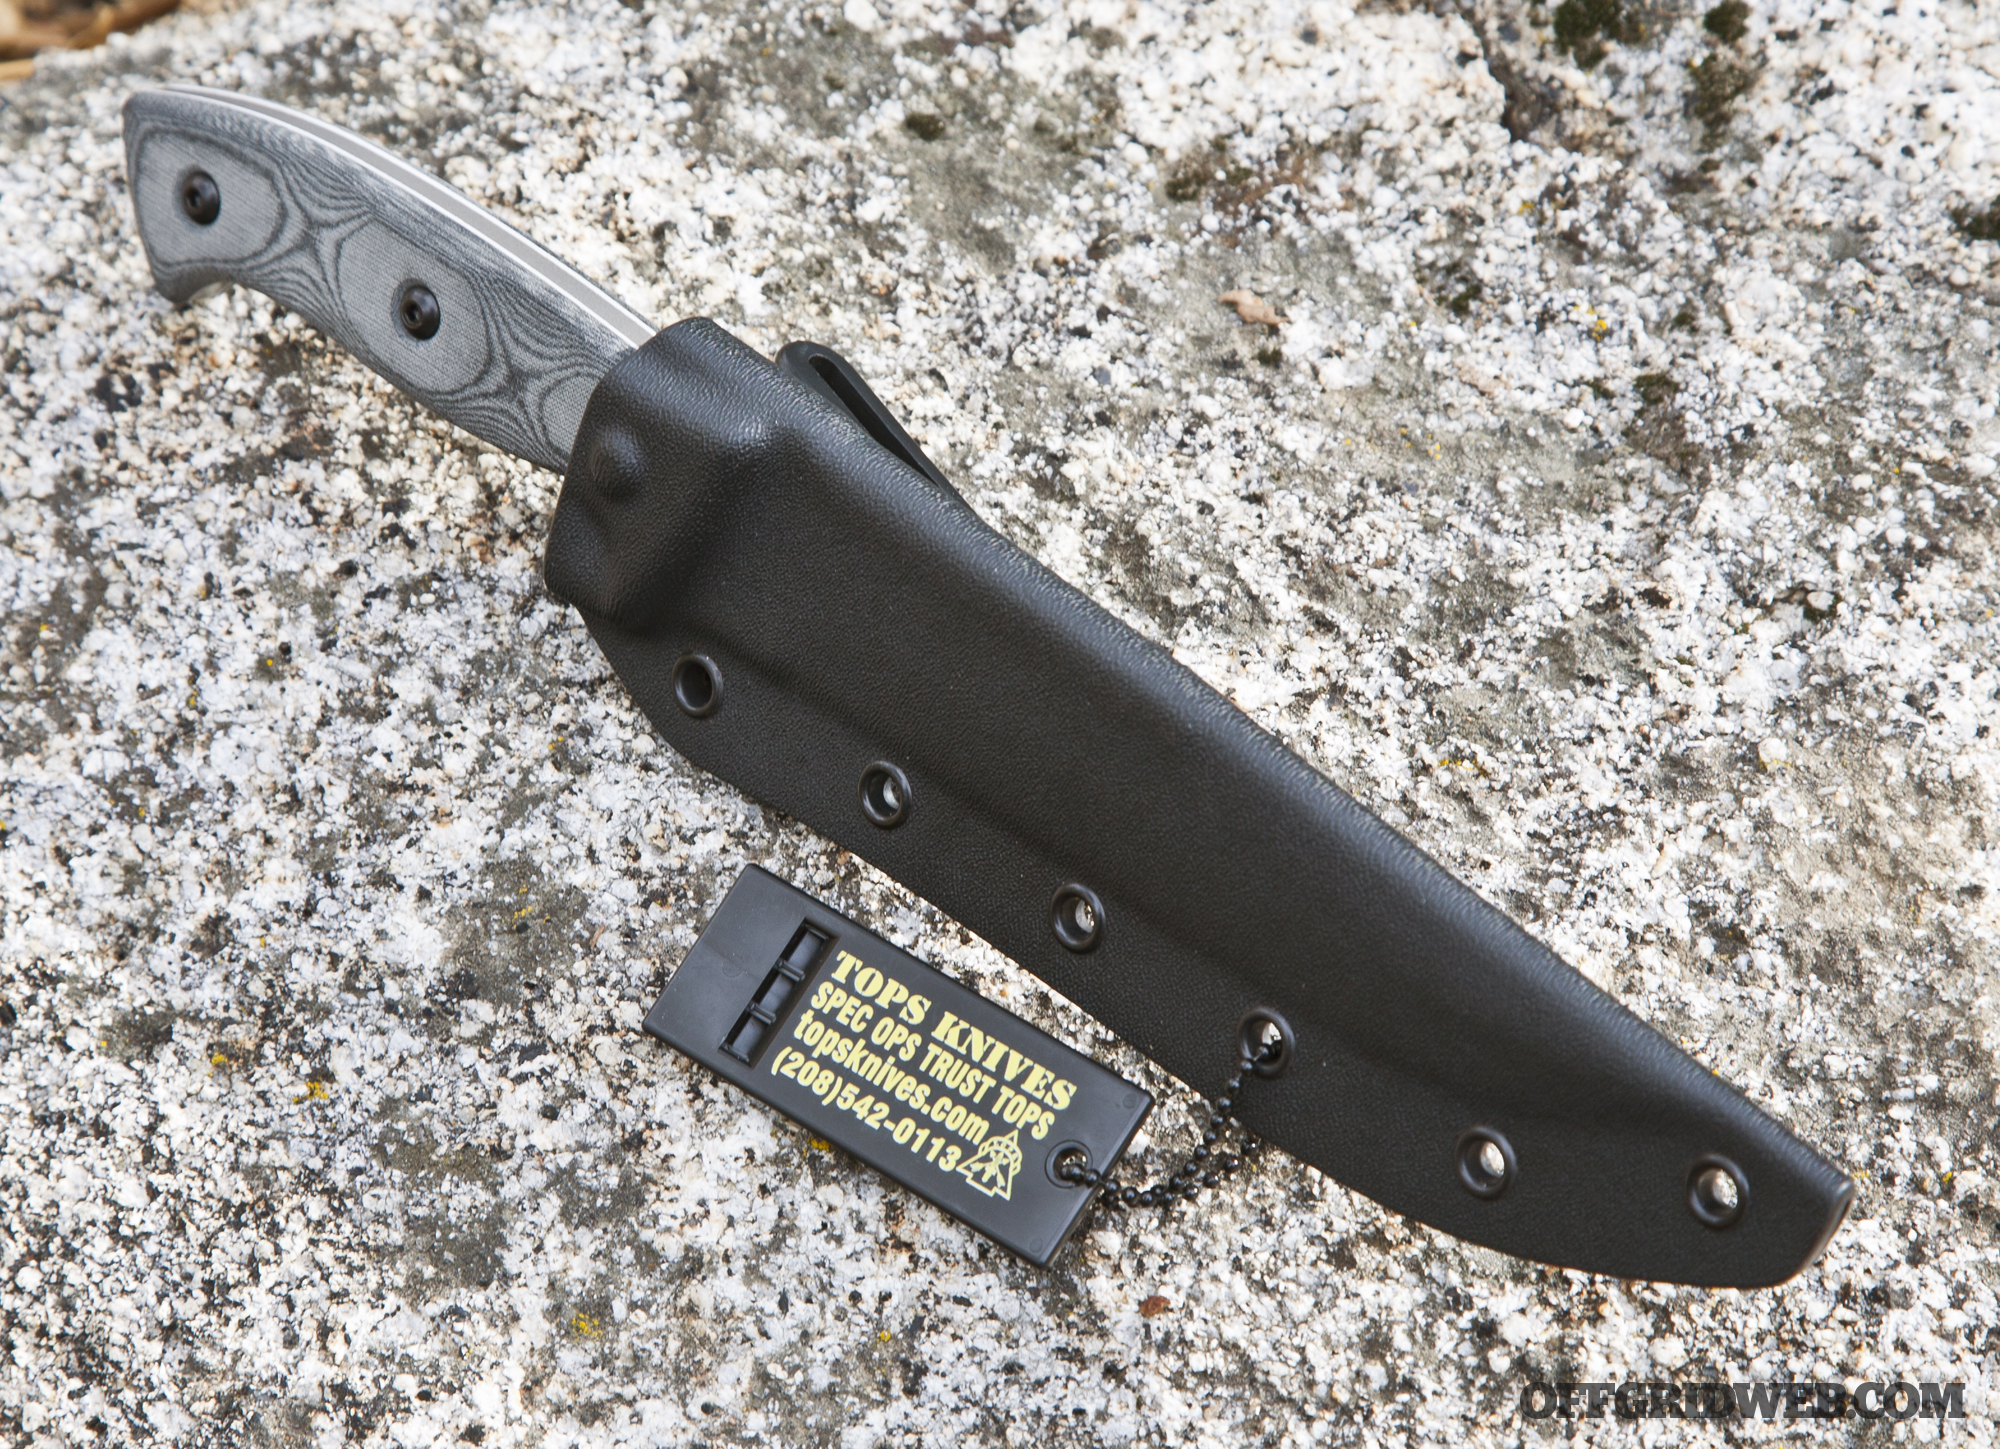
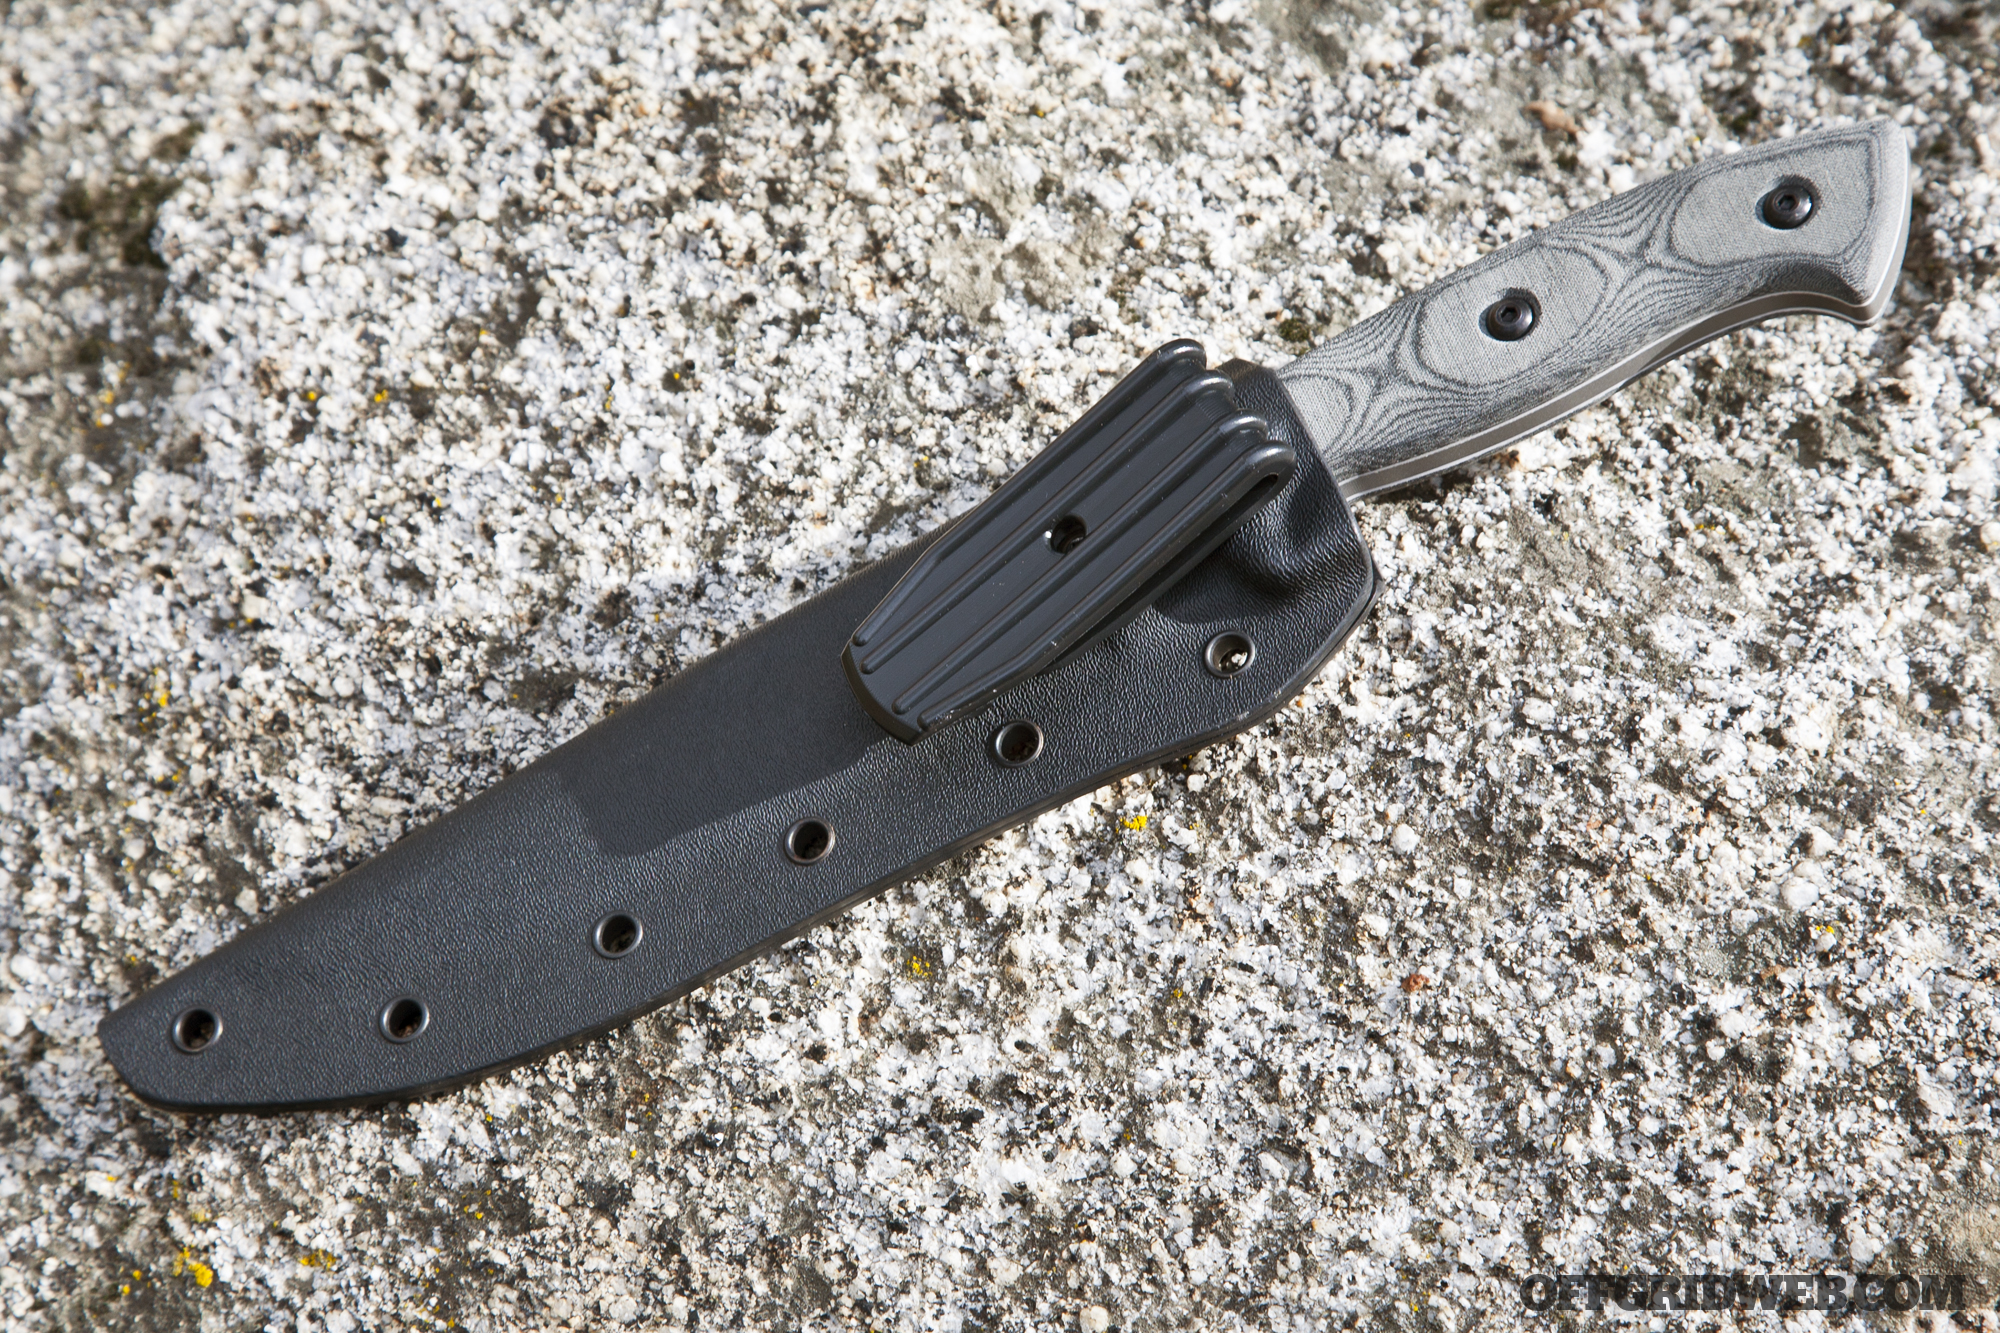
Other TOPS Knives we’ve used include nylon fabric sheaths (which, honestly, we’re not big fans of), but the Hazen Legion comes with a black Kydex sheath. We found that it provides a very secure fit, likely due to the fact that TOPS hand-molds the Kydex around each knife at their Idaho facility.
The sheath has a molded nylon belt clip, which rotates a full 360 degrees and will fit belts up to approximately 2.25″ wide. It also includes grommeted holes for adding a paracord wrap or strapping the sheath to your pack.
Finally, there’s a small TOPS-branded rescue whistle included, in case you need to signal for help at some point. It’s a nice freebie, but we promptly removed it from our sheath to eliminate rattling as we walked.
Our Impressions
From a visual standpoint, there’s no denying that this knife looks great. It’s a subtly modern twist on a classic combat knife design, without any fancy serrations, saw teeth, or other added features we wouldn’t use. The only purely stylistic flair added is some jimping along the spine’s midsection, which doesn’t really hurt anything if you ask us.
The Legion 6.0 is quite comfortable in hand, and is supremely balanced. This makes the knife effortless to manipulate, like an extension of your own arm. We will say that based on the overall proportions of the handle, we think it wouldn’t have hurt to make the blade about 1″ shorter—it’s just a hair more than we found ourselves needing. However, the added length could be handy for batoning firewood and other tasks.
We loved how the micarta scales absorb sweat without getting slippery—you can actually see the material darken as it absorbs moisture, and lighten as it dries out. Jimping on the thumb rest also gives a bit more leverage and grip for precise cuts.
The thick 1095 steel and moderately-obtuse 25-degree grind spell excellent durability for repeated use (although it makes ultra-precise cuts a little more difficult). Also, the Hunter’s Point shape lets it pierce even the hardest materials with ease.
Conclusions
To summarize, here’s a quick list of pros and cons we found after using the TOPS Hazen Legion 6.0:
Blade is slightly (0.5″ to 1″) longer than we felt necessary, and seems a little out of proportion with the handle size
1095 carbon steel may eventually develop cosmetic surface rust/oxidation under heavy use. We did not experience this, and TOPS says occasional oiling of the cutting edge can prevent it.
So, what’s the answer to the question posed earlier: does TOPS Knives make legitimate survival tools you can depend on?
Based on our experience with the Hazen Legion 6.0, the answer is an unequivocal yes. Some models in the TOPS lineup are certainly flashier, but this particular knife is a purpose-built blade that can stand up to the rigors of hard daily use—it’s the real deal, and certainly not just a show piece. We’d wager that anyone who says otherwise hasn’t actually used it.
Sure, it’s on the expensive side of the spectrum, but it’s a hand-finished, American-made, lifetime-warrantied blade. If you can afford a survival knife in this price range, we’d have no hesitation recommending the Hazen Legion 6.0.
For more information on TOPS Knives, visit TopsKnives.com.
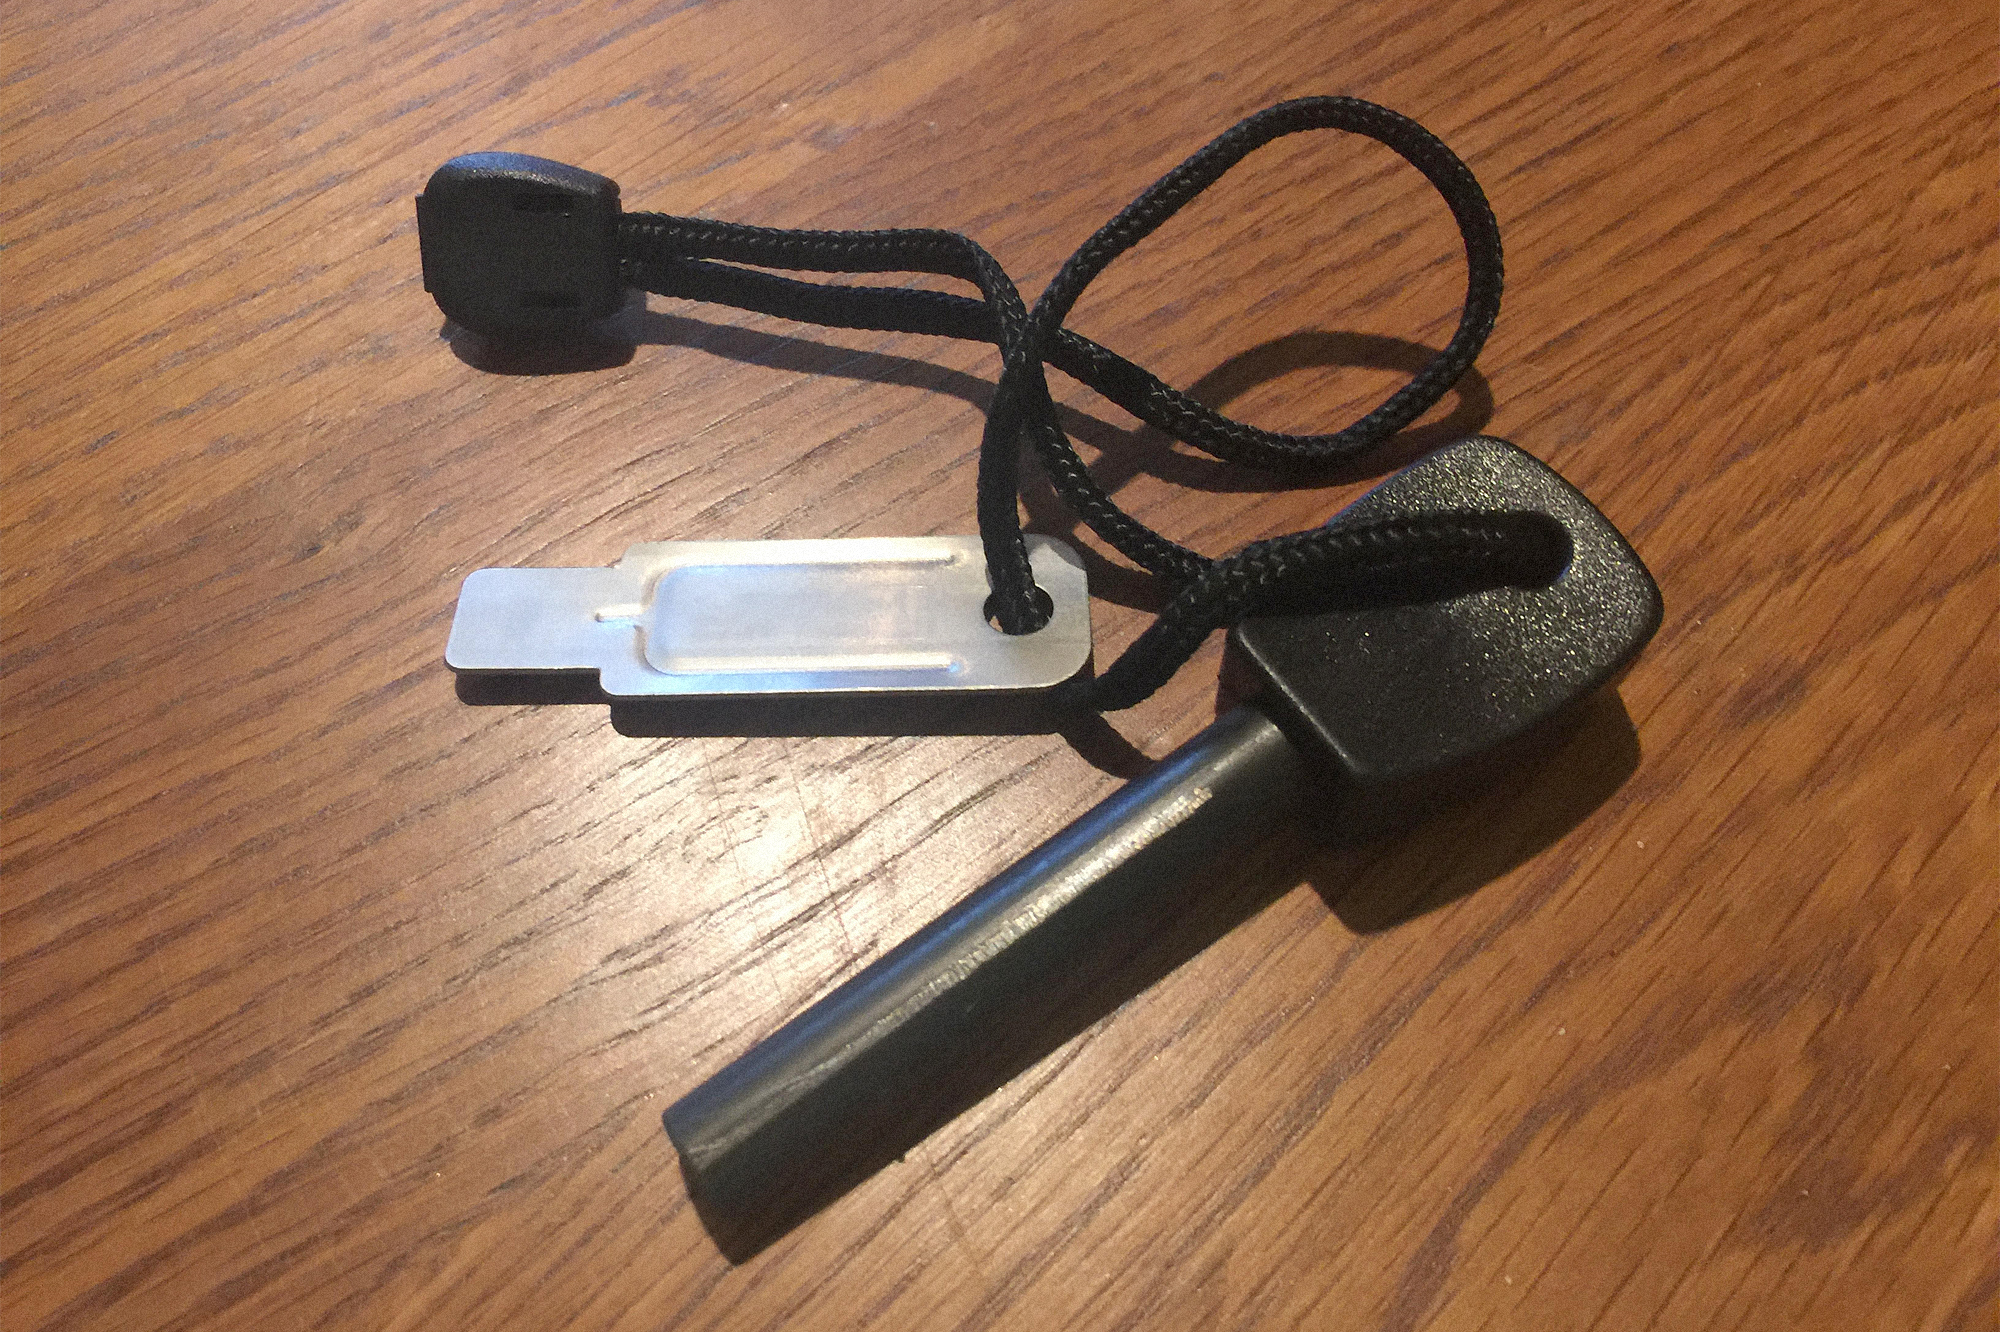
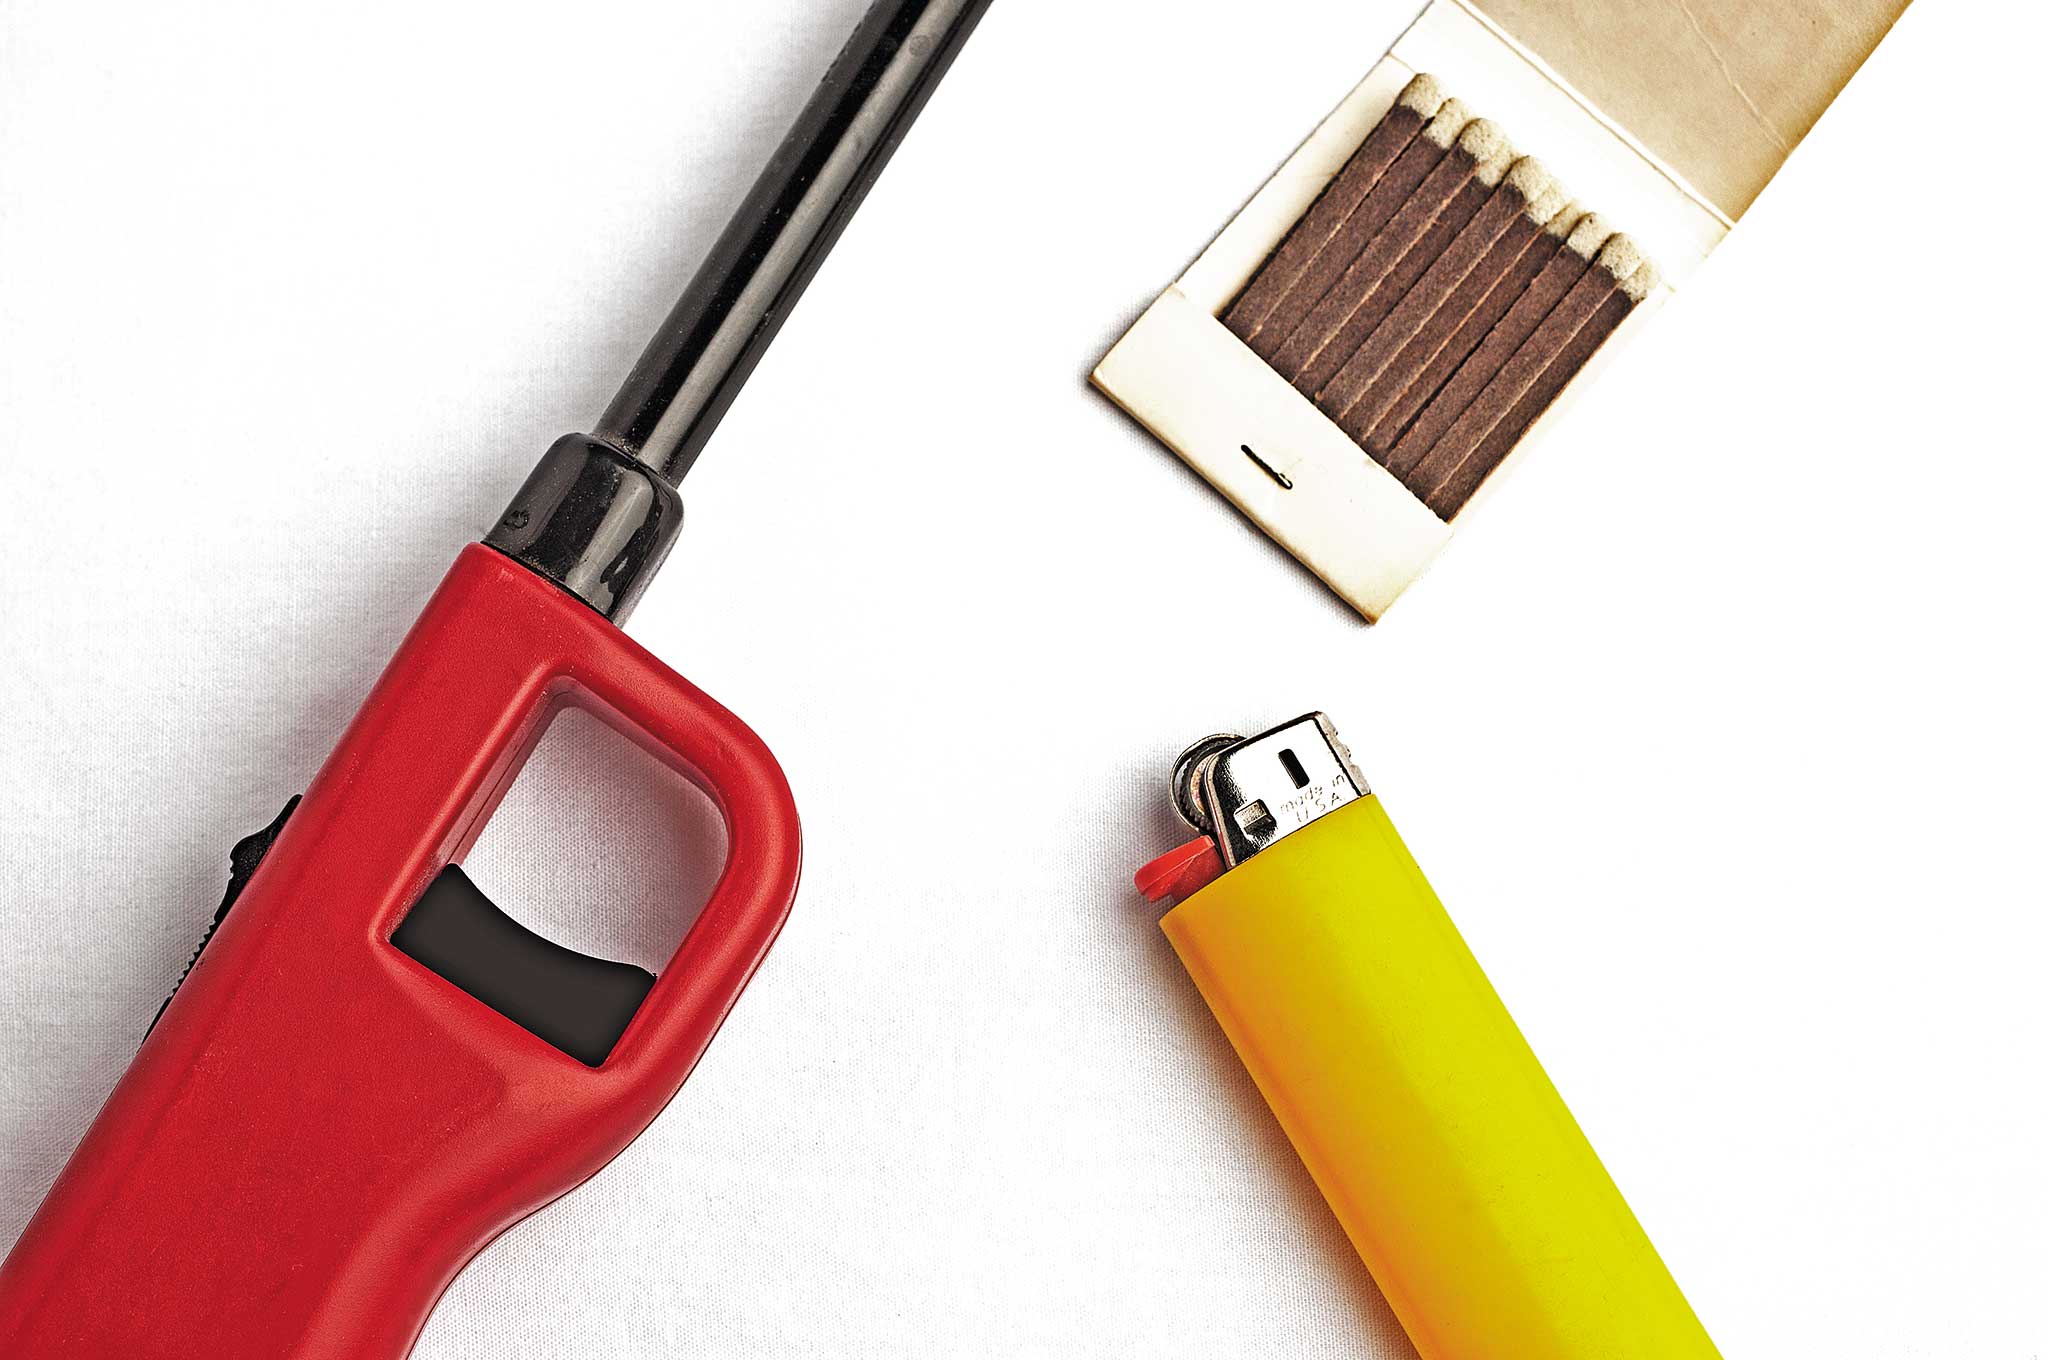
We’re often told by purported survival experts on TV and on the internet that the most reliable and dependable method for starting a fire in the wilderness is a ferro rod (also called a fire steel). On the surface, this claim makes sense—the ferrocerium rod and steel striker are compact, have no complex mechanical components to break, and can throw a nice big shower of sparks with ease. You can even strike a ferro rod against the back of some knives.
We have nothing against ferro rods, and know that they can serve as effective fire-starters. However, many people claim that there’s a superior survival fire-starting technology available: the lighter. You may think a lighter is unreliable or overly complicated compared to a ferro rod, but we’d encourage you not to jump to that conclusion just yet.
This 22-minute video from Weekend Wanderer on YouTube makes a pretty compelling case for using a lighter as your primary survival fire source:
If you don’t have time to watch the whole video, here are some key points:
Historically, we have progressed from striking rocks together, to striking flint against steel, to striking matches, to simply flicking on a lighter for an instant flame.
The invention of ferrocerium in 1903 made modern lighters possible. However, rather than using these modern lighters, many survivalists continue to stick with the older ferro rod tool.
The video host claims that “this seems like it’s going backwards technologically.”
The host also makes several comparisons of the effectiveness of lighters and ferro rods:
Tinder is generally more difficult to ignite with a shower of sparks than with an open flame. This means you’ll usually have to strike the ferro rod multiple times to get a fire going.
Ferro rods are typically heavier than plastic lighters.
Ferro rods require a sharp metal striker of some kind, and must be operated with two hands. Lighters are self-contained and can be ignited with one hand.
Lighters may be slightly more susceptible to moisture, but will usually work within seconds if shaken or blown dry.
Both ferro rods and lighters are marginally affected by cold weather.
Ferro rods are more expensive than plastic lighters, and can’t be purchased at any gas station or convenience store like lighters can.
Lighters can be purchased in any color you want, so you won’t lose them as easily.
While we don’t necessarily agree with everything the Weekend Warrior host says, we’d agree with his point that lighters can have considerable advantages over ferro rods in many cases. No matter what, your survival kit should include multiple fire-starters—regardless of which device is your first choice.
We want to know: what’s in your fire-starting kit, and which method is your favorite? Tell us your thoughts in the comments below.