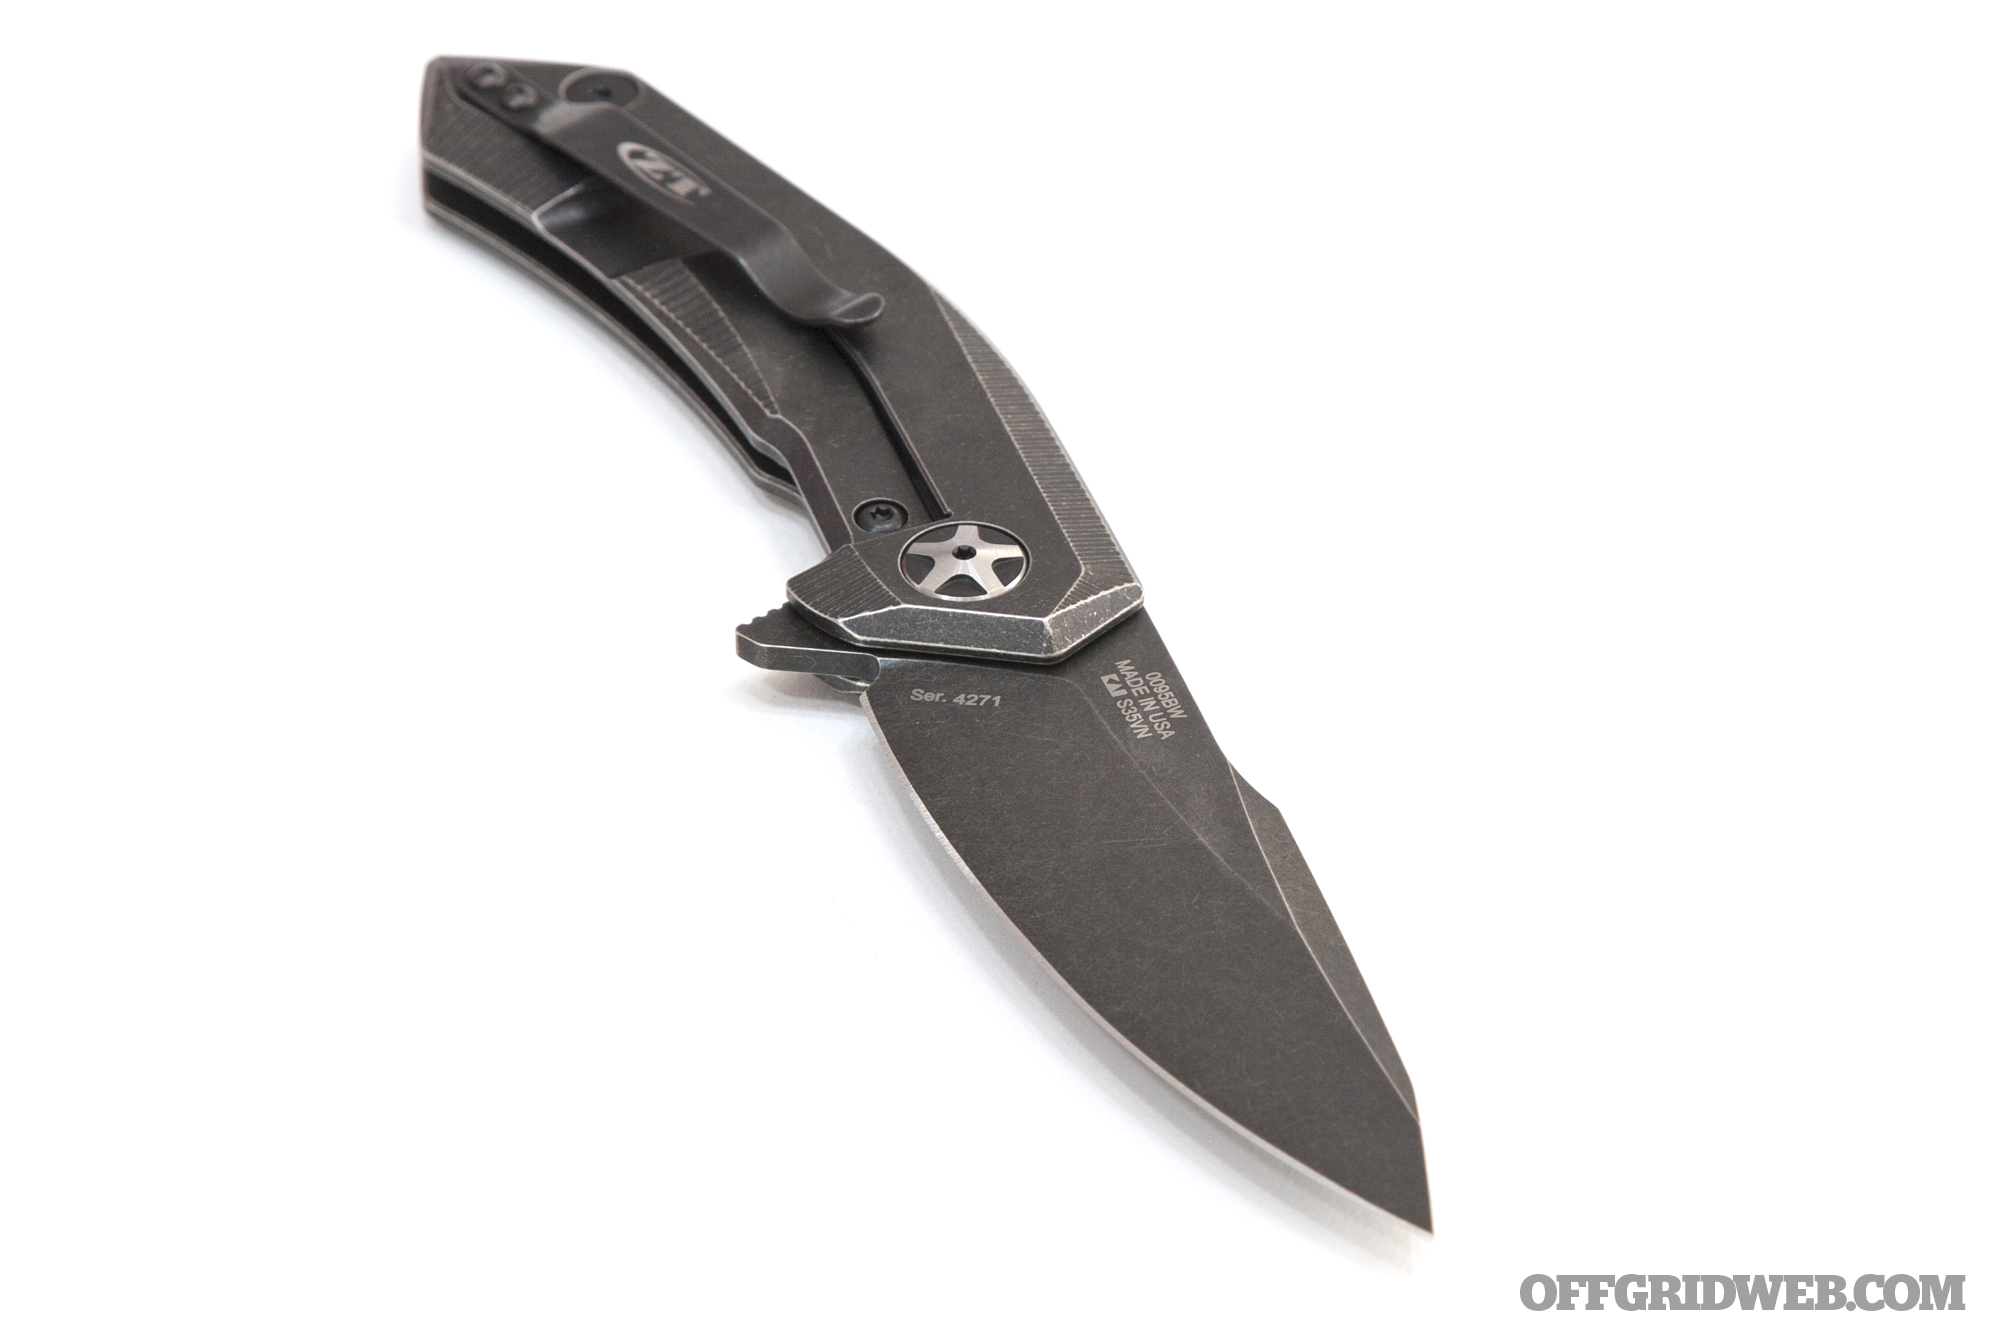
Many of us carry folding knives as part of our every-day carry gear, and there are countless reasons to do so. These small blades come in handy for all sorts of mundane daily tasks, including slicing open packages, removing zip-ties, and cutting up fruit for a mid-day snack. However, a folding knife can also be an incredibly powerful self-defense tool in emergency situations.
With the proper techniques and training, the folding knife you carry can disable an armed attacker in the blink of an eye. Obviously, if you’re able to run away from a deadly threat, that should be your top priority. But if there’s nowhere else to go and you’re in serious danger, knowing how to use the folding knife as a defensive tool can save your life.
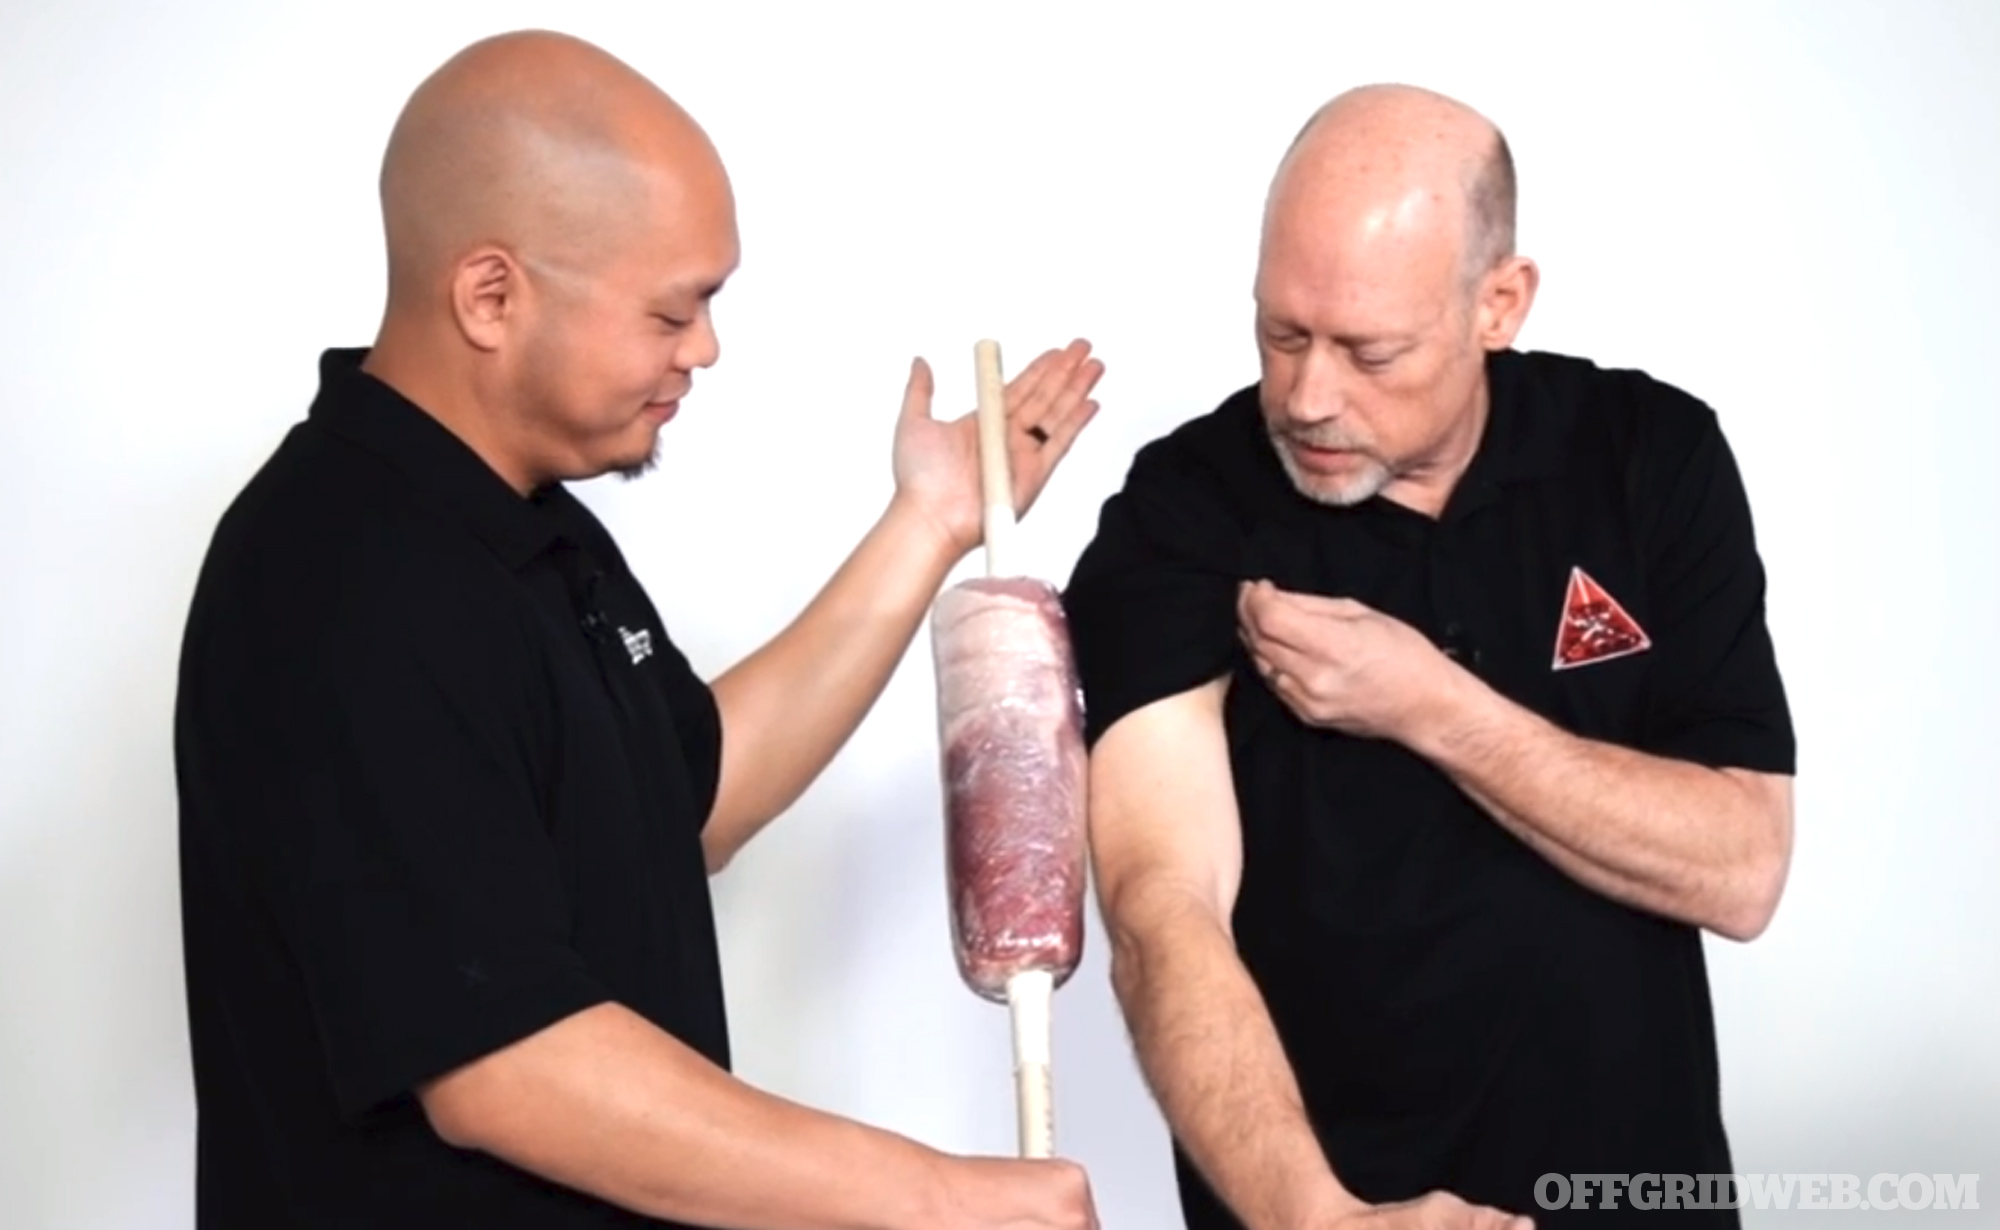
Michael Janich uses a chunk of pork on a PVC pipe to demonstrate a knife’s devastating effect on human flesh.
In the following RECOILtv video, editor Patrick Vuong chats with Martial Blade Concepts founder Michael Janich about the effectiveness of a folding knife for self-defense. Janich is a frequent contributor to our magazine, and an expert at edged-weapon combatives.
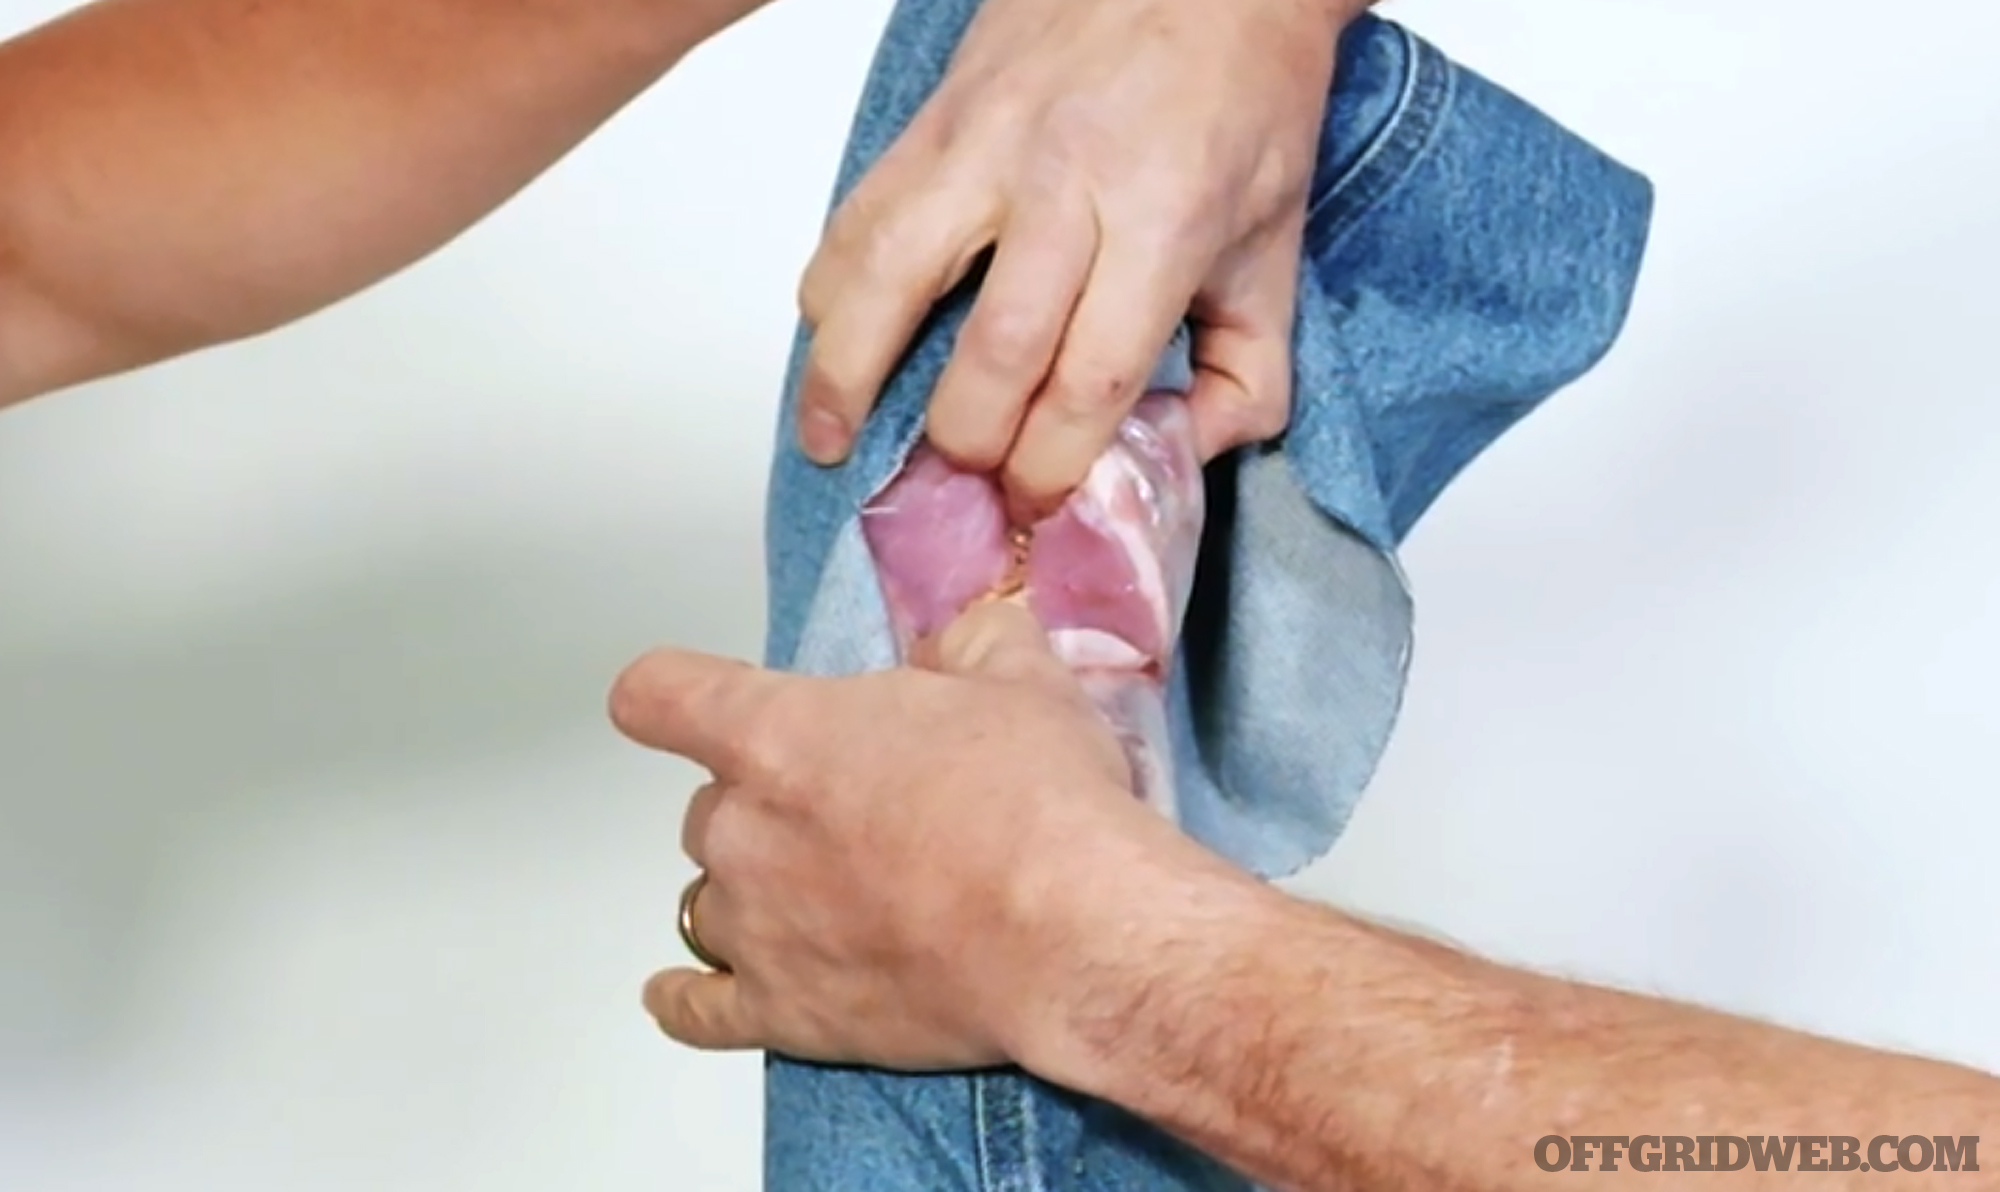
Even through thick jeans and with minimal effort, the blade cuts cleanly to the bone.
In this 5-minute clip, Janich demonstrates the power of a single strike with a sharp knife through thick clothes. The Spyderco Delica wharncliffe slashes straight down to the bone of his “pork man” flesh analogue. Janich then discusses how to cut an attacker’s forearm and upper arm to disable the limb, and how to deal a finishing blow to the quadriceps muscle.
For more tips on self-defense with knives, tactical pens, firearms, and empty hands, check out MartialBladeConcepts.com. For more of our video content, be sure to follow RECOILtv and the SHTF/OFFGRID channel.
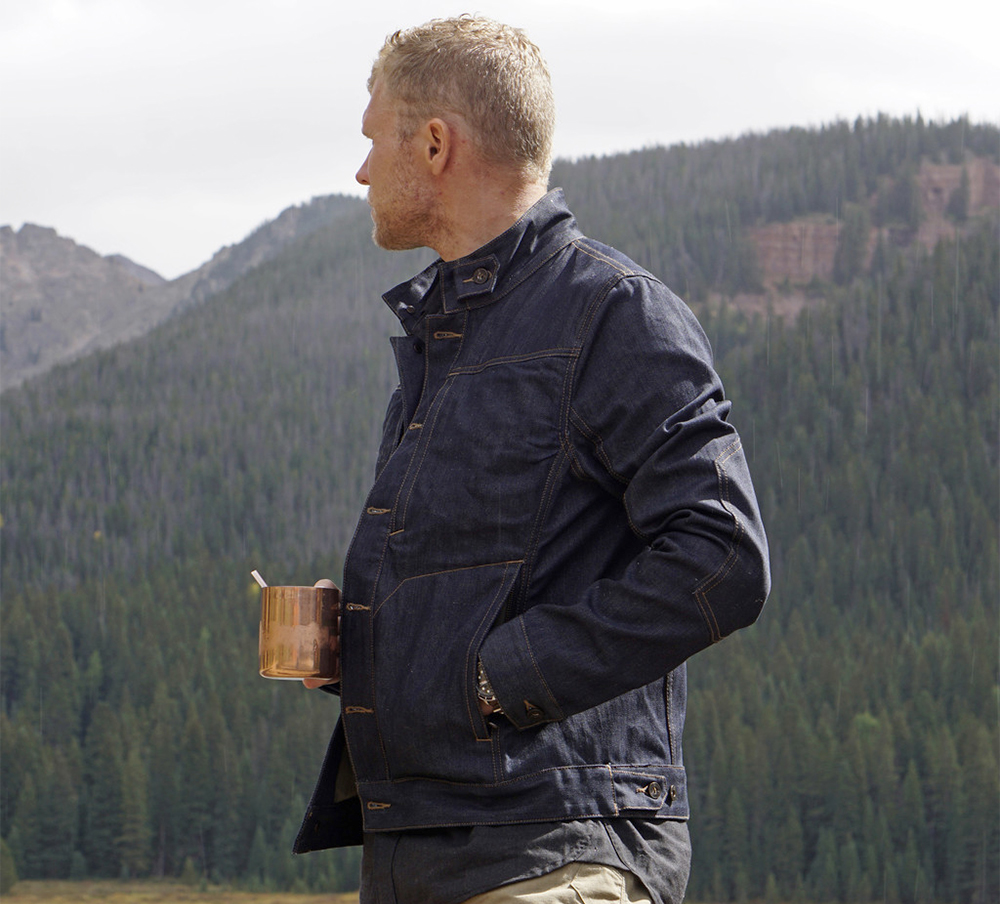
Denim has been a popular fabric choice for outdoor apparel and workwear since the late 1800s due to its rugged toughness. Almost everyone owns at least one pair of denim jeans, and jackets made from the material have also seen a recent resurgence in popularity — some might even rock both for a full Canadian tuxedo. No matter how you wear your denim, it provides a classic look that’s both functional and durable.
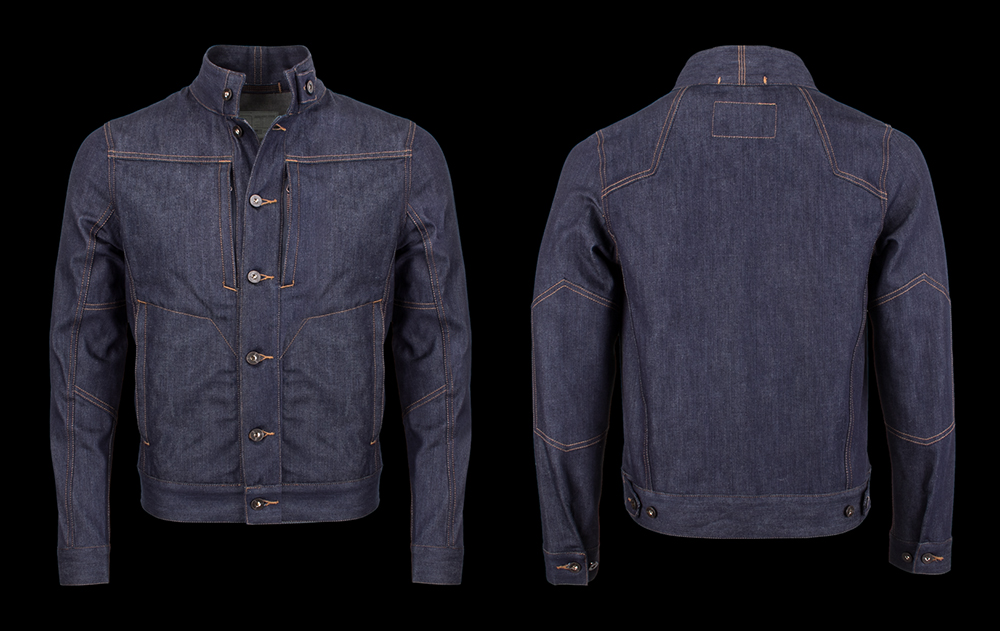
Triple Aught Design has taken the old-school denim jacket into the modern age with a new piece of apparel called the Interval PD jacket. The letters “PD” stand for performance denim, a fabric that’s produced for TAD at America’s oldest working denim mill, the White Oak plant in Greensboro, North Carolina. It’s sanforized (i.e. pre-shrunk) and contains 99% cotton and 1% elastane for added flexibility.
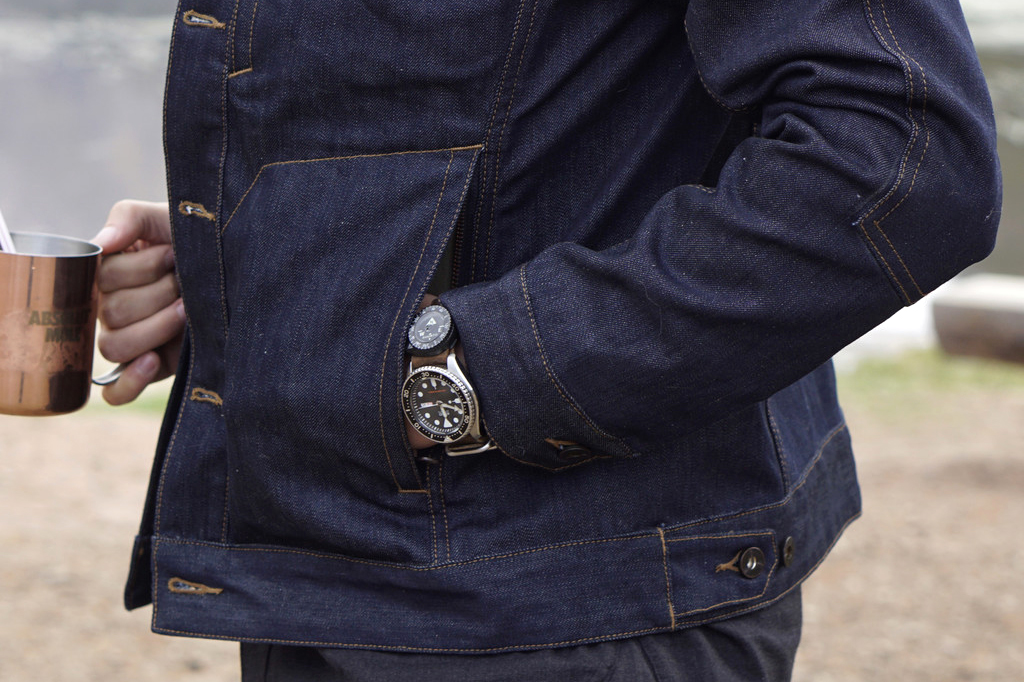
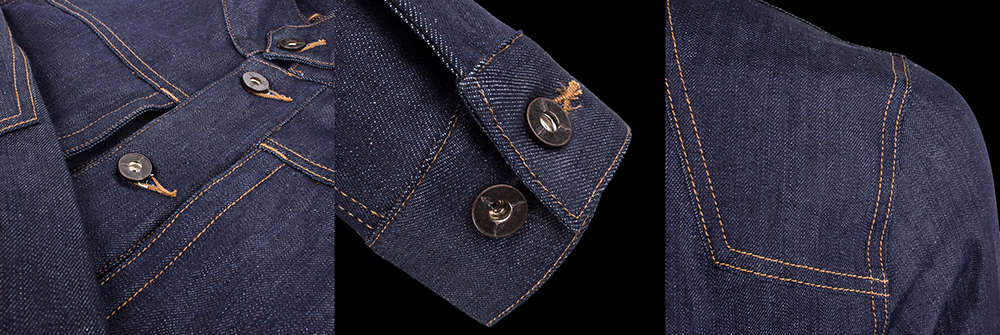
The TAD Interval PD jacket is made in the USA with strategic reinforcements for maximum wear resistance. Its standard fit is designed to permit mobility, and resist printing for wearers who carry concealed weapons. Buttons on the collar, cuffs, and waist can keep out drafts in colder weather.
This jacket offers four simple pockets:
Two zippered hand pockets with internal open-top pockets for smaller items
Two zippered upper chest pockets for maps, cell phones, or paperwork
The Triple Aught Design Interval PD jacket is available at an MSRP of $220 in sizes ranging from small to XXL. For more information, go to TripleAughtDesign.com.
Disclaimer Skills and gear described in this article can be dangerous. Even with training, proper gear, and common sense, you can still get injured. The materials provided are for illustrative purposes only. Any use of the information contained in this article shall be solely at the reader’s risk. This publication and its contributors are not responsible for resulting injury.
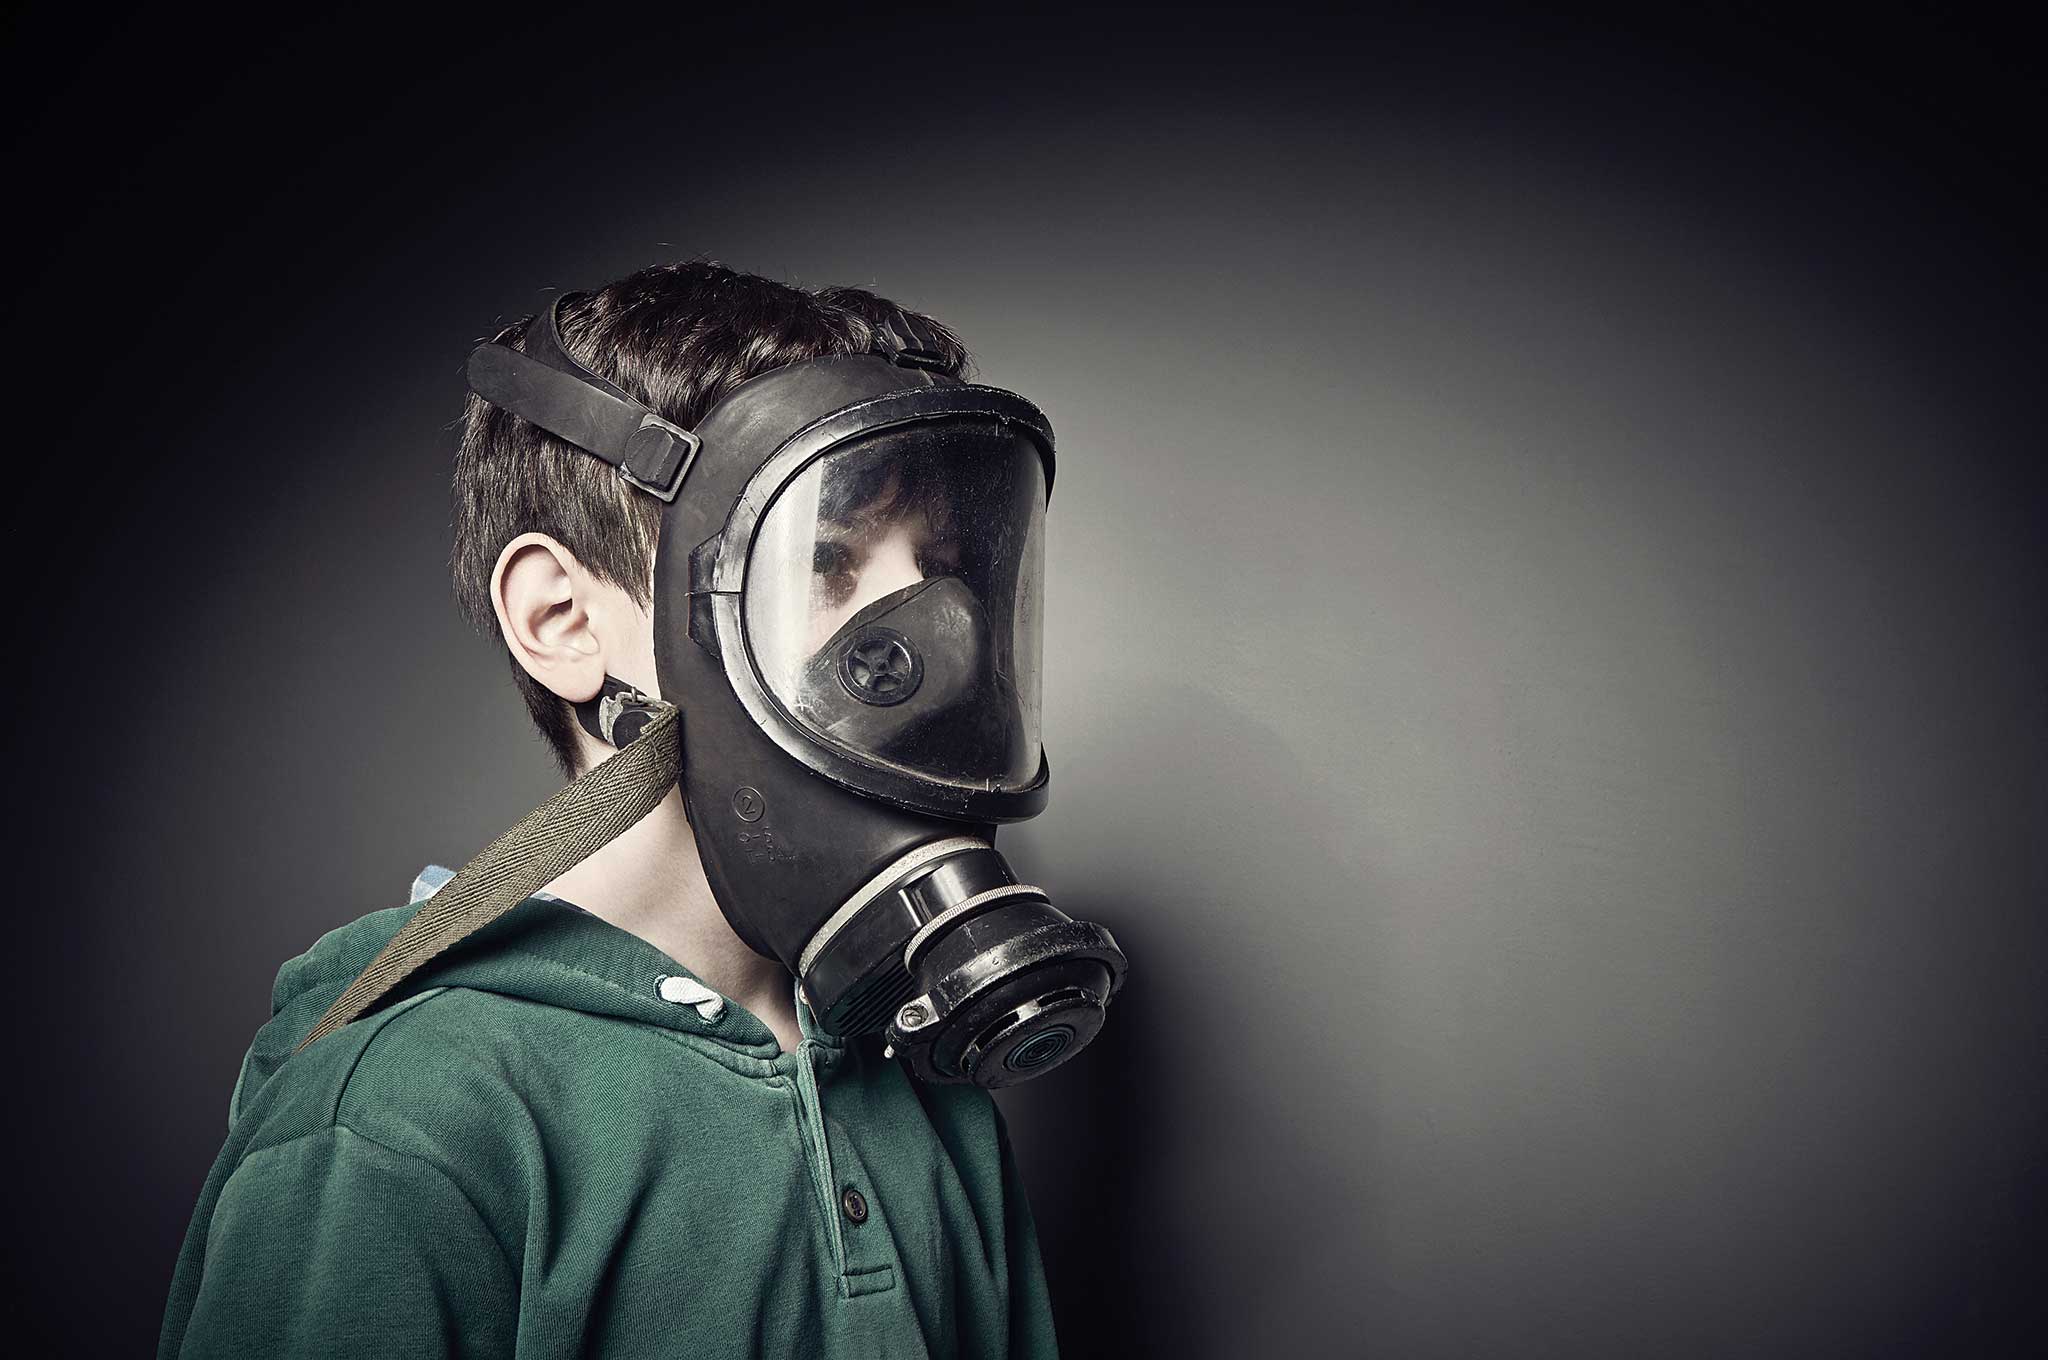
We see them all the time in movies, TV shows, and video games. Whether it’s a killer outbreak, a chemical attack, or just a plain ol’ run-of-the-mill apocalypse, this ominous piece of gear has become synonymous with doomsday.
But are gas masks really practical? Or are they more prop than prep, providing a false sense of security? With so many survival products competing for our preparedness dollars, are they really worth the cost?
In this article we explore the gas mask basics, set aside myth and fiction, and provide in-depth answers to some of the most common questions.
The History
The concept of the gas mask dates back to antiquity; reportedly the ancient Greeks used common sea sponges to filter out smoke and other toxic substances. Most of these primitive masks were woefully ineffective, but perhaps they were better than nothing. Humans have never stopped trying to develop more effective forms of protection from toxic substances in the air.
What’s generally acknowledged as the modern-day gas mask dates back to the early 1900s.
During World War I, soldiers encountered the first full-scale use of chemical weapons on the battlefield. As result of this new threat, gas masks became so important to the battlefield solider that they were considered second only to the soldier’s rifle. Troops were expected not only to train with their masks, but also know how to clean and repair them.
Although there have been many significant advances in technology and materials since those early masks, the basic principle remains the same: filter out hazardous airborne contaminants and allow the user to breathe safely in hostile environments. One hundred years later, law enforcement and military personnel around the world still use and train with gas masks. In today’s unpredictable global environment, however, more and more civilians are also considering the benefits of including a gas mask in their personal survival kits. Up until 2014, Israel’s government distributed free gas masks to its civilian population. As late as 2013, Israelis routinely lined up to collect their gas mask kits and for demonstrations on how to use the gear correctly.
The Basics
The traditional gas mask, sometimes called a respirator, protects against noxious contaminants. Although the science can get intricate, the basic purpose of the modern gas mask is designed to filter out harmful substances while allowing in clean, breathable air. The full-face mask also serves to protect the eyes and other vulnerable tissue, while allowing the wearer to see and communicate clearly.
While wearing a gas mask can offer significant protection in some environments, it’s important to understand what it can and can’t do, and to be well trained in its correct use.
A gas mask will not protect the user against chemical agents that can be absorbed directly through the skin, such as sarin, mustard gas, tabun, and VX. (Sarin, for example, is colorless, odorless, and tasteless, but is rapidly absorbed through the skin and is many times more deadly than cyanide gas.)
Also, a standard gas mask will filter out soot and keep smoke out of your eyes, but it offers little to no protection in a fire. Depending on the type of filter used, a gas mask may provide short-term protection against some of the particulates found in smoke, but it won’t protect against oxygen deficiency — smoke from a fire doesn’t contain enough oxygen to support life. This is why firefighters use air-supply respirators equipped with a tank of pressurized air while working in a smoke-filled environment.
Today’s gas masks are designed for everything from riot control and warfare to highly specialized industrial applications and just about everything in between. For purposes of this article, however, we’ll focus on gas masks available to ordinary civilians looking to add another level of security to their crisis preparations.
What to Look For
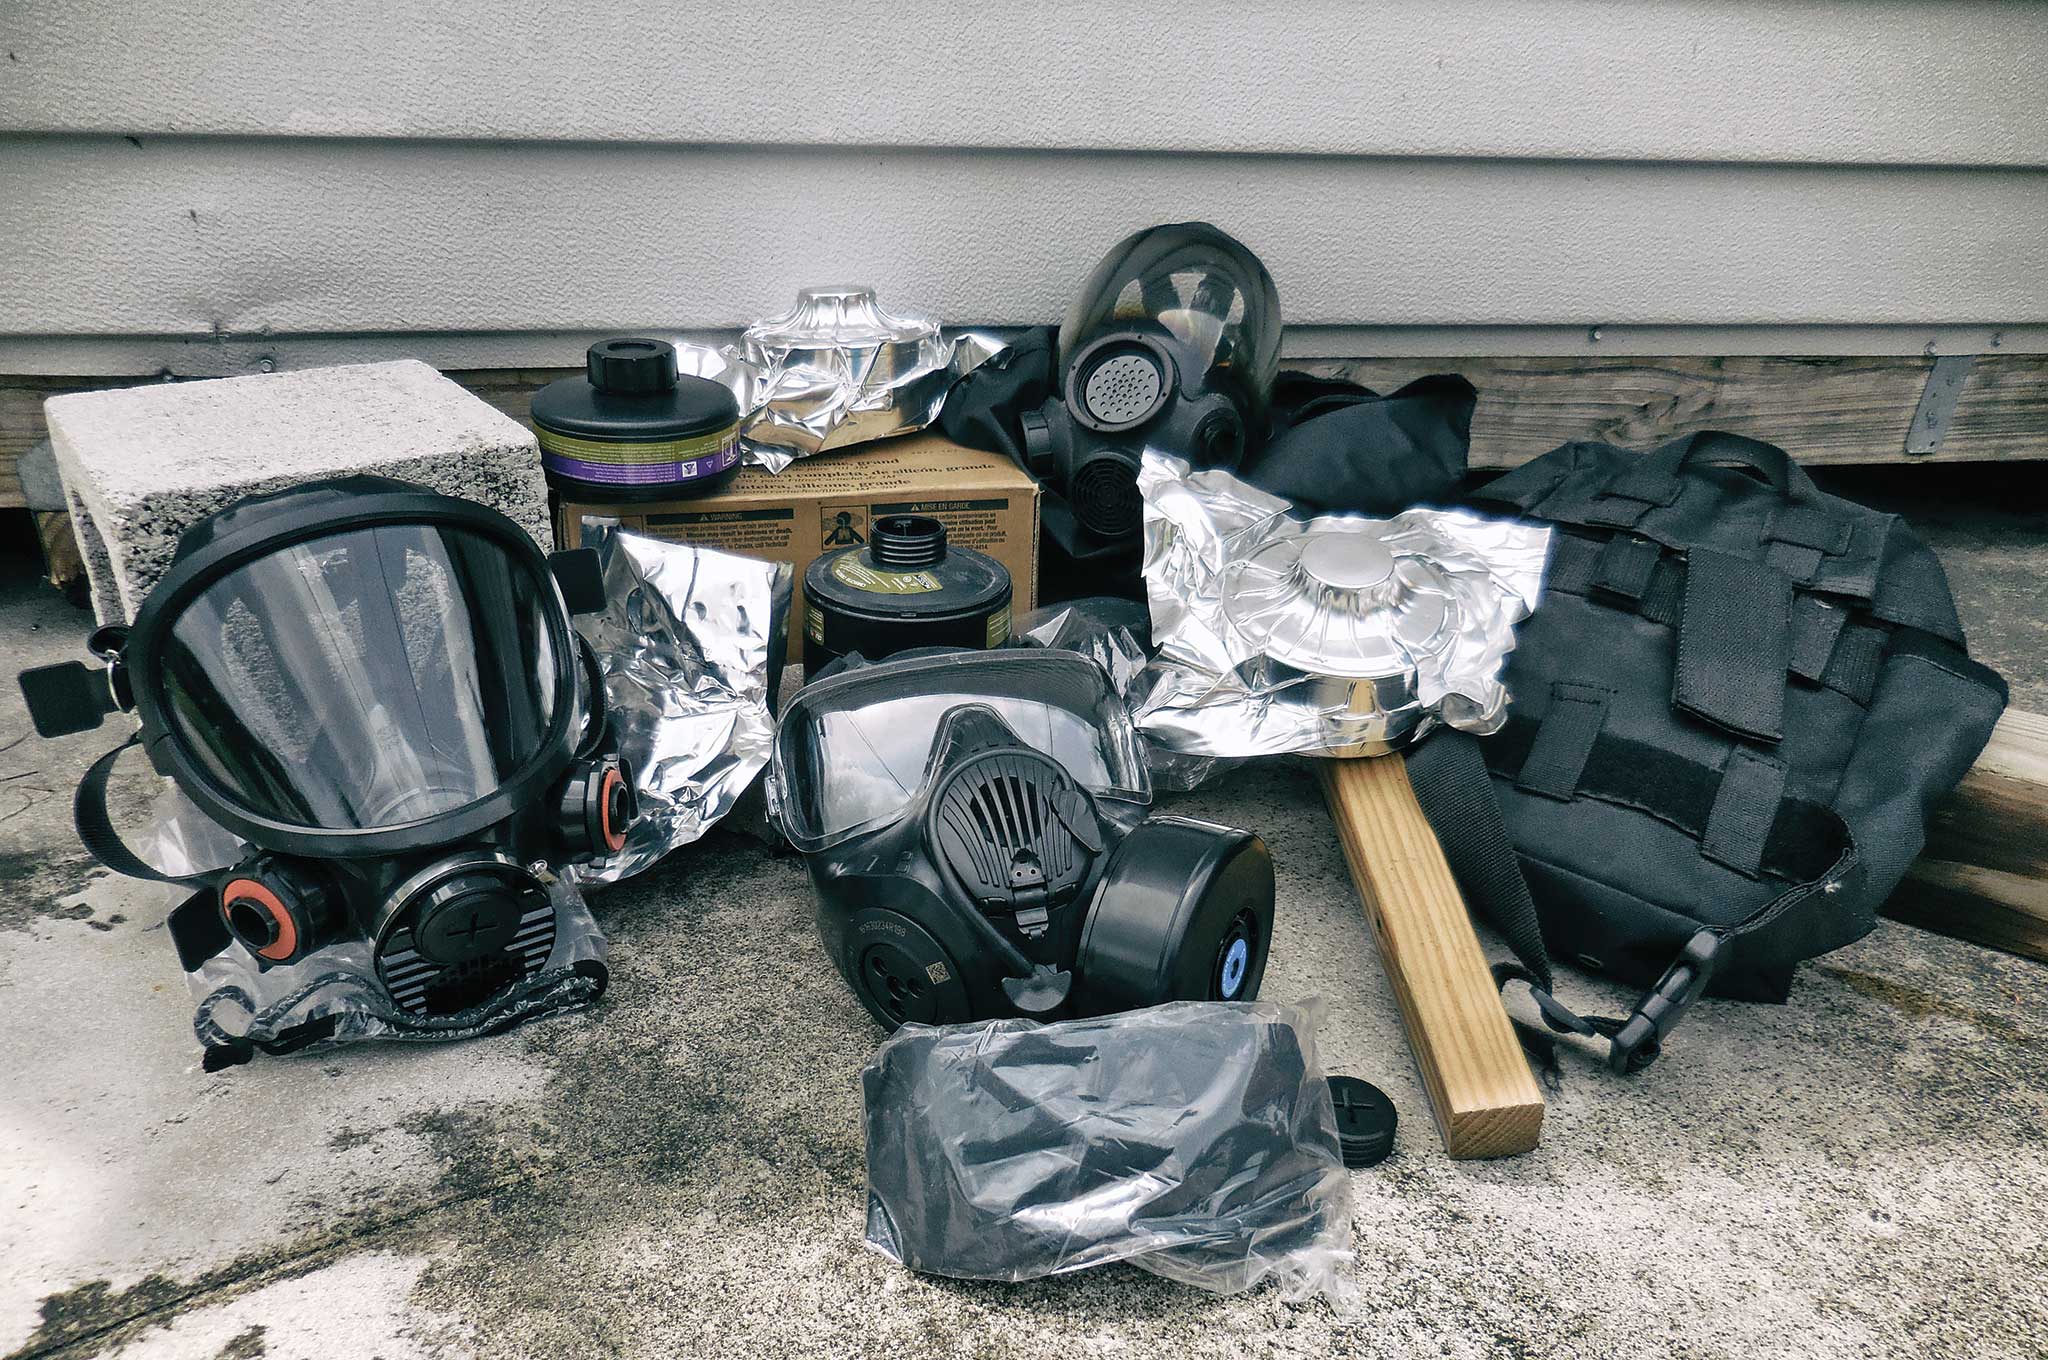
Gas masks, and other chemical protective gear, are considered a prohibited item for export, but are legal for sale in the USA. (Recently the Venezuelan government passed a ban on the import of gas masks intended for use by the public.) Naturally, this is one item that you really need to get right the first time — there’s no trial and error when it comes to deadly airborne contaminants. To obtain the right mask that offers the maximum protection, you’ll need to know what to look for, and you’ll need to choose wisely. Look for:
A Good Fit: Select a size and shape that fits your face securely. Most gas masks available today are constructed of an impermeable polymer material and are secured by adjustable straps to ensure an airtight fit. Also, look for one that provides a comfortable seal while you’re performing physical activities (e.g., running, shooting, and during filter changes.) Masks with filter connection points on the left and right side offer more flexibility, allowing you to attach a new filter before detaching the spent one.
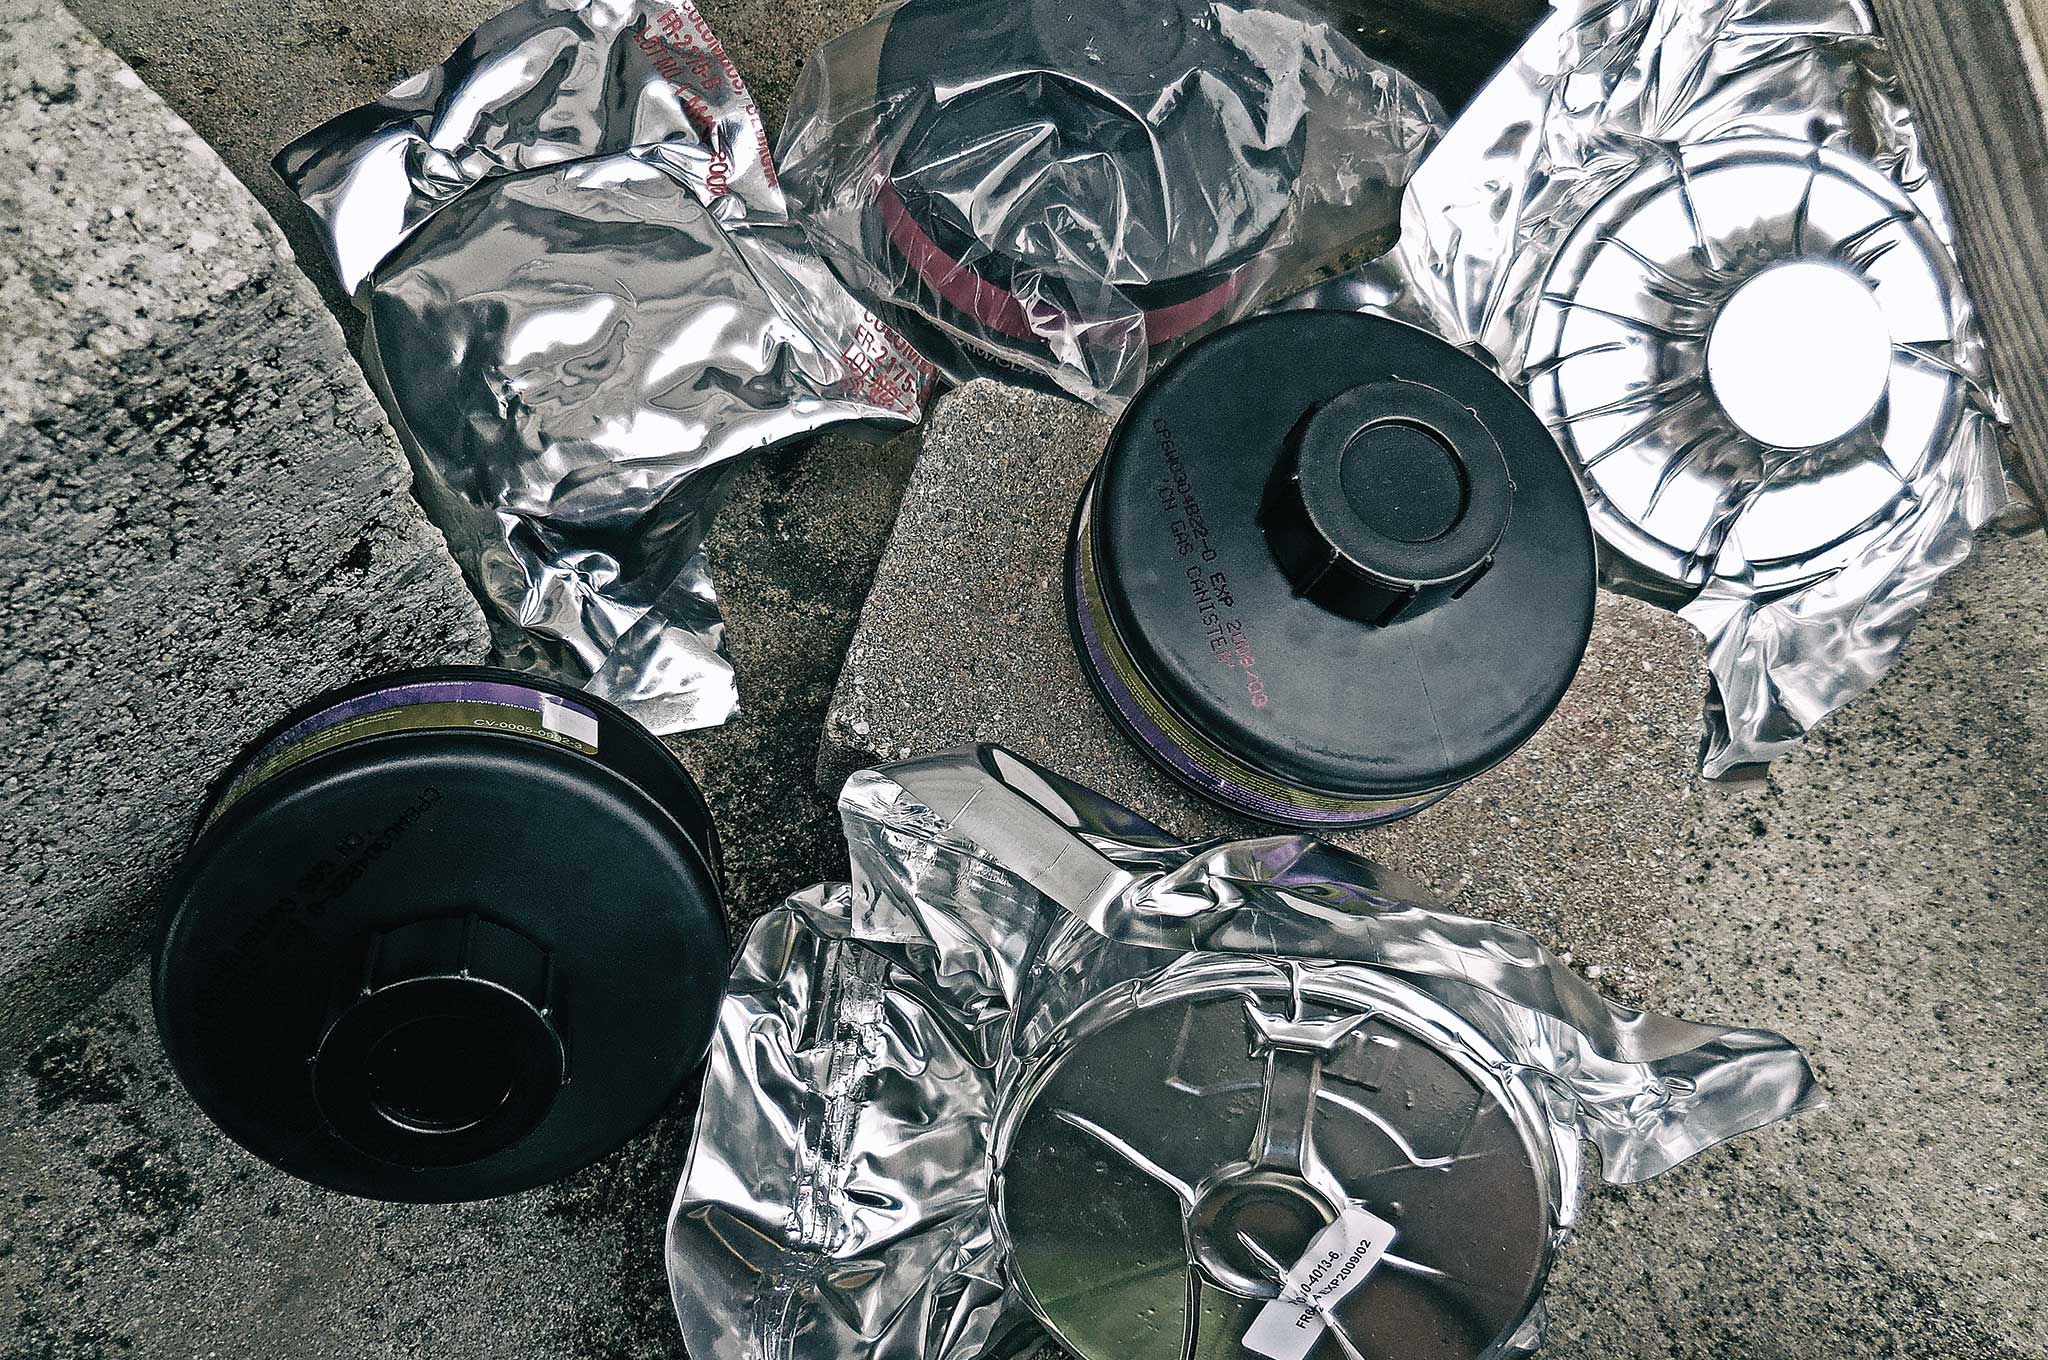
The Right Rating: Look for a mask and filter(s) rated for chemical blowing and riot control agents (CBR/RCA) and nuclear, biological and chemical (NBC) rating. Surprisingly, not all masks protect against these risks. Make sure replacement filters are vacuum sealed and properly rated, too. Once you’ve got your masks and replacement filters, store them in a cool, dry place away from sunlight and humidity.
Up-to-Date Masks: There are many surplus gas masks available to the public — Russian, Israeli, Chinese, etc. Some military surplus models offered at bargain prices seem like a tremendous deal, but they’re inexpensive for a good reason: They’re outdated, defective, or just plain junk. These masks (and filters) have been sitting in storage for many years past their recommended expiration date — not a good thing since materials degrade over time and compromise the mask’s integrity and efficiency. In addition, many of these outdated designs have been recalled due to serious design flaws and the use of toxic materials. You can definitely save money, but is it worth the risk? That’s not to say that all surplus masks are a waste of money; keep in mind, “caveat emptor” applies.
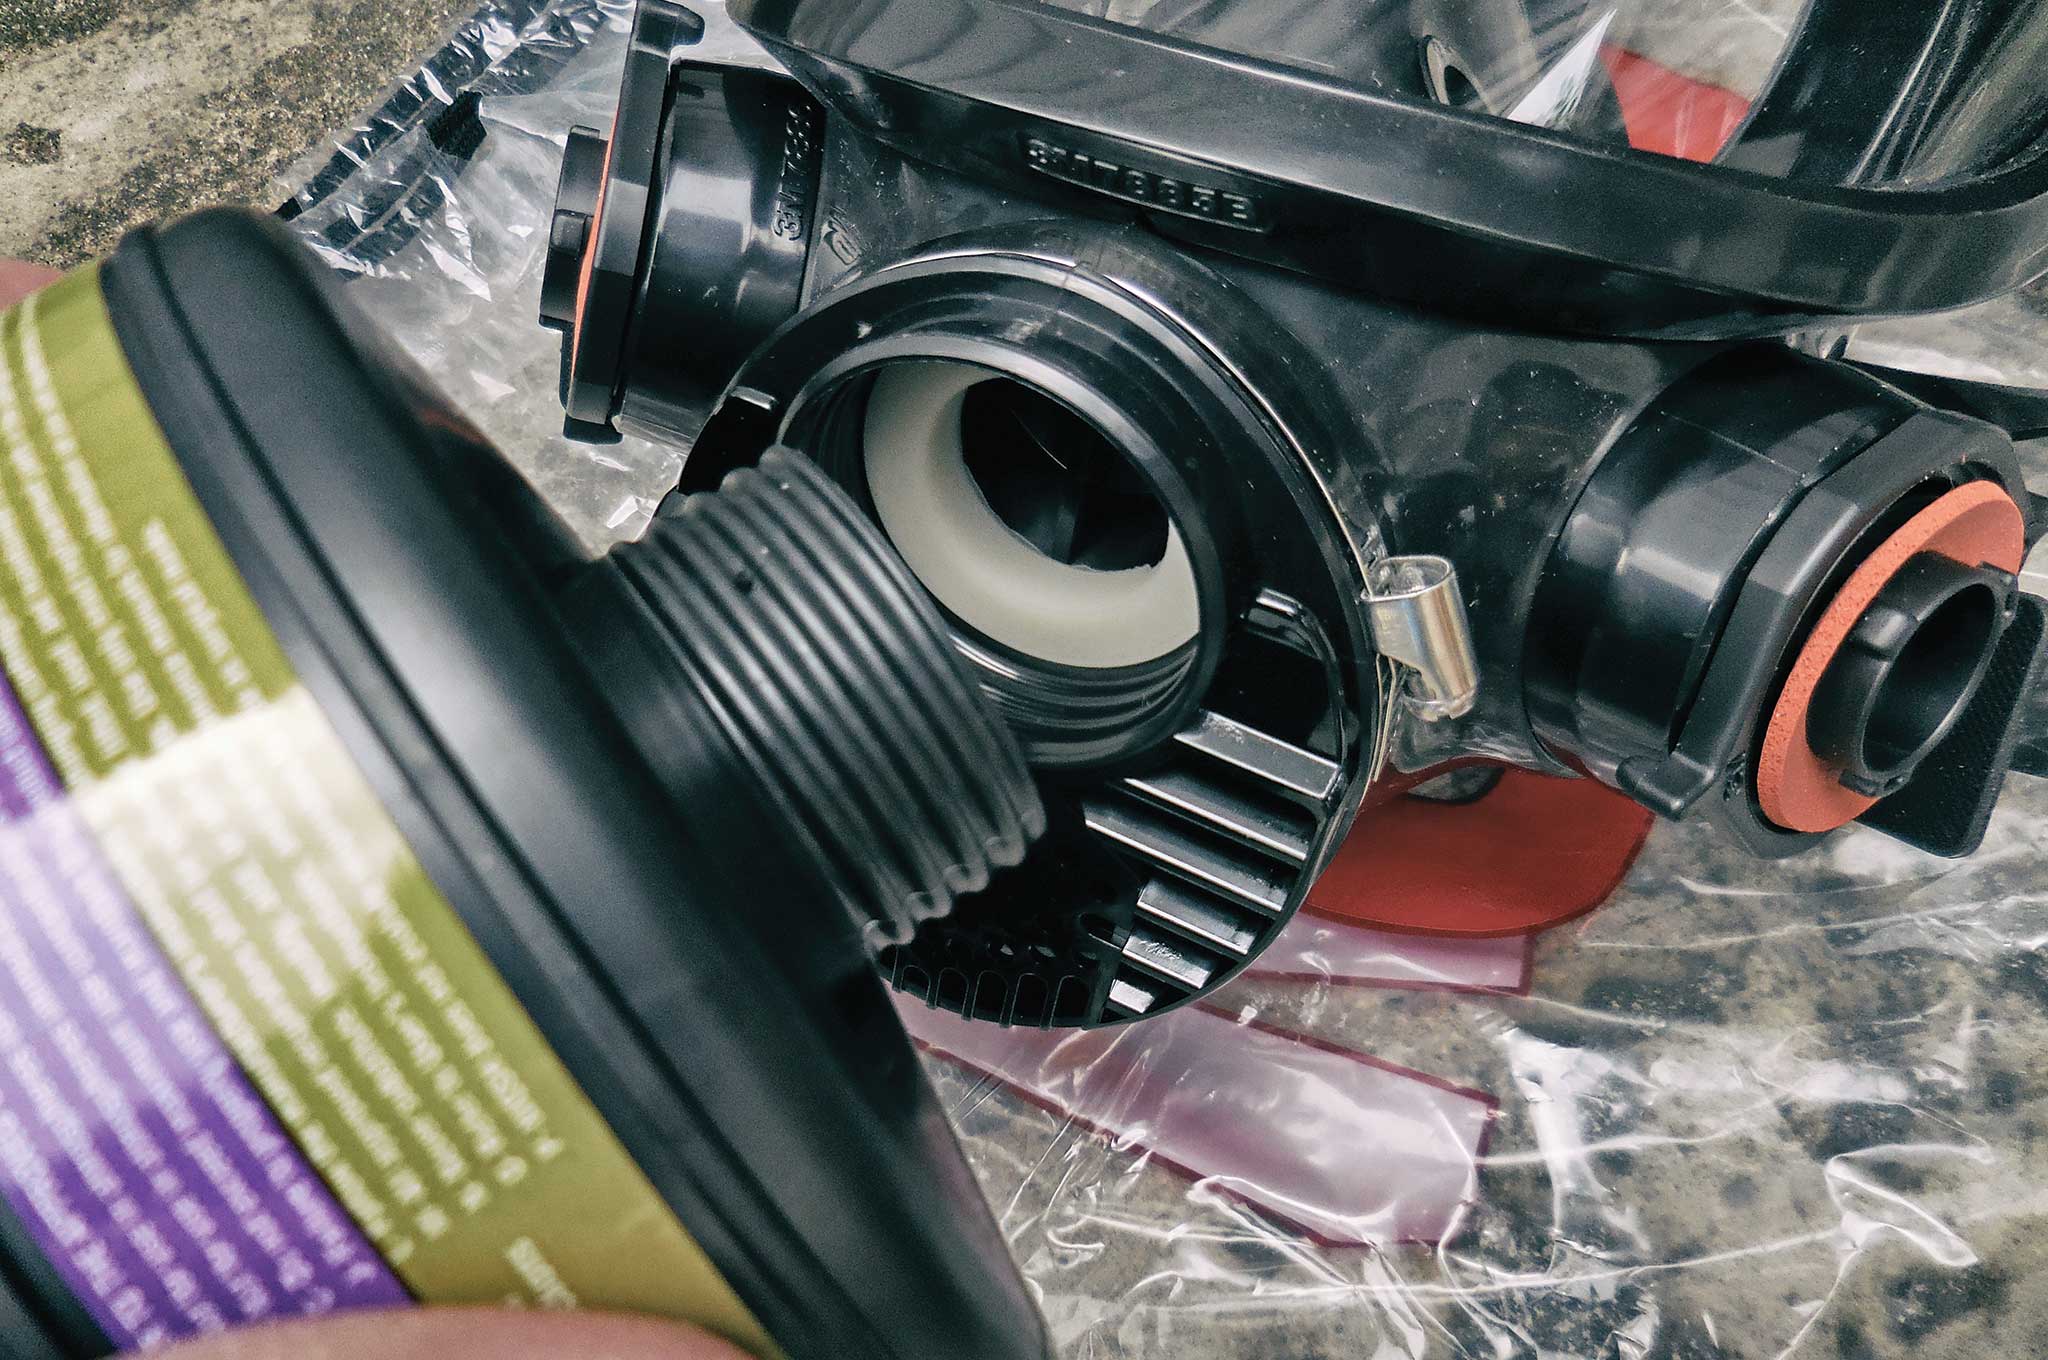
To install a new filter, remove all plugs and caps from the canister. Carefully screw the canister into one of the canister inlets on the mask and hand tighten for a good seal with the gasket. Make sure that the threads don’t bind, and avoid over tightening.
Replacement Filters: A gas mask is useless without a proper canister/filter. Many filters contain activated charcoal and other chemicals to absorb (filter out) harmful agents. Once the mask is sealed around the face the only air entering the mask will first need to pass through the filter media. Filters have a limited shelf life and need to be replaced once expired. Make sure that you stock up on replacement filters for your mask. If you’re in a situation where you actually deploy your mask, you’ll know it’s time to swap out a filter when breathing gets more difficult. Practice changing the filter with the mask on to ensure you can do it by yourself when SHTF.
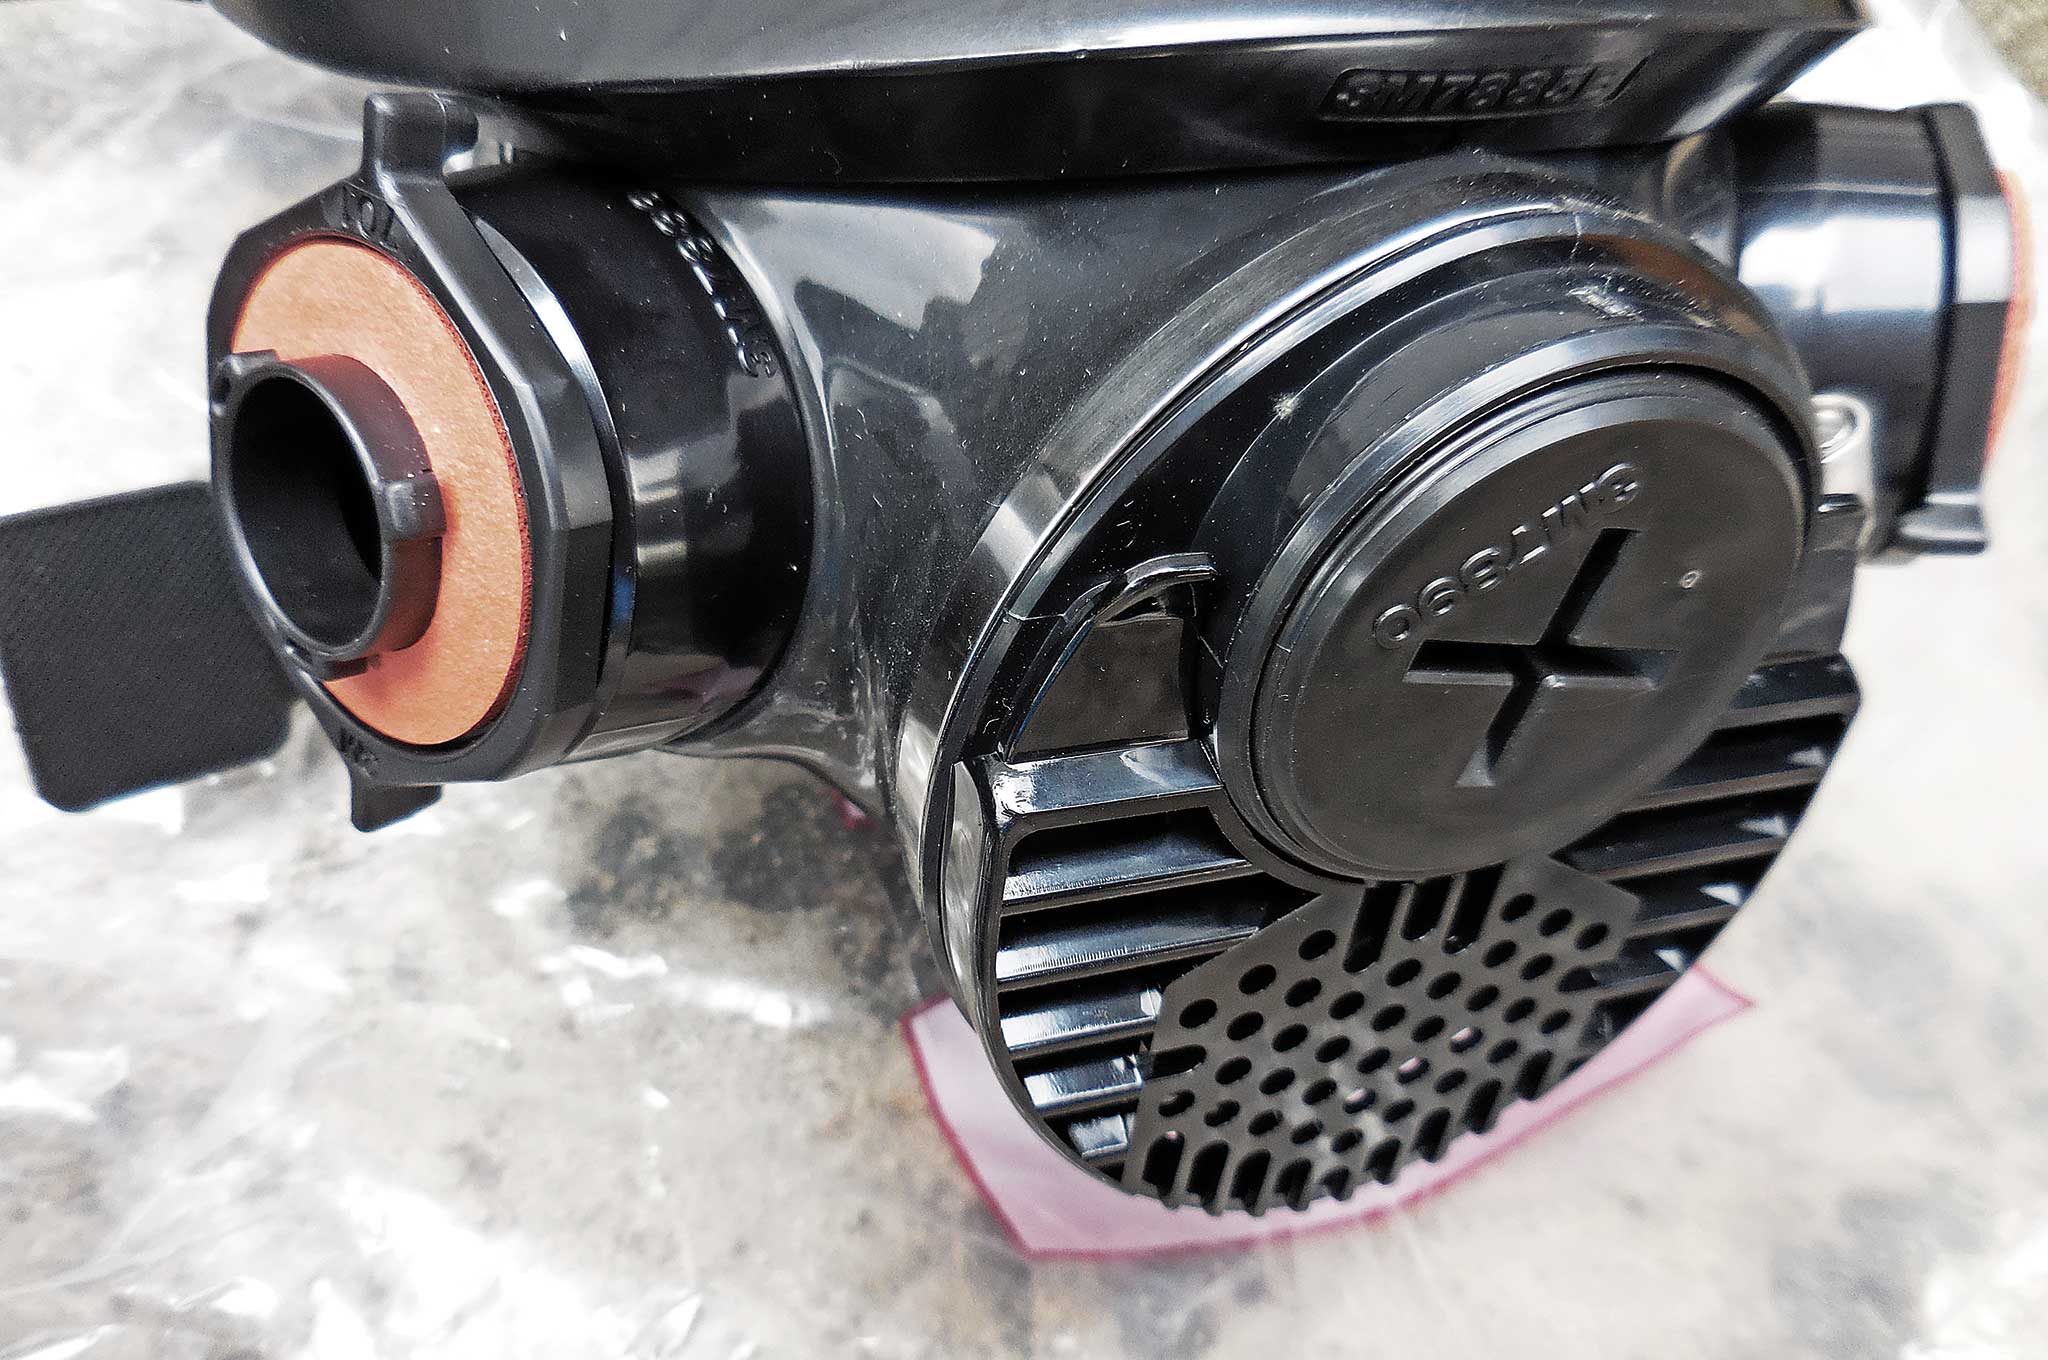
Some masks come with a drinking plug that allows you to connect a water tube to a drinking compatible water container or canteen. With this model, a simple flip of a lever moves the interior mouth piece into position for easy drinking without removing the mask.
Extra Features: Some masks come with a hydration port that allows you to connect a tube to a compatible water bladder or canteen. This feature allows the wearer to stay hydrated without having to remove the mask. Other useful features to look for include corrective vision compatibility for folks who wear prescription glasses and an electronics port used to connect in-mask communication accessories.
Cost vs. Benefit
A quality gas mask can set you back hundreds of dollars — add the cost of replacement filters and other accessories and you could be looking at a few thousand dollars for a family of four. Measuring the worth of survival gear that can potentially save your life, or protect you from serious harm, is difficult. But unless you’re independently wealthy, that’s exactly what you must do. If you’re like most of us, you’ll need to make serious choices and measure your priorities as you spend your limited survival dollars
Being prepared is definitely important, but so is paying your mortgage, utilities, groceries, insurance, and all the other bills we deal with on a monthly basis.
Finally, you should consider your overall state of preparedness and decide if and how gas masks fill gaps in your plans. Have you addressed all of your basic survival needs? Do you have a plan and sufficient supplies, gear, knowledge, and skills? Have you adequately considered your family’s need for survival food, emergency water, security/self-defense, first aid/medical, sanitation/hygiene, and finally do you have a plan for bugging in or out? If any of these things are lacking, would a gas mask truly be the best and most effective use of your available dollars at this time?
In the end, the fact that you are even thinking about all this and carefully considering your options will put you in a much stronger position to survive whatever crisis comes your way.
Richard Duarte is a practicing attorney, urban survival consultant, writer, and firearms enthusiast. He’s the author of Surviving Doomsday: A Guide for Surviving an Urban Disaster and The Quick Start Guide for Urban Preparedness. For more information, go to www.quickstartsurvival.com and www.facebook.com/survivingdoomsdaythebook.
Rookie Mistakes to Avoid
Whether it’s an improper fit, the wrong filter, or just a defective product, if it doesn’t work correctly, you might as well not bother getting a gas mask. Here’s a short list of some of things to watch out for. While nothing is ever 100 percent, extra effort in these areas will help improve the odds in your favor.
Buying a One-Size-Fits-All Mask: To be truly effective, a gas mask must be properly fitted. A badly fitted mask will most likely fail. A faulty seal will let in contaminated air every time you draw a breath. The most common reason for a bad fit is using an incorrect mask size. Masks usually come in three sizes: small, medium, and large. There are other factors to consider, for example men with beards will find that it’s nearly impossible to get a proper fit/seal unless they shave. Likewise, people with glasses will need to remove them before putting on the mask. (Some gas masks are available with corrective lenses incorporated into the mask itself, or with attachments to snap in your own prescription glasses.)
When breathing becomes more difficult, it usually means that the filter has become saturated and it’s time to replace it.
Buying Bad Filters: The effective life span of a filter in use varies depending on the circumstances. (Figure an average of about eight hours of use for most filters.) But remember, temperature, humidity, level of exertion, and the concentration level of the suspected contaminant(s) will all affect the useful life of your filter. If you’re going to invest in a gas mask, make sure you also invest in an ample supply of quality replacement filters. A filter that is expired, has been opened and exposed to air, or has otherwise been damaged, will probably not protect you. (A properly stored filter should last about five years.)
Buying Obsolete Masks: Masks have a limited shelf life as well. To be effective, masks must be free from defects, tears, dry rot, cracking, or other issues that might cause it to leak. Over time, however, even the best mask will get old and fail. While there are many questionable masks available at low prices, you’ll likely get what you pay for — an outdated piece of obsolete gear will likely offer zero protection. Remember, it’s only a bargain if it works.
Storing Improperly: An improperly stored mask/filter will deteriorate much faster. Store your mask(s) and filters in a cool, clean, dry place, avoiding temperature extremes. Proper storage will also help avoid deforming the shape of the mask. Inspect your masks/filters often and repair or replace as required.
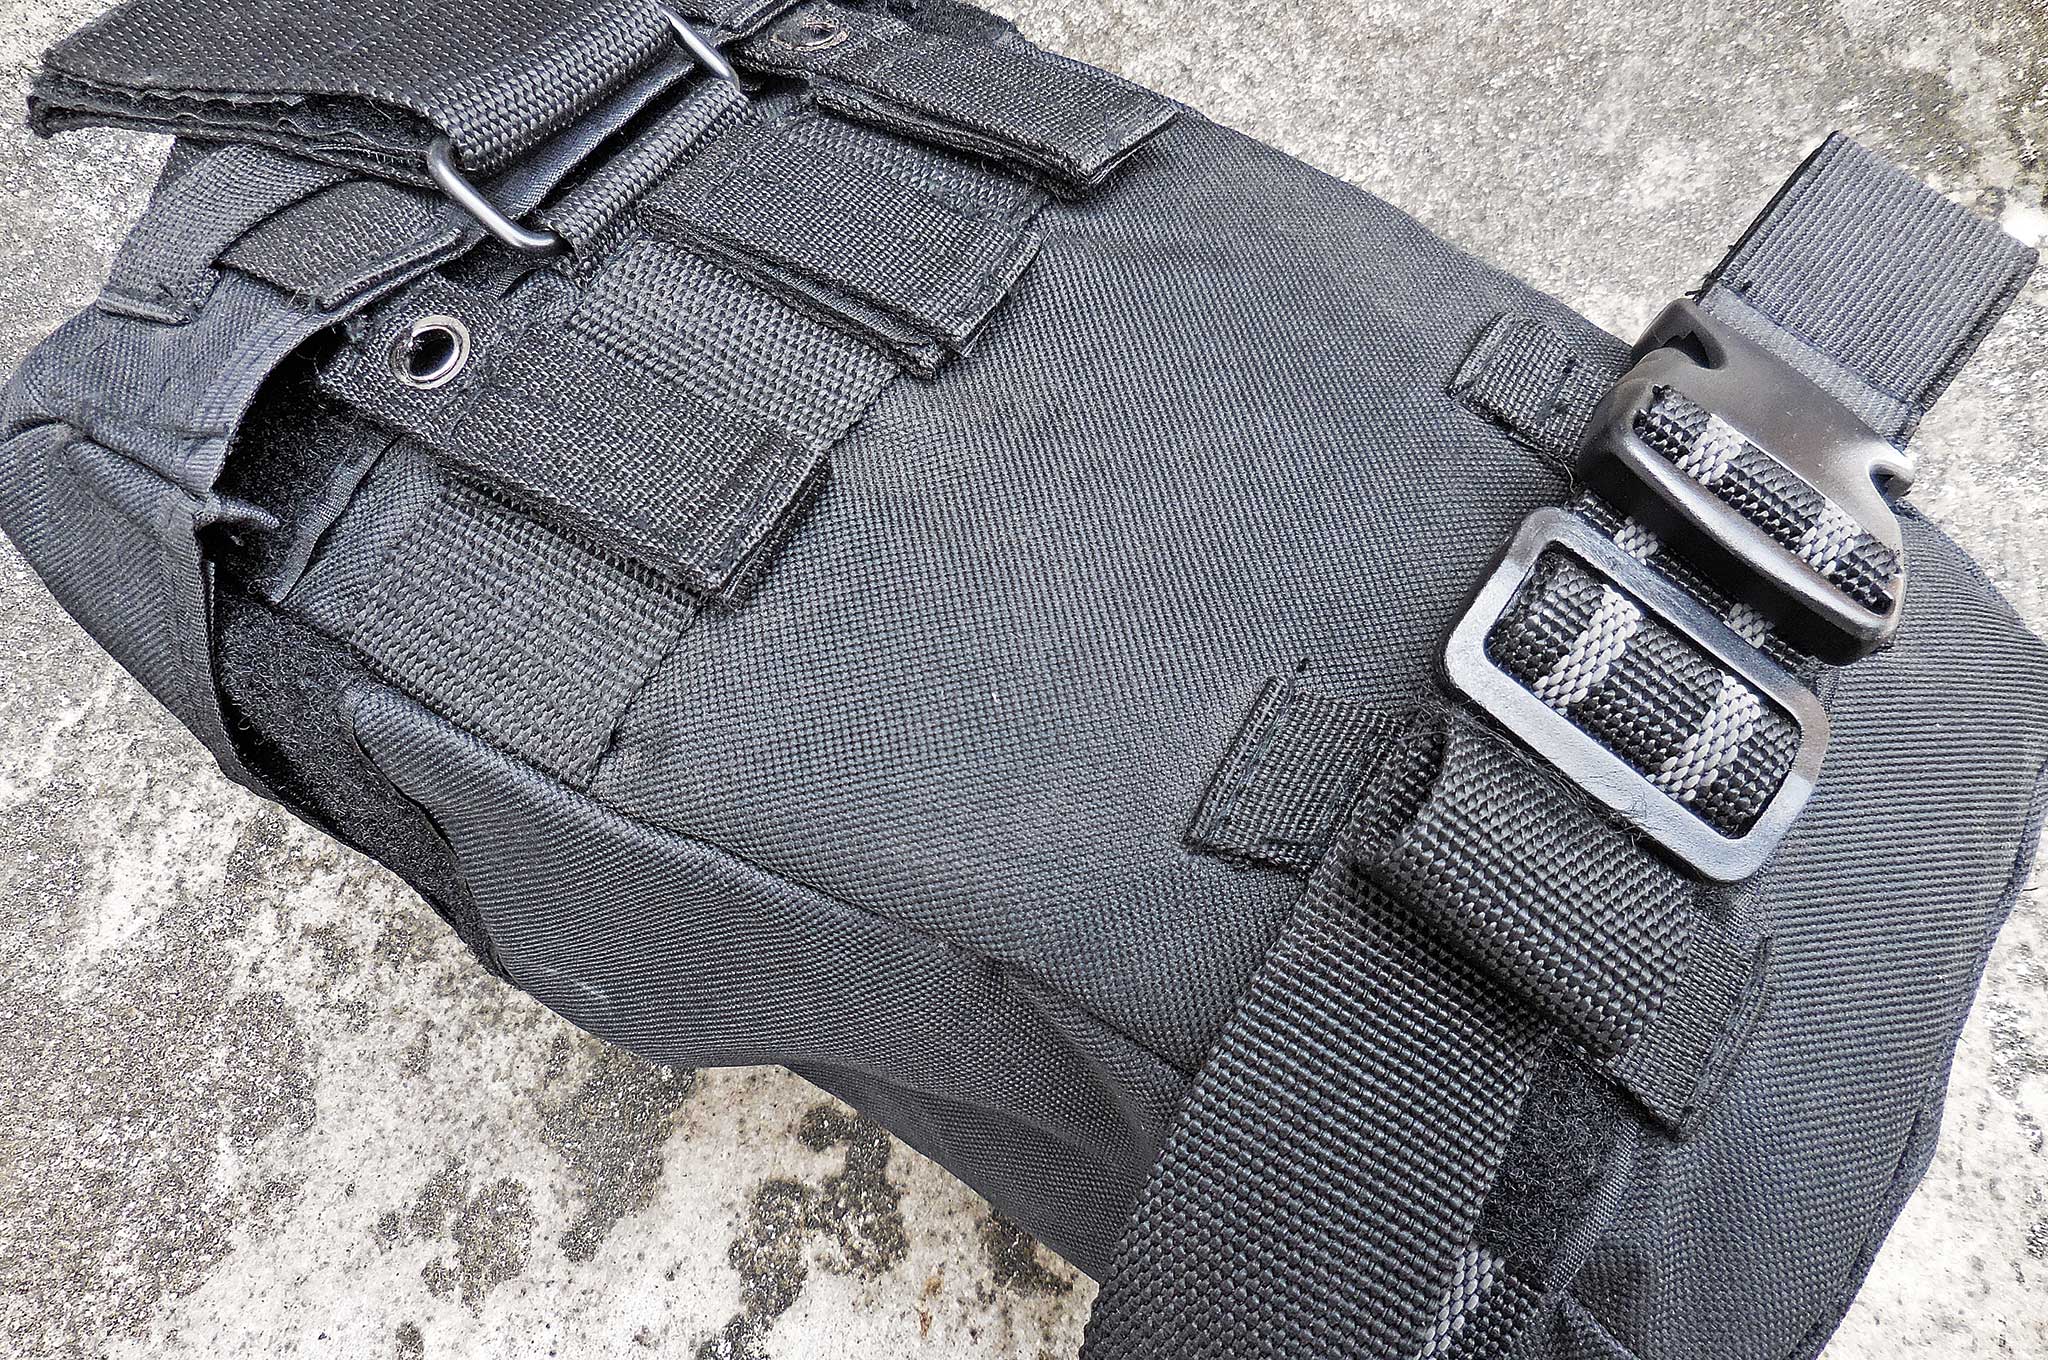
A gas mask pouch/carrier affords quick and easy access to your mask and filters, plus it protects the mask when not in use.
Not Practicing With Your Mask: As with any other gear, you need to practice with your mask. Make sure you can put your mask on quickly and your comfortable performing appropriate tasks with your mask on — running, fighting, shooting. Also make sure you’re able to speak and be heard with your mask on. Lastly, practice changing filters, while keeping the mask on. Now is the time to make the mistakes, and correct them.
Not Testing The Mask: One safe and easy way to test your mask is to use banana oil (isoamyl acetate) ampules, which give off a non-irritating odor of, you guessed it, banana oil. This test will confirm that your mask is properly fitted to your face and providing an airtight seal. The quick and cheapo way to test the mask is to put it on, tightly cover the breathing port with your hand, and breathe in. If the seal is good the entire mask will suck into your face.
Children’s Gas Masks
An adult-size gas mask will not protect a child since it won’t seal properly around a child’s smaller face. Gas masks aren’t normally made in kids’ sizes. There are alternative products, like protective hoods, but they are not always easy to find. A limited supply of these products can be found at www.approvedgasmasks.com/child-masks.htm.
More on Masks, Respirators, and Preparation from Airborne Hazards
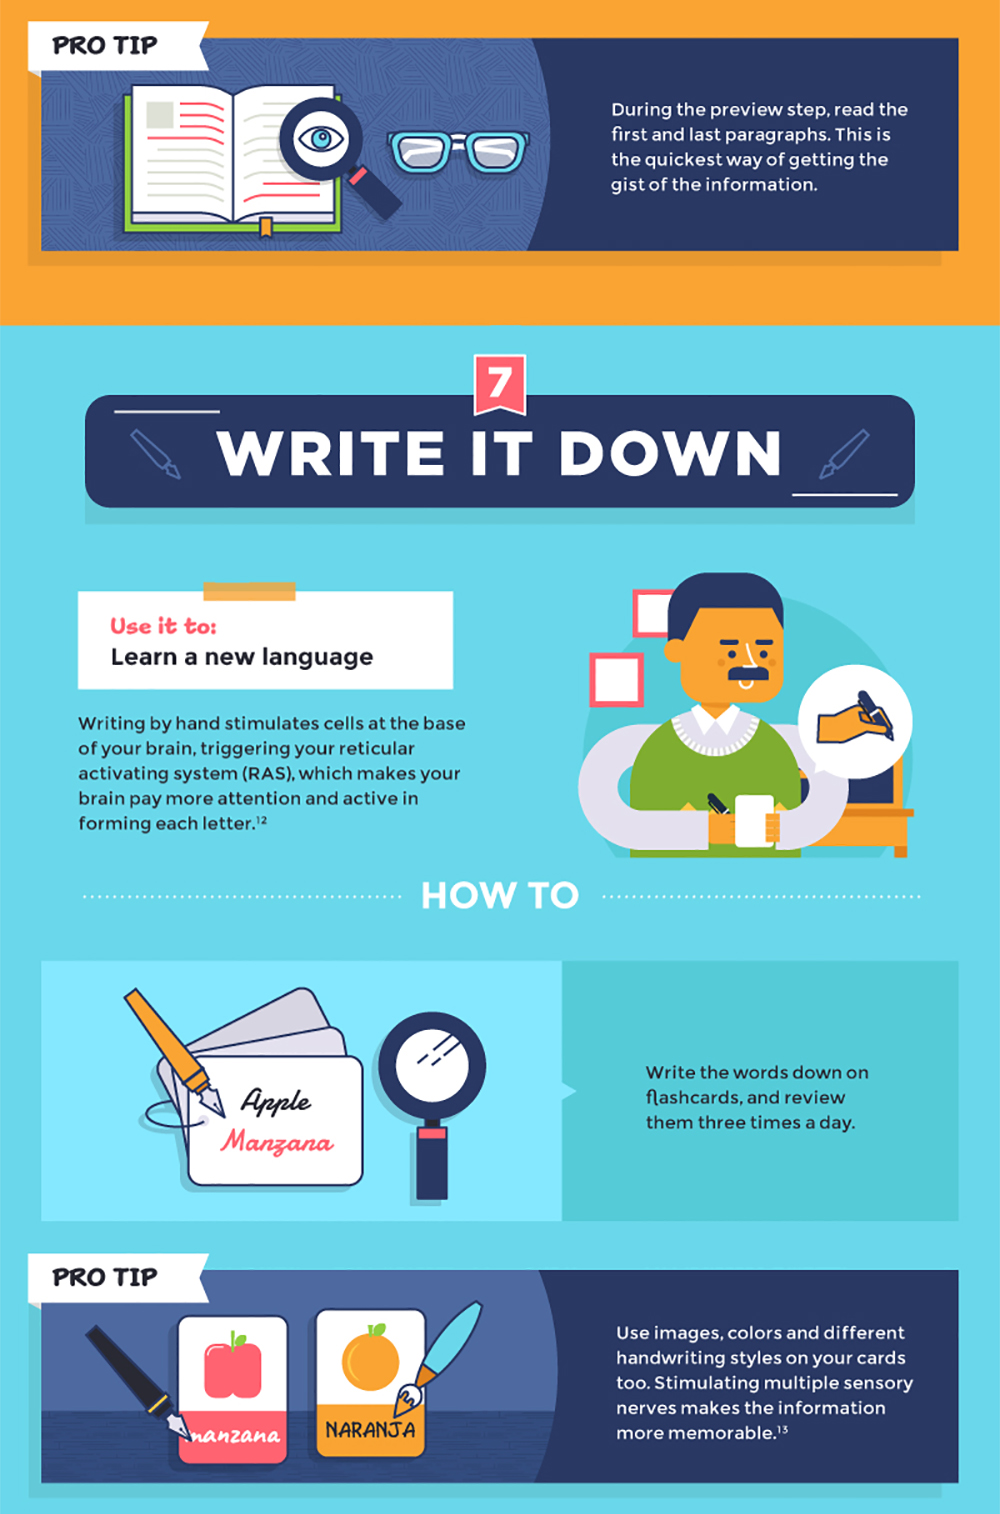
Few things are worse than that feeling in the pit of your stomach when you realize you forgot something critical. Whether it’s the answer to an important question on a final exam, the keys to your truck that just got locked inside, or the path you need to take to return home from a day hike, forgetfulness negatively affects many aspects of our lives. In extreme circumstances like the last example, it can even put our lives in danger.
The human mind is powerful, but can also feel disorganized without some sort of mental filing system.
Most of us wish we could instantly recall every piece of information we studied, but unfortunately, that’s simply impossible unless you’re some sort of survivalist Rain Man. However, all hope is not lost. There are quite a few time-tested methods which can be employed to improve memory, even under stressful circumstances.
Kim Breed is a been there, done that, gets it type of guy. You’ve probably heard the expression, been there, done that, but maybe not the last part. While this expression may not be a part of the common lexicon, we’d like to make a case for it. Kim is a retired Green Beret and he remains a serious badass to this day. His military service is a testament to his been there, done that experience. The gets it description comes from his knowledge of blacksmithing, years of practice in knifemaking, and his passion for the outdoors. Kim simply understands what a knife should be and how it needs to work in the real world.
With this understanding in mind, we took some time to evaluate and analyze Kim Breed’s latest knife offering.
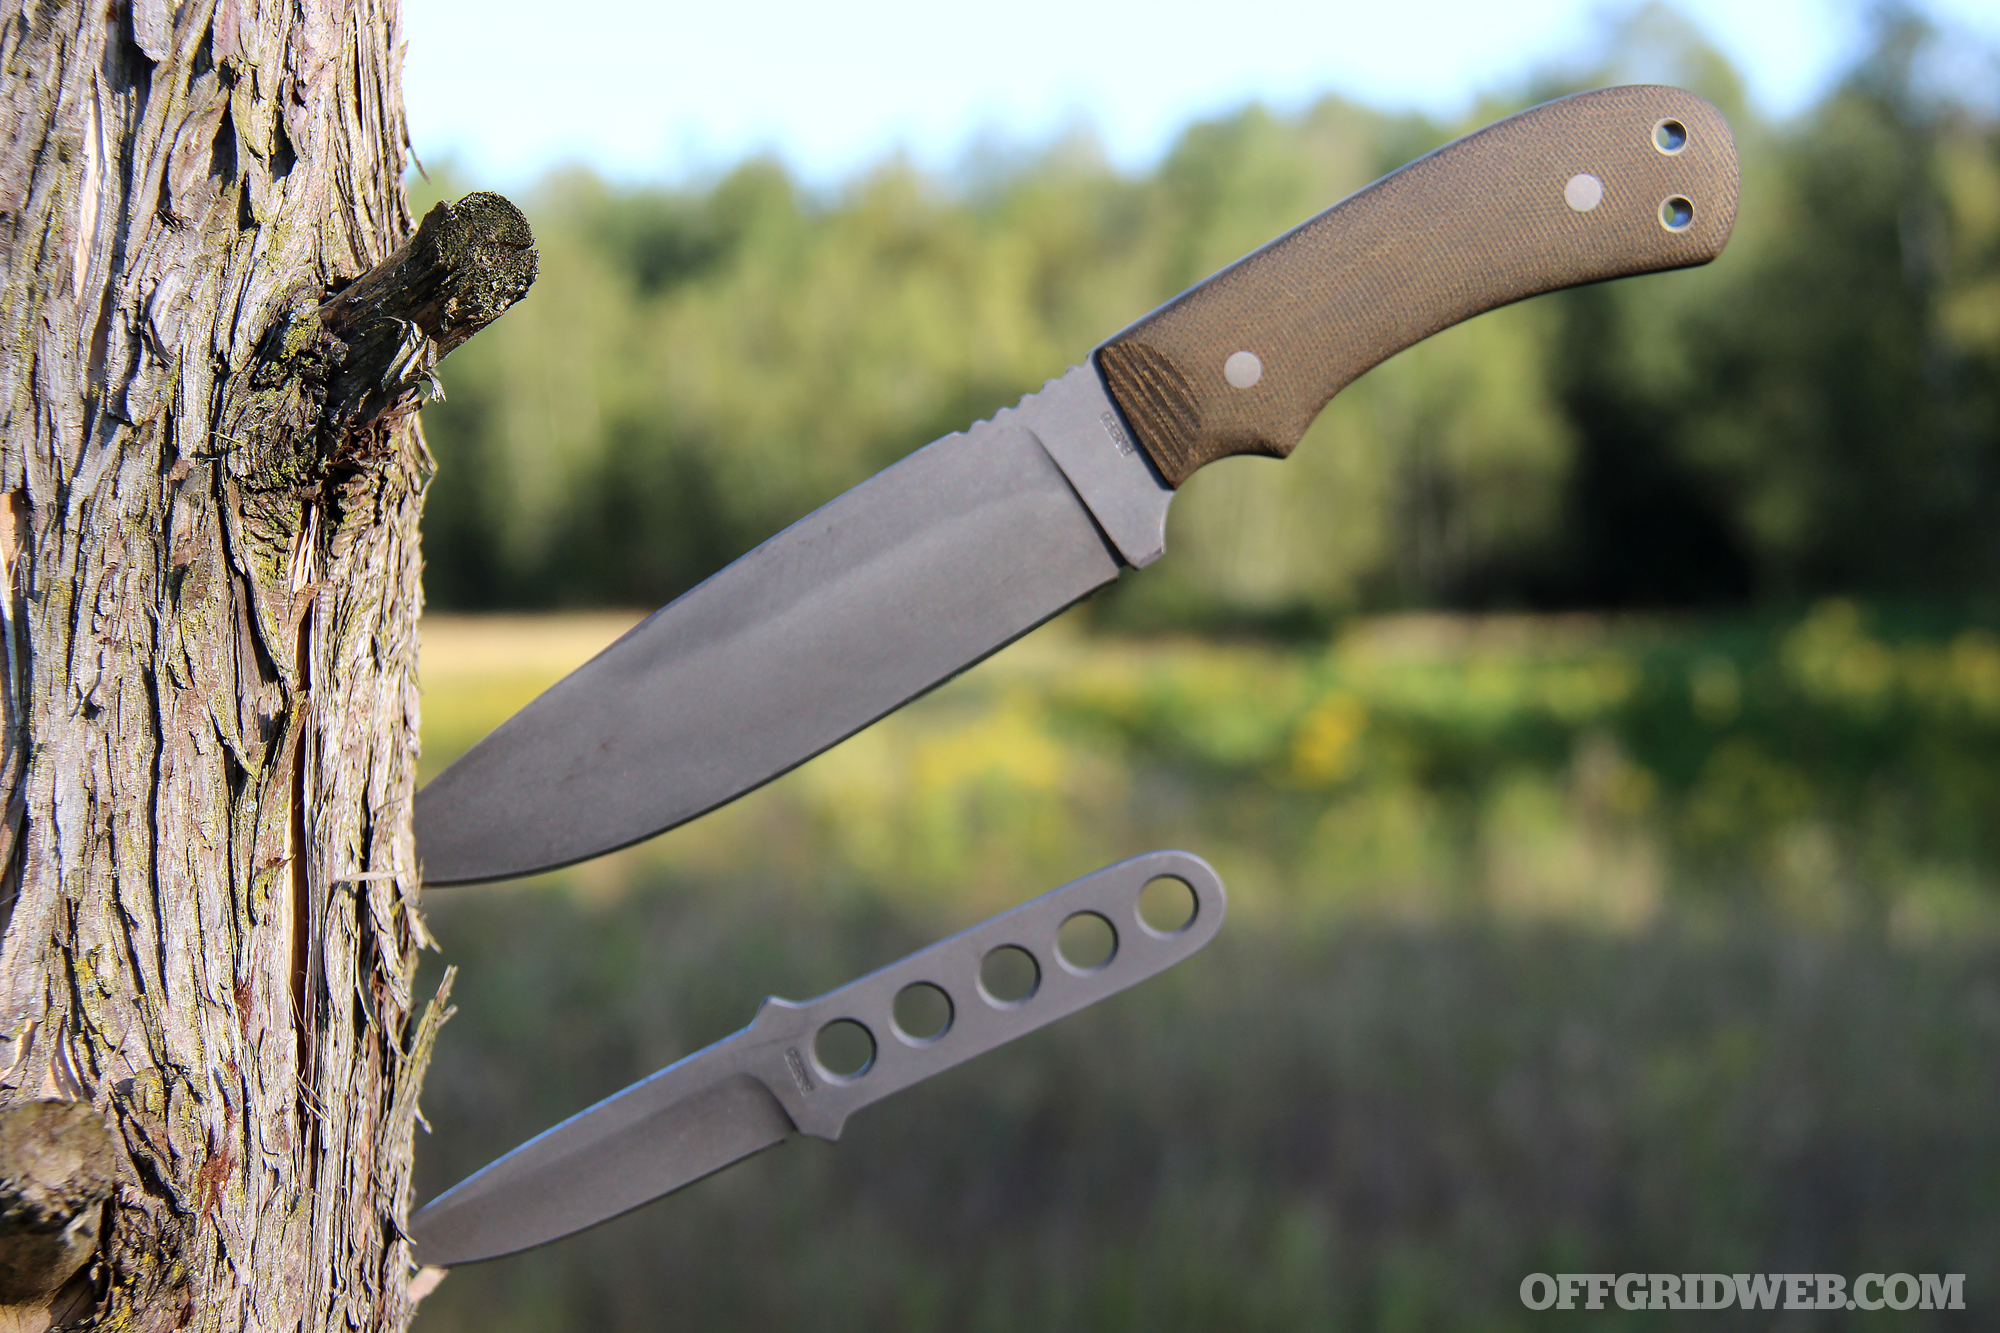
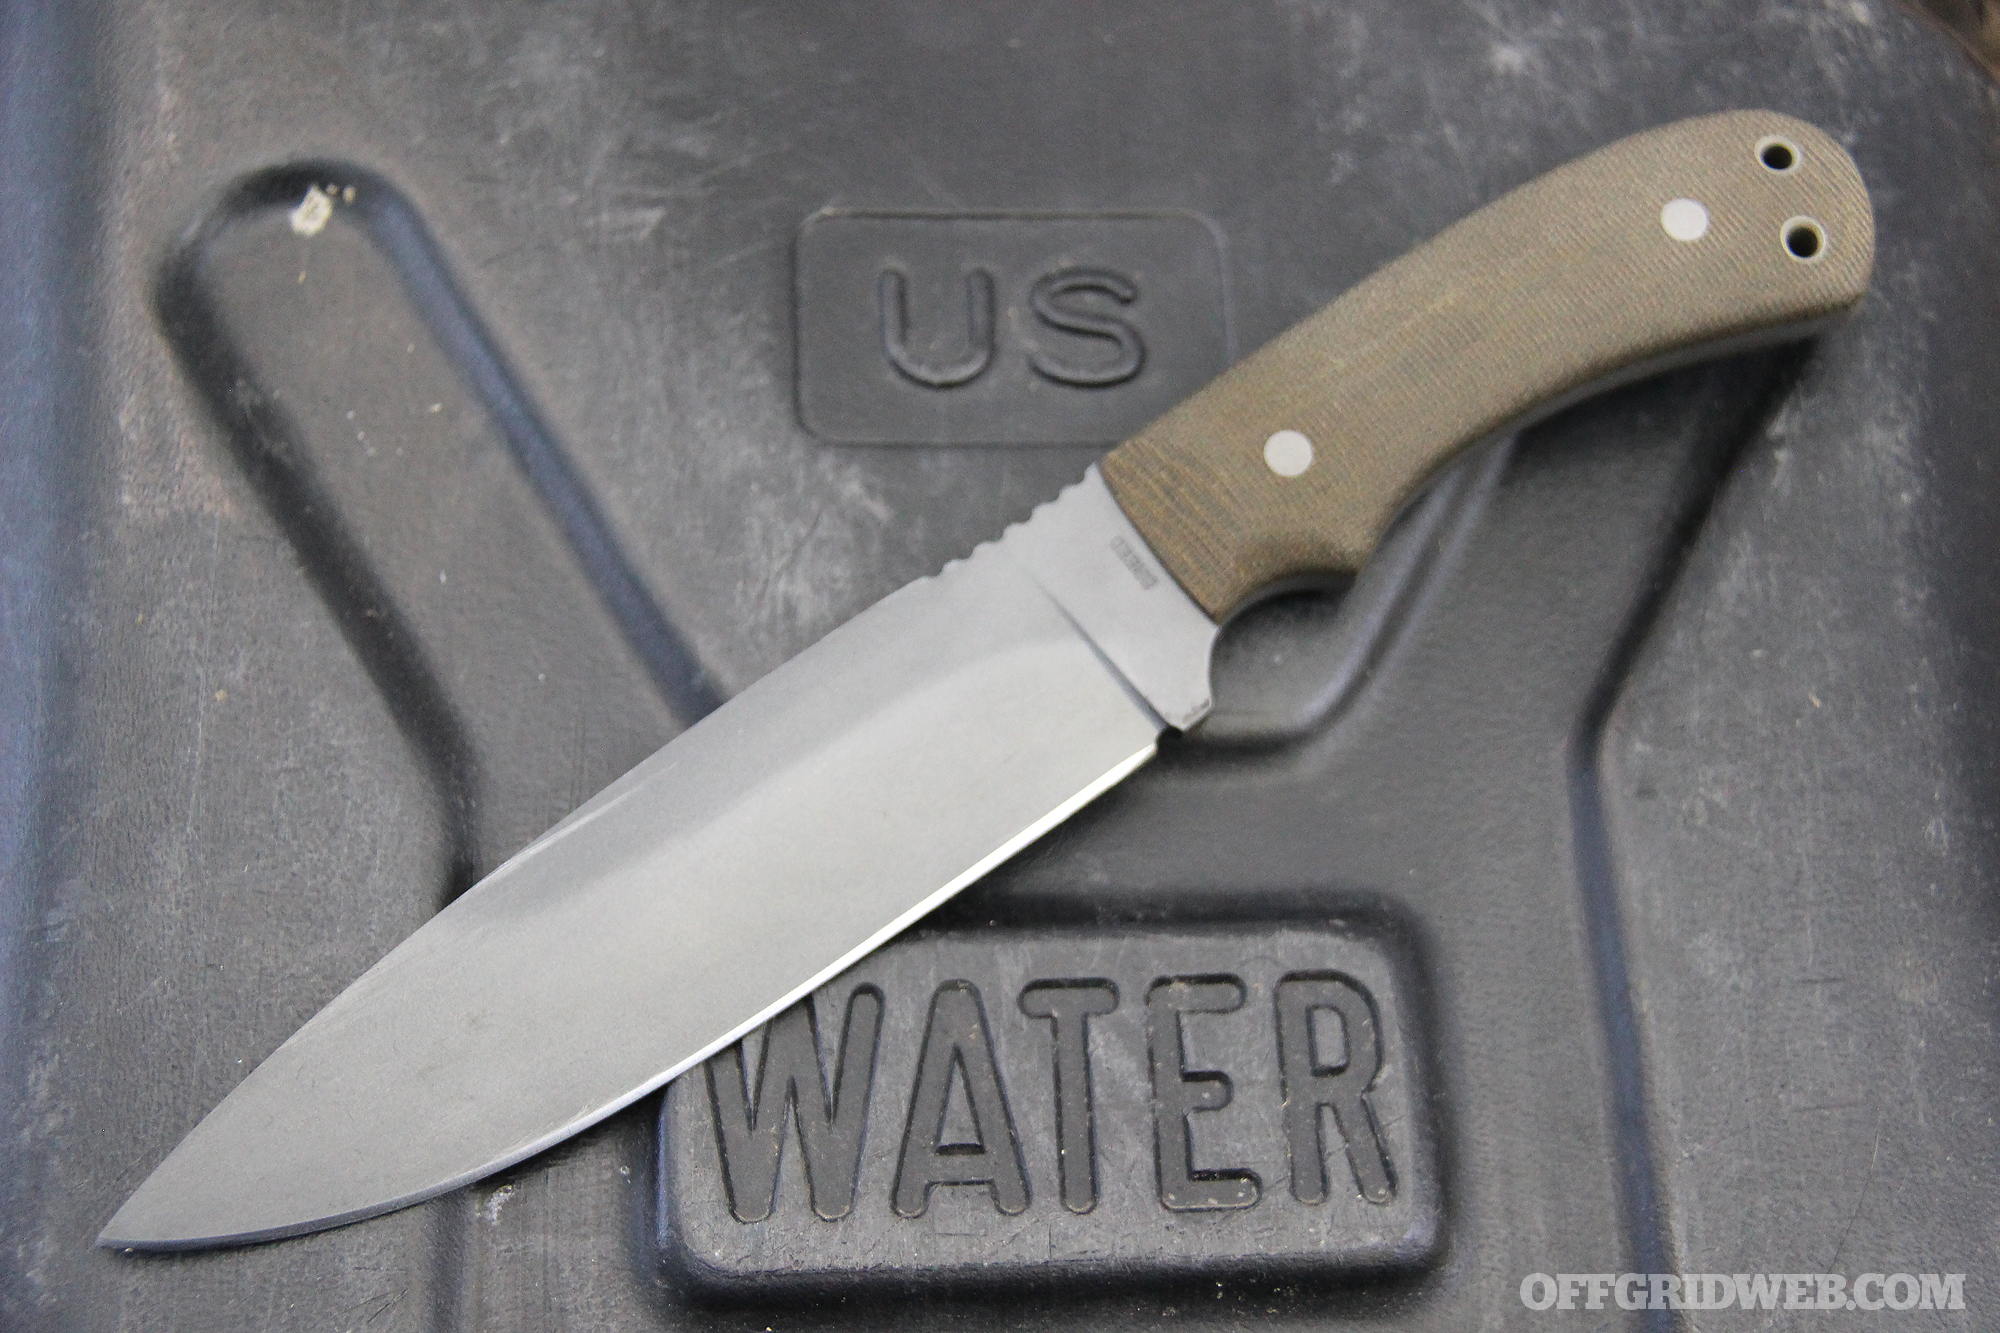
The Kim Breed SERE Combo
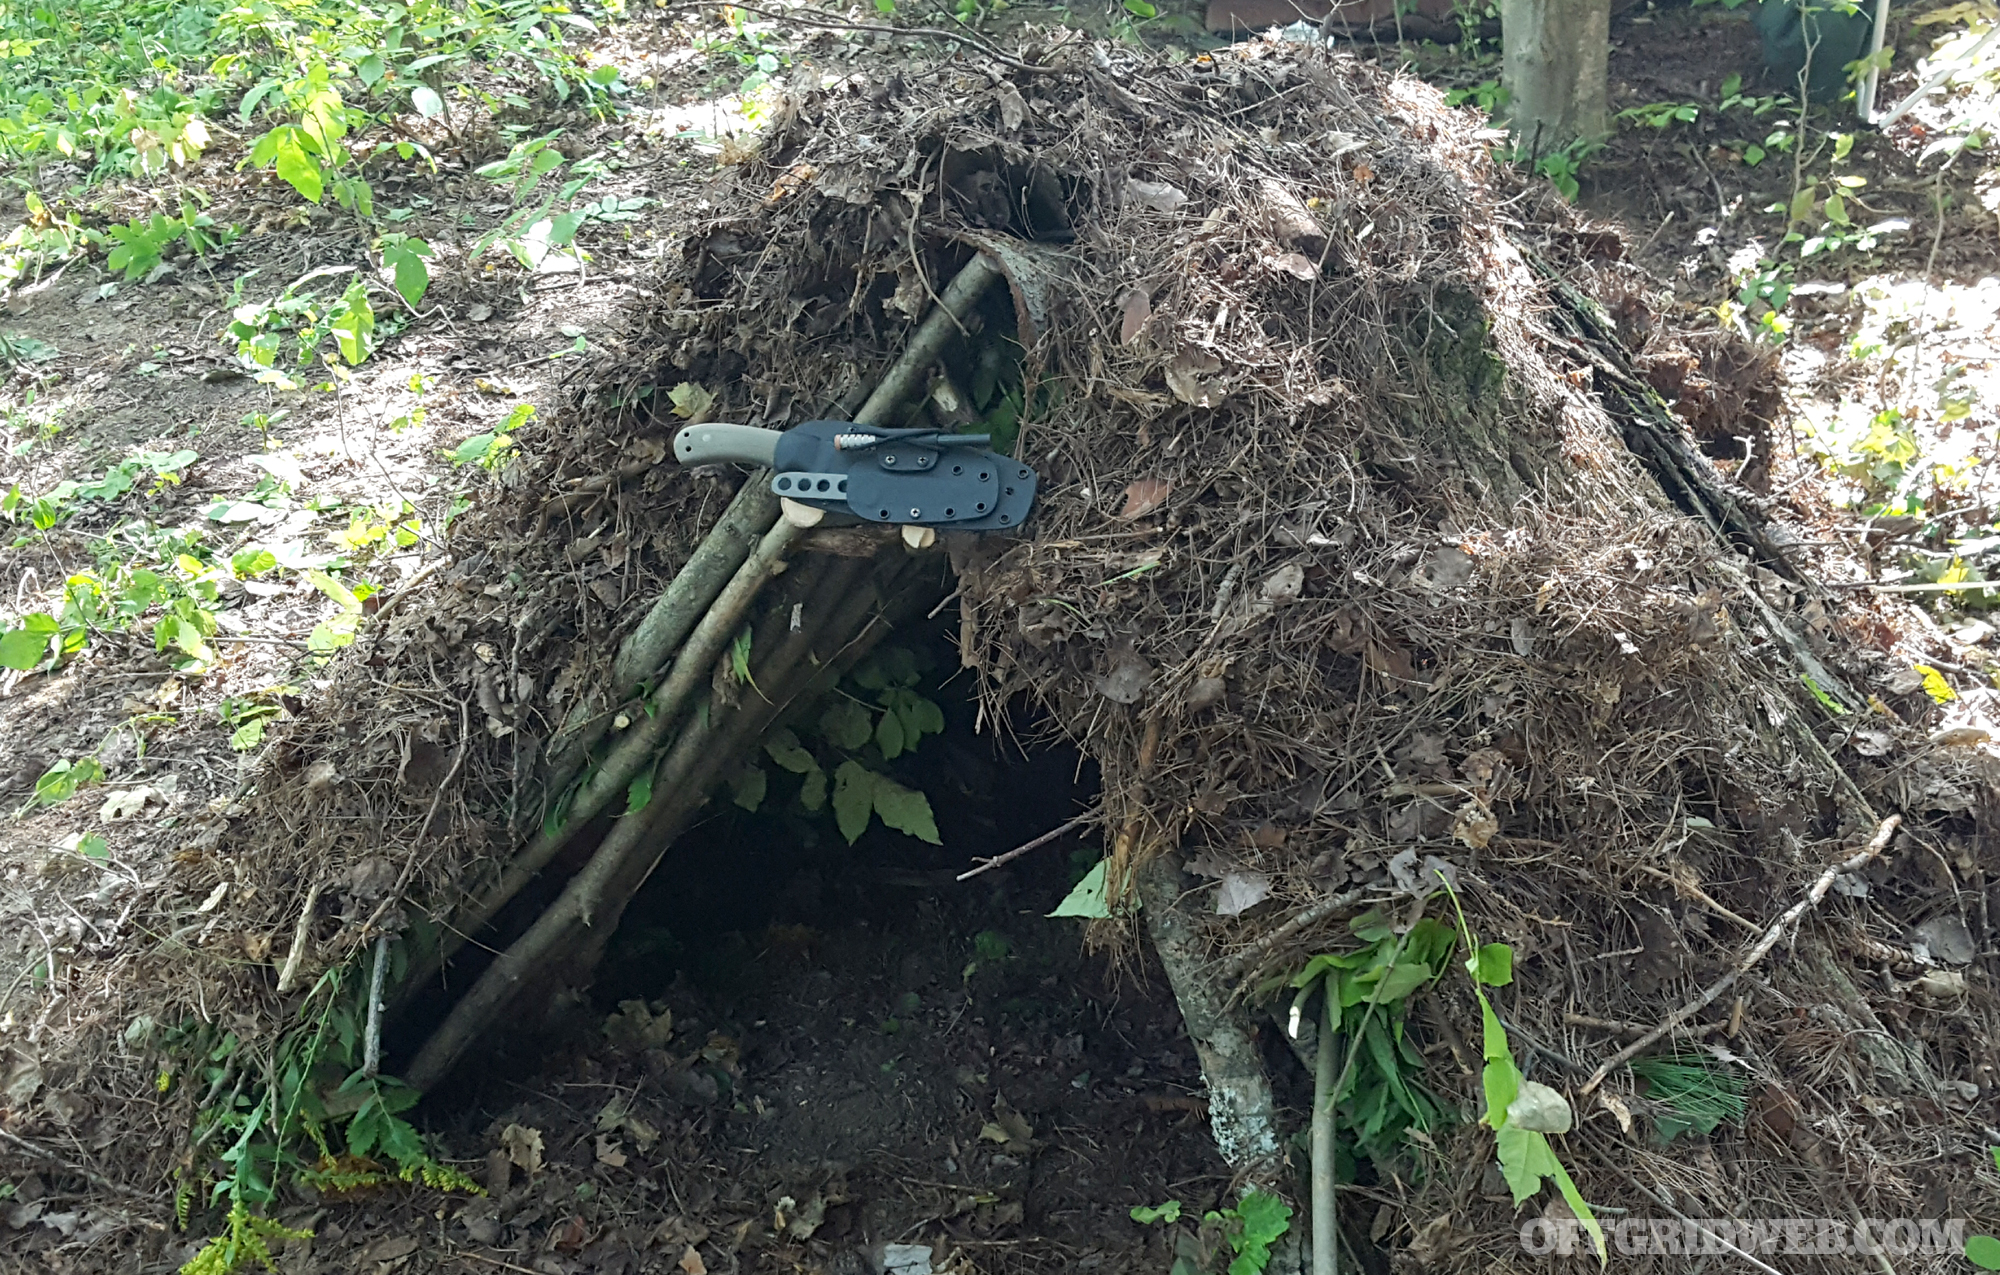
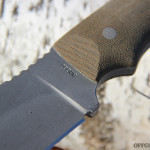
Meant for bushcraft and survival, the SERE Combo features a pair of knives: a strong main blade and a smaller and more nimble companion blade. A custom ferro rod from HRK Machining rounds out the SERE Combo, and all three components are carried securely in a Kydex sheath with a Tek-Lok buckle.
For the guy who only has room on his duty gear for a single blade, this package provides a lot of utility in a compact package. Unlike some piggyback combos, this setup doesn’t feel like a boat anchor dragging you down — its total weight is only a hint over 20 ounces. If carrying multiple blades on a single belt rig is not your style, the smaller piggyback blade, carried on the outside of the main sheath, can be worn around the neck as a deep-cover concealment blade. Any way you slice it, this combination is meant for work and we put it to the test on numerous nights out in the field over the past few months.
We wanted to see how effective the Kim Breed SERE Combo could be for the construction of temporary shelters, camp tools and food procurement methods. We also wanted to see how the knives would fare against seasoned hardwoods and tough webbing.
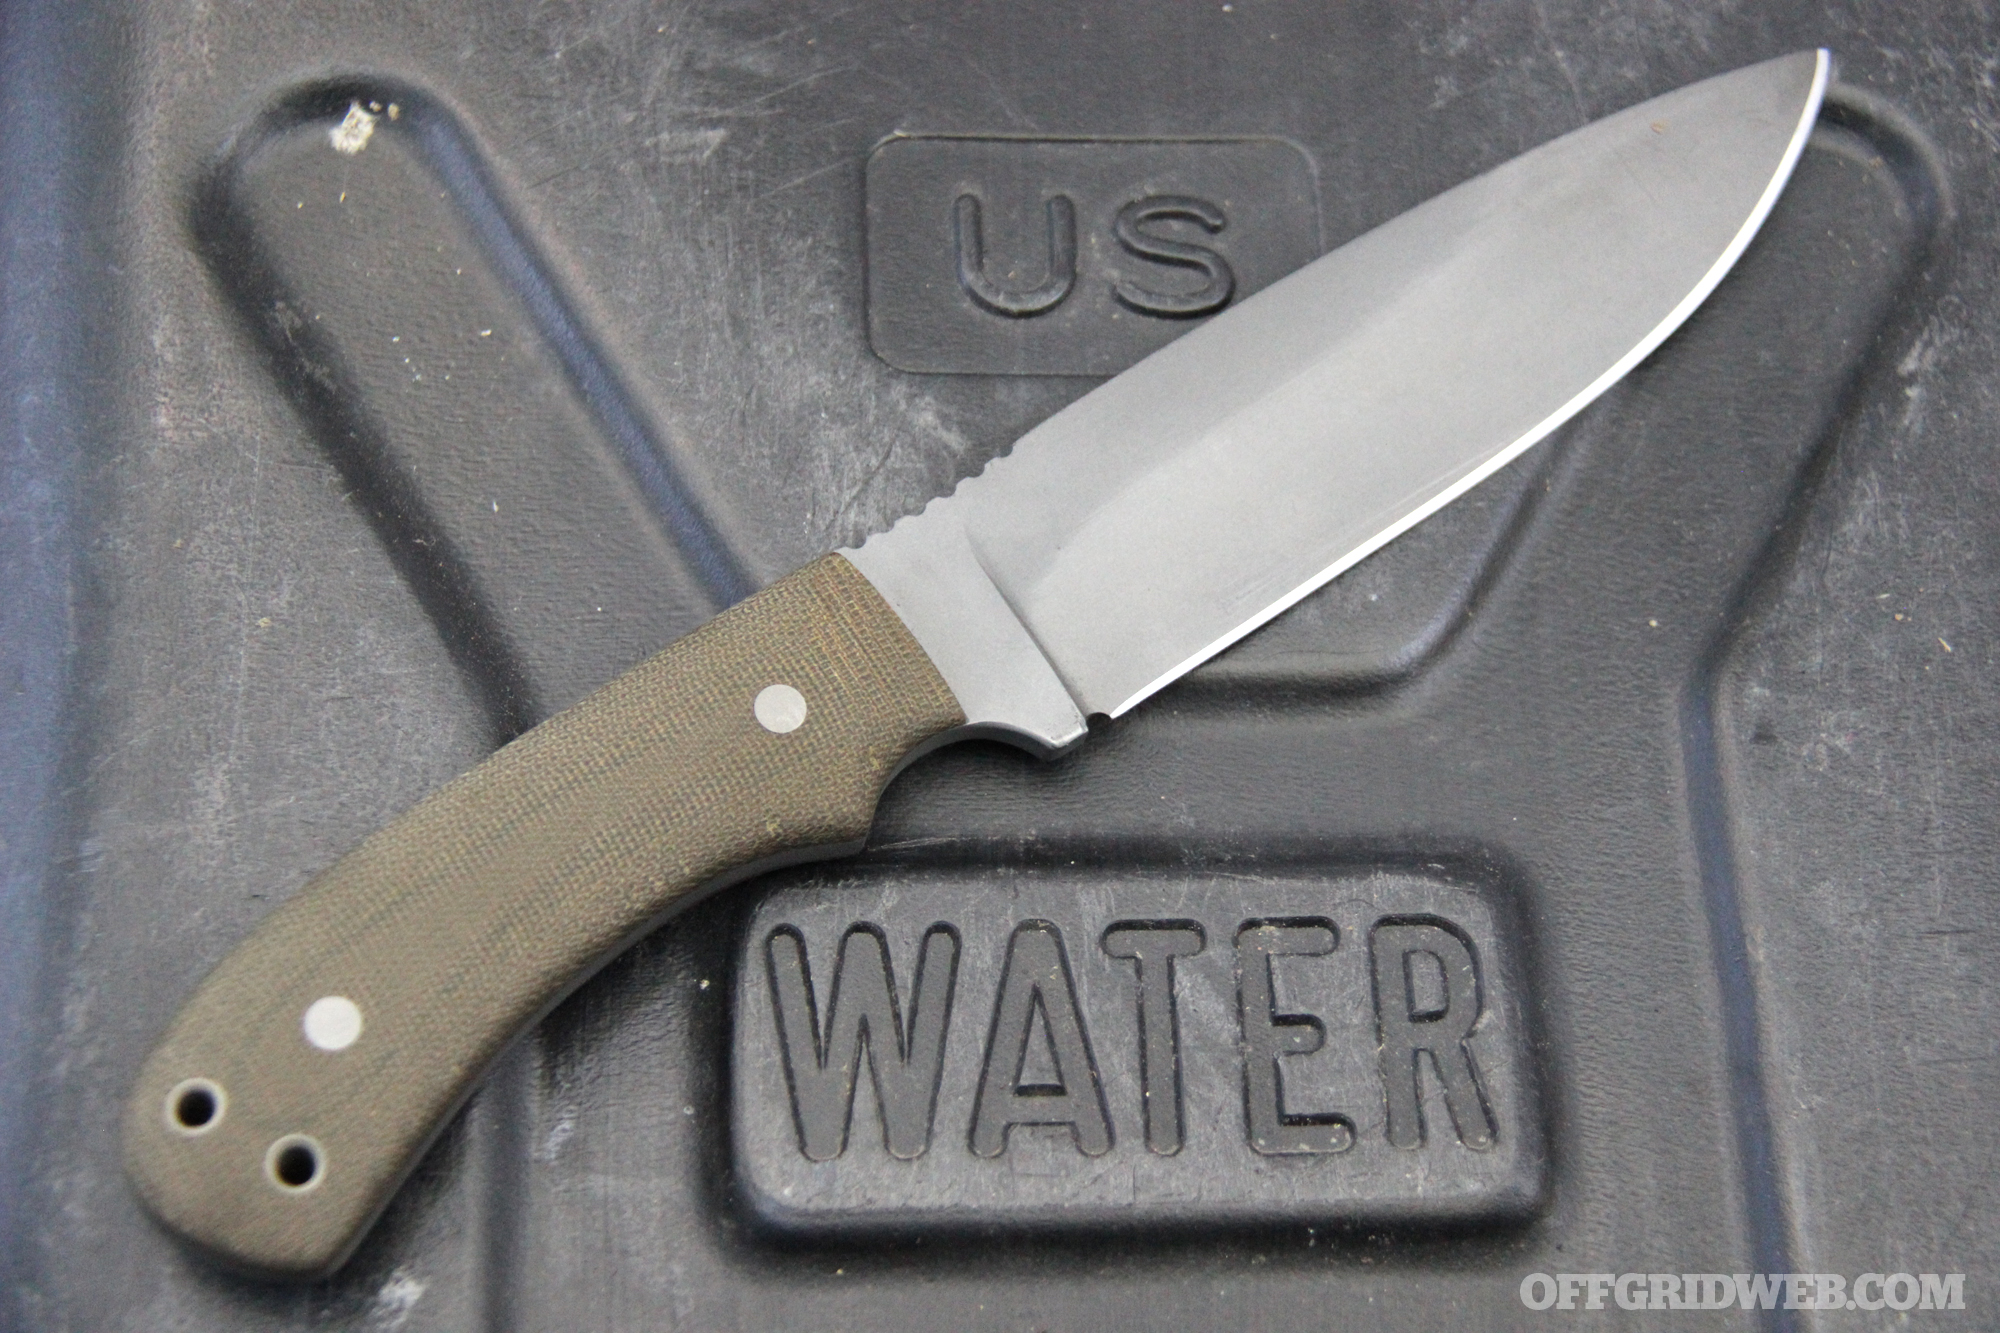
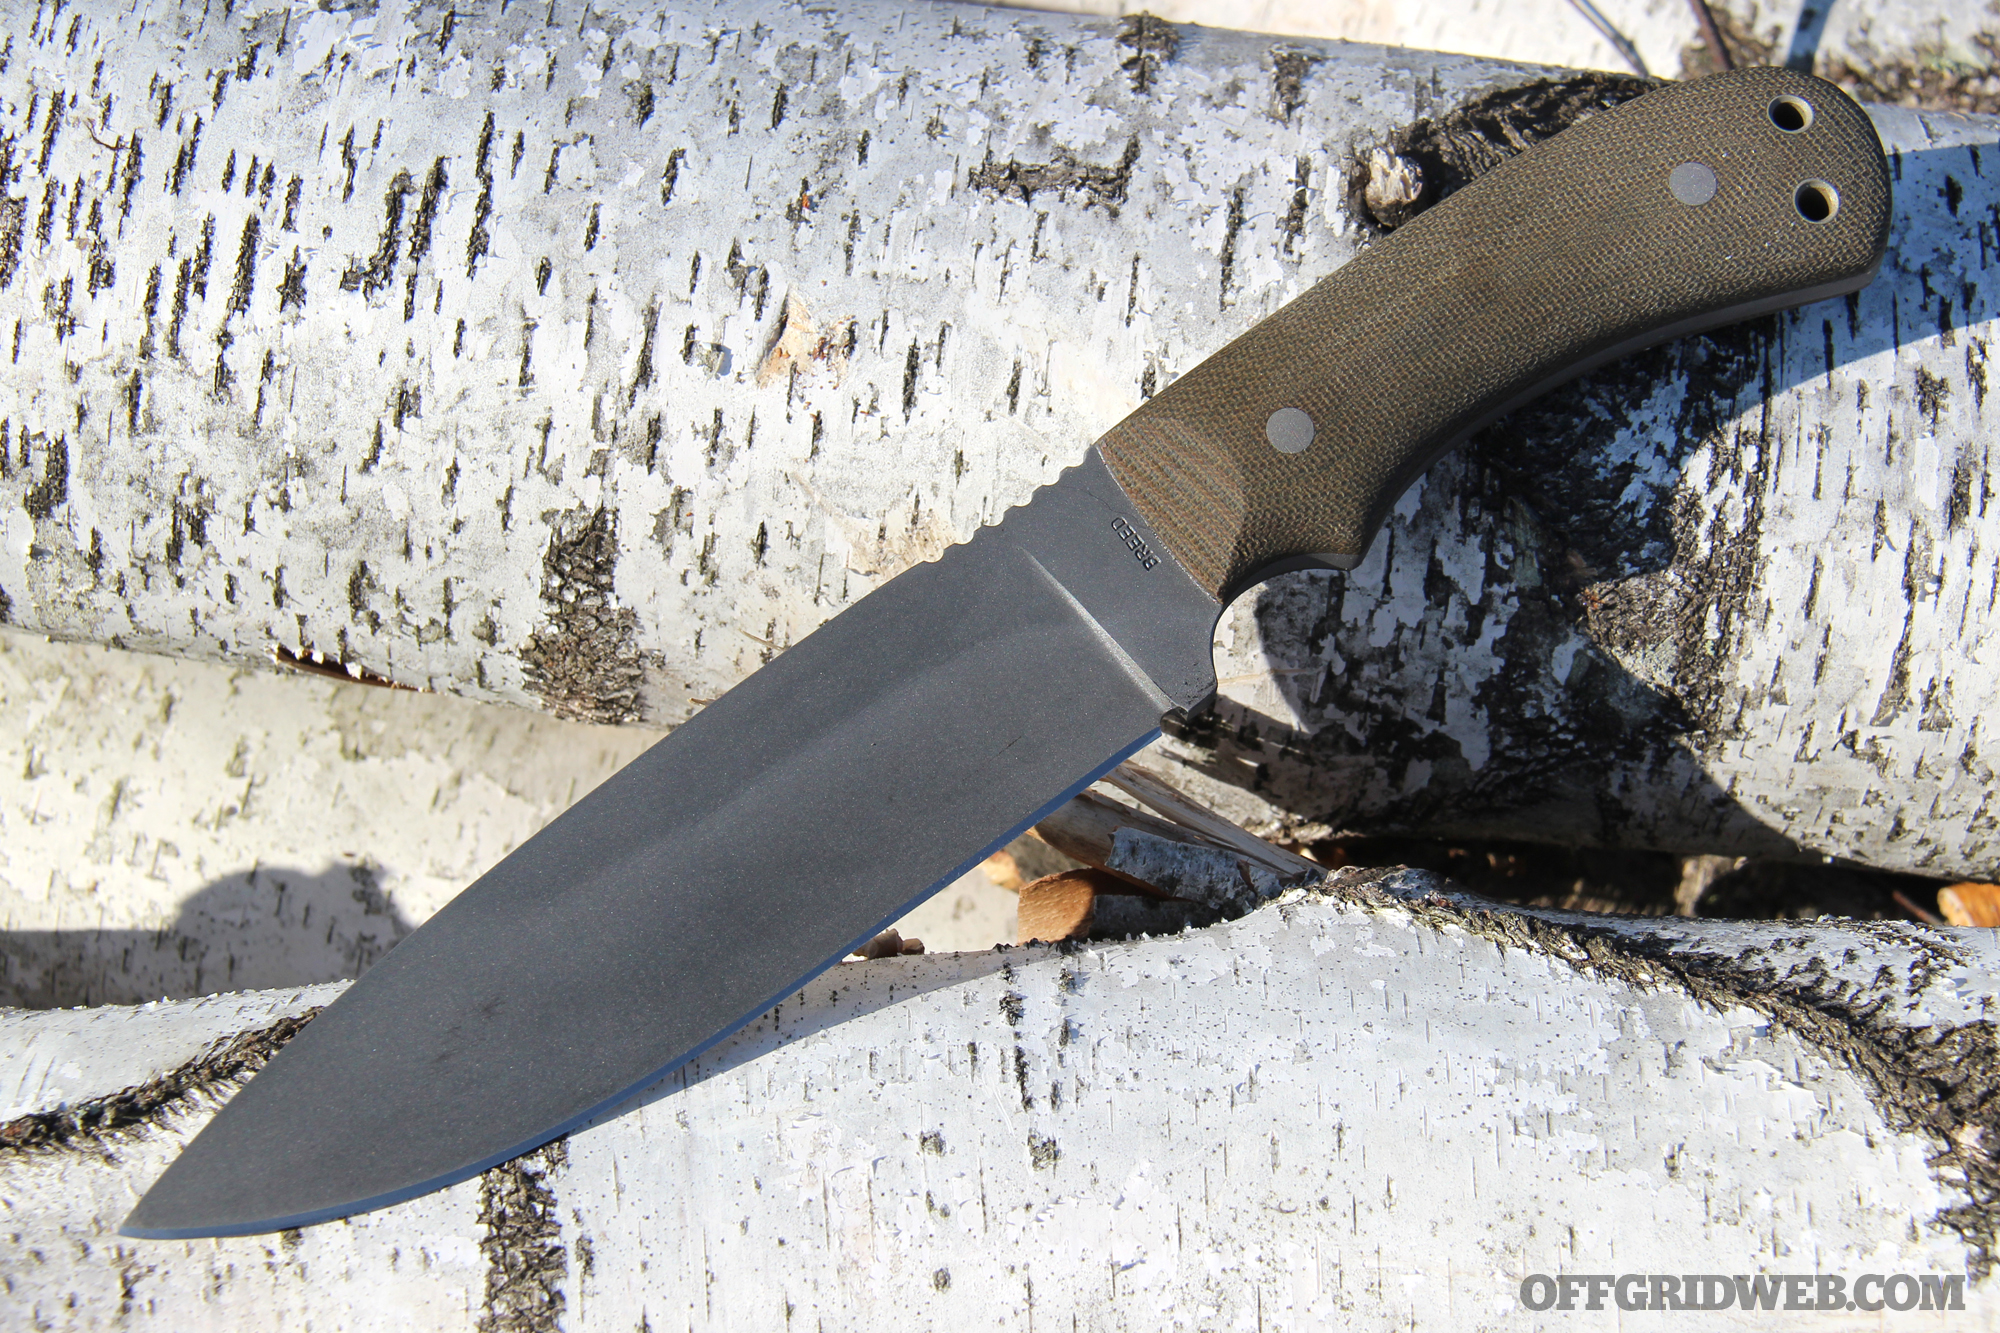
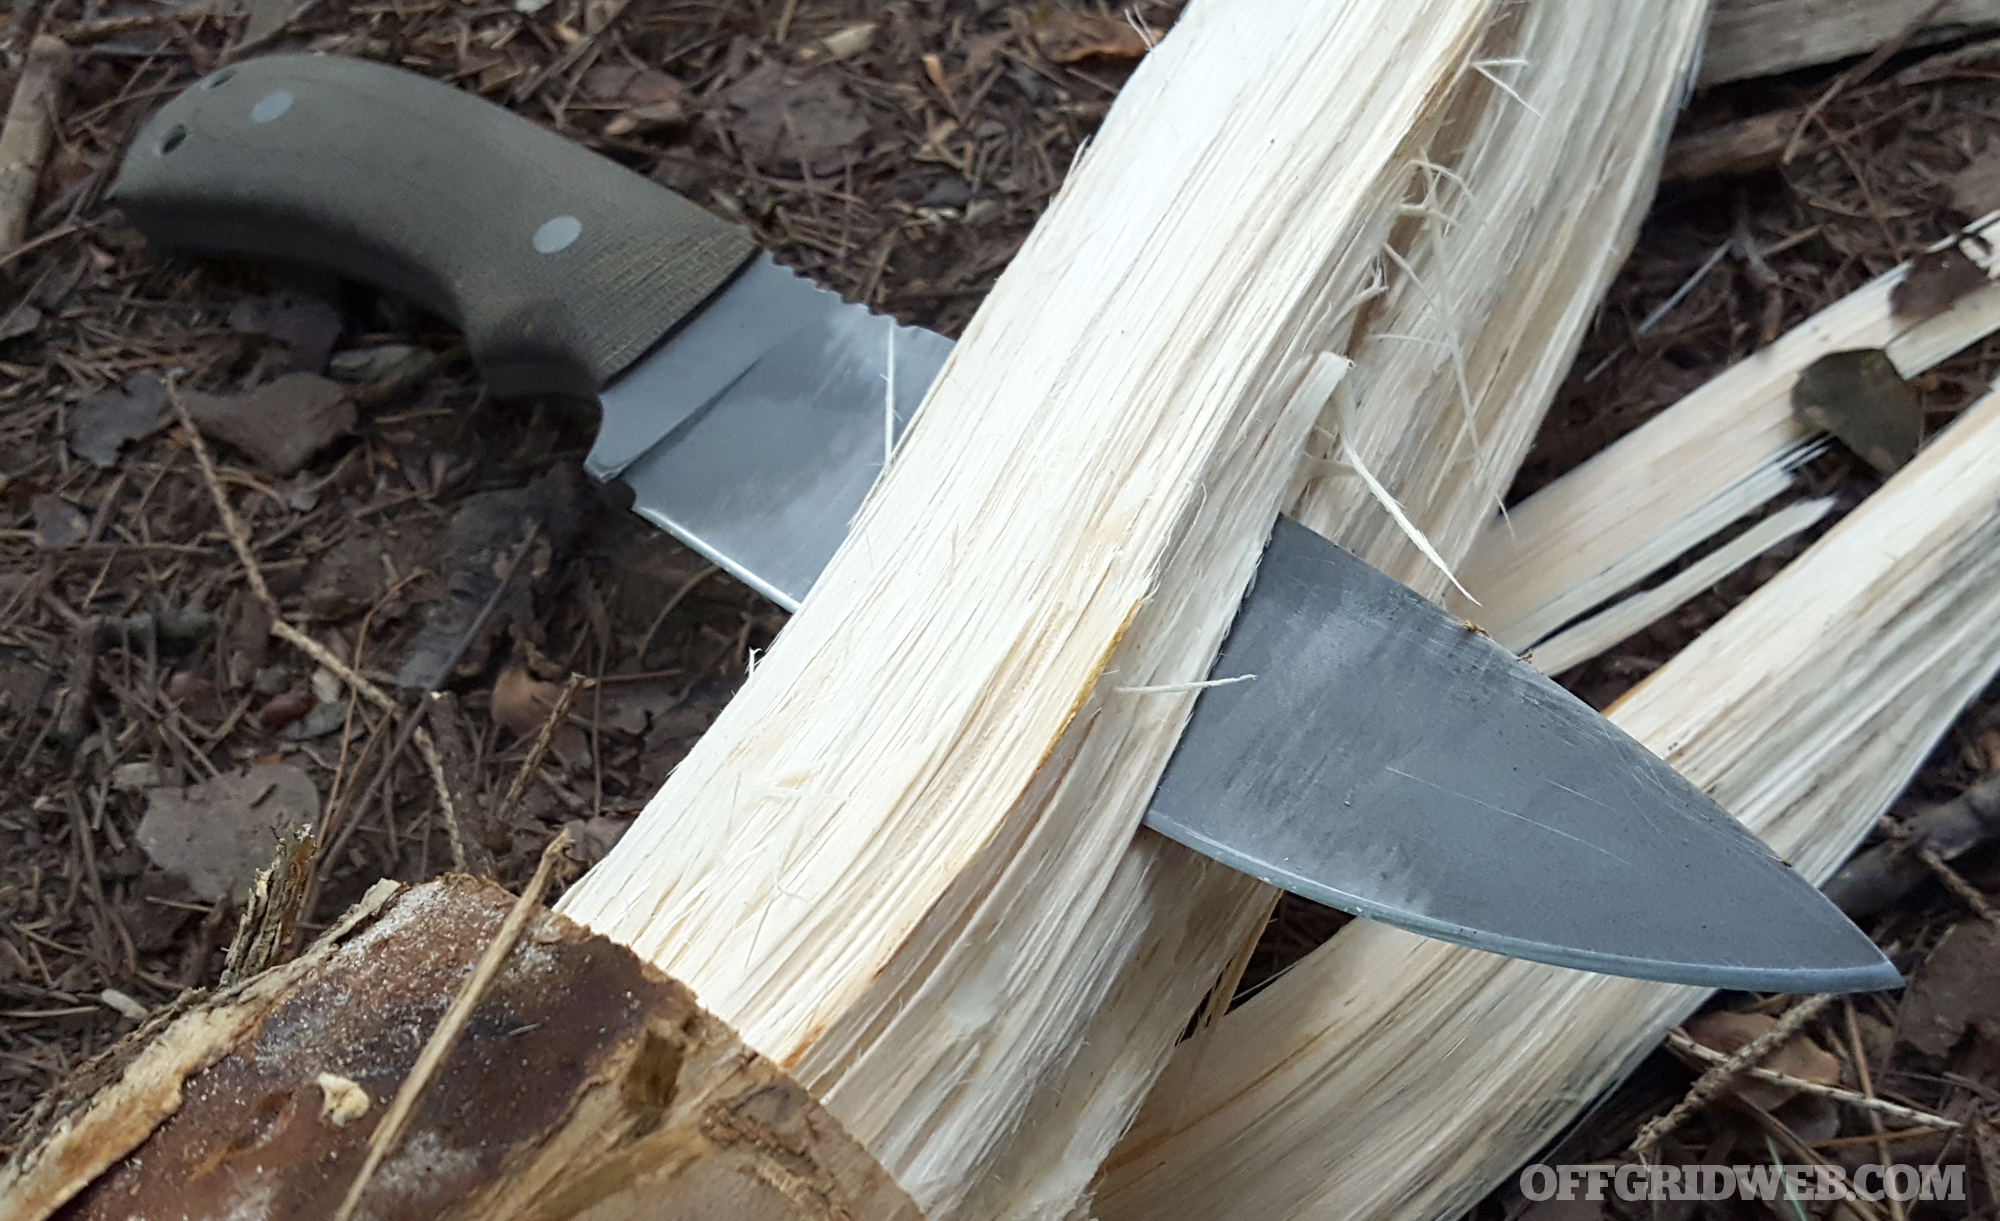
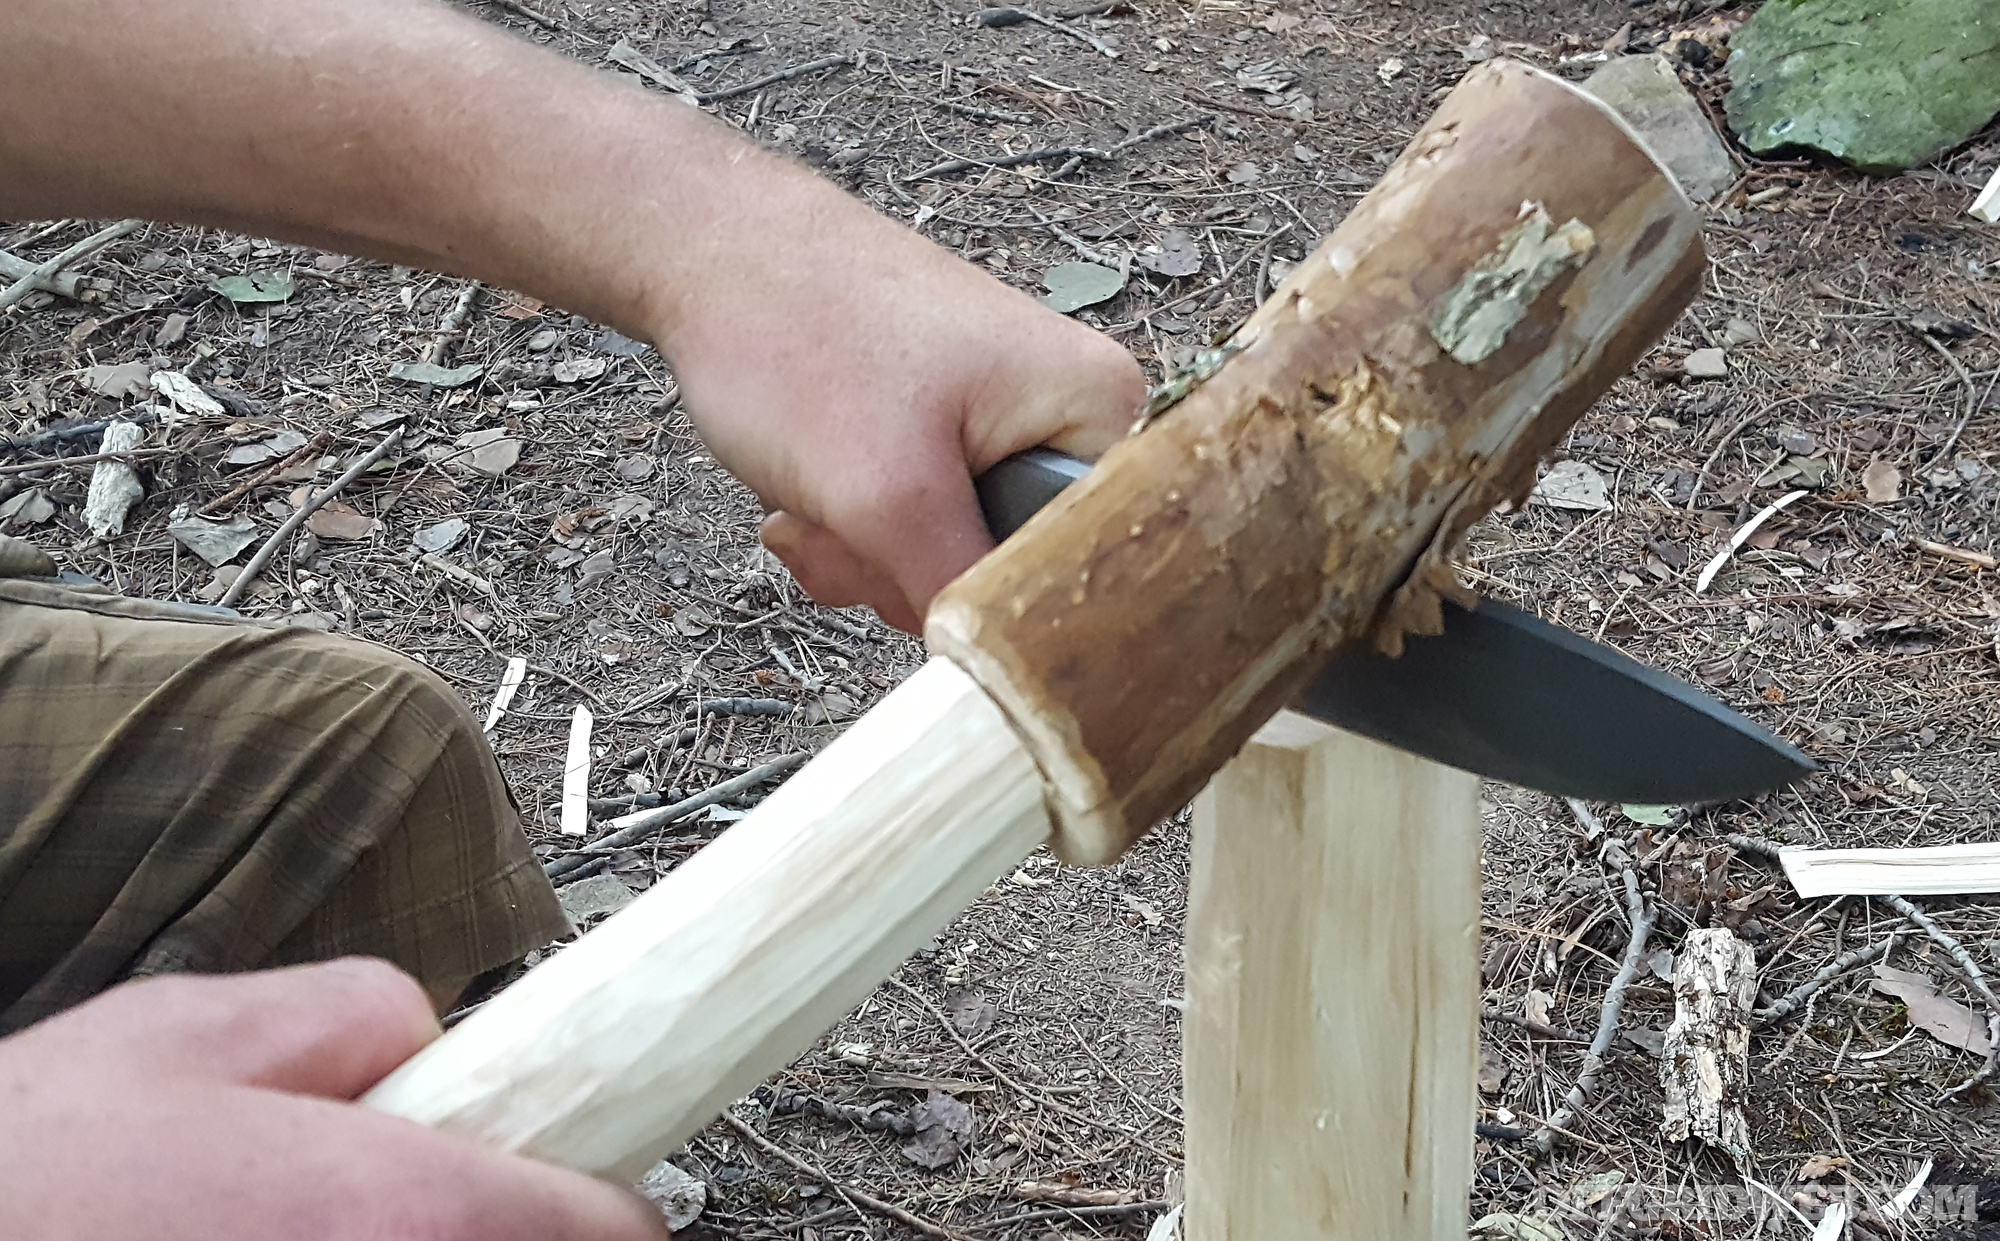
Full-Size SERE Knife
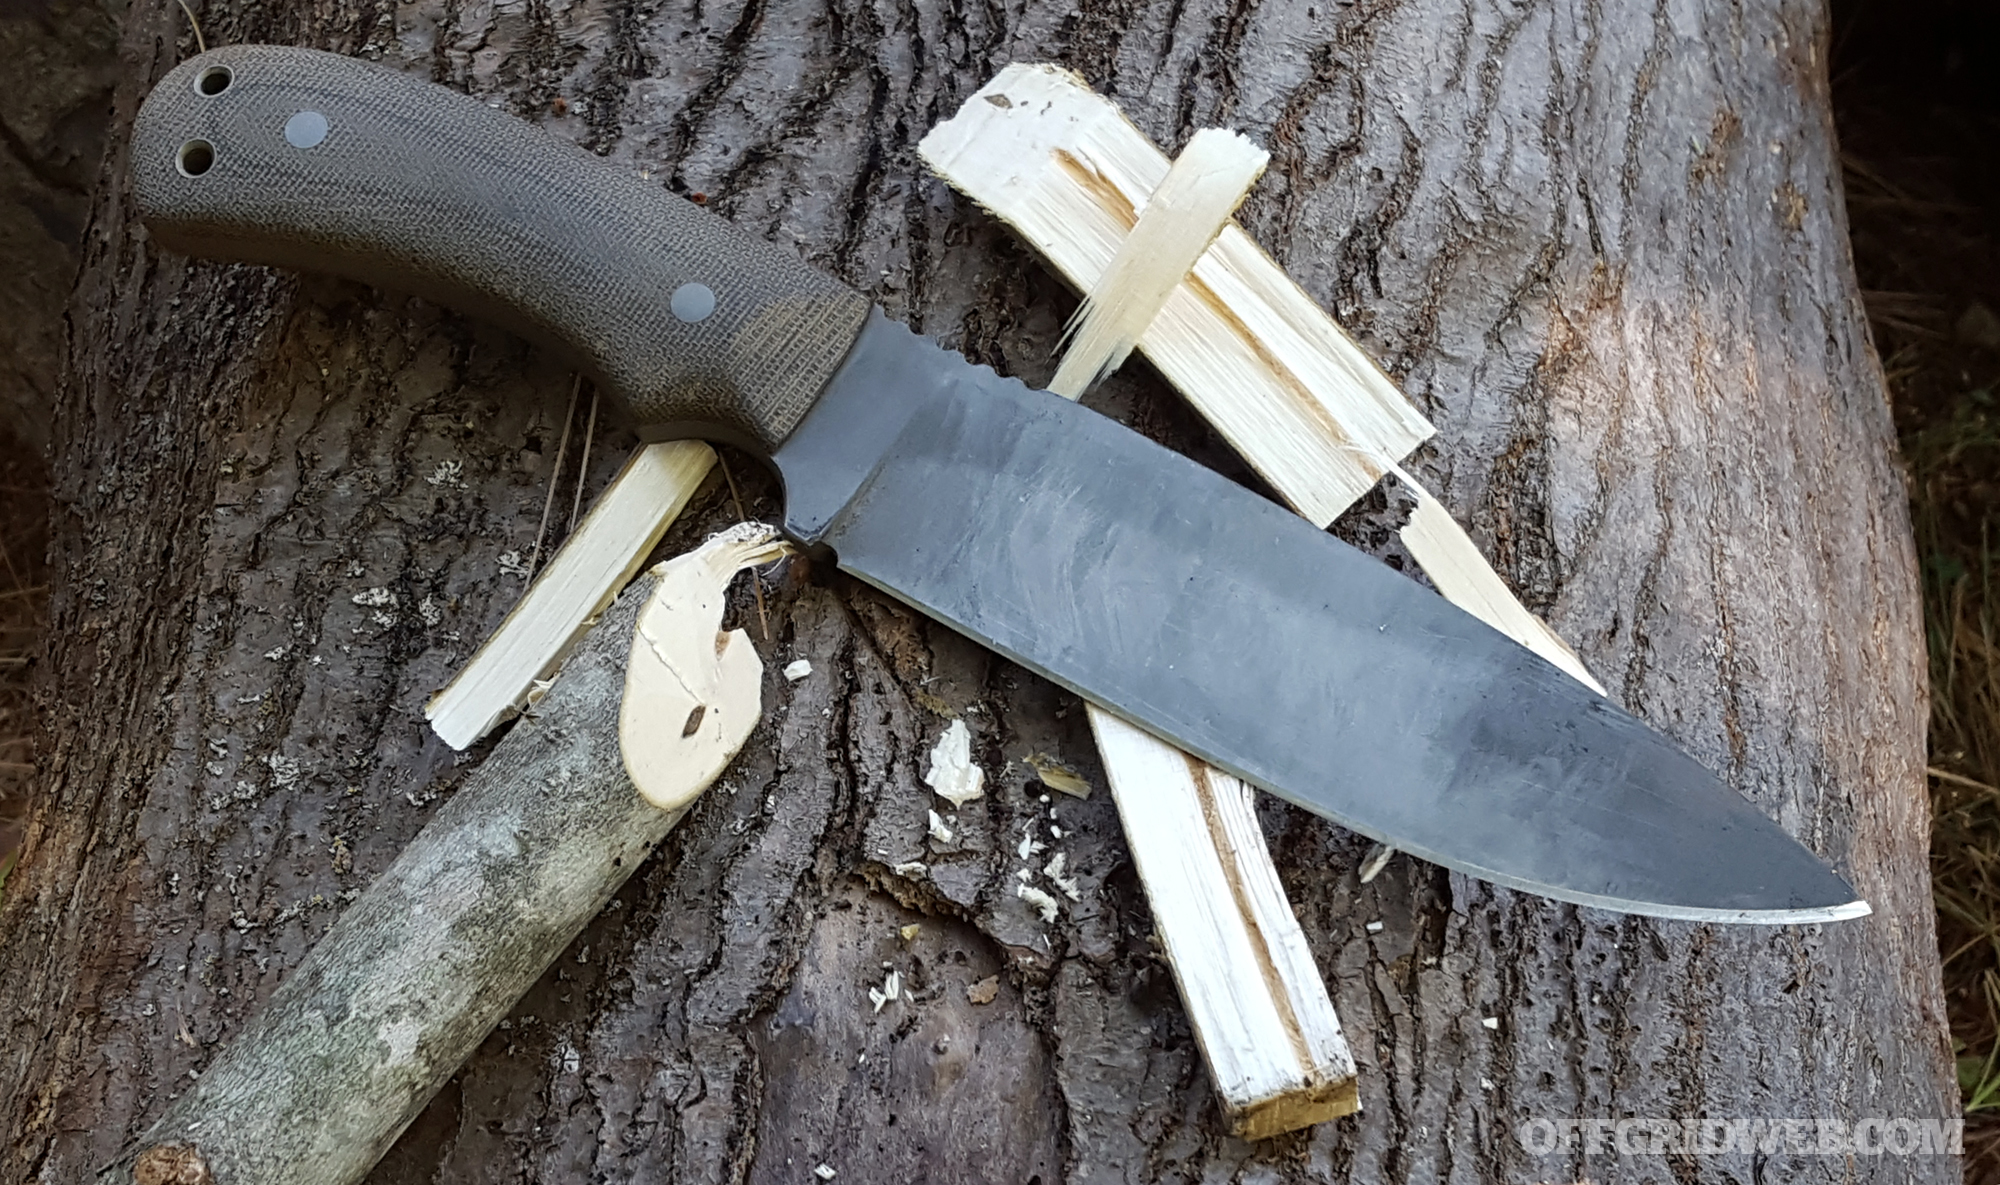
With quick snap cuts, the edge cleanly made its way through bamboo. We used the main blade to chop saplings and remove branches from them. We split smaller pieces of wood by tip-first batoning the blade through them. By choking up on the handle, we had excellent control to carve trap triggers. The single-finger guard in the handle kept our hand from riding the blade.
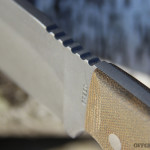
By choking back on the handle, we effectively extended its length and used a snap cut to make quick work of the tasks at hand. We added a small lanyard to the rear lanyard holes but found even more security using a forward lanyard tied around the ricasso.
Using a wooden baton, we forced the 80CrV2 blade through knotted woods and found no deformation to the edge. After extended use, some of the finish on the blade wore off but this was the only noticeable wear on the blade. The edge remained arm-hair-shaving sharp. While used in various grips, the handle felt great and produced no hot spots.
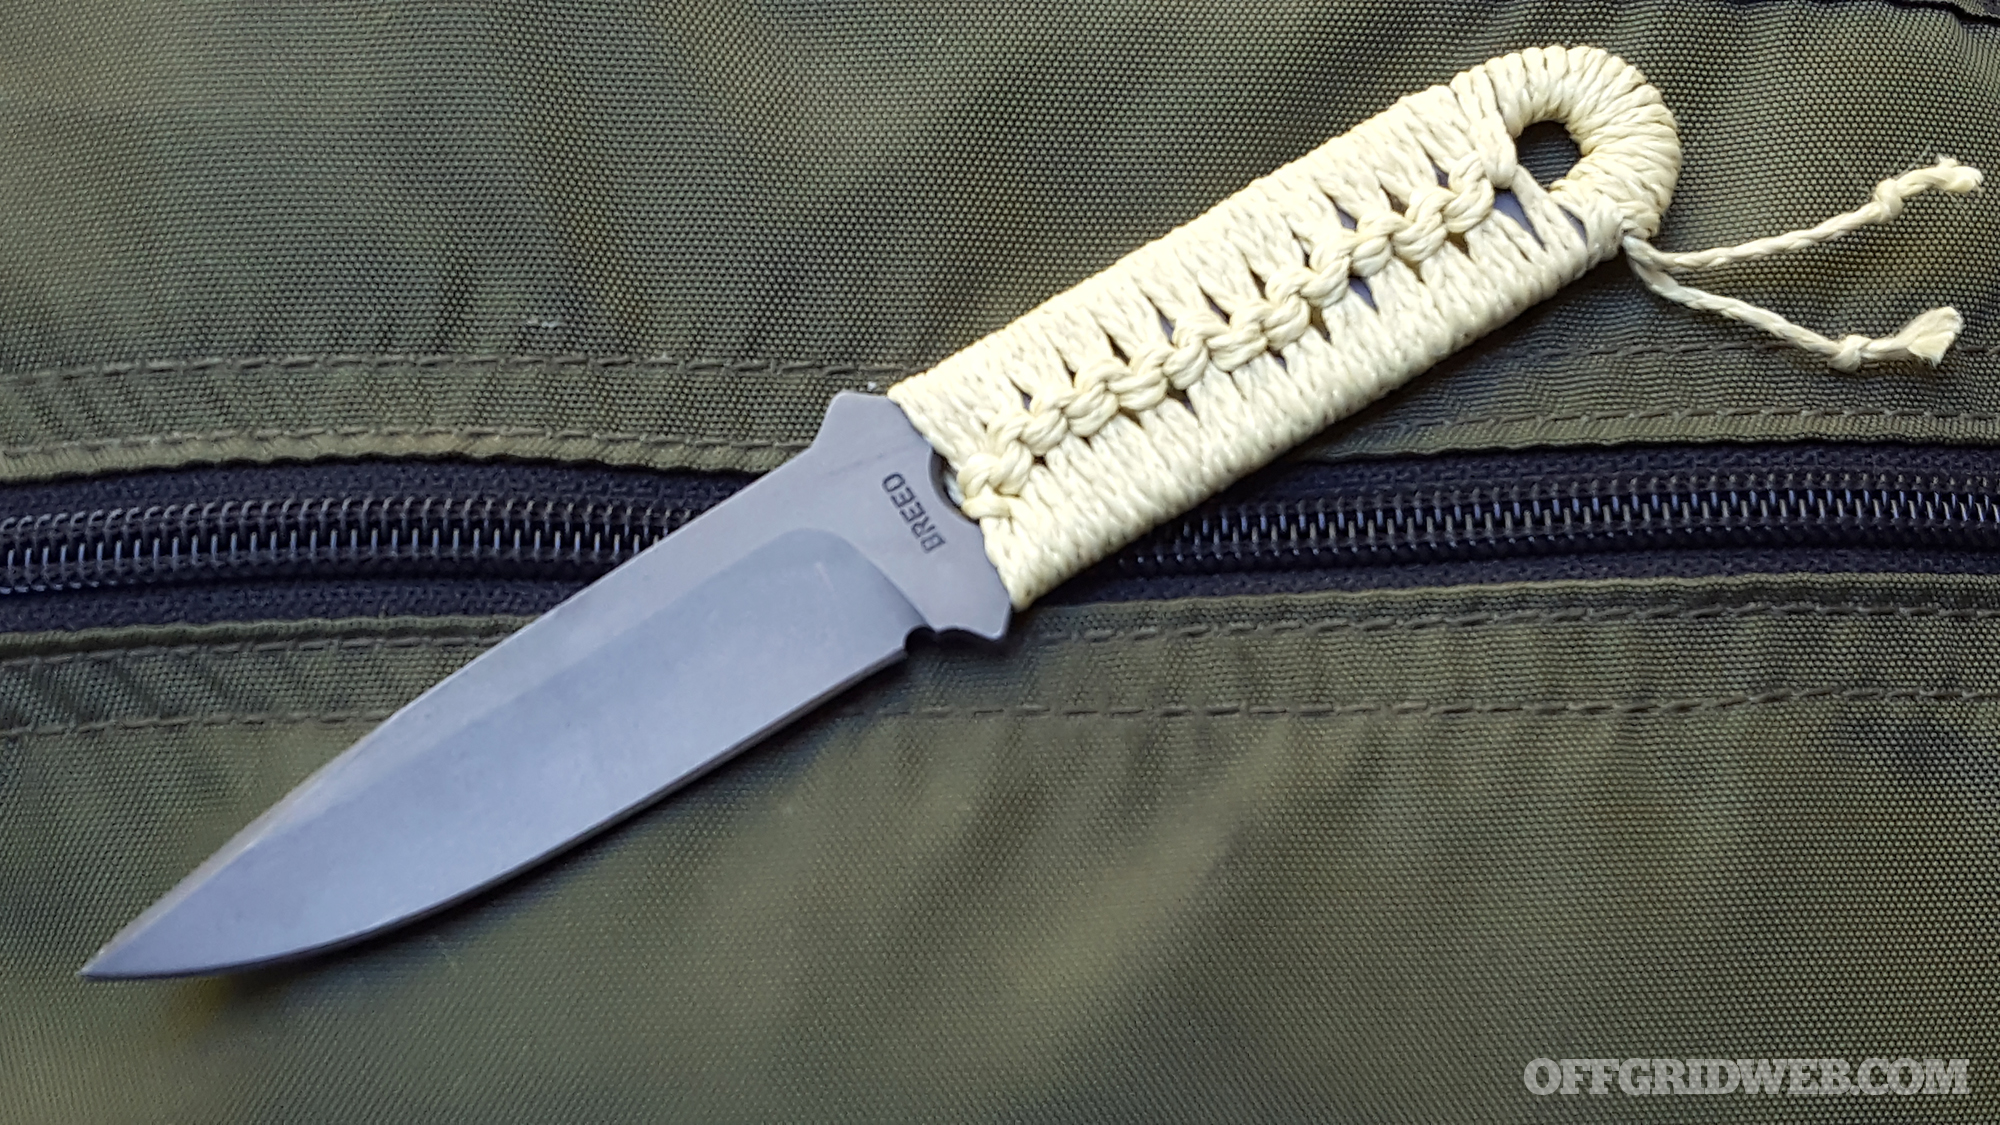
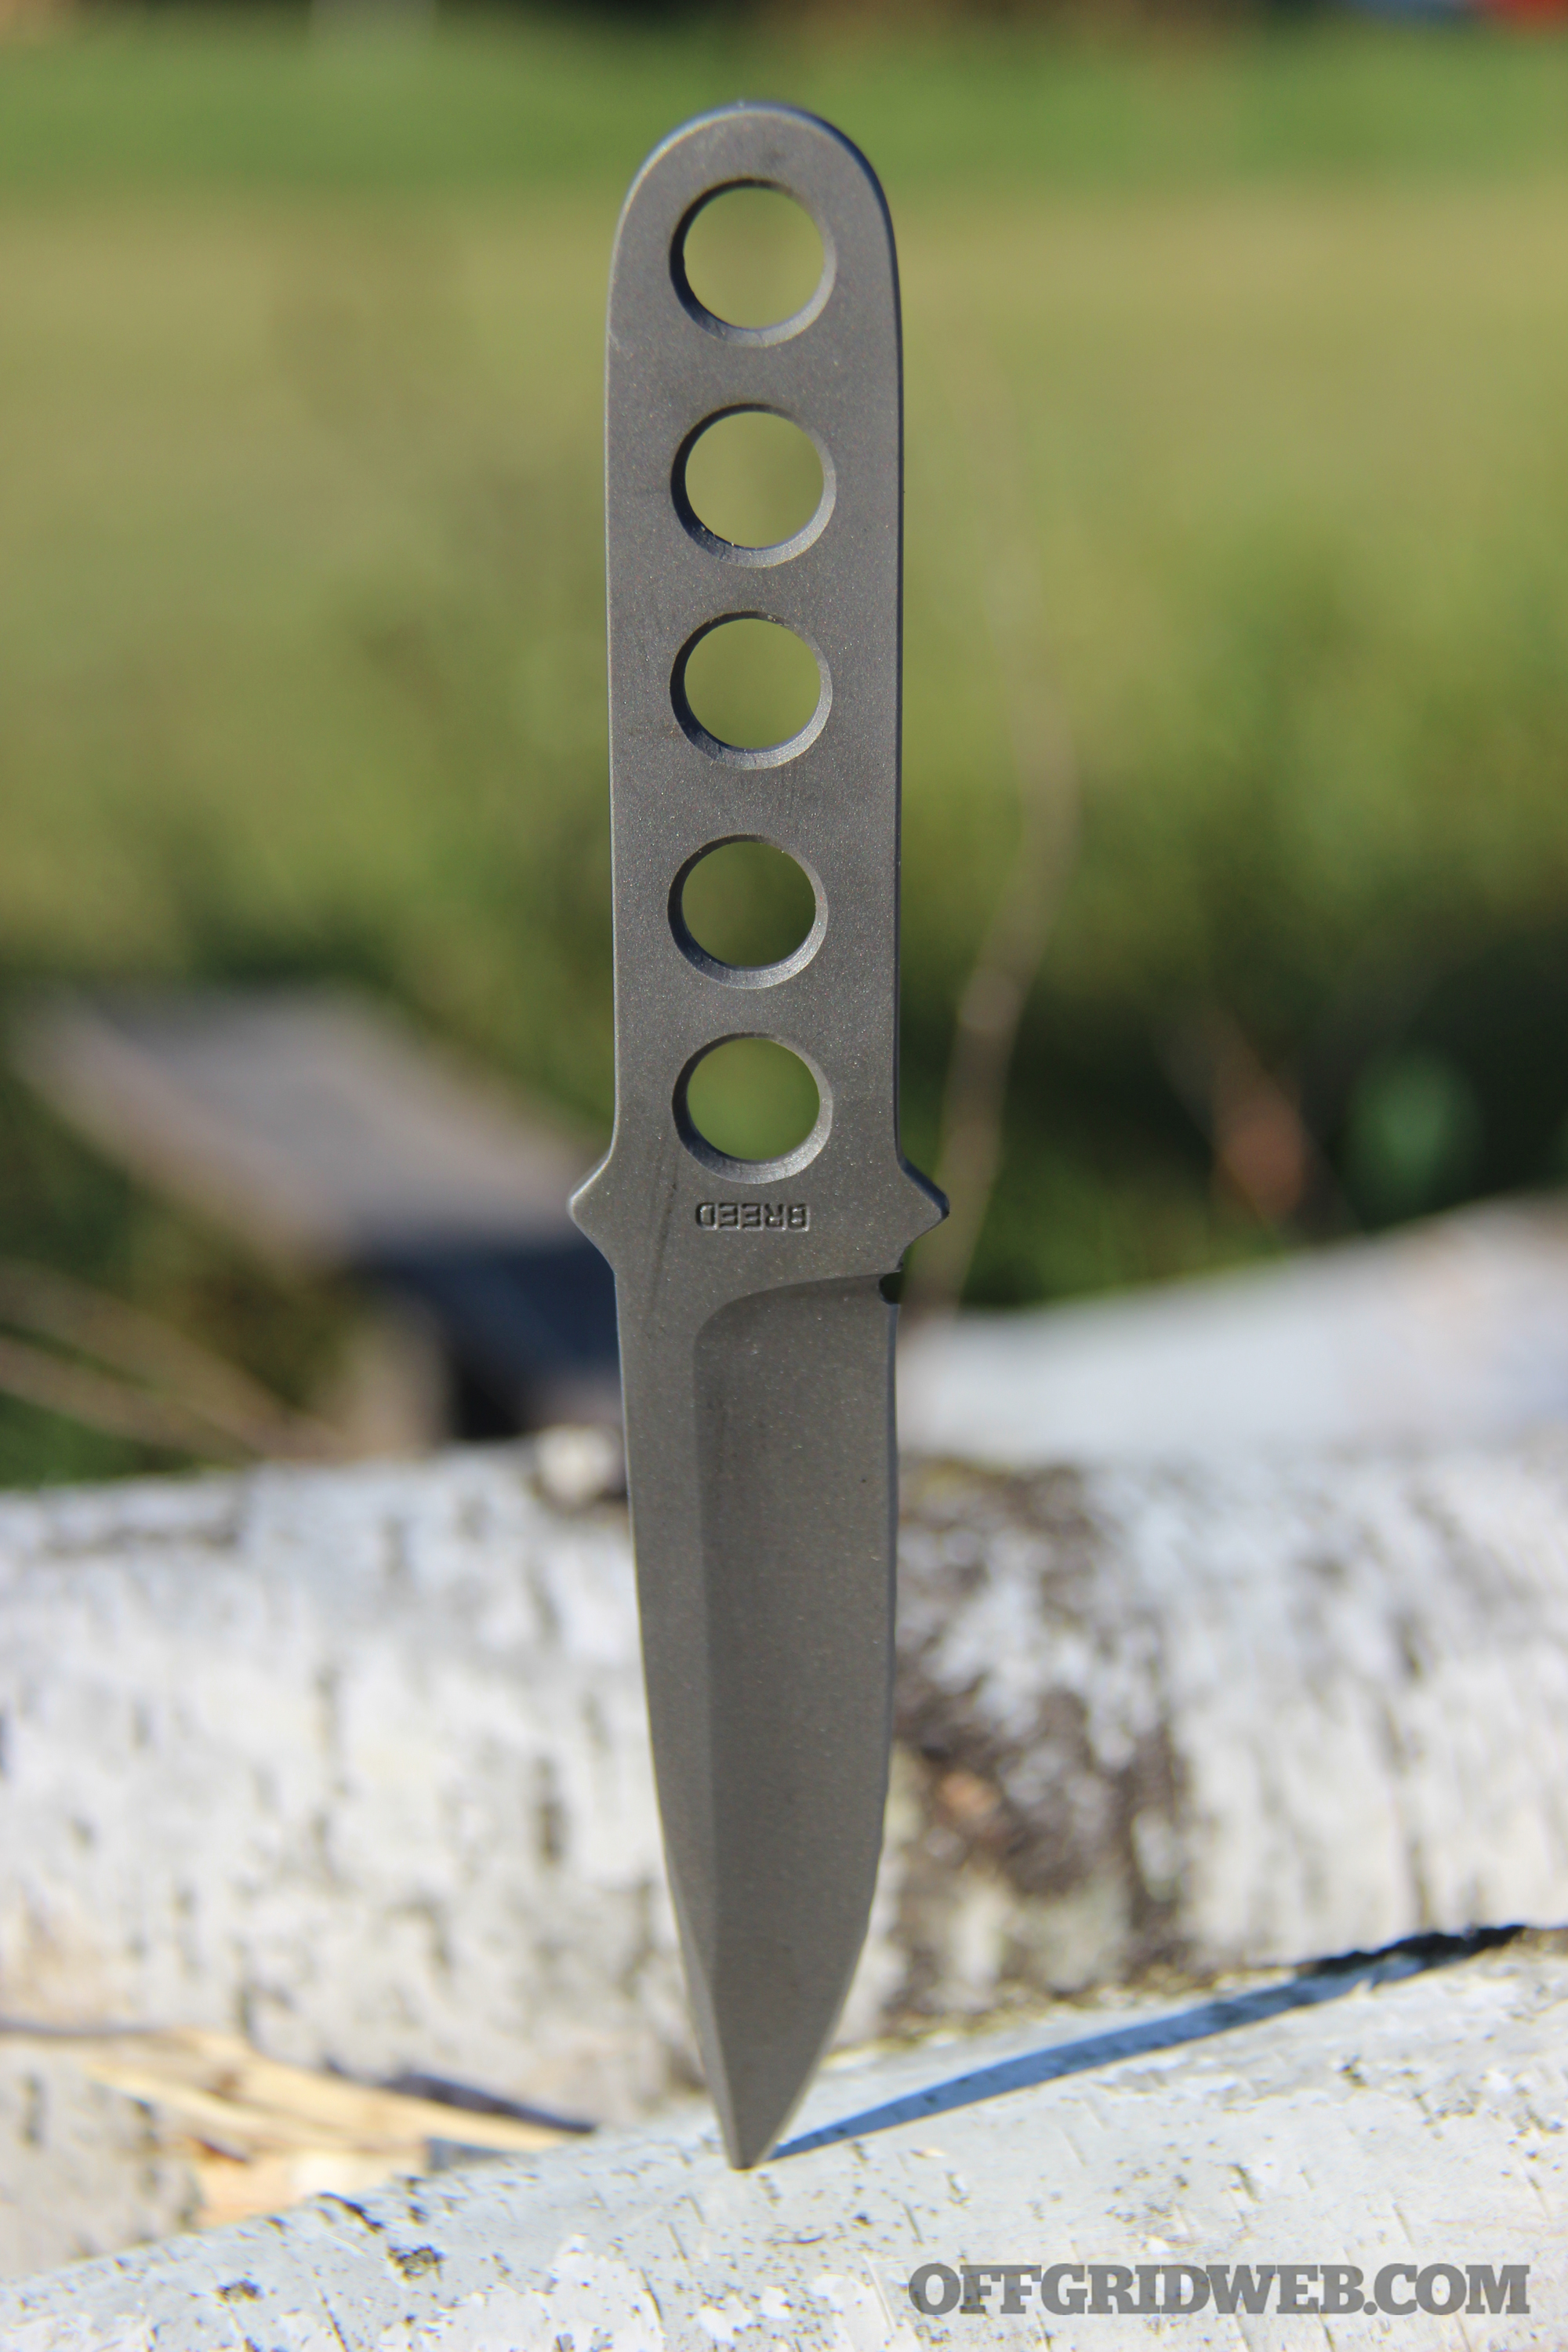
Small SERE Companion Knife
The smaller companion blade, also worked great for its size. Let’s face it, a small blade like the skeletonized companion is not going to do the heavy work of its bigger brother. We decided to use it in lieu of a neck knife for opening meal packets, prepping our food (like hard cheeses and summer sausages) and as a fire steel scraper for the HRK Machining ferro rod.
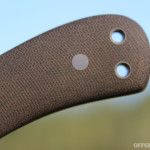
The minimalist design is not meant for a full grip. Most of the time, we used the smaller companion blade in a pinch grip. When we wrapped the smaller blade with some Kevlar-braided cord, it was easier to hold in more traditional grips. With the cordage around the handle, we were still able to use the provided Kydex sheath without having to modify it at all. We also tried paracord and found it extremely comfortable in hand as it made the grip larger but we found we couldn’t get the knife back into its sheath with this bulkier handle wrapping.
At first, we questioned the use of ordinary 440C as a steel instead of one of the newer super steels. Then we remembered who the maker of the SERE Combo is, and realized there must be a reason for selecting that steel. Since the companion blade is carried on the outside of the sheath, it requires better rust resistance, as the blade will be exposed to humidity and precipitation. During all of our testing, we carried the SERE Combo in all sorts of weather and we didn’t notice any rust on the smaller blade.
Ferro Rod Fire Starter
We also tried out the custom ferro rod from HRK Machining that’s available as an option with the Kim Breed SERE Combo.
The knurling on the ferro rod is subtle, but certainly noticeable when your hands are cold and wet. The 4-inch rod is also available in a 3-inch version, but the extra length means extra sparks. We used the companion blade as a scraper, and it worked well, but still wasn’t as effective as a carbide scraper. Hey, we have to call it how it is.
If we could change anything about the SERE Combo, it would be the spine on the companion blade. Its edges are sharp enough to throw a spark, but they could be a little sharper. As it is is, we were able to light multiple fires with this setup, using both man-made tinder and an assortment of birch bark, dried leaves, cedar duff, and cattails. HRK Machining threads their ferro rods, so this rod can be replaced in between training trips and missions in the field.
The more we used the Kim Breed SERE Combo, the more it became evident Kim Breed’s been there, done that, gets it reputation is well deserved. Sure, we could have used an assortment of purpose-specific blades for each of the individual tasks in this article, but the SERE Combo pairing of blades worked extremely well together as a comprehensive survival set. We’re confident this combo of tools will be right at home on your next trip into the woods.
Kevin Estela is the owner/head instructor of Estela Wilderness Education, a bushcraft and survival school in New England. He is a Sayoc Kali Associate Instructor, Brazilian Jiu-Jitsu practitioner, and an avid marksman. As a “survival athlete” he can be found regularly testing his physical and mental limitations in the gym, woods, and urban landscape preparing for the fight.
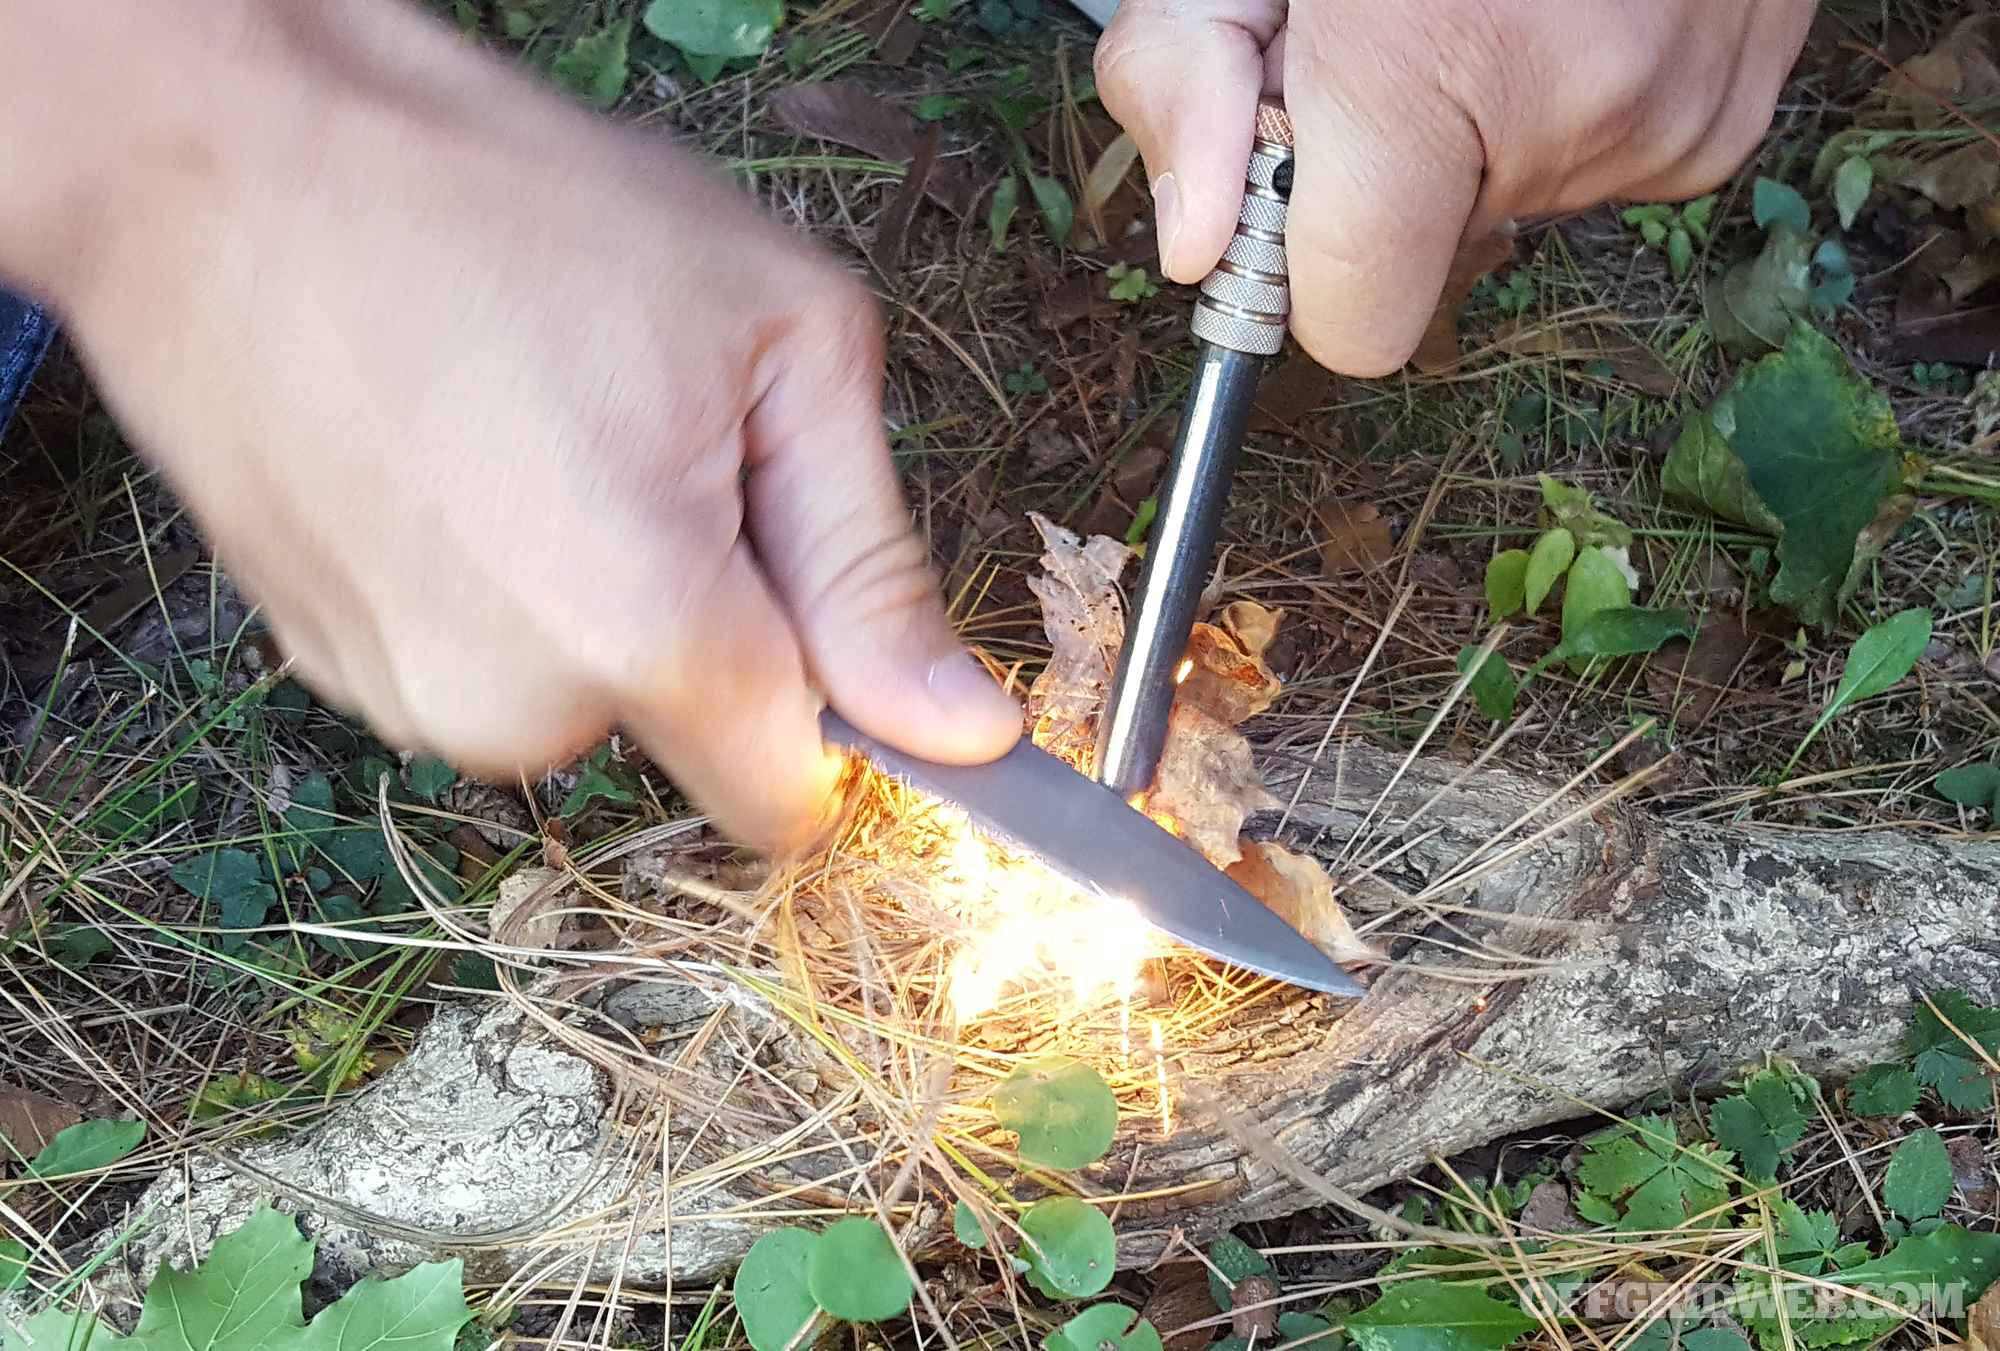
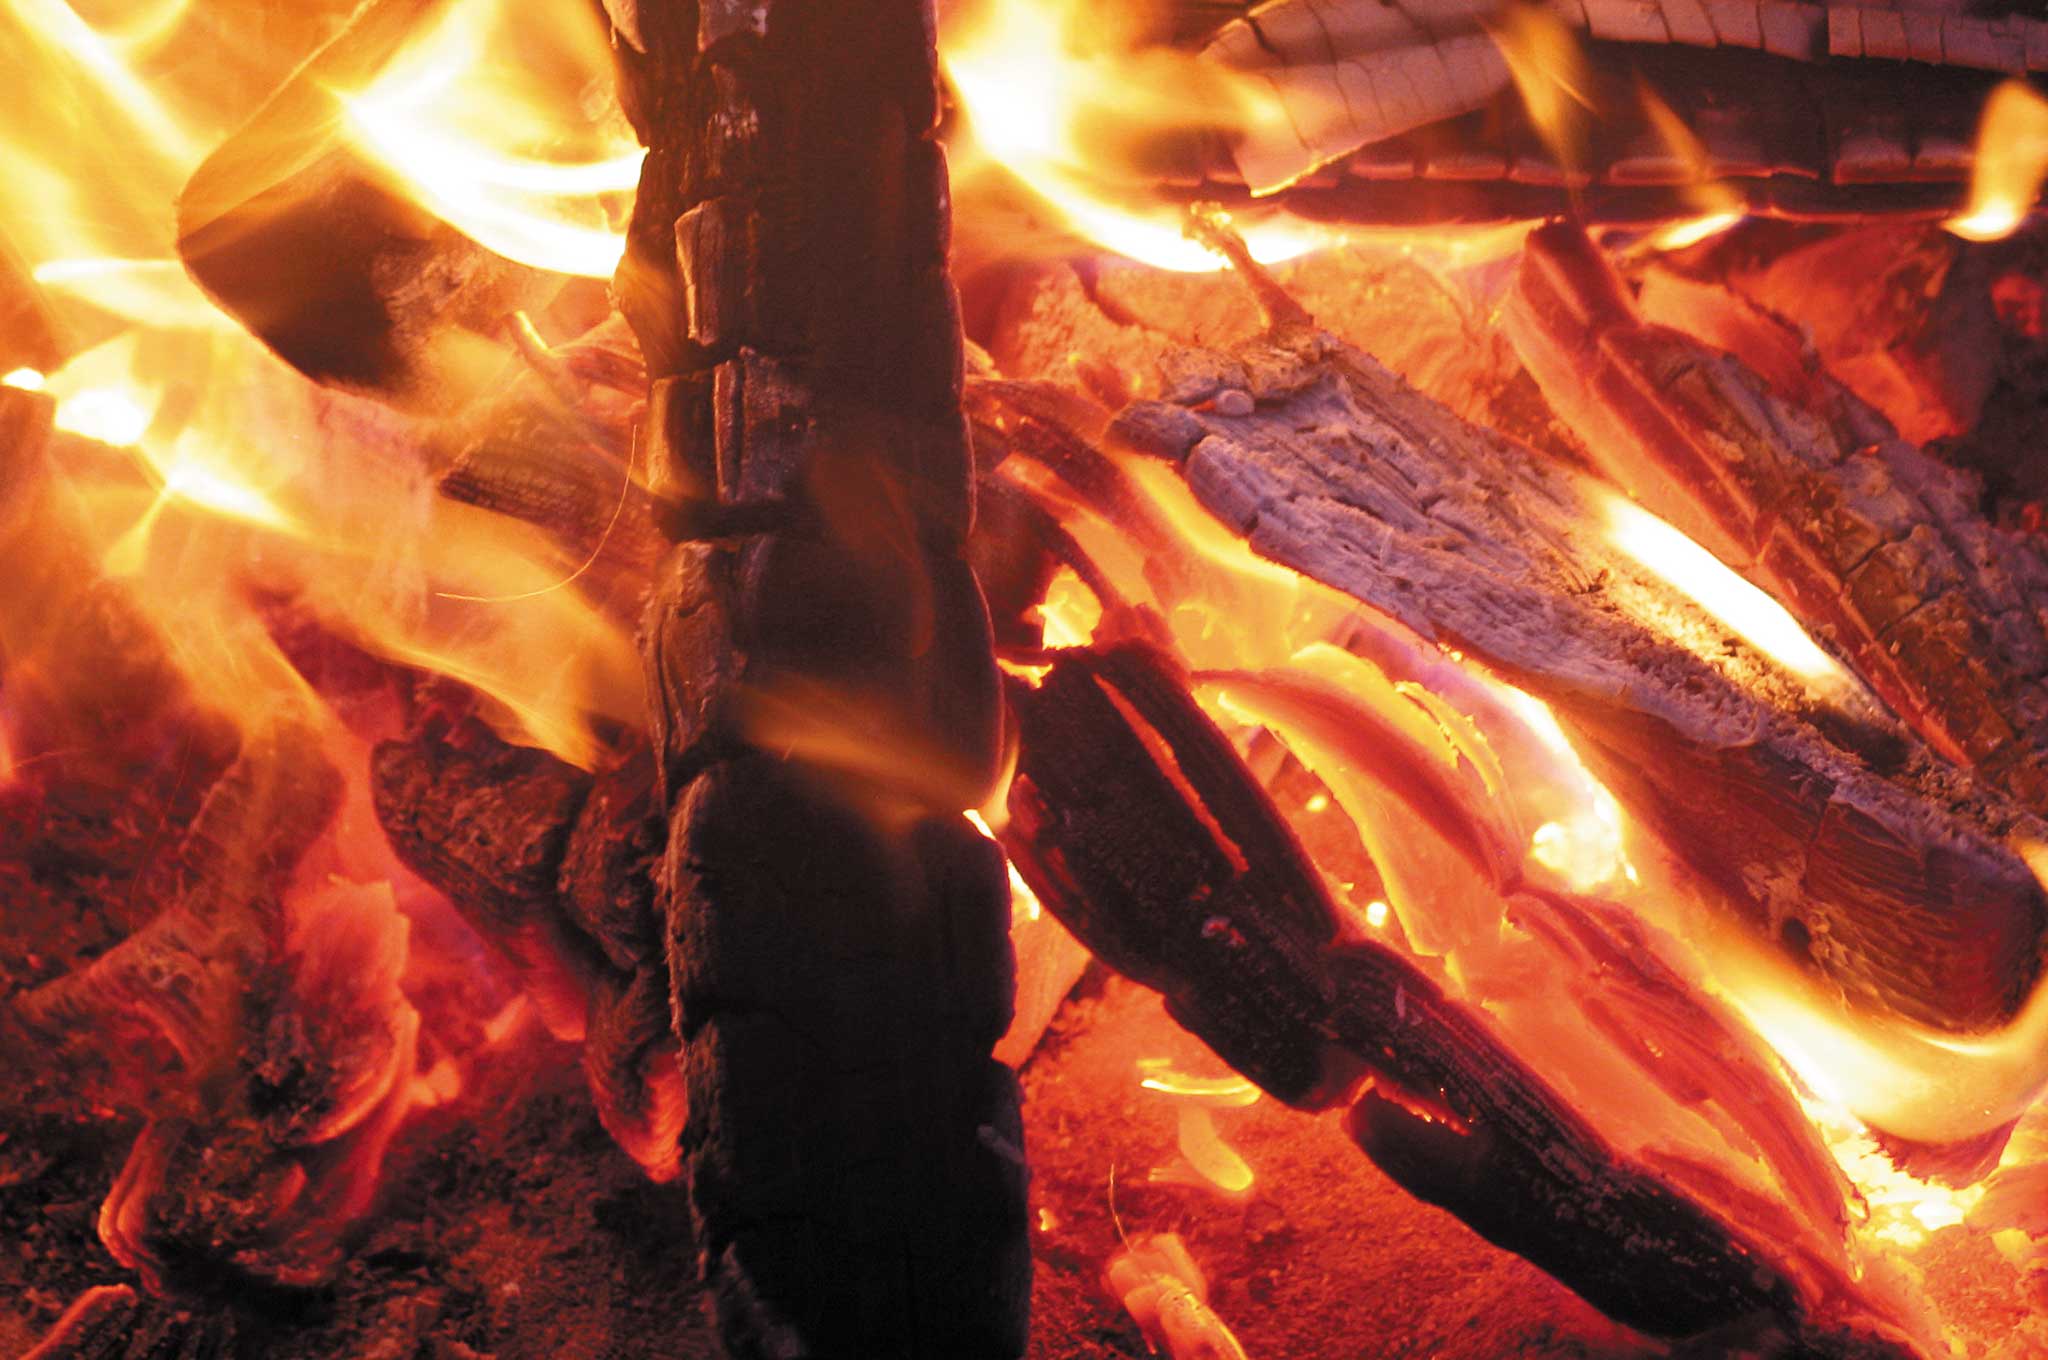
With the aid of modern tools, starting a fire may seem like an easy task. Just whip out a trusty lighter and a few scraps of tinder, and if all goes according to plan, you’ll have a fire going in seconds. If the lighter fails to do the trick, you’ve probably got a backup or two in your survival kit — stormproof matches, a ferro rod, or maybe even a camp stove with built-in ignition. However, if you were somehow separated from all these tools, would you still be able to start a fire?
Primitive fire-making skills can be a life-saver in difficult circumstances because they enable you to get a campfire going with minimal gear. We’ve previously touched on the bow drill and other improvised fire-starters, but one other method to know is the flint and steel technique. Using nothing but a piece of high-carbon steel (such as the spine of your knife) and a sharp-edged hard rock, you can generate enough sparks to light a fire.
“They’re not rocks, Marie. They’re MINERALS!”
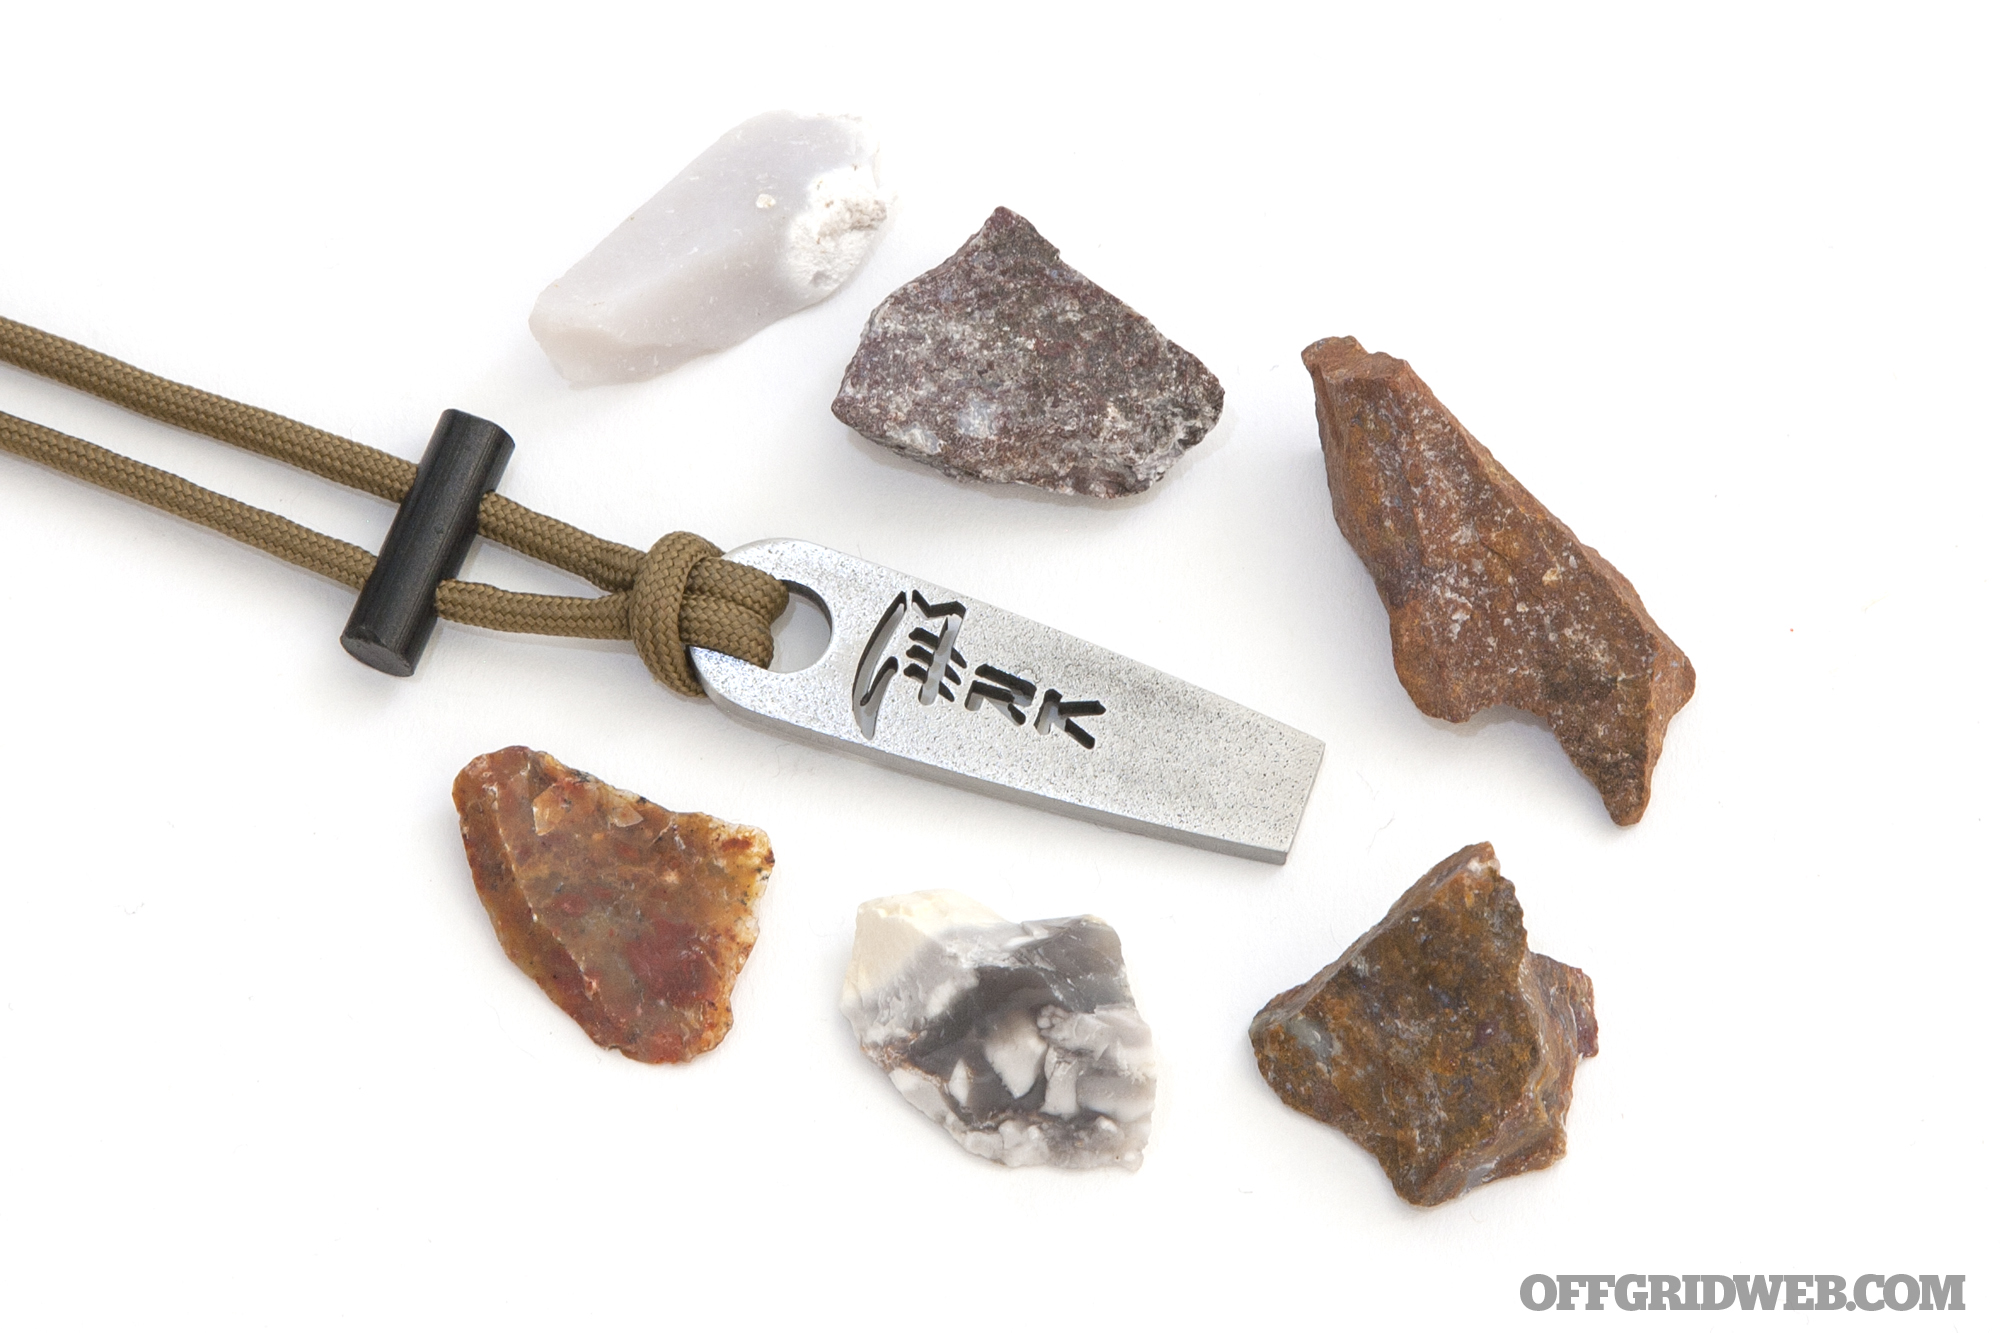
Unless you’ve made a habit of carrying a dedicated flint rock and steel striker, you’ll need to know how to find flint in the wild. It’s important to note that the “flint rock” you find is unlikely to be actual flint or a rock — it’ll probably be some other hard mineral, such as quartz, chert, or agate. However, the name doesn’t matter for the purpose of survival fire-starting. What matters is the stone’s hardness and its ability to form a sharp edge.
The image above shows several types of flint, chert, agate, and quartz, which can be purchased from Emberlit along with various steel striker pendants. For more info on these items, check out our fire-starter buyer’s guide from Issue 18 of our magazine.
In this video from Wilderness Outfitters, Dave Canterbury discusses the characteristics of a fire-starting flint rock. Essentially, it must be rated at approximately 7 on the Mohs scale of mineral hardness, or slightly softer than hardened steel. This can be checked by hitting the rock with a hammer stone, and checking if the stone chips and breaks away with a sharp edge.
Some sources of flint may be encapsulated in a discolored outer crust. Photo: Wikipedia
Another method to find flint is to attempt to scratch glass with the rock’s edge — glass is a 5.5 on the Mohs scale, so flint should be able to scratch it without much resistance. The video below from Mike Reed Outdoors explains in greater detail:
Once you’ve found a source of natural flint or similar hard rock, it’s just a matter of striking a carbon steel item with quick grazing blows. With a little practice, this will generate reliable sparks. These sparks can then be caught by char cloth (ideally) or a carefully-constructed nest of some other highly volatile tinder material. It may not be as quick and easy as pulling out a lighter, but it’s a great fall-back method for primitive survival.
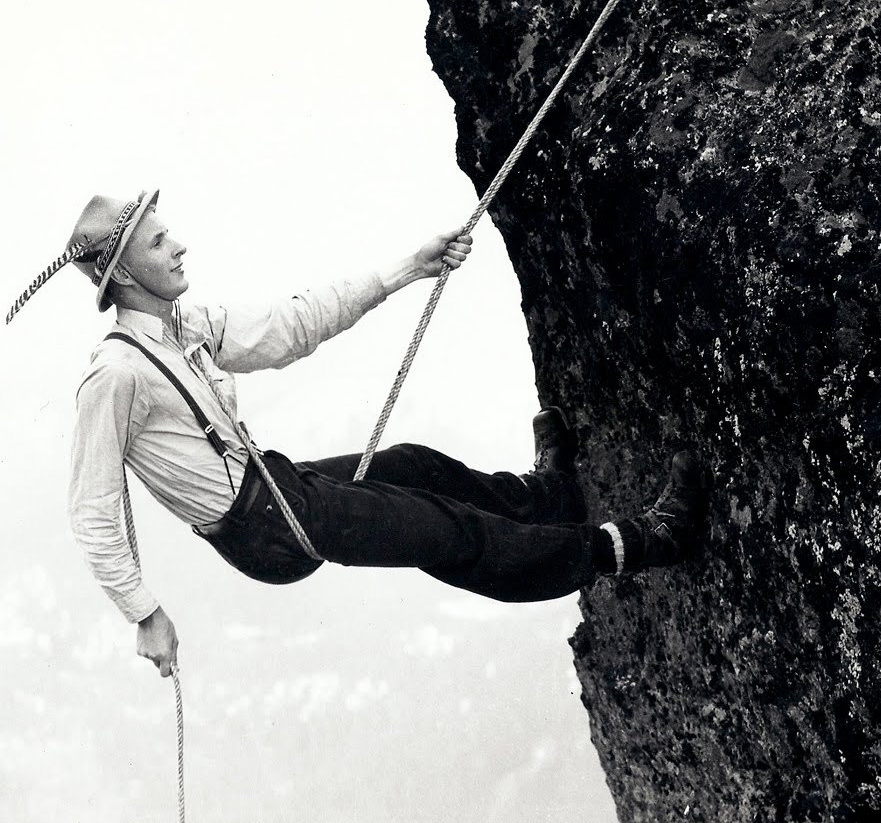
Cordage is useful for many purposes during survival situations, including building shelters, trapping animals for food, and rappelling safely down slopes to reach otherwise inaccessible resources. You’ve probably already got paracord in your bug-out bag, and you may also have jute twine, monofilament fishing line, or other types of cordage. However, these are all finite resources, meaning that they’ll run out or wear out eventually.
Even if you’re not a dapper Swiss mountain-climber, rope can get you out of trouble in many ways.
In long-term survival situations, knowing how to make your own cordage from natural materials is an extremely valuable skill. Luckily, it’s not difficult to do so. Primitive cultures have been making rope and other woven items from natural plant fibers for millennia.
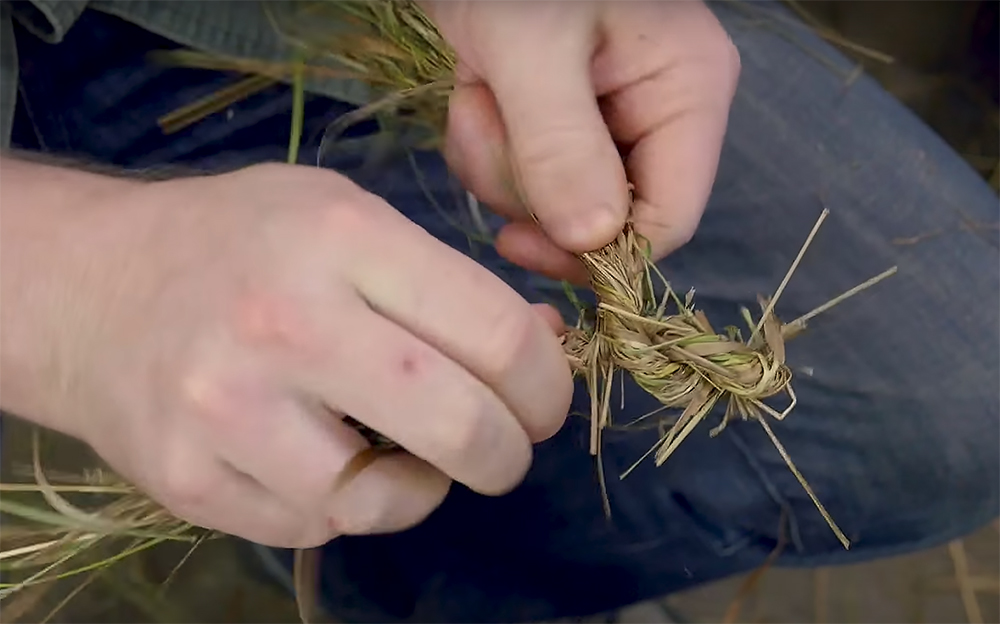
The YouTuber known as NightHawkinLight has made a name for himself by creating hundreds of videos showing how to craft various items, from air cannons and knives to rockets and musical instruments. In his latest DIY video, he shows how to create hand-braided rope from dry grass.
This method can be adapted to any length or thickness of rope, and with a little practice, it’ll only take a few minutes to complete a foot of strong cordage. He also emphasizes that the stiffness and moisture content has a dramatic effect on the rope — fresh green grass is more malleable, but if it’s not dried before use, it’ll shrink and weaken the rope.
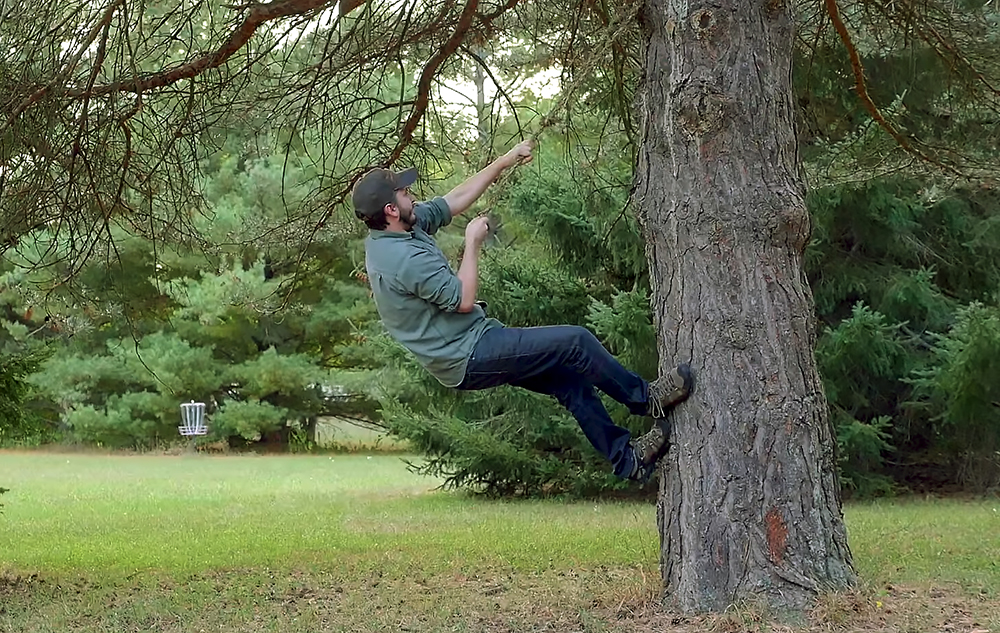
The rope is surprisingly strong. Even knotted, it’s able to support the maker’s full weight.
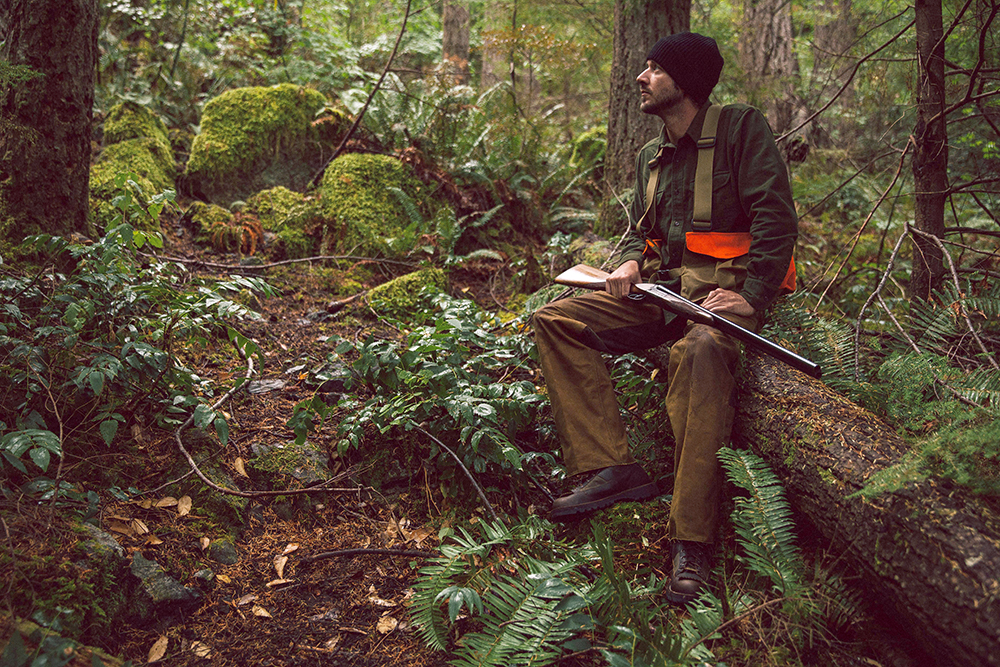
Danner, Grousse Boots, Hunting, Boots, Footwear, 3rd Party, FW17, 20075482BrownGreen
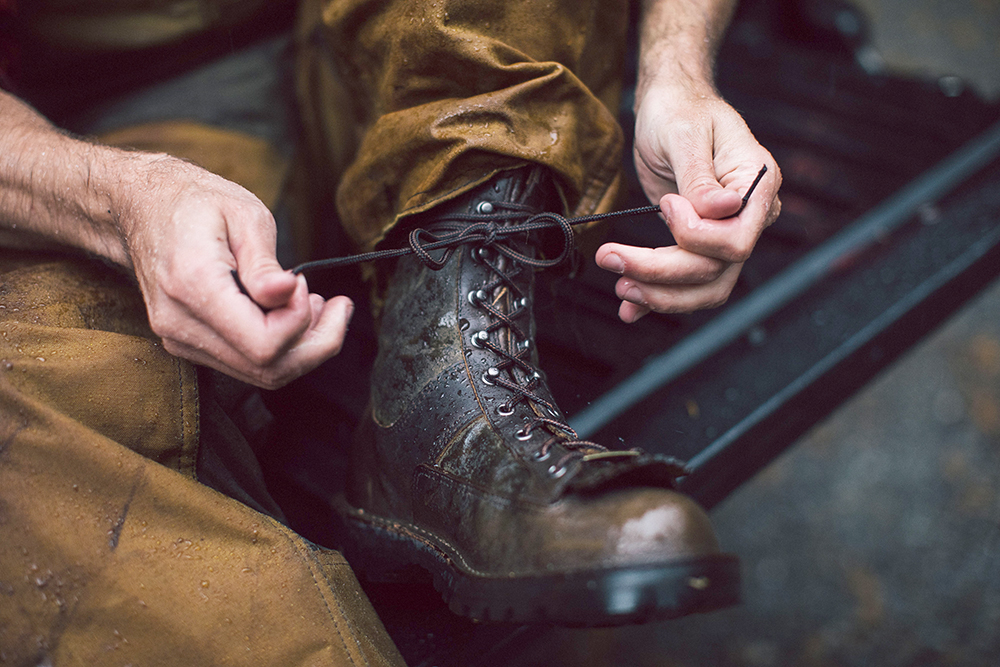
In the wilderness, a pair of good boots is worth its weight in gold. Poor-quality, unsupportive, or uncomfortable footwear can slow your daily trekking progress to a crawl. This effect only gets worse as terrain difficulty increases. Inadequate boots can even lead to serious injury as a result of a slip and fall, a twisted ankle, or a blister that opens the door to infection. For all these reasons, finding the right footwear is paramount for any outdoor adventure.
Fortunately, while synthetic materials and manufacturing techniques have come a long way in the last 100 years, the basic design characteristics of boots have remained relatively constant. Danner was founded in 1932, and has been producing American-made boots with the same core principles since then. Rugged soles, durable leather, and a time-tested lace-up design — it’s a formula that works in the backwoods.
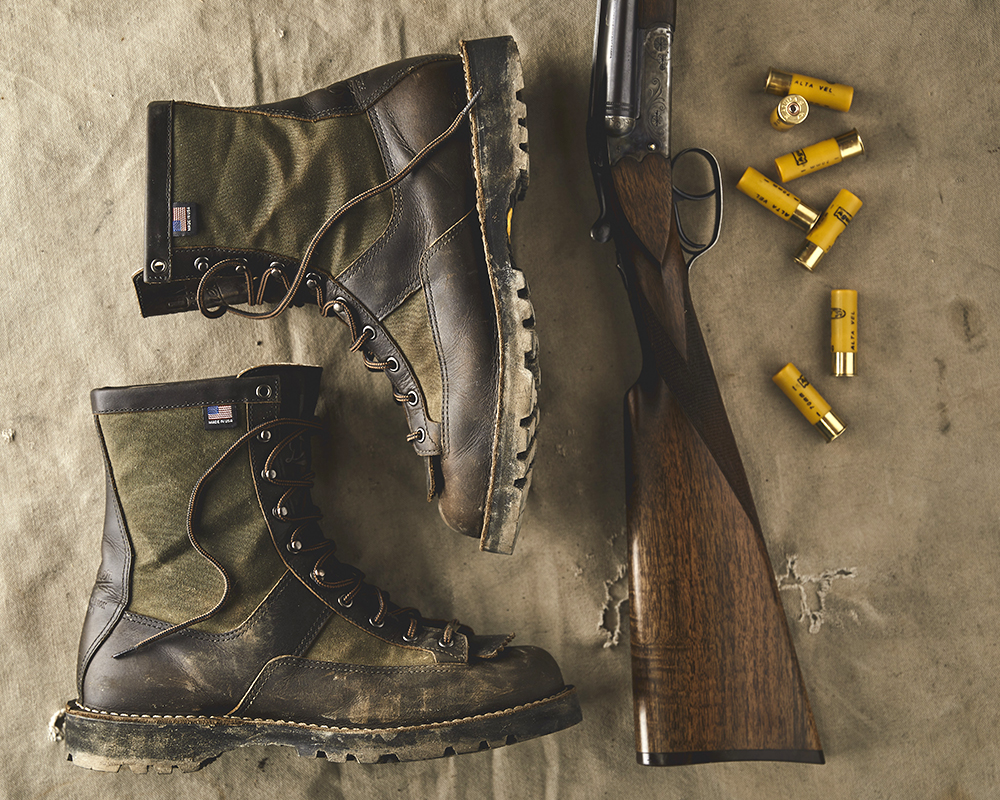
This year, Danner has announced a new collaboration with another even older gear brand. Filson was established in Seattle in 1897, and is still known for its tough outdoor clothing, from flannel work shirts to wool sweaters and leather jackets.
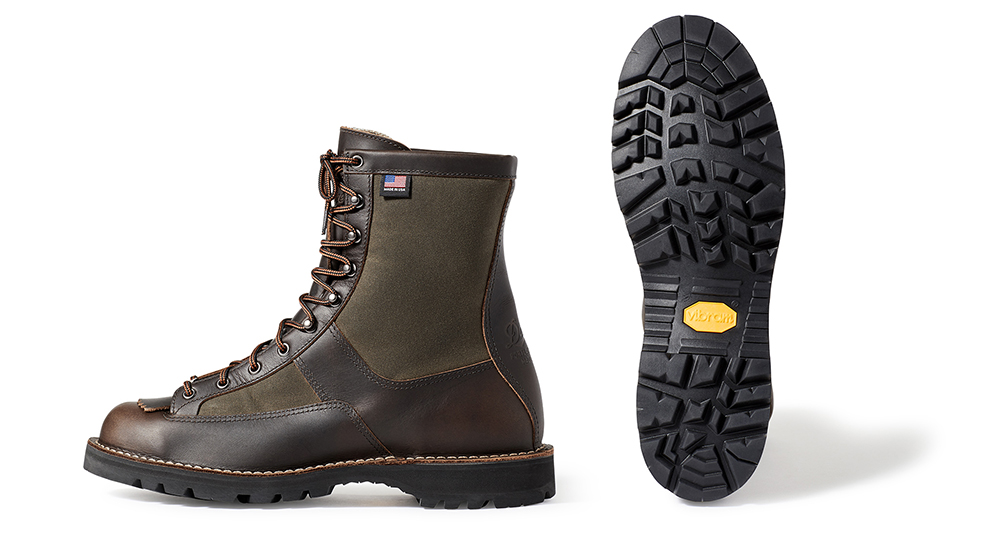
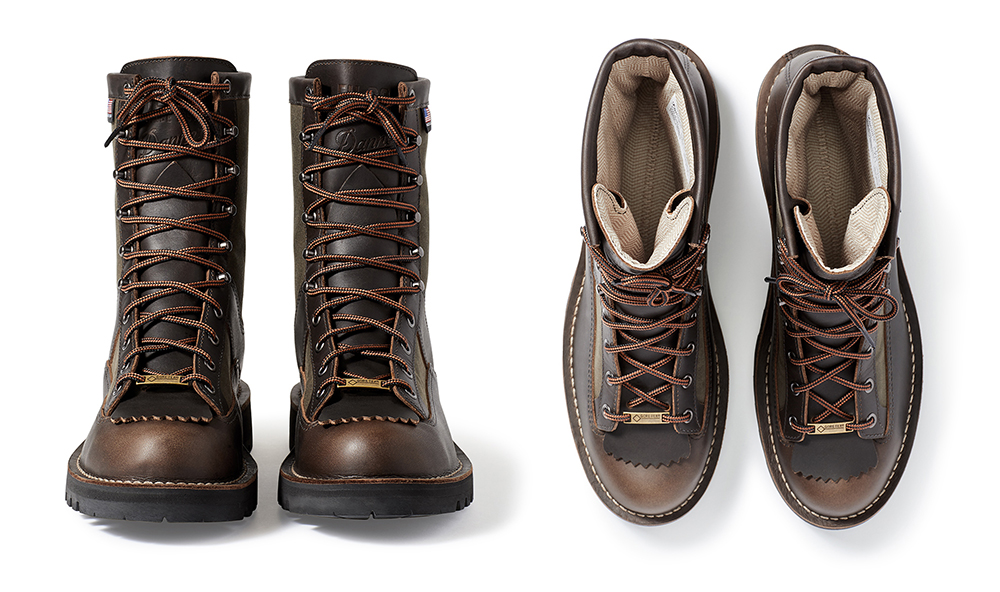
Filson and Danner have teamed up to produce the Filson x Danner Grouse boot. These 8-inch boots blend full-grain brown leather from Danner, water-resistant waxed tin cloth from Filson, GORE-TEX lining, and a Vibram Sierra outsole.
The Filson x Danner Grouse is being manufactured in Danner’s Portland, Oregon facility, and each boot bears a clear “Made in USA” tag on its collar. However, a press release stated that production of these collab boots will be limited to 375 pairs, so it should be considered a limited-time project.
These hunting boots are available at Filson and Danner retail stores, or online at Filson.com or Danner.com. Their MSRP is $390, and they range in size from 8 to 13 (standard D width).
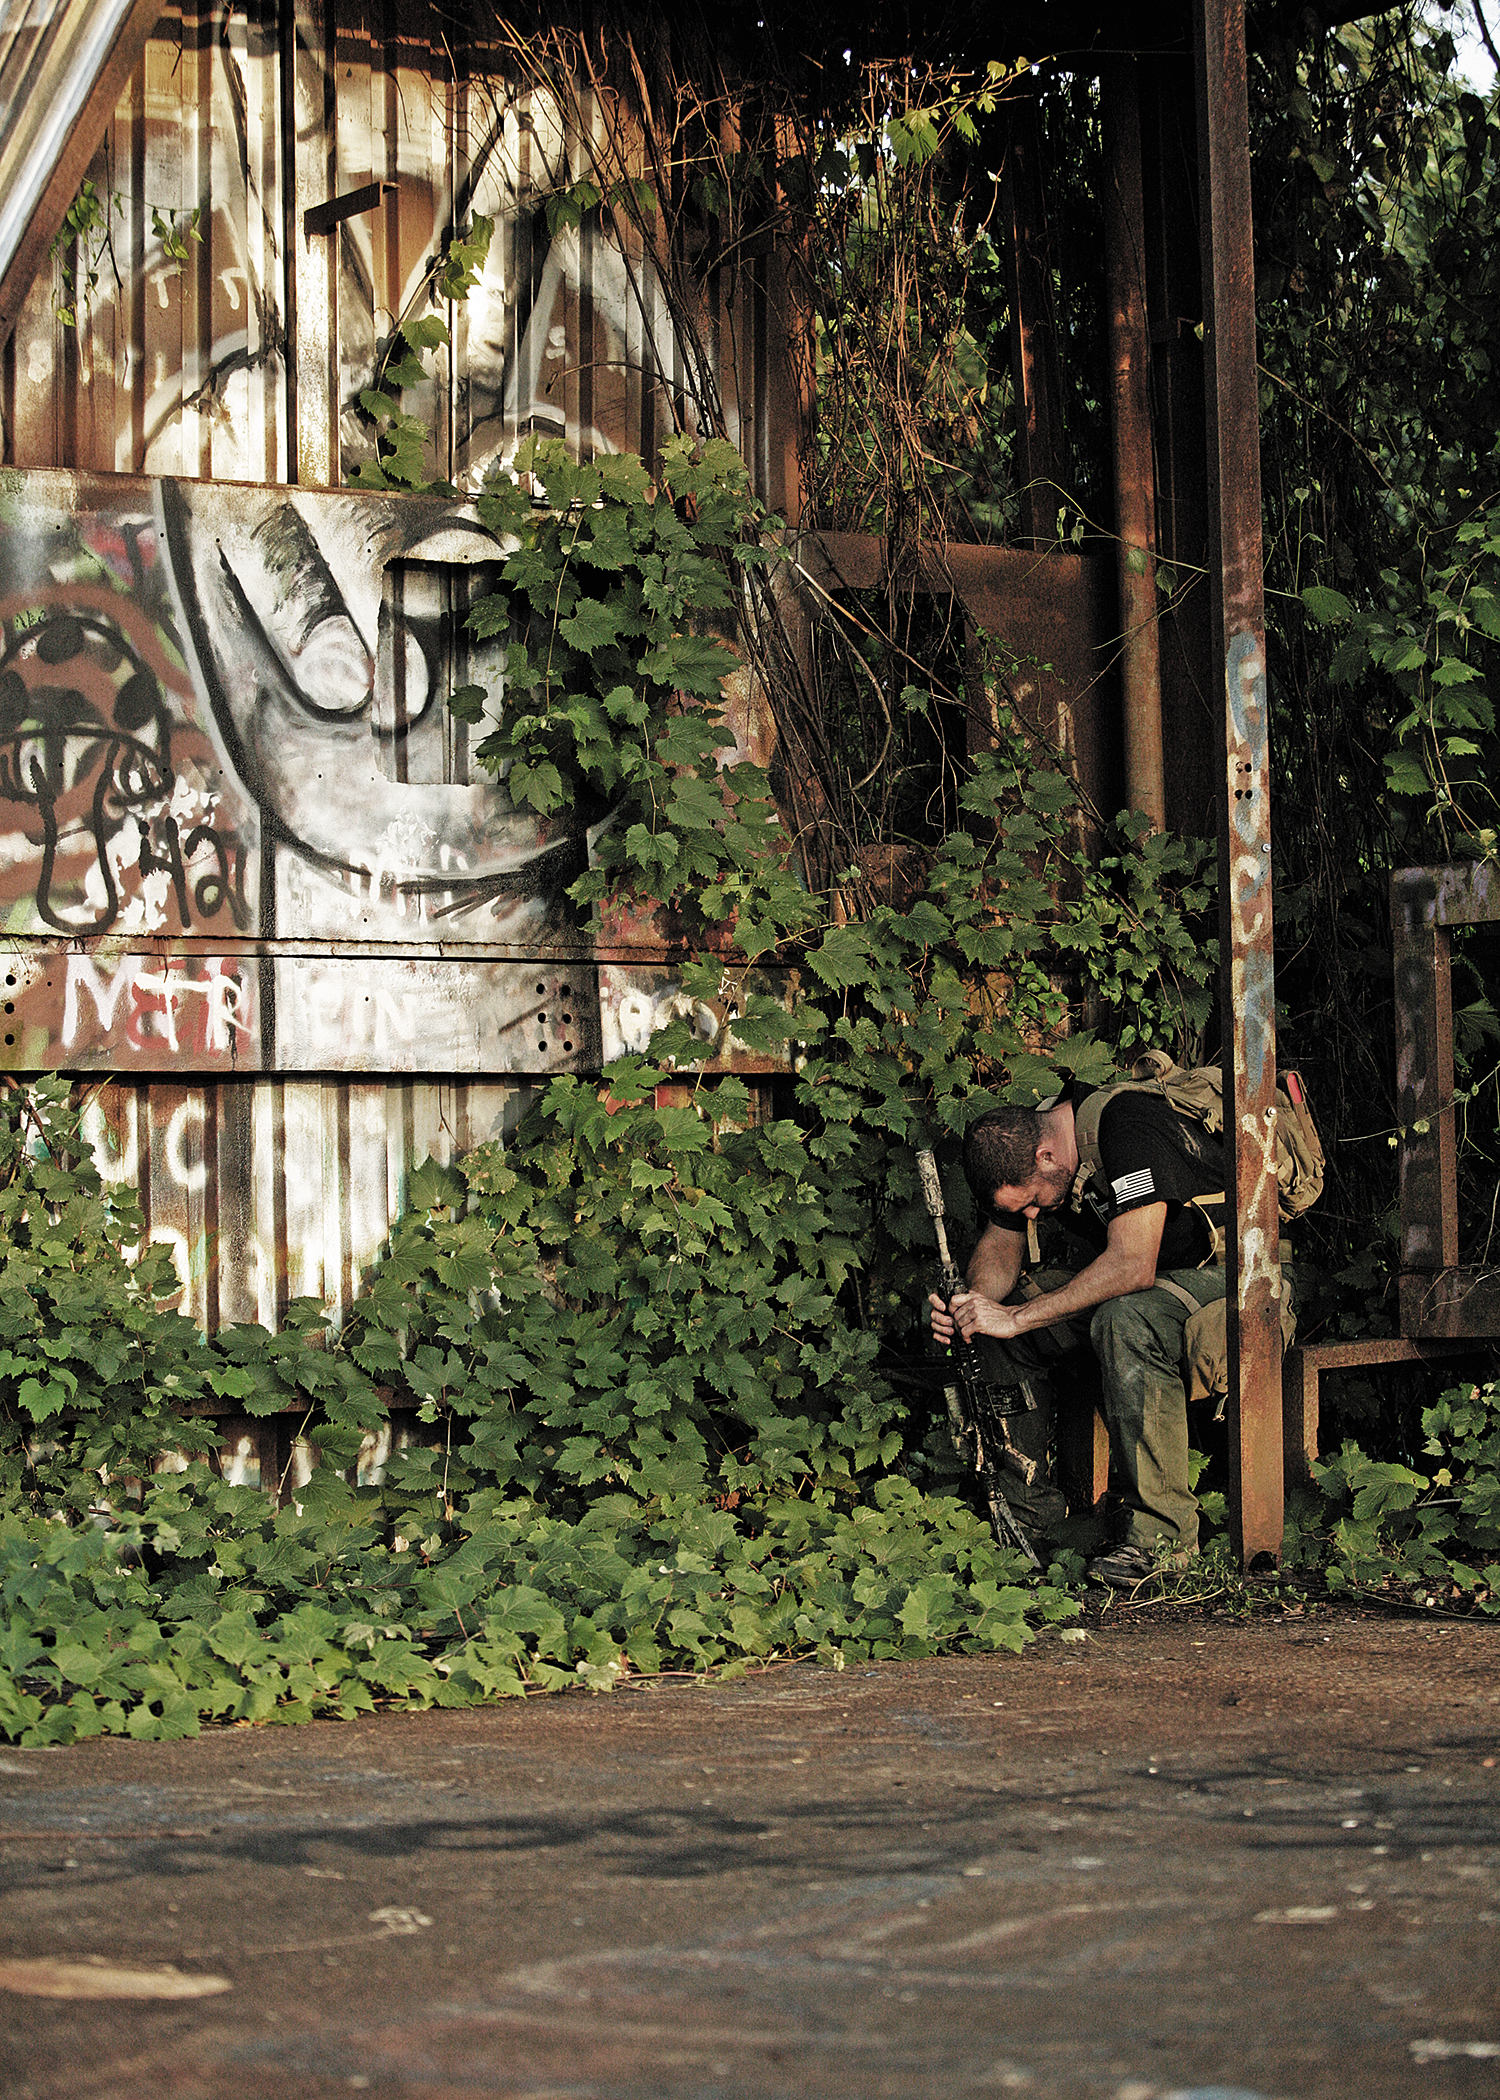
Recent articles in Business Insider, Forbes, and The New Yorker have all reported that some of the nation’s wealthiest individuals are snatching up large swaths of land or even buying abandoned missile silos and converting them into condos in preparation for doomsday. If this is a sign of things to come, then it’s definitely time to start thinking about securing your own remote rendezvous.
But where do you start, what do you look for, and what is really appropriate to sustain your family in the event of a long-term disaster?
While it might sound easy enough to fall back to your vacation property a few hours away, play out some hypothetical events first to determine if that’s even realistic. If things get haywire, will angry hordes also desperately seek shelter in the same vicinity? Can you and your family reach the area on foot if it’s inaccessible by vehicle? Are the altitude, temperature, and surrounding resources conducive to years of potential occupancy?
RECOIL OFFGRID got a chance to check out one owner’s hideaway and pick his brain on what his impetus was for buying a secluded property, what his criteria were for choosing the right location, and what he’s done to make it livable.
The Writing on the Wall
Joe Galt was born in California, but has lived in Colorado for 20-plus years where he’s raised a family and now works as a professional. Although Y2K (and all the hysteria leading up to it) ended up being one of the biggest false alarms in human history, it got him thinking about how things might have turned out if the country had been technologically frozen on a major scale. Heeding this warning, he realized the Denver metro area wouldn’t be safe if a similar event wasn’t quite as forgiving and began establishing some stipulations for an isolated home away from home.
Through a real estate agent, he learned of a 70-acre parcel in rural Gardner, Colorado, for sale by a private party. Gardner is roughly two hours south of Denver by car, and Galt felt it checked off the conditions that were important to him. Although everyone’s needs are different, we’ll break down what his prerequisites were and how this property met those requirements.
Privacy
In the aftermath of a disaster, close proximity to dense population centers will draw attention to the resources and people you’re trying to defend. The haves and have-nots will become that much more apparent if conditions become desperate. Galt’s first order of business was getting away from major cities.
“I wanted an area that had access to roads, but wasn’t close to big cities and didn’t force us to pass through any while en route to the location,” he says. “I also didn’t want to be anywhere people lived and commuted, or near any big industrial production or prisons.”
Galt forecasted some possible disaster scenarios to predict if his location would be in the path of possible population drifts from the closest major cities. If disaster struck, he anticipated those in Denver would head west to the mountains during the summer months because it’s cooler. If a catastrophe occurred during winter, and snowplows aren’t running, 6 inches of snow or greater is enough to severely limit any mobility in or out of many cities — most people would be stuck where they are until the weather breaks.
Gardner itself has a population of less than 100 people. It’s an unincorporated area, and zoned for agriculture. The closest major highway to Galt’s property is 30 miles away and has limited traffic consisting primarily of local farming and ranching activity. The city is devoid of tourism and any residential development. His location is 4 miles from any paved road and a mile off the nearest county road. Mail is sent to a P.O. box.
Galt also felt the likelihood anyone would stray 30 miles from the highway during a catastrophe was low.
“This location is hard to find if you don’t know where you’re going,” he says. “People just wouldn’t think there’s resources here. If someone has nowhere to go, they’d likely go somewhere they’re familiar with like Aspen, Steamboat, or Vail, instead of a small city where they don’t know what to expect. People might eventually find their way out here, but having an environment you can control, identify who’s who, and block off vehicle traffic is critical — and that’s what we have.”
The city of Gardner is essentially only accessible via one highway. The closest cities are Trinidad and Walsenburg, both of which are at least 30 miles away and have populations under 10,000 people according to the latest census data.
Accessibility & Security
The question of being able to get to the property if roads or bridges are blocked, or if transportation is unavailable, was something else Galt contemplated and attracted him to this particular location. Many people are so reliant on driving that they don’t bother to examine topography or identify difficult terrain or obstacles that can’t be traversed without a car.
There are no major waterways, mountain ranges, or thoroughfares to cross if he and his family had to escape on foot from Denver to his bug-out locale.
“If we had to walk it, we could do it in two-and-a-half days with our bug-out bags,” he says. It’s generally assumed that civility will collapse within 72 hours of a major disaster, so this travel timeline works well within that prediction.
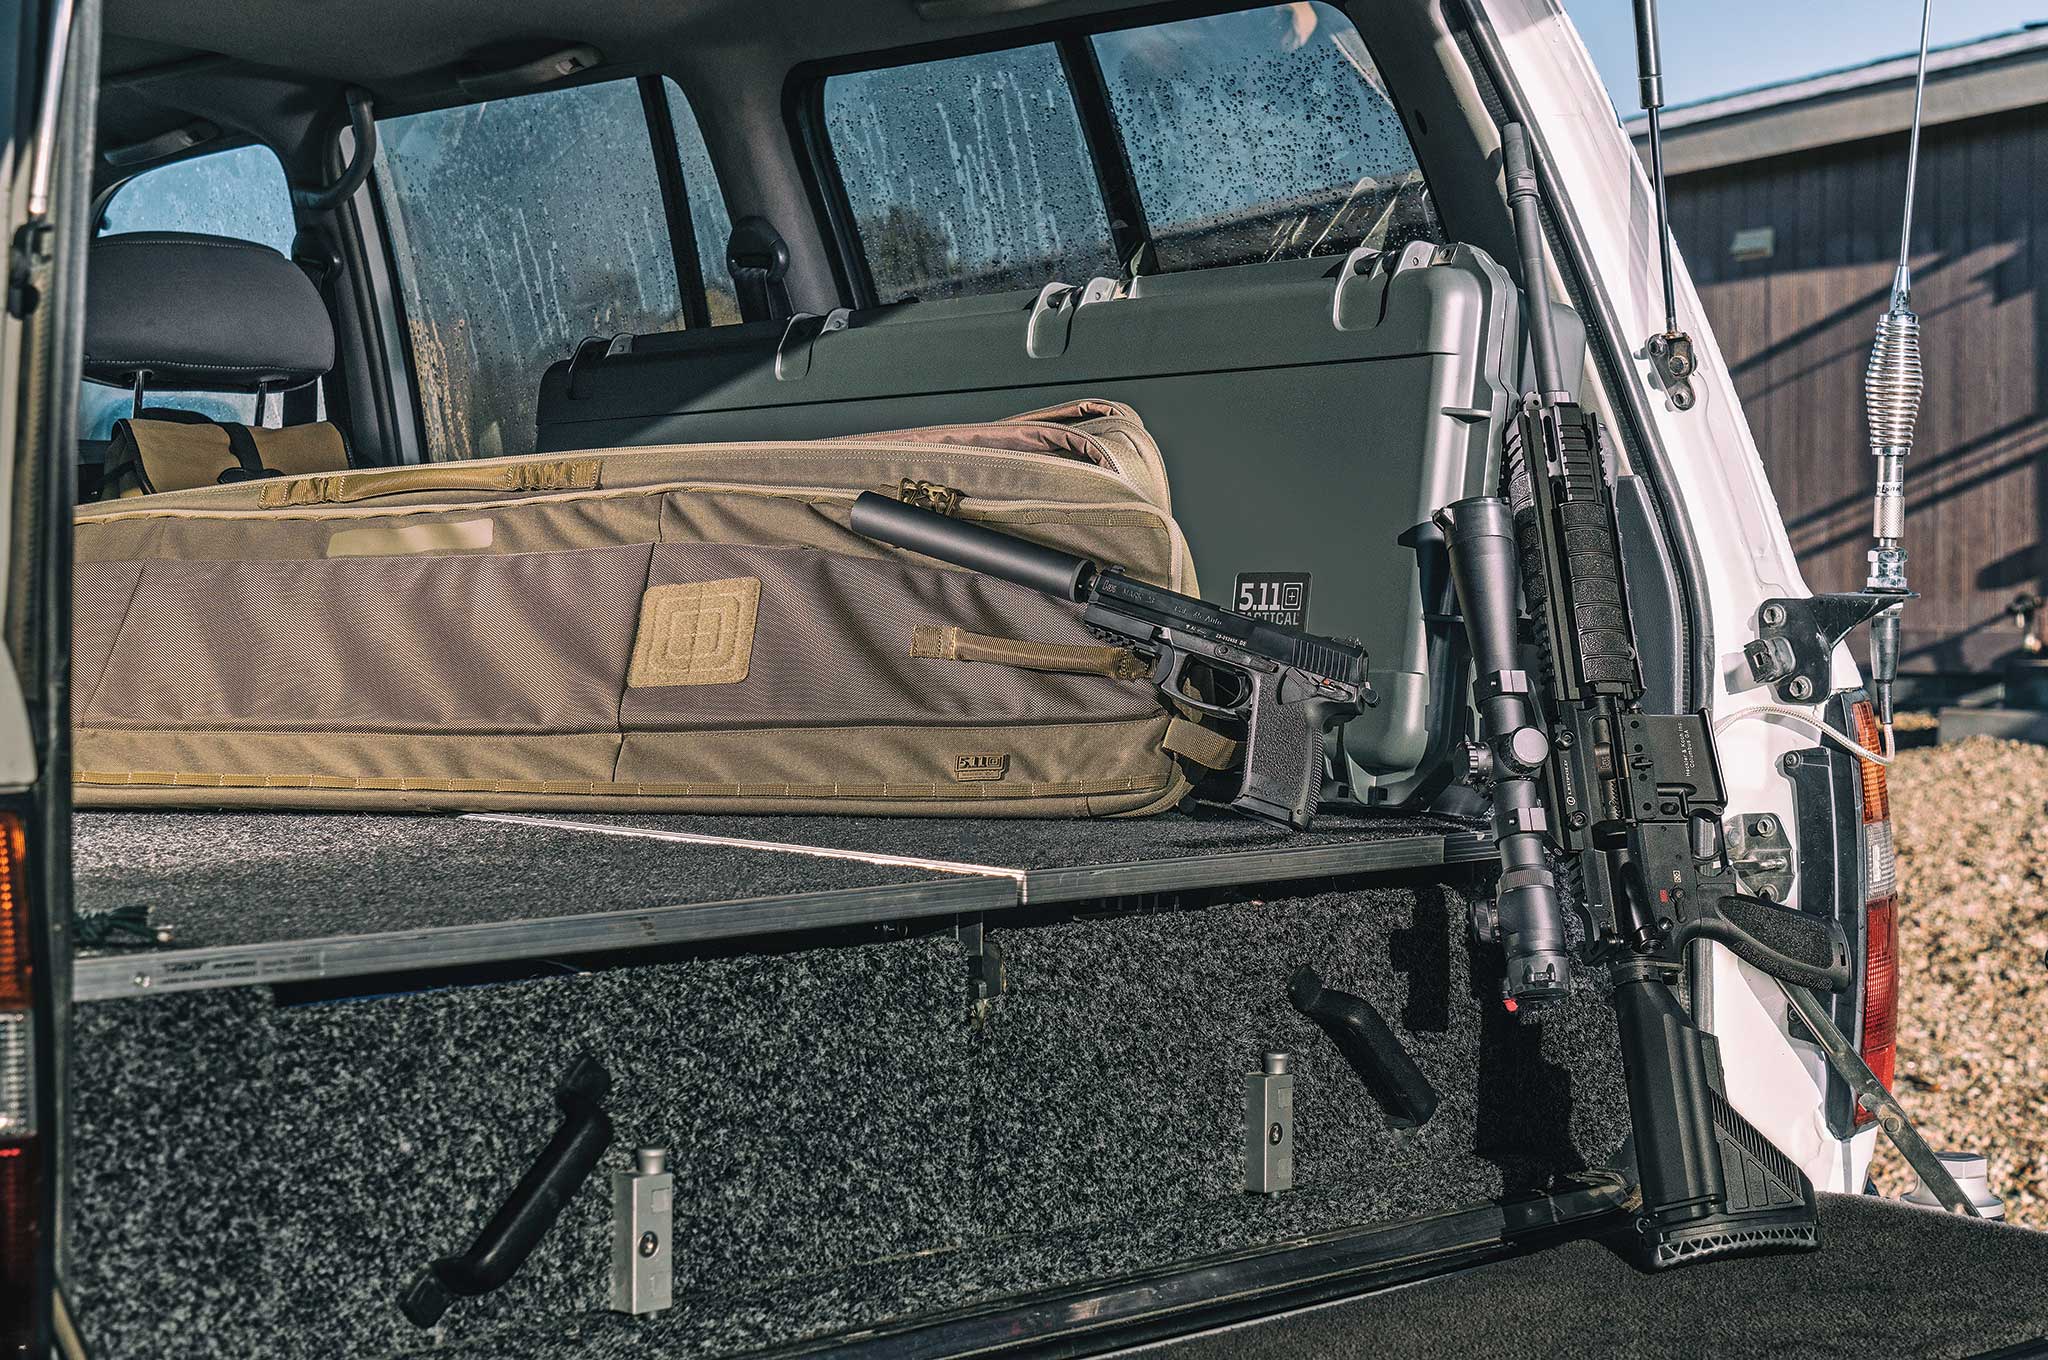
If vehicular transportation is still feasible, Joe didn’t leave those considerations off his checklist either. Galt turned his ’94 Toyota Land Cruiser into one of the most strategically built bug-out vehicles we’ve ever seen. Check out our article “Self Preservation” in Issue 33 of our sister publication RECOIL to learn more about his truck.
Joe keeps firearms at the ready whether traveling or at home. Shown here is an HK Mark 23 with Octane 45 suppressor, HK MR556 with a Leupold Mark 4 LRT 3.5-10x40mm optic, and 5.11 cases for on-the-go storage.
Galt’s property backs up to approximately 4,500 acres of Federal Bureau of Land Management land, so vehicle access is confined to one direction. If he sees someone unannounced coming up the road, there’s time to prepare. During his time developing the land, Galt added large rock landscaping to confine vehicular access to a narrow chokepoint. The sloping of the property also has certain spots conducive to natural listening and observation posts to defend against intruders.
As a big believer in personal protection, Galt also focused on finding a location where laws allowed him to store enough firearm provisions to defend himself and his family for an indefinite period. “You’re expected to have a gun out here, and it’s more shocking if you don’t have one,” he says.
Assuming cell or landline connections go down, HAM and C.B. radios kept on the property allow Galt a variety of alternative communication methods. Having cameras as well as motion and security lights on the property also help keep the area protected. His bird-hunting dogs are another early warning system against trespassers.
Threat Proximity
Potential property buyers should also think about nearby threat locations. Ask yourself if you live near a city or installation that a foreign power or terrorist organization could benefit from disabling and how the attack might be carried out. Military bases, major areas of commerce, and powerplants all fit the bill.
The nearest military installation to Galt is the North American Aerospace Defense Command Cheyenne Mountain facility, nearly two-and-a-half hours by car northeast of his location. NORAD is a major military fixture, and potential nuclear target, so Galt considered these possibilities when prospecting the location. “Prevailing winds would send any fallout due east and pose no threat,” he says.
Also, take stock of any jails or prisons that may empty their inmates into the streets (a la Hurricane Katrina) if the situation gets grim enough. You wouldn’t want to be in the path of a bunch of fleeing criminals.
“The nearest prison system is over 50 miles and two 14,000-foot [mountain] ranges away,” Galt says. “Odds don’t support a successful migration of any criminal element without facing significant determent from locals, geography, and weather. The typical movement would place any escapees into the nearest forest and or population centers. Nowhere near our location.”
Climate & Resources
If you’re going to live off the land, inclement weather is another consideration that’ll affect a location’s sustainability and growing season. Previously, Galt owned property at about 9,000 feet elevation, but harsh weather six to seven months out of the year meant it couldn’t accommodate his family the way he wanted. Gardner sits at approximately 7,000 feet and is part of the state’s Banana Belt, which doesn’t have the climate extremes common to other areas of the state. Since the region is already of an agricultural makeup, the conditions lent themselves very well to long-term occupancy and cultivation. A preexisting apple orchard on the land complements the crops and other vegetation he added.
The National Weather Service reports that Denver receives an average seasonal snowfall of 57.1 inches — something to think about if you intend to grow produce or raise livestock.
“Snow storms 30 miles to the east or west will bury the cities, but I’ll barely get 8 to 9 inches during the winter,” he says. “The average summer temperature is in the 70s. We frequent our location at all times throughout the year and have never had an issue making it in our cabin with a four-wheel-drive vehicle. Even at times of 2 to 3 feet of snow, the gradient is subtle enough to allow for access.”
The Huerfano River is a mile away, and the surrounding area allows for duck hunting and trout fishing. Bear, elk, and beaver can also be found nearby if the situation calls for hunting beyond the allowed seasons and regulations if things became desperate, and it were a matter of surviving or starving.
Zoning & Utilities
Something else to investigate prior to purchasing a property are the political obstacles that stand in the way of building and adding the resources you envision. The fewer government agencies you have to go through for construction permits, the less headache (and cost) you’ll experience while developing your land.
“In addition to low property and sales taxes, we have reasonable income taxes, and food tax is nothing. Fuel prices and groceries are typically 40- to 50-percent lower than anything along the I-70 corridor, the most common location for seasonal landowners,” he says. “The zoning laws are very limited and allow for full access to nearby BLM land as well as the tens of thousands of acres of forested ranching land.” The only other people who have access to the property when Galt isn’t there is a local cattle rancher who leases the property from him for grazing purposes. This qualifies him for an agricultural tax exemption.
Although Joe had power pulled in, the Department of Homeland Security built a listening tower nearby and needed to run power through his location. Joe was able to be the beneficiary of this coincidence and keep his electricity costs low. He also keeps redundant generators and a fuel station on the property consisting of 300 gallons of fuel and 1,000 gallons of propane. He plans on installing solar panels and wind generators in the near future.
Opting not to pull in standard sewer and water, Galt installed a well on the property that comes off a natural spring. He not only uses it for irrigation, but it also serves as his drinking water, and he stores 3,000 gallons in an underground tank. Two manmade ponds fed by the spring were also added to the property and hold 20,000 gallons of water. Sewage is contained in a septic system.
Building & Supplies
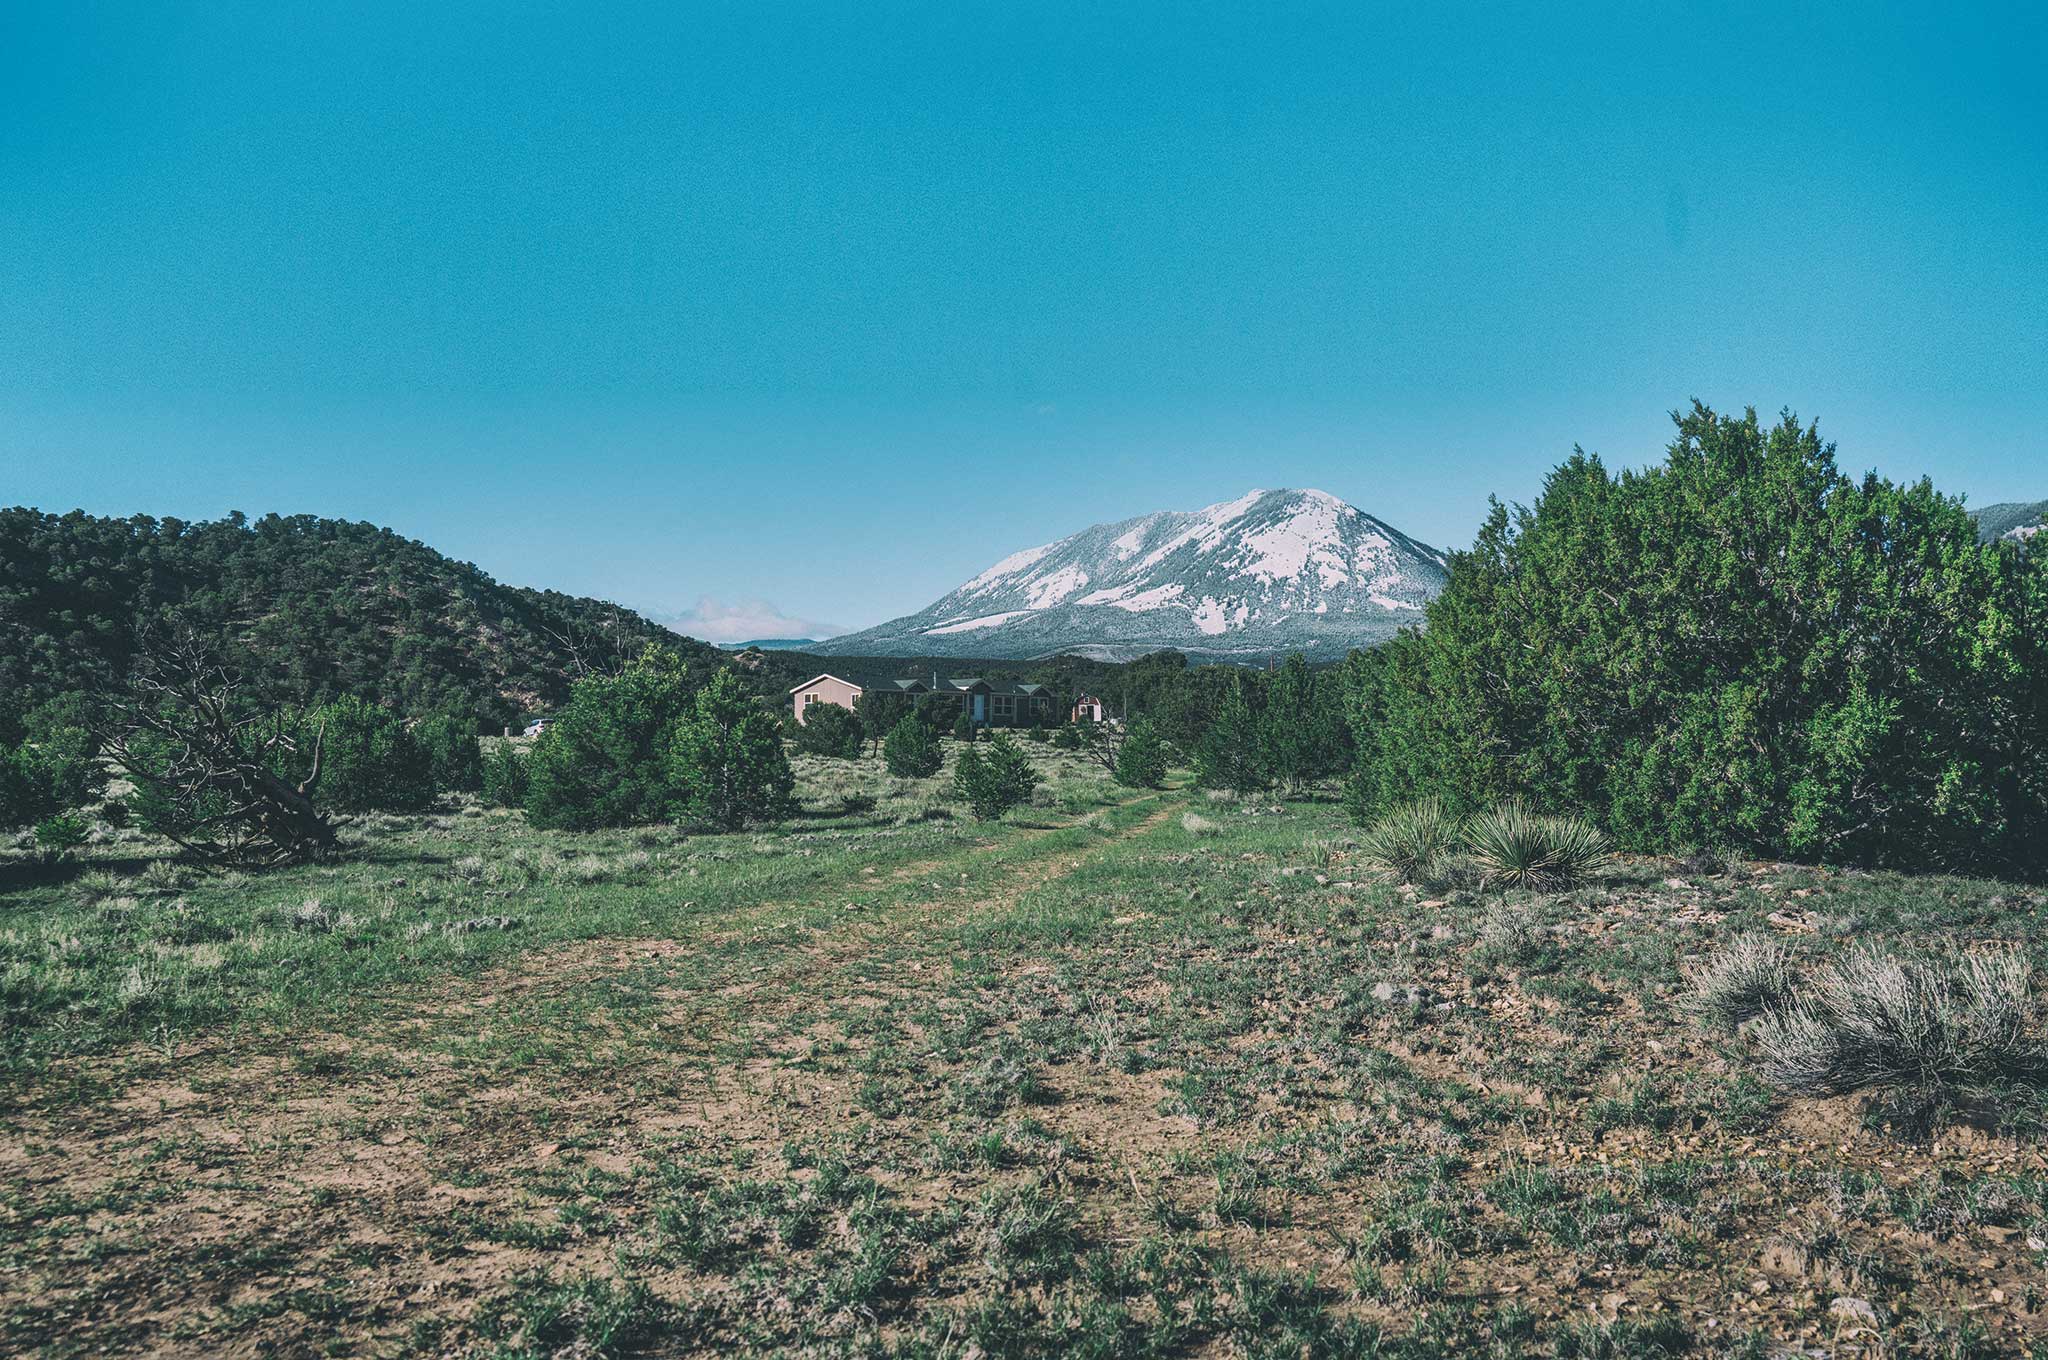
While you might expect the location to look like some super-fortified structure to wait out the apocalypse, its unassuming appearance allows it to blend in with other homes in the area and avoid calling attention to itself. Joe hired a company to build everything from scratch. Gravel was added around the main structures to help keep the dust level down. The main cabin is 2,100 square feet and has practically all the trappings of your average home. Galt also keeps enough food on site to feed a family of eight for a year.
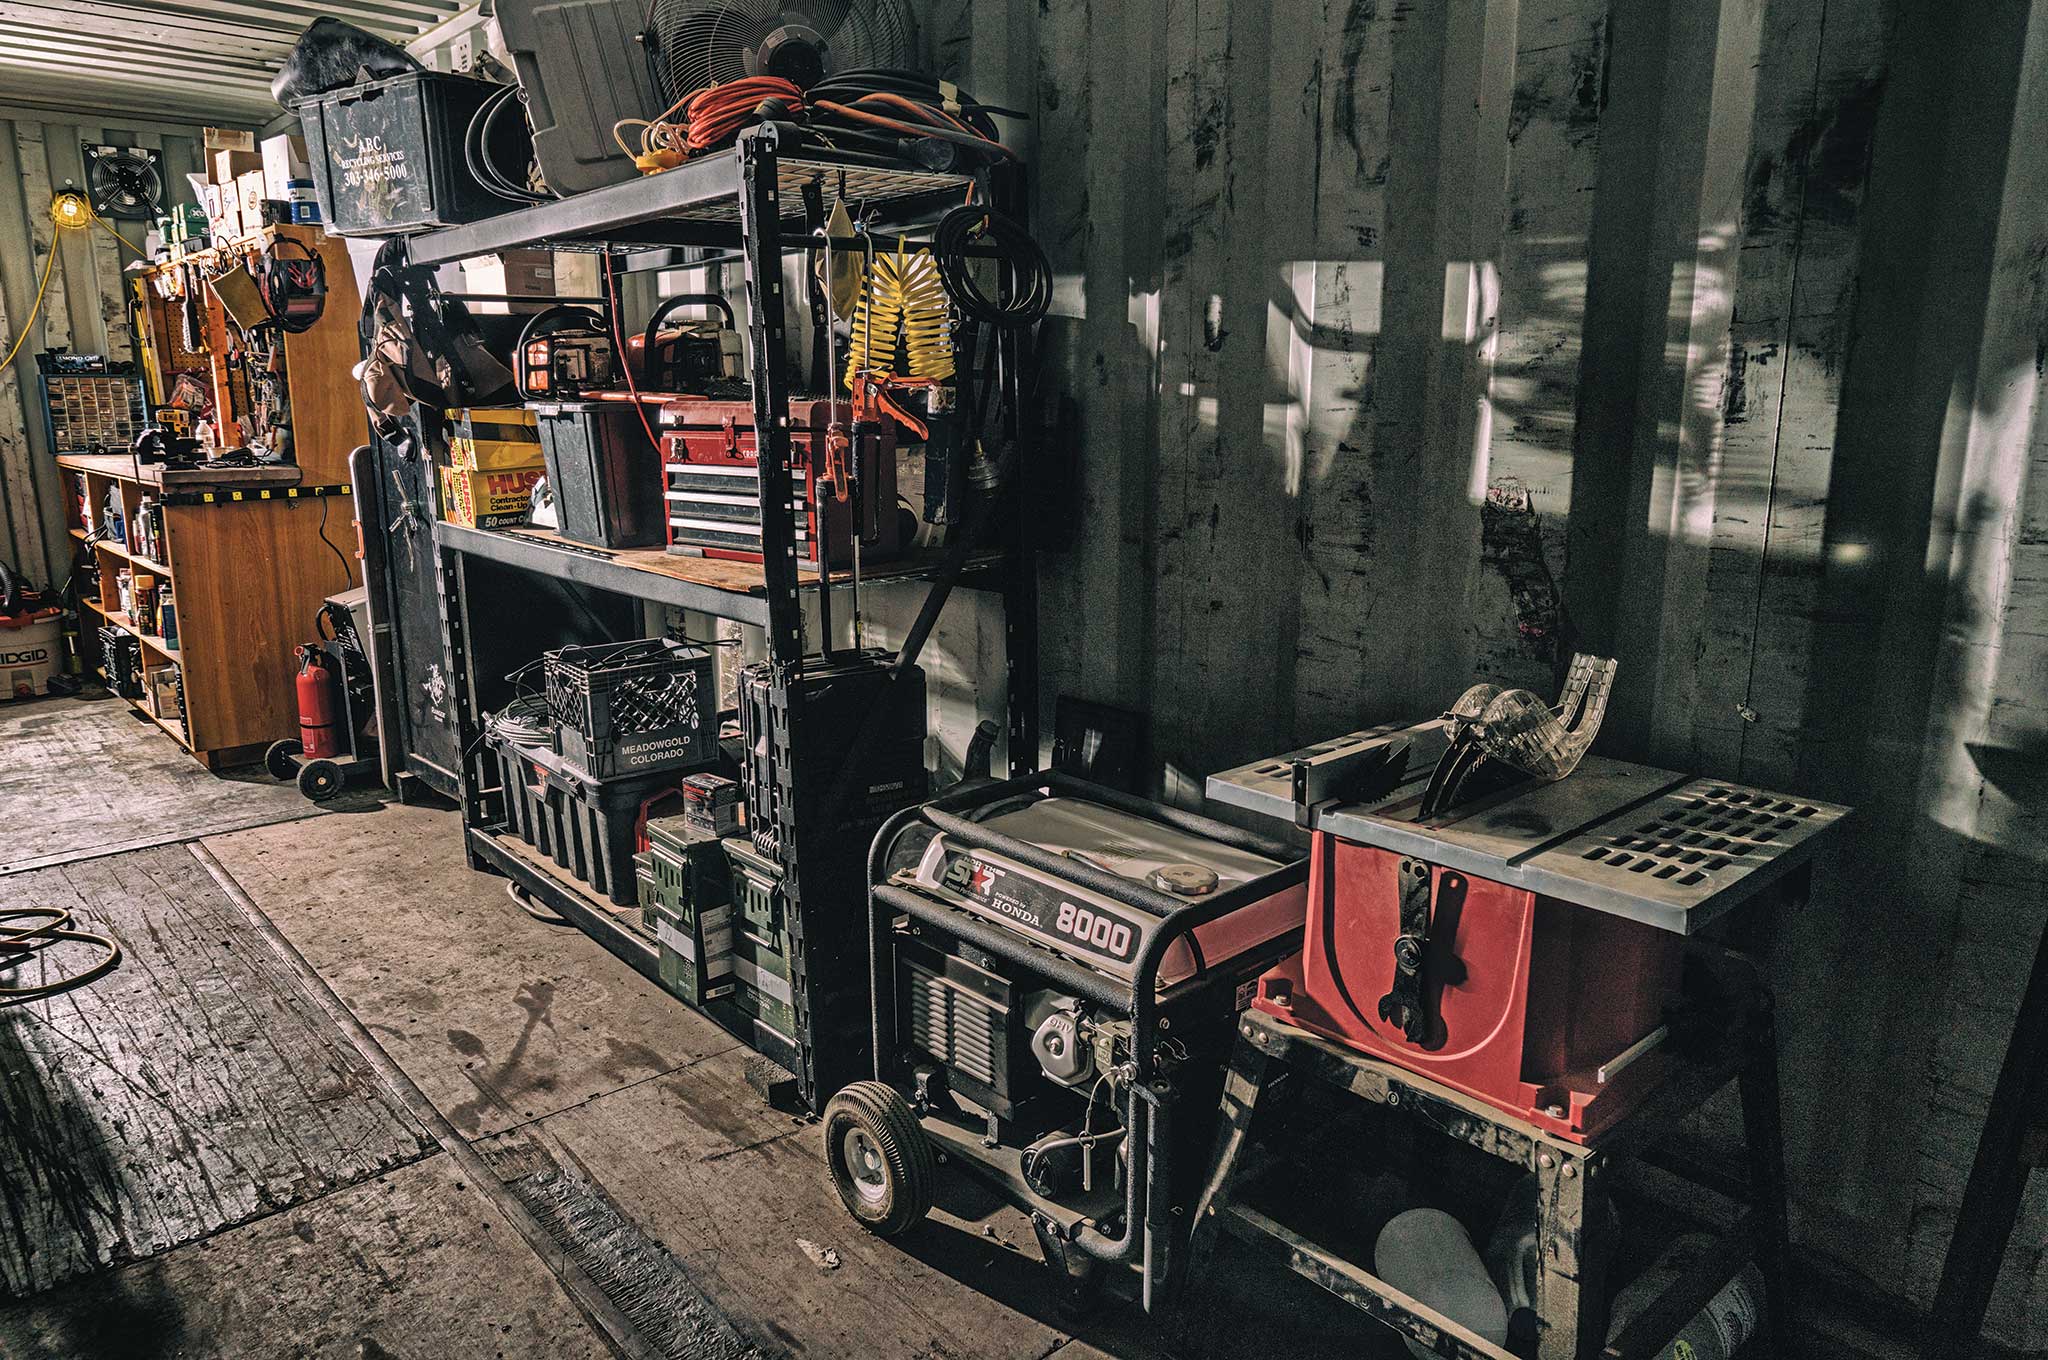
Do you have the tools to repair vehicles, home damage caused by weather or looters, or fabricate needed supplies? If so, do you know how to use them?
For storage, a 53-foot shipping container houses tools, air compressors, welders, and off-road vehicles. A 40-foot shipping container serves as an additional shelter and contains assorted equipment, extra food, and a supplemental kitchen. A barn also allows storage of hunting gear, firewood, and other tools. Kayaks, ATVs, mountain bikes, and snowmobiles also reside on the property.
“I wanted efficient, capable vehicles that had low usage of resources when we finally reached the property, and we can do about 120 miles on 4 gallons of gas in an ATV,” he says.
Remember that purchasing a bug-out property is only the first step. Stocking it with enough food and water to sustain your entire family will quickly become important. Food storage should be based on caloric intake.
Does it Make Sense for You?
When it comes to getting a secondary home for emergency purposes, you might have every intention of buying or building something to try and mimic the daily routine you once knew, but a bug-out location should revolve around what’s practical for dire circumstances. Civil stability and infrastructure may not return for a very long time. Get out of the vacation home mentality and start thinking about a long-term, clandestine existence with the kind of surroundings and architecture that makes sense for that. You’re going to be living off the land, and whatever food and supplies you’ve managed to save up. Assume you may have to defend those supplies with your life.
Although it’s logical to combine a secluded location with activities you might enjoy, like skiing or hunting so it’s also practical for recreational purposes, be prepared to put the time, homework, and money into making it feasible for survival.
“You have to have functionality and make sure it’ll be conducive to something you enjoy. It’s got to be a labor of love though, as it takes a lot of work to make it livable,” Galt says. “Don’t buy it for vanity.”
Joe estimates he’s put in about $250,000 to get the property to where it is today and that doesn’t include ancillary supplies. Not bad when you consider the benefits it offers, but it’s still something that took several years to build and ongoing dedication to maintain.
Research city and county zoning requirements online to become familiar with the rules of the jurisdiction you’re prospecting before you break ground. Regulations regarding setback from adjoining properties, easements from adjoining neighbors (ability for them to drive on your property), and installation of septic systems and wells are all things to keep and mind and could result in hefty fines if you deliberately or inadvertently ignore them. Also see our article “Safe Haven” in the Fall 2014 Issue of RECOIL OFFGRID for tips on buying a bug-out location.
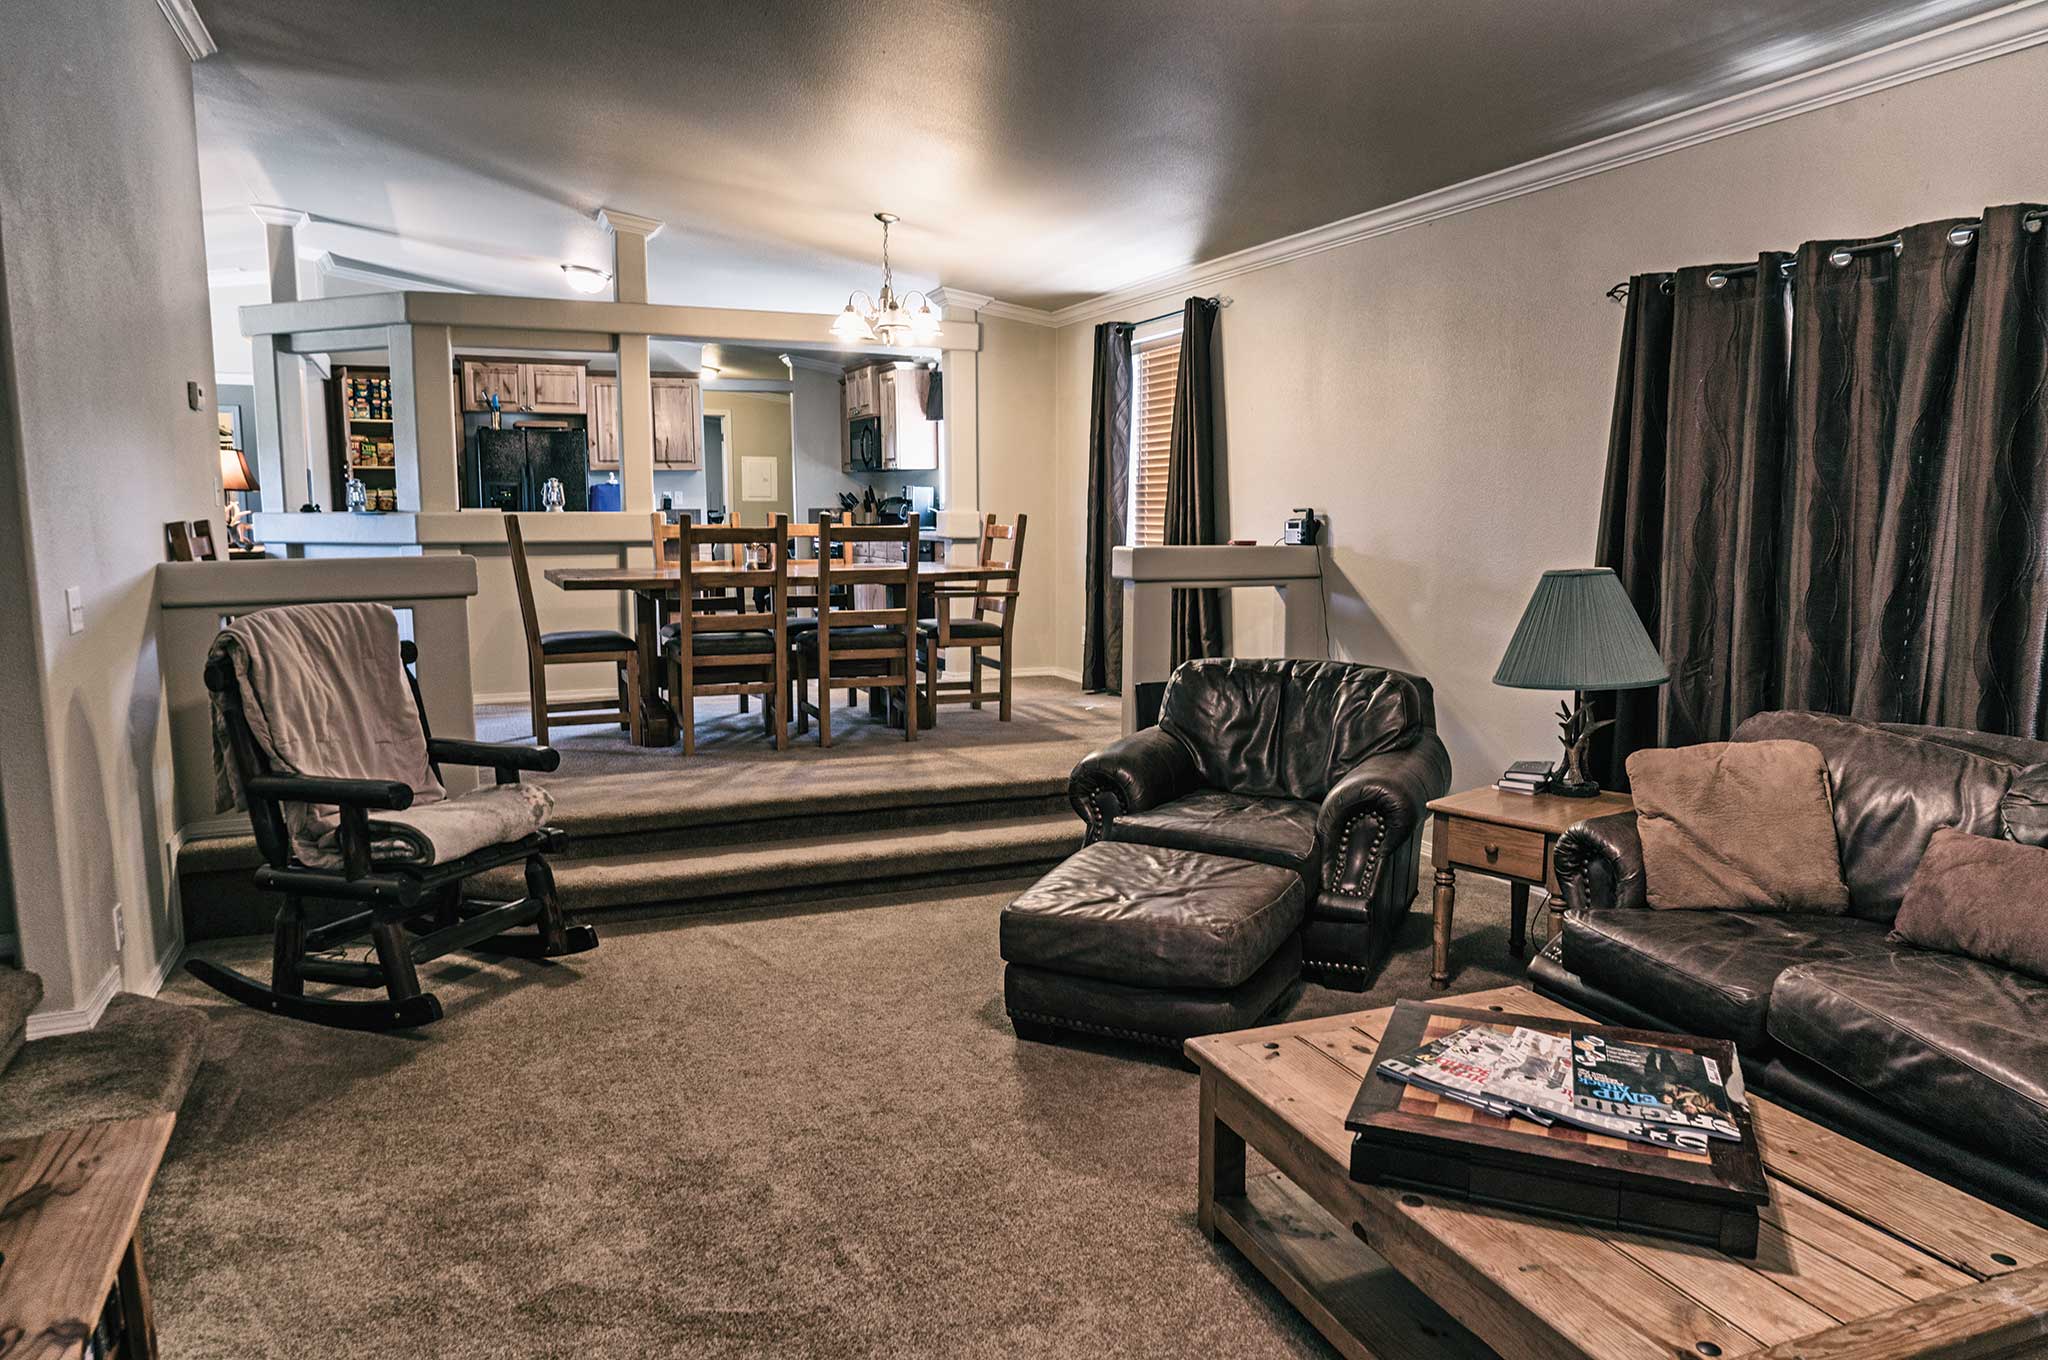
Living off the grid doesn’t always have to mean sacrificing comfort, or even style. It just takes enough time and resources to prepare adequately. Notice the magazines on the table? No prepper should be without these.
Vetting a Real Estate Agent
Don’t get taken to the cleaners. Pin down potential real estate agents with as many questions as possible until you feel like you’re comfortable with their level of knowledge. Buying a home or large piece of property is one of the biggest purchases of your life. Here are some tips to help you find the right person.
Find a real estate broker local to the area of purchase.
Use a multi-office firm.
Use an experienced broker who has been in the business at least 10 years, not just a new real estate agent.
Ask for references from past sellers and buyers.
Ask escrow officers for real estate firm recommendations.
Finding and Developing Rural Property
Most residential real estate agents won’t have the expertise you need to help you find and build on property suitable for a bug-out location. Read these recommendations to locate rural, vacant land; not just an empty lot in an area that faces the potential of surrounding development that would encroach on your desire for seclusion.
Real estate brokers local to your desired area can use the MLS (Multiple Listing Service) to find available properties
If possible, buy a property that’s not for sale by talking with the landowner. You can avoid paying a 6-percent sales commission this way. Many people don’t think of selling until someone offers to buy.
Review the rules of building in rural area with controlling jurisdiction with emphasis on zoning and building department regulations.
Find locations of the nearest water and sewer and review any issues that could impact your desired construction.
Inquire with jurisdictional planning department to check to see if your selected property is near any future planned development.
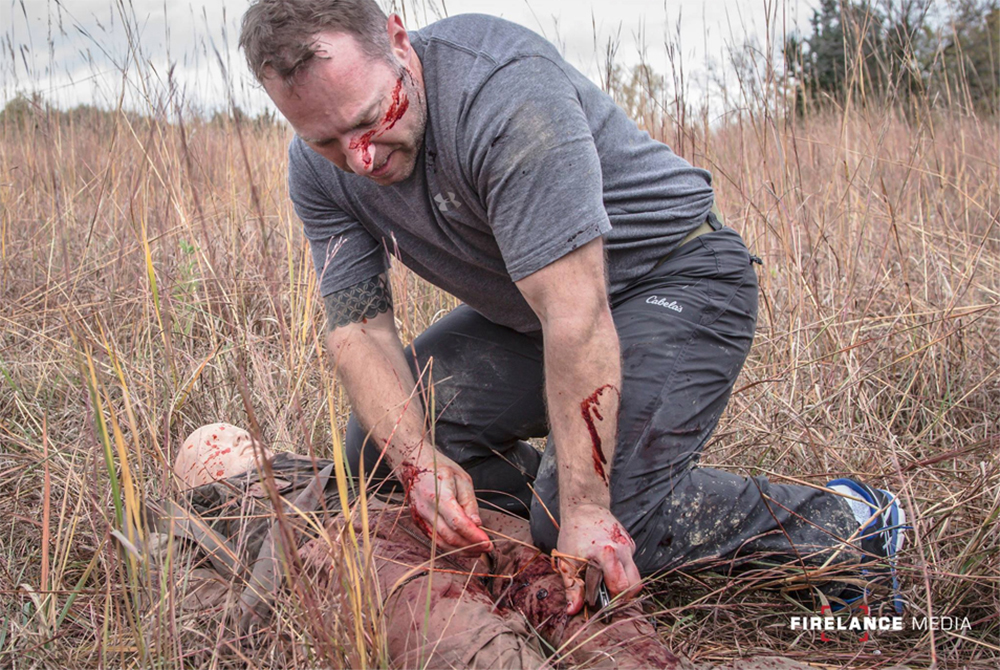
Basic knowledge about medical trauma treatment is an incredibly valuable skill for any prepared individual. Whether you’re up against gunshot wounds, badly broken limbs, or deep cuts, the sudden blood loss from these major injuries can lead to death in minutes. This is why it’s essential to know how to stop the bleeding immediately, and to have the correct mindset and tools to do so. The recent tragedy in Las Vegas is a clear example of the importance of these skills.
The following article from Breach Bang Clear contributor Shawn Whittington explains the importance of tourniquets for trauma treatment, and dispels the notion that they’re only a tool of last resort. Whittington is a licensed Tactical Paramedic with more than 25 years of experience in the EMS/Fire industry, and a senior instructor at 88 Tactical.
Photo by FirelanceMedia.com
Editor’s Note: The following article was originally published by our friends at Breach Bang Clear. It appears here in its entirety with their permission. For more from the Mad Duo and crew, go to BreachBangClear.com or follow them on Facebook or Instagram. You can also learn more about 88 Tactical medical courses at 88Tactical.com.
88 Tactical offers training in firearms, self-defense, self-rescue, field medicine, bushcraft and survival.
An injury on a shooting range, a motor vehicle accident, a child running through a plate glass door, and even an animal bite are all injuries I’ve personally seen in the field that required aggressive bleeding control to save the victim’s life. When I got started in EMS over two decades ago, we were taught that tourniquets were only to be used as a last resort. Once applied, the tourniquets had to be loosened every five minutes to restore blood flow to the affected limb to prevent extensive tissue necrosis – death of most or all organ tissue cells due to blood loss. The time of application was to be written on the patient’s forehead, in blood if need be.
Those days are long gone, and tourniquets are now at the top of the list as the recommended treatment for life-threatening bleeding from an extremity. Bleeding to death from an extremity remains a leading cause of death on the battlefield – a death that’s preventable with swift and appropriate treatment by the application of a tourniquet. These injuries don’t only happen in combat. Tourniquets have become standard equipment in most individual first aid kits as well as most Law Enforcement medical bags and active killer response kits.
In cases of tourniquet use, numerous medical studies have shown that commercial tourniquets can be left on for several hours without causing permanent damage to the affected limb. The same cannot be said of improvised tourniquets; research shows improvised tourniquets to be less effective and more damaging. This is mostly due to the improvised tourniquet not being constructed and applied properly. If you find yourself in a situation where the only option is to improvise a tourniquet, it must be done correctly.
88 Tactical only stocks and recommends C-TECC/C-TECC-approved windlass-style tourniquets: the Combat Application Tourniquet (CAT) and the Special Operations Forces Tactical Tourniquet-Wide with the new-style buckle. These tourniquets are approved for US military use and have been tested and proven in the field. Anytime I am participating in a high-risk activity (shooting, hunting, etc.), I have a tourniquet either on my person or within reach. I also keep extras stocked in my med kit.
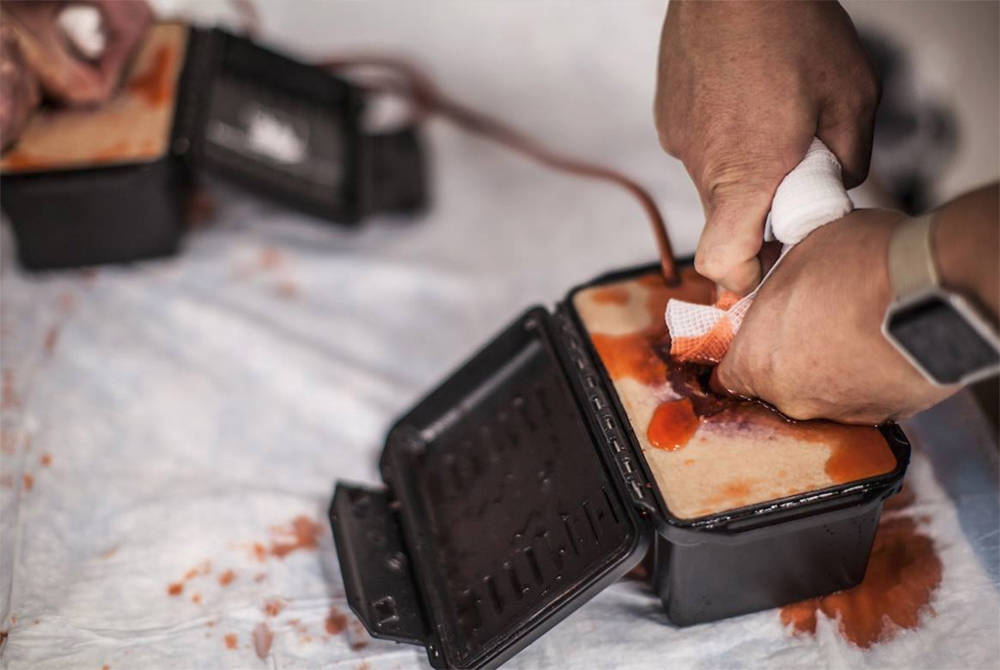
While tourniquets are an important and necessary component of a well-stocked medical kit, your plan to stop life threatening bleeding cannot begin and end with tourniquets alone. A recent study on the wounding patterns of civilians at active killer incidents paints a different picture than the military wounding patterns most tactical medicine classes are based on. Twelve active killer events were reviewed, with 139 fatalities and a total of 371 wounds. All wounds were from firearms, with each victim having an average of 2.7 gunshots.
Compared to military statistics the death rate was significantly higher, and the number of potentially survivable injuries was significantly lower. Due to the location of the injuries, none of the casualties in this study would have benefited from the use of a tourniquet. Your treatment strategy should also include proper recognition and treatment of penetrating torso trauma and simple triage. Adding some extra chest seals to your medical kit is highly recommended.
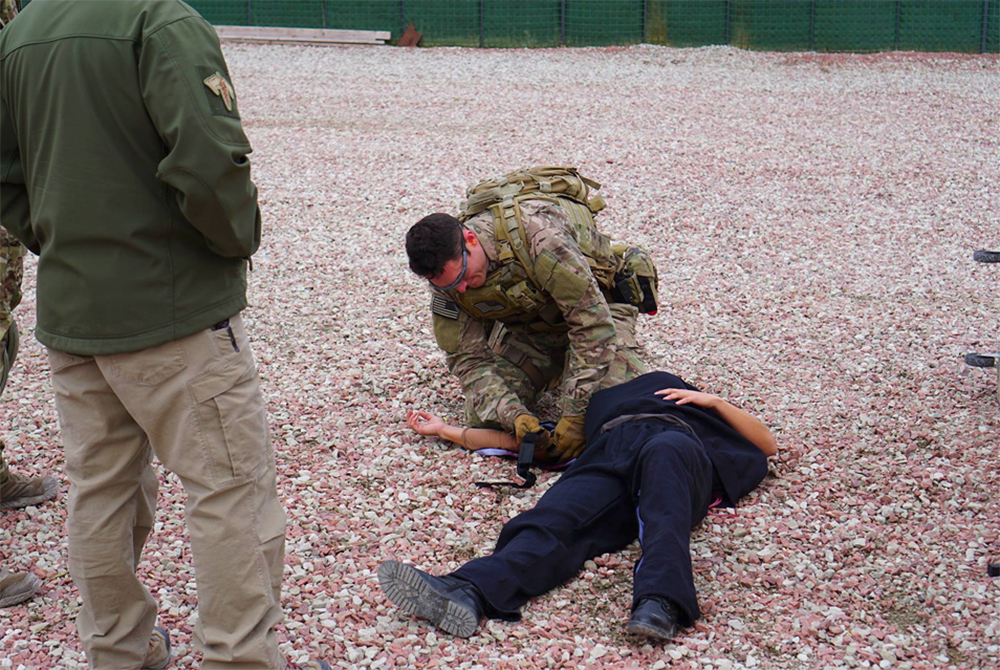
The proper techniques for bleeding control are covered in 88 Tactical’s multiple levels of Tactical Medicine (TacMed) courses – offered to both civilians and law enforcement personnel. Like any piece of gear, you need to take the tourniquet out of the package and familiarize yourself with it. Purchasing an extra tourniquet for practice only is also recommended. You must be proficient in training first if you expect to apply a tourniquet successfully under the stress of a real-life incident.
You can read more about the referenced study here. For more information on the 88 Tactical TacMed courses, visit 88tactical.com.