For those of us who don’t work as emergency medical personnel, observing a traumatic injury can be completely overwhelming. Even if you don’t freeze up or suddenly become ill, it’s a natural human response to start to panic when there’s blood gushing everywhere. This panic is amplified exponentially when the one who’s bleeding out is a close friend or family member — it might even be your own blood splattering on the ground.
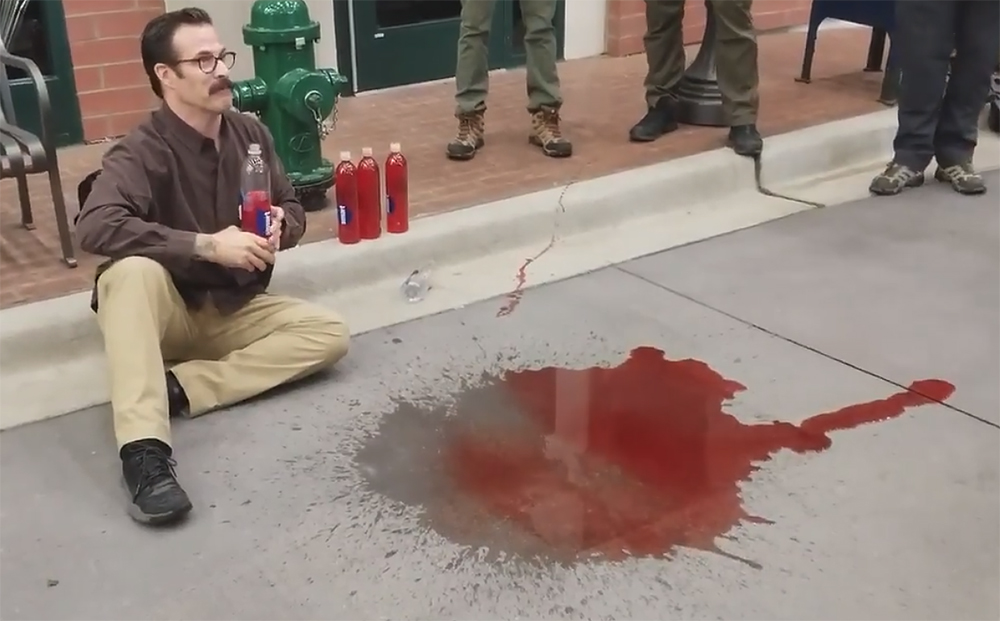
Fortunately, by preparing yourself mentally for this physical trauma, you can snap yourself out of the panic and take action. Even if there’s a huge pool of blood surrounding the victim, there may still be time to save their life. The following video was posted by North American Rescue on Facebook, and shows a demonstration of just how much blood can be lost before the victim becomes disoriented or loses consciousness.
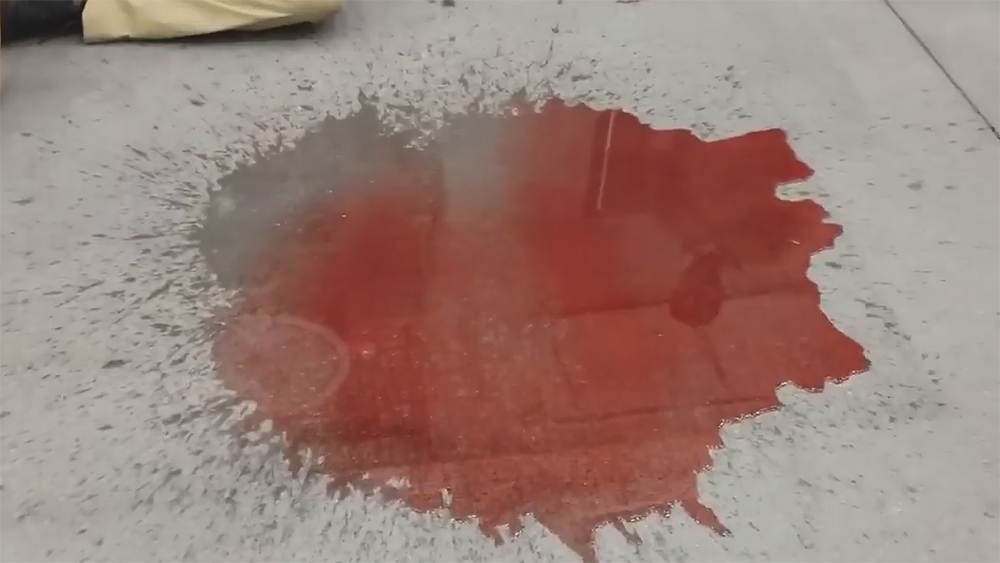
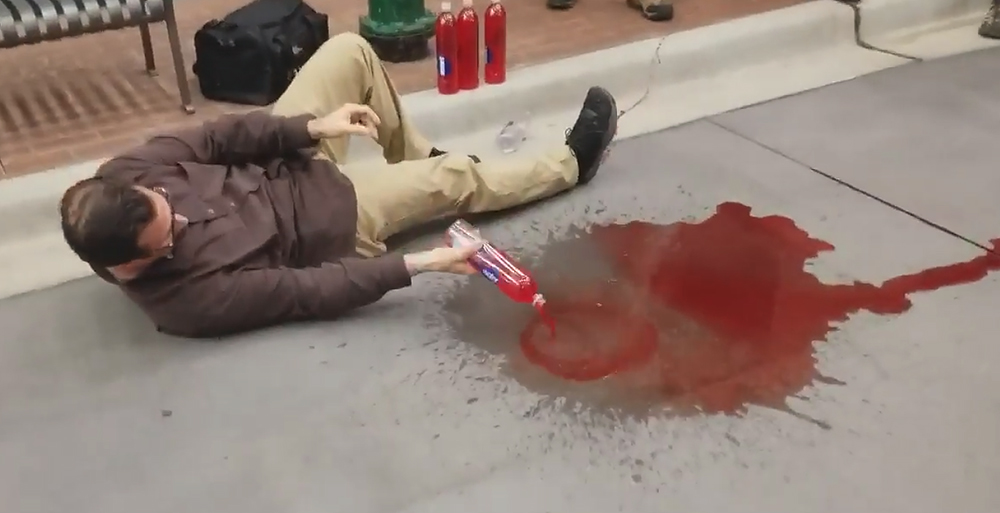
You may have heard that a typical adult body contains roughly 5 liters of blood — that’s 10.5 pints. The instructor in this video demonstrates by filling five one-liter bottles with red liquid. As he pours out the contents, he describes what effects the victim will experience. When a full liter of blood loss has occurred, he says “it’s bad, but not as bad as you think.”
Even after losing a full liter — that’s 2.1 pints, or 20% of total blood volume — the victim should still be physically able to focus, assuming the psychological shock doesn’t cause them to pass out. As blood loss increases past 1.5 liters, the instructor says vision will start to “tunnel in” and the victim may become unable to distinguish friends from foes.
Check out the full video below. It may help you keep some perspective if you ever witness a traumatic injury (or experience one firsthand). Of course, this also reinforces the importance of having a tourniquet on hand to stop the bleed ASAP. Note: This video contains some not-safe-for-work language.
Thanks to contributor Cameron Carden for letting us know about this video.
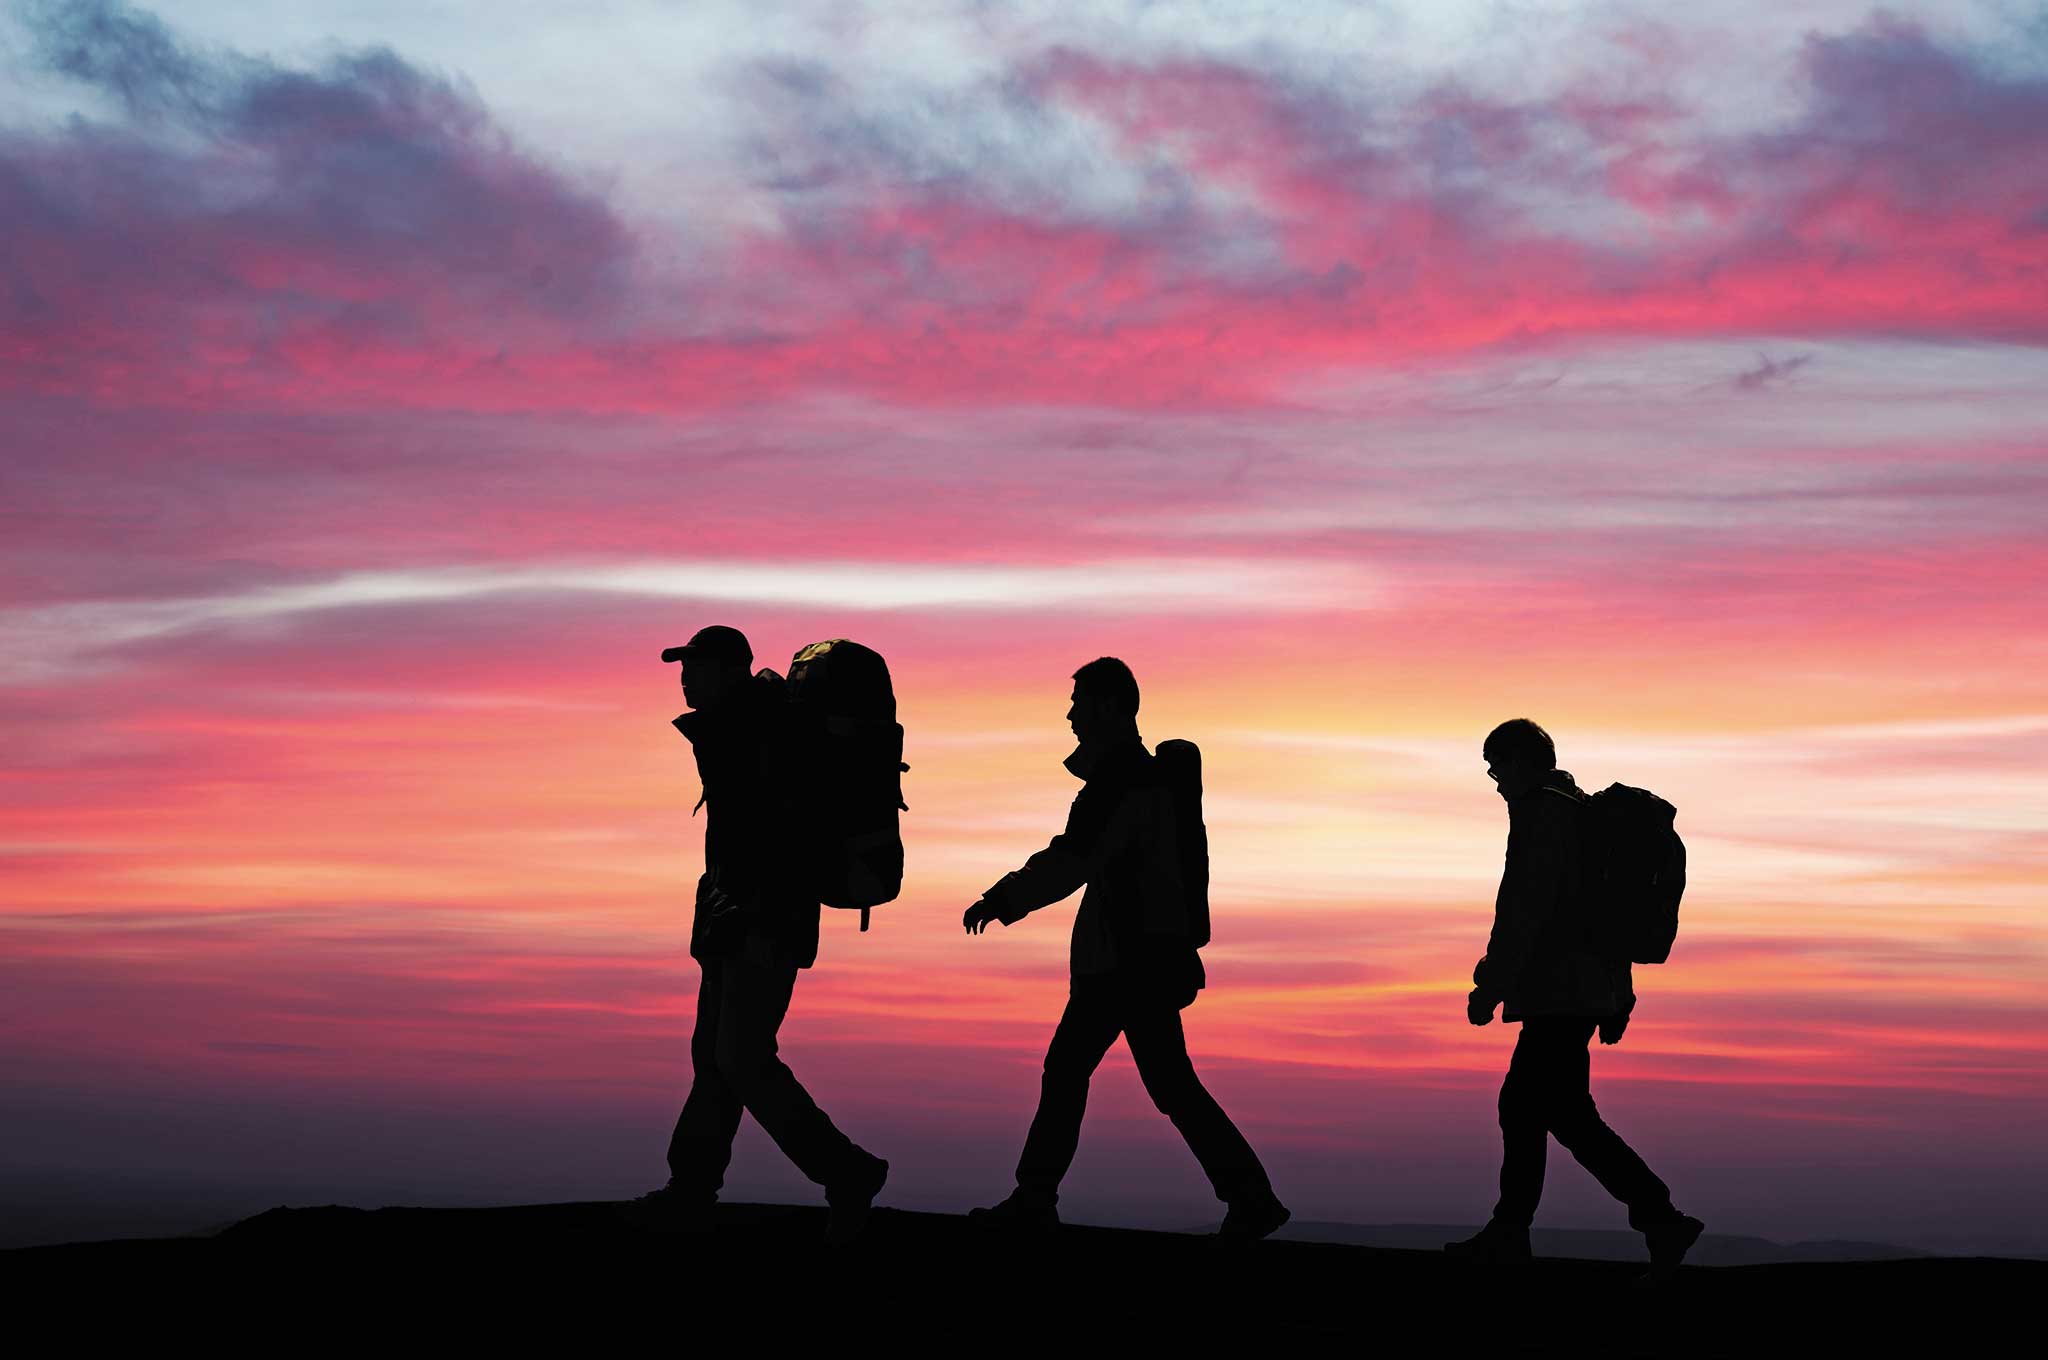
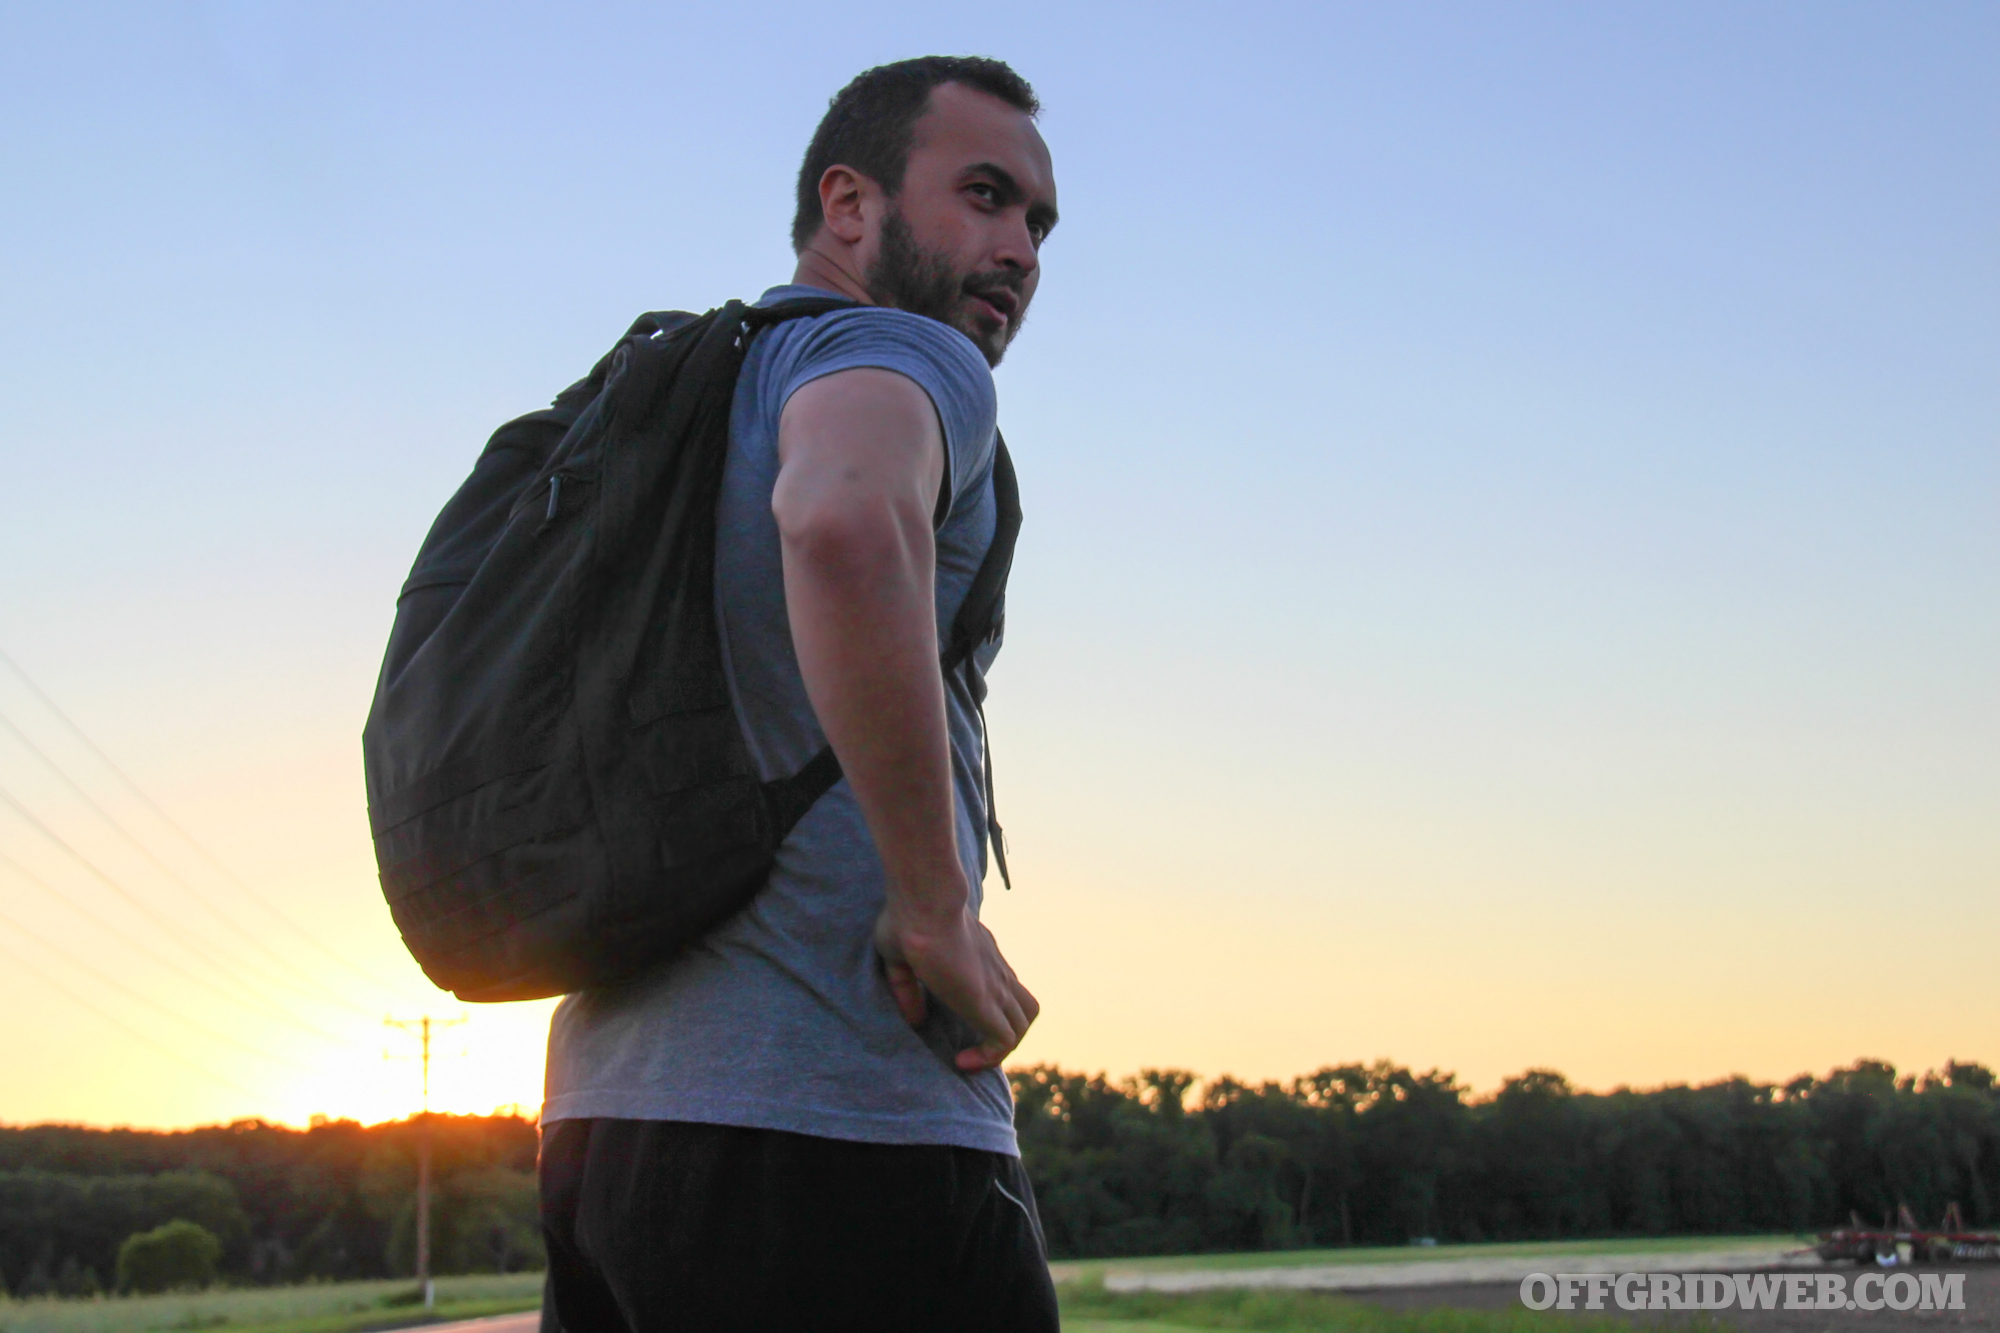
As a weekend tripper, you know the importance of bringing the right pack for the adventure. You need enough space to equip yourself for whatever nature may throw at you. And space fills up quickly. Just as necessary is to make sure that your pack is comfortable for the long trip ahead. With the Fully Loaded Tactical Military Style Backpack, you can be sure you’ll be suited for any situation.
Made of lightweight yet durable nylon, this backpack comes with plenty of space for the essentials, and then some, with 3 outer pockets. Speaking of the essentials, this carryall features a flashlight and 480mL water flask bundled in. In addition, you can buckle up the chest strap for all-day hikes. Or, if you’re staying in town, you can travel safely with your laptop thanks to an additionally padded inner pouch. Plus, it comes in 3 colors—black, green, and khaki—so you can buy one for the whole crew. With all the space and support this backpack possesses, you can be sure to fit everything you need, and might even be able to fit the kitchen sink too.
If you’re on the hunt for a backpack for your next epic escapade, look no further than the Fully Loaded Tactical Military Style Backpack. You can nab one for just $39.99, a savings of 59%.
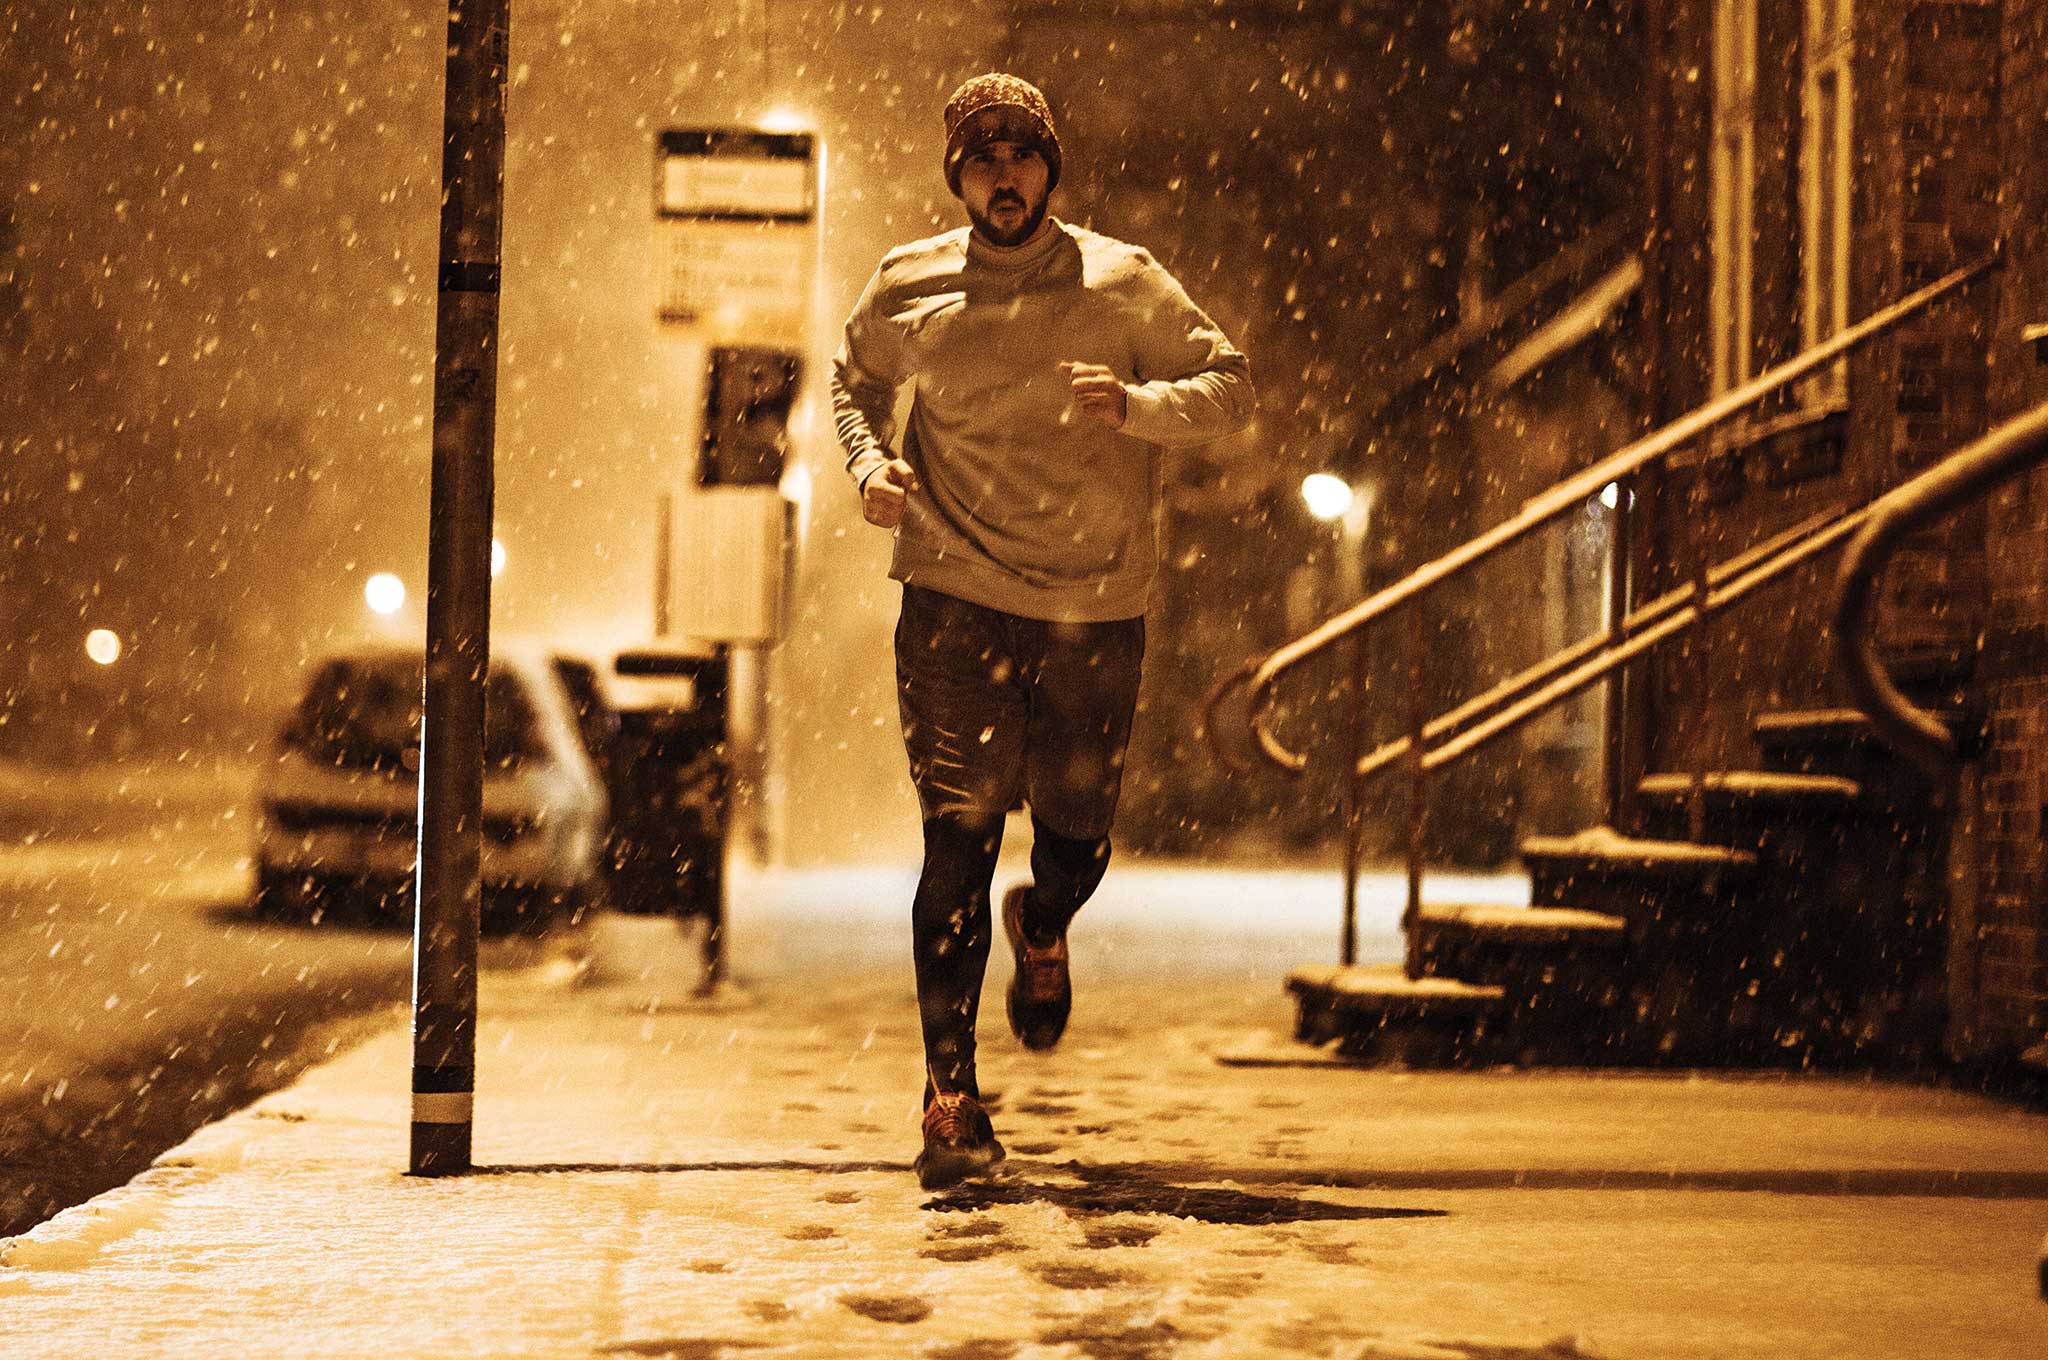
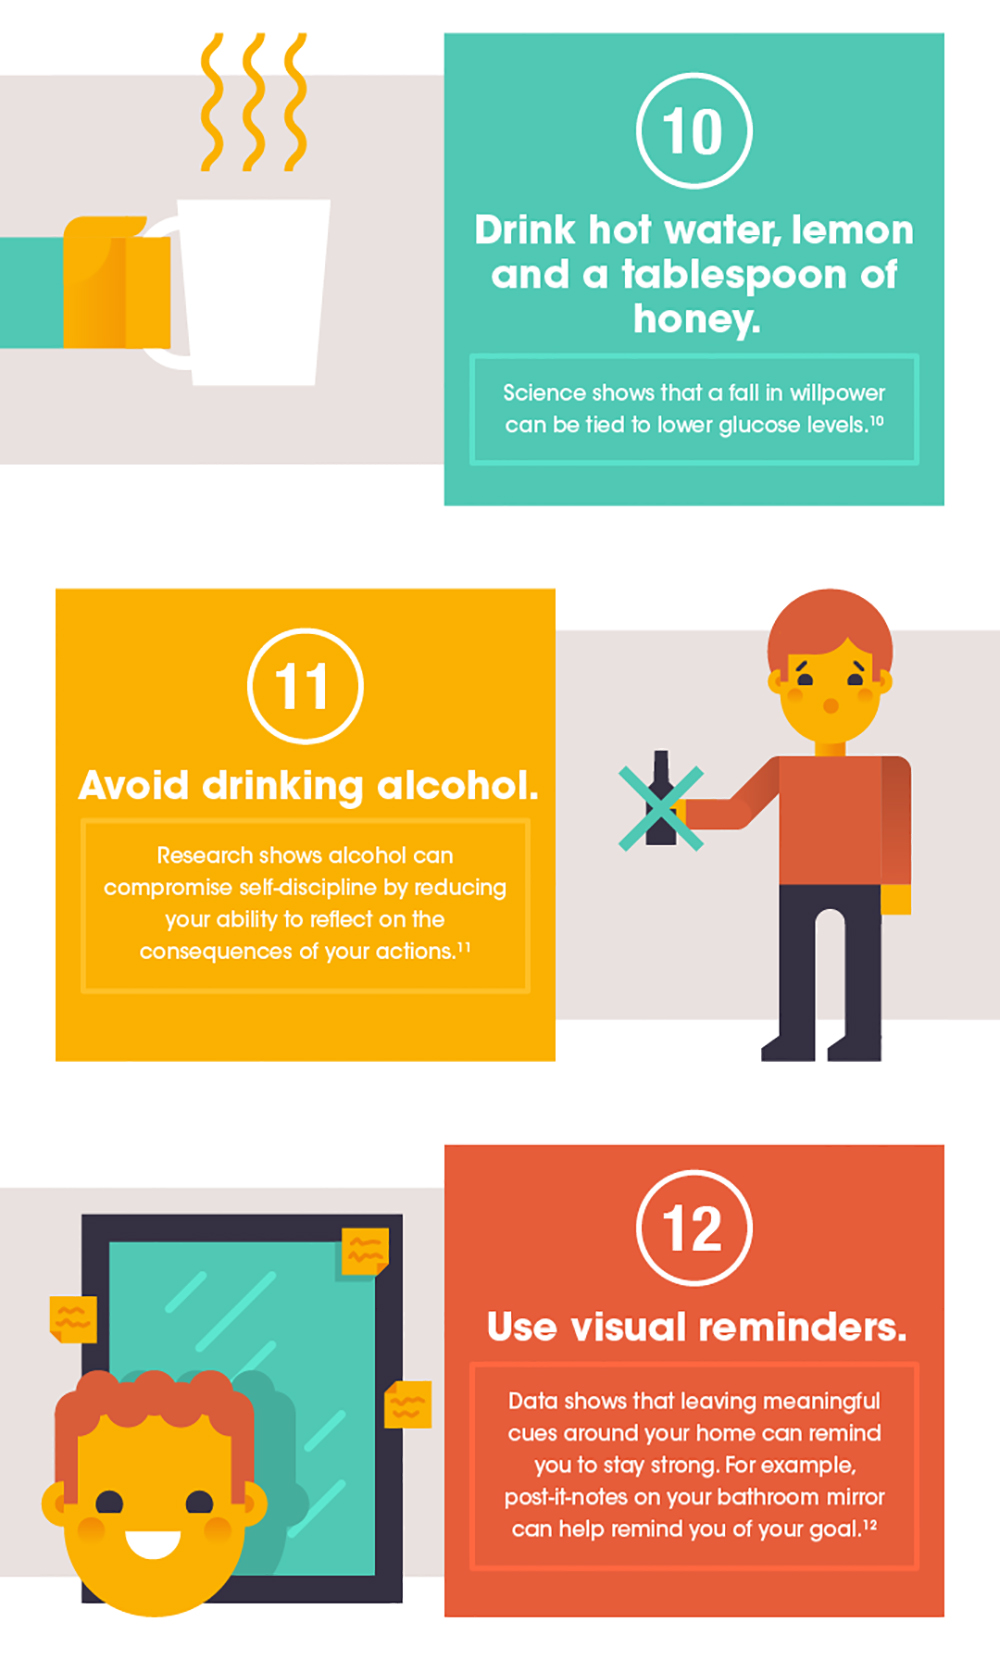
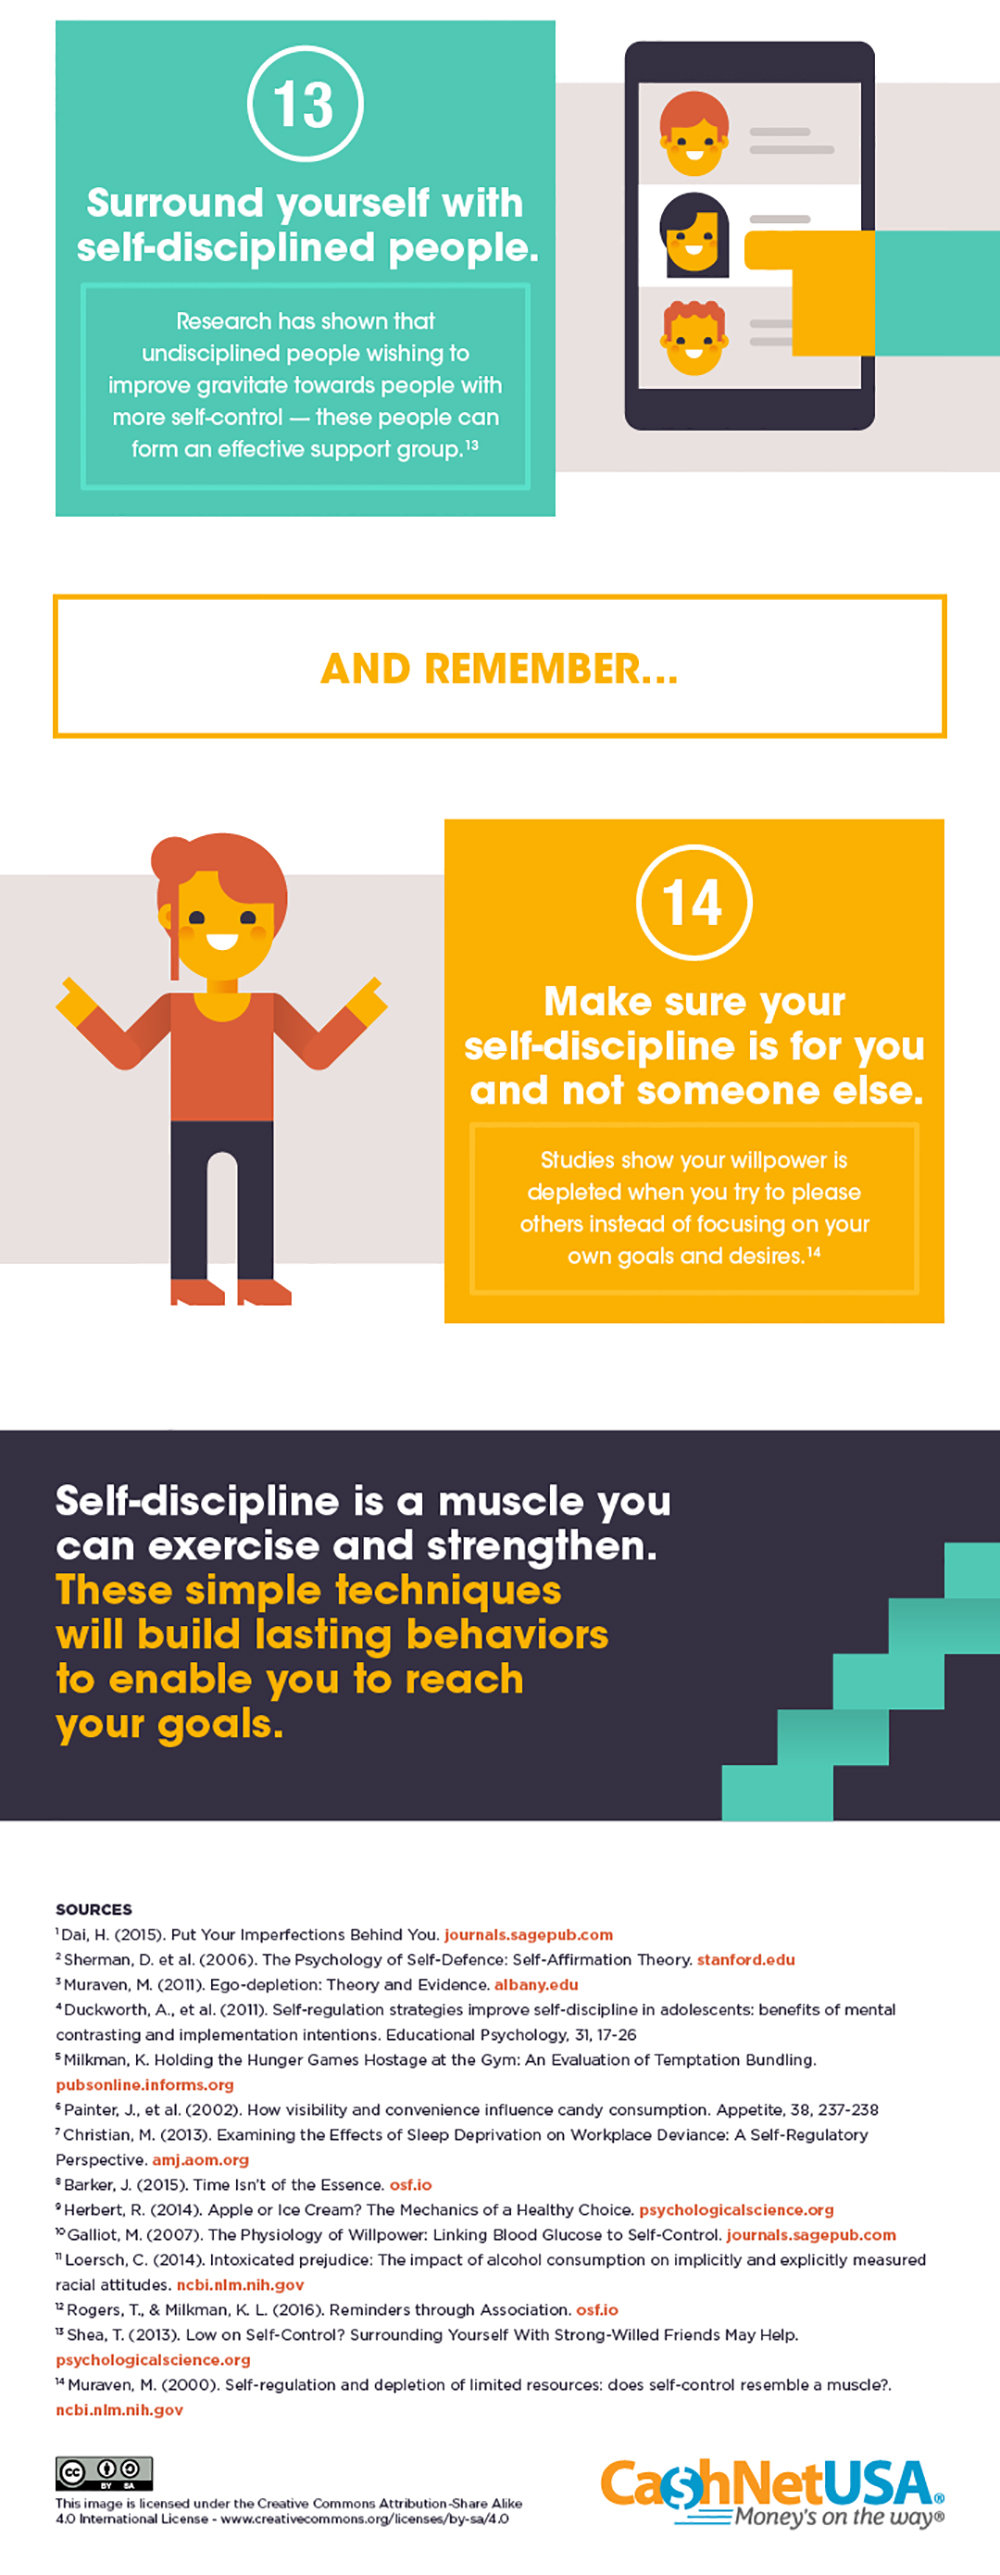
January is approaching fast, and you may already have some new year’s resolutions in mind. Whether you’re planning to grow your emergency stockpiles, learn a new skill, quit smoking, lose weight, finish a household project, or get back the six-pack abs you had in high school, you’re going to need considerable determination to get there.
Unfortunately, there’s a reason these resolutions have become synonymous with over-promising and under-delivering — it’s not easy to stay disciplined and achieve your ambitious goals. If it were, we’d all be muscle-bound millionaires with no bad habits. So, it’s beneficial to take some steps to improve your self discipline, thereby improving your emergency preparedness. The person who preps by thinking “I’ll do that later” is usually the same one who’s in serious trouble when disaster strikes.
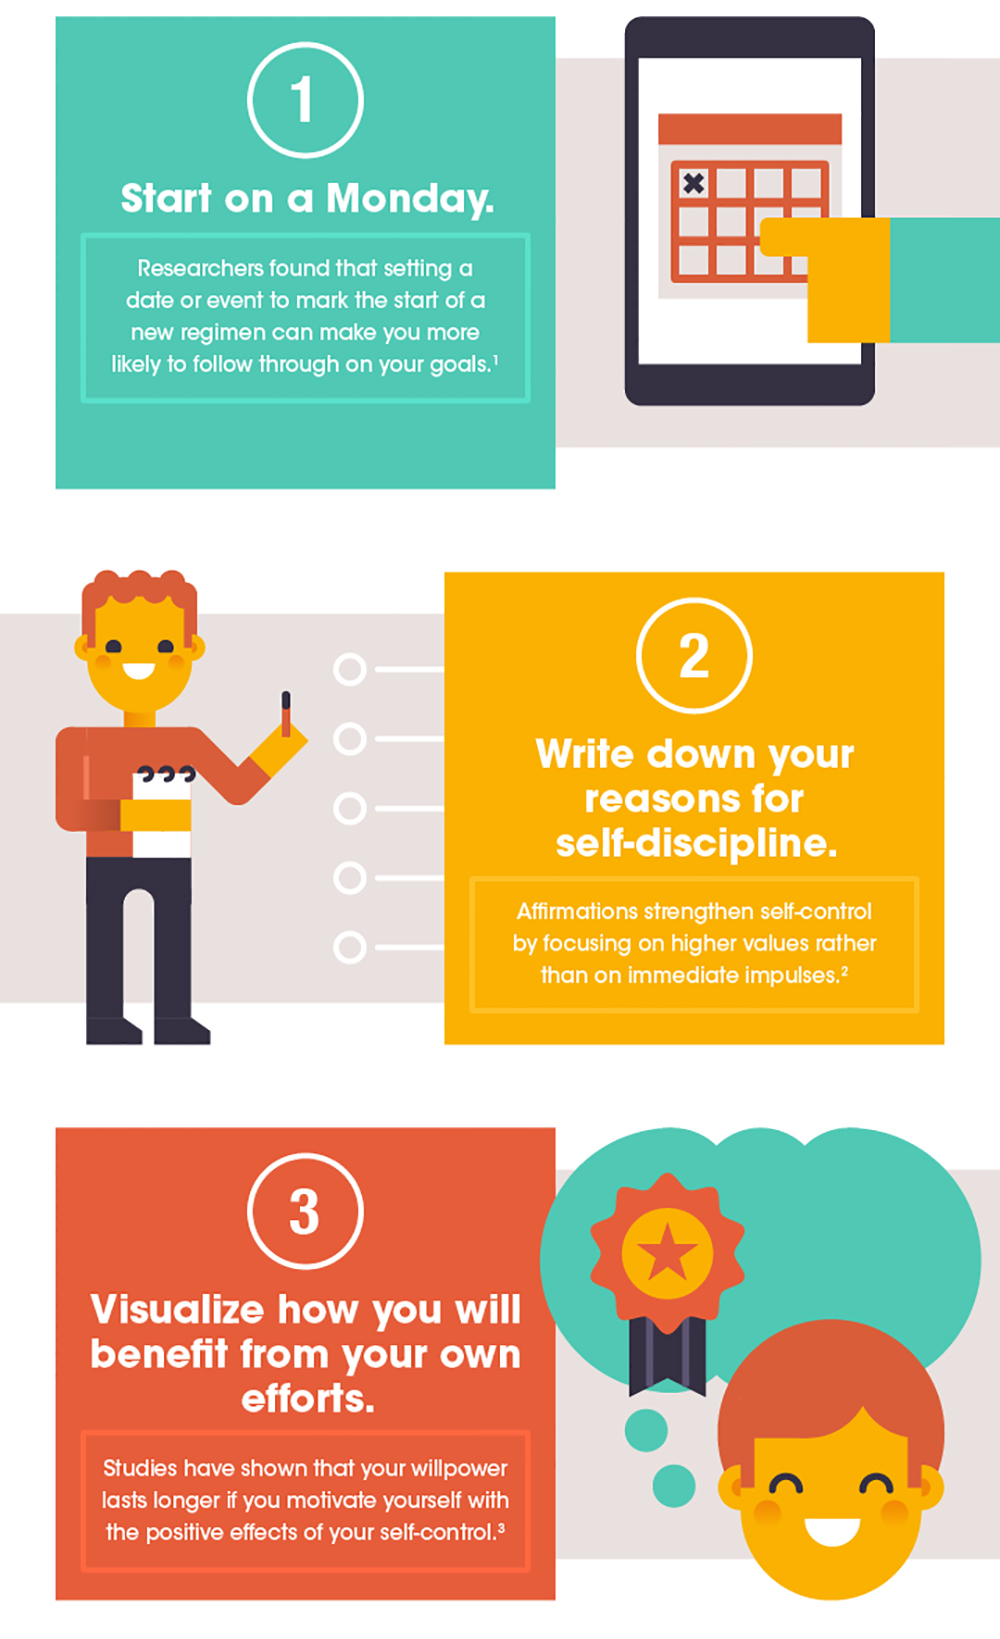
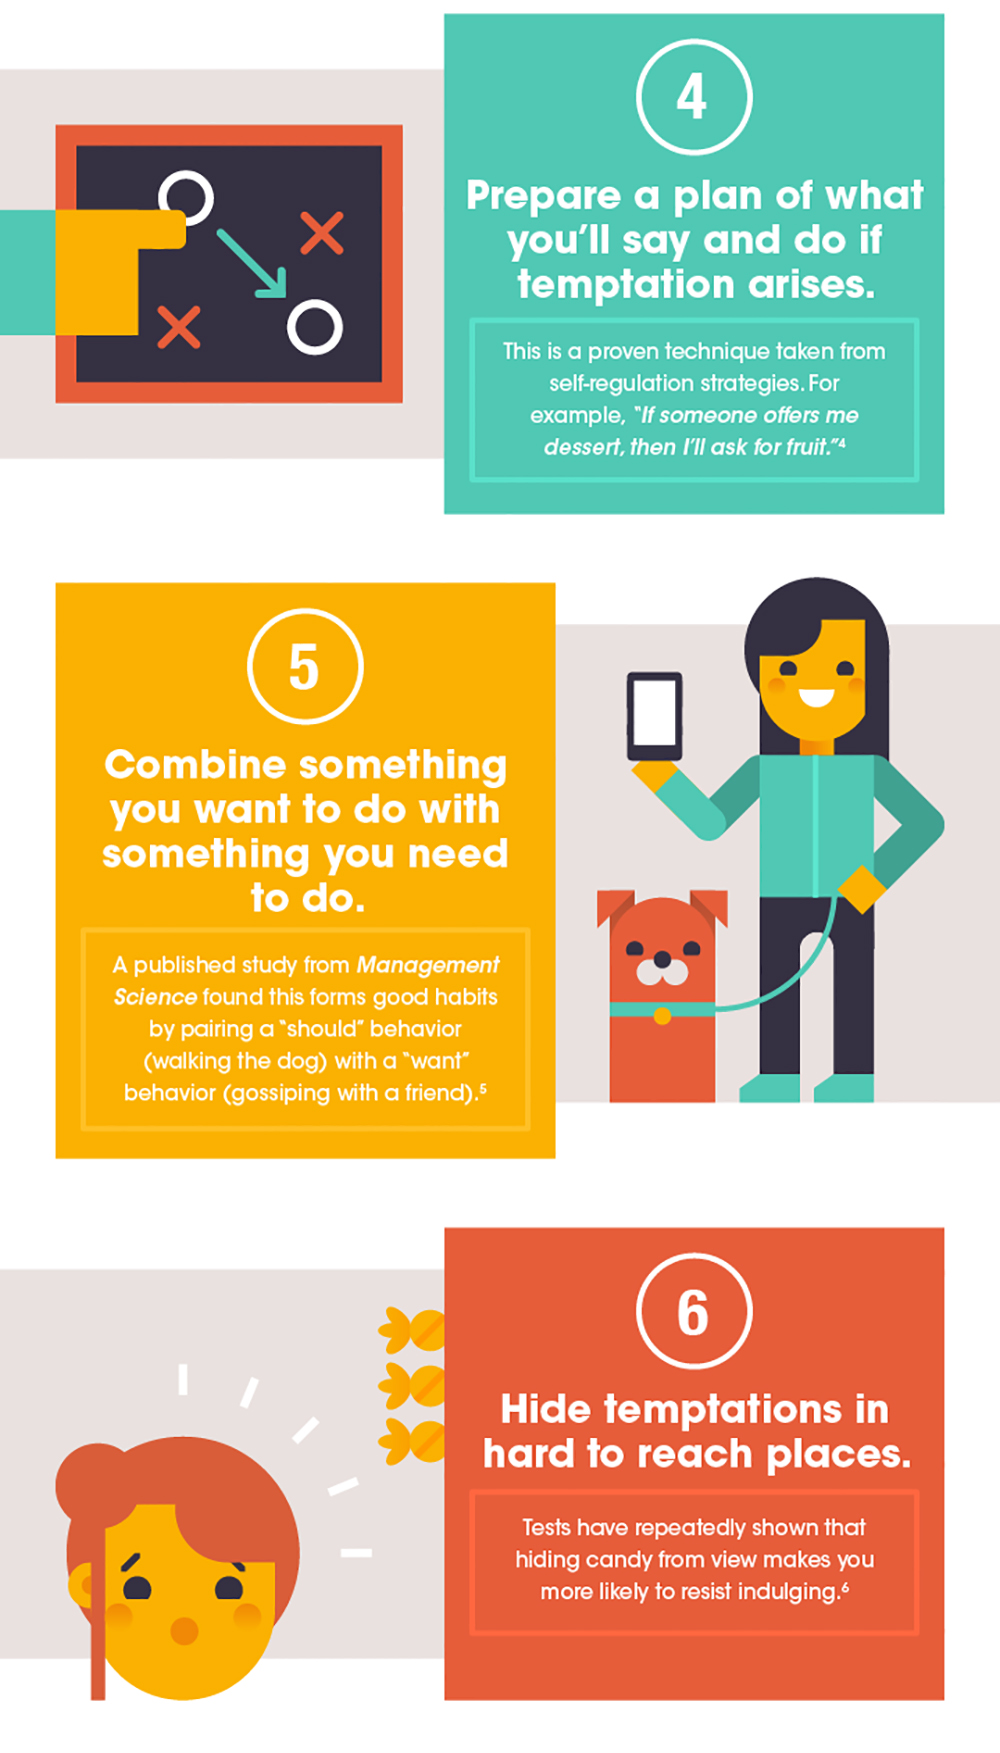
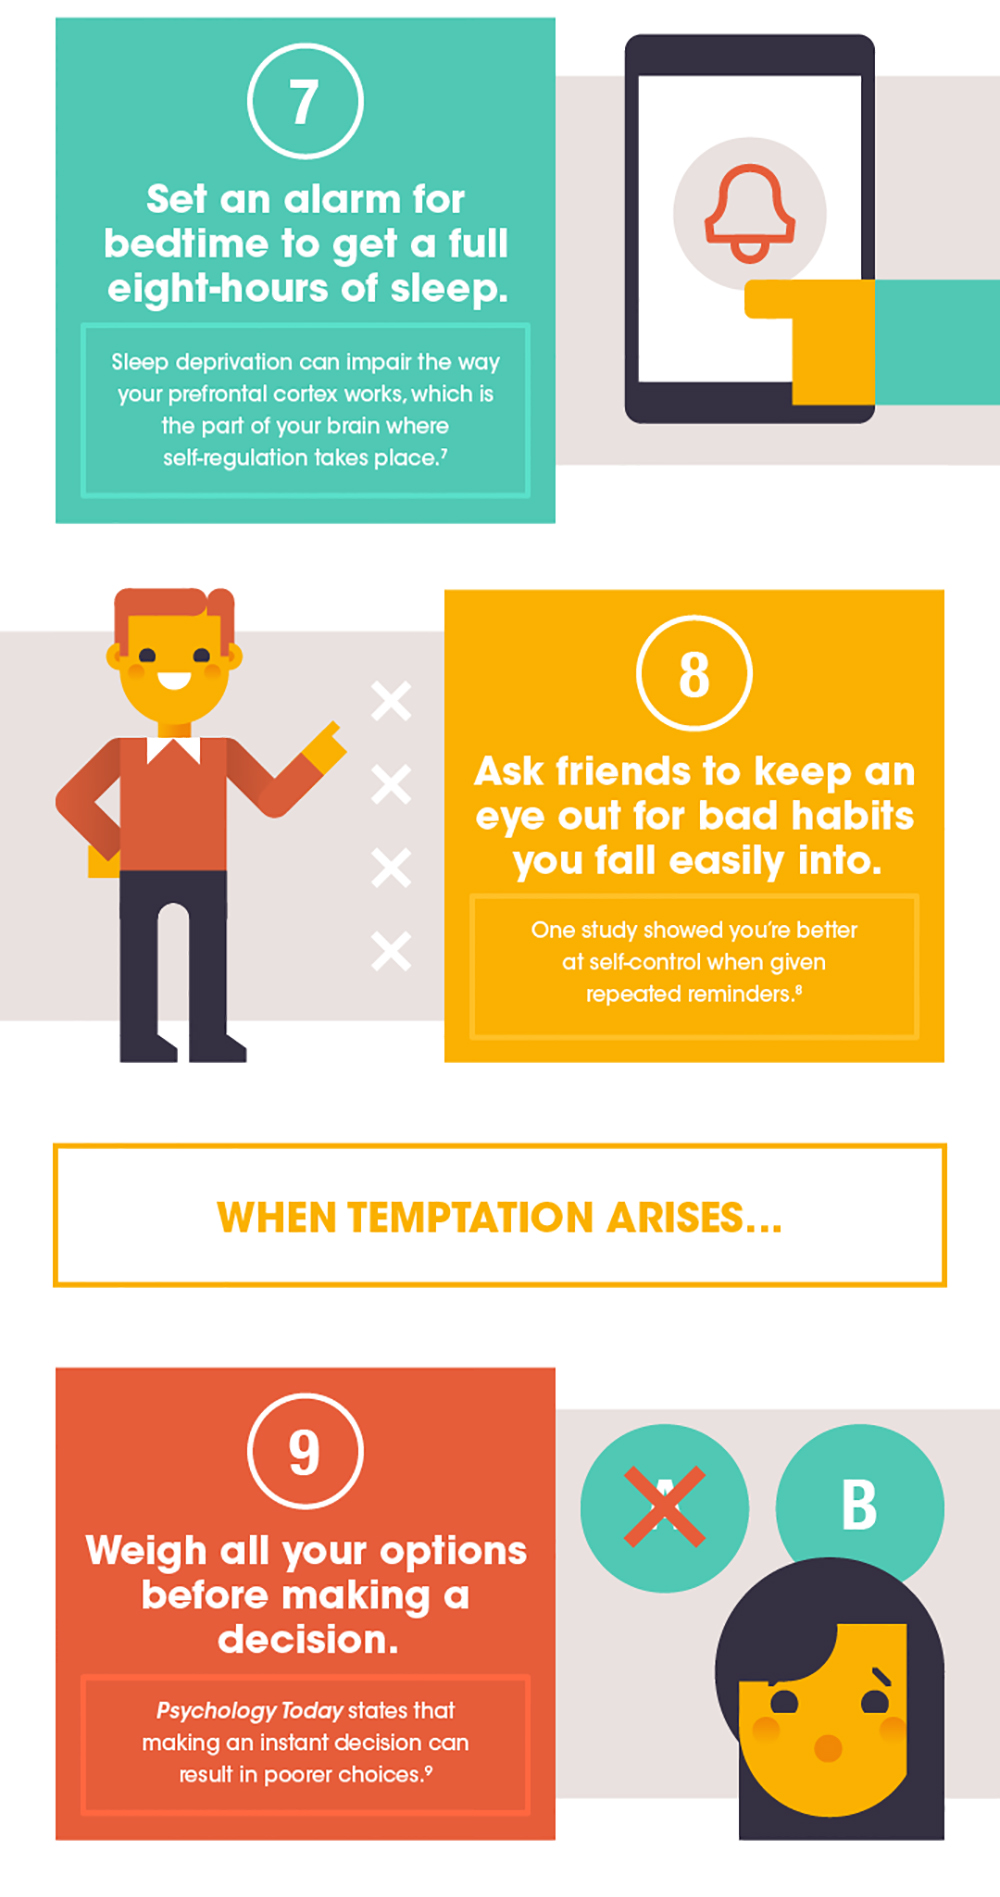
The following infographic from CashNetUSA outlines 14 tips which can help you improve your self discipline in 2018. Each tip is supported by scientific research — see the list of sources at the end of the graphic or click here for a list of web links. A full-size version of this graphic can be downloaded here.
Admittedly, the catch-22 here is that you’ll need enough discipline to study and apply these tips to your life in order to improve your discipline. But if your willpower needs a little boost, give them a shot. They may help you be happier, healthier, and better prepared for survival.
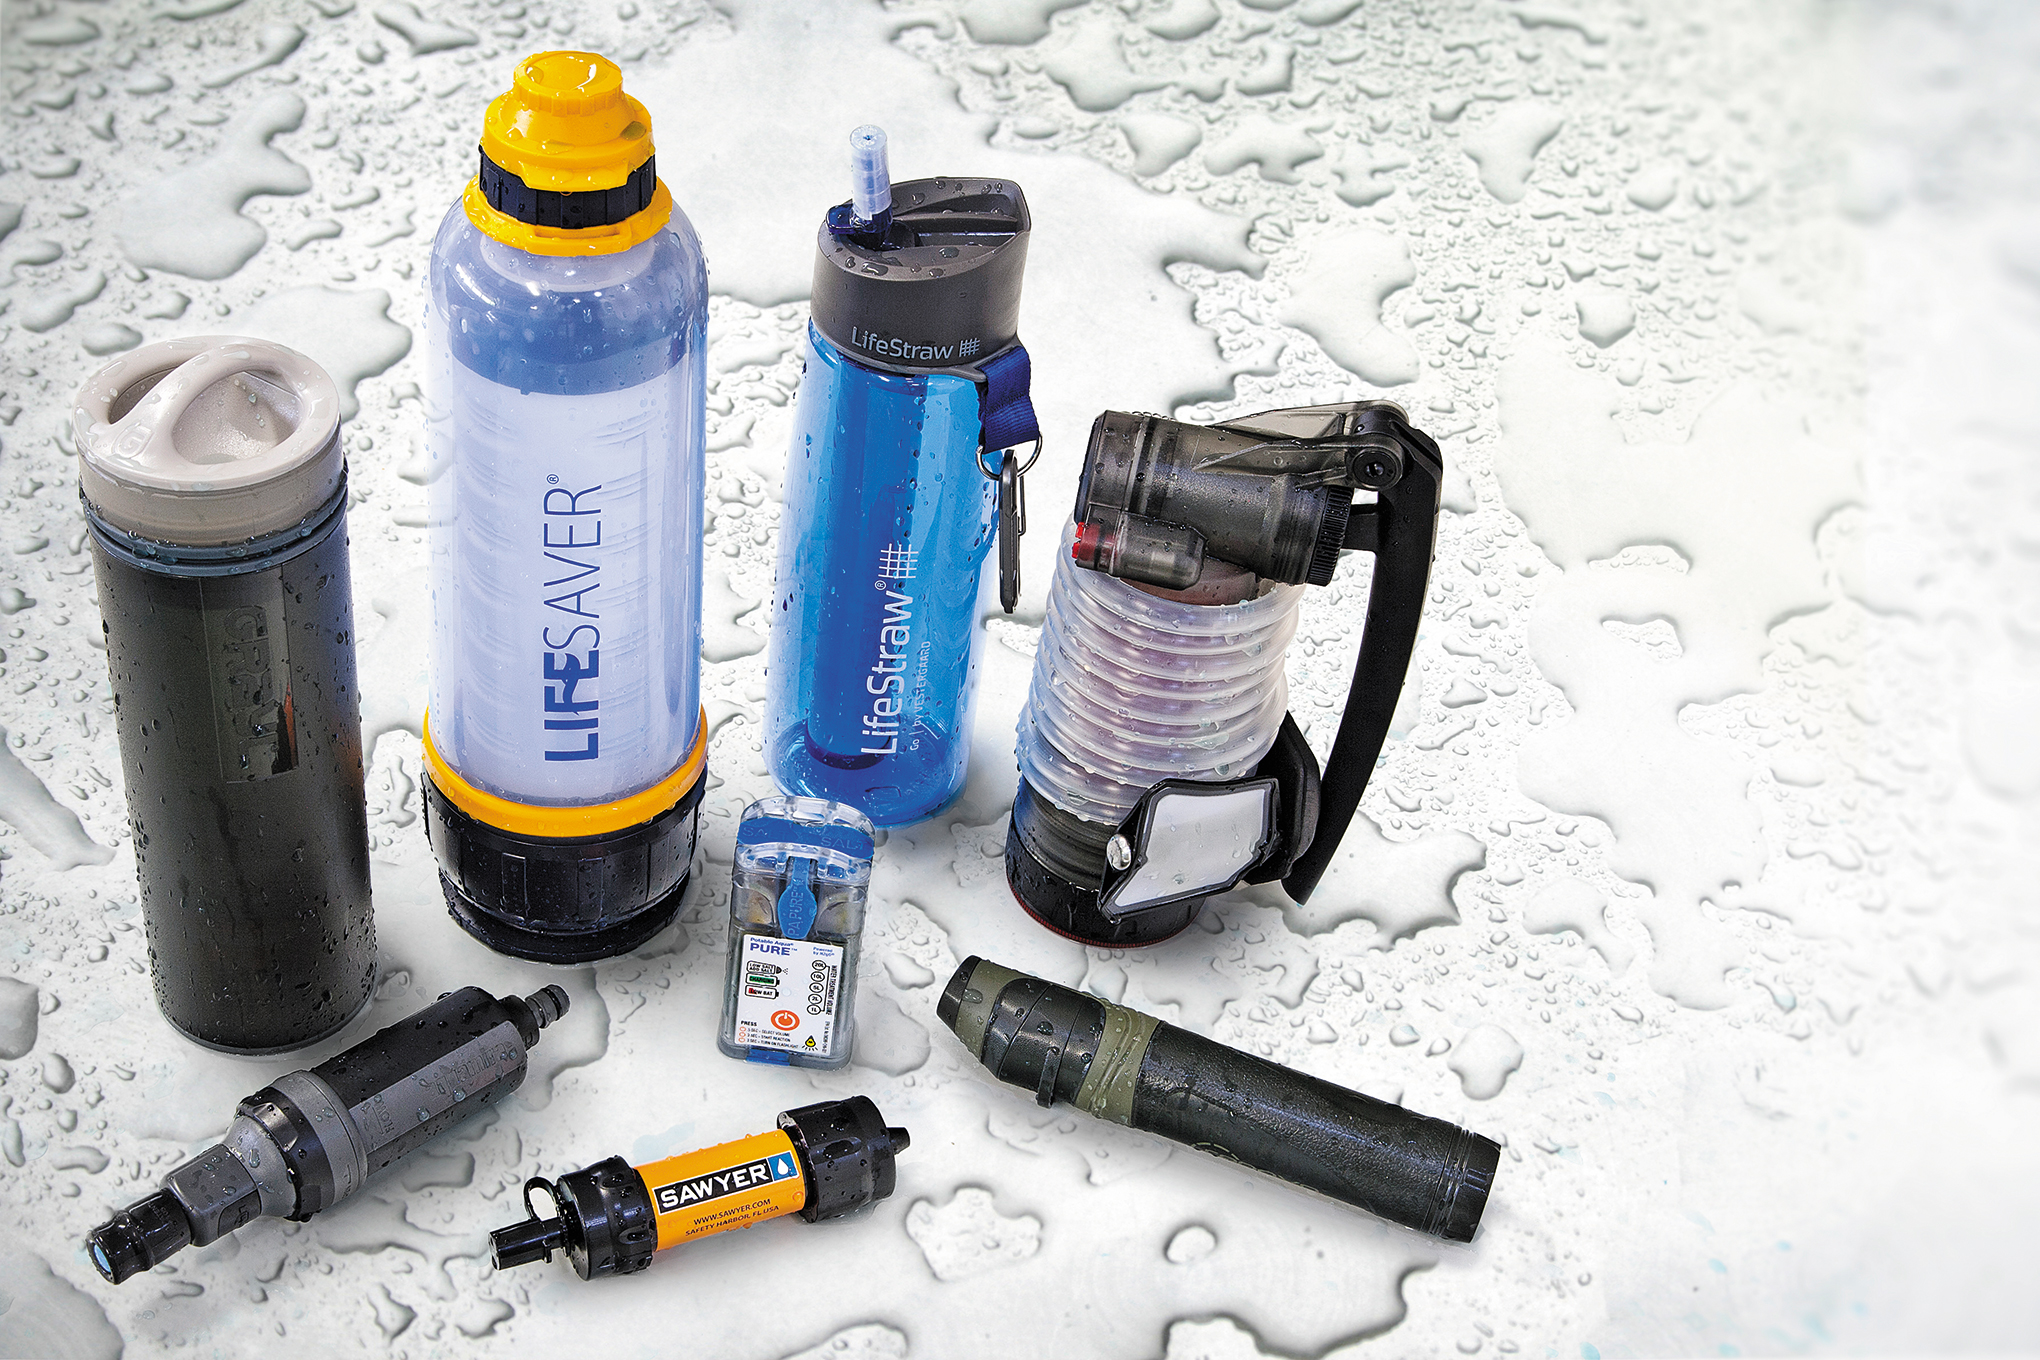
Hypothermia sets in quickly during bitterly cold winter weather when you’re unable to maintain your body heat. But even in warmer environments, a harsh wind chill or clothing soaked by an unexpected rainstorm can lead to a dangerous and potentially fatal drop in core temperature. For these reasons and many more, a reliable source of fire is an essential part of any emergency kit, and something you should consider and test thoroughly.
You certainly don’t want to learn about a flaw in your fire-starting plan when you’re already shivering, numb, and losing muscle coordination.
Last winter in Issue 18, we featured a buyer’s guide for manually operated fire-starters, including ferro rods, magnesium bars, several types of matches, and even a primitive fire bow. This time around, we’re focusing on tools that can create an instant flame.
Lighters vs. Torches
These two devices share many similarities, but can be differentiated easily by observing their flames. Lighters produce soft and flickering orange flames from flammable fluid or liquified gas, while torches release a fine stream (or streams) of gas at higher pressure to generate intense blue jets. Some of these fire-starters blur the line, offering a manual adjustment that can achieve either type of combustion.
Both lighters and torches can easily ignite a campfire, and many share the same butane fuel, but there are functional differences as well. Lighters generally offer even heat, and simple ignition and fuel systems for long-term durability. Torches generate more powerful and focused heat — enough to solder wiring, braze metal pipes, vaporize moisture, and brulee fancy desserts — but their fuels and Piezoelectric ignition systems may be more sensitive to environmental conditions.
We obtained three lighters and three torches, and evaluated each based on ease of use, reliability, power, features, and cost. Read our impressions and decide if one of these fire-starters is hot enough for your bug-out bag or winter survival kit.
Most of us have heard the common idiom “rub salt in a wound”. According to the Cambridge Dictionary, the phrase is used to describe making a bad situation even worse. For example, if you just lost your job and started clearing out your desk, only to have a coworker walk up and brag about his new promotion, he’d be rubbing salt in your metaphorical wound.
The origin of this idiom is easy enough to ascertain. If you’ve ever gotten seawater in a fresh cut, you’ll know that literal salt in a wound can be physically painful. However, you may also recall that saline solution is used for wound irrigation in hospitals around the world. This got us thinking: it’s obvious that rubbing salt in a real wound is painful, but is it really making a bad situation worse? Or could the salt make the situation better in the long term and prevent infection, becoming a viable technique for backcountry medicine?
Note: This article is not a comprehensive first-aid guide. Professional medical treatment should always be sought first before attempting any improvised treatments.
Historical linguists have indicated that the idiom came from a time when salt was used as an improvised antiseptic. “During the earlier centuries, when England was establishing its navy, most sailors were forced into service. While at sea, punishment was often lashes with a cat’o’nine tails. These whippings would almost always break the skin, and salt was rubbed into the wound to prevent infection. In this way, “salt in wound” was a very literal, stinging phrase.”
However, just because it was seen as a viable antiseptic back then doesn’t mean it still is today. After all, we certainly don’t use blood-letting, mercury, or lobotomies to cure our diseases these days.
In our search for an answer to this question, we found the following statement from Walter Sipe, M.D. of the University of California, San Francisco. He wrote the following response in 2006 in an Ask a Scientist column for the Howard Hughes Medical Institute:
Let me start by saying: Do not put salt on your cut. The single most important aspect of wound care in the backcountry is vigorous and copious irrigation with clean water (filtered or chemically treated so it is drinkable). You can generate a high-pressure stream by filling a zip-top plastic bag with water, poking a tiny hole in a bottom corner of it with a needle, and then squeezing the bag so water comes out through the hole. For dirty wounds, vigorous scrubbing to remove foreign bodies is also important. Exposing wounds to iodine, alcohol, peroxide, and pure salt is no more effective than water irrigation at preventing infection and can potentially damage tissues. The safest way to slow bleeding is to hold direct pressure on the wound until the bleeding stops.
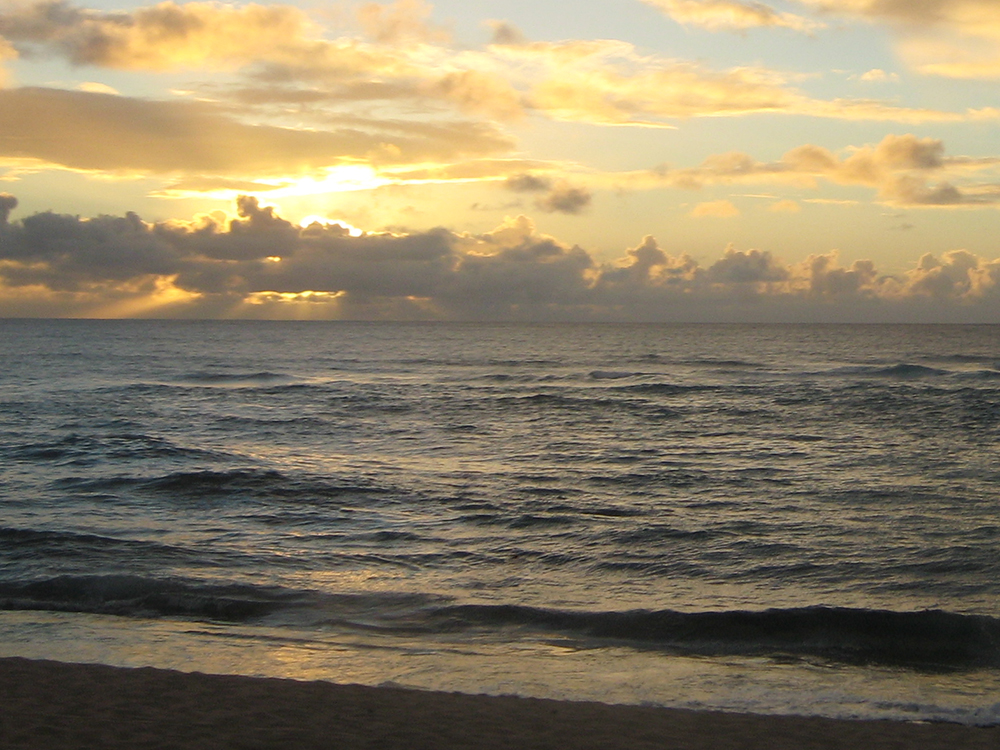
Before you go thinking a dip in the ocean might be a better way of salting your wounds, scientists have found that rinsing a wound in seawater is harmful due to the presence of marine bacteria. Additionally, many dangerous bacteria have an extremely high salt tolerance and thrive in salty environments — Staphylococcus aureus, the bacteria behind potentially-deadly MRSA staph infections, is one notable example.
Finally, while it’s true that sterile saline solution is used in many medical facilities, this solution contains a very small amount of dissolved salt for the purpose of mimicking your body’s natural conditions. With regard to saline’s antiseptic properties, multiplescientificstudies have found that saline solution is no more effective for preventing infection than distilled water or even clean tap water. In fact, studies indicate that water may be preferable in some cases.
Distilled, boiled, or purified water can be used to irrigate wounds and reduce infection risk.
So, the conclusion is clear: next time you hear the phrase “rubbing salt in a wound”, remember that its metaphorical use of “making a bad situation worse” is also true in a medical context. It is not a viable technique for treating wounds in the backcountry. Doing so is likely to be very painful, may further irritate the wound, and it will not kill all the bacteria which might lead to a dangerous infection. Instead, keep the salt for your next meal, and irrigate your wounds thoroughly with clean purified or distilled water until you can seek professional medical treatment.
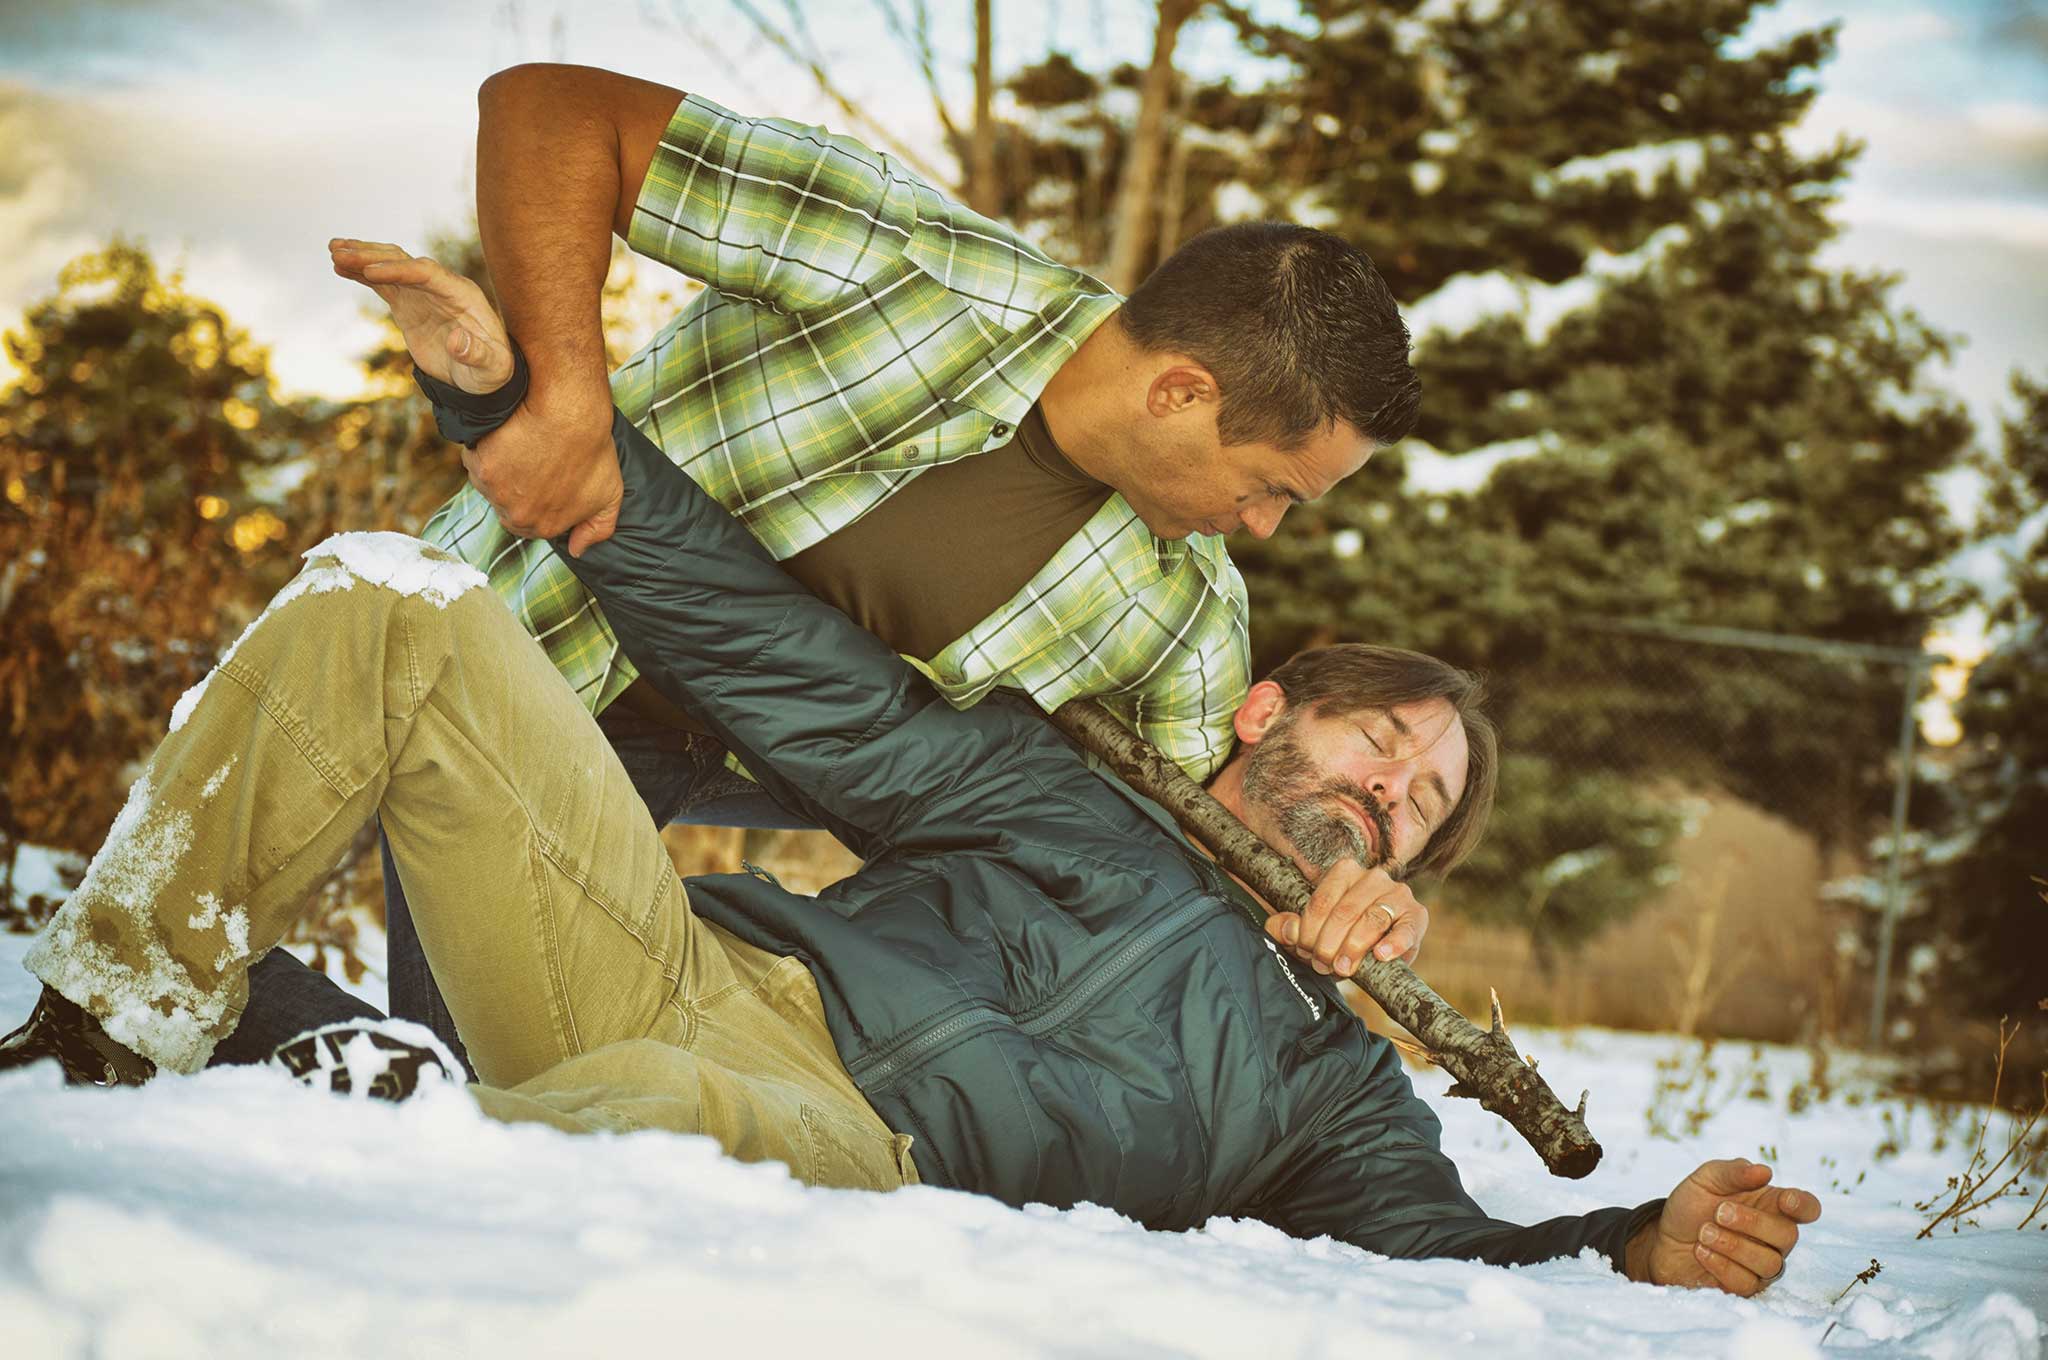
Warning! The concepts shown here are for illustrative purposes only. Seek professional training from a reputable instructor before attempting any techniques discussed or shown in this story.
Sticks and stones may break your bones… period. Imagine a cataclysmic scenario — there’s been a criminal or terrorist attack during your vacation, and you’ve been forced to flee into the wilderness before making your way to a safe zone. Or an electromagnetic pulse or act of God has put emergency services out of commission while you’re away from home, and opportunist looters are on the street. Maybe it’s something simpler — you’ve encountered trouble while out on a camping trip with your family.
Whatever the case, so long as there are branches, trees, timber, or bamboo-type grasses around, there will always be an effective weapon waiting to be recognized and formed.
Nature’s Weapons
It’s not much of a stretch to assume that a stick was likely the first weapon wielded by mankind. Even apes can be found smacking each other (and other animals) with them in the wild. The number of cultures that developed intricate fighting systems or martial arts throughout history to enhance their ability to defend and attack with sticks is staggering. These systems extend much further than East Asia, where most people typically associate martial arts of this kind.
Origins
As a young man growing up in New Zealand, I was fortunate to have had the opportunity to train in an age-old martial art developed by the native Maori people called Mau Rakau or “art of the wooden weapon.” The primary focus of this art is a medium-length wooden staff called Taiaha, which is typically 5 to 6 feet long. I also had the opportunity over two decades ago to spend two years living in the Philippines, where I discovered and began studying a Filipino martial art commonly called Kali.
Those familiar with the Filipino martial arts are aware that their training methodology starts with sticks and blades, as opposed to the initial empty-hand focus of most other martial arts. The arts that hail from areas of the Philippines where the Spanish once exercised greater control seem to put more focus on sticks, as their Spaniard overlords prohibited the practice of fighting arts with blades during much of their 300-year colonization.
The likes of Bruce Lee and Ed Parker found the Filipino stick fighting arts so effective that they not only trained in them, but assimilated elements of these arts into the fighting systems they developed during their lifetimes.
Categories
When procuring a good branch or piece of wood to form into a weapon, there are two categories that you can generally put stick weapons into, each with advantages and disadvantages: one-handed and two-handed weapons. Although long staffs can be found in some of their arts, the Filipinos found that the ideal length for a fighting stick was around 24 to 31 inches in length.
Much shorter than that and the stick begins to lose the torque that can be harnessed with a good one-arm swing. Much longer than that and the stick starts to become unwieldy as a one-handed weapon, requiring the use of two hands. For the purposes of this article we’re going to focus on the strengths of using a stick that can be manipulated with one or two hands for survival.
It’s very possible in a pinch that the old adage beggars can’t be choosers may very well apply when choosing a branch or piece of wood to become your survival stick. For defensive purposes, any rigid stick you can hold and swing is better than empty hands. But if you are in an area where sticks are plentiful, you may be able to choose and shape your own ideal survival stick. So what should you look for when hand-crafting one of these implements?
What to Look for
The first step will be finding a stick that’s as straight as possible, with a circumference that is close to matching your hand size. When gripping the stick, you will want the tip of your thumb to reach somewhere between the tip of the index finger and the first knuckle of the same finger. Wood can come in a variety of weights and densities. A heavier stick will be slower and more cumbersome to wield, while a lighter stick will transfer less kinetic energy on impact. Just imagine the chances of stopping a threat with a balsa wood staff.
You’ll want to find some middle ground -— this will be different for everyone based on your size and strength. It’s very possible that you’ll need to remove twigs or other protrusions from a smaller branch. If a simple knife is available to utilize, you can shape your ideal stick from a larger stronger branch or piece of wood. The last thing to decide is the length. Again, people come in all shapes and sizes and so should your custom survival sticks.
As a good measuring reference, stretch your arm out directly to the side and place the stick in your armpit parallel to your arm. A good stick length will measure from the armpit to about the tip of your fingers or just a little beyond. At this length you can typically wield it with one hand comfortably, or can also put two hands on it for additional power if necessary. If you have a pocketknife and want to enhance the defensive capabilities of your stick, try sharpening the end of your stick into a point that can be used for thrusting.
As you train to use your stick defensively, keep it simple. Regardless of the grip you use, downward 45-degree-angled strikes from right and left in a figure-eight motion can be used offensively and defensively. Centerline thrusts can also be used preemptively or as quick counterattacks.
These three attacks are all you really need to build a solid foundation. If you have time to train you can get more elaborate than that in steady progressions, or seek out the instruction of a good Filipino martial arts instructor. At a fundamental level of defense, if you want to be able to stick it to ’em, it’s best to stick to the basics.
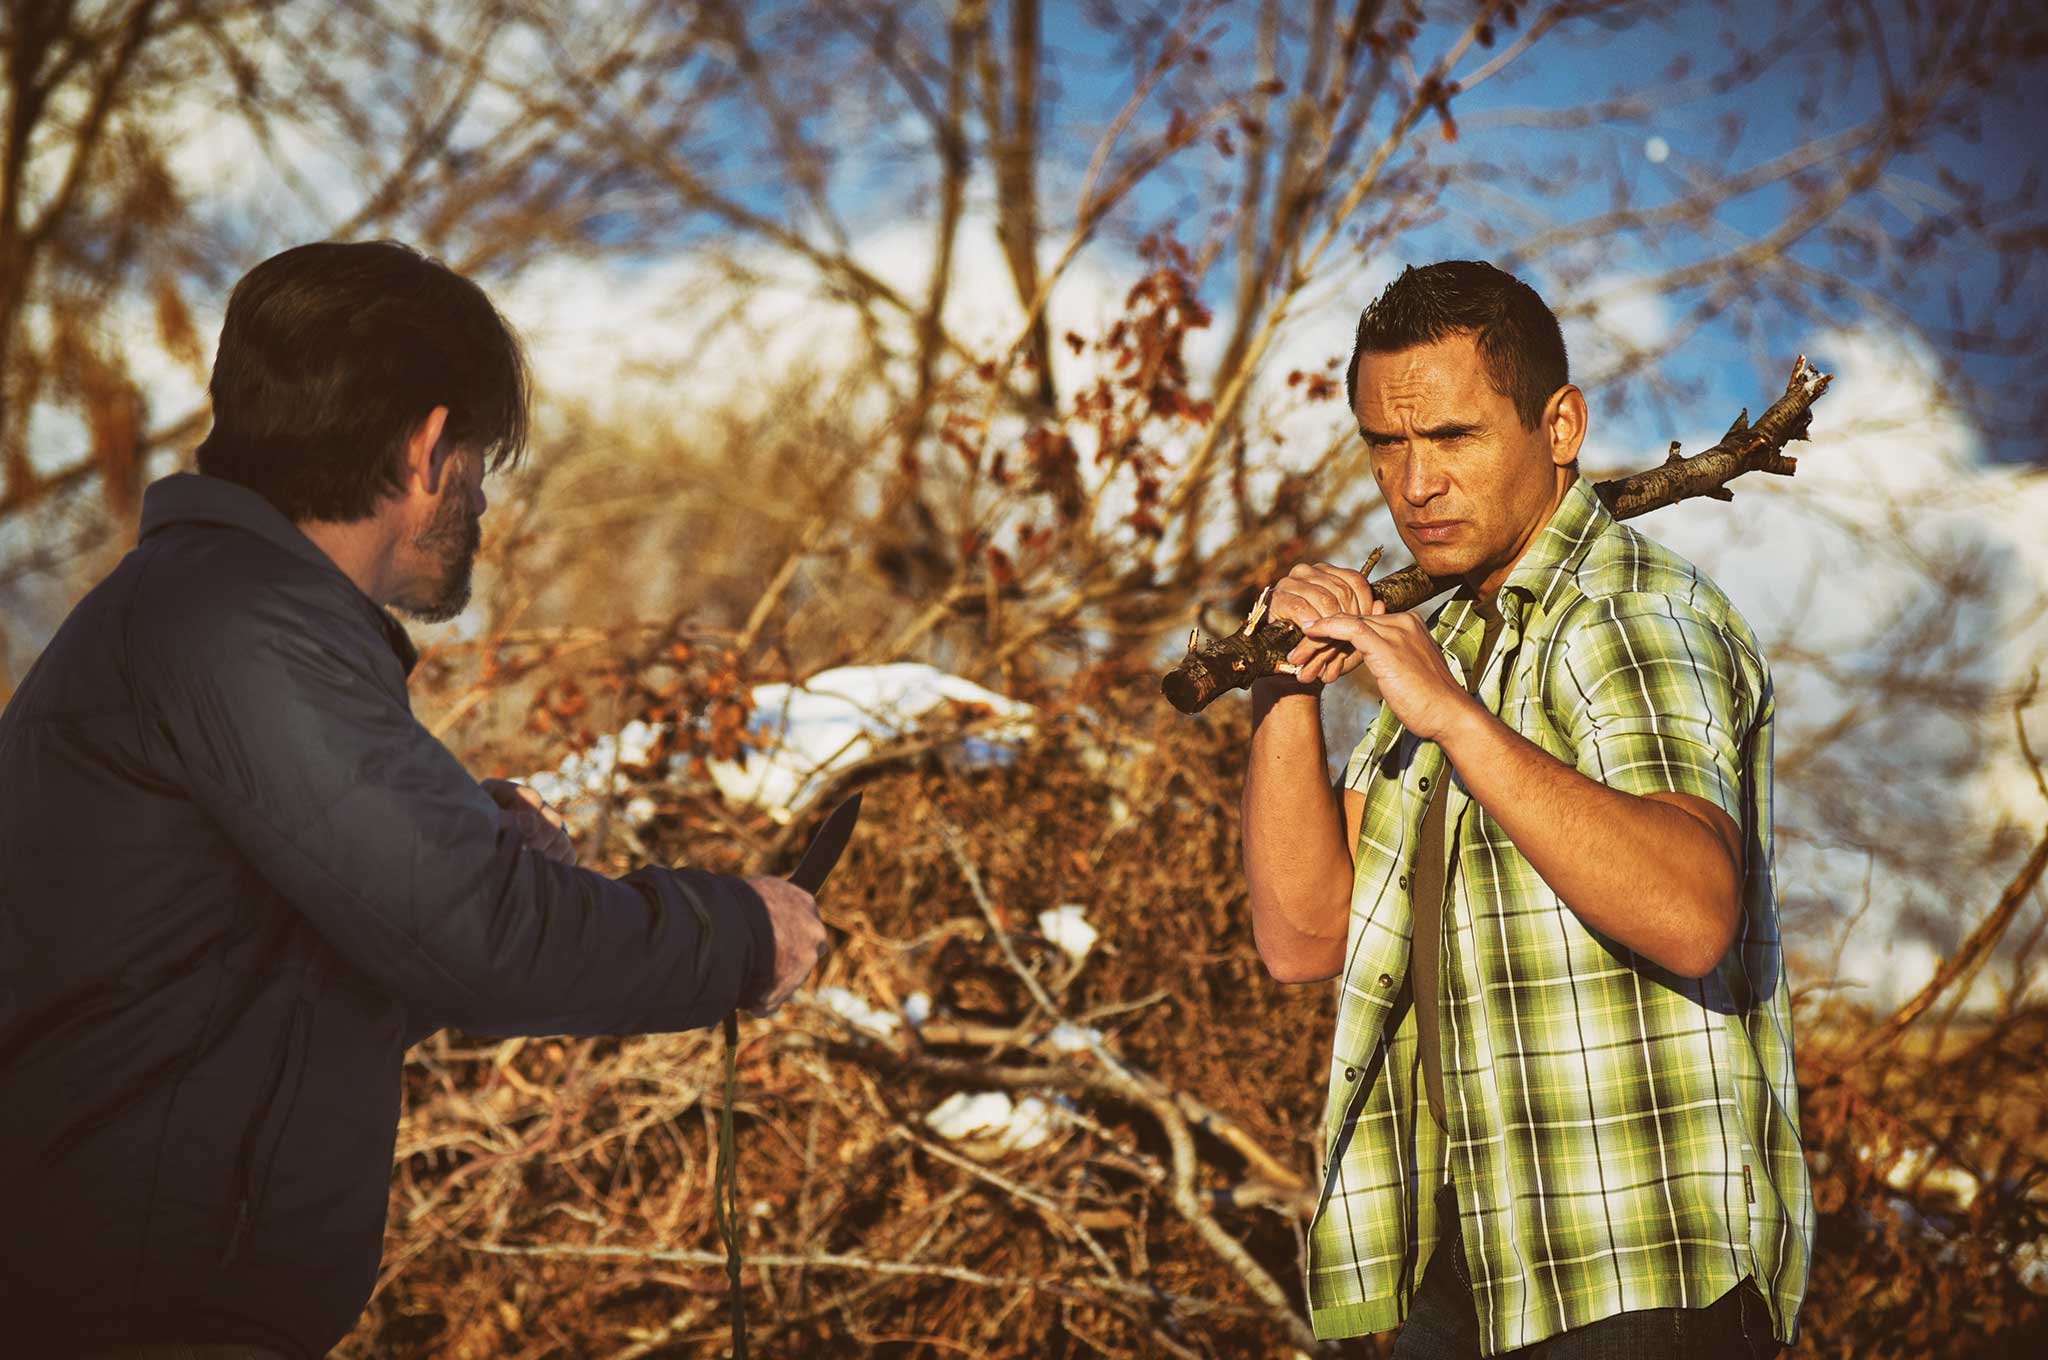
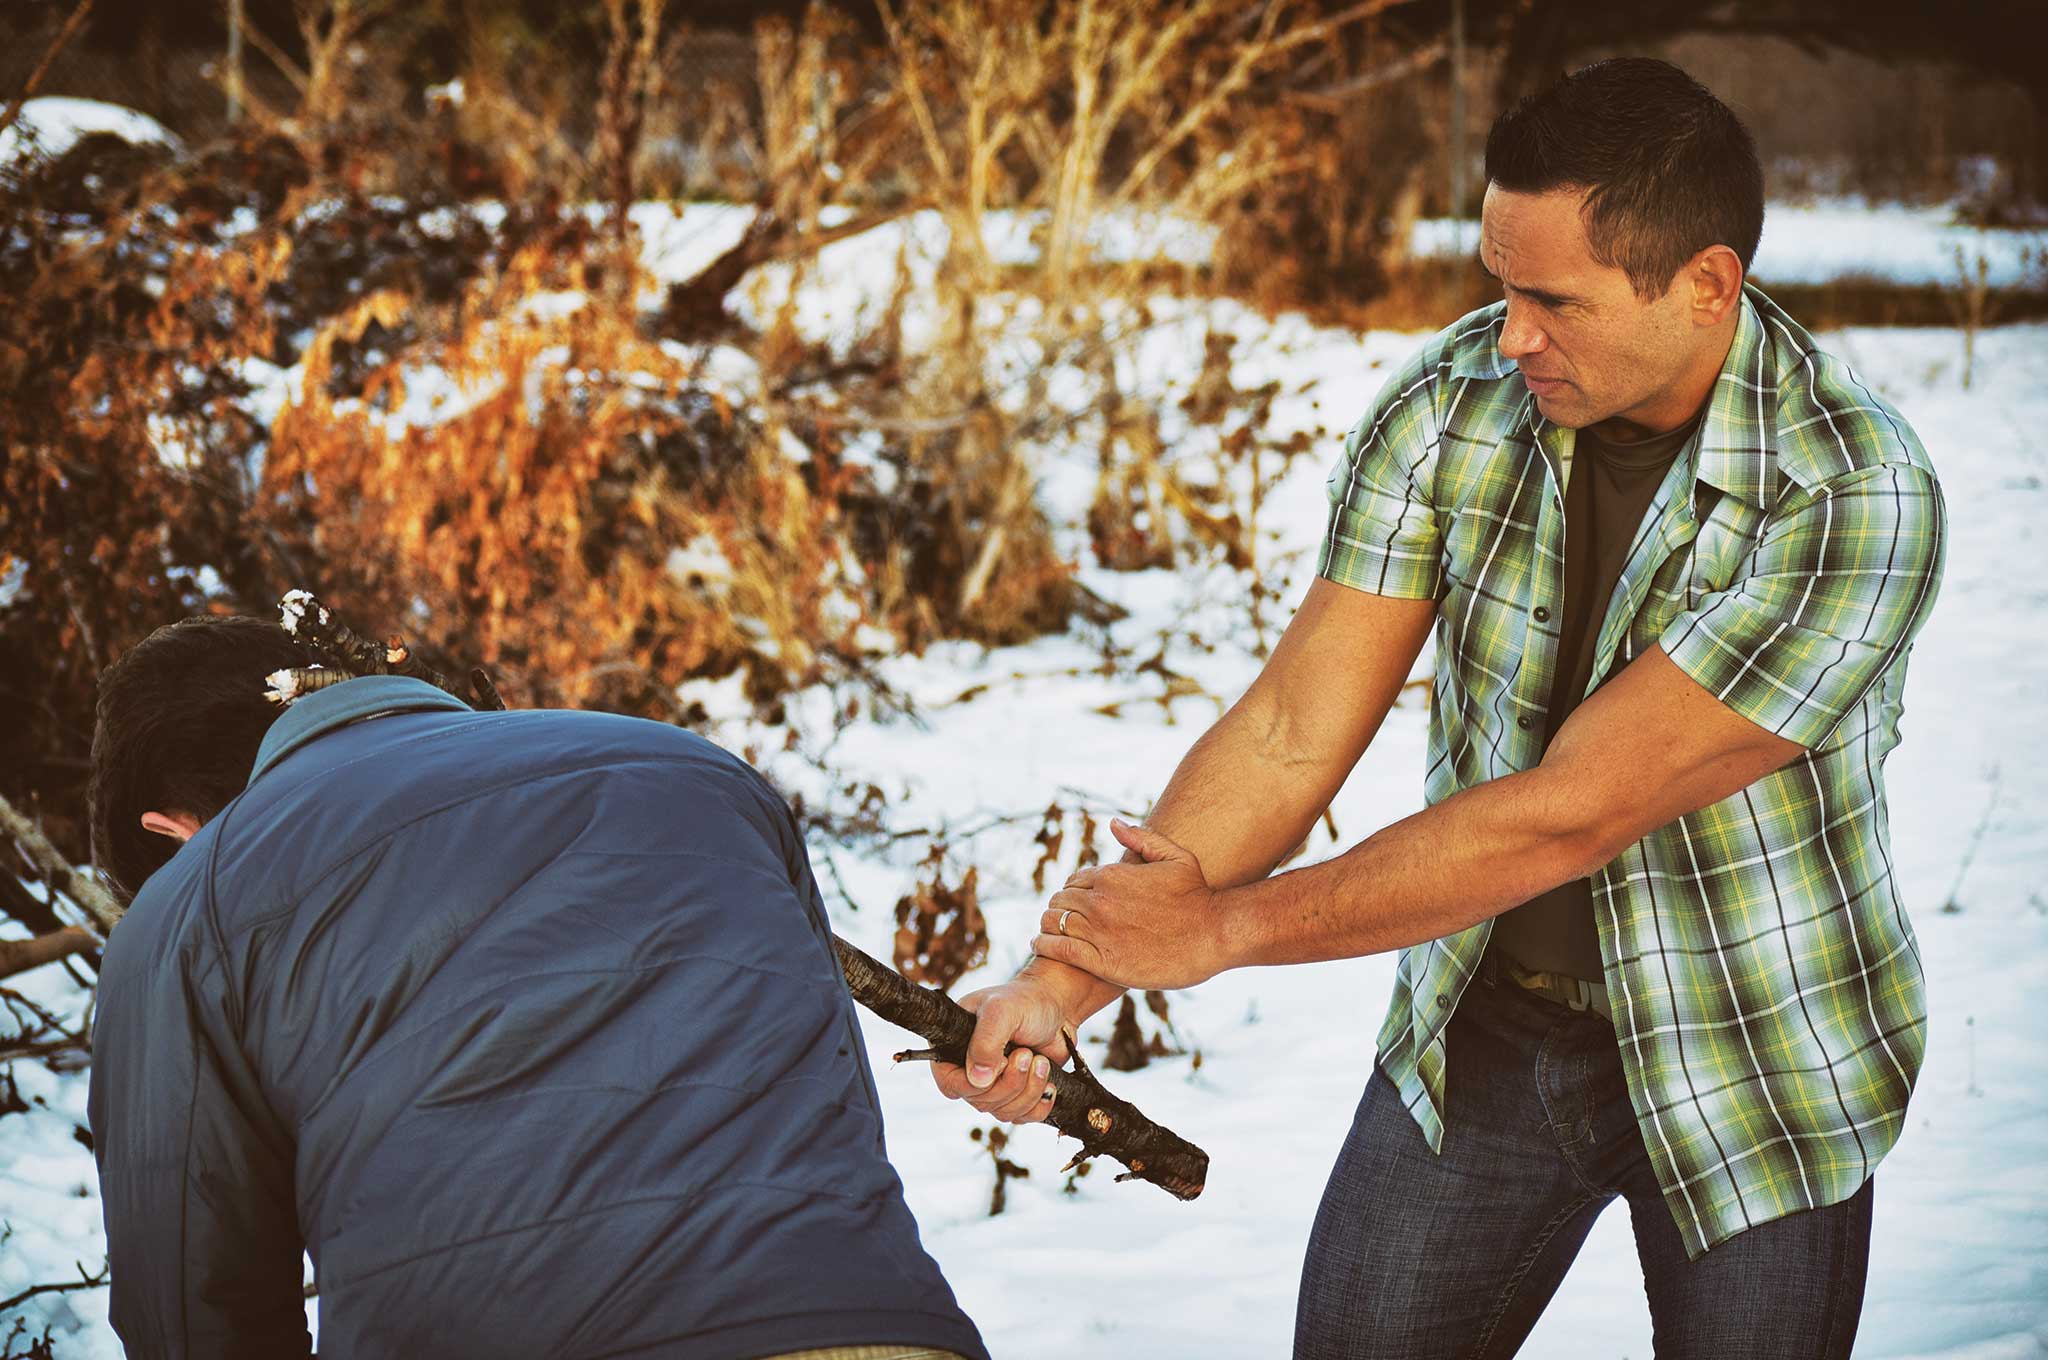
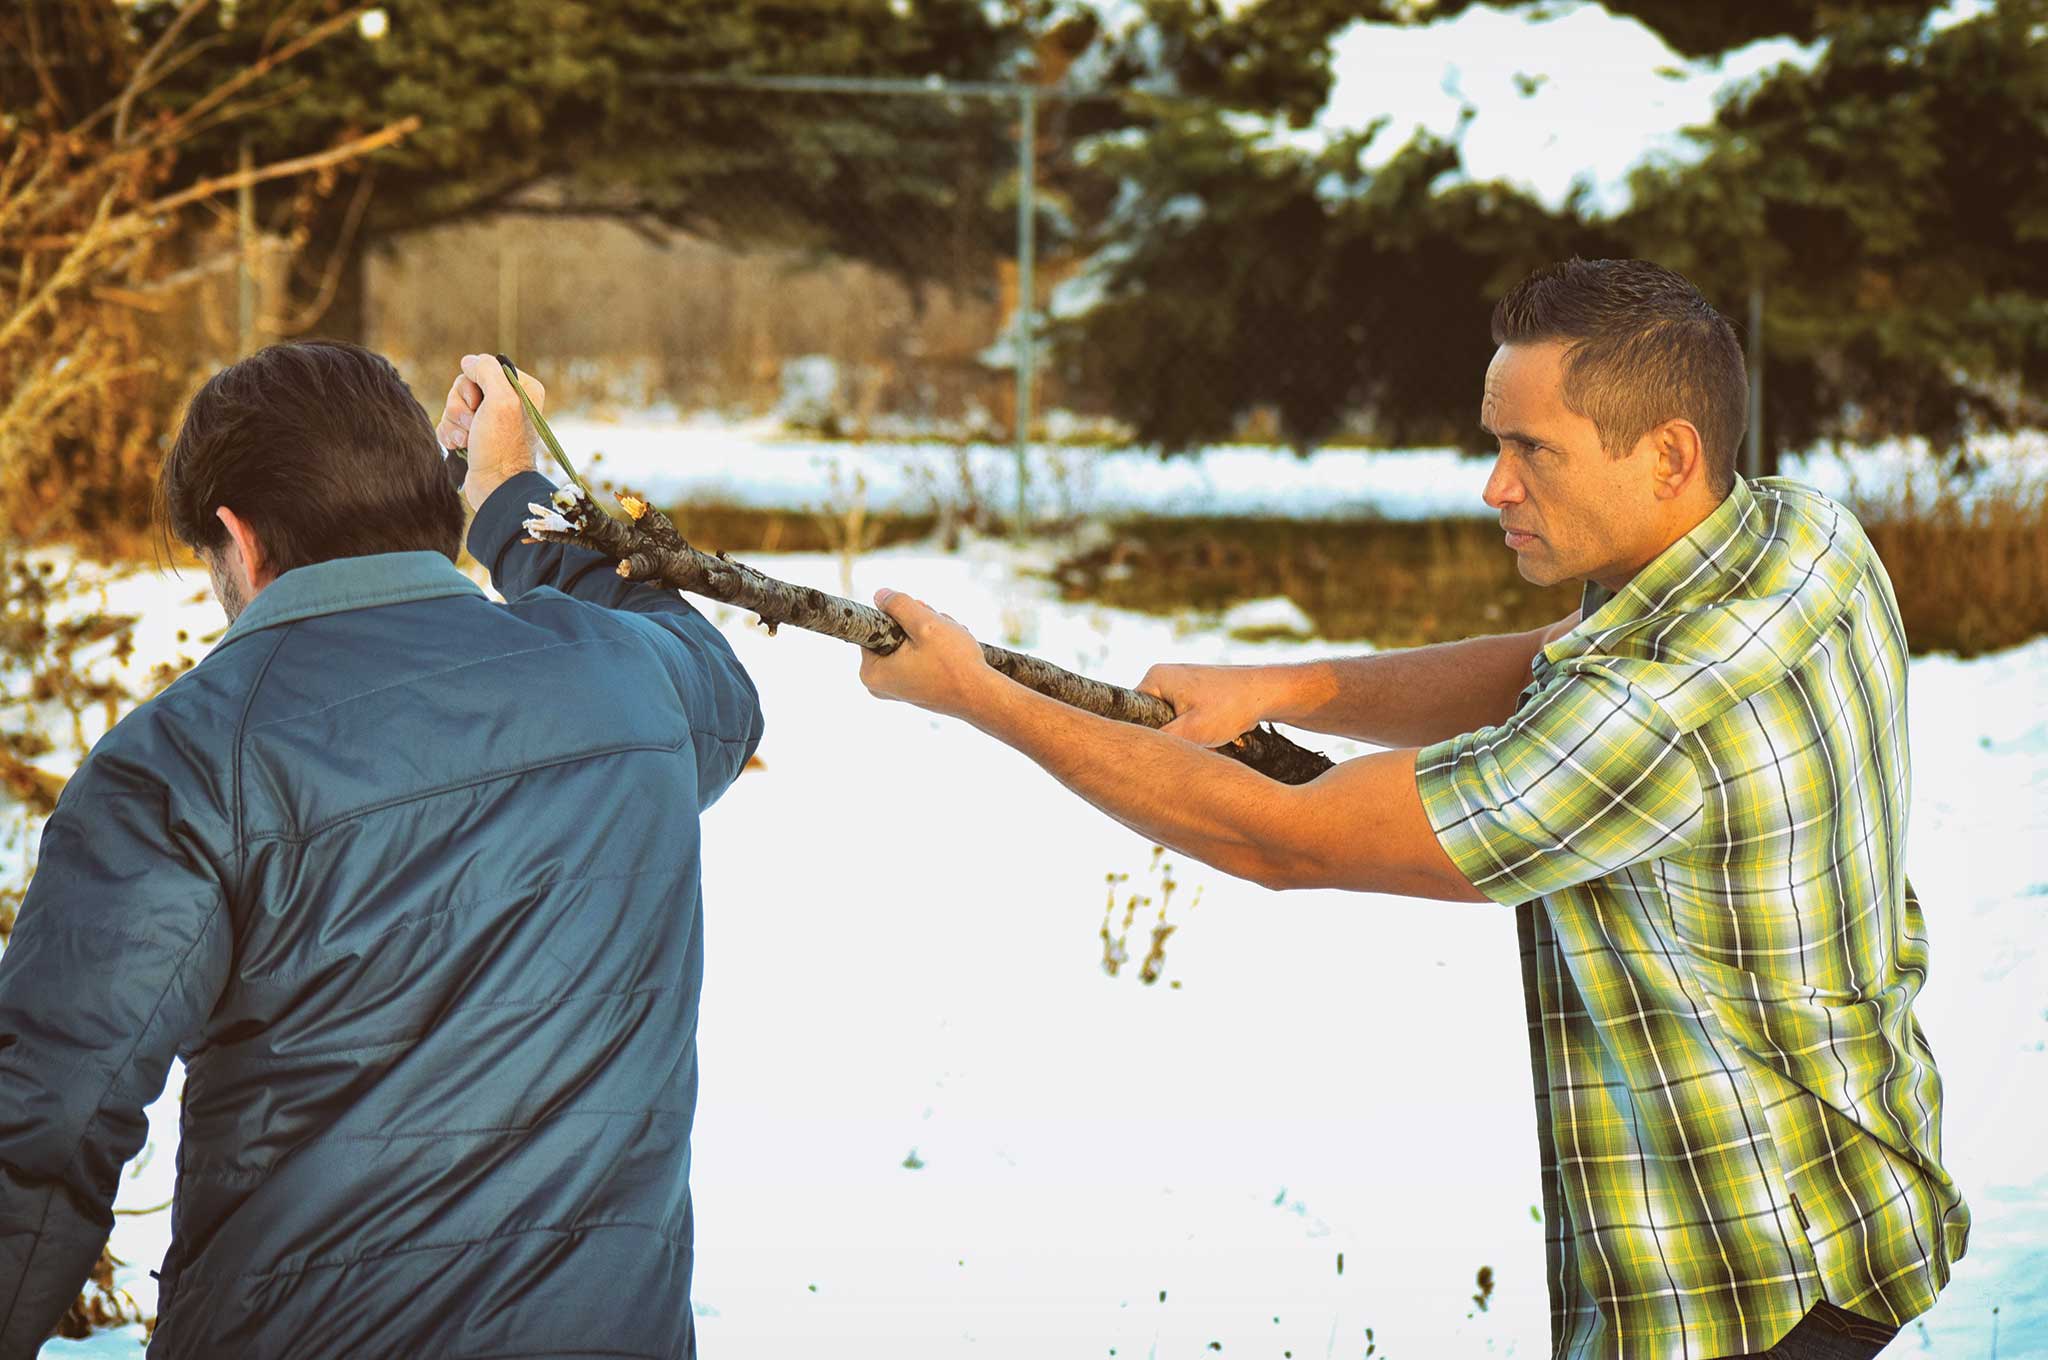
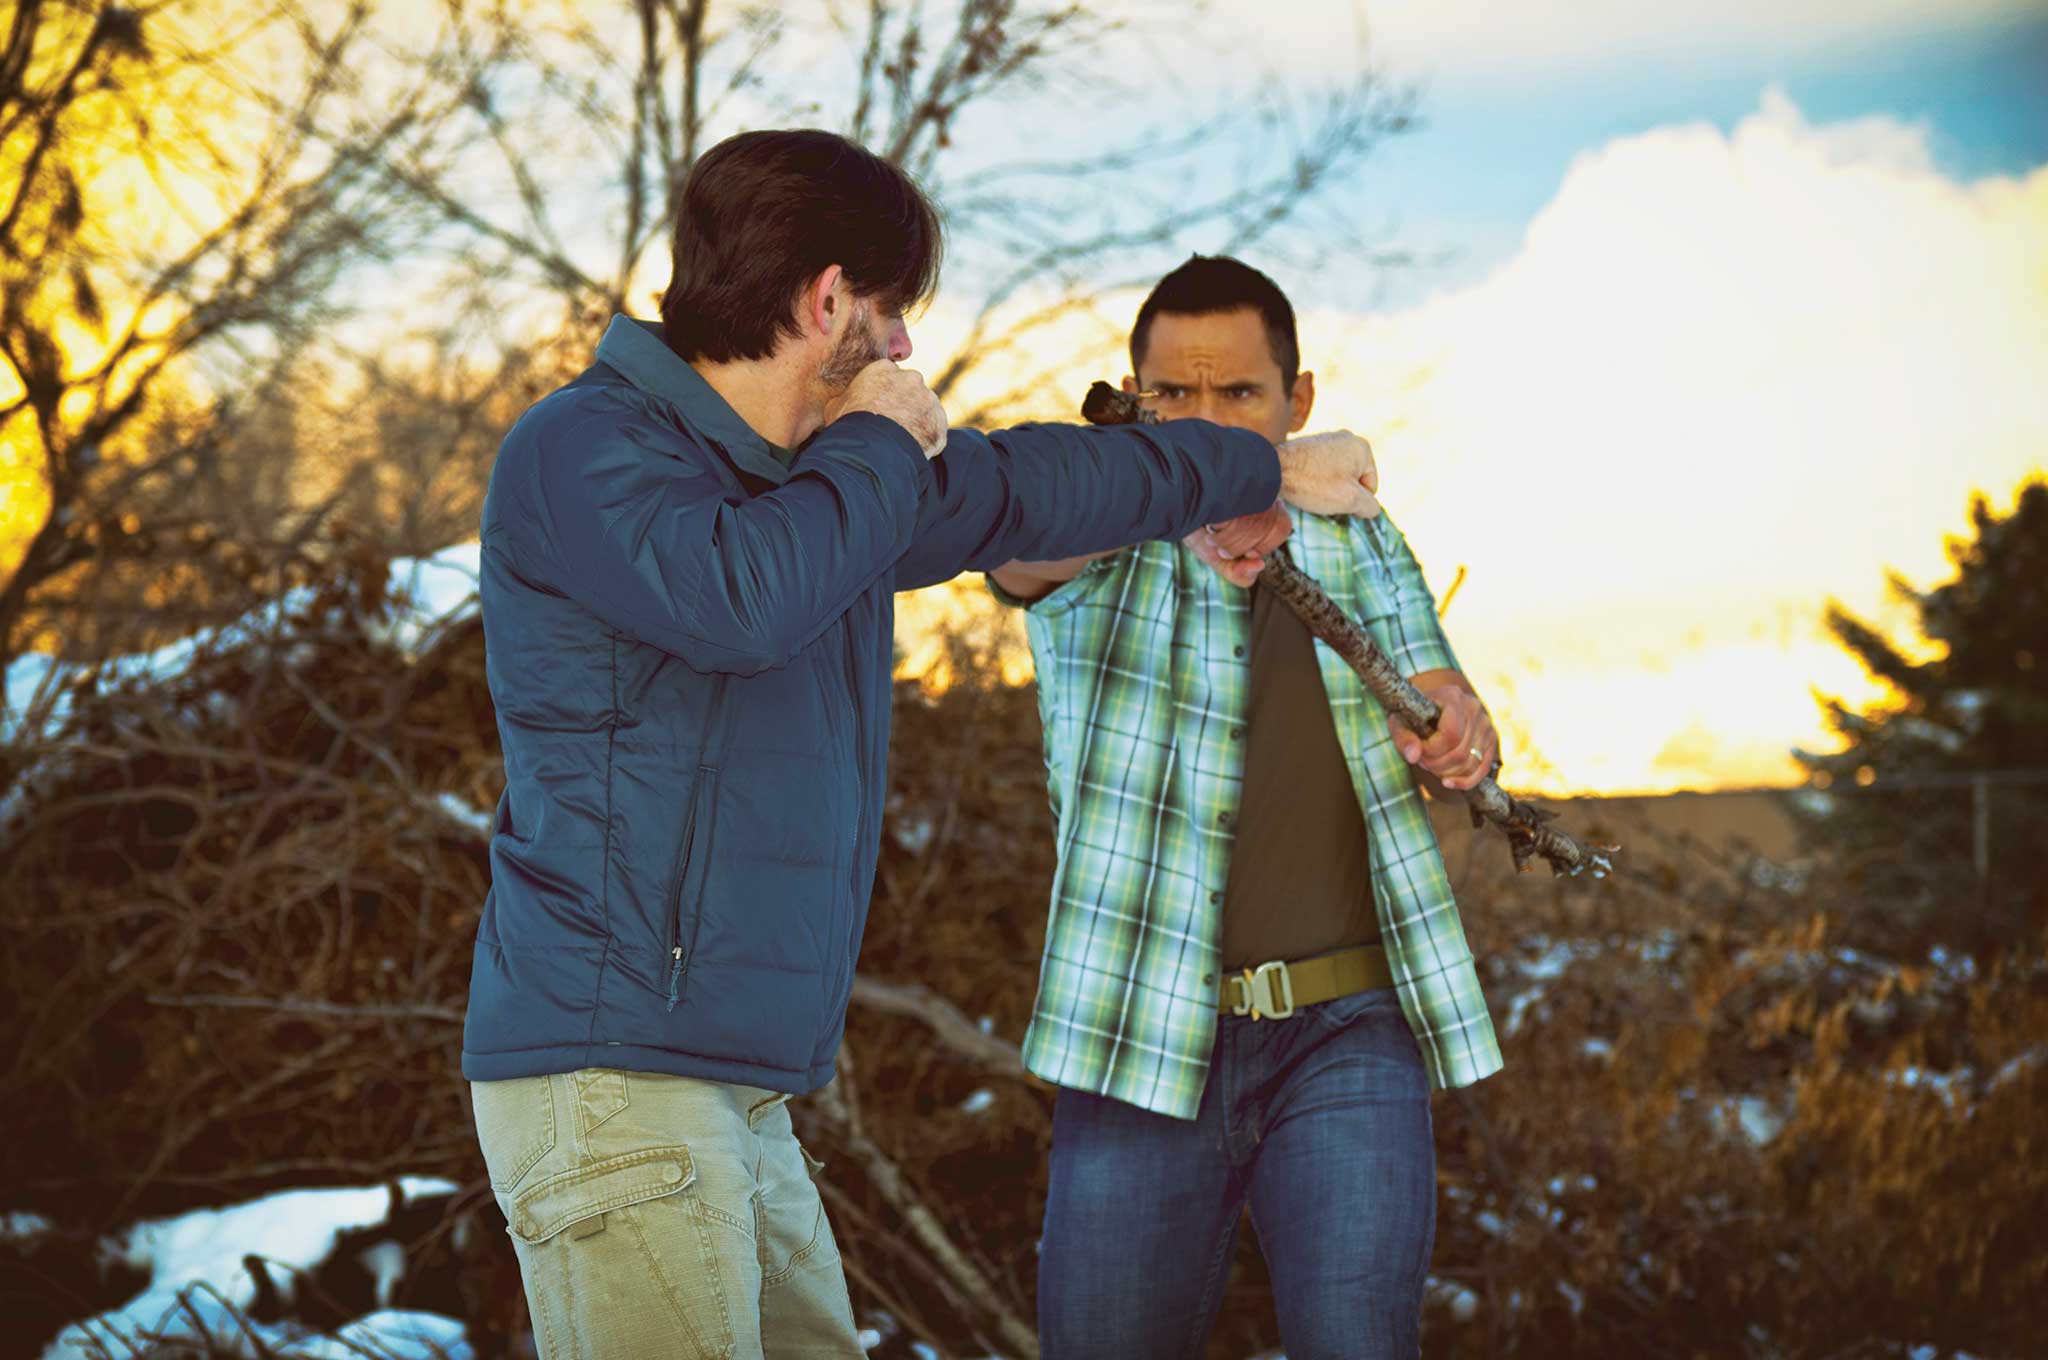
DEFENSE SEQUENCE 1: One-Handed Combination
1. Defending against a shorter weapon such as a knife, keep your distance and use your reach to your advantage.
2. Aim to attack the weapon-bearing limb. This allows you to maintain the maximum distance possible while disrupting the assailant’s ability to cause you harm.
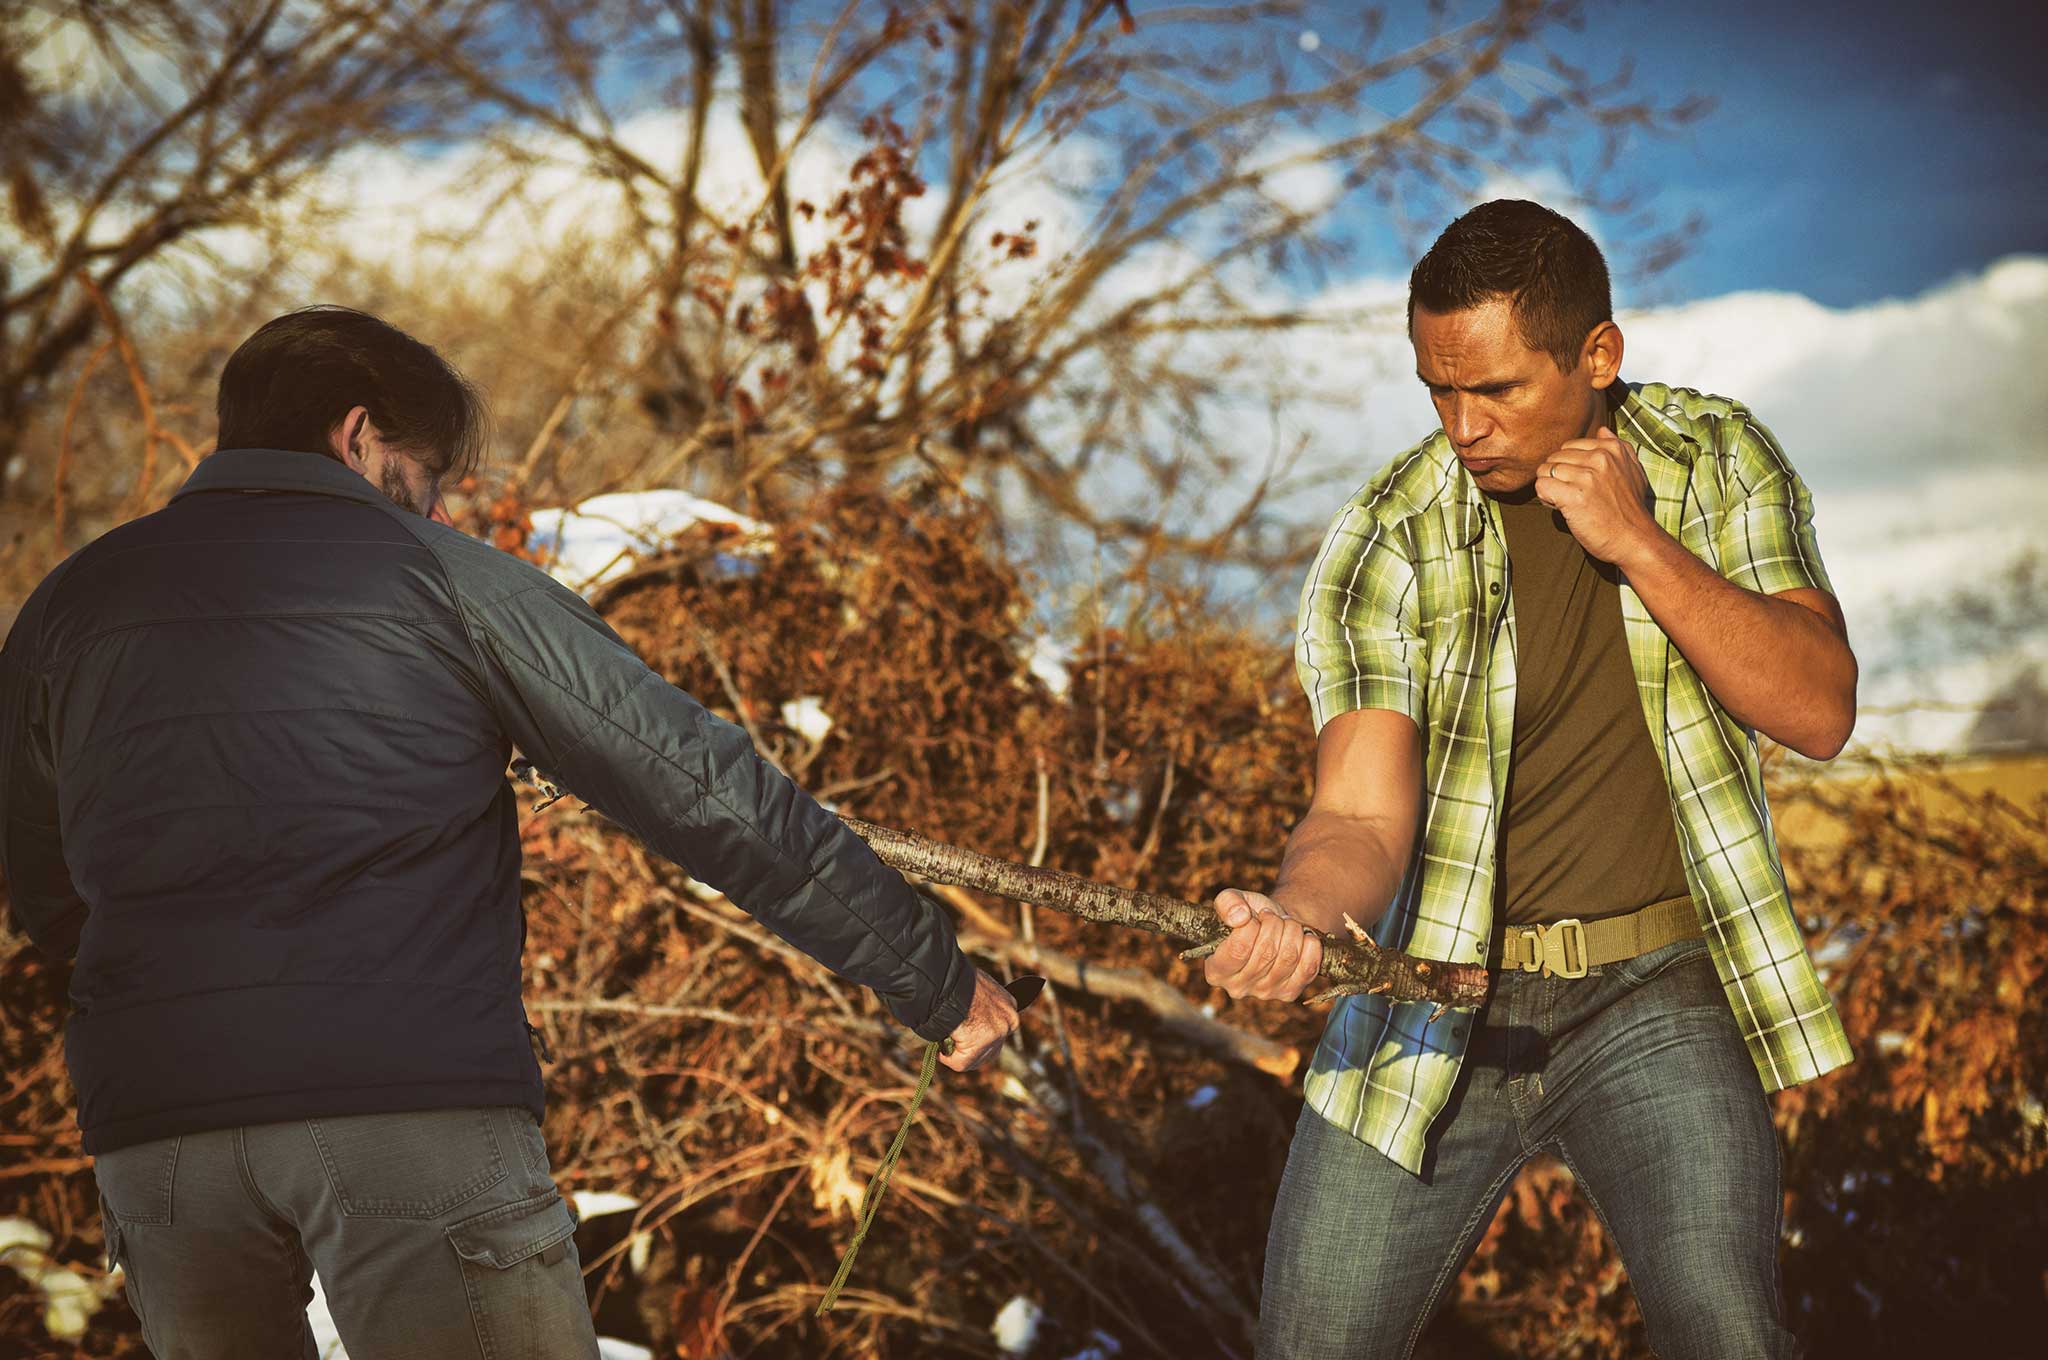
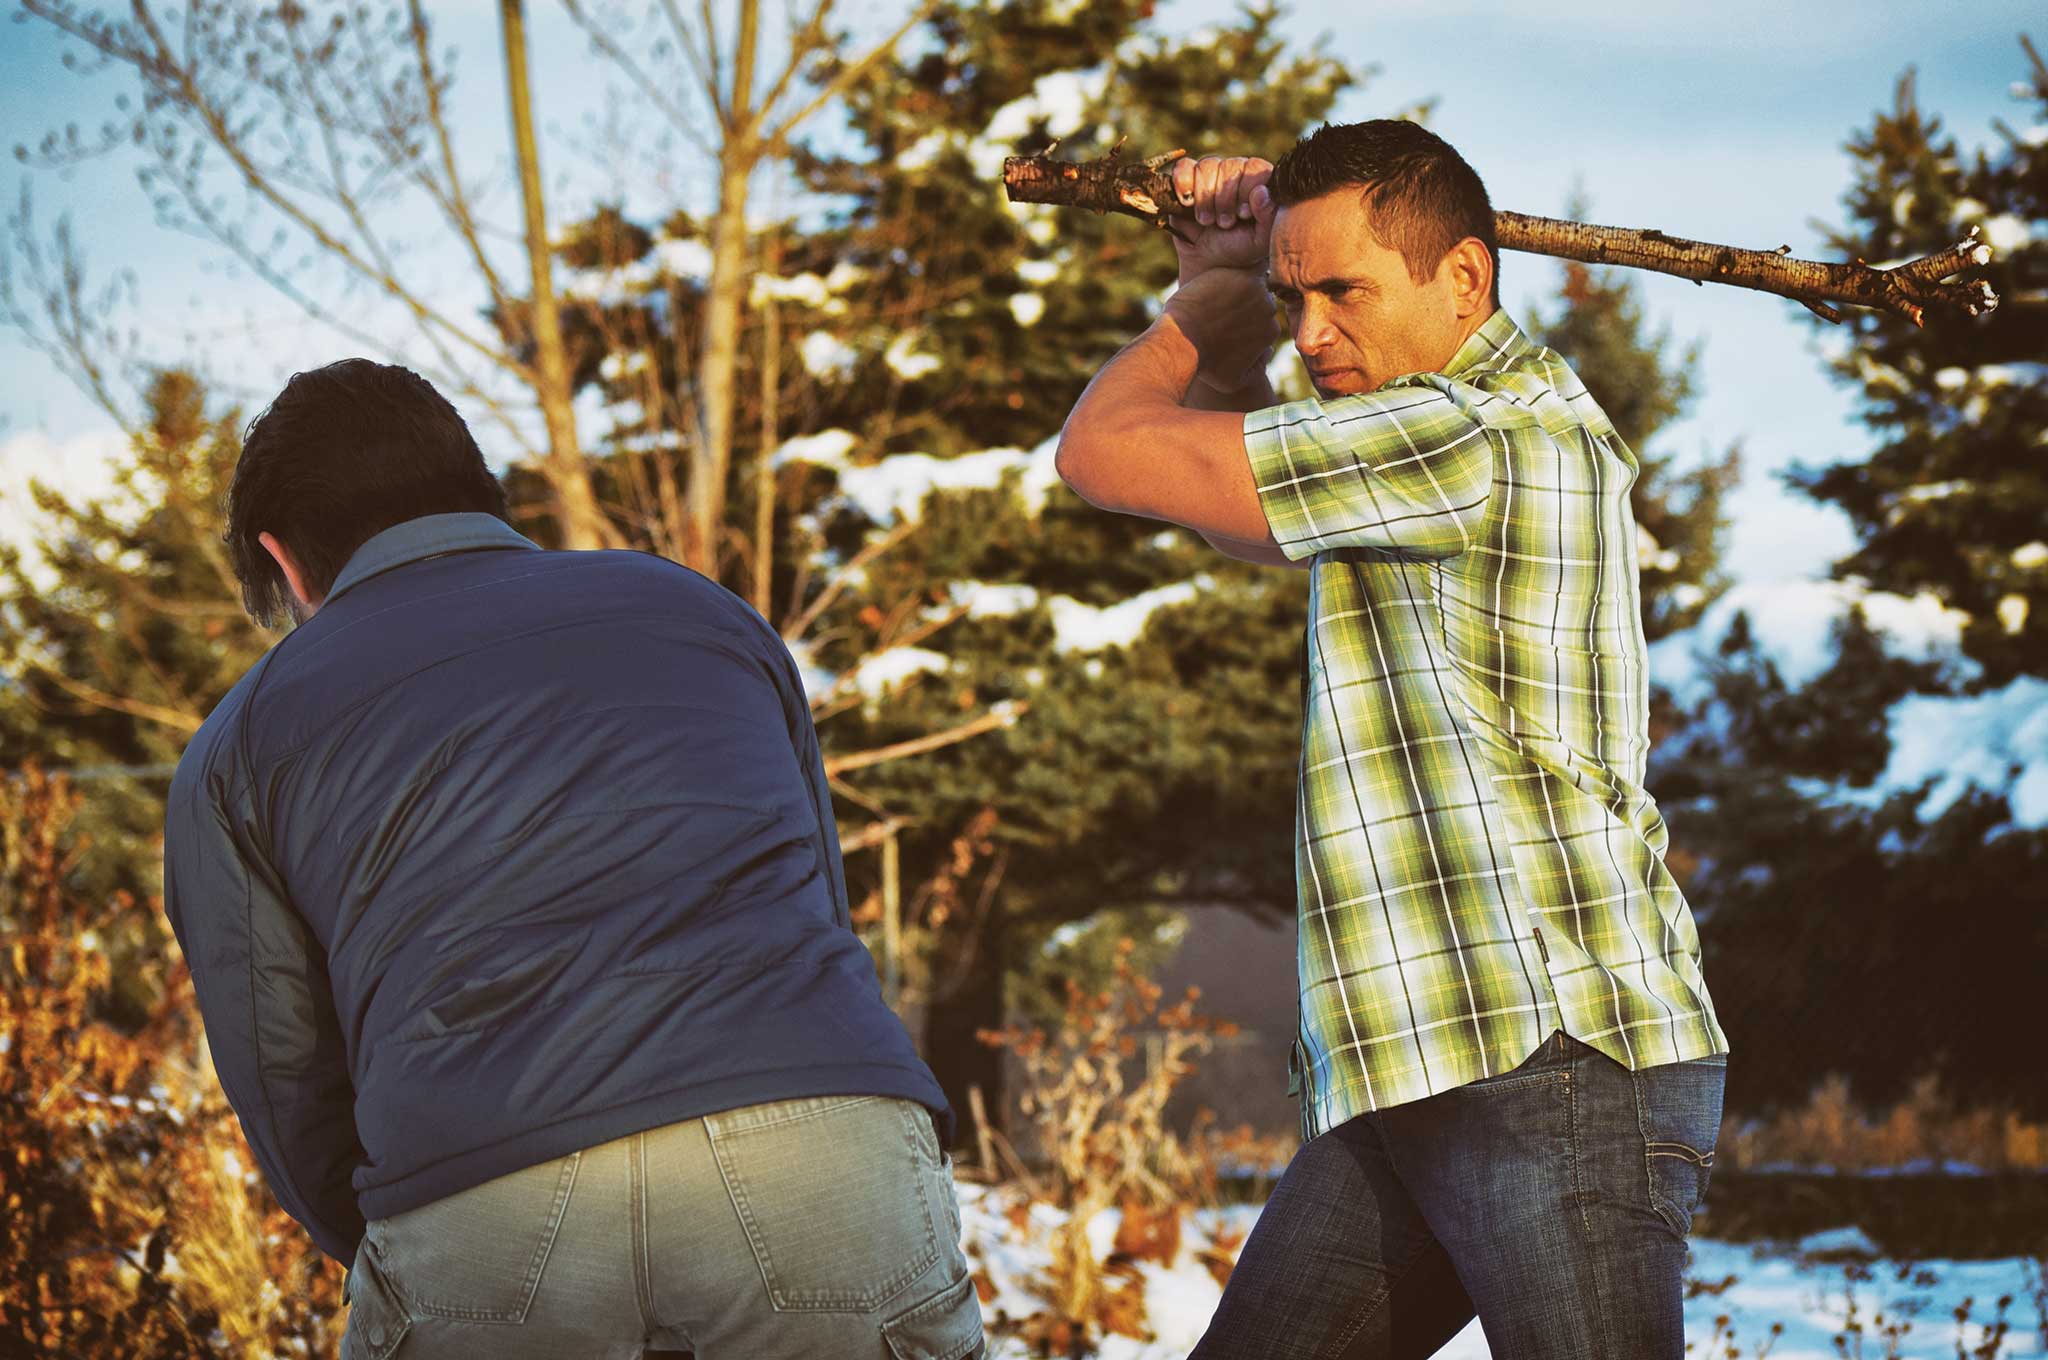
3. Wind up for a follow-up strike. With a backhand strike, you can push to your wrist with your support hand to add power.
4. Aim for areas that have the highest probability of neutralizing the threat, as is reasonably necessary.
5. As necessary, follow backhand power strikes with forehand power strikes for economy of motion.
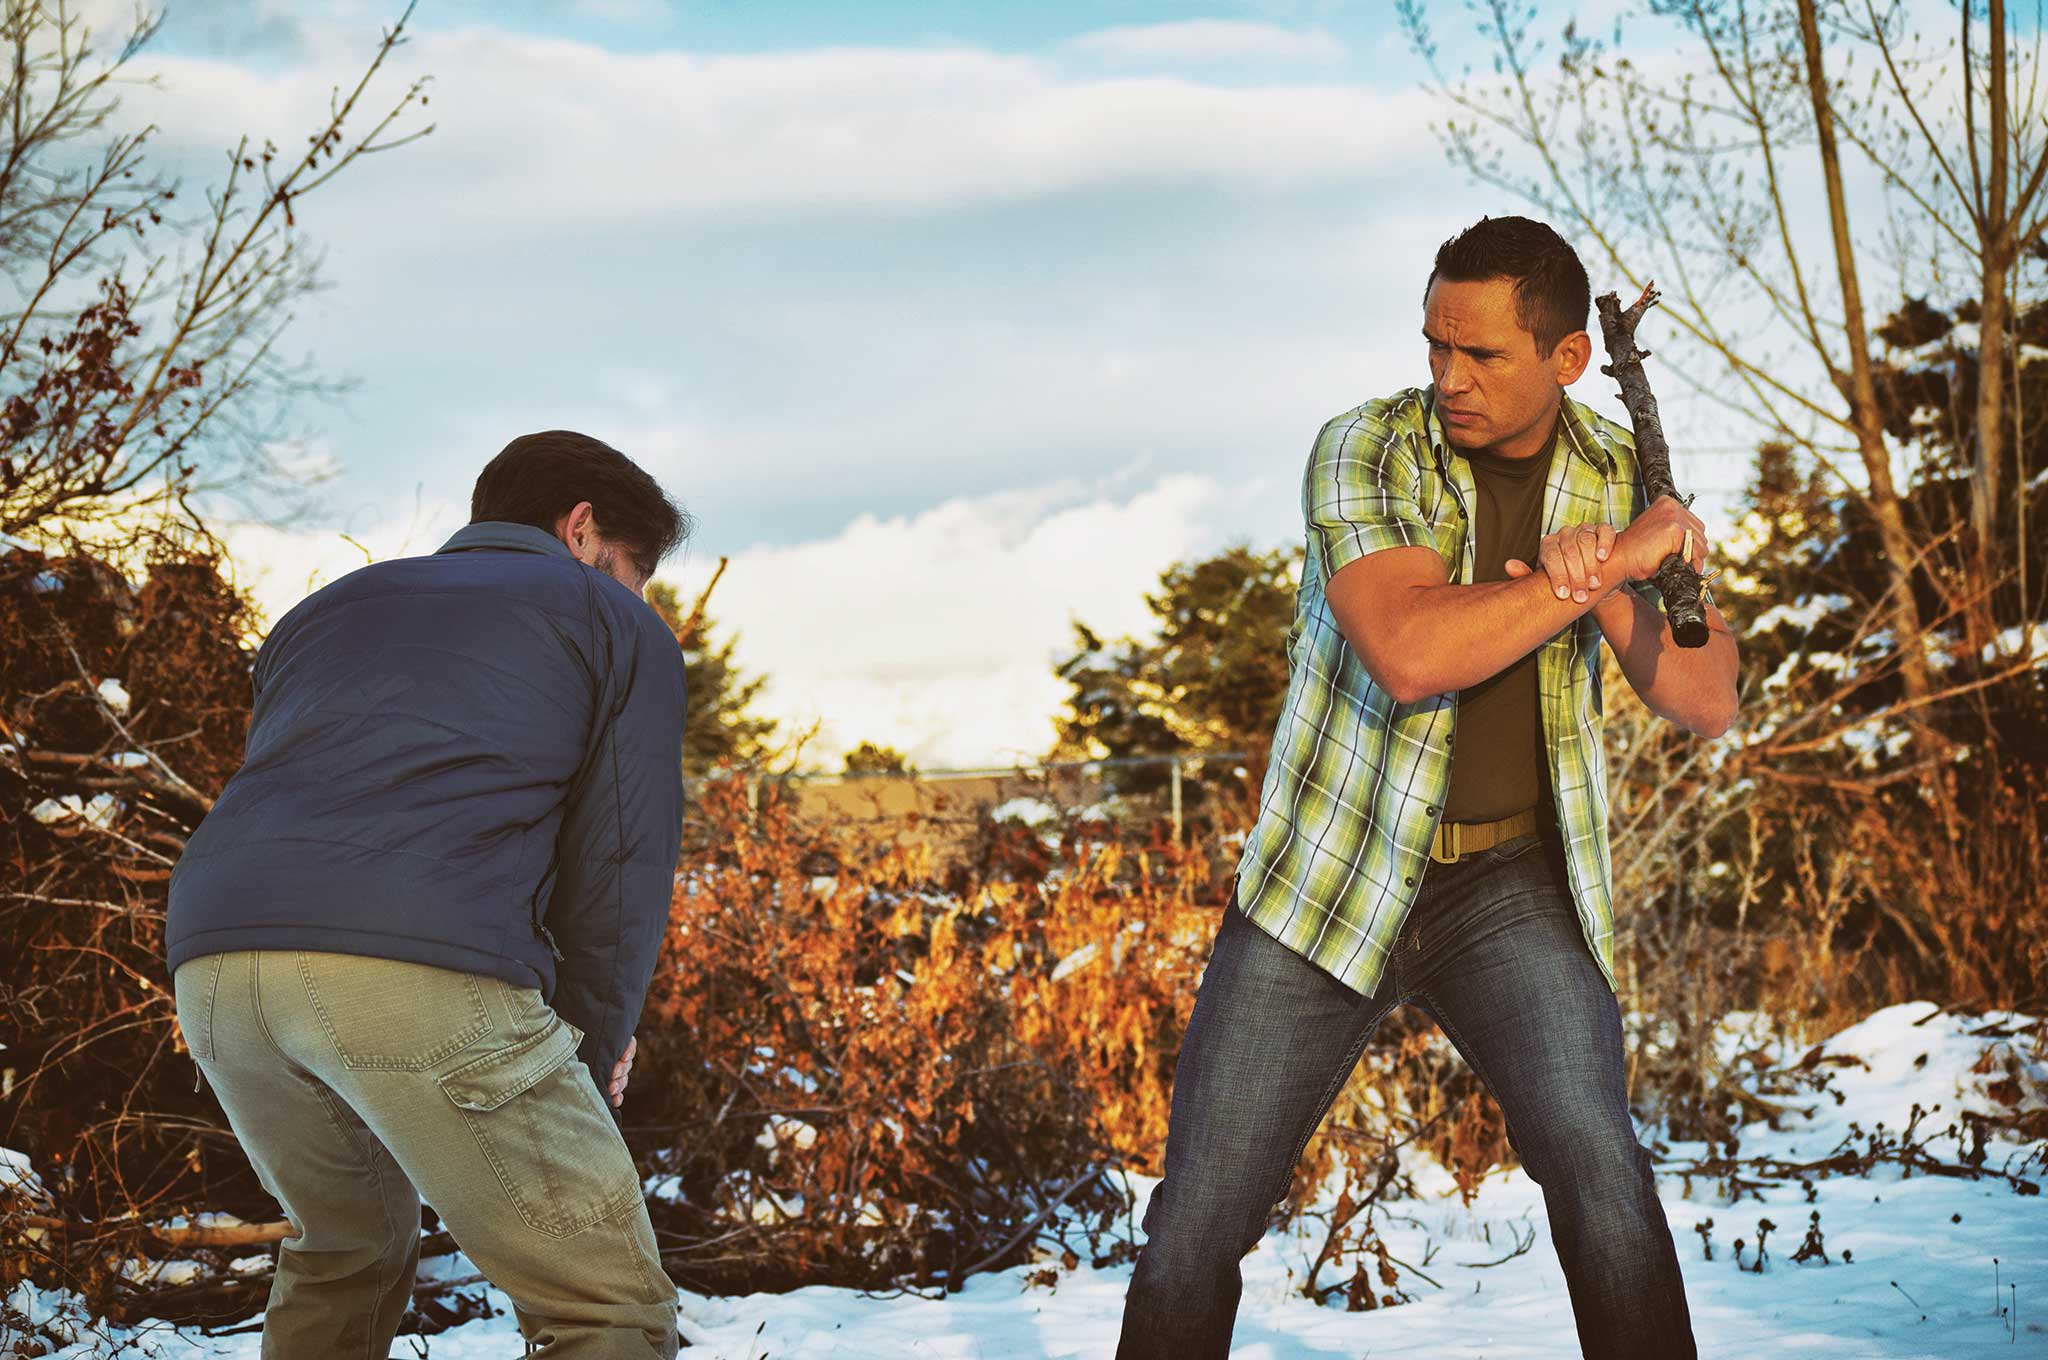
6. Continue targeting vital areas.
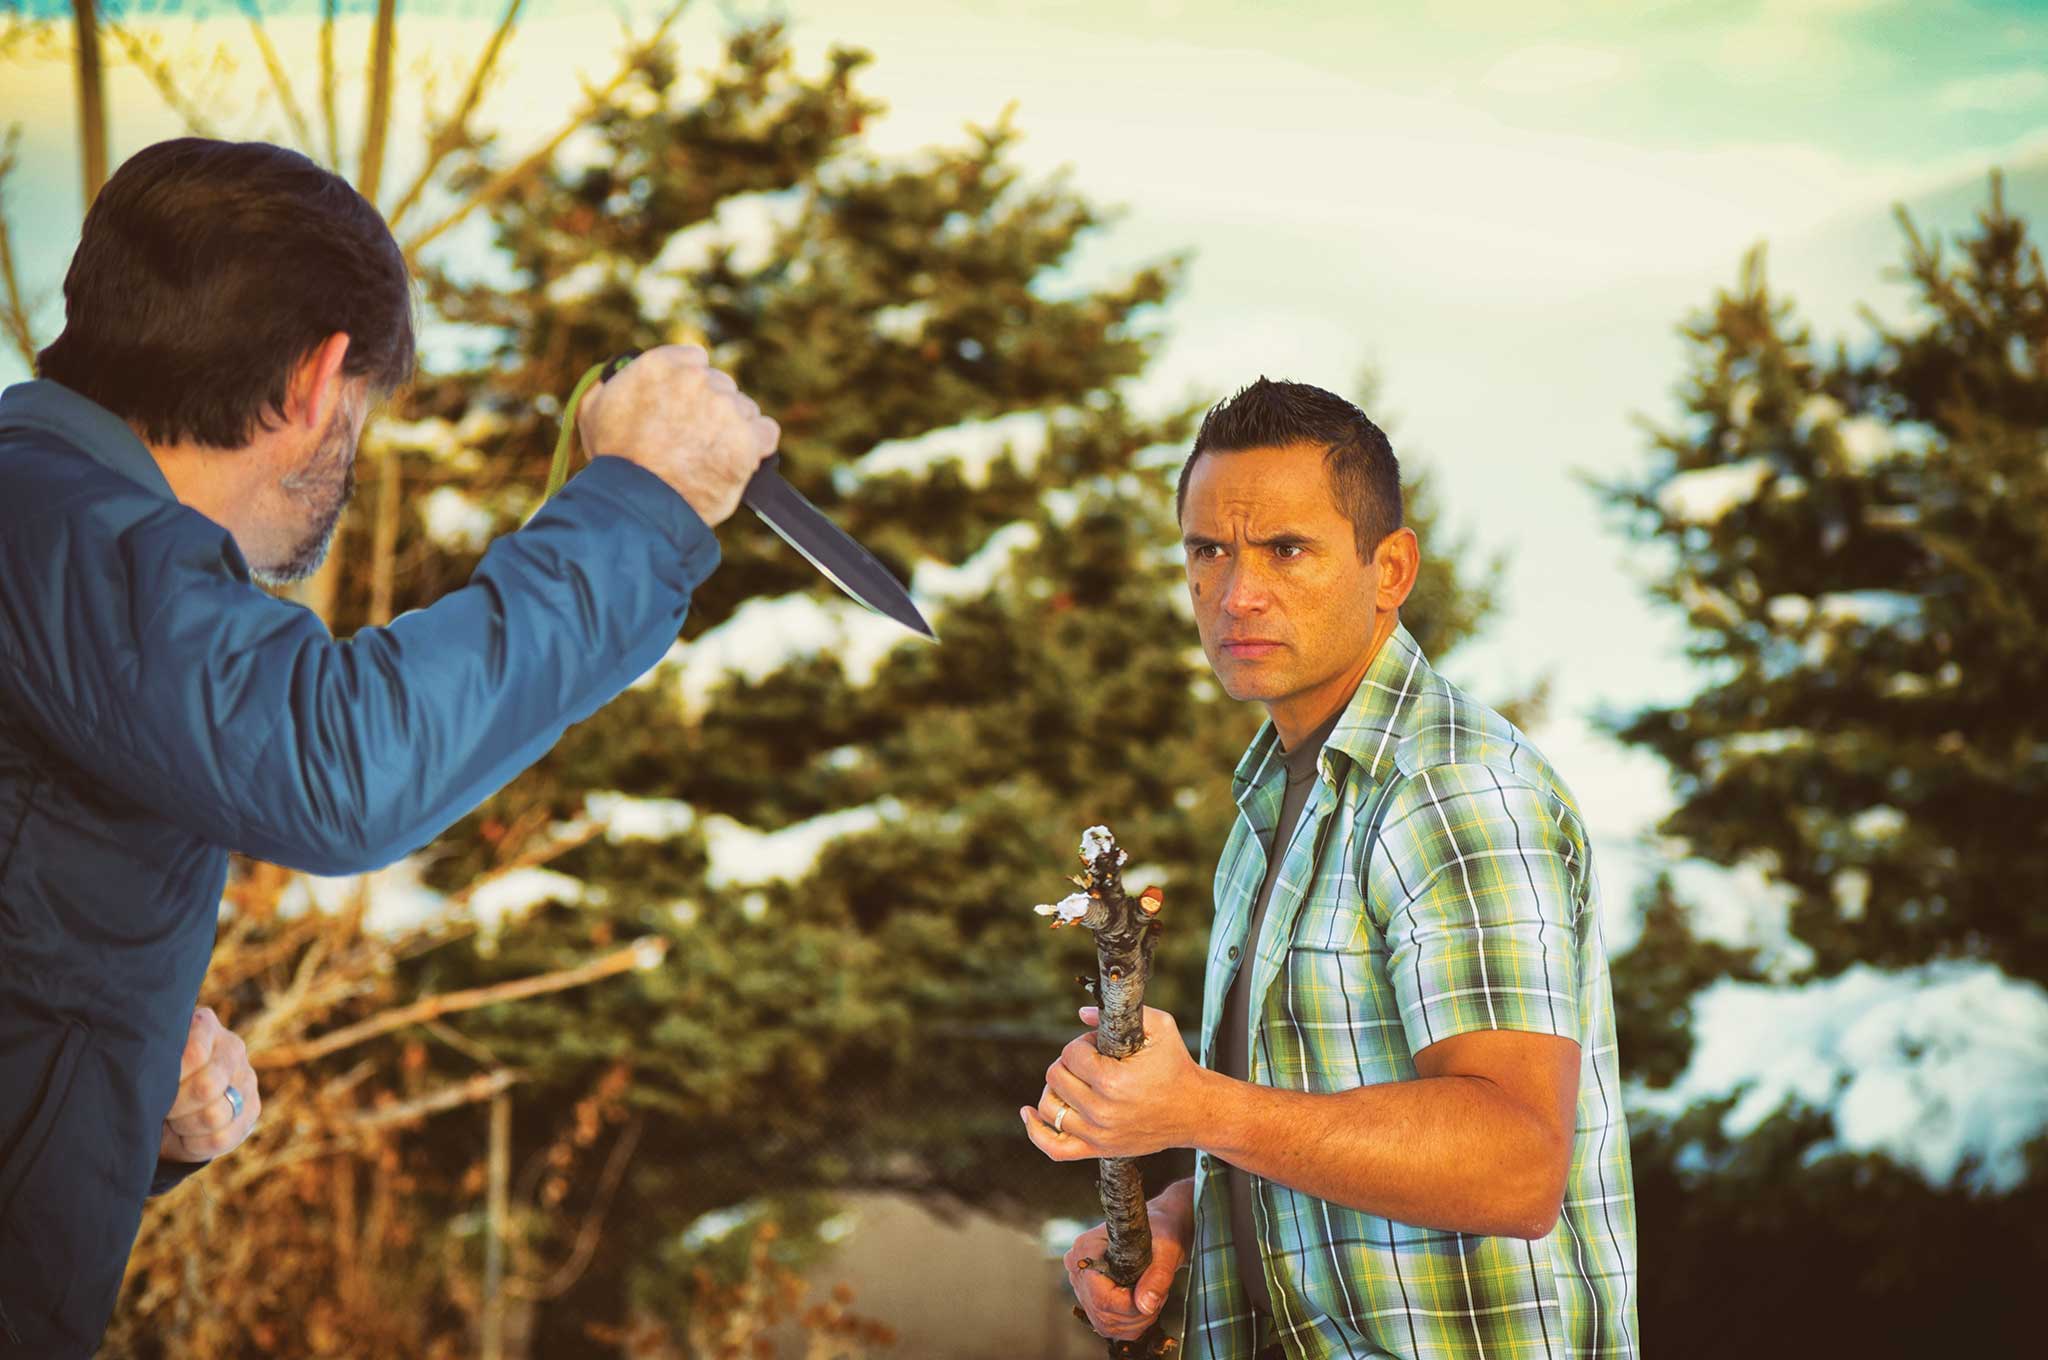
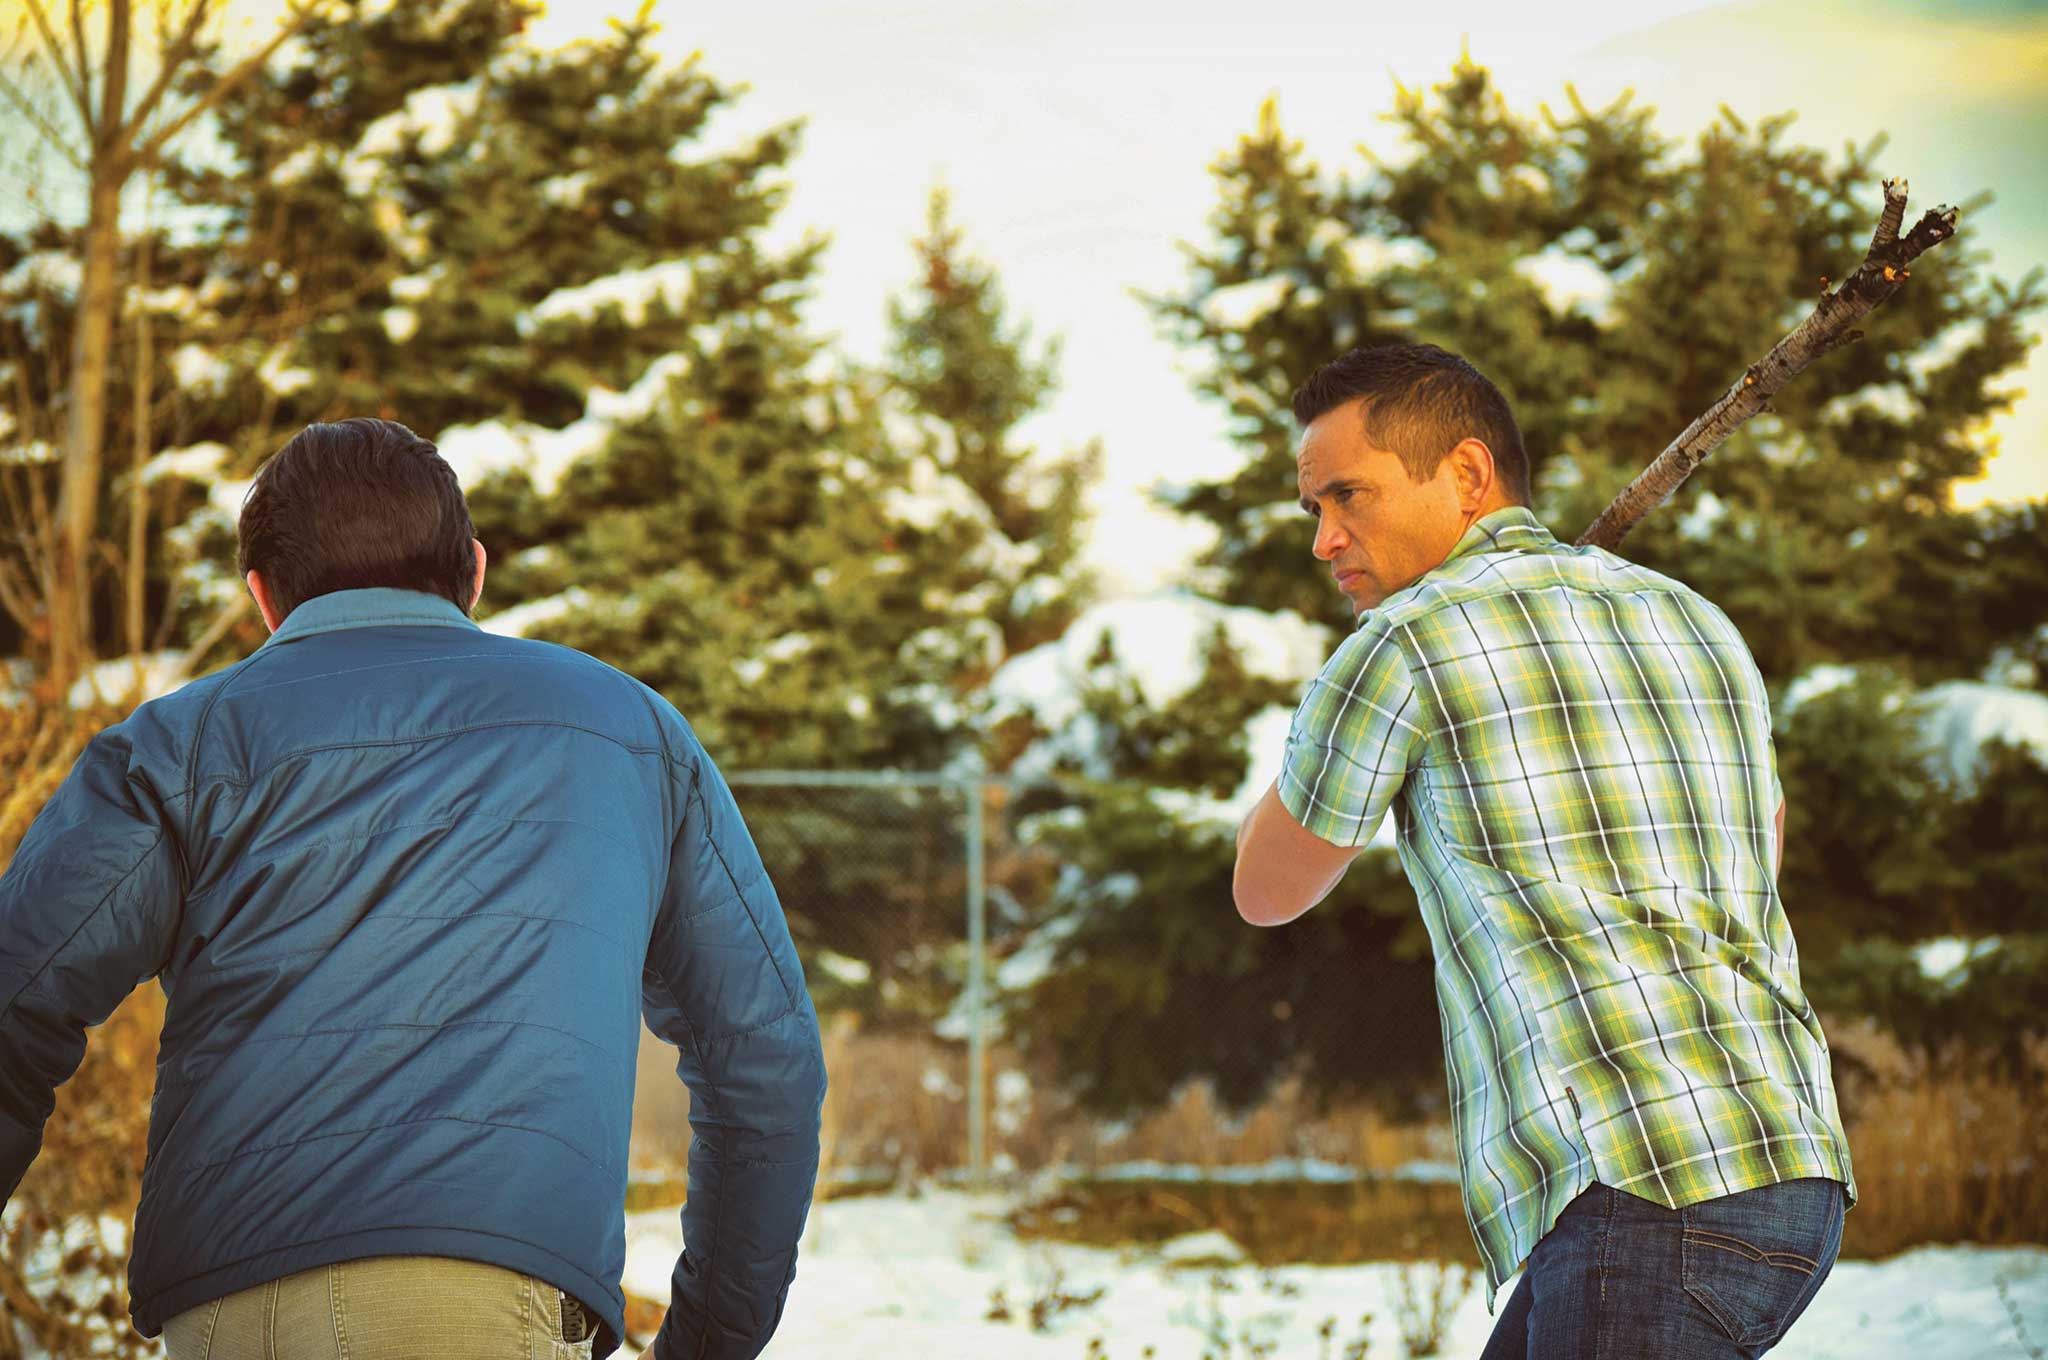
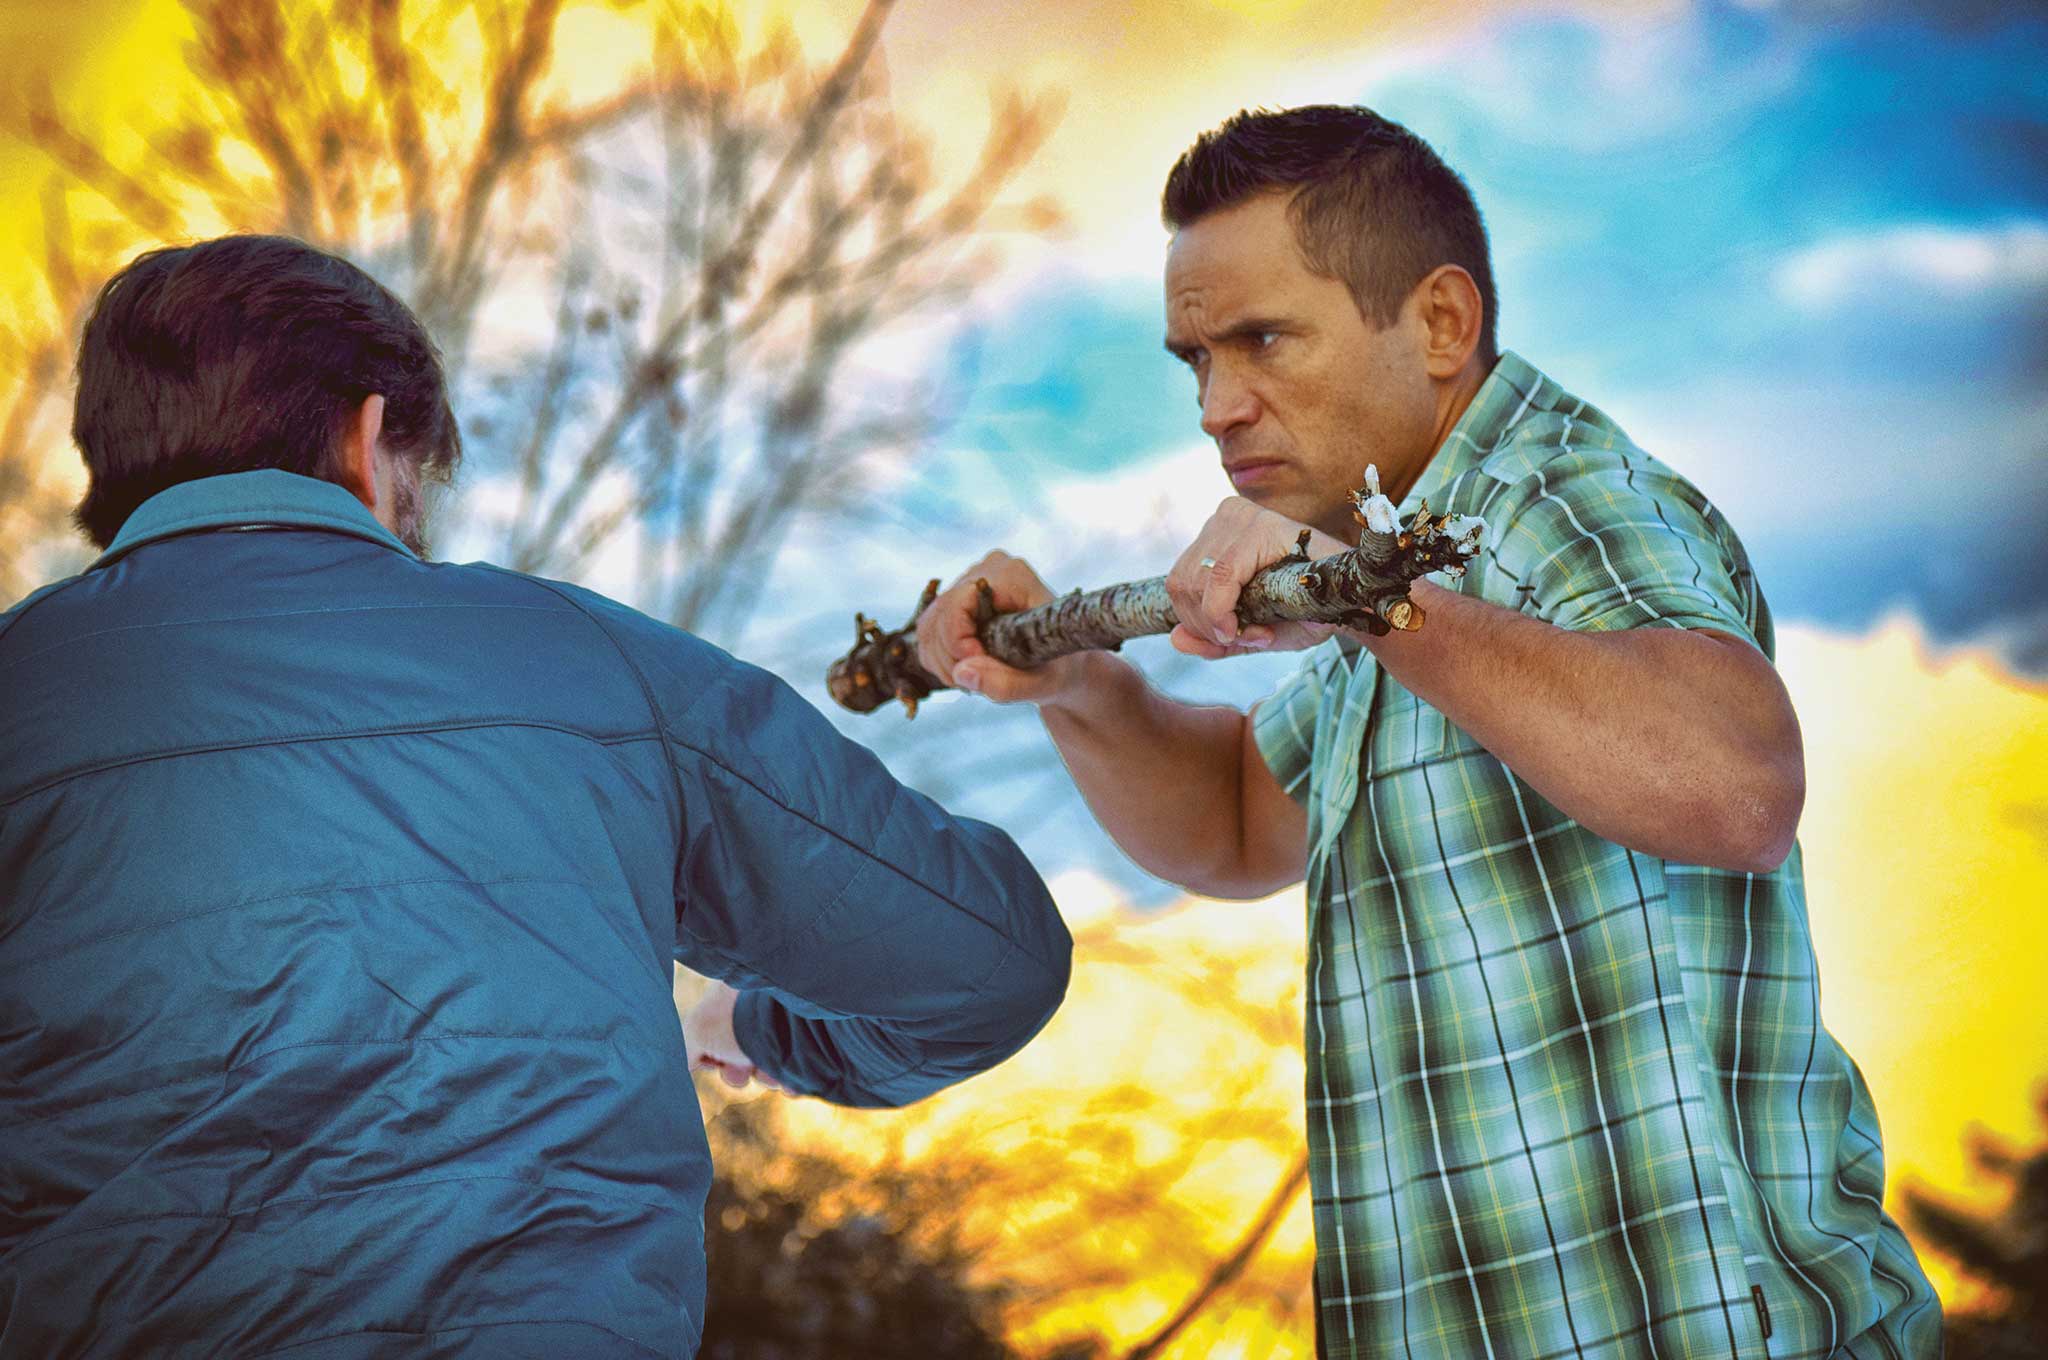
DEFENSE SEQUENCE 2: Over-Under Grip
1. Hold the weapon in the rifle grip, with support hand forward of the strong hand.
2. Quick straight-line thrusts can be used to preempt an attack.
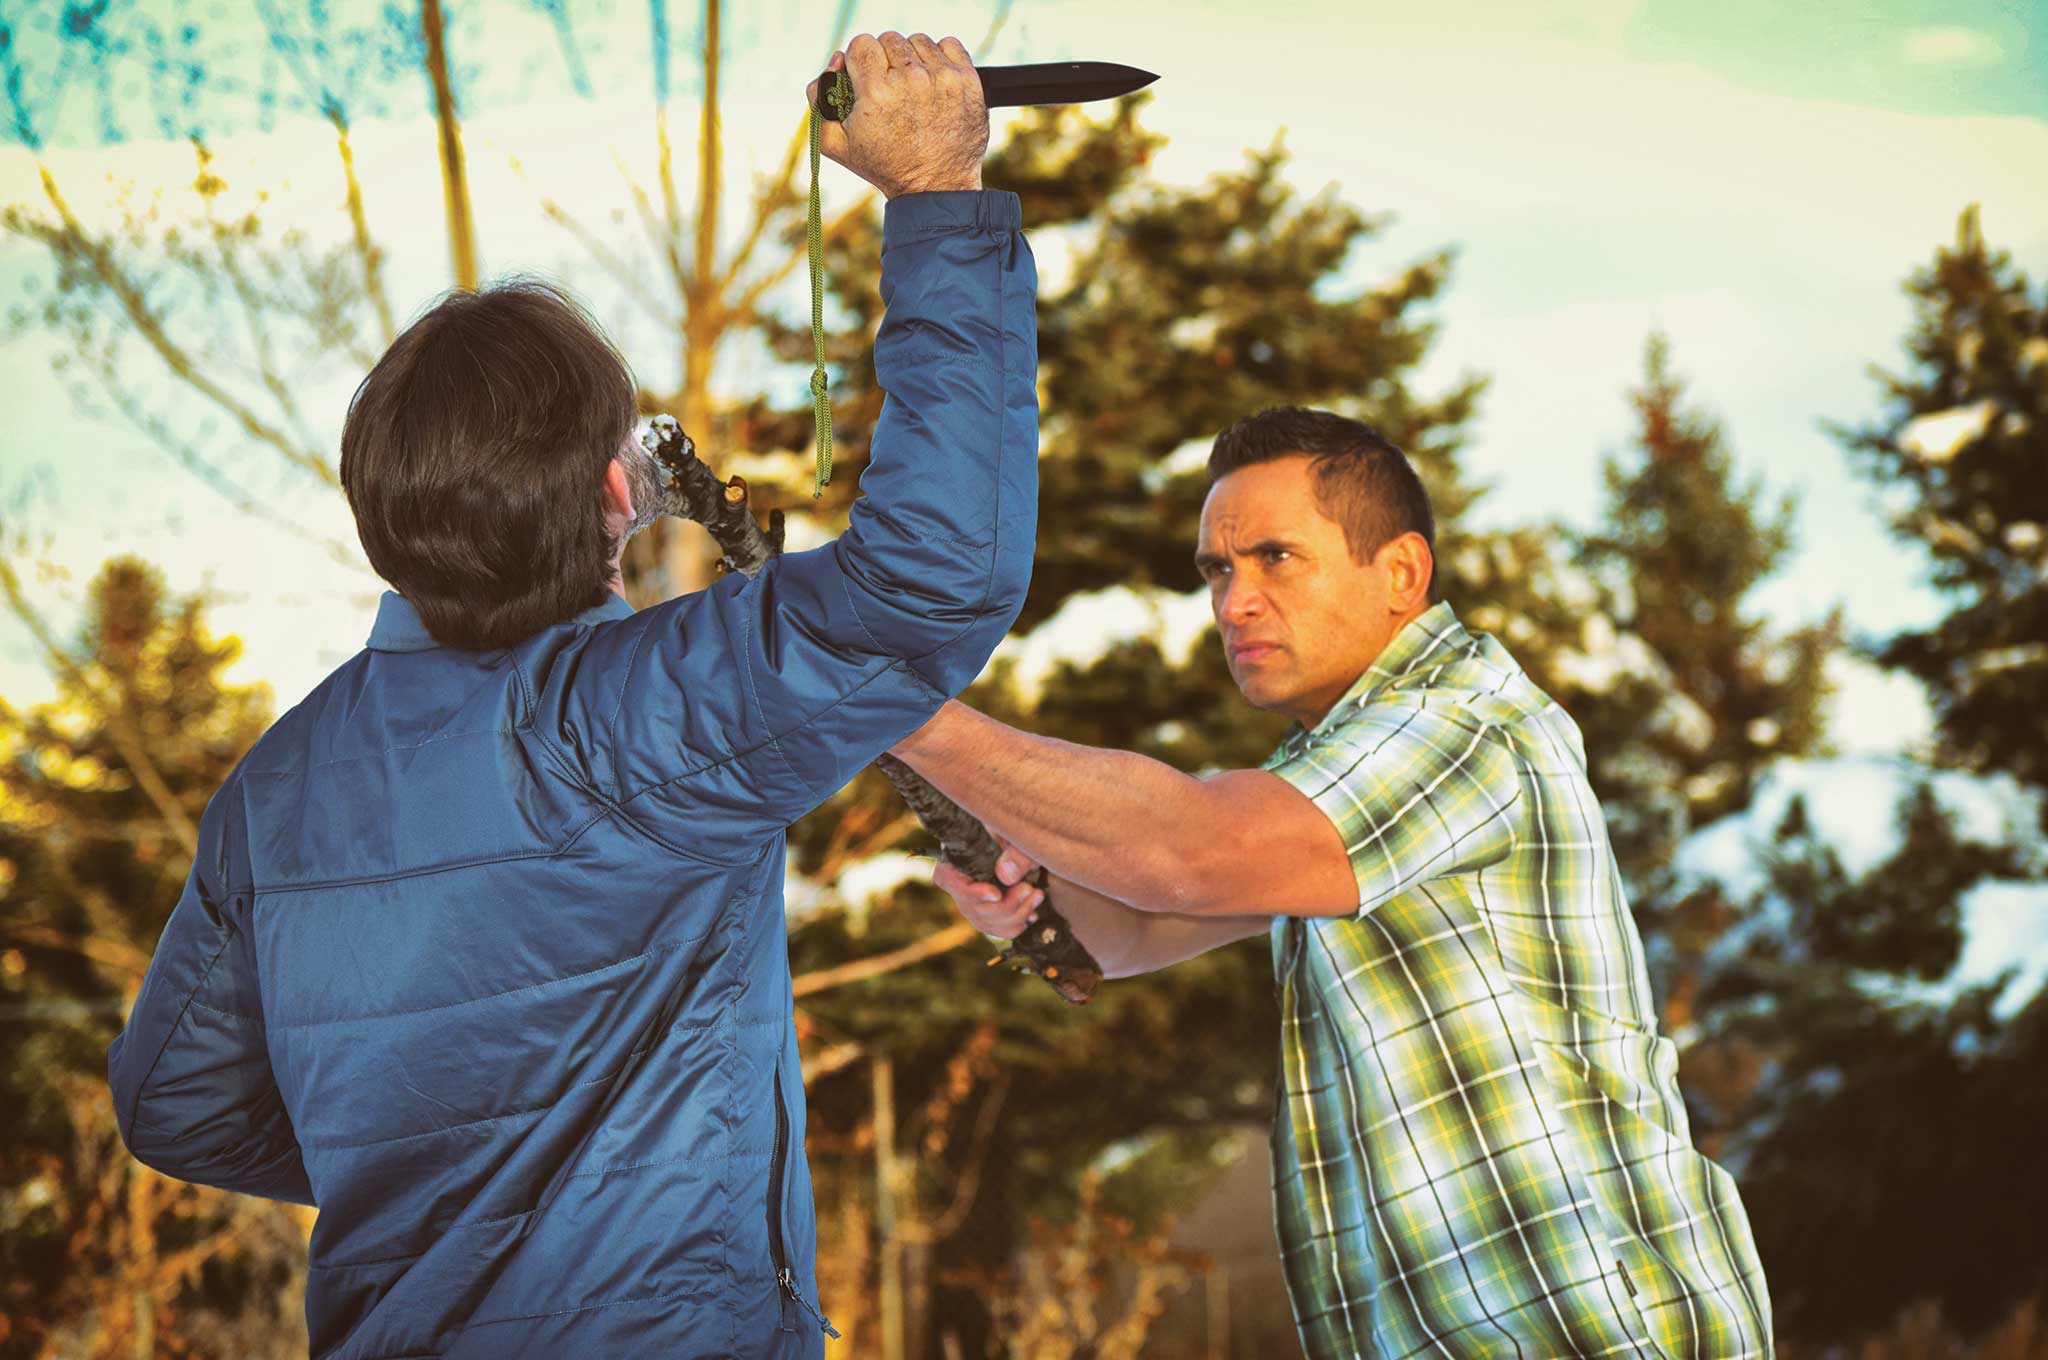
3. Use the forward end of the stick to parry an attack downward while positioning yourself to the outside line.
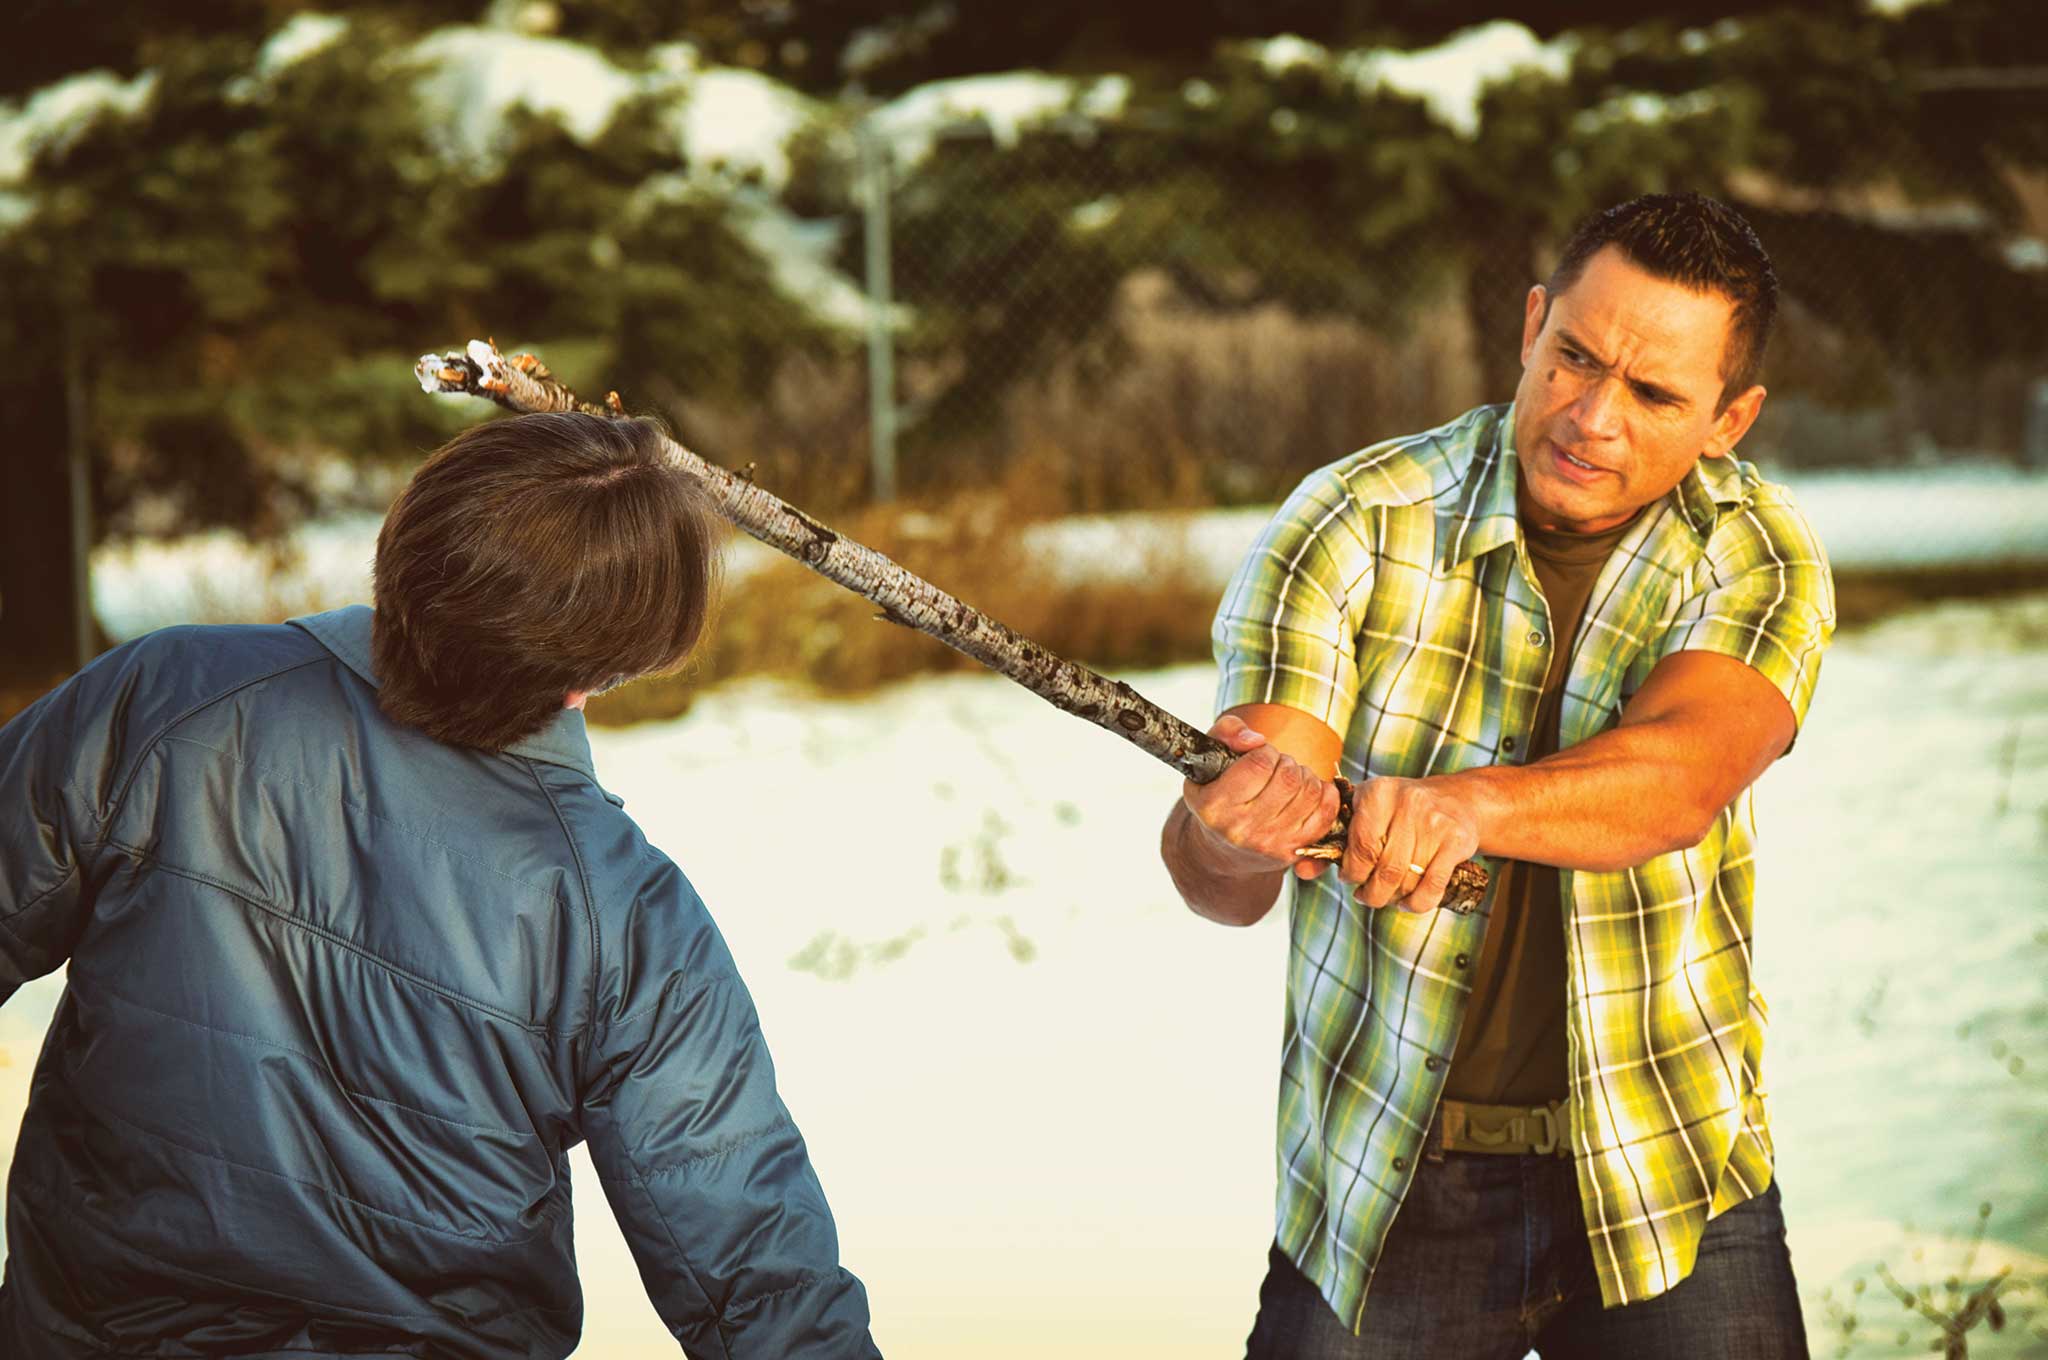
4. Quickly change the support hand to the baseball bat grip while winding up for the coup de gras.
5. Hit a home run to finish the fight.
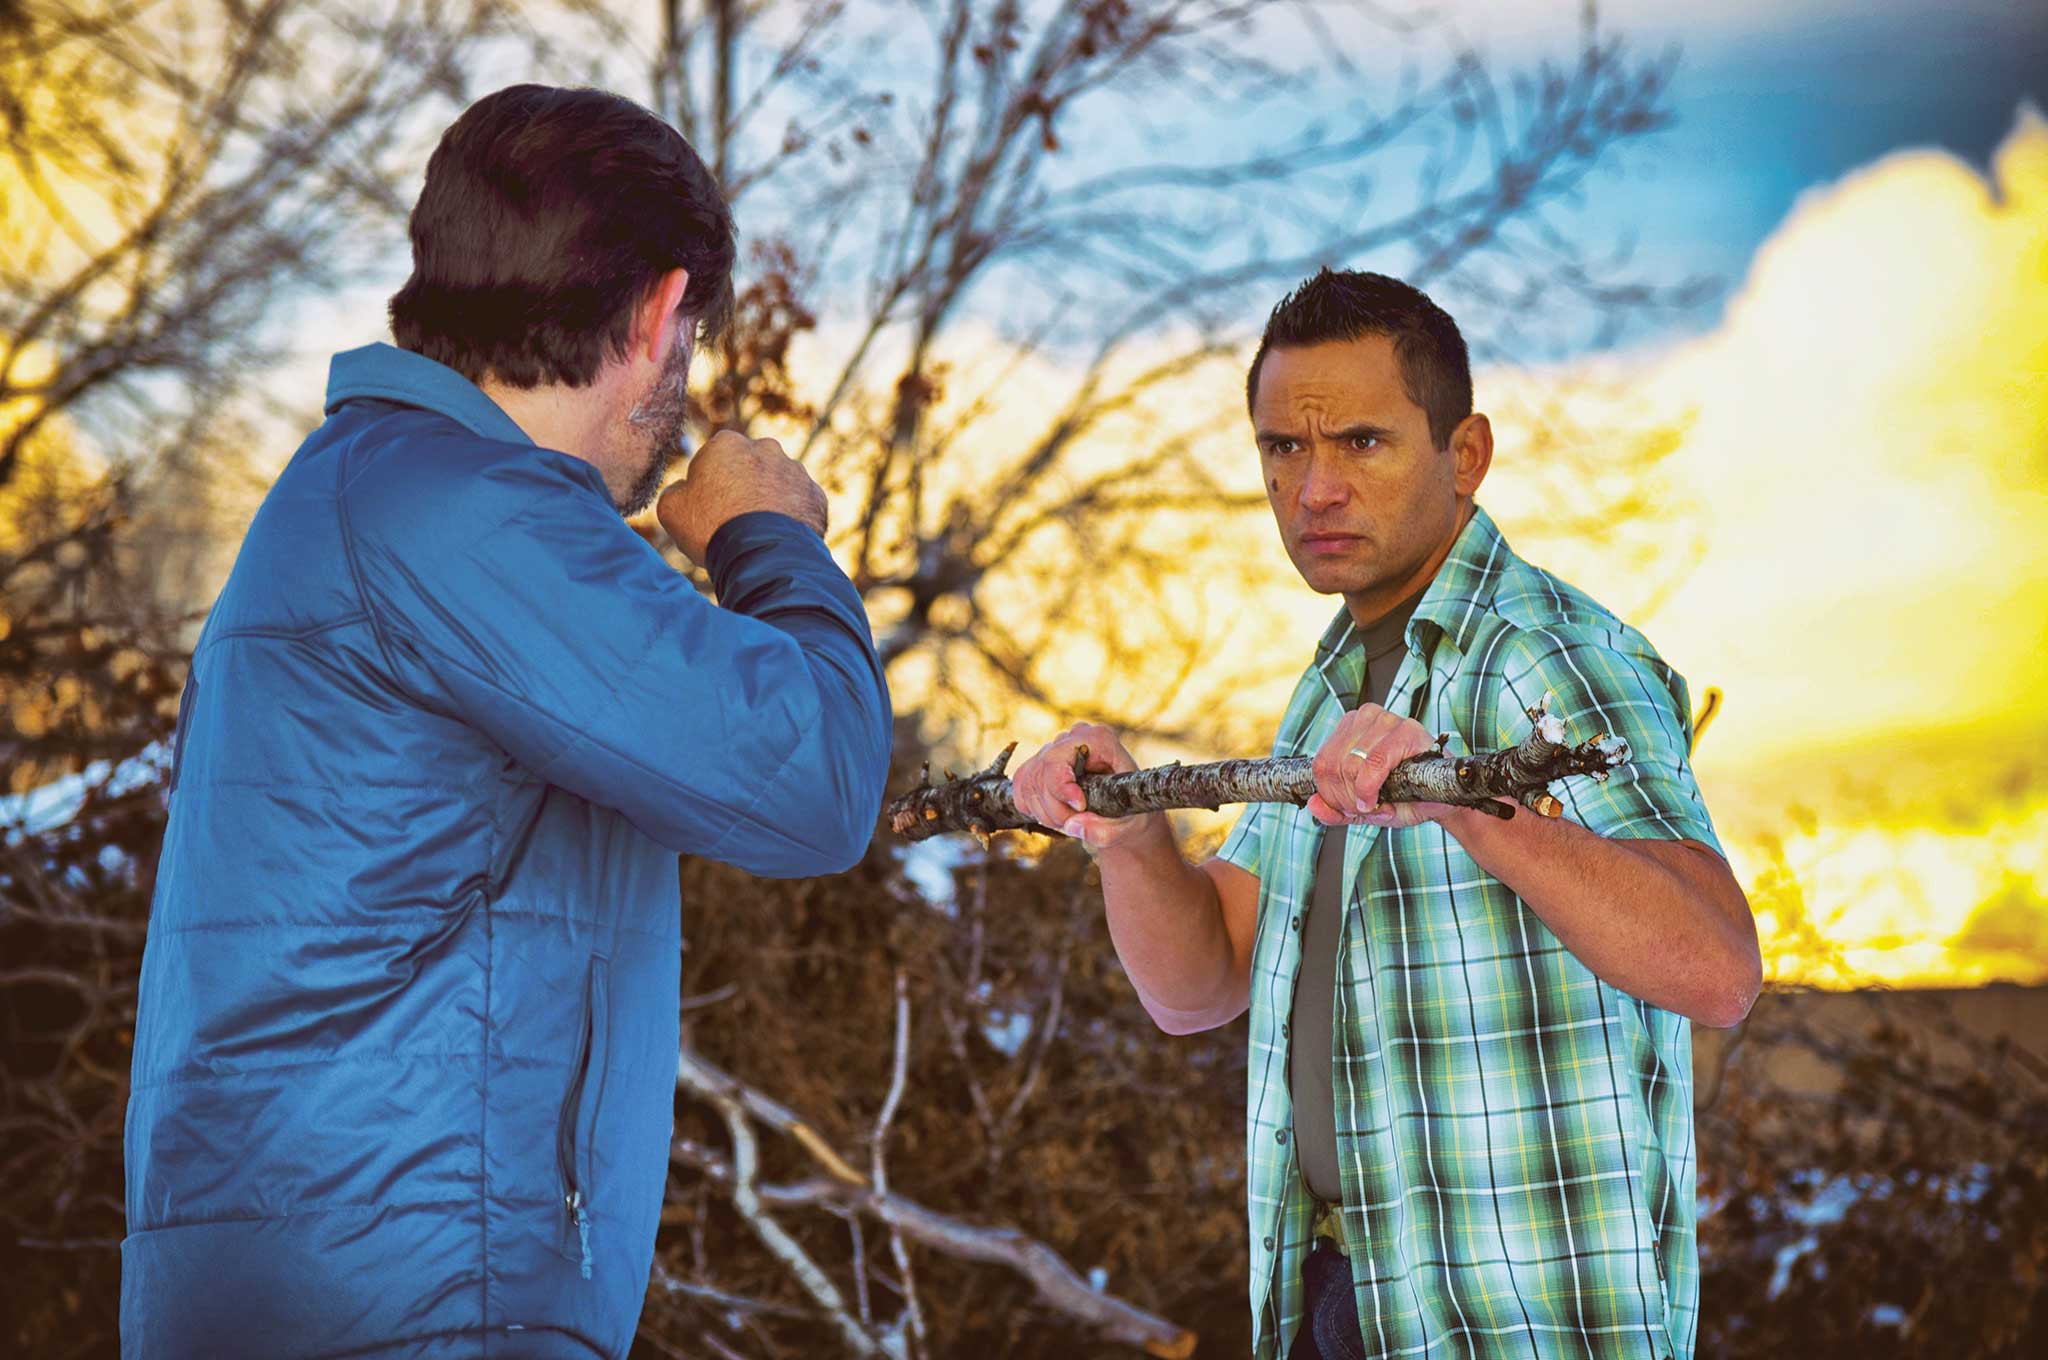
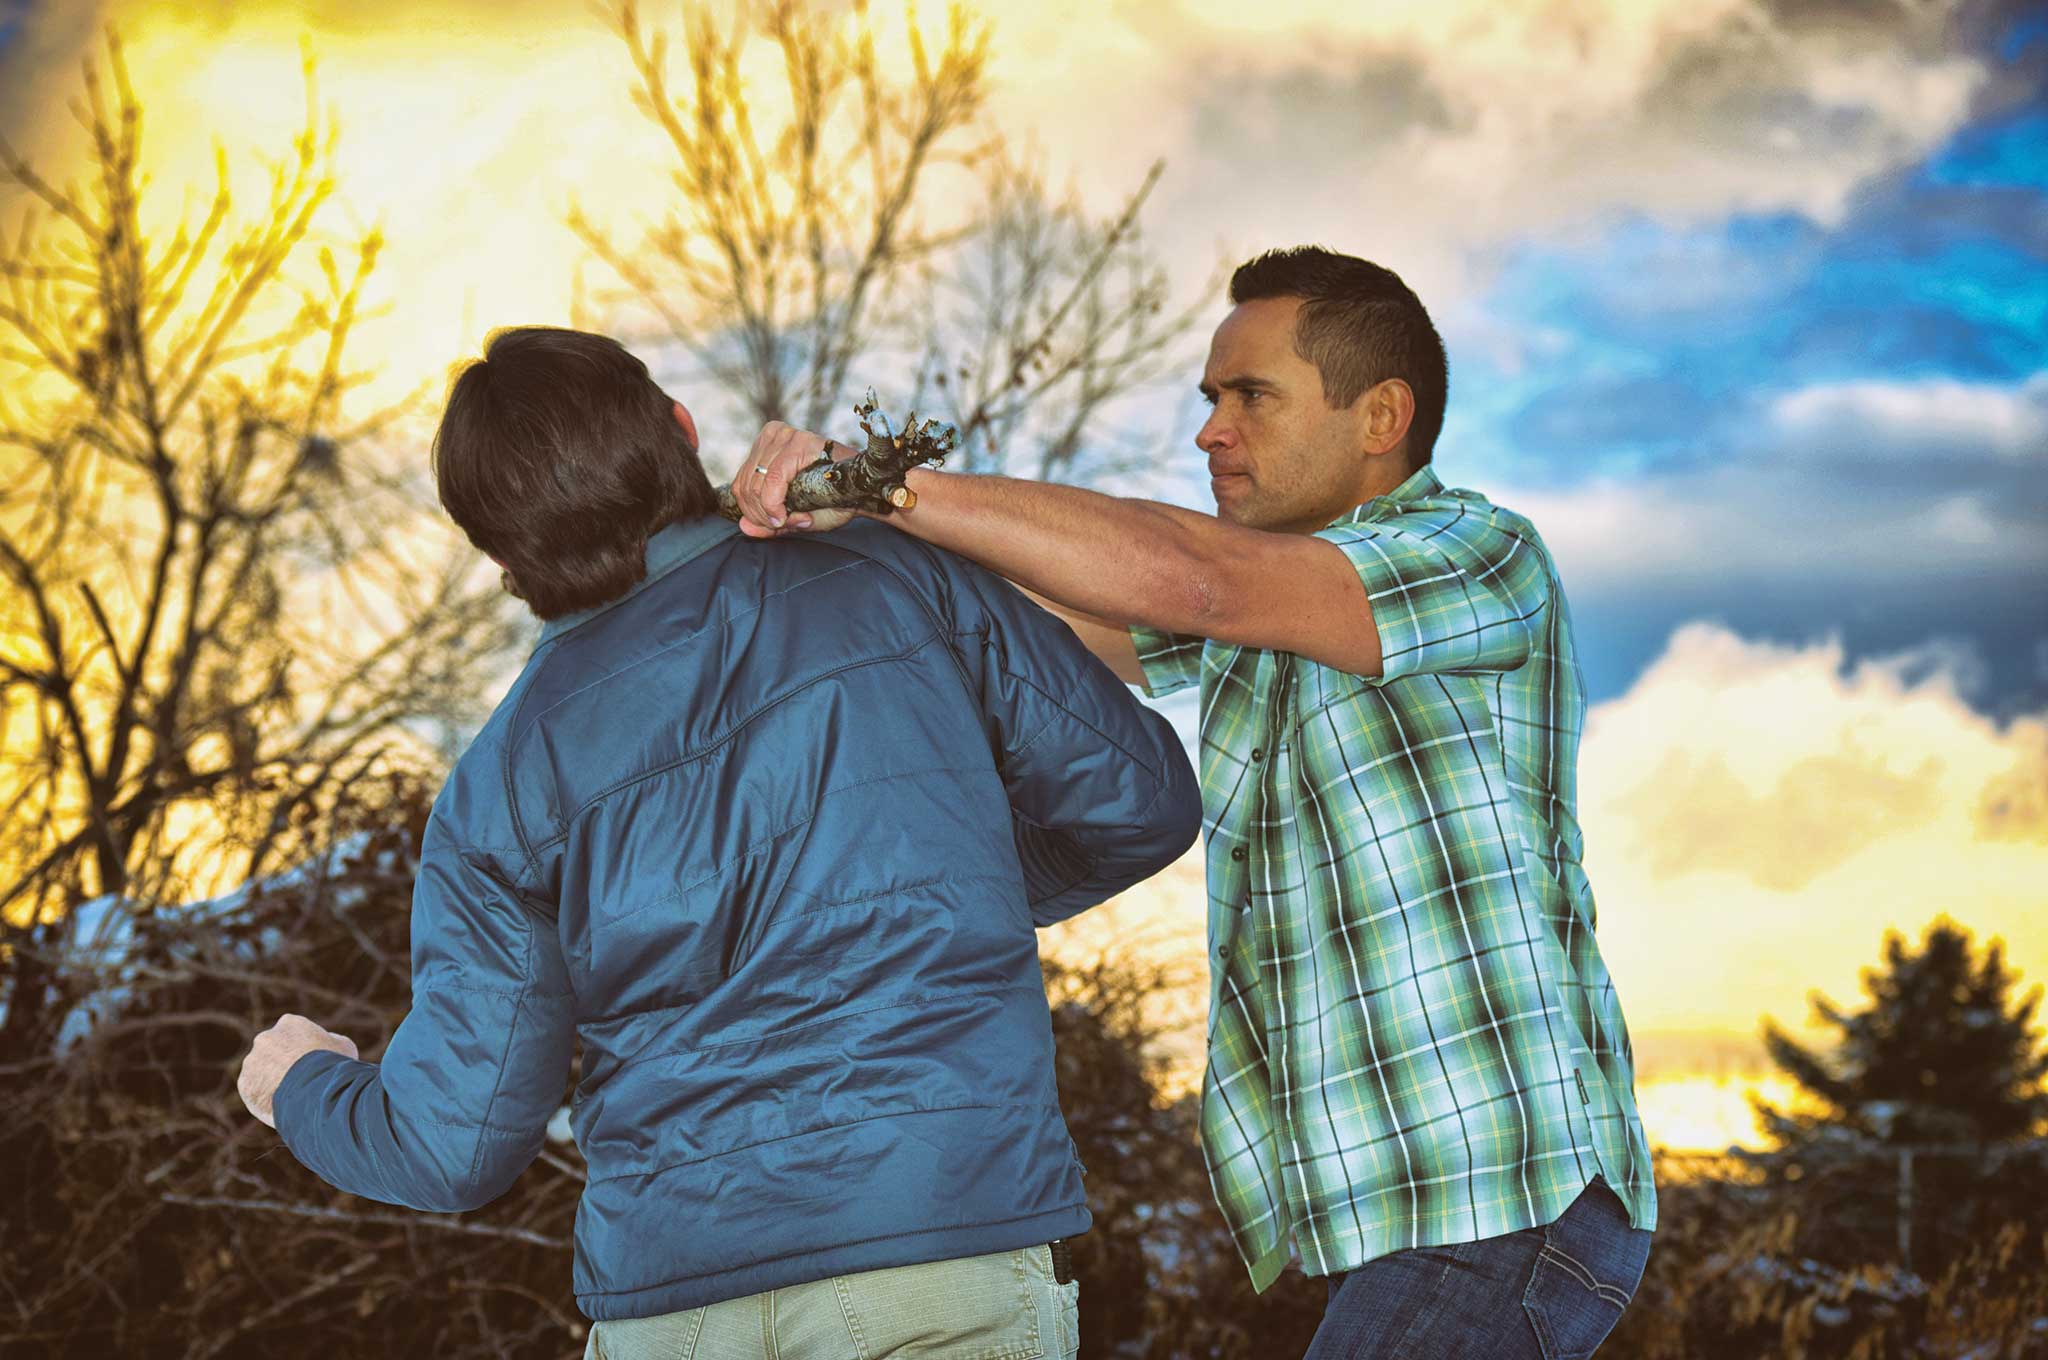
DEFENSE SEQUENCE 3: Double-Over Grip
1. Hold the stick in a kayak paddle grip, hands about shoulder-width apart.
2. Use the end to strike inward, parrying the straight-line jab.
3. Repeat on the other side to the straight-line cross.
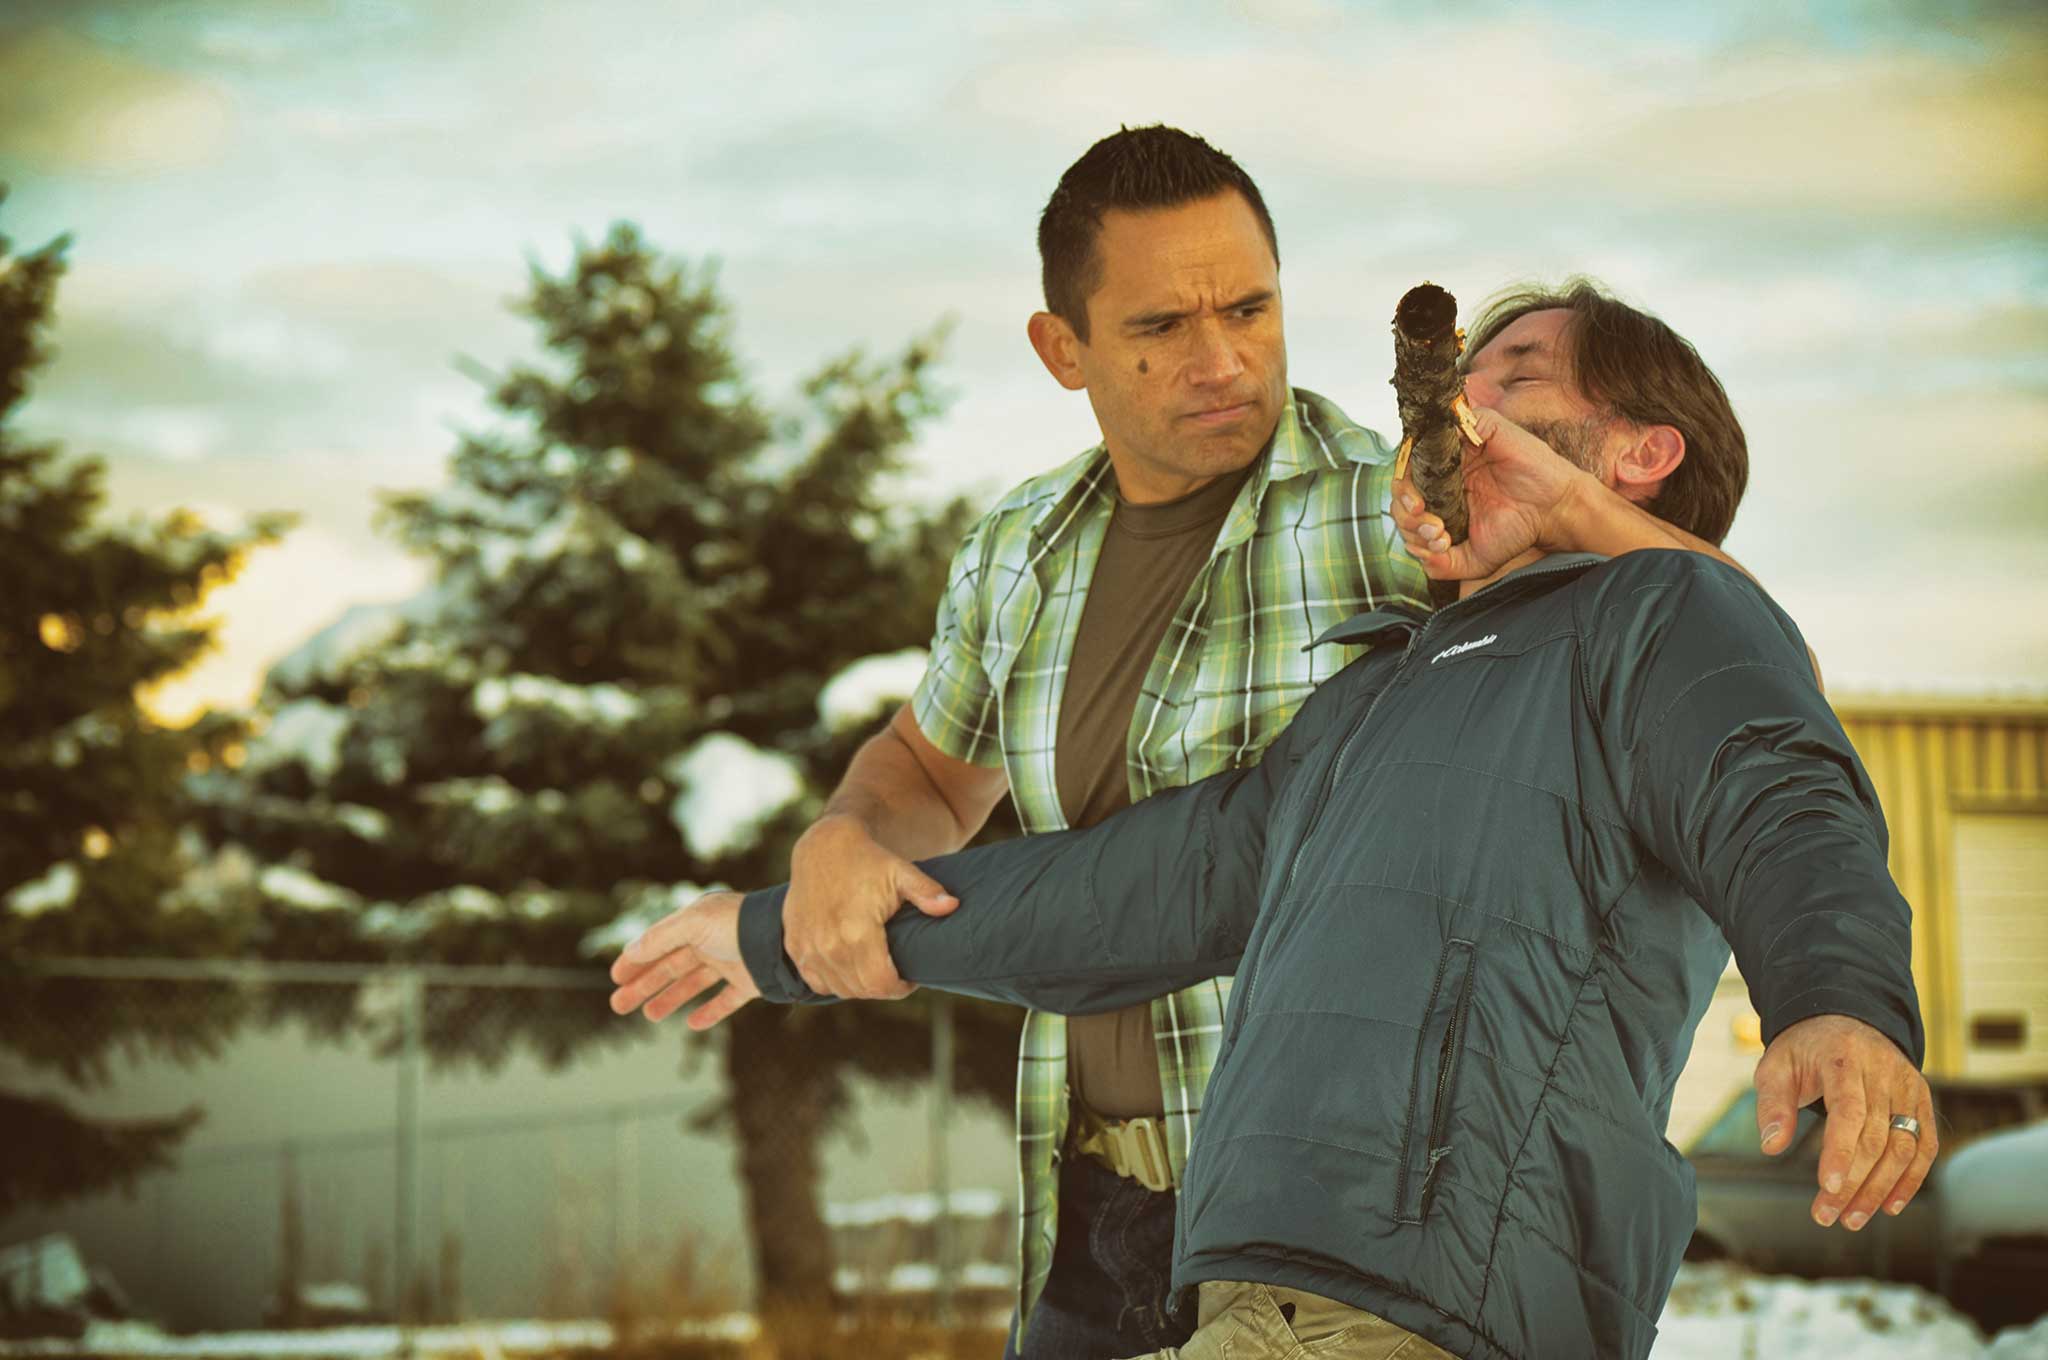
4. Use the center of the stick between your hands to deliver a power strike to the jaw line.
5. If the assailant is taller than you, pull down to their collarbone area to bring them down a little. Reach over the top of your stick and behind their neck with your left hand. Grab the stick on the other side, leaving the stick under your left armpit.
6. Control their arm with your free hand, and pull backward on their neck with the stick. Keeping the space small where their neck is will sink a choke in.
7. Pivot your left leg back, go down to your left knee and pull them backward down to the ground.
8. If the choke doesn’t sink in fast enough, deliver a few strikes to disrupt any attempted counterattack.
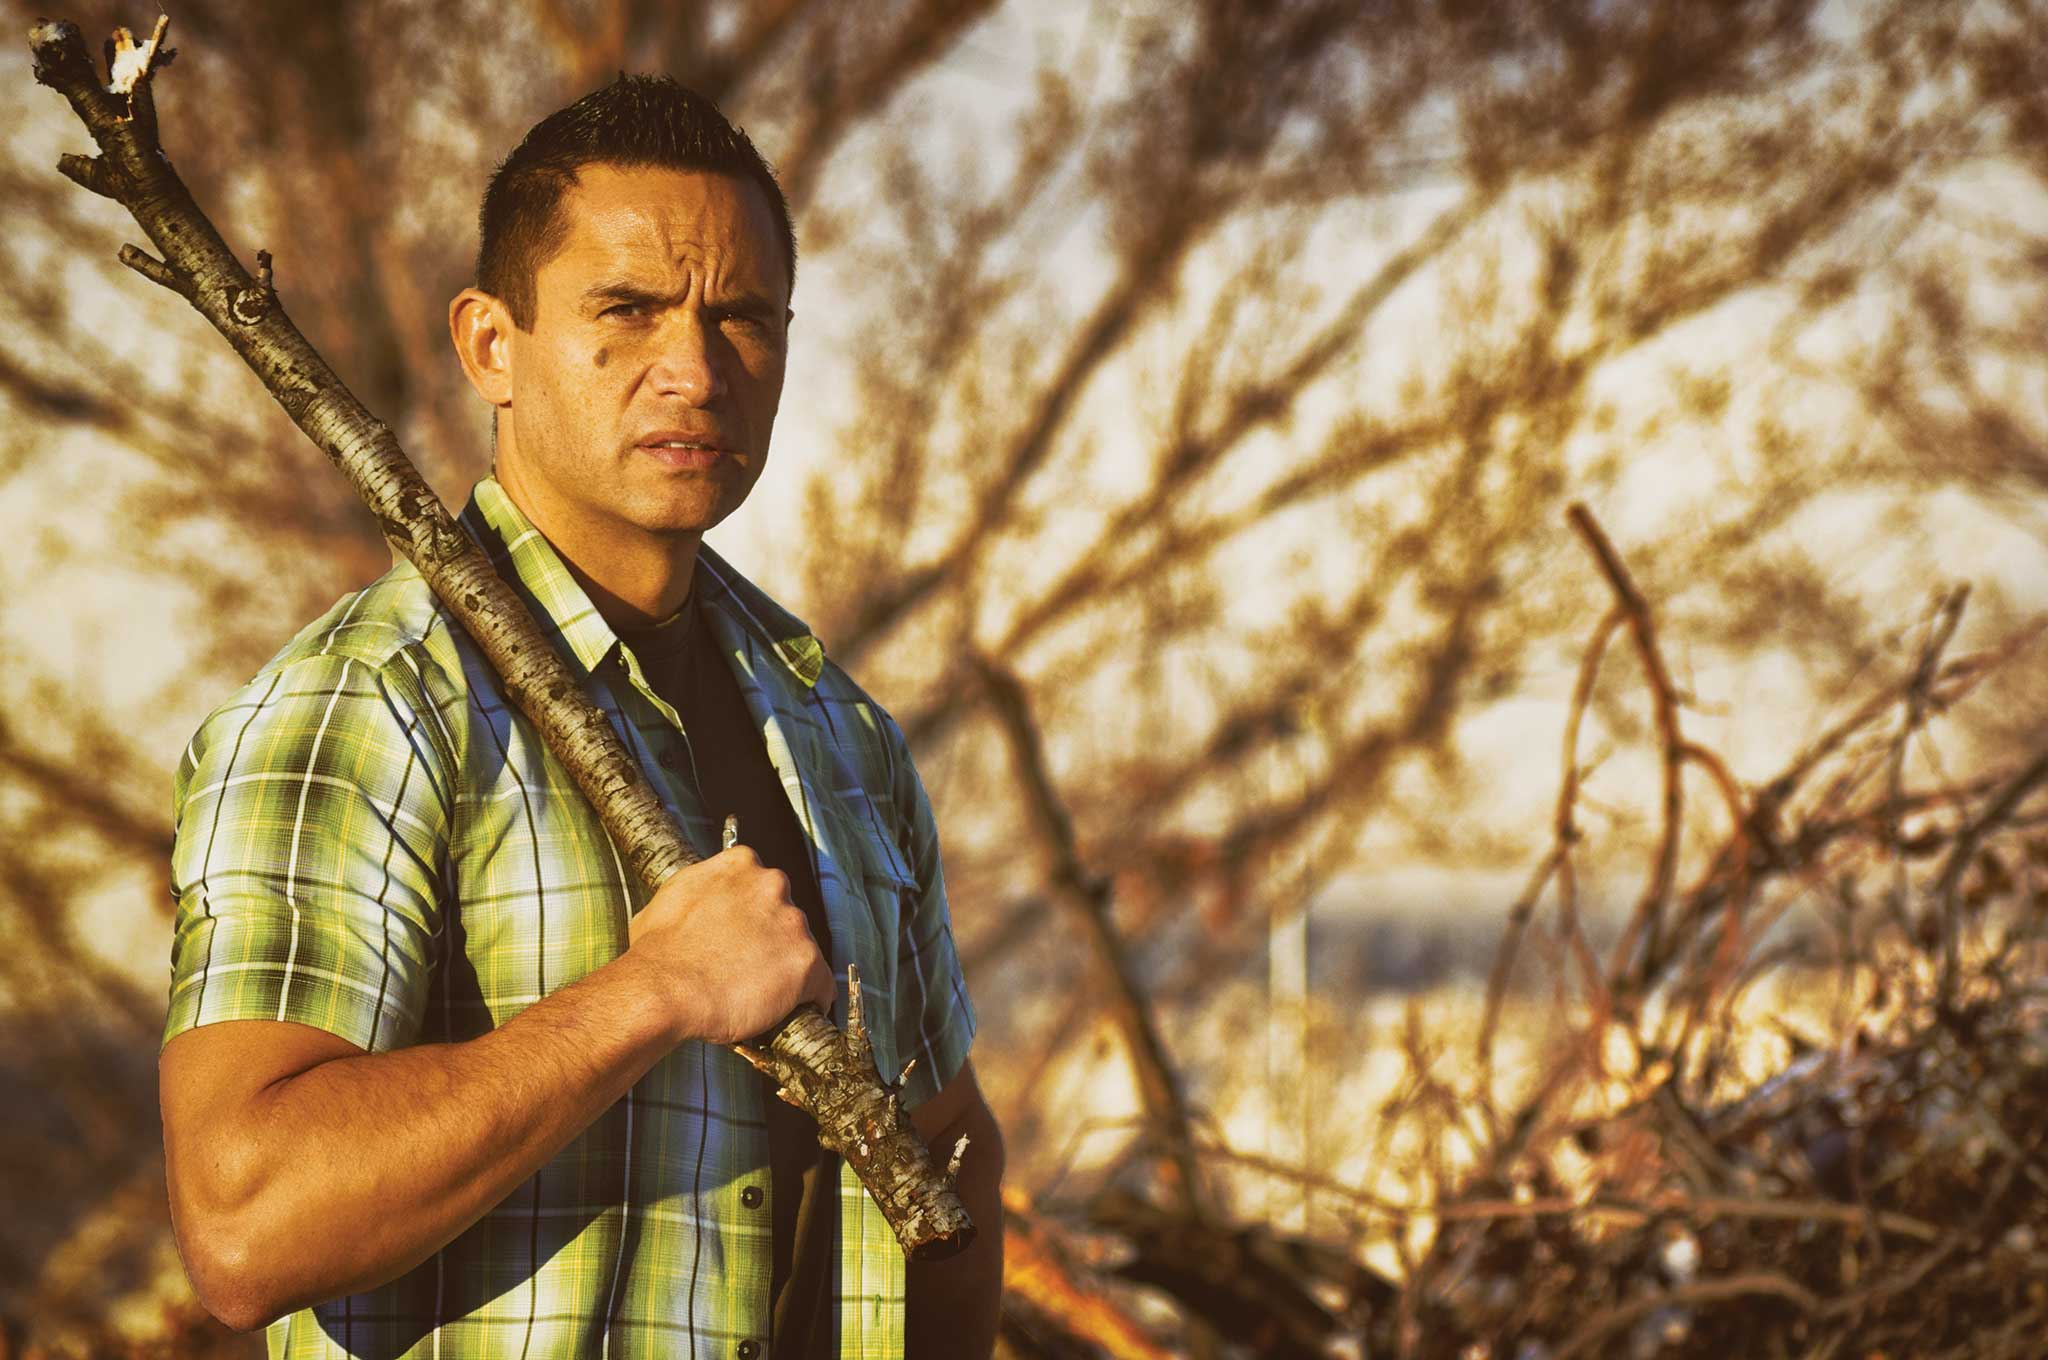
About the Author
Jared Wihongi is a 16-year veteran law enforcement officer with considerable time serving in the SWAT community, a specialist in close-quarter combatives, and one of a handful of master-level instructors of the Filipino combat art Pekiti-Tirsia Kali. Moreover, Wihongi has more than a decade of experience instructing armed forces around the globe. He’s the tactical consultant and frontman for Browning’s Black Label line of knives. Learn more about him at www.jaredwihongi.com.
Pros and Cons of a One-Handed Survival Stick
PROS
Hand-free transport, it can easily be packed in a ruck or slung sword-style on your hip.
Non-cumbersome. Less likely to be snagging on branches or walls as your move from A to B.
Second hand can be free to grab, defend, attack, hold other equipment or wield a second weapon.
Easier and less clumsy to wield with little practice.
It’s harder to enter inside the effective range of a shorter stick and better suited to close quarters.
CONS
Longer weapons give you a greater standoff distance. This is a good thing in an open space environment.
The power of a two-handed swing can be … you guessed it, about twice as strong as a one-handed swing.
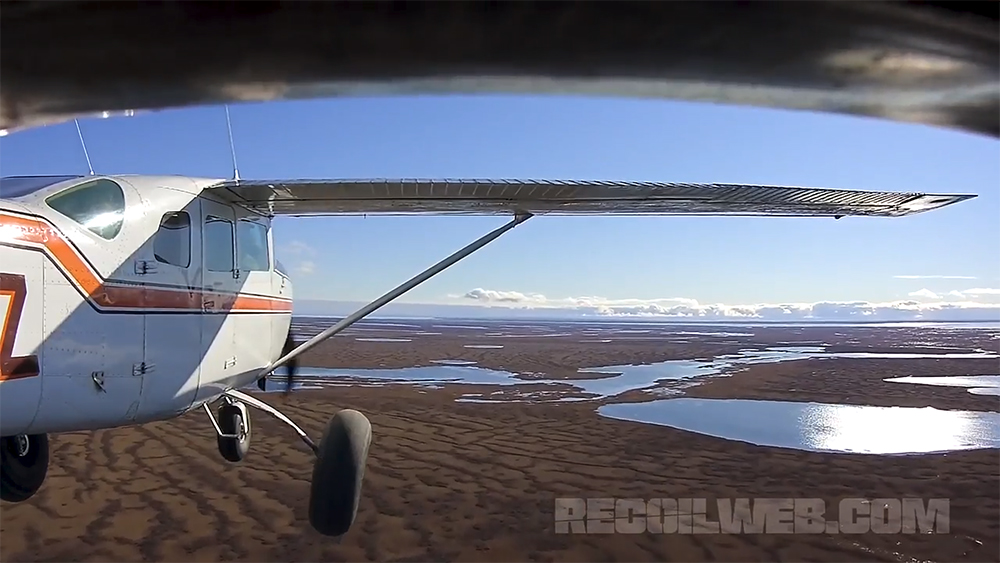
Hunting provides a means of survival in emergency situations, but it’s also more than that. It can be a catalyst for testing other survival skills, a powerful bonding experience between friends, and even a form of group therapy for individuals who have struggled to overcome difficult experiences. Iain Harrison, the editor of RECOIL Magazine, covered all these bases on a Caribou hunting trip last year.
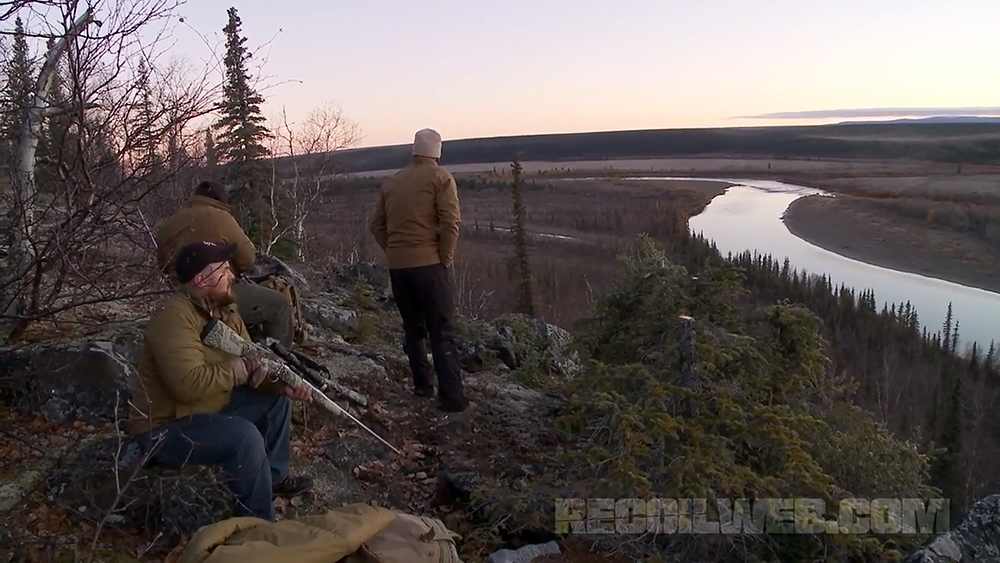
Harrison teamed up with the non-profit organization Camp Patriot to bring a group of three wounded veterans on this hunting trip. The group traveled via small bush planes to a remote spot in Kotzebue, Alaska, only a few miles south of the Arctic Circle. After landing on a small gravel bar at the edge of a river, the men set up camp and started scouting for a nearby herd of caribou.
From a position on the mountainside, the men could see approximately 4,000 caribou — they just had to position themselves strategically and wait for a clear shot. Check out the full video below from RECOILtv. It discusses the results of the hunt, as well as the individual stories of each of the three veterans who joined Harrison on the trip.
A knife is a tool, and like any other tool, it must be engineered from the outset to handle a specific set of tasks. Some knives are big, heavy, and overbuilt in order to withstand the rigors of hard outdoor use. Other knives are made of exotic materials and designed to be both functional and elegant, like a finely-crafted watch. There are small blades for opening packages, large blades designed for combat, and blades with blunt tips made for use in rescue situations.
The Benefits of Losing Weight
One knife category we feel doesn’t get as much attention as it deserves is that of the lightweight knife. Knives in this category have a variety of useful applications. Steel is heavy, so a lightweight knife will go a long way to reduce the load in your pack — as the saying goes, ounces equal pounds, and pounds equal pain. Like a scalpel, a light blade also offers increased precision and maneuverability. And if you’re heading out for a run or some other fast-paced physical activity, you don’t want a heavy blade bouncing against your leg with each step.
As a general rule, people tend to associate the term lightweight with three others: small, fragile, and expensive. Admittedly, this is often the case — just put the word ultralight in front of any piece of gear you’re looking to buy, then watch as prices increase and durability decreases. However, with the proper forethought and application of materials, this doesn’t have to be the case.
Benchmade Bugout
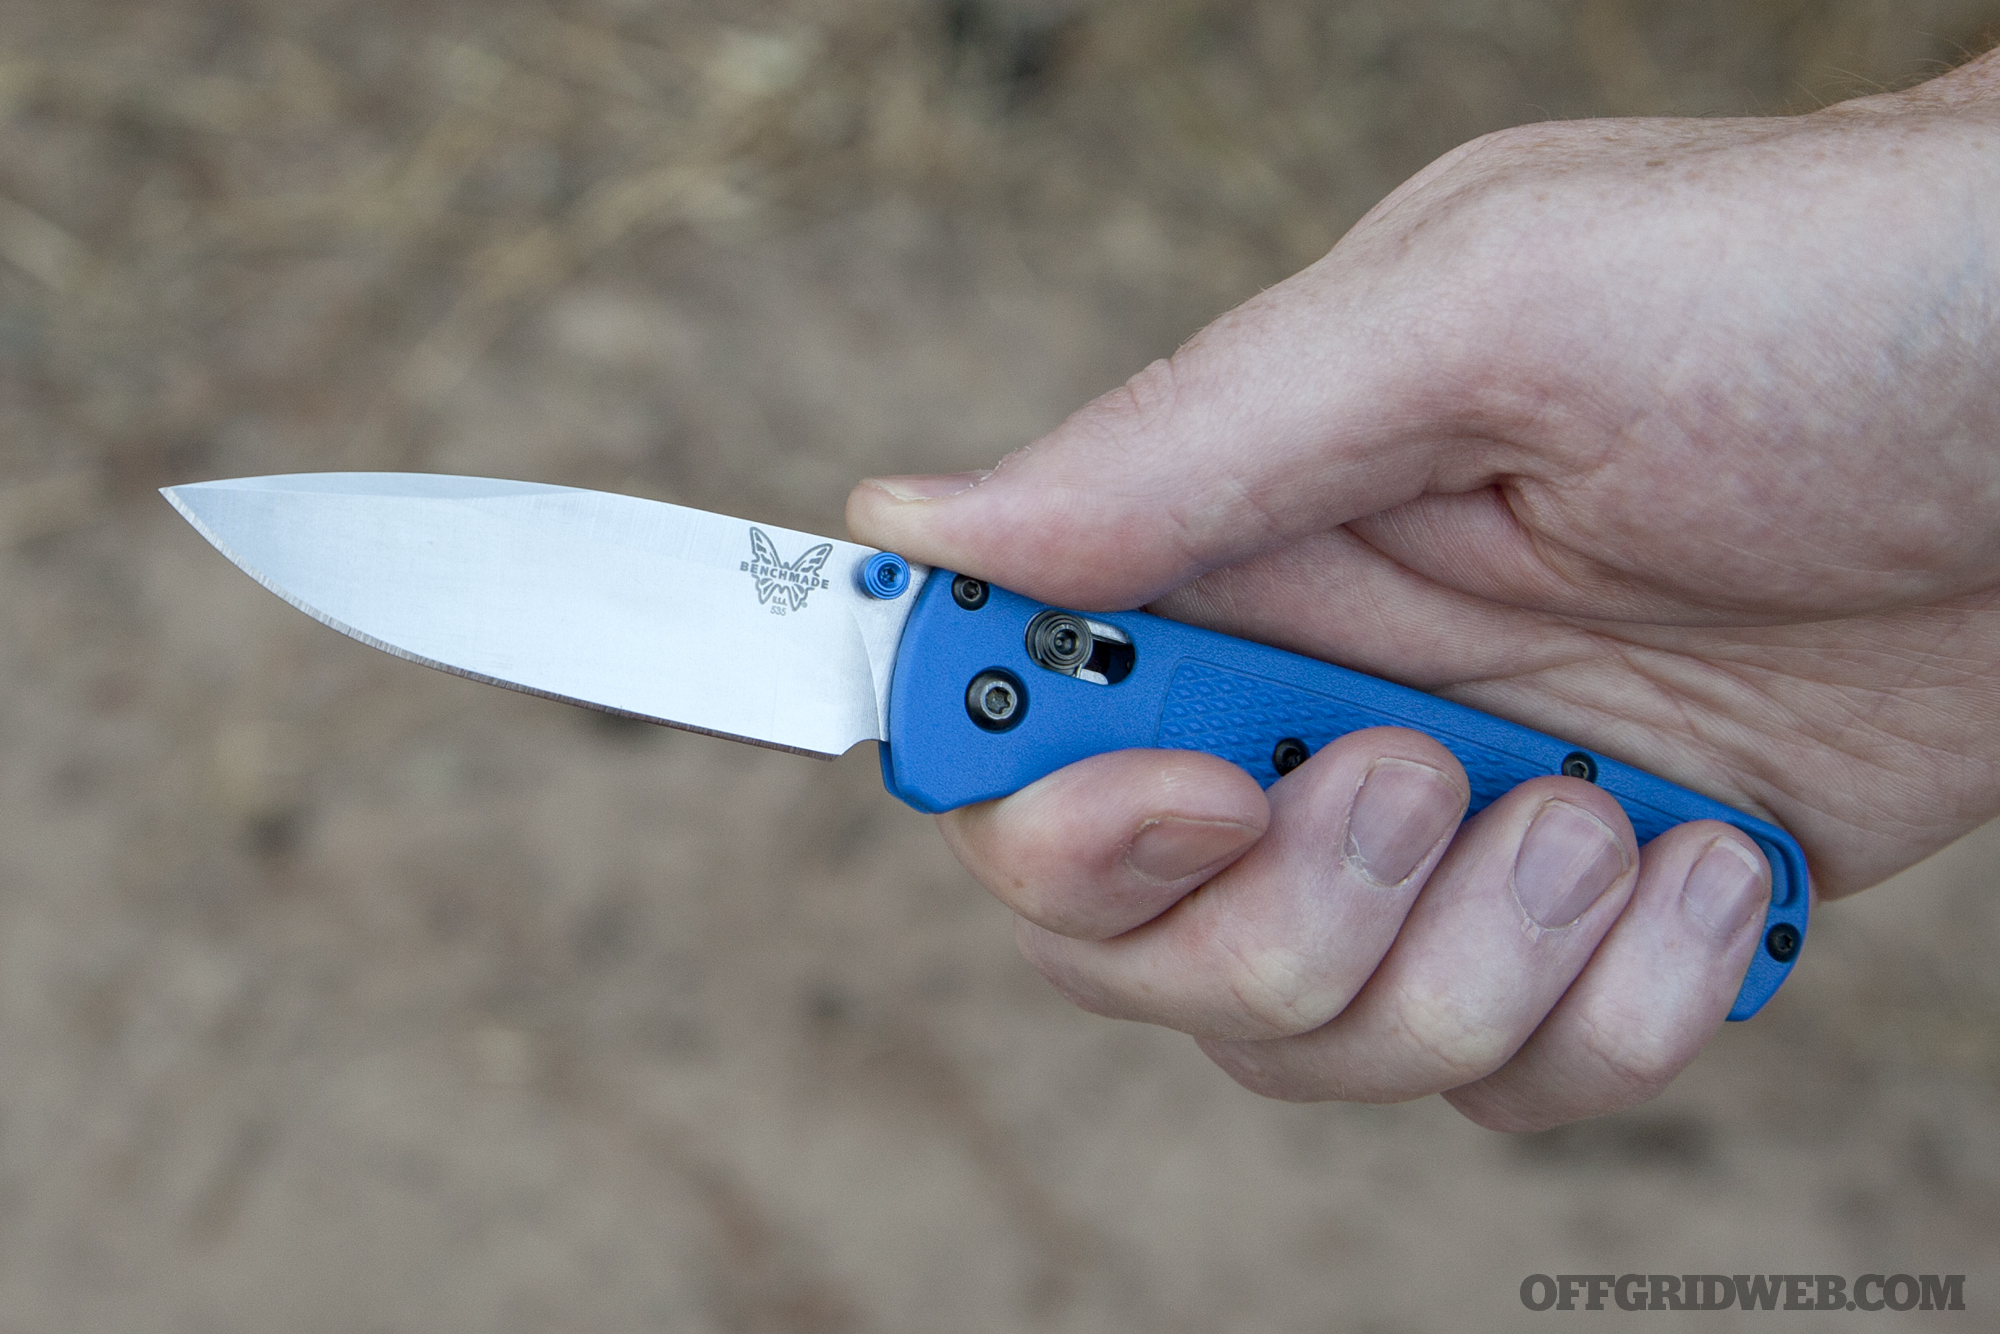
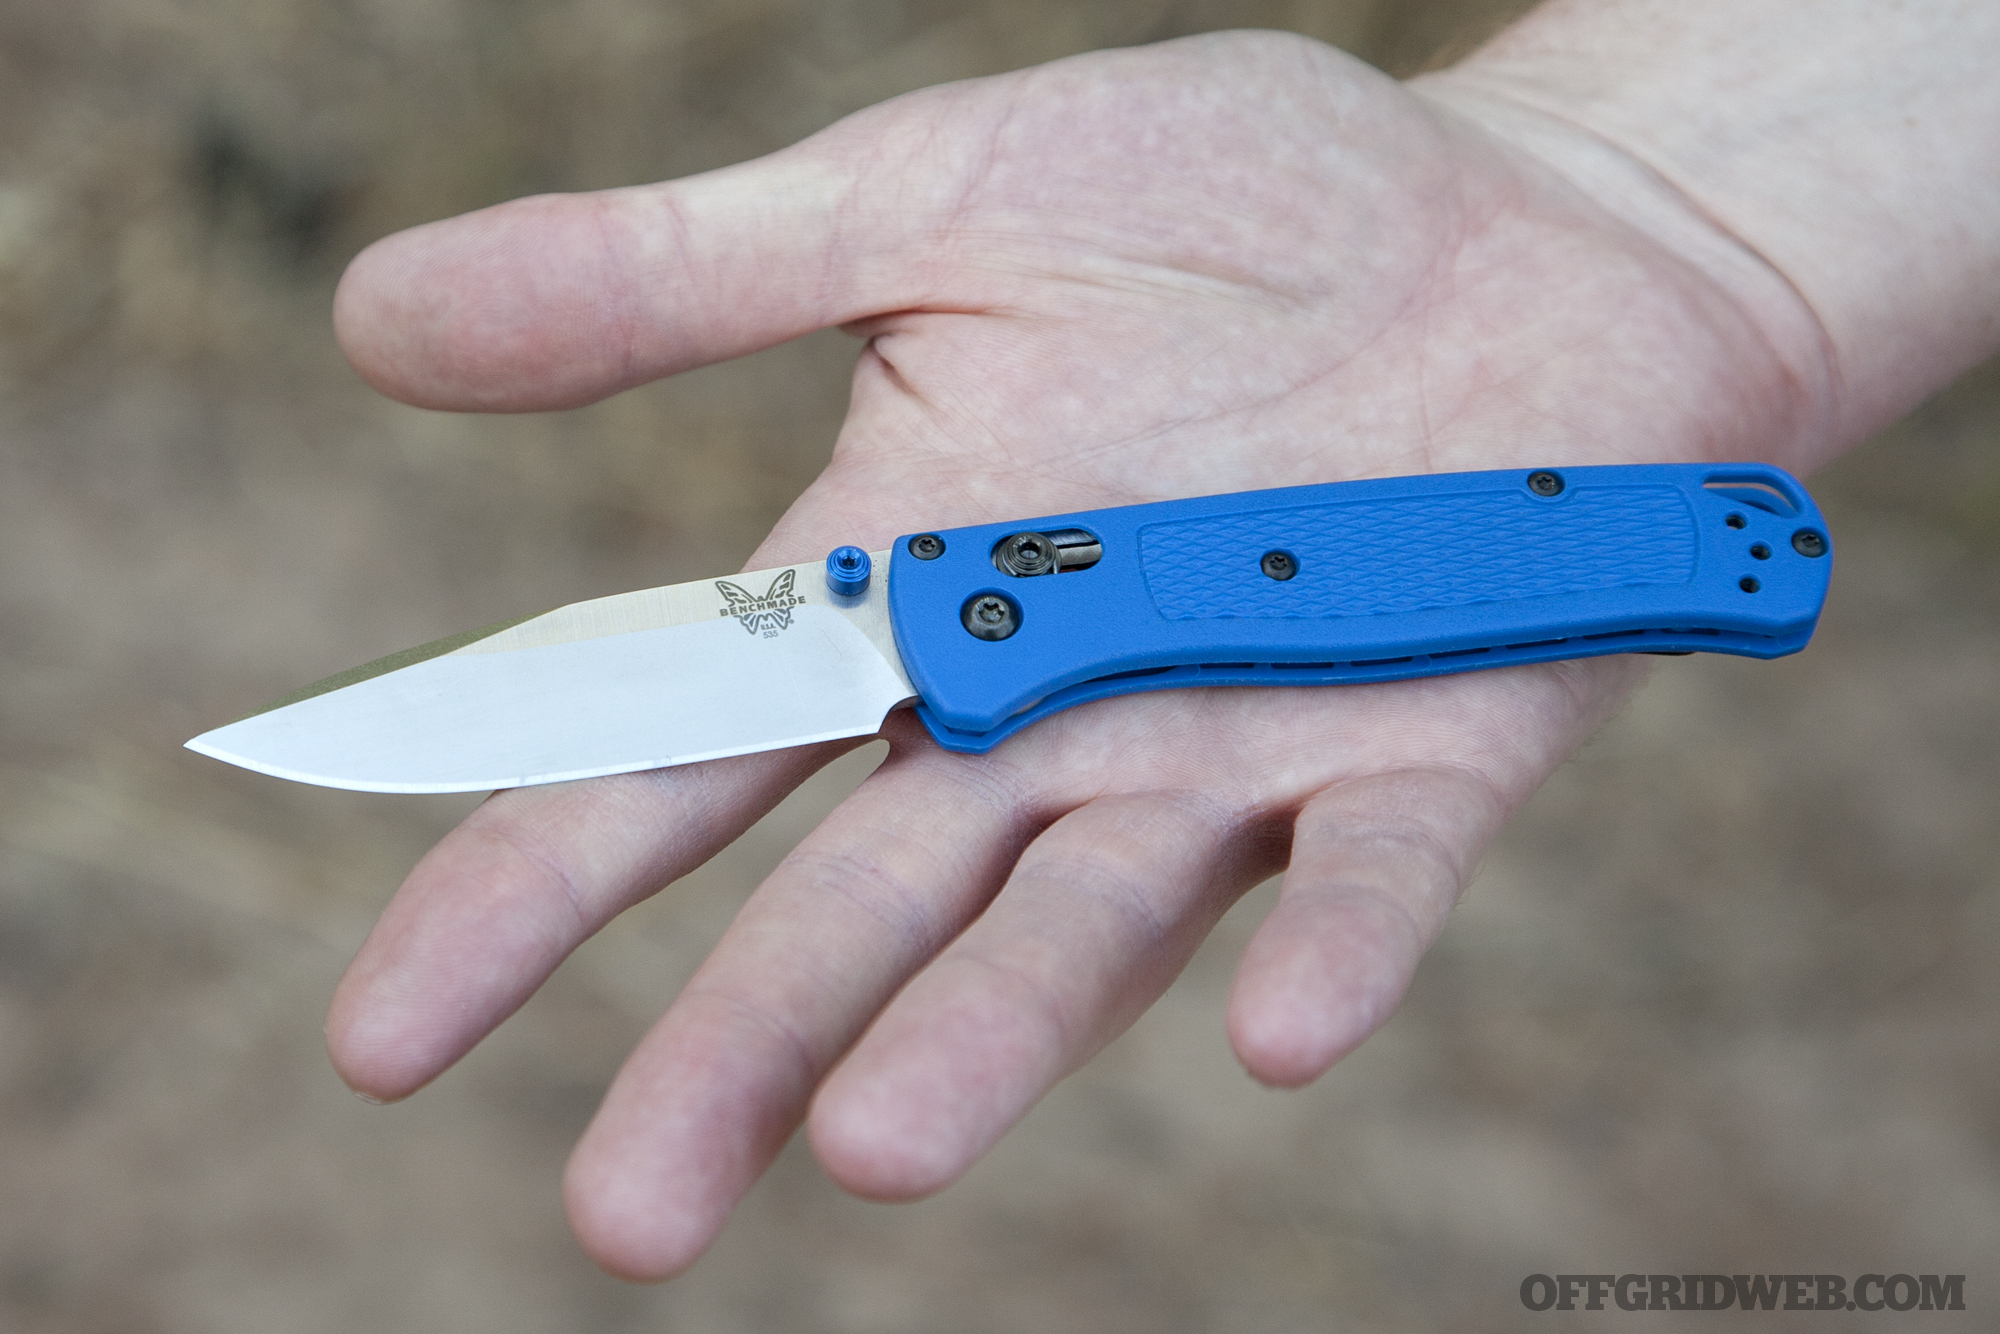
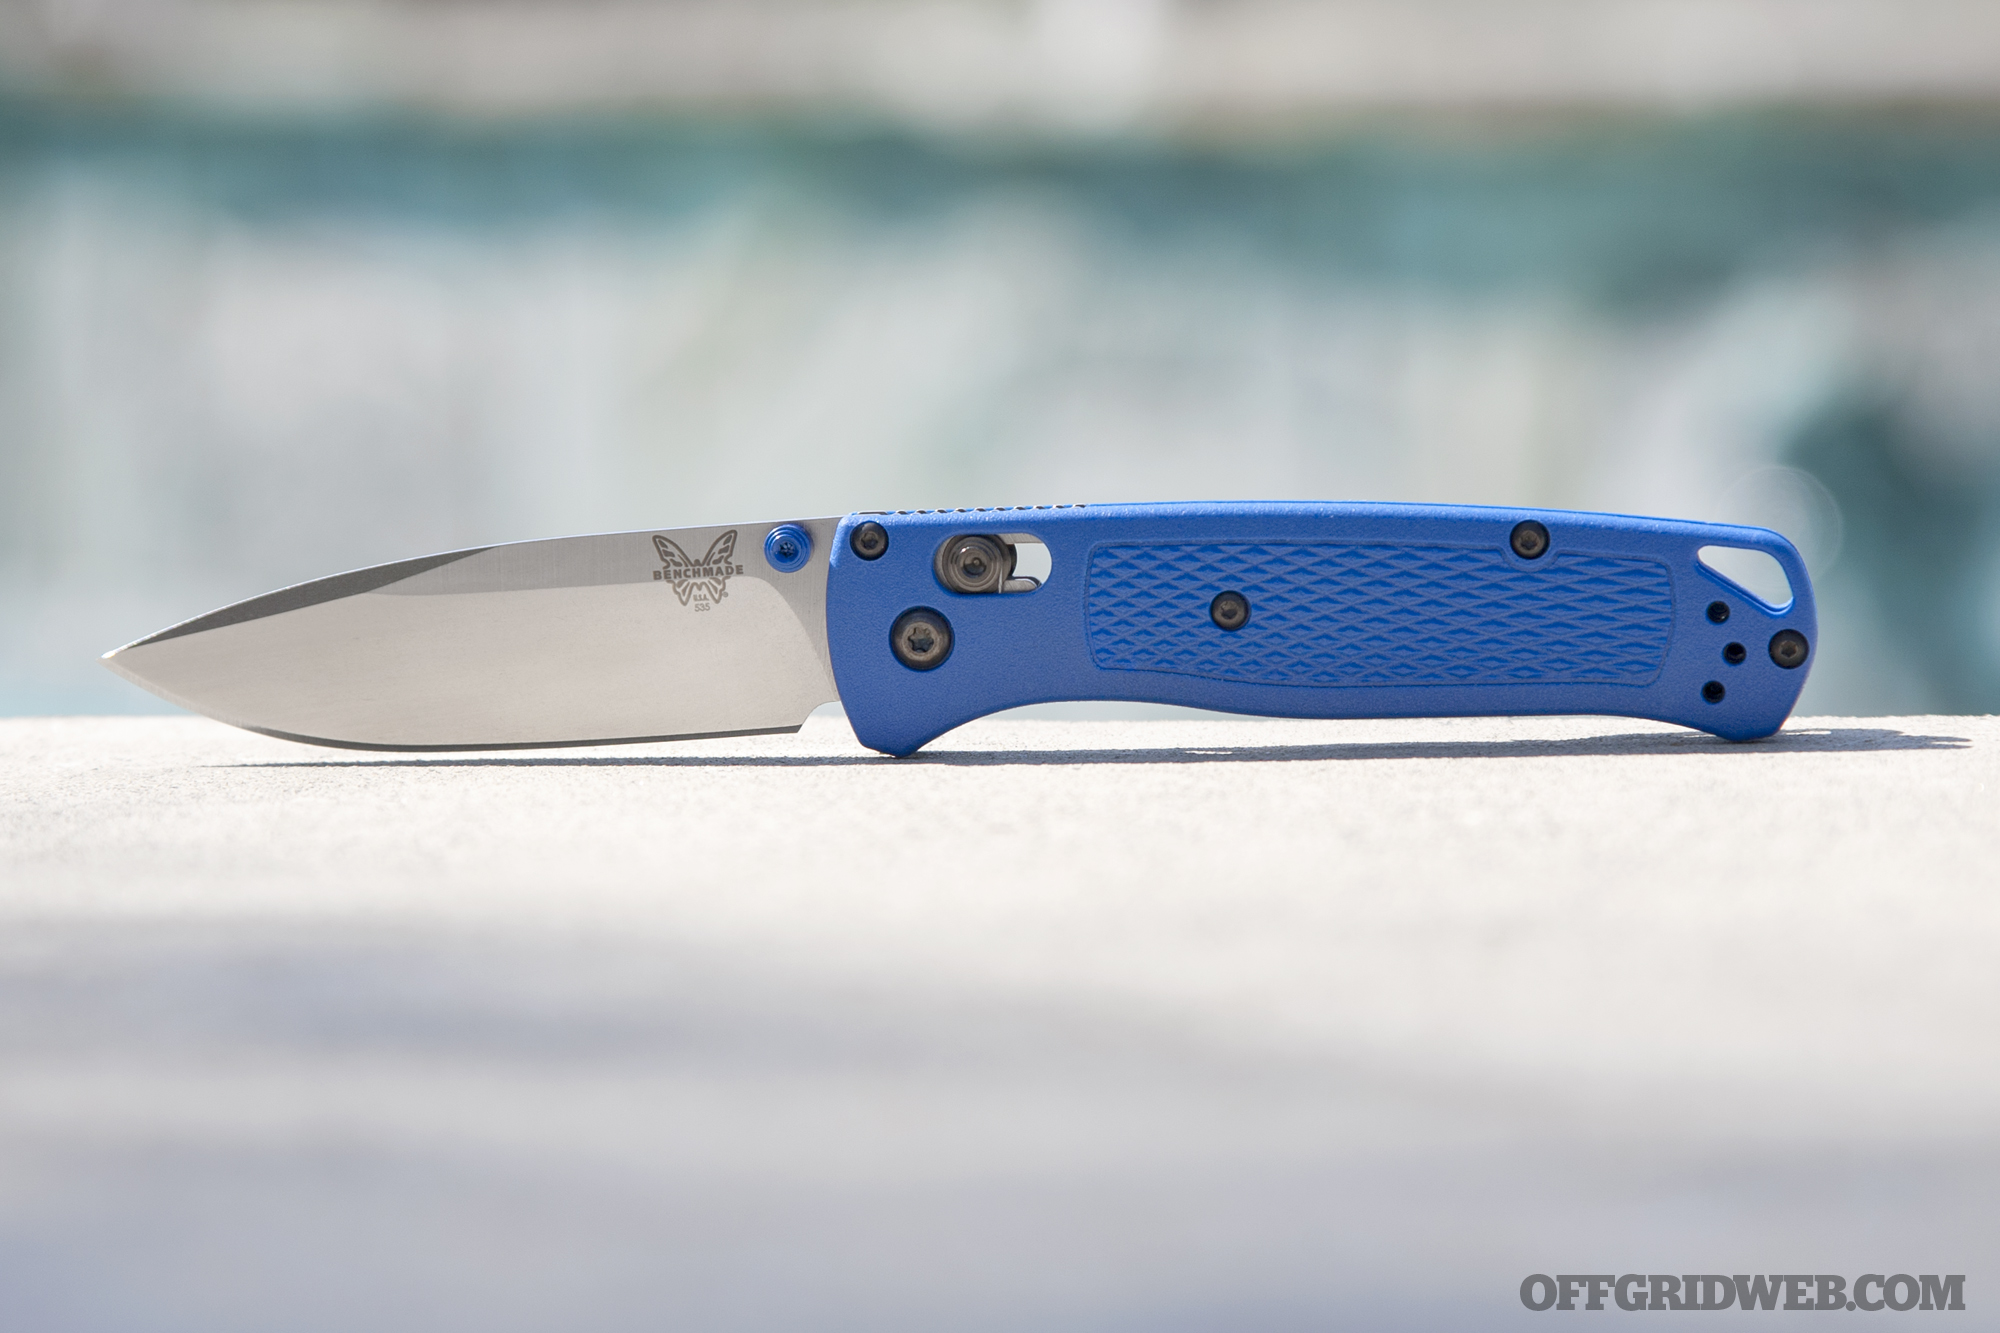
Earlier this year, Benchmade set out to develop a folding knife that would remain as light as possible without substantially impacting durability or cost. The easy way to do this would be to simply make a very small knife, but that would limit its functionality, so Benchmade aimed for a much more practical 3+-inch blade. The end result of this challenging task was the new Benchmade Bugout.
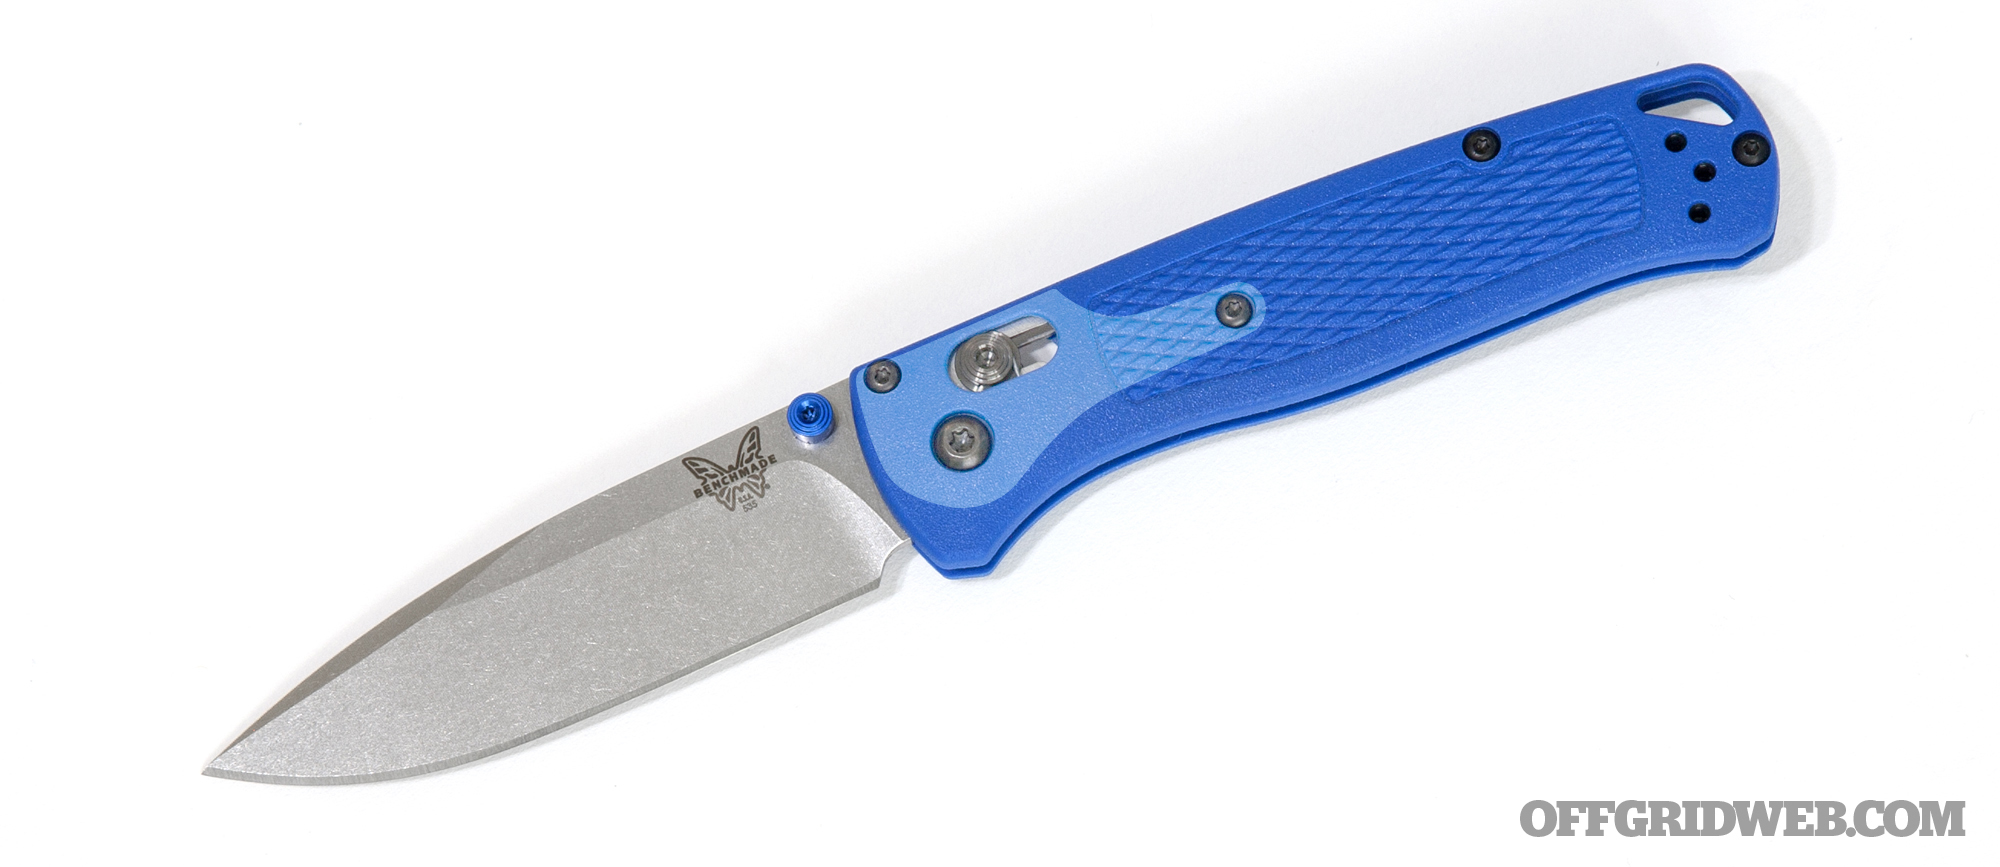
The Bugout, also known as the 535, combines a slim steel blade with a tough polymer handle and Benchmade’s signature AXIS lock mechanism. Every part of this formula was adjusted with lightness in mind, and examining the knife closely shows this attention to detail.
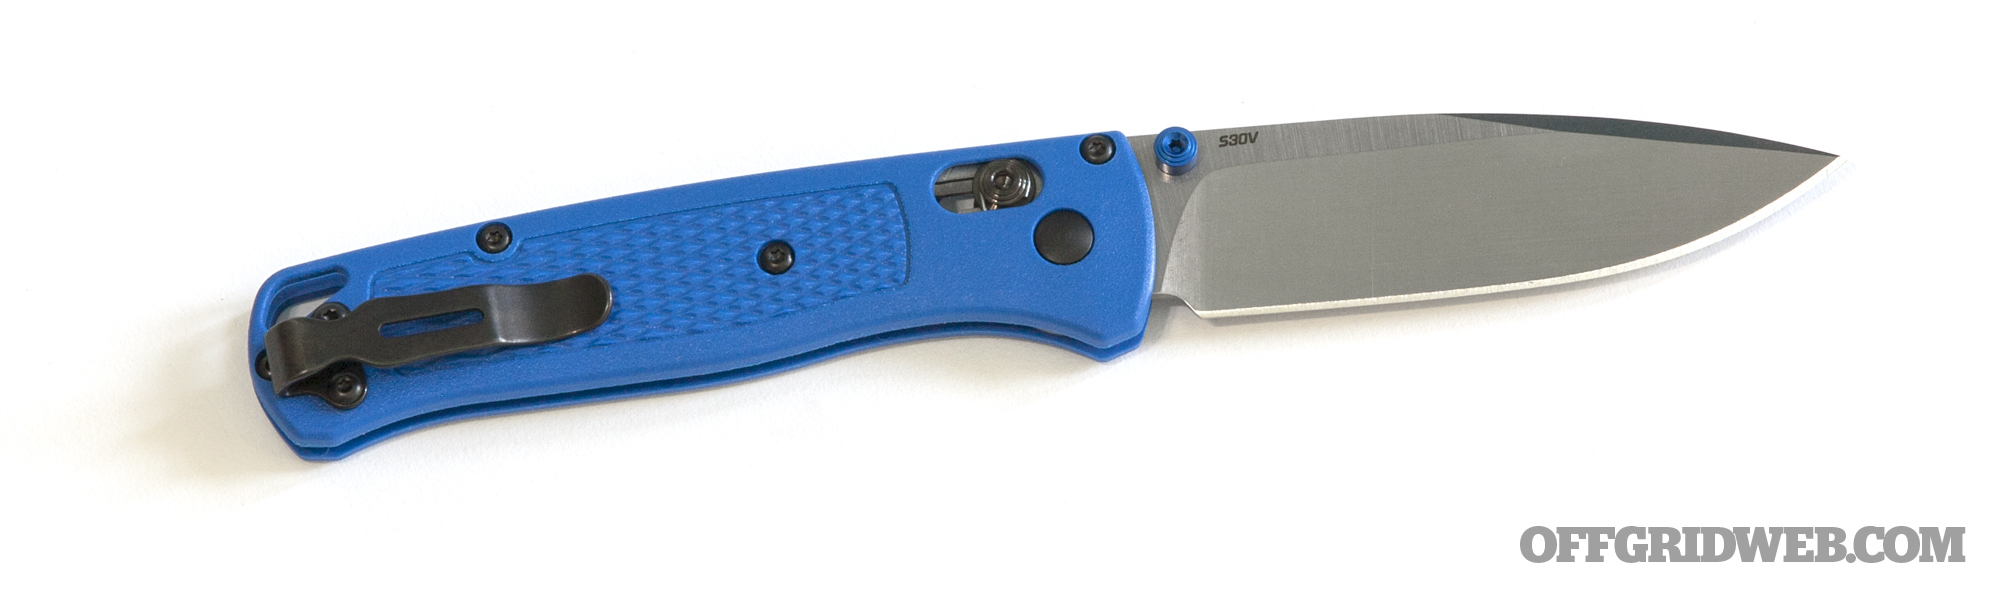
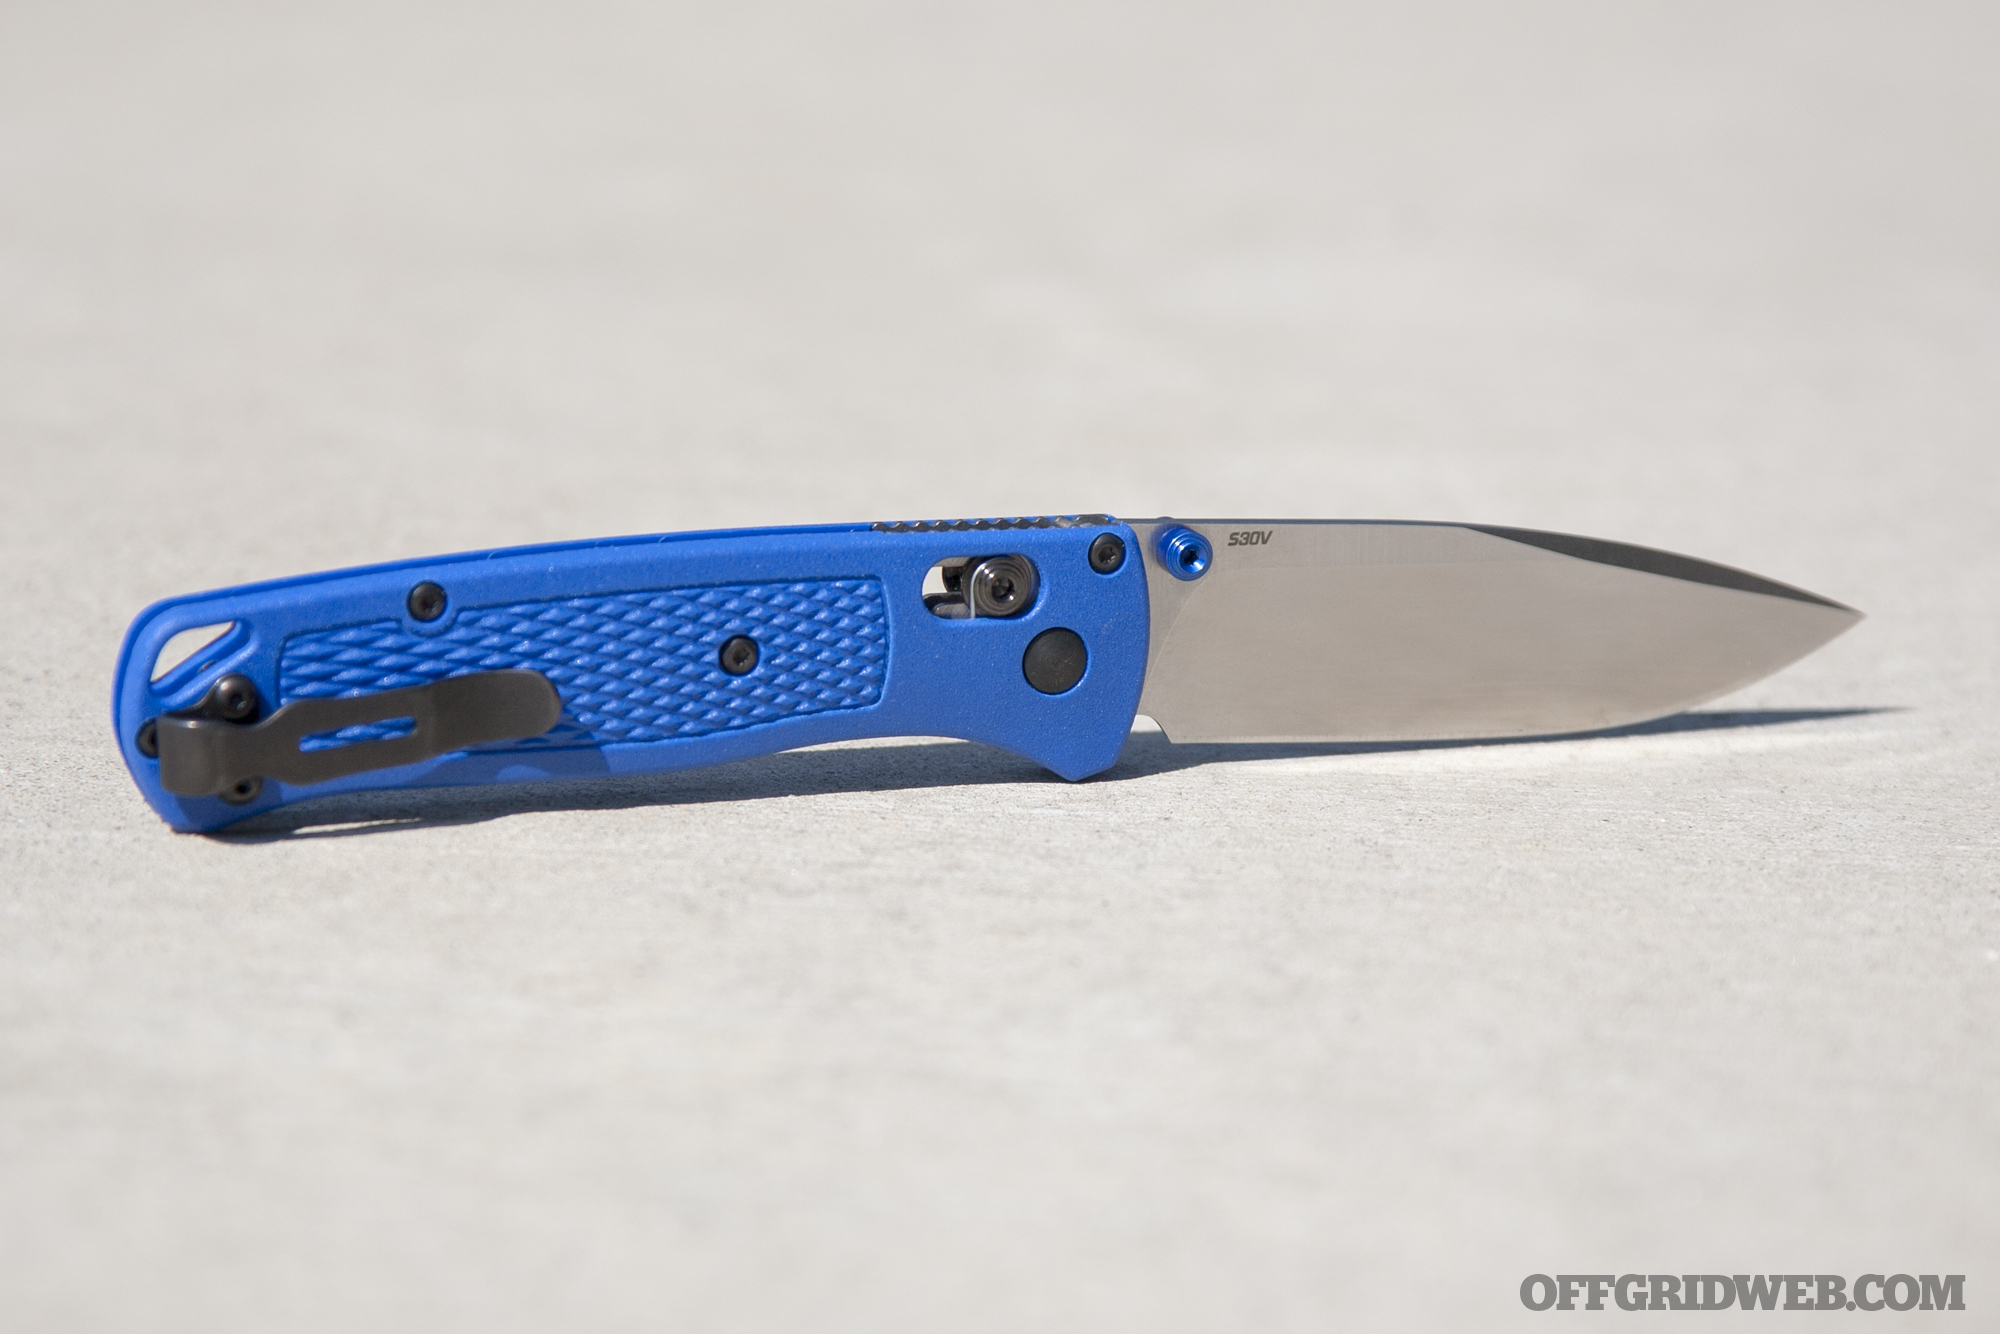
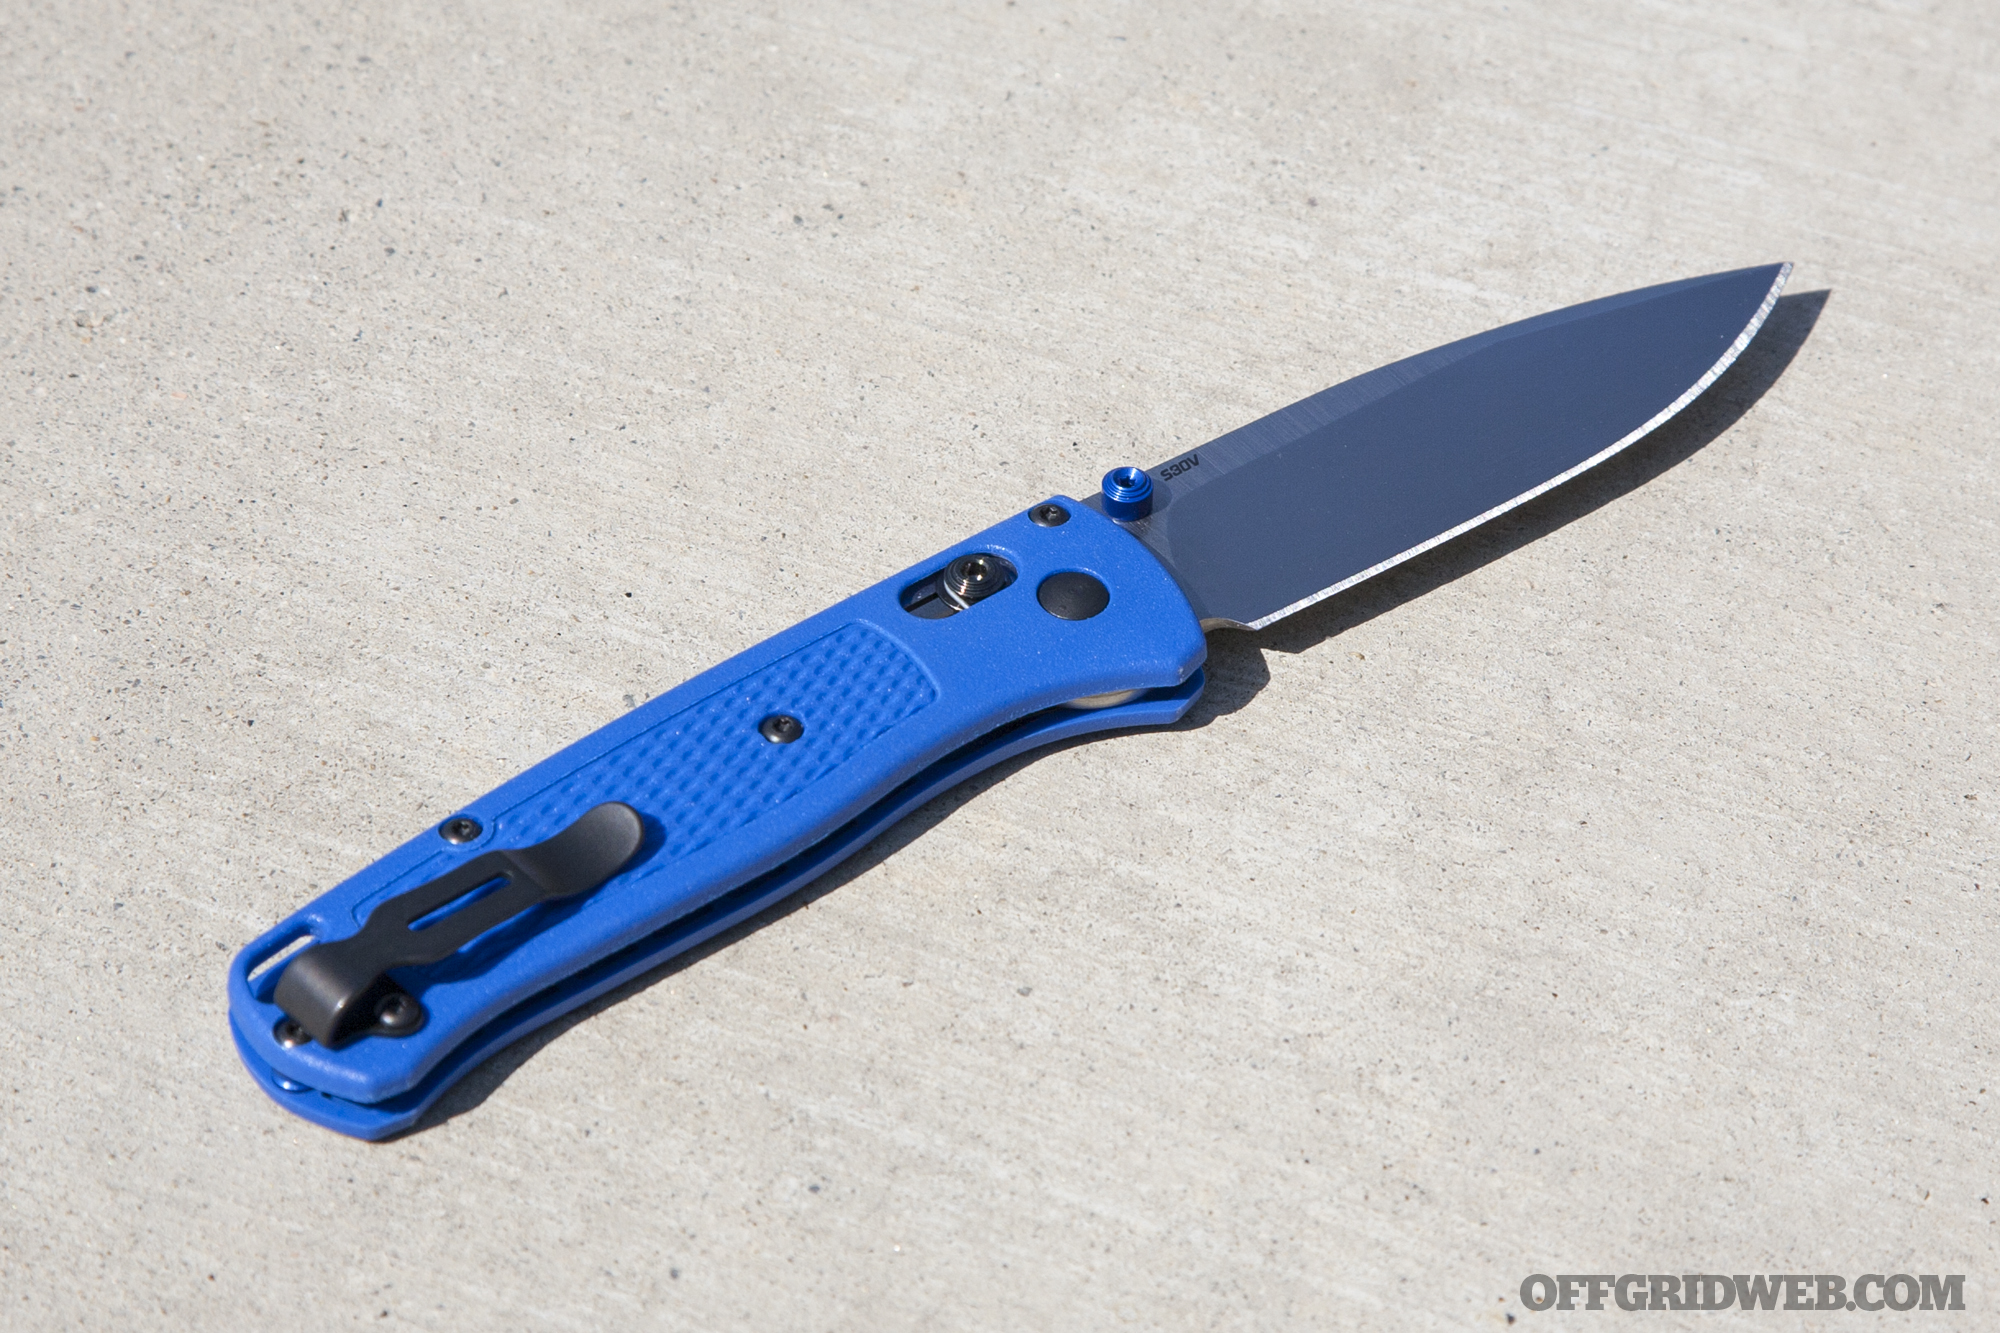
First and foremost, the blade had to be addressed. Benchmade’s design team knew that using an exotic steel would lose some weight but also drive up the price. Instead, they stuck with the company’s new mainstay, CPM S30V. The Bugout’s satin-finished drop-point blade is 3.24 inches long, barely shorter than the company’s popular Griptilian line, so that’s not the source of the weight savings either.
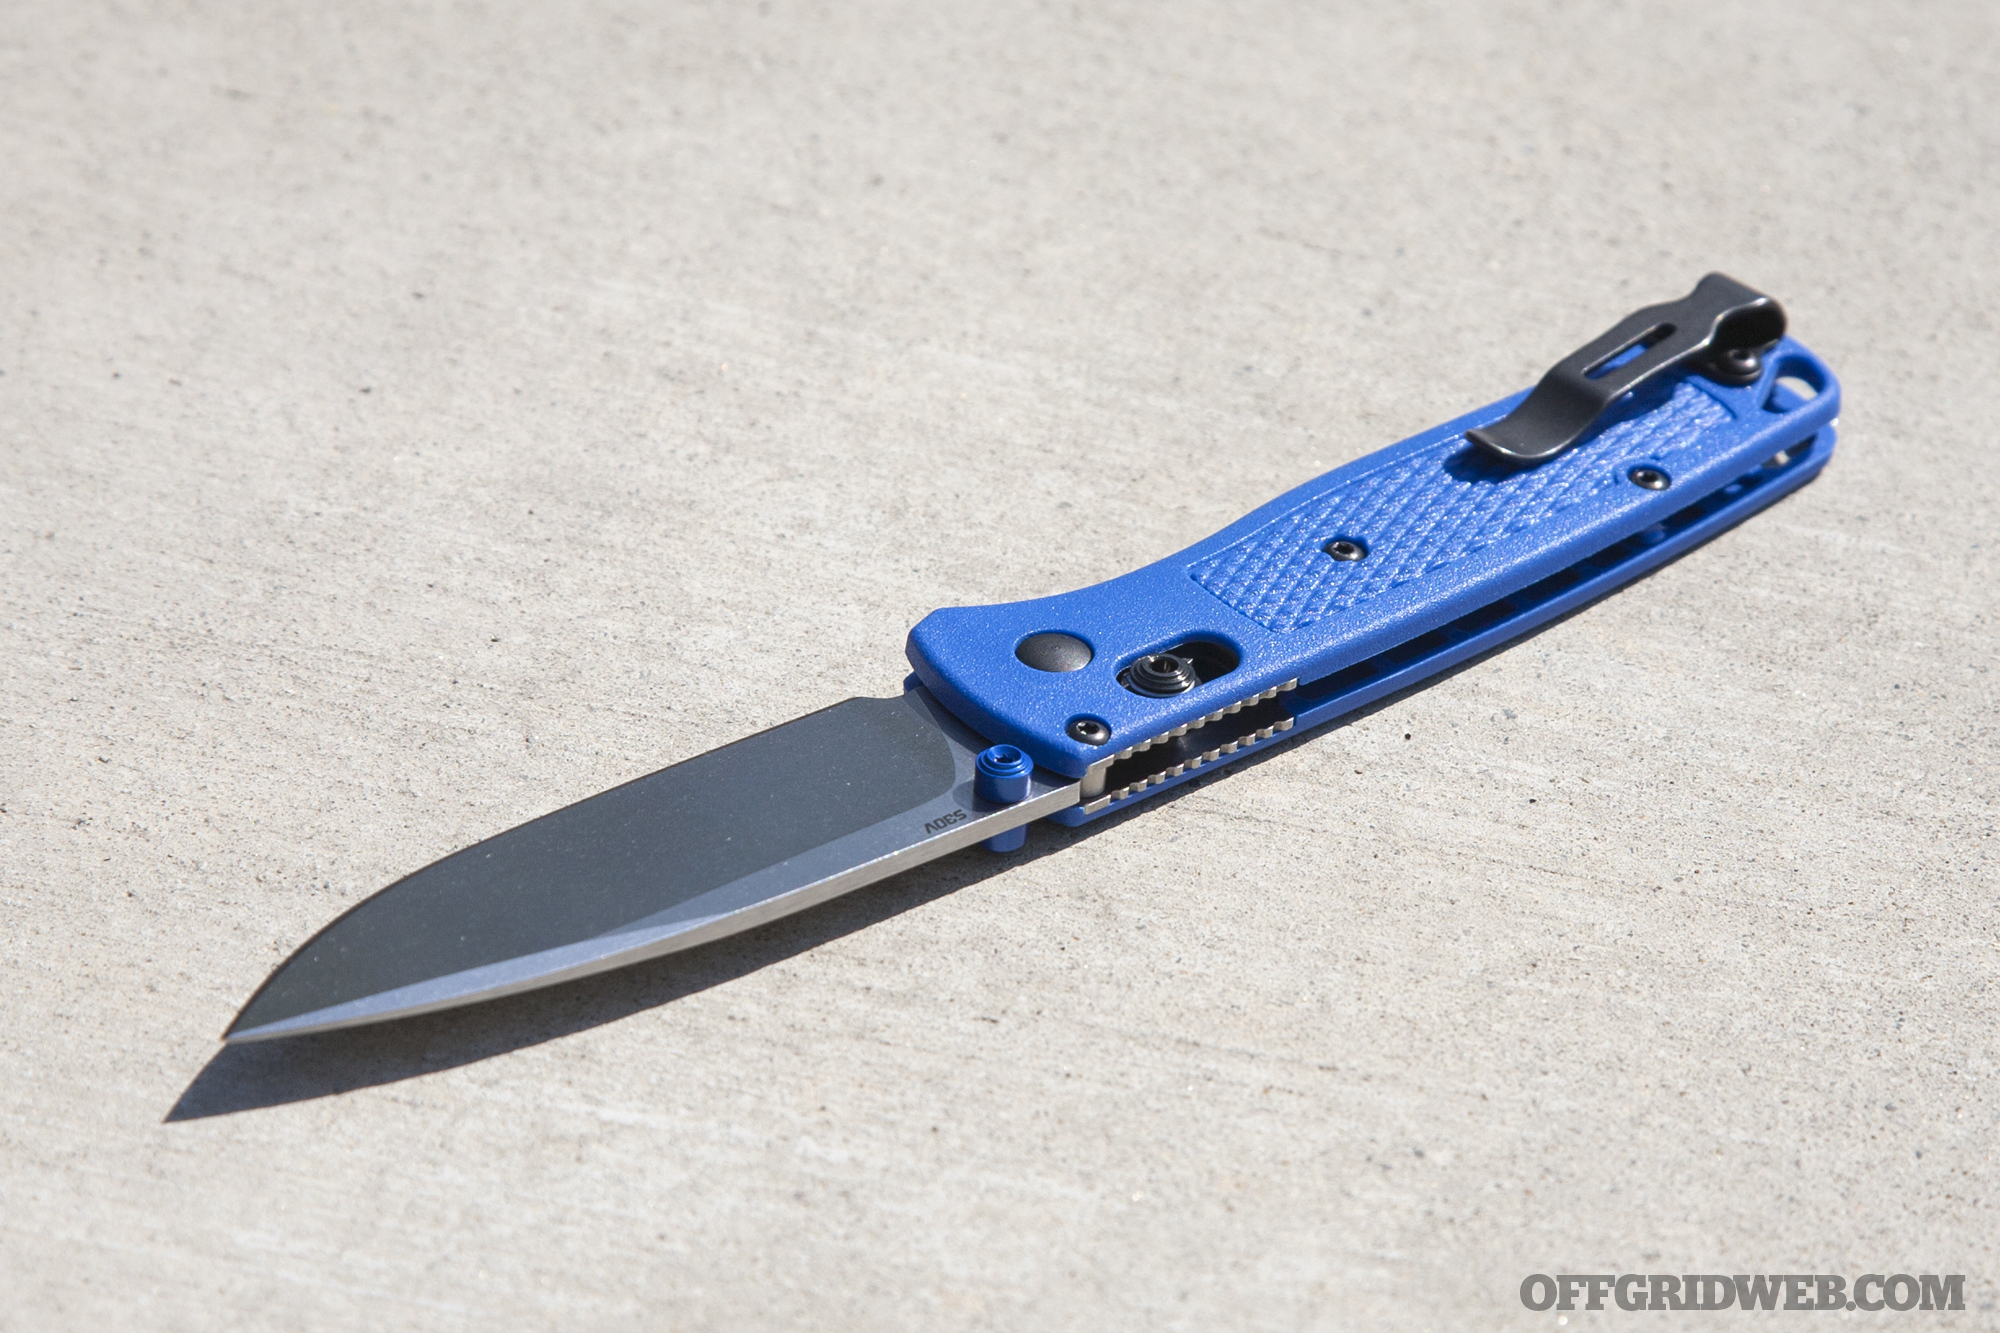
Taking a look at the spine reveals the secret — it has been shaved down to just 0.09 inches thick (2.29mm). The blue anodized aluminum thumb studs are also shorter than other Benchmade knives, and match the width of the slim handle (more on that below). The blade is finished off with a high primary grind line and prominent swedge, further reducing its weight by removing more steel.
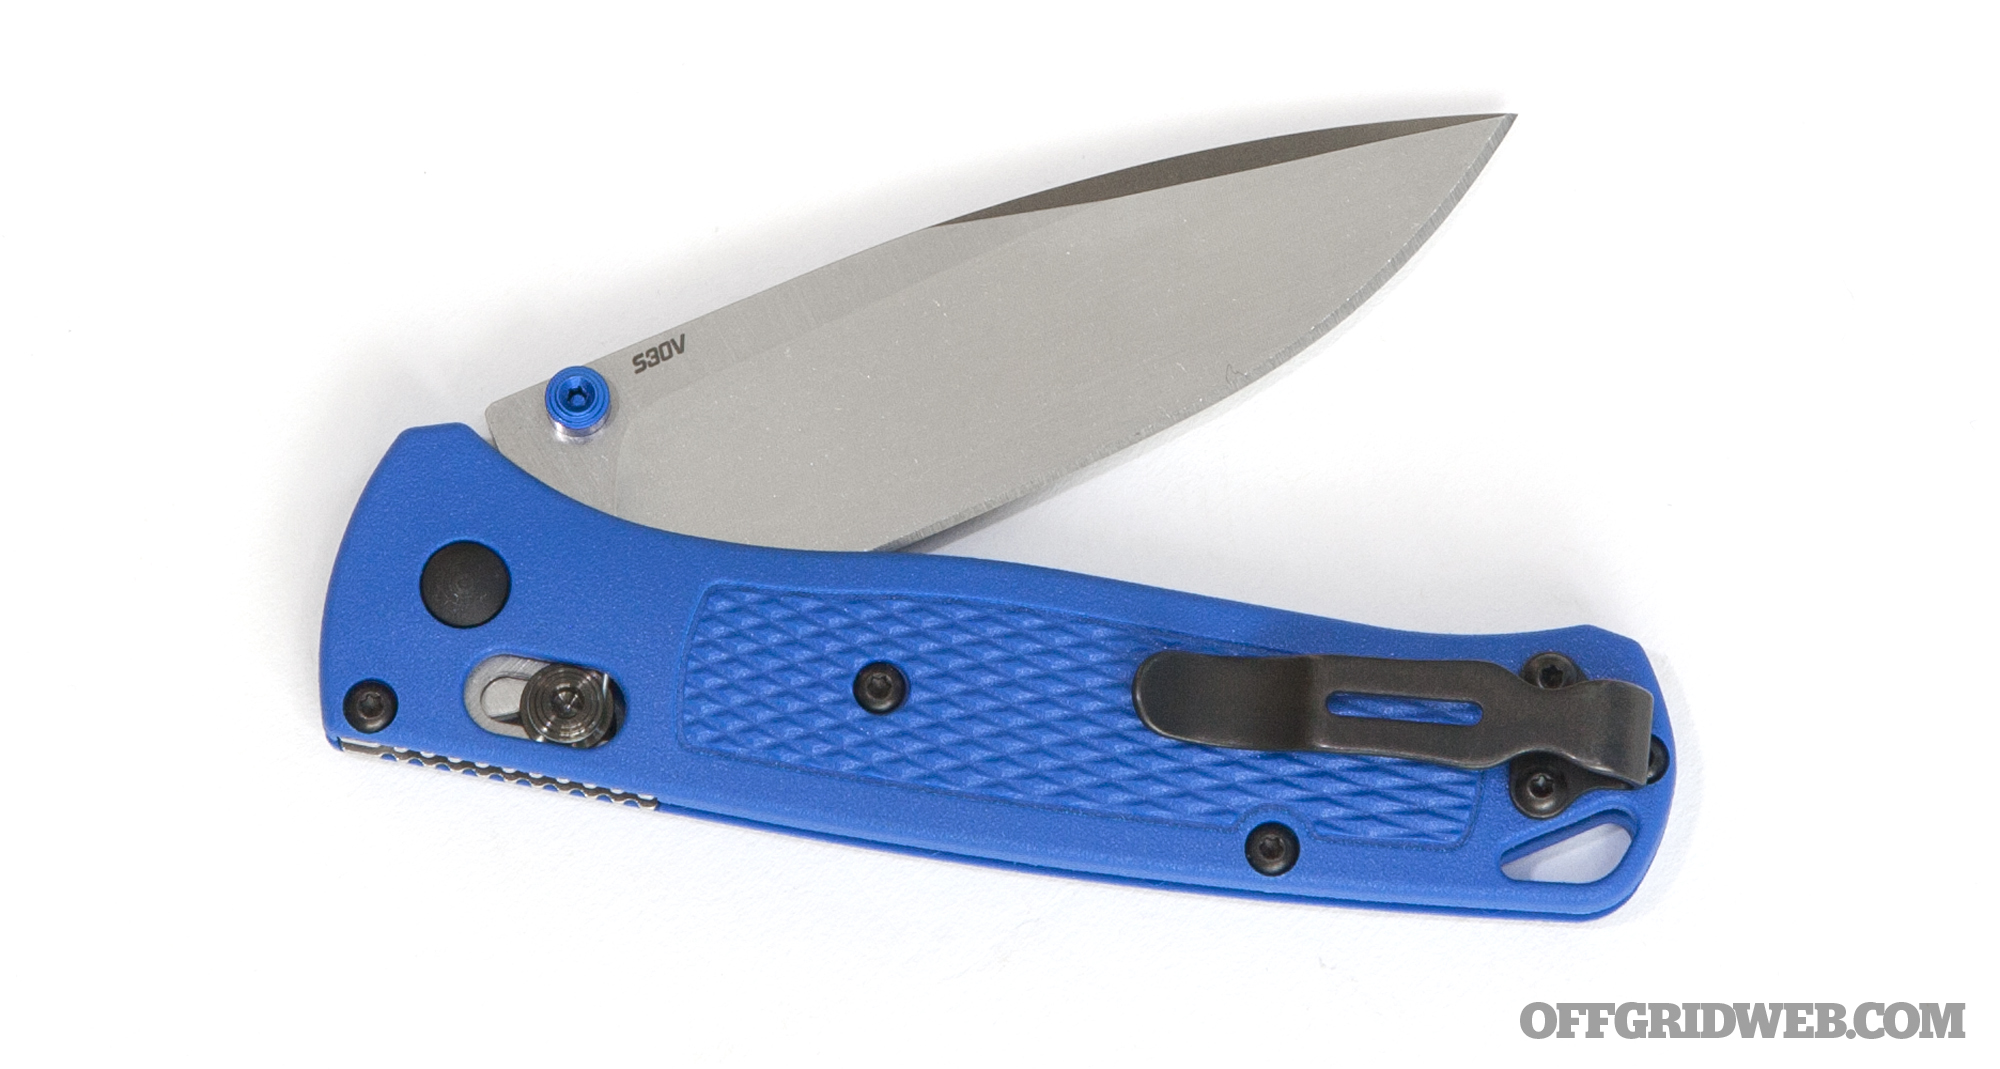
Moving to the pivot of the knife, anyone familiar with Benchmade will recognize the AXIS lock. In case you’re unfamiliar, this sliding steel lock bar is held in place with a pair of tension springs. Pulling back on the bar allows the knife to swing open or shut freely with a flick of the wrist. A stop pin at the corner of the handle prevents vertical blade movement when the knife is open.
“Metal Replacement” Handle
One feature that’s unique to the Benchmade Bugout is its lock housing. Like all AXIS-lock knives, the handle contains two metal plates that hold together the lock bar, springs, pivot washers, and stop pin. Other Benchmade knives integrate this lock housing into metal liners which run the entire length of the handle, providing a rigid structure and mounting points for handle scales. But the Bugout is different — it has no full-length metal liners.
Only part of the Bugout’s handle is reinforced with metal, highlighted above. The rest is solid polymer.
The metal structure in the Bugout’s handle runs from the stop pin and pivot point to a pair of screws near the mid-point of the handle. The remainder of the handle is constructed from Grivory, a type of fiberglass-reinforced nylon that is touted as a “metal replacement” polymer due to its extreme toughness.
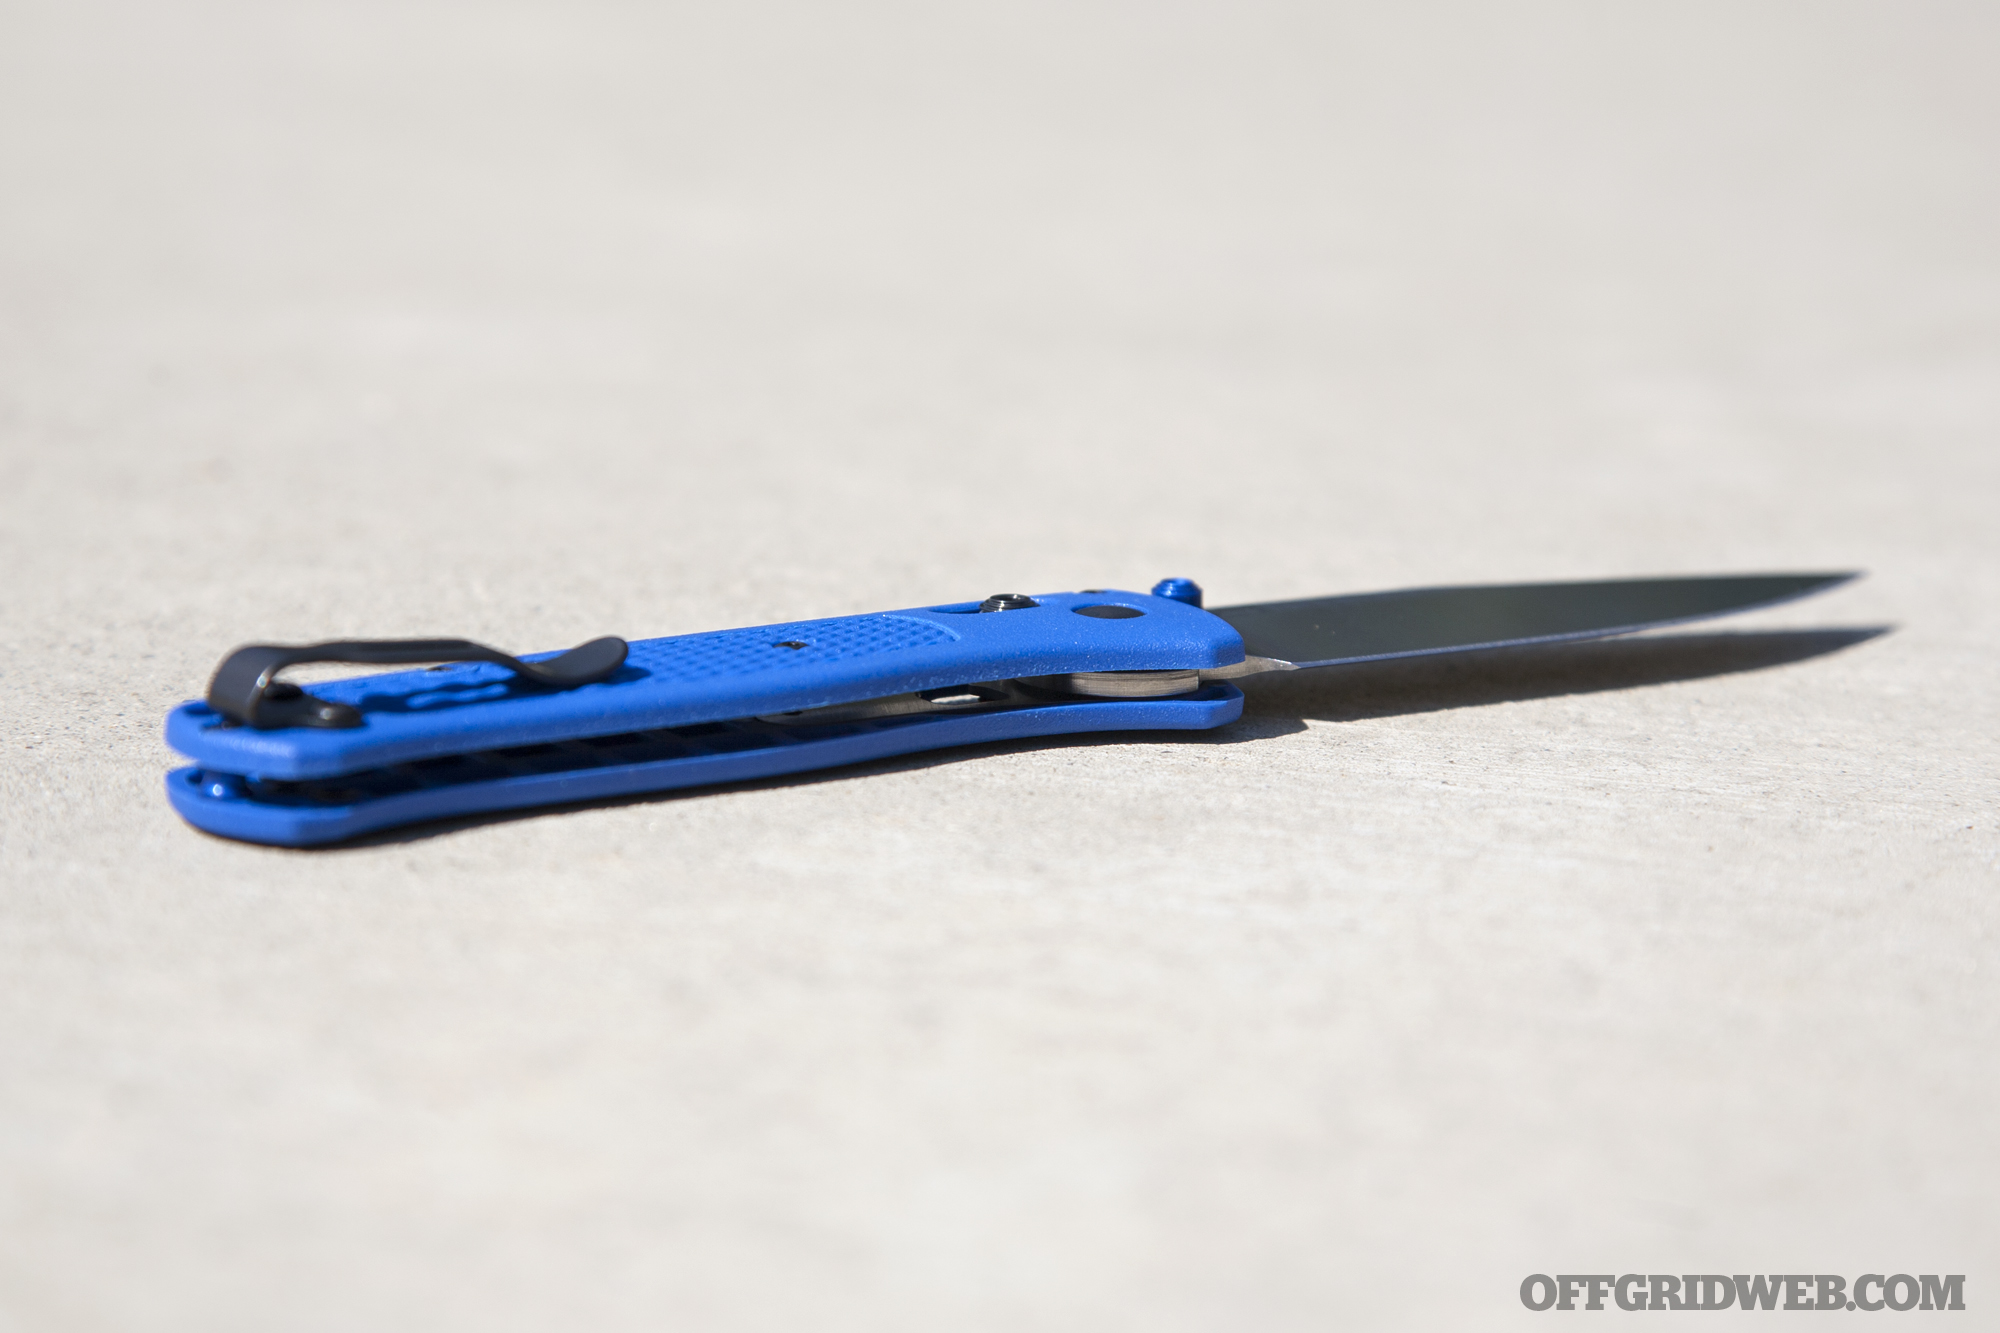
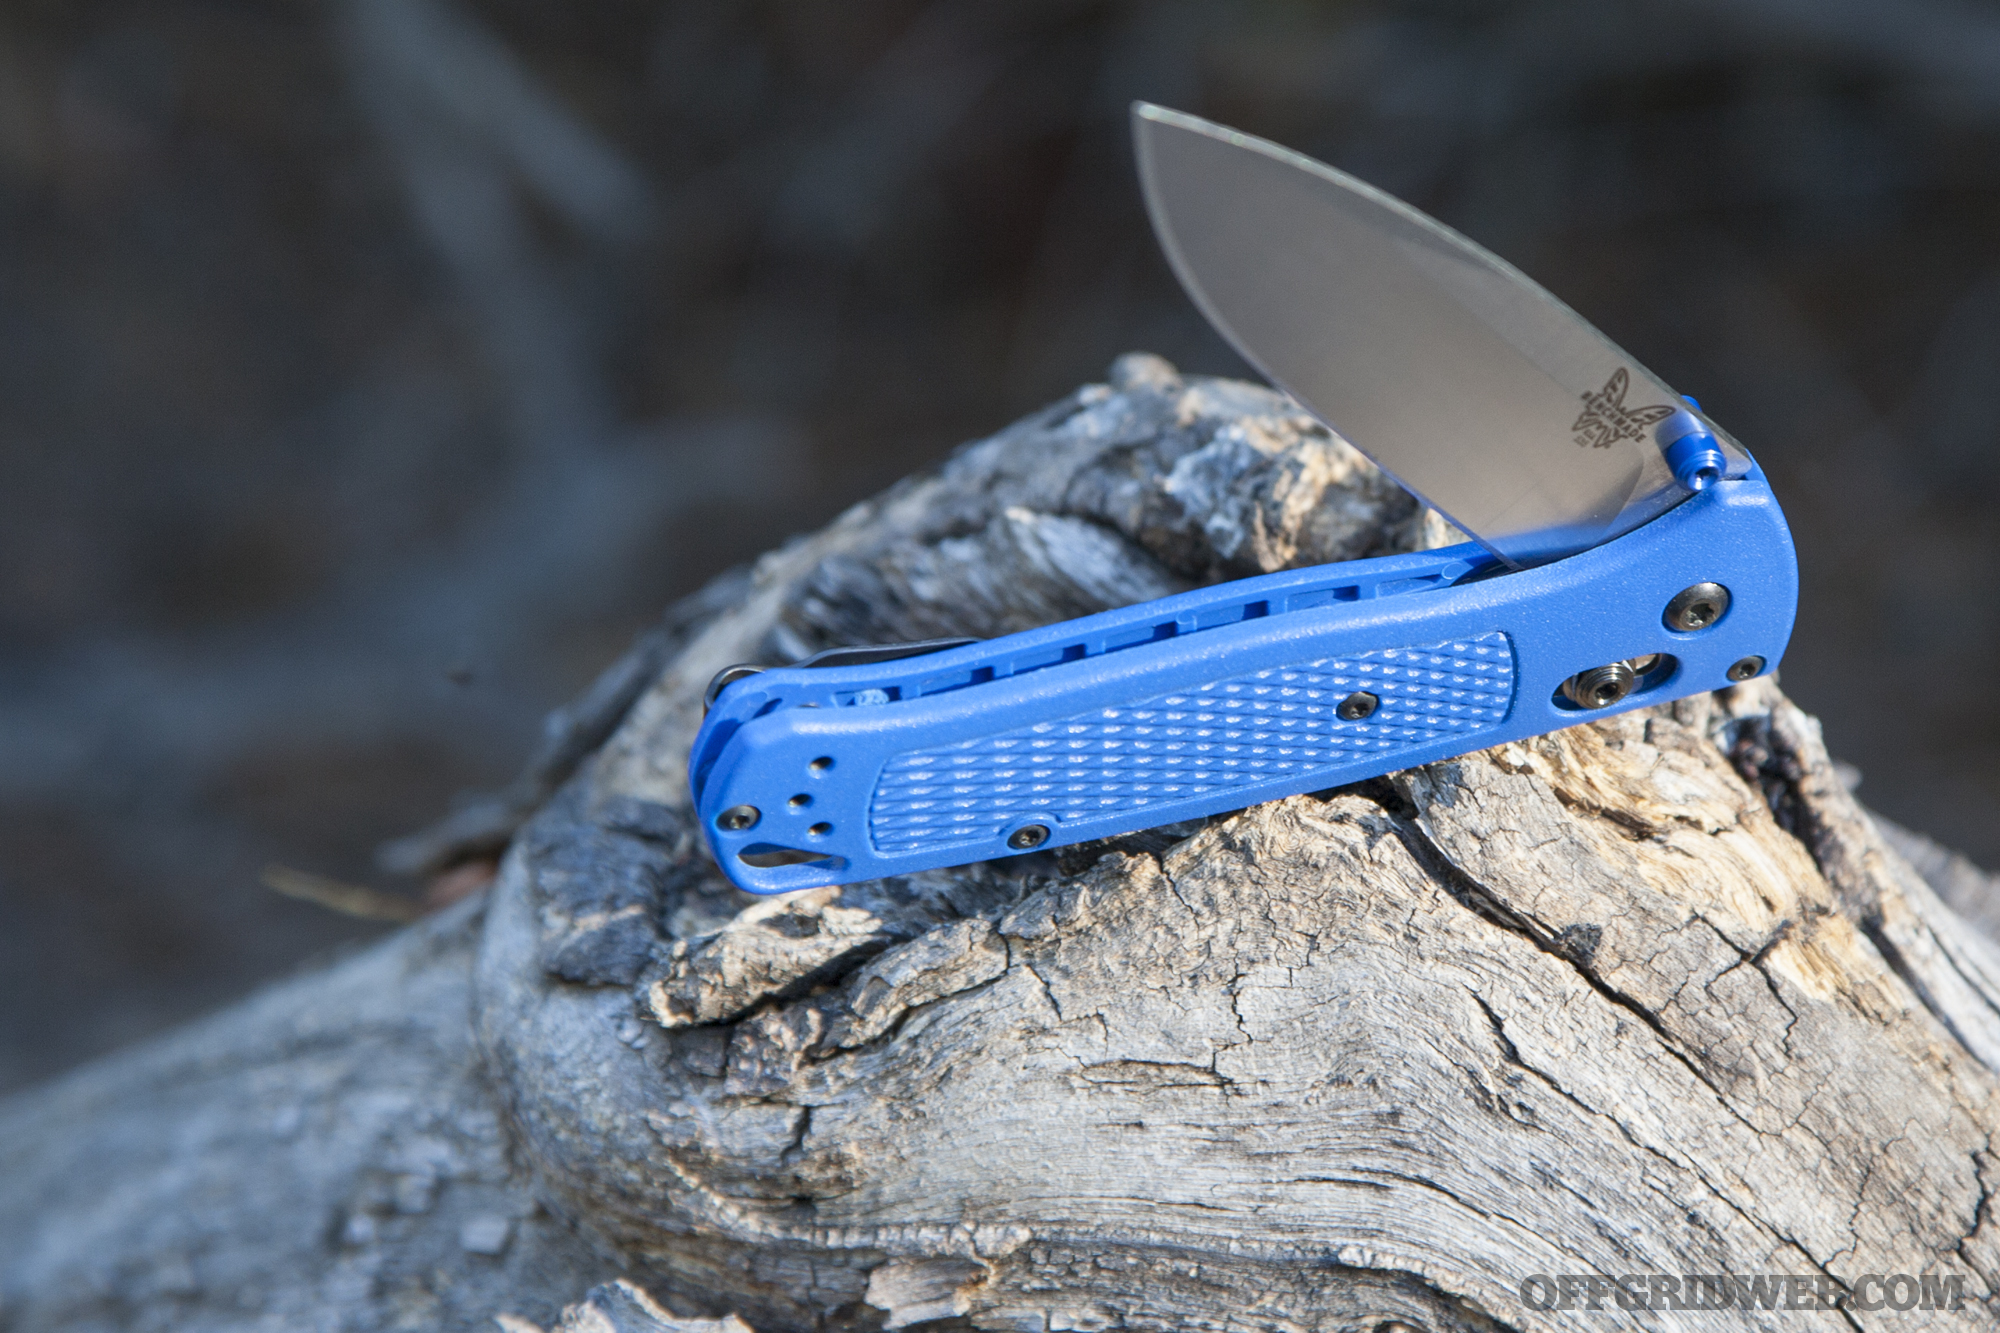
Though this material is already light, Benchmade used as little as possible to construct the knife. Pockets were machined out from all along the inside of the handle, and a large lanyard hole was cut into the end. Overall thickness of the handle is just 0.42 inches.
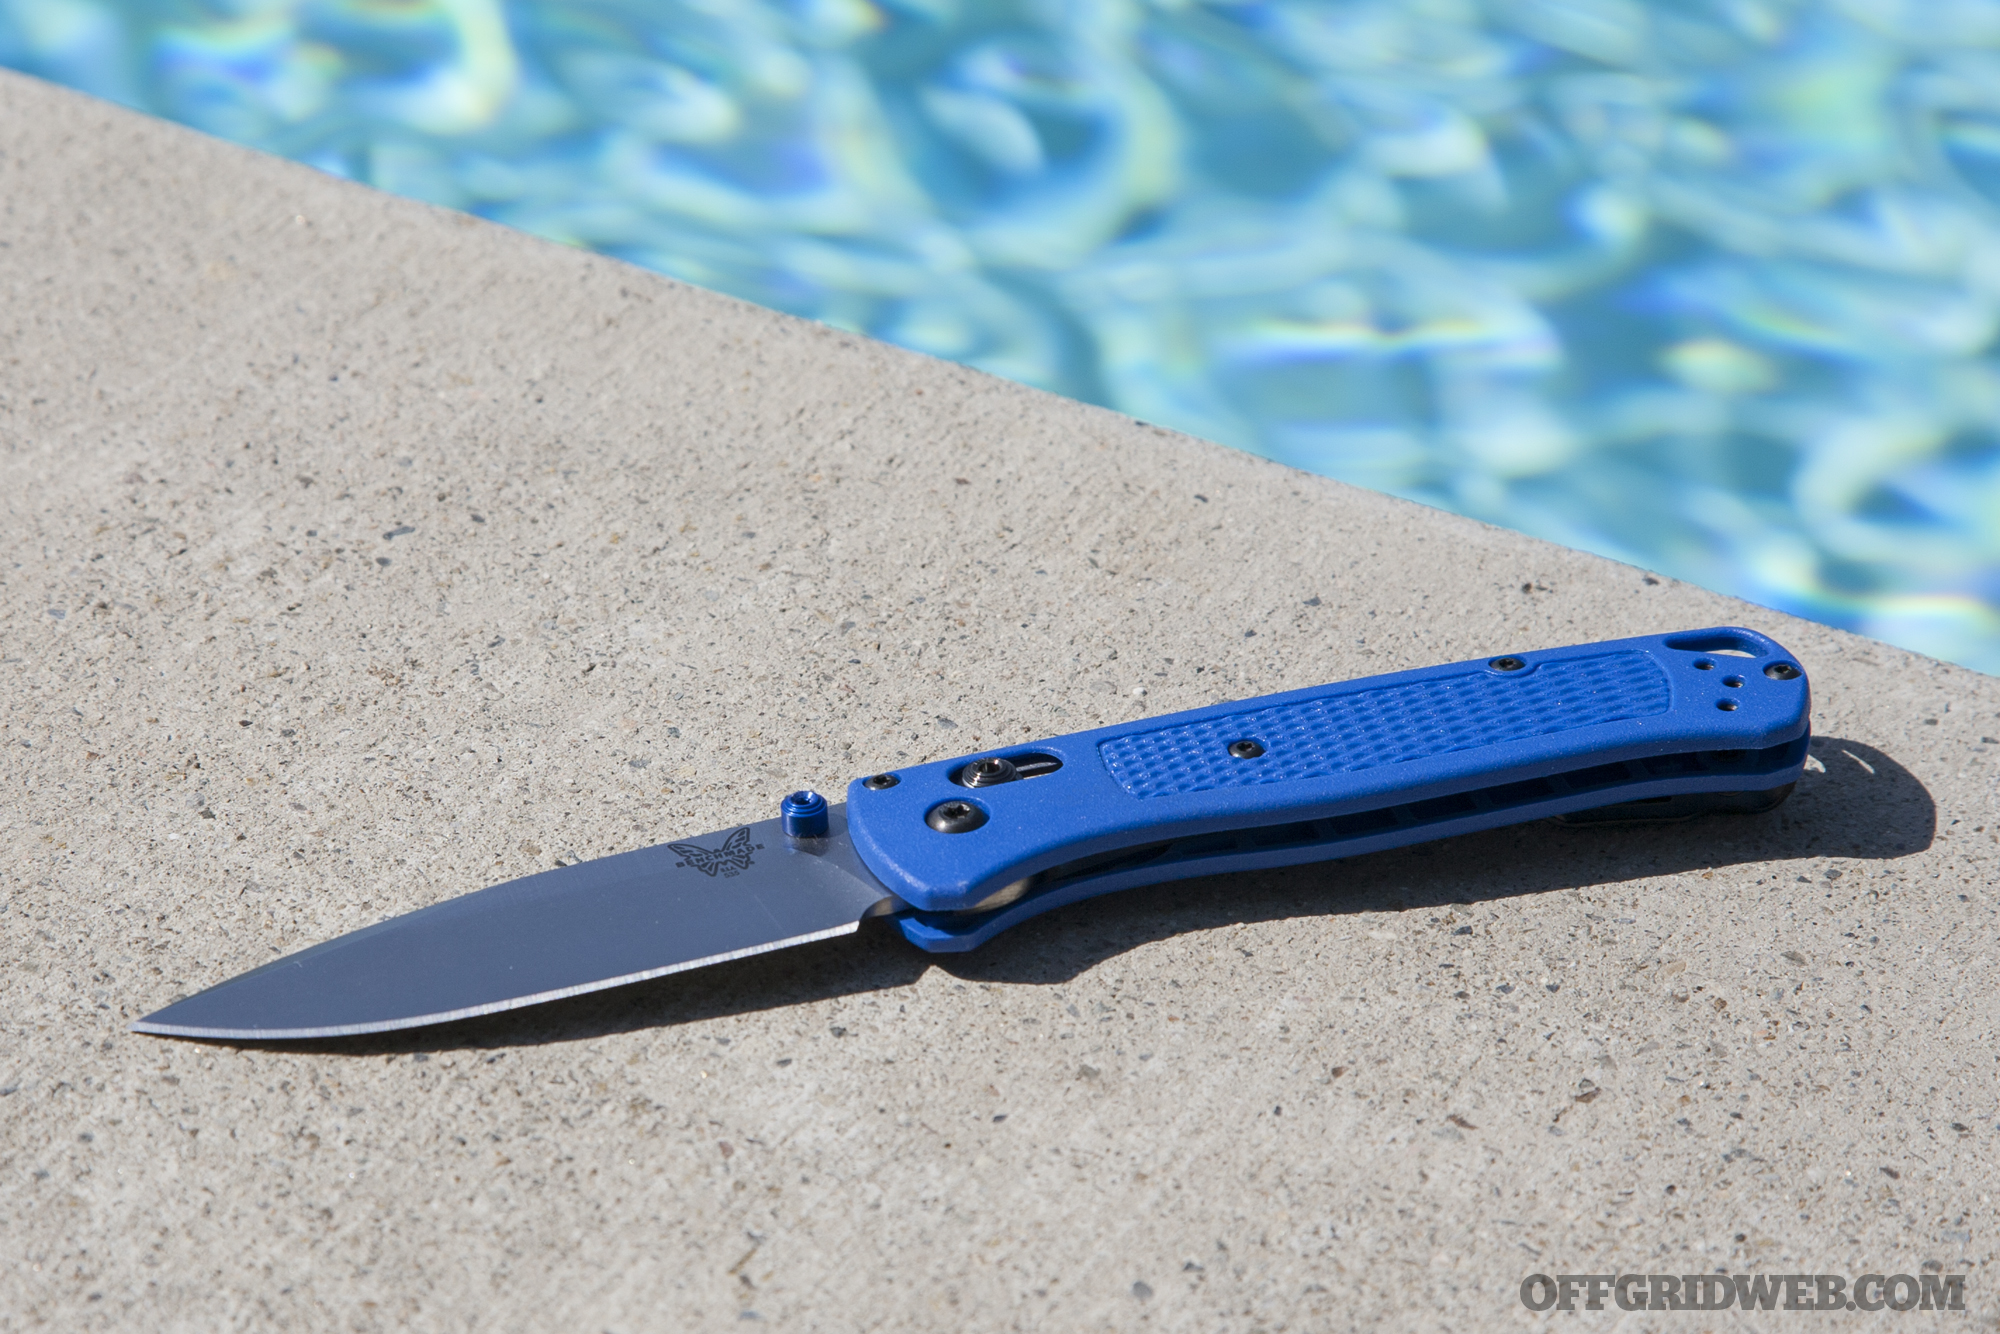
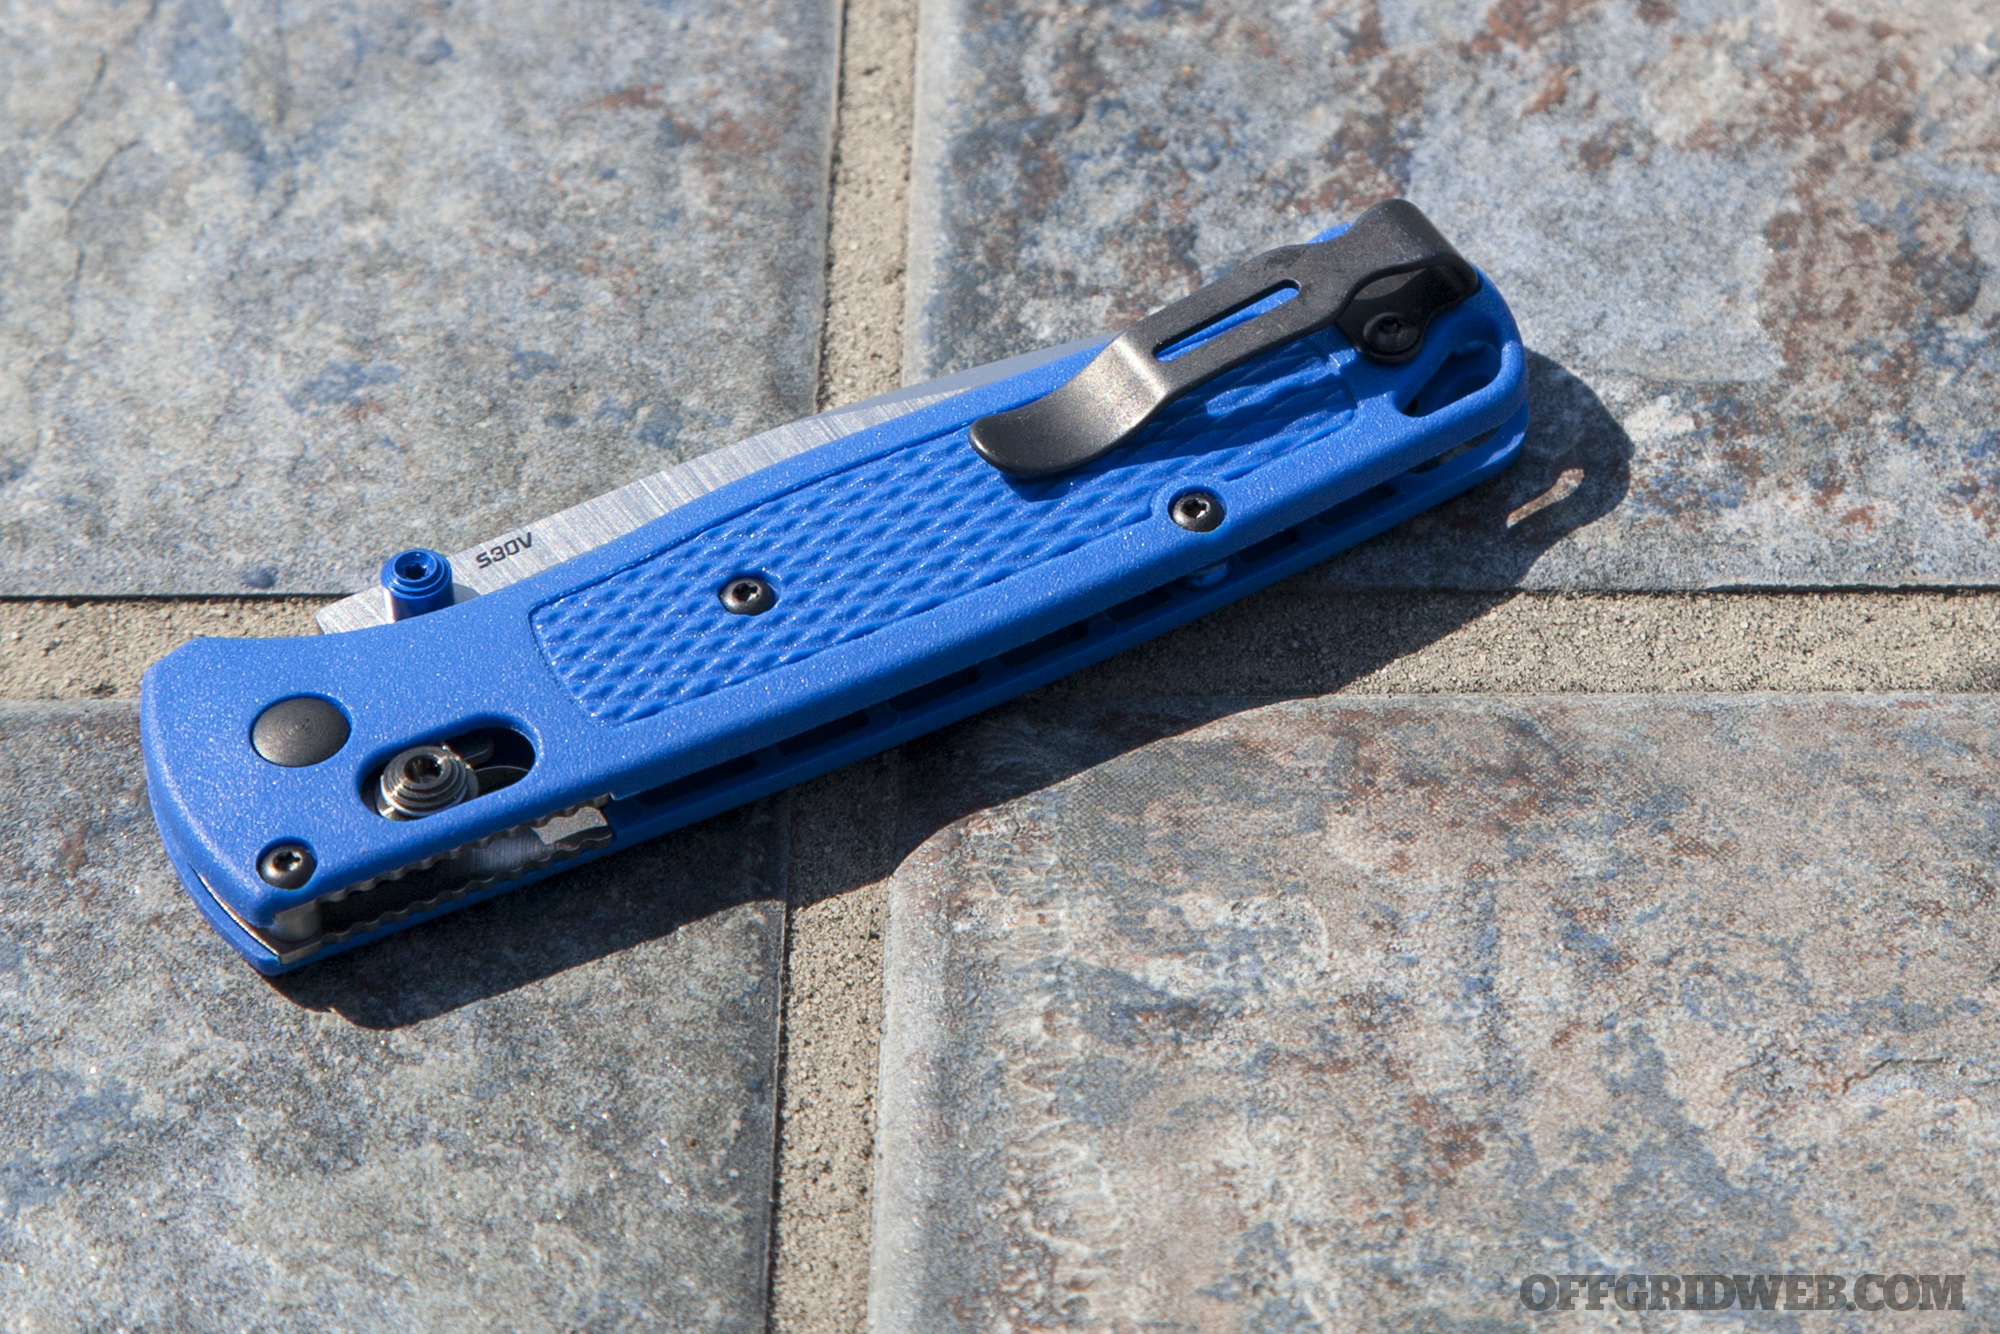
Benchmade chose a distinctive shade of bright blue for the polymer material. Its color nicely matches the blue anodized aluminum thumb studs, as well as the two anodized standoffs that hold together the rear of the handle. The rest of the knife’s hardware is black, including the pressed-in metal threads for the reversible pocket clip.
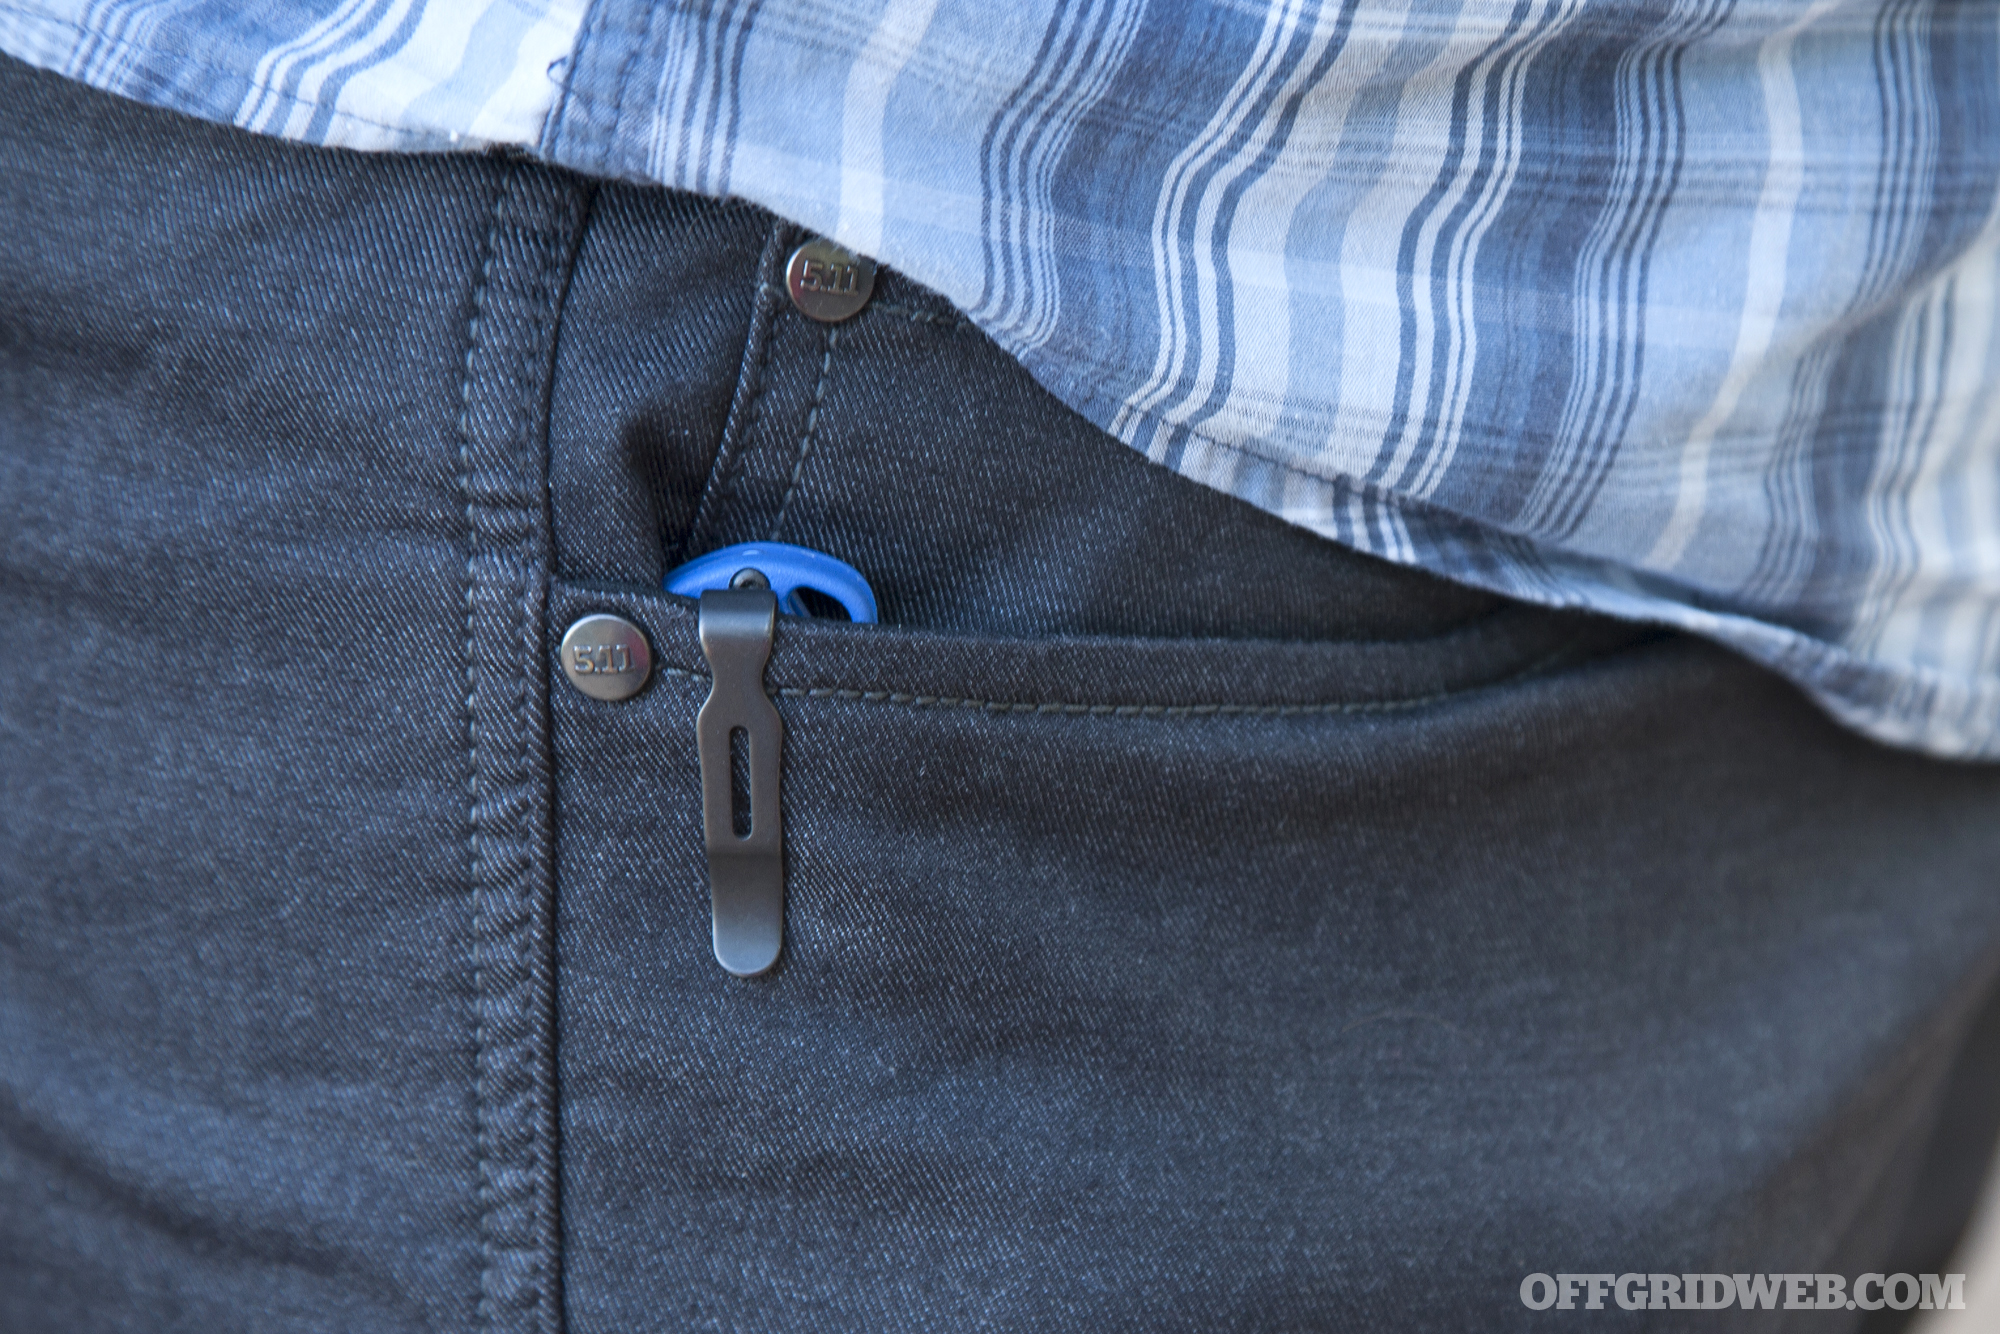
Speaking of the pocket clip, it too is unique to the Bugout. This deep-carry clip has been slotted and shortened to 1.6 inches in an effort to minimize its weight. Benchmade was serious when they said they took every opportunity to reduce the weight of this knife.
The end result is a folding knife that’s 7.46 inches long but weighs an incredible 1.85 ounces. Most other folding knives this size weigh two or three times that much. For its size, the Bugout is easily one of the lightest folders on the market, and its $135 price makes it one of the least expensive Benchmade models available today.
Our Impressions
We first got our hands on a sample of the Bugout at the Outdoor Retailer Summer Market show in July. The name certainly caught our attention, and its lightweight design was appealing, so we eventually requested a sample to test out in the real world.
After a few months of using the Bugout regularly, we can say it’s a solid little knife for EDC. The AXIS lock really lends itself to quick one-handed use — you can easily flick it open and flick it shut without placing a finger in the path of the blade. In that regard, it performs just as you’d expect a Benchmade folder to perform, and we consider that a good thing.
This knife is also incredibly light, almost to the point of feeling like a trainer or toy. You may end up forgetting it’s clipped to your pocket, even if you’re wearing light running shorts, and it’s easy to manipulate for precise cuts. We can’t imagine it getting much lighter than this, unless Benchmade skeletonized the entire handle to an uncomfortable degree.
The Bugout has held up well to normal use in an urban environment. It’s great for cutting tape, zip ties, cordage, fruit, plastic packaging, and the like. The S30V has good edge retention, and despite being thin, showed no signs of chipping or deformation. Lockup is solid with little to no play.
That said, this clearly isn’t the sort of knife you’d want to use for high-impact tasks like batoning wood, chopping through bone, or prying open a metal can. There are plenty of other knives better-suited for those tasks.
We appreciate the deep-carry clip which tucks the knife discreetly into your pocket — despite its short length, it feels quite secure. The lanyard hole is also a nice touch.
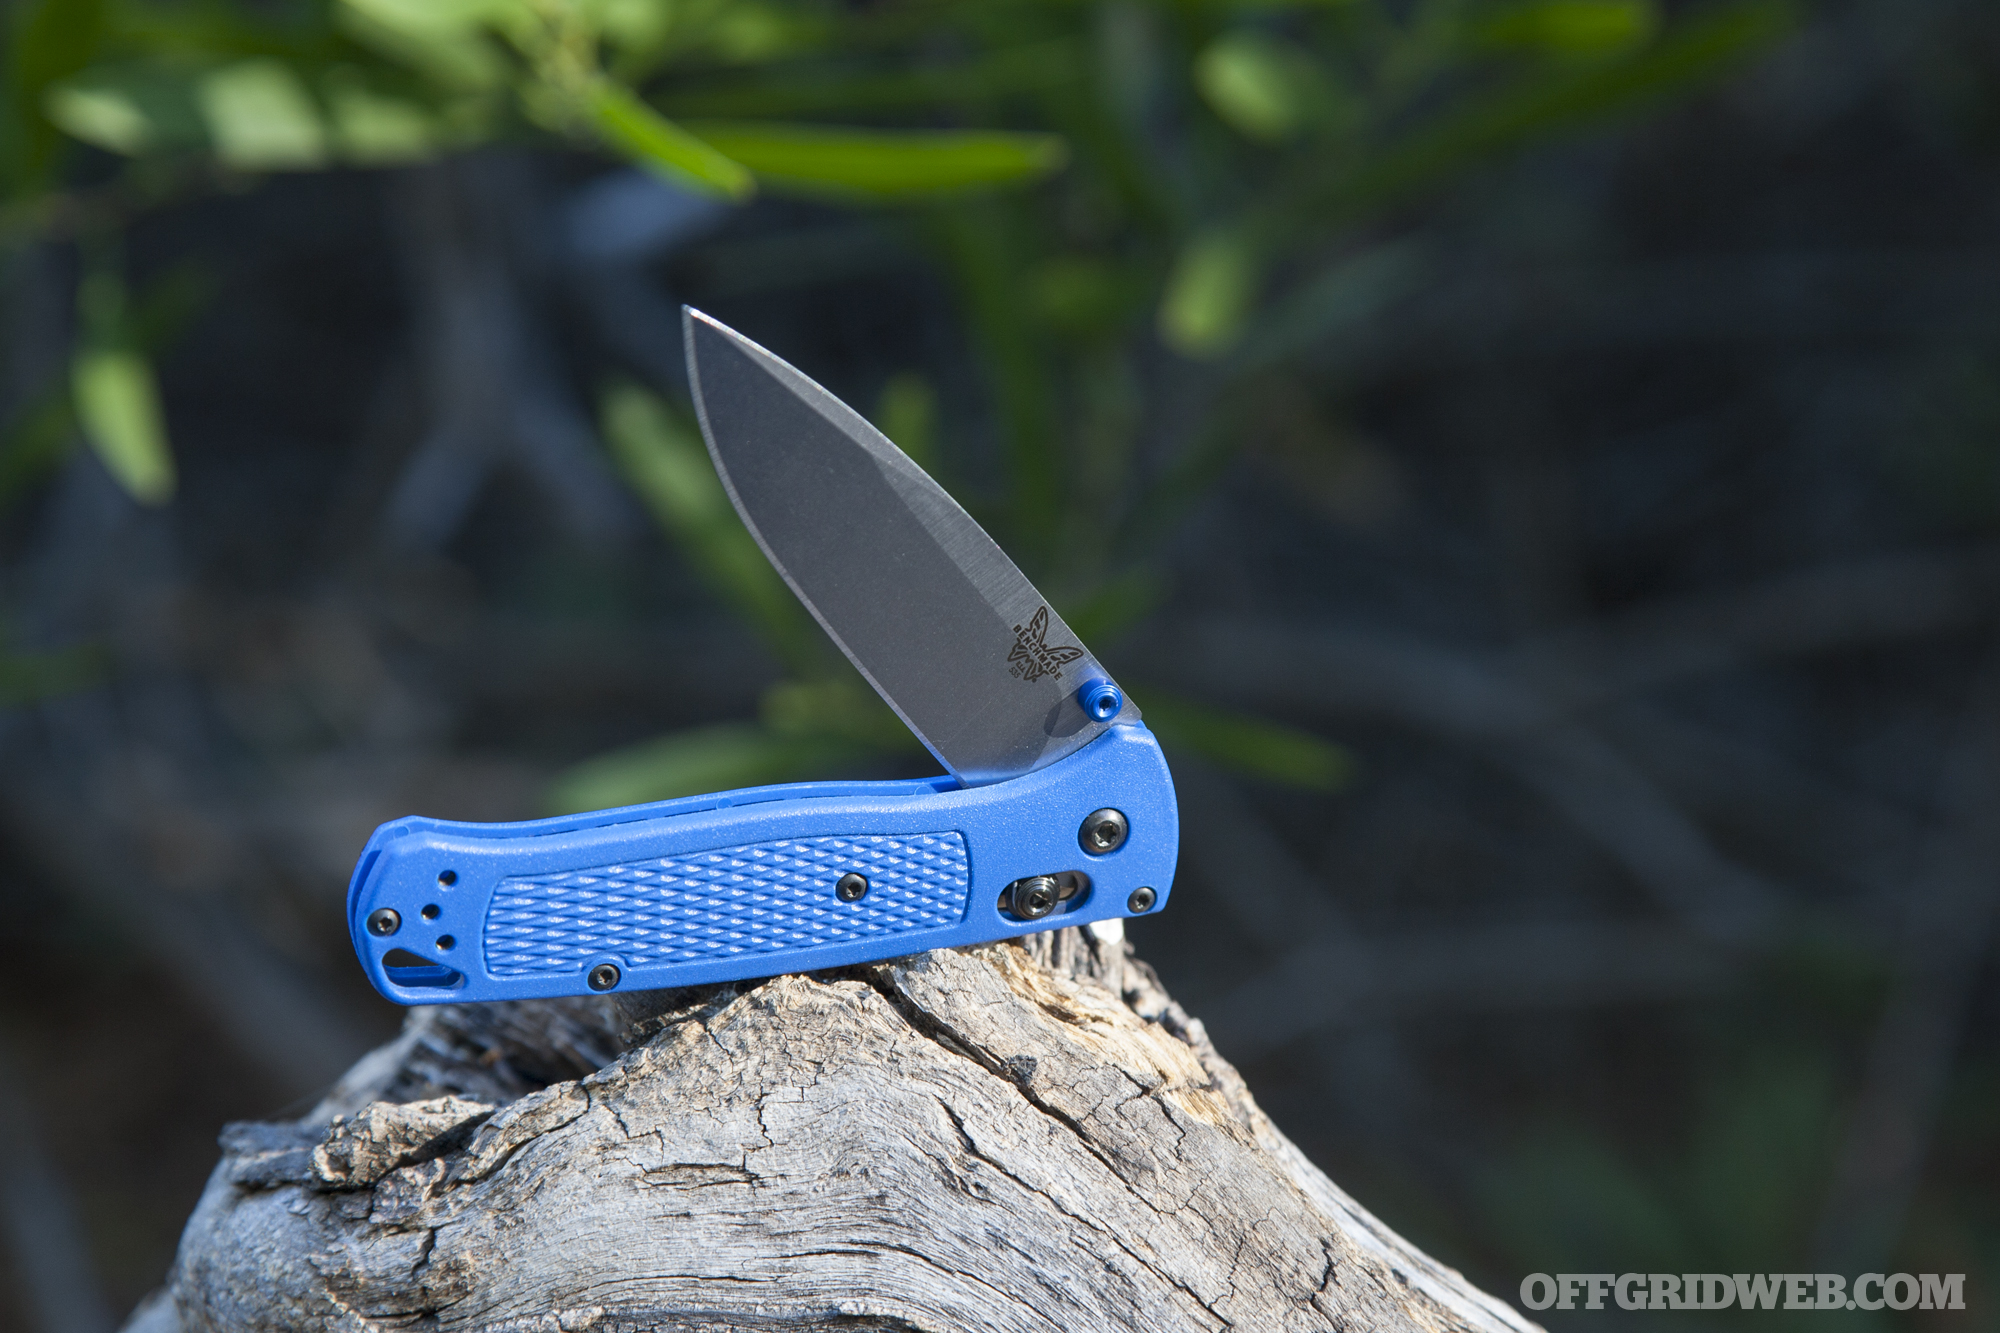
Unfortunately, if you don’t like blue, you’re out of luck for now. At the time of publication, the Bugout is only available in this blue color, though buyers can customize the knife with a plain or serrated edge and additional lasermarking on the blade.
While Bugout is a cool name for a knife, we’re not entirely sure it’s fitting for this particular design. It’s appropriate in that it’s not heavy enough to slow you down as you run for the hills — we get that. But when we think of a bugout knife, we think of something extremely rugged and durable that’s ready for months of continuous abuse away from civilized society. Ironically, this Bugout seems more fitting for every-day carry than for long-term bugout.
Nomenclature nitpicks notwithstanding, the Benchmade Bugout is a seriously impressive featherweight knife, and one we wouldn’t hesitate to carry regularly.
For more information on the Benchmade Bugout, go to Benchmade.com.
Building a bug-out truck can get expensive quickly, especially if your starting point is a brand-new consumer-grade truck or SUV. On the low end, a decked-out truck can be tens of thousands of dollars, and on the high end it can reach several million. It goes without saying that most of us don’t have that kind of money to throw around, so the challenge is to find vehicles that are affordable, reliable, and spacious enough to live and travel in.
A school bus can provide an inexpensive DIY RV platform, though we wouldn’t suggest painting it like this.
One option for an affordable bug-out RV is to purchase an anonymous-looking box truck, and outfit the interior with the comforts of home. Another option is to do what many traveling hippies did in the 1960s: retrofit an old school bus. These vehicles can be found at auction for as little as $2000, and are typically powered by diesel engines designed for long-term reliability.
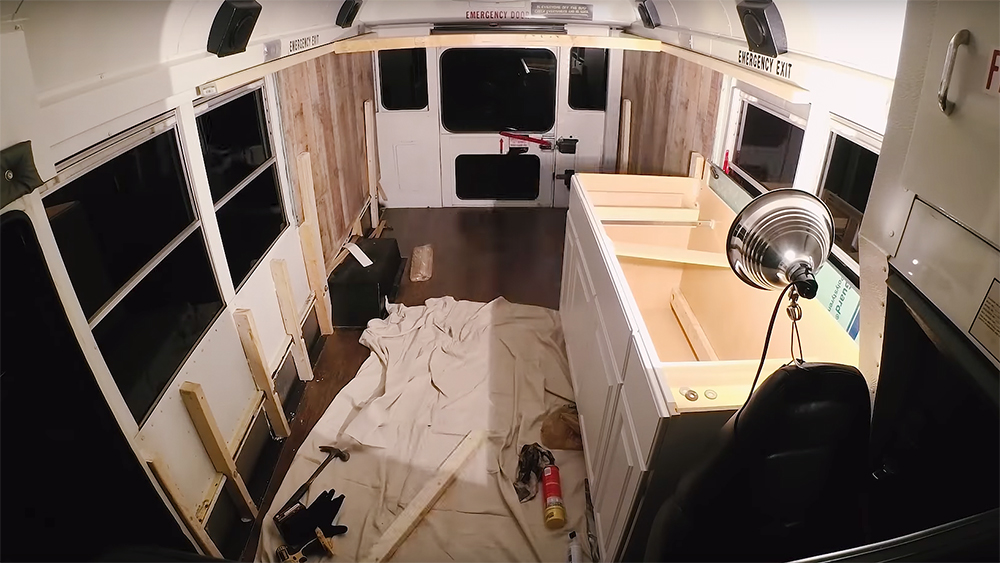
The host of YouTube channel Adrenaline Addiction purchased an inexpensive used school bus from a dealer in the Philadelphia area, and set a goal to build it into a road trip adventure vehicle in less than two weeks. With a few basic appliances he purchased and the aid of his dad’s carpentry experience, he says he completed the build in just 11 days.
The retrofitted bus features a sink, two-burner propane stove, solar panels connected to a bank of batteries, electrical outlets, and a plug-in heater. There’s also laminate flooring, a hinged folding desk, and an elevated bed platform with storage cabinets underneath.
While the host seems more like an adventure-junkie bro than a prepper, the video shows that a project like this can be done with a relatively low cost and short time frame. You could easily tailor a school bus DIY RV build to any gear you need to carry, or any environment you plan to travel through. For another in-depth example of a school bus bug-out vehicle build, check out this build album from Reddit user Intalleyvision.
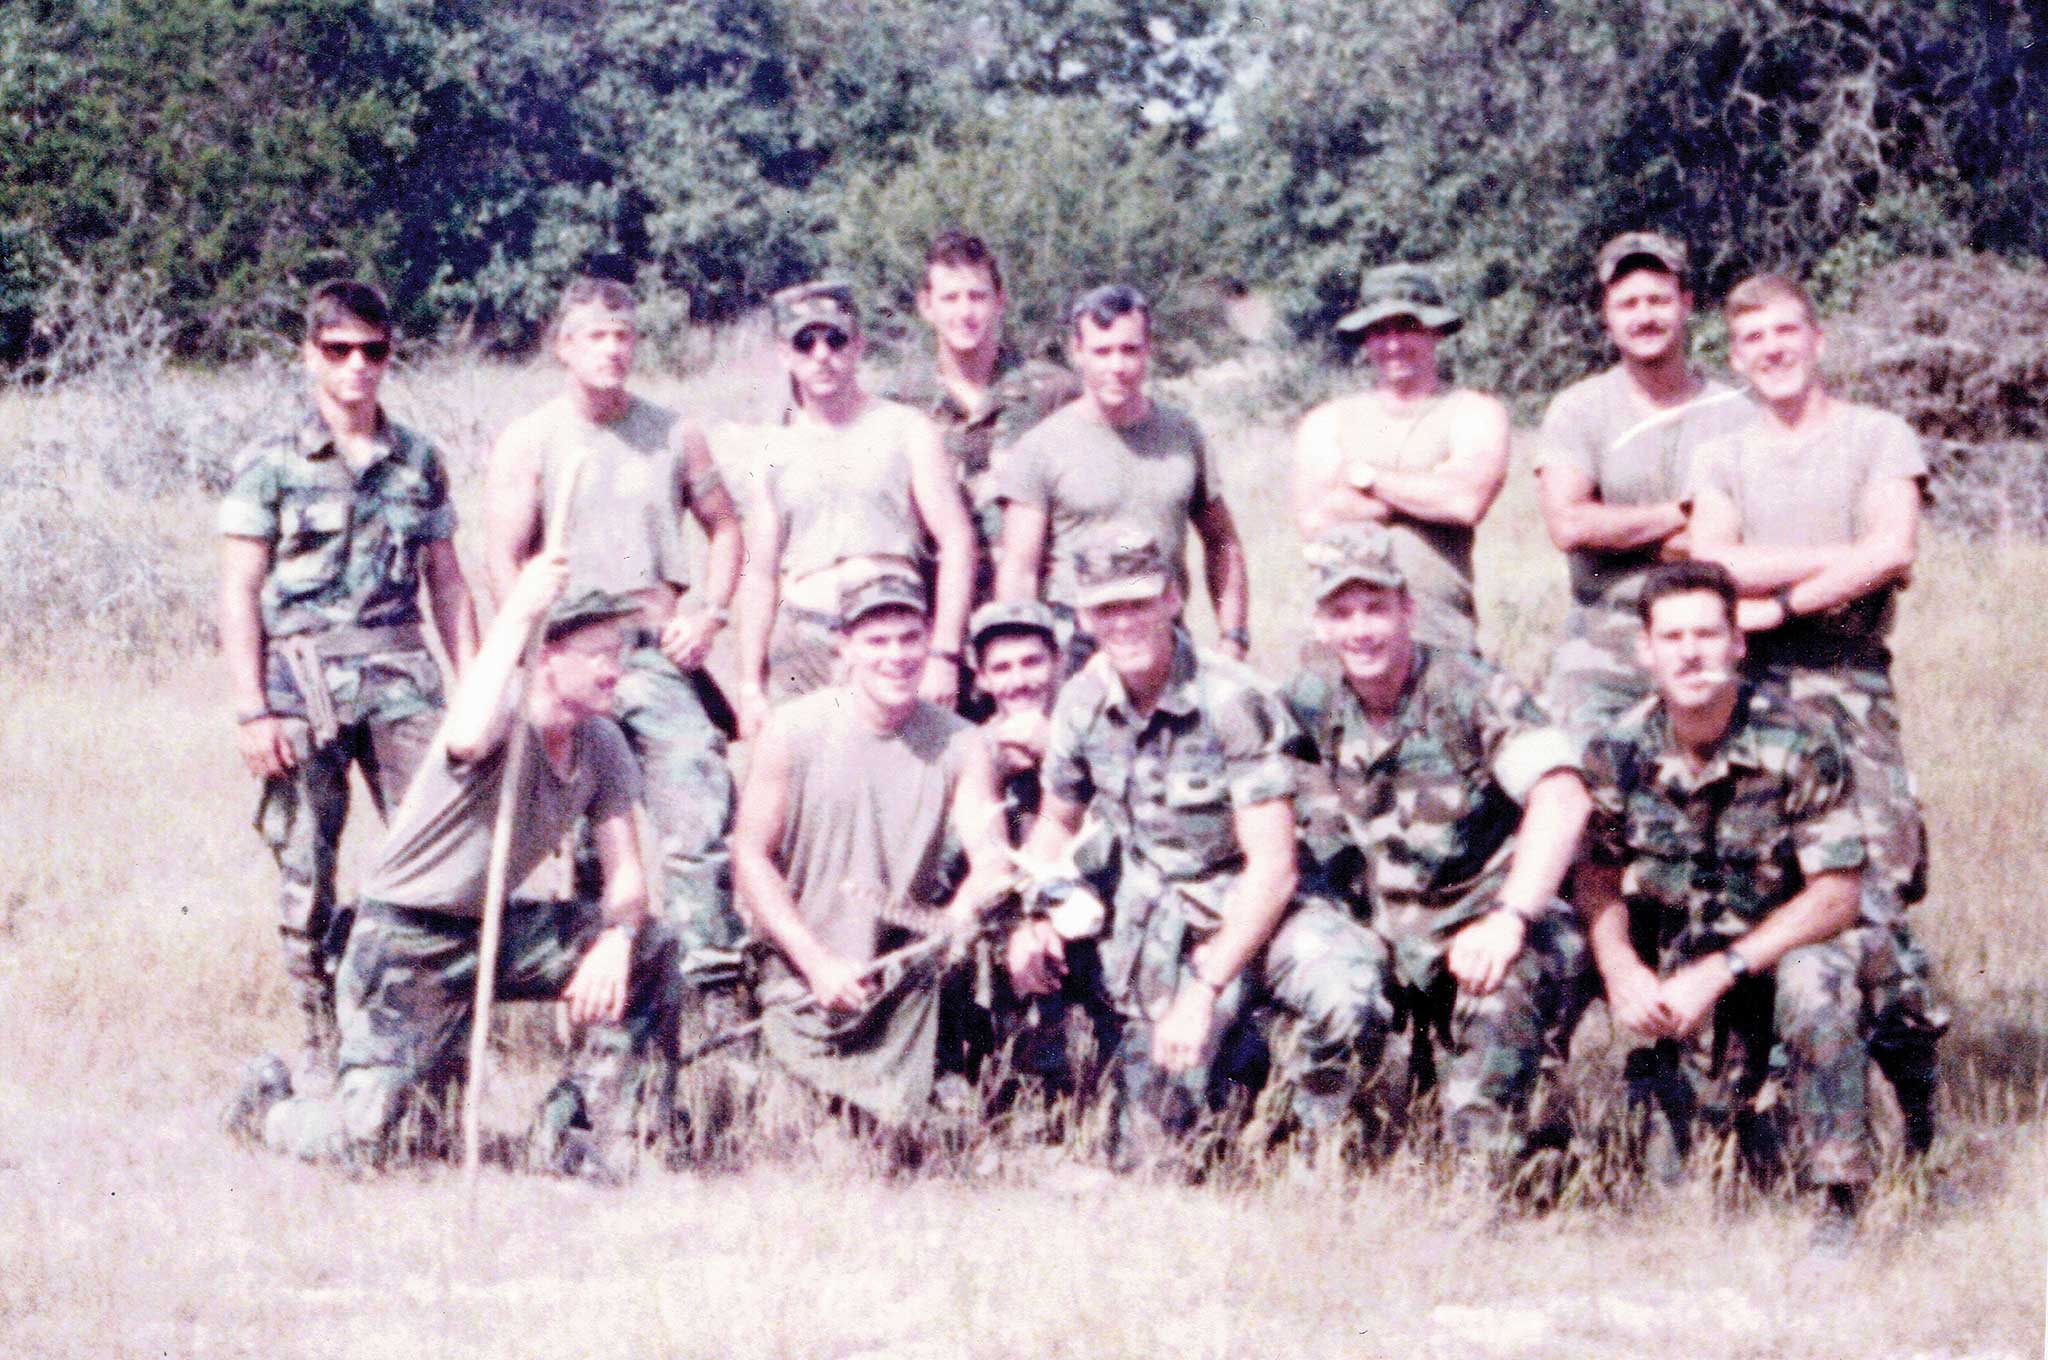
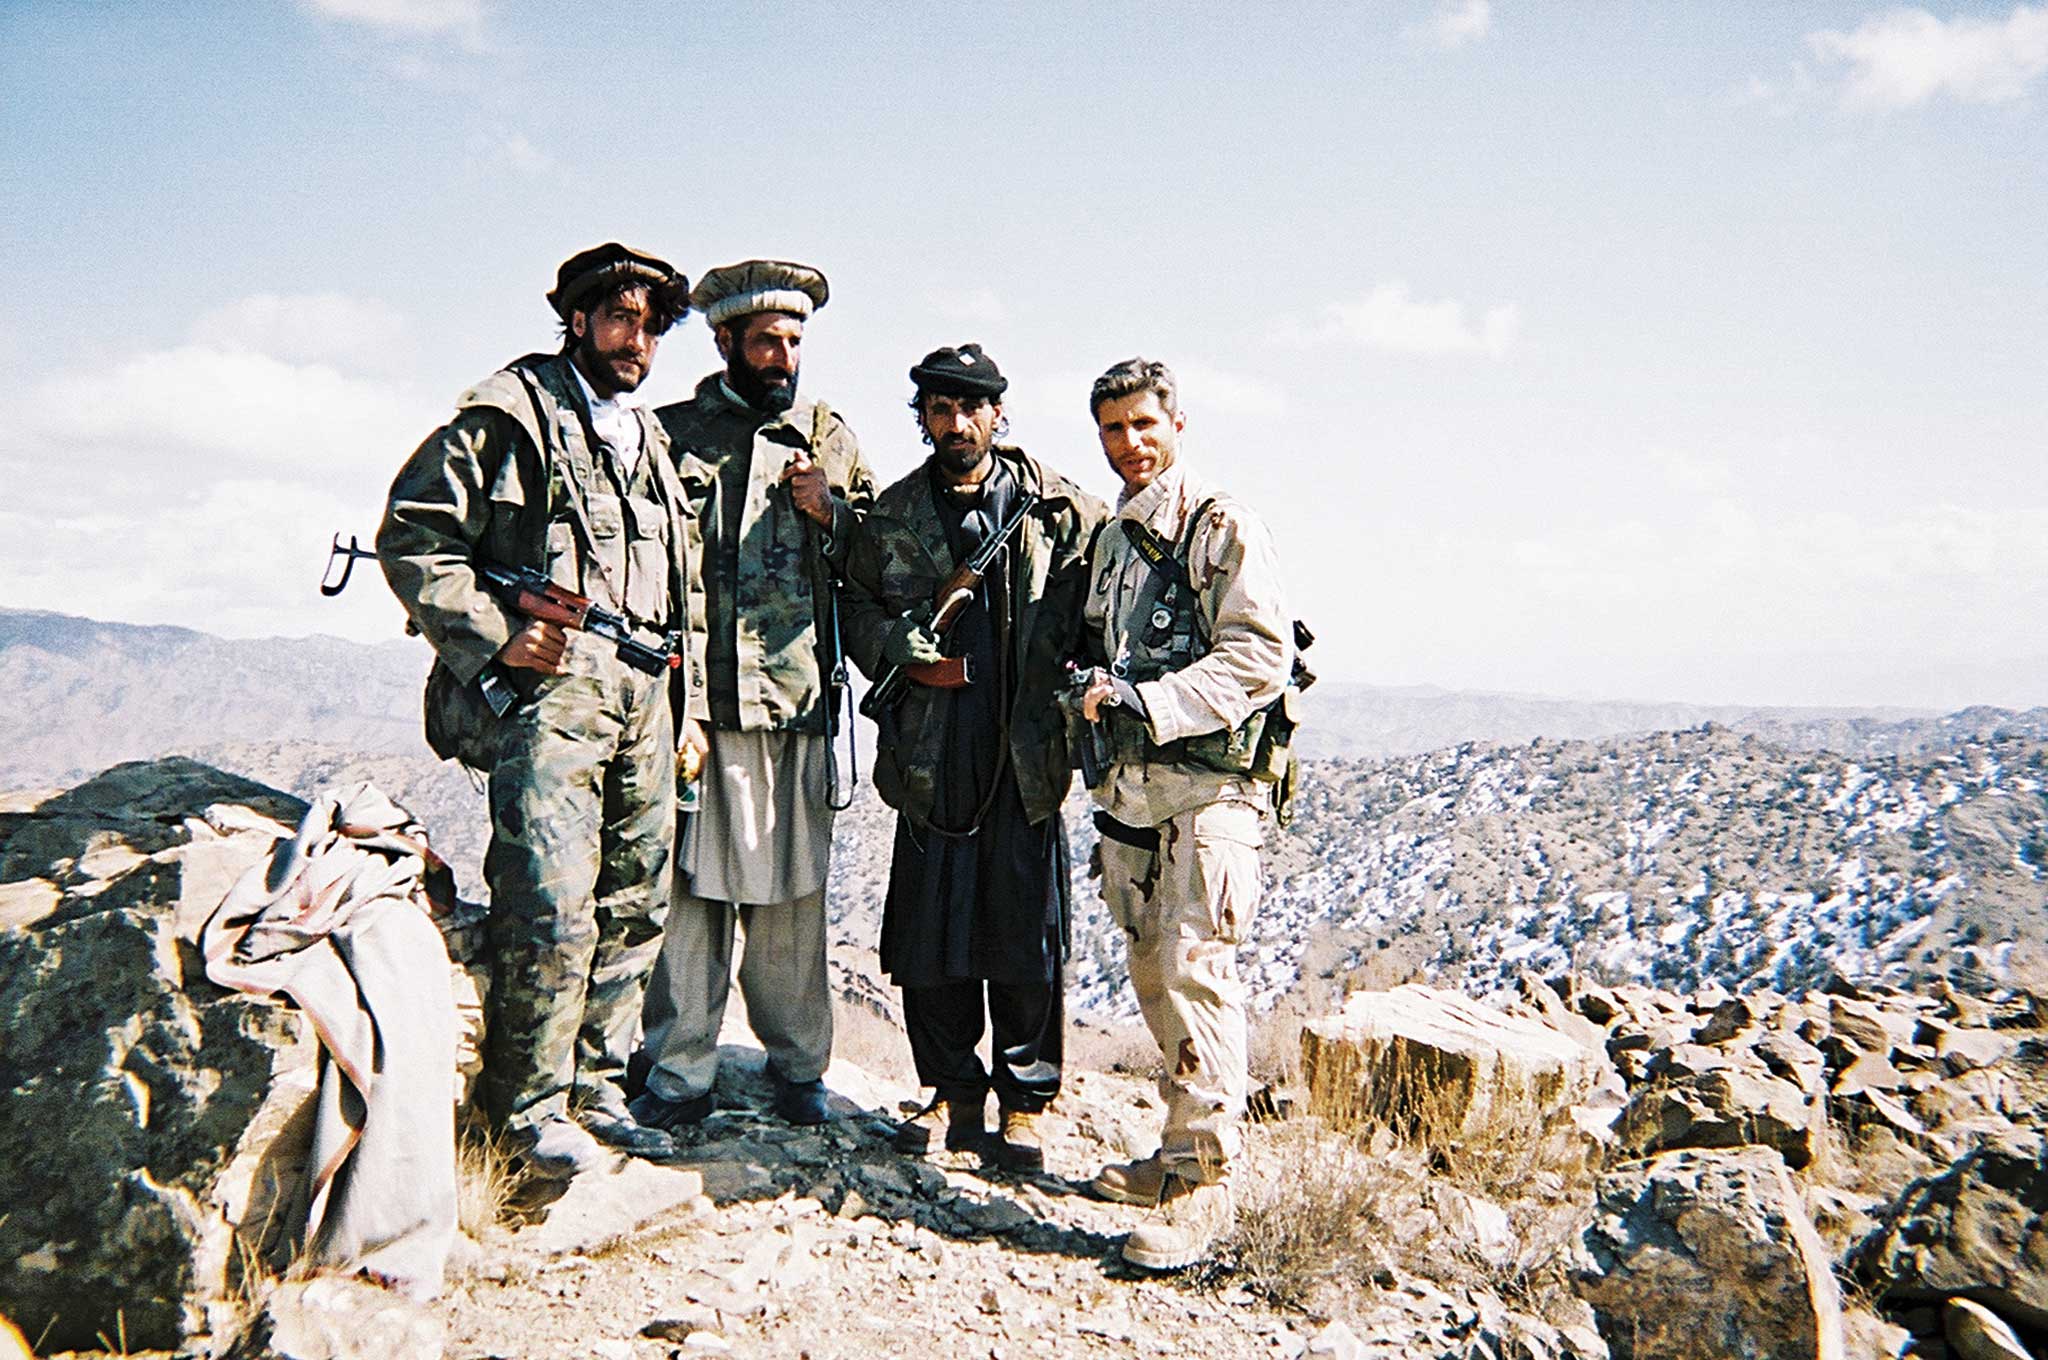
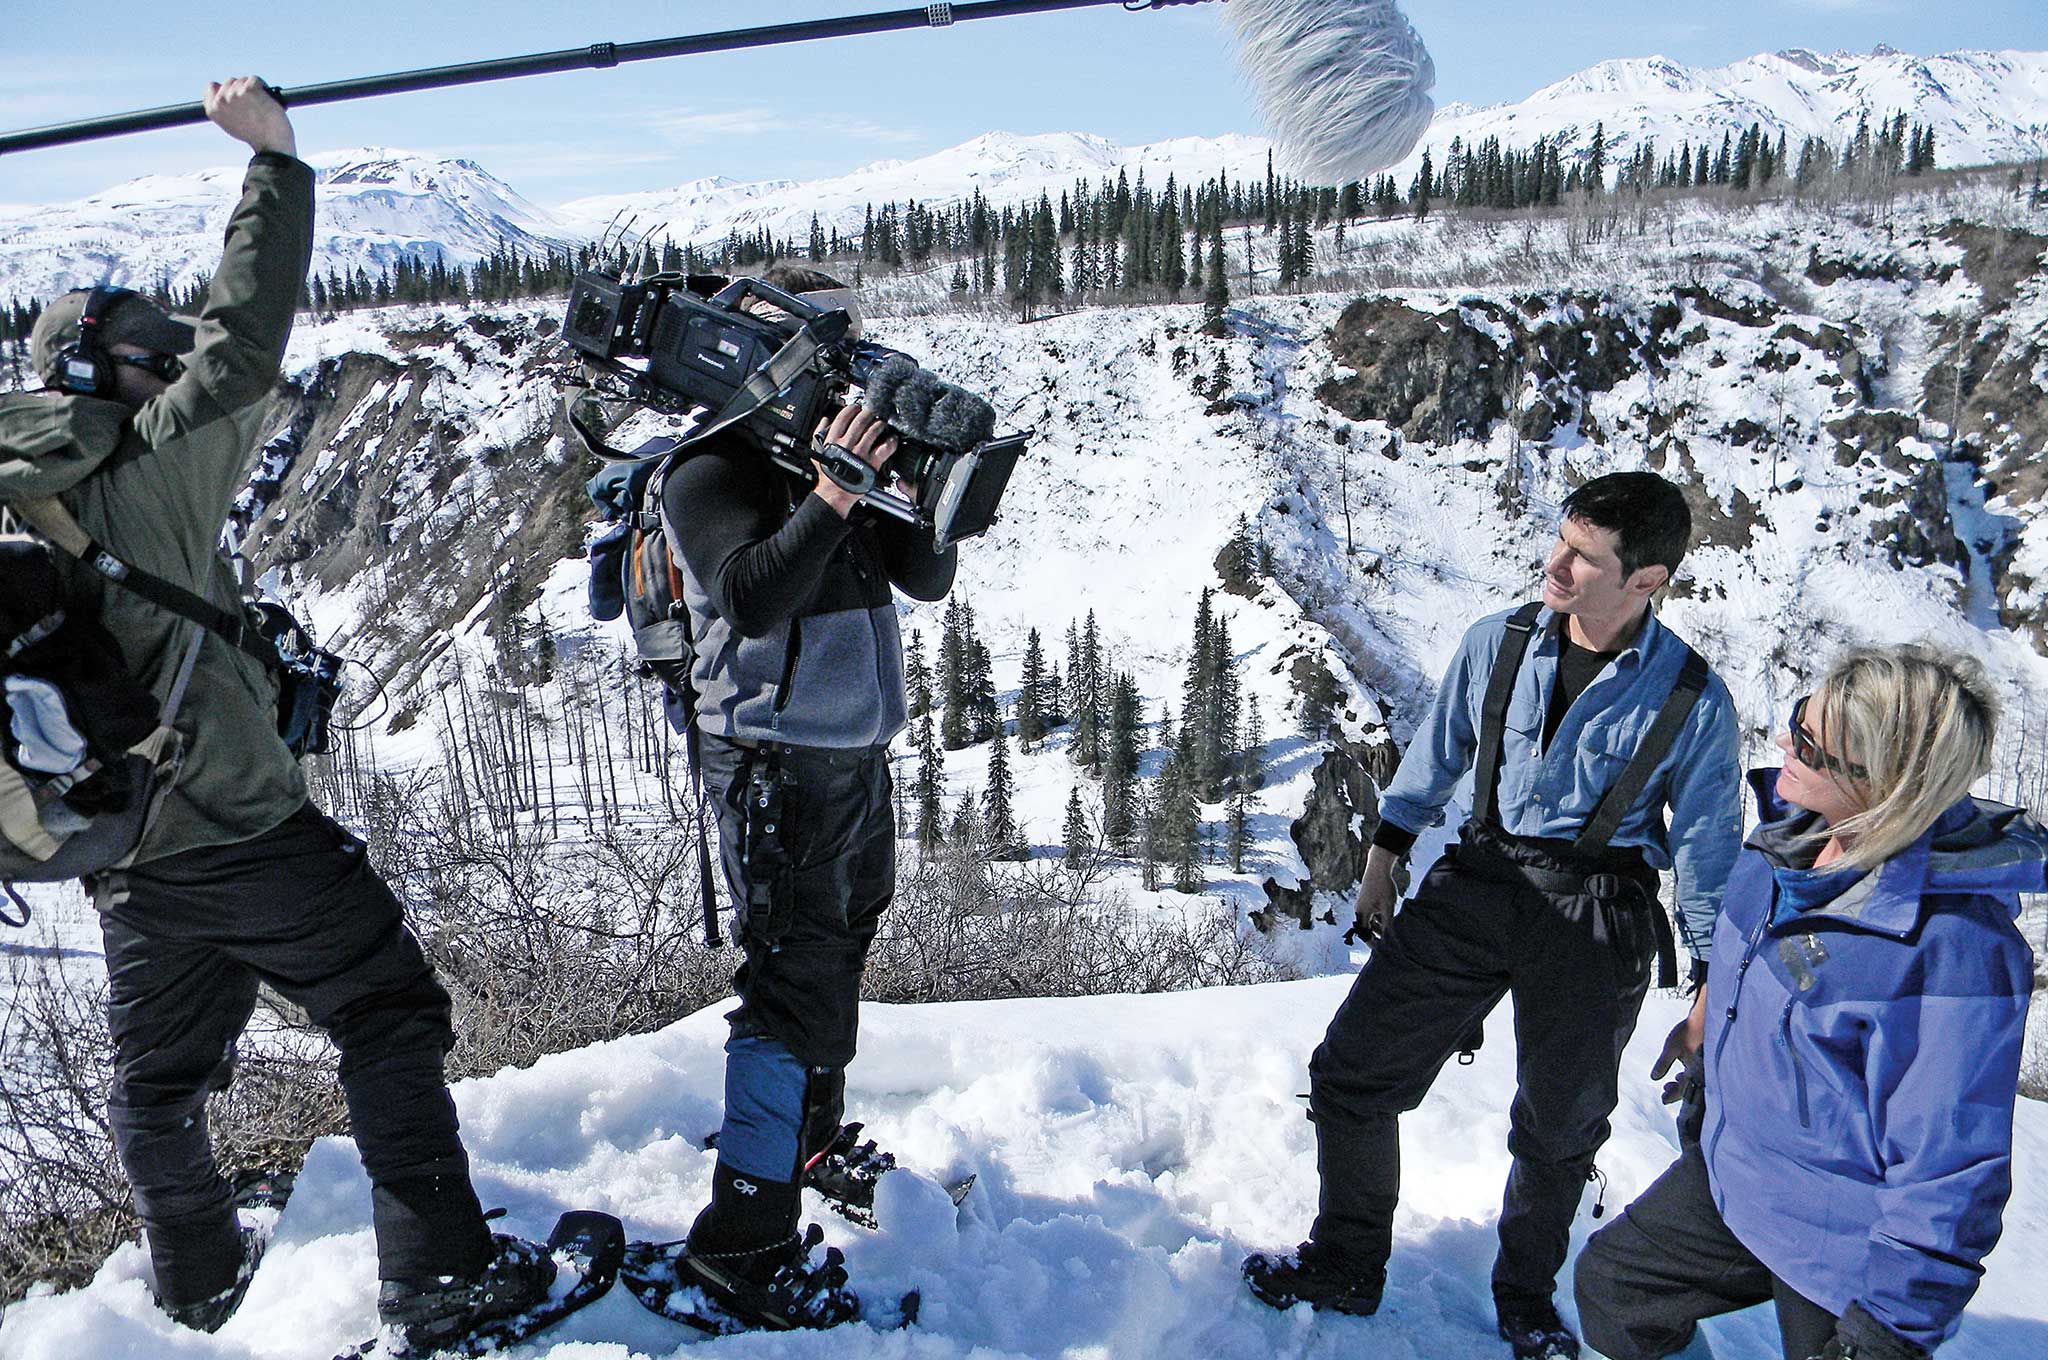
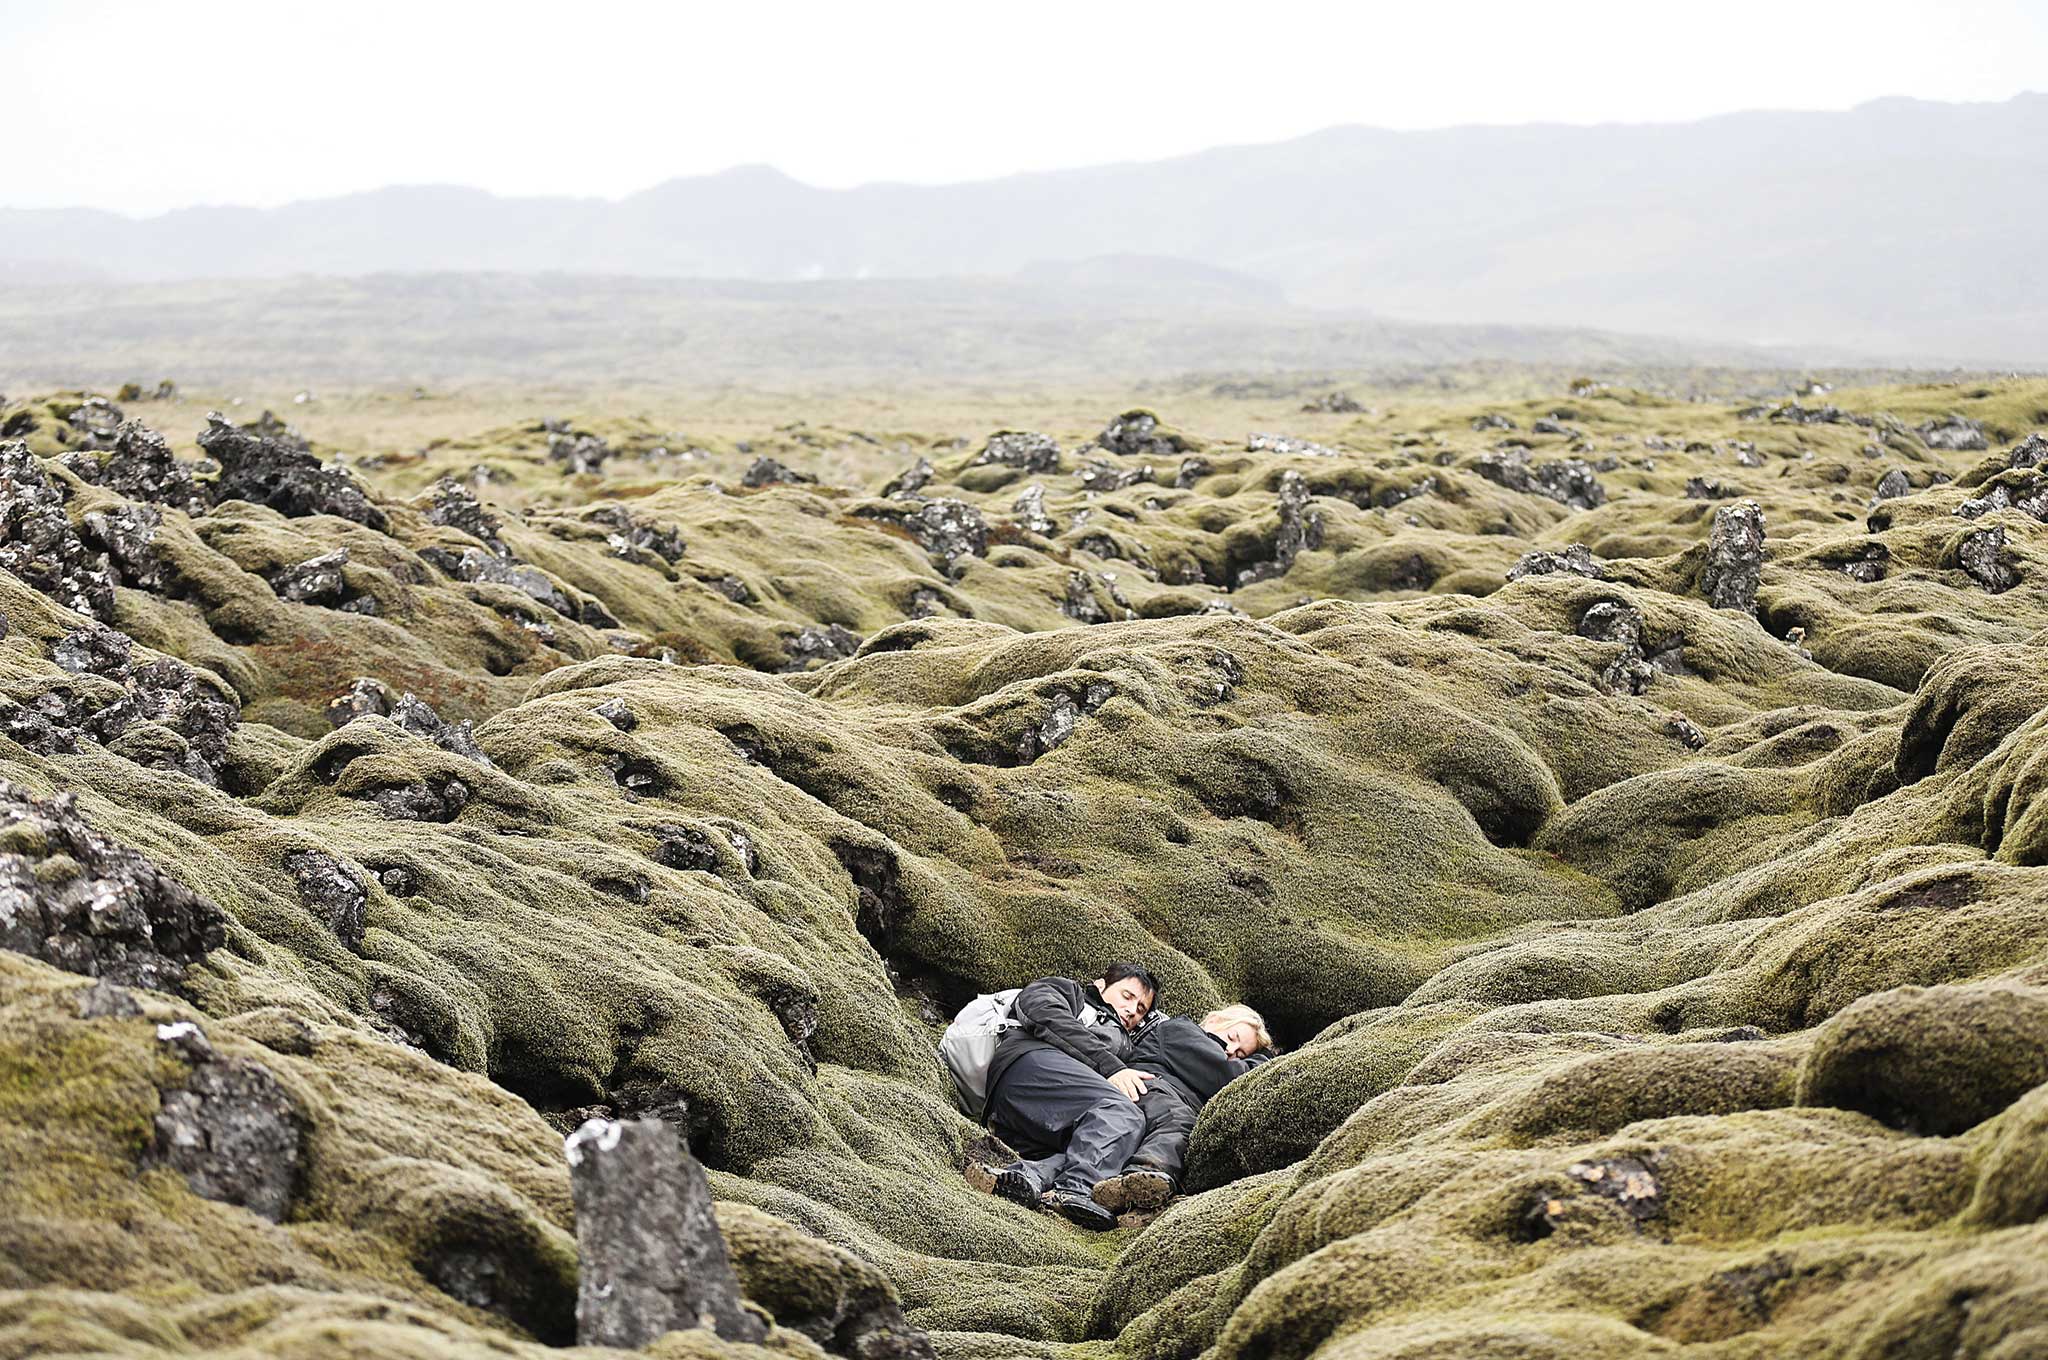
Unapologetic for his views on survivalism and television executives alike, former U.S. Army Green Beret Mykel Hawke has cut a unique and wide-ranging path through life. He first became famous for his work on the TV show Man, Woman, Wild, which featured him and his wife, Ruth England, being dropped into various real-deal (and at times too real) survival scenarios. He’s also taught survival classes for more than 20 years, earned the Combat Infantry Badge in Afghanistan following Sept. 11, was rated by the Army to speak seven different languages, and has somehow managed to stay humble about all of it.
“For me, the Green Berets was the poor man’s passport to the world,” he says. “Some people join because it’s a calling for them. For a lot of people the military is a way out of poverty. But people have to remember that it’s all of America that makes America great — it’s every teacher, every trash guy, everybody.”
We spoke with him in person at ALTAIR Training Solutions, an all-hazards tactical training compound located on the fringes of the Florida Everglades. We discussed how to introduce kids to survival skills, his thoughts on the recent Las Vegas shooting, and why one night a year spent camping in Ft. Living Room can make all the difference.
RECOIL OFFGRID: What was your childhood like?
Mykel Hawke: Sh*tty. You gotta remember, it’s the Vietnam era. My father was a soldier, and my mother was a waitress. My dad went off to Vietnam, decided he liked it, stayed there for two more tours. My mom and dad split up, he married a Panamanian lady to give us some sort of mother, but she was evil as hell. She beat us all the time.
You mean like … all the time?
MH: Oh yeah. It was a turning point in my life. One Sunday morning, I was starving. She didn’t feed us much. But she did beat us with boards she had cut holes into and then rub salt into our wounds. One Sunday I got up, went into the cabinet, and saw a package of Twinkies. I took one of those and I ate it. Well, of course, she found it — she must have had a Twinkie count or something. When I admitted it to her, she beat me, locked me in a closet, and said, “You’re not gonna eat anything for 24 hours.”
So I’m locked in the closet; I’m crying because I got beat. Finally, in the evening I’m starving, saying please give me some food. So she knew I hated peas, and this … pleasant lady … opens up the closet. She says, “If you’re really hungry you’ll eat these peas.”
I looked at her, and in my mind I told myself that you will find my skeleton bones in this closet in the morning before I eat those peas. And I didn’t. When she opened up the door in the morning I could see the shock on her face. I took a pride in that and from that point on I knew. I said to myself, I don’t understand what she’s doing to me, but I know it’s wrong, and when I grow up I’m going to help other people who can’t help themselves.
How did that influence you going forward?
MH: Two things. First, that pea incident means that to this day I don’t eat peas, just as a personal political protest. Second, when I first learned about the Green Berets, I found out that their whole motto is De oppresso liber, “To free the oppressed.” And I decided, that’s who I am, that’s what I fight for. We fight bullies.
And that situation is what got me into survival. When I got to about 14 years old she tried to beat me again. By this time I was bigger, so I grabbed the belt and took it from her, and I told her, “No more.” So she threw me out. I ended up spending a whole winter as a teenager sleeping on the streets. Sleeping in stairwells, in dumpsters. I figured out that I could go behind grocery stores and sleep behind HVAC vents to get some heat. I learned they throw away a lot of good food in grocery stores every day. I learned all of this survival stuff because I had to.
Talk to us about your military background.
MH: I served for four years in the U.S. Army as an active duty soldier. After that I served in the reserves while putting myself through college. I served in Afghanistan, worked as a country manager for special operations medics in Iraq, and got shot at on deployment in El Salvador, Turkey, and Thailand. Eventually I became a private military contractor where I worked in Colombia, Haiti, Sierra Leone, and Azerbaijan. That’s four more contracts, and all of them I got shot at and people were trying to kill me.
What’s the difference between a soldier and a contractor?
MH: It’s like comparing a security guard to a police officer. A contractor can pick what they want to do. They have a choice to quit. A contractor might have worked in a war zone — like they have Pizza Hut and Starbucks there now, but a soldier serves in combat by fighting. So for a military contractor to say he’s a combat veteran like a soldier is, they can kiss my d*ck. I call myself a combat veteran only because of my combat experience serving as a soldier in Afghanistan — not because of my military contracting I did in other places, even though I got shot at.
Mykel as jungle doctor in El Salvador, circa 1993
How did you get into the military and survival?
MH: Well, I got shot and stabbed before I ever joined the army. I was an honor roll student, and I was in the chess club. But because I was so poor, no one would hang out with me, so I started hanging out with the gangsters. And I didn’t do drugs, so it was real easy for me to just say, “Guys, if you just organize a little here and a little here, we can sell better here. So we started turning a profit, and we started kicking the other gang’s butts because we were unified. So the stuff that we did, I hate to say it, but we did some pretty cool stuff.
But when I had a buddy who got killed, and another one who went to jail for killing someone, I said to myself, this cycle of poverty is a one-way street to death or jail. The only way I’m going to break this cycle is to get an education, and the only way for me to do that was to join the Army. That’s why I joined — so I could go to college. So as soon as I turned 17 in 1982, they shipped me off to basic training and that led me to Special Forces.
As I got older in the military, I was really fascinated with all these old Vietnam-era guys who knew all these old survival things. But when I went into SERE (Survival, Evasion, Resistance, and Escape) School, we only spent three days on survival out of a three-week course. I said to myself, this is all we’re going to learn? I realized that this is not enough. So what happens is that even the special ops guys don’t know primitive survival skills in a lot of cases. People just don’t know this stuff so I started teaching it to people. Long before it was a TV show, long before it was cool. I wasn’t a weirdo, and I didn’t want to teach weirdos. But things like medicine, first aid, survival — these are things everybody can use and they’re applicable to everyday life. So it became my passion. One thing led to another, and I started a business doing it in 1994.
How did you get your start in TV?
MH: When Sept. 11 happened, I was living in L.A., still serving in the National Guard. So we watched those assholes fly the second plane into a building and I told my sons, “Hey, as a single father of two boys, I can get a compassionate reassignment and not go to war, or I can go to war because I’m Special Forces.” And they told me, “Dad, go over there and go kick some ass.”
So I mobilized, and I went to war for two years. When I came back the Green Berets were all in the news, because we went in there on horseback and all that kind of good stuff. All my media friends didn’t really know any Green Berets except me. So they would ask me, “Myke, do you mind being a subject-matter expert on this or on that?” I thought sure, what the hell.
Then finally they asked me, if you had your own show what you would end up doing? I said well, I’d take my wife out surviving, and maybe do a special ops competition, and things went on from there. I looked at it like this: I didn’t give a rat’s ass about TV, but I liked teaching survival skills, and this was a way to reach more people.
Are survival shows education or entertainment? What are your general impressions?
MH: Networks think that people are stupid, and production companies only want money. It comes down to the people they feature and their core character. There are great folks like Ray Mears, Les Stroud, and Cody Lundin who care more about teaching. Then there are folks like Bear (Grylls) who favor entertainment, and then there are some who are just flat frauds and charlatans.
How about your experiences on the TV shows Man, Woman, Wild; One Man Army, and Lost Survivors. Does one stand out to you?
MH: We nearly died a bunch of times on Man, Woman, Wild. People don’t realize how tough those shows were and how real they were. For the desert one, I told them, “Let’s not film in the day. Let’s film at dusk or at night with a full moon when we got better illumination.” But they made us film in the day, and they nearly killed us. My wife ended up getting heat stroke, and I grabbed the cameraman by the neck, looked into the camera because I knew the producers were watching from 1/2 mile away on their little screen, and I said, “If my wife does not leave this desert, none of you will.” That’s when they called the medic in.
Hawke as combat commander in Afghanistan, circa 2003
What do you think sets your shows apart from others?
MH: I feel as a Special Forces guy, I owe it to my brothers and to my people to be real about what I say and what I do. The networks will ask me, “Why don’t you be more like Bear Grylls and jump off some cliffs and do backflips into the water?”
I tell them, “I won’t do that because it’s stupid and it’s wrong, and it will get people killed. I will do stuff that is safe and has sound principles. I’m sure it’s not as sexy and as cool as you would like it to be, but it’s real.”
It’s always a balance of trying to give the networks what they want versus doing what you believe is right for your teaching and your principles, and also for your brotherhood and your community. You’re always going to have people you can’t make happy, so I do what I believe is right. You can judge me all the f*ck you want. I live with myself, and I don’t regret sh*t that I do because I do what I believe.
What do you have coming up?
MH: Besides the survival videos for kids we’re planning, I just did an episode of ABC’s The Bachelor, where my wife and I took them all out on a “survival date.” So Ruth and I taught these girls basic survival so The Bachelor could figure out which of the 12 girls he likes. Ruth and I taught them shelter, food, water, and navigation. Also, I just did an episode of Valor for CW, doing background acting as a mission control officer.
We’re also creating an adventure race that incorporates not only obstacles, but also live-fire weapons and primitive weapons. So you’re gonna get to shoot a pistol, rifle, shotgun, a sniper rifle, an automatic weapon, but also get to throw a spear, an atlatl, a blowdart, slingshot, hatchet, and a knife. So you’re gonna run, do an obstacle, then do a target with a modern weapon, then use a primitive weapon. And it’s for families as well as elite guys. We’re doing it all at the main ALTAIR Training Solutions facility in Immokalee [Florida]. We’ll break ground on the obstacle course in February and we hope to have it up and running by next fall.
But the coolest thing coming up right away is an eight-hour special for The History Channel called Frontiersmen. It’s made by Leonardo DiCaprio’s production company who made The Revenant. I think it will reinstall in America not only who we are, learning about our roots, but hopefully showing everyone that survival is in all of us. It’s from our forefathers so get back to it. The more self-reliant you are, the better everybody is because there’s one less body to be taken care of.
Do you think that survivalism is a skillset or a mindset?
MH: Mindset is important; you can’t do it without the mindset. But the mindset without the skillset will not serve you. Unless you practice survival you are not a survival guy. For example, I can carry a gun because I have the mindset to shoot it. But if I don’t practice with the gun, I can’t depend on hope and luck to see me through a firefight. Sorry, but that’s poor planning. That’s asking mostly to get killed with your own gun still in your hand, and how embarrassing is that?
The mindset is a crucial component, because if you don’t have the will to live you’re not going to make it. I get people in my survival classes all the time who want to quit. It usually happens in my Kill Class. We take a cute little bunny rabbit that sounds like a little baby when you kill it. It’s horrible. But I tell them, you have to learn to kill it because you might have to eat it someday. You can get more energy and sustenance off this rabbit than off three days of foraging out there. It’s easier to get your energy from animals than from plants, plain and simple.
So I tell these people, you’ve got to go through this once in your life, and hopefully never have to do it again. And people always want to say, “I’m not going to do it, I’m not going to kill anything.”
And I respond, “OK, here’s a pen and paper. Think of who you love the most in this world. Write to them that, “I love you with all my heart, but I love this little bunny rabbit more than you, so I’m going to lay down and die so that this bunny rabbit can live, and I’m never going to see you again.” Usually at that point they say, “Give me the rabbit.”
What about teaching survival to kids?
MH: With my first boys I’d wake them up at 3 in the morning and do fire drills, make them crawl blindfolded on the floor to find the phone and dial 911, and get out to the middle of the yard. They hated me for it, but I taught them everything I could about survival. I was maybe too aggressive with them as a younger man, and I didn’t make it fun. And now, I try to make it fun so I take my boy out camping once a year with a sole mission: to learn survival stuff. If you can bring in humor, that’s where people’s minds are open. That’s why I don’t bust people’s asses in my class. I make it real easy and relaxed, and let them have fun.
So actually what I’m doing with my younger third son, because the internet is so different now, we plan to start making home videos where the wife and I are gonna teach him, and then he’s gonna teach kids. That way he can explain how he’s learned it from us and how thinks it would be better for kids to learn from him.
Are there any specific survival skills that are good to teach kids?
MH: Yeah, train your kids how to start a fire. It’s not just as easy as lighting a match. You’ve gotta know how to make the tinder ball and then how to build it. I’ve seen people with fireplaces that don’t know how to get a fire going because they don’t know how to build it up from the base. If you can make it fun for your kids they will learn it, and they’ll be so proud and confident. And then as a parent you’ll be confident too. You don’t have to be a weirdo prepper living in your basement and drinking your pee. The fact is that sh*t’s gonna happen, and the government can’t do everything for you, and it’s gonna take them a while to get there and help you.
How can readers plan to take care of themselves before help arrives?
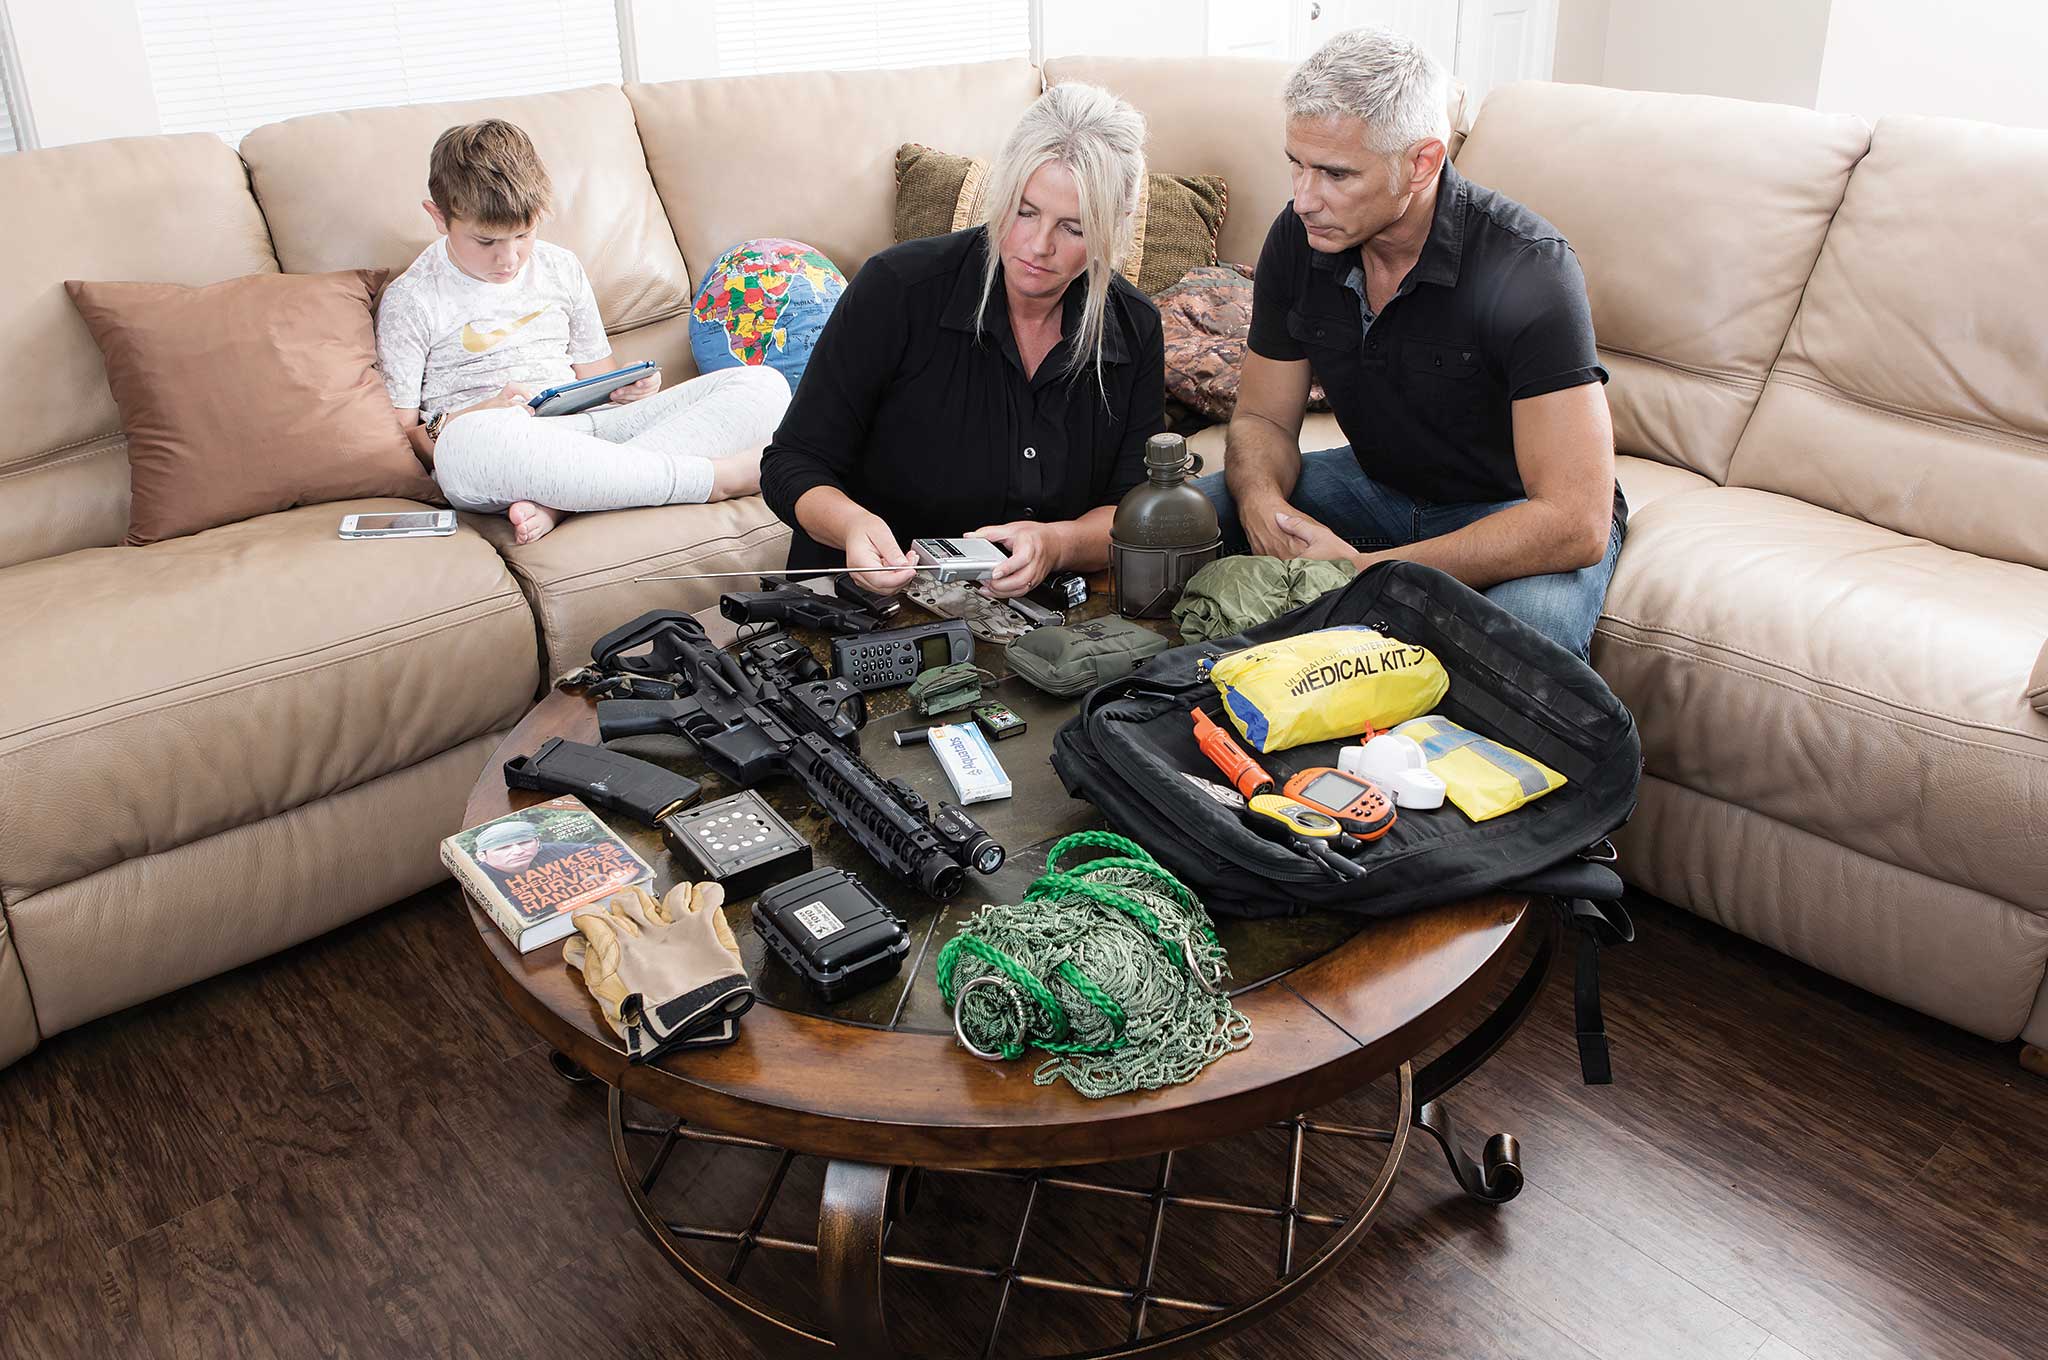
MH: You should carry 24 hours’ worth of survival supplies on your body at all times. Carry three days’ of survival stuff in your car or on your little pack, and keep seven days’ worth in your office, in your plane, or your little log cabin. Last you need to have a 30-day supply of everything you need in your home.
I always tell people that, once a year, they should have an indoor campout using just their survival gear. Turn off your power. Don’t run any water. Don’t use any gas. Live in Ft. Living Room without any of those things. Then, open your sh*t. Play with it — let your family see where it’s stored and how it works. You’ll find that some stuff doesn’t work! Some stuff breaks, erodes, or corrodes. Do you have a way to wash clothes for a month? Do you have a way to cook food, or get rid of your trash for a month? When you do your indoor campout, you’ll figure lots of these things out.
Compared to the mental and physical aspects of preparedness, how important is your gear while you’re out adventuring?
MH: I will kid you not, gear is key. The better it is, the better everything is. It’s no substitute for skills, but without gear, skills can make substitutes! But too much gear can be as bad as too little — carrying too much can wear you down, and if you don’t know how to use it all, it can cause you grief in a critical moment of need. Like they say, balance is the key in all things.
What would you say is the biggest mistake you see rookie survivalists make?
MH: Thinking that they can make a fire quickly or build a shelter easily, underestimating the need for water, and overestimating their physical abilities.
What lessons, if any, did you personally draw from the Las Vegas mass shooting?
MH: Man, that is just a sad tragedy with no just reason for it. But that aside, in my time as a military contractor as well as my service as a soldier, I’ve encountered many coups and rebel attacks. So, how I live and operate applies here too and maybe some can benefit from this.
First, I try to always pack heat and stay close to cover and an egress/exit whenever I go to public venues. I also try not to be in the middle or right on the edges — just close enough to escape, but not take the rounds if it comes from the edges. But in this case, my pistol would not have done anything to stop that guy from so high with long guns, so the best you can do is be calm, be brave, try to help others, and pray that God doesn’t wanna call you home just yet.
I’ve saved so many lives under fire, at times I just knew my brains were gonna get popped any second. But it never came, and I just focused on saving one man at a time. We’re all gonna die, so go out doing good, and if you survive, you survive with honor. Either way, you win, in my book anyway.
How can you tell when an individual you come in contact with is going to be a threat?
MH: Most threats are conveying their intentions long before they get to you. They are out hunting and targeting, so if you’re alert, chances are you’ll sense it and then gear up your guard a notch or two. Situational awareness is vital, and it sure helps to always be ready as you can’t always sense it. Often we’re so busy with other things in the moment that we might miss the vital clues, but they are usually there unless you have been pre-targeted. And in that case, things are going either too well or too many odd things at once should cue you up. I’m the kinda guy who when I hear gun fire, I take a second to look for the immediate threat, but then instantly look around to see if that is only the distraction for an actual larger operation or the start of an ambush. Bottom line: train yourself to respond, and stay in response-on-tap mode with situational awareness as your trigger mechanism.
What threats do you prepare for?
MH: On a daily basis I prepare for the threats of robbery, travel breakdowns, and security and safety on air, land, and sea. Then in the bigger picture, I prepare for natural disasters, as those also cover warfare both large and small, and even terrorism.
I don’t prepare for NBC (Nuclear, Biological, Chemical) attack for a reason. With nuclear either you’re dead or not, ASAP from the blast or shortly after if you’re in the gamma ray zone. The fallout zone can be minimized and, to a degree, avoided.
The idea of preparing for the biological and chemical is funny to me. I went to the chemical warfare school. I know that most of the things man can make to kill his fellow man, we have no protections against. The NBC/MOPP suits and gas masks only stop about 3 percent of all the hateful things out there so they’re really just providing a false sense of comfort and confidence. If you are where they pop the canister, if it’s the bad stuff — and that is cheap and easy to make — then you’re nailed.
The hopeful part is this: Those things are hard to disperse on a wide scale, and we have amazing folks fighting to stop those buttheads from doing it every day. What we can’t ever predict or stop, sadly, is the rare radical homegrown monster like the Las Vegas killer. Humans are humans and as such, some things will always be unpredictable. But that doesn’t mean we should give up our rights or give up hope. The best way to win is live well and keep fighting.
Mykel Hawke
Age: 52
Occupation: Teacher
Hometown: Louisville, KY
Base of Operations: Tropical Southern Florida
Family: Wife, three sons, two grandkids
Education: Master’s Degree in Psychology for Family Counseling, Bachelor’s Degree in Pre-Med Biology
Favorite Quote: “I may have been on the losing side, but I am not convinced it was the wrong side.” — Captain Reynolds in Myke’s favorite TV series Firefly
Favorite TV Show:Firefly
Favorite Film:Serenity
Last Book Read: A Fire Upon the Deep by Vernor Vinge
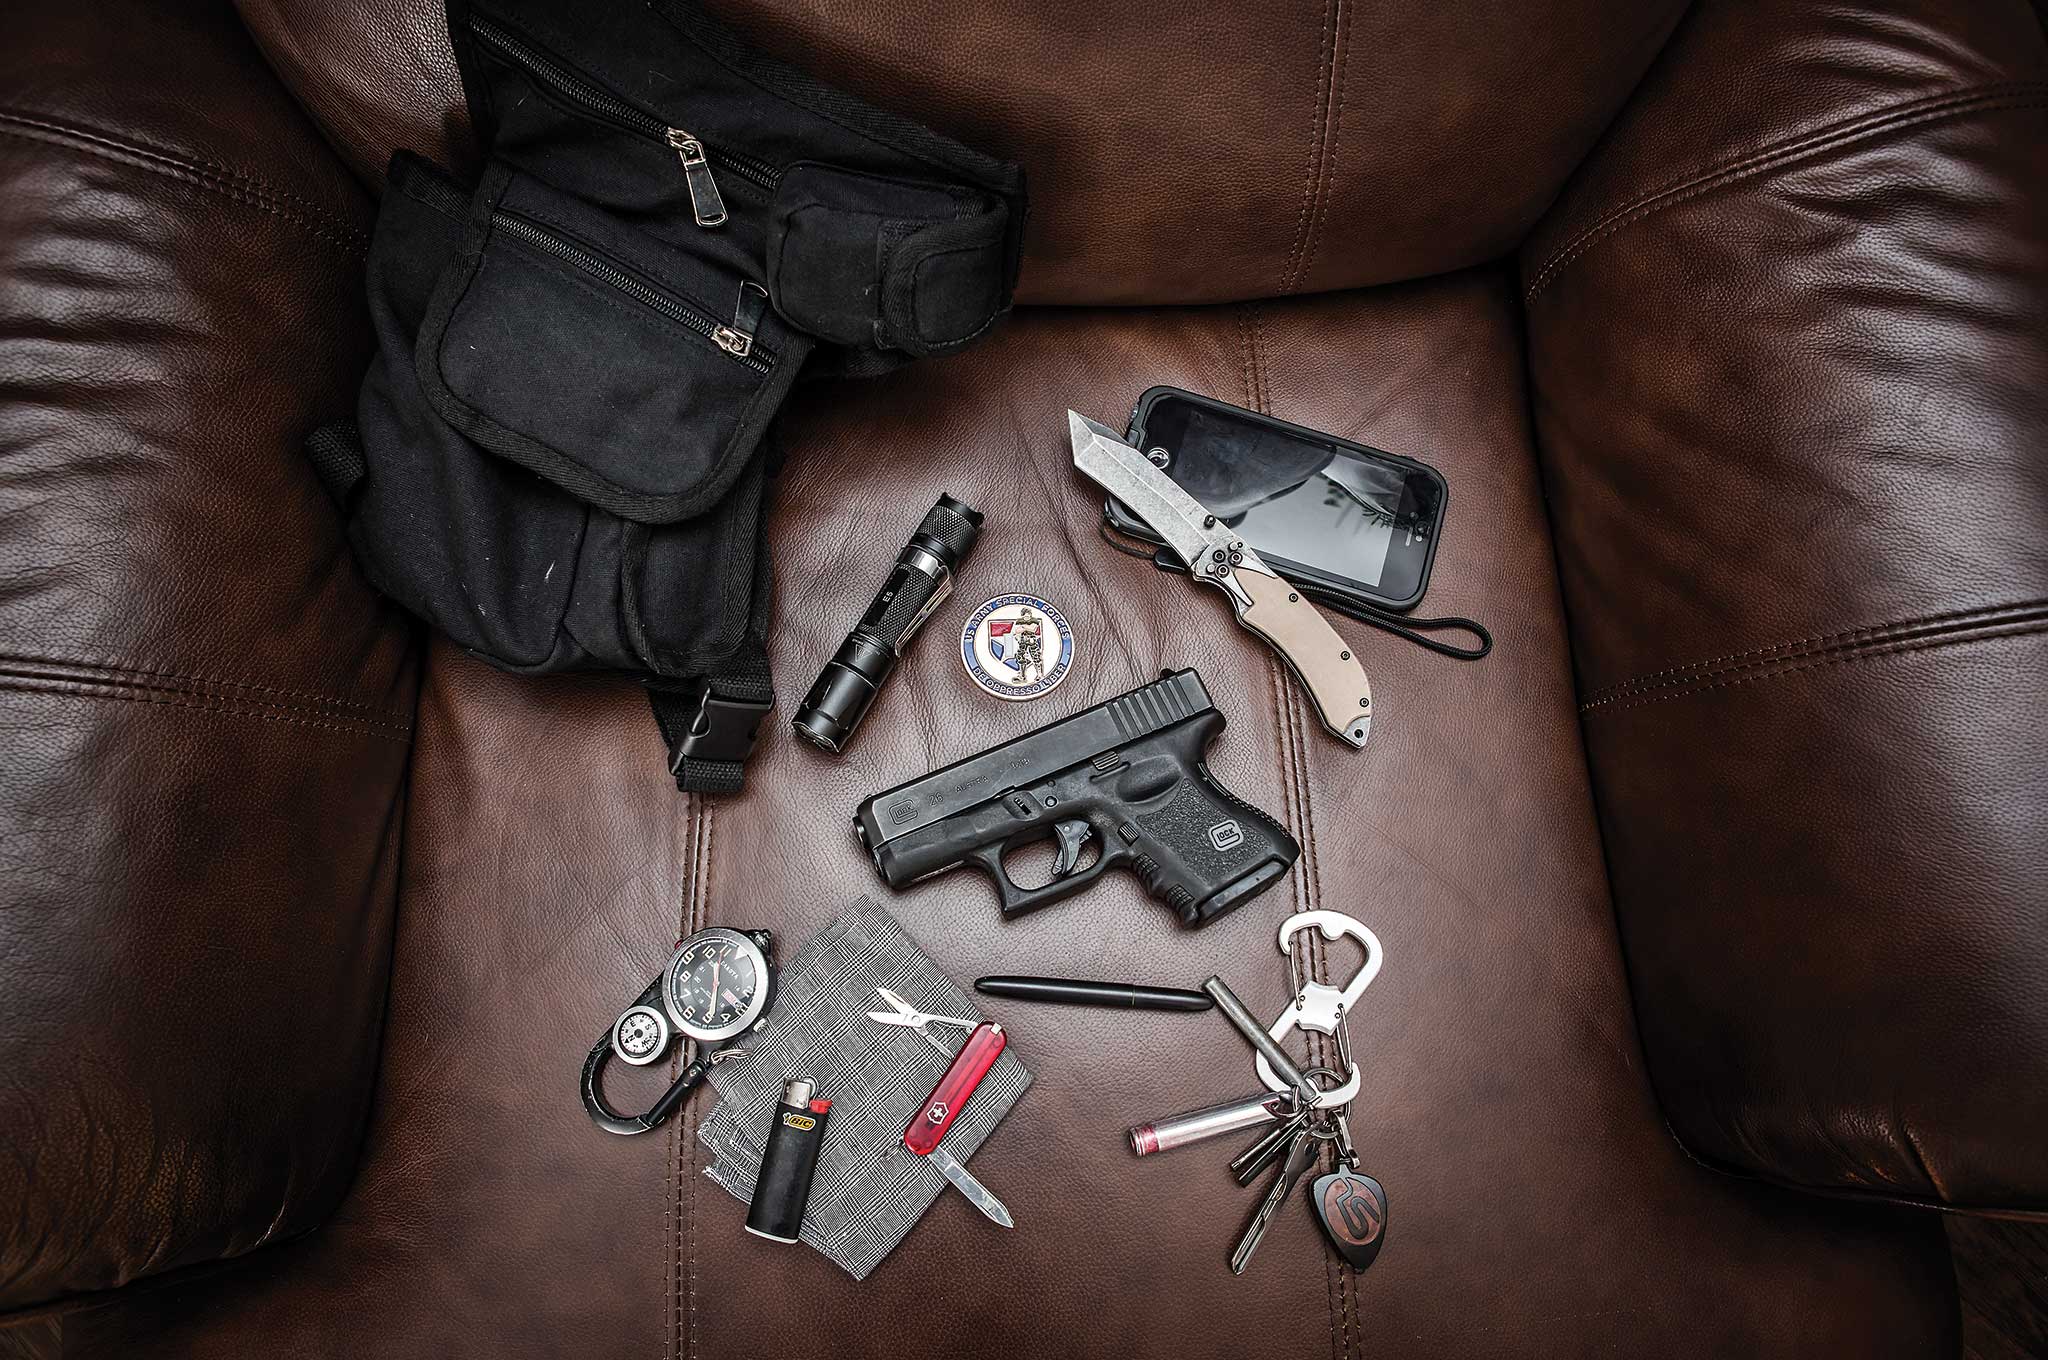
Food: Breakfast bar, beef jerky, and vitamin pack Water Storage: condom, Ziplock bag with purification tablets Fire: Lighter and magnesium bar Shelter: Trash bag Signal: Dakota Watch Green Angler II Ana-Digi Clip Watch, phone First Aid: Cravat bandage and medications Multitools: Swiss Army SwissChamp Multi-tool (city), Leatherman Multi-tool (field), and Hawke Knives Tacti-Tool for EDC. Navigation: Compass