We love a good post-apocalyptic movie or TV show, but the vast majority of these Hollywood creations prioritize flashy visuals and entertainment factor over realism. That’s somewhat understandable, since watching the protagonist roar through the deserted streets on a chopper draws in a bigger audience, and money is the name of the game. However, one of our pet peeves with this genre is the way they overlook a virtually-unavoidable problem in a long-term survival situation: fuel expiration.
Mad Max: Fury Road makes for great entertainment… but it’s *a wee bit* unrealistic. (Photo: Warner Bros.)
Problem number one: in a major nationwide or worldwide crisis, fuel production and distribution will cease. If the proverbial fire and brimstone is raining down from the sky, Steve the local tanker truck driver is going to stop making his rounds to the gas stations and go find his family. (It’s OK Steve, we’d do the same.) If the disaster is big enough, ports, shipping lines, and refineries will also grind to a halt. That means no new fuel will be produced or distributed.
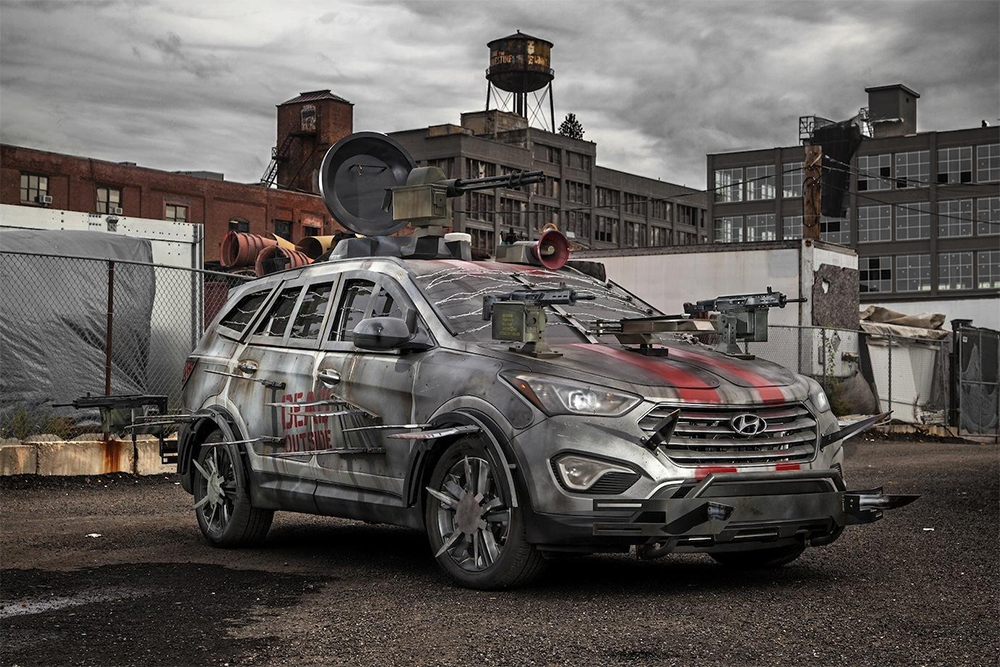
Sorry “The Walking Dead” fans, this Hyundai would likely sputter to a stop less than a year after SHTF. (Photo: Hyundai)
If the only fuel that’s available is sitting idly in the tanks of vehicles, gas stations, and regional storage facilities, we’ll run into problem number two pretty quickly. Most vehicle fuels have a limited shelf life, and when there’s a finite supply of new fuel, it’s a matter of time until the volatile fuel expires. Generally, modern ethanol-blended E10 gasoline will last 3 to 6 months, depending on how it’s stored and the tolerances of the equipment it’s being used in. Diesel (or biodiesel made from cooking oil) is a little better, with a 6 to 12 month shelf life.
After this time, fuels will form gum, varnish, and oxidized deposits, which may clog filters, injectors, and lines. Condensation may also cause water buildup in the fuel, reducing its potency and causing misfires or knocking. It may even cause rust in the system, which can break off particles and be a real nightmare to clean. You can check for fuel expiration in a number of ways:
Look at the color. Old fuel turns dark brown as impurities form.
Waft a little of the fumes toward your nose and smell them. If it smells sour, it may be expired.
Use a test swab from an auto parts or hardware store. These strips can detect the presence of water and contaminants.
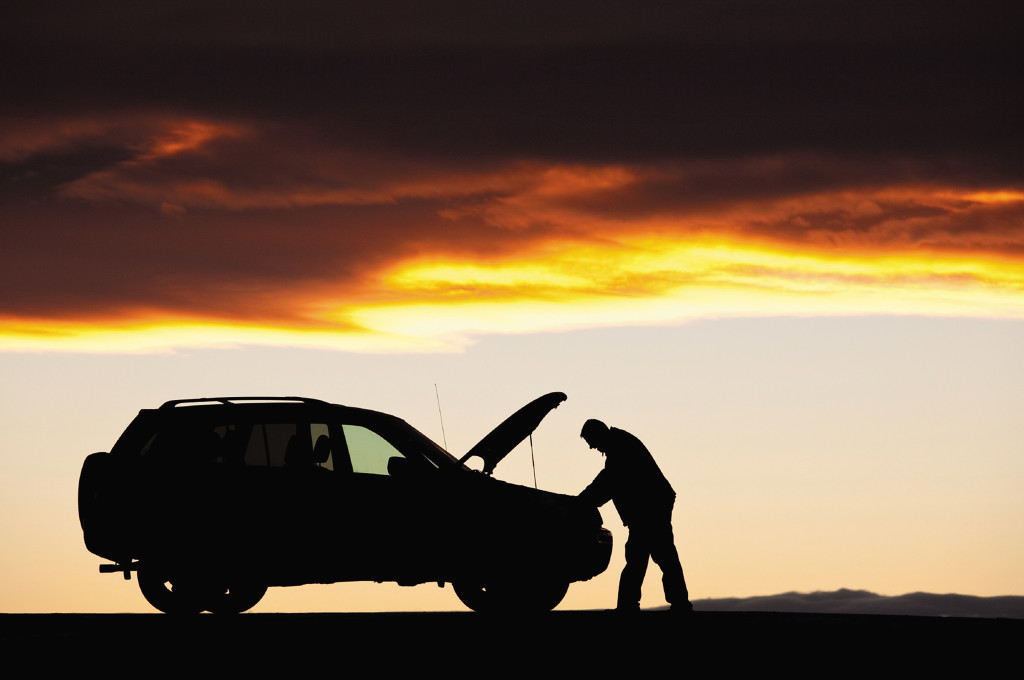
The last thing you want is to try to fire up your engine and bug out, only to find it won’t start.
So, now that we know fuel will eventually expire, what can you do to stop it? Unfortunately, it’s impossible to permanently prevent fuel expiration, but you can slow down the degradation process with the following steps.
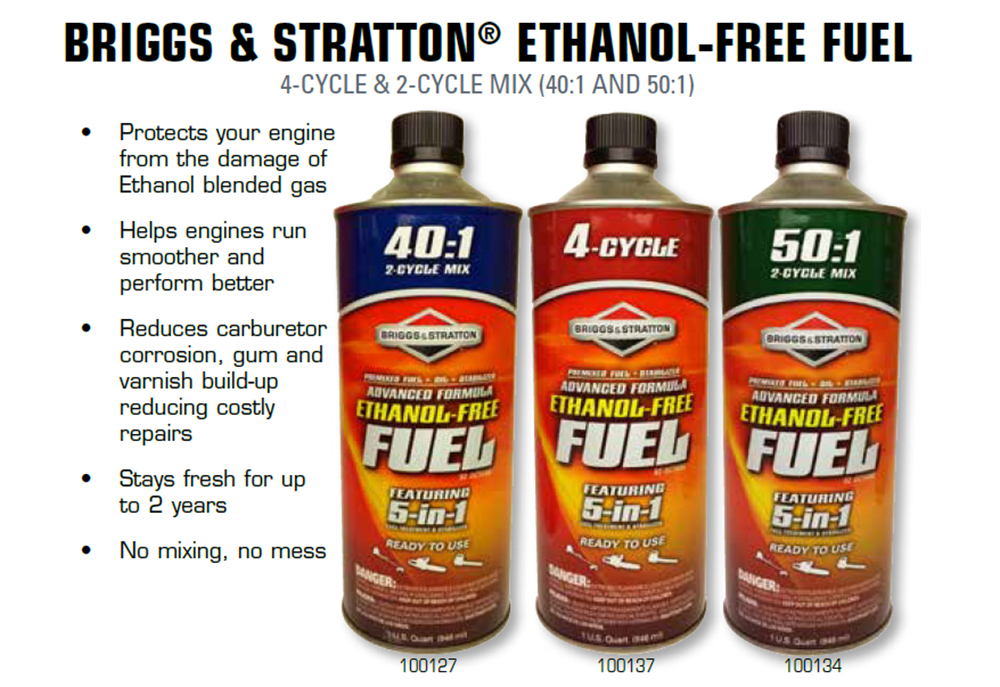
Obtain ethanol-free gasoline, which has a shelf life of many years, since it has less tendency to attract water. Small cans of stabilized ethanol-free fuel are also available for 2-cycle and 4-cycle engines — while these won’t be practical for keeping a car running, they would be a good option for small generators, chainsaws, or even motorcycles.
Store your fuel in a purpose-built air-tight container. Contact with oxygen, moisture, or certain metals can cause it to degrade faster.
Keep your fuel in a cool and dark environment. Heat accelerates degradation.
Fill tanks to the top to keep excess air pockets away from the fuel. A half-full tank will form condensation quickly.
Top off with a little fresh fuel when possible, if you manage to find some that has been properly stored and stabilized.
Mix in a anti-oxidant fuel stabilizer before storing your fuel. This reduces the rate of oxidation and can double or triple shelf life (12 to 15 months for regular gas).
Use an older vehicle that’s less sensitive to poor-quality fuel. Modern fuel injection systems can become clogged easily by particulate.
Convert your vehicle to run on used vegetable oil. This fuel source is plentiful, and you can gather it easily while other survivors fight over the remaining gasoline.
Walk into any grocery store or outdoor gear shop, and you’ll see a smorgasbord of granola bars, protein bars, seasoned beef jerky, energy gels, and other calorie-dense travel-ready snacks. But that wasn’t always the case. Hundreds of years before the dawn of the supermarket, compact calorie-dense survival food was hard to come by. There were no Power Bars or Clif Bars — if you wanted portable food, you probably had to make your own, or buy it from a trader who knew how to do so.
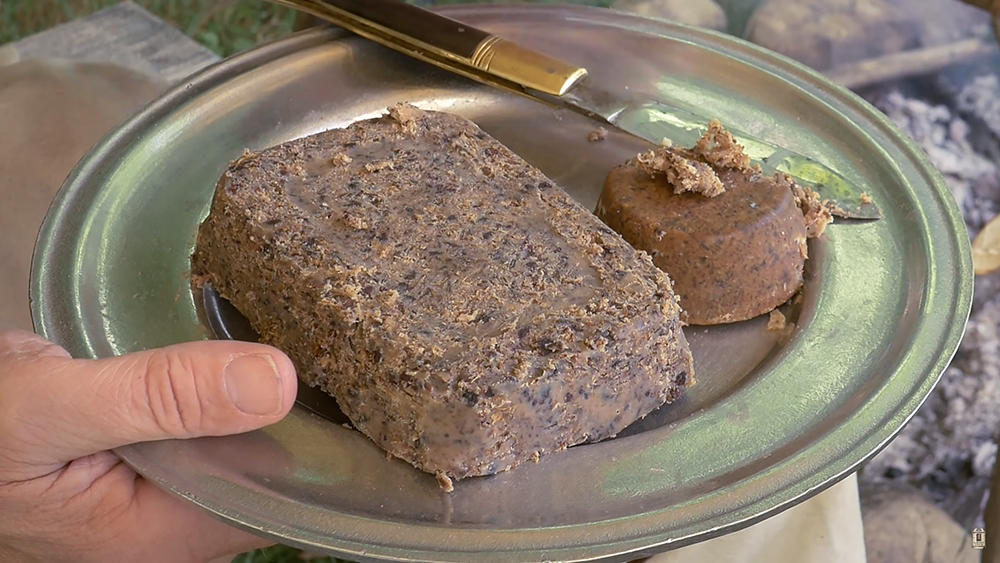
Pemmican, as shown in the video below, is an extremely dense calorie-rich food source.
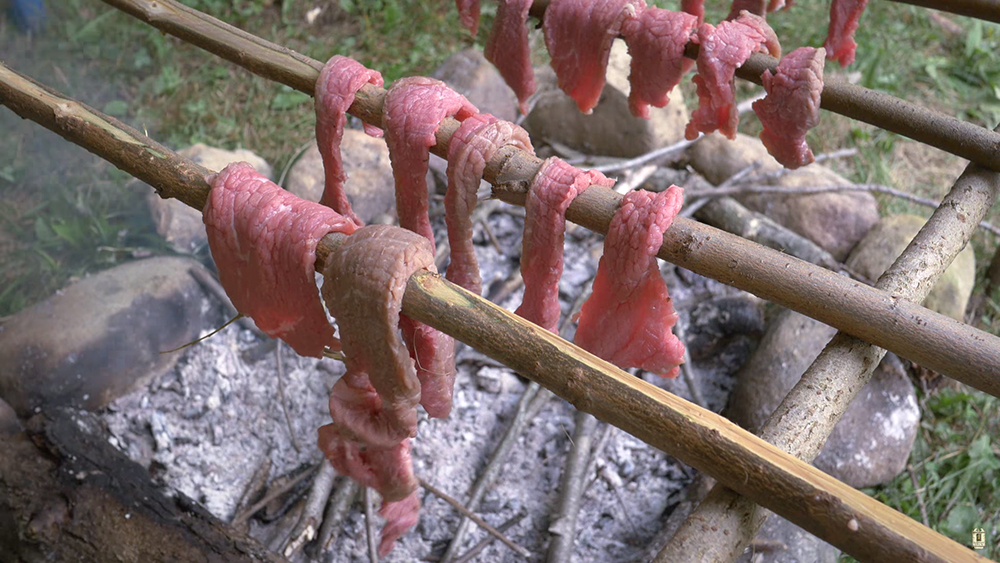
Pemmican could be called the original protein bar. It originated from Native American tradition, and was widely used by early American trappers, fur traders, and explorers. It was usually composed of two or three simple ingredients: dried powdered meat, animal fat, and (sometimes) dried berries.
Pemmican typically started out with a bison, deer, or elk, but beef, fish, and other meats can also be used. The meat was cut into thin strips against the grain, dried out over a fire, and pounded into a fine powder. An equal quantity of fat was melted and added to the powdered meat, creating a thick mixture. Dried berries could also be added for additional nutrients, though this wasn’t always done. Once the mixture dried, it could be stored for 10 years or more, as long as it remained in a sealed container in cool and dry conditions.
Pemmican equates to about 2,000 calories per pound, and it’s unsurprisingly high in fat and protein. It can be eaten cold (though some may consider it gritty and unpleasant), heated in a frying pan, or boiled into a stew along with wild vegetables and biscuits or flour — this was called a rubaboo (roob-uh-boo).
In the video below, 18th-century historical YouTube channel Jas. Townsend and Son, Inc. discusses the origins and core components of pemmican. Don’t be put off by the period-correct colonial apparel, the information in this video series is extremely informative, even in today’s modern context.
Subsequent videos in this series show how to produce pemmican, how to cook it into rubaboo stew, and how to make rousseau (pemmican hash) in a frying pan. The channel also features videos on pemmican storage and potential additions to spice up your pemmican. If you’re interested in these topics, check out Jas. Townsend and Son’s other videos. There’s lots of good primitive and semi-primitive survival info to be found on this historically-oriented channel.
While you should always be prepared to defend yourself against threats no matter where you are, there are certain activities that require extra caution. Any time you are carrying cash or valuables, or may be perceived to be carrying these items, you become a target for crimes of opportunity. The risk only increases if you’re complacent or distracted. If you’re looking down at your phone, digging through your backpack, or simply preoccupied with other thoughts, you leave the door wide open to criminals.
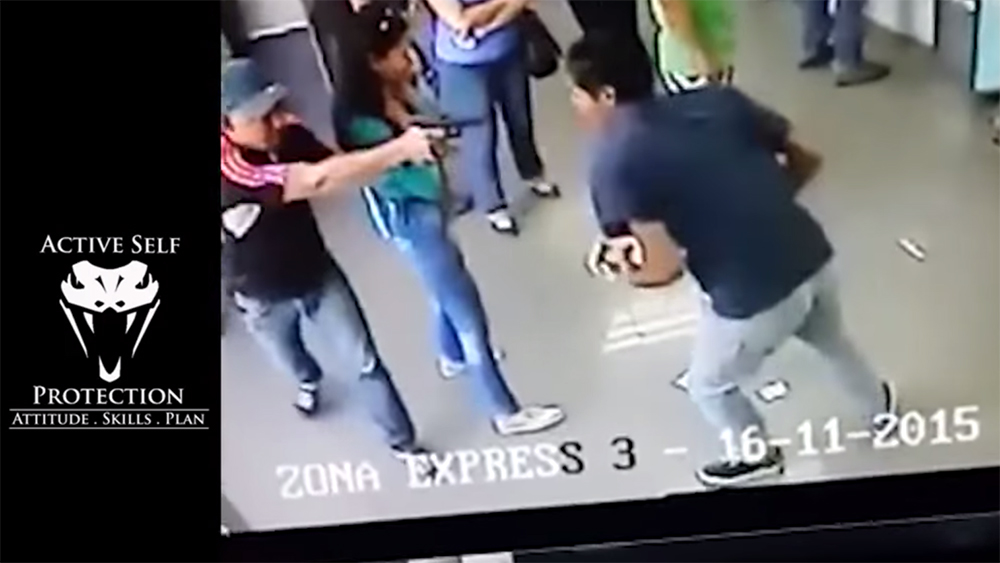
Going to the ATM to deposit a check or withdraw some cash is often a necessity, and many people don’t realize just how dangerous this ordinary activity can be. We may assume the public space and security cameras will deter criminals, but a careless or desperate individual won’t think twice about these measures. There’s plenty of evidence to back up the old adage that ATM stands for “accessory to mugging”. So, you should be on high alert against ATM muggings any time you walk up to one of these machines.
In the following three videos from Active Self Protection, self-defense expert John Correia analyzes three ATM muggings that resulted in violence. The first occurred in Brazil — if you’ve spent any time on LiveLeak, you’ll know that Brazil is notorious for its brazen and ruthless armed robbers. The situation drags on for several agonizing seconds until the robber is distracted, and the victim is able to draw his handgun.
The second scenario discussed by ASP happened in Venezuela, a country which has experienced a total economic collapse and major political upheaval in recent years. This situation shows that even in a crowded public space, armed criminals may remain a serious threat — don’t assume that bystanders will discourage muggers or wait around to help you. Most will either freeze or run. John has many interesting conclusions to draw from this clip:
Finally, here’s an ATM mugging that occurred without the involvement of weapons. While the victim managed to escape safely, his poor situational awareness almost caused the situation to end very differently. Watch and learn:
Hopefully these three incidents hammer home the point that ATMs require extra caution. But beyond this, you also need to be prepared to deal with violent opportunistic criminals, regardless of where they may strike. Be aware of your surroundings, keep distractions to a minimum, and be ready to react swiftly if necessary.
A big part of survival is making the most of what you have, and often this means re-purposing trash into treasure. Whether it’s a tin can stove or a fertilizer compost pile, it’s wise to learn how to make what you need rather than relying on local stores that may be picked clean in an emergency situation. That’s why we enjoy seeing scrap materials turned into tools and weapons — for example, a PVC pipe bow or a file utility knife.
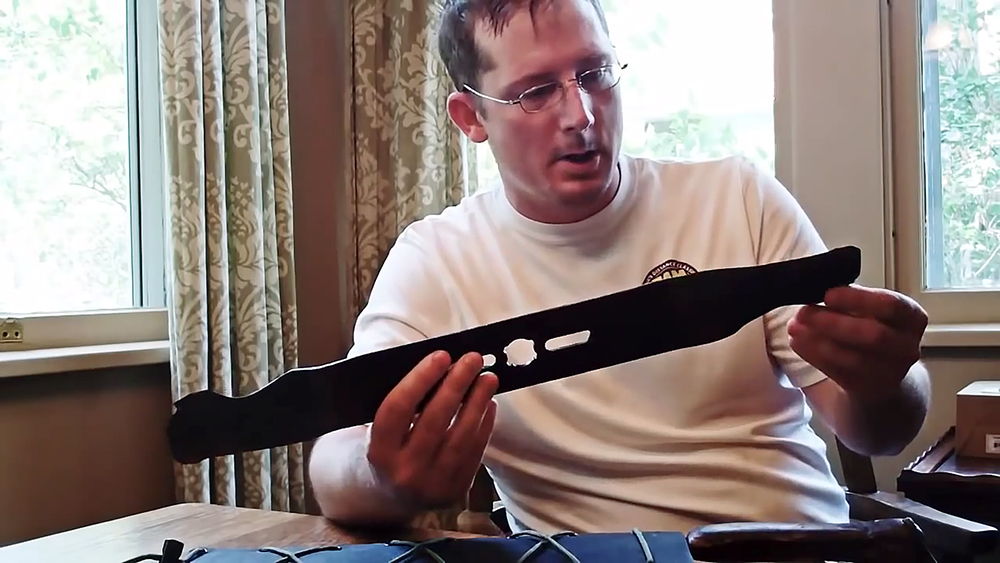
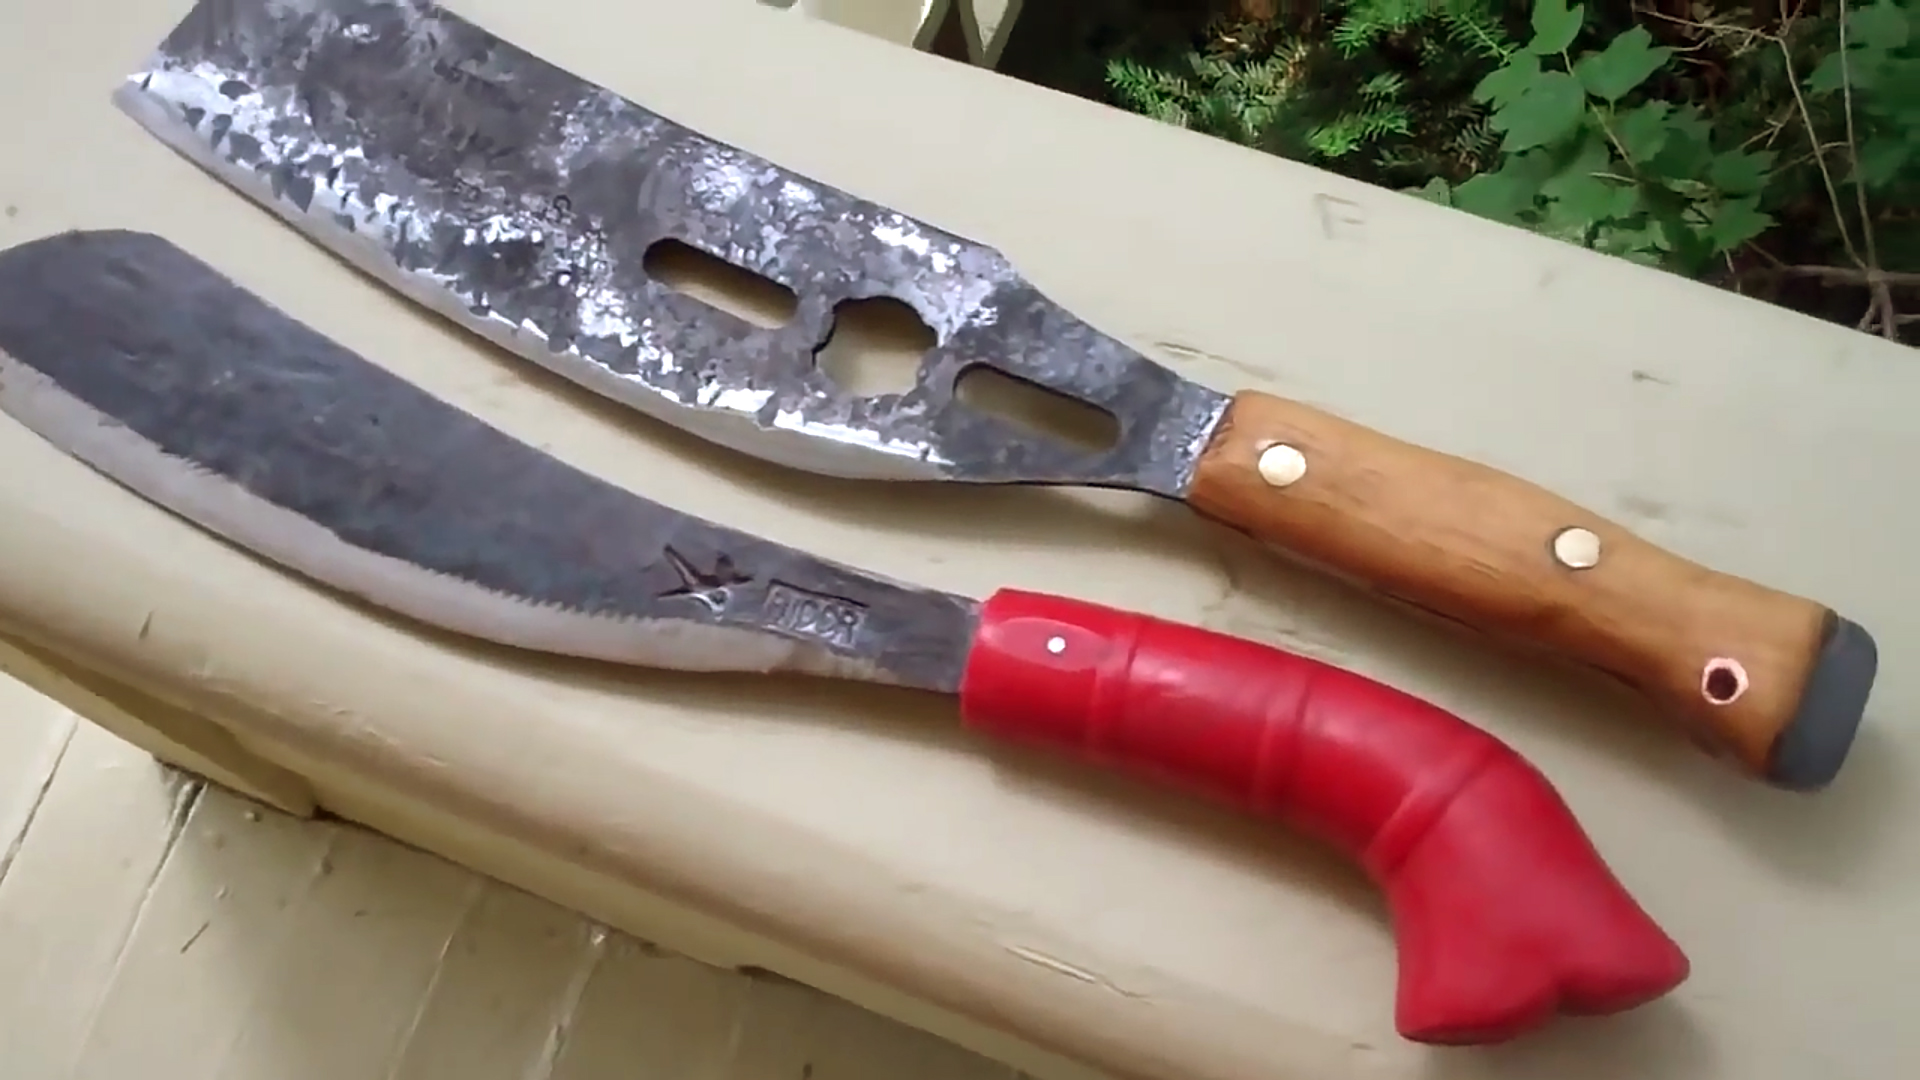
We recently came across a video from YouTuber AverageIowaGuy that shows how to make a parang knife from a lawnmower blade. It’s a relatively quick process to form this traditional chopper, and only requires a simple homemade propane forge, peanut oil for quenching, an anvil, and a few other tools found in most garages or workshops. That may sound like a lot to someone who’s never made a knife before, but in the modern knifemaking world of million-dollar CNC machines, it’s positively primitive.
Check out the video below. One thing to keep in mind is that steel quality can vary greatly among lawnmower blades, so you may need to sharpen the edge more often if you end up with a softer donor steel. You may also want to consider other steel sources, such as truck leaf springs, a material commonly used for knife-making in southeast Asia due to its relatively consistent strength and flexibility. Regardless, do your best with what you’ve got — a knife that dulls quickly is still far better than no knife at all.
Running isn’t a bad workout; it just isn’t the only workout, as some would lead you to believe. Cardiovascular exercise and preparing for the fight go hand in hand.
But running on its own doesn’t build muscle or develop functional strength. Running in nothing more than skimpy shorts with a fanny pack of electrolyte goo won’t prepare you for SHTF. You need an exercise that’ll test your power, endurance, and cargo-carrying capacity.
This workout, of course, is ruck marching. Whether you prefer to go at it alone or wish to seek out a training group to motivate you, ruck marching (or “rucking”) is a growing trend you should be consider joining.
Long before health-minded folks used weighted packs for exercise, soldiers carried rucksacks into the field and backpackers carried frame packs up mountains. In recent years, rucking has grown exponentially as a health trend. You’ll find individuals and groups around the country storming down trails, urban landscapes, and sidewalks under heavy pack in the name of fitness. Leading the charge is a company called GoRuck. It’s spearheaded the movement with its own line of packs, dedicated group equipment, and organized events nationwide.
Today, the numbers continue to grow and are led by fitness fanatics who’ve abandoned traditional running for a workout with a much greater health-benefit yield.
Science
Walking burns more calories than sitting. Running burns more calories than walking. And rucking burns the most calories of the trio at an approximate rate of three times that of walking.
How? Add weight to your back and you build strength in your shoulders and core. Add weight to your legs and you increase the work necessary to move you, improving your cardiovascular output.
Opinions vary as to the magic number of workout minutes needed to burn fat. Assuming it’s around 30, give or take, rucking with a weighted pack will help keep the heart rate up with far less impact on the bones and joints than running.
Also, since rucking taps into different muscles, folks who can’t run 30-plus minutes on end may find rucking easier while accomplishing similar goals. Even accomplished runners will find they’re sore the next morning (and especially two days later) after a good rucking session. It simply works the body in a way running can’t. The weight of the ruck requires the wearer to tap into stabilizing muscle groups in the torso and legs.
It’s a true full-body workout.
Rucking Types
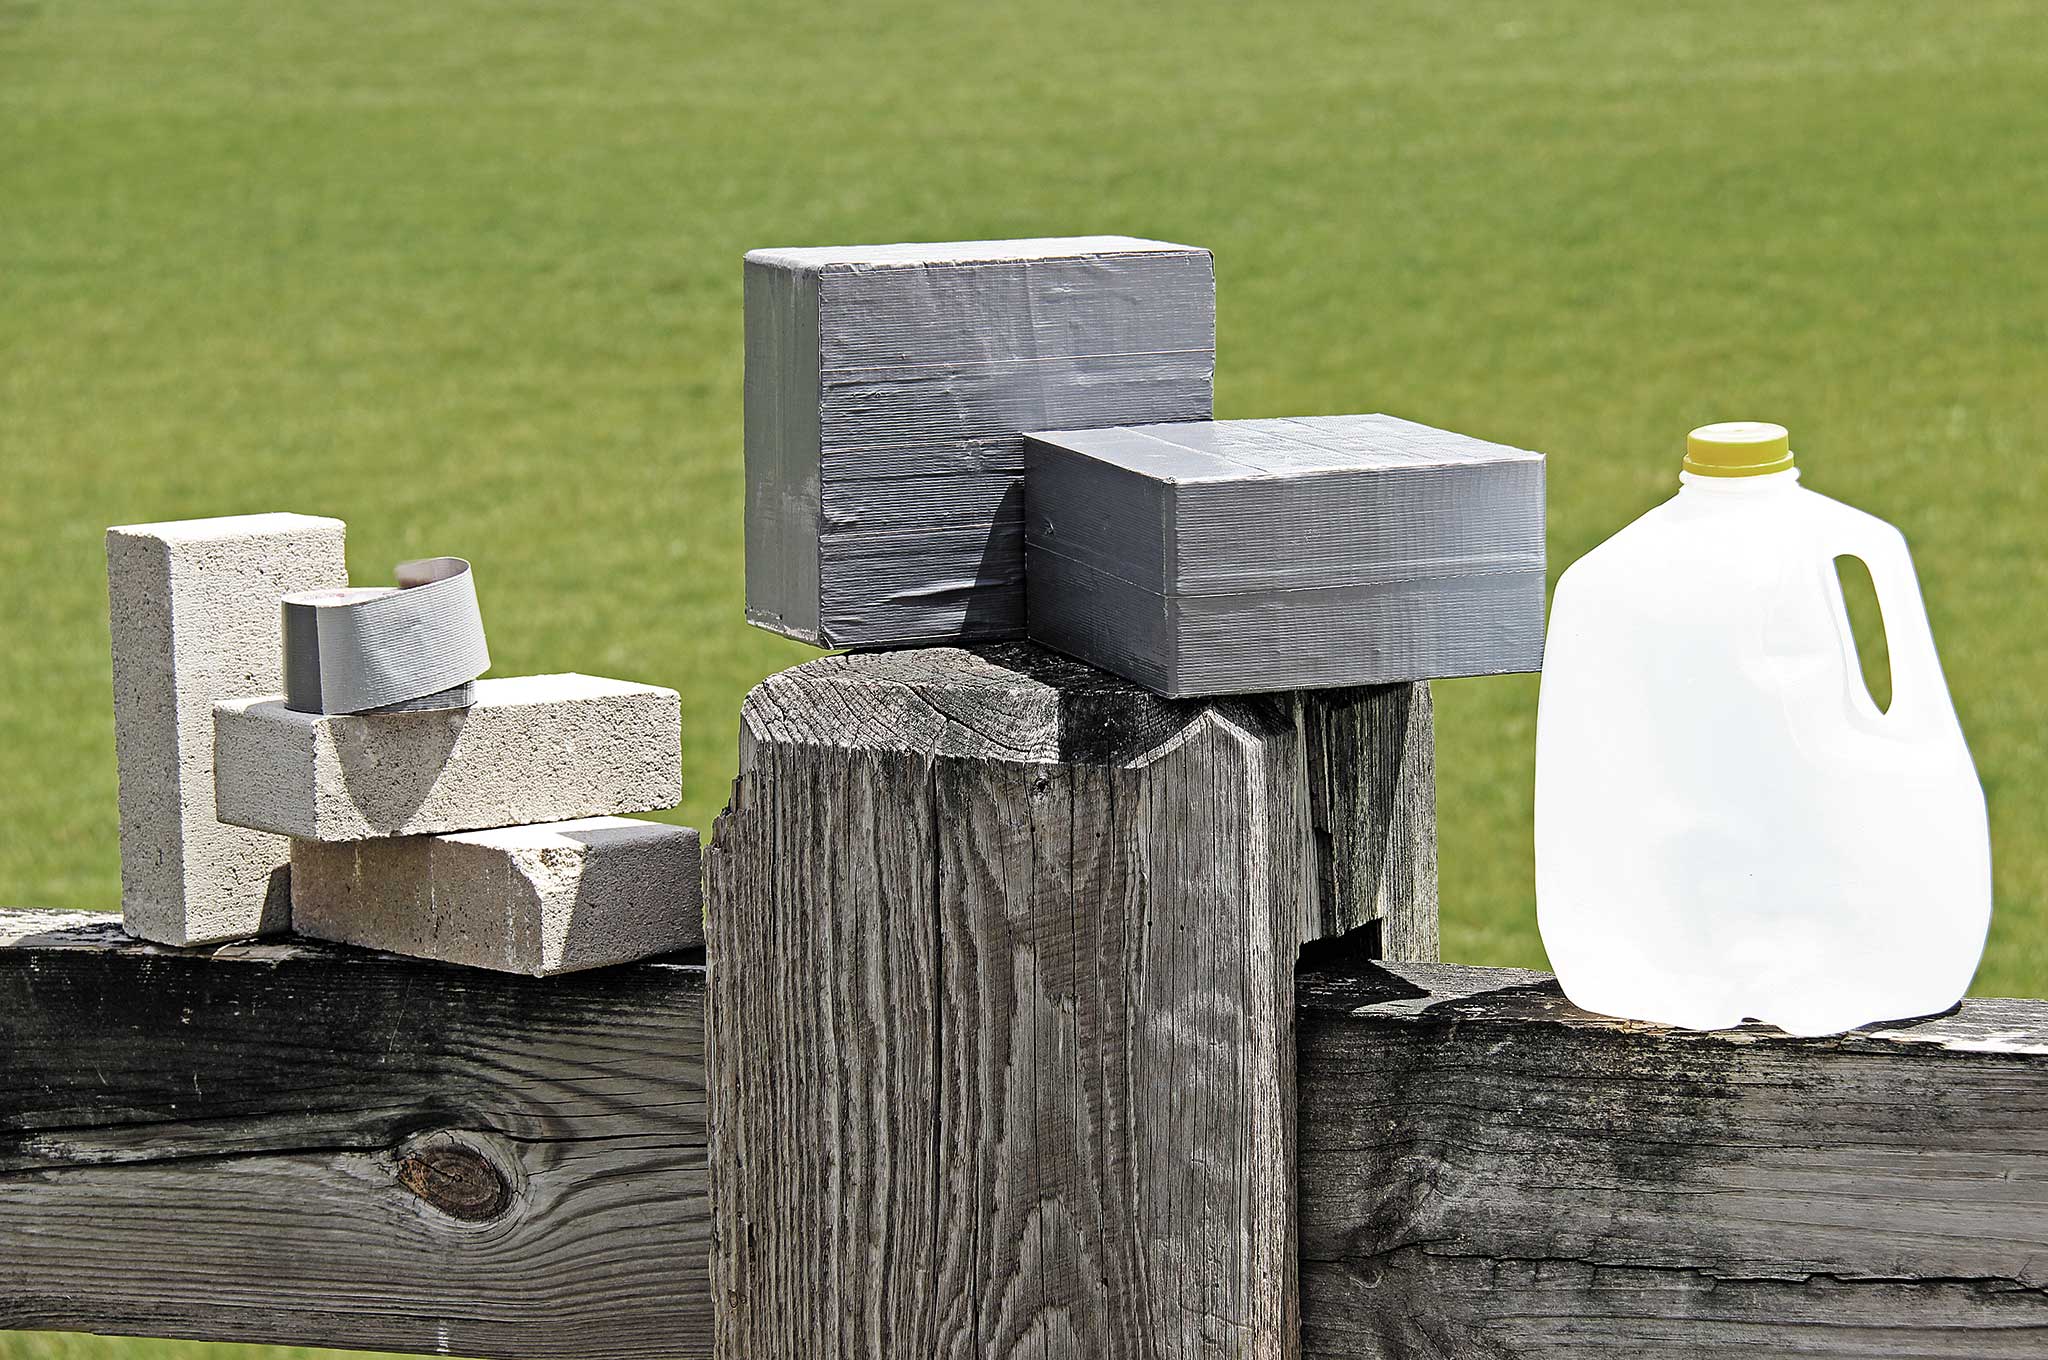
The Basics: While any weight will work, most supplemental pack weights are dedicated plates meant for competition and training and makeshift weights made from bags of sand and duct-taped bricks. Bricks can be abrasive on packs and need to be wrapped in duct tape. Those who don’t will get nicknamed “raw dog.” We’ll pass.
Tape your bricks before loading them in your ruck, lest you want a shredded pack.
For official events, participants under 150 pounds generally carry four bricks and those over 150 pounds haul six. For the individual not bound by competition rules, a good rule of thumb is to begin with approximately 10 to 20 percent of your bodyweight. To more closely mimic reality, carrying true hard armor plates and ammo cans will let the “survival athlete” know how they’ll perform in a real-life situation.
Group/Team Rucking: The group dynamic of a ruck cannot be denied. Peer pressure, as well as the pressure from elite Special Forces cadre who lead the GoRuck events, help runners push through pain. A group usually travels only as fast as the slowest rucker, and generally there’s a team burden to bear. Depending on the fitness level of the participant, group ruck marches can last hours or even days.
If this level of organization is too much commitment for you, informal partnerships between two or more ruckers will ensure someone is watching your back and vice versa.
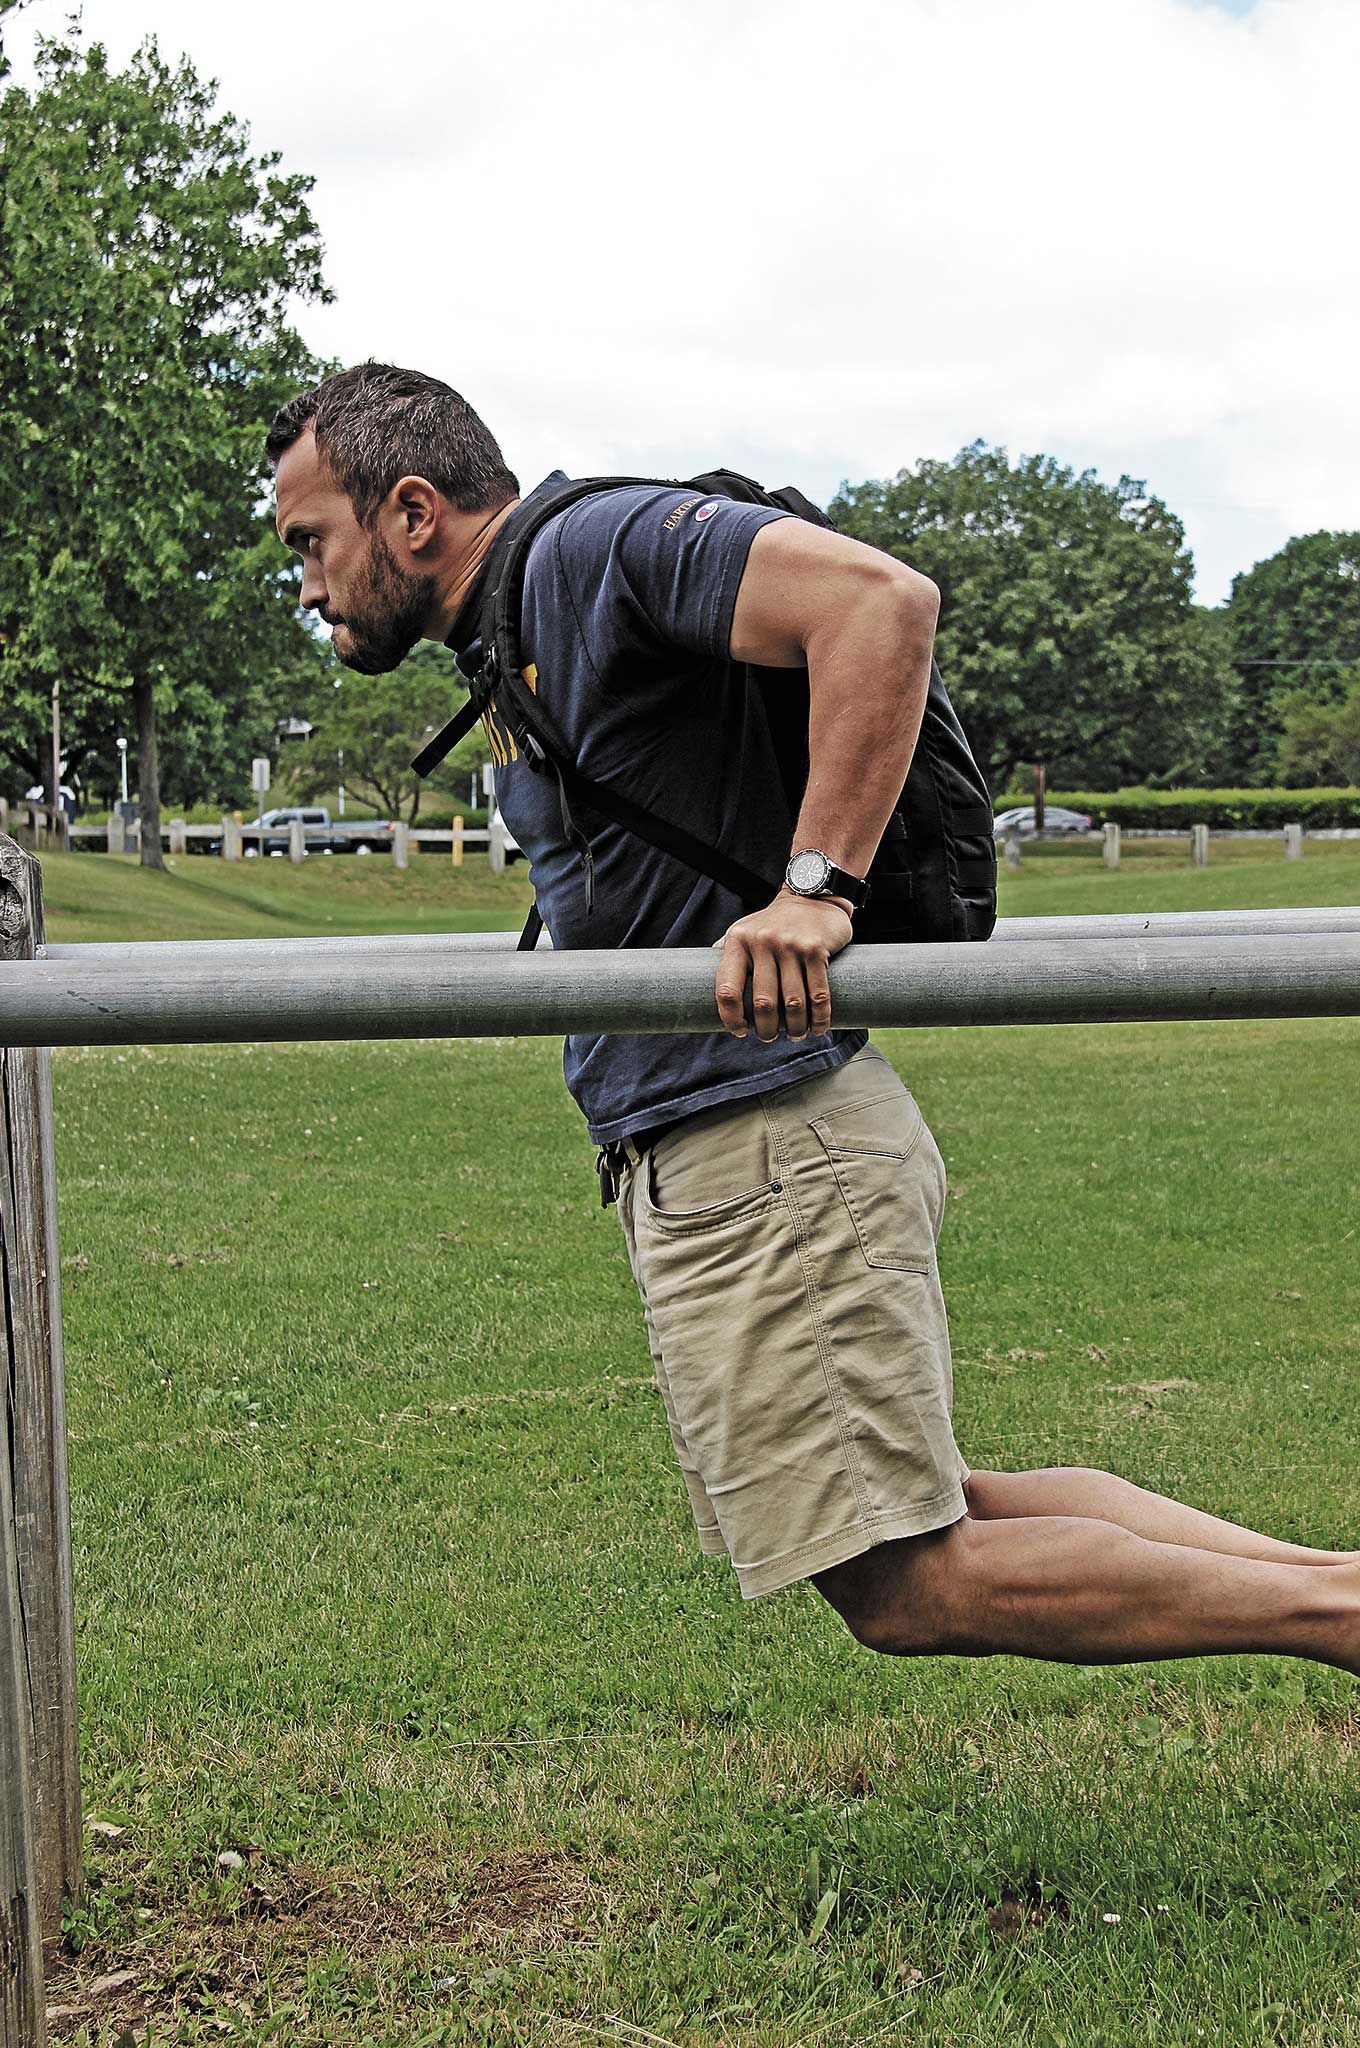
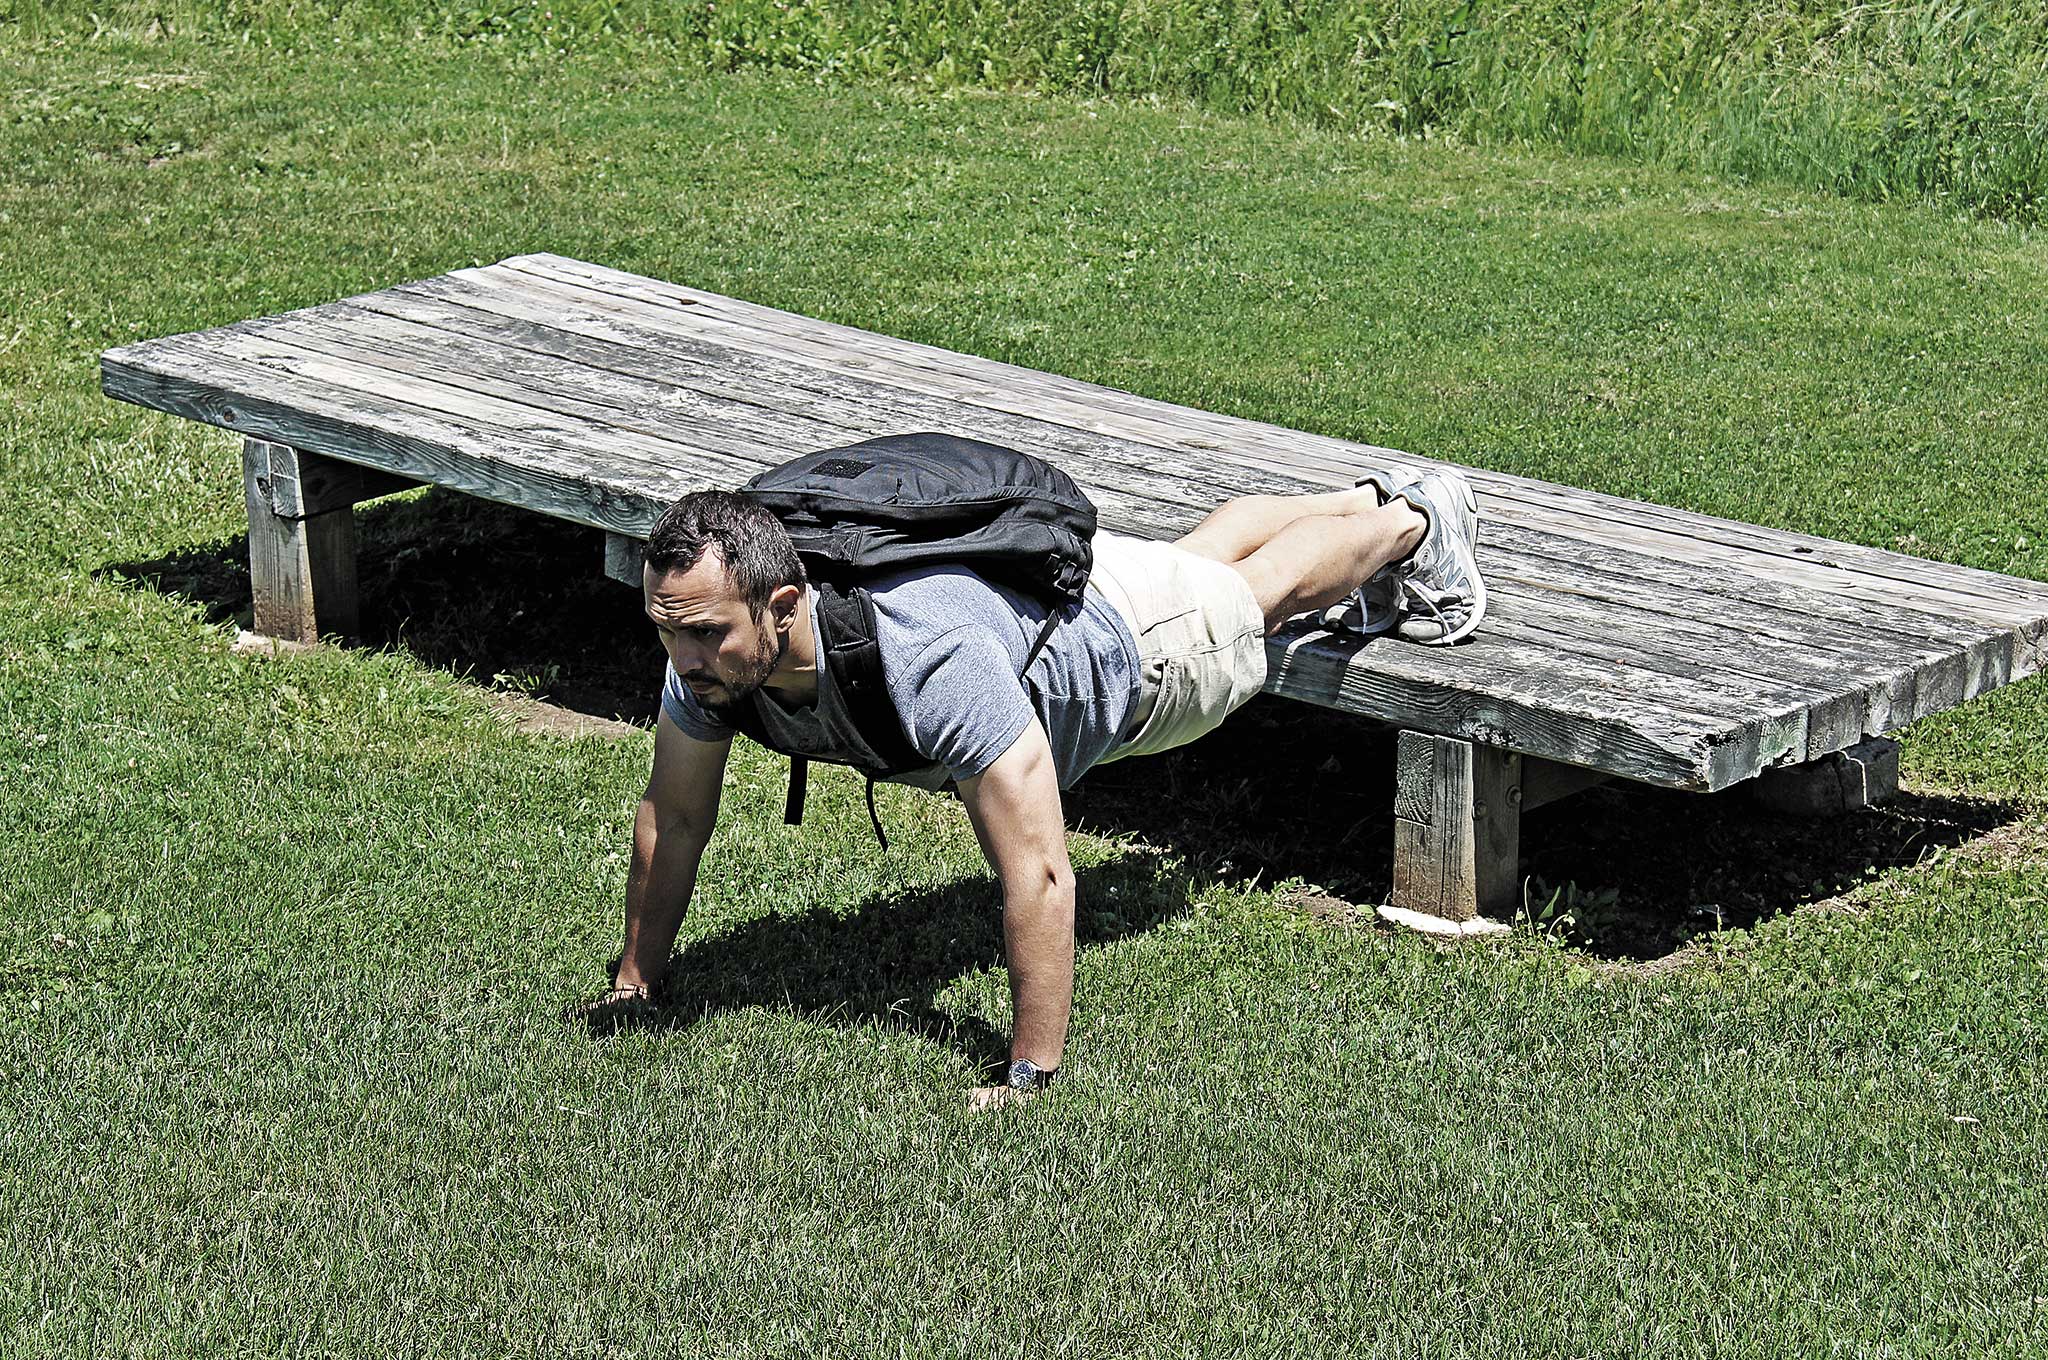
Beyond Rucking: Most any bodyweight workout can be enhanced with the use of a ruck. These workouts don’t require much space and allow the athlete to train in place. Pull-ups, dips, and pushups take on a new dimension when the added resistance of a weighted pack is incorporated. Squats, lunges, and calf raises will work the lower body relative to the amount of weight stuffed in the rucksack.
Weighted ruck dipsWeighted ruck push-ups
Even crunches with the pack clutched to the chest, leg raises with the ruck squeezed at the calves, and planks can be used to work the core and stabilizing muscles. For those who have never tried resistance training with anything other than a barbell, using a weighted bag requires more frequent stabilizing. This added resistance burns more calories.
Deep lunges with weighted ruckFarmer carry with 5-gallon buckets for cross-training
How to Prep
Note Your Baseline: Before you strike off on a ruck march, you should consult a physician if you’re unsure about your health. Also, it’s advisable to determine your baseline resting heart rate as well as your maximum heart rate. Rucking can be a tough workout, and you should know how to monitor your pulse to achieve the fat loss or muscle building beats per minute needed formula to achieve your goal.
Stay Visible: Rucking is done at all hours of the day. Plan on finding trails and pathways where you won’t be struck by a car. For this reason, carrying a headlamp and signal panel will help drivers see you.
Pick It: While any pack can be worn during a ruck march, a durable well-fitting pack is best. Hip belts are non-existent on many rucks, as they interfere with what’s worn on the belt. Looking to the experience of the military, this means waist belts are cut off to avoid obstructing holsters and blades. A ruck shouldn’t shift unnecessarily when worn. A sternum strap will add support, but it must be worn just above the nipple line or the wearer risks being choked out by his ruck.
Test It: A good ruck must be comfortable to wear with significant weight inside. The ruck chosen should be tough as nails, as it may house objects that will abrade and damage lesser-quality designs. Padded and curved shoulder straps will help cushion the load and a good padded back panel will mitigate the sharp corners of taped bricks, armor plates, and dedicated weight panels.
Fit It: One other consideration in picking your pack is knowing how it fits your torso. The torso of a 6-foot man isn’t the same size as a 5-foot female. Make sure your ruck fits before you exit the store, let alone strike off on the trail.
Benefits
Even those with a good running technique (landing mid-foot to forward instead of heel striking) will eventually feel the effects of running. It’s jarring on the knees and the pounding takes its toll. Rucking works the body three times as hard as walking — even if you take the same exact trail — but has less impact on the human body. With rucking, since one foot remains on the ground when the stepping foot makes contact, less impact is felt than running where the athlete “catches” his weight with each stride.
The benefits of rucking extend far beyond the physical for the survivor. Anyone who has completed a set distance run (from 5K to full marathon) always remarks on their feeling of accomplishment. They were tested and finished the race. The same is true for rucking. If you never thought you could walk to safety or have what it takes to push on, rucking will give you the answer. Rucking is a safe dry run, giving you the mental strength and confidence if you really have to bug out.
“The mind is toughened through the body,” says Johnny Ray Vega, a rucker, Crossfitter, and fitness trainer. “Rucking allows you to tribally connect to likeminded individuals.”
Why Ruck?
Beach muscles aren’t the same as functional muscles. The average fighter (soldier, police officer, martial artist) isn’t built like the professional bodybuilders seen on stage. Rucking will give you muscle for function first, form second. It challenges the mind and the body, building abilities the survivor may need to tap into if the SHTF.
Most runners run with nothing more than a house key, an identification card, and an MP3 player or smartphone. In a bug-out scenario, anyone caught with this minimalist load out won’t last long. A more practical prepper on the run will have a pack with them. What they carry and how far they can carry it shouldn’t be unknown factors. Ruck marching exposes the answers and prepares the survival athlete for hard times.
If you’re looking for more information on ruck marches, we have exclusive content online. To learn what you should pack in your ruck and five common newbie mistakes to avoid, go to www.offgridweb.com/preparation/ruck-gear.
About the Author
Kevin Estela is the owner/head instructor of Estela Wilderness Education, a bushcraft and survival school in New England. He is a Sayoc Kali Associate Instructor, Brazilian Jiu-Jitsu practitioner, and an avid marksman. As a “survival athlete” he can be found regularly testing his physical and mental limitations in the gym, woods, and urban landscape preparing for the fight. www.kevinestela.com
Home gardening is a useful skill for survivalists, since it can provide a renewable food source and improve nutrition during emergencies. If the shelves at the grocery store are suddenly picked bare, it’s nice to have a long-lasting supply of fresh fruit and veggies. But plants shouldn’t be seen only as a source of food — they have many other benefits. Some have medicinal properties, some provide valuable cordage, and many plants can improve morale and create a peaceful environment if you’re stuck indoors for an extended period.
Certain indoor plants, such as this peace lily, can naturally remove volatile organic compounds from the air.
On top of all this, there are a select few plants that have been proven to be effective at removing toxic agents from the air. Now, we know what some of you are thinking — this sounds like it could easily be a pseudo-scientific home remedy that’s only creates a placebo effect. We certainly don’t blame you, since there’s a lot of nonsense on the internet about how cleansing crystals can magically heal your various ailments. However, in this case, there’s actual scientific research to back up the claim of air-filtering plants.
In 1989, NASA published a study titled “Interior Landscape Plants for Indoor Air Pollution Abatement”. The study analyzed 12 plants and measured their ability to remove harmful chemicals such as benzene, formaldehyde, and trichloroethane from the air. The study found that “low-light-requiring houseplants, along with activated carbon plant filters, have demonstrated the potential for improving indoor air quality by removing trace organic pollutants from the air.”
This research was later continued by B.C. Wolverton, one of the scientists who conducted the original NASA study. The results listed a total of more than 30 plants which were effective at removing volatile organic compounds (VOCs) from air.
When it comes to survival food, many of us gravitate to the idea of hunting or fishing. While a big slab of meat sizzling over the fire is certainly an appealing prospect, actively catching food often requires significant preparation and substantial effort — that means carrying added gear, and burning calories to obtain more calories. In some cases, there are sources of food in your surrounding environment that won’t put up a fight or escape your grasp. In these cases, you should consider foraging.
Black walnut trees can be found throughout most of the eastern United States. (Map via Wikipedia)
Sometimes, sources of food will be clear as day — a ripe ready-to-eat fruit dangling from a tree along your path, for example. In other cases, you’ll want to be extremely cautious when foraging for wild edibles. Certain types of mushrooms can be deadly, and may closely resemble edible varieties. This is why it’s wise to study and prepare yourself before you venture into the wilderness.
The brown walnut shells we’re familiar with must be removed from the green fleshy husk.
In the following video, YouTube survivalist The Wooded Beardsman shows how to process wild black walnuts from tree to table. These walnuts are an incredibly calorie-dense food source, with 100 grams (about 3/4 cup) providing approximately 618 calories. They’re also high in fat and protein, both important resources for energy-intensive survival situations. In his own words: “When [walnuts] are available, the survivalist — like a busy squirrel preparing for winter — should focus their efforts on collecting as many as possible before it’s too late.”
As the Wooded Beardsman aptly notes, “making a living from wild food is a very time-consuming and labor-intensive endeavor.” But if you know where to look and learn how to process them, these black walnuts can be an incredibly valuable resource for survival.
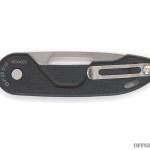
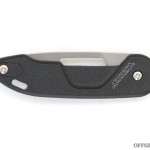
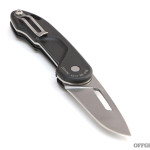
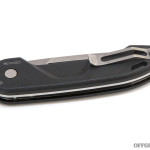
Is there such a thing as too many knives? Unless you’re going full mall ninja and carrying five at a time, we’d say that having more EDC knives to choose from is never a bad thing. That’s why we went all-out and requested knives from 24 companies for our ultimate folding knife buyer’s guide. Fourteen of these made it into our print article, which you can also read in its entirety online — check those out first if you haven’t already.
Part two of our EDC blade guide begins here and now. These ten knife reviews are exclusive to OFFGRIDweb.com, so read on for our thoughts on each of these folders.
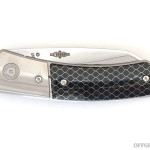
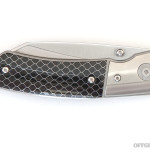
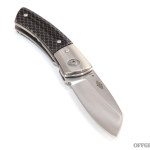
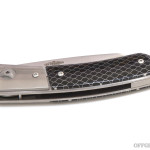
We’ve had previous experience with Boker Plus knives, a mid-priced line manufactured in Taiwan or China, and have generally been pleased with these blades. However, the Les-Voorhies-designed Model 10 CG is part of the core Boker line, manufactured in the company’s historic facility in Solingen, Germany. It’s apparent that substantial care went into this knife’s construction — the “CG” in its name stands for Collector’s Grade. The hollow grind on its CPM 154 blade is practically a work of art, and the titanium liner keeps it securely locked open. The handle is composed of C-Tek, a glossy resin-infused aluminum honeycomb, flanked by titanium bolsters. This knife lacks a pocket clip, but includes a microfiber drawstring pouch for storage.
Pros:
Gorgeous glossy finish and interesting choice of handle materials make this knife a real looker.
Modified wharncliffe blade is razor-sharp and highly effective for everyday cutting tasks in an urban environment.
Cons:
Considering its price and features, this knife doesn’t wow us from a bang-for-the-buck standpoint. It’s more of a collector’s item than a practical choice.
Lacks a pocket clip, and only has a one-sided thumb stud.
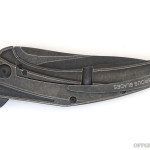
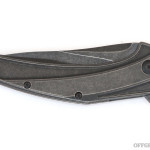
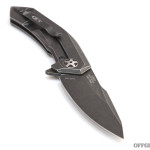
Looking like it escaped a biomechanical Engineer spacecraft from the Alien movie franchise, the Brous Blades Parallax is a sleek premium folder with a price some may consider equally out-of-this-world. This knife is available in four finish options — satin, stonewash, blackout, and acid stonewash. Our sample features the last and most costly finish, and we think the dark, weathered appearance perfectly complements its sinister shape. The handle is constructed from 3D-milled 6AL4V titanium, with a frame lock and ultra-smooth ceramic detent ball. The slim upswept 4-inch blade is formed from durable D2 steel, and includes a flipper for quick opening.
Pros:
Unique and beautiful design reminiscent of something penned by H.R. Giger.
Ceramic ball bearing makes flipping this knife open lightning-fast and smooth.
Cons:
Brous Blades couldn’t have picked a more boring font to etch onto the pocket clip, and it contrasts starkly with the aggressive knife design.
Lockbar release feels sticky rather than smooth. The Brous Blades site offers instructions on how to alleviate this through application of a Sharpie pen or graphite pencil, but in this price range, we’d expect it to feel smoother out of the box.
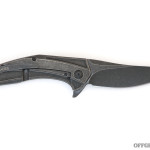
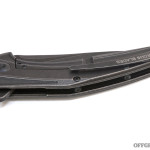
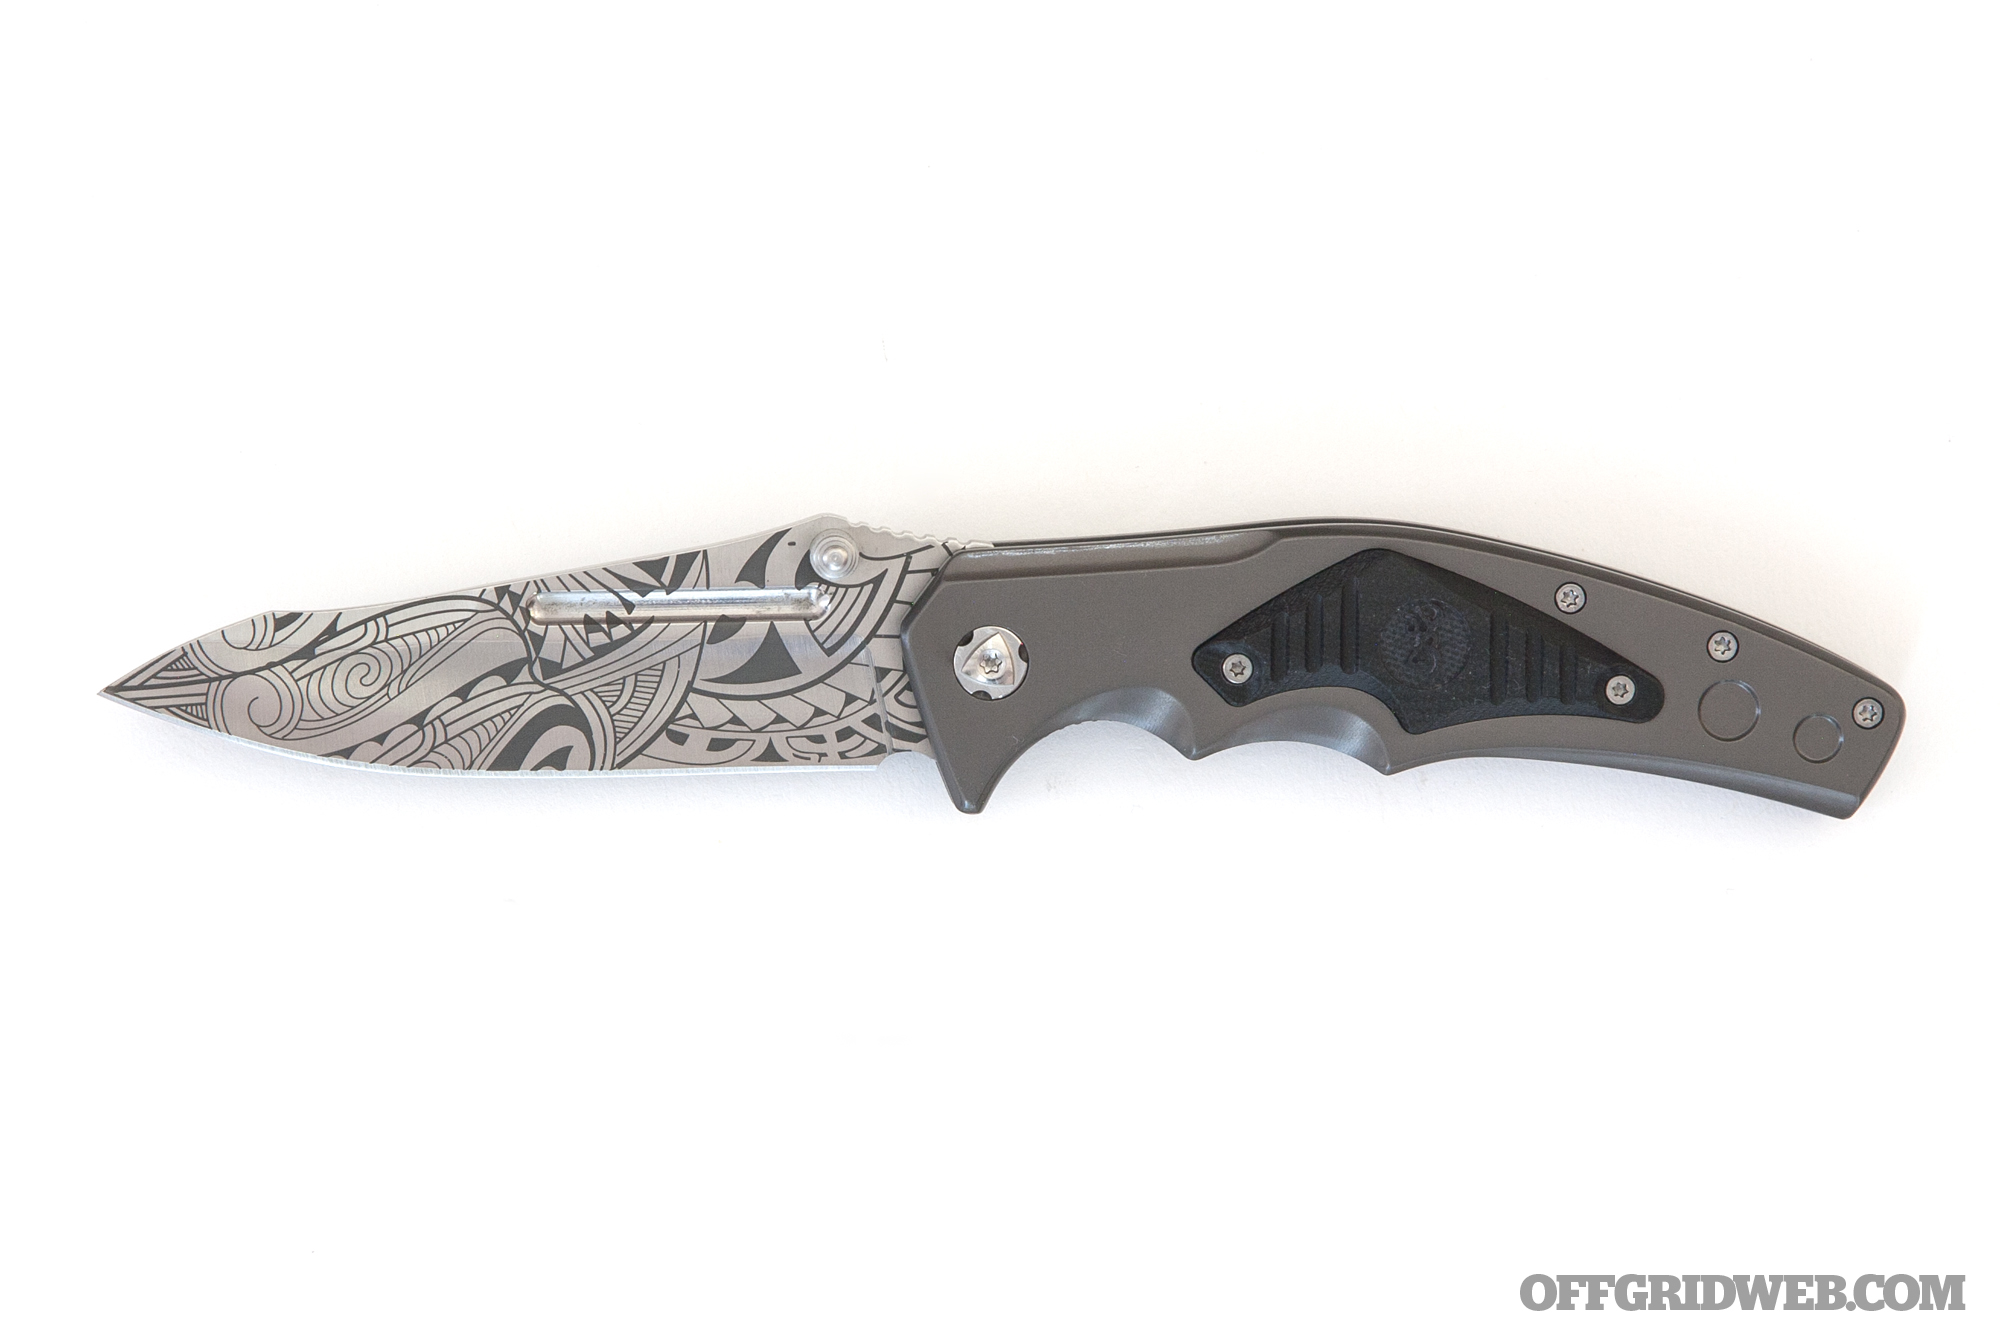
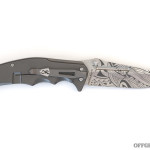
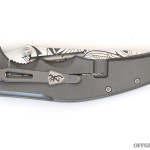
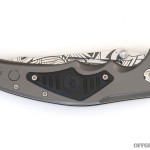
The Wihongi Attachment is a new model for 2017, and its etched tribal motif was inspired by New-Zealand-born martial arts instructor Jared Wihongi. The design was directed by Jared, penned by Russ Kommer, and manufactured in China to keep the price at an affordable $40. The hollow-ground drop point blade is constructed from 5Cr15MoV/7-Cr stainless steel, and the handle is aircraft aluminum with an interchangeable G10 or carbon fiber insert. It includes a removable tip-down pocket clip with the Browning Buck Mark logo.
Pros:
The handle design and jimping on the blade’s spine produce a secure grip.
The tribal motif creates a unique and eye-catching appearance.
Cons:
The frame lock on our sample failed to engage reliably when opening the knife slowly. This is a major safety concern, though it may be an isolated quality control issue.
The Chinese 5Cr15MoV/7-Cr steel is hard to pronounce and wouldn’t be our first choice for long-term durability, though it’s acceptable at this price point.
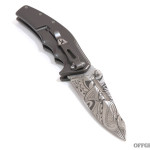
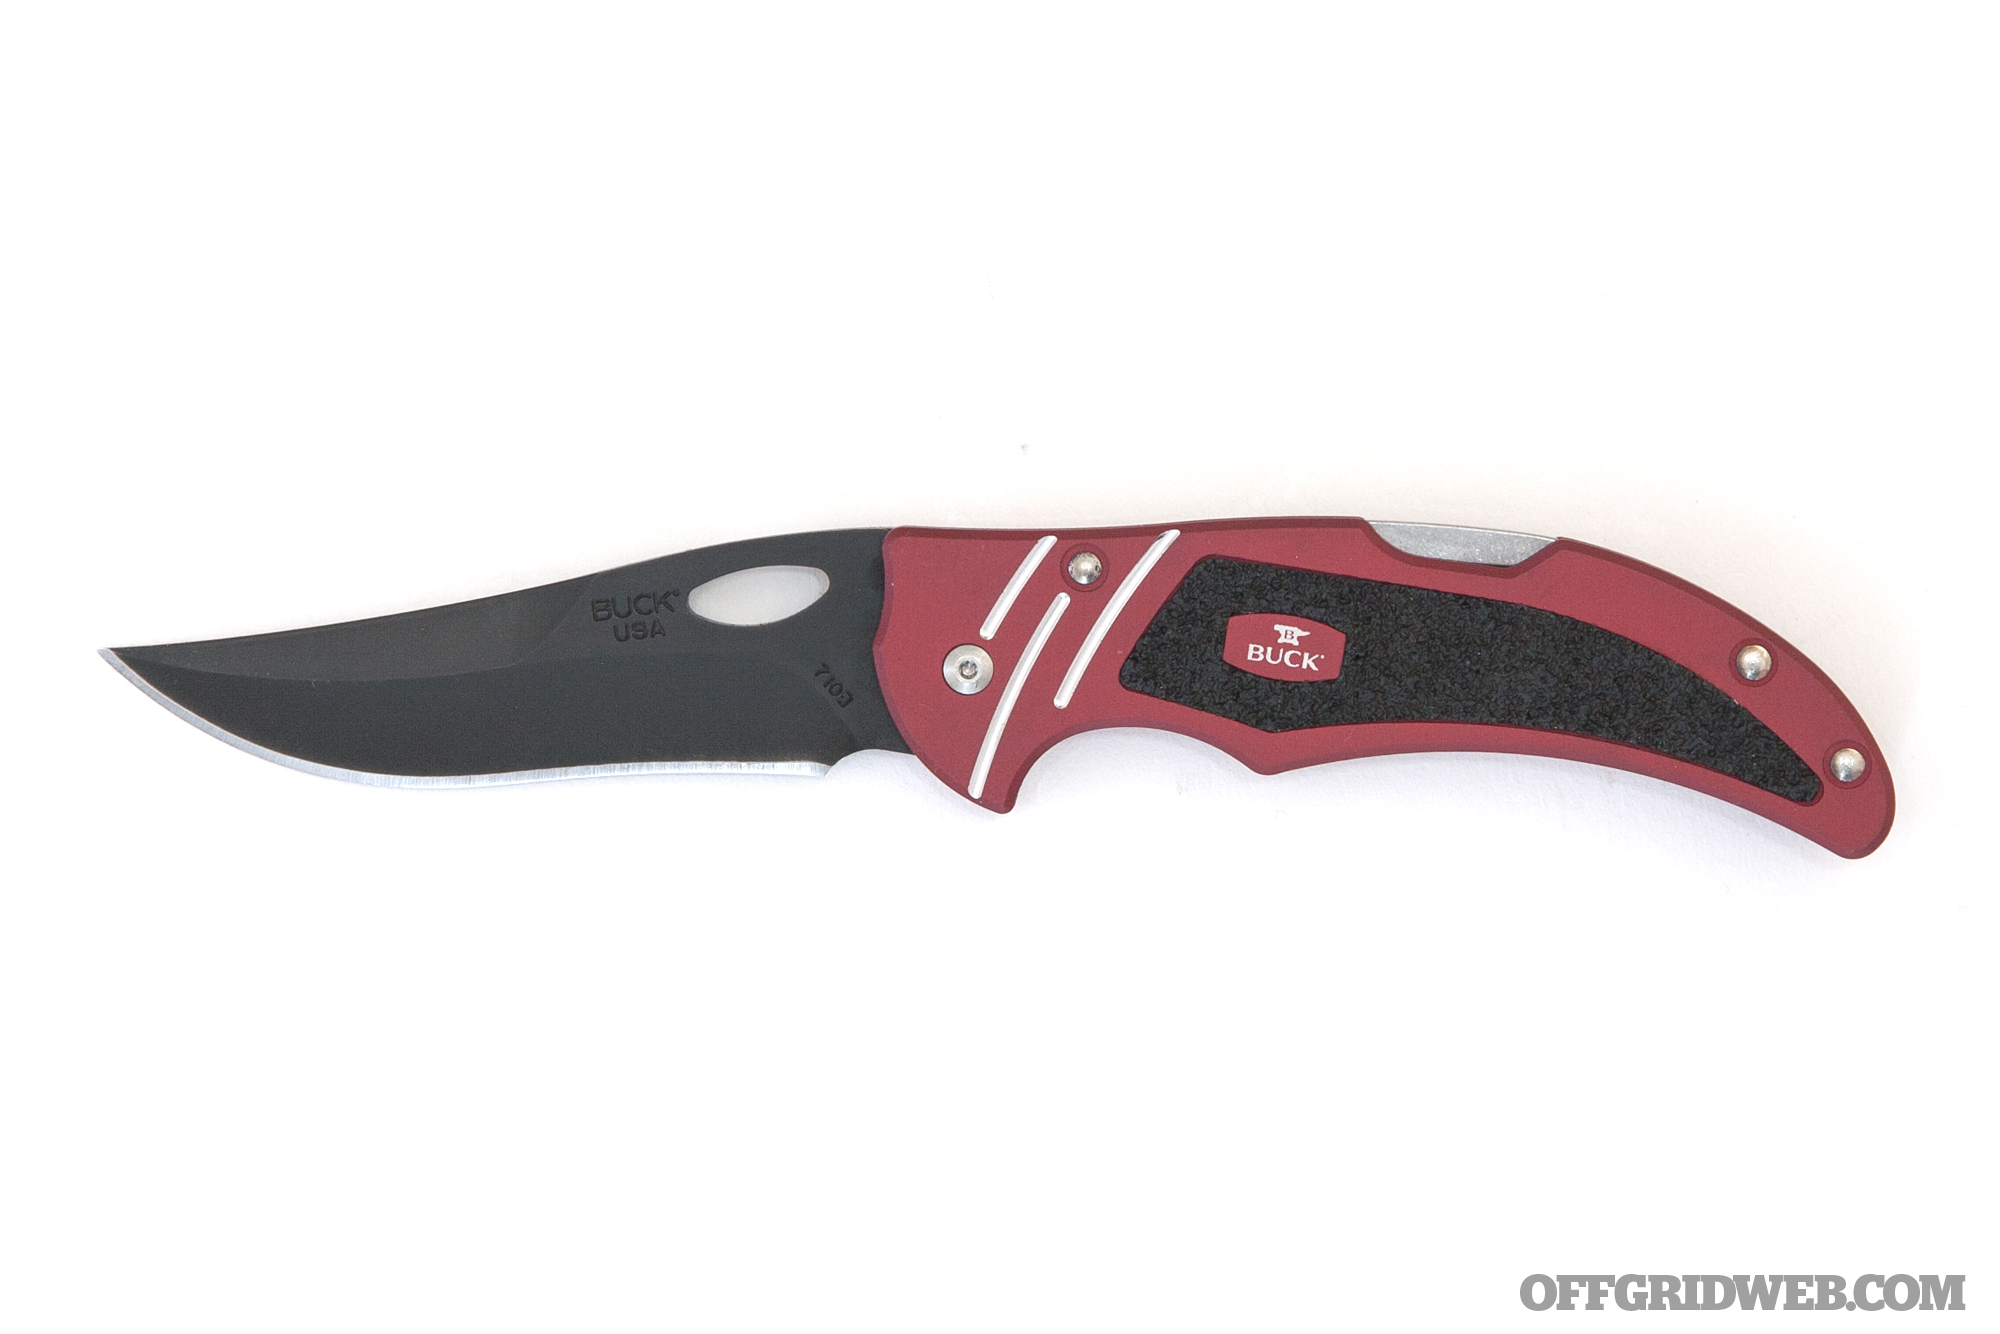
The Buck 710 Volt is an American-made folding knife with a recurved skinner shape inspired by the fixed-blade Buck Kalinga. The blade is constructed from 420HC steel with a black oxide coating and oblong thumb hole, and paired with an anodized aluminum handle. Textured inlays and milled ridges on the handle scales add grip. The backlock mechanism will be familiar to Buck fans, and produces a sturdy lockup. There’s also a removable black-oxide-coated pocket clip.
Pros:
Good ergonomics thanks to a large forefinger groove and textured handle inlays.
Slim and lightweight design makes it ideal for minimalist EDC loadouts.
Cons:
Backlock creates resistance in the closed position, making it tough to open the knife one-handed.
420HC steel dulls quickly, though it’s also relatively easy to re-sharpen.
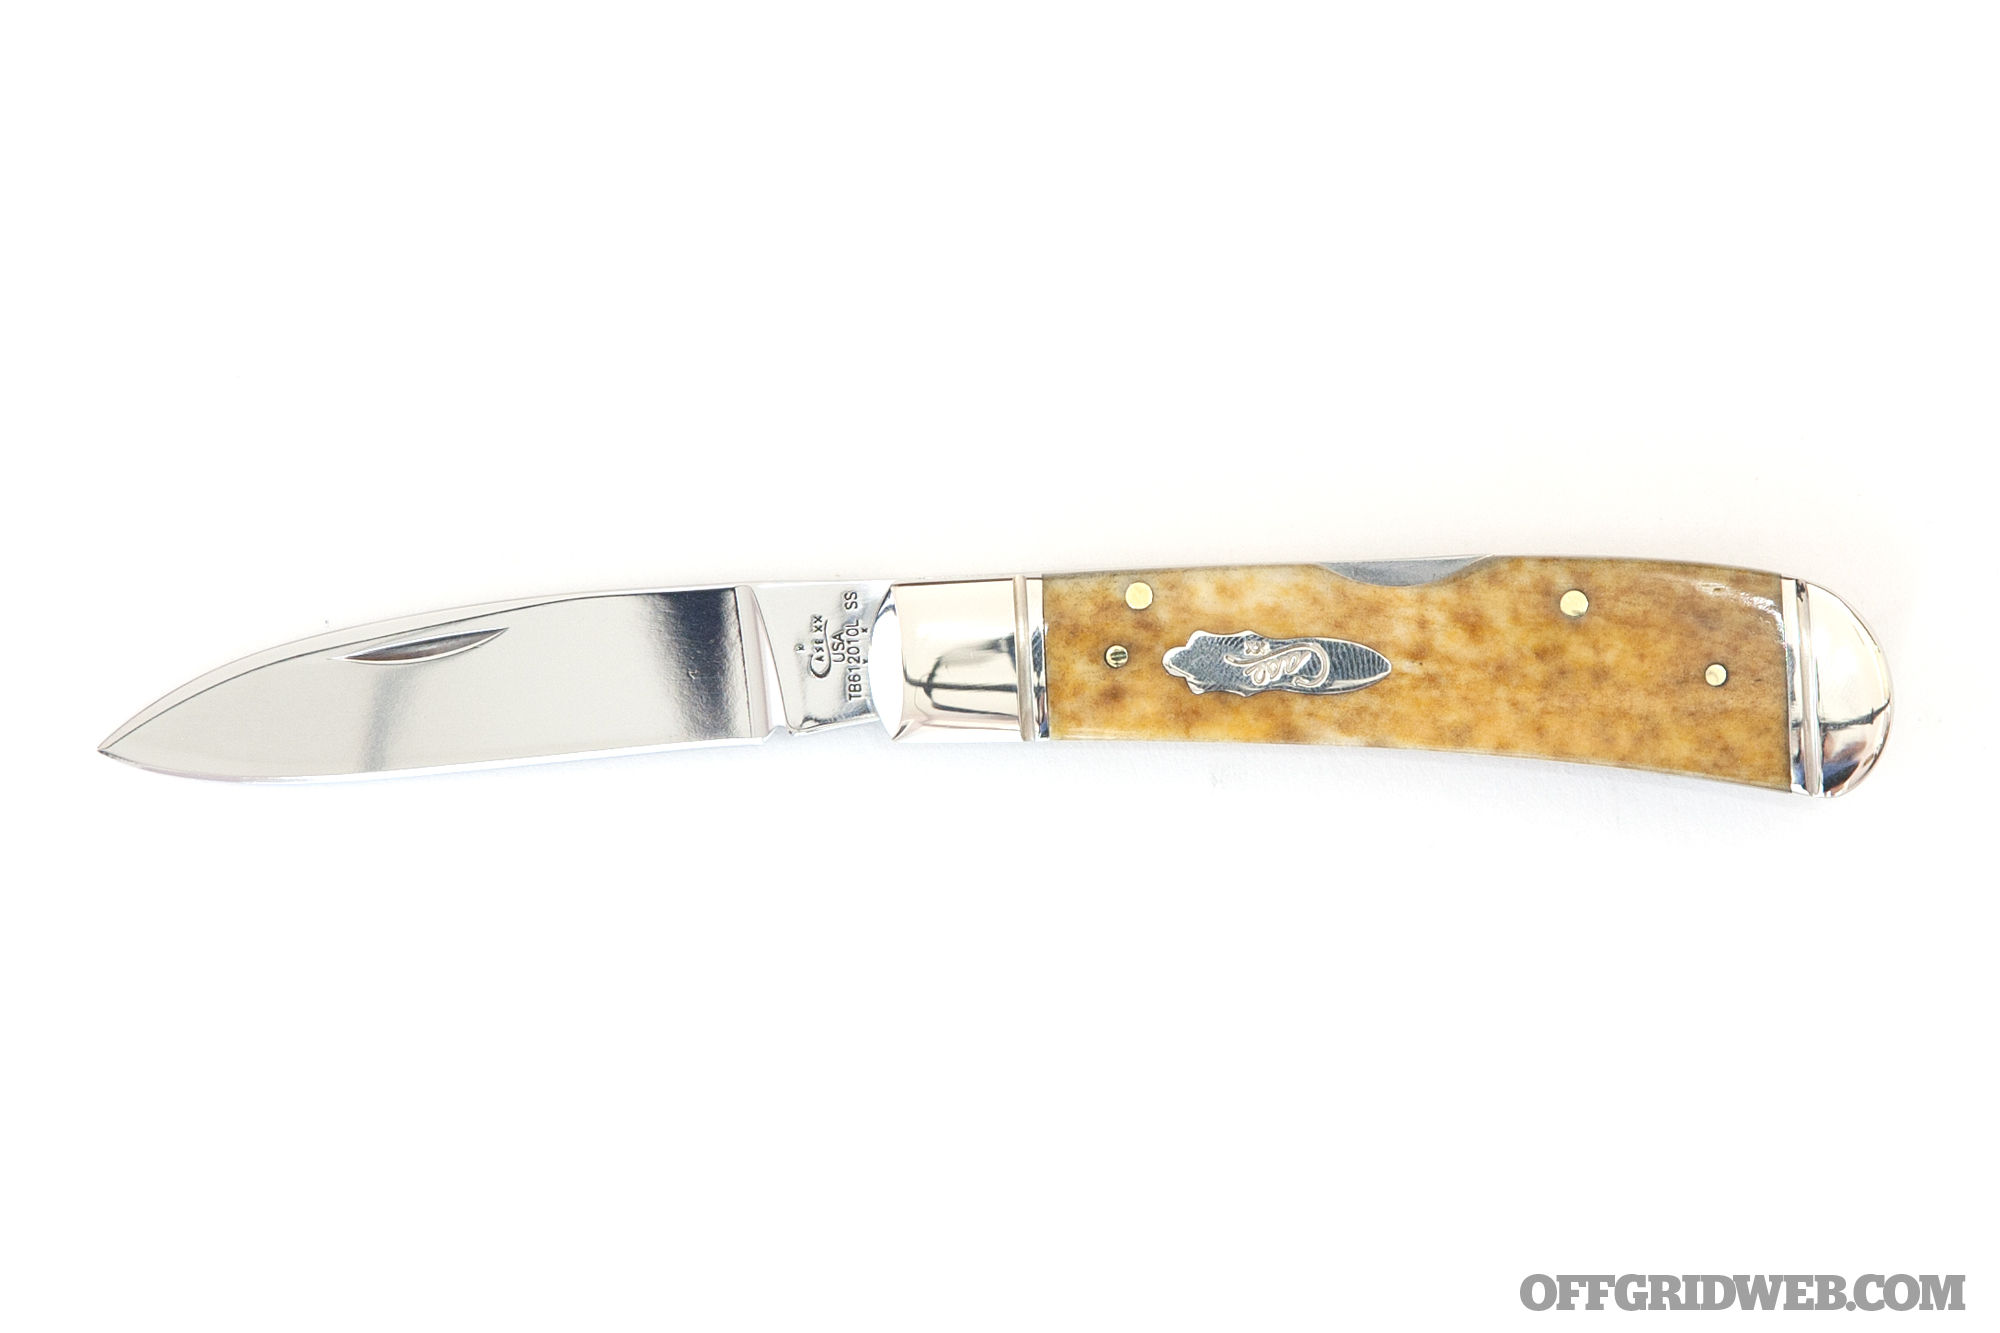
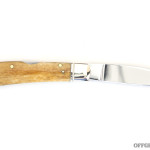
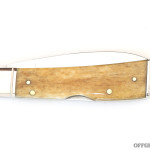
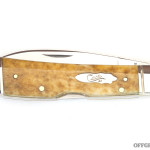
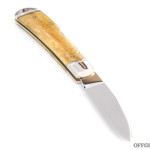
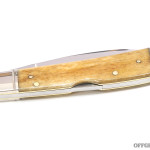
If you’re a real traditionalist, or simply want to add a vintage-style blade to your EDC rotation, the Tribal Lock from W.R. Case is an appealing choice. This American-made compact folder is simple yet classic, and features a mirror-finish stainless steel blade with a nail nick for opening. The handle is composed of a backlock sandwiched between more mirror-finish stainless steel, fluted bolsters, and the handle scale of your choice. Nine scale options are available; we went with smooth antique bone. It may not use high-tech materials or fancy blade geometry, but it’s a beautiful iteration of the timeless gentleman’s pocket knife.
Pros:
Nicely-crafted with excellent fit and finish.
You can practically use the flat of the blade as an emergency signal mirror — it’s that polished.
Cons:
Too small to be used for any sort of heavy-duty survival tasks.
Lack of a clip or key ring means you’ll need to be OK with this free-floating in your pocket.
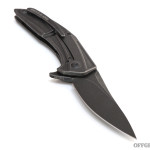
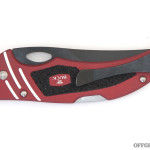
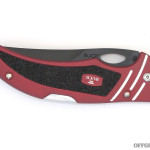
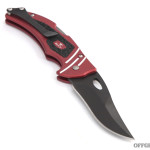
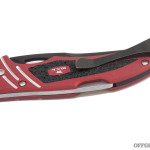
Cold Steel
Immortal OD Green Overall Length: 9 inches Blade Length: 4 inches Weight: 5.9 ounces MSRP: $200 URL:ColdSteel.com
Inspired by the Roman gladius sword shape and designed by Mike Wallace, Cold Steel’s Immortal folder is a huge and hefty knife. The company says its distinctive 4-inch blade is “almost like an extra wide tanto point, but with an angular chisel ground false edge”. It’s made in Taiwan from Carpenter CTS XHP steel, and fitted with a rectangular thumb plate and strong backlock. The handles are scalloped and ridged OD Green G10, though the knife is also available with Coyote Tan scales. The polished stainless pocket clip is reversible for left- or right-handed tip-up carry.
Pros:
Razor-sharp and impressively-durable CTS XHP steel.
The solid backlock and stout blade leave no doubts in our mind that this knife can take a beating.
Cons:
While the pointed blade shape excels at piercing, it’s less adept at delicate slicing tasks.
We’re not wild about the thumb plate, especially when paired with a stiff backlock. This knife is tricky to open one-handed.
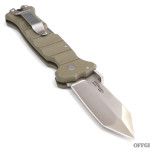
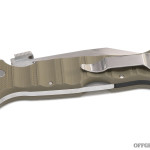
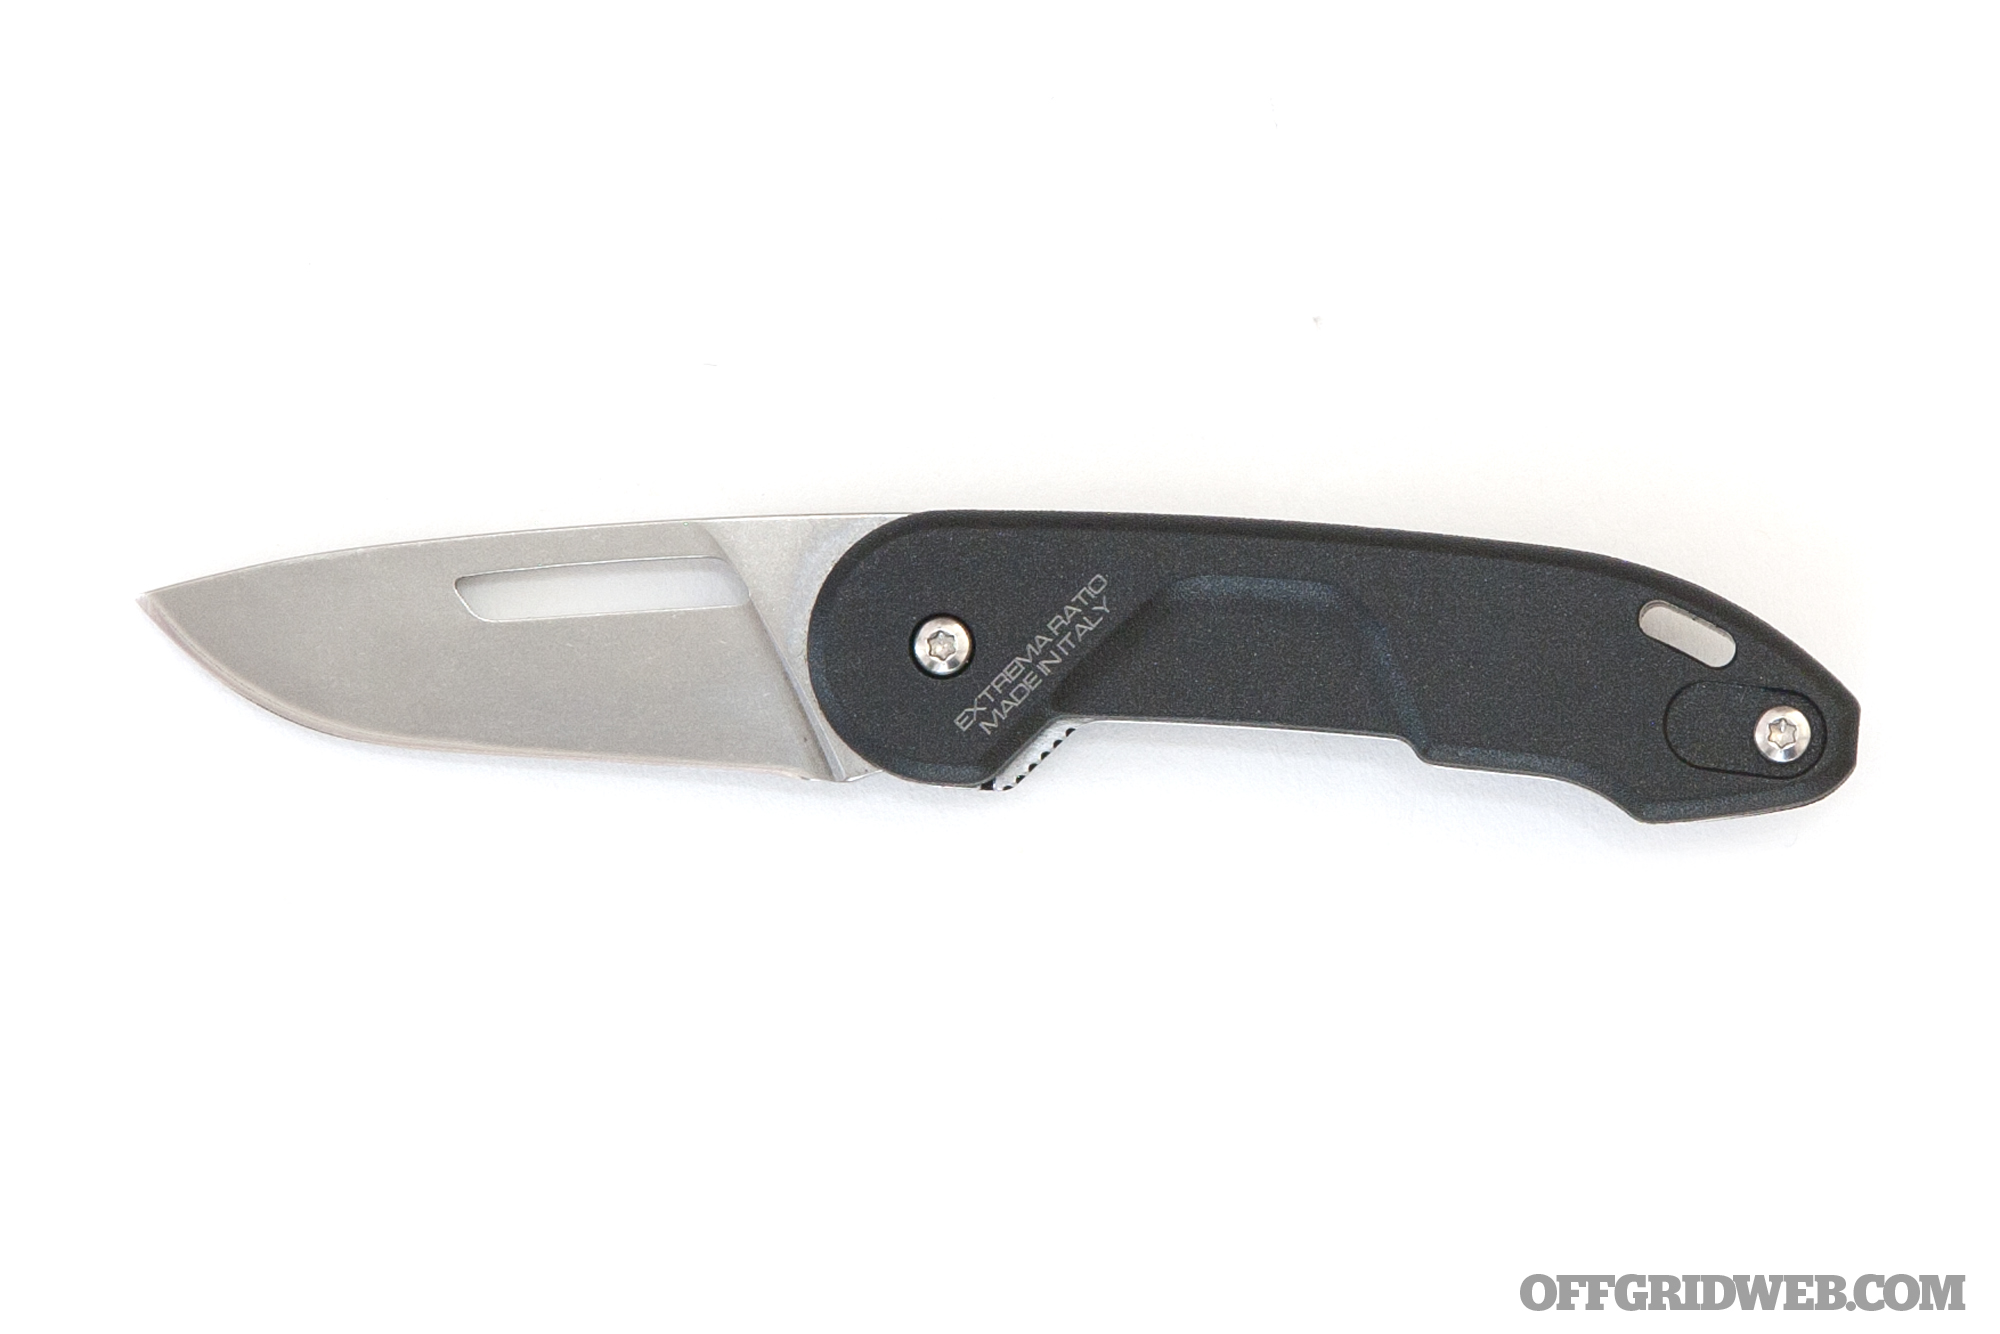
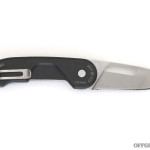
It may not be apparent in the photos, but the BF0 CD knife is truly tiny. As the smallest of the Extrema Ratio Basic Folder series, this 2.1-inch blade fits nicely into the palm of your hand, but its small reversible clip allows it to be carried normally without remaining loose in the bowels of your pocket. The nylon polymer handle contains a small liner lock, and the stonewashed drop-point blade is made in Italy from high-quality Bohler N690 steel. There’s also a small lanyard hole so you can carry it on a keychain, if you prefer.
Pros:
Tiny and lightweight, making it ideal for carry in a shirt pocket or as a backup keychain knife.
Extrema Ratio didn’t skimp on the steel quality even though this is a small blade. Bohler N690 is also used on the company’s larger blades.
Cons:
The liner lock has a very small textured release lever, so closing the blade can be difficult, especially with wet or gloved hands.
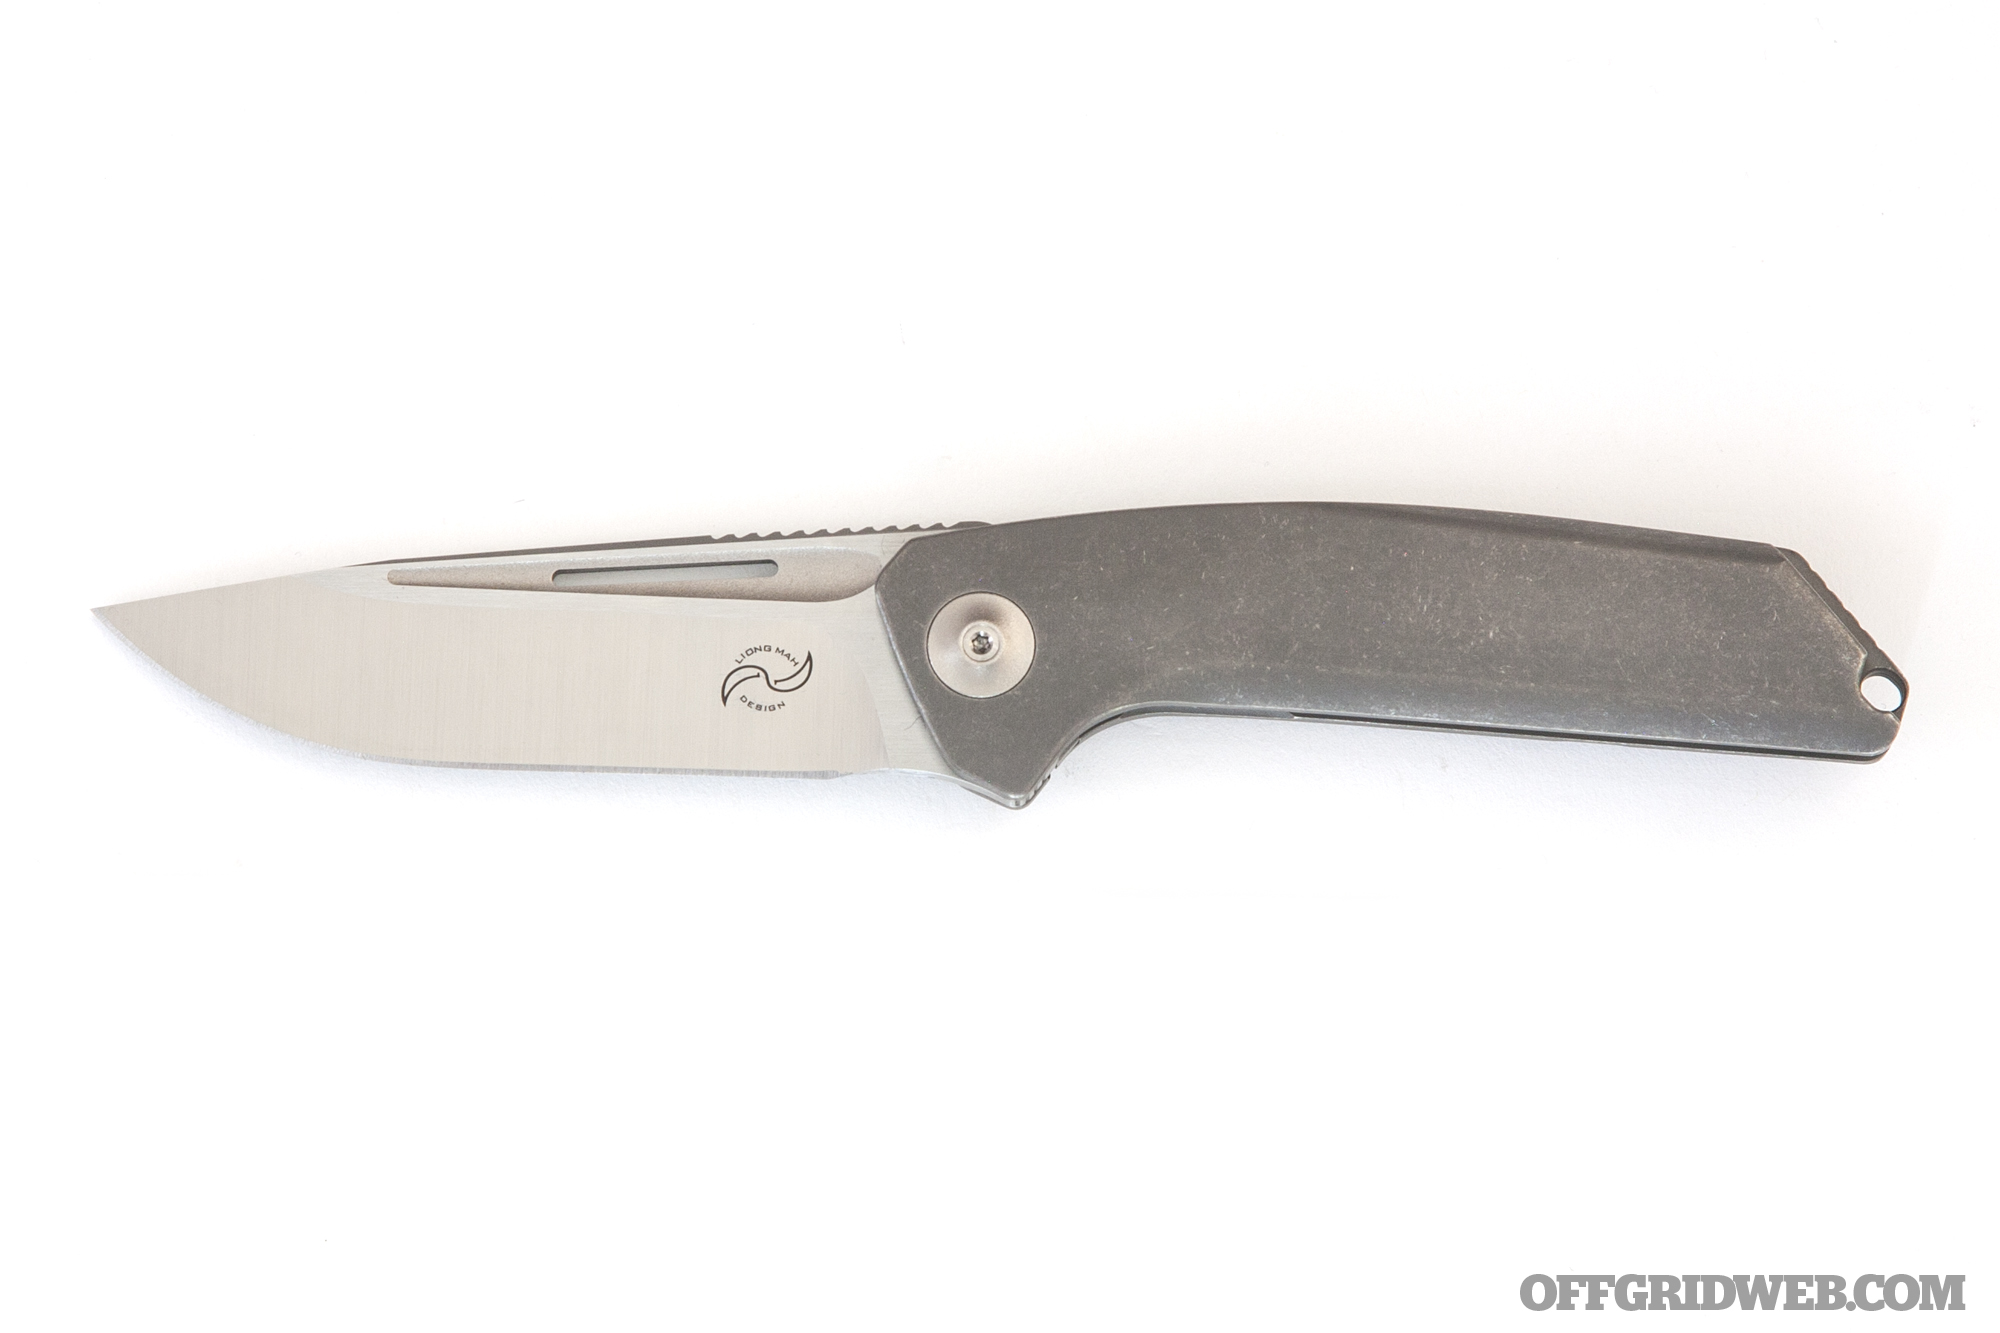
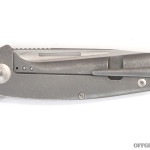
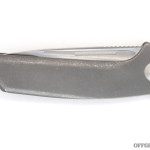
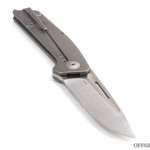
This American-made knife is the creation of legendary designer Liong Mah, who also designed the CRKT Remedy we featured in part one of our guide. The Endevour name appears to be a clever play on the words endeavor (an attempt to achieve a goal) and devour (to consume quickly). Its 3.8-inch blade is crafted from S35VN steel sourced from Texas, then hand-ground and finished. The Endevour can be opened via a textured recess and machined slot in the blade, or via a low-profile flipper which nestles into the handle as the blade pivots into place. Speaking of the handle, it’s machined from a half-inch-thick billet of titanium, and includes a titanium ball bearing and slick blind-screwed titanium pocket clip.
Pros:
Modern and elegant design with many cool details, such as the blind-screwed Ti pocket clip that blends almost seamlessly into the handle.
Highly functional blade size and shape makes this a practical choice for EDC, assuming your budget permits it.
Cons:
The low-profile flipper lever is a little too low-profile, and can be difficult to use reliably without concentrating and adjusting your grip.
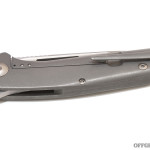
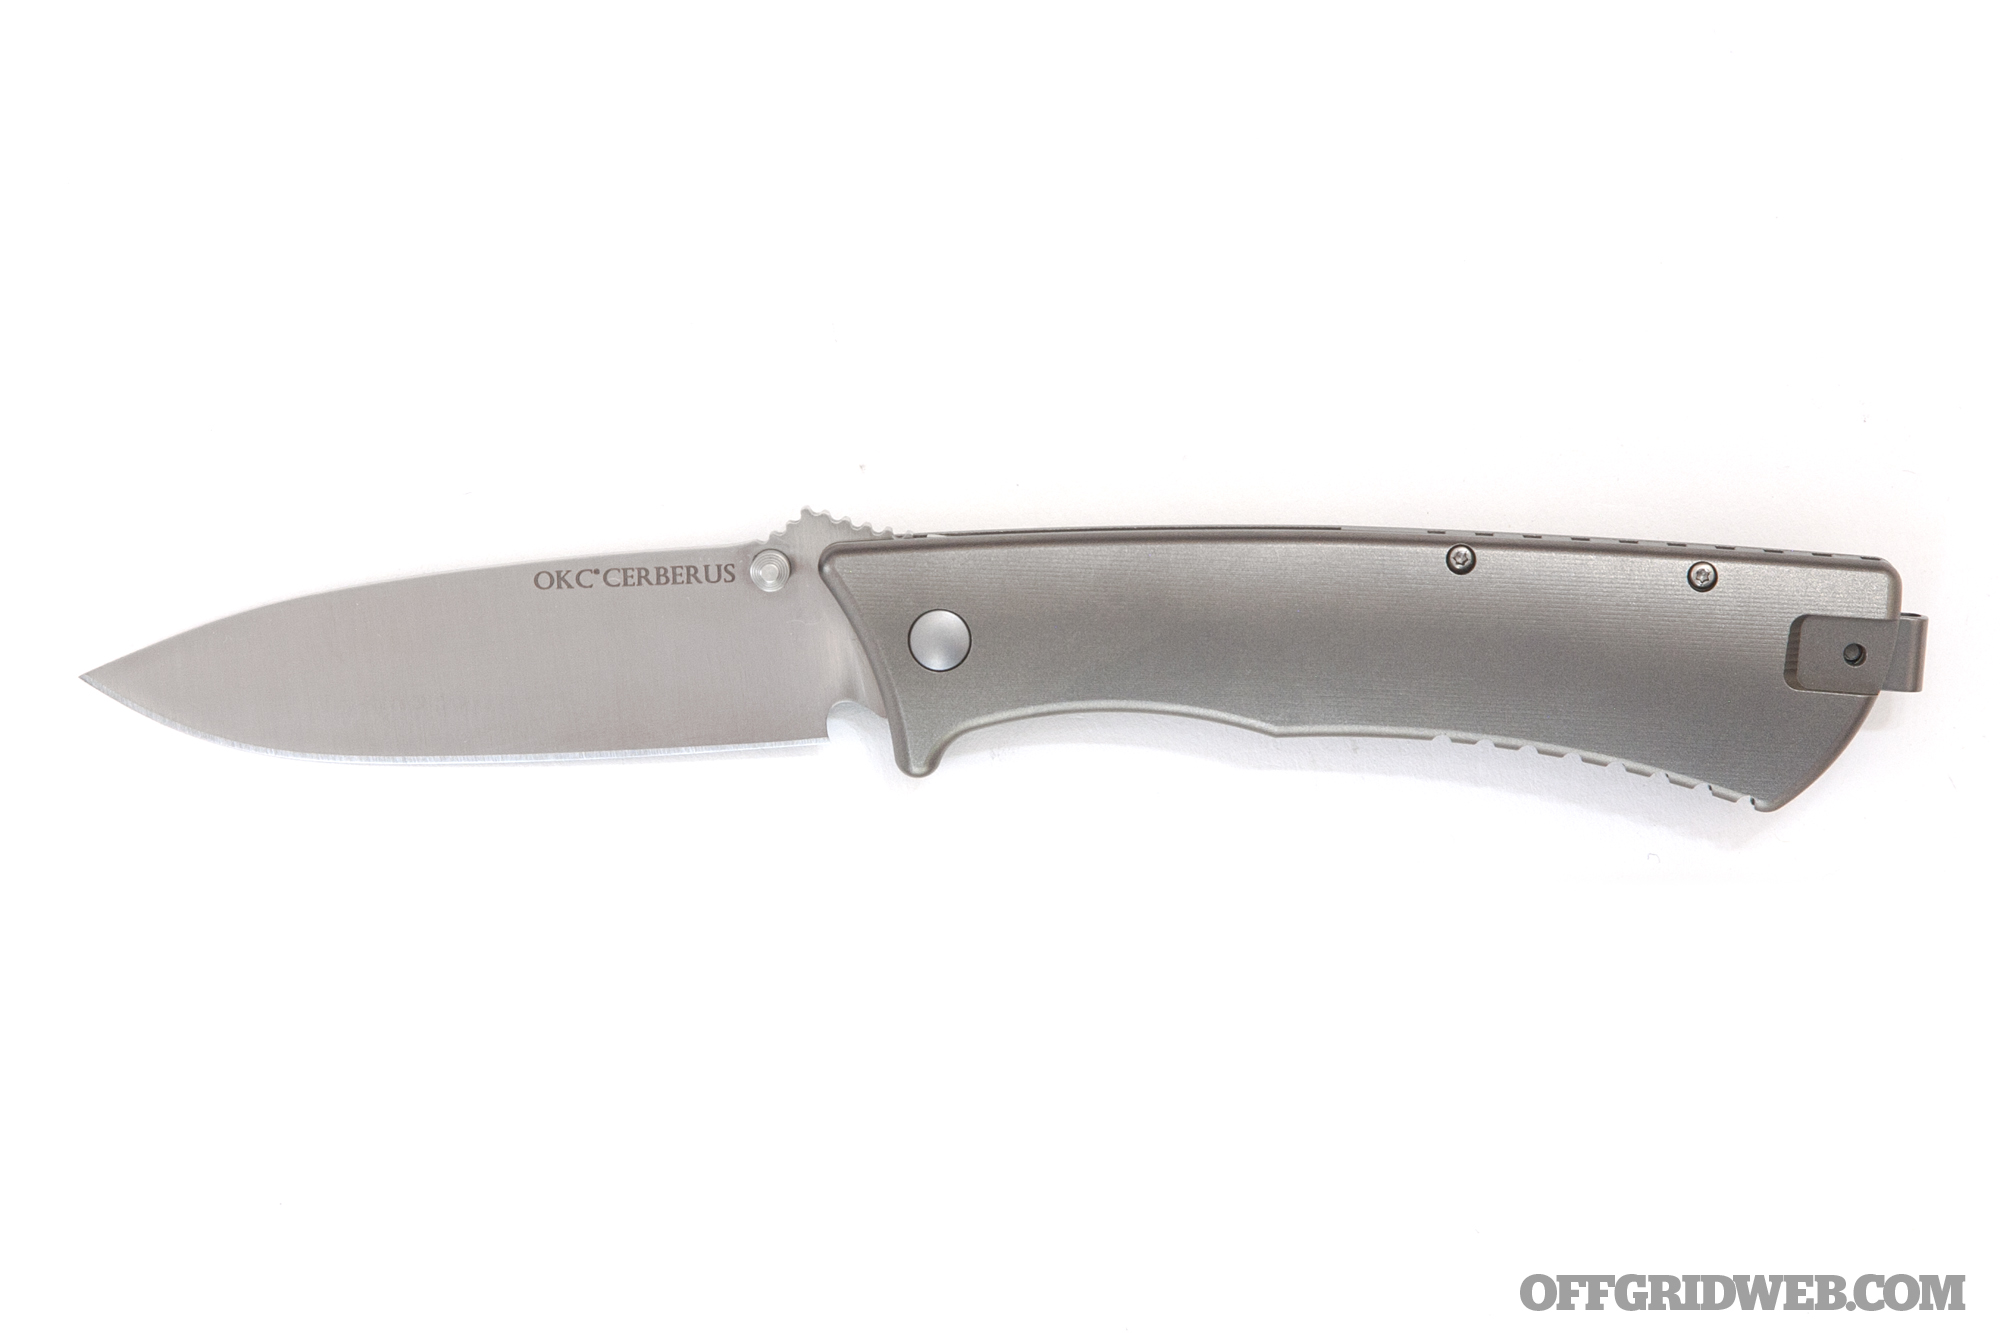
Named after the three-headed hound of Hades in Greek mythology, the OKC Cerberus folder is not to be confused with the company’s Cerberus fixed blade, an unrelated design. This large knife is made in Taiwan from respectable materials — namely D2 tool steel for the blade and titanium for the handle. Said titanium features a simple satin finish, frame lock, and matching titanium backspacer. There’s also a reversible skeletonized pocket clip. The drop-point blade features a prominent thumb ramp and ambidextrous thumb stud.
Pros:
Thumb ramp provides added force and control for precise cuts.
Durable D2 steel and a simple drop-point blade make this a good choice for utility or combat.
Cons:
While we have no complaints about the materials used, the design isn’t what we’d call exciting. A little added texture on the handle would improve both appearance and grip.
The overall length of over 9 inches seems a bit excessive for most EDC applications, and makes the knife heavy despite extensive use of titanium.
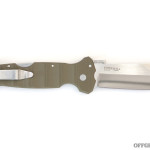
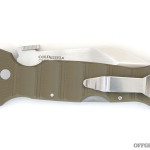
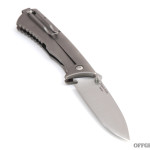
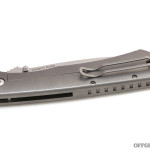
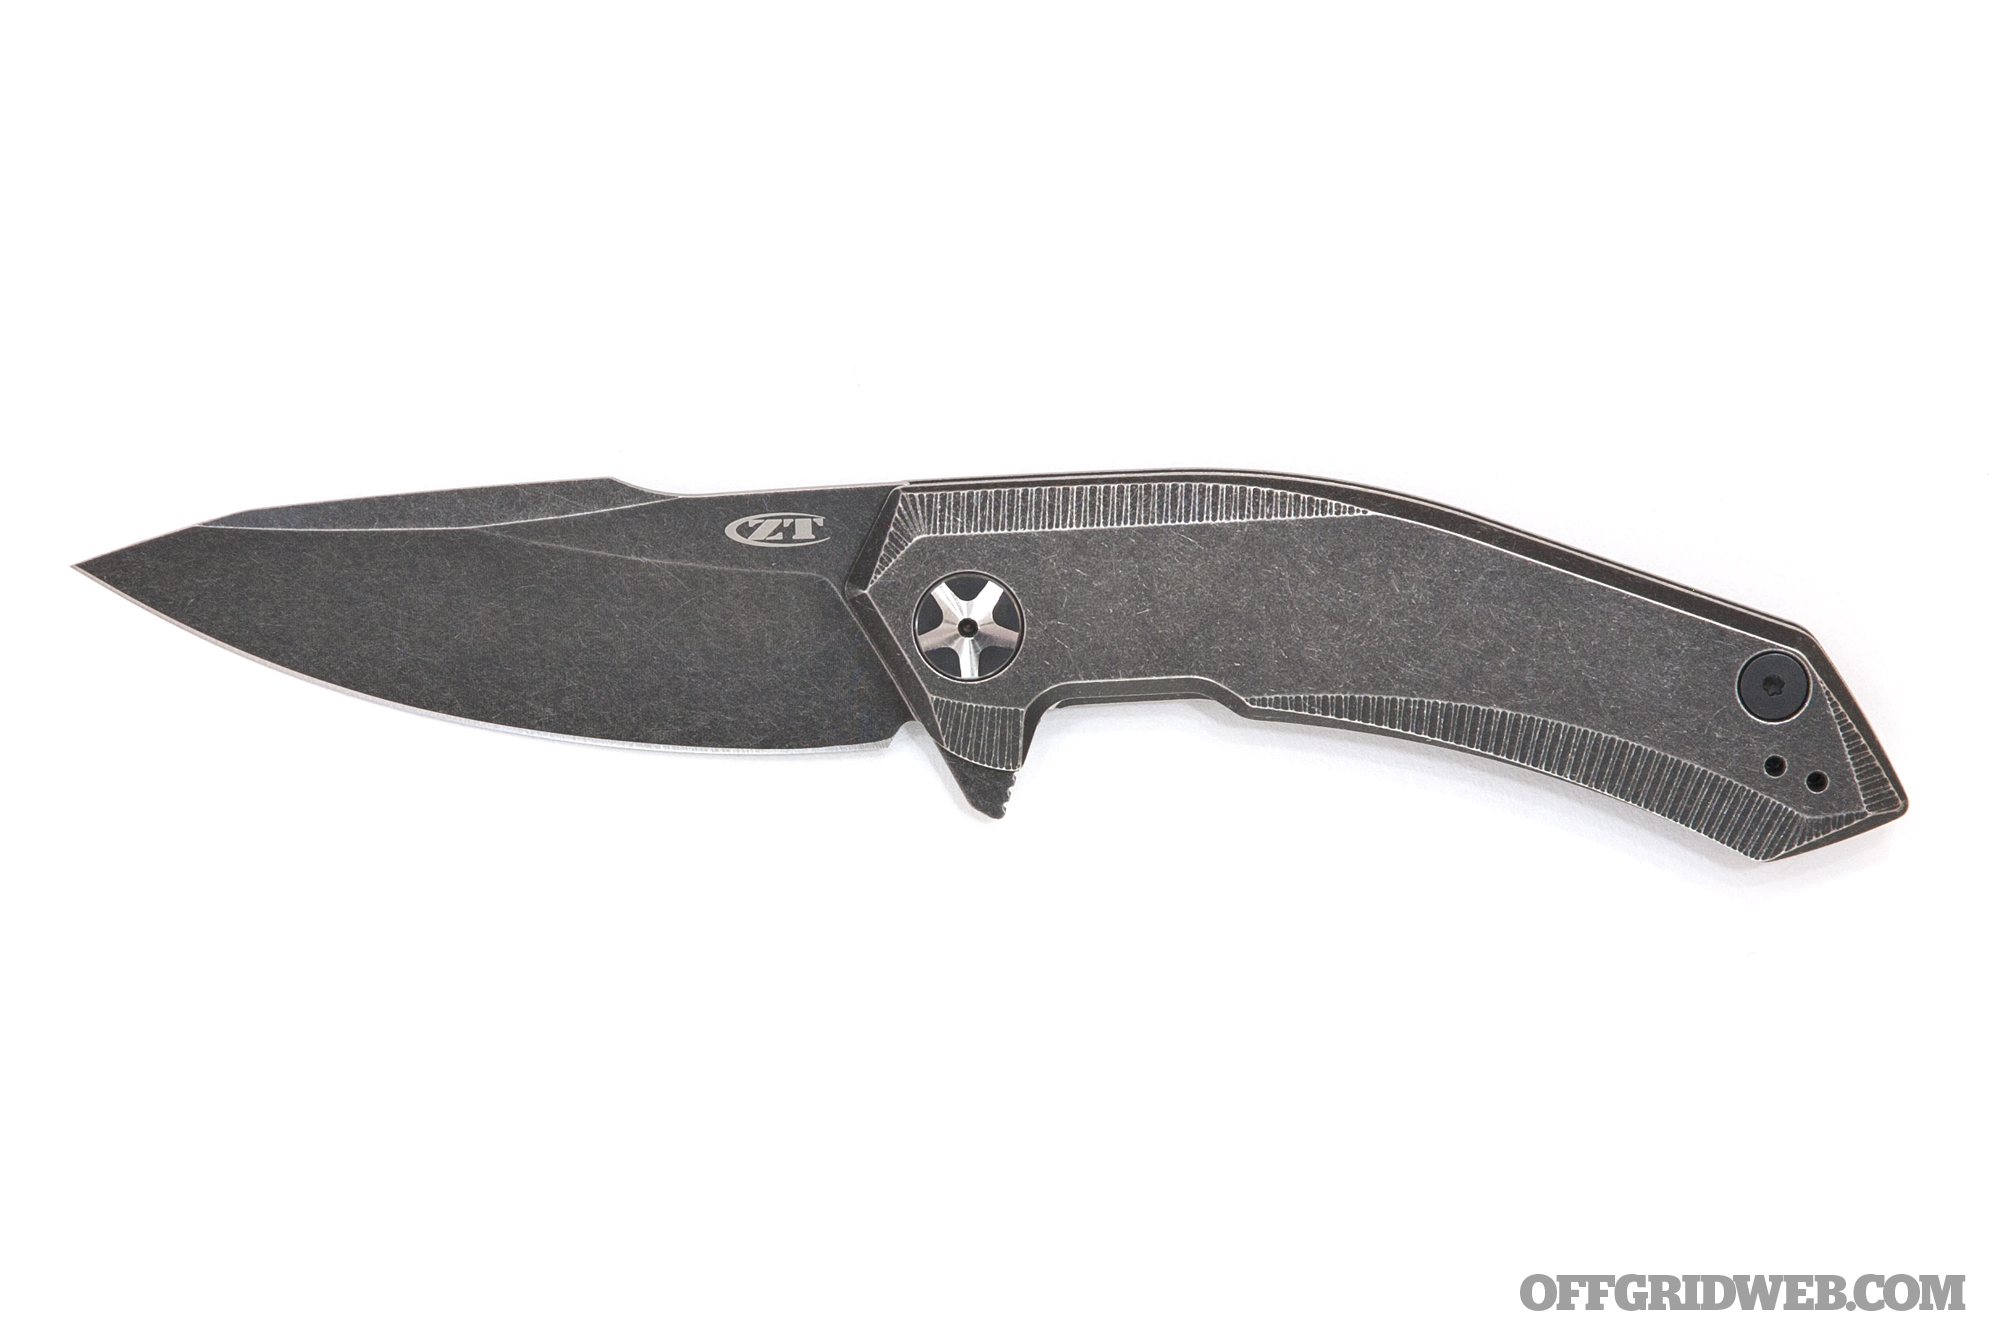
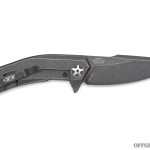
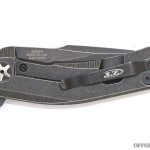
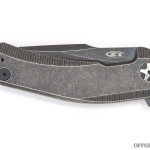
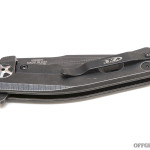
Zero Tolerance calls the styling of the 0095BW “dramatic”, and we agree. Its new BlackWash finish accentuates the aggressive angles of the titanium handle, and highlights details like the ridged milling marks on its perimeter and the machined hardware surrounding the KVT pivot bearing. Its frame lock includes a hardened steel lockbar insert. The blade is composed of S35VN steel, with a large flipper and a small thumb ramp on the spine. The pocket clip is reversible for left- or right-handed tip-up carry. Like all Zero Tolerance knives, the 0095BW is made in the USA.
Pros:
Of all the knives in this guide, this is the one I found myself carrying most consistently. It cuts beautifully, flicks opens smoothly, and quickly found its way into my EDC rotation.
With a cohesive blend of smooth curves, geometric angles, and a deep black finish, the 0095BW has visual appeal in spades.
Cons:
Out of the box, the detent felt excessively stiff, causing the flipper’s hard edges to dig into your finger as the knife opens. However, after a short break-in period, this improved substantially.
As a result of the handle and clip design, it rides fairly high in the pocket. A deep-carry clip would’ve been a welcome addition.
Anybody who stayed up too late in the mid-1980s remembers the cringe-worthy infomercial for the Showtime Rotisserie. This appliance cooked Flintstone-sized hunks of meat. Studio audience members bellowed like parrots, “Set it and forget it!” Seth McGinn’s CanCooker makes the same type of claims, suited for cooks on the go.
Inspired by the meals cooked in a 10-gallon cream can and served to ranch hands on his grandparents’ cattle farm in Nebraska, Seth McGinn wanted to replicate his childhood experience but had trouble finding a modern can that could handle the task. In 2009, he brought his own to market, allowing people to cook a lot of food with little effort.
Made from FDA-approved 1060 anodized aluminum, the CanCooker comes in three varieties: the 4-gallon Original, the 2-gallon CanCooker Jr., and the 4-gallon Bone Collector (which appears to offer nothing different than a dire name and a deer skull logo for a penny less than the Original). They’re 10 inches in diameter, but the Jr. is 3 inches shorter than the 10-inch stature of the other two.
All three, however, offer the same benefits. CanCooker makes a complete meal in about 40 minutes and can work on any heat source: stovetops, grills, fryers, camp stoves, campfires, and the Multi-Fuel Portable Cooktop offered from the company. The CanCooker’s insides are coated with a nonstick surface.
Food and Function
We reviewed the CanCooker Jr. Adventure Special kit, consisting of the CanCooker Jr. and a Multi-Fuel Portal Cooktop. Our sample kit also contained a small plank cutting board (normally sold separately for $18) and a couple examples of the seasonings. However, it didn’t include the optional two-piece rack, so we felt obliged to purchase one for $14 since every recipe in the manual suggested it.
The Multi-Fuel Portable Cooktop is a single burner unit capable of 10,000-btu output and can be fueled by butane or propane. It’s compact for a single-burner stove, but not entirely practical for bugging out. This is a basecamp stove, packaged with a hard-shell plastic case.
The concept of the CanCooker is simple. Put in the rack, dump in the food in a particular order (usually a bed of vegetables then meat on top), and add 12 ounces of a liquid (in our case, a Belgian ale). Clamp down the lid (which has a silicone gasket), and fire up the stove. Then walk away.
The CanCooker converts whatever liquids you put in there into steam, which thoroughly cooks the food. The concept of steam cooking started in the American Southwest about 7,000 years ago, and it’s considered a healthy alternative to frying or other stove-top cooking methods that involve oils.
We were apprehensive to walk away from the stove while it was spouting steam like an old-timey locomotive, but as a watched pot never boils, 3 pounds of sausage, peppers, and onions never cooks. So that’s what we did.
After 30 minutes of steaming and a 10-minute rest, everything was cooked to perfection. The sausage was moist and tender, and the seasonings had melted into the meat. The vegetables retained their full flavor and didn’t absorb any from the sausage, while the Belgian ale provided a subtle crispness to the whole dish.
Overall
The CanCooker — especially the Jr. — would be perfect for an RV or a remote cabin where the fuel may not be reliable and you would have to use different sources. The CanCooker can be placed directly on burning coals if need be (though you’ll stain the aluminum with soot). It’s a convenient and versatile tool — not to mention that our 2-gallon version prepared enough food to feed more than a few people.
This, however, is by no means a cooking vessel one could take in a bug-out situation … or on a hiking trip … or anywhere where space is an issue. It’s light, at 2.1 pounds, but cumbersome because of its girth (though it has a cinch sack). And forget its cooktop — we’re sure you can find a much smaller portable stove that could fit inside the CanCooker, should you choose to pack it with your survival cache.
Still, it’s a solidly constructed and well-designed piece of cookware, and it functions exactly as promised. We’re still baffled by the Bone Collector version (and the penny savings) though. Maybe people steam bones they’ve collected. Frankly, we don’t want to know. We’ll stick with the sausage, thanks.
Make & Model Seth McGinn’s CanCooker CanCooker Jr. Adventure Special
We all have that special person in our life who just doesn’t get it, right? They don’t understand EDC, survival, or anything even remotely related to our lifestyle. It seems like they have no interest in learning, either. It’s baffling at times to have a loved one repeatedly brush you off when you’re trying to arm them with information that could potentially save their lives in a worst-case scenario. One would think that just watching the news would light a fire under their butts.
As a wife and mother, I can attest that nearly all women already think about worst-case scenarios. They’re habitually the storyline of our nightmares and always lurking in the recesses of our minds when we’re awake. So even with that innate sense of concern, why then aren’t more women into survivalism?
Women are often afraid of confronting the issue because then they’ll have to deal with it —hence, why some women don’t want to talk about it at all. Ignorance is bliss? Fortunately, knowledge can combat fear.
From Adversary to Advocate
I’m not law enforcement or military, just a wife and a mother who happens to really enjoy learning and teaching survivalism and firearms. Having grown up in Alaska, I’m always mindful of personal protection. Whether you’re camping, hunting, or just being vigilant of the state’s drug and alcohol problems, you need to be aware or you could very well get killed.
Still, when I first got married, my husband was light-years ahead of me in this survival mindset. It seemed like the only things he wanted to talk about were everyday carry (EDC), firearms, and impending doom. This was a sore spot in our marriage until I bluntly told him that it scared me, and he needed to back off. Those conversations made me nauseous and left me wide awake at night.
Fortunately, my husband listened. He drastically reduced the amount of discussions about this topic, but did it in a way in which I could still ask questions. It took more than a year of processing this information before I was ready to dive in.
I liken it to learning how to drive a car. Sure, the excitement is there, but deep inside there’s that inner voice that’s terrified of getting in a wreck. Eventually everyone overcomes that hurdle and gains enough experience to make driving practically second nature. So, what changed? Knowledge. You learned how to operate that tool and became comfortable with it. Survivalism is the same way. The more knowledge one has on survival, the less daunting it becomes.
Converting Others
I’ve spent the last several years trying to get my close female friends and relatives interested in prepping and survivalism. It’s been challenging to say the least. There’s a certain fear or anxiety that women have when entering a role that’s traditionally seen as a man’s responsibility —providing the last line of defense for the family.
Here are five of the most common excuses I hear from women for not wanting to prep and train —and how to deal with them:
1. “Bad things will never happen to me.” I wish I could go back to this kind of naivete. Bad things can happen to anyone at any time. If you don’t believe me, find a first-responder —they’d surely have many stories to change your mind. More than likely, this is something that ladies will have to come to grips with on their own terms.
2. “I already carry so many things, why add more?” What some women don’t realize is that adding a few extra items to their purse, pockets, or diaper bag increases their survivability exponentially. A greater level of preparedness is worth a slightly larger or slightly heavier handbag. Fellas, you might need to go on a purse shopping trip —a win-win for both of you.
3. “I will never use those items.” That’s great! Hopefully no one will need them, but it’s better to have and not need, than to need and not have. EDC tools are much like a fire extinguisher or a firearm. There’s no substitute for some of these tools in an emergency.
4. “It’s the husband’s job to protect the family.” Many women think this way, but what they fail to understand is that husbands can’t protect them if they’re not there. Of course, husbands want their wives to be safe and sometimes that comes in the form of harping about bug-out bags, concealed guns, and the right mindset. Instead, be patient. Rather than lecture her, offer her a chance to ask questions or send her to the appropriate courses.
5. “I’m too busy being a mom to think about survival.” Being a mom and/or a wife is tough sometimes. There’s laundry, driving the kids, setting up play-dates, shopping, and the list goes on —not to mention our own careers. When a mother says, “Being a mom is my first priority,” she may not make the connection that the safety of the children also rests on her having the proper mindset, equipment, and training. Find a time where she isn’t distracted to approach her with this information.
Mothers make natural preppers, as they have to ensure not only their own safety but also that of their children. Some extra gear and training, and the right mindset, can keep everyone safe.
Training the Converts
If you’ve taken your time and eased up on the “sky is falling” tactics, there’s a strong possibility you’ll eventually seduce your significant other to the survivalism side. If she’s ready to prep and start learning, here are some ways to keep her interested:
Keep the Criticism Constructive: If you want the lady in your life to dive into this world, don’t make fun of her. There’s no better way to turn her off than to ridicule her questions or concerns. We didn’t grow up playing with G.I. Joe action figures or pretending to be cowboys and Indians. Most of us were given Barbies and baby dolls and groomed to be nurturers and caregivers. Keep the feedback positive and focused on improvement.
Don’t Do it Yourself: Most women don’t have that primal survivalist mentality, especially in the presence of their husbands or boyfriends. But if you split up the couple and the woman is put into the position of being the primary protector, her inner mama bear will come out. Oftentimes, she’ll be just as fierce, if not more so, than her male counterpart. So, if you’re a guy trying to teach your wife, it’s often more effective to ask a trusted friend to do so instead. It’s hard to go from equals as husband and wife to the power disparity of teacher and student. Better yet, sign her up with a reputable instructor or two who can teach her self-defense and survivalism.
Be an EDC Enabler: How do you get women to carry more survival tools with their EDC gear? Make it easy. My husband put together my first EDC kit. I can’t say that I knew how to use everything at first, but over time I asked questions and started doing research. When my husband was deployed with the U.S. Army and I became the sole protector of our children, I used this time to practice. I was given the space to process all the information and soon saw how much it benefited me.
Don’t Pink it and Shrink it: There isn’t a lot of tactical or survival equipment made specifically for females, relatively speaking. So, we have to tweak some things and make do with others. Many companies think that by making their products pink and small that they become female friendly. That’s just condescending. Don’t automatically assume women want the fuchsia-colored go-bag. Instead, give her the opportunity to try out as many different models of gear as possible until she finds one to her liking.
Don’t Convert the Diaper Bag: I’ve never been the kind of mom who just throws her wallet, phone, and keys into a diaper bag. I want a separate pack so I don’t confuse a diaper bag with my EDC kit. In a dire situation, if I need to leave an area quickly with my kids, I can drop the diaper bag and replace its contents later.
The author and her husband, a U.S. Army paratrooper, practice some fire-starting techniques.
The Sell Job
Getting the lady in your life into prepping isn’t rocket science. It just has to make sense to her. Start slowly and present it in a way that shows your concern for her safety. She’ll pick up on that. Perhaps start with a flashlight and a multitool. However, don’t be that guy. You may be thinking it, but save your hard-core prepper what-if sessions for your guy friends (for now).
Also, don’t be offended if she doesn’t want to learn from you. After all, it’s not easy to take someone seriously as an educator if you’ve already seen them in their birthday suit. Give your lady space to learn, ask questions, and process their journey to becoming a survivalist. Dont’ scare her to death, she needs time to associate the correct response with each potential situation, which is proper EDC and mindset. Remember, knowledge always trumps fear.
About the Author
Nila Rhoades is originally from Alaska, but currently resides in Northern Colorado. She is the wife of a U.S. Army paratrooper and has two handsome boys. She has spent the last several years researching firearms, prepping, and survivalism, and now teaches other women how they can help their family survive a worst-case scenario. She also loves peanut butter ice cream. www.milspecmom.com
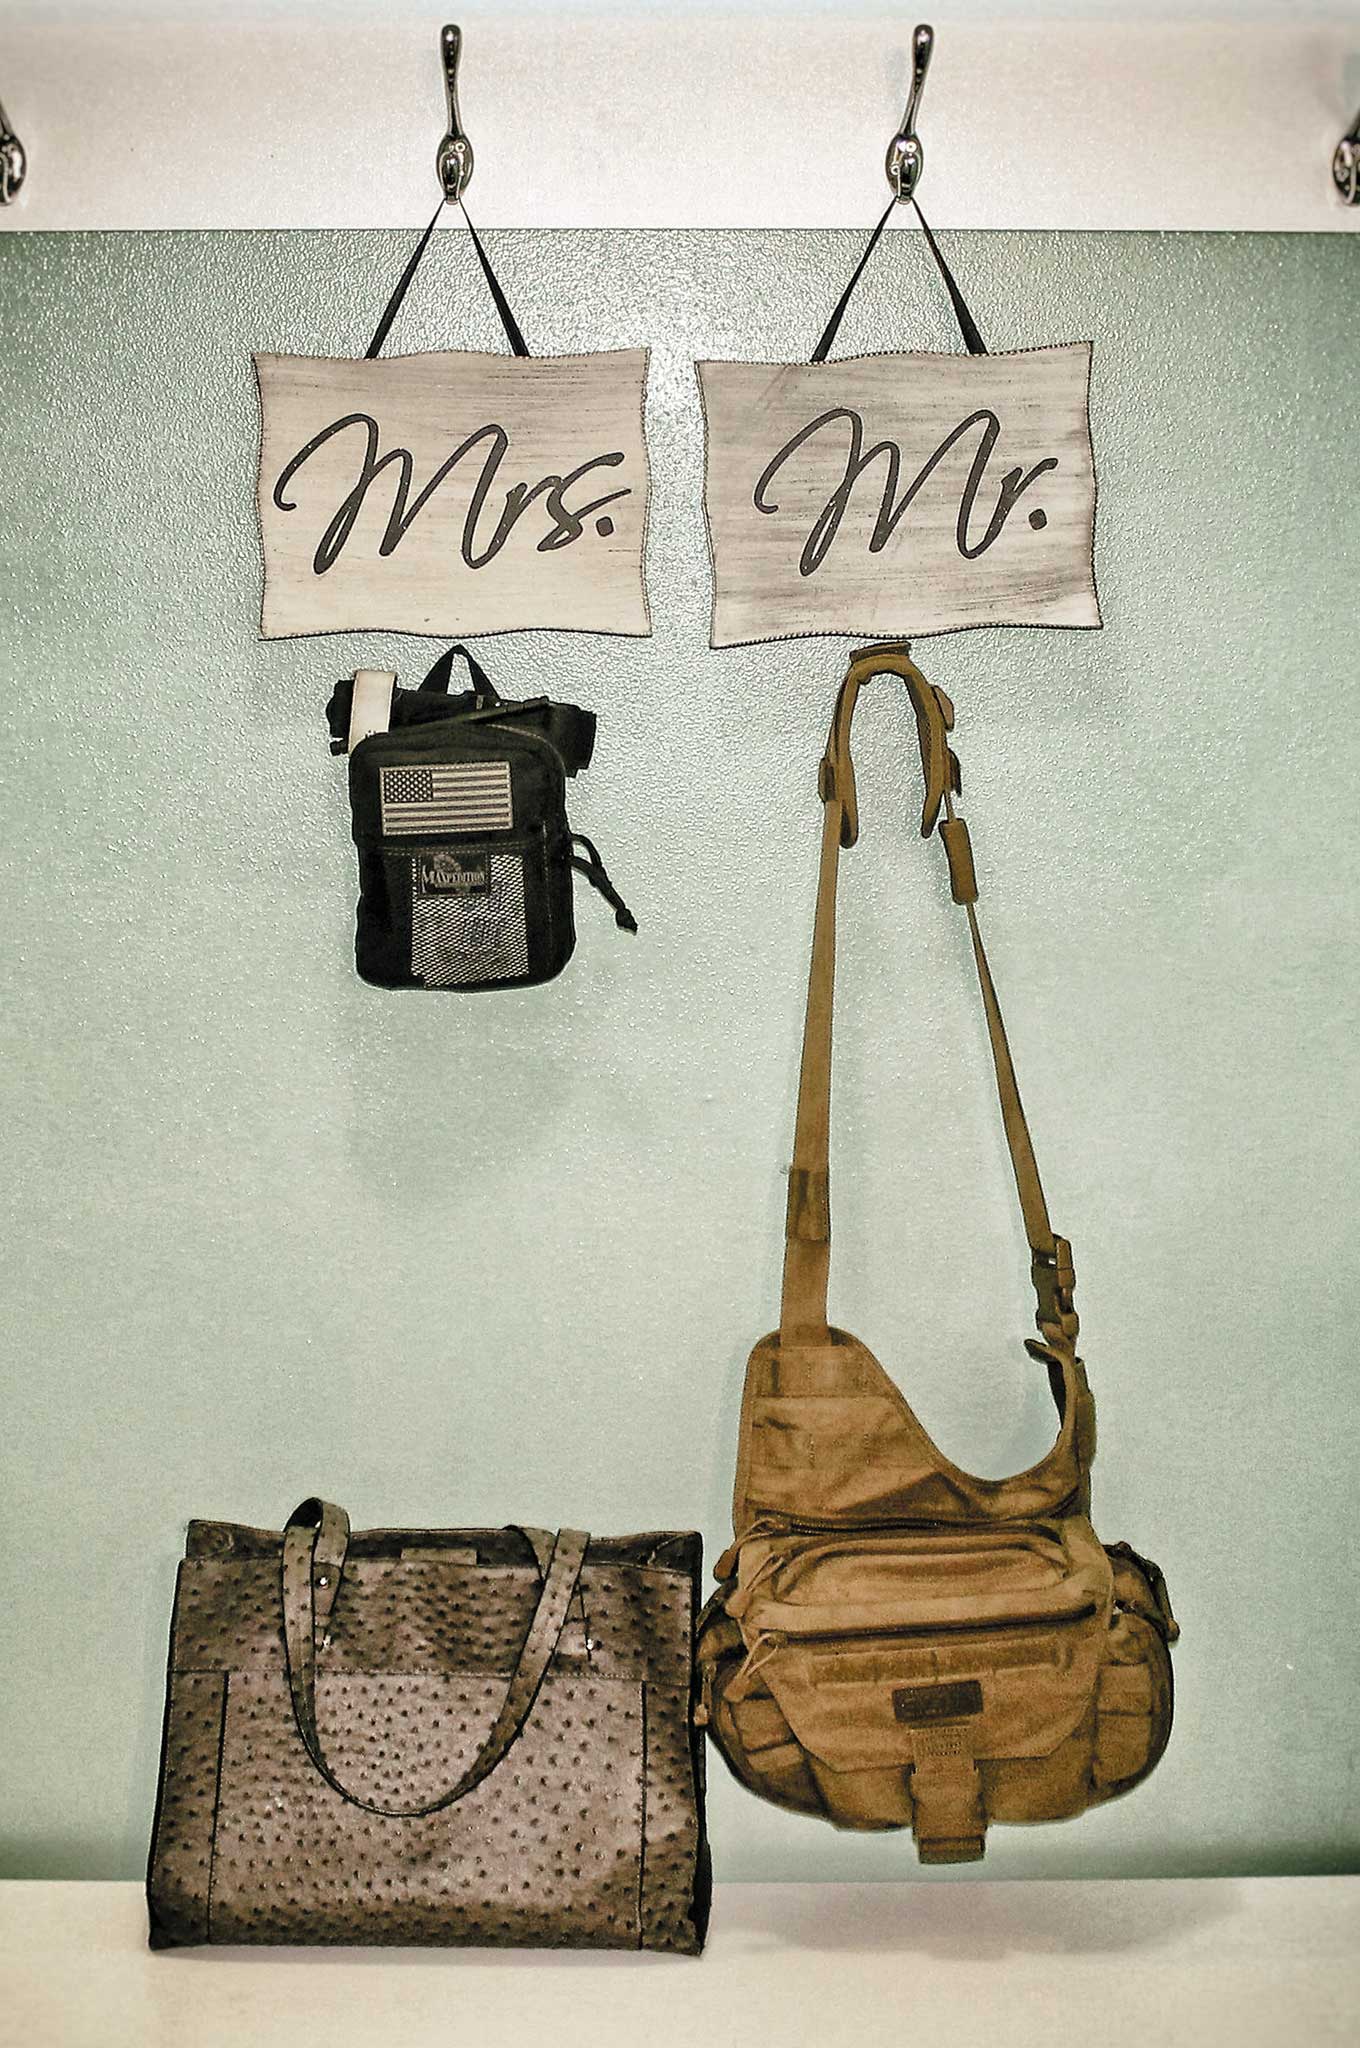
Female EDC
Whether you’re a woman looking to supplement your purse with more preparedness-minded accessories, or you’re a man trying to figure out ways to entice your lady to get into the survival scene, looking at everyday carry (EDC) gear is one of the most concrete ways to show the value of readiness.
My EDC Kit
Here’s a look at what I put in my Maxpedition Fatty Pouch, broken down by basic survival categories:
Water
Sawyer Mini Water Filtration System
Fire
Lighter
UST Little Sparkie Fire Starter
UST Wetfire Tinder
Shelter
Space blanket
Medical
QuikClot Combat
CAT tourniquet
Band-Aids
Food
Tuna pouch
Signaling Device
Signal mirror
Navigation
Compass
Hygiene
Hand sanitizer
Others
Duct tape
225/550 paracord
Superglue
Chem light
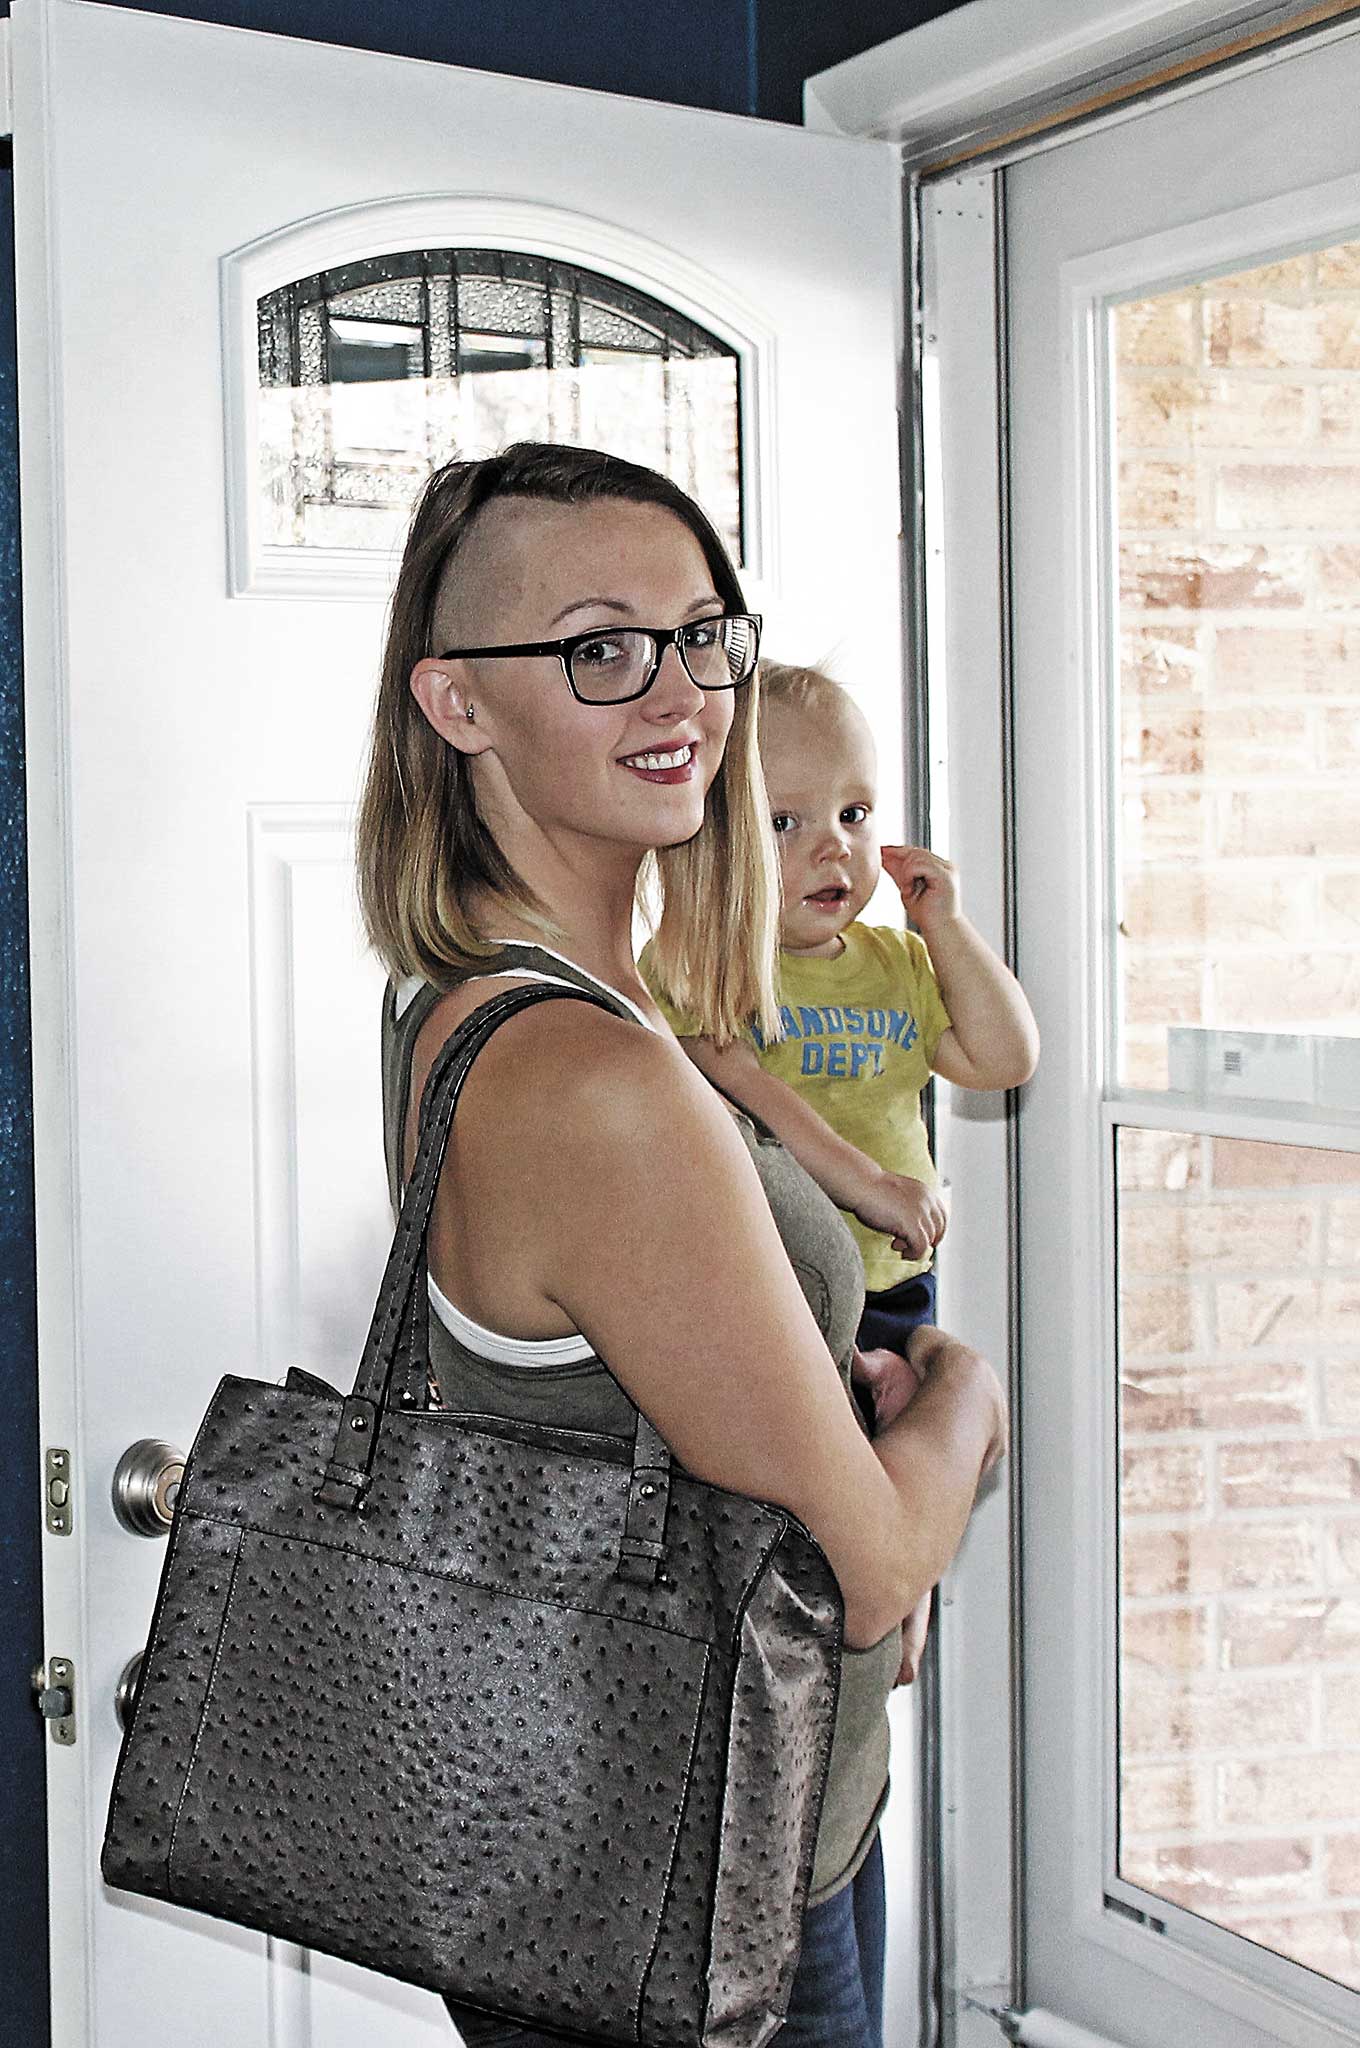
My Purse
Aside from my EDC kit, I also carry a purse. (Hey, I’m a woman after all.) I keep a few items in the main compartments because of the frequency of use:
Leatherman Wave: a multitool for, well, multiple purposes
TerraLUX TT5: a tactical flashlight with a strike bezel and strobe option
Goal Zero solar panel: While I carry a wall charger and a portable charger, this is a redundant method of charging electronics —and redundancy is good in survival situations.
These products don’t take up a lot of space. Sure, I wouldn’t be able to stuff this gear in a clutch, but not many women I know do carry a clutch on a regular basis anyway.
Any purse can be a concealed carry purse (even one from Target, like mine), but there’s one thing that it must have —a dedicated zipper pocket for those off chances that you might be carrying your firearm in your purse. It needs to have a pocket that nothing else goes in. Nearly all clothing and accessories can easily be tweaked to accommodate concealed firearm carry and EDC.
My CCW
My concealed carry weapon is a Glock 26. I love the simplicity of the Glock platform and because my husband’s carry firearm is a Glock 17 we can interchange spare magazines. I carry my Glock 26 in an Antero Pistol Holster from Long’s Shadow Holster. I’ve tried dozens of holsters, and this one is more comfortable and concealable for me than anything else I’ve found. It’s slightly curved, so it hugs the curves of a woman’s body. It won’t fall off your pants and skid across the bathroom floor when you use the restroom either.
My Phone
I always have my phone in a pocket. It’s easier to access if I need it. With it in my pocket I’m not rifling through my purse while walking to the grocery store. My eyes are up and on any potential threats, allies, cover, and concealment. Walking confidently and with full situational awareness makes me look like a harder target, too. After all, the best way to get out of a scary situation is to avoid it in the first place.