Illustrations by Cassandra Dale
“Hey, we should climb up to someplace high before it gets dark. Maybe the phones will work up on a ridge or something.” Even before you shoot your friend a look that says dumbest plan ever, he looks down at your damaged knee and says “Oh, right. Never mind.” After a few minutes pass, the snowfall seems to increase and another awful plan gets proposed: “You know, if we could stand by the roadside long enough, some hot girls would probably pick us up, especially with you looking like a broken-legged puppy and all.”
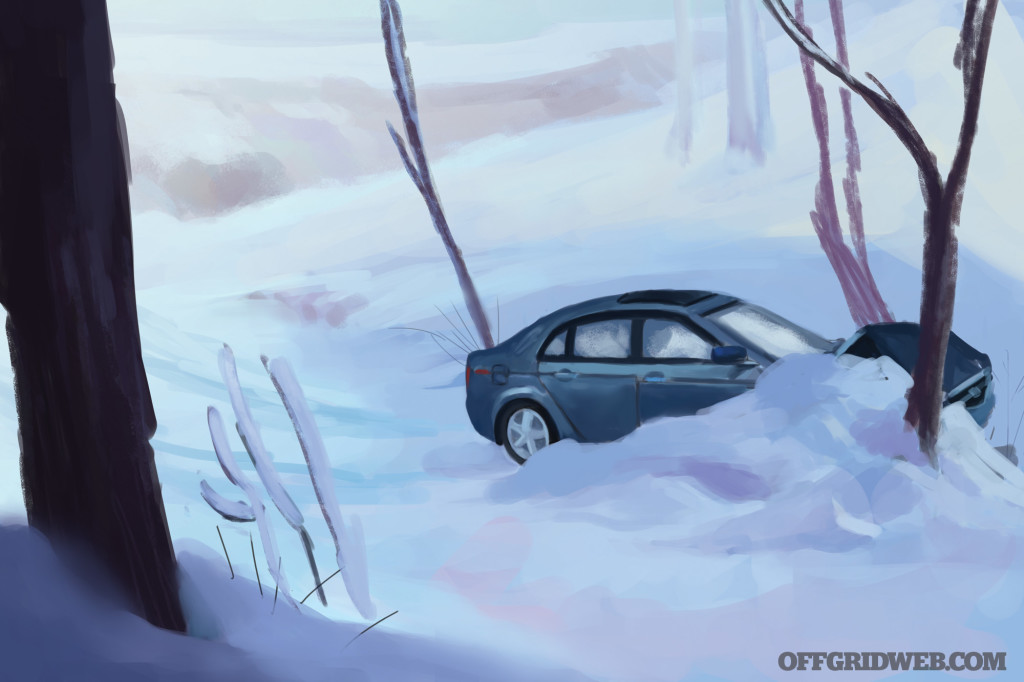
The snow was still falling. The light was fading fast. The car was completely off the road and there was no sign of anyone else in the area. Worst of all, your buddy didn’t have his head in the game. Dan was a cheerful guy and a good friend, but right now you just wish he’d shut the hell up. It’s time to come up with a real plan, you figured. Then the first shiver hit your body. Your thoughts darkened. Maybe it’s already too late for a real plan.
Cold is one of humanity’s oldest and most relentless foes. Even by itself, the frigid air can rob our bodies of the heat we need to stay functional (and alive). If you add wind and moisture into the mix, hypothermia (the dangerous chilling of the body’s core temperature) can occur in no time. Of course, anyone with enough sense to come in out of the rain will try to go indoors to warm up when the weather gets glacial. But what happens when there’s no place to warm up?
In this edition of What If?, we pose the question: What if you’re stranded in winter? As our ancestors discovered, there’s more than one way to survive in the cold, so RECOIL OFFGRID asked three survival writers for their own spin on a winter survival story.
For this installment, we have Ryan Lee Price, a freelance journalist and outdoors enthusiast who has also contributed to the SHTF column in our sister publication, RECOIL. We also have Erik Lund, a longtime contributor who’s also a federal law enforcement agent with a bevy of tactical and survival experience.
And for the final frosty tale, ROG asked me to carve a story out of the snow as well. I’ve been teaching people how to survive the cold (and many other challenges) for the past 20 years. I’ve also written multiple New York Times-bestselling survival manuals from my experience. And it’s an honor and a privilege to be able to share my stories in the What If? feature. So grab your mittens and some hot cocoa, because the temperature is about to plummet.
The Scenario
Situation Type
Stranded in winter
Your Crew
You and your college roommate, Dan (both early 20s)
Location
Superior National Forest, Minnesota
Season
Winter (December)
Weather
Cloudy, 17 to 30 degrees F
The Setup: Originally from Arizona, you’ve always wanted to ride a dogsled since wearing out a VHS copy of White Fang as a kid. Because you’re staying in your dorm at the University of Minnesota Duluth during the holiday break, you ask your roommate, Dan, if he wants to join you on a spontaneous road trip. Suffering from cabin fever, he happily agrees.
You set up the dogsled tour and assorted activities while he preps his older Acura TL for the three-hour drive to the dogsled winter resort in Grand Marais. You give him a list of supplies and rations to pack into a vehicle emergency kit. “No worries,” Dan says, claiming he’s a veteran of winter driving, having grown up in Dayton, Ohio.
Two days later, you hit the road and find it to be a mild ride for the first two hours or so. Constant snowfall, but nothing crazy. While on Gunflint Trail, just 45 minutes from your destination, Dan hits a patch of black ice and the car spins out of control. It hits the snow embankment, launching off the road and tumbling into some trees.
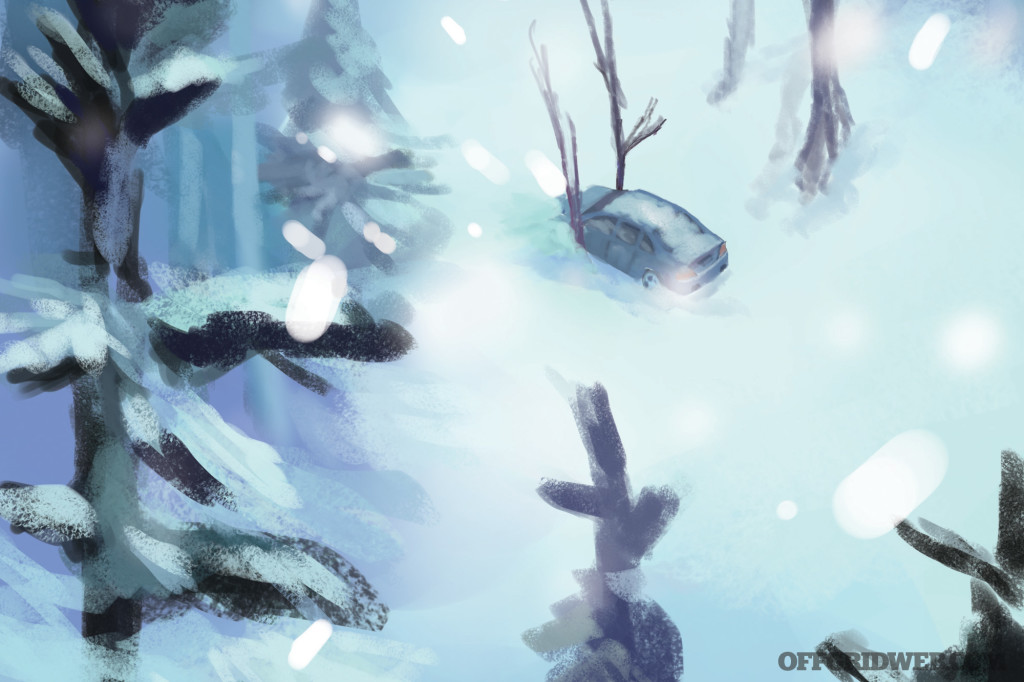
The Complication: You wake up minutes (hours?) later to an unconscious Dan and snow in every direction. Did you land in a mound of snow or has the snowfall covered your vehicle? Or maybe the car’s upside down? Quickly rousing Dan, you’re relieved to find him otherwise functional with only a cut on his head and some bruises memorializing his injuries..
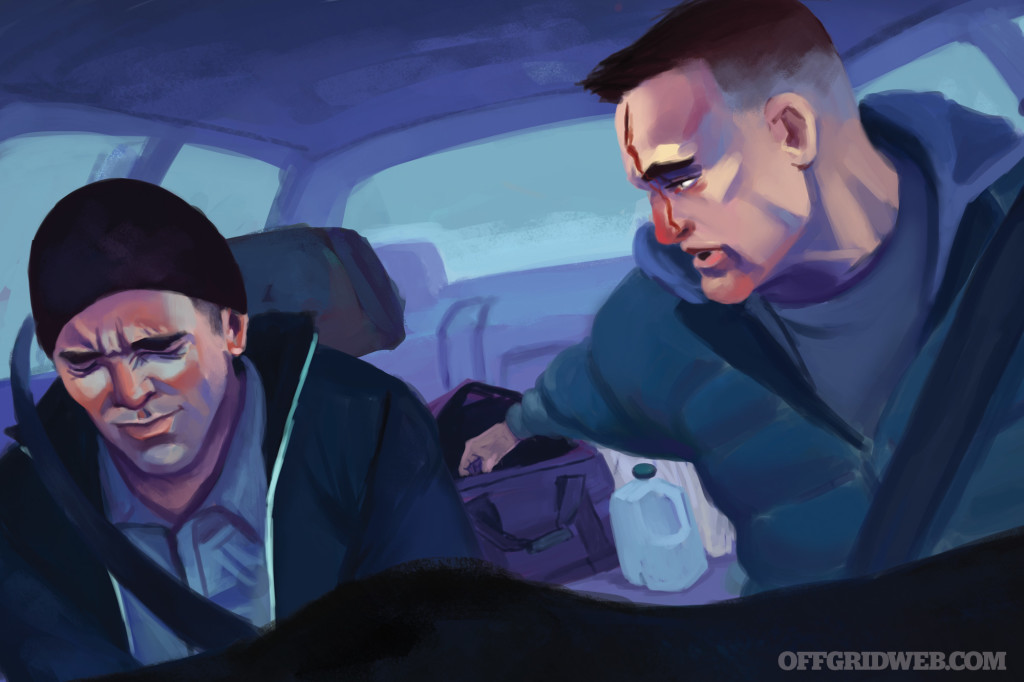
The shock gives way to pain. You grimace as you look at your knee. It doesn’t look mangled, but it’s definitely not working. You’re not sure if it’s a sprain or worse. You tell Dan to grab the emergency bag; the first-aid kit should help. “I forgot it back home,” he says, looking like he just crapped the bed. “It” and all the other survival supplies. Bad just got worse.
The New Plan: Stranded in the middle of nowhere with snow all around (with more falling by the hour) and daylight fading fast in this northern state, you have to figure out how to get help with the following limitations:
- Knee injury
- Vehicle damaged by trees and stuck in snow
- No cellphone reception or Internet connectivity
- Time is roughly 3:30 p.m. (sunset is around 4:40 p.m.)
Federal Agent: Erik Lund’s Approach
I didn’t need to say anything; Dan knew how badly he had screwed up.
He hung his head and quietly said, “My bad. I shouldn’t have forgotten the kit.” Dan found his phone and attempted to dial 911. “I don’t have any reception. Do you?” I quickly looked around, but I didn’t see my phone anywhere in the car.
“I don’t know where it is.” We looked around the inside of the car, but couldn’t find it.
The pain in my knee refocused my attention on the immediate problem of determining the seriousness of my injury.
“My knee is pretty messed up. I don’t think I can walk, and I definitely won’t be able to make it through the snow.” Dan asked if I was bleeding or if anything else hurt. “I don’t see any or feel any blood, but I can feel my knee swelling up, and the pain is pretty intense.” Dan said he would try to get out and come around to my door.
After smacking the driver side door with his shoulder, Dan was able to squeeze out and walk around to my side. He tried several times to open the door, but the damage to my side of the car seized the door in place.
Dan walked back around and stuck his head in the car, “That door isn’t coming open, too much damage. You think you can climb over the seats and come out my side?” I squirmed a little and a lightning bolt of pain ran through my knee.

I looked at Dan and shook my head, “I can’t move.”
A look of guilt ran across Dan’s face. He said, “I’m gonna head up to the road and check my reception. If I don’t have any signal, I’ll see if I can flag anyone down. I’ll be back for you.” I nodded my head in approval and watched him leave. I laid my head back and closed my eyes and thought, I hope someone shows up. My knee is killing me, and it’s gonna get cold real fast.
After an hour, the sun disappeared and darkness was quickly approaching. Dan finally came back. I could tell by the look on his face the news was not good.
“I walked up the road about a half mile in both directions. No luck on getting a signal, and I didn’t see a single car. My hands and feet are about frozen solid,” he said. I told Dan that I appreciated his efforts, but we needed to prepare for spending the night in the car. Dan agreed and reached into the back seat and started pulling out the heavy clothing we had packed for our adventure.
Despite being on the verge of frostbite, Dan helped to get my sweatpants and snow pants on over my injured knee. After struggling into the rest of my clothes, I finally was able to sit back, rest, and think about our options.
As I started to settle in, Dan said, “I’ll be back, I’m going to make a signal in case someone comes down the road.” He grabbed his backpack and headed back out into the cold night. I asked Dan how, but he just told me to try to keep warm and that he’d be back. Dan opened up the trunk and started digging around. Ten minutes later, I watched Dan walk off into the darkness carrying, of all things, our spare tire.
The wind had picked up and was starting to howl while the outside temperature was falling quickly, but at the moment I was surprisingly warm inside the car. All of the additional clothing provided enough insulation to maintain some warmth for my body. Dan had been gone for more than 30 minutes and, although I was hopeful that someone may have stopped to help us, I was concerned for him.
It was damn cold outside, and Dan was sure to be hypothermic by now. The feeling of helplessness was crushing, but it did take my mind off of my throbbing knee.
Abruptly, Dan stuck his head back into the car. “Give me all of the clothes you have left in your bag.”
I pushed my bag across to him and asked, “What the hell are you doing, dude?”
Dan responded, “I’m going to redeem myself and save your ass!” Before I could respond, Dan closed the door and was moving off back toward the road again. Unable to do anything to help him, I tried to maintain a positive attitude and think about how this trip turned out to be one hell of an adventure.
Dan stumbled back to the car about 20 minutes later.
Climbing into the driver seat, I noticed Dan was visibly shivering uncontrollably. “We’re going to be OK,” he said. Over the next few minutes, my roommate explained how he grabbed the spare tire, some road flares, and the spare quart of oil he kept in the trunk and went up to the road. Stacking the supplies on the side of the road, his next task was to locate some wood that was dry enough to burn.
When he located enough wood, Dan made his way back to the vehicle to collect the clothes that we weren’t using to keep warm. Working his way back up to the road with the clothes, he pulled out the brightest colors in the group and set them aside. Dan walked out into the middle of the road and started clearing the snow away from a small area as best as he could.
Next he took all the of brightest colored clothes and made an arrow on the ground pointing toward the area of the embankment where we ran off the road and our car was stranded. Dan then took the spare tire, deflated it, and rolled it out into the middle of the road.
Dan drenched all of the remaining clothes with the spare quart of oil. He then took a few of the wood logs and laid them out on the ground in the center of the road with several of the oil-soaked clothes packed in and around them. Next, my buddy laid the spare tire on the pile and stacked the remaining logs and branches on top of the tire. He stuck a few of the flares in the oil-soaked clothes and ignited the last flare, pushing it under the tire into the pile.
In a few moments everything was ablaze in a huge bonfire with thick black smoke from the burning tire rising into the night air. The signal fire and arrow would direct anyone coming down the road to our location and the tire and wood should burn for several hours. Dan intended on checking on the fire every hour through the night to keep it going.
When he was finished, I looked at my roommate in amazement and tried to express my appreciation for his ingenuity, but in the end the only words I could manage was “Thank you.”
Dan looked back and me, still shivering, and simply said, “I got this, dude.” I unzipped my jacket and reached across and grabbed his shivering hands.
I placed a hand under each of my armpits in an attempt to warm up his fingers to prevent frostbite, and we bro-hugged until his shivering subsided. Throughout the evening and into the night as I tried to stay warm, he would periodically get out of the car and tend to the fire. Some trips were quick and others would take longer as he searched for more dry wood to burn. Each time he would return shivering and frozen.
I awoke to a loud banging on the roof of the car, a blinding light piercing through the frost-covered window, and a voice yelling, “Hello!” It was past 2 in the morning when a Minnesota state trooper working the midnight shift happened upon our signal fire. It had just about died out, but following Dan’s signal arrow, the Trooper located our car down the embankment.
Thirty minutes later, a fire and rescue unit arrived. The firemen had to cut open the door to get me out of the car. They rigged up a basket and pulley system to hoist me up the embankment. Even after spending more than 10 hours in freezing temperatures, the warm cabin of the ambulance quickly raised my body temperature — unfortunately it also thawed out my knee and the pain came flooding back. I asked the medic how Dan was doing.
She said that some of his toes had frostbite but he would be all right.
While processing that bit of information, the medic added, “The trooper said that without that signal fire, he would have driven right past you guys. There’s no telling how long you may have been trapped down that embankment. It was a good thing your friend kept that fire going.” I looked back at her and smiled, “Yeah, he’s the kind of guy who would do anything for you.”
Average Joe: Ryan Lee Price’s Approach
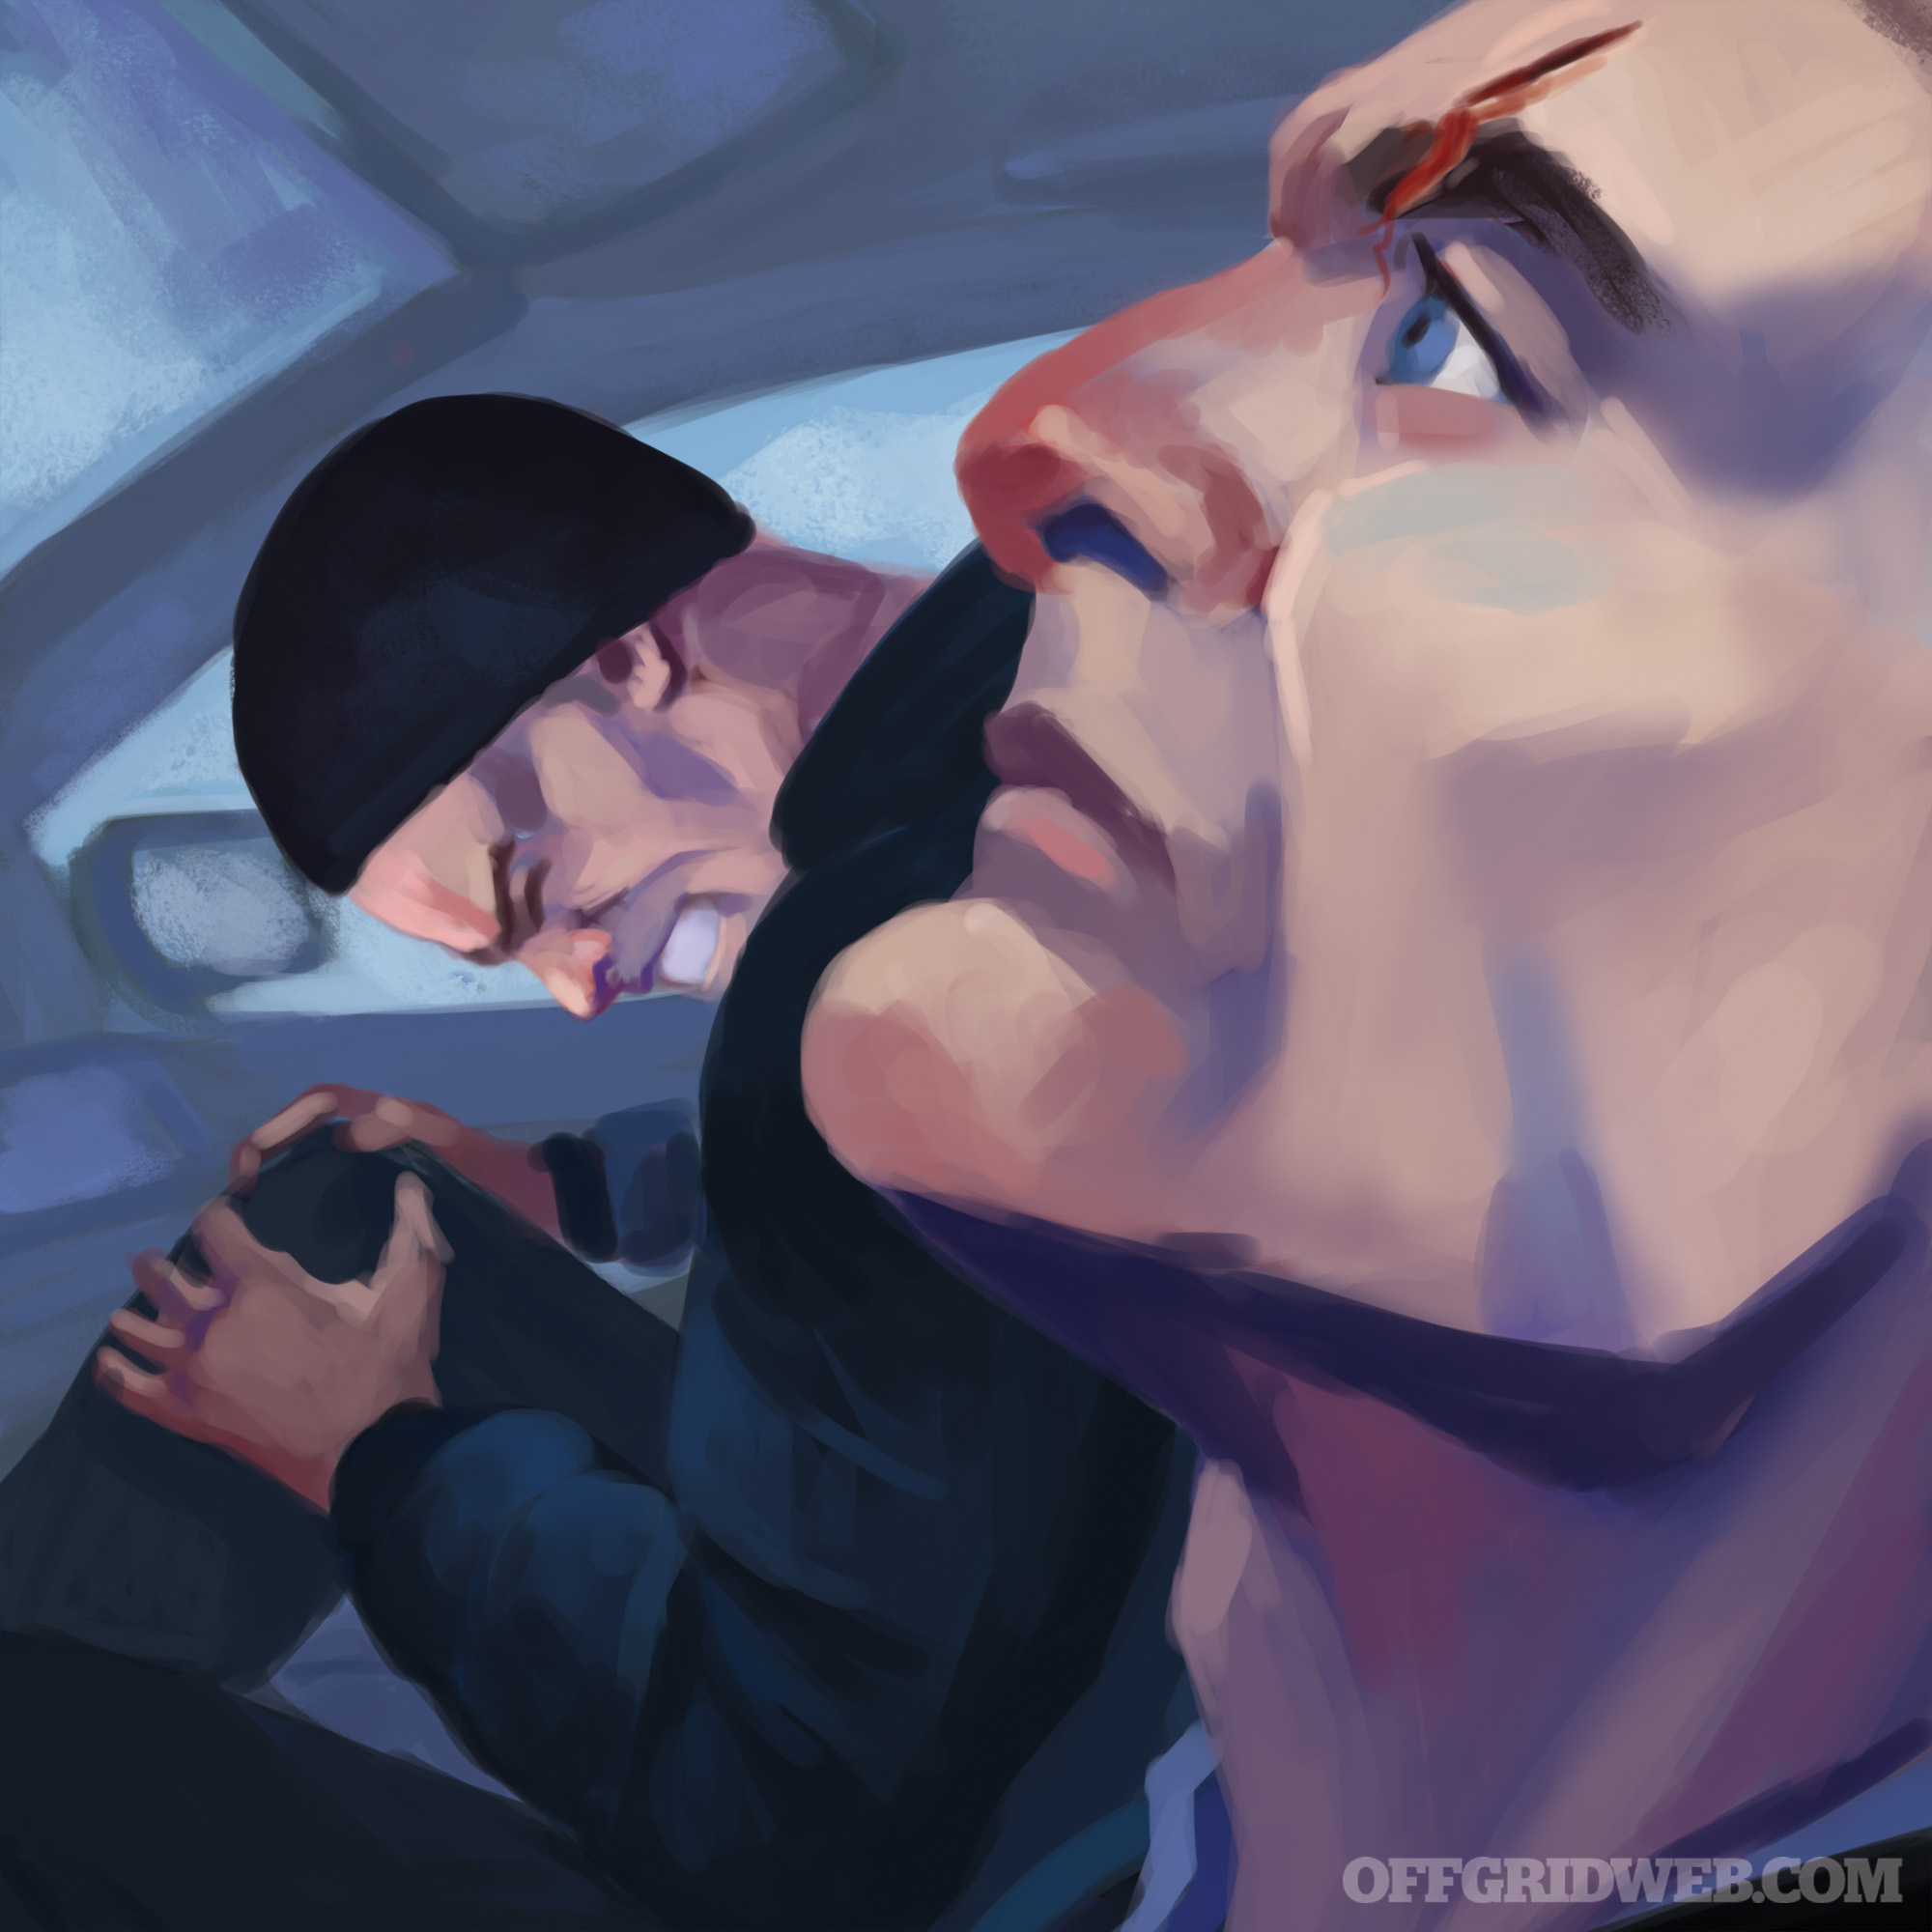
It’s tough to piece together what happened since everything after seeing the deer dart onto the road was a blur. There were screeching tires, trees, snow, road, a jarring crash, and then blackness. I awoke with Dan’s panic-stricken face yelling at me to wake up. I don’t know how long it had been, but he was upside-down; my whole world was upside-down and all white. My leg was twisted in an awkward position under the glovebox, and it seemed like everything we were taking with us that weekend had exploded around the cabin of Dan’s Acura TL.
It was supposed to be a simple three-hour drive from the University of Minnesota Duluth to a historic resort on the Gunflint Lake near the Canadian border. After grabbing lunch at the Angry Trout Café on the banks of the snow-swept Lake Superior in Grand Marais, we left Highway 61 for Country Road 12, a slender ribbon of blacktop that winds its way north. Being used to the arid desolation of Arizona is nothing compared to the sheet whiteness of northern Minnesota in winter. Thick forests of trees butted up against the road, their branches loaded with snow.
The last thing I remembered before seeing the deer was Lullaby Creek Road on the left because I made a joke about how quiet it probably was. Then, Dan put the car into a sweeping right turn a mile or so later. The next thing I knew, the car was upside-down, surrounded by trees and half buried in the snow. The passenger windows were shattered, there were deployed airbags everywhere, and the windshield was a spider-webbed mess.
Dan had already unbuckled his seatbelt and was sitting on the ceiling of the car in absolute shock. “You OK?” he asked.
“I think my leg is broken,” I winced. “Help me down.” Dan unbuckled my seatbelt, and I very ungracefully crumpled onto the ceiling of the car with a crushing pain in my leg.
“We need to get out of here.” Dan crawled around me and shimmied himself out of the window, sinking into the snow. I was able to pull myself out of the window with Dan’s help, but not without excruciating pain. Both of us, in the now fading light of the late afternoon sun, were speckled with various cuts and scrapes; a few of them could use bandaging.
“First order of business, let’s find that emergency kit you packed and get some of these wounds cleaned up,” I suggested. “Is it in the trunk?”
“Um,” Dan started. “About that ….”
Somewhere between expecting a bang but hearing a click, and hearing a bang but expecting a click, the worst sound you’ll hear is your roommate saying, “I left the supplies at home.” It was as if someone just punched me in the nuts. I fumed. It had emergency food, water, matches, signaling devices … everything we might need for a situation exactly like this.
“It’s not that big of a deal,” Dan defended. “I’ll just hike up to the road and flag down a car. We’re, what, 50 yards from the road?”
“When’s the last time we passed a car on this road?” I asked.
Dan didn’t need to answer that because we both knew. It was never. Since leaving the café at Grand Marais two hours before, we hadn’t passed a single car.
We were stranded and, with night quickly approaching, likely stranded until morning — so we needed to get our gear together while we could still see it. Dan pulled the carpets out of the car, and we used those to sit on to avoid sinking into the snow. Since the whole point of the trip was to go dog sledding at the resort, we had plenty of winter clothes and likely wouldn’t freeze to death, but my immediate problem was my leg. It was already getting cold and would be quite a painful struggle to tug on snow pants over it. Plus, it needed to be splinted so I would stop involuntarily moving it.
Luckily, Dan and I are both avid magazine readers, so there were a couple of old issues of RECOIL OFFGRID in the back of the car. Their large format and thick pages were perfect for a leg split. Dan wrapped a couple of issues around my knee and tied them tight with shoelaces from my extra pair of boots. It would hold. Now onto other problems.
Dan and I didn’t expect we would be here for more than the night, but we agreed that his trekking up to the road and waiting for someone to come along while leaving me and my leg by the car wasn’t a good idea. At least, not at night. The news during the winter is littered with stories of people dying in the snow mere feet from their cars — plus, we weren’t sure how much snow would dump on us during the night.
Surprisingly enough, being stuck in the snow is similar to being stuck in the ocean or the desert. You’re surrounded by water that you can’t drink like in the ocean, and you’re in a place that’s just as dry as the desert.
Rummaging in his car, Dan found a metal coffee thermos and a mug. We packed those with as much snow as we could, and Dan placed them in the upturned engine compartment. It was still warm and might melt some of the snow into water. Until then, we only had two 16-ounce bottles of water to drink. That is, until they’d freeze.
Darkness was coming fast. We had two choices, neither too pleasant: Either build a makeshift shelter in the snow or hunker down in an upside-down car for the night. We decided on the car. When the temperature dropped below freezing again that night, at least we’d have some shelter. The trick would be to keep the side of the car clear of fresh falling snow so it wouldn’t entomb us during the night.
There was no cell signal at all, and the roadside assistance feature on Dan’s Acura wasn’t functioning. The hazards were blinking, casting an eerie orange pall over the snow. The horn worked too, but we figured we’d save that for tomorrow if we needed it.
We decided against a fire for the moment. With little effort, gasoline could be harvested from the car to help get a blaze going. Additionally, we had plenty of things to burn during the night — canvas shoes, extra clothes, suitcases, sports equipment — for one reason or another, Dan had a few ping-pong balls, which are made from nitrocellulose, a very flammable material.
Since it looked as though we’d be spending the night, we shored up the damaged windows with the suitcases and spread out over the ceiling all of the extra clothes, snow suits, floor mats, and whatever else we could find that would insulate us from the snow below. Since I couldn’t move very far, Dan shoveled as much snow as he could up against the three other sides of the car. Snow is an excellent insulator, and by creating an improvised igloo around the car with snowdrift, it would hopefully help retain heat inside the car.
Sure, it was going to be cold, but with the two of us well-dressed for dog sledding, we would be fine. My leg was now swollen and I was in considerable pain, but it would only be for a night.
At sunrise, Dan would venture up to the road and flag down someone. Perhaps because we didn’t show up at the resort as planned, concern would be raised for our whereabouts. Time would only tell, and as the temperature continually dropped, Dan and I huddled close together to conserve body heat.
Damn it — we left the thermos and mug of snow in the engine bay. It’ll be frozen by morning for sure.
Survival Expert: Tim MacWelch’s Approach
“You forgot the emergency kit!?! Are you kidding me!” I shouted. I looked my friend square in the face, “Look, Dan, people die in situations like this.”
Dan laughed and scoffed, “Die! That’s stupid! Only stupid people die from getting cold. Do I look dumb to you or something?” I shook my head as if to say “no,” but I really wanted to say something else. I pulled out my phone and tried to call 911, but there was no service. When Dan saw me trying to make a call, he followed my example, but had no better luck. Great, I thought, this is just what we need.
Trying to rally my falling morale, I suggested that we see what stuff we had to work with. Dan jumped at the idea and began pulling the luggage and everything else from the tumbled vehicle. We had clothing and outerwear, a bit of food and water, our electronics, and not much else. There was no first-aid gear, no matches to make a fire, no sleeping bags or bedding.
We decided (after much debate and many wild ideas), that we should stay put and build a fire. This could keep us warm and signal our distress to any passing drivers. Dan wanted to walk down the snow-covered road, but he finally agreed to stay after I reminded him again that I couldn’t walk and that he didn’t really want to drag me through the cold.
If my mood had been poor before we formed our fire-building plan, it was truly sour after we went through our supplies a second time to confirm that there were no matches or lighters. Dan’s car was new enough that it didn’t even have ashtrays or a cigarette lighter. Good God, I thought, are we going to die because neither of us smoke?
As I pondered this, I started shivering. This reminded me to put on all the clothing and outerwear that I had. It also reminded me of something from school. My biology professor’s voice jumped into my head and began droning on about our body’s tools for survival. “Shivering is a physiological response to the body’s temperature dropping.” As a pre-med student, I had a slightly better clue to the vulnerability of the human body than business student Dan did, and much more so than most of my classmates who often espoused invulnerability. I definitely understood our peril better than Dan. But what I didn’t understand was how we were going to make a fire in the snow.
No lighter, no matches, no way to light the fire we desperately needed. We took shelter in the car and tried to figure out a way to signal any passing car. We tried to start the car, to run it for heat. The engine wouldn’t even turn over. Dan collected a few sticks from the surrounding brush and used a strip of cloth to create a tripod right on the edge of the road. From this stick “tipi” he hung a red shirt, but as I watched through the cracked car window, the snow quickly stuck to the cloth and soon obscured it from view.
When he returned to the car, Dan talked briefly again about walking through the snow to find help, but even he began to realize just how dangerous that idea would be. It could be a death sentence to leave the car in this kind of weather, so we decided to focus on the fire. Dan dismantled his vape device in hopes that there would be some ignition source inside. As he worked, he grumbled about the irony of the situation.
“You know, if I were still smoking cigarettes, we’d have a way to make fire,” he said.
Comments like that didn’t help us at all, and I swore that the throbbing in my knee increased after hearing Dan’s thoughtless comment. The vape smoker held no way to make a fire that we could discover, so I started thinking about other options. We had two phones and a flashlight. And we needed light to signal for help.
We decided to hang the flashlight from the tripod instead of the red shirt, and this was a solid improvement. We had no idea of the runtime the batteries would provide, but a flashlight twisting from a string was a better signal than we had before. We never actually saw the sun set due to the heavy cloud cover and snow, but by 5 p.m. it was truly dark.
I couldn’t escape the feeling that we would die if we didn’t get a fire, and once Dan returned from setting up the flashlight as a roadside beacon, I asked him to help me hobble to the hood of the car. Dan hit the hood latch, but the crumpled hood wouldn’t rise. We took turns prying with Dan’s small knife and still had no luck opening the engine compartment.
Finally, after beating on the hood while Dan worked the latch, I pried open the hood and surveyed the engine. There were plenty of flammable fluids in a car, and electricity to make sparks. But Dan didn’t even have jumper cables to help our situation.
I swore that if we lived through this, I’d have very different rules about the supplies for winter travel from then onward. If we made it, I thought.
As my hope was growing thin, Dan stepped up for once with a good idea at a good time. He grabbed a cotton sock from his luggage and began to scrape it with my knife. I held my phone aloft for light, and he produced a small fuzz ball of cotton fiber. Then wiggling the battery cable loose, he touched it to the post repeatedly over the fuzz ball until a spark finally lit the cotton.
The fuzz burned bright for a few seconds and then it was gone, but it was proof of concept! I asked him with amazement where he learned such a trick. He said it was called a “prison match” and he learned it from the Survivorman TV show. I looked at Dan with a whole new appreciation. Maybe we had a chance after all. Realizing that we were onto something, Dan dipped a piece of the cotton sock in some steering fluid (the easiest reservoir to reach), and I scraped a monstrous ball of fuzz from one of the socks. After several minutes of work, the battery cable stark ignited the fuzz ball, which in turn lit the oil-soaked sock fabric. Unbelievably, we had created a flame!
Dan fed pages of the car owner’s manual to the oily sock that was quickly melting down into the snow by the side of the car. I scraped the ground to make a clear patch, and told Dan to hurry as he grabbed sticks and twigs to feed our new fire. But then I realized our mistake. We needed the fire up by the road, not down in the ditch with our car. I grabbed another sock, soaked it in steering fluid and wrapped it around a stick. I told Dan I would nurse the fire by the car if he built one by the roadside.
In the darkness, the white snow reflected our firelight and gave us a surprising amount of light to see. I hopped back and forth collecting sticks, and Dan did a fine job kindling a blaze on the roadside. I knew it would be a constant battle to feed two fires, but we needed both for heat and light. With his fire burning bright, Dan returned to the car to build up my fire.
How our fortunes had changed. Just a few hours ago, I had felt that Dan would be the death of us both. But he turned out to be the hero after all.
We sat in the car, doors open to receive the heat of our fire. We dozed a bit through the night. We also ate our food and drank our water. Dan awoke each time the fire ran low and brought in more wood to feed the blaze. The snow deepened as the hours passed, and Dan let the roadside fire go out so that he could focus on the fire that was keeping us warm. It was getting light again and the snowfall had finally stopped when Dan returned to the roadside with several burning sticks to rebuild our signal fire.
The morning was bitterly cold, and our movement was sluggish, but he helped me work my way up to the roadside to warm myself by the new fire. There we sat, perched on our luggage in a sea of white, hunkered by the only color in sight — the beautiful orange fire.
And as luck would have it, it wasn’t too long before we both heard a strange sound like a dull roar. It got louder, and to our elation, we saw a snowplow coming toward us on the twisting road. Dan started jumping and shouting, but the driver was already flashing his lights when he saw two figures by a fire on the edge of the road. The best sound I’ve ever heard was the squeak of the air brakes as the driver stopped beside us.
Conclusion
It’s been said that fortune favors the bold, but in my experience fortune favors the prepared. And there’s no better time to be prepared than in the winter. Survival is hard enough when the weather is nice and the temperatures are within the Goldilocks zone (not too hot or too cold). When the temperature drops, your odds of survival naturally drop with it.
In frigid conditions, staying warm becomes harder. Lighting fires becomes harder. Your water filter can freeze up, and you can easily lose your gear in fresh powdery snow. With all these factors (and many more) stacked against you, it’s critical for you to travel through the winter landscape with the supplies that will keep you alive and the skills to use them.
Keep a well-stocked survival kit in every vehicle you own. This could be a bin or duffel bag loaded with shelter items like coats, space blankets, and sleeping bags. It should also contain water and non-perishable food. Use store-bought bottled water, since the bottles are able to expand without bursting. Bring first-aid supplies, lighting devices, and a way to charge your mobile phone too. In addition, bring back-up signaling equipment in case your phone has no signal and bring plenty of fire-starting equipment. Fire has preserved human life in cold climates for millennia, and there’s no reason to skip it now.
Finally, before we go — if you have a vehicle in your survival scenario, stay there! The statistics are clear. People who stay with a car get rescued. People who wander off into the snow usually die. Stay with the vehicle!
[meetourpanel]
More From Issue 17
Don’t miss essential survival insights—sign up for Recoil Offgrid’s free newsletter today!
Read articles from the next issue of Recoil Offgrid: Issue 16
Read articles from the previous issue of Recoil Offgrid: Issue 18
Check out our other publications on the web: Recoil | Gun Digest | Blade | RecoilTV | RECOILtv (YouTube)
Editor’s Note: This article has been modified from its original version for the web.


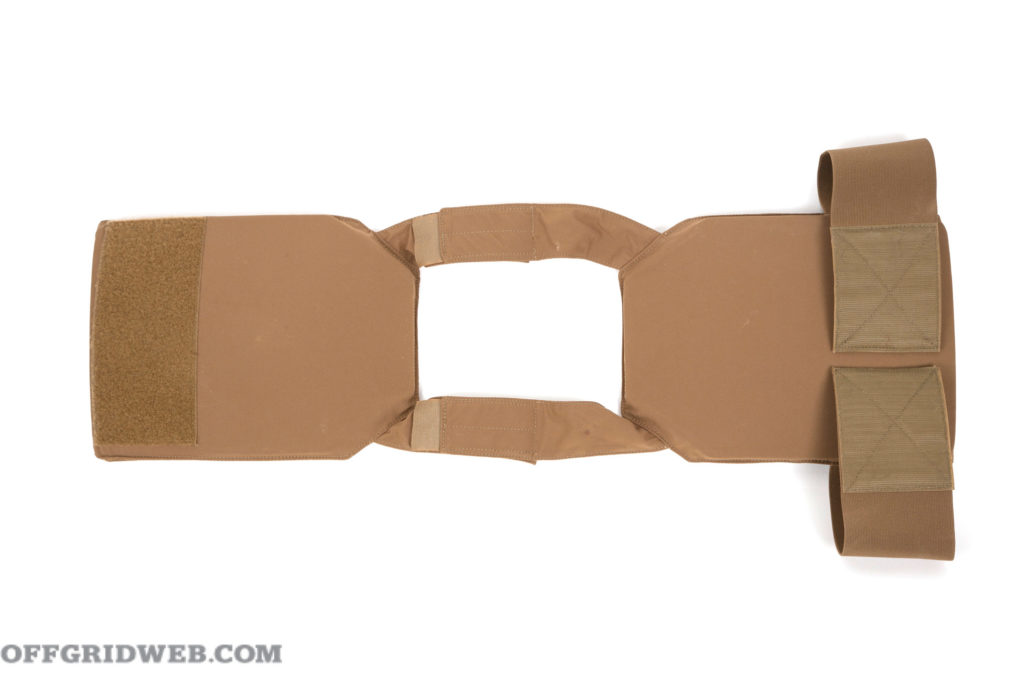
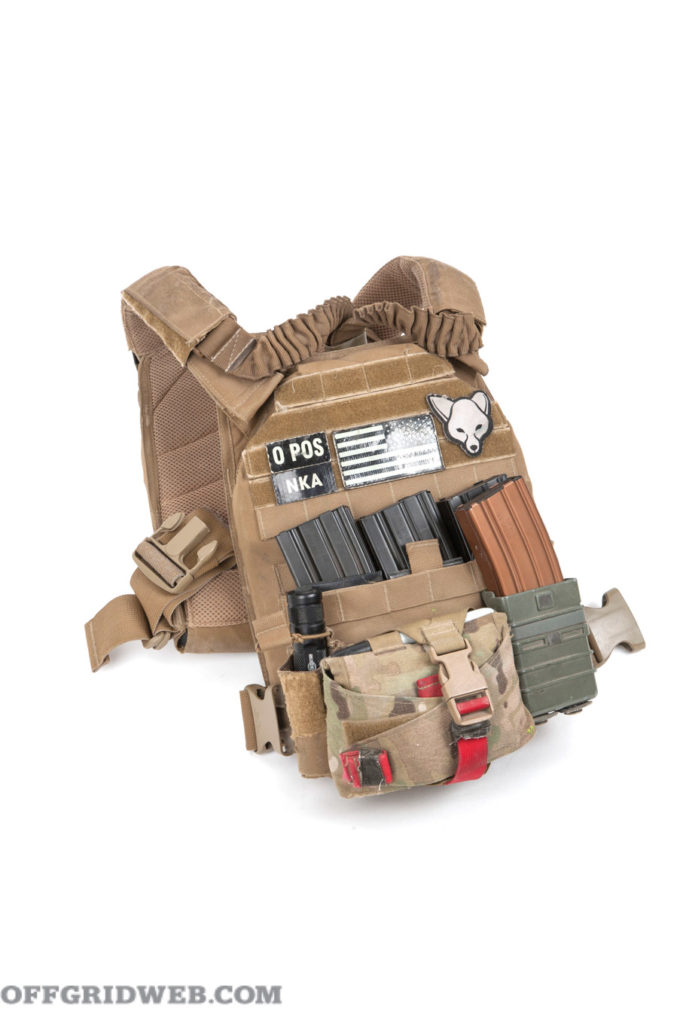
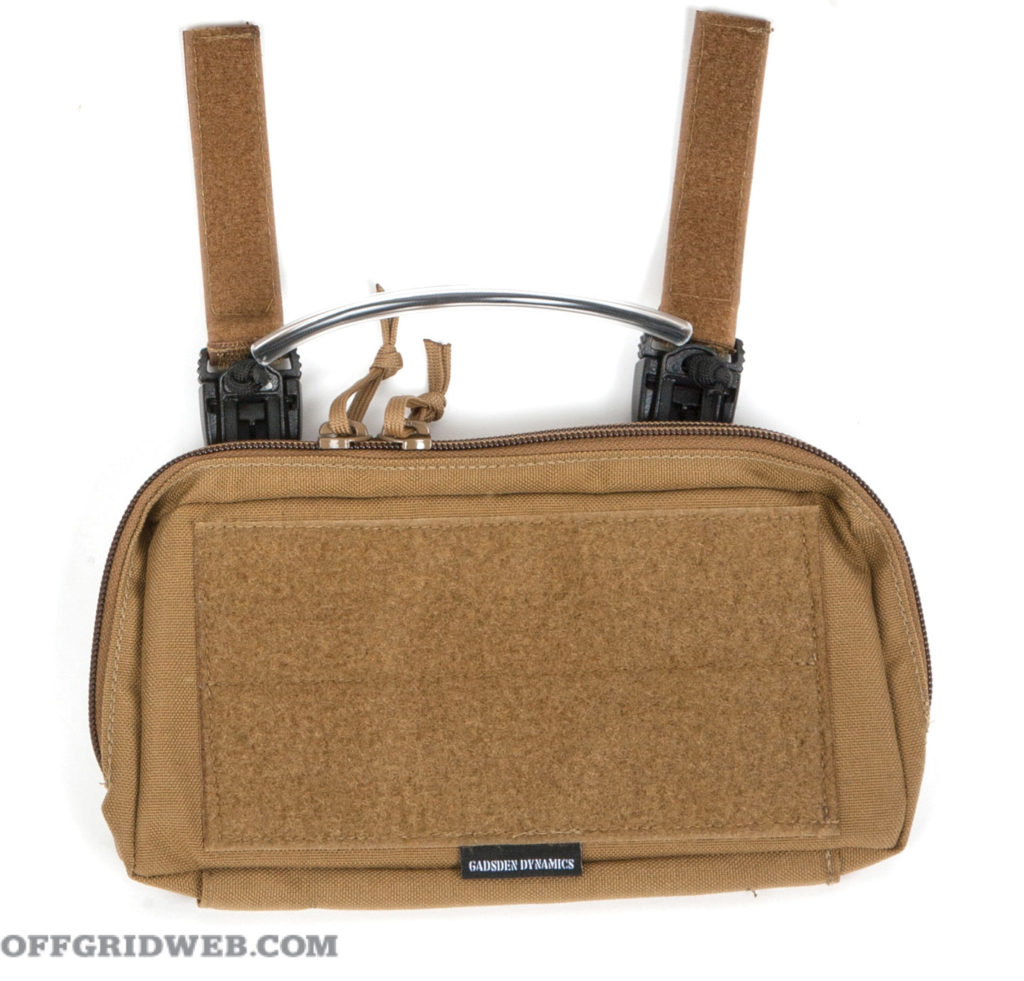
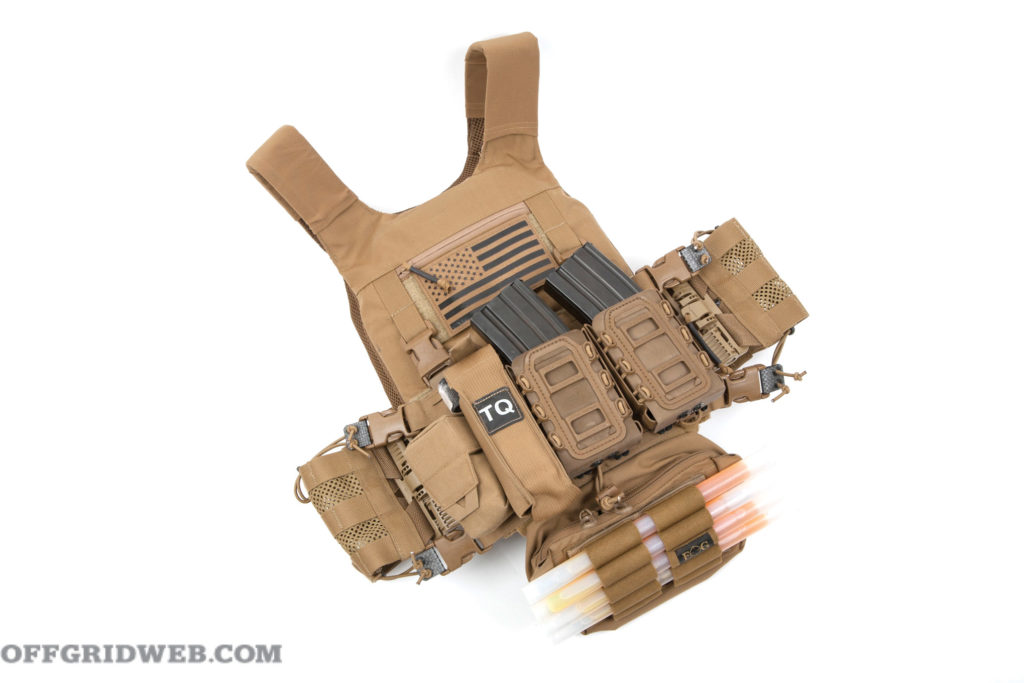
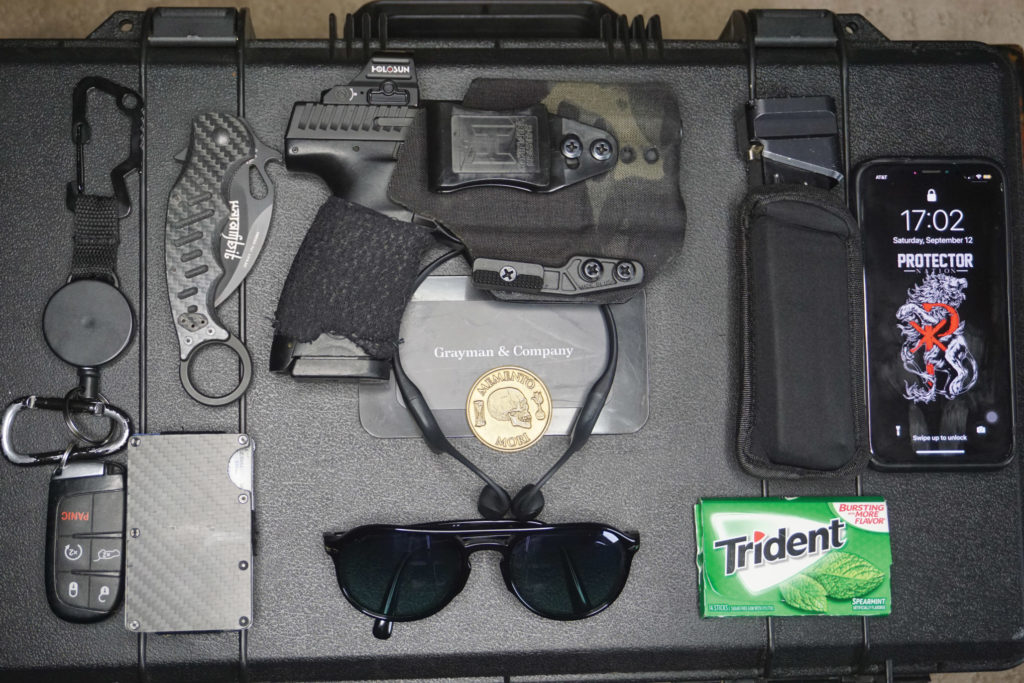
 Above: The Defense Mechanisms MEPC with Maximus Placard.


 AHMESH ADALJA
 ERIC DIETZ
 TIM FRAZIER
 ROBERT QUIGLEY