RECOIL OFFGRID Survival USMC Winter Shelters
In This Article
This winter, it's important for those of us who live in colder climates to prepare for outdoor survival. If you end up stuck outside in the elements, you'll need to think fast and prepare a shelter before the icy wind saps your precious body heat. Fortunately, the U.S. Marine Corps has provided two useful documents that show us how to construct improvised shelters: the Survival, Evasion, and Recovery Handbook and the Winter Survival Course Handbook.

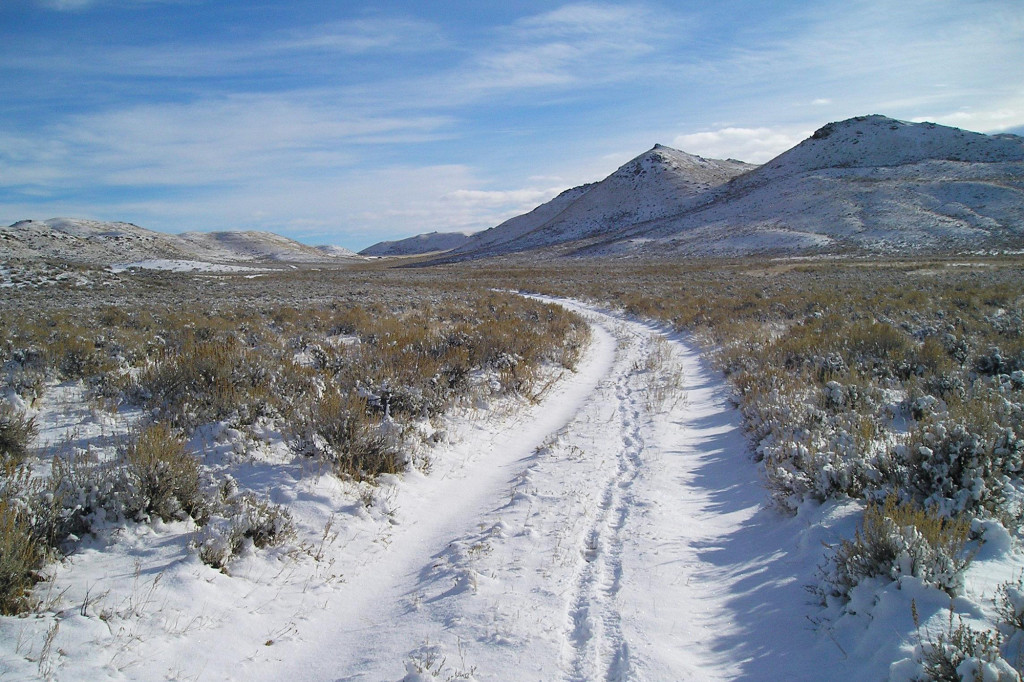
A valley like this is a dangerous place to be exposed, as wind chill can rapidly drop your core temperature.
We looked through these two handbooks, and found 5 different winter shelters that have been tested and proven by the USMC to protect you from the cold. See below for the methods, but first, here are some general tips:
This is what the USMC calls an “immediate shelter”. It's about as basic as it gets, but piling up a snow wall to act as a wind break for your camp is a lot better than sitting totally exposed. Wind chill can drop the perceived ambient temperature by 20 to 30 degrees (or more), so by simply blocking this wind, you'll feel much warmer.

If you're located in a flat plain or valley like the photo above, there are no trees to work with, and the snow is too shallow to dig into, a snow wall may be your best option. File this under last-ditch plan, but don't rule it out completely.
The tree pit shelter is another form of immediate shelter. If you can find a sizeable tree buried in a few feet of snow, dig down to the base of the trunk, and cover the ground with boughs from the tree itself.
Then, stack more boughs against the trunk above you to serve as a roof. Aside from an ingress/egress hole, try to keep the space as enclosed as possible to retain heat. Simple but effective.
You've probably heard of an A-frame shelter before, and this is a winter variant. Build a framework as shown from tree branches or sticks, then cover with a parachute, tarp, or thermal blanket (if you have one). Cover the floor with tree boughs or other soft plant material, which will insulate your body from the cold ground.

Evergreen boughs make for excellent bedding material. They're cushy, insulate heat, and even smell nice.
Top off the structure with more tree boughs, preferably stacked in layers from the bottom up (with the branch up and leaves down), in a similar manner to roofing shingles. This layered pattern will help strengthen the structure, and prevent pinhole leaks from forming in the next layer.

The shingle method is useful in warm or cold climates, as layers strengthen the roof and seal out moisture.
Speaking of the next layer, the previous step is where you would have stopped if you were building an ordinary A-frame shelter—now for the “winter” part. Cover the tree boughs with packed snow, watching for holes and gaps. Finish it off with a door plug to seal out the wind, and don't forget to add an air vent if you plan to build a fire inside.
This shelter is exactly what it sounds like. First, you'll dig a ditch or trench into the snow, making it deep enough to lie down in comfortably. Then create a support structure of sticks across the top, and cover with foliage (such as tree boughs or moss) and snow. Plug the doorway, and voila—it's not roomy, but it'll keep you warm.
The Snow Trench method can also be combined with the Tree Pit design, by digging your trench under the snow-covered branches of a nearby tree. The branches act as a pre-made roof, saving you time and effort.
This is the most complex and time-consuming shelter to build, but it also provides lots of space, excellent insulation, and even a way to conceal your location. Dig your shelter into a snowy hillside, ensuring there's plenty of snow above your head to prevent a collapse.
You'll also want to create three stepped floor levels. The purpose behind these levels has to do with the fact that cold air naturally sinks, while hot air rises. By building the floor of the chamber below where you're sleeping and working, you'll avoid sitting in a “pool” of cold air that has fallen to the lowest point in the chamber. This makes efficient use of the heat you generate inside the shelter.

Don't venture outdoors this winter without knowing how to build a simple shelter. It could save your life.
The lowest level is the cold air sump, which is even with the entrance to the shelter. This is where the cold air will collect. Next, you have a working platform, where you can cook and build your fire. Finally, on the top level, you have your sleeping platform, elevated for maximum heat retention while you're asleep.
As with the other shelters, remember to block off the entrance with a solid object (like a backpack or some snow), so the wind doesn't get in. Also, don't forget to poke a small air vent hole at the top, to prevent carbon monoxide from collecting in the shelter and silently poisoning you. It would be a real shame to go to the effort of making this shelter, only to have it become your tomb because you forgot the air vent.
Be safe out there this winter, and if you try building one of these shelters, we want to see it. Tag us on Instagram @recoiloffgridmagazine or post it on our Facebook page.
 STAY SAFE: Download a Free copy of the OFFGRID Outbreak Issue
No Comments