In This Article
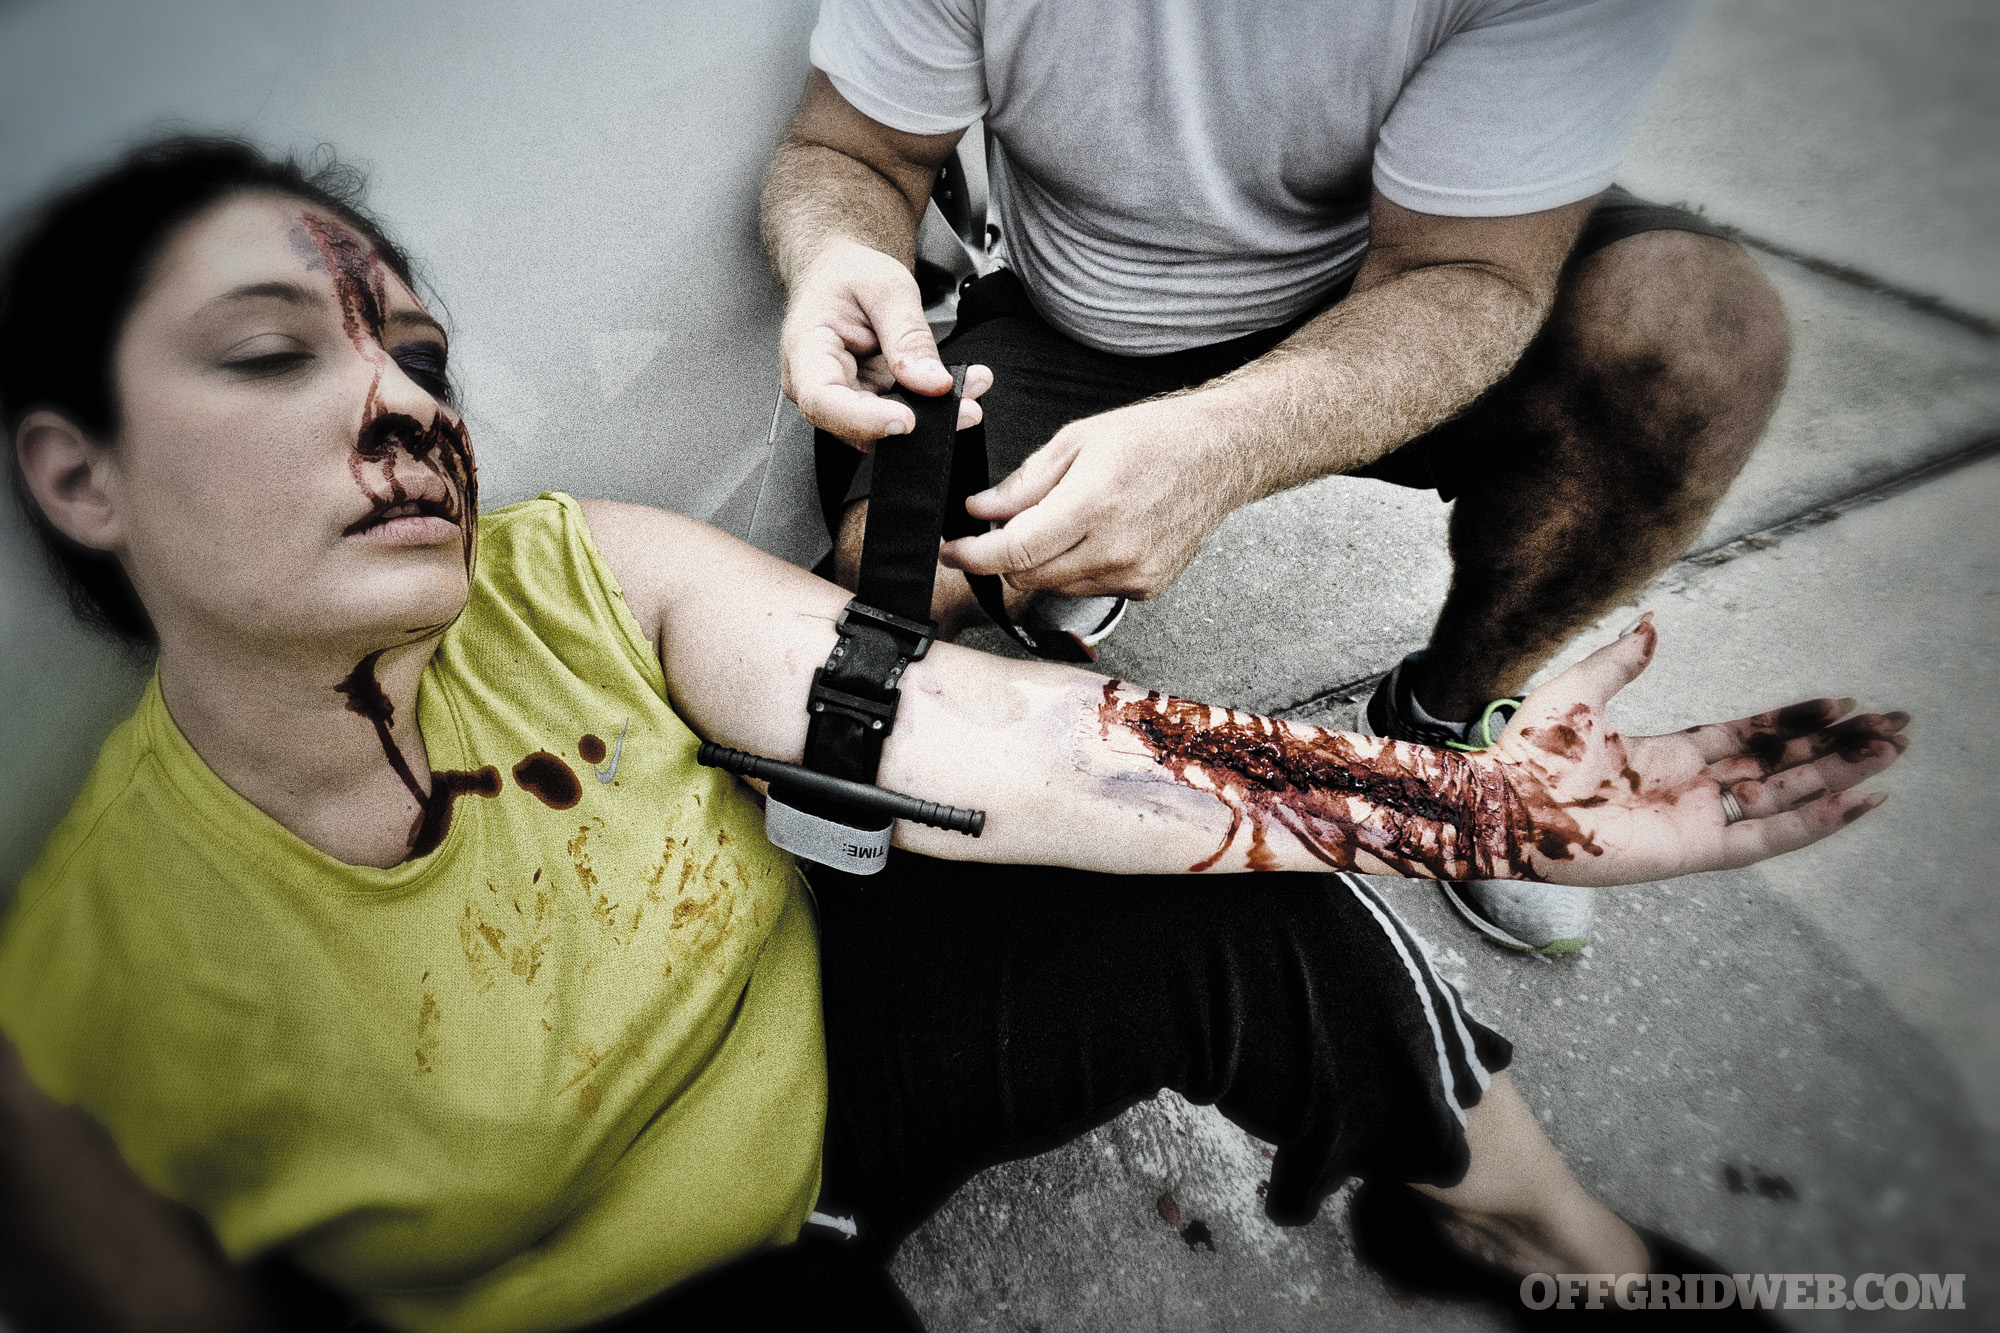
WARNING: This story is meant to be a general overview and not a detailed guide on emergency first-aid methods. Do not attempt to perform these techniques without first receiving professional paramedic or first-aid training.
The skill set of a U.S. special operations combat medic (SOCM) seems tailor-made for preppers. Through years of training, they learn to do much with little, to improvise equipment and techniques, and to scrap and scrounge in the name of keeping their teammates alive.
We had the privilege of learning how to treat some specific medical emergencies from a 26-year Special Operations Combat Medic. He’s uniquely suited to teach RECOIL OFFGRID’s readers since he’s accustomed to depending on himself to take care of things — whether waiting 72 hours for a helo to evacuate his wounded soldiers or having to triage a mass-casualty incident to decide who gets saved.
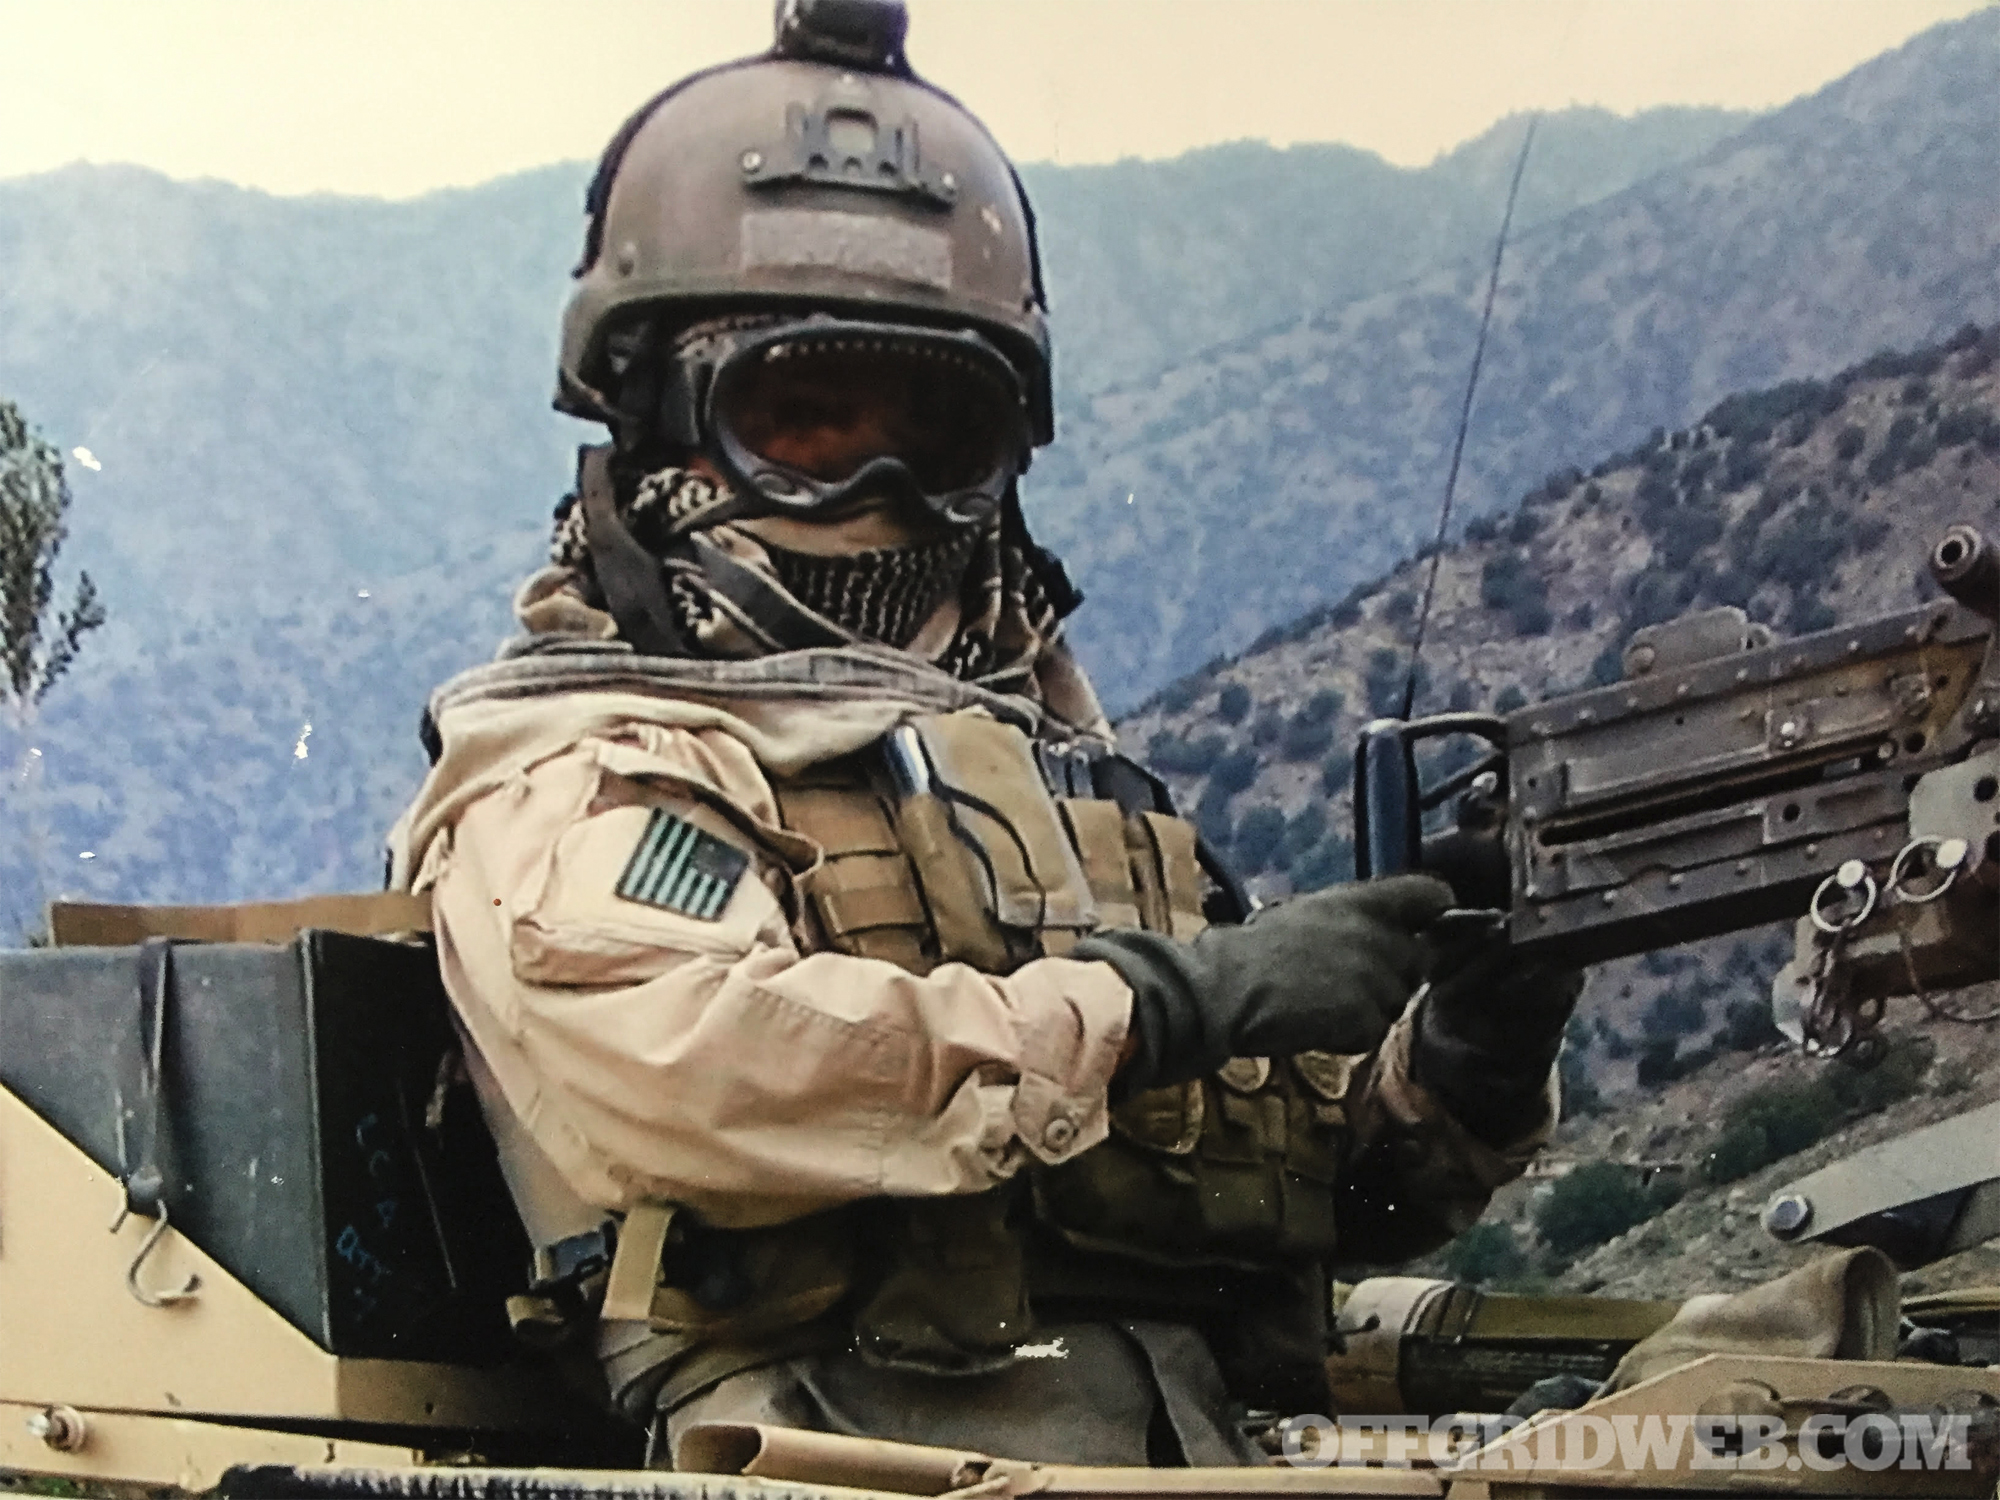
Because he’s still active-duty we can’t disclose his identity or unit affiliation. He started his career as a U.S. Navy corpsman in 1991 and, since 9/11, has spent more than five years in combat zones. He’s been deployed a sh*t-ton of times throughout the Middle East, South America, and Africa. Within his tight-knit community, he goes by the nickname of “LEGO” because he’s always tinkering with his gear.
“Though we only receive a paramedic qualification for practicing medicine in the states, as an independent duty corpsman (IDC) we are asked and trained to do much more,” he says. “I’ve had to perform amputations, placed chest tubes, performed minor surgeries, pulled teeth, practiced veterinary medicine, and diagnosed and treated diseases that most healthcare professionals only read about.”
With all that being said, we asked LEGO how he’d tackle three common trauma situations that our readers may someday face with minimal medical equipment. Read on to see how you might be able to incorporate these concepts into your own preps.
Injury #1: Blunt Head Trauma
RECOIL OFFGRID: Talk to us about head trauma, whether it’s from a fall, a vehicle crash, or a blunt weapon.
LEGO: The simple fact is that head trauma is one of the hardest things to treat in the field. There’s often a period immediately following where they seem to get better, but left untreated they can rapidly decompensate to the point of coma or death.
Visible signs of trauma or a known mechanism of injury (i.e. car crash) along with loss of their level of consciousness (LOC) are the main indicators of a concussion. You assess LOC by asking questions that require them to access long-term, short-term, and cognitive centers of the brain. Ask a simple math question or who the president is. Establish a baseline and then reassess every so often. Every five to 10 minutes at first, then spread it out to every hour if they’ve been stable for more than a half hour.
Even when they appear completely unconscious you can still check their LOC to some extent. You can flash a light in their eyes and look for pupillary response. Their pupils should be equal size and react to light. If they’re fixed and dilated you have a serious problem. Another way to establish LOC is to check their response to pain. Pinch them hard or rub on their sternum with your knuckles hard to elicit a response. You’re looking for a grimace.
There are other head trauma indicators that show up immediately, minutes, hours, or even days later. One is posturing. If you’ve ever seen someone get knocked out in a UFC fight and their arms and legs go straight out almost like a seizure, that’s a sign of brain damage. Other indicators are bleeding from ears or nose, one pupil bigger than the other, they can’t stick their tongue straight out, loss of smell, hearing, or eyesight, black eyes or bruising behind the ears, or headache.
Keep in mind that bleeding from the nose or ears isn’t evidence of significant head trauma in and of itself. You could break your nose or pop your eardrums and get blood. You can test if the blood is coming from within the skull by doing a halo test. You dip a piece of gauze in the blood and look for separation of blood and cerebral fluid. The blood tends to stay in the center as a yellow or clear ring (halo) forms on the outside, wicking away from the thicker blood.
ROG: What about short-term treatment, assuming that EMS is a simple 911 call and less than 10 minutes away?
LEGO: Like with most types of trauma, the ABCs (airway, breathing, and circulation) come first. Open their airway (mouth), check for breathing, and if they’re not breathing begin chest compressions. However, unlike other types of trauma, if you suspect head trauma, never put the feet above the head. Have them sit up slightly or lay on an incline. The object of treatment is to reduce swelling and decrease pressure. Have them relax to reduce heart rate, and never give aspirin for pain. It’ll thin the blood and increase the chance of bleeding. Also, don’t feed or give water in case they need surgery.
If bleeding from the skull, be careful with how you address it. Remember, if blood is getting out, the pressure is being relieved somewhat. If bleeding profusely from the head, never put pressure directly over the wound if there’s a chance for skull fracture. You can roll a bandage or cloth to form a donut. The donut will apply pressure 360 around the wound. The wound should be in the center of the donut you created.
ROG: What if EMS is going to be delayed for an hour or longer?
LEGO: If they are going downhill the only thing that will save them is surgery to relieve the pressure. You need to get them to the hospital ASAP. If EMS cannot get to you then you might have to get to EMS. This is when you think about life over limb. Sometimes the need to move them to get them to care outweighs other injuries that might cause more damage if you move them.
In the meantime, keep them calm. Monitor their vitals and LOC. Be prepared to manage breathing if pressure from swelling increases to the point that it puts pressure on the brain stem. Use mouth-to-mouth breathing, with one breath about every five seconds. Keep objects that can hurt them away from them in case they start flailing.
Injury #2: Blunt Abdominal Trauma
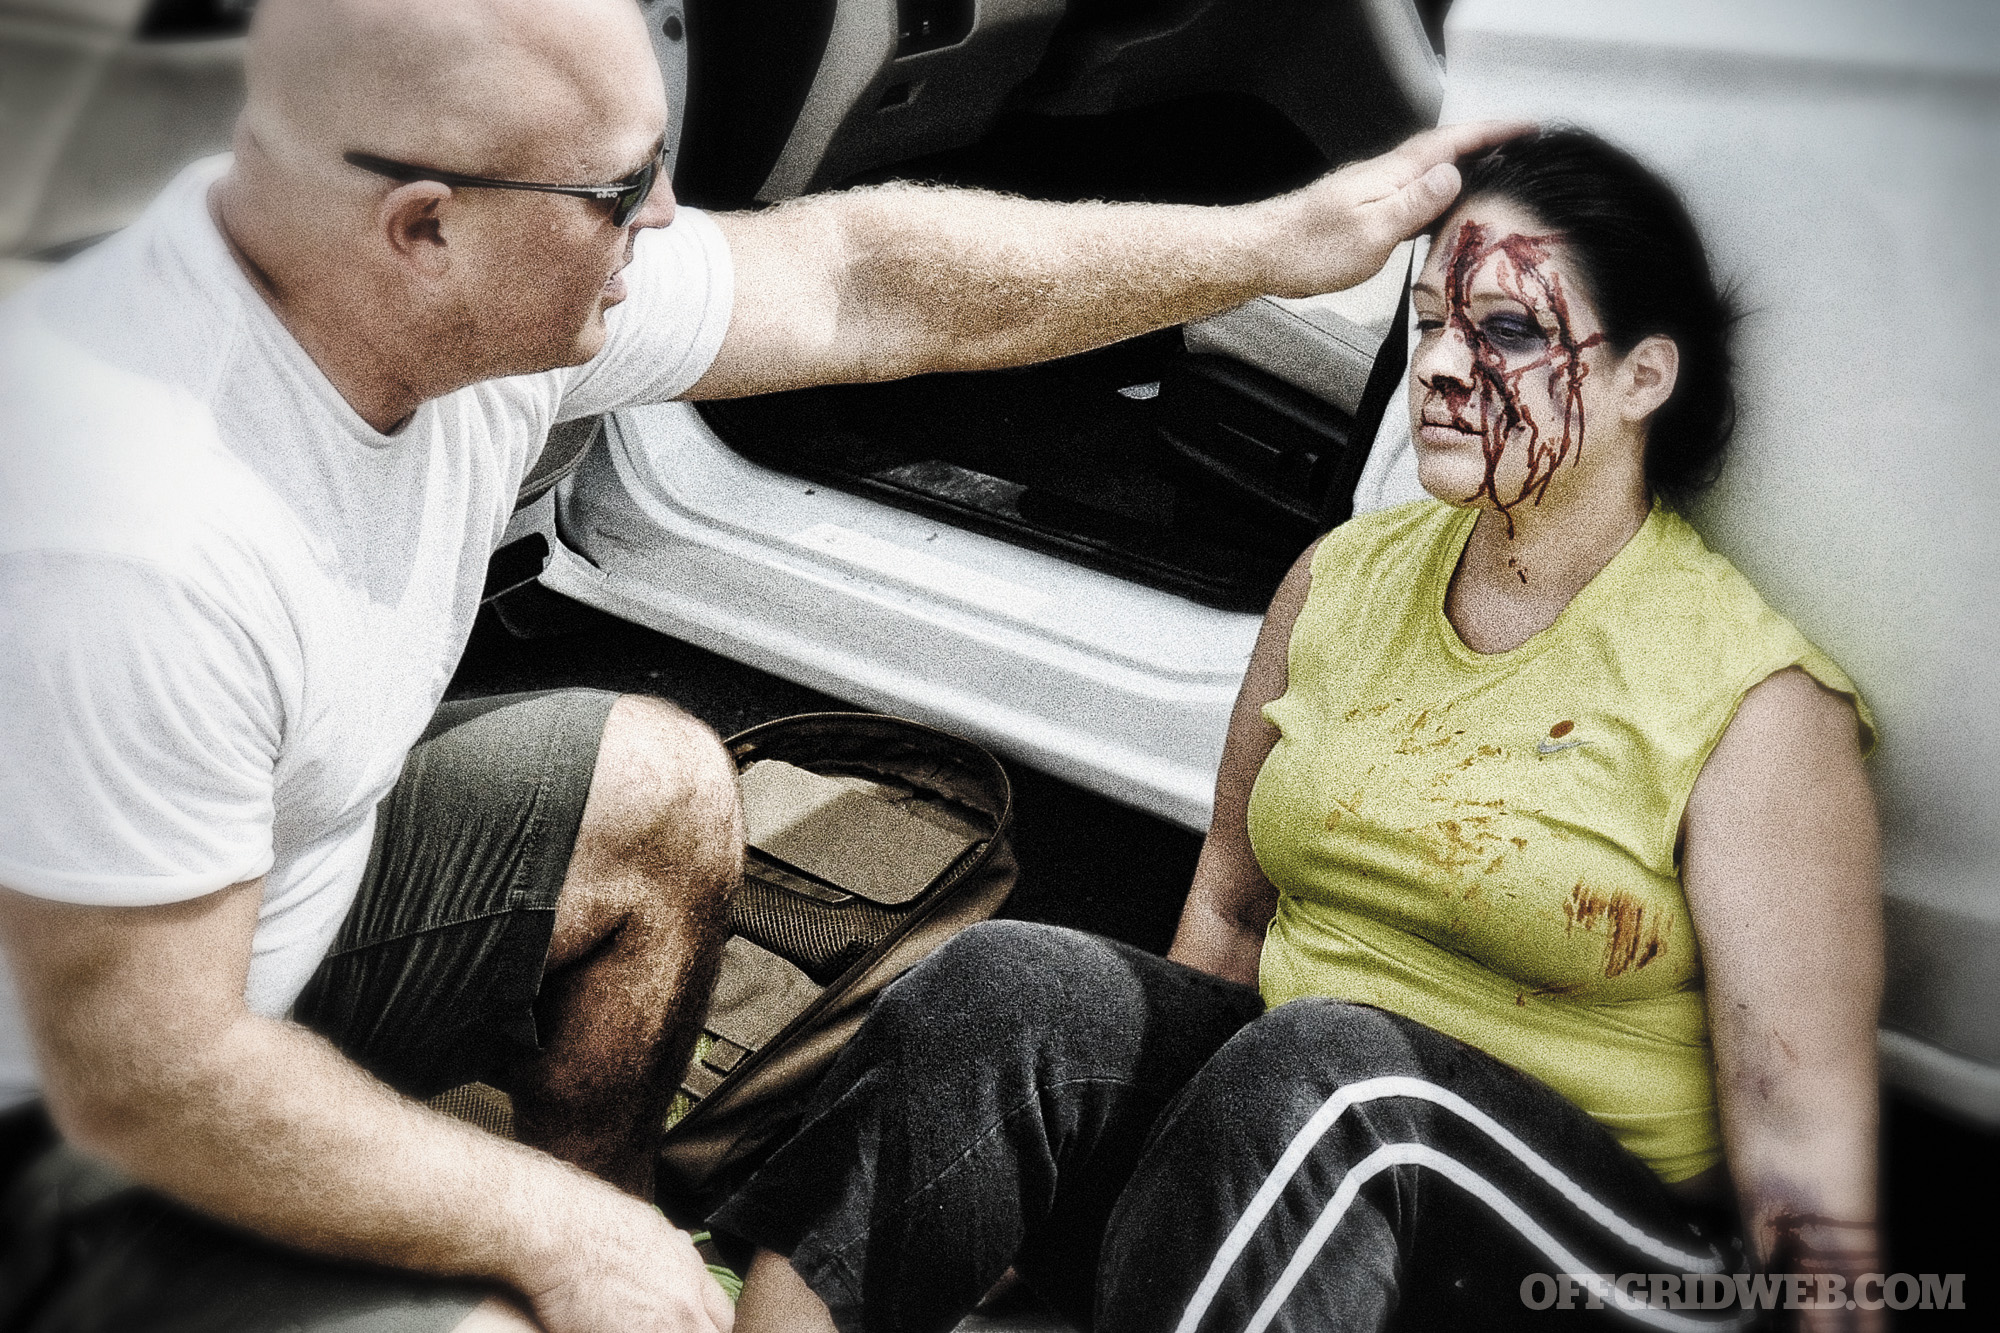
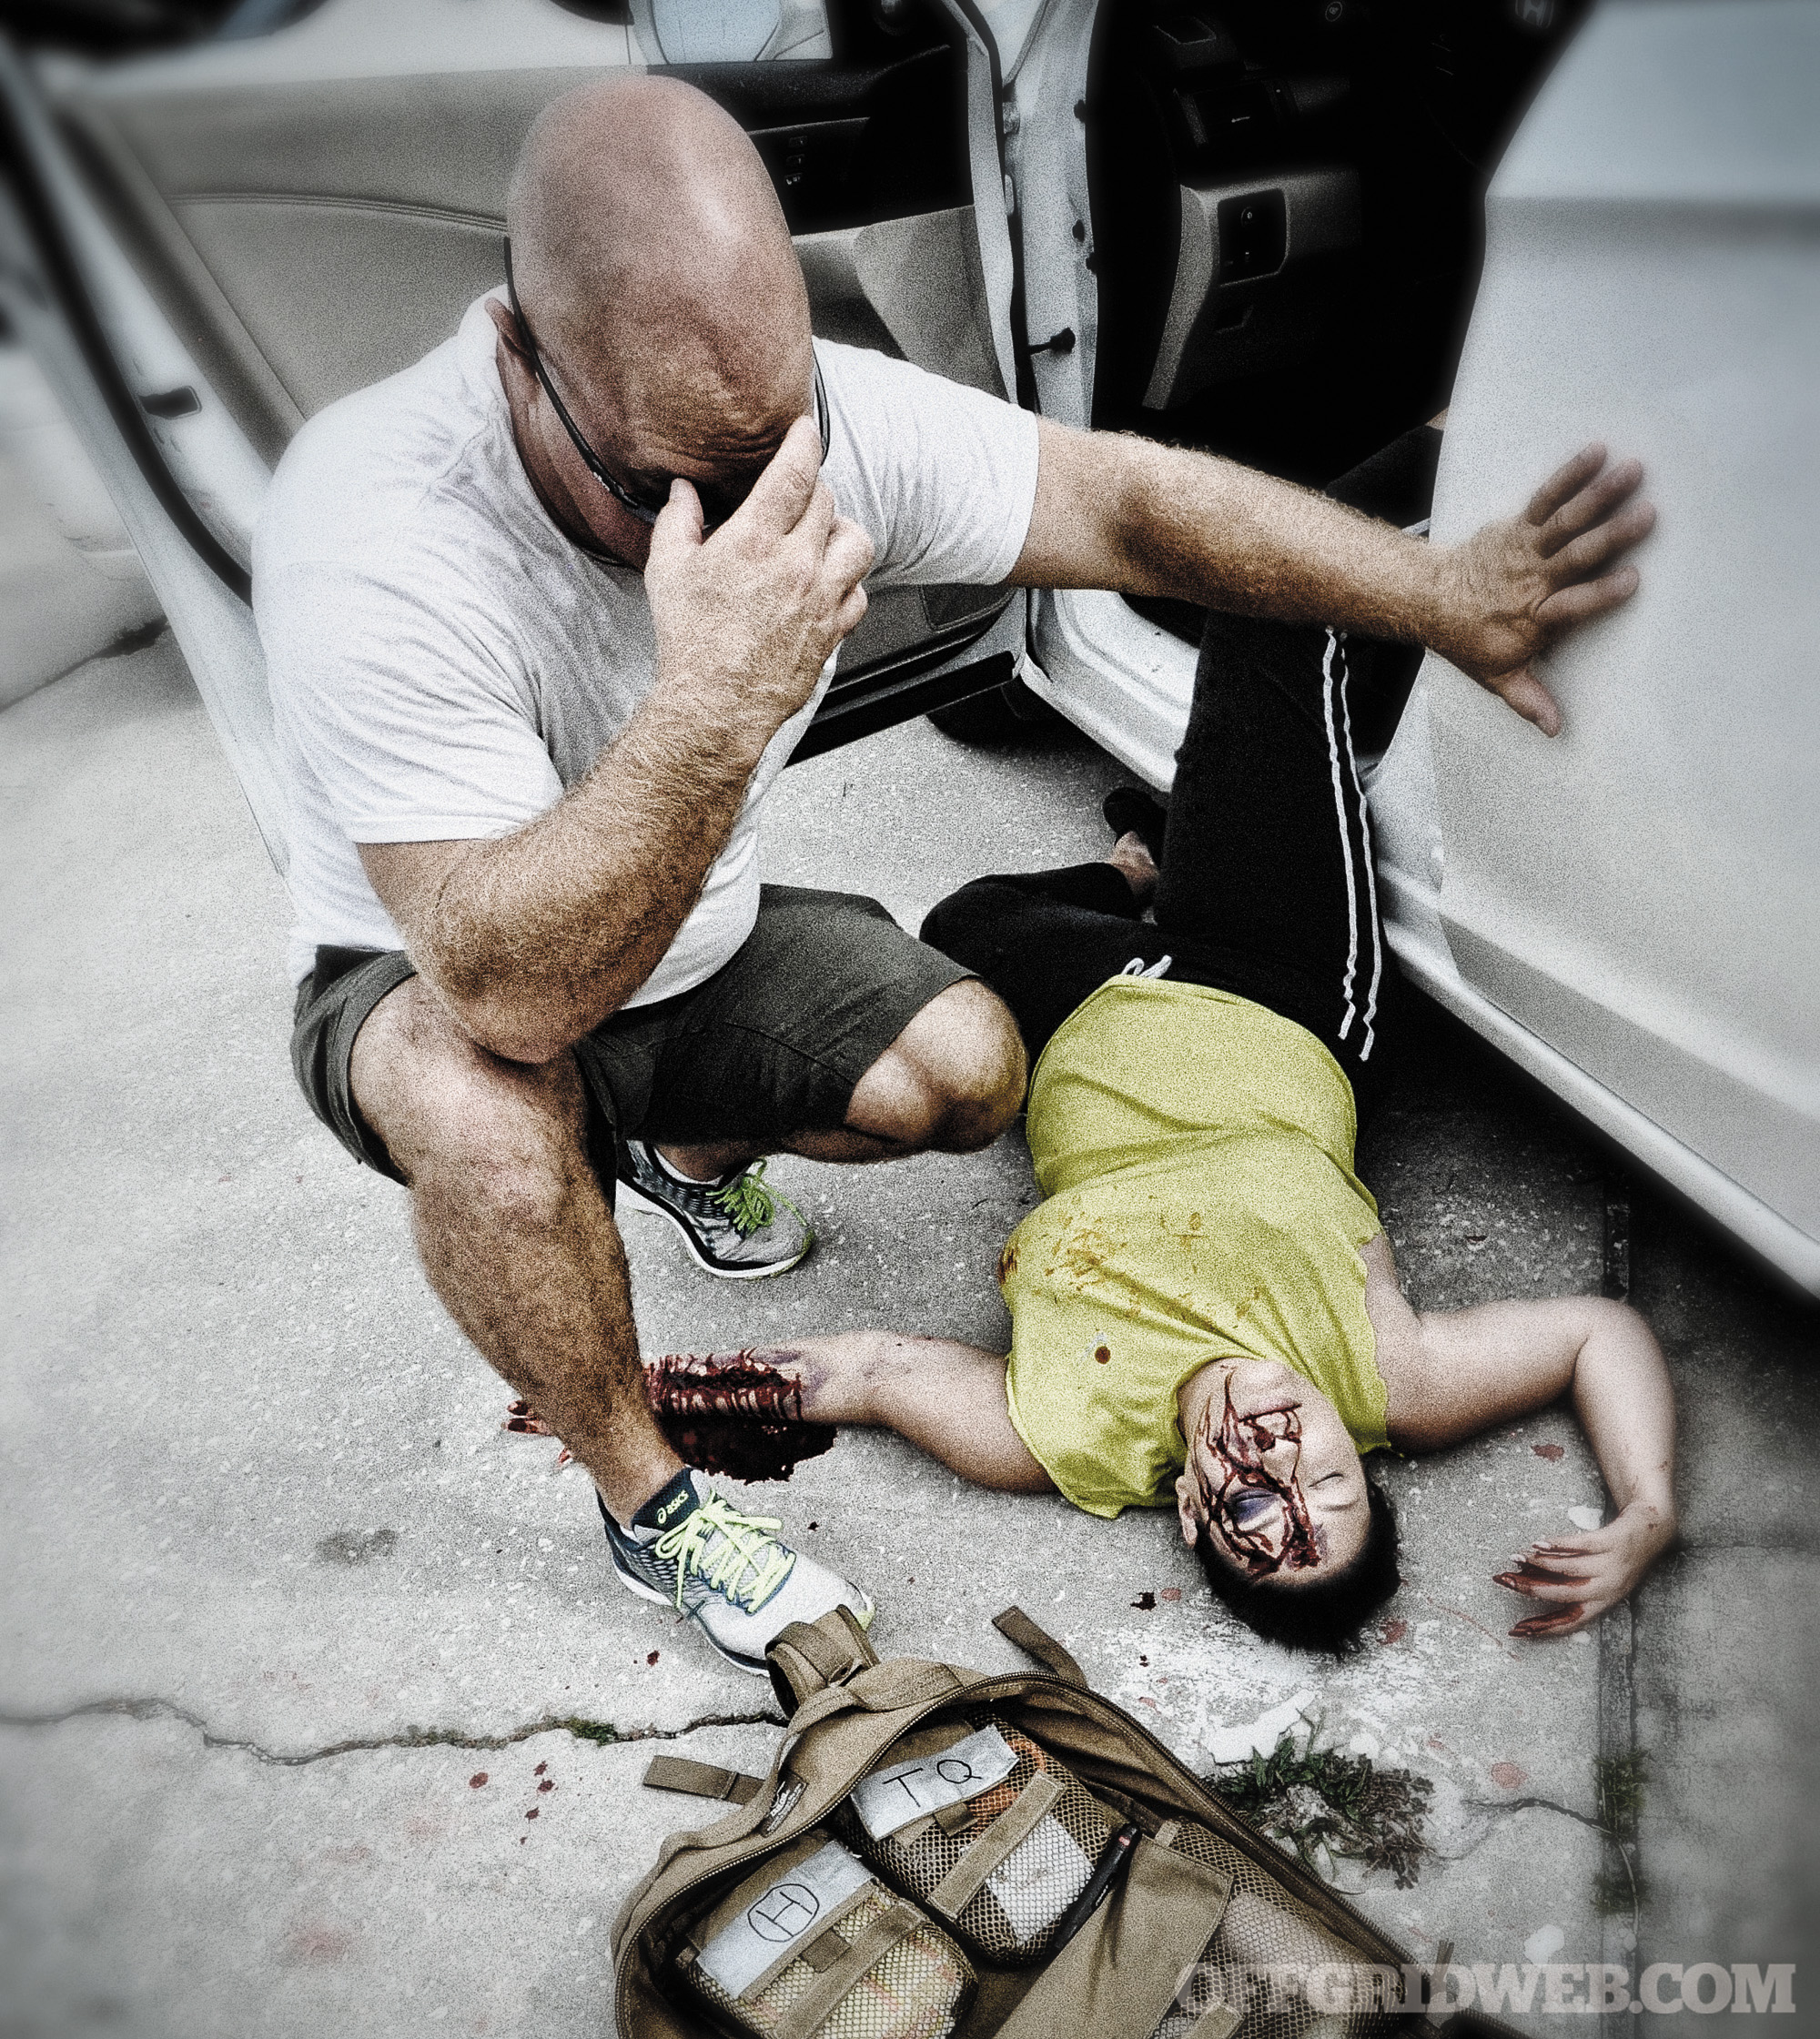
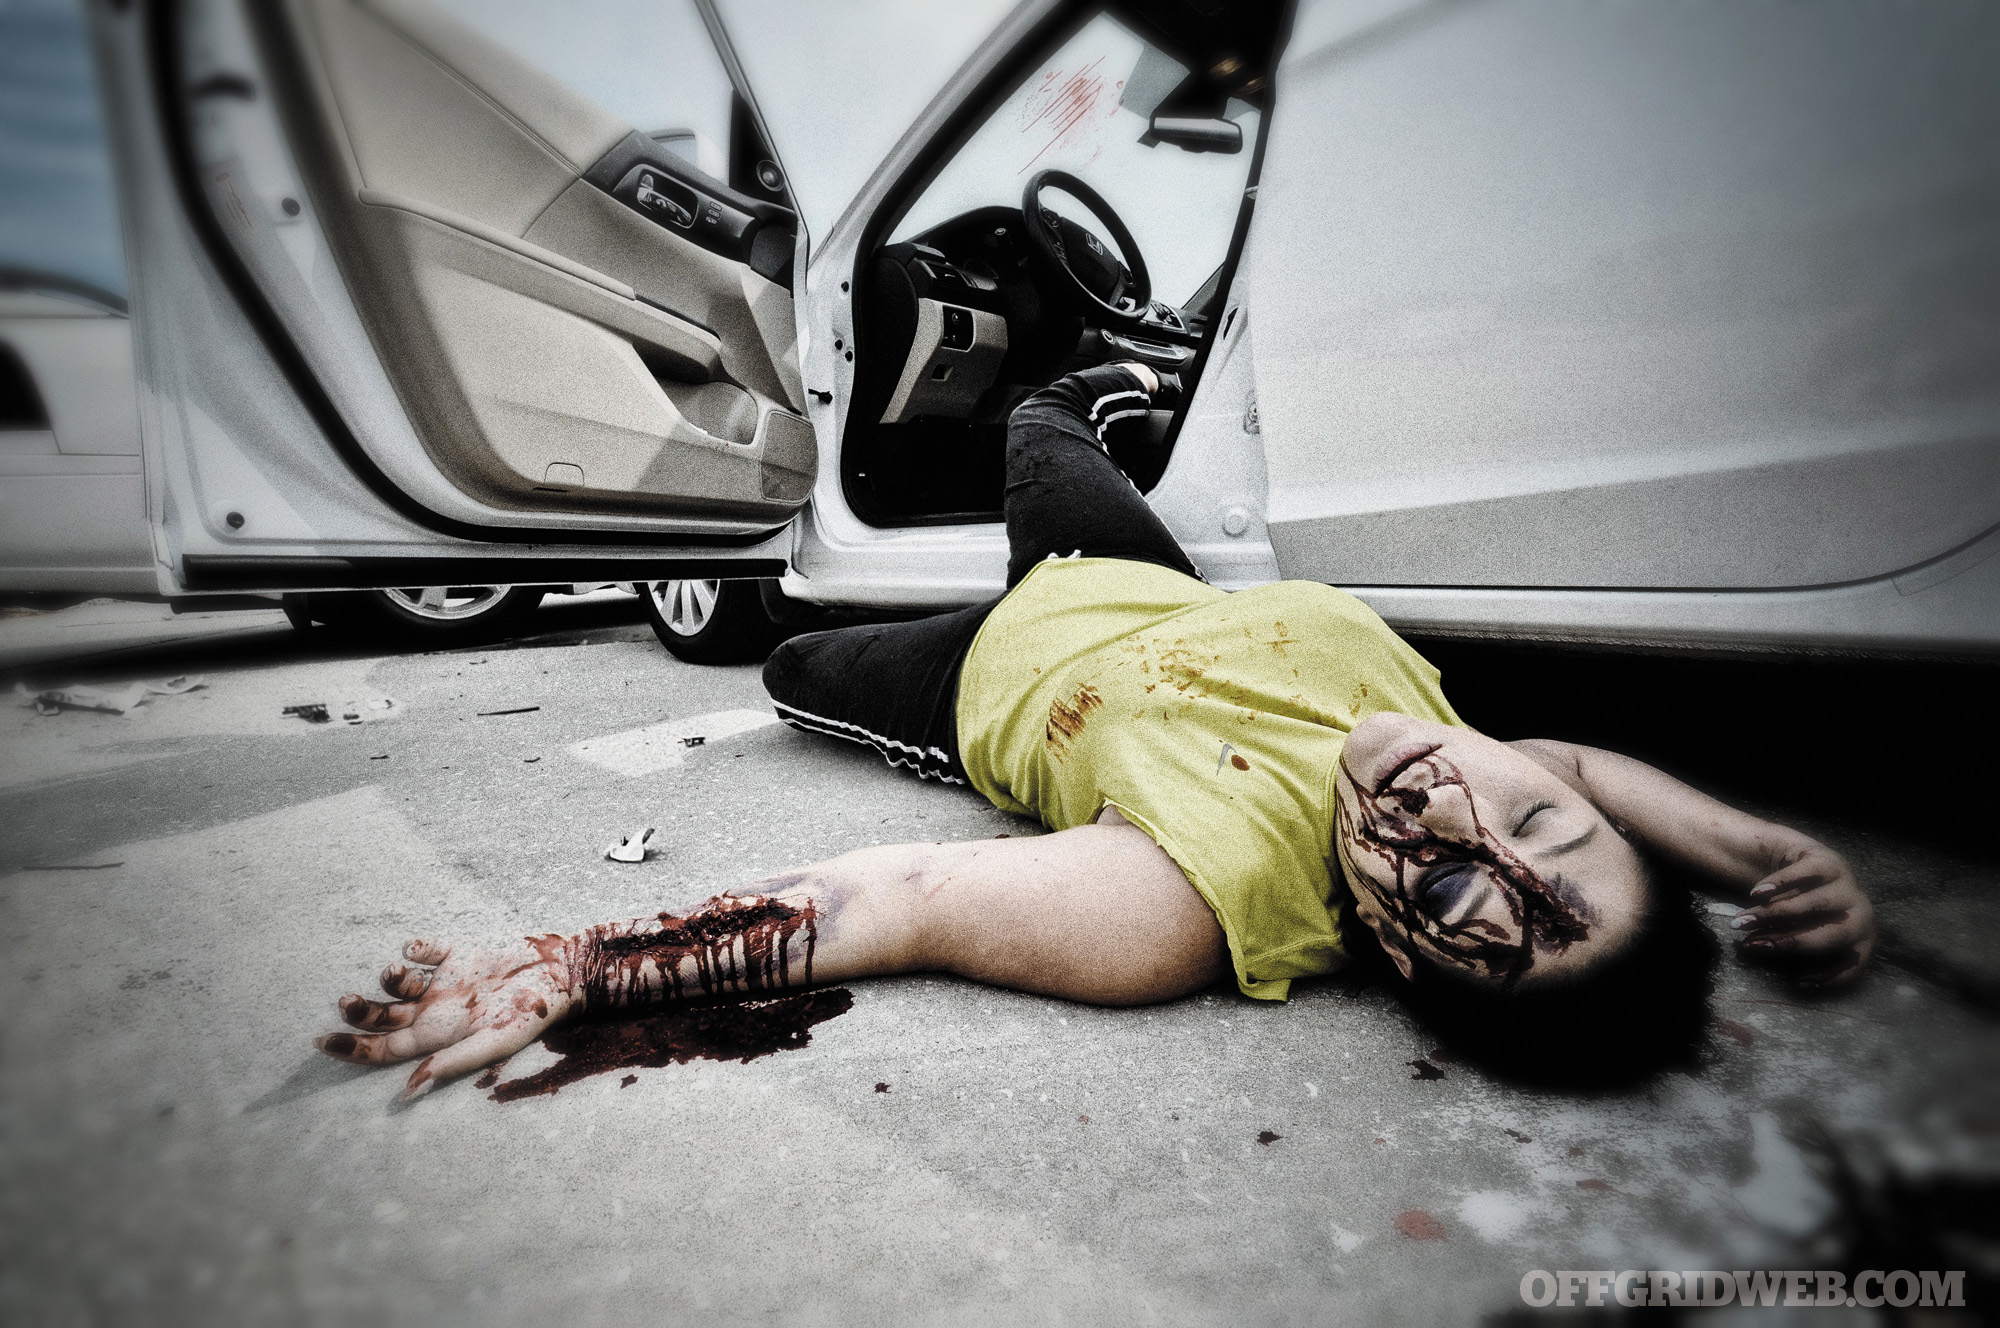
ROG: How about blunt abdominal trauma, like what usually happens in car crashes?
LEGO: Understanding the mechanism of injury is again a key indicator in determining whether they might have an internal injury. Look for abdominal rigidity (their belly will be hard as a rock), difficulty breathing, distention (this is when the belly is pushed out like a kid’s), blood on rectum or on the head of the penis, nausea or vomiting blood, or latent bruising, which shows up later. They might be very thirsty which is a common symptom with internal bleeding.
Also, crushing injuries may involve fractures to the ribs or pelvis. You can check by placing your hands around the rib cage or pelvis like you’re holding a basketball, and apply slight pressure. You’ll feel a grinding or crunching if bones are broken and see a grimace in their face. Fair warning, if the patient is awake they’re liable to come up swinging!
ROG: We’ve always been told that if EMS is on the way, leave the victim inside the vehicle for fear of spinal injuries. But what if the car is on fire or EMS isn’t coming?
LEGO: Again, if it’s a life-over-limb judgment call, you do what you got to do. If they’re wearing a jacket you can grab the collar, which helps support the head. If the shirt will not hold up, then grab under the arms to drag them out. The point is to keep the feet in line with the head as much as possible, so that if the spine is broken you don’t sever the spinal column.
Remember, the idea to any internal injury is to keep internal organs from shutting down due to lack of blood and oxygen. So treatments for blunt abdominal trauma are focused on increasing blood pressure to the core of the body where the critical organs reside. Stop external bleeding first. If they have lacerations, add pressure to that spot.
Next is posturing. Elevate the legs and arms so the blood moves into the core of the body. If they have breathing issues, roll them onto the affected side or fractured side to take pressure off the good side.
If you have elastic bandage wraps, you can try adding one to the midsection to increase pressure or add them to the legs to force the blood to the core. Start from the feet and move up toward the thighs. If you notice bruising, trace the outline using a Sharpie. Mark time on it to give you an idea of how bad the bleed is. Make this part of your reassessment loop as you check vitals. Do what you can until you can’t do any more.
Many jurisdictions have good Samaritan laws that shield helpful bystanders from litigation. Regardless, it’s not a bad idea to take notes about any actions you took at the scene before they pass from your memory in case you are ever called on them.
Injury #3: Penetrating Trauma
ROG: Can we talk about penetrating trauma, like a gunshot wound?
LEGO: Penetrating trauma is probably the most common of combat casualties. Whether it’s from a blast or gunshot, location and velocity of the object can produce a variety of injuries.
ROG: What about stabbings?
LEGO: In cases of a stabbing or impalement, damage tends to be localized. If the object is still there, leave it in. Stabilize it to protect it. This might mean cutting it down so it’s manageable, building donuts up around it similar to a head wound, or placing something over it like a cup and taping it in place. Leaving it in will maintain pressure created by the object itself against anything it severed.
If the penetration is anywhere in the trunk of the body, you should treat the wound with an occlusive dressing. That is an airtight dressing that prevents air from escaping or entering the chest cavity, which could cause the lungs to collapse. You can make one by placing a piece of plastic, like a wrapper or credit card, directly over the hole and taping the sides down.
Keep in mind that if the lung is punctured, air can escape into the chest cavity from the lungs themselves. With occlusive dressings placed, the trapped pressure can collapse the lungs further, even adding pressure to the heart until no exchange of air is possible. This is called a pneumothorax. The most recognizable sign of this is unilateral breathing, where one side of the chest rises, but not the other. You’ll see increasingly labored breathing and you might even see distended neck veins.
If you recognize these signs, you might need to burp the wound. To do this, peel up the plastic dressing and wipe away any clots so the air can escape. Replace the bandage once the pressure is relieved.
OG: What if the wound is to a limb?
LEGO: Put a tourniquet on as high on the limb as possible. This is a precaution until you locate or eliminate the presence of an exit wound.
Do a blood sweep: Search with your hands 360 degrees on the body for an exit wound. Be thorough. You never know what path the bullet will take once it hits flesh. The path will often depend on the way the bullet is facing as it starts to tumble. I’ve seen people that appeared to be simply shot in the leg, but had an exit wound through their back.
If you find a wound, immediately apply pressure, place a tourniquet, then cover it with a pressure dressing. You apply a pressure dressing by first packing the wound with gauze. Once you locate the hole, open it so you can see the bleed, and shove gauze directly in the bleed. You must be aggressive with this.
With your fingers feeding it in, unroll the gauze as you pack the wound until you can’t fit any more gauze into it. Apply a couple wraps of elastic bandage wrap or other dressing to secure the gauze in place.
Once you cover the wound completely with the wrap, you can start adding a twist in the wrap directly over the wound. This will help add more direct pressure. Once the pressure dressing is in place and you’ve ruled out an exit wound, you can loosen the tourniquet and lower it to about 2 inches above the dressing.
ROG: How would you treat penetrating trauma in the longer term?
LEGO: If the wound continues to bleed after loosening the tourniquet, replace the tourniquet roughly 2 inches above the wound. You’ll need to loosen the tourniquet once every 30 minutes so they don’t lose their limb. Loosen it slowly so you don’t blow out any clots that’ve formed. And when you loosen it, make sure you leave it in place just above the wound site. This way it can be rapidly applied again if your dressing starts seeping. Eventually, the wound should clot and the bleeding will stop.
If you have it, give them broad-spectrum antibiotics. But any antibiotic would be better than nothing at this point.
You want to debride (remove dead and damaged tissue) and clean the wound aggressively. Note: Your patient will not like it! After debridement, pack the wound and keep it covered for the first five days, smelling it and checking for infection. You can consider closing smaller, low-velocity wounds at this point if there are no signs of infection. Larger holes that you can’t close will need to have their dressings changed often. As you rip out the old gauze it removes the top layer of scab, helping the granulation process. This is where it heals from the inside out. Keep the wound covered and do this daily until it no longer bleeds.
ROG: Is there anything else we should keep in mind?
LEGO: Always remember that attitude can have a huge impact on a patient’s survivability. I’ve seen individuals shot once or twice fold because they focused on the wrong thing. Others I’ve seen shot up to 26 times and survive. Don’t underestimate the power of the mind. Keep them engaged on doing a job if possible, to take the focus off of their wounds if you can. Keeping calm will help calm them. If you project confidence in the fact that they’ll make it, they will too.
Medic’s Gear
LEGO, a U.S. special operations combat medic, is used to saving lives in combat zones with little more than his medical kit and his experience. So adaptation is the name of his game.
“If I had five items to choose from, I would have ACE wrap, rolled gauze, tourniquets, shears, and 100-mph tape,” LEGO says. “You can improvise everything if you have these items. You can use the inside of the sterile wrappers for occlusive dressings, or if internal organs are exposed. You can cut your shirt for more bandages and use tape for just about everything.”
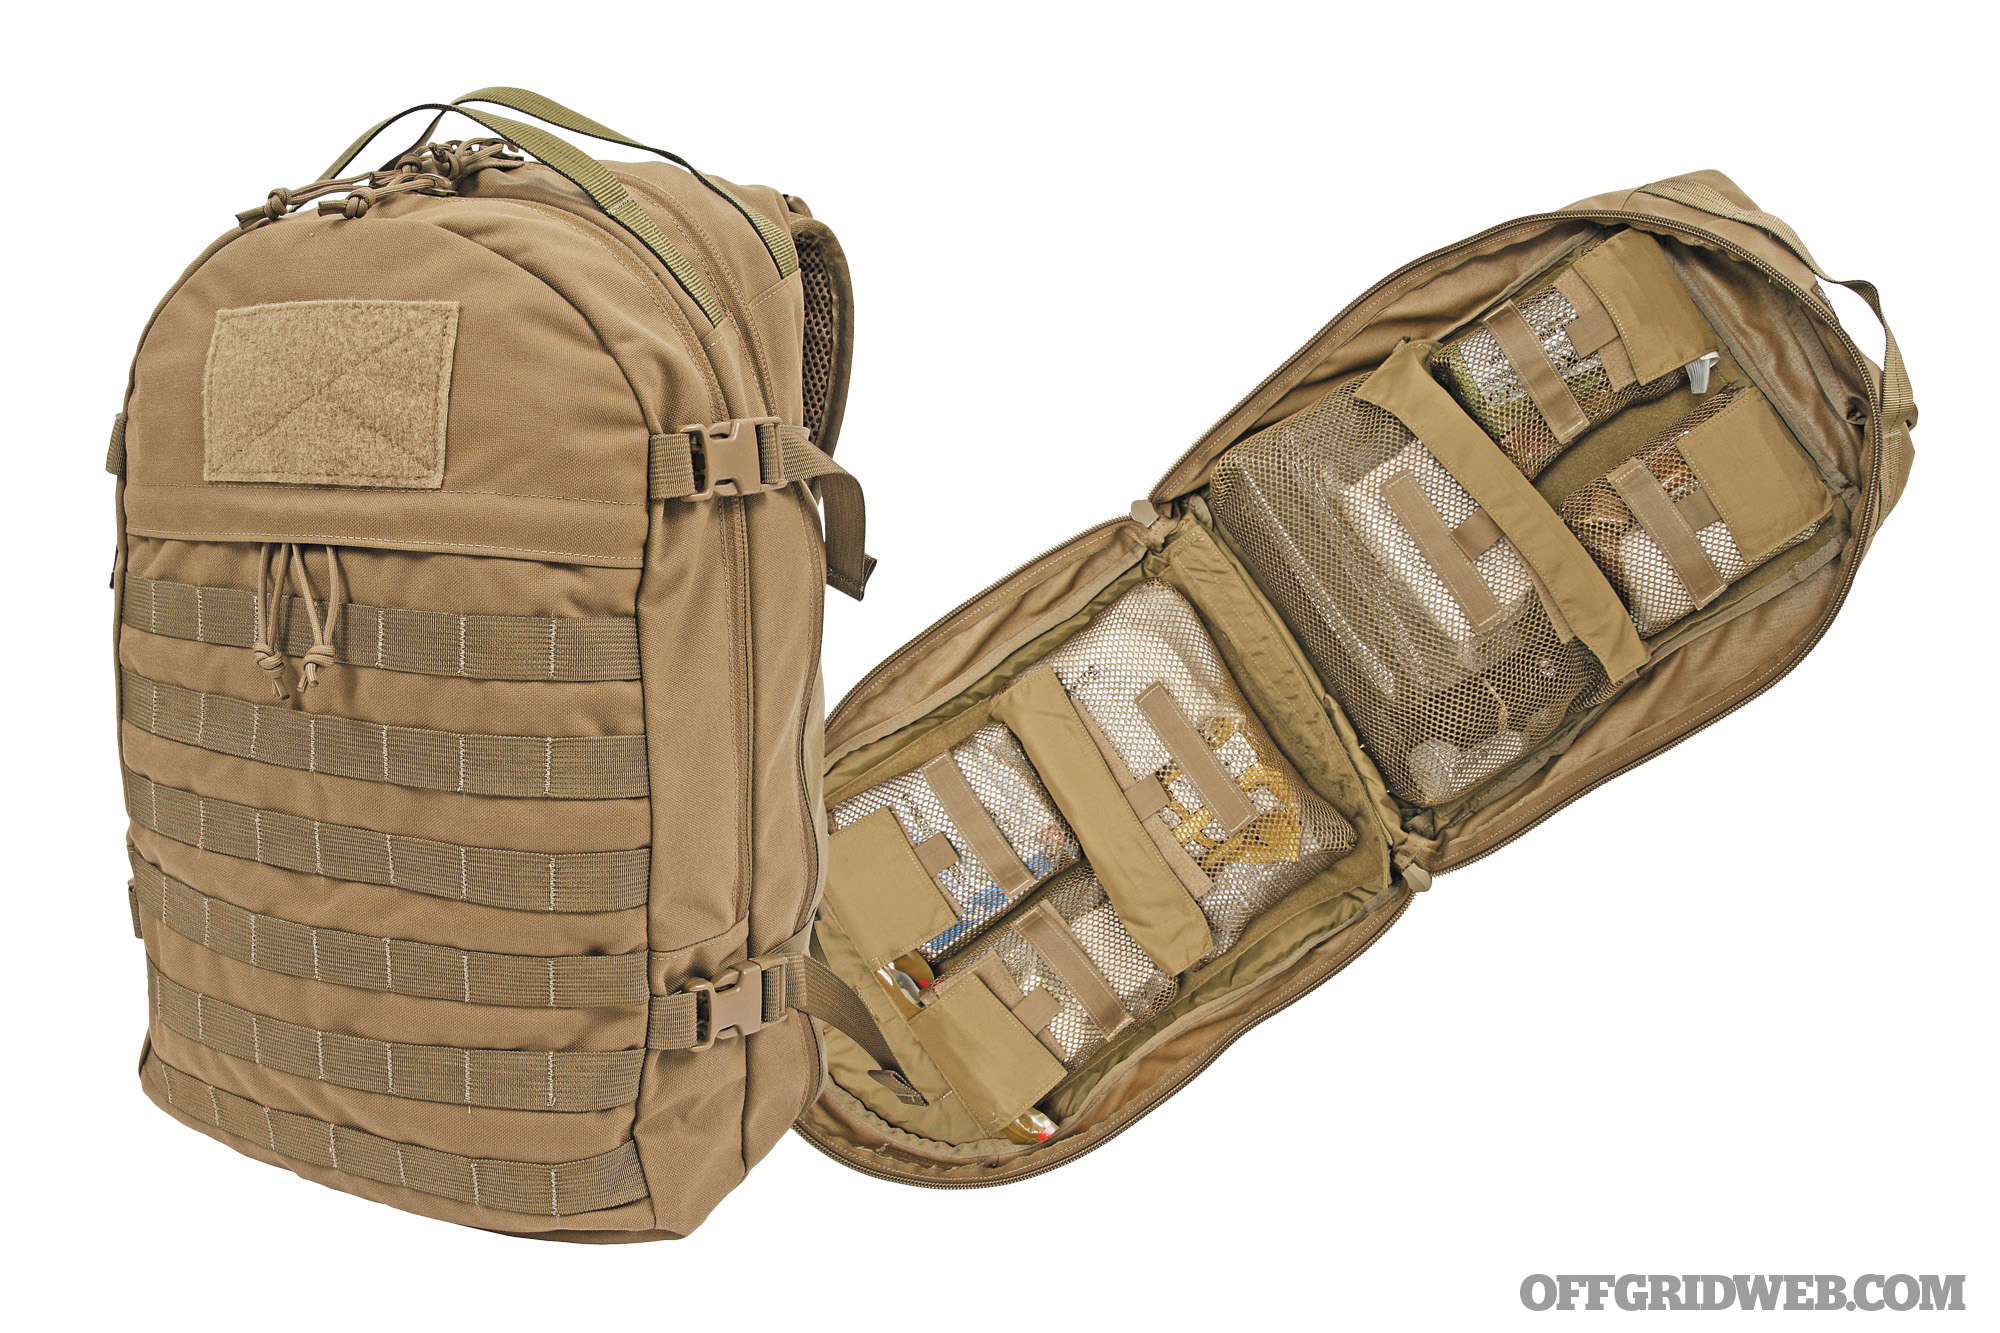
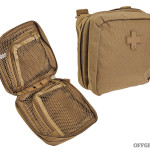
Medic Pack
For larger-scale supply storage, the Cerberus 72-Hour Medic Pack from Tactical Tailor carries enough for an entire family or survival group. The $400 price tag is high, but on par with similar USA-made packs of the same quality and size. The interior mesh pockets are completely separated and detachable. They can be positioned in dozens of combinations to fit each user’s unique needs. www.tacticaltailor.com/72hourmedicpack.aspx
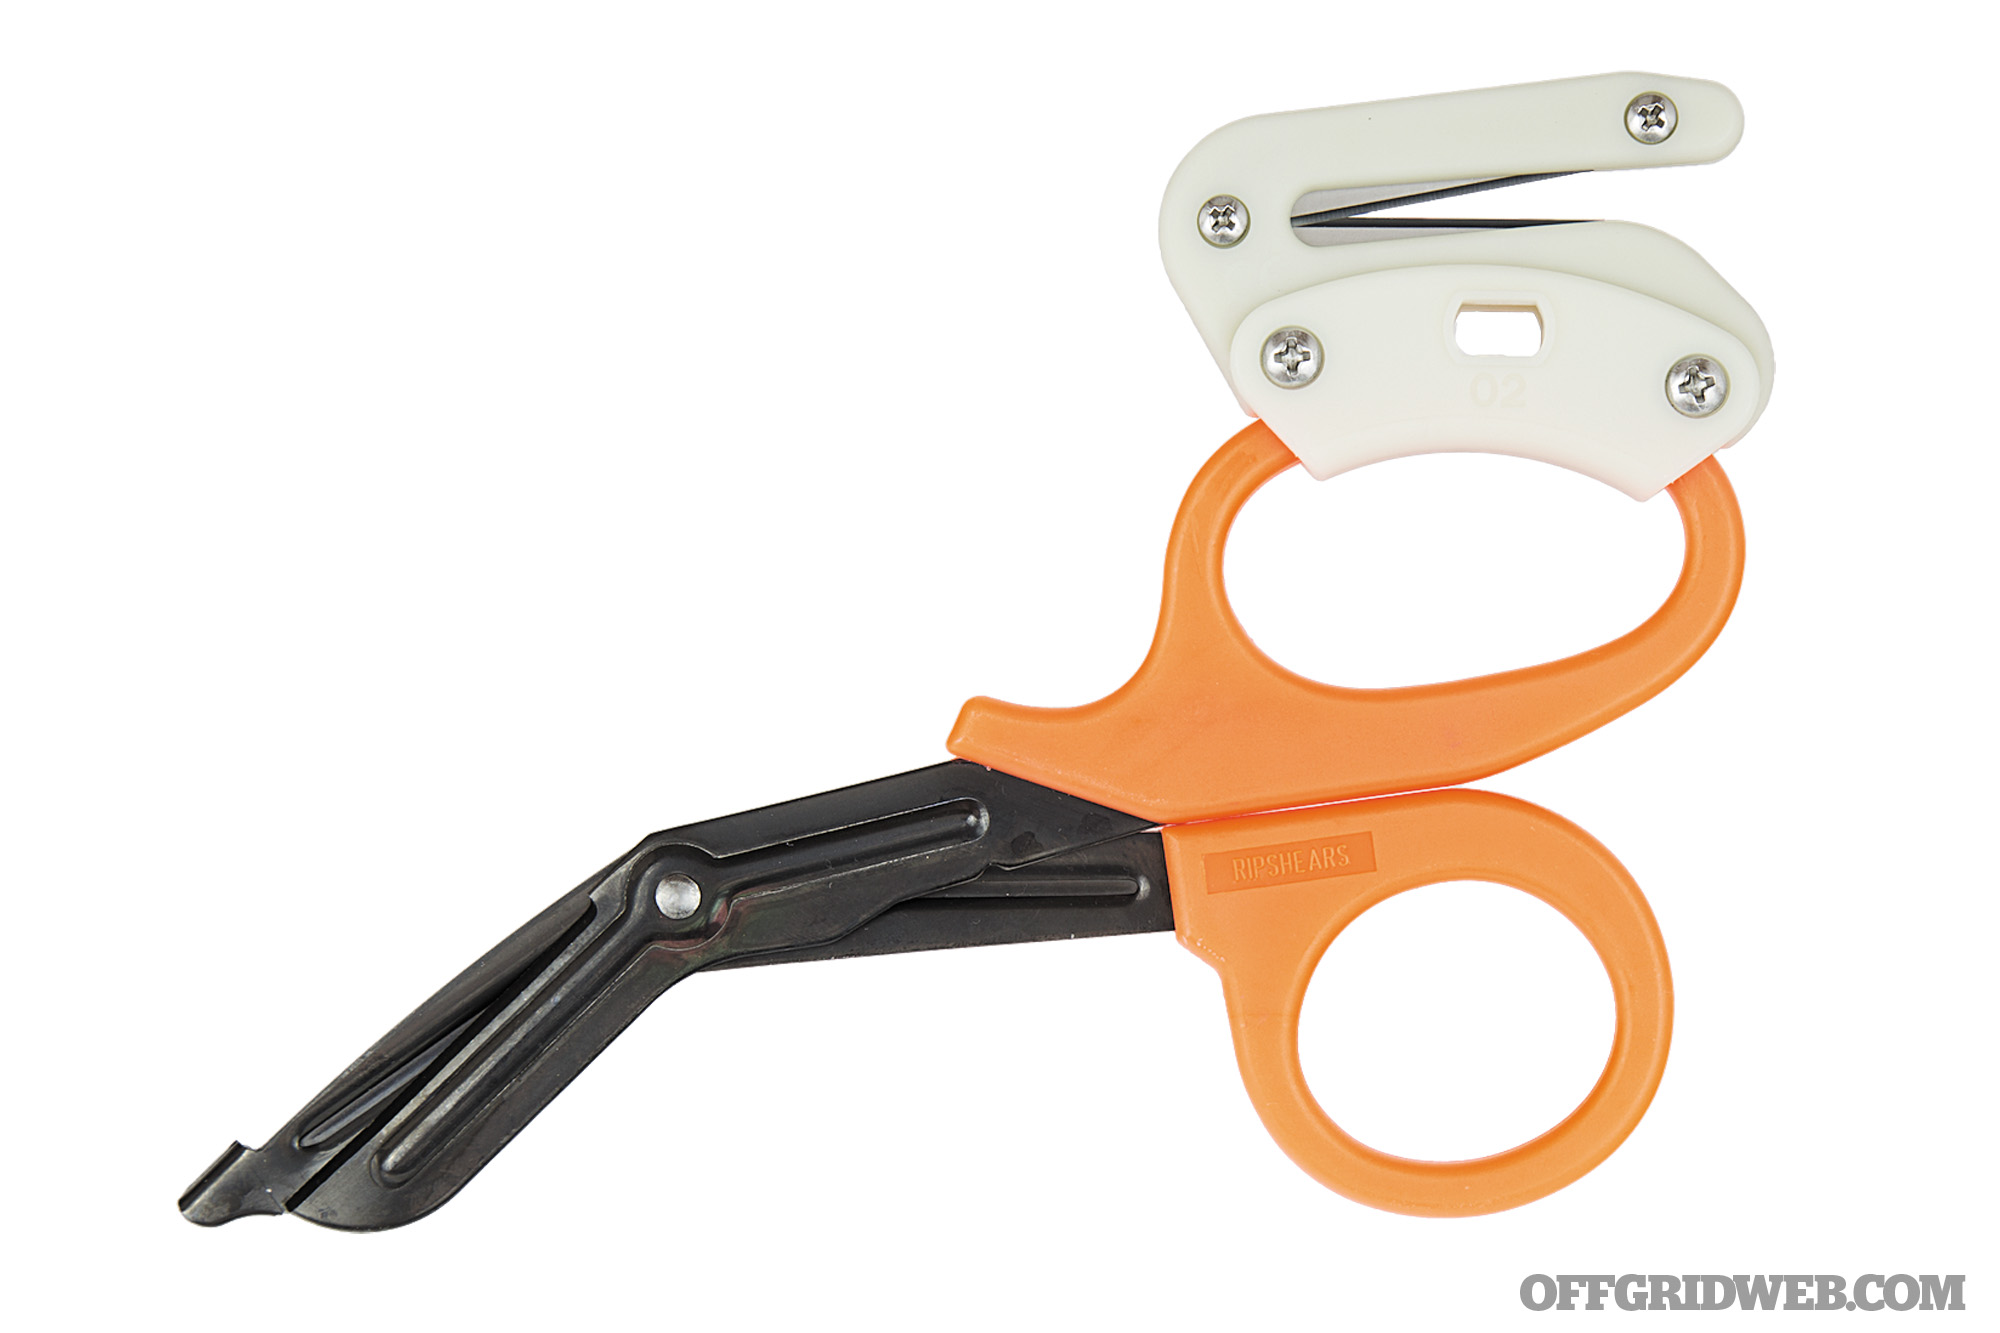
Shears
Oftentimes, it’s important to remove a victim’s clothing to expose the wounds, especially if the patient is unconscious. The fastest tools we’ve ever seen for this are USA-made Ripshears ($28). These patented shears combine trauma shears with an inline safety knife to zip through clothing, including boots, protective bunker gear, and heavy jackets in seconds. www.ripshears.com
IFAK
Medical tools must be portable and deployable immediately. The veteran 6.6 Med Pouch from 5.11 Tactical ($30) attaches to a larger backpack or duffle with MOLLE compatibility and zippered mesh pockets. The UCR IFAK pouch ($35) is a souped-up version with better separation, faster access and increased interior visibility, and can easily mount to a vehicle headrest. www.511tactical.com
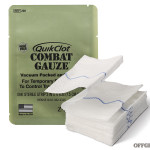
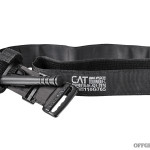
Gauze and TQ
QuickClot Combat Gauze ($38) and the Combat Application Tourniquet (CAT) ($33) are standard issue to our military, both available from North American Rescue. Its website offers all of these medic basics plus helpful videos to explain their use. www.narescue.com
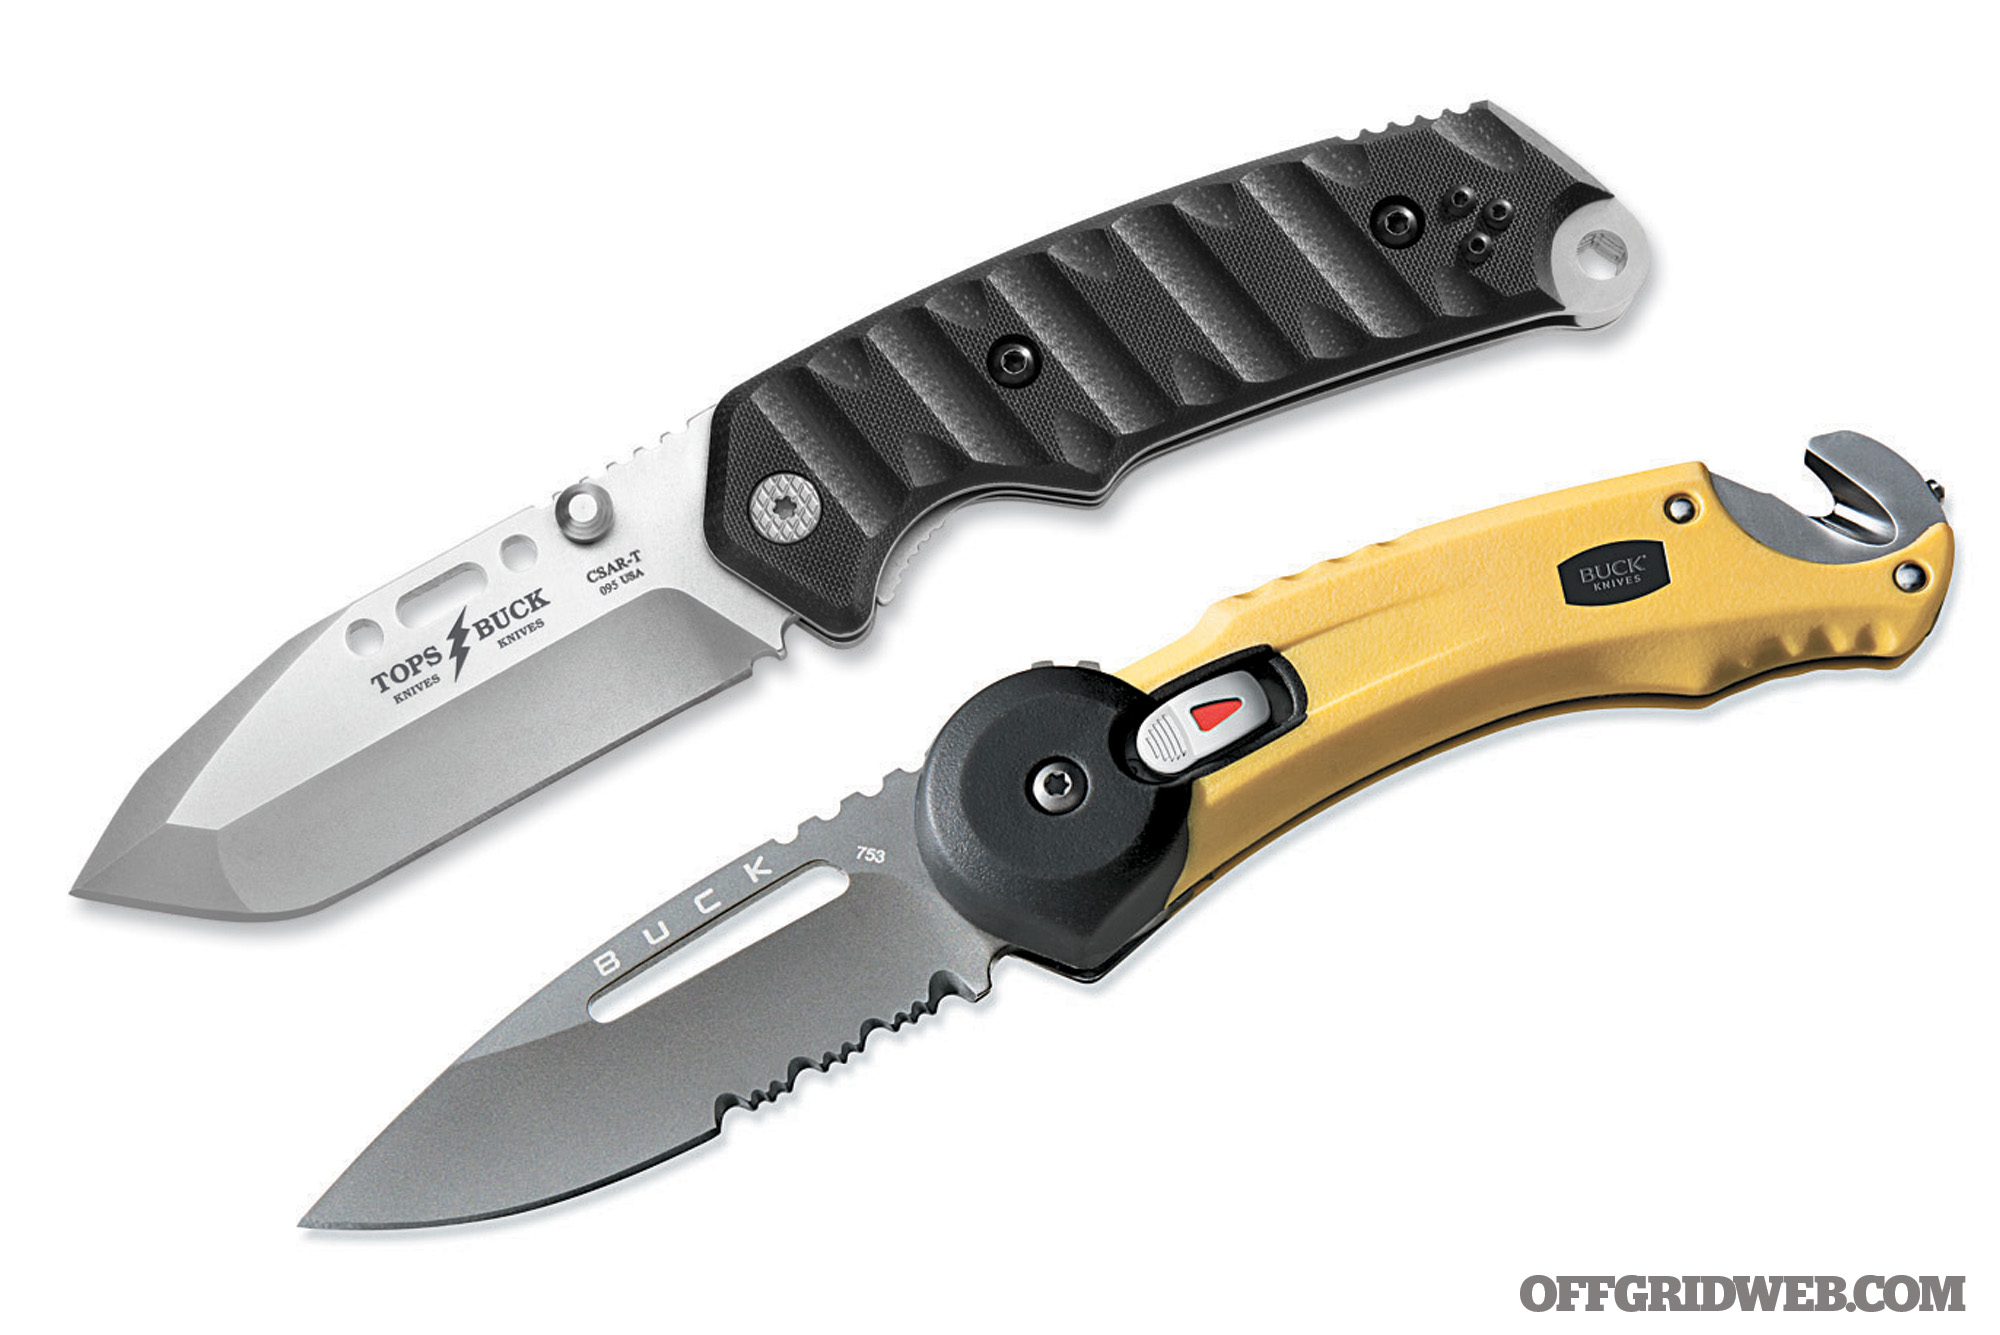
Knife
The made-in-USA TOPS/BUCK CSAR-T knife ($95) was designed to be the best available knife for rescuers. With its Rocky Mountain Tread grip and chunky ATS-34 blade, it feels a lot like Mission Accomplished. But if you’re working on a first responder or combat medic’s budget, the very best tools may sometimes be out of your reach. In that case look for the imported Buck Redpoint rescue knife ($32). www.buckknives.com
About the Author
Andrew Schrader is a licensed professional engineer and is certified by the U.S. Army Corps of Engineers as an Urban Search and Rescue (USAR) Structures Specialist. His company, Recon Response Engineering LLC, advises state and federal government organizations on the subject of urban search and rescue and building collapse. He recently assisted the U.S. Department of State’s Italian Consulate in the development of their post-earthquake response and rescue protocol. Website: www.reconresponse.com Instagram: @reconresponse
More From Issue 17
Don’t miss essential survival insights—sign up for Recoil Offgrid’s free newsletter today!
- Snow Worries: 7 Survival Tips for Hiking in Winter
- What If a Winter Road Trip Leaves You Stranded and Injured?
- Staying Sharp: Spencer Frazer of SOG Knives
- Full Speed Ahead: Power Training Workouts for Survival
- Review: DGT Shadrach Neck Knife
- Shrink Your Drink: Collapsible Water Bottle Buyer’s Guide
- 4 DIY Survival Uses for Altoids Tins
- Mommy, I’m Scared: 5 Keys to Children’s Fears
- The No-B.S. Paramedic Guide to 3 Common Injuries
- 7 Common Self-Defense Mistakes
- Piggy Warmers: Cold Weather Socks Buyer’s Guide
- Miniature Flashlights – Highlights
- The 10 Most Neglected (But Essential) Preps
Read articles from the next issue of Recoil Offgrid: Issue 16
Read articles from the previous issue of Recoil Offgrid: Issue 18
Check out our other publications on the web: Recoil | Gun Digest | Blade | RecoilTV | RECOILtv (YouTube)
Editor’s Note: This article has been modified from its original version for the web.
