What do you call a knife that doesn’t cut? Trick question — it doesn’t really matter what you call it, because you’ll be too busy cursing under your breath to think of a name. Anyone who has ever tried to use a dull knife understands this frustration, and therefore knows the merits of sharpening blades regularly. But much like cleaning your guns, sharpening isn’t something you should only be able to do at home or in a well-lit and organized workshop. It’s the kind of maintenance you should always be prepared to do. This is especially true for those of us who take long trips away from home or into the remote wilderness — if your knife gets dull out there and you don’t have the correct tools, you may end up in serious trouble.
The solution to this is simple: make a small knife sharpener part of your every day carry kit, whether it’s in your pocket or your pack. There are many options on the market, such as the ever-popular Lansky Blademedic. In Issue 30 of the RECOIL OFFGRID print magazine, we review 7 pocket sharpeners from CRKT, DMT, Lansky, Mora, Spyderco, Victorinox, and Work Sharp. Keep an eye out for that issue on shelves in February 2019.
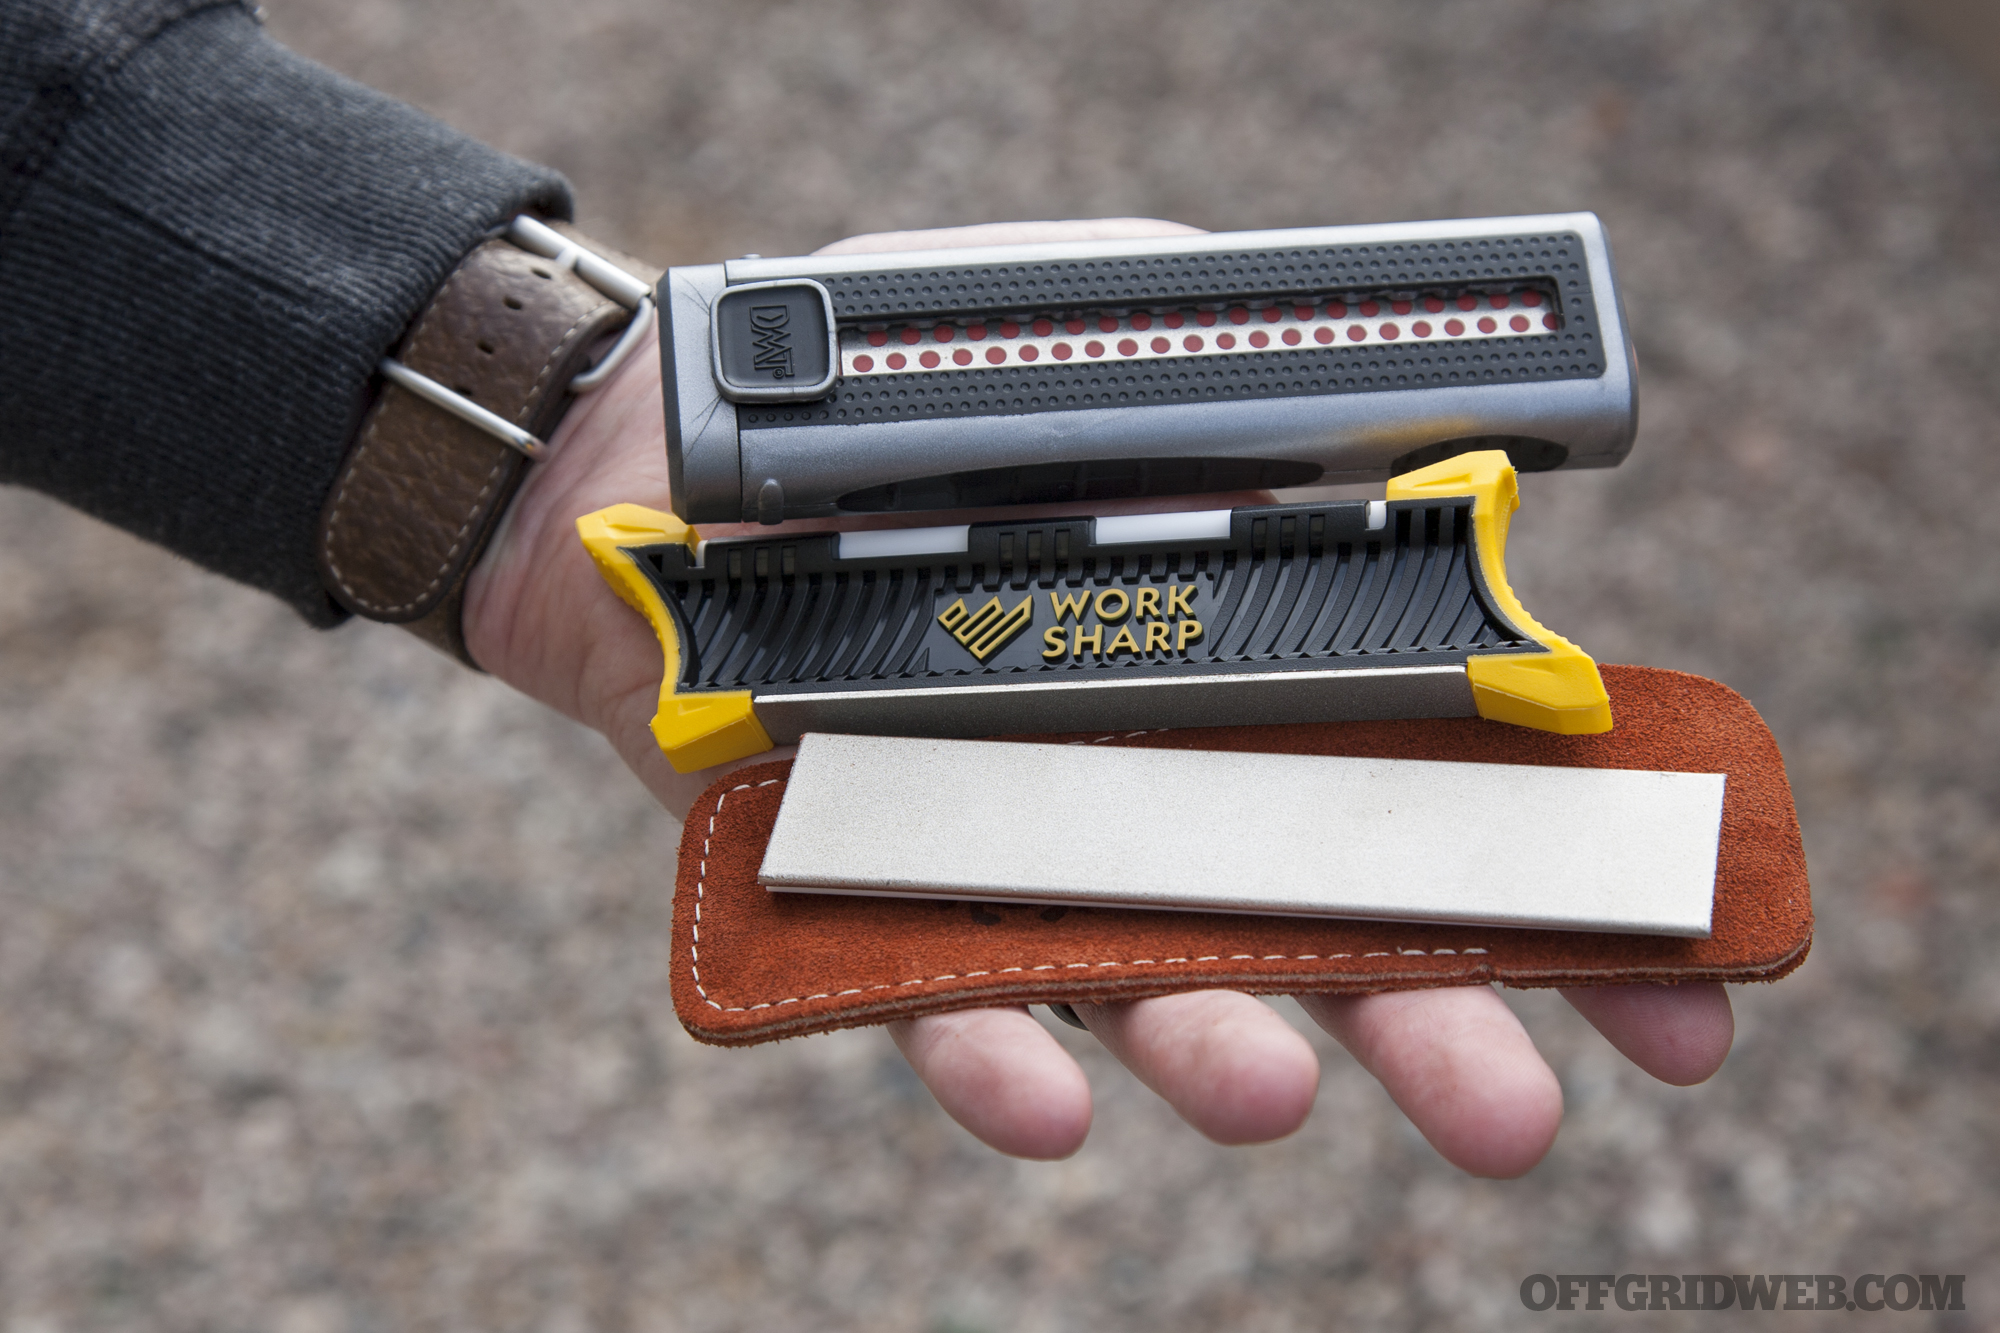
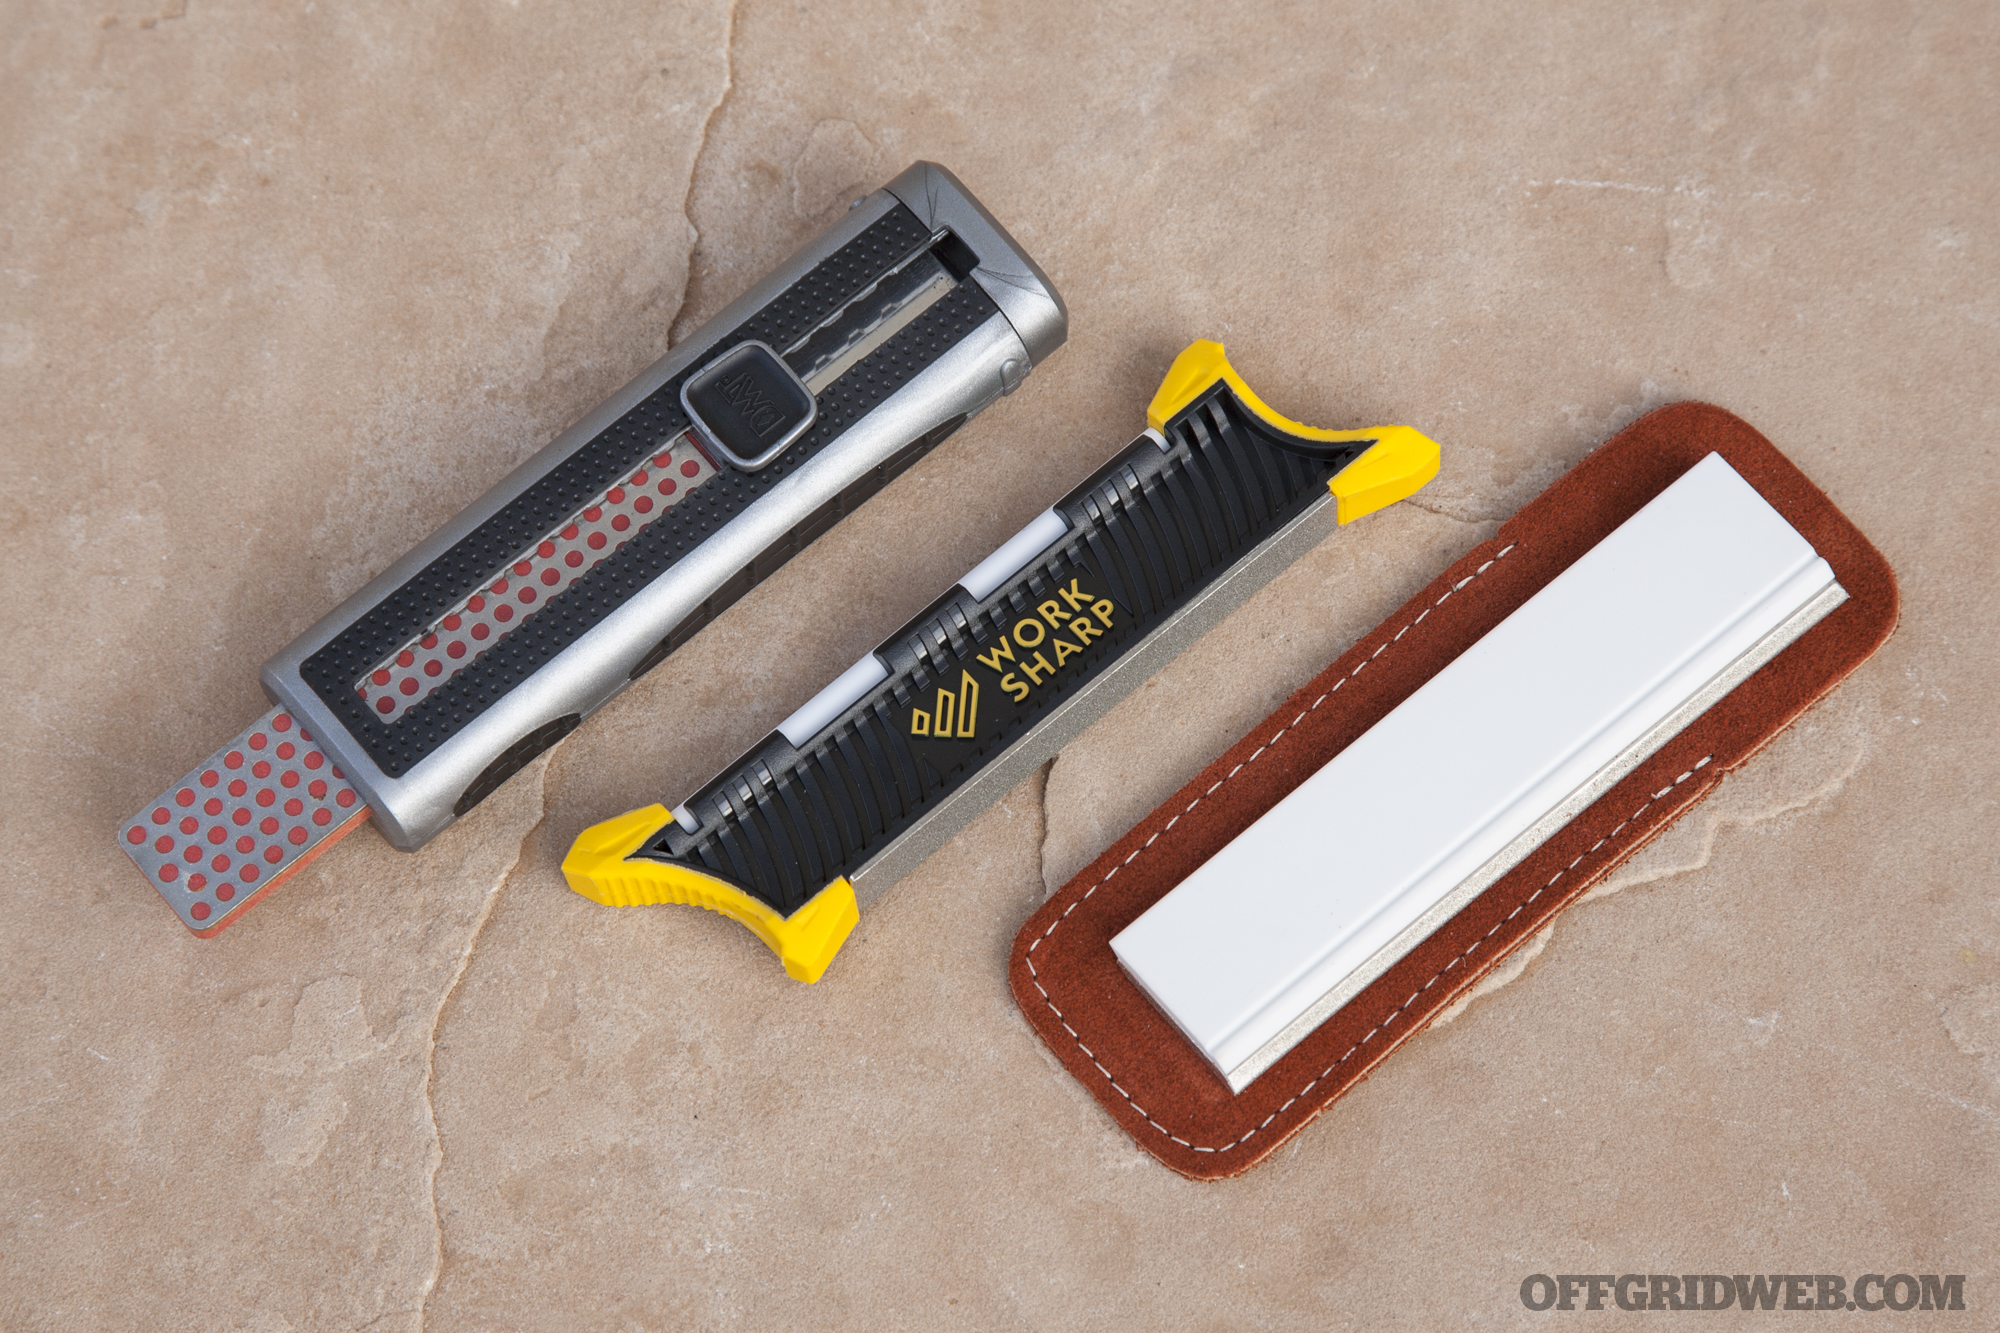
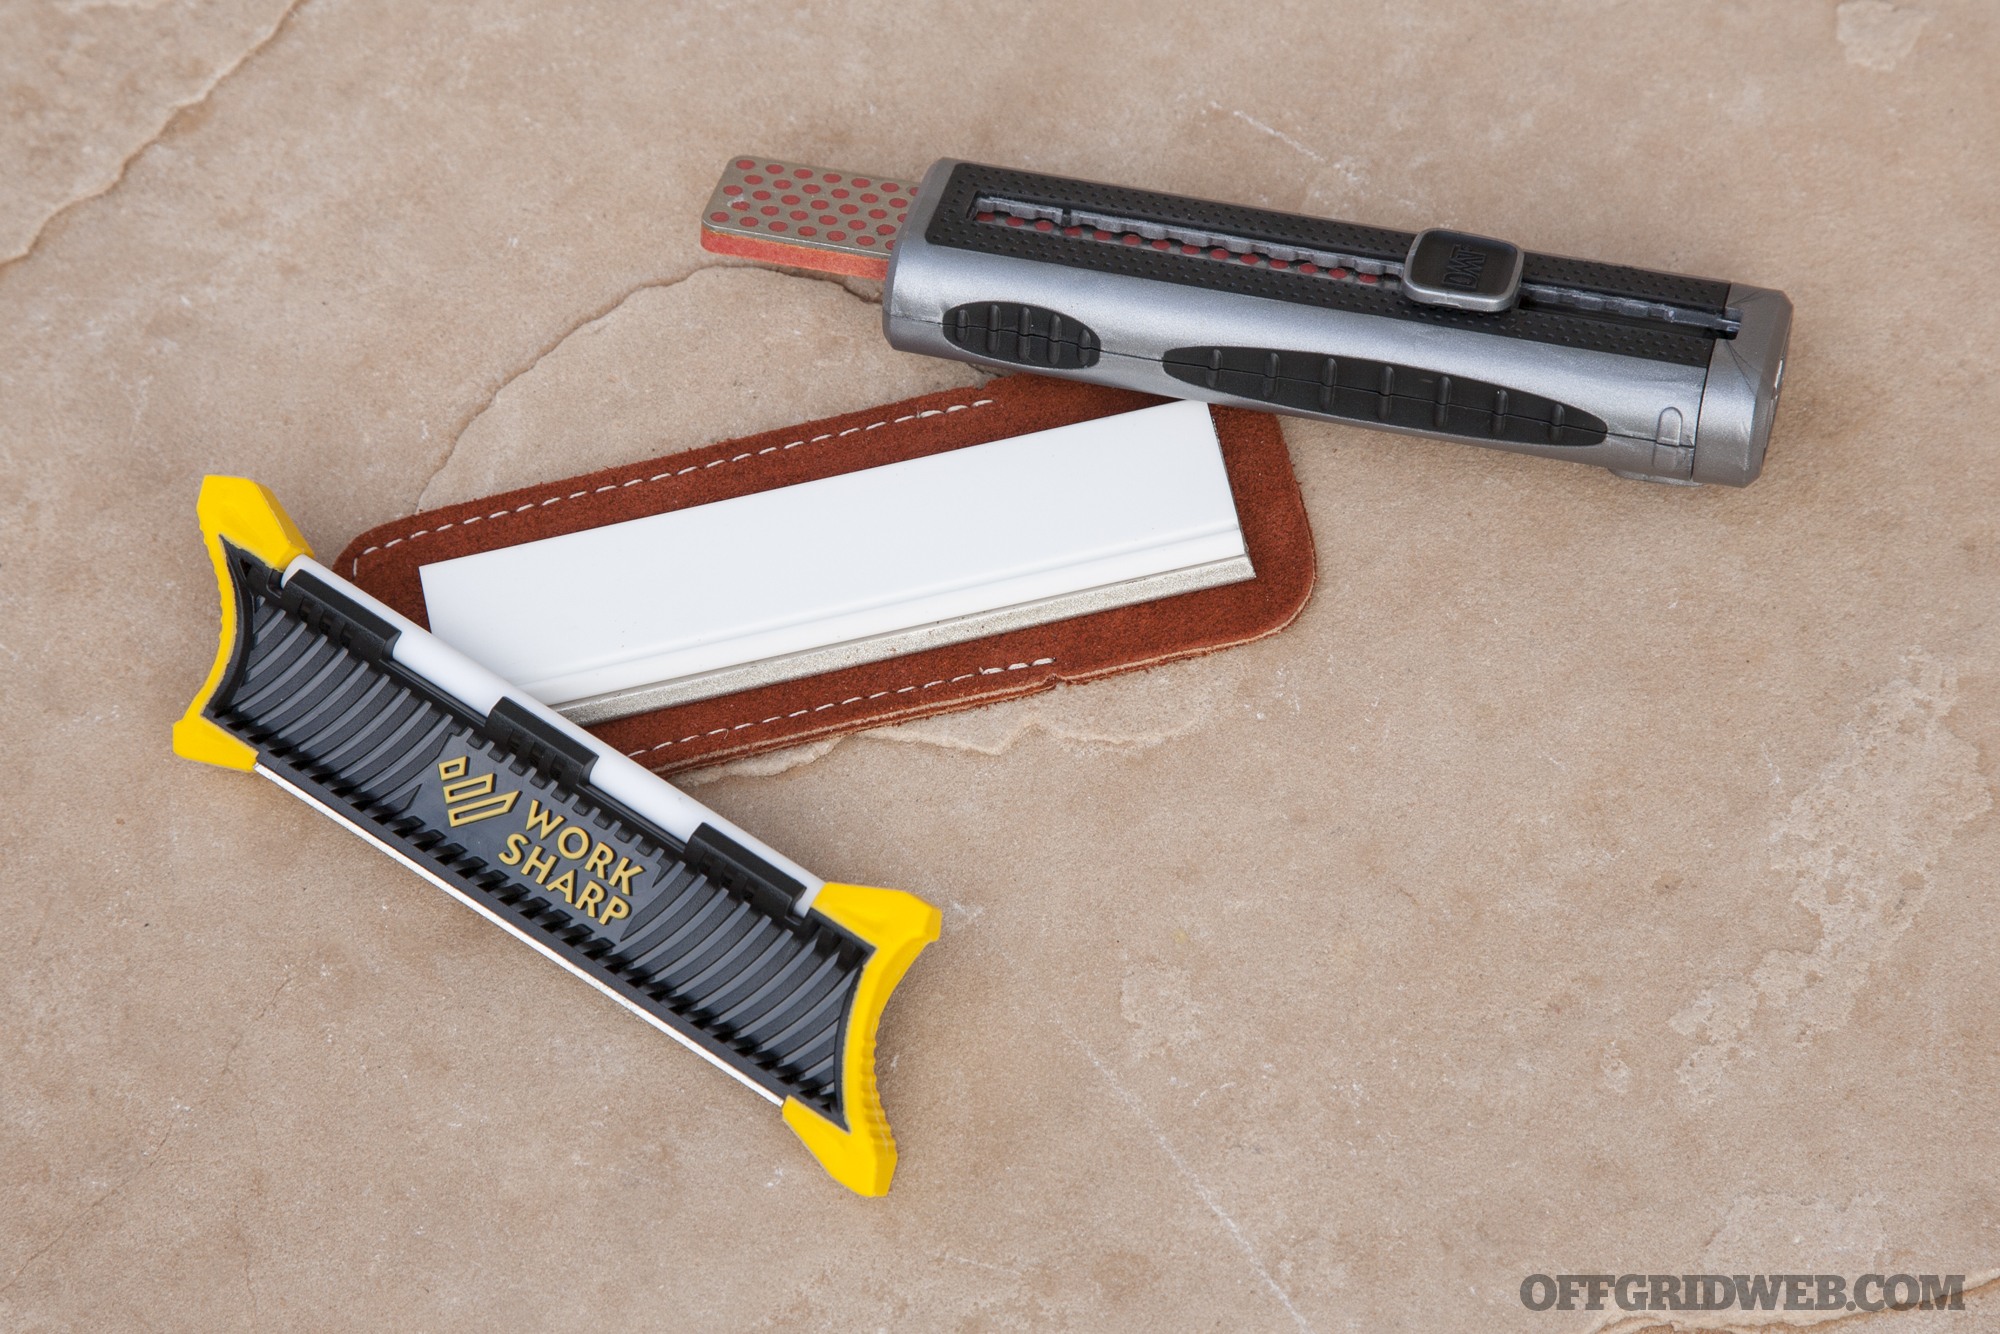
In the mean time, we received 3 additional sharpeners that didn’t make it into our print guide, so today we’ll compare and review each of them. These include the DMT Slydr-Sharp, Spyderco Double-Stuff 2, and Work Sharp Pocket Knife Sharpener. Read on for our thoughts on these knife sharpeners.
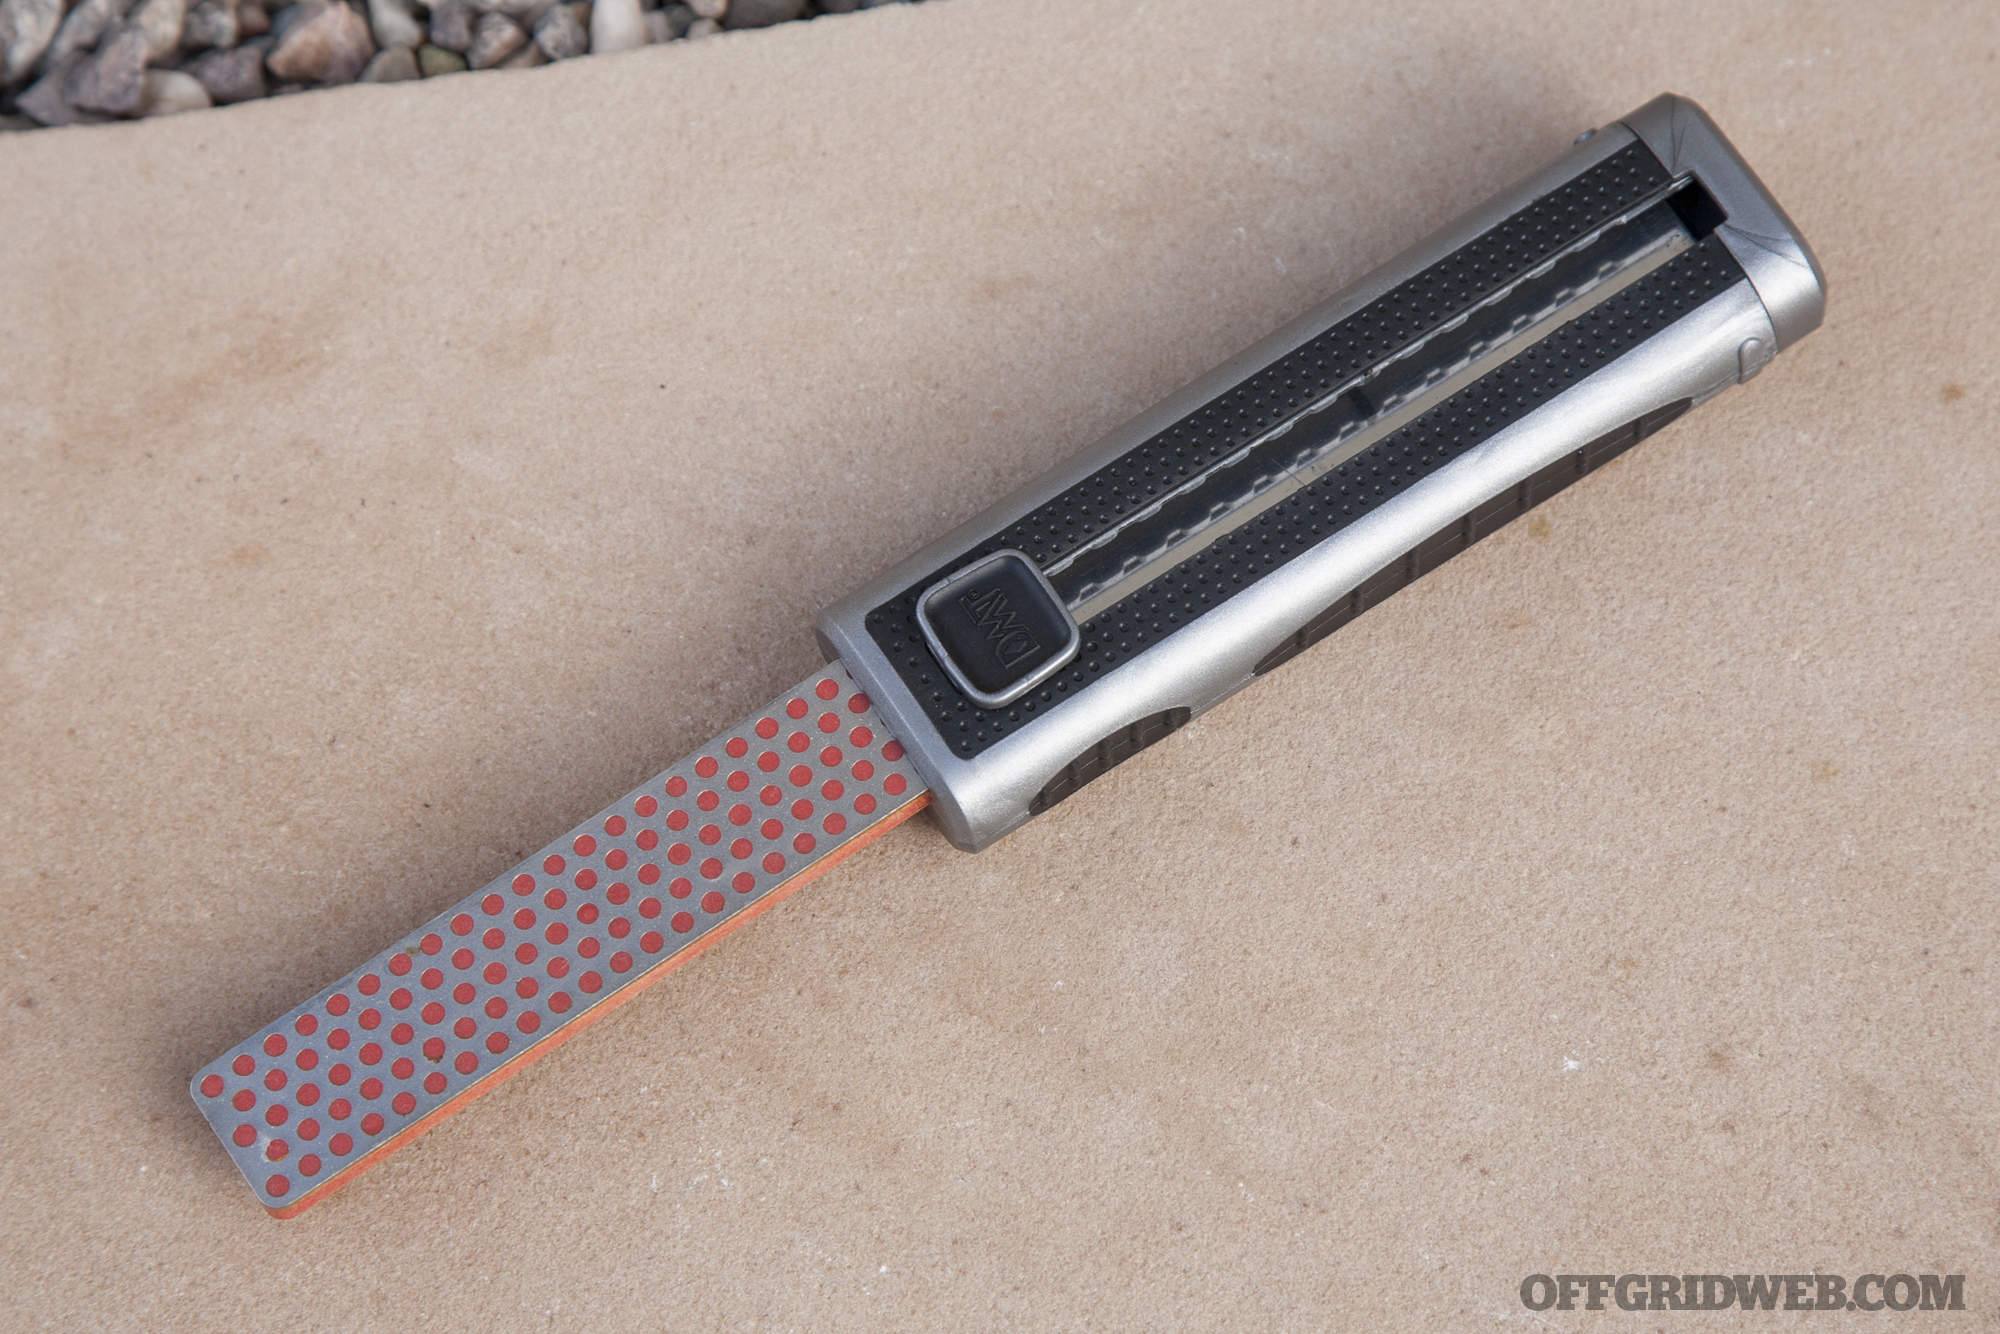
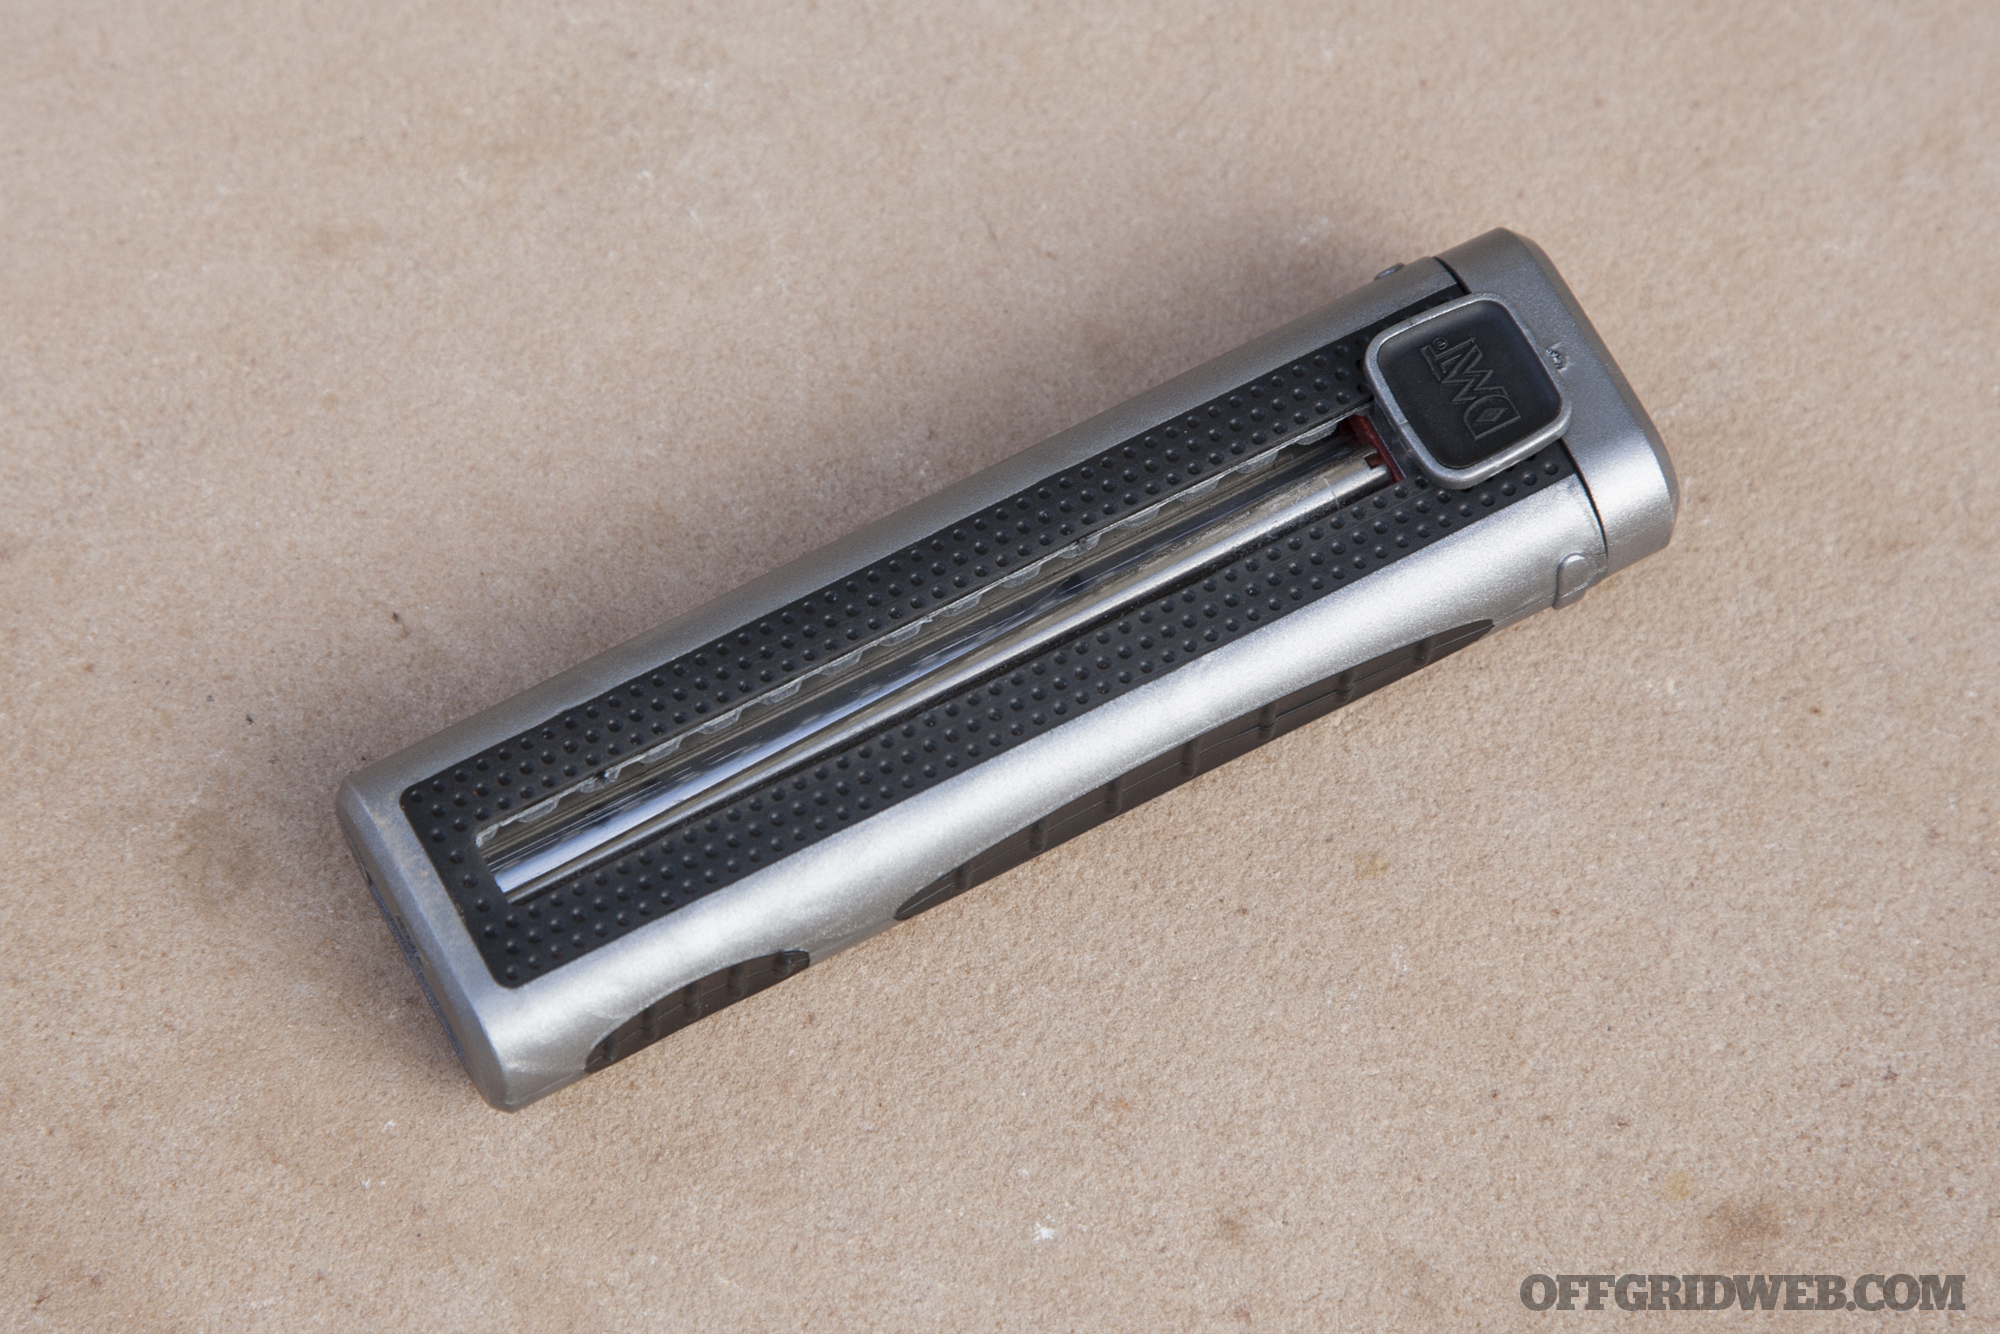
Notes The Slydr-Sharp is a new product for 2018, and debuted earlier this year at SHOT Show. As the name implies, it features a sliding mechanism that’s similar to that of a box cutter. There’s one slider on each side of the tool; each features a series of notches that can hold the sharpeners in various positions throughout their range of travel.
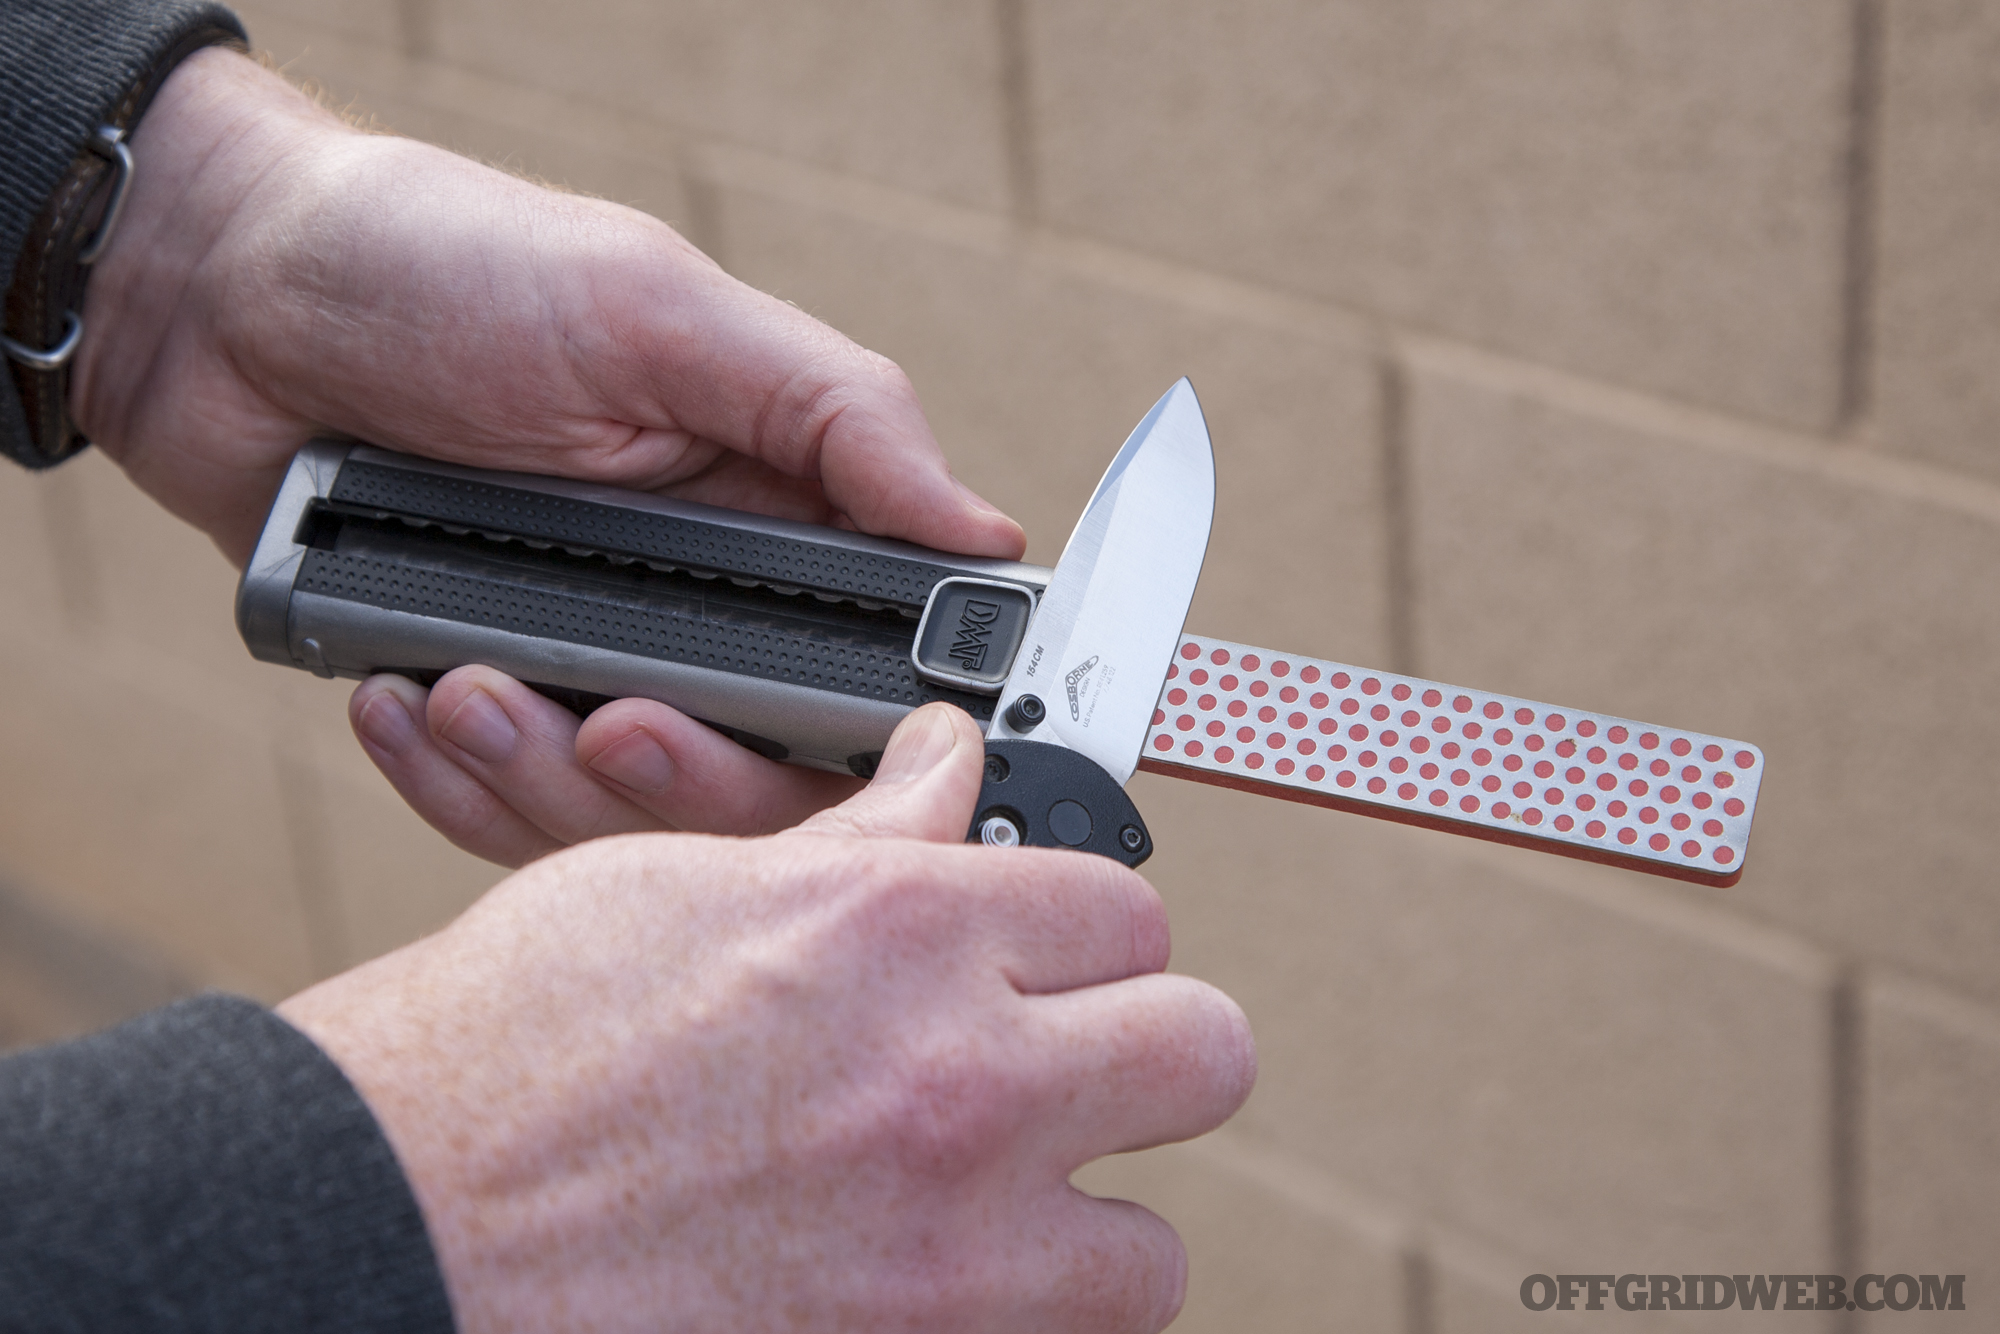
One of the sliders extends and retracts a flat diamond abrasive surface, which includes a pattern of recessed holes that form DMT’s signature “polka dot” pattern. These dots serve to trap microscopic metal shavings known as swarf, thereby preventing the abrasive surface from getting clogged and losing its effectiveness.
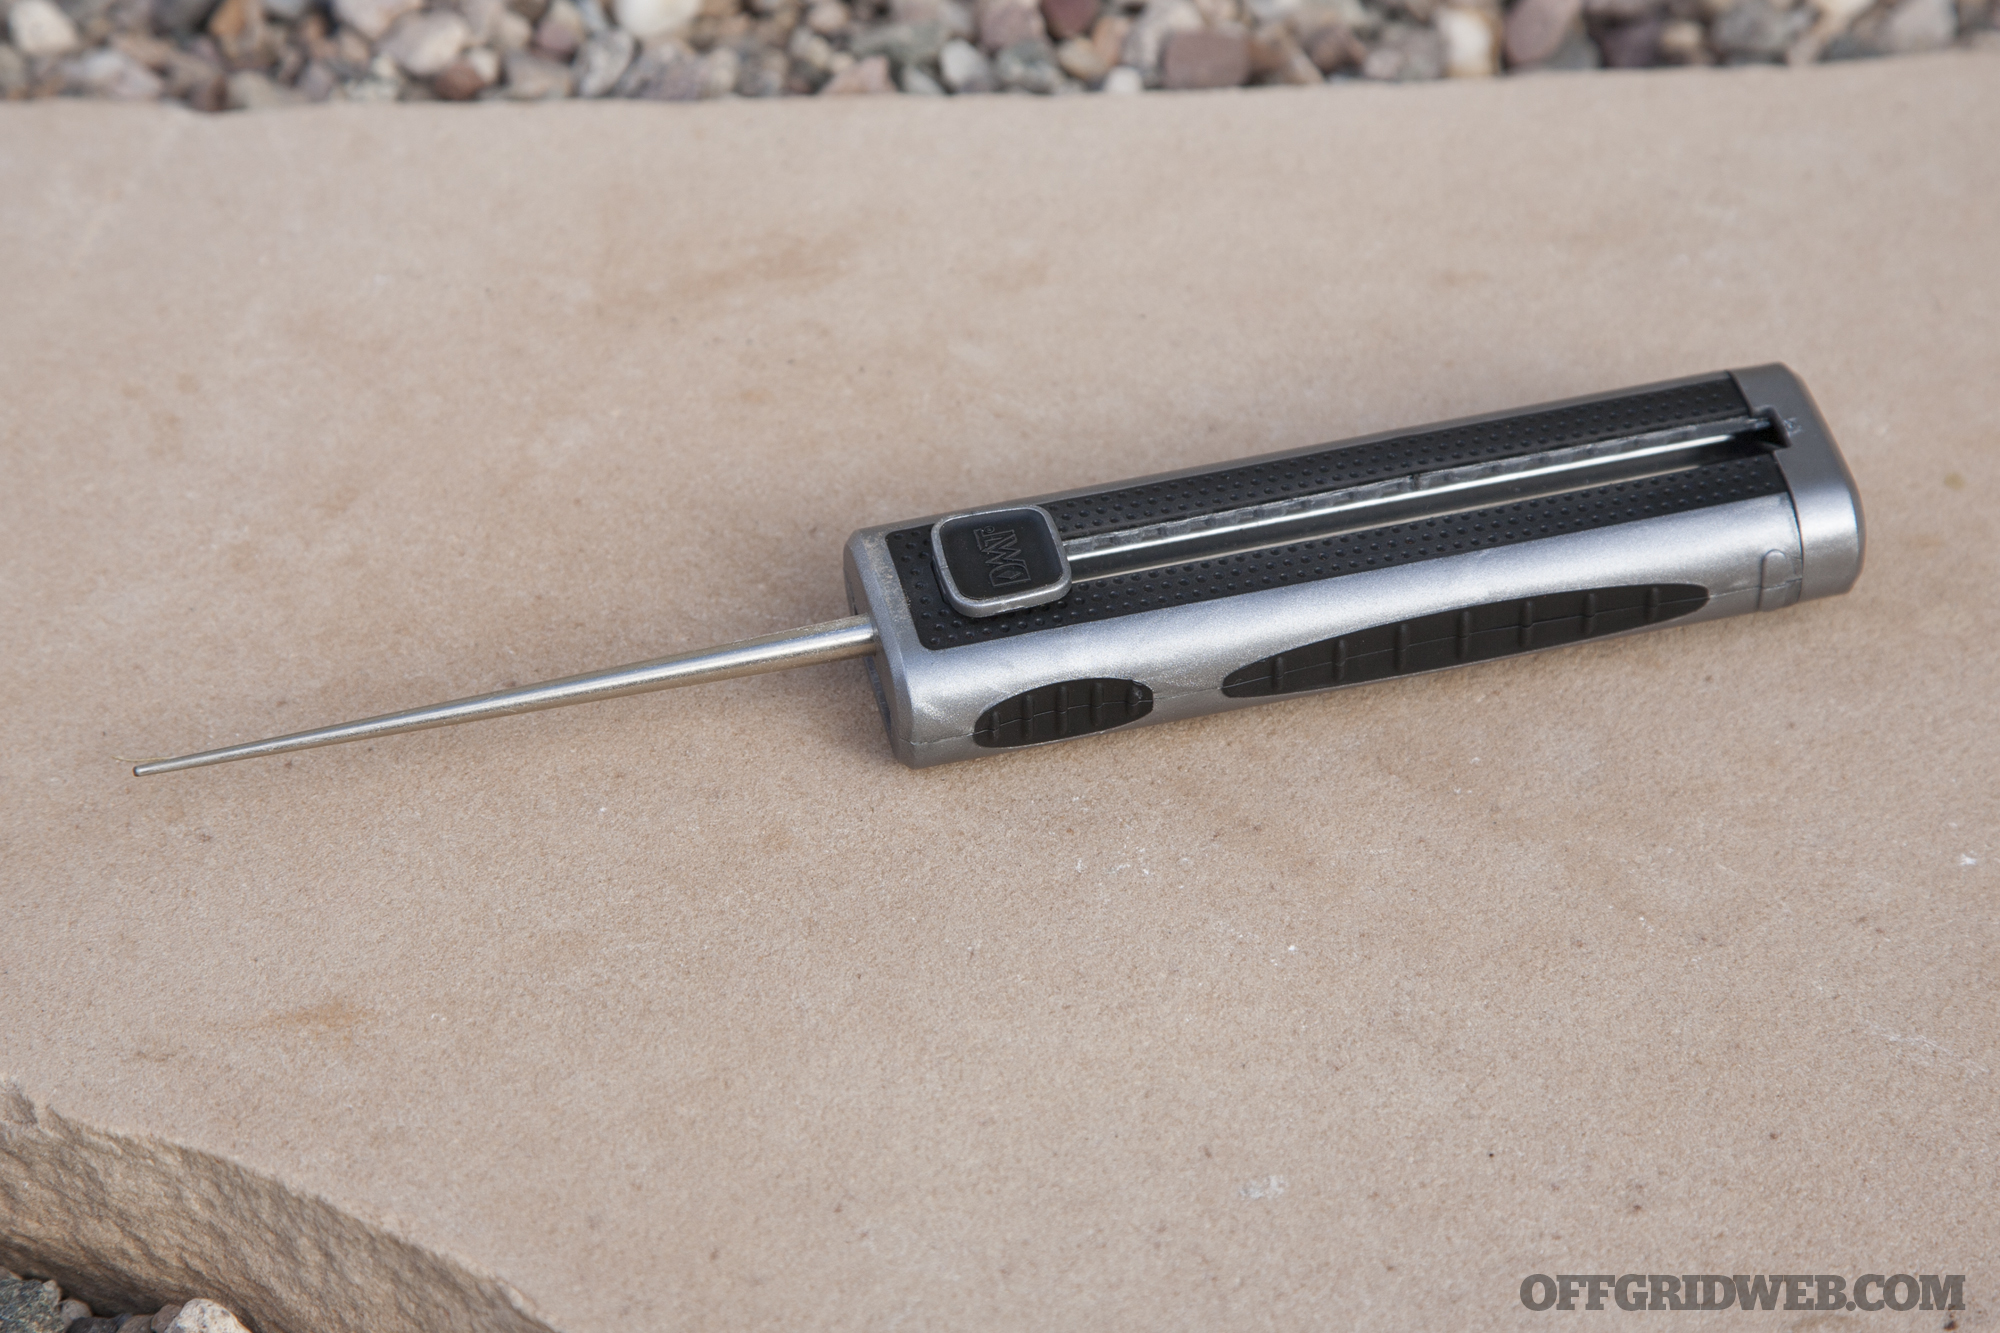
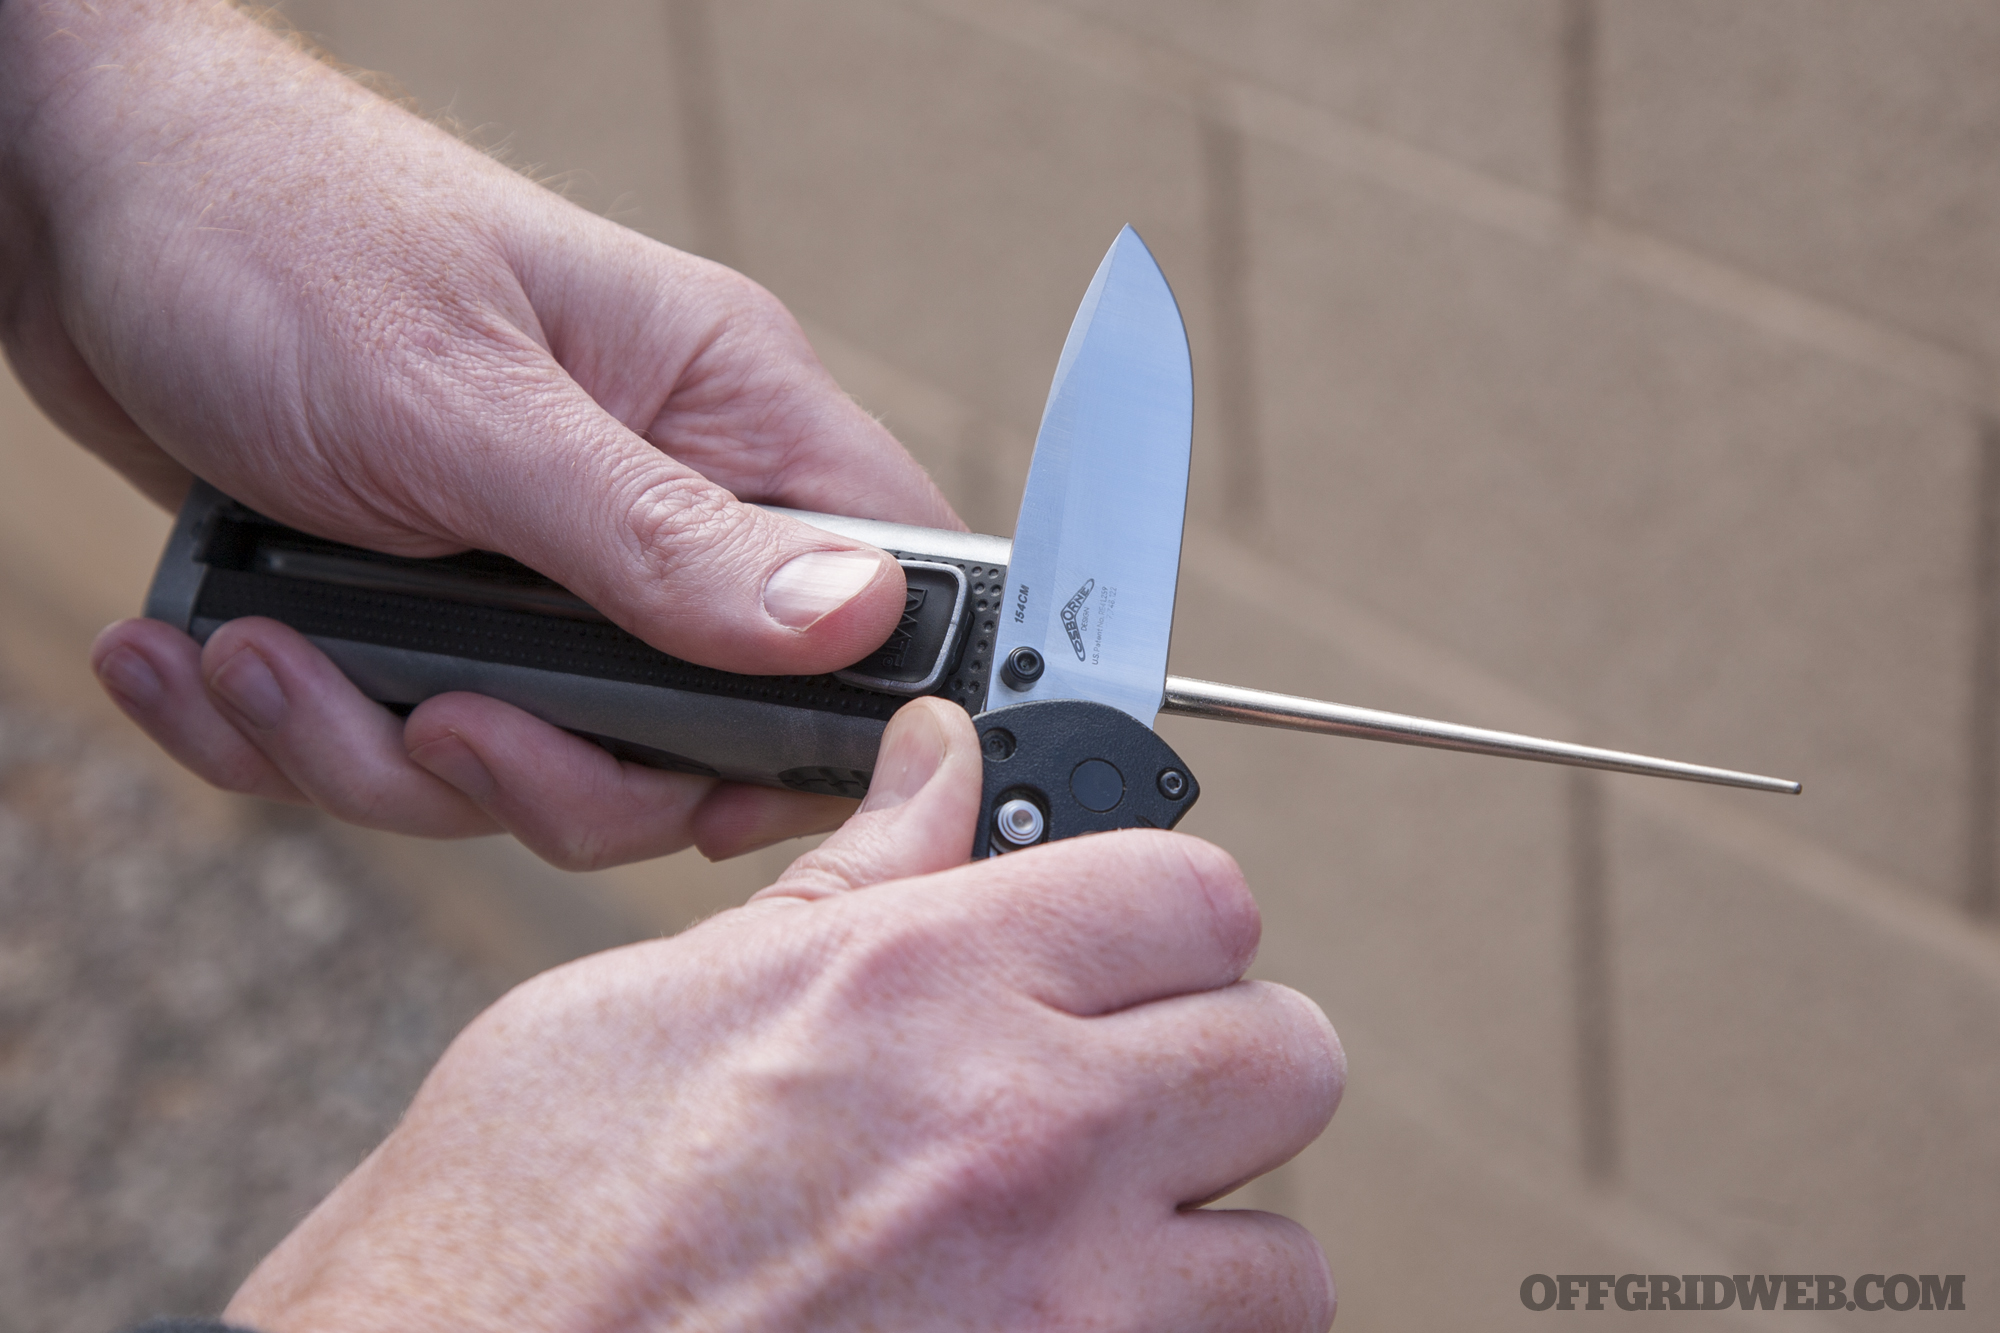
The second slider on the opposite side of the handle is attached to a tapered diamond abrasive rod. This can be used to sharpen serrations, or used on curved blades that would be difficult to sharpen on the flat surface. Both the flat plate and tapered rod are made from the same 600-grit abrasive material — a good all-purpose abrasive that’s not too aggressive for frequent use.
These sharpeners are contained in a hard plastic case with textured rubber inserts on all four sides for added grip.
Pros:
Retractable mechanism keeps the tool compact without sacrificing functionality or comfort
Large handle makes it easy to grip firmly and use safely
Adapts well to almost any blade shape or grind type
Cons:
Blade edge tends to snag on the flat sharpening surface’s recessed holes
Sharpeners are loosely-mounted and rattle when retracted into case
Two sharpeners made from the same abrasive material — we would’ve preferred two different grits
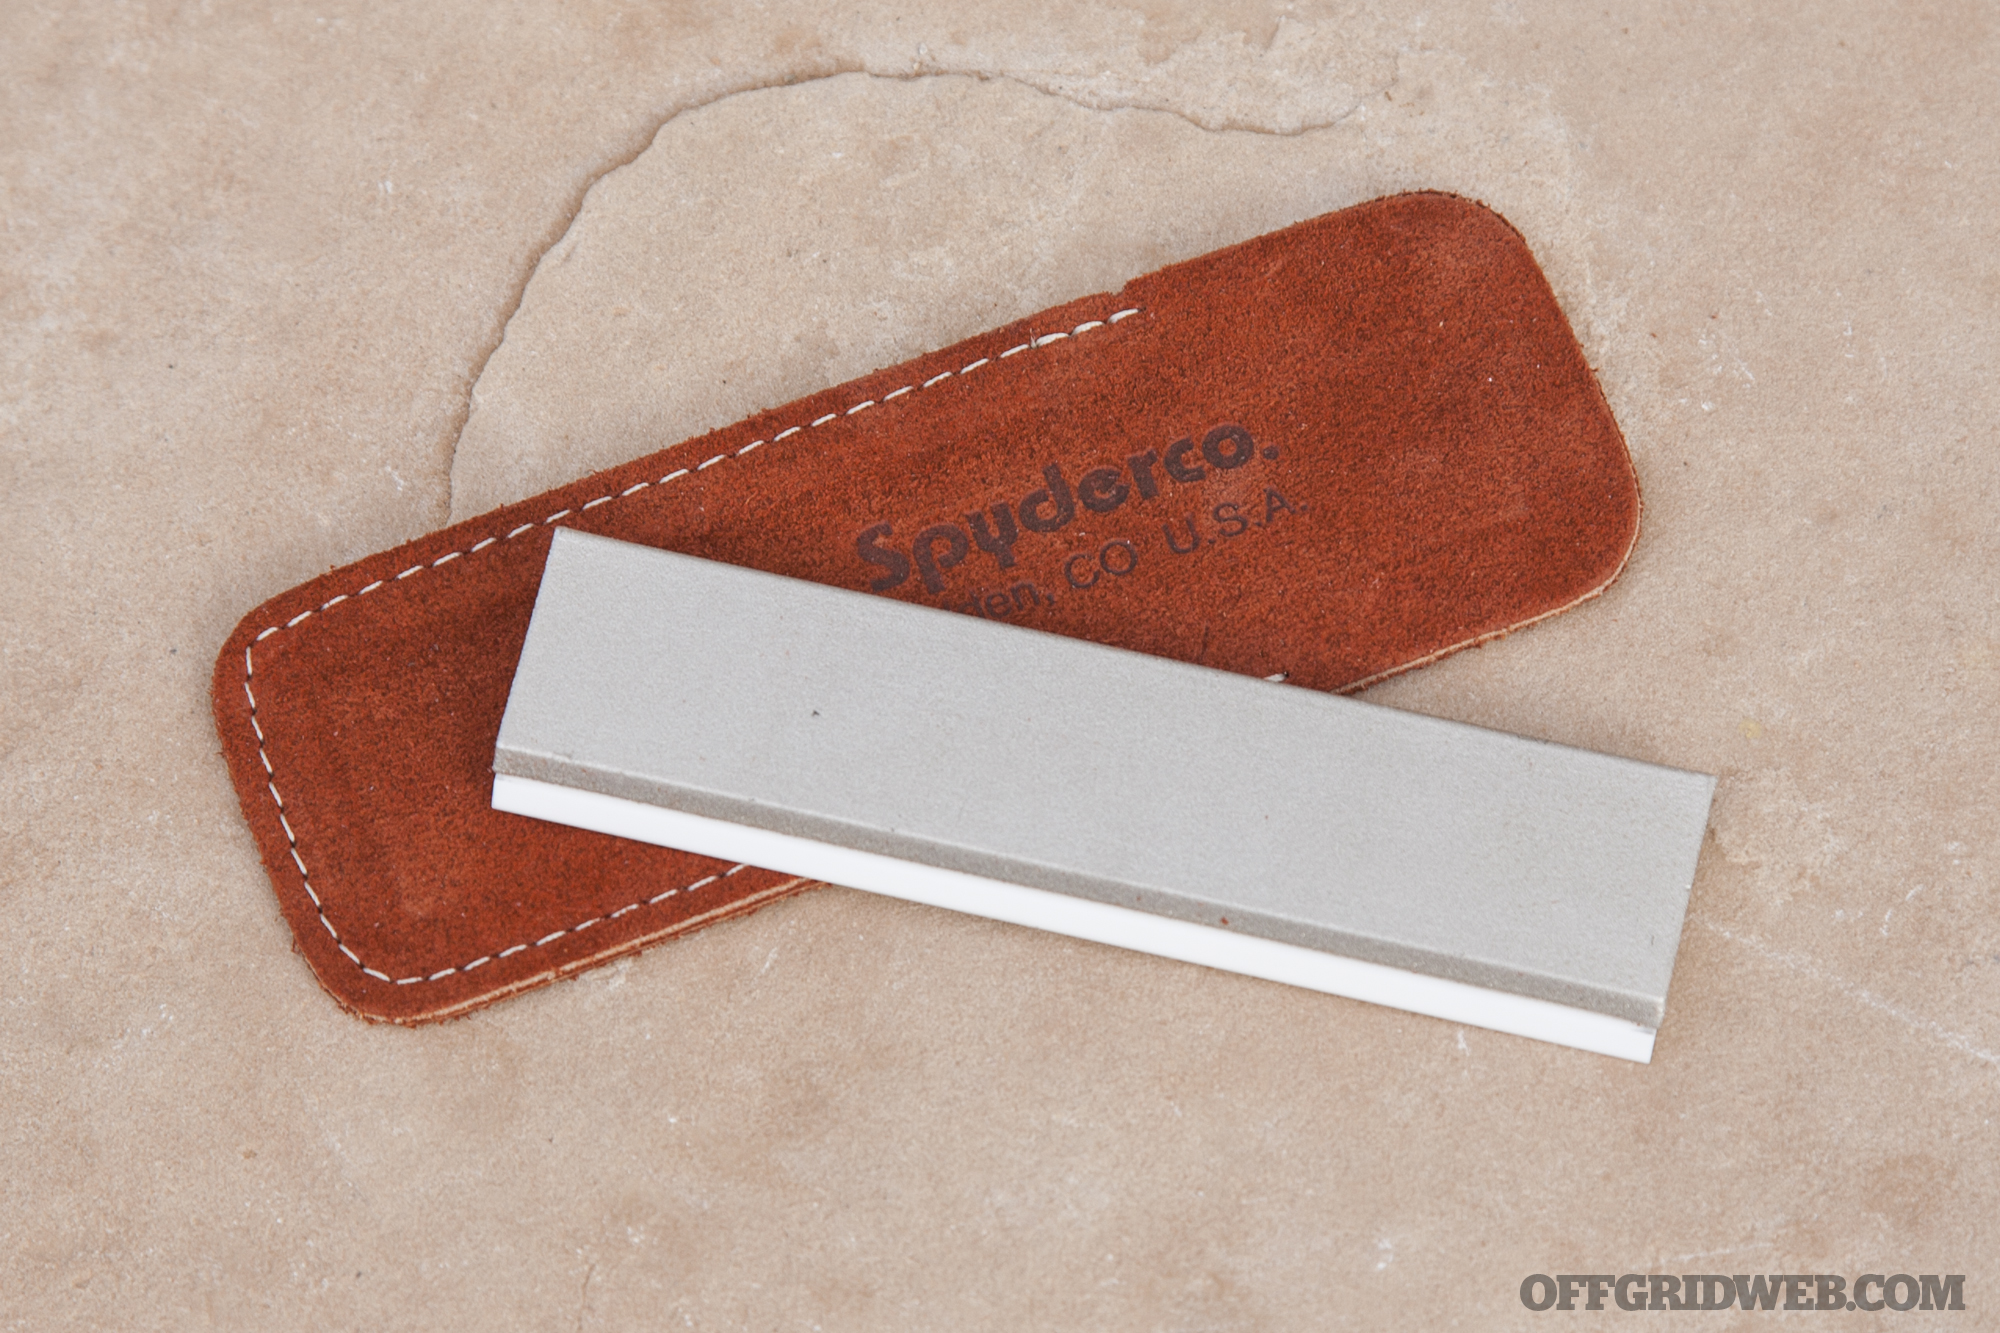
Spyderco Double Stuff 2
Materials Cubic Boron Nitride (CBN) abrasive, fine ceramic, suede leather
Dimensions 5″ by 1.2″ by 0.3″ (6″ by 2.1″ by 0.4″ including pouch)
Weight 4.7 ounces (5.4 ounces including pouch)
Origin Ceramic made in USA, CBN abrasive made in China
Notes Although the Double Stuff 2 sounds like some extravagant new type of Oreo cookie, it’s actually a two-piece pocket stone made by the knife experts at Spyderco. Technically we’d call it a three-part system, but more on that later.
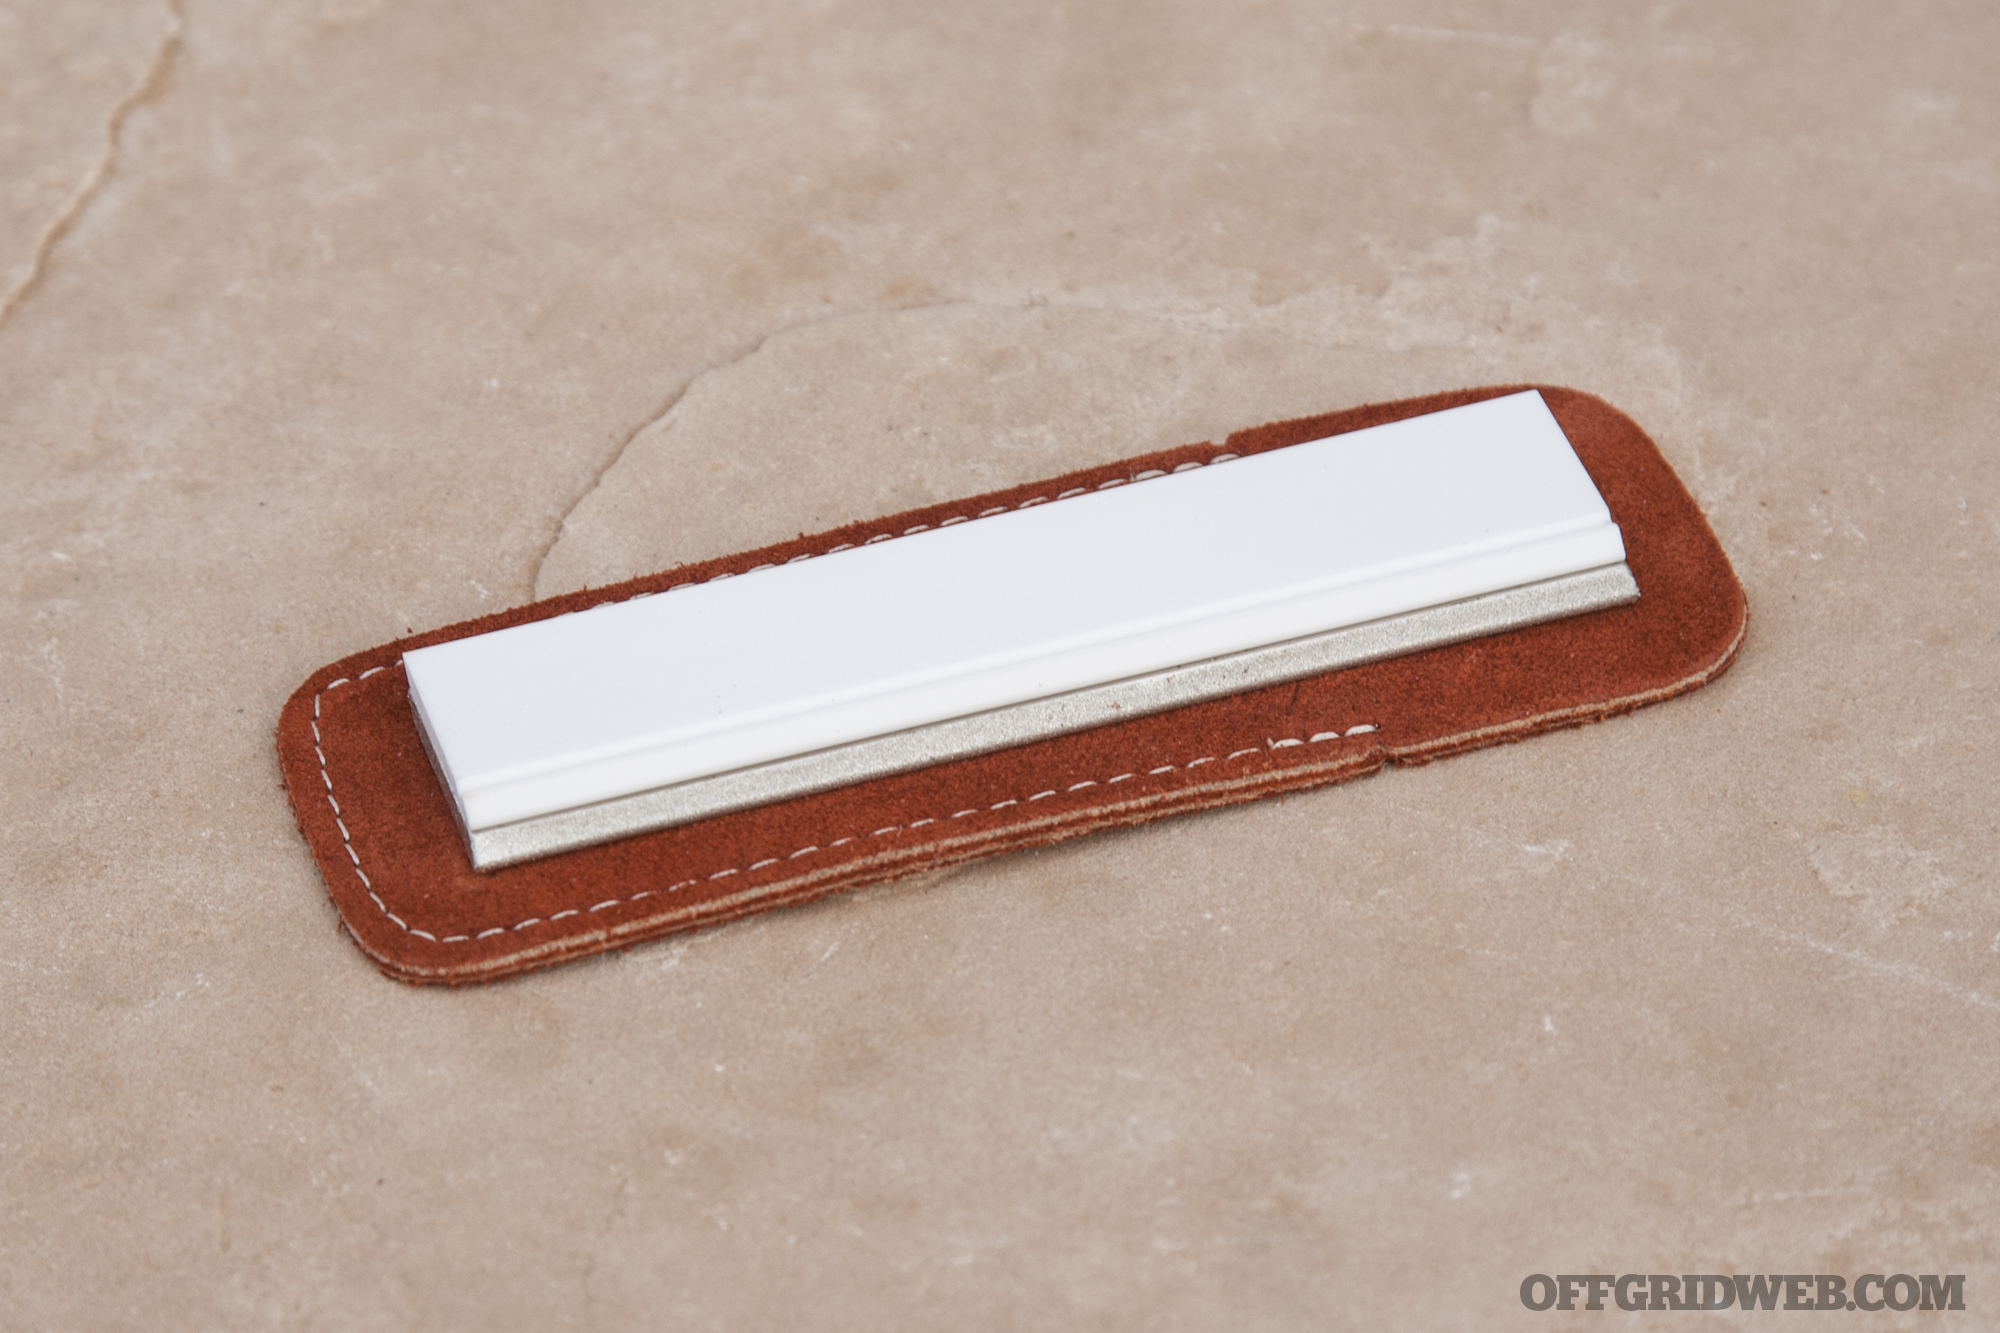
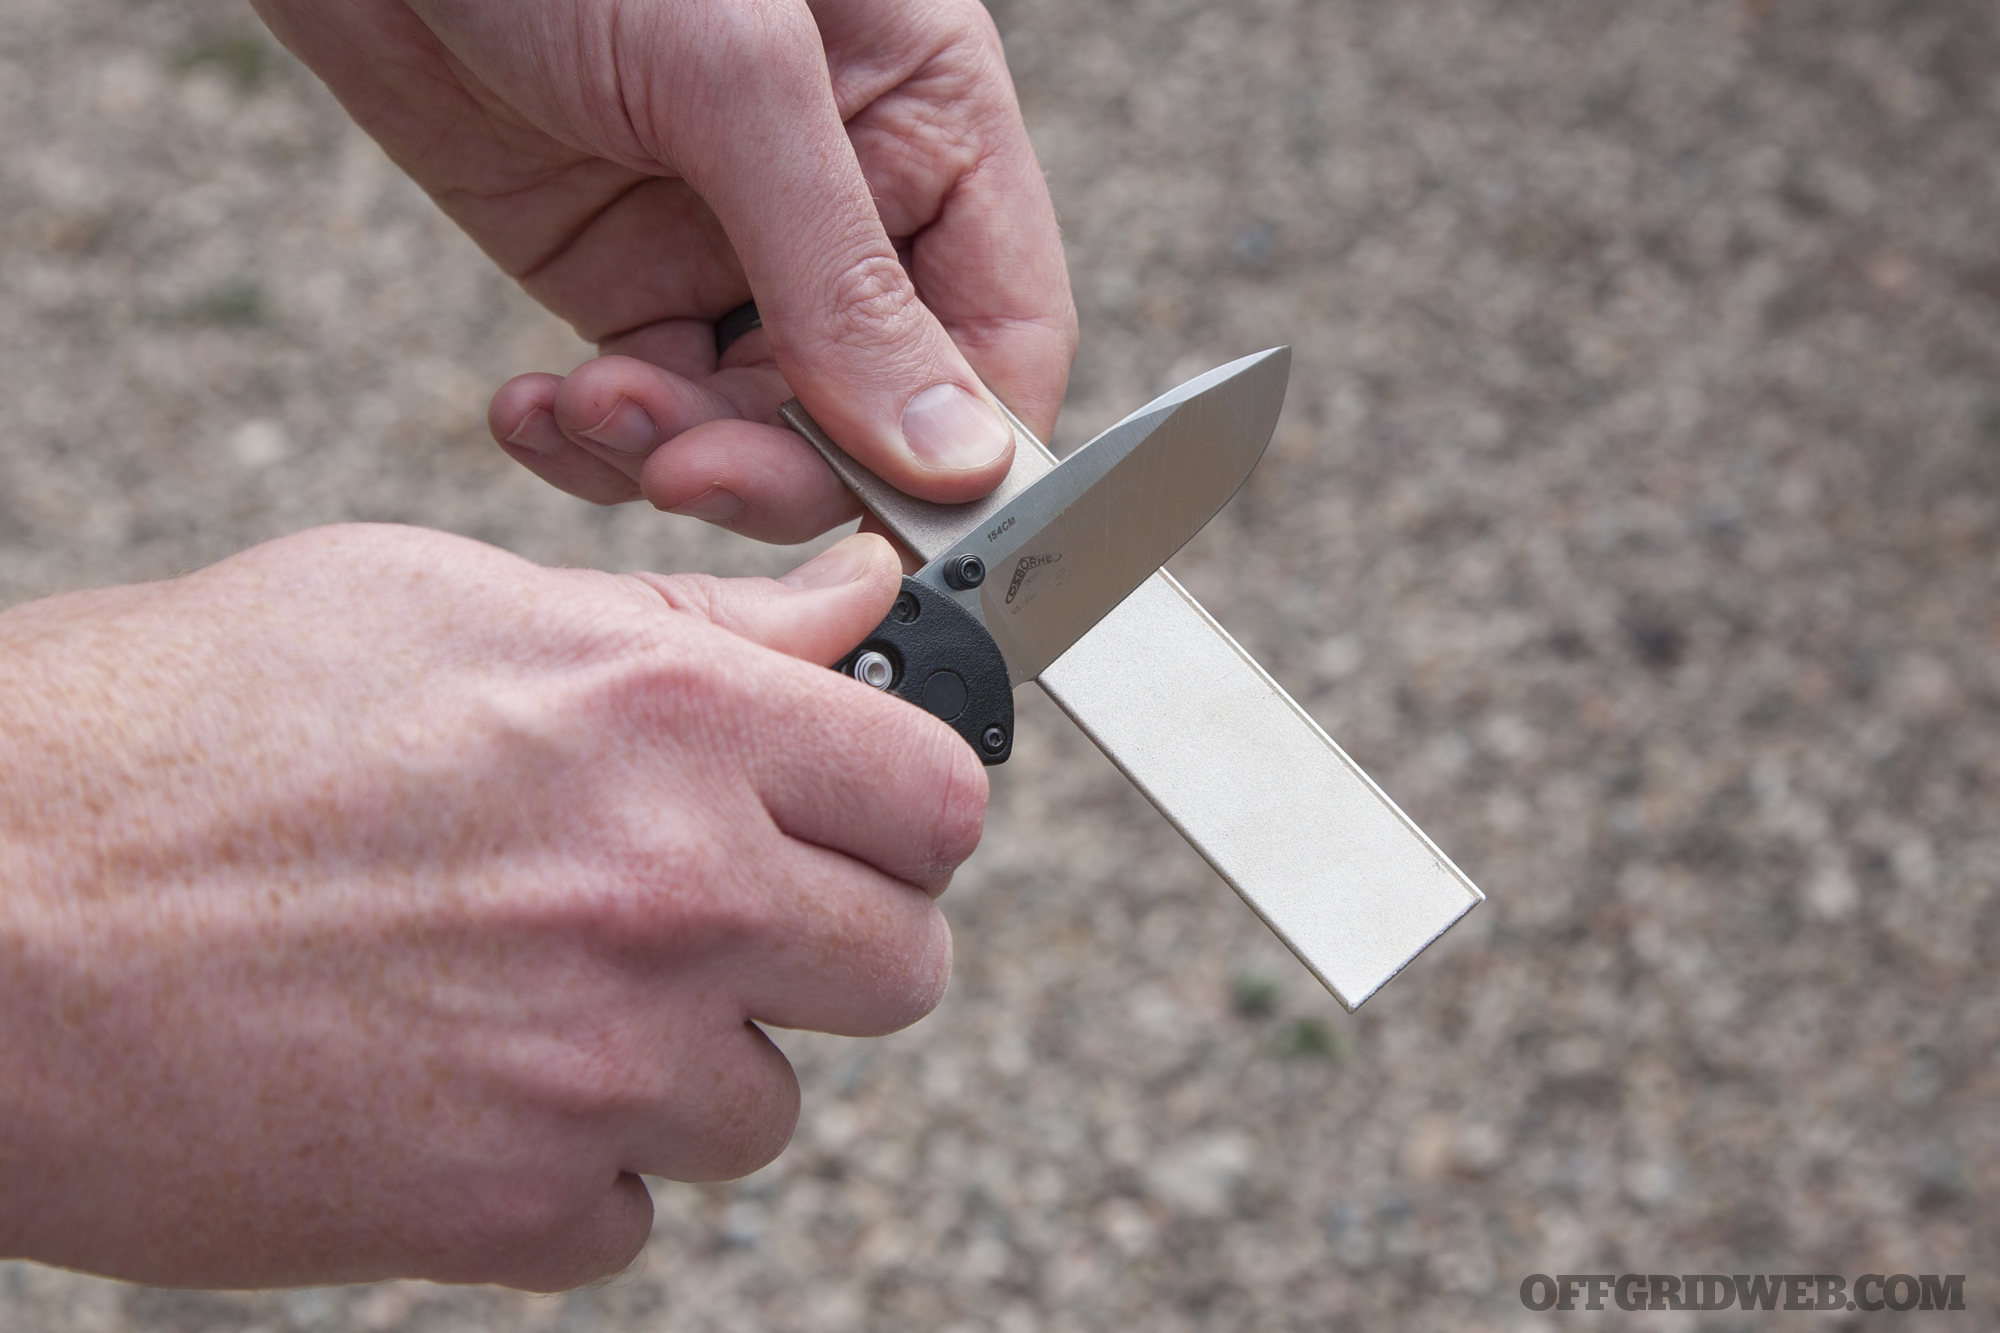
The first side of the Double Stuff 2 is a metal plate made from Cubic Boron Nitride (CBN), which Spyderco calls “a superabrasive that is second in hardness only to diamond.” This is a coarse abrasive designed for more aggressive sharpening, and one that the company also offers as an upgrade for its popular Sharpmaker system. We’d estimate it’s about 400 grit, although an exact rating isn’t specified.
Opposite the CBN plate, there’s a flat ceramic surface that serves as a fine abrasive for lighter sharpening. It includes a small groove for sharpening fish hooks and other pointed tools. Each layer of the Double Stuff 2 is shaped like a parallelogram, with acute and obtuse corners that can be used to sharpen serrations.
Unsurprisingly, this small amount of glue didn’t hold the stone’s halves together.
The CBN and ceramic layers are glued together, but whoever applied the glue to our Double Stuff didn’t do a very good job. Immediately after opening the package, the layers fell apart. We were able to fix this by scraping off the glue and replacing it with a generous amount of strong epoxy. Still, this shouldn’t have been an issue — especially not on a $75 sharpener from a respectable company like Spyderco.
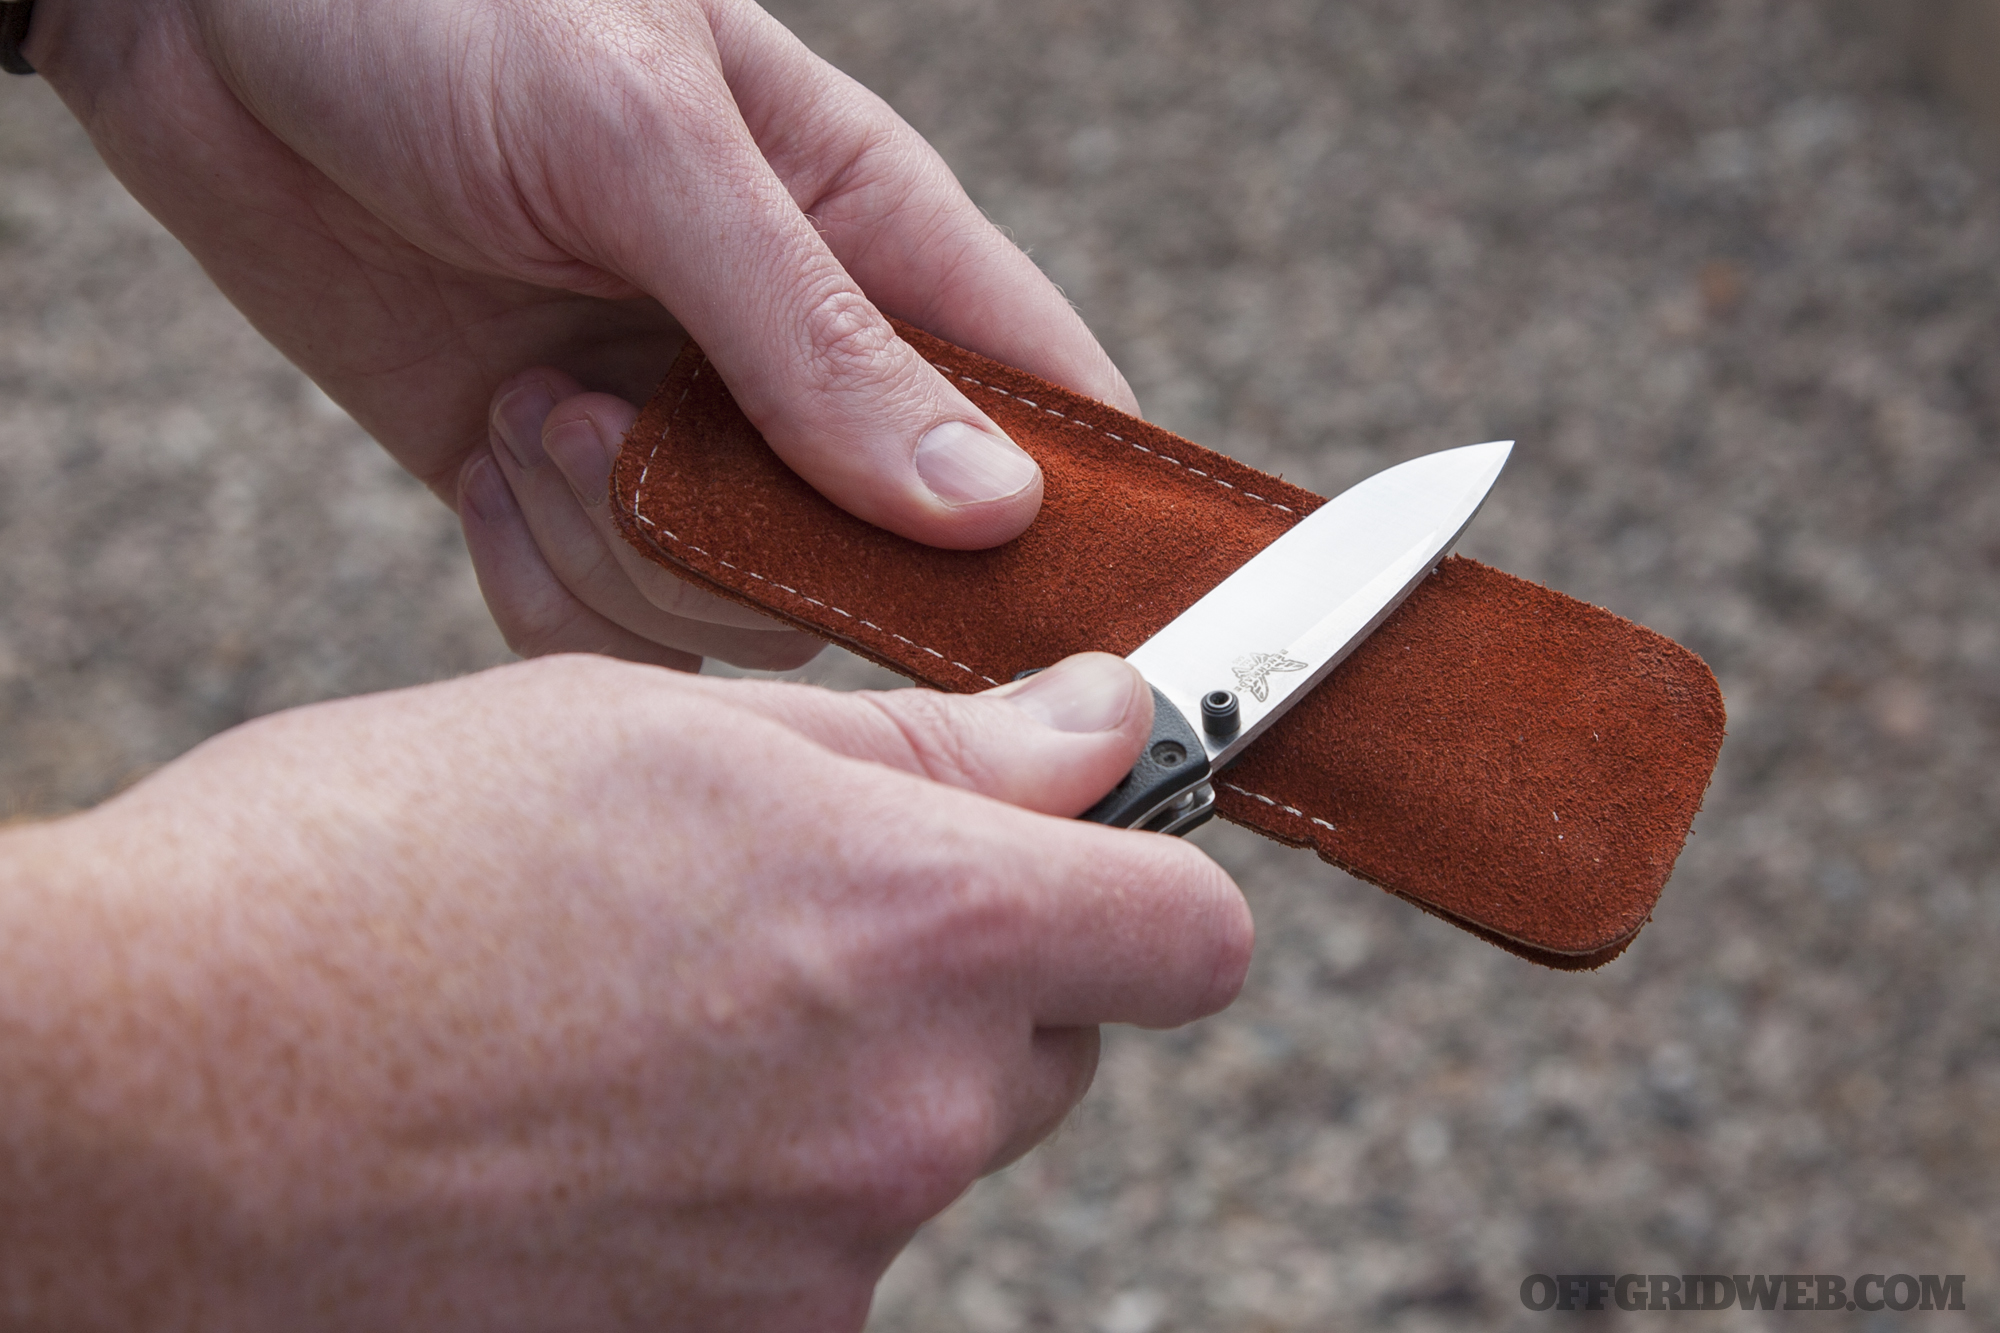
The third piece of this system is a suede leather pouch. It protects the stone and acts as an anti-slip base for use on a table top. It also works great as a strop to polish away burrs, producing a razor-sharp finished edge.
Stropping the blade edge by running it backwards against the suede leather pouch.
Pros:
CBN and fine ceramic abrasives complement each other nicely, producing a very sharp edge
Suede leather case can be used as a strop to remove burrs
Includes a notch for sharpening fish hooks
Cons:
Poor quality control — sloppy glue application caused the halves to separate as soon as we opened the package
Works best on a flat surface
Rather pricey given its simple design
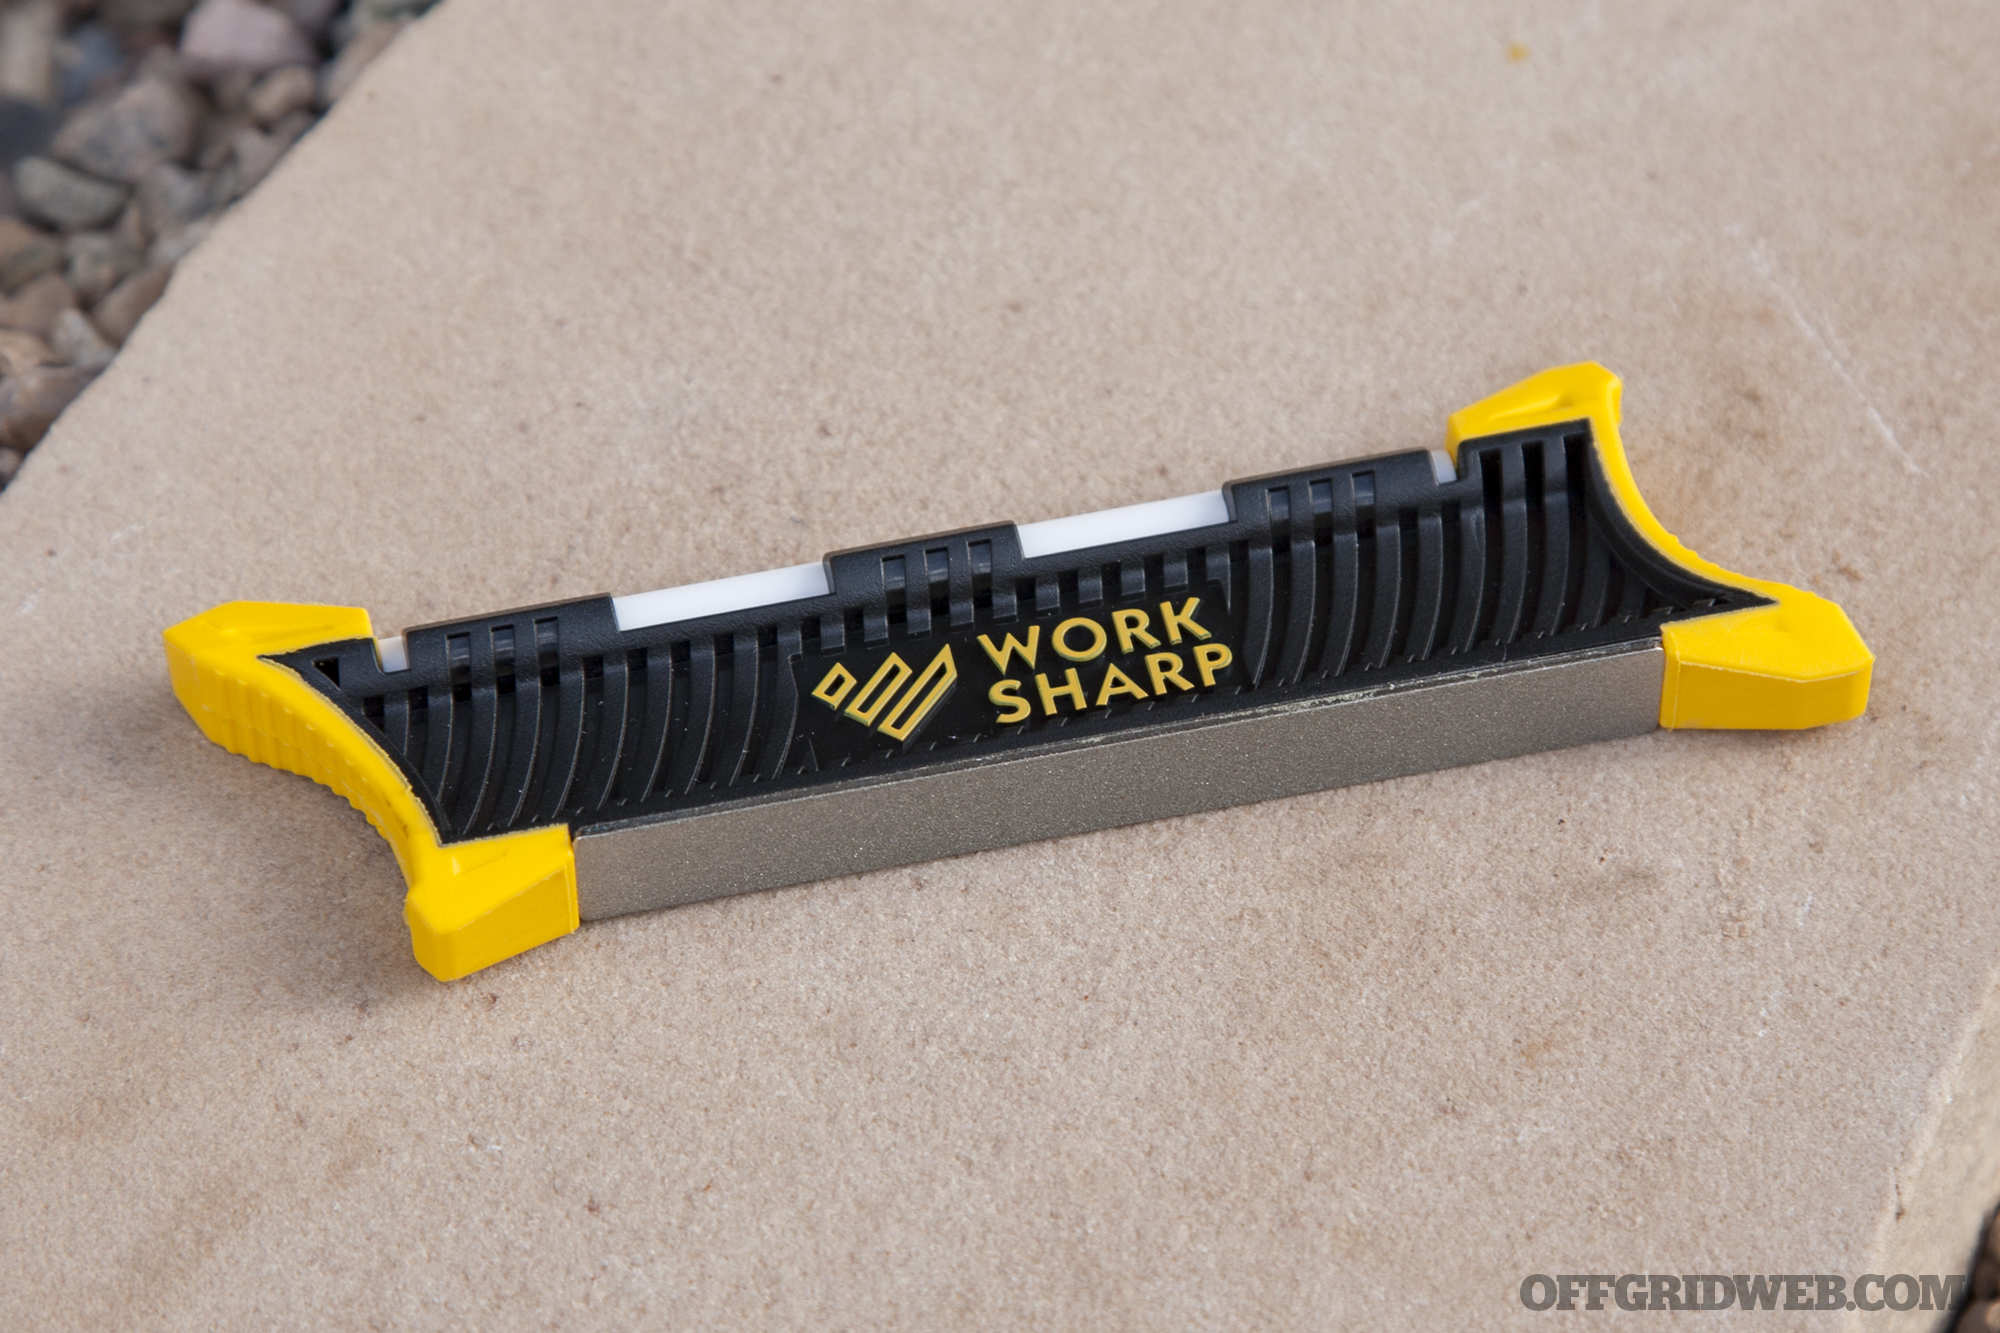
Work Sharp Pocket Knife Sharpener
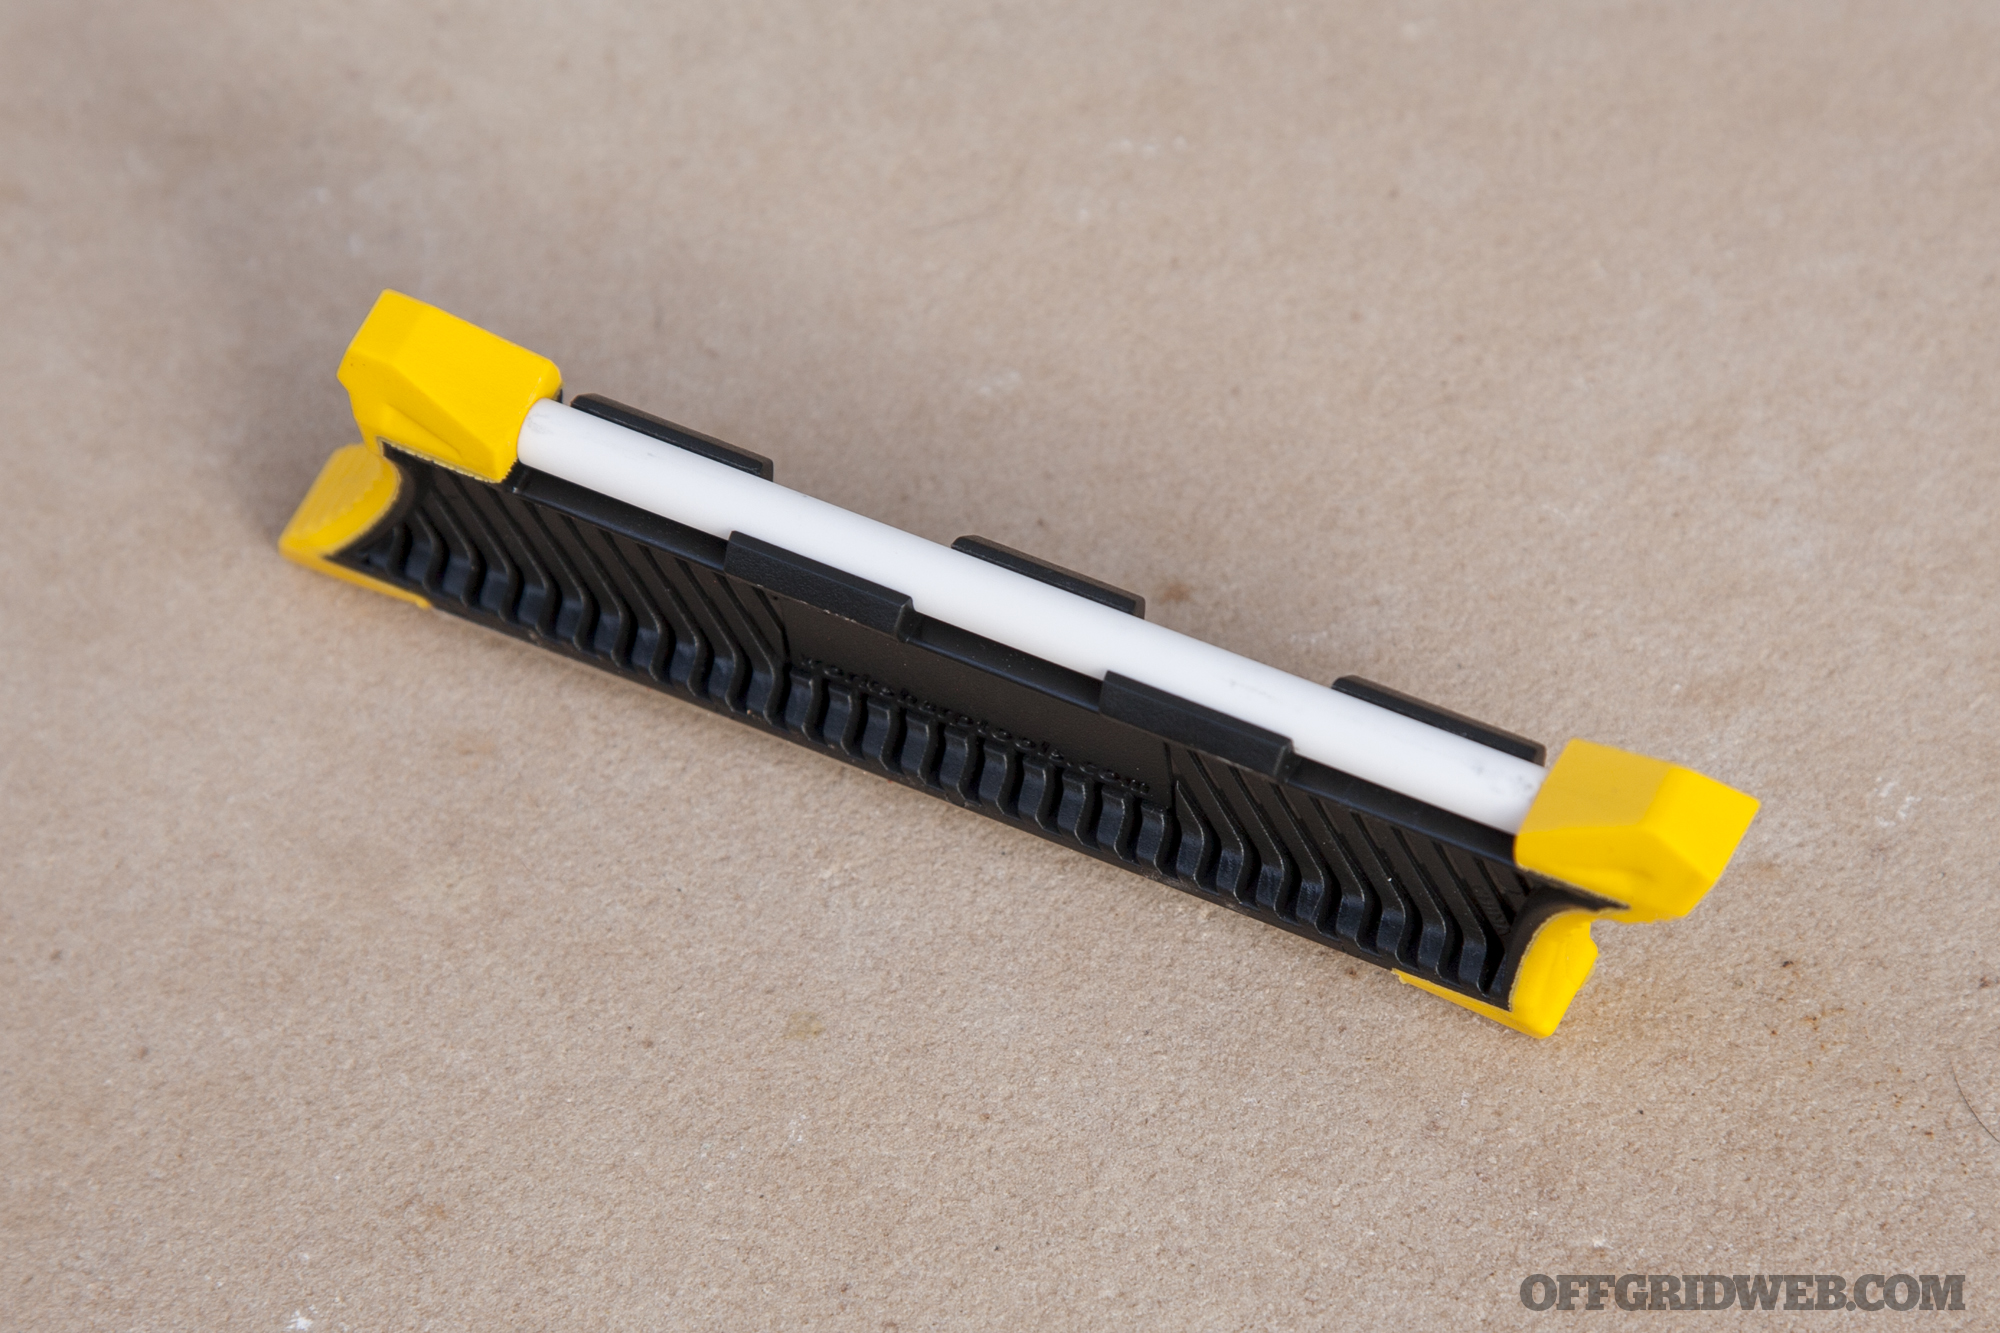
Materials 320-grit diamond abrasive, fine ceramic rod, polymer body with rubberized end caps
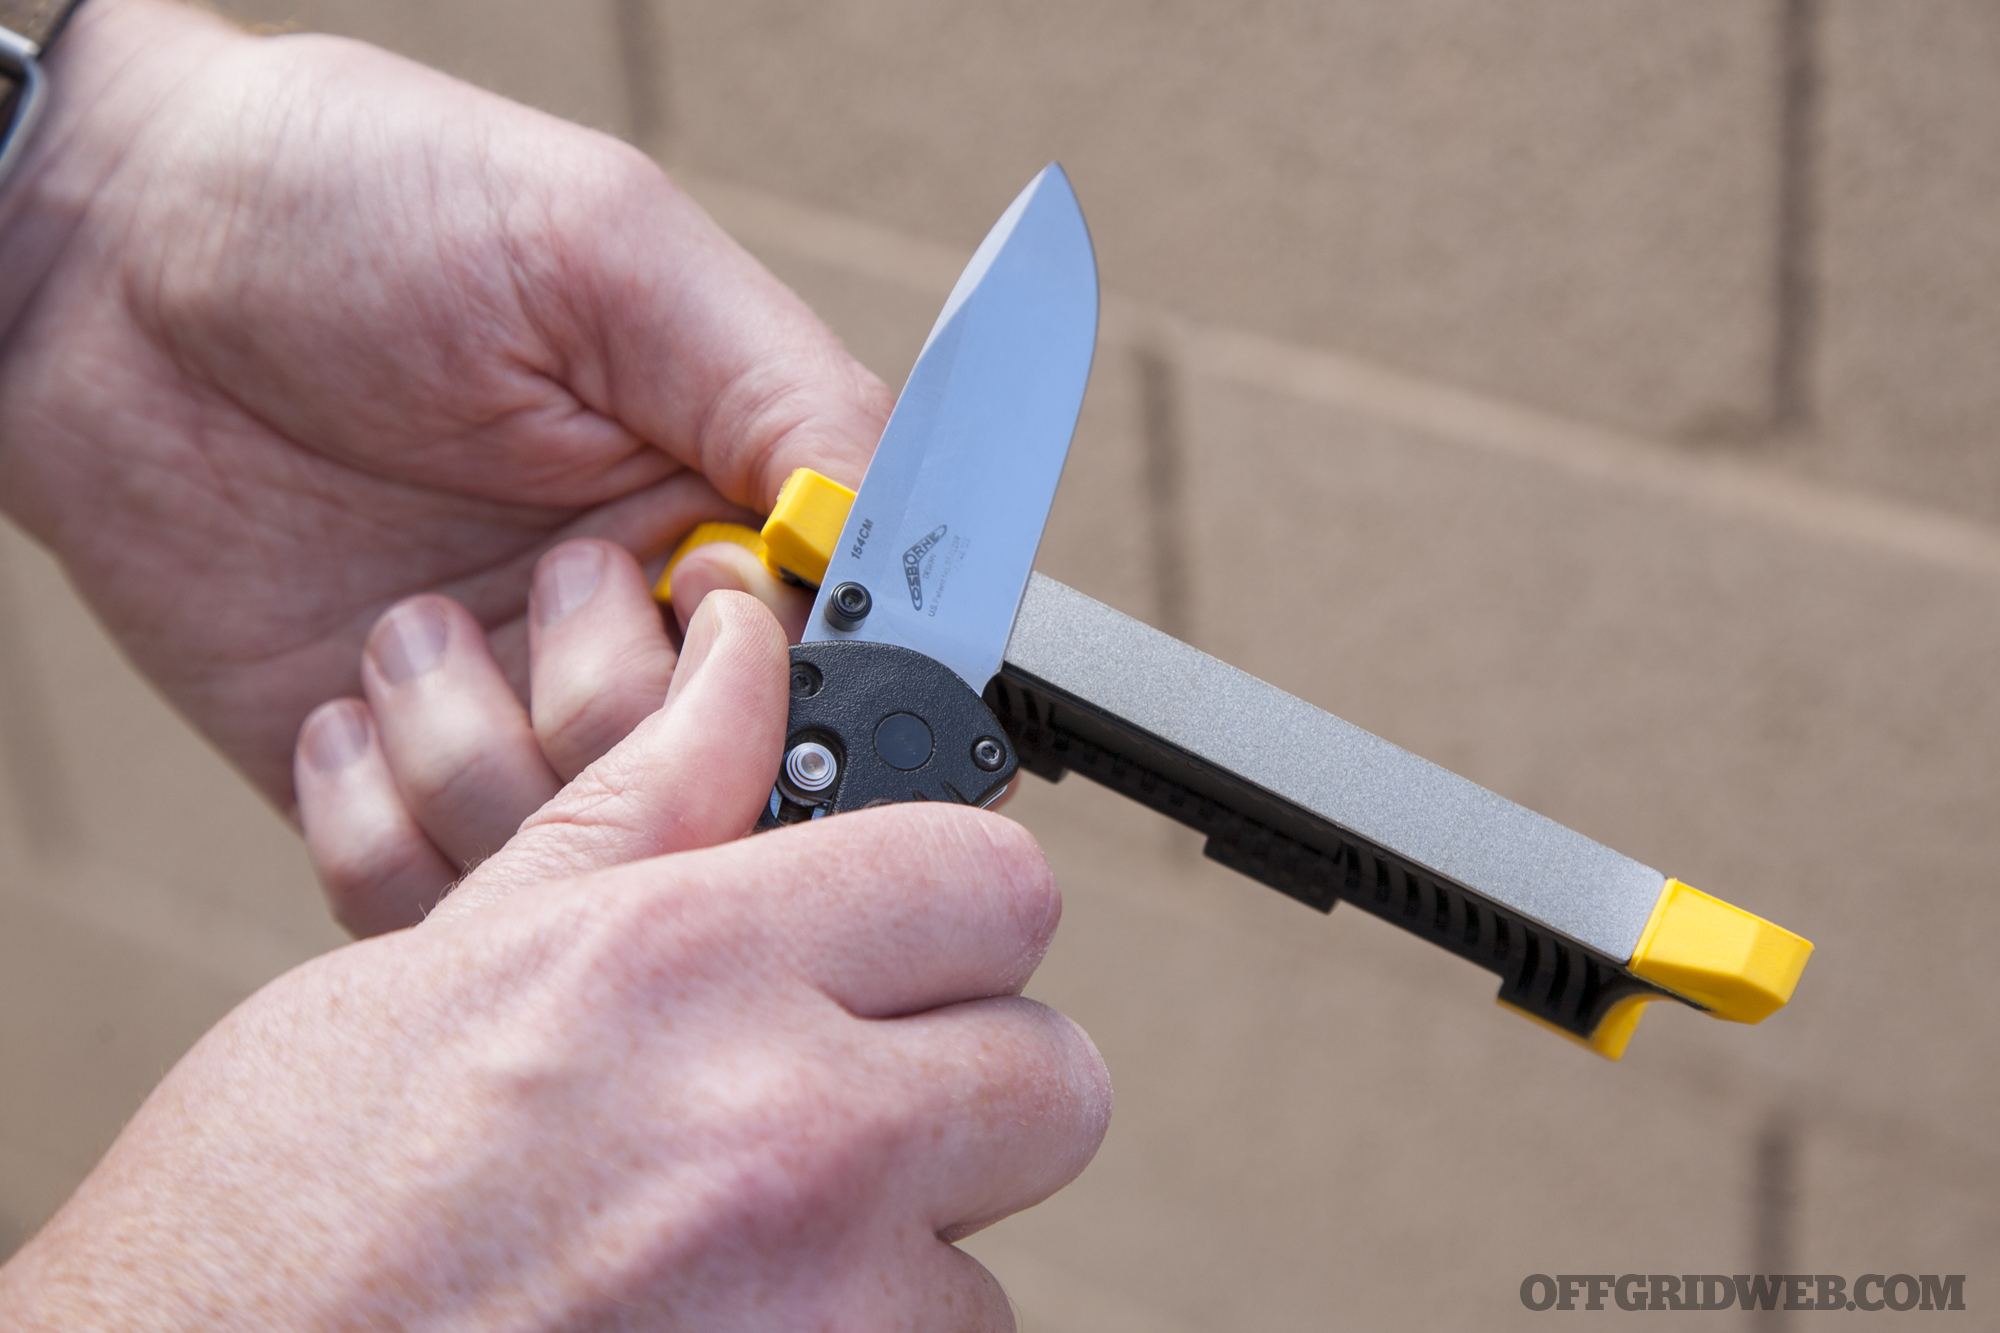
Notes The Pocket Knife Sharpener is a new model from Work Sharp, taking its place as the entry-level model in the company’s lineup. It’s one step below the Guided Field Sharpener, one of seven sharpeners we reviewed in our upcoming Pocket Preps: Knife Sharpeners article in Issue 30 (available in February 2019). While the Guided Field Sharpener has five stages as well as provisions for dealing with fish hooks and serrations, the Pocket Knife Sharpener is a simple two-stage system.
Along the bottom edge of the tool, there’s a flat diamond abrasive surface rated at 320 grit. This is coarse enough to quickly grind away substantial chips and imperfections — it’s actually a little too coarse for our liking. Still, it’s good to have for dealing with heavily-worn or dull blades. Work Sharp recommends 10 alternating strokes to fully sharpen an edge.
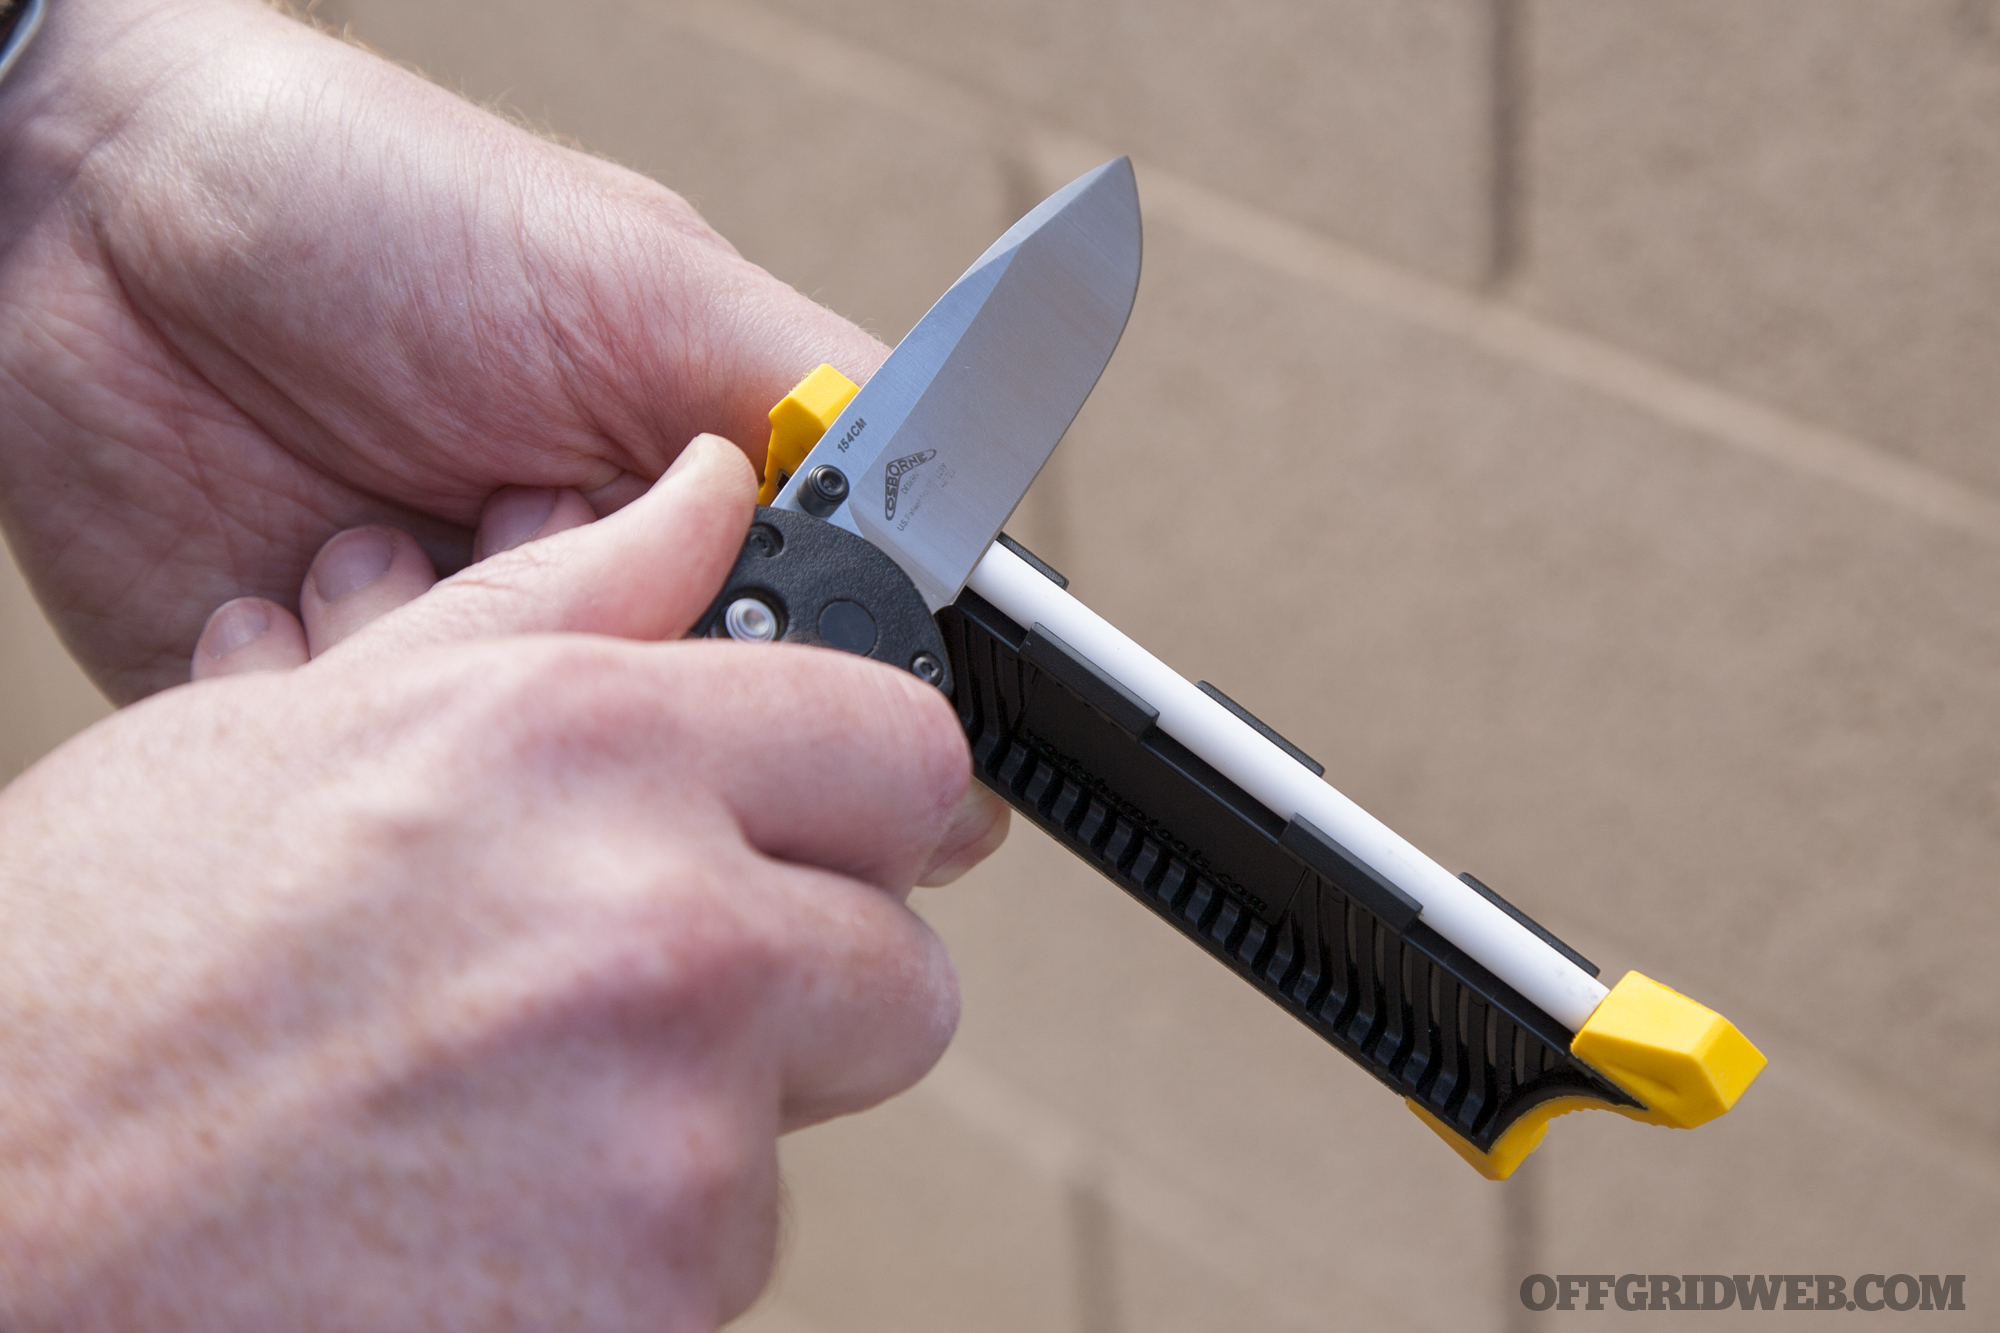
On the top edge, there’s a fine ceramic rod that can be used for cleaning up the edge after the coarse sharpener or honing an edge that’s only slightly dull. We see ourselves using this material about 90% of the time, since it’s much gentler on a blade and doesn’t remove as much steel.
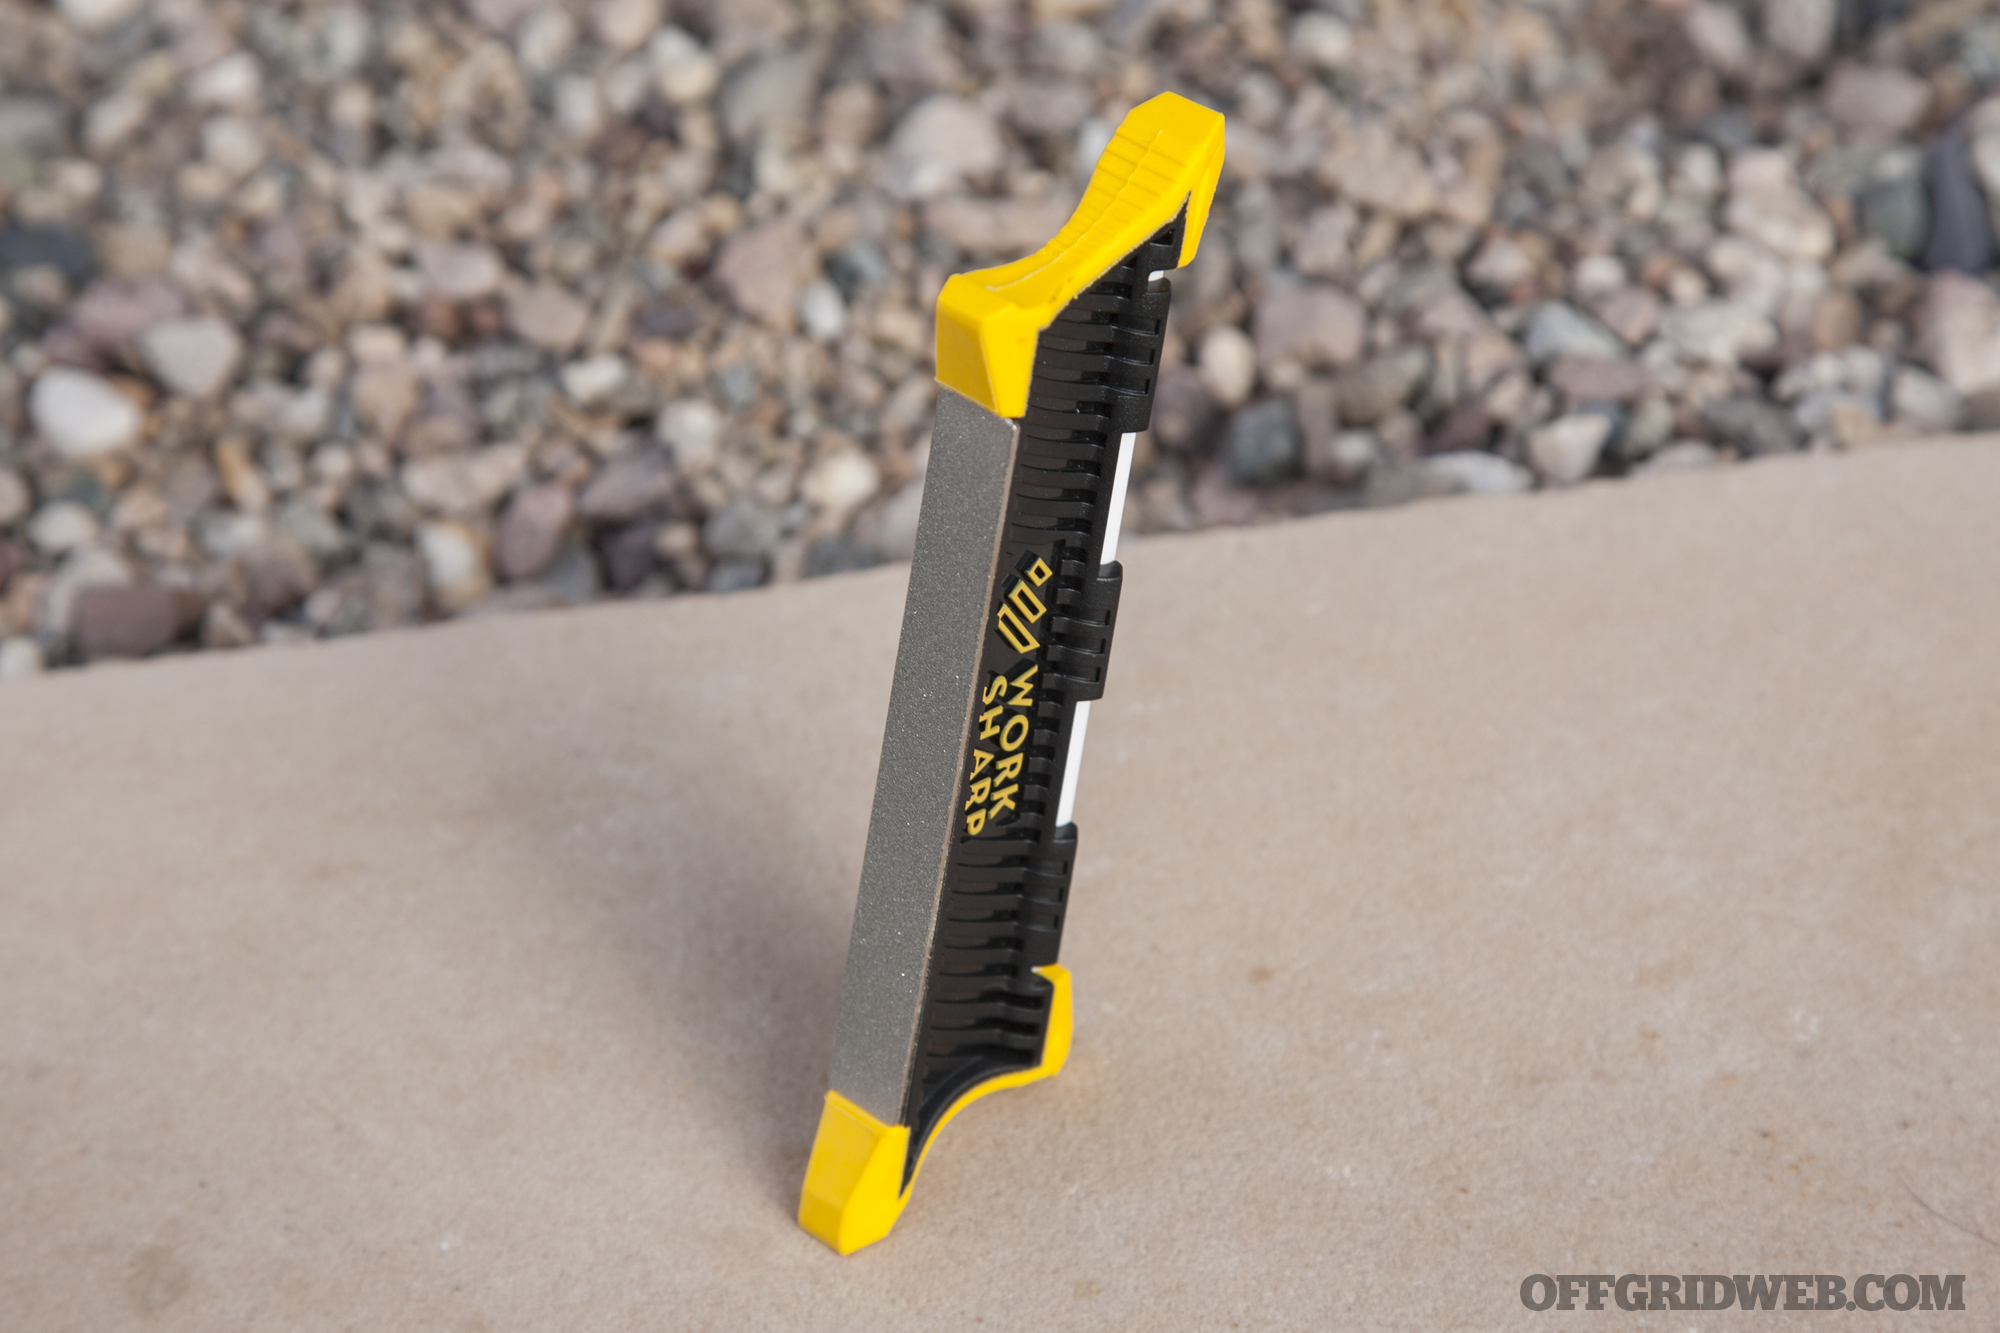
Both the diamond and ceramic surfaces include integrated angle guides at each end. Leaning the blade against these guides can help you maintain a 20-degree angle as you sharpen. Also, take note of the angled rubber feet on each end of the tool. These allow it to be held vertically against a flat surface so you can sharpen with a downward motion.
Pros:
Built-in guides on both sharpening surfaces make it easy to maintain a consistent angle
Lightweight yet durable
Great value for the money
Cons:
Diamond abrasive is very aggressive, so we’d advise using it sparingly
No provision for sharpening serrated blades, unlike the other two sharpeners in this article
Conclusion
Each of these pocket knife sharpeners has its advantages and disadvantages. The DMT has full-size functionality in a pocket-sized package, but its single grit level limits its versatility. The Spyderco offers the ability to develop an extremely sharp edge that’s free of imperfections, but it’s best-used on a bench, and we found a disappointing quality-control flaw in our sample. The Work Sharp gives you great bang for the buck, but can’t sharpen serrated blades.
No matter which sharpener you choose as part of your EDC, you’ll be glad you have one handy when the time comes. Whether it’s the folding knife in your pocket, the bushcraft fixed blade on your hip, or the carving knife at a family get-together, being able to restore a blade to shaving-sharp condition is always valuable.
For more pocket-sized sharpeners to consider, keep an eye out for Pocket Preps: Knife Sharpeners in Issue 30 of RECOIL OFFGRID magazine, on sale in February 2019.
In May 2017, Frank Massabki and his fiancée, Jennifer, traveled to Mexico City to scout locations for their upcoming wedding. An hour after renting a car in the city, they were rear-ended by another vehicle. The couple told Inside Edition that they stepped out to inspect the damage, but were approached by several men with guns who threw them into the backseat and drove them to a location they didn’t recognize. The kidnappers bound their wrists with shoelaces, blindfolded them, and said they planned to demand a ransom. The men then attempted to sexually assault Jennifer, but she fought back, receiving a punch to the face that broke her nose. During this struggle, Frank managed to escape from his crude restraints and ran to call for help. Realizing they had lost control, the kidnappers fled, and the couple were able to return home to the United States.
As a result of countless melodramatic Hollywood depictions, kidnapping may seem like a distant threat — the sort of thing that only happens if you’re a secret agent, millionaire businessman, or key witness in a mafia murder trial. But the unfortunate reality is that it does happen to ordinary people like the Massabkis, especially in impoverished countries where ruthless criminals and corrupt officials view foreigners as high-value targets. And if these individuals can’t get what they want, most won’t hesitate to resort to torture, rape, or murder.
Ed’s Manifesto: Counter-Custody Training
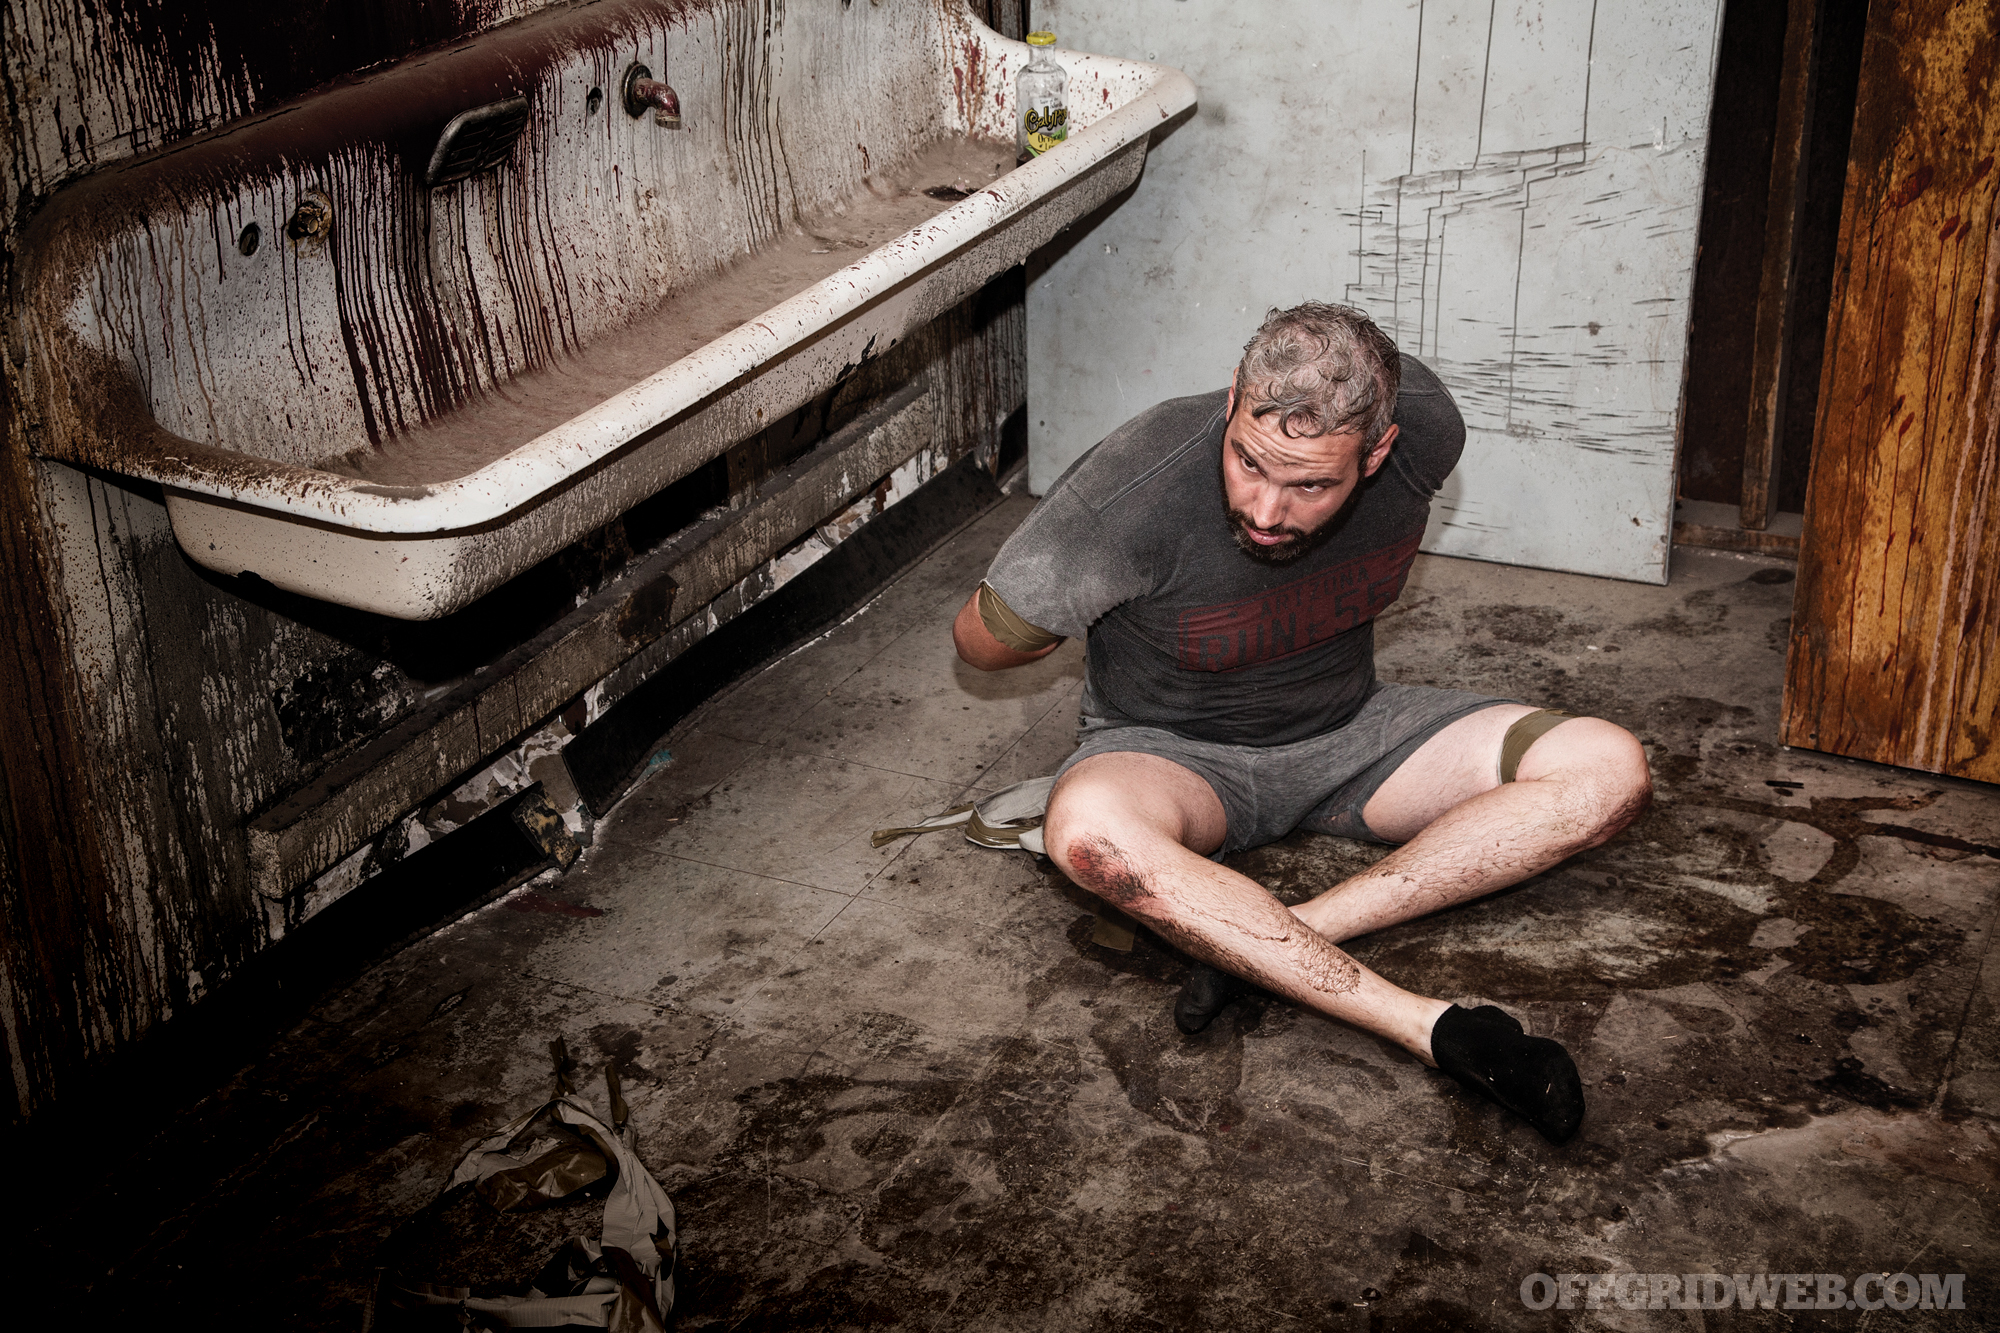
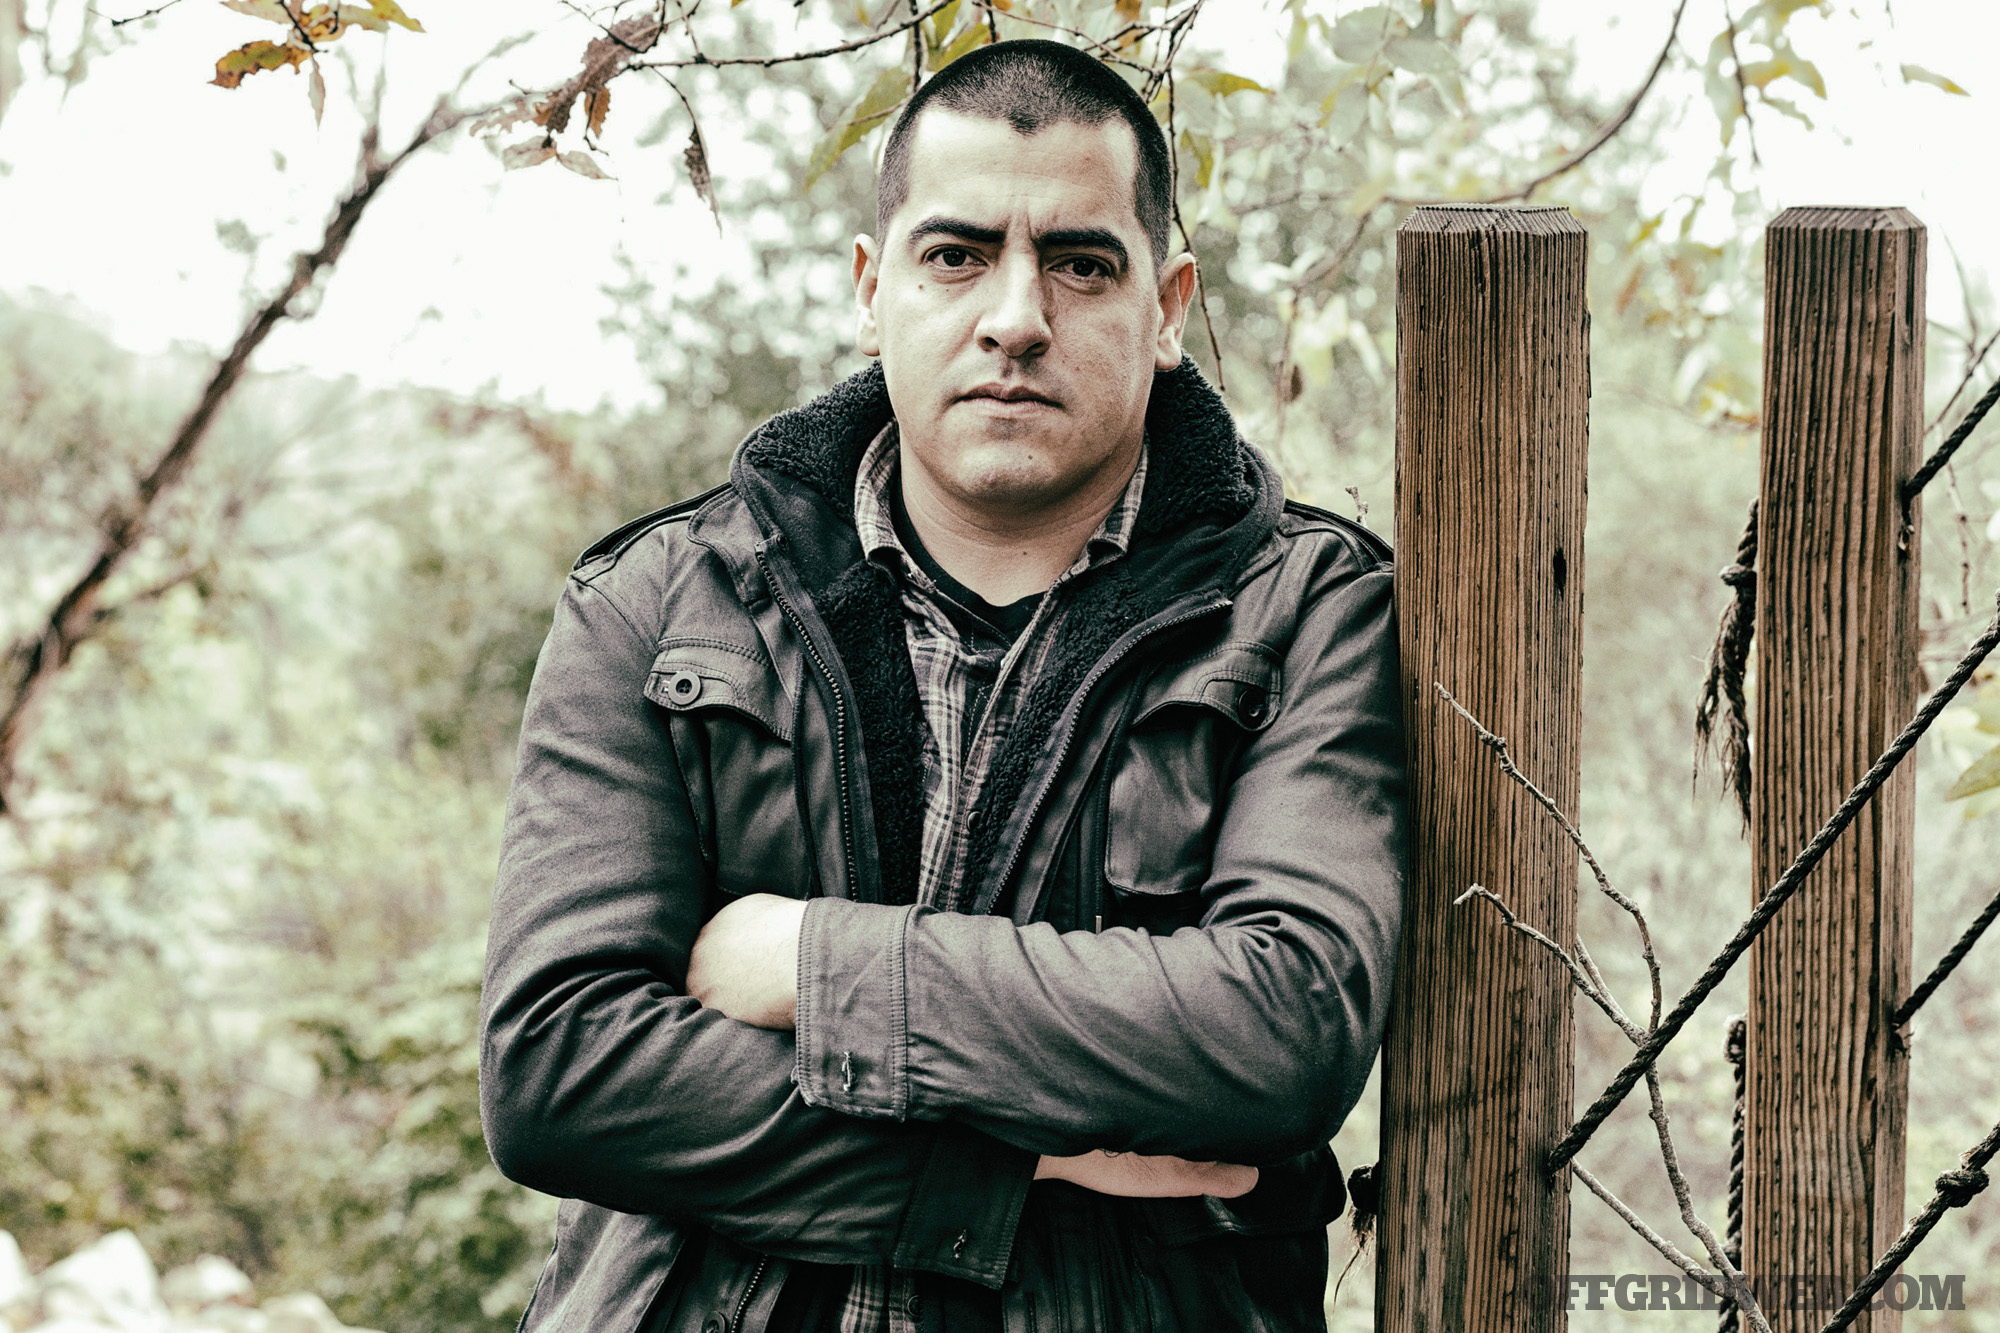
Ed Calderon, who you may recognize from our Survivalist Spotlight interview in Issue 25, has forged a career as a specific type of survival instructor. Based on firsthand experience with the cartels during his time as a Mexican law enforcement officer, Calderon has developed an in-depth curriculum that teaches students how to avoid abduction and escape captivity. These courses are more than just academic theory — they place students in simulated kidnapping scenarios, and give each individual a jarring glimpse of the physical and psychological trauma that can ensue.
We recently attended one of Ed’s two-day counter-custody courses, and learned several skills that can help you turn the tables on kidnappers and increase your odds of making it home alive. These principles can help you avoid unnecessary attention from would-be attackers, and develop the resolve to escape life-threatening illegal imprisonment.
Calderon based the captivity scenarios on techniques he saw used by the cartels in Mexico.
1. Know Thy Enemy
Situational awareness and threat identification are cornerstones of self-defense, whether you’re concerned about theft, assault, or abduction. Given Ed’s experience in Mexico, the first portion of the class was dedicated to spotting cartel members and their associates. If you think that these individuals only exist south of the border, he’ll be the first to tell you that you’re sorely mistaken — demand for street drugs and human trafficking has maintained a healthy network throughout the United States.
There are many physical cues that can help you identify someone who’s accustomed to violence. A crooked nose, cauliflower ears, and scarring on the knuckles are clear signs of physical brawls; a callus on the middle finger of the dominant hand speaks of many hours rubbing against the trigger guard of a weapon. Muscular physical build isn’t necessarily an indicator, as many hardened criminals are overweight or out of shape. Tattoos are also hit or miss, as high-level criminals know better than to brand themselves with identifying marks. In modern cartel circles, streetwear fashion is increasingly popular — skinny jeans and high-end sneakers have replaced stereotypical cowboy apparel and snakeskin boots.
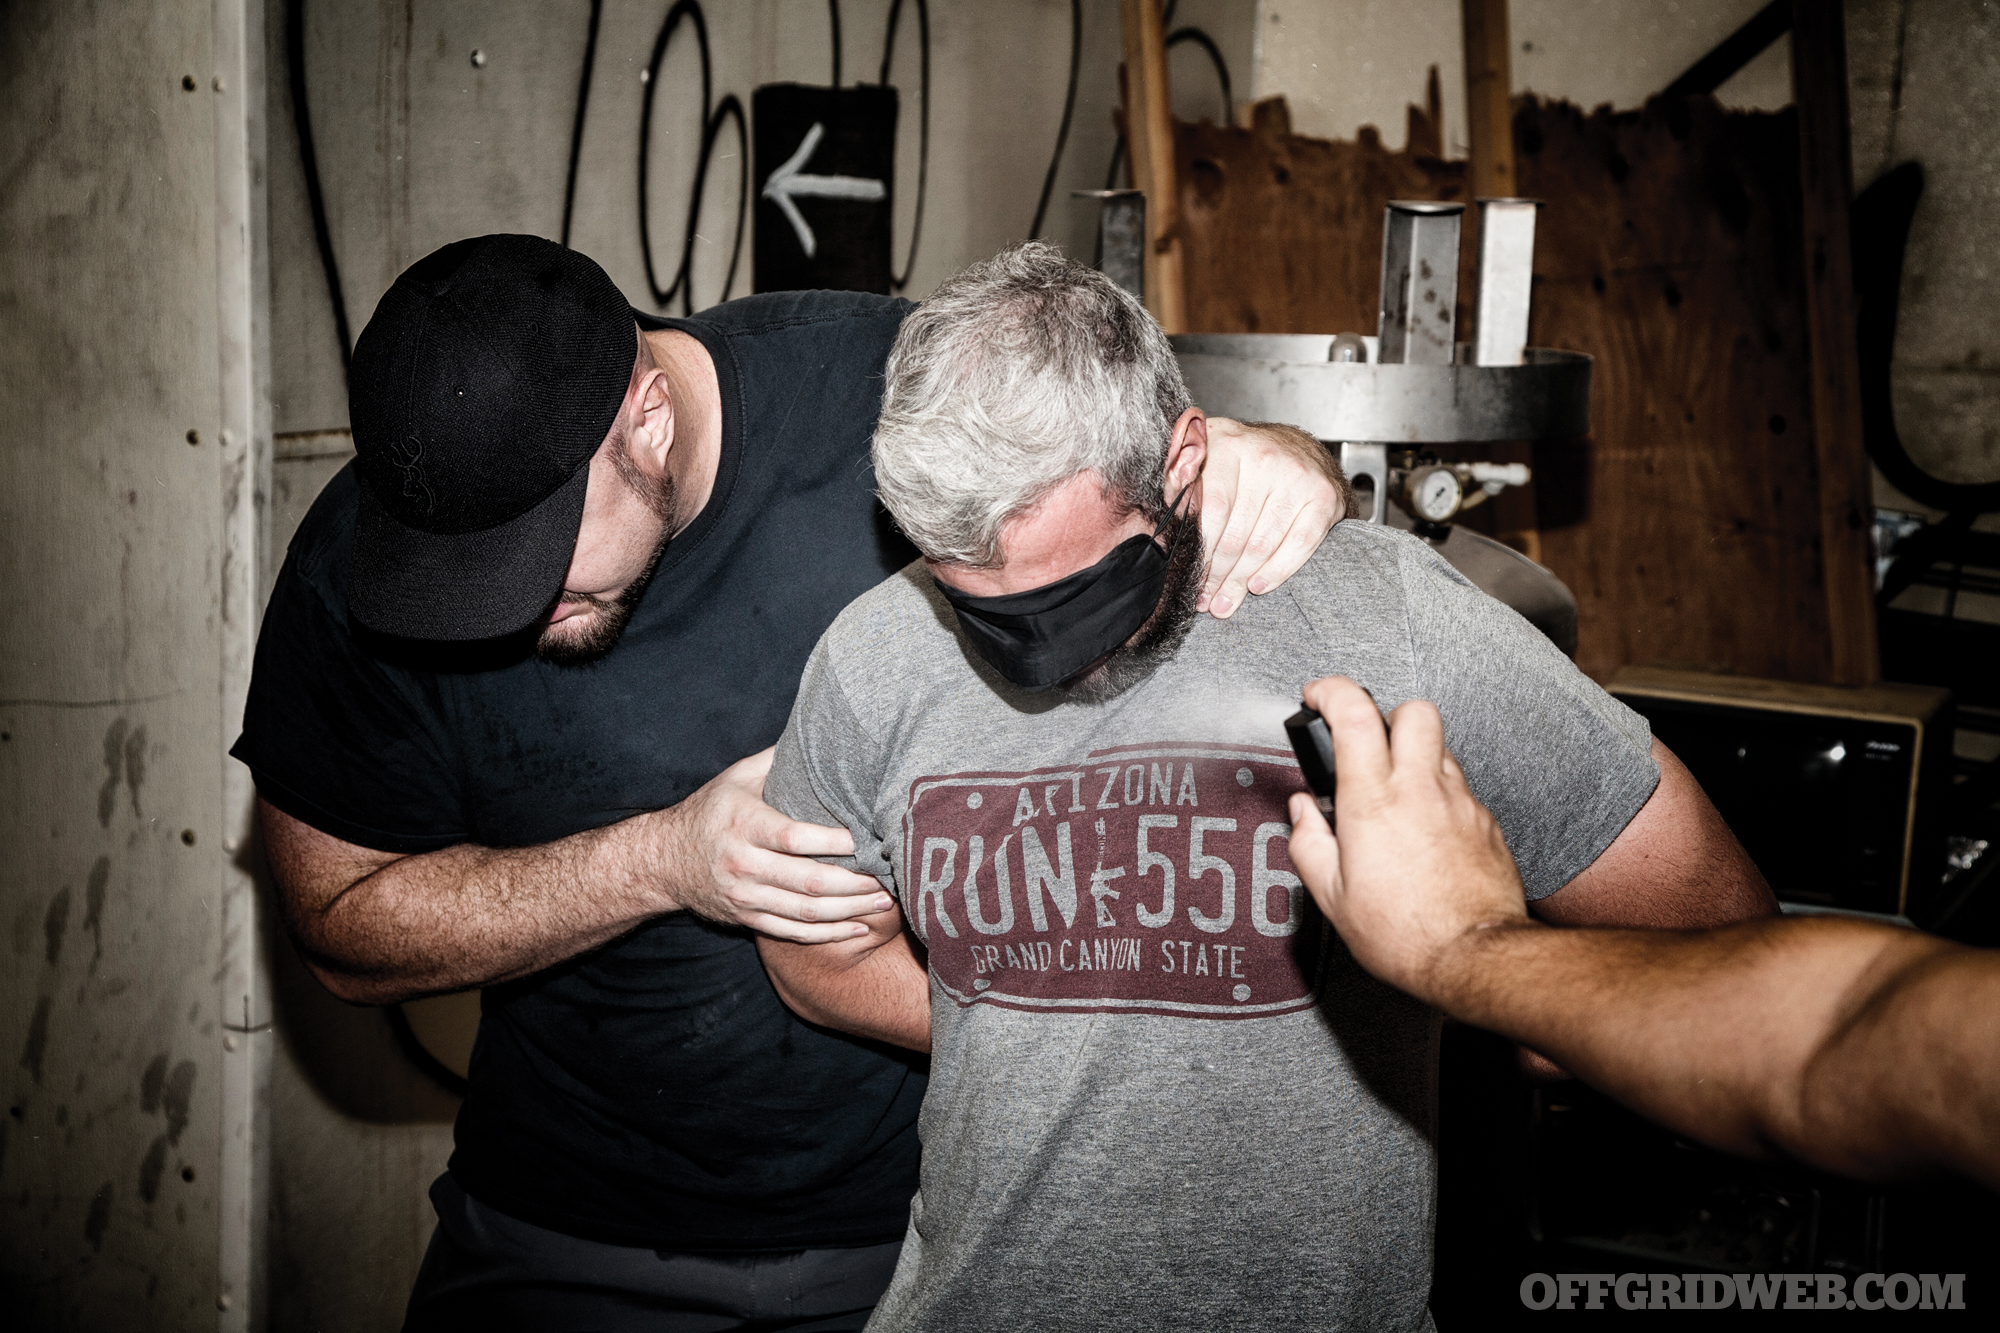
Above: Students were blindfolded, doused in aerosol body spray, and exposed to continuous loud music as a form of sensory deprivation.
Ed says cartel members are often “armed to the teeth” with weapons ranging from full-auto-converted civilian ARs and AKs to grenades and belt-fed machine guns. Unsurprisingly, gun laws in the U.S. and Mexico haven’t prevented them from acquiring these weapons. Fighting tactics and communications are generally primitive, but this is changing as new-generation cartel members realize the value of thermal optics, drones, and other modern resources. Restraints often consist of surplus or off-brand handcuffs, rope, duct tape, and commercial zip ties or purpose-built zip cuffs. These basic materials are combined in devious variations — for example, tethering cuffs to a belt loop to restrict arm movement.
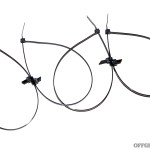
Above: You may have seen videos depicting how to break out of zip ties using a swift downward motion of the arms. Cartel members saw them too, and developed these “vampire” cuffs to cut open the wrists of captives who try to break free.
The ability to piece together these clues and understand the threat early can provide time to defend against it instead of being blindsided. Knowing your enemy also lets you know what to expect if you’re taken captive.
2. Never Go Without Tools
In any survival situation, tools provide a tremendous advantage, and this is especially true in captivity. With proper training, items such as handcuff keys, shims, a Kevlar cord saw, and a sharp blade can help you escape most restraints. However, getting these tools through a rudimentary pat down — much less a thorough search — isn’t an easy task.
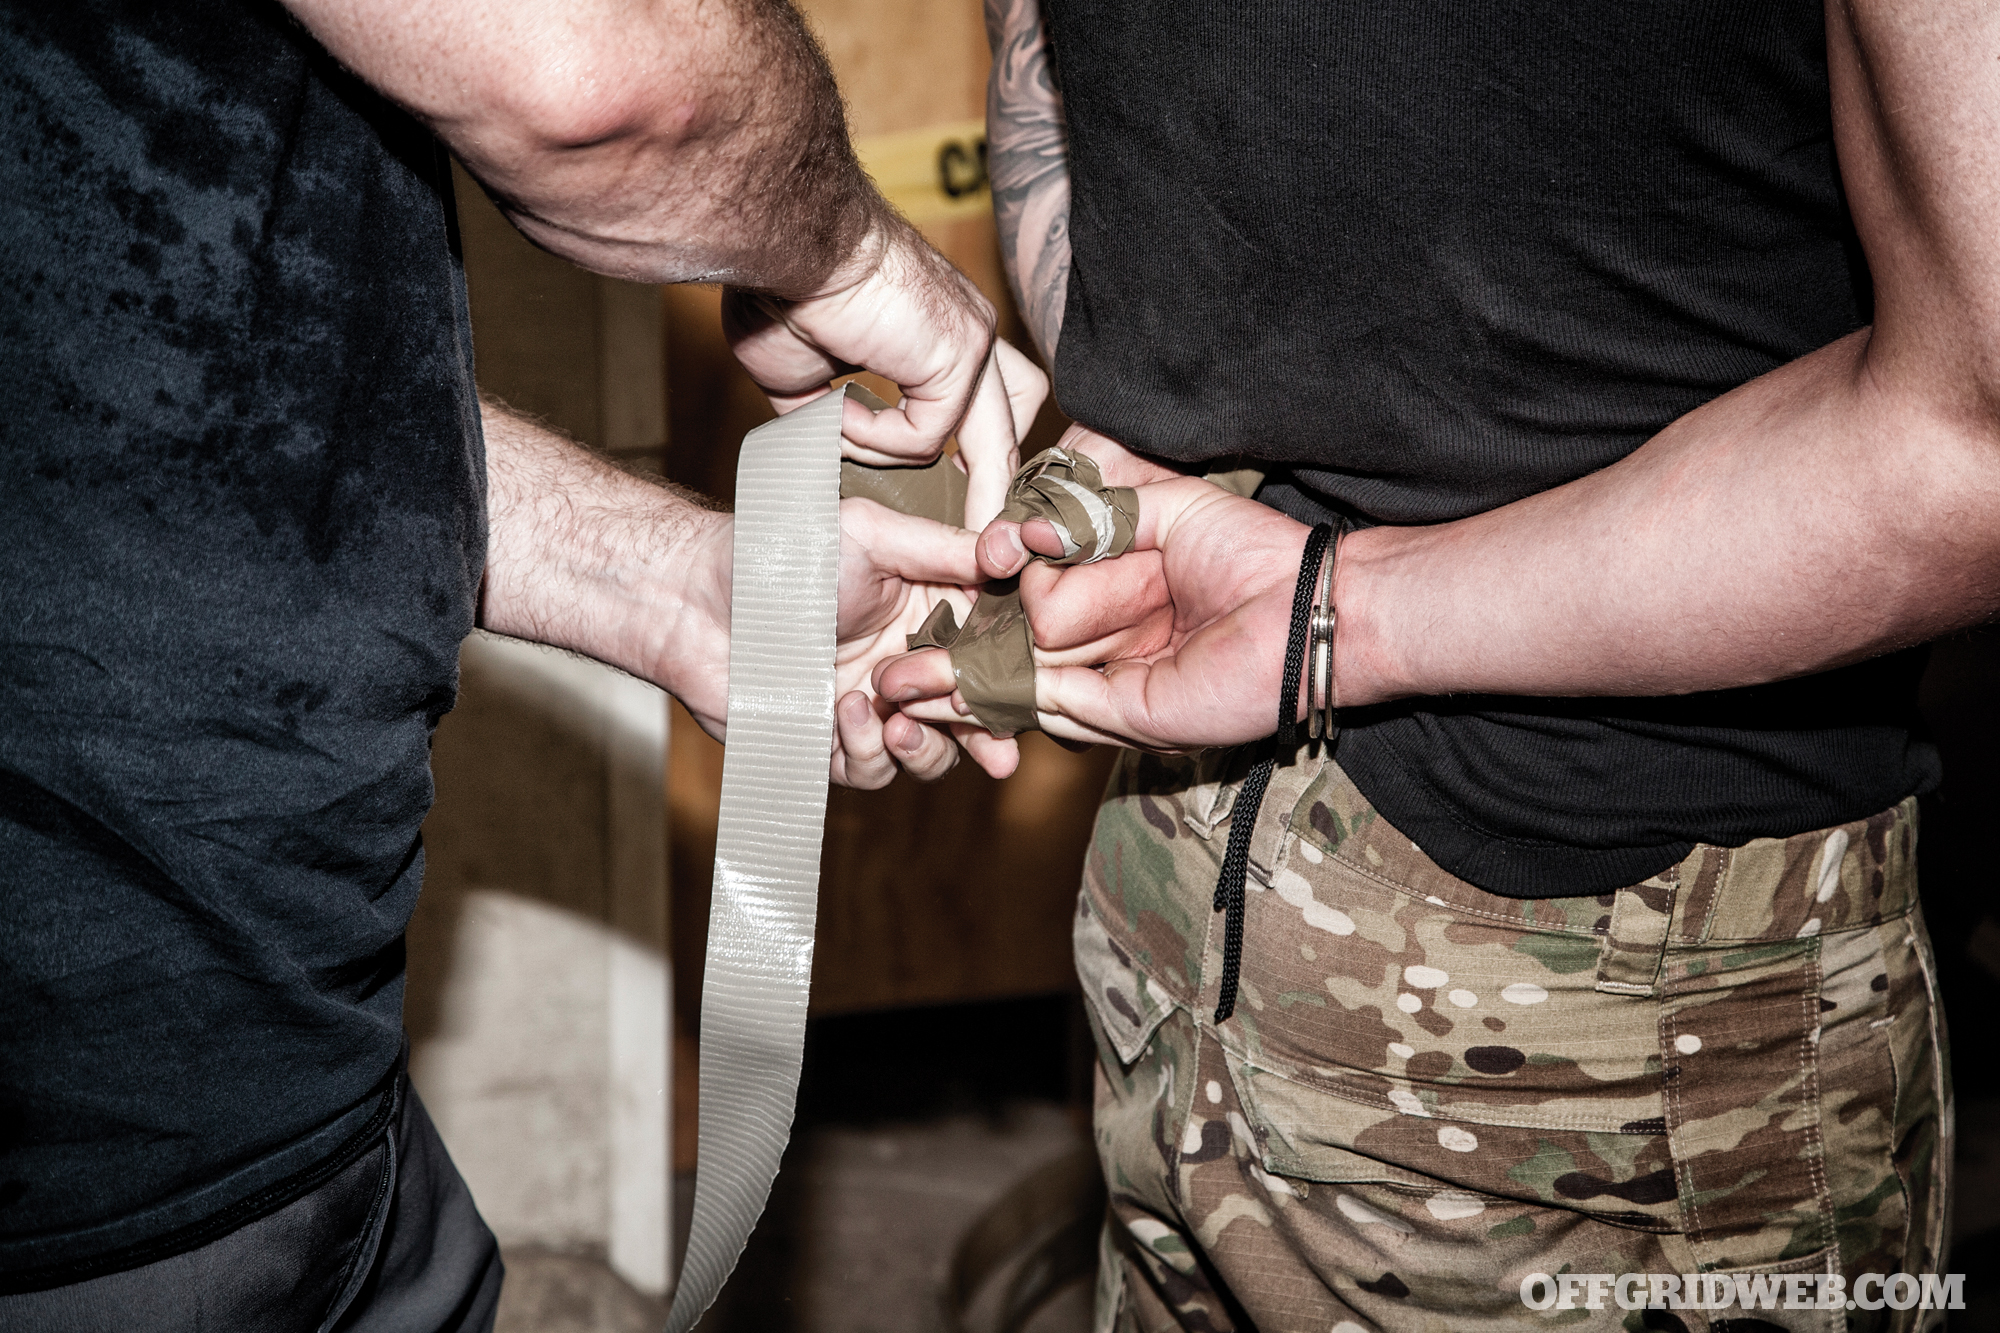
Above: Handcuffs, scraps of cord, and duct tape were combined to make multi-stage restraints that selectively restricted movement.
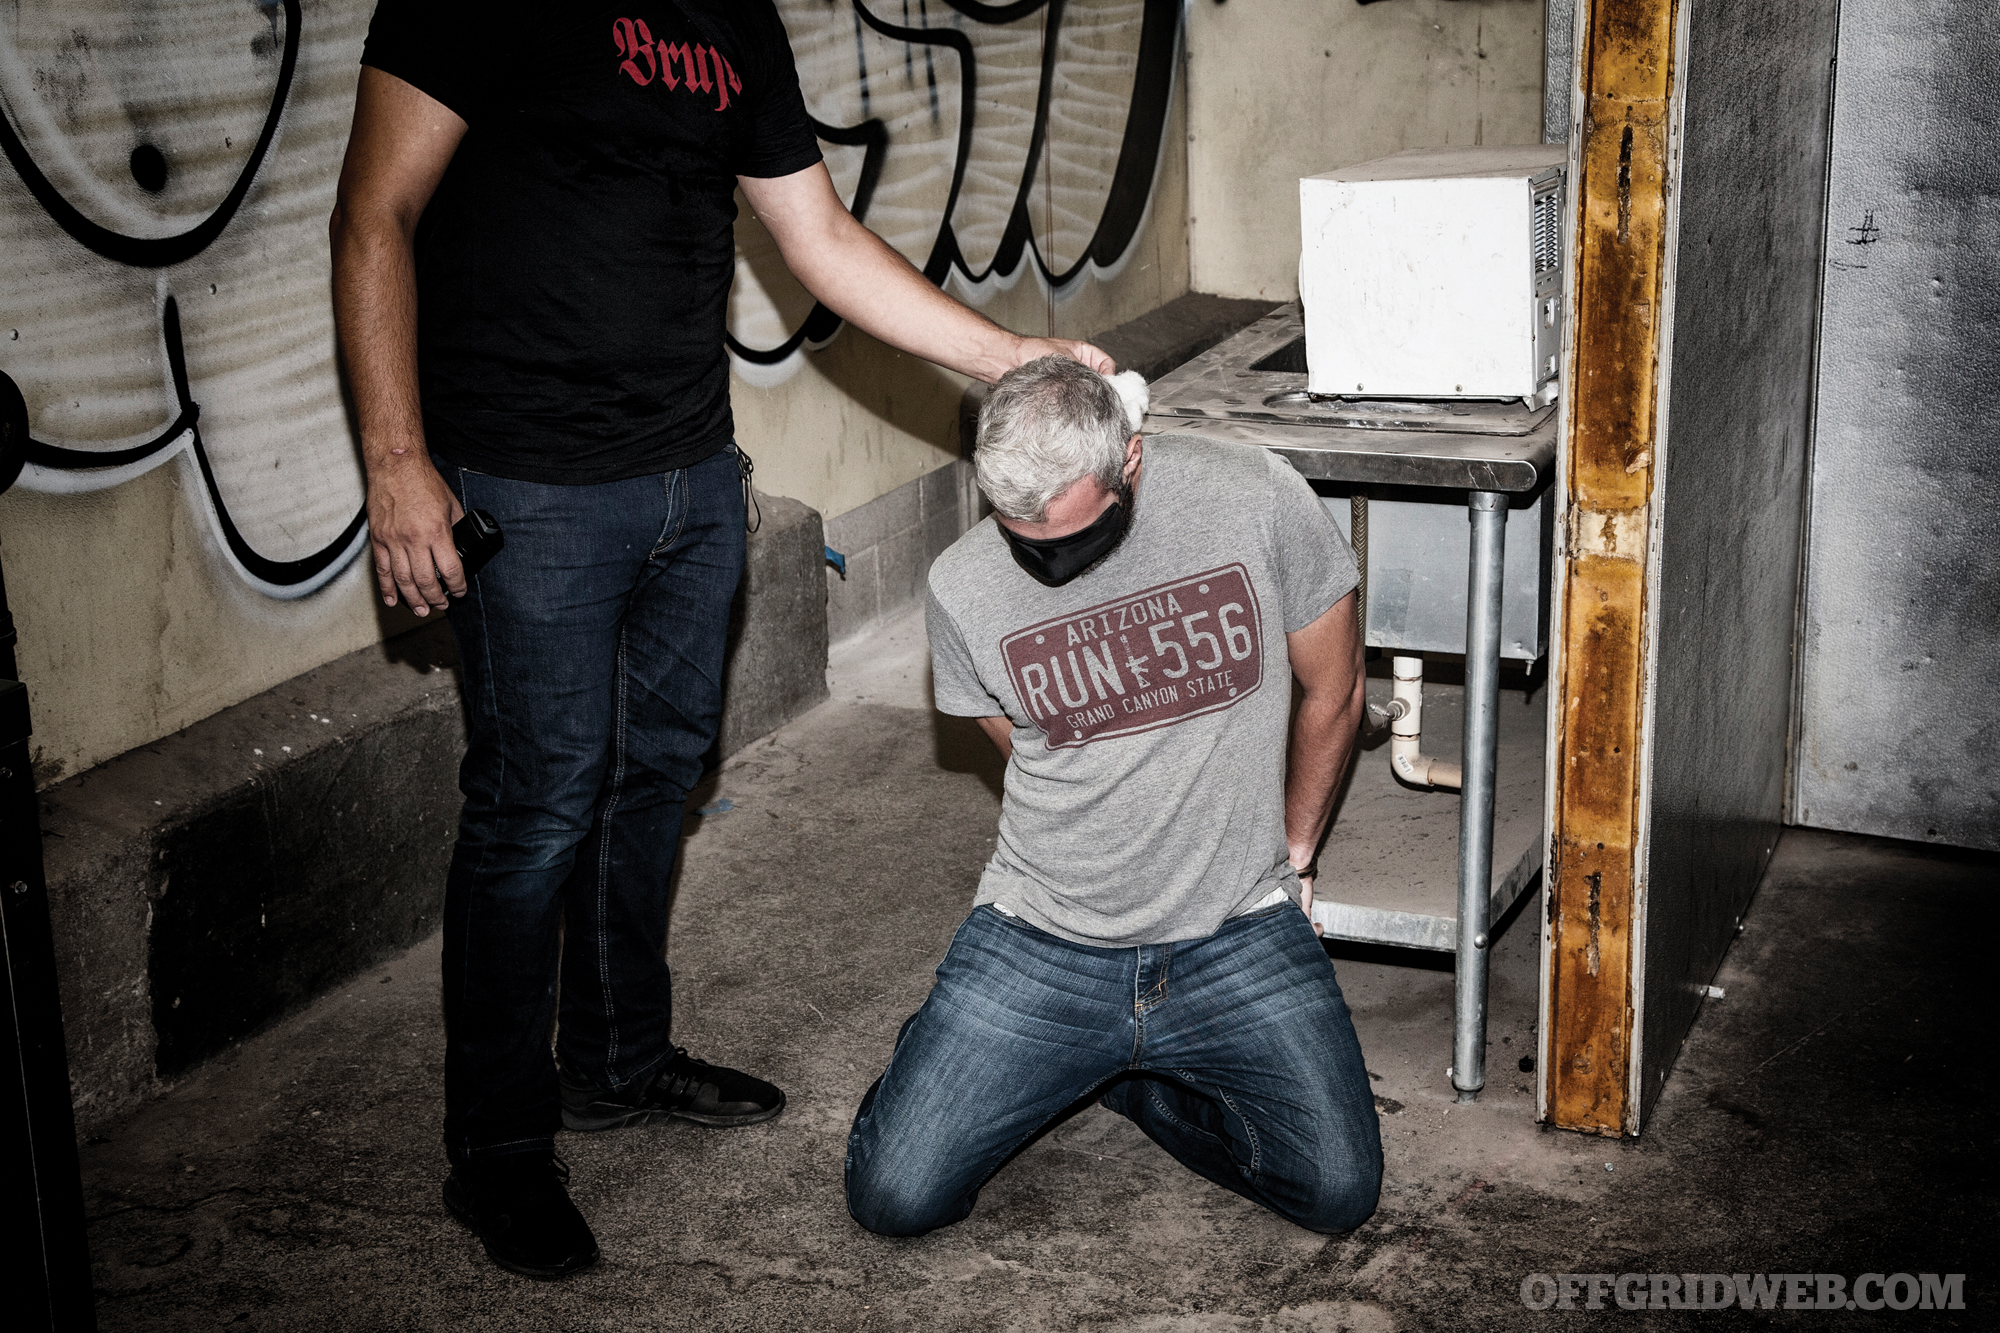
During the counter-custody class, students practiced escaping handcuffs in various positions using cuff keys and shims. We were then tasked with concealing these tools to make it through a head-to-toe search. This process led to an acronym Ed Calderon refers to as ACPN:
Access: Can you get to the tool while wearing cuffs? What if it’s behind your back? What if you’re blindfolded and lying face-down? The waistline and ankles are generally easiest to access while restrained.
Concealment: Can the tool be hidden from a visual inspection, pat-down, metal detector, or even a strip search? This must be balanced with accessibility, since deep-concealed items may not be reachable when you need them.
Above: Ed Calderon showed us a shim retained in the stitching on the inside of his belt loop, and a hidden cuff key slipped into the waistband of his jeans.
Permanence: Will the item stay with you in a SHTF situation? For example, your fancy SERE kit paracord bracelet will almost certainly be removed by kidnappers, so storing critical items there is unwise.
Narrative: If your tools are found, what do they say about you? A concealed ceramic knife may lead captors to think you’re a spy or assassin; a set of lockpicks could be considered burglary tools. Also consider disposability and traceability — a dollar store paring knife is superior to an expensive dagger engraved with a serial number.
3. Prepare to Improvise
In many cases, carrying purpose-built tools isn’t an option. Perhaps the search is extremely thorough, or the consequences of getting caught are too severe to risk carrying them. In these cases, you’ll have to improvise once you’ve cleared security.
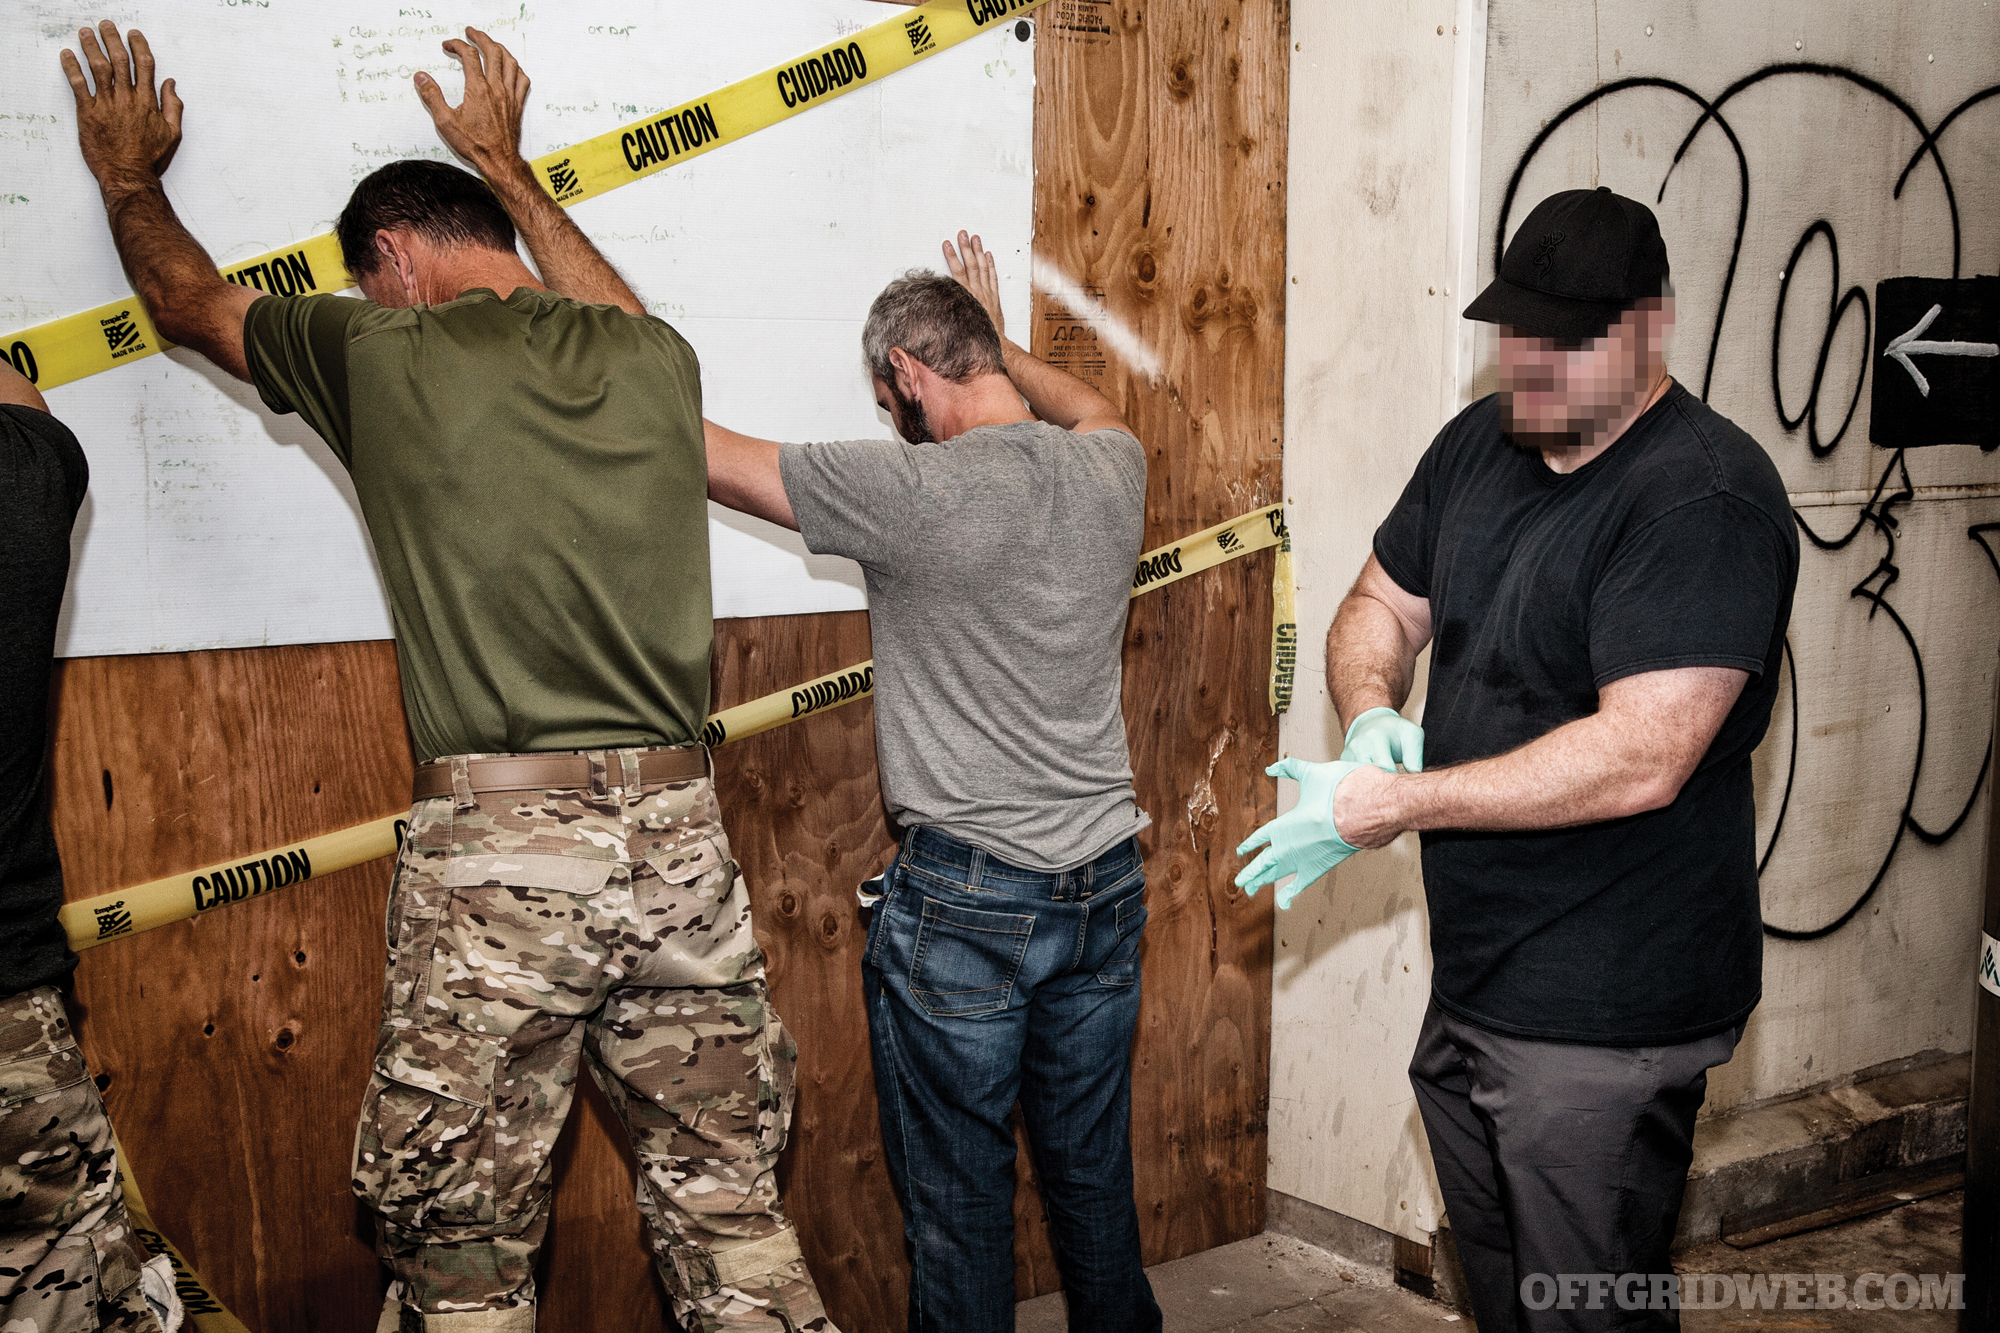
Above: Students were told to conceal escape tools for each scenario, and were then thoroughly searched before being restrained. In the final test, pants and shoes were also confiscated.
One key point stuck with us: You don’t have to carry what you need — you just have to get the materials to make what you need. Knives might be banned where you’re going, but there are countless unrestricted items you can carry to craft a deadly shiv in a few minutes. A toothbrush can be sharpened into a point on sandpaper or concrete; rubbing a clear plastic BIC pen rapidly against carpet makes a syringe-like “ventilator” weapon in less than 10 seconds. A basic metal hair clip or the tweezers from a Swiss Army Knife serve as surprisingly effective handcuff shims.
Ed describes this mindset as “software over hardware.” Despite the undeniable value of tools, knowledge and resourcefulness are far more valuable.
Above: Students crafted concealable shivs from wood, plastic, and metal. One particularly vicious weapon (at bottom right) even included breakaway cactus spines attached with electrical tape.
4. The Clock is Ticking
In general, captivity situations don’t get easier as time passes. They get more difficult and more dangerous. Minutes after you’re taken prisoner, you may still have your shoes, clothes, and concealed tools. After a few hours or days, it’s likely that these items will be found and stripped away. The last thing you want is to end up naked, blindfolded, and hogtied. On top of this, abuse and malnutrition will gradually weaken your body and dull your senses, or your assailants may decide you’re a liability and execute you. Calderon tells us many of those abducted by the cartels are never found. They’re killed, the flesh is melted in caustic soda, and the bones are dumped in mass graves.
Above: A length of braided Kevlar cord (sold in bulk as competition kite string) can easily be woven through the waistband or inseam. Looping it around each foot and moving in a pedaling motion can cut through many restraints in seconds.
The point is simple: The best time to escape is immediately. Look for the first possible opportunity and seize it like your life depends on it — it probably does.
5. Fight for Your Life
Escape isn’t always as simple as breaking your restraints and sneaking past a distracted guard. In many cases, you may have to fight your way through an armed individual to create an opening. In these cases, you’ll need to use the element of surprise and attack with deadly force.
Since it’s unlikely you’ll have access to a gun, knife, or any other purpose-built weapon in these scenarios, start thinking like a prisoner — make a shiv. A slim and solid piercing weapon that reaches the length of your outstretched thumb is enough to kill. Repeated “sewing machine” strikes with a hammer-fist motion are powerful, especially when targeting vital areas like the subclavian artery (behind the collarbone) or the heart (two finger widths below the left nipple). Even simple items such as a screwdriver or sharp piece of plastic can be deadly in this capacity, and little to no experience is needed to wield them. Calderon reinforced this point by showing the class several graphic LiveLeak videos of stabbing incidents (here’s one fatal example), and letting students watch as the victims bled out in minutes. These unfortunate individuals are often fatally wounded before they even realize they’re being stabbed.
When you’re facing captivity, torture, or worse, fighting fair is off the table. Using deadly force with an improvised weapon may be your only way to survive.
Escaping Handcuffs
Many people assume handcuffs are only used by law enforcement officers on criminals — or perhaps used in the bedroom if you’re feeling adventurous. Unfortunately, criminals have firsthand experience with the effectiveness of these devices, and will have no qualms about using them to illegally restrain their captives. Knowing how to break free from a pair of handcuffs is a valuable skill, since doing so may be the last thing your captors expect.
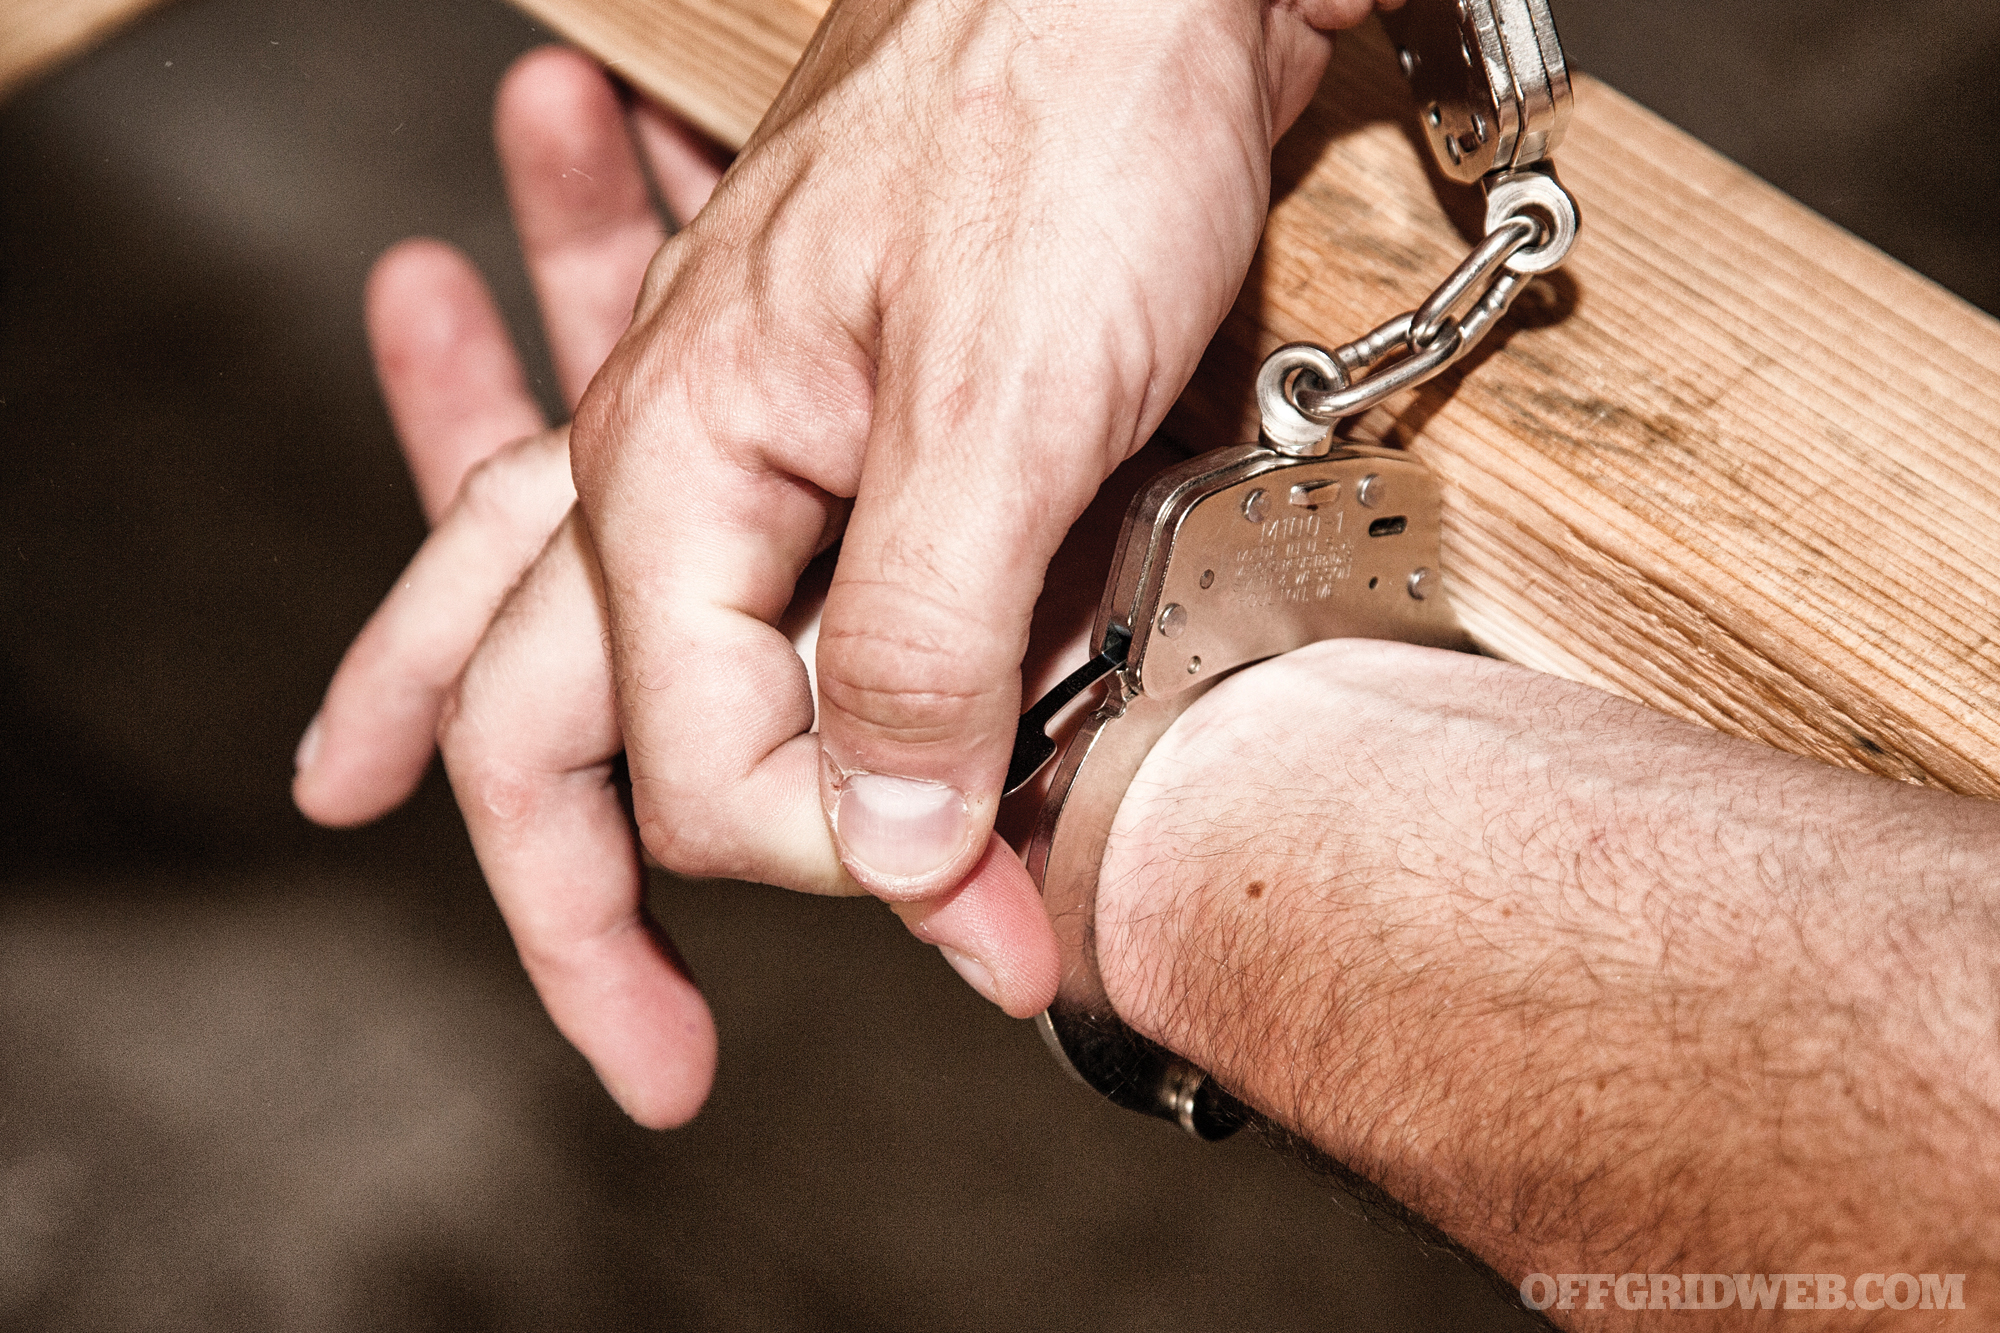
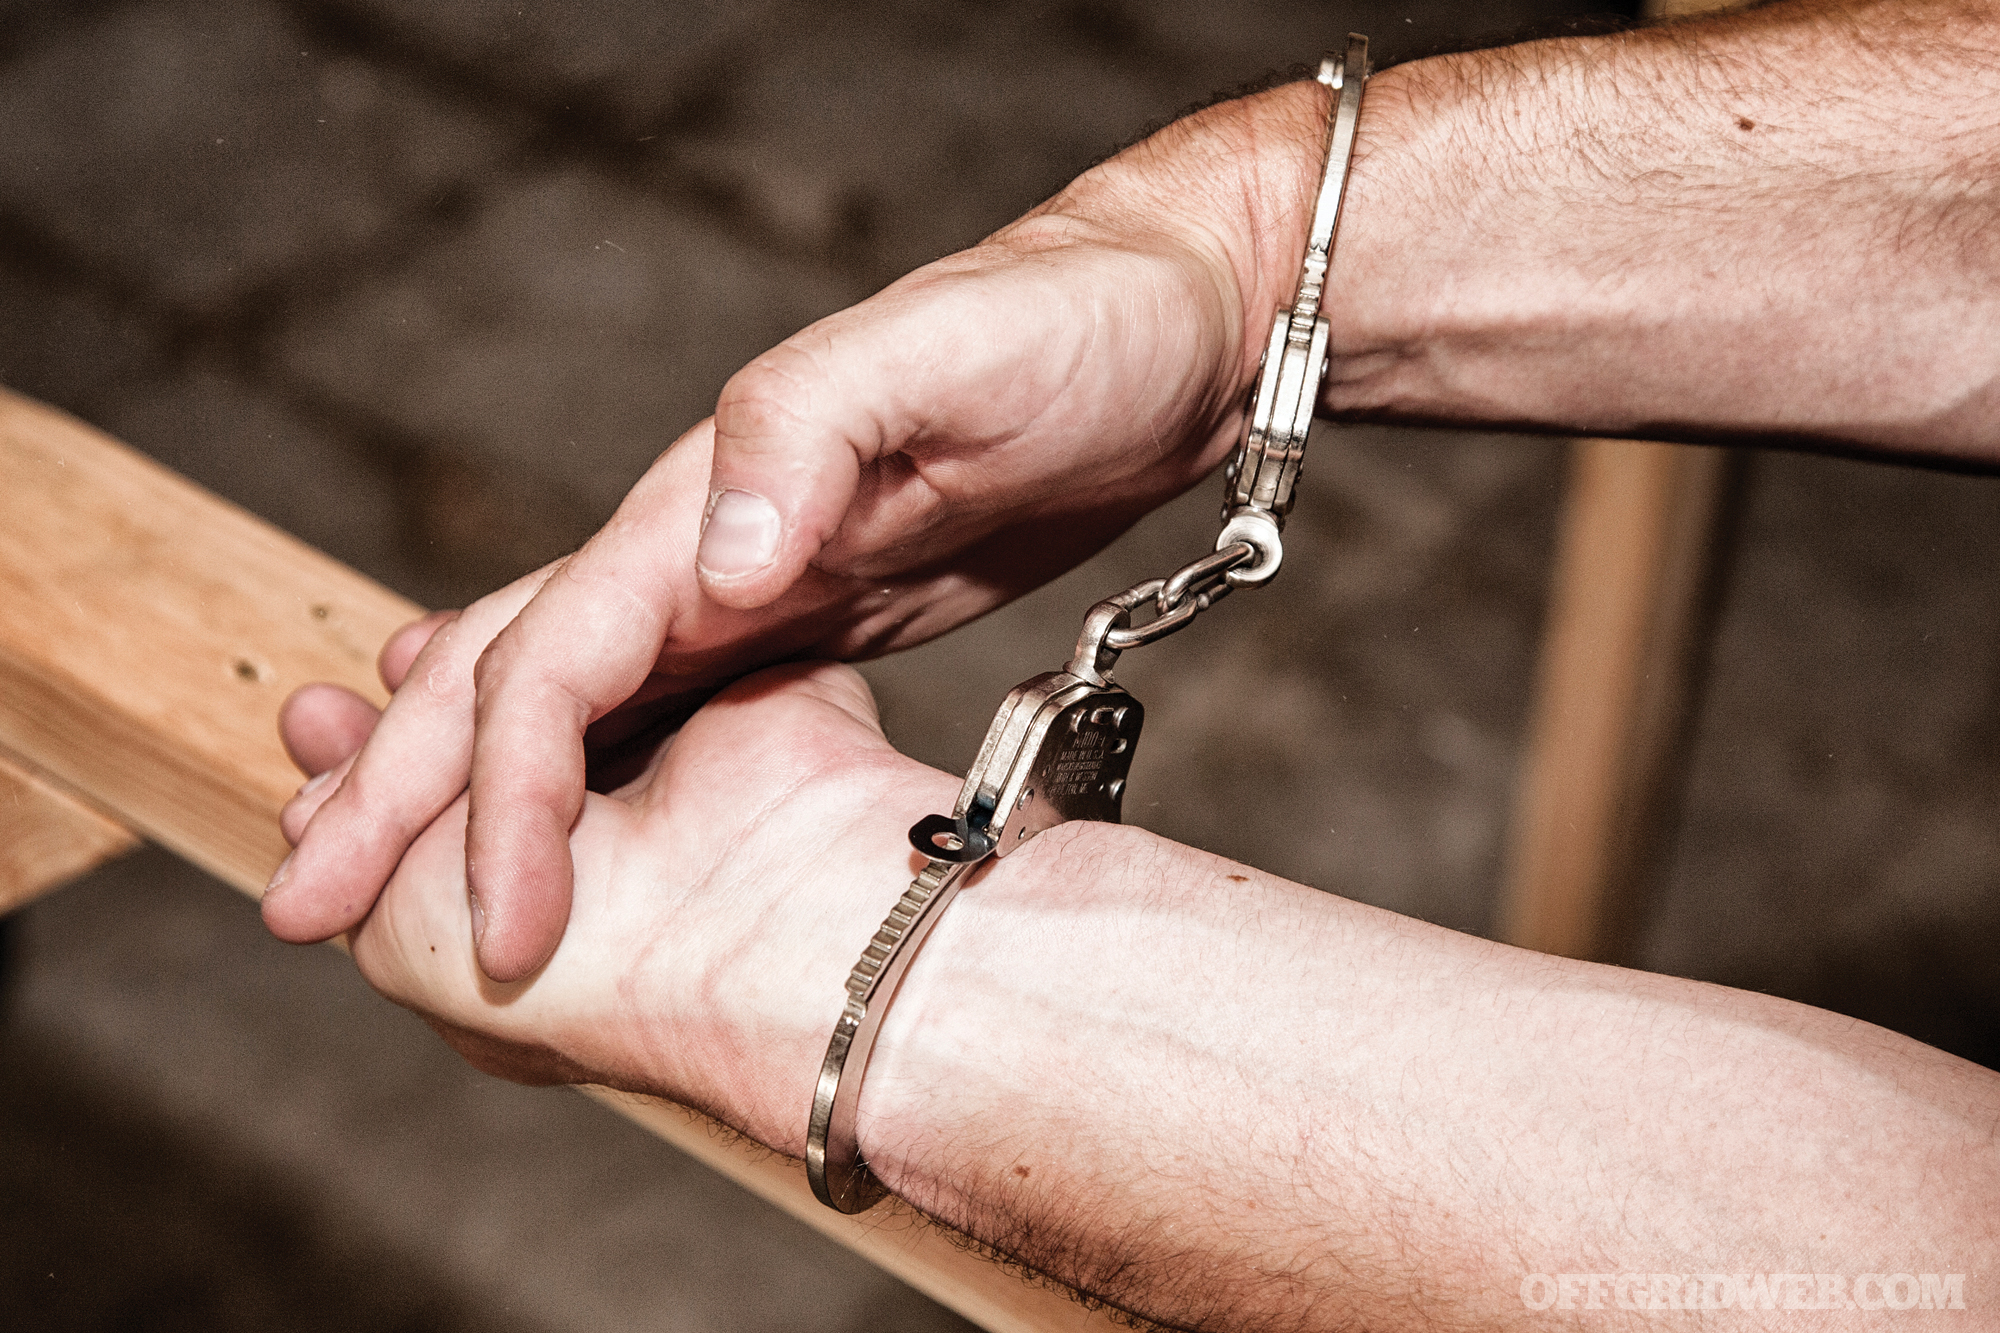
1. A cuff key (left) and shim (right) from SerePick provide two effective means of escaping most standard handcuffs. Calderon recommends a metal key, since plastic keys are easy to snap and may generate the wrong narrative if found by authorities.
2. The shim is inserted into the locking mechanism atop the ratcheting teeth.
3. While applying downward and inward pressure to the shim, the cuffs are tightened by at least two clicks to force the shim deeper into the mechanism.
4. Once the shim is fully inserted, holding it in place while rolling the wrist will cause the cuff to slide open.
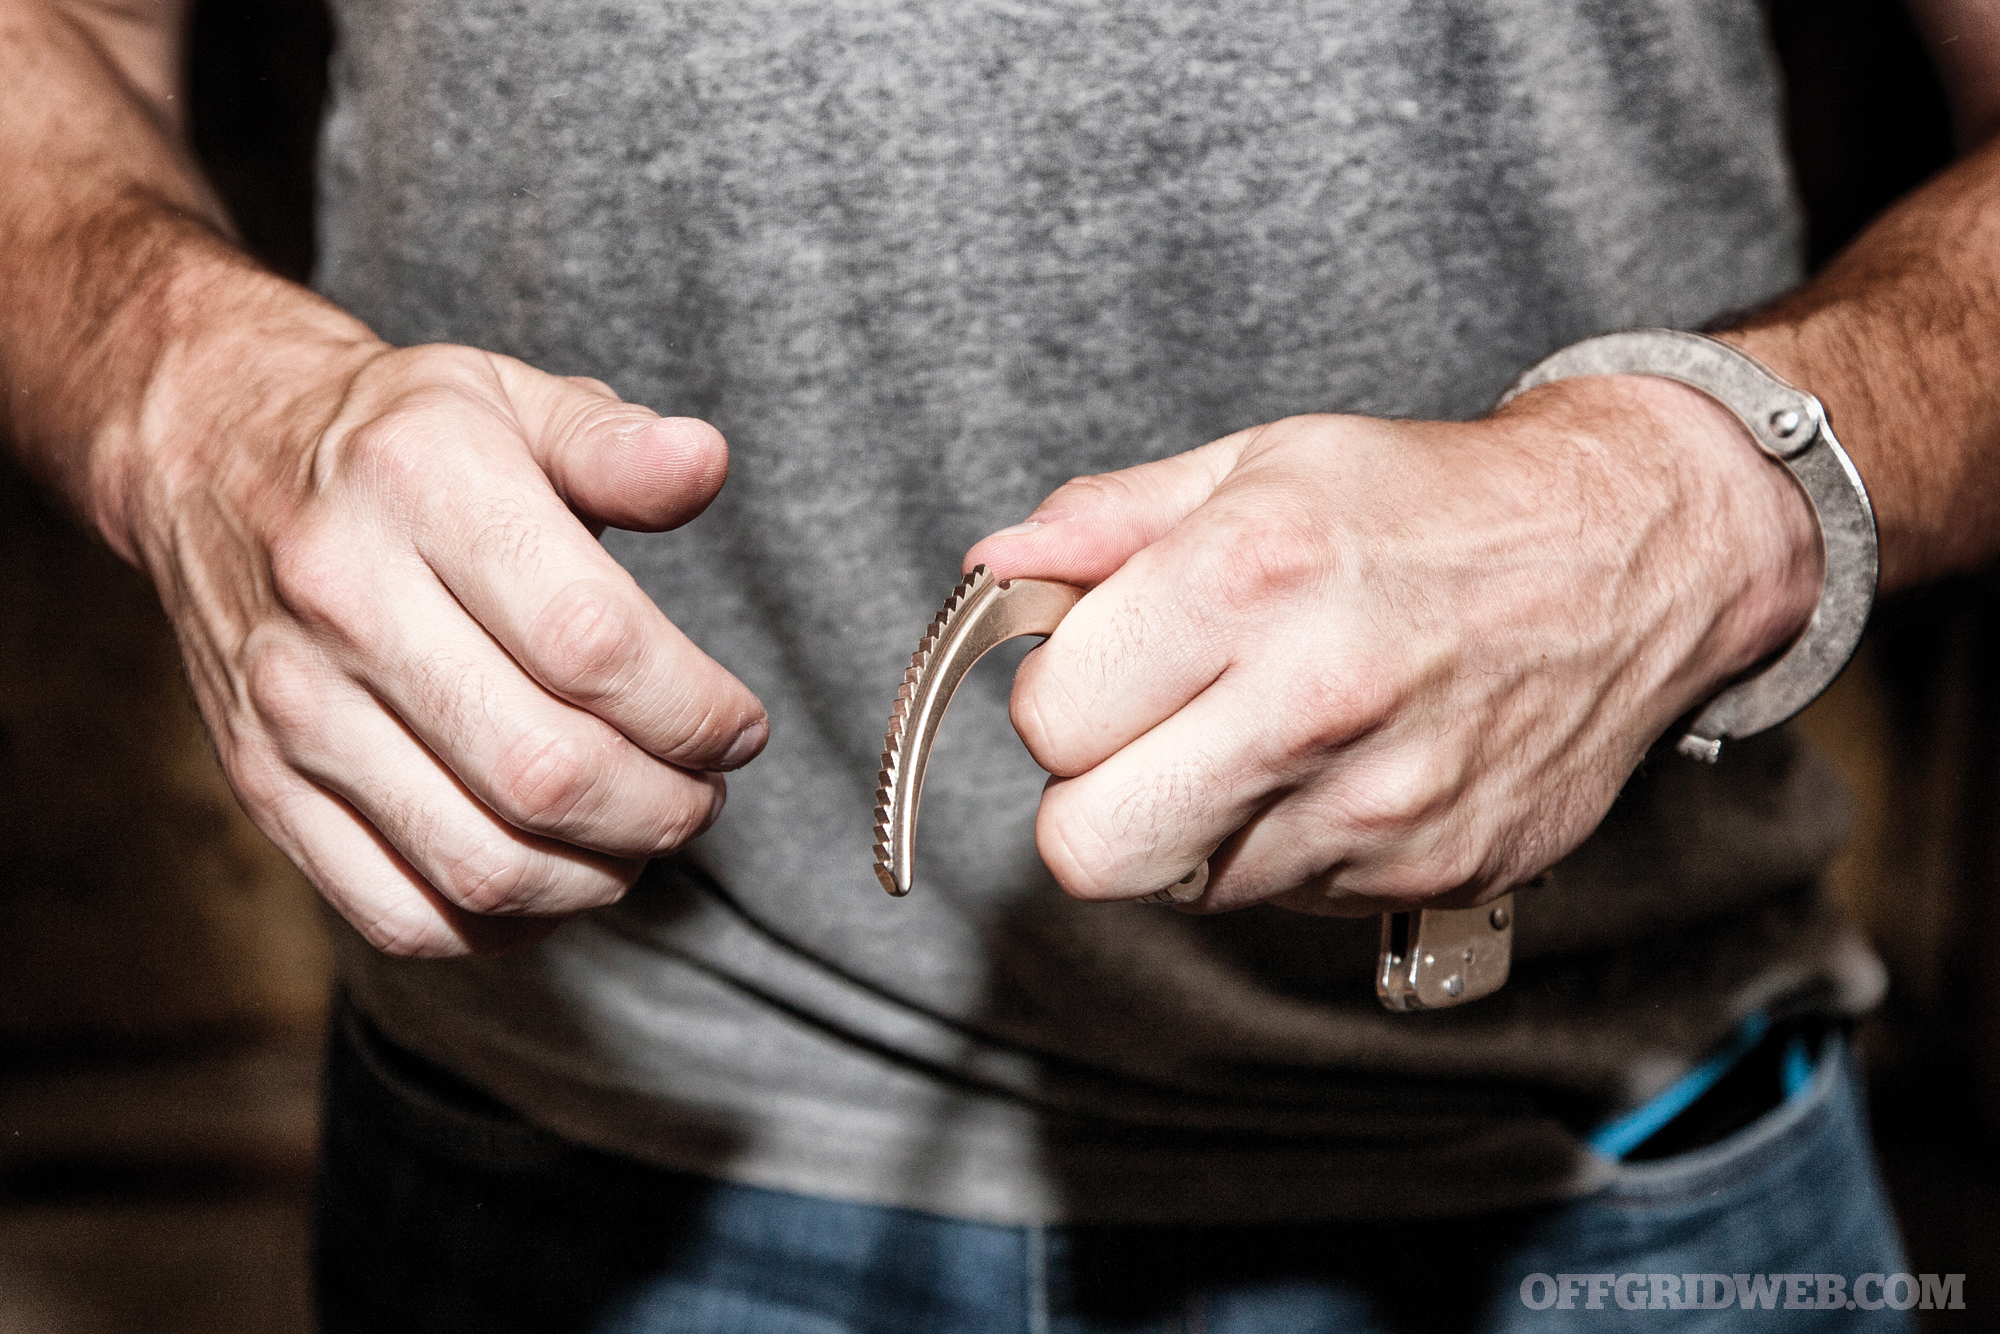
5. The open cuff can now be used as an improvised impact weapon.
“The Prison Wallet”
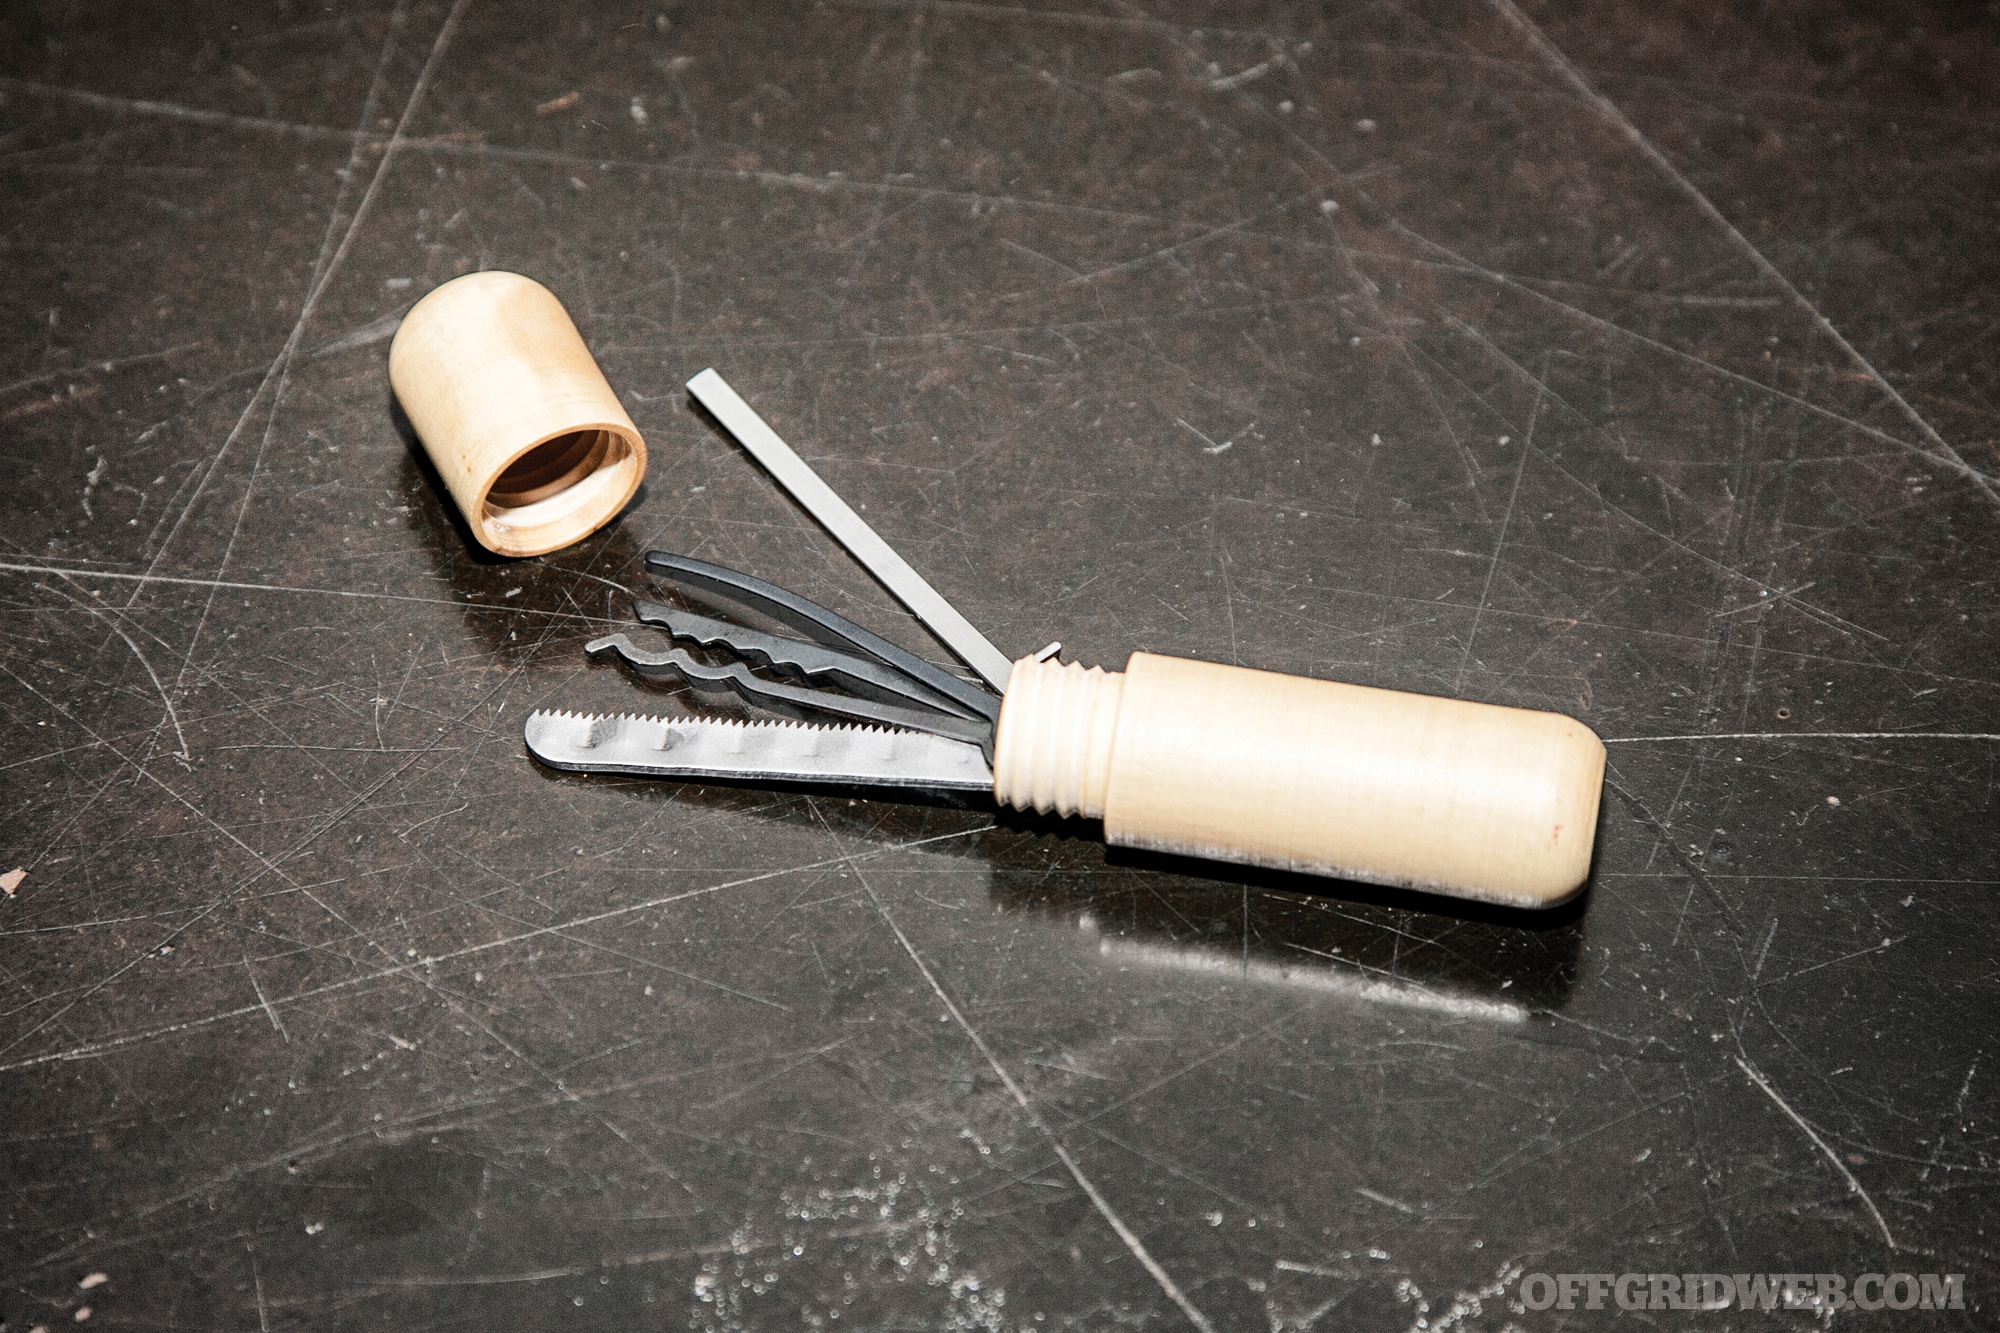
Where do you hide tools when there’s nowhere left to hide? The answer is an unpleasant but necessary option that has developed a reputation among prison inmates. No matter what nickname you use or how many jokes you make about this smelly stash spot, it provides a last-resort means of smuggling essential escape tools past a strip-search. If your life depends on it, you won’t be laughing.
Ed showed us a few examples of caches that are effective for this purpose, including a metal lip balm tube from the 1960s, a WWII-era threaded metal capsule, and a custom tube made out of bamboo. These containers are small enough to be retrieved safely, but large enough to carry keys, shims, lockpicks, or even a blade. Plastic and other fragile materials should be avoided since they may break open in transit, leading to a very awkward trip to the emergency room.
Conclusion
For many of us, the likelihood of being kidnapped or held prisoner is relatively low. But as any prepared individual should know, we must weigh the likelihood of an event with the severity of its consequences. These scenarios are some of the most dangerous you could ever face, since they place you almost entirely at the mercy of captors who are likely to be merciless. But by leveraging these five principles, you’ll be better prepared for captivity and give yourself a fighting chance at becoming the one who got away.
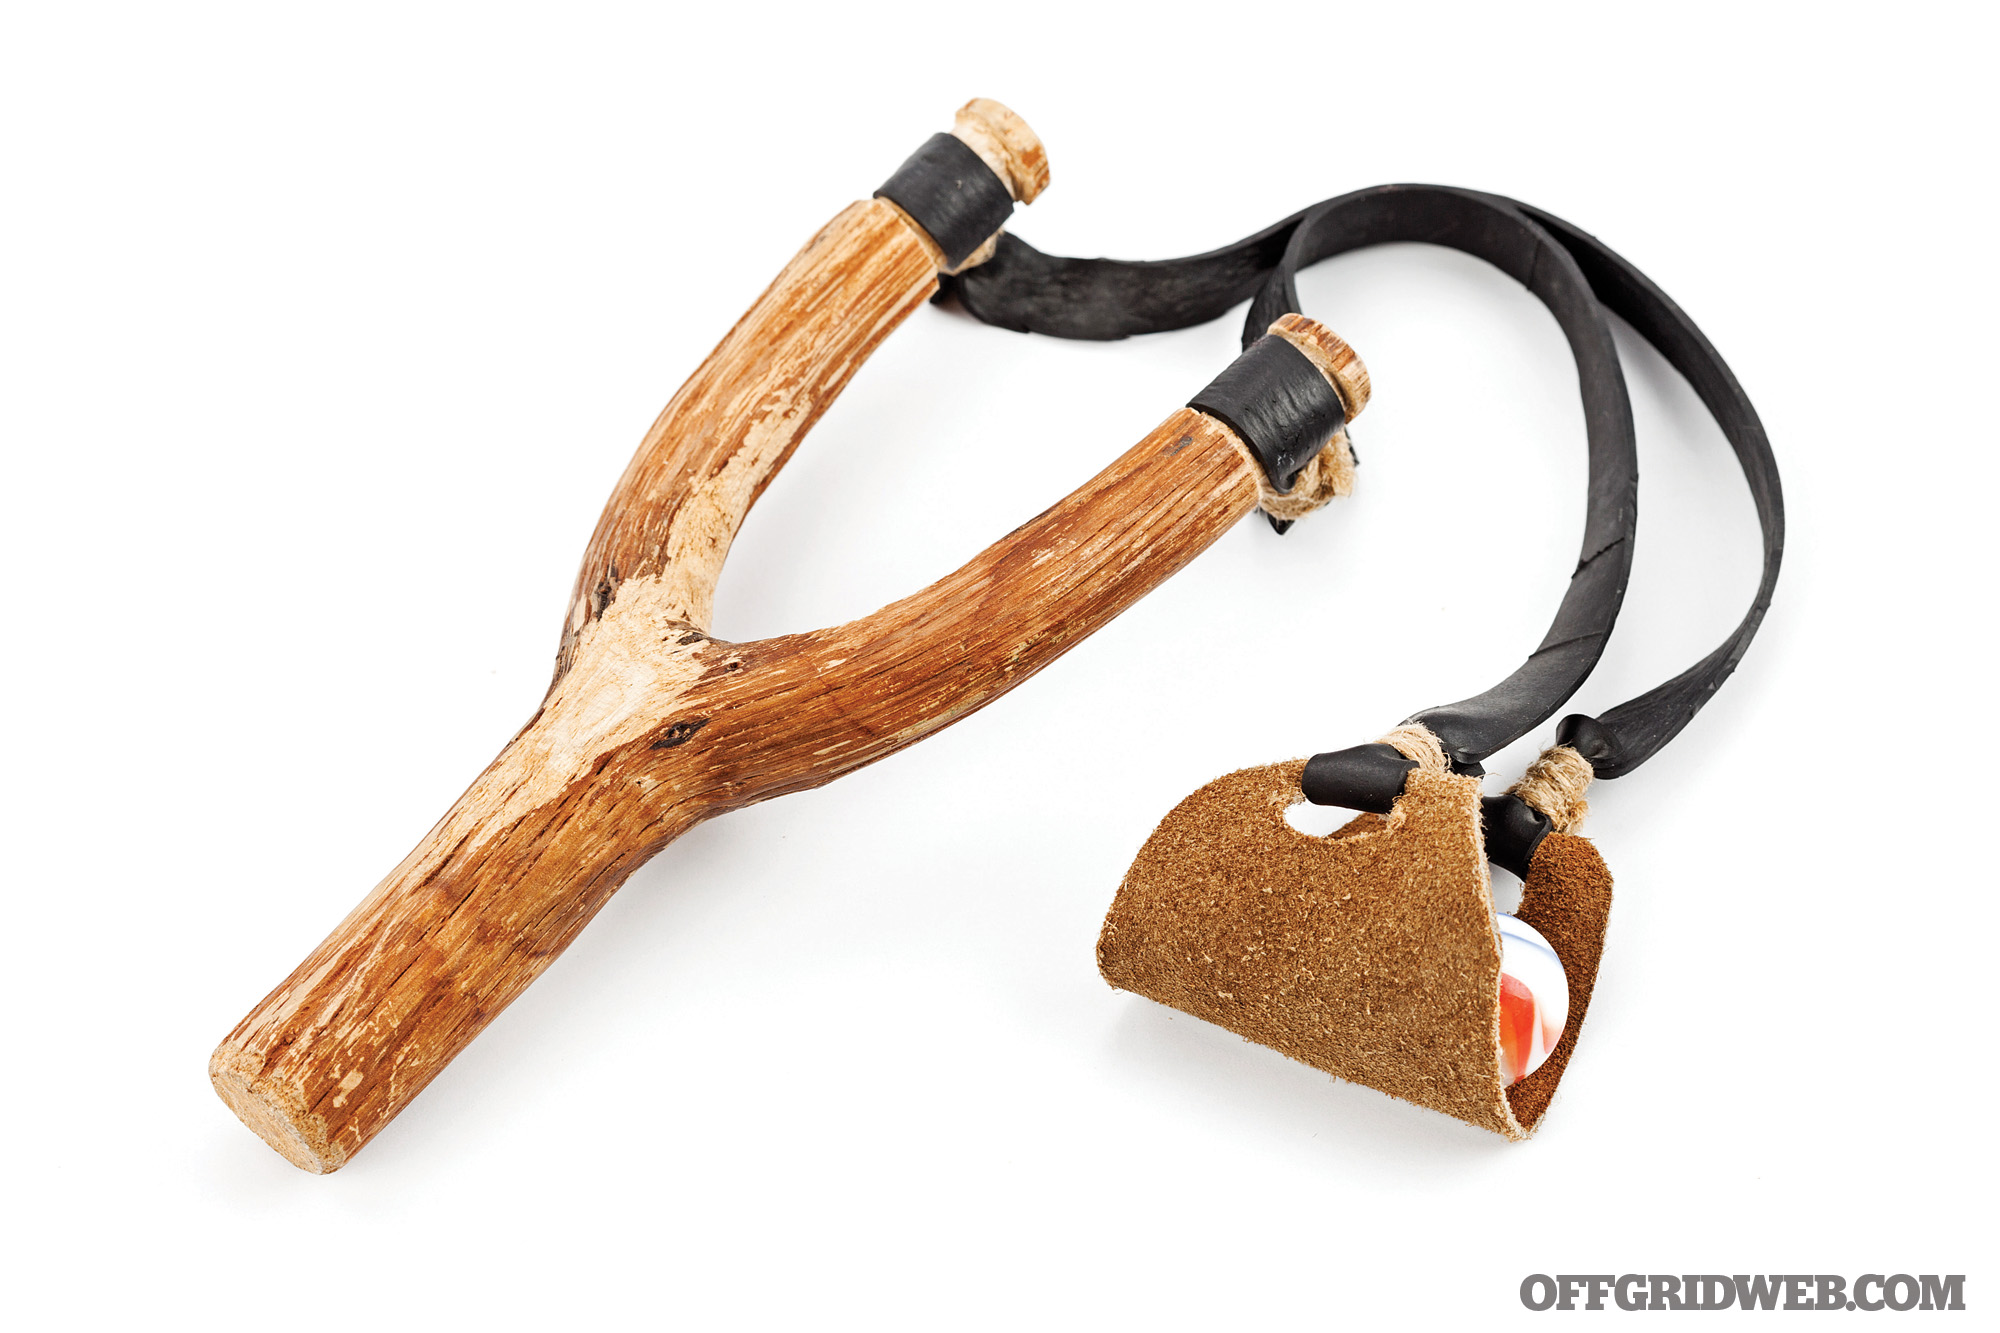
What do you get when you combine one of the greatest industrial advances in history with a healthy dose of Bart Simpson–style evil genius and a forked stick? You get one of the most underrated members of the survivalist arsenal: the humble slingshot.
When Charles Goodyear patented his process for vulcanizing rubber in 1844, he solved the puzzle of making “India rubber” into a stable material that could handle temperature fluctuation without melting or cracking. He also paved the way for the manufacture of high-quality commercial rubber goods like inner tubes. By the late 19th century, enterprising delinquents all over the globe figured out that those inner tubes, cut into strips and lashed to a Y-shaped branch, could be used to launch small projectiles with surprising power and accuracy. The slingshot was born.
Slingshots, also known as catapults or “katty” (United Kingdom), kettie (South Africa), shanghai (Australia), or ging (Australia and New Zealand), remained DIY items until 1918, when the first commercial slingshot — the cast-iron “Zip-Zip” — was manufactured. It wasn’t until after World War II, though, that the concept of high-performance commercial slingshots really became popular. The Wham-O company, founded in 1948, led the way with their namesake Wham-O slingshot, which also came with a rest to shoot arrows. In 1954, the Wrist-Rocket company introduced the wrist-braced slingshot, which stabilizes the weapon and reduces the torque of the rubber bands on the shooter’s wrist, and pioneered the use of surgical rubber tubing instead of flat rubber bands.
Above: Slingshots can be a viable addition to a prepper’s arsenal, but only if you invest the time and practice to become skilled in their use.
Although the Wrist-Rocket set the standard in slingshot performance for many years, the innovation didn’t stop there. Die-hard shooters with far too much free time on their hands were obsessed with pushing the envelope of power, performance, and accuracy. As they continued to tinker with slingshot design, materials and manufacturing methods also evolved — and more and more companies got involved in the slingshot market. Today, there are literally dozens of factory and custom-made slingshots available, many of which are lavishly pimped, including everything from on-board ammo storage to inertial stabilizers to Picatinny rails and even built-in laser sights. While the actual performance advantages of these features are highly debatable, they definitely show that the slingshot shooters’ market is hungry for variety and innovation.
Above: Most slingshots don’t have sights, so accuracy is dependent on “gap” shooting. Pick an index on the slingshot (usually the tip of a fork tine) and use it as an aiming index. Shoot a group to determine the difference between point of aim and point of impact, and then adjust your aiming point accordingly.
While this roundup only scratches the surface of what’s out there on the market, it provides a great sampling of the basic types of slingshots that are commercially available. The pros and cons of each of the specific models we considered also give you an idea of what to look for, and what to look out for, when choosing a slingshot for your bug-out bag.
Above: With a little practice, it’s not difficult to hit soda cans from 21 feet. The cans are fun to shoot and about the same size as slingshot-worthy small game.
Performance Quantified
No matter which slingshot trips your personal trigger, you can pretty much expect about the same performance. Let’s face it, there’s only so much a couple of rubber bands will do.
To quantify that performance, we shot all the “catties” we had available through a chronograph using the same ammo — solid steel .38-caliber ball bearings. Each of these projectiles tipped the scales at 4 grams, or about 62 grains. With the exception of one slingshot that did not allow a full draw, we used classic slingshot technique, drawing to an anchor point on our cheek for a draw length of about 33 inches.
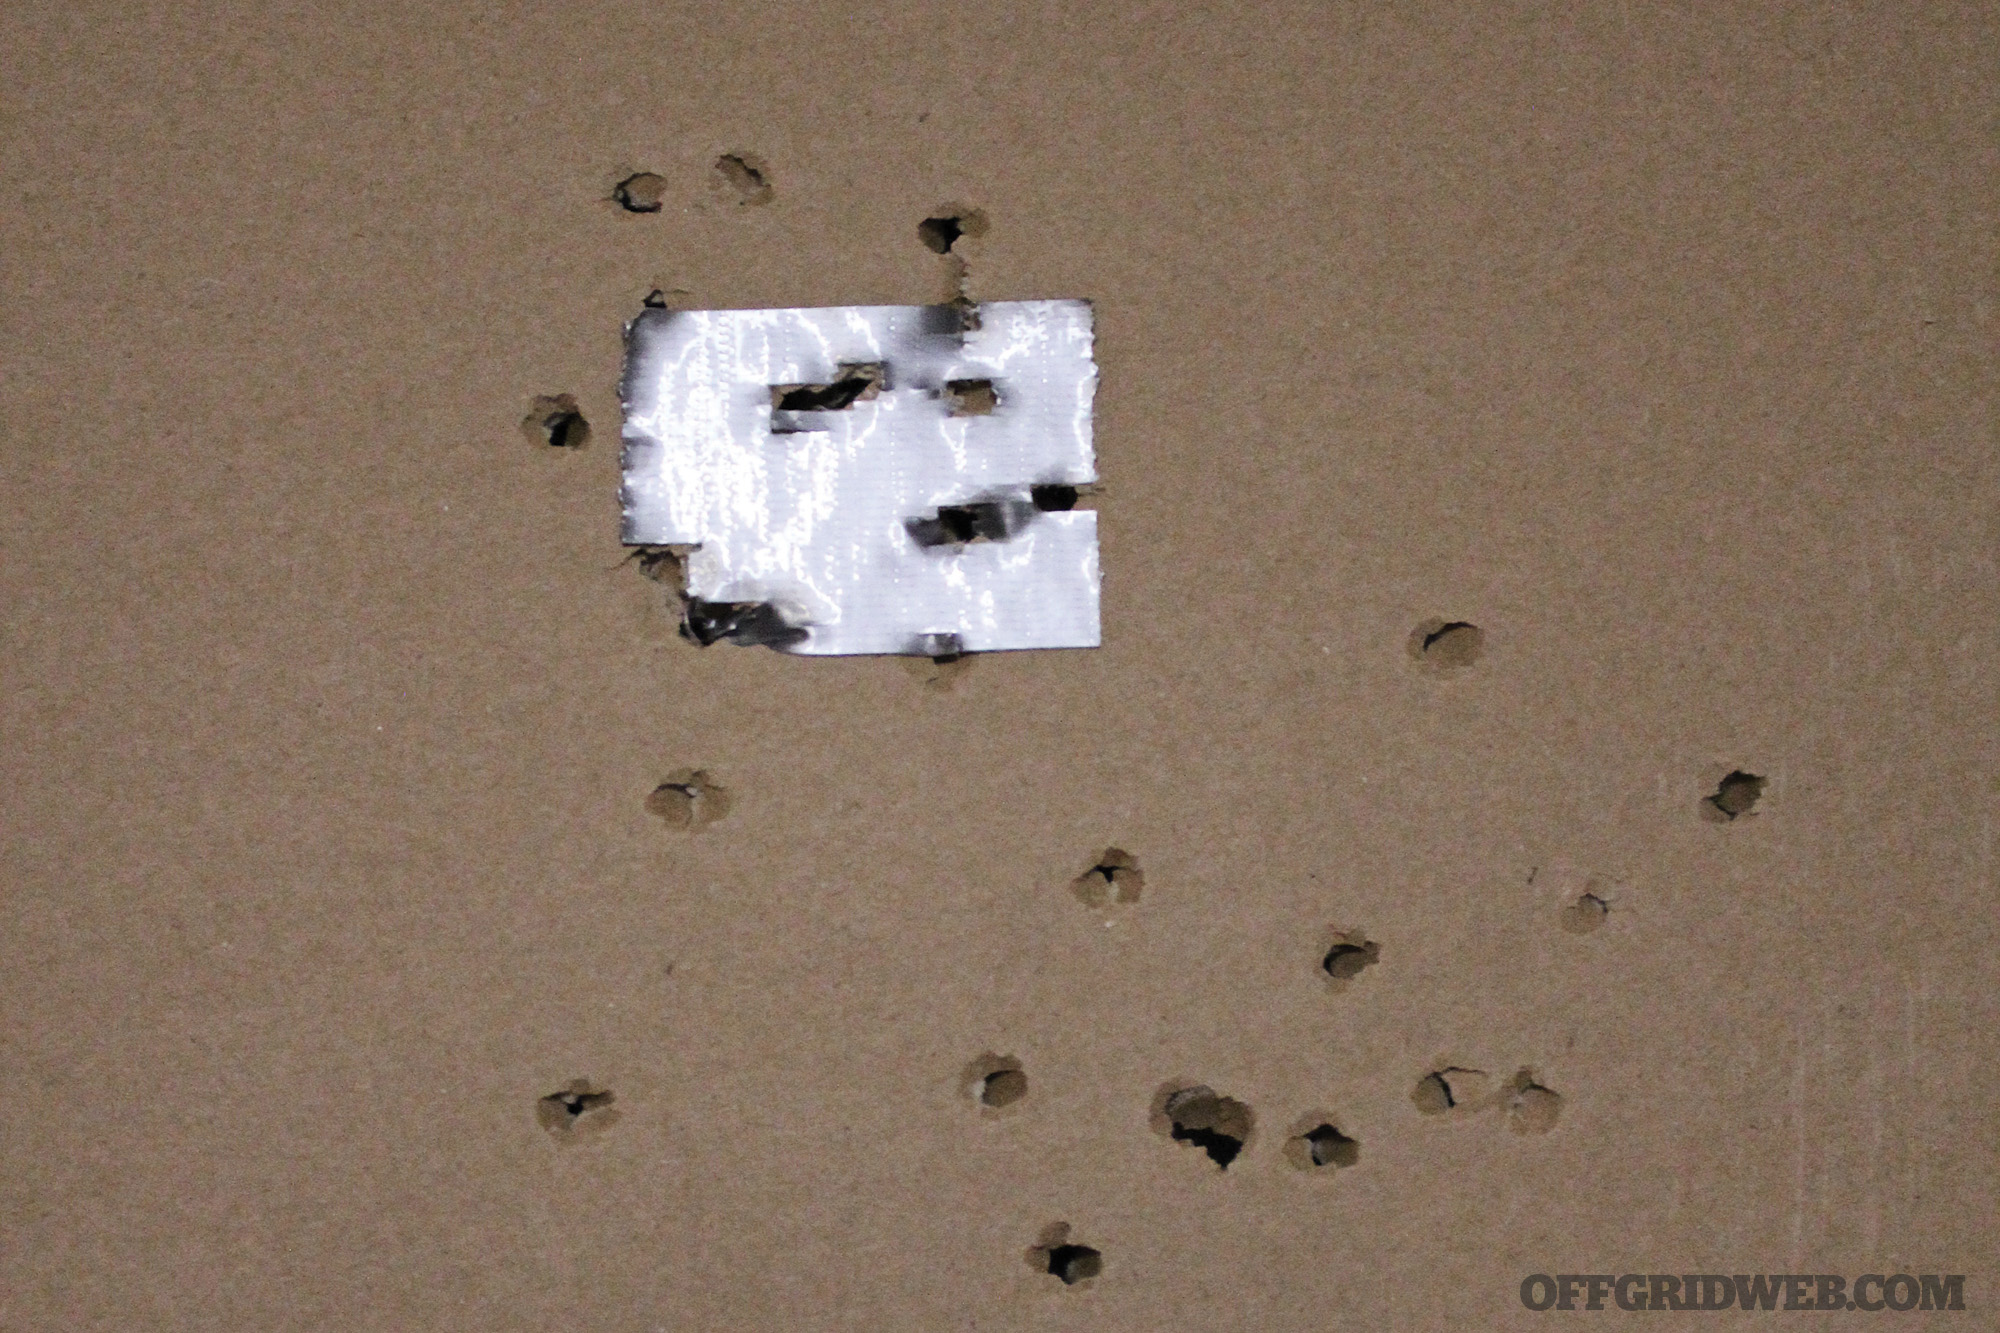
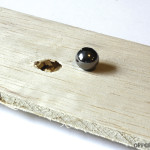
Above: Compared to firearms or airguns, slingshots don’t have much muzzle energy. However, they can still leave a mark. This is the front of a piece of 1⁄4-inch plywood hit by a 3⁄8-inch steel ball bearing. The back tells even more of the story.
Shooting 10-shot groups to get a representative average for each slingshot, velocities ranged from a low of 120.2 feet per second (fps) to a high of 176.7 fps. That’s an overall average of 153.0 fps. Plugging those numbers into a ballistic calculator revealed that the “muzzle energy” for these shots was 2 to 4 foot-pounds (ft-lb), or an average of 3 ft-lb. To put that into perspective, a Wal-Mart .177 pellet gun spitting a 7.6-grain pellet at 550 fps yields a significantly greater, yet still woefully anemic, 5.1 ft-lb of energy.
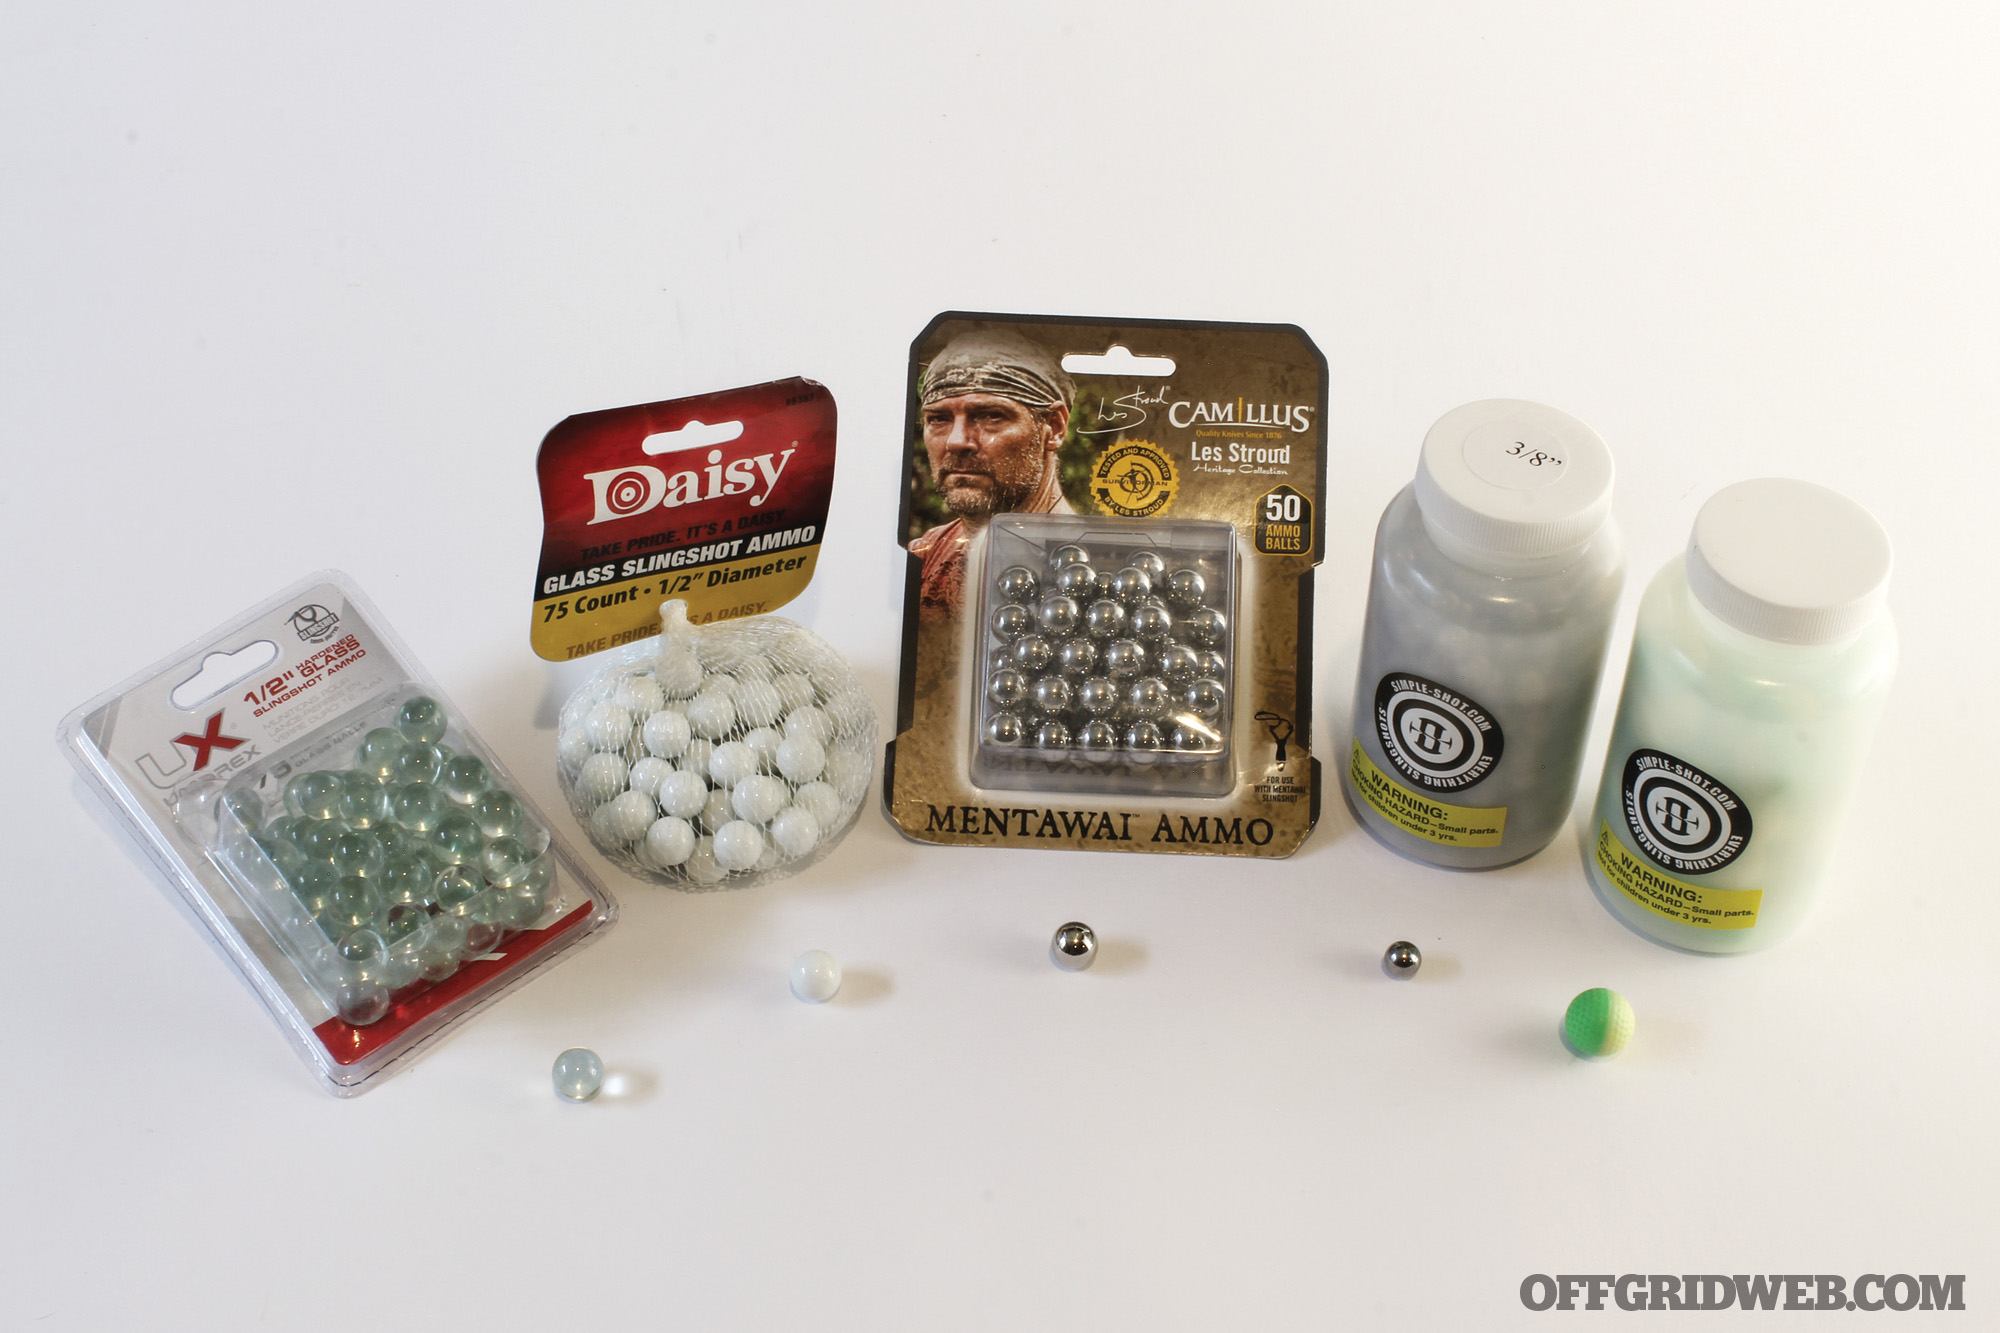
Above: Modern slingshot ammo includes glass projectiles, steel ball bearings of various sizes and weights, and even chalk-filled marking rounds.
Since the slingshot ammo collected for this test included everything from lightweight chalk-filled marker rounds and glass projectiles to heavy .50-cal ball bearings, we figured it might be worthwhile to test them and see if either a light-and-fast or slow-and-heavy combination could squeeze any more ballistic performance out of a slingshot. For that test, we chose the “Pocket Hammer” slingshot, which uses a rubber condom-like pouch instead of bands, has a much shorter draw length, but consistently shot about 30-fps faster than the competition with the .38-caliber ammo.
The “Pocket Hammer” launched lightweight 31-grain glass projectiles and its own branded 5⁄16-inch steel ammo at nearly 220 fps and 108-grain ½-inch ball bearings at about 140 fps. However, doing the math was still underwhelming, translating to 3 and 5 ft-lb of energy, respectively.
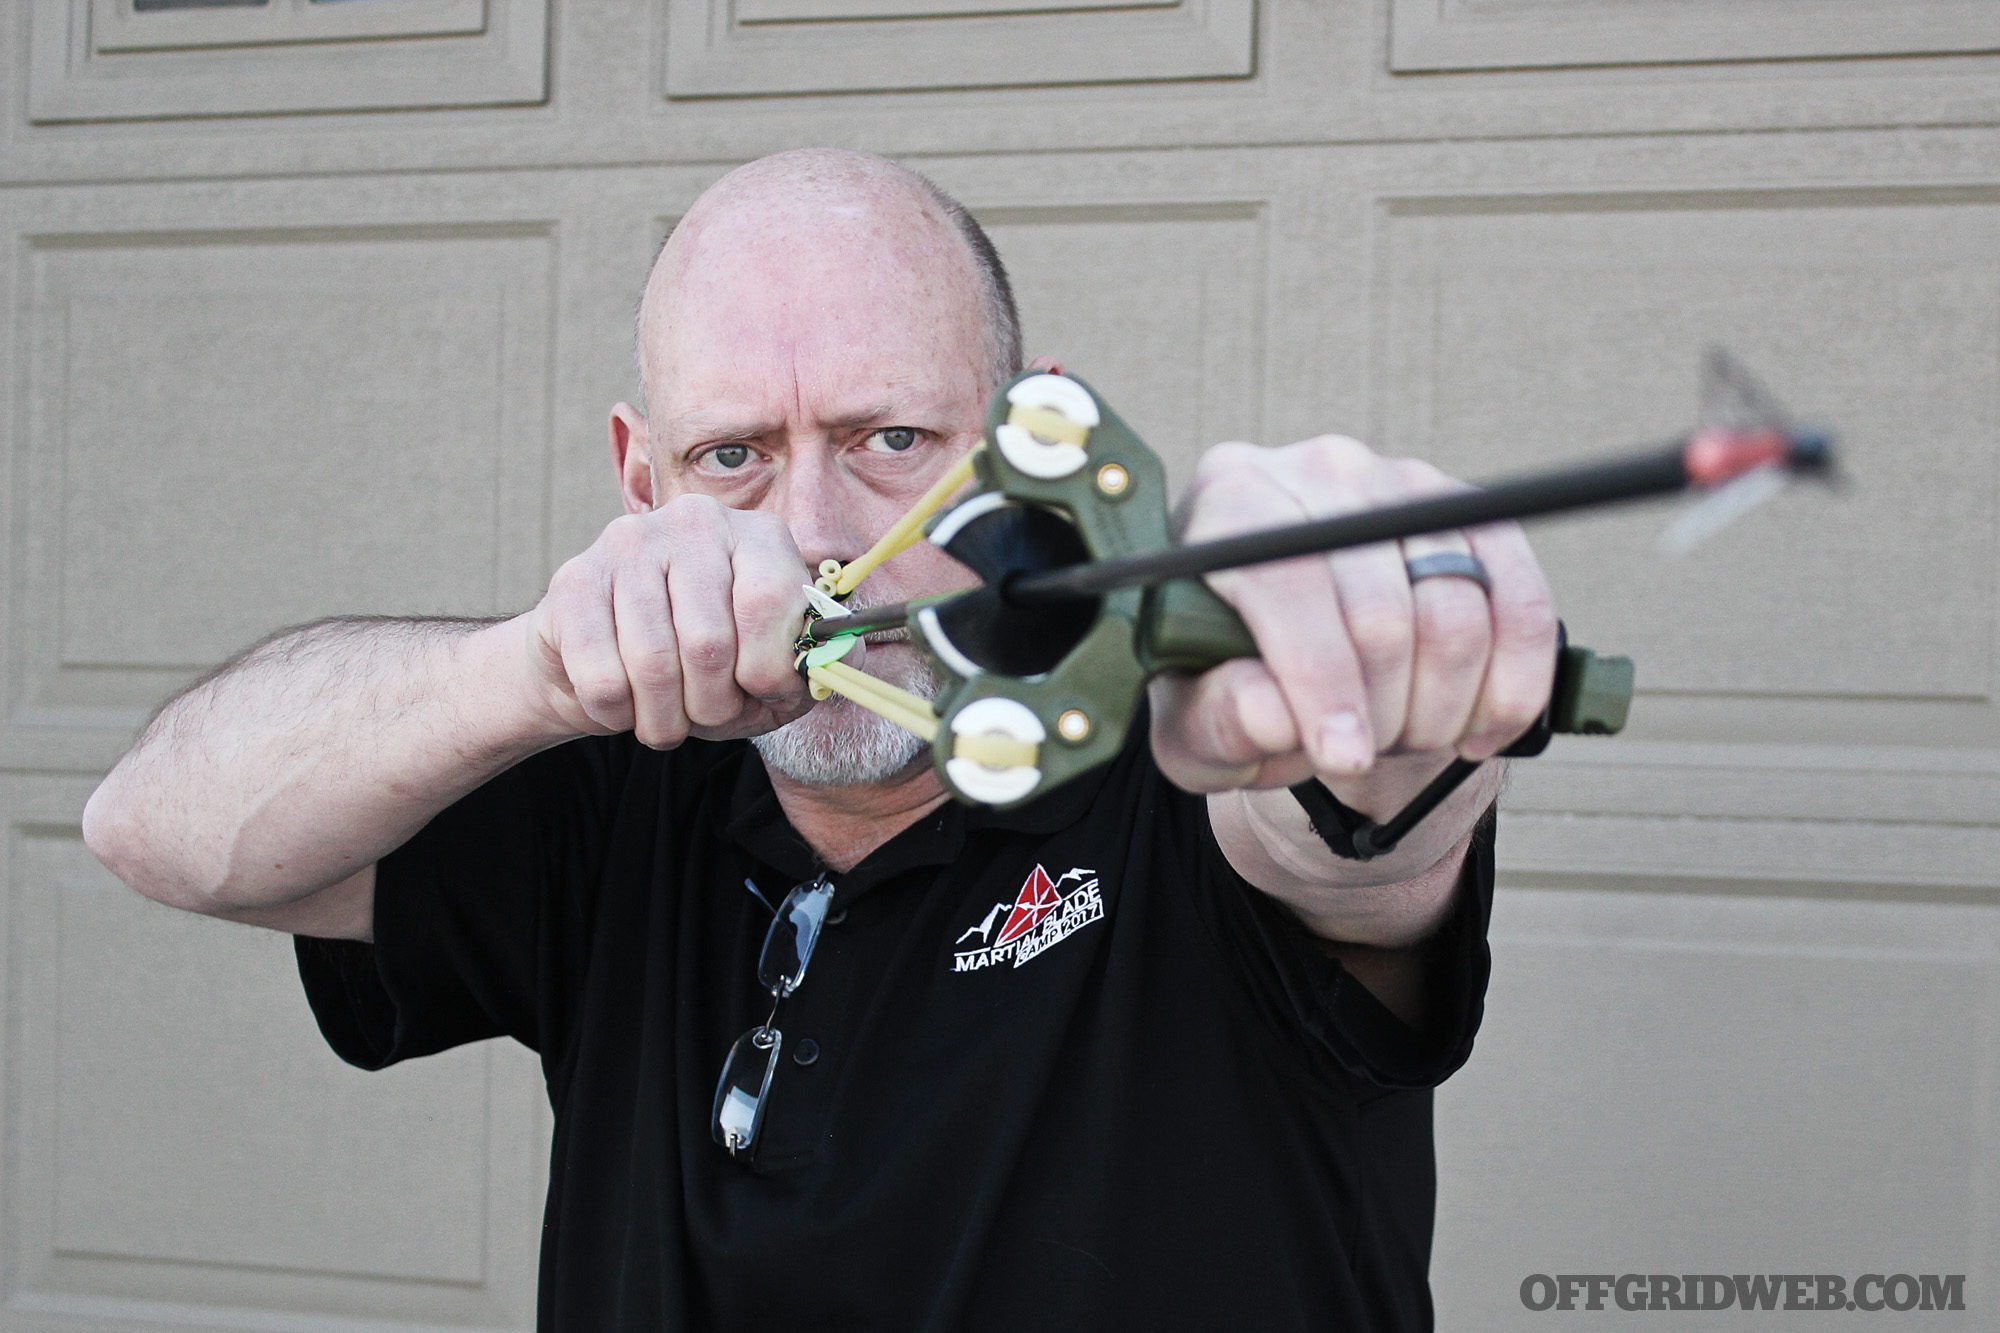
Above: With a standard cheek-index style of shooting, most slingshots produce velocities of 150-200 fps with typical ammo choices.
Instead of anchoring their release hand to their cheek or jaw, some slingshot shooters prefer a much longer “Albatross” draw with the arms extended in opposite directions. This requires more strength and skill, but can also consistently generate velocities approaching 250 fps and muzzle energies of 6 ft-lb with steel ball bearings.
The Bottom Line
Several careers ago, I worked for the U.S. government in Vietnam and Laos. Although many of the areas we worked in had thriving rat populations, we weren’t allowed to have firearms or even airguns purchased outside the country. Before we discovered some decent Czech air rifles in the local markets, blowguns and slingshots were our pest-control tools of choice. After lots of practice, we got good enough to consistently hit rats with slingshots. When we did, we either killed them outright or stunned them badly enough that we could finish them off easily. When we missed, however, the ricocheting ball bearings or shattering glass marbles made life exciting and occasionally painful.
From a survivalist’s perspective, the slingshot is a handy, economical weapon that can easily tuck into a bug-out bag. Despite its limited power, it’s certainly capable of killing small game. If you invest in a model that launches arrows like a bow, you can go after even bigger critters. However, if you actually plan to put food on the table with any kind of slingshot, you should probably start practicing now.
SimpleShot “The Hammer” Slingshot/Slingbow Kit
Type Modular Wrist-Braced Slingshot or Arrow Launcher
This high-quality kit includes a molded grip (with an integral Picatinny rail), a wrist brace, two modular yoke attachments (one conventional slingshot and one for shooting arrow), and dedicated band assemblies for each yoke. The slingshot used flat bands, while the arrow yoke used a special assembly of surgical tubing and a nocking string for the arrow. Since this was the only arrow launcher in the mix, testing focused primarily on the slingshot mode.
Pros:
Easiest to draw of all those tested
Can be shot with or without the wrist brace
Soft leather pouch was easy to load
SimpleShot’s website is a treasure trove of slingshot information.
Cons:
Despite the brand name, assembly isn’t intuitive (consult the website before the balloon goes up).
Wrist brace is removable but doesn’t fold for transport
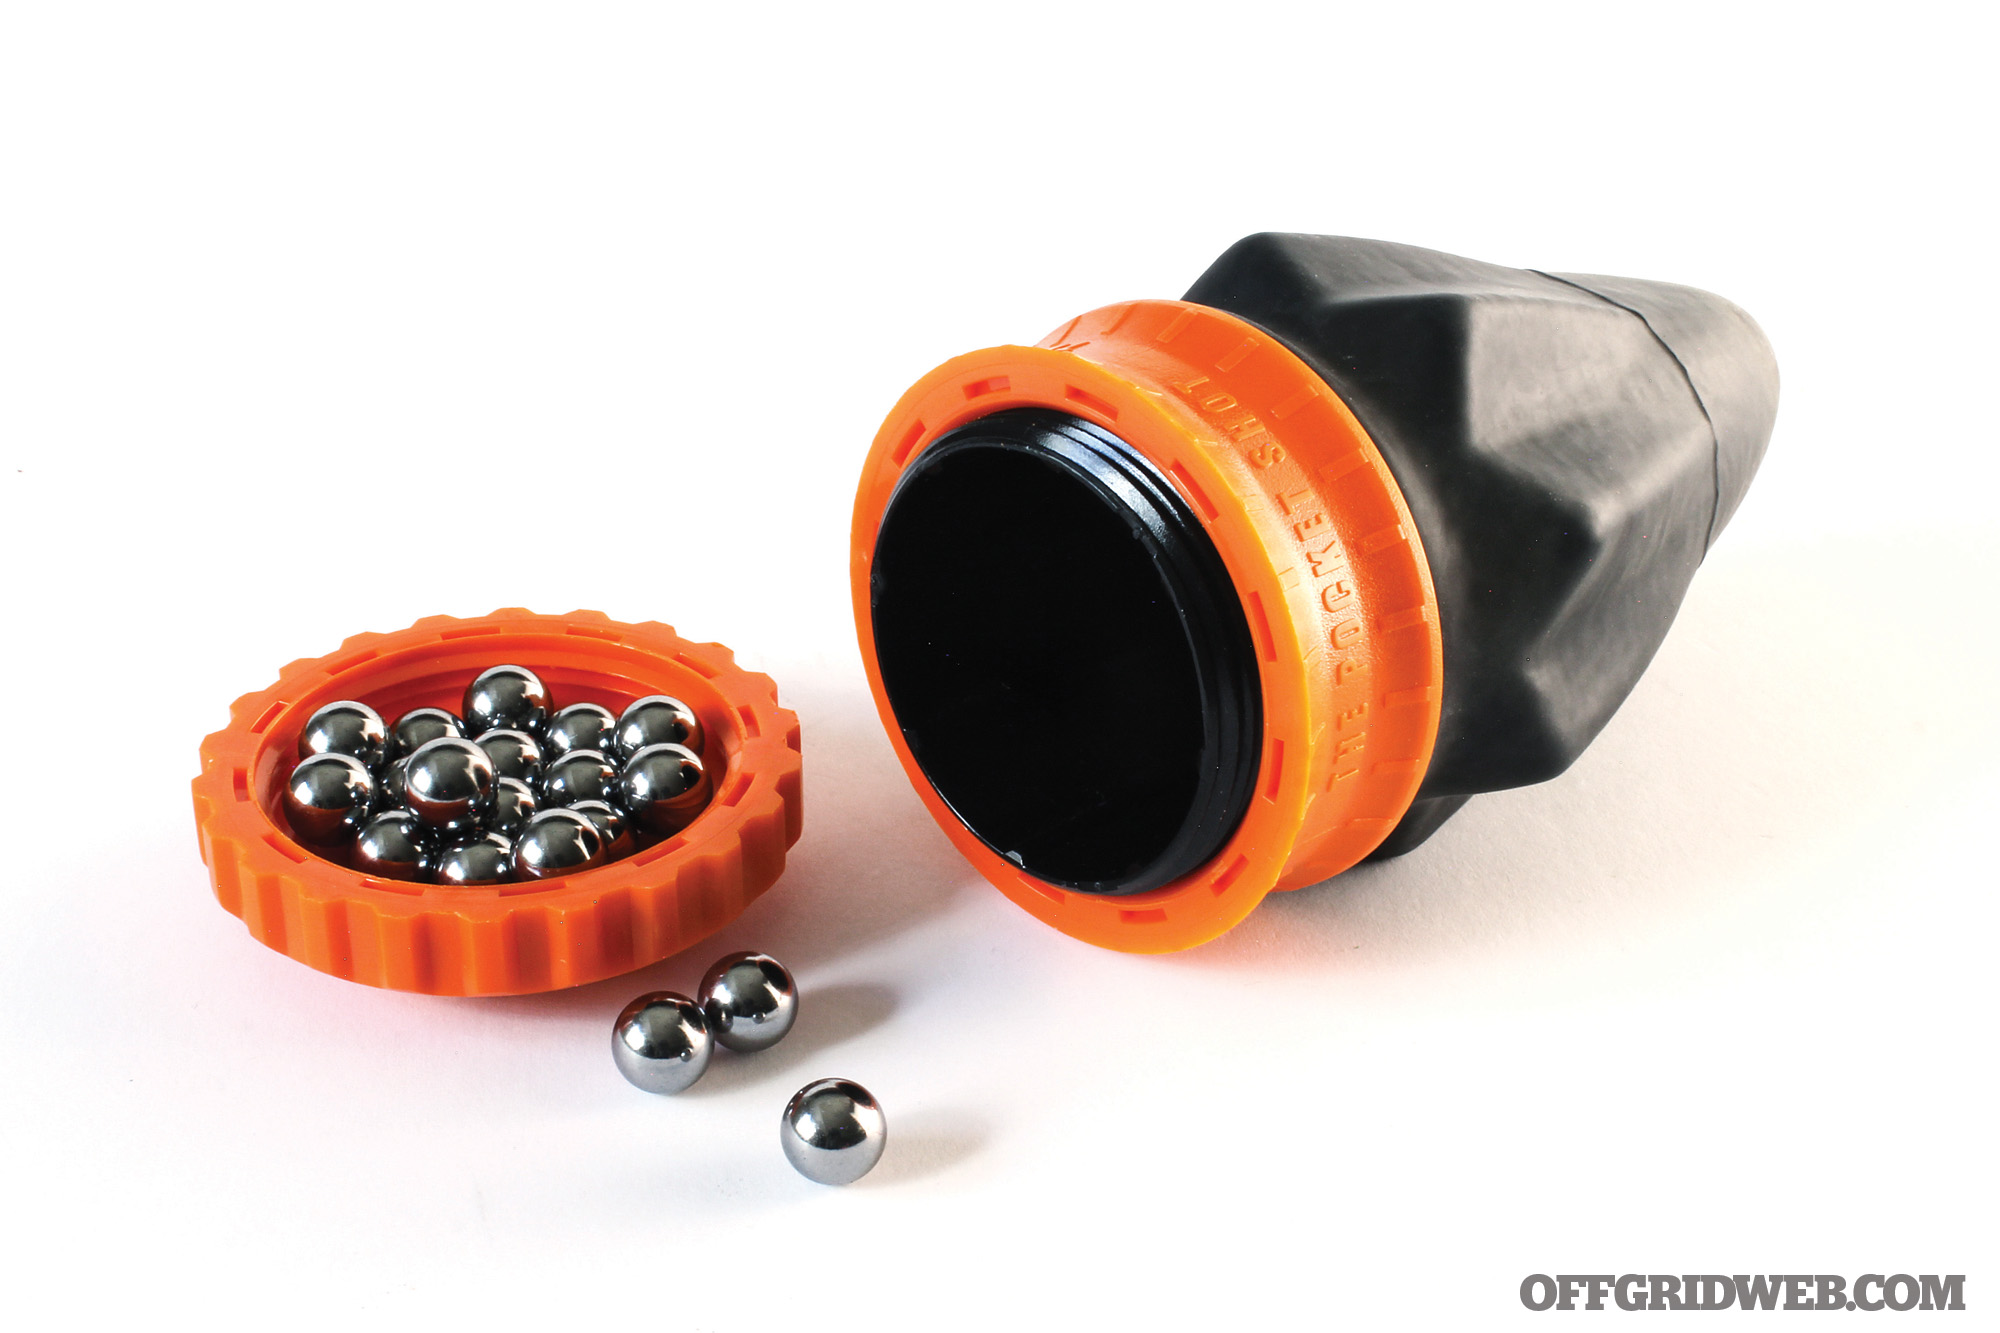
This brilliantly simple slingshot consists of a heavy rubber pouch attached to a two-piece threaded polycarbonate ring. Just remove the ring’s screw-on cap (which doubles as a wrench for changing pouches), drop a projectile in the pouch, hold the ring between your thumb and index finger, pull back, and let fly. Extremely compact and lightweight, it’s an easy addition to any bug-out bag.
Pros:
Surprisingly powerful
Pouch design makes it impossible to drop or misalign a projectile.
Compact, lightweight, and easy to pack
Screw-on cap allows ammo to be stored in the pouch
Lots of aftermarket accessories, including high-power pouches and arrow launchers, also available
Cons:
Short draw length
Ring-style grip requires good hand strength.
Unconventional shooting position
Poor shooting form can result in some impressively painful palm hits.
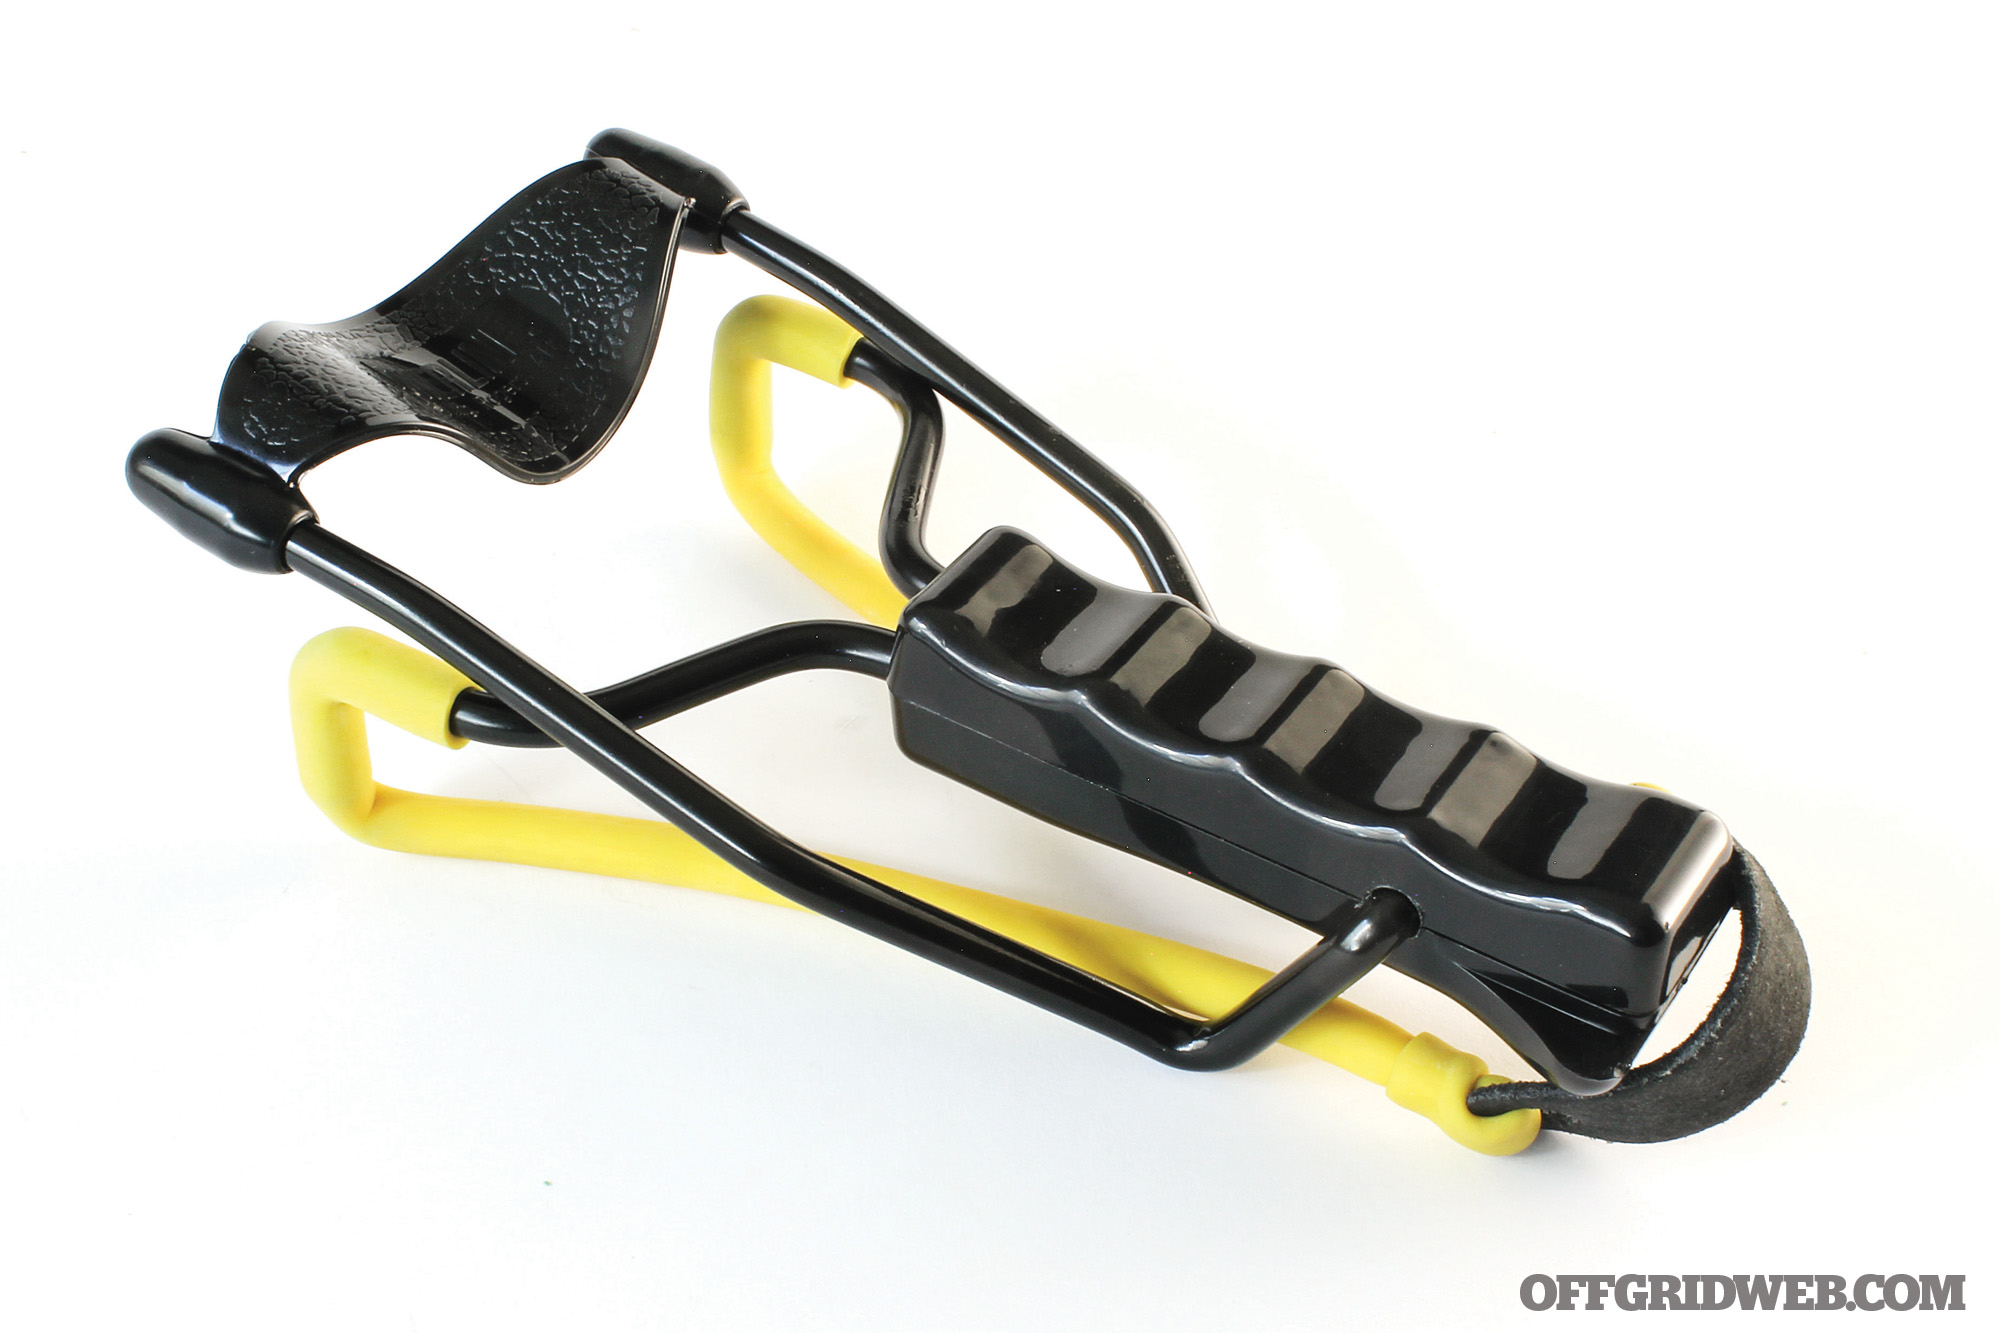
Pocket Shot with Pocket Hammer
Type Pouch-Style Slingshot with Wrist-Braced Pistol Grip
The Pocket Hammer is an injection-molded pistol-grip platform designed for use with the Pocket Shot. It includes a folding wrist brace and provides a much more stable shooting platform. Its integral Picatinny rail accepts an optional fishing reel that, along with other aftermarket accessories, allows it to be used for bowfishing.
Pros:
Much more stable and easier to aim than the ring-style Pocket Shot
Wrist brace allows a longer pull and more power
Folding design is still reasonably compact and packable
Lots of optional accessories available
Cons:
Still has a short draw length
Still requires an unconventional shooting position
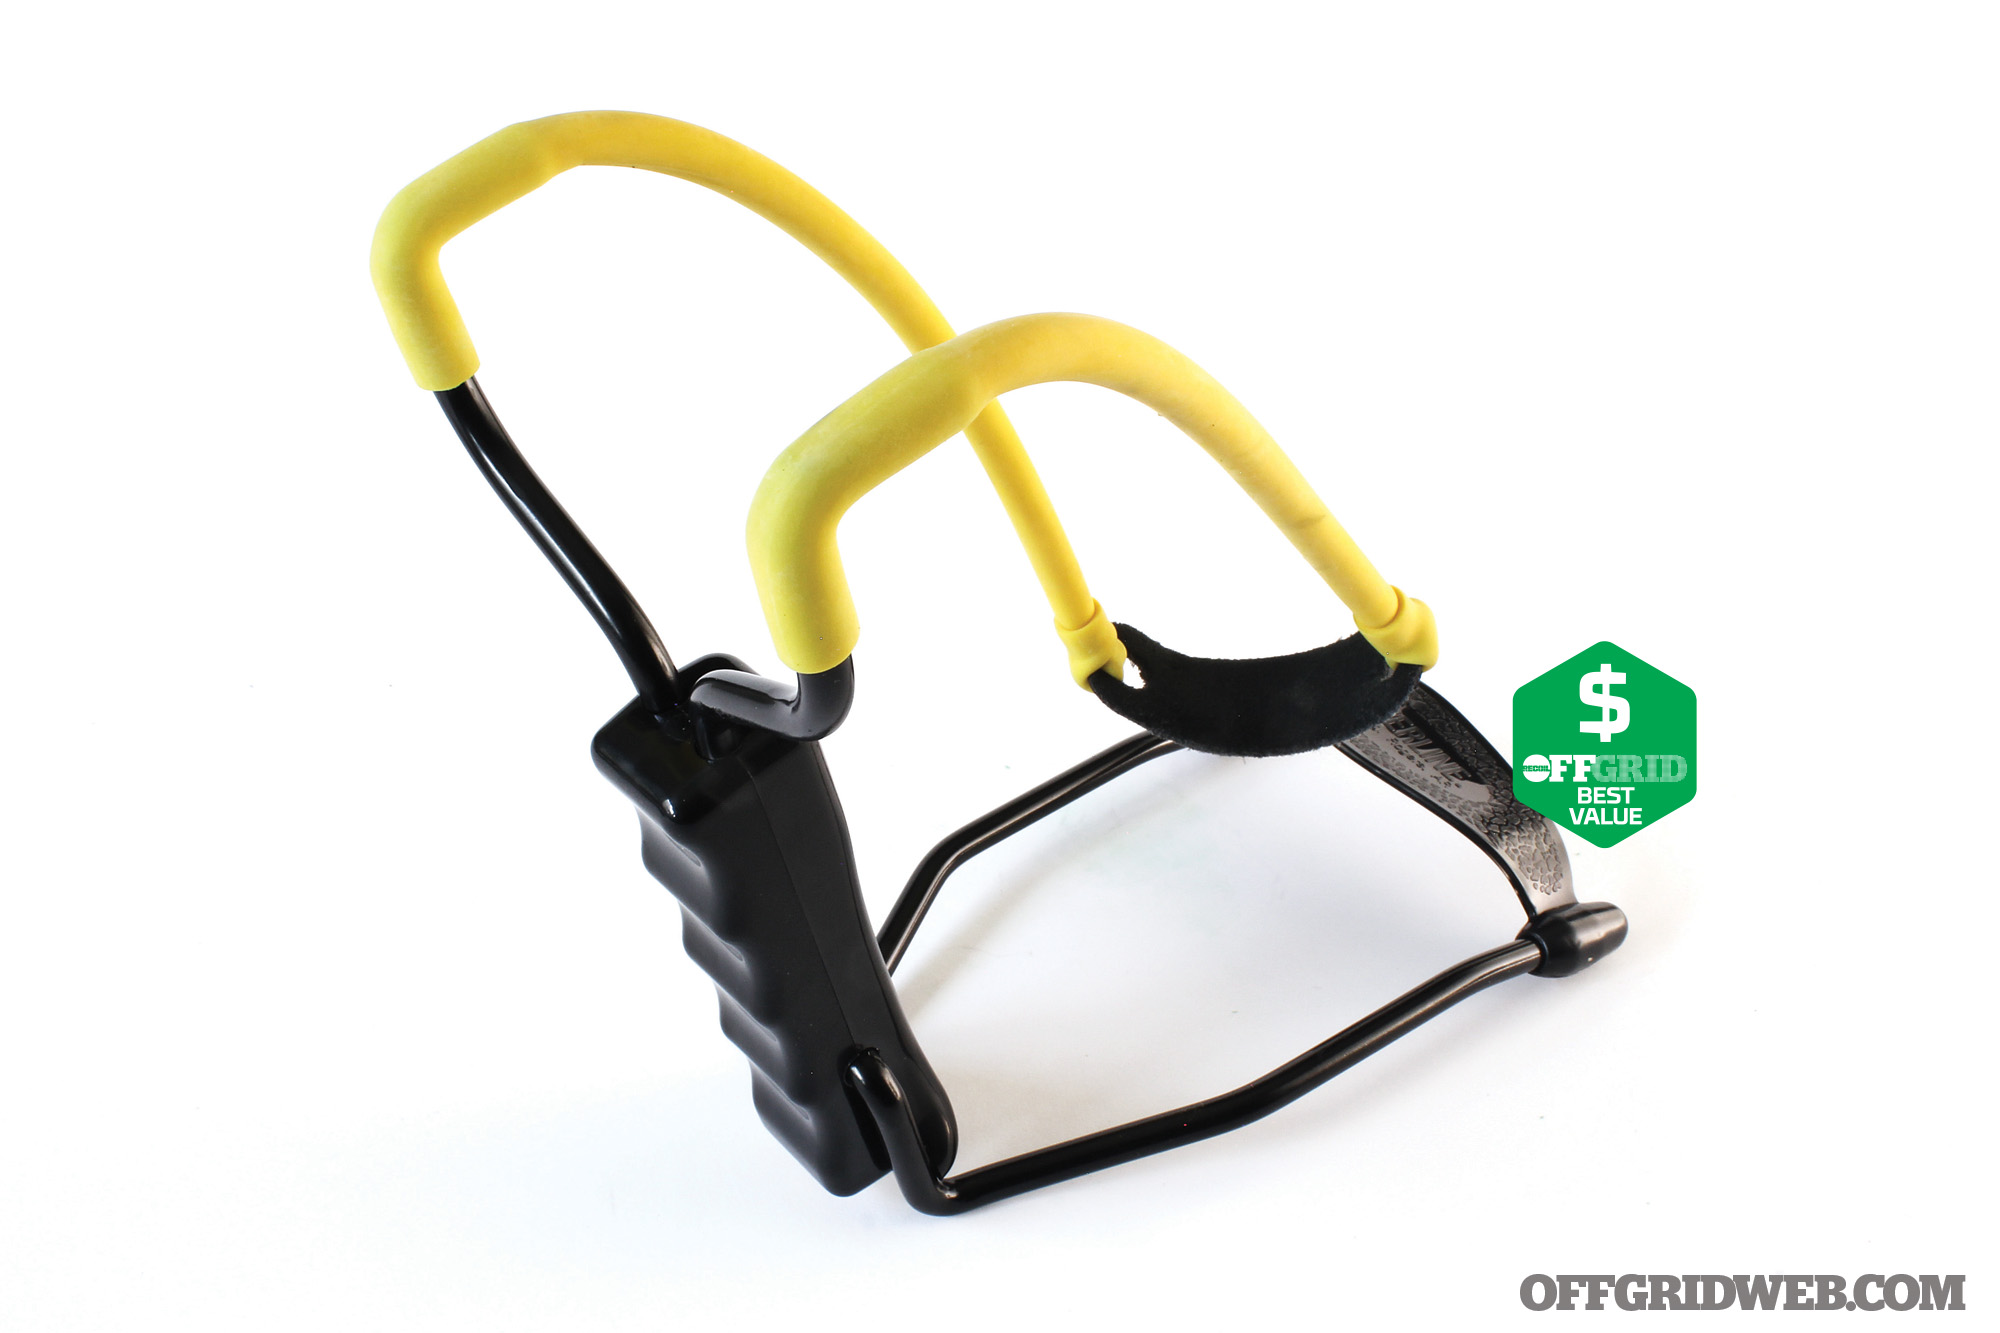
Daisy PowerLine B52 Slingshot Model 8152
Type Tubular Band Slingshot with Folding Wrist Brace
This slingshot epitomizes the iconic “wrist-rocket” style of wrist-braced, tubular band slingshots. Simple, sturdy, and straightforward, it’s also extremely affordable. Its folding wrist brace design also allows it to fit in a pack. Its leather pouch was a bit stiff but would easily break in with use.
Pros:
Classic, no-frills “wrist rocket” design
Folding wrist brace makes it packable
Very affordably priced
Cons:
Stiff leather pouch makes indexing projectiles difficult at first
Like all slingshots, shooting accurately requires considerable practice.
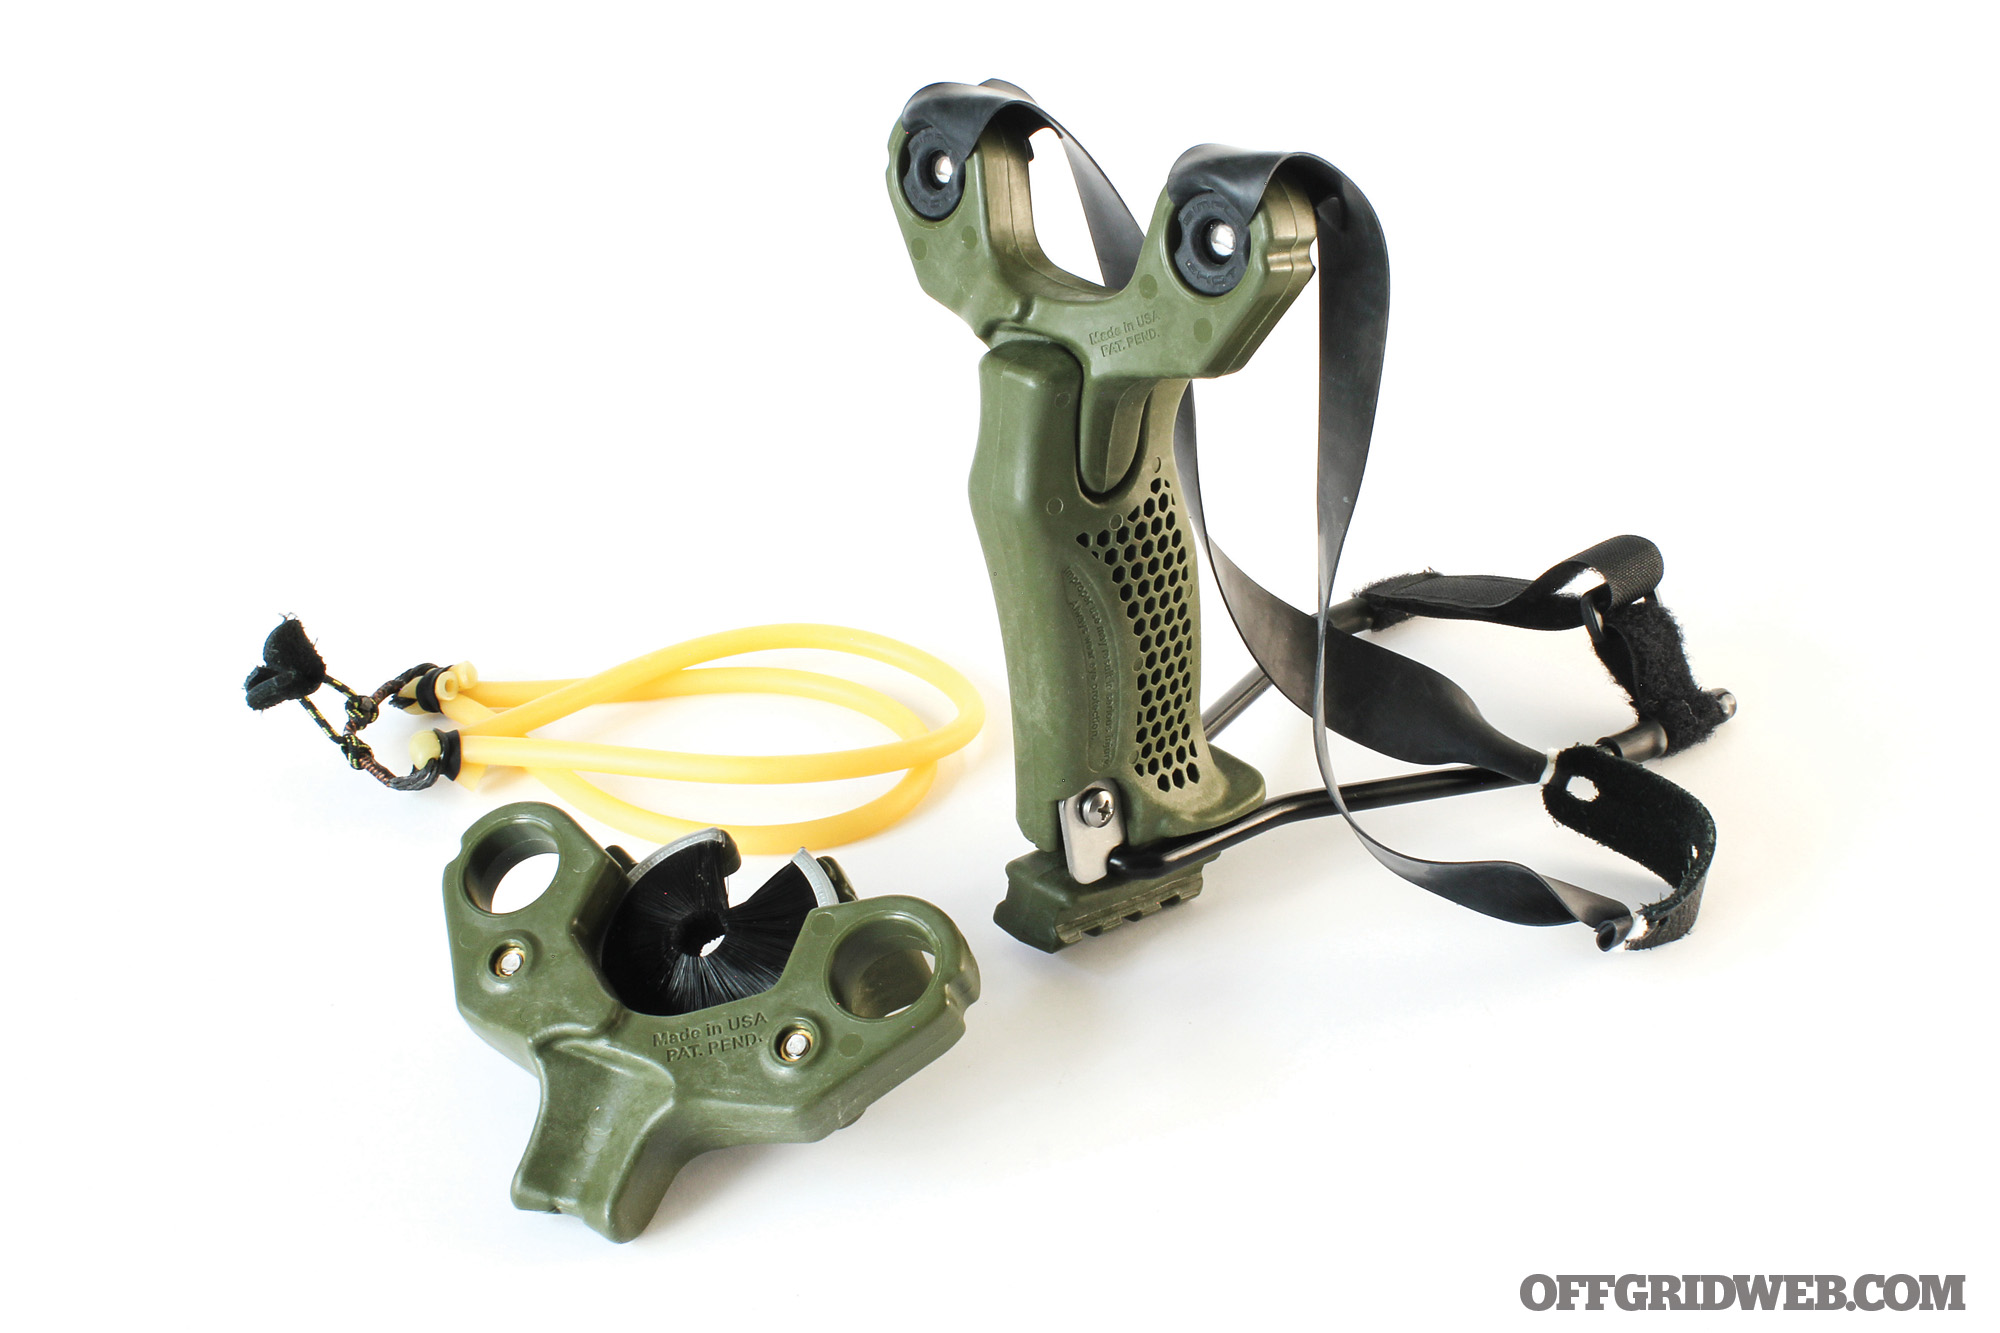
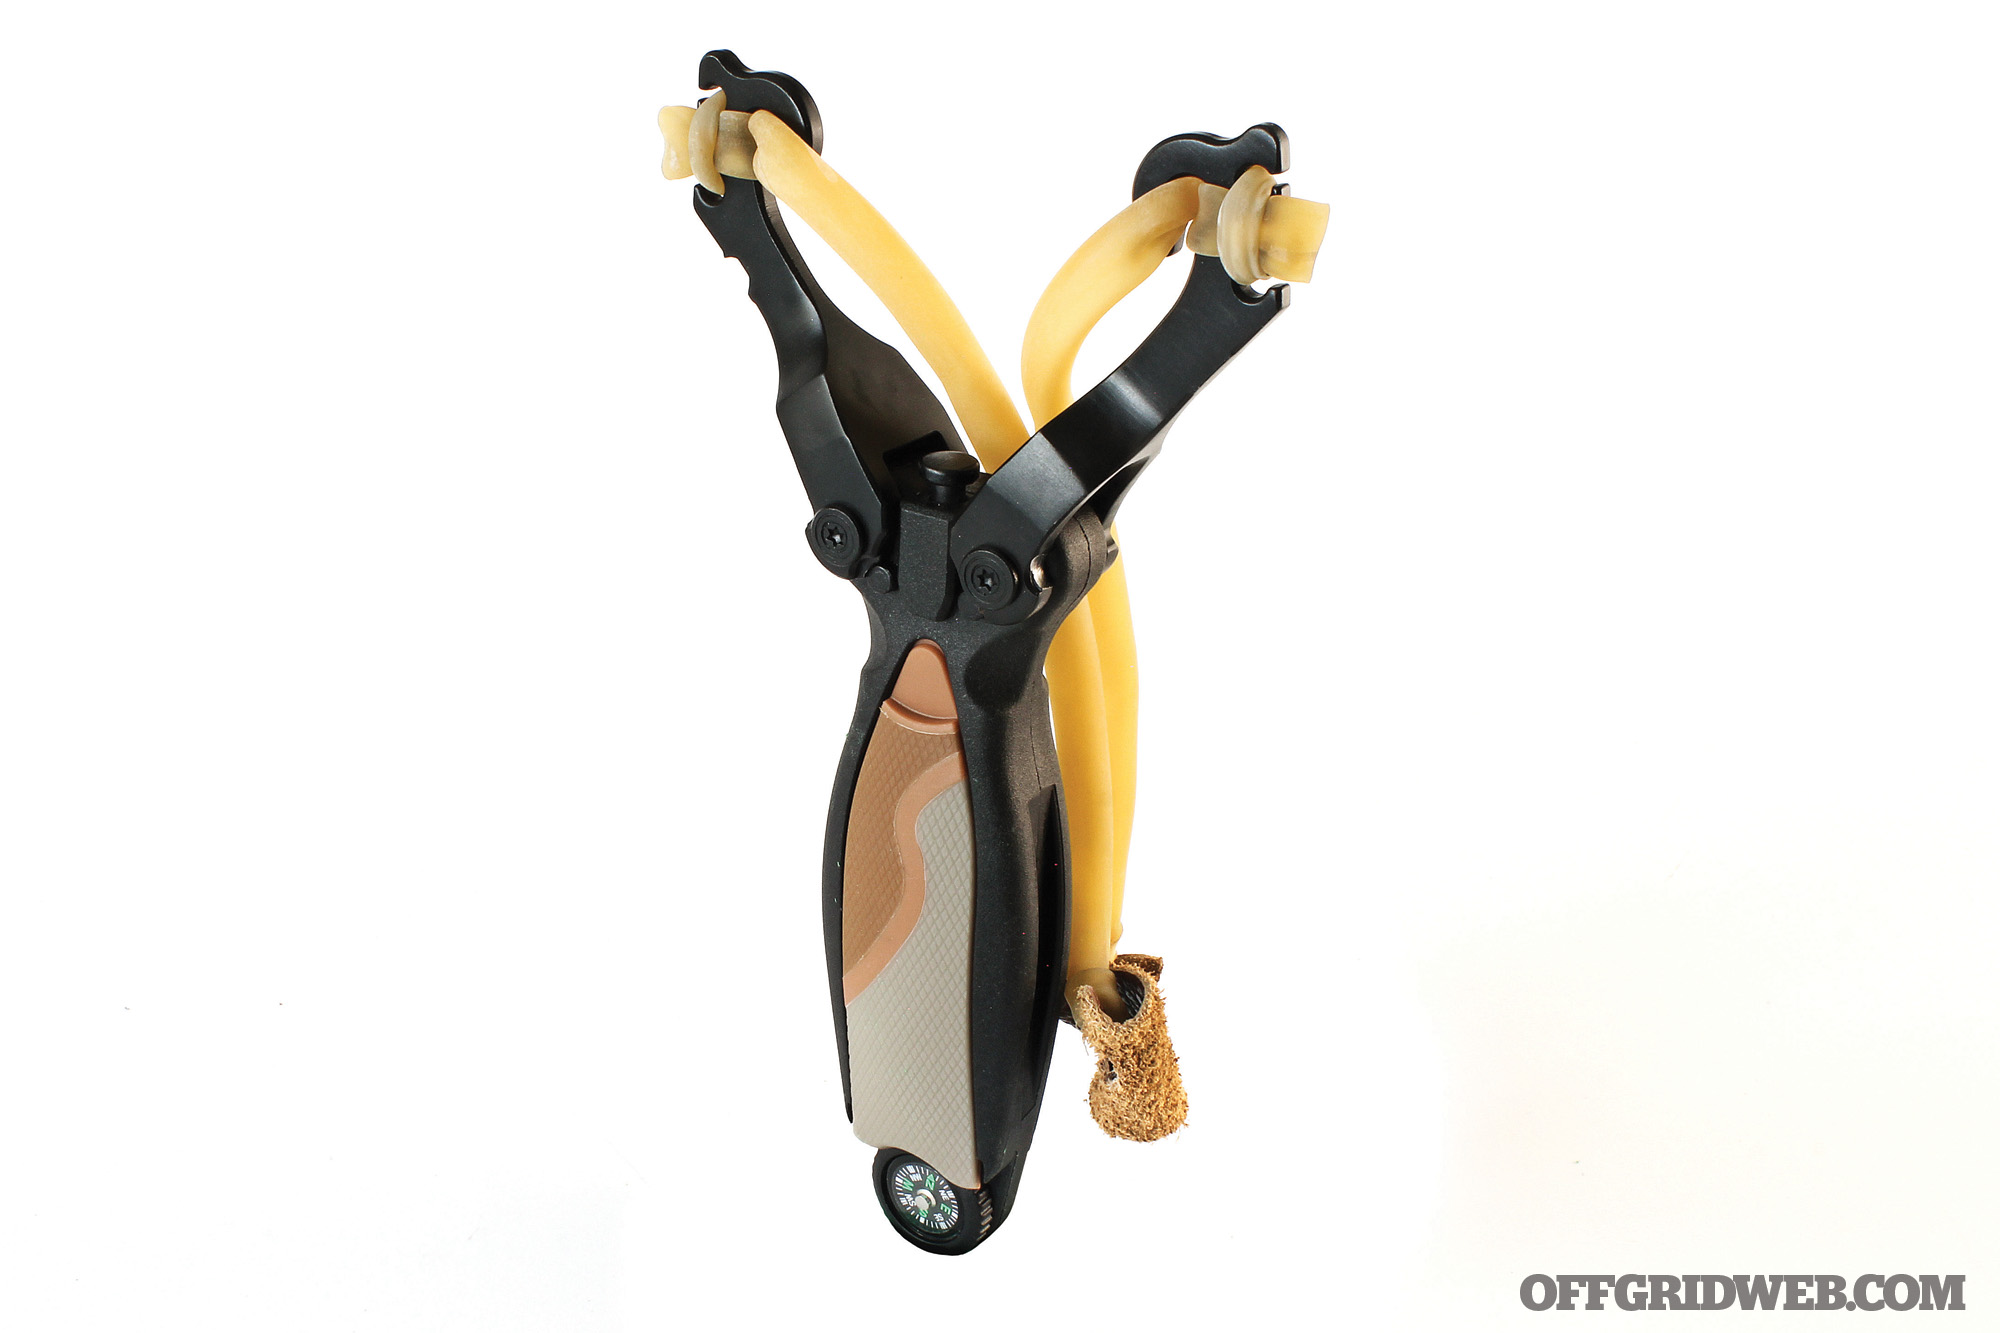
Designed by survival guru Les Stroud, this slingshot features a heavy-duty cast body and independently folding, locking steel yoke arms. The slingshot body has a built-in compass and a hollow storage cavity that holds a combination fire starter/whistle and four heavy ball bearing projectiles (included). Impressively sturdy, it uses tubular rubber bands and a soft leather pouch.
Pros:
Multi-function design includes compass and fire starter/whistle
On-board ammo storage
Folds to compact size
Sturdy construction
Cons:
Pre-installed tubular bands were twisted, making it slow and difficult to load.
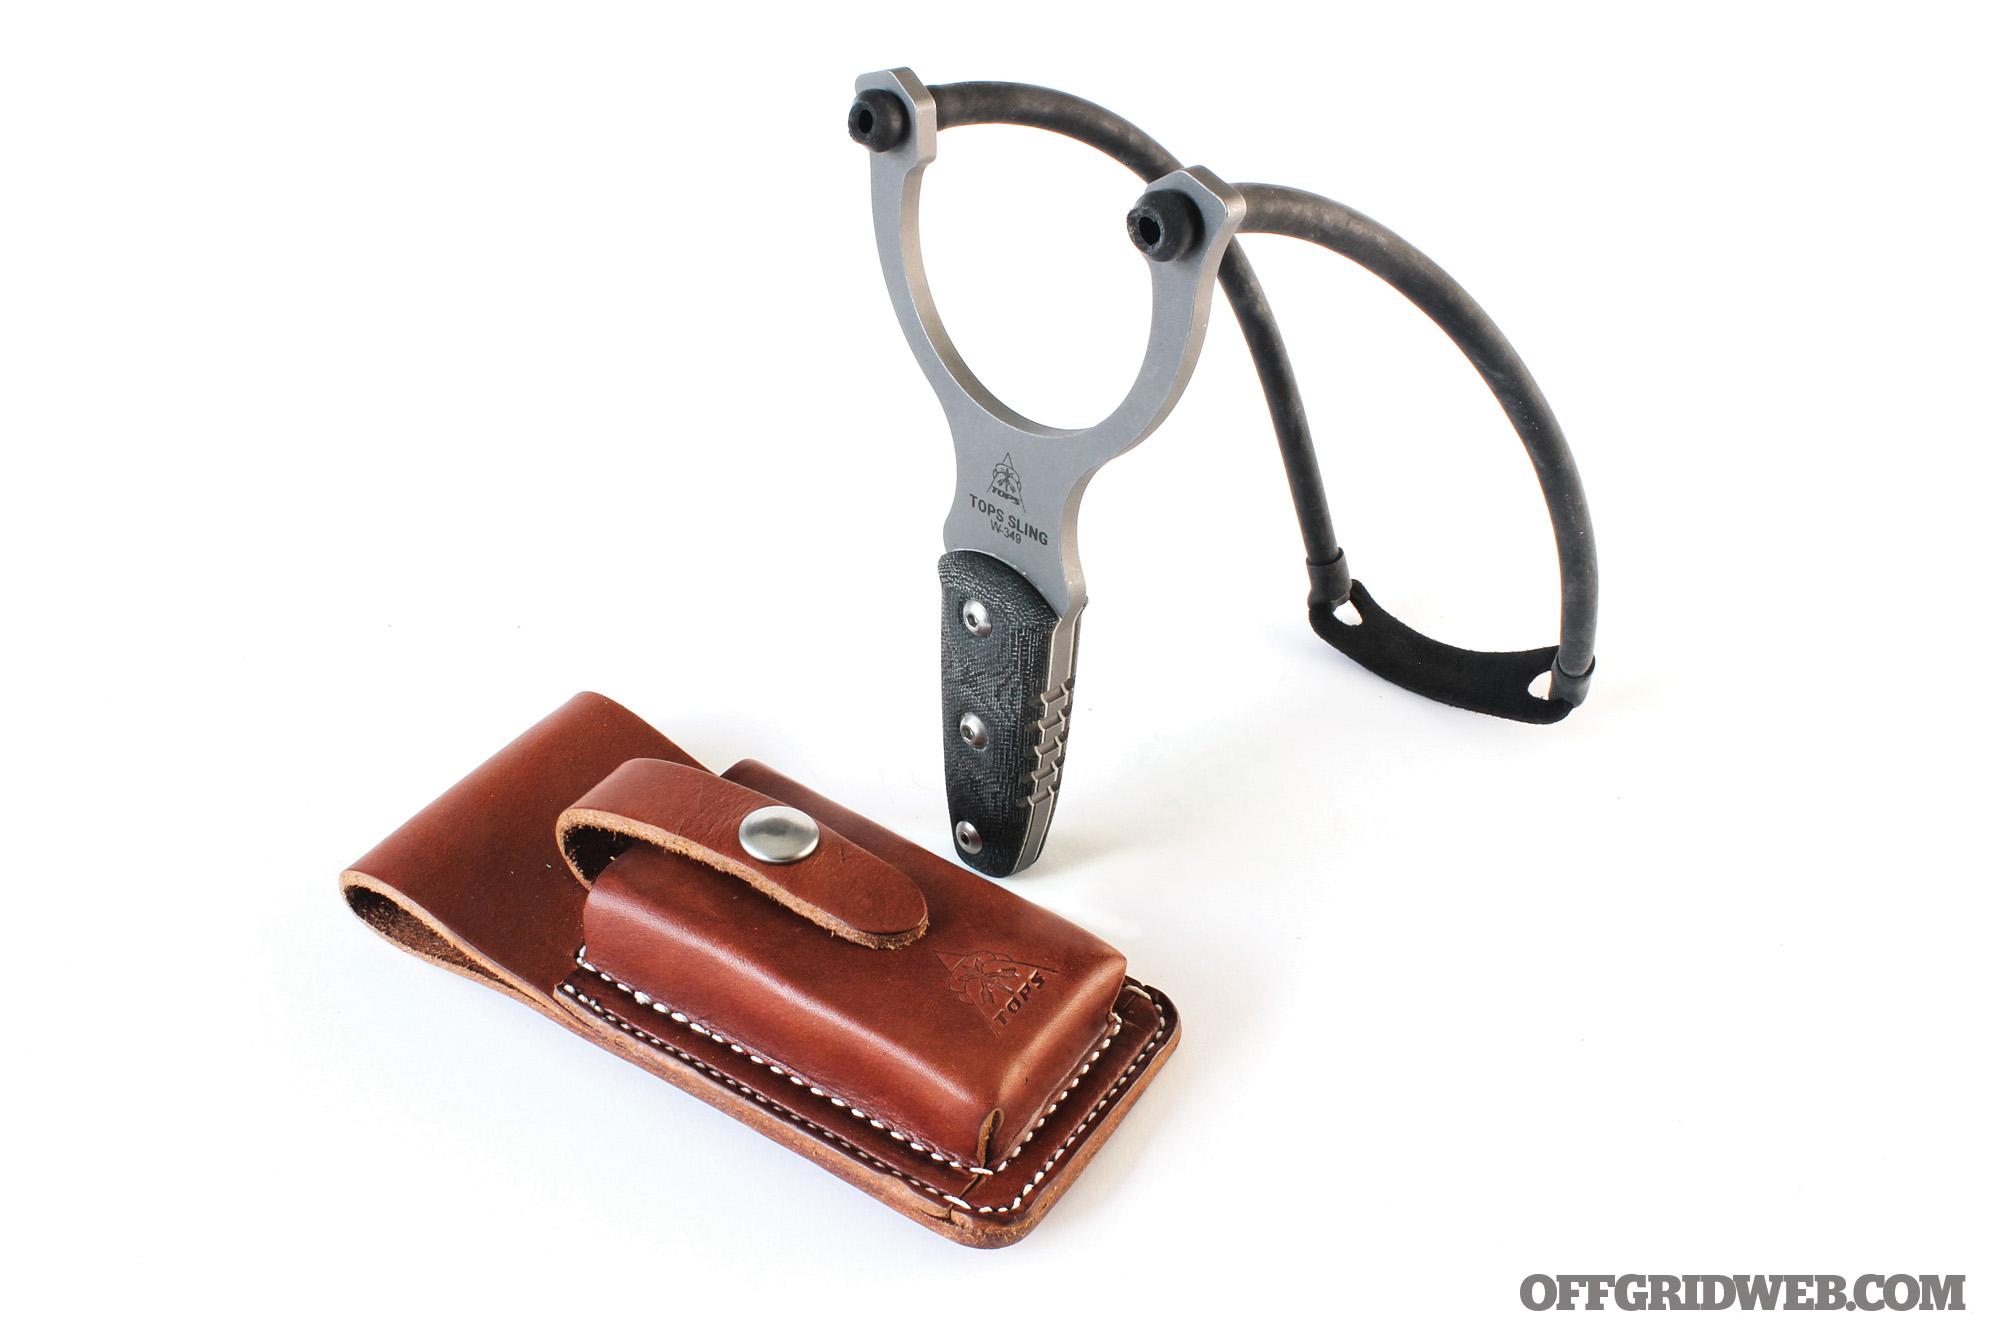
TOPS Knives, respected makers of hell-for-stout knives, applied their proven craftsmanship to the slingshot to create the TOPS Sling. It features a tumble-finished 1095 tool steel body, black canvas Micarta scales, and strong tubular bands. It also comes complete with a beautifully crafted leather belt pouch. A kick-ass expression of the classic fork-style slingshot, it’d be even more pleasant to shoot if the edges of the fork had been radiused a bit.
Pros:
Extremely high-quality materials and craftsmanship
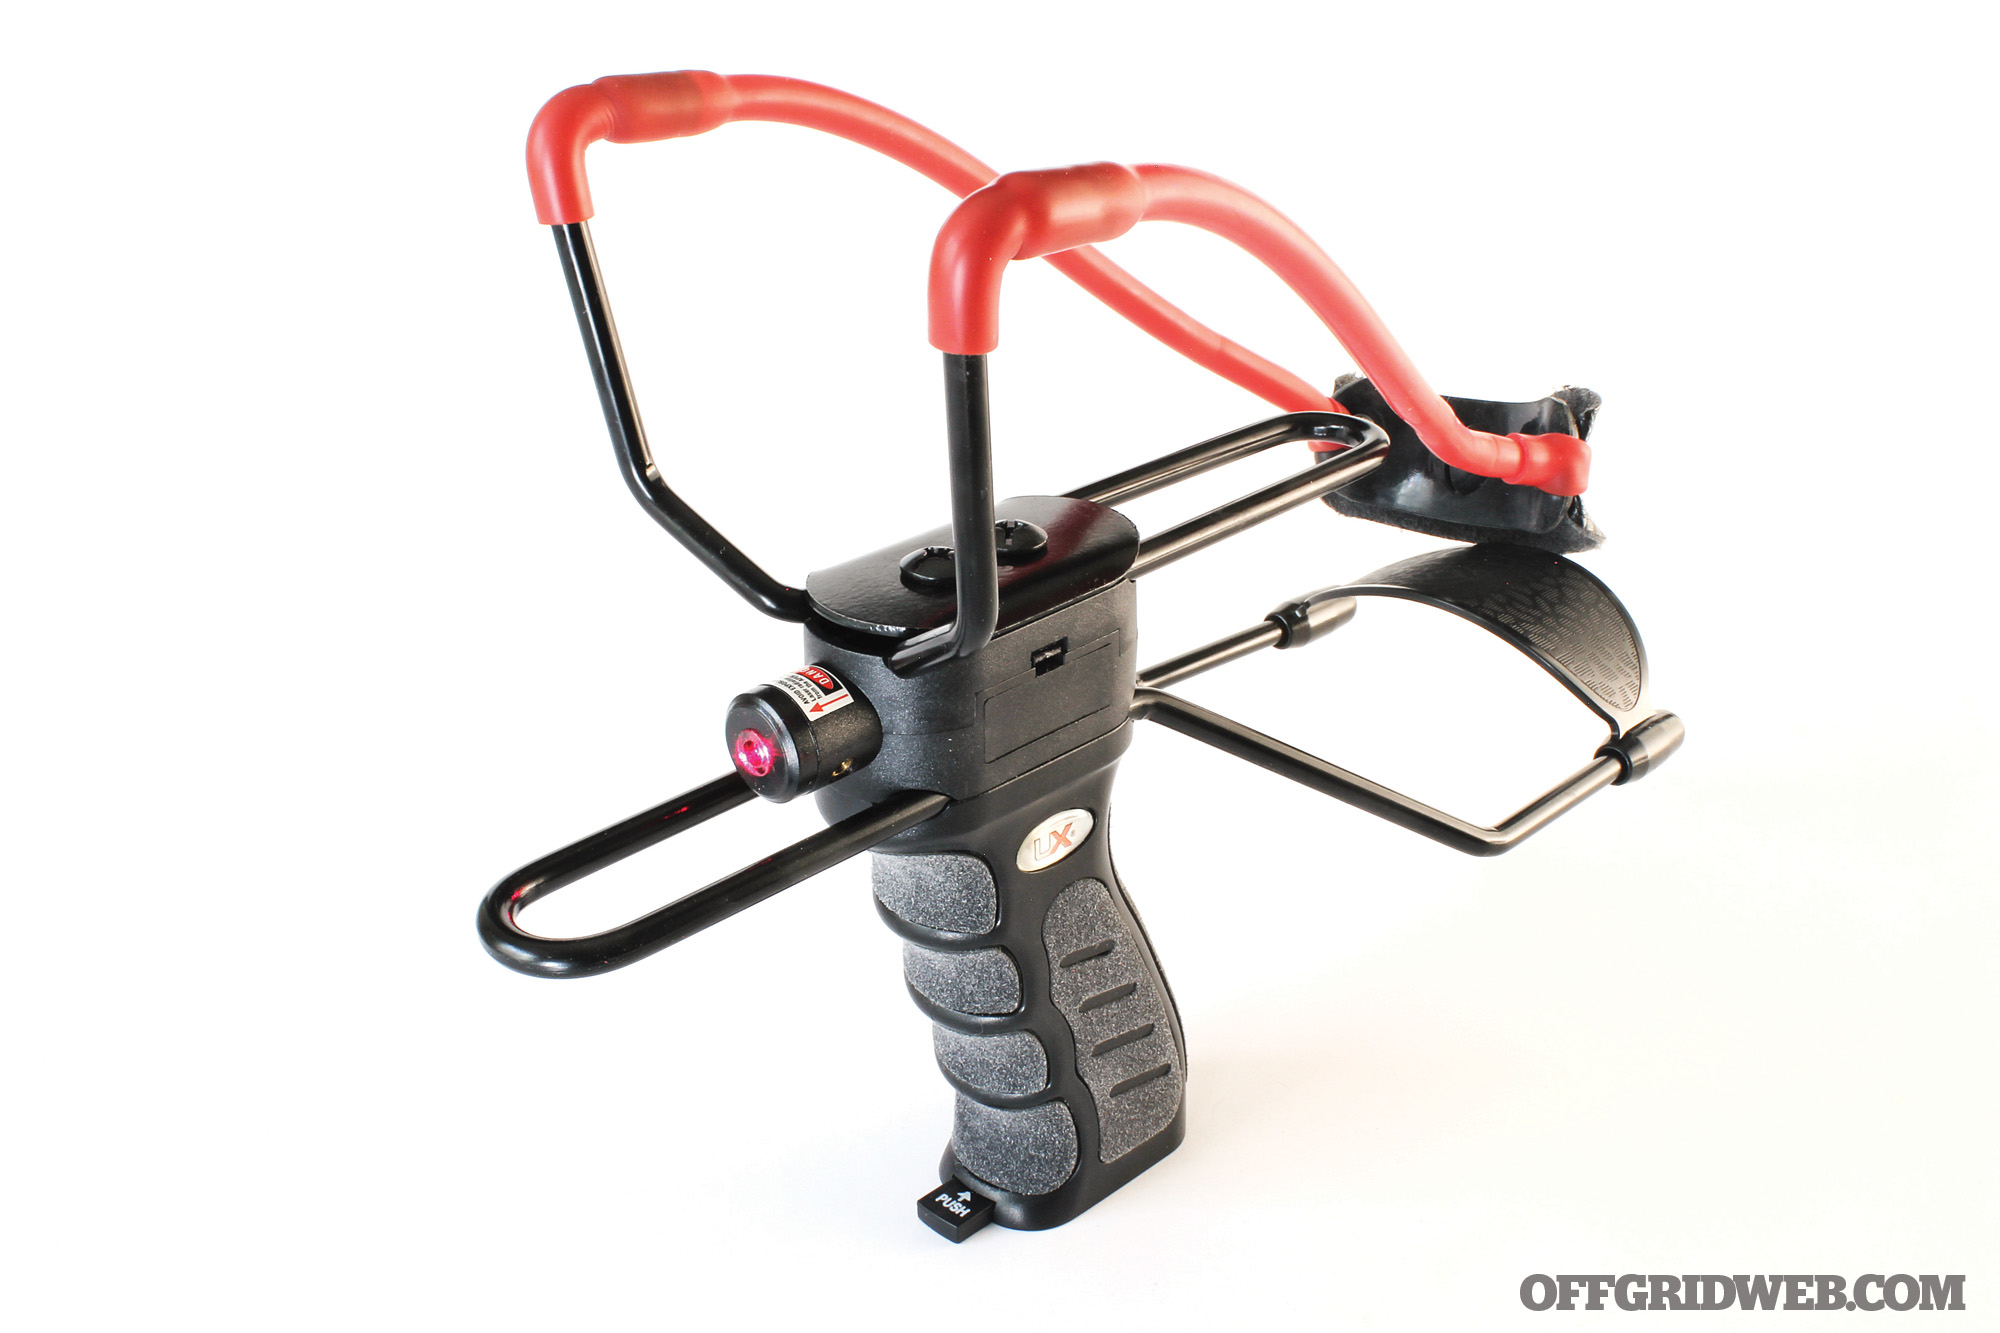
In simple terms, the Umarex X-Shot LE is a wrist-braced, tubular-band-style slingshot with an adjustable fork and wrist brace that allows you to tune the length of pull. It also has on-board ammo storage in the grip and a squeeze-operated “Auto-Feed” ammo dispenser. Its not-so-simple features include a laser sight in the grip and a “Command Clasp” magnetized retaining pouch to hold steel ammo in place. While an ambitious effort to create a high-tech slingshot that does everything, its actual performance was disappointing.
Pros:
Adjustable wrist brace and fork position allow variable length of pull.
On-board ammo storage and easy dispensing
Cons:
“Command Clasp” pouch is too complicated and doesn’t align with the leather finger hold, limiting accuracy and frequently causing misfires.
Wrist brace design doesn’t support wrist well
Laser makes a better cat toy than slingshot sight
Non-folding design is awkward and doesn’t pack well
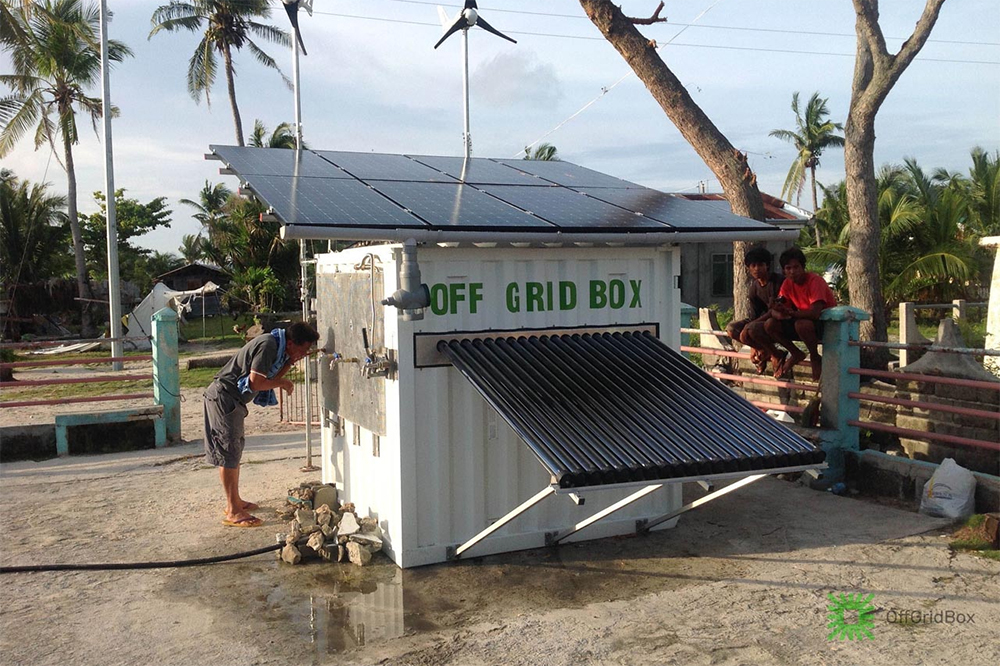
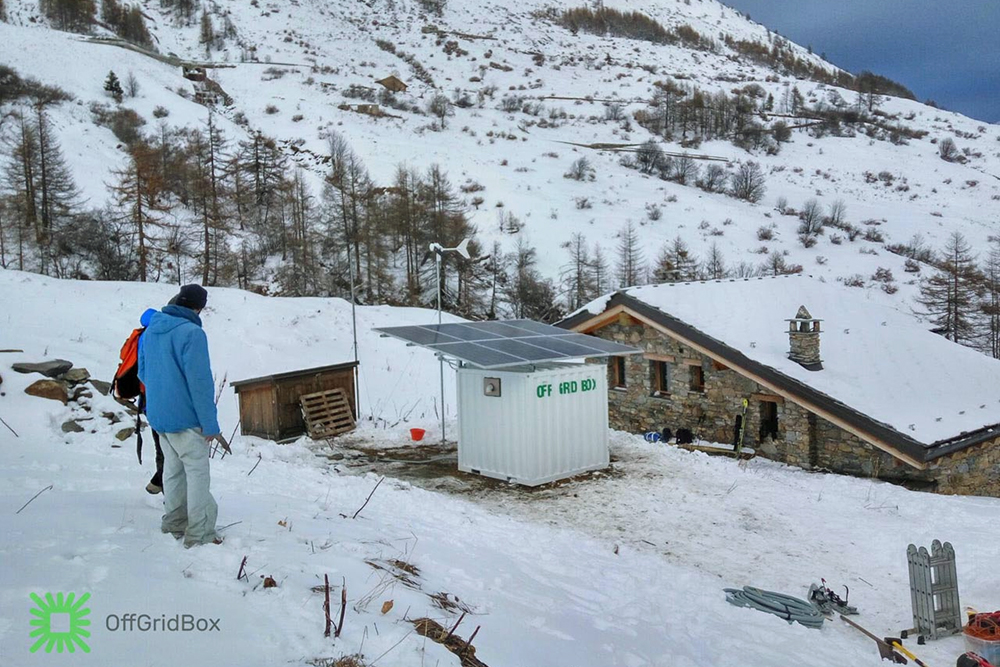
Lack of access to clean water for drinking and washing is a life-threatening issue faced by millions of people in impoverished nations every day. Without clean water, infectious diseases spread like wildfire, and this is compounded by the limited availability of doctors and medicine in these places. Obviously, this is also a major consideration for those of us who wish to prepare for natural disasters and other domestic emergency situations. If you can find a way to efficiently produce clean water that’s free of pathogens, you’ll have more time and energy to focus on other critical tasks, such as staying warm and putting food on the table.
A Boston-based company known as OffGridBox — no relation to our company or magazine — has developed a compact all-in-one system that can gather electricity from solar panels and use it to purify water for up to 1,500 people. All the components are housed in a durable 6’x6’x6′ metal shipping container, which can be delivered to the necessary location by truck, train, boat, or even airlifted in on a helicopter. The box is then unloaded and assembled on-site.
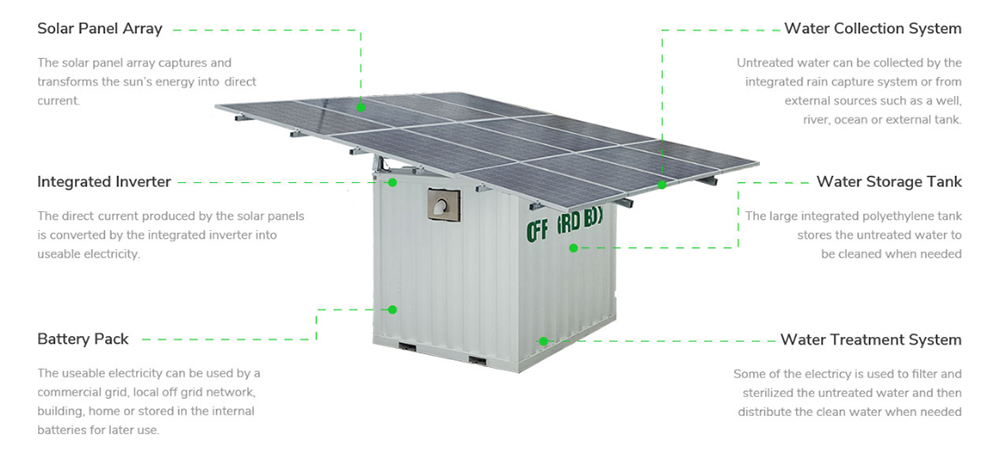
The OffGridBox starts with a large solar panel array set up on top of the container, which generates up to up to 16 kWh of power per day without any connection to the power grid. An inverter turns this DC into usable AC, which can be stored in the built-in battery pack or used to power other appliances (or even a small building). This electricity is also used to filter and purify up to 24,000 liters of water per day, and pump it to wherever it needs to go.
You might be wondering where the water comes from, and that’s a good question. The OffGridBox includes an integrated rainwater capture system, which feeds an onboard polyethylene storage tank, which in turn feeds the purifier. Untreated water can also be pumped into the unit from a well, river, or other external reservoir. There’s even an optional upgrade planned that will equip the unit with a desalinator, so you could turn saltwater from the ocean into pure drinkable fresh water on demand.
A basic model OffGridBox is said to produce enough electricity every day to support more than 300 families with basic electrical needs (2 lights and 2 smartphones each). At the same time, it can deliver a daily supply of up to 27 liters of clean water to each of these families. If you’re not looking to support a whole village, you could use the unit to power a single home with more sophisticated appliances such as air conditioning, a refrigerator, and a washing machine.
Here’s a summary of the standard OffGridBox’s specifications:
External Dimensions: 6’ 6” x 6’ 5” x 6’ 3” (L x W x H)
Solar Panel Dimensions: 13.12’ x 16.40’
Weight: 2,866 lbs dry / 6,172 lbs wet
Solar Panel Array: 12 modules 330wp each (4kWp)
Inverter: 5KVA (10 kW peak, 4.5kW continious, can be upgraded to 10KVA 20kW peak)
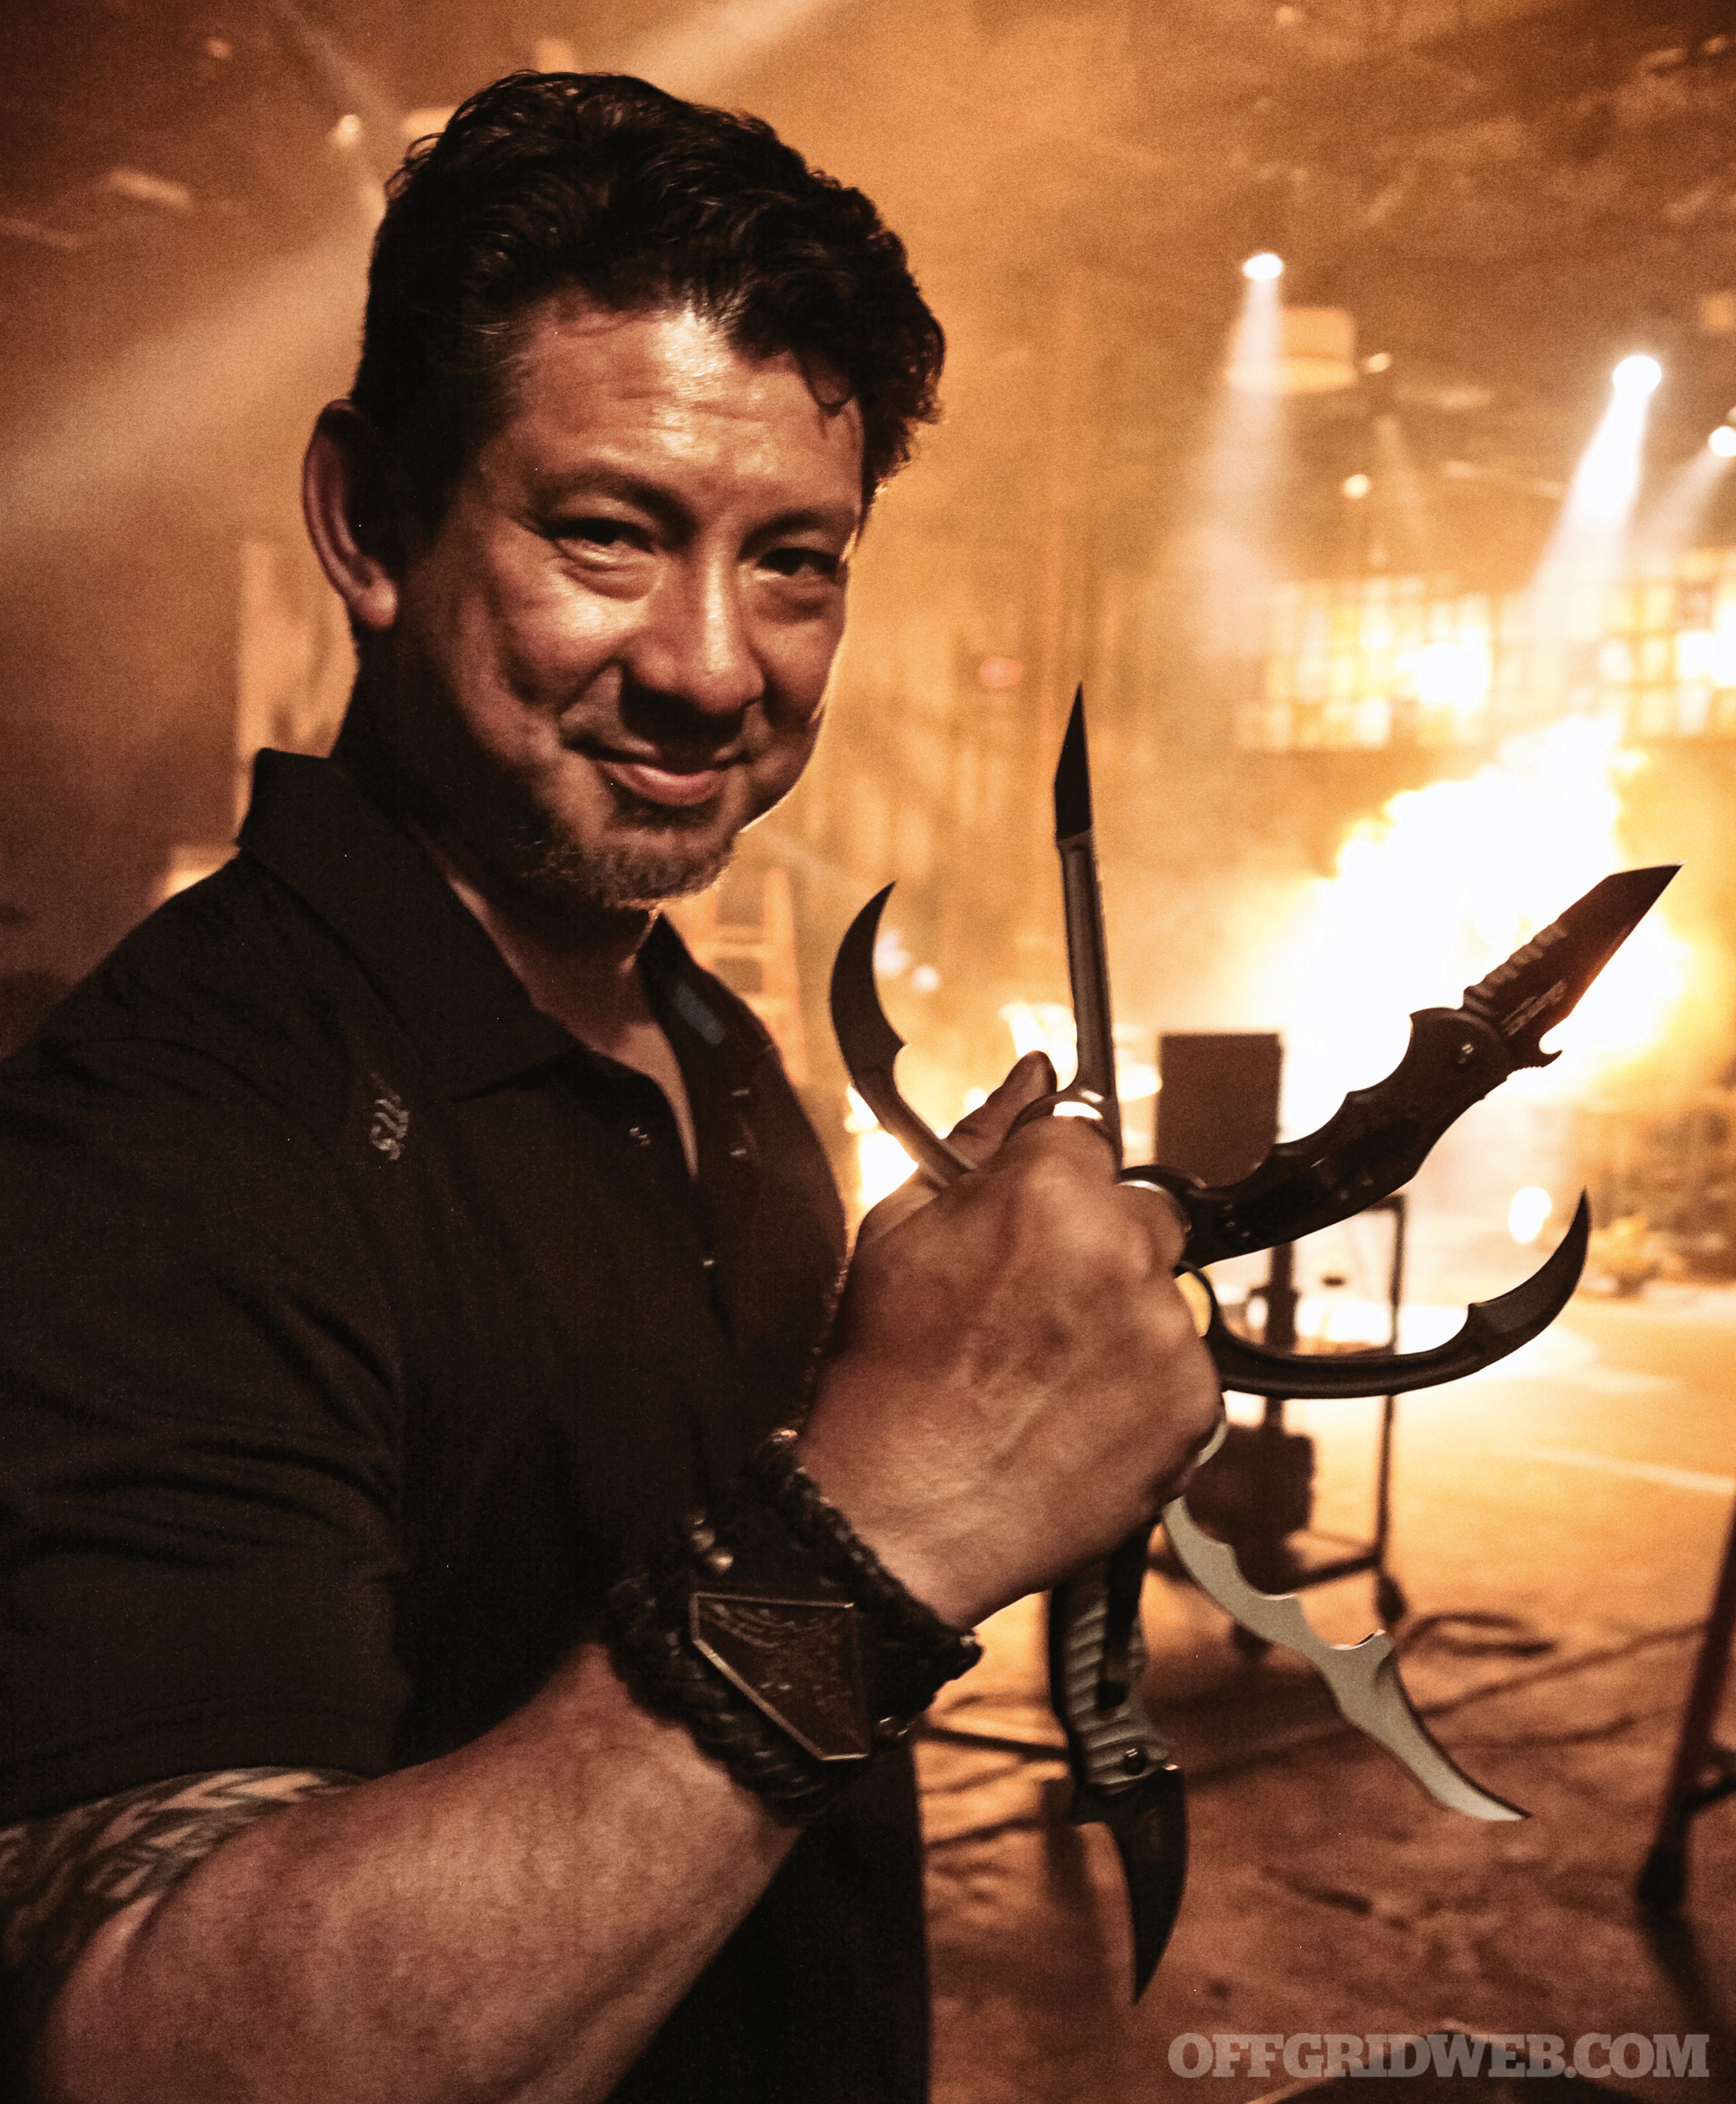
Looking at Doug Marcaida, you might think he’s an artist of some sort with a gallery on Rodeo Drive. He’s got that goatee, the suave hair, and the elegant demeanor. He’s articulate and refined. So what’s he doing swinging swords, axes, and knives on the History Channel’s Forged in Fire?
Forged in Fire (in case you’ve just emerged from your underground bunker) is a competition series with three judges (including Doug), one host, and four bladesmith contestants. Each episode focuses on forging a cutting tool or edged weapon from scratch. The winner walks away with a cool 10 grand in their pocket, and the episode’s championship title. How cool is that? Weapons, fire, forging, information, and fine edges are all displayed in full boob-tube brilliance. That explains why this year marks the fifth season, and even spawned a spin-off series titled Forged in Fire: Knife or Death.
On the set of Forged in Fire.
Marcaida’s involvement in the show involves pressure testing the weapons and evaluating each blade for combat effectiveness. As a master of the Filipino art of Kali, he’s a natural for handling edged weapons. We recently caught up with Doug between filming episodes and cut straight to the chase with his observations of the hit show, what martial arts he secretly wants to study, and his attitude toward survival.
Our Interview with Doug Marcaida
RECOIL OFFGRID: How did you get hooked up with Forged in Fire?
Doug Marcaida: I got a call from their casting producer who found me through my YouTube videos. They were looking for an end user of edged weapons to be a judge on the show.
What’s the filming schedule like?
DM: It’s taken over my time. We film an average of 30 to 40 episodes spread out through the year and about a week per episode … so, it’s drawn out.
That’s a lot of work. How long does it take to film one episode of Forged in Fire?
DM: It takes about eight days for each episode to be completed.
Now in the fifth season, why do you think Forged in Fire has become such a hit?
DM: I think that our inner desire to be able to create things with our hands is projected when we watch shows like Forged in Fire. From imagination to creation in a competition format, but we happen to have fire, sparks, edged weapons, kill tests, strength tests, and sharpness tests … and did I mention edged weapons?
What’s not to like, right? Handling weapons, especially sharp, pointy ones is dangerous. Did you have any dicey situations where life and limb were threatened?
DM: All the time! To wield a weapon with full intent to cut or decapitate is very dangerous, especially because it’s not a weapon that I have time to “zero in” or be familiar with. Every bladed weapon to me is as dangerous as a firearm. We can easily take it for granted, when in fact they were created with one purpose, which is to destroy life and limb.
Were you ever injured while filming?
DM: Yes, I was injured during one of our tests. I was testing a heavy blade that was not very sharp against a dry, rubbery ballistics dummy where the shock of the cut and impact injured my rotator cuff.
What did you do in the military?
DM: I started out in logistics, then cross-trained into the cardio-pulmonary field. It was during my stint in the Air Force that I discovered Filipino martial arts (FMA).
What piqued your interest in martial arts?
DM: I always liked fighting and was a big fan of martial arts movies as a kid, so I had to get my Bruce Lee moves on.
We’re big fans of martial arts movies as well. What are your favorites?
DM:The Last Samurai is by far my favorite of all time in terms of story line and that “martial Zen” feeling. I am of course a big fan of Bruce Lee and enjoy Tony Jaa for his amazing timing, along with Iko Uwais. I’m also a big Kurosawa fan.
Tell us about your martial arts journey.
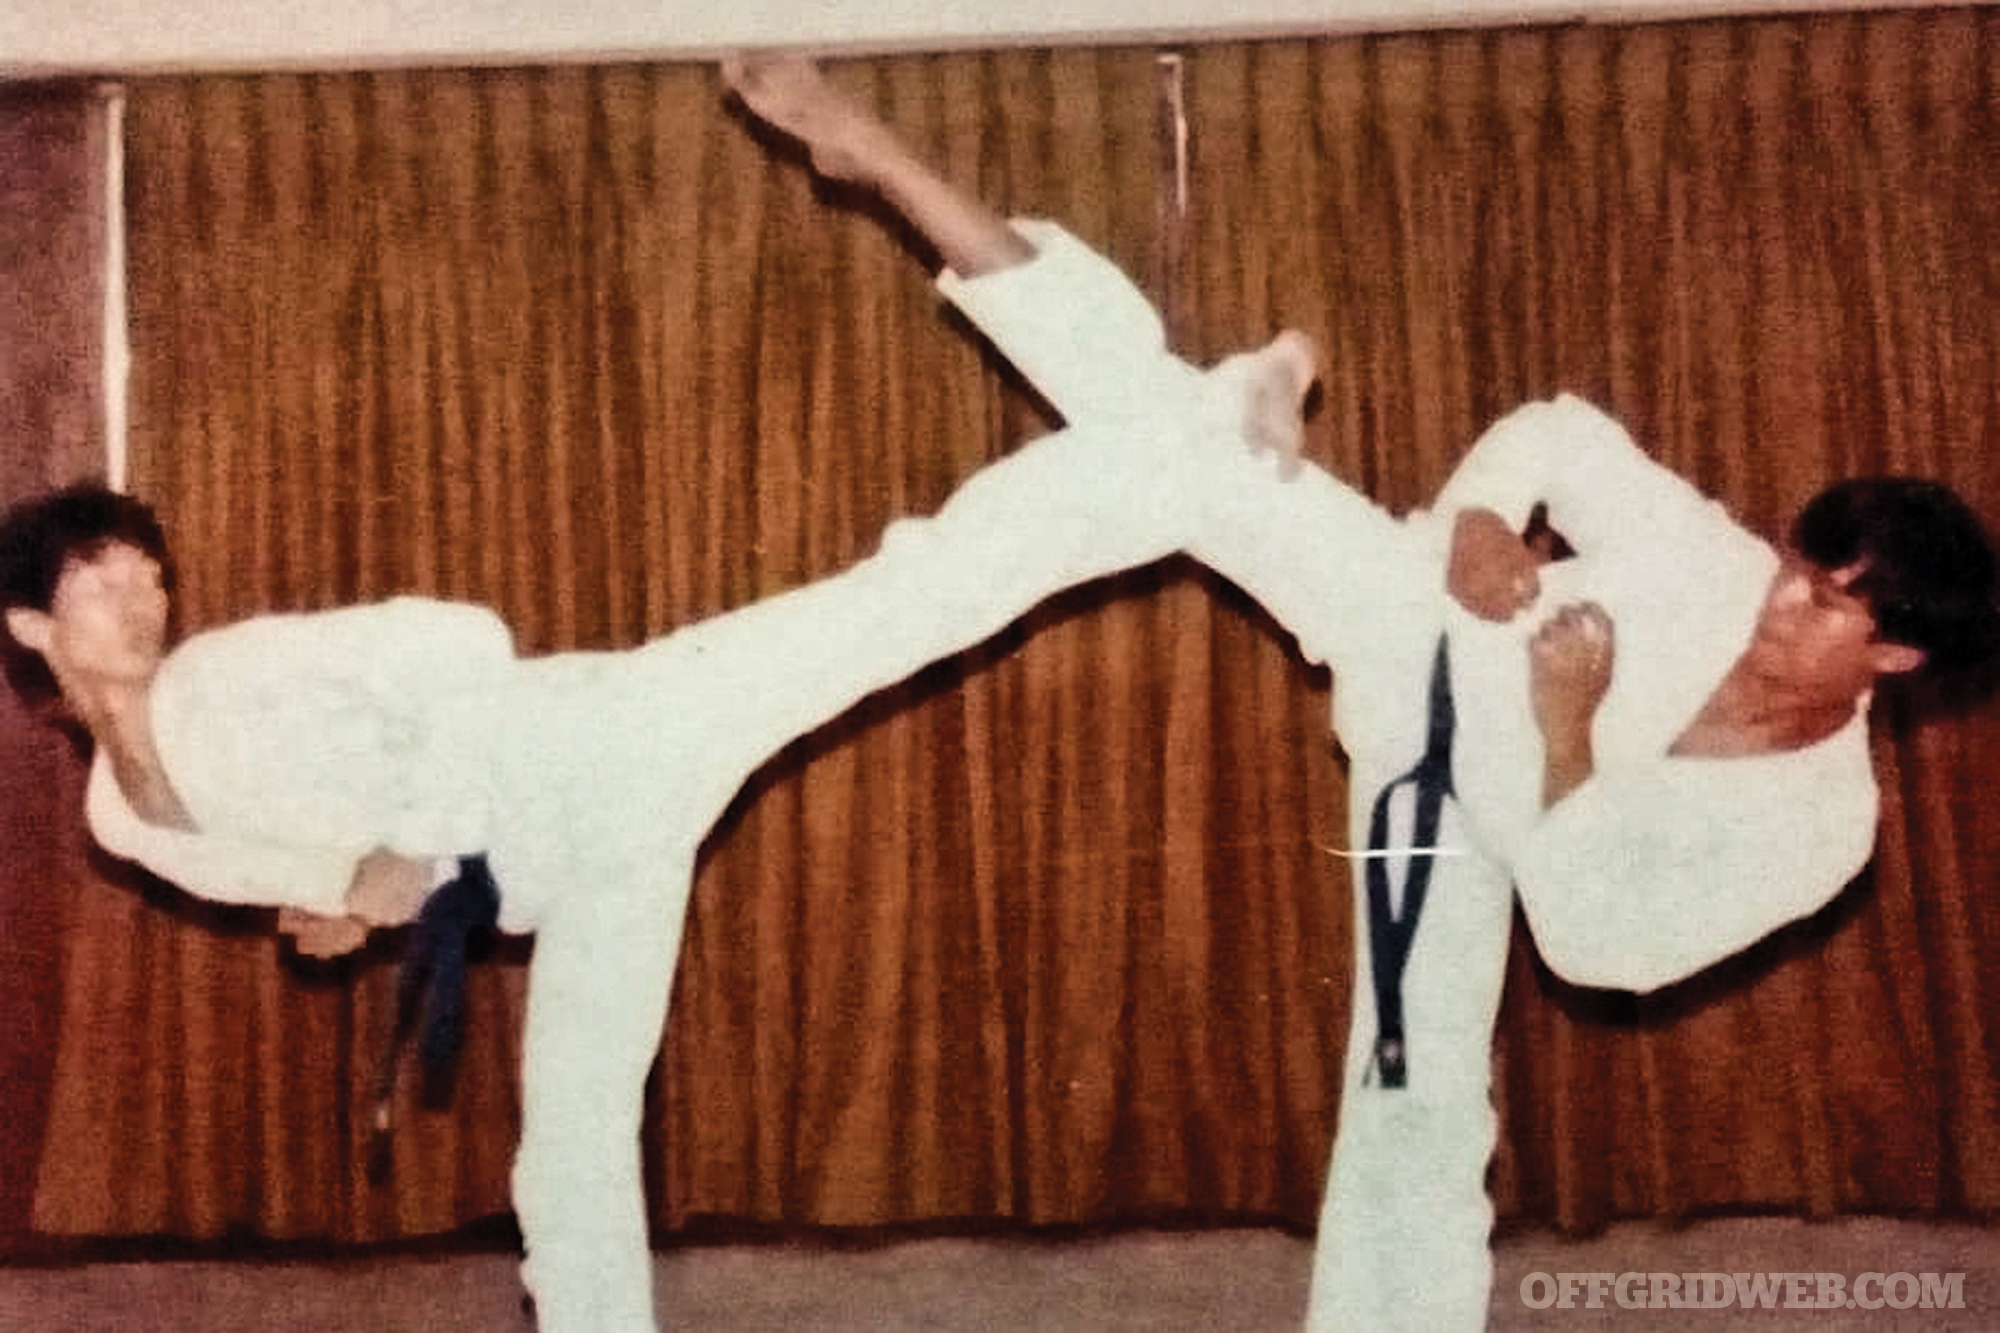
DM: I started as a kid with basics of karate, kickboxing, and Tae Kwon Do, but it was always a side hobby. It wasn’t until I discovered Filipino martial arts in my mid 20s that I really became serious about training. I studied under the several grandmasters and instructors of Pekiti Tirsia Kali, San Miguel Eskrima, and Kali deLeon, along with exposure to Silat and other FMA systems.
Tae Kwon Do days.
Why did you end up choosing Eskrima/Kali, or did it choose you?
DM: It chose me. [Laughs] When I was introduced to it in my mid 20s I fell madly in love with the art, and I seemed to have a flair for it. But I never learned it in my homeland as a kid growing up in the Philippines. I learned it in the U.S. while I was in the Air force. The irony of it all.
Your English is excellent for a kid growing up in the Philippines. How old were you when you came to the U.S.?
DM: I was 17 when I came to the U.S.
You teach Marcaida Kali, what is that and why is it different from other systems of FMA?
DM: It is my interpretation of martial arts. The way I am able to explain doing what I love to do. It’s a mix of all my lessons learned, but more so, the process. I teach learning methods. And the final test is to create your own system and call it by your name. Marcaida Kali is just a term people use to associate it with me.
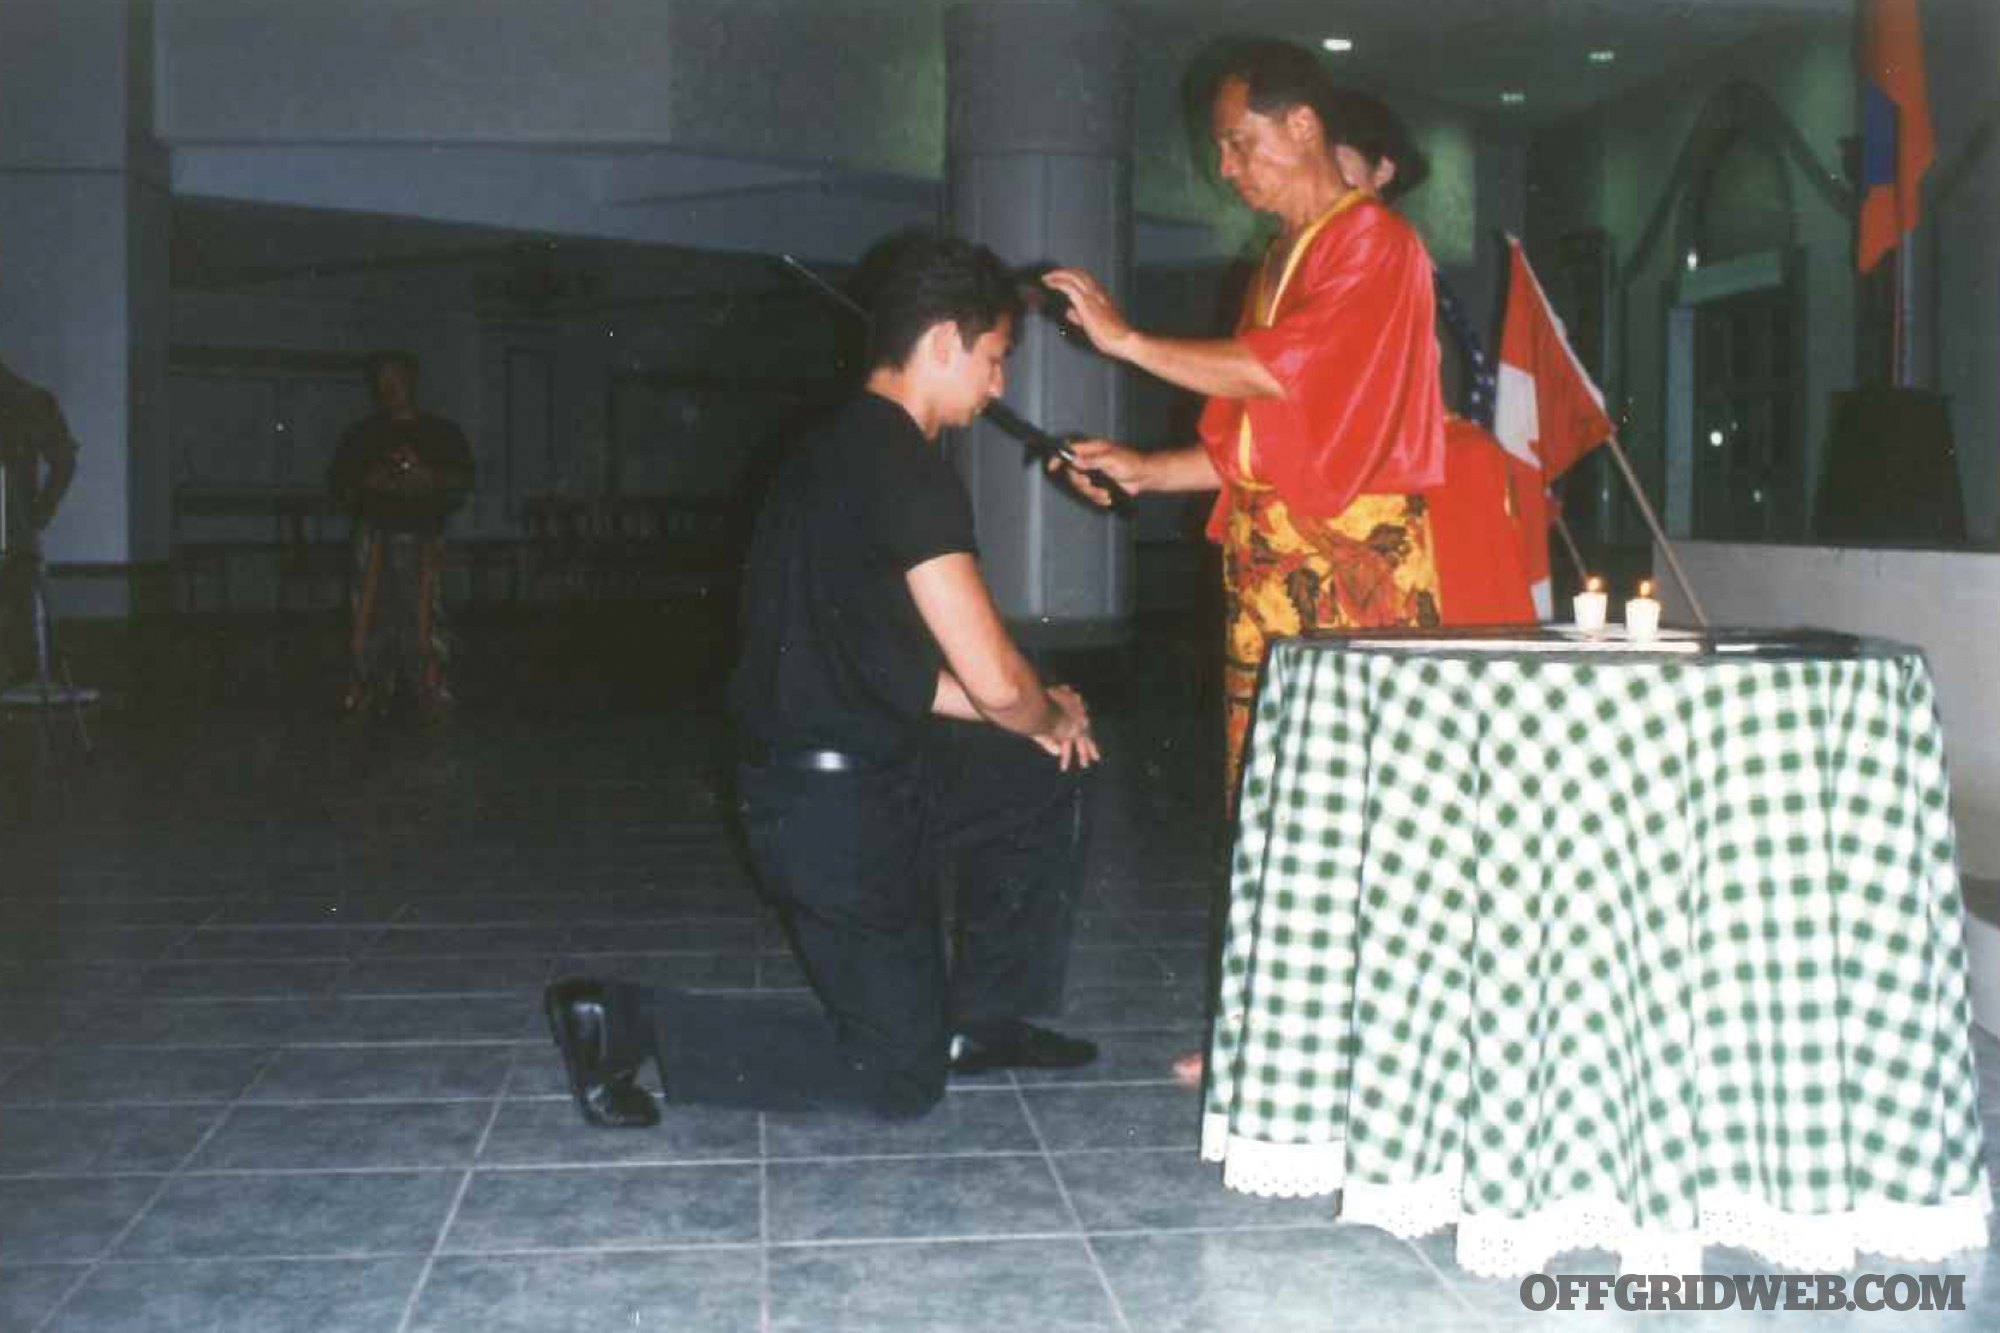
Pekiti Tirsia ceremony with Grand Tuhon Lep Gaje, 1997.
Inyour OFFGRIDweb.com interview, you stated that with martial arts we should, “seek to develop the good attributes aside from the physical skills and bring back what good qualities martial training develops in a person.” What are these good qualities?
DM: Respect, honor, and integrity — the basic things that should guide our physical, mental, and spiritual being. We need to know why we do things and how these things have to be guided with respectable and honorable use. Martial arts should make us better, not bitter.
What’s the biggest benefit of training in martial arts?
DM: It’s hard to say what are the most important attributes, aside from physical skills developed by the practice of martial arts. Concentration and awareness are probably at the top of the list. From a social standpoint, equanimity is perhaps the most important virtue a martial artist can have; that is, to be able to live in the world without prejudice or fear.
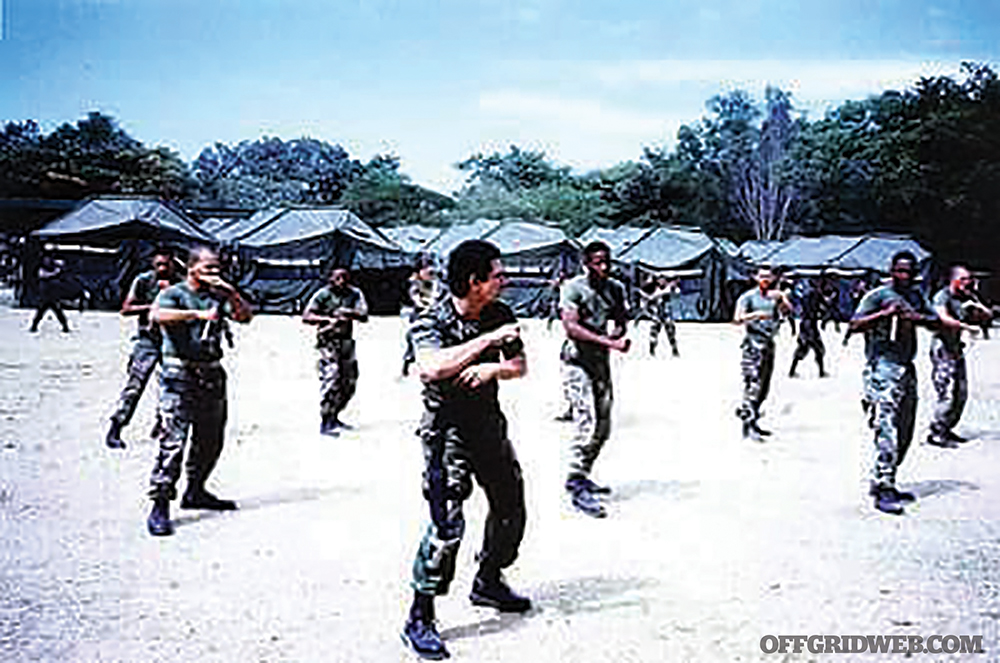
With the Philippine Force Recon Battalion edged-weapon training graduation.
Every art has strengths and weaknesses. What are the weaknesses of your art?
DM: Though we have an empty-hand component in our art, I believe that time spent on any one thing will become your strength. So since FMA is weapons-based, I see that the empty-hands portions — if not trained often — can become the weakness. But what wields the weapons? I would also say that in weapons training, the ground is the last place you want to be; then, ground-grappling would be the weakness. I don’t spend enough time on the ground to make it our strength.
What about the strengths of Kali?
DM: It is a fact of nature that all forms of action are limited by circumstance. In the case of martial arts — size, strength, age, dedication — they all play a fundamental role. Kali is subject to these limitations as are all other martial arts. Its great strength is its ability to weaponize practically everything, thus making the surrounding world a tool — a means of equalizing most disadvantages. The ability to use this resource without abusing it distinguishes the fully accomplished practitioner of Kali from those who are merely attracted to the most flashy aspects of the art.
What was your training schedule like when you started in martial arts?
DM: When I really was into it (still am), my formative years were spent with six-hour-long training sessions on Saturdays and another two hours, twice a week. I gave up my entire Saturdays for the training sessions. Three hours of conditioning, till burn out. Then three hours of technical drills and specifics. The idea was to be so exhausted that the technical were done with only the right muscle groups teaching us to learn to breathe and stay relaxed. Not to power through anything and to trust the weapon.
Joint U.S. Philippine Marines edged impact combatives training.
No wonder you are so good. What is your schedule of training now?
DM: Three times a week I train and teach two guys at 5 a.m.
When SHTF, how important is training? What about physical fitness?
DM: You default to what your comfort level is. This is muscle memory, taken from the repetition of training. Training is basic for every aspect of the art. In regards to a violent attack, it embraces the whole range from preventing to surviving it. Physical fitness is as useful in martial arts, as it is in the preservation of a sound cardiovascular system. If you do not have the physical attributes to do what you learned, then it can’t be executed. I guess that is why I like Kali. The weapons act as the ultimate force multiplier. You do not have to be super strong or flexible to use an edge or impact weapon, yet you can have the same results as one who is younger and stronger.
Do you think a person who trains in the martial arts has an advantage during a violent situation?
DM: Anyone who trains correctly will become aware and then create preventive measures. Training will give you possible answers to violent situations. Training and preparing for violence gives you a better chance compared to someone who has never even thought of violence and simply relies on their natural instincts once it occurs. We are all different, so some are natural at dealing with violence and some are not. Given that you choose to learn something so you can deal with it makes you that much better at dealing with that situation.
On the beach, water sparring with brother.
During any crisis, like a survival situation, how can martial arts be of help?
DM: If your martial art teaches you crisis management, and it is trained properly then yes, we are all different and train differently. But one thing martial arts discipline does teach is a chance to focus on whatever you are learning. Training the mind to control the body helps you deal with a crisis much better. It’s not just the self-defense techniques of martial arts that come into play. Breathing helps control emotions and keeps you focused and relaxed. You’ll be able to assess things better and make the right choices. The martial practices give conditioning, but mind, body, and spirit should work as a whole. This increases your chances of surviving a crisis in my opinion.
You teach a lot of seminars. What is it that people are looking to learn?
DM: My guess is to move and do the things they see me doing. I, in turn, try to teach them the methodology of how I learned these things and how I train them, as opposed to memorizing techniques.
If someone wants to protect home and hearth, what should they do?
DM: Educate yourself about everything that has to do with your home. Learn about entry and exit points, weapons of opportunity around the house, safe rooms, emergency plans, and where to meet in case things happen. Make a plan, but make sure you actually train your plans. Knowledge without the ability to execute will limit your effectiveness.
We agree, practicing your plan is critical. Do you have to spend a lot of time training?
DM: If you know how to incorporate training into your daily life then you are training all the time. There is no limit to the amount you should train in something you want to be good at.
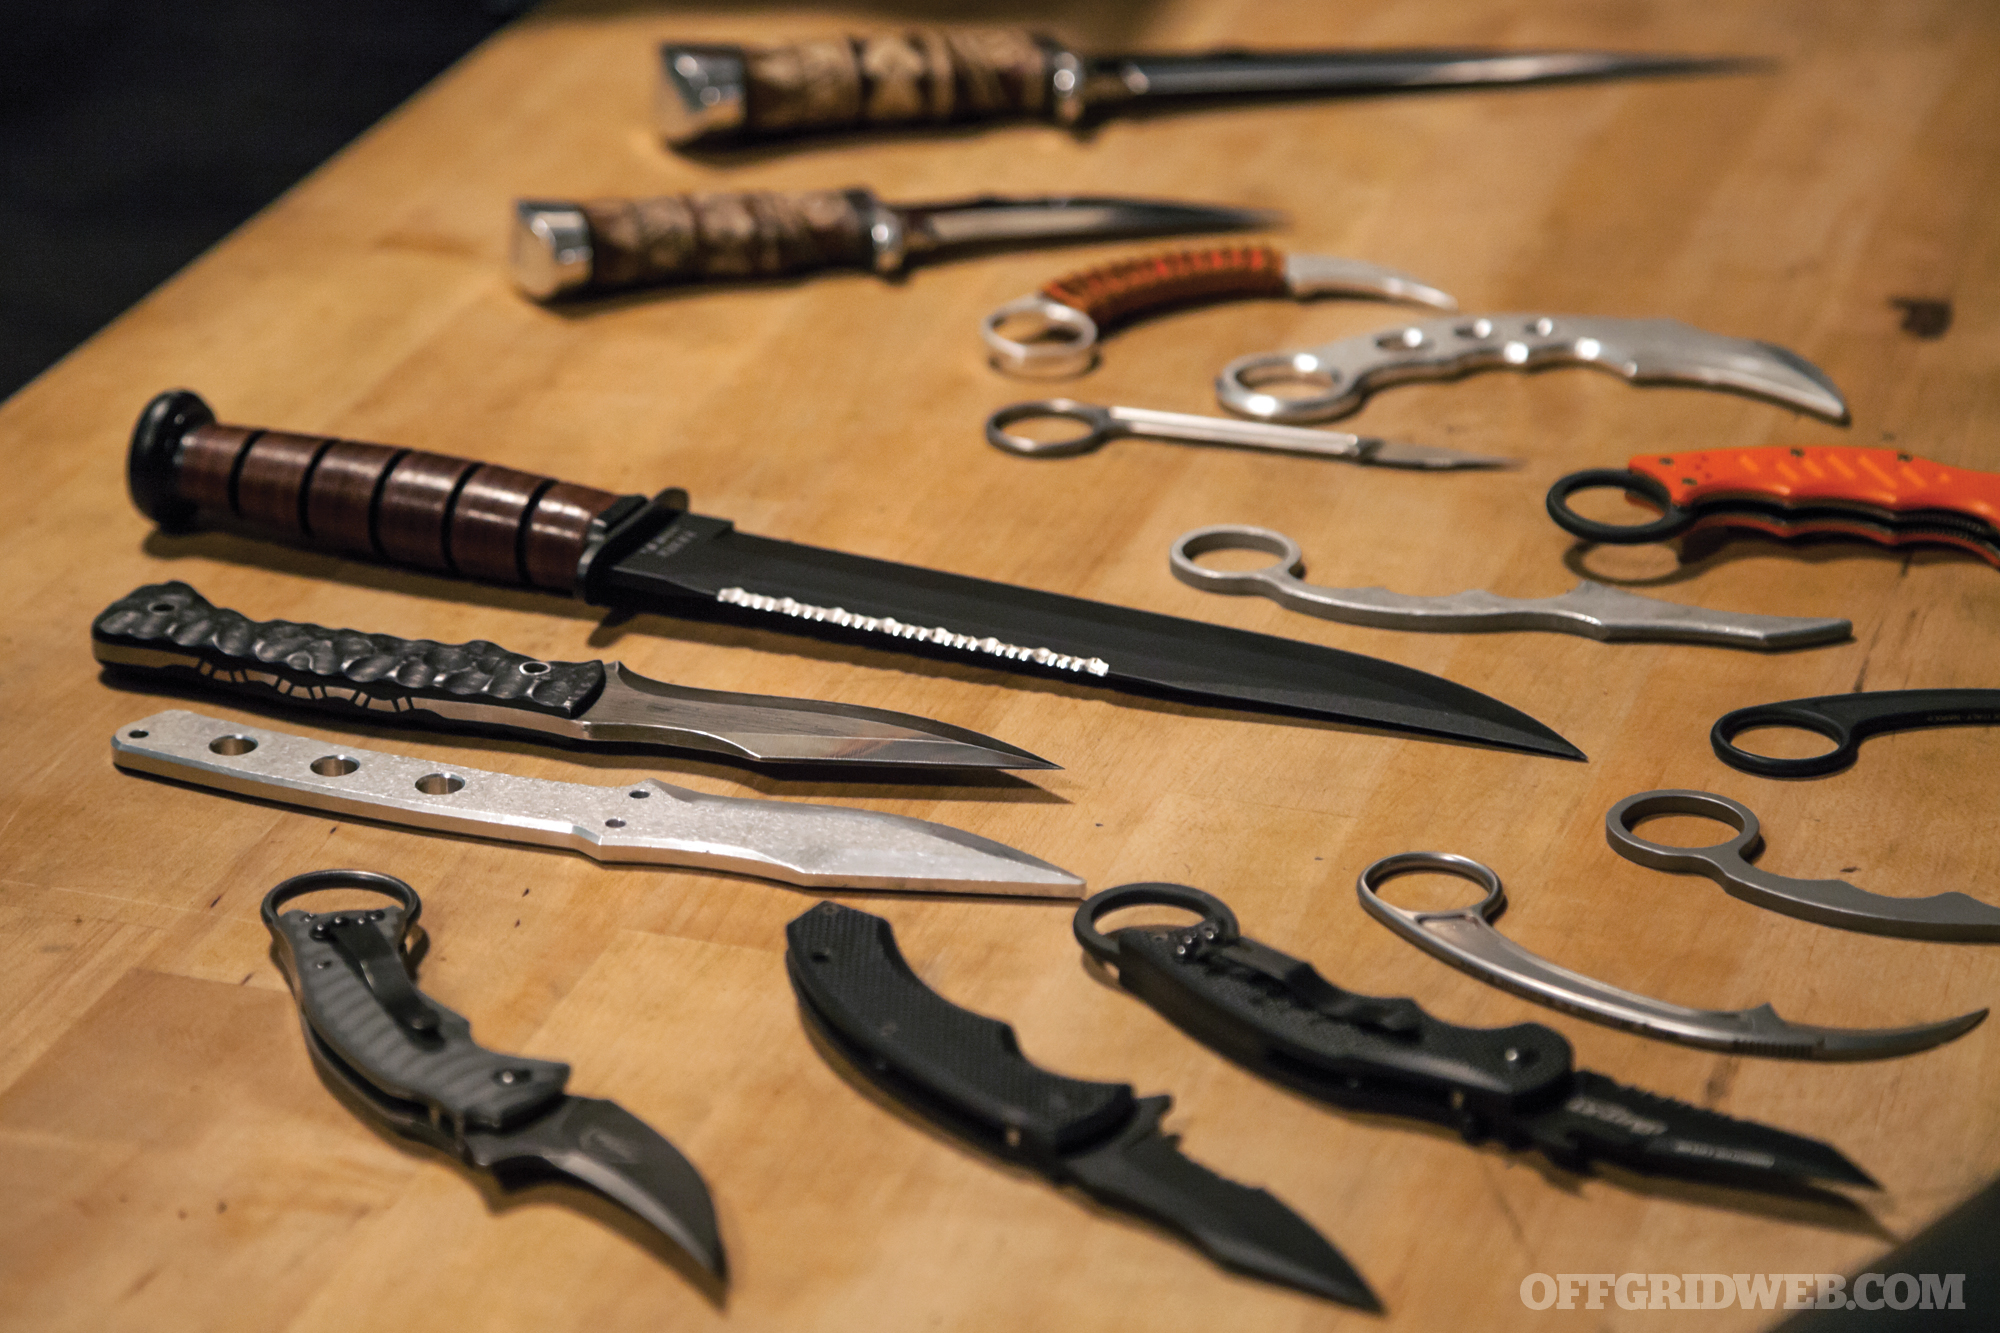
Above: Doug Marcaida blade designs and collaborations with KaBar Knives, Fox Knives Italy, Max Venom, Bastinelli Knives, Russian Blades, and Jason Knight.
How does one go about incorporating training into their daily life?
DM: “Train the way you will fight, so you will fight the way you train.” I will take it further — you should, “Live the way you will fight, so that you will fight the way you live.” Unless you are in a sport where you are sure the fight will take place in a ring, you need to realize that the dojo (training hall) is probably the safest place to be. Fights happen outside and mostly while you are just living your life. So if living your life is a constant; meaning how you move, how you do things, how you think all the time, and that is what you want to protect, then train those very same things to be functional in a fight. Here’s an example, if I normally swing my hands as I walk, can I turn that swing into strikes? If I normally walk and stomp on an insect, can I turn that stomp to be a strike? If a wrist lock is a turn of a wrist, is that motion similar to turning a door knob? If using a spear in combat is about creating a barrier in combat, can chairs, tables, or the obvious broom be used? These are the same principles that I see in everyday living. These are the things that I do every day, so training is an all the time thing.
With all this training, have you been in an altercation where you used your skills? If so, what happened and what did you learn?
DM: I plead the 5th. But I did learn that ego is the real enemy. It gets you into trouble where trouble could have been avoided and even if you win a fight, you lost at harmony in life. Could it have been prevented? Most of the time the answer is yes.
UFC and MMA has a large following now. What are your views of the UFC and MMA?
DM: I am a big fan of the sport. What I love is the idea to be well rounded; that one should learn to cover all bases that just one art cannot provide. What I find disappointing is the way some athletes conduct themselves in public. Their aggressive nature is what martial arts tries to control, and they think it’s OK to act this way in public. Those who are exposed to true violence, where life and death is a matter of opportunity, know that you don’t act this way. No one is bulletproof or stab-proof. But as public figures how they conduct themselves affects the impressionable fans who will take on their persona because perception is reality to them. Also, there’s nothing wrong in practicing martial arts as a sport as long as one understands the difference between playing and fighting for one’s life and limb. Intent is the key.
If you were to learn a new martial arts, what would it be and why?
DM: Brazilian Jiu-Jitsu and Russian Sambo. I have always wanted to put a lot of time in to learn, but have not had the pleasure of doing so.
Do you consider yourself a “prepper?”
DM: Yes. I try to prepare for things that may or may not happen in my life.
What should the average prepper/survivalist prepare for?
DM: Take yourself out of your comfort zone. What would you do if you do not have the things you depend on daily to live? How would you then survive? Your answer to that will give you lessons about yourself that you may or may not be aware of. It will show you your strengths and weakness. Maybe you’re a tech-savvy person, but when technology is out the window, what then? Can you live without certain things? We all say we can do without, but how does your mindset deal with the stress when you are without? Some of us can’t handle it and go through withdrawals. Try going without your smartphone for even a few hours and watch your response. There are some who get stressed. [Laughs] What things are really necessities over niceties? Once you expose the weakness, prepare to strengthen it.
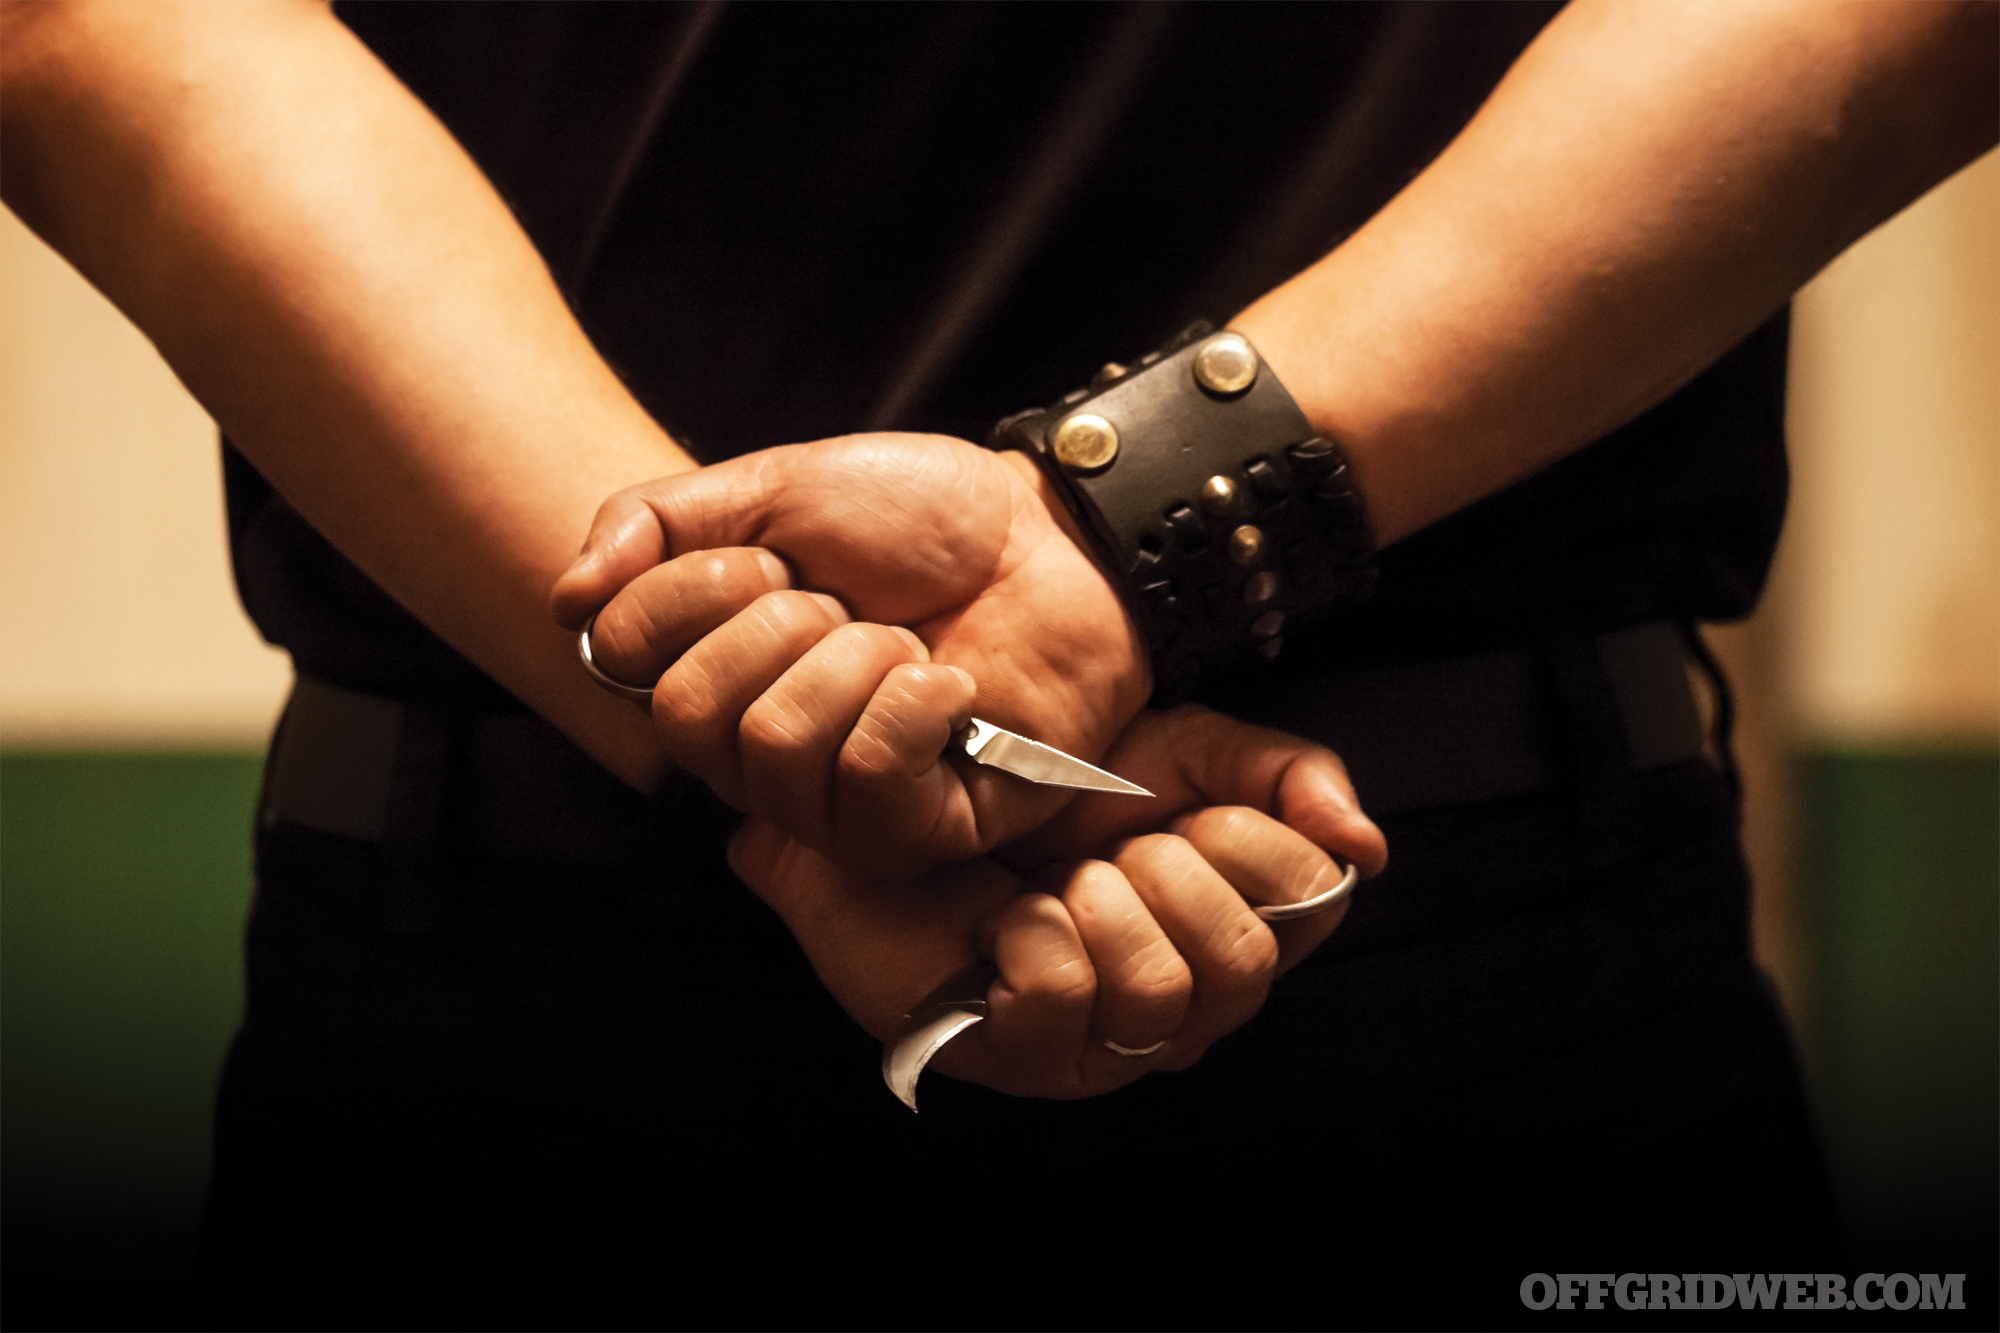
The Bastinelli Knives Le Picouer scalpel.
What’s been keeping you busy lately?
DM: Forged in Fire, knife designing, and martial program writing.
Martial program writing? What is that?
DM: Ever since I transitioned into media, I have not been able to continue my work as a military contractor for my edged and impact weapons instruction. I want to continue this even if it’s in the “train the trainer” capacity, which means write the programs so others can teach them.
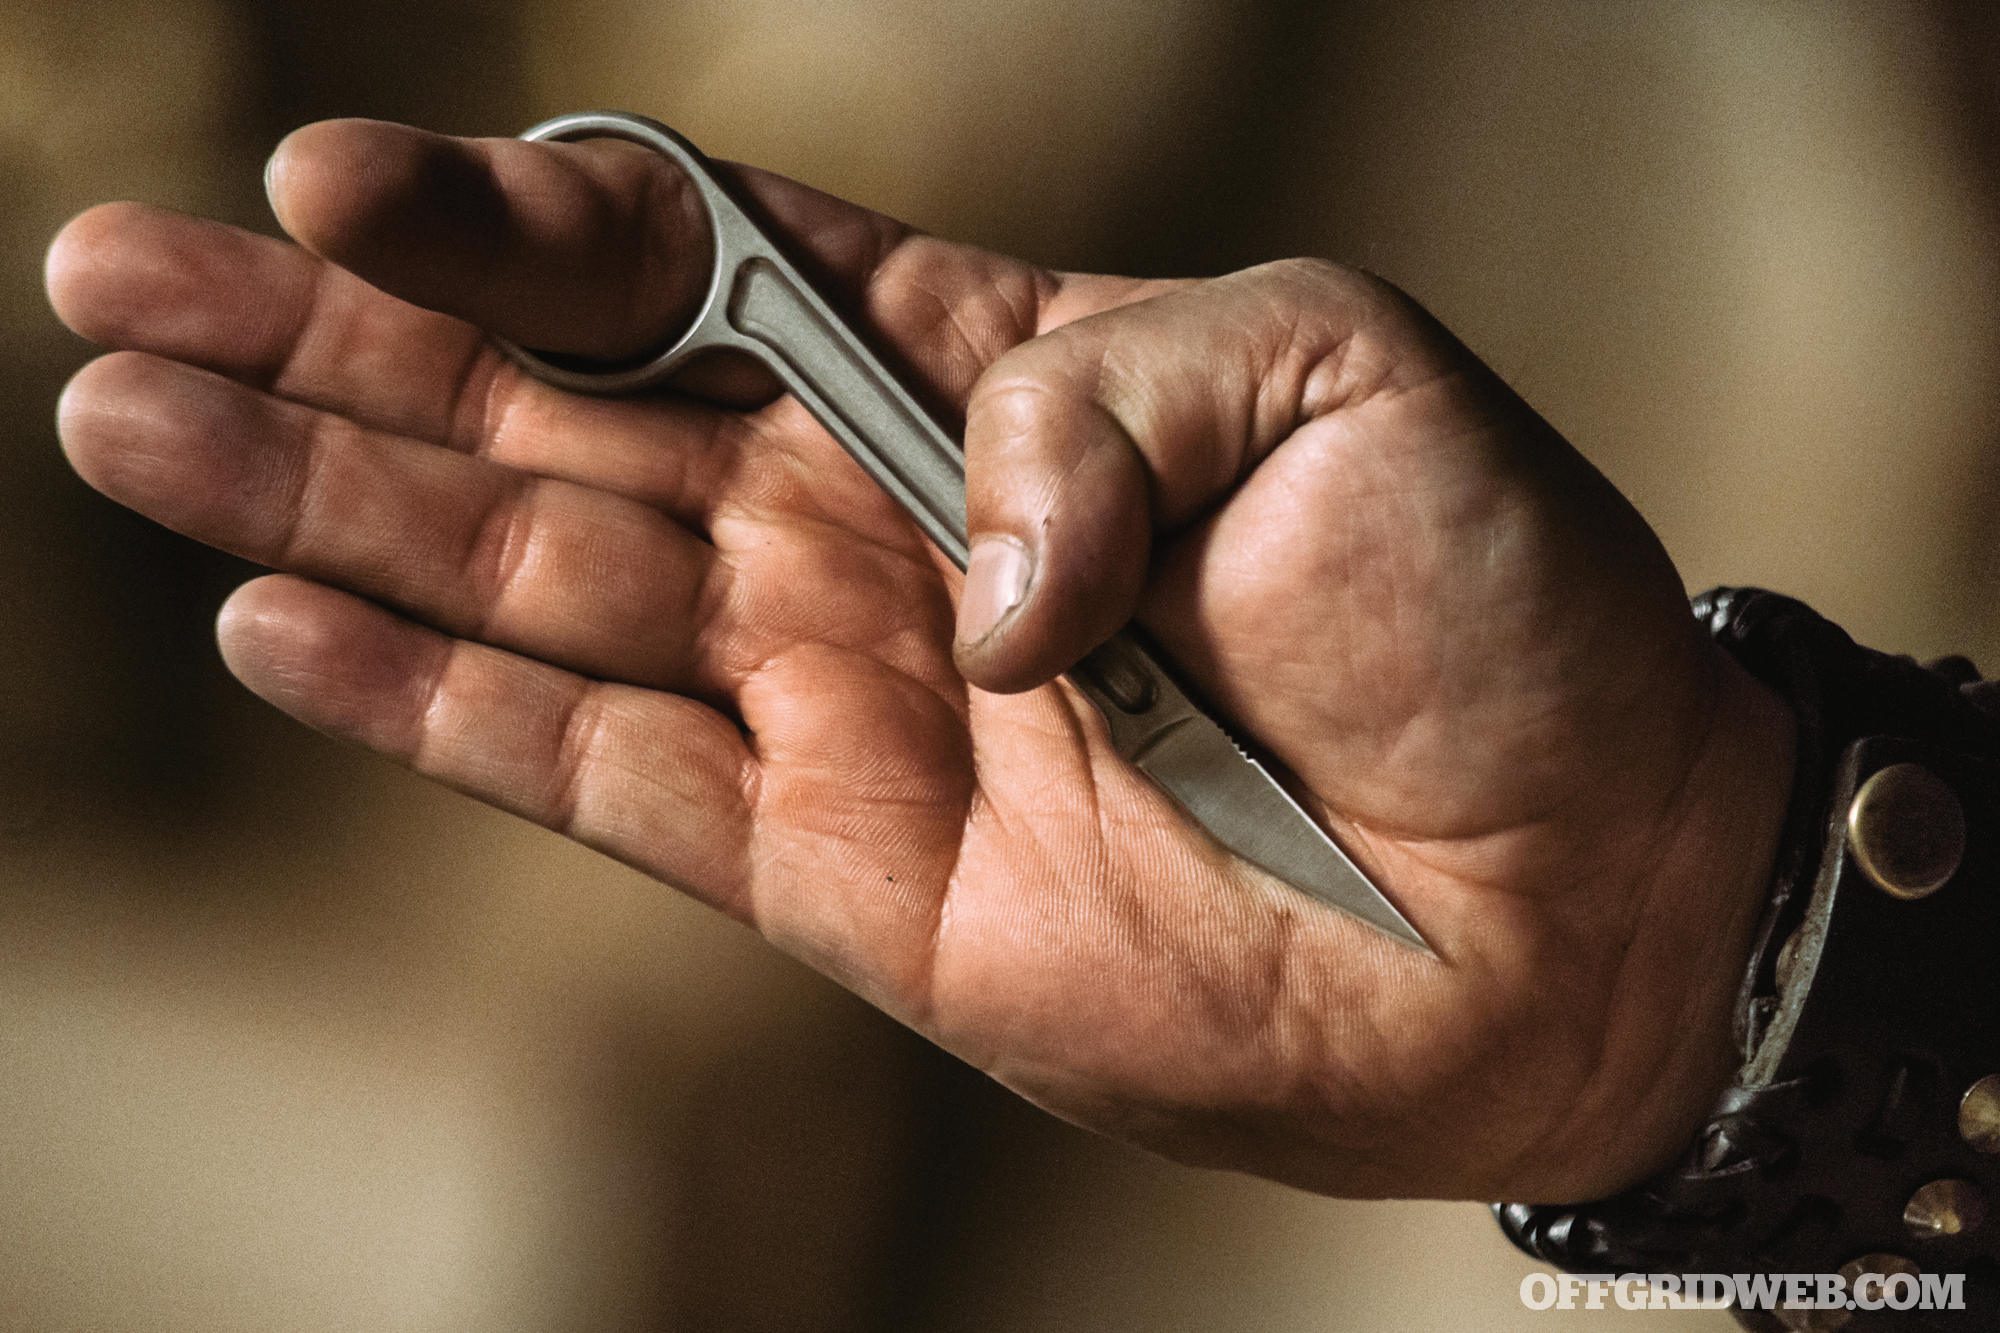
Any cool knife design you’re working on now or have completed recently?
DM: The Kortada Knife and the Kortada Dagger are two of my current designs that I am releasing. The kortada as the word sounds, means “to cut.” This blade design is based on a ginunting (scissor) knife I was exposed to when I was training with the Force Recon Marines. My version has a more acute edge to allow for thrusting, but keeps the geometry to do what it was named to do — to cut.
A man in his element — Doug looking over several of his knife design collaborations.
About Doug Marcaida
Age: 52
Occupation: Martial artist, knife designer, media personality
Base of operations: Rochester, NY
Top 5 recommended reading list:
The Alchemist by Paolo Colhoe
On Killing by Dave Grossman
The Gift of Fear by Gavin De Becker
Just Two Seconds by Gavin De Becker
The Little Prince by Antoine de Saint
Family: Wife, Joelle and three sons: Alex, DJ, and Jaden
Favorite Film: The Last Samurai
Favorite quote: “It’s not about how many you can hurt, but how many you can protect”
Doug’s ring knife designs from top to bottom: Pika karambit satin finish (Bastinelli Knives), Le Picouer scalpel (Bastinelli Knives), The Fox Dart XT (Fox Knives Italy), Pika karambit black cerakote (Bastinelli Knives), DmaX karambit neck knife (Max Venom), Mako Knife folder (Bastinelli Knives).
Access to electricity is something we often take for granted in America, but it has become a critical part of our daily lives. The first thing we do in the morning is flip a light switch, and our use of electronic devices is near non-stop from that moment on — you wouldn’t even be reading this article without electricity. However, the power grid that supports our lights, computers, cell phones, point-of-sale terminals, hospitals, and transportation infrastructure (along with countless other services) may not be as bulletproof as many Americans assume. And if a purposeful attack was directed at the grid, it could leave our nation in a state of chaos.
Photo credit: Steven Biver
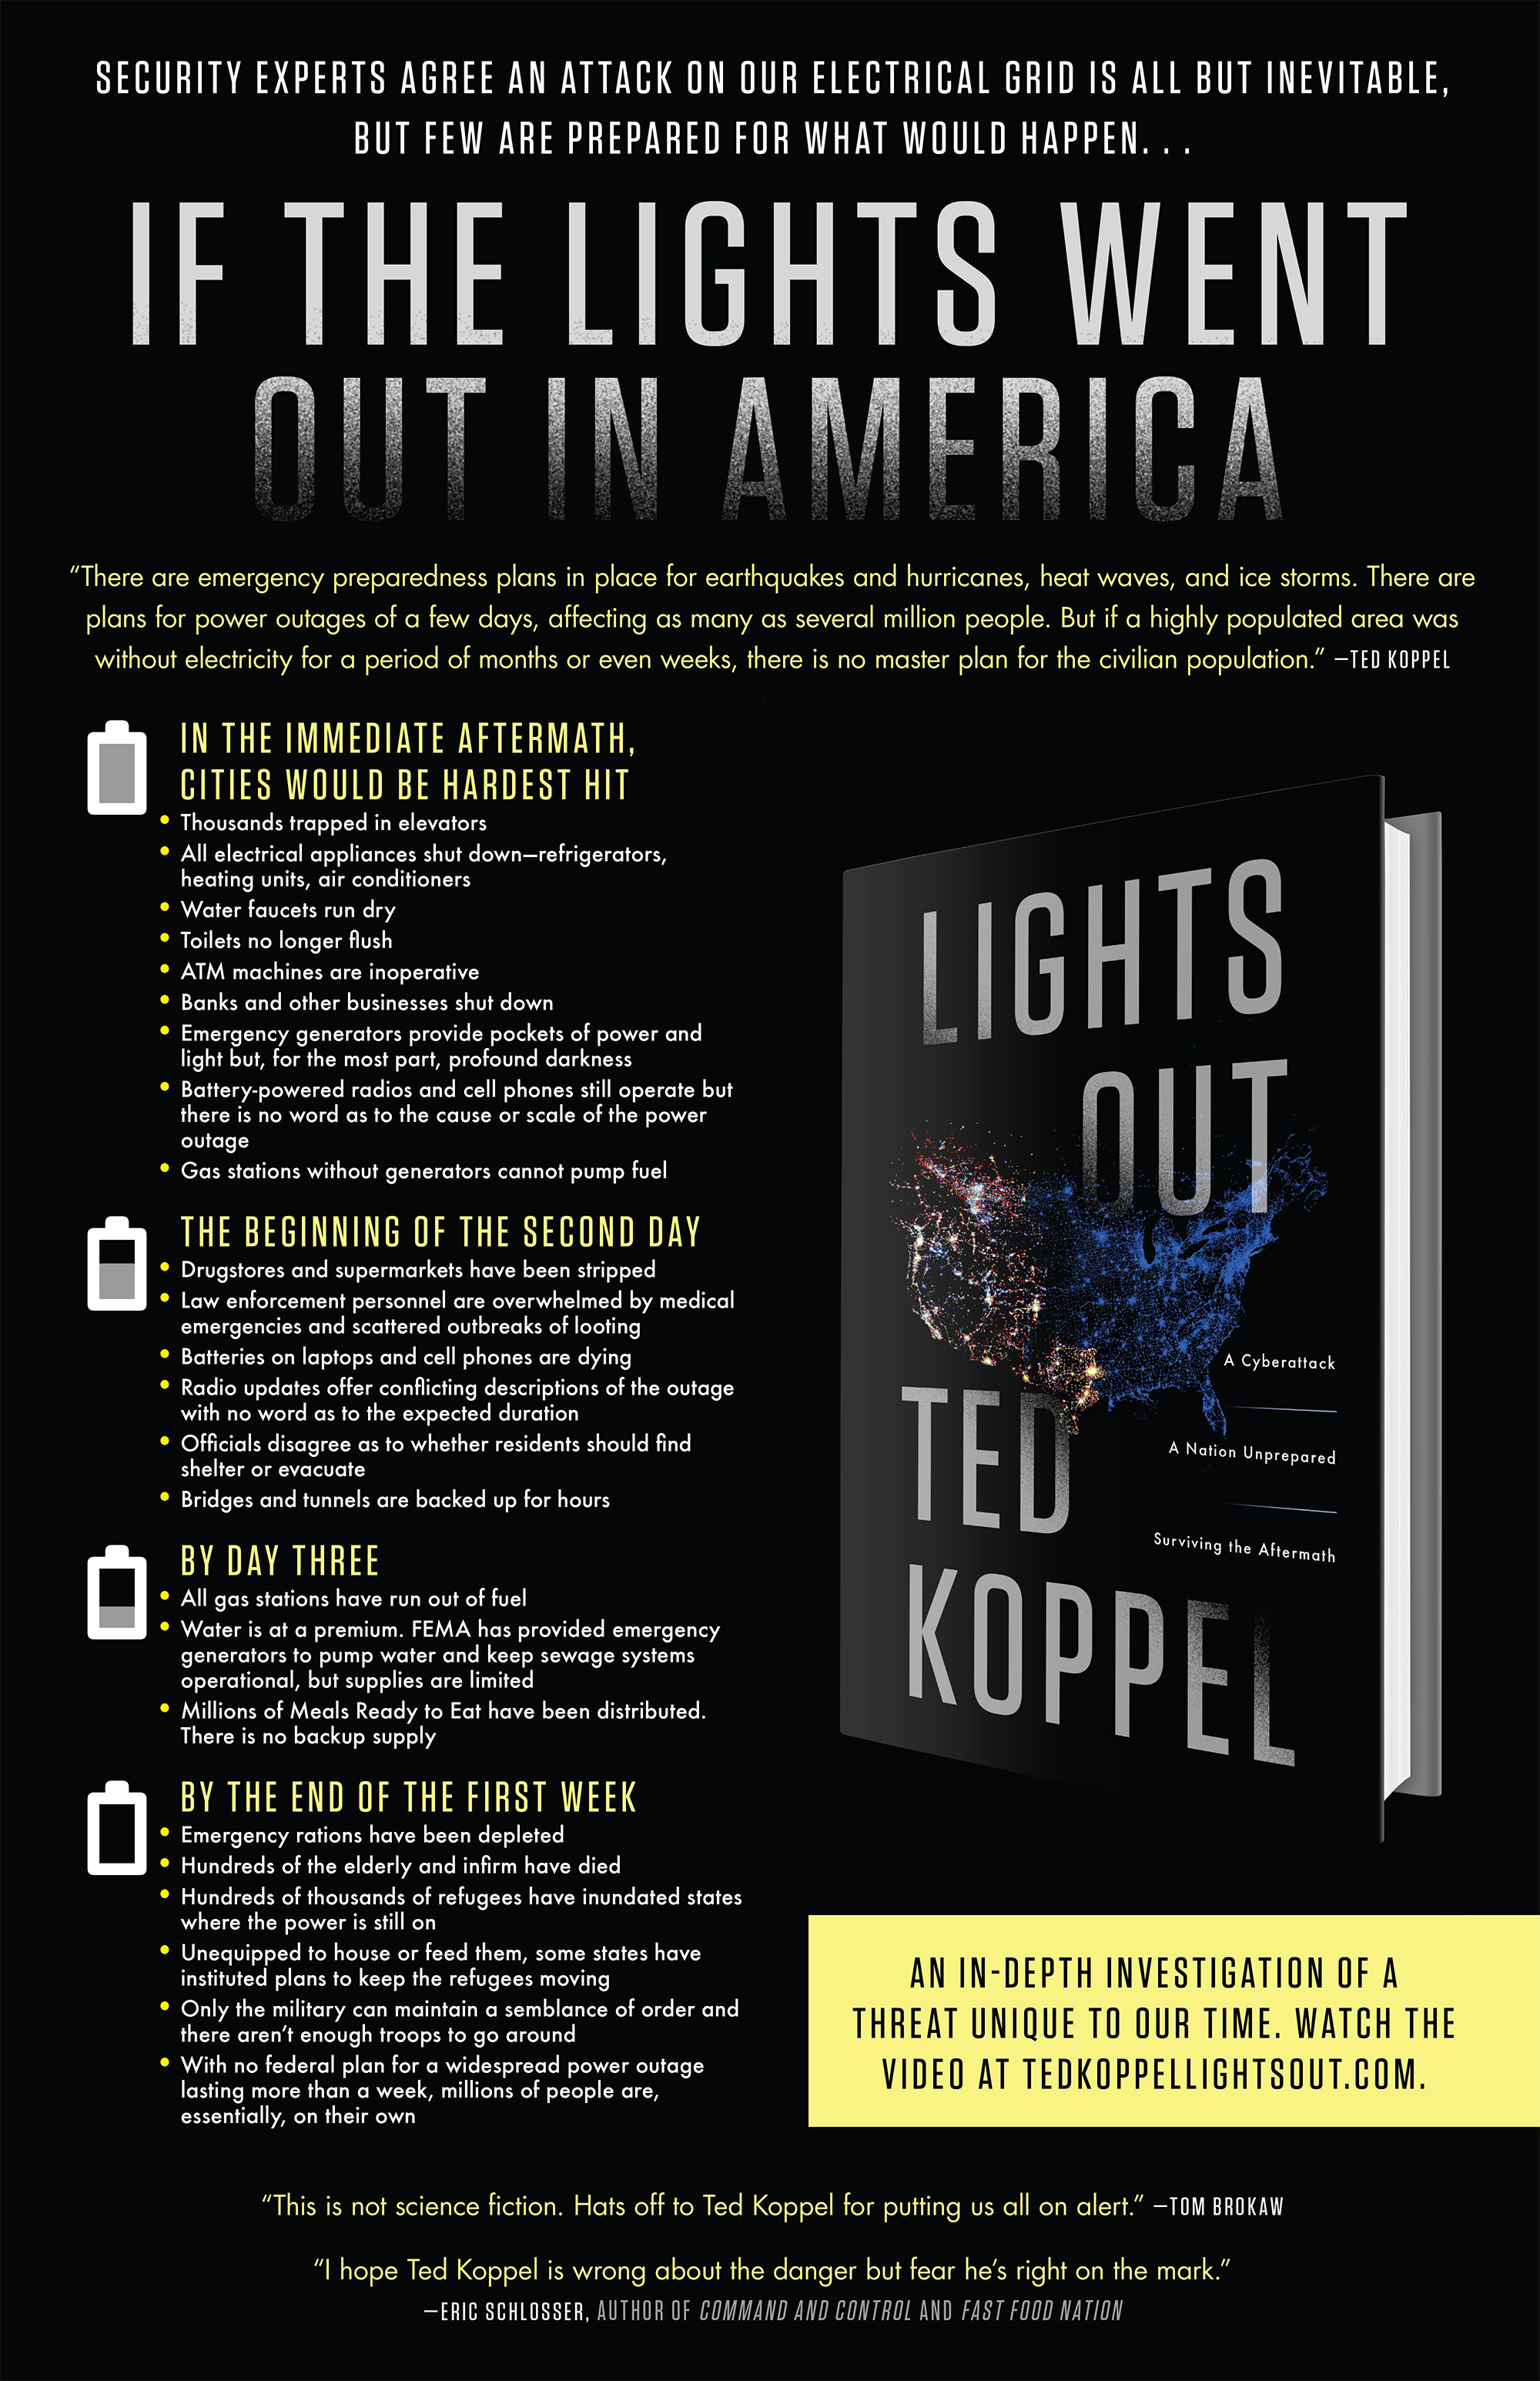
Ted Koppel, the author of the NY Times Bestselling book Lights Out, studied the power grid and analyzed the consequences a targeted cyberattack could have on it. Penguin Random House provided the following Q&A with Koppel, where he discusses the grid’s vulnerability, potential avenues of attack, and his thoughts on how each of us can be prepared for a power grid disaster.
How likely is an attack on our power grid?
Ted Koppel: Very. When I posed that question to former Secretary of Homeland Security Janet Napolitano, she put the likelihood at 80 or 90 percent. General Lloyd Austin, who currently heads up the U.S. military’s Central Command, told me that it’s not a question of “if, but of when.” Former Defense Secretary Leon Panetta has warned of a cyber Pearl Harbor, and President Obama highlighted the threat to our power grid in his 2013 State of the Union address. In short, government and military leaders think it’s likely, and I found no compelling evidence to the contrary.
What could happen if our power grid was attacked?
TK: Depending on the sophistication of the attack it could take out all or part of a grid, of which there are only three in the entire United States. Under a worst case scenario, tens of millions of Americans could be without a normal supply of electric power for weeks or even months. The resulting shortages would, inevitably, lead to civil unrest, with the likelihood that large numbers of people would flee affected cities. The wealthy (assuming they could access their money) could relocate to unaffected parts of the country. Those without means would very likely be urged to keep moving.
You say the Internet should be viewed not only as an incredible tool, but also a potential weapon of mass destruction. That phrase has a lot of immediate connotations, specifically to nuclear weapons. Why use it here?
TK: Weapons of mass destruction are not limited to nuclear. There are biological and chemical weapons that are categorized as weapons of mass destruction. The definition depends on the number of people who could be affected. Using that as a measure, denying an urban population electric power (other than that produced by emergency generators) over an extended period of time would result in significant casualties: patients needing life support systems powered by electricity; the most vulnerable elderly, dependent on electric heating in the winter, cooling in the summer; and the unpredictable casualties that would result from civil unrest when food, water, and medicine are in short supply.
WMDs are not exclusively nuclear, chemical, or biological agents. A digital WMD is a very real possibility.
Why is our power grid so vulnerable?
TK: The electric power industry is made up of more than 3,000 companies, many of them using old and difficult-to-repair equipment. The large power transformers, for example, which are crucial to the transmission of electricity across the country, are almost 40 years old on average. They are enormous, so they are not easily moved or replaced. They tend to be custom made, so they are not easily interchangeable. They are very expensive, so small companies don’t keep backups on hand, and most of them are built overseas and it takes more than a year to get a new one. The largest, most profitable companies have taken elaborate precautions against cyberattack; but they are interconnected with the smaller, less protected companies. Like any chain, the power grids are only as strong as their weakest link.
Who is most likely to mount a cyberattack?
TK: The Chinese and Russians are the most capable of launching an attack against one of our power grids, but because of their many interlocking interests with the United States they are less likely to do so. (As we’ve seen, of course, these ties haven’t stopped the Chinese from launching the biggest cyberespionage attack in history, vacuuming more than 21 million personnel files out of the U.S. government’s computers). The great danger of a catastrophic cyberattack comes from entities that have fewer common interests with the United States: countries like North Korea or terrorist groups like ISIS. There is a growing belief among U.S. intelligence specialists that independent groups already have, or will soon have, that capability.
What kind of plans are in place if the power does go out? What agencies would be responsible in that event?
TK: The only plans our government has in place are those created to deal with natural disasters, such as hurricanes or blizzards. A cyberattack on one of our power grids would be vastly different—its impact would be spread over a far wider area and the outage could last weeks or even months. FEMA and the Department of Homeland Security are the two agencies that have the greatest responsibility to prepare, but they disagree over the likelihood of such an attack and over how to respond.
Couldn’t people just evacuate?
TK: One area of disagreement is over the option of evacuating our urban centers. The deputy administrator (the number two man) at FEMA thinks evacuation is the right option. His boss, the administrator, disagrees. He thinks there would be too many people involved, not enough time and not enough willing host destinations. Indeed, I found that in one small rural state, the governor has developed plans to keep refugees moving: give them a sandwich, a bottle of water, and a map indicating the nearest gas stations.
Who, if anybody, is best prepared for this kind of scenario?
TK: The Church of Jesus Christ of Latter-day Saints, the Mormons, have been conditioned throughout their history to prepare for one form of disaster or another. I devote three chapters to the Mormons and their extraordinary level of organization. It would be difficult for any other institution to duplicate, but there are measures Mormon families take from which the rest of us can learn.
Is there anything ordinary citizens can or should do to prepare for such a possibility?
TK: Preparing for the unexpected is always a tricky proposition. I spent my earliest childhood years in London during World War II. The British had gone to great lengths preparing for poison gas attacks, which never materialized. They evacuated well over a million people from their cities in anticipation of German attacks, but hundreds of thousands of those evacuees, as it turned out, preferred taking their chances at home to being refugees in someone else’s home. Past experience in preparing for the unexpected teaches us that, more often than not, we get it wrong. It also teaches that there is value in the act of searching for answers. Acknowledging ignorance is often the first step toward finding a solution.
The poster below summarizes some of the points Koppel covers in Lights Out. For more information on the book, go to TedKoppelLightsOut.com.
WARNING: The materials provided are for illustration and/or informational purposes only. Any use of the information contained in this article shall be solely at the reader’s risk.
In 2017, natural disasters set many records around the globe. With monstrous wildfires, killer earthquakes, and super-strength hurricanes and floods, 2017 will also be remembered as one of the deadliest and most expensive years in recent history.
But the widespread devastation also highlighted the need for more effective and timely communications — before, during, and after a disaster. This includes not only exploring more efficient ways of identifying victims and allocating relief efforts, but also providing the average person with access to lifesaving resources and communications.
When things go sideways, obtaining accurate and timely information, or getting word from family and friends, can be difficult, if not impossible. But staying connected is a crucial part of surviving a natural or manmade crisis. Enter mobile applications.
In this article, we review 10 mobile applications that could potentially help you prepare for, and survive, a crisis or other public emergency.
Smart Devices and Mobile Apps
Smart devices have become an essential tool in everyday life. Mobile technology, social media, and apps have also started to play an increasing role in emergency/rescue efforts as tools for getting information to and from people in affected areas. Normally, these devices provide us with digital connectivity and round-the-clock access to a variety of information sources from around the globe. When a disaster strikes, however, our access to reliable communications and up-to-date information are usually among the first things to take a hit. Ironically, it’s usually during those difficult moments that our need to stay connected is even greater — from contacting others to sending out an urgent call for rescue.
The apps we considered for inclusion in this review all provide access to resources. They’re not necessarily “disaster” apps, but rather apps that could be useful before, during, and after a real-world crisis. For practical reasons we had to limit the review to 10 apps, but there were certainly many more that we could’ve included.
Your phone can do much more than just call people when service may be jammed. Some of these apps we reviewed here will function without connectivity.
What to Look For
In the 10 apps we reviewed, we sought to provide a practical mix. Each person’s situation is, of course, different, and the apps you choose should reflect your specific needs and circumstances. The following are some factors you may want to consider:
Ease of Use and Reliability: We looked for apps that were easy to download, set up, and use. We also prefer a clean layout, with easy-to-identify links, buttons, and fonts that are big enough for the average person to see clearly. If the app falls short in any of these areas, you’ll likely get frustrated, no matter how good the actual content may be. For many people, reliability is a must, especially during a crisis. Overall, the best apps are useful, fast, convenient, easy to use, consistent, and reliable.
Navigation and Design: Think of this as the layout of the various elements and functions and how easy and intuitive it is to navigate throughout the app. Important information should be conveniently placed. The user should notice that everything flows well. Getting around should be intuitive and easy, and you should be able to do so quickly, too. Functions that are slow and clumsy won’t get used; it’s that simple.
Cost: Many apps are free, and that’s great. But be careful; some of those “free” apps come at the cost of having to endure some very annoying ads. On the other hand, some folks don’t mind paying a few bucks for a great app to avoid seeing a bunch of ads. All the apps on our list are free, although some offer upgrades for a fee, or an option to pay to avoid seeing ads.
No Cell Service Needed: Smart devices have become the multitool of our age. There are literally hundreds of functions that can be performed on these devices. But while many functions don’t require connectivity, the majority require cell service or a Wi-Fi connection.
Many of the apps we reviewed come with pre-loaded content available to the user even without connectivity. This is important if you’ll be relying on that content in the aftermath of a disaster when cell service and/or internet service may be down.
What We Found
With these tips in mind, we took a look at 10 popular apps and put them to the test. While we couldn’t anticipate the real-world conditions that the apps might be subjected to, we looked at each through the lens of how they could be used before, during, and in the aftermath of a crisis. We also evaluated each for daily use and how they could be used in the absence of cell or Internet service. Here’s how they stacked up.
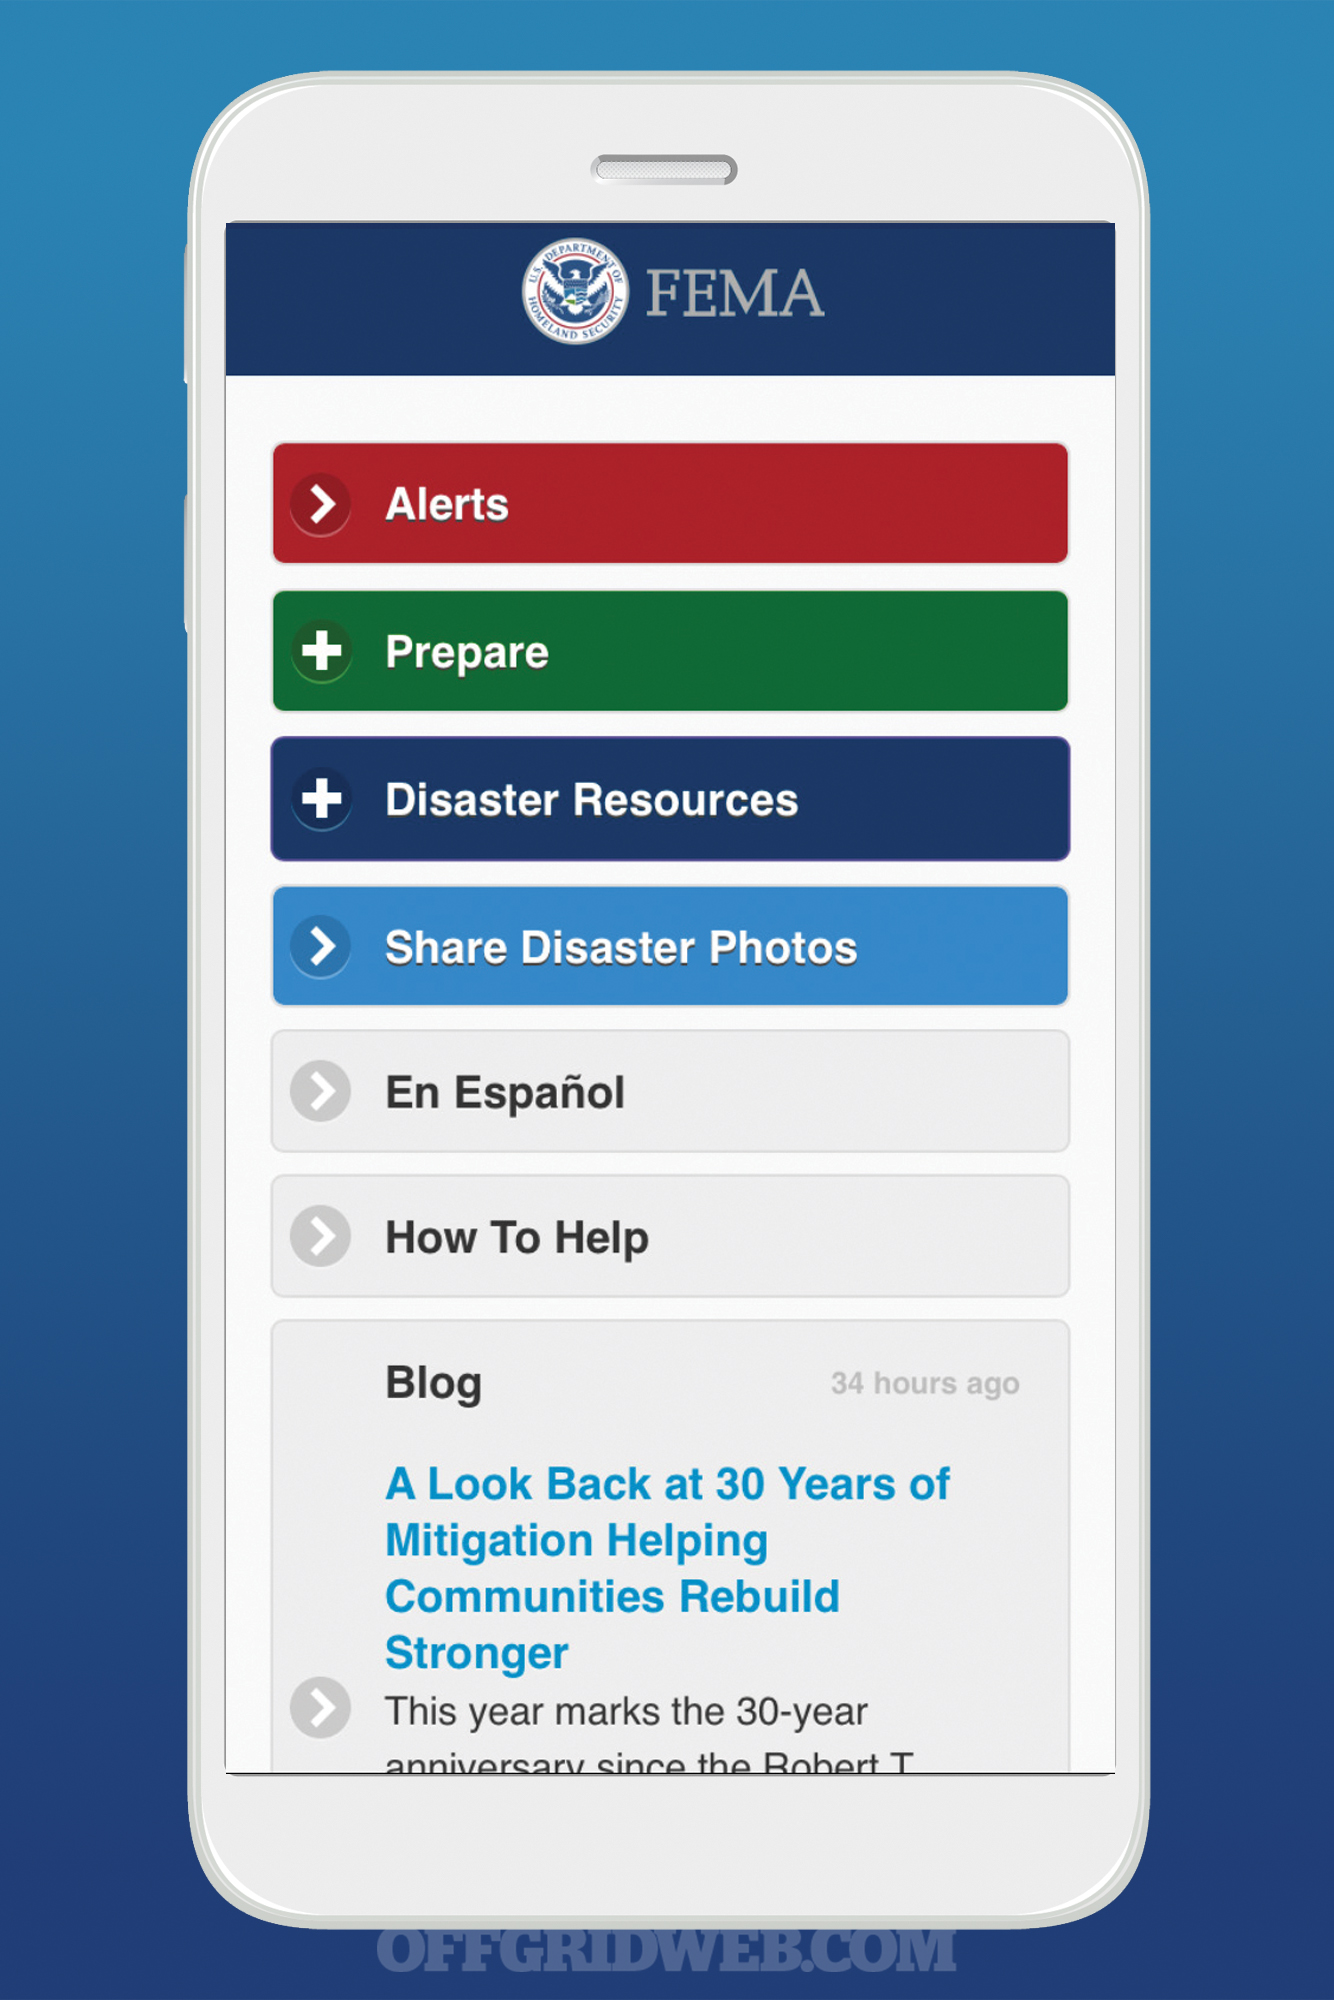
FEMA Mobile App
Seller/Developer Federal Emergency Management Agency (FEMA)
Size 11 MB
Compatibility iOS 9.0 or later. Compatible with iPhone, iPad, and iPod touch; Android 4.0.3 and up
Languages English
Price Free
Notes The FEMA Mobile App packs lots of resources and information into an easy-to-use and navigate package that can receive real-time alerts from the National Weather Service for up to five locations. It also features emergency information and tips and ideas on what to do before, during, and after the crisis. The main menu is separated into four sections: Alerts, Prepare, Disaster Resources, and Share Disaster Photos.
Pros:
Resources for before and after a disaster/crisis
Relatively easy to use and navigate
The “Prepare” and “Disaster Resources” sections work without connectivity.
You can receive weather alerts for up to five locations.
Family sharing allows up to six family members to use the app.
Find Recovery Centers in your area to connect with FEMA representatives.
Call 911 directly from the app
Toggle between English and Spanish
Available for Apple and Android mobile devices
Cons:
While it does provide some summary level information, it shouldn’t be relied upon as your primary source of preparedness material.
The majority of features require connectivity.
First Aid: American Red Cross
Seller/Developer American Red Cross
Size 63.3 MB for iOS/45 MB for Android
Compatibility iOS 9.0 or later. Compatible with iPhone, iPad, and iPod touch; Android 4.0.3 and up
Languages English & Spanish
Price Free
Notes The American Red Cross First Aid app features preloaded content and instant advice for everyday emergencies and basic first-aid tips and information. App also features instructive videos, step-by-step first aid tips/information, and interactive quizzes to test your knowledge. (Tip: The Red Cross also has a Pet First Aid app featuring first aid tips and information, preventive care, and a location finder for vet hospitals and pet-friendly hotels.)
Pros:
Easy-to-use, simple step-by-step instructions for many basic first-aid situations
9-1-1 feature allows you to call for EMS directly from the app.
Safety tips, videos, and animations tackle a variety of scenarios.
Preloaded content ensures access to safety information with or without reception or internet connection.
Content is also available in Spanish by using a simple toggle switch.
App is ad-free and spam free.
Available for Apple and Android mobile devices
Cons:
Light gray text can be difficult to read.
Excessive number of notifications can distract users.
Emergency Alerts: American Red Cross
Seller/Developer American Red Cross
Size 104.8 MB for iOS/45 MB for Android
Compatibility iOS 10.0 or later. Compatible with iPhone, iPad, and iPod touch; and Android 4.4 and up
Languages English & Spanish
Price Free
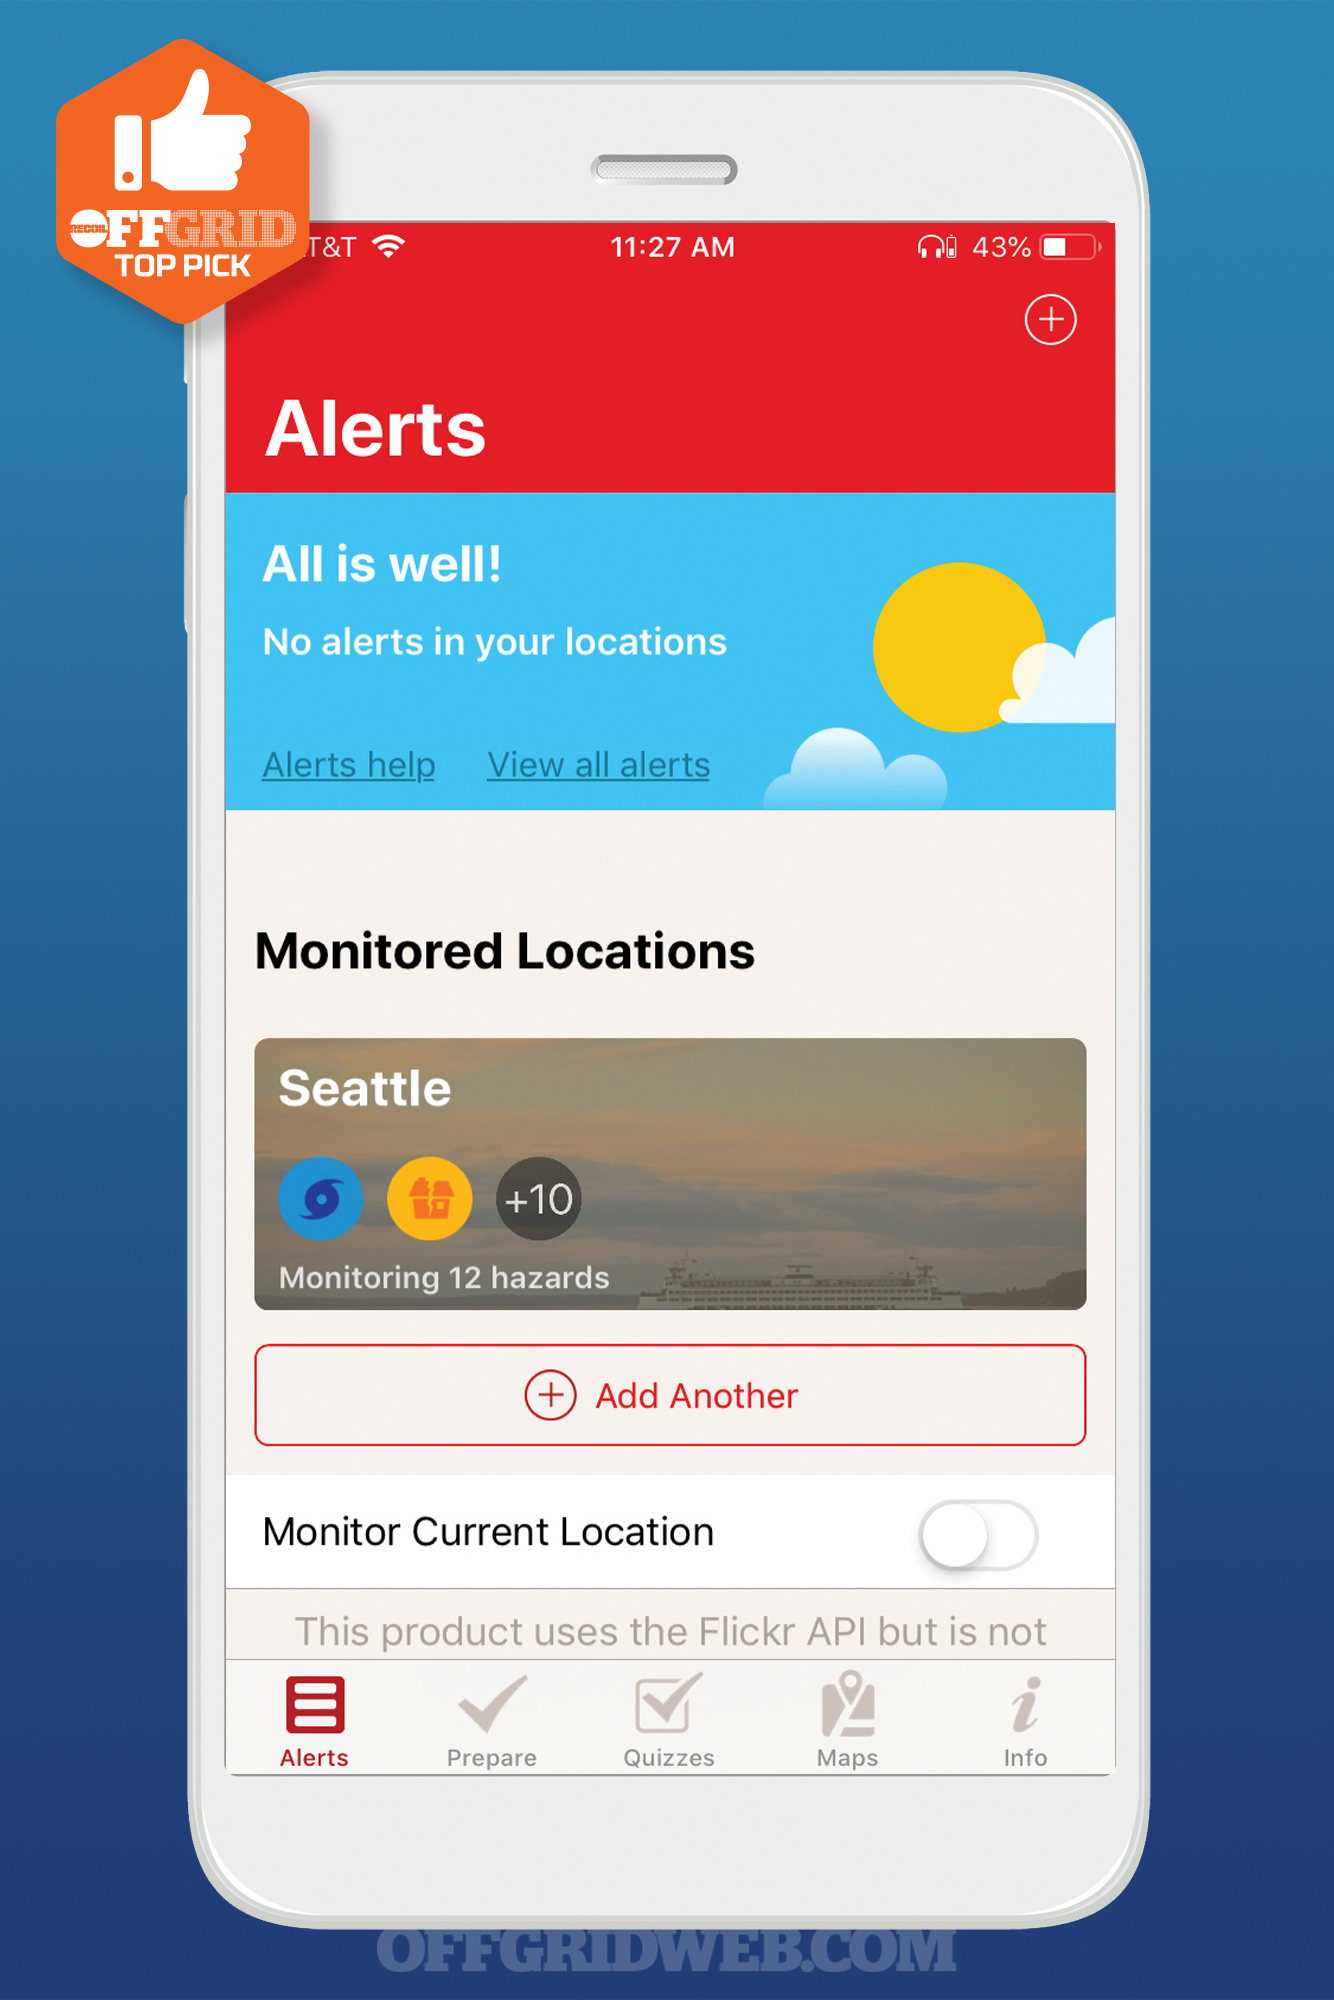
Notes This all-inclusive app from the American Red Cross will help you monitor more than 35 different severe weather and emergency conditions in your area so that you can be aware of approaching hazards. The app provides customizable real-time alerts to help you prepare for oncoming threats. App also features preloaded emergency content, providing instant access to help you even without connectivity.
Pros:
Monitor for earthquakes, tornadoes, hurricanes, flood, winter storms, extreme heat, wildfires, and severe weather
Connect with loved ones to share alerts
Customizable alerts and notifications
Preloaded content ensures access to safety information with or without reception or internet connection.
Map showing locations of Red Cross shelters
Step-by-step directions and guidance on making a family emergency plan
Toolkit with a flashlight, strobe light, and audible alarm
Content is also available in Spanish by using a simple toggle switch.
Available for Apple and Android mobile devices
Now supports Apple Watch OS 4.0 and above, and Android Wearables 2.6 and above
Cons:
Text can sometimes be difficult to read.
Excessive number of notifications can distract users.
You may receive notifications soliciting blood donations.
Mayday Safety
Seller/Developer Ryan Cleckner
Size 50.6 MB for iOS/7.0 MB for Android
Compatibility iOS 10.0 or later. Compatible with iPhone, iPad, and iPod touch; Android 5.1 and up
Languages English
Price Free, available upgrade packages
Notes With Mayday Safety, you can send and receive emergency notifications. With a cell phone signal or Internet connection, the Mayday safety app allows users to send and receive emergency alerts to and from contacts on a worldwide basis. You can also share your precise location and other contact information. The Mayday Safety app alerts convey who needs help and where they are.
Pros:
Easy to use under stress — three presses of the Mayday button sends an emergency alert to Mayday Safety app users nearby
Simple and effective communications during emergency situations
Free for individuals, can be upgraded to include family members and organizations anywhere around the world
Safety checks with loved ones included in the family account upgrade
Possible upgrades, including Mayday Pro Dashboard, provides services on an organizational level and allows tracking, safety checks, notifications, locations, and a full view of emergency details to and from the entire organization or specific individuals on the interactive map dashboard.
Available for Apple and Android mobile devices
Cons:
Full functionality of the app requires upgraded account/subscription; packages start at $9.95 per month.
Continued use can dramatically decrease battery life
Medical ID
Seller/Developer Medical ID App
Size 5.7 MB for Android/5.4 MB for iOS
Compatibility Android 5 and up. iOS 8.0 or later
Languages English
Price Free, available upgrade
Notes Use Medical ID app to store your important medical/health information. It’s similar to a physical medical ID bracelet, but with much more information. During an emergency medical situation, the Medical ID app provides first responders, medical staff, and doctors with instant access to your medical information, like allergies and medical conditions that may affect your treatment.
Pros:
Emergency call screen provides access to Medical ID information without unlocking the device.
Provides current location including address and GPS coordinates
Nearby hospital locator
Access to medical information without a cell signal or internet
Elegant design
Speaks for you, when you can’t speak for yourself
Call 911 directly from the app
Very easy to use, navigate, organize, and customize
Available for Android mobile devices (iPhones running iOS 8 or later already have Medical ID within the Health App).
Cons:
Full functionality of the app requires one-time upgrade at a cost of $5.99.
Viber
Seller/Developer Viber Media SARL
Size 212.7 MB for iOS/35.15 MB for Android
Compatibility iOS 9.0 or later. Compatible with iPhone, iPad, and iPod touch; and Android 2.3 or higher
Languages English, and about 39 other languages
Price Free
Notes Viber is a free secure call, text, and video messaging app that can help you stay connected to contacts around the globe. Any person on your contact list who also has the app can be reached quickly and efficiently. It’s easy to set up and use, connections are reliable, and you even get a confirmation that your message was delivered. This is an app that people can use on a daily basis, especially to communicate with contacts in other countries without incurring international fees.
Pros:
Group chats, audio and video calls, including international
Instant voice and video messages
End-to-end encryption
According to Viber, nothing you share is ever stored on their servers once the message is delivered, and none of that private information will never be sold to third parties or advertisers.
Self-destruct timer automatically deletes messages from the recipient’s phone once it’s read.
Available for Apple and Android mobile devices
Cons:
Requires an Internet connection; Wi-Fi is preferred
In-App purchases can get expensive
Waze
Seller/Developer Waze, Inc.
Size 151.2 MB for iOS /69.38 MB for Android
Compatibility iOS 9.0 or later. Compatible with iPhone, iPad, and iPod touch; and Android 2.2 or higher
Languages English, and approximately 41 other languages
Price Free
Notes Mobile app to help you plan your driving route based on real-time, crowd-sourced traffic information, detailing road congestion, accidents, construction, police activity, etc. Waze also provides information on alternative routes to help you avoid problem spots along your route and help you arrive at your destination faster. The app also allows you to see if your friends are also on the road and to see their location.
This is an app that people use on a daily basis to help manage their commute, but it can also be a very valuable tool during an evacuation or some other emergency situation that requires a quick departure and road travel to reach safety.
Pros:
User-friendly, easy to use, and information that’s constantly being updated
Real-time navigation and traffic data that allows you to make fast decisions to arrive at your destination faster.
Pop-up alerts on police activity, accidents, road hazards, and traffic jams
Gas price reports along your route
Waze claims more than 50-million users
Available for Apple and Android mobile devices
Cons:
The app may continue accessing your location even when it isn’t open, which may substantially decrease battery life.
User interface can be cumbersome to navigate.
Pop-up ads for local businesses may occasionally appear.
GasBuddy
Seller/Developer GasBuddy Organization, Inc.
Size 190.7 MB for iOS/46.76 MB for Android
Compatibility iOS 10.0 or later. Compatible with iPhone, iPad, and iPod touch; Android 4.4 and up
Languages English
Price Free
Notes The GasBuddy App allows you to locate gas stations near you with the lowest price using gas price information provided by a community of 70-million users. While the app offers a number of other features, the ability to find gas stations before, during, and after a crisis can be a major advantage for motorists.
Pros:
Resources for before and after a disaster/crisis helping you find open gas stations, at home and while on the road
Filter search results by price, location, brand, and convenience store details
Provides price hike alerts
Works in USA, Canada, and Australia
Available for Apple and Android mobile devices
Cons:
The app may continue accessing your location even when it isn’t open, which may substantially decrease battery life and continue using data.
You should expect to see ads.
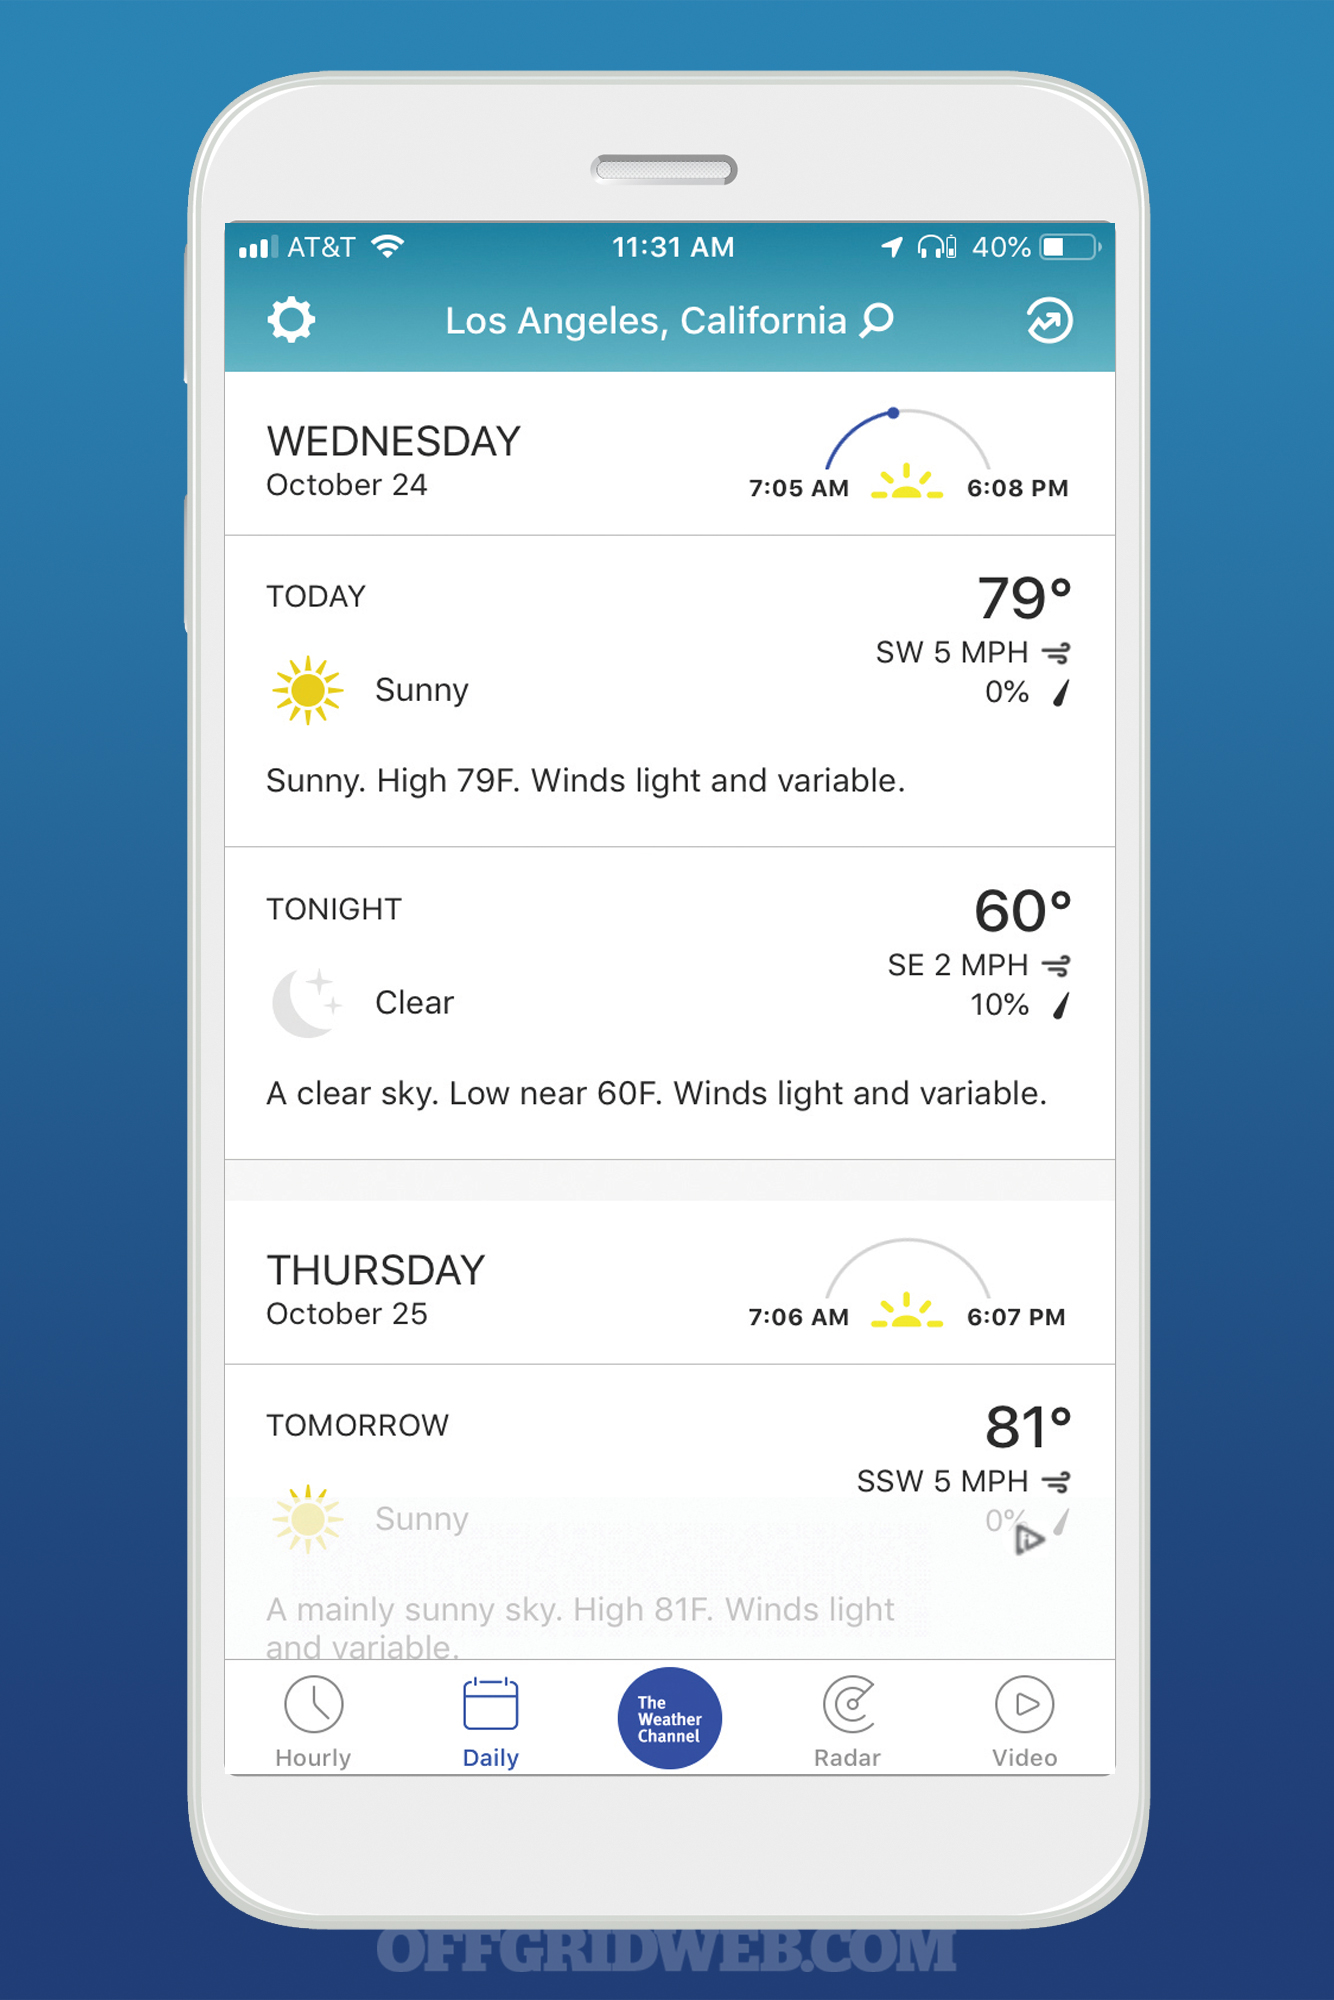
The Weather Channel
Seller/Developer The Weather Channel
Size 141.8 MB for iOS/29.9 MB for Android
Compatibility iOS 11.0 or later. Compatible with iPhone, iPad, and iPod touch; Android 4.4 and up
Languages English, and over 30 other languages
Price Free
Notes Plan ahead with accurate, reliable weather forecasts for up to two weeks in advance no matter where you are. Includes fast-loading interactive radar maps and real-time alerts. Easy-to-find weather information using weather graphs, instant insights, and interactive tools to stay informed of all weather conditions.
Pros:
Live alerts and safety advice for extreme weather events, including floods and hurricanes
Air quality reports for the U.S., UK, Spain, France, Germany, Mexico, China, and India
Sleek, well-designed interface with new home screen and easy-to-use navigation bar
Hourly forecasts, including rain and snow alerts
Lightning alerts for your GPS location to advise you where lightning is striking nearby
Weather news, videos, and other informational content
Fast access to detailed weather information and individual conditions to see how they’ll change over the next hours or days
Available for Apple and Android mobile devices
Cons:
The app may continue accessing your location even when it isn’t open, which may substantially decrease battery life and continue using data.
Expect to see ads unless you pay a $3.99 single payment in-app purchase to remove the ads.
Zello Walkie Talkie
Seller/Developer Zello, Inc.
Size 64.2 MB for iOS/18.68 MB for Android
Compatibility iOS 8.0 or later. Compatible with iPhone, iPad, and iPod touch; Android 4.4 and up
Languages English, and over 18 other languages
Price Free, with premium channel upgrade for $0.99
Notes The Zello app turns your smart phone into a walkie-talkie with a push-to-talk radio app. Talk to your contacts privately or join public channels. The app is free and works anywhere in the world as long as you have an internet connection.
Pros:
Live voice over any network or Wi-Fi connection (2G, 3G, or 4G mobile data)
Send photos, text, or your location to your contacts
Replay any messages you may have received, even if your phone was turned off
Shows availability of your contacts and text status
No ads
Available for Apple and Android mobile devices
Cons:
The app may access your location even when it isn’t open, and can significantly decrease battery life.
Requires an Internet connection or cell service
Wrap Up
Emergencies come in all shapes and sizes, and getting accurate, up-to-date information or communicating with others in the middle of a crisis or public emergency can be a huge challenge. But with today’s mobile technology and the right apps, you can provide yourself with a major advantage. Whether you live in the mountains or along the coast, there are apps that can not only provide timely and accurate emergency information, but can help you send out a distress signal, transmit your location in an emergency, or contact friends and family members.
If you’ve spent any time browsing gun photos on Instagram or other social media platforms, you’ll know that so-called Gucci Glocks are all the rage these days. It seems like everyone and their mother is upgrading a Glock with fancy parts until almost nothing remains of the original gun, and that’s not even including the 80% builds that provide a blank canvas for customization. Although these projects may receive a deluge of likes on social media, we’re sometimes left wondering how many of them are just safe queens or temperamental range toys.
The Upgrade/Downgrade Conundrum
As preparedness-minded individuals, we like plinking at the range as much as any other red-blooded American, but we also prefer our weapons to remain practical and reliable for real-world defensive use. Form over function isn’t really our thing. We want to know that we can keep that weapon close at hand in case of emergency, and trust it to go bang every time we pull the trigger. Anything else is probably just an entertaining novelty item to flex on people with less disposable income.
So, what are some upgrades we can add to a plain-jane Glock 19 that will improve function without downgrading dependability? We started by looking at the slide and barrel, since these parts can easily be swapped out for the stock counterparts if we ever want to return to the original configuration. They offer more serrations for gripping the slide, tighter tolerances for improved accuracy, and they provide the ability to add an RMR or other micro red dot optic as well as a suppressor or compensator. And, of course, they make for a nice cosmetic change as well.
Grey Ghost Precision Glock Parts
You may recall our recent review of the Grey Ghost Gear Gypsy backpack. The guys at Grey Ghost have also been expanding more into the gun market with parts and even complete pistol and rifle builds under their Grey Ghost Precision brand. Relevant to our aforementioned search for G19 upgrades, GGP offers both slides and barrels for several Glock models. Stripped slides are available for the G17 Gen 3 and Gen 4, G19 Gen 3 and Gen 4, and G43.
The Grey Ghost Precision G19 slides are machined from billets of American-made 17-4 stainless steel, and feature tighter tolerances than the OE Glock slides. Each slide is finished in a durable black nitride coating. Each also includes an RMR red dot cut, and comes with a GGP-logo G10 blanking plate and mounting screws.
Two patterns are offered for these slides — V1 is composed of diagonal serrations with lightening cuts at the front, while V2 has a hexagonal “geoscale” texture. As we said previously, there are versions for Gen 3 and Gen 4 guns.
Side-by-side comparison of the two available patterns for Grey Ghost Precision Glock 19 slides.
As for the barrels, they’re currently available for the G17 and G19. They’re constructed from 416R stainless steel, with tolerances of +/- 0.003″ and match chambers that meet Sporting Arms and Ammunition Manufacturers’ Institute (SAAMI) specifications. The barrels have a 1:10 twist rate, and can be had either uncoated or with a black nitride finish. For those who want to run a can or a comp, GGP offers optional 1/2 x 28 threads with an included thread protector.
GGP G19 Gen 4 V1 Slide
We decided to try out the V1 slide ($450 MSRP) for our Glock 19 Gen 4. It arrived in a neatly-packed foam case, along with the pre-installed blanking plate, two long screws for use with an RMR optic, and an assembly/installation guide. The manual also has a QR code that points to the slide assembly guide video:
Slide Completion Parts, Sights, & Trigger from Brownells
The Grey Ghost Precision slide is stripped, so we still needed completion parts before it’d be usable. Per the manual, you’ll need the following items to complete it:
Firing pin and spring
Channel liner
Complete extractor with LCI
Extractor plunger assembly
Spring cups
Safety plunger and spring
Recoil spring/guide rod assembly
Rear slide plate
Sights
We headed over to Brownells.com to pick up these items. The all-in-one Glock 19 slide completion kit ($80 MSRP) was out of stock at the time, so we filled our cart with the individual components we needed:
The anodized aluminum backplate from ZEV was a nice finishing touch for our slide.
Since it was so easy to swap, we re-used the original recoil spring assembly from our G19 rather than buying a replacement. We also selected a set of Trijicon HD night sights ($141 MSRP), with a combination of tritium and bright orange paint for visibility in all light conditions. It’s worth noting that you’ll need to be cautious when selecting sights for any aftermarket slide, since large-footprint sets like the TruGlo TFO may not fit with the RMR cut. The Trijicon set, however, worked perfectly.
Lastly, we knew that a heavy stock trigger would be out of place on this build, but we also didn’t want an ultra-light trigger for a gun we plan to carry. So, we chose an Apex Action Enhancement Kit ($123 MSRP) to reduce trigger pull by about 1 pound, eliminate excess travel, and smooth out the reset. This drop-in kit includes the trigger, connector, and safety plunger.
Using the process shown in Grey Ghost Precision’s video, we assembled the slide internals at home with a set of punches, and also installed the Apex trigger. A local shop easily pressed in the Trijicon sights, completing our slide.
GGP G19 Match Grade Barrel
The last piece of the puzzle was the barrel, and we chose one with black nitride finish and threading ($190 MSRP). It features machined GGP lettering, 9mm designation, and recesses on top that match those on the slide. The thread protector ring has a machined texture that provides a cool visual touch and offers plenty of grip for quick removal.
After installing the barrel and lubricating the gun, we could finally load up and head to the range.
At the Range
To check the reliability of our newly-upgraded G19, we ran through several boxes of our typical Federal 115gr FMJ range ammo. About 20 rounds in, we got a single nose-up failure to feed:
However, more than 100 rounds later we were unable to replicate this jam. Next we shot 20 rounds of Federal HST 147gr hollow-points, and the Glock ran smoothly with these as well. Aside from the isolated malfunction shown above, there was nothing unusual to report.
Although we didn’t conduct scientific testing, we noticed a slight improvement in groups which we attribute to a combination of the match barrel’s tighter tolerances and the improved Apex trigger. The high-vis Trijicon sights were also helpful for follow-up shot placement.
Conclusions
Overall, we felt our upgraded G19 ran great. The single failure to feed was worrying at first, but its early occurrence and our inability to replicate it later leads us to believe it may have been a break-in issue. We’ll continue to run the gun at the range with various ammo to further bolster our confidence in this conclusion, but for now we’re satisfied in its reliability. A pattern of jams would be a cause for concern; an isolated one on brand-new parts is not.
Racking the slide is easy thanks to its aggressive serrations, and its lightening cuts add a little visual flair without going into over-the-top space gun territory. There’s also the option to add an RMR, which we plan to do in the future. For now, we’re very pleased with the Trijicon HDs.
The GGP match barrel offers a slight improvement in accuracy due to its tight tolerances, but a bigger selling point for us is its threads. This provides the means to add a suppressor or compensator — we shouldn’t have to explain the many benefits of a suppressor, but if you’re curious about the benefits of carry pistol comps, check out this article by RECOIL’s Dave Merrill.
As for the Apex Action Enhancement Kit, we’d consider it a nice incremental upgrade for a carry gun. It maintains most of the weight of the trigger pull while smoothing the action and adding a crisper reset. We’ve shot enough Glocks with 2-pound triggers to know that’s not what we wanted, and so we’re glad we added the Apex kit to our Brownells order.
Though we may not have achieved full Gucci status without ostentatious frame work, brightly-colored magazine base plates, and a custom Cerakote job, we’re happy with our tuned-up G19. The total upgrade MSRP was $1,011 not including the gun, and many of you may prefer to allocate that kind of money to buying another pistol — an understandable choice. But if you’re looking to make your existing Glock even better without destroying its reliability, adding a few carefully-chosen parts is a good way to go. All those Instagram likes you’ll rake in are just a nice bonus.
For more information on Grey Ghost Precision Glock slides and barrels, or the company’s turn-key Combat Pistol, go to GreyGhostPrecision.com. For slide completion parts, sights, triggers, magazines, ammo, and other items you’ll need, check out what Brownells has to offer.
As survivalists, all of the gear we purchase or invest in is necessary, but some of it just isn’t that exciting. Water purification system? It’ll save you from contracting nasty parasites, but it’s not exactly a conversation piece you show off to all your friends. A lighter, stronger groundsheet to place under your tent? Meh. Other objects, thankfully, smack of high adventure and exploration, of manifest destiny and blazing a trail. The compass, clearly, falls into the latter category.
If you still question why you’d ever need a compass since your phone has Google Maps and GPS, then this probably isn’t the article for you. If, however, you’ve ever gotten lost in the woods because your phone (or handheld GPS) ran out of batteries, lost signal, or fell into a creek, then settle in and read up on the latest offerings we’ve collected.
We explore six different compass models in this buyer’s guide, ranging the entire spectrum from basic backpacker to professional off-grid adventurer. Our hope is that this guide assists your decision-making process the next time you consider supplementing your survivalist land-nav tool belt. If you’re still wondering how exactly to use one, please refer to Ryan Cleckner’s article on land navigation from Issue 29.
Brunton Conventional Transit
Everything about this precision compass exemplifies high quality and durability — and for its stratospheric price, it’s about what we’d expect to see. From the oiled leather case that it arrives in to the heavy (nearly 1/2 pound) cast-aluminum body, it definitely looks the part of a tool designed for serious and long-term use.
Designed in 1894 by Canadian-born mining engineer David W. Brunton, the Transit is widely used to this day by professional geologists and engineers. The movement of the needle is smooth and very fast, with immediate dampening and ability to “lock on” to magnetic north faster than any other compass we tested. This is because rather than being filled with fluid like most compasses, the Brunton utilizes magnetic induction damping and a sapphire jewel bearing, contributing to smooth movement through 360 degrees.
Its locking clamshell design helps to protect its sensitive components; however, we found it could be difficult to open with shaky or cold hands, and impossible (for us) to open with gloves on. This drawback isn’t necessarily a deal breaker, but it’s indicative that it was designed more for use by professionals in relatively pleasant weather conditions — not so much for survival in frigid environments.
Unlike some of the other models we tested, the Transit has no tritium or glow-in-the-dark inserts; therefore it isn’t as easily readable in low-light conditions. Again, this isn’t really a design flaw since it was designed for professionals reading the compass during the day, at a time that’s convenient for them. However, for survival purposes we have to consider it a drawback.
Would we take it with us if our lives depended on it? Probably. Would we want to pay $400 for it? Not really. The product is basically unparalleled, but it may be a bit more than we really need or want to plunk down money for. Published accuracy +/- 0.5 degrees.
More than 60 years after its original design as specified by the U.S. Army, the Cammenga 3H is also known as the M1950 compass, which began production in 1950. It’s been relied upon by generations of soldiers through all environments, including the frozen Chosin Reservoir in Korea, the jungles of Vietnam, and present-day service in Iraq and Afghanistan. It took its design cues from lessons learned with the M1938 compass used in WWII. The Army liked the basic blueprint but wanted to give it a tougher and heavier housing as well as a damping mechanism to prevent wild swinging of the needle. With these modifications, a legend was born.
Like the Brunton model, the 3H is made in the United States and uses a non-liquid filled needle housing. The movement of the needle is very smooth, although it doesn’t turn or settle in quite the same confident or reassuring manner as the Brunton. We liked that we were able to open and use the compass using our whole hand, not just our fingertips as with the larger Brunton. Opening and sighting was faster and more intuitive, and the seven tritium micro-lights assisted in low-light acquisition.
From a durability standpoint, there’s no question that the 3H is hard to kill. It’s waterproof and shockproof, and tested in temperatures from -50F to 150F (-45C to 65C). The aluminum frame, although not quite as tank-like as the Brunton Transit, is still substantial and didn’t have a problem with being dropped or stepped on.
Even in 2018, any combat veteran who has actually had to rely on his or her gear will tell you that some of the Mil-spec articles they’re issued are complete junk. With a sterling track record and a more than half-century of abusive field testing behind it, the 3H is a well-loved exception. We wouldn’t hesitate to place our lives in its hands, and there aren’t many sub $100 tools we can say that about. Published accuracy: +/- 2.25 degrees.
Pros:
Basically the same compass your father (and/or grandfather) used
Unrivaled reliability record
All-temperature performance
Cons:
Without a clear baseplate, may not be quite as easy to read maps
Compass card divided into 5-degree increments; not as precise as some other compasses
Our first impression was that we’d found this as a “prize” in the bottom of a Cracker Jack box or it was the one Morgan Freeman bought at the pawnshop in Shawshank Redemption. The thin plastic housing felt like it might snap in two as soon as we opened the case.
After opening it, we worried that if we stepped on the compass it’d break, yet were pleasantly surprised that somehow it stood up to a 230-pound man putting all his weight on top of it (following the navigational testing, of course).
Trying to sight the liquid-filled compass wasn’t easy, but it was doable. The nail in the coffin, however, came when we couldn’t get the needle to align properly. No amount of tapping or cajoling would yield a consistent reading, and magnetic north consistently wandered between 10 to 20 degrees away.
Although this compass is inexpensive, $10 spent on garbage is still a waste. We wouldn’t even give it to a child as a learning tool, fearing that they might actually try to use it one day for real navigation. Its only real use would be as part of a Halloween costume. Coleman does offer some quality products, but this isn’t one of them. We can only hope that they put this product out of its misery before someone makes the mistake of relying upon it in a life-and-death situation.
As with the Coleman compass, at first we were suspicious of the Silva because of its light weight. When we actually started reading bearings and using it with maps, however, we found the mirror design to be very well-thought-out and clearly marked. And although it’s very lightweight, the plastic is thick in the right places to prevent damage. Three scales, a map magnifier, clinometer, and declination adjustment were additional features that made its value stand out.
In this product evaluation group, its closest competitor would be the Suunto MC-2, so let’s make some comparisons. The design on both of them is very similar, and their appearance, weight, and feel are very close. There are a few differences, as noted in the Suunto section which follows, but both designs have a solid reputation in the backcountry.
Pros:
Lightweight compass with precise 2-degree measurement increments
Affordable cost and good entry-level value
Cons:
Liquid-filled capsule may have issues in low temperatures.
This design is quite lightweight, although tougher than what you’d initially expect. As with the Silva, both designs use a clear plastic backing, making it easier to quickly find where you’re going and chart a course on a paper map. They both utilize liquid-filled capsules, which can sometimes create problems when used in low temperatures.
Glow-in-the-dark (non-tritium) markings, which need to be “re-charged” with a flashlight in the dark, are also used on the faces of both compasses. The Suunto, however, features a thick, bright ring around the compass face as well as on the directional markings. This seems preferable, as it helped us to locate it in the dark and provided faster orientation in low light.
An informal polling of our wilderness search-and-rescue associates revealed their unanimous approval of this option from Suunto, although we still weren’t 100-percent sold. While both the Suunto and Silva retail for less than the Cammenga 3H, we’d still pick the Cammenga for its intuitive ease of use and unquestionable durability in all conditions. Published accuracy: +/- 2 degrees.
Pros:
Solidly built (for plastic) compass with proven field experience
Lightweight frame
Limited lifetime warranty
Cons:
Suunto logo blocks orientation arrows, making map use more difficult
Retailing for $10, the UST mirror compass is in the same price range as the Coleman Lensatic compass, but offers significantly better build quality. It’s also easily readable, even for laypersons who don’t have much experience using a compass. Even if you don’t use the mirror function and just use it for basic wayfinding, it’d still be worth the price of admission to keep on-hand as a backup.
Although the plastic snap closure isn’t as crisp as on the similar Suunto or Silva models, the UST compass still didn’t feel like a toy. The compass needle settled fairly quickly, and the day-glo green backing allowed us to find it quickly in or bag or locate it if dropped on the ground.
The metal pins which hold the plastic clamshell pieces together began to work their way out after a series of openings and closings, raising questions about its long-term durability when used in the field. However, as an affordable model for someone just learning to use a mirror type compass, it’s a worthwhile option.
Andrew Schrader is a licensed professional engineer and is certified by the U.S. Army Corps of Engineers as an Urban Search and Rescue (USAR) Structures Specialist. His company, Recon Response Engineering LLC, educates firefighters and search-and-rescue teams on the subject of urban search and rescue and building collapse. He was deployed on rescue operations for Hurricane Hermine in 2016 and Hurricane Irma in 2017.
How hard can it be? After all, if you want to go “up” on a map, you just follow the direction that your compass is pointing, right? Well, navigation is actually a bit more complicated than that. There are three different “norths” — true north, magnetic north, and grid north.
True north refers to the very top of the globe (the North Pole), magnetic north is where the north-seeking arrow of your compass points, and grid north is the direction the vertical grid lines on your map point. Why are they different, and how does this affect your ability to navigate accurately? Follow along to find out.
True North and Magnetic North
True north and magnetic north are different because, despite what many believe, the North Pole isn’t magnetic and your compass doesn’t point there. Instead, your compass points to a giant ore deposit in Northern Canada. Therefore, depending on where you’re standing in the world, your compass may actually point off to the side of true north.
Above: True north (top of globe/earth) versus magnetic north (where your compass points). Compasses don’t actually point at the North Pole; instead they point at Northern Canada.
For example, in parts of Tennessee and Alabama, magnetic north and true north are in line with each other so there’s no perceptible difference between the two at that location.
However, the variance gets worse the further east or west you are. For example, in parts of Georgia, your compass will indicate a few degrees west of the North Pole. In Maine, your compass will be a staggering 16 degrees west of true north.
Going the other direction produces opposite results. In Louisiana, your compass will point a few degrees east of True North, and in Alaska, your compass might point a whopping 25 degrees to the east of true north. So if you’re in certain parts of America and want to walk to the North Pole by following “north” on your compass, you’ll never get there.
To make this more difficult, magnetic north actually shifts. Year to year, the location to which your compass points changes slightly. Therefore, it’s important to know the current values for your specific location. It doesn’t move much, so if you use information from last year it may not make much of a difference. But if you use data from 10 years ago, it may be enough of a change to cause you to miss your mark.
The difference between true north and magnetic north for a given location is called magnetic declination, measured in the number of degrees of variation and the direction (east or west). More on declination in a bit.
Above: These lines show how magnetic declination varies across the United States. The lines curve because a map, as shown, is flat but the Earth isn’t.
Grid North
Grid north refers to the orientation of the gridlines on a map and often diverges quite a bit from true north and magnetic north.
Why don’t the gridlines on a map point to true north? Well, let’s start with a fact that may upset some diehard conspiracy theorists — the Earth is spherical. If you’ve ever tried to cover a bowling ball with postage stamps (don’t ask), you’ll know that a bunch of square shapes don’t fit nicely on a sphere, especially toward the top and bottom. The same is true with trying to create a bunch of square representations (maps) of our Earth. Therefore, to keep our maps square, we have to fudge a bit on the orientation of gridlines.
Above: Square maps might work around the equator, but notice how the shape changes closer to the poles.
The current system used for U.S. Geological Survey (USGS) maps is called Universal Transverse Mercator (UTM). That’s just a really fancy way of referring to the layout and number of gridlines on our globe. This methodology is very similar to the Military Grid Reference System (MGRS) used by the U.S. Armed Forces.
The UTM concept is metric-based, in that grids are broken down into tenths to determine a location on the map. Once you’ve learned it, it’s an incredibly powerful system that can utilize varying numbers of digits to signify different levels of accuracy. For example, a four-digit grid number refers to a square kilometer (1,000 meter square), while a 10-digit grid number is used for accuracy down to 1 square meter.
Understanding and using this system could easily be a subject for its own article, so we’ll leave it at that for now.
Why Should You Care About the Three Norths?
Well, if you look on a map and see a fresh water source or road you need to reach directly above your current position, it’s essential to know which north is “up” and how to make your conversions to get there.
Although we refer to these as the “Three Norths,” it’s really the three types of directions or azimuths. An azimuth is the direction of an object/location from an observer represented in degrees. Whereas, a bearing is the direction you’re traveling. For example, “I confirmed that the water tower was behind me at an azimuth of 90 degrees before I continued on my bearing of 270 degrees.”
Shooting an azimuth with a lensatic compass.
It’s common to refer to an azimuth as “measured” when it was determined a map, and “shot” when it was determined from using a lensatic compass. Shooting an azimuth is accomplished by aiming at a visible landmark through the sights of a lensatic compass, much like you would with the iron sights of a gun. For example, “I measured an azimuth of 45 degrees from the map. I confirmed the direction of the hilltop by shooting an azimuth of 45 degrees.”
For example, there’s 90 degrees (east) on your compass (magnetic 90 degrees), a right turn from true north (true 90 degrees), and straight to the right on your map (grid 90 degrees). That isn’t meant to confuse you or make it sound excessively complicated. Instead, it’s important to picture three different orientations of an entire 360-degree circle. Each circle’s north points to a slightly different location, and it’s important to know which system someone is referring to when they tell you to travel 5 kilometers with an azimuth of 180 degrees. If you’re in Acadia National Park in Maine and they gave you a grid north azimuth and you use a magnetic azimuth, you’ll end up almost 1.5 kilometers away from where you intended.
Declination
When using a map and compass, it’s often necessary to convert between a grid azimuth and a magnetic azimuth. Although we introduced the concept of the deviation of magnetic north from true north, it’s not very common to convert between them. The two norths you’ll likely be most concerned with are grid north and magnetic north because those are the two norths that correspond with the tools in your hand — the map is a grid while your compass is magnetic.
When converting from one to the other, you must either add or subtract the difference in degrees depending on whether magnetic north appears to the left or right of grid north from your current position.
On USGS maps, you’ll find a declination diagram at the bottom of the map (highlighted above). This diagram will represent the difference between each of the three norths from the center of the map on a certain date. Be sure to check the date! If it’s too old, you should look up the current declination numbers for that map.
Here’s an example from an older map of the Grand Canyon. From this diagram, we can see that our compass would point to magnetic north a little over 13 degrees to the right of “straight up” on the map (grid north). True north is represented by a star.
Above: For this example in the Grand Canyon, grid north (“GN”) differs from true north (the star) by 38 minutes and from magnetic north (“MN”) by another 13 degrees. Grid north is what you’d see on your map, and magnetic north is what your compass would indicate.
Note that the difference between magnetic north and grid north in this diagram is 13 degrees and 38 minutes (slightly over half a degree because there are 60 minutes in a degree). It’s 13 degrees from magnetic north to true north and then an additional 0 degrees and 38 minutes from true north to grid north.
For this example, I wouldn’t worry about the additional 0 degrees and 38 minutes. After all, I’d be planning to walk across terrain — I’m not surveying property lines. However, it’s important to note because it is a significant figure on some maps. Let’s just assume an even 13 degrees for the rest of this example.
Conversions
From any azimuth using this map, there’ll be a 13-degree difference between the azimuth on the map and an azimuth shot with your compass. There are a few mnemonics to help you remember when to add or subtract the difference (we’ll give you an example shortly). Also, some compasses have tools that help account for declination.
If you’d like to set the declination in your compass, follow the instructions for your particular model compass. By doing this, you can offset the direction the compass points in relation to where the magnetic needle points. This can be handy for many; however, there are good reasons to convert declination in your head and to leave the settings on your compass alone.
First, you’ll never forget your settings on your compass and accidentally use an old/incorrect declination setting. Second, many compass features involve perfectly orienting a map, aligning a compass edge for your path, and then aligning the needle within certain marks as a guide for your azimuth. This is a good way to use a map and compass. In fact, it’s probably the most recommended and taught method. However, I like to use a map and compass “on the go” and don’t always want to stop and spread everything out.
Also, I like to employ advanced techniques, such as intersection and resection, that require a good understanding of what’s going on. Using rotating bezels and guide marks to help you with your path are handy, but they often remove some of the important basics, such as understanding how to convert azimuths and what you’re actually doing.
A great mnemonic to convert for declination is “LARS,” which stands for “left add, right subtract,” because it’s simple and doesn’t require you to know whether you’re in an area with easterly or westerly declination (more on that next).
To use the LARS mnemonic, you simply look at, and use, the declination diagram on the bottom of your map. If you have a magnetic azimuth at the Grand Canyon and you want to convert that to a grid azimuth, place your finger on the magnetic north arrow and note that you’d need to move your finger left to get to the grid north arrow.
Using LARS, we know that going to the left means “add” — therefore we add the 13 degrees to convert from magnetic north to grid north. To convert from grid to magnetic, we’d move our finger to the right so we’d subtract the 13 degrees.
Let’s jump to an example to see how this works and also to see a real-world example of when you might need to do this.
Grid to Magnetic: Imagine that you know your position on the map, and you’d like to walk to a road intersection on the map that measures 35 degrees from your position. As you now know, you can’t just find 35 degrees with your compass and walk that way because you’ll be 13 degrees off-course … but which way? We have a measured grid azimuth of 35 degrees, but we need to shoot a magnetic azimuth for our compass. On this map, we move to the right to get from Grid North to Magnetic North on the declination diagram so we use the LARS mnemonic and know that we have to subtract the 13-degree difference for this location. We end up walking a bearing of 22 degrees with our compass to get to a point on our map 35 degrees from our location.
Magnetic to Grid: Now imagine that you’re sitting on a hilltop and see something in the distance. You use your compass and determine that the object is 270 degrees from your position, but you’d like to see where the object is on your map. Because you used your compass, you now have a magnetic azimuth and you need to convert to a grid azimuth. On our example map, your finger must move to the left as it transitions from the magnetic to the grid north arrows in the declination diagram, therefore using the mnemonic LARS tells us to add the 13-degree declination to our magnetic azimuth to get our grid azimuth of 283 degrees.
Above: Acadia National Park, Maine. The difference between magnetic north and grid north is 16.5 degrees; failing to account for this on a 5km trek will make you miss your target by 1.4 km.
Another popular mnemonic is “west is best, east is least.” The trick here is to add the difference (best) with westerly declination and subtract it (least) for easterly declination. There are two reasons why we don’t recommend this one.
First, you need to remember that the declination is east on the west half of the U.S. and west in the east. Yes, you read that right. Second, you need to remember that this is only for converting from grid to magnetic (and not the other way around). The modified mnemonic “from map to field the proper yield is east is least and west is best” can help you recall this conversion, but even then, it’s ripe for confusion.
Drop the GPS
This may have been a lot to absorb. Apologies if it was. However, we hope that this encourages you to learn more about the critical skill of land navigation with a map and compass.
About the Author
Ryan Cleckner is a former special operations sniper and sniper instructor. Currently, he’s a firearms law attorney, best-selling author, university lecturer, Trigger Words podcast host, and entrepreneur. He runs RocketFFL, which helps people get an FFL and stay compliant, Mayday Safety, a software/app company that helps protect schools and other organizations, and his newest project, online firearms courses at GunUniversity.com.