In This Article
Whether you find yourself in the backcountry on a hiking trip, working on a home project, or standing in the wake of a natural disaster, you may encounter the need to move something heavier than you can safely move by yourself. In those situations, you can apply a few pieces of lightweight and relatively inexpensive equipment to take off some of the load.
Recalling a little grade school science, there are six types of simple machines: lever, wedge, screw, inclined plane, wheel and axle, and pulley. From this list, you can employ a pulley in the aforementioned scenarios to lighten your workload by half or more by utilizing mechanical advantage. Simply put, rope-based mechanical advantage is using ropes and pulleys to leverage force.
A haul system is the utilization of rope and a few basic components to create mechanical advantage in order to lift or move someone or something. You don’t have to be a rope expert to be able to construct a haul system. You can use a high-tech physics concept and make it low-tech, easy, and useful.
Using ropes to make difficult work easier has a variety of uses from the mundane to crucial. Rope-based mechanical advantage can be seen in use by landscapers and furniture movers. It can be used to hoist camping gear vertically to a higher elevation. Rescue teams use haul systems all the time to move patients in both the horizontal and vertical realms. Ropes and pulleys are also often seen in post-disaster conditions when large pieces of structure need to be moved off of people, or trees need to be moved out of the road. Mechanical advantage is used in a number of ways to accomplish what we can’t on our own.
Important Basics
Before diving into the construction of a haul system, there are some basic concepts and terminology that should be discussed. For those familiar with using rope and climbing gear, this may be familiar territory, but for those who aren’t, let’s discuss a few topics:
Kilonewtons: Because very few things can be universally easy, when you’re talking rope, rope gear, and rope-related mechanical advantage, all equipment is rated in kilonewtons (kN) rather than pounds. Just like pounds, a kilonewton is a measure of force. The purpose for using kilonewtons rather than pounds seems to be more historical and geographical than anything else. The history of the construction and use of rope dates back centuries, but modern rope craft and widespread knowledge and acceptance of mechanical advantage concepts trace back to European nautical origins.
The UK uses pounds to denote currency, so it wouldn’t make sense to measure equipment in pounds, just as Americans wouldn’t use dollars to refer to anything but money. So, rating by kilonewtons became the norm. Americans hold on tightly to our anti-metric roots and largely ignore the otherwise globally accepted International System of Units. Fortunately, the conversion isn’t difficult: 1 kilonewton equals 225 pounds (224.8 if you want to be exact). Although many companies are starting to list both pound and kilonewton ratings for their gear, you should expect to see kN a lot.
A Moment of Physics
Since the vast majority of us aren’t physics majors, I tend to keep things simplified. When you tie a rope to something and pull, you’re exerting 1 pound of force to move 1 pound of mass. In fact, it’s even more offset than that because of friction, so you’re actually having to pull harder than 1:1. The heavier the person or object, the more force will need to be applied. Once you factor in uneven terrain or the associated gravity that factor in to steep inclines or declines, it becomes virtually impossible and/or dangerous. By simply adding a few carabiners, Prusik loops, and pulleys, we can significantly decrease our workload, which might mean the difference between life and death in extreme circumstances.
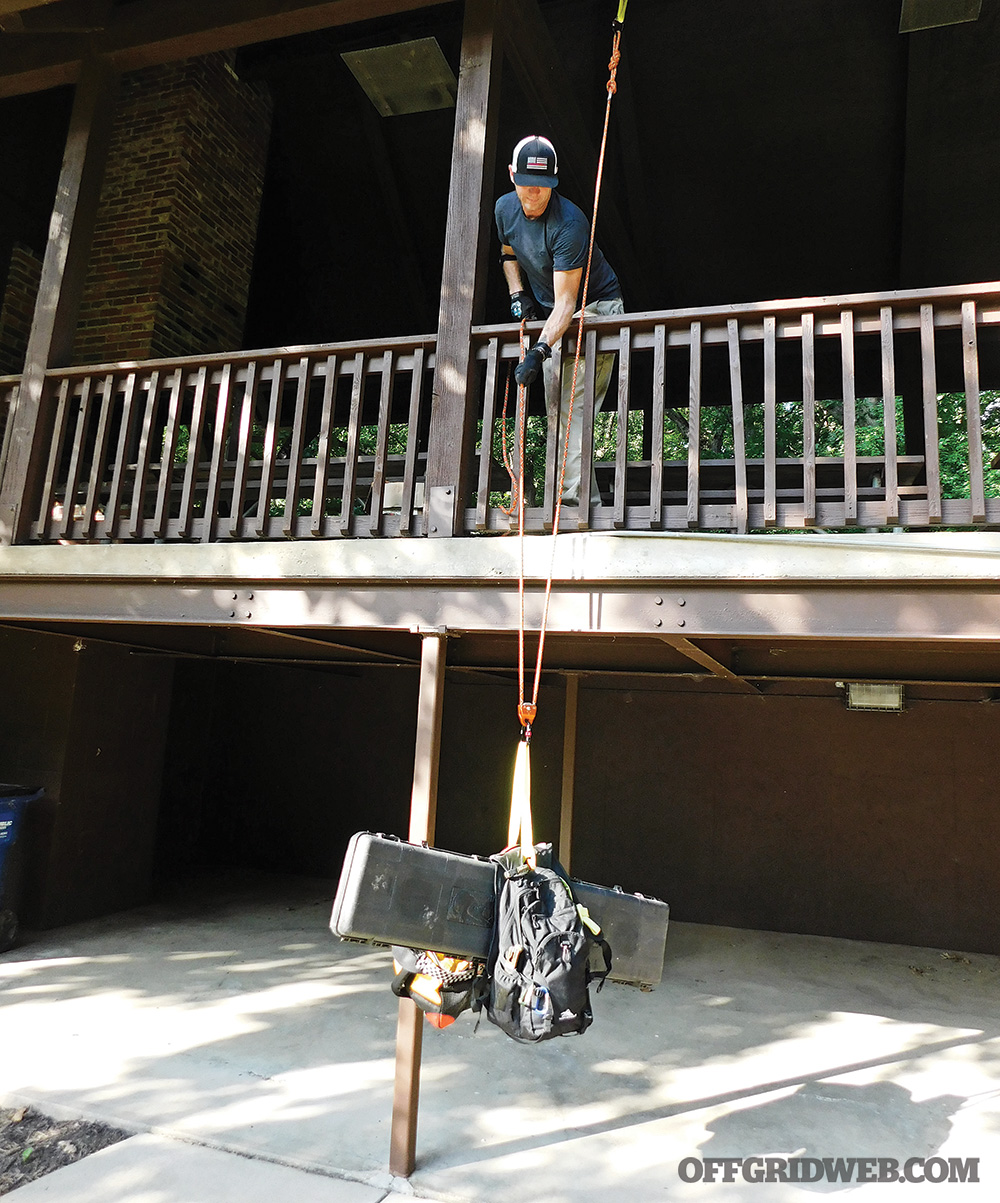
Above: A 3:1 haul system can decrease your workload significantly when resources are limited.
In this article, we’ll discuss tipping the advantage in our favor by learning how to create a 2:1 and a 3:1 mechanical advantage. In those situations, you’re either exerting 1 pound of force to every 2 pounds of mass or, even better, 1 pound of force for every 3 pounds of mass respectively.
Equipment Needed
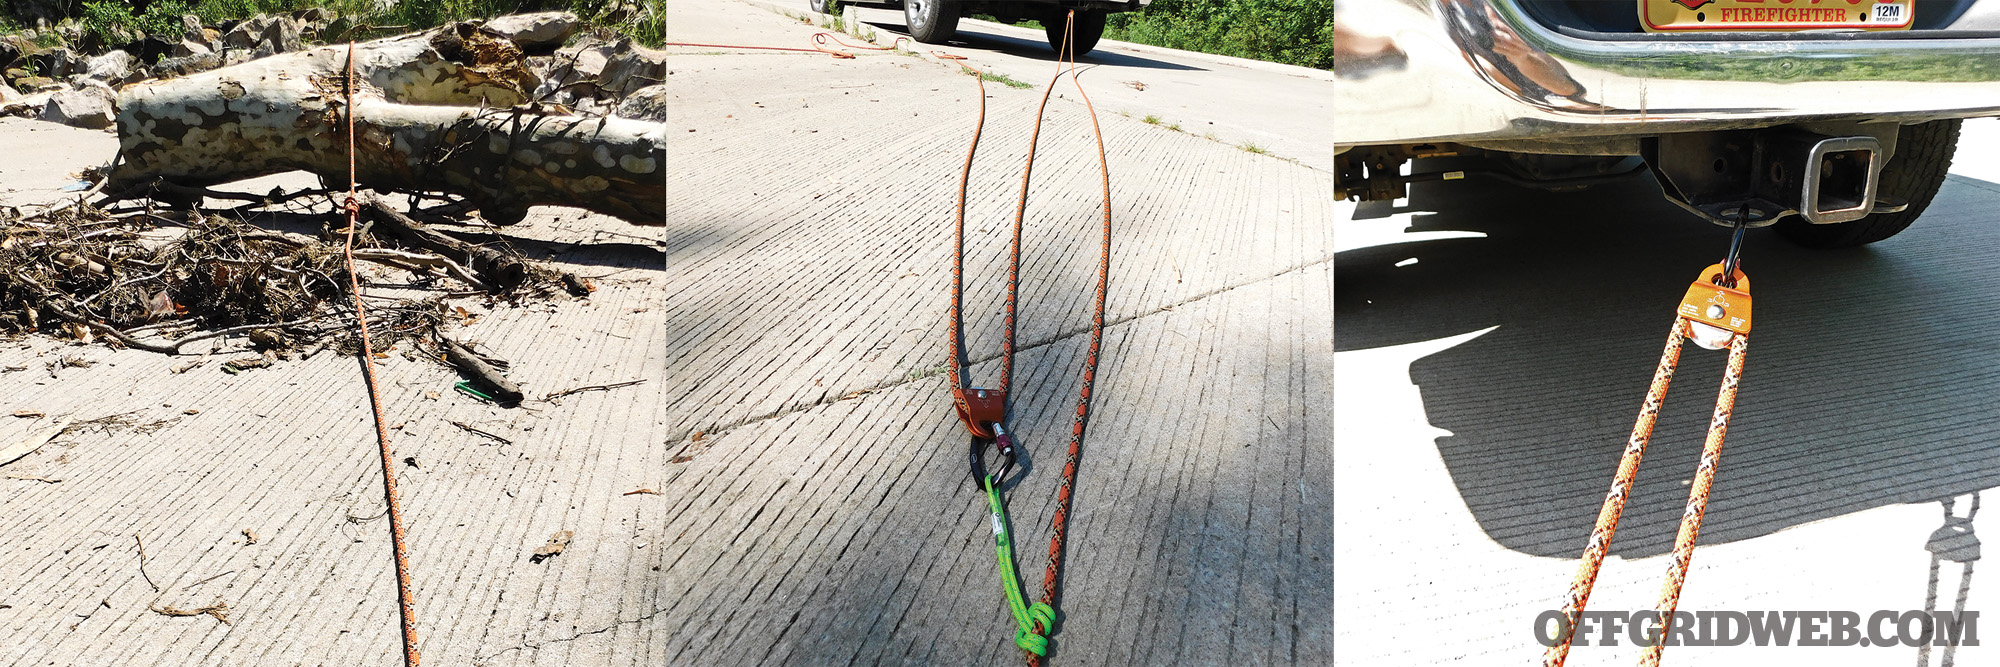
Any outdoor or disaster preparation gear should include a few basic pieces of equipment that can be used to create mechanical advantage. Most people carry some type of rope, which is always a good idea. The addition of two pulleys, a few Prusik cords, and a few carabiners, and you have the ability to decrease your workload by up to a third.
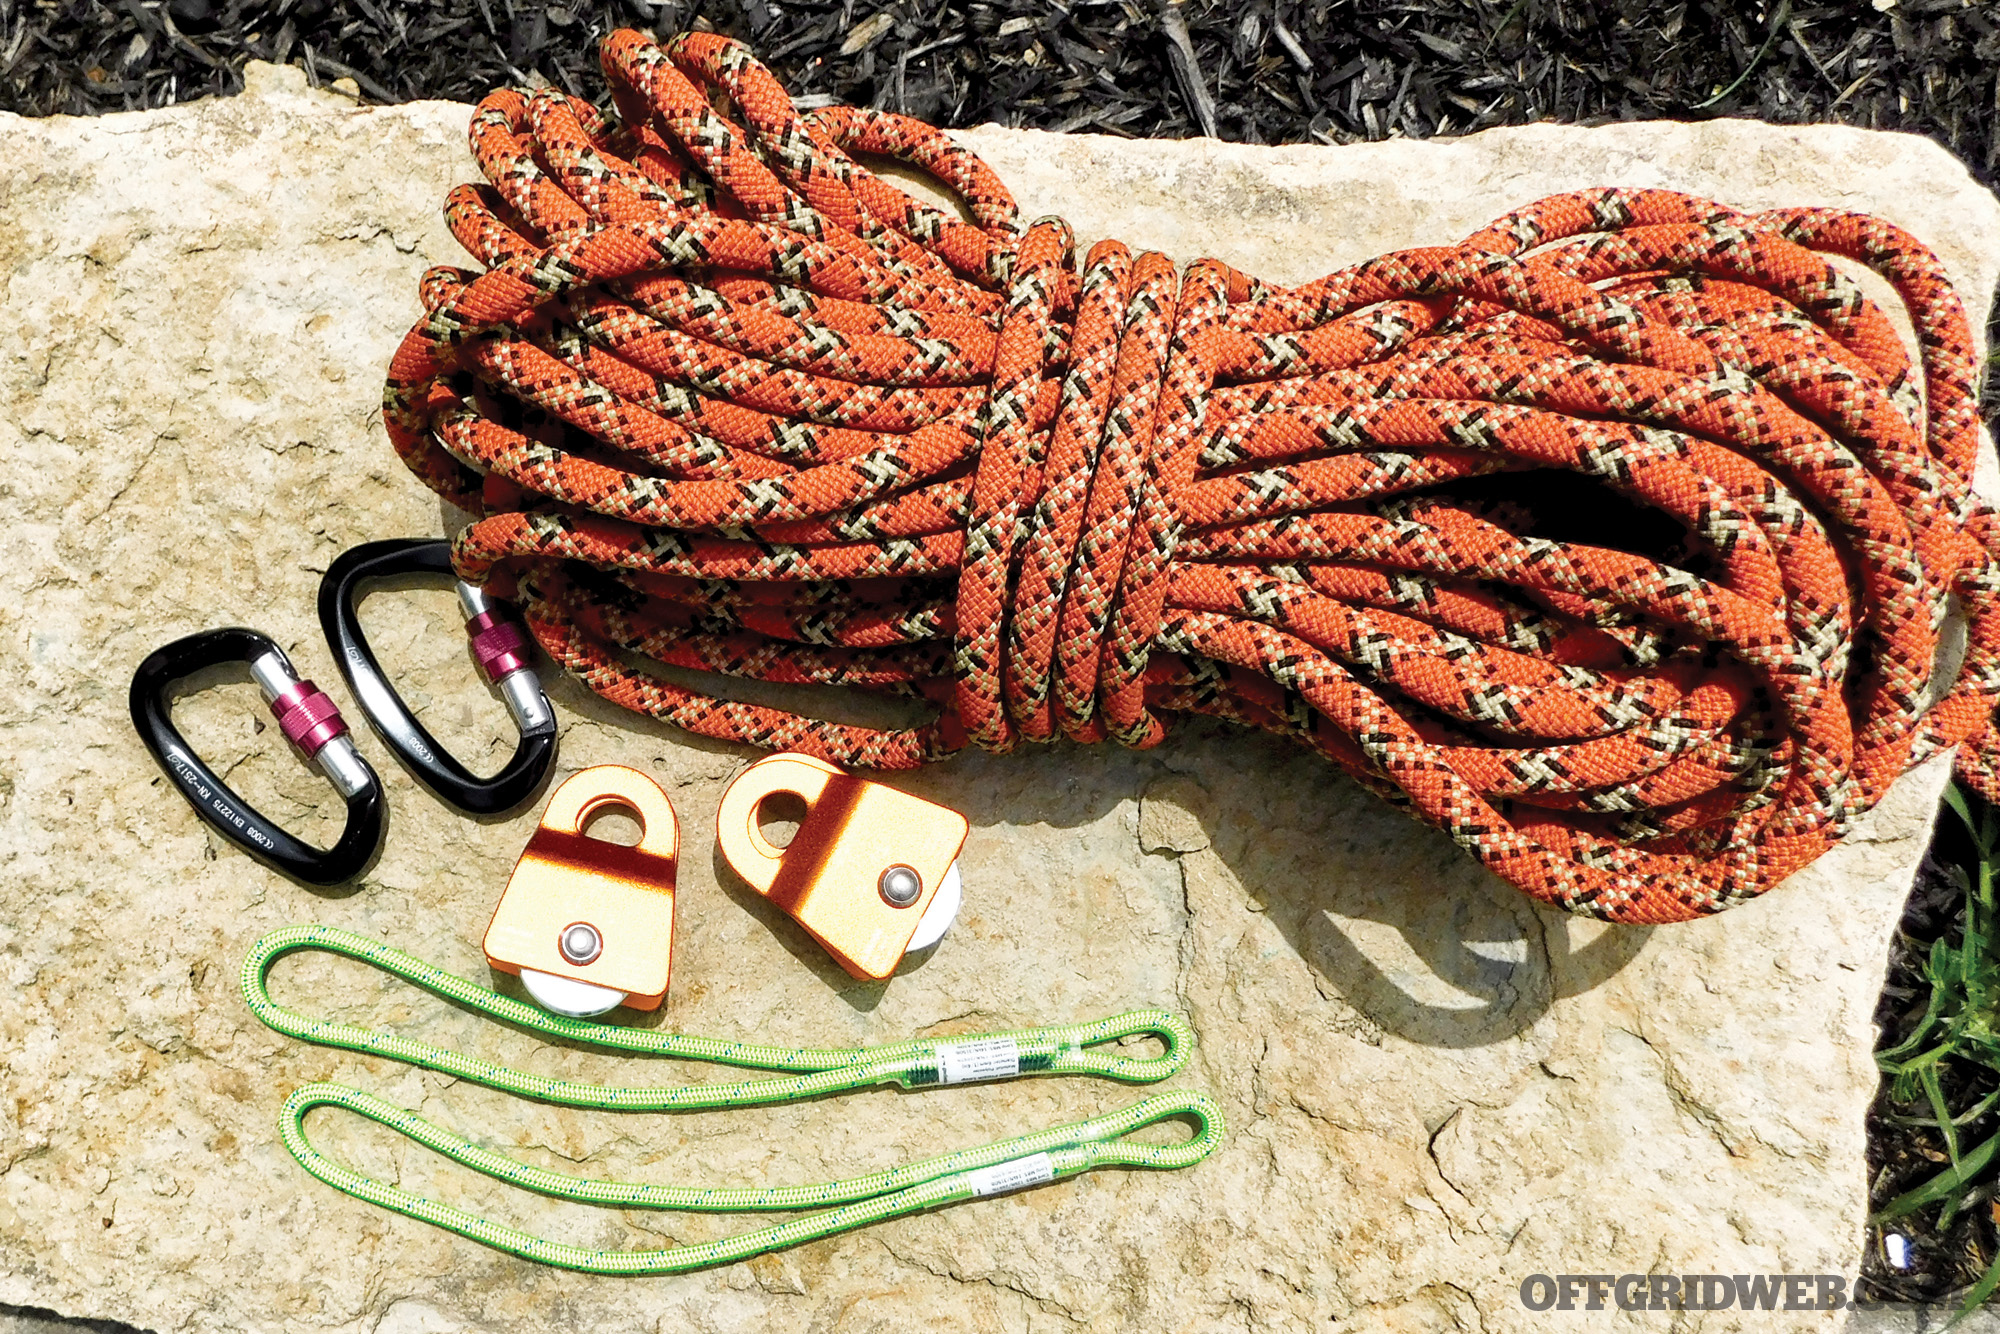
Above: Simply adding two carabiners, two pulleys, and two Prusik loops to your supplies offers you a variety of options to raise and lower people and equipment.
Rope: The rope you choose will depend solely on your personal preference and comfort level. While 11mm or 12mm (roughly ½-inch diameter) rope is pretty universally utilized in life safety applications, it can be heavy and take up a lot of space in your pack. I always recommend having 100 or 200 feet of 11mm or 12mm rope at home or accessible, but it’s not practical to carry that unless you’re exclusively carrying rope and rope gear for climbing or a haul system.
It may take a few visits to your local outdoor gear store and conversations with experienced climbers, but identify a section of rope that’ll meet your specific needs. Keep quantity in mind as well. A lot of rope is typically needed for building a haul system. You should have more than you think you’ll need. Even tying a single knot can occupy several feet of rope and few things are more frustrating than needing 1 or 2 more feet of rope and coming up short.
When it comes to rope, your life may literally be hanging from it, so don’t buy the cheap rope at the hardware store. Rope is constructed in a variety of ways and, although quality rope is a little bit more expensive, this is one situation where spending the money is 100 percent the right thing to do. Do your homework!
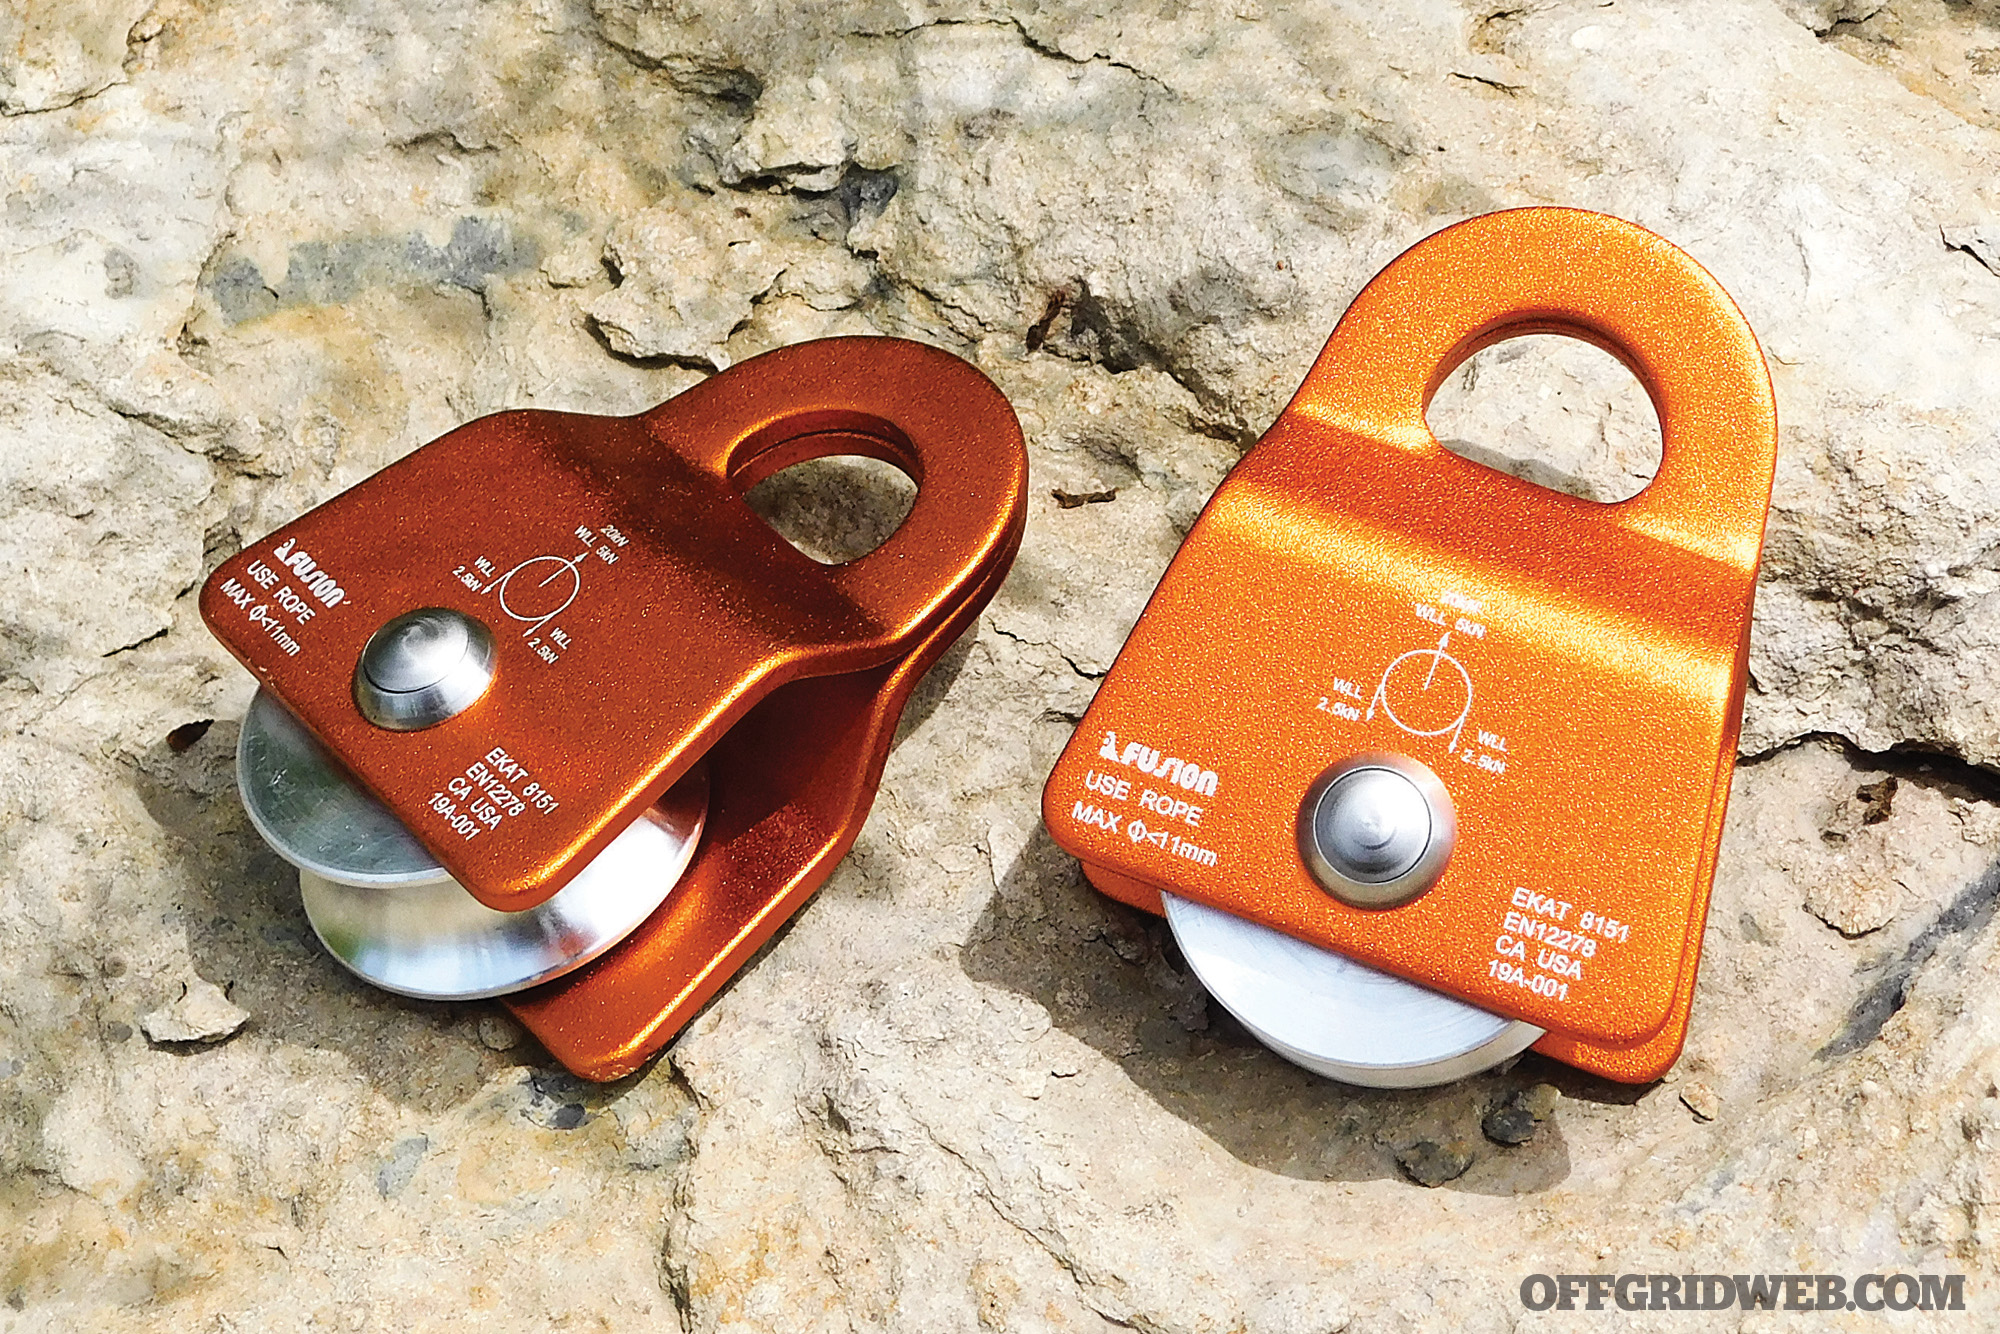
Pulley(s): Having a few pulleys with you is the first step (and a required one) to creating mechanical advantage. Carrying one pulley is the minimum, but at least two pulleys is recommended. First of all, having a backup is a good plan. Especially if you subscribe to the “two is one and one is none” school of thought. Secondly, the more pulleys you have, the greater the mechanical advantage you can create.
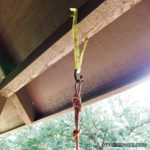
Above: Prusik minding pulleys can be a small, lightweight, and versatile addition to anyone’s supplies.
Pulleys can be purchased just about anywhere that sells tools or outdoor equipment. They come in a variety of strengths, sizes, and colors. Read the fine print on the pulleys and find the kN rating. The pulleys I selected for this article are 20 kN pulleys. Remember the conversion: 1kN = 225 pounds, so 20 x 225 = 4,500 pounds. That’s over 2 tons! One would think you could significantly downgrade and get cheaper equipment with less weight rating. The ratings on rope equipment are for static loads, but an important factor in rope dynamics lies in shock loading the rope (a sudden, weighted jerk) and swinging the rope. The weighted force changes significantly, so the stronger the equipment the better. Most would agree, though, that 20 kN is a pretty good starting point for basic mechanical advantage.
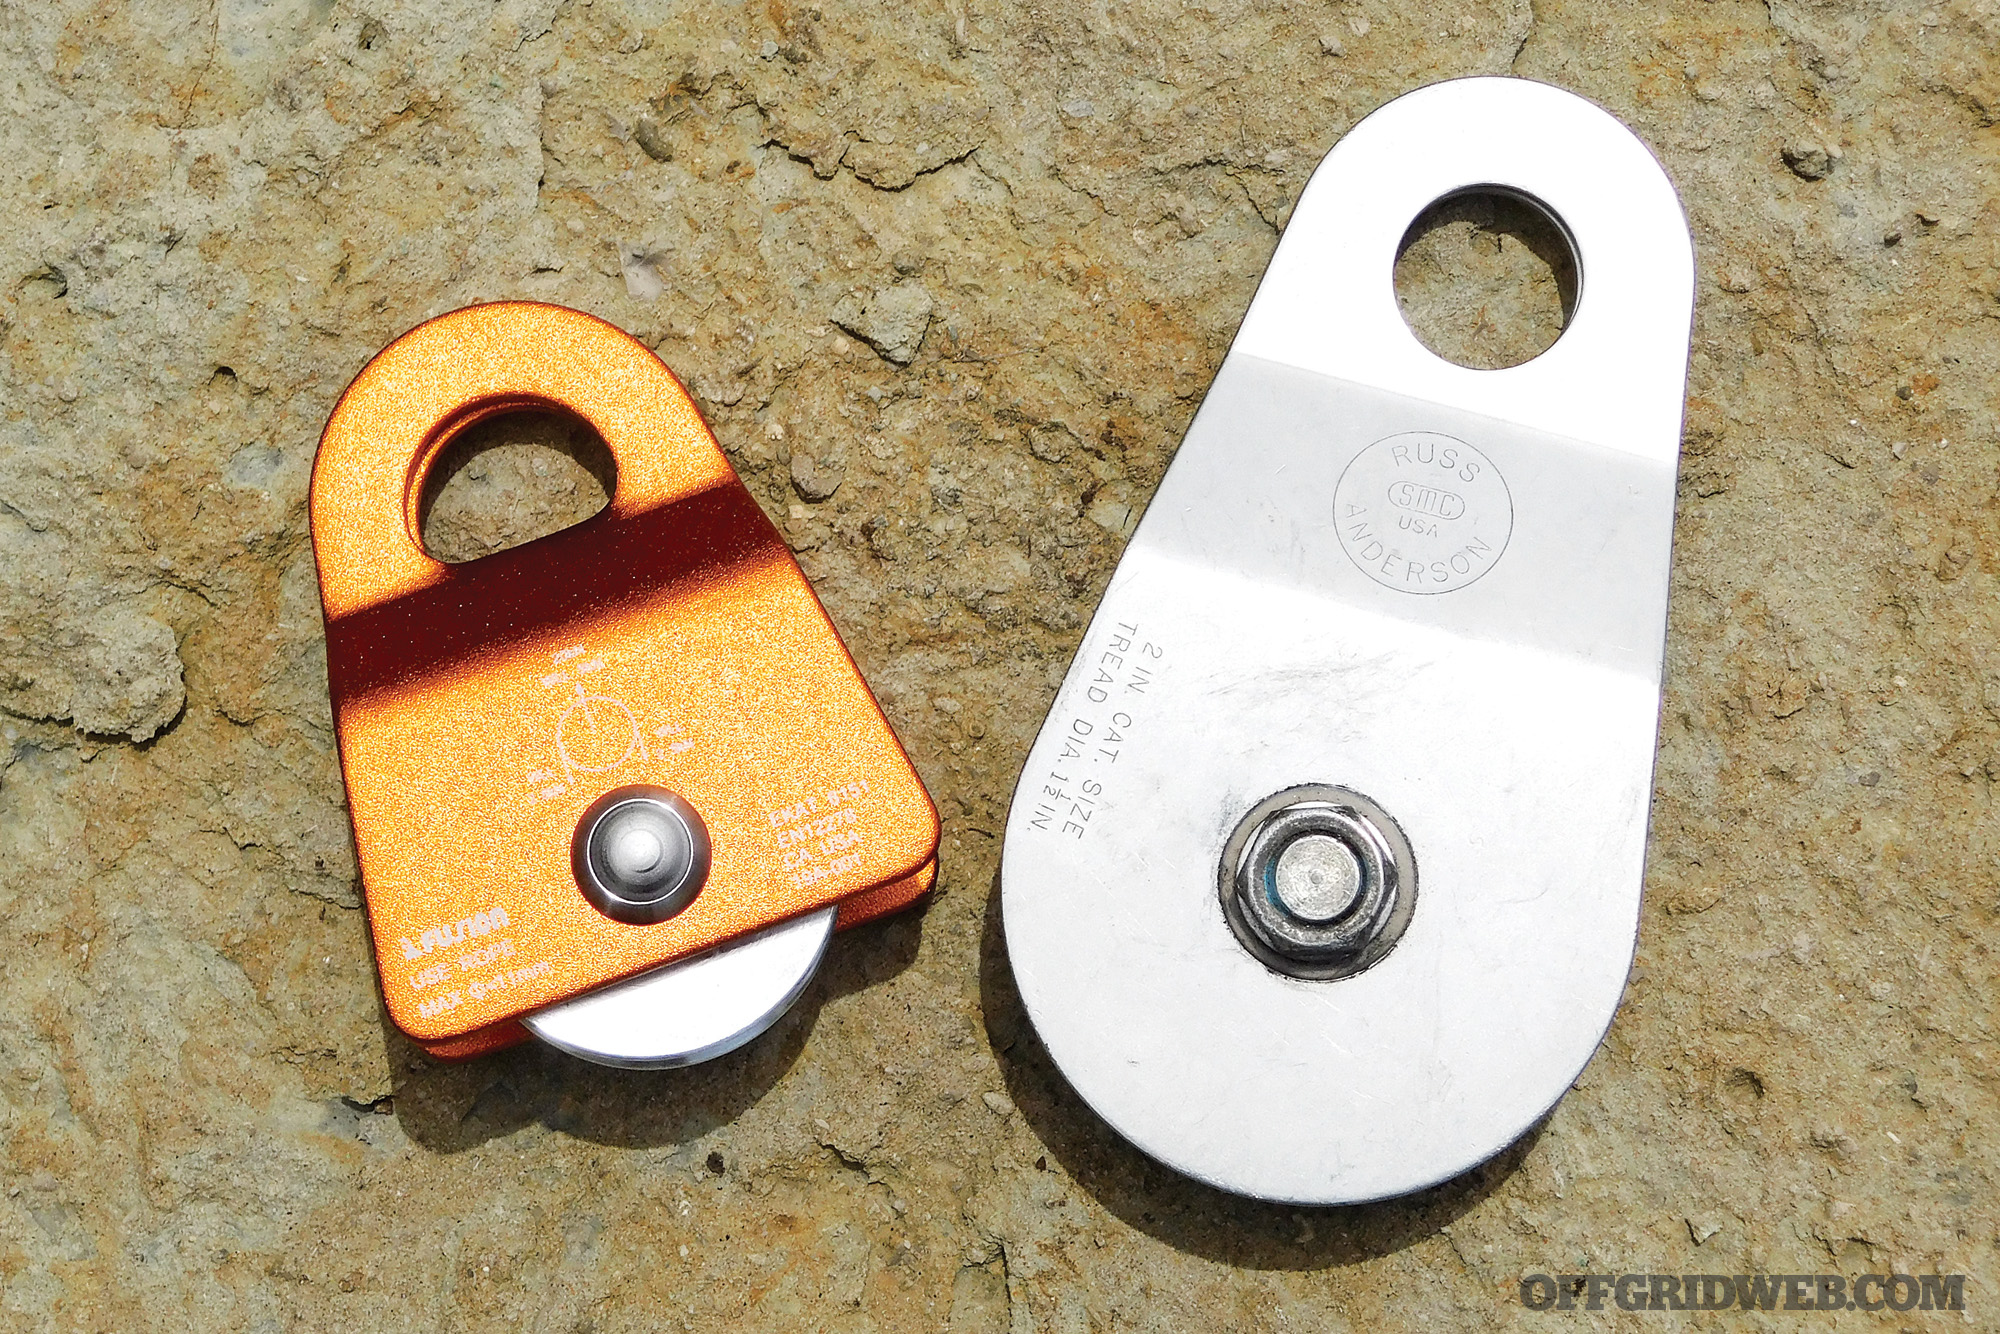
Above: A Prusik minding pulley is constructed with edged side plates whereas a traditional pulley has rounded side plates. The side plates don’t affect the strength, but the angled edges prevent Prusiks from being drawn into the pulley.
One recommendation that should be made, when utilizing pulleys to create haul systems, is to use “Prusik minding” pulleys. These will have cornered side plates rather than rounded (see picture below), which allows a Prusik to be drawn against a pulley without being pulled into the pulley.
Prusik(s): A “Prusik cord” or a “Prusik loop” is a small piece of looped rope, tied to itself by a double fisherman knot, used as a friction hitch. They’re often purchased premade with a shrink-wrapped end in varying lengths. Your Prusik options lie in diameter, length, and color. The vast majority of Prusik cordage you’ll find falls in the 3mm to 8mm range. As a general rule, you’ll want to use a diameter that’s in the range of 60 to 80 percent the diameter of your standing rope. If you use Prusik cordage that’s too thin, it’ll tighten easily on the rope and become a nuisance. If your cordage is too thick, it may not generate enough friction to tighten when you need it to.
The other major factor, assuming color doesn’t matter to you, is the length of your Prusiks. For building a mechanical advantage haul system, length isn’t a significant factor. Generally, the more compact, the better. But some rope enthusiasts prefer longer Prusiks for the options they provide in other areas of rope craft. In this demonstration, 12-inch 6mm Prusiks are used.
As with your standing rope, quality counts. Even high-quality Prusiks are inexpensive, so make sure you’re buying quality, highly rated Prusiks from a reputable source. Here’s how it works.
The use of Prusiks not only allow you to build a haul system to move heavy objects, but they also afford you the ability to ascend or descend a rope! In this particular instance, longer Prusiks (as shown) are needed. By simply wrapping the Prusiks around your main line, you can slide them up or down and literally climb a rope. In order to descend a rope using only Prusiks:
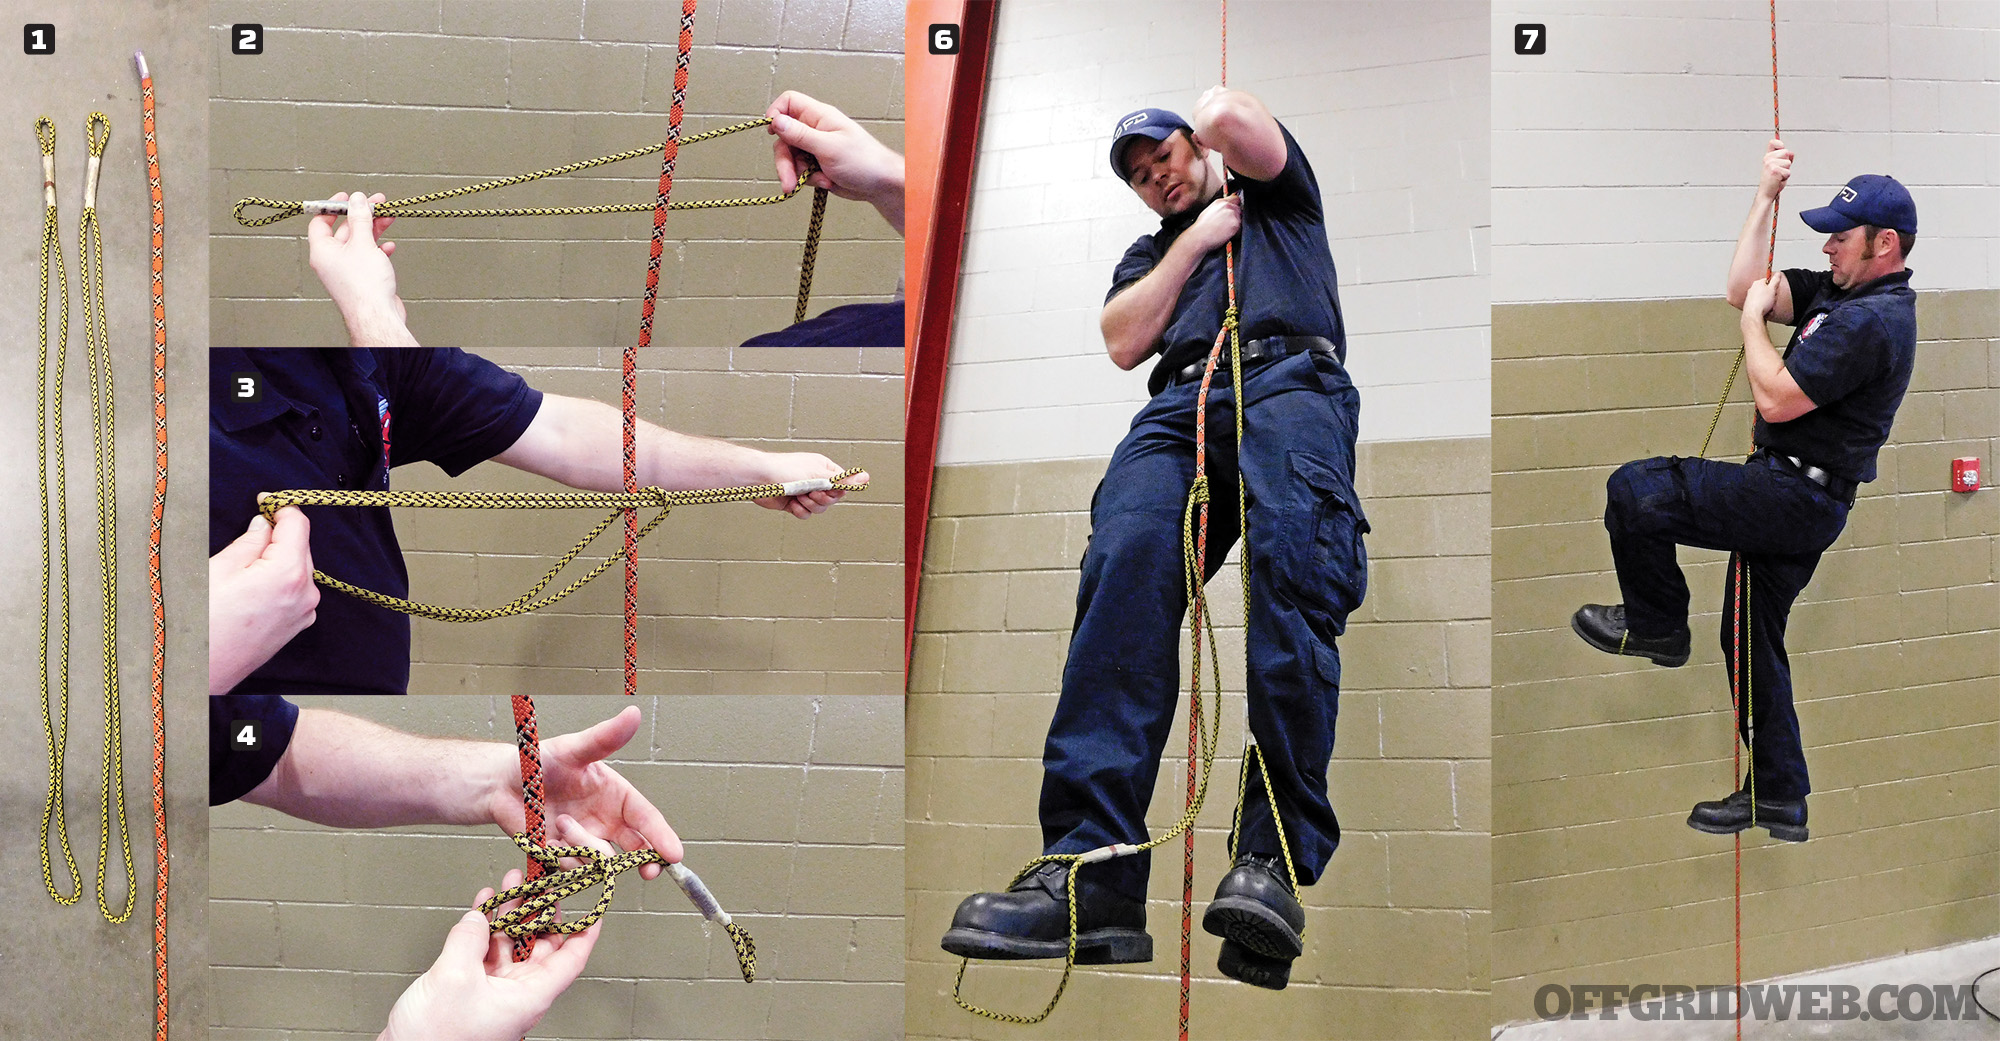
- Equipment: two Prusiks and one rope.
- Hold the Prusik perpendicular to the main rope.
- Wrap the Prusik around the main rope and then tuck one end through the other.
- Wrap two more times and pull tightly.
- Attach the second Prusik to the main rope the same way.
- Step into the Prusiks.
- Lower the bottom Prusik.
- Put your weight on the lower foot and then lower the top Prusik.
- Put your weight on the top Prusik.
- Repeat 7 – 9.
Carabiner(s): Carabiners can be found anywhere from high-end outfitter stores to plastic bins at the cash register at Walmart. A simple internet search can be overwhelming. Carabiners are the utility player of the outdoors/survivalist world. They’re used for a myriad of applications and are often found in bulk with preppers, hikers, bicyclers, and coffee shop backpacks.
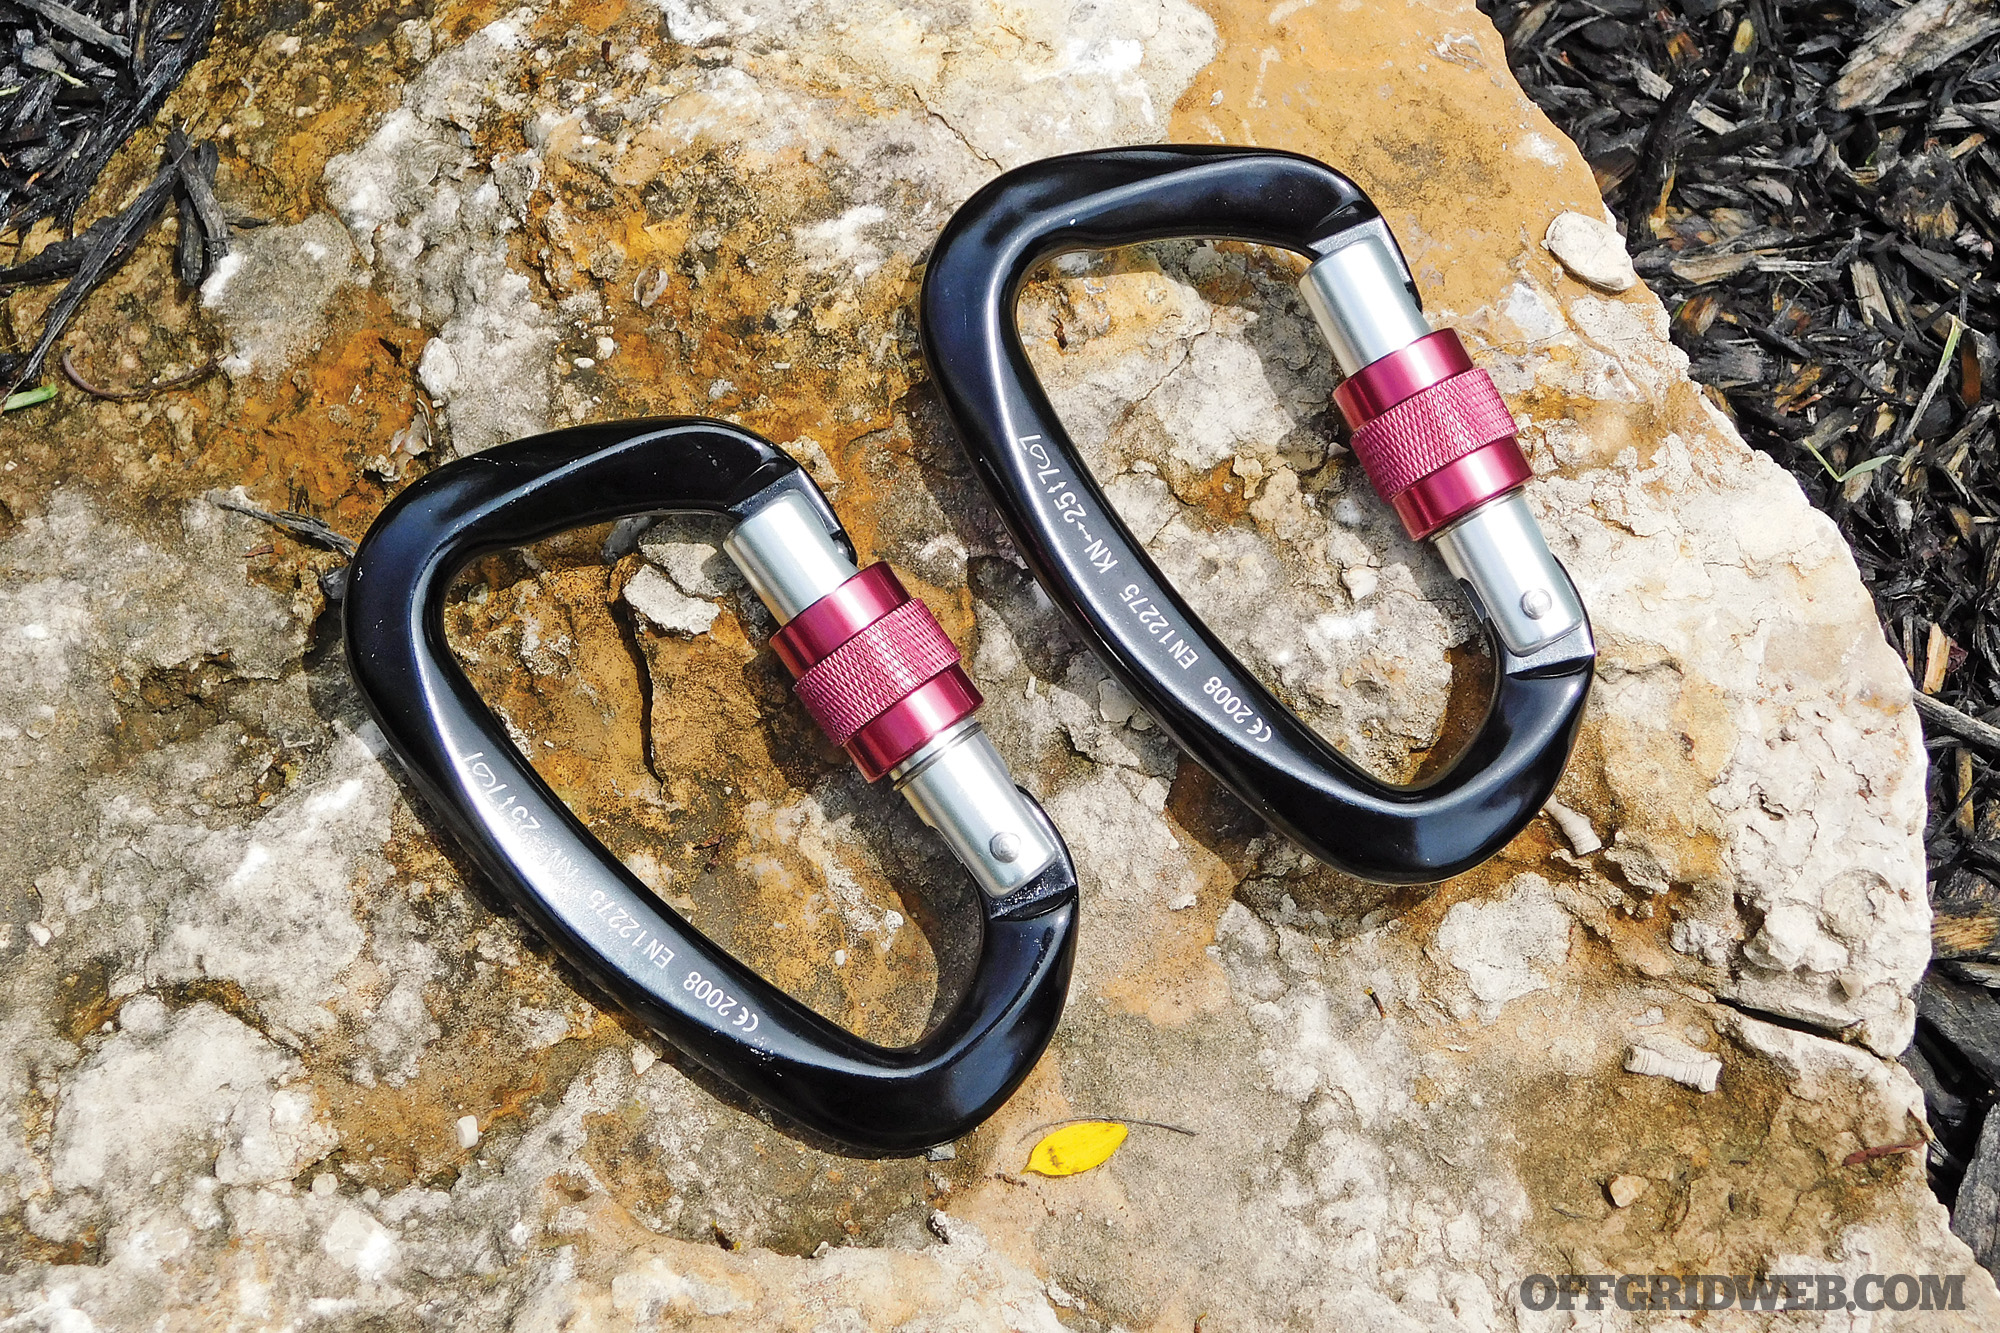
Which carabiners you buy depends on your application and makes a huge difference in the result of your endeavor. Don’t assume all are alike and have the same weight rating. Some will say clearly on the side “not for climbing.” If you’re looking to be able to clip your car keys to your belt loop, an inexpensive generic carabiner will work just fine. If you’re a rock climber and need the carabiner to be lightweight enough to carry many of them without weighing you down, but strong enough to support your body weight, you step up in price and quality. For applications that include suspending heavy objects or people — such as life rescue scenarios — robust steel carabiners are used. For this application, high-strength aluminum carabiners seem to be the sweet spot, having a relatively high strength rating while remaining lightweight.
And finally, a locking system is important. Carabiners now have a variety of methods to secure the gate that prevents it from coming open and leading to possibly catastrophic results. You’ll find twist locks, screw locks, wire locks, and ball locks, among others. They all serve their purpose, and it really comes down to personal preference. Before buying, put your hands on them and see what works best for you (a breakdown of locking types can be found here: www.petzl.com/LU/en/Sport/Carabiner-locking-systems).
Bombproof Anchor
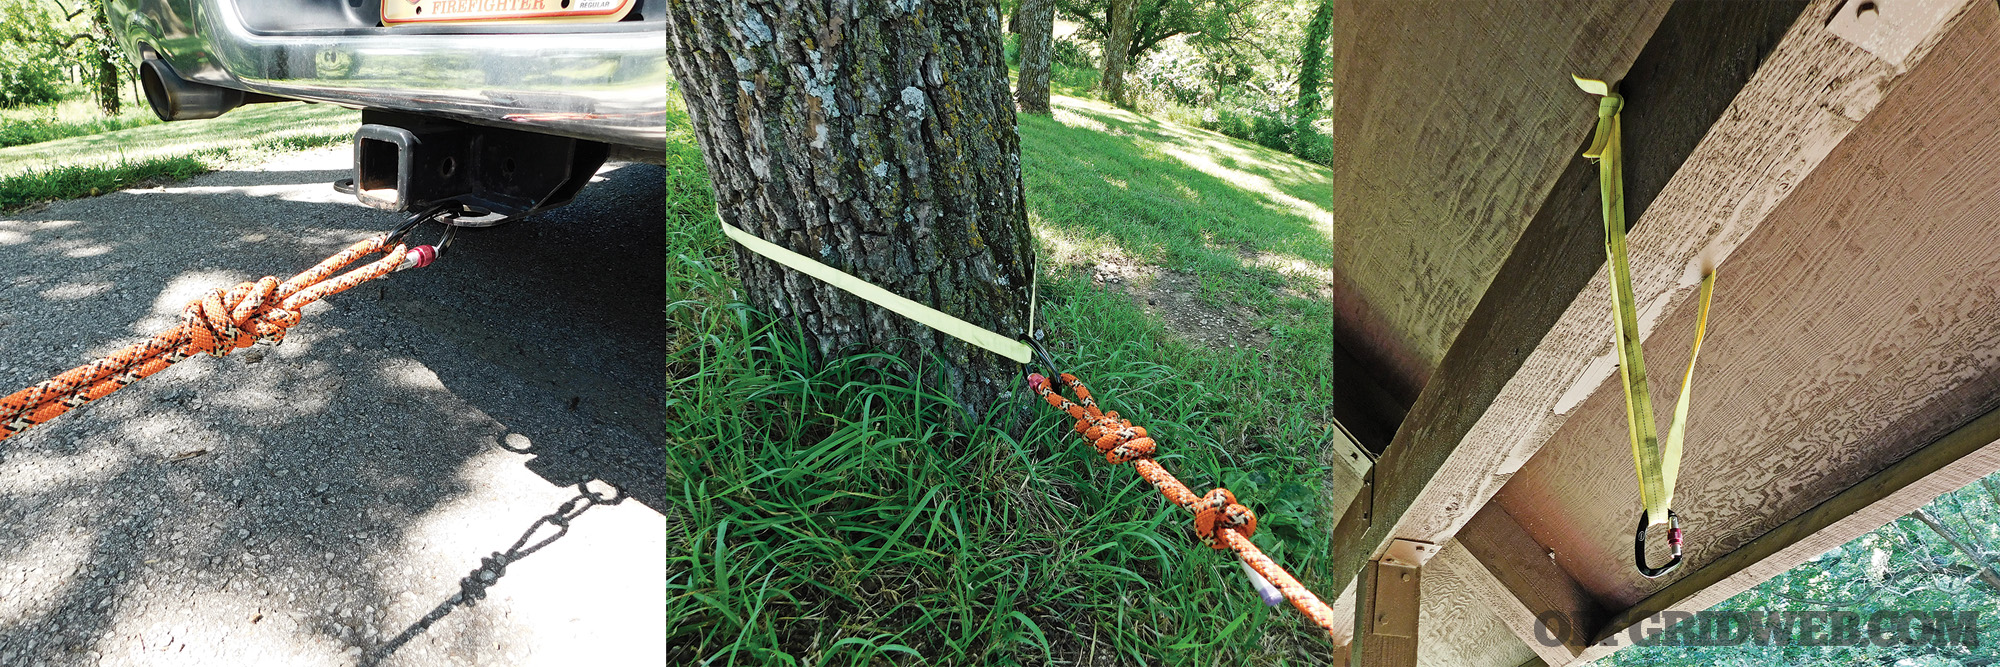
A “bombproof” anchor is the basis for a haul system and should be substantially solid. A bolted stair rail is a poor location to anchor your system. A concrete structural pillar, large, mature tree, or a vehicle can be considered a “bombproof” anchor.
Cost Breakdown
Given the ability to create simple mechanical advantage, two assumptions were made: that you already have a workable length of quality rope, and that you also have webbing or a second rope that’ll allow you to attach your system to an anchor. With those on hand, you simply need to bolster your gear a bit to include the ability to create 2:1 and 3:1 mechanical advantage. The minimal gear you’ll need to add is:
- Two pulleys
- Two Prusiks
- Two carabiners
For this article, I purchased a two-pack of 20kN pulleys ($13), a three-pack of 12-inch 6mm Prusiks ($16), and a two-pack of 25kN carabiners ($17). All were purchased on Amazon Prime and each are highly rated with adequate strength ratings. The grand total for all equipment, with tax was about $61. There are countless options when it comes to buying this equipment, and it would be easy to spend considerably more money, but this is an example of what you can expect as a starting point for the purchase of safe, quality equipment to create rope-based mechanical advantage.
Useful Scenarios
1:1, 2:1, and 3:1 Mechanical Advantage
When discussing mechanical advantage, first we must identify what is not mechanical advantage. As previously mentioned, tying a rope to an object and pulling offers no mechanical advantage. Running a rope through an anchored pulley and pulling on the other side, despite what some may think, offers no mechanical advantage. That scenario is literally the same as the first with the added feature of the pulley, known as a “change of direction.” Mechanical advantage begins with 2:1 and 3:1 systems. Their beauty lies in both simplicity and effectiveness.
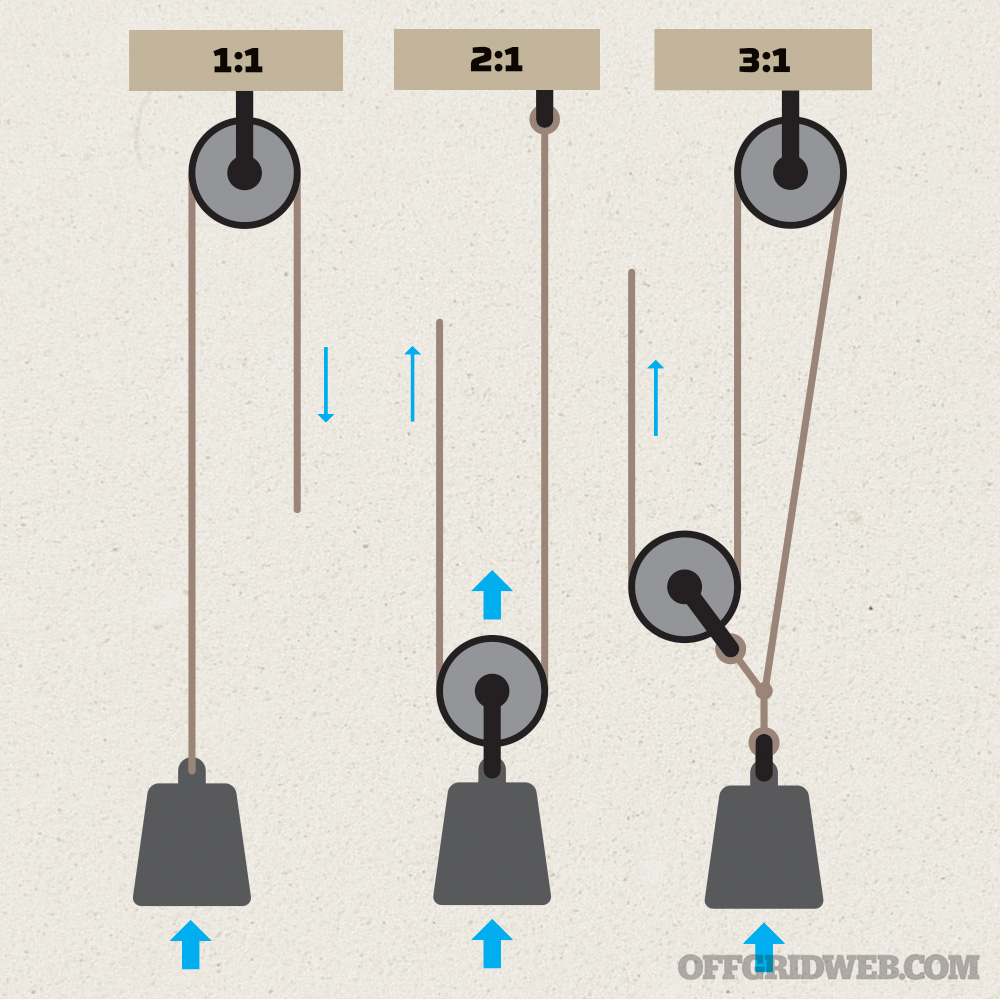
In order to achieve mechanical advantage, you’ll need to construct a haul system with a moving pulley. That begins with a 2:1 mechanical advantage. In a 2:1 haul system, a person is required to exert roughly half as much force as the weight of the object.
- The rope is terminated with knot at a “bombproof” anchor (see sidebar).
- Attach a pulley to the load.
- Run rope through the pulley.
- Haul on the other side.
- Note: An additional pulley can be added as a change of direction. It offers no mechanical advantage, but in certain places improves your haul field.
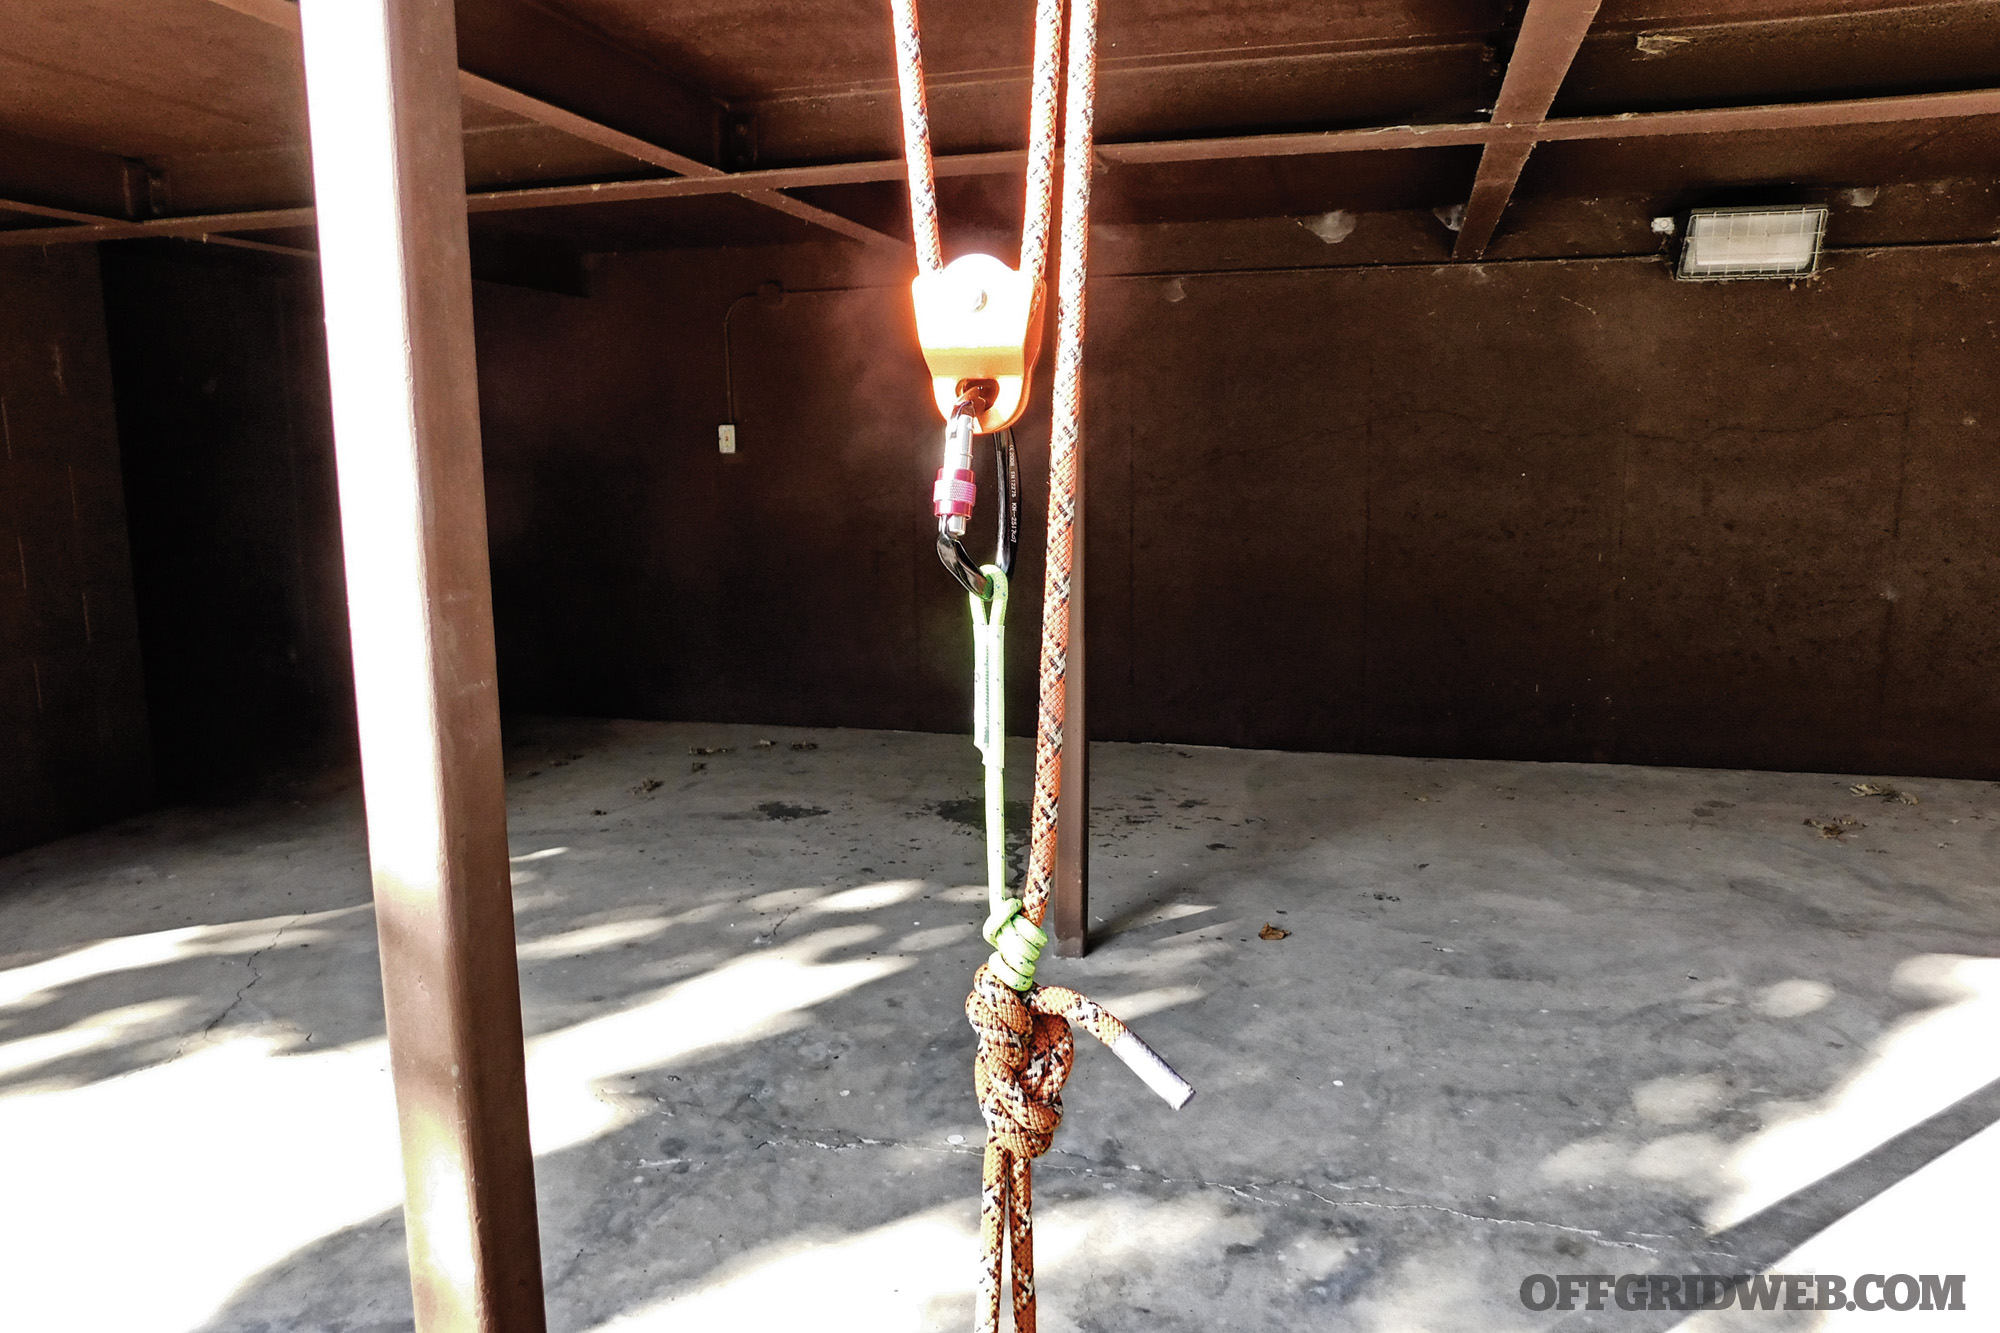
A 3:1 mechanical advantage can be easily built with only a few more parts and can decrease your workload significantly. A 3:1 is commonly referred to as a “Z rig” because of its general shape when complete. To build a 3:1 haul system:
- The rope is terminated at the load.
- A pulley is attached to a “bombproof” anchor.
- Run the rope from the load through the pulley.
- Add a second pulley.
- Attach a Prusik (minimum of two wraps) to the rope.
- Attach the second pulley and the Prusik with a carabiner.
To take it one step further, if you’re utilizing a Z rig to raise a load vertically, your haul system will need to pass the “whistle test.” This means that if at any point during a haul, someone blows a whistle, you should be able to let go of the rope without a catastrophic failure. By adding a Prusik to a 3:1 as a “progress capture device” you prevent dropping the load if, mid-raise, a swarm of bees descends upon you and you let go of the rope and run away screaming. The Prusik is added to the load side of the Prusik minding pulley, which will allow you to freely pull at whatever speed you choose but allows you the opportunity to rest or let go of the rope. Progress is captured as the weight of the load goes straight up the rope, to the Prusik, and to your bombproof anchor.
Summary
Creating mechanical advantage is one of those topics that can seem complicated, but once you get your hands on the pieces and build 2:1 and 3:1’s a few times, it becomes quite easy and offers significant benefits when the need arises. There are many more options when it comes to haul systems, but these provide a strong foundation for your foray into rope craft. Obtaining the right equipment can be inexpensive and is a great way to shore up your supplies to ensure you’re prepared to help yourself or someone else in need. Once you have the right gear, select a solid anchor, and build the system correctly, you have just decreased your workload and increased your effective ability by using physics to your advantage.
