RECOIL OFFGRID Preparation RECOILweb: Expert Advice for Backcountry Hunting
In This Article
The following article was originally published in Issue 2 of our sister publication CARNIVORE. It appears here in its entirety with permission. For more articles on guns, training, and gear, go to RECOILweb.com.
Photos by Dave Merrill and Luke Carrick
No tree stands. No bait. No getting trucked in. You are the transportation. You are the logistics. You’re all on your own. If you like backpacking and you like hunting, then perhaps backcountry hunting is right up your alley. But if you’re the type who enjoys a high-fenced canned hunt with guaranteed kills, you should probably be reading another magazine.

Last year, we attended either the very last Magpul Backcountry Hunting Class or the very first class Caylen Wojcik taught at Gunwerks — details are unclear, but the instruction absolutely wasn’t. Wojcik, along with Luke Carrick of Guide Rite Adventures, taught a comprehensive master class.
On the surface, this makes for one of the simplest and one of the most difficult hunting ventures you’re likely to take on. It takes more than just tramping off into the woods without a solid plan — lest you want to experience frustration, and possibly being the ultimate goal of a search-and-rescue mission.
Essentially, it means hiking to a remote location, glassing, hitting your mark, and packing out all of your meat. Oh yeah, and then your gear. Oh yeah, then if you have any energy left, that’s when you go back for your trophy horn-porn, if you’re into that sort of thing.
Today, we’re going to share with you some lessons learned — all are incredibly important to have a successful trip, regardless of the outcome of your hunt.
This applies to everything. From the weight of your pack and your physical capabilities, to your rifle and yourself. Rule number one isn’t cardio; rule number one is equipping yourself with the discipline needed to work within your physical limitations.
Just spotting an elk or whichever game you’re out for doesn’t mean you can hit it. While there are many who would be fully confident and capable of taking a 900-yard shot on one, if you aren’t, you absolutely shouldn’t. The more you know your rifle and yourself, the better the chances for a successful, humane kill.
This means going out and shooting from compromised positions; strange angles and in bad weather — confident from a bench is entirely different than competence in the field.
Have DOPE cards. Zero before venturing out. Shoot at both high and low angles. Learn how to read wind and apply corrections for your specific rifle and caliber combination. Don’t wound some animal to run off and die a slow, painful death just because you’re an unprepared a**hole.
Being a flat-lander mostly these days, the class treks up the mountain with camping kit, shooting gear, (heavy) camera equipment, and rifle made for some absolutely grueling and grinding days. Had I hit a stairmaster at the local gym wearing a ruck for a couple months before, it wouldn’t have been so bad. On the plus side, it probably made the other students in the class understand that they weren’t the weakest link. Don’t be the weakest link.
This isn’t just about shooting, but about glassing as well. Ever try to handhold a 40x spotting scope? Not. Going. To. Happen. A small travel tripod with a pan/tilt head makes a world of difference. We utilized the compact and inexpensive Benro meFOTO Roadtrip tripod combined with a Vanguard GH-100 pistol-grip head for everything from spotting to shooting. While this offers less stability than a full-on Really Right Stuff setup, it definitely did the job without breaking either back or bank.
Additionally, we use sling pressure with the tripod itself to increase stability. Because this was a lighter-weight tripod, a bungee-type sling attached to the belt and the rifle sling itself allowed us to increase pressure for greater support.
Shoot off your pack. Shoot off your rolled-up sleeping pad. Shoot from the most stable position possible at the time.
Years ago, foolishly, I thought trekking poles were just for people who weren’t strong. And then a pair of poles saved me from blowing off the side of one of the Towers of Paine in Chile — big believer ever since.
Not only do trekking poles offer stability when traversing mountains, they also help you keep your legs fresher during ascents, and importantly, can be used as a rifle rest, if needed. While we still have a bipod mounted on the rifle, and a tripod as a secondary, knowing how to use poles for shooting is a great easy-button when you need it.
The longer subtitle should be: Consolidate where you can, not where you shouldn’t. The rule of any backpacking trip is to have as many multipurpose items as possible. But sometimes that may put you in the realm of suboptimal equipment. On our venture to the mountains of Washington, support gear included a Bushnell ConX rangefinder, tripod, Kestrel Elite ballistic computer, a pair of Vortex Razor HD 10x binoculars, and a Vortex Razor HD 22-48x spotting scope.
An easy way to lighten the load would’ve been to use a smaller rangefinder. But taking it a step further by using a set of rangefinding binos would be even better (see our rangefinder buyer’s guide elsewhere in this issue). And if you have a weatherproof cellphone? Using the Applied Ballistics app might be an option to go without your Kestrel.
While some don’t see the point of having both a spotting scope and binoculars, it’s far easier to see detail at range with a decent spotting scope. Despite the additional weight and bulk, we didn’t consolidate here. However, many will forgo the spotting scope in favor of using binoculars. While a great many binos have a tripod mount on them, you don’t necessarily need one. Instead, use some bungee cords with balls on the end to secure them to your tripod — far more stable than hand-holding in any situation.
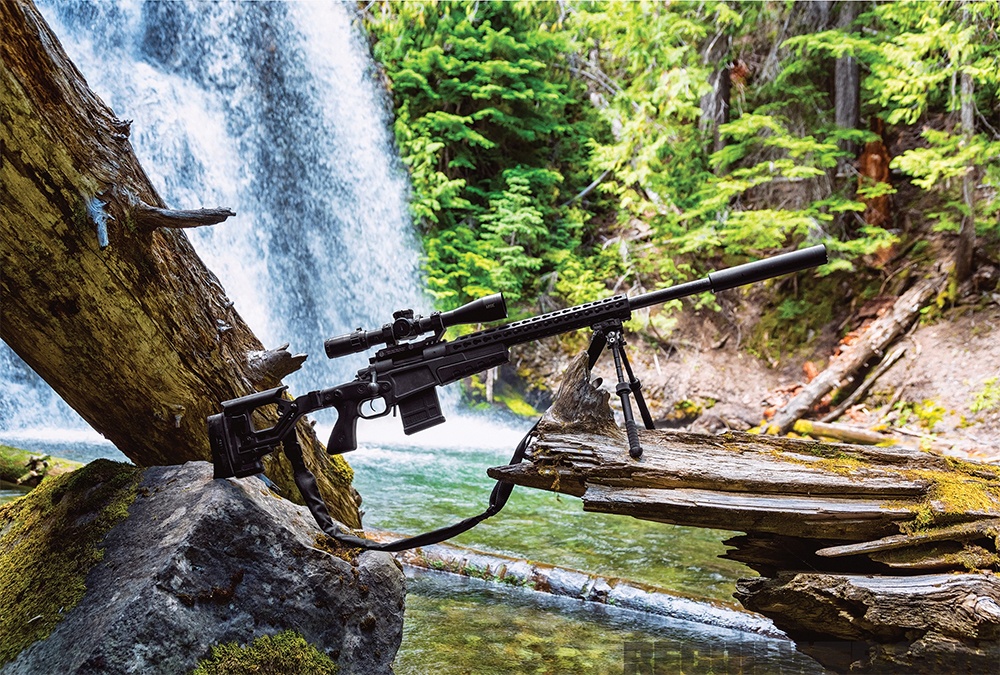
Your rifle doesn’t have to be über light, so long as you know how to carry it. We were using a custom Surgeon rifle chambered in .260 Remington with a Bushnell Elite Tactical LRTS 4.5-18x in a GDI mount on top. While this is a decidedly heavier rifle than most would take into the backcountry, it was also a rifle we knew inside and out, and could be confident grabbing game at distances we wouldn’t be comfortable when shooting something with half the heft.
… Just inappropriate clothing and gear. Layering is key: Regardless of what month of the year it is, you may find yourself cold and wet, especially as you gain altitude. Whether regular backpacking or in the midst of a full-on backcountry hunt, always bring gear for cold and inclement weather.
Down-insulated jackets are lightweight, pack small, and keep you warm. Even if it’s July you want one along with a watch cap, gloves, a base layer, and a hard-shell exterior layer. We’re not saying that you need an Arc’teryx Beta SL, but it works damn well for that purpose.

Heavy is the head that wears the crown — and also the load of one who carries this awesome Surgeon. We found the...
Sleep matters too. If you end up in cold weather, a standard sleeping pad won’t do you much good — all the insulation in your bag compresses when you lay down on it. We’re big fans of the Big Agnes insulated air core pads to keep your body from being frozen at night.
Glassing the countryside is not for those that get bored easily. You’ll spend hours on a mountaintop viewing all of the surrounding terrain. While you may think this is time for some music or a podcast, you’d be wrong: There are still predators in North America that would love nothing more than to eat you for lunch. If you’re the type of person who always needs mental stimulation, this one isn’t for you.
But more than that, sitting for long periods of time can be uncomfortable. While there are specialized seats expressly for this purpose, we went the “consolidation” route and opted for an InstantCamp AL-101 Ultralight inflatable pillow. At a mere 2.4 ounces, it kept our head off the ground at night, and made for a great seat while glassing.
Navigating by GPS? Cool — also have a map and a compass. Is your fire plan solely a BIC Lighter? Carry two — and then some waterproof matches on top of that. Water filter? Great — also throw in some iodine tablets. The failure of one single piece of equipment in your gear shouldn’t compromise your ability to survive.
If your rifle breaks, the hunt itself may be over, but your ability to get home safely shouldn’t be compromised. Unless you get attacked by a predator. We suggest a big-bore pistol as a backup, and hey, you never know, you might get a shot at the critter you were hunting all along.
We also can’t stress enough to let someone else know where you’re going — one James Franco movie about a man cutting off his own arm with a dull knife is enough.
Ultimately, we learned there’s far more nuance to backcountry hunting than just a combination of backpacking and hunting. It’s a situation where you absolutely don’t know what you don’t know, which is why courses like these exist in the first place. Even if you’re damn sure you know it all, attending a class with someone with extensive experience such as Caylen Wojcik or Luke Carrick is highly advised before your first trip out.
 STAY SAFE: Download a Free copy of the OFFGRID Outbreak Issue
No Comments