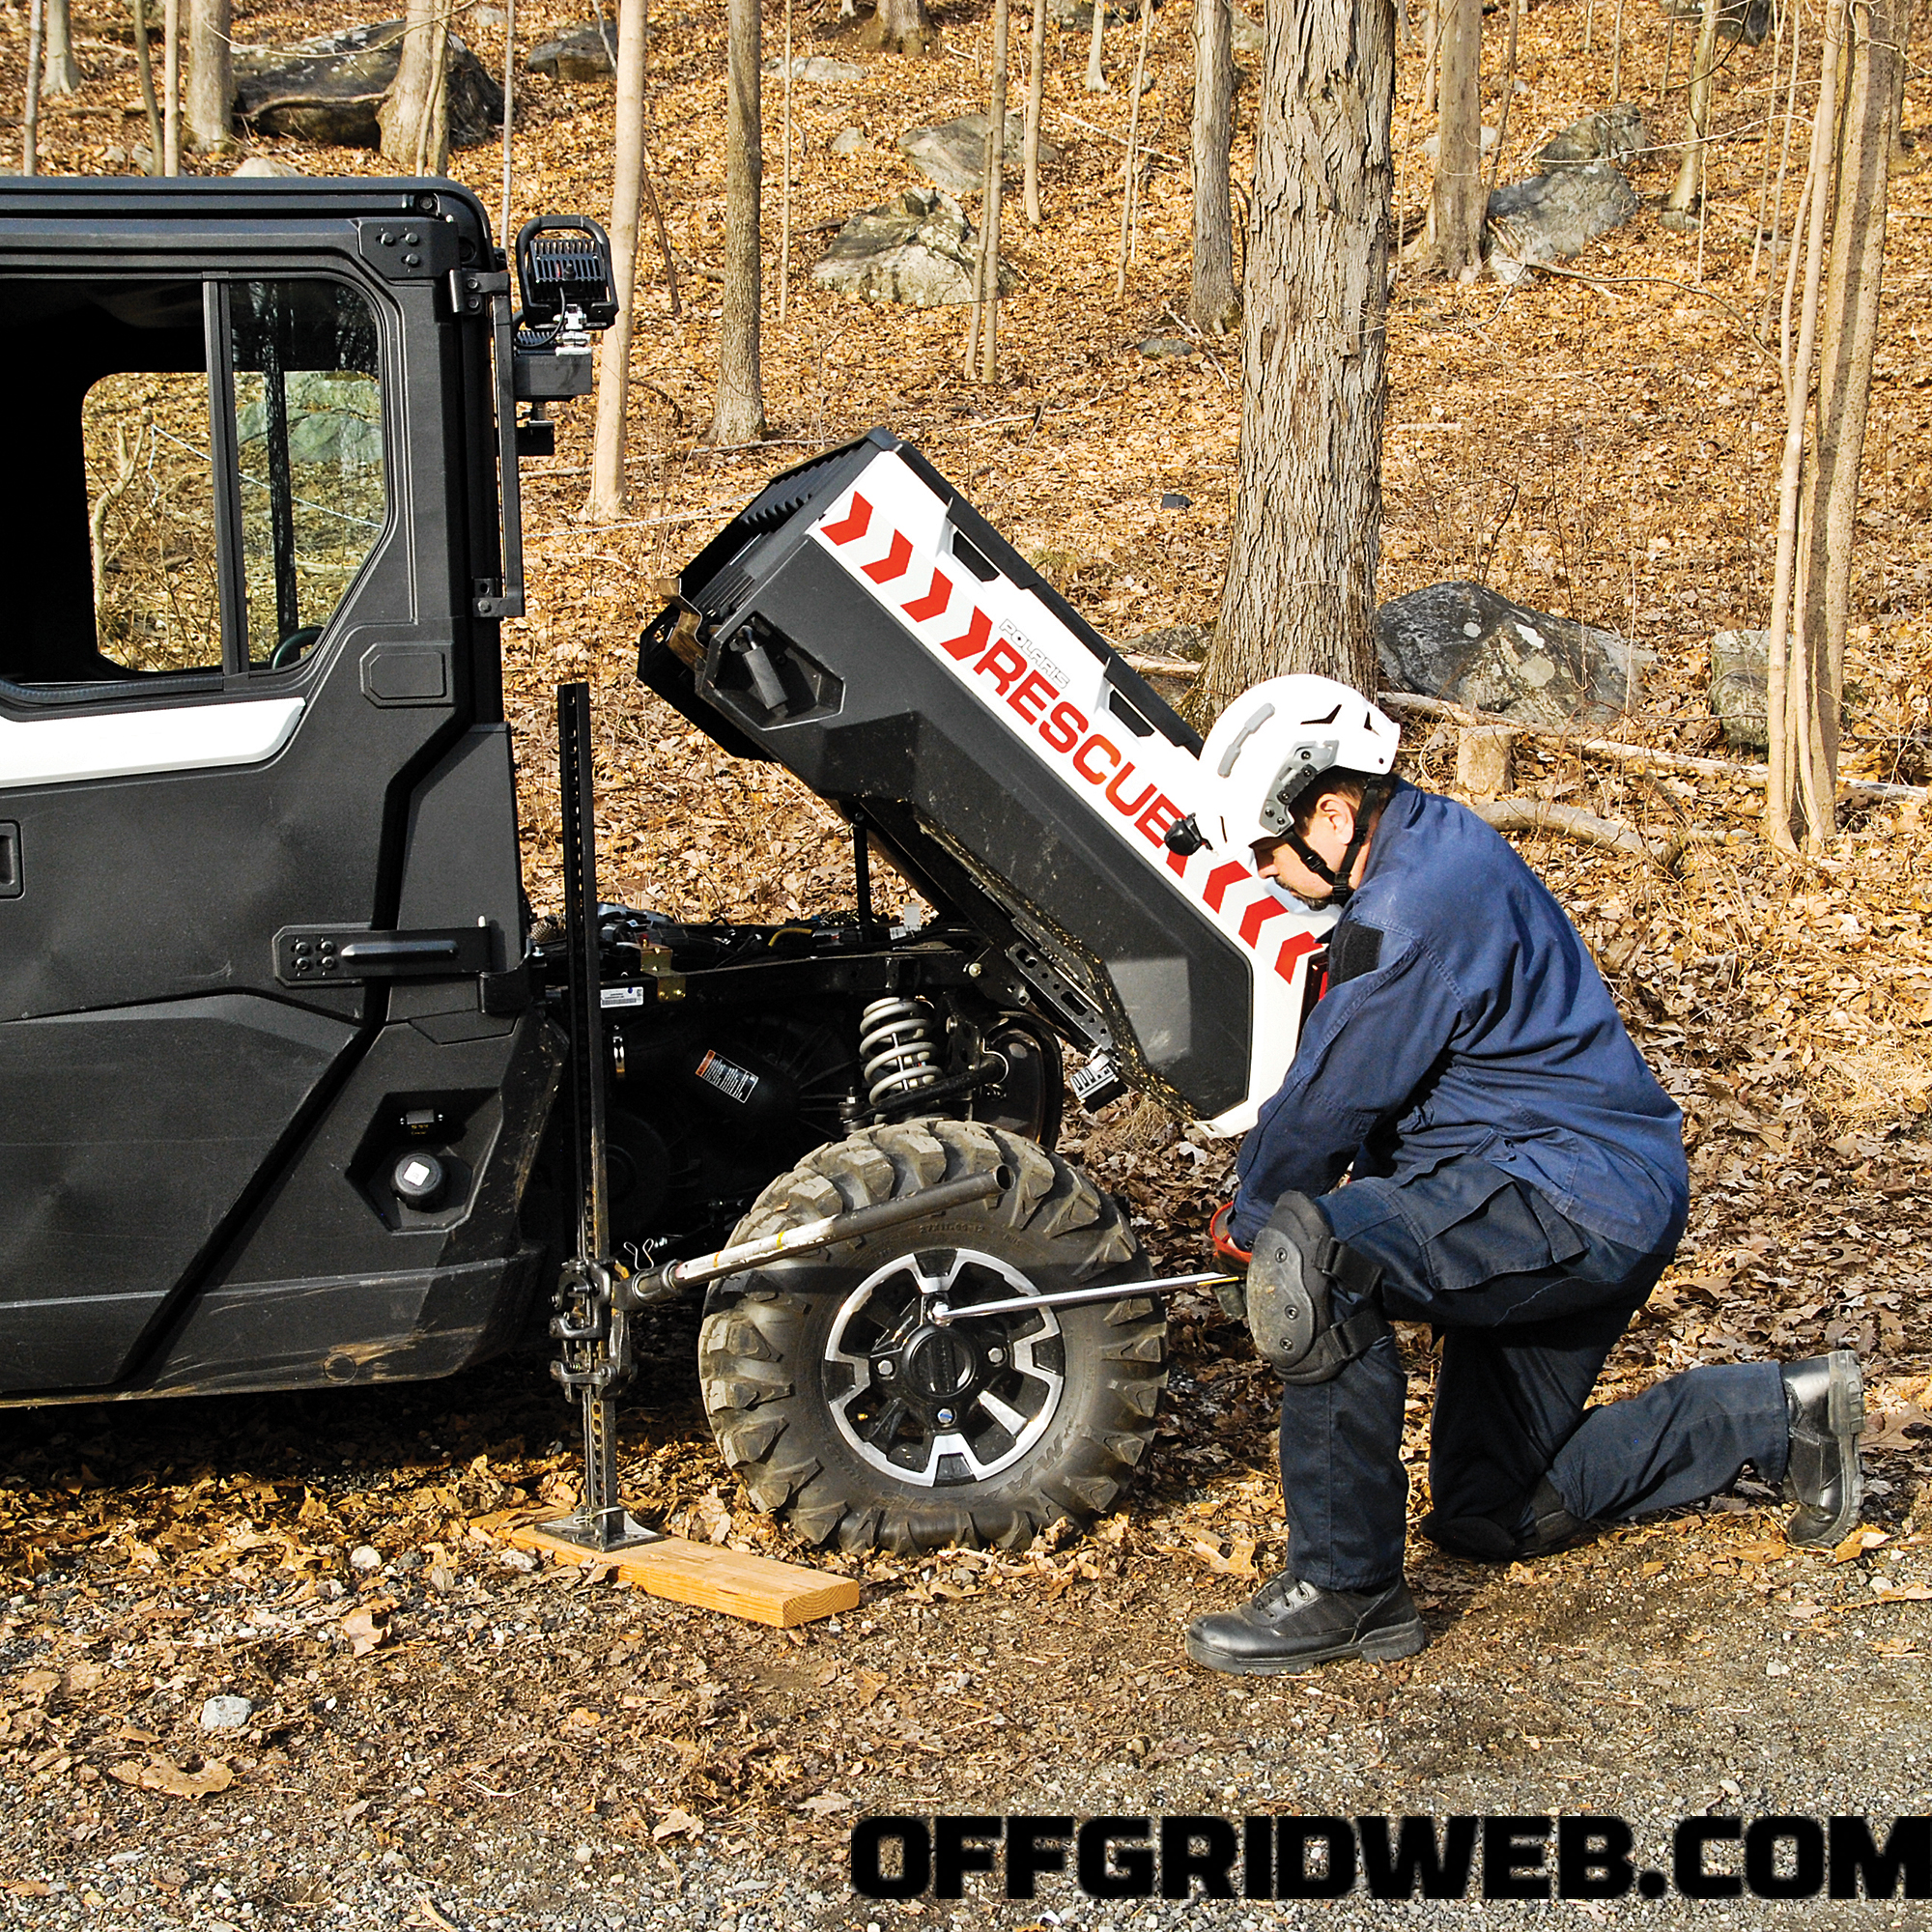
Several years ago, my fellow rescue technicians and I conducted a search-and-rescue operation. We were in the middle of transporting our subject out of the woods when we realized that our transport UTV was getting a flat tire and needed some tire repair. The escort ATVs were unable to safely evacuate the subject, so we needed to come up with a quick solution to get our subject out of the woods and to a proper ambulance. Thankfully, we had several viable solutions available to us, and we were able to get to safety with only minor delay. What did we do? More importantly, if you find yourself in an austere environment or off-the-grid scenario, what are your options and what can you learn from our event?
First, let’s talk about changing a tire. Some folks out there might not have ever needed to change a flat tire by themselves. While it’s not fun to do when you’re on-road, it’s even less fun when you’re off-road. If you don’t know how to change a tire, learn. Please. It’s relatively easy to do and can save you a disproportionate amount of heartache if you find yourself in this situation. If you do already know how, you’d be remiss not to teach your spouse, children, and friends.
Your preparations need to start by making sure you have all the equipment needed to change a tire and the knowledge of how to do it safely. Naturally, having a spare tire helps a lot. Knowing where the spare tire is located and how to access it is a must. Spare tires may be located inside a vehicle, perhaps under the floor of an SUV, or covered by the plastic trim on the side. It could also be located in the trunk of a car or outside the vehicle, suspended underneath with a cable that you’ll need to crank down with a tool that should be included in the tire-changing kit that came with the vehicle. If your vehicle is like the latter, you’ll need to know the proper procedure to lower that spare. It’s not always obvious, and you should refer to the owner’s manual for instructions. Also, make sure to periodically check the tire pressure of your spare and top it off if it’s low. Note that some vehicles don’t come with a spare tire at all, instead relying on special run-flat tires or a tire repair kit.
You’ll need an appropriate jack to lift the car and a lug wrench that’s sized for your lug nuts. Some people don’t know where their spare tire is, don’t know how to access their spare tire, don’t have a jack, and don’t have a lug wrench sized to fit their vehicle. This is a recipe for disaster.
The basic steps to changing a tire are as follows: Choose a safe location with level ground. Turn on your hazard lights, then set the parking brake and block the tires so the vehicle can’t accidentally roll away while you’re jacking it up. Before you lift the car, use the lug wrench to begin loosening all of the lug nuts; it’s much easier to do this when the wheel is on the ground and can’t move. Just get them started; don’t remove them completely. Place your jack at the specified jack point for your car and raise the car. Remove the lug nuts, and then swap the spare tire for the flat. Read your owner’s manual for specifics; for example, some vehicles (like certain German cars) have lug bolts instead of lug nuts. If you’ve never changed a tire, it’s helpful to get hands-on instruction.
The natural next question becomes: What are your options if you can’t change the tire?
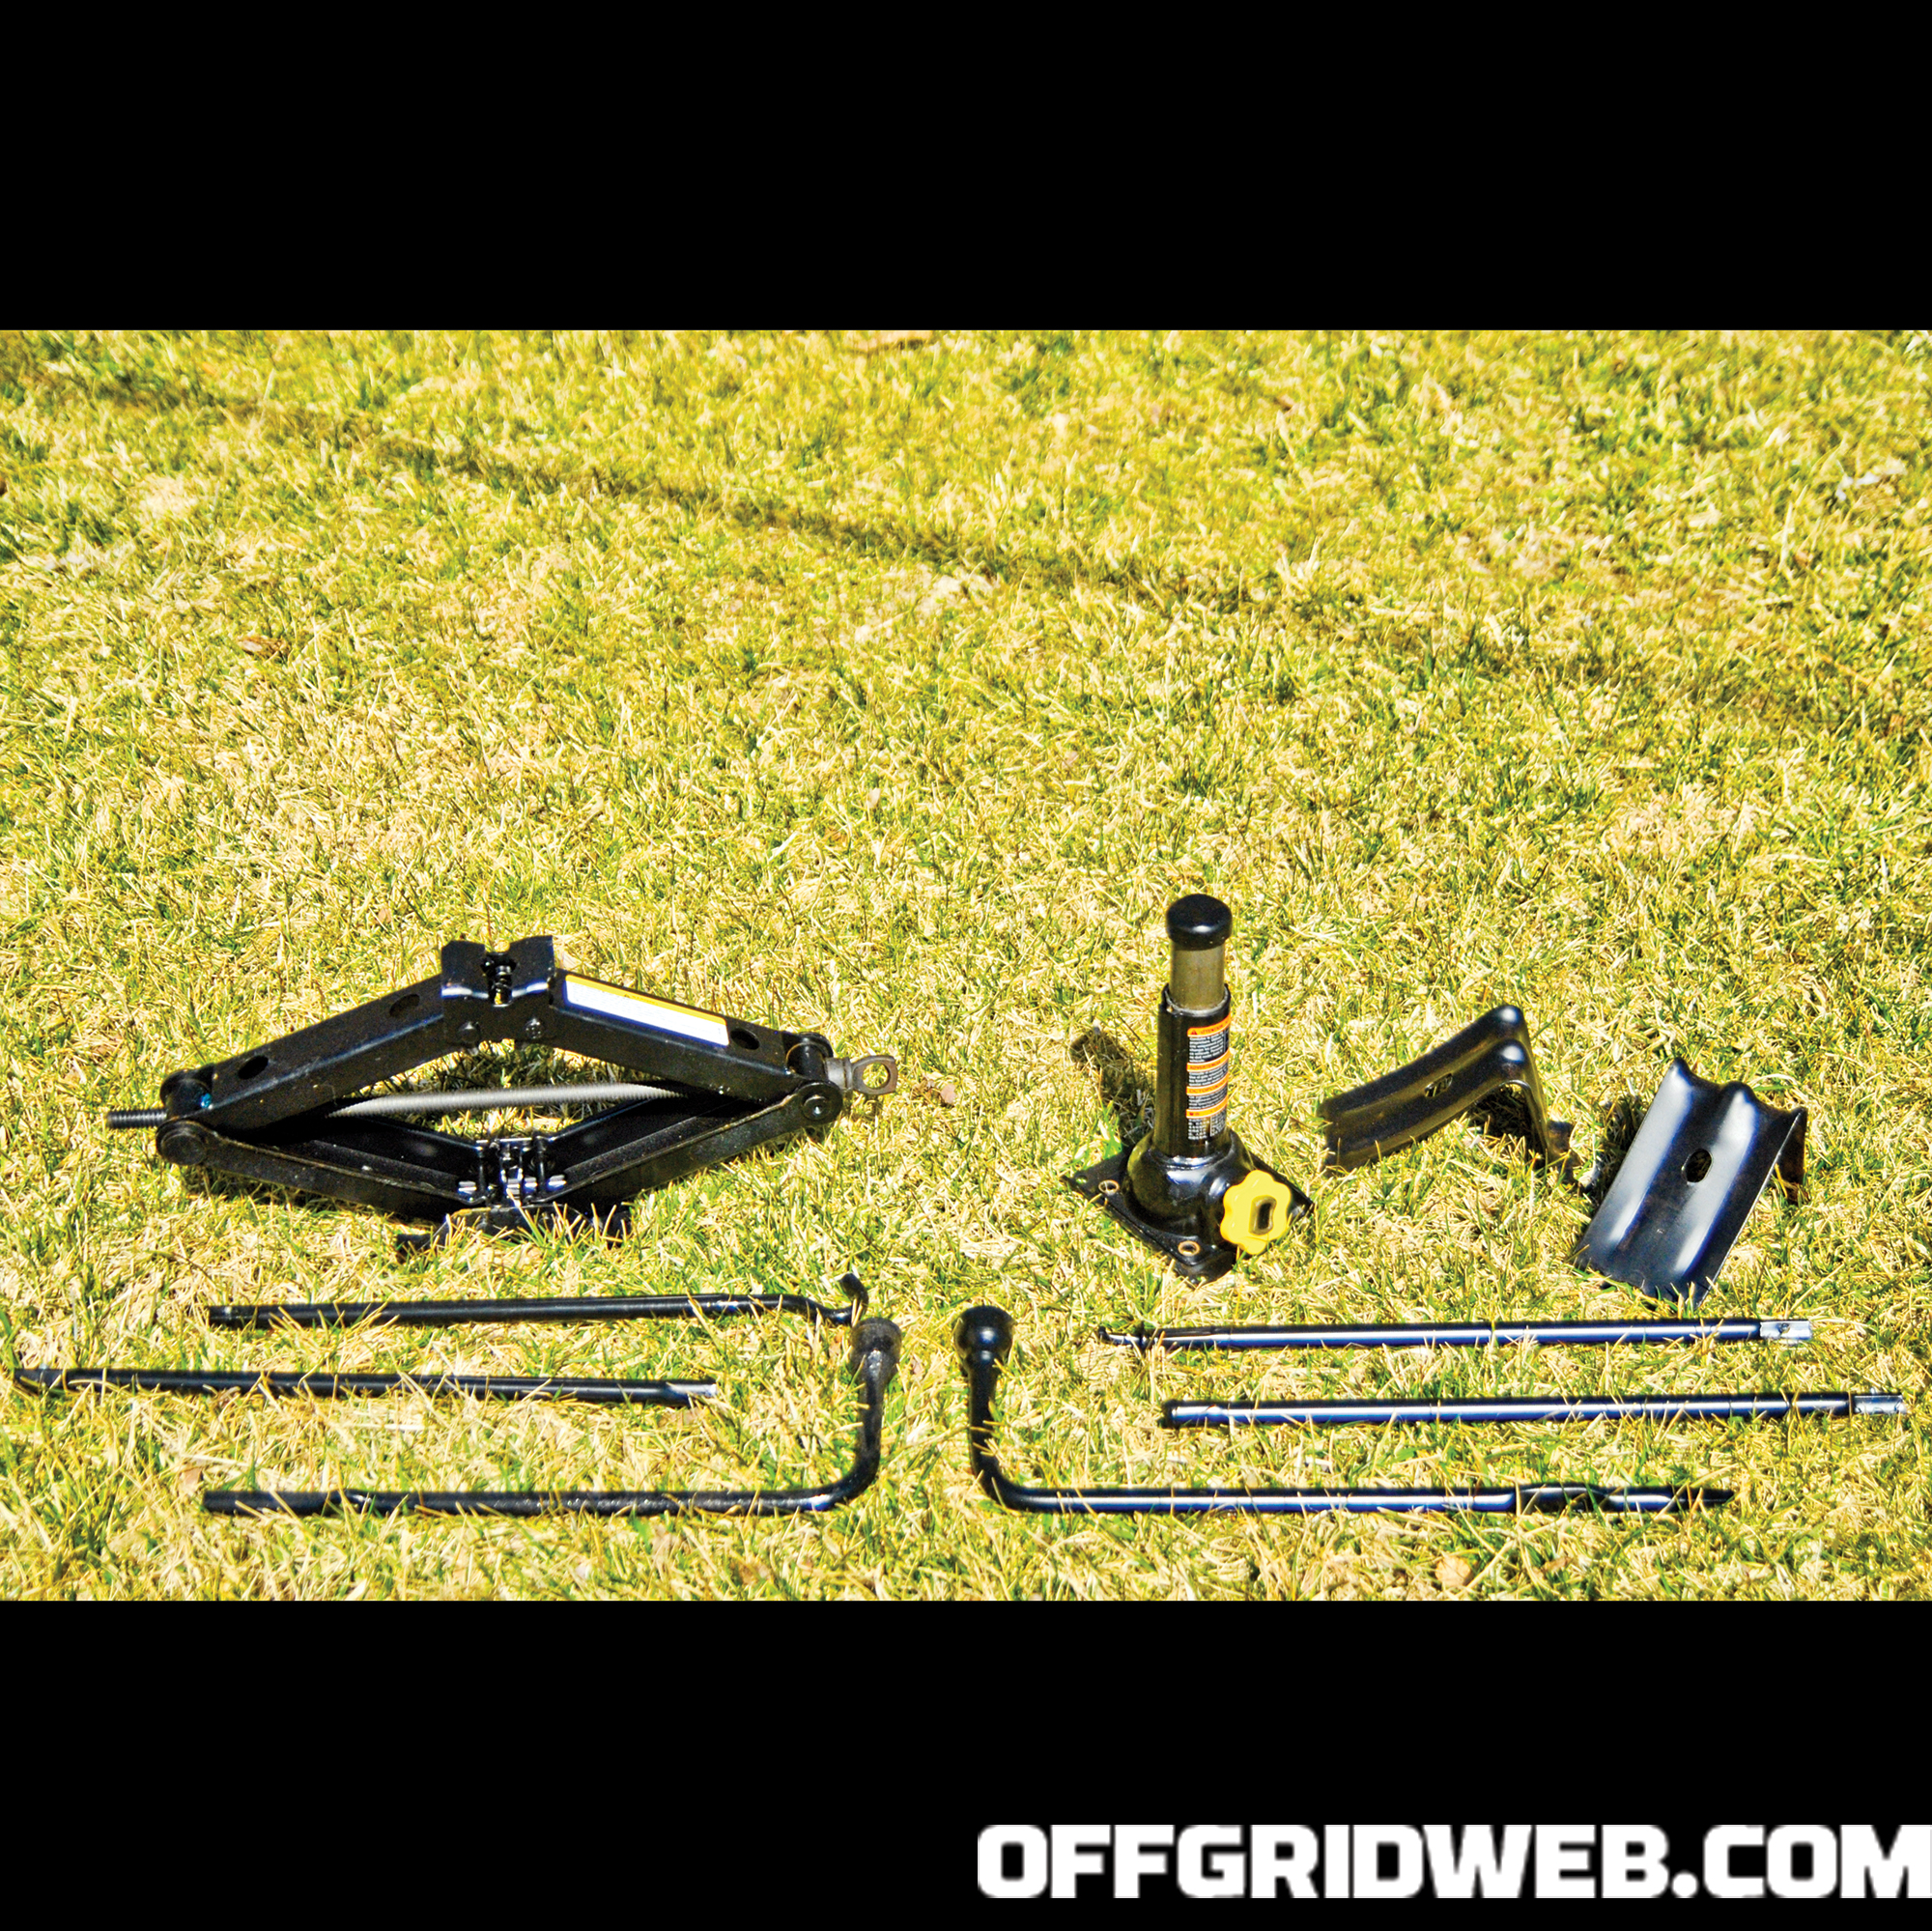
Above: A scissor jack, shown at left, is likely what you’ll find provided by your car’s manufacturer in the trunk. While working the crank is no fun and it also has a small base, these jacks are purely mechanical, so they’re a reliable choice for emergency use. Hydraulic bottle jacks are compact and strong. However, their small bases compromise on stability and they might be too tall for low vehicles.
Compressed Air
The first possibility is to refill your flat tire with air. There are many inexpensive air compressors on the market that you can plug into your 12-volt power source to reinflate your tire. There are also compressed air canisters you can use, ranging from tiny CO2 cartridges that can fill a smaller tire (or use several for larger tires) to larger portable compressed air tanks that could fill large tires. In a worst-case scenario, you could use a manual pump, like a bicycle pump, to inflate the tire. If the leak is slow enough, this could buy you time to get to safety. If the tire damage is more extensive, simply refilling a tire with air might not be possible and you’ll need to try a different method.
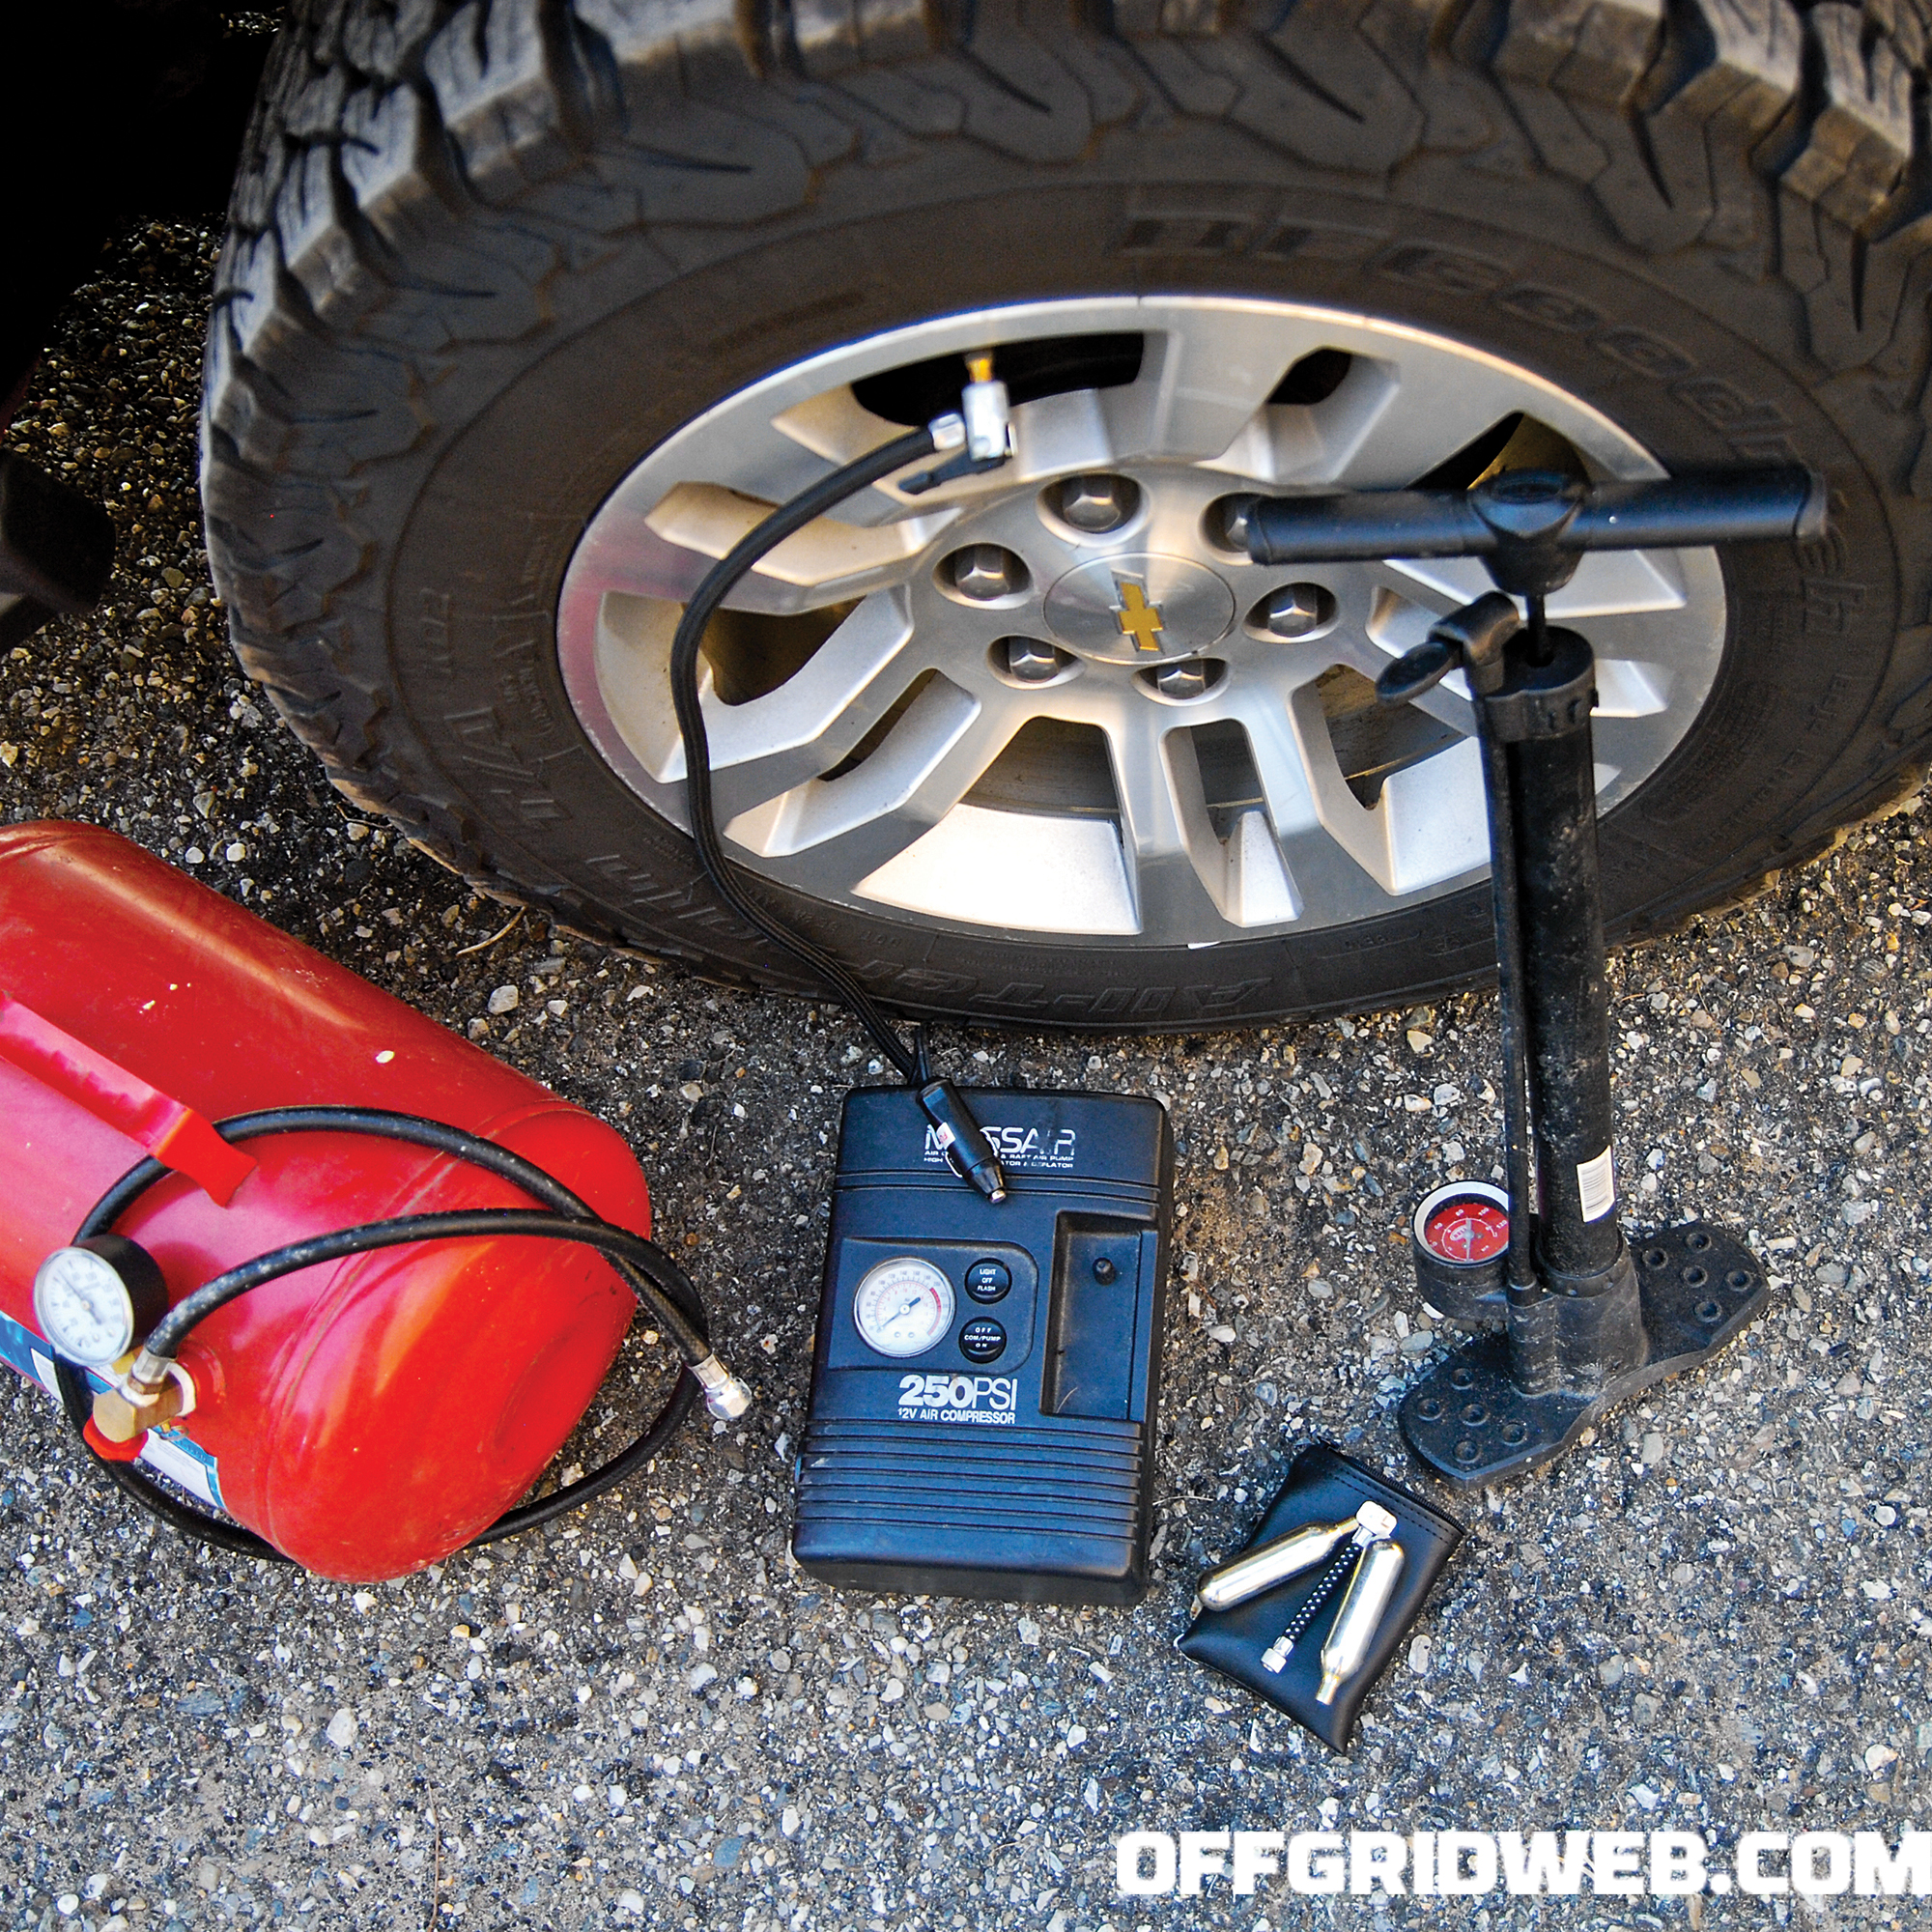
Above: There are many options to refill a tire, from compressed air to electric pumps to good old-fashioned elbow grease.
Plugs
There are several options to plug a damaged tire. The U.S. Tire Manufacturers Association (USTMA) outlines criteria for fixing a flat. Their Product Service Bulletin titled “Puncture Repair Procedures for Passenger and Light Truck Tires,” which includes a wall chart, shows the industry recommended puncture repair procedure. It basically advises that you can only repair holes up to ¼-inch diameter in the tread area of a tire (not the edge of the tread or sidewall). This standard should be adhered to under all normal circumstances. But you might not be in normal circumstances — you might be in an off-road, off-grid, life-and-death situation!
The best type of flat tire repair is a pull-through plug with an interior patch. These are installed from inside the tire and are the type of repairs performed at service stations. It involves reaming out the hole, putting a plug into the hole, using a vulcanizing compound (glue), and then putting a patch on the plug from the inside of the tire.
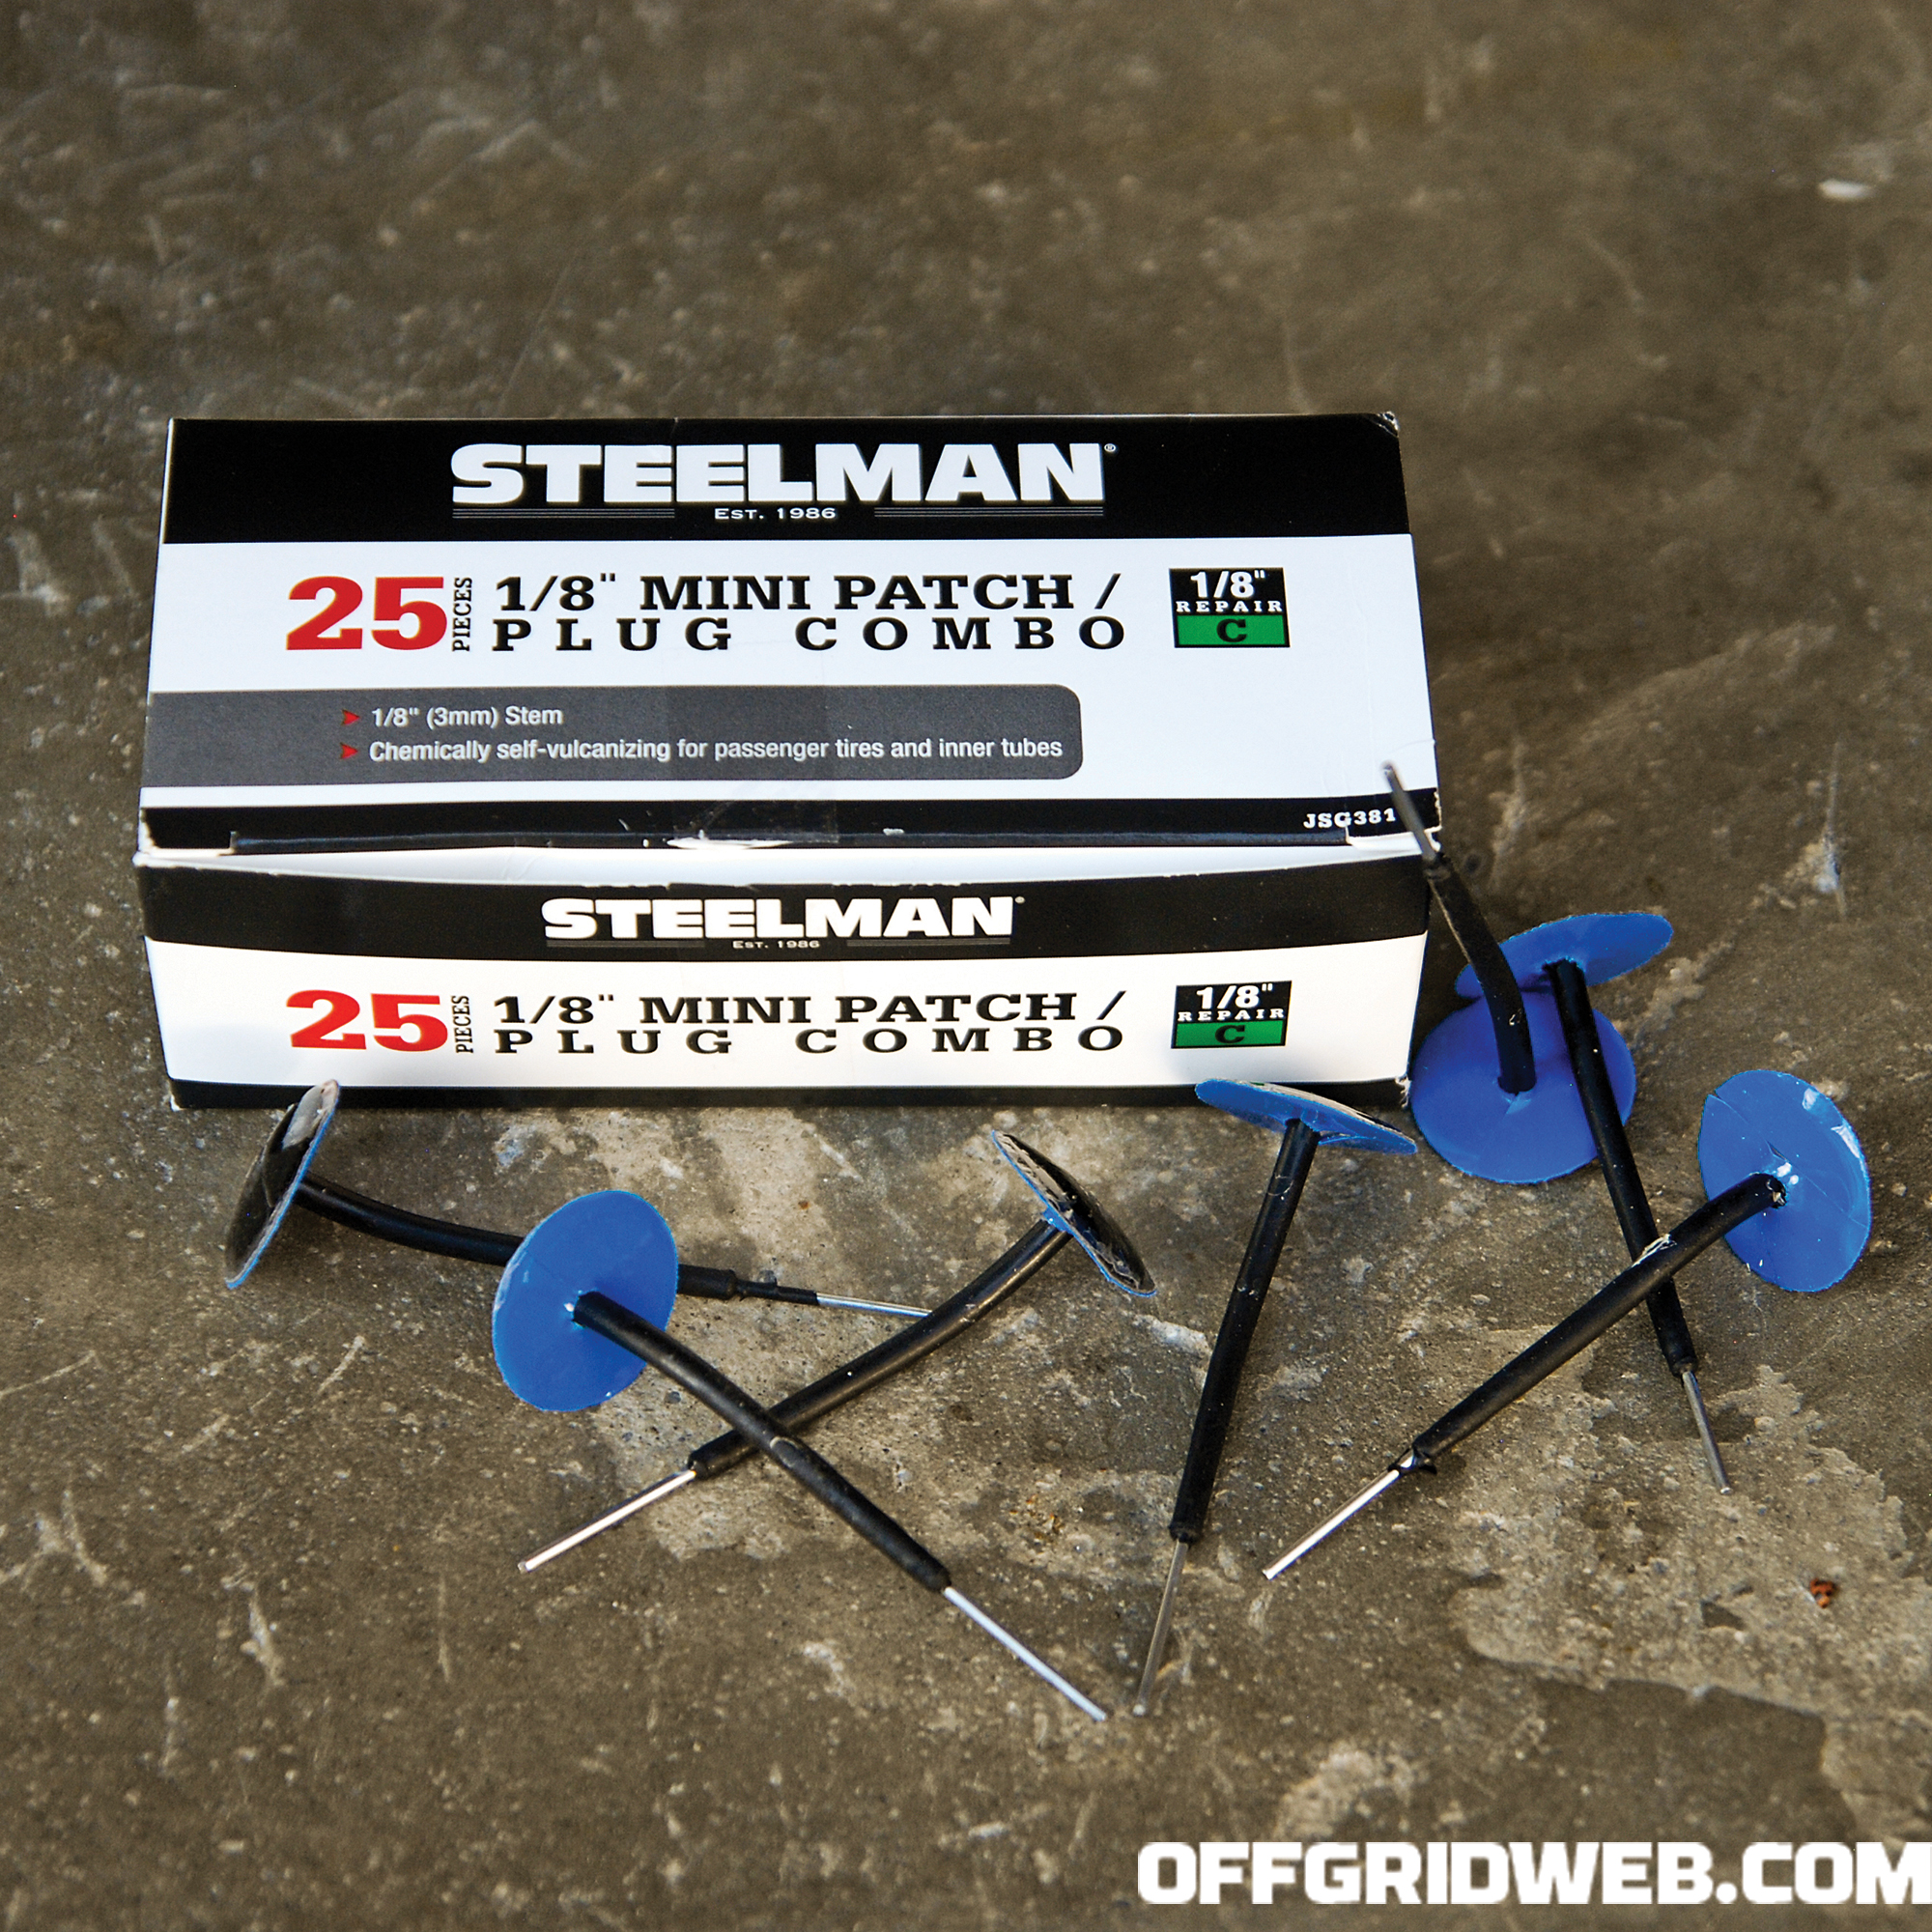
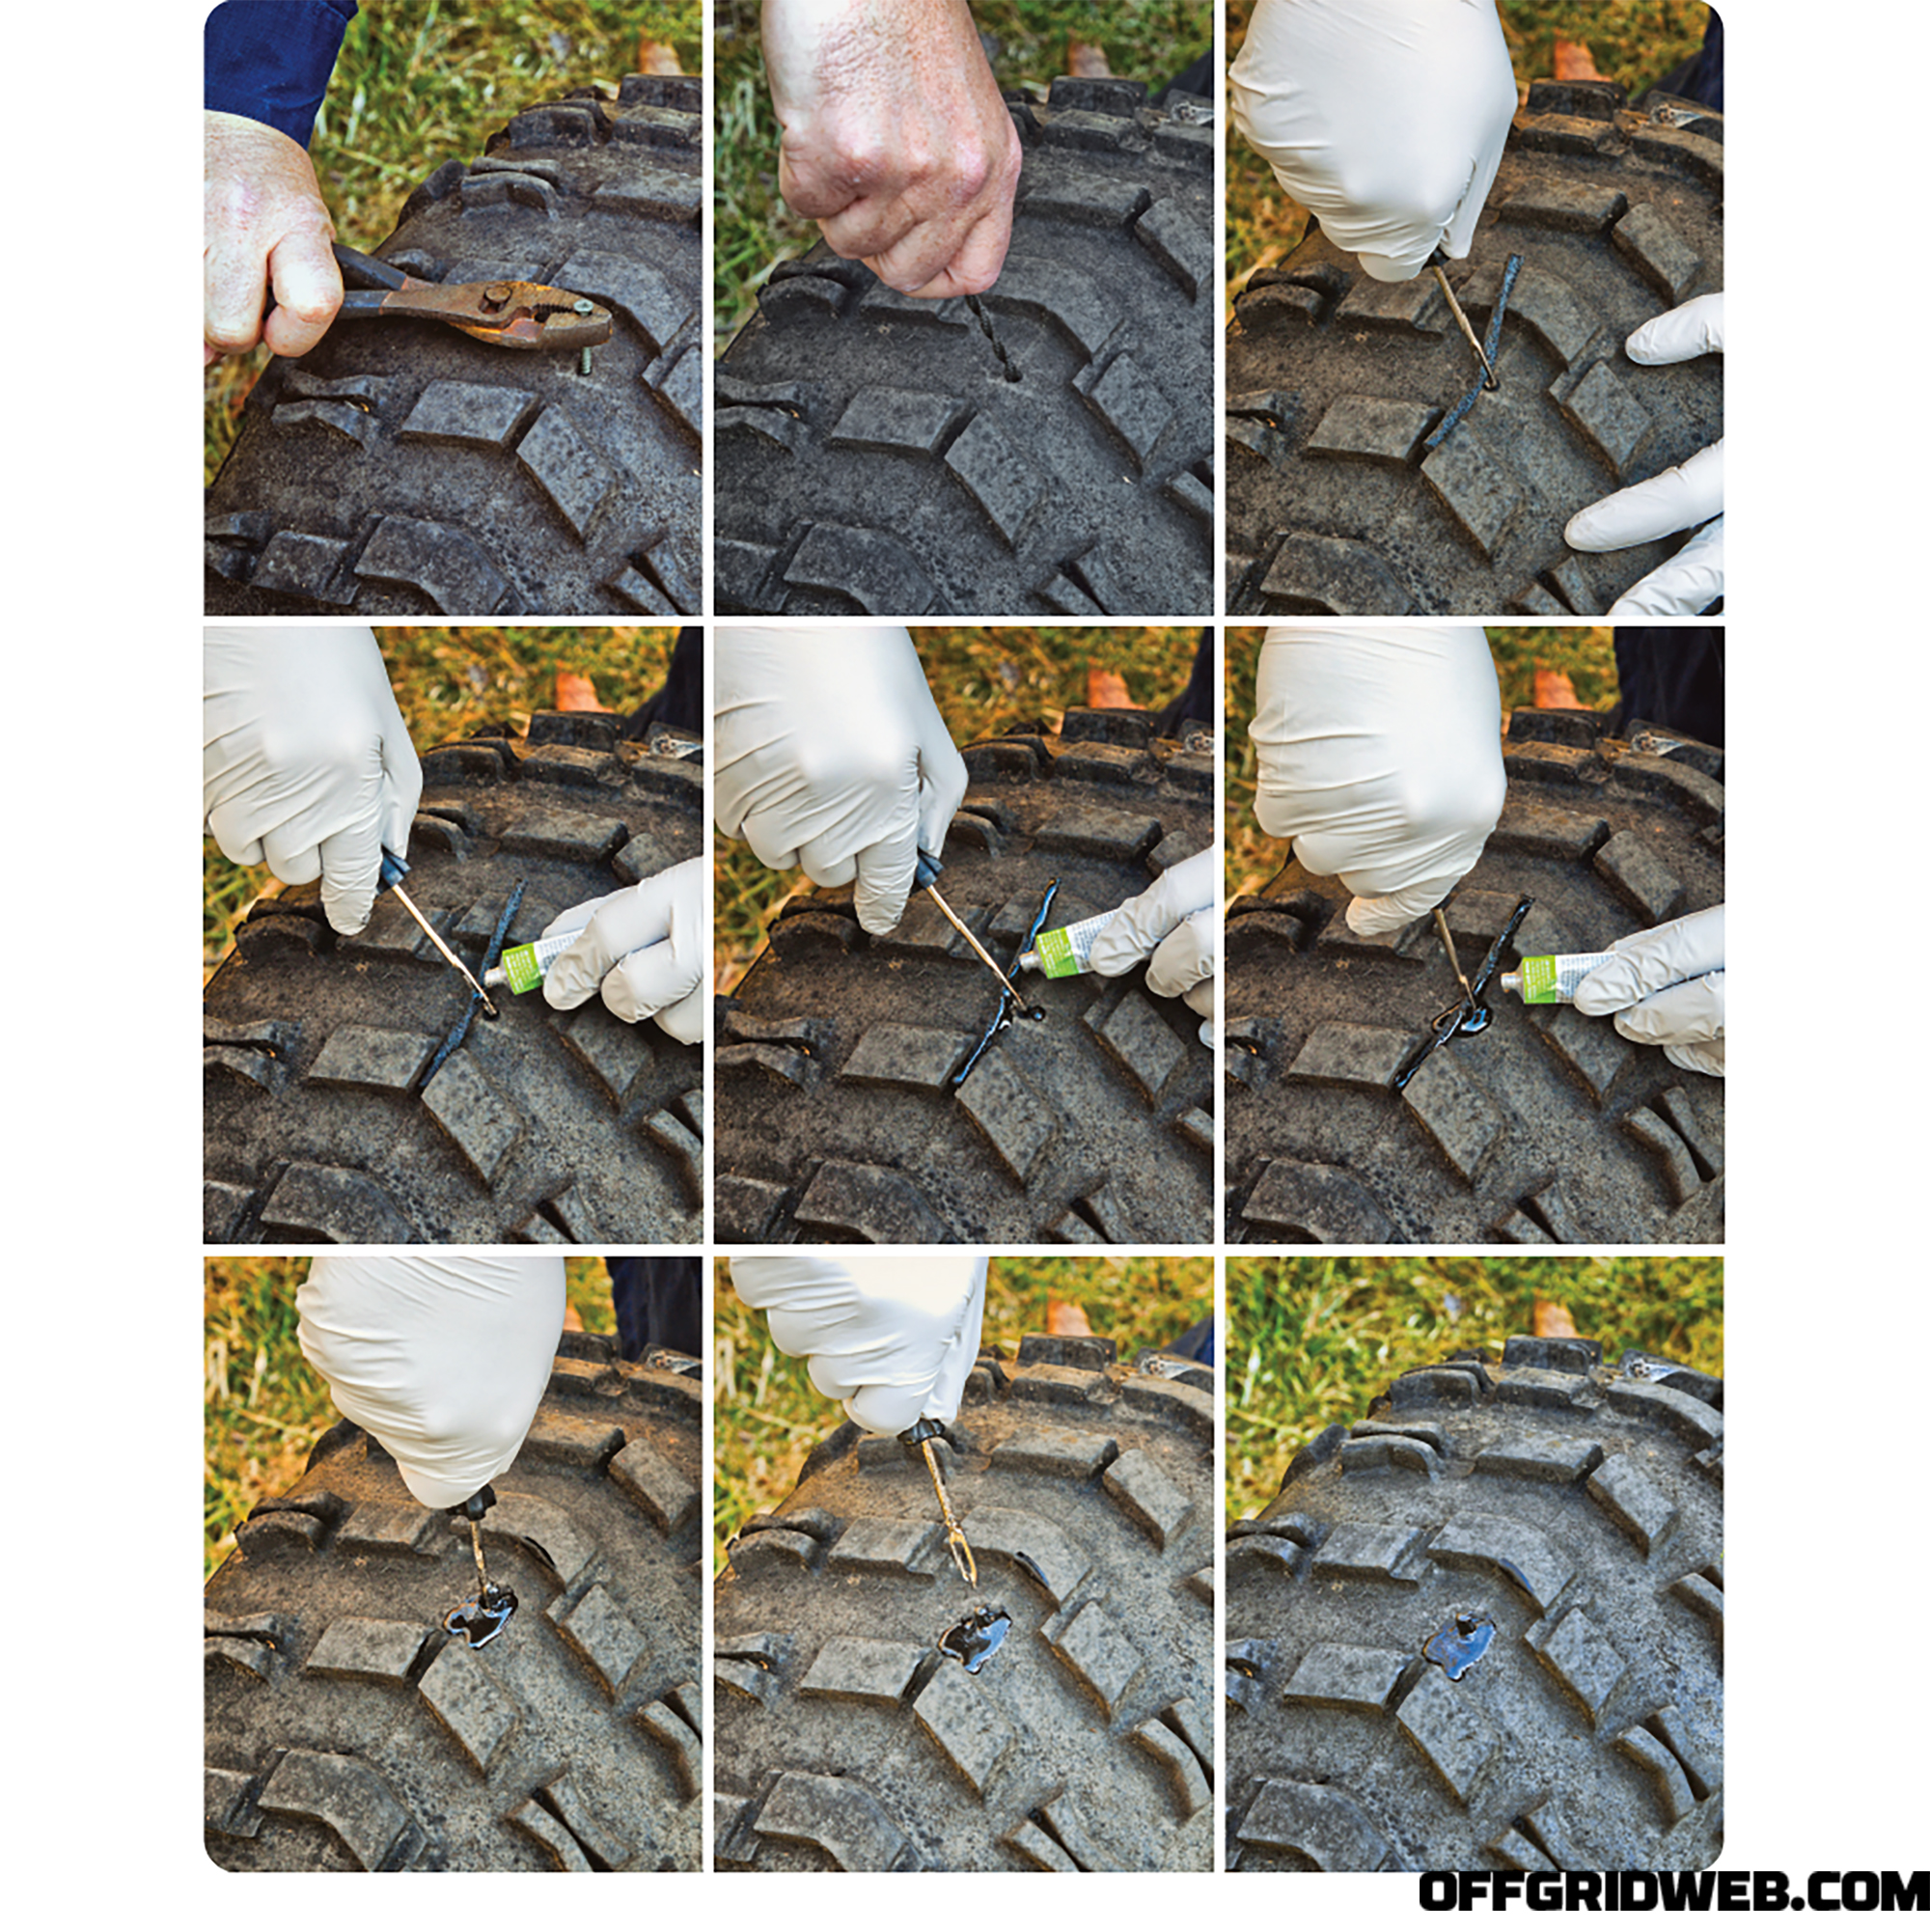
A simple external tire plug can be installed by the average person, with the tire still on the rim. First, through visual and physical inspection, locate where the tire is damaged. Once located, remove any debris, such as a screw or nail. Then, insert a probe tool, which is a rough file/rasp-type rod, into the hole that caused the flat to clean it out. Next, thread a repair plug onto the plug tool, which looks like a giant sewing needle. Spread a generous amount of rubber cement onto the plug and push the plug straight down into the hole, leaving about ½ to ¼ inch of the plug sticking out of the hole. Then, twist the plug tool and pull it out, leaving the plug in the hole. Allow the cement a few minutes to dry, and if the damage isn’t too severe, the hole should be plugged. This type of repair has been known to hold up for many years.
While it’s generally not recommended, if the tire is still leaking from that hole, you can try a second, third, or fourth plug. Additionally, the USTMA advises never to put a plug into a sidewall, and I wouldn’t advise it either — but I’ve seen it done on numerous ATV, UTV, tractor, and other off-road tires in an emergency. If you should ever need to do such a thing, drive no faster than a walking pace and only as far as you need to reach a place where a proper tire change can be done. Don’t drive at roadway speeds as there’s great risk of a catastrophic blowout with a sidewall repair.
There are plenty of generic tire plugs available, but plugs from Stop & Go International are a much better option. While they follow the same plug-the-hole concept as the others, these plugs offer significant advantages. First, they’re available in two diameters (5/16 and 7/16 inch), the larger of which is much bigger than a standard tire plug. Second, they’re contoured in a mushroom shape, the head of which forms a better seal inside the tire versus a standard plug. Third, to achieve a tight fit, they require some mechanical advantage via a screw-in applicator or a springloaded “gun” applicator.
Above: The most robust repair method is to install a plug and patch from the inside. This will need to be done at a shop that can remove the tire from the wheel.
Chemical Sealants
Some of you might say, “Why go through all that trouble; why don’t you just carry a can of Fix-a-Flat?” Well, that’s certainly an option, but historically one of the worst. Does it work? Sometimes. But before you put it to use, understand its downsides. In 2016, the formulation was changed, but according to the Safety Data Sheet dated 10/15/2000, the chemical mix of the previous version of Fix-a-Flat was corrosive. If you’ve had a can or two of this stuff sitting in your vehicle or garage for a while, it might be the older formula that can cause damage to your tire, and if left for an extended period of time, potentially corrode the wheel, too. And if you happen to have a tire pressure monitoring system (TPMS), which was mandated for vehicles in the United States after fall 2007, there’s a good chance you’ll cause damage to this component as well. Fix-a-Flat is a very temporary fix and should be removed from the inside of your tire as soon as possible. It’ll require cleaning out the inside of the tire, and some shops will charge you extra. Even with the new formulation, Fix-a-Flat instructions specify you have three days or 100 miles to get your tire professionally repaired.
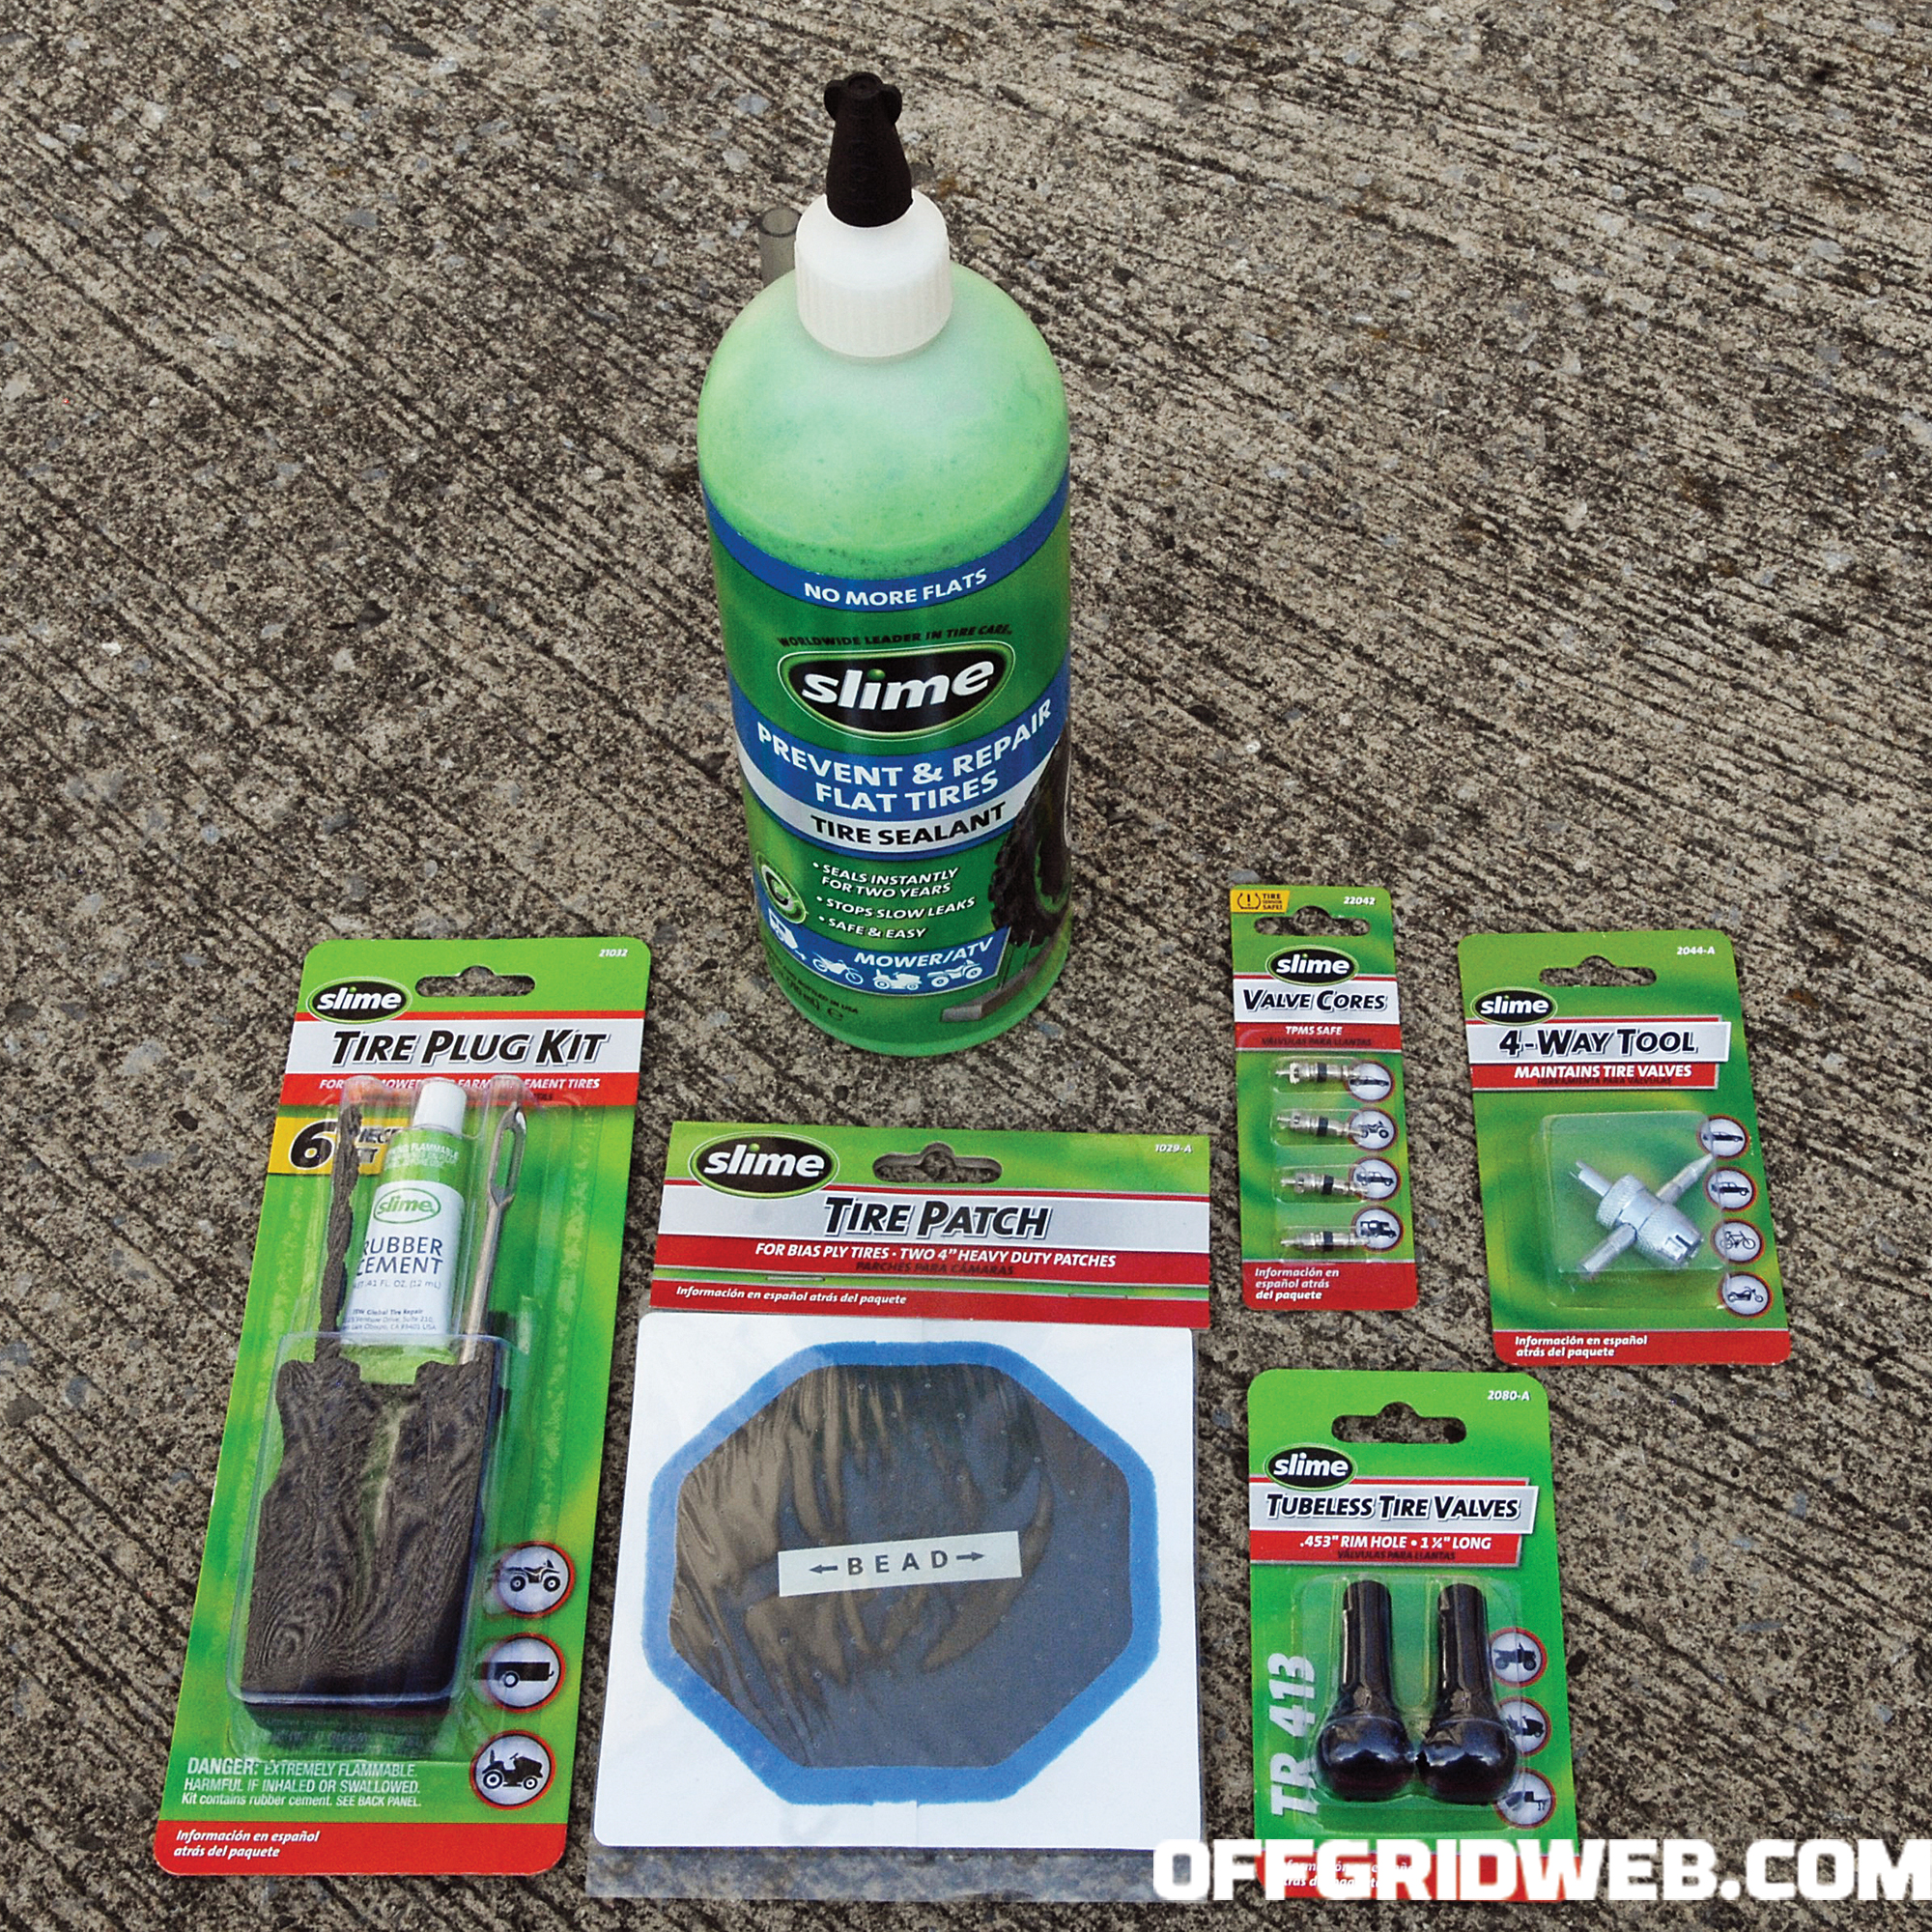
Above: Slime’s tire sealant, which you inject into your tire to seal a puncture, along with more traditional repair kits.
The chemical ingredients of the older Fix-a-Flat formula are tetrafluoroethane, heavy aromatic solvent naptha, amorphous polyolefin, aromatic resin, inert filler, and a trade secret emulsifier. The current chemical ingredients are Tetrafluoro-1-propene, glycerol, and cellulose. It’s a good idea to know which version you have.
You may have also heard of Slime tire sealant, a thick green goo that you can inject inside your tire to repair small holes or prevent the tire from going flat in the first place. The manufacturer claims that their product is TPMS-safe, contains rust inhibitors to protect your rim, and is effective for up to two years. From personal experience, this stuff works very well, and I know people who have left Slime in their tires for many years. To use it, you’ll need to pull the core out of your valve stem using a special tool and inject the sealant inside your tire. It’s a simple process.
The chemical ingredients of Slime are glycerol, attapulgite (binder), cellulose, and quartz.
TireJect tire sealant is similar to Slime; it’s a liquid that you inject into your tire through the valve stem and is said to be effective for two years. However, it’s a much thinner liquid and comes in two different versions. The automotive sealant will seal bead leaks and tread punctures up to ¼ inch, while remaining safe for tires, rims, and TPMS sensors. The off-road tire sealant will seal leaks up to 3/8 inch, including the sidewall and dry rot. This sealant is made with liquid rubber, active sealing particles, and aramid (Kevlar) fiber, but it’s not TPMS friendly. I tried this product on the dry-rotted tires of my lawn aerator, which would no longer hold air for more than a day or two. Thirty days after using TireJect, the dry-rotted tires are still holding air. Impressive.
The chemical ingredients of TireJect are propylene glycol and natural rubber latex.
While doing research, I found another product, FlatOut Multi Seal. I haven’t used it yet, but feel it deserves mention. Like Slime and TireJect, this liquid is injected into your tire through the valve stem. The manufacturer claims their sealant is good for 10 years but is formulated for off-road vehicles only, as it can damage TPMS sensors. The Multi Seal Pro HD 2500 will plug holes up to ¾ inch, while the Multi Seal Armor 3500 will plug holes all the way up to a whopping 1¼ inches — that’s bullet hole territory. They have a video on their website showing them driving a 5/8-inch steel rod into a tire and FlatOut Multi Seal plugging the hole in seconds.
The chemical ingredients of FlatOut Multi Seal are approximately 50-percent propylene glycol with the remaining proprietary components not at reportable concentrations.
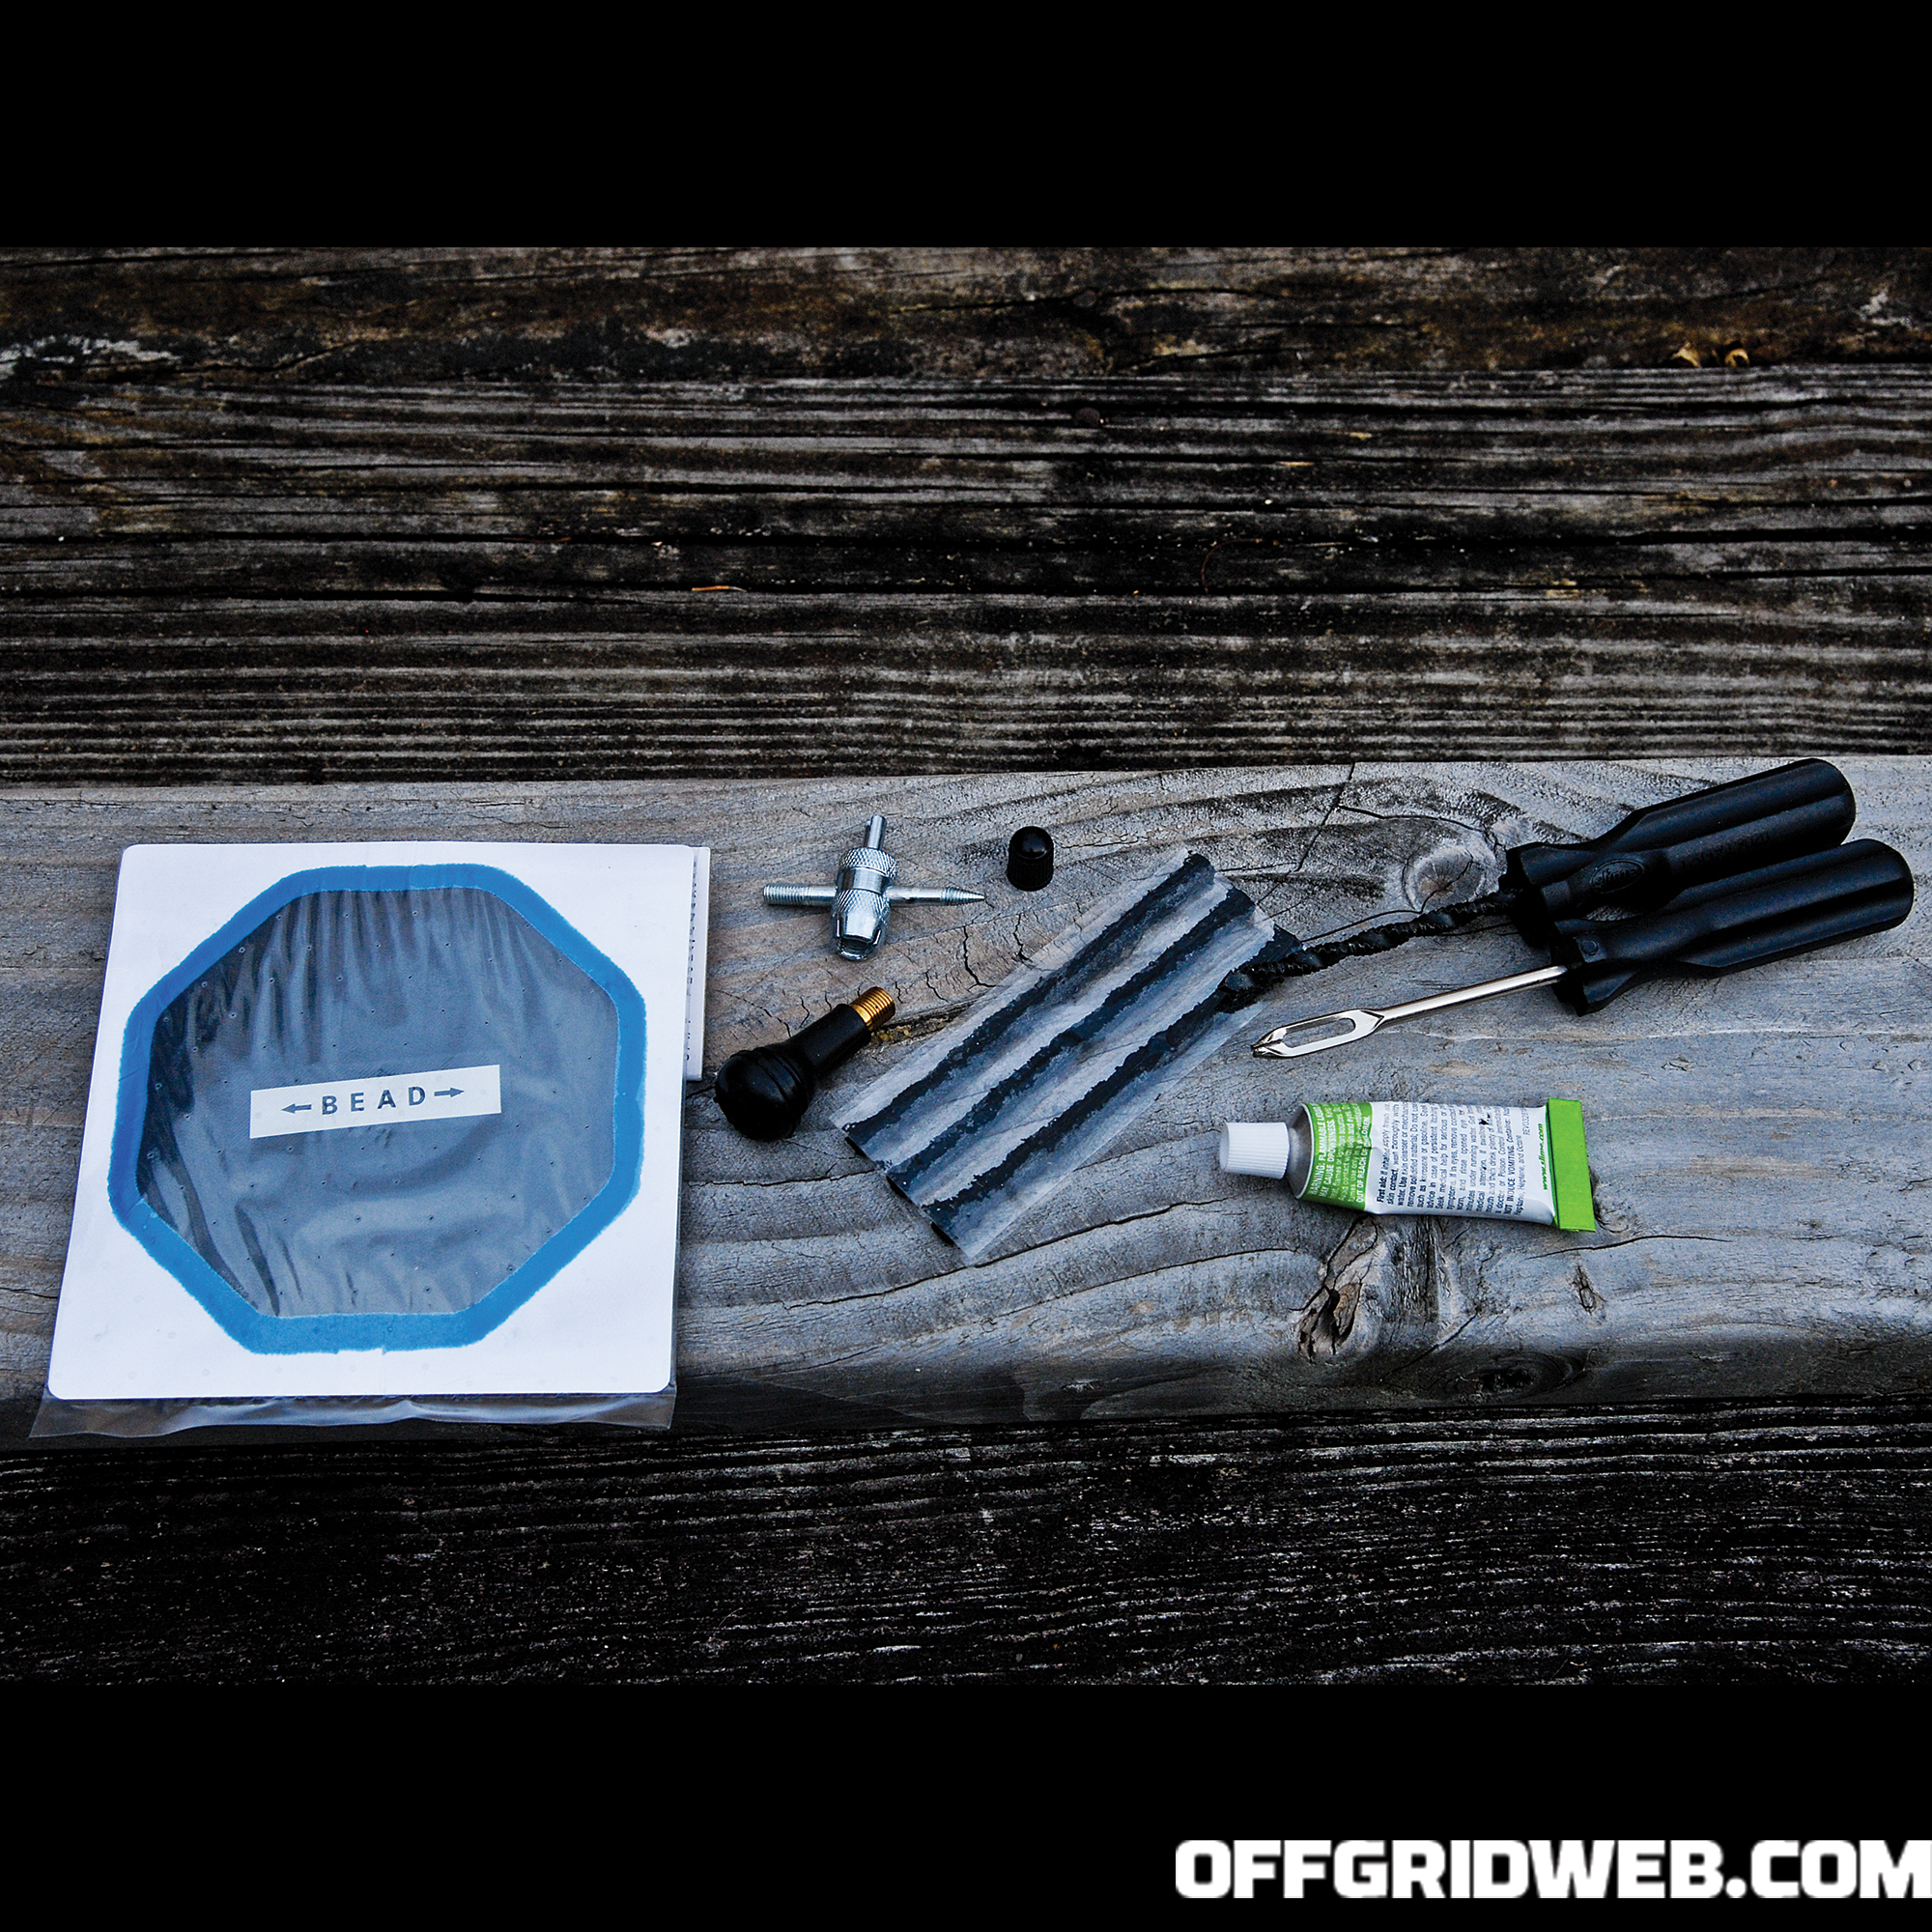
Above: You can use an external tire plug kit to repair a tire without removing it from the wheel. It involves removing the offending object, cleaning up the hole, then inserting a repair plug and applying cement. It’s wise to have a patch applied on the inside surface of the tire afterward to reduce the risk of leaks.
Other Extreme Repairs
A friend was out on an ATV camping trip when he put a gash into the tire. It was too big to be repaired with conventional means, and he hadn’t brought a spare tire with him. Rather than attempting to drive the trail on a flat tire or hiking many miles out of the woods, he sewed the gash closed. Yes, you read that correctly. Using a heavy tarp repair needle and thread, he put a bunch of stitches into the gash to hold it closed, applied a patch inside the tire, and then coated it liberally, inside and out, with vulcanizing cement. It held, and he was able to drive out.
In some third-world countries, they still repair flats with a torch and bits of rubber that they melt back into the tire. It takes a skilled hand to do it well, but tons of tires have surely been repaired this way. There’s also the old-school trick of re-seating a completely deflated tire by spraying it with a flammable aerosol such as starter fluid, then carefully igniting it. The resulting fireball can pop the tire bead back around the wheel, but we wouldn’t recommend trying this dangerous technique at home.

Damage to a tire’s sidewall is usually catastrophic. Plugging a hole in the sidewall isn’t advisable, but can be done as a temporary measure in emergencies.
Conclusion
At the beginning of this article I mentioned having a flat tire on a mission, and that we had several options available to us to repair the flat in that situation. We could’ve patched the tire with a plug or worm, but it would’ve taken a little while to locate the exact cause of the leak and make the repair. We could’ve changed the tire, except we didn’t carry a spare tire on board any of our UTVs.
We could’ve dismounted the tire and put a new inner tube into the existing tire, but that would’ve required finding a lug wrench, jacking up the vehicle, and then replacing the tube. Well, we did have a spare inner tube, but we realized we didn’t have the lug wrench with us, and we didn’t have a jack, so this type of repair would take some improvising and a fair amount of time. We might’ve been able to take a good tire/rim from one of the ATVs and mount it on the UTV temporarily, but, again, we didn’t have the lug wrench or jack with us.
Above: High-lift jacks are particularly useful off-road with high-clearance vehicles. They have a wide range of articulation, and in addition to lifting they can push, pull, winch, and clamp.
In the end, we first set in motion our Plan B. We sent two of the four vehicles we had to retrieve the spare tire, jack, and lug wrench from our staging point along the paved road. As our Plan A, we went with the fastest and easiest short-term fix — we used the small air compressor we had on hand to add air to the tire. We had to fill it several times along the way, but it gave us several minutes of drive time between fillings. This was enough to get our subject to the ambulance waiting along the paved road. Admittedly, the process would’ve gone a lot faster if we’d had a couple more tools with us. But what we did have — a layered mission support plan and knowledge of multiple alternatives — allowed us to find a solution that worked for us in the moment. Knowledge is power, and being knowledgeable about what tools are available to repair damaged tires can go a long way to keep you rolling down whatever roads you choose to travel.
