Photos by Broadview Motion
Whether knowingly or unknowingly, if you’ve used ballistic or bump helmets before, you’ve probably used a Team Wendy product. While the company is best known for helmets, they also make some other products, such as the Team Wendy Radio Rig. It’s evident that a lot of thought has gone into this communications-gear-oriented load-bearing vest, which has some outstanding and thoughtful features. Depending on the environment in which you deploy, it can make you more agile and efficient while working with your comms loadout in the field.
The information Team Wendy sent out leading up to the rig’s release suggests that their target market was search-and-rescue (SAR) teams. So, while this review will primarily cover the SAR perspective, it’ll also discuss other applications in which this type of rig could be beneficial.
Note: The patches in this article were provided by CitizenE Industries.
Pouches, Pockets, and Pull-Tabs
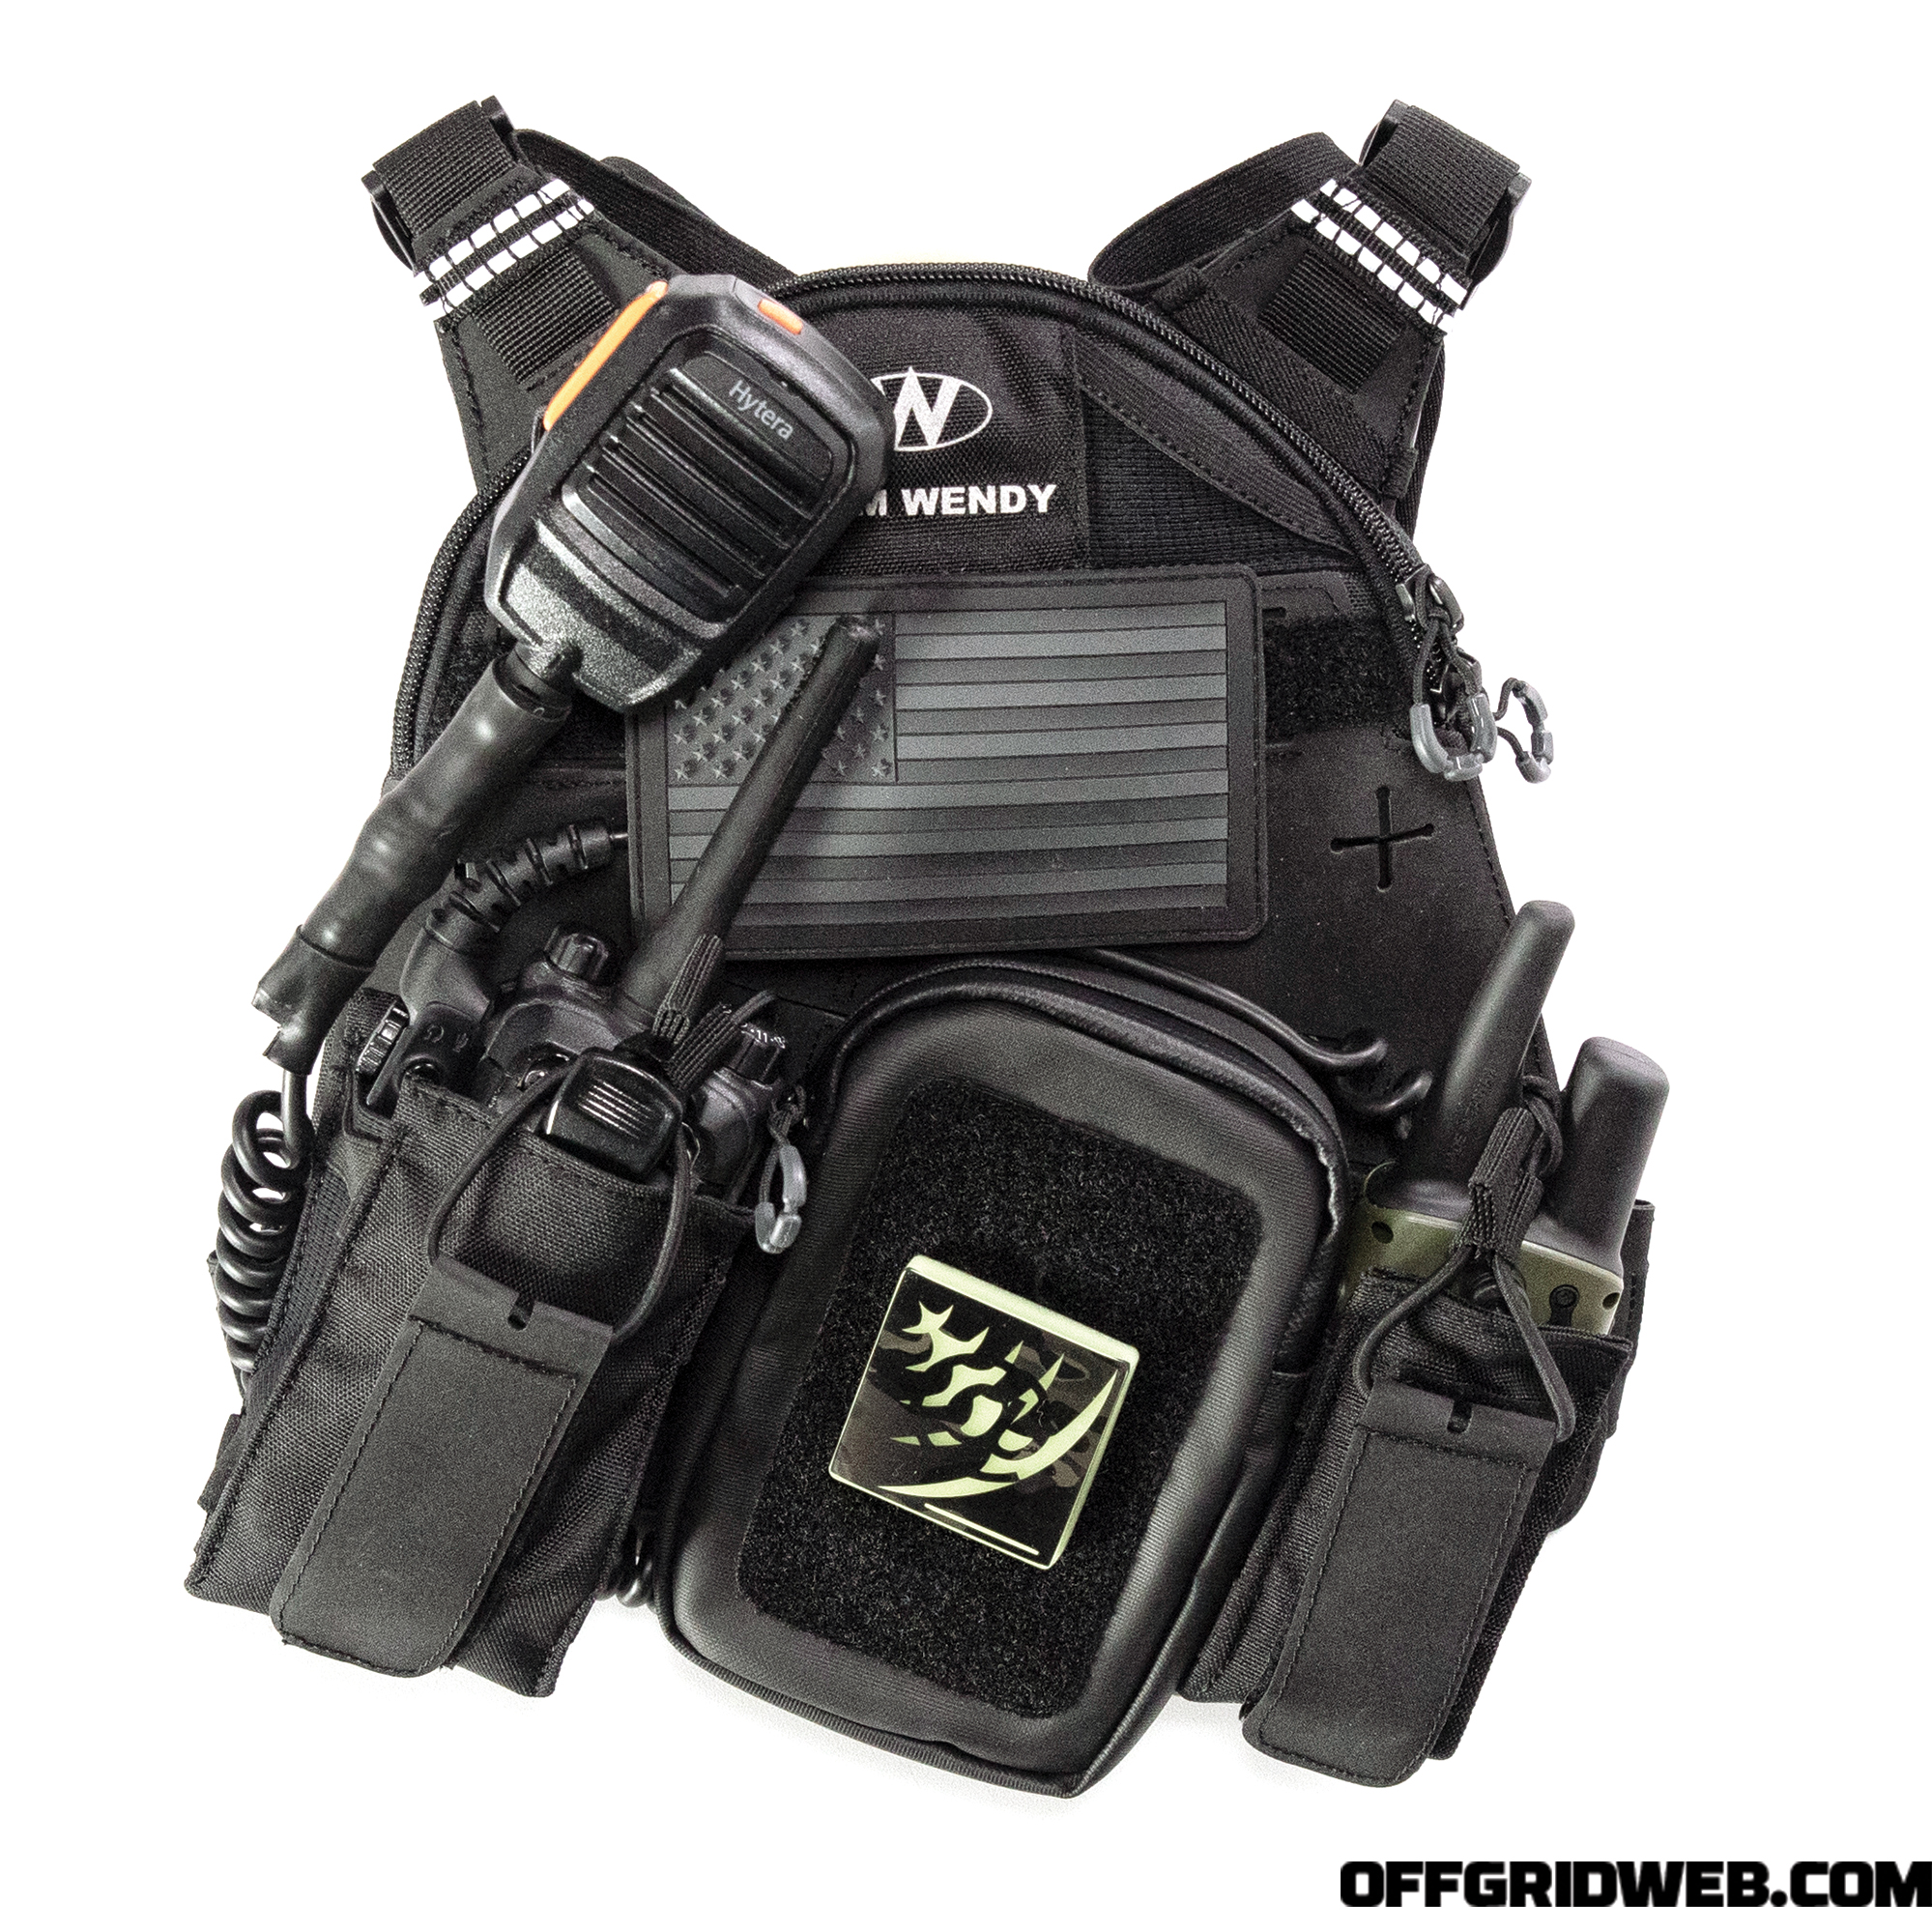
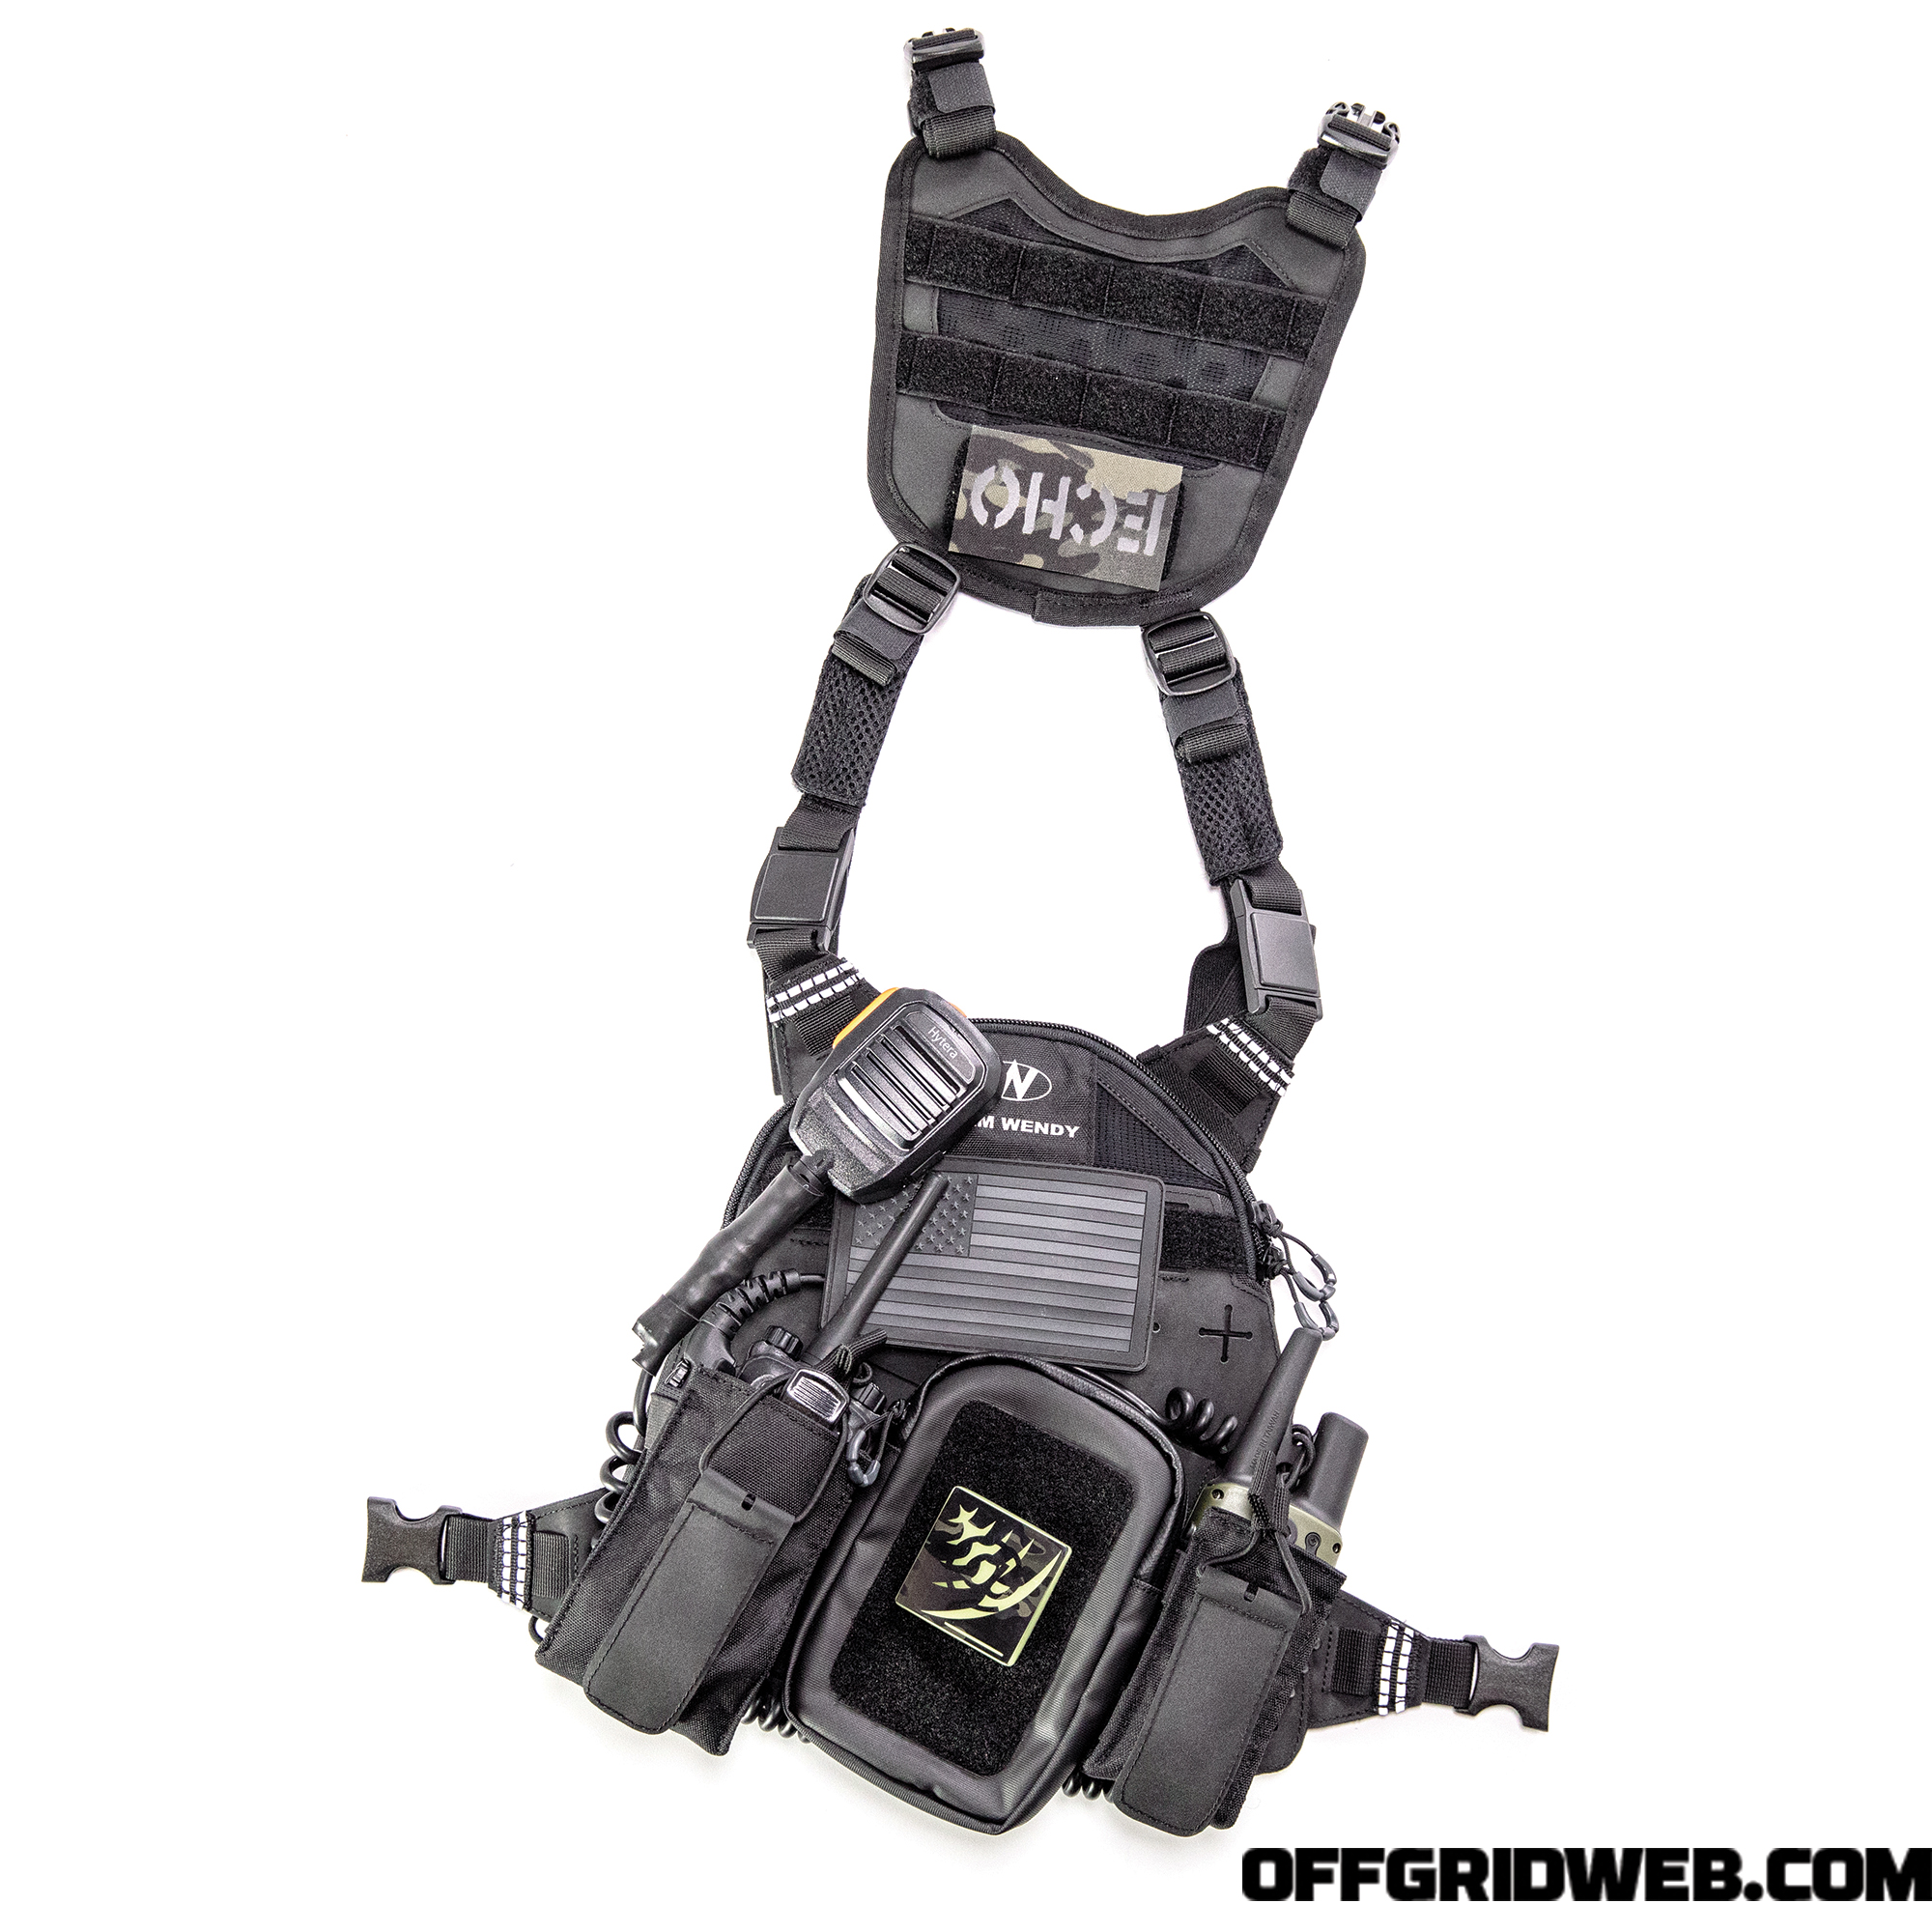
The rig is well constructed, with excellent stitching, and comes with three pouches that can accept a plethora of radio/GPS types and sizes, as well as an additional weather-resistant accessory pouch. The pouches are attached to the rig via PALS webbing, so you can attach any other MOLLE-compatible pouches that you have. However, the advantage (and value) is that the pouches are provided as part of the rig. The individual or organization purchasing it need not incur additional costs to buy extra pouches to outfit the rig appropriately.
The three pouches are very reminiscent of standard rifle magazine pouches. Attached to the Velcro closure and the rear of the pouch is shock-cord with a small nylon pull-tab. In an age of digital radios that have LCD screens and 10-plus digit key inputs, it’s very important to be able to remove the radio from its pouch without having to repeatedly manipulate the Velcro closure.
Once you select the appropriate pouch for your device, you may have some extra space in the pouch that allows your device to flop around during movement. This is easily remedied by the tried-and-true method of twisting the shock-cord repeatedly, properly adjusting your pull-tab placement, and resecuring the Velcro closure. The elastic shock-cord will then secure your device in the pouch more tightly.
If your device is between pouch sizes, the sides of the pouches themselves also have elastic and will stretch. If you can secure your device in the smaller of the two pouches, while still being able to remove it efficiently via the shock-cord/pull-tab, that’s your best bet.
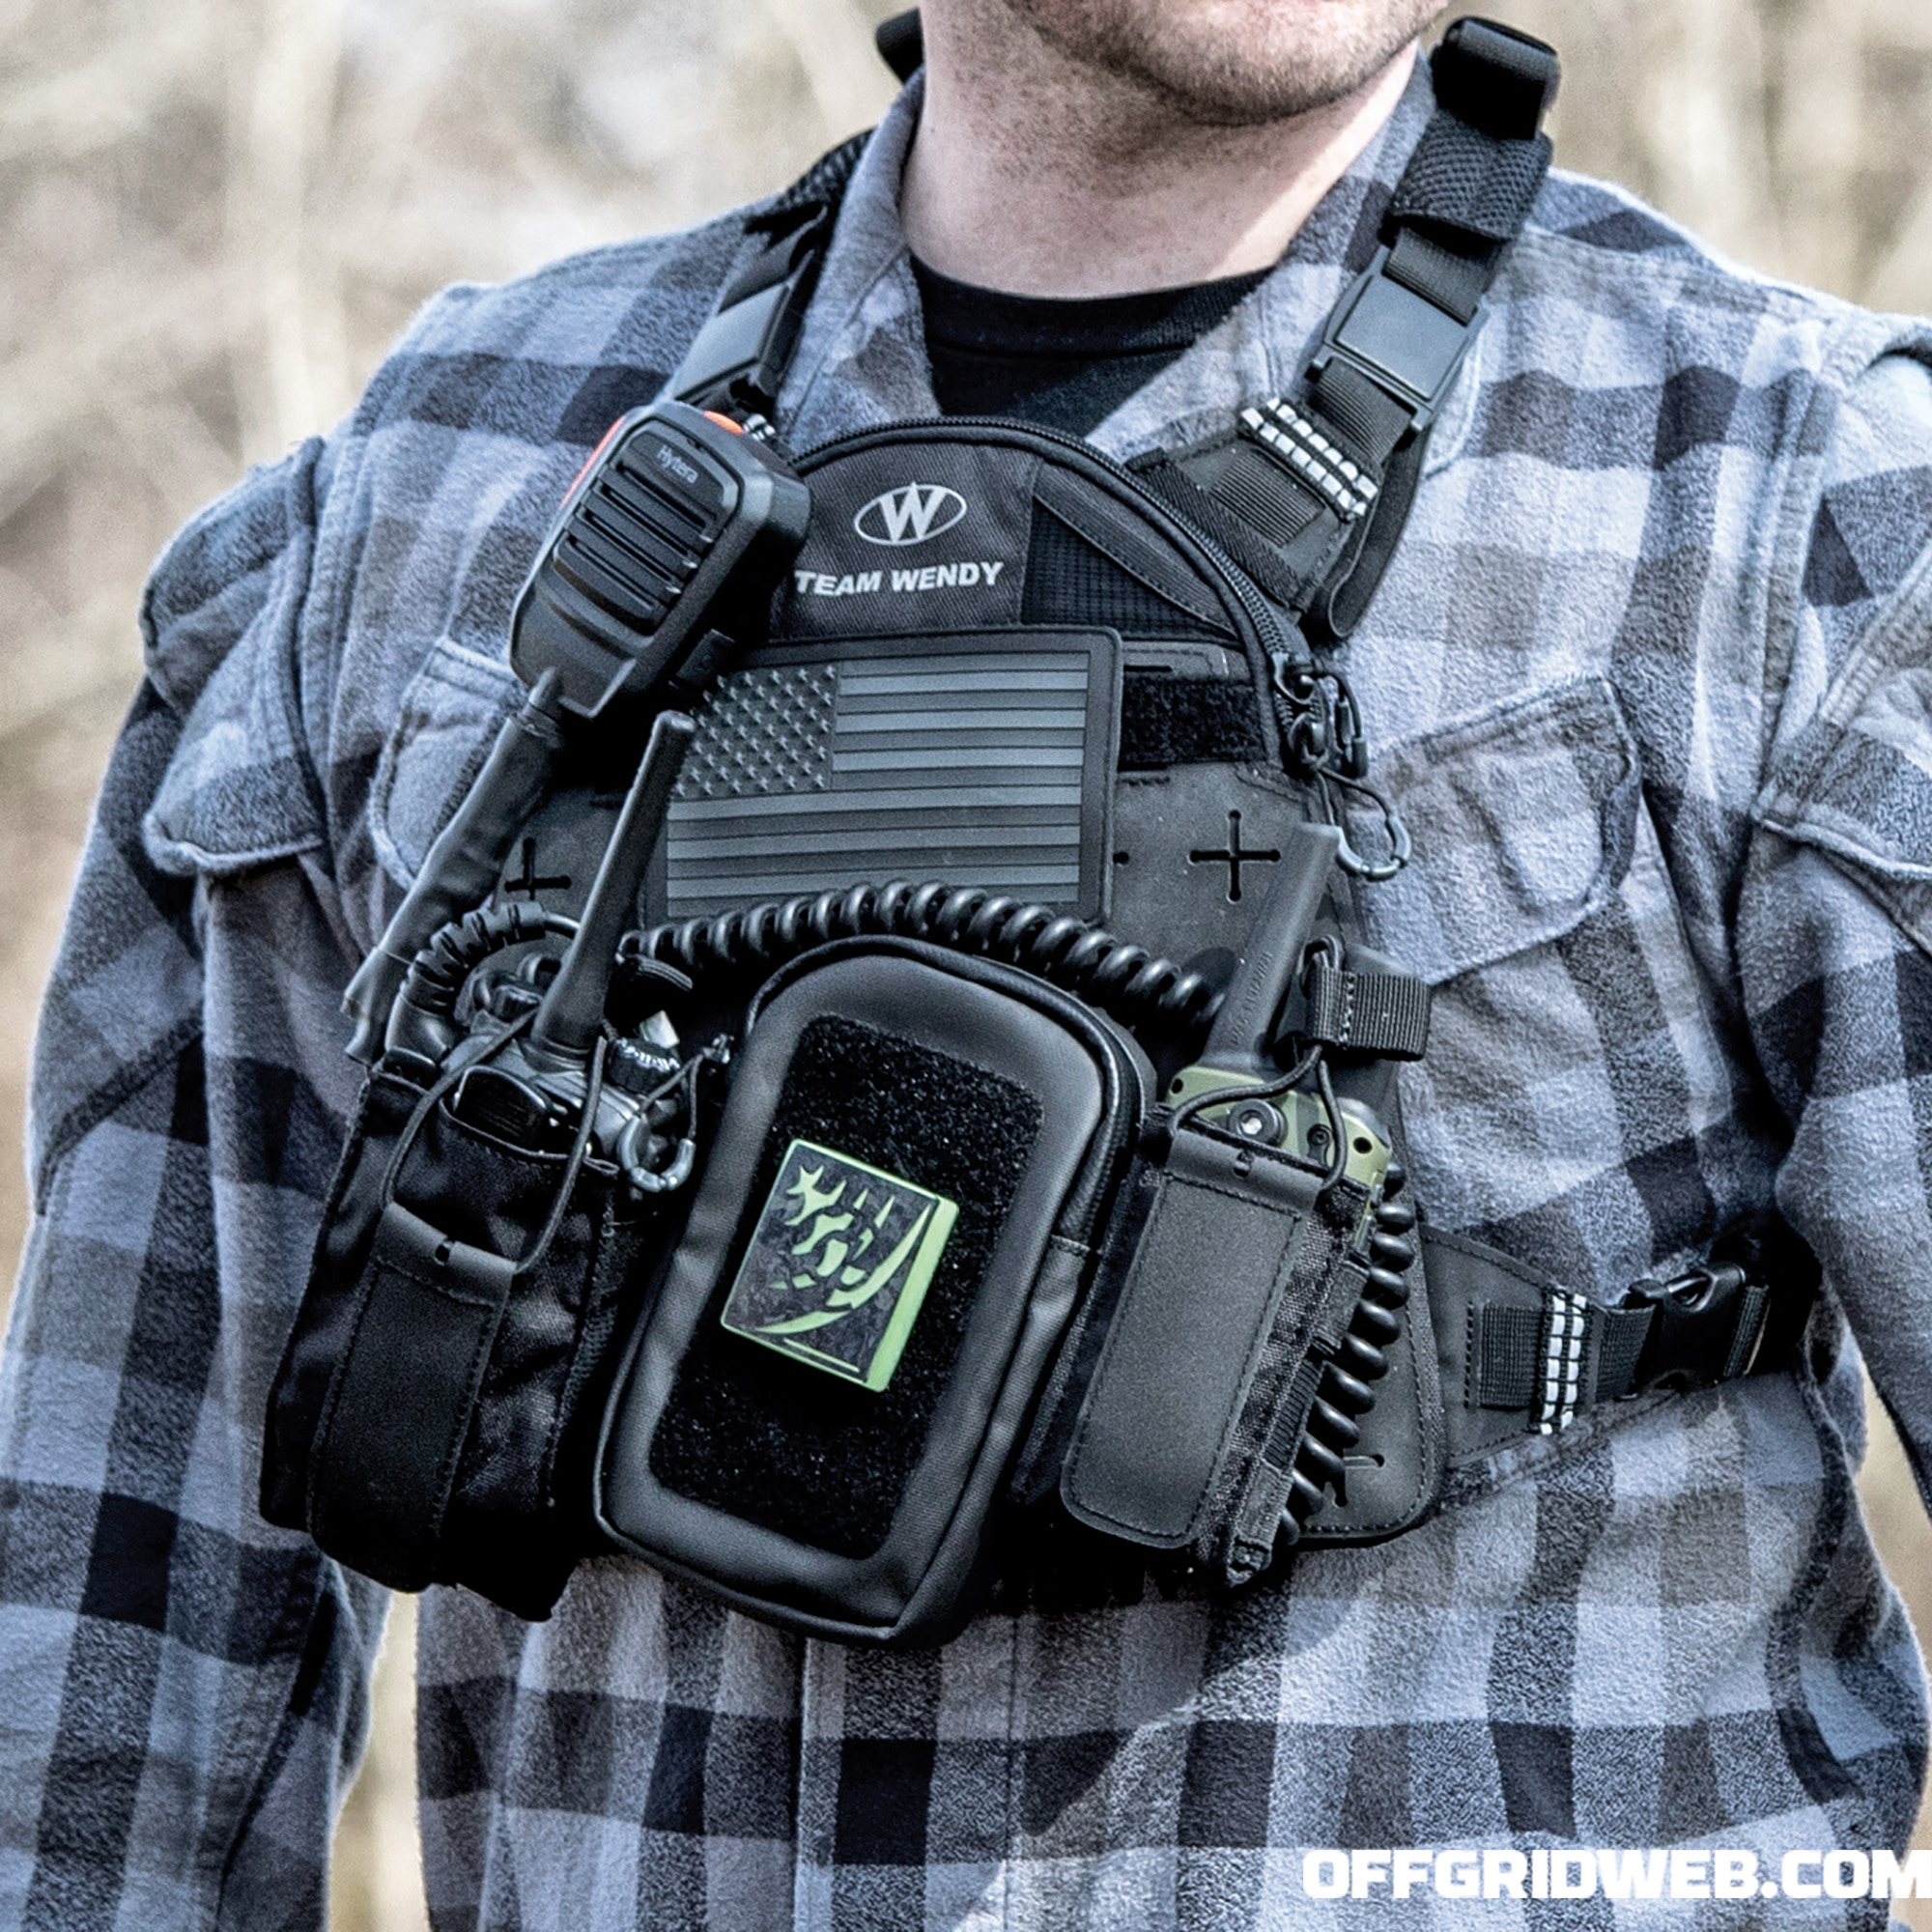
The weather-resistant accessory pouch was perfect to carry a smartphone. Its Hypalon construction and high-quality zipper provides a lot of confidence during a downpour. To test the level of weather-resistance, I poured water directly over the zipper in a sink and couldn’t find any evidence of water incursion. However, if you have a large phone or case, it may not fit, and the sternum pocket of the rig will work better. For example, an iPhone XR with a case maxed out the pouch. If you’re unable to use this pouch for your phone, it could certainly accept various GPS devices or anything else you want to shelter from the elements.
There’s a strip of loop Velcro for your name tape, identification, or other accessories that are backed with hook Velcro. There’s also two triangular pieces of elastic on each side of the Team Wendy logo. These extend behind the logo, allowing various items to be clipped on, such as a speaker/mic. The main admin pocket is located on the sternum of the rig and is a great place to put your field notebook or any other mission essentials. Team Wendy outfitted the interior of the pocket with elastic bands of various sizes that can easily accommodate pens, Sharpies, chem-lights, protein bar, or multi-tool.
Cable Management
In the admin pocket, behind a nylon separator and secured by two snaps, is the space used for cable management. That’s where I started running into some issues. On the front of the rig are six pass-throughs that are shaped like a plus sign. They allow you to run your communications cables through them, leaving excess slack in the cable management pocket and out of the way. This is an outstanding idea, but the size of the pass-through openings severely limits the size and type of cables and connectors that can be passed through them. The circumference of the pass-throughs is roughly the size of a quarter and, unless you’re just running uncoiled cables with slim audio connectors (such as dual-pin connectors or single-pin connectors used on a Peltor Comtac System), you’ll have similar issues.
While evaluating this rig, I ran a speaker/mic, and the majority of those come with a coiled cable to allow for flexibility. Coiled cables were nearly impossible to thread through the small pass-throughs. Additionally, the multi-pin connector on my speaker/mic barely fit through the opening, requiring a substantial amount of force that nearly compromised the rubber gasket on the inside of the connector. The multi-pin connector for my Hytera speaker/mic is one of the smallest multi-pin connectors on the market (without using an additional adapter) and pushing it through was still a struggle.
Several Motorola and Kenwood speaker/mics wouldn’t fit through the pass-throughs, especially those located at the bottom of the rig, which caused the connectors to bind. Switching from a speaker/mic to a two-wire earpiece and mic still results in the same issue as with the multi-pin connector, but because two-wire earpiece setups don’t incorporate coiled cables (with the exception of the earpiece itself, Secret Service style), you can at least push the excess cable into the pass-through to get it out of the way. Short of purchasing adapters for your comms gear or hogging out the pass-through openings, you can also simply snake excess cable around and in between your pouches.
Maps, Analog or Digital?
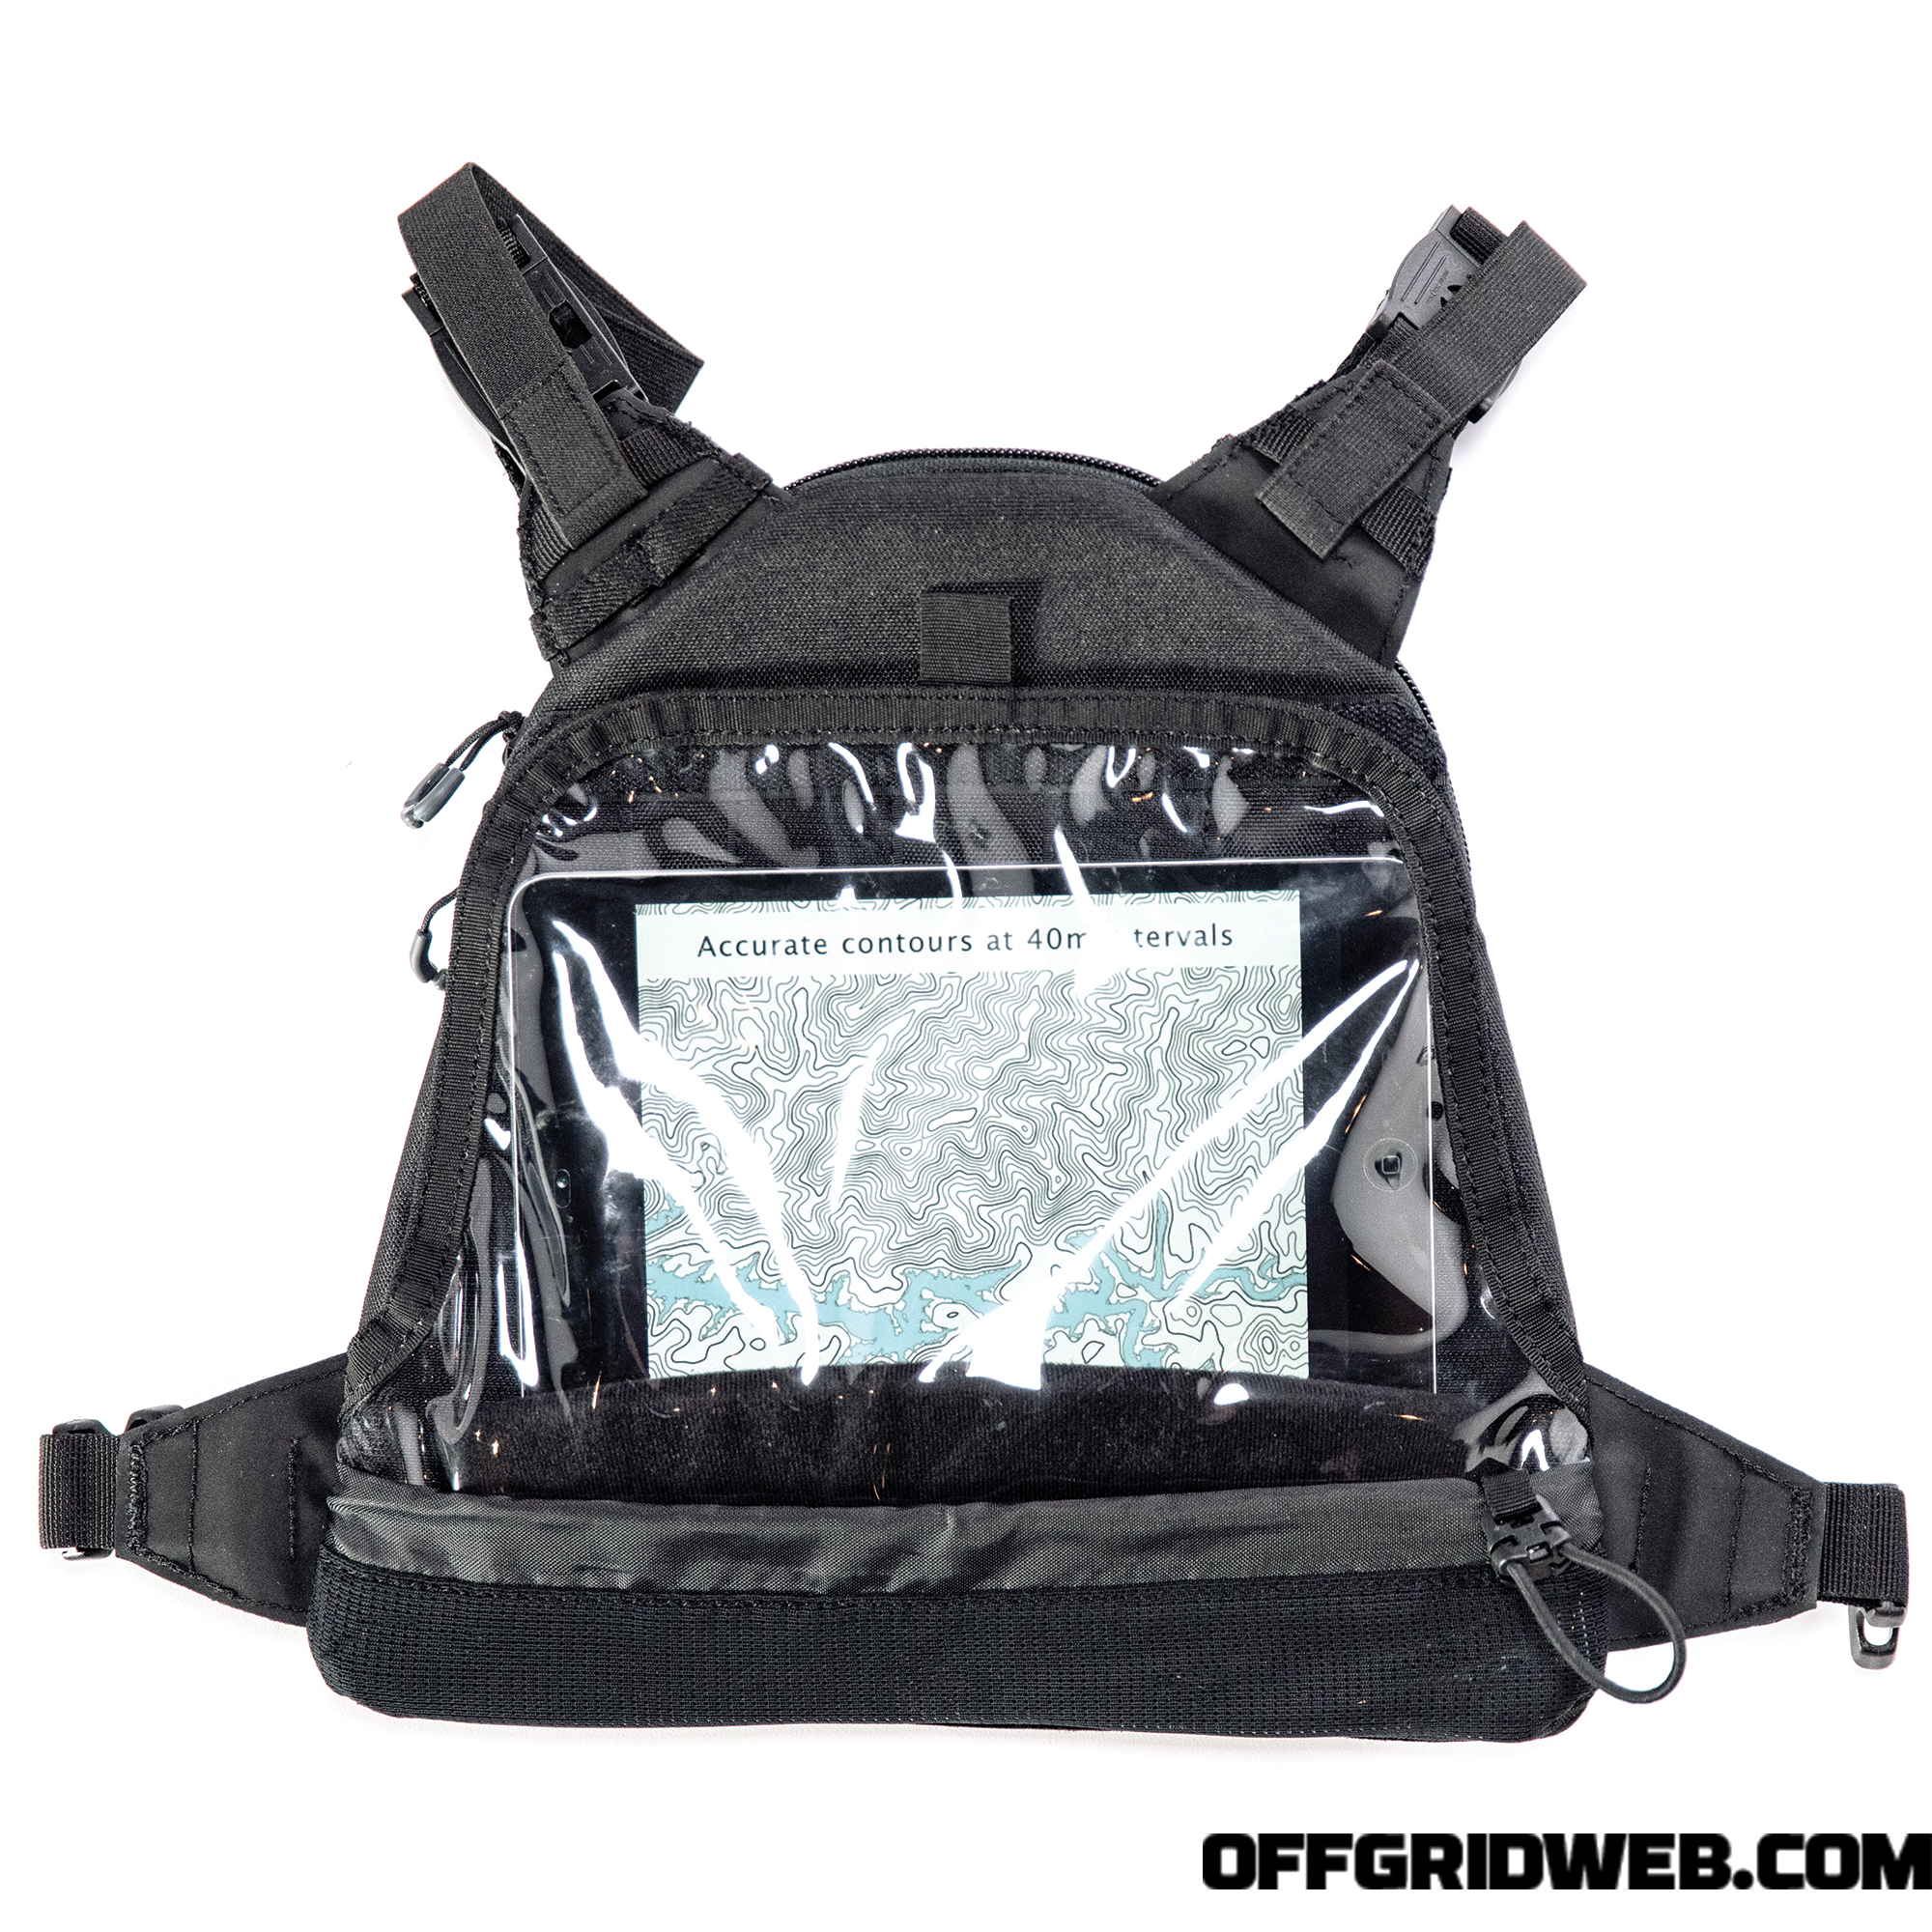
The clear interior pocket accommodates a paper map or tablet for navigation or reference. To reference your map while in the field, you can unclip the front of the rig utilizing the magnetic “Fidlock” buckles. They’re independent of the main support structure of the rig, so the rig won’t fall off of you when you unclip them. Once unclipped, the front of the rig is suspended at roughly a 45-degree angle, attached to the main support structure of the rig via two elastic straps. Once your map check is complete, simply resecure the Fidlocks into place and continue on your way.
The Fidlocks are very easy to manipulate once you practice with them a little bit. Many designs over the years have required the user to disconnect and reconnect Fastex-type connectors mounted on your shoulders. Even with a full loadout in the Team Wendy rig, using the Fidlocks was so much simpler than previous designs.
If you put a tablet in the clear pocket, it’ll be protected from rain or snow but still accessible. While typing is a challenge, swiping and manipulating a map on the touchscreen is no problem. Depending on the size of your tablet, this is a great option and allows for a lot of utility. I carried an iPad Mini in the pocket without worry — just keep in mind what you place in the admin pocket next to it. Even though the pockets are separate, items may hit your tablet if you happen to find yourself laying on your stomach, and your tablet’s glass may not appreciate that.
Inside the map pouch, there are three pieces (two short and one long) of padded material that stick to the four vertical hook Velcro strips on the interior of the map pocket. You can use them to help secure your tablet or phone in the pocket so it doesn’t bounce around, though the user guide that came with the rig doesn’t reference their intended purpose. Outside and below the clear map pocket is a 1-inch strip of mesh that had shock-cord stitched into it, complete with a keeper. Using the shock-cord and the keeper, you can make minor adjustments to how tight or loose the mesh is. It’s not clear what it’s for, as the user guide doesn’t address it either.
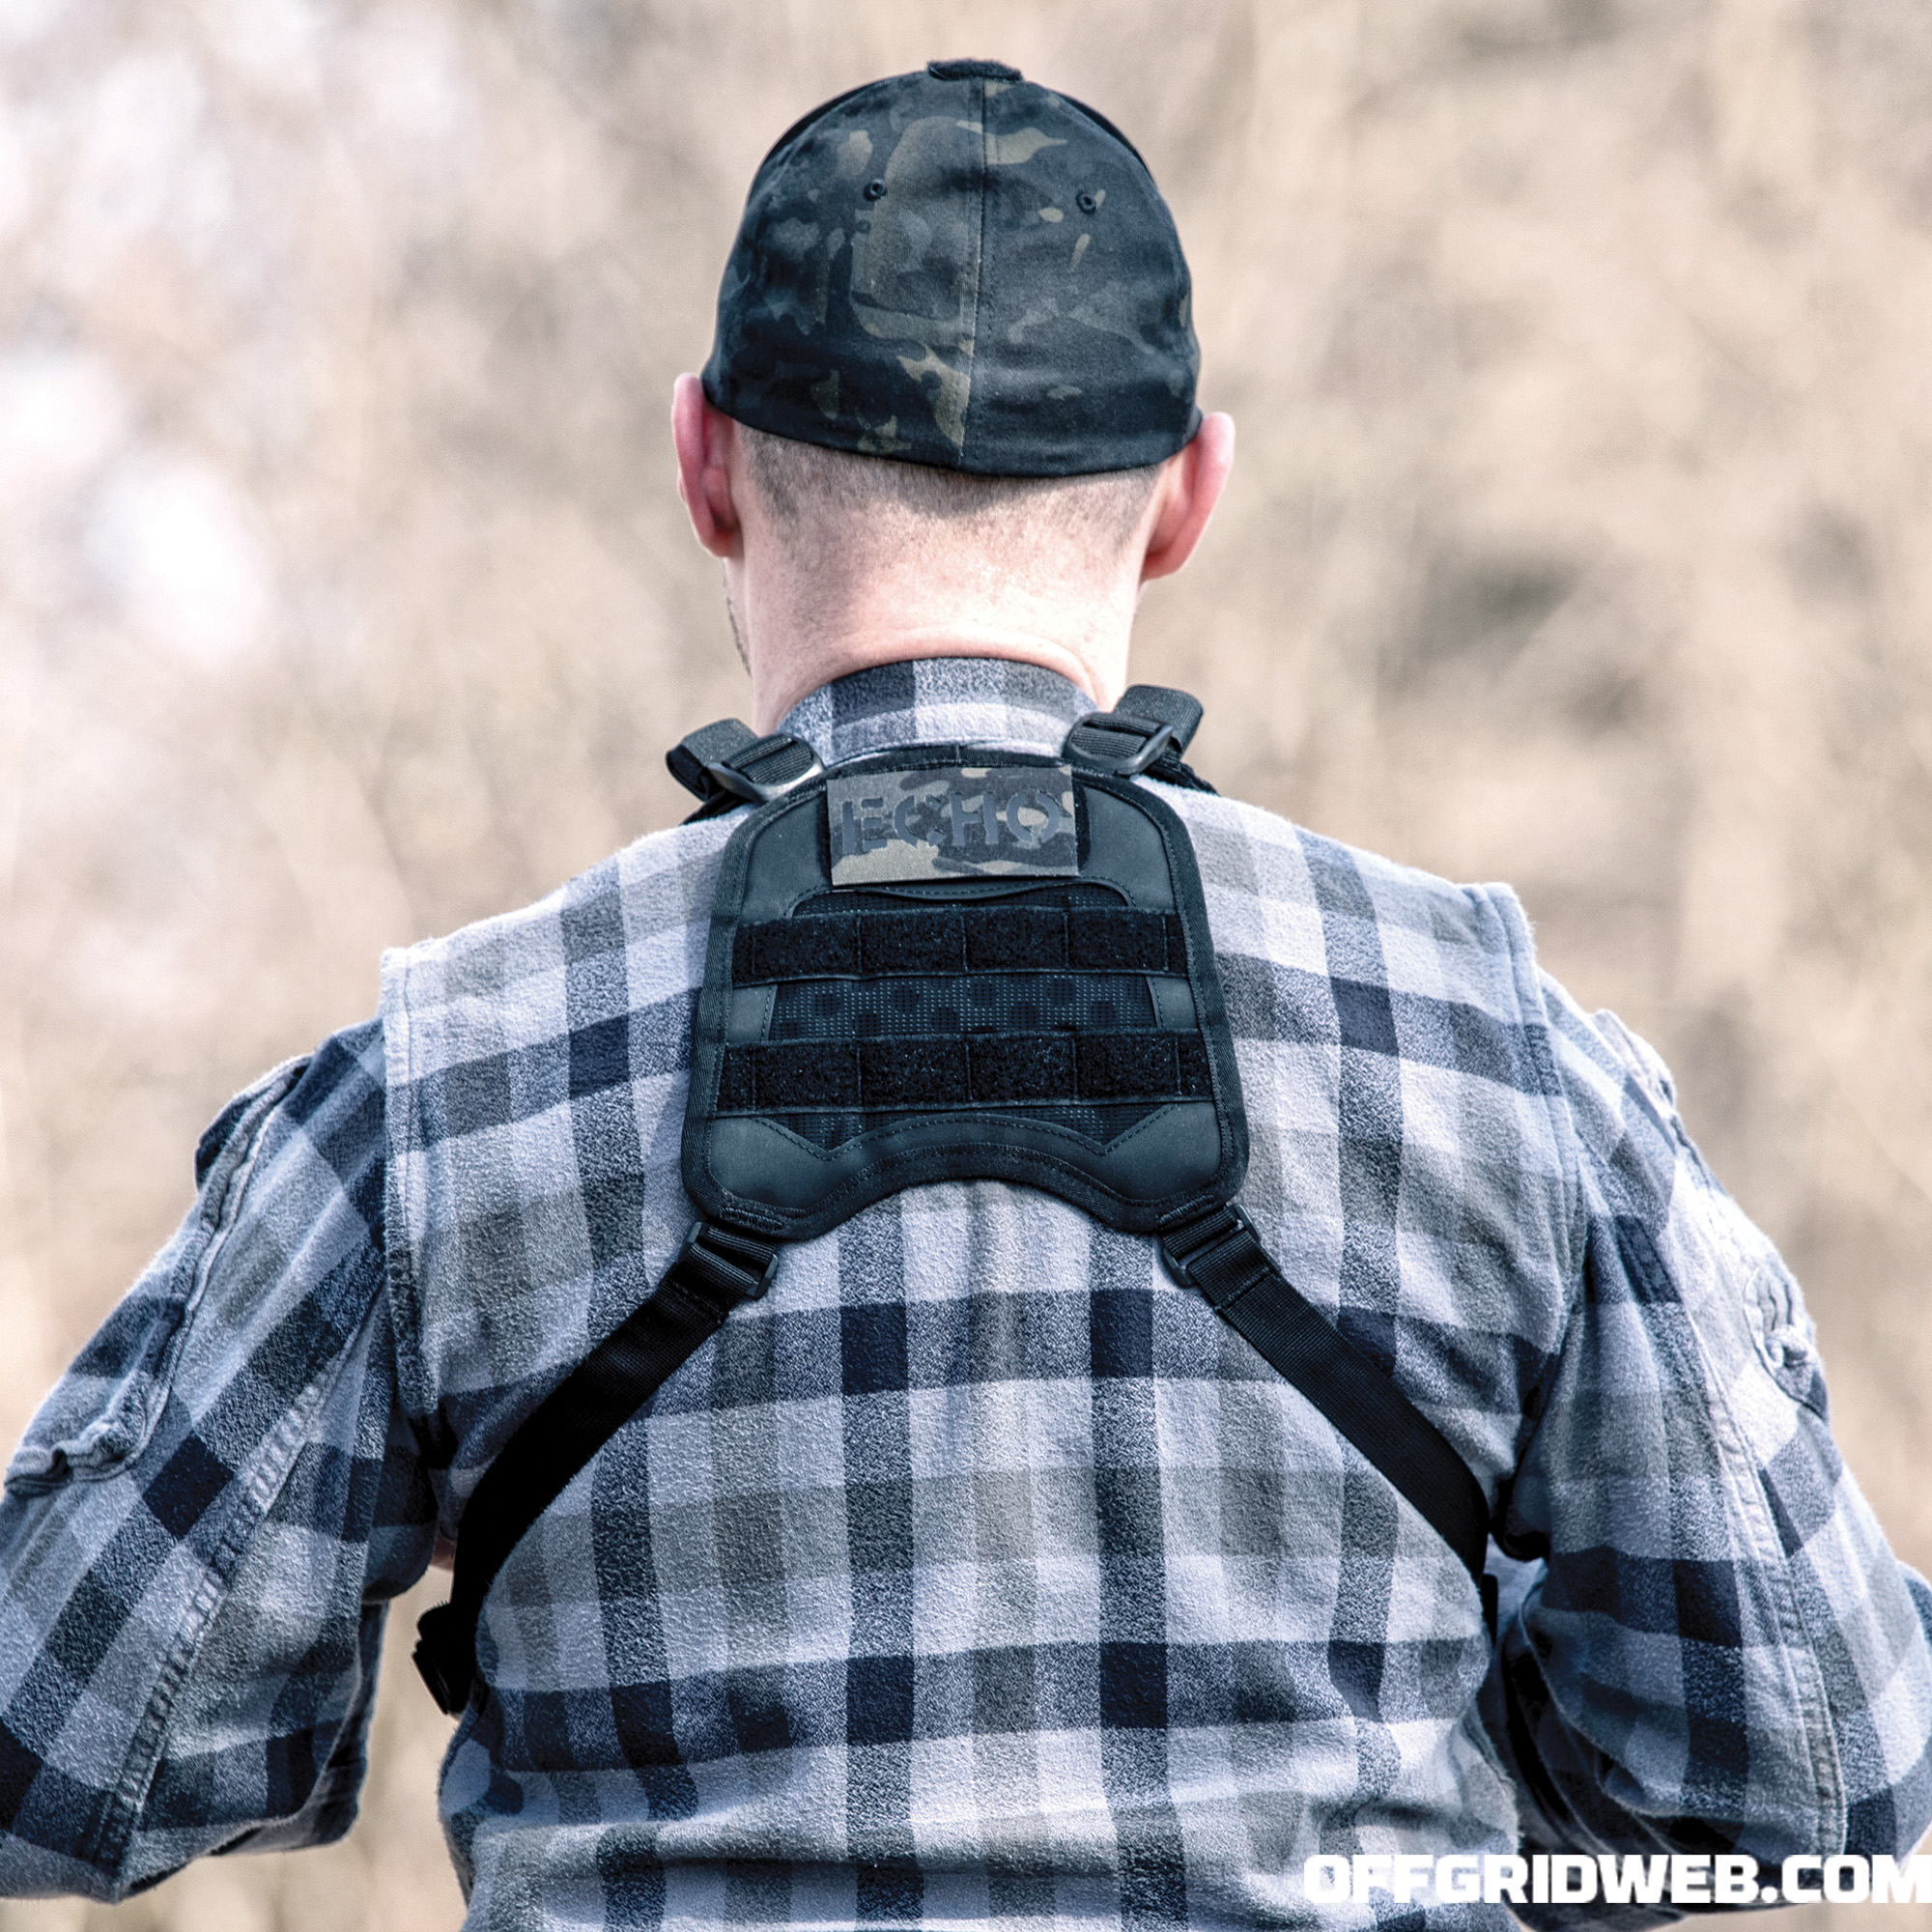
Moving to the Rear
At the top on the back of the rig is a loop Velcro field for a patch or identification. Below that are two strips of PALS webbing that are covered in loop Velcro, providing real estate for additional patches or a larger field to attach a single large patch. If you’d like to relocate an antenna to the rear panel or attach an IFAK (individual first aid kit) that a friend can use on you if you’re injured, that’s probably the best use of this space. In the guide, it states that the “low-profile rear panel allows use with other backpacks,” so a backpack like the Haley Strategic Flatpack could be a nice companion.
Other Prospective Uses
Besides SAR teams, who else could benefit from the use of this rig? It definitely has a place in the emergency management sector. Regardless of how integrated your communication plan is, emergency management teams routinely have to carry multiple radios to maintain contact with various agencies to coordinate a response.
It also has utility in tactical environments. While you may not want to stack up with an entry team wearing just the Radio Rig, it could excel in a surveillance role, especially with a multi-agency task force where different agencies may be working on different radio systems and frequencies — requiring you to carry multiple radios. Likewise, close protection teams and covert response teams could easily conceal this rig under a jacket. Last but not least, it could also be useful to amateur radio operators, especially those who participate in RACES (Radio Amateur Civil Emergency Service) and work with emergency management teams during times of crisis.
Conclusion
The Team Wendy Radio Rig is a well-constructed piece of gear that could fit into numerous applications and environments. The Fidlock buckles allow the end user to easily reference a map or a tablet in the field — they’re my favorite feature on this rig. The rig also comes with several pouches so you can put it to work right away, as well as standard PALS webbing instead of a proprietary attachment system. It’s also very comfortable — those on long callouts will certainly appreciate this.
The pass-throughs and routing loops, however, should be enlarged to accommodate the cables and connectors most commonly used in first-responder communications equipment. Also, the rig could use better instructional documentation, so you know what all of the straps and cords are intended to do.
All things considered, the Team Wendy radio rig could serve you and your team well if you’re in need of a dedicated load-bearing system for comms gear.
Team Wendy Radio Rig
Size: One size fits all
Color: Black
MSRP: $135
URL: www.teamwendy.com
