In This Article
Editor’s Note: This article is the continuation of Part 3 in our “Tailor-Made ARs” series. If you haven’t already, we strongly recommend you go here to read the first half of this article — it sets the foundation and explains the logic behind the 13.9-inch pin and weld rifle seen here. Otherwise, read on as we explain the details of this build.
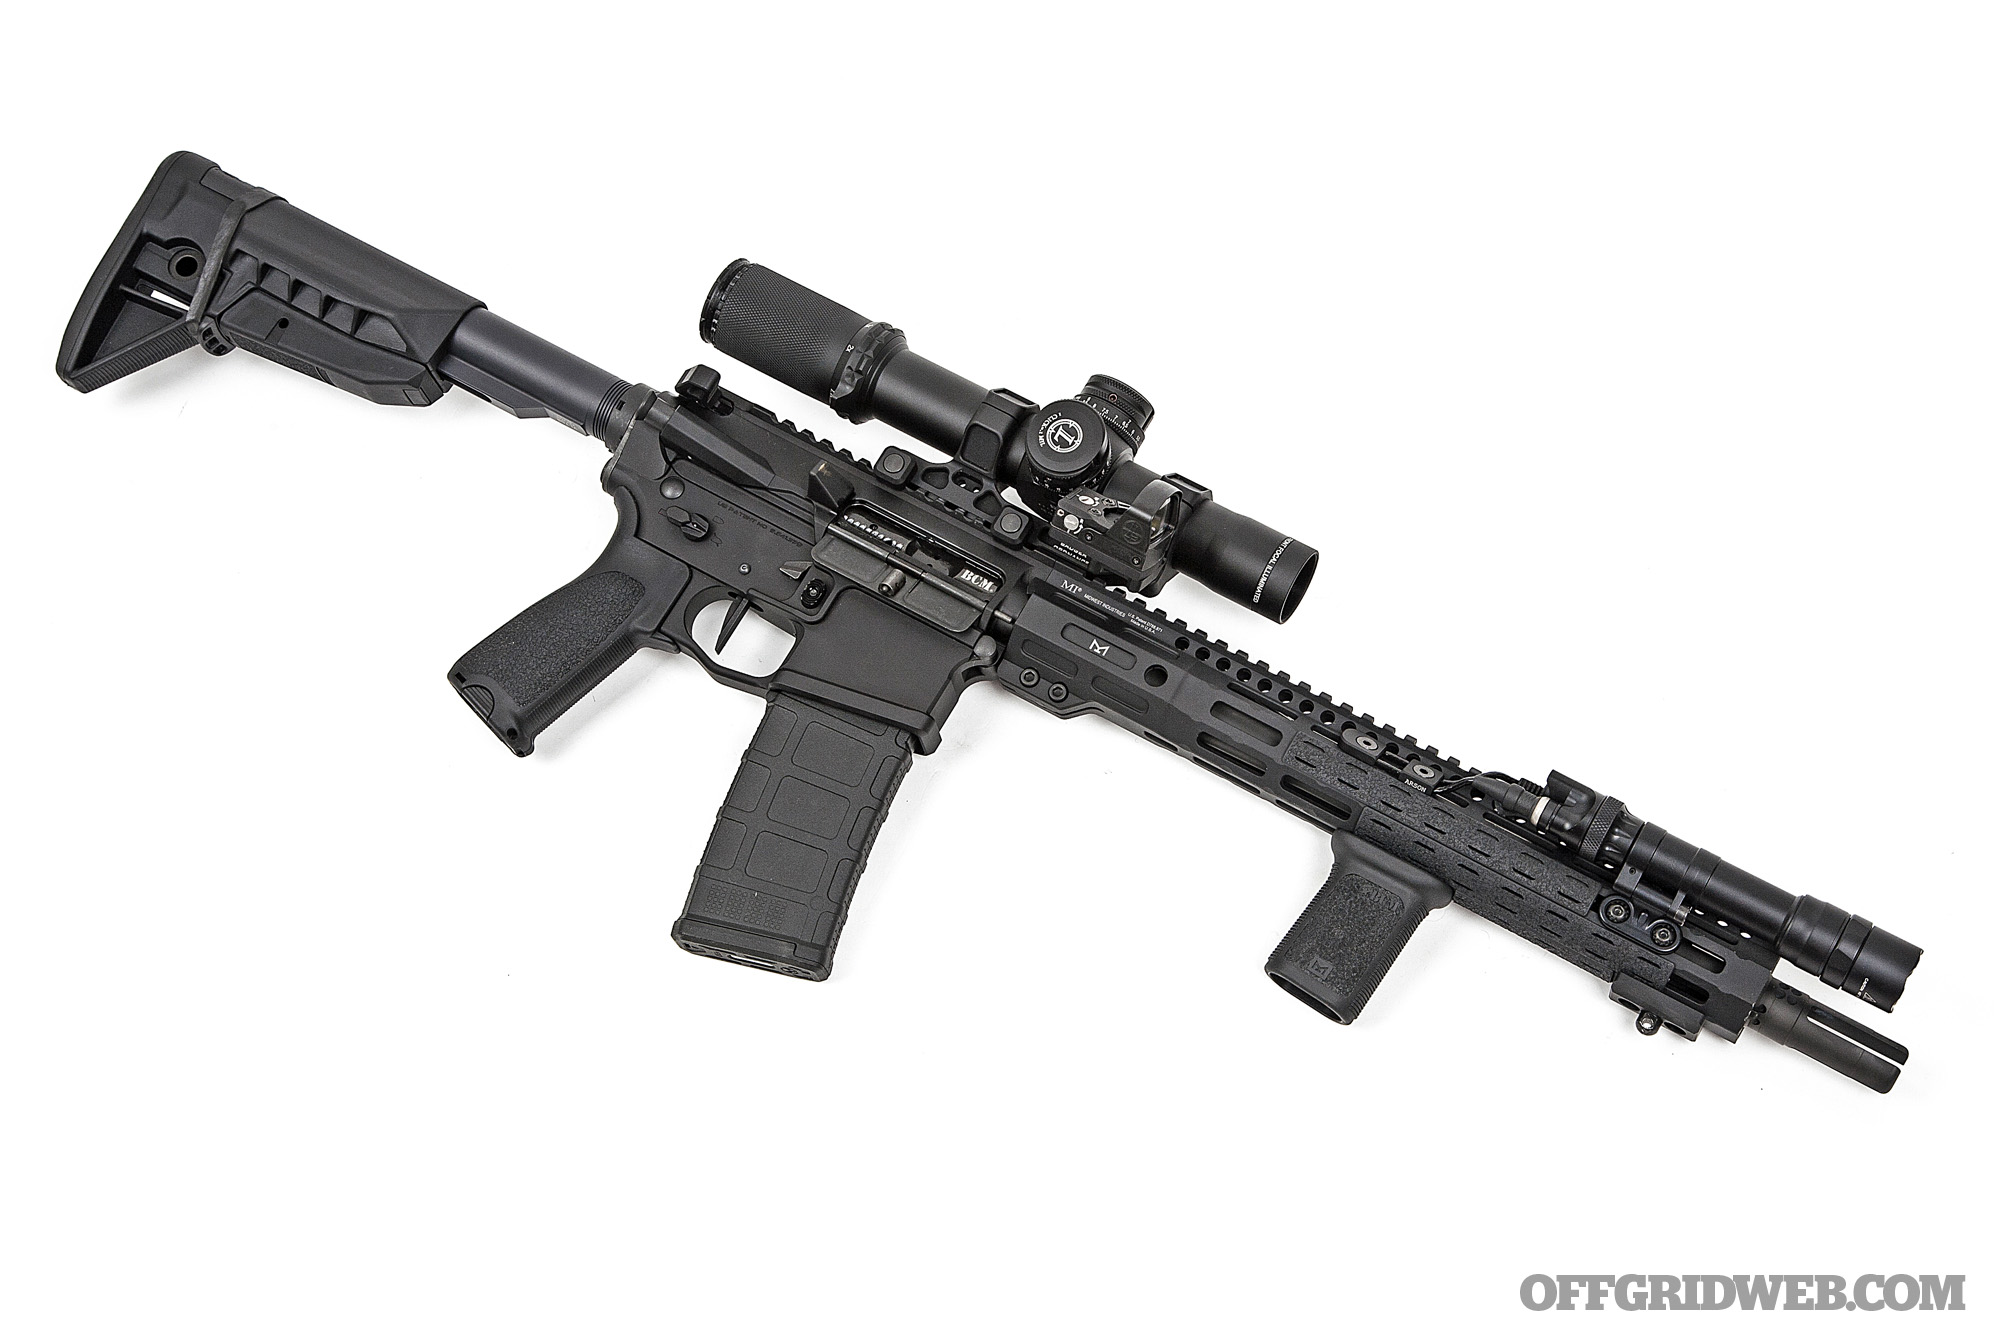
13.9-inch Pin and Weld Rifle
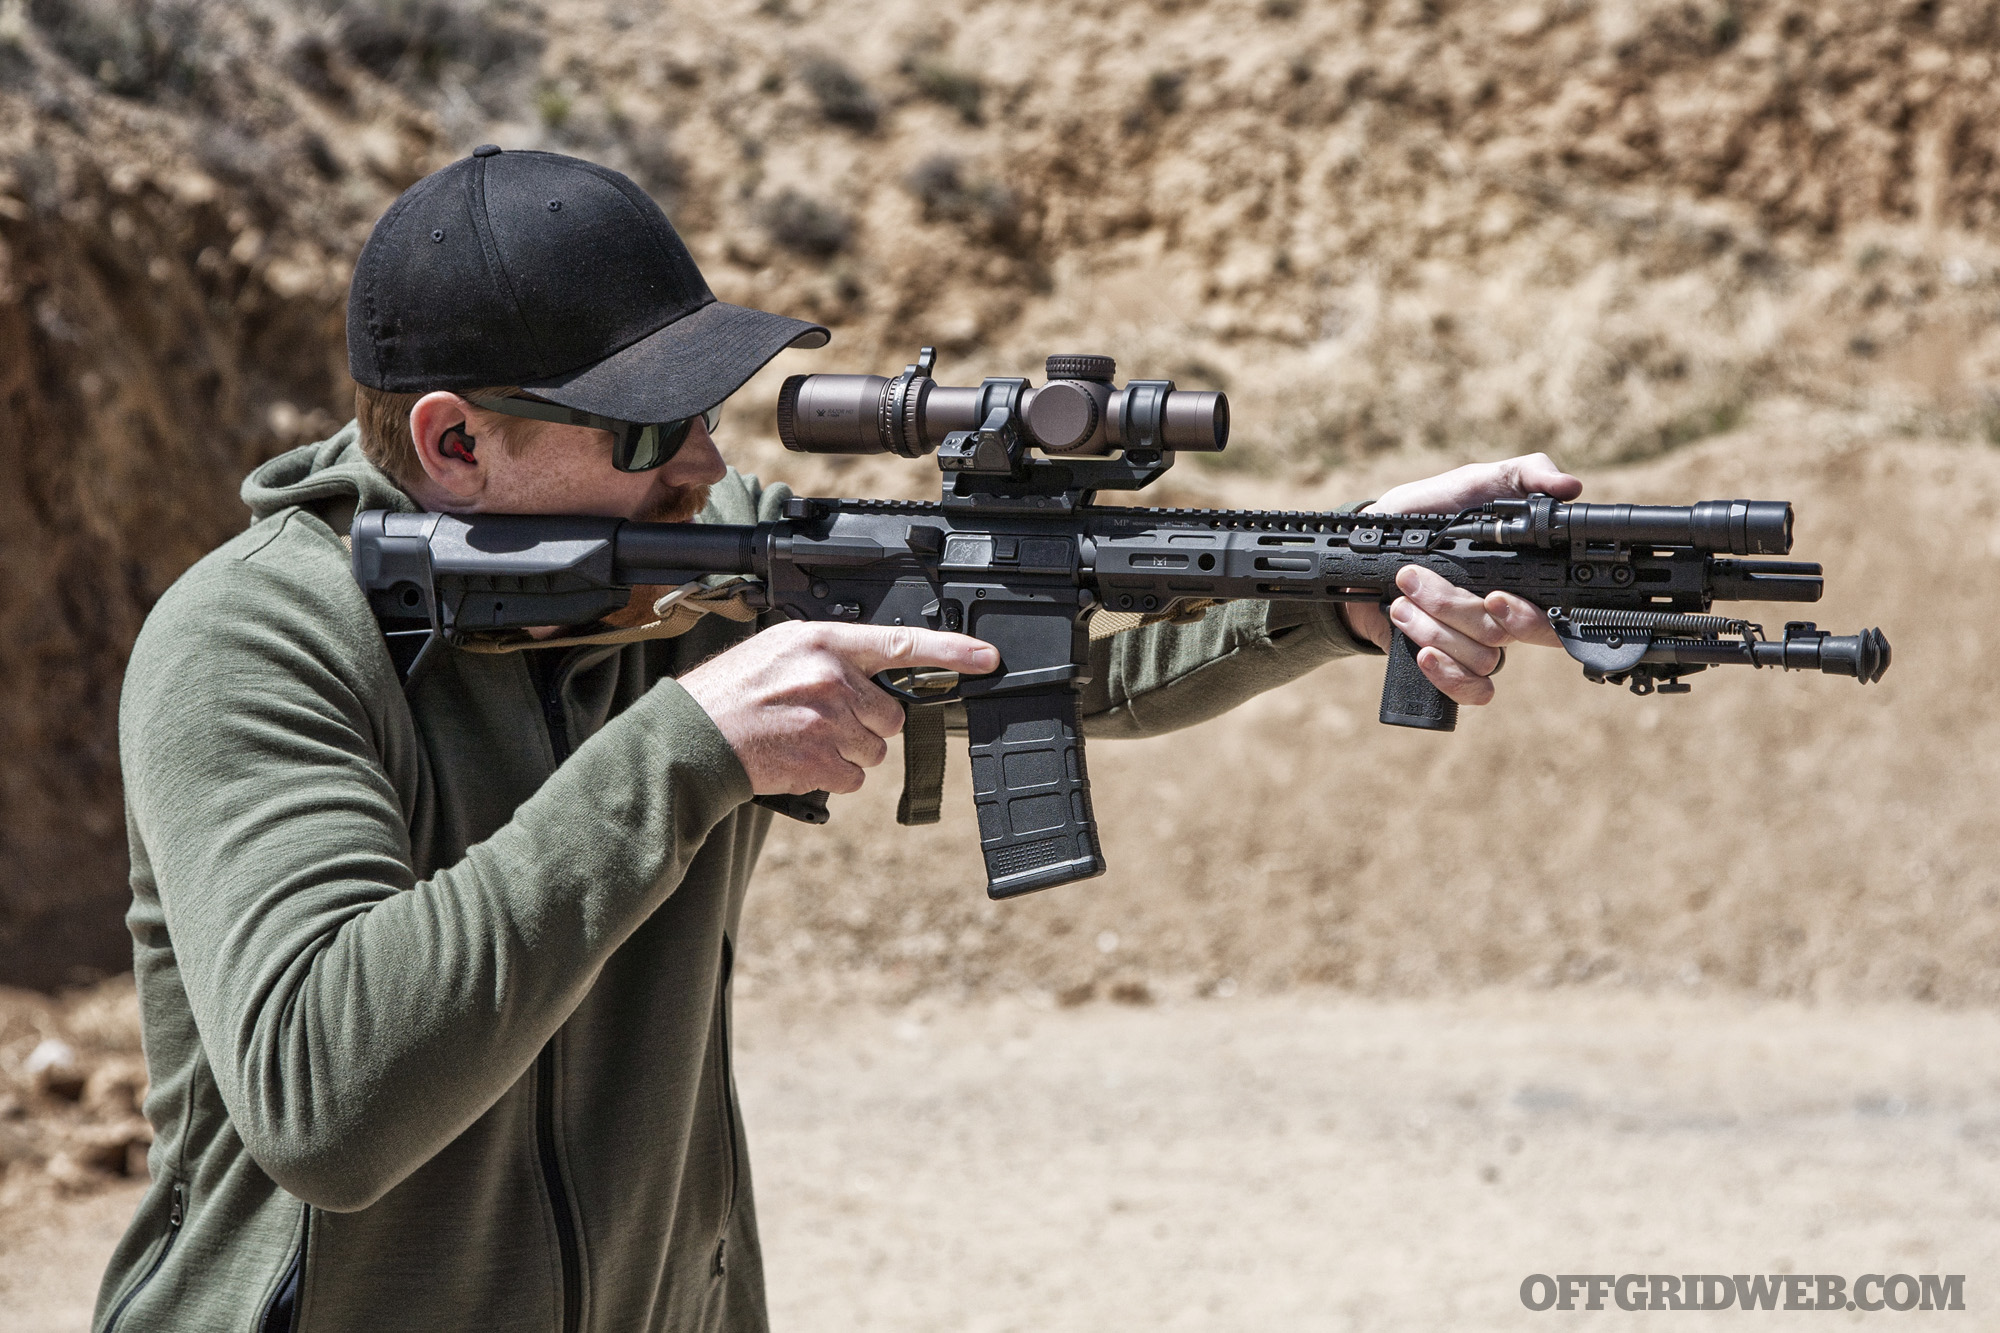
Photo by Tom Marshall
For my second rifle, I decided to achieve the legally required barrel length so I didn’t have to register it as an SBR, therefore avoiding the $200 tax stamp and interstate travel restrictions associated with SBRs. Rather than buying a 16-inch barrel and ending up with more length and weight than I wanted, I started with a Criterion CORE Series 13.9-inch barrel. This barrel came with some optional add-ons: a headspaced Bravo Company MFG (BCM) bolt carrier group, a Badger Ordnance gas block, and a gas tube. My local gunsmith — Wright Armory in Mesa, Arizona — permanently attached a SureFire Warcomp muzzle device to the barrel, extending it to meet the 16-inch minimum. This is usually referred to as a “pin and weld” setup, because that’s exactly how it’s affixed.
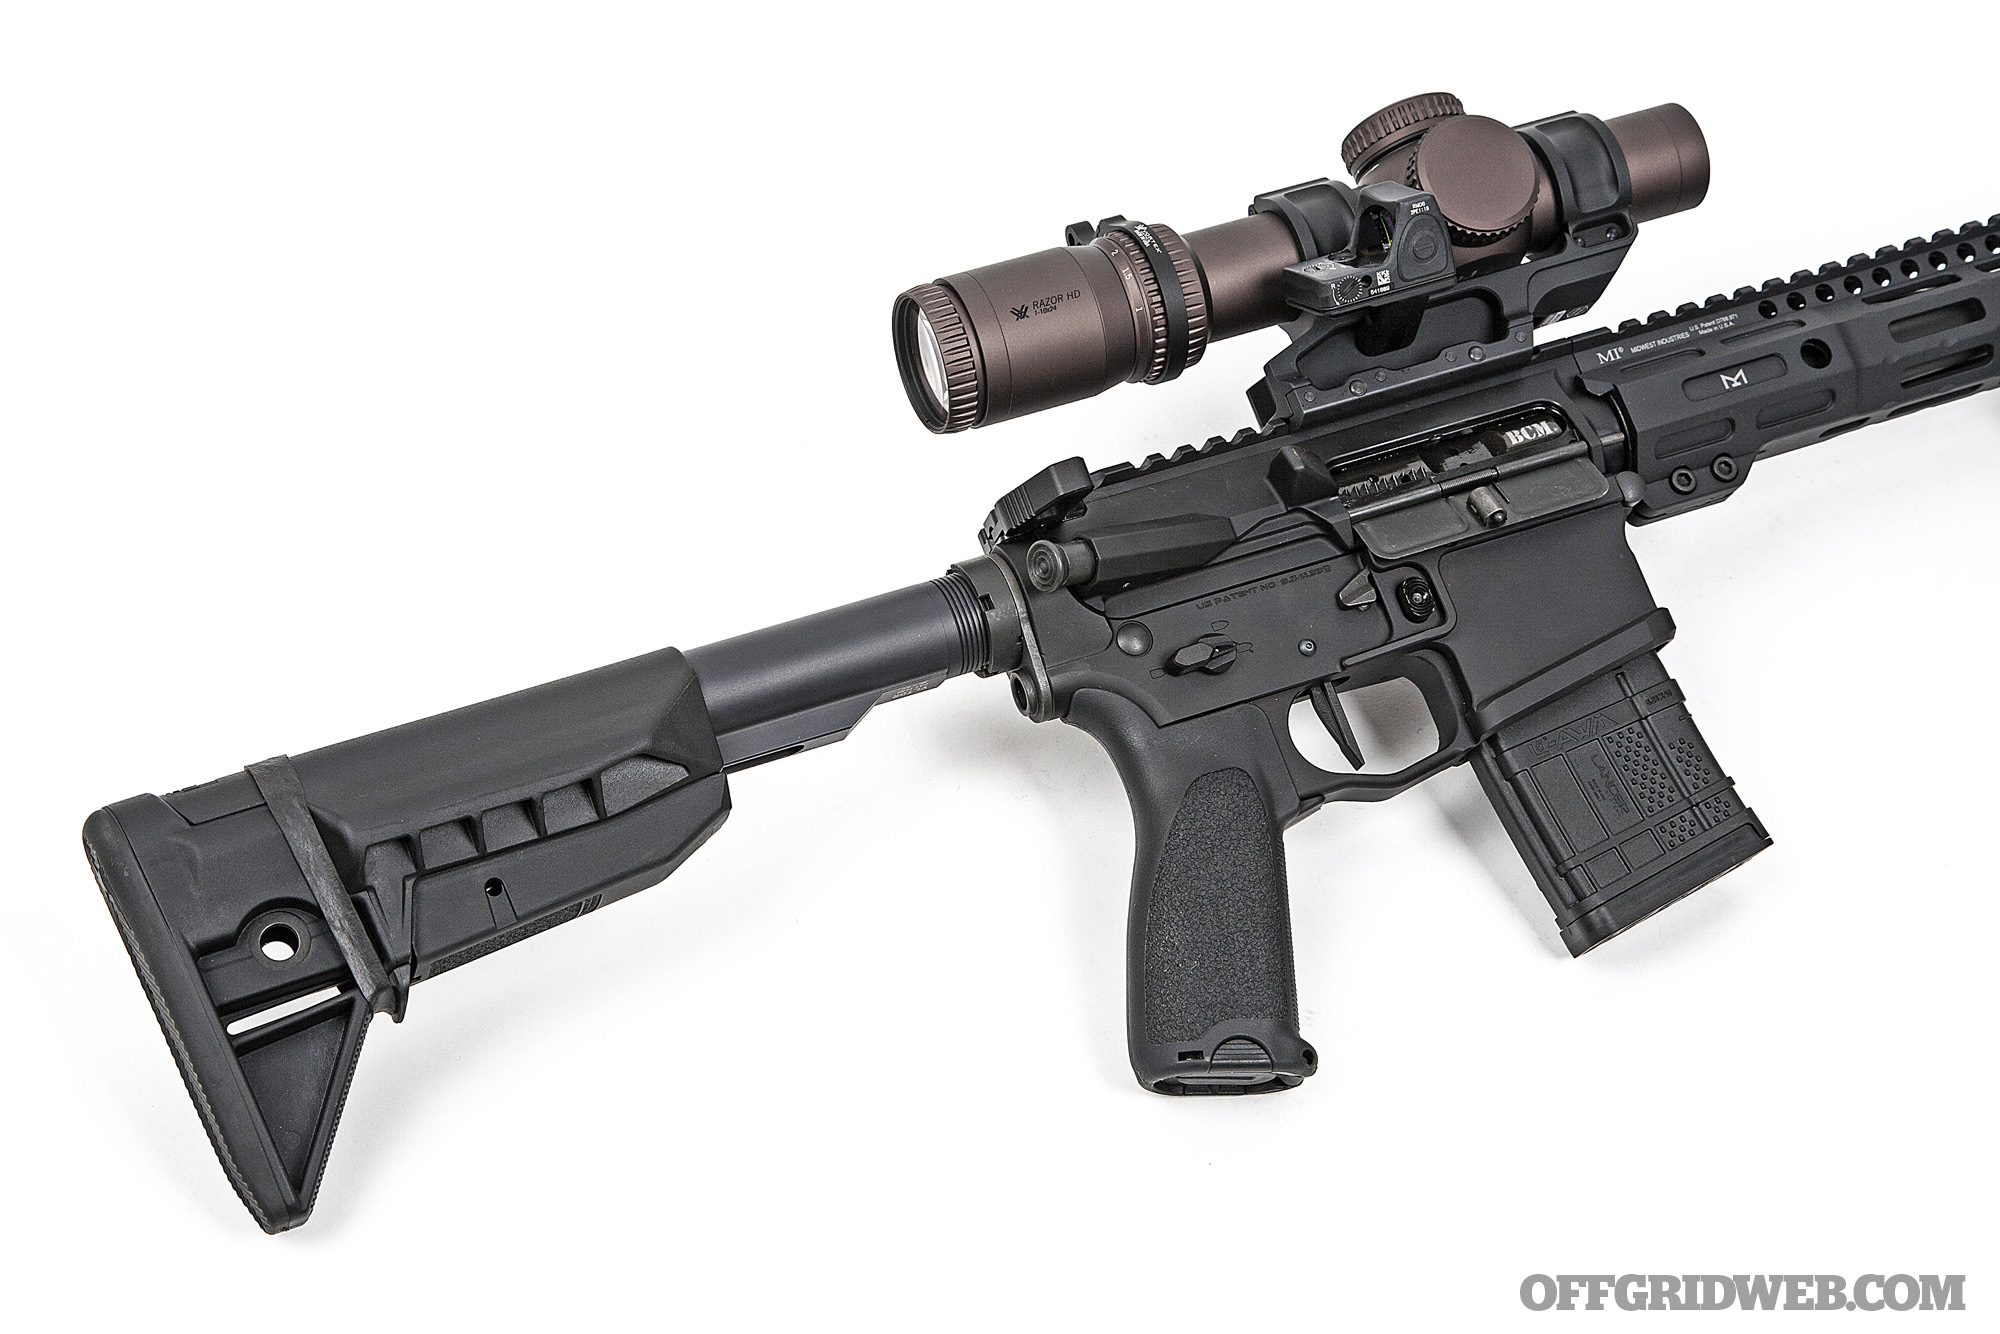
The barrel is installed in an American Defense Manufacturing ADM4 billet aluminum receiver set. Like the receiver I used for my 11.5 build, the ADM4 has an enlarged, ambidextrous bolt catch and release, but it also adds an ambidextrous magazine release and a forward assist. Although it has extra controls that differ from Mil-spec, the standard controls won’t feel unfamiliar to anyone who has run an AR before.

Above: The ADM4 receiver’s large bolt release paddle is impossible to miss, and it’s paired with a lever on the opposite side of the receiver that offers the same functions to the shooter’s index finger. The mag release is also ambidextrous.
A Midwest Industries Night Fighter 13.5-inch handguard is designed to reduce handguard flex, which will be useful if I add an IR laser for night vision use in the future. That rigidity is also useful for stabilizing the weight of the rifle via a bipod; I attached a Harris bipod to the handguard using a Midwest Industries M-LOK bipod adapter. Although the SureFire Warcomp can serve as an attachment point for a suppressor, there’s not enough clearance between it and the end of the handguard; if I decide to add a suppressor to this build someday, I can install a shorter Midwest Industries handguard for more clearance.
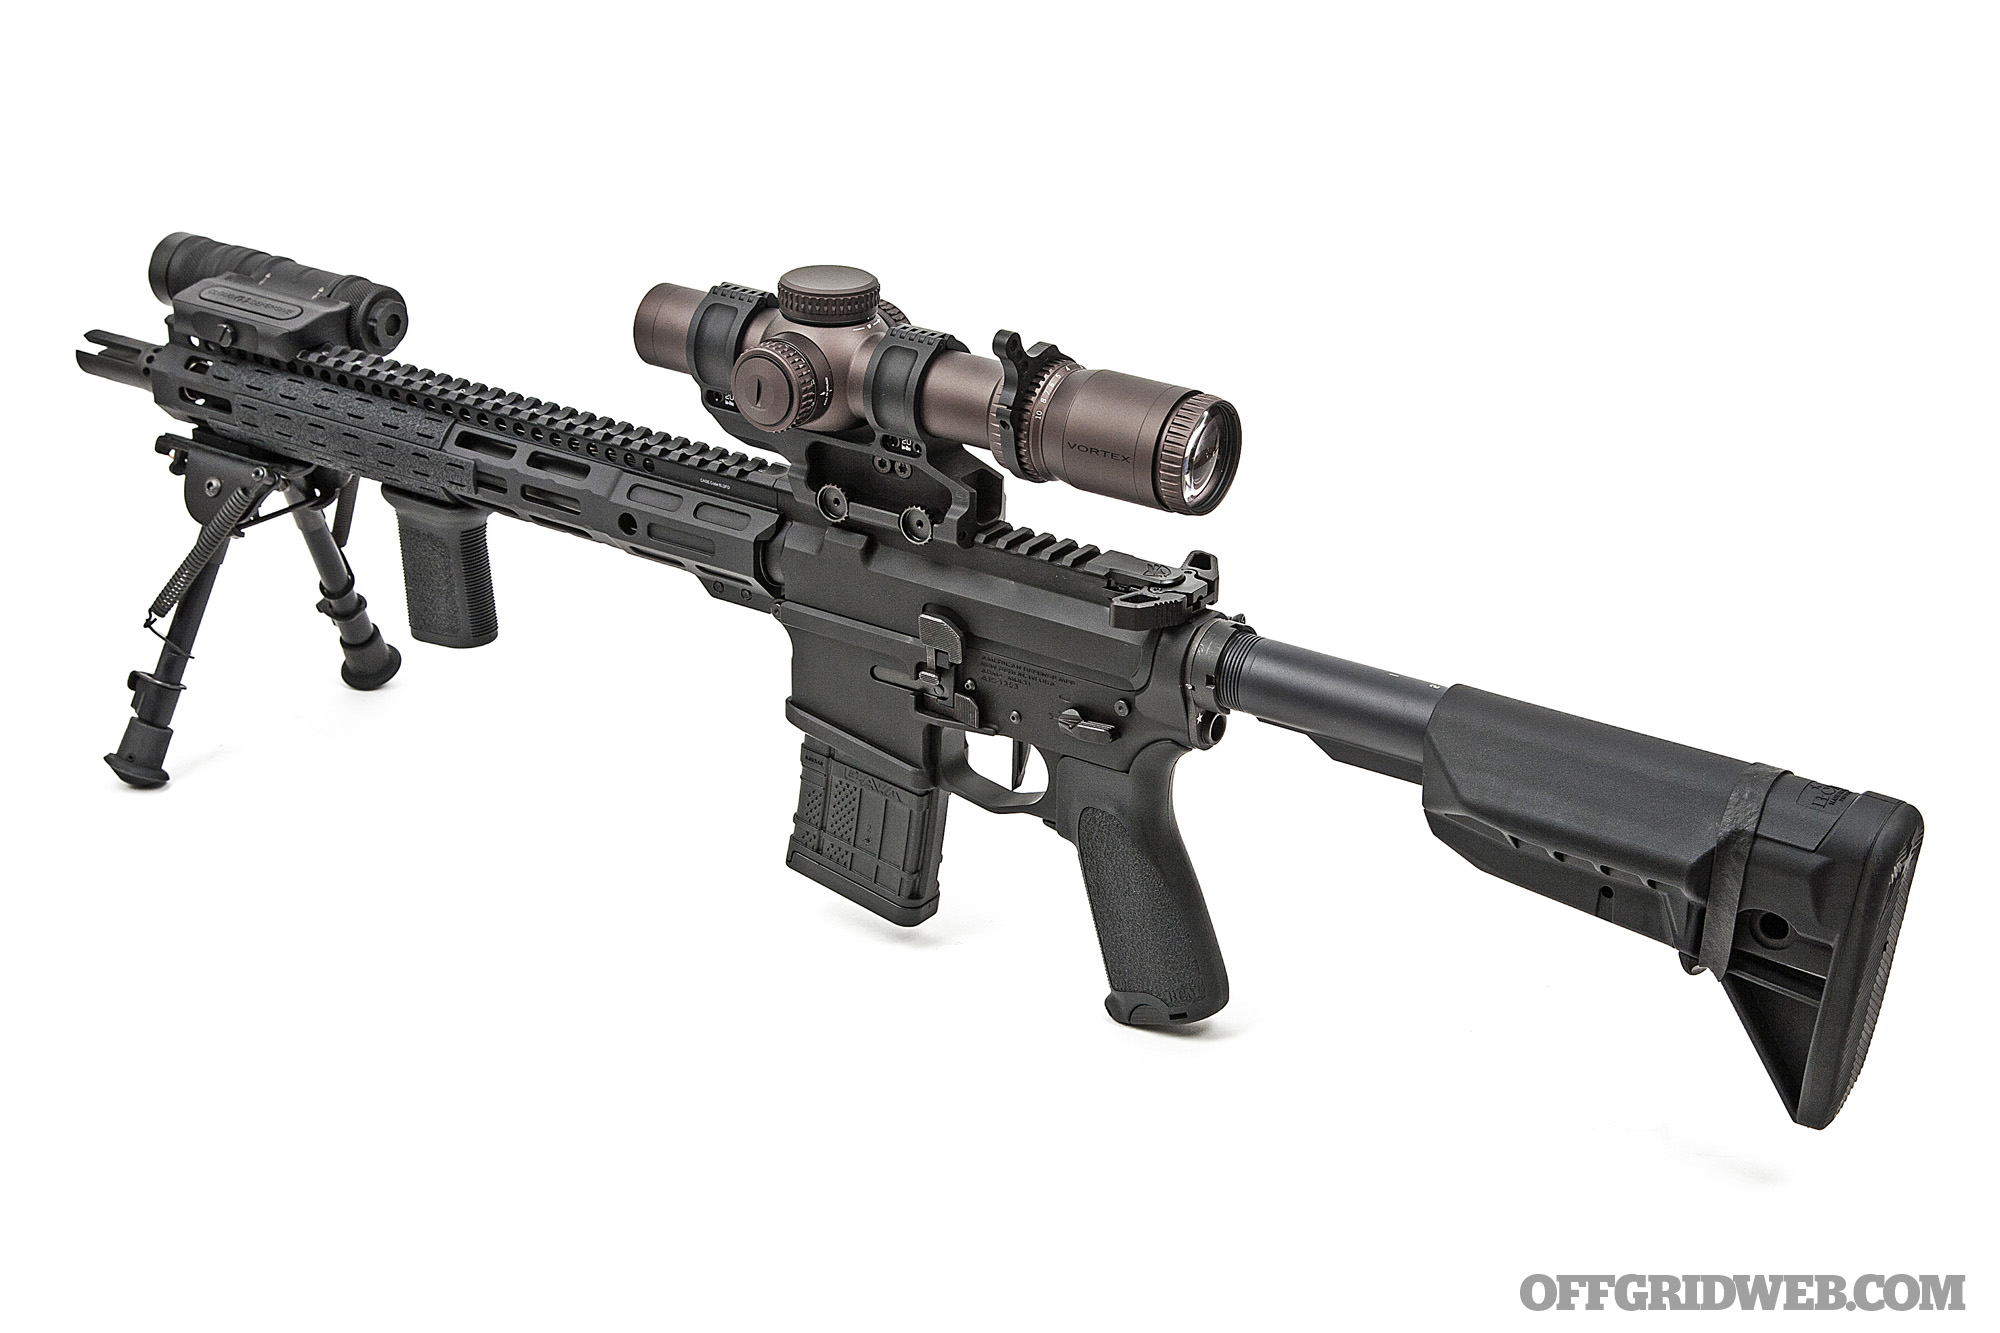
The lower receiver was completed with one last part from Midwest Industries, an Enhanced flat-face drop-in trigger. It provides a clean 3.5-pound break and well-defined reset that are suitable for precision shooting, but it’s also capable of quick shots at closer range. Like the 11.5, this build also features a Radian Talon 45-degree safety selector and a Radian Raptor charging handle.
Lights
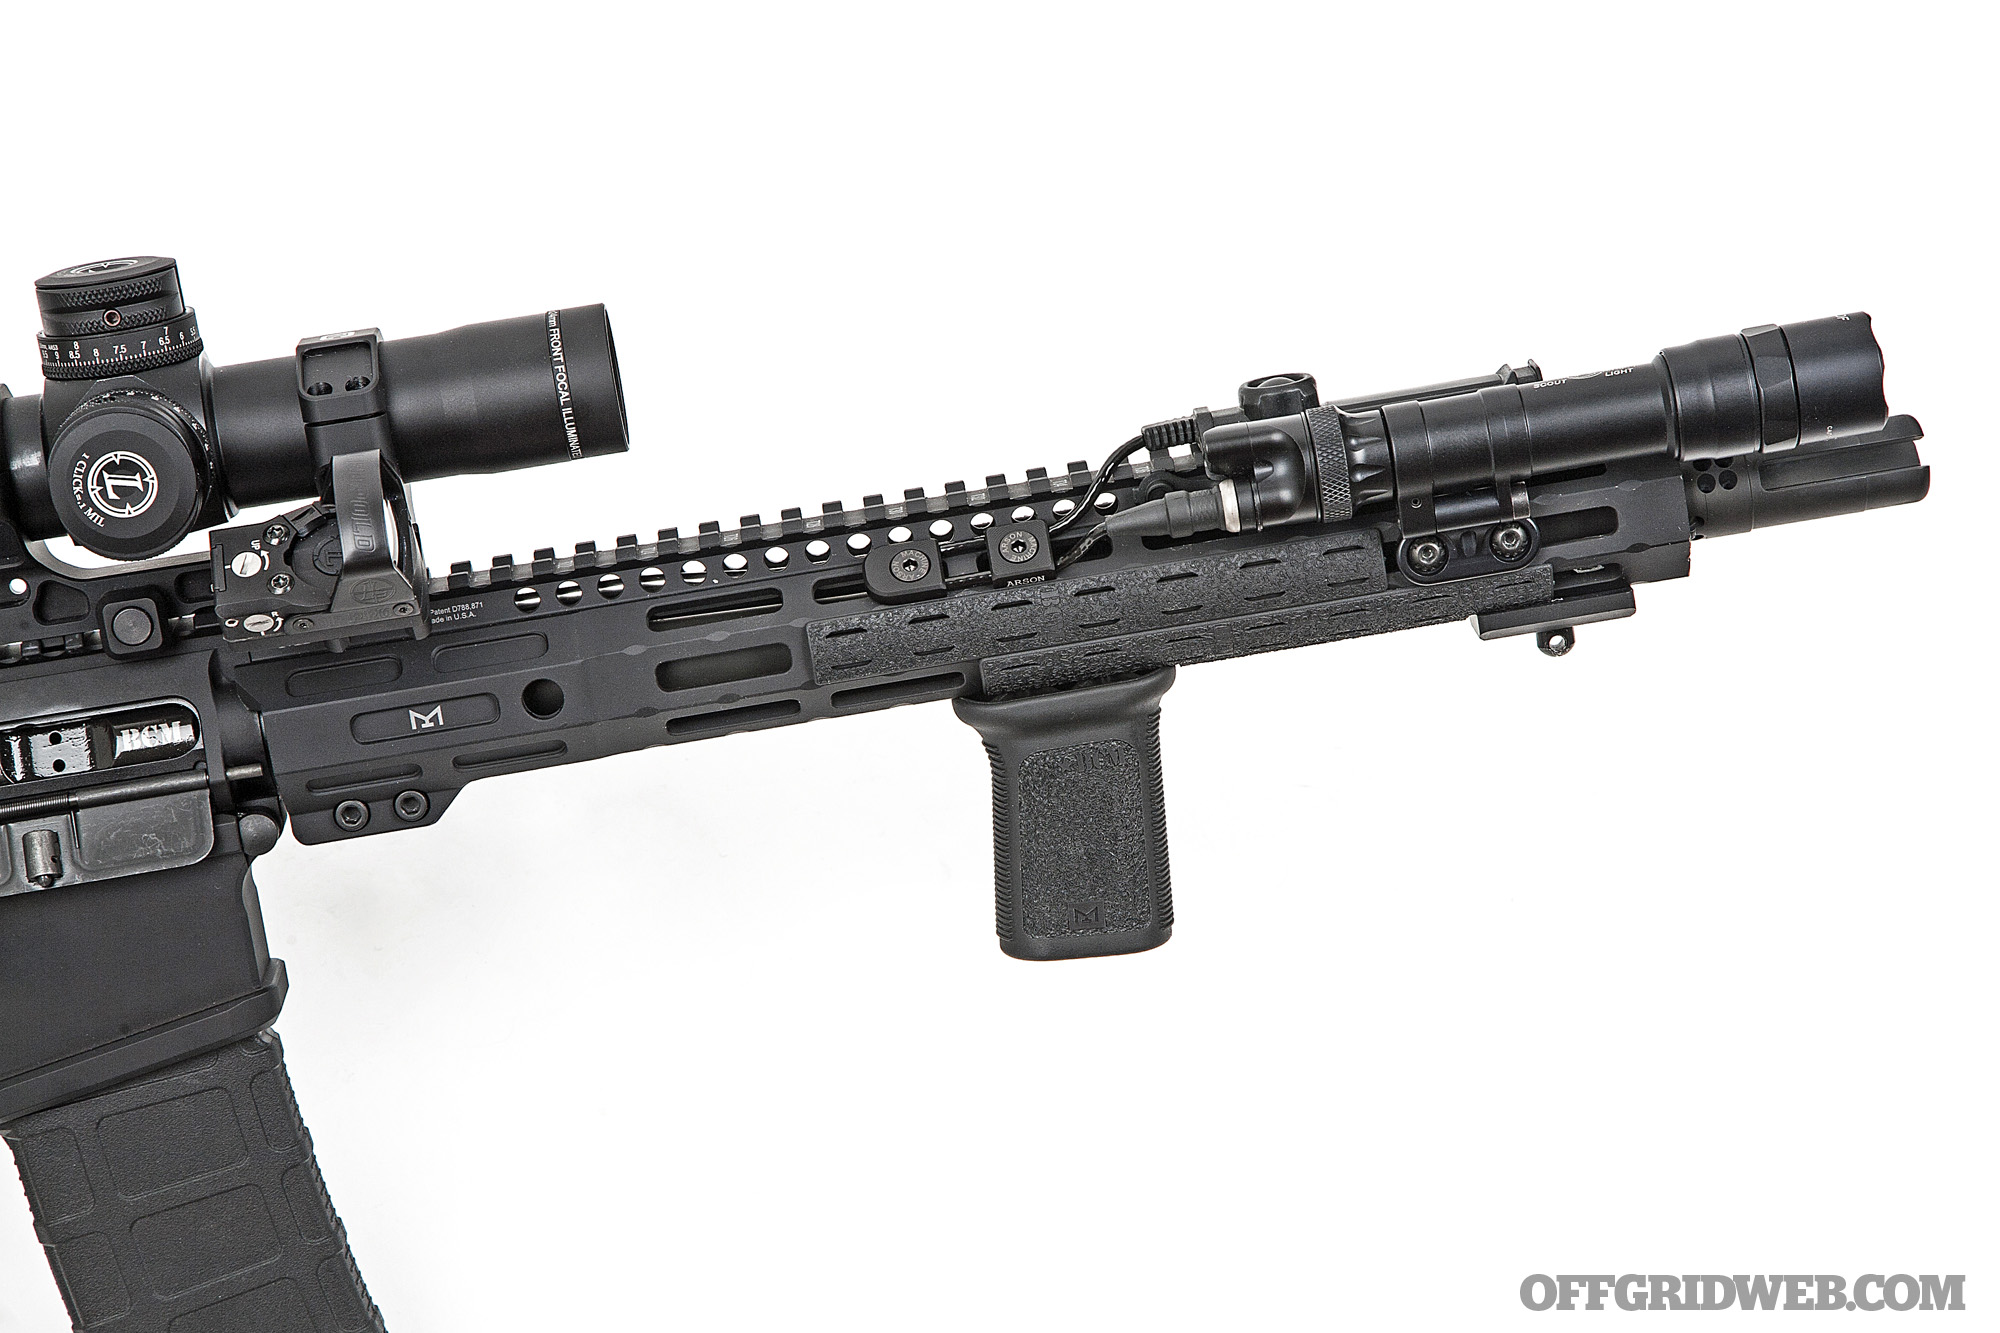
Above: The first of two light setups I tested is based around a SureFire Scout Pro with dual-switch tail cap and remote switch. The wires are routed neatly thanks to anodized aluminum WireGuides from Arson Machine.
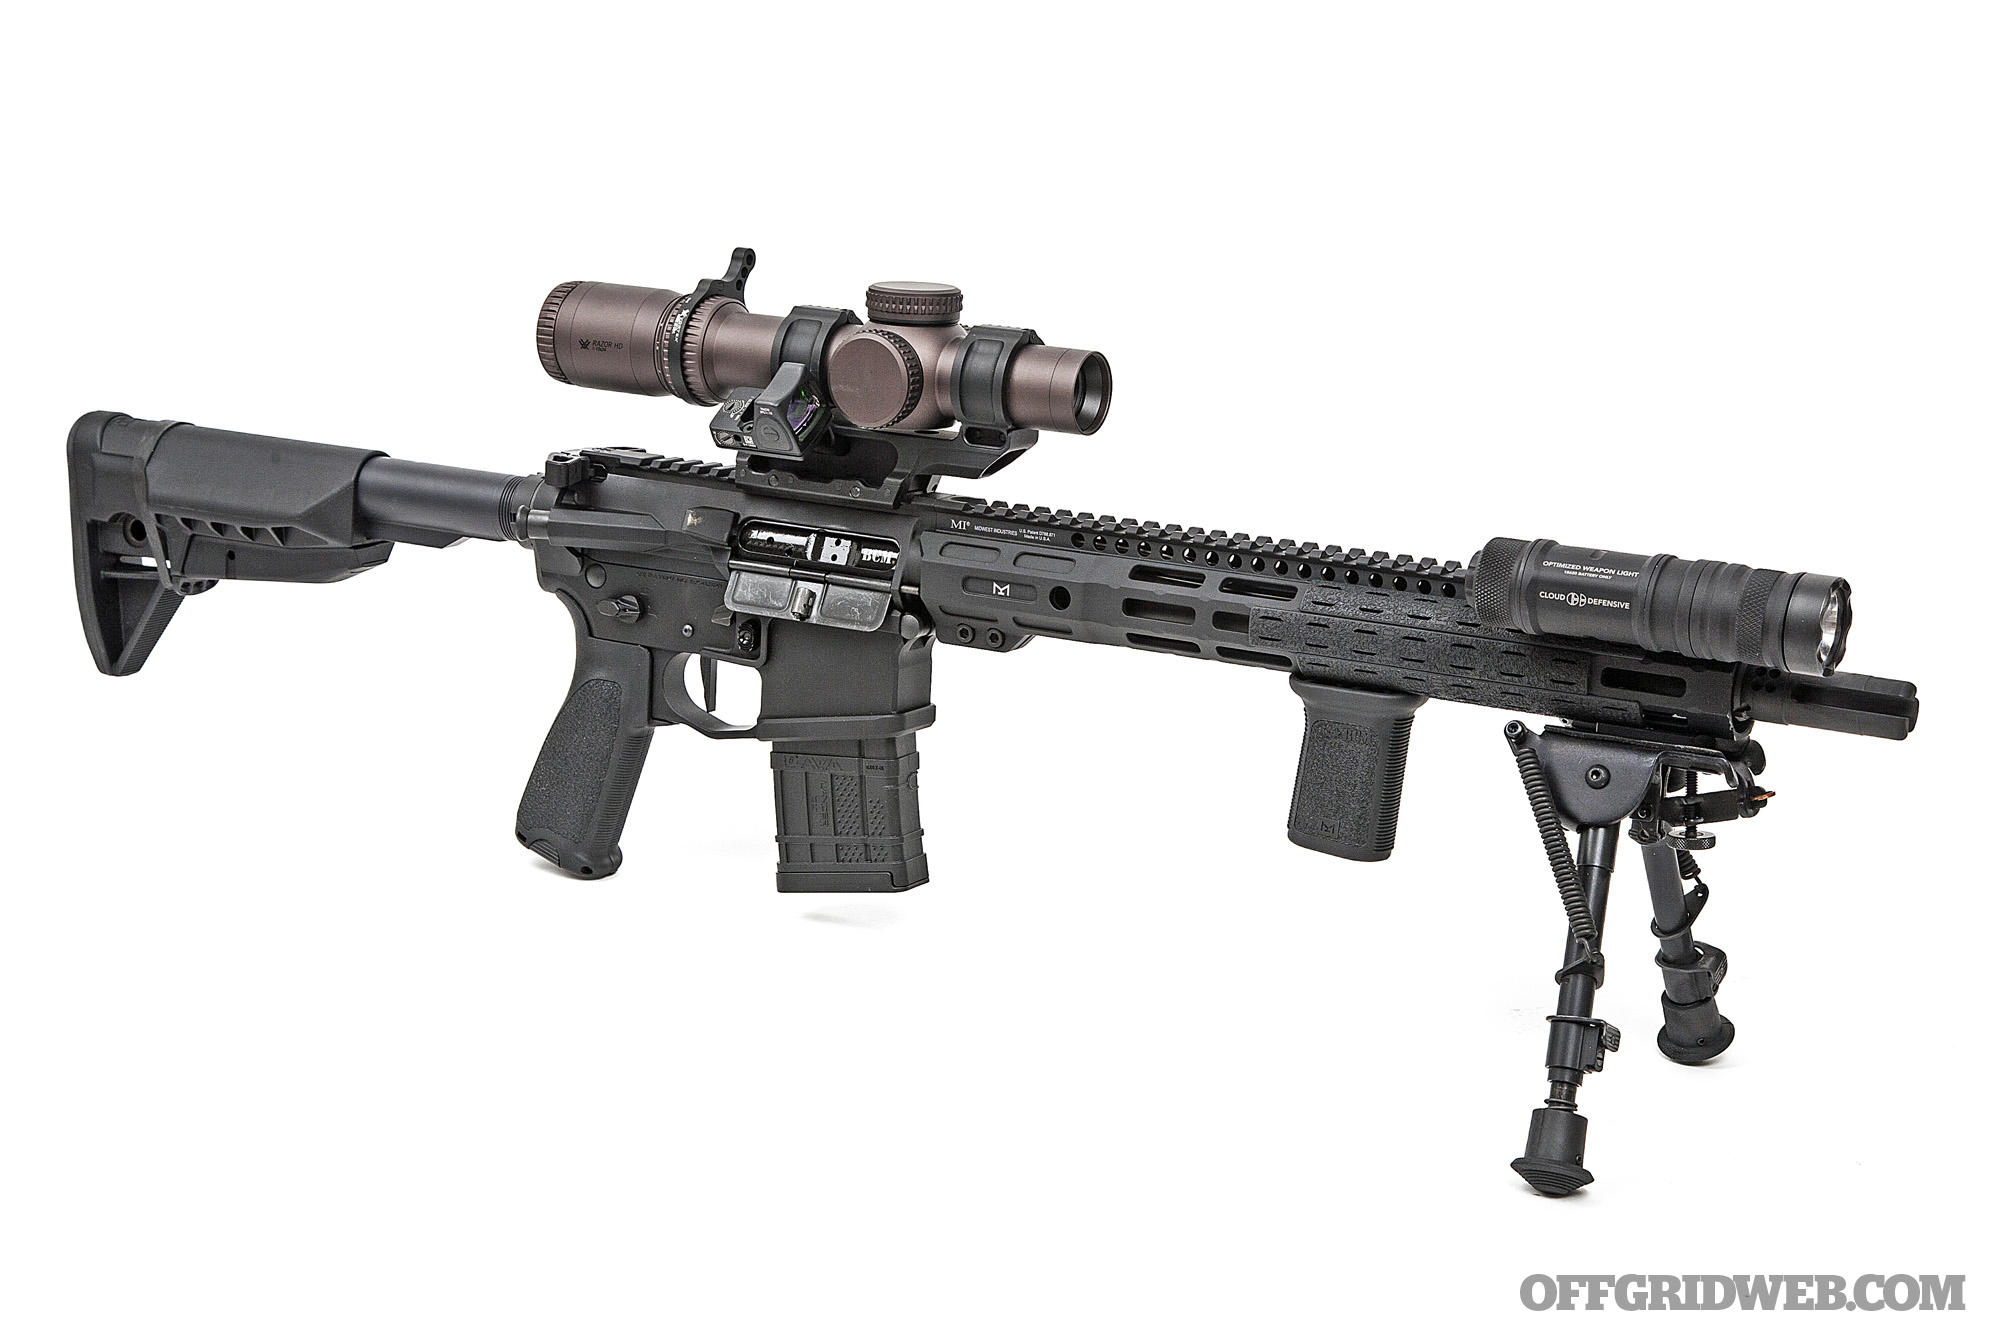
I experimented with two light setups on this build. The first is a SureFire Dual Fuel Scout Light Pro, which provides 1,500 lumens with a rechargeable 18650 lithium battery. It also accepts two common CR123A batteries with a reduced output of 1,200 lumens. This dual-fuel capability is a nice option for long-term emergency scenarios, since I can either recharge the main battery or swap to some spares that I already carry for other tools. The Pro body adds a swivel mount that nestles the light as close as possible to the handguard. It’s set up with a DS-SR07 dual-switch tail cap and remote switch. The wires for the switch are kept neat and tidy using M-LOK WireGuides from Arson Machine.
The second light I tried is a Cloud Defensive OWL, which produces 1,200 lumens and 50,000 candela from a rechargeable 18650 battery. This all-in-one unit is built like a tank and has impressive long-range throw that fits the precision-oriented build of this rifle. It’s a bit “chunky,” but I appreciate its durability and simple integrated pressure switch design. If I’m going to a daytime class or match, I can pop the light and the bipod off in seconds to lighten the rifle. Neither requires extra tools — the OWL’s tail cap has a built-in socket wrench to loosen its rail clamp bolt.
Above: The Cloud Defensive OWL is a little “big-boned,” but it’s also nearly indestructible (a valuable trait for a survival rifle) and produces a high-candela beam that’s well-suited to long shots in low-light conditions.
Optics
As with lights, I tried two different setups, each involving a low-power variable optic (LPVO) and an offset red-dot sight. The first is a Leupold Mark 8 CQBSS 1-8×24; it offers first-focal-plane magnification and four different illuminated reticles to choose from. I picked the M-TMR model, which features 0.5-MIL hash marks and a small selection of ranging brackets to help determine distance to a target. This optic is installed in a Badger Ordnance Condition One 1.54-inch-height modular mount with a Badger Ordnance 45-degree J-Arm and Delta Point Pro adapter plate. That plate holds (you guessed it) a Leupold DeltaPoint Pro NV sight. The absolute-cowitness height of this optic setup is great for establishing a solid cheek weld while shooting from prone, and I like the DP Pro’s large window for quick target ID at close range.
Above: In this photo, you can see the Leupold Mark 8 and DeltaPoint Pro red dot mounted in a Condition One modular mount. The Harris bipod has also been removed from the Midwest Industries M-LOK bipod adapter to reduce front-end weight.
This setup paired best with the SureFire light, since the larger-diameter body of the Cloud Defensive OWL intruded into the window of the DP Pro red dot.
The second optic setup I tried is based around a Vortex Razor HD Gen III 1-10×24 scope. This optic is also a first-focal-plane design, and features the excellent EBR-9 reticle, which includes a bright illuminated dot and ring as well as MIL subtension markings. Some shooters might find the detailed “Christmas tree” reticle a little distracting at higher magnification settings; I like that it enables quick and precise holds for windage and elevation, so I can spend less time dialing the optic and more time shooting. I mounted this scope in a Scalarworks LEAP/09 1.93-inch-height mount and added the new Scalarworks KICK/02 offset red dot mount with a Trijicon RMR. As I mentioned previously, the taller optic mount has some trade-offs, but I found it to be more comfortable for my face shape and cheek weld position while standing.

Above: Here’s a comparison between the two offset red-dot setups. The RMR on the Scalarworks KICK mount (left) is positioned at a 35-degree angle for quick acquisition and snag reduction. The DeltaPoint Pro sits at a typical 45-degree angle in the Badger Ordnance mount (right), which helps it clear the Mark 8’s locking windage turret.
The KICK mount aligns the RMR at a shallower 35-degree angle and doesn’t protrude as far from the LPVO; this has pros and cons. On one hand, it’s exceptionally fast to pivot from aiming through the LPVO to the RMR, and it reduces the risk of bashing or snagging your optic on obstacles. On the other hand, the windage turret obscures a segment of the RMR’s window by design, and optics with longer turrets (e.g. the Mark 8) can cover the dot completely. Thankfully, after testing our build, we found that it’s easy enough to visually “tune out” the turret intrusion for this particular setup.
Both configurations give me redundancy — an etched reticle for primary use, and a red dot to serve as a backup sight. I typically leave the LPVO set to 4x magnification at a minimum, since I can transition to the red dot for close-range targets. However, if the red dot fails for any reason, I know I can still crank my LPVO back to 1x and click on the illumination.
Furniture
Above: I found that the wider design of the BCM SOPMOD stock helps me keep my head more stable while shooting — a must for this LPVO setup. The VBOST tab provides retention for a rubber band to keep my sling stowed neatly against the stock.
The last bits and pieces for this build came from Bravo Company USA (BCM). There’s a Gunfighter Grip Mod 3 pistol grip, SOPMOD Stock Mod 0, Vertical Grip Mod 3, and a set of MCMR Rail Covers. I trimmed one of the covers with a Dremel, so it perfectly fills the space between the bipod mount and the vertical grip; this gives me nonslip texture all the way around the surface of the handguard. The SOPMOD stock is a bit wider than that on my 11.5 build, since cheek weld stability is far more important for a precision-oriented rifle. Finally, a BCM endplate and castle nut were used to attach a VLTOR A5 buffer system. Like my other rifle, I attached a QD sling mount to sockets on the rear of the handguard and the end plate, but this time I went with a Blue Force Gear Vickers padded sling. A rubber band secures it to the stock when it’s not in use; the BCM stock has a Vehicle Borne Operations Sling Tab (VBOST) feature that’s designed for this exact purpose.
Closing Thoughts
Talk to anyone who works with tools for a living — mechanics, plumbers, electricians, and so on — and you’ll learn some valuable lessons about quality equipment. The best tools are scratched and scuffed, well-worn, and well-loved. They’re not stowed in velvet display cases and handled with white gloves. They’re often dirty and greasy because they’re used day-in and day-out, and this constant use is a testament to their reliability. When they’re needed, they either get the job done, or they’re unceremoniously replaced.
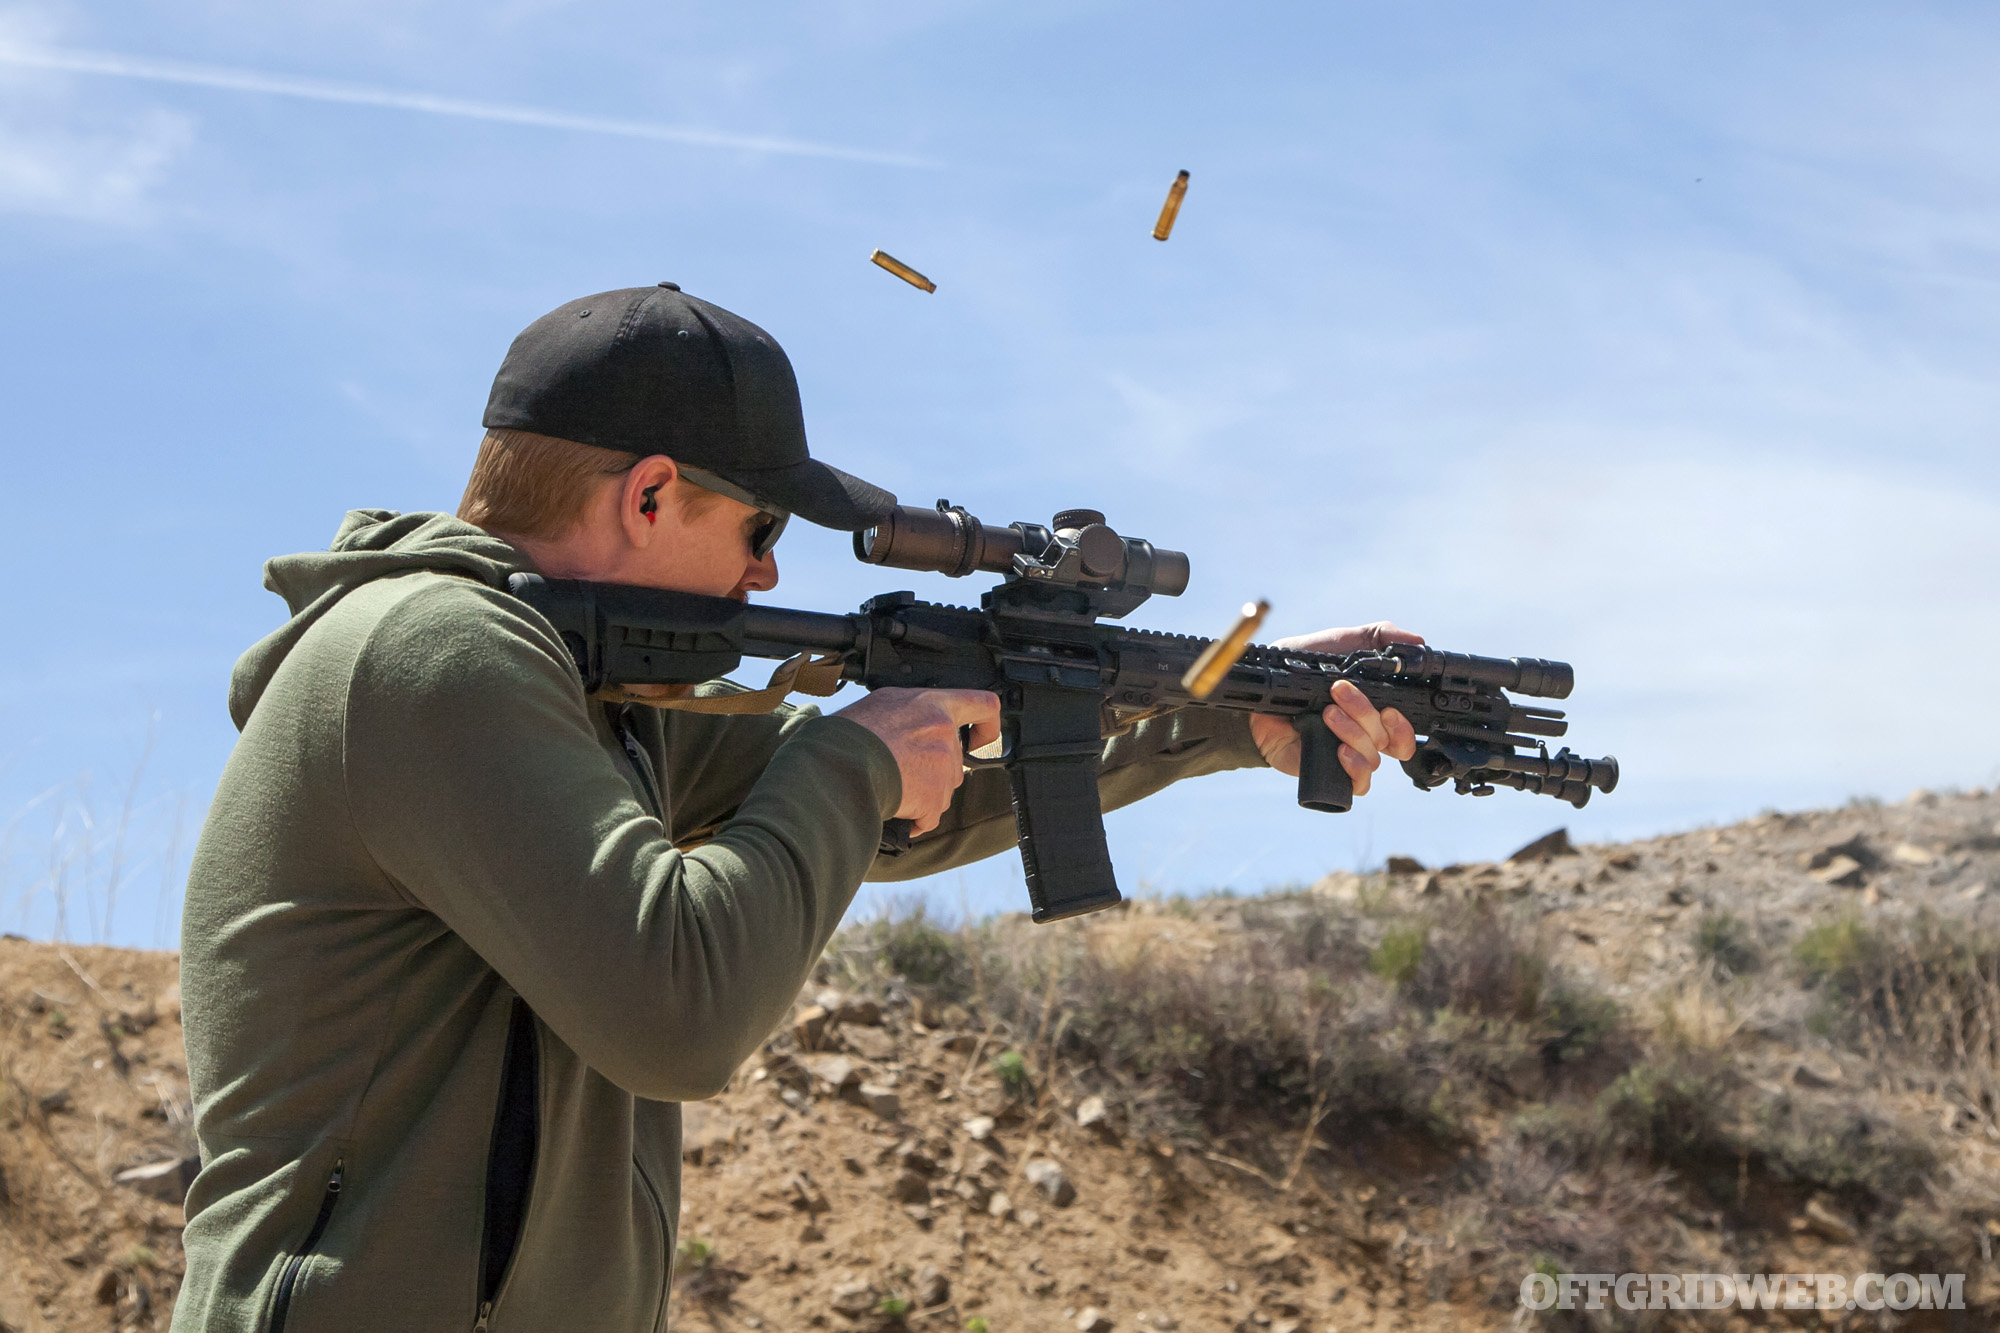
Similarly, my rifles don’t just sit around collecting dust until an emergency arises. They’re not stashed in a wall-mounted case with a label that says, “break glass if SHTF.” Both are built from high-quality components that weren’t cheap, and while I certainly won’t deliberately abuse or damage them, I’m not going to pamper them either. Under normal circumstances, the 11.5 sits at my bedside for home-defense purposes, and the 13.9 makes an excellent game-getter. Both have been used in recreational shooting competitions on weekends, and both are frequently taken out to classes where I run them through a variety of drills. I cycle through new types of ammo in each constantly to watch for malfunctions and shot group deviation. So, although they’re survival rifles and can be employed as such, they’re also my daily drivers. If the day ever comes where I have to use either in a life-and-death situation, that’s how I know they’ll be ready.
If I had to do it all with one rifle, I’d probably split the differences between these builds, running a short-barrel configuration with a red dot sight and removable magnifier similar to Tom Marshall’s mini-recce build in Part I of this series. But my other emergency preparedness tools all have backups and overlap, so my rifle setup philosophy sticks to the same pattern — two is one.
