In This Article
In Part 1 of this article, we covered the advantages and disadvantages of a low-power variable optic, discussed important factors for buying an LPVO, and talked about how to choose an appropriate LPVO mount. Now that we’ve addressed these “hardware” considerations, it’s time to address the “software” you’ll need to get the best performance from your LPVO-equipped rifle. Like any complex tool, you can’t expect to use it properly if you’re not trained. The two-day TruKinetics Intro to the LPVO class we attended provided many helpful lessons to keep in mind.
How to Mount an LPVO
Before firing a single round out of our guns, task number one was to confirm our optics were mounted correctly. That might sound like a no-brainer, but it’s easy to mount an LPVO incorrectly, and if you do, you’ll be left wondering why you’re constantly struggling to find the eye box or hit targets. Knowing your optic is mounted securely and zeroed will leave you with a sense of confidence, and that’s especially important for a magnified optic that may be used at 500 yards or more.
LPVO mounting involves three factors:
- Placement – Is your optic an appropriate distance from your eye? If not, you’ll struggle to acquire a clear sight picture quickly.
- Leveling – Is your reticle level? If not, you’ll be constantly chasing a proper zero. Even a few degrees of tilt in the reticle can cause rounds to completely miss a target at 500 yards.
- Torque – Is every nut and bolt tightened to the correct specification? If not, your optic level, placement, and zero may shift unexpectedly (usually at the worst possible time). Estimating “gutentight” is not acceptable!
Tools
Here’s what you’ll need to mount your LPVO:
- Inch-pound (not foot-pound) torque wrench and/or torque driver
- Bubble level and/or leveling wedge
- A small amount of oil to lubricate the rings
TruKinetics LPVO Mounting Procedure

Step 1: Apply a small drop of oil to your fingertip, and rub a very light film of oil onto the inside of the mounting rings. This allows your optic to move freely in precise increments until it’s fully torqued.
Step 2: Set the LPVO into the mount and insert the hardware, turning each screw a few times with your fingers to confirm it’s threaded in properly.
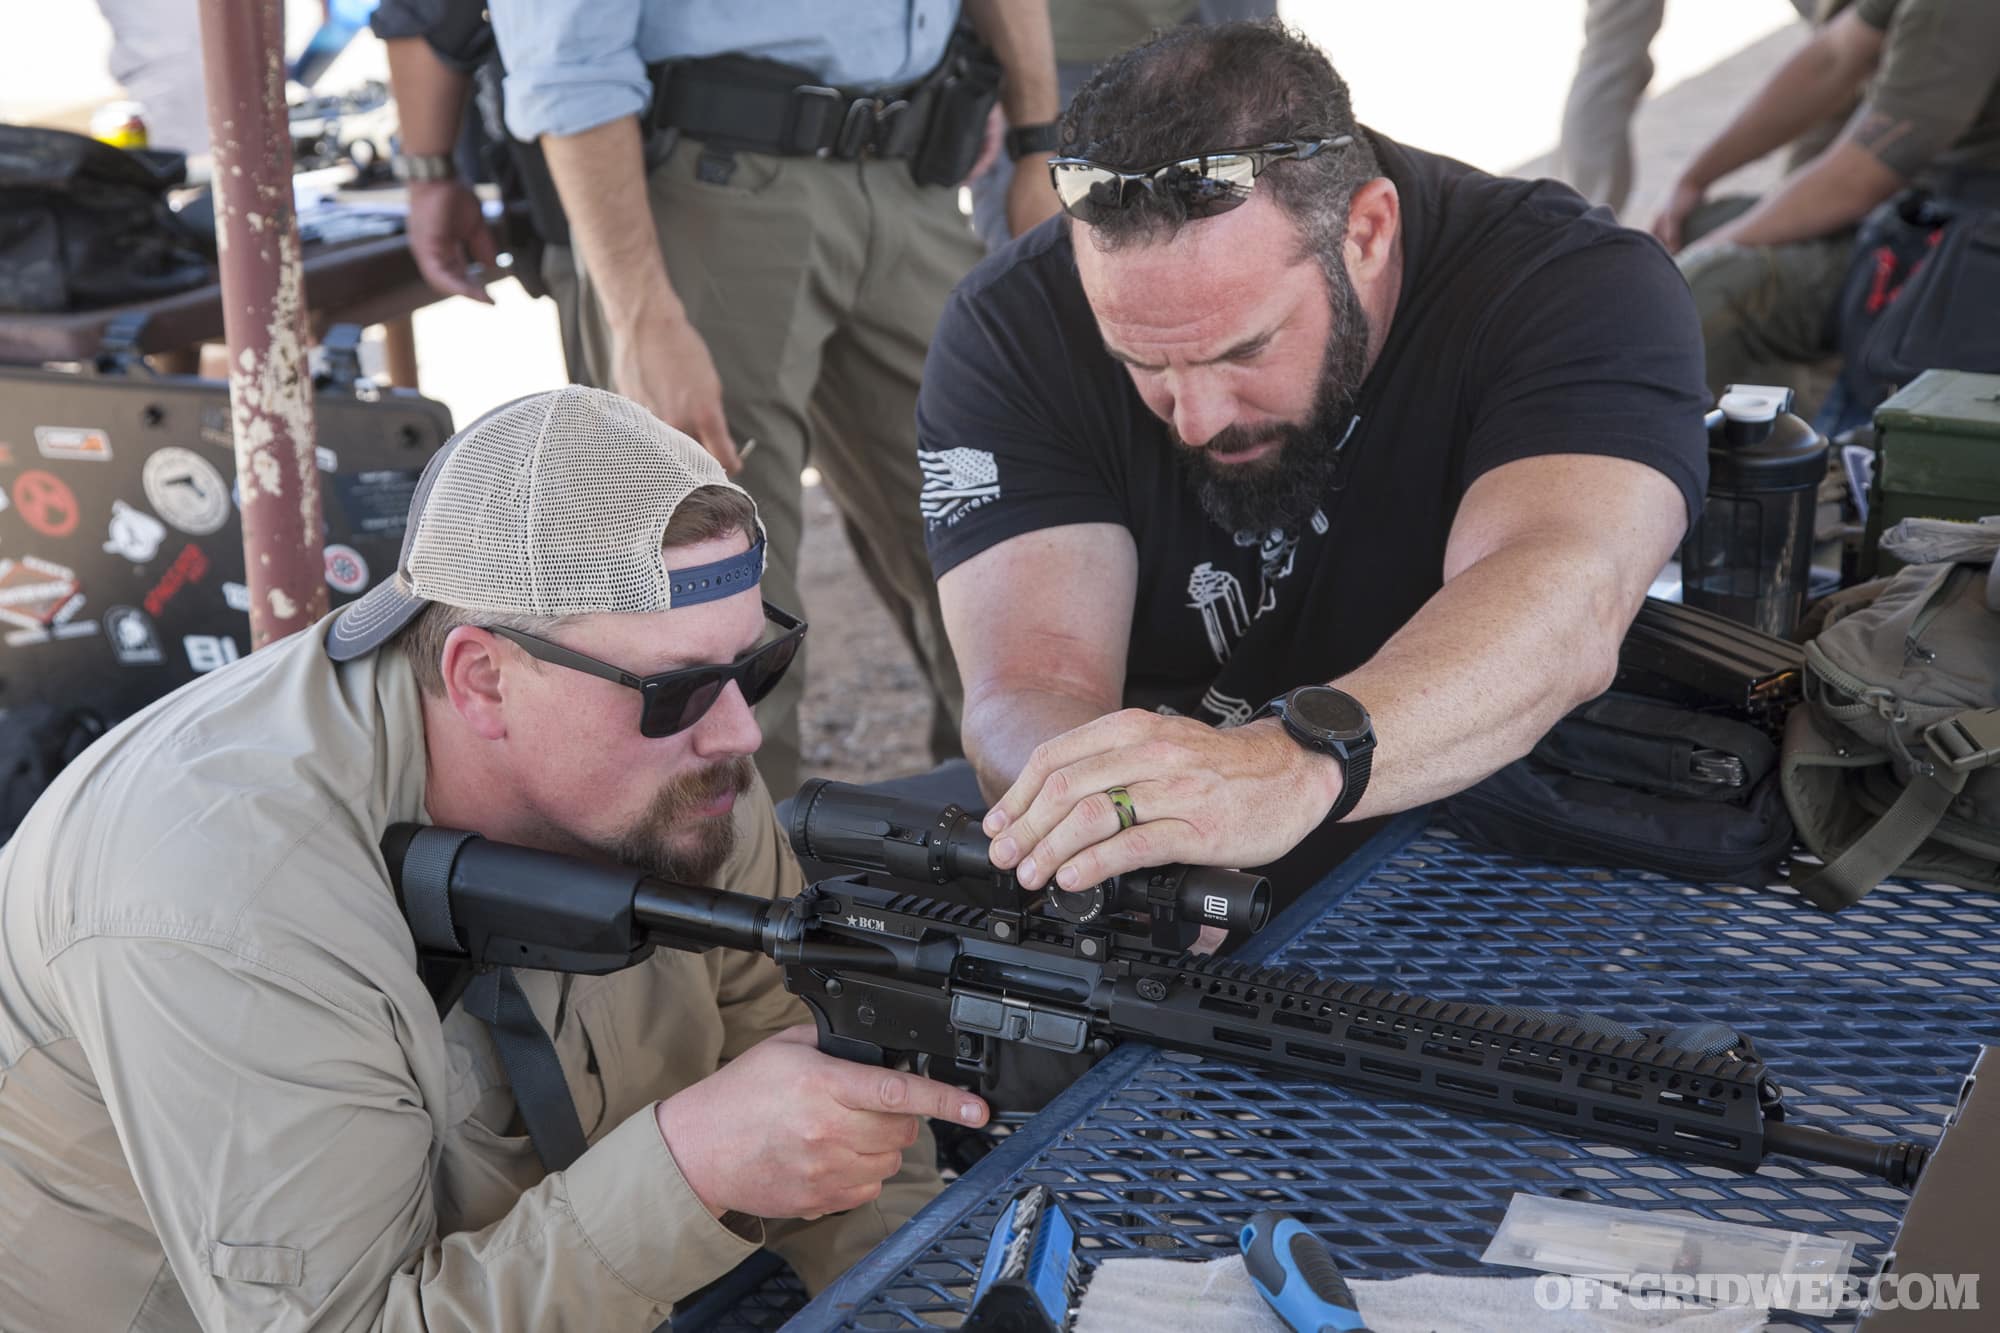
Step 3: Determine the appropriate placement of your optic on the gun at full magnification power. Make sure your rifle’s stock is set to your preferred setting, and move the optic back and forth until you get a full sight picture without shadow at the edges of the lens. Large adjustments can be made by shifting the mount forward on the upper receiver Picatinny rail (never attach or “bridge” it onto to the handguard). Finer adjustments can be made by sliding the optic tube inside the mount.
Above: Instructor Todd helped this student position his LPVO for a clear sight picture before tightening the hardware.
Step 4: Once the placement is correct, lightly snug the ring hardware in an alternating X pattern, maintaining equal gap between the ring halves on either side of the mount. The LPVO should still be able to move a little, but shouldn’t be sliding around loosely.
Step 5: Hold the mount on the Picatinny rail and press it forward to eliminate any wiggle room within the rail slot. Then, with your inch-pound torque wrench, torque the rail mount hardware to the manufacturer’s recommended specification (for example, 30 in-lbs).

Above: The Arisaka Defense leveling wedge is an easy and inexpensive way to quickly level an optic. However, it may not work for setups with tight clearance between the mount and optic housing. Bubble levels are a tried-and-true method, even if they require some patience and finesse.
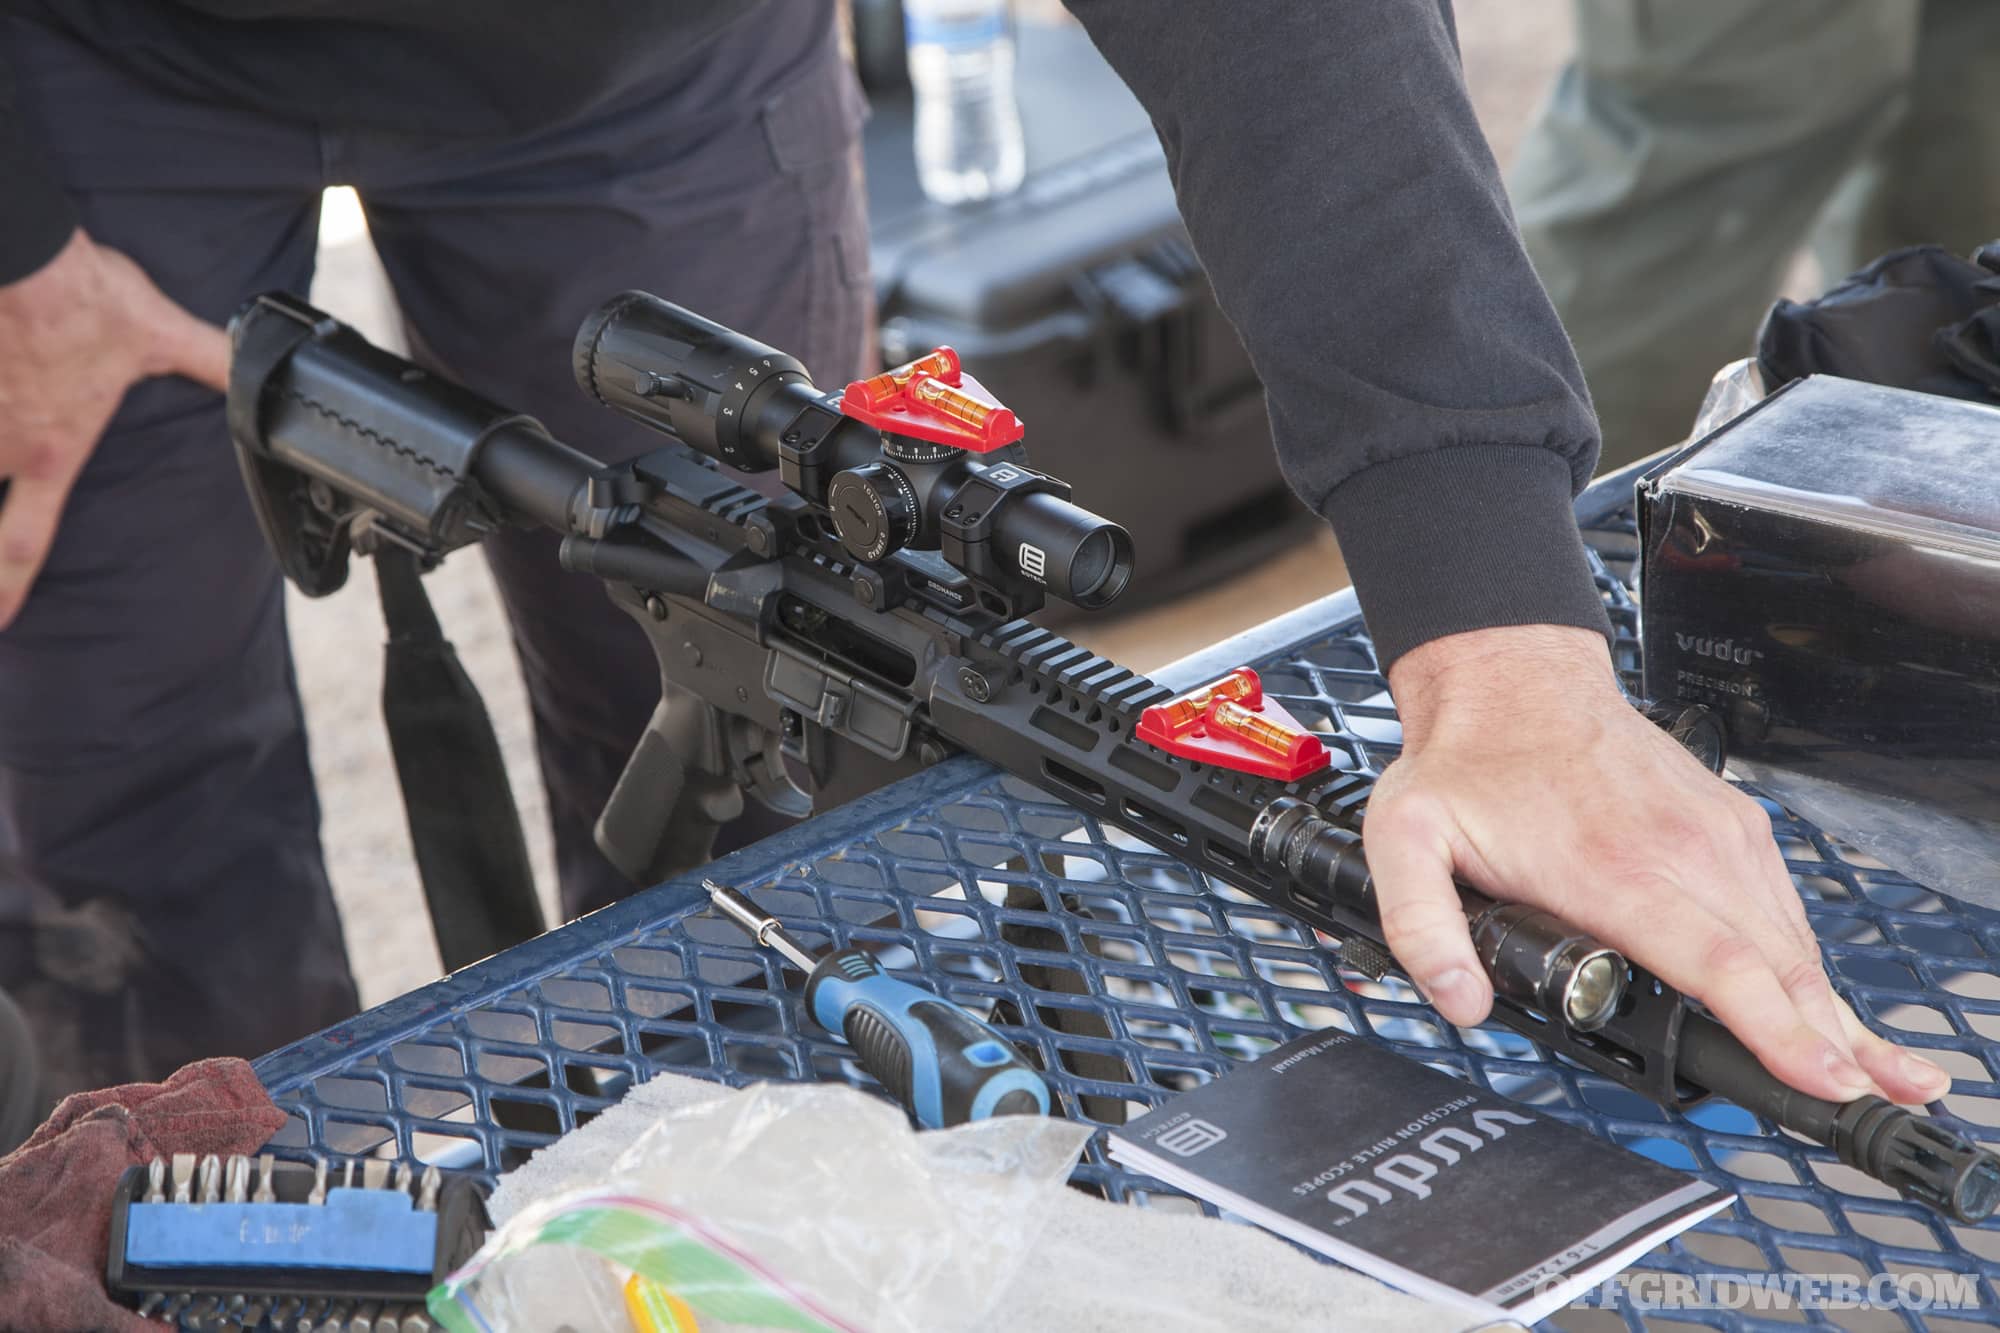
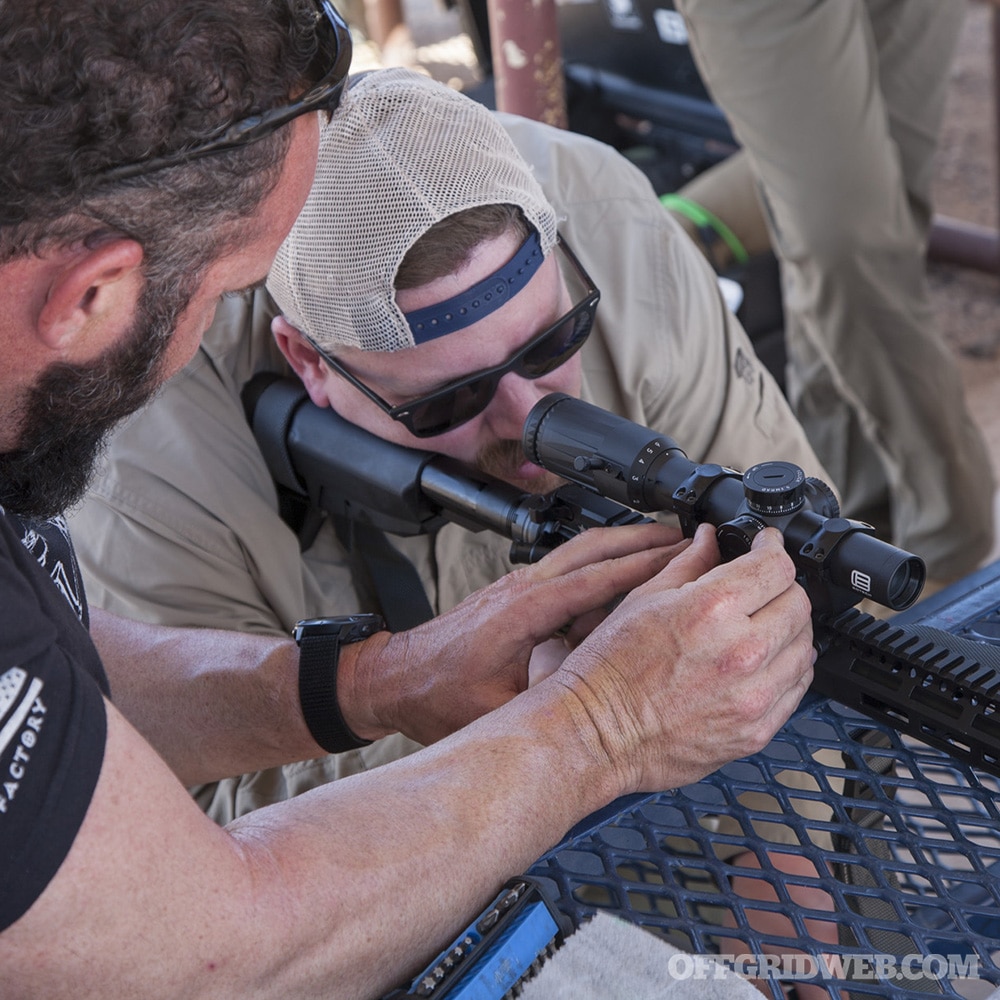
Step 6: Level your optic. There are many tools for this job, but TruKinetics recommends the Arisaka Defense Optic Leveler ($28 MSRP), which is a wedge system that physically levels the flat bottom of an optic against the mount. Bubble levels should be used to confirm that the mount and optic are completely level relative to the gun.
Step 7: Using the inch-pound torque wrench, torque all the hardware on the rings in an X pattern to the manufacturer’s recommended specification (for example, 15 in-lbs). Watch the level carefully to confirm it doesn’t move during this process. It’s generally not recommended to use any kind of Loctite or thread-locker compound on this hardware, since it lubricates the threads and can lead to unwanted variances in torque.
Step 8: Add witness marks on the torqued hardware using a paint pen or silver sharpie. This will give you a visual clue if anything comes loose in the future.
Step 9: Set the diopter on your optic. Aim at a plain white surface such as a wall and begin slowly turning the diopter ring (obviously do this in a safe direction while following all firearm safety rules). At the correct diopter setting, you should see a clear, in-focus reticle without any fisheye distortion or unwanted magnification. You may need to look away or close your eyes occasionally to reset your vision and confirm the diopter setting.
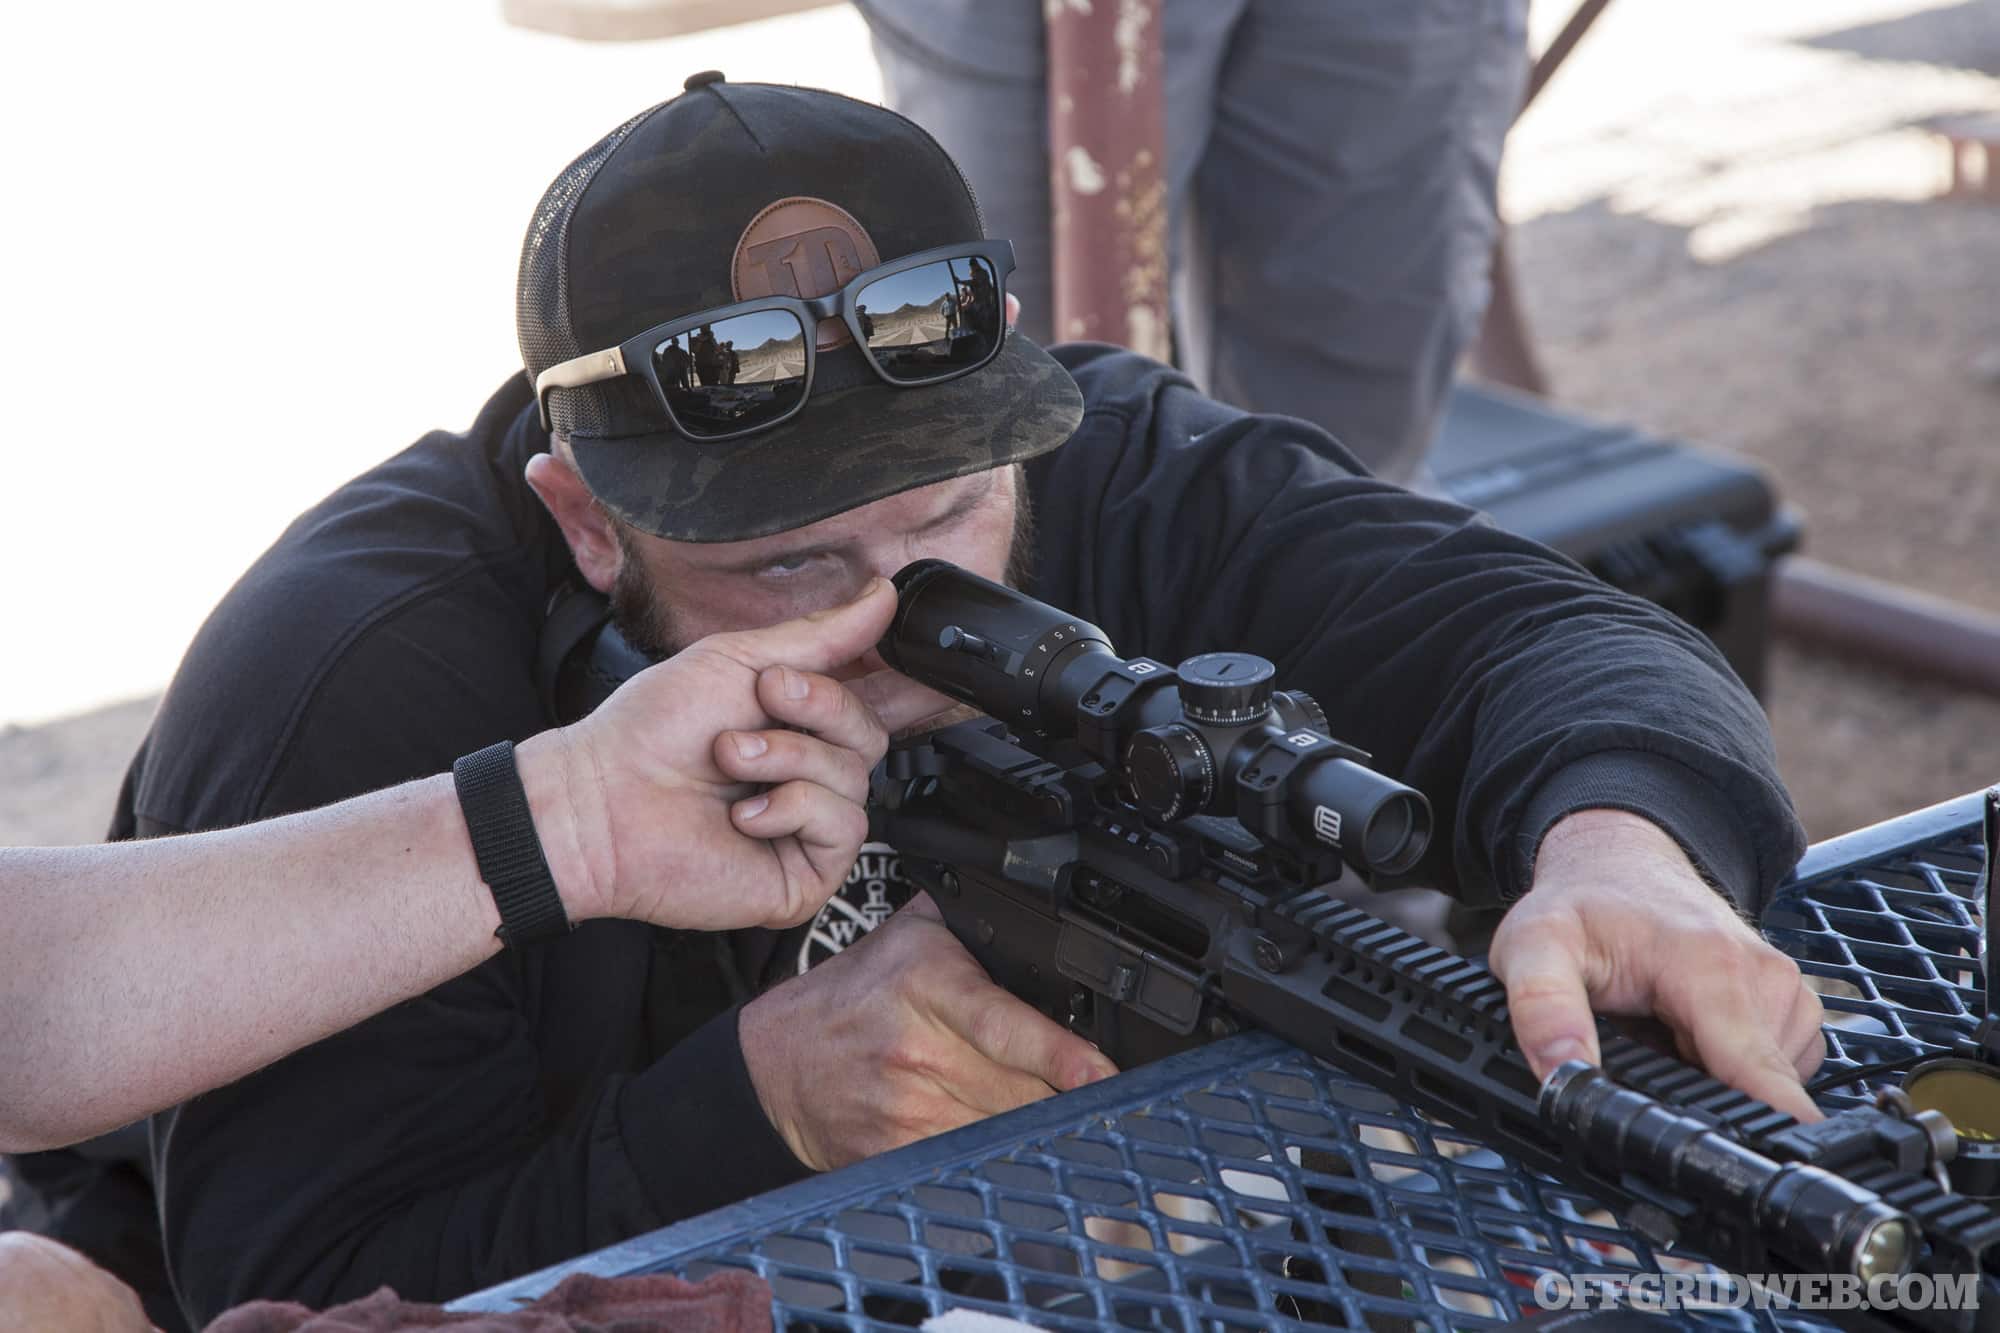
Above: Diopter setting is specific to the user’s eye, so if your rifle is used by multiple people, you may want to add color-coded witness marks for each shooter’s setting.
LPVO Training Tips
Read on for a few of the lessons we learned from the drills during our two-day TruKinetics class.
Start With a Good Zero
This probably sounds like another no-brainer, but if a trusted zero is important on a red dot sight, it’s doubly important on a magnified optic that may be used at 500 yards or more. TruKinetics instructors recommend the classic 50/200-yard zero — rounds impact on your point of aim at both 50 and 200 yards, and will impact high by a negligible amount at 100 yards. Beyond 200, you’ll need to hold over using the markings on your reticle and the data you’ve recorded while testing your gun (data on prior engagements, a.k.a. DOPE).
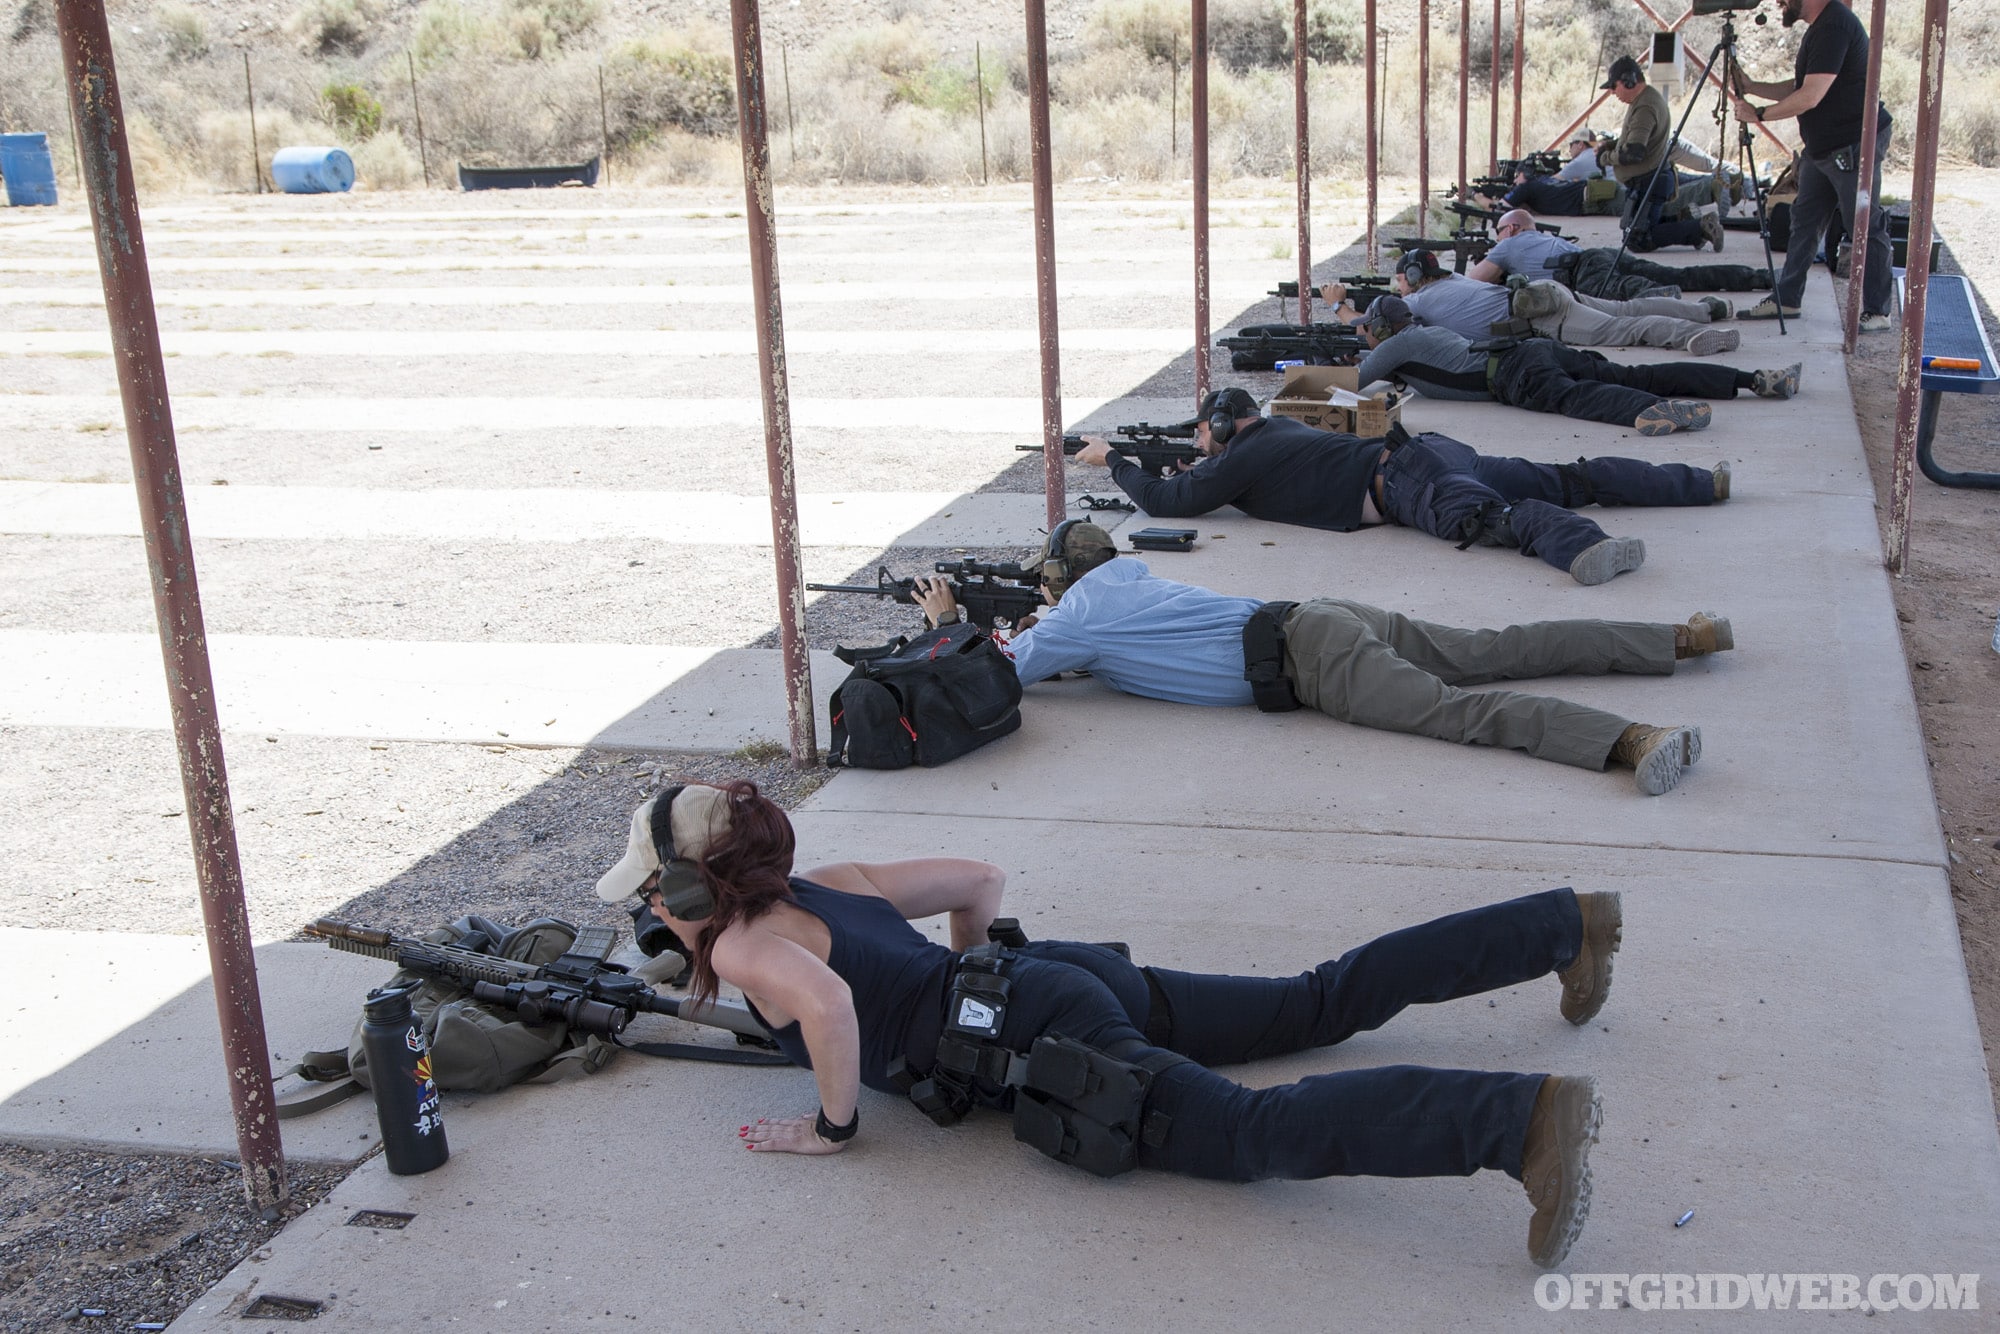
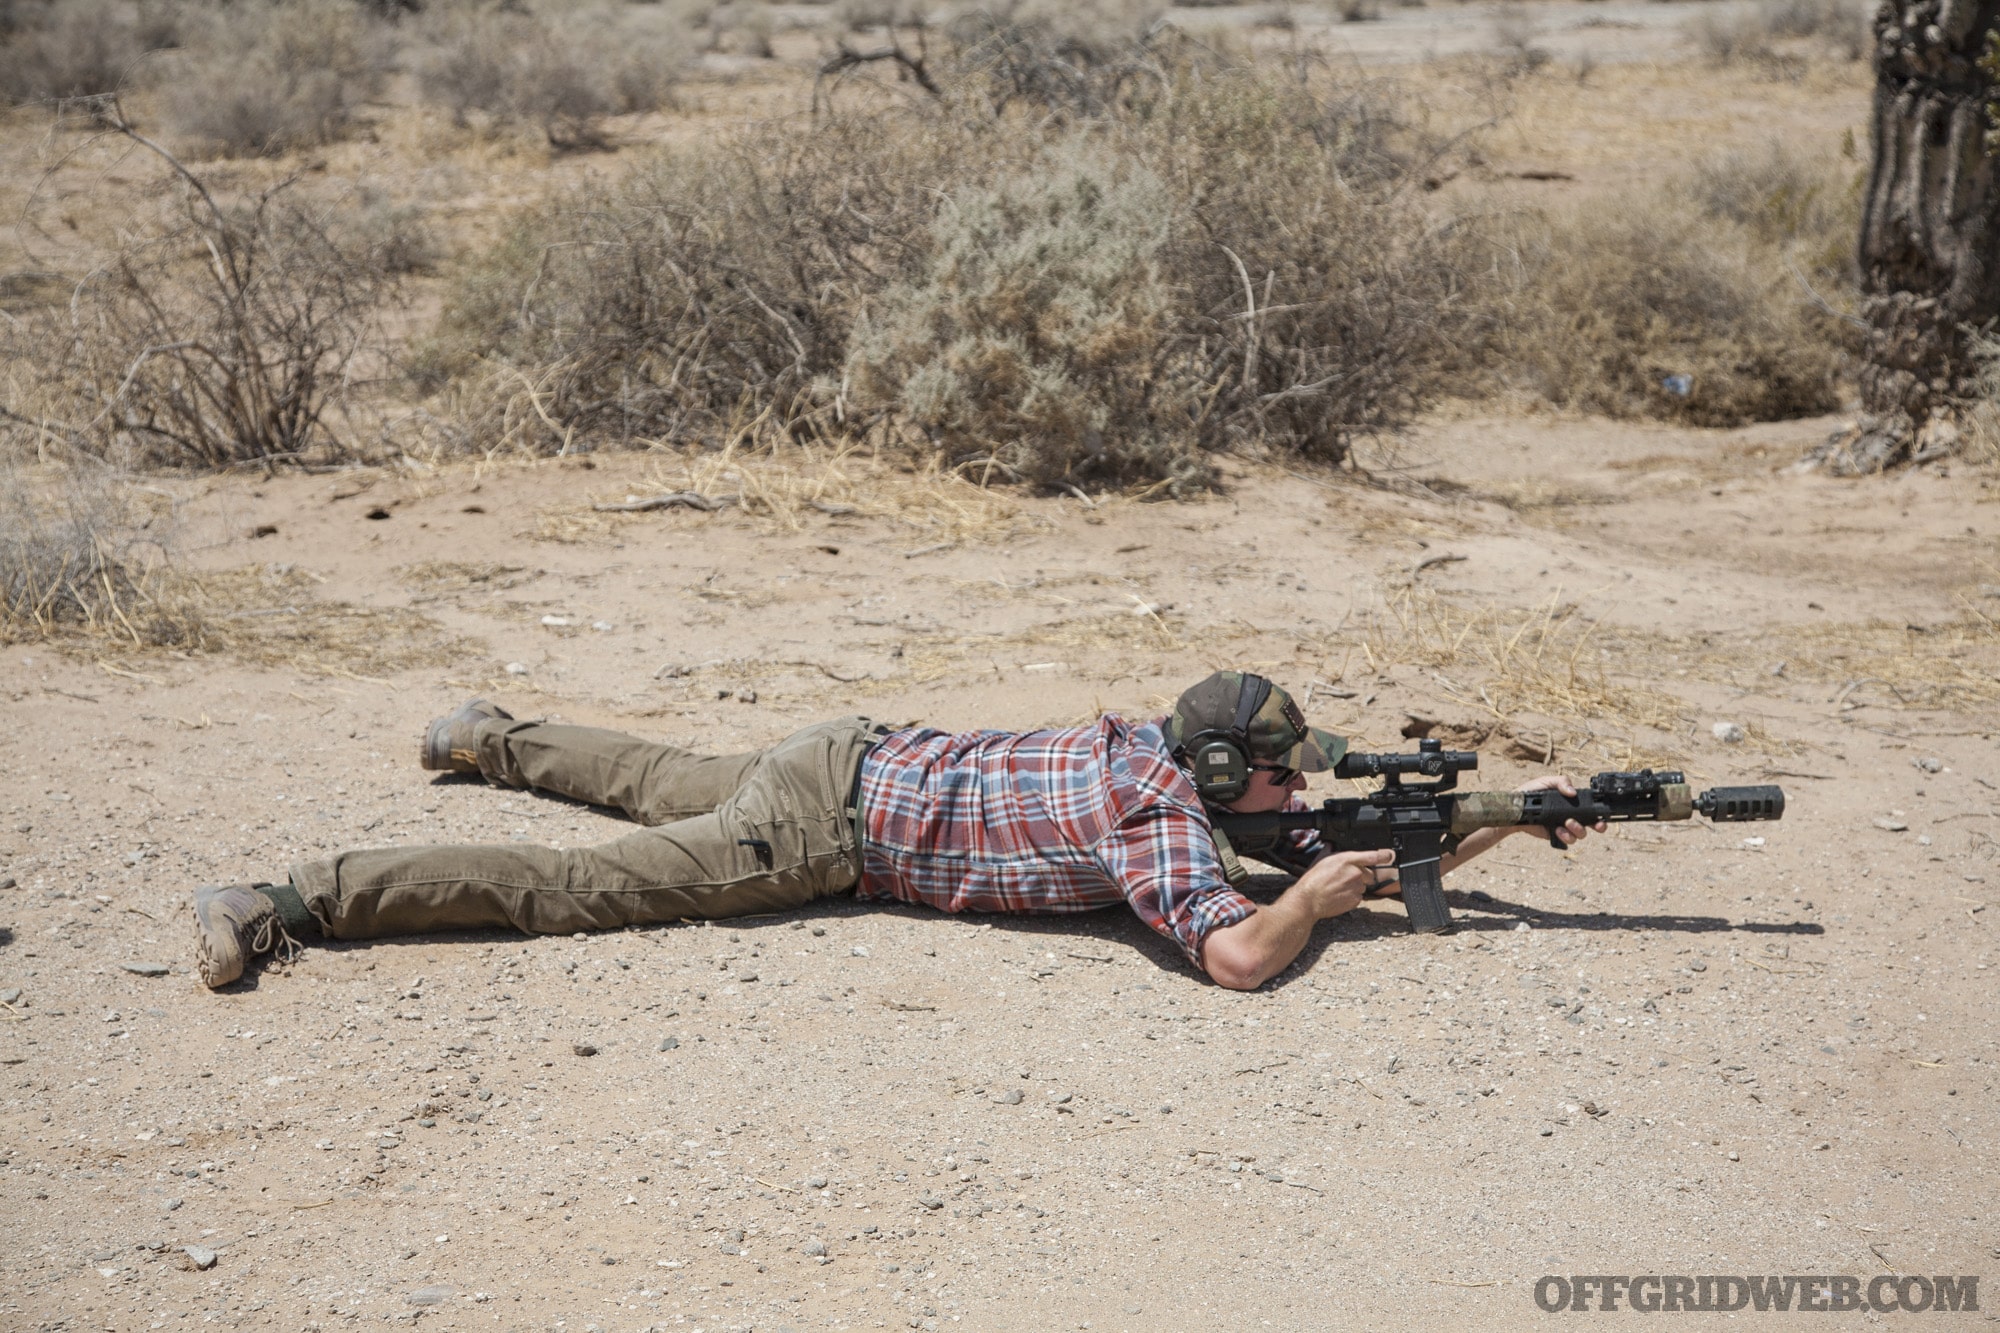
We zeroed our rifles at 50 yards from supported prone positions, using a bipod, backpack, and/or sand bags. Our LPVOs were set to full power, and we shot 5-round groups before making adjustments to elevation and windage turrets. Once we were absolutely confident about the settings, we loosened and reset our optic turrets back to the 0 mark. If it’s necessary to dial in elevation or windage adjustments in the future, this will allow us to quickly return to our rifle’s zero, rather than some arbitrary number on the dial.
Don’t Be Afraid of the Shadows
There’s an important difference between a perfect sight picture and an acceptable sight picture. With an LPVO, especially on higher magnification settings, achieving a perfect sight picture without any scope shadow at the edges takes time. In any life-and-death shooting situation — whether it’s civilian self-defense, law enforcement, or military — time is one thing you won’t have much of. Therefore, it’s critical to know how to take quick shots from an acceptable sight picture (i.e. one where there’s visible scope shadow). This is the single biggest training hurdle associated with moving from a red dot sight to an LPVO.
Above: Shooting quickly with an LPVO requires learning to accept an imperfect sight picture. Scope shadow can feel distracting at first, but with some practice, it’s easy to tune out the shadow and still get good hits.
Thankfully, scope shadow is both manageable and predictable. As we mentioned earlier, shadow on one side of the scope “pushes” point of impact towards the other side. In other words, if you notice shadow at the top of your optic, expect rounds to impact lower than your point of aim. How much lower? That’s something you’ll need to test for yourself, since every gun and optic is a little different. We did several drills during the TruKinetics course to check this principle, and most students noticed that even with substantial scope shadow, there was barely any deviation in point of impact.
Of course, if you’re shooting at longer distances or smaller targets, eliminating scope shadow becomes increasingly important, so you should take more time to refine your sight picture. But at 10 or 20 yards, there’s no reason to let a little scope shadow slow you down.
Focus On What Matters
Many of us who have spent time using red dot sights have learned the importance of being target-focused. Instead of focusing our vision on dot itself, we focus on what we’re shooting at and simply remain aware of the dot’s placement. This lowers the risk of fixating on small movements of the dot, which can cause us to slow down too much or miss the target entirely.
On the other hand, those who have spent time shooting precision rifles will know that the opposite is true — it’s generally considered better to bias your visual focus towards the reticle, not the target. This allows us to determine a precise point of aim on the reticle, including elevation and windage measurements, and hold that point on the target while pressing the trigger.
Since an LPVO can be used for both short-range and long-range shooting, you’ll need to let the situation dictate what you’re focusing on. For a quick shot at 1x within 50 yards, focus on the target just as you would with a red dot. A daylight-bright illuminated reticle will help you use your LPVO in this manner. If you’re at 6x magnification trying to hit a small plate at 300 yards, take more time to focus on the reticle and use it to measure the appropriate hold-over.
Above: It’s essential to understand your LVPO’s reticle and take mental notes on hold-overs at various distances. Even if you’re not pausing to use a DOPE chart and laser rangefinder before taking a shot, your reticle will help you quickly estimate a target’s distance and the appropriate point of aim.
Measure Your Misses
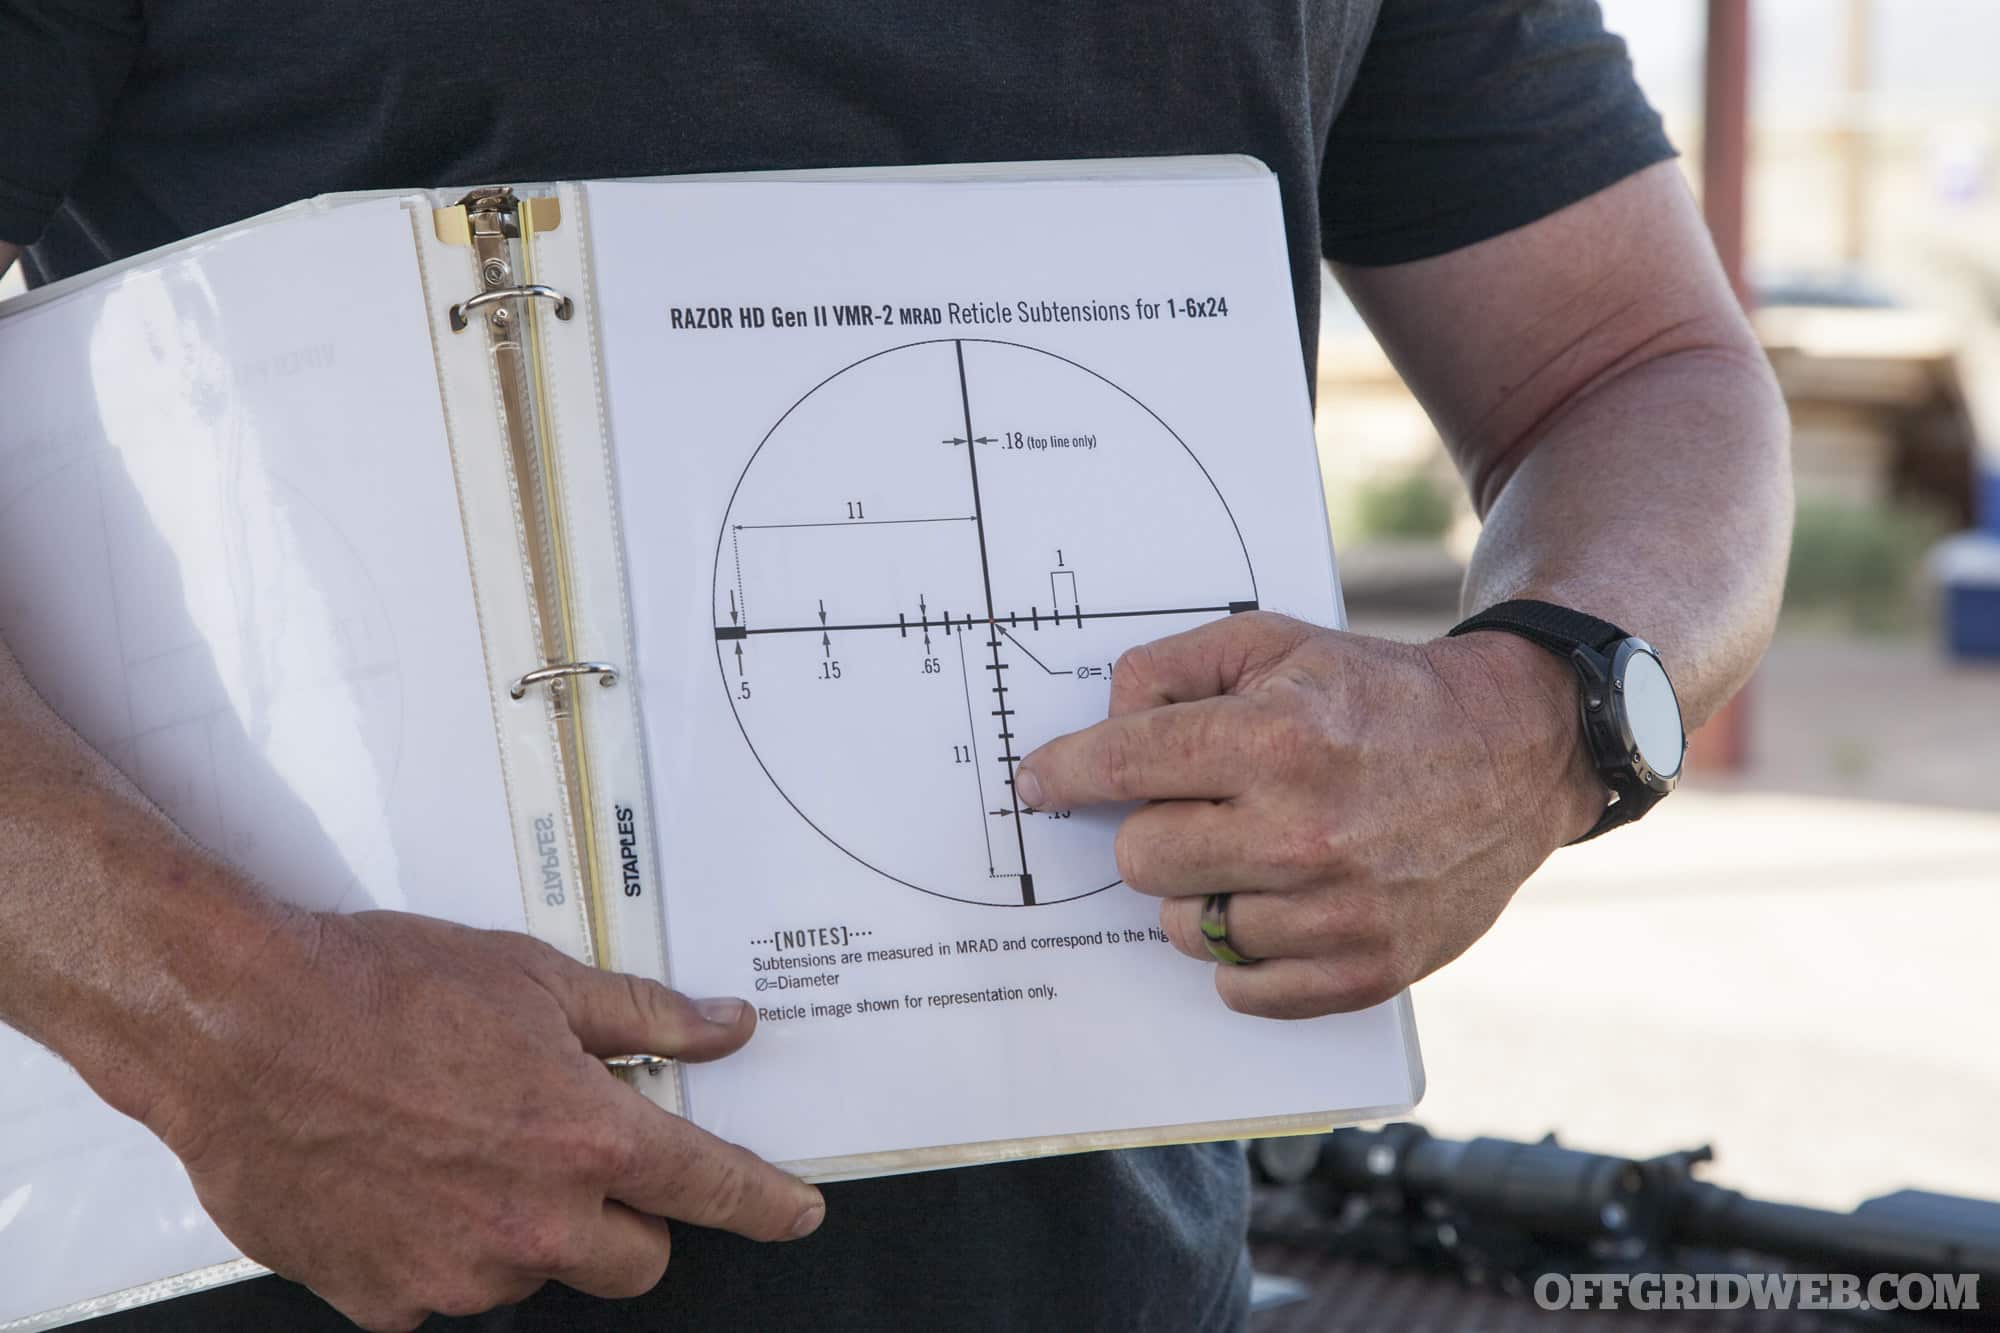
As we mentioned before, one of the LPVO’s greatest strengths is its use as an observational tool. That observation shouldn’t end after you fire your first shot. If you hit the target, great — keep watching to determine if you need to fire again. If you missed, the reticle’s “ruler” should give you all the information you need to correct your error. With a red dot, you may not be able to see where your round impacted, and if you can, you’re forced to use a generalized correction (e.g. hold right edge of target). An LPVO offers better visibility and much more precise corrections (e.g. hold right 0.6 MIL).
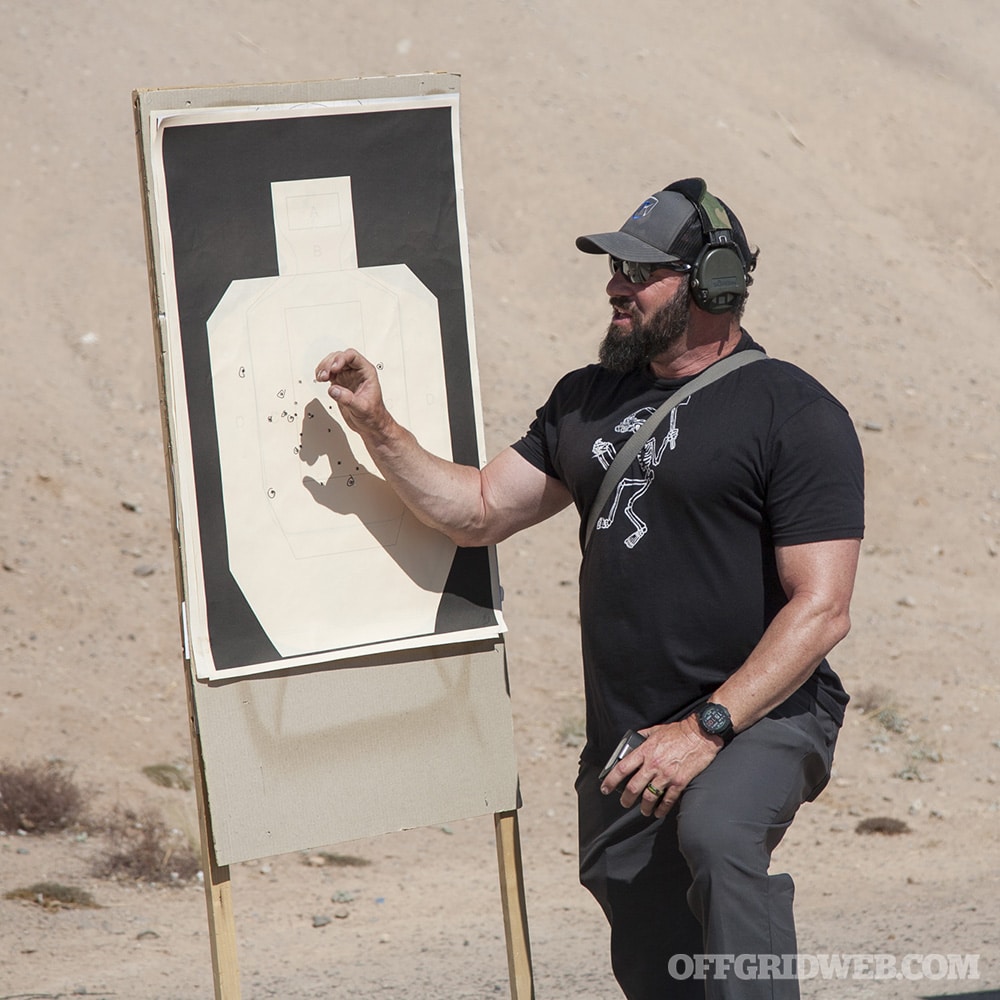
Above: Misses happen. With a red dot, you’ll need to estimate wind and elevation holds, but an LPVO’s detailed reticle offers precise information to help you make a quick follow-up shot. (This is the same reason why TruKinetics doesn’t recommend oversimplified duplex reticles.)
Don’t Overmagnify
Magnification is a double-edged sword, so use it with caution. Just because your optic can go up to 6x or 8x or 10x doesn’t mean you always have to use all that power. Doing so may give you a great view of the target, but it also gives you tunnel vision.
Excessive magnification can slow down your ability to scan the environment for a target, or it can cause you to mistakenly shoot the wrong target. Dialing back to an intermediate magnification setting gives better spatial awareness — the last thing you want is for an innocent bystander to run into your field of view just as you break a shot.

Above: Magnification should be high enough to identify the target and determine whether it’s a threat, but low enough to maintain spatial awareness around the target. To demonstrate this balance, some paper targets depicted individuals with weapons that weren’t easily visible until magnification was dialed up.
Hold Before Dialing
In the precision shooting world, it’s advisable to take time to measure the environmentals, enter them into a ballistic calculator, and dial corrections into the scope before firing. With an LPVO-equipped carbine, you may be moving around or shooting at multiple targets at various ranges, so dialing becomes less practical. It’s smarter to simply use the reticle markings to hold corrections and take the shot. This is where a “Christmas tree” reticle with a grid of windage and elevation dots becomes especially helpful — it offers quick reference points that help you shoot precisely and quickly.
As one of the instructors explained, LPVOs offer enhanced precision capability, but that doesn’t mean every LPVO user needs to become a sniper. All we really need is “a knuckledragger understanding of how to get good hits.”
Closing Thoughts
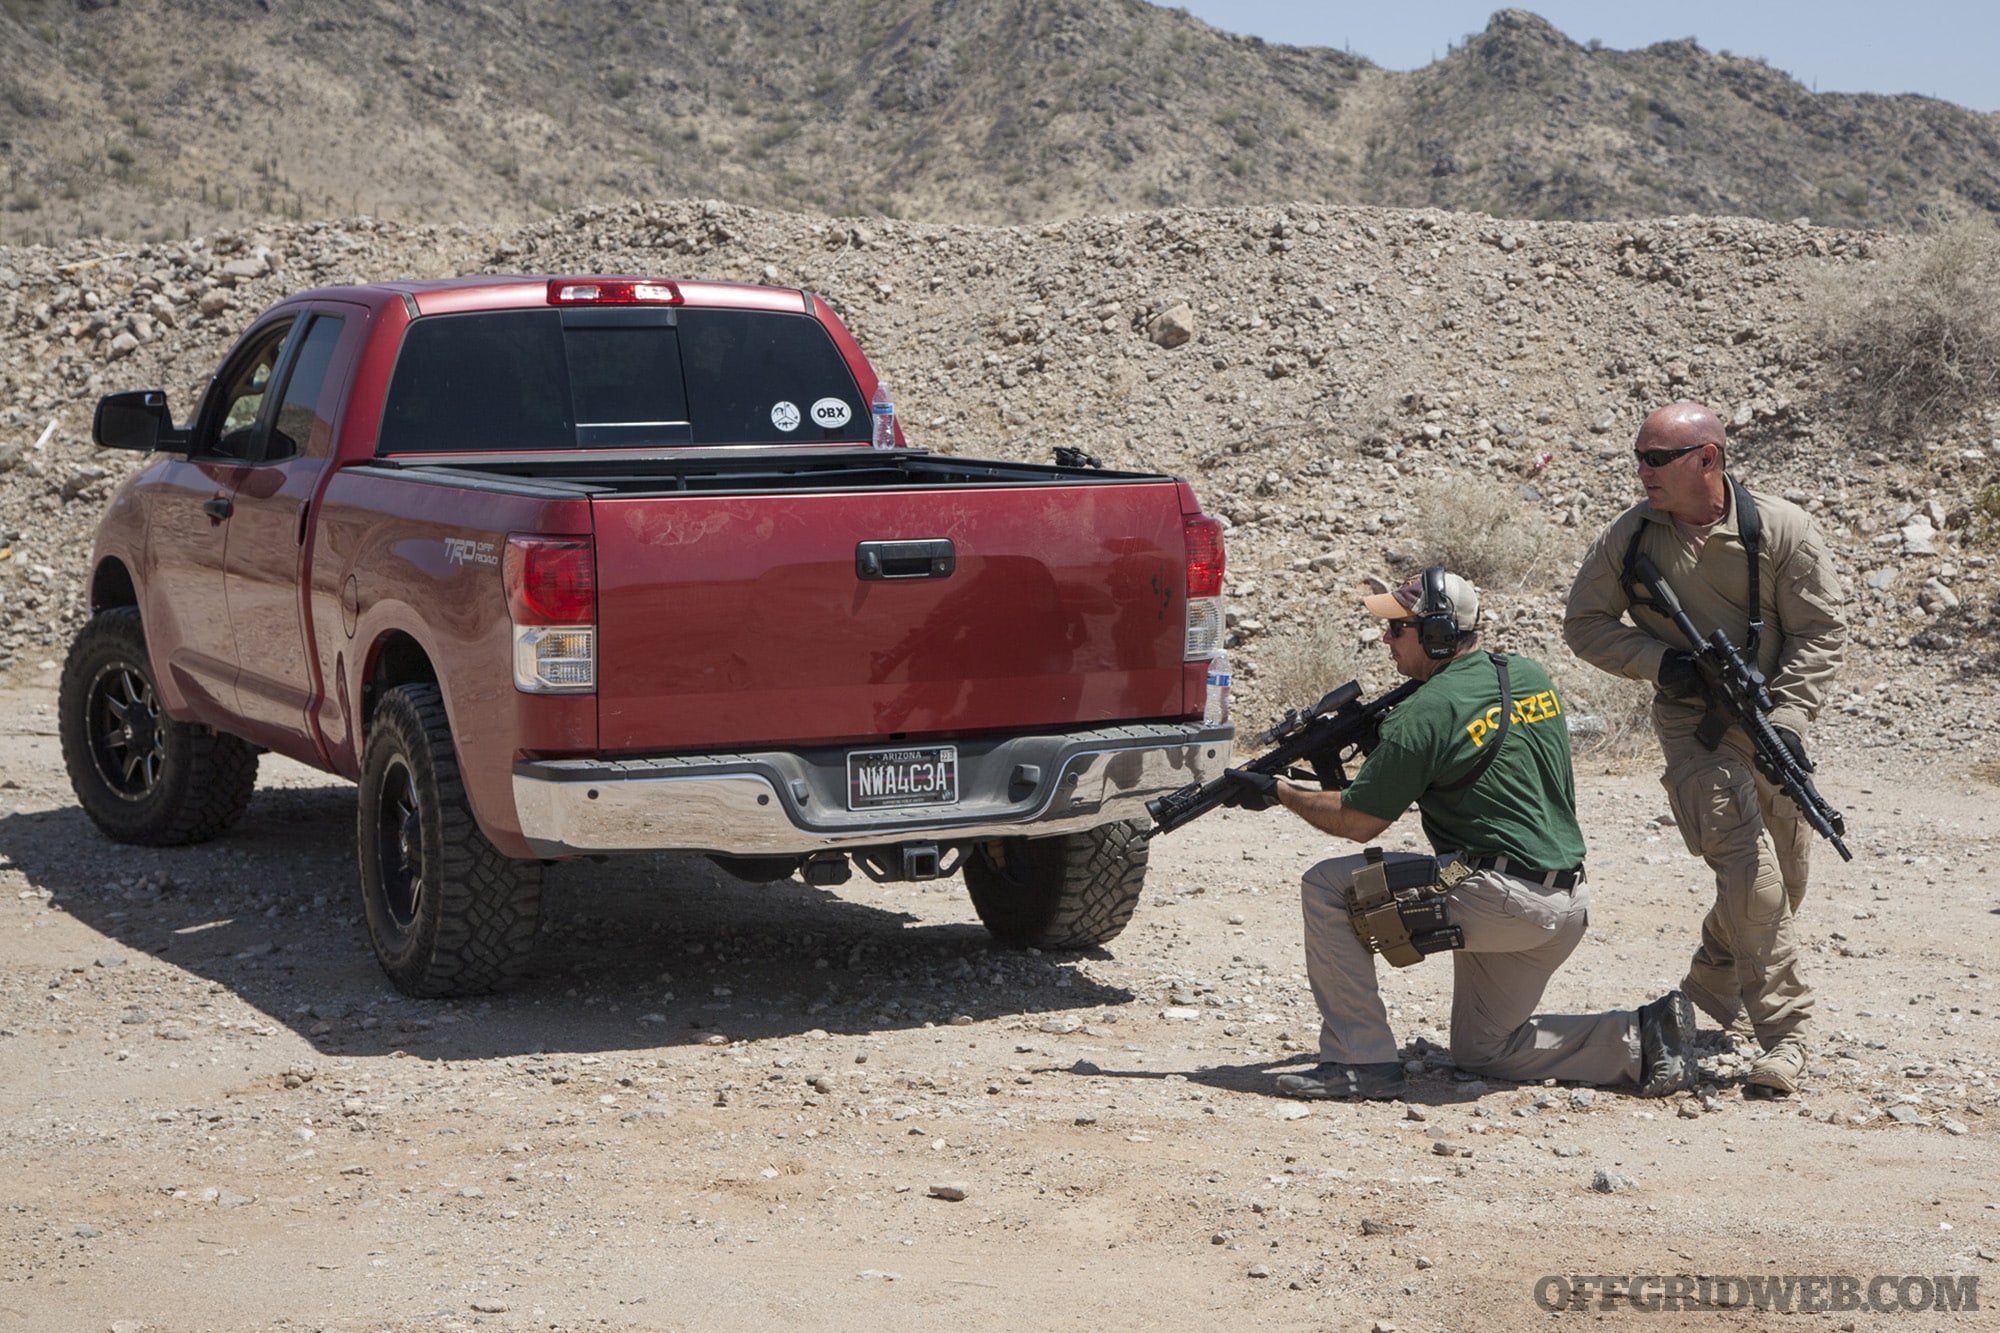
The TruKinetics LPVO class culminated with drills that tested every student’s LPVO proficiency, incorporating speed, precision, target transitions, movement, and positional shooting.
In one drill, we started near a parked truck in hilly desert terrain, and moved in a two-man team to assess 10 paper targets scattered through the environment. Each student communicated by shouting “set,” “moving,” and “move” to his partner, and we covered each other as we wove through cactus and scrub brush. Some targets depicted simple armed threats; others were holding hostages, surrendering, or carrying harmless objects that might be misinterpreted as weapons. We used our LPVOs for positive identification of each target, and made quick decisions to shoot or keep moving.
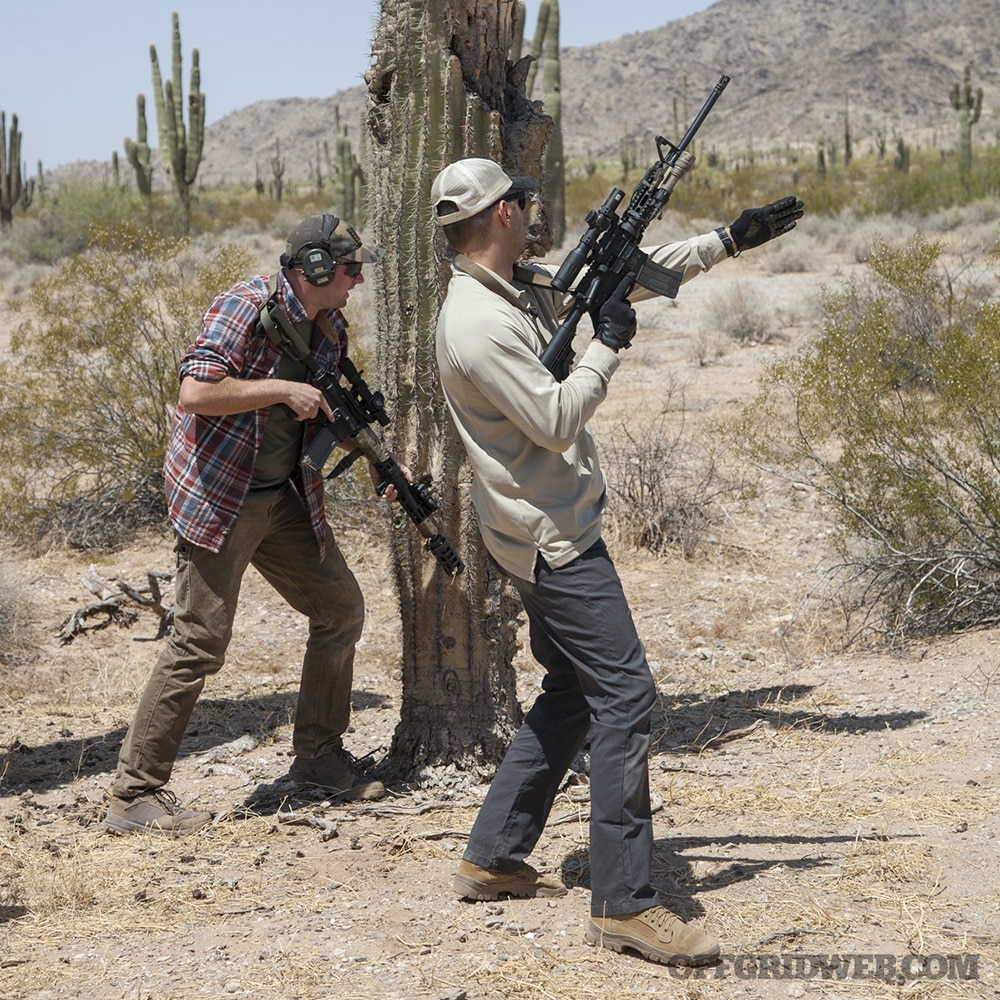
Above: Practical drills forced students to maintain the fundamentals of shooting, moving, and communication while also using LPVOs to positively identify targets at various distances.
Another drill involved a timed competition-style stage, with paper targets as close as 10 yards and steel plates as far as 200. This also involved bracing off barricades and sprinting between shooting positions. We were scored based on one hit in the A zone (head box) or two hits in the C zone (body) on paper, with time penalties incurred for failure to eliminate or engage targets. This was a fun challenge that generated some friendly competition between students, and the top shooter received a prize at the end of the class.
After two full days and 600 rounds of ammo expended, I walked away from the TruKinetics class feeling confident in my LPVO-equipped rifle as well as my ability to use it to the fullest. Although there’s certainly a learning curve involved with any LPVO, overcoming it will make you a better, more well-rounded shooter. I know that my AR-15 can get reliable hits at 500 yards and beyond. More importantly, I know I have enough magnification to positively identify those targets before taking a shot, and I have reticle markings to quickly correct any misses after the first shot. That’s a massive advantage over a red dot sight, even one with a magnifier.
For more information on TruKinetics civilian and law enforcement training courses, go to trukinetics.com or follow @trukinetics on Instagram.
