The following article was published in Issue 36 of our magazine. This issue is available now in print or digital format.
We live in a world where established safety measures, if followed, prevent a lot of injuries. Unfortunately, they’ll never prevent all injuries. There were an estimated 45 million incidents of trauma in the U.S. last year that required an emergency room visit. Car wrecks, outdoor injuries, industrial accidents, and other mishaps contribute to a whole lot of hurt in good times. That leaves us to wonder: How would this change in bad times?
Let’s face it, people get injured and sick whether or not there’s a rescue helicopter on the horizon. Broken bones, bleeding, sprains, and other issues will need to be treated.
If the modern emergency system breaks down, is overloaded, or simply too far away, someone in the family or group will become the highest medical asset left. Certified or not, they’ll be the end of the line with regards to the medical well-being of their people. Without equipment and know-how, deaths will occur that could’ve been prevented with a good medical kit and knowledge of basic first aid.
People prepare for the worst by accumulating food, water, personal protection items, and more. The wisest of them also stockpile a good supply of medical equipment and medicines as well. In a short-term event, those with training and equipment will save many lives. But what happens when the medic bag is empty?
All is not lost. Necessity, they say, is the mother of invention. The resourceful will make do with found objects. A variety of items on the trail or in abandoned buildings can serve as medical supplies. All it takes is an instinct to explore, a good eye, and some imagination.
Before we begin, it should be mentioned that the medical improvisations below are stopgap measures for dire situations when traditional medical resources and treatment are not available — unfortunately, the current Coronavirus / COVID-19 outbreak may be one such circumstance, if it continues to worsen. Improvised methods are rarely as successful as modern technology and equipment (if used properly). Having said that, some of the strategies below might just save lives in times of trouble.
Water Bottles as Filters
You can last quite a while without food, but only about three days without water. Even when there’s a water source nearby, you can’t see the microscopic organisms that make you sick. In survival settings, more lives may be lost by diseases due to contaminated water than bullet wounds.
With a clear plastic PET (polyethelene terephthalate) bottle, you can make water safer. It shouldn’t be hard to find; approximately 500 billion are produced every year. Unless you have a purpose-built water filter like the Sawyer Mini or LifeStraw, you’ll need containers to: 1) filter out particulates that make the water cloudy, and 2) destroy disease-causing microbes in the water.
To improvise a filter, you’ll need the following items that you might find by scavenging, or in your medical kit:
- Clear plastic bottles
- Coffee filters or paper towels
- Fine sand
- Gravel
- Small rocks
- Activated charcoal or wood charcoal
- Knife
- Hammer and nail
First, use your knife to cut the bottom off of, say, a 2-liter bottle about a third of the way up. Using your hammer and nail, punch a hole in the bottle cap and screw it back on. Turn the top portion of the bottle upside down and place it in the bottom portion that you cut off.
Place a coffee filter or paper towel (or other barrier) in the neck of the bottle.
Use some activated charcoal (commonly found in a home with an aquarium) or wood charcoal from your fire to form the first layer. Place a layer of fine sand next. Add a layer of small gravel on top of the sand.
The last layer will be some small rocks. Place a filter, paper towel or cloth on top to catch algae, mosquito larvae, and other debris. Allow the questionable water to sit for a while before you use the filter. This lets material settle to the bottom as much as possible and makes the process more effective.
1. Supplies needed for an effective water filter. Use a hammer and nail to make a hole in the lid; add first layer (coffee filter/paper towel) in bottom.
2. Next, layer with activated charcoal added on top of the coffee filter/paper towel.
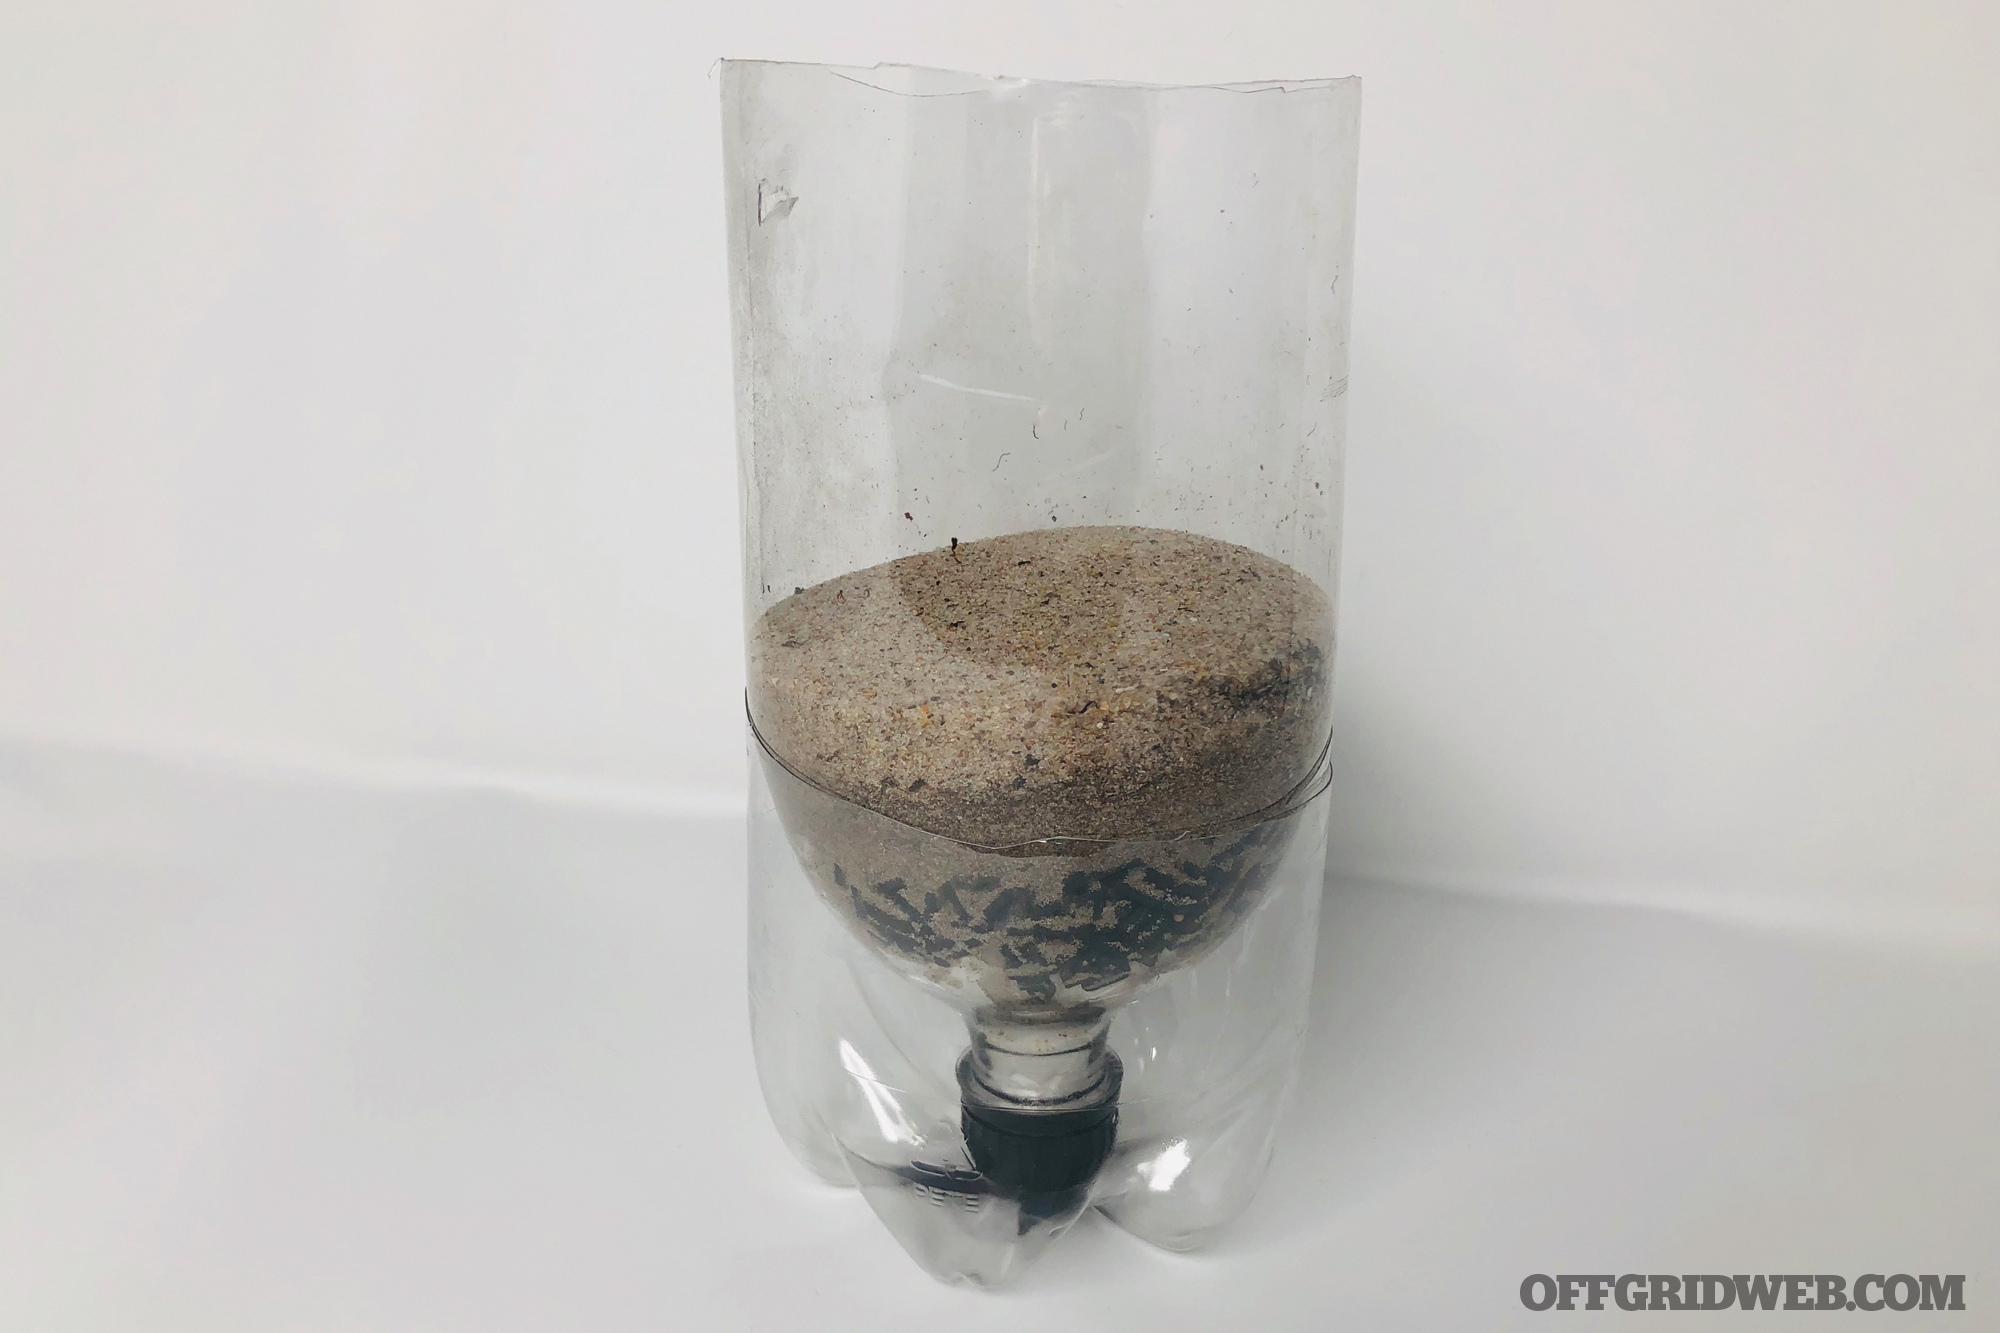
3. Add sand over the activated charcoal.
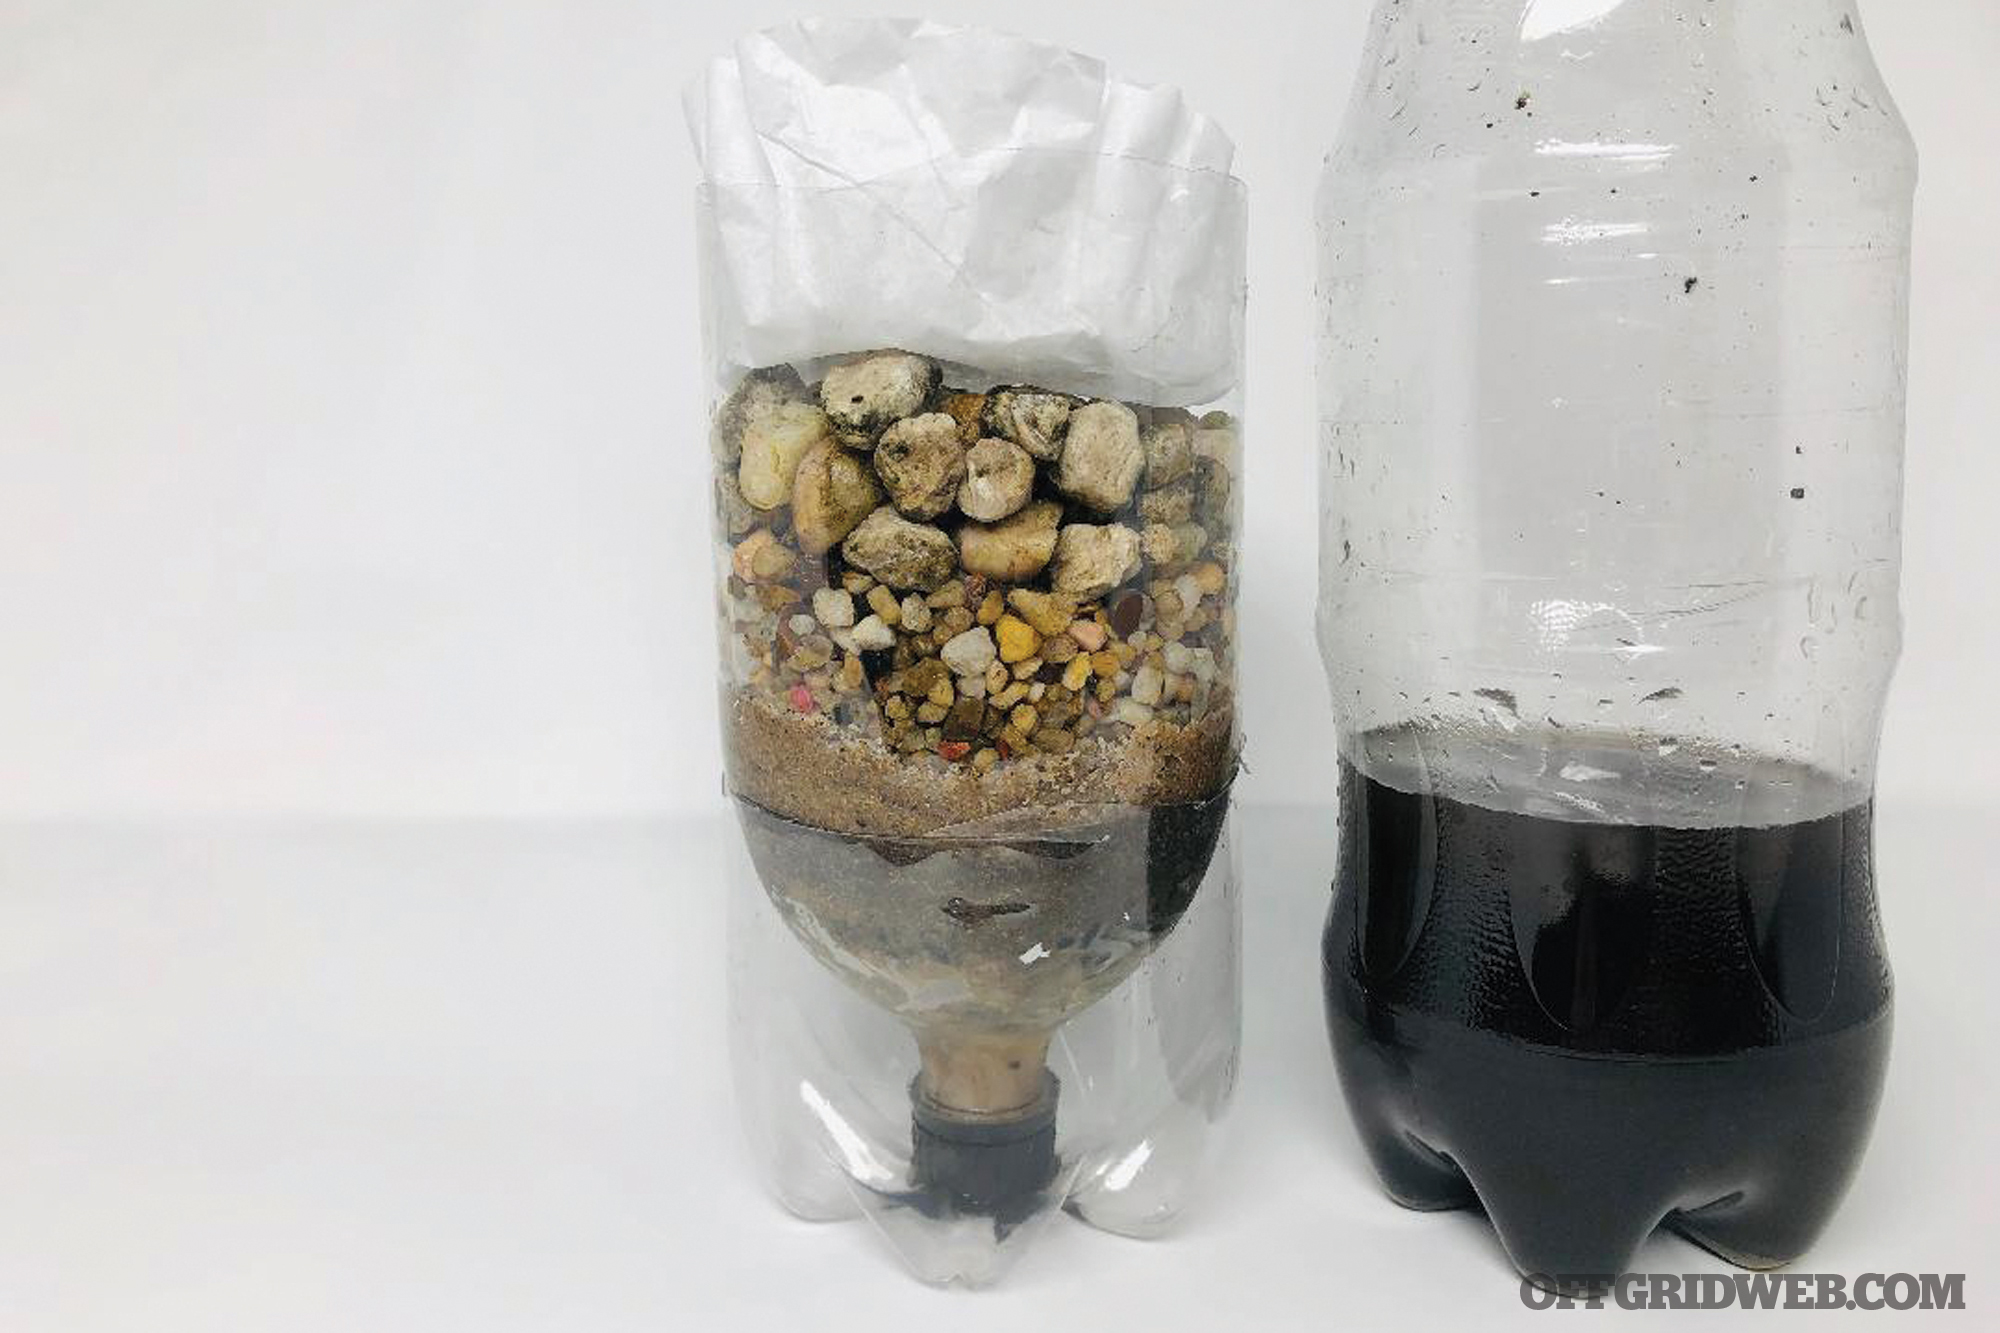
4. Improvised filter with sand and gravel layers completed. Turn the page to see how well the filter works on the dirty water on the right.
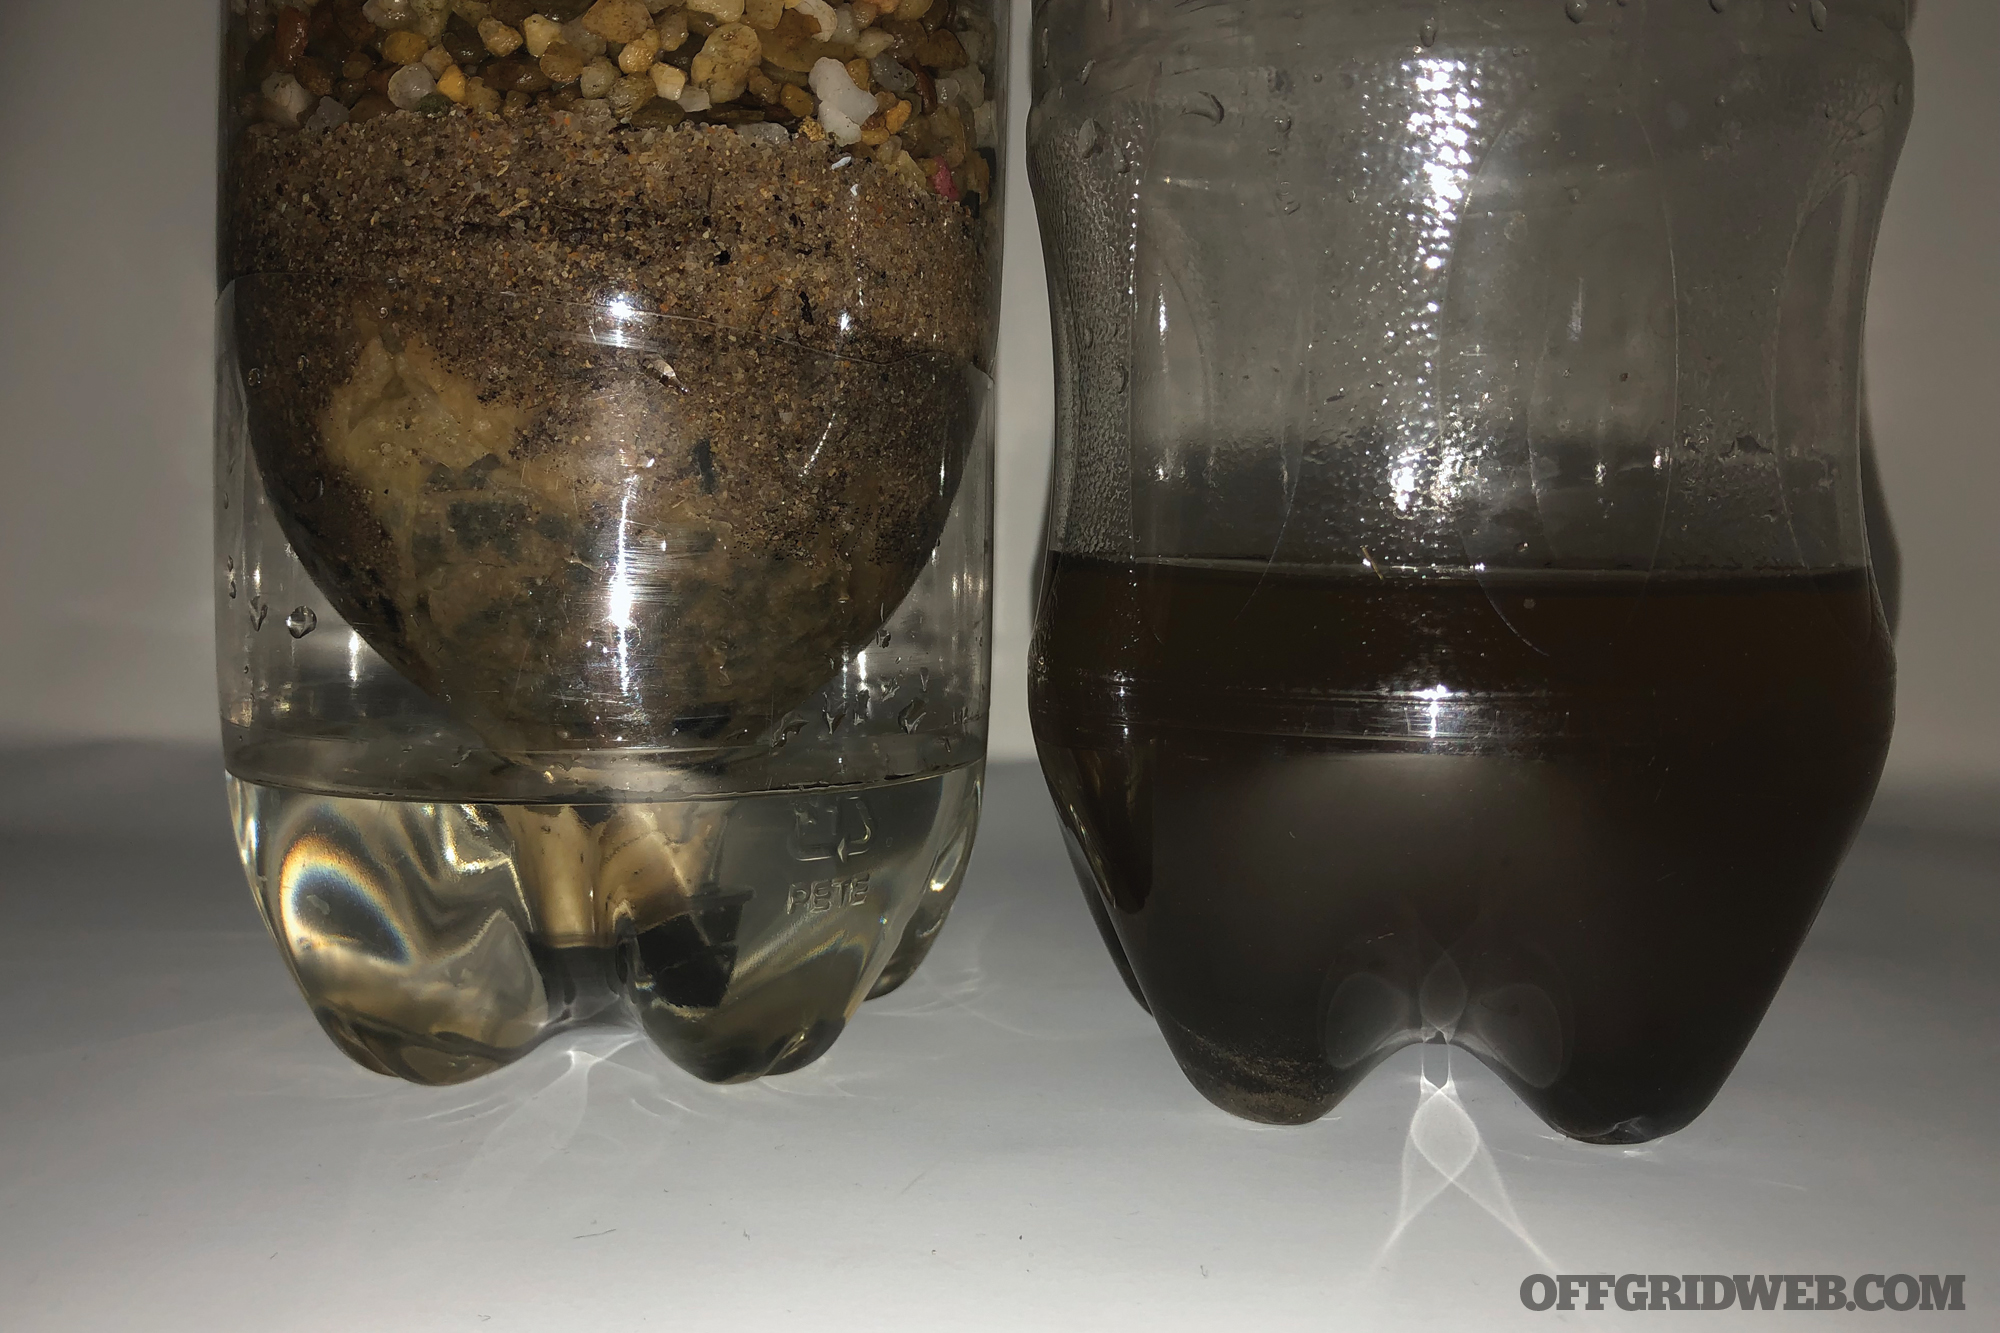
Above: Completed bottle filter in action; more than one pass may be needed.
Many variations on this method exist: some use grass as a layer, while others put a coffee filter between every layer. The key is to have a series of materials of different sizes. Be patient! It takes a while for the water to pass through all these layers.
Now that your water looks and smells relatively clear, it’s time to disinfect it. Use another clean, clear plastic bottle and fill it about 80-percent full of the filtered water. Screw the top on and shake vigorously for 20 seconds. Leave out in direct sunlight for six to eight hours on a clear day, or two days if it’s cloudy; ultraviolet radiation from the sun will do all the work. Placing the bottle on a reflective surface does an even better job. This is known as Solar Water Disinfection, or SODIS, and is used extensively in developing nations where clean running water isn’t available.
If the sun won’t cooperate or time is of the essence, you may have to go back to the old standby of boiling it. The CDC recommends a good roiling boil for one minute at sea level, with three additional minutes added for elevations of 6,562 feet (2,000 meters) or more. Unfortunately, it may take several pounds of wood to reach boiling temperatures.
Bleach or iodine will also work. Use eight drops of standard 6-percent unscented household bleach per gallon of water, but double the dose if it’s cloudy, colored, or very cold. Alternatively, add five drops of 2-percent tincture of iodine to each quart or liter of water; double the dose if cloudy or colored. Both bleach and iodine take a good 30 minutes to work their magic.
Once full, your plastic bottle can serve a very different purpose: as a way to apply pressure to a pelvic or abdominal wound. The weight of the bottle directly on the injury, secured in place with an elastic wrap pressure dressing, might help to slow down internal bleeding.
Pool Shock to Disinfect Water
Alternately, you may be able to get your hands on a bag of Pool Shock or similar product in many garages, or general stores in areas where residential pools are prevalent. Pool Shock (calcium hypochlorite) is a granular product used to disinfect pool water. It can be used to make a bleach substitute for the purpose of emergency disinfection. This is a legitimate option; it’s on the list of accepted emergency disinfection methods by the CDC.
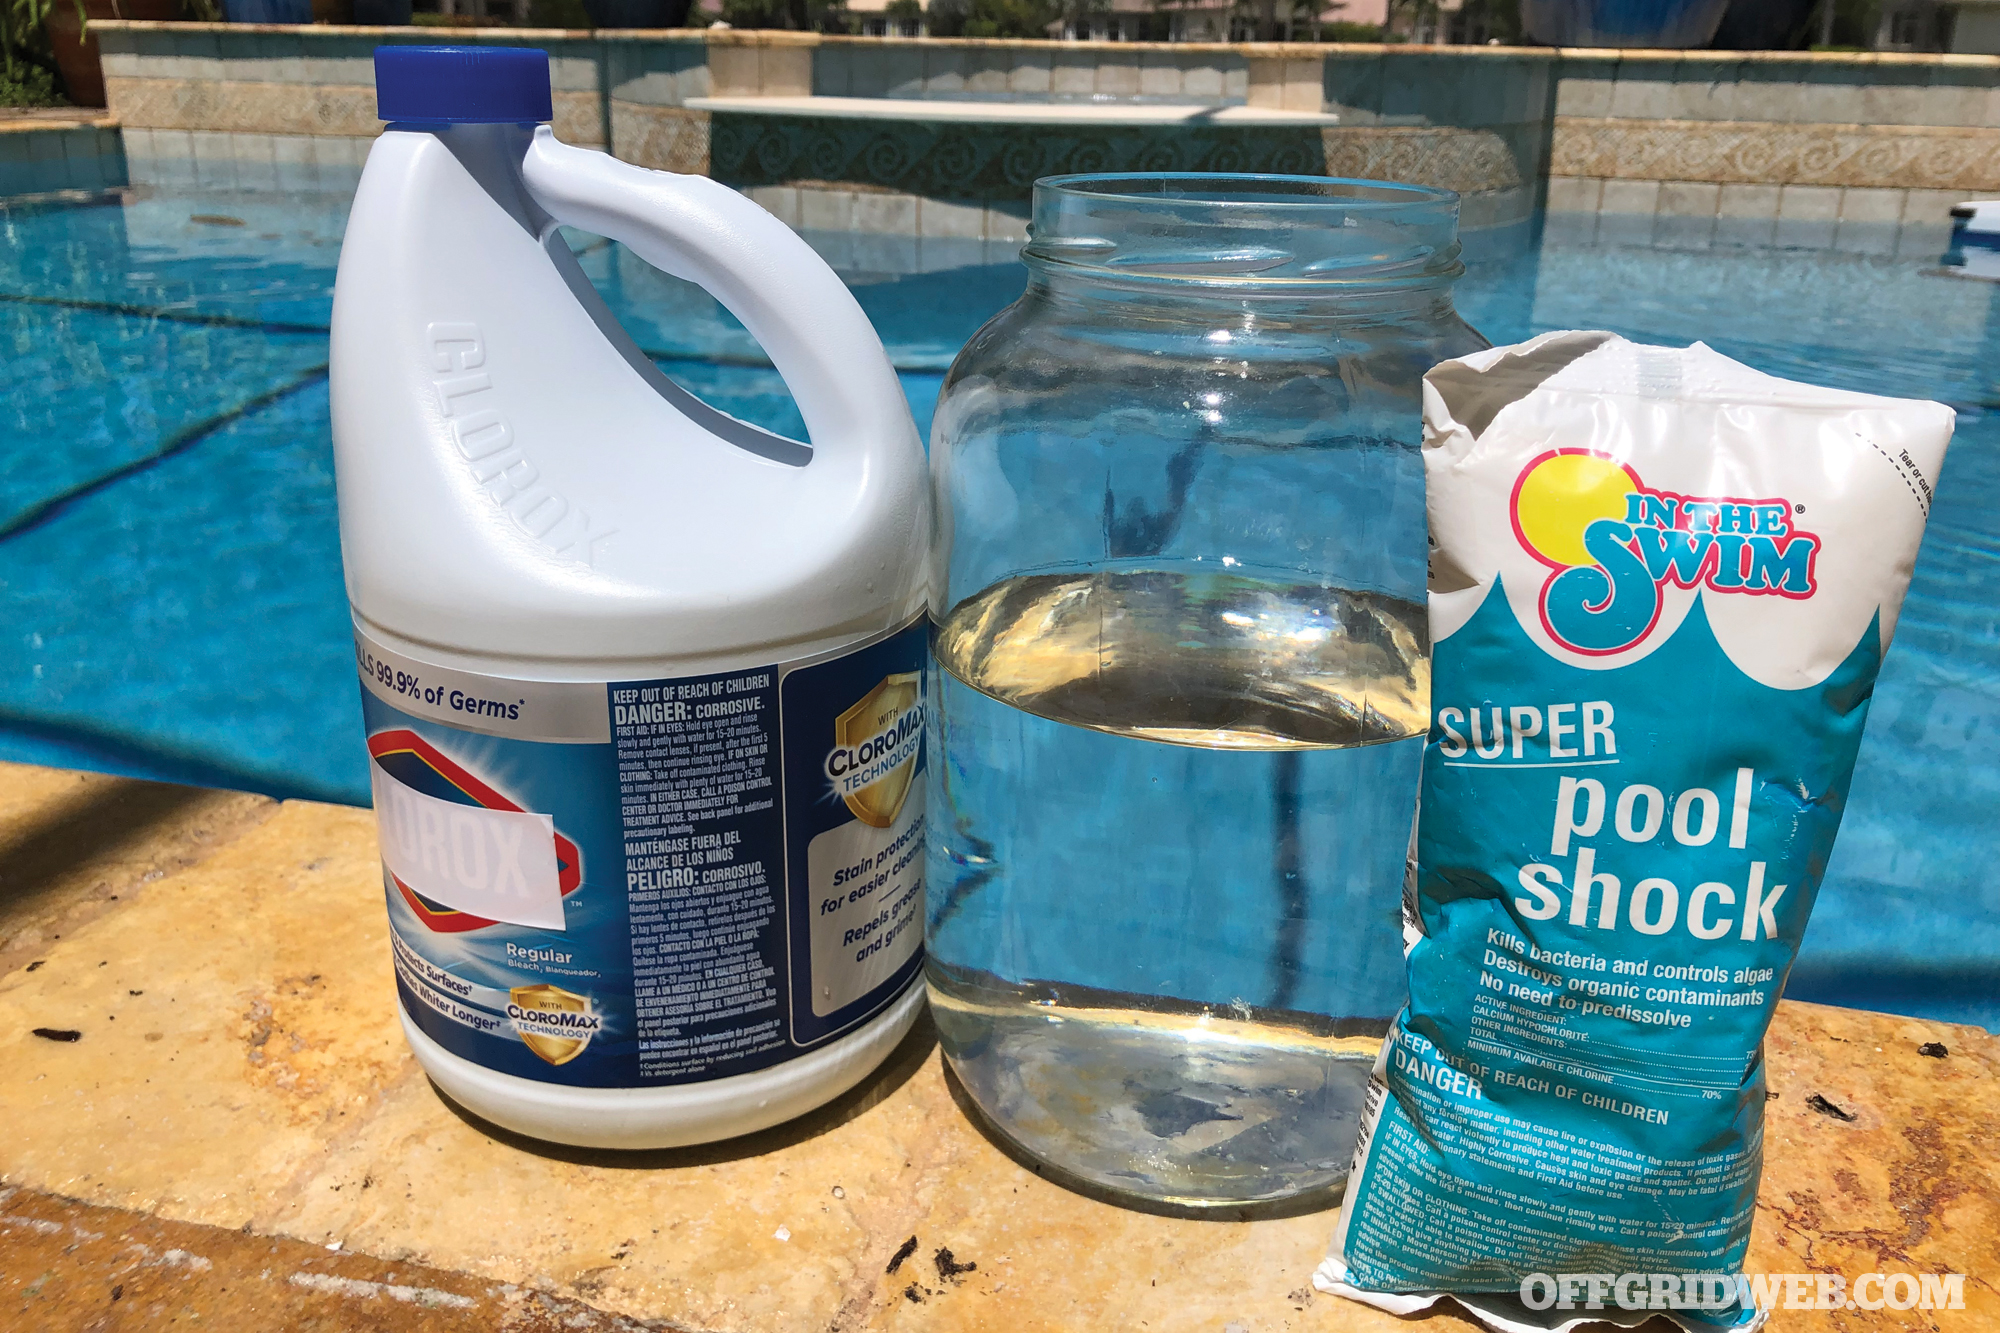
To make a chlorine solution with calcium hypochlorite, add one heaping teaspoon to 2 gallons of water and stir. To disinfect water, add one part of the chlorine mixture you just made to 100 parts of water. If the chlorine taste is unpleasant, pouring the water from one container to another seems to help, especially if you wait a period of time before use.
Commercial Option:
Old Sheets for Bandaging
Dealing with traumatic injuries is part and parcel of being the off-grid medic. You’ll need bandages. An old cotton sheet is best — white is preferable, but take what you can get. Cut into long strips of at least 5 to 6 feet in length. You might consider varying the widths of your rolls, say, 2, 4, and 6 inches. Boil them to disinfect to lower the risk of infection.
The Handy Triangular Bandage (Bandanna)
Commercial triangular bandages, also called cravats, are valuable additions to any medical kit. Have them in quantity. When they’re eventually expended, however, those old sheets or bandannas become useful items.
To make your own bandanna/triangular bandage, cut some sturdy fabric into 40×40-inch squares and fold over — voilà, a triangle. Alternatively, cut the square in half diagonally to make two bandages. For storage, fold over several times to make a compact square. Forty inches may seem large to you, but smaller bandannas aren’t quite as versatile.
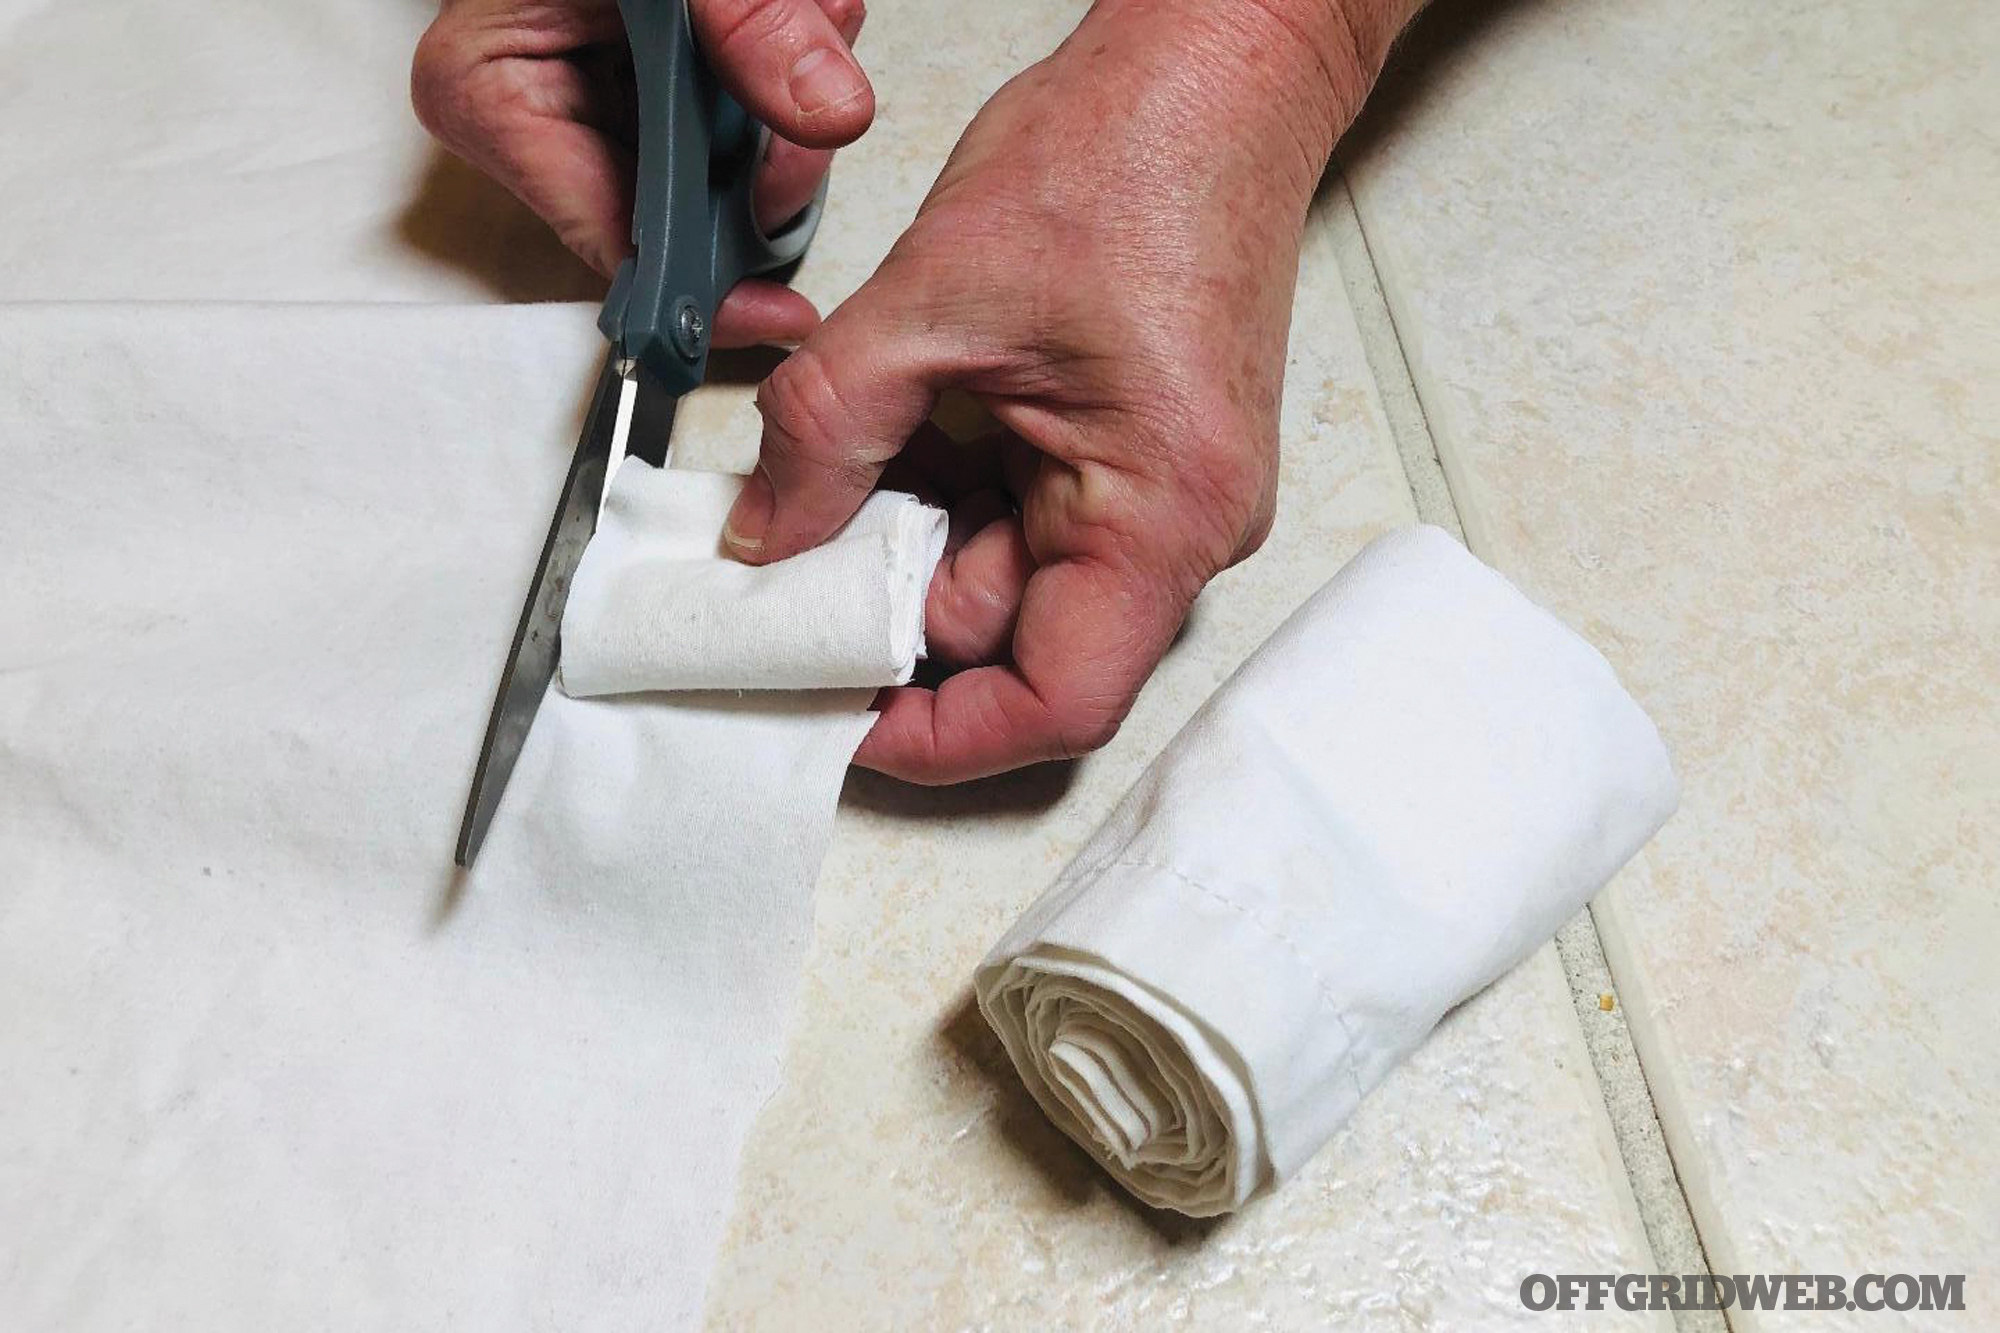
Above: Cut an old cotton sheet into strips for use as bandages.
The standard medical improvisation using a triangular folded cloth is the arm sling, but there are many other options that help treat a number of injuries. Here are just some of the ways you can deal with injuries using the triangular bandage and, perhaps, a few found objects:
Arm, Shoulder, and Rib Injuries
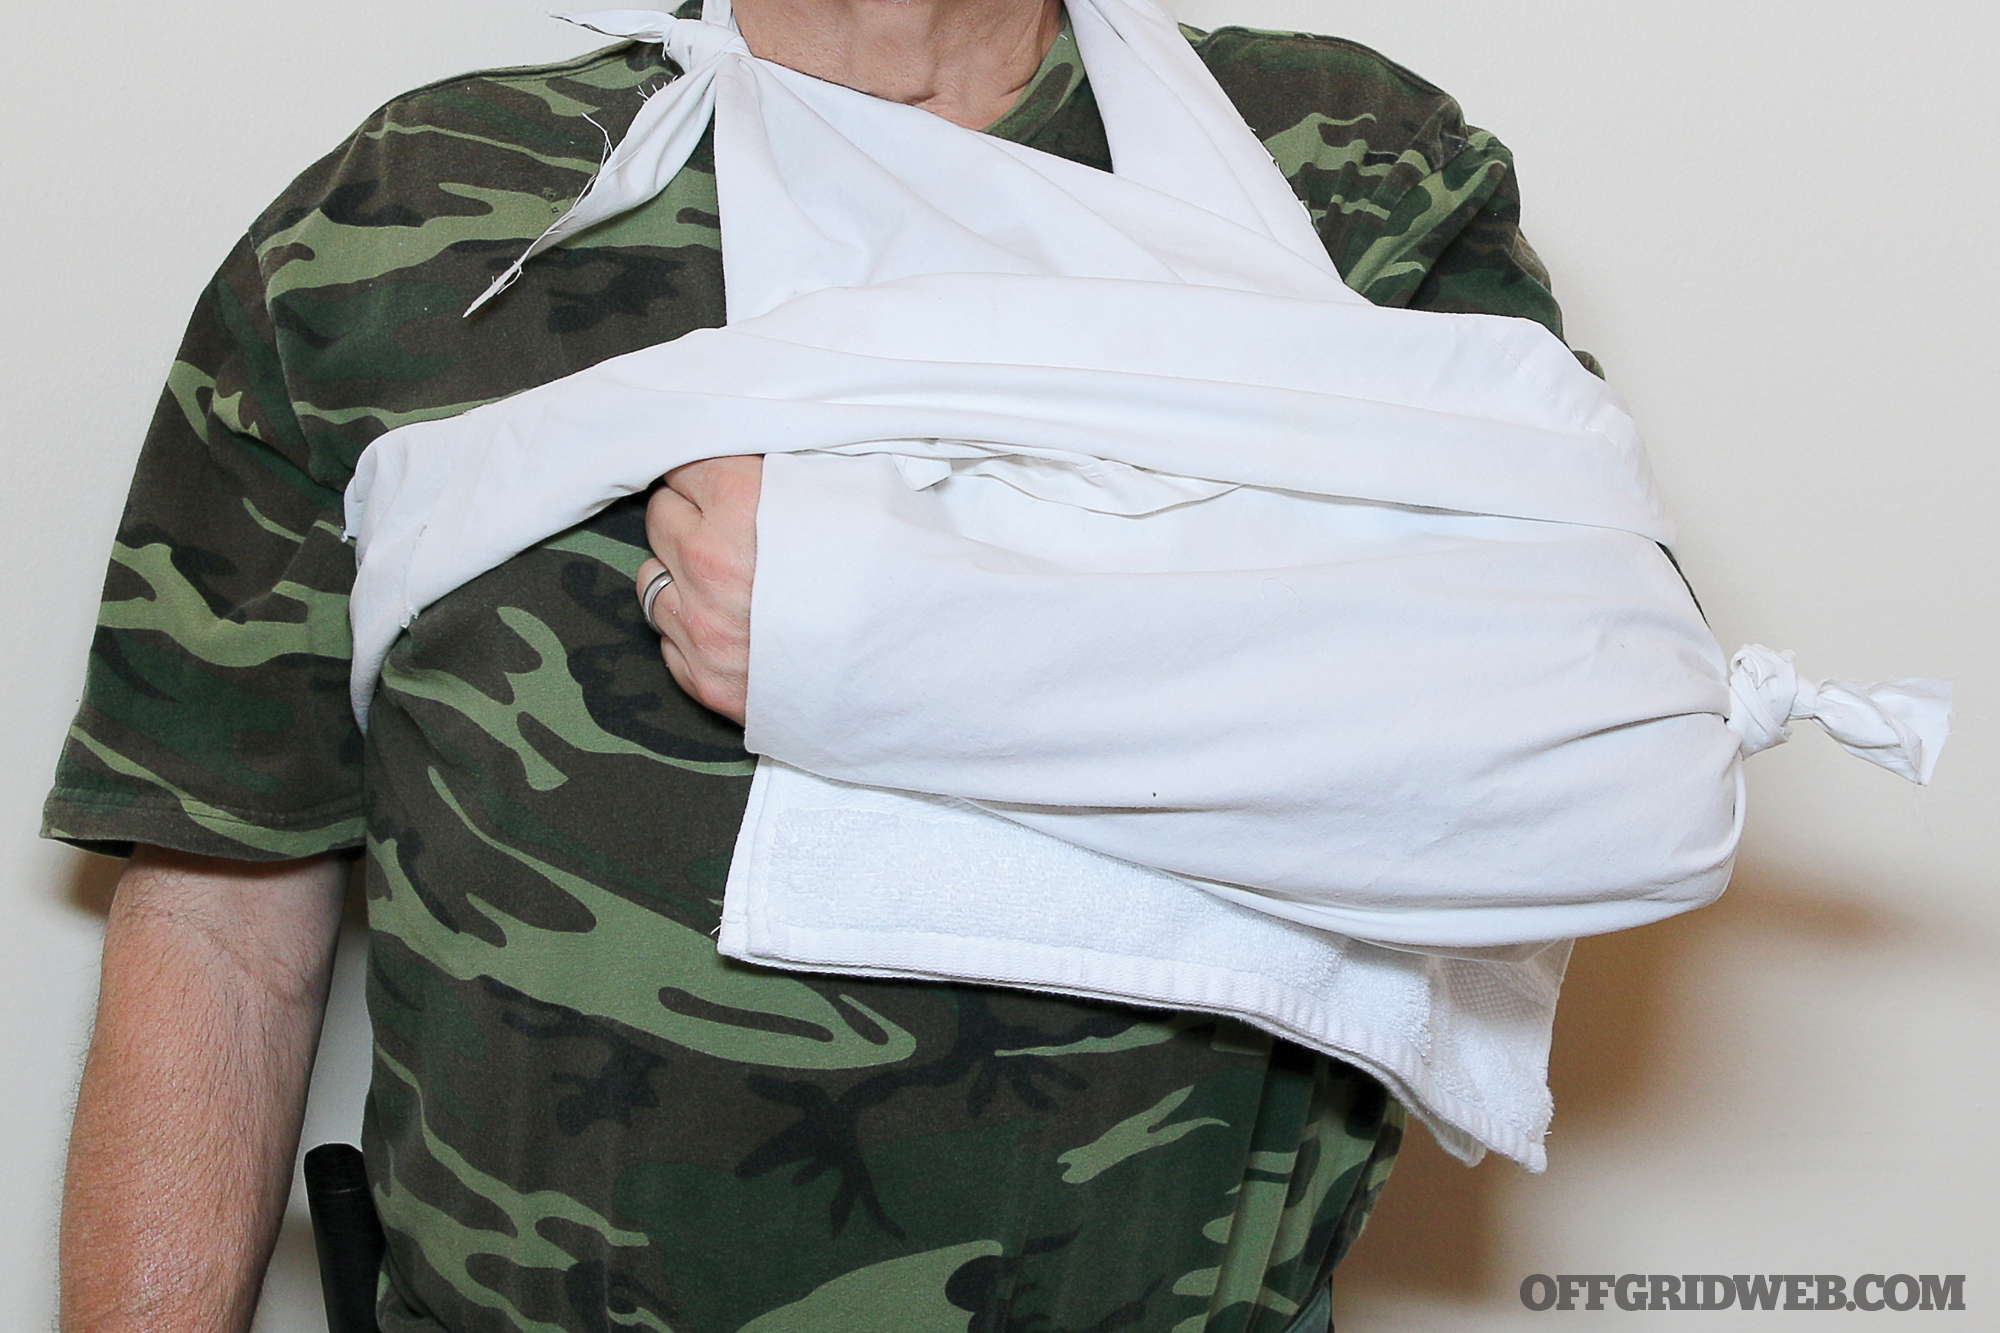
The classic sling helps support an injured arm, shoulder, or rib. Place your bandage lengthwise against the person’s body, with the point toward the injured arm’s elbow. The arm should be held in front and bent slightly about the horizontal plane. Lift the lower end of the bandage up over the uninjured side and behind the person’s neck to reach the upper end. Tie a knot. You can fold in the point of the bandage by the elbow, use a safety pin, or tie a knot for added stability. For even more stability, a second bandage can be used around the torso over the sling. For rib fractures, place a pillow under the “slung” arm.
Scalp Injuries
The triangular bandage can also take the place of a number of items that might have a more specialized purpose. For example, it functions as a bandanna to wrap scalp injuries. Holding a cloth, gauze dressing, or sanitary napkin on the wound, fold the long end and place the triangle so the tip reaches the back of the neck.
Then, wrap around the head over the triangle point and around to the front. Tie and pull down the triangle at the back to exert pressure on the top of the head. The tip can be folded over or left to guard the nape from the sun.
Eye Injuries
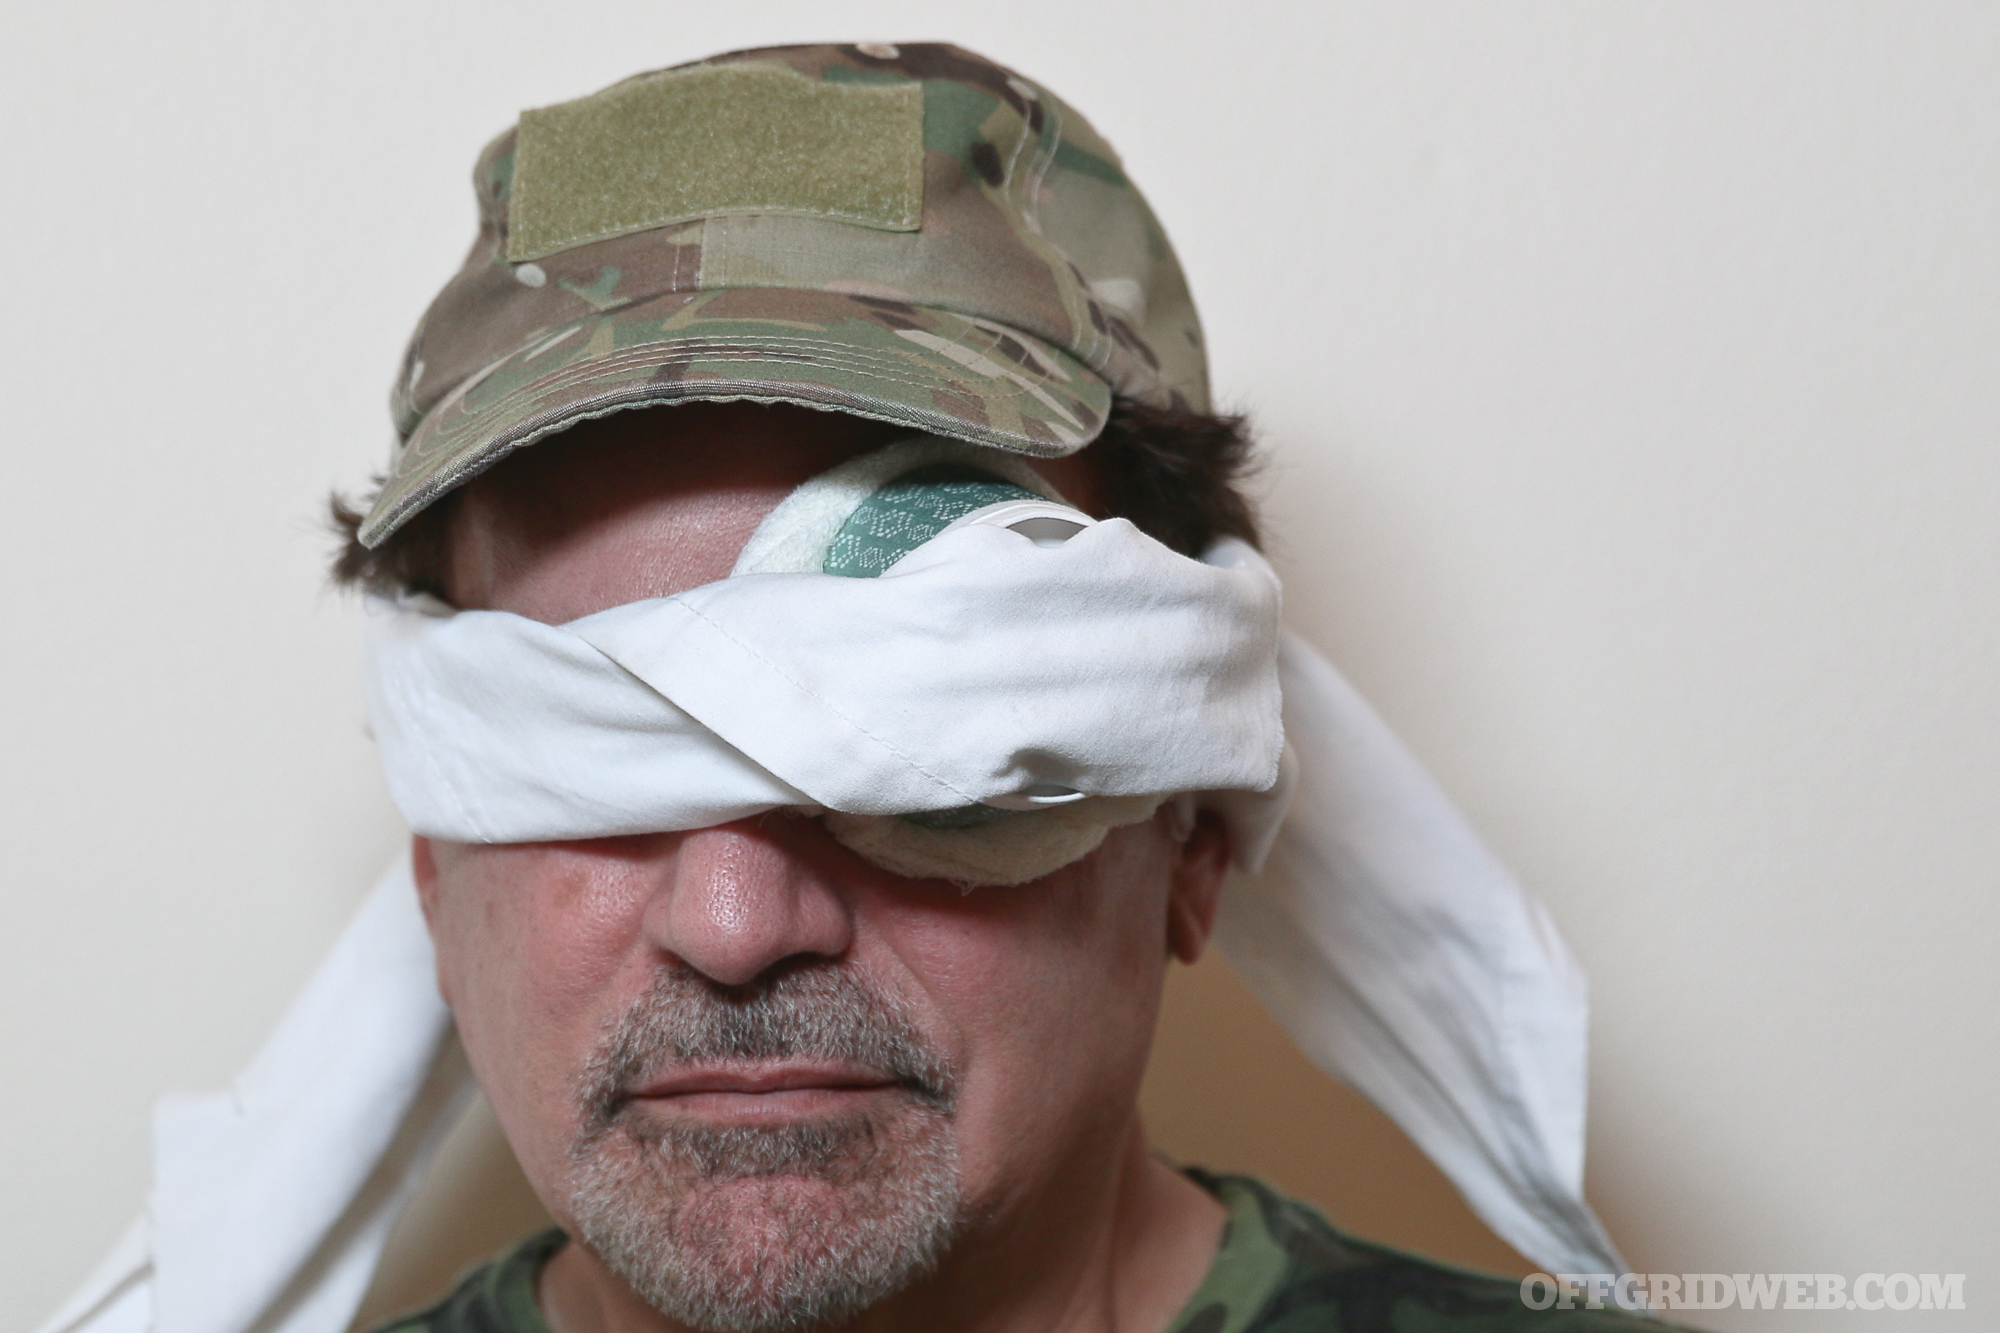
The triangular bandage can also work for an eye injury. With eye injuries, you should consider bandaging both eyes, if appropriate, as they move in unison. If one eye moves, the injured eye will also move, which is problematic if a foreign object protrudes from the eye. The bottom of a paper cup, some light padding, and a triangular bandage will provide sturdy protection.
Hand Injuries
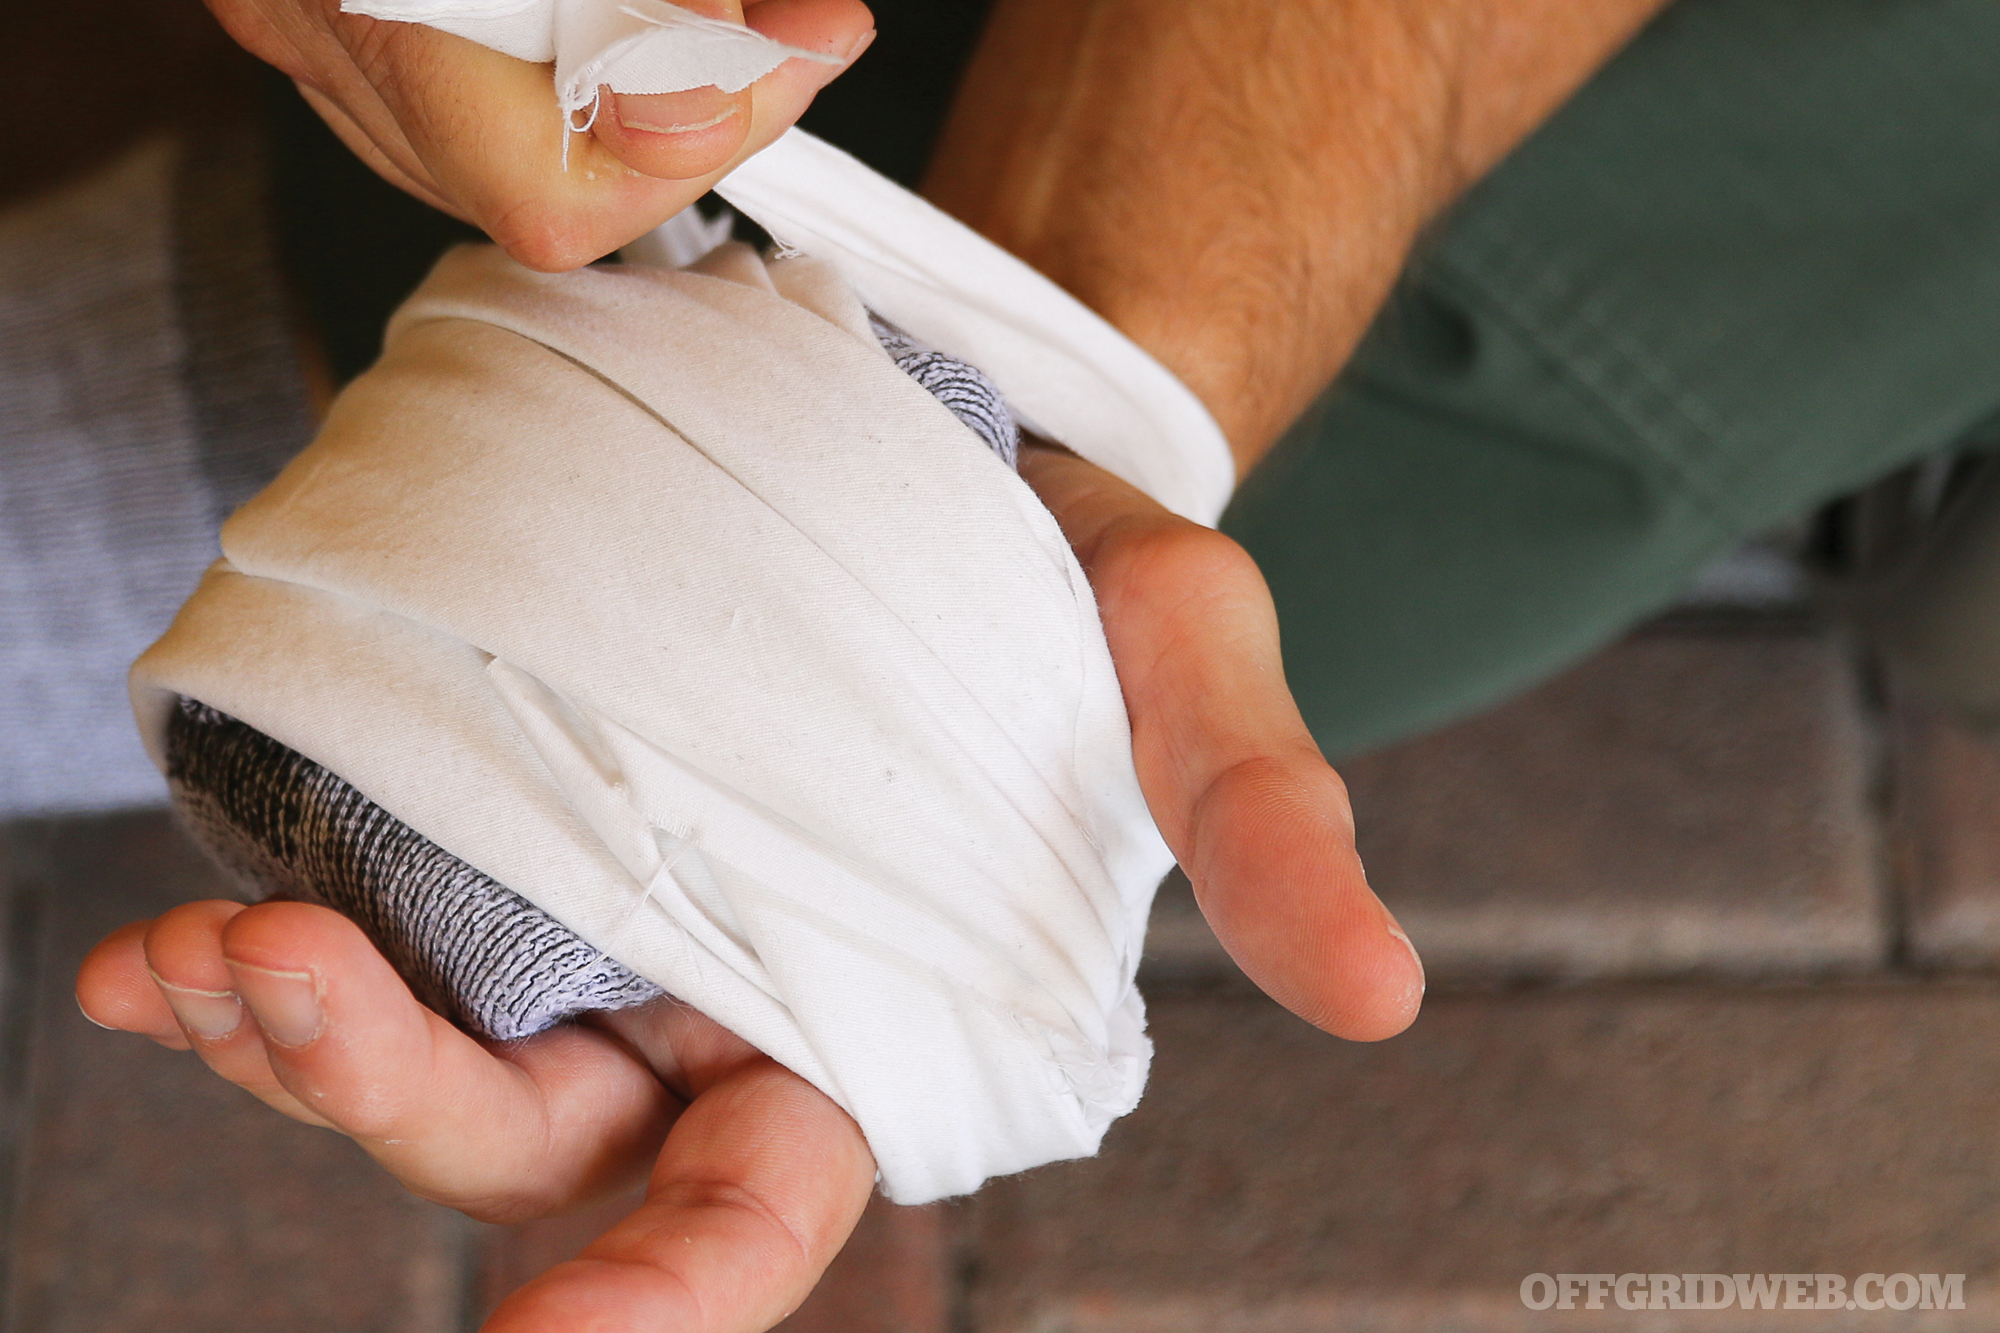
A triangular bandage can also easily wrap a hand wound. When covering an injury like a burn, place a gauze or cloth with some petroleum jelly or aloe vera on the injury itself, then simply fold the triangular end over the palm, wrap around the wrist, and tie. When pressure is needed, place some pads or sterile gauze on the bleeding area, and then use a folded-over cravat like a roller bandage.
Ankle Injuries
Ankle injuries are usually dressed with elastic wraps, but a triangular bandage can also work in a pinch.
- Place on top of the foot, then fold over the bottom.
- Lifting the foot slightly, take both ends and cross behind the ankle.
- Cross both ends in front and under the bandage on each side.
- Tie on top of the foot.
Using the Triangular Bandage as a Tourniquet
Note: While improvised tourniquets may do the job as a last resort, every well-equipped medic should have several military-style tourniquets like the SOFTT, CAT, or SAM XT as well as the versatile SWAT, which can do double duty as a tourniquet, pressure dressing, sling, or splint stabilizer.
What about bleeding wounds? The bandage by itself can serve as a reasonable barrier for application of direct pressure on an injury. You can use one or several to pack into the wound, if needed. It also can be used as part of an improvised tourniquet similar to how it was used centuries ago.
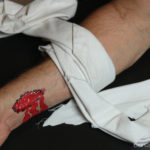
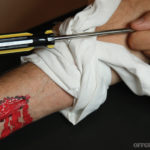
Above: To improvise a tourniquet, begin by wrapping your bandage around the extremity 2 to 3 inches above the injury. Tie a knot after wrapping the gauze; place the “windlass” rod over this knot. Tie another knot over the windlass and begin turning to tighten the tourniquet until bleeding stops and pulse not felt. Secure the tightened windlass to prevent unwinding. Monitor for restart of bleeding after the tourniquet is secured.
Wrap the folded bandage (about 2 to 3 inches wide) around the limb at least 2 inches above the bleeding wound. Avoid joints; go above instead. Tie a square knot. Now you must add a “windlass.” This can be a stick, marker pen, metal utensil, or other sturdy item that’s turned to apply increasing pressure.
Place the windlass above the first knot and tie a second knot over it. Now, turn the windlass several times to achieve more and more pressure until the bleeding and the pulse beyond the level of the injury (that is, further from the torso) has stopped. Tie once again to secure the windlass in position.
Other Uses for Triangular Bandages Made from Sheets
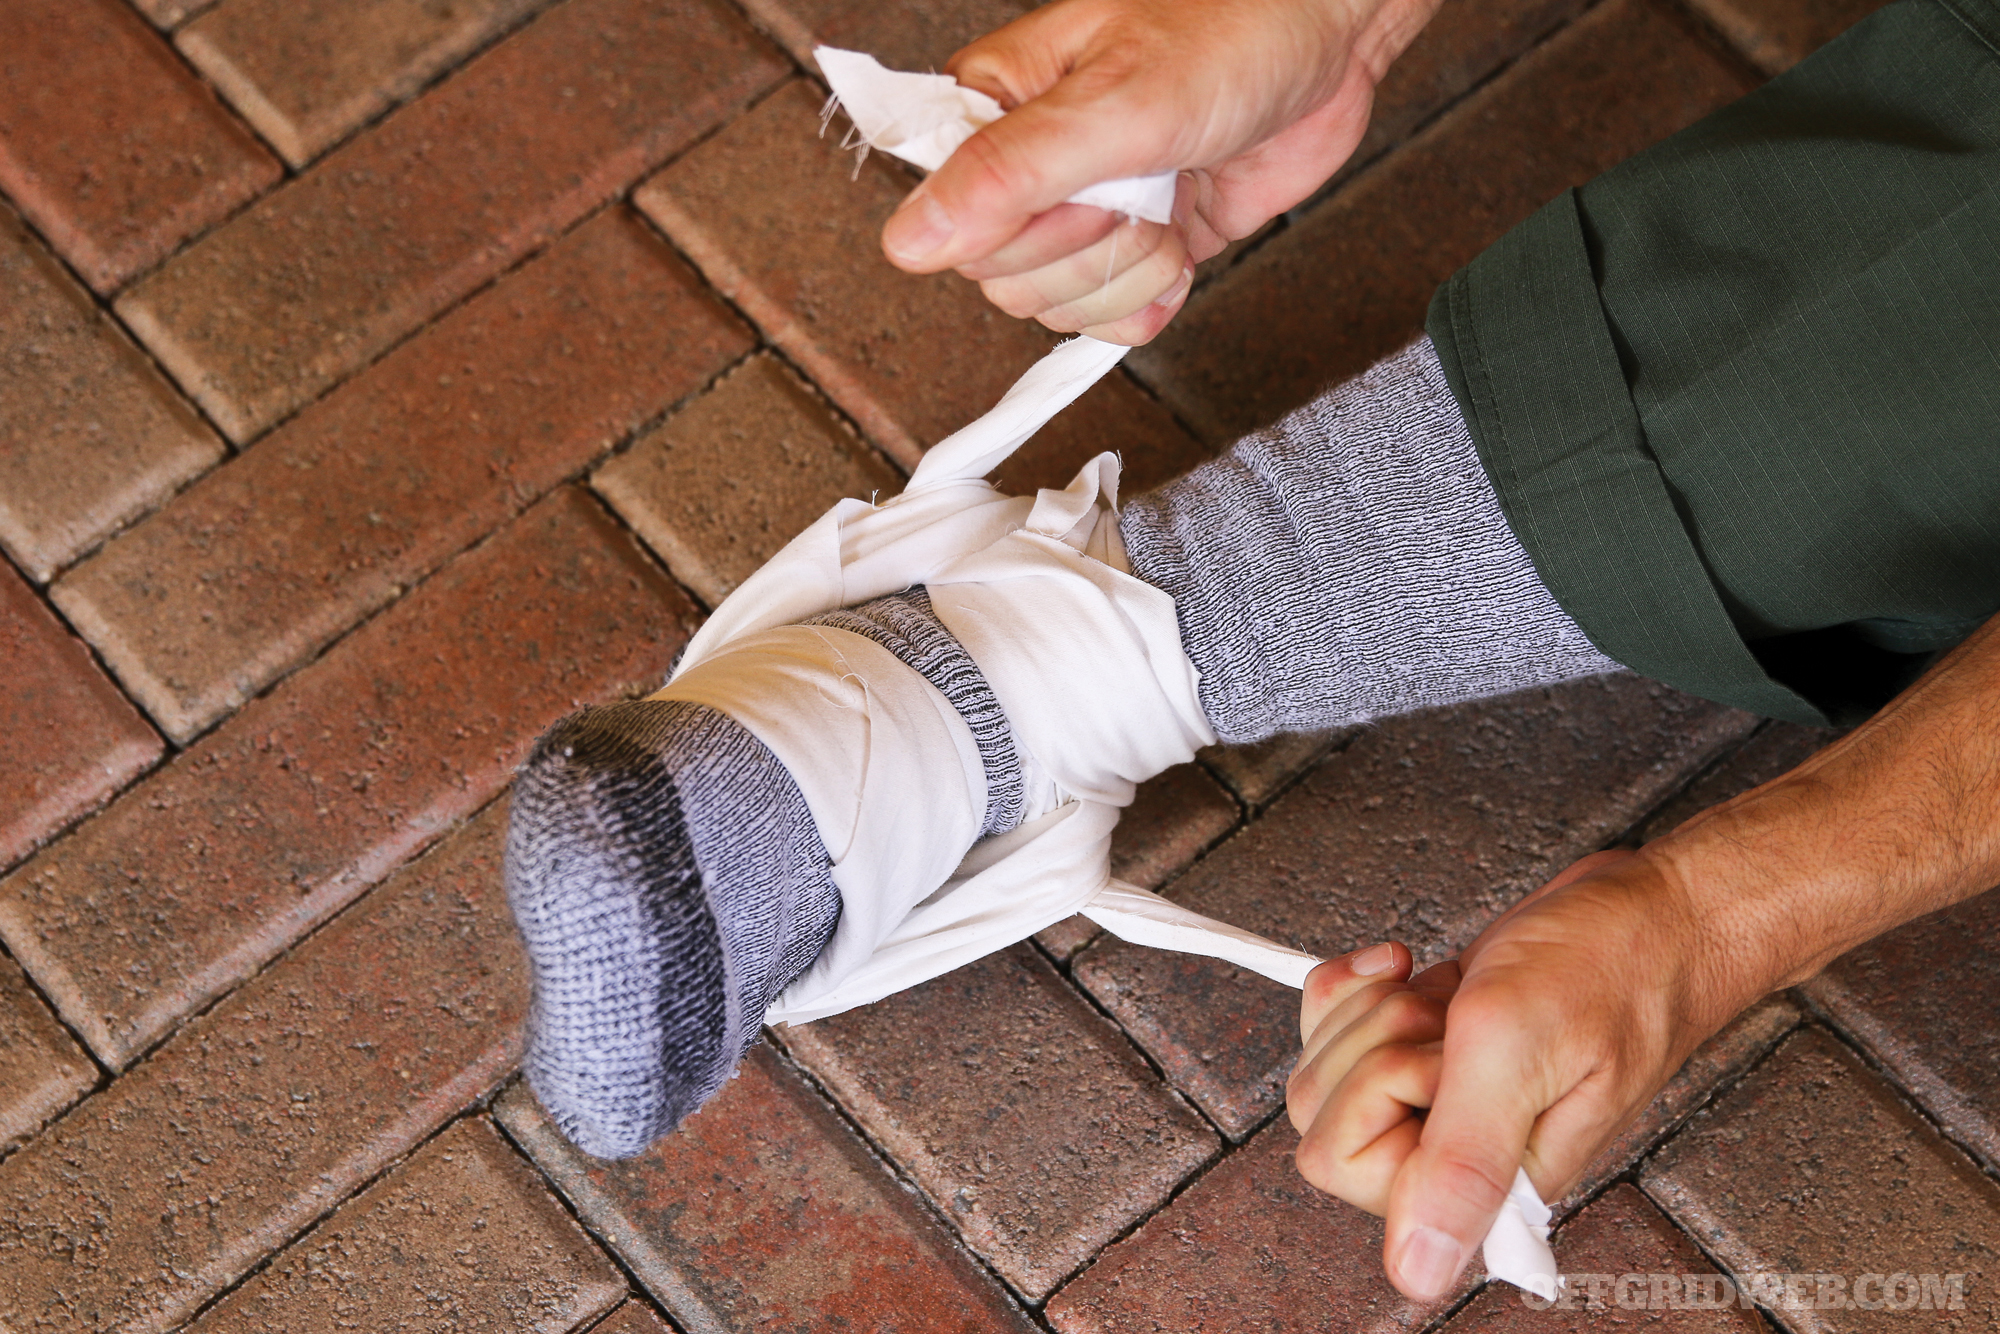
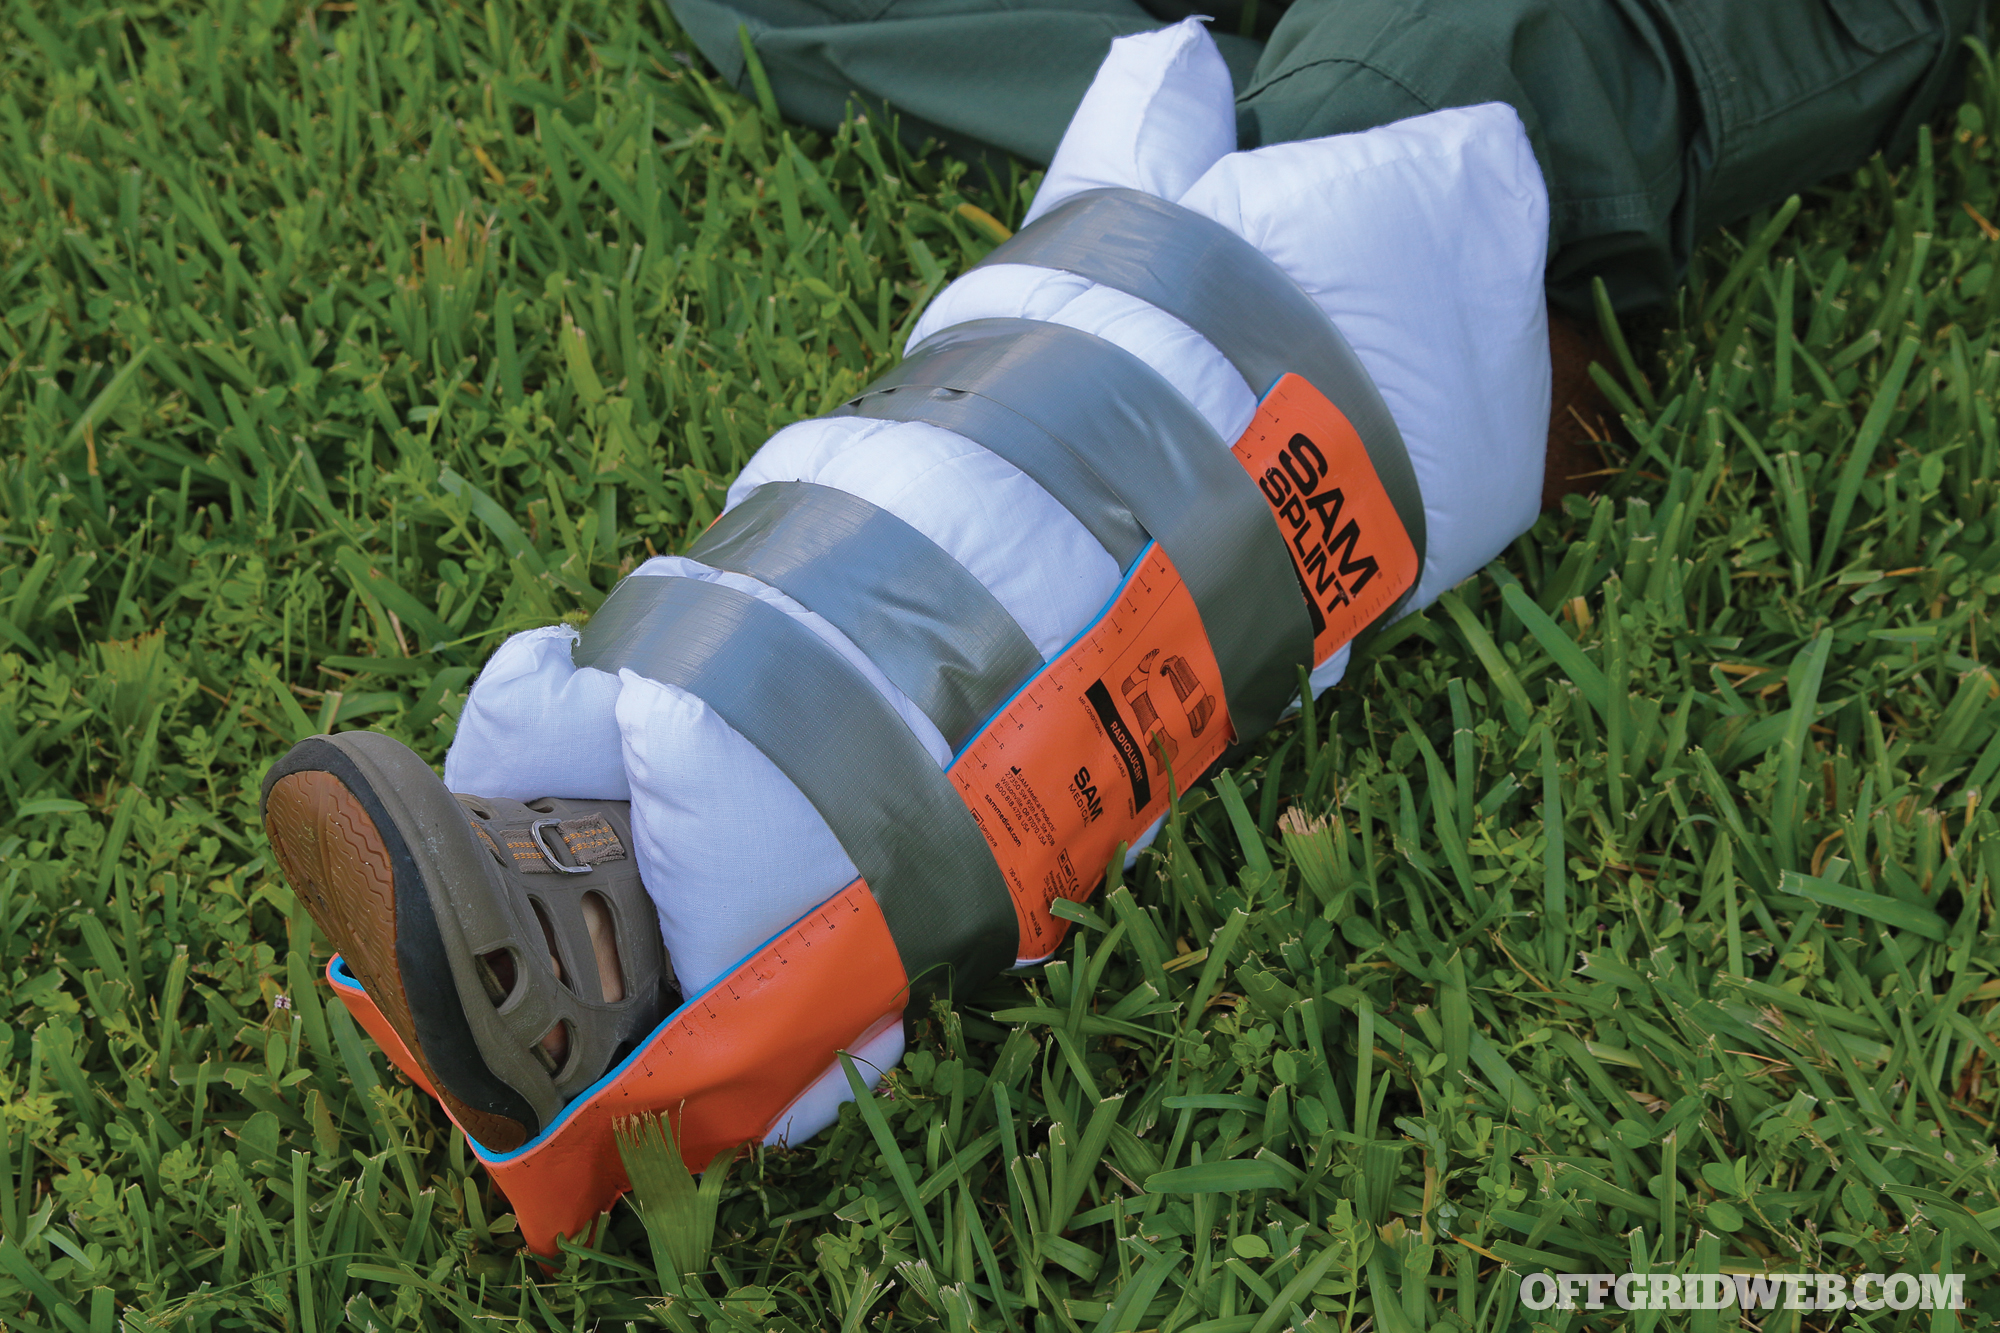
Your triangular bandages are also useful as splint stabilizers. Let’s say you have a SAM splint in place, but it won’t stay there without some help. You can tie triangular bandages around the extremity to hold the splint in place and support the injured limb. No SAM splint? You can use branches, blankets, pillows, paint stirring sticks, rulers, and any number of other creative ways to provide support and stabilization for the injury. That depends, of course, on the location and severity of the trauma.
Besides dressing injuries, a triangular bandage can be used as a face mask in dust storms or as a stopgap in epidemic scenarios (it’s no N95 mask, though).
Bandana Pack at Amazon:
The Pillow Splint
Pillows can help stabilize a sprained joint with just a little duct tape. If you’re using two sticks or a commercial SAM splint to immobilize the injury, pillow material can still be used to wrap around as padding.
Above: Improvised medical supplies to stabilize orthopedic injuries with pillow, duct tape, and torn sheets.
Jackets, Blankets, and Chairs as Stretchers
On the trail, the shirt off your back can serve many purposes; one of them is to assemble a serviceable stretcher. For this, you’ll need two long branches or poles at least 2 inches thick and two shirts or jackets. With one person holding the end of a pole in each hand, a second pulls his partner’s jacket off over the back and onto the poles. The two then switch roles, with the first pulling the jacket off the second in the same manner. Zip or button the jackets to provide a relatively sturdy “cradle” for a victim in need of transport.
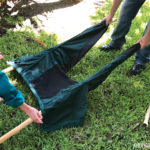
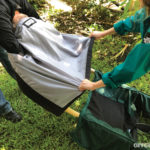
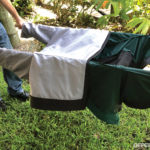
Above: To make a stretcher with two jackets, hold a pole in each hand and have an assistant pull the jacket over your back. Slide the jacket onto the poles and button/zip. Pull a second jacket over the other ends of the poles and button/zip.
If you’re in an urban setting, almost any domicile will have blankets. These can make an even more solid and comfortable stretcher by simply folding it over two (solid) broomsticks or poles. A chair can also be used to safely transport a conscious and alert casualty.
Duct Tape to Close Wounds
Among its many uses, duct tape can serve as a reasonable butterfly closure for a simple straight laceration. Take a strip of tape about 3 inches long and cut into the form of an “H,” folding in the middle to make a non-adhesive surface to go over the cut itself. Apply tension while placing the tape to achieve closure.
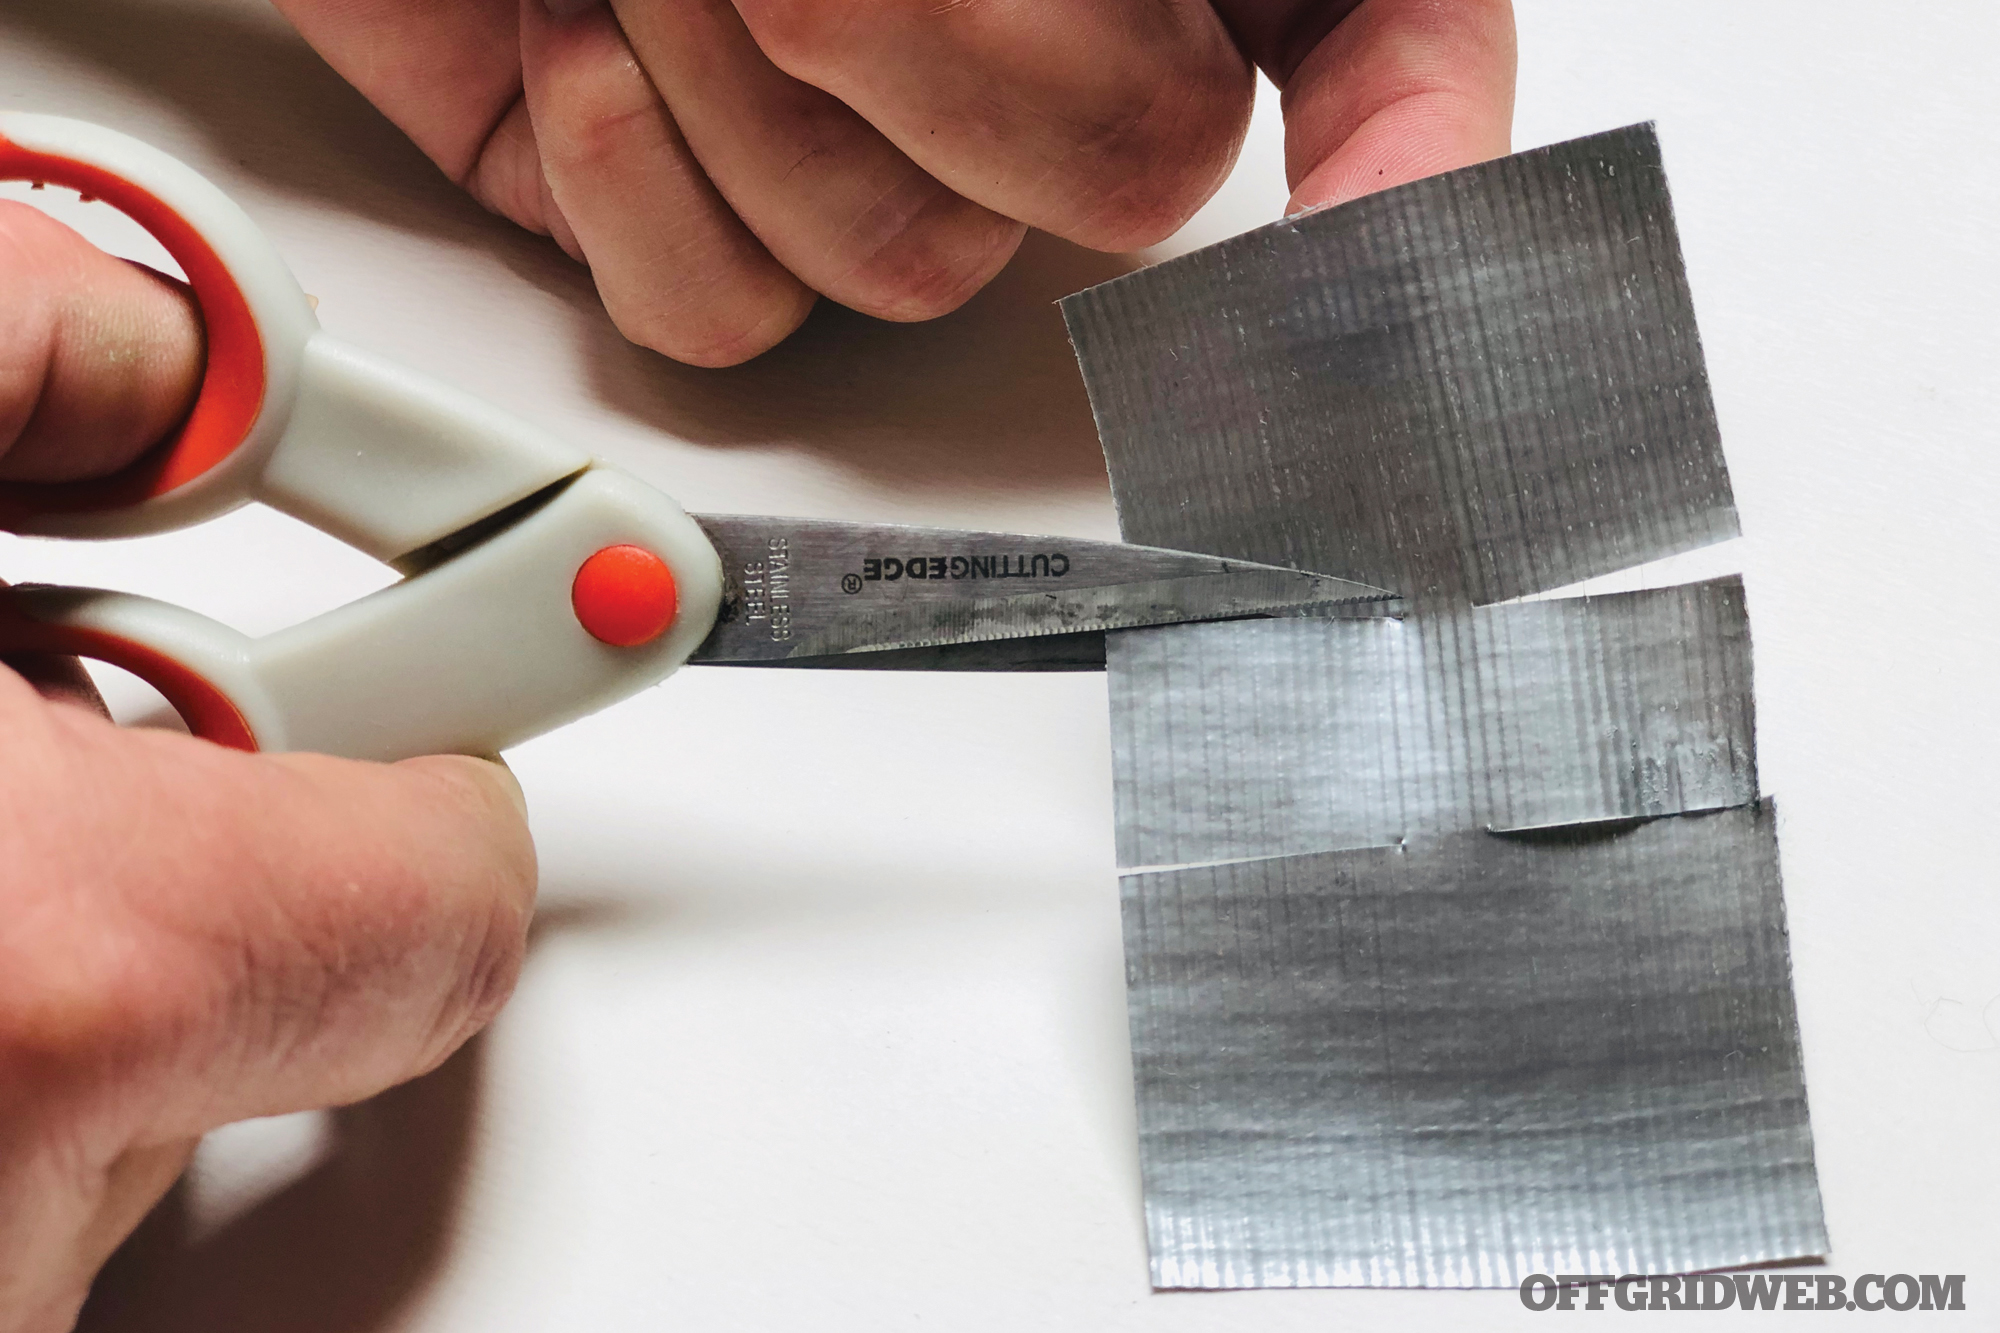
Above: Duct tape cut into an “H” shape can help close a wound.
If you’re good at sewing, you can use other found objects to help close wounds. Curved needles are easiest to handle — thread them with silk or cotton thread or even unused monofilament fishing line, and they’ll keep that gaping wound closed. It’s important to remember, though, that many wounds incurred in survival settings will be dirty; closing dirty wounds is a recipe for an infection, despite what Rambo says.
Willow Bark as Pain Relief
You’re down to your last Ibuprofen tablet, and you have three people in pain from assorted injuries. What do you do? There are no opiate-laden poppies around, but if there are willow trees in the neighborhood, you might have an answer. The inner bark of willow trees contains salicin, the ingredient used to make the first aspirin back in the 19th century. Birches, aspens, poplars, and other trees also contain salicin, but in smaller quantities.
Cut through the dense outer bark to the inner bark. Remove some strips and make a tea (1 to 2 tablespoons of dried bark per cup) or just chew the strips themselves. You won’t know how much “aspirin” is in the dose, which could be a serious concern, but it’s an option for austere settings. Don’t use more than 4 cups of tea per day. The concoction will help with pain, inflammation, and fever.
Aspirin: The First Manufactured Drug
Although Hippocrates wrote about the use of salicin from natural sources in 400 BC, the word “Aspirin” was the original brand name given by Bayer to acetylsalicylic acid, first manufactured in the late 1890s. The “A” stands for “acetyl” and the “spir” stands for the Latin name for meadowsweet (spiraea ulmaria), an herb that happens, along with willow, aspen, and poplar trees, to also contain salicin.
Honey to Prevent Wound Infections
Another natural product that has medicinal benefits is honey, especially in its raw, unprocessed form. Honey is known for its antibacterial properties and has been applied to wounds for centuries to prevent and treat infection. Honey can decrease the growth of bacteria; it’s high in sugar and acidic in nature. Most types of honey also generate hydrogen peroxide when diluted, a substance that increases antimicrobial activity. Additionally, honey has been proven to last for centuries in sealed containers, so it can be safely stockpiled without concerns about expiration. In situations where there are no antibiotics, honey is a helpful tool in the medical woodshed.
Clean the wound with soap and water, then apply honey diluted in solution or by itself onto wounds and cover with a dressing. Many believe it’s simpler to place the honey onto the wound dressing itself. Besides open and possibly infected wounds, honey is helpful to treat burns. Apply directly and cover with a nonstick bandage.
Sanitary Napkins as Wound Dressings
At first glance, you might consider feminine sanitary napkins to be a poor substitute for conventional sterile dressings. According to a study published in the Spring 2006 issue of the Canadian Journal of Plastic Surgery, you might be wrong. Evaluation for microbes in both products found a number of sanitary napkin brands were as free of disease-causing bacteria as expensive sterile dressings. As a matter of fact, two of 20 sterile dressings grew bacteria, while zero of 20 sanitary pads did. The brands tested were Kotex, Always, Stay Free, and Compliments.
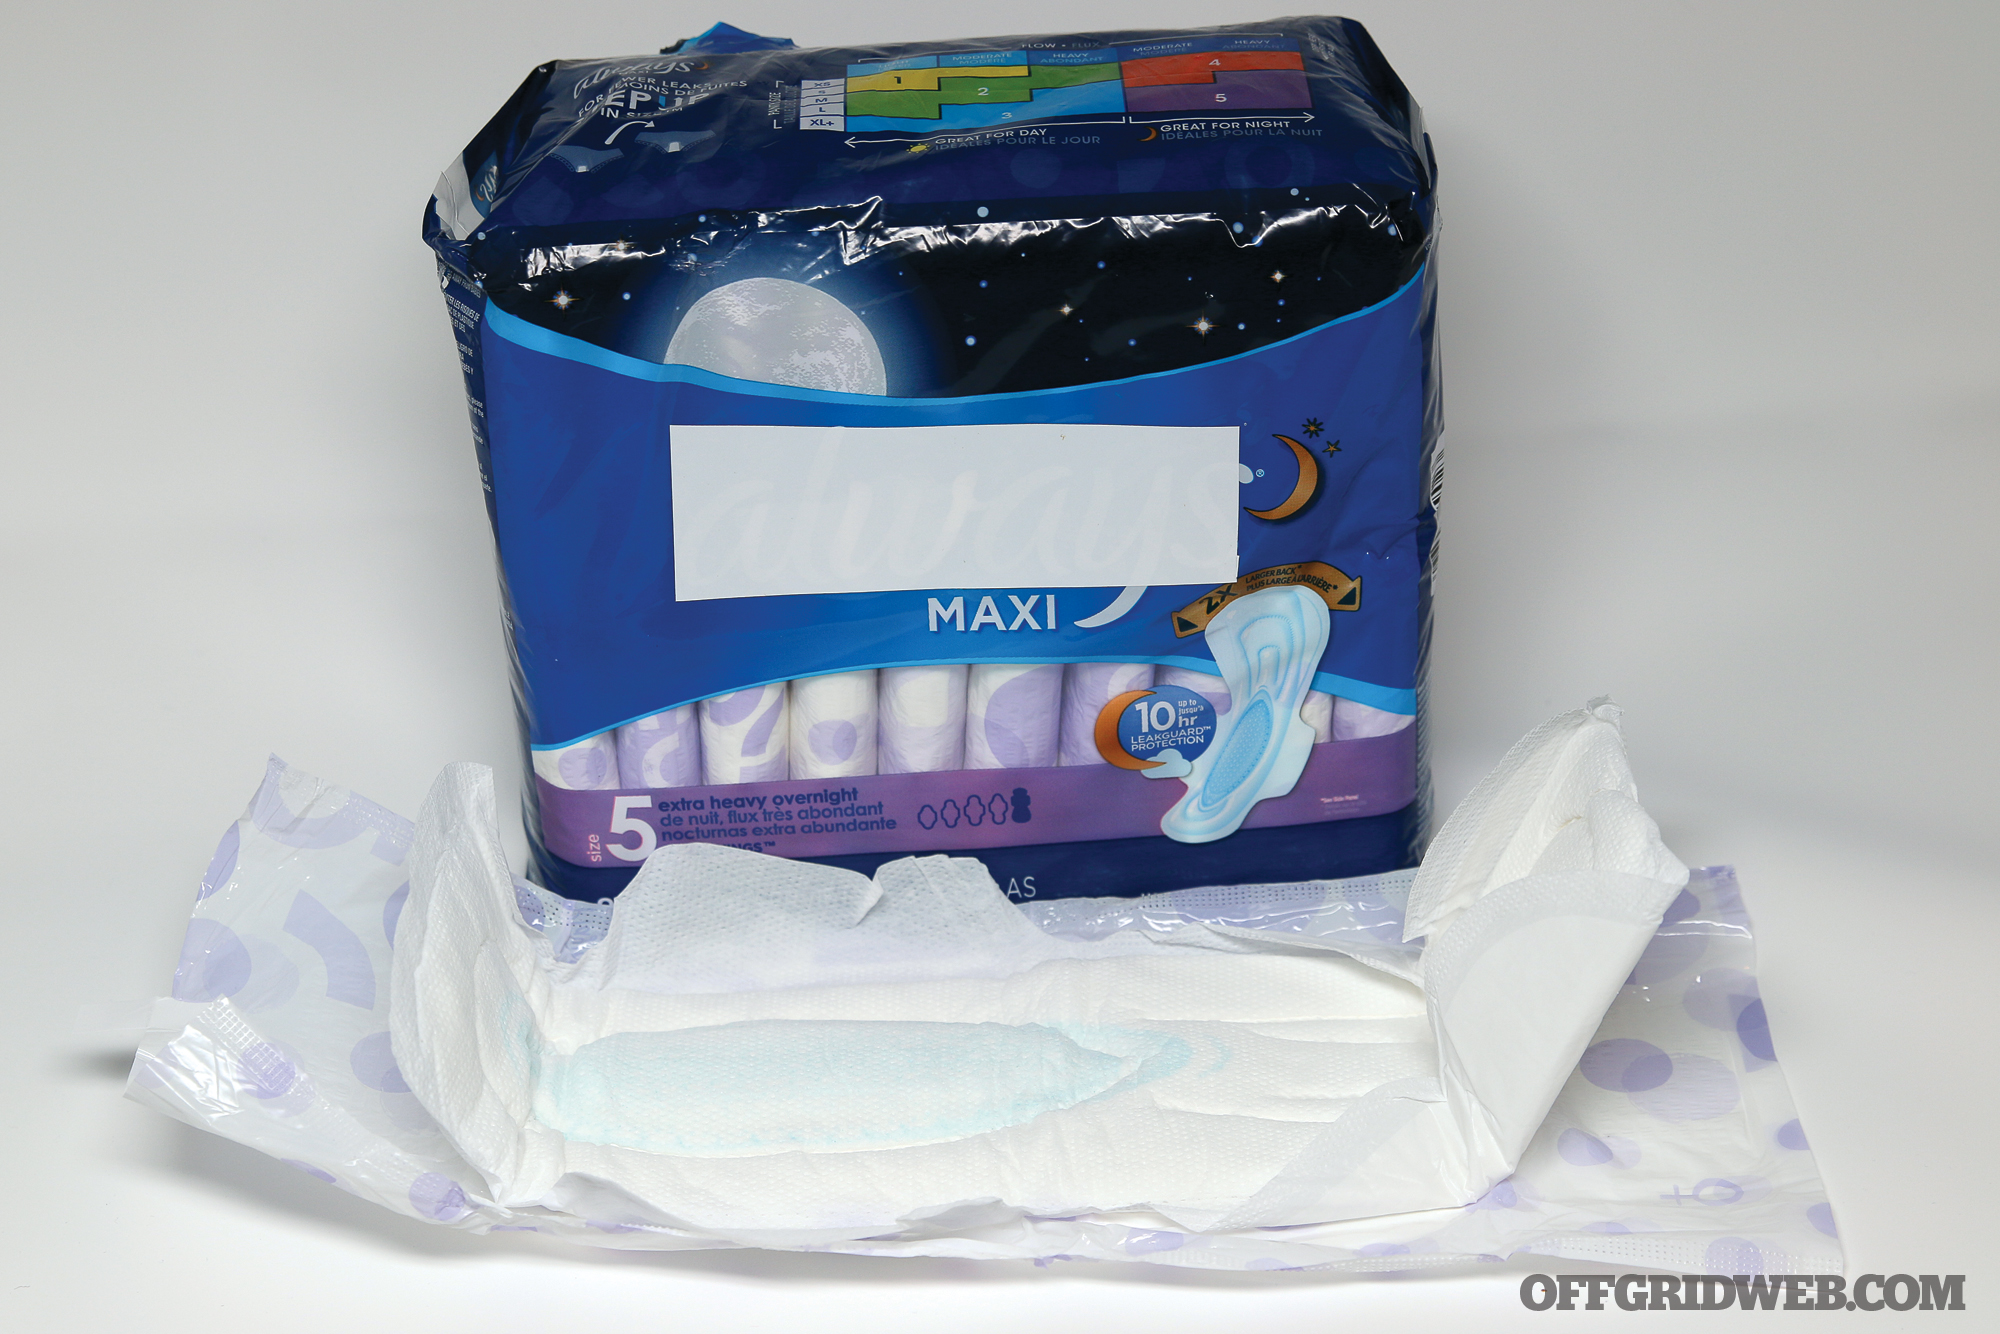
Above: Thick female sanitary pads can be used as padding or to cover open wounds.
Having said that, some sanitary pads are shaped for the area of the body that they’re intended for. Some have adhesive surfaces that can make them awkward for some other applications. They still make for useful padding for orthopedic injuries and to cover packed wounds.
On a similar note, you’ve probably heard the old notion that tampons should be carried as a means of packing gunshot wounds to stop blood flow. However, there are numerous reasons why they’re not ideal for severe traumatic injuries. Check doomandbloom.net/the-tactical-tampon for more on this topic.
Cardboard as Snow Glasses
Snow blindness can rob you of your vision when you need it most. To protect your eyes, simply cut two slits in some cardboard and, perhaps, an area to fit the bridge of your nose. Duct tape can be fashioned into reasonable eye protection against snow blindness as well.
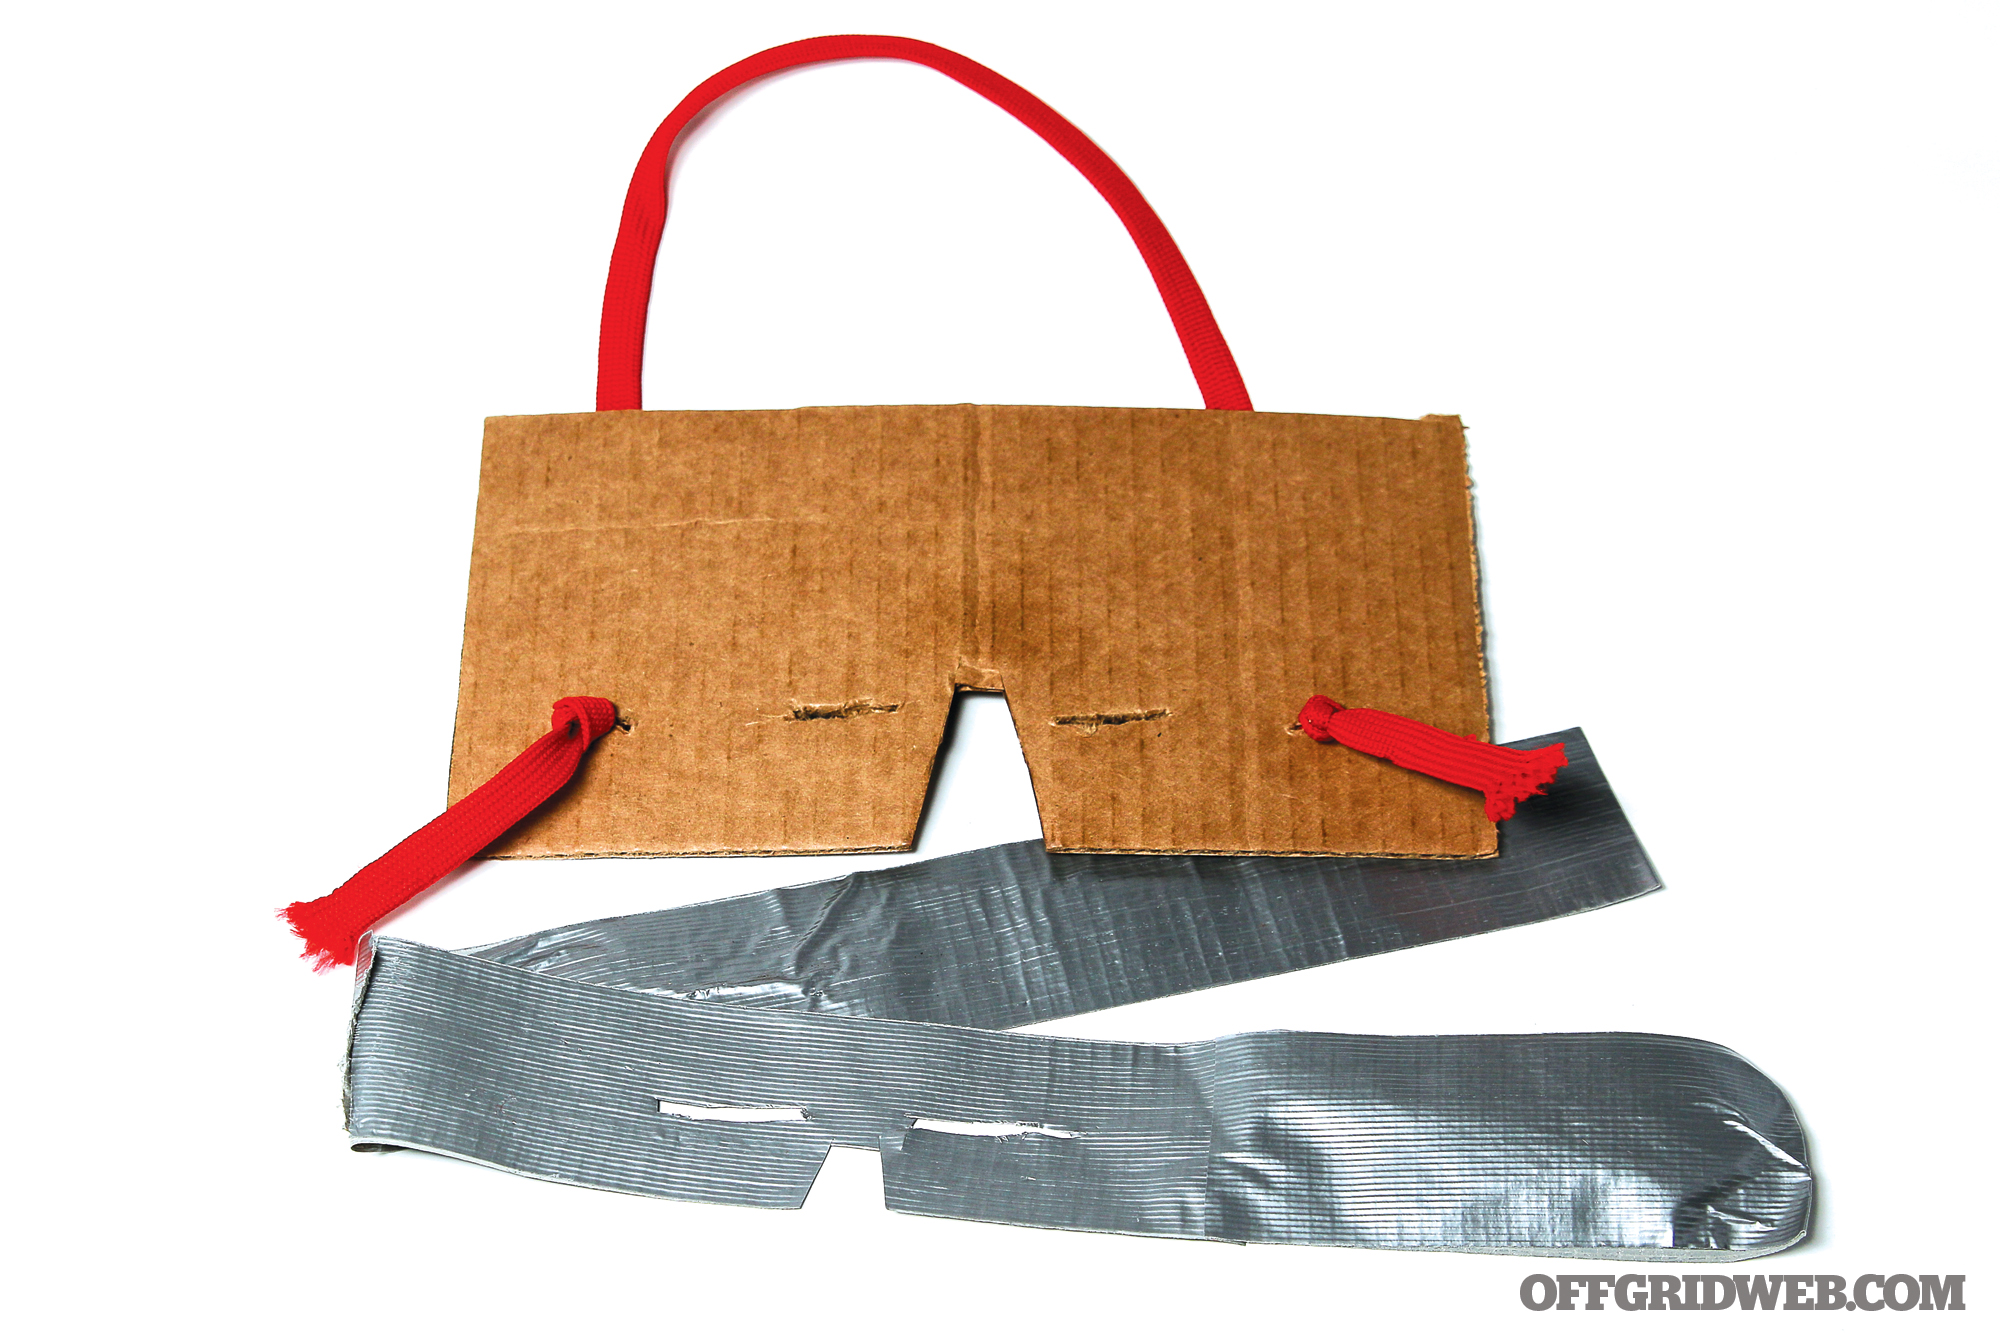
Above: Cut slits into duct tape or cardboard to prevent snow blindness.
The 5-Gallon Restroom
Human waste is handled sanitarily during normal times, and you’ll keep your people healthier if you stay vigilant off the grid as well. A five-gallon bucket can serve as a portable restroom in times of trouble. There are few residences that won’t have one of these laying around, so put one to good use. If you have two, use one bucket for solid waste and one for liquid.
Urine from healthy people is acceptable for use in your survival garden and may even increase production. Although there are bacteria in the soil, few organisms in urine will transmit infections. Leptospirosis is one, but less than 200 cases are reported yearly (many in Puerto Rico) in a U.S. population of 330 million.
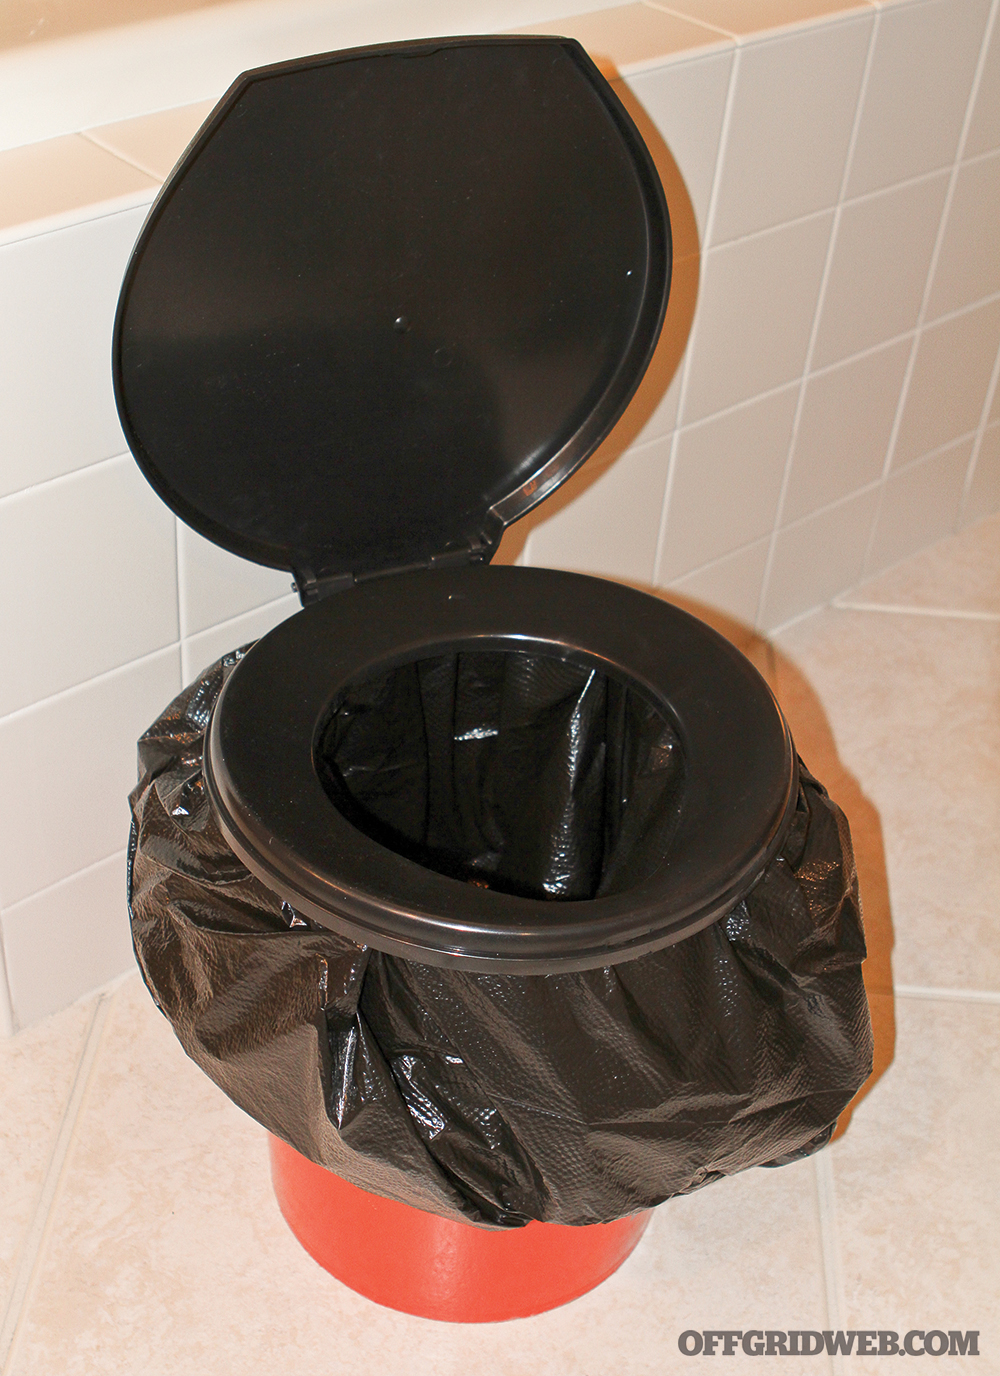
Above: The “Luggable Loo” helps turn your five-gallon bucket into a usable toilet.
For your “poop” bucket, you’ll want some plastic garbage bags and some sand, dirt, or kitty litter.
Place one or two garbage bags in the bucket and place an amount of fill in the bag. Add more with each use. Dispose of the bag when about half-full. Some feel that a dilute bleach solution would be helpful, but use too much and you’ll go right through the plastic.
A way to make this bodily function more comfortable is with the affordable plastic “luggable loo,” essentially a toilet seat that fits right onto the top of a five-gallon bucket.
Where to Get First Aid Training
American Red Cross first-aid training classes offer information and impart skills to help during many emergency situations. These are available online or in person. Check RedCross.org for the class nearest to you.
FEMA’s Community Emergency Response Team (CERT) program trains volunteers to prepare for the types of disasters that are most likely in a particular area. Through hands-on practice and simulations, CERT teaches response to various catastrophes. Contact your municipality or FEMA at FEMA-Prepare@fema.dhs.gov.
There are also many companies that offer wilderness first-aid courses. Do your own research and ask around to find a qualified instructor with a professional medical background.
It should be noted that even wilderness first-aid classes assume that, at one point or another, advanced medical care will play a part in resolving the emergency. As a result, many will focus on stabilizing the patient and signaling for rescue. The long-term survival mindset is different — you must prepare to deal with an injury or illness from beginning to end without the miracle of modern technology or the arrival of a medevac helicopter.
Conclusion
There are many additional items you’ll find in your travels that can be put to good medical use. Baking soda can be mixed with bleach to make Dakin’s, a cleaning solution used as far back as World War I for preventing infection in traumatic wounds and bedsores. You can also use baking soda to brush your teeth. Speaking of brushing teeth, smashing the end of a pencil-width green twig until it’s frayed makes a serviceable toothbrush.
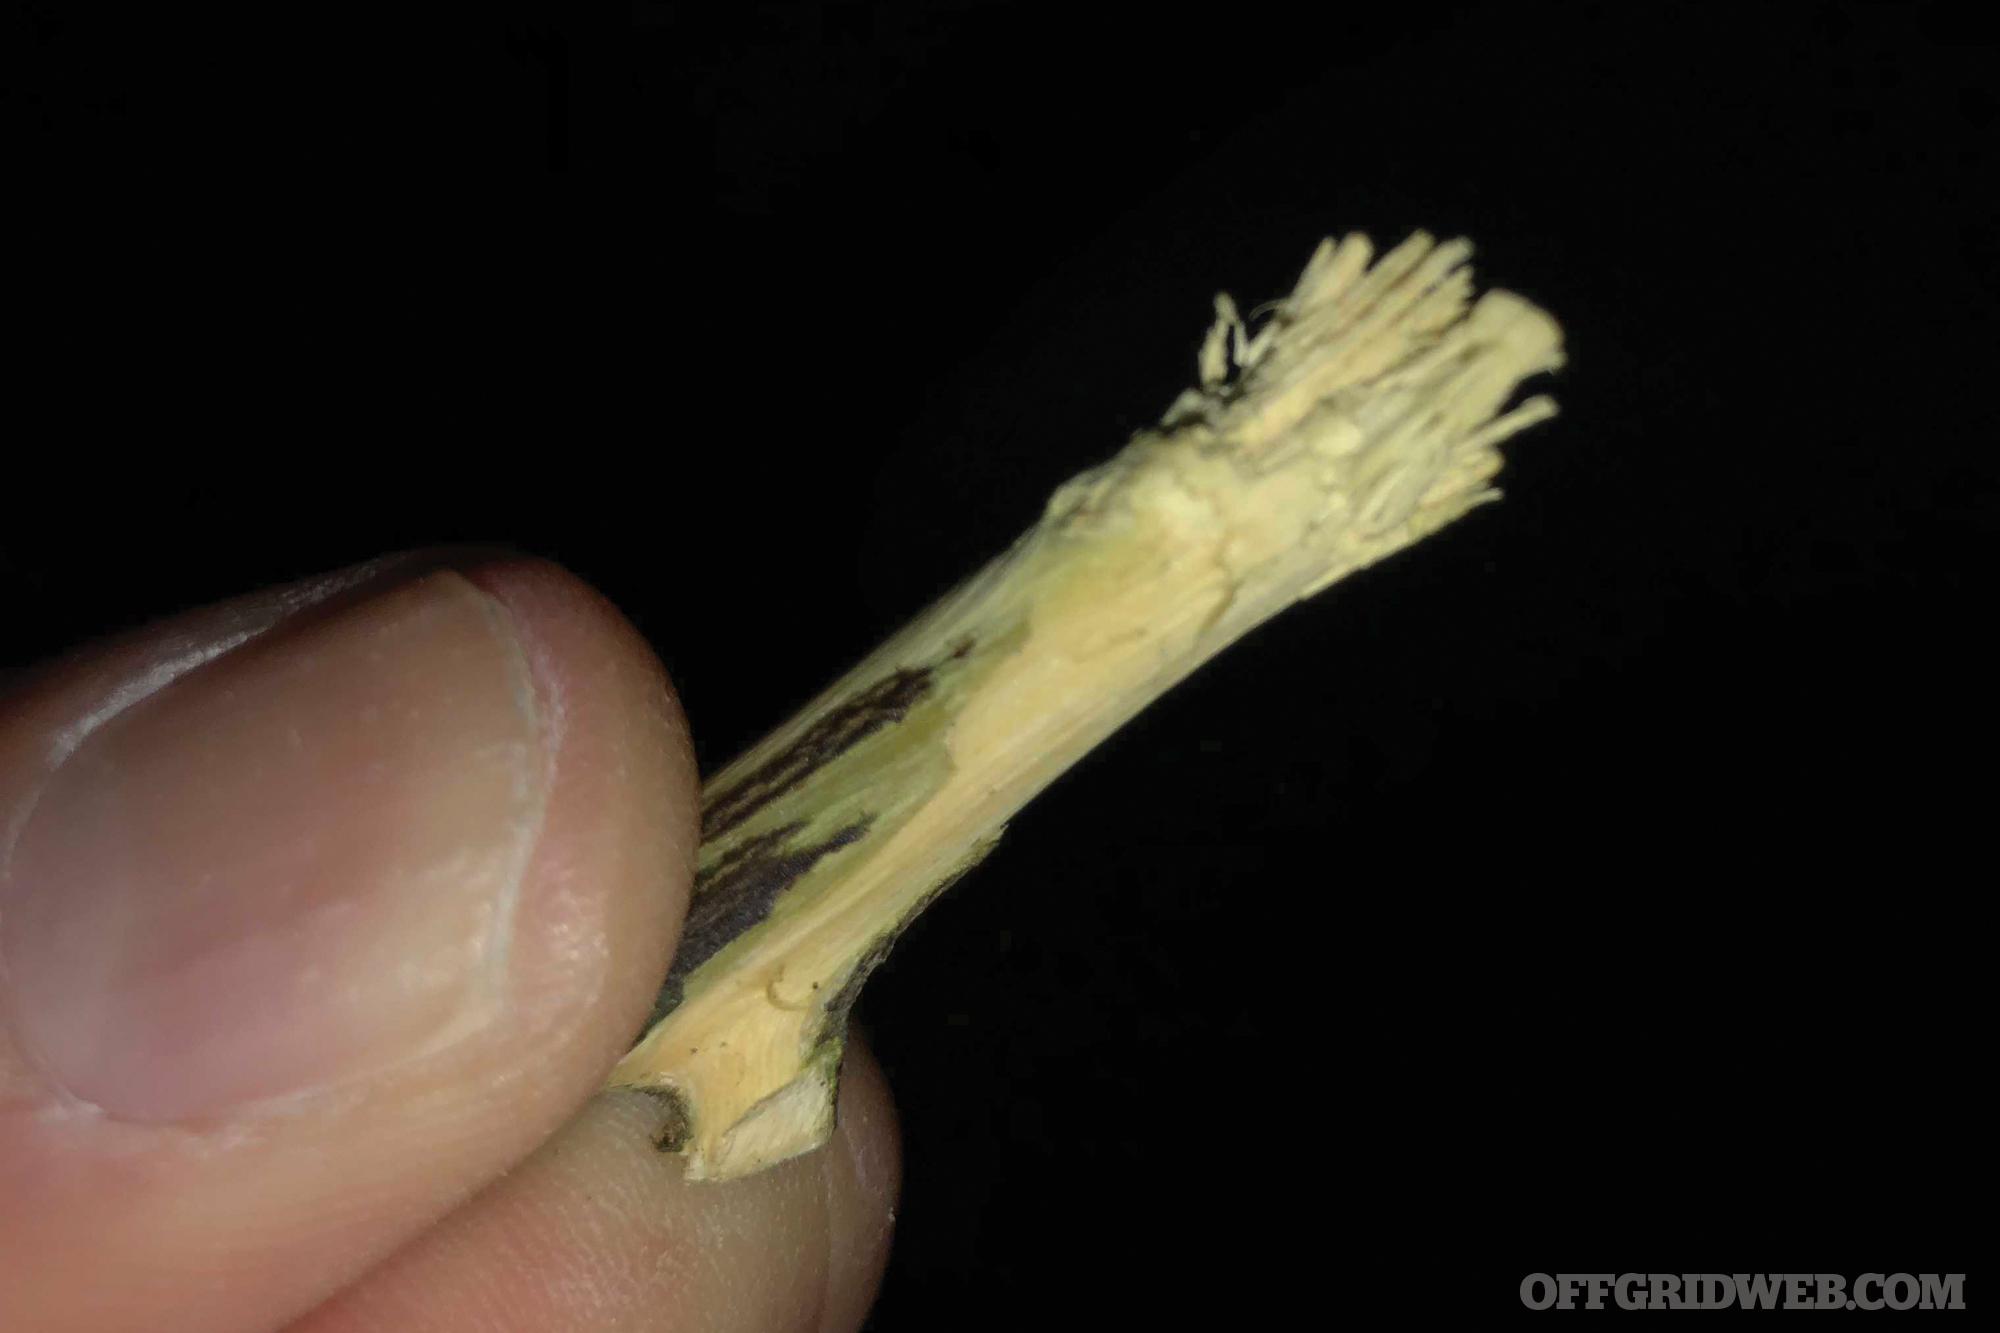
Above: Improvise a toothbrush by fraying the end of a pencil-thick twig.
There are more tools in the medical woodshed, even in tough times, than you might imagine. With attention to what’s available and a little ingenuity, medics will still be able to do good using outside-the-box strategies. When the commercial supplies run out, they’ll have to. As President Theodore Roosevelt once said, “Do what you can, with what you have, where you are.”
Ready-Made IFAK:
About the Author
Joseph Alton, MD, is a New York Times/Amazon bestselling author and a Fellow of both the American College of Surgeons and the American College of OB/GYN. He’s a member of the Wilderness Medical Society and certified as an Advanced Wilderness Expedition Provider. His books include The Survival Medicine Handbook: The Guide for When Help is Not on the Way, Alton’s Antibiotics and Infectious Disease, and others. He provides over 1,000 free articles, podcasts, and videos on his award-winning survival website doomandbloom.net.
