Warning!
The exercises and content expressed in this column are for illustrative purposes only. Consult a medical professional before trying any physical activity or nutritional plan.
People tend to think that all they need to do is pop a pill (of both the medicinal and supplemental kind) and their joints will be perfectly fine. What they don’t realize is that the first step in joint health is to stay active, a key component in preventing injuries and also alleviating past pains.
You might be asking, “What does joint pain have to do with prepping?” Sure, it’s easy to focus on working on bushcraft or testing out your latest bug-out bag. But how will you worry about any of that if you’ve blown out your knee while fleeing the initial catastrophe? Prepping also includes preparing and repairing the hardware you were born with, not just the ones you buy at the army surplus store. So, how can a prepper do this?
Body
Let’s say your knee starts giving you trouble. You figure it’s just the awkward way you hopped over the fallen tree while lugging your gear to the next safe zone. It’ll go away in a day or two, you tell yourself. Well, when it still persists days or weeks later, maybe something else is going on. The problem is, it’s far too common to think that knee pain equates to a knee problem. Most of the time, it’s not your knee. Just because you feel pain there doesn’t mean that it’s the source of your problem.
Your whole body moves through an interconnected series of joints — some of which need to be more stable, while others need to be more mobile. In simplified terms, your shoulder and hips need to be mobile, while your lower back and knees need to be more stable. When you don’t have enough stability or mobility in these joints, other areas need to pick up the slack. This extra slack is what we’re looking to eliminate. Sometimes, it can lead to debilitating back pain or a painful shoulder. Let’s take a look at some tests and corrective exercises to fix your ailing joints.
Self-Tests
Complete the following self-tests to determine which areas of your body need further work.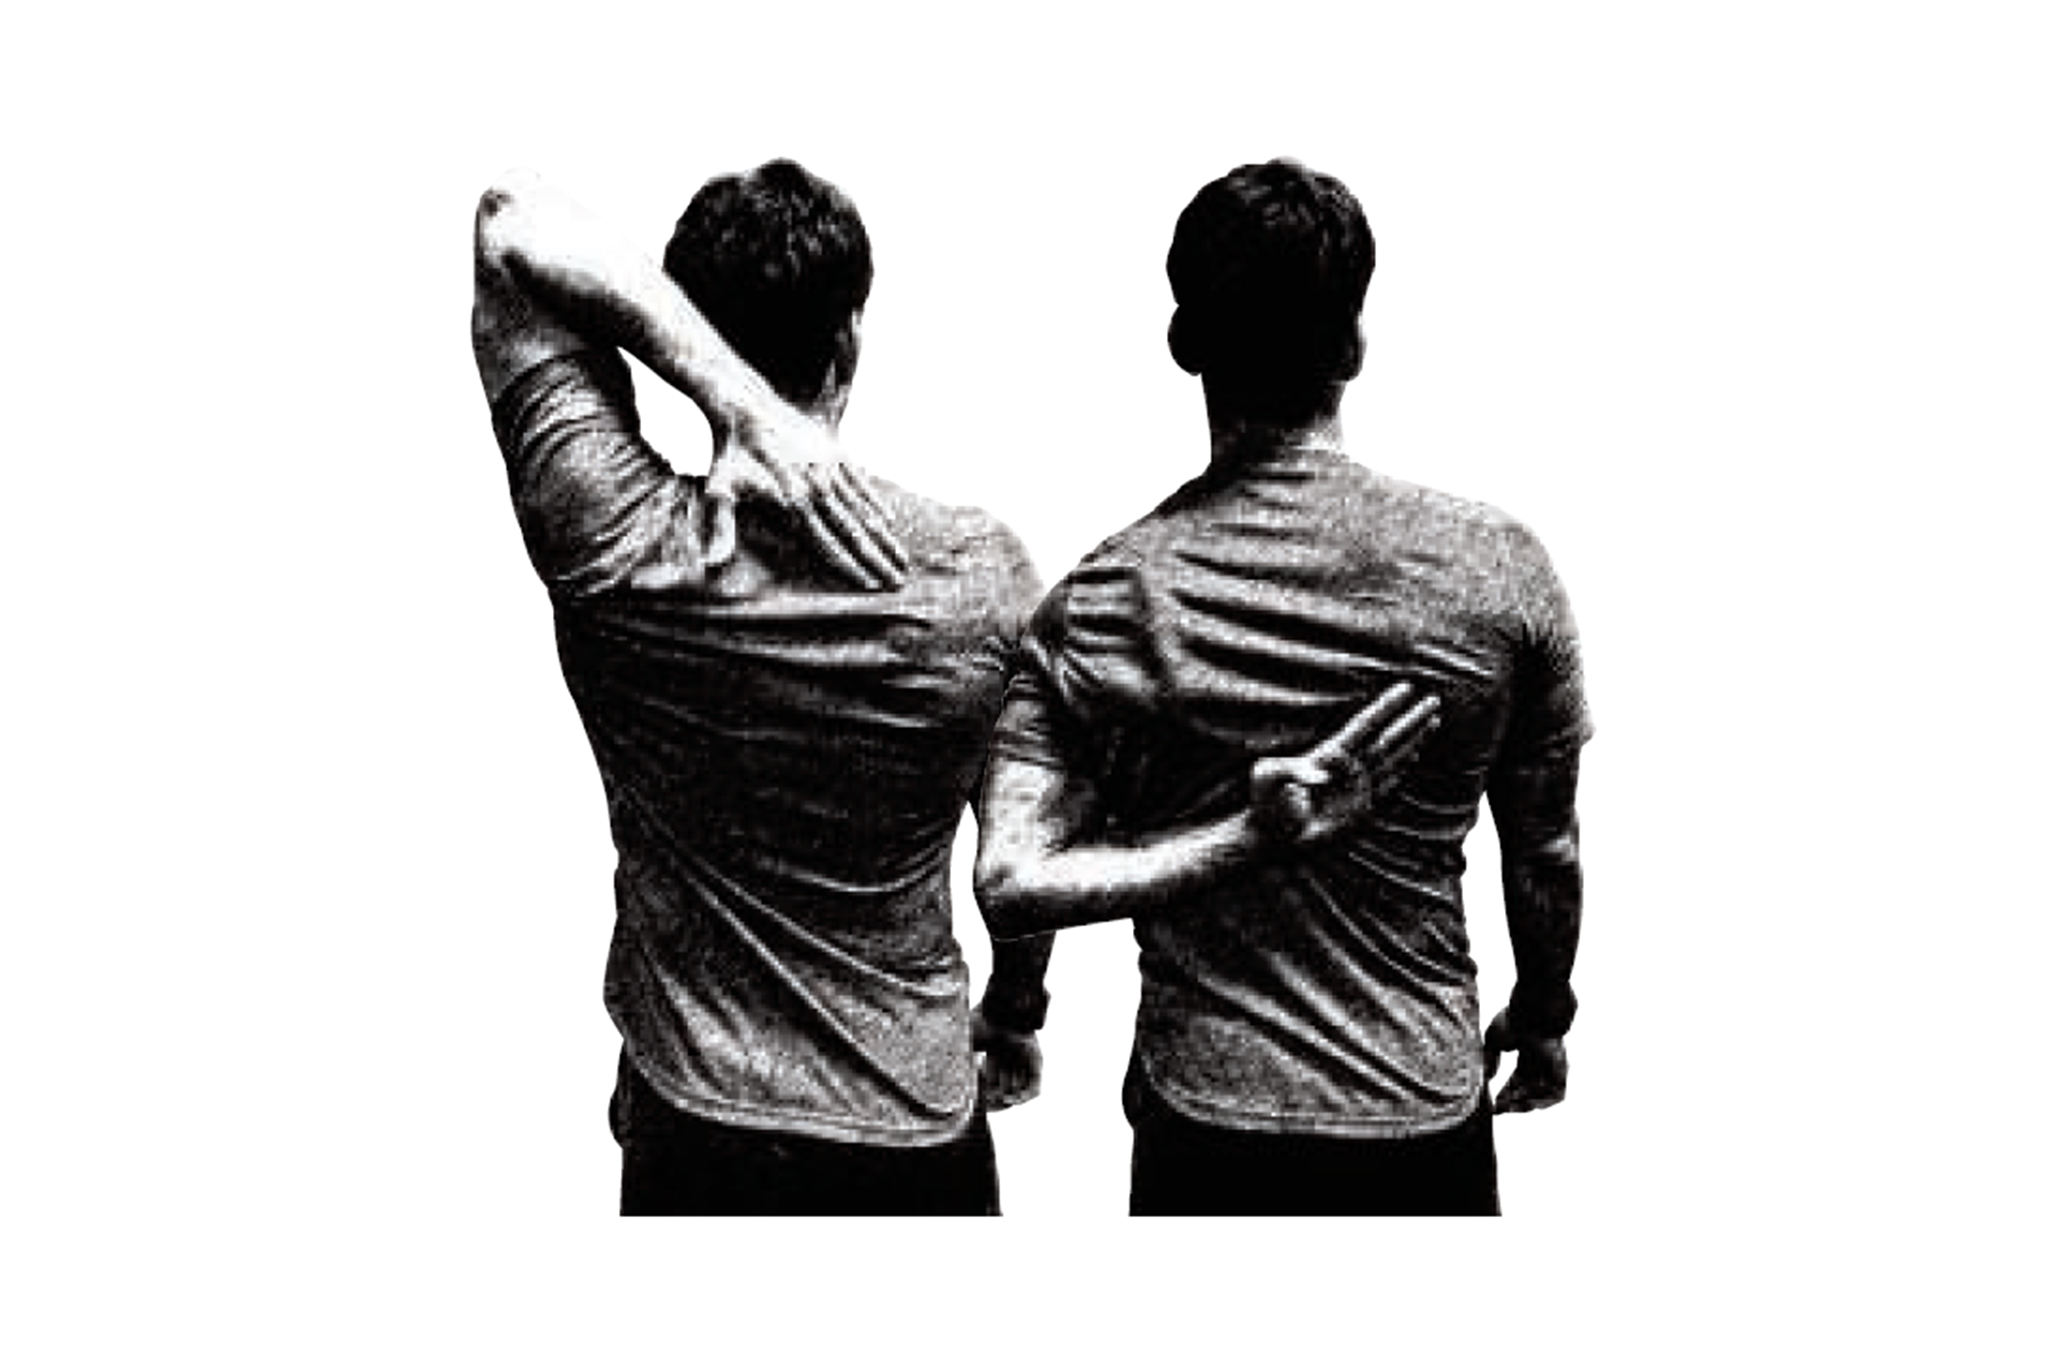
1 Shoulder: Apley Scratch Test
To test range of motion of the shoulder, we’re going to use the Apley Scratch Test. To do this, reach behind your head to touch the upper part of your opposite side shoulder blade. Then, reach behind your back to touch the lower part of the opposite side shoulder blade. If you can’t reach your shoulder blade, this is an area on which to focus.
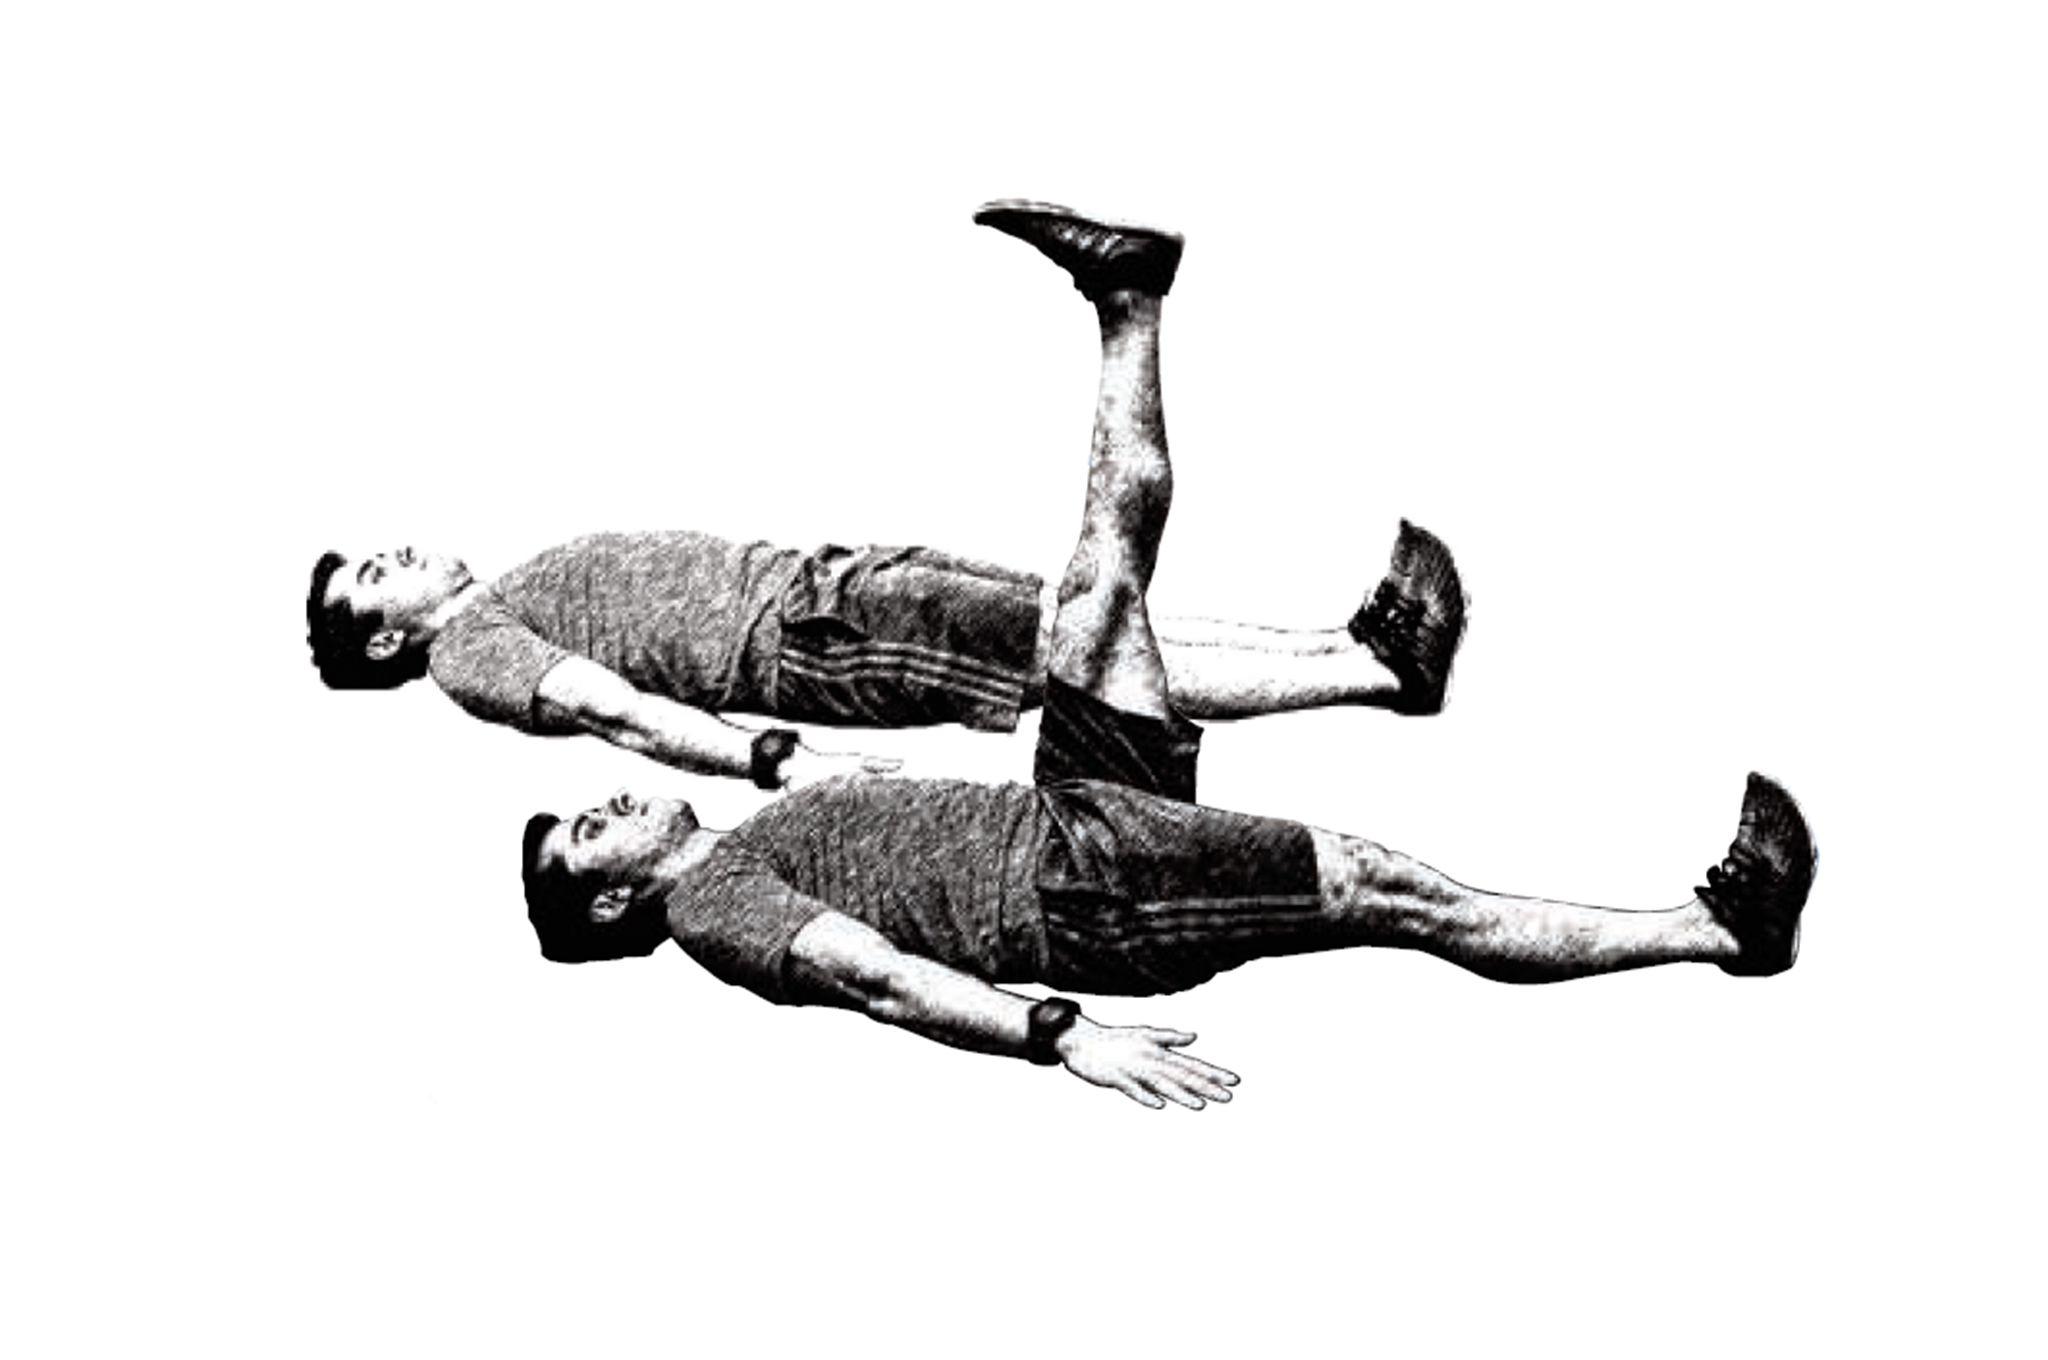
2 Hip and Lower Back: Straight-Leg Raise
Begin lying on your back with your feet together and toes up, arms out to your sides with palms down. Lie next to a stationary object, such as the end of a wall, at the middle of your thigh.
Keeping both legs straight, raise the leg closest to the wall as high as you can. Do this test on both sides. If you’re unable to raise your leg at the same level or higher than the wall, you’ll need to focus on this.

3 Lower Back: Birddog
Begin on the ground on all fours. Simultaneously, reach your right arm forward and stretch your left leg backwards. Try to make yourself as long as possible and hold for 20 seconds on each side. If you’re unable to hold for the duration, we’ll look at fixing this area.

4 Knee, Hip, Lower Back, and Shoulder: Overhead Squat
Begin standing 6 inches in front of a doorway. Your feet should be hip-width apart with your toes pointed forward. Hold a dowel or broomstick overhead with your hands, about twice your shoulder width apart. Keep your arms as straight and vertical as possible.
Keeping your heels flat on the floor and your toes straight ahead, squat down as deeply as possible. Your hips should be able to get below your knees, with your toes staying straight ahead, and you shouldn’t touch anything on the way down or up.

5 Knee: Wall Ankle Mobilization
Begin by standing and facing a wall with one foot about 4 inches away from the wall. Place your hands on the wall. Keeping your heel on the floor, move your knee forward to reach the wall with your knee. If you’re unable to reach the wall, there’s a restriction we’ll need to address.
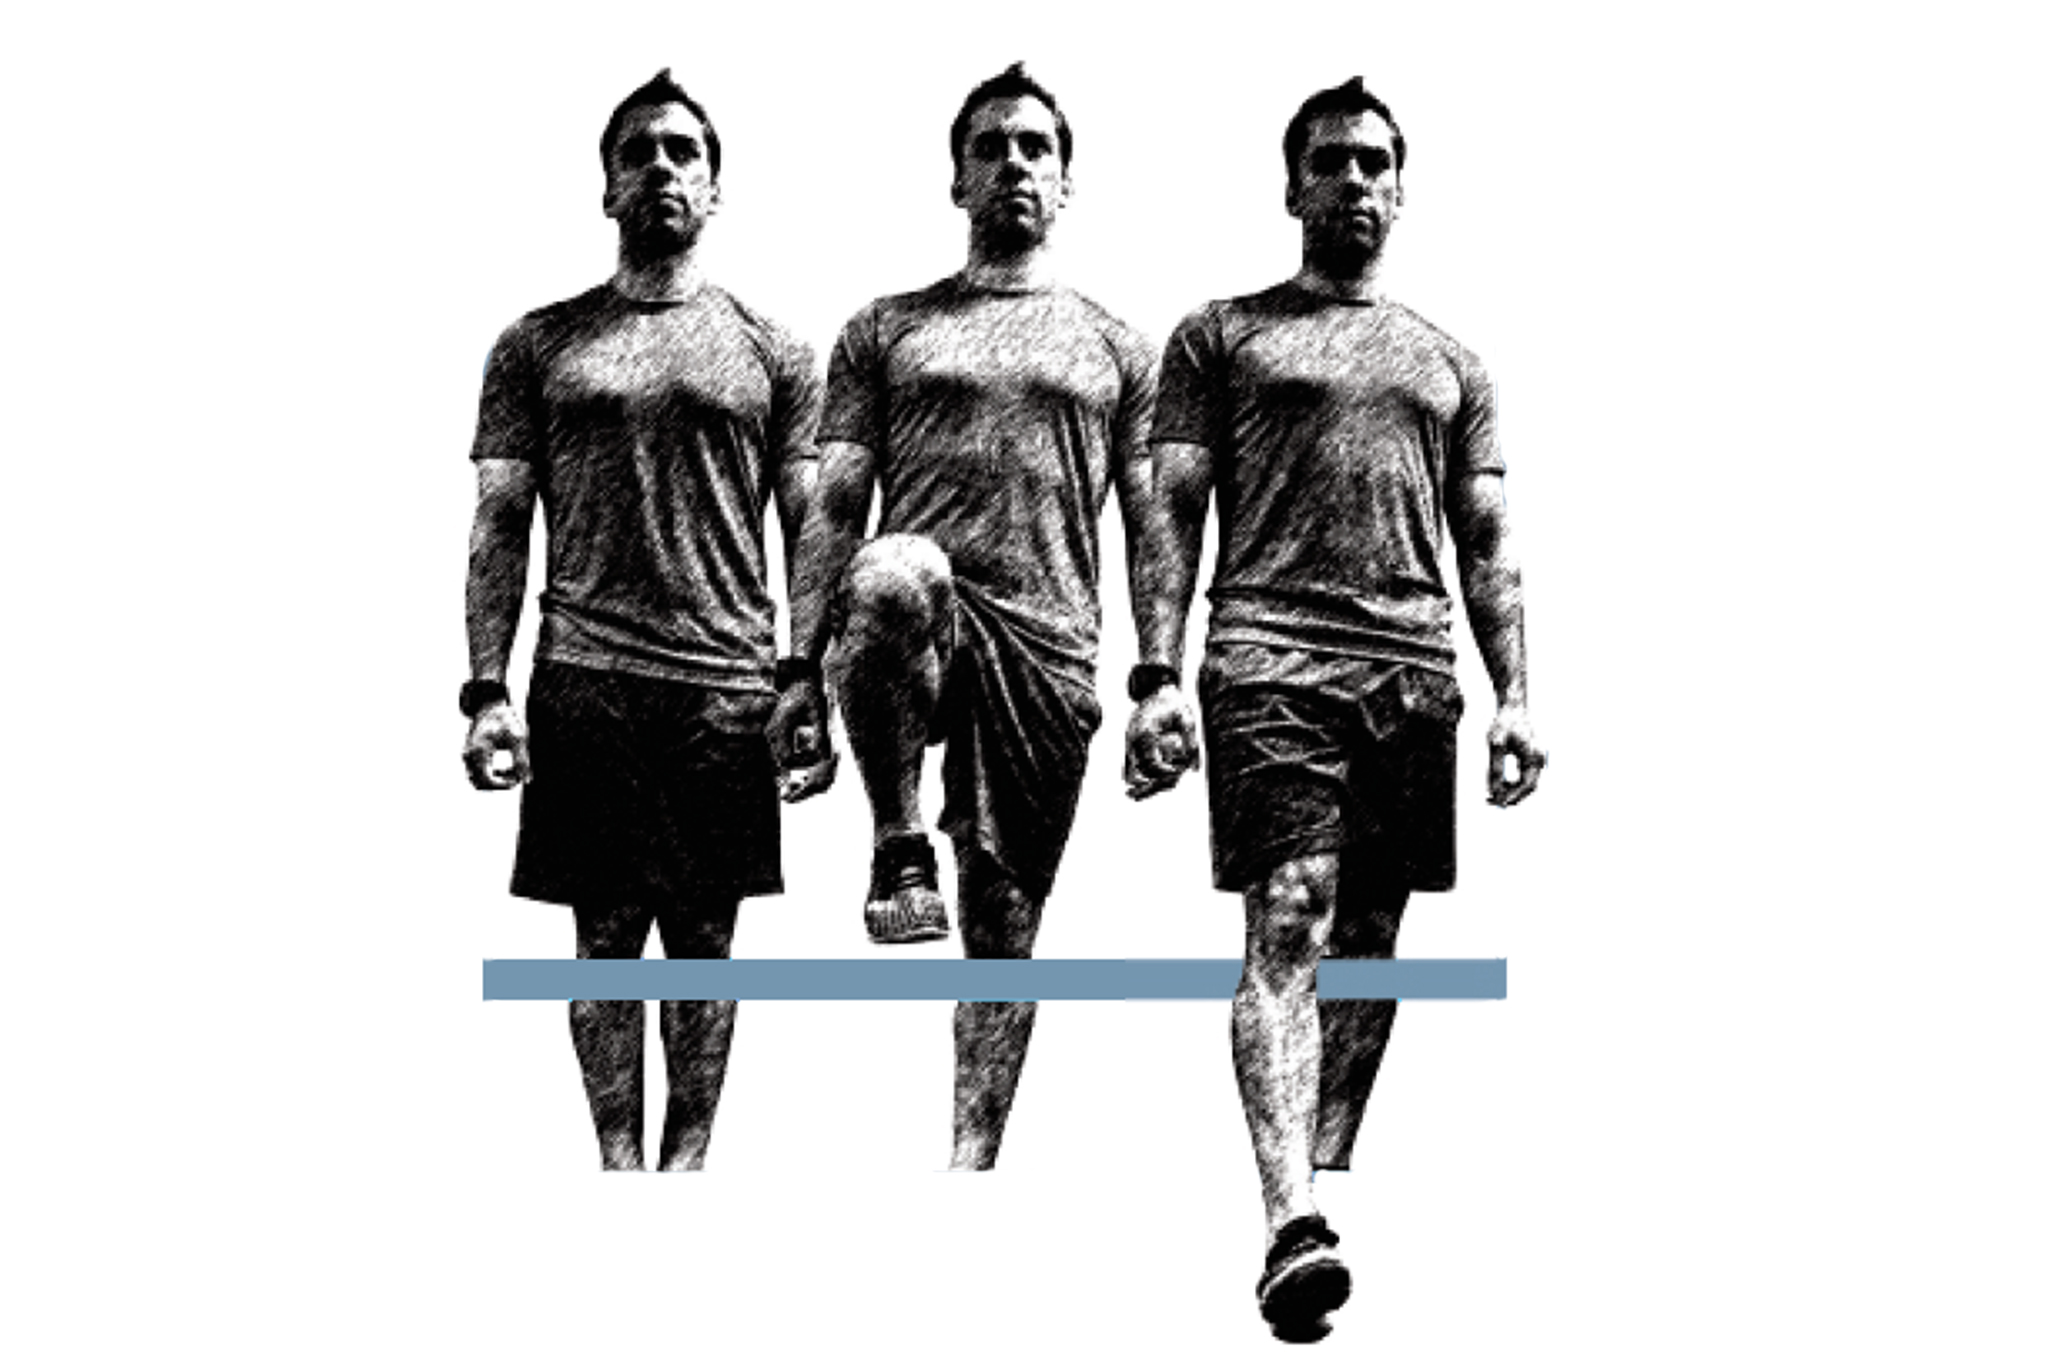
6 Knee and Hip: Hurdle Step
Begin by placing a piece of tape across a door frame just beneath the height of your knee. Stand directly in front of the tape. Raise one leg up and over the tape, and place your heel on the ground in front. Bring the same leg back over and return to the starting position. If you make contact with the tape during this process, this will be an area we’ll focus on improving.
Corrective Exercises
Once you’ve determined which areas of your body you need to address, focus on the following corrective exercises.
Shoulders
The shoulder is a structurally unstable joint. Unlike your hip, which has a much deeper socket, your shoulder joint resembles a golf ball on a tee. The key to keeping your shoulders healthy involves keeping your rotator cuff strong, your shoulder blades stable, and your spine mobile in the area between your shoulder blades (thoracic spine).

1 Quadruped Extension/Rotation
Begin down on all fours and rock back, slightly arching your lower back. Place one hand behind your head. Start by rotating down and bring your elbow toward your opposite knee. Then, rotate your elbow up toward the ceiling. Follow your elbow with your eyes. Complete two sets of 10 repetitions per side.
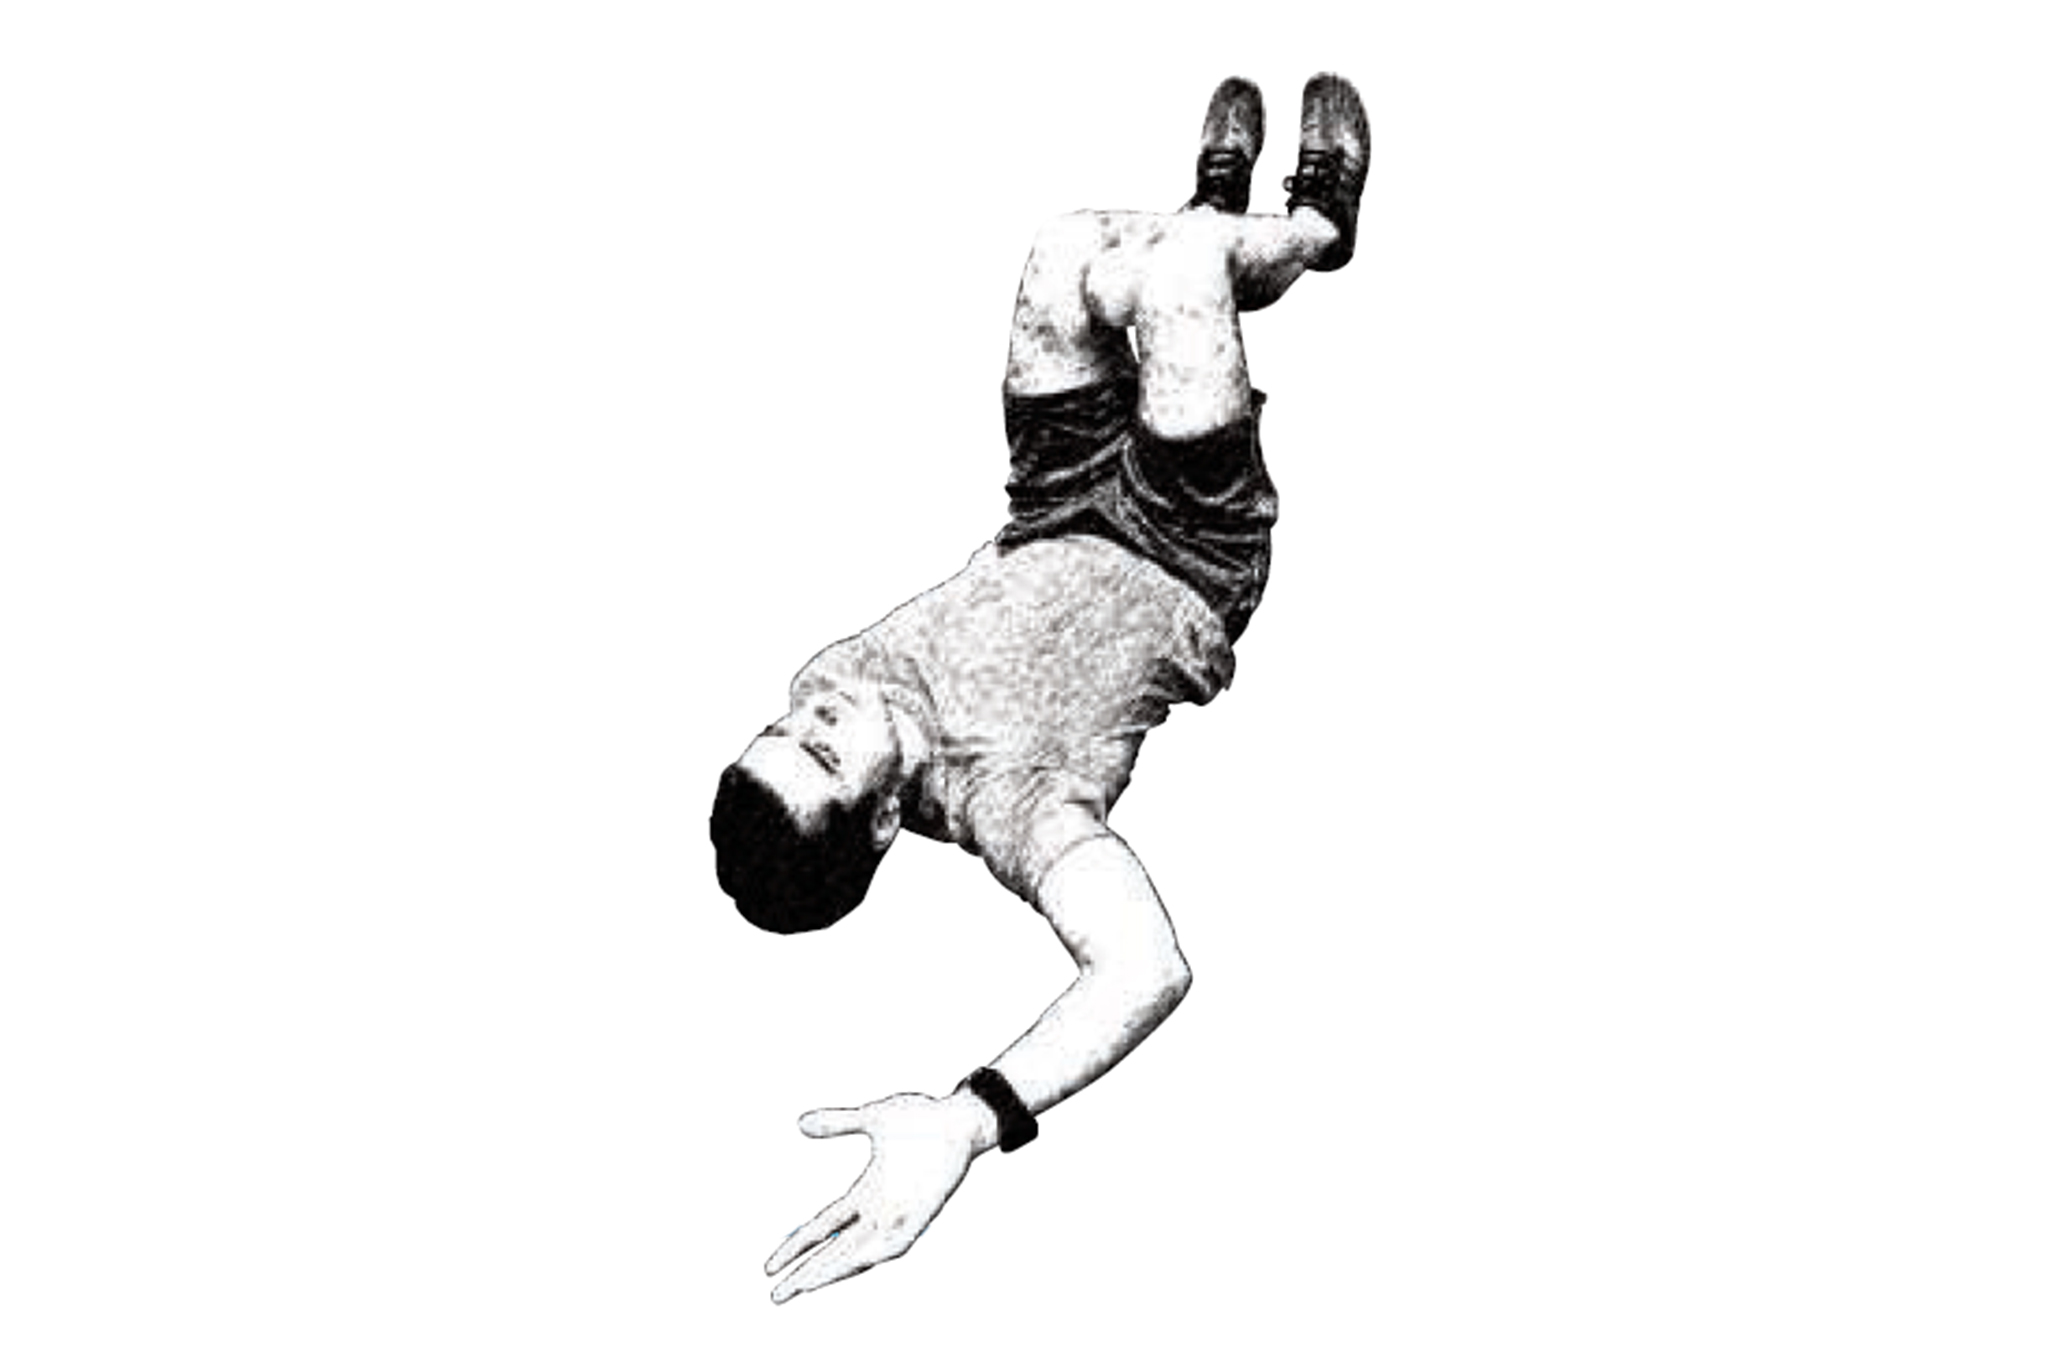
2 90/90 Hip Lift With Breathing
Improper breathing can have a huge impact on shoulder function. If you’re recruiting larger muscles to aid in breathing, this will cause the overuse of many muscles of the shoulder and upper body, causing them to become very tight and restrict movement. Begin by lying on your back with your feet flat on a wall. Position yourself so there are 90-degree angles at your hips and knees, with your right arm overhead. Breathe in through your nose, and as you exhale, pull down through your heels to curl only your hips off the floor. Hold this position as you breathe all of your air out and pause for three seconds, before inhaling again. Complete 2our to five sets of four to five breaths.
Hips
As explained earlier, the hips are a more stable structure than the shoulders, mainly due to the hip socket depth. It’s a ball-and-socket joint, meaning there’s a considerable amount of motion available. Keeping the hips healthy is all about retaining mobility, but also being able to stabilize when need be. It’s when you lose range of motion or stability that problems arise.
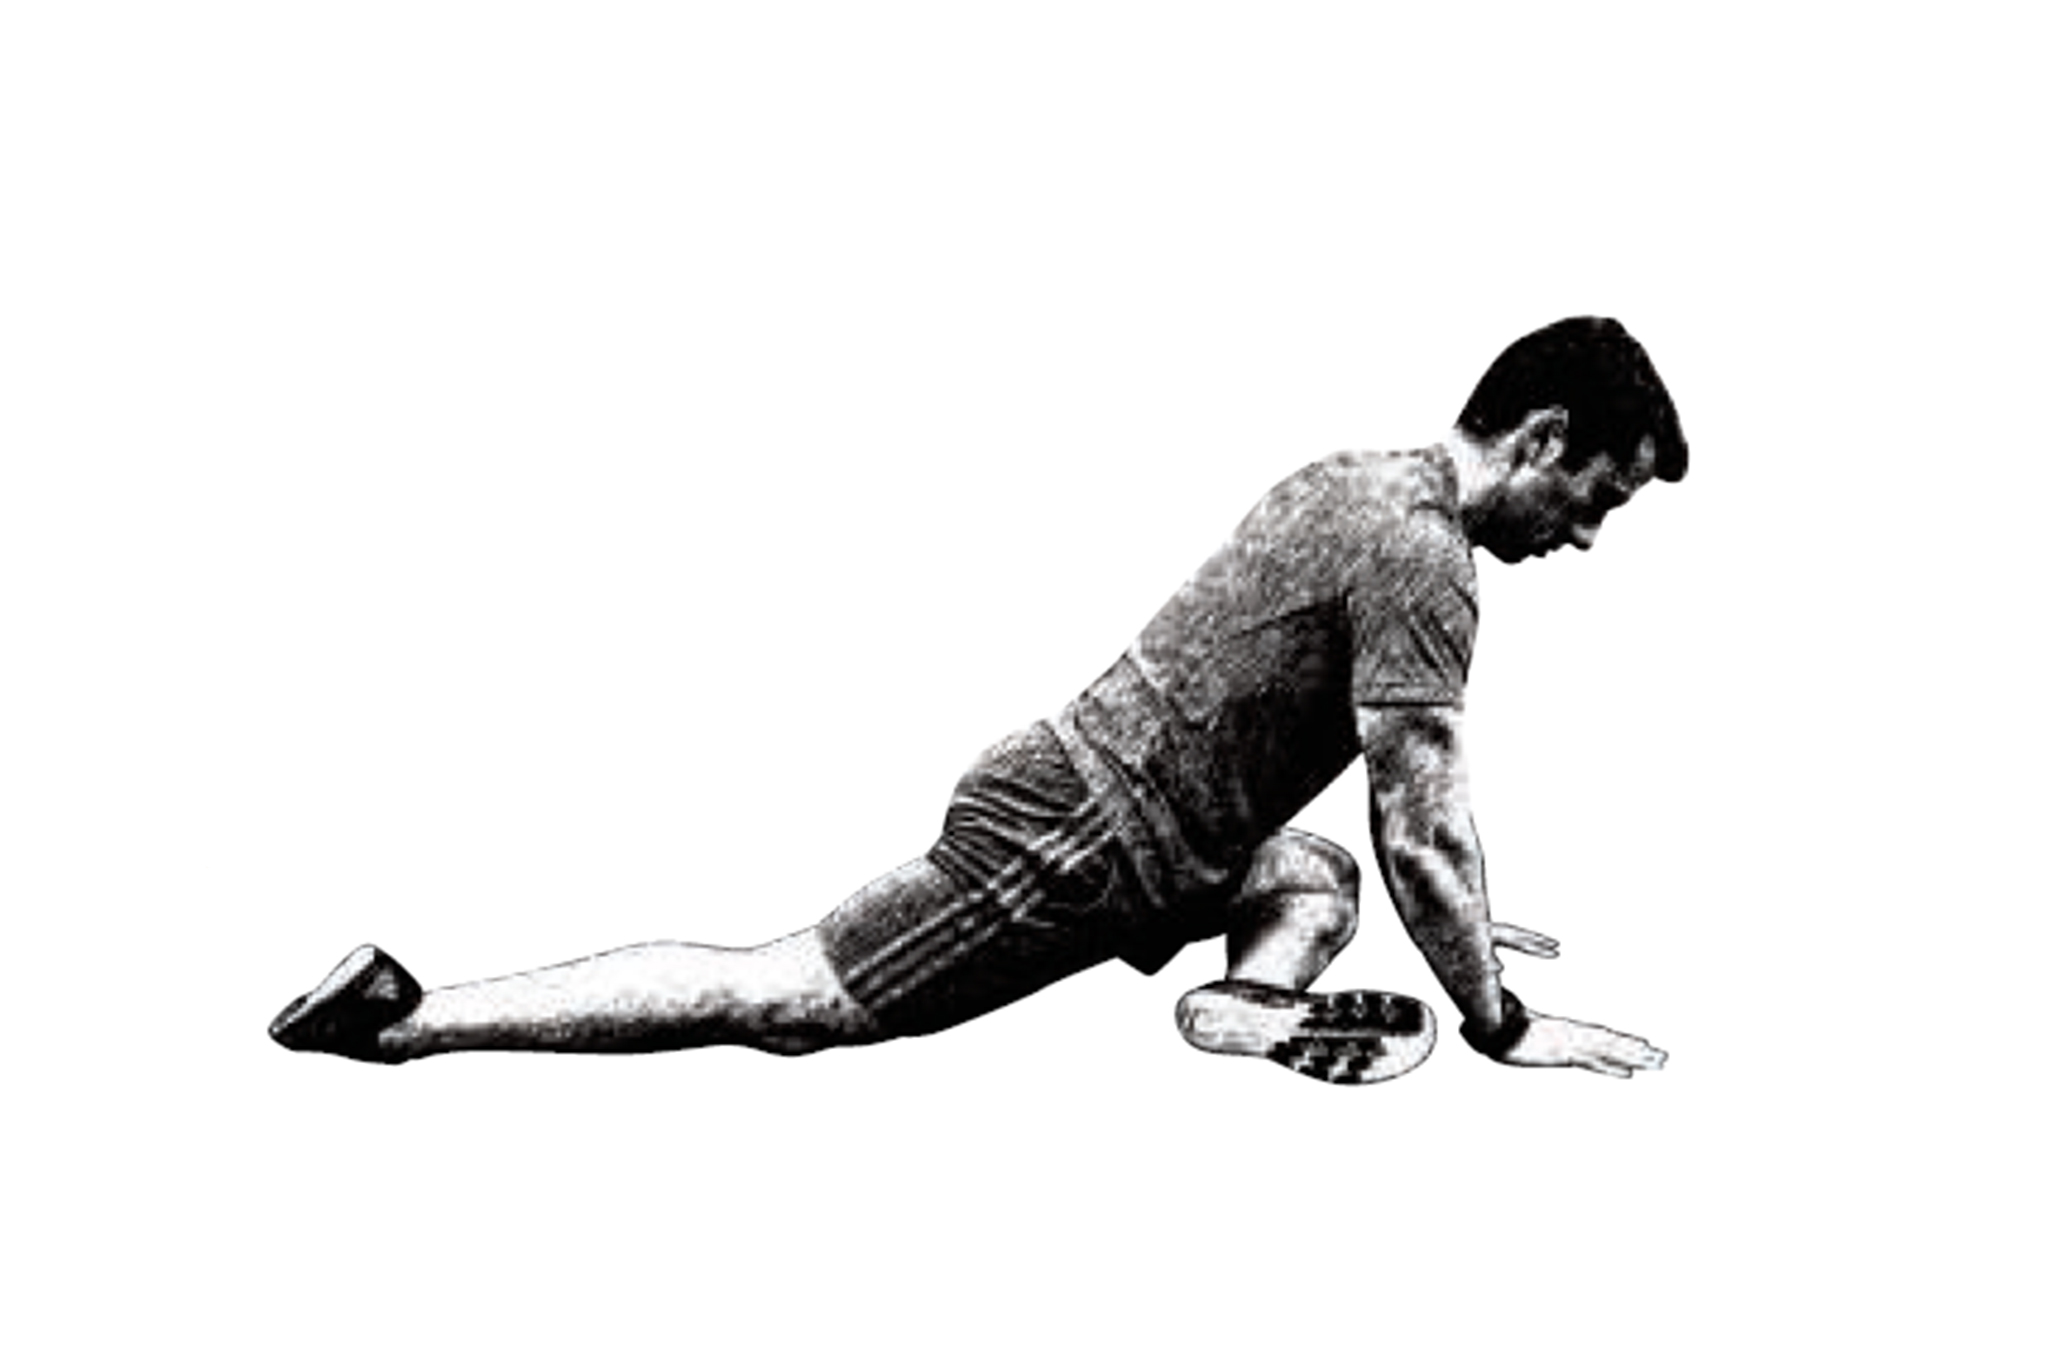
1 Hip Rotator Stretch
Begin in a push-up position and bring one knee forward. Rotate that leg outward, bringing your front shin perpendicular to your body. Slowly lower yourself down, relaxing into the stretched hip. Focus on breathing slowly and deeply, trying to deepen the stretch throughout the time frame. Complete one set of 40 to 60 seconds on each side.
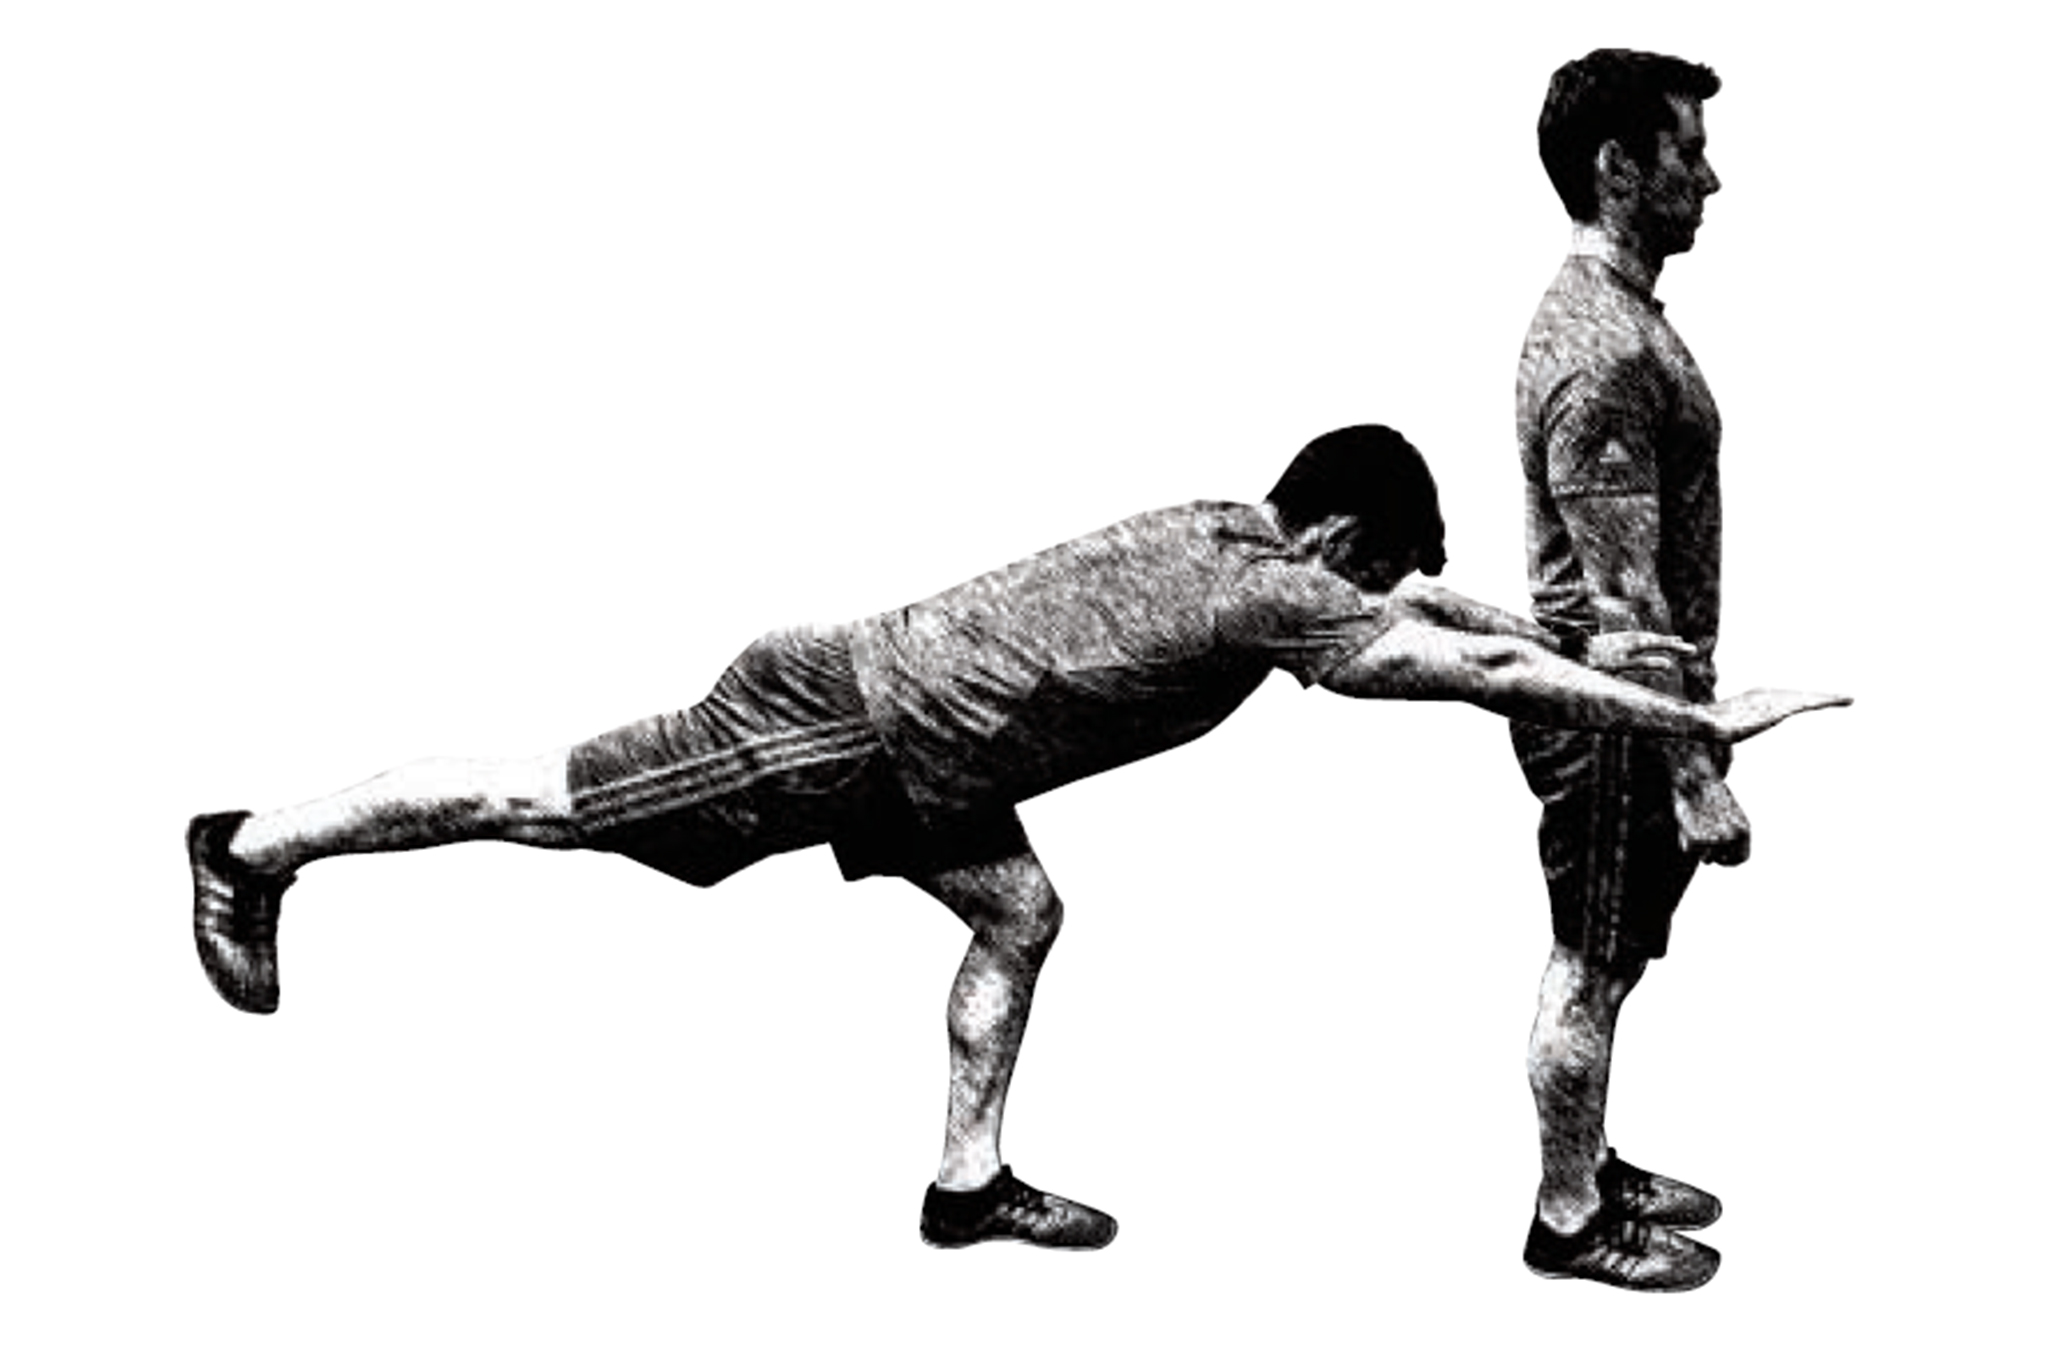
2 Single-Leg Romanian Deadlift
Begin in a standing position. Simultaneously reach both arms forward and stretch your other leg far back behind you. Push your planted foot through the floor to return to the starting position. Complete three sets of eight repetitions per side.
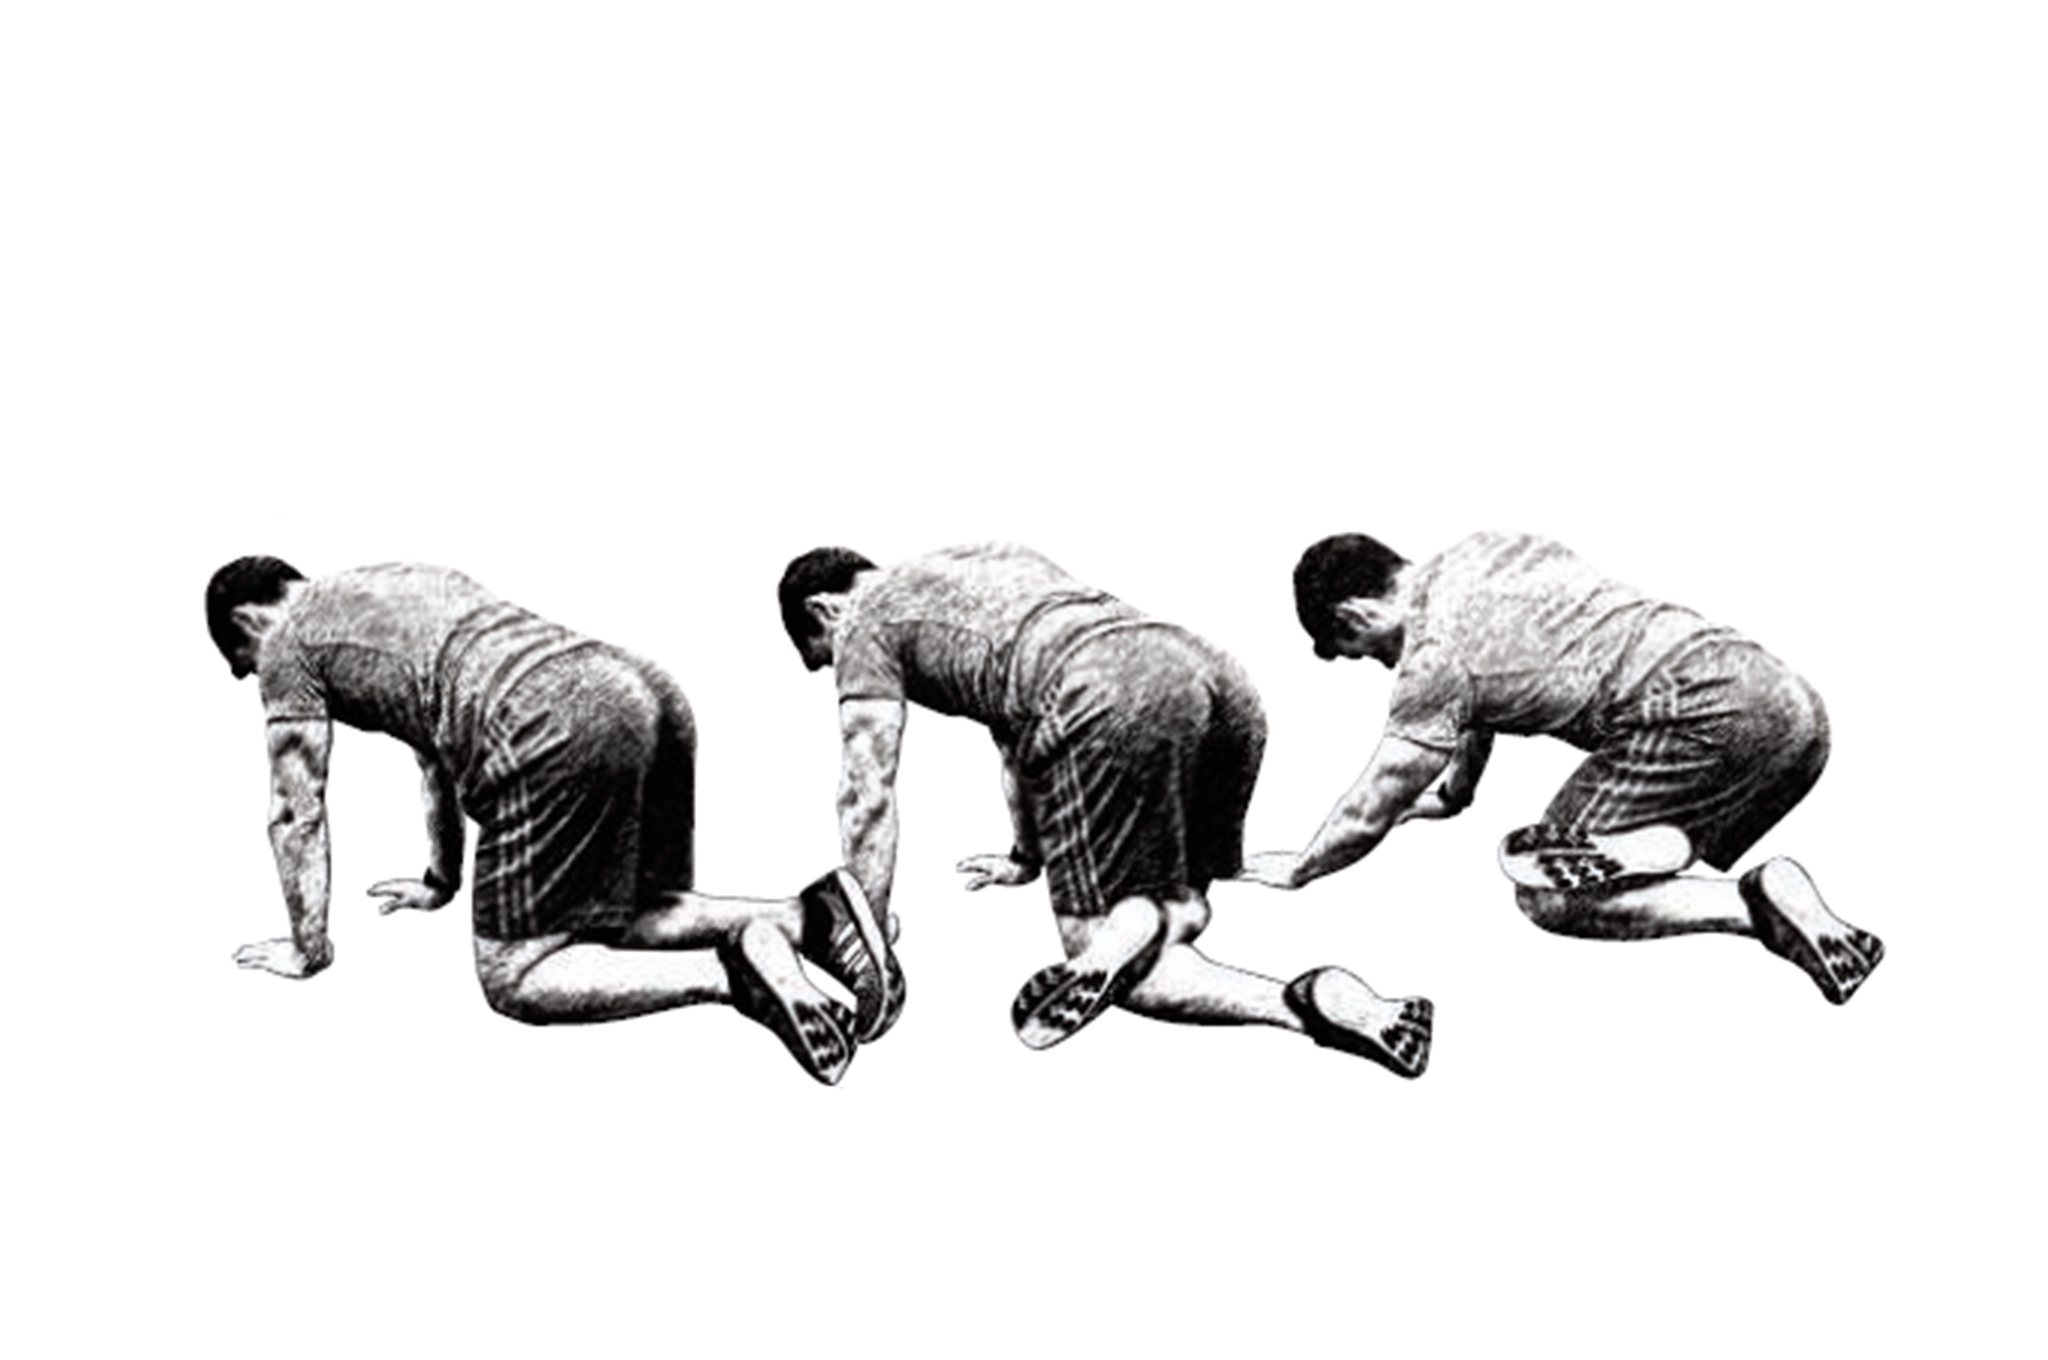
3 All Fours Glute Mobilization
Start in an all fours position. Place one foot behind the opposite knee. Slowly rock your hips back and to the rotated side. Complete one set of eight repetitions per side.
Knees
The knee is commonly referred to as a dumb joint because it’s mainly a product of the hip and ankle. It lies between these two joints, both of which should be highly mobile. The knee primarily bends and straightens, so you need the hip and ankle to be mobile enough to move through their full range of motion, but also stable enough to resist any motion that would put the knee in jeopardy. Therefore, it’s key to focus on the hip and ankle when keeping knees healthy and pain-free. Work on the hip mobility exercises described earlier, as well as the following exercises.
1 Wall Ankle Mobilization
Begin standing and facing a wall. Place your hands on the wall, and put one foot in front of the other. Keeping your front heel flat on the floor, slowly rock your knee forward until you reach the wall. Continue to move your foot further away from the wall until it becomes difficult but achievable to reach the wall. Complete two sets of 10 repetitions per side.
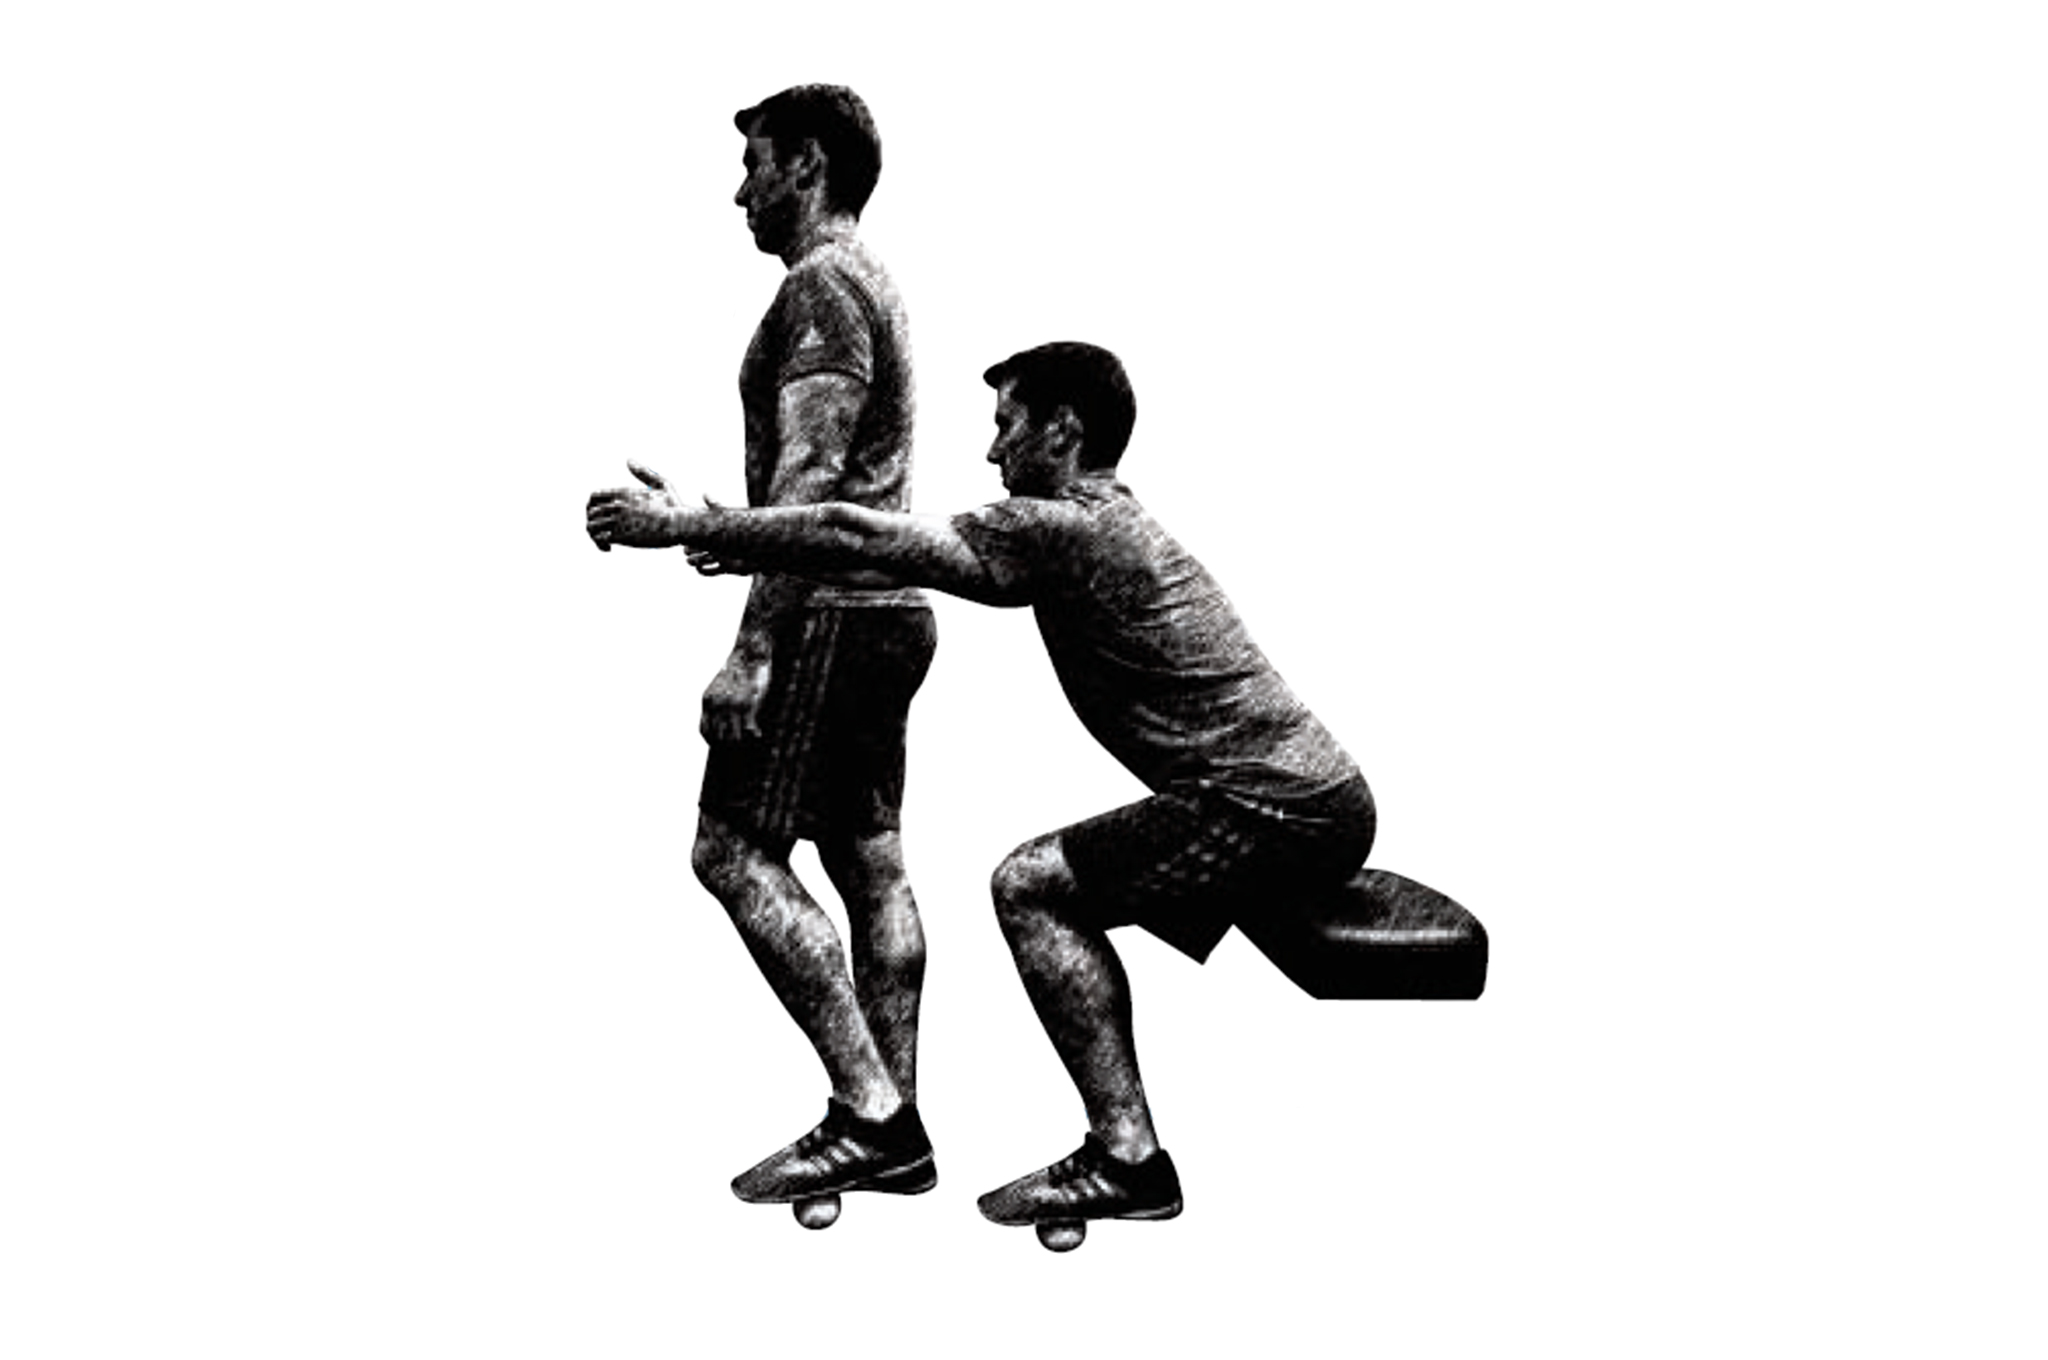
2 Single-Leg Squat With Tennis Ball
Begin standing about a foot in front of a chair or bench. Place a tennis ball under the ball of one foot. Keep your weight mostly on the other foot, and slowly reach forward as you sit back and down. Gently tap the chair or bench, then return to the starting position. If it’s too difficult to reach the chair, place additional objects on it, such as a book or two, until you are able to complete eight repetitions. Complete three sets per side.
Lower Back
Who hasn’t had lower back pain at some point? Unfortunately, it’s far too prevalent. The lower back is an area that needs a lot of stability. Not only does that area of the spine allow much less movement, it’s also where force gets transferred between the upper and lower body. If there isn’t adequate stability, you won’t be able to transfer force very well, and you’ll probably have some pain.
Much like the other joints we’ve discussed, the lower back will have to make up for any mobility that’s lacking in the surrounding joints. We’re specifically talking about your hips, shoulders, and middle spine segment (thoracic spine). To address these areas, work on the shoulder and hip mobility exercises outlined above, as well as the following exercises.
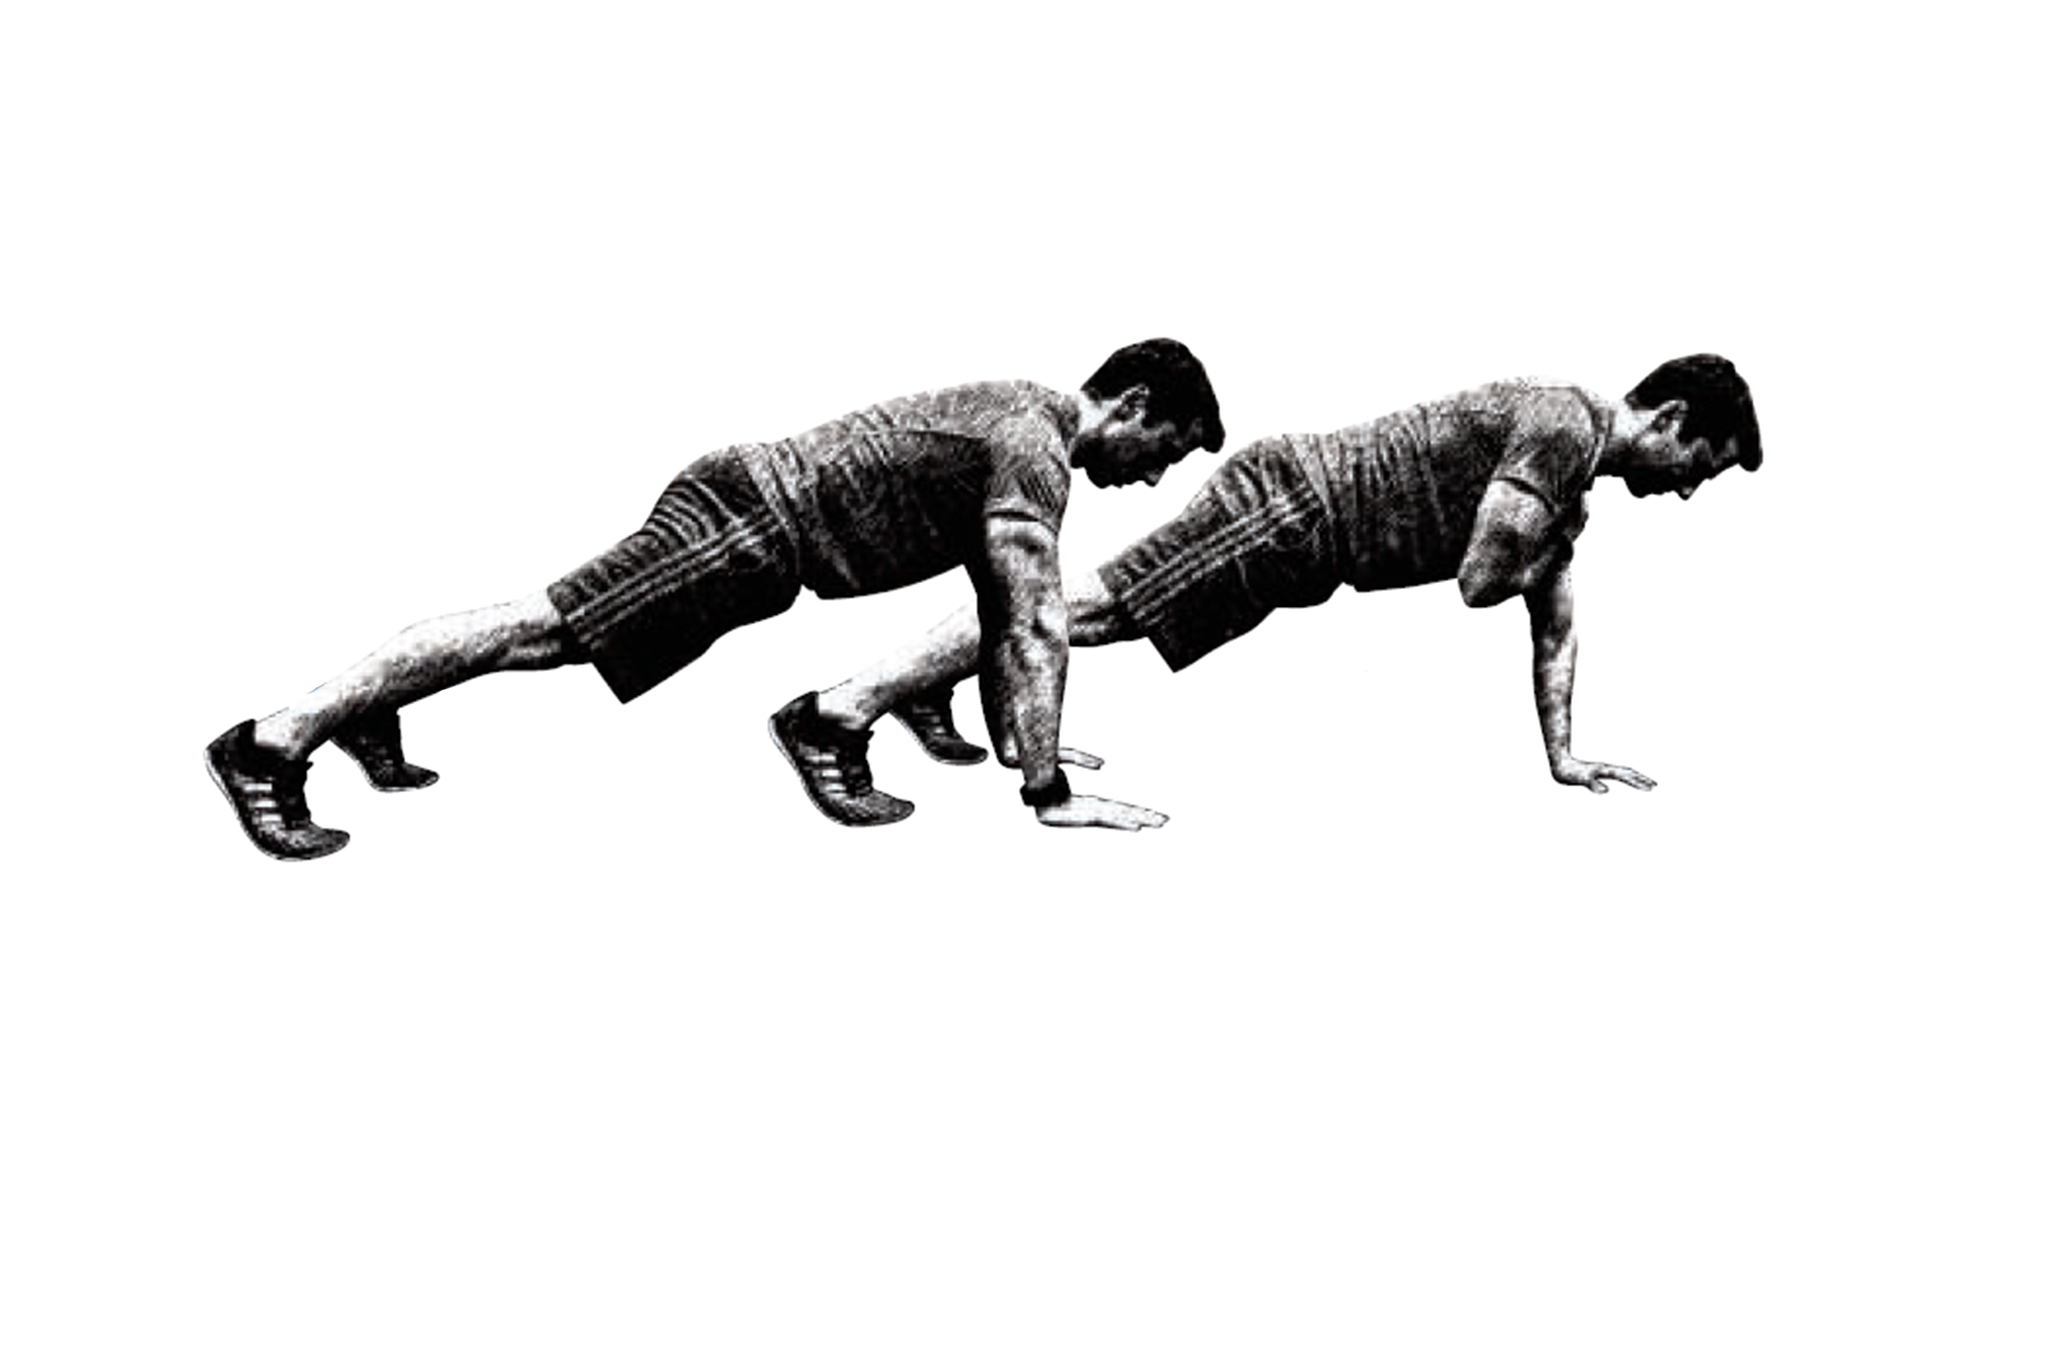
1 Straight-Arm Plank With Shoulder Tap
Begin in push-up position with your feet a little wider than shoulder-width apart. Keeping your whole body rigid, alternately place one arm on the opposite shoulder. Move as little as possible. Complete three sets of 30 seconds.
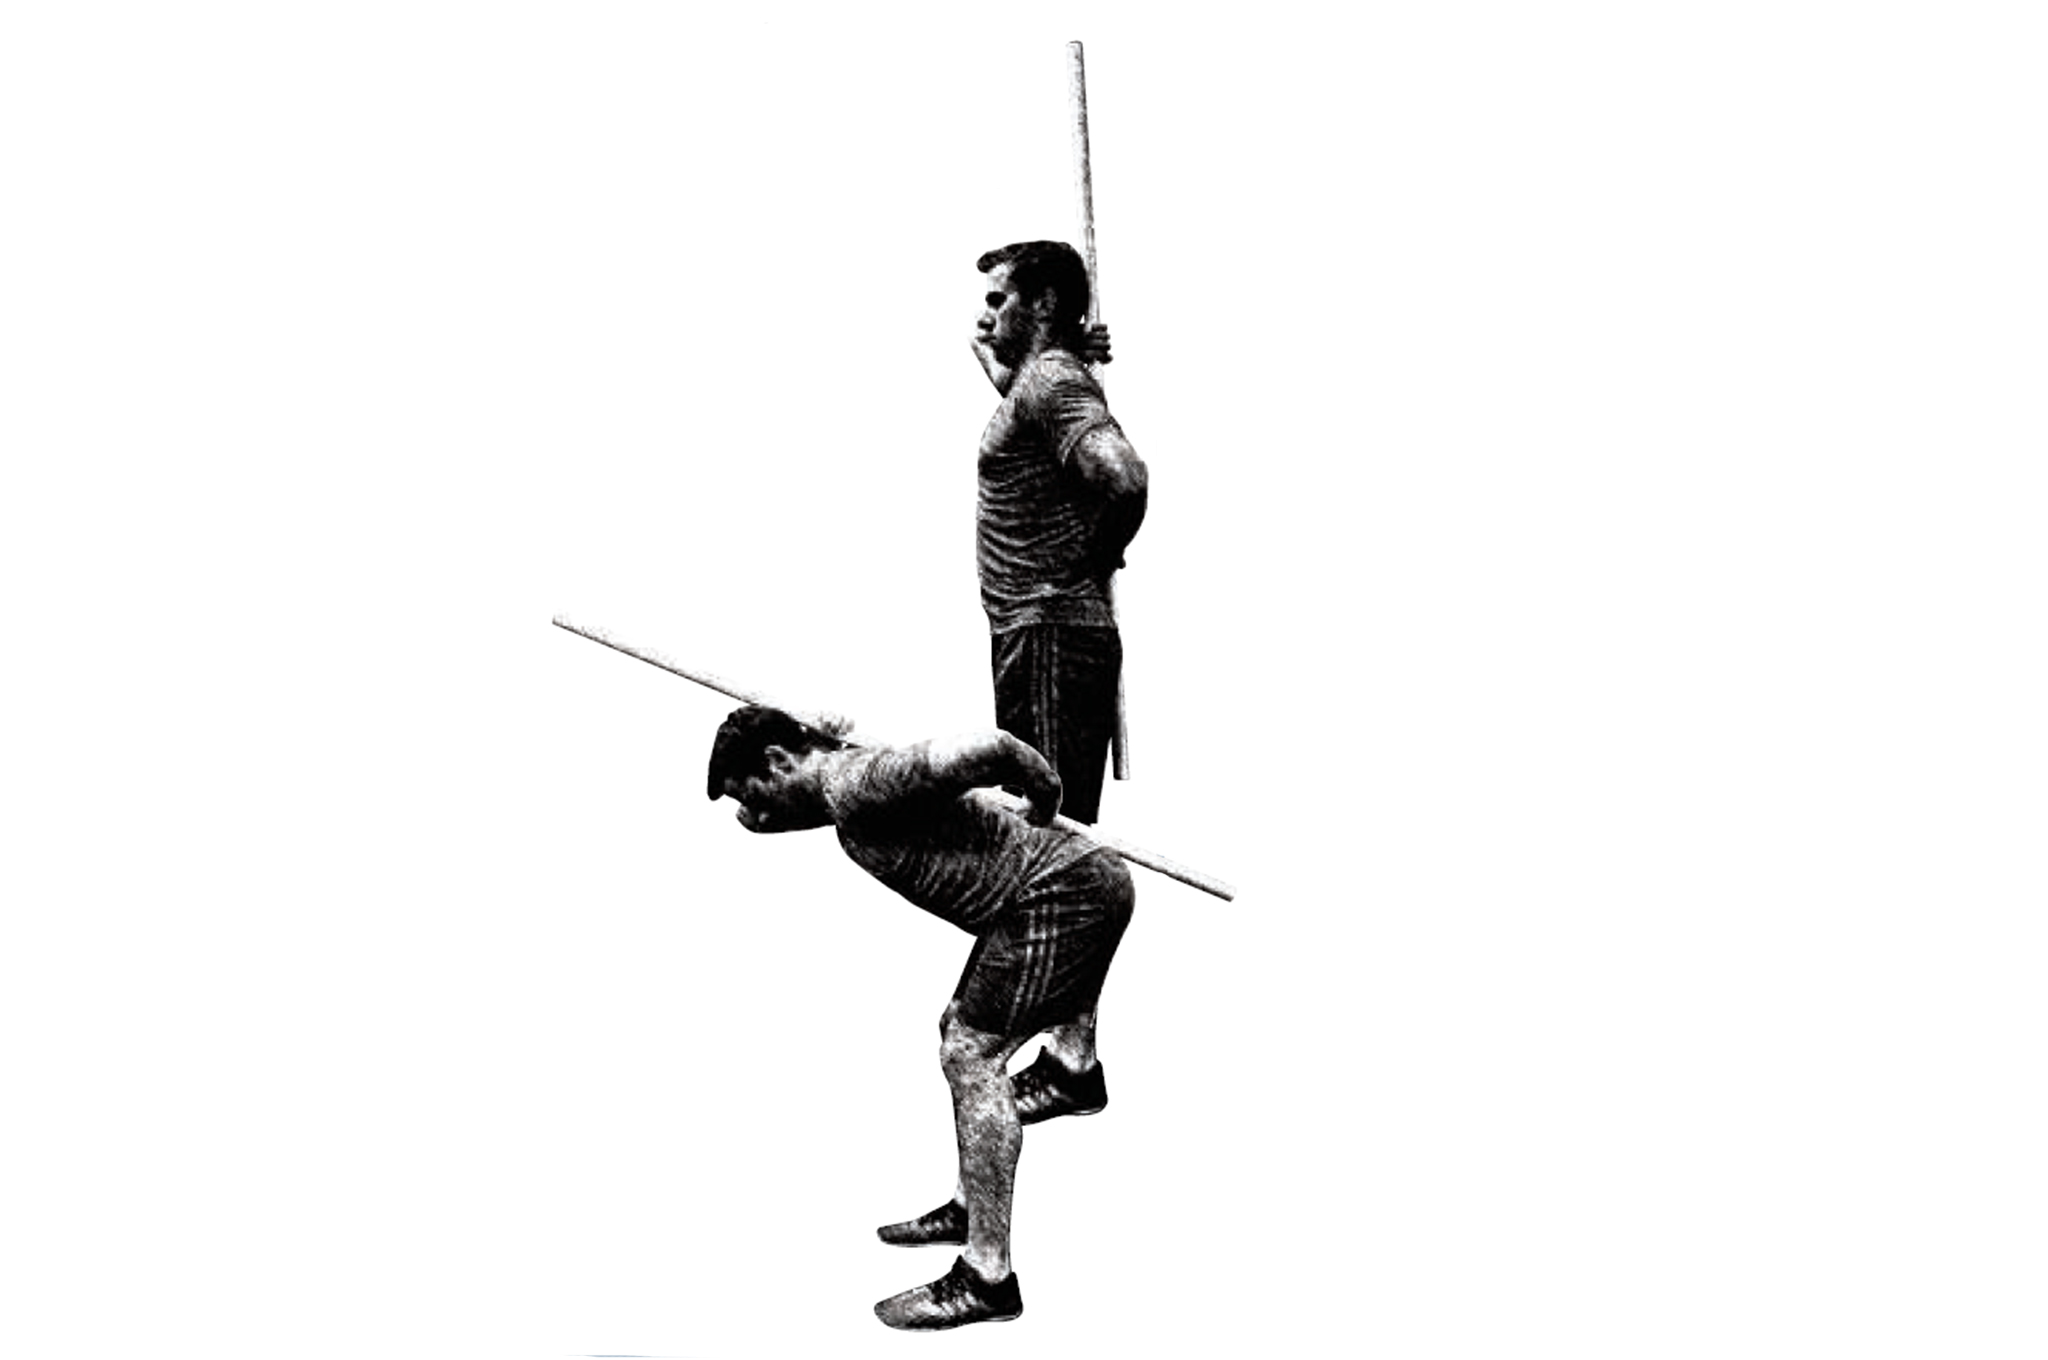
2 Hip Hinge with Dowel
Learning to move through your hips can drastically reduce the amount of strain on your lower back. Begin by holding a dowel or broomstick along your back, touching the back of your head, spine, and tailbone. Soften your knees. Keeping the dowel in contact with all three points, drive your hips backward until you feel a stretch in your hamstrings. Push your feet into the floor to return to the starting position. Complete three sets of 10 repetitions.
Conclusion
The bottom line is that rarely is an issue in one joint isolated to that particular joint. Most often, it’s the surrounding joints — or even more distant joints — that have a significant impact on how well it functions. Oftentimes, you can help yourself overcome aches and pains simply by knowing how to take care of yourself. Self care is one of the best assurances to provide maximum advantage when disaster strikes. So learn what you need to do to become more durable and to take care of yourself and others when crap starts hitting the fan.
Sources
Athletic Body In Balance > http://www.humankinetics.com
Movement: Functional Movement Systems > http://www.otpbooks.com
About The Author:
A frequent Recoil Offgrid contributor, Ryne Gioviano is the co-owner of Welligee Personal Training & Lifestyle located in Naperville, Illinois. He holds a master’s degree in exercise physiology and is certified through the National Strength and Conditioning Association.
http://www.welligee.com
