In This Article
Hiking, camping, shooting, and off-roading — these are a few of our favorite things. Even if you’re not a custom vehicle enthusiast, it’s hard to deny the value that a well-equipped truck brings to each of these outdoor activities. It offers the space to load up all the gear you want, the ruggedness to make it through mud and snow, and the emergency supplies you need if you get stuck or injured. Essentially, it offers the freedom to go on a variety of adventures. This was the realization that led me to start our Toyota 4Runner overland vehicle project, which began with the installation of off-grid communication and navigation equipment inside the cab. The next phase involves some more noticeable upgrades: a Westcott Designs roof rack, an array of Baja Designs LED lights, and an sPOD system to control the onboard electronics.
Function Over Fashion
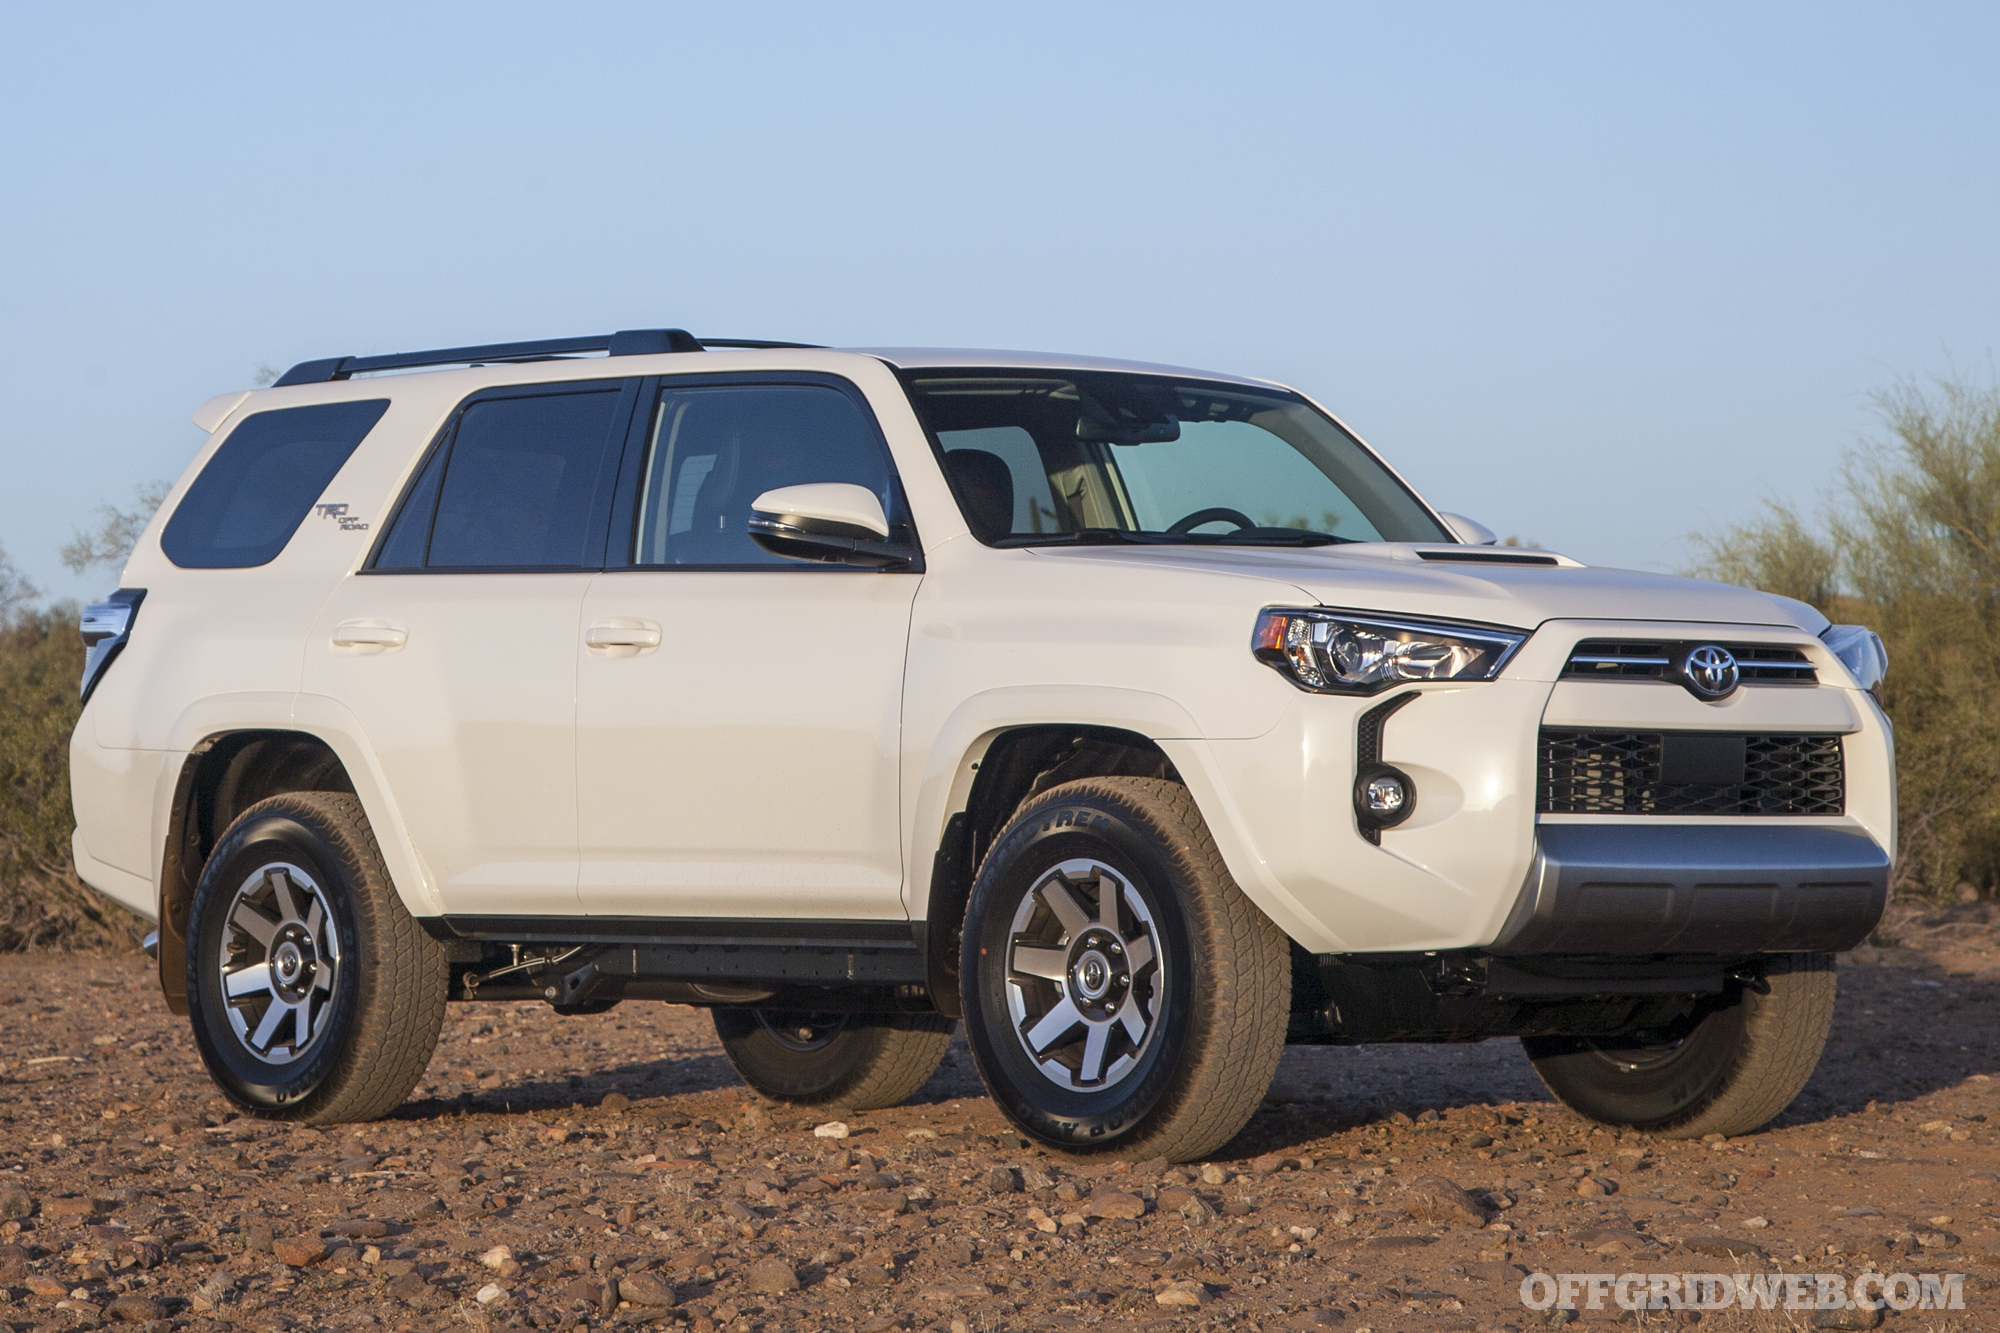
Above: Here’s a photo of the 4Runner in stock form shortly after I purchased it.
Plenty of guys like to upgrade their trucks with heavy-duty roof racks piled high with recovery gear and enough LED lights to resemble one of the UFOs from Close Encounters of the Third Kind. There’s nothing wrong with these flashy builds, but personally, I prefer the “less is more” approach. So, I started the exterior upgrades with a Lo-Pro roof rack from local Arizona truck parts manufacturer Westcott Designs. This offers expandability for a variety of gear and accessories in the future — awnings, rooftop tents, rifle cases, mountain bikes, and so on — but maintains a sleek appearance.
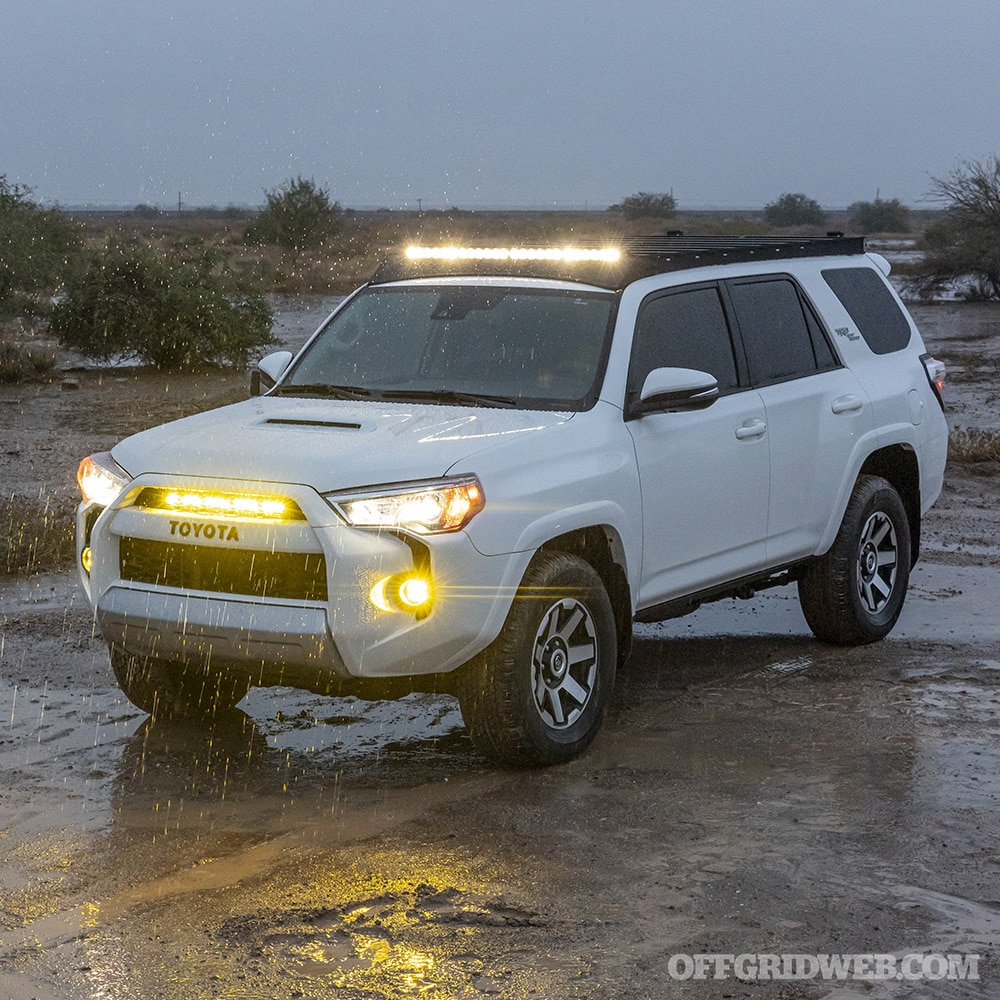
Lighting was next on my wishlist. I live in an area where streetlights are few and far between, and I often drive to remote locations where it gets extremely dark after sunset. Light makes any nighttime activity easier, whether it’s cleaning up gear after an evening range session or attempting to navigate a narrow trail back to the main road. My 2022 4Runner’s stock Bi-LED headlight low beams are good, but the high beam only moves a shutter to adjust the light pattern; it barely makes a difference in a truly dark environment. So, I reached out to Baja Designs for a few auxiliary LED lights that will massively increase the truck’s available light output.
These include amber lights in the bumper and grille to cut through dust and fog, a 40-inch white light bar on the roof rack to replace the puny factory high beam, and a pair of rear-facing area lights that double as high-powered hazard/strobe lights.
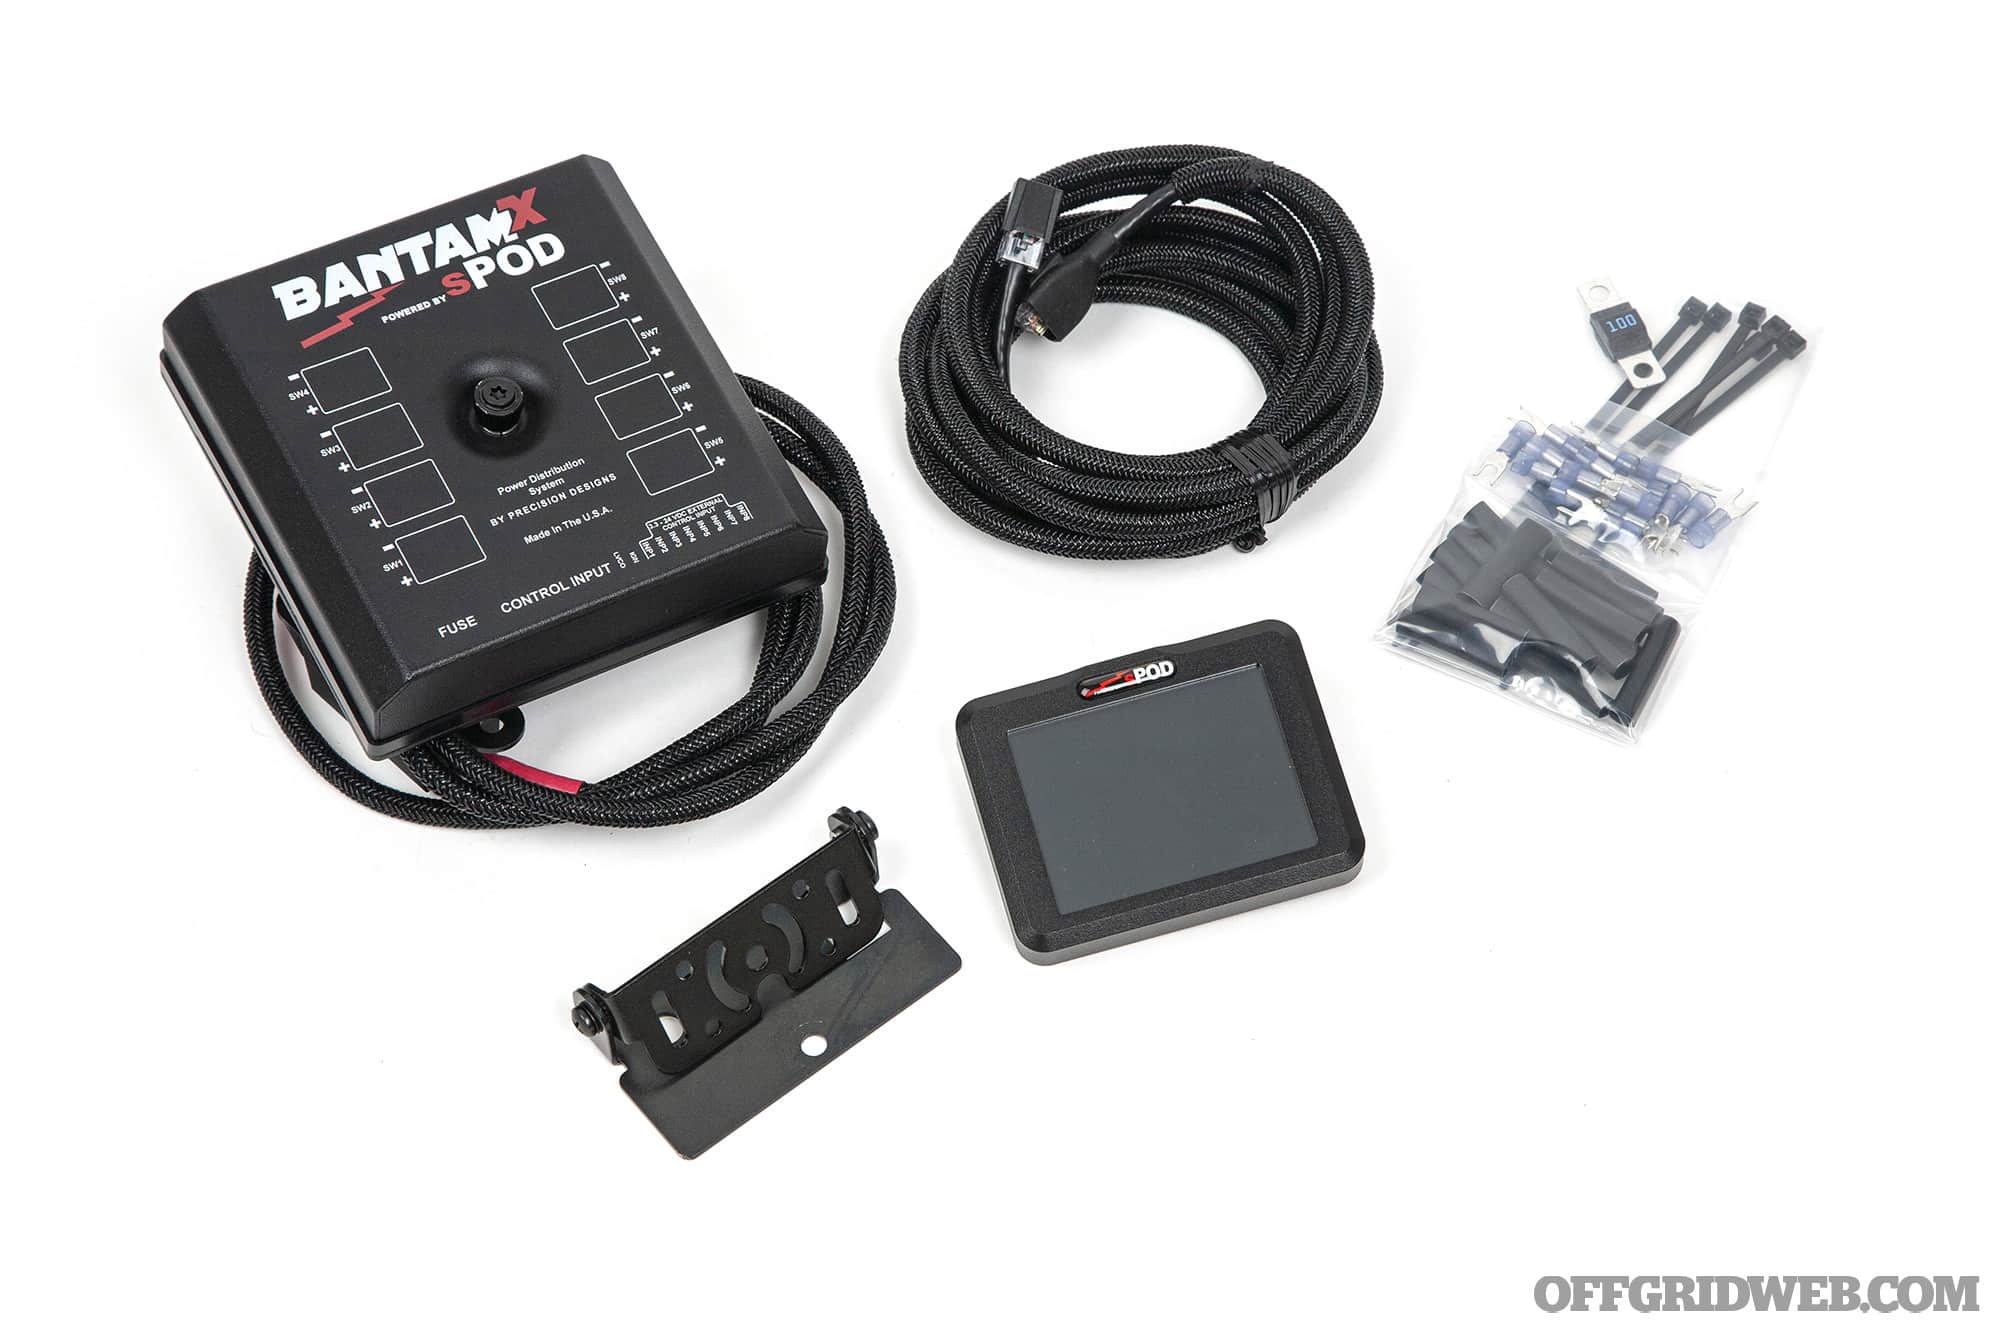
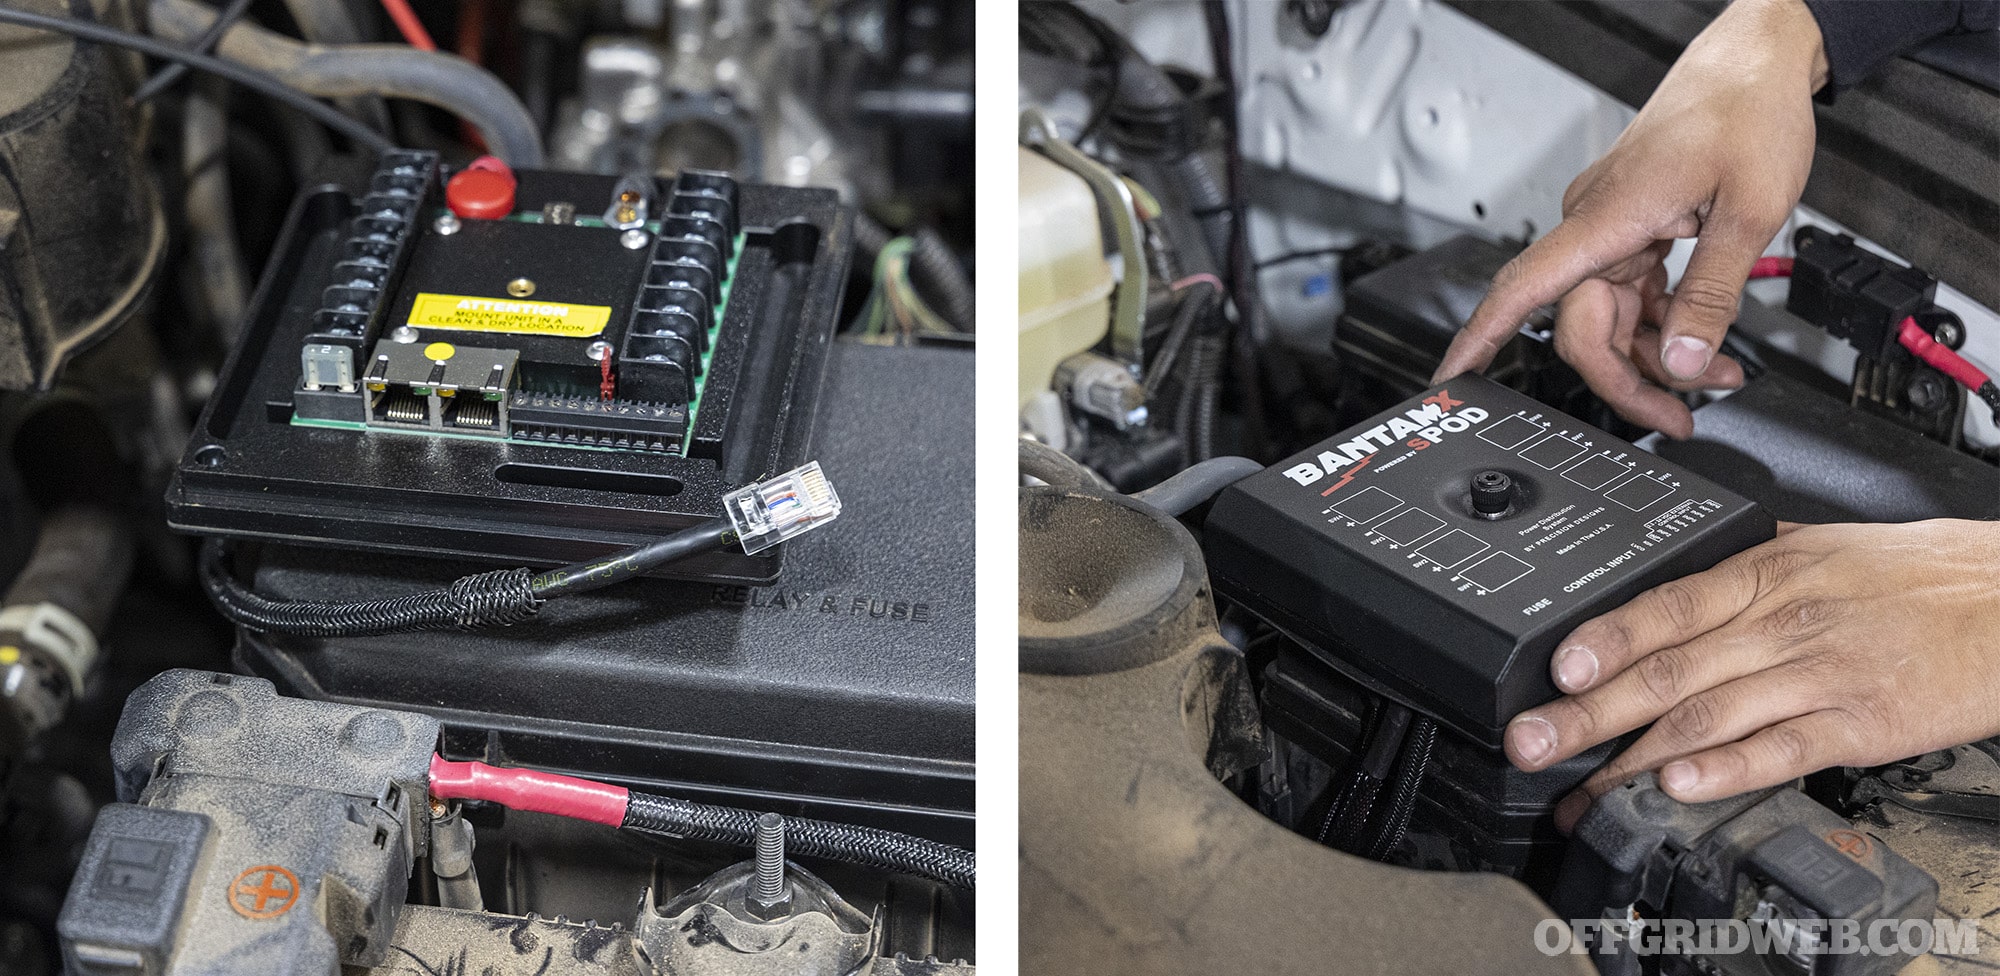
Above: The sPOD BantamX Touchscreen kit serves as an electronic brain that simplifies the wiring and management of electronic accessories. I’m using it primarily for lights, but it can also control up to 8 items such as refrigerators, air compressors, radios, backup power stations, and all kinds of other vehicle-mounted gear.
Wiring four sets of auxiliary lights could easily lead to a rat’s nest of wires under the hood; that’s not only ugly, it’s a huge headache to install and troubleshoot. I decided to alleviate this problem by installing an sPOD BantamX, which conveniently manages all the lighting connections (and other electronic accessories) in a single unit that mounts in the engine bay atop the fuse box. The BantamX unit is then simply connected with a single wire to an sPOD touchscreen controller inside the truck, allowing me to activate any or all of the lights. It also adds dimming, strobe, automatic shut-off timer, and many other smart functions (more on that later).
Baja Designs Lights
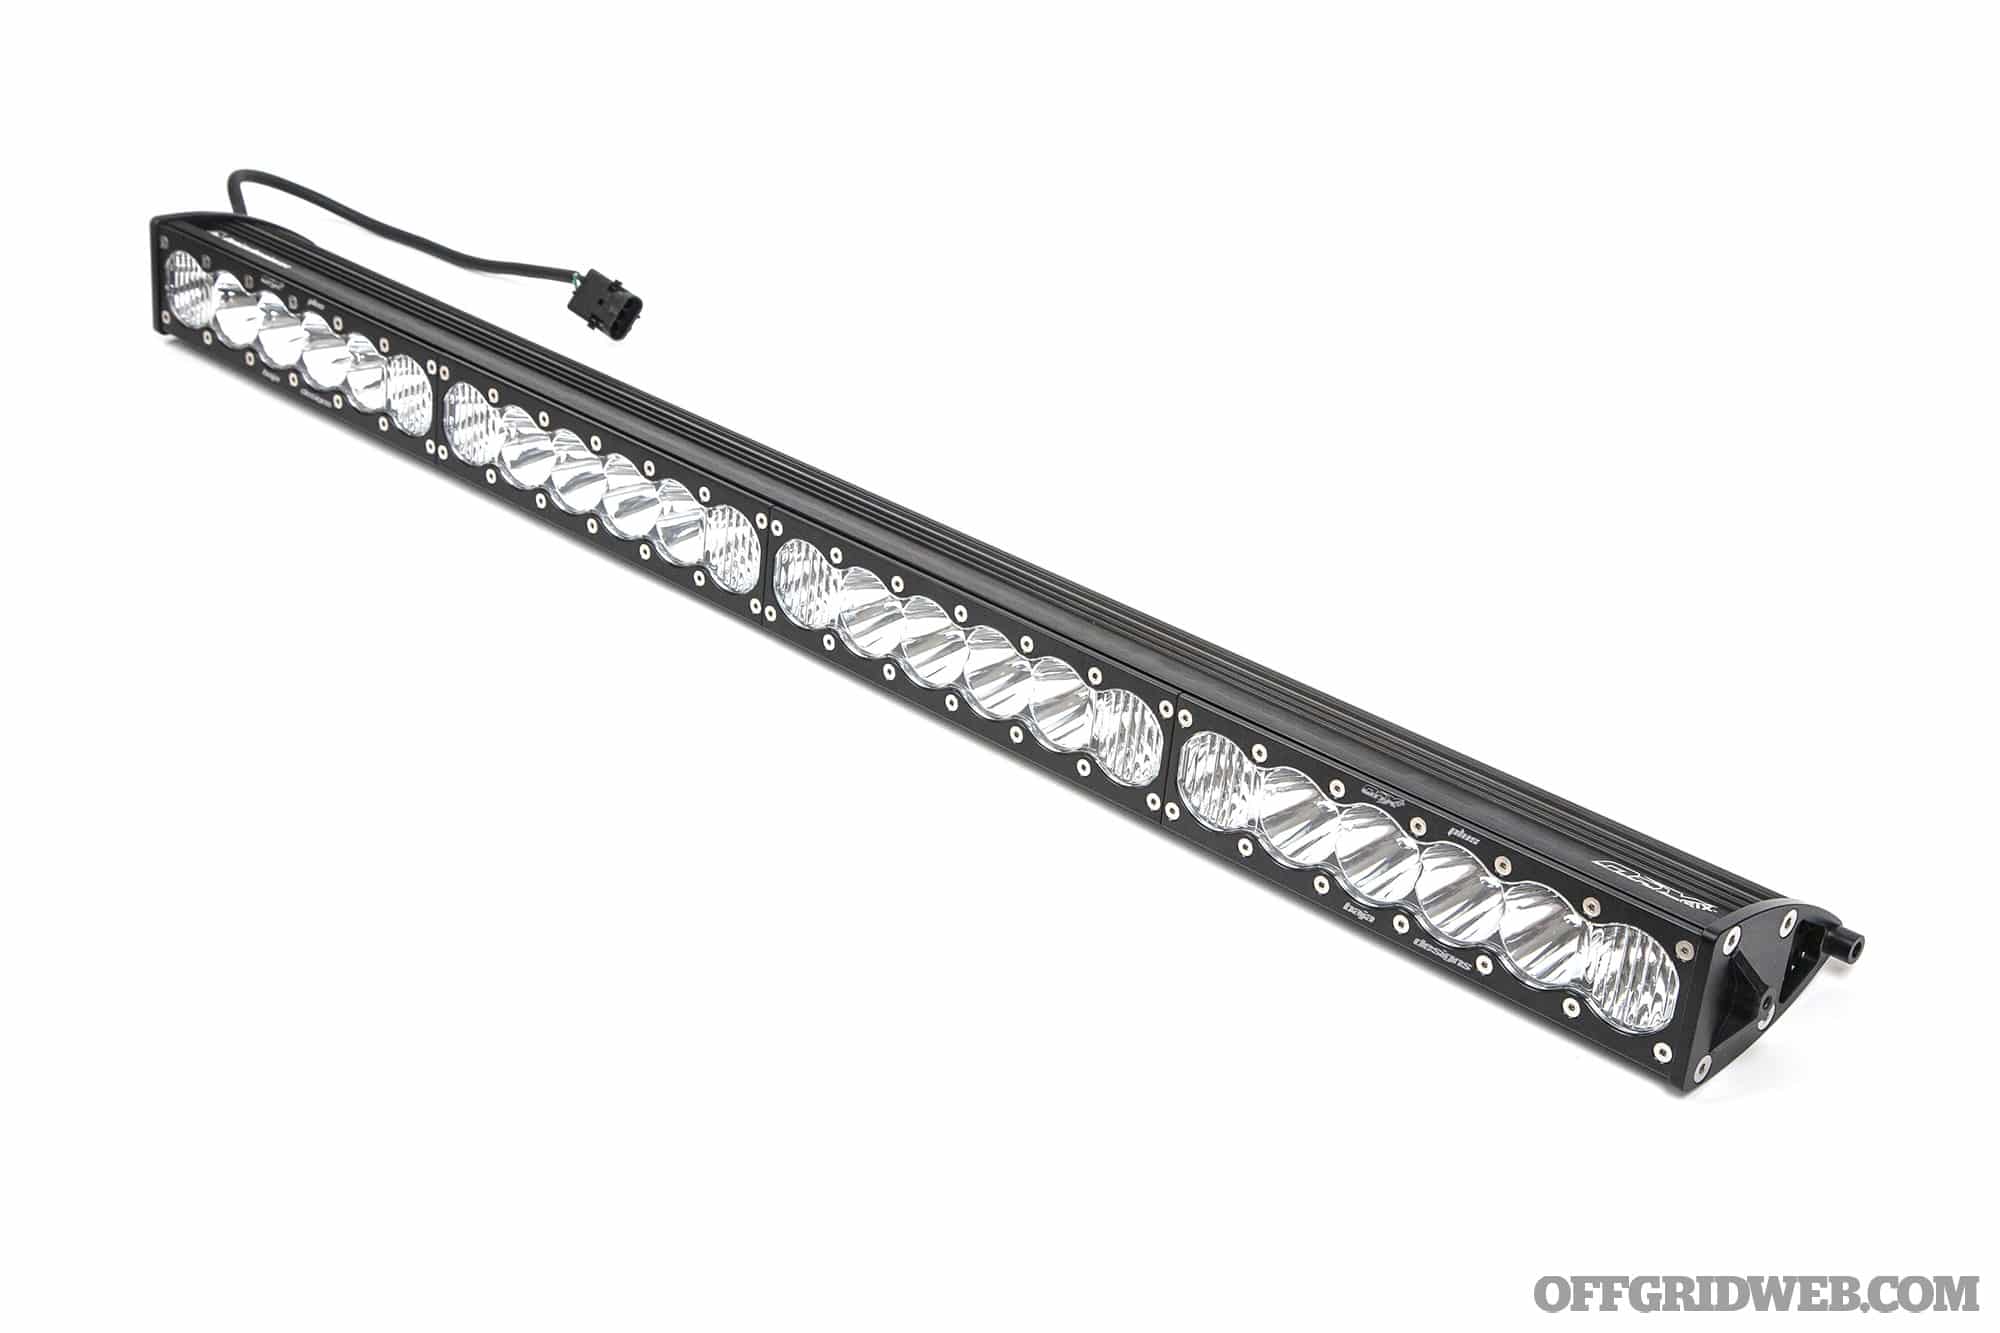
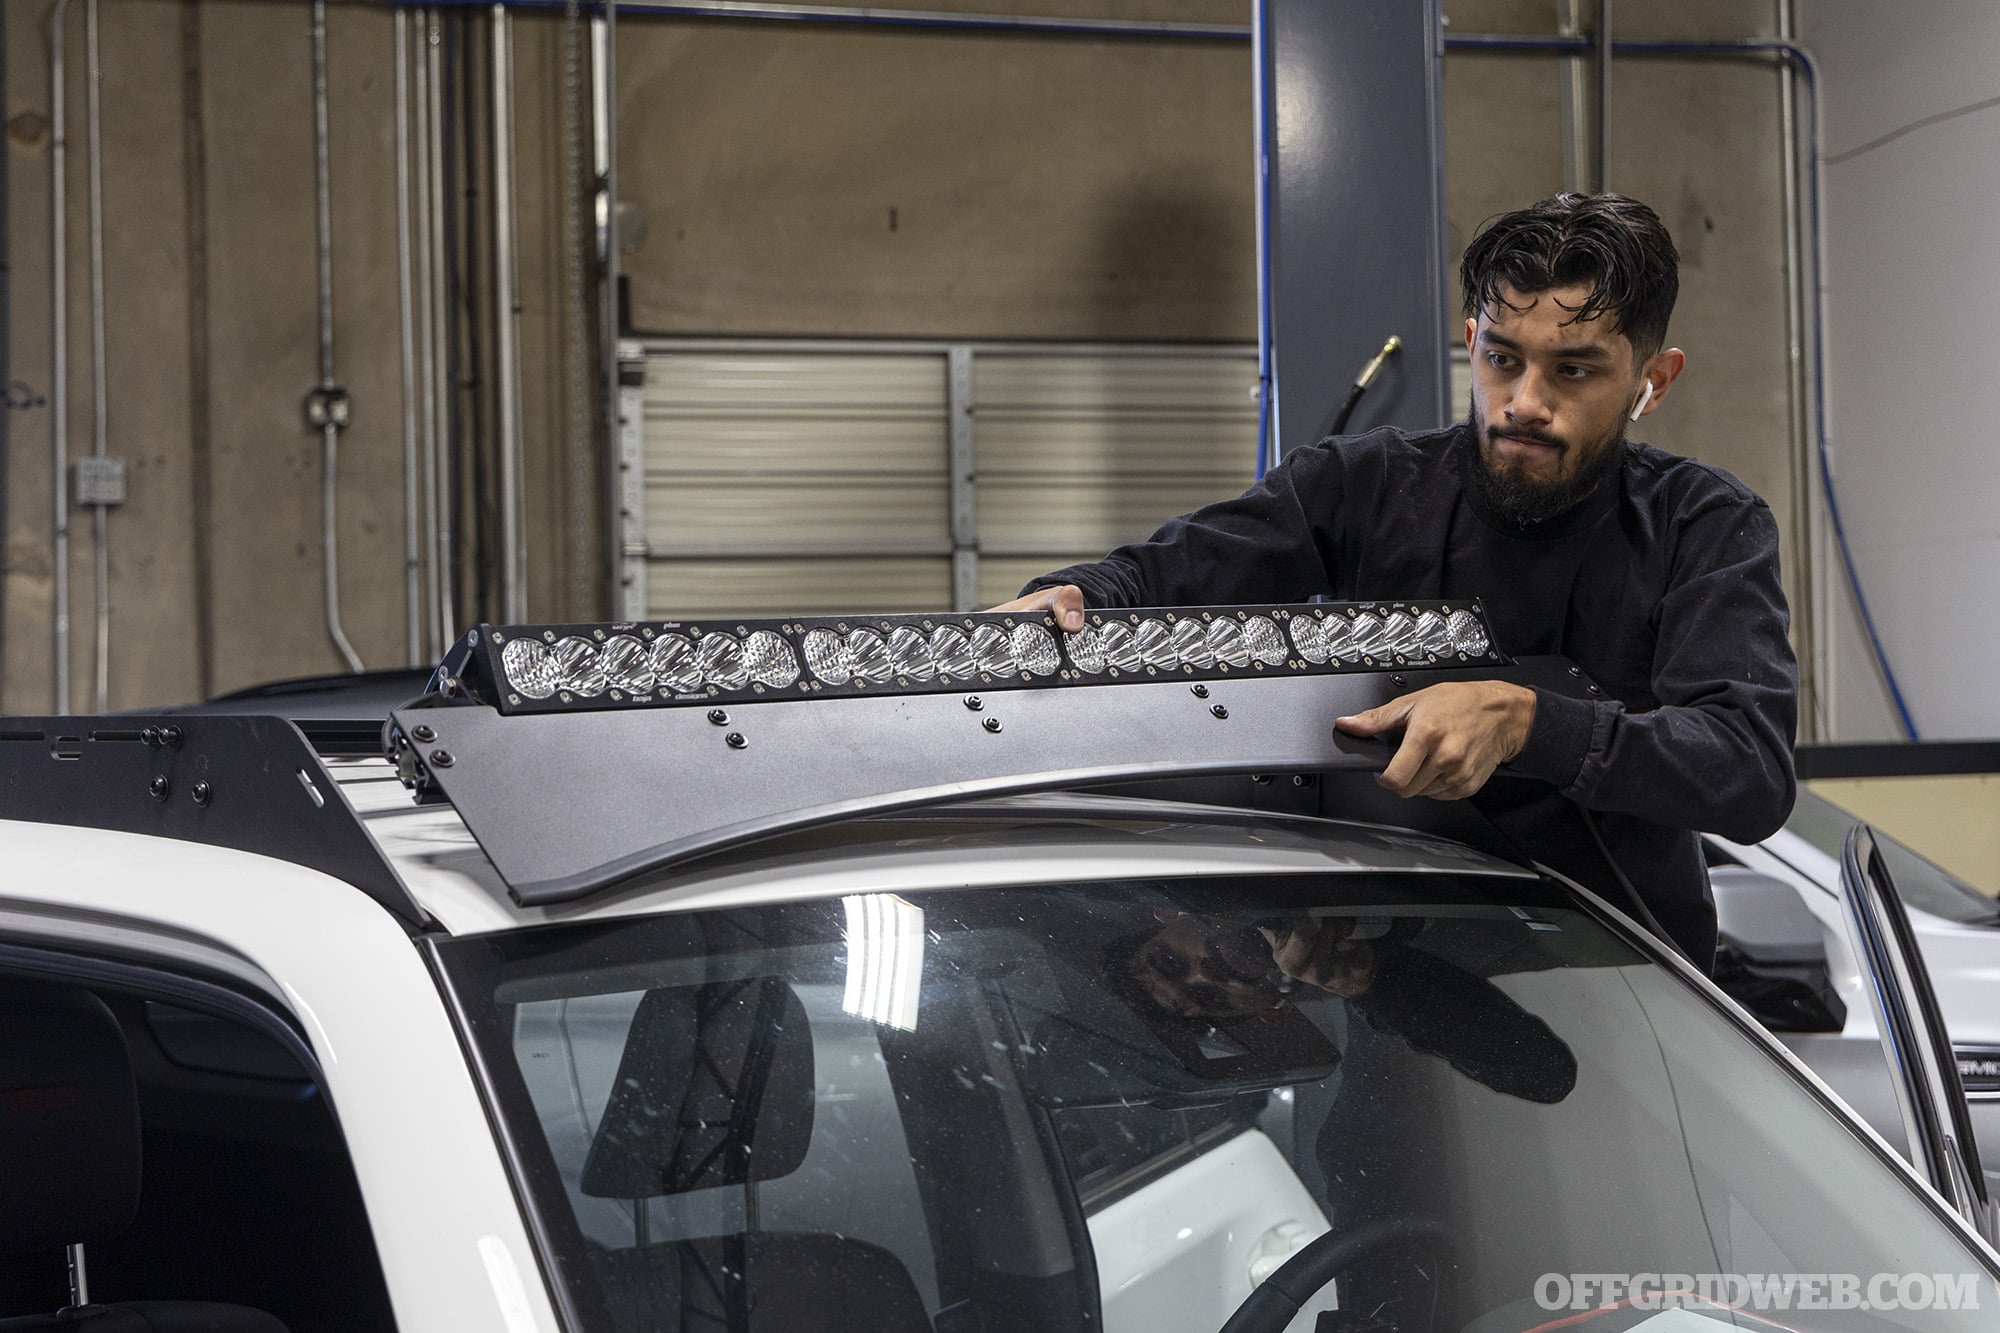
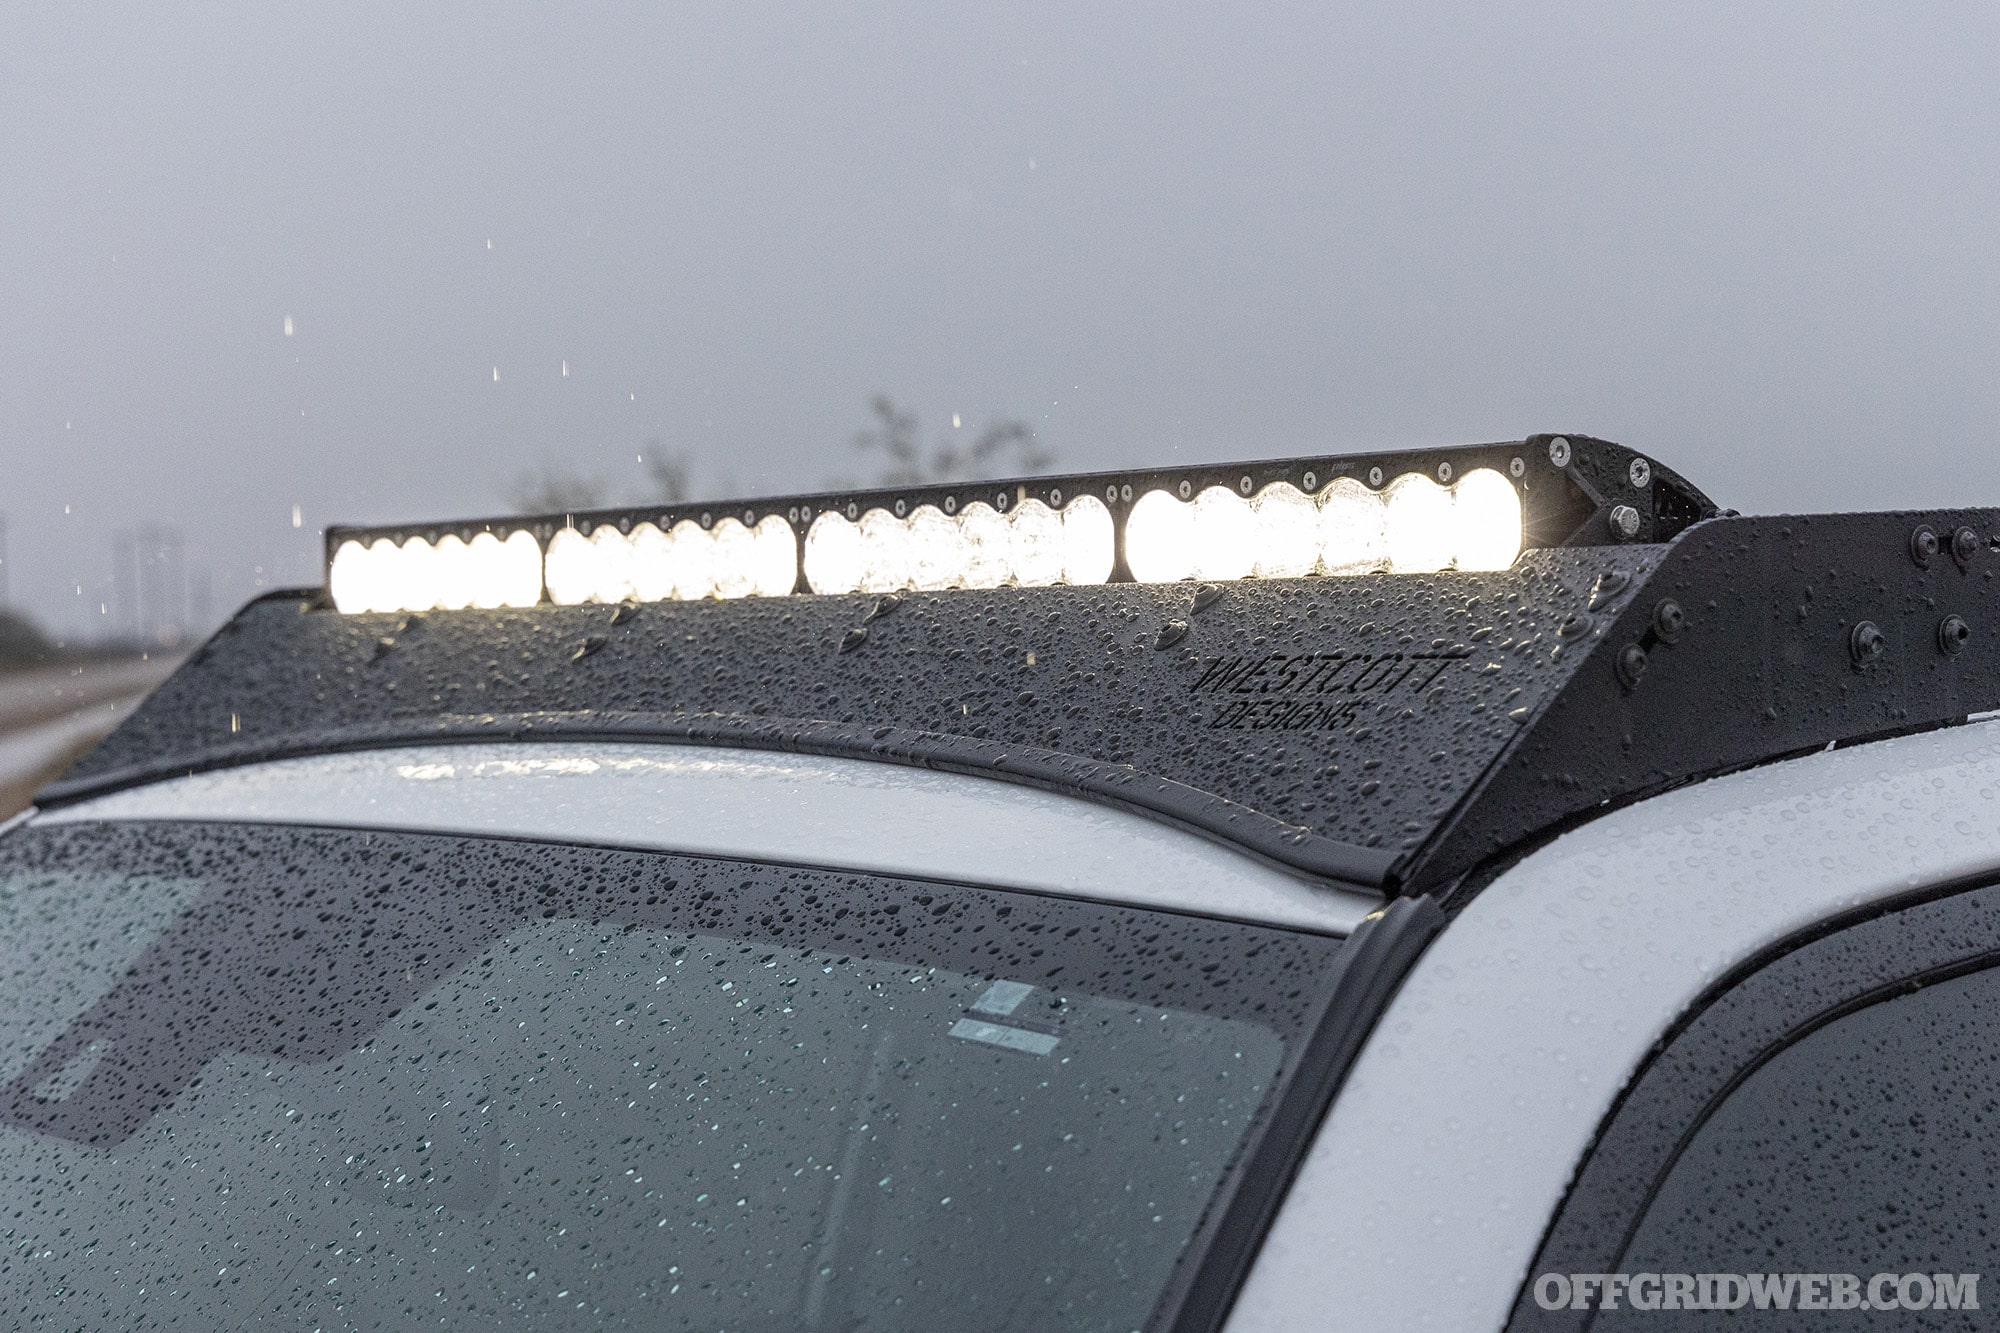
I began this project by planning out the lights I needed using Baja Designs’ lighting zones framework. The 4Runner’s stock high beam will be supplemented by a long-distance light (Zone 4); I chose a 40-inch OnX6+ light bar that would be mounted on the roof rack. This high mounting position ensures it clears low brush and other obstructions near ground level. I went with a Driving/Combo beam pattern since I still wanted the versatility of some spill, as opposed to a tightly-focused spotlight. This bar produces an insane 38,900 lumens with an average rated lifespan of nearly 50,000 hours — that’s more than 5 years of continuous runtime.
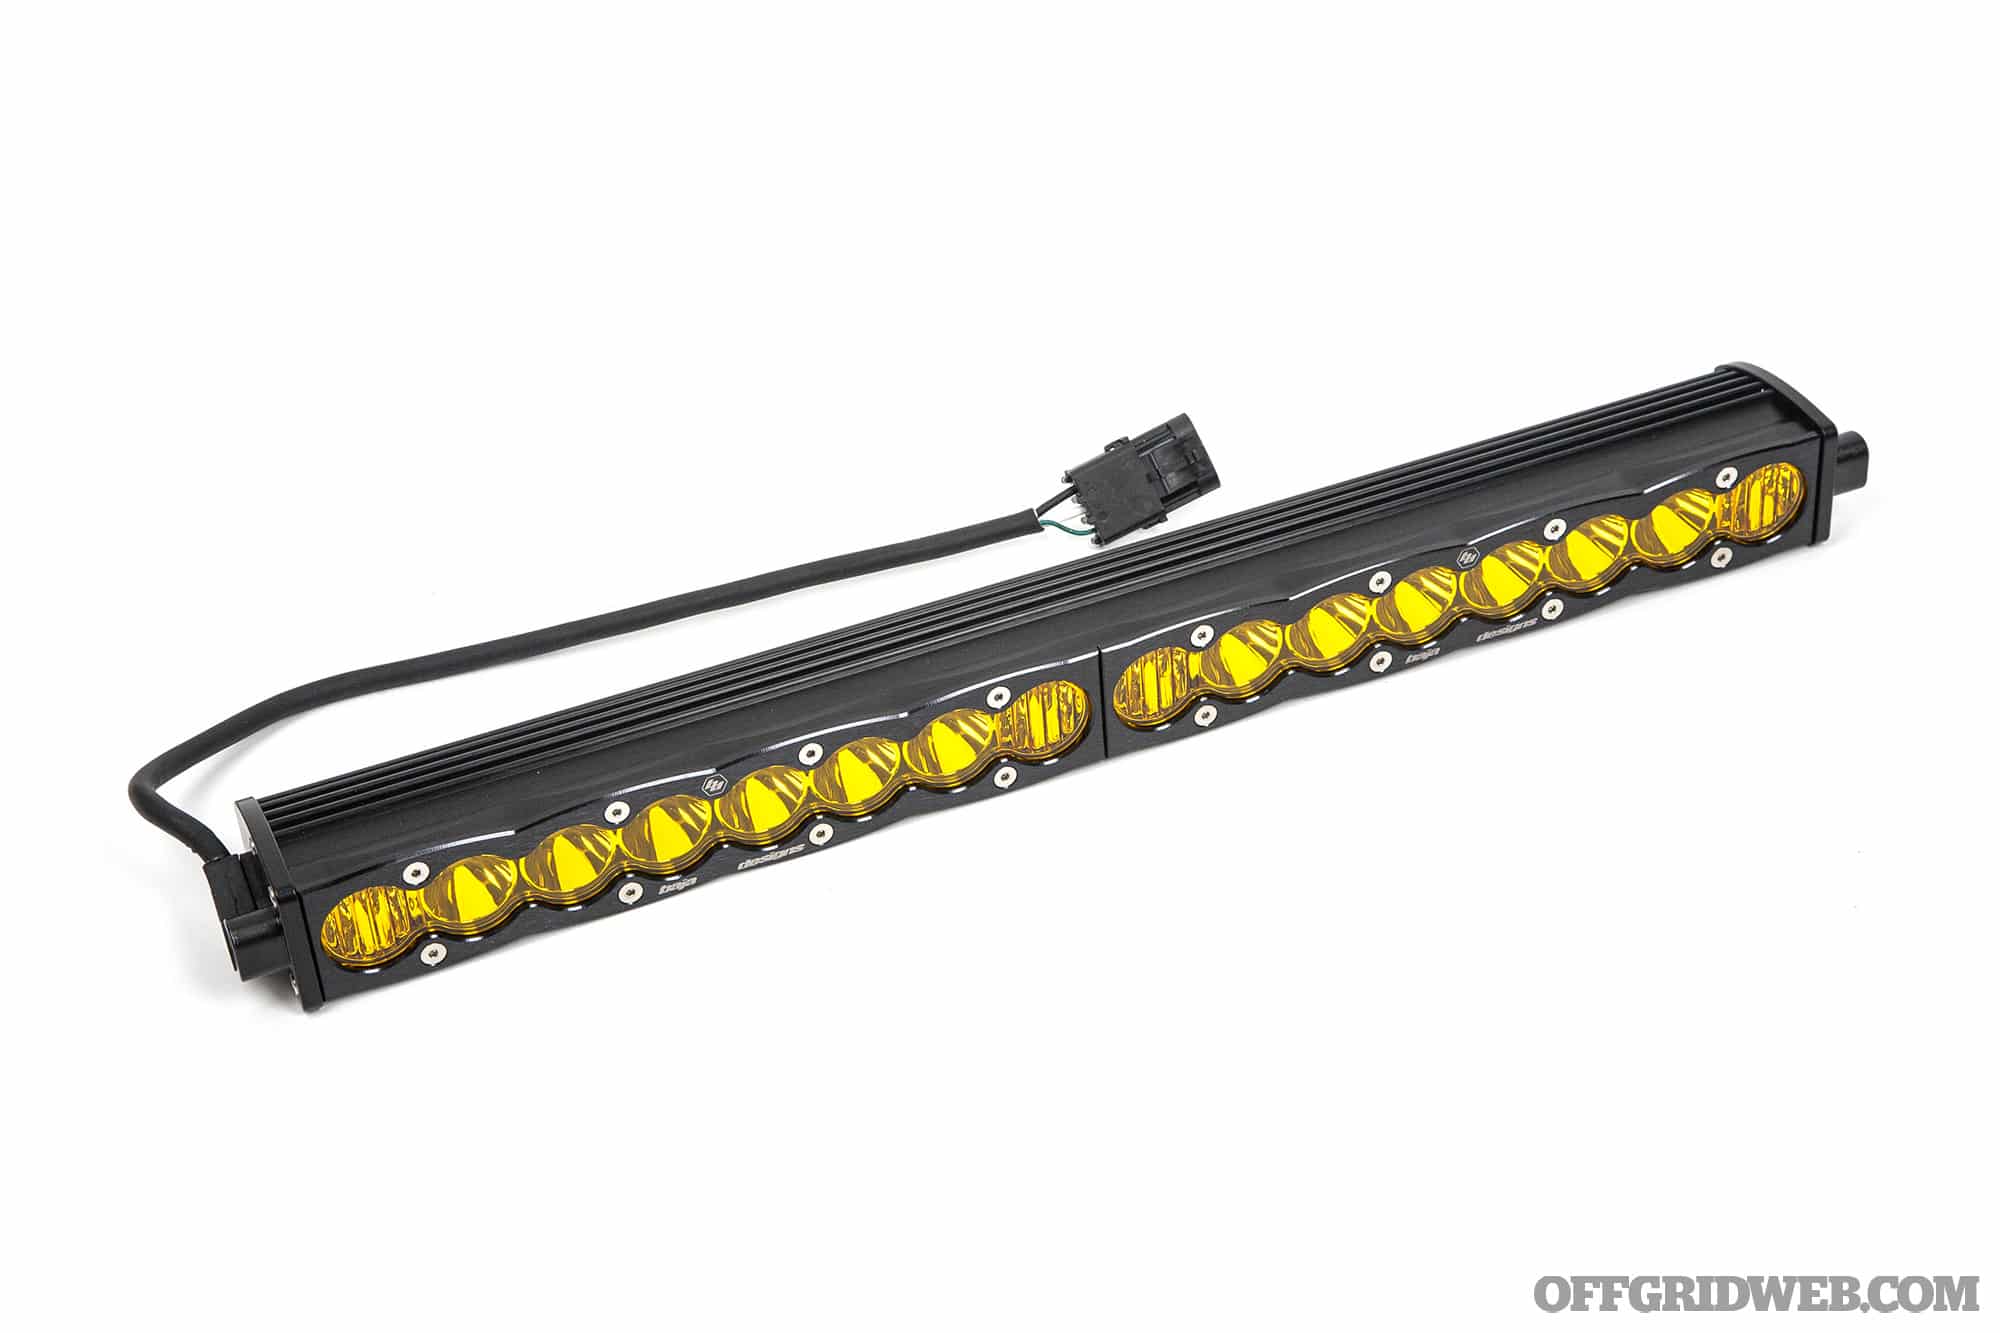
Next, I wanted some driving lights for navigating tighter trails where the immense power of a 40-inch OnX6+ would be overkill. To maintain a stealthier appearance and reduce the likelihood of theft, I decided to mount a 20-inch Baja Designs S8 light bar behind the grille. This covers Baja Designs’ Zone 3 with a “primary driving light” pattern. I recently upgraded the 4Runner to a white TRD-Pro-style grille from Trail Standard Offroad, which deletes the Toyota emblem and chrome strips that block the upper grille on TRD Offroad models like mine. That modification made it possible to place the S8 inside the upper grille using light bar brackets from SDHQ.
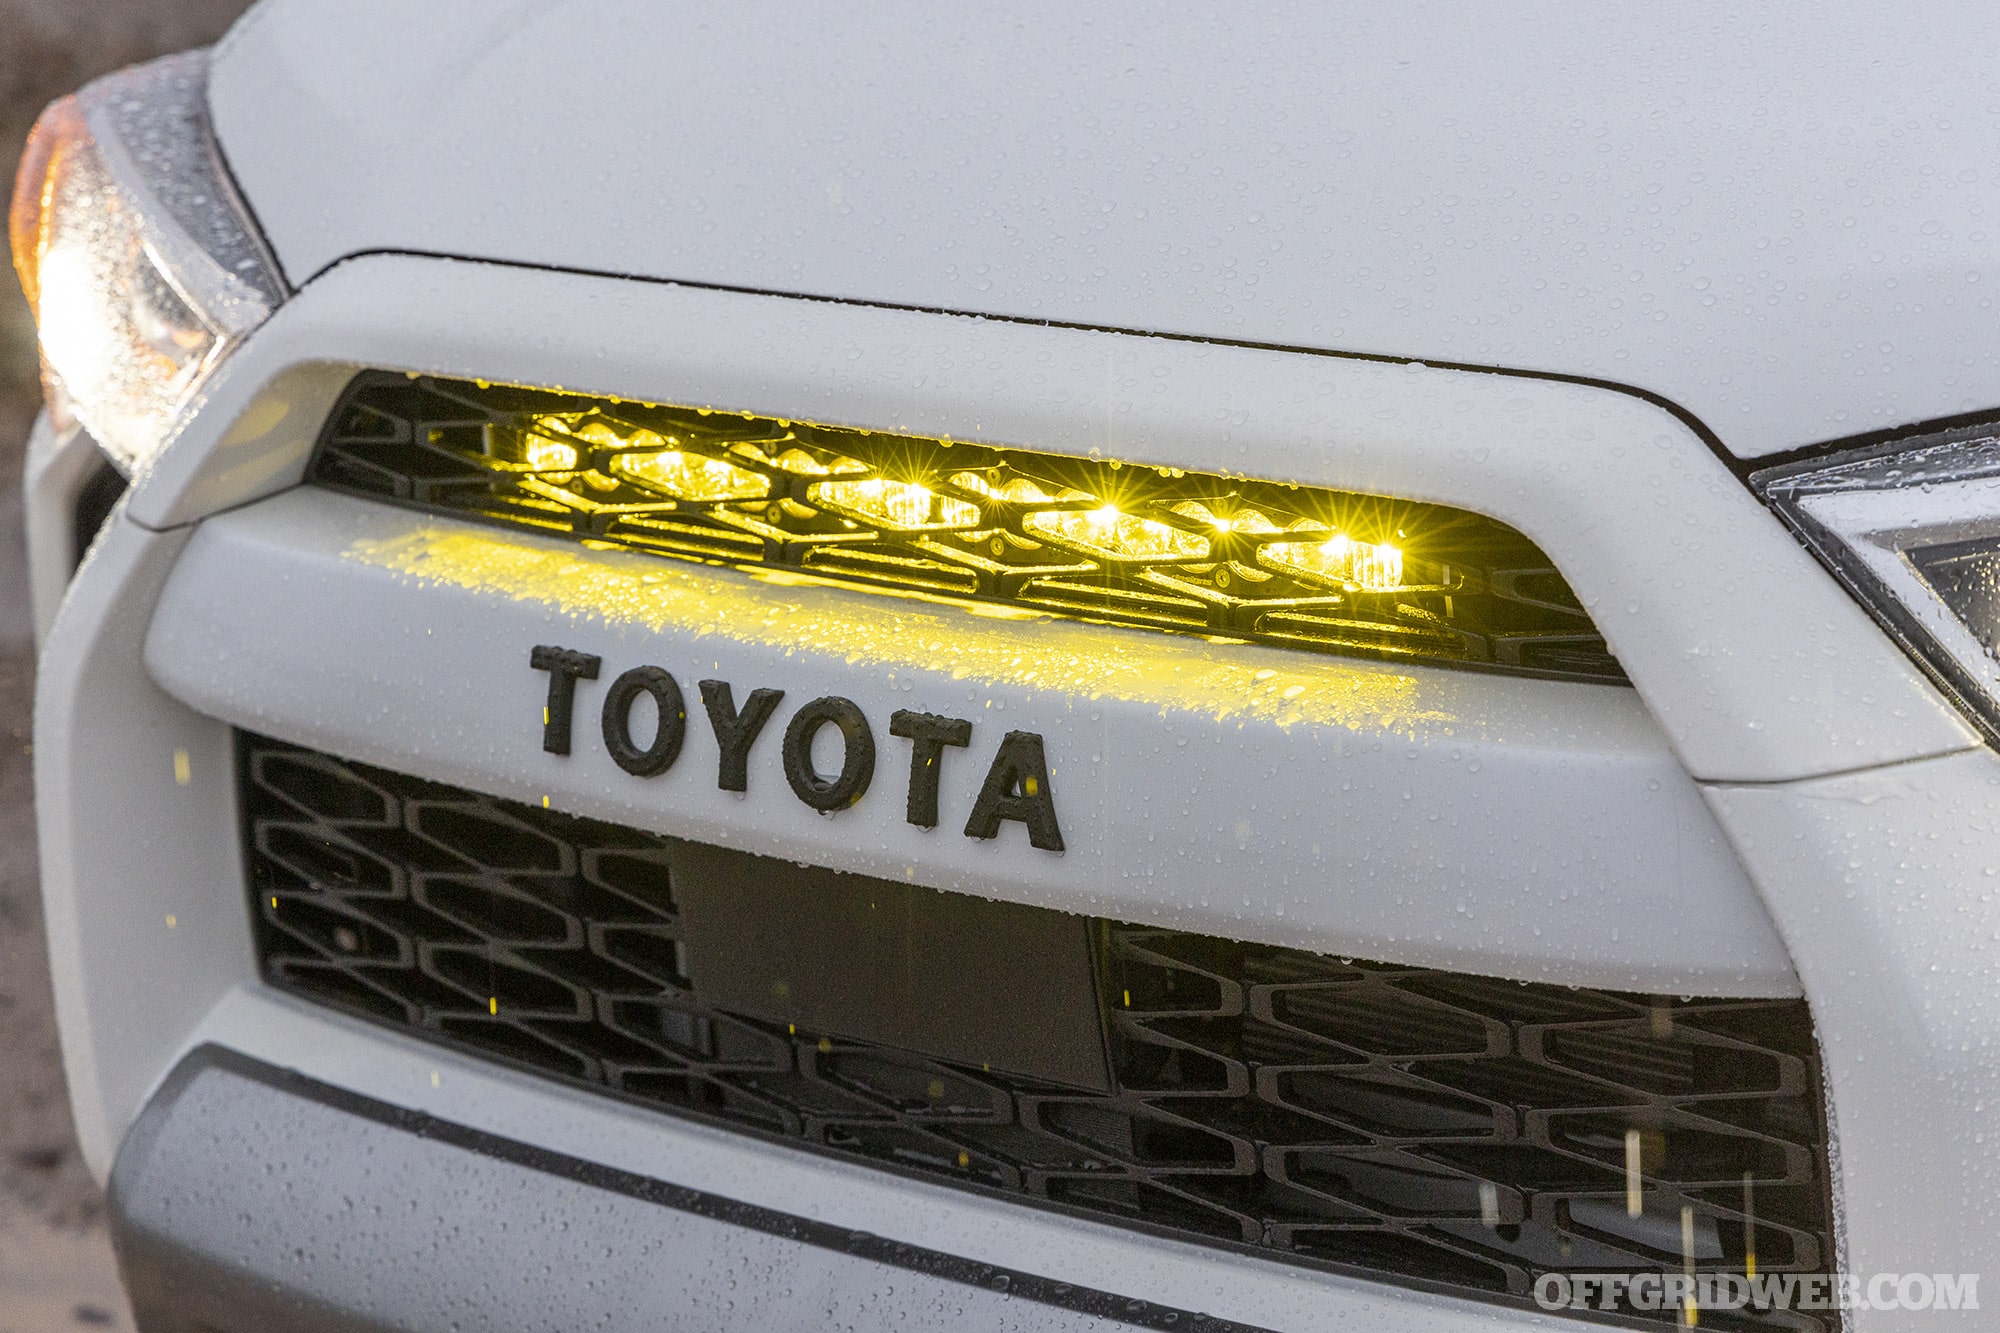
Above: The 20-inch light bar is barely visible when it’s turned off, but shines through the upper grille clearly once it’s powered on.
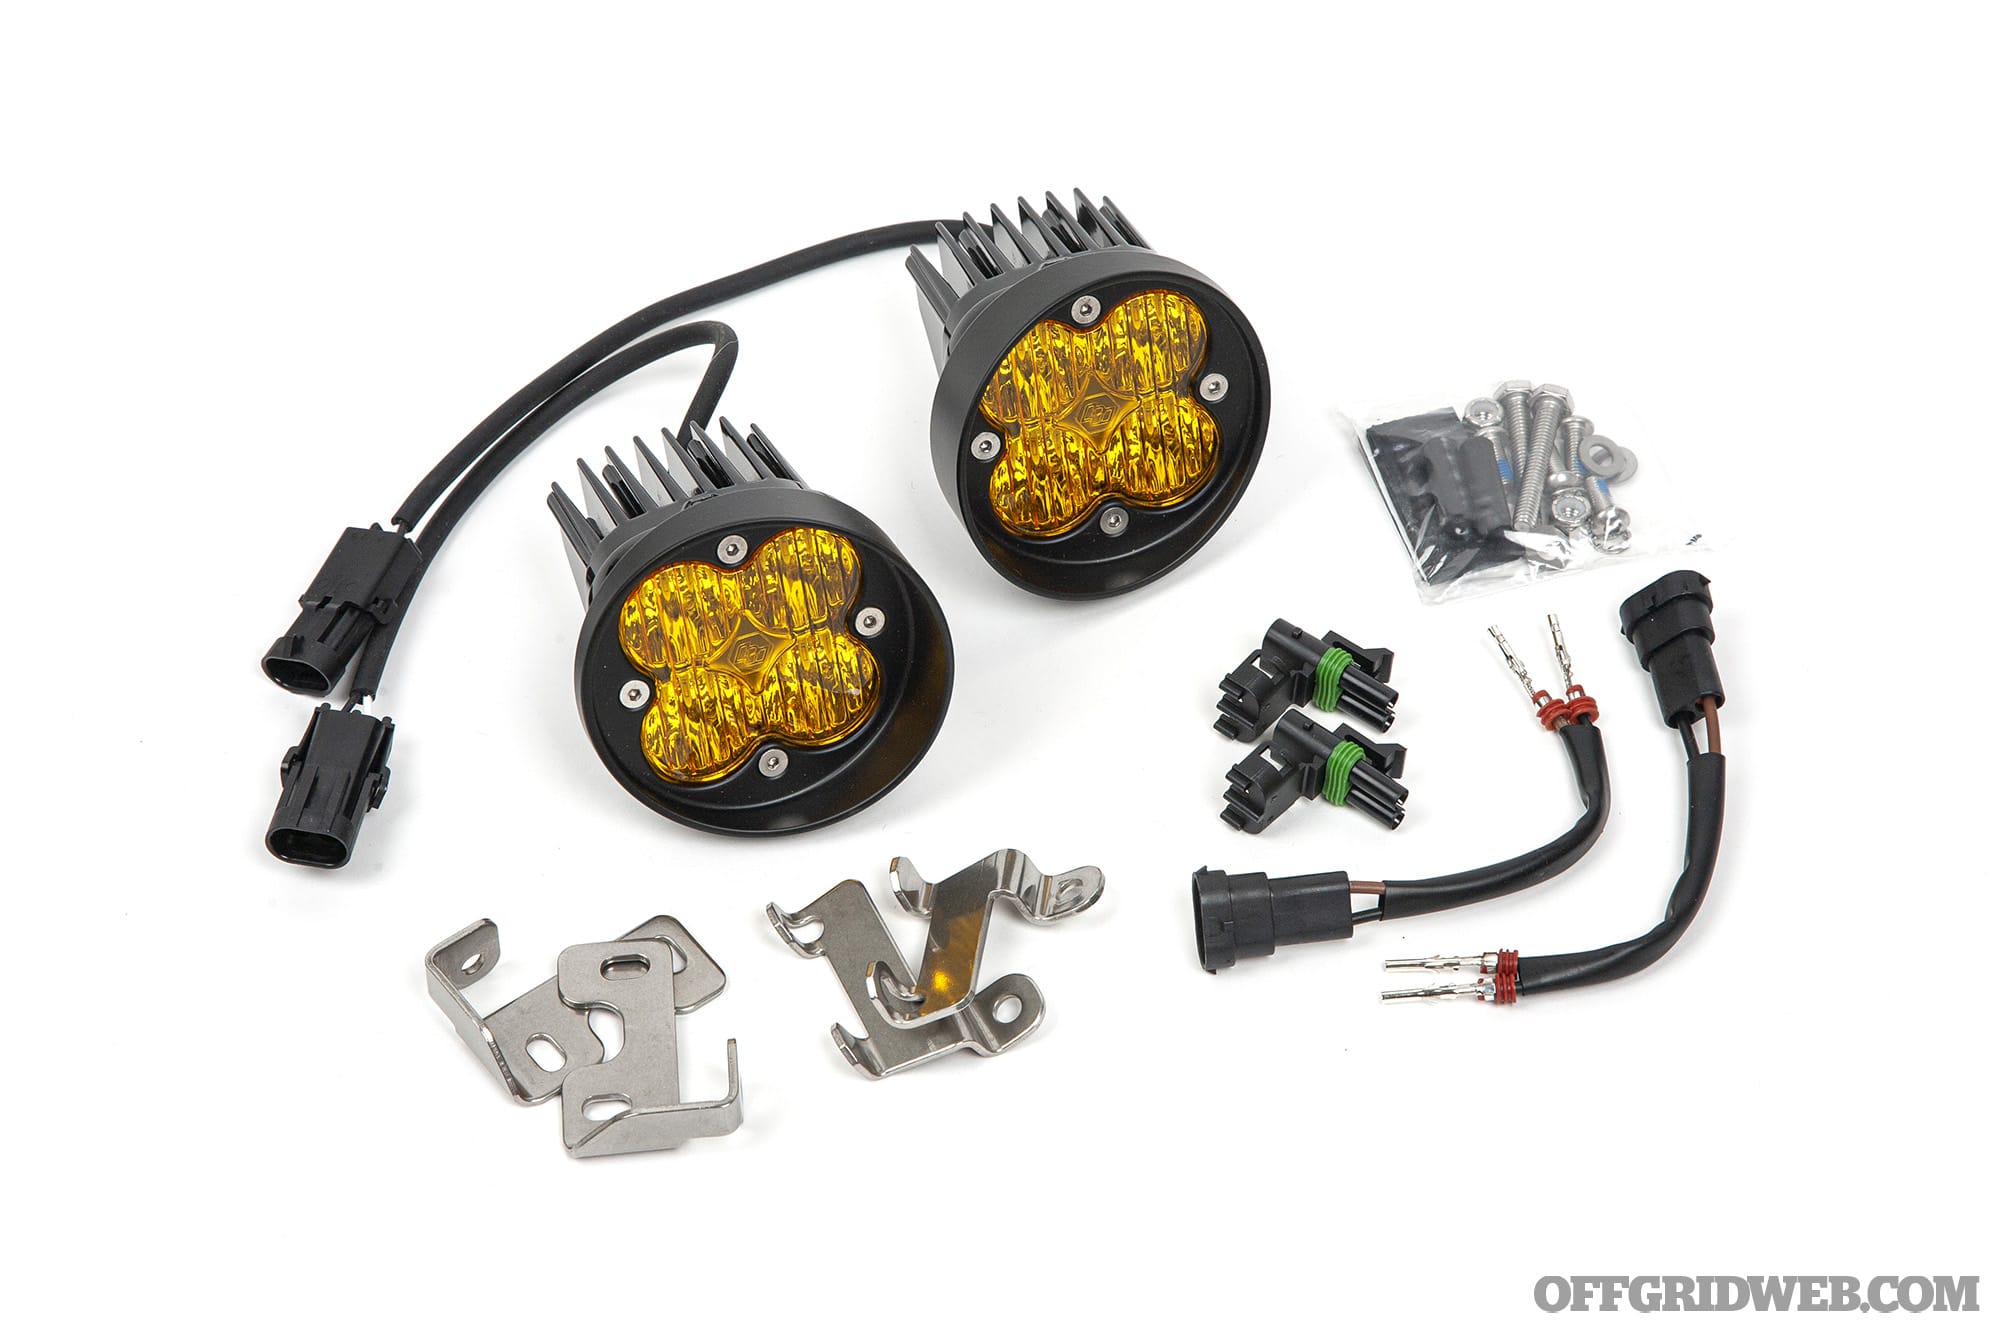
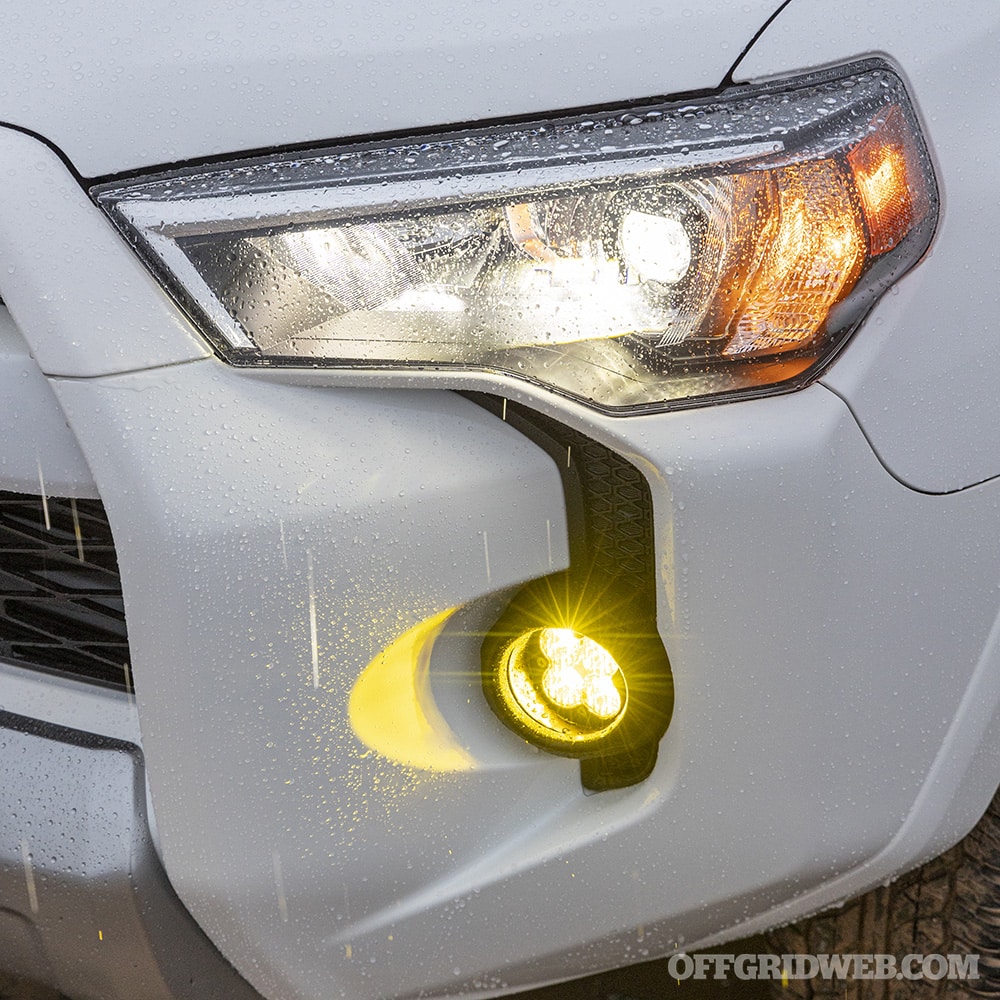
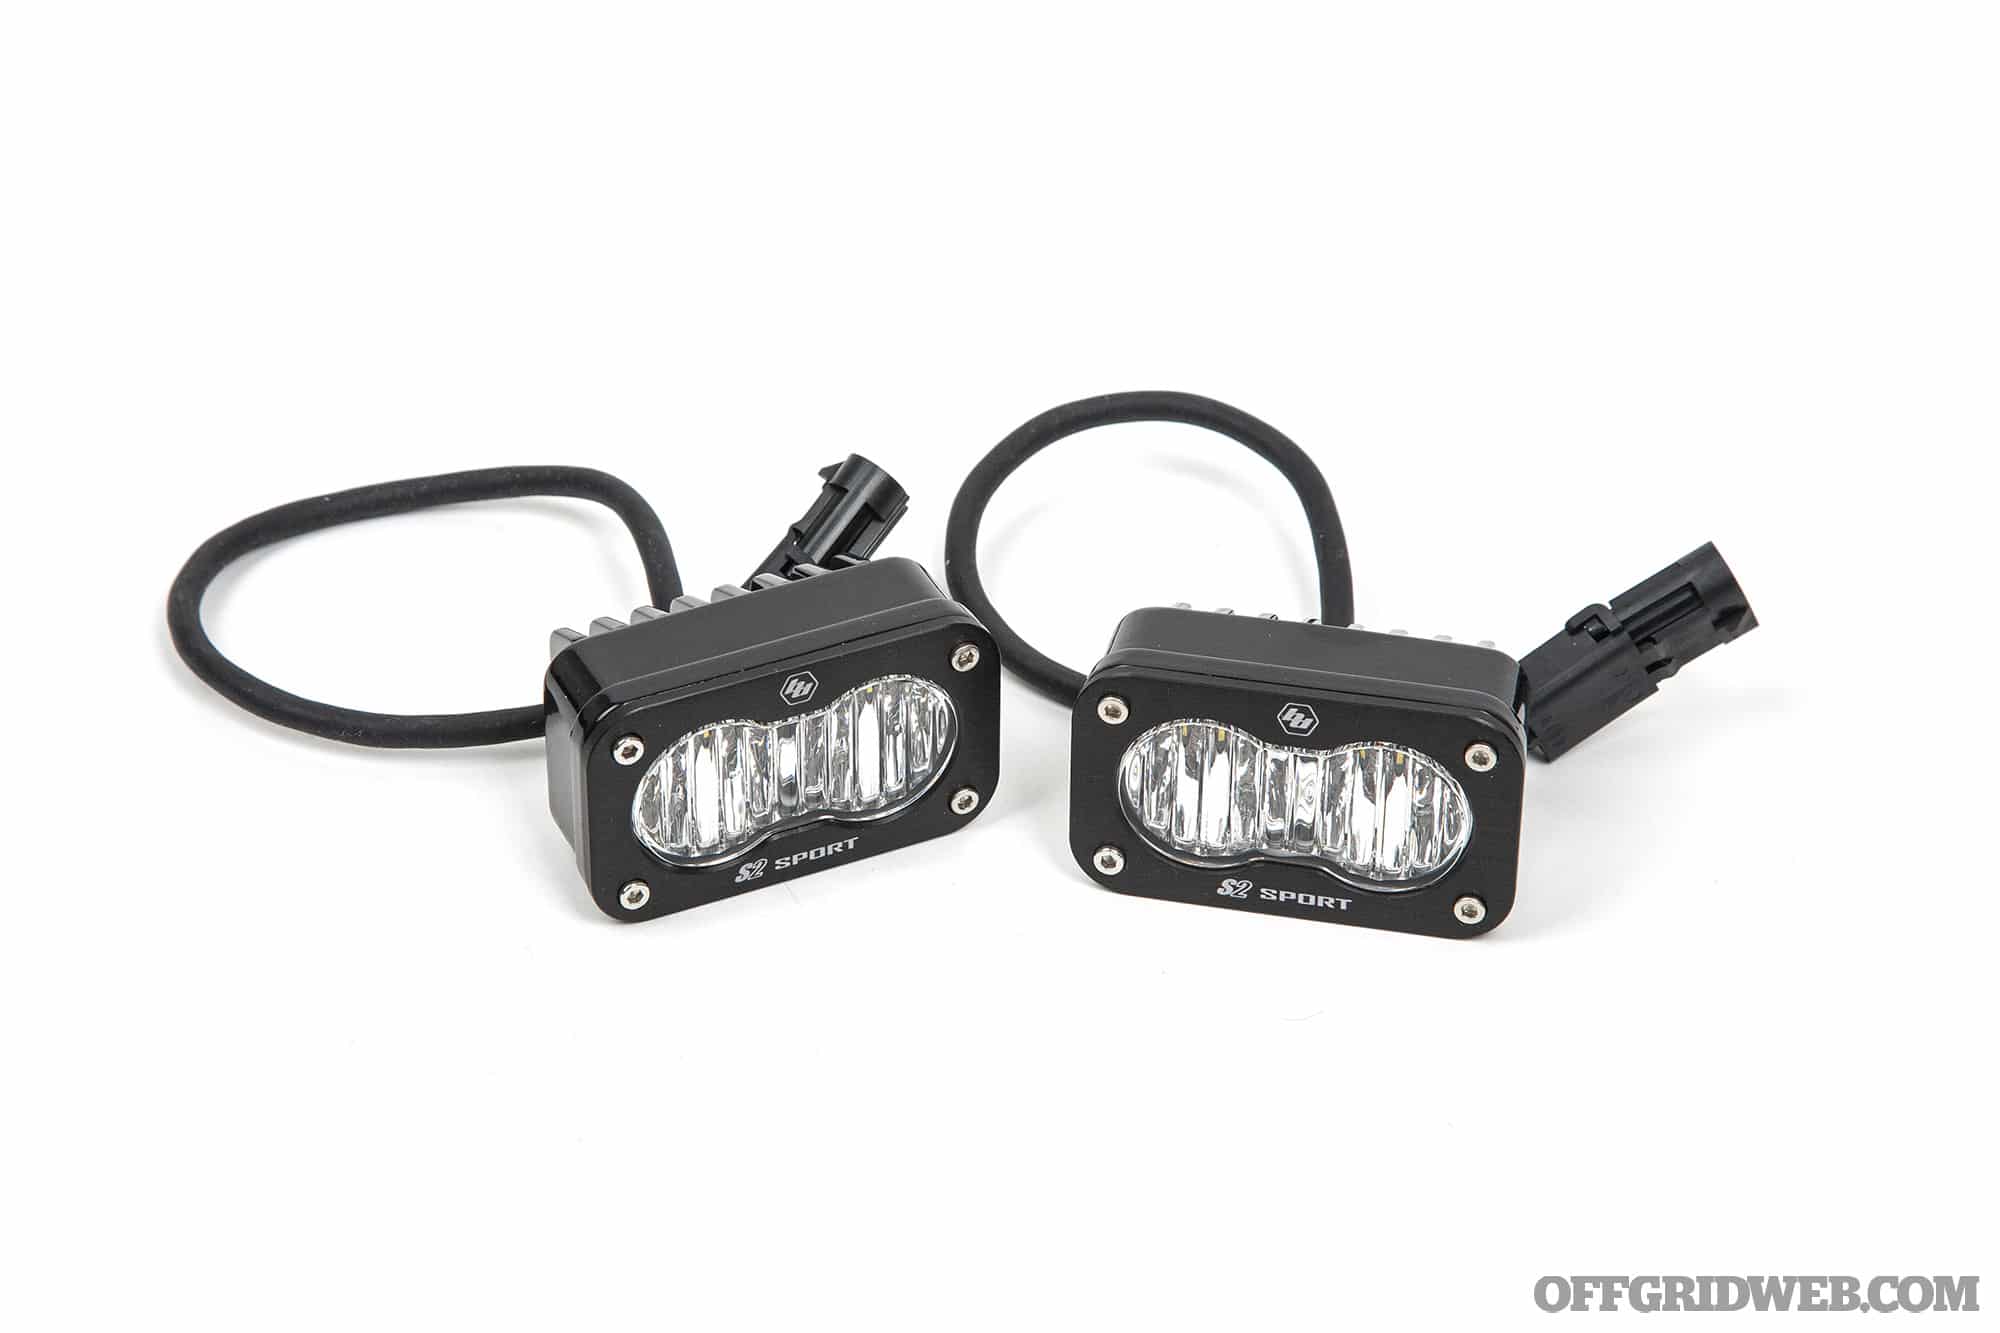
I supplemented the grille light bar with a drop-in Toyota 4Runner Fog Pocket Light Kit from Baja Designs. This includes a pair of Squadron Sport lights with Wide Driving pattern lenses (covering Zone 2 / cornering light) , plus brackets and wiring connectors to install them in place of the factory fog lights. I used the brackets, but opted to connect these lights to the sPOD system for independent control, rather than using them with the truck’s factory fog light button (which is only active when the headlights are turned on). These Squadron fog lights add an even wider spread of light to illuminate both sides of the road and any obstacles immediately in front of the truck.
Finally, I selected a pair of S2 Sport reverse lights with a wide cornering beam pattern. While it’s possible to mount these beneath the rear bumper or flush-mount them in the bumper itself, I decided to place them higher up at the back of the roof rack.
These Wide Cornering work lights can be used for backing up in extremely dark places, camping or working around the rear of the truck, or even as a way to alert vehicles of a roadside emergency. The latter function is especially useful with the sPOD’s strobe setting.
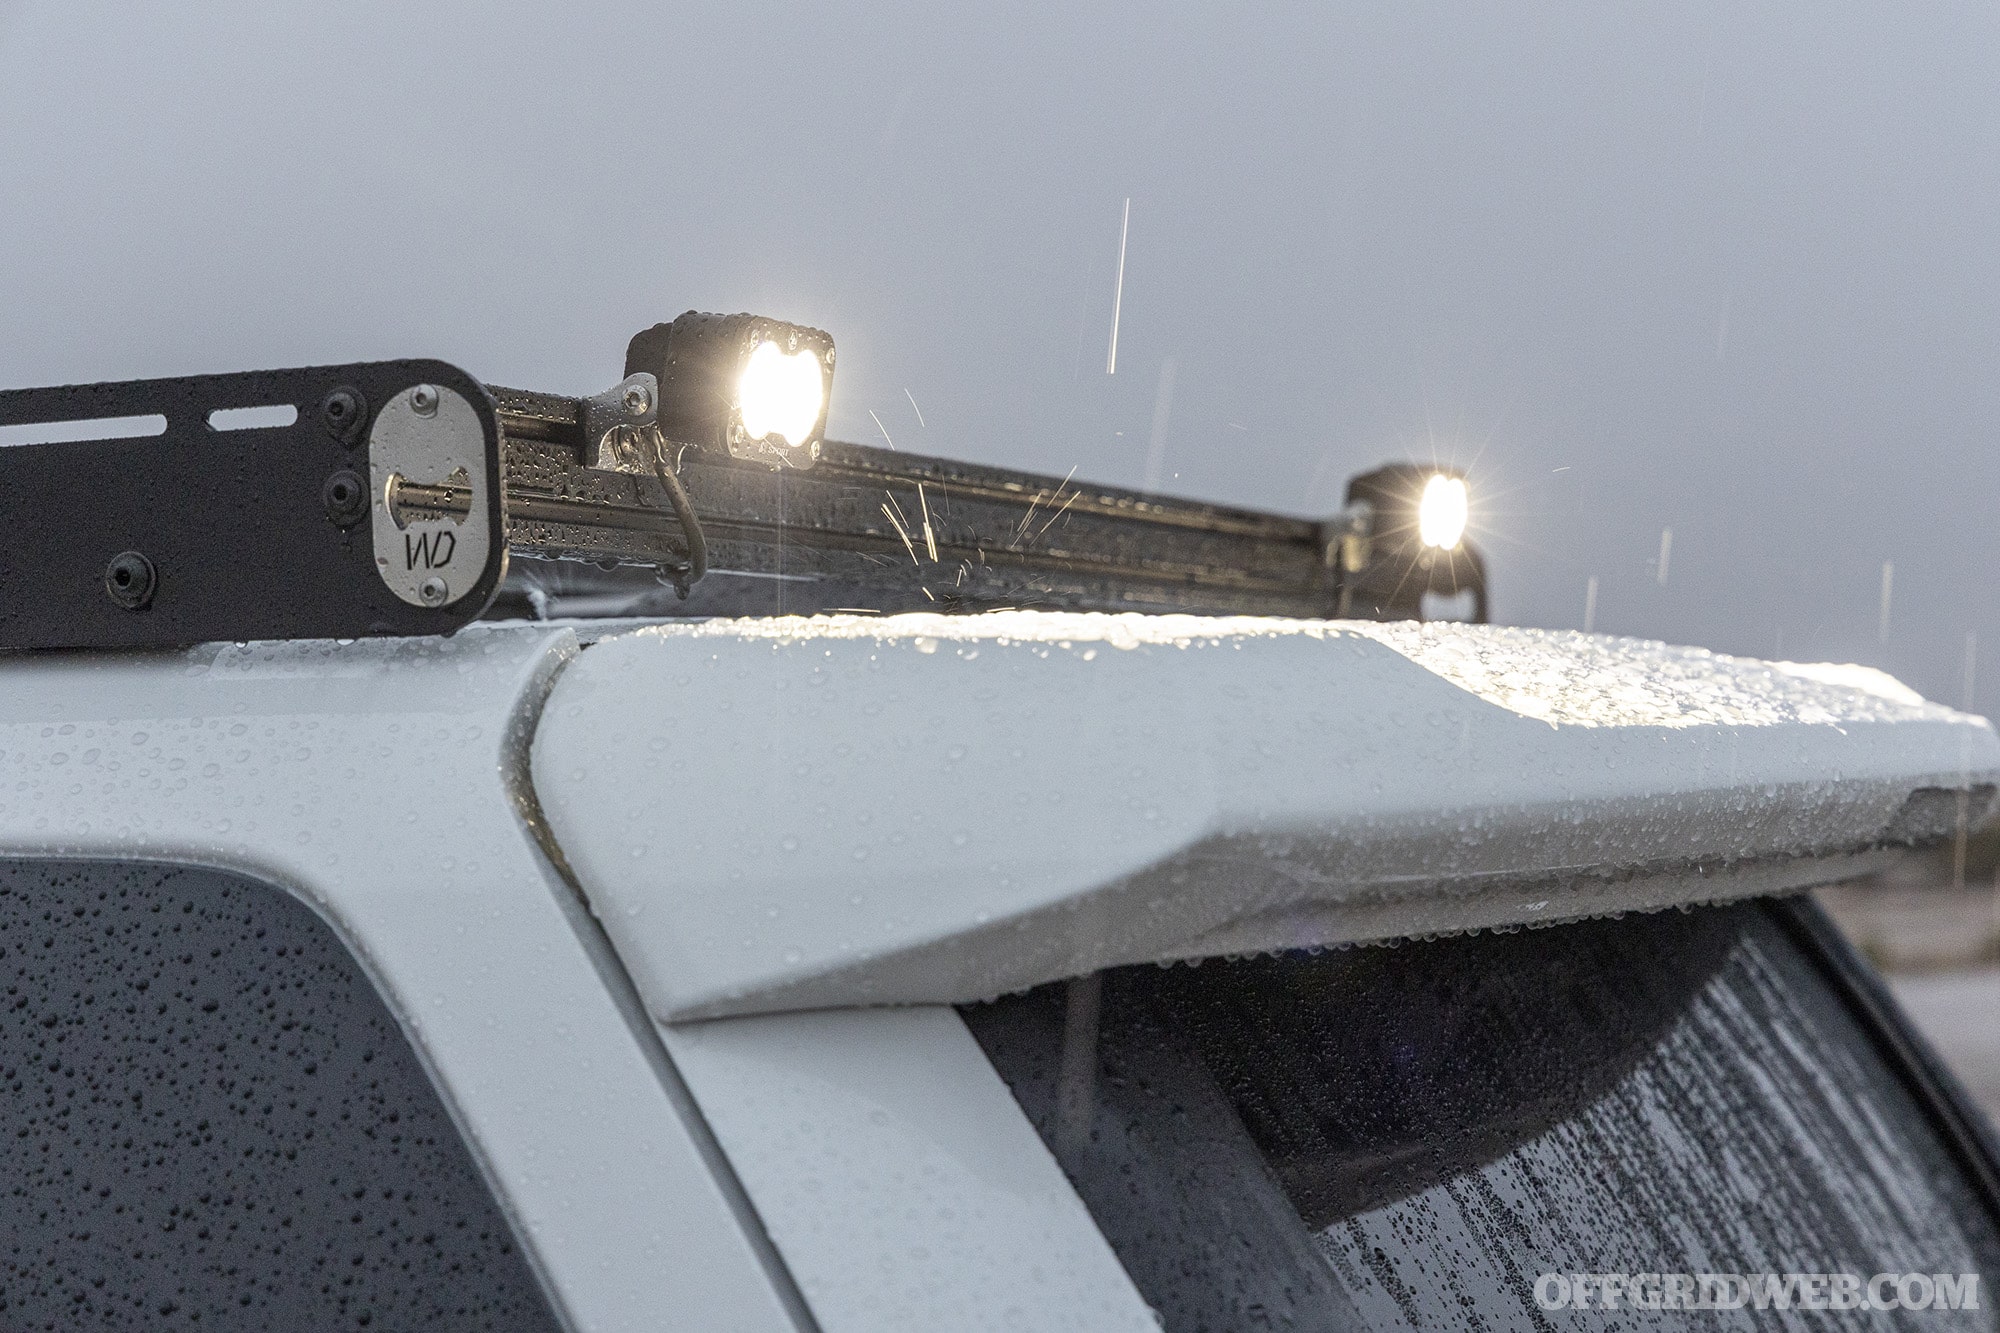
Above: The S2 Sport lights are angled down slightly to project light over the edge of the spoiler at the top of the 4Runner’s hatch. Clearance is very tight with the hatch open, but they don’t make contact.
A Note on Amber Lighting

Above: A color temperature scale and LED example diagram from Baja Designs.
Why are yellow or amber lights so popular in the off-road and overland market? Well, as some of you may already know, amber lights help with visibility in less-than-ideal conditions — dust, rain, fog, and snow. However, the reason behind this is a little more complicated. The human eye is adapted to see best in daylight, which is equivalent to approximately 5,000 Kelvin on a color temperature scale. As light becomes more blue (higher than 5,000K temperature values) it can cause fatigue and eye strain to gradually build up. In a video on the Baja Designs YouTube channel, an engineer explains that yellow light (lower than 5,000K) results in “less optical workload to register and define what’s in your environment.” While amber lights don’t physically cut through dust particles or raindrops better, they do help your brain process visual data more easily despite haze or reduced contrast.
Technically, Baja Designs “amber” lights aren’t true amber. They’re selective yellow, or approximately 3,000K color temperature. The term amber is used because that’s the industry standard for off-road lights in this portion of the color spectrum. Many amber lights on the market are more orange, but Baja Designs says that color has a detrimental effect on lumen output. As light enters the orange and red portion of the color spectrum, it can become harder to recognize objects we’re used to seeing in daylight, so you wouldn’t want to go too far into the “warm” end of the spectrum. Selective yellow is similar enough to daylight with the added advantage of enhanced visibility in inclement conditions.
Westcott Designs 4Runner Lo-Pro Roof Rack

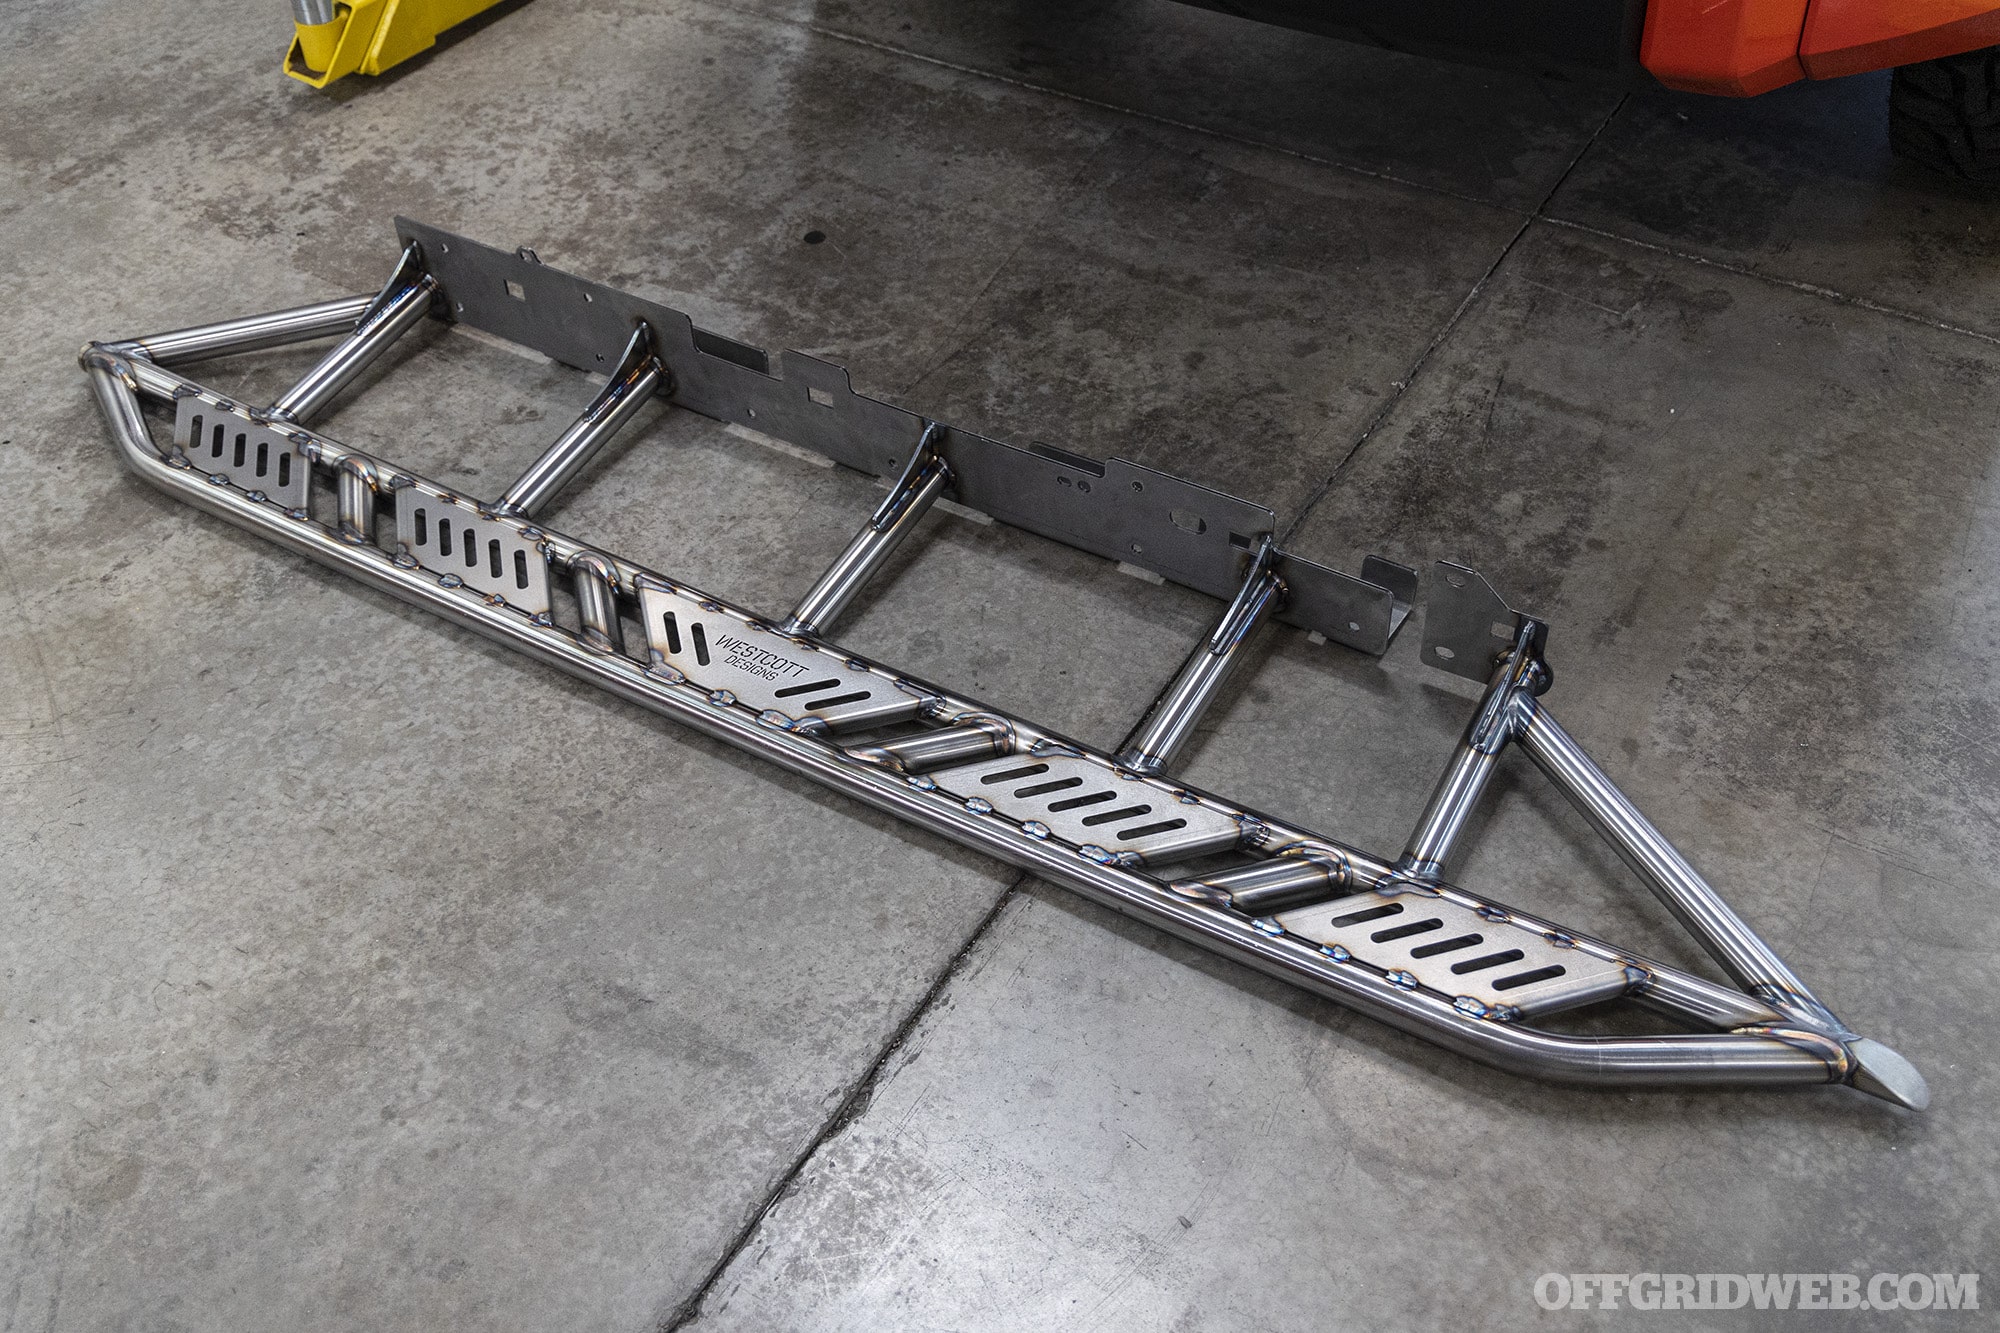
I’m a big believer in supporting local businesses whenever it’s possible — I’d rather help those who are bringing jobs and revenue to the local economy, as opposed to those who outsource it overseas. So, when I learned that Westcott Designs was only a short trip from my home in Arizona, I decided to head over and check out their shop. They gave me a tour of their manufacturing facility in Phoenix, AZ, and showed me some of the metalwork that goes into building rock sliders, roof racks, bed racks, spare tire carriers, and other off-road vehicle parts. From raw sheet metal to cutting and welding to the powder-coated final product, everything is done in-house.
Above: The workshop at Westcott Designs is full of beautiful metalwork, such as these TIG-welded 2022 Tundra rock sliders that were about to head off to the powdercoating booth.
Westcott Designs offers two roof rack styles for the 5th Gen 4Runner: the standard Modular Rack and the Lo-Pro Rack. Both are constructed from lightweight aluminum with sturdy steel mounting brackets. I selected the latter design, and pulled my truck into one of Westcott’s shop bays to have it installed. First, the rack was loosely assembled on the ground with all slotted crossbars in place.
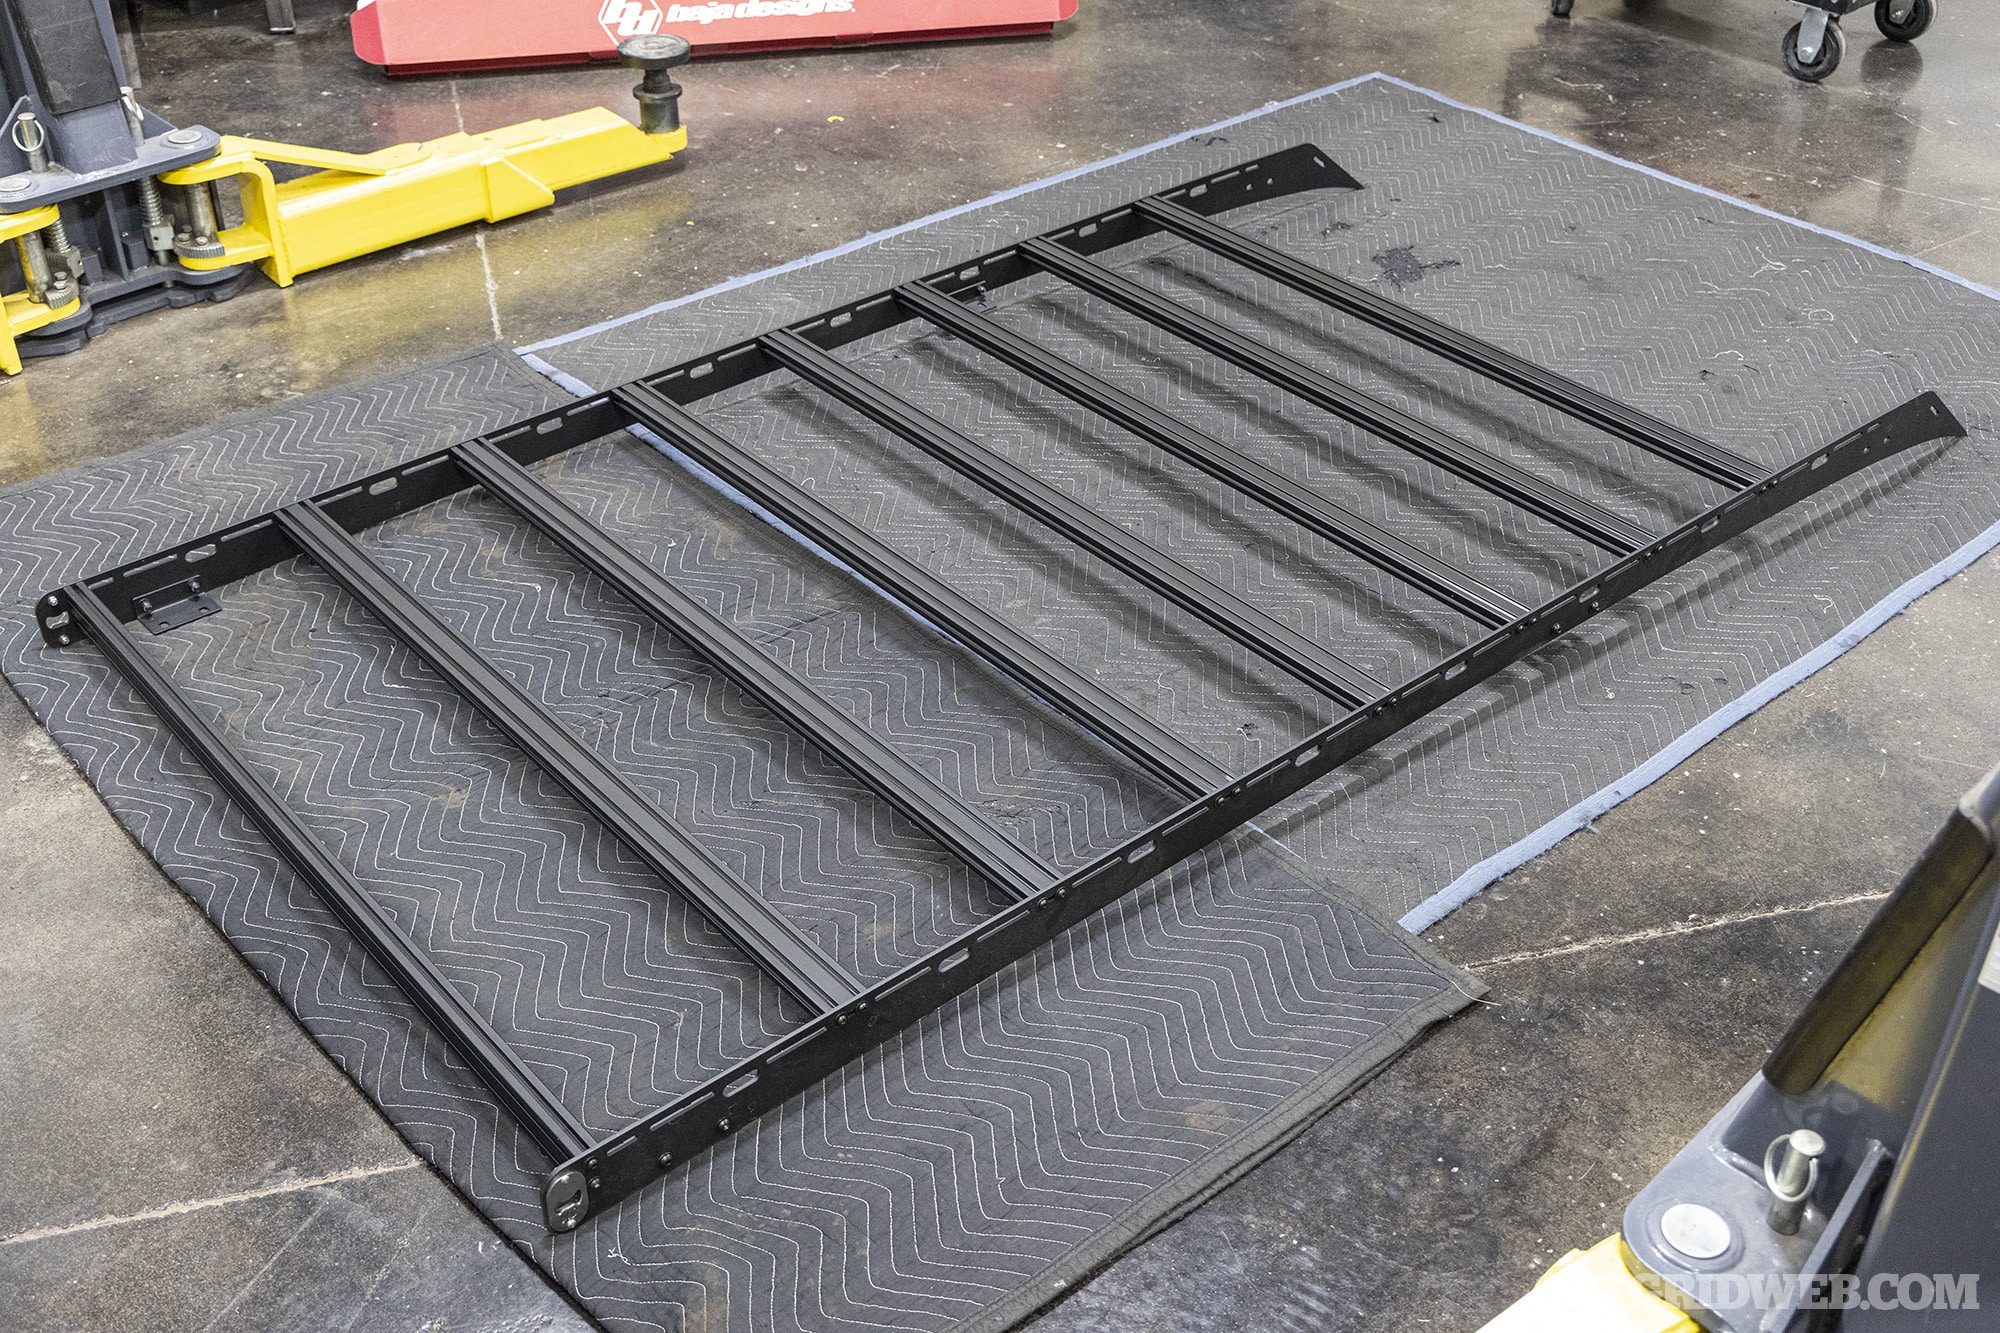
Various wind deflector options are available to accommodate aftermarket light bars from 40 to 44 inches or arrays of individual lights (ten 4-inch lights or six 6-inch lights). I selected the 40-inch cutout visor option, and Westcott employee Jesus got started on assembling it with the OnX6+ light bar. Tracks on the back side of the wind deflector allowed him to secure the wiring harness out of sight.
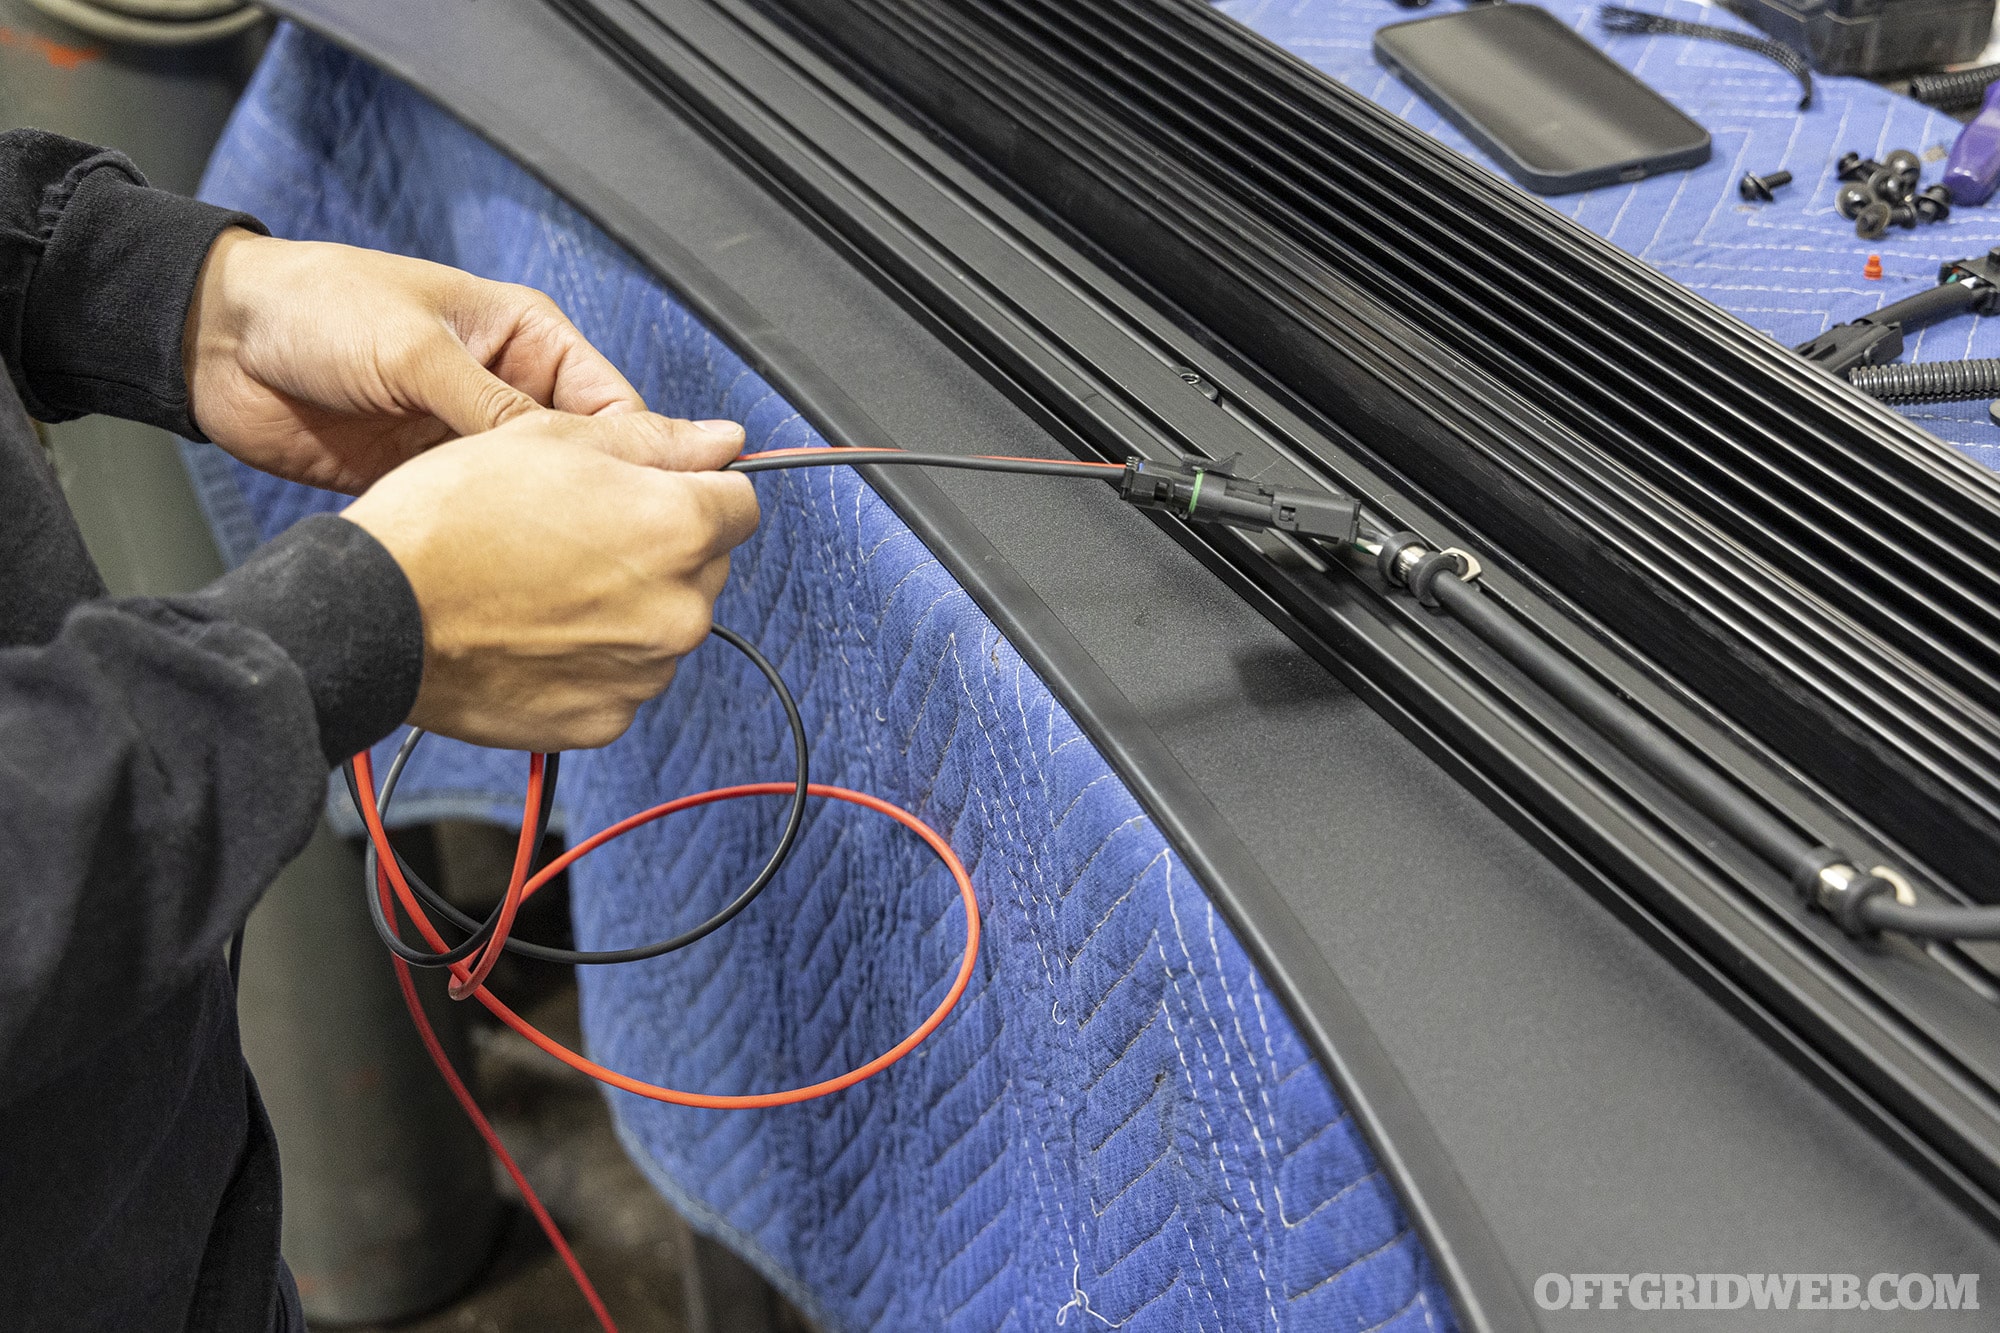
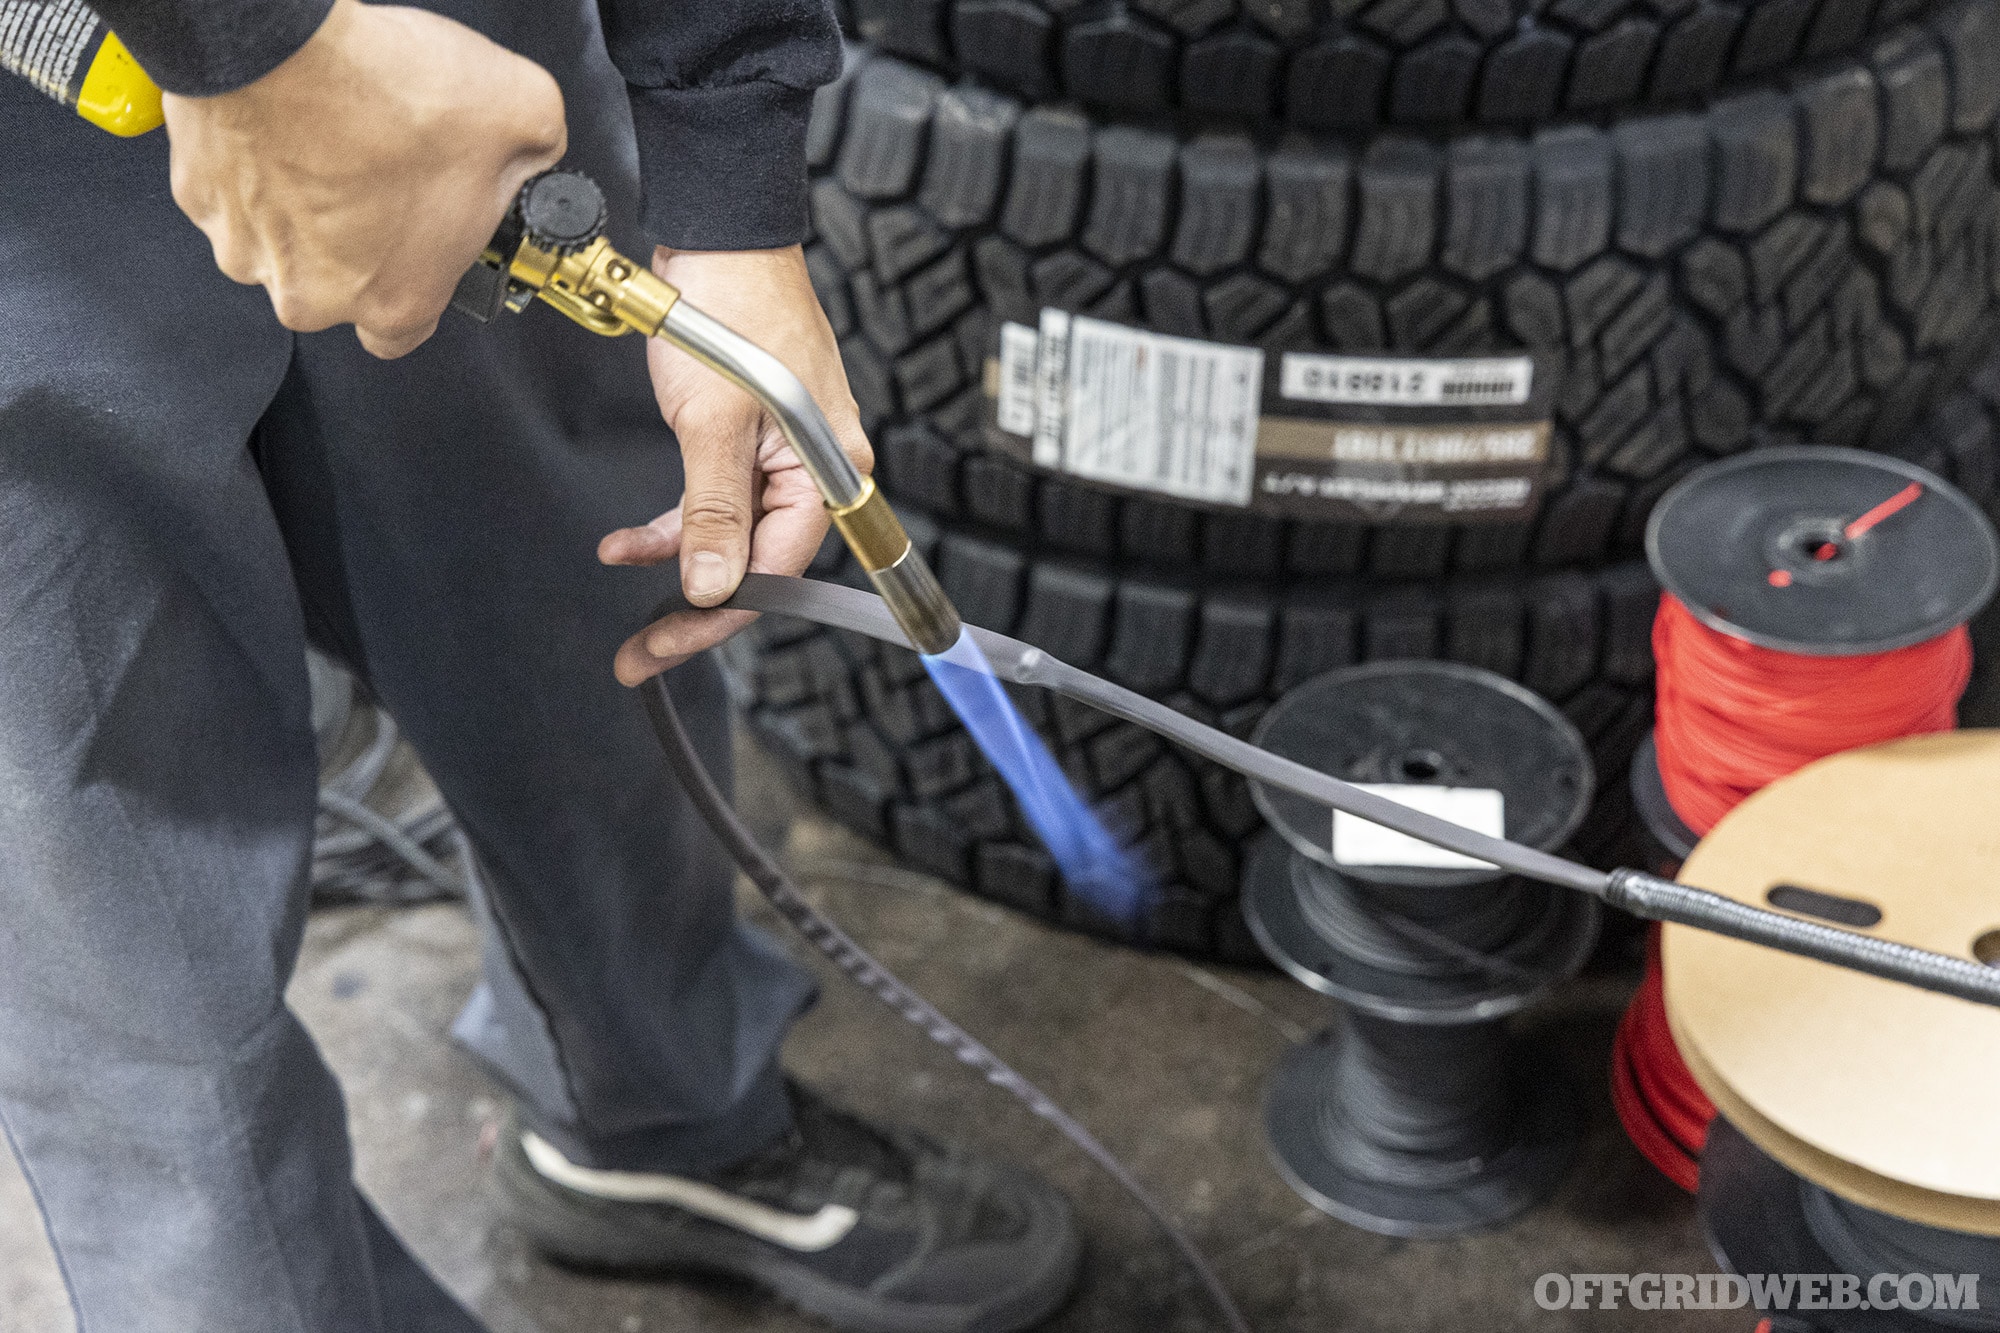
After an appropriate amount of 10-gauge wire was measured and cut to reach from the light bar into the engine bay, Jesus coated it in a combination of wire loom and heatshrink to protect it from the elements.
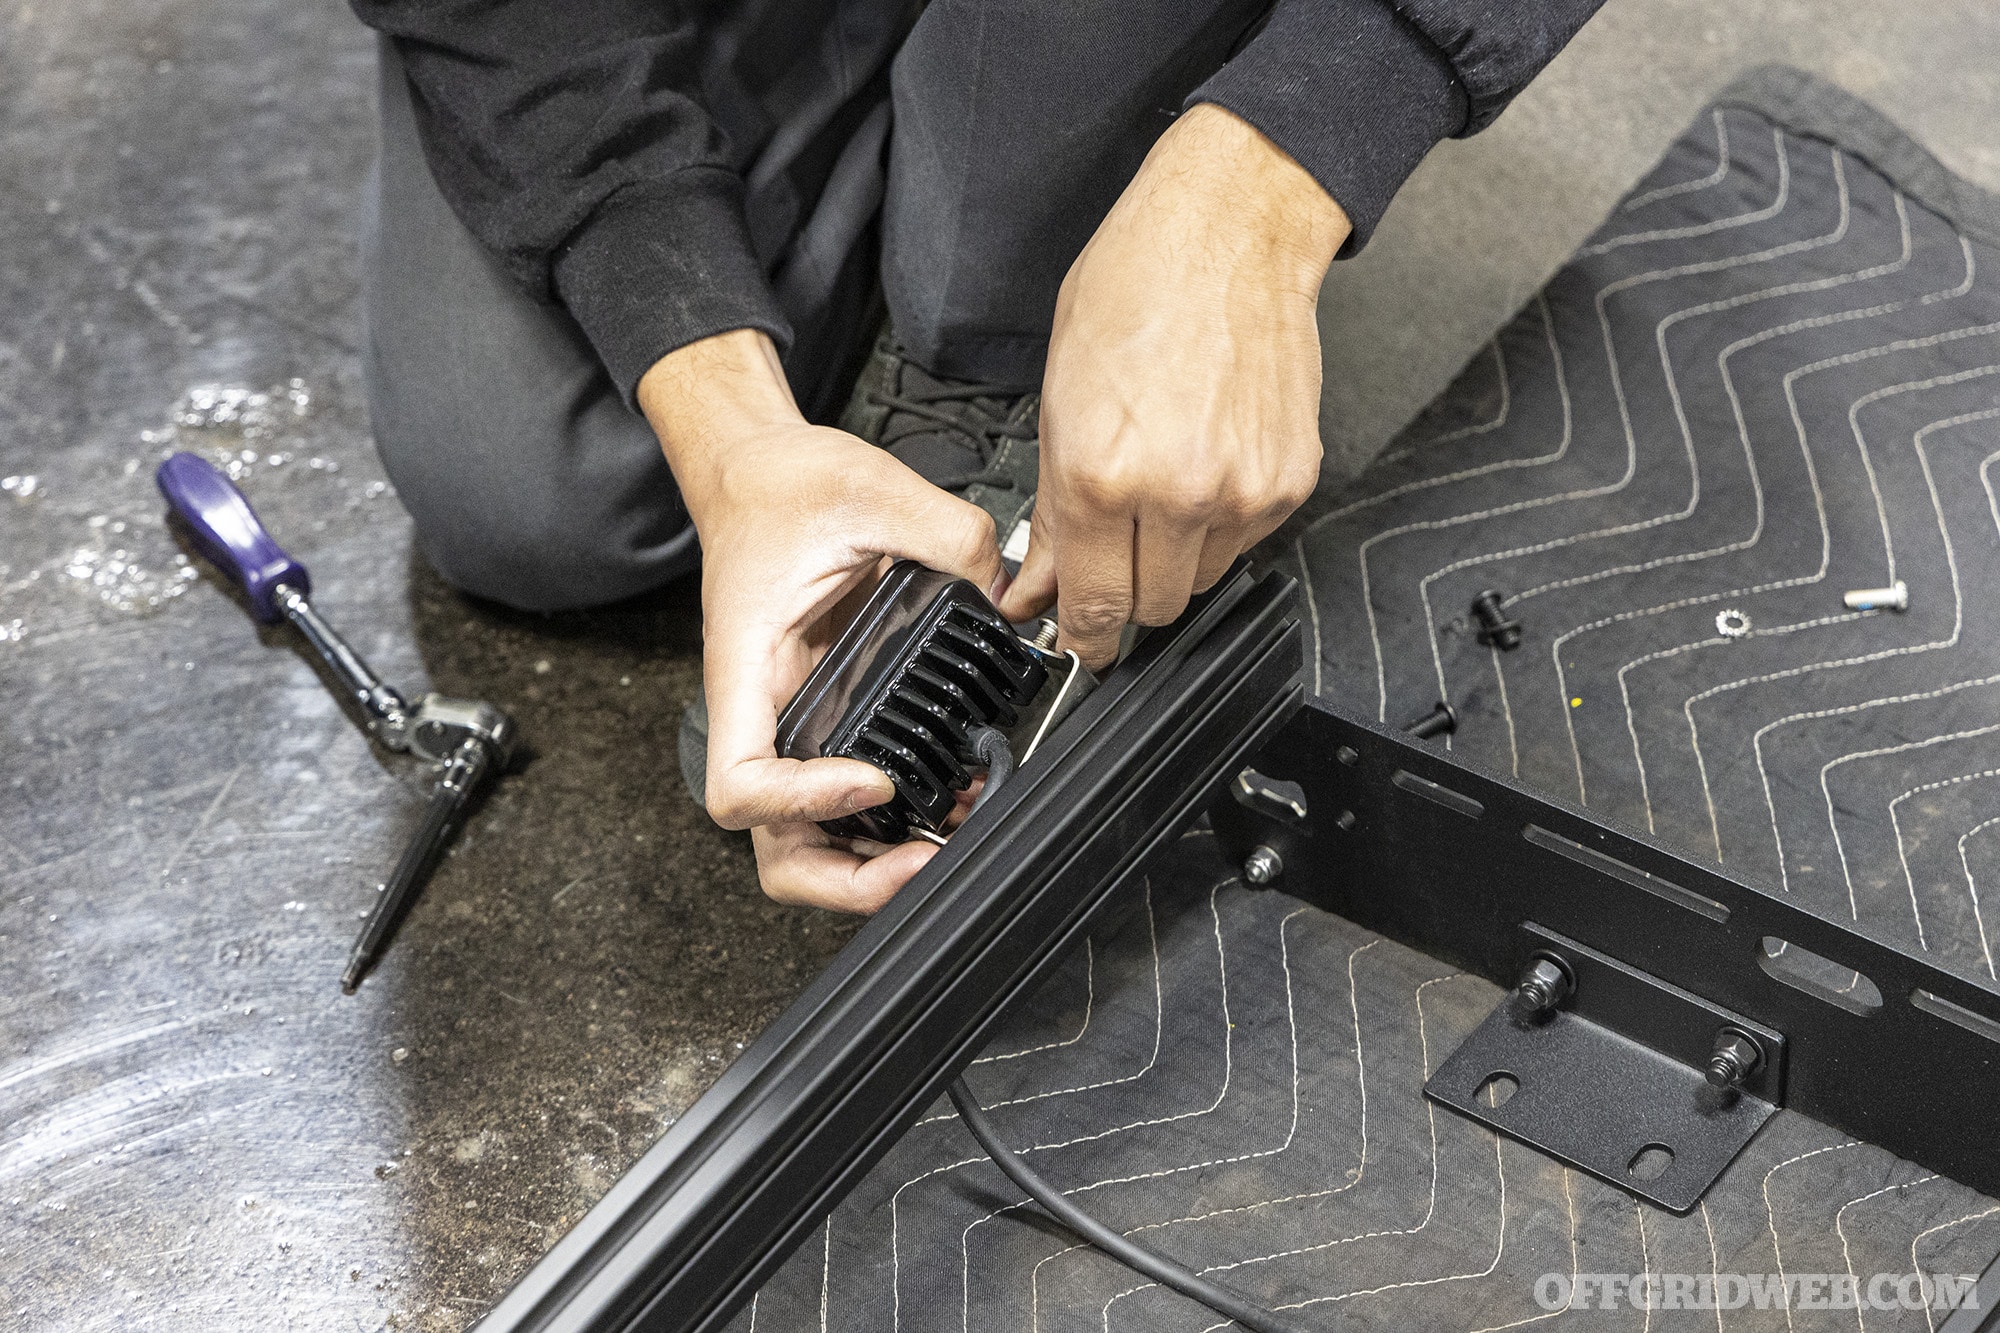
Moving to the rear of the rack, the S2 Sport reverse lights were mocked up on the rearmost bar. The hardware was left finger-tight, since these would need to be adjusted later.
Jesus removed the factory Toyota roof rack, and applied weather-resistant sealant around the bolt holes to prepare for the Westcott Designs rack. This new rack is a no-drill design, so it reuses the original mounting points on the roof.
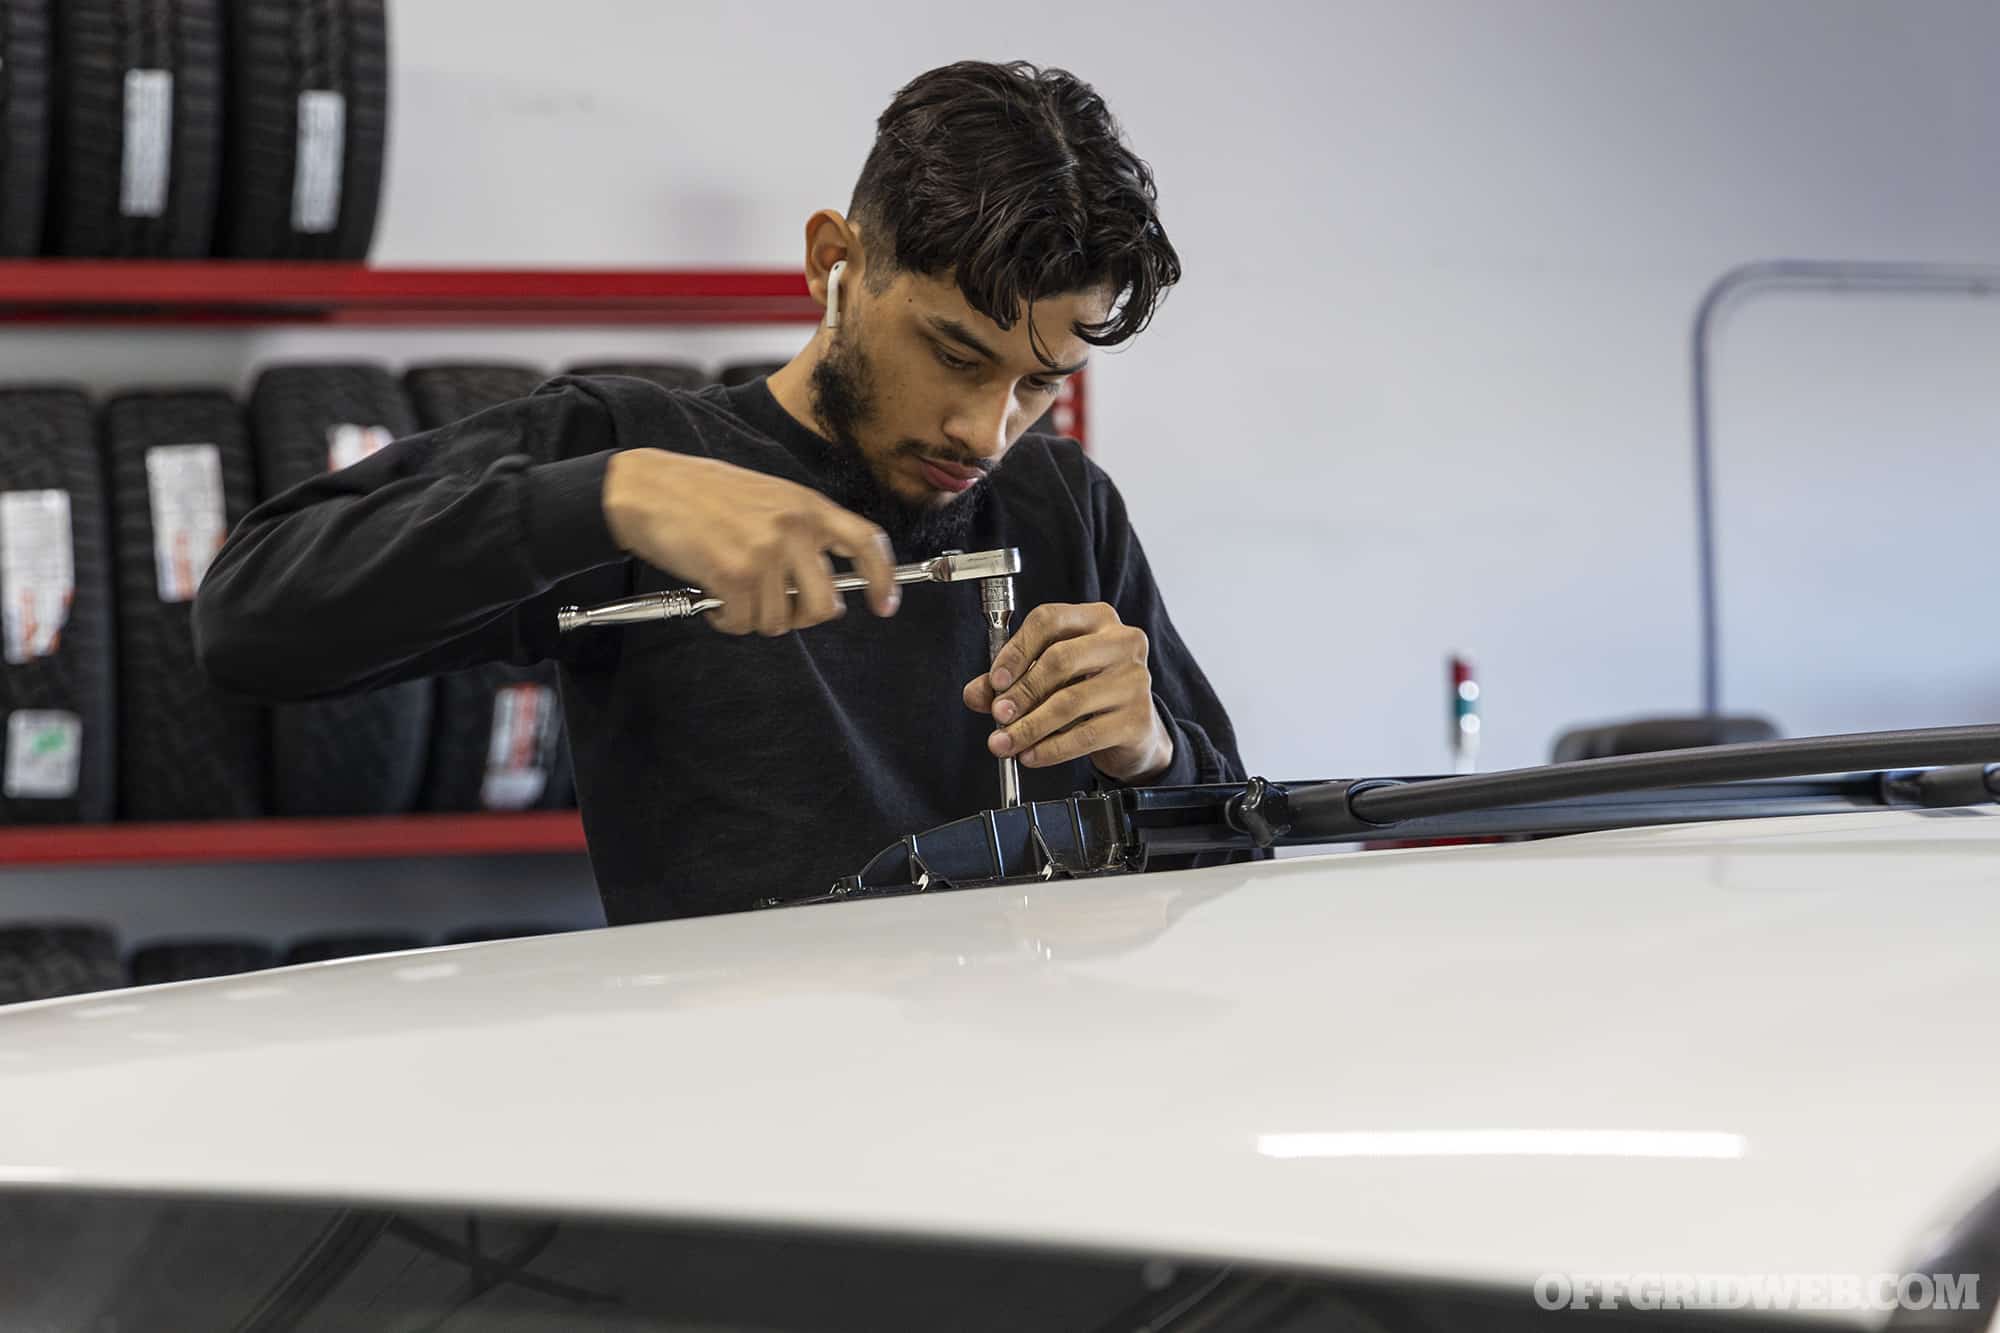
A few extra helpers stepped in to lift the Lo-Pro roof rack onto my 4Runner. It’s not heavy — only 44 pounds — but we didn’t want it accidentally scratching the roof as we maneuvered it over the truck.
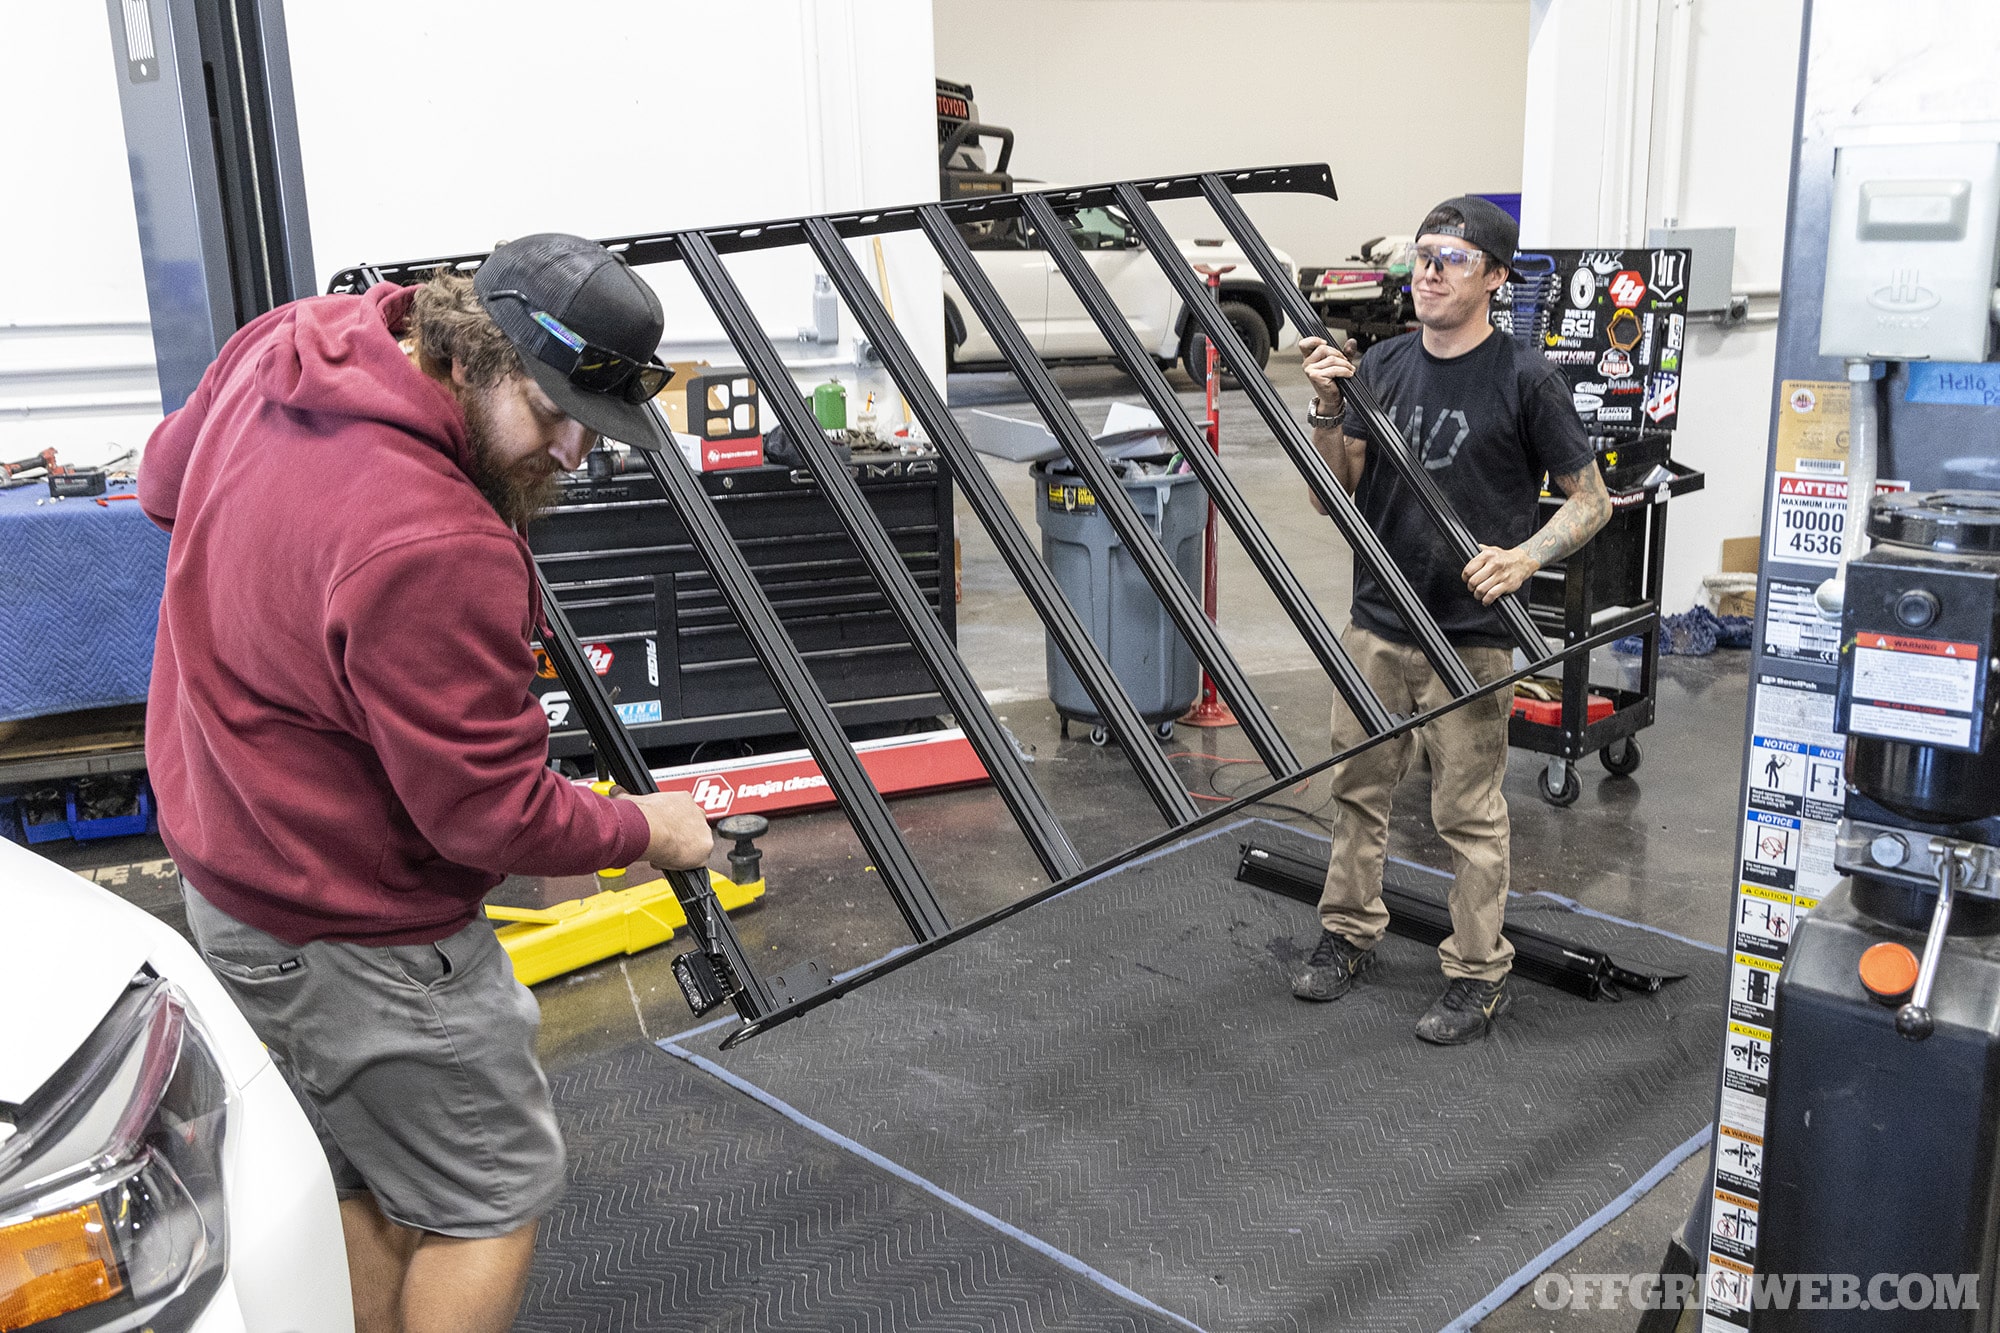
Finally, Jesus lifted the visor and light bar into position, and tightened the remaining hardware to secure the rack and visor. The angle of the light bar was also set at this point by tightening the bolts on either end.
The final step was to route the wires from the three lights (OnX6+ and dual S2 Sports) down into the engine bay. A protective rubber channel was adhered along the edge of the A-pillar, and the wiring harnesses were routed through the channel and under the hood.
sPOD BantamX Installation
The flat top of the 4Runner’s fuse box provides a perfect mounting location for the sPOD BantamX. The positive and ground wires from the lights will be connected to four of the eight switch terminals on the BantamX unit, leaving four terminals open for future upgrades. Jesus started by using the included template and a punch to mark the drilling locations onto the fuse box lid.
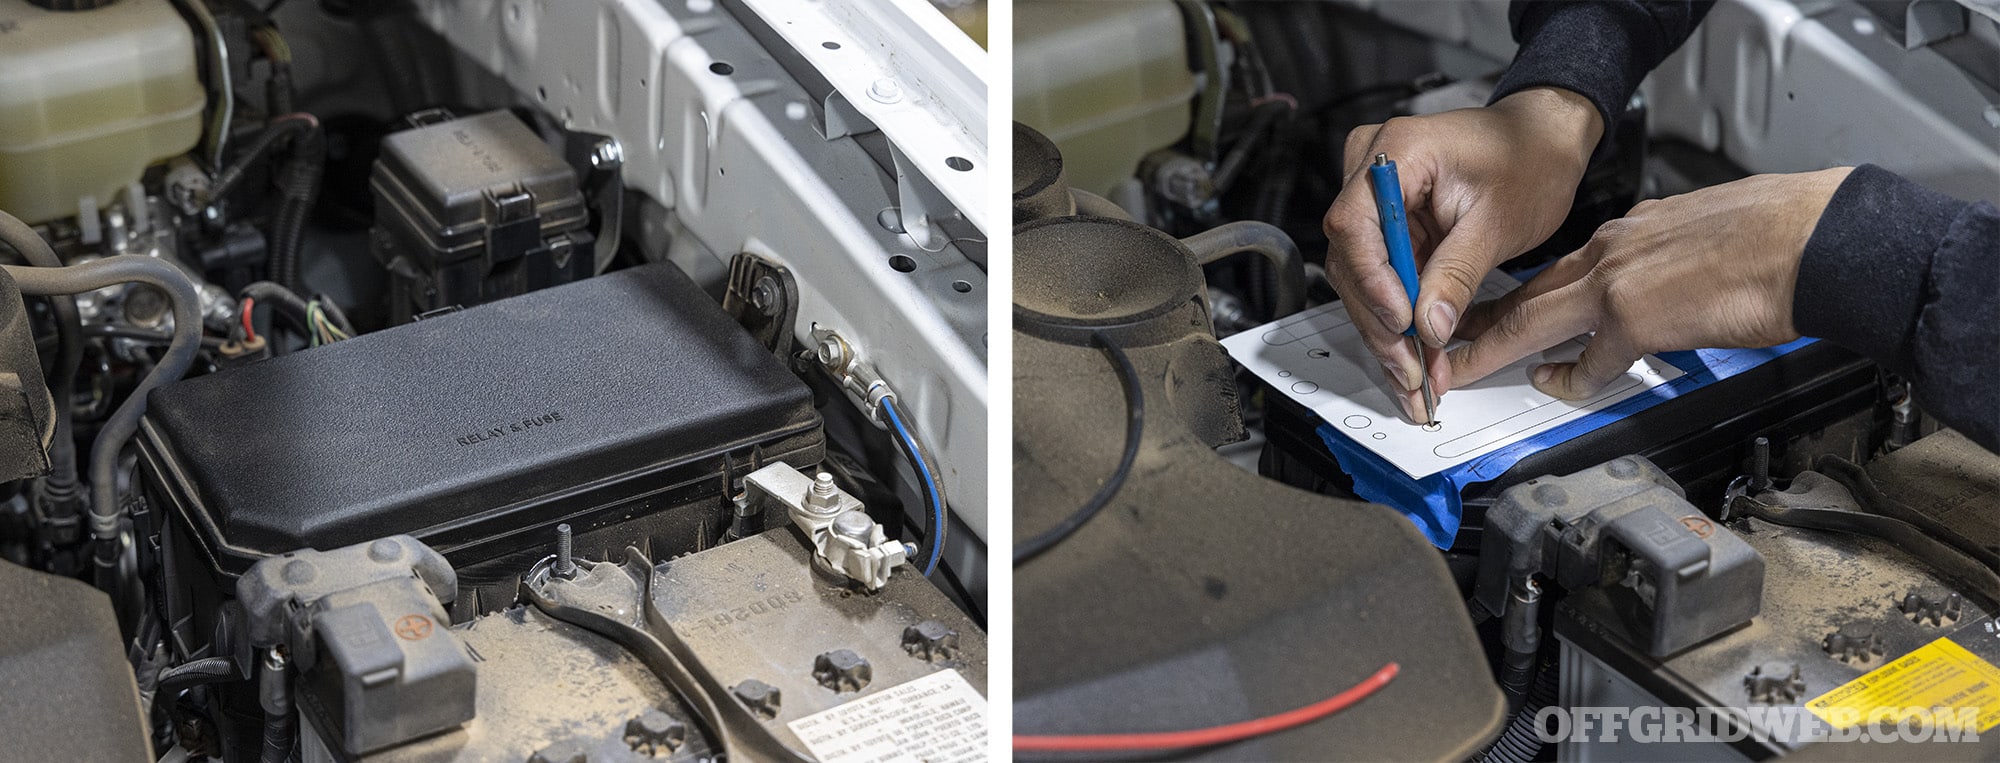
Next, the lid was removed and drilled in the appropriate locations. The BantamX was attached using the included screws.
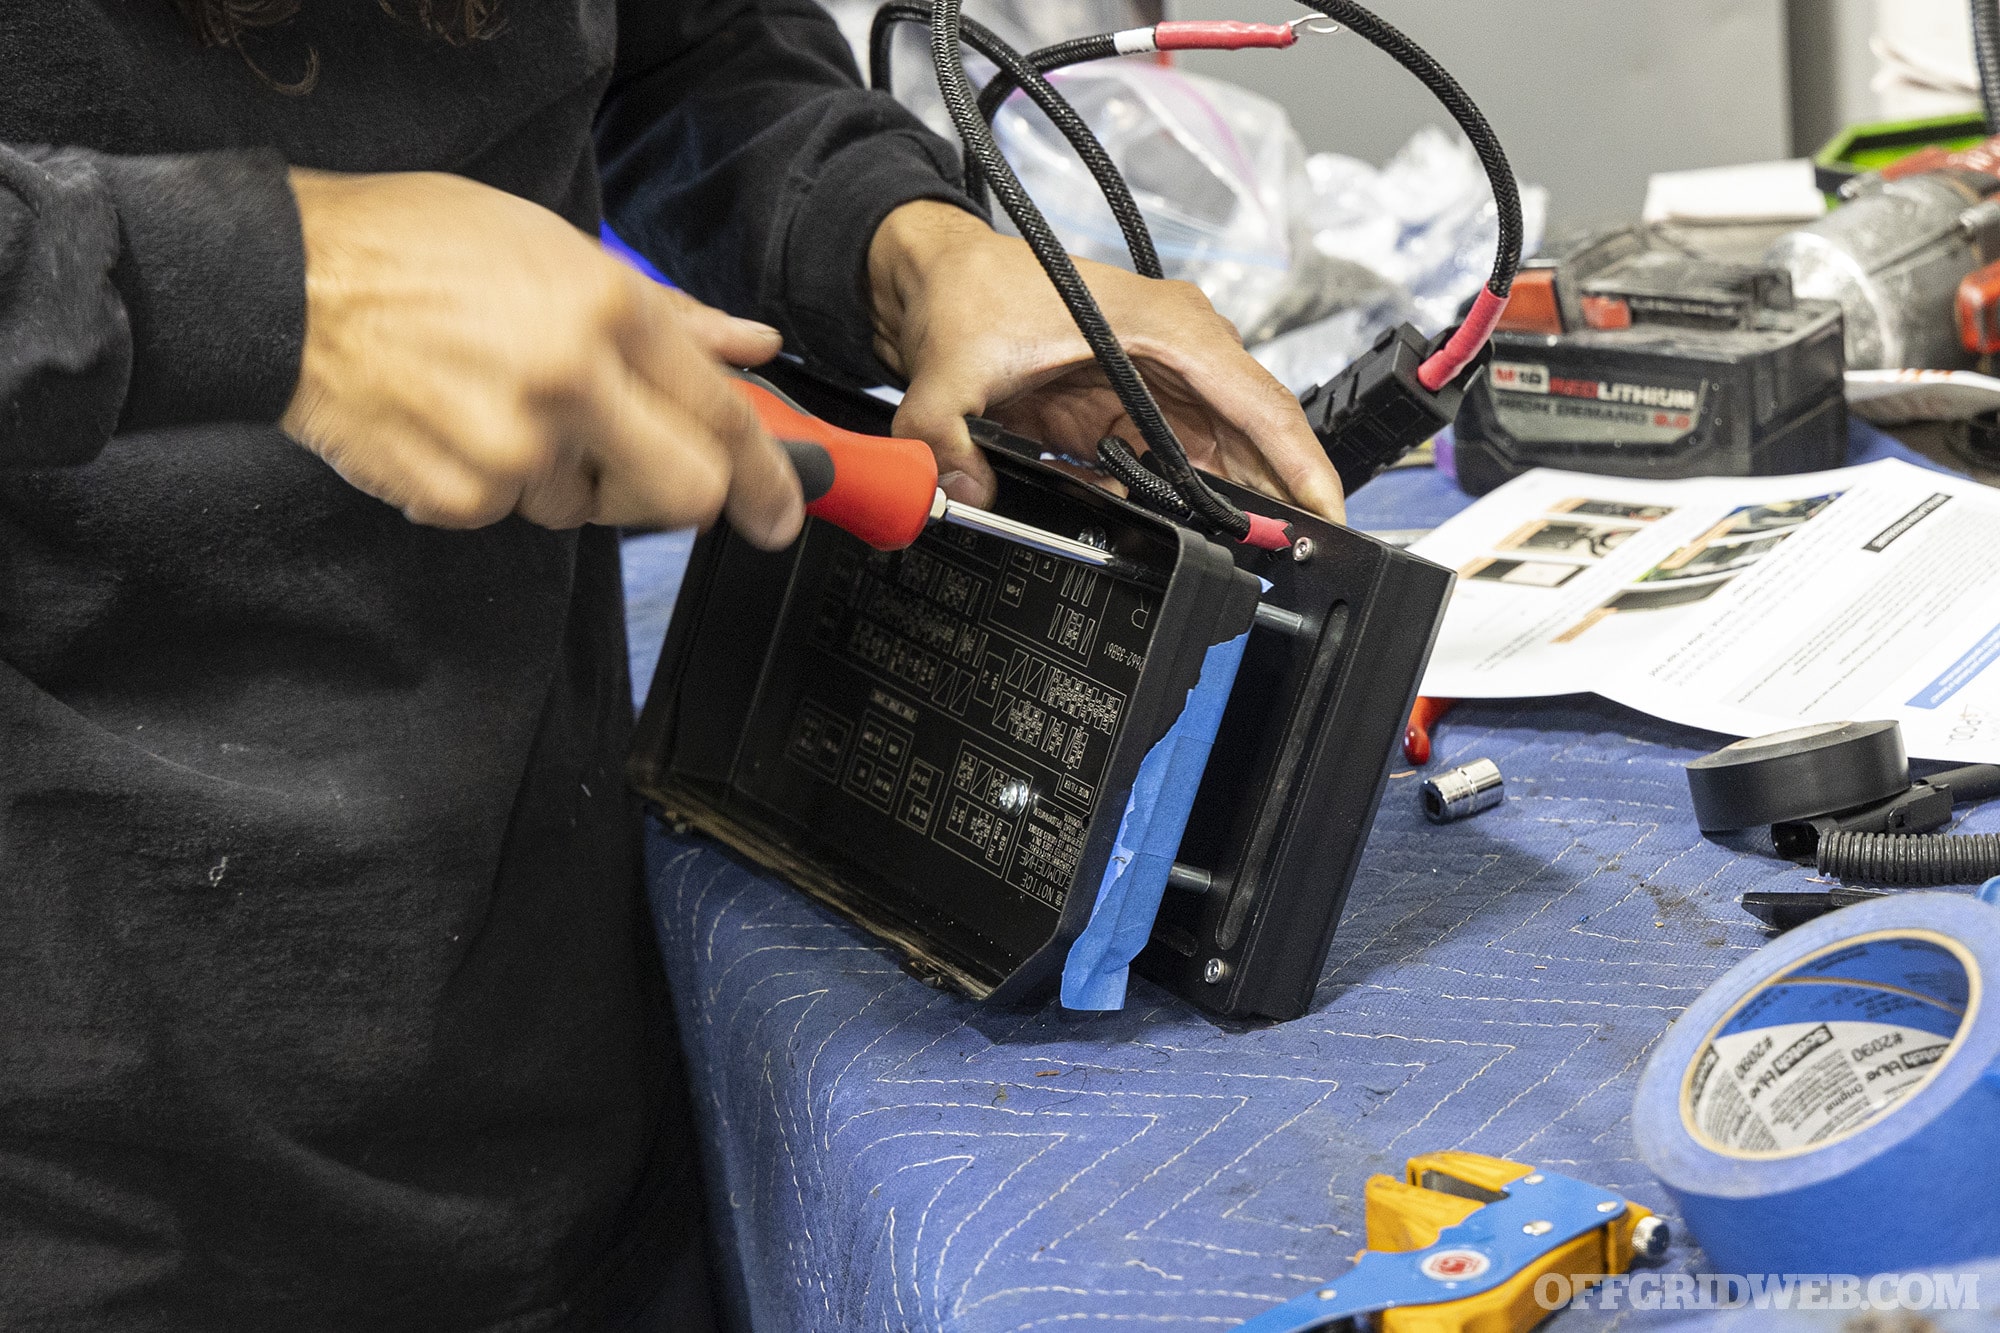
Since the BantamX is connected to the sPOD Touchscreen controller inside the cab by a single Ethernet cable, we only needed to run one wire into the truck’s interior. That certainly beats running eight wires to four traditional switches. There’s a second Ethernet cable port on the BantamX so it can be daisy-chained to another unit, expanding up to 4 daisy-chained BantamX units with 32 switches.
The power wire from the BantamX was connected to the battery, with an in-line fuse attached to the engine bay wall near the fuse box. The ground wire was also attached to a nearby ground point. To connect the individual positive and ground wires from the light bars, Jesus crimped the included spade connectors onto the end of each wire and secured them to each + and – screw terminal.
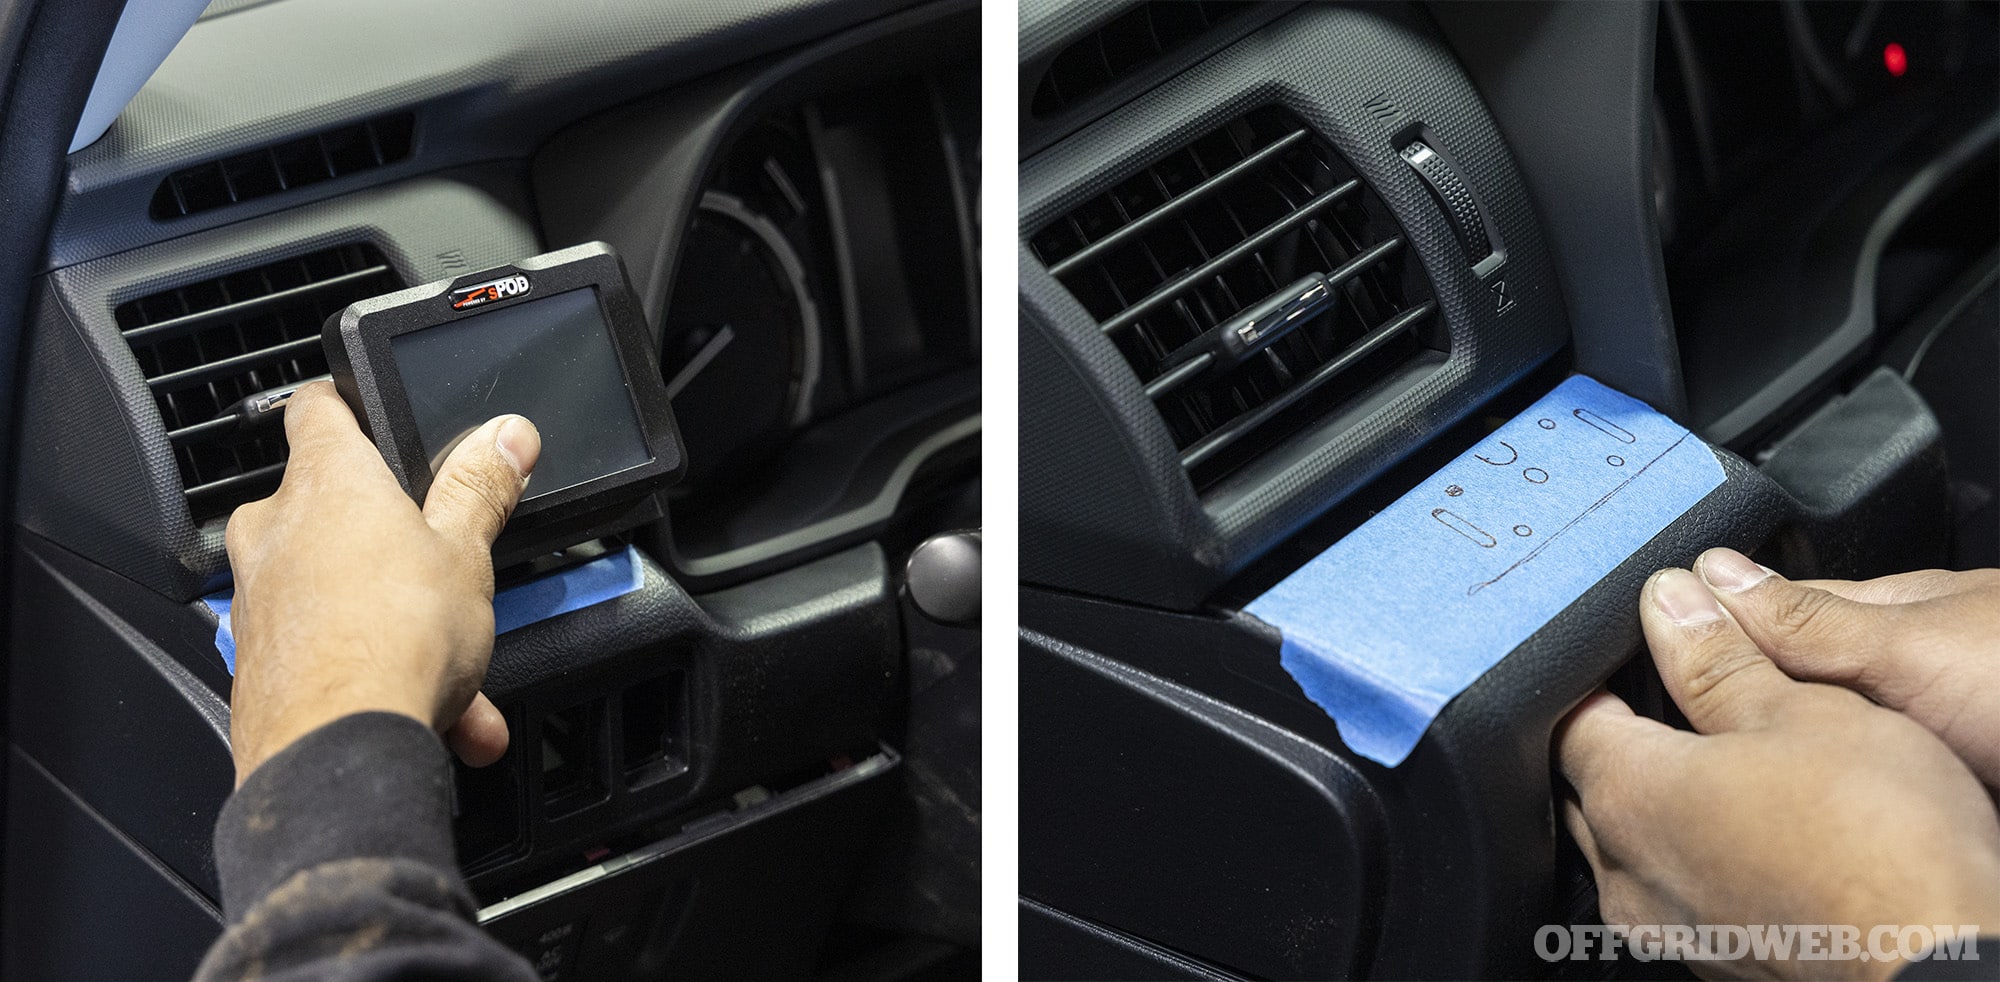
Inside the 4Runner, the other end of the Ethernet cable was routed through the firewall and up to the left side of the dash. We decided to mount the sPOD Touchscreen on a removable trim panel to the left of the gauge cluster for easy access. The position was marked onto masking tape, then the panel was removed and drilled out.
Once the controller was mounted and plugged in, we started the engine to boot up the sPOD system (it won’t start under ignition power alone on the first boot-up). The full-color screen turned on, and we confirmed that pressing each switch activated the appropriate lights.
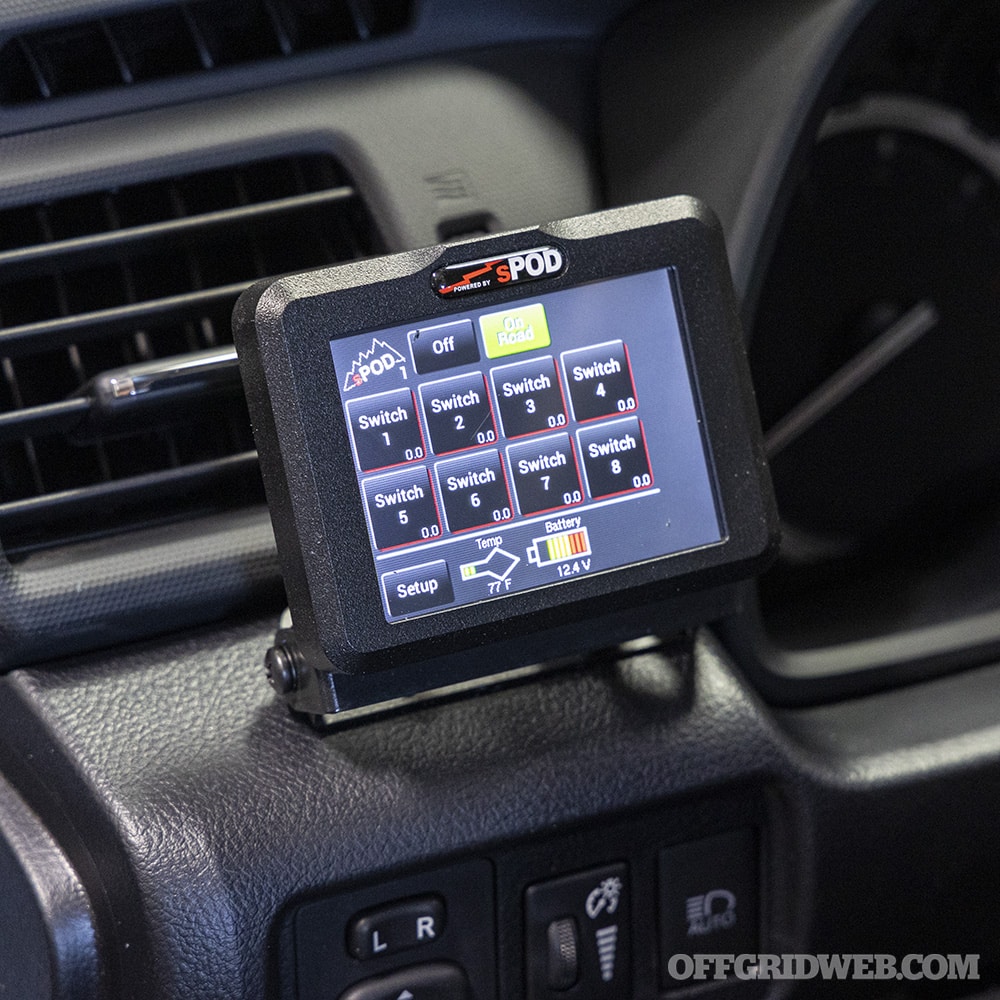
There are many options for customization, including renaming the switches, changing icons, and even linking multiple switches together. Some features can be accessed through the built-in menu, but since the sPOD has Bluetooth, it’s easier to configure it through the sPOD mobile app. The app also allows for firmware updates and access to “Pro-Series” functions for a one-time $30 fee — these include advanced functions such as circuit timers, variable strobe settings, and programmable ignition control. The Pro app isn’t mandatory, but it was worth the upgrade for our needs.
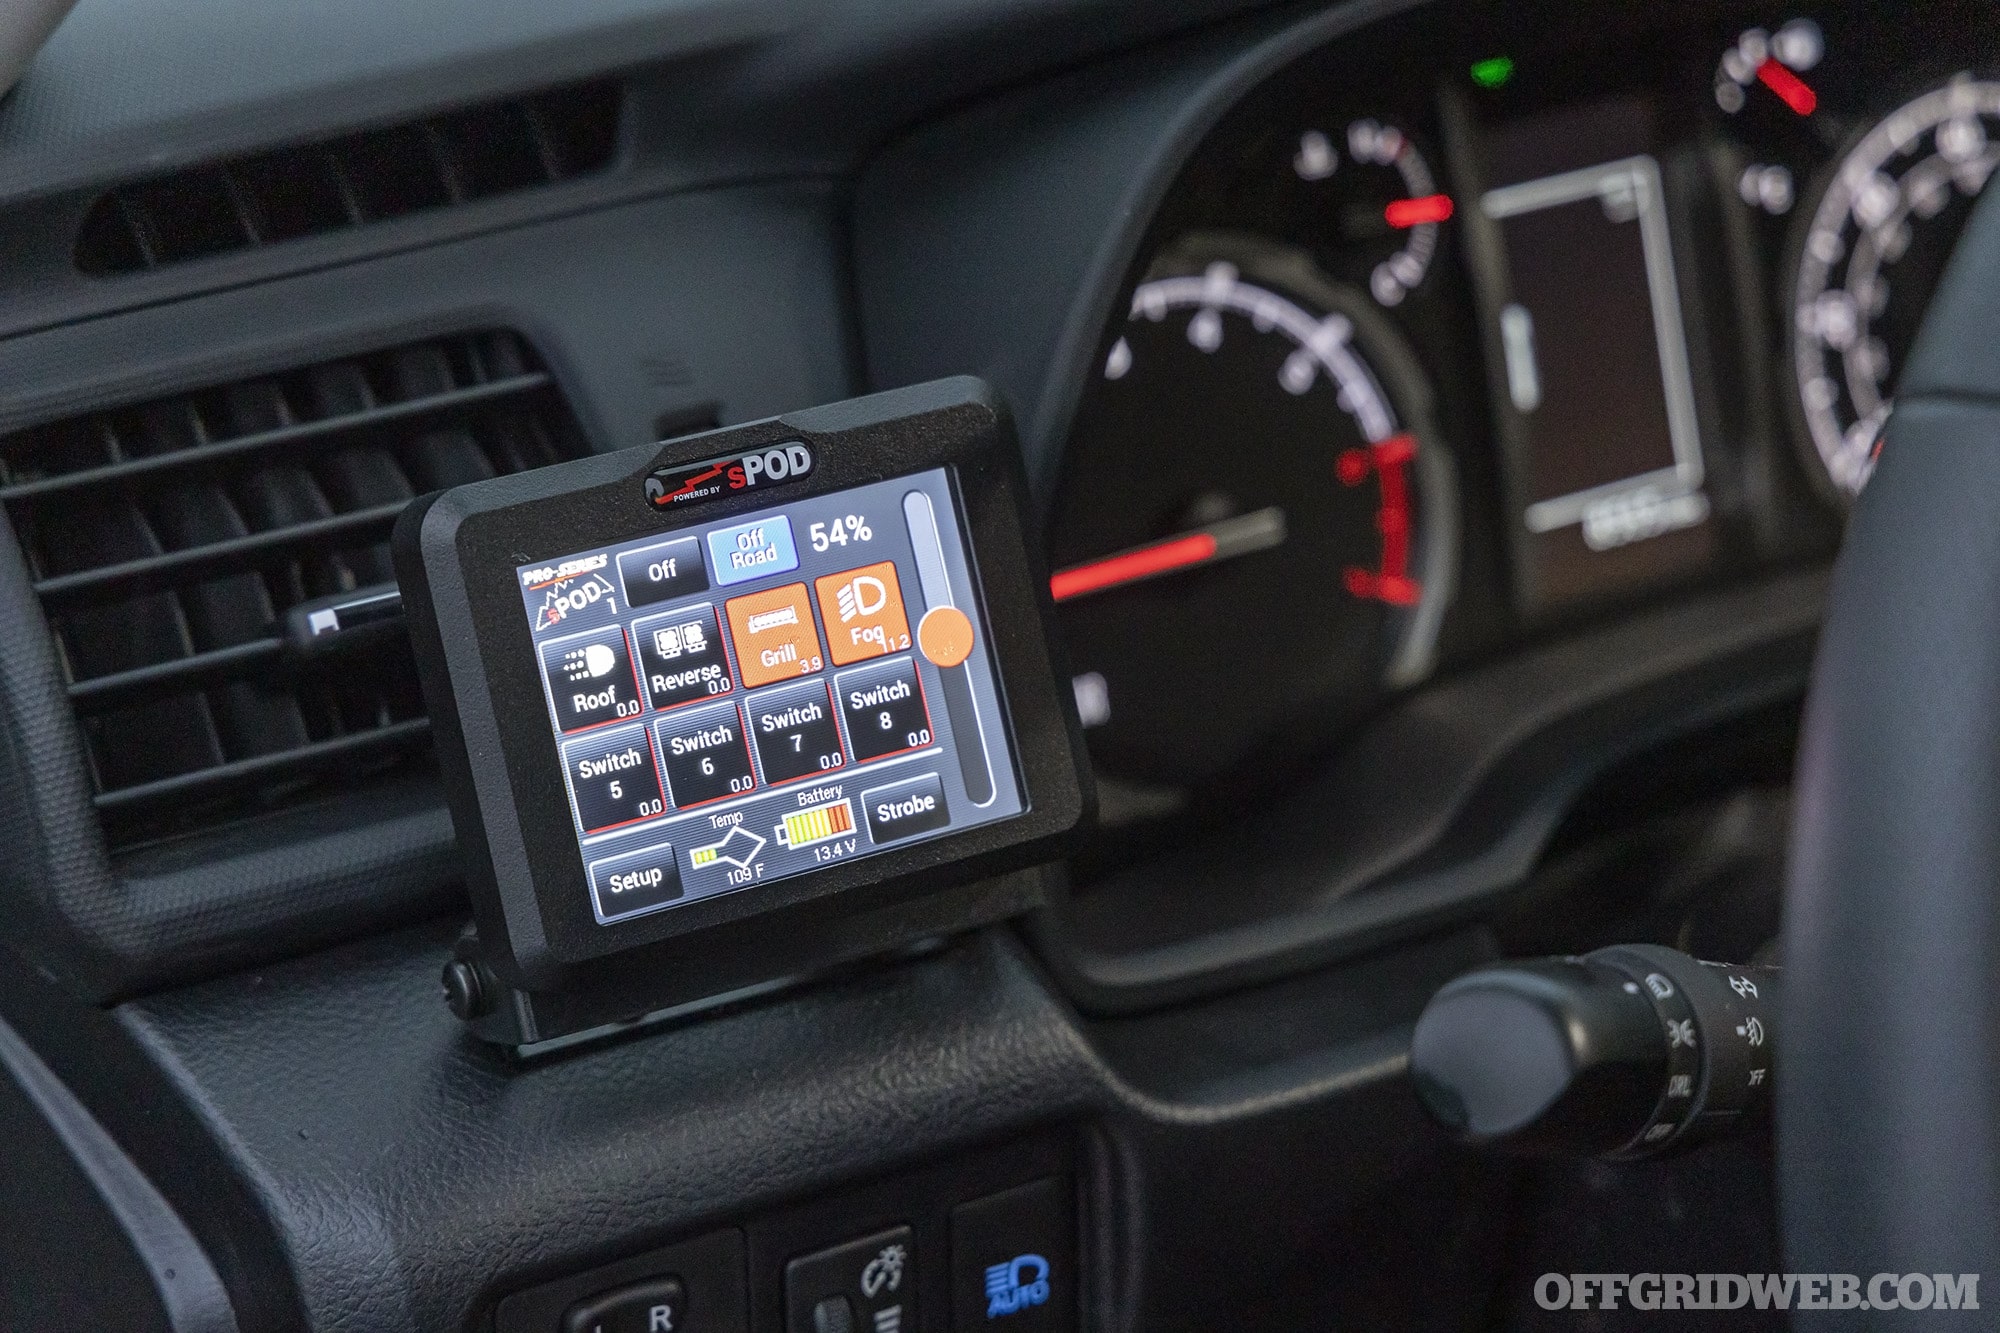
I configured my sPOD with custom names and icons for the four Baja Designs lights. Each switch shows the light’s amp draw in the bottom corner, and turning on “Off Road” mode enables flash or strobe functions. A slider on the right side of the screen allows each light to be dimmed from 100% to 1%. The controller also displays battery voltage and the temperature of the BantamX unit under the hood.
If I ever forget to turn off a light, the unit will automatically shut off once voltage drops below a set threshold; this prevents the battery from draining completely and rendering the truck unable to start. And if there’s a short or current spike, the self-healing fault protection system will kick in to turn off the offending switch without blowing a fuse.
The Road Ahead
These upgrades feel like a substantial step forward for our OFFGRID 4Runner project. The Baja Designs lights have already proven themselves valuable by cutting through rainstorms and dust like a hot knife through butter. The sPOD controller makes it possible to dim the output and transform any of the LEDs into area lights at a campsite, or to send them into full strobe mode for signaling. Beyond this, I’ve barely scratched the surface of the incredible amount of customization offered by the sPOD touchscreen and mobile app. As for the Westcott Designs roof rack, it’s a good-looking, rock-solid platform for these lights as well as future upgrades — I plan to add an awning, locking cargo case, and some basic recovery tools onto the rack in the near future.
SOURCES
- Baja Designs – bajadesigns.com
- sPOD – 4x4spod.com
- Westcott Designs – westcottdesigns.net
