In This Article
Every day, most of us have approximately 12 to 16 hours of sunlight to work with. That means we also have approximately 8 to 12 hours of darkness. If your rifle, handgun, or shotgun aren’t setup for working in the dark, you potentially have a limited-use item — a 12- to 16-hour gun for a 24-hour world. If you’re one of these folks, we’re going to help you out. I personally strive to have a 24-hour gun. So, no matter the occasion, I have a working firearm that can do more than just shoot in well-lit, controlled environments. I want a reliable, dependable system with the equipment that’s better than just “good enough.” The phrase “good enough” tells me that you know there’s better, and you’re not willing to achieve it — don’t fall for that trap.
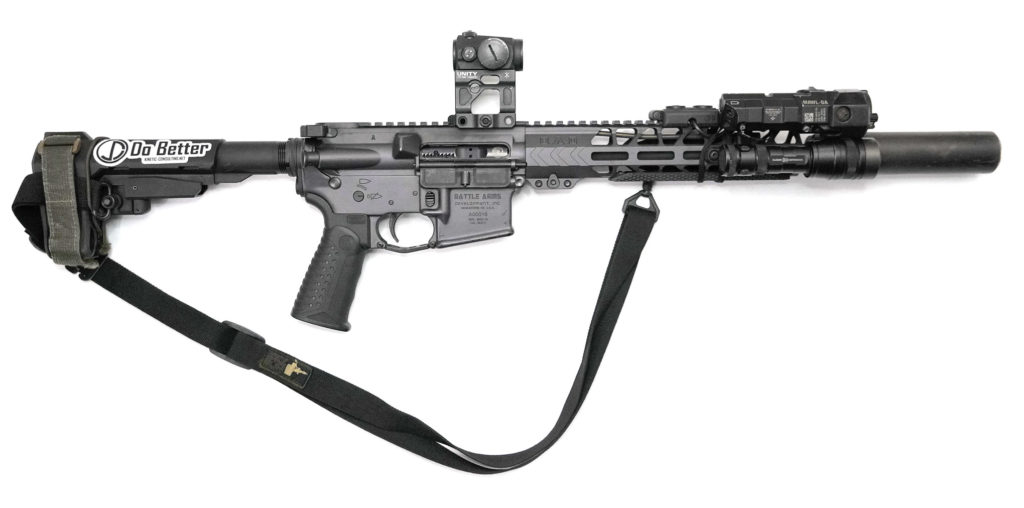
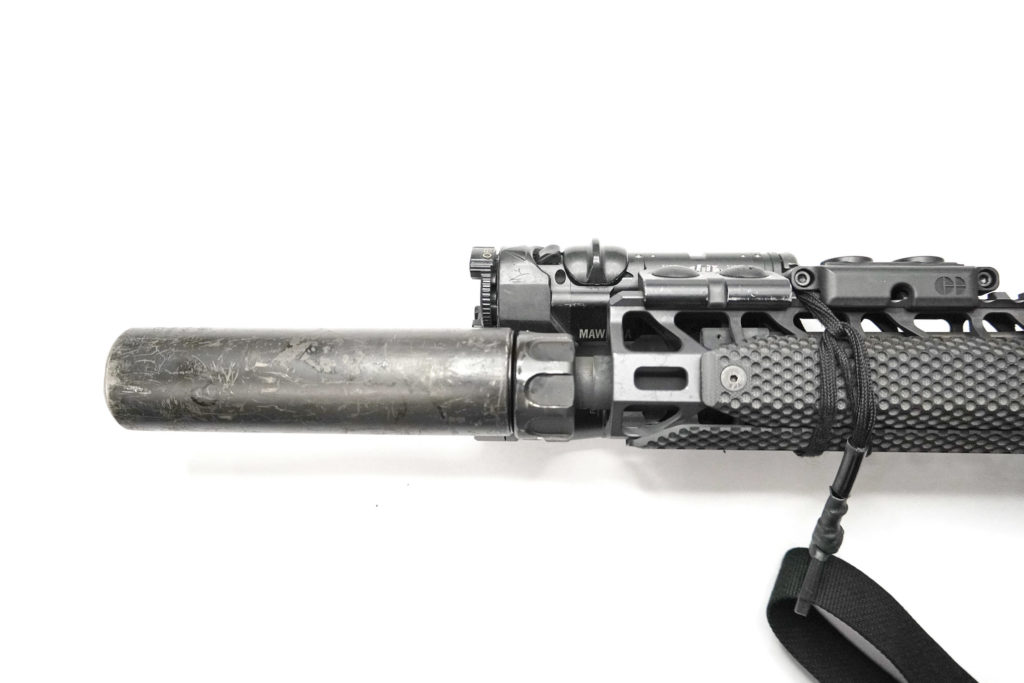
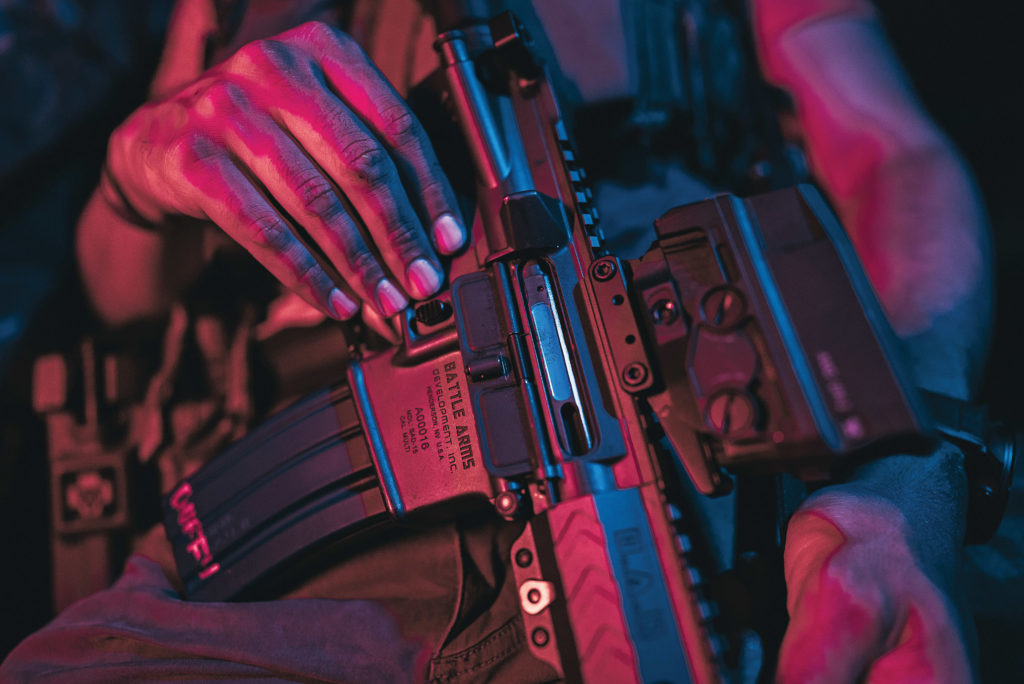
Above: Battle Arms Development Workhorse Rail with a Rosco MFG Bloodline barrel and a SureFire RC2. On the rail is a Cloud Defensive REIN and B.E. Meyers MAWL.
Let us start our journey with a base rifle. Like I stated above, I want something reliable and dependable. There are plenty of fantastic manufacturers out there, but I personally choose Battle Arms Development for my base rifle. At the heart of the rifle is a Rosco Manufacturing barrel — I’ve tested it in so many conditions in the last few years that I don’t want to use anything else at this point. Once you make your choice, or if you already have a base ready to go, we need to pick the appropriate accessories to add. Options are almost endless, so we’ll touch on some of the most important.
Optic Choices (Red Dot vs. Holographic vs. LPVO)
Optics are going to be the primary way we aim our rifles, so choose wisely. We have some things to figure out if we want to fight in the dark. Red dots are standard nowadays, and they’re usually the easiest to learn with and use night or day. Red dots come in two distinct offerings: diode or holographic.
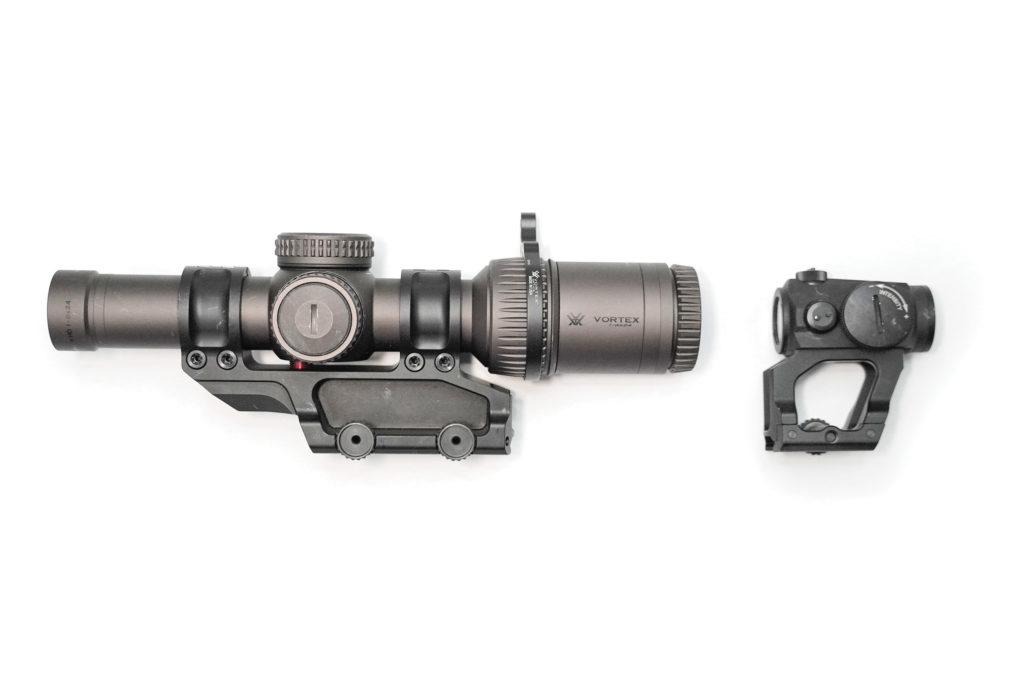
Above: Scalar-works LEAP 1.93 mounts for the Vortex Gen 2 Razor 1-6 (Left) and Aimpoint T-1 (Right).
Diode-based optics project light from an LED, which the front lens reflects it back toward your eye. Very simple and robust. The downside is that this projected light can appear distorted for those of us with imperfect vision (especially astigmatism). If that’s not an issue, then the hard part comes in with choosing a specific optic. This is one of the more personal choices that you’ll have to make. I use the Aimpoint Micro series most of the time, unless I’m testing something for another company, because they have a long battery life, low weight, small size, and a sturdy housing with easy adjustments. No frills, they just work. If you plan to use night vision, make sure to get a model that features low-brightness settings designed for this purpose.
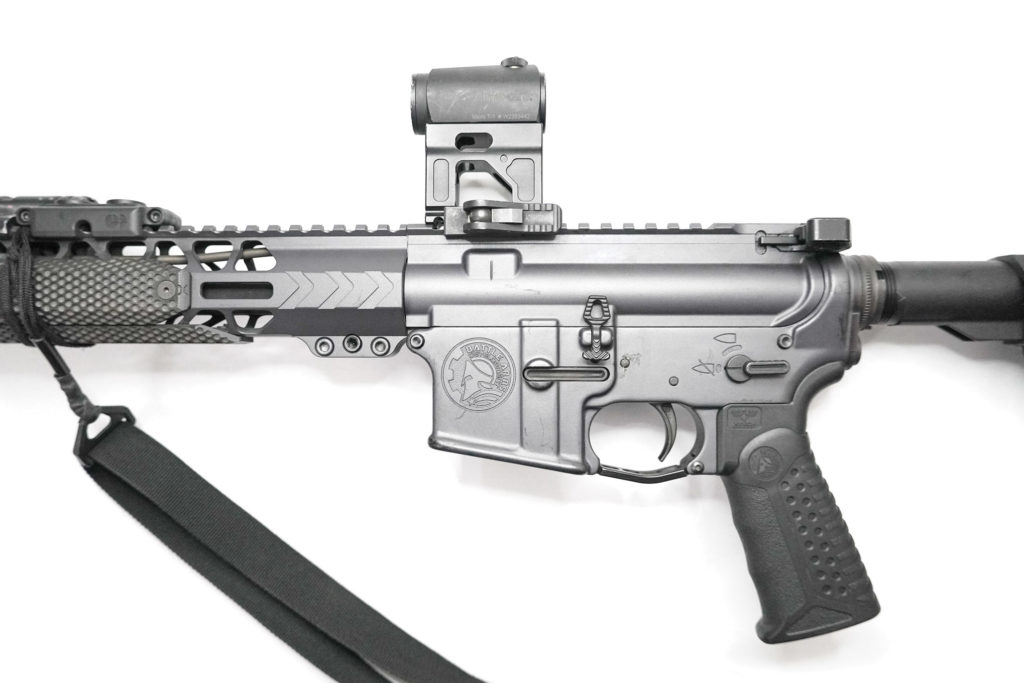
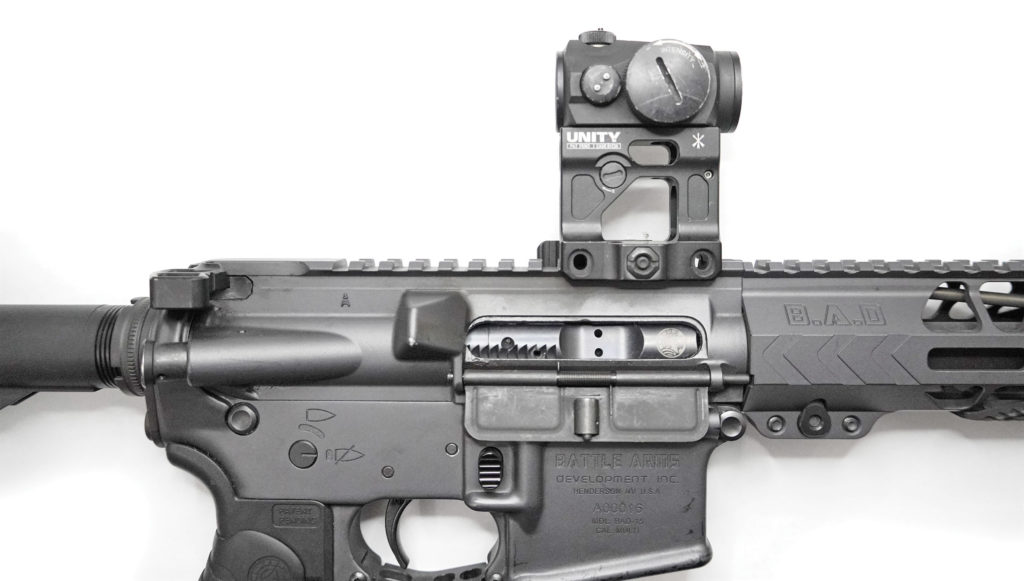
Above: Battle Arms Development Workhorse with an Aimpoint T-1 on a Unity Tactical Fast mount.
Another option you have is a holographic sight like one of the EOTech models or the Vortex UH-1. These have much shorter battery life than red dots, but work well with magnifiers and night vision. Depending on your eyes, you may see a sparkly reticle or a solid one. I’ve been told by a significant amount of people that their astigmatism is lessened by holographic sights, as well. When it comes to holographic sights, I’ve been gravitating toward the Vortex UH-1 Gen 2, but that is once again a personal choice. You must make your own.
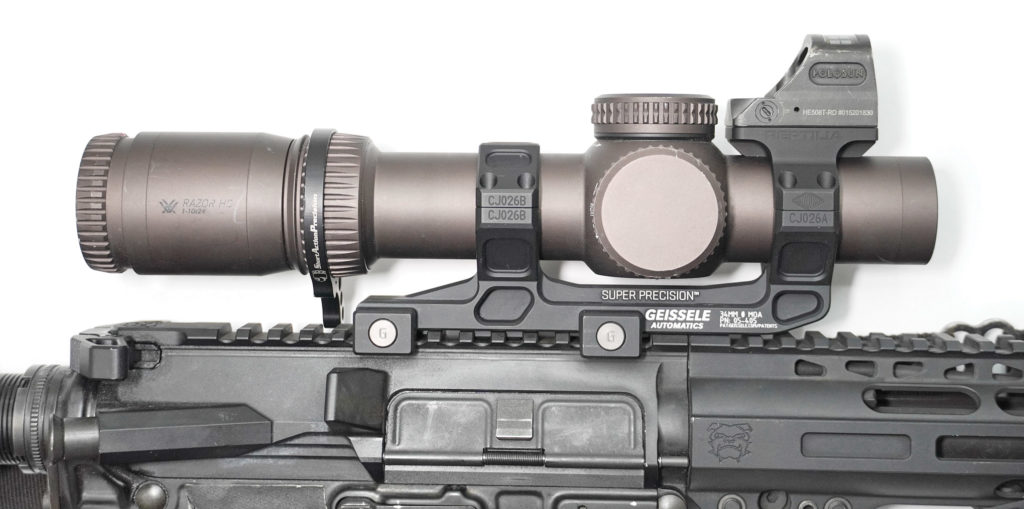
Above: The Vortex Razor Gen 3 1-10 in a Geissele 1.5 height mount with a Holosun 508T on a Reptilia Corp ROF-90 mount.
The third option for optic selection is a Low Power Variable Optic (LPVO), typically with magnification range around 1-6x. LPVOs have an advantage over the other two types of optic: an etched reticle. Depending on the brand and optic you choose, there are some awesome choices out there from Vortex, Leupold, and Nightforce. These optics have magnification when you want it, and models with an illuminated reticle can be used like a red dot with practice. The main downsides are that they’re significantly heavier and more expensive than red dots. Illuminated LPVOs have similar battery life to a holographic sight. When it comes to LPVOs, you’re now working with a more precise optic that you can use to dive deeper into the pool of precision.
Mount Height
With optic selection comes mount selection. Mounts typically range from 1.3 inches all the way to 2.33. So, let’s go through them to see what may fit your needs.
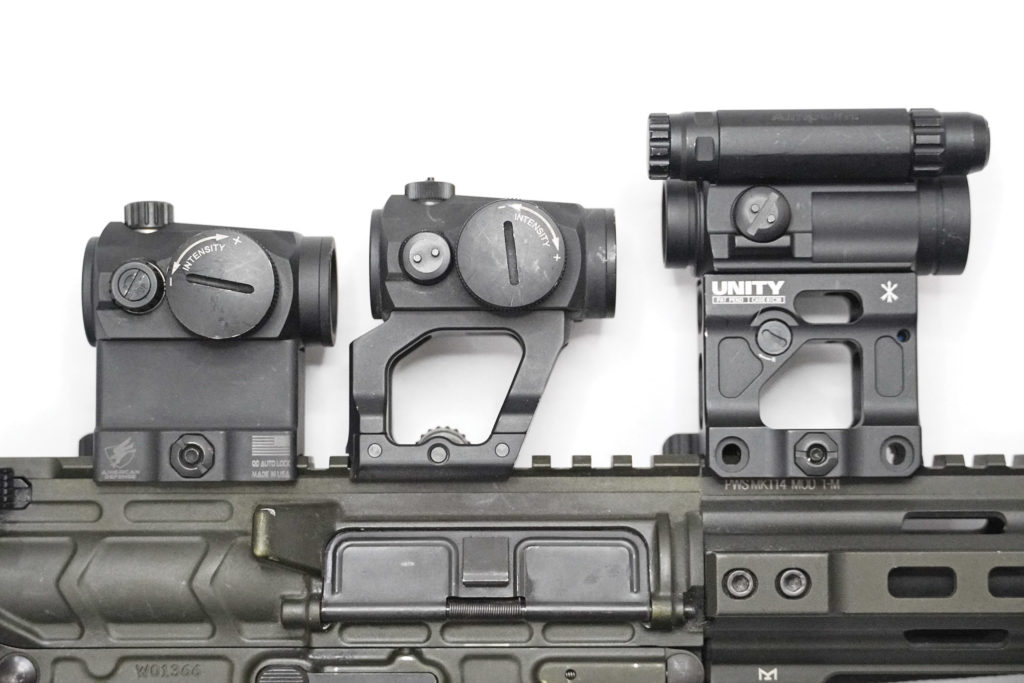
Above: From left to right, an ADM 1/3 co-witness mount, Scalar-works LEAP 1.93, and Unity Tactical Fast 2.26.
1.3 to 1.5 are great for magnified scopes, or for when you need a consistent cheekweld for precision shooting. Just be aware some scopes won’t fit in a 1.3 depending on the objective lens size. I also don’t recommend the 1.3 and 1.5 (absolute co-witness) for red dots on most weapons. It’s unnecessarily low for the needs that a red dot fits, but like everything, it’s your choice.
The next step up is a 1.7, also known as a 1/3 (or “lower third”) co-witness height. This is a popular place to mount LVPOs and red dots for iron sight co-witness, if you still use iron sights. It’s still a little low for those of you trying to use it for night vision, and depending on head size, you may end up craning your neck.
1.93 is the next height — this is at the limits of comfort for any prone shooting with night vision, but it’s a great height for those who plan to be upright or standing more than prone. I enjoy the 1.93 or 2.05 for my LPVOs that I’ll be using as a primary optic. This height also works well for red dots.
Next up are the 2.26 and 2.33 heights. I don’t suggest these for an LPVO. It ends up being difficult to consistently avoid parallax — not that it cannot be trained, but it’ll take more work and is very straining on the neck for anything prone. My suggestion for any mount that you choose is to figure out the purpose of the rifle and the optic you’re using to make a choice.
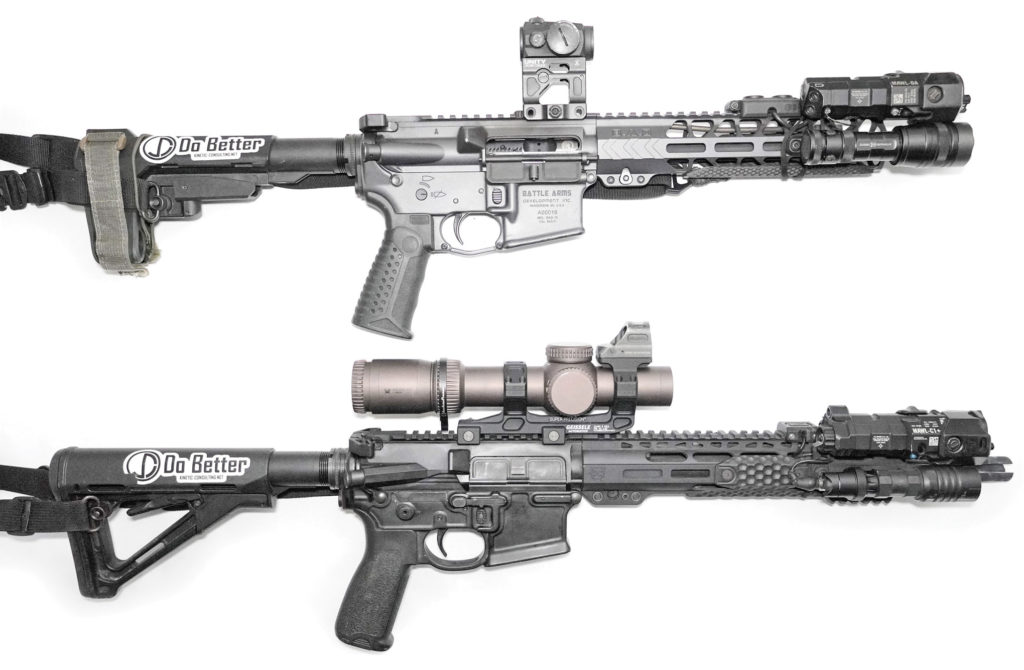
Above Top: Battle Arms Development Workhorse — my main jam. Below: Rosco MFG 12.5 URG — my do-it-all rifle.
Another style of mount selection is blending the traditional mounts above with an offset mount. There are a lot of combination mounts that you can put micro red dots on the top or side (45-degree) of your scope. This adds a level of redundancy and options to enhance your capabilities. Top-mounted red dots on scopes are one of my favorite styles, as it gives me ambidextrous use of my rifle in a scope or red dot capacity. I still enjoy using side-mounted dots when I use a higher magnified optic or am trying to keep the height profile of my rifle down. Either one needs some personal consideration depending on your setup and needs.
Weapon-Mounted Lights (White vs. IR)
Weapon-mounted lights are an absolute must for a rifle. The only exception is something used exclusively for daytime competitions. As for a dedicated low-light rifle, you’ll need a good light. By good light, I’m not just talking about any light that says “tactical” and comes with a rail mount. I’m talking about the output on multiple levels. Your light should have high candela, lumen, and lux stats. Candela is the intensity of the beam emitted from the light. Lumens is the overall brightness rating of the light. Lux is the intensity of the light in a given area or distance. Personally, I stick to two companies that I believe have surpassed the others in performance capability. Modlite and Cloud Defensive have made lights that are modular and offer outstanding performance in these key areas. Modlite offers lights that are compatible with industry-standard mounts, tailcaps, switches, and other components. Cloud has attacked the market in another way, starting from the ground up to develop two different-style lights, the OWL and REIN. Both companies make great products that someone can adapt to their needs.

Above: From left to right, the Cloud Defensive REIN, Modlite OKW, and SureFire M600V.
If you’re operating under night vision, you may want either a dedicated infrared (IR) or dual-output white/IR light. These are very specific use items. Depending on your laser setup, you can supplement it with a dual spectrum light like the SureFire M300V/M600V “Vampire” series. Just remember most dual-spectrum lights provide both IR and white light, but usually do both jobs sub-optimally. Most use these lights to add more IR illumination to the area they’re targeting for passive night vision use, or as a searching tool. The only dual-spectrum light I use is on my helmet. More on that in the future.
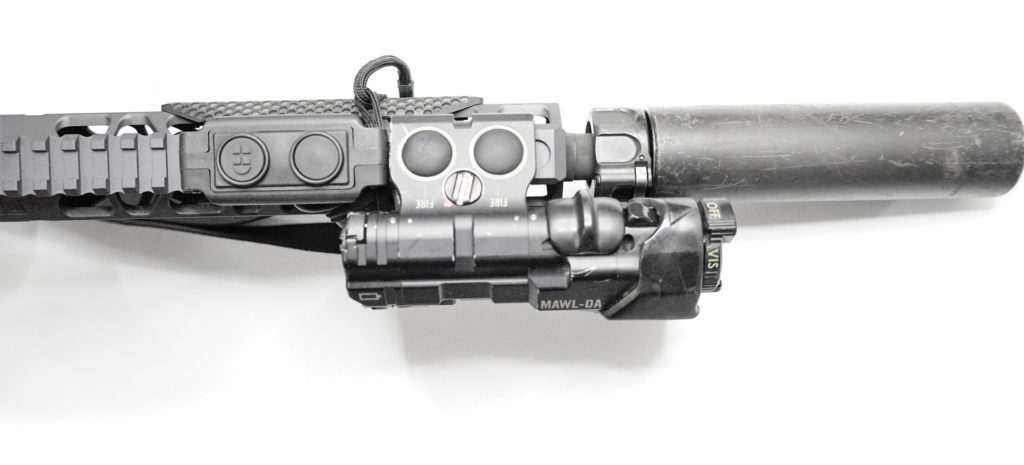
Above: A top view of button controls for the Cloud Defensive REIN and B.E. Meyers MAWL.
Muzzle Devices (Muzzle Brakes, Flash Hiders, and Suppressors)
Muzzle devices vary in many ways, and each will have pros and cons. The most common muzzle devices are muzzle brakes and flash hiders. Beyond those, there are also suppressors, which are my favorite option. I can be seen in the wild most of the time using one. Let’s get into some of the details.
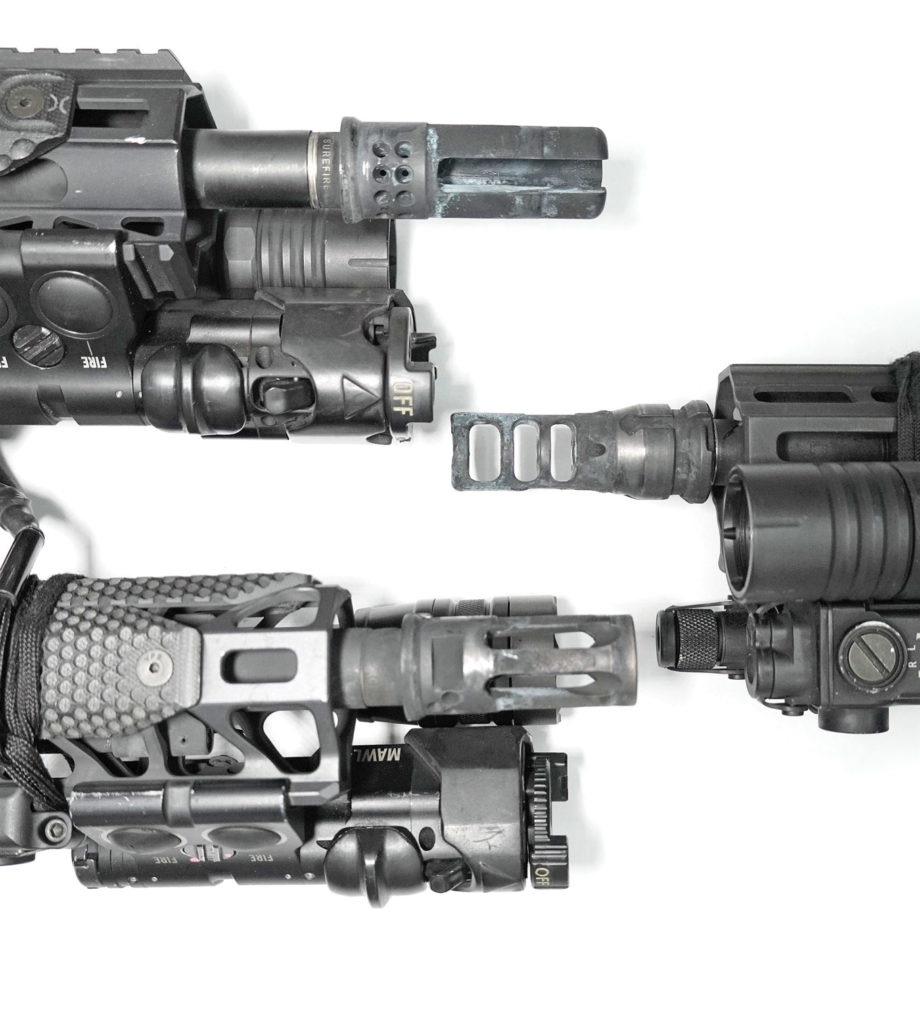 Above: From top to bottom, a SureFire Warcomp flash hider, Dead Air Keymount brake, SureFire Warcomp closed-tine flash hider.
Muzzle brakes, also known as compensators, are usually the best at recoil mitigation because of the way they redirect gases to force the muzzle lower or reduce muzzle climb. That benefit also has some downsides. I’ve found that if I shoot with a brake/compensator for long enough, I start to relax my shooting position. I relax so much to the point that shooting with anything else is harder to manage. Also, if you’re shooting next to others — teammates and/or classmates — you’ll be hated by all. That redirection of gases and concussive force is very harsh to your neighbors. I suggest that you don’t shoot a muzzle brake indoors, since it’ll be unpleasant even with the best ear protection.
Above: Battle Arms Development Rail with a Rosco MFG Bloodline barrel, SureFire RC2, and Rail-scales EXO panels.
Flash hiders conceal the muzzle flash by using slots or holes in the muzzle device. Flash hiders are also misinterpreted: They don’t hide all the muzzle flash; they mitigate or minimize it. Flash hiders were originally meant to help the shooter’s eyesight by not overwhelming the photo receptors in their eyes. Some flash hiders also help with recoil, giving you a blend of a brake and hider. Just remember, most devices that do both usually aren’t ideal at either one.
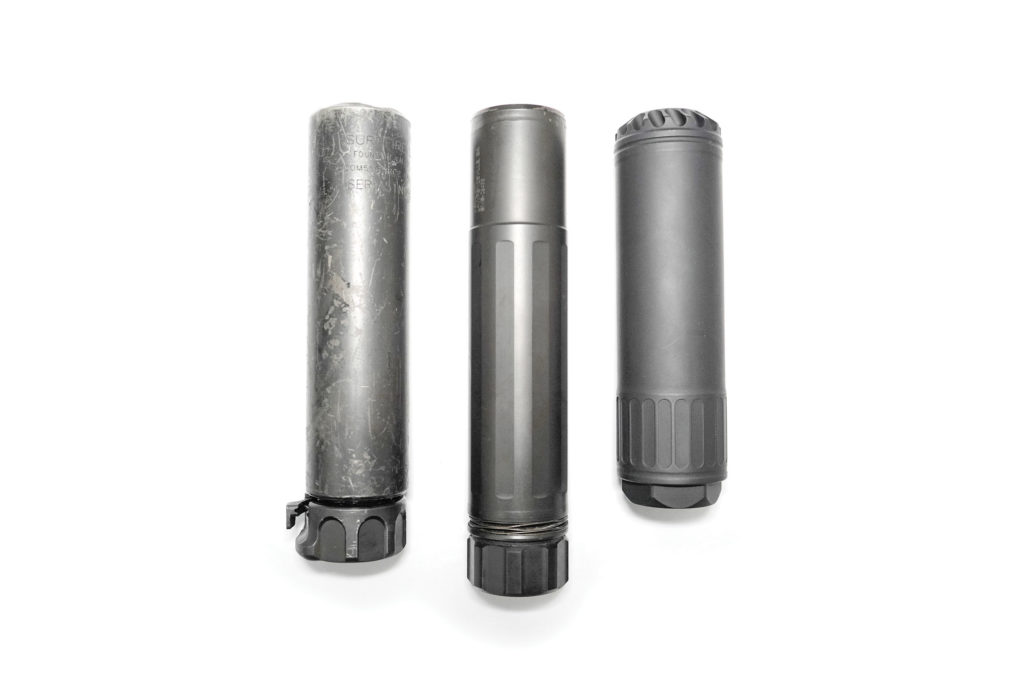
Above: Left to right is a SureFire RC2, Dead Air Sandman S, and OSS 556K.
Both kinds of muzzle devices can also include a mount for a suppressor. Suppressors, also known as silencers, use a series of baffles or chambers to limit the expansion of gases. This limits the noise coming from the rifle and can also potentially limit the amount of flash, depending on the length of rifle and suppressor. Suppressors add weight to the front of the rifle, and that takes some getting used to if you don’t do enough pushups. For some, a suppressor is cost-prohibitive, but I highly recommend you save your pennies for one. Suppressors are the ultimate muzzle device for a low-light rifle and can also help protect your hearing. The only other downside is that they get extremely hot with use, so don’t burn yourself.
Laser Devices
Laser devices come in a lot of shapes and sizes. Lasers are also very specific tools and must be cared for, so they take a dedicated user. They’re not plug-and-play like some believe them to be. They must be carefully positioned and zeroed, much like an optic. I don’t recommend just grabbing any laser off the internet. Choose the laser that’ll fit your needs. Visible lasers are great for certain uses, like gas mask work and practicing for IR laser use. Be aware that they have limitations due to lighting in the environment you’re working in. IR laser devices are meant for use under night vision, so they won’t be visible to the naked eye. As a result, IR lasers are often paired with a visible laser, so that if one is zeroed you know the other should be, too. Since I use a lot of night vision and teach it, I use a B.E. Meyers MAWL, which has a visible laser, IR laser, and an IR illuminator. I suggest those going into night vision get something with all three tools.
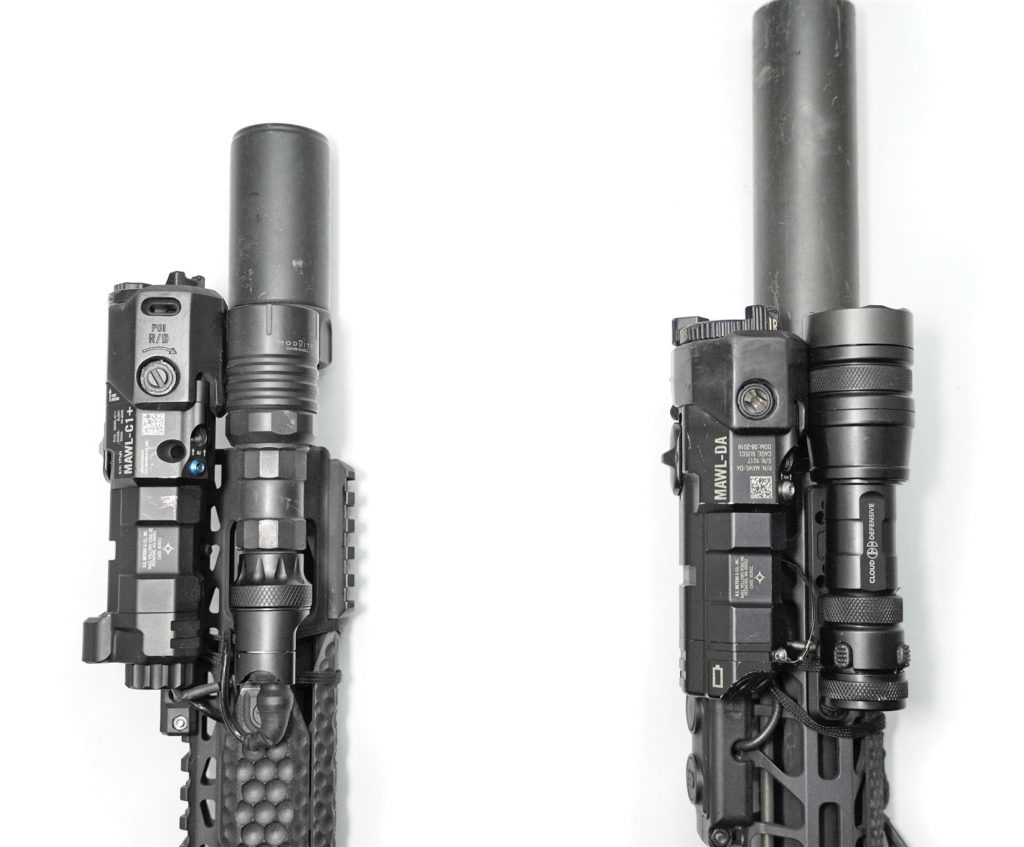
Above: Both my setups have some similarities. To the left is a B.E. Meyers MAWL and a Modlite OKW. On the right is B.E. Meyers MAWL and a Cloud Defensive REIN.
Conclusion
Setting up a rifle is very dependent on your needs and wants. I don’t like to skimp on my equipment and don’t suggest it to anyone. Save up and buy the good stuff, instead of buying inexpensive gear that you may have to replace when it breaks or malfunctions. With the myriad of accessories and tools on the market, setting up a low-light rifle can be overwhelming, but I hope that this article helps guide you. Build a list, save your money, and get practicing.
To see Jon Dufresne’s Training Calender or to Check out Kinetic Consulting: kinetic-consulting.net
Follow him on Instagram: @mochabear_actual
[Editor’s note: Photography by Jon Dufresne and Real Dirty Media.]
MORE ON NIGHT VISION
- Night Vision 101.
- GBRS Group: Shadows that Bite.
- Night Vision Helmet Setup Guide.
- Sionyx Aurora Pro: Color Night Vision Review.
- Night Vision Goggles: A Double Primer.
- Unobtainium Gear Active Night Vision Recording System: Taping what you see.
