In This Article
Disaster has struck. Maybe you’re on your way to work. You find yourself having to bug out — realizing you forgot your faithful EDC knife on your dresser drawer at home. Or perhaps you’ve just survived a plane crash or an off-road ATV accident far from civilization, and you’ve lost your gear. Whatever the calamity, you’re now up SHTF creek without a paddle and, worst of all, without a knife. You need to find one, quickly. Most of us cannot fathom going down the street without a pocket knife of some sort, yet here you are. Miles from the closest sporting goods store or hardware store, what will you do when the time comes to use the art of blade smithing to help you survive until you make it home? Build your own, of course.
But first a clarification: We’re not talking about an improvised weapon. This was deftly covered in OG’s 2014 winter issue. Most of us who have even the smallest inkling about self-defense can be resourceful when it comes to finding a stick, club, rock, broken bottle, or any number of available weapons to fend off an attack. Nor do we mean a custom knife adorned with ergonomic scales and using modern super steels in the blade that was developed by NASA for use in the space shuttle program.
What we’re talking about here is a tool meant for cutting, chopping, whittling, skinning, and various other chores that we may be confronted with in a survival situation.
The knife is arguably humankind’s oldest tool and can often mean the difference between life and death. Because of its age, however, a resourceful human can fashion a blade from most materials that can be found almost anywhere. Our ancestors crafted knives before they invented a written language, and we have learned along the way through centuries of blade making how to only get better at it.
Two Roads Diverged
A knife is made by two basic methods: forging or stock removal. The forged blade is made by taking a piece of metal and shaping it into a knife by means of heat and pressure. Stock removal, on the other hand, means taking a piece of material and removing everything that does not look like a knife. Each method has its pros and cons, but for our purposes we’re only looking at which is easier to make based on the average reader’s skill set and on the materials one might find in an emergency or a grid-down scenario.
To grind a blade from a piece of metal, you will need the steel with which to work and an abrasive surface, such as a rock, brick, or even another piece of metal to shape the blade and expose the carbides in the steel. In other words, you need a piece of metal and something to sharpen it with. A lid from a can of tuna fish, an old metal shelving bracket, a metal file, or anything reasonably flat can be pressed into service with the help of an abrasive surface to form the edge.
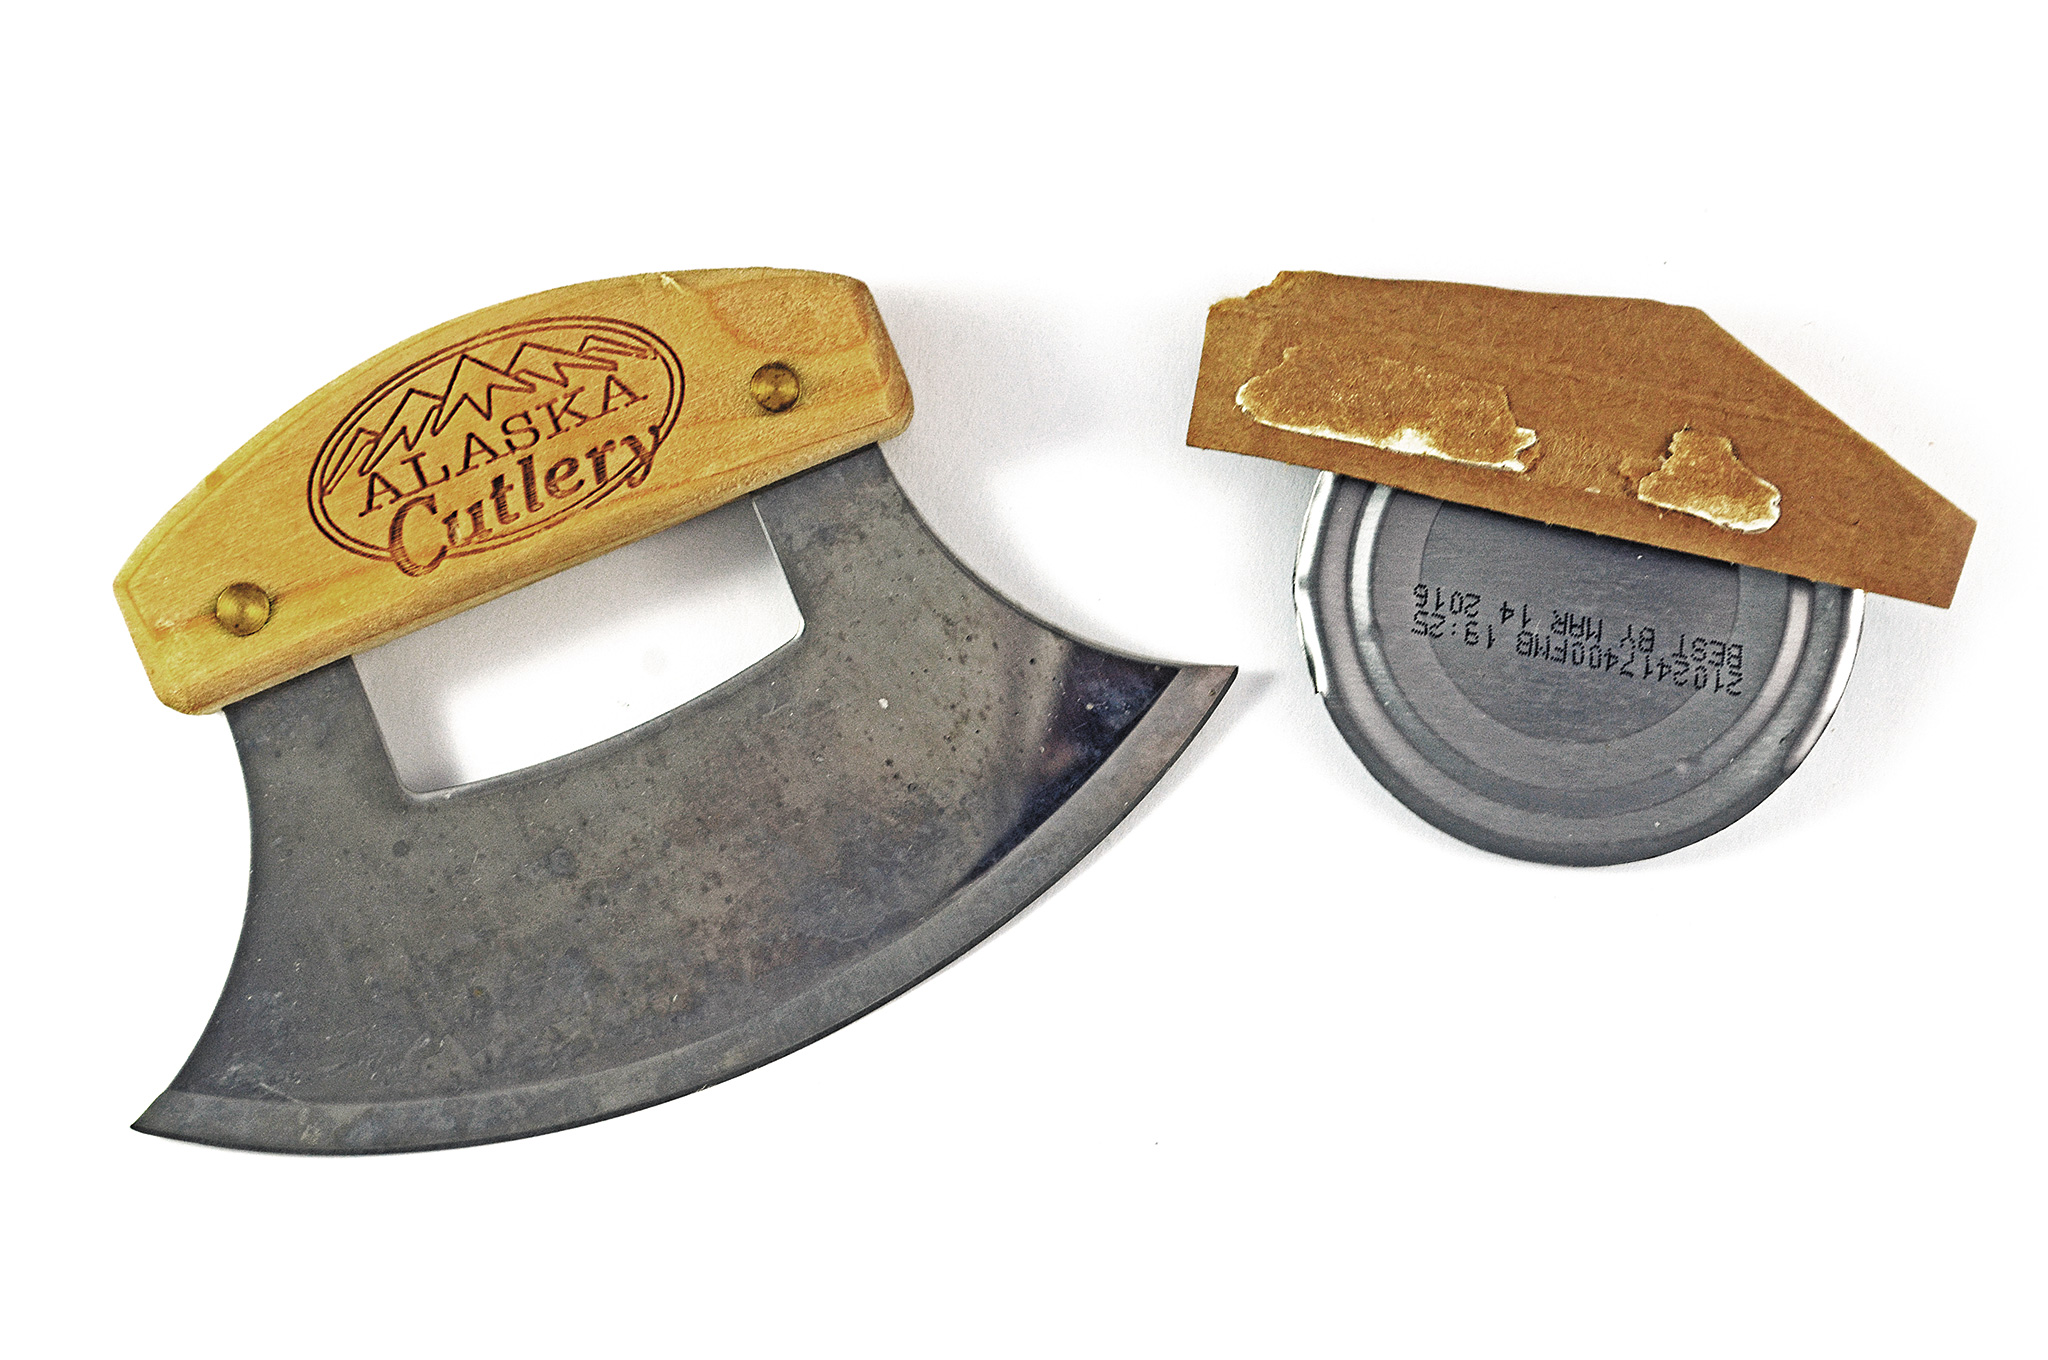
For example, we tried the can lid method by assembling a blade from:
- Lid from a can of smoked salmon
- Cardboard
- Duct tape
These materials weren’t optimal by any means, but represented what could be scavenged from a trash can. The lid needed sharpening and, after working it for nearly 45 minutes on a slab of concrete, we obtained something resembling an edge.
We decided to fashion it as an ulu-style blade. For a small piece of metal with no method to pin the handle, it made the most sense. The inferiority of the metal made it usable on softer materials, like fruits, vegetables, and cooked meat. Our ulu even worked well enough to cut cardboard, but this would not work well as a general-use knife.
When it comes to making a blade out of scrap like this, your only limitation — besides what you can scrounge — is your imagination.
Forge Ahead
Maybe your situation doesn’t lend itself to grinding out a knife. Fortunately when the author surveyed a dozen professional knife-makers (most of whom were the stock-removal types) the overwhelming response came back as, “I would forge one.”
We consulted with two bladesmiths from the American Bladesmith Society: Michael Quesenberry and Peter Pruyn. These makers specialize in the art of the forged blade, and considering we’ve never forged a piece of steel before, their input gave the author a better appreciation of forged knives.
What is important here is finding an appropriate piece of metal to start with. In addition to the steel, the forger in the wild needs a source of heat, an anvil, and a hammer. The heated metal is placed on the anvil and the hammer provides the opposing force to beat the metal into the desired shape (this was the pressure we mentioned previously). Anvils and hammers can be improvised: We are merely looking for a hard, flat surface on which to work and a hardened tool with a flat head to force the metal into shape. The anvil could be an old tree stump, while the hammer could be a large rock.
To forge steel, we will need a heat source of around 2,100 degrees. Ideally, the forge will need to burn hotter and more consistent than wood, such as with charcoal or propane. Forcing air into the forge will keep the temperature high and consistent.
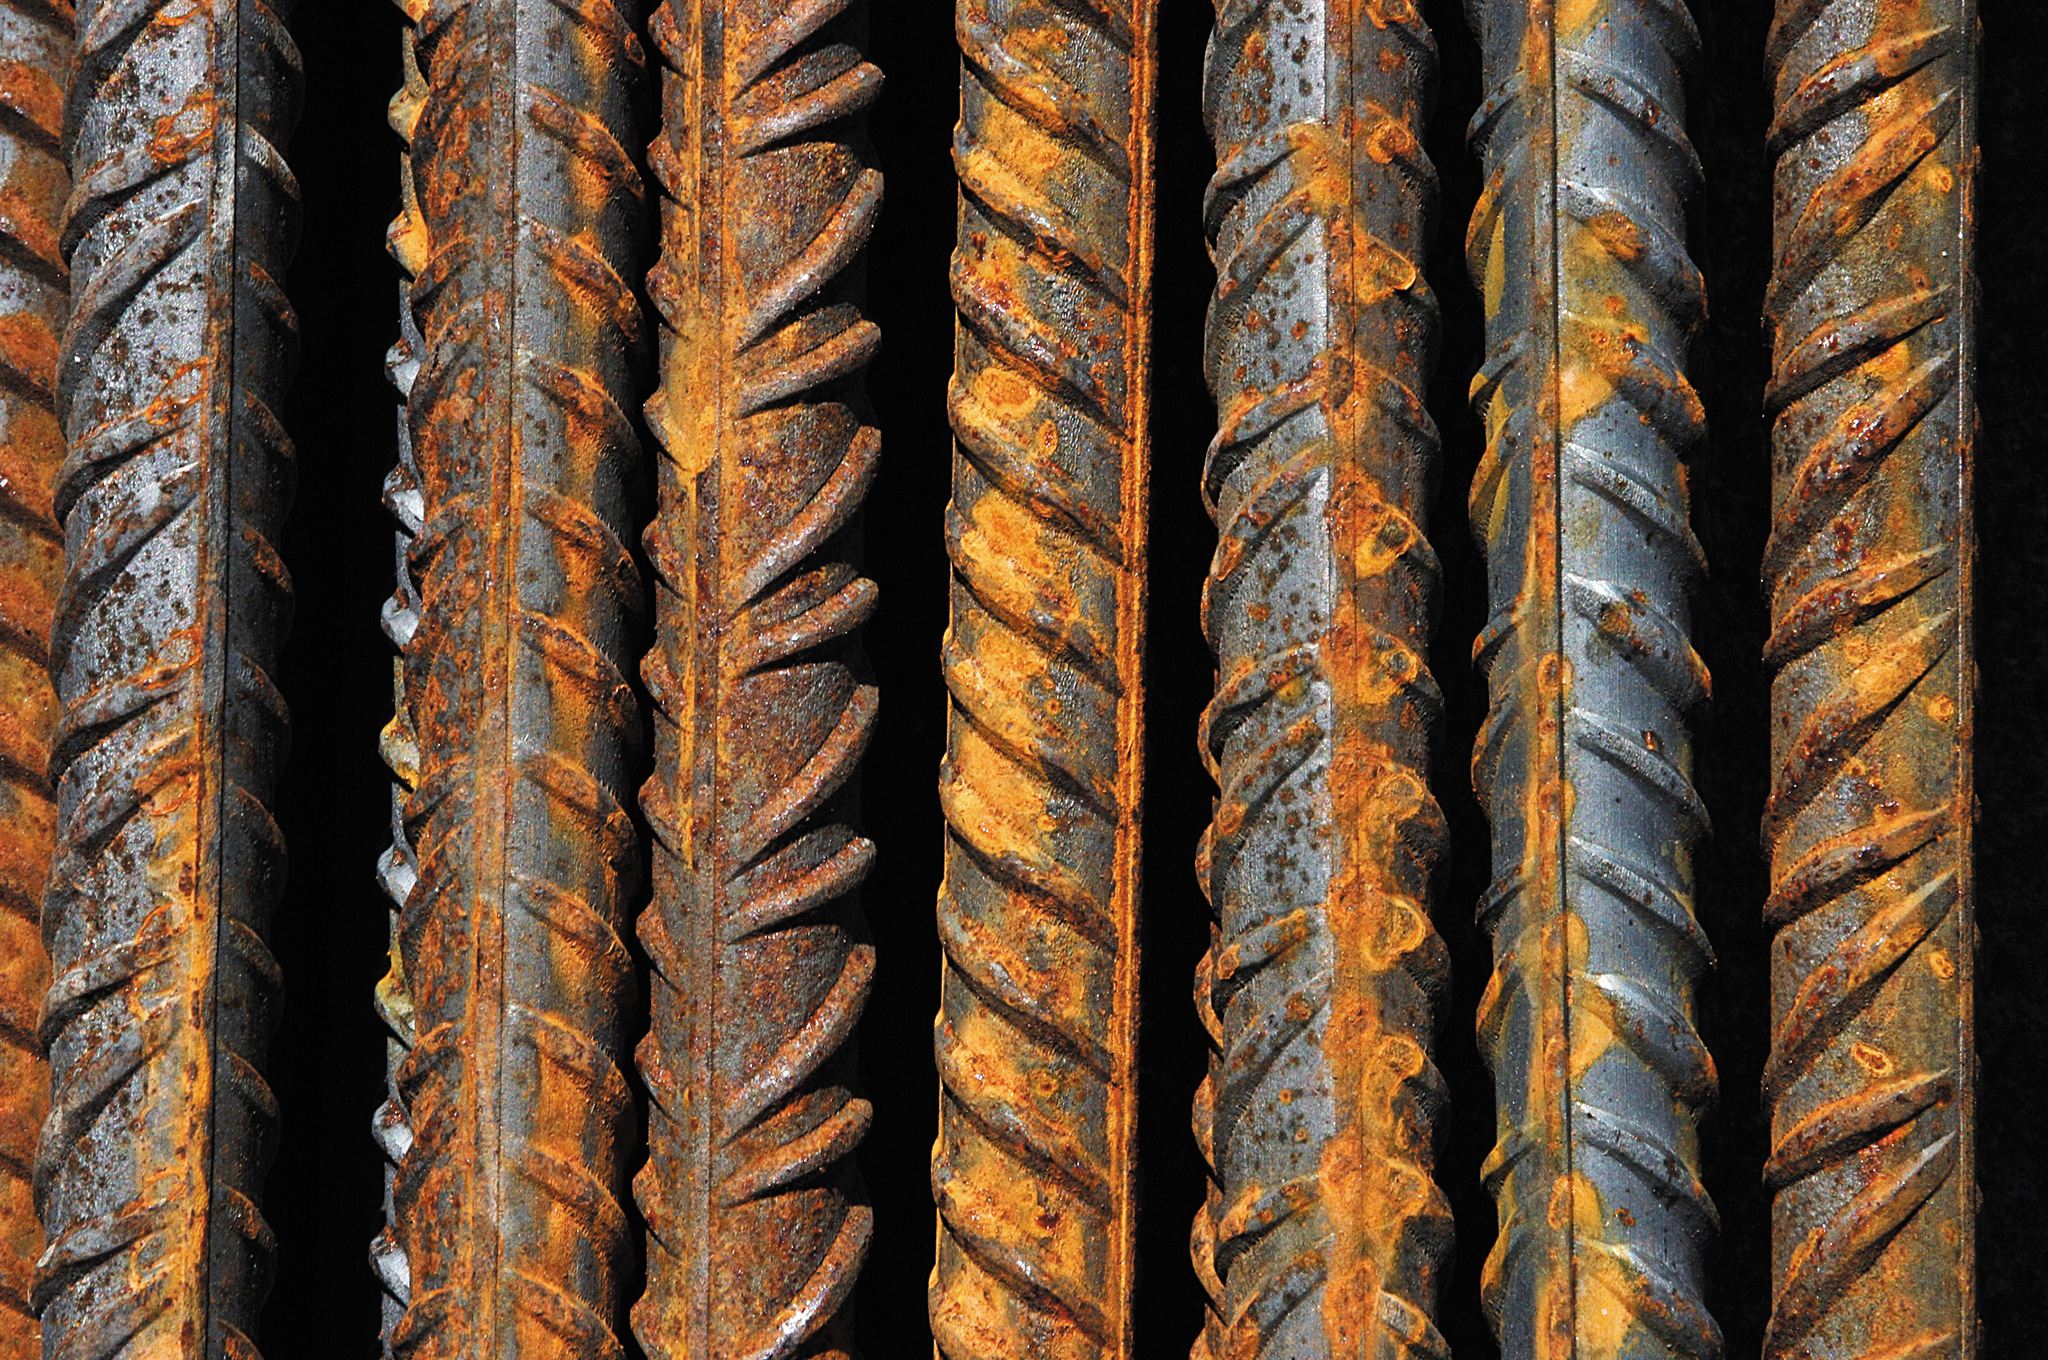
Select Your Steel: Keeping with the concept of scavenging, we chose rebar. Both of our bladesmiths felt that it was an unsuitable steel type, but we reminded them that this would not be a “knife-show beauty,” but rather a DIY survival blade. Eventually, the experts agreed that rebar would give us the bare minimum in cutting ability and strength, plus it can be found in almost any urban setting. The same concept could be applied to old files, horseshoes, saw blades, railroad spikes, or just about anything composed of steel — with the caveat that the harder the steel, the more heat (and arm strength) will be needed to hammer it into shape.
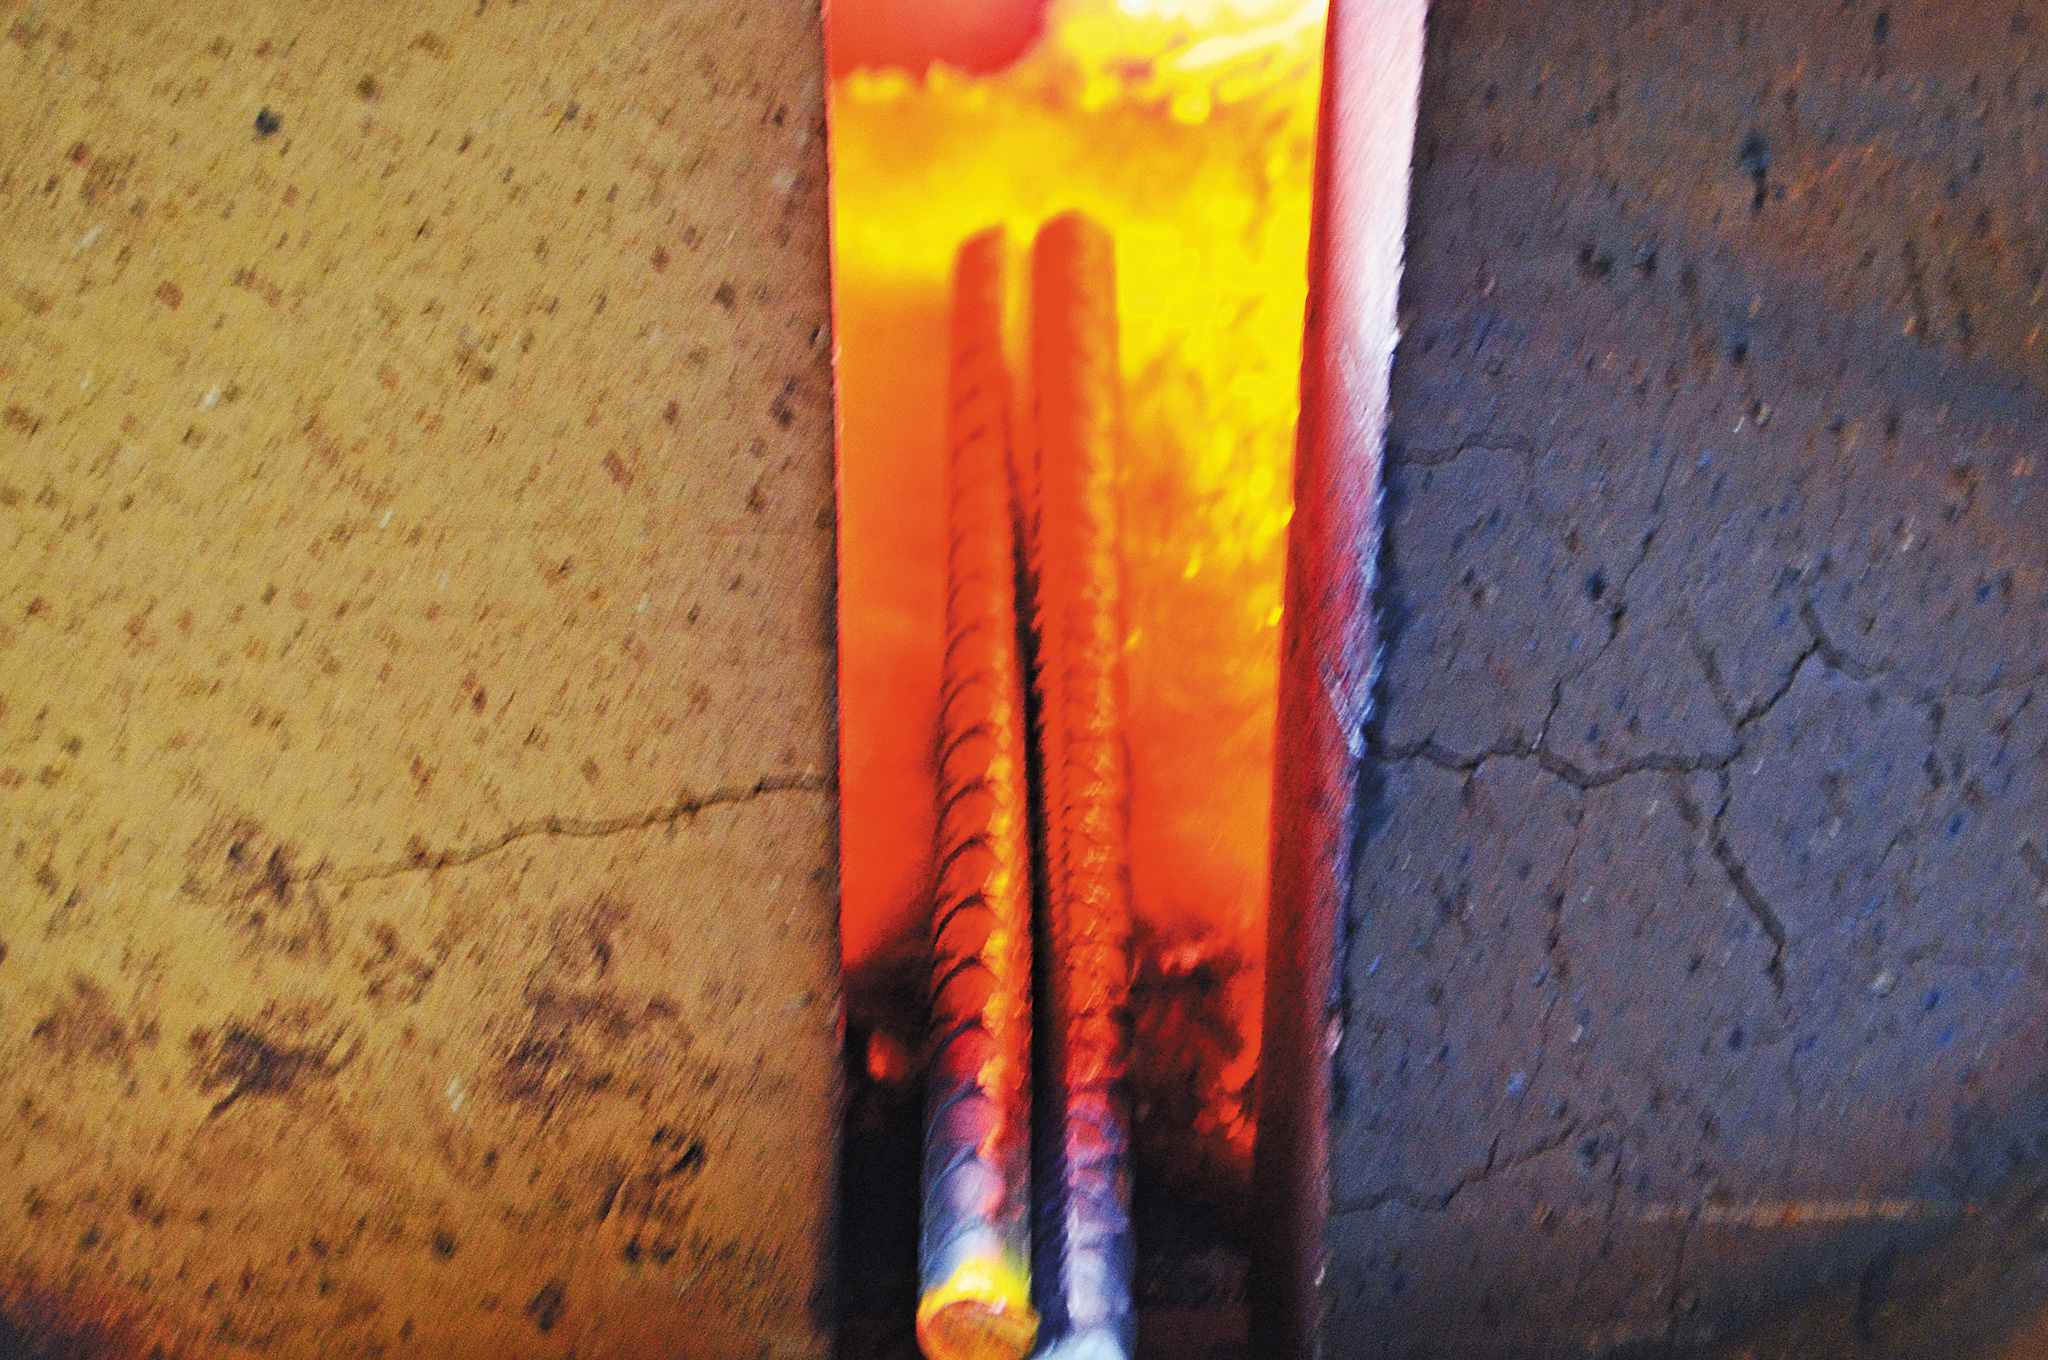
Build a Fire: The process begins with heat, and we used a simple forge. In an emergency situation a bonfire could generate the same heat. If you have access to a stove of some sort or can improvise an oven using bricks or rocks to keep the heat trapped, you are halfway there. We’ve seen some people use metal barrels to achieve the same heat.
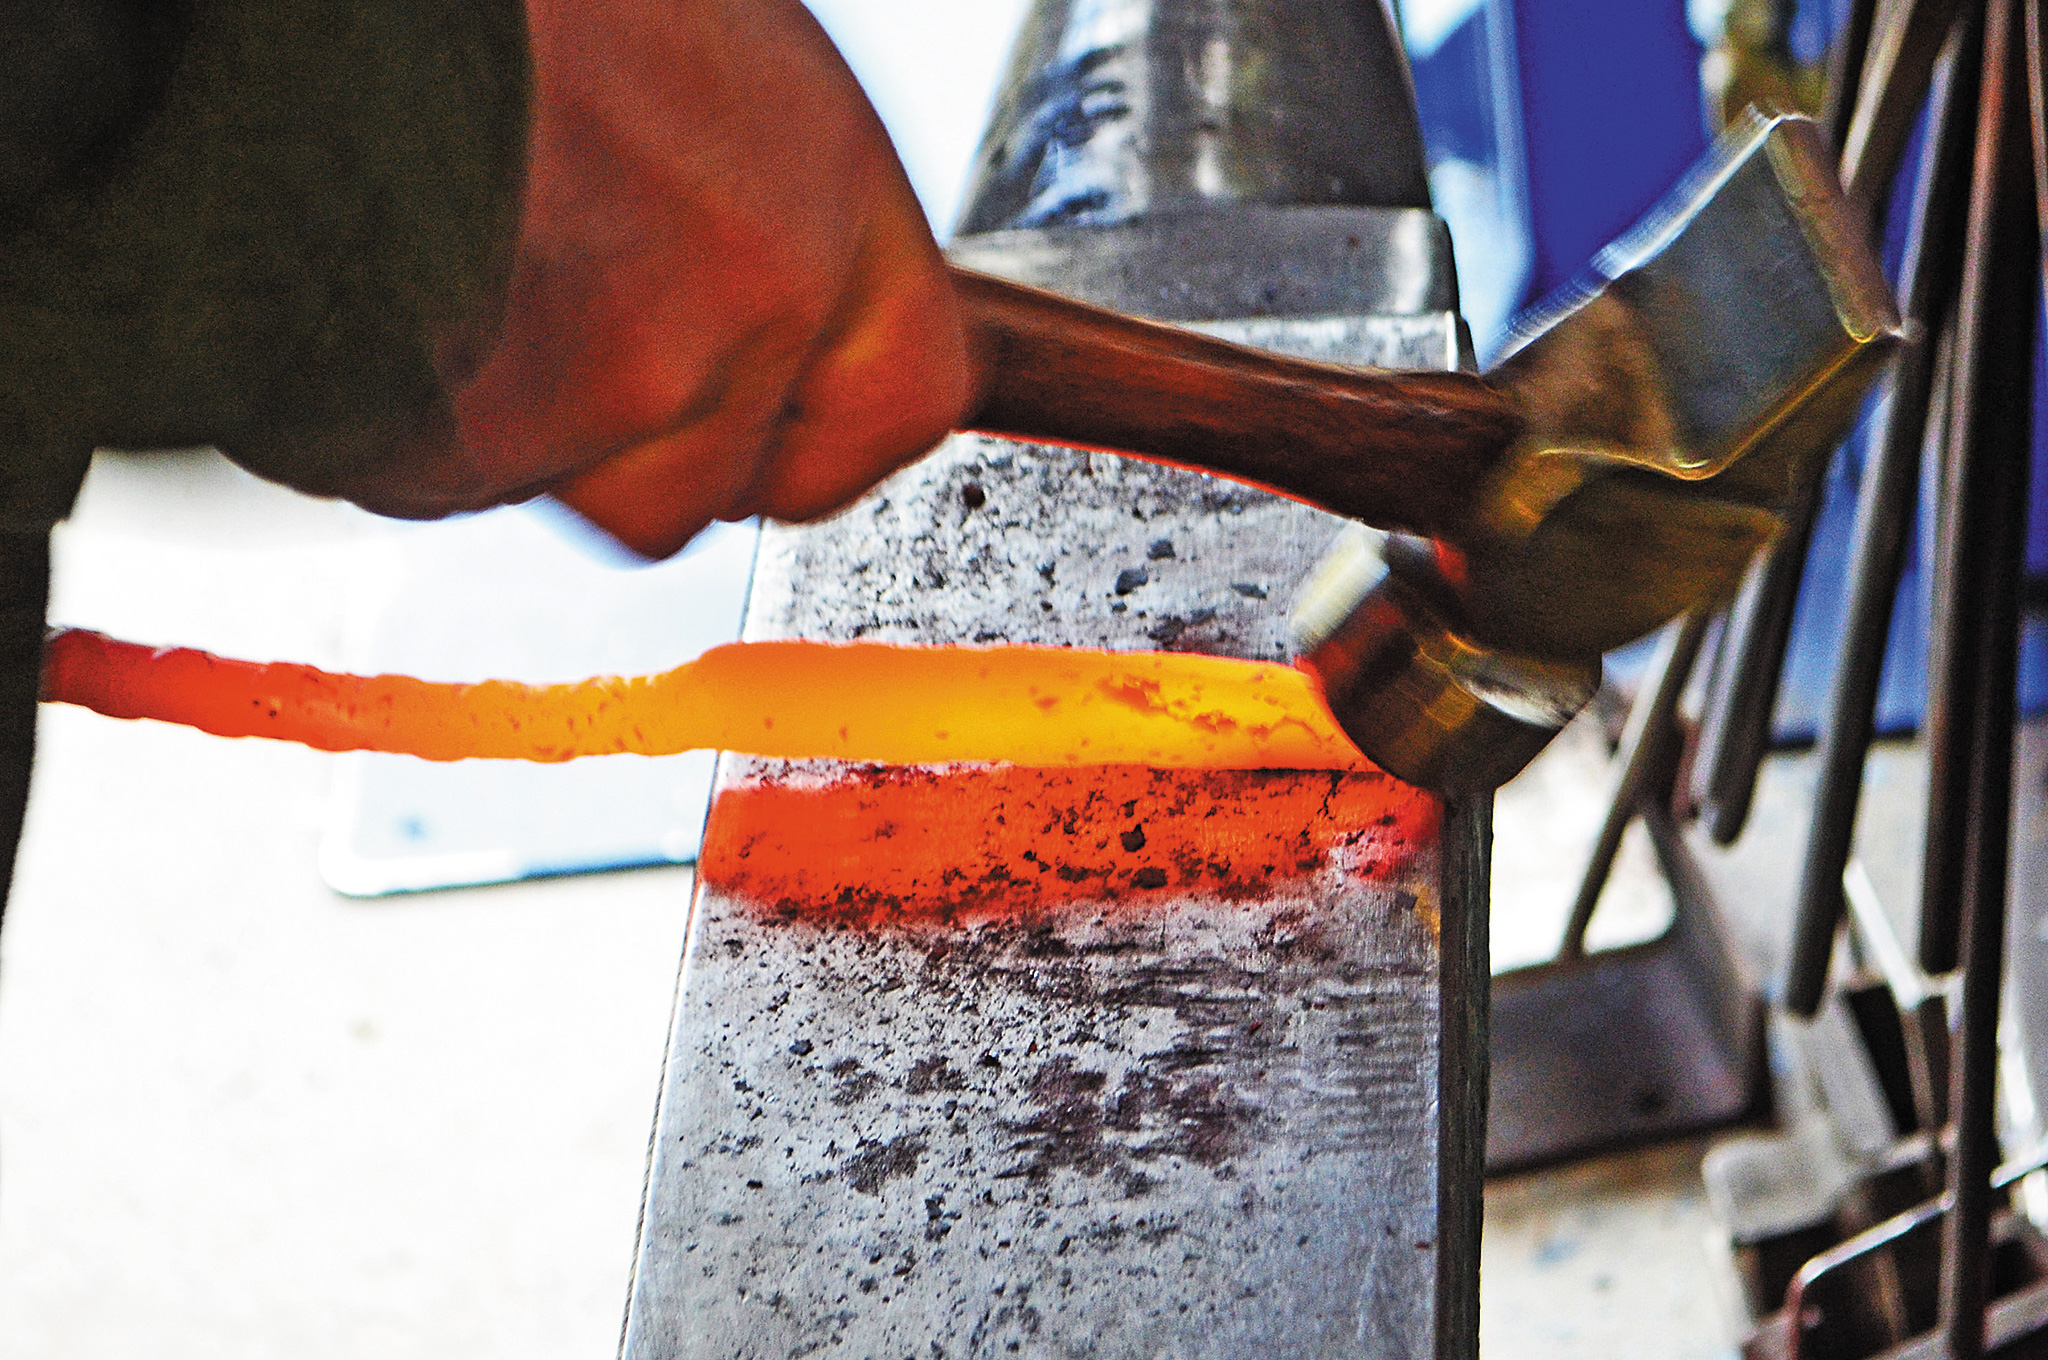
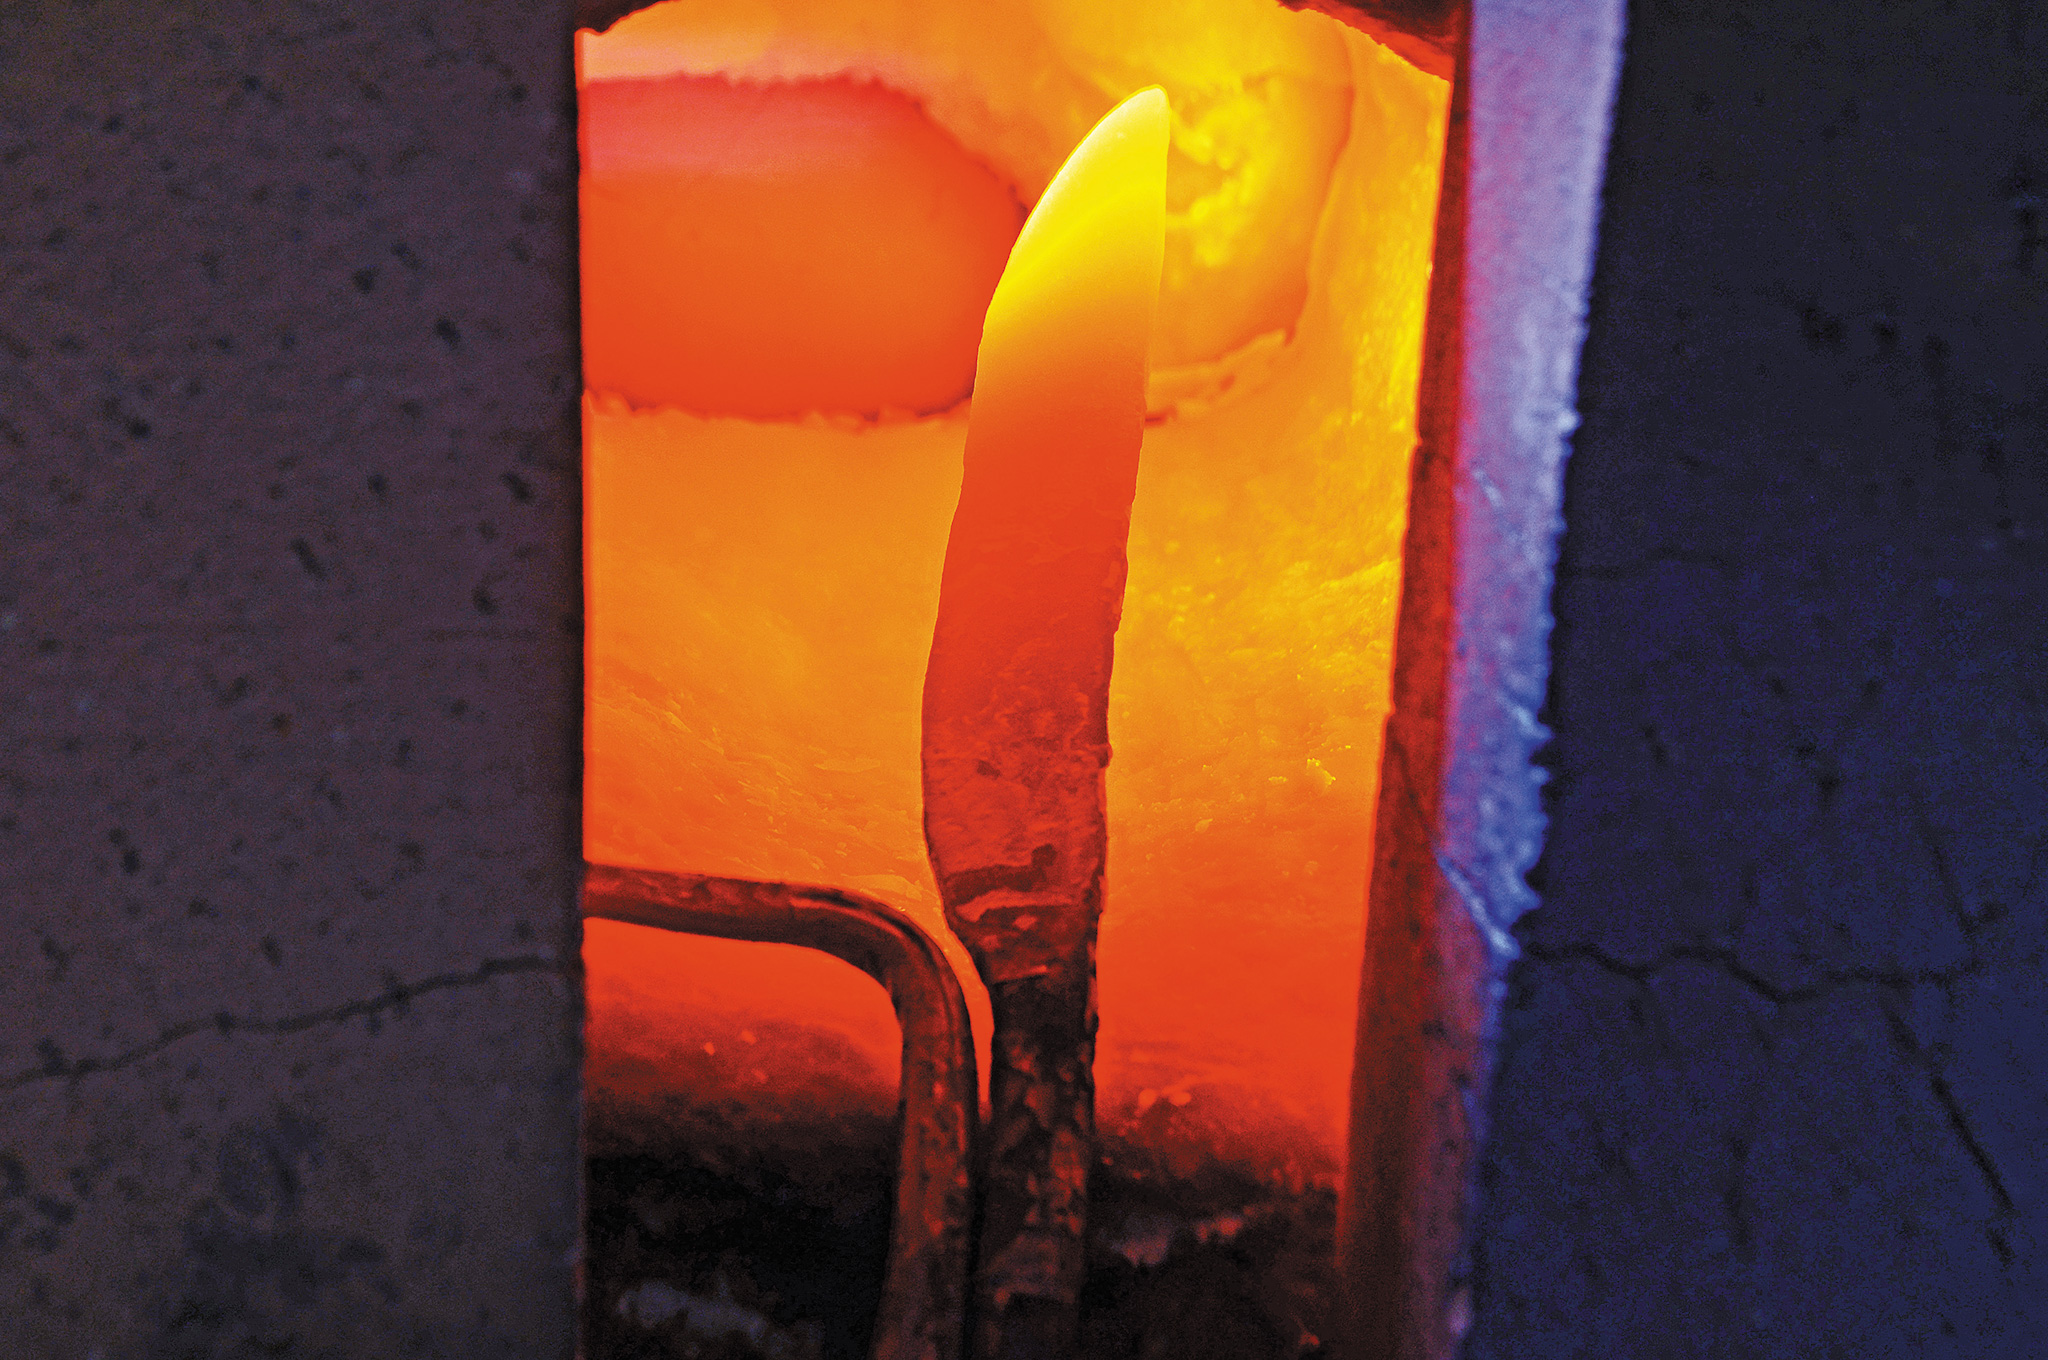
Hammer Away: Your selected blade metal must be heated until it glows reddish orange, at which point you can remove it from the forge and hammer flat. The metal cools relatively quickly and when it turns gray or black, it goes back into the fire.
Once the area of the blade is reasonably flat, hit it at an angle to form bevels. The hammer strikes must be hard, consistent, and need to overlap. The process will make the tip curl upward into a natural point. When we worked the blade, we wanted to form more of a drop point, which took a bit of shaping using the hammer. We wanted a thinner edge, which caused the blade to stretch a bit more.
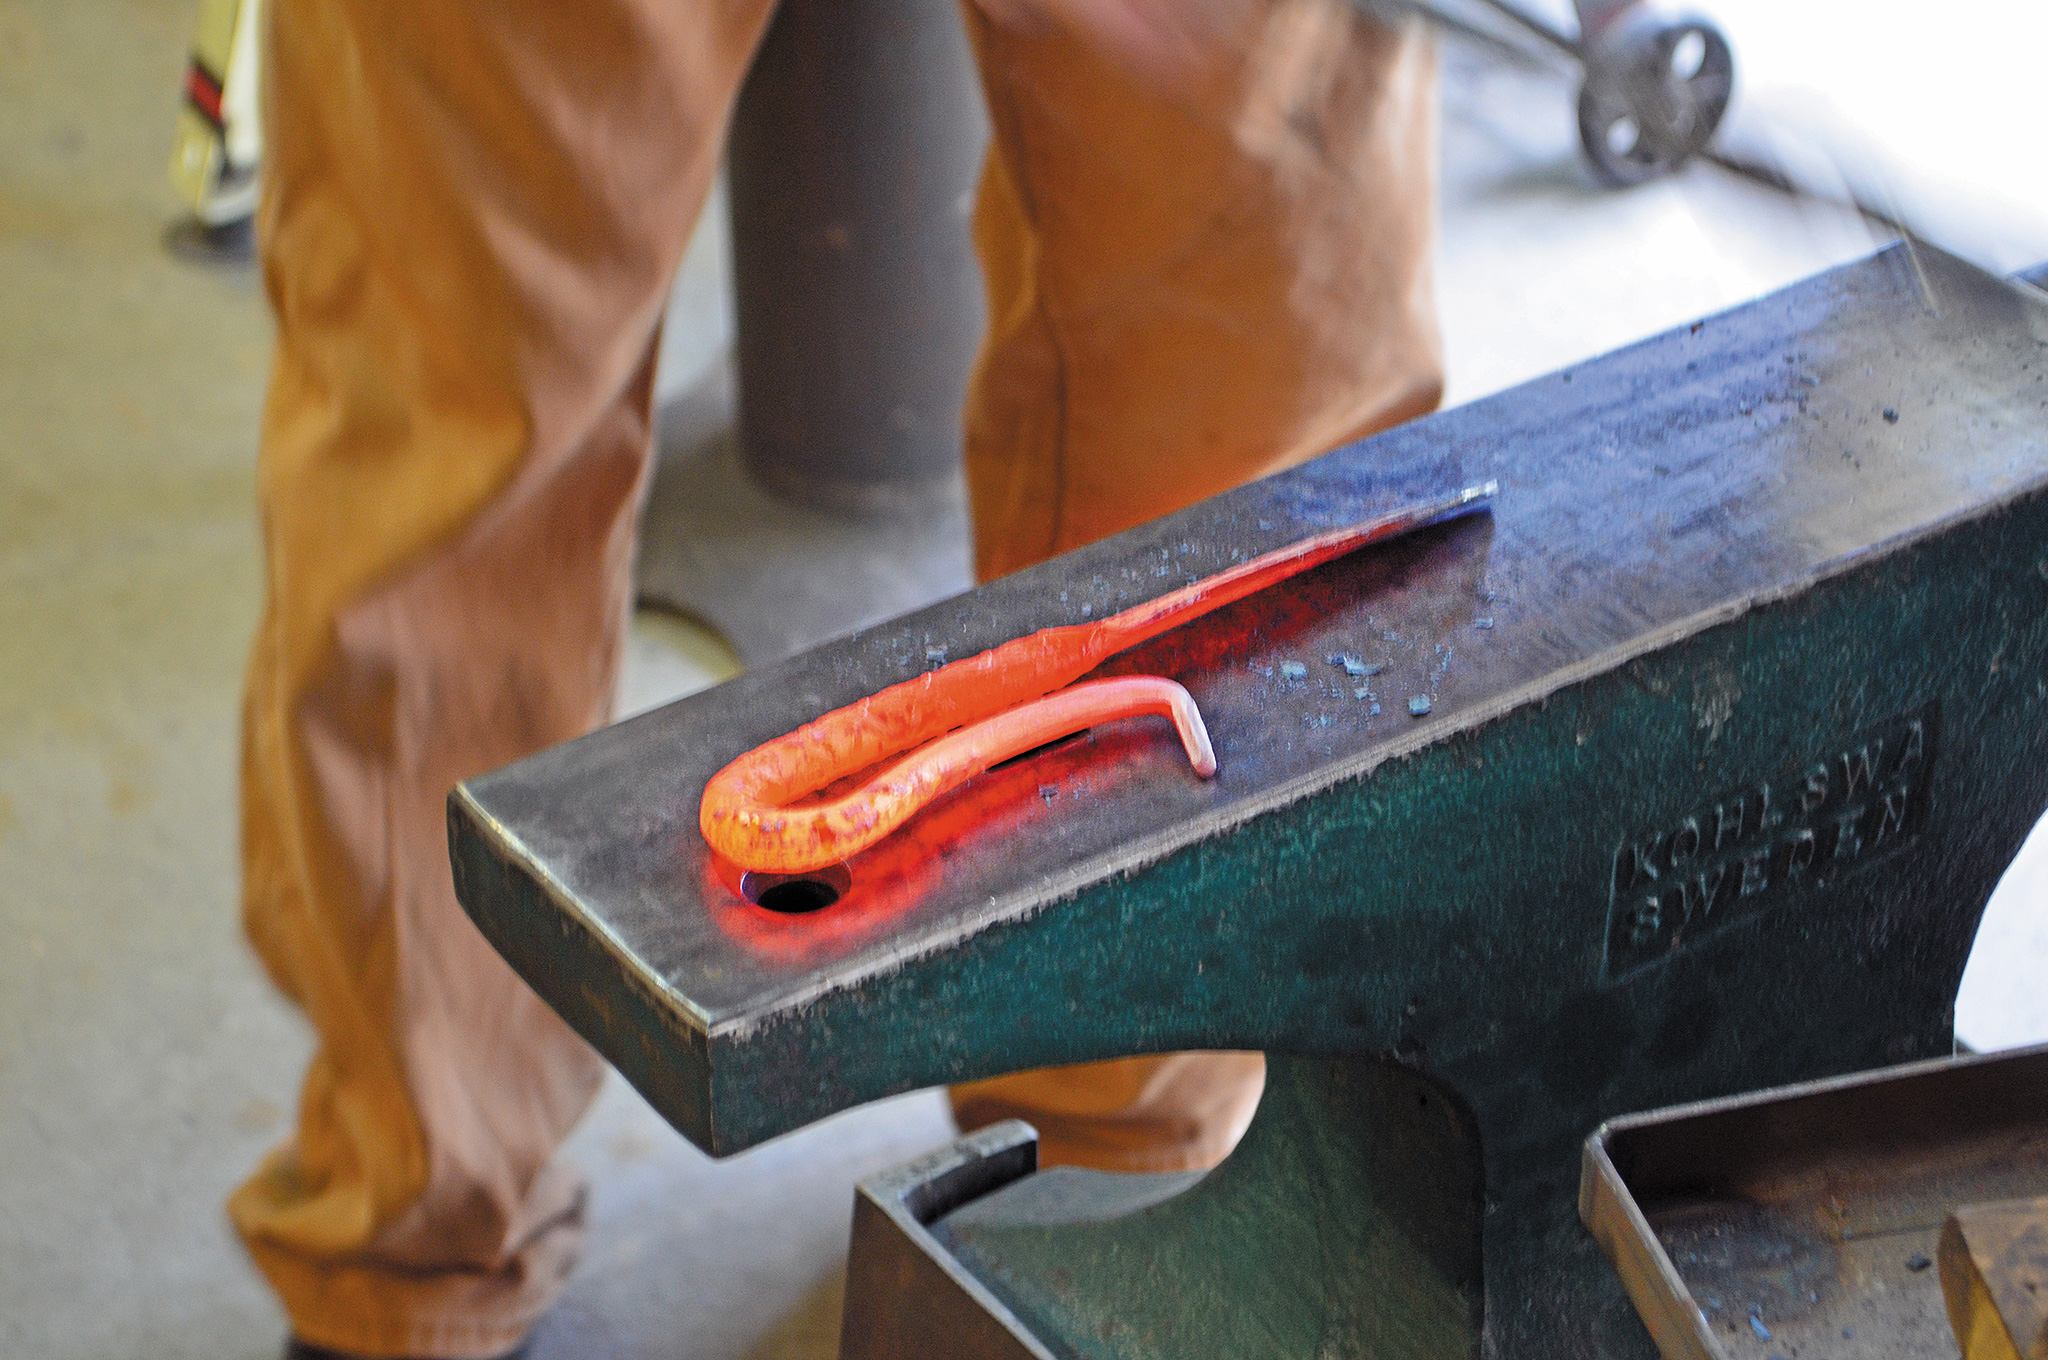
When finished, we put the rebar back in the forge in reverse. Another advantage of using rebar is its length, which provides plenty of materials to make an integrated handle and guard. No need to search for screws and wood scales to fashion a comfortable grip.
The very end was formed into a rectangle by hitting it from six angles. After another trip into the forge, we hit the handle off the side of the anvil to form a perpendicular finger guard and hit the apex around the anvil’s horn into a loop and underneath the spine of the handle. With our creation looking a little bit more knifelike, we allowed it to cool. Then we had to normalize the metal and bring it back to a state where it could be used. This resulted in three more quick trips to the forge for less than two minutes each time with a cool-down period.
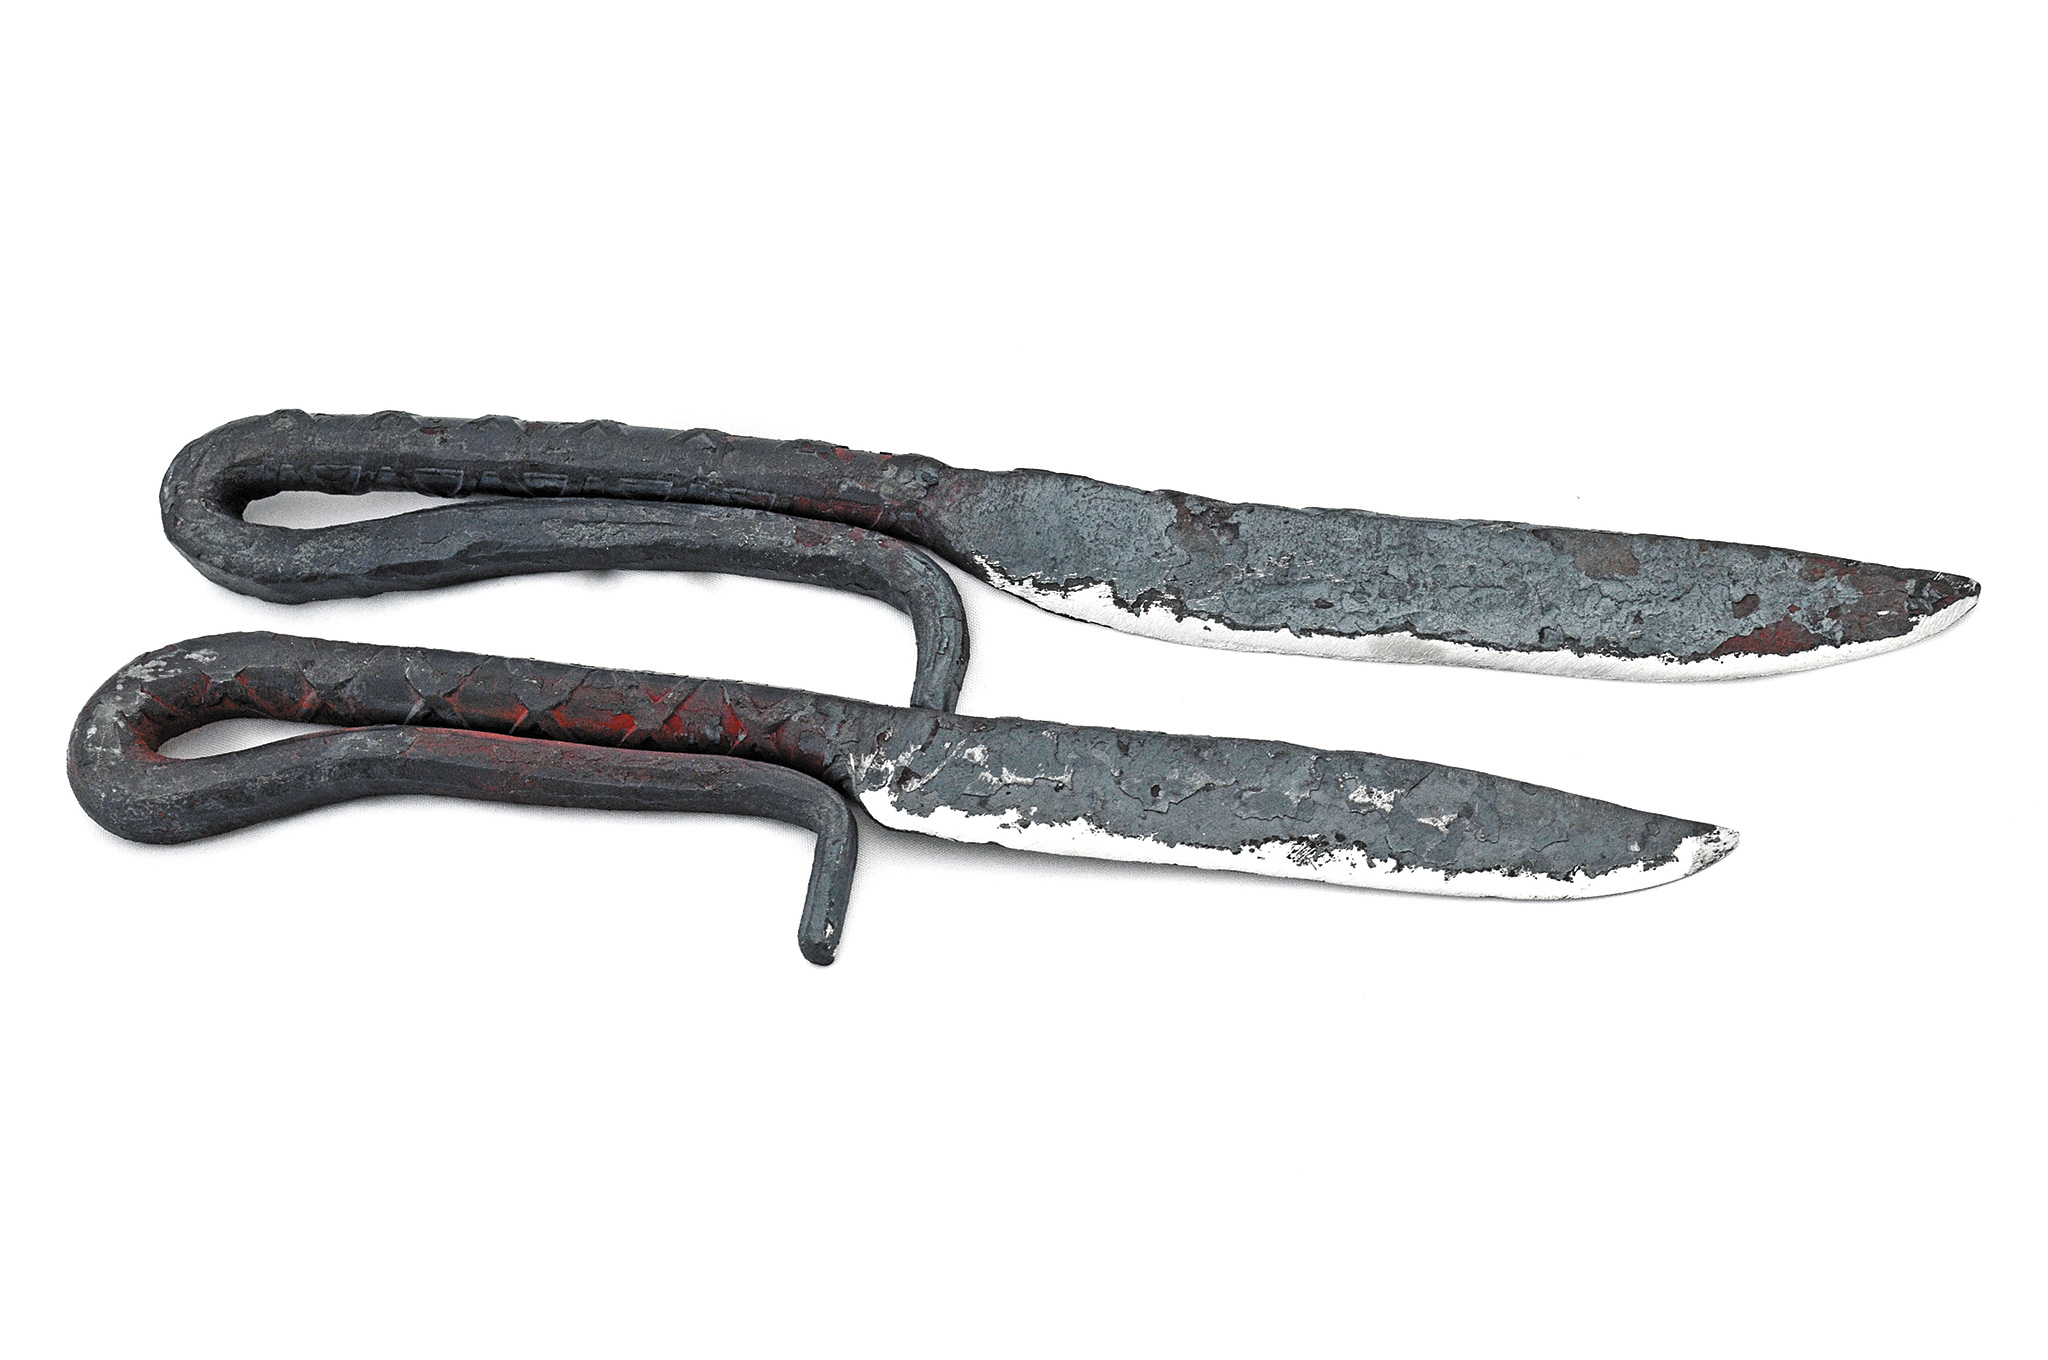
Grind It Out: Finally the edge has to be ground. We chose a metal file in lieu of a belt sander or grinder. The hardest part was breaking through the scale. This is the gray-looking material that “ugly ups” the two knives. A real smith would clean this up on the belt, through quenching or blasting, but we chose to forgo those luxuries to simulate a grid-down scenario. We finished the edge using an old piece of sandpaper.
Field Test It: When all was done, we tested the knives on rope, cardboard, and a piece of leather. While it lacked the fine edge of a custom blade, the end result was close enough for government work. And the texture of the rebar made for a surprisingly good grip.
Total time was five hours using a forge, anvil, and hammer. As of this writing, the author has been using the knife on a daily basis for four weeks and, while it’s not the best knife in the world or a suitable candidate for use as a razor for shaving, it gets the job done and would probably last as long as a professionally made knife of similar or even better materials.
Take a Knap
Before humans learned how to extract ore from the earth or how to work it, the majority of our edged tools were made from stone. These types of tools were used as late as the 19th century in the Americas. In an extreme survival situation, this may be the only recourse available if no usable metal can be found.
Flint knapping originally referred to the process by which a hunter or gun-maker would craft usable flints for his flintlock rifle and comes from a German word meaning “to strike.” These old-time gunsmiths would use a tool to chip away small pieces of flint from a larger one in order to make a piece small enough to fit their rifles.

For our purposes the craft is the same and is similar to the stock-removal method mentioned previous. Find a piece of flint, quartzite, agate, chert, or obsidian and start chipping away with small tools like our ancestors did. Hard wood, antlers, denser rocks, or pieces of copper or brass produce the best results. Harder metals such as steel, iron, or titanium are too destructive for the process, as they tend to shatter the stone. We used a variety of old pieces of cartridge brass, a rounded rock, and a piece of elk horn attached to a fire starter as our tools.
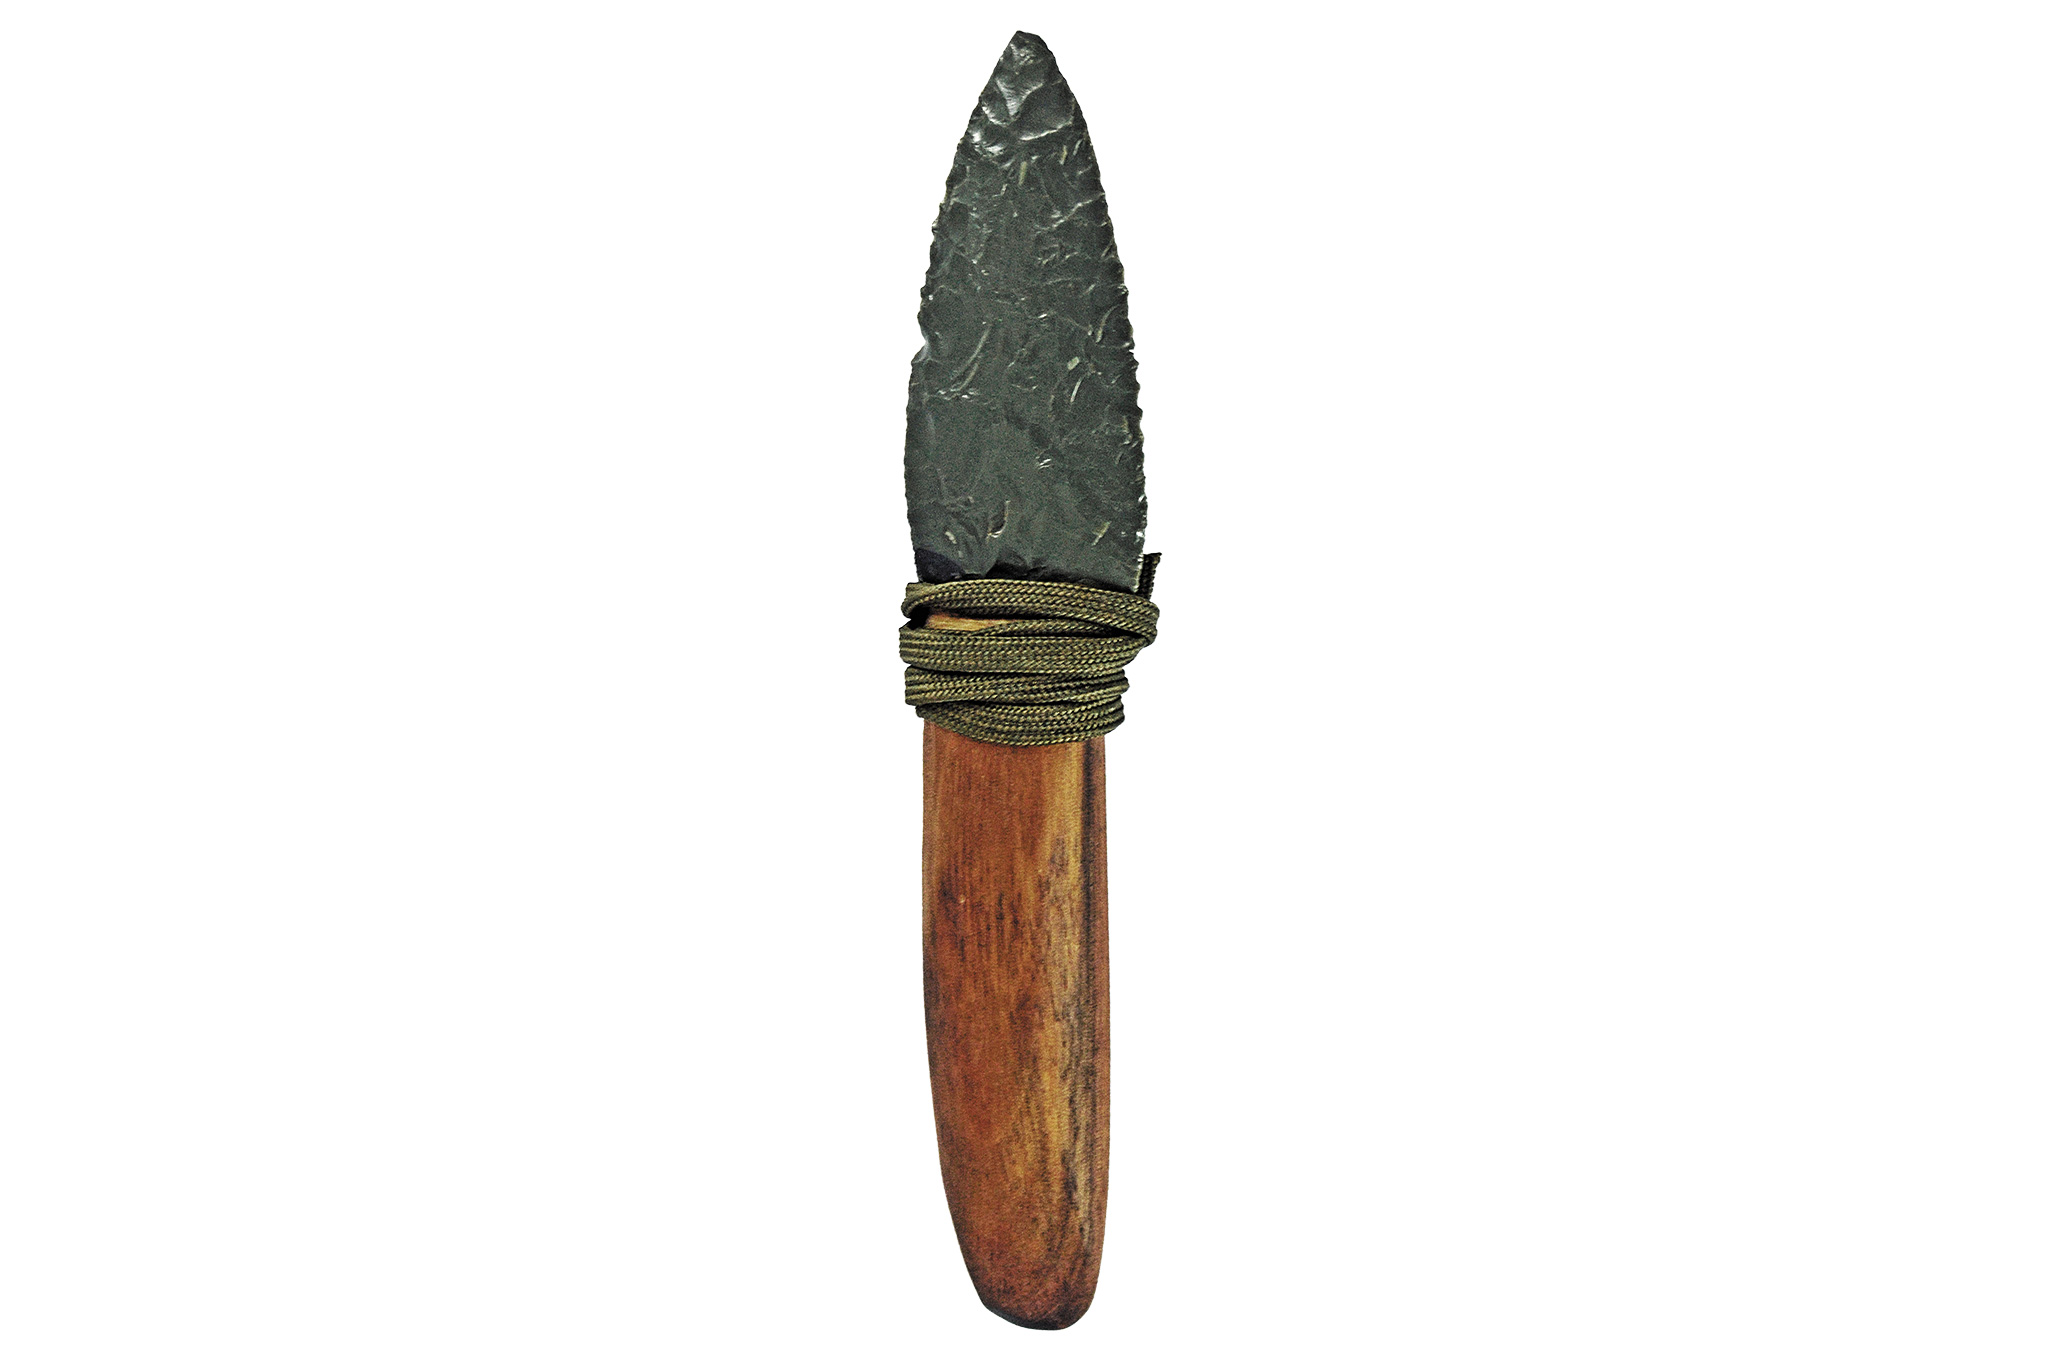
Knapping a blade is tougher than it seems. Our first effort was decent for producing a sharp cutting edge, but the point kept eluding us and would round. The more we worked on the point, the more flint would break off. We stopped at a somewhat rounded point as we were losing valuable blade length.
We had a usable blade in about three hours. Finding handle material and a means to secure the knife to the handle took a bit less.
Get a Grip
One of the challenges to making a knife is making a handle and keeping it somewhat permanently fixed. In our stock-removal experiment, we were limited to duct tape and cardboard. The forged blade allowed us to make an integral handle, and the rebar gave us a good gripping surface. The flint blade was perhaps the easiest in that we could knock out notches on either side to wrap the blade to a piece of wood. Our primitive ancestors used rawhide, but hollowed paracord proved to be an acceptable substitute.
In terms of performance, the flint knife cuts food, rope with some effort, and is surprisingly durable for what it is. This was probably our second best attempt. We realize it might not be practical depending on your region of the world, as the best stones to perform this type of work are not simply lying on the ground to be picked up. Our master smith tutor, Michael Quesenberry, shared that he has seen evidence of Native American knife-making factories on various bluffs overlooking rivers in his travels through the western United States, evidenced by tiny chips of obsidian found well outside the “Ring of Fire.” The hypothesis is that Native Americans traded amongst one another for obsidian and would sit on these bluffs crafting knives, arrowheads, spearheads, etc.
Another survival expert and knife-maker, Abe Elias, mentioned that the same effort could be made by using glass as a medium. True, glass can be sharp and make effective cuts. If we simply wanted an improvised weapon, it would suit that role. Yet it is not durable enough to be carried, and there is the risk of glass particles contaminating food if such a blade is used in food prep of any sort. That could pose a bigger risk than having no knife at all.
Which One Was Best?
By far, the best knife we made was the forged blade; it also took the longest amount of time. Grinding the can lid on concrete was the quickest, but definitely the flimsiest piece we made. And the flint knapping was completely dependent on the part of the country where the author lives. Every scenario is different, and your calamity may put you in a place where raw materials are virtually nonexistent or in place where resources are abundant, but you have little means to work with them.
If you want more information on how to make your own knives under ideal circumstances to prepare you for when those circumstances are less than ideal, contact your local custom knife-maker for a shop tour or contact larger organizations, such as the American Bladesmith Society or the Knifemakers’ Guild.
Hopefully this will make you remember that your knife may be your most important piece of equipment and to never leave home without it. If you should find yourself having to make one to get by, please keep these guidelines in mind and realize your only limitation is your own creativity and ingenuity.
Making Charcoal
The drawback of the forged blade is producing enough heat to make it. Campfires, bonfires, and wood-burning stoves can be used, but the problem is that the campfire method or stove method requires more time in the fire whereas the bonfire may be too hot to get close enough to heat the metal without tongs. A charcoal fire will burn hotter than wood, but if a disaster breaks out, and you don’t already have a knife, there’s a good chance you won’t have a bag of Kingsford Briquettes handy, either.
Charcoal is made from wood. The easiest way to make it is to cram as much wood that will fit into a metal or masonry container and heat it in a bonfire or burn barrel. The receptacle (known as a retort) needs vent holes in the bottom that will vent the gases back into the fire to make it hotter and cook of the oxygen inside. The wood needs to cook for several hours depending upon the size of the retort.
Typically two-thirds to three-quarters of the size of the wood will be lost in the process. So 50 pounds of wood should yield 12 to 18 pounds of briquettes. Obviously, in a grid-down scenario, firewood won’t come cheap or easy unless you’re Grizzly Adams, so you could create charcoal as a byproduct of making good use of fire, such as to keep your basecamp warm in the winter or to grill a steak after you’ve dressed out a prime piece of game.
Sources
Abe Elias > www.facebook.com/aelias2
American Bladesmith Society > www.americanbladesmith.com
Knifemakers’ Guild > www.knifemakersguild.com
Michael Quesenberry > www.quesenberryknives.com
Peter Pruyn > www.facebook.com/peter.pruyn.3
More From Issue 11
Subscribe to Recoil Offgrid’s free newsletter for more content like this.
- Today’s Active Volcanoes
- Reviewing The 3-In-1 Rechargeable Torch 250 From Goal Zer
- Making Your Own Jerky
- Boost Your Sprint Performance and Save Your Life
- Jerky Taste Test: Which Dried Meat is Prepper Approved?
- DIY Blade-Smithing
- Don’t Be Afraid of Fear
- Using Filipino Self-Defense Tactics for When SHTF
- Backyard Survival Training
- A Buyer’s Guide to Bug-Out Hammocks
- Build Your Own Survival Bow
- Can a Bug-Out Canoe Be a Viable Transportation Alternative?
- What If You Have to Deliver a Baby Without Medical Help?
- Bugging Out With A Baby
- What If? Yellowstone’s Underground Super-Volcano Erupts?
Read articles from the next issue of Recoil Offgrid: Issue 12
Editor’s Note: This article has been modified from its original print version for the web.
