Who doesn’t want to upgrade their camping game? Maybe you can relate — how many tools do you toss into your backpack before heading into the woods? And out of those, how many do you actually rely on? Spoiler alert: Some of the best gear is the stuff you whip up yourself. For many campers and bushcraft enthusiasts, the joy of crafting things in the wild is part of the adventure. There are plenty of clever ways to enhance your campsite, and they mostly hinge on mastering a few straightforward skills with simple tools at hand.
A wooden stump offers a flat surface for working and sitting, and it can serve as a sawhorse. You can modify it to hold wood for sawing.
The Camp Anvil
A wooden stump proves to be the unsung hero of wooden tools in any backyard or campsite. You just can’t underestimate the comfort of having a flat surface to lean on after a long day of outdoor fun. It doubles as a handy table or nightstand when you need a spot to set your gear down. Plus, when you’re getting crafty with firewood or other camp projects, that stump transforms into the ultimate workspace for splitting or carving. Lay it down sideways, carve a “V notch” on the side, and you’ve got yourself a solid sawing surface.
There are a few ways to accomplish this feat. The easiest is to use a saw to create the “V” and call it a day. The second way is to use a chopping tool and chop the “V” out of the log. The most challenging version is to use a fixed-blade knife and a baton to get that “V” cut out of the log. However, that’s a lot of use and abuse on your knife.
Pro tip: Don’t waste that cut-out “V.” It can be used for splitting wood, steadying a pole bed, or evening that camp log chair.
The author created a wooden maul from green poplar with a single saw cut and roughly shaped the handle.
The Maul
It might sound like something an epic fantasy villain would wield, but it’s just a dependable camping tool. My go-to wooden tool, the maul (or mallet, if you prefer), takes the cake. There’s simply no comparison between a solid hardwood hammering tool and some random stick that may decide to splinter at the first tap. Crafting a mallet is a breeze if you’ve got a saw and a sturdy cutting tool on hand. Mallets come in all shapes and sizes, so don’t worry about getting it “just right.”
Grab a hearty piece of wood, whether it’s dry or green, that’s around 3 to 7 inches thick and roughly the length from your fingertips to your elbow. Mark off about the length of your hand, from fingertip to wrist, and saw down about a 1/2 inch or so. Then, stand the wood upright, with the sawed part facing down, and start using a knife or your favorite cutting tool to baton it down toward the cut. Before you know it, you’ll have a handle taking shape, but you’ll want to carve it until it feels right in your hand.
Let’s talk about wedges to accompany your maul. These are your best pals for splitting wood, especially if you’re stuck without a heavier tool. If all you’ve got is a light tomahawk or a fixed blade, wooden wedges are the way to go. Sturdy hardwood pieces are best and should be about the length of your forearm and around 2 to 3 inches thick. You can whip these up quickly with a machete or tomahawk. Just make a chisel or wedge shape on each side. And don’t forget to bevel the top to make your life easier when you’re pounding it with your newly crafted mallet.
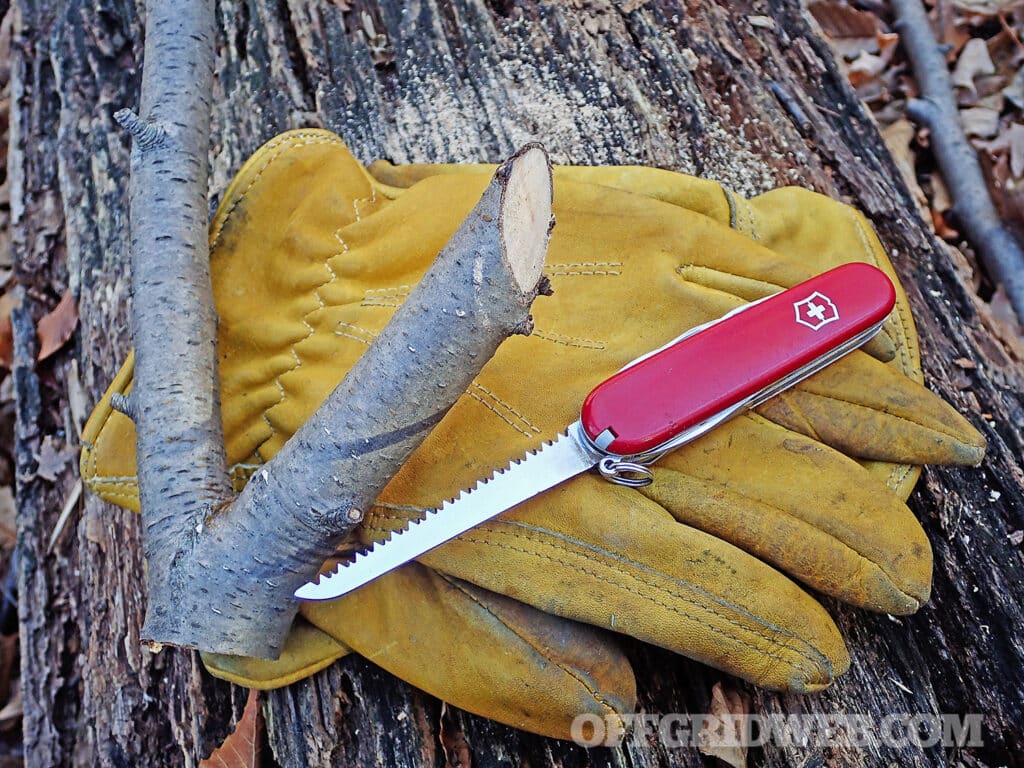
These tools require minimal equipment. I made this pot lifter/fire poker with just a Swiss Army knife.
Fire Pokers
In the 1920s, George Sears, known as “Nessmuk,” penned a chapter on “Camp Cookery” for Dover Publications’ Woodcraft and Camping that every camper should read. He makes a strong case for the necessity of a campfire poker and tongs, declaring, “No campfire should be without them.” I can’t help but nod in agreement, and I’ve learned the hard way that attempting to shift burning logs or coals by hand is a recipe for disaster. We’ve all had that moment of bravado, thinking we could just move a log quickly, only to end up with singed fingers.
If you’re cooking with a kettle or pot that sits in coals or slightly over the flames, you’ll need a special kind of poker. You can whip one up using a fixed-blade knife, a small saw, a machete, or even an axe. While green wood is excellent for this wooden tool because it resists fire better, I usually grab whatever’s around. Most often it’s just whichever sturdy dead stick I can find. Aim for something about the thickness of a broomstick, around 3 to 4 feet long.
The bottom should have a forked shape for lifting kettles out of coals/fire and moving burning logs. The top should be flattened to a point, like a flathead screwdriver. This clever design allows for fire poking and lifting pot lids. With this simple tool at your side, you’ll add a layer of safety and convenience to your campfire adventures.
The author often makes simple tongs by binding a split stick and using a small stick to spread it open, using either dry or green wood.
Camp Tongs
No camping trip is truly complete without a trusty pair of tongs. Let’s be honest, when cooking over an open flame or sizzling on a grill, something is bound to find its way into the fire. That’s when your pair of tongs, crafted from either green or deadwood, comes to the rescue. They’re the ultimate camping buddy and easy to toss back into the forest or pack up for the next adventure.
Making tongs can be a fun DIY project, and I’ve got about four methods up my sleeve. One straightforward technique involves finding a flexible green branch with a lovely “Y” fork. Trim it down about 7 to 10 inches above the fork and 3 inches below it. A little carving to flatten the ends or a few quick saw cuts to texture the inner grabbers, and voilà! You’ve got yourself some quick and functional tongs.
Another option? Scout out a green or dry stick about 12 to 14 inches long and roughly the thickness of a broomstick. Split that wood all the way down to the last 5 inches. To keep it from splitting further, bind the end with some cordage and insert a small stick into the split to create that perfect grip. While you could consider your tongs done at this stage, I’d recommend giving the outer parts a chisel-like carve to help scoop up meat and veggies off a frying rock. Want more versatility? Shape one end to a chisel for lifting and point the other for poking to check doneness. It’s also a sneaky method to snatch food that’s taken an unfortunate plunge into the flames.
You can use a greenwood grill to toast bread, roast sausages, and keep food warm. An open flame can dry or burn the grill, or you can use coals.
Hand Grill
Crafting a grill from sticks is a practical addition to your camp kitchen and a delightful little project. Start by finding some greenwood from a recently fallen tree or a bushy witch-hazel, willow, or alder thicket. Look for a branch shaped like a natural Y. Keeping it thin and springy is best. If it sports three branches like a trident, you’re in luck; it’ll make your life much easier.
To prepare your materials, grab a sharp knife and gently carve away with a 45-degree angle as you bend the branch. Rock the blade against the fibers until it gives way. Don’t forget to trim any pesky offshoots and leaves. Next, twist and intertwine your two Y-shaped pieces together to form a hoop. If they don’t hold on their own, a bit of natural cordage will do the trick. Alternatively, wedge in another stick if your branch lacks a central piece.
Next, grab some thin sticks or a larger split piece and start weaving them in, alternating between going over and under the middle stick. Remember, all your sticks must be green for this project to work.
Pro tip: This wooden tool grill works wonders over hot coals rather than flames, and steer clear of oleander, a common and highly poisonous shrub.
A rabbit or throwing stick is arm-length and wrist-thick, used for throwing, digging, and wedging.
Pilot Stick
This wooden tool will make your life much easier in the wilderness. Its purpose is to create a hole in harder ground for your roasting sticks, stakes, and campfire crafts. Think of it as a pre-hole so you don’t need to hammer on your “Y-sticks” that may easily split. Use hardwood for planting wooden table legs or cooking rigs in the ground. Oak, hickory, or maple are good choices for a pilot stick.
To make it, you’ll need about a 1-foot-long piece of hardwood and a branch that’s no thicker than a broomstick. Use a chopping tool if you have one available. If not, be ready to carve. Use the larger diameter, thicker end for your top hammering surface. Bevel the end well, making it as round as possible with a knife. The other end needs a point, but don’t make it too sharp. Be sure you remove and smooth out any knots on the sharp, tapered end for easy penetration into the ground. Using a chopping tool will make this task easier than carving.
This set of wooden wedges, crafted from dry wood, offers various sizes essential for splitting logs.
Digging Stick
Stick wooden tools are about as fundamental and ancient as tossing a rock. And with a touch of creativity, it can be transformed into a highly useful camping tool. To craft your digging stick, start by finding a piece of wood roughly the length from your fingertip to your armpit and about the thickness of your wrist. If you have a chopping tool, that’s fantastic, but any sturdy knife can get the job done.
When selecting your piece of wood, I recommend choosing one with a gentle curve — nothing as extreme as a boomerang, but enough to give it some aerodynamic qualities. Shape one end of the stick like a flathead screwdriver to assist in digging into the ground, while the other end should be rounded to provide a comfortable grip when you’re using it. It can also be employed for digging up roots or carving out a trench for a Dakota fire pit.
As an extra bonus, this nifty tool can serve various purposes. As a throwing weapon, it works wonders for targeting small game such as squirrels, marmots, iguanas, sloths, and rabbits — hence its nickname, the rabbit stick. When you throw it, aim low and sideways. Thanks to its curved design, it tends to fly relatively straight and true, making it practical for catching small game. With just a bit of practice, you’ll find yourself becoming proficient in your throwing technique.
A green wooden spear with four prongs and a three-pronged trident serves as camp security and tools for hunting and cooking.
Spears
Wooden tools can double as weapons or hunting gadgets, and spears are a classic example that dates back to when cave dwellers tossed them at woolly mammoths. Nearly every indigenous culture has crafted spears from wood, and they serve more than one role. Spears can probe treetops for bird nests (perfect for your tinder needs) or used for gathering fruit. It’s also ideal for sneaky maneuvers in dark spots where your hand might hesitate.
When it comes to frogging or primitive fishing, nothing beats a spear. And don’t overlook small mammals, which can also fall victim to your spear-wielding prowess. To create a gigging spear, grab a pole taller than your head. Choose one with minimal knots and use a knife or tomahawk to create two slits in the shape of a plus sign, around 6 to 8 inches from one end. Hold the splits together as if they’re still one piece, then sharpen the tips all at once for maximum effectiveness.
Next, wedge small sticks into the slits, ensuring they’re opposite each other to make a splayed design. After that, it’s just a matter of fine-tuning your spear to achieve the perfect sharpness. Lastly, wrap some cordage below the splits to keep everything tightly bound and prevent further splitting. Soon you’ll be ready to tackle whatever catches your eye.
Apache Throwing Star
The Apache Throwing Star, also known as the “Apache Crown,” is a classic weapon wielded by Apache warriors. Imagine four sharp, pointed spikes, crafted from wood to offer impressive speed and accuracy. This star is a functional work of art that reflects the creativity and skill of its makers.
To craft your own, grab two pieces of wood about the length of your forearms, stripped of bark (which you can save for some future tinder adventures). Sharpen the ends with a knife to create points that are ready for action. Next, carve out two square notches on each piece in the middle to fit together snugly. Secure them with a pair of jam knots for that extra hold. For bonus points, harden the tips by tossing them into hot coals.
Closing Thoughts
Crafting your own wooden tools enhances your outdoor adventures and allows you to express your creativity and personal style. The tools we covered are just the beginning. Fashioning a sturdy walking stick for your hikes, or versatile utensils for your campfire cooking, serves a practical purpose while reflecting your unique touch. Embrace the joy of woodworking and channel your adventurous spirit to transform simple materials into essential gear for your wilderness escapades.
It’s time to unleash your inner cave dweller with the thrilling experience of Stone Age cooking, perfect for both backcountry adventures and backyard bonfires. In this guide, we’ll cover the art of creating mouthwatering wilderness dishes using flat rocks, roasting sticks, a stone oven, and hot coals. Get ready to heighten your outdoor cooking game.
Cooking Outdoors
Survival depends on the ability to make use of everything the environment offers, both natural materials and discarded items we might otherwise overlook. These resources can be repurposed to build shelters, carry supplies, secure water, and maintain fire for warmth and cooking. Just like machines need fuel to run, our bodies require energy to function efficiently. Knowing how to stretch and apply these resources effectively can make all the difference in tough conditions.
Natural materials offer an excellent opportunity for cooking food, whether foraged from the wild or brought along on an outdoor adventure. With a bit of creativity and the right tools, you can transform your cooking experience. Even ingredients that don’t require cooking can be enhanced when exposed to the warmth and aroma of an open flame or set against a backdrop of glowing coals. The subtle char and smoky flavor imparted by the fire can enhance the taste, turning a simple meal into an unforgettable woods culinary delight.
The author expertly cooked over a fire using a large flat stone as a griddle. A small spatula was skillfully crafted at camp using a fixed-blade knife.
Keeping It Minimal
Cooking in the wilderness is a primary motivation for many outdoor enthusiasts. During the warmer months, when a traditional campfire may not be necessary or practical, a twig stove can be an excellent alternative. When homemade, these stoves, often called bio, wood, or hobo stoves, utilize natural materials as fuel.
Familiar fuel sources include twigs, thicker sticks, conifer cones, and wood pellets. The design of twig stoves operates on the principle of maintaining a small fire within the stove, with a cooking vessel placed on top. Fuel is added through a designated port, allowing for efficient cooking while minimizing the environmental impact.
Stone Frying Caveman Style
Frying pans are generally heavy and take up valuable space, hindering your trips. Skip the hassle of carrying one and embrace the frying pans that Mother Nature offers. These natural tools are ideally suited for cooking in the wilderness, and with a little effort, any outdoor enthusiast can find numerous options. When selecting a flat rock, target one that measures 2 to 4 inches in thickness. Avoid stones sourced from water, as they often hold moisture. Opt for wide, flat rocks to maximize your cooking surface and ensure stability on the stove since an uneven surface will cause oil and eggs to spill.
When you use a bio stove, ignite it and establish a solid, self-sustaining fire. Once the fire is going, carefully place the flat rock on top of the stove using gloves, as high flames can spread to the sides during this process. Avoid using rocks that have or may have been submerged in water. Moisture trapped in the rock will expand into steam when heated by fire and turn it into a grenade instead of a frying pan. After placing the rock over flames, step back and wait for a while to ensure it doesn’t crack or explode. Wear sunglasses if you must get close to the rock — safety first! After a reasonable amount of time and when you feel confident it’s safe, you can start cooking.
Ensure it’s even. I recommend dropping a little water to check its level. If you’re dealing with something fatty and oily, coating the rock will show you where the oil and juices are leaning. The rock on top restricts airflow, and the stove’s height limits the flame. For higher heat or larger quantities of food, you should create a stand for a raised flat stone.
An egg can be cooked directly on the bacon frying stone or in a small pecan pie tin set on the surface, which makes it less messy.
Stone Age Raised Stone Cooking
This raised flat-top grill provides an expanded surface area for cooking, allowing for more excellent food maneuverability. However, more heat is required to warm the larger area. Using a larger rock necessitates a stand that can support it, made from sturdy materials such as thumb-thick sticks. These support sticks should be long enough to extend approximately 4 inches above the stove once hammered into the ground.
If the flat rock is wide, it can be supported by dead sticks, positioned further from the heat source. Conversely, for a smaller rock, the supports will be closer to the flames, and using green wood for these pieces is advisable to withstand the higher temperatures. To create the stand, first place the flat rock on the stove to gauge where the support sticks should be hammered into the ground. After marking the spots, remove the rock and drive the sticks into the ground. Once this step is done, replace the rock on top of the support pieces and make any necessary adjustments to ensure stability.
When starting the fire in the stove, it’s essential to carefully place the rock back on the stand before the flames become too large. The design allows longer sticks to extend from the top and enhances airflow, facilitating better combustion. You can add fuel through the designated fuel port located in front of or above the stove. I recommended keeping a safe distance from the stove and the rock, as they heat up, and wearing sunglasses or safety goggles as a safety measure.
To test the heat of the rock griddle for cooking, hold your hand above the surface and drop a few drops of water onto the stone; the water should sizzle upon contact. When ready to cook, place food in the center of the stone and utilize the outer edges, which are cooler and serve as a relief zone. The wider the stone, the greater the cooking area and the easier it is to manage the food while it cooks.
Caveman Bacon Fryer
It wouldn’t be Stone Age cooking without a campfire and a designated bacon frying stone. I call it a “bacon fryer,” but it can fry and cook anything. It doesn’t require a large fire. I’ve done this on day trips, stopping for a lunch break. Tools are needed but not 100-percent necessary. Saw two logs approximately a foot long and about thigh thick. Make your fire between them and establish a coal base before adding the flat stone on top. All the same rules apply as using a stone with a stove.
The fuel is added underneath the hot stone and will ignite more readily once there’s a solid coal base. An egg can cook directly on the stone or in a small pecan pie tin set on the surface — this way, it’s less messy. Use leather gloves or camp tongs to move the egg tin for safety.
Y-Stick Roasters are strategically placed on the ends of logs over coals for optimal maneuverability and versatility.
Y-Sticks
You can cook food using sticks in several ways. We’ve all probably stabbed a hotdog, leaned it against a log, or awkwardly stuck it in the ground, only to have it fall into the fire or a pile of ashes. However, there’s a more effective method for roasting kabobs, sausages, fish, and bread.
To create this cooking tool, find a green Y-stick about the length from your fingertip to your elbow. Next, get a thin stick — similar in thickness to a No. 2 pencil — slightly longer than the width of the Y part. Carve the ends of this stick to form two flat, tapered sides, ensuring they align on the same plane. Then, stand the Y-stick upright and split both ends of the Y so you can wedge the smaller stick into the splits. Simply insert the thin stick into your preferred hotdog, kabob, bread, or sausage, and securely prop the Y-stick on a log or rock over the coals. Alternatively, you can drive the Y-stick into the ground and rotate it. The possibilities are endless.
A stuffed bell pepper baked in a bed of hardwood coals stuffed with cooked rice, broccoli, ham, and mushrooms.
Caveman Cooking with Coals
Cooking food directly on hot coals is an excellent method for preparing meat, eggs, potatoes, corn on the cob, and peppers without the need for a pan or grill. To establish a superior bed of hot coals, begin with any available wood and combine it with hardwood, ensuring a longer burn time and hotter coals that can support the weight of the food without crumbling. Always use tongs or a forked poking stick to handle the food safely and avoid burns. Enhance oxygen flow to the coals with a small fan or a piece of a sleeping pad, making your cooking process more efficient.
Cooking eggs requires a few careful steps. Start by poking a small hole in the top of each shell. Next, use tongs to place the eggs directly into the hot coals carefully. Leave them there for 15 to 20 minutes. Remember, cooking time can vary based on the quality of the coals and other conditions, so keep an eye on them. When the time is up, always use tongs to retrieve the eggs, as they’ll be extremely hot.
The author scooped out a portion of potato and cracked an egg inside, using sticks in the potato top as a lid.
Stone Age Baking with Coals
Potatoes are incredibly straightforward to prepare. You can shove them directly into the coals, lay them atop the coals, and rotate them occasionally for even cooking. However, to really improve the Stone Age quality, add toppings. Slice about a third of the potato and carefully scoop out some potato with a spoon, stick, or knife. Add diced sausages, ham, cheese, an egg, or any other creative addition. Bury the potato in coals or wrap it in foil first. If you use the latter method, rotate the tater. If it’s straight in coals, just leave it buried in coals. Leather gloves or wide-opening tongs are essential for safely retrieving your camp coal delicacy.
Cooking corn on the cob is most effective when you leave the husk on. Ensure it’s soaked in water to retain moisture before placing it on the coals. The steam produced from the water will cook the corn perfectly, utilizing both the heat of the coals and the steam for optimal results. Bell peppers are perfect for creative cooking over coals. Begin by cutting off the top of the pepper and removing the seed core. Stuff it with a hearty mixture of precooked rice, mushrooms, onions, and chopped sausage, then securely replace the top. Position the stuffed pepper on the coals, ensuring it’s well-nested for optimal cooking. This technique stands out because you can easily enjoy the filling with any utensil while the pepper acts as the cooking vessel and the bowl. This method isn’t just efficient; it’s incredibly delicious.
The author built a frying pan stand like a Swedish torch, igniting a fire underneath that uses the hardwood stand as fuel.
Swedish Pot Stand
I call this the Swedish torch cooking method, and it’s a game changer. It requires hardwood, ensuring it burns slowly and effectively, allowing the setup to shine. You can use a frying pan, kettle, or flat stone — whatever suits you best. This method demands minimal materials and time for construction.
Begin by gathering four to five pieces of wood, roughly the thickness of a broomstick, and stand about calf to knee high. Sharpen the ends to a point and create a flat saw cut at the top. Arrange these pieces in a circular pattern, slightly smaller than your cooking vessel. That’s it; you’re ready for the next step.
Add kindling to the bottom, starting with thin twigs and progressing to pencil, finger, and thumb thickness. Lastly, place thin, fluffy tinder at the bottom to prevent it from absorbing any moisture. Once you ignite the kindling from below, the rising hot air will work its magic, and the stand will serve as both a cooking platform and a fuel source. Get started.
Pro Tip: Always maintain a hand on the cooking vessel to prevent one leg from burning through quickly.
Here is the stone cooking oven the author made and uses currently.
Stone Cooking Oven
Disclaimer: This method may take more strength and some luck with materials. Such is the case with my experience constructing stone cooking ovens. I have used a semi-permanent camp in my woods for several years. I noticed a sizable protruding stone with a side piece and used another large stone and make it a three-sided structure. Eventually, I found a wide, heavy, flat stone to use as a griddle and placed it on top. This last step hugely changed my cooking ventures.
With a fire roaring, the stones gave the camp a highly reflective heat quality. Spacing the flat stone away from the back protruding stone gave me a place to heat my kettle and supplied airflow. The flat stone I leveled became the perfect cooking area. I cooked bacon, eggs, hashbrowns, sausages, and fish without sacrificing any of it to the campfire gods.
The three-sided enclosure amplified the quality of coal cooking. Roasting meat was excellent thanks to the three-sided stones’ reflective heat transfer. The stone cooking oven made drying gloves and camp gear more manageable — I recommend one.
Craft “bush tongs” by splitting a sturdy stick and sharpening one end for cooking.
Stone Age Cooking Utensils
Cooking in the wilderness requires primitive utensils, especially if you’ve forgotten your tools. A practical solution is to make “bush tongs” from a green stick. Simply heat it, bend it into shape, and carve the ends to form a chisel-like grip.
Alternatively, split a sturdy stick and sharpen one end for poking and forking meat. This primitive cooking approach not only enhances your outdoor experience but also prepares you to tackle any challenge that arises. Embrace the opportunity to connect with nature and make the most of your surroundings.
chicken, peppers, and tomatoes were expertly cooked on a flat rock in the woods using a Griddle Rock Stand
Jungle Swamp Grill
Want to get Stone Age, jungle style? A swamp grill is an essential makeshift cooking tool, typically constructed from green sticks designed for grilling. When paired with a twig stove, this setup functions like a rock griddle, using a potent heat source to cook food efficiently above. You’ll employ a low open flame to broil and roast meat, and it’s also effective for warming bread and tortillas. However, you need to construct it properly first.
You can use a tomahawk, large chopping knife, or hatchet, but a fixed blade will accomplish the task effectively, although it requires more time and skill. Start by creating four holes in the ground, a pilot stick made from hardwood is crucial. You need a pointed or chiseled end on one side, with a solid hammering surface on top.
Gather four Y-forked branches, two cross pieces, and several green, finger-thick sticks to serve as the grill. Use the pilot stick to dig the initial holes and remove any rocks obstructing your work. Because the Y-sticks are delicate, use the pilot stick for heavy-duty digging. Sharpen the ends of the Y-branches on hard ground for final adjustments, the thickest part can withstand some hammering, but avoid hitting the middle of the Y, as this will likely cause it to split.
Once you have the Y-branches securely positioned, add the cross-pieces across the width of the grill and trim several green sticks to lay across them evenly. The grill is now complete. Ignite the twig stove to create your fire. Be prepared to remove the grilling pieces until the flame reaches the ideal cooking temperature. Only then should you place the grill atop the fire and start cooking your food. Experiment with these methods and enjoy your culinary creations.
The top view of the Griddle Rock Stand highlights the generous cooking space a wide rock offers for cooking meat, peppers, tomatoes, mushrooms, and an egg
In Closing
Stone Age cooking offers a unique way to connect with nature through culinary creativity. By utilizing natural materials and harnessing the power of fire, outdoor cooking becomes not only a practical survival skill but also a rewarding culinary adventure, transforming simple ingredients into memorable meals in the wild.
If there’s one thing many Americans can agree on, it’s that our world has changed dramatically since the pandemic of 2020 took the world by storm. I’d been preparing for exactly this kind of scenario for a long time. When it finally happened, I was grateful I had the skills and resources to make it through.
When Hurricane Katrina made landfall, I remember watching the devastation on the news. Unfortunately, a lot of people didn’t take the hurricane warning seriously, and sadly, some people had nowhere to go. I couldn’t imagine the fear people experienced living through that storm. That’s when the thought of preparedness was planted in my brain.
But unbeknownst to me at the time, my journey to preparedness actually began in the early 1970s when my family established a homestead on 26 acres in Sam’s Valley, Oregon. This is where I learned my skills on surviving off the land. In addition to having a huge garden we raised chickens, rabbits, cows, horses, pigs, pheasant, and quail. Life was fun for me on the homestead. I was a tomboy who was climbing trees, catching frogs, snakes, and taking care of my horse.
Having a cat around not only provides entertainment and companionship, it also takes care of troublesome pests.
As the first African American student to attend all three community schools in the area, I stood out — visibly and culturally. That difference often made me a target, and I found myself in more than a few fights just to defend myself. We were a new family in a community where most folks had never seen a Black person in real life. I still remember the day a little girl reached out to touch my arm and told her mother, “Mommy, the color doesn’t come off.” It was the early 1970s, and although the law had changed, many hearts and minds had not. In places like ours, the idea of different races living side by side was still met with resistance.
The Civil Rights Act of 1964 had outlawed segregation in schools, public places, and businesses. It also banned discriminatory hiring practices. But laws don’t always change lived realities overnight. When my parents tried to purchase land, they were denied — solely because the neighbors didn’t want people of color living nearby. Still, my father found a way forward. He rented land from a family friend named Mr. Fuller who lived in California. That decision changed everything. Living on the land, surrounded by open space instead of city streets, gave us a layer of protection and privacy that helped us weather the storms of ignorance and hate.
We were the only Black family in the region, and my parents didn’t sugarcoat it. They taught us what racism looked like and how to carry ourselves with dignity in spite of it. They kept us busy, too — signed us up for sports, summer camps, and community programs that would have us. One of those was 4-H. It was there we learned practical skills: how to cook, sew, raise livestock, and show animals. Looking back, those experiences didn’t just keep us occupied, they planted the seeds of self-reliance that continue to shape who I am today.
Being off the grid doesn’t mean you can’t be comfortable.
My passion for homesteading and preparedness traces back to my childhood and the lessons I learned from my father, a U.S. Marine. As the oldest, I was the first to receive his teachings — how to fight, how to handle firearms and knives for protection, and how to live independently through farming, hunting, and maintaining my own vehicle. He understood the reality we faced: that there were still places where signs of hatred, both literal and unspoken, hadn’t disappeared.
He wasn’t just raising a child; he was preparing me to survive in a world that might not welcome me. We lived 20 miles from the nearest city, and he worried I could be targeted on the way to school or anywhere else I needed to go. Quietly and with trust, he gave me a pistol to keep in my car when I turned 16 and earned my driver’s license. Just in case. He wasn’t being reckless. He was being a father and arming me with the tools and mindset to protect myself when the world wouldn’t.
Before Homesteading there is a Shift to Self-Reliance
When the COVID-19 shelter-in-place mandate hit in 2020, I knew it was time to activate my survival plan. I left my home in Portland — furniture and all — and relocated to our one-acre family compound in Boring, Oregon. This had long been our designated bug-out location (BOL), and it was ready. The main house was already full with family members, but I brought my survival gear, food, and essential supplies and set up in an old 18-foot travel trailer from the 1980s. It was wired into the house for power, allowing me to work remotely while staying on the property.
There were eight of us in total, and we made it work. We raised chickens and rabbits, maintained gardens, and cleaned up the land to make room for more people if needed. I stayed there for about four months — until a nearby wildland fire forced us to evacuate. Bugging out of my BOL had never crossed my mind. But with the compound in the danger zone, I returned to Portland. The city didn’t feel like home anymore, but I was still tied to it by a mortgage.
Raising animals provides numerous benefits, such as food and fertilizer.
By March 2021, after careful planning and research, I sold the home I’d lived in for 20 years. That same month, I secured a land lease on an 80-acre working farm in Beavercreek, Oregon. This became my training ground — the place where I prepared to live fully off the grid on my own property in Washington state. Knowing the winters up there would be unforgiving, I stayed in Beavercreek through the cold season, using the time to sharpen my systems and build confidence. Eventually, I gave my landlord notice. As much as I appreciated my time on the farm, it didn’t make sense to keep paying $800 a month in rent when I had land of my own, paid off and waiting.
How the Commitment to Living Off-Grid Led to Homesteading
By September 2021, the pressure to take the shots led me to walk away from two long-held positions: administrative specialist and incident commander for the state of Oregon’s Radiological Emergency Response Team. On my 57th birthday, I submitted my resignation. A month later, I officially retired.
On March 18, 2022, I packed up and left Beavercreek behind, setting out for my 66-acre property in eastern Washington. By the end of that month, I was staring at 19 inches of snow. Winter had come early. I quickly learned what it meant to survive on my own land, in a 24-foot travel trailer, with nothing but what I had brought with me. That’s also when I realized my trailer wasn’t insulated enough for the biting cold. I toughed it out, but I knew I needed a better solution.
Fresh eggs are provided daily from some hard-working chickens.
The next year, I brought in my 45-foot Helibase Communications Incident Command trailer — the same kind I had used during deployments. First thing I did was install a potbelly woodstove. That decision turned out to be a lifesaver. Temperatures plummeted, but that little stove kept me warm and comfortable through the worst of it.
My next problem was mobility. Winter travel wasn’t just difficult — it was nearly impossible. With three to six feet of snow on the ground, walking was out of the question. I learned that the hard way and swore I’d never do it again. Then, luck stepped in. A fellow landowner, preparing to move, offered to sell me his snowmobile. It took time and plenty of practice, but eventually I learned to navigate the two-and-a-half mile stretch from my cabin to the truck I had to park down the road.
Living off-grid isn’t just about building fires and chopping wood. It requires the mental endurance to stay calm, focused, and adaptive when comfort and convenience fall away. Winter was no enemy of mine. I respected it, planned for it, and made peace with its challenges. My wood stove became the heartbeat of my homestead. And one hard-earned lesson stands out above the rest: always have enough dry wood. Running out isn’t an option.
Sharon Ross shows how water and electricity is routed from external sources to the interior of her shelter
How to Start Building a Sustainable Homestead
Designing my homestead for off-grid living has required patience, planning, and a sharp eye on future threats. My power system is a blend of generators, solar panels, and wind energy, all carefully set up to keep things running regardless of what’s happening beyond my property lines. My water system is winterized, ensuring year-round access to clean water even when temperatures drop well below freezing.
Sustainability and self-reliance form the foundation of everything I do. Food storage is a top priority. I rely on a combination of freeze-dried meals, canned goods, dehydrated staples, and wild game. Living close to a small town that offers food box deliveries twice a month has also helped. I was able to begin building my pantry without draining funds needed elsewhere. I’ve learned not to turn away free food, as it’s one of the smartest ways to stretch resources when every dollar matters. Preparedness, after all, goes beyond food and shelter. It’s about thinking several moves ahead.
My decision to live off-grid is rooted in a very specific concern: the threat of a solar flare or coordinated attack on the power grid. I believe a nationwide blackout is not just possible, it’s likely. Our enemies know the grid is fragile. A high-altitude explosion could create an electromagnetic pulse (EMP) strong enough to disable it. What most people don’t realize is how few vulnerabilities it would take to bring the entire country to a standstill.
A partially in-ground greenhouse is in the works.
According to research from the Federal Energy Regulatory Commission (FERC), there are roughly 55,000 electrical substations in the United States. These substations are essential, and they connect power generation to distribution and delivery systems. Yet, a targeted attack on just nine of the most critical substations could cause a cascading failure that triggers a nationwide blackout lasting for months. It wouldn’t take a missile strike. It would only take precision and intent.
Solar flares and EMPs may come from different sources, but the result is the same: lights out. A solar flare is a natural burst of energy from the sun, while an EMP is man-made, typically caused by a nuclear detonation high above the atmosphere. Both have the potential to wipe out our electrical grid in an instant. If such an event happened today, life as we know it would grind to a halt. Power, communication, transportation — all gone. Experts say it could take up to two years, or longer, to restore the grid. Digital devices like phones, computers, and radios would be fried. Unless you’re lucky enough to own a pre-1978 model that predates microchip controls, modern vehicles, packed with sensitive electronics, would be rendered useless.
This is why I live off-grid. Not just for the simplicity, but also for survivability. Whether the grid goes down from a solar event or a hostile act, I intend to stay operational.
Not only does the stove provide heat, but it also heats up water to provide a little humidity when the air is dry
A failing grid isn’t the only threat I prepare for. Wildfires have become a growing danger in the Pacific Northwest, and I take that risk seriously. My homestead is surrounded by forest, so creating defensible space around my cabin is a non-negotiable task. I’ve cleared brush and debris, and my structures are built with a mix of wood and metal to reduce flammability. I’ve installed a fire hydrant on the property and secured access to a 4,000-gallon water truck as an added layer of protection.
Wildfires move fast and unpredictably. In the summer months, I monitor local fire conditions and stay in contact with neighboring landowners and the community fire department. Communication is key, and so is readiness. My evacuation plan is always in place. I keep a bug-out bag in my vehicle and my 24-foot travel trailer remains stocked and ready to roll at a moment’s notice. In emergencies, there’s no time to hesitate.
Located next to the woodstove, a cordless dehydrator utilizes the radiant heat to ensure nothing goes to waste.
Homesteading Turns Preparedness to Empowerment
Preparedness isn’t about turning fear into freedom. It’s not a panic response; it’s life insurance. True preparedness goes far beyond stockpiling supplies. It’s about building knowledge, fostering resilience, and creating a strong, connected community. In times of crisis, no one makes it alone. Sharing skills, resources, and support strengthens everyone’s chances.
That’s why I teach others how to prepare for emergencies and embrace self-reliance. My philosophy is rooted in empowerment. I focus especially on reaching marginalized and diverse communities, those groups that are often left out of the mainstream survival conversation. My goal is to make preparedness accessible. To demystify it. To show that anyone, no matter their background, can take practical steps to protect themselves and their families.
Ever the life-long student, Ross is constantly learning new tools and techniques to become self-sufficient.
From building emergency kits to drafting evacuation plans, from long-term food and water storage to developing mental resilience, I guide people toward reclaiming their independence — one skill at a time.
My off-grid life has taught me invaluable lessons about survival and self-reliance:
• Adaptability is Key: Flexibility and problem-solving are essential when facing harsh winters, wildfires, and other unpredictable challenges. • Preparation is Empowerment: Having a plan and resources gives me a sense of control in uncertain situations. • Sustainability Matters: Living in harmony with nature reduces reliance on external systems and fosters a deeper connection with the environment. • Community Strengthens Resilience: Building a network of support ensures that I’m not facing challenges alone.
Modern technology like Starlink is a game changer for those who want to live in remote locations, while maintaining the capability to communicate.
Call to Action: Are you Prepared to Live Off-Grid?
Let’s be honest, we’re in a chaotic place right now. The economy has been unstable, the food supply is increasingly fragile, and long-term employment is becoming increasingly uncertain. That list could go on, but here’s the bottom line: The systems we depend on are showing cracks.
You may not choose to live the way I do, but ask yourself a few hard questions:
• What would you do if the power grid failed tomorrow? • Do you have at least a month’s worth of food and water for your family? • What if war broke out on U.S. soil? Would you survive?
Large solar panels are typically enough to generate the electricity needed to heat water and keep devices charge
Disasters don’t send invitations. They strike fast, without warning. When the lights go out, the shelves go bare, and help is days away, the only thing that matters is how prepared you are. I don’t live off the grid because it’s easy. I live this way because I believe it’s necessary. The time to prepare isn’t after the emergency. It’s now. The world is changing quickly, and every one of us needs to be ready for the possibility of a major disruption here at home. You have the power to take control — starting right where you are.
Focus on creating sustainable systems for food, water, and — if possible — animal husbandry. These aren’t just survival tactics; they’re confidence builders. When disaster strikes, you’ll be ready to thrive, not just endure. You have the power to take control, starting right where you are.
Making use of larger power banks is an easy and convenient way to keep necessary electronics running.
Even if you live in a city, you can begin building the skills needed to live off-grid. Simulate blackouts at home to test your readiness. These practice runs will expose the gaps in your plan before a real crisis does.
Start small. Plant a garden. Set up rain barrels around your home to capture runoff from your roof. Learn how to purify water safely. These simple steps lay the foundation for a resilient life, and one less dependent on fragile systems.
So, take control. Start today. Build an emergency and evacuation plan. Stock up on essential supplies. Learn the skills you need to protect yourself and your loved ones. Don’t wait for the next crisis to remind you of what you should’ve done.
Storing water is a necessity, and Ross uses an aquarium heater as an ingenious way of making sure the storage tank doesn’t freeze in the win
About the Author
Sharon Ross, also known as Afrovivalist, is a seasoned survivalist and emergency preparedness consultant with years of hands-on experience helping individuals, families, and communities build resilience in uncertain times. She offers personalized guidance on off-grid living, emergency planning, and stocking essential supplies — empowering others to take control before crisis strikes. Ross believes that preparing today brings peace of mind tomorrow, and that true freedom comes from self-reliance. To learn more, visit www.afrovivalist.com or reach out directly at afrovivalist@gmail.com. You can also follow her on Facebook at Afrovivalist and deCamp Outdoors, on Instagram @Afrovivalist, and on YouTube at Afrovivalist.
Founded by two retired Green Berets, Spartan Blades has a well-earned reputation for excellence. While many of their designs are jaw-dropping gorgeous, they aren’t just wall hangers or safe queens. Every single one is built for hard use. The Spartan Blades Ronin Torii is an excellent example.
The Torii was designed to be the ultimate close-quarters combat knife, and it’s designed by people who know that subject matter intimately. It’s a collaboration between Spartan Blades and Tu Lam of Ronin Tactics. They wanted to commemorate the Green Berets who have served at Torii Station in Okinawa, Japan. This knife is a tribute to them and is intended to honor the C-1-1 CIF (CINC’s Extremist Force), a unit that has a formidable reputation for close-quarters battle and tactical prowess.
Being the curious sort, I looked up the definition of torii in Japanese. It refers to the traditional gate commonly found at the entrance to or within Shinto shrines. It signifies the gateway between the mundane world and the sacred. It isn’t a stretch to interpret that it refers to the difference between the ordinary and the elite, such as the Green Berets.
The reverse side of the blade shows the logos for Ronin Tactics as well as Spartan Blades, letting users know this is a collaboration between the two companies.
Opening the Box
The Spartan Torii has a decidedly unique attribute. Picking it up and removing it from the Kydex sheath, you immediately feel taller, sturdier, and ready to take on the world. Yeah, it’s that impressive. I’ve been writing about knives for well over a decade and I’ve only run into maybe a handful of other blades that had a similar quality.
It runs 11.5 inches from end to end, with a blade length of 6.5 inches. The D2 steel is 0.1875-inch thick at the spine. The blade is treated with a black powder coat that reduces corrosion concerns. Even at nearly a foot long, the Torii is deceptively light, tipping the scales at a very modest 8.4 ounces. Don’t get me wrong, there’s noticeable heft. But it doesn’t feel like you’re wielding a sharpened pry bar. There’s an elegance present.
At the thickest point, the handle is about 0.625-inch wide. It’s comparable to the venerable Buck 110 Folding Hunter in that regard. The scales are contoured G-10. I went with the red/black option for the scales, rather than the straight black. The texturing is aggressive, yet comfortable. There are no concerns about losing your grip, no matter how wet your hands might get. At the same time, I didn’t experience any hot spots or other discomfort when handling the knife, even after extended periods of time.
Corrugated cardboard is tough on knives, but the Torii did just fine.
The pattern of the G-10 texturing is reminiscent of Japan’s flag and its rising sun motif. This is rather fitting given the Torii’s evident kwaiken lineage. When Tu Lam was young, he dedicated his life to the samurai code of Bushido. The kwaiken was a dagger that was carried by men and women of the samurai class in ancient Japan. It had a curved trailing point profile and was intended to be a weapon for close-quarter situations where swords would be impractical. And that’s exactly what the Torii is, a close-up weapon capable of devastating damage.
The Torii comes with a well-made injection-molded sheath. In my experience, all too often knife makers treat the sheath like it’s an afterthought at best. It’s just something they toss into the box as a bonus. That’s definitely not the case here. This sheath has had some serious thought put into the design. It comes equipped with two MOLLE straps, which can also be used as belt loops. These can be easily removed, if desired. The sheath features several slots and eyelets so it can be configured for carry in a number of ways.
The retention is solid and tight, yet pulling the Torii free is a piece of cake. The sheath has a small thumb ramp to help with deployment. It’s details like these that make it evident this sheath wasn’t just slapped together at the last minute.
All in all, it is a beautiful knife. It even caught my wife’s eye, which is rare given the number of knives that come across the kitchen table on a monthly basis.
We used push cuts and pull cuts, and the paracord posed no issues at all.
Performance
The Spartan Torii is made for battle, no question about it. But I wasn’t about to go around challenging people to a knife fight to see how the blade would perform. So, I had to come up with some other ideas.
First, I picked up a cantaloupe at the grocery store and took it into the backyard. The Torii sliced into it like a laser beam going through butter. There was zero hesitation at any point as the blade cut through the melon. I utilized a few different grips on the Torii, including overhand and reverse, as I cut up the fruit and there were no problems with controlling the blade in any direction.
One of the most common knife chores we run into is cutting cordage. So, I grabbed a hank of paracord and went to work. I started with some push cuts, just resting the cordage on a board and pressing the knife blade through it. The Torii did fine, though I found rocking the blade just a touch was necessary a couple of times. I also sliced through more paracord by running the blade through loops of it, trying to use as much of the blade as possible. No issues at all.
Corrugated cardboard can be murder on a knife’s edge. The glue used when making the cardboard is extremely hard. On top of that, factories producing cardboard aren’t exactly sterile environments. All sorts of dirt and such gets inside those little corrugations. The end result is that cardboard can dull a knife blade quicker than you might think. That makes it a great medium for knife testing.
Well, that and there’s never a lack of cardboard boxes sitting around. The Torii made short work of the box I grabbed. I sliced both with and against the grain of the corrugations. The last couple of crosscuts, the blade didn’t get all the way through, and I had to repeat the cut. This wasn’t entirely surprising, and I don’t consider it a serious problem by any stretch.
The Torii sliced through cantaloupe like it wasn’t even there.
Making the Cut
The Spartan Torii is a battle blade, pure and simple. It’s a high-quality blade that lends confidence. If I were headed to war, or for any other reason felt I might need to rely on a knife to defend my life or the lives of those around me, the Torii would be at the top of the list. The only limitations to its performance would be on the part of the user, and not the fault of the Torii. I can’t recommend it highly enough.
Its injection-molded sheath is just as well-designed as the knife it carries.
Spartan Blades Ronin Torii Field Grade Explained
Spartan Blades is known for producing very high-quality knives, but they can carry a hefty price tag. Don’t get me wrong, you absolutely get what you pay for. But they can be out of reach for many knife users.
Some years ago, Spartan started a Field Grade line in partnership with their Pineland Cutlery division. The idea was to produce some of their models in more affordable configurations. They don’t skimp on quality, just on maybe a few of the bells and whistles.
Here’s the mystery, though. The Torii is considered part of this Field Grade lineup. Why is this puzzling? After using this knife for a while, I’m baffled how anyone could consider it a budget-grade knife. I’ve spent far more for lesser-quality blades. Granted, many people probably wouldn’t consider $250 to be a budget-friendly price, but those who frequent knife circles will be the first to tell you that is a fairly moderate price for a knife like this.
About the Author
Jim Cobb is a nationally recognized authority on disaster readiness, as well as a lifelong knife nut. He has been involved with preparedness for nearly 40 years and has developed a reputation for his common-sense approach to the subject. In addition to his numerous books and several hundred magazine articles, Cobb is one of the cohosts of the How to Survive 2025 podcast. He offers a free weekly newsletter called The Survival Weekly Dispatch (jimcobb.substack.com).
Summer is here! Now that the days have grown long, and the smell of barbecue is on the wind, we’re ready to spend quality downtime outdoors. As temperatures become more amiable to hikes and overnight camping, it’s finally time to venture off to find a trail, or endeavor to create a new one.
Be sure to inspect and inventory all your gear before you leave the blacktop. Top off that canteen and make sure you have your fire-starting tools. Have fun. Make memories. Keep your wits about you, and you’ll go far.
There’s a lot more going on inside of this gift set than you’d think. Upon opening the beautiful presentation box, you’ll see what looks like a nice thermos. It’s not until you unscrew the different sections that you see the extensive thought and engineering that went into the VSSL Pour Over Kit + Java G25 Grinder Gift Set. You’ll find two 10-ounce double-walled stainless steel mugs, a 304 food grade stainless steel mesh filter, food-safe BPA-free lid, and stainless steel pour-over dripper.
Choose your grind setting based on your preferred method of brewing, pour in coffee beans, and enjoy the silky-smooth machining as your new full G25 Java grinder turns beans into 30 grams of grounds. We have found through extensive and laborious fireside testing this tends to be the perfect weight for 20 ounces of blissful field brew. The gift set is available in black or cream; however, VSSL has recently released an attractive green Nesting Pour Over Set sans the grinder. Not to worry, you can buy a grinder separately to complete the set.
NOTES After a long day on the trail the last thing you want to do is sit in the dirt or on a stump. You want back support at a minimum. Not only does the new Chair One High-Back (re) support you in all the right places without being restrictive or cut off circulation in your legs, it’s incredibly sturdy and stable. This chair can support up to 320 pounds assembled. The (re) design adds a second tension line within the perimeter of the chair to distribute weight around the front.
Each new (re) comes with a newly redesigned storage bag with a zippered 3/4 opening instead of a standard sleeve with a drawstring. This makes packing up fast and easy. The bottom of the storage bag also has a single row of MOLLE to attach your chair to the outside of your pack. Helinox offers the new Chair One High Back (re) in four solid colors as well as three patterns.
The Highland is reminiscent of an old-school Chuck Taylor All Star design, but don’t be fooled, it is a moccasin. Anxynt designed these for bow hunting where being stealthy is priority one. Oftentimes, bow hunting requires the hunter to stalk within 30 to 50 yards of a game animal. That is a tough prospect considering the ground can be covered in loose rock, cactus, or leaves, depending on where you’re hunting. The Highland has a full-grain upper for durability.
A thick bison sole is used to defend against cactus thorns and jagged rocks. Innovative Airlift insoles afford the wearer shock absorption, making these not only comfortable and more breathable than you’d imagine for a full leather moccasin and are incredibly quiet when traversing the wild places of the world in search of game. Depending on your size, they’ll weigh between 22 and 39 ounces, making it easy to pack a set out with you should you choose to preserve them for the hunt and not the hike.
Without a doubt, this is the most interesting folding pocketknife to come across the desk in the last year. Dave Wenger lends his Tracker knife design to Boker Knives to collaborate on the Micro Tracker Folder. This hits a sweet spot in the hearts of our crew, as many of us are trackers or have experience and extensive training in the art and science of tracking.
Overall open length is 7.5 inches, while it is 4.5 inches closed. A 154CM stainless steel blade is a particularly good choice for this outdoorsman’s knife, as 154CM is known to have excellent edge retention, relatively easy to sharpen, is a high-quality stainless steel, has good corrosion resistance, and is easy to heat treat, grind, and finish, all making this ideal for a cost-effective EDC knife. The Micro Tracker has a lanyard hole with brass sleeve, and a narrow low-profile pocket clip. It comes with a nice presentation box, a soft zippered case with three internal pockets, a ceramic sharpening rod, and fire pull.
Let the battle begin! You can choose from a straight handle or a T-handle. Who knew there was such a divide about a seemingly trivial issue? We went with the straight handle. This Ti shovel is super lightweight at 10.8 ounces with a 6-inch-wide shovel head and is very handy. It may not look like much, but its welded construction means it’s meant for heavier work than you’d think. Sharpened shovel head edges make for a formidable weapon should you find yourself fending off camp pests or predators.
Those same sharp edges can also help you part out large game animals in a pinch. Yes, you can absolutely cut through muscle or hack your way through rib bones if you find yourself low on options. So far, we’ve used ours to dig a privy and do a little cooking over the fire. Titanium is a great heat conductor, making it ideal as an impromptu frying pan.
This is a He-Man sword of a knife. At 11.25 inches overall, it arrives remarkably sharp for such a large knife straight from the box. The blade is 6 inches long, 1.47 inches wide, and 3/16 inch thick. The blade makes up half the overall length, while the other half is a smoothly contoured grip, which brings great balance to this large knife.
Having the F6 on your belt as you stroll through the woods and wild places gives you a sense of confidence that you’re ready for any outdoor, survival, or bushcrafting hurdle nature might drop in your path. It’s great for batoning and processing firewood, pairing with a ferro rod to get your fire going, or even cleaning game animals. Reiff offers the F6 in two handle material choices G10 or Micarta and in eight color options. The F6 ships with a sturdy leather sheath that includes a belt loop mount, as well as a removable dangler to drop the ride height.
If only my dad would’ve had a selection of ratcheting Pipe Vise tools when I was a kid instead of regular wrenches, he might have loved me more, and I would have disappointed him less. The Micro 5 is 6 inches long with a highly polished contoured chrome handle. Precision machined self-adjusting teeth are the feature that makes The Micro 5 so attractive.
It’s meant to be used in tight spaces like toilet bolts, battery terminals, and supply lines. This is the kind of tool that makes typically tedious jobs a breeze, because the user isn’t required to remove and reposition the tool to continue working. With a minimum use size of 8mm or 5/16, and a max of 19mm or 3/4, this is a versatile tool to add to your toolbox, cabinet, bug-out bag, or automotive repair kit.
This is a blend of functionality and rugged elegance brought to you by Forscher. The MK2 Mod 1 is a 316 L stainless steel, automatic timepiece. Automatic watch movements don’t require a battery to keep time. Powered by the reliable and exceptionally durable Seiko NH38a movement with a 41-hour power reserve, this watch is ready for any environment you find yourself in.
While you’re admiring your watch sitting next to your nightly campfire, remember to give the movement a winding every other day, and you’ll always be on time. A mix of highly polished and brushed 41mm stainless steel case, high gloss ceramic bezel, matte black dial, and C3 Super-Luminova numbers and number positions makes this watch perfect for the office and is right at home diving in the ocean or hiking the mountains. The MK2 Mod 1 comes with a 20mm CWC G10 strap; however, Forscher has recently released a new stainless steel bracelet for this model that you can add to your cart when you order. We prefer the new Nemesis Camo strap pictured.
No matter what, you’ve got to have clean drinking water. In the field, or at home, water is a must. Contaminated water kills 800,000 people per year worldwide. That’s more than three times the amount of people who die worldwide from violence involving guns. Epic Water Filters Water Pitcher is made from medical-grade Tritan, which is BPA/BPS free, so you won’t have to be concerned about interruptions to your endocrine system.
This filters 99.9 percent of all contaminants including glyphosate, lead, chlorine, benzine, PFAS, and heavy metals. With an 80-ounce reservoir and a slim space-saving design, it fits nicely into your fridge and has enough capacity for a family. The smart lid design incorporates a designated port to turn the lid into a contamination barrier in case of a spill when filling the unfiltered reservoir keeping clean water safe.
Since 1969, Mountain Safety Research (MSR) has been outdoors blazing the trail in groundbreaking innovation like few others have. MSR’s iconic line includes camp stoves, water treatment solutions, tents, snowshoes, and much more. You’re not likely to find a serious backpacker who isn’t using titanium cook pots these days. Odds are pretty good that the company you’re likely to find with a lot of campers and solo backpackers is MSR. The Titan 900mL Kettle weighs just 4.4 ounces thanks to its titanium construction. Titanium is half the weight of steel and twice as strong as aluminum.
Large enough to store a 4-ounce fuel canister and a pocket rocket stove or one 8-ounce canister, this kettle helps you save room for your cooking necessities. With the new and improved pouring spout to help hydrate freeze-dried meals, silicone comfort grip-coated folding handles, and precise measurement embossments on the side, this kettle is great for meal prep or as a dedicated cook pot. Few things are more satisfying than knowing you’ve got food or water heating over the fire after a long day on the trial.
Oakley has long been a leader and innovator in the eyewear market and continues to lead the charge today. The Oakley SI Ballistic M Frame 2.0 is in the running for the ultimate eyewear for personal protection equipment (PPE). With razor-sharp clarity from edge to edge, you’ll see zero distortion. Surpassing ANSI Z87.1 Industrial Standards for high-mass and high-velocity impact protection, they’re perfectly at home at the indoor range, shoot house, warehouse, or in the field.
One of the features making the M Frame so formidable in the market is the ability to change out the lens to fit the specific environment you find yourself in. Unobtainium ear socks and nose pads increase grip and comfort while under stress of exertion, sweat, and weather. Lightweight and comfortable, the Ballistic M Frames come with a hard case with slide lock and a micro-fiber cleaning sock that can be used as an alternate form of protection should you abandon the hard case.
NOTES The Skyweight is more akin to your day hiker’s backpack than the operator style packs 5.11 is known for. Keeping with the same rugged toughness you expect from 5.11, but with a feel geared more for the trail than midnight assault operation. Weighing in at 1.3 kilograms in part due to the light-but-tough 330D material on the main body, this pack will help you lighten your load with contoured padded shoulder straps, load lifters, and a padded waist belt to shift the load from hips to shoulders throughout your travels.
Compression straps at the top of the main body not only shrink down the profile of the pack, but they also keep the load close to your body to reduce fatigue from fighting shifting weight. Tucked inside is a high-vis blaze orange rainfly to keep gear safe from the elements but also is great to use as a signaling panel. Conveniently located on the outside is a “stuff-it” pocket for quick access as well as two bottom gear loops for additional gear on the underside. Offered in M81 Woodland or as it is affectionately known “God’s Plaid.”
This isn’t your run-of-the-mill pullover hoodie. No, the 0241 Pullover is a hard-use, veteran designed, tough-built piece of rugged outdoor clothing made from Nyco ripstop. You’ll want to make sure you buy a size larger than usual if you want a little room as these have absolutely no stretch to them. Jammed full of features, this is a great over garment or a stand-alone.
Adjustable cuffs, raid mod shoulder-mounted pockets with loop Velcro for identifier patches, cinch waist, oversized hood compatible with helmets, large main chest pocket (kangaroo pouch) suitable for a weatherproof map sleeve, and two back stash pockets. Available in common military camouflage patterns as well as nearly two-dozen obscure and highly regarded patterns from militaries worldwide. Sizes range from small to XXX large. These run in military sizes. If you wear a large in civilian clothing, go down a size unless you intend to use this as an overgarment covering a coat.
NOTES After 10 years as an industry leader in shushing most things that go bang, Dead Air once again sets the standard. The Mojave 45 is a 3D-printed silencer made from 6AL-4V DMLS titanium, 7075 aluminum, and stainless steel. Dead Air used their patent pending Triskelion “Gas Management System” to not only reduce the audible report of the round but also reduce felt recoil. This means a more pleasurable recoil impulse, making shooting less physically taxing and is great when teaching beginners.
Upon arrival, the can is ready to mount straight onto your 45 ACP handgun. If you intend to mount this to a fixed barrel such as a 350 Legend hunting rifle, you’ll need to order a separate mount, as the thread pitch is different as well as a spacer to preserve the internal piston system. In full auto, the Mojave is ready for 45 auto with no barrel length restrictions as well as 300 BLK subsonic with an 8-inch barrel minimum. For semi-auto, you can run 300 BLK supersonic, 350 Legend, 400 Legend and 450 Bushmaster Subs, .357 Mag, and .44 Mag lever actions with 16-inch barrels.
There are stories of soldiers’ guns being destroyed in IEDs; however, the Aimpoint would still be functionable even with cracked lenses. The ACRO keeps up with the legendary toughness that warriors, LEOs, and competition shooters count on. Featuring a fully enclosed emitter to keep the rain and humidity from turning your nice round dot into a spiderweb, the ACRO P-2 weighs in at just 2.1 ounces with an aperture measuring .59x.59 or 15x15mm. Flush-mounted windage and elevation adjustments require an Aimpoint sight tool to adjust, but this ensures you won’t be inadvertently interrupting your meticulously sighted optic. While the ACRO was designed to be low profile and narrow enough to fit nicely onto the slide of your pistol, it doesn’t shy away from the work to be done mounted on a rifle or even a shotgun.
Try as we might, it’s tough to get away from our dependance on electronics even in the outdoors. There’s no question as to how valuable smartphones can be should you need a topographical map, identify and differentiate edible and poisonous plants or more seriously to guide emergency services to your position. That said, we believe we should have support for our electronic devices. The Nestout Power Bank 15000mAh is as tough a power bank as we’ve found.
Waterproof, shock resistant, and dustproof, the Nestout is up for an afternoon on the trail or a multi-day expedition through the mountainside when paired with a two- or four-panel Outdoor Solar charger. Outfitted with tethered waterproof covers, there are two USB-A and one USB-C charging ports to provide a variety of simultaneous charging options. It’s available in tan, black, and gray as well as a catalog of accessories that’s being added to periodically. We have found the Outdoor Solar Panel and Flash-1 LED Light to be particularly useful.
Perfect for car camping, homesteading, or to get through a power outage. The Hottap Nomad Kit is not only an on-demand propane-powered water heater, this kit is also a kitchen sink with drying rack and a shower head. All you need is a water source, a couple D cell batteries to power the water pump, and a propane tank to have hot water. There’s a thermostat built into the system, so you get a comfortable warm shower instead of scalded. With great water pressure even at 100 feet from the water source, you’ll be able to clean dishes and get a great shower.
The pump hose has a very capable filter to keep the pump and hose lines free from debris as well as a protective cone in case you need to throw the filter further out to get to a suitable depth of water. Assembly is very easy thanks to the color-coated hoses as well as an intuitive design. Articulating sink and shower heads with on/off flow switches make for ease of use and reduce water and energy waste. Joolca also offers mounting accessories for the heating unit and shower tents for overlanding rigs and RVs.
Top Picks
There are few things that bring people together like a good campfire. Be it morning or night, a fire possesses an ancestral pull on the human psyche. Around a blazing fire is where early humans sought counsel from elders and strengthened fellowship among friends. Today, the only thing that’s changed is the frequency in which we enjoy this tradition.
It is with this in mind that we have decided our two top items for this summer: the VSSL Pour Over Kit + Java G25 Grinder Gift Set and the Helinox Chair One High-Back (re). These two items have been mainstays at basecamp for us since they arrived. Nothing says “good morning” like a great cup of coffee, and the VSSL has all but the beans and water to make that happen. Helinox brings comfort to the fire circle, granting us more time with our elders and the fellowship of friends and family.
Walking through the woods is often a peaceful journey to reconnect with nature. But occasionally, that peace is disrupted by a fall and an injury. Knowing how to take care of the injury is essential. Often, medicinal plants aren’t thought of due to the unfamiliarity with what’s available. Knowing the area is important and should be part of the planning for the hike. Knowing what medicinal plants are available in that area is just as important. In this article, medicinal plants will be discussed as they relate to inflammation, analgesia, and muscle relaxants. Although there are many options, what follows is just a few offerings. What is discussed here can be found in (but not limited to) North America, and becoming familiar with them can turn a bad situation on a hike into a more tolerable one.
What Medicinal Plants Have Anti-Inflammatory Action?
Willow
The first offering is that of the willow tree (Salix spp.). The classic weeping willow tree can grow to 40 feet and loves the sun-filled spaces. The tree can be found throughout the United States. It contains an active ingredient called salicin, which works like salicylic acid (aspirin). This component will inhibit some of the precursors of inflammation (e.g., prostaglandins). The inner bark is used and can be chewed or brewed as a tea. Because it resembles aspirin, it also exerts antiplatelet activity. Careful attention to bleeding should be observed.
Arnica
Arnica montana should be considered for topical uses and often needs to be diluted in a 1:10 ratio. The bright yellow flowers with hairy green leaves are characteristic of this plant. Growth tops out about two feet. It loves the grasslands and pastures of the mountainous regions of North America and Northern Europe. Arnica also inhibits inflammation precursors (e.g., TNF alpha, IL1Beta, IL6, IL 12). The yellow flower is the part that’s used to apply to the wound. There are also some analgesic properties associated with this medicinal plant. Arnica is poisonous if ingested and may cause an allergic reaction. It does exhibit some antiplatelet activity, so care should be warranted to watch for bleeding.
Ashwagandha and Tumeric
A popular medicinal plant that has gained public recognition is Withania somnifera (Ashwagandha). This plant can grow up to five feet in tropical climates of India, the Middle East, or Africa. The leaves are oval, and the flowers are yellow in color. The fruit is green and resembles cherry tomatoes. The root is often used for medicinal purposes. Its active ingredient is withanolide, which provides COX inhibition and has efficacy similar to that of hydrocortisone. It also represses pro-inflammatory cytokines IL-6, IL-1ß, IL-8. This down-regulation of gene expression of these cytokines contributes to its anti-inflammatory response. This medicinal plant should NOT be used in pregnancy as it can induce miscarriage. Other adverse effects include nausea, vomiting, and drowsiness, among other reported effects. It should not be used with other benzodiazepines or barbiturates due to its central nervous system depressant effects. This can be bought as a supplement or found in its native habitat.
Curcuma longa (turmeric) is found in Belize, Costa Rica, the Caribbean, and Southeast Asia. The plant can reach heights of three feet. The leaves are long and simple, with small flowers ranging in color from white to orange. The orange root is often ground and contains the active ingredient curcumin. It acts as an anti-inflammatory by inhibiting tumor necrosis factor-alpha. It can also act as an analgesic, but the mechanism isn’t understood. Side effects could include an allergic reaction or gastrointestinal distress. Turmeric can also potentiate the formation of kidney stones, so be advised. It can also interfere with some chemotherapy drugs (cyclophosphamide and doxorubicin) because of a similar metabolic pathway.
What Medicinal Plants Have Analgesic Action?
Hog Apple
Found in Florida, Morinda citrifolia (aka Noni or Hog apple) can be used as an analgesic. This small tree (18 feet) can have square-like twigs with long, large leaves. The fruit (3.5 inches) is green on the outside and white with dark seeds on the inside. It can be eaten directly, although it has a strong odor. The leaves and roots can be brewed as tea. The analgesic mechanism of action is not understood; however, it’s antagonized by naloxone. Naloxone is the “antidote” for opium intoxication and implies that Noni may bind to opioid receptors. It can also have anti-inflammatory properties because it works on precursors to the inflammatory cascade. Some side effects include diarrhea, liver damage, and elevated potassium.
Poppy
The second offering in terms of an analgesic is Papaver somniferum (opium), found in about two-thirds of the United States. It can reach about 40 inches tall and is known for its red flowers but can be white. The fruit is round and grayish green in color. This plant has derived such medications as morphine, heroin, and fentanyl, which are controlled substances requiring a prescription to possess. It is not illegal to grow small amounts of poppies in your herb garden. Check with local authorities before deciding to grow the medicinal plant. This drug works on opioid receptors that help modulate pain. It can also have muscle relaxant properties as well. Some adverse reactions could include constipation, nausea, hallucinations, and withdrawal symptoms as well. The poppy seeds can be steeped in hot water and drank as tea.
What Medicinal Plants Have Muscle Relaxant Action?
Cannabis
Another illicit plant is that of Cannabis sativa (marijuana). This plant can grow up to 12 feet tall and prefers sunny areas. Found throughout the United States, it is becoming more acceptable to use for medicinal purposes. Only four states have banned all uses of marijuana (Idaho, Wyoming, Kansas, and South Carolina). All other states have some degree of tolerance for the medicinal plant. The active ingredients are cannabinoids (e.g., THC and CBD) that bind to cannabinoid receptors (CB1 in the central nervous system and CB2 in the immune system). These affect the binding proteins (e.g., GABA, NMDA), which play a role in muscle contraction and inflammation.
Although reasonably well tolerated, nausea can be a side effect. In extreme cases, intractable vomiting may occur (cyclic vomiting syndrome). This often requires stopping marijuana use and can even require hospitalization due to dehydration and frequent vomiting.
Valerian Root
Valeria officinalis (valerian root) can be found throughout the United States. This perennial plant can grow up to five feet tall and has pink or white flowers. The root can be used as a tea, or an extract can also be utilized. The active ingredient, valeric acid, works on the GABA A protein in the cell by binding to the site where benzodiazepines bind. This is likely the reason for the muscle-relaxing properties. It’s generally well tolerated but can have liver toxicity with long-term use.
Chamomile
Another plant that can be found in essentially every state is Matricaria recutita (chamomile). This plant can grow one to two feet tall and prefers sunny locations. This pretty, white flower with a yellow center blooms from June to August and contains apigenin. This active ingredient binds to GABA A receptors similar to benzodiazepines and yields a muscle relaxant effect, similar to valerian root. It also has some anti-inflammatory properties by inhibiting COX 2 enzyme systems. Chamomile is generally well tolerated and may only yield an allergic reaction. The flowers can be brewed as tea, or they can be used topically on a wound.
In Summary
The next time a hike is undertaken, attempt to discover some of these plants. Know what plants are found in the area. Get additional books to review the many plants that can have medicinal value. A helpful website is the Memorial Sloan Kettering Herbal Database (mskcc.org). This site will review much of what’s summarized above and go into more depth about the plant.
While this is a short list of medicinal plants, it’s meant to give the reader a starting point for the study of medicinal plants and their benefits. Many of these plants have benefits other than those listed above. For ease of discussion, the areas where these plants can be found were limited to North America. This is by no means a suggestion to replace what medicine is being prescribed. Often, there can be interactions with medicines, so be advised. Always consult a pharmacist or physician before starting any medicinal plant supplement.
About the Author
David L. Miller, DO FACOI, is an internist in private practice for 20 years. His experiences away from the office have included time as a fight doctor in regional MMA events and as a team physician for 10 years at a mid-major university in the Midwest. Currently, he serves as the lead medical instructor for the Civilian Crisis Response team based out of Indianapolis.
When you hear the term “long-range shooting,” a few things might come to mind. Big rifles, bigger scopes, and probably a competition shooter buried behind a steel barricade somewhere in the American Southwest. What probably doesn’t come to mind is a vineyard in Southern California, a hunting rifle, and a group of down-to-earth people stretching their shots from 250 out to 1,250 yards. But that’s exactly what Practical Precision 101 turned out to be.
Hosted at a private ranch somewhere in Southern California (for the privacy of the rancher and guests, we’ll keep the vineyard’s name off the record), this two-day course was run by South Coast Long Gunner, with Ryan Burns as the primary instructor. Burns — backed by the ranch owner and his range safety officers — put together a class that didn’t require a competition-ready rifle or a physics degree to follow. Instead, it was focused on giving students a working knowledge of the principles behind long-range shooting and helping them explore the real capabilities of their rifles.
Students were forced to get creative when it came to establishing shooting positions.
A Grounded Start
Like any good long range shooting course, we started with a safety brief. Burns made it clear that safety was non-negotiable and walked everyone through the protocols for both individual shooters and the firing line as a whole. With that squared away, we shifted focus to the first real task of the course: getting our rifles zeroed at 100 yards.
For many of us, that’s where our familiarity with our rifles began and ended. Burns challenged that right off the bat. “Most of you have been using your rifles as 200-yard tools,” he said. “But they’re capable of so much more.”
The rest of the weekend would serve as proof of that. Day one was all about building the foundation, which included zeroing the optics, understanding scope adjustments, and getting familiar with the mechanics of long range shooting. Day two would stretch that foundation to the edge, with targets ranging from 250 yards all the way out to 1,250.
Special tools, like this inexpensive anemometer, were used to precisely measure wind speed and air temperature.
Beyond the Muzzle
To understand what it takes to hit targets long range shooting, we first had to get our heads around what happens between the muzzle and the target. Burns laid it out simply, “Three things affect your bullet in flight: gravity, the environment, and time.”
Gravity pulls your bullet down the moment it leaves the barrel. The environment encompasses wind, humidity, air pressure, drag, and even the rotation of the earth, which all play a role in steering the bullet off course. Time makes both of those worse by compounding inaccuracies the further it travels. The longer your bullet is in flight, the more it drops and the more the environment can mess with it.
Burns emphasized that we’re not at the mercy of those forces. We can quantify them, dial them into our scopes, and work with them. But to do that, we need to ditch the “set it and forget it” approach.
“Back in the day, people zeroed their scopes, put the caps back on, and never touched them again,” Burns said. “Now we’ve got the tools to adjust our optics dynamically by distance, by wind, by situation.”
Moving from hilltop to hilltop, students had to make shots with elevated heartbeats and heavy breathing.
MOA vs. Mils
One of the first technical conversations we got into was about scope adjustments. Specifically, the difference between MOA (minutes of angle) and Mils (milliradians). Most of us had probably used MOA before without fully understanding its limitations.
Here’s the deal: MOA is an angular unit of measurement, where 1 MOA equals roughly 1 inch at 100 yards. Most scopes adjust in 1/4 MOA increments, which works well in even-number scenarios. But when you’re trying to compensate for odd numbers — like needing 7.3 inches of correction — it quickly turns into a math headache. Add in environmental factors and changing distances, and those fractions become a liability.
Mils, on the other hand, are based on the metric system, which is base 10, and the math stays a lot more consistent across distances. That makes Mils easier to work with, especially under pressure or in less-than-ideal conditions.
Lead instructor Ryan Burns observes the impacts of rounds being sent down range.
DOPE and Ballistics Apps
“DOPE” stands for Data On Previous Engagements, and before smartphones and ballistic solvers, shooters used to keep hand-written DOPE charts based on their range time. But those charts were only as good as the atmospheric conditions they were written under. Change elevation, temperature, or humidity, and your data could fall apart.
That’s where apps like Applied Ballistics and GeoBallistics come in. Feed them good input, such as ammo type, barrel length, and ballistic coefficient, and they’ll give you accurate DOPE for your shot. The key is giving them the right data.
A big part of that data includes understanding drag coefficients, specifically the difference between G1 and G7. G1 is the older model, designed for round-nosed or flat-based bullets like what you’d find in a .22LR or 9mm. G7 applies to modern, boat-tailed, spire-point bullets like 6.5 Creedmoor or match-grade 5.56. These are far more aerodynamic. Think of G1 like a school bus and G7 like a Corvette. The more accurate your ballistic coefficient entry is, and the better you understand what kind of bullet you’re shooting, the better your app will be at doing the heavy lifting. That’s the science. But reading the wind? That’s the art.
No two firearms were the same, and we were able to get a better understanding of how different builds performed.
Weaponizing Mirage
Burns introduced us to a technique that was new to many of us: watching mirage. Mirage, or the shimmer you see rising off a hot surface, isn’t exclusive to desert illusions. It’s a direct visual indicator of wind. When there’s little to no wind, mirage rises straight up. A slight lean (15 to 30 degrees) means a 4- to 7-mph wind. Mirage at 45 degrees suggests over 10 mph. When it starts flowing parallel to the ground, you’re dealing with over 15-mph wind.
Using mirage to estimate wind speed, especially through a spotting scope or high-magnification optic, adds another layer of control to the long range shooting process. You’re not just guessing anymore. You’re reading the environment in real time.
After the relatively short classroom portion, the rest of the first day was spent ensuring our optics were perfectly zeroed.
Position Matters In Long Range Shooting
In long range shooting, not all shots come from a benchrest. Especially in the hunting world, your shots are more likely to come from awkward terrain, hasty positions, and whatever support you can improvise. Burns walked us through positional shooting basics. A few takeaways that stuck:
• The more of the rifle your body is supporting, the less stable the shot will be. • Don’t force a position. If you feel tension anywhere in your body, it’ll show up in the shot. • Avoid “stacking joints,” like elbow joint directly on knee joint. Instead, plant your elbow in the meat of your thigh for greater stability • Point your toes and hips at the target to square up your base.
He also emphasized the importance of spotting your misses. “Don’t lift your head off the gun,” he told us. “Keep the target in the scope before, during, and after the shot.” One trick he offered was to hold the trigger back after the shot breaks. Often it helps keep your eye behind the glass and prevents you from flinching away from recoil.
Logs and other debris made adequate improvised firing positions.
When a Hunting Rifle Is All You’ve Got
I took the course with a lightweight hunting rifle — a setup designed more for carrying through brush than ringing steel plates at 1,000 yards. My scope had decent clarity but lacked high magnification. My barrel was shorter than what most precision shooters would pick. Basically, my gear wasn’t ideal for this kind of shooting. But that’s where the course shined. Instead of punishing students for their gear choices, it taught them how to make the most of it.
Because my rifle was significantly lighter than the PRS-style rifles others brought, I had to pay close attention to my position. Recoil management was harder. Staying in the scope through the shot was harder. But some of the techniques — like pressing the trigger and holding it to the rear — helped a lot.
My biggest takeaway? Match-grade ammunition makes a difference. Long-range shooting is all about consistency, and consistency starts with your ammo. When everything else is held equal, small inconsistencies in ammo turn into big misses downrange.
Closing Thoughts
By the end of the weekend, we were hitting steel out past 1,000 yards — some of us with rifles that had never been pushed past 200. More than that, we walked away with a new level of confidence, not just in our equipment but in our ability to use it.
Practical Precision 101 lived up to its name. It was practical in the best sense of the word. Focused, grounded, and built for shooters who want to make real improvements. Even if you’re running a high-end precision rifle or a bolt-action you’d use during deer season, the lessons apply. Burns and the South Coast Long Gunner team gave us the tools to push past our own perceived limits — one click, one wind call, one trigger press at a time.
Build Sheet
This is a rifle I intend to use on future hunting trips. The lighter weight isn’t ideal for PRS-style competitive shooting, but with the right technique, it’s still capable of reaching out and touching targets 1,000 yards away and beyond
Zero Tolerance (ZT) Knives was founded in 2006. Over the last couple of decades, they’ve earned a reputation for producing hard use knives. While they were originally focused on the law enforcement and military markets, civilians quickly got their grubby mitts on these overbuilt blades and were suitably impressed.
By 2010 or so, ZT Knives recognized that their intended audience had expanded greatly, and their offerings did so as well. Today, ZT Knives is known as a premium knife company that produces high-quality, robust cutting tools that are pretty much bombproof.
Now the thing is that when you use terms like overbuilt and robust when discussing knives, there’s a tendency to imagine chunky, even clunky, designs. Handles that look like you could use one to smash apart a cinder block, that sort of thing. ZT has found ways to sidestep that issue entirely and deliver knives that are tough as nails, but also sleek and handsome.
The ZT 0512 is a perfect example of that combination. It’s a beast, but one that’s always under your control.
The jimping on the spine is wide but comfortable, giving some traction without digging into the thumb.
What’s In the Box?
The ZT 0512 is a side-opening automatic knife. With the blade fully deployed, the knife stretches 8.0 inches even. The blade is 3.45 inches long, giving it a closed length of 4.55 inches. The handle is 0.53-inch thick. While the ZT website indicates the weight of the 0512 to be 4.4 ounces, on my scale it’s 4.2 ounces. For perspective, that’s about the same as two C batteries.
The handle is an interesting design, with one side natural canvas micarta and the other titanium. The micarta has been left just a little rough, rather than polished. While the scales are flat, the handle is shaped such that it provides a comfortable and secure grip. A bronze-anodized spacer adds some visual pop along the back of the handle.
Looking at the micarta side of the handle, you’ll see a small bronze button. That’s where the fun begins. Pressing it snaps the blade into position, and it does so with considerable authority. The button is fairly recessed to reduce the risk of accidental openings. I’ve been carrying the 0512 off and on for several weeks and I’ve had zero worries about it opening in my pocket.
The reverse side of the knife is titanium. The deep carry pocket clip is reversible.
The 0512’s blade is a clip point design. It’s CPM Cru-Wear with a dark bronze Cerakote coating to provide additional protection from corrosion. Cru-Wear is a great knife steel, known for toughness, edge retention, and overall hardness. The blade is razor-sharp right out of the box. Having owned a few other ZT knives previously, this was no surprise.
The deep carry pocket clip is reversible, allowing for right- or left-side carry. Either way, the knife is tip up in the pocket.
How Does the ZT 0512 Perform?
I’ve long had an affinity for automatic knives, and I’ve enjoyed every other ZT knife I’ve had, so I knew going in that the 0512 was likely to be a home run.
The action on the knife is incredible. You have to push the deployment button with a little force, which I presume is a safety feature. But when the blade swings out, it does so remarkably fast and hard. Once open, it locks into place. There is zero wiggle front to back or side to side. While no knife lock should be considered perfect, the lockup on the 0512 comes about as close as I’ve ever seen.
Releasing the blade to close it uses the same button. Press it and fold the blade closed manually. There’s just a bit of resistance as the blade closes.
The natural canvas micarta is just gorgeous and really pops on this knife.
I love the micarta scale on the obverse or front side of the handle. Now granted, I’m a sucker for natural canvas micarta to begin with. I particularly like it when it’s left a little raw, so there’s some discernable texture with it. It looks almost vintage, which I think is really cool. I’ve had one or two knives from Kershaw that similar handles. Given that ZT Knives and Kershaw are both part of the same company, that makes sense I suppose. The micarta gives the 0512 some additional visual appeal while also augmenting the grip security.
This is a fairly large pocket knife, though it is both smaller and lighter than the venerable Buck 110 Folding Hunter. Make no mistake, it fills the hand. But at the same time, it handles like a dream. The weight lends a sense of solidity rather than feeling like an anchor dragging your hand down. I don’t know that I’d go so far as to say the 0512 entirely replaces the need for a fixed blade when you’re in the field, but it can sure do an awful lot of the same work.
The Cerakote coating is there for corrosion-resistance, but it also gives the blade a cool appearance. It has a matte finish, so it serves to give it a tactical look, if you’re into that sort of thing.
The clip point blade profile has a slight swedge along the top.
Over the last several weeks, I’ve used the 0512 to process countless cardboard boxes, slice up fruit and vegetables in the kitchen and on the trail, and do some carving and whittling. The blade remains incredibly sharp. The jimping on the spine feels great under the thumb when you’re carving, giving you a bit of added control. There is a slight swedge on the spine but it isn’t anywhere near sharp enough to cause problems if you’re applying pressure there with your index finger while doing detail work.
I’ve opened and closed the knife well over a thousand times at this point. The mechanism has never even come close to failing. The blade deploys just as reliably now as it did when I first took the knife from the box.
Automatic Knives and the Law
Once upon a time, possessing an automatic knife could lead to serious legal issues if it were discovered by law enforcement. Today, many areas of the United States have loosened those restrictions. There are far more jurisdictions where carrying an auto knife is legal than areas where it’s still verboten.
However, it pays to do your homework. You can start with the American Knife & Tool Institute (www.akti.org/state-laws-regarding-automatics/). They maintain a very accurate database on such restrictions.
The ZT 0512 is a great companion, whether you’re trekking the countryside or just working in the backyard.
Does the ZT 0512 Make the Cut?
I can’t recommend the ZT 0512 highly enough. It gets five stars all around. This is a genuine workhorse, and one that has zero quit in it. This is the type of knife that from the moment you pick it up, you’re looking for something to cut or slice. It just wants to be put to work. This isn’t a safe queen. Instead, it’s more like the handyman who knows how to fix anything and won’t rest until the job is done.
About the Author
Jim Cobb is a nationally recognized authority on disaster readiness, as well as a lifelong knife nut. He has been involved with preparedness for nearly 40 years and has developed a reputation for his common-sense approach to the subject. In addition to his numerous books and several hundred magazine articles, Jim is one of the co-hosts of the How to Survive 2025 podcast. He offers a free weekly newsletter called The Survival Weekly Dispatch (https://jimcobb.substack.com/).
Blade Show Atlanta 2025 is in the books! Not only did we get to see some of the latest and greatest knives on the market, but we also got to hang out with iconic knife makers, teach some classes, and interact with so many members of the community! Join Offgrid Associate Editor, Nick Italiano, as he recaps of some of his favorite knives, hot new gear, and moments from the show!
Pre-Blade Show
Traveling by air is always a draining experience, and heading to Blade Show is no exception. Living about an hour away from the closest airport, combined with the 2 to 3 hour wait at the airport, flight time, and chaos of arrival into one of the world’s largest airports in Atlanta, Georgia takes its toll on body and mind! All that quickly fades when upon arriving to the area surrounding the Cobb Galleria, where Blade Show is held, as the familiar sites and faces from previous years come into view!
I arrived to my hotel around 7pm and it wasn’t more than 10 minutes after checking in that I was getting text messages from friends and business associates asking when I was going to be coming to “The Pit.” For those who haven’t been to Blade Show Atlanta before, The Pit is the name that has been given to the lobby of the Renaissance Waverly Hotel that serves as a meeting grounds and after party location for those who are either working at or attending Blade Show.
After a quick change of clothes, I set out to grab a burger and meet up with some friends and associates at the Waverly. Upon arrival I was happy to see a bustling area filled with old friends, new faces, and Blade Show banners, After a few hours of catching up with people I went back to the hotel to grab some shut eye, because day one of Blade Show starts early and is absolute madness in the best kind of way.
Blade Show Opening Day
I arrived at the Cobb Galleria shortly before 8am, and it was no surprise to me to find hundreds of knife enthusiasts lined up outside waiting for early bird entrance. It is not uncommon for people to camp out overnight to ensure they can hold their spot on line so they will not miss their opportunity to get their hands on limited edition or show special knives from their favorite makers.
Inside knife makers, retailers, and assorted gear producers were inside getting the final touches on their booths completed, laying out their merchandise, and getting scrambling to finish their breakfast and coffee before the opening rush. While the vendors were getting set up Alicia Newton, Director of Blade Show and hardest working woman in all of knifedom, was running around answering questions, solving last minute problems, and working her magic to ensure the world’s largest knife show goes off without any issues. The rest of the show staff were assisting ticket holders, setting up displays, or taking pictures and video.
With everything in place, it was time for the show to open! The early bird ticket holders eagerly awaited Alicia’s call to head into the main room, and as soon as she gave the word hundreds of knife enthusiasts poured into the room, many sprinting to get to their favorite knife makers booths for the opportunity to purchase coveted one offs and limited edition knives. In most cases these show specials sell out in mere minutes so there is a tremendous value in being among the first through those doors!
Brakimo Forged for the Field Class
After successfully making it through the morning rush I hosted a class with renowned jungle guide, survival instructor, and knife designer Joe Flowers. In this class we dove into Joe’s experience in the jungle and how it lead to the creation of the TOPS Knives Brakimo. We discussed practical knife use techniques, showed off a few of the prototypes that eventually lead to the final production version, and highlighted one of the first versions of the upcoming TOPS Knives Brakimo Slim.
One lucky 10 year old even walked away with his very own Brakimo, a lot of advice on how to start his knife making journey, and a few contacts to leverage when he gets started!
Opening Day Wrap Up and The Pit
After the class the I continued walking the floor visiting various booths to talk to knife makers, and gather photos and video, and gather demo knives for my next class the following day. When all was said and done I had walked nearly 15 miles around the show floor! Once the show closed I grabbed a quick dinner with friends and made my way to the pit.
It is said that all business at knife show is done in the pit. That is not referring to knife sales of course, but it is often where businesses make connections with each other as most companies have been tied to their booths all day! Opening night is much busier when compared to the pre-show evening as the lobby of Waverly was filled with knife makers, enthusiasts, writers, media, and social media personalities. I took the opportunity to catch up with people I hadn’t had to chance to see during the day, talk with fellow writers and press, and make a few new connections.
While I decided to head back to my hotel around midnight, I heard the party kept going for at least a few more hours after I retired!
Blade Show Day 2 and The Cutting Edge Class
For me, the second day of Blade Show started with a class I wrote to help educate knife buyers on the functionality of various knife design features, steel choices, handle materials, blade coatings, sheath types and more. The class ran about and hour and a few of the students stayed behind for almost another hour to ask more questions about knife design features, discuss survival topics, and take a closer look at the demo knives I had out.
While I still believe I am a far better writer than presenter, it was fun sharing knowledge with those who are eager to learn about the practical applications of the tools they were there to see!
The rest of the second day was dedicated to seeing as many knives as I could and picking up some of the latest and greatest knives to test and review. After the show closed I went to dinner with a few of my favorite knife makers before heading back to the Waverly for the award ceremony and hang out time.
Wrap Up
For all the makers and vendors in attendance, the last day of Blade Show was open from 9 am to 2 pm. While they were enjoying the final hours of the show I was at the airport waiting for my flight home. Blade Show is always a marathon, sometimes literally as I walked over 45 miles over the two and a half days I was in Atlanta. Beyond all the walking it’s a mad rush interacting with friends and industry associates, checking out new knives from familiar makers and discovering up and coming knife makers!
While the weekend is fast paced and my voice is all but gone at the end of it, it always leaves me wanting more. If you are a knife enthusiast and have not experienced Blade Show Atlanta at least once, it should be high on your priority list! Once you’ve attended one, you will already be planning on attending next year!
It doesn’t matter what type of knives you are into, you’ll find it at Blade Show! The greater knife community is filled with awesome people -It’s a great place to catch up with friends and people you have met through assorted online enthusiast groups. Even if you walk into the show not knowing anyone, you will find comradery with fellow enthusiasts and understand the deeper meaning behind the term knife community!
Now let’s get into what you are all here for – The Knives!
Nick’s Favorite Blade Show Exclusives
Knives By Nuge Sharky Wicket and Captain’s Edition XL
Knives by Nuge is an American Knife Maker out of New Jersey who is known for his handcrafted outdoor, hunting, and fishing related knives. While all Nuge knives are designed for outdoor and sportsman use, many of his smaller models have also become popular as everyday carry knives due to their exceptional build quality and utilitarian design. KBN is also working on launching a line of American made production knives that will feature many of his existing models!
The Sharky Wicket added some unique handle scale material made by Flying Shark Knives. These were combined with a custom made black alligator pattern leather sheath by Badger Claw Outfitters.
The Captains Edition aka “the Rikket” is a collaboration design with Rikki Hernandez (above), also known as capt.rikki on social media. Rikki is a talented videographer working in the knife industry. This unique take on the existing Wicket XL design adds a harpoon style point, hand filed jimping, and desert iron wood handle scales.
Auxiliary Manufacturing Captain’s Bowie
Rikki was a busy man this year! His second design collaboration takes Auxiliary Manufacturing’s tactically oriented Pocket Bowie and dresses it up for EDC. The Captain’s Bowie featured a custom made Desert Iron Wood and Richlite handle scales with more subdued texturing for a clean and classy finish.
Sasquatch Spartan Blades Harsey USA Made Blade Exclusive
The Spartan Harsey folder, designed by legendary knife maker Bill Harsey is the knife that proves that a beautiful high end folding knife can function as great as it looks! For years Spartan Knives has used the titanium frame of the Harsey Folder to create stunning graphic images by combing precision lasers and anodization of the metal for color.
The USA Made Blade Exclusive is no exception. This version features USA Made Blade’s sasquatch mascot in a shadowy woodland scene. Despite artistic nature of the this special edition Spartan Harsey, once you get this utilitarian 4-inch folder in your hand you will want to put it to work!
T.Kell Knives x Knives By Nuge DP-1
T.Kell Knives is known for making hard use tactical style knives, along with several models suited for EDC and outdoor use. Most models feature T.Kell’s signature NiB coating that is commonly found on bolt carrier groups. Their are variety of handle options and textures offered across the T.Kell lineup. One handle option that is not typically found in that lineup is burnt jute wrap.
To alleviate that Tim created a special batch of his EDC friendly DP-1 knife. Each of DP-1 in this collaboration was hand wrapped by Tom Nugent, owner of Knives by Nuge in the same fashion as his Primitive Wicket series! One side of these unique DP-1’s featured the T.Kell logo and the other featured the Knives by Nuge Logo.
Nick’s Highlighted Makers
TOPS Knives
TOPS Knives has been a leader in U.S. production fixed blades for decades. TOPS was founded in 1998 with the goal of producing durable and functional tactical knives, and they have met that goal and far more! If you are looking for a robust tactical knife TOPS Knives has what you are looking for. TOPS offers a large portfolio of tactical fixed blades ranging from pocket sized to full sized field and fighting knives.
The TOPS line up does not stop with tactical knives. They also offer a diverse line-up of outdoor and EDC fixed blades with both in house designs and collaborative efforts with reputable professionals across the industry. All TOPS knives, regardless of style, are built to take on hard use tasks and beg for more!
TOPS Knives produces knives in just about every size you can think of. Full sized machetes, large fighting knives, discrete self-defense knives, outdoor knives for large to small, and compact EDC fixed blades.
T.Kell Knives
T.Kell Knives is a family owned and operated company founded by USMC Veteran Tim Kell with the goal of producing top quality, U.S. Made tools that you can trust your life with at an accessible price. Tim definitely has a type. Known for his compact tactical/self-defense style knives, T.Kell is one of the leading small U.S. Knife makers thanks to excellent designs, tough materials, premium fit and finish, and his unquie NiB coating.
Despite the tactical nature of these small fixed blades, many T.Kell knives serve double duty as practical everyday use knives. T.Kell Knives offers a diverse line up that also offers outdoor and less aggressive EDC fixed blades and even a robust folding knife. Regardless of the style of knife you are looking for – Tim’s values of functional design, distinctive aesthetics, and premium build quality are evident in every knife produced.
Knives By Nuge
Tom Nugent and his girlfriend Lauren are the two people behind Knives By Nuge. This up and coming fixed blade maker has become very popular in the hunting, fishing, outdoor, and EDC communities for his utilitarian designs and eye for detail. While Tom has spent the last few years producing handmade knives, he has recently branched out into production work to keep up with the high demand for his knives.
The cub shown below is one of Knives By Nuge’s newest models. This is a compact fixed blade is based off his larger Bruin, and is designed to accomplish all the outdoor and game processing tasks of the Bruin but in a smaller, more pocket friendly package.
Reiff Knives
Reiff Knives is in the business of making no-nonsense, premium, hard-use fixed blades – and business is good! Since Reiff hit the market a few years back with their signature F4 and F6 survival knives, every new model and update to existing models have continuously shown Reiff’s dedication to producing some of the best designed field knives in the U.S.
Pictured below is owner, Stu Shank, with Reiff’s newest model the Vicon.
The Signature F4, pictured below, has seen a few updates over the the years included upgraded micarta handles and the use of premium steel options such as Magnacut.
Auxiliary Manufacturing
Mike Jarvis is an award winning knife maker known for making highly functional tactical style knives that have a distinctive design aesthetic. In addition to the long running line of handmade fixed blades, Auxiliary Manufacturing has recently launched a line of production fixed blades and folding knives.
Shown below is another Blade Show Collaboration exclusive with Flying Shark Knives. The Bowie XL is a larger version of the Pocket Bowie, the first knife to feature Auxiliary Manufacturing’s coffin handle shape design.
Revenant Corps
Cache Haggard started Revenant Corps with a simple goal, to make high quality self-defense tools for non-permissive environments. Each model is designed with everything you would expect to see in a small tactical knife, but instead of steel they are made entirely of G10. While G10 is commonly used as handle scale material due to its superior durability, Revenant Corps has perfected the art of machining and grinding G10 to make a durable knife.
Revenant Corps offers everything in discreet black, but if you are looking for some color, G10 offers many options. All the handles are cord wrapped with genuine ray skin underlays adding to the premium look and feel of each knife.
L.T. Wright and The Woods Monkey
L.T. Wright has been one of the leading makers of handmade outdoor, hunting, and bushcraft knives for many years. Each design is simple, functional, and ready to work. The Woods Monkey is a division of L.T. Wright that brings some fun into the line up with unique designs that retain the functionality LT is known for.
Shown below, Brian from the Woods Monkey with the new Batwing knife that combines a scandi and chisel grind.
L.T. Wright offers most standard models with Micarta handles scales, but unique handle scales options can often be found at Blade Show and on their exclusive members only forum, the Pout House.
Glow Rhino
Glow Rhino is a company that caught my eye recently. They offer a variety of EDC sized folding knives to suit many styles and budgets. What sets Glow Rhino apart from other brands is the inclusion of Tritium, a radioactive element, that produces a glow that never needs to be charged. Tritium is safe, as the low level radiation can not penetrate human skin, and will glow bright for 12 years, ensuring you will never misplace you knife in the dark. Shown below is the new McGuire button lock folder that sports premium materials and a tritium insert in the thumb stud and rear handle.
Shown below is the Battlbox Exclusive Fermi 2 in low light to demonstrate the Glow Rhino tritium insert. In addition to folding knives Glow Rhino has recently launched an all purpose fixed blade and offers a variety of fobs that can be attached to gear for easy location in dark environments.
JD Custom Knives
JD is a custom knife maker who makes stunning handmade outdoor knives. His passion for design, premium materials, and meticulous fit and finish is evident across every knife he makes. If you are in the market for a piece of functional art JD’s knives will not disappoint even the most discerning collector and user.
JD places great attention to producing high quality handle scales from unique and exotic materials ensuring each knife is like no other. If you like the idea of having a one off knife that will never be duplicated JD Custom Knives is definitely worth a look. He has also recently dipped his toes into semi-production knives with the his Cheeker XL. While the blades are machine cut each Cheeker XL is hand sharpened and finished by JD to ensure each knife meets his exacting standards.
AA Forge
Adam from AA forge has been making knives professionally his entire life. Known primarily for hand making large outdoor and hunting fixed blades, he has recently taken to producing smaller EDC sized fixed blades that he frequently has available at Blade Show.
Adam’s designs, attention to detail, and incredible knowledge of steel properties allow him to produce incredibly functional knives that look great and will serve avid outdoors people well when put to the task.
The Simple Sparrow shown below offers outdoor functionality in a compact form making it ideal for EDC, fishing, small game hunting, and light bushcraft work.
Hellbender Blade Co.
Hellbender Blade Co. was founded by Mike Kent, owner of Rivers Edge Cutlery. They have recently launched their premier line of knives, the Snot Otter Series. The SO-2 features a 2.8 inch blade making it ideal for everyday carry and the SO-4 has a 4 inch blade designed for hard use task. Coming soon is the SO-5, a sized up version of the SO-4 for those who are looking for a large outdoor knife.
The Snot Otter series is available in a variety of premium handle scale options and blade finishes to suit just about every taste. All Hellbender Blades are made in the USA with U.S. sourced materials.
Nick’s Blade Show Haul
It wouldn’t be a successful Blade Show if I didn’t bring back a bunch of cool stuff for testing and review! Here is a sneak peak of a few of the new knives that you can expect to see in upcoming articles! There are a few more that are not ready for public consumption so stay tuned!
Knives by Nuge Sheepsfoot Cub
Reiff Knives Vicon and Circadian
Auxiliary Manufacturing Production Pocket Bowie and Pocket Bowie Folder
Every kingdom divided against itself is brought to desolation, and every city or house divided against itself shall not stand.” This quote from the book of Matthew in the Bible served as inspiration to Abraham Lincoln, who famously paraphrased it in a speech on June 16, 1858. Three years later, the start of the American Civil War reinforced the truth of these words, but it’s far from an isolated example.
From the fall of Rome to the breakup of the Soviet Union, history has proved time and again that deep-seated division is a cancer that — if left unchecked — can topple empires. That’s not to say that differences of opinion are a death knell for any society. In many cases, they’re the exact opposite, serving as a sign of healthy discourse and freedom of expression. But if the division turns to blind hatred, and hatred escalates to violence, a tipping point may be reached.
In modern history, this phenomenon has been referred to as Balkanization, a reference to the division of the Balkan peninsula after the collapse of the Ottoman Empire in the early 1900s. The Balkan region — containing modern-day Croatia, Bosnia and Herzegovina, Serbia, Slovenia, Montenegro, Kosovo, and North Macedonia, among other nations — has faced numerous periods of instability, war, and genocide in the last few centuries, earning it the nickname “the powder keg of Europe.” Some of these nations were united into Yugoslavia after World War I, but then split once more in the early 1990s, leading to a decade of vicious wars.
Even now, tensions are mounting once again between Serb and Bosnian leaders due to disputes over recognition of previous war crimes. In an interview with the History Channel, Princeton University associate professor of Near Eastern Studies Michael A. Reynolds cited the Balkan region’s “tremendous diversity in terms of ethnicity, language, economics, and geography” as a rift that made unification difficult.
A declassified CIA memo from 1983 explained that “problems in the Balkans have deep roots,” including economic decline, political tyranny and turmoil, fierce national/ethnic/religious rivalries, and the deliberate intervention of large outside powers (namely the USSR).
For many Americans, those problems sound uncomfortably familiar. As we approach another highly divisive presidential election in November, the news media and politicians are fanning the flames to turn neighbors and families against one another. Although we sincerely hope for a better outcome, we can’t help but contemplate what might happen if the United States became fragmented much like the failed state of Yugoslavia.
Editor’s Note: Our goal for this article is not to make a political statement, it’s to make you think about how to prepare for large-scale unrest and instability. Try not to read this through the lens of partisan politics. Instead, focus on steps you can take to be ready for possible Balkanization of America — or better yet, to prevent it altogether.
Above: History provides countless examples of nations and empires rising to power and breaking apart. Economic decline, political turmoil, and bitter rivalries between internal factions are common hallmarks of this process.
The Scenario: Fragmented Nation
Situation type: Balkanization of America Your Crew: Yourself, your spouse, and your two children (ages 15 and 9) Location: Northern Virginia Season: Late fall Weather: Cloudy; high 52 degrees F, low 34 degrees F
The Setup
At first, this election seemed no different from any other. The talking heads on TV bickered and pointed fingers at one another, signs appeared on every roadside, and political rants filled social media feeds. “It’ll be over soon,” you thought to yourself. But on the night of the election, as votes were being counted, huge discrepancies started to appear.
States that were considered guaranteed wins for one party suddenly flipped to the other. Voting tallies showed mail-in ballots flooding in at rates that made no sense. Both parties blamed one another and accused each other of conspiring with foreign enemies to control the results.
The losing presidential candidate told all of America to rise up and demand a recount by force, while the winning candidate released a list of conspirators from the opposing party who must be arrested immediately for election interference. In a matter of hours, there was violence on the streets of every major city.
Protesters and counter-protesters clashed, each firmly believing they were on the right side of history. And rather than fizzling out as the days turned into weeks, the chaos only got worse. America had reached its breaking point.
The Complication
As the division worsened, state officials began to take sides. Senators and governors are now speaking out in favor their preferred candidate, claiming that the other candidate is a treasonous enemy of the people. Some even go so far as to suggest that anyone who supported the opposing party is guilty of treason by association. Extremist groups on both sides are taking this as a tacit endorsement for targeted violence against businesses and homes on the other end of the political spectrum.
Your family of four lives in Northern Virginia, only about half an hour away from Capitol Hill. Washington D.C. has become a hotbed for violence, and law enforcement is unable to keep it under control. The nearby cities of Baltimore and Richmond are burning, with arson attacks becoming a daily occurrence, and you’ve heard news of assaults and murders radiating outward to suburbia.
Your neighborhood is still relatively quiet, but you feel like you could cut the tension with a knife. Just yesterday, you were shocked to see two neighbors get into a fistfight in the middle of the street. Your spouse is scared to leave the house, and your kids say their classmates are repeating increasingly violent rhetoric passed down from their parents.
What can you do to keep yourself, your spouse, and your kids safe during this rapidly accelerating national turmoil? Should you attempt to get together with some like-minded friends for safety in numbers, or should you keep to yourselves and maintain a low profile? How will you stay on good terms with your neighbors, many of whom have differing political views?
If arson and rioting spreads from big cities to your suburb, how would you respond? On a larger scale, conflict between states and regions may eventually lead to fracturing of the nation or even civil war. How would you prepare for this life-changing outcome and the years of instability that might follow?
Above: Washington D.C. and its surrounding suburbs would be a challenging place to survive, as law enforcement and emergency services may be tasked with protecting high-priority areas
Former Government Contractor Jessica Spurlin’s Approach
Preparation
At first, the rhetoric and violence were equivalent to what we saw in previous election years — pundits fanning the flames, and mysterious pallets of bricks appearing on the street corners in downtown Washington, D.C. — but this year felt different. As issues compounded and the feeling of being pushed into a corner grew, my husband and I decided to take a few more steps to actively increase our overall preparedness. Save your expressions for like-minded individuals.
In the lead up to the election, I reminded my family that we already know where we stand and where our neighbors stand. We know who we can trust, who is on the fence (likely a future victim), and who is a threat. The rest will identify themselves. This will minimize the immediate target on my family’s back while we assess the degree to which this situation evolves. Having a realistic understanding of our preparedness and what we may need will assist us in focusing on who we need to collaborate with. Having a plan to collaborate is vital.
Communication
We watched several countries in the past few years — for example, Iran, Venezuela, and Bangladesh — shut down their country’s Internet and mobile services in the face of political turmoil. Similarly, we saw an increase in physical and cyberattacks on communication and broadcast infrastructure. As the election got closer, my husband and I decided it was time to purchase a Starlink Roam.
Whether or not Starlink will stay online as America divides will depend on Elon Musk, but we decided to have one in our possession and then hedge our bets as to which side he lands. Having Internet with encrypted messaging apps, specifically Signal, will enable us to securely communicate with our network of like-minded individuals should cell service become unavailable. I would recommend downloading offline maps before they’re needed through applications like MAPS.ME or OsmAnd.
I would also print duplicative hard copies for a (rapidly approaching) rainy day. In terms of which maps, I would recommend local and regional maps, as well as detailed alternative routes to get to a “fall back” location, should it be needed. As a failsafe, we made sure our small handheld radios were operational, and our HAM radio could easily move from a static location to a mobile one.
Finances
Before the election, my husband and I increasingly withdrew cash from our bank accounts to ensure we had a healthy amount of cash on hand. On a normal day, most, if not all banks limit how much cash you can withdraw at one time. The average amount is maddeningly low, and that’s before a life-or-death scenario unfolds.
We did not want to wait to find out if the banks would freeze any of their constituents’ accounts for party-affiliation or just to prevent an overall run on the banks, should the situation deteriorate rapidly after the election.
Information is everything
Similar to the preparation of our communications equipment, I wanted to bolster our communication streams. I am not a fan of social media for a number of reasons (namely the overly aggressive backend algorithms desperate for your attention and the gross oversharing of individuals’ personal lives), but I am when it comes to open-source intelligence (OSINT).
Social media, especially X, breaks more stories in real time than mainstream media. Also, protestors (“mostly peaceful” or otherwise) often get their instructions from social media. I followed several local opposition leaders (on both sides) and multiple neighborhood/city accounts to help keep me informed of any potential unrest in our area.
These accounts are likely to provide insights on any tactics or trends being utilized, like arson, murders, or ethnic cleansing. I also started an anonymous regional account. It’s anonymous to protect my family’s identity and regional to spread truthful information and resources to my local community in the face of increased propaganda.
Above: When fractures within a region get deep enough, especially if they’re compounded by underlying ethnic and religious conflicts, violence may escalate into genocide and other atrocities.
On-Site
The civil unrest that ensued from the failed election was unparalleled. As the violence spread beyond its usual downtown locations, my husband and I pulled our children out of school to keep them safe. I knew targeted arson was a growing threat, so we focused our efforts there and quickly began preparing our house.
Home security
For our home, I tasked my kids with clearing any debris or easily flammable material away from the house. We made sure the hoses and running water were working and able to reach every part of the house. We bought more fire extinguishers and placed them where we could easily reach them in each room. My husband installed bright motion-sensor lights along our fence and added several very overt cameras.
We decided to keep our house dark to draw as little attention as possible, until someone (in this case a protestor/arsonist) got too close and triggered the lights. Best case scenario: the bright lights, cameras, and home alarm system act as a deterrent, and the would-be arsonists choose an easier target. If not, and the would-be arsonists are as dense as they seem, we’d prepare for the worst.
Personal security
As the saying goes, “Stay strapped or get clapped.” If arsonists and murderers step onto our property with the demonstrated intent to kill or harm my family, my husband and I will be exercising our Second Amendment right to bear arms. We will deal with the legal ramifications whenever civil society comes back online and there is any semblance of law and order. I would recommend adding a lawyer to your Rolodex of like-minded individuals, or at least invite them to your Signal chat.
Gear
The number of riots steadily increased and showed no signs of slowing. Local law enforcement was unable to respond to the high demands, and the National Guard was struggling in the city centers throughout the State. While we were thankful for our early preparation, we understood we would need to seriously prepare for long-term instability.
We purchased a solar-powered generator (Goal Zero), an extra hand-crank power bank, and lots of batteries for the handheld radios, flashlights, watches, etc.
We inventoried our medical kits and stocked up on additional over-the-counter medicine for a multitude of potential issues in the future. Since it was already late fall, we had all of our winter gear out and accessible. At this time, my husband and I were still undecided as to whether or not we should leave the area, but we did decide to acquire more cold weather gear should we need to relocate to a colder climate.
We also purchased a drone for overhead imagery to serve as an early warning system to alert us if rioters were approaching our neighborhood and potentially towards our house. Our oldest child liked this task of “fire watch” more than clearing debris.
Food Security
The well-oiled machine of resupplying food in America is incredibly fragile, and every major city, regardless of their State’s “political leanings,” is grossly ill-equipped to provide for their overpopulated residents. Whether it’s protestors blocking major highways or state officials blocking cross-state shipments, food security is going to be an issue. Knowing this — and the fact that every authoritarian socialist-communist takeover has brought mass starvation and death — my husband and I secured a year’s worth of meat in our freezer, as well as a dozen containers of 25-year emergency food. If you can, I’d recommend getting chickens too.
Transportation
My family and I worked to ensure we had everything we needed to survive this developing national crisis and made sure we had a way to move it all if we had to (looking at you, tactical minivan). Since we live so close to the airport, we took note of which planes were still operational, if they were commercial, private, or military, and how frequently they were flying. We’d use this data as another indicator if the riots were escalating into a full-scale civil war.
Crisis
Like Yugoslavia, a Balkanized America would likely divide amongst ethnic, cultural, and political lines. Whether or not my family and I stay in Northern Virginia, only 30 minutes from Washington, D.C., would depend on how many like-minded individuals are in our local community.
We’d also consider whether Northern Virginia could become a “stronghold” to stage out of and whether the capital is worth fighting over. Because Washington, D.C., like every major city, is predominantly skewed to one political party with fewer and fewer individuals who align with my stance, my family and I would leave. We would also leave sooner than later in case major highways were shut down and any state border crossings were implemented, since we would be moving all of our valuable gear as well.
Closing Thoughts
The Bosnian War saw horrible atrocities such as ethnic cleansing and mass rape. I strongly believe the United States would face similar outcomes if we were to dissolve into a Balkanized civil war. Unfortunately, I think this situation is increasingly more likely to occur in America with every passing day.
That said, my family and I would prepare early and add additional resources as needed to meet emerging tactics. We would find our community of like-minded individuals and, as they say, “brace for impact.”
Above: Protecting your home from accidental fire is one thing, but defending against arson is more challenging. Have you considered a strategy?
Former Combat Medic Jon Wayne Taylor’s Approach
It’s been a weird life. I’ve served as a rural police officer, volunteer firefighter, and EMT going back for decades. I’ve provided medical care to vulnerable populations in some of the lousiest places on the planet in war and peace as an Army medic, a contractor, and as a volunteer. I’ve been an SME for large businesses seeking to develop infrastructure projects throughout the developing world. I’ve directly advised members of our state and federal governments at the highest levels. Now I run an insurance company. A common thread there is risk and how to make the best of bad choices.
If you’re stuck in one of the major metropolitan areas in the United States, you might be getting a little nervous. You might be stocking up guns, gear, food and other supplies.
Throughout my life’s work, I’ve seen communities on the edge of collapse, and beyond. I’m not stocking up and I’m not getting nervous. I’ve got basic supplies. I’ve got some guns. That’s not what I need.
The thing I need right now is to know what’s really going on around me. No reporter can tell me this. Social media will lie to me about this. This is the key intelligence that will drive all of my other key decisions. It is vitally important.
The best way any of us can gather information is to get to know our neighbors. Your neighbors are your first source of real intelligence, your most likely source of assistance, or your most immediate and significant threats. Talk to them. Get to know them. For folks that don’t really like folks (like me) that’s not easy, but it’s more important than your draw time, your food cache, or even the locks on your door. Make it the priority it deserves.
Be a good neighbor. Take their trash can out to the curb if they forget. Take special note and care of the old and infirm. Be kind. If you can’t talk to them, bake them (or buy them) some cookies and leave them a note saying “hi.” You might find you share a lot in common with them.
You might find you can depend on them. You also might find out you are surrounded by people who’d rather see you dead — if that’s the case, it’s better to know that now when you still have a chance to do something about it, like leave.
Above: Widespread civil unrest often forces businesses to close, making short-term resupply difficult or impossible.
I’ve seen the supreme value of community over and over again, all over the world, but the differences in community reactions between hurricanes Katrina and Harvey highlighted the need to know your neighbors better than any other.
During Katrina, I helped with medical triage and moving patients from the Superdome. People from the same neighborhoods were rescued at very different times, with the elderly often arriving last, sometimes many days later. Patients often arrived after being found by rescue teams during searches, even when people from the same neighborhoods had already arrived on their own. Looting was rampant and robberies and theft even inside the relief centers were common. Those people did not know each other.
During Harvey, Houston and all the surrounding cities flooded. I was volunteering with the Team 5 Medical Foundation providing direct medical treatment. Waterborne rescue units, like ours, used overpasses not only as dry-land refuge but as boat ramps. We were never the first to arrive. Time after time, there were local community members already there, and they weren’t just waiting for help, they were providing it. Teenagers in a car club told us about an apartment complex where the water rose so fast it trapped other enthusiasts on the third floor.
Others told us about people that were always around when they cooked out at a park on Sundays, and where they should be. In places where they had reception, some groups were running massive text chains tracking people who needed help and their locations, providing those to rescuers. In many communities, civilian organizations rescued everyone before government assets even arrived. That community engagement saved tens of thousands of lives. Those lives could be yours, your friends and family, especially if government assets won’t be arriving at all.
Looting during Harvey was extremely rare; theft in relief centers was unheard of. Those were neighbors helping neighbors. Beyond simply talking to your neighbors, a great way to get that information is to join a service organization in your community. Ideally that would be something like a local fire department or other emergency service.
It doesn’t matter if it’s for pay or if you volunteer — get involved. Homeless shelters, food banks, EMT dispatch centers, prison services, all of these are good options. You want to find something that serves the community and is logistically tied into the formal infrastructure of that community.
Joining a community service organization will allow you to get direct, real-time knowledge of what is happening in and around your community beyond your own social group. If it is tied into the formal infrastructure of the community, you’ll also see when the need for those services rises (not good) and you’ll get an early indication on when those services are failing (very bad).
If you can’t join any of these organizations, befriend someone that did and talk to them regularly. When the COVID shutdowns kicked off, my wife, volunteering at a county food bank, told me she saw “soccer-moms in Escalades driving up asking for whatever they could get.” She saw people she’d never seen before asking for food.
That was a big sign that things were going awry, and not just because people were unreasonably scared. That huge influx of new people who could drive there in their expensive cars meant that there was no food left by the time the truly destitute families got there any way they could. Those later families went home with nothing, and now they were desperate. Desperate people do desperate things.
The failure of local systems to provide for the poor and indigent is one of the biggest signals that you should be taking immediate action. Another big one is the capacity of the local health care system. If you are a member of one of the aforementioned services, you’ll get an early warning of when these systems fail. A solid metric for trouble is when hospitals are diverting patients to other facilities, especially if they are different hospital systems.
Hospitals make money off patients. If they are sending those patients somewhere else, it’s because they can’t figure out a way to treat them. This has a rapidly cascading effect on a community, as people have to go farther and farther away for care. Primary care physicians, already stretched thin, are almost instantly overwhelmed.
If you don’t have direct access to that information, at least pay attention to hospital, urgent care, and minor emergency clinic parking lots. Are they completely full all of a sudden (without an accompanying natural disaster)? That’s not good. Did they get rapidly full and now they’re abandoned? That’s very, very bad.
I’ve experienced riots in South Africa, Haiti, and throughout the developing world. I’ve never seen one that didn’t raid the pharmacies first. People don’t care what they are stealing, they just steal everything. Now nobody’s kids get insulin or asthma medication without a fight. Add to that reality the significant portion of Americans on mental health medications for anxiety and panic disorders and now they can’t get their prescriptions filled. Welcome to Thunderdome.
When the social services in my area start failing, it’s time for me to call friends near and far away, check road conditions, keep the trucks gassed up, and keep my family close. That’s when I’m on my amateur radio talking to people all over the country, or farther, to find out what it’s like where they are and how easy it is to get there. Bags are getting packed. Family members get texted throughout the day, and everyone knows it’s time to be ready to leave.
If all the hospitals in my area are diverting patients, I pull my kids out of school and go somewhere else. Simple things like a broken leg from a fall or a car wreck become life and limb-threatening when you can’t get into the ER. That’s the most immediate and likely danger and it’s completely avoidable.
I feel truly sorry for the folks that don’t have the option to leave. Your only choice then is to harden up and wait it out. I’ve rarely seen that work in a suburban environment like those that surround DC if there is a large urban population nearby. The exception is some of the communities in Pretoria and Johannesburg, South Africa, that have been able to create their own walled and patrolled towns inside of cities. Anything short of that, and you just end up dying of some easily treatable illness or injury, or you get burned alive inside your well-stocked home. The first group to your door brings guns, the next group brings gasoline.
For the vast majority of people with families, like me, leaving is almost always the best option. Since you’ve talked to friends and family about routes of escape, there’s not a good enough reason to stay. All of your work with your neighbors and your community means that you had plenty of time to get ready. You probably had time to pack lots of stuff. Nobody is unduly stressed, and your decisions are based on real, actionable information, not broadcast fear.
Above: Rather than allowing yourself to become consumed by division and anger, focus on building positive relationships with other members of your community.
Conclusion
Much like the Balkans, the United States is far from a homogeneous society — our nation is made up of states with enormous geographic, economic, cultural, ethnic, and religious differences. And it’s impossible to deny that we’re currently facing many of the same struggles, including tumultuous politics, media bias, rising inflation, internal division, and opposition from rival nations.
Some believe we’re doomed to follow in the footsteps of nations that have preceded us, while others are more hopeful. Regardless of your opinion on what the future holds, the prepared individual should ask two questions. First, what can I do to be ready for the worst-case scenario? Secondly, and more urgently, ask yourself how can I help prevent that outcome?
As the November election approaches, we encourage you to take a step back, unplug yourself from the 24/7 barrage of TV and internet political hysteria, and work on making friends rather than enemies.
Stronger communities yield stronger states and a stronger nation. As Founding Father Patrick Henry said in his last public speech in March 1799, “United we stand, divided we fall. Let us not split into factions which must destroy that union upon which our existence hangs.”