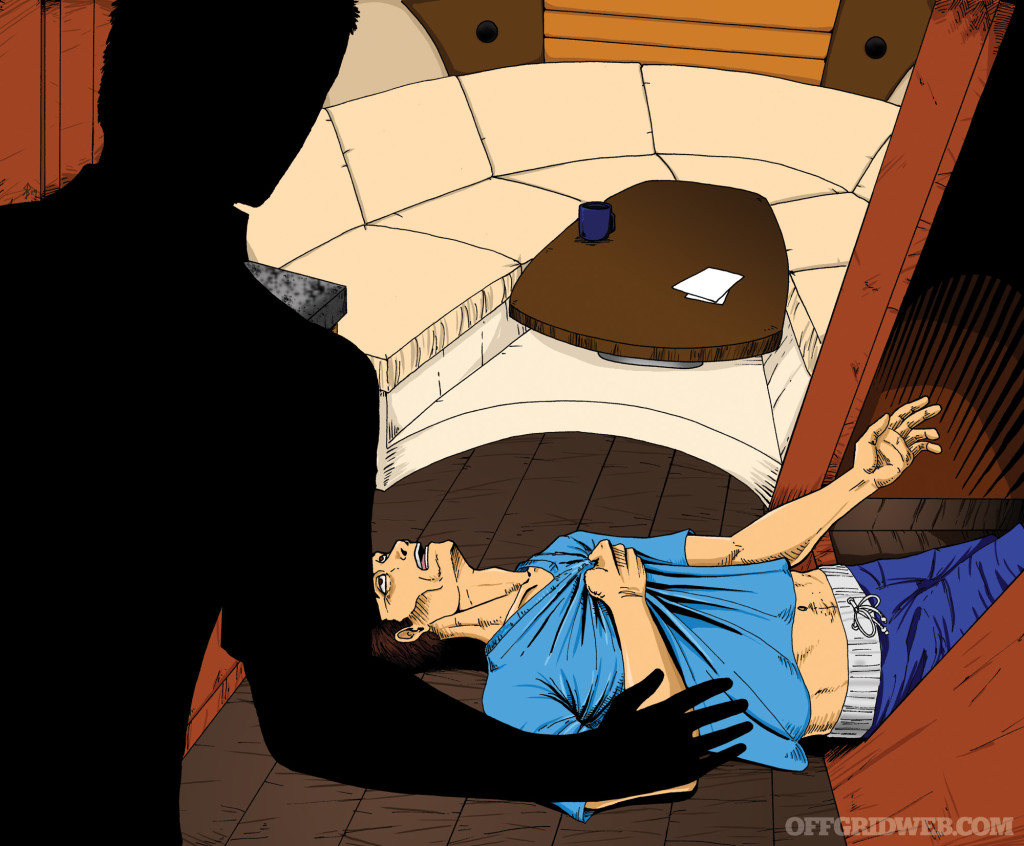
Illustrations by Robert Bruner
The smooth Pacific water had been full of biting fish that morning. You were overwhelmed with the feeling that life just couldn’t get any better. Floating on your friend’s boat in the warm glass-like ocean had seemed like a dream in the early morning hours. The sunrise over land had been impressive. The two of you had laughed, reminisced, and pulled fish after fish out of the productive waters. Then everything changed.
Just a few hours after the fishing was over, your good friend who captained the boat the two of you were on now lay dead on the deck beneath the ignoble shroud of a black plastic trash bag. As the sun beat down burning your skin, your pleasant dream had shifted into a dark and disturbing nightmare. Only one of you knew how to pilot the boat and navigate through the shallows and sandbars to get back to land — and that person lay dead at your feet. You were alone, far from shore, with limited food and water. Was there any course of action that would keep you from joining your friend in an untimely demise, or would all paths lead to the same dark end?
For this episode of RECOIL OFFGRID’s “What If?” column, the editors have asked us what we’d do if lost at sea in a rather grim scenario. There’ll be no scavenging the neighborhood or the backcountry for emergency supplies in this situation. If we didn’t bring it on the boat, we don’t get to use it! To complicate things, we don’t have nautical skills, the emergency takes place in foreign waters, and we don’t even speak the local lingo.
The deck is stacked against us, and that’s when we need our preparations the most. During this installment of “What If?” we’ll look at some survival strategies on the water and the preparations to consider before heading out onto the ocean. A boat can be different things to different people. Sometimes it’s a toy to be played with, other times it’s a mode of transport. But in rare situations, that vessel can become a floating prison, or worse, a sinking tomb if you don’t make the right choices.
The Scenario
Situation Type
Stranded on a friend’s motorboat
Your Crew
You and your friend George
Location
Pacific Ocean, off the coast of Baja California
Season
Summer
Weather
Hot; high 98 degrees F, low 63 degrees F
The Setup
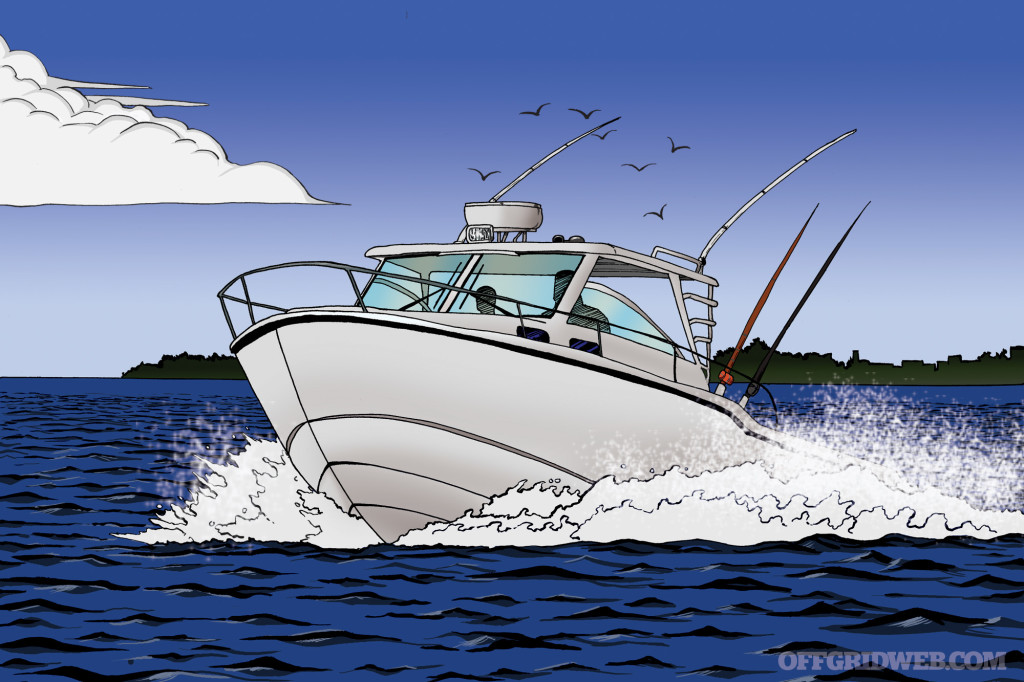
It’s a Saturday morning and you’ve ventured to beautiful San Quintín in Baja California to fish for yellowtail. You’ve traveled down to stay at your friend George’s summer home. As an avid fisherman, you’re looking forward to this outing and its promising fishing reports. George owns a Boston Whaler 315 Conquest, which is a 31-foot, twin-outboard-engine motorboat that the two of you will be using. He tells you about a spot where he’s had good luck lately, and says that not many of the other charter boats know about it, so there’s a good chance there won’t be anyone else around. You’re only mildly familiar with deep-sea fishing, this is your first time to the area, you don’t speak Spanish, and you have only a little bit of knowledge about maritime rules, boating, and basic navigation. You’re relying primarily on George’s knowledge to get you where you need to this newly discovered fishing honey hole and back to shore safely.
After loading up the fishing gear and a cooler with some sandwiches, beer, and water bottles, you shove off. You make a quick stop about 10 minutes from where you launched to catch some bait fish for the day. Then George says the spot you’ll be fishing at will take about another hour to get to. He tells you on the way out that it’s a tricky run, explaining that the path to get there and back is very narrow and shallow in places, and inexperienced boaters have run aground in the area before. He also tells you that after nightfall San Quintín is reportedly a delivery spot for offshore drug trafficking and that boats operating in the later hours are often connected to cartel activities. After you arrive, it’s approximately 7 a.m. and there’s no one else around. You begin fishing, but also notice that land is no longer visible.
The Complication
You and George have had a successful morning, but after about two hours of fishing, George tells you he’s feeling a little sick and says he’s going to the bathroom. After about 15 minutes, you go to check and George and he has fallen in the bathroom and is unconscious. You suspect a heart attack, check vitals, and immediately begin CPR. You’re unsuccessful in your effort to revive him and fear your friend has died. Here you are, stuck somewhere in the Pacific Ocean with minimal boating experience and no idea how to get home safely.
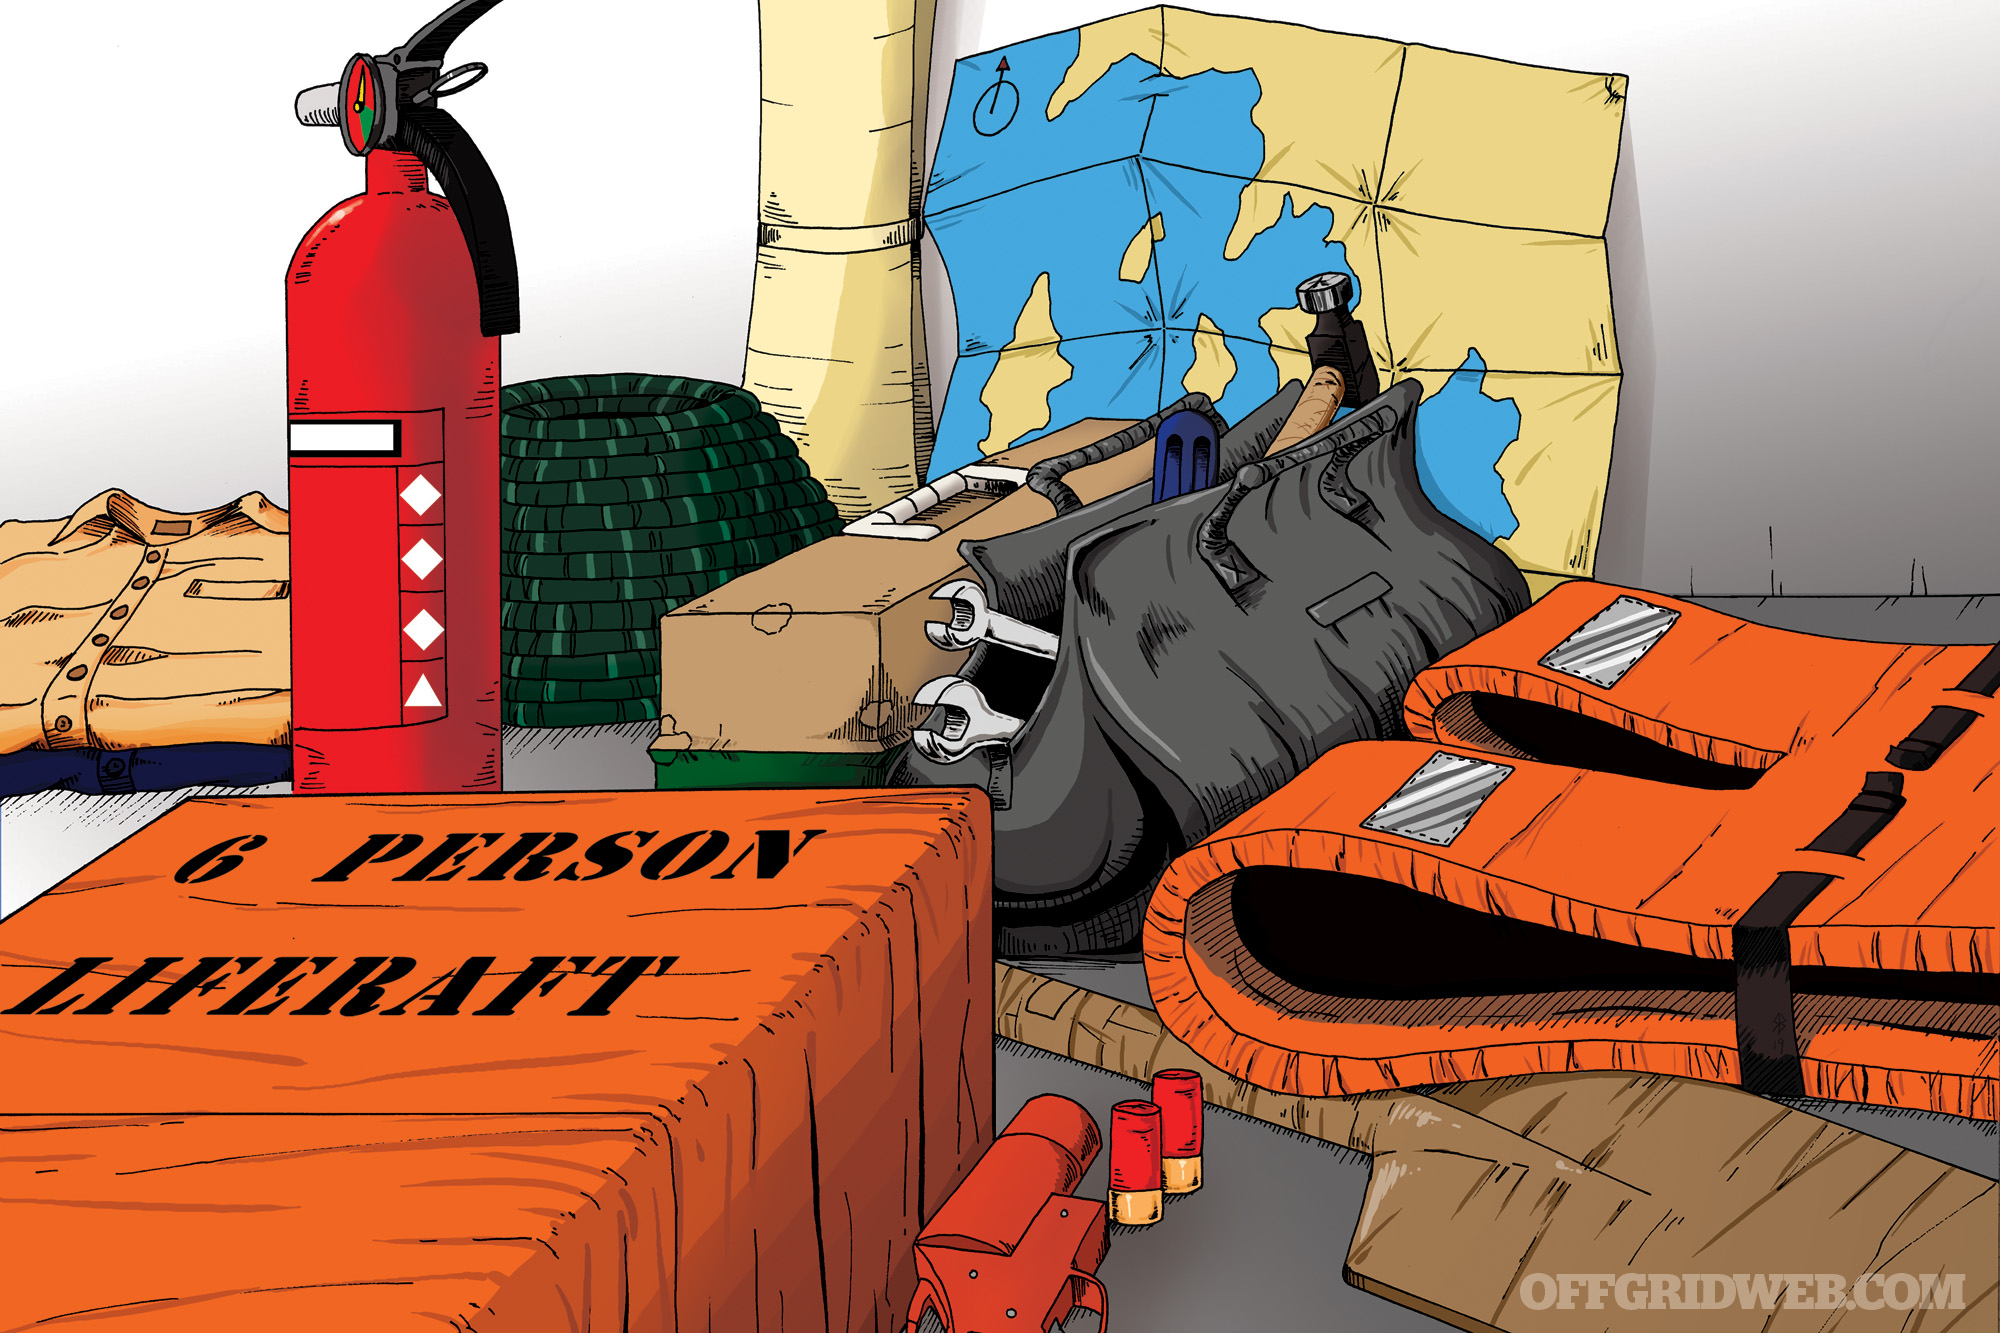
You begin to look around and find what you can. A flare gun, a few life jackets, extra fishing equipment, inflatable life raft with a small paddle, some spare clothing, tools, a fire extinguisher, some charts and registration paperwork, mooring rope, but no extra fuel. What steps should you take? How would you weigh risk versus reward on staying put and hoping help would come to you versus attempting to pilot the boat back to land or find other fishermen? Should you toss the anchor over and wait things out? Attempt to use the radio to communicate with anyone nearby, hope they understand English, and possibly risk being overheard by drug runners who would exploit your situation? Would you attempt to pilot the boat yourself in search of help without fully understanding how to recognize the areas that are shallow and could rupture the hull? For this installment, our situation is fraught with potential complications.
Maritime Expert David Martin’s Approach
Preparation
With practice, even last-minute travel invitations can be met with a logical order of thought to boost your own safety and success. Remain mindful of seasonal swings in weather, elevation, and temperature differences from your home conditions. Research your destination and host expectations. Do not rely entirely on one person in your group to figure out the details so that you can “just show up.”
Even though you may travel on short notice as a guest of a trusted host, find time to get hands on with a chart, map, any source of computer-based orientation to get the lay of the land, or in this case, an ocean involving a border crossing into Mexico. Working in reverse order from my destination, I’d create my itinerary to share back home with those tracking my travels. Next, I’d assemble a compact carry in a Watershed bag of essential documents, licenses, passport, insurance cards, and required forms of ID to ensure safe passage along the water or overland route, including cash.
Moving to communications and navigation, think worst-case scenario — separating from the mother ship. Pack a second sea gear ditch bag with a few key lightweight essentials, from electronics right down to a survival mirror. Topping the list, I’d bring a Garmin Inreach Mini, which is a two-way communication device, complete with the essential water bundle subscription service to enable messaging to friends, family, or satellite-relayed emergency calls, including key GPS coordinate mapping/tracking capabilities for loved ones at home.
Also along for the trip I’d have a handheld Garmin GPS, a waterproof camera, a non-flashy digital watch, and a compact, portable handheld Horizon VHF radio capable of tracking weather, communicating with other vessels, and relaying lat/lon coordinates through a distress signal. A submersible, portable locator beacon and accompanying emergency strobe light are so affordable, including the registration and lessons, that there’s no excuse not to stop at your marine supply store to inquire about them. Your cell phone will be of limited usage beyond many costal waters. I would explore renting a satellite phone for extended, remote coastal trips.

Illumination tools I’d take with me would include water-resistant headlamps, plus a small SureFire Invictus flashlight, which comes with SOS settings capable of running for hours. Grab chem’ break lights and kayak strobes for each life vest or raft.
I’d pack clothing such as sun-protective, quick-drying long-sleeve shirts and pants from Simms, gator face mask, hat, gloves, ankle-high boat booties, and two-piece rain gear and fleece vests to ward off overnight temperature drops. If the motors went down and help is days away I don’t want to risk exposure, dehydration, sunburn, or chills during an overnight or extended float. In extreme heat, a towel, dunked in the cooler ice water and draped around the neck, will help reduce the risk of heatstroke.
Items like lighters, a water distiller or desalinator, duct tape, tourniquet, a med kit containing hook removal line, pliers, and bug juice would all make sense, especially if you must abandon ship into a survival raft. Flying without a blade? Make a mental note to pick up a small filet knife in the first marina you see.
Ponchos offer protection from the sun and can double as a decent cistern for catching rainwater aboard a life raft in the event you lack another source of potable water. Ponchos with grommets or small tarps and rain jackets can be rigged with cordage and broken oars to serve as sails for rafts, conserving energy in strong currents. I’d triple check that my Wiley X shades with polarized lenses were in my bag.
After covering contingencies for our fishing trip, I turn my attention to our brief overland journey from California south by first reviewing the U.S. State Department site, my first stop for any trip south of the border. On the revised 1 to 4 scale, with levels 3 and 4 including “Reconsider Travel” to “Do Not Travel” I see nightmare scenarios of violence bullet pointed to serve as examples of random to organized targeting of tourists. Baja largely falls into the Level 1 to 2 range of “Exercising Caution” to “Exercising Increased Caution.” I’m troubled by the advisories that disclose that tourist resorts are no longer exempt from brushes with seemingly random or even targeted violence, especially after dark on remote roads.
Last, I’d make a quick call to Global Rescue to verify my coverage was up to date. In a recent sporting trade show, one of their brochures stuck with me, reading, “The best fishing spots are the worst places to have an emergency.” This membership organization provides integrated medical, security, travel risk, and crisis response services. These services include on-demand medical advisory, field rescue, security extraction and evacuation services with affiliations with leading sports conservation organizations. Global Rescue’s mobile app connects clients with medical and security sources throughout the world.
On Site
Local knowledge is golden in any angling community, but that can be a somewhat guarded set of hard-won facts. I was completely dependent upon George for local knowledge. Pay particular attention to maritime hazards from rocky shallow reefs outside the surf line, simple sand bars, tidal swings and water clarity, prevailing ocean currents, forecast winds, and the boat’s capabilities. Due to my limited Spanish, I was particularly interested in offshore jurisdictions and emergency protocol, including laws, limits, and any local customs for communication protocol with local authorities.
George shared with me a detailed route, including a couple of key points that I relayed to the family back home complete with plan to return no later than sunset. With this info the family would be able to track our progress and exchange text messages during the journey, including the ability to receive any emergency or distress declaration. He did not file a float plan with the marina, but they knew to look for him before dark, he said.
Dockside, I’d want George to provide a brief rundown on operating the basic controls and electronics, plus the boat’s layout to separate creature comforts from operational necessities, especially GPS mapping, waypoint books, and sonar. Before casting off, I’d take the tour from bow to stern. The Whaler’s foam-filled hull has a reputation for being unsinkable.
Openly discuss your floating emergency response plan with your captain or group leader. Use the five-step “range safety emergency” for worse case scenarios: First, take control of the situation; contact authorities and medical responders if needed with your location details; render care to the extent of your medical training while continuing communications and guiding responding rescuers to your location. Last, once the emergency is resolved, prepare to fully record or document your actions for your own protection, especially your chronology of decisions. In the aftermath expect scrutiny. Anticipate your actions will be not only questioned, but also second-guessed. Events recorded in a Rite in the Rain notebook, portable camera, or on video may prevent your loss of freedom, reputation, or avoid liability during the investigation that follows any life or death incident.
Openly discuss the availability of any onboard firearms and the requirements for returning to port or being inspected. Florida anglers are well aware of strict accountability for every last bullet awaiting them upon entering Bahamian waters, for example. George is not a gun guy, tells me our vessel is without weapons, and explains that Mexico has strict gun laws, especially for non-residents. He wants to avoid trouble with authorities and so do I. Do not board someone’s boat with a firearm without permission or knowledge of laws.
Crisis
If you suddenly find yourself without a captain, try to determine where you are. Pay attention to your horizon, conditions onboard, and navigational hazards to determine whether self-rescue opportunities will suffice or whether emergency assistance is required. Communicate your situation and location early on to responders via VHF, even if your distress call is not a call for a rescue, yet. Know in advance which channels are monitored by the U.S. Coast Guard or national authorities. In foreign waters consider activating your emergency signaling devices and two-way satellite communicators, including distress signalization. Hailing any vessel on multiple channels may bring about people with maligned intentions.
In one common event running aground on sandbars may simply require awaiting a tidal cycle to resume safe operating. In the extreme, severe structural or hull damage may result from collisions with submerged reefs, other vessels, unlit channel markers, or floating debris. In the event you’re taking on water in a volume that exceeds your ability to plug, pump, or salvage the vessel, get the life jackets, communicate your situation, and start gathering emergency supplies, especially if you have a backup vessel like a dinghy or inflatable emergency raft.
Your visibility and survival chances increase greatly by staying with the vessel. Only in the most extreme example of an uncontrollable boat fire would I consider abandoning the Whaler. Stay with the boat until it begins to submerge.
Larger commercial craft with life rafts will secure these in above-deck storage containers. These are usually inflated via a compressed air tank connected to the raft, pre-equipped with rescue supplies, including insulated floors and tent-like covers to prevent exposure and increase visibility. Supplies may include a V-shaped forward sail, oars, or a sea anchor to remain near the disaster site and avoid drifting away.
Smaller private pleasure craft with inflatable life rafts usually stow the rafts in dedicated gear lockers or in cabins to prevent theft. These smaller rafts are usually not equipped with survival gear so prepare to grab at least two separate ditch bags, one with survival gear and one with emergency comms, including visual distress signals. Don’t attempt to paddle home unless a destination is in sight. Paddling is exhausting and dehydrating.
If I had to abandon ship I would attempt to carry all portable water and nonperishable energy foods. A Katadyn Survivor 35 Desalinator is capable of producing 1 ounce of water every two minutes. Stored in a separate waterproof container I would want the combined emergency distress and locator signaling devices in both electronic and flare forms. Consider SOLAS class magnum flares, including parachute flares capable of attaining heights visible for miles. During daylight hours handheld or floating orange smoke signals are capable of guiding in aircraft or rescue helicopters.
I owe it to my old friend to return him safely to loved ones. I don’t want to be intercepted transporting a deceased man. If possible, I’d text my family and one trusted friend of the situation, advising my plan. I repeat this message to USCG authorities via text, advising my approximate route and arrival time. I reviewed readings at the helm to gauge fuel levels and approximate burn time.
Survival Expert Tim MacWelch’s Approach
Preparation
Not being a seaman, I would definitely want to do my homework before chugging out onto the ocean. Finding a polite way to ask, I’d question George about his plans to get fresh water (since saltwater isn’t safe to drink); and I’d inquire about his safety equipment and communications equipment. Since there aren’t many cell phone towers bobbing around in the ocean, I’d consider bringing my own satellite phone for an outing like this. These can be rented, if funds are limited. I’d also need local emergency numbers like the nearest USCG station. And whether you rent or buy a phone, shop around for a more rugged model (something that a splash of saltwater won’t destroy).
While on the topic of communication, I’d ask George what kind of radio his boat has, how it works, how to send distress signals, and anything else that seems handy to know. Before the trip, I’d also pester George about desalination equipment (just to make sure he had something onboard). There are hand pumps (like water filters) that remove salt from the water. Fluid Technology Solutions makes a Mariner F2O bag that will pull the salt from seawater. The pump is expensive and takes a lot of physical effort to operate. The osmosis bags are much cheaper and easier to use — just fill and wait for the salt to be separated from the water. But these desalination bags can only be used once.
As far as research goes, it would be wise for me to study previous “lost at sea” situations. Even though they may not instill me with confidence to leave my beloved terra firma, reading real-life ocean survival stories could show me how other people survived in open water circumstances and provide insight into the psychology of nautical survival. As you should do for any trip, I’d have a “what if” discussion with someone at home about my travel details and create a “check in” plan with them.
For example, I might plan to call home every day at 5 p.m., just to check in, remind them of my plans for the following day, and of course, let them know if any plans have changed. I wouldn’t be shy about asking George for the specific latitude/longitude of the area we’d be fishing, even if he protests about his secret fishing spot. Someone else needs to know where I am, and it’s not a bad idea to determine how much time should pass before they take action if I didn’t make the call in within a certain number of hours or if I went missing. Sure, it sucks a little fun and freedom away from a trip to have these daily check in’s, but their worth far outweighs the hassle.
Before we leave the dock, I’d ask George to walk me through his boat for the grand tour. With unbridled curiosity, I’d let the questions fly. Show me how to read a map. How do I use the radio? What are the local ocean current patterns? What do these instruments do? How do you file a plan with the harbormaster to go boating off the coast of a foreign country? I’d be like a hyper-curious 5-year-old with the questions. What’s this? What’s that? How’s it work? Hopefully, George will interpret this enthusiasm as a shared interest, or at least understand that it’s from a desire to be prepared.
On Site
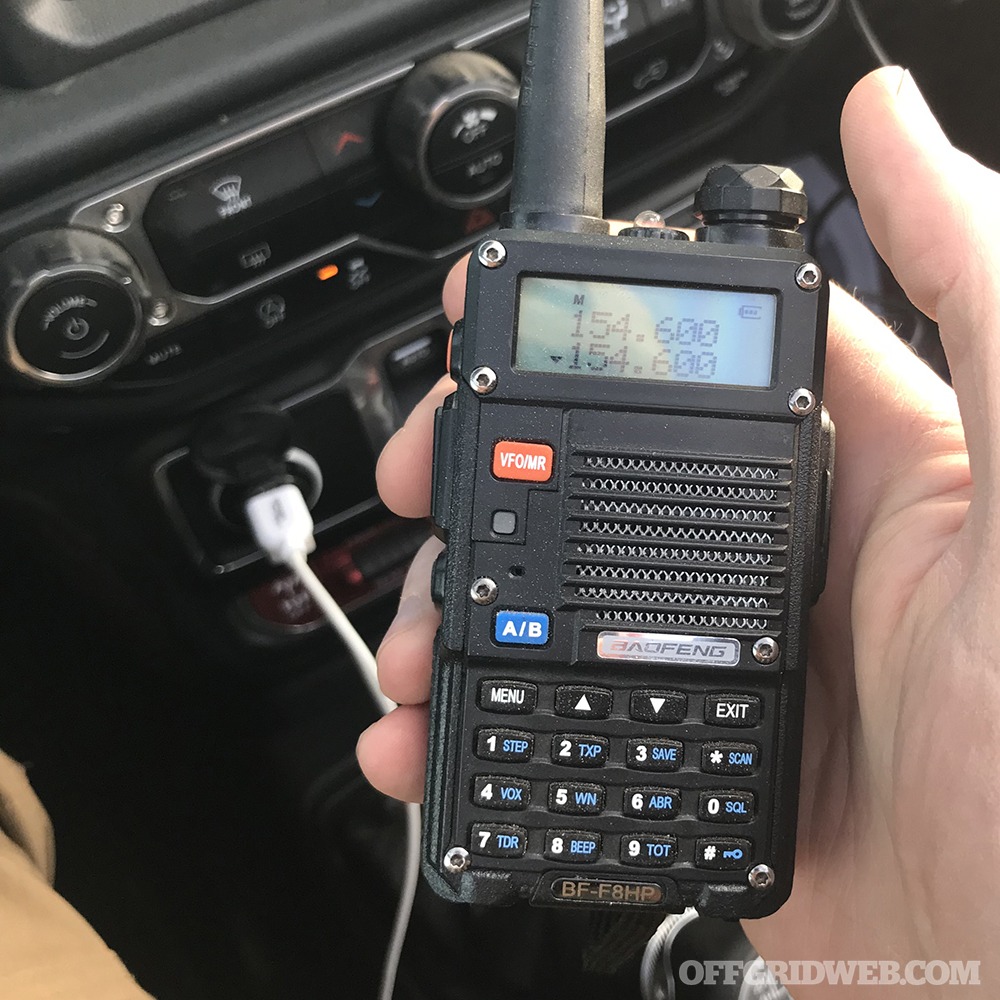
George is gone to his final rest, and after I said a prayer for my lost friend, the first thing I’d do is get on the radio or hit the button on the emergency beacon. I wouldn’t have let George leave the harbor without showing me how to use the communication equipment in an emergency, and this situation definitely qualifies. The size of the vessel will have an impact on the type of communication and emergency signaling equipment required by law. On a vessel like George’s, the radio might be a very high-frequency (VHF) or single-sideband (SSB) radio. Vessels in distress can radio for help on VHF channel 16, if they don’t have a beacon. With the radio on the correct channel, press the button and say “Mayday, Mayday, Mayday, Coast Guard this is (your vessel name).” Await their reply and they will ask for your location and type of distress.
Once you’ve established communication, the local authorities may direct you to another channel (to discuss your situation off the main channel). If the vessel has an emergency position-indicating radio beacon (EPIRB), it will notify rescuers via a global satellite system. All you have to do is push a button. Again, the size of the vessel will dictate whether an EPIRB is required or not. Luckily for this scenario, the U.S. Coast Guard is very active in western California/Mexican waters. There are several small boat stations down the coast of California, as well as several large cutters that patrol those waters.
Once the beacon was activated or the radio call was successfully made, I’d sit tight. Even if the boat did have enough fuel to get back to the harbor and then some, I’m no captain and would not attempt to drive the boat with limited experience. It takes a lot of training to read charts, navigate shallow waters, and drive a boat safely. If I didn’t have that knowledge, the best thing would be to stay put. Furthermore, having relayed my position to local authorities, the last thing I’d want to do is move. Unless the boat is engulfed in fire or sinking quick, I’m staying on the boat to keep vigil over my departed friend and the boat is staying anchored. But this wouldn’t be a good “what if” unless we compounded our problems. So let’s say a rogue wave slammed the boat into a reef and the vessel started bringing on water.
Crisis
Since the boat is my shelter in an unforgiving environment, I’d do my best to patch the leak, if it were accessible, once I realized that we were taking on water. If there was no risk of being crushed between the hull and the reef that ruptured it, I could get in the water and try to improvise a patch on the outside of the hull. If it is merely fractured due to impact (there isn’t a big chunk missing), I could place a large thick piece of plastic sheeting across the leak on the outside of the hull. Secured in place with ropes, the pressure of the water will help hold the plastic in place and slow the leak (if I had nothing better to use). Tape that can be used underwater (like Flex Tape) would be even better.
If the vessel caught fire and couldn’t be extinguished or is taking on water faster than any onboard pumps can bail it out, it’s time to start thinking about abandoning ship in favor of the life raft. After inflating the raft and tying it off to the sinking vessel, I’d start loading the supplies. I’d bring the fresh water, any desalination equipment that was on the boat, and my sat phone. I’d also grab all the food, some fishing tackle, the mooring line, the flare gun, and some spare clothing. If time allowed, I’d salvage as much as possible and tie my friend’s remains to the boat. This would prevent him from being lost in the water and allow his loved ones a proper burial after his remains are recovered. Rather than trying to paddle the raft toward shore, I’d stay anchored by the sunken boat. By running the mooring line around a boat rail, the sunken and anchored boat becomes the anchor for my raft. This keeps me from drifting away in the current. Even If the boat sank completely in the shallow waters, I’m still in the right place and able to signal when other craft approach (with flares, smoke, mirror, air horn, etc.).
Now, let’s say the whole day has passed and no rescue came. Then at dusk, I signal a passing vessel with my flare gun. The other boaters approach and seem to be offering help, but I don’t speak their language. Would I board their vessel? What if they’re drug runners or human traffickers? If the “bad guys” heard my call for help over the radio, they wouldn’t be likely to come investigate or hang around the area. They’d be concerned about getting caught by USCG patrols. I’d have to trust my gut, but I’d probably go with the help that is offered rather than wait for a more legitimate-looking rescue vessel.
Conclusion
I’d like to conclude this article by thanking all Navy servicemen and women, U.S. Coast Guard members, and other maritime emergency responders for their service worldwide — in times of conflict and peace. Your service and sacrifices have not gone unnoticed. I’d also like to remind you that as long as a ship, boat, or rubber raft isn’t on fire or sinking, it’s important to understand that the watercraft is your “shelter” in the world’s largest wilderness — the ocean. Without that shelter, you can only stay afloat for so long before you drown or exposure kills you. Even if you’ve lost your anchor and you’re adrift, your craft is still the most lifesaving asset you have. Without it, you’re at the mercy of the sea — a survival setting where no quarter is given. So when the water rations are low and you think you know which way to swim to shore, think again! Making the choice to abandon ship is often the last choice made by those who are claimed by the ocean.

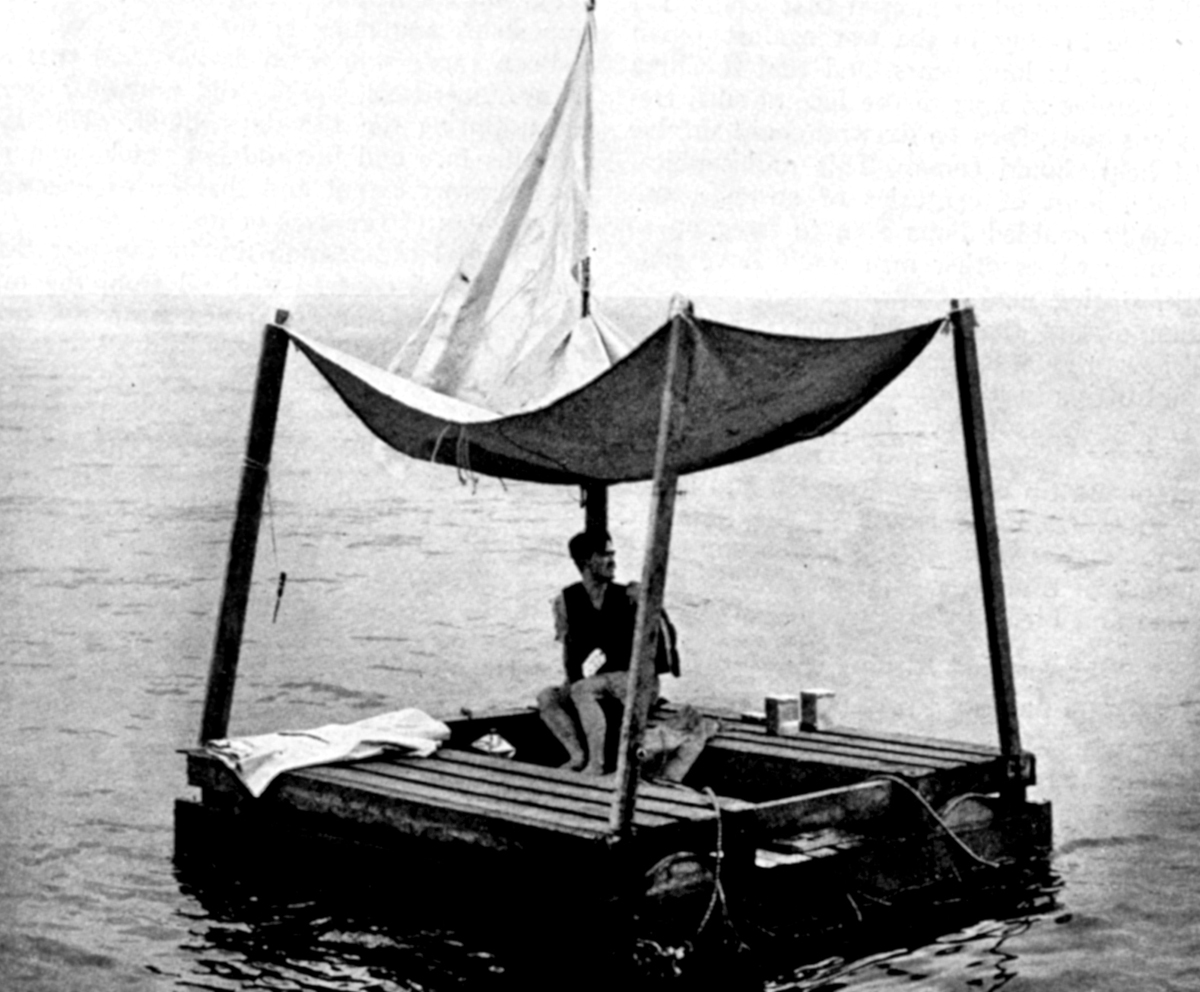
For a real-life example of survival at sea, check out the following article on OFFGRIDweb. It tells the incredible story of Poon Lim, a 24-year-old sailor who survived alone on a tiny life raft for 133 days after the British merchant ship he worked on was sunk by a German U-boat during WWII. offgridweb.com/survival/survival-at-sea
[meetourpanel]
More From Issue 31
Don’t miss essential survival insights—sign up for Recoil Offgrid’s free newsletter today!
Read articles from the next issue of Recoil Offgrid: Issue 32
Read articles from the previous issue of Recoil Offgrid: Issue 30
Check out our other publications on the web: Recoil | Gun Digest | Blade | RecoilTV | RECOILtv (YouTube)
Editor’s Note: This article has been modified from its original version for the web.