If the grid goes down, having a mobile and renewable power source can keep you in the 21st century while everyone else is reverting to the 18th. Electronics are usually not an absolute necessity for survival, but they sure do make it easier. Even something as simple as a fully-charged flashlight or handheld radio can make a huge difference in an emergency.
Solar power is an excellent source of electricity for everything from casual camping to long-term survival scenarios. Solar panels passively soak up sunlight to produce a charge, and pairing them with a battery improves versatility by allowing you to recharge your devices at any time.
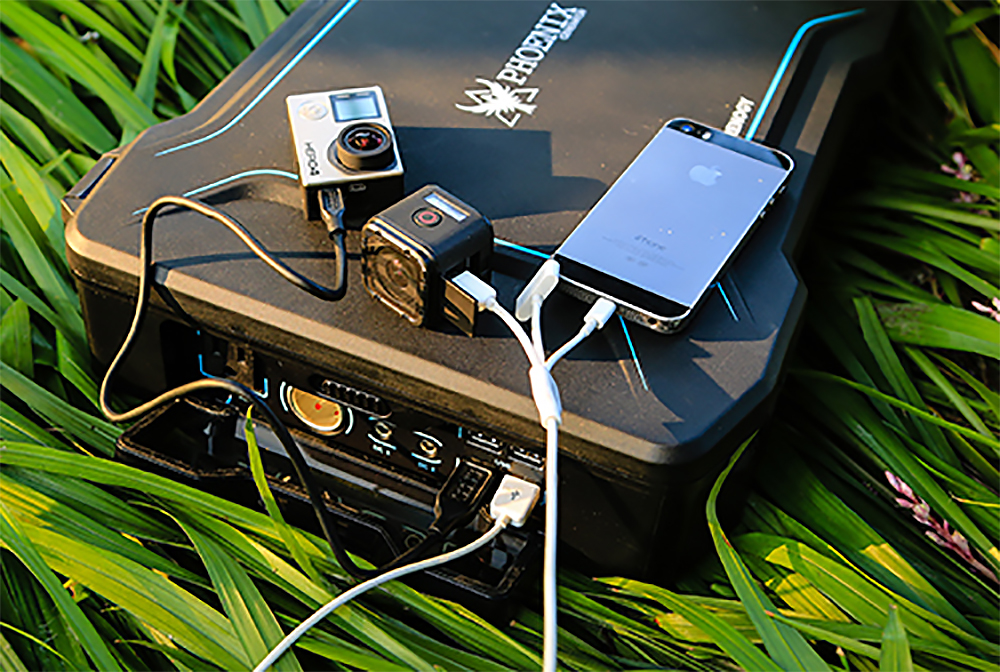
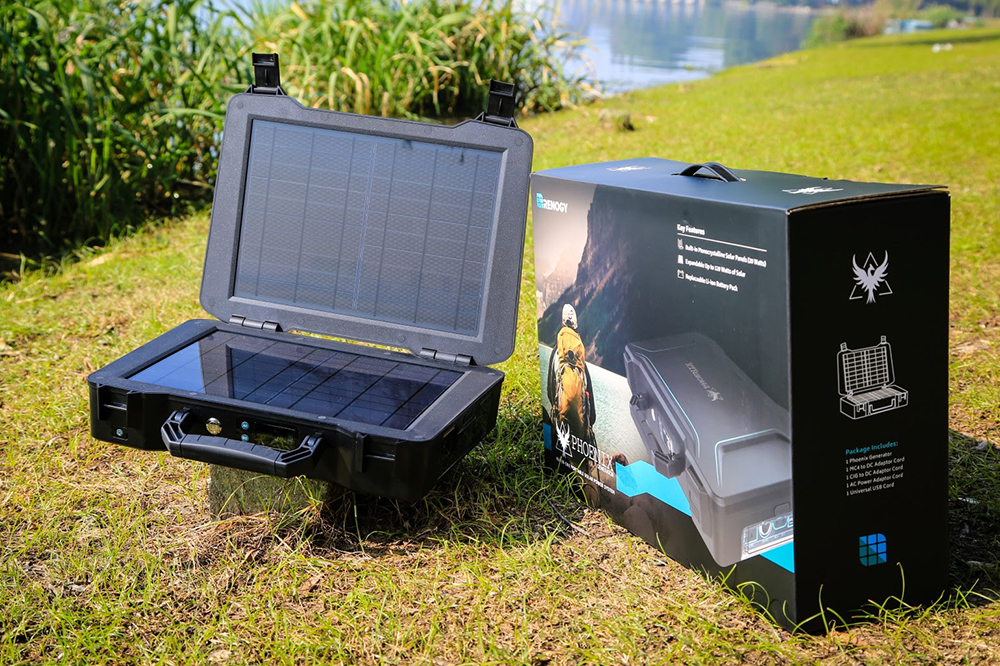
Renogy recently announced the all-new Phoenix, a device which combines solar panels and a battery into a convenient briefcase-style unit. The lid of the Renogy Phoenix opens to reveal two efficient 10-watt solar panels, and offers expansion ports for up to 120 watts. The device can also be charged via an AC wall charger or a 12V car charger.
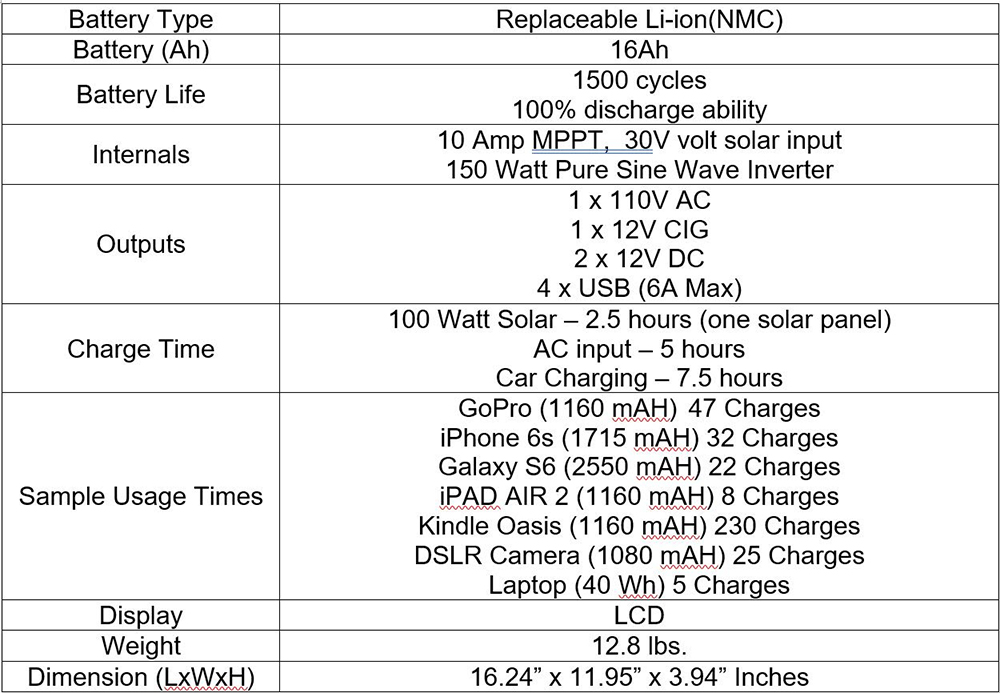
The Renogy Phoenix contains a replaceable 16,000 mAh (milliamp-hour) lithium-ion battery. This provides enough capacity to fully recharge a laptop up to 5 times, or an iPhone 6S up to 32 times. Outputs include a 110V AC wall-style outlet, a 12V cigarette lighter output, two 12V DC ports, and four 6A USB ports. There’s also a built-in multi-mode 3W LED light.
The new Renogy Phoenix solar generator is currently available for $589. For more information, visit Renogy.com.
Starting a fire in an emergency is often paramount to staying warm and staying alive, especially during the colder months. However, if it’s wet outside, you may have a very tough time getting the first few damp pieces of kindling to ignite. This is where a good source of tinder material becomes important — it allows you to bolster the initial spark from your lighter, match, or ferro rod into a healthy flame.
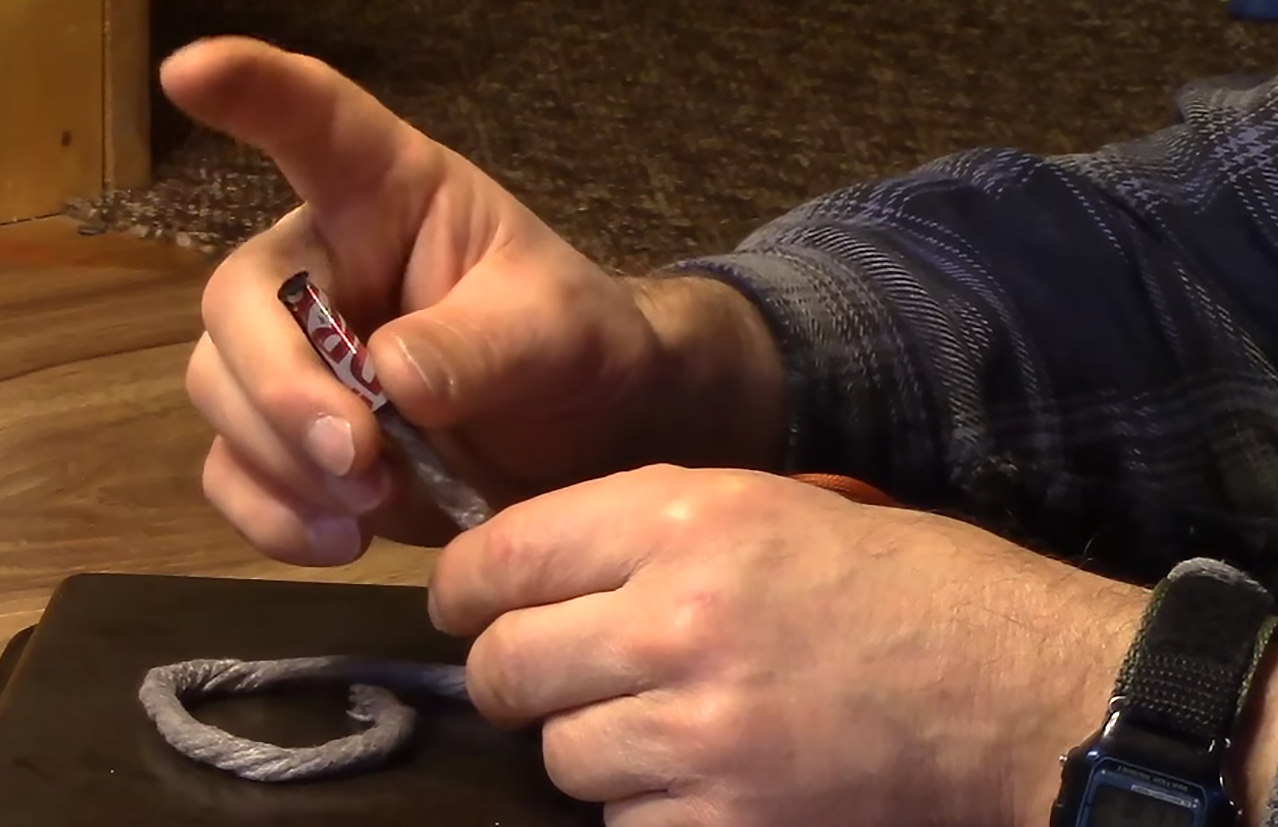
Braided cotton or jute rope can be effective as tinder, but it’s also sensitive to moisture. Applying petroleum jelly or paraffin wax aids waterproofing and extends burn time. This is nothing new; many bushcrafters and survivalists make their own waxed cotton, and commercially-available products like FireCord incorporate a pre-waxed tinder strand. However, we recently came across a pretty cool way of enhancing and regulating burn rate of a waxed cotton rope.
In the video below, Lonnie of Far North Bushcraft and Survival demonstrates his adjustable waterproof tinder wick. It uses a braided cotton rope about the size of a pencil — strands cut from a cheap cotton mop head should work well for this, or you could braid your own rope from individual strings. The rope is dipped in paraffin candle wax, and a 1-inch-wide strip of aluminum from a soda can is wrapped around the rope, forming a sliding collar.
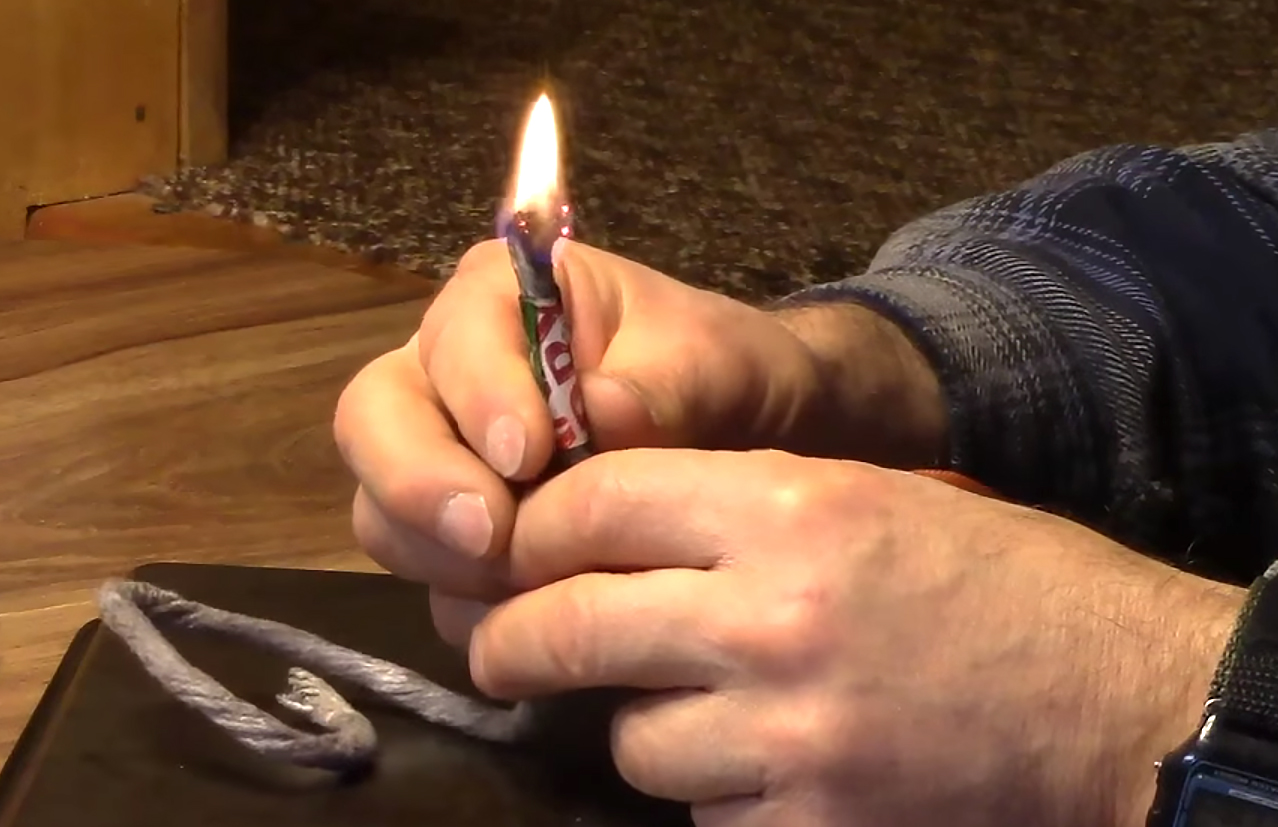
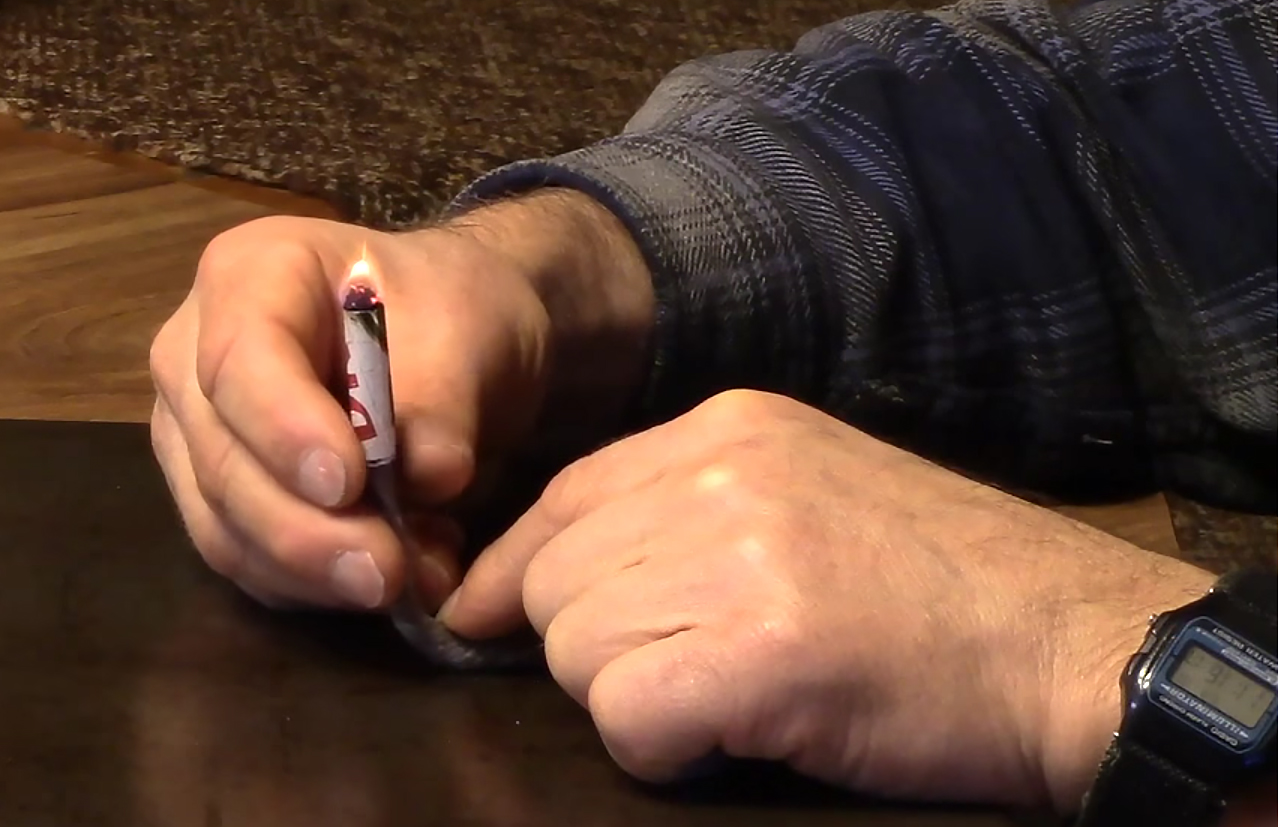
The rope is waterproof due to the wax, and can be ignited normally with a lighter, match, or ferro rod. Then, the user can slide the collar up to slow the burn and regulate the flame size, or slide it completely over the burning end and cut off oxygen to extinguish the flame completely. It’s a pretty clever trick, and left us wondering, why didn’t we think of that?!
Next time you’re looking to replenish your tinder supply, consider this option. It seems like an ingenious idea that could help your tinder wick last much longer.
First Tactical produces just about everything you’d need for a complete EDC loadout — apparel, boots backpacks, knives, flashlights, hats and gloves. The company has continued to branch out for 2017, expanding its collection of watches from one model to three.
Two new watches, the Fathom (left) and Ridgeline (center), join the existing Canyon Digital Compass (right).
The initial watch, known as the Canyon Digital Compass, was released in late 2016. The Canyon includes a digital time display and second hand, as well as day, date, and compass functions. Its large rubberized bezel and polymer band are designed for tough outdoor use. Color choices include black, coyote, and OD green; MSRP is $140.
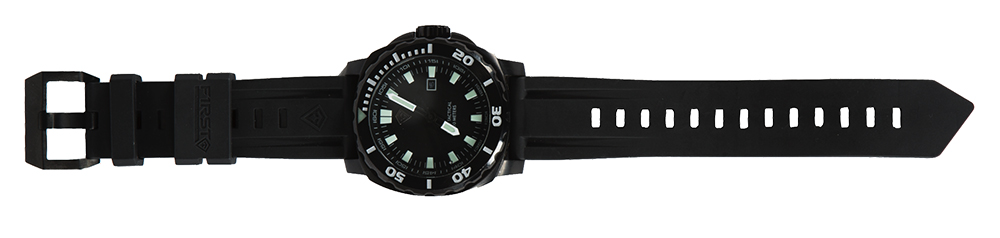
The Fathom Stainless Dive Watch is an all-new analog model in the line of First Tactical watches. This watch is waterproof to 200 meters, and uses a stainless steel housing, stainless bezel, and screw-down crown.
Super-luminova glow-in-the-dark hands and markings improve nighttime visibility. It’s available in either polished Titanium finish or black; MSRP is $250.
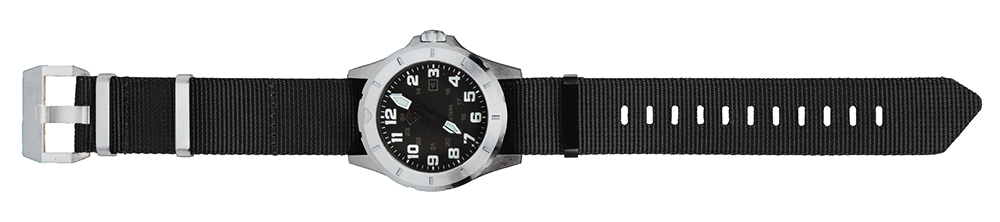
The Ridgeline Carbon Field Watch resembles a modernized version of the vintage field watches issued by many military organizations in the past. It’s constructed from ultra-light carbon resin PA material, with a medium-sized face and large markings.
The durable laser-cut nylon webbing band also keeps weight at a minimum, and luminous hands maintain low-light visibility. The First Tactical Ridgeline is available in black with OD green band or brushed stainless with black band. MSRP is $190.
For more information on the new First Tactical watches and other EDC gear, visit FirstTactical.com.
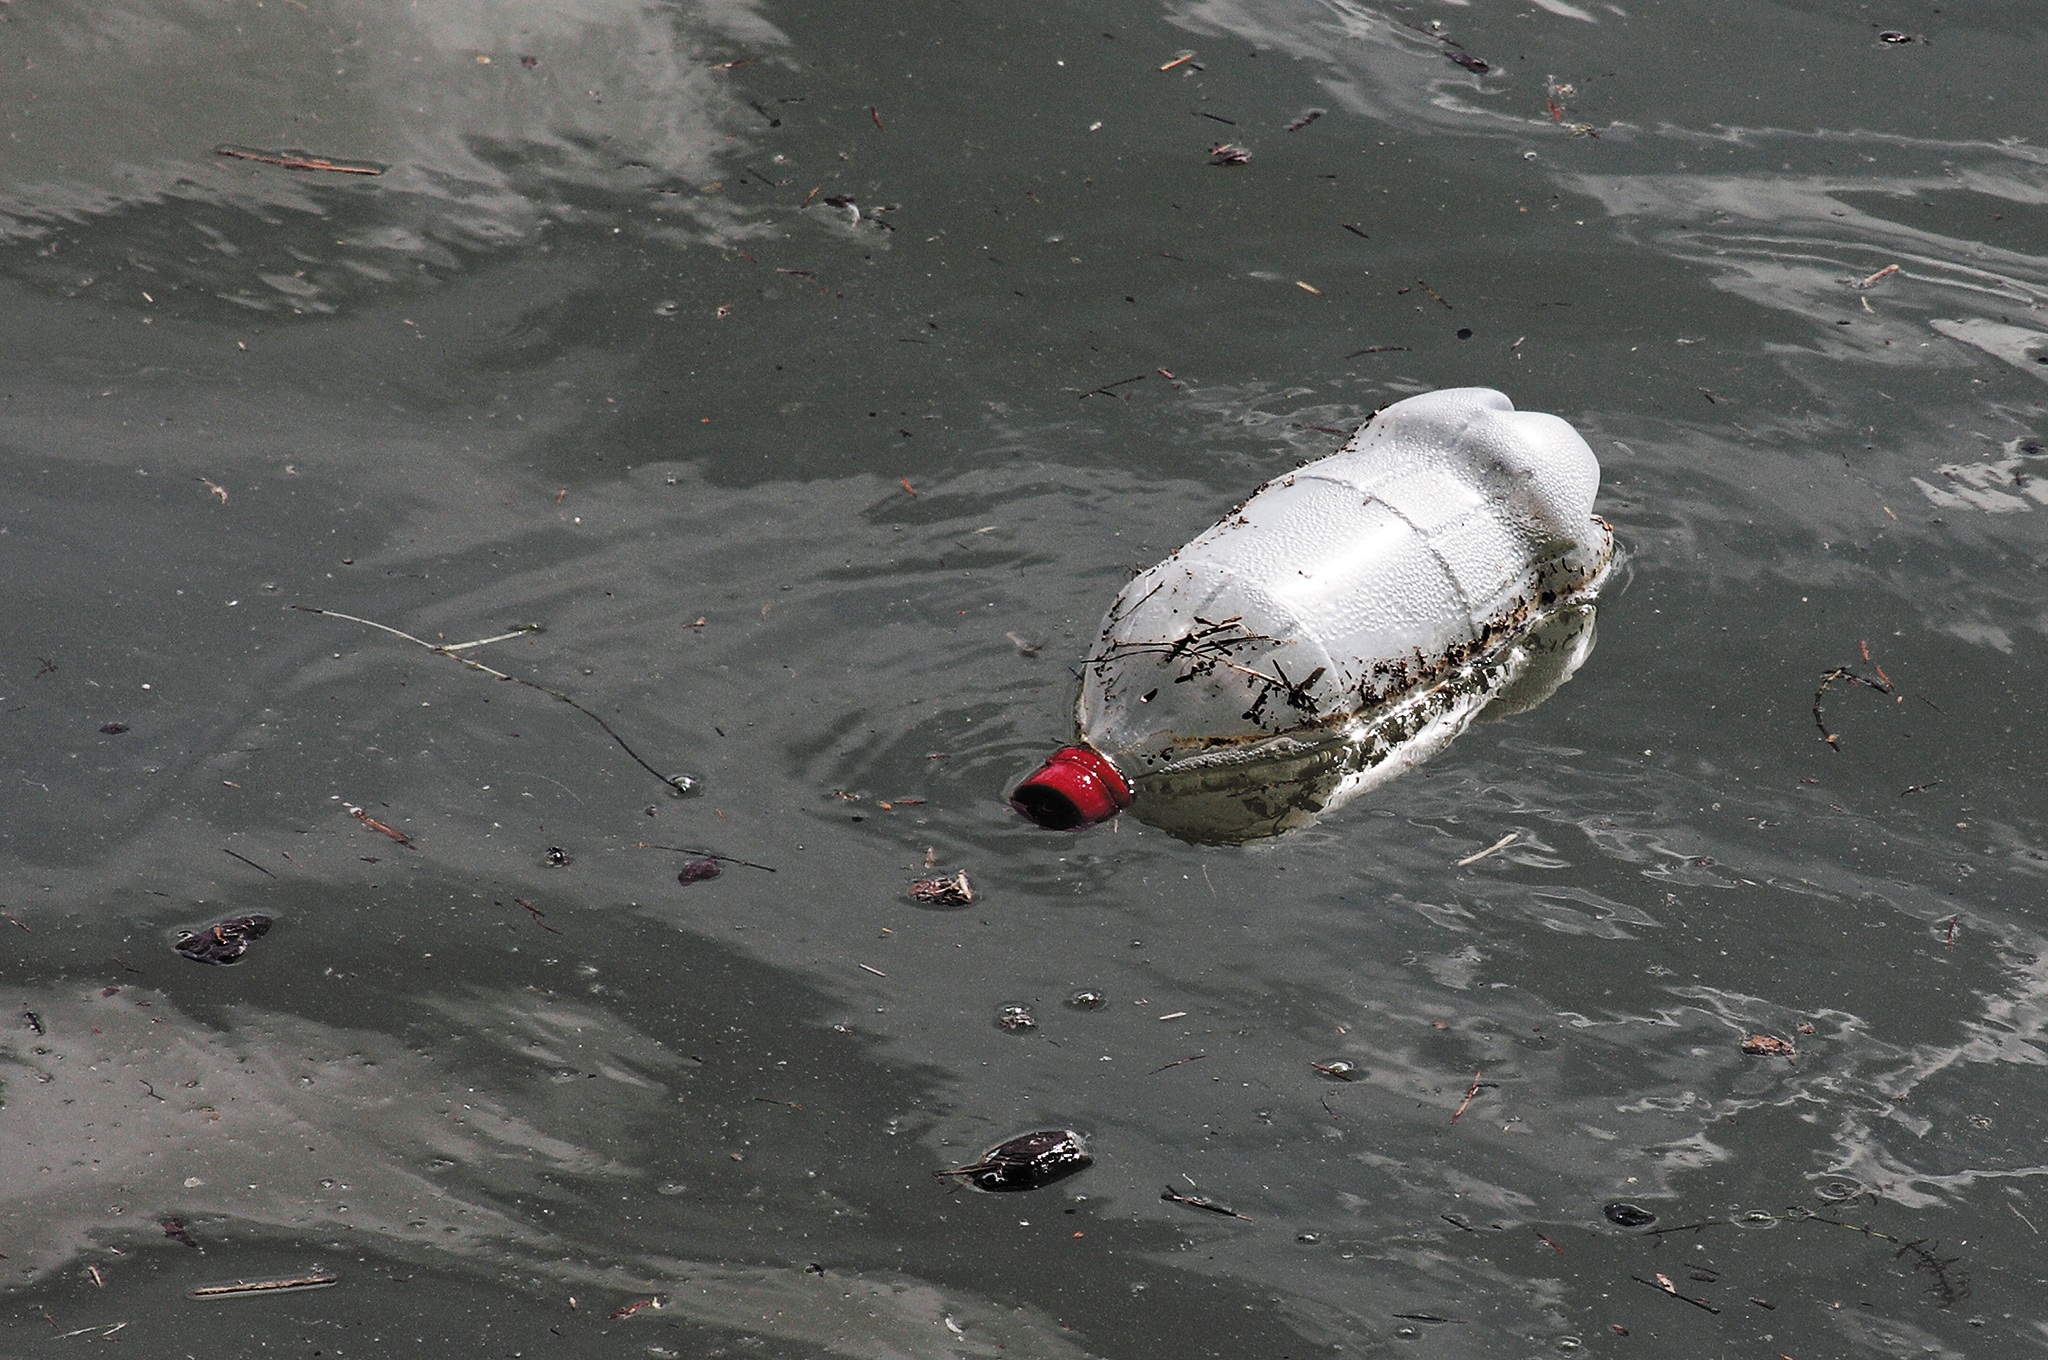
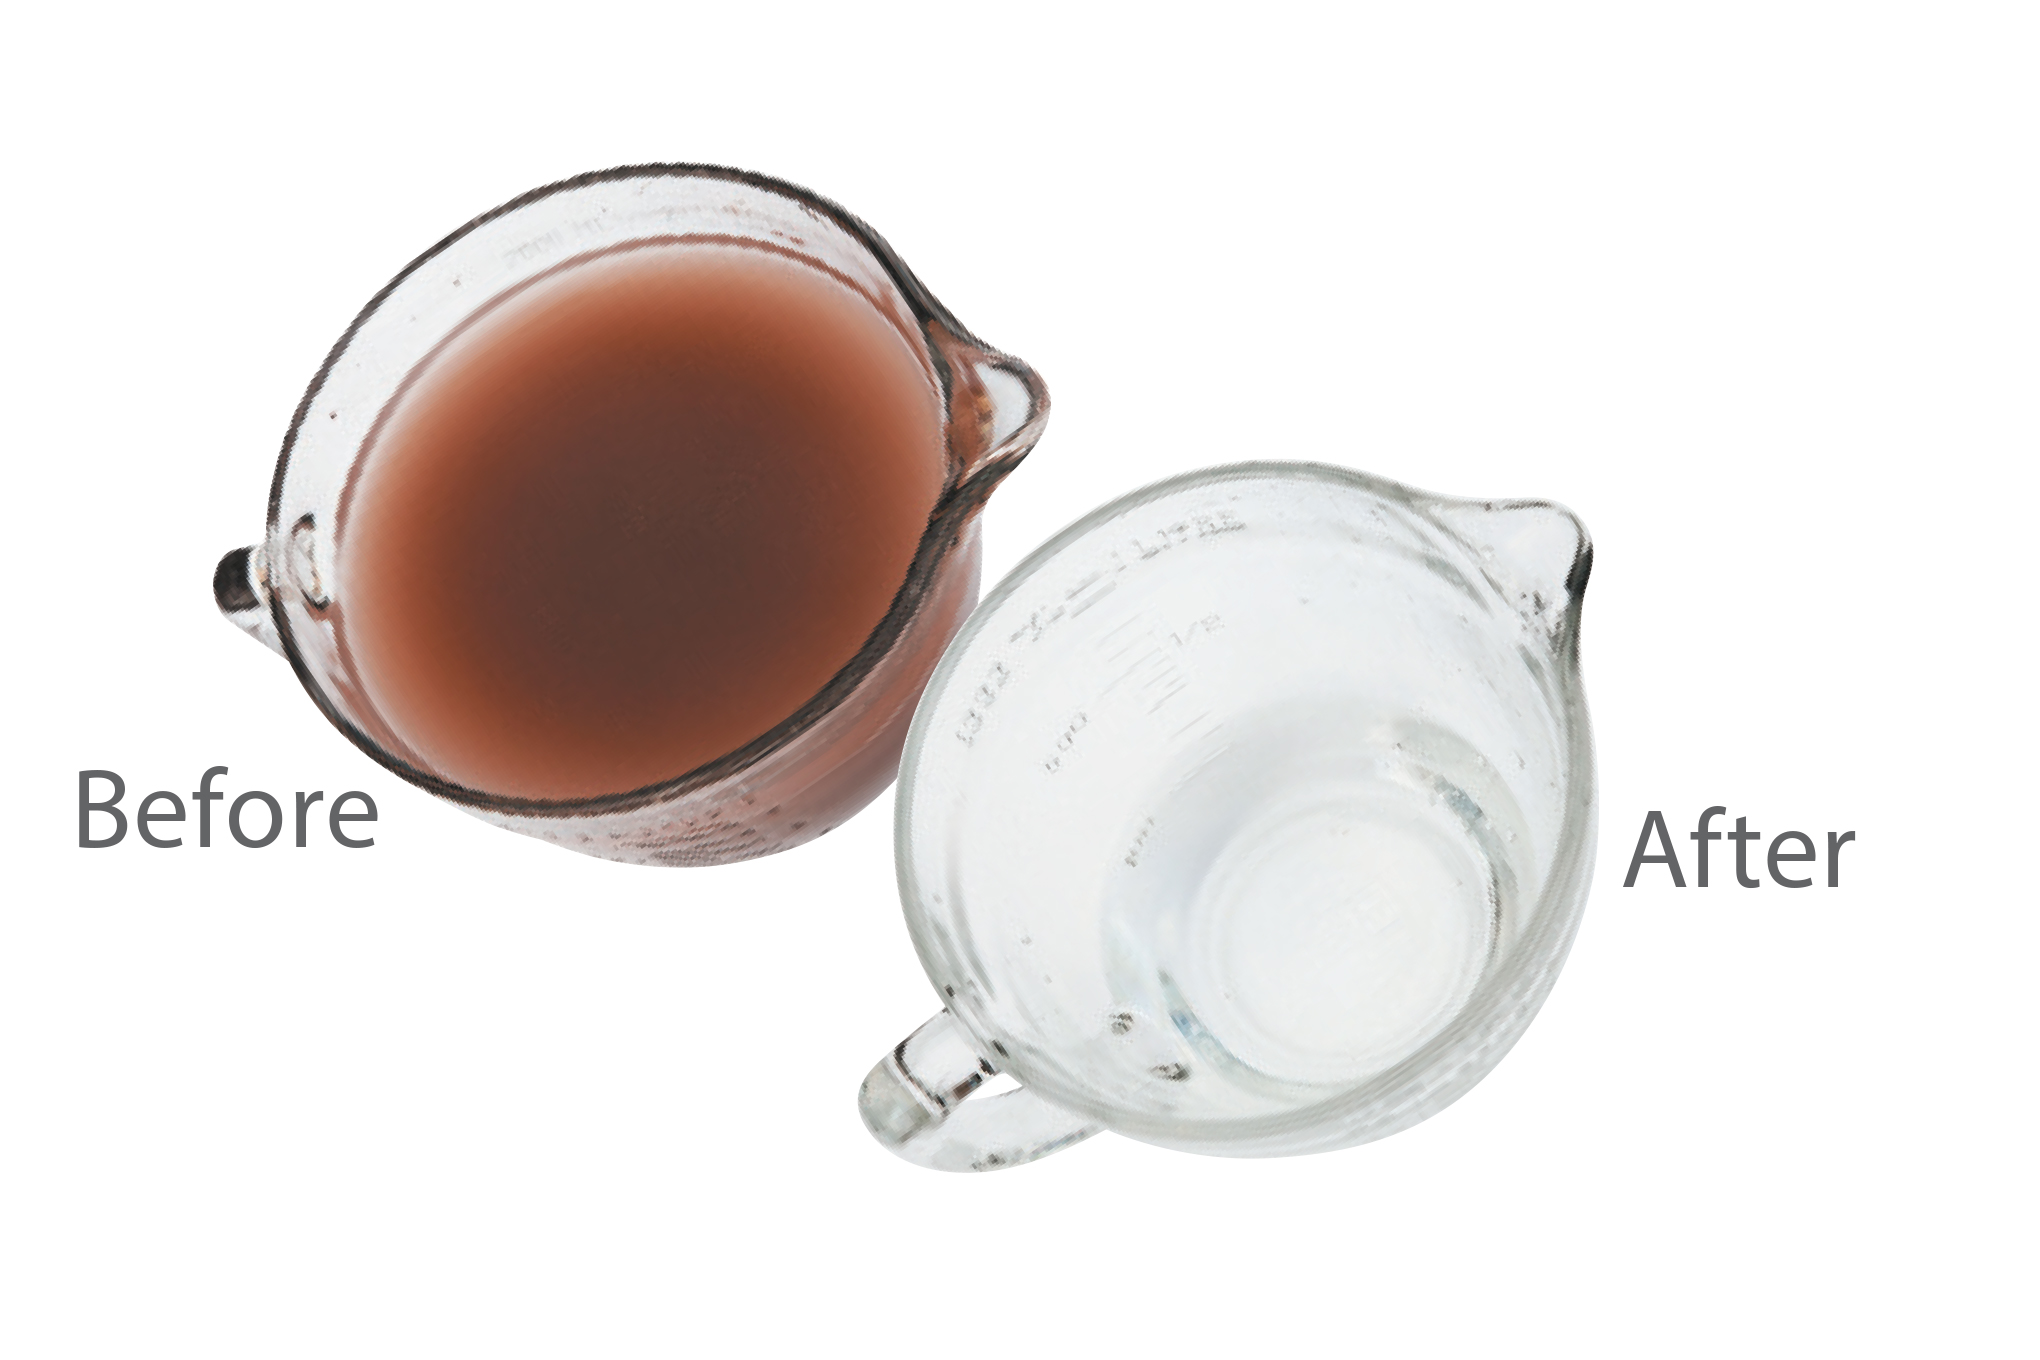
Clean drinking water is an absolute necessity. It’s often said humans can survive three days without water, but during strenuous physical activity, this could be a generous estimate. However, rehydrating isn’t as simple as drinking directly from the first pond or stream you find. Even if untreated water looks crystal clear, it may be packed with millions of pathogens that are invisible to the human eye.
In a cruel twist of fate, drinking the wrong water can do more harm than drinking nothing at all.
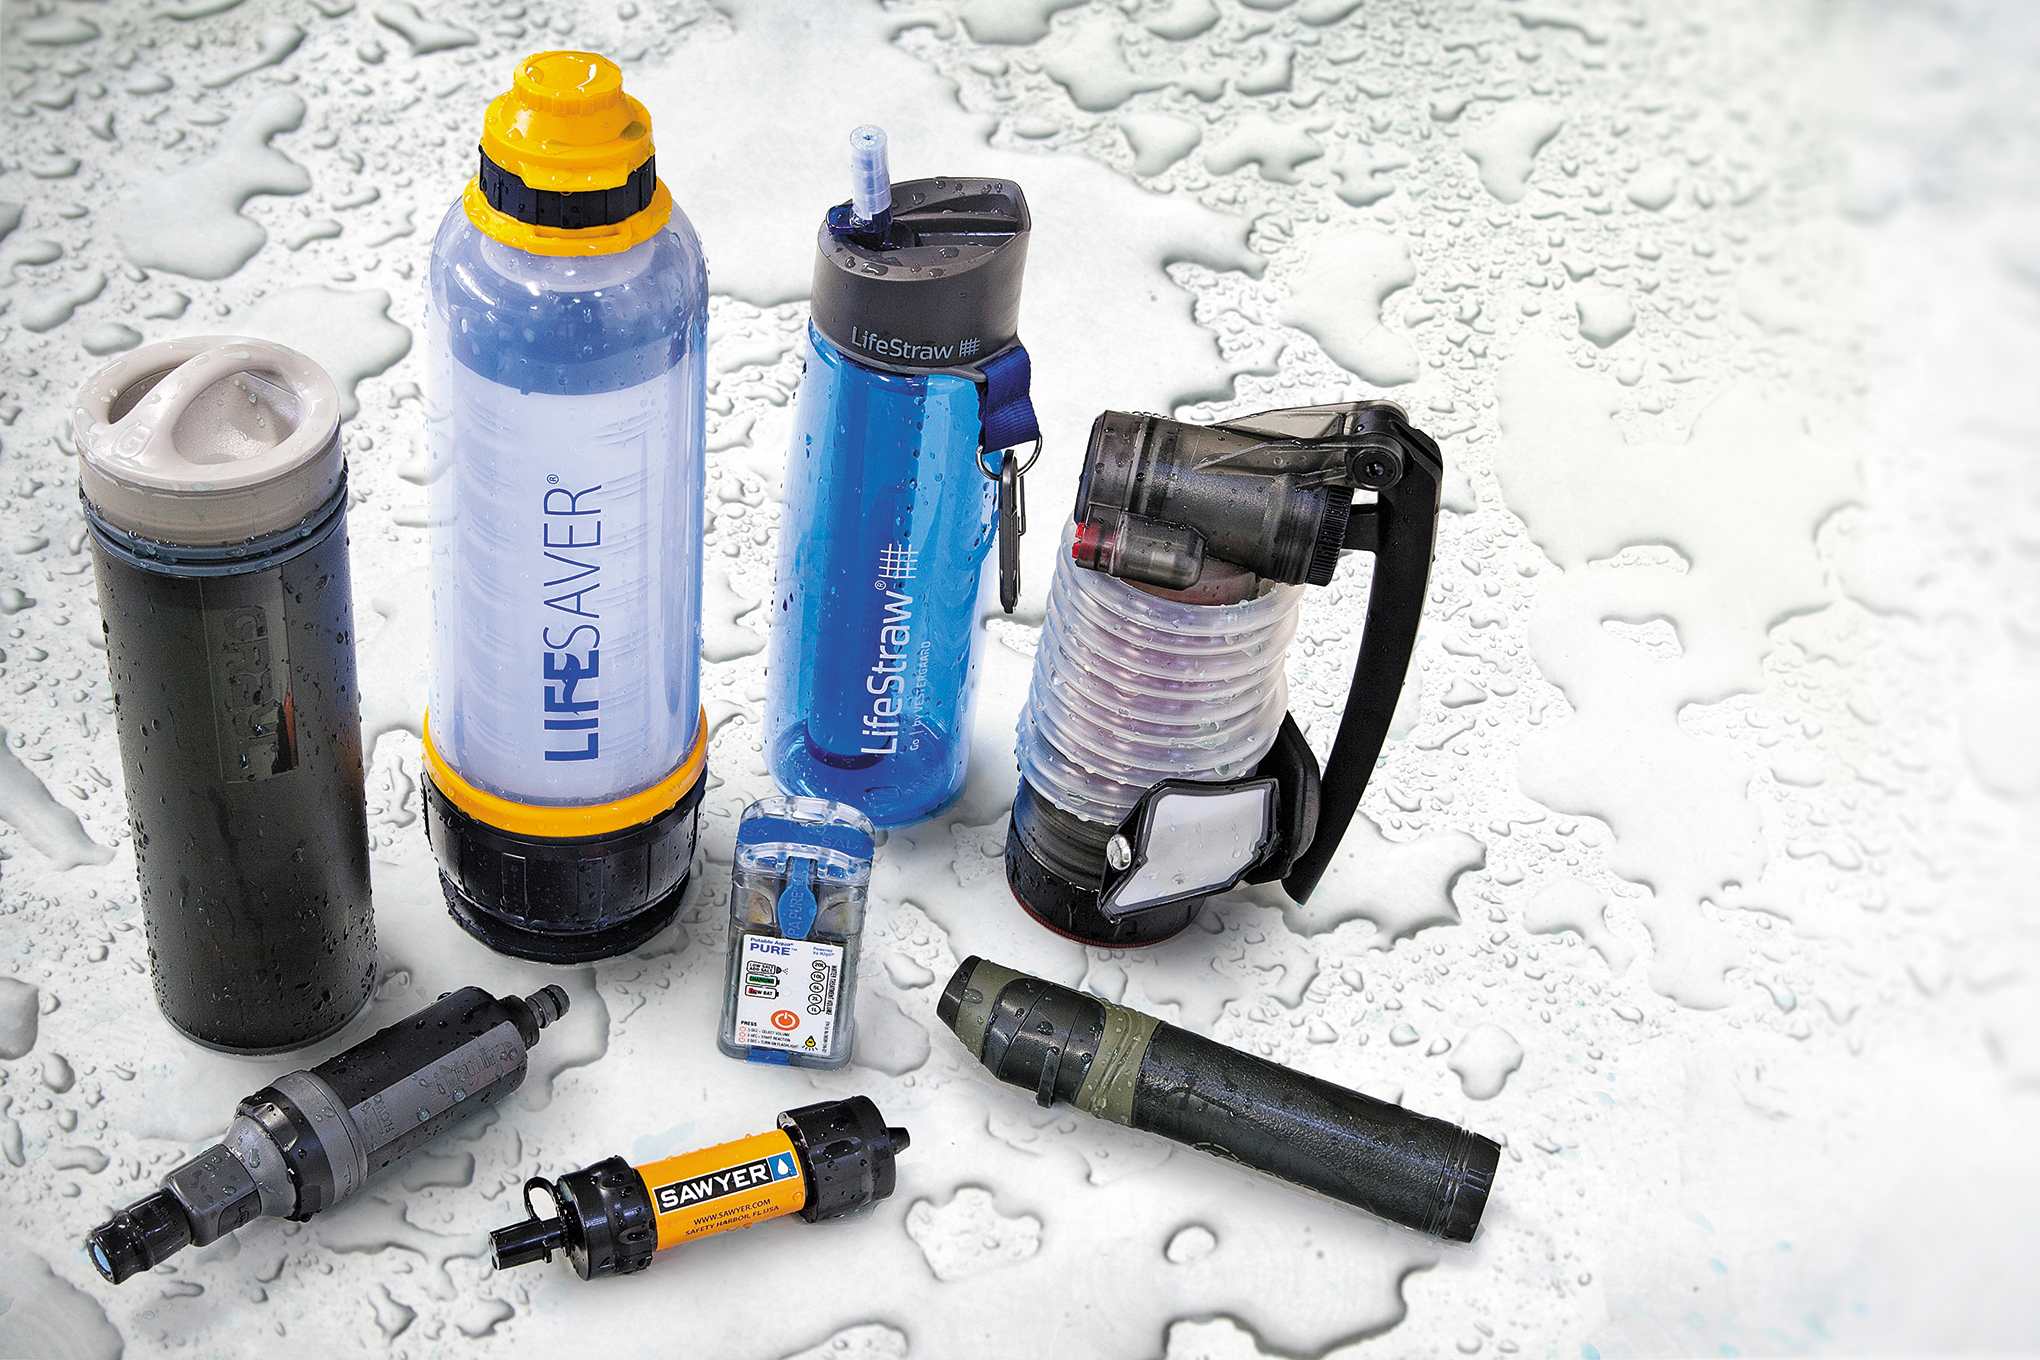
To avoid becoming ill, you’ll need to find a way to remove or inactivate these unseen microbes — which isn’t always easy if you’re fleeing a catastrophe. In the past, this meant setting up camp, building a fire, and boiling water — a laborious and time-consuming process. Today, there’s a better way to provide clean water on the go. Portable water filter or purifier devices come in many shapes, sizes, and configurations, but they all share one key advantage: they can produce clean drinking water quickly and reliably, without the need to set up camp.
Waterborne Pathogens
To better understand water purity, you should be aware of the waterborne vectors that pose the biggest health threat: viruses, bacteria, and protozoan cysts — we’ll call them the “Big Three.” Drinking water contaminated with any member of the Big Three family can cause diarrhea, vomiting, fever, fatigue, sudden weight loss, and even death. The most common examples of each are:
Beyond the Big Three, you may also want to watch for chemicals (such as chlorine and pesticides) and heavy metals (like lead and arsenic). Unless these other contaminants are found in extremely high concentrations, such as in industrial runoff, they probably won’t make you sick immediately. However, they can have long-term negative effects on your health.
Particulates, taste, and odor should also be considered. Although they may not be directly harmful to your health, nobody wants to drink murky, gritty, foul-smelling water. Ideally, filters and purifiers should also address these components.
Our Review Procedure
Unlike buyer’s guides found in our competitors’ pages or websites, RECOIL OFFGRID actually reviews the products. Thoroughly. We don’t regurgitate manufacturers’ ad copy, but instead test every item and provide our honest assessments. With that said, you’d practically need a PhD in microbiology to understand the dozens of standards and protocols governing water purity.
Adequately testing the purity of water to these exacting standards is impossible without sophisticated lab equipment and highly trained personnel. Off-the-shelf water test kits can’t possibly detect the minuscule levels of contaminants we’re dealing with here. Microbiological lab testing would be prohibitively expensive and time-consuming for the purposes of this guide. So, rather than focusing on verifying the accuracy of manufacturers’ water purification claims, we have provided those claims at face value for comparative purposes.
We also evaluated the filter systems with a focus on practical concerns. These include ease of use, speed of filtration, the ability to clear murky water, and the ability to reduce unpleasant taste and odor.
We carried each device, and learned to use it correctly. Next, we sampled ordinary tap water with each purifier, to see if it altered the water’s neutral taste in any way. Then, we simulated turbid or murky water by stirring in a set amount of fine particulate, and observed the clarity of the water produced by each filter. We then taste-tested the filtered water, estimating the system’s ability to remove flavors and odors caused by pollutants.
Finally, we dismantled, cleaned, and reassembled each filter, and tested tap water again to establish if any residual taste remained from the turbid water test.
Comparing Effectiveness
Remember how we said we wouldn’t get too technical? Well, bear with us, because we’re going to need to bend that rule.
Water purifiers are typically measured and rated to remove 99.X percent of viruses, bacteria, or protozoan cysts. Each digit in this percentage represents a power of 10, also called a “log” (short for logarithm). For example, a filter rated to remove 99.99 percent of bacteria would be rated at a “4-log bacteria reduction.” If your water had exactly 1,000,000 microbes in it, a 4-log reduction would mean only 100 of those microbes would be left in the water after treatment — 999,900 microbes would be removed. A 6-log or 99.9999-percent reduction would leave only 1 microbe in the water.
For the purposes of this comparison chart, the ● symbol represents one decimal place. So, ●●●● represents 99.9999 percent or 6-log reduction rate, ●●● represents 99.999 percent or 5-log, and so on.
According to NSF International and ANSI (two major safety certification organizations), the minimum standard for effective microbiological reduction is 99.9999 percent of bacteria (●●●●), 99.9 percent of protozoan cysts (●), and 99.99 percent of viruses (●●). This is based on a U.S. Environmental Protection Agency (EPA) report called the “Guide Standard and Protocol for Testing Microbiological Water Purifiers.”
Any purifier that meets or exceeds this standard, known as NSF/ANSI P231, can be said to effectively remove virtually all of these three contaminants present in water. Some purifiers actually exceed this NSF/ANSI standard, but as long as the rating is met for all three categories (bacteria, protozoa, and viruses), any difference in water purity beyond this standard can be considered negligible.
In simpler terms, more dots and checkmarks represent better performance.
Bacteria
Protozoan Cysts
Viruses
Chemicals
Heavy Metals
Particulates
Odor & Taste
NSF/ANSI P231 Standard
●●●●
●
●●
N/A
N/A
N/A
N/A
Aquamira
●●●●
●
●●
✓
✓
✓
✓
GRAYL
●●●●
●●●
●●●●
✓
✓
✓
✓
Icon Lifesaver
●●●●
●
●●
✓
✓
✓
✓
LifeStraw
●●●●
●
✓
MSR
●●●●
●
●●
✓
Potable Aqua
●●●●
●
●●
Renovo
●●●
Unverified
✓
✓
✓
✓
Sawyer
●●●●●
●●●●
✓
Brita
✓
✓
✓
✓
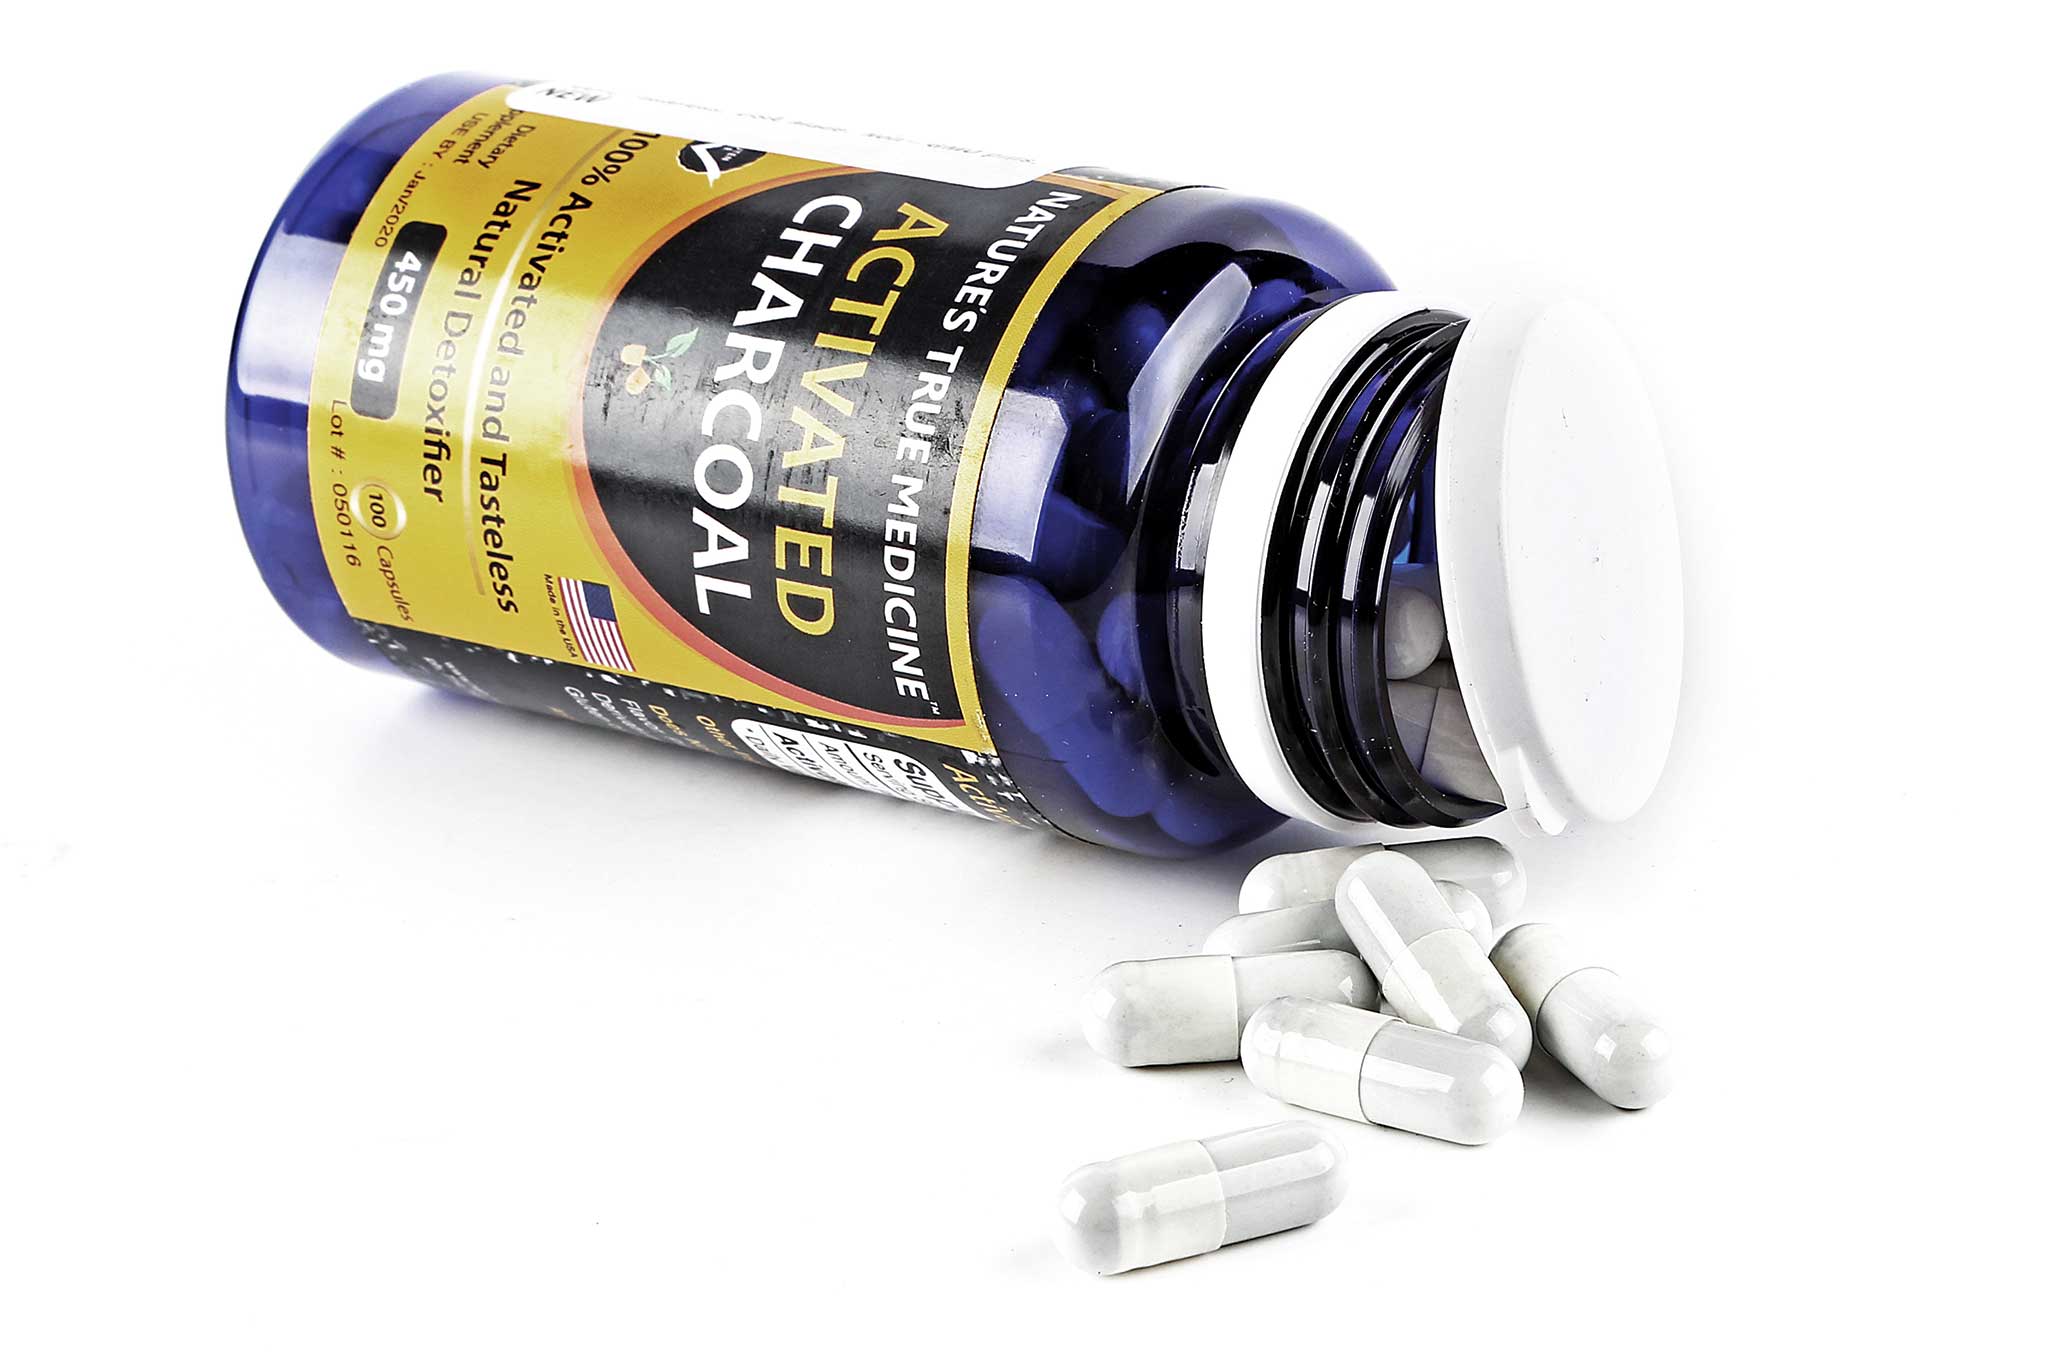
Activated Carbon: What It Can & Can’t Do
Activated carbon is found in several filters covered in this guide. This substance, also called activated charcoal, is highly porous and captures trace chemical elements found in water. This is especially useful for removing off-putting taste and odor, such as the chlorinated taste of tap water. It can also remove traces of other chemicals, heavy metals, and poisons (see “Poison Eraser” in Issue 15). As a result, filters or purifiers that address taste and odor typically incorporate an activated carbon component.
Activated charcoal can act as a “poison eraser” in the body, but it does not remove pathogens from water.
However — and this is an important point — an activated carbon filter shouldn’t be seen as a water purifier by itself. Activated carbon doesn’t treat or remove bacteria, protozoan cysts, or viruses. So, it can’t prevent you from getting sick from these contaminants.
For comparison purposes, we reviewed a Brita Sport water bottle that exclusively uses an activated carbon filter. It may cost only $10, and it can make your water taste better, but it’s not going to prevent the devastating health effects of a bacterial infection or waterborne parasite. Activated carbon filters like this Brita are fine for home use on clean tap water, but they certainly shouldn’t be part of your emergency survival kit.
If you’ve ever seen the Discovery TV show Survivorman, you’ll surely be familiar with host and survival expert Les Stroud. While most of Les’s survival journeys were in the wilderness, he also briefly addressed urban survival. In the bonus content on the Survivorman season 3 DVD, there’s a 40-minute special video titled “Surviving Urban Disasters” which addresses how to deal with an urban flood scenario.
During this urban survival special, Les discusses one of the most imminent threats to survival: finding clean drinking water. As he aptly points out, water will be everywhere during an urban flood, but drinking it could lead to serious illness. Flood water will be full of raw sewage, chemical runoff, and all sorts of other harmful contaminants. So, you’ll need to find a clean source quickly.
If water floods your home, anything below the water line is virtually guaranteed to be contaminated.
In this video, Les provides three quick tips for how to find or obtain clean water, even when all the water around you seems undrinkable. Watch the YouTube mirror below, or click here to view the original version on the Science Channel web site.
To summarize, here are Les Stroud’s three methods for finding clean water, and why they’re effective:
Drink from the toilet tank — This reservoir is above the waterline, and was filled with clean tap water, assuming you haven’t flushed it since the flood began. If flushed, the tank may have been refilled with contaminated tap water, so be careful. (Your home water heater is another potential source of clean water.)
Distill water — Boiling is effective at killing bacteria, protozoa, and viruses. However, if you suspect your water contains chemical runoff or has mixed with seawater, boiling it will only concentrate these contaminants. Distillation removes most impurities, including salt and chemicals, by heating the water into vapor and condensing the vapor back to liquid.
Make a rain catch — A simple rain catch on the windowsill can funnel clean rain water into a container. Just be sure you’re collecting pure rain, not runoff from the roof or gutters, as this may be contaminated.
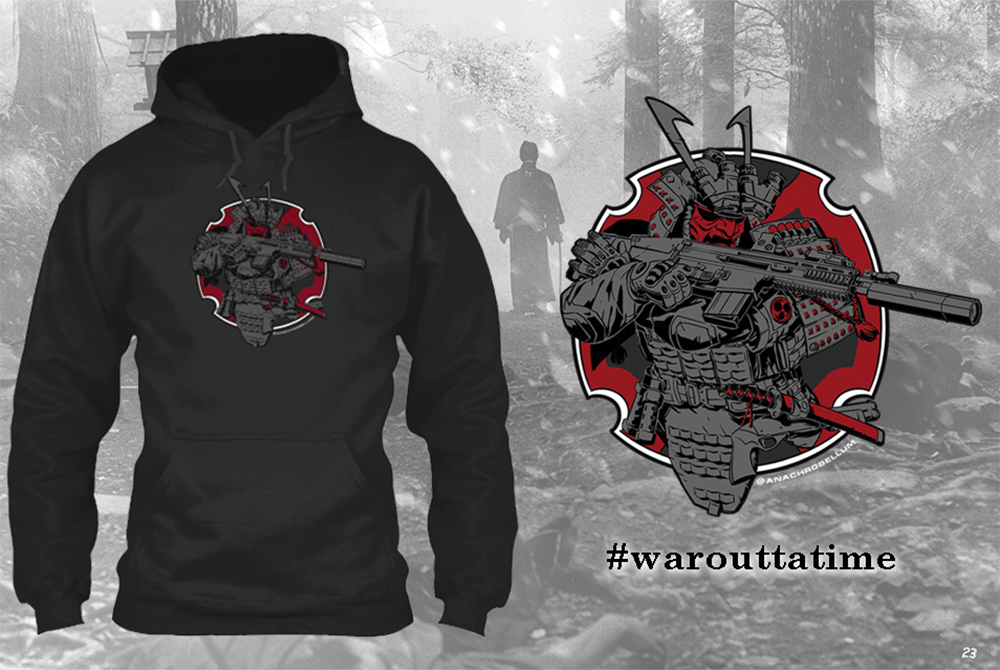
Philosopher and poet George Santayana coined the phrase, “Those who cannot remember the past are condemned to repeat it.” This reminds us of the importance of studying history, and more importantly, applying its lessons to our everyday lives. There are undeniable parallels between the conflicts of the past and those of today. The Art of War was written nearly 2,500 years ago, yet many of its proverbs remain relevant in the 21st century.
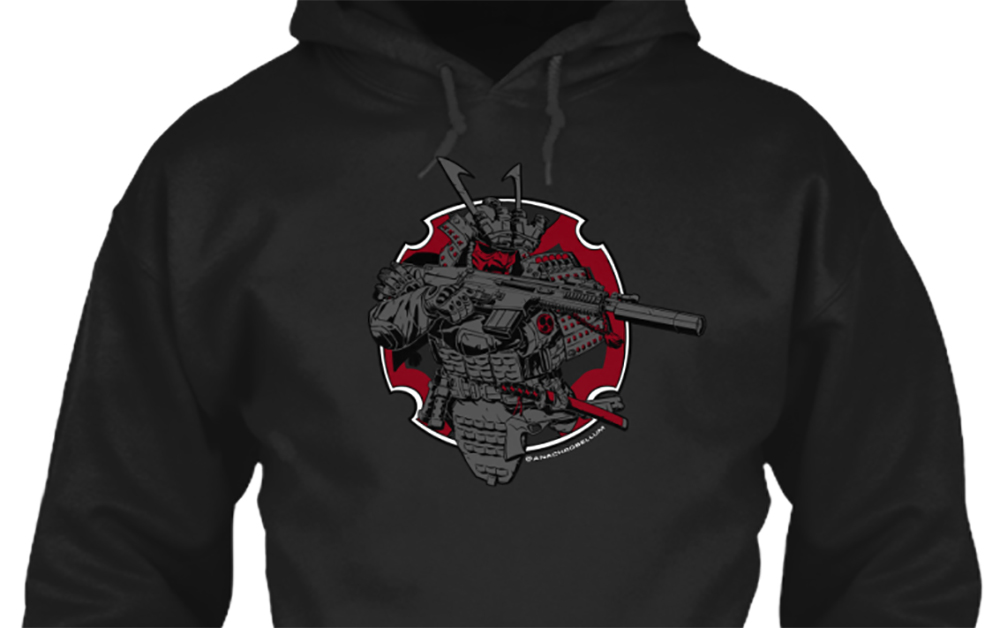
This link between ancient history and present-day warfare served as inspiration for Oklahoma-based clothing company Anachrobellum. Each of the company’s apparel designs combines an classic warrior archetype with modern weapons and equipment. These include a viking, a colonial scout, and a member of the Roman legion.
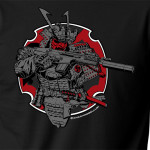
Anachrobellum’s most popular design, Modern Budō, depicts a samurai warrior with a suppressed SCAR, flashbang grenades, and a breacher shotgun alongside his traditional wakizashi blade. This artwork has been available on T-shirts and patches, but has now made its way onto a hooded sweatshirt.
The first production run of these tactical samurai hoodies launched on Teespring for $40 each. There’s still time to catch one of these early sweatshirts for a few more hours today, but if you missed the campaign, they’ll be available on the Anachrobellum web store once more are produced. For more updates, follow Anachrobellum on Facebook or on Instagram.
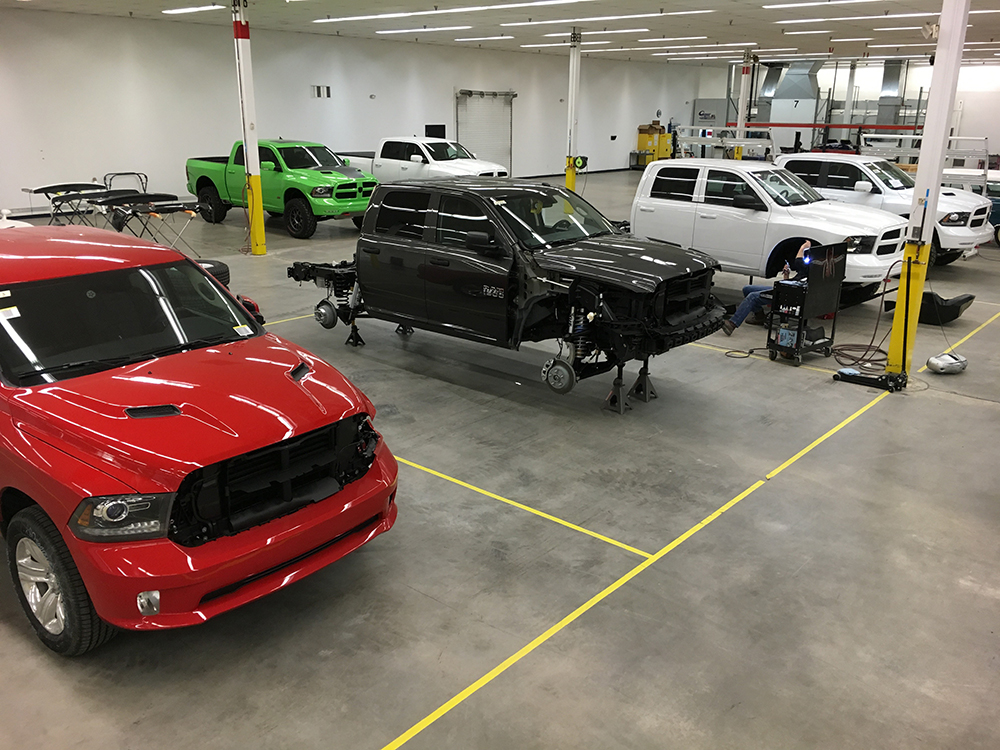
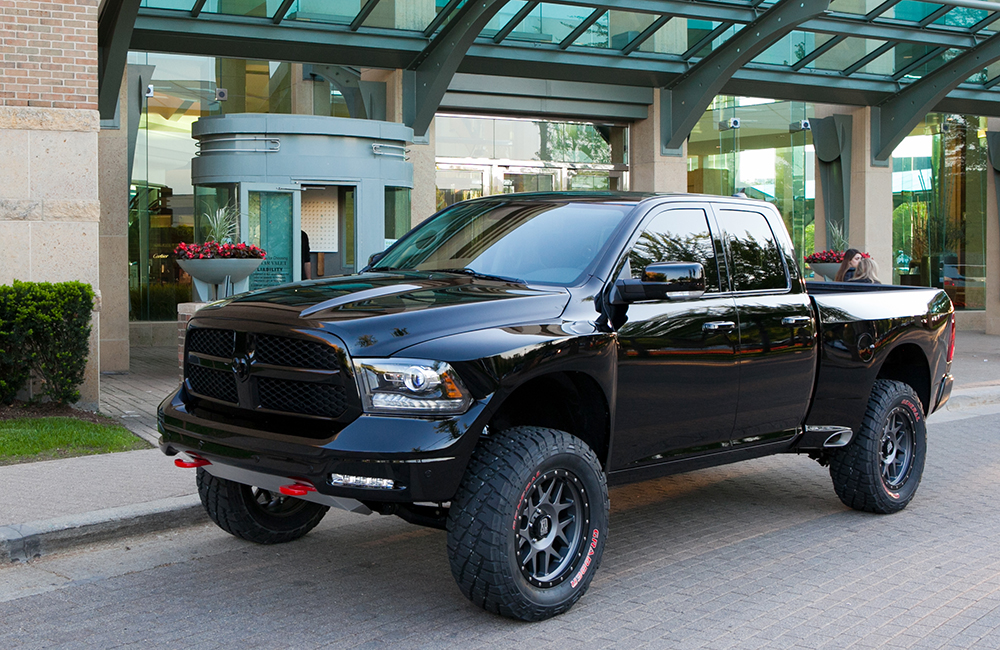
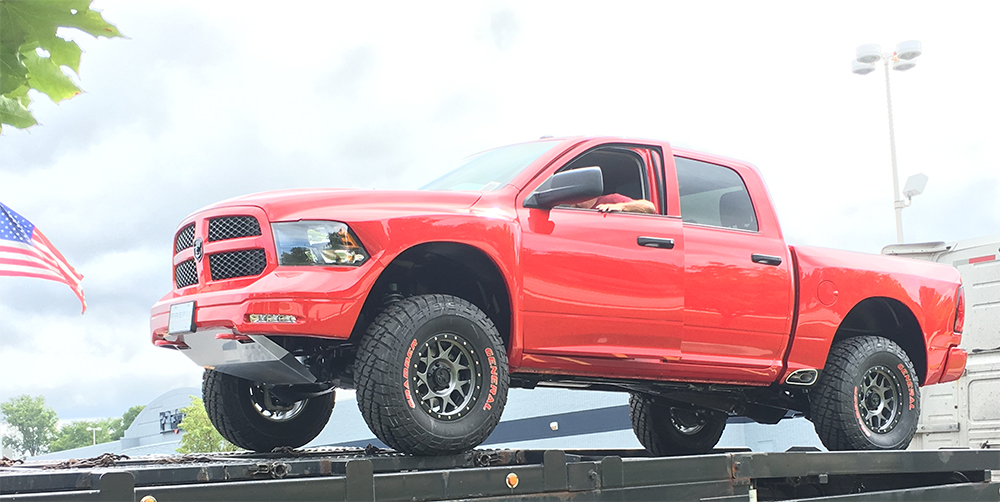
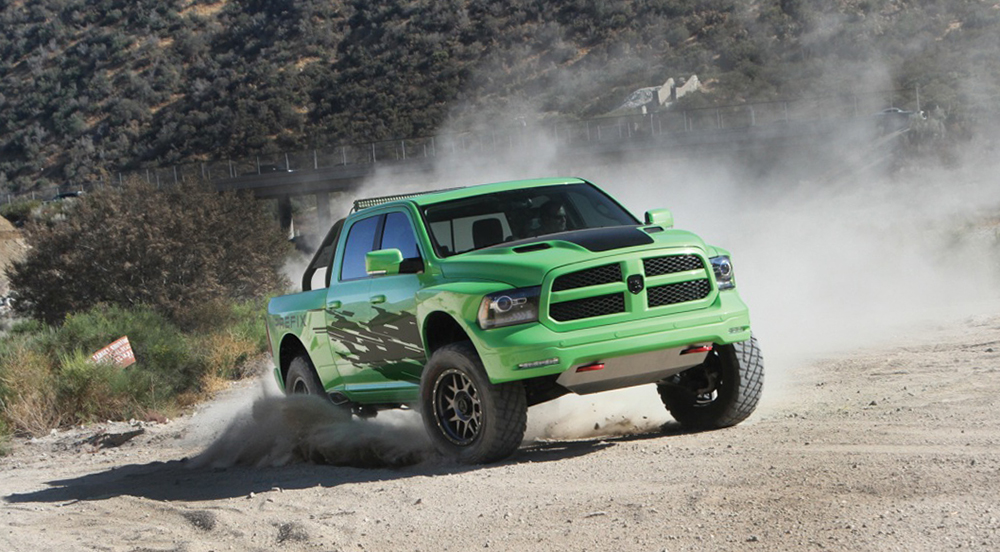
In Greek mythology, the Minotaur was a terrifyingly-powerful beast with the muscular body of a man and the head of a bull. When Michigan-based automotive company Prefix decided to create its own monstrous Minotaur, they didn’t make it part bull — they made it part RAM.
The Prefix Minotaur is a custom off-road truck conversion based on a RAM 1500. It’s inspired by desert race vehicles and “prerunner” trucks; Prefix even entered a race-prepped V10-powered Minotaur in the Baja 1000. The production version of the Minotaur is designed for maximum off-road performance while retaining daily-drivable levels of comfort. Prefix doesn’t mention the Ford Raptor, but it’s clear this truck is designed with the Raptor in its sights.
Each Minotaur starts life as a standard RAM 1500 4×4 with a 5.7L HEMI V8, crew cab, and short bed. However, many obvious changes have been made.
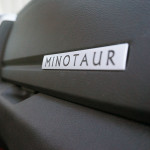
The first thing you’ll notice is likely the body — new composite fenders are 11 inches wider in front and 8 inches wider in the rear. A low-profile front bumper increases approach/departure angles (41 degrees and 30 degrees, respectively) and ground clearance. It also includes an aluminum skid plate, dual tow hooks, and LED fog lights. Black projector headlights, a black mesh grille, custom Minotaur badging, and embroidered floor mats add to the aesthetics.
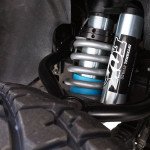
Upgrades are more than cosmetic, especially in the suspension department. Each Minotaur comes standard with KORE coilover suspension with a 4-inch lift, Fox Racing 3-inch internal bypass shocks, and an impressive 14 inches of total travel (that’s more than a 2017 Raptor, FYI). The truck rides on 17-inch gunmetal wheels and 35-inch General all-terrain tires; 20-inch wheels are optional.
Buyers can also request a cold-air intake and side-exit Viper-style exhaust for added performance. For those who want even more power, Prefix will install a supercharger on the 5.7L, or can even swap the factory motor for a 6.4L HEMI 392.
The Prefix Minotaur is available in “any custom color you can dream of” — the truck pictured above is painted in Tequila Lime with optional black vinyl graphics. However, this long-travel truck is a limited-production model; Prefix estimates 200 will be built in 2017. Pricing for a complete Prefix Minotaur truck starts at $60,000. To learn more, visit Prefix.com.
So, what do you think of the Prefix Minotaur? Is it a possible Raptor-killer for Mopar fans, or would you rather choose a different bug-out truck?
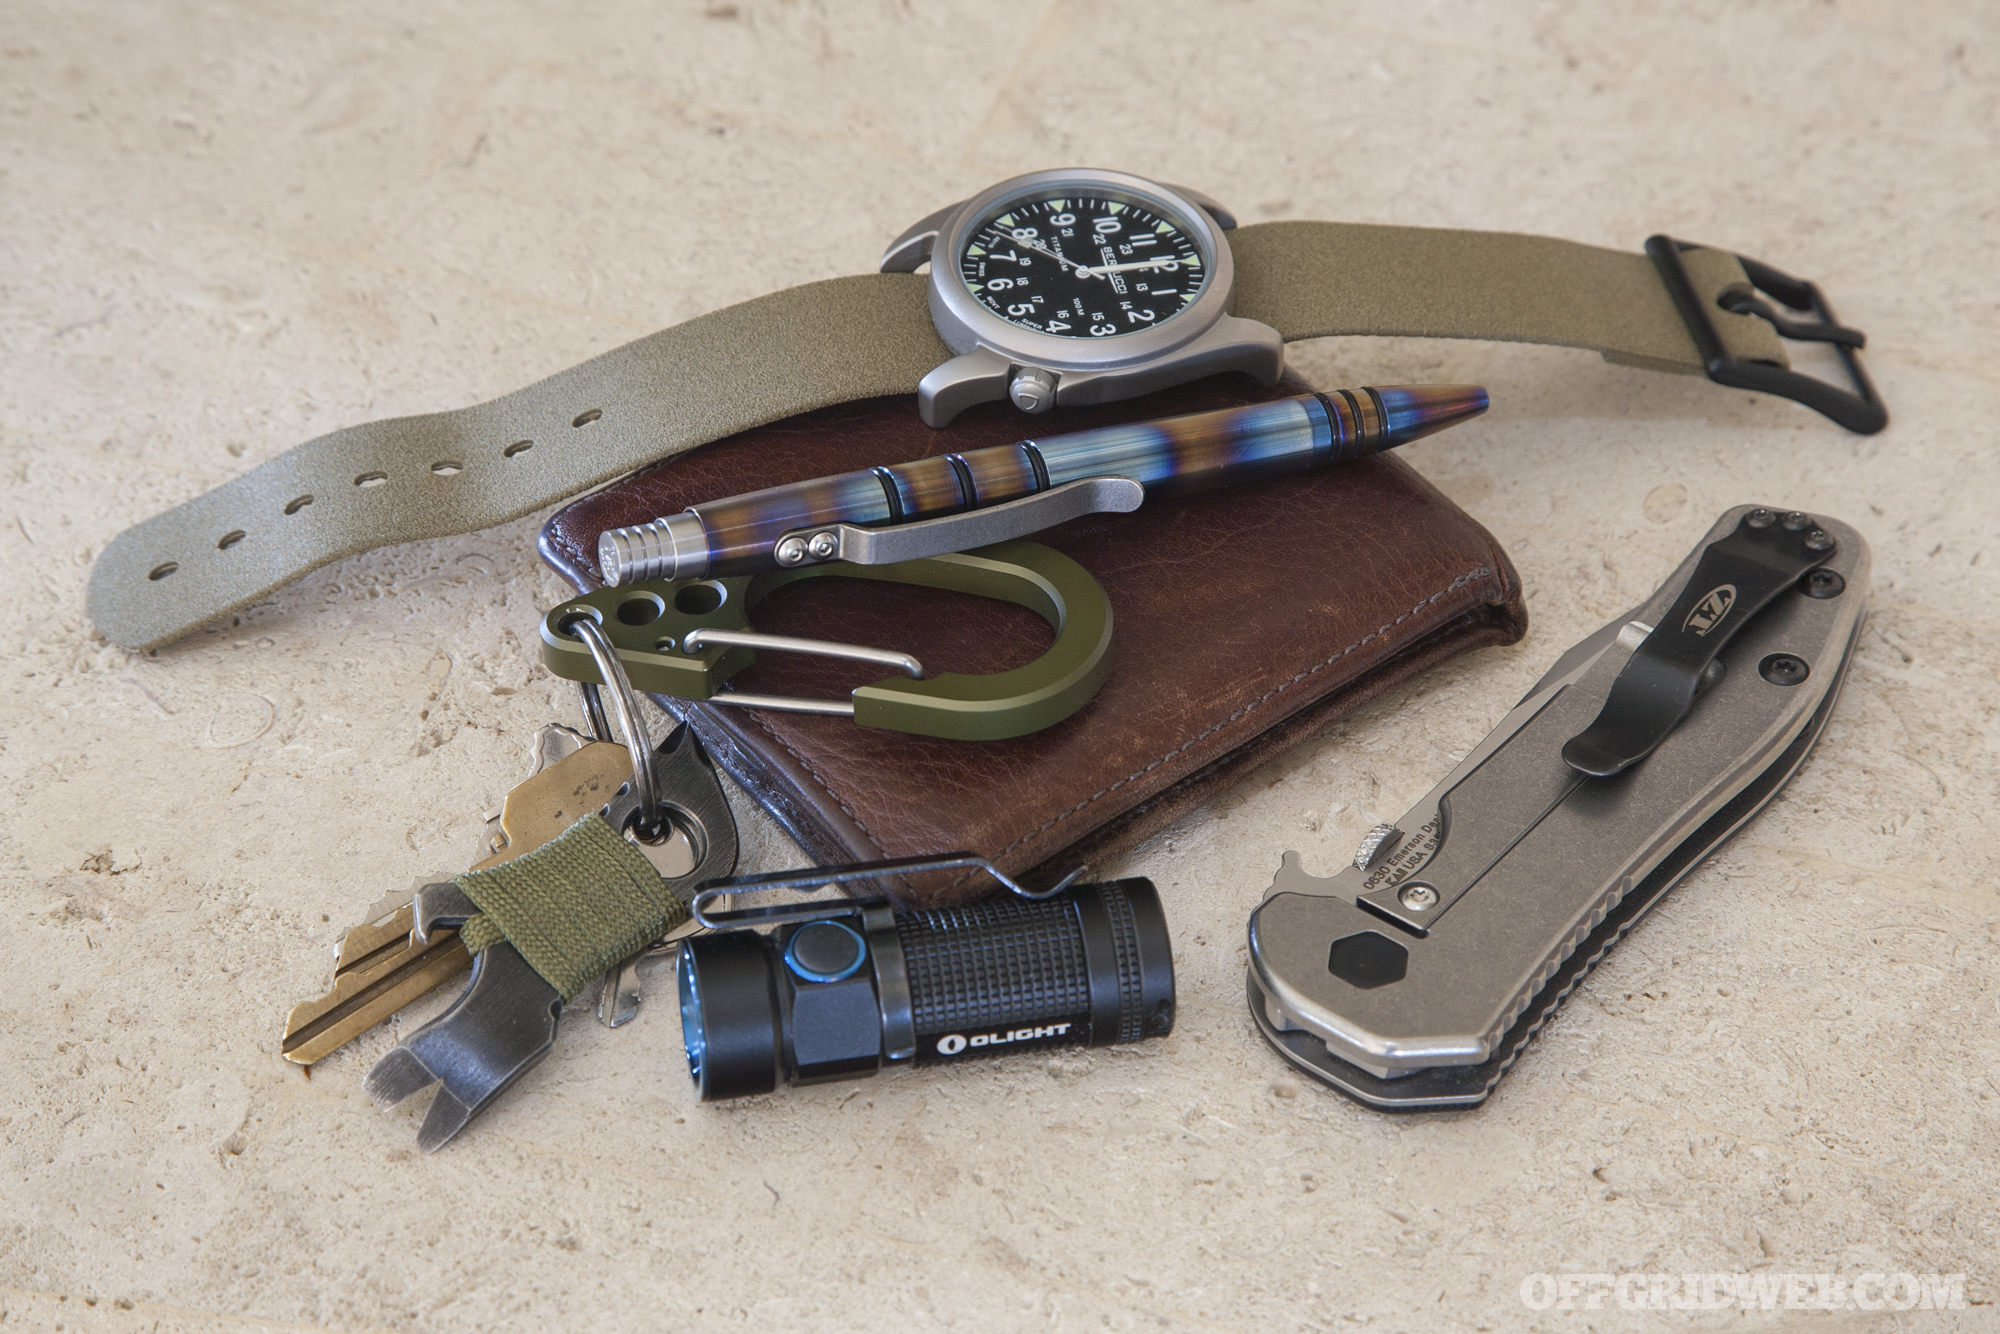
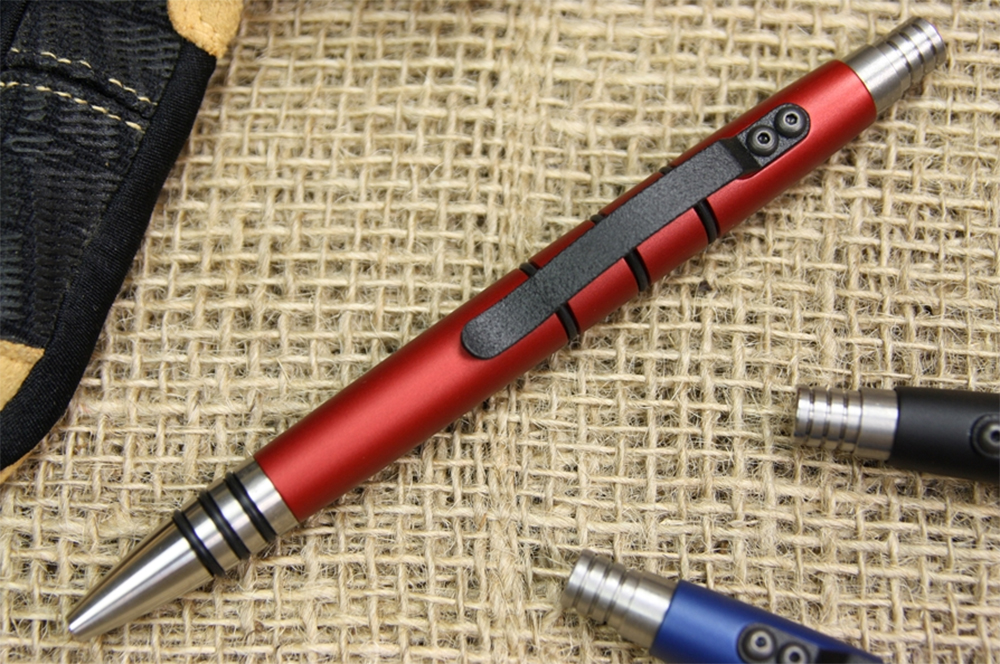
When it comes to choosing everyday-carry gear, less is more. EDC is all about maximizing your capability to solve daily problems, and doing so as efficiently as possible. Heavy, bulky, single-function tools don’t belong in this category — the goal is not to look like the tacticool version of Batman, with a utility belt packed full of oddly-specific gadgets. EDC tools should be justified based on their size, weight, durability, and effectiveness at a variety of tasks. If these variables are out of whack, the tool probably doesn’t belong in your pocket.
The tactical pen is a perfect example of a multi-purpose EDC tool. It’s undeniably handy for jotting notes and filling out paperwork on a day-to-day basis, but is also designed for use as an impact weapon in self-defense scenarios. And, much like pocket knives, tactical pen designs range from basic and affordable to intricate and exotic.
Tuff Writer Tactical Pens
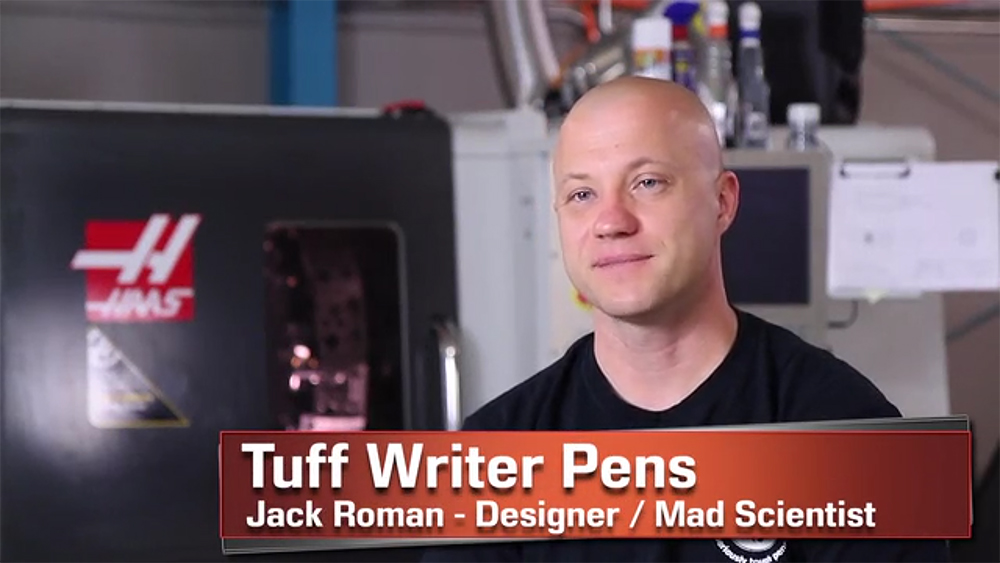
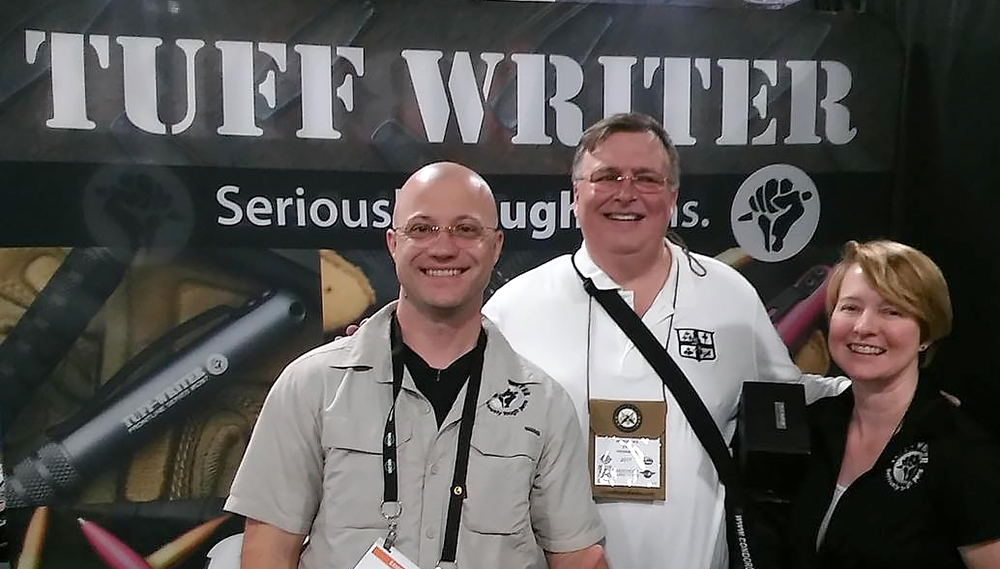
Today, Tuff Writer is an industry-leader in the tactical pen market, but the company started out as a personal project by founder Jack Roman.
About eight years ago, Jack designed and produced his first tactical pens for members of his martial arts training group in Chandler, Arizona. He writes, “We trained everything from empty hand to stick, knife, and improvised weapons tactics… I suggested that someone should make a pen that would serve as an improvised defensive tool. [My instructor’s] reply was, ‘Great idea [expletive], why don’t you do that and make us some.'”
Editor’s Note: In this article, we’ll share some excerpts of our interview with Jack Roman, but there’s a lot more info about his journey with Tuff Writer that we couldn’t fit here. Click here to read the entire uncut interview with more of Jack’s thoughts and insights.
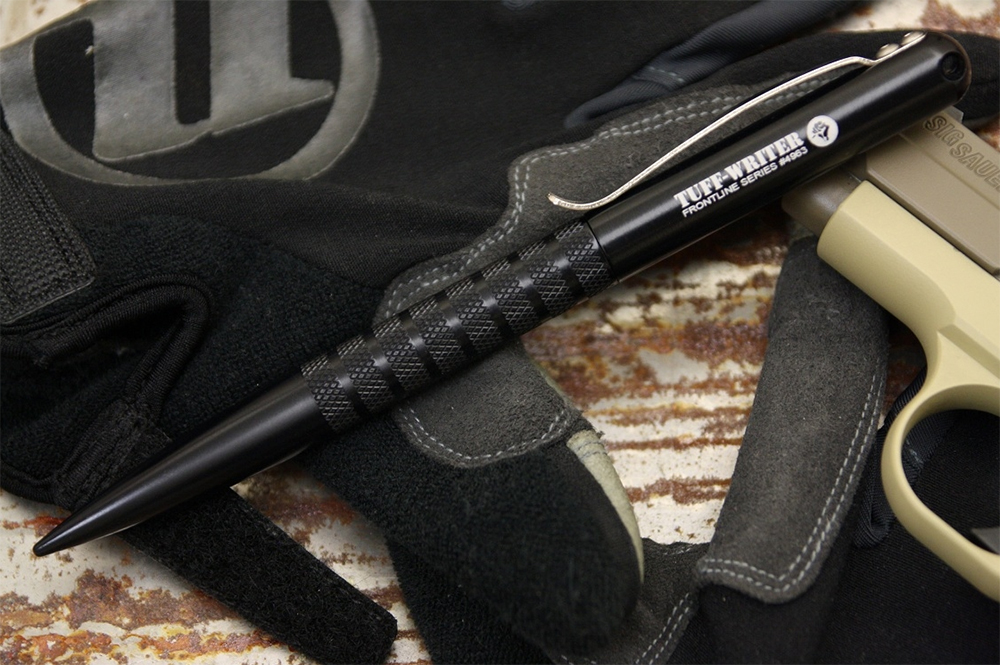
The Frontline was Jack’s first tactical pen design, and showed that Tuff Writer was a viable business.
“The idea was just stuck in my head. So I took the money I had in savings, hired a mechanical engineer to help me with the first design, and got to work.” The end result was the Tuff Writer Frontline tactical pen. Through word-of-mouth and the launch of the company’s web site, orders were soon pouring in from law enforcement officers, military members, and martial artists from far and wide.
The Tuff Writer Operator series was inspired by the success of the original Frontline.
Jack continued to build on this success through tooling improvements and new designs. As Tuff Writer grew, he remained determined to continue designing and manufacturing the pens in the USA.
He writes, “Outsourcing was never part of the plan. That was a conscious decision from the very start… You can usually make it cheaper somewhere else but rarely can you make it better somewhere else. For us, keeping manufacturing in the USA is and always will be a core value. We now have 3 CNC machines and do everything from design to prototyping and machining as well as post machine finishing (tumbling, brushing, flaming and polishing, etc.) in-house.”
The Original Mini-Click
After several well-received capped pen designs, Jack saw the demand for a tough tactical pen with the convenience of a click mechanism. His friends Roy Huntington and Mike Janich also suggested a smaller model for shirt-pocket carry, and this led to the creation of the Mini-Click. The first-generation aluminum Mini-Click was launched on Kickstarter, and quickly developed a strong fan base.
The original Mini-Click was designed with a small footprint for carry in a shirt pocket.
After the Mini-Click Kickstarter project took off, Jack listened intently to his customers. “Quite a few people started asking about a titanium version. I took the opportunity to incorporate some small design improvements here and there based on user feedback, and pretty soon I found that virtually every piece had changed. We were looking at a Gen-2 Mini-Click.”
Jack went back to the drawing board for Gen 2. Nearly every piece of the pen has been revised.
In January 2017, the second-gen Tuff Writer Mini-Click pen launched on Kickstarter. That same month, we met Jack at SHOT Show in Las Vegas, and he graciously gave us one of the very first Mini-Click Gen 2 pens to test and review. After bringing it back home, snapping some photos, and using it for several weeks, we’ll share our thoughts on this new tactical pen.
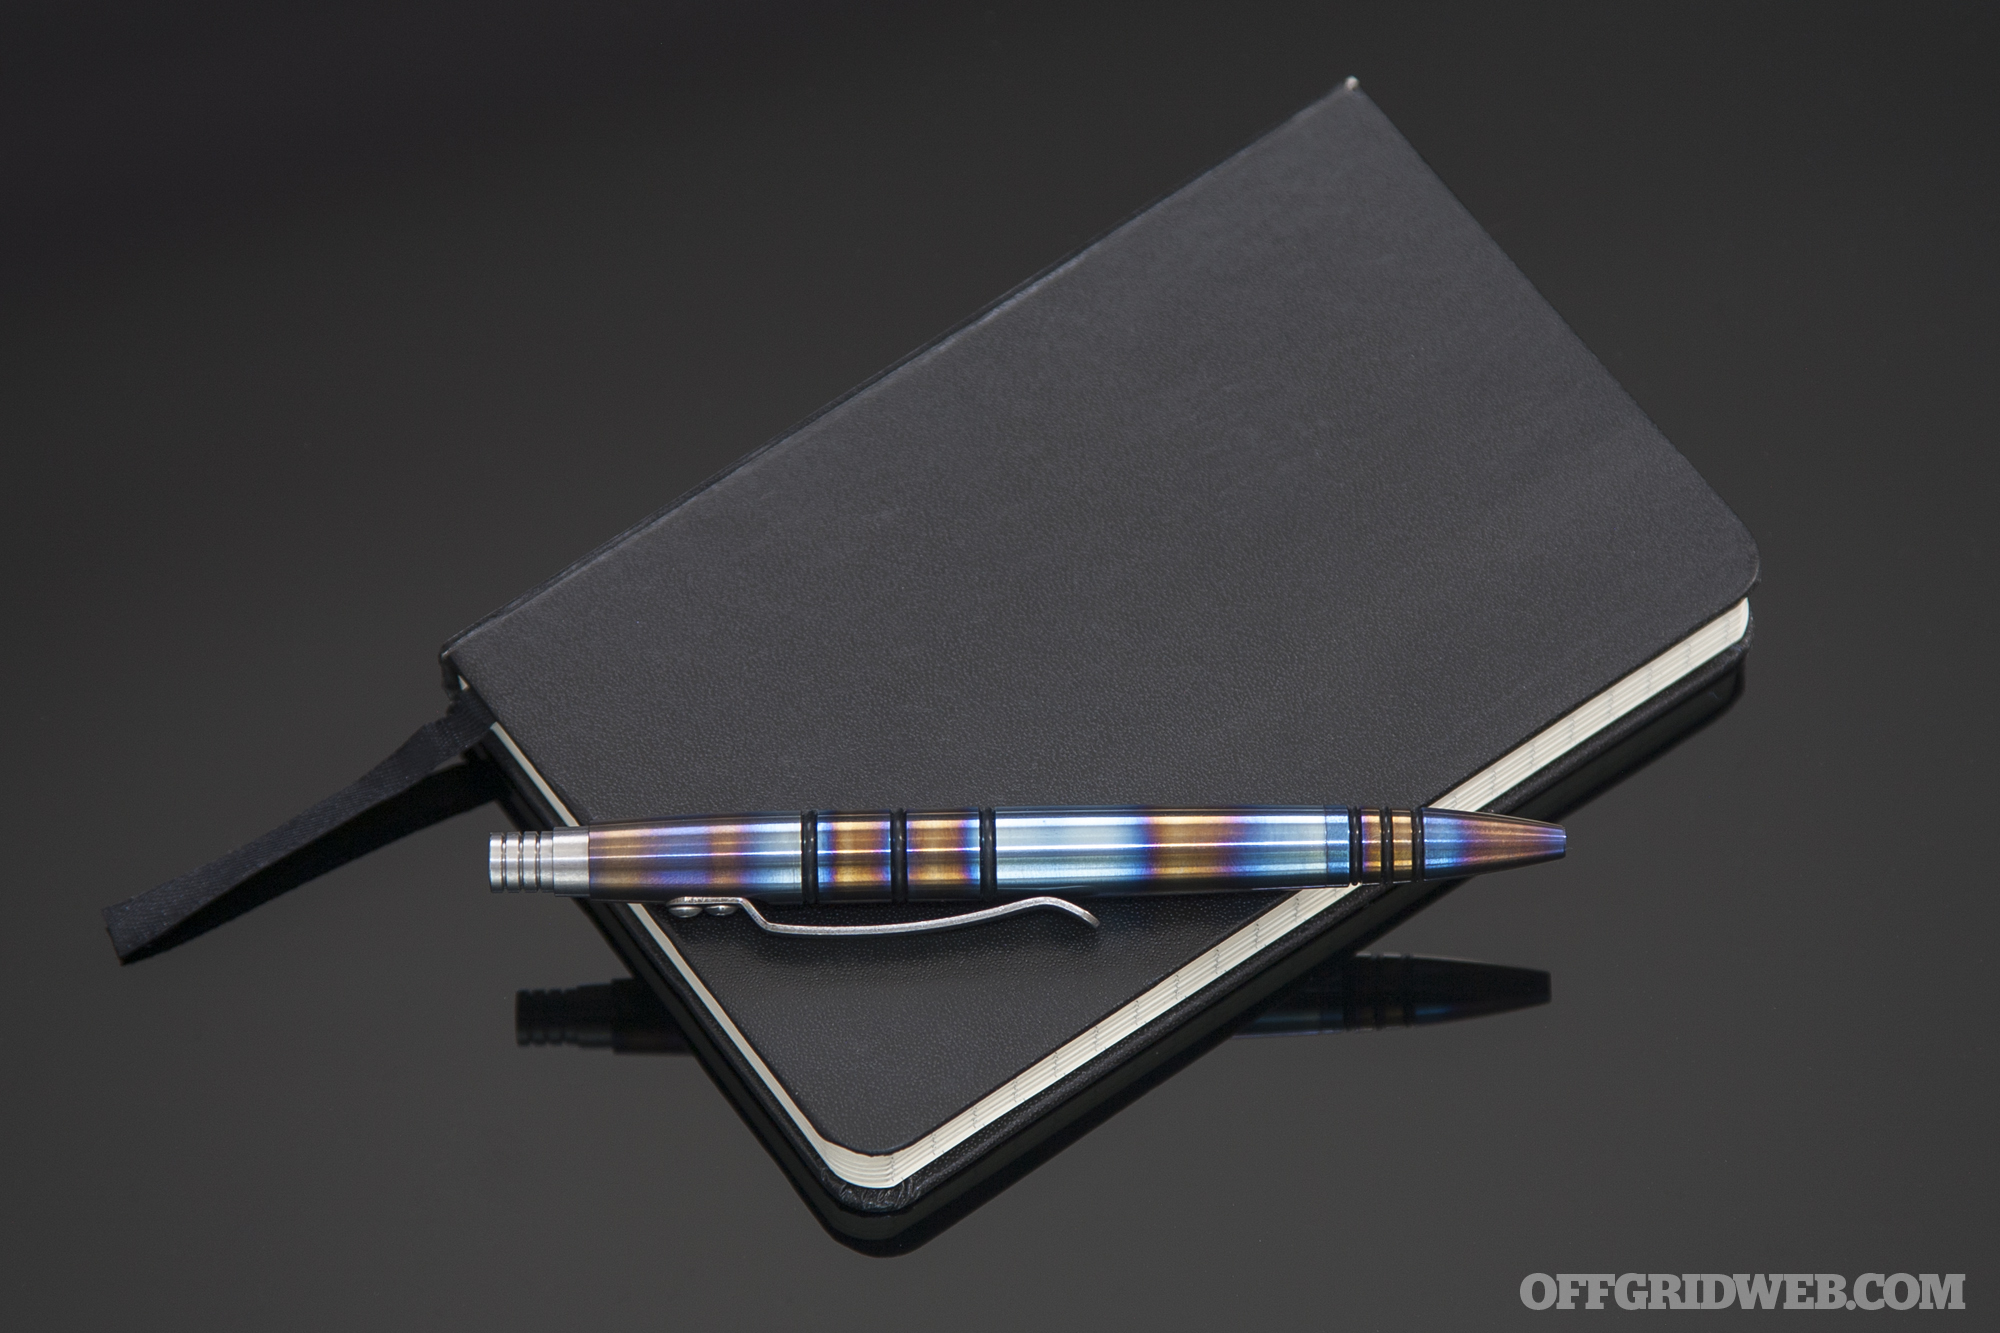
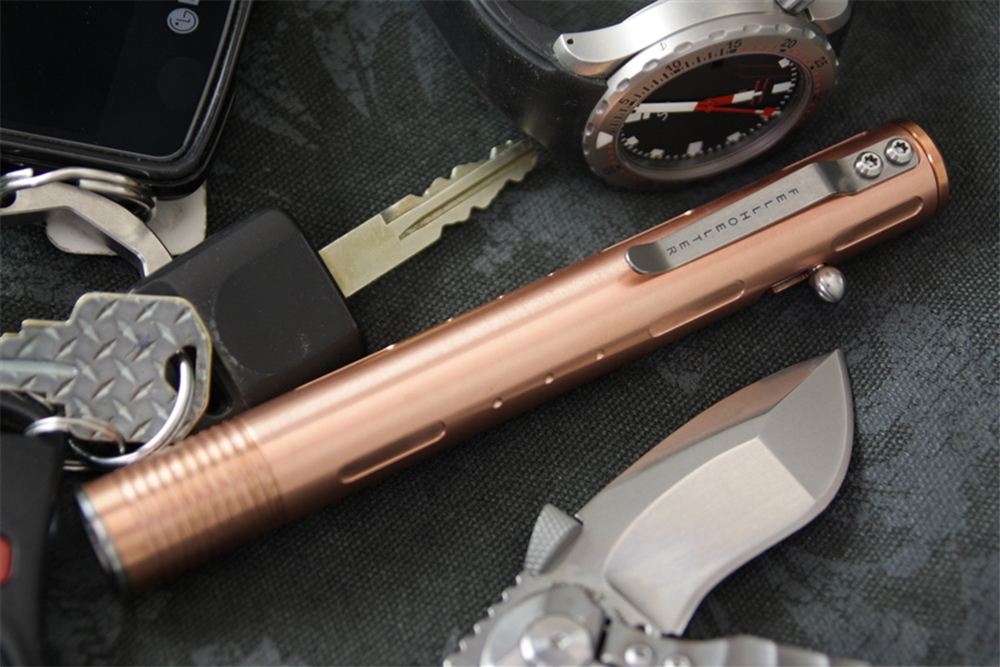
Mini-Click Gen 2 Review
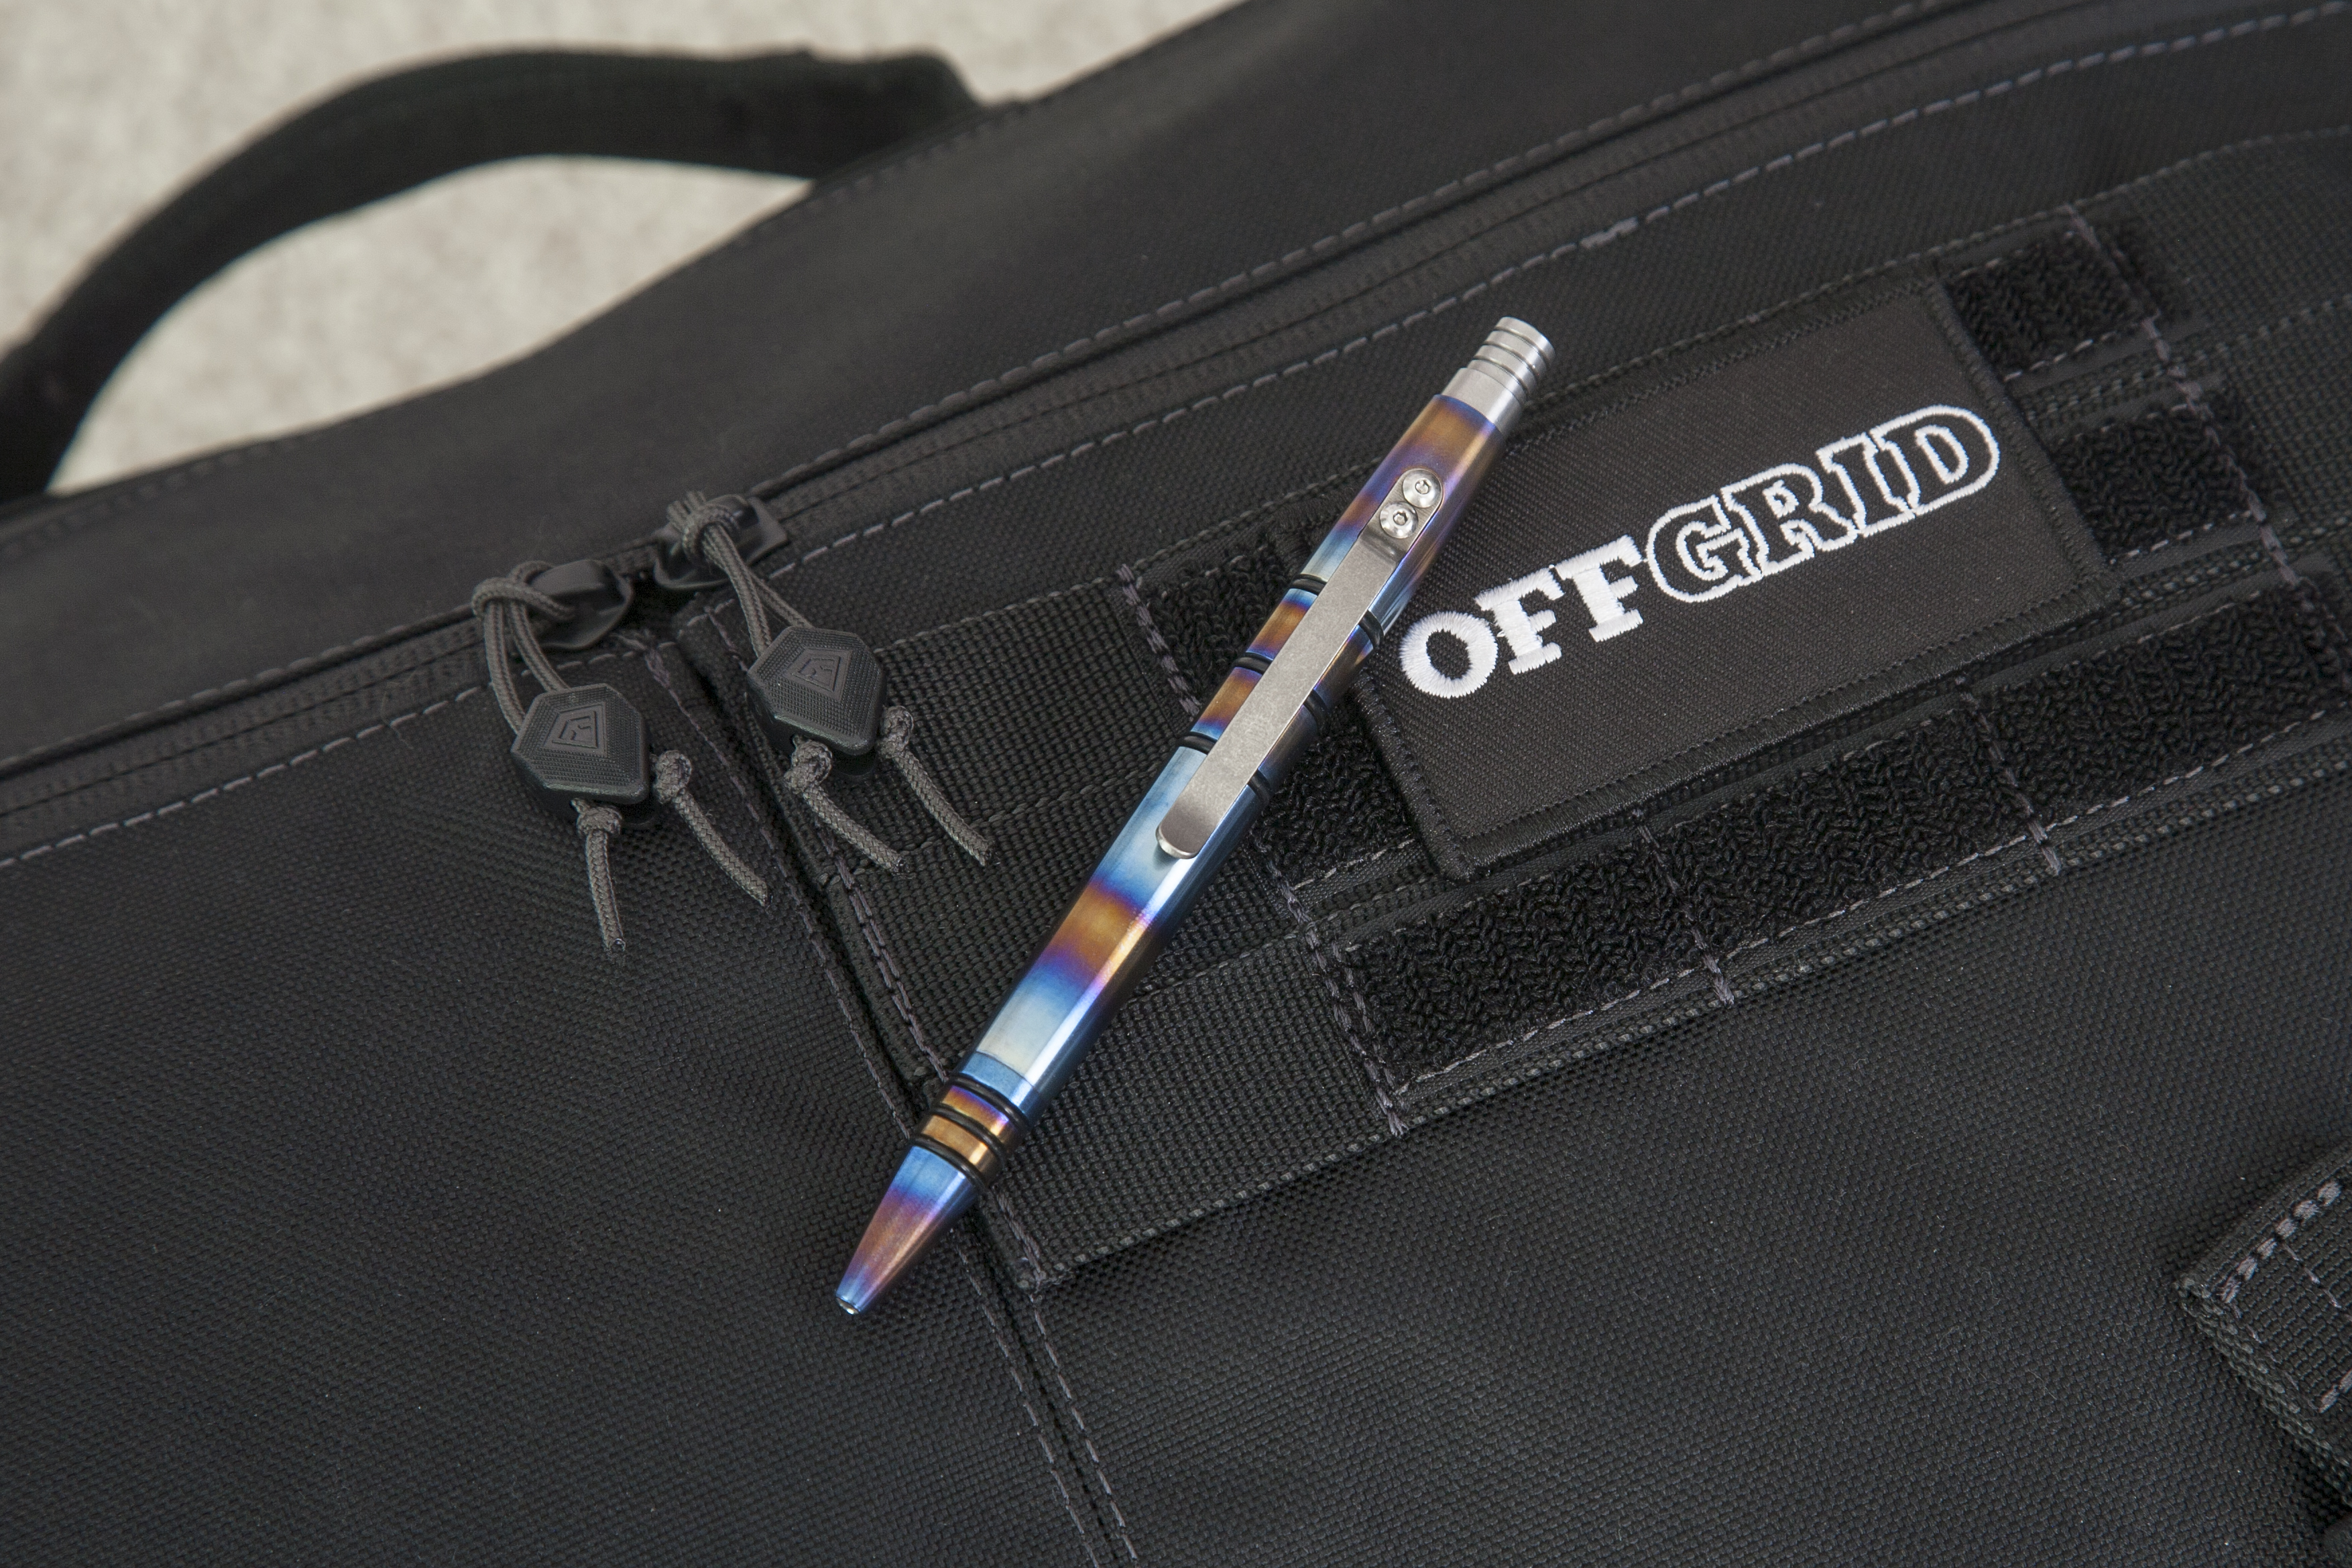
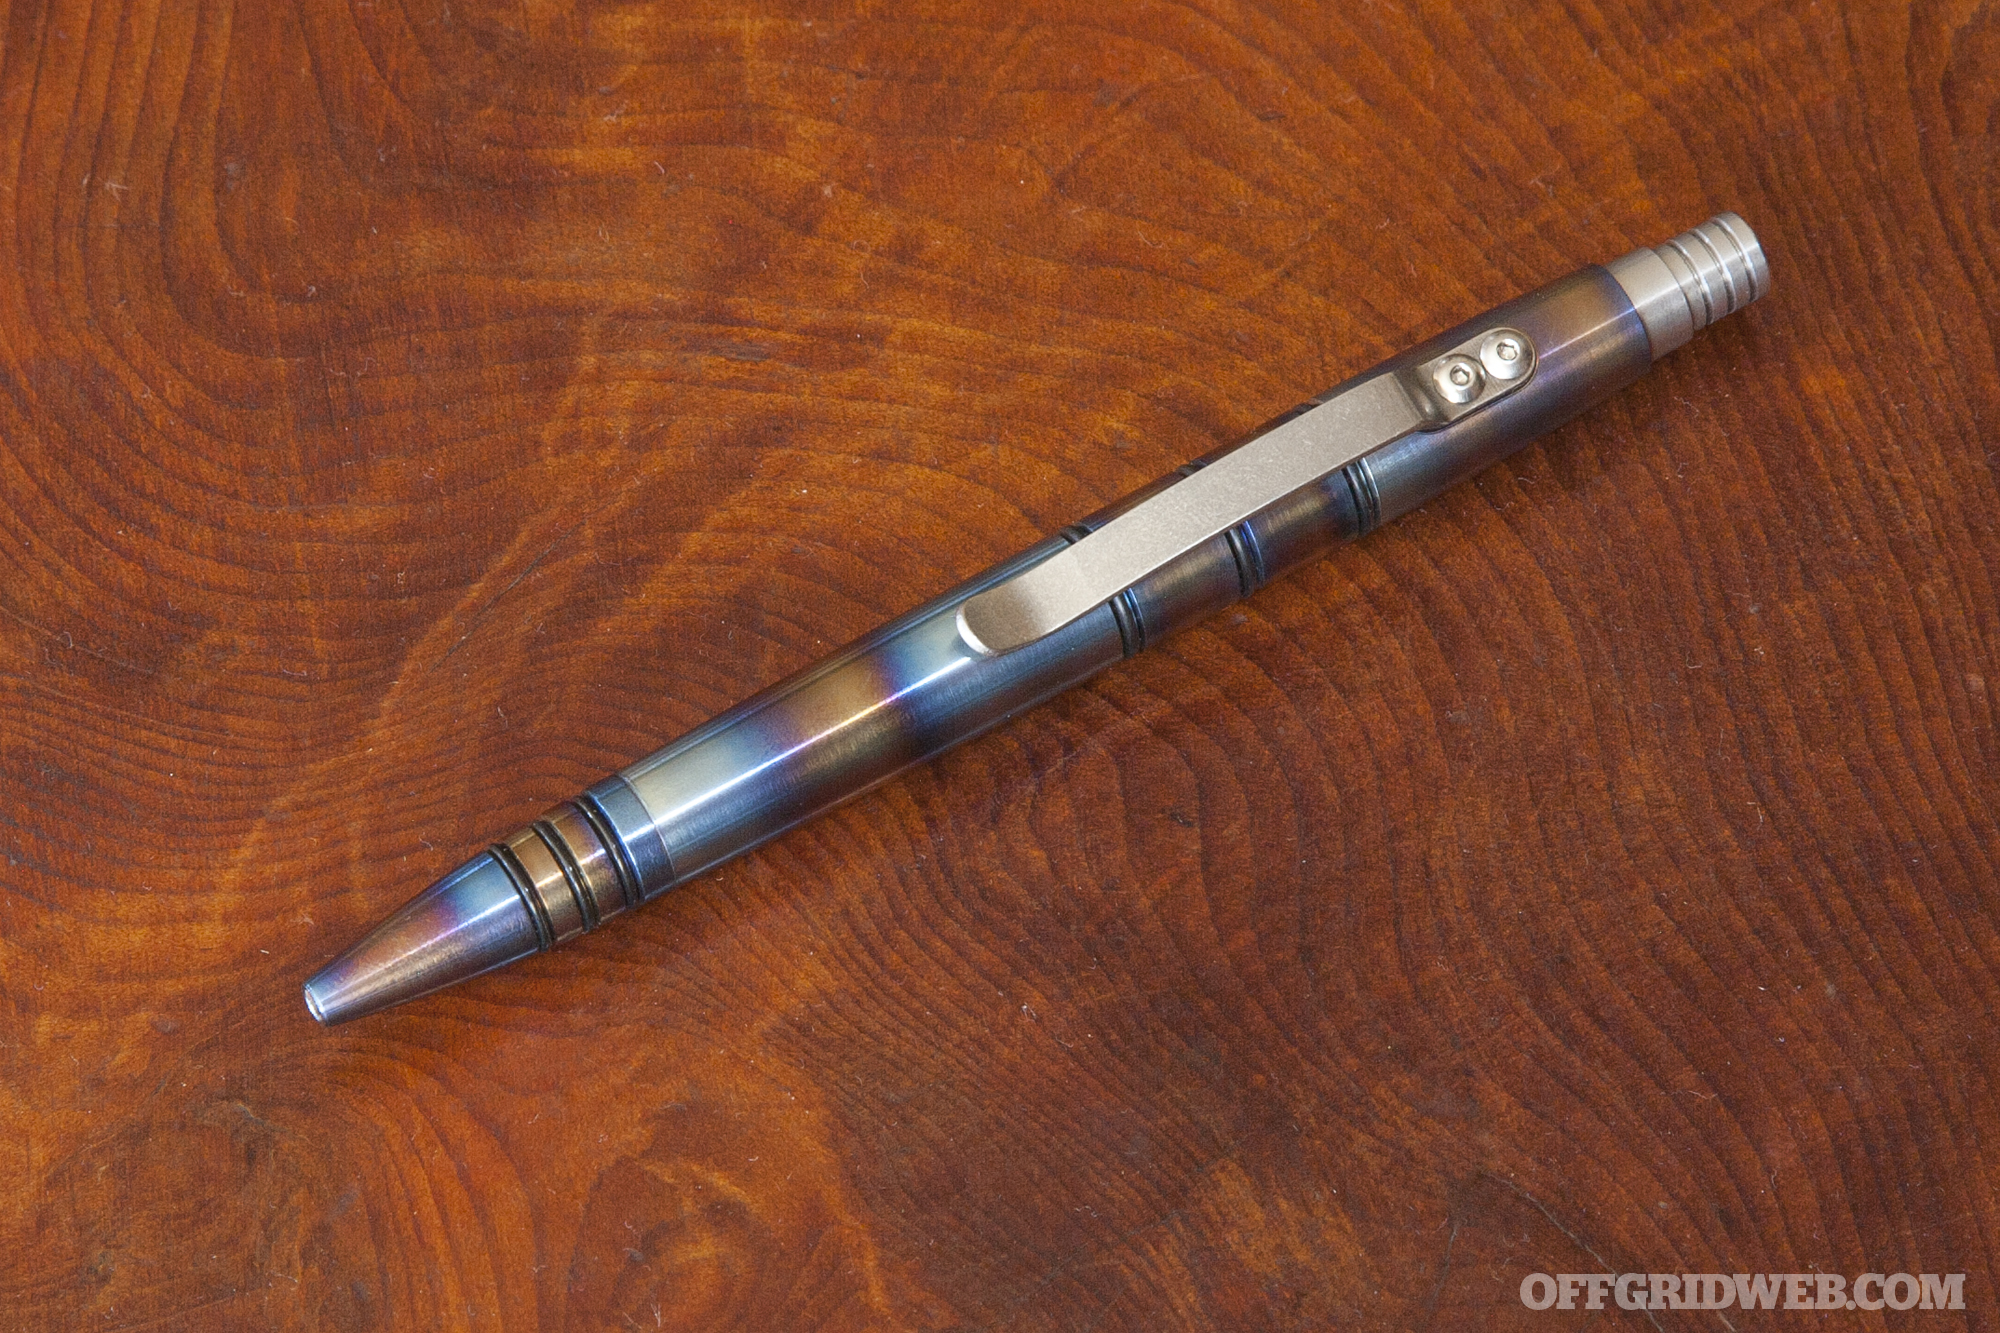
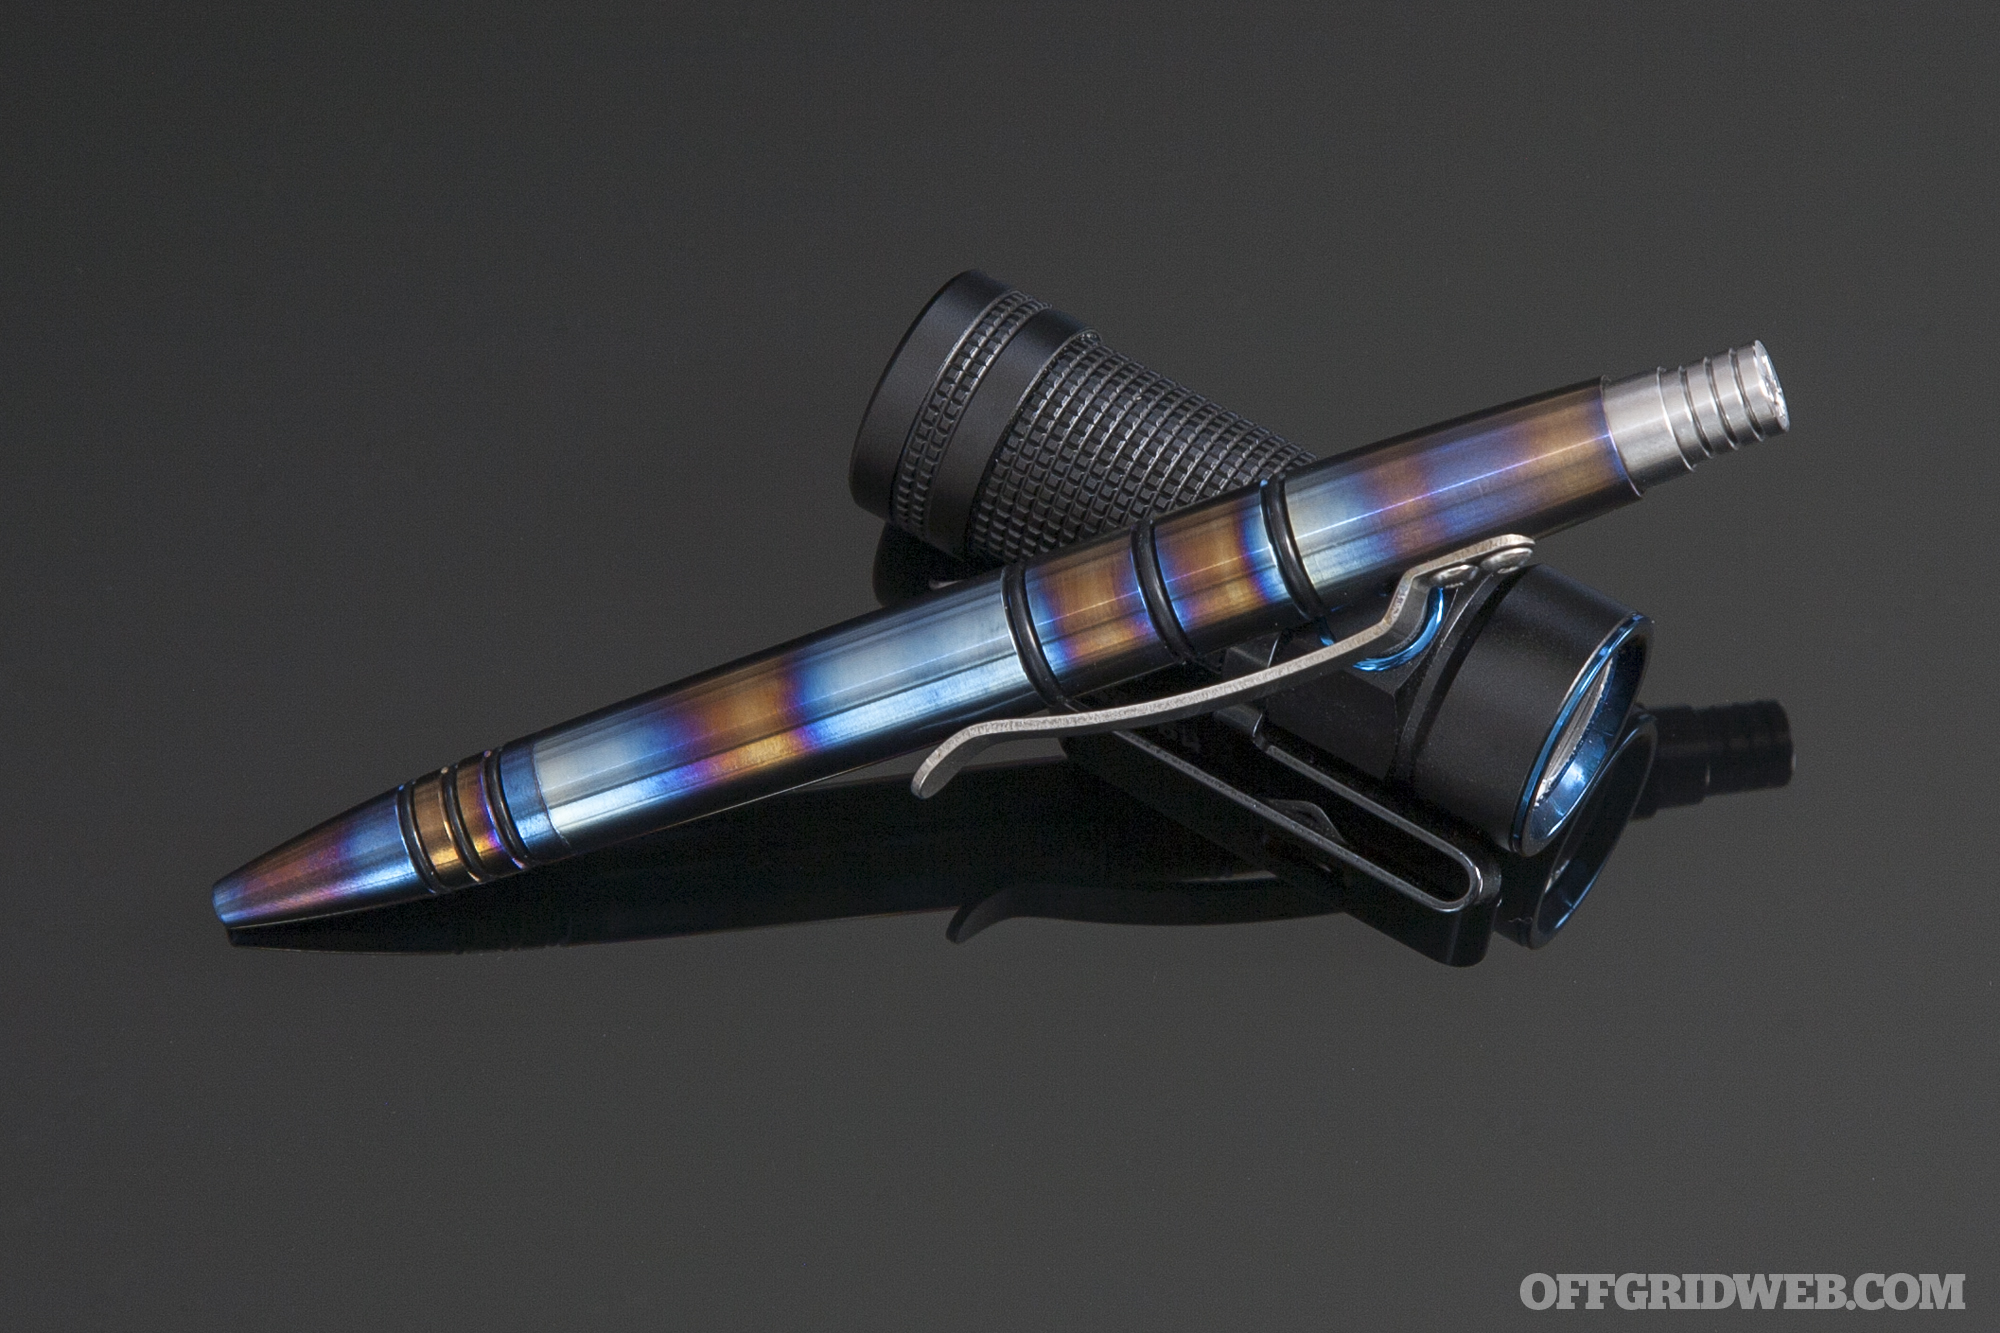
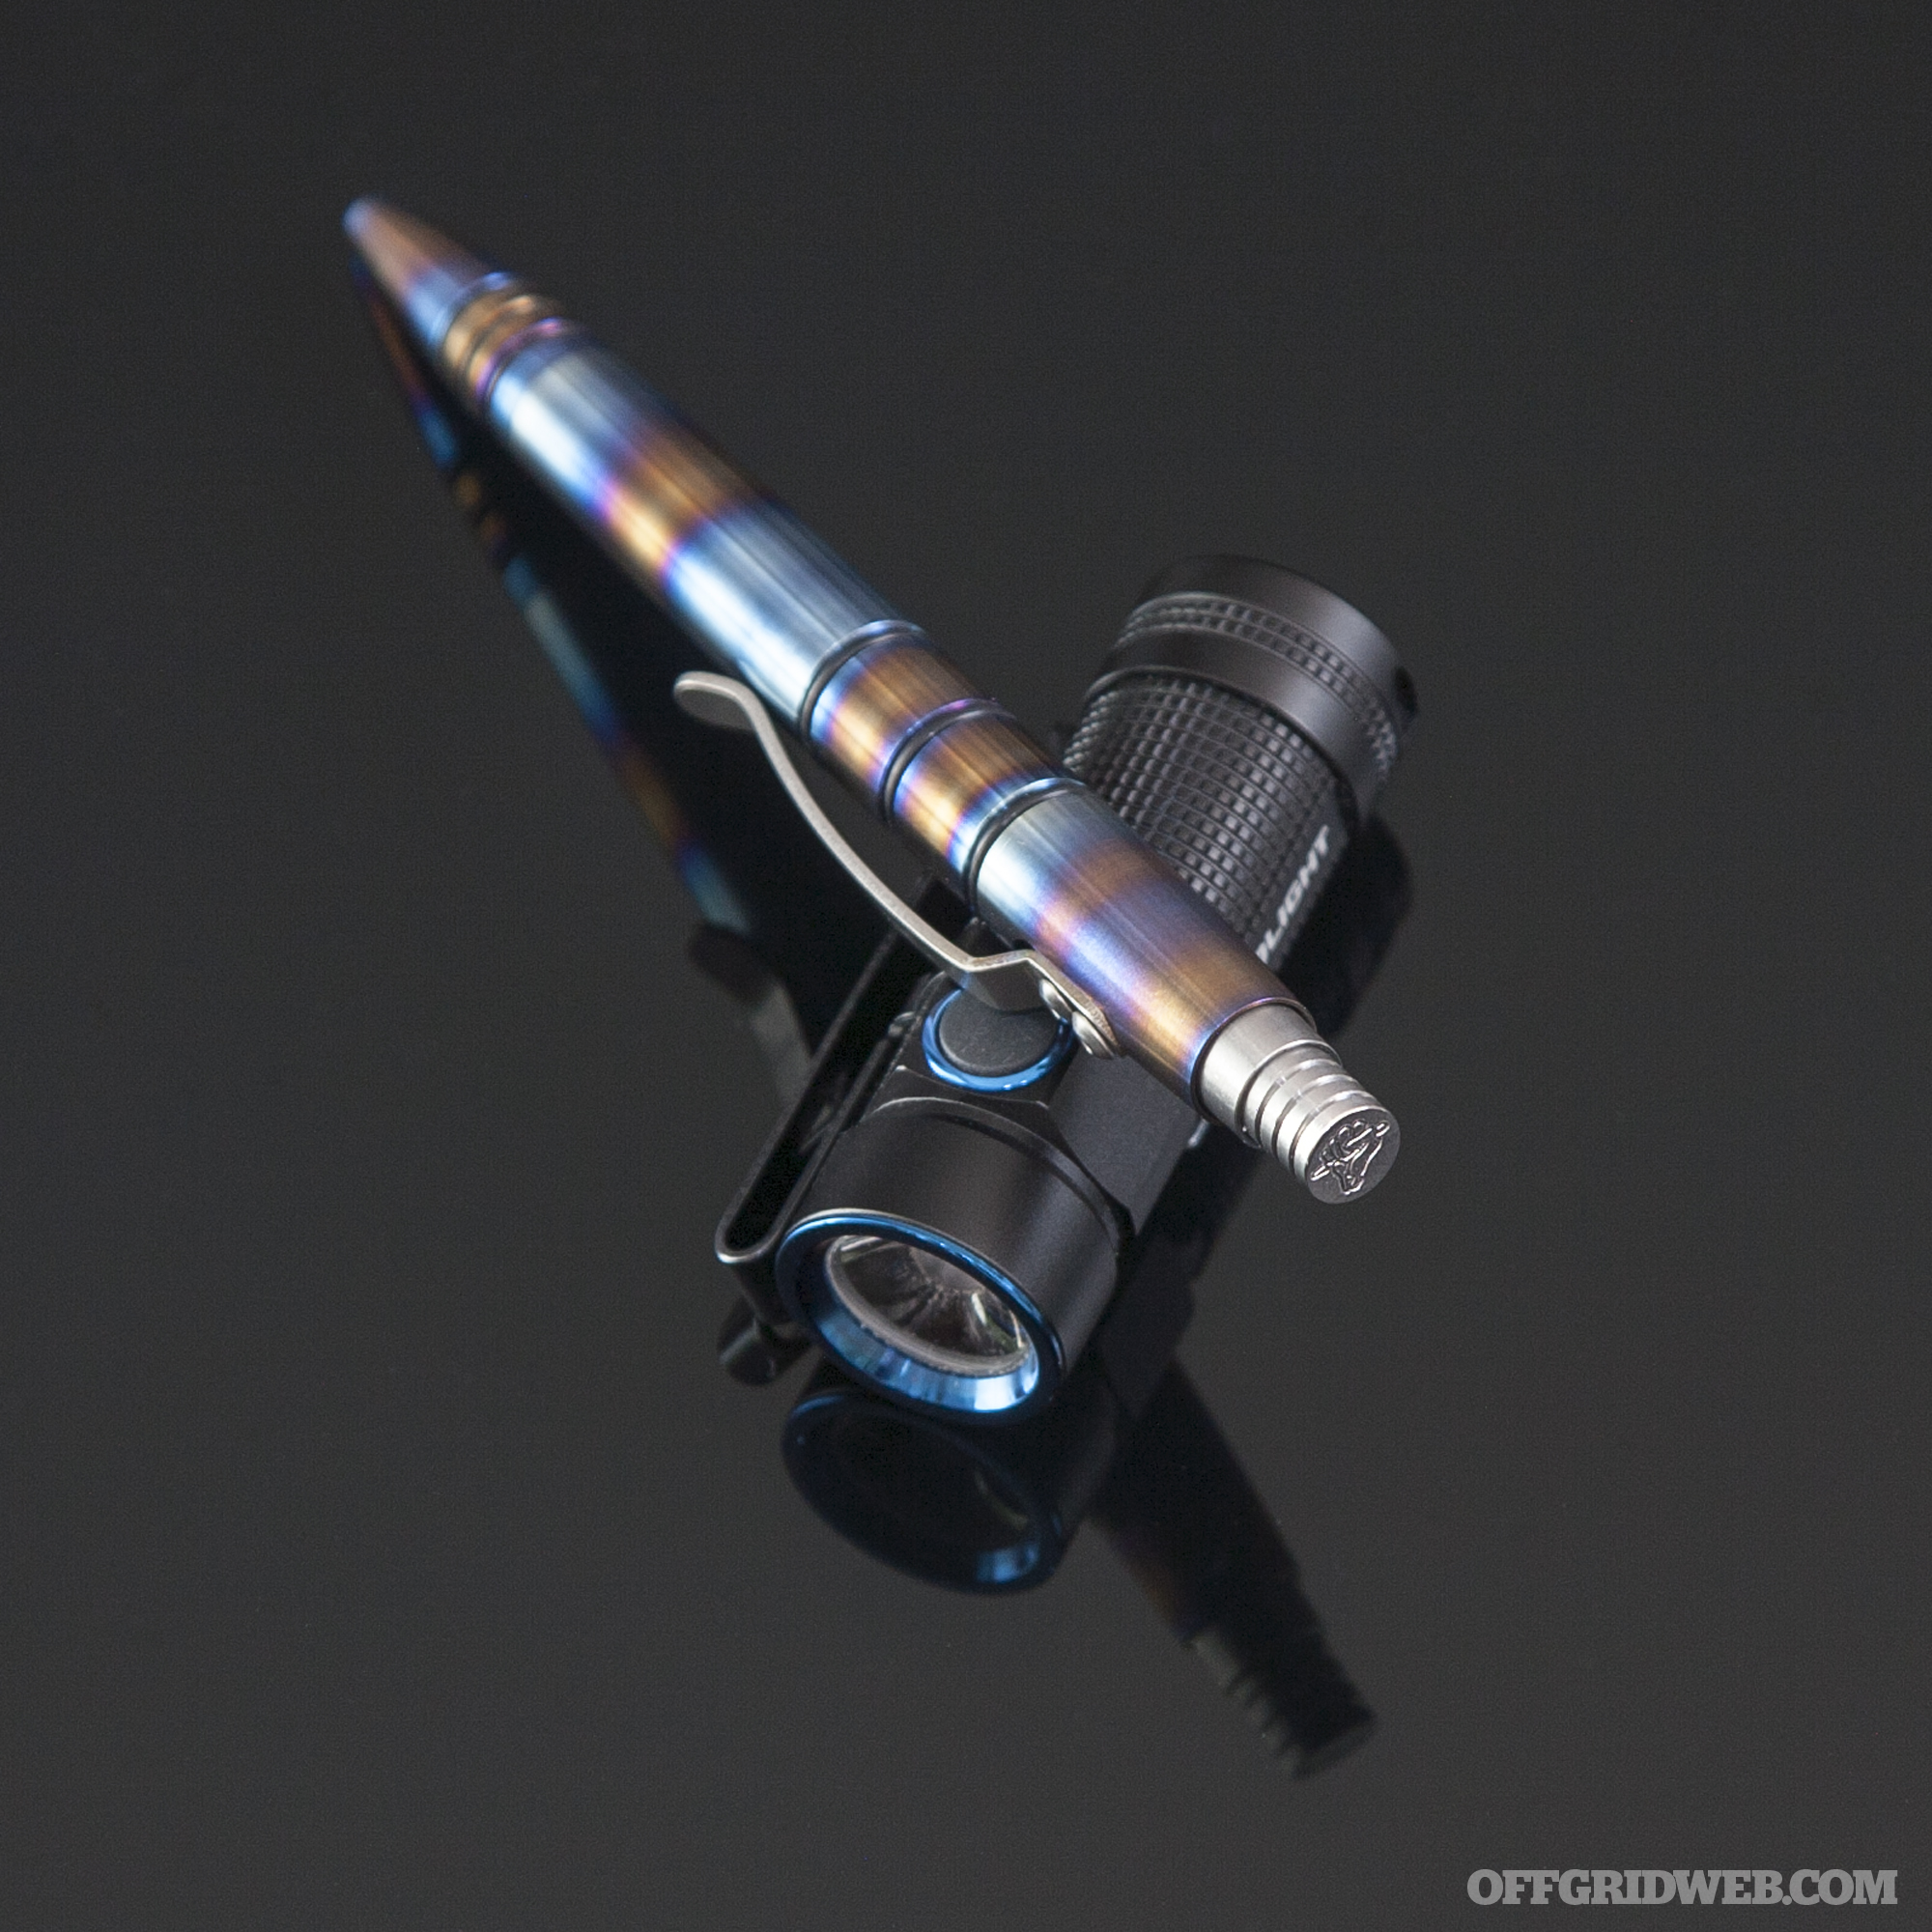
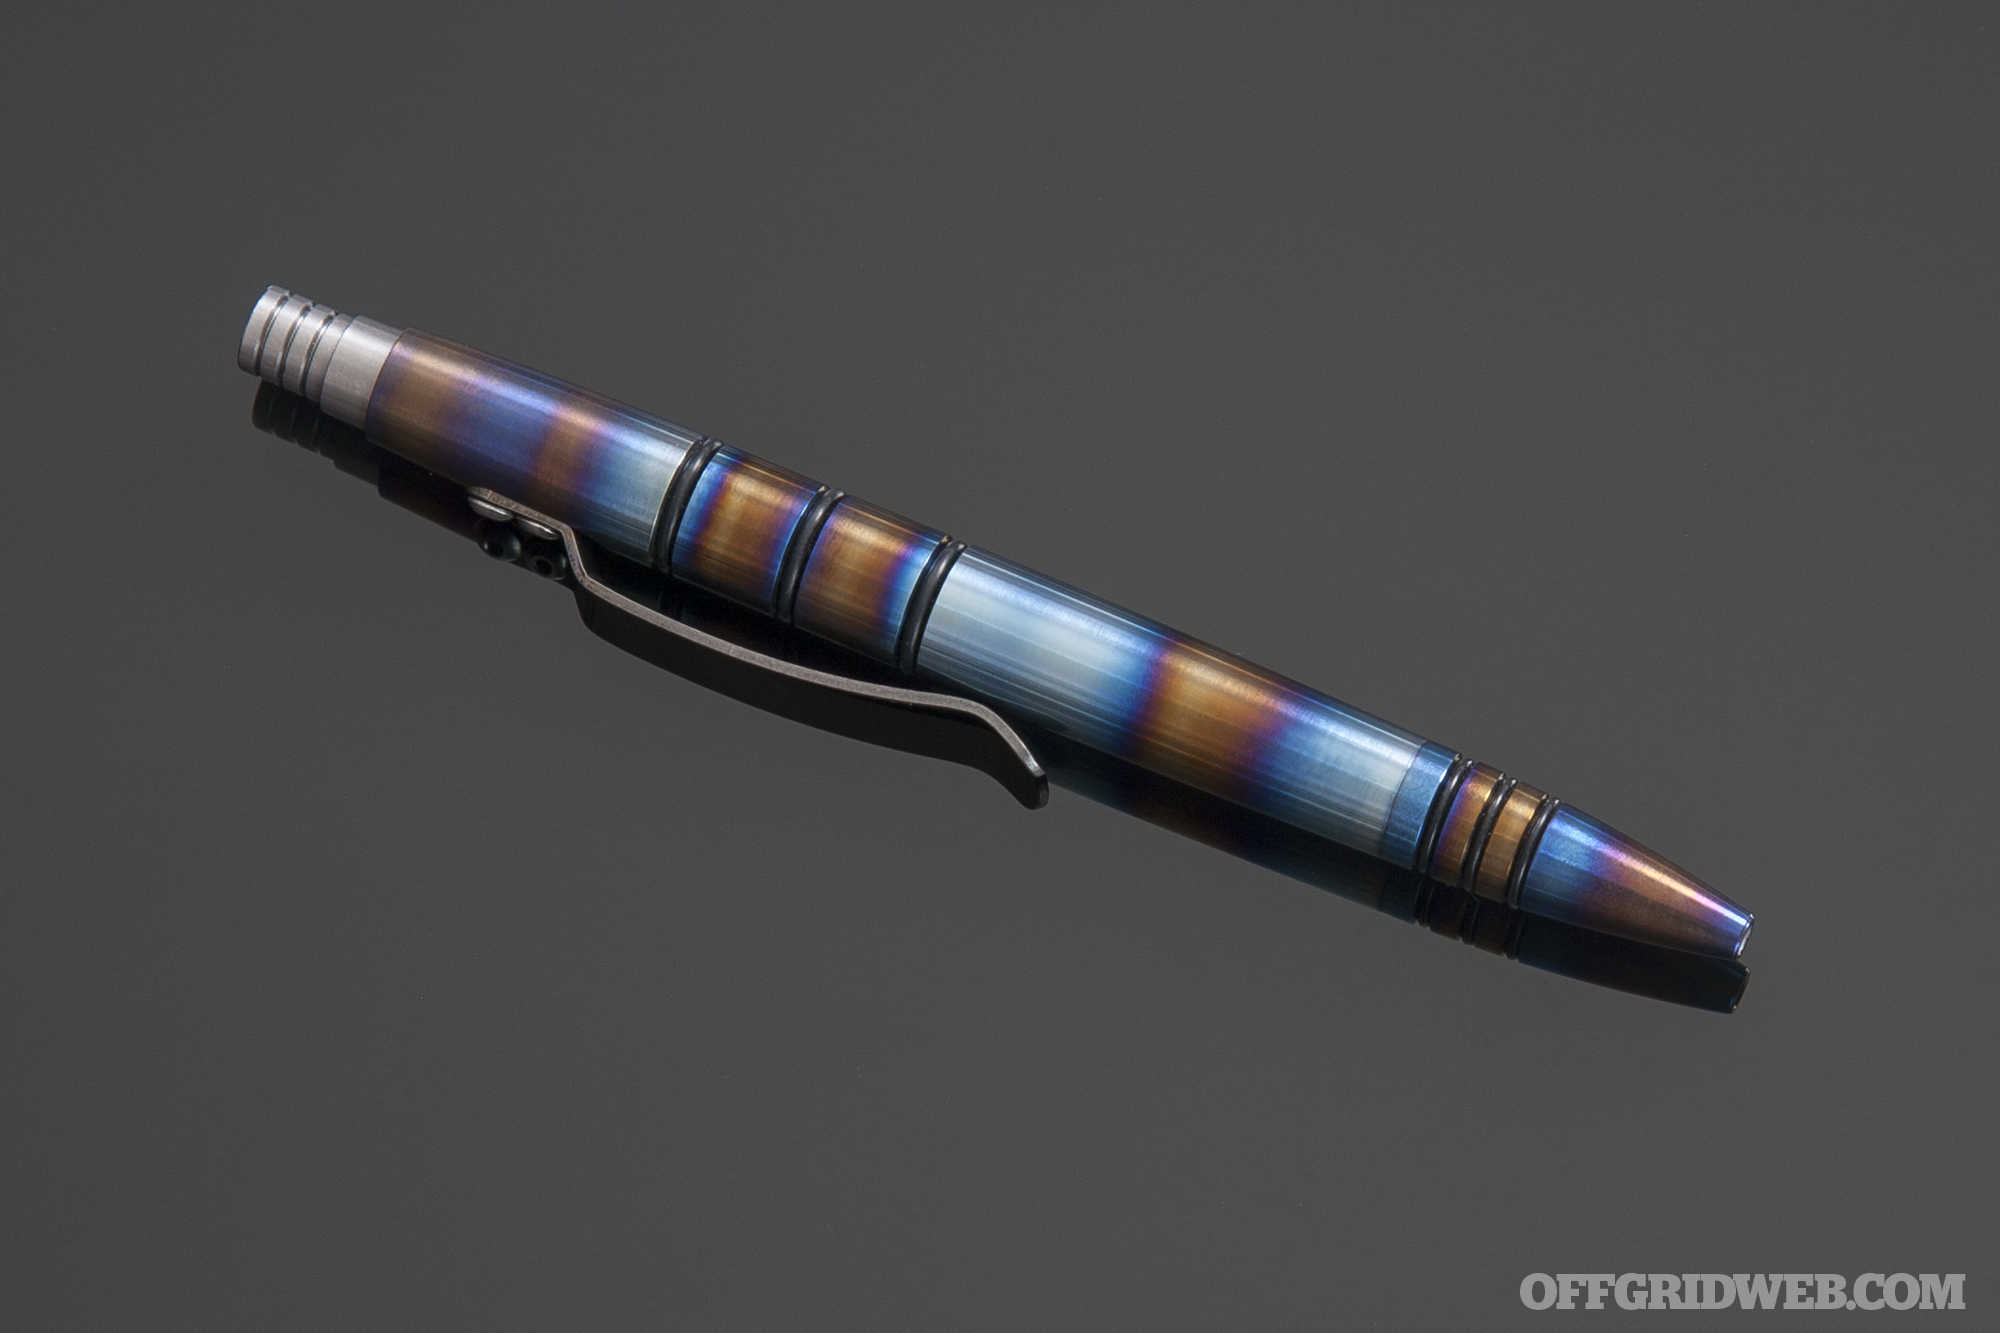
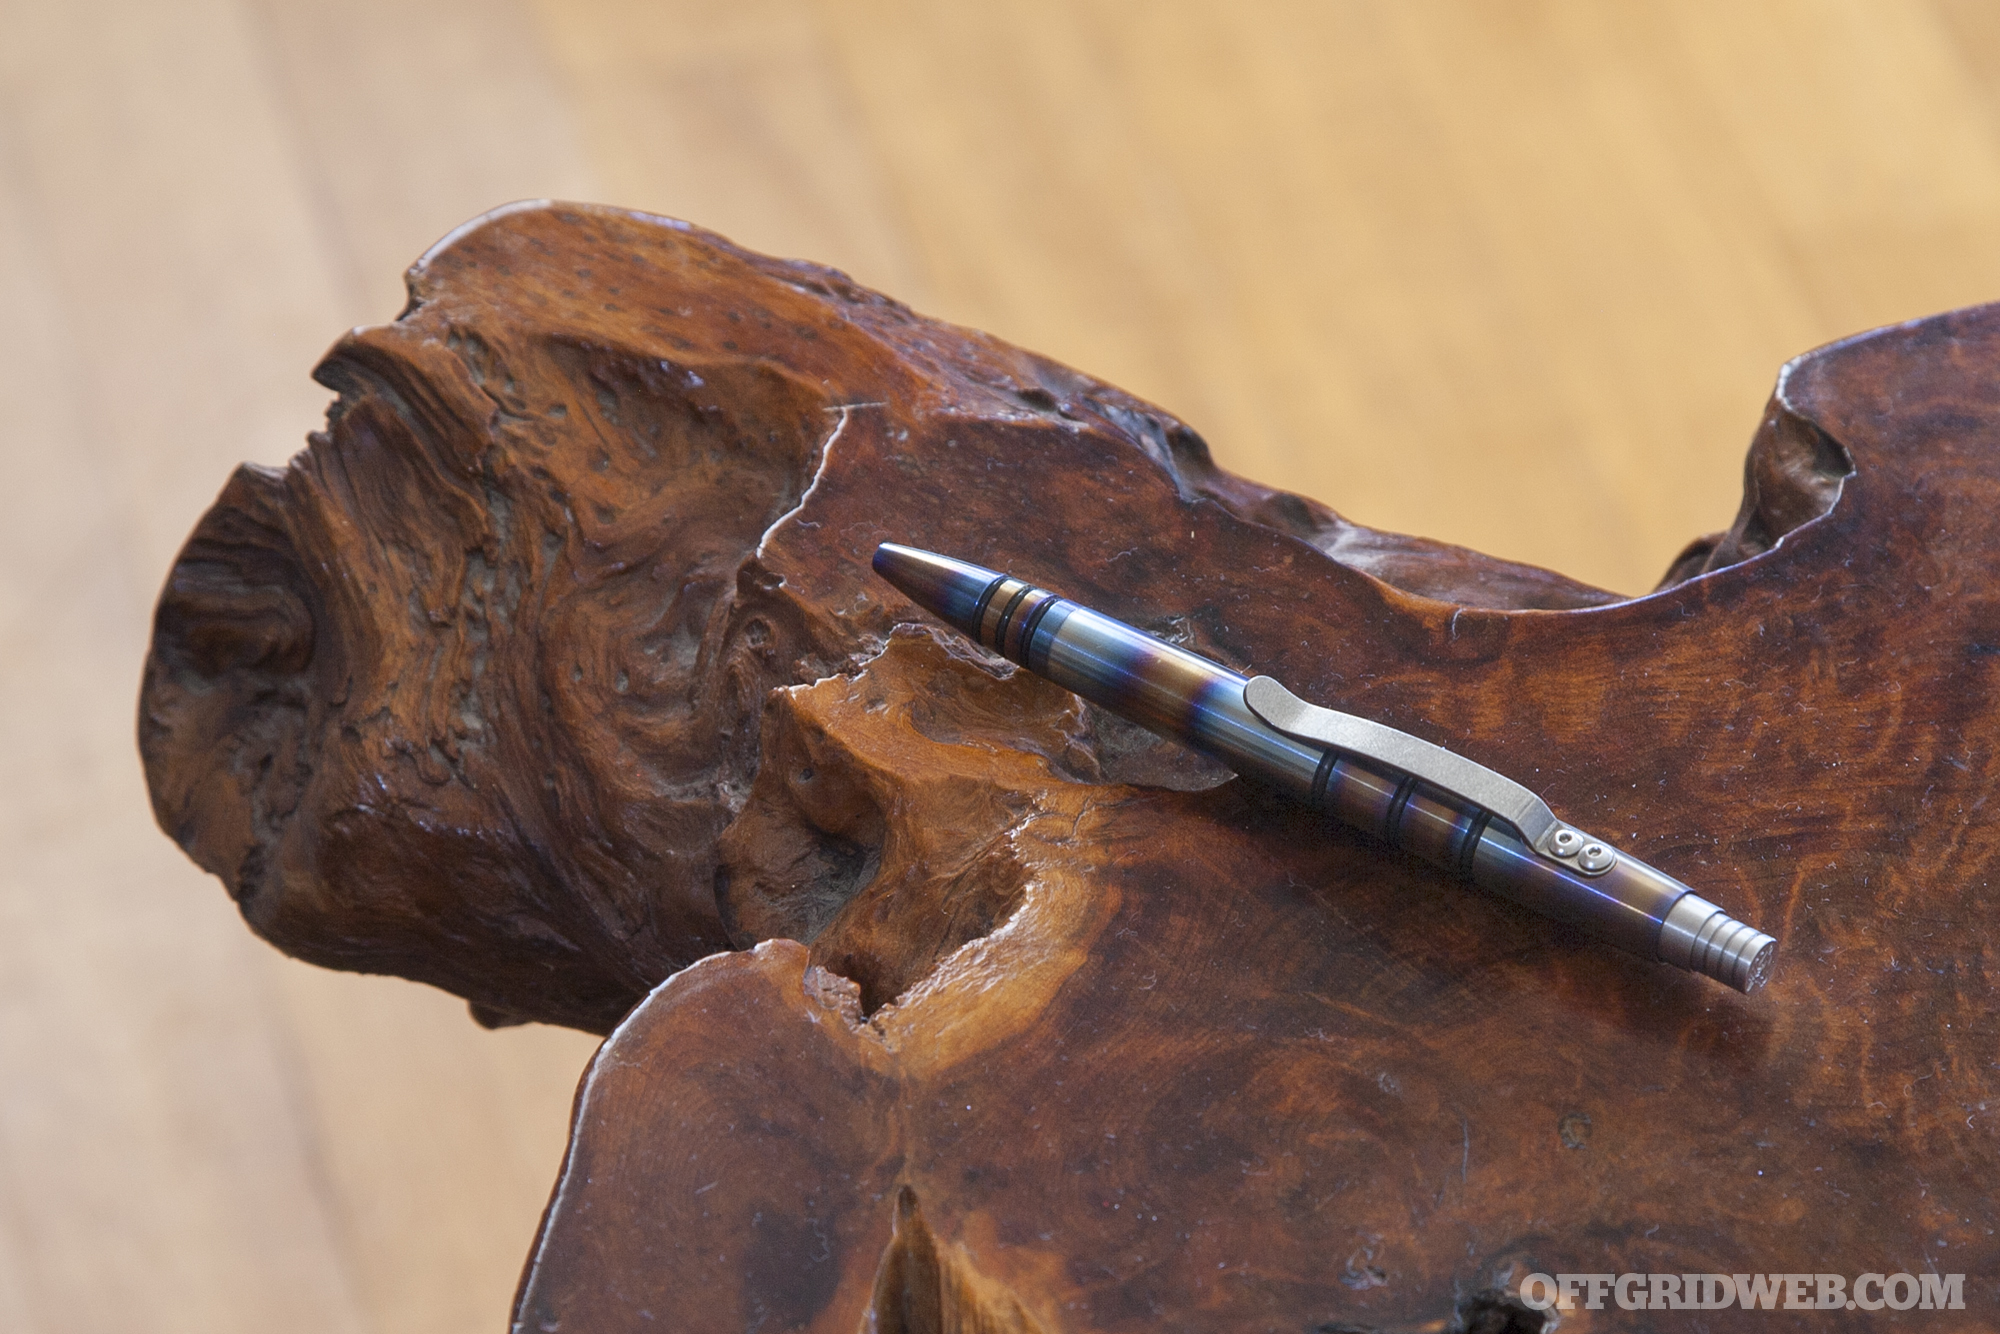
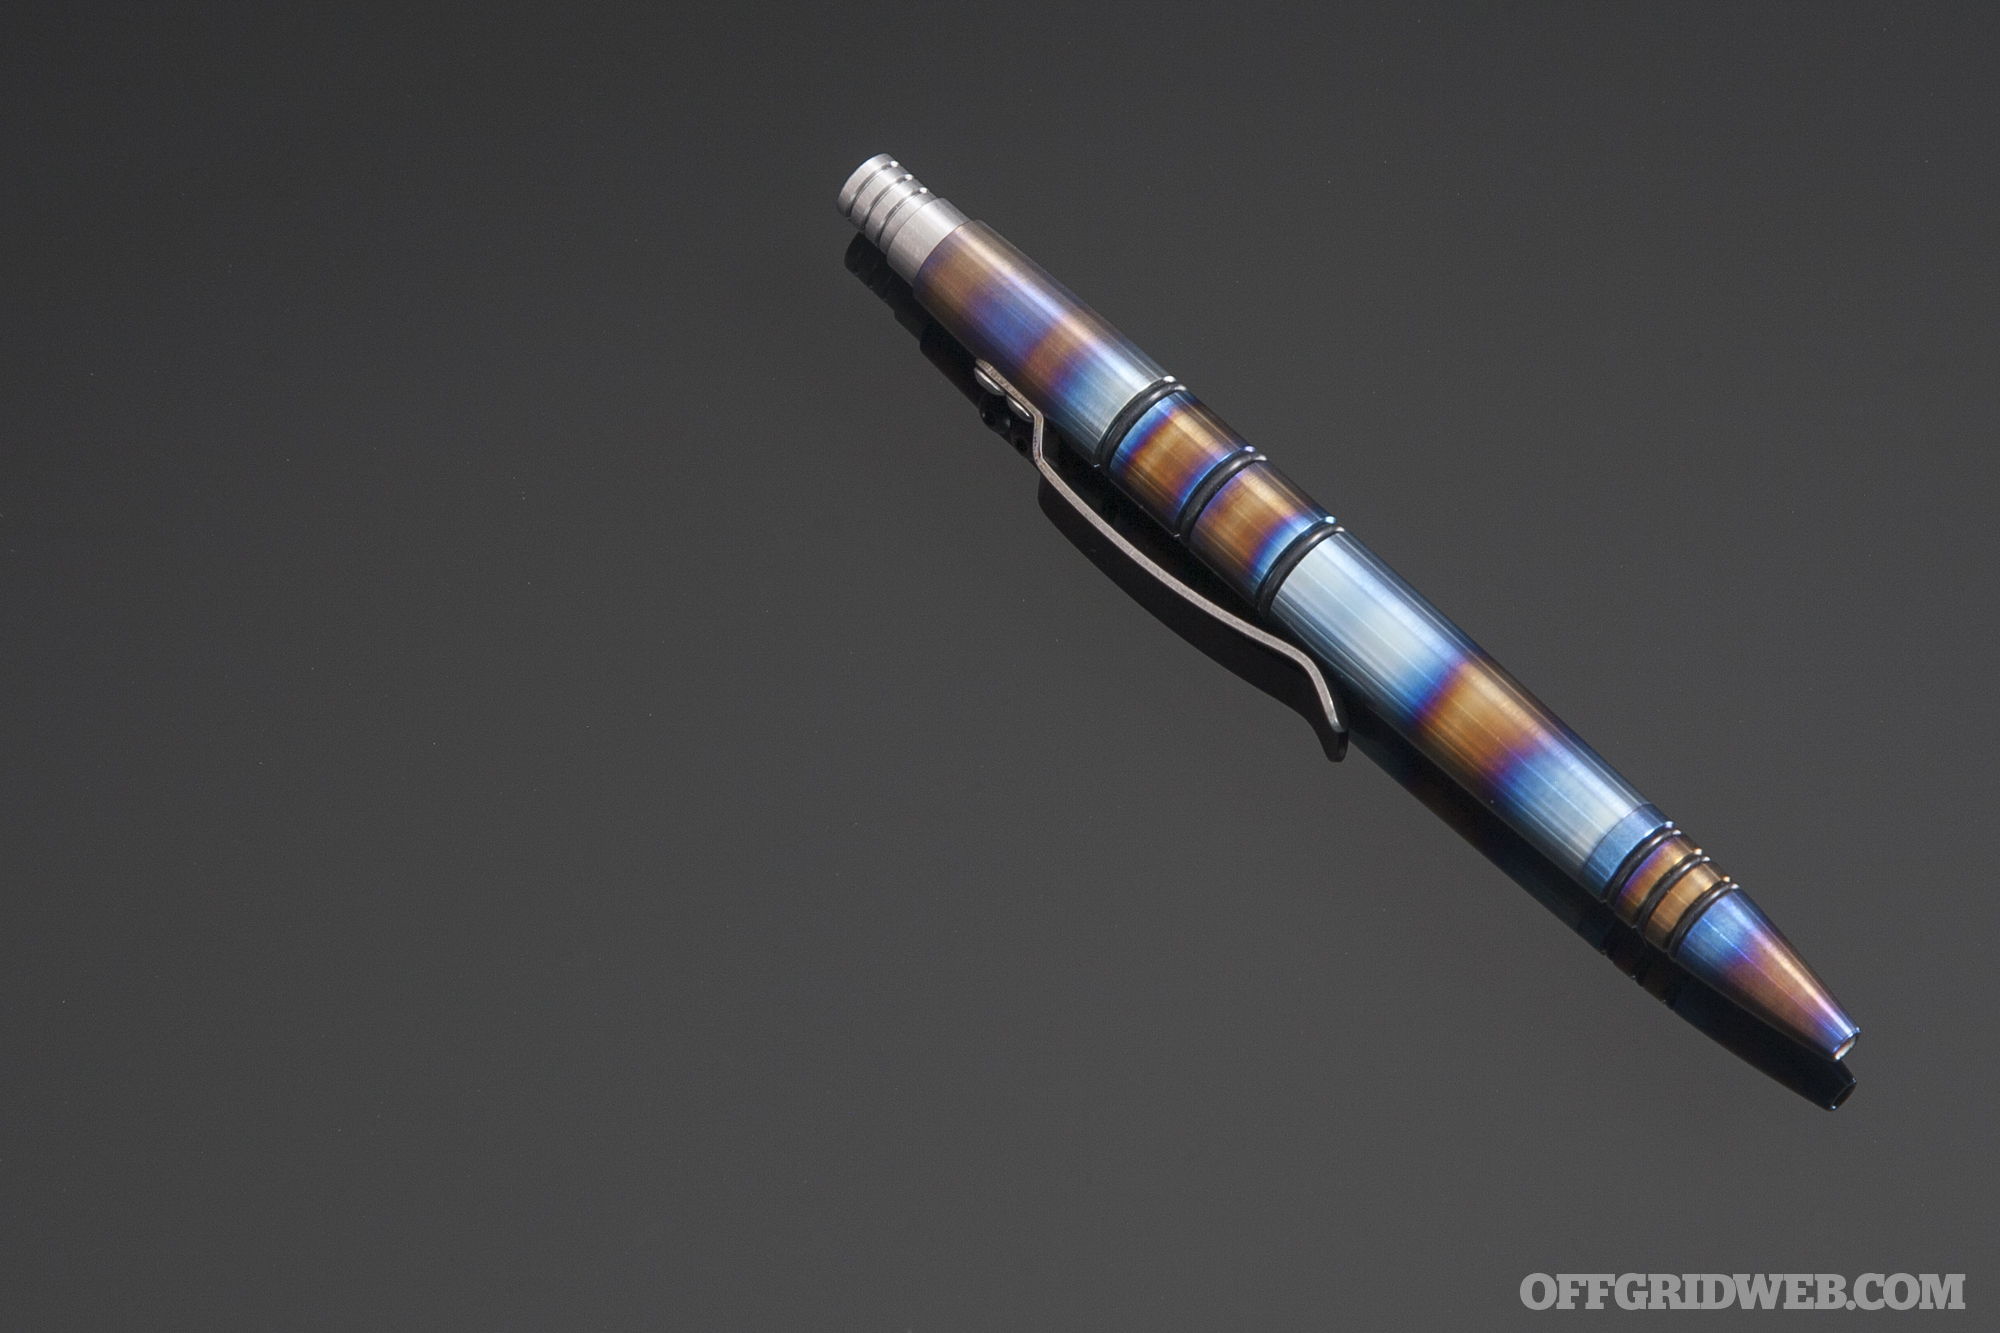
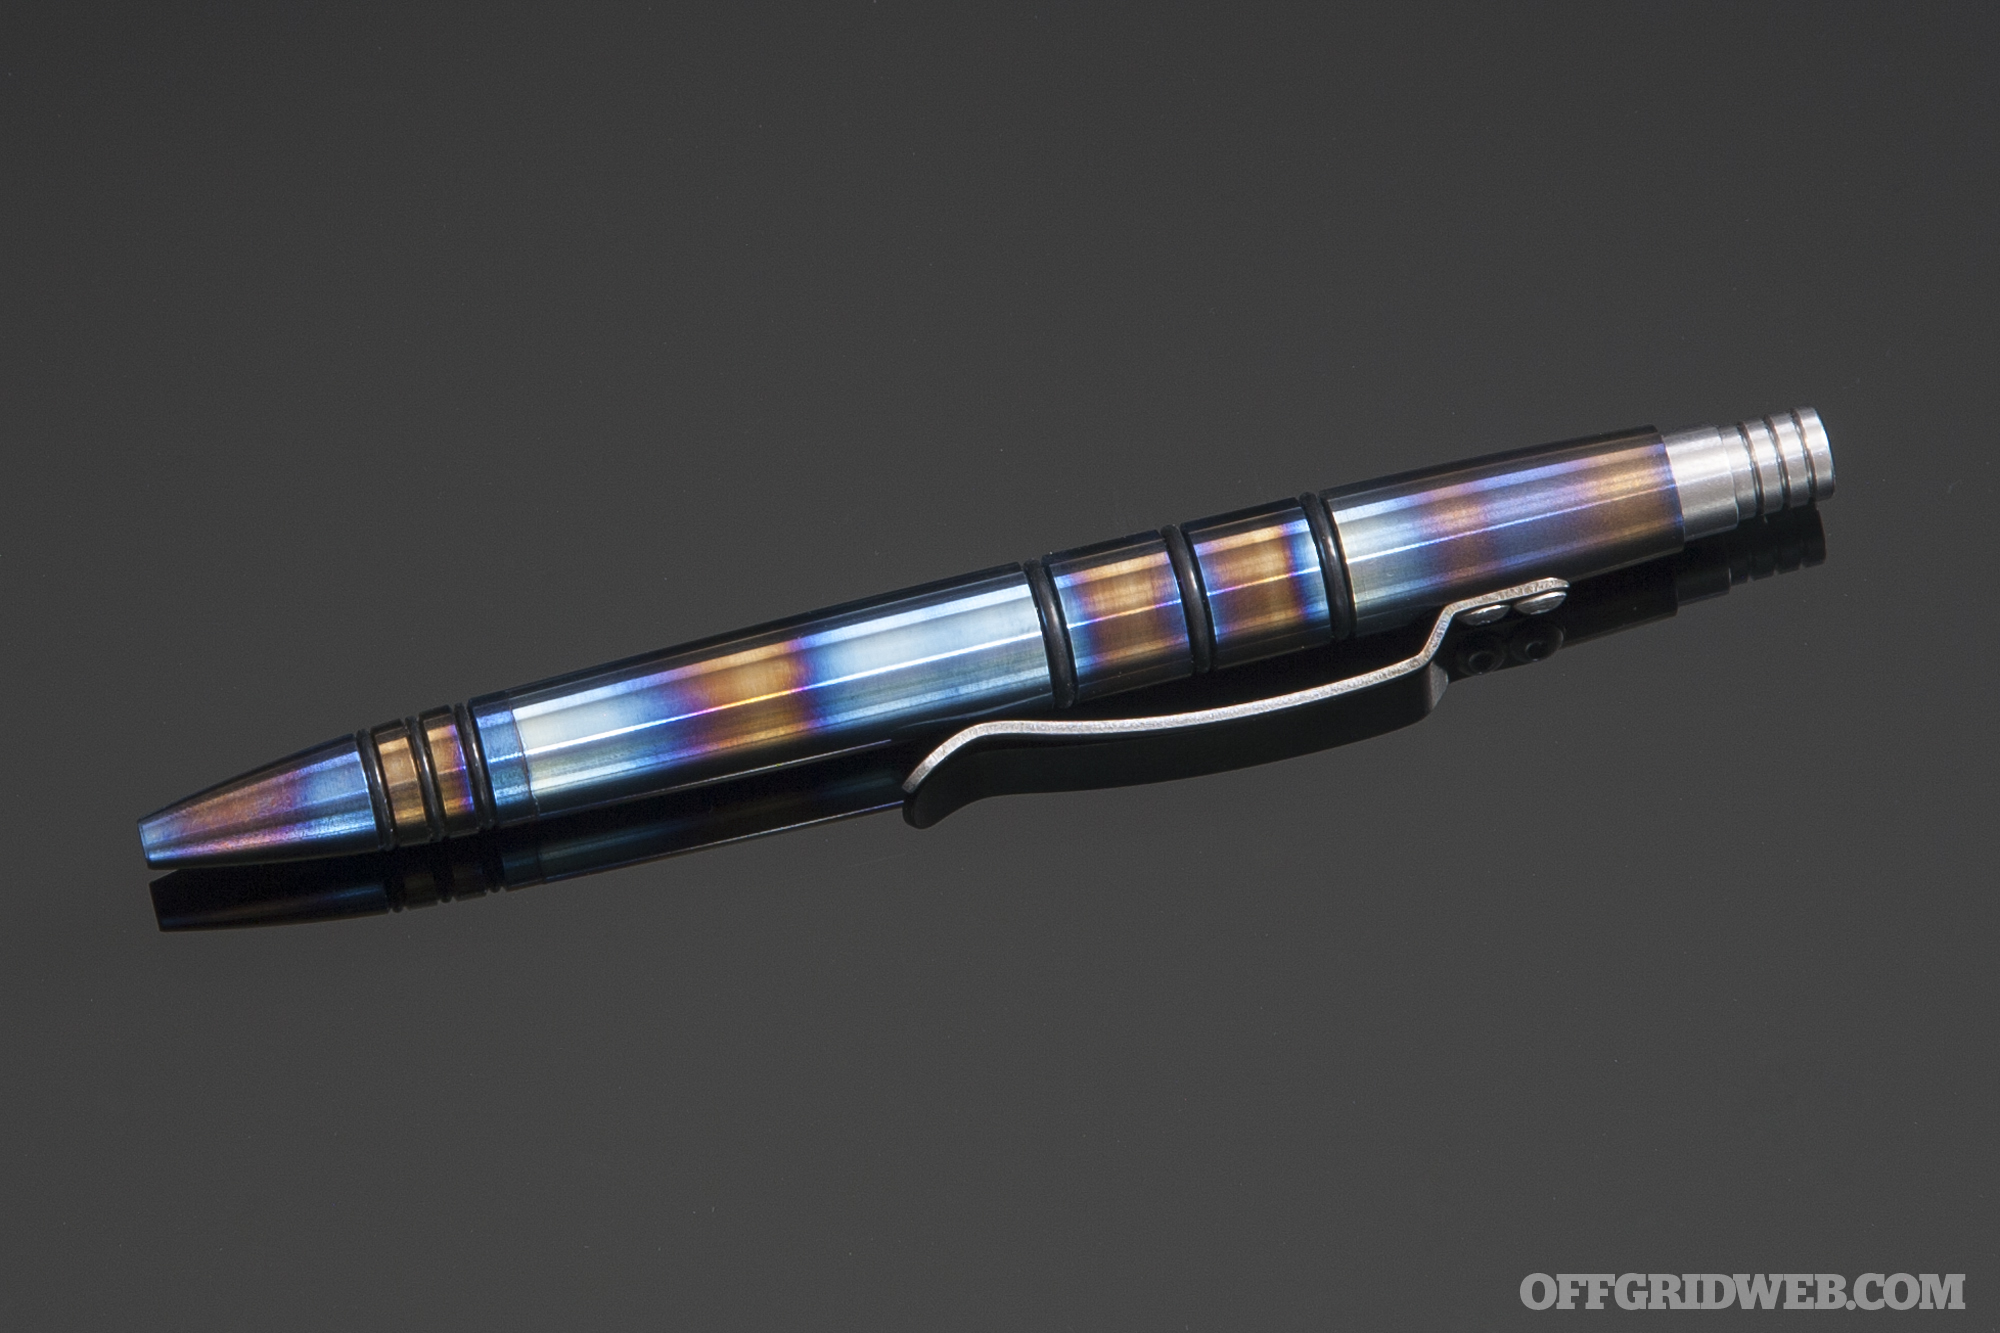
The first thing you’ll notice about the all-new Mini-Click pen seen here is its core component: titanium. You won’t even need to pick it up to tell the difference — its flamed finish produces colorful bands that indicate this pen isn’t aluminum like its predecessor.
When exposed to intense heat, the titanium changes color from neutral grey to warm brown, then purple, and finally vibrant blue. This multi-colored treatment is applied by hand; Tuff Writer’s Kickstarter says every pen is different, “like a snowflake, a virtually indestructible titanium snowflake.”
In person, the flamed finish is a real head-turner, and it received compliments almost every time it came out of our pockets. Even those who would normally be disinterested in EDC gear were saying, “Wow, that’s a cool pen.”
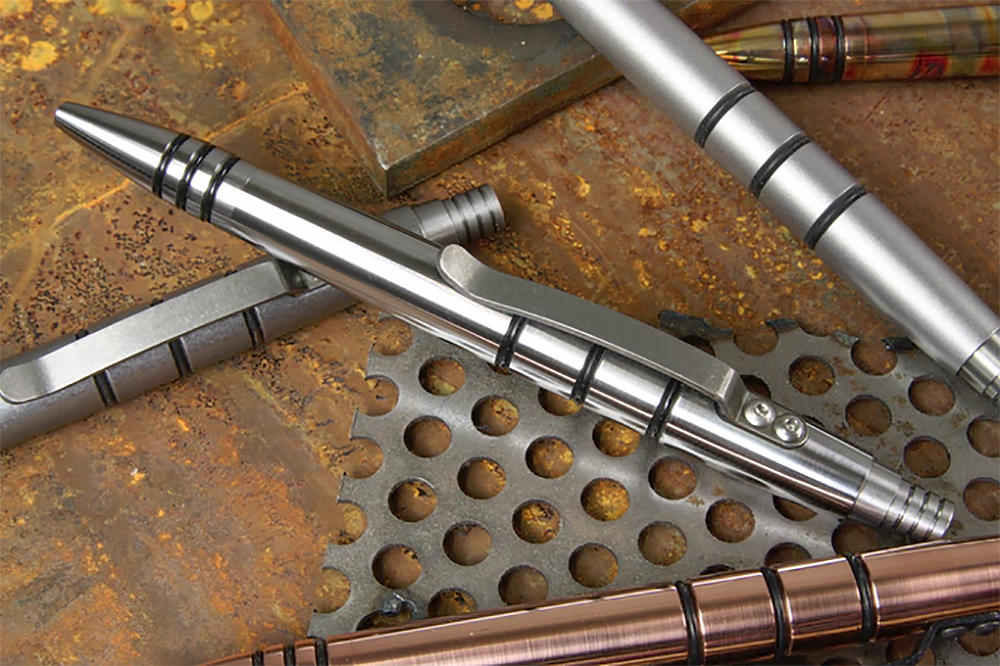
Of course, this isn’t the only finish available for the new Mini-Click — far from it. Here’s a quick list of some of the other materials and finishes Tuff Writer currently offers:
Copper (C145 Tellurium) – polished, flamed, or tumbled
Brass (360) – polished, tumbled, or aged
The new Mini-Click pens are available in three materials and many different finishes.
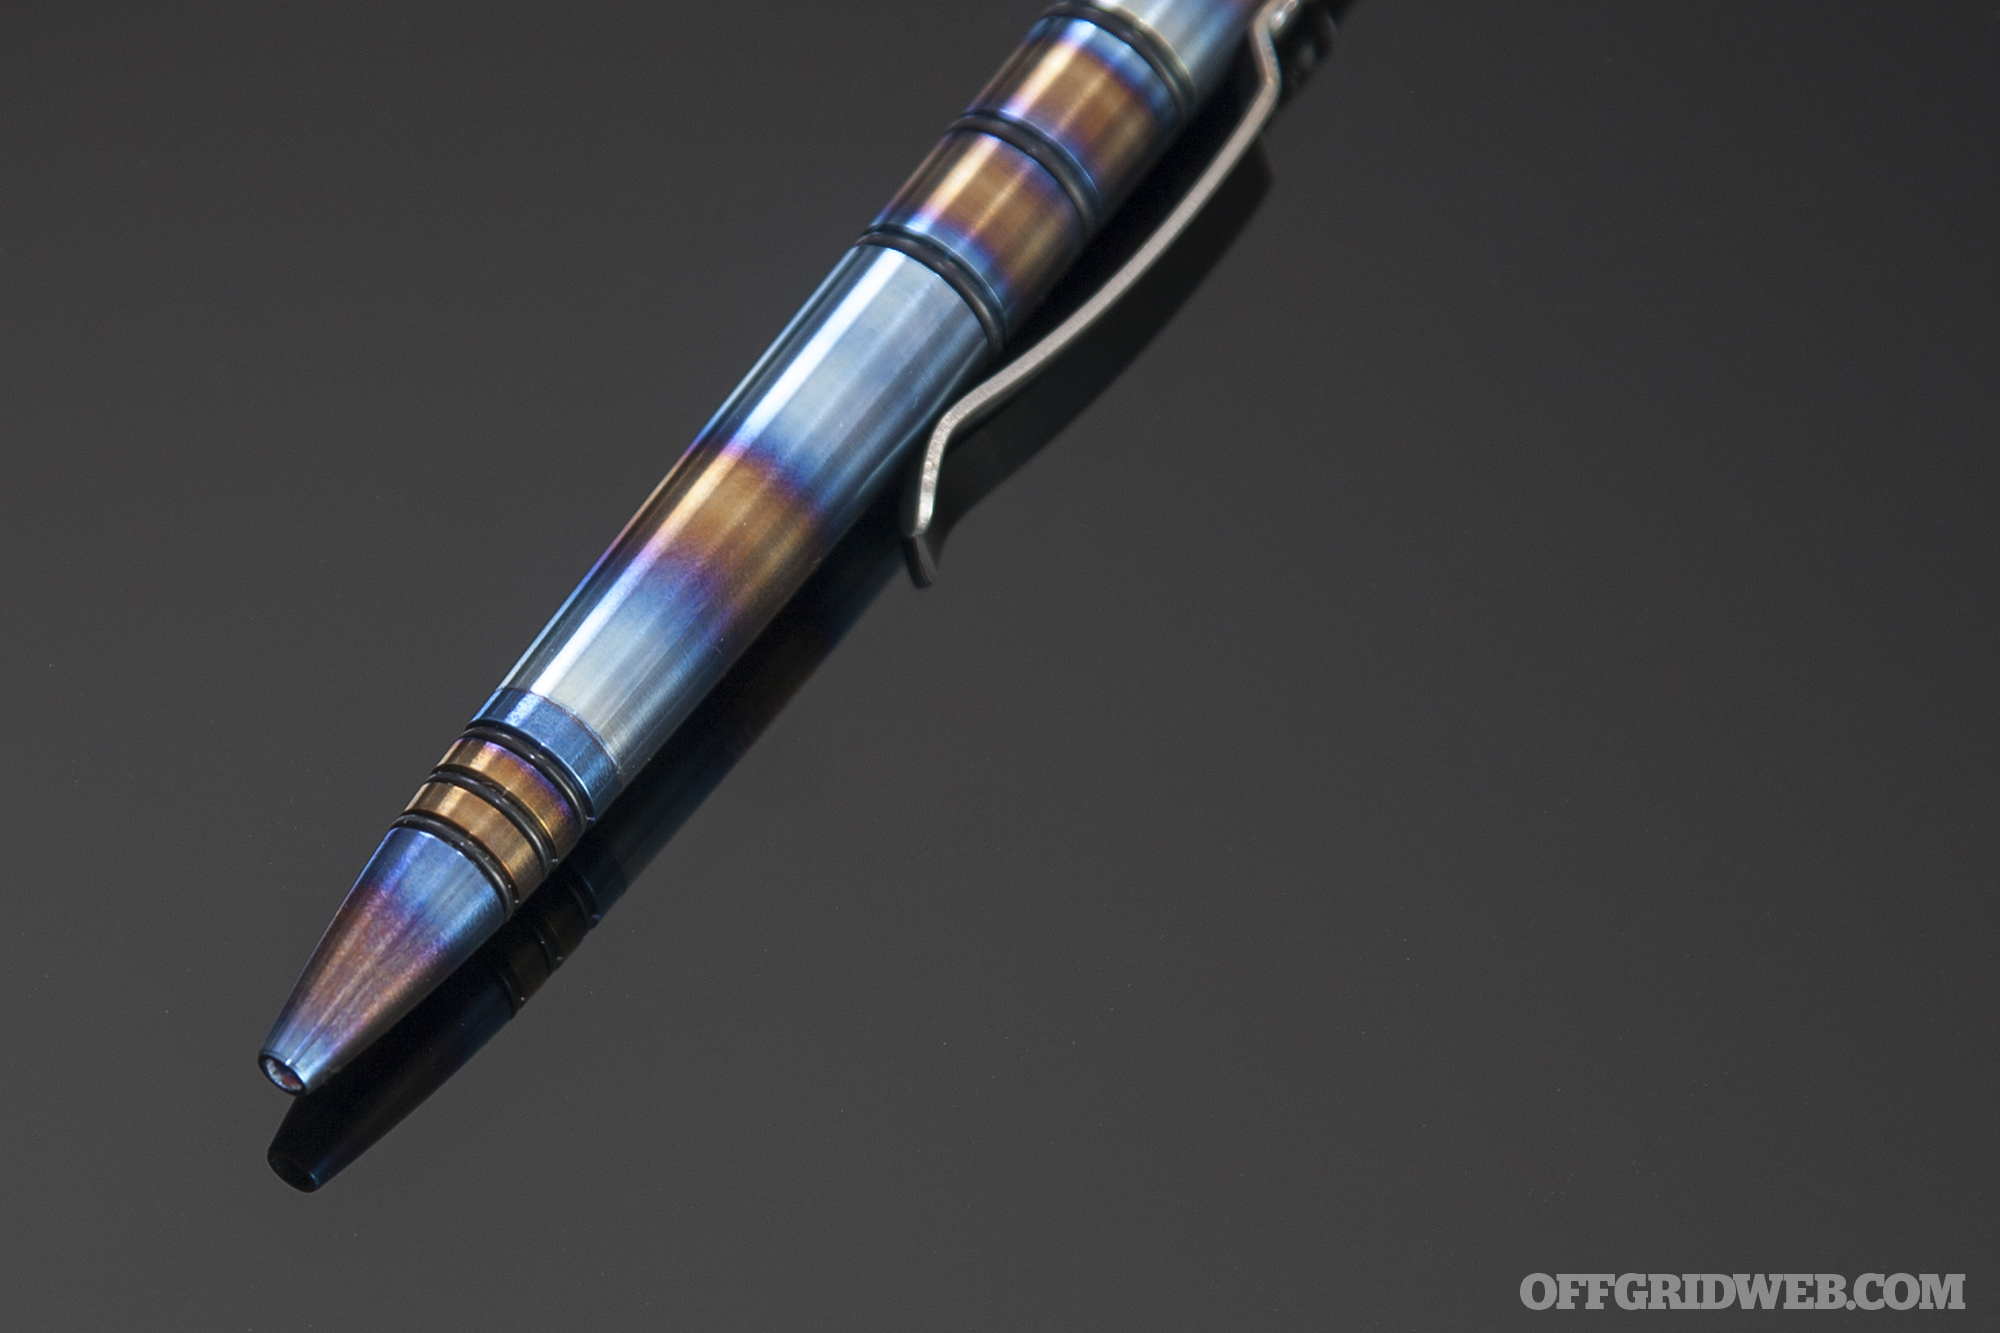
The new materials and finishes give the Mini-Click Gen 2 a new look, but the changes are more than skin-deep. Numerous subtle modifications have been implemented to make the second-generation pens more versatile and easier to use.
Recessed, firmer O-rings improve comfort and grip.
Jack summarized a few technical changes:
Tip opening is now .002″ larger to accept Fisher, Foray, Parker, Waterman and many other common ink refills
Top O-ring groove is now also below the tip-to-body mating seam
O-rings are Buna-70 (a firm rubber) and thicker as well as being recessed deeper
Clip is slightly thinner to aid flexibility
Updated 416SS mechanism with improved race design (custom tooling to cut the race and remove burs in one toolpath)
These modifications would almost certainly go unnoticed unless you were looking for them. However, they demonstrate the degree of focus and care that Tuff Writer puts into these pens. They’re not just writing instruments, they’re precision-machined tools. Jack is clearly not one to say a design is good enough — he’s continuously looking for ways to improve his product.
Technical aspects aside, the new 416SS click mechanism is definitely worth mentioning. Instead of buying one of the many plastic or brass advancing mechanisms from an outside manufacturer, Tuff Writer designed and built its own proprietary mechanism from 416 stainless steel. This is machined on an ultra-precise Citizen L20 Swiss-type CNC lathe, and dimensions are controlled down to absurd 0.0005-inch tolerances. The machined pieces and chrome ball-bearings are assembled by hand under a magnifier.
You may ask, why does this matter? First of all, it makes the click incredibly smooth, which feels great under the thumb. More importantly, it’s extremely strong and reliable. For a pen that’s designed to be used as a self-defense impact weapon and slammed into hard objects, that’s a must.
The bottom line: retail MSRP for the titanium Mini-Click seen here is $155, including a $5 premium for the flamed finish. Brass and copper models will be available for $125 retail. If you’re looking to save some cash, limited-time discounts are currently available on Kickstarter. Those who back the project before it ends on Monday, February 27th can get a brass or copper pen for $96, or a titanium pen for $100.
Some will say this is a lot of money for a pen, but it should be obvious that this is certainly no ordinary pen. As is true for high-end knives, watches, and other precision-machined items, quality craftsmanship doesn’t come cheap — and this is about as high-quality as an EDC pen can conceivably get. We’re also encouraged by Jack’s commitment to American manufacturing. In his own words, “we make the best products we know how to make, and then stand behind them all the way.”
Conclusions
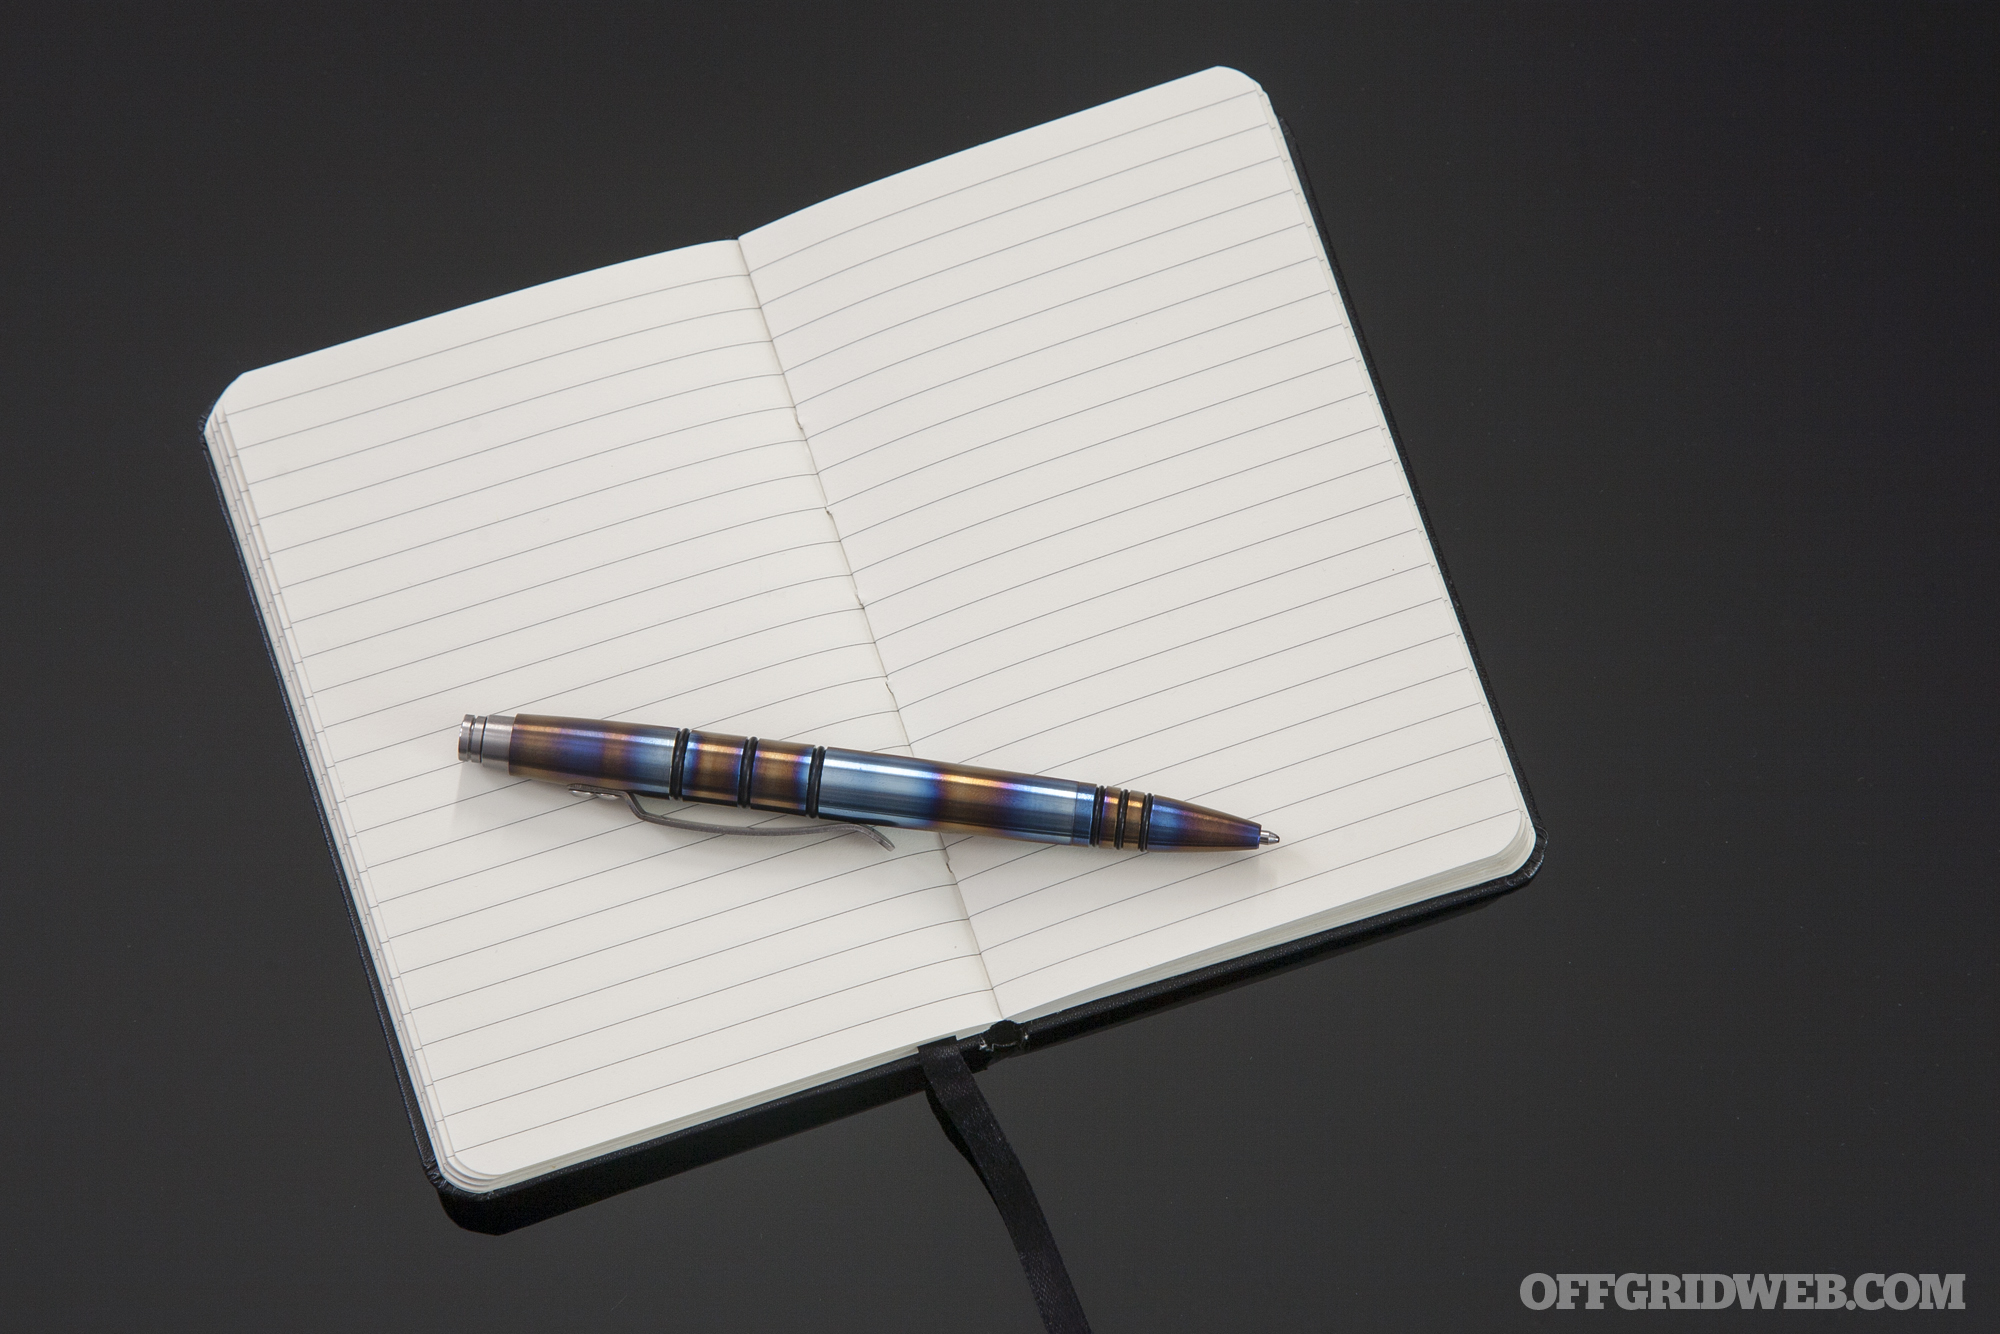
Whether you’re looking for a writing instrument that’s capable of withstanding the apocalypse, or you just need something reliable to write with on a daily basis, there’s a lot to like about the new Mini-Click. It looks like a work of art, feels sturdy, and it’s built like a Swiss watch.
Most importantly, it’s exceedingly comfortable to use, since the recessed O-rings provide substantial grip without shredding your finger after the first paragraph. We tried ink refills from a few other pens to confirm that they work, but preferred the included Fisher Space Pen cartridge. Still, it’s nice to have the expanded compatibility as an option.
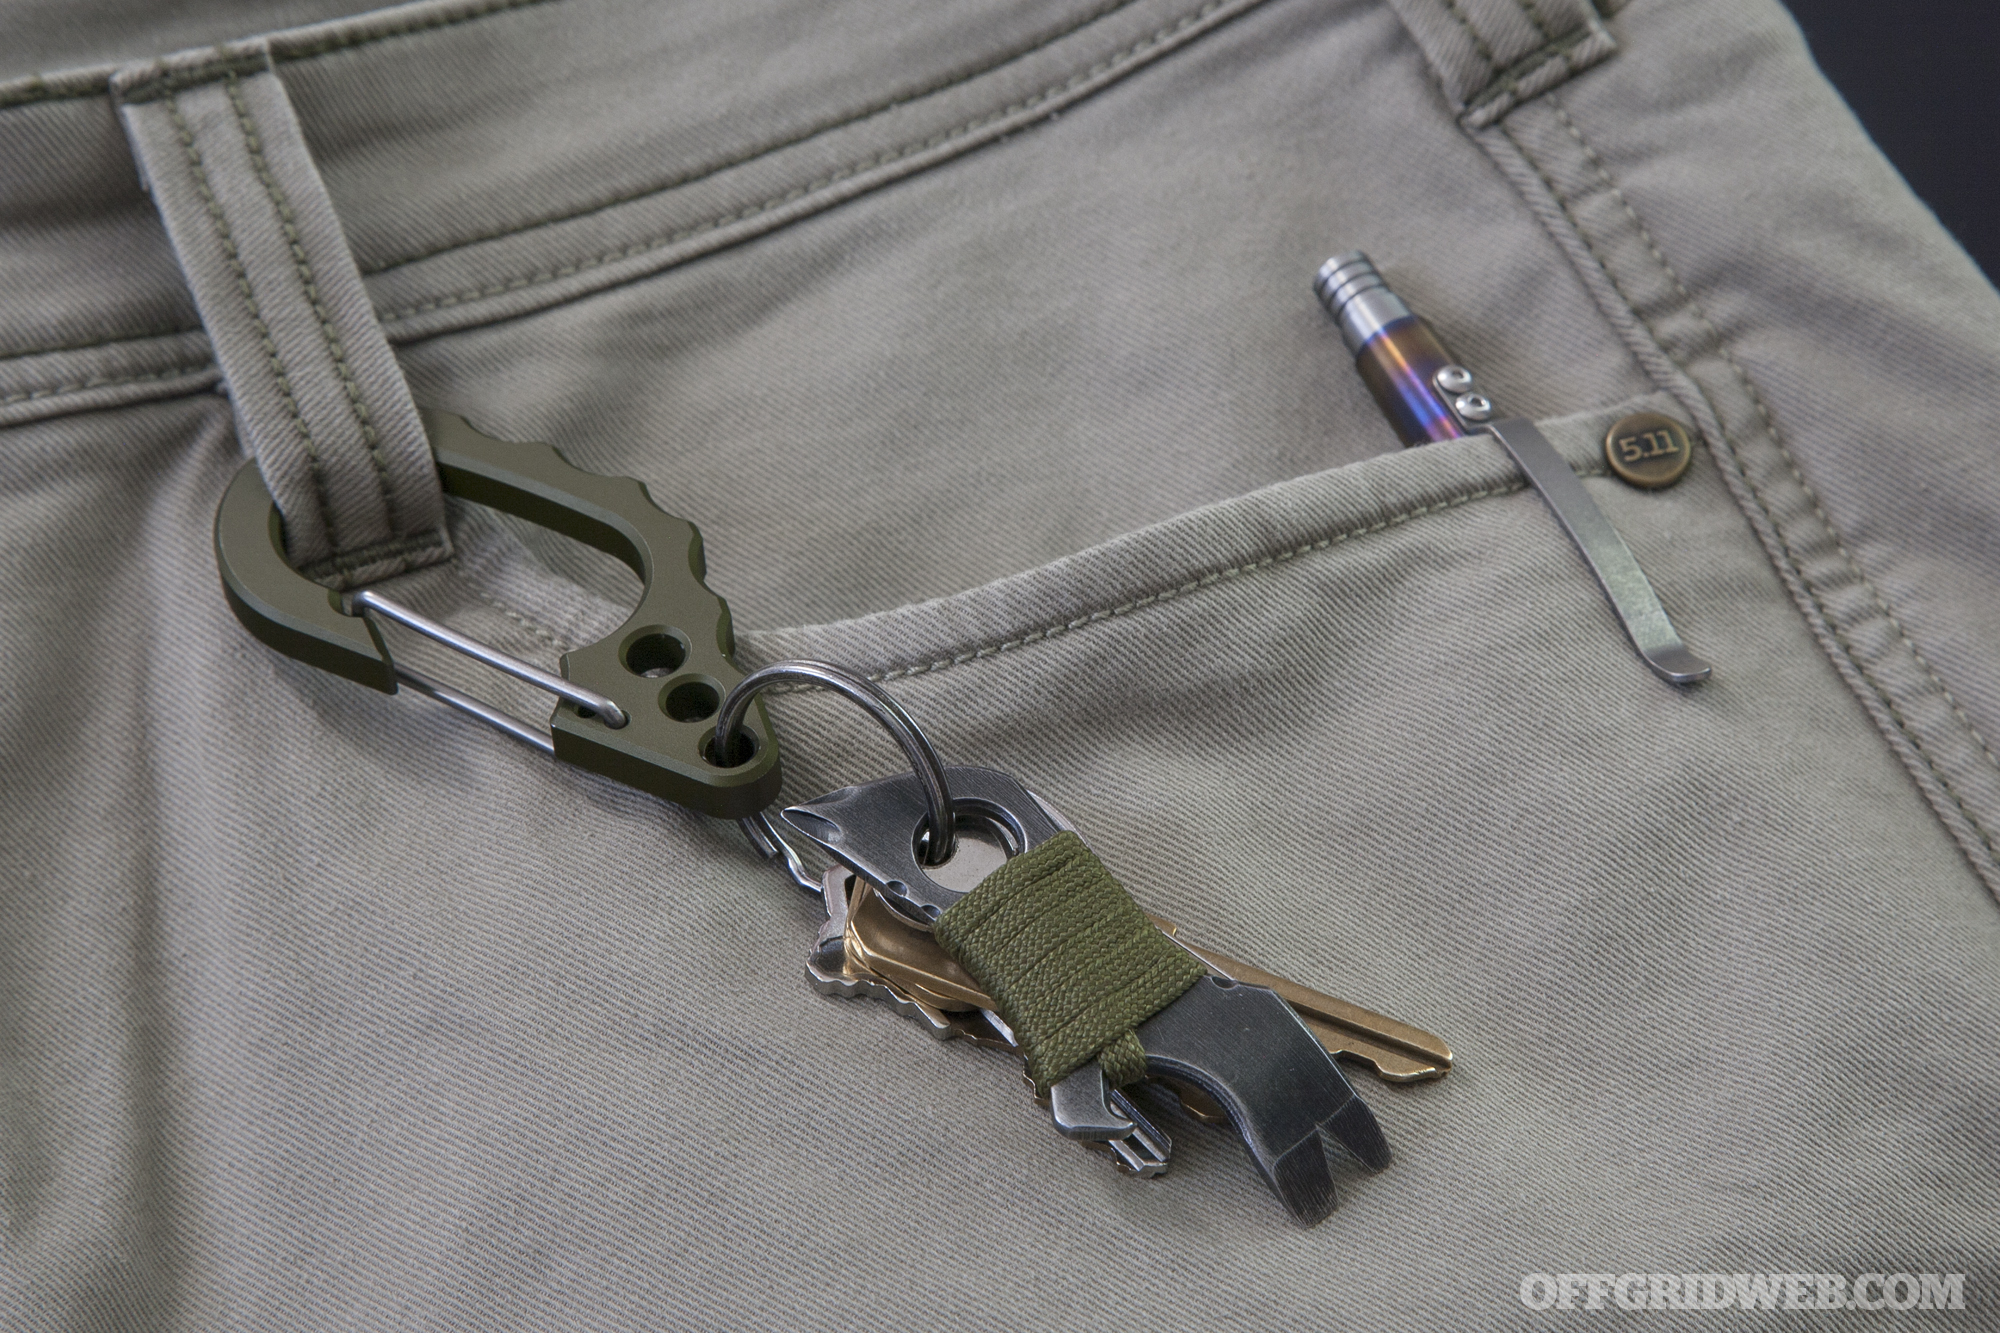
Tuff Writer also makes this anodized aluminum D22 keychain carabiner, which doubles as a bottle-opener.
The Tuff Writer Mini-Click Gen 2 sets a high bar for tactical pens, and for pens in general. There’s only one catch: like the flawless edge on a brand-new knife, it looks so good that we almost hesitate to subject it to the beating it’s designed to withstand. Oh well — scratches build character, and this tool is meant to be used.
At the end of our conversation, Jack left us with these words:
“Thank you to everyone who has come along on the ride with us. I feel privileged to be a part of this industry and the community. I’m a big believer in the idea that we’re all in it together, to that end I invite everyone to keep in touch by following us on Instagram or on Facebook and see what we’ve got going on. Also, stop by at the shows to say hi, or send us an email telling us what you think or what you’d like to see next.”
We just reviewed the new Tuff Writer Mini-Click Gen 2 tactical pen — click here to read that review. During our research on the pen, we had the opportunity to interview Tuff Writer founder Jack Roman. Read on for the uncut transcript of that interview. It provides some insight into precision-machining, design philosophy, and how Jack developed his small business in the USA.
Jack (left) with his wife Peachy and Tim Fisher of Space Pen fame.
OG: How did Tuff Writer get started? Tell us about what inspired you to make your very first pens.
The original idea for the pens came when I “fell in with a good crowd”. I used to train boxing out of Blue Corner Boxing in Chandler, Arizona, but as much as I loved getting punched in the face, I was also interested in learning other martial arts.
While looking around I ran into a bunch of guys at my gym training some really, really nasty stuff. It didn’t look like anything I had seen before. I asked them if I could join the class and the instructor, Sifu Wes Infiesto, told me that they were just a small training group and weren’t taking new people. I kept pestering them, and they finally told me that they trained quite hard and I probably wouldn’t like it. In short, they beat the piss out of me for about a month and then it was “welcome to the group”.
Sifu was a former Army special operations guy and the group was comprised of some fairly high-speed individuals. We trained everything from empty hand to stick, knife and improvised weapons tactics, firearms integration, as well as nasty stuff I’d never seen before.
At one point we were discussing improvised weapons and I suggested that maybe we should try pens. Sifu mentioned that they had tried that but the pens broke too easily. Since I worked for the Judicial Branch in court buildings all the time and carried a pen everywhere but could not carry a firearm inside the courts, I suggested that someone should make a pen that would serve as an improvised defensive tool. His reply was, “Great idea [expletive], why don’t you do that and make us some.”
At the same time I was in graduate school for finance and had to create a new product category for my marketing class, I decided to take this idea and called it the “tactical pen”. The idea was just stuck in my head so I took the money I had in savings, hired a mechanical engineer to help me with the first design and got to work.
None of the local machine shops took this seriously and most wouldn’t even quote me, but I remembered that my friend Chris in Chicago took over his family’s machine shop (Automatic Precision) so I called him up and asked if he’d help. After some persuading, he agreed to help, and we got the first pens made. They were fantastic — the Frontline Series.
The Frontline was Jack’s first tactical pen design, and showed that Tuff Writer was a viable business.
Once I put the web site up we started getting phone calls, primarily from military and law enforcement members plus the occasional martial artist who were looking for something exactly like this. We continued to improve the design and eventually came out with the Operator Series which was a more functional pen, and then eventually the clicky versions.
OG: In an industry where manufacturing is often outsourced to other countries, you’ve chosen to keep making your products in the USA. Has that been a challenging decision?
Outsourcing was never part of the plan. That was conscious decision from the very start and it’s probably cost us in some ways, but I feel that it’s also paid off in many more ways. You can usually make it cheaper somewhere else but rarely can you make it better somewhere else. For us, keeping manufacturing in the USA is and always will be a core value.
We now have 3 CNC machines and do everything from design to prototyping and machining as well as post machine finishing (tumbling, brushing, flaming and polishing, etc.) in-house. We still out source some specialized machining and anodizing but we now control the manufacturing process from start to finish. Again, this allows us to design and build quality in from the very beginning and not as an afterthought.
OG: What led to the development of your original Mini-Click pen?
The original Mini-Click came about after sitting around the table and drinking a few beers with Roy Huntington and Mike Janich one night after the BLADE Show in Atlanta a few years back. At first I was skeptical that a smaller pen was the way to go but Roy and Mike made some really good arguments in terms of usability and shirt-pocket carry so I started designing. We launched the project on Kickstarter to see if people would be receptive, and they absolutely were.
OG: How has the Mini-Click design evolved for the second-generation?
After the first Mini-Click pen took off quite a few people started asking about a titanium version. I took the opportunity to incorporate some small design improvements here and there based on user feedback, and pretty soon I found that virtually every piece had changed. We were looking at a Gen2 Mini-Click.
The tip opening is now .002″ larger to let various different refills cycle more easily. The top O-ring groove is now also below the tip to body mating seam and the O-rings are Buna-70 and thicker as well as being recessed deeper. Finally the clip is slightly thinner to make it more flexible and we’ve updated the mechanism with yet another improved race design (custom tooling to cut the race and remove burs in one toolpath).
OG: It’s clear that there has already been a tremendous community response to your Kickstarter project. How has Kickstarter played a role in the success of Tuff Writer?
Kickstarter has been really pivotal for us, not just from the funding aspect but also the direct feedback from backers – being able to keep them in the loop during the manufacturing process. Many of our improvements and design changes actually come from users in the field who have an idea on how to make the pen better, more reliable or just more awesome. After the last project for the Mini-Click pen people have been peppering us with requests for more material options including Titanium, Copper and Brass. The new version of the Mini-Click incorporates those changes, and the backer community is constantly helping us to keep improving by providing continual feedback.
The new Mini-Click pens are available in three materials and many different finishes.
One of the other rewarding aspects of the crowdfunding projects is when people come up to us at trade shows and tell us, “Hey, I learned about you guys on Kickstarter and wanted to come over and talk about the pens.” Again, it gives us the ability to interact with our customers on a more personal level which is something important in a business sense but also very personally rewarding.
OG: What does the future hold for Tuff Writer? Can you give us any hints about upcoming projects?
We’ve had a few people ask for fountain pens but up until now we’ve been too busy with existing projects. In the next year we’re considering revising the Operator Series pen and possibly adding a fountain pen version as well. I have to learn a little bit more about fountain pens because we don’t want to make “just another fountain pen” but rather something worth adding to the Tuff Writer lineup.
Since we’ve brought prototyping and manufacturing in-house we’ve had a few people in the industry come to us with napkin sketches and help turn them into actual finished products. We’ve done projects with some high-end knife makers, other pen makers, flashlight companies and EDC accessory makers.
Tuff Writer partnered with FourSevens to develop the Bolt flashlight.
One of the other pen companies who have been having reliability problems with their pen mechanisms asked if we’d consider making mechanisms for them as well. We’ve even had a local firearms company come to us and ask us to help them with design and prototype work.
I don’t necessarily see us as becoming a job shop but we’ve already collaborated with other makers on projects and I’d love to keep that part of the business going because you get to make some great relationships and work on fantastic projects that you’d never dream of otherwise. As small manufacturers we’re really all in it together and I’ve always found that working collaboratively pays off in ways that are impossible to predict.
OG: Thanks again for taking the time to chat with us, and for letting us check out the new Mini-Click pen. Do you have any closing thoughts for our readers?
Mostly just a big “thank you” to everyone who has come along on the ride with us. I feel privileged to be a part of this industry and the community. I’m a big believer in the idea that we’re all in it together, to that end I invite everyone to keep in touch by following us on Instagram or on Facebook and seeing what we’ve got going on. Also, stop by at the shows to say hi, or send us an email telling us what you think or what you’d like to see next.
If there’s one thing we’ve learned from studying improvised weapons, it’s to never underestimate human creativity. Convicts come up with new ways to attack their fellow inmates, stranded castaways develop rudimentary hunting tools, and garage tinkerers craft ingenious contraptions from limited materials. When there’s enough time and determination, it’s possible to make some impressively powerful improvised weaponry.
This is the face of a man who REALLY loves making improvised weapons.
We recently came across a video from a German YouTuber named Joerg Sprave, which shows a sort of MacGyvered projectile weapon we never would have dreamed of. Joerg built a full-auto crossbow from some plywood, wood screws, rubber bands, a little aluminum, and a Makita power drill. These are all items you’d find in an ordinary garage, workshop, or hardware store.
Joerg’s crossbow works via a relatively simple gearbox. Pulling the trigger on the drill turns an aluminum-reinforced wood gear, which cocks the crossbow and puts tension on the rubber bands. When the crossbow reaches the cocked position, the gear disengages, a bolt drops into place, and a trigger sear releases the bow. The drill continues turning the gear, and the cycle repeats, firing up to 32 aluminum bolts before it’s necessary to reload.
You might be thinking that this is some sort of toy, but wait until you see what it can do. Accuracy doesn’t appear to be its strong suit, but it embeds the crossbow bolts firmly into plywood, even at what the host says is a distance of 40 meters (131 feet). You definitely wouldn’t want to be on the other end of this:
Joerg later made a version with a replaceable magazine (although the thumbnail image incorrectly calls it a “clip”). He also discusses some of the challenges he encountered while developing the weapon, and responds to viewers’ questions: