In This Article
A flashlight is one of the most useful items you can add to your vehicle, but simply tossing one into the glovebox or center console isn’t always ideal. In those locations, it may end up rolling around and getting buried under other items you’ll have to rummage through. More importantly, you’ll have to remember to charge or replace its batteries periodically, otherwise Murphy’s Law says the batteries will be dead when you really need a light (ask us how we know). So, how can you guarantee you have a flashlight that’s always within arm’s reach and always fully charged? That’s the problem we set out to solve by installing a hardwired Maglite ML150LR in our 2022 4Runner project truck.
About the Maglite ML150LR Rechargeable LED Flashlight
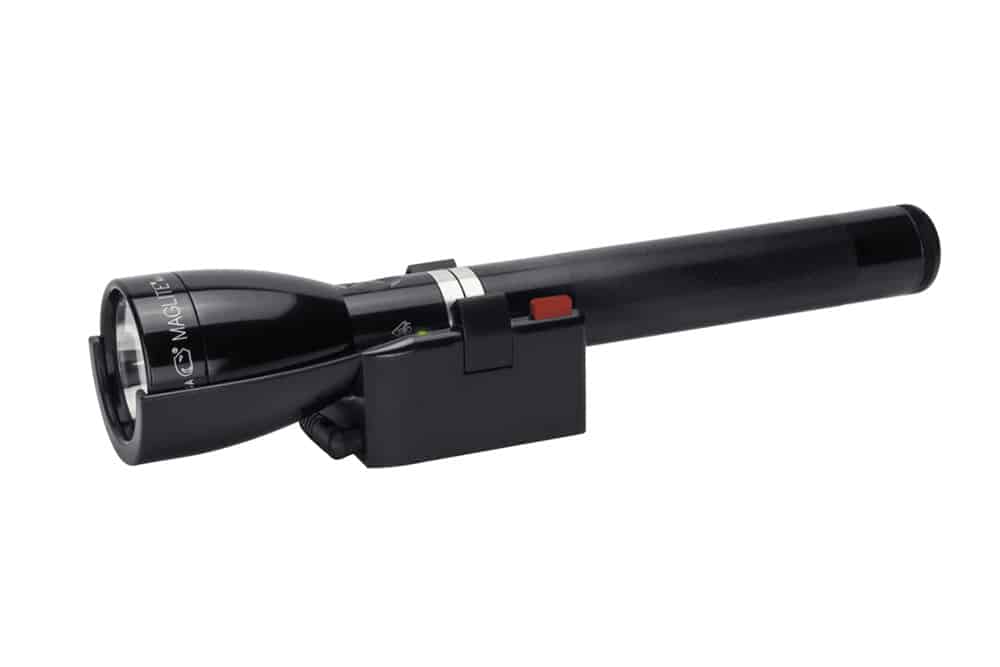
Above: The Maglite ML150LR is available in gloss or matte finish, each with various wall/car/hardwire charging cable configurations. A shorter ML150LRS model is also available for those who prefer a more compact light.
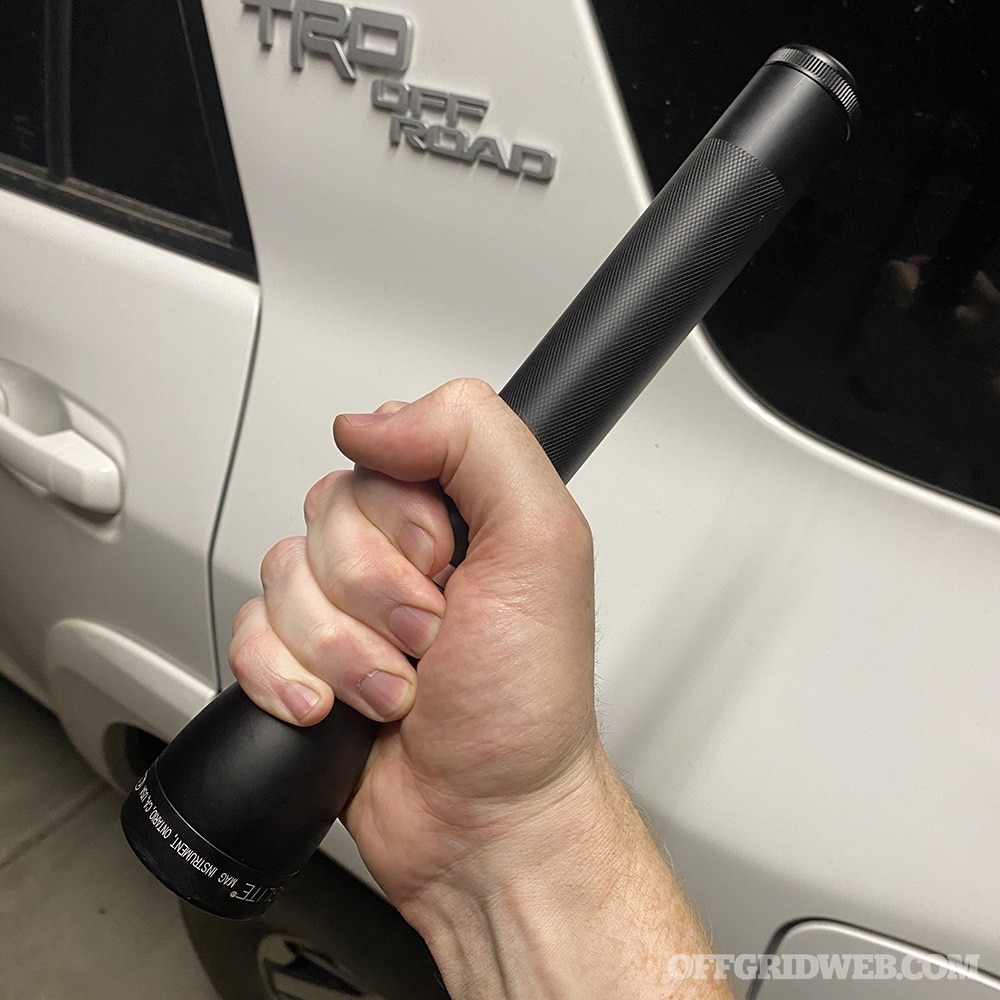
If you grew up in the ’80s or ’90s, you’re probably familiar with the old D-cell and C-cell Maglite flashlights with incandescent bulbs. They were great for their time, but flashlight technology has come a long way since then. Thankfully, Maglite isn’t just resting on its laurels. The ML150LR features a 1,082 lumen LED powered by a LiFeP04 rechargeable battery. It’ll run for 3 hours and 15 minutes in high-output mode, or can be switched to 138-lumen low mode for an 18-hour runtime. There’s also a 25-lumen eco mode that boasts 79 hours of runtime.
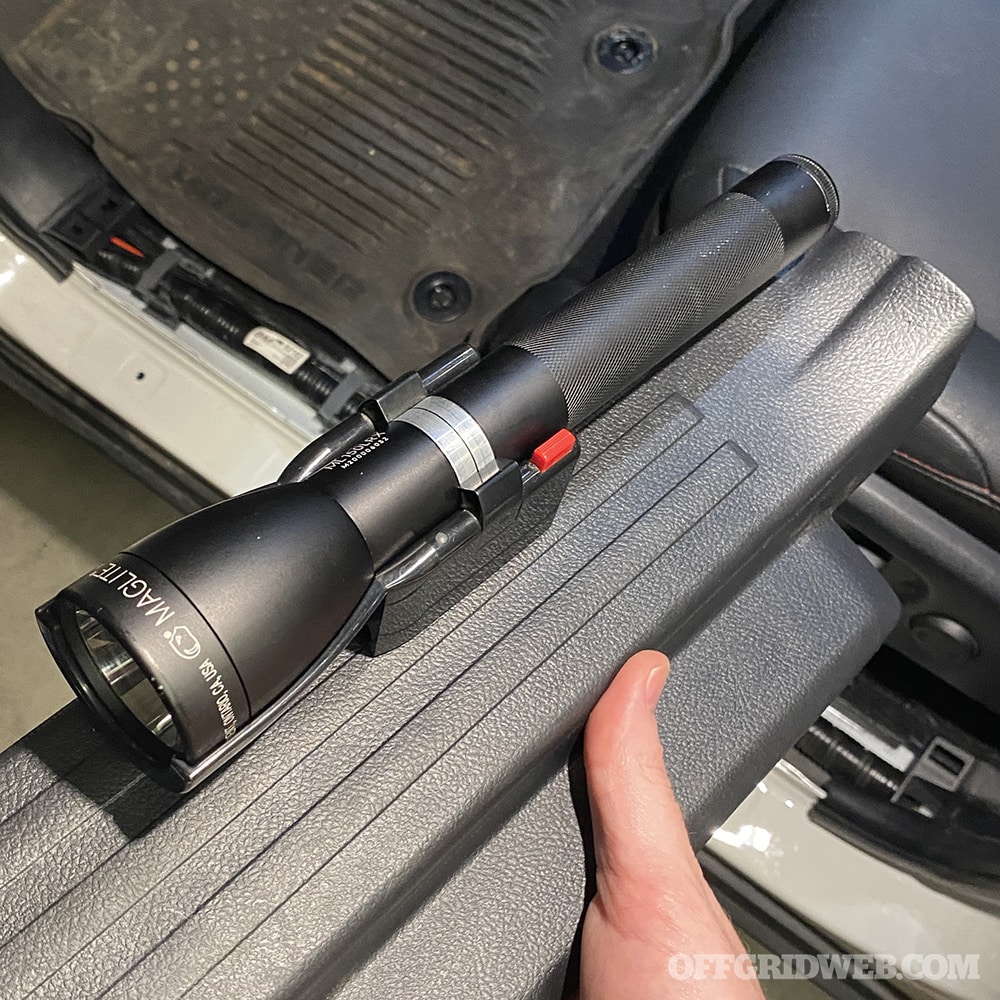
The included charging cradle locks securely around the flashlight when it’s pressed into place, and will only release it if the red release button is pushed. The charger can replenish the battery from 0% to 80% in 30 minutes.
Above: The ML150LR is comparable in size to one of Maglite’s classic 3 C-cell alkaline models. The large size offers extended battery life and allows it to double as an impact tool in a pinch.
The ML150LR can be configured by the user in one of four function sets. Secondary and tertiary functions are accessed by quickly tapping the activation button two or three times.
- General — High, low, eco
- Outdoor — High, low, strobe (our preferred function set)
- Law Enforcement — Momentary, high, eco
- Tactical — Momentary, high, strobe
Despite all these modern features, this is still a classic Maglite at its core. It’s constructed from impact-resistant aluminum, it’s IPX4 water resistant, and the head features Maglite’s twist-focus functionality. Maglites are also popular due to their ability to be used as an impact tool, glass breaker, or baton in defensive situations, and the ML150LR seems well-suited to those tasks.
Hardwired Maglite Installation
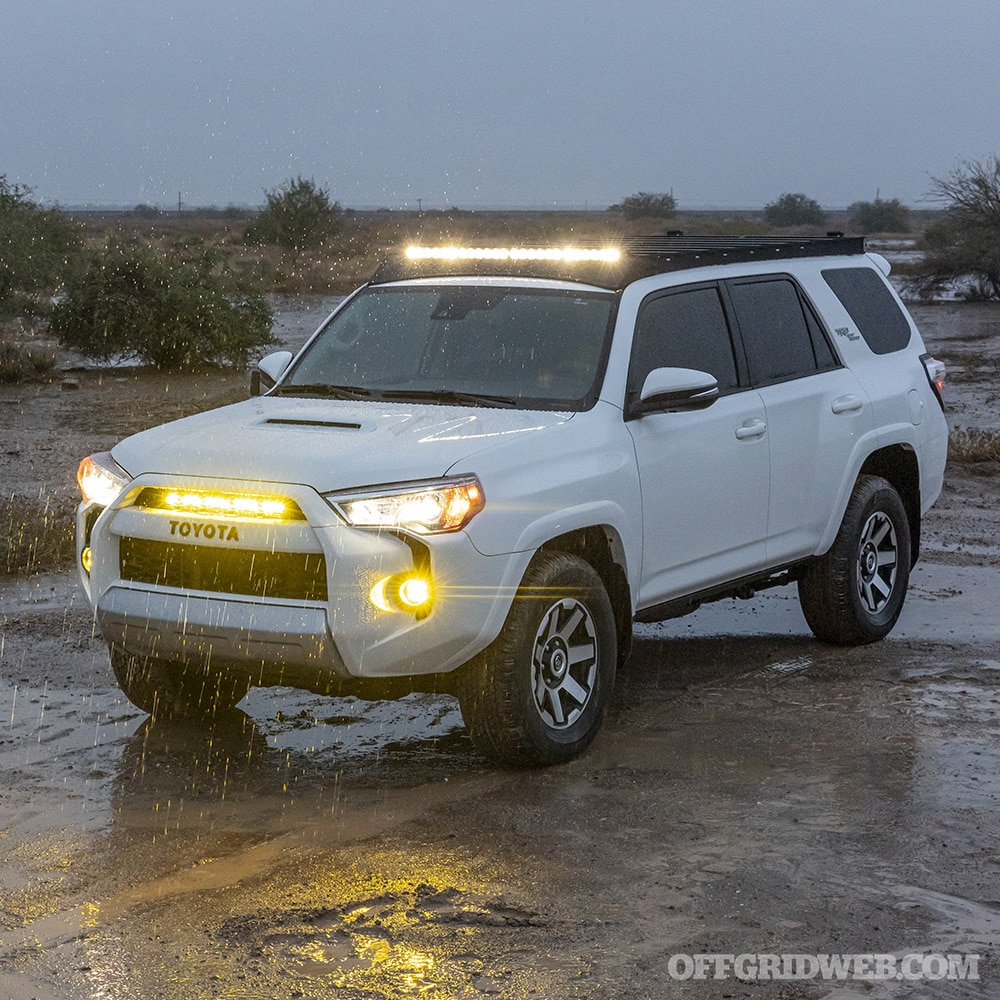
Above: Our 4Runner project truck has plenty of forward-facing and rear-facing Baja Designs lights to illuminate the trail, but there are many situations where we might need to scan out a side window or walk away from the truck. A handheld flashlight is a necessity for these instances.
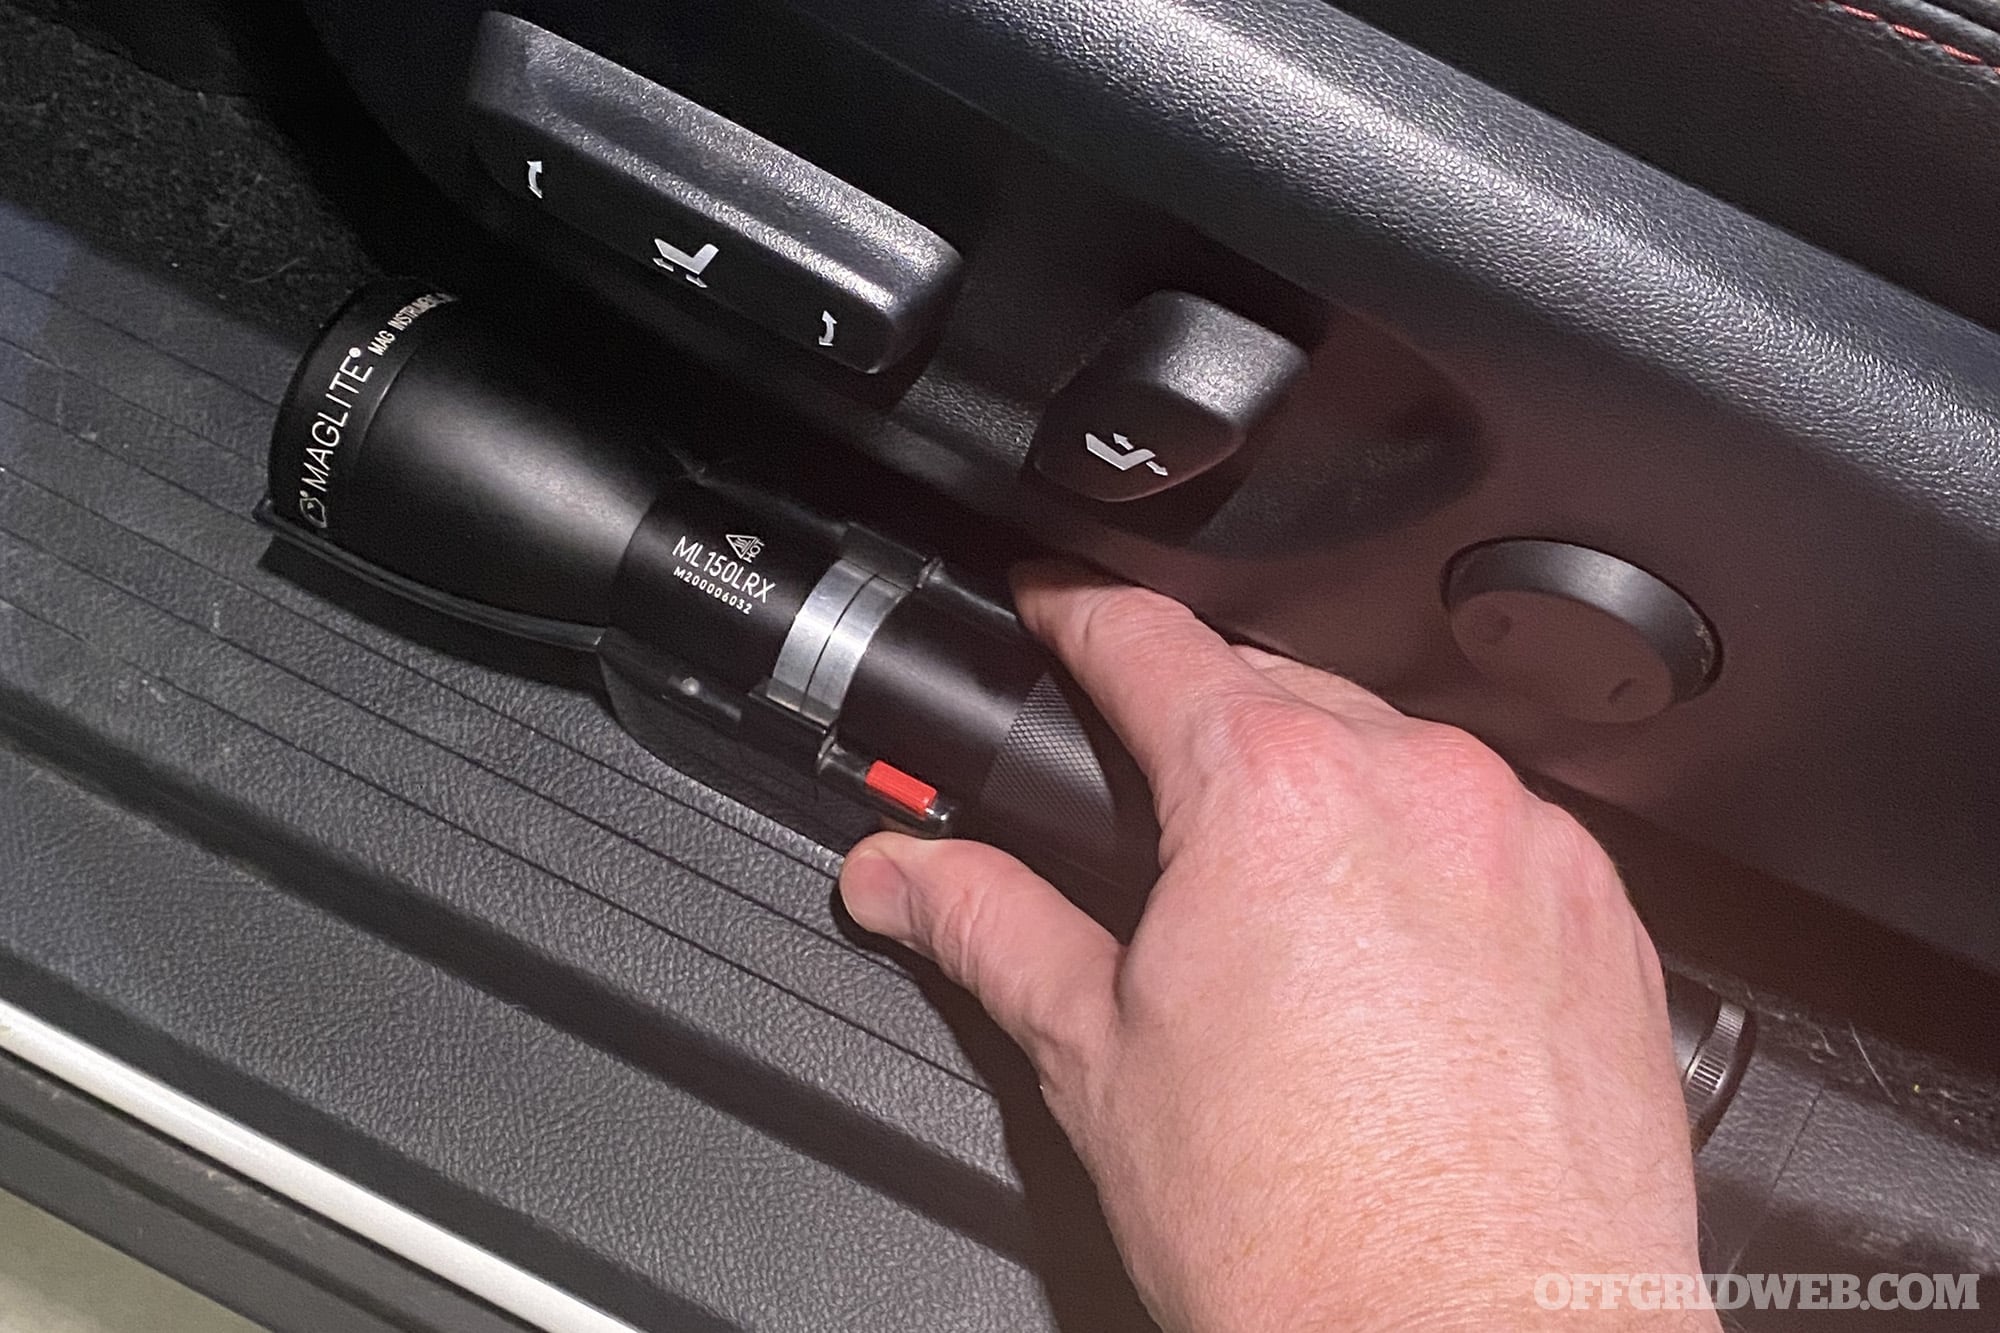
The first step is to determine where you’re going to mount the hardwired Maglite charging cradle. In our 5th Gen 4Runner, it fit perfectly between the driver’s seat and interior door panel, with about 1/2-inch of clearance on either side. We positioned it carefully and used a pencil to mark the outline of the charger onto the plastic door sill panel. Be sure to check clearance by shutting the door firmly and moving the seat forward/backward — nothing should make contact with the cradle or flashlight.
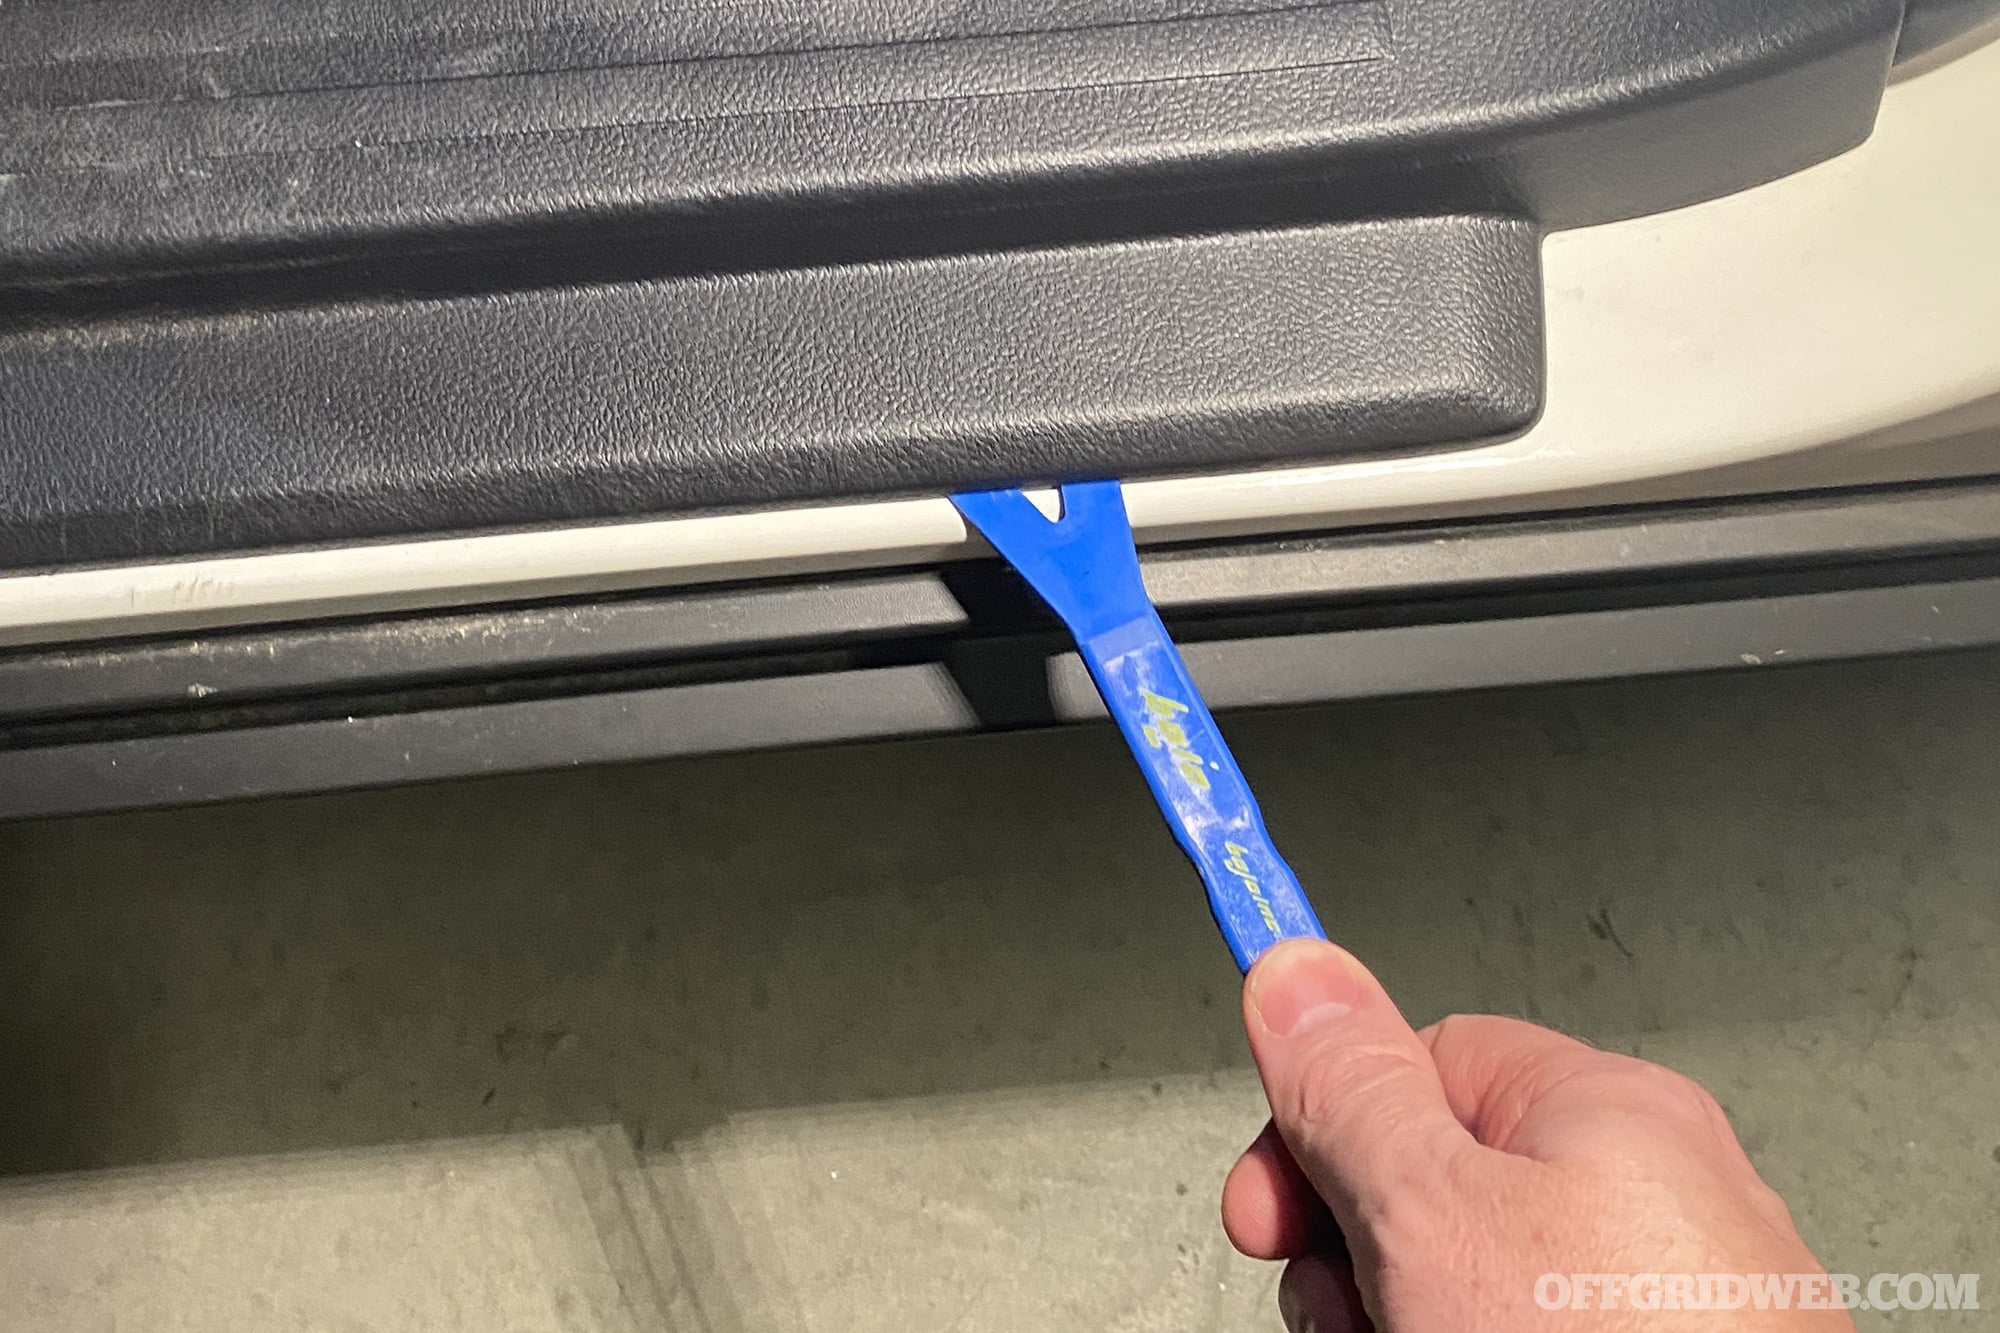
Once you’ve determined the placement of the charger, use a plastic pry tool to gently pry upward around the edges of the sill panel. The clips will pop out without too much effort, revealing a channel with a bunch of wires already running through it. This is where we ran the wires for our hardwired Midland GMRS radio, which is mounted under the driver’s seat.
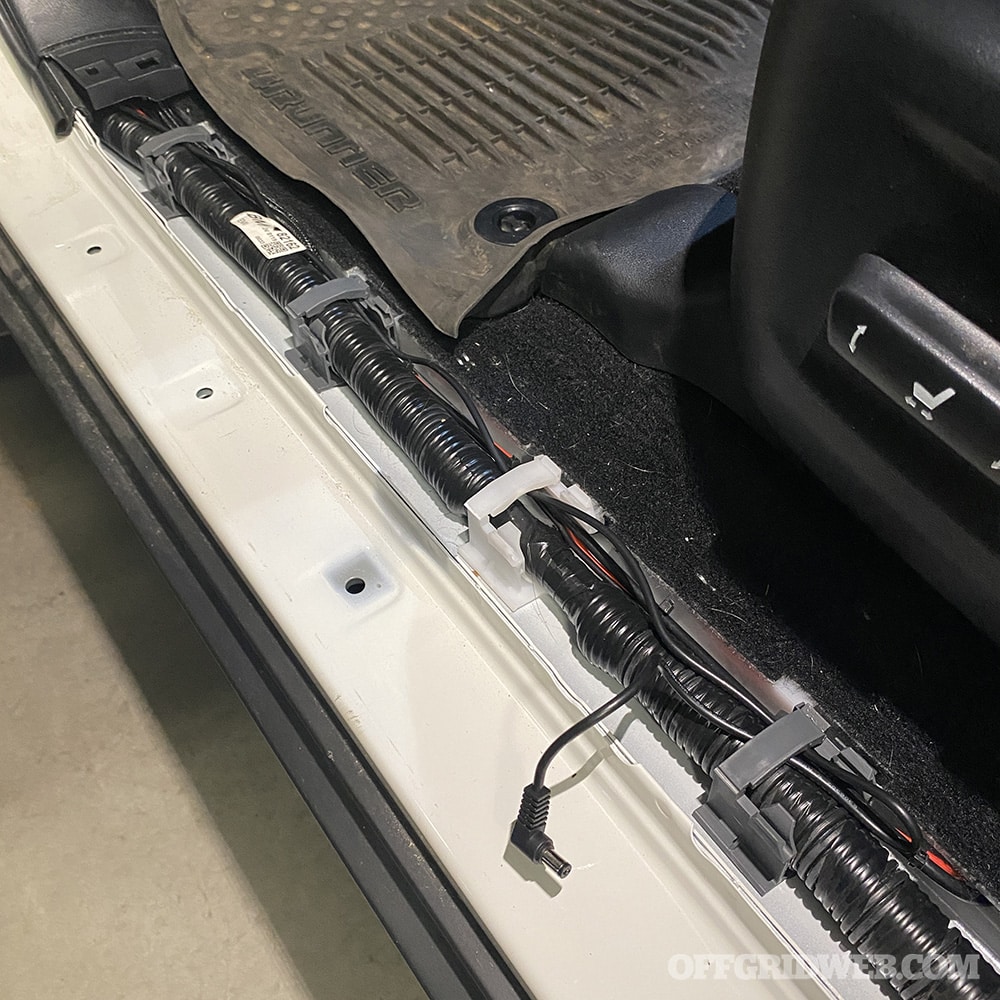
Place the end of the charging cable next to where the cradle will be installed, then run the other end towards the front of the vehicle and up through the kick panel by the driver’s left foot.
We cannibalized the 12V car charger that came with our Maglite, snipping off the 12V DC plug and stripping the outer sheath to reveal positive and ground wires. If you don’t want to do this, Maglite offers a ML150LR Straight Wire accessory for $17, or you can buy the complete ML150LR package with a straight wire. Either way, you’ll want the positive and ground wires routed up through the driver’s side kick panel.
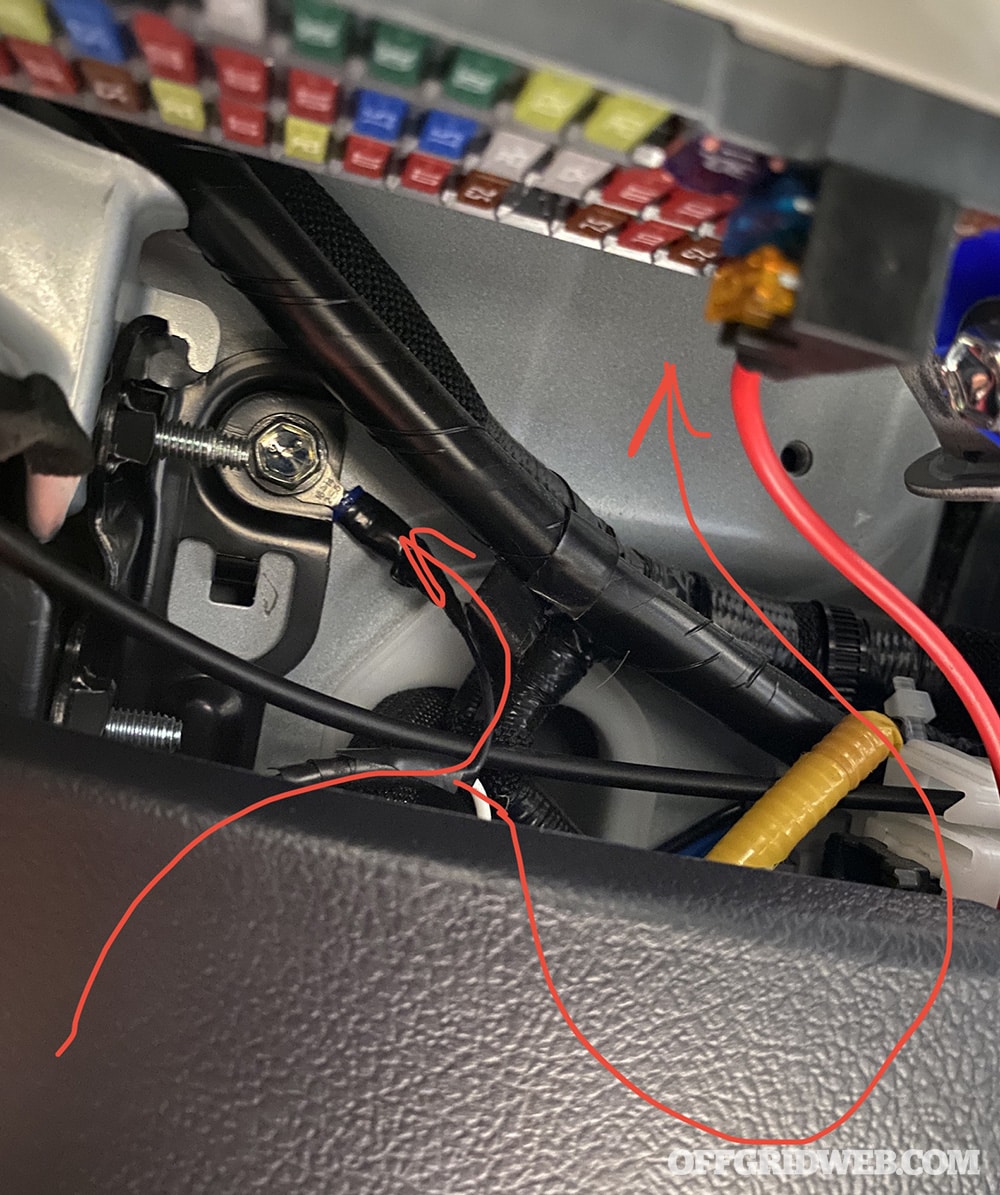
Above: Under the lower left side of the dash, the ground wire (originally bare, now protected by heat shrink and electrical tape) is connected to a grounded bolt via a spade terminal. The positive wire (white) is attached to a fuse tap, which connects to the interior fuse box a few inches away.
The ground wire should be connected to a ground point on your vehicle. We crimped the wire into a spade terminal and placed it under the head of a nearby bolt that attaches directly to the body. It’s important that the bolt isn’t attached to plastic or another insulated surface; bare metal is best for a reliable ground.
Next, the positive wire should be crimped into a fuse tap, which will be inserted into our 4Runner’s interior fuse box (located under the dash by the driver’s left knee). The fuse tap you use will depend on the type of fuses your vehicle has; our ’22 4Runner required a low profile mini fuse tap.
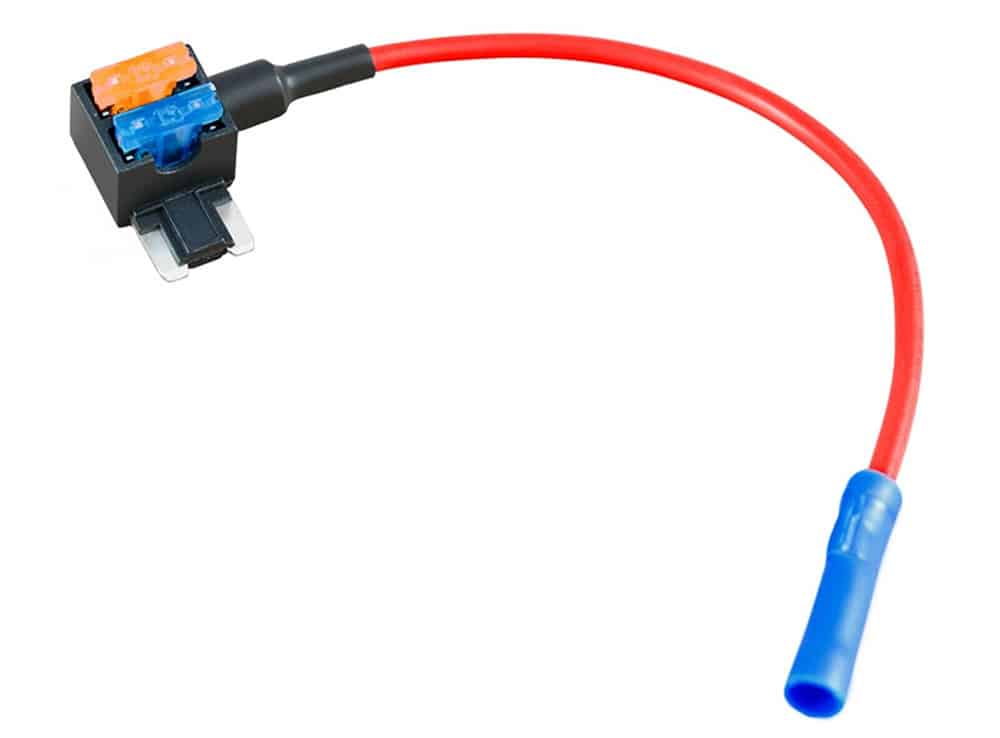
Above: A low-profile mini fuse tap. The bottom fuse (blue) is the fuse for the original circuit (the one from your fuse box), and the top fuse (orange) is the fuse for your new circuit (the hardwired Maglite).
Which Fuse to Use?
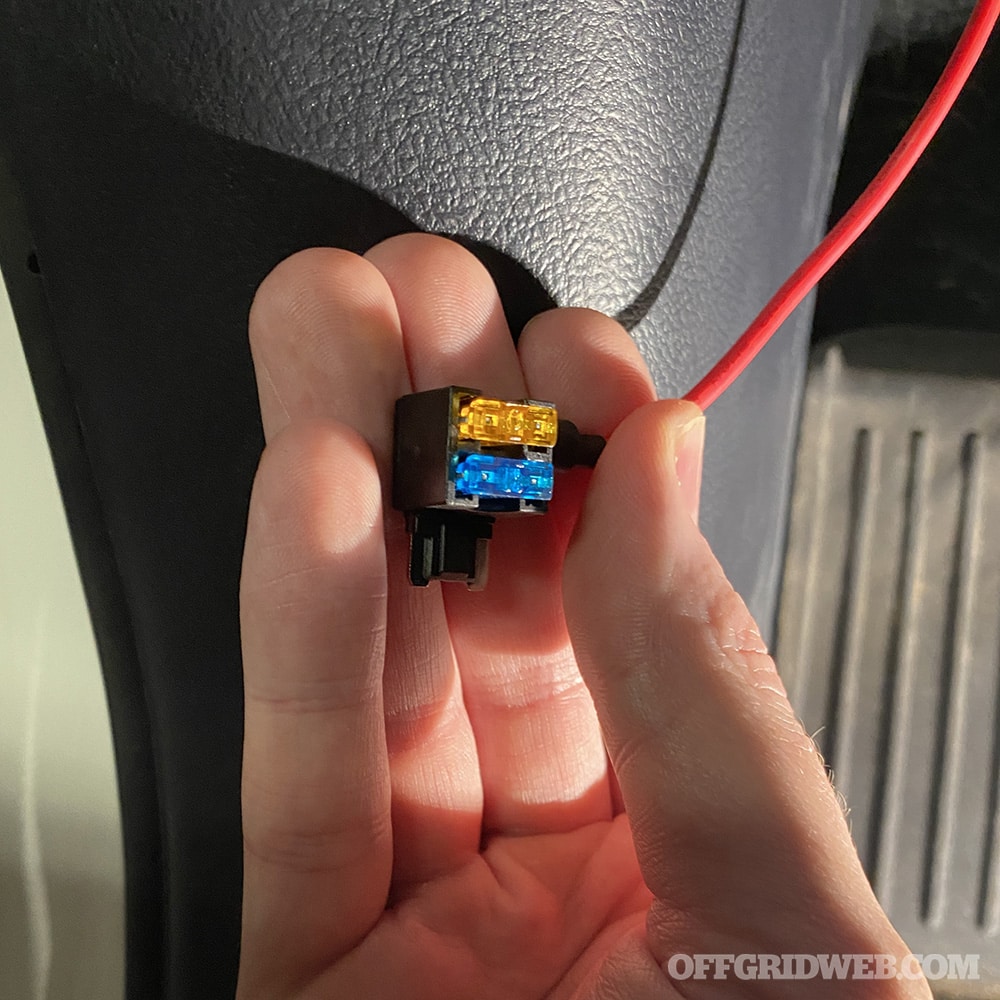
Above: The mini fuse tap with 15A and 5A fuses installed. The order of these fuses does matter, so be sure not to mix them up!
Since we want our Maglite to charge only when the truck’s ignition is turned on, we need to find a fuse for a circuit that gets ignition power. We’d recommend doing a Google search for “[your vehicle year/make/model] ignition fuse tap,” since someone online may have already found an appropriate fuse. If you don’t find the answer, or you want to be extra sure, you should use a test light or a multi-meter to check the circuit. Place the ground probe on the ground bolt, and touch the positive probe to the metal contact point on the fuse in your fuse box. With the vehicle’s ignition turned on, you should see roughly 12 volts; with it turned off, you should see 0 volts.
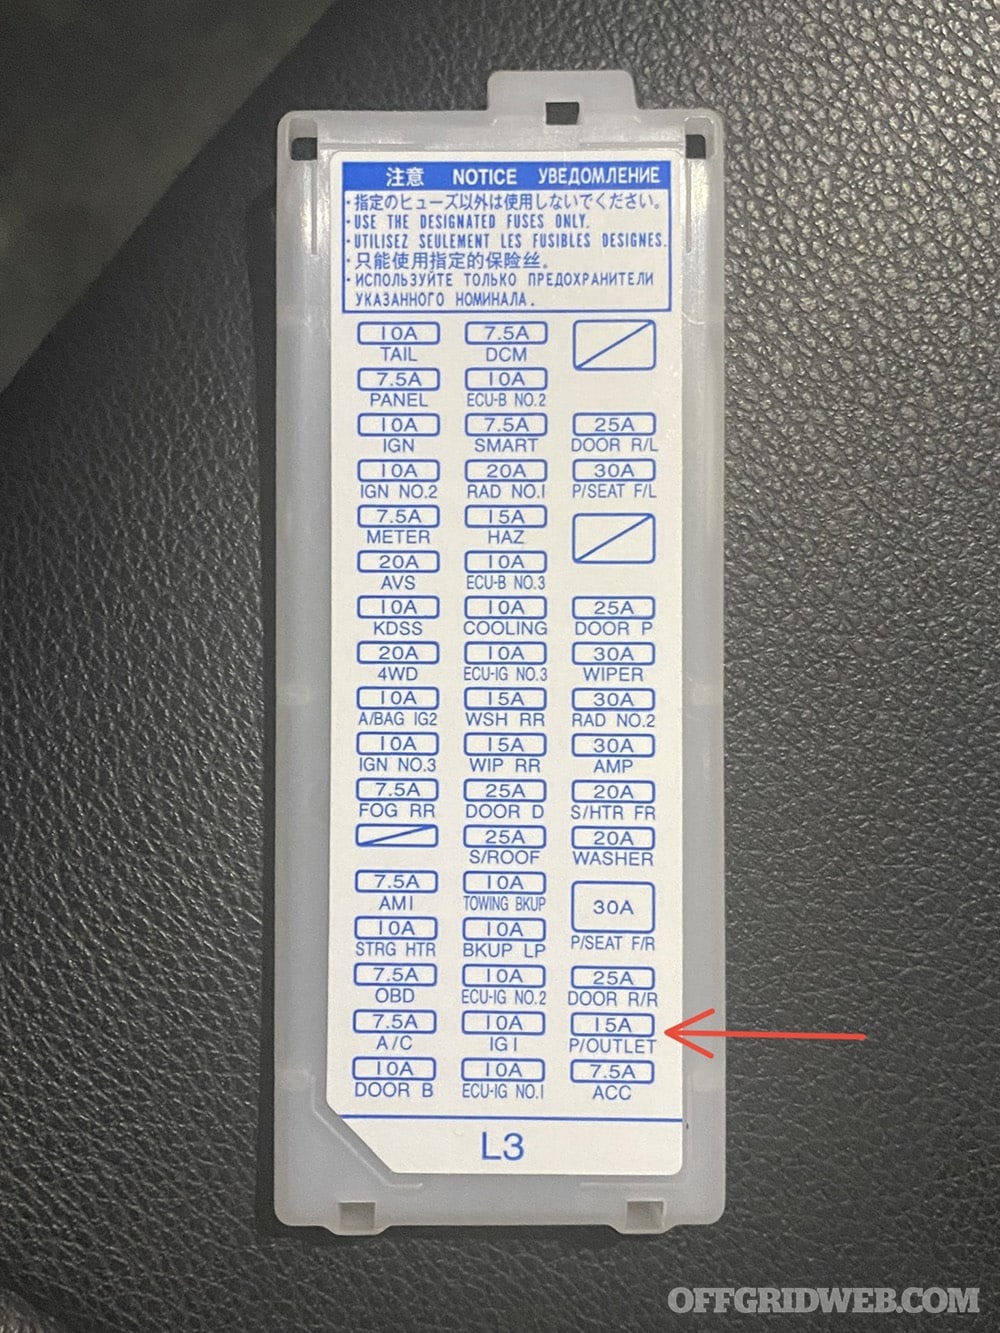
Above: The 2022 4Runner interior fuse box lid shows the amperage and purpose of all fuses. We selected this 15A power outlet fuse, and tested it with a multi-meter to confirm it’s powered by the ignition.
For our 2022 4Runner, we removed the 15A “P/OUTLET’ fuse and placed it in the bottom slot on our fuse tap. Then we added a 5A fuse to the top slot to protect our new Maglite charger circuit, and inserted the fuse tap into the fuse box slot where the 15A P/OUTLET fuse had been. Maglite’s manual recommends a 10A slow-blow fuse installed in-line on the positive wire, but we haven’t had any issues with a standard 5A blade fuse in our fuse tap. Just don’t use a fuse greater than 10A, since that could potentially lead to melted wiring or even a fire if the circuit shorts out.
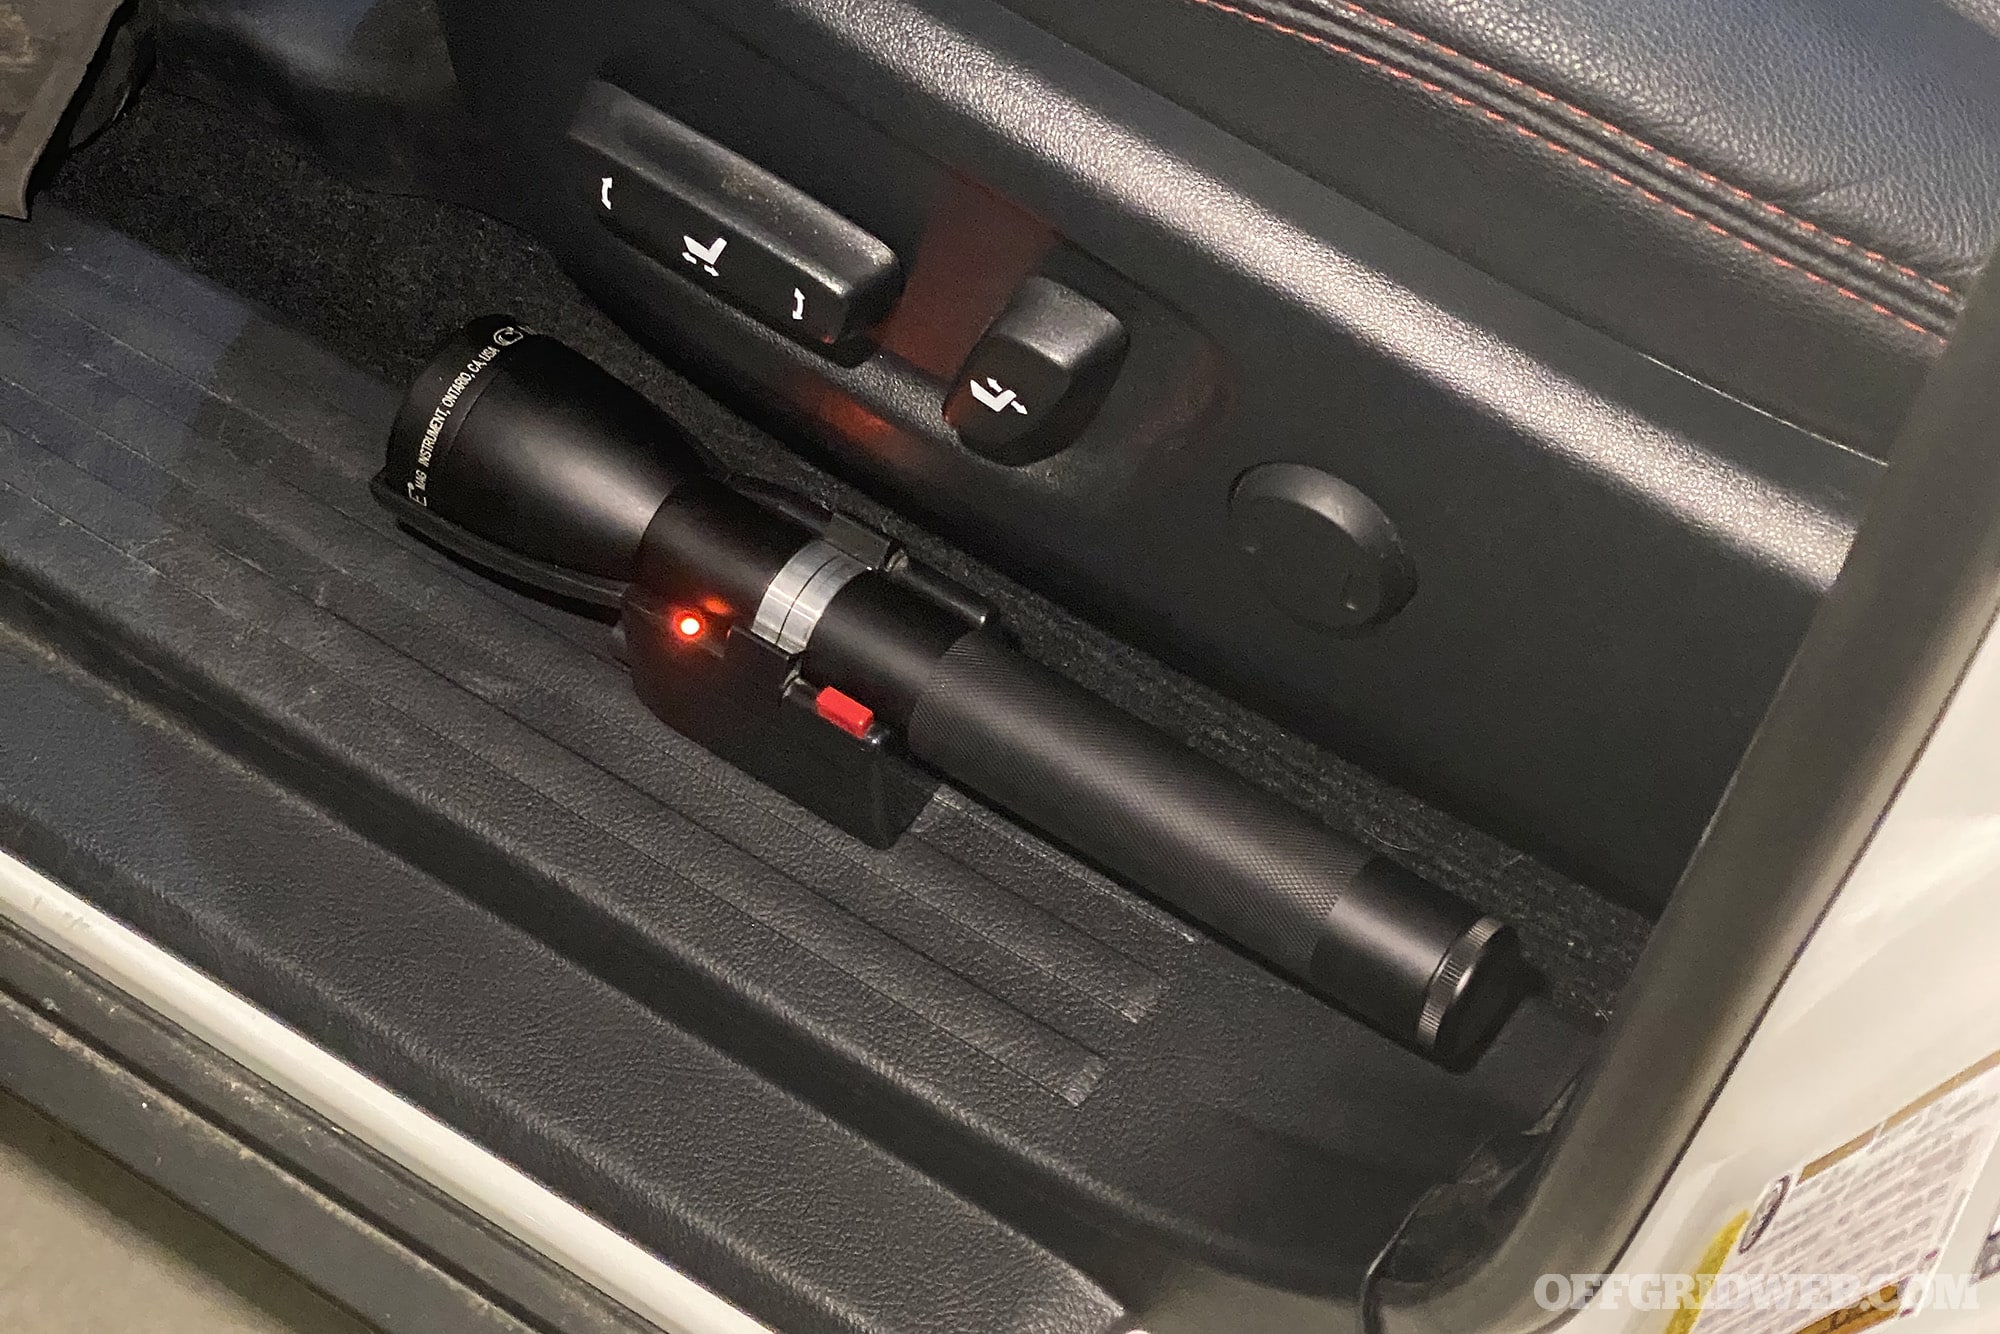
Above: The orange light on the cradle indicates our ML150LR is between 0% and 80% charged. When it’s between 80% and 100% charged, the light blinks green.
At this point, you should plug in the Maglite charging cradle and turn on the ignition to confirm the charger status light illuminates. If it does, congrats — you’re done with wiring!
Mounting the Cradle
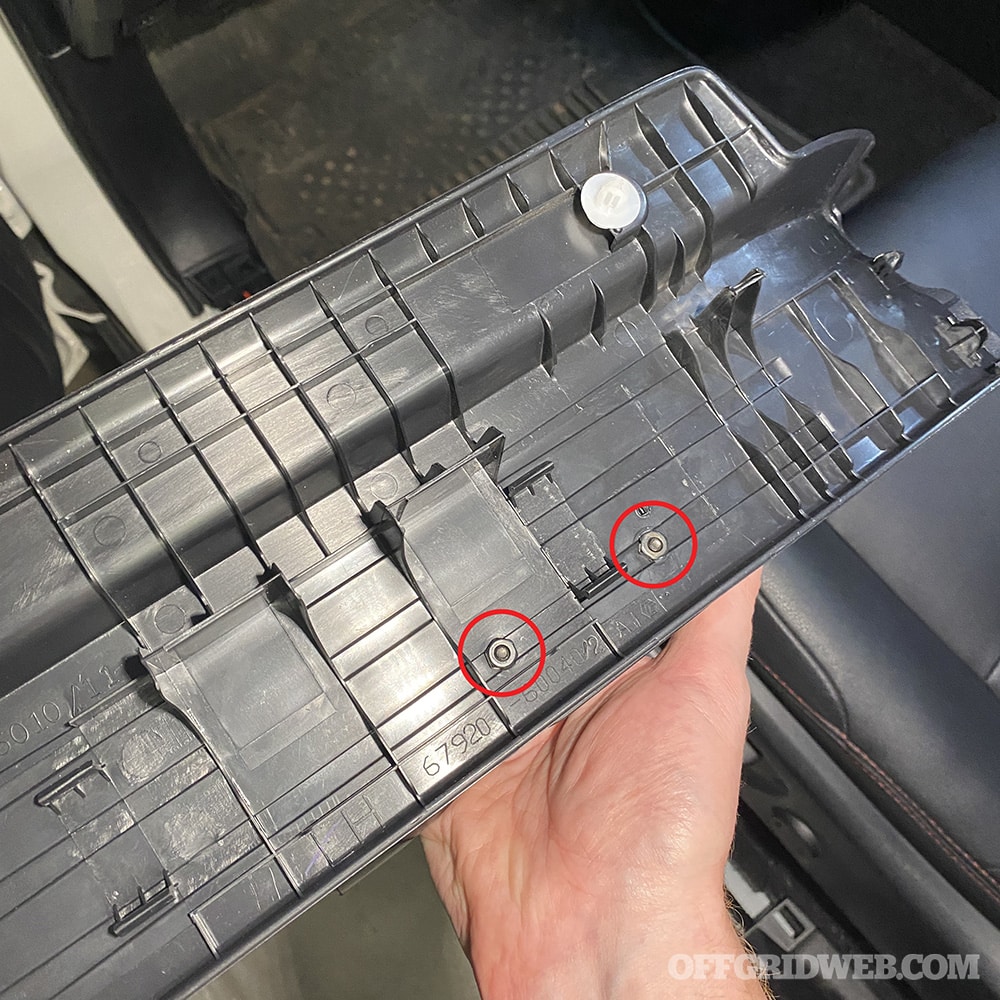
Above: Two 3/4-inch-long hex bolts attach the cradle to the sill panel. Strips of double-sided mounting tape were also used for a secure, vibration-free fit.
Now that our hardwired Maglite is working properly, it’s time to finish permanently installing the cradle. Using the pencil marks from earlier, we set the Toyota sill panel on our work bench and carefully drilled two holes through it in the appropriate locations. Maglite includes self-tapping screws for this purpose, but we definitely don’t want the sharp tips of those screws anywhere near the sensitive wiring harness that passes under this sill panel. So, we used some 3/4-inch-long #8-32UNC hex bolts and nuts. We also applied strips of 3M heavy-duty mounting tape to the underside of the cradle — this will prevent any noisy plastic-on-plastic vibration as we’re driving.
Once the bolts were tightened and the sill panel was pressed back into place, we stood back and admired our new hardwired Maglite setup. Now we’ll never have to wonder if our flashlight is fully charged or fumble around for it in the dark. It’s always nearby and ready to go.
For more information on the Maglite ML150LR and other duty-grade flashlights, go to Maglite.com.
