In This Article
Disclaimer: The concepts shown here are for illustrative purposes only. Be sure to check local laws before setting any traps.
You can’t grill it until you kill it. This expression sends anti-hunter types into full-triggered mode. To some, there’s a preconceived notion that living in the woods will only require eating nuts and berries. The reality of the scenario involves a much larger buffet line of small game and rodents that pack nutritious calories in little fur-bundled packages. Running around trying to hunt them expends more calories than will be returned — so the logical answer to the survival question is developing a series of traps that’ll work for you when you rest or attend to other survival needs.
Check out the most popular survival books in your local bookstore or library, and you’ll find any number of elaborate trap illustrations. Creating these traps may seem like a daunting task, but with enough practice, a rough working example can be made in short order. We’ve seen these books, and we’ve also seen what’s often left out of written instruction. We’ll break down some of the most common traps and focus on the trigger mechanisms to make them both more sensitive and more effective in putting meat over your fire. Check your local regulations as well before setting any traps.
Crushing Traps
Figure 4
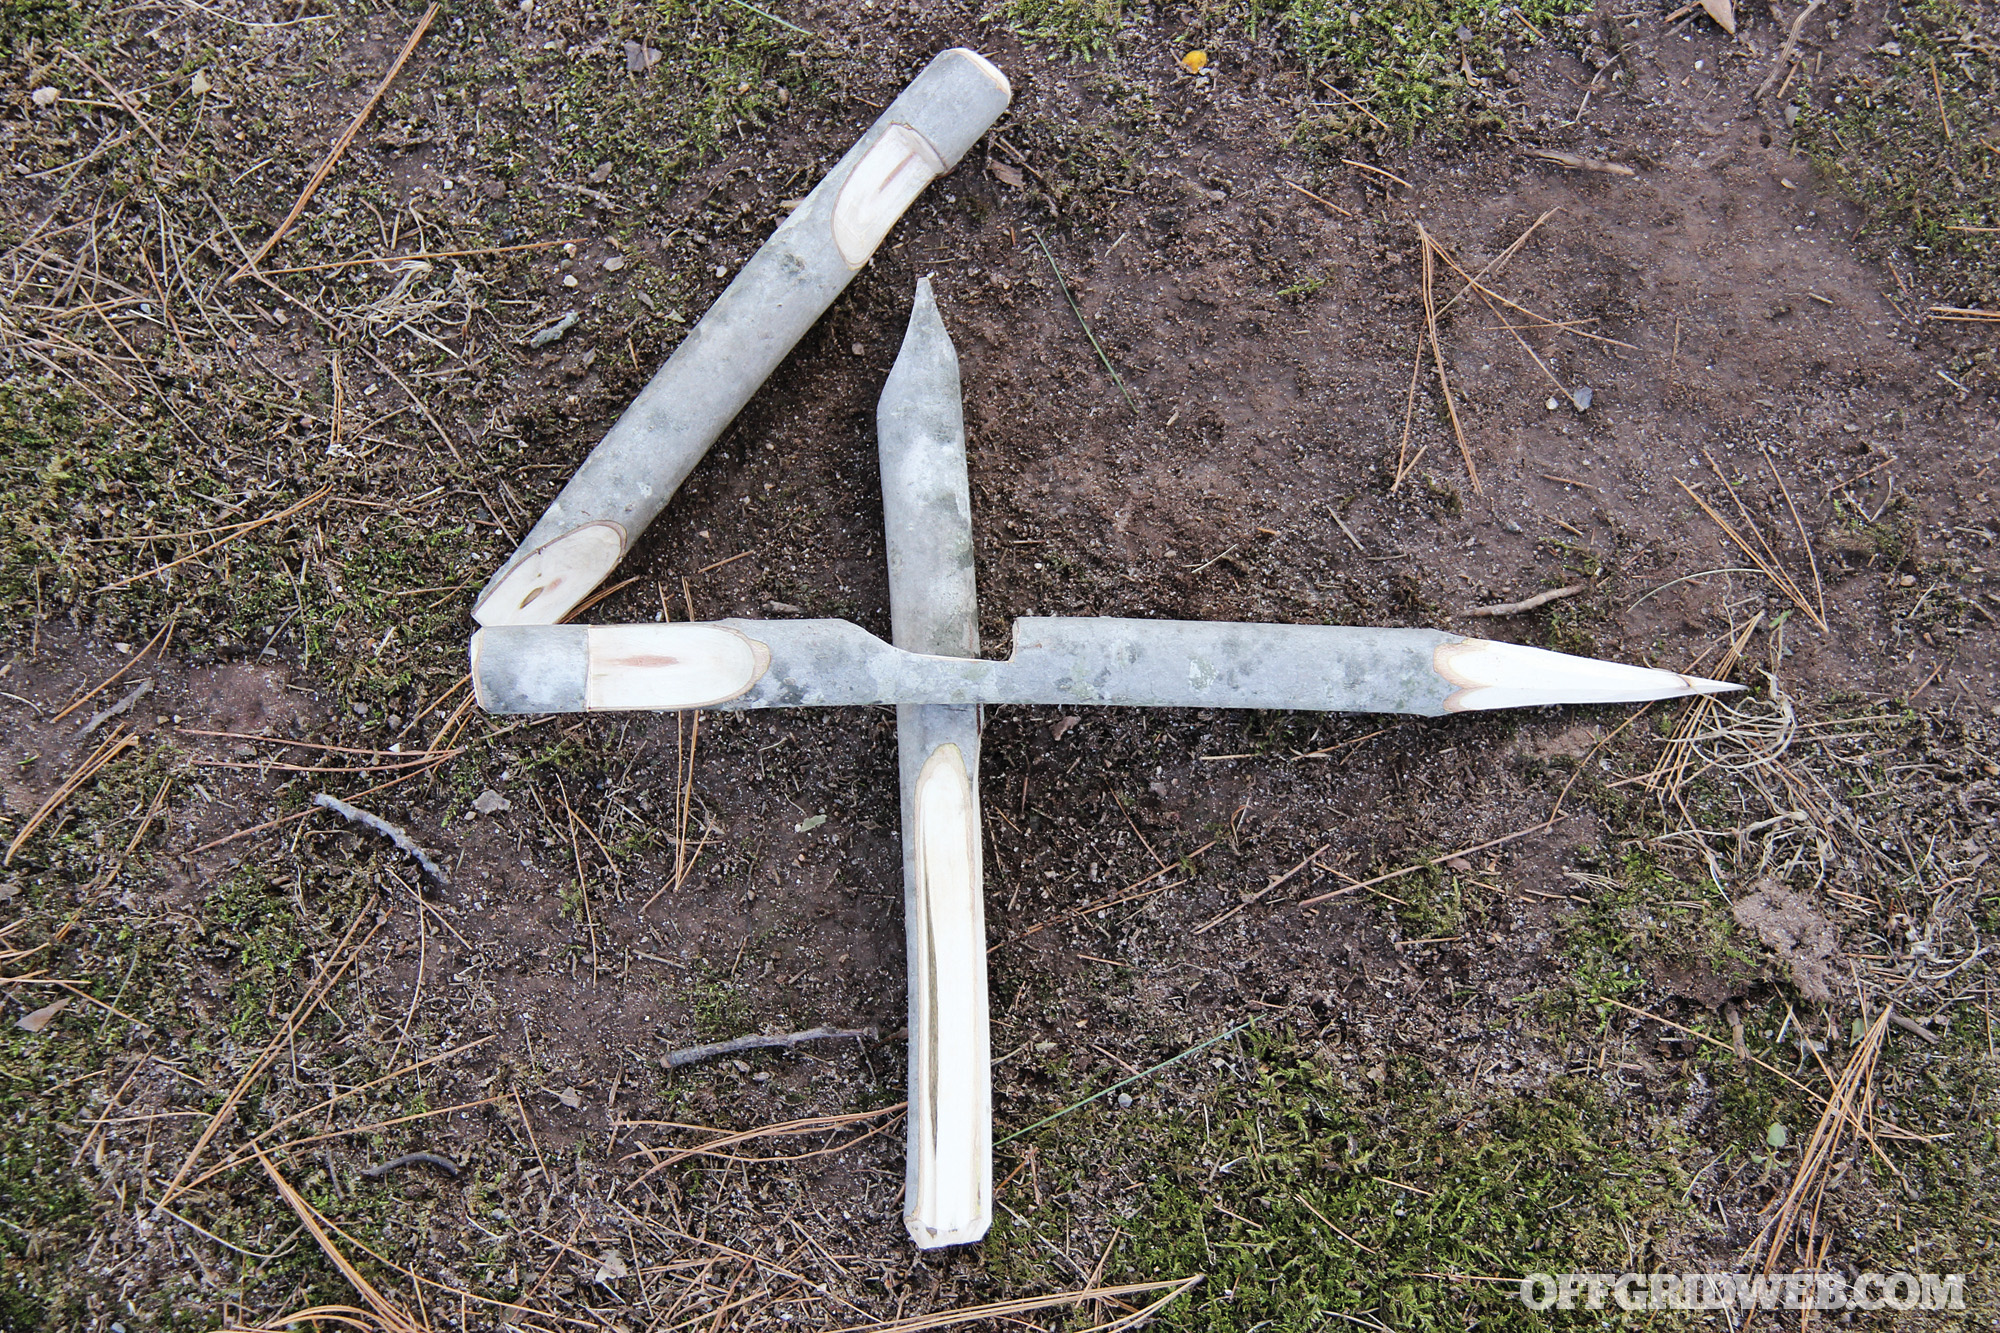
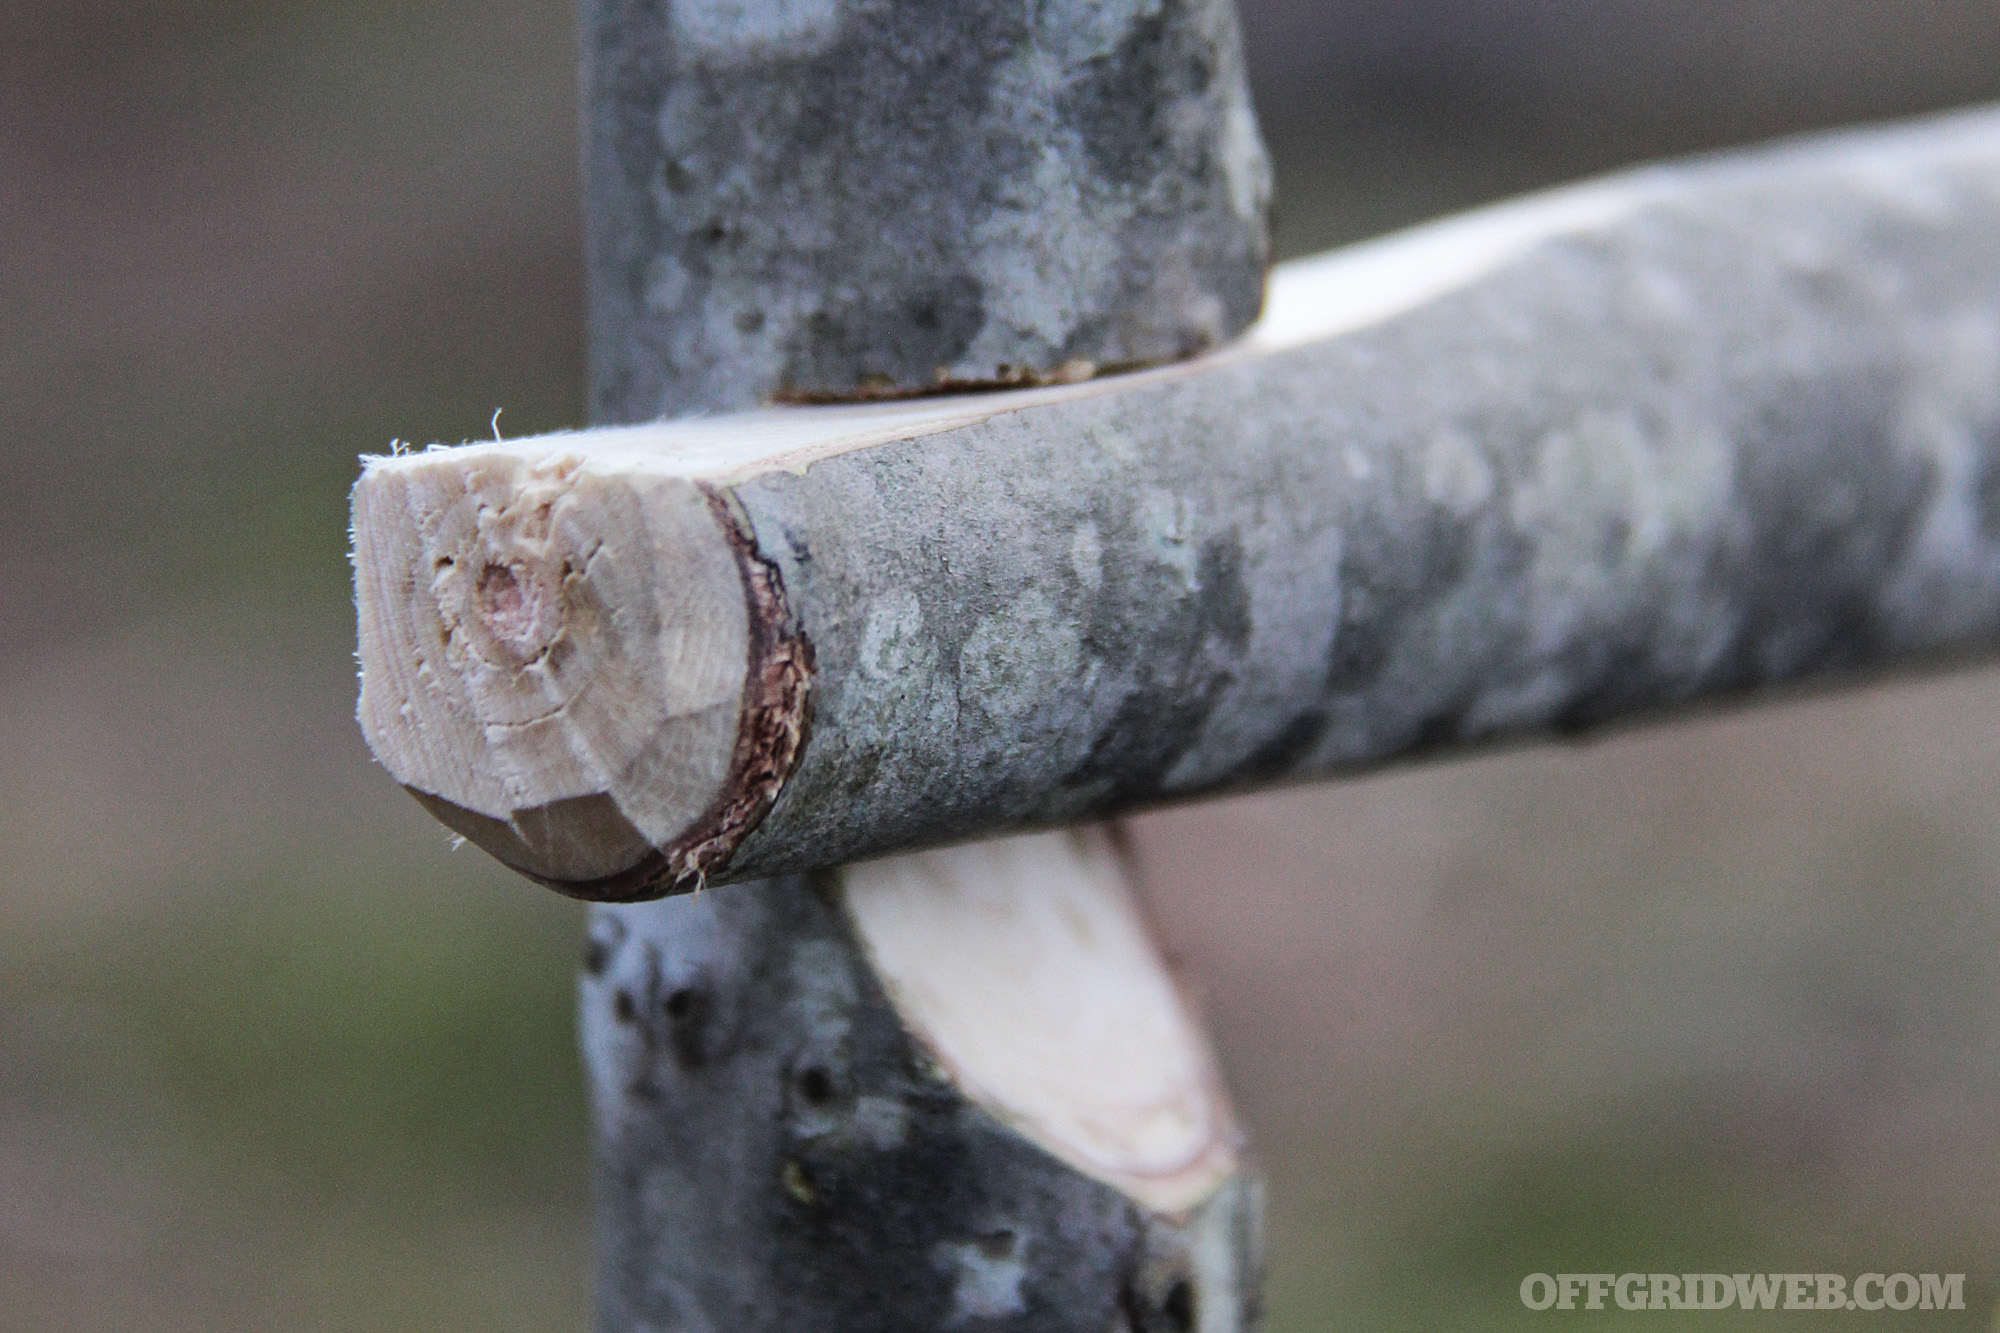
The Figure 4 trap trigger is easily carved with nothing more than a blade and some hardwood. This trigger is most frequently used with a crushing weight, such as a rock or large round of wood, but pest control can be handled in urban areas with wood planks, pallets, and cinder blocks. Use dried seasoned branches free of rot, if you can. Green branches will contract as they dry and may split along the grain. If possible, select wood free of knots and about the thickness of a Sharpie marker to start. You can always scale your trap part components up or down. The three components — the upright, diagonal, and horizontal (these terms will make sense shortly) — can all be carved from a single stick. The thickest part of the stick is used for the diagonal stick, the thinnest for the horizontal, and medium thickness for the upright.
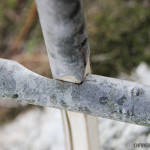

The key to carving the Figure 4 is to make precise cuts with the correct angles and orientation to one another. The vertical stick requires a chisel tip as well as a 90-degree angle. The diagonal stick requires a ramped notch on one end and a chisel on the other. The horizontal requires two ramped notches configured 90 degrees offset from each other. The three pieces of this trap trigger are held in place with opposing pressure. The angle of the diagonal stick and the length will vary the speed at which it triggers.
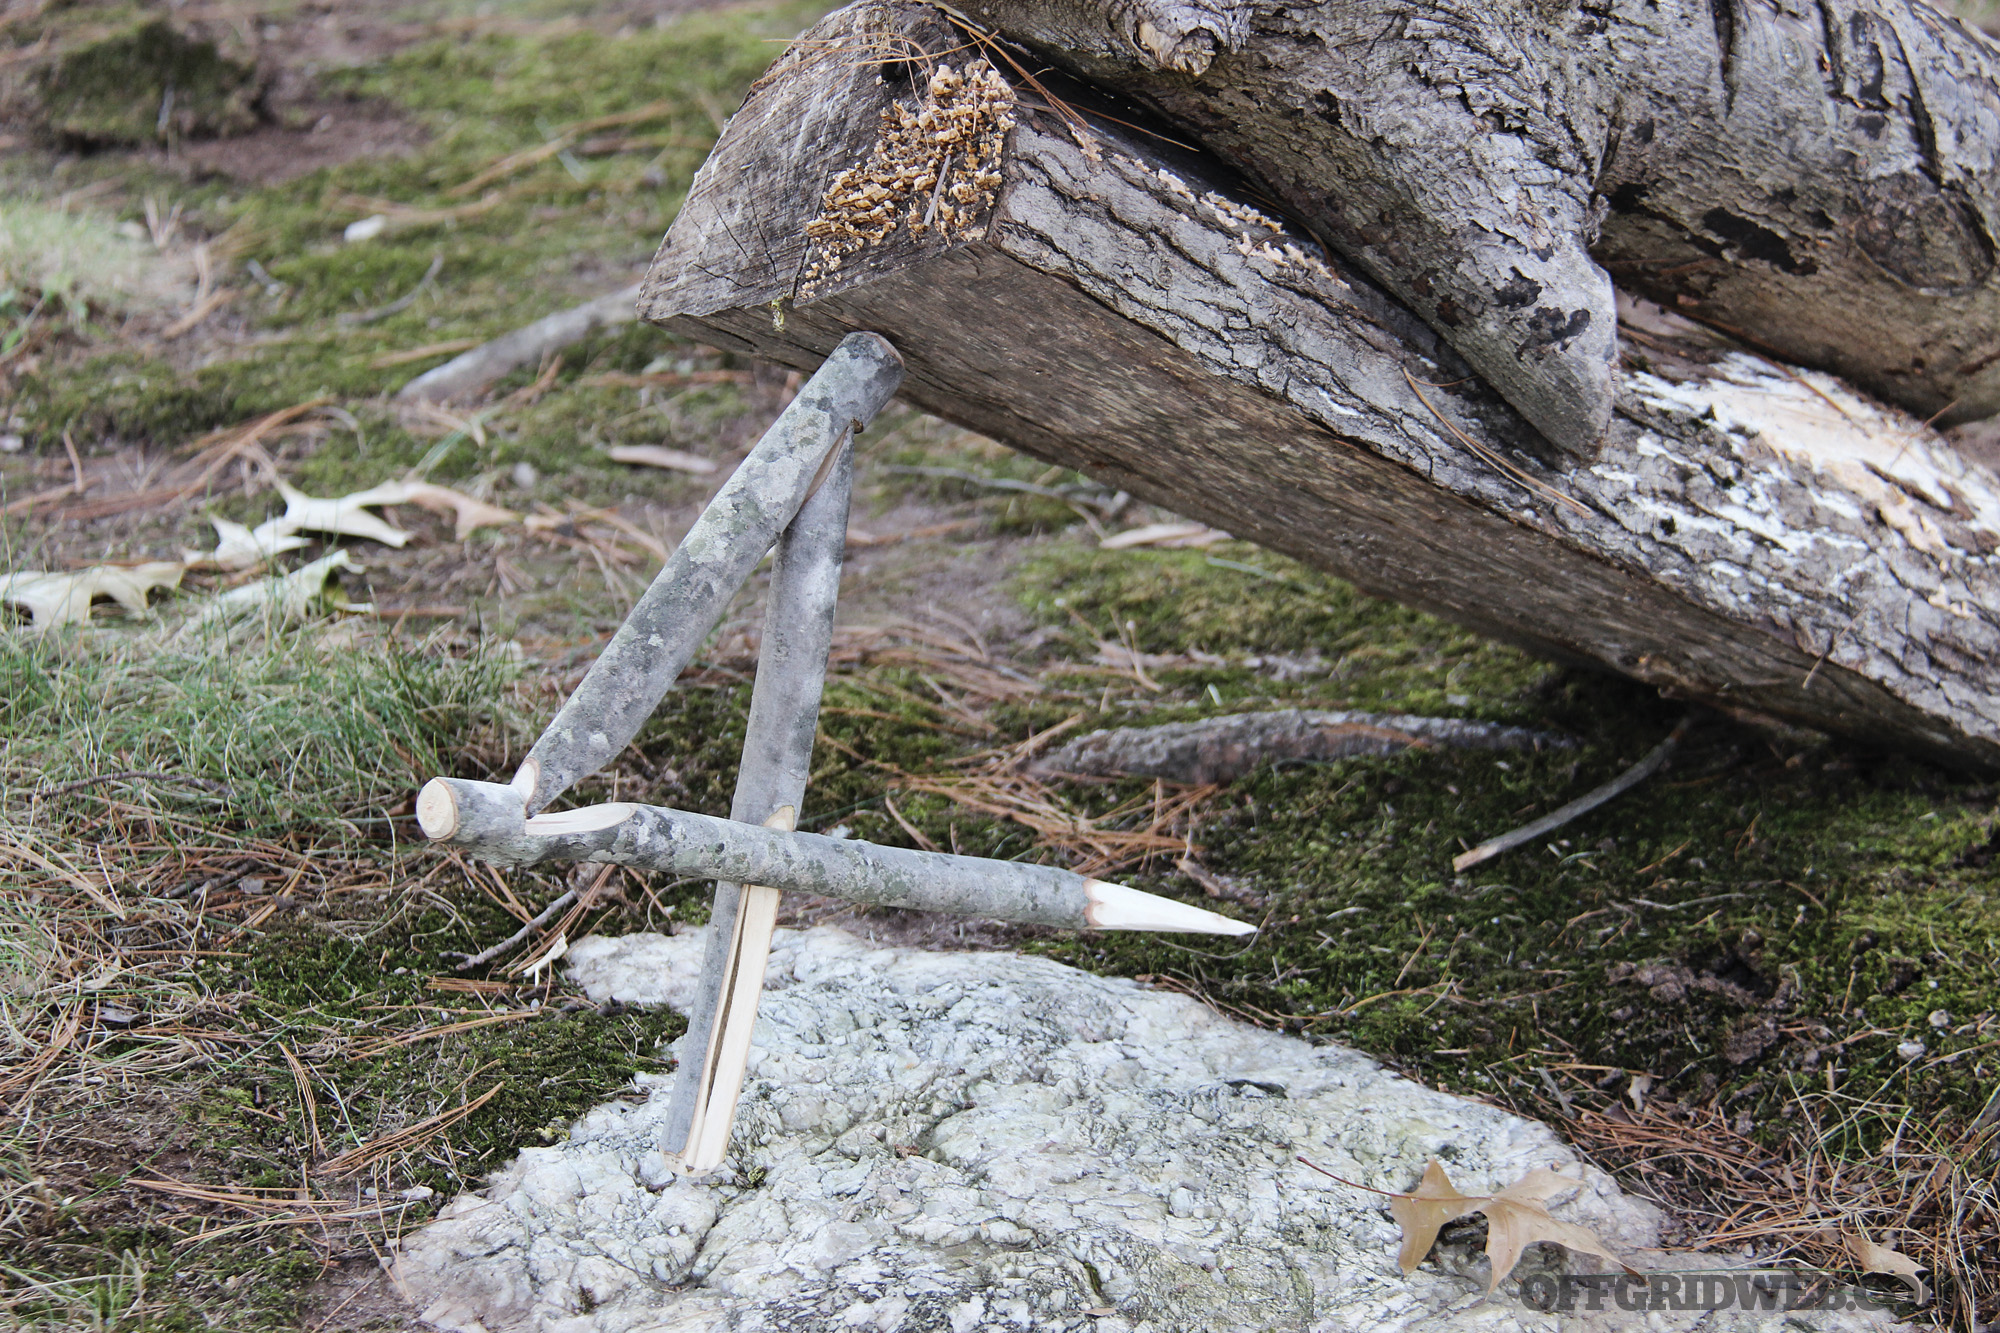
Above: The Figure 4 trap trigger is adaptable to many variations of crushing traps. This trap has an additional weight added to the primary crushing log to increase lethality and effectiveness.
When carved correctly, the Figure 4 will be thrown out of the way when the trap is triggered. To make it more sensitive, keep the points of contact smooth without bevels or scratches. Don’t drive the vertical stick into the ground, but rather rest it on a hard surface instead. The size of the weight will depend on the animal you intend to catch; for example, a 10-pound rock falling on a 2-pound animal will be sufficient to crush it. Placing a flat rock or setting the trap on a hard surface will increase the crushing force of your trap.
Pros: Simple knife-and-knowledge skill (just add sticks). Works well with “cage-like” traps, too.
Cons: Requires a deadfall weight
Paiute Figure 4
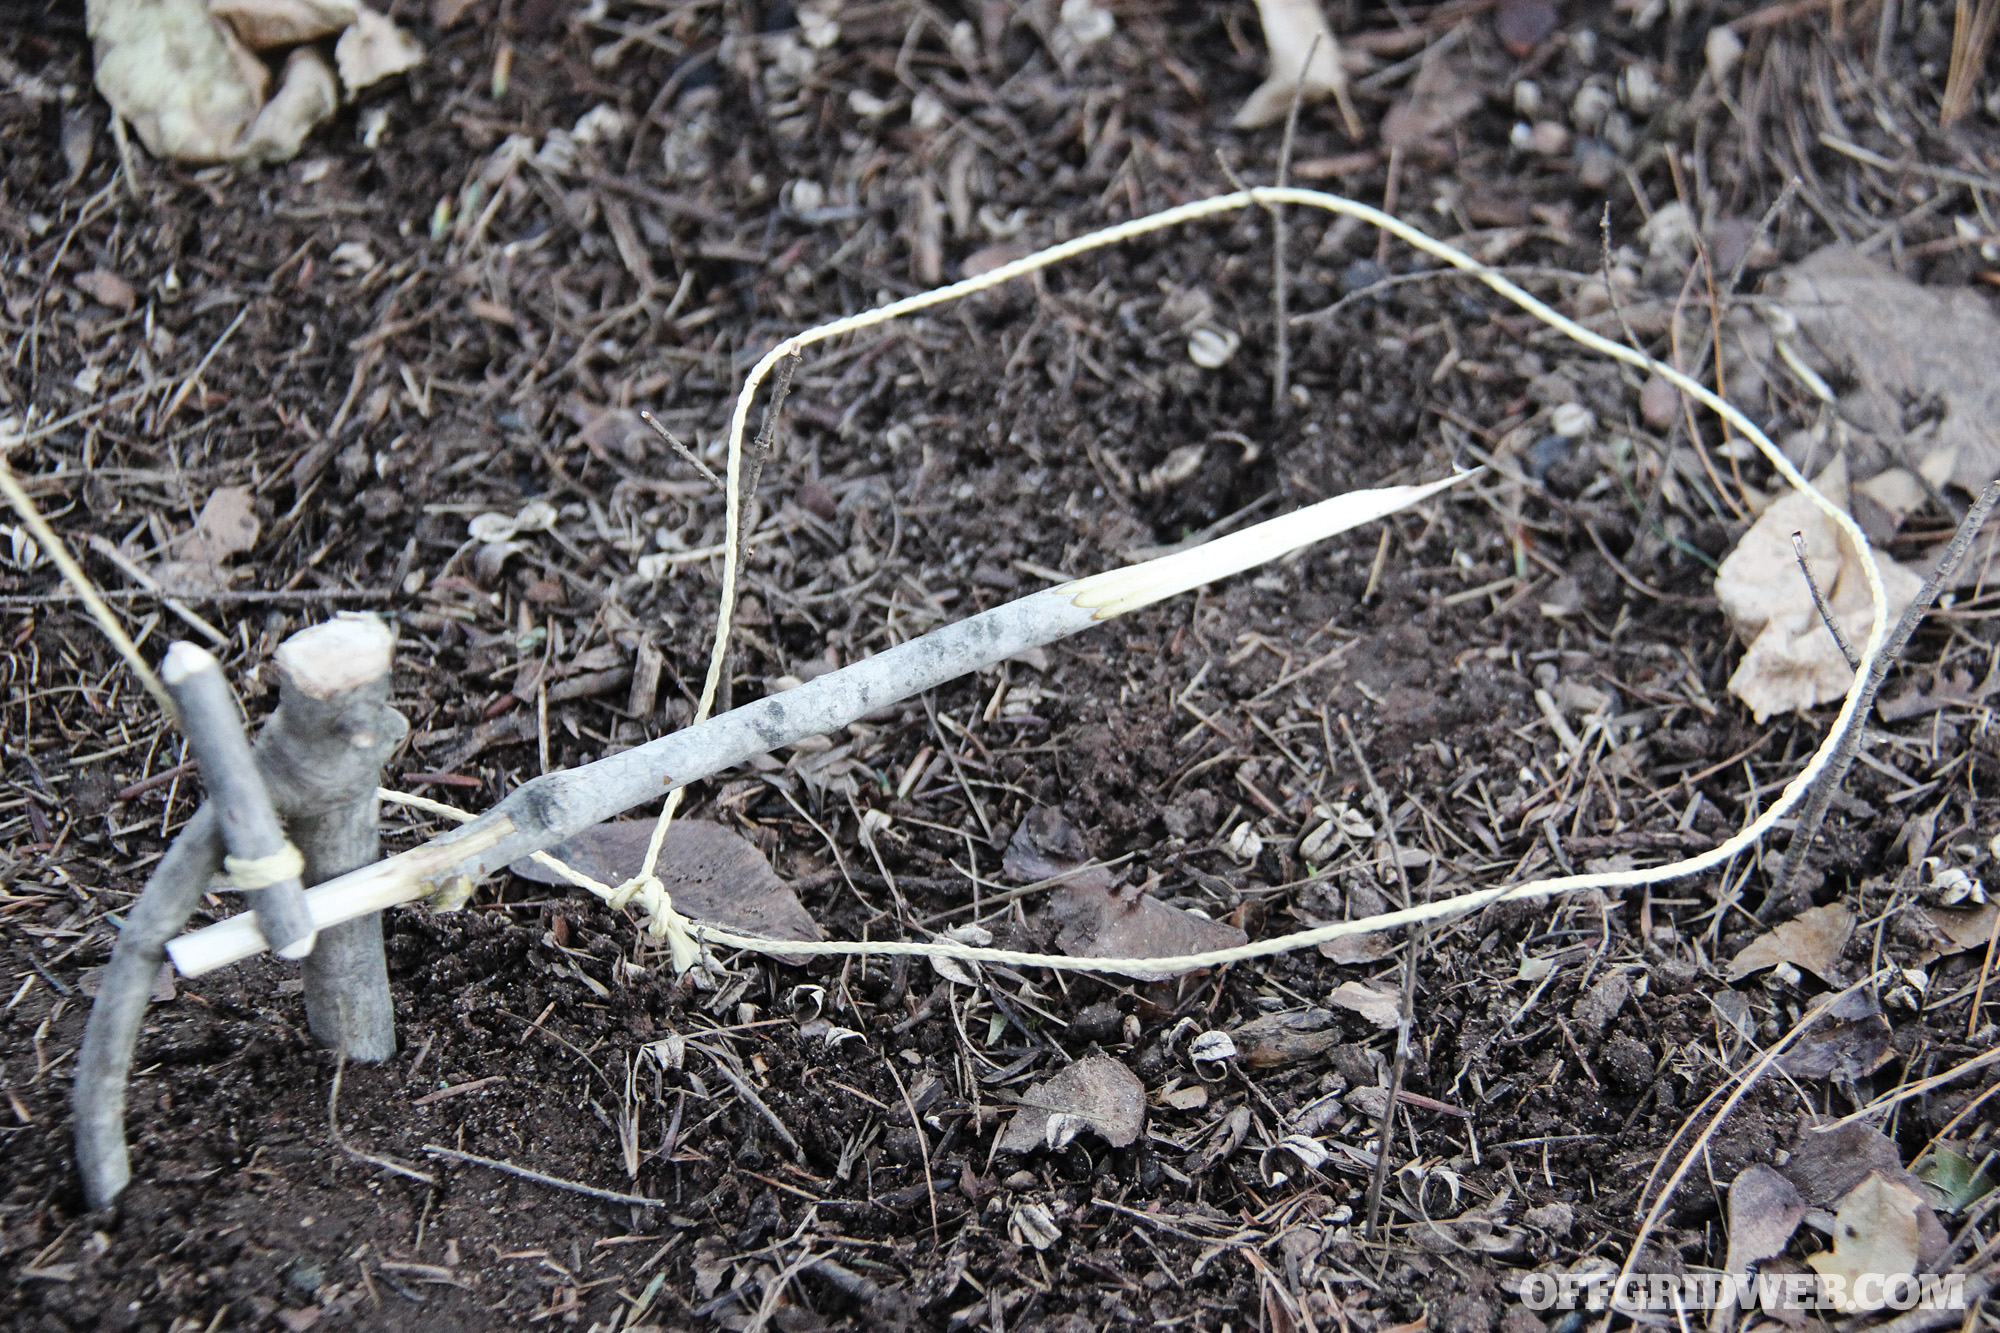
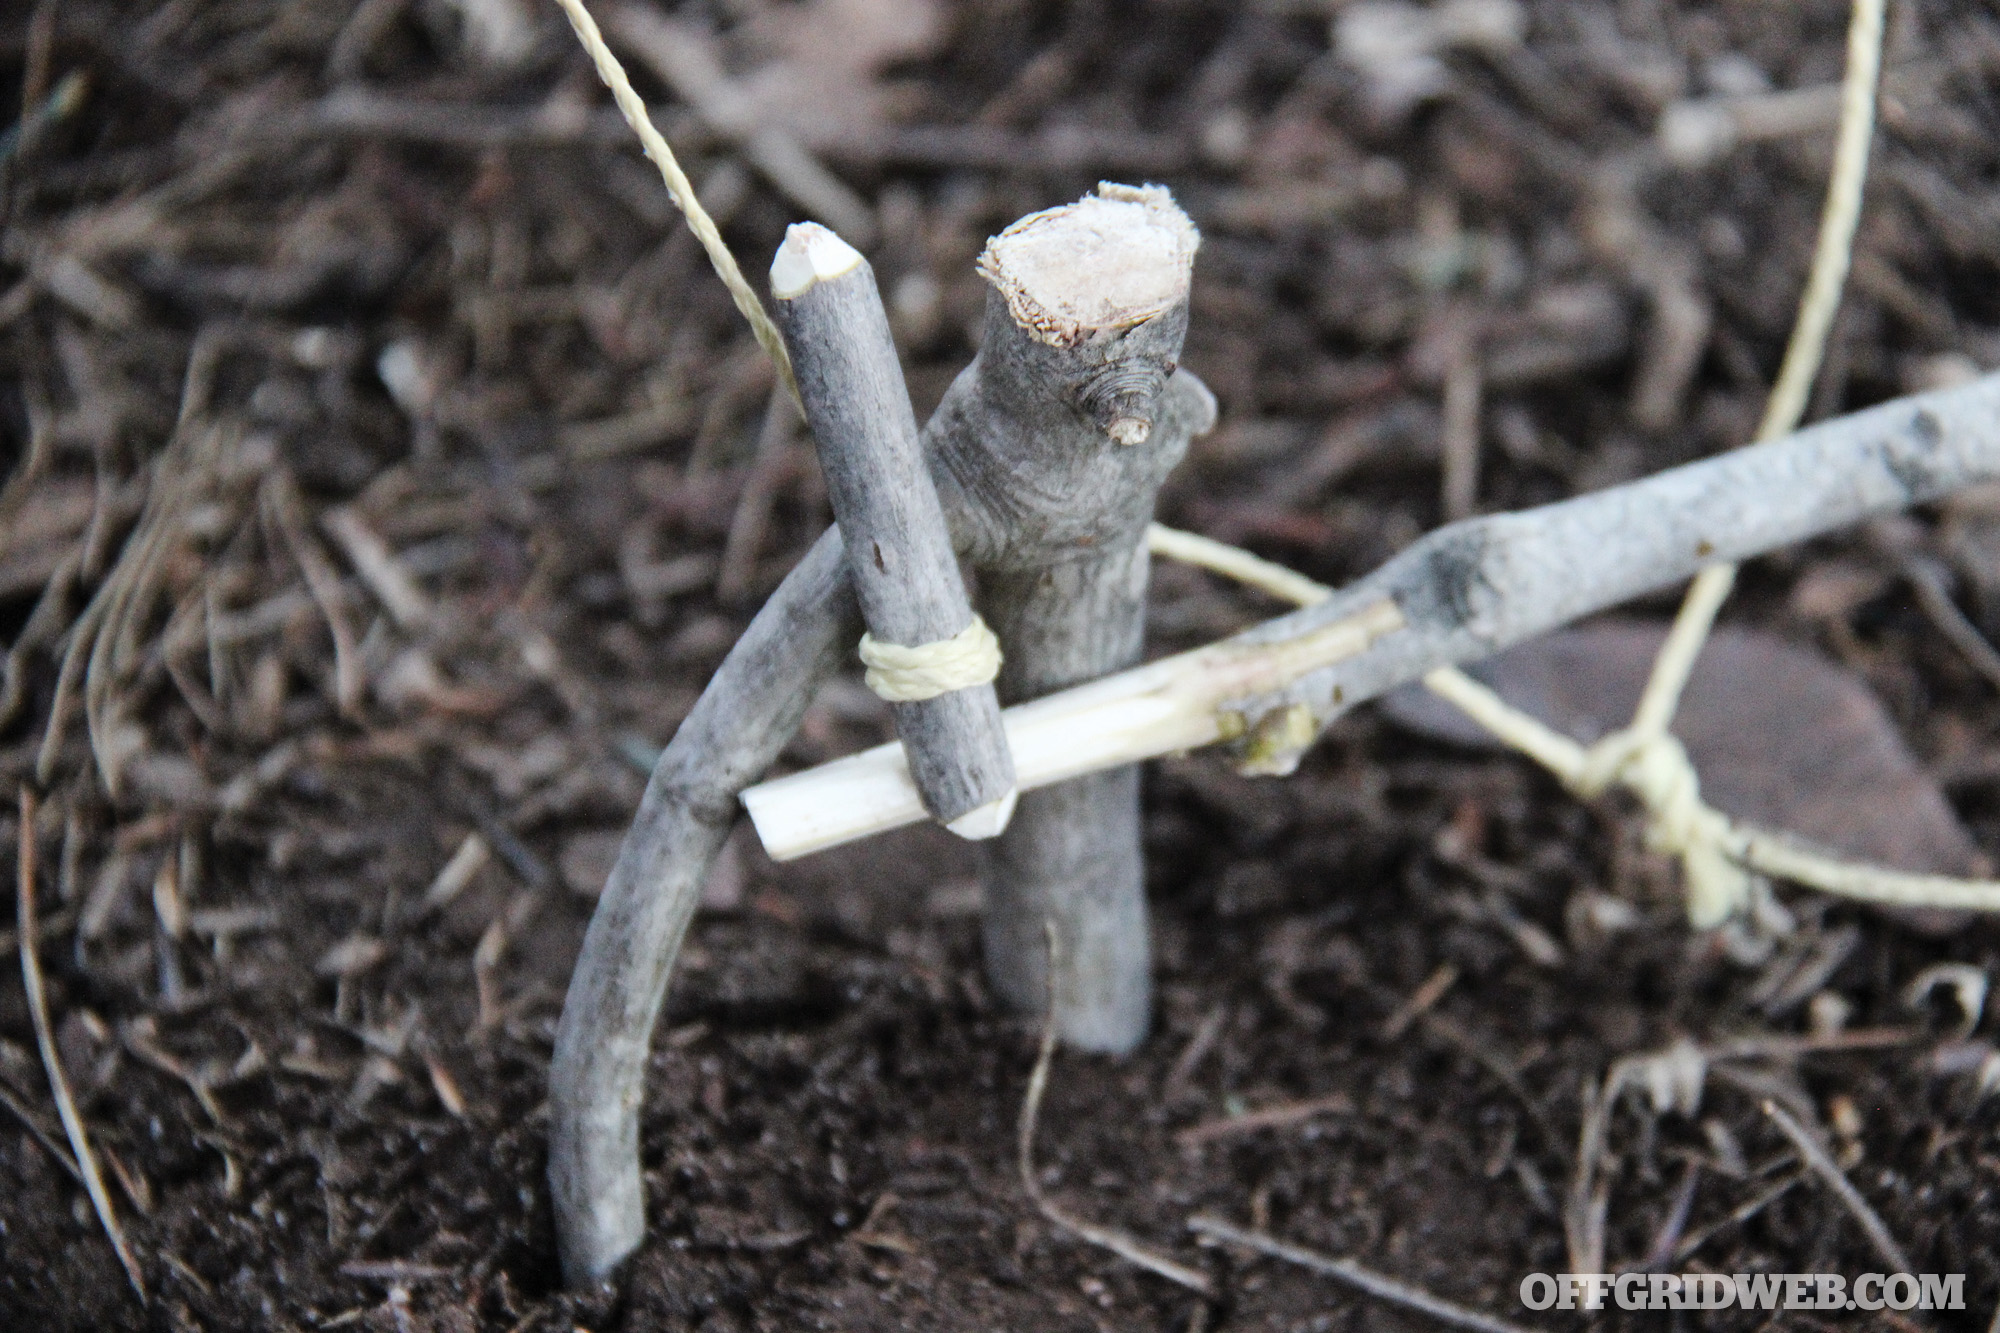
Above: The Paiute Figure 4 trap trigger requires less carving with the trade-off of adding cordage to the setup. The Paiute Figure 4 is an incredibly responsive and fast trap trigger; it works well with crushing traps and makeshift cage traps. A cage trap can be created to catch animals live, but must be weighted to prevent an animal from escaping.
A variation of a Figure 4 with increased sensitivity is the Paiute Figure 4. This trap needs less carving, but requires cordage. In the Southwest states where the Paiute lived, Yucca fibers were easily processed into cordage with sufficient strength for trap triggers. In the modern era, paracord innards and jute twine can be substituted if your natural cordage making skills aren’t up to snuff. Make sure your cordage has little to no stretch to prevent delayed action.
The Paiute requires a single chisel tip and ramped notch along with a single groove around the horizontal stick. If you’re using reverse-wrapped cordage, the initial loop created can be looped around the toggle that wraps around the vertical stick. Where many survival manuals get it wrong is showing the Paiute trigger stick and toggle stick carved to perfect flats that maximize contact with one another at the expense of increased friction. To increase the sensitivity of the trigger and toggle, round the ends and smooth them out as best as possible.

Pros: Less carving than Figure 4, very fast trigger.
Cons: Requires cordage and a deadfall weight
The Simple Snare
A simple snare loop can be made from wire. Ideally, the wire should be the braided variety as it has greater resistance to breaking and the braid has a tendency to catch animal fur, adding a level of retention. Aside from the wire, the only other material necessary is a small twig or a stick that serves as a dowel. The process is easy.
Step 1: Cut a small length of snare wire (approximately 18 inches). About 4 inches down from one end, place a dowel horizontally across the wire and loop the wire around three times.
Step 2: With one hand pinching the dowel and the other the ends of the wire, twist it tightly a half dozen times.
Step 3: Break the dowel in half and pull it from the loop. Don’t let the loop close, but pinch it flat.
Step 4: Bend the tail end of the working end of the wire to create an acute hook.
Step 5: Thread the running end of the wire through the twisted loop and position the hook on the other end of the wire in line with the opening. The hook may increase the chances of hooking on the prey’s fur and help close the loop.
Step 6: Measure the size of the loop appropriately for the prey you intend to catch. The size of the loop should be approximately two to three fingers wide for a chipmunk or squirrel and four fingers for a rabbit.
Step 7: Attach the running end of the snare wire to a good anchor. Make sure the anchor is affixed to the ground or a branch the animal cannot break free. If you have them, use a fishing swivel to prevent the wire from twisting and weakening.
Snaring Traps
Goal Post
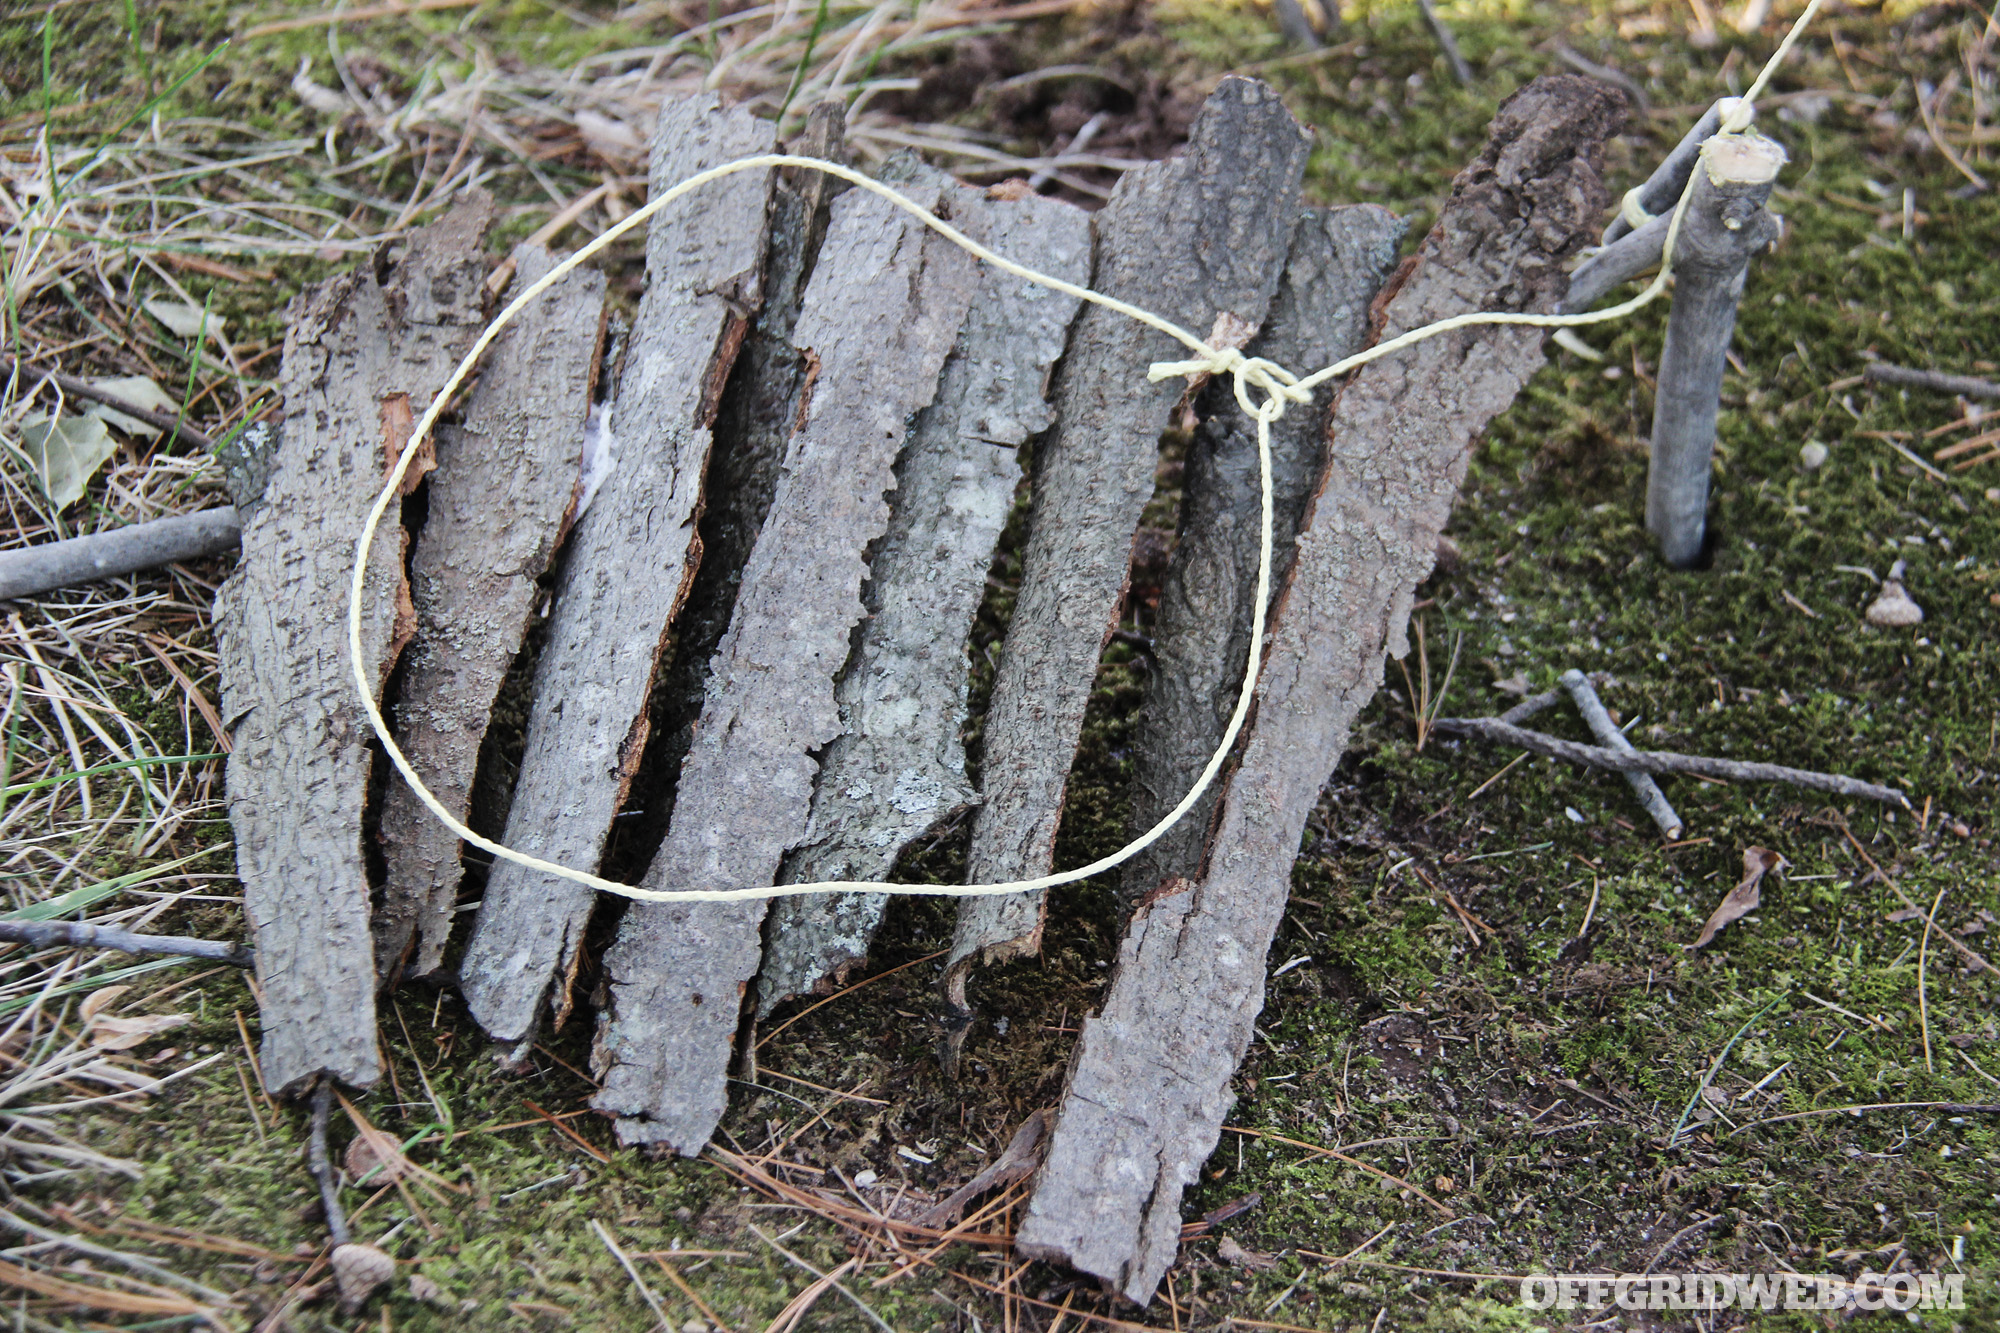
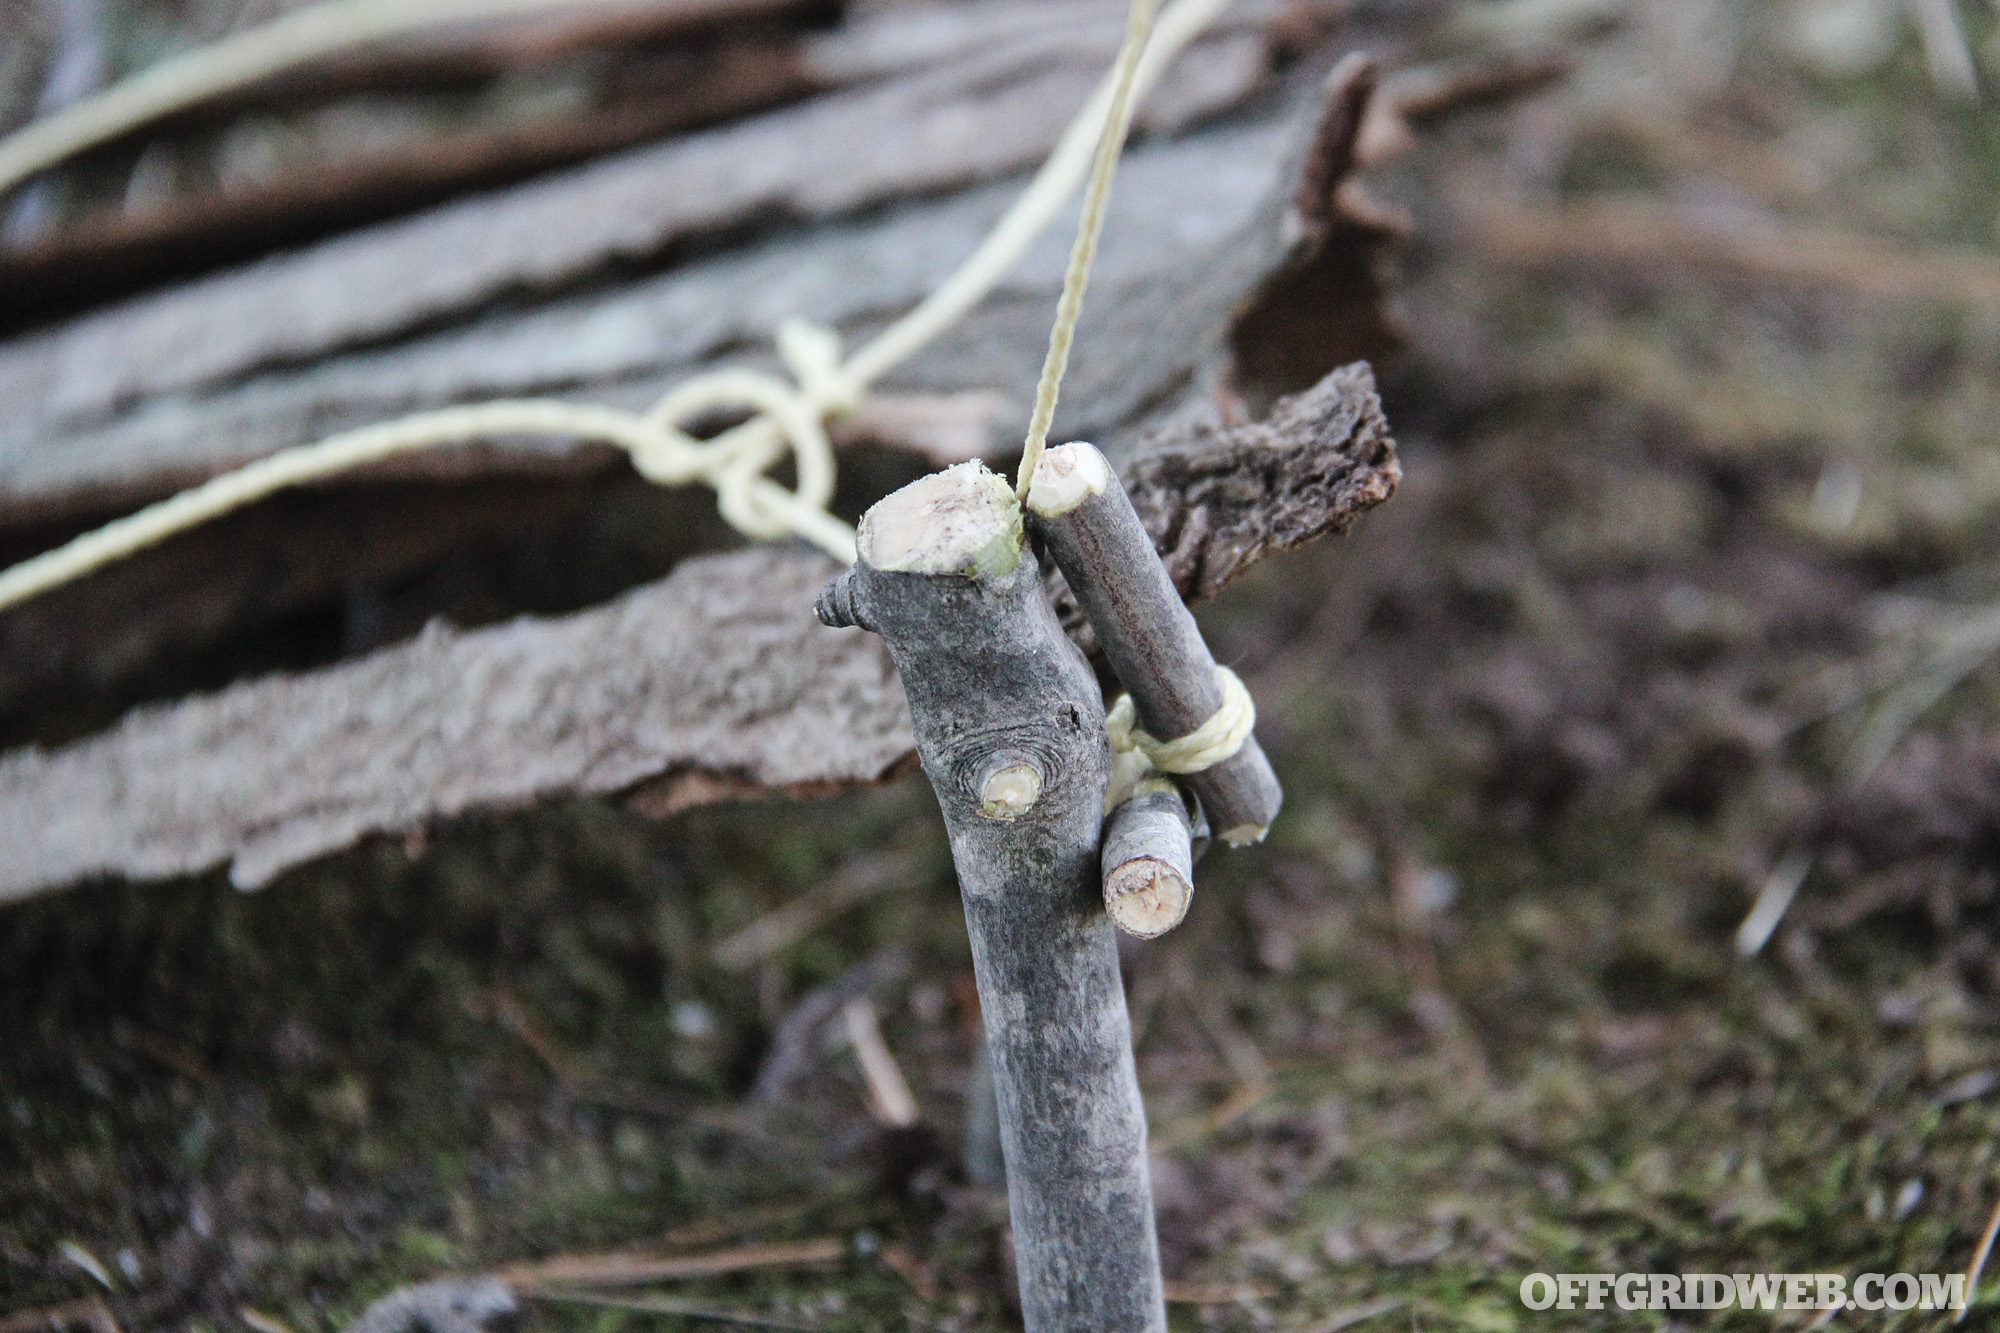
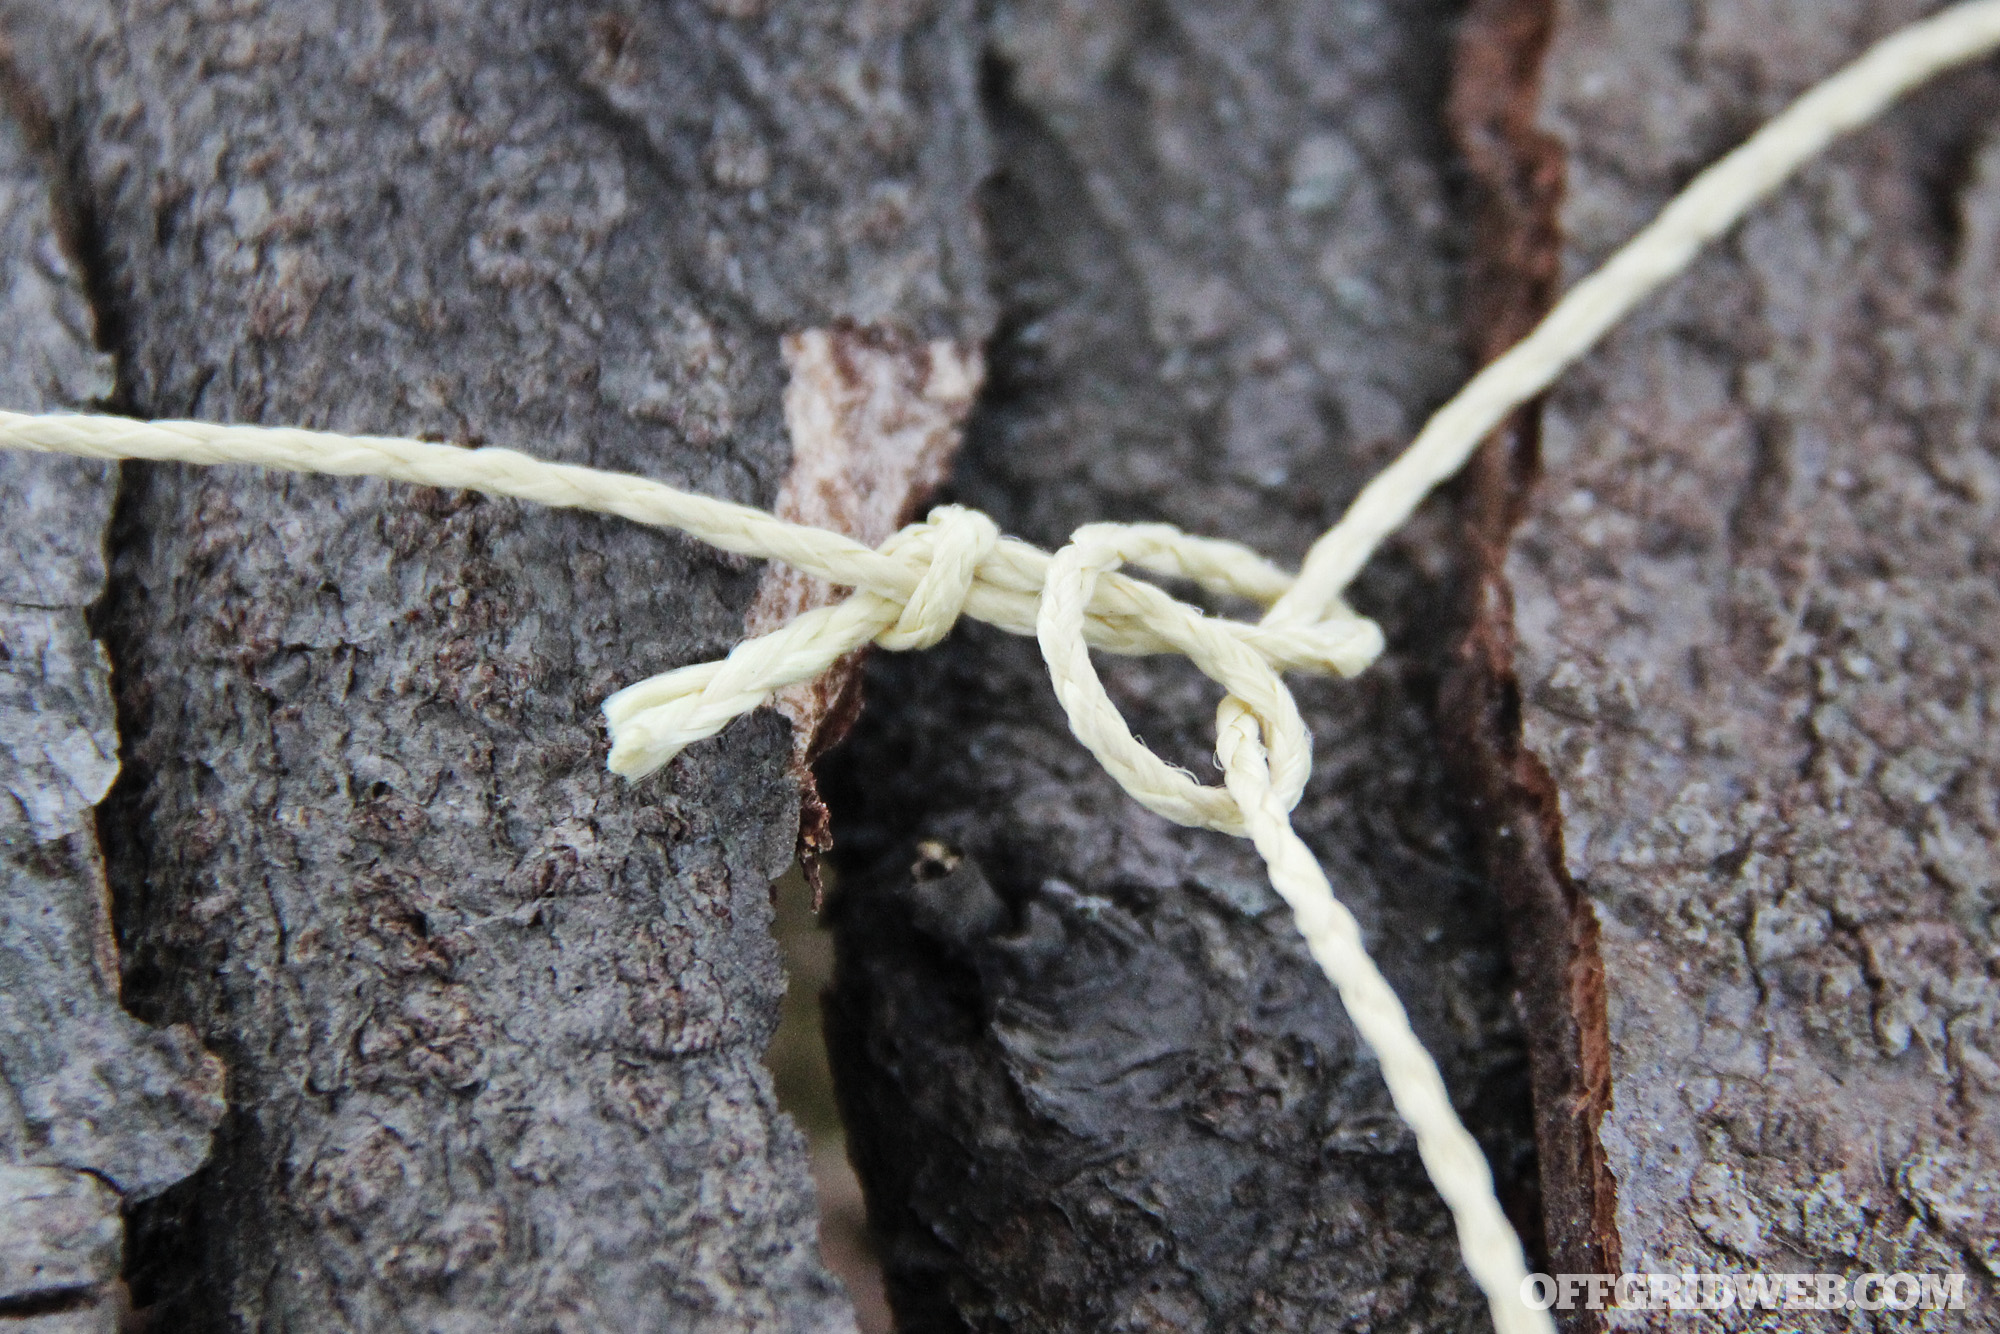
Above: The Goal Post setup is a bidirectional trap trigger. Regardless of which way an animal runs through the Goal Post, it’ll trigger. Whenever a lightweight snare is used, small forked twigs can be used to prop it open and hold it at the right height above the ground. A simple girth hitch can be used to create the snare loop with a simple stopper knot.
The goal post trap trigger is simple to construct with only three sticks and some form of lifting mechanism (bent sapling, counterweight, tensioned cord, etc). Cut two upright posts and carve ramped notches into them at the same height. Cut the upright sticks into digging chisels or a point. Using a blade, cut serrations in the space between the chisel tip and the notched ramps on each upright to grip the earth and prevent them from being easily extracted. The horizontal stick is the trigger pin; cut it to create two 90-degree angles opposite from each other on the two ends.
The goal post is set by pounding the upright sticks in the ground along a game trail. The width between the goal post will vary, but in general it should be slightly wider than the animal’s body. Make sure the upright sticks are positioned with the ramped notches facing opposite directions inline with the game trail. This allows the trigger pin to fire from either direction. Placing the notches on the uprights facing the same way will only allow the trap to work in one direction. A single or a double snare can be suspended from the horizontal post. When the animal runs through the goal post and is caught through the snare, the trigger pin will be displaced and the tension from the lifting mechanism lifts the animal. Contrary to popular belief, the animal need not be lifted entirely off the ground. All that’s needed is to lift the front legs. Lifting an animal completely off the ground and out of the reach of predators does have its place when they could also be in the area.
Pros: Very strong bidirectional trigger
Cons: Requires additional cordage for lifting mechanism
Toggle (aka the “L7” Trigger)
Above: The “L7” trap trigger utilizes two forked sticks that hook onto one another. It’s very responsive and can be used for many setups, including fishing traps that set the hook when triggered. Forked “Y” twigs are used for holding snares at the appropriate height.
The toggle trigger is shaped and configured just like the letter “L” and number 7. This trigger works on the concept of opposing pressure to keep it from firing. This trigger mechanism can be carved from a single branch. Carve the ramped notches with minimal space from the 90-degree angle and the end of the stick. Bevel the ends of the “L” and “7” pieces to fit together better. Groove the opposite ends with an awl or carved knife tip to create a hole for cordage.

The toggle trigger is capable of holding an incredible amount of weight. It works well in various configurations, from a floating trigger pin to a staked version in the ground. Where the books have gotten it wrong in the past is showing an incredible amount of weight or force suspended with a toggle trigger on a set designed for an animal that can’t trigger it. The friction between the two notched ramps can be alleviated by either working the beveled notches to points or by using a round twig as a “roller bearing.”
The toggle trigger can be used for either snaring traps or for crushing traps. One easily constructed trap set is built with a rock suspended over the head of an animal, funneled into an area where one end of the toggle is attached to an attractant or bait an animal will tug on. When the toggle is released, the rock suspended above falls on top of the animal’s head.
Pros: Easy concept to grasp
Cons: Can stick without “roller bearing”
Twitch Up
Above: The classic twitch up works with a baited stick. When the prey disturbs the trigger stick, the toggle releases and the snare catches around the animal’s neck, neck and front leg(s), body, or leg(s) alone. Note the “Y” twigs propping the snare loop open.
A classic snare trap trigger is the twitch up. This type of trap trigger can exploit natural forks in root systems, or carved forks can be pounded into the ground along game trails. The twitch up is very sensitive and can be scaled to any size to catch a chipmunk or an alien predator with dreadlocks by the leg. In case you’re wondering, this is the one you’d use to lift a person upside down by the ankle like they do in the movies.
Pound a forked stick into the ground, with the same type of serrations described for the goal post. This forked stick needs to be secure enough to hold the force of the counterweight, and there needs to be enough room between the crotch of the fork and the ground for the trigger pin to clear. The trigger pin can be fashioned from a smooth piece of hardwood, bone, or antler. You can taper it like a cone, debark it, and round it so it slips with the greatest ease. Attach the trigger pin to the counterweight with strong cordage, and attach the snare to the trigger pin as well. Pull the trigger pin through the forked stick and align the broad end with the end of the fork facing upward.
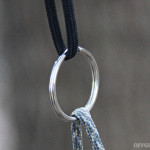

Above: Key chain split rings work well to redirect the pull from a counterweight with minimal drag. Logs work well as lifting weights in the woods and cinder blocks do the same in urban environments. With enough weight, a lifting trap can be scaled up for man-sized prey.
There’ll be tension against the fork, and the trigger pin will want to pull through the fork. To prevent this, place a horizontal stick between the two tines of the fork and the tapered end of the trigger pin. The horizontal stick can be tweaked to have a minimum amount of surface area touching it. This will increase the sensitivity. Place the loop of the snare under the baited horizontal bar and prop it up with small forked twigs. When the prey disturbs the baited horizontal bar, the trigger pin will release and the counterweight or bent sapling will pull the snare tight around one of the legs and lift the animal upward.
Pros: Extremely sensitive trap, adaptable to any size prey
Cons: May not react if parts are incorrectly sized and mismatched
Platform Twitch Up
Above: The platform twitch up snare setup requires no bait and fires when the prey steps foot on the platform. The twitch up pulls taut around the prey’s leg and holds under the tension from the counterweight.
While the traditional twitch up is an effective and easy-to-make trigger mechanism, it relies on the prey eating from a baited stick. To increase the odds of success for this trap, a platform can be constructed over it. In this configuration, when an animal steps on the platform, the snare closes around the leg. This can be accomplished as easily as placing perpendicular sticks or a solid flat object like a piece of bark, wooden plank, or hard-ribbed leaves across the horizontal stick.
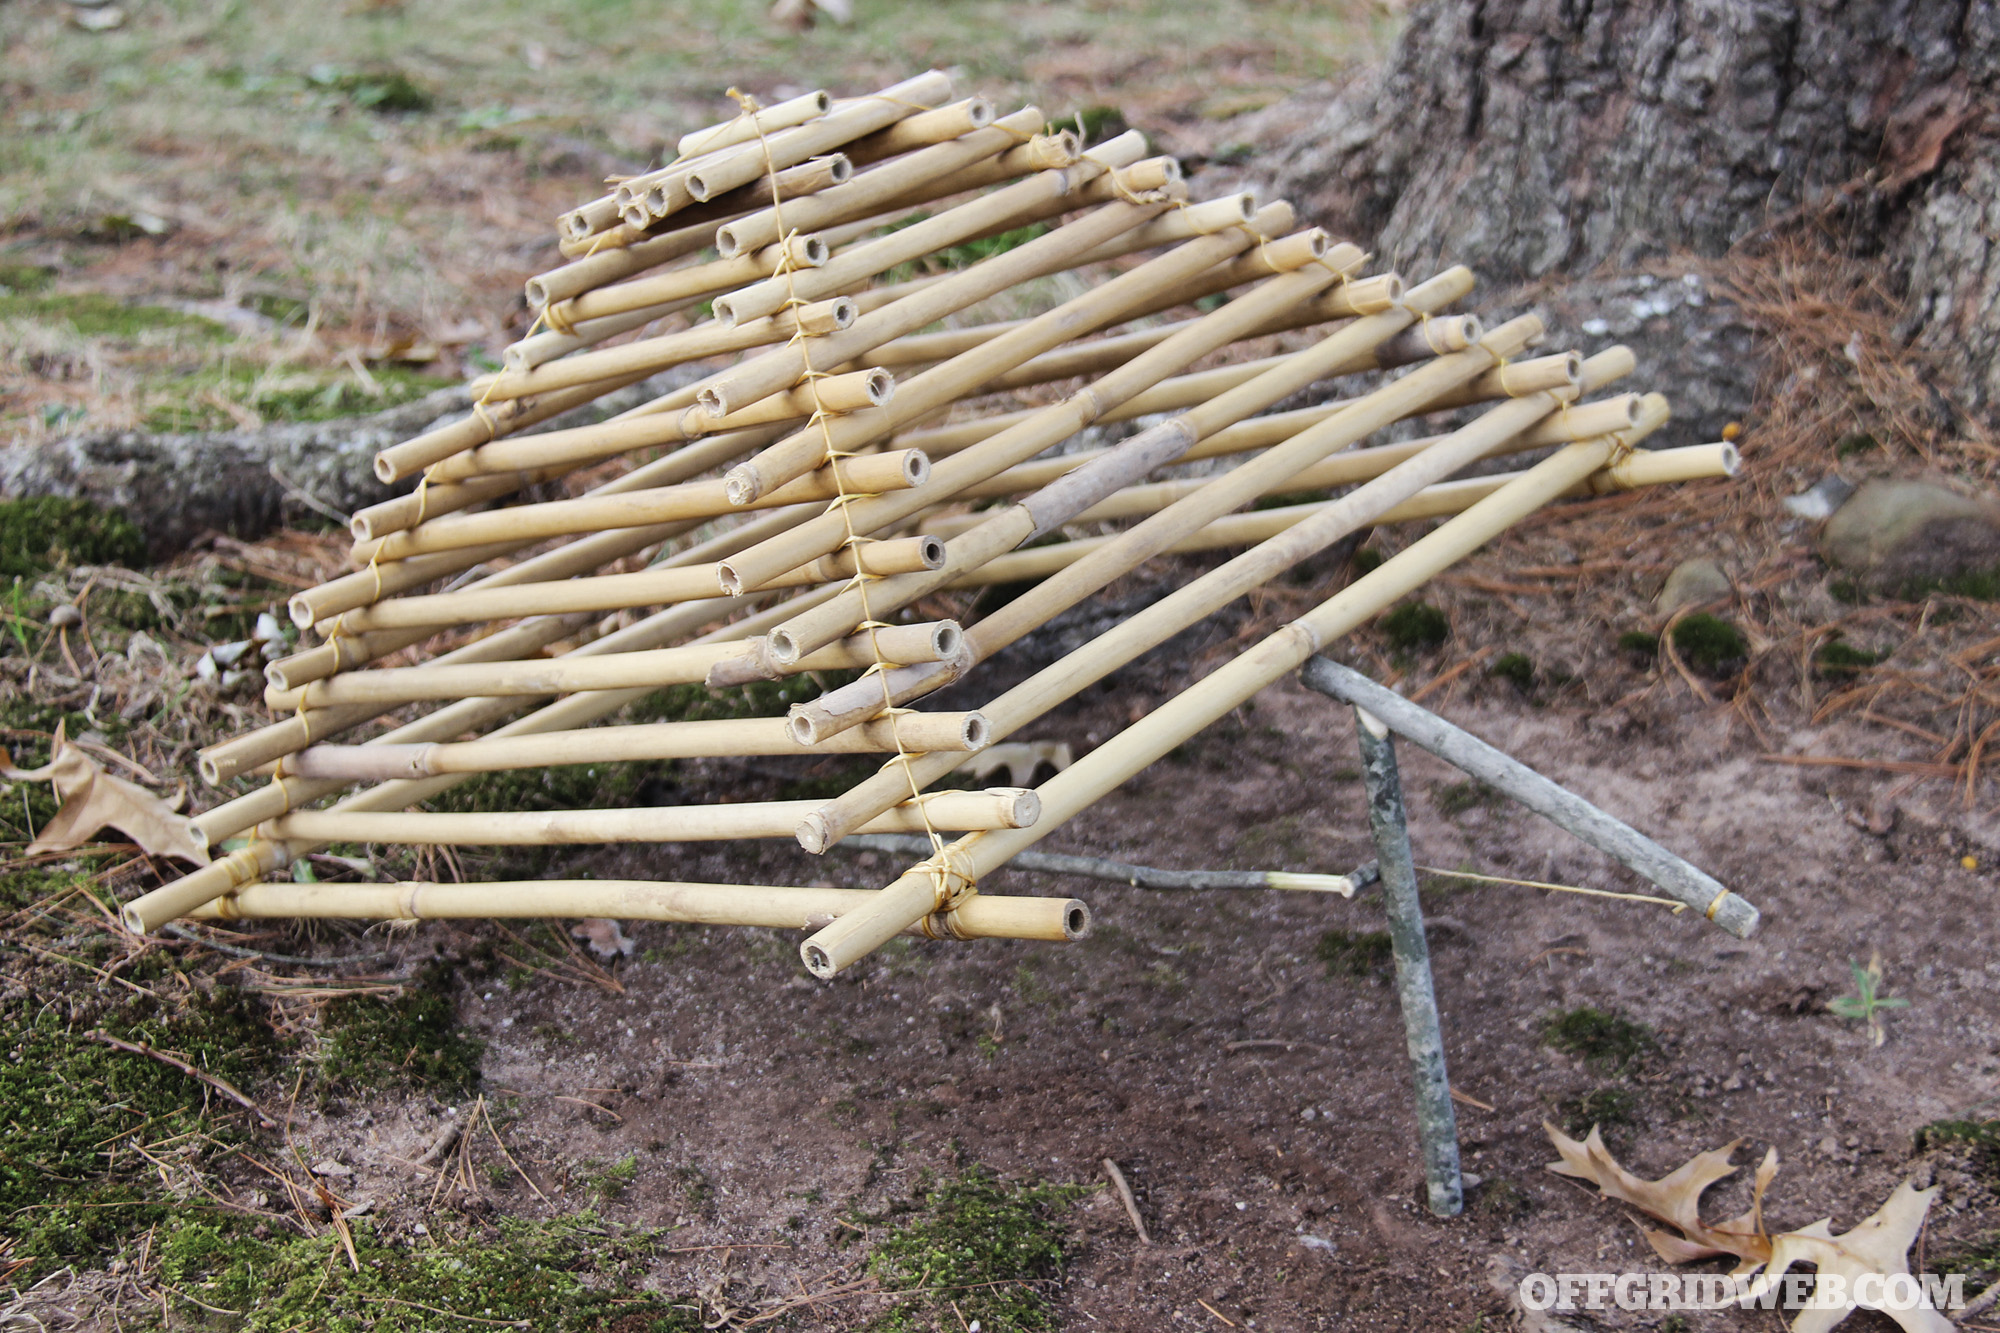
With more surface area, there’s a greater chance to set off the trap. Unfortunately, this platform is more easily detected as it has a larger profile than the single horizontal stick used in a basic twitch up. A good trade-off is to make multiple snare loops for a prey to step in. Also, instead of creating a flat platform, alternating branches can be placed over the horizontal stick to resemble a “rooftop” platform.
Pros: Greater surface area for greater triggering effect
Cons: Larger footprint means easier recognition by prey
Universal Trapping/Snaring Best Practices
1. Funneling: Using branches, rocks, and logs, create a funnel that forces your prey into your trap. If you can’t bait your trap, funneling draws an animal into a setup they otherwise would attempt to avoid.
2. Multiple Traps: Trapping works best on the principle of the more, the better. A single snare covering a rabbit hole may pay off, but multiple overlapping snares will increase your odds. The same concept goes for crushing traps — a minimum of six should be set with the expectation that just one will be effective.
3. Watch Your Eyes and Fingers: Whenever you’re setting a trap, there’s a possibility you’ll accidently trigger it. Eye injuries or crushed fingers can happen. Respect your traps and what they can do.
4. Check Frequently: Traps can be triggered inadvertently, and a trap that isn’t set won’t catch anything. Traps can be blown over by the wind, or they might just wound an animal, allowing it to possibly escape before you return. Traps should be checked every four to eight hours.
5. Dispatch Safely: Ideally, snares will wrap a loop around an animal’s neck and either snap the spine or strangle it. Ideal is rarely the case, and snares can sometimes catch an animal around the head and shoulder, around the trunk, or around one or both of the rear legs. If you catch an animal that’s still squirming in a trap, you need a way to dispatch it humanely. A good forked stick will help pin it down or against a tree. A baton strike or .22 to the head will do the rest.
6. Reset Traps: Animals are creatures of habit, and the instincts that drew the first animal to the trap you set may lead others there too. If your trap isn’t mangled from the first kill, reset it and check it later.
7. Baiting Traps: Baiting traps will improve your odds. Scavenged mushrooms, berries, nuts, and animal guts can be harvested in the wild depending on the usual diet is the animal you’re trying to trap. You can also sacrifice some trail mix or a small bit of an energy bar to bait your traps.
Conclusion
All of these trap triggers have their quirks and nuances to make them more sensitive and effective. Our photos show the basic traps without the clutter of “fencing” that funnels the animal in. This will increase the effectiveness of the trap. Of course, you could have the best trap in the world, but if it isn’t in the right spot, it won’t matter and you’ll end up hungry. Don’t try to half-ass your approach to game getting. If you’re willing to learn how to make the traps to catch game, learn where your dinner lives, its habits, and the knowledge from seasoned trappers, you’ll be able to bring dinner to you rather than you tracking it down.
About the Author
Kevin Estela has been a professional survival instructor since 2007 first at the Wilderness Learning Center as lead instructor and then with his own company, Estela Wilderness Education. Kevin is a ranked associate level instructor in Sayoc Kali, a purple belt in Brazilian Jiu-Jitsu under Sifu Chris Smith, and an avid firearms marksman and shooter. When not teaching outdoor skills, he’s a full-time high school history teacher and founder of the Estela Wilderness Education Fund. Follow him on Instagram/twitter @Estelawilded or www.facebook.com/estelawildernesseducation
More From Issue 30
Don’t miss essential survival insights—sign up for Recoil Offgrid’s free newsletter today!
- Pocket Preps: Knife Sharpener
- Gear Up Issue 30
- Parental Preps Issue 30
- What If You Awaken to a Kidnapping, Abduction, or Worse?
- Rugged Recipes: How to Make 4 Historic Survival Foods
- Out of the Darkness: Taking Control After Sexual Violence
- Survivalist Spotlight: Rudy Reyes
- 6 Trap Triggers for Survival
- All Washed Up: How to Make Soap from Scratch
- Review: Klim Arsenal Vest
- Young Hunters: Tips for Teaching Kids to Hunt
- Household Ingenuity: 13 Specialized Tools for Survival
- Battle of the Boomsticks: Kel-Tec KSG vs. SRM 1216
- Book Review: “Waste Land” by David T. Hanson
- Traumatic Shock Treatment & Survival
Read articles from the next issue of Recoil Offgrid: Issue 31
Read articles from the previous issue of Recoil Offgrid: Issue 29
Check out our other publications on the web: Recoil | Gun Digest | Blade | RecoilTV | RECOILtv (YouTube)
Editor’s Note: This article has been modified from its original version for the web.
