Editor’s Letter Issue 68

Rooted in Resilience

Planting a seed. Lighting a fire with flint and steel. Shaping wood into a tool with your own two hands. These small actions might seem simple, even old-fashioned, but they carry weight. In a world marked by rising costs, fragile supply chains, and unreliable systems, they represent something solid. Something lasting.

This issue of RECOIL OFFGRID carries the theme Homestead, but don’t mistake that for a lifestyle limited to people living miles from the nearest neighbor. Homesteading is skill-based. It’s mindset-driven. It starts when you stop assuming someone else will provide everything you need and begin asking what you can do for yourself.

That spirit runs through every page of this issue. We’re proud to feature Sharon Ross, the founder of Afrovivalist, who shares her personal path into survival training and self-reliance. Her story doesn’t pull punches. After facing discrimination and seeing how unstable life can become, she made the decision to carve her own path — one rooted in strength, knowledge, and community.

We also take you deep into practical skills, like primitive cooking techniques using hot rocks and coals, crafting wooden tools by hand, identifying wild edible plants, and tapping into the healing properties of medicinal herbs. These are time-tested abilities with real-world value, and they’re accessible to anyone willing to learn.

For those sharpening their edge, we also include a field lesson on taking a hunting rifle to a precision marksmanship course, an experience that reinforces how important it is to push our limits and train with what we actually use.

Every contributor in this issue brought more than information. They brought experience, vulnerability, and wisdom. I’m thankful for each of them. This is the kind of knowledge that builds long-term resilience and becomes part of who you are.

You don’t need livestock or solar panels to begin this process. Start small. Grow a few herbs. Learn one new way to cook off-grid. Practice identifying a handful of wild plants. What matters most is building a foundation that doesn’t rely on shipping lanes, power grids, or fragile economies.

The more the world leans into chaos, the more valuable it becomes to lean into self-reliance.

Read More From Issue 68

Don’t miss essential survival insights—sign up for Recoil Offgrid's free newsletter today!

Check out our other publications on the web: Recoil | Gun Digest | Blade | RecoilTV | RECOILtv (YouTube)

Editor's Note: This article has been modified from its original version for the web.


Offgrid at Blade Show Atlanta

Blade Show Atlanta is nearly upon us! On June 6-8, 2025  knife enthusiasts, makers, and companies will come together at the Cobb Galleria for the worlds biggest knife show! Blade Show always provides attendees with the opportunity to get some face time with their favorite knife makers, pick up the latest and greatest from the most prominent knife companies, and get a sneak peak at what's coming down the line. Of course we can't forget after hours at “the pit” where enthusiasts, makers, media personalities, and even some celebrities come together for a good time!

What more can you ask for? How about some knife related survival training from the Offgrid Team and maybe a special guest! Blade University offers a number of classes for knife enthusiasts and aspiring makers – this year Offgrid is upping the ante with two exclusive classes!

Nick Italiano

Offgrid Instructor: Nick Italiano

Nick is the Associate Editor of Offgrid Magazine and a passionate outdoorsman, survivalist, and self-reliant living advocate. In addition to his work with Offgrid he is the founder of Black Flag Survival where he strives to educate and inspire others who are interested in learning wilderness and preparedness skills through his website, social media, and classes.

He is one of the three hosts of Raise the Flag Podcast, along with Tom Nugent of Knives by Nuge and Heather Saulsbury of PNWBUSHCRAFT.

Joe Flowers

Guest Instructor: Joe Flowers

Joe Flowers is a man of many talents. He is a professional jungle guide, wilderness survival skills expert, international hunter, wilderness first responder, writer, zoologist, and knife designer. Through his company Bushcraft Global, Joe Flowers has explored awe inspiring and terrifying environments and often takes his students along with him!

His knife designs are all based on his experiences using knives in jungle and other wilderness scenarios and his passion for all things that cut! Joe has fixed blades designs made by a number of companies include TOPS Knives, Condor Tool & Knife, CJRB, Artisan Cutlery and more!

TOPS Knives Mini Brakimo

Brakimo: Forged for the Field

  • When: Friday 1:00 pm – 2:00 pm
  • Location: Room 107
  • Instructor: Nick Italiano and Joe Flowers

Join Nick Italiano, Associate Editor of Recoil Offgrid and host of Raise the Flag Podcast, for an exclusive conversation with legendary knife designer Joe Flowers. As the mastermind behind the TOPS Knives Brakimo and the driving force behind Bushcraft Global, Joe reveals the untold story behind the Brakimo’s design—crafted for survival, adventure, and everything in between.

on body edc for mountain readiness expo

The Cutting Edge

  • When: Saturday 9:45 am -10:45 am
  • Location: Room 107
  • Instructor:  Nick Italiano

Nick Italiano, seasoned outdoorsman and host of the Raise The Flag Podcast, discusses the nuances of various blade grinds. From common everyday uses to survival situations, Nick covers several common grinds and their real-world function.

Picking the right tool for the job is vital for not just your safety, but also for the longevity of your tool. While all knives are inherently designed to cut things, what they are designed to cut can vary greatly. This class will cover what grinds, blade shapes, and material choices you should be looking for in knives for various uses including EDC, outdoor, industrial, and tactical knives.


blade show logo

Class Sign Up & Discounted Blade Show Tickets

If you don't have tickets for Blade Show Atlanta yet, don't wait! Use code BUGOUTBLADE to get either a day pass or a full weekend pass for 20% off! Click the link below to get your tickets.

Read More

Don’t miss essential survival insights—sign up for Recoil Offgrid's free newsletter today!

Check out our other publications on the web: Recoil | Gun Digest | Blade | RecoilTV | RECOILtv (YouTube)


Raven Wilderness School Review: Wilderness Survival I

I recently had the opportunity to attend Raven Wilderness School’s Wilderness Survival 1 course over the weekend where I joined a group of outdoor enthusiasts as they embarked on their journey to becoming skilled survivalists. The course covers essential skills that can not only save your life in a wilderness emergency but also lays a solid foundation to grow upon.

raven wilderness school logo

About Jeff Hatch and Raven Wilderness School

Raven Wilderness School was founded by Jeff Hatch in 2015. Jeff is an experienced outdoor adventurer and wilderness first responder who developed his skillset by learning from some of the most prominent names in wilderness survival including Ray Mears, Lars Falt, and Mors Kochanski

All classes are designed to create immersive experience in a wilderness setting where students can learn to understand, respect, and utilize the environment around them to handle challenging emergency situations. The courses are not just designed to teach hard skills, but also to foster adaptability when facing the many unexpected variables that can occur in a wilderness emergency.

Raven Wilderness School currently offers a number of classes including three levels of wilderness survival as well as specialized courses in land navigation, foraging, and wilderness medicine with many new offerings currently in development.

In addition to Jeff, Raven Wilderness School has several other instructors and apprentices who help make each course a valuable learning experience for all who attend.

Raven Wilderness School Team

The Instruction Team for Raven Wilderness School's  Wilderness Survival Class

From left to right Thomas Meyer, Jeff Hatch, Avery Sharp, Nunzio Bruno 

Location

Raven Wilderness School is housed in Wolcott, Connecticut within Indian Rock Preserve. If you are not from Connecticut chances are you’ve never heard of Wolcott, but the location is ideal for those living in New England and the Mid-Atlantic Region. Being centrally located between New York City and Boston Raven Wilderness School is roughly a 2-hour drive from either city.

The whole class from Wilderness Survival 1

The Wilderness Survival Class. The youngest participant was just 8 years old, but he was eager to learn!

The Wilderness Survival I Course Experience

Raven Wilderness School’s Wilderness Survival I course is designed to provide students with tangible skills that can ultimately save their life in a wilderness emergency. These skills include proper tool selection, safety, and use as well as essential fire, water, and shelter skills. Each lesson throughout the course is designed to build upon the previously utilized skills, giving students ample time to practice skills in numerous scenarios while having an instructor guide them. Upon the completion of all the lessons the students are put to the test, requiring them to use all that they have learned to complete a final challenge on their own.

While this course covers the “basics” Jeff’s presentation is anything but basic. Every lesson is packed with not just a tangible skill, but the reasons behind why the skill is important and backed up by experiences in Jeff’s own wilderness adventures. Even with the enormous amount of information being presented, each lesson feels like a conversation allowing plenty of student questions and participation in the learning experience.

Each lesson started with the sharing of knowledge and skills demonstrations by Jeff and his apprentices and was followed by practical exercises where students performed the skills they just learned and allows for ample time and support to make sure each student gets it right.

Jeff Hatch giving the safety brief for Wilderness Survival I

Safety Brief and Gear Check

The Wilderness Survival 1 course started with everyone meeting in a classroom on site to cover essential safety information and ensure each student brought proper equipment in their packs. Raven Wilderness School had plenty of equipment on hand for students to borrow in the event they forgot something or brought something that would not work well in the class.

The safety brief ended with a discussion of the survival mindset and detailed the importance of remaining calm, capable, and aware. A lesson that was reinforced throughout the days activities.

walking to the woods at raven wilderness school

Into the Woods

After the safety brief we took a short hike into the woods to a wilderness camp area featuring a teepee, fire ring area, and some bushcrafted wooden stands. This area served as the “classroom” for the day’s activities. There was plenty of room for the nine students, three apprentices, an awesome dog, and Jeff to situate comfortably throughout the day.

jeff hatch demonstrating knife safety

Knife and Tool Skills and Safety

The first lesson at wilderness camp detailed how to select a outdoor knife. Jeff emphasized the importance of a strong full tang blade that could stand up to the rigors of hard use tasks like batoning wood. He discussed the values of a scandi grind blade, quality steel, and proper sheath retention. From there he also covered the use of saws and axes while demonstrating proper knife use techniques including safe cutting, basic notches, and ways to utilize a small knife to do larger tasks. The Demonstration portion wrapped up with the creation of tent stakes and knife maintenance using a leather strop.

The students were then tasked with using knives and saws to take down saplings to create tent stakes and perfect their notch carving techniques.

managing paracord

Paracord Management and Uses

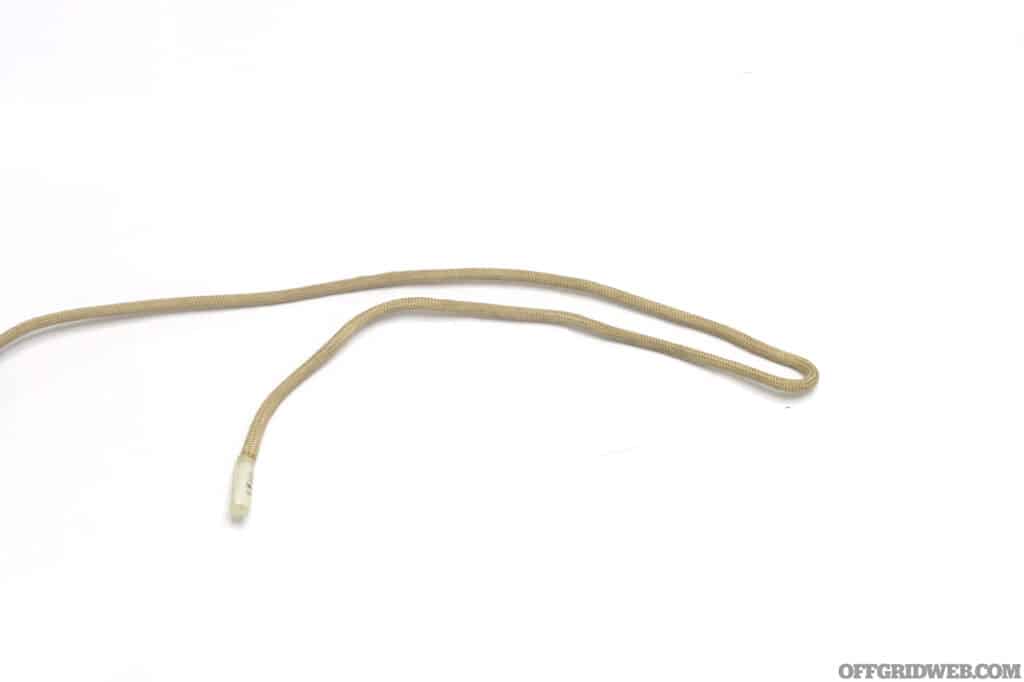
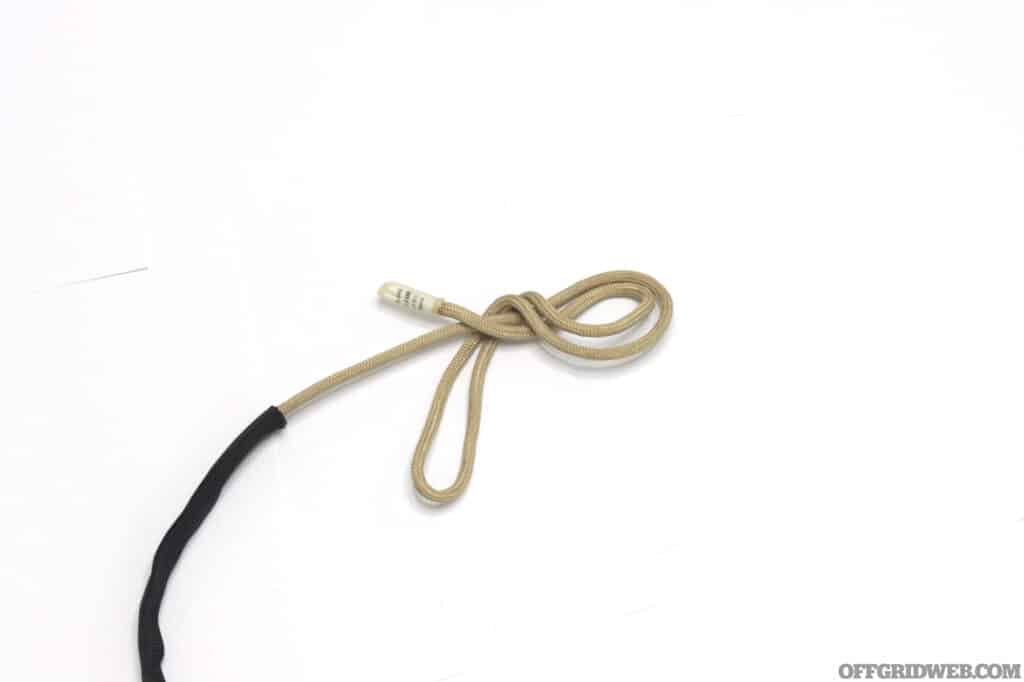
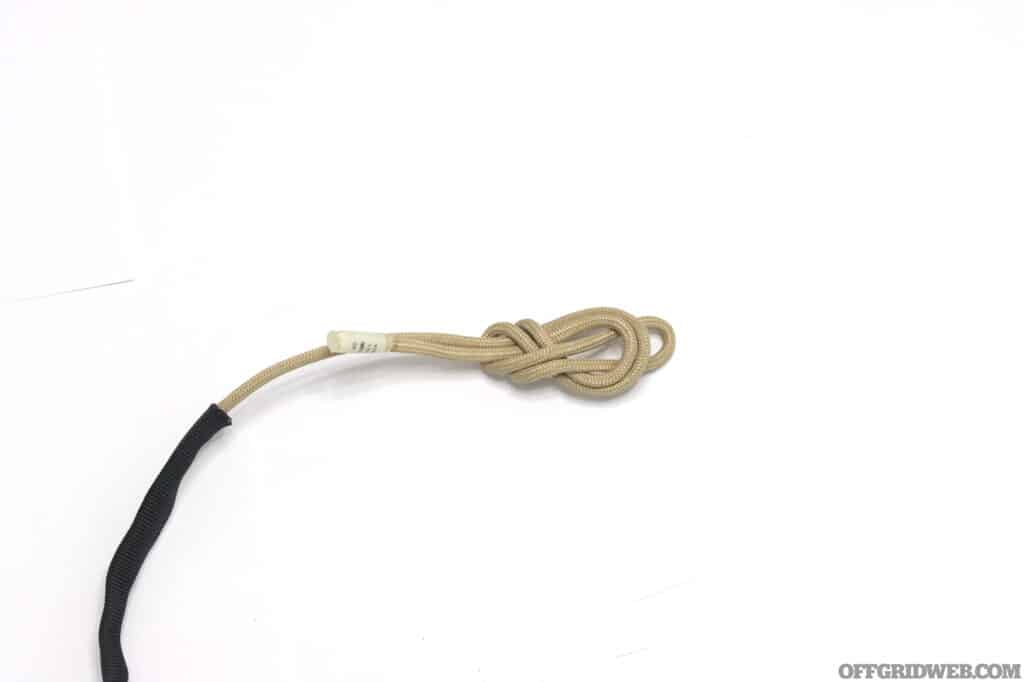
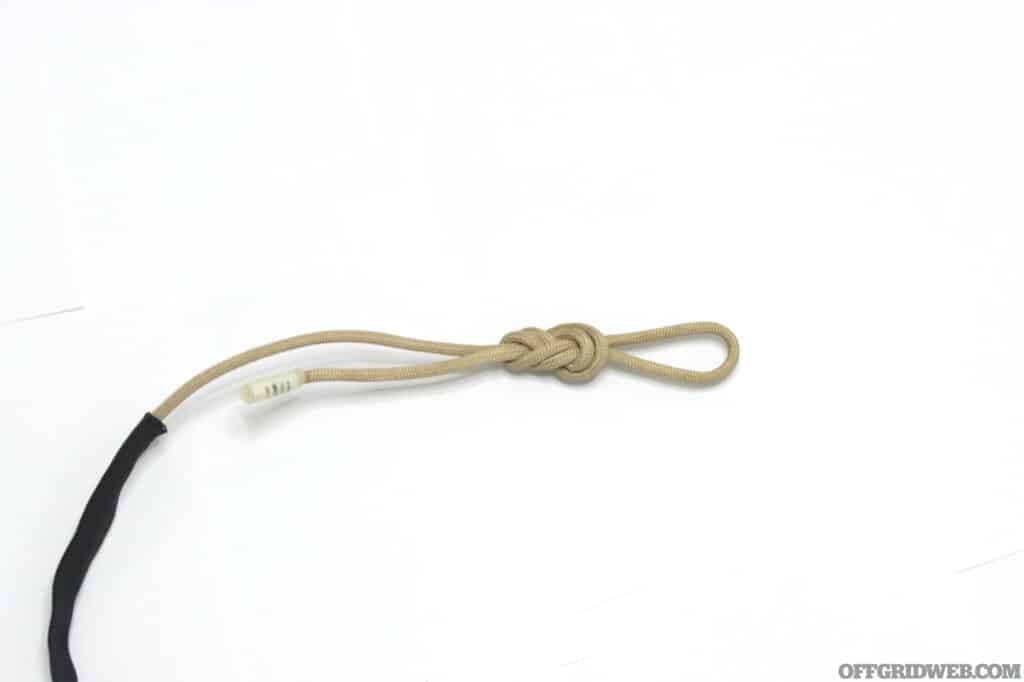
Next up was paracord management. Jeff demonstrated how to cut paracord into useable lengths and had to create neat bundles for storage to avoid tangles. From there he also demonstrated how to use loop-to-loop connections to combine shorter lengths of paracord together if needed.

The value of this lesson was quickly realized when students dug into their bags to pull out paracord and nearly every student had a tangled mess of cord that needed to be untangled, cut, and bundled.

wilderness survival fire heating food

Fire Craft

Once paracord management was complete we moved into fire craft. Jeff discussed how to find dry wood in wet environments and demonstrated how to create a bed for fire on damp ground. The concepts of tinder, kindling, and fuel were discussed in detail and proper fire starting using a ferrocerium rod was demonstrated. Jeff also covered the ins and outs of fire safety and the importance of making sure the fire was extinguished after use.

Now it was time for students to start their own fires, and they set off into the woods to gather birch bark for tinder and dry wood for kindling and fuel. They practiced batoning with their knife to create the bed for their fires and began to assemble their fire.

jeff hatch building a wilderness survival fire

As expected, the students struggled to get fires started – while an experienced ferro rod user makes it look easy, students lacked the finesse when sparking the rod and many did not process their willow bark fine enough to spark. Jeff and his apprentices observed each student and after some time stepped in to offer advice but ensured each student was able to get the fire started on their own.

The satisfaction the students experienced when they finally got their fires started could be felt all around camp, but that moment of satisfaction was cut short when nature does what it often does – throws us a curve ball!

father and son practicing wilderness survival skills at raven wilderness school

An Unexpected Challenge

Rain started coming down and Jeff used that opportunity to challenge students to adapt and keep their fires going while throughout lunch as the rain came down. The students, with some tips from the instructors, successfully kept their fires going during lunch, with one group successfully heating their lunch over the fire using a simple stick and pot hanger.

Water Purification

After lunch the rain let up and we took a short hike to a stream where Jeff covered some of the hazards in water sources, general sourcing practices, prefiltering, and boiling water. He also demonstrated the use of a prefilter and how a Grayl water filter bottle works.

Students were asked to gather water in their metal water bottles for later use and we then hiked back to wilderness camp.

building wilderness survival shelters at raven wilderness school

Shelter Building

When we returned to camp we moved into shelter building. Jeff did a great job discussing the importance of shelter and the threats of exposure in a wilderness survival situation. Jeff detailed the importance of creating an insulating layer from the ground, especially in cold and wet environments.

For the purposes of this course shelter building was limited to using a tarp, paracord, and the wooden stakes that were made earlier in the course.

jeff hatch showing student how to manage para cord

Jeff and his apprentices built a plow shelter and an A-Frame shelter. During each build different knots and hitches, including Jeff’s own “Hatch Hitch” were demonstrated in detail. The instruction team also demonstrated how to build and connect multiple shelters to conserve cordage.

The students set out to practice building their own shelters and Jeff went around to each student helping them get their knot and hitch techniques dialed in.

students at raven wilderness school working together

The Final Challenge

After a full day of learning and practice, the time came for the students to put their newfound wilderness survival skills to the test! Jeff broke the students into groups and tasked each group with building a functional shelter, building a fire, and bringing a container of water to a rolling boil and safely removing the water from the fire. They were given just over an hour to complete this task.

Each group set out to identify a safe location to build their shelters and gather materials. It was great to see each group using teamwork to break down tasks to individual group members to complete all their tasks in the given time frame.

At the end of the allotted time each group had successfully completed all their tasks and what started as a group of outdoor enthusiasts ended and a budding group of wilderness survivalists!

Jeff hatch helping student with a trucker hitch

Debrief

After the final challenge all fires were properly extinguished, shelters were taken down, and the wilderness camp was cleaned up. We hiked back to our starting point in the classroom where Jeff debriefed the group as to what they learned for the day and the next steps they could take to improve their skills. He answered all the questions the students had and ended up demonstrating and practicing a few more knots with the group.

students practicing wilderness survival skills at raven wilderness school

Final Thoughts on Raven Wilderness School and Wilderness Survival I

Overall, Jeff and his team did a great job getting vital wilderness survival information and skills to a class of outdoors enthusiasts that wanted to take their passions to the next level. While the course focused on the basics, it left students with tangible skills that can be used in a wilderness survival scenario and created a solid foundation in which they can build upon. Each lesson was carefully crafted to draw upon Jeff’s training and personal experience which helped drive home the importance of each skill. The learning environment was welcoming and free from judgement. The students were always encouraged to ask questions and share their experiences – and in some cases their lack of experience!

If you are a novice Wilderness Survival I is a great place to start. Raven Wilderness School offers more advanced classes for those with more experience and from what I discovered in conversation with Jeff and his team, higher level classes push students to further develop their ability to adapt to the unknown and survive with limited resources and improvised tools. Personally, I am looking forward to seeing some of these more advanced courses in action!

Do you want to develop wilderness survival skills? Check out all the course offerings with Jeff Hatch at the Raven Wilderness School!

Read More

Don’t miss essential survival insights—sign up for Recoil Offgrid's free newsletter today!

Check out our other publications on the web: Recoil | Gun Digest | Blade | RecoilTV | RECOILtv (YouTube)


A Woman’s Guide to Building a Bug Out Bag

“The most difficult thing is the decision to act, the rest is merely tenacity. The fears are paper tigers. You can do anything you decide to do. You can act to change and control your life; and the procedure, the process is its own reward.”
— Amelia Earhart

Self-Reliance: Every Woman’s Responsibility

When it comes to emergency situations women and men have different survival needs. While many needs are similar, a woman's physiology is different from that of a man requiring us to take into account physical differences and medical needs. Understanding our unique needs is the key to self reliance – it will allow us to build women's specific bug out bags and enable us to use some of our differences to our advantage in a survival situation.

Building a bug out bag (BOB) isn’t about gender—it’s about practicality, preparedness, and self-reliance. While survival is often framed as a masculine pursuit, reality tells a different story: Women will face the same emergency situations men do and women are just as capable of preparing for, enduring, and overcoming SHTF scenarios. The goal of this guide isn’t to advocate a feminist perspective but to offer a realistic and actionable approach to assembling a functional, reliable, and customized Women's bug out bag that addresses our unique needs.

kyt lyn walken

Kyt Lyn Walken, professional tracker, trainer, and preparedness expert.

Advantages Women have in Survival

Women-Specific Items That Serve Dual Purposes

In a survival situation the best gear is the gear you have on you! Many personal care items that we use and carry daily have hidden survival benefits. 

  • Lipstick: Can be used to leave a visible message on walls, windows, or mirrors in an emergency.
  • Tampons: The highly absorbent nature of tampons have practical applications in wound care. They can also be used in fire-starting with the addition of alcohol and in limited water water filtration.
  • Hair ties & bobby pins: Useful for securing gear, setting traps, or holding small tools in place.
  • Compact mirror: Can serve as a signal mirror for rescue or checking for injuries.

The Psychology of Appearance

Many survival situations present challenges beyond environmental and infrastructure issues – in many cases interacting with other people is a necessity . Understanding psychology and social norms play an important role in survival situations. Knowing how to use your appearance strategically can be invaluable when negotiating with others, blending in, or deescalating threats.

woman with a bug out bag

Choosing a pack to fit your frame and body type is essential to your comfort and safety.

Common Sense and Care in Women's Bug Out Bags

Any bug out bag is useless if it is poorly maintained or inaccessible when you need it most. Here are a the key considerations when building and using not just women's bug out bags, but any bug out bag:

Regular Gear Checks – Inspect your gear periodically. Items can degrade over time, especially in humid or extreme temperatures.
Strategic Storage – Keep your bug out bag in an easy-to-reach location, where you don’t need a ladder or excessive effort to grab it in a hurry.
Dedicated Placement – Avoid moving your BOB around frequently. Find a fixed, accessible spot in your home and keep it there.
Function Over Aesthetic – Forget about whether the bag fits your home’s decor. Survival doesn’t care about personal style—speed and efficiency are what matters in an emergency.

Choosing the Right Bug Out Bag: One Body, One Mind, One Gear

If your bug out bag is difficult to carry it can reduce your speed and maneuverability and lead to injuries. When choosing a bug out bag remember these guidelines.

  • Ergonomic and Comfortable – If you can’t carry it for long distances, it’s the wrong bag.
  • Adaptable to Your Body Type – Your height, weight, and strength impact what kind of load you can bear. We can train to build strength and endurance, but we can not change our body type and frame.
  • Practical, Not Trendy – A stylish pack is irrelevant if it compromises your survival. Focus on function over style.

Lessons from My Own Experience

Over six years, I tested more than 20 different bags. What works at the moment may not work forever. I adjusted my bug out bag choices based on:

  • Changes in strength and endurance
  • Refining my gear preferences
  • Adapting to different scenarios and environments

Women's Bug Out Bad Dilemma: Finding the Right Fit

Most packs are designed for a male frame. Finding the right fit for women's bug out bags can be challenging and can require some trial and error tests to get find a pack that fits right.  During my testing I initially settled on a 100 liter Tasmanian Tiger Range Pack MKII but later switched to a Berghaus Vulcan II Military Rucksack due to:

  • Height Issues – The Range Pack MKII is an excellent pack, but its was too tall for my body type, forcing me to keep my head down while navigating rough terrain.
  • Weight Distribution – The Vulcan II had better weight balance for my body type and provided easier access to essential gear.

Having a proper fit is just one thing to consider when choosing women's bug out bags we must also consider:

  • Capacity : How much space do you need? While it may be tempting to load a large bag, a lighter pack means more mobility and endurance.
  • Durability: Look for water-resistant bags made tough materials with reinforced seams.
  • Support : A proper waist belt is mandatory to reduce back strain.
  • Stealth Mode: Choose muted colors to avoid standing out
  • Silent Zippers & Clips: Greasing zippers with wax or flaxseed oil can further reduce noise.

Women's Bug Out Bag Essentials: What to Pack

Bug out bags should be designed to provide everything you need to survive for 72 hours. A 72-hour bug out bag should contain six primary categories. While much of this equipment is general for anyone, having equipment that fits your body type and size is important.

Photo of a red first aid kit on the railing of a wooden balcony with a panoramic view of a forest in the background.

1. Hygiene & First Aid

  • First Aid Kit (bandages, antiseptics, medications, painkillers)
  • Duct Tape (for improvised wound care, gear repairs)
  • Menstrual Supplies 
  • Toothbrush & Toothpaste
  • Hand Sanitizer & Wet Wipes

womans jacket

2. Clothing & Weather Protection

  • Dry, Clean Clothes (Utilize a layering system: base, insulation, waterproof)
  • Waterproof Jacket & Gloves
  • Hiking Boots or Sturdy Shoes (like bags unisex footwear is design based on the male anatomy, ensure you are using shoes or boots built for women)
  • Scarf & Hat

hand gun for women's bug out bag

3. Tools & Weapons

  • Multitool
  • Fixed-Blade Survival Knife
  • Handgun & Ammo (if trained)
  • Cleaning Kit for Weapons

compass for bug out bag

4. Navigation & Communication

  • Paper Maps & Compass (GPS is can unreliable in emergencies)
  • Fully Charged Burner Phone
  • Extra Batteries / Solar Charger
  • Watch & Pace Counter
  • Permanent Marker & Notepad

basic tent shelter for bug out bag

5. Shelter & Protection

  • Tarp or Tent
  • Mylar Space Blanket
  • Paracord
  • Sleeping Bag (Once again, unisex sleeping bags are designed with men in mind, select a sleeping bag designed for women for optimal warmth and comfort)

Studio photo of a pack of Nutrient Survival food.

6. Food & Water

  • Water Purification Tablets / Filter
  • Canteens & Collapsible Bottles
  • Energy Bars/MREs
  • Small Aluminum Pot for Boiling Water

Pro Tip

Leave extra room in your pack for:

  • Additional supplies
  • Carrying another person’s gear
  • Transporting foraged resources (food, tools, or firewood)

training with your pack

Training with your pack is essential to being ready to use it in an emergency. 

Mastering Your Bug Out Bag Through Practice

Owning a bug out bag is one thing—knowing how to use it under stress is another. With out practice carry, accessing, and utilizing the equipment in your bug out bag is becomes dead weight in an emergency. The exercises below will help become familiar with you pack and its contents and help you build your physical strength and endurance.

Training Drills to Improve Preparedness

  • Blindfolded Assembly & Retrieval: Practice finding and using your gear in total darkness.
  • Timed Load-Outs – Try grabbing and donning your bug out bag in under 60 seconds.
  • Weighted Walks – Carry your pack for hours across different terrains.
  • Weather Simulation – Test your endurance in rain, cold, or heat.

Tactical Organization: Tips from Anti-Poaching Units

South African anti-poaching teams use an efficient method to prevent gear loss in the field:

  • Tie small items to MOLLE straps with thin cords to prevent accidental drops.
  • Attach essential gear to fixed locations in your pack for quick access.

woman training

Regular skills and fitness training leads to a better state preparedness. 

Final Thoughts: Strength, Adaptability, and Resilience

“Women, like men, should try to do the impossible. And when they fail, their failure should be a challenge to others.”
Amelia Earhart

Women’s physical strength and endurance limitations compared to men is real, but with proper training and physical conditioning these can be easily overcome. 

  • Strength Training – Focus on back, shoulders, and arms to improve endurance.
  • Skill Development – Practice fire-starting, first aid, and self-defense.
  • Field Experience – Test your BOB in real conditions to refine what works best for you.

Your bug out bag isn’t just about survival gear—it’s a reflection of your mindset, skills, and readiness.

When SHTF, will you be ready? Your preparedness starts now.


Kyt Lyn Walken

About The Author

Kyt Lyn Walken is an official representative and instructor for Hull's Tracking School in Virginia. She is recognized as one of the leading experts on mantracking skills. Kyt trains law enforcement, military, and search and rescue personnel across Europe and South America. Learn more at thewayoftracking.com

Read More

Don’t miss essential survival insights—sign up for Recoil Offgrid's free newsletter today!


Defiant7 Knives Talos Review

Welcome to Knife of the Week! Each week the Offgrid Editorial Team will highlight one of their favorite knives. These will range from time tested classics to the newest cutting edge designs. You won't find any glorified box openers here, each featured knife will be a purpose driven outdoor, bushcraft, survival, or tactical tool that is ready to work when you need it the most! This week's we will be looking at the Defiant7 Knives Talos, an exclusive design available at USA Made Blade.

Defiant7 Talos with box


Defiant7 Talos USA Made Blade Exclusive Specs

  • Type: EDC
  • Configuration: Folding Pocket Knife
  • Lock: Button Lock
  • Blade Deployment: Thumb Stud
  • Blade Length: 3.5-inches
  • Blade Steel: Magnacut
  • Blade Finish: Stonewash
  • Handle Length: 4.5-Inches
  • Handle Frame Material: Hard Anodized Aerospace Aluminum
  • Carry Style: Steel Deep Carry Pocket Clip
  • Weight: 4.7 Ounces
  • Production Location: Mississippi, USA
  • Designer: Les George
  • MSRP: $285

close up of the defiant7 logo

What is Defiant7 Knives?

I first saw the Defiant7 Talos when visiting USA Made Blade in North Carolina. If you're a knife enthusiast like me you probably before even knowing the name of the knife you will probably recognize the distinctive Les George design, in fact it is nearly identical to the Les George Talos. At first I made the assumption that Les George had licensed the design to a new knife company, but upon talking to USA Made Blade owner Scott “Whitty” Whittington I learned that Les George had partnered with the owner of Nicholas Damascus, Chad Nichols, to create Defiant7 Knives.

When a legendary knife designer and owner of one of America's most prominent Damascus makers get together it can't be a bad thing, but the ethos behind Defiant7 makes the company even more appealing – one of Defiant7's driving goals is to teach the next generation the art of US based knife production! Defiant7 employs young machinists and strives to hand down the extensive experience of two legends in the industry to them! Beyond all that, Defiant7 is bringing out models from some other amazing designers including Allen Elishewitz, Ryan Johnson, Tom Krein, and Matt Martin.

Right off the bat, the Defiant7  Talos checked a lot of boxes for me – it packs a proven design, it is made in the USA, I love what the company stands for, it is backed by two highly respected makers in the industry, and I'm a sucker for button locks!

closed Talos showing button lock

What is a Button Lock Knife?

Button locks are interesting and surprisingly versatile. The outward appearance looks just like an automatic knife, the main difference being there is no internal spring mechanism to deploy the blade. Button lock knives generally employ a thumb stud, like the Defiant7 Talos, or a flipper tab to deploy the knife. To close the knife the button is depressed to release the lock. In my experience high quality button locks have a super solid lock up and have a low chance to accidently disengage the lock as your fingers are not near the lock mechanism like a frame lock or a liner lock.

Another advantage to button locks are one handed opening and closing. The thumb stud or flipper can quickly deploy the blade and one the button is depressed the blade will easily return to the frame. You can also use the button to open the knife, it just requires a little bit of inertia.

While some people see button locks as a “poor man's auto,” they are a great option for those of us who live in areas where autos are illegal and they offer unappareled one handed opening and closing in the manual folding knife market.

What are the Differences between the Defiant7 Talos and the Les George Talos?

The Defiant7 Talos is nearly identical to the Les George Talos with the exception of the lock type and material. The Les George Talos features a frame lock and titanium frame handle, where the Defiant7 Talos uses a button lock and Aerospace aluminum frame handle. The other major difference is price – The Les George version retails starting around $425 where the Defiant7 Talos retails at $285.

Defiant7 Talos in hand

The Blade

Let's get into the design a bit. The Talos has a relatively simple design that combines superbly ergonomic handle design and a highly functional blade drop point blade. The choice to use a drop point blade makes the Talos a versatile workhorse. Drop point blades provide stability, a strong tip, and enough belly for slicing tasks. This means the Talos more than adequate for day to day cutting tasks but can also be used in game/food processing tasks. From a self-defense standpoint the drop point tip is not as fine as a clip point or a Wharncliffe the wider point provides far more durability with good piercing ability making it capable in a pinch.  The Defiant7 Talos has a 3.5-inch blade, sort of a sweet spot for a full sized folding knife in my opinion. It's big enough to handle most tasks without being to big to comfortably carry in public.

The blade is made from premium Magnacut super steel which is known for its toughness, edge retention, and corrosion resistance. These are all features you want in a blade steel that you plan on putting to work both in urban and wilderness environments. While all steels will eventually dull with use Magnacut ensures the longest use time between sharpening. The downside is that Magnacut can be more difficult to sharpen and requires the use higher grades stones. The corrosion resistance of Magancut makes it a great choice for working in wet environments when you don't have the time to worry about carefully cleaning and drying your blade between uses.

close up of Talos jimping

The Handle Frame

The Defiant7 Talos uses and aerospace aluminum handle frame. While this is not as “fancy” as the Les George version with the titanium frame, aluminum is both durable and lightweight. Aluminum is also far less expensive to procure and easier to machine when compared to titanium which helps keep the price down for the end user. The the frame is hard coat anodized black giving it a sleek look and provides excellent wear resistance.

The handle is a total of 4.5 inches allowing a full hand grip for most users. The handle shape is contoured to comfortably fit your hand reducing fatigue during extended use. The handle also has a few strategically placed sections of jimping to enhance grip retention when in use. In my experience I found no hot spots on when using the knife and found the jimping particularly useful when doing more detailed cuts.

The stainless steel pocket clip is mounted on the “back” handle and can not be moved anywhere else on the knife. It is the same style found on most Les George knives. It offers a nice deep carry and doesn't get in your way when using the knife.

back side of Talos showing Les George Clip

Lock up and Deployment

The button lock on the Defiant7 Talos is located on the “show” side set slightly above and behind the pivot screw. It's location is nowhere I'd naturally rest my fingers during use and is recessed which all but eliminates accidental designment of the blade during use. When deployed the lock up is solid with zero left to right blade play and only the slightest amount of downward play when an unrealistic amount of force for folding knife use is applied to the spine of the blade. Spine impact did not cause the lock to fail, so overall I am very confident in the blade's lock up.

Deployment using the thumb stud is snappy with a bit of practice. While I typically prefer a flipper tab, the thumb stud works well with the handle design making it easy to rapidly deploy in a pinch. Upon deployment the blade locks into place with a very satisfying “thunk.” The button lock and some wrist movement will also allow you to deploy the blade with far less noise if you need to be more discreet.

Defiant7 Talos Outdoors

Defiant7 Talos Overall Impression

Overall, I really like the Defiant7 Talos. For starters it gives people the opportunity to get their hands on an iconic design from a legend in the field for far less then the cost of the Les George branded version with very little trade off. The Aluminum handle frame looks good, feels good, and packs great durability while also keeping the Talos Light and easy to carry. The ergonomics, highly functional blade shape, and premium steel ensure the Defiant7 Talos is ready to work when you need it. The Talos was plenty sharp out of the box. The fit and finish is exceptional, and when combined with all the other features you get a truly premium US made knife at a very reasonable price of $285.

USA Made Blade logo and Les George designed Defiant7 Talos

Get One At USA Made Blade

The Defiant 7 Talos is a an exclusive design made for USA Made Blade and multiple batches have already sold out. Make sure you sign up for the USA Made Blade newsletter so you can get all the details on the next drop!

To see learn more about Defiant7 and to check out their available and upcoming designs check out the official Defiant7 website.

Check Out these In-Depth Off Grid Knife Reviews

Blade Magazine

Need more Knife Content? Check out Blade Magazine for the latest and greatest knife news!


Mountain Readiness Expo 2025 Recap

The Third Annual Mountain Readiness Expo was held at the Van Hoy Campground in Harmony, North Carolina May 2-4 2025. This family friendly event featured a wide array of classes, demonstrations, and vendors all centered around making attendees more prepared to handle emergencies and bring an increased awareness of the importance of self-reliance skills and lifestyle. Beyond the education and gear, the Mountain Readiness Expo also packed in great local food, tent and RV camping, evening entertainment, and most importantly – community!

My wife Robin and I road tripped 700 miles from our home in rural Connecticut to beautiful North Carolina to attend the Expo and we both left with new skills, a great sense of community, and we are already looking forward to next year!

The People Behind the Mountain Readiness Expo

T of mountain readiness

Robert “T” Toombs, Co-Founder of Mountain Readiness

Robert “T” Toombs,  life experiences have driven him becoming among the most passionate and dedicated self-reliance enthusiasts I have had the pleasure of knowing. Growing up and moving around rural areas T learned first hand the value of utilizing natural resources and the challenges that come along with it. As an adult T worked his way to becoming a logistics manager for a major company and experienced life in urban environments.

amber of mountain readiness

Amber Toombs, Co-Founder of Mountain Readiness

Amber Toombs spent 13 years serving in the United States Army where she deployed to Kuwait, Iraq, and Afghanistan. She then went worked in law enforcement for 6 years. The yearning for a simpler way of life and a shared passion with her husband T for teaching others the value of preparedness and self-sufficiency led to the founding Rustic Roots Homestead and Mountain Readiness.

Having a diverse skillset and self-reliant living mentality is not enough, you need a community – that is exactly what T and Amber set out to build when they founded Mountain Readiness. Over the past few years the Mountain Readiness Expo has grown thanks to T and Amber's relentless dedication to creating connections, building community, and the desire to share valuable skills with those willing to learn!

Now that we understand the people behind the event, let's take a look at what Mountain Readiness Expo brought to the table in 2025!

knife forging class mountain readiness expo

Knife forging was one of the many class options at the 2025 Mountain Readiness Expo

Diverse Class Options

Before attending Mountain Readiness Expo, the class and demonstration line-up really drew my attention. The classes covered a wide variety of topics that fell into the many categories including:

  • Homesteading
  • Primitive Skills
  • Wilderness Survival
  • Bushcraft
  • Self-Defense
  • Communications
  • Tactics
  • Sustainable Living
  • Firearms
  • Woman's Only Firearms

While each of these topics have more subtopics than anyone could count, bringing a small sampling of all them together in one weekend brings a unique value. For starters it allows attendees to focus on skill areas that interest them most. More importantly this demonstrates how skills across multiple disciplines compliment each other and make us better prepared for the unexpected. While we did not have enough time to participate in everything we got the chance to take some great classes and demonstrations!

Jacks genega

Jacks Genega teaching attendees the anatomy and function of a compass.

Land Navigation and Plant Walk with Jacks Genega

Jacks Genega is an experienced wilderness survival expert and owner of Wildcard Wilderness. Her navigation course taught the the anatomy of a compass and detailed the nuances of how to use it and culminated with a real world exercise in using a compass to gain your bearings in the woods.

The plant walk class took participants through the woods to identify and discuss the uses of many of North Carolina's native plants as well as harmful plants to avoid!


patrick dubois

Patrick DuBose getting his timber bundle ignited after making a hot coal with a bow drill.

Bow Drill Fire Starting with Patrick DuBose

Patrick Dubose may be young, but his skillset and experience is something that can benefit all ages! His passion for developing, preserving, and teaching ancestral skills should be an inspiration to us all. Patrick demonstrated primitive fire making skills using a bow drill and utilizing natural materials that can be found anywhere.

  heavy crown forge

Rob Schneider demonstrating simple hook creation.

Black Smithing with Heavy Crown Forge and Crafts

Retired Marine, Rob Schneider, began his Black Smithing journey in 2018 and currently works as a hobbyist Black Smith. In addition to creating tools he also strives to pass down blacks smithing skills to those who wish to learn so that this vital art is not lost. Through out the event Rob worked on custom orders as well as ready to buy items and passionately explained his processes and equipment as well as his “hammering home” the importance of preserving the black smithing craft.

self defense knives

The Auxiliary Manufacturing Karl Jr is one of my go to self-defense tools. The Defiant 7 Talos is a new addition that I picked up from USA Made Blade while in North Carolina.

Knife Fighting Basics and Techniques

If you plan on carrying a knife for self-defense having the training and skills to back it up is vital. Two knife fighting classes we offered one to cover the basics and another to go over different knife fighting techniques. While neither course would make a participant a master, these courses provided the basics needed to get started through practical situation demonstrations and covering how to select self-defense knives.

chicken processing

The hands on chicken processing class afforded participants the opportunity to process a chicken from farm to table.

Chicken Health Care and Chicken Processing

Among the many homesteading classes available were courses in chicken care and a course in processing chickens from live birds to ready to cook! The chicken care class covered how to keep chickens and keep them healthy. the Chicken processing course covered everything from the 24 hours before slaughter and how to humanly dispatch your chicken to defeathering and butchering the chicken to maximize useable meat. The chicken processing course afforded class participants the opportunity to do the entire process under supervision of trained experts!


joe flowers

Knife designer, jungle guide, and founder of Bushcraft Global – Joe Flowers

Impromptu Woodsman Skills with Joe Flowers

When jungle guide and knife design legend, Joe Flowers, says “hey do you want to head into the woods and do cool stuff” you don't say no! Joe, Robin, and I headed off to the woods to practice large knife tasks with smaller knives, find water in vines, hunt down naturally occurring fatwood, and learn about assorted plants and insects. Check out our social media profiles for some videos of our woodland fun!


TOPS Knives Mini Brakimo

We got to check out the prototype of TOPS Knives Mini Brakimo, designed by Joe Flowers.

This was just a small sampling of the courses available at the Mountain Readiness Expo and even over the course of three days it would be impossible to take all the classes! The instructor line up was incredible, bringing many well known and reputable trainers to the event. Some instructors even offered additional full length classes were also offered at an additional charge in the the few days after the event closed allowing those with a desire to take a deeper dive into specific topics the opportunity to do so. Check out the full list of instructors in attendance.

one of the camping areas at Mountian Readiness Expo

One of the camping areas near the parade field at Mountain Readiness Expo.

Mountain Readiness Expo Grounds and Amenities

The Mountain Readiness Expo was held at the Van Hoy Camp Ground offering hundreds of acres of fields, woodlands, essential buildings, and plenty of room for camping as well as ample parking for those just coming for the day. The camping option was particularly popular with hundreds of people camping out in RVs, tents, or pop-up campers. Many people camping leads to a ton of campfires and community building after the normal event hours, and the folks at Mountain Readiness ensured there was plenty of after hours activities going on including night vision demos, cookouts, and live music.

food trucks at mountain readiness

Everything from hot food, to ice cream and coffee were available!

There were was a nice variety of local food trucks on site bring some tasty BBQ options, local farm made ice cream, stir fry, tacos, and on-site freshly roasted coffee. If attendees were on the hunt for new gear there were plenty of options to choose from including bushcraft gear, survival equipment, outdoor cooking tools, body armor, and knives of all shapes and sizes. There was also a raffle on Sunday featuring some great gear from vendors, instructors, sponsors.

class in a forest

While the main event was held on the filed the grounds offered hundreds of acres of dense woodland for courses and exploration.

Being an outdoor event the southern sun was more than I have acclimated to being it has been largely cold and gray here in New England, but most of the classes were held in large tents which provide shelter from the sun and were open on both ends to allow the breeze through. Some classes were held in the woods surround the main event area providing a nice reprieve from the sun.

There were ample amounts of porta-potties available around the main area and despite having hundreds of attendees they were kept clean and there was never a long wait to access the facilities.


Nick and Robin at Mountain readiness expo

Having a blast covering the Mountain Readiness Expo with the help of my wife, Robin Italiano.

Final Thoughts

The question a we have been asked by many since returning is “was Mountain Readiness Expo worth the the trip?” we can honestly say, without reservation, it was! Our only regret was that we could not stay longer! If you are into learning new self-reliance skills or getting a fresh take on existing skills, this is the event for you. If you are looking to forge connections and build community with welcoming like minded people this is the event for you!

If you are traveling and want to camp out there is plenty of room and community to do it with! If you wanted to stay indoors there are plenty of nice hotel options just 20 minutes away.

Ultimately if you are a survival, preparedness, and/or survival enthusiast the Mountain Readiness Expo has a lot to offer. There is a wealth of information and classes for beginners and plenty to continue skills development of the seasoned enthusiast. With so much class variety it was nice to dive into topics I passionate about and get out of my comfort zone and learn new skills.

The sense of community that the Toombs family has built was refreshing. Everyone one I encountered was incredible. It didn't matter if you were an enthusiast, the CEO of a company, a well known trainer, or a popular media personality – everyone in attendance was unified with the common goal to learn from others and teach what they know!

 Get More Mountain Readiness Expo Here!

Don’t miss essential survival insights—sign up for Recoil Offgrid's free newsletter today!

Check out our other publications on the web: Recoil | Gun Digest | Blade | RecoilTV | RECOILtv (YouTube)


CANCON Arizona 2025 After Action Report

CANCON Arizona 2025 is in the books and it proved to be an action packed weekend for shooting, tactical, and preparedness enthusiasts This year featured hundreds of firearms, more shooting lanes than ever before, high-end gear vendors, an amazing VIP experience, and the unveiling of the brand new OFFGRID Basecamp experience!

The OFFGRID Basecamp Experience

OFFGRID Basecamp was designed to enhance the CANCON experience by bringing hands on training across a variety of preparedness topics including emergency medical care, proper use of professional and emergency CBRN masks, enhancing situational awareness, tactical carbine operations and more! In addition to providing essential practical preparedness skills, the OFFGRID team also curated some of top gear vendors so attendees could get their hands on some of the best purpose built gear survival gear on the market! We may be slightly biased, but we think the Basecamp tied the whole event together.

Patrick Diedrich, the commander of offgrid basecamp, greets the crowd.

Above: OFFGRID Senior Editor and host of the OFFGRID Podcast, Patrick Diedrich, greets the crowd at the OFFGRID Basecamp.

The Classes

No Basecamp is complete without some subject matter experts to equip travelers with much needed wisdom. This year we had four companies who went above and beyond to share their insights extensively with our VIPs, and with the public audience as well:

American Reconstruction Concepts (ARC): Tactical Carbine Challenge

One of the standout moments from the weekend was a fast-paced 10-round drill designed to test both speed and precision under pressure. Participants were challenged to fire accurately and efficiently while maintaining solid fundamentals—stance, grip, trigger discipline, and visual tracking—all in rapid succession. The class focused on how well you could hold form when your heart rate was up and the clock was ticking.

The drill was led by Michael Caughran, a former USAF SERE Specialist and the founder of ARC. With a background in personnel recovery and advanced combat training, Caughran brought a level of instruction that merged military precision with a civilian-applicable mindset. In addition to helping students learn how to get rounds downrange, he also focused on sharpening the kind of technique that holds up when everything’s on the line.

Instructor Michael Caughran walks VIPs through a rapid fire drill.

Above: ARC instructor Michael Caughran walks VIPs through a tactical carbine rapid fire drill.

AVON Protection: Tactical Gas Masks 101

In a hands-on course presented by AVON Protection, attendees got a practical crash course in respiratory readiness. The class broke down how to select, fit, and maintain tactical gas masks built for real-world use. Beyond the basic donning and doffing, students learned how to spot filter incompatibilities, avoid common gear failures, and make sure their masks would hold up when lives depend on it.

Instructor Jeffery DeSocio brought a unique perspective to the session. With a background in broadcast journalism and a current role as Content Marketing Specialist for AVON Protection, he was able to blend deep industry insight with a communicator’s clarity. His passion for preparedness and tactical training came through as he guided the group through the essentials of respiratory protection, reinforcing the idea that good gear only matters if you know how to use it when it counts.

The importance of a chemical mask seal.

Above: Don't take clean air for granted. Knowing how to properly select and wear the right PPE is life-saving knowledge.

Greenside Training: Weaponize the Senses

Presented by the only Native American owned and operated tracking school in the U.S., this course gave participants a solid foundation in the art and science of tracking. From identifying subtle footprints to interpreting disturbances in the terrain, students learned how to determine direction of travel, read environmental clues, and build a clearer picture of human or animal movement. In addition to reading what could be detected on the ground, the class also emphasized the importance of tuning in to everything around you. The skills gained here had clear value for search and rescue, personal security, and anyone who wants to be less blind to what’s happening in their surroundings.

The course was led by Freddy Osuna, founder of Greenside Training and one of the foremost voices in visual tracking today. A former Marine and combat tracking instructor, Osuna combines Native American fieldcraft with modern tactical thinking. His approach is rooted not only observation, but understanding. Training the brain to notice what others miss. His passion for the craft and deep knowledge made this course one of the most eye-opening (pun intended) sessions of the event.

Freddy Osuna teaching man tracking skills. Above: Freddy Osuna teaches VIP the anatomy of a heal-strike.

Gorilla Medical: F*** I Got Shot! Now What?!

Hosted by Gorilla Medical, this crash course in trauma response cut straight to what matters most: keeping someone alive after they’ve been shot. Attendees were put through the essentials of bleeding control, chest wound treatment, and tourniquet application with zero fluff and all intensity. The goal was to make sure every student could take fast, effective action when time is short and pressure is high.

Instructors Kristopher Hasenauer and Mandy Espinal brought decades of battlefield and clinical experience to the table. Kris, a board-certified physician assistant and former 18D Special Forces medic, has spent his career balancing front-line care with big-picture medical planning inside U.S. Special Operations Command. Mandy, a retired Army Combat Medic, brought a grounded, no-BS perspective shaped by both military service and her work supporting veterans in the nonprofit world. Together, they delivered a course that gave students the confidence to respond when lives are on the line.

Gorilla medical teaches the proper application of a tourniquet.

Above: Proper application of a tourniquet is a skill for people of all ages.

The Vendors

In addition to the incredible brands who put together classes, we also had some excellent vendors that helped make our Basecamp a resounding success:

PNWBushcraft: PNWBushcraft made a big impression at the Basecamp, traveling all the way from the far reaches of the Pacific Northwest to share their handmade waxed canvas gear. This family-run company started over a decade ago with a mission to create rugged, heirloom-quality gear built to handle the region’s unforgiving elements. Inspired by vintage outdoor equipment and old-school adventures, their products combine classic design with serious durability. It was great having them on-site, showing off the craftsmanship and legacy that’s earned them respect across the survival and bushcraft community.
PNWBushcraft's custom patch, Tactical Ted. Above: PNWBushcraft came rockin' their custom “Tactical Ted” patch! (photo courtesy of Heather Salisbury)

  • Stroup Knives: This veteran-owned family business has been turning out high-quality survival and combat knives since 2017, with every blade designed to handle hard use without breaking the bank. Stroup Knives makes everything from EDC to field-ready tactical tools, and their lineup reflects a commitment to durability and real-world function. It was great having the Stroup family make the trip and share their work with a crowd that appreciates gear built with purpose.
  • Jack Wolf Knives: Jack Wolf Knives brought a unique blend of nostalgia, precision, and craftsmanship to the Basecamp. Local Arizonian Benjamin Belkin showcased his line of heirloom-quality knives—each one designed in-house and inspired by 80s and 90s culture, knife collecting, and childhood memories of his grandfather’s slip joint. Every knife is a piece of functional art, blending modern materials with timeless style. It was a treat having him there in person, connecting with fellow knife enthusiasts and sharing the story behind his brand.
  • Auxiliary Manufacturing: Auxiliary Manufacturing showed up strong, bringing their no-nonsense approach to blade design and field-ready tools. Known for crafting knives that blend hard-use functionality with a distinct visual style, their lineup is built for people who actually use their gear. Every blade reflects a commitment to performance, with designs that balance utility and aggression. It was great having them make the trip to be part of the event and connect directly with folks who put their tools to the test.
    Signage at the auxiliary manufacturing table.
  • OTIS Technology: Otis Technology made their mark at Offgrid Basecamp, traveling in to showcase what Smart Gun Care really looks like. Founded in the mud—literally—when a failed deer hunt sparked a better way to clean a rifle, Otis has spent decades rethinking firearm maintenance from the ground up. Their American-made products are designed to make gun care faster, easier, and more effective without cutting corners. It was great having them on site, connecting with attendees who value precision, longevity, and the kind of innovation that only comes from real-world experience.

The VIP Treatment

This year, our VIP Ticket holders got the experience of a lifetime including a full day of VIP only shooting, special training courses at the OFFGRID Basecamp, and a VIP Bag loaded with some of the best gear out there!

VIP Range Day 

The VIP Range Day at CANCON Arizona 2025 kicked off the event with exclusive early access on Thursday, April 10th, at the Ben Avery Shooting Facility. VIP ticket holders enjoyed a catered industry dinner at the range and received a swag bag filled with premium gear from top manufacturers. The day offered a unfettered access to experience a wide array of fully suppressed firearms, including lever-actions, bolt-actions, pistols, rifles, full-auto machine guns, and our personal favorite: a fully suppressed mini-gun!

OFFGRID Basecamp VIP Instruction

The VIP Range Day at CANCON Arizona 2025 kicked things off with more than just trigger time—it gave attendees exclusive, hands-on instruction from the expert cadre behind Offgrid Basecamp. Not only did VIPs have the entire range to themselves, they also leveled up their survival skills. Instructors who would go on to teach full classes over the weekend offered in-depth guidance on firearm fundamentals, tactical movement, gear setup, and mindset. It was a rare chance to train in small groups, ask questions, and sharpen skills alongside some of the best in the business before the crowds rolled in.

Attendees and vendors alike were able to be on the cover of their very own issue of Recoil Offgrid!

Above: Attendees and vendors alike were able to strike a pose on the cover of their very own issue of Recoil OFFGRID (photo courtesy of Heather Salisbury)

VIP Bag

One of the best parts of the VIP ticket is the inclusion of a bag packed with goodies. No two VIP bags are the same, which ensures that, even if you were lucky enough to snag a VIP ticket last time,  you'll still get some something unique the next time around. At this year's CANCON Arizona, 75 tickets were offered and sold out in minutes. Although the contents are kept top secret before the event, people who went for it and came away empty handed often wonder what that $1300 ticket would have gotten them. This year, the VIP bag cache had a value well over $3400, and much higher depending on where you applied the included product discounts. Here is a breakdown:

Photo of VIP bag contents.

Above: This years VIP bag was loaded with goodies!

A Fully Suppressed Weekend

We pulled out all the stops this year — adding more lanes, more firearms, and the latest innovations in suppressor technology to provide the record breaking number of attendees ample opportunity to shoot suppressed pistols, carbines, rifles, and even sprinkled in a few vehicle mounted belt fed miniguns! The Pros vs Joes competition afforded another opportunity to win a firearm if you could best a Recoil shooter.

Shooting at the range.

Going to a range where every firearm has a silencer on the end, ready to shoot for the cost of the admission ticket, is already a fun experience. It's the perfect opportunity to take different models for a test drive before deciding to buy, and a great chance to learn about firearms and firearm safety. Add in food trucks, vendors, and a place to learn useful skills, and it quickly becomes an event that is a class of its own.

If you were there, thank you for attending and we hope you had a great weekend of firearms and training! If you didn't attend and wish you did, don't worry we will be back in November for CANCON South Carolina! Check out the official CANCON website to stay up-to-date on ticket availability!

 Get More CANCON Here!

Don’t miss essential survival insights—sign up for Recoil Offgrid's free newsletter today!

Check out our other publications on the web: Recoil | Gun Digest | Blade | RecoilTV | RECOILtv (YouTube)


Gearing Up for Mountain Readiness Expo

This weekend my wife and I will be road tripping 680 miles to attend Mountain Readiness Expo in Harmony, North Carolina. Mountain Readiness is dedicated to teaching people the skills to be prepared for emergencies and be more self-sufficient in their daily lives. The founder of Mountain Readiness, Bob “T” Toombs, understands that preparedness is more than mastering a single skillset and encompasses a broad spectrum knowledge and skills. This is why the Mountain Readiness expo features classes and demonstrations across a variety of skill sets including wilderness skills, austere medicine, off grid communications, self defense, homesteading and more. Each course and demonstration is led by skilled individuals with years of personal and professional experience to ensure attendees get the most out of the weekends events.

mountain readiness expo banner

Mountain Readiness Expo: Location, Tickets, and Accommodations

Does this sound like something you would be into? If so the event is open to the public and is 100% family friendly!

The Mountain Readiness Expo Info:

  • May 2-4 2025
  • Van Hoy Campground, Harmony, NC
  • Onsite Tent and RV Camping Available
  • Local Hotel Accommodations Available
  • Food Trucks on Sites
  • Rest Rooms on Site
  • Kid's Section and Events

Grab your tickets at the Mountain Readiness Website

Mountain Readiness Expo map

Gearing Up for Mountain Readiness

The tricky part about traveling is having the preparedness, survival, and EDC gear you need while away from home. To further complicate matters, our trip to the Mountain Readiness Expo is almost a 1400 mile round trip drive.  Long drives mean we need even more equipment to account for travel related emergencies and adds additional preparation concerns. Since I spent the better part of a week planning and packing our gear and prepping our vehicle, I decided I would share the gear and bringing along and the steps I took to be prepared for potential emergencies while traveling.

road trip preparedness kit

Vehicle Preparedness

When on a road trip the most important tool we have is our vehicle itself! Our vehicle is not only our mode of transportation it is also what holds our equipment and is our primary shelter while on the road – making sure it is in tip top shape for a long trip is vital! In addition much of this gear fills the role of general emergency equipment reducing the need for redundancy.

Vehicle Maintenance

Before a long trip you should ensure all your basic maintenance is up to date. While many of these items can be taken care of while traveling it is safer and more cost effective to ensure this is done before the trip.

Before I travel I always  check:

  • Oil and Oil Filter
  • Brakes
  • Tires
  • Fluids
  • Battery
  • Belts 
  • Wipers
  • Lights

Vehicle Emergency Equipment

Every vehicle should have some basic vehicle maintenance and emergency tools, along with the knowledge and skills to use them if needed.

These tools include:

  • Spare Tire
  • Tire Repair Kit
  • Jack
  • Flares or Signaling Items
  • Jump Cables
  • Basic hand tools (i.e. screwdrivers, wrenches)
  • Work Gloves
  • Tow Strap
  • Basic First Aid Kit
  • Flashlight

road trip emergency gear

In addition to the basics I keep some additional items in my vehicle:

  • Pod Xtreme Jump Starter: Jump cables are great if there is another vehicle around to help us, but in the absence of another vehicle they won't help get us get our vehicle started. The Pod Xtreme is designed to jump start both gas and diesel engines, this compact 12V unit produces over 1000 amps to get your vehicle started.
  • Gerber E-Tool: This simple folding shovel and help if we get stuck by allowing us to dig snow, mud, sand, or underbrush away from our tires.
  • Wool Blankets: While the weather is warming up, it is still dropping into the 30's and 40's at night here in New England. It is important to have something to help keep our bodies warm in the event of a breakdown away from civilization. While the risk of hypothermia is most prominent in temperature below freezing, exposure to wind and rain can increase the risk of  hypothermia in temperature well above freezing.
  • Custom Built Trauma Kit in Vanquest Fatpack: I always keep a custom built trauma kit in our vehicle to handle more significant injuries if needed. I build my own kits based on my skill level to ensure I am carrying equipment I am familiar with using. Advanced medical gear requires training to use effectively and safely.
  • Stand Alone GPS Unit: Smart phones are great for the ability to help us navigate, but in areas where there is no cell reception your phone will not be able to connect to GPS. We have both onboard GPS and handheld GPS unit in our vehicle for both on road and off road navigation.
  • Toilet Paper: While not truly an emergency item, having some TP in your car can go a long way for your personal comfort and hygiene if stranded on the road for an extended period of time.
  • Weather Gear: I always account for a situation where we may need to travel on foot away from our vehicle. Having some disposable rain ponchos, water proof footwear, and other seasonable outerwear is essential in an emergency.

Additional Road Trip Related Items 

While the above items make for a pretty comprehensive kit there are a few other considerations for a extended road trip from preparedness standpoint.

  • Jackery Portable Generator: Portable generators, like the Jackery Explorer 300, can provide large amounts of back up power for all of our electronic devices and can ensure our emergency electronics like GPS units and Jump Start units can be charged should they run down.
  • Solar Panel: While the portable generator should provide more than enough power for this trip, I have decided to pack foldable solar charging panels should we face some form of long term power outage situation. These panels can charge the Jackery as well as any other electronic devices if needed.
  • Grayl Geopress: Grayl makes easy to use water filtration containers and the Geopress is capable of filtering and storing 24 ounces of water, making it ideal for filtering water in the wild in an emergency and tap water at our hotel.
  • Food and Water: Driving requires focus and our bodies need fuel to do so! Keeping high-quality foods like nuts and protein bars will provide fuel and having an ample supply of water and electrolytes on hand will ensure proper hydration.
  • Princeton Tech Helix LI Lantern: Flashlights are great for producing bright light, but most are not designed to produced area light or run for extended periods of time. The Apex lantern is compact, waterproof, produces 300 max lumens of area lighting and can run for up to 110 hours before a recharge. If stranded overnight or hands free light is needed a compact lantern is a good option to have on hand.

road trip bag

Travel Bag

Nemo Double Haul 30 Liter: Being that most of our emergency gear is covered in our vehicle prep our main travel bags don't need to be all that large. While much of my emergency gear is designed to with stand the elements my computer and camera equipment are not.

The Nemo Double Haul has more then enough room to hold a weekends worth of clothing, toiletries,  a small laptop, and my camera gear. The bag is made from water resistant nylon material and converts from a duffel bag to a backpack making it ideal should an emergency arise that requires us to leave our vehicle.

The Double Haul also converts to a tote style bag, so after arriving at the hotel and unpacking it, it can be used to transport items to and from the Mountain Readiness Expo.

mountain readiness expo edc bag

EDC Bag: Vanquest Vert-7 

Personally I like to keep my EDC light when traveling to events as I tend to spend a lot of time on my feet, and I'm sure there will be no shortage of emergency preparedness supplies at Mountain Readiness Expo! That being said, keeping it light does not mean unprepared.

The Vert-7 is a compact 7 liter EDC sling bag designed to keep all your essentials on hand without slowing you down. For comprehensive look at the Vert-7 check out our High-Tech EDC article.

Let's take a look at some of the compact kits I have inside:

  • Tuff Possum Nick and Scrapes Pouch: This 6×8 pouch is just large enough to hold my first aid and bleed kit essentials. Including quick clot and a TQ.
  • Badger Claw Outfitters Scout EDC Pouch: This compact pouch contains a miniature field kit. which includes a Knives by Nuge Wicket, Wazoo Whetstone, Tuff Possum Entry Kit, and assorted survival essentials for fire starting, water purification, signaling, and quick shelter.
  • PNWBUSHCRAFT EDC Travel Tray 3.0: The organizer is convertible into a tray and houses some basic EDC tools including a small Leatherman multi-tool, pen/pencil combo, Sharpie marker, and a small pry tool.
  • Prepper Disk Kit: Another set of items you will find in the High-Tech EDC article, the Prepper Disk Unit has become an item I do not leave home without. Containing a ton of vital survival information for both short term and long term scenarios, this is an vital reference resource that gives you everything you need when an internet or cellular connection is not available!

edc bag kits

Other in Bag Items

  • Dark Energy Poseidon Pro: My go-to power bank. The Poseidon Pro is a rugged weather-proof power bank offering numerous advanced features including automatic shut off and trickle change options to ensure the most efficient use of power. I have included assorted charging chords for all my devices.
  • Powertac SOL Keychain Light: This compact light offers free standing, clip, and magnetic placement options ensuring I can get hands free light anywhere I need it. The SOL produces 250 lumens, is rechargeable, and weighs next to nothing.
  • Portable Hard Drive: I don't like to keep sensitive data on my phone that can be potentially hacked. Having a small portable hard drive allows me to keep all my sensitive data and documents offline but accessible if needed. In addition it gives me a place to store photo and video files taken from events without bogging down my phone.

edc bag electronics

On-Body EDC

Having a bag with essentials is great, but I like having quick access to my most used items and any self-defense equipment I may be carrying. When traveling I try to keep my on body gear as minimalist as possible to ensure I can move quickly if needed and just for general comfort for long days on the road, taking classes, or at event like Mountain Readiness Expo.

For general utility purposes I will have:

  • Zero Tolerance 0308 CF: The ZT0308 is a large robust folding knife that has been among my favorites for years. The CF is the latest production version featuring a carbon fiber handle scale. For more on the ZT0308 check out my full review.
  • Knives by Nuge Bruin: The Bruin is a mid-sized outdoor fixed blade that is easily carried on your belt or in a deep pants pocket. The scandi grind makes it ideal for wood processing tasks and the blade shape lends to processing game. read more about the KBN Bruin here.
  • Fenix PD25R: This compact yet powerful flashlight clips comfortable to my pocket and produces a maximum output of 800 lumens of white light. It is weather resistant, offers multiple intensity modes, and is rechargeable via a covered USB-C port.
  • Outdoor Element Fire Sparky: I hang my keys off a carabineer, the Sparky adds utility by including a ferrocerium rod for starting fires.
  • Wazoo Spark Necklace:  This simple necklace on a leather cord not only looks cool, it can help you start a fire, break a window in an emergency, and hone your knife blade thanks to the tough zirconium ceramic striker.

on body edc for mountain readiness expo

For Self-Defense I will have:

  • Auxiliary Manufacturing Karl Jr: This discreet compact fixed blade won't let you down in high stress situations. Great ergonomics combined with a aggressive piercing tip, and multiple carry options make the Karl Jr and ideal self-defense tool. Read more about it in our review .
  • ASP Defender: The Defender OC Spray is a regular part of my daily carry. The unique and compact nature of the Defender makes it easy to carry and use if needed. Read more about it here.

offgrid swag

Offgrid Swag!

Yep, I'll have a bag of swag! If you will be at the Mountain Readiness Expo, I will have some of our exclusive Recoil Offgrid patches and some copies of our SERE issue! so hunt me down for your chance to grab one while supplies last! Hope to see you there!

Read More

Don’t miss essential survival insights—sign up for Recoil Offgrid's free newsletter today!

Check out our other publications on the web: Recoil | Gun Digest | Blade | RecoilTV | RECOILtv (YouTube)


CANCON Arizona 2025 Video


Join us for an action-packed recap of CANCON Arizona 2025, the ultimate fully suppressed shooting experience! With over 40 live-fire lanes fully suppressed, we explored the hottest gear, exclusive firearm debuts, and groundbreaking suppressor technology. From the innovative Maxim PDX-SD in 5.56 to the legendary Henry 45-70 and a game-changing Tri-Lug Disconnect suppressor mount, this event had it all.

Experience the highlights, including:

• Maxim Defense PDX-SD: 5.5-inch compact firepower

• Henry Supreme 45-70: Classic power meets modern suppression

• Ronin Arms Women's Shooting Experience

• Tri-Lug Disconnect by Tion: Revolutionary quick-attach suppressor tech

• Knife Innovations: Jack Wolf Knives & Auxiliary Manufacturing

• American Reconstruction Concepts: Top-tier tactical training

• Belt-Fed Alley: Unleashing full-auto firepower

Catch the best moments and newest gear from CANCON Arizona 2025, and get a taste of the incredible firearms community atmosphere. Missed out? Join us in South Carolina this November for CANCON Carolinas 2025!

Get more CANCON

Don’t miss essential survival insights—sign up for Recoil Offgrid's free newsletter today!

Check out the official CANCON website to get Tickets for the next event!

Check out our other publications on the web: Recoil | Gun Digest | Blade | RecoilTV | RECOILtv (YouTube)


Hobo Stoves

When the chips are down for whatever reason — be it a power outage, civil unrest, or the grid is down — you still gotta eat. Urban survival comes in a variety of flavors. Not all are great. Electric or gas stoves will probably be obsolete in times of trouble. Urban survival hobo stoves to the rescue!

Why a Hobo Stove

Imagine the attention of sight and smell a big ol’, cozy, warming campfire gives off.

In an urban survival scenario, you want the opposite. Less attention is a good thing to strive for (unless search and rescue is looking to evacuate you or your group). A hobo stove helps you fly under the radar with a small, contained fire to stay out of view from the possible unsavory characters who come with urban survival scenarios. Some other benefits to hobo stove cooking include:

Efficiency: Less fuel is needed in a concentrated area, increasing the airflow and heat. These stoves burn fuel more completely, minimizing waste. This means you’ll need less fuel to cook the same amount of food.

Faster Cook Time: An open campfire has many health benefits. However, there’s a lot of wasted fuel, and it heats cookware slowly. Hobo stoves come to temperature faster, which is a significant advantage in cold weather and when time is of the essence.

Safety: Small fires found in hobo stoves are easier to keep contained, reducing the risk of them getting out of control and starting a wildfire. These stable stoves lessen the risk of spilling or tipping pots and pans.

Pro Tip: Procure a large metal container that fits over your hobo stove. A trash can, barbecue cover, or larger tin can will do. The larger can will quickly cover the entire stove and snuff the fire out if you get any unwanted looky-loos. It may extinguish the fire, but remember you already have heat and fuel. Most likely, you’ll only need a resupply of oxygen.
Portable and Environmentally Friendly

No matter what size can size you use for your hobo stove, coffee, tomato, or larger cans are all portable. They’re also made of aluminum, a super lightweight metal. Aluminum also cools off lighting fast, making it easy to grab and go. Using readily available natural fuels, hobo stoves minimize their environmental impact compared to burning larger logs or using chemical fuels. They also produce less smoke due to their controlled combustion process, which helps to reduce air pollution.

tools to build a hobo stove

The heavy-duty tin snips make cutting the ports safe and easy.

What You Need

Simple is always best, and a simple stove build requires simple tools. I used three. However, you can easily substitute these for drills, Dremel tools, and whatever you can access before you need to make do without those luxuries, like electricity to use said tools. I used an awl from a Victorinox Swiss Tool with a positive lock, tin snips, and a church key-style can opener.

A stout fixed-blade knife can replace the tin snips, but I recommend the tin snips for ease of use and safety. The most essential item you’ll need is a coffee tin, tomato sauce can, or larger green bean can, which are all excellent candidates for an urban survival hobo stove. And one more thing, get some leather gloves. You’ll see why once you start moving hot cookware around.

can opener to make vents in hobo stove

The church key can opener is simple and effective for making vent holes.

Constructing It

A hobo stove creates a small, efficient, controlled fire for cooking and boiling water. Its design and shape utilize the principle of hot rising air as the fire ignites from the bottom. You can also ignite it from the top. I’ve made several hobo stoves in various sizes and designs,

incorporating different vent and fuel ports. Recently, I created a hobo stove using a small coffee can, an awl from my Swiss Army Knife, and a triangular can opener (not a P-38 military type). The result was crude and rude, but it worked well.

To make the hobo stove, I started with a metal can. I used the triangular can opener to punch holes around the top and bottom for ventilation. Then, I cut out a large panel from the top to create a fuel port as an additional vent. Heavy-gauge tin snips work well for cutting this section, although other tools can do the job. The open section at the top allows the flame to escape, providing a place for metal pans and kettles. For anything smaller than the can’s diameter, I needed support. At first, I used a sturdy piece of chicken wire mesh, but later, I switched to a stovetop grill for better support. I slid steel tent stakes into the top vent holes to hold a small pot.

;oaded up hobo stove

The author positions the kindling of small, toothpick, and pencil-thick dead sticks above the fuel.

The Portal

Most commercial bio/twig stoves come with a large port in front and on the lower part. However, I hate valuable hardwood coals that took me time and effort to create, escaping from the bottom.

At the same time, with top-feeding ports, you’ll never need to remove your cooking vessel to add fuel. And they become self-feeding. As they burn, they descend into the fire. All the hard-fought coals stay intact and don’t escape like the previous bottom ports.

wood in stove

Top-down fires in hobo stoves require larger fuel at the bottom and must be alternated in direction for maximum airflow.

Load It Up!

To kick off cooking with a hobo stove, I grab dry twigs about the size of pencils or slimmer. I start by stuffing smaller twigs in the center and then surround them with finger-thick pieces and a few larger ones to keep things spicy. Once those little guys catch fire, the larger pieces will happily fall into place. I save the fine tinder for last and cram it at the bottom without choking off the precious airflow. My go-to tinder options? Shredded poplar bark, birch bark, and a splash of Fatwood for that extra kick. Once the fire ignites from below, that snug setup works wonders, aided by the all-important air vents.

While establishing a cozy warmth and glowing coals, I pop in larger logs from the top, feeding the fire until it creates a sustainable blaze. This part is my favorite — not only does it warm me during those chilly winter days, but it also gets a kettle boiling above those high flames. When I’m ready to whip up a meal, I shove in hardwoods through the large vent. Maple, oak, hickory, and walnut are my champions in the fuel department, since they pack more BTUs and reduce the wood needed for cooking. I lay some heavy-duty chicken wire over the top to support my cookware or slide in metal tent stakes through the air vents. If I bring out a big frying pan or skillet, I don’t even need support. The can does all the heavy lifting.

Pro Tip: Keep a couple of sticks handy to adjust the larger vent or fuel port position to catch the breeze. This little maneuver will boost your flames and save you from the tiresome task of fanning when the wind decides to die down. Want to dial back the heat? Simply turn the stove away from the prevailing breeze to avoid a flame thrower scenario.

cooking with a hobo stove

The author has used larger and wider hobo stove cans and boiled kettles by hanging them above in the cold months and taking advantage of their warmth.

Cooking on a Hobo Stove

The initial flame will be high once you ignite the stove. Make sure to take advantage of it. There’s no better time to use a high flame to boil water for warm drinks or to disinfect it for safe drinking. A tripod or some type of method to raise a pot will be a gem here. Be crafty and plant two Y-sticks on either side of the stove. Get a green or stout dry stick to lay across the Y-sticks, hang the pot or kettle, and use that high flame. When the flame dies down into cooking territory, act accordingly.

Frying Pan: A small to medium-sized frying pan will fit on top of most homemade hobo stoves and popular twig stoves sold commercially. The frying pan is a good choice for these types of stoves. It means you can use a flame, like cooking over a gas burner. Use leather gloves or a bandana when you handle the frying pan. Wind changes and flames will shoot out of ports and be at the mercy of the wind.

When using a very small diameter pot, kettle, or frying pan over a larger stove, use metal tent stakes, chopsticks, or wire coat hanger pieces. This method will allow smaller vessels to do their thing. However, if their handles or hanging systems allow, hang them over the initial flame, as stated above. Be creative — invent something and have fun.

Steam It: Cooking in the woods can be a breeze, especially when you choose steaming as your method. I’ve got a killer recipe that’s simple, quick, and virtually foolproof. Inspired by Scandinavian cuisine, I steam fresh vegetables and seafood on a hobo stove, and the results are delicious.
Here’s How It Works: Start with a small pot filled with water at the bottom and toss in some fresh maple or oak wood chips. Then, I layer some spruce or hemlock twigs — or even ferns — on top of those wood chips, creating a nifty platform above the water. Your creativity and the pot’s size are the only limits regarding what to cook. I like to keep things fast and efficient, so I don’t overcrowd the pot. My go-to combo usually includes some fish and shrimp. For good measure, I throw in spinach, mushrooms, tomatoes, and a sprinkle of Red Eyed Hog outdoor seasoning.

First, I layer the larger fish and veggies, stacking the smaller pieces on top. Once everything’s prepped, I cover the pot and place it over the hobo stove, waiting for that water to boil and the steam to work its magic. Every few minutes, I can’t resist checking on my creation, using leather gloves or a bandana to lift the pot lid safely. The fantastic thing about steaming is that it cooks food quickly, and thanks to the gentle steam, it’s also more forgiving than frying or grilling. Keep an eye on it, and you’ll soon whip up a fantastic meal.

Pro Tip: Leather gloves are your friend here. Wind is fickle. Use leather gloves to rotate the stove into the prevailing wind when it changes. Use wooden tongs or sticks to rotate the stove without leather gloves.

eggs on a hobo stove

This small coffee can-style hobo stove was made with a church key and fixed-blade knife. It was perfect for a small carbon steel skillet to make a basil omelet.

Flip It

The coolest thing you can do with a hobo stove — homemade or the commercially built type — is to flip it. Take what you know and invert it. Make the fire first; keep it small and contained. Once it becomes a sustainable fire, cap it with the open side down. Now you have the top as a small, flat griddle. Continue to feed the fire as usual through the port. The top surface will be large enough for sausage links or a fried egg. However, if you used a larger can, you could get two eggs or sausage and bacon. Then, transfer them and add the eggs. The flat top surface is an excellent bread or tortilla warmer, too.

Night Prep Like a Boss

When I camp outside of any urban survival scenario, my nightly ritual is making feather sticks, gathering stray shavings, and keeping them in my hobo stove. I fill it to the top while romancing over campfire TV (a lovely glowing campfire). Use your tools with caution in the dark. Make splits and large shavings in addition to the fine feathers that should be thin enough to take sparks from a ferro rod readily. Keep the loaded hobo stove under your shelter covering for the morning. Morning dew, light sprinkles, or snow will affect your dry fire preparation. Don’t give Mother Nature a vote. Always cover your hard-earned fire preparation.

hobo stove and outdoor gear

Urban survival cooking has never been this easy with the small, portable, environmentally friendly hobo stove.

Skills Practice

Using a hobo stove forces us all to keep practicing camp skills like fire making. All rules of making a fire are pertinent. You’ll always need tinder, kindling, and fuel. The fire triangle is still relevant with heat, oxygen, and fuel (HOF). If you skip a step, you’ll have either a poor fire or no fire at all. Like the legendary British author of the SAS Survival Handbook John “Lofty” Wiseman said, “What seems like a shortcut may ultimately take more time in the long run, so do it right the first time.”

Fire materials must be dead and dry. Use dead-standing wood hung up in trees or up off the ground. Split larger pieces of fuel if they’re coated with snow or moisture. However, the fuel must be deadwood. The heat of the kindling burning will dry and eventually combust the fuel.

Sum It Up

A hobo stove makes an excellent choice for small cooking or warming fires. It uses less fuel and burns materials to ash, making disposal easy. Don’t be afraid to modify your creation and experiment with some trial and error. Make more vent holes and cut another port for maximum airflow. This isn’t a science, nor is it baking, so experiment, fail, improve, and make it better.
This affordable alternative to commercial options also provides an excellent opportunity to practice fire skills. You can use it in firepits and camps and pack it with other cookware. Plus, it’s a lot of fun.

ikea stove

Ikea Hobo Stove

This type of stove is the easiest to make, requiring minimal modifications. It comes ready to use and needs to be fed from the top. You can also utilize the numerous vent holes to feed small sticks through. You can find stainless steel utensil holders in various places, but many people first discovered them at IKEA. Their ample air vents and ease of modification make them a popular choice for DIY enthusiasts.

They come in two sizes: 53⁄8 and 71⁄8 inches high (43⁄4 inches wide). You can choose either size for this modification. Simply cut a U-shaped port using tin snips at the top, using the pre-existing holes as guides to simplify the process. You can decide where to create the port or go without one. However, if you forgo the port, you’ll need to move the cooking container to add more fuel from the top.

Making a top vent/port design allows for sticks and longer fuel pieces to extend out and self-feed. It also keeps the coals at the bottom to prevent them from spilling. Using stones or a metal trivet can elevate the stove for improved airflow underneath and prevent it from resting on cold or damp ground. You can use metal chopsticks or stakes to support smaller-diameter cooking vessels in the various slots. Don’t forget that this style of stove can be a flipper, and the holes on the bottom are instantly transformed into a grill. Say hello to kabob heaven, or, with some creativity, this can be a mini-smoker when adequately covered.

reuben bolieu

About The Author

Adventurer, writer, photographer, and survival instructor for Randall’s Adventure & Training, Reuben Bolieu has spent most of his life hiking and backpacking through the world’s wildernesses. He has traveled abroad in extreme environments and seeks out primitive survival techniques, construction, and the use of knives and edged tools. Bolieu has published many articles on survival, knife and tool use, and woodcraft. He remains a lifetime student of survival.

Read More From Issue 67

Don’t miss essential survival insights—sign up for Recoil Offgrid's free newsletter today!

Check out our other publications on the web: Recoil | Gun Digest | Blade | RecoilTV | RECOILtv (YouTube)

Editor's Note: This article has been modified from its original version for the web.