Can You Survive After a Nuclear War?

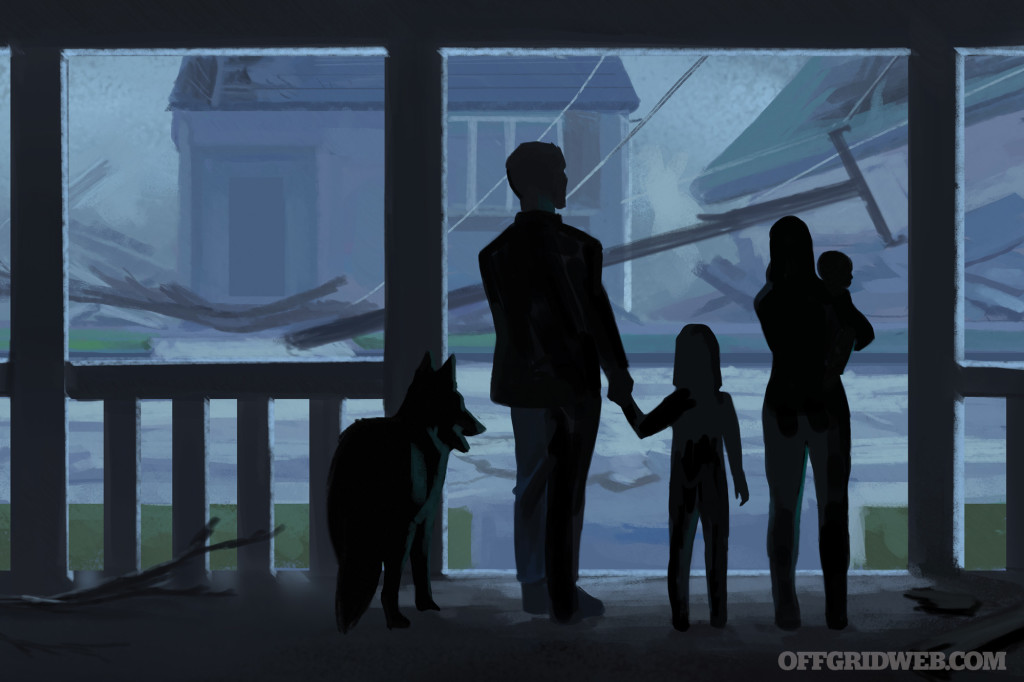
If you’re reading this, you must have survived. Soon you’ll realize that those who didn’t survive were the lucky ones, obliterated in an instant flash of light or shattered to bits by a tremendous shockwave rippling outward from the epicenter of a thermonuclear detonation.

Who knows what the rest of the country looks like, and you’ll have no way of finding out.

OK, so the above situation is more hypothetical than historical. But with current events making people wonder if we’ve regressed to the 1960s, we take a look at that time period’s worst fear: nuclear winter. Is it possible to survive after a nuclear war? What would your world look like if you did? And what sort of preps can you make now?

What better way to be prepared for the future than to research the past. After all, George Santayana warned us that, “Those who cannot remember the past are condemned to repeat it.”

The Atomic Age

The Atomic Age began with a bang in 1945. Although the United States hoped to have a monopoly on its newest technological terror, stolen secrets spread around the globe. The USA tested its first nuclear bomb in July 1945, and the Soviets followed with its own tests four years later. The U.K., France, and China joined the Atomic Age by the early 1960s.

The Nuclear Nonproliferation Treaty in 1968 and the Comprehensive Nuclear Test Ban Treaty in 1996 curbed some countries from developing nukes, but spurred others — India, Pakistan, North Korea, Iran, Syria, and Israel — to pursue nuclear programs. Stockpiles of nuclear weapons, which today are at an all-time low, hit a high-water mark during the Cold War with 70,000 warheads and a variety of delivery systems.

According to data from the New START Treaty of 2015, together the USA and Russia currently deploy 3,179 strategic warheads on 1,300 bombers and missiles — far more than is needed to completely annihilate the globe.

Dr. Ira Helfand, chair of the security committee and co-president of Physicians for Social Responsibility, writes: “If only 300 warheads in the Russian arsenal got through to targets in American cities, 75 million to 100 million people would be killed in the first 30 minutes.”

Cloudy With a Chance of Radiation

In 1983, a group of scientists wrote that an all-out nuclear war would easily doom humankind, and in doing so they coined the phrase “nuclear winter.” What would follow, they suggested, would be a winter so severe that the living might well envy the dead. Beneath the sun-blocking dome of dust, surface temperatures would plummet, conceivably by as much as 60 degrees F. Plant and animal life would die, and crops would wither. With only a 10-percent drop in worldwide crops, famine would spread across the globe.

Alan Robock, a professor at Rutgers University and the country’s foremost authority on the aftermath of a nuclear confrontation, says, “There are now nine nuclear-weapons states. Use of a fraction (only 1 percent or 50 Hiroshima-size bombs) of the global nuclear arsenal by anyone still presents the largest potential environmental danger to the planet by humans.”

There’s no need to detonate 50 warheads to understand what happens when millions of tons of dust are hurtled into the atmosphere. One must merely look to history, specifically at the 1815 volcanic eruption of Mount Tambora in Indonesia.

Lord Byron wrote in his 1816 poem, Darkness, about an “icy earth” and “the sun being extinguished” based on his observations while on the other side of the globe in Switzerland. Thomas Robbins, a reverend in Ohio, wrote in his diary about the “year without a summer,” remarking on June 9, 1816: “The cold and wind still continue. The last three days have been extraordinary. It is said that there was snow at the northward last Thursday.” On August 22, there was frost on the ground.

Imagine this on a scale 100 times larger, due to the black soot particles thrown into the atmosphere from a nuclear event.

Dr. Luke Oman, a physical scientist at Atmospheric Chemistry and Dynamics Laboratory at NASA, explains, “Whereas sulfate particles from a volcano might warm the air of the upper atmosphere by a couple degrees, black carbon absorbs heat from the sun and can lead to much more atmospheric warming. Black carbon particles are smaller than sulfate particles and can be lofted much higher by solar heating, where their influence on climate can last up to a decade.”

Can You Survive This?

Well, the short answer is probably not. If in a full-scale nuclear war between superpowers you’re located anywhere near a largely populated city or a military installation of any kind, you’re at ground zero. The blasts will probably kill you.

“One of these false beliefs is that nuclear war would be such a terrible catastrophe that it is an unthinkable impossibility,” says Cresson H. Kearny, who wrote Nuclear War Survival Skills. “If these were true, there would be no logical reason to worry about nuclear war or to make preparations to survive a nuclear attack.”

However, the long answer is that anything is survivable if you’re very prepared … but most of the world is not prepared.

Dr. Helfand explains: “The entire economic infrastructure, on which we depend to sustain our population, would be destroyed. The transportation system, the communications network, the public health and banking systems, the food distribution network — all would be gone.”

Provided you survived the initial attack, there are other dangers to follow (before the advent of nuclear winter). Radiation from fallout (if it’s a surface blast) will return to the earth within a few days unless it’s carried aloft by winds in the upper atmosphere. This not only leads to nuclear winter, but also contributes to radiated fallout to be spread farther away.

The area just outside the blast and shockwave radii is in danger of fires and building collapses. Fires will spread rapidly due to broken gas lines, damaged structures, etc.

Not a danger, but certainly a hindrance to your gear, is the electromagnetic pulse (EMP) that can be emitted during a nuclear detonation. This EMP could potentially damage sensitive electrical equipment for hundreds of miles around the blast.

Plan for Disaster

One would want to plan for such a terrible situation for the same reason one would plan for any disaster: to survive. Therefore, the strategy is no different — plan ahead.

In 1983, Carl Sagan and his peers predicted the conditions you may face: “For many simulated exchanges of several thousand megatons, in which dust and smoke are generated and encircle the Earth within one to two weeks, average light levels can be reduced to a few percent of ambient, and land temperatures can reach -15 to -25 degrees C.” According to their estimations, there will be a 75-percent drop in rainfall worldwide and a 90-percent drop in visibility in the highly affected areas.

Today, scientists continue to debate the level of severity predicted by Sagan’s initial theory — some say this nuclear winter would be more like a nuclear autumn. However, most researchers agree that even a small-scale nuclear exchange would eventually have a dramatic affect on the global climate.

Keep on hand appropriate winter clothing and emergency sources of heat, such as gas-fueled heaters and stoves with a surplus of firewood. Wear clothing in layers; consider materials like wool that not only wick away sweat, but still insulate when wet.

Winterize your home or shelter with the best methods possible. Upgrade the insulation factor in your attic and basement, while making sure your windows and doors seal properly. Keep in your cache of gear a few cans of insulation foam/sealant in case drafts are discovered. Not only will this keep out the cold, but it could also keep out any extra radiation (though your house isn’t a good barrier from radiation to begin with).

And though it might be perpetually cloudy, you’d still want to lather on sunscreen. The ozone would be effected, greatly increasing levels of ultraviolet radiation from the sun (even in the shade of high-atmosphere dust clouds). UV light can cause serious damage to your skin and corneas, leading to blindness and cancer.

Pack UV-protected sunglasses or goggles, limit your time outdoors, and consider a wide-brim hat and/or a hooded jacket.

Food

Starvation will be the real killer. Though it might seem impractical to keep a year’s supply or more of non-perishable food on hand for each person, it’s not impossible. There are many companies selling 365 days’ worth of meals that offer variety, nutrition, and ease of preparation.

If you have to live off of the land, root vegetables (like carrots, potatoes, and radishes) are the safest because they’re protected by the earth. Animals can be harvested and eaten, but leave about 1⁄8 inch of meat on the bone because radiation builds up in the skeletal system. Avoid fish and birds completely, though depending on the severity of the nuclear winter, both might end up in short supply.

Always available will be insects, as they’re likely to survive any level of nuclear attack. Crickets, grasshoppers, and many beetles have a great deal of protein, essential minerals, and vitamins.

Growing vegetables in low light (obstructed sun) can be difficult, but not impossible. Leafy greens like lettuce, spinach, and cabbage don’t require a great deal of light (equal to about two hours of sunlight a day). Getting creative with light-colored walls, reflective mulch (or tinfoil around each plant), and even mirrors can increase the amount of light in your garden. Barring that, consider a hydroponic system in your basement or shelter (if it’s large enough); you can grow as much (and as many varieties of) food as you need without the worry of the lack of sun or contaminant-free soil.

Water

For most urban-dwellers, clean water will be the biggest challenge. For example, storing 1 gallon of water for four people (for example) per day for one year equates to 27 55-gallon drums of water — impractical to store in most people’s homes. Having a deep-drilled well on your property and a mechanical way of retrieving it is your best bet to get safe water for a long-term scenario. Besides that, safe water can be found in underground springs (in caves), water stored in underground tanks or pipes, snow taken 5 or more feet from the surface, and water from fast-flowing rivers.

If you have to get water from outside surface sources, such as rivers, lakes, and even swimming pools, it’ll need to be filtered to remove not only the normal contaminants found in water (viruses, bacteria, etc.), but any potential radioactive material as well. An anti-radiation “total radioisotope aqua purifier” (TRAP) filter can remove radioactive particles from potential drinking water. Without this filter, distilling and reverse osmosis methods are both good at removing the contaminants.

Protect Your Family

With even a limited nuclear battle, the government will either be destroyed or too busy dealing with the threat to concern itself with your well-being. Expect social breakdown in the months to come, especially when nuclear winter dries up all the usual sources of food and water. Protect not only your family, but your resources as well.

Don’t advertise that you have these preps, and like the 1950s fallout shelter advertisements suggested, don’t tell all your friends you’ve got a fully stocked hideout.

You’ve prepared for a reason. In the event of nuclear winter, up to 1 billion lives will be lost. Don’t be one of them. Instead, take a few steps to ensure you have the knowledge, supplies, and foresight to protect yourself and your loved ones. The future of civilization might be in your hands.

Exploding Nuclear Myths

Myth #1: The fallout would stay around for years and kill everyone.

False: The danger of radioactive fallout lessens with time. According to FEMA, the 7:10 Rule of Thumb states that for every seven-fold increase in time after detonation, there is a 10-fold decrease in the exposure rate. For example, two hours after detonation, the exposure rate would be 400 Roentgen/hour. After 14 hours, the exposure rate would be 1/10 as much, or 40 Roentgen/hour. For more on radiation sickness, see “Invisible Death” in Issue 16.

Myth #2: All of the food in a fallout area would be poisoned and inedible.

Mostly False: Food and water in dust-tight containers will be completely free of radiation particles. Peeling fruits and vegetables and removing the top several inches of stored grain will eliminate most of the radiated material. Tiny doses may still prevail.

Myth #3: Most unborn children would be genetically damaged from parents exposed to radiation.

False: Published in 1977, A Thirty Year Study of the Survivors of Hiroshima and Nagasaki concluded that incidences of genetic abnormalities were no higher among children born from exposed parents as they were among children born from unexposed parents.

Myth #4: A full-scale nuclear war would completely destroy mankind.

False: Though many military facilities are within cities and surrounded by populations, much of the world is populated by people who have no military value whatsoever and are not on the list of targets from either side. Life will go on, just maybe not in your region.

Suit Up?

By John Schwartze

The first prep that pops to mind when people say “surviving a nuclear holocaust” is a hazardous materials (hazmat) suit. As with any gear, having it and knowing how to use it are two different things. Hazmat suits are broken into several categories.

Level A: Fully encapsulating, vapor and chemical protective suit. Typically worn with SCBA-type (self-contained breathing apparatus) units with closed-loop, rebreather systems where air is scrubbed and recirculated. Used when working with substances that can be absorbed by or are hazardous to skin.

Level B: Non-gas-tight encapsulating suits. Mainly for splash protection; not ideal for radiation environments. Used mainly with open-loop SCBA or SAR (supplied air respirators) where air comes from a compressed cylinder and exhaled air is released to the atmosphere. Worn if substances cannot be absorbed by or are not hazardous to skin.

Level C: Similar material/protection level as B, but can be worn with respirators that filter outside air. Used when environmental contaminants will not harm or be absorbed by exposed skin.

Level D: No chemical exposure protection. Worn if atmosphere contains no known hazard and if work precludes splashes, immersion, or potential for unexpected inhalation with hazardous chemical levels. Worn mainly by hospital/medical personnel.

While these suits are available for public purchase, they do pose certain risks. For instance, Level A suits, which offer the best protection against nuclear/radiation threats, pose potential fatigue and overheating concerns. Someone wearing such a suit would need to be in good shape with no respiratory problems. There’s also a specific process to don and doff them safely to prevent contamination.

Level A suits are reserved for hazmat specialists in the first-responder industry and typically require at least 200 hours of training. These suits can cost thousands of dollars, so before buying anything, do your research to see if they offer the protection level you desire. Proceed with caution, though. For the same reason scuba divers get certified, training is imperative and people can die without it. Manufacturers may also limit their access due to potent liability. For other protective measures against radiation exposure, see our previous article on Dirty Bombs.

Rad Gear, Dude

OFGP-161000-NUKE-SB2-02.jpg

Heavy Metal Filter
MSRP: $30
www.NukePills.com
The Seychelle filtration system included on this 28-ounce BPA-free water bottle removes up to 99.99 percent of toxic chemicals, contaminants, and pollutants found in fresh water, including Radon 222, DDT, arsenic, asbestos, detergents, aluminum, and other heavy metals. The filter can decontaminate up to 100 gallons of water before needing to be replaced.

Nuclear war atomic bomb mushroom cloud radiation survival shtf disaster prepping 5

Watch Your Radiation
MSRP: $1,500
www.SpecialOpsWatch.com
The MTM RAD is a line of tactical watches that includes integrated Geiger-Müller tubes, measuring single-dose gamma ray levels, as well as cumulative exposure. The ultrasensitive detector tracks dose equivalents (a measure of tissue damage caused by radiation) from 0.0001 to 9,999 millisieverts, and the dose equivalent rate up to 4,000 microsieverts per hour. Users can set their minimum radiation threshold, and an alarm will sound when this level has been reached.

OFGP-161000-NUKE-SB2-06.jpg

Take Shelter
MSRP: $50,000 (one space in Indiana)
www.TerraVivos.com
The Vivos Group offers a series of pre-built shelters around the world with locations in Indiana and in Europe, as well as a line of custom-built shelters for personal use. The Quantum Shelter package comes completely furnished, includes a primary and emergency exit, water and septic tanks, and backup systems. Shown is a proposed plan for the Vivos Trine, a scalable bunker for 200 people.

More From Issue 16

Don’t miss essential survival insights—sign up for Recoil Offgrid's free newsletter today.

Read articles from the next issue of Recoil Offgrid: Issue 17

Read articles from the previous issue of Recoil Offgrid: Issue 15

Check out our other publications on the web: Recoil | Gun Digest | Blade | RecoilTV | RECOILtv (YouTube)

Editor's Note: This article has been modified from its original print version for the web.


Petya: The World’s Most Devastating Cyber-Attack

Imagine the first volley of an all-out war between world superpowers. What images come to mind? If you grew up during the Cold War,  you'll probably think of ICBMs loaded with nuclear warheads detonating in major cities, wiping out millions of lives in the blink of an eye. Or perhaps you see guerrilla-style attacks with conventional explosives, dirty bombs, or even chemical or biological weapons as a greater possibility. While the prospect of any of these incidents is horrifying, there's an increasing probability that a modern-day war between superpowers would begin with an entirely different kind of attack — a cyber-attack.

No, we're not talking about the rise of the machines.

Unlike fictional Hollywood portrayals, a cyber-war is a real possibility in the near future.

Before you roll your eyes and write off cyber-war as the sort of thing that only happens in science-fiction movies, consider some recent historical evidence — specifically, the devastating spread of ransomware known as Petya.  This malware (i.e. malicious software), and its subsequent variant NotPetya, wiped out computers and computer-controlled systems around the world in 2016 and 2017. A statement from the Press Secretary of the United States called this “the most destructive and costly cyber-attack in history… causing billions of dollars in damage across Europe, Asia, and the Americas.”

By studying and analyzing the Petya and NotPetya malware, we can glean a better understanding of the very real possibility of a state-sponsored cyber-war between nations. Although these may have been the first cyber-attacks of this scale and severity, our ever-increasing dependence on technology ensures they won't be the last.

Petya ransomware cyberattack war technology computers terrorism survival prepping 4

A screenshot of the warning screen generated after a computer was infected with Petya.

The Origin of Petya

In Spring 2016, security researchers discovered a new piece of malware that began spreading to businesses through emails that posed as job applications. Each email reportedly contained a short message with a fake  applicant's photo and a link to a file that appeared to be a PDF document. If the email recipient downloaded and opened the file, the malware would be installed and the computer would crash immediately with a blue screen.

Petya ransomware cyberattack war technology computers terrorism survival prepping 3

Once the the computer was rebooted, a message would appear stating that the computer's file system was being repaired. This closely resembles an actual Check Disk message generated by Windows in the event of a system error, so many users assumed it was not out of the ordinary. However, the process actually encrypts all documents and files on the infected computer.

Petya ransomware cyberattack war technology computers terrorism survival prepping 2

Once the process completed, a message would appear stating that the computer had been infected by Petya (a reference to one of the Soviet weapon satellites in the James Bond movie GoldenEye) and that all data would be permanently lost unless a Bitcoin payment was sent to those responsible for the attack — hence the name ransomware.

The attackers promised to provide a decryption key that would unlock the computer after the payment equivalent to roughly $900 was received, but the encryption was generally irreversible through other means. In other words, any computer affected by Petya was instantly unusable and all data on it was locked. For most users, the only option was to wipe the hard drive, permanently erasing all the files on the computer.

The following video shows how a 2016 version of Petya functions:

As ransomware, these early versions of Petya were tools for monetary gain, holding computers hostage in the hope that panicked users would give in to attackers' demands. But Petya hadn't made major headlines yet. This was only the beginning.

NotPetya – The Malware Evolves

On June 27th, 2017, a new cyber-attack began. It was based heavily on the earlier versions of Petya, and used a similar mechanism of encrypting files after a computer was rebooted. However, according to a statement by Microsoft, this variant was “more sophisticated”. Security researchers would eventually name it NotPetya.

The NotPetya

The NotPetya “ransom” screen featured different instructions and a lower demand of $300.

The first cases of NotPetya infection have been traced back to MEDoc, a Ukrainian tax and accounting software company. Later investigation would show that hackers stole an employee's login credentials and added code to MEDoc, causing its update process to distribute NotPetya and start the infection.

Unfortunately, computers with MEDoc software were not the only victims — this was only the first wave of the cyber-attack.

An especially insidious new characteristic of NotPetya was its ability to spread through networks via a security vulnerability in Windows. After a computer was infected, the program would automatically search for all other accessible computers on the local network and install itself on them. This meant that the malware could spread from one computer to infect every PC in an entire company.

Unlike the original Petya, researchers have concluded that NotPetya's goal was not monetary. In fact, Symantec concluded that the randomly-generated installation key has no relationship to the disk encryption and “the disk can never be decrypted”. Rather than considering NotPetya ransomware, Symantec calls it a “wiper” — malware designed to irreversibly destroy files and disable computers. This was no longer simple extortion, it was a weapon.

Evidence of Targeting

MEDoc, the initial vector for the attack, is a Ukrainian company whose software is widely-used in that country. According to Reuters, “M.E.Doc is used by 80 percent of Ukrainian companies and installed on about 1 million computers in the country.” This made it an ideal means of distributing the malware within the country.

The following graphic from Symantec shows a comparison of the number of organizations affected by NotPetya in 20 countries:

Petya ransomware cyberattack war technology computers terrorism survival prepping 5

In addition to the initiation of the NotPetya attack in Ukraine and the disproportionate number of Ukrainian computers affected by the malware, even the date of the attack bears some significance. June 28th is Ukraine's Constitution Day, a day which celebrates the country's independence. This would be comparable to a major attack on the United States occurring on the afternoon of July 3rd.

Given this information, security researchers soon concluded that Ukraine was the primary target of the NotPetya attack, and that its spread to other countries could be considered either diversion or simple collateral damage. Craig Williams, senior technical leader for Cisco’s Talos intelligence unit told Reuters, “This wasn’t made for any other purpose but to destabilize businesses in the Ukraine.”

Possible State Sponsorship

Flickr.com/larrywkoester

Flickr.com/larrywkoester

Considering the long-running conflict between Russia and Ukraine, analysts began to speculate that the attack may have originated in Russia, and shortly after the attack, Ukrainian officials made statements accusing this connection. Anton Gerashenko, a member of Ukrainian Parliament, called it “just one part of the hybrid war of the Russian empire against Ukraine.”

Official statements from the White House and the UK Foreign Office also blamed Russia for the attack — the former said it was “part of the Kremlin’s ongoing effort to destabilize Ukraine” and “a reckless and indiscriminate cyber-attack that will be met with international consequences.” A Kremlin spokesman responded by denying responsibility for these attacks and calling these accusations “Russophobic”.

Ironically, the EternalBlue security vulnerability that made NotPetya's spread through networks possible was initially developed by the U.S. National Security Administration (NSA). Brad Smith, President of Microsoft, clearly stated that the vulnerability was “stolen from the NSA” before being leaked to the public and eventually being utilized by the criminals behind this and other ransomware attacks. He also wrote that there is “a completely unintended but disconcerting link between the two most serious forms of cybersecurity threats in the world today – nation-state action and organized criminal action.”

Conclusions

Flickr.com/jeroenbennink

Regardless of the origin of NotPetya, it is clear that this malware was intended to cause catastrophic damage on a national (and potentially international) scale. It succeeded in this aim.

Within the Ukraine, computers at numerous government agencies, hospitals, banks, transit systems, utility providers, and even the radiation monitoring system at Chernobyl suddenly went offline. Outside the Ukraine, numerous multinational organizations were also affected. DLA Piper — one of the world's largest law firms with 3,600 lawyers across 40 countries — instantly went into lockdown mode and lost millions of dollars as a result of NotPetya. Other multi-national organizations affected by NotPetya include Danish shipping company Maersk, German shipping company DHL, U.S. pharmaceutical company Merck, French construction company Saint-Gobain, and India's largest shipping port JNPT.

Ambulance hospital medical trauma first responder accident

Computers are intertwined with every facet of our society, from banking to medical care.

While the widespread use of computers and technology has certainly made our lives easier, it has also left us vulnerable to cyber-attacks that can cause sudden disruptions in the availability of resources we rely on. Cyber-attacks such as Petya can interfere with our personal PCs, but more sophisticated variants such as NotPetya have proven themselves capable of shutting down financial institutions, electrical infrastructure, shipping and manufacturing of consumer goods, medical treatment, and other essential services. Without these, our polite society would quickly descend into chaos.

A cyber-war started by a rogue terrorist group or criminal organization is a substantial threat, but one sponsored by national funding could be truly devastating, even if you're not over-reliant on personal electronics. Fortunately, if you're prepared for a large-scale emergency situation, the cause — whether it's a natural disaster, conventional attack, cyber-attack, or Terminator-esque sentient cyborg uprising — will be irrelevant.


Infographic: Bodyweight Training Basic Routine

Whether you're in a survival situation without access to purpose-built workout gear or you simply can't afford to spend money on expensive equipment or gym memberships, bodyweight exercises are a great way to stay in shape. Rather than using weights or machines, bodyweight workouts can be done with simple items such as a pull-up bar, bench, and stool. Many of these exercises require no equipment at all.

Start Bodyweight workout exercise routine fitness infographic 1

Photo credit: StartBodyweight.com

While bodyweight training has many advantages, it poses one challenge: when an exercise becomes too easy, progressing isn't as simple as adding more weight to a barbell. The bodyweight exercise in question must be replaced with a more challenging one. This allows you to maintain a certain level of difficulty and gradually build endurance and strength.

To address this challenge, StartBodyweight.com compiled a large printable chart of more than 100 bodyweight exercises. Moving down each column increases difficulty, and moving left to right in each row changes the muscle group that's emphasized. A basic workout routine is created by performing 3 sets of 4 reps for each of the six exercises in the first row, then a plank. Once this is manageable, the number of reps can be gradually increased until 3 sets of 8 reps is achieved — then it's time to move down one row to a harder exercise.

Check out the infographic below, or click here to download a full-size printable version. To learn more about bodyweight training, refer to StartBodyweight.com or join the discussion on Reddit.

Start Bodyweight workout exercise routine fitness infographic 3Start Bodyweight workout exercise routine fitness infographic 4Start Bodyweight workout exercise routine fitness infographic 5


Estimate Lightning Distance with the “Flash to Bang” Method

Nobody ever thinks they're going to be struck by lightning — we even use this event as an expression of rarity with phrases such as “lightning never strikes twice”. Although being struck during a thunderstorm is likely to be a once-in-a-lifetime event unless you're extremely unlucky, it's certainly something you never want to experience. It's therefore wise to take reasonable precautions during summer storms to reduce this risk.

Lightning strikes video 2

One easy way to gauge the proximity of a lightning strike is often referred to as the “flash to bang” method. This technique involves counting the time in seconds between a visible lightning bolt (flash) and the audible thunder clap (bang). Since we know light travels faster than sound waves, you'll notice a delay between the two. This difference can be used to estimate roughly how far the lightning is from your current location.

Sound travels at about 1,088 feet per second, or about 0.2 miles per second (depending on air temperature and humidity). That means it'll take the sound of thunder about 5 seconds to travel 1 mile. So, the “flash to bang” distance can be calculated as follows: (seconds between flash and bang) divided by 5. Five seconds is one mile, 10 seconds is two miles, and so on.

Lightning strike storm weather clouds rain forest thunderstorm 1

This may seem like little more than a cool piece of trivia, but it's actually a valuable early-warning system. The National Oceanic and Atmospheric Administration (NOAA) warns, “Lightning can strike as far as 10 to 15 miles from the area where it is raining. That's about the distance you can hear thunder. If you can hear thunder, you are within striking distance. Seek safe shelter immediately.”

So, there's always some risk when you can hear thunder, but we can calculate it further to better gauge your actual risk. A study by the National Severe Storms Laboratory (NSSL) found that 80% of lightning strikes in a thunderstorm are 2 to 3 miles from each other, and that more typically strikes occur within 6 miles of each other. NOAA says that “bolts from the blue” in the 10- to 15-mile radius are rare, but they're not entirely unheard of.

From this information, we can establish the following danger levels from the “flash to bang” method:

  • Less than 10 seconds: highest risk
  • 10 to 15 seconds: high risk
  • 15 to 30 seconds: moderate risk
  • 30 to 50 seconds: low risk
  • More than 50 seconds: minimal risk (thunder will be difficult to hear clearly at this range)

For more information on the “flash to bang” method, refer to the NOAA page “Understanding Lightning”. For additional tips on general safety in thunderstorms and other risk factors, check out this PDF from the National Weather Service.


Portable Lumberjack: Pocket Hatchet Buyer’s Guide

Before you spend the money burning a hole in your pocket on a hatchet that could cut a hole in your pocket, consider what you should look for in a compact ax. Weight, steel selection, overall design, spike versus hammer poll, and handle length and material are all important factors to evaluate.

You might be eager to practice all the cool skills shown in our Primer on Pocket Hatchets & Proper Technique, but that doesn’t mean you should rush into buying the first one-handed ax you come across. As we explain in that article, there are plenty of uses for this tool and many ways to carry it. Whether you’re headed into the woods for the weekend, loading out your car for an emergency, or strapping on some edged protection to your plate carrier, there’s always room in your kit for a pocket hatchet — but which one you buy will depend on your needs and circumstances.

Wood stack

Axes have a lot of character and — just like a good dog — the type should fit the owner’s lifestyle. Take a look at the models reviewed here; maybe one will give you the edge you’re looking for.

Editor’s Note: For this story, we consider a hatchet any short ax that’s used easily with one hand. Naturally, a pocket hatchet is one that can be placed in your pocket or conveniently carried on the body. Also, for the purposes of this buyer’s guide, we refer to small tomahawks and pocket hatchets synonymously.

Chuck Cook Scout Axe

Weight: 6.75 ounces
Overall Length: 5 3/8 inches
Head Material: Forged 1095 high-carbon steel
Handle Material: Varies with build
MSRP: $80
URL: scout-knives.synthasite.com


Notes:

This Scout Axe is in a category of its own. Sold without a handle, this pocket ax is carried in a Kydex edge guard (its smaller brother fits inside an Altoids tin). Primitive man used flint-knapped hand axes before he learned to haft sharpened rocks to sticks. This tool works along the same lines. It can be used on its own as a cutting edge similar to an ulu, or it can be paired with a hardwood shaft harvested from the field.

The idea is to avoid consuming space in a loadout if an ax isn’t immediately needed. Additionally, sometimes you want a hatchet, sometimes a two-handed chopper, or something in between. During testing, we fashioned the Scout Axe with the blade in line with the handle and on a forked branch with the blade perpendicular to the handle to make a carving ax. Using a Swiss Army Knife saw and a length of paracord, we had a functional chopping tool in about 30 minutes.

Even if a large piece of hardwood isn’t available, multiple saplings can be lashed together in a bundle to serve the same purpose. For those who want to make this Scout Axe even more compact, Kevlar-braided thread can serve as a substitute for paracord.

Pros:

  • Easily packed inside the bottom of a mess kit
  • Can be used as a hand ax or an ulu

Cons:

  • Requires cordage to construct
  • Takes time to haft into a handle in the field

Gerber 9” Hatchet

OFGP-170600-HATCHET-05.JPG

Weight: 1 pound, 3.4 ounces
Overall Length: 9 inches
Head Material: Forged Steel
Handle Material: Glass-Filled Nylon
MSRP: $58
URL: www.gerbergear.com

OFGP-170600-HATCHET-06.JPG

Notes:

As the least expensive model in this gear guide, it serves as an entry-level pocket hatchet.

The polymer handle is molded around the steel head and didn’t separate under hard use. Gerber axes are made by Fiskars, which was established in 1649 (yes, the 17th century) and is known for producing full-size axes tough enough to endure the needs of Scandinavian foresters. We didn’t run over it with a truck, but we did use it to split wood for a backpacking titanium stove. With the aid of a baton, the hatchet worked well as a splitting wedge.

With a durable black coating on the blade and no gap between it and the handle, this hatchet is a good all-weather tool. Unlike wood handles, the nylon handle won’t absorb water, swell, or shrink as conditions change. Small emergency gear can be stuffed inside the hollow handle (be sure to empty it before use). Re-sharpening isn’t difficult, and its flat grind is easy to maintain, following the angle with a bastard file or various-grit sandpaper backed up by a two-by-four.

This Gerber will work well as a starter tool and become a great loaner when you’re ready to upgrade later.

Pros:

  • With street prices closer to $30, this hatchet is less than the cost of ammo for your average range day.
  • Lightweight handle will not loosen, shrink, or swell with changing weather.

Cons:

  • Thick edge geometry is similar to a sharpened wedge.
  • Bulky carrying case isn’t as streamlined as other scabbards.

Gränsfors Bruk Small Hatchet

OFGP-170600-HATCHET-14.JPG

Weight: 11.2 ounces
Overall Length: 10 inches
Head Material: High-carbon steel
Handle Material: Hickory
MSRP:$180
URL: www.gransforsbruk.com/en

OFGP-170600-HATCHET-18.JPG

Notes:

Gransfors Bruk wins the prize for the most refined and polished pocket hatchet. Among bushcrafters, these axes are the pedigree all others are judged by.

We got several “that’s cute” remarks from onlookers — until they got a chance to test out the blade; no one could deny its cutting potential. It has enough weight to substitute for a larger camp knife meant for chopping. It also comes with a highly polished convex edge that can shave your arm hair. No, really, it can.

With the leather edge guard, it fits perfectly in your back pocket. It’s ideal for anyone looking to retain the non-threatening looks of a traditional hatchet in places where carrying anything but a small knife is frowned upon.

The Small Hatchet — sometimes referred to as “the Mini” — feels like a toy in the hand, but don’t play with it. In a matter of minutes, you can transform rounds of wood into the basic outline of a spoon, bowl, or digging tool. The fine work can be done by choking up on its handle. In fact, it carves better than some knives thanks to its edge geometry. It can be used to clean fish and game and create splitting wedges to crack open significantly larger logs than expected.

The wooden handle is warm in hand and creates no blistering when used for extended periods of time. The oval shape also prevents the blade from rolling in the palm of your hand. Just two reasons why wooden handles are still relevant in a world of paracord-wrapped and full-tang tomahawks.

This baby hatchet is the perfect blend of performance and class — if that’s what you’re looking for.

OFGP-170600-POCKET-16.JPG

Pros:

  • Factory edge sharp enough to shave with
  • Look and feel of a traditional hatchet
  • Lightweight

Cons:

  • Two-piece design is inherently weaker than one-piece designs.
  • Ground for European softwoods, not American hardwoods

RMJ Tactical Pathfinder

OFGP-170600-HATCHET-30.JPG

Weight: 1 pound, 8 ounces
Overall Length: 11 3⁄4 inches
Head Material: 4140 chrome-moly steel
Handle Material: Textured G-10
MSRP: $480
URL: www.rmjtactical.com

OFGP-170600-HATCHET-31.JPG

Notes:

What started out as a model called the Active Shooter Tomahawk for police has morphed into and been rebranded as the Pathfinder. Who knew a product for the streets would turn out to be one of the best tomahawks for the backcountry to date? On the larger side of pocket hatchets, but in the spirit of scaled-down choppers, this one still works as a one-handed ax.

The Pathfinder has an incredibly comfortable textured grip with several hand-placement options, depending on your task. The slightly longer handle length helps it limb downed trees more easily than other hatchets in this guide, not to mention generating more power behind your swing. Plus, the wide cutting surface coupled with long grind lines makes quick work of wood.

This ’hawk excels at snapping locks, too. Simply put the spike through the gate of a padlock and pry away. (Not that we’re encouraging illegal entries. Strictly for legal emergency use, of course.)

You probably won’t haul this one in a pants pocket, but the scabbard is heavy-duty Kydex with multiple lashing points and carry configurations. In fact, it was our primary off-grid chopping tool during a five-week Alaska trek last summer. RMJ ’hawks are legendary in their performance, and the Pathfinder doesn’t disappoint.

OFGP-170600-POCKET-03.JPG

Pros:

  • One-piece, full-exposed tang construction
  • Large cutting blade and “large enough” rear spike
  • Outstanding performance

Cons:

  • Barely fits into the “pocket hatchets” category
  • Multiple edges to accidentally self-cut under stress

Wenger Blades Wiglaf

OFGP-170600-HATCHET-20.JPG

Weight
1 pound

Overall Length
10 inches

Head Material
80CrV2 high-carbon steel

Handle Material
10 feet of paracord and Micarta

MSRP
$450

URL
www.wengerblades.com

OFGP-170600-HATCHET-25.JPG

Notes:

If a Viking and MacGyver were to sit around a campfire, pass around a bottle of bourbon, and sketch a pocket tomahawk that’s equal parts multitool and fighter, the Wenger Blades Wiglaf is what they’d come up with.

This beautiful little mutt is capable of working well in a number of roles. Its design lends itself to fire-starting, foraging, shelter construction, and other bushcraft tasks. Its durability also makes it a great tactical tool for the armed professional who may need to construct hides, punch out shooting holes through walls, or deploy a backup weapon.

The Wiglaf’s unique head shape includes a bow-drill bearing block. Yes, it works. We made multiple coals while minding the sharpened edge. According to the maker, the production sheath will allow use of the bearing while the edge is covered.

The hammer poll is perfect for crushing. We used the top of the head like a potato masher to process wild harvested starches, including cattail. With 3/8-inch stock used in the full-tang construction, the Wiglaf has a significant amount of weight toward the head and great chopping balance. You’ll want a good forward lanyard on the handle, as this one is hungry for wood to cut.

From bushcraft to tactical operations, this tough-as-nails ’hawk is at home just about anywhere a chopping tool is needed.

OFGP-170600-POCKET-21.JPG

Pros:

  • Highly versatile for a variety of tasks
  • Strong cutting edge and hammer poll retain traditional hatchet look
  • Paracord wrap reduces weight and is removable for emergency cordage.

Cons:

  • Conversely, the paracord wrap can cause blisters when gripped for extended carving sessions.
  • Prototype scabbard covers bow-drill bearing while edge is protected.

Winkler Knives II/Sayoc Kali RnD Compact Hawk

OFGP-170600-HATCHET-37.JPG

Weight: 1 pound, 3.5 ounces
Overall Length: 10 3⁄4 inches
Head Material: 5160 spring steel
Handle Material: Rubber
MSRP: $760
URL: www.winklerknives.com

OFGP-170600-HATCHET-38.JPG

Notes:

Master bladesmith Daniel Winkler collaborated with Sayoc Kali Tuhon (Master) Rafael Kayanan to create the RnD Hawk. This model is the baby brother version and has proven to be an excellent tomahawk for multiple applications.

Available with or without a front spike, this tomahawk draws inspiration from the headhunter tribes of the Philippines. “Wait, what? Front spike?” you might be asking with some confusion. This uncommon appendage is actually advanced technology with origins in the jungles and mountains. It helps guide the cutting edge into rounded objects and works like a shear. When the spike is placed on a piece of wood and the ax and wood is struck against a larger log simultaneously, the spike holds the wood being cut in place and the hard work is left up to gravity and inertia.

In our testing, the RnD Compact Hawk cleanly cut brown coconuts in half. Against tatami mats, it didn’t make cuts through and through. What it wasn’t able to cut cleanly, it ripped aggressively. The front spike also acted like a small blade of its own and was controllable for fine scoring, cutting, and scraping when using a choked-up grip directly under the head. The rear spike was as equally effective in penetration tests.

OFGP-170600-POCKET-45.JPG

Pros:

  • Front spike designed for guiding cutting surface
  • Comfortable in multiple grip positions
  • Rubberized handle reduces vibration and provides traction in wet weather.

Cons:

  • On the flip side, rubberized handle tends to snag on clothing while concealed.
  • Bungee cord retention on sheath can accidentally release.
  • As a custom piece, it’s expensive.

More From Issue 19

Don’t miss essential survival insights—sign up for Recoil Offgrid's free newsletter today!

Read articles from the next issue of Recoil Offgrid: Issue 20

Read articles from the previous issue of Recoil Offgrid: Issue 18

Check out our other publications on the web: Recoil | Gun Digest | Blade | RecoilTV | RECOILtv (YouTube)

Editor's Note: This article has been modified from its original version for the web.


A Primer on Pocket Hatchets & Proper Technique

WARNING: The content in this story is provided for illustrative purposes only and not meant to be construed as advice or instruction. Any use of the information contained in this article shall be solely at the reader’s risk. This publication and its contributors are not responsible for any potential injuries.

“The ax is back!” Thanks to rally cries like this from neatly manscaped, mustachioed, flannelled hipsters, the average Joe might believe there’s a resurgence in this classic woodsman’s tool. The reality is the ax never went anywhere and has been used continuously for centuries in the hands of true professionals.

While the idea of the ax being the “latest and greatest” men’s fashion accessory (we’re not joking; there are lumbersexuals who buy “designer axes” now) is considered comical by the modern-day Ragnarok, an actual growing trend in the ax world is the emergence of more lightweight and compact pocket hatchets. Let’s face it, there are times when you can’t swing that full-sized ax, and you need something more practical. The pocket hatchet — and its combat-oriented brother, the pocket tomahawk — is the answer. (For the purpose of this article, the term “pocket hatchet” will be used interchangeably to reference both pocket hatchets and compact tomahawks.)

OFGP-170600-POCKET-45.JPG

Though easily dismissed by those who think larger hatchets and two-handed axes as the only chopping tools worth a damn, these diminutive hatchets fit into a unique category of cutting tools and shouldn’t be overlooked. Sometimes referred to as sounding hatchets, these little guys are easily carried in a jacket pocket or your pants’ back pocket for light work.

Why carry them? You may not have room in your everyday-carry (EDC) gear for anything larger. And, when the need arises, you’ll certainly be thankful you have a pocket-sized chopper that’s more effective than your tactical folder or Swiss Army Knife.

Log Splitting

A common misconception of log splitting is that the round of wood must stand on one end and an ax must come down on it from the neatly sawn end. When you watch a skilled woodsman, they make it look easy. Assuming you only have a pocket hatchet and must access the dry wood found inside a piece of downed dry wood, there won’t be a cleanly cut stump to prop the log up on, and there won’t be a clean end on the other side to split in half.

How, then, do you access the dry wood when all you have is a baby hatchet?

Above: Small rounds of wood can be split with simple technique. The blade is placed parallel to the grain of the wood and both pocket hatchet and wooden round are pounded on a wooden log simultaneously.

The easiest way is to hold the hatchet in line with the grain of the wood and parallel to it and grasp the round of wood in your other hand. Both hands move the two objects in sync with one another onto a log or wooden stump. The force of the impact drives the blade into the round of wood more safely than swinging the pocket hatchet at the wood. Exercise care to keep your fingers free from the round of wood and make sure there’s clearance for your hand, lest you risk injury.

While on the topic of injuries, remember, the shorter the handle on an ax, the greater the chance of self-cutting from an errant follow-through.

Hatchet wounds are generally found in the quadriceps, while hand-and-a-half and felling axes are found in the shins and feet. Don’t be that guy. Exercise caution. When in doubt, simply kneel low to the ground when using one. If your axe ends up glancing off something, you’ll impact the soil instead of yourself.

Splitting Wedges

Look at a seasoned stack of wood. As it dries, natural cracks begin to separate the grain of the wood. These cracks compromise the strength of the wood and give the outdoorsman a reference point for splitting. The cracks in a log generally run the full-length of the grain and, unless they’re met by a knot in the wood, will split predictably along it.

Splitting mauls and large camp knives are generally swung or pounded through wood — both rely on the extra mass and strength of the tool to handle the stress of this normal use.

OFGP-170600-POCKET-16.JPG

Above: The Gransfors Bruks Small Hatchet next to a wooden baton and hardwood wedges. With these tools, large rounds of wood can be split open exposing dry wood inside.

Batoning is a popular practice to split wood, incorporating a wooden baton to add heft to a smaller blade that lacks it. Pocket hatchets traditionally were never meant for large splitting tasks, but that doesn’t mean they aren’t capable with an application of a little lateral thinking.

Rather than using the hatchet head like a wedge to baton into the wood, exploit the natural cracks by creating wedges. Use hardwood branches to create wedge pegs you can drive into the wood with a wooden baton or rock. To create a baton, either saw or chop away a smaller diameter handle from a wide round of wood. As you pound your wedges into the log, you’ll hear it crack and then settle.

As wedges are added further down a crack, the previous wedges will become loose. You may find you have to create wider wedges depending on how stubborn the wood grain is. With practice, patience, and a decent amount of effort, an extremely large log can be split to the heartwood with a pocket hatchet a fraction of its size.

Choke-Grip and Fine Carving

Watch any seasoned hatchet user around a campfire, and you’ll notice how many times his or her grip changes while processing campfire wood. The most common grip while using a pocket hatchet is at the very bottom of the handle, called the “end knob,” but depending on the amount of force and pressure needed, the user may find his or her hand directly under the head and just behind the cutting edge, called the “shoulder.”

Held this way, you can use the pocket hatchet to finely carve, notch, and push cut with the blade. Since choking up on the blade in this manner puts the edge in line with the index and middle finger (depending on the size of the blade and profile), there’s less leverage placed on the wrist than a conventional knife blade.

This additional mechanical advantage gives the choked-up grip incredible strength.

Above: Numerous grips exist for pocket hatchets — the standard grip at the bottom of the handle, underneath the head, and cupping the poll of the pocket hatchet. The lightweight head makes handling easy and less fatiguing than using a much larger hatchet. 

A pocket hatchet can be used to carve by holding it directly under the blade, just above the bottom of the end knob, or any point in between. If the pocket hatchet has a spike, it can be driven into a log and the user can move the wood being carved over the edge to create fine shavings for fire starting. If the pocket hatchet’s butt is equipped with a hammer (also called a poll) instead of a spike, you can also hold it by cupping the hammer, letting you use it in the same manner as an Eskimo ulu.

You’ll find that the pocket hatchet responds differently depending on where it’s held. You have a lot of handle (OK, as much as you can get with a pocket ax) to work with, so try it out.

Small-Game Processing

These compact tools can be used for cleaning small game and fish with ease. The upper corner of many pocket hatchet edges comes close to a 90-degree angle. With this “tip,” the user can pierce flesh and hide. A slicing motion is easily accomplished by holding the pocket hatchet in the ulu manner previously mentioned.

While cutting through bone isn’t advised for hunting knives with keen edges, especially hollow-ground edges, a heavier grind found on pocket hatchets can easily cleave a rainbow trout or squirrel head from the day’s catch. Depending on how thinly profiled the edge is, a pocket hatchet can easily gut a fish from vent to gills.

Generally, the poll end of a hunter’s ax can crack bone; with slightly more force, a pocket hatchet can do the same. Once the bone is cracked with the hammer, the sharpened end can cut through the muscle, fat, and flesh around it.

OFGP-170600-POCKET-26.JPG

Above: Even a compact tomahawk like the Winkler Blades II RnD Compact Sayoc Tomahawk packs a serious punch. We used it to easily crack open coconuts with no deformation to the spike or edge. The front spike prevented glances on the round surface too.

Rescue

A pocket hatchet has many invaluable characteristics making it ideal for self-rescue or breaching doors and windows. With the correct pocket hatchet (full tang, synthetic handle, stout blade), a person can easily puncture metal without fear of damaging the edge. Axes, including some pocket hatchets, have a thicker profile and are ground to stronger edge geometry than knives of the same blade length. This means they can withstand the force of impact and stress of cutting steel with minimal deformation to the blade.

Historically, crash axes have been carried on aircraft as an emergency tool. A pocket hatchet can be stowed easily in a vehicle and pressed into service to break windows and pry open doors if environmental conditions warrant it.

The rear spike and sharpened beard of some compact ’hawks and pocket hatchets provide new capabilities in the hands of a law-enforcement officer, soldier, or prepared citizen.

Above: The RMJ Pathfinder spike can split locks. Insert the spike and crank the handle downward. Most locks will either flex or crack and then open under this pressure.

While traditionally used as a weapon, the rear spike (like that found on the RMJ Tactical Pathfinder) can crack open padlocks with the right technique and leverage afforded by its handle. All one needs to do is insert the spike and crank the handle downward. Most padlocks will either fracture at the gate or bend until they open. After testing this on various padlocks and trigger locks, we found no damage on the rear spike. Consider what resources may be chain locked in an emergency and how this breaching ability could come in handy. The Pathfinder’s sharpened beard can be used like a can opener on thin-skinned metal or fabric.

Self-Defense

Anyone who can swing a hammer can learn to swing a pocket hatchet. The power generated by a 1-pound ball-peen hammer is not what an attacker wants to experience, let alone a 1-pound ax with a sharpened edge. Pocket hatchets are highly effective combative tools. With all the ways these puppies can be carried, there’s always a way to access one when SHTF. As a weapon-retention tool or a get-off-me device, no one will deny what can be done with a good pocket hatchet and some skill.

When used to supplement a sidearm or a rifle, the pocket hatchet becomes an effective backup in close quarters.

OFGP-170600-POCKET-23.JPG

Above: Pistol punching with a front spike on the Winkler Blades II RnD Compact Sayoc Tomahawk puts a lot of force behind the front spike. This is just one of the many ways a pocket ’hawk can be used for defense.

The shape of its head allows the user to punch with it using a choked-up grip. To hook and pull, just hold it lower on the grip. The rear spike or hammer can puncture or crush without the need to flip your wrist over. A pocket ’hawk can parry inbound attacks and redirect energy back at the attacker. Less-lethal attacks can include hitting with the unsharpened top of the hatchet head or the bottom of the handle. The grip of most pocket hatchets makes applying stick grappling and restraint techniques possible too.

A word of warning to anyone using a pocket hatchet for defense — train with your ax while the edge guard is on. An ax carries a lot of momentum and can easily cause injury if the follow-through isn’t respected. In other words, learn to not miss and if you accidentally do, make sure your legs are out of the way.

OFGP-170600-POCKET-38.JPG

Above: The Chuck Cook Scout Axe can be carried into the woods disassembled in its protective sheath. If a large hatchet is needed, one can be fashioned from the resources at hand.

Also, make sure your buddies aren’t too close as you can hurt them with a wild swing too. If you have some spare paracord around, creating a wrist thong will prevent your pocket hatchet from becoming a projectile if you lose your grip.

Methods of Carry

Inverted belt carry is one way to conceal the handle.

Inverted belt carry is one way to conceal the handle.

1. Inverted Belt Carry
The problem with wearing a hatchet on your belt is that the handle hangs down your leg and gets in the way. If you’re on the go, it’s a no-go. Since many modern pocket hatchets have “bottom-eject” sheaths, turning the sheath upside down lets you run the handle up under your arm. It’s easy to extract, and the handle can be further held in place by a backpack strap. Want to see it in action? Check out former Navy SEAL Joel Lambert on Discovery’s Lone Target.

Pocket hatchets can be carried easily centerline on a chest rig or on a battle belt where they won’t interfere with firearm manipulations.

Pocket hatchets can be carried easily centerline on a chest rig or on a battle belt where they won’t interfere with...

2. Chest Rig or Battle Belt
From pocket hatchet to tactical tomahawk, centerline carry on your chest rig or on your battle belt are good options. Attached on MOLLE mag carriers, the full-length of the pocket hatchet fits within the length of the torso and the handle falls at the belt. The tool is accessible with either hand and won’t get in the way of magazine changes or other weapon manipulations. If you’re worried about the handle smacking you in the chin, pocket hatchet handles are generally short enough to prevent this. Worn on a battle belt, the pocket hatchet handle hangs to your side where it won’t smack your thigh as you run.

Pocket hatchets can be concealed in Kydex sheaths and worn like shoulder holsters. Pictured are rigs from Survival Sheath. Photo courtesy of Robert Humelbaugh

Pocket hatchets can be concealed in Kydex sheaths and worn like shoulder holsters. Pictured are rigs from Survival...

3. Inside-the-Jacket Carry
Old timers will tell you to always warm your ax head before swinging it in the dead of winter. The cold can easily make your edge crack. To prevent this from happening, carry your pocket hatchet “bandoleer style” inside your jacket. That’ll keep it warm.

4. Ice-Ax Style
Ice climbers know where to stash their tools when they’re not in use. The handle is passed through a loop on the bottom of their pack to the base of the pocket hatchet head. The handle is then flipped, on its head, to place it upright, and it’s lashed down. This method allows you to keep the ax’s weight low on the body instead of high up near the shoulders.

5. Vehicle Carry
The pocket hatchet can fit easily in a glovebox, between or under the seat, or tucked in a seatback pocket. Should you need to cut yourself out of a wrecked car or access a trunk that’s crushed and locked closed, you’ll have the right tool in place. You’ll also be ready to help someone else if you stumble upon an emergency.

The author carries a compact tomahawk behind his canteen survival kit.

The author carries a compact tomahawk behind his canteen survival kit.

6. Canteen Carry
Water bottle carriers are popular within the bushcraft and survival community. It makes sense to build a kit around an item that addresses a basic need of survival. Since canteens are carried with a shoulder strap, an additional pound of weight usually isn’t too burdensome. Carried behind the bottle, the only part of the pocket hatchet exposed is the handle. It’s an easy way to add extra cutting power to your woods-walking kit.

Newbs, Beware — Risks of Using a Hatchet

You know the guy who’s new to firearms when you see him at the range. His gear is crisp, he has every accessory under the sun, and he lasers you with his muzzle. The same goes for pocket hatchet users. Whereas the rookie at the range is more likely to hurt someone else, the rookie axman is most likely to hurt himself. Here are some helpful hints to prevent you from bleeding your own blood.

OFGP-170600-POCKET-64.JPG

Mind the Follow Through
The longer the ax, the safer the ax. A newbie with a 36-inch felling ax is less likely to self-cut than one with a pocket hatchet. If you’re cutting wood and question your ability, take a knee. If you glance, your pocket hatchet will impact the dirt instead of your kneecap.

Edges Should Be Covered
Pocket hatchets cut. Don’t carry one without some sort of edge guard. Don’t leave your edge stuck in wood while in camp as the wood’s moisture can cause it to rust. If your pocket hatchet has a spike, burying one side leaves a pointy end exposed on the other.

OFGP-170600-POCKET-68.JPG

Slice the Grain, Don’t Compress It
Wood grain separates most easily when it is severed at an angle. Cut diagonally across it instead of down on it. Be careful, though; too shallow of an angle causes the cutting tool to glance.

OFGP-170600-POCKET-65.JPG

Keep Your Edges Sharp
Sharp is a relative term. Some guys like the ability to shave with their pocket hatchet while others want a “working edge” that’s broader and less likely to chip or roll. Whatever your preference, don’t let it dull. It’s easier to hone your edge after each use than re-profile it when it’s too late.

Never Lend Your Pocket Hatchet
This doesn’t make you a jerk, it makes you smart. If you value your tool, you don’t trust anyone with it. This is old woodsman etiquette. If you do lend out your pocket hatchet, only lend it to people who would be willing to fix the edge, replace the handle, or buy you a new one. Ax repairs take time, and a friend wouldn’t want you to invest a lot into fixing a screw up.

Final Thoughts

OFGP-170600-POCKET-21.JPG

Above: The Wiglaf by Wenger Blades can be used in every stage of fire preparation. Included in the design is an integral bow drill divot for use as a bearing block for friction fire starting.

Pocket hatchets may be small in stature, but they make up for it in character. Compact, concealable, multipurpose, plenty of bite — the reasons to pack, hell, even EDC a pocket hatchet far outnumber the reasons not to. Next time you venture off-grid or head into a rough part of town, pair a pocket hatchet with a pistol and knife, and you have an excellent loadout for just about any emergency. Throw one into your pocket, bag, or kit and improve your survivability.

More From Issue 19

Don’t miss essential survival insights—sign up for Recoil Offgrid's free newsletter today!

Read articles from the next issue of Recoil Offgrid: Issue 20

Read articles from the previous issue of Recoil Offgrid: Issue 18

Check out our other publications on the web: Recoil | Gun Digest | Blade | RecoilTV | RECOILtv (YouTube)

Editor's Note: This article has been modified from its original version for the web.


Video: Making a Removable Pot Bail Hanger

When you need to boil water over an open campfire, it's easy enough to set a single-walled metal pot or bottle directly at the base of the fire. Although this will get your water boiling quickly, it also has some downsides. The application of heat is too direct and extreme for more precise cooking, so you'll be more likely to burn food if you cook this way. It also exposes open vessels to smoke and ash from the fire, and can make recovering your vessel without burning your hands tricky.

An easy solution to these issues is to suspend your pot or bottle above the fire, taking advantage of radiant heat rather than intense flames. A wire hanger, also known as a bail, allows the pot to be suspended from above without tipping over. However, many pots and bottles lack this feature.

Many camp cups, such as this one from GSI Outdoors, have side handles but no bail hanger.

Many camp cups, such as this one from GSI Outdoors, have side handles but no central bail hanger.

We've seen many methods of adding bail hangers to camp cookware. Some require drilling holes or soldering on tabs, while others require combinations of hooks and screwed-together clamps. The following video from Far North Bushcraft and Survival shows one of the simplest methods we've seen, and one that looks to be very effective with a variety of vessels.

Cooking pot bail cable handle wire hanger camping fire survival 1

Lonnie combines 3 feet of 1/16″ steel cable and two 1/16″ ferrules from the hardware store to create a removable pot bail hanger that will fit any vessel with a rolled rim. Once they're clamped in place around the cable ends, the ferrules can adjust to fit various types of cookware. So, you'd likely only need one bail for your entire mess kit.

Check out the video below to see how it's done:


RECOILweb: How to Use Pepper Spray

Editor’s Note: The following article was originally published by our sister publication RECOIL, and appears here in its entirety with permission. For more articles on guns, training, and gear, go to RECOILweb.com.

Photos by Dave Merrill

Amongst the cognoscenti, the popularity of a less-lethal option for EDC has been steadily increasing. Whether you use one to add to the force continuum, or because more deadly weapons are illegal in your locale, you need to know the why’s and how’s behind them.

So Why Carry Less Lethal in the First Place?

You can’t shoot every threat you run into — pulling or using a gun on a less-than-deadly-force threat can get you put in prison. The old saying “If all you have is a hammer, every problem gets treated like a nail” is in play here.

In my class lectures on this subject I often refer to the case of George Zimmerman. Change the dynamics of the case a bit; if George had sprayed Trayvon Martin in the face with OC spray when he was confronted, would we even know who George was? The answer is likely not, because this would’ve very likely ended the confrontation right there. And everybody involved would’ve been better off for it.

If not having to kill another human being if you don’t have to isn’t enough, less than lethal options also help you do things like not shoot someone’s dog when you get chased while jogging.

One can do a “take back” in effect with OC if the decision to use spray was hasty, whereas “oops, sorry” can’t be done with bullets.

Pepper spray OC capsaicin self defense less lethal tool combatives 1

The vast majority of the research done on the use of OC spray on humans has come from the police world for obvious reasons. Several things we know from observation of use of OC spray in law enforcement going way back to the 1980s is that OC tends to work very well (roughly 85 percent of the time, or better), and it tends to lower the level of violence involved in arrest scenarios. It “takes the fight out of the fighter” to steal a quote from one of my mentors.

In the non-LE context it tends to work even better. Why? Because what cops have to do that non-cop self-defenders don’t is arrest bad guys — to actually lay hands on them after spraying them.

We also know from numerous U.S. and Canadian law enforcement studies that OC spray lowers the injury rate for both the cops and the suspects involved. In fact, OC spray has proven to be the safest use of force option available for law enforcement, with injury rates being almost nil. This is safer for everyone involved, even when compared to empty hand tactics.

Lastly, OC is widely accepted in our society, so much so that it’s common to see spray in purses. It’s socially acceptable to do things like walk out to your car across the dreaded dark parking lot with your OC in hand. Doing so with a gun will likely cause alarm to bystanders, or even cause the police to be called. With OC, people don’t even bat an eye, if they even notice. This allows a defender to have a near-instantaneous response to an assailant.

No, you probably shouldn’t carry three OC dispensers, but any one of them should be fairly easy to integrate into your EDC.

No, you probably shouldn’t carry three OC dispensers, but any one of them should be fairly easy to integrate into...

What the Hell Should I Carry?

The non-LE tasers suck, period. Even in the LE world, tasers are an iffy thing. In my experience, about 50 percent of taser shots work the way we want tasers to work. Electronic “stun guns” are a jackass party favor at best and worthless for self-defense. Sorry, gun show vendors.

Expandable batons are a pain to carry and damn near completely ineffective even when used by someone who’s good with a baton. And if you aren’t? Good luck.

Of the less-lethal options that are viable for CCW carry, the two that stand out are OC spray and saps. Saps are illegal in many states, even for people who can legally carry a gun. Even though I think they’re a viable (and old-school awesome) choice, you may not have that option.

This leaves us with OC spray, aka pepper spray.

Buyer Beware…

A very real issue I discuss in training is smart purchasing. In the OC world, to use guns as an analogy, it’s very easy to buy a Hi-Point-quality spray, and often difficult for people to find a Glock/SIG/S&W quality of spray.

Many people are surprised to find there are no national standards for OC makers unless the OC spray in question is marketed as a bear or dog spray. For use on animals, OC spray is heavily regulated by the EPA; for use on people, there are no rules. Nothing exists for anti-bad-guy OC in the way we have SAAMI specifications for ammunition. If you had a blender to liquefy hot peppers, a supply of canisters, a way to pressurize the cans, and a label maker, you could become a defensive spray manufacturer in your garage tomorrow.

Skip the Scovilles — MCC content of 0.7 percent or higher is what you’re looking for.

Skip the Scovilles — MCC content of 0.7 percent or higher is what you’re looking for.

What to Look For

Does your OC manufacturer have a MSDS/SDS (safety data sheet) available on their website? If not, do not buy. If they have a SDS, does it list things like known carcinogens in the ingredients list? Here’s a hint: Some do, and invariably they’re among the brands recommended.

Does the OC manufacturer list the Major Capsaicinoid Content (MCC) of the product? If not, then your product is likely bullsh*t.

A dirty little secret of many OC makers is that they use terms like “10%”, and “SHUs” (Scoville Heat Units) in advertising, but have no real idea how “hot” their product is, because they do no quality control testing on the peppers they use, or the product they extract from it.

One easily researched scientific paper on this subject will tell the reader, “Estimating the SHU value based on the total capsaicinoid concentration of the pepper sprays suggested that the labeled SHU values were sometimes overstated by a factor of 100 times.” This isn’t good.

Look for a product with a MCC content of at least 0.7 to 0.8. Less than this is literally weak sauce. A good top end is the common “police strength” 1.33% MCC.

Your OC spray canister should have some sort of safety built into it to avoid accidental discharge. Pocket or purse NDs are all too common with some of the smaller keychain-sized units due to not having a safety at all, or not having a robust safety.

As far as form type for non-cop-duty belt use, I greatly prefer the usability of the “MK6” sized units, or the mini baton/Kubaton-style sprayers that have a reloadable insert. Both of these types of spray units are easy to use under duress and are very safe from accidental discharge.

Now, if you have all of that taken care of, what next? You need to choose what type of spray you want to use, which breaks down to stream-type sprays, cone-shaped mist, or gels. As Pat Rogers famously said, “The mission drives the gear train.” The spray type you choose depends on your circumstances.

The flip-to-side safeties (on right) are easy to inadvertently discharge in your purse or pocket.

The flip-to-side safeties (on right) are easy to inadvertently discharge in your purse or pocket.

Cone-shaped mist sprays have the advantage of a “shotgun” type pattern that makes it very easy to hit a bad guy in the face on the first shot and gives good coverage in doing so. The mist easily gets into the eyes, even around glasses, and causes severe short-term coughing in most people. This pattern also makes it easier to affect multiple bad guys at once, or allow the spray to be used as a barrier while retreating. Disadvantages are that this type of spray is most affected by the wind, and most prone to cross-contamination of bystanders, or yourself if you spray into the wind.

Streamers have a longer range, but require the user to be much more accurate in placement of a burst to get a solid hit. This accuracy requirement is where more than a few “OC failure” cases stories have stemmed from. Risk of cross contamination is much lower than with cone, as aerosolization is far less, and respiratory effects to the bad guy are diminished.

Gel sprays have a pattern much like a streamer, but are thicker and have as near to zero aerosolization as one can get in an OC spray. Respiratory effects are basically zero, so a hit to the bad guy’s eyes is a must for any useful effect. In my observation, both from being sprayed and from use on students in scenario training, the gels are noticeably slower to take effect versus cone- and stream-type sprays.

Something to shop for while you’re at it is inert training spray that matches what you’d like to carry. Inert spray is a valuable training adjunct to live OC and allows one to “target practice” safely and effectively, even at home.

I’ve seen more than one student change their mind as to what OC spray they thought they wanted to carry after getting some experience in class. Using the inert version against a live human being in practice drills makes all the difference. Trainers are readily available and inexpensive, especially compared to never spraying one at all until you need it.

Quick and Dirty Primer On Using Pepper Spray

After some years of playing with both strong-hand and weak-hand use of my spray, in both on- and off-duty scenarios, I strongly prefer using OC with my strong hand. This leaves me able to use a flashlight at the same time, and keep that light if I decide to ditch the spray and go to guns. Also, much of the time lately I am using a Kubaton-type “keystick” style sprayer while off-duty. Strong-hand use allows me to instantly transition to using the sprayer as an impact device, using the Pikal jab techniques taught by famed trainer Craig Douglas.

Another consideration is that when things go to guns, objects being carried in the strong hand are discarded when one goes for the draw; objects in the weak hand are often retained, and interfere with a good two-handed grip on the gun. Yes, this is a “training issue,” but it’s something I’ve noted several times in after action reviews of video of various confrontations.

From top down: Cone, stream, and gel shaped spray patterns.

From top down: Cone, stream, and gel shaped spray patterns.

Unlike other common aerosol products, OC spray should be used with a strong grip, allowing the thumb to activate the spray button, not the index finger. This is a fight, not a hair care event.

Use the spray in short one-second bursts. Just like with defensive pistol shooting, if you miss, or your shot doesn’t take effect, adjust your aim and give another burst. Overspraying your bad guy and using the whole can at once isn’t better. The OC that drips onto your assailant’s T-shirt is doing you very little good in a confrontation.

Having a plan B is key. OC spray works most of the time on most people, but just like anything else, including gunfire, it can fail. It’s best to be prepared for that, just in case.

Inert training spray

Inert training spray

I commonly teach various empty hand skills, and transitioning to the pistol as appropriate. This is another place where drilling with a trainer, or training partner, can pay huge dividends when one uses inert OC and dummy guns.

Regardless of which particular OC you end up with — train with it. Try different carry methodologies, and consult your local laws as to when it’s time for spicy treats, and when it’s time for the iron.

Use your thumb, not your pointer, for the best control. You aren’t using hair spray. Proper deployment method is seen on the right, improper on the left.

Use your thumb, not your pointer, for the best control. You aren’t using hair spray. Proper deployment method is seen...


Fire at Will: Fire-Starter Buyer’s Guide

Minnesota-born novelist Sinclair Lewis once wrote, “Winter is not a season, it’s an occupation.” In other words, winter is not the time for complacency, especially for survivalists. But no matter the season, hypothermia can quickly set in as a result of rain, wind chill, or dropping temperatures after nightfall. In any survival situation, we need to view staying warm as a full-time job.

Layered clothing and a proper shelter can go a long way, but the cornerstone of warmth is knowing with complete certainty that you can quickly and reliably start a fire. This means your survival kit should contain a diverse and redundant set of fire-starting tools. Why? Because if you rely on just one, you’ll eventually learn the answer the hard way when it fails.

Whether you need to add a backup firestarter to your bug-out bag or you’re looking to replace an item in your incendiary arsenal, it’s beneficial to examine all the available options. We collected a wide variety of firestarters from six different categories, then tested each tool knowing that each type would have its own pros and cons. (For the purposes of this guide, we omitted lighters and torches — for these devices, refer to our Lighter & Torch Buyer's Guide from Issue 23.)

Fire starters matches bow drill fresnel lens lighter ferro rod magnesium tinder 1

And because you demanded it, we also include several budget buys to see how these affordable options compare to the brand names. That said, read on to hear our thoughts on each fire-starting tool and consider whether one or more deserves a place in your emergency kit.

EXOTAC nanoSTRIKER XL

Fire starters matches bow drill fresnel lens lighter ferro rod magnesium tinder 3

Type
Ferro Rod

Dimensions
3.7 inches long by 0.4-inch diameter

Weight
1 ounce

Components
Threaded aluminum body, ferro rod, tungsten carbide striker

Lifespan
3,000 strikes per replaceable rod

Special Features
Key ring, lanyard, waterproof O-rings, 4 colors available

MSRP / Recurring Costs
$29 / $7.50 ferro rod, $9 striker

URL
www.exotac.com

Fire starters matches bow drill fresnel lens lighter ferro rod magnesium tinder 4

The XL in this product’s name may lead you to believe it’s gigantic — that’s not the case. This is a slightly enlarged version of the original EXOTAC nanoSTRIKER, but it’s still under 4 inches long and about as thick as a ballpoint pen. The company claims the XL threaded ferro rod will last for 3,000 strikes, approximately triple the lifespan of the discontinued original version. Using this three-piece ferro rod is simple. Just unscrew the components, thread the ferro rod onto the cap facing the opposite direction, and strike it with the carbide striker.

Unfortunately, the small parts can be difficult to assemble and use reliably in the cold, in the dark, or while wearing gloves. This firestarter would be terrific for everyday carry on a keychain, but it wouldn’t be our first choice for frigid wilderness survival.
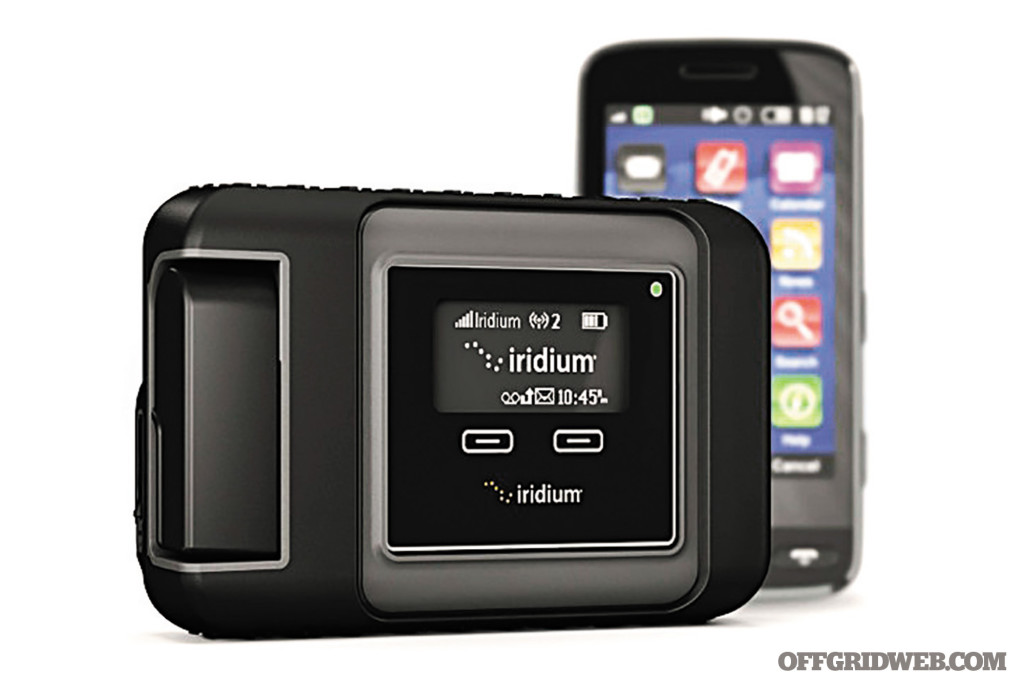
Pros:

  • Sleek, modern design that’s perfect for everyday carry (EDC)
  • Made in the USA

Cons:

  • Small striker takes finesse to spark reliably.
  • Three-piece design risks losing components

Light My Fire Swedish FireSteel 2.0 Scout

Fire starters matches bow drill fresnel lens lighter ferro rod magnesium tinder 5

Type
Ferro Rod

Dimensions
3 by 0.9 by 0.5 inches

Weight
1 ounce

Components
Ferro rod, stainless striker

Lifespan
3,000 strikes

Special Features
Emergency whistle, lanyard, nesting handles

MSRP / Recurring Costs
$15 / N/A

URL
www.lightmyfire.com

Fire starters matches bow drill fresnel lens lighter ferro rod magnesium tinder 6

Just as the Swiss are known for their army knife, the Swedes are famous for FireSteel. This ferro rod design was developed for the Swedish Ministry of Defence for use by the country’s armed forces. Light My Fire still manufactures the product in a dedicated factory in Västervik, though the rod’s design has evolved since its inception. Version 2.0 comes with ergonomically improved handles and a built-in emergency whistle.
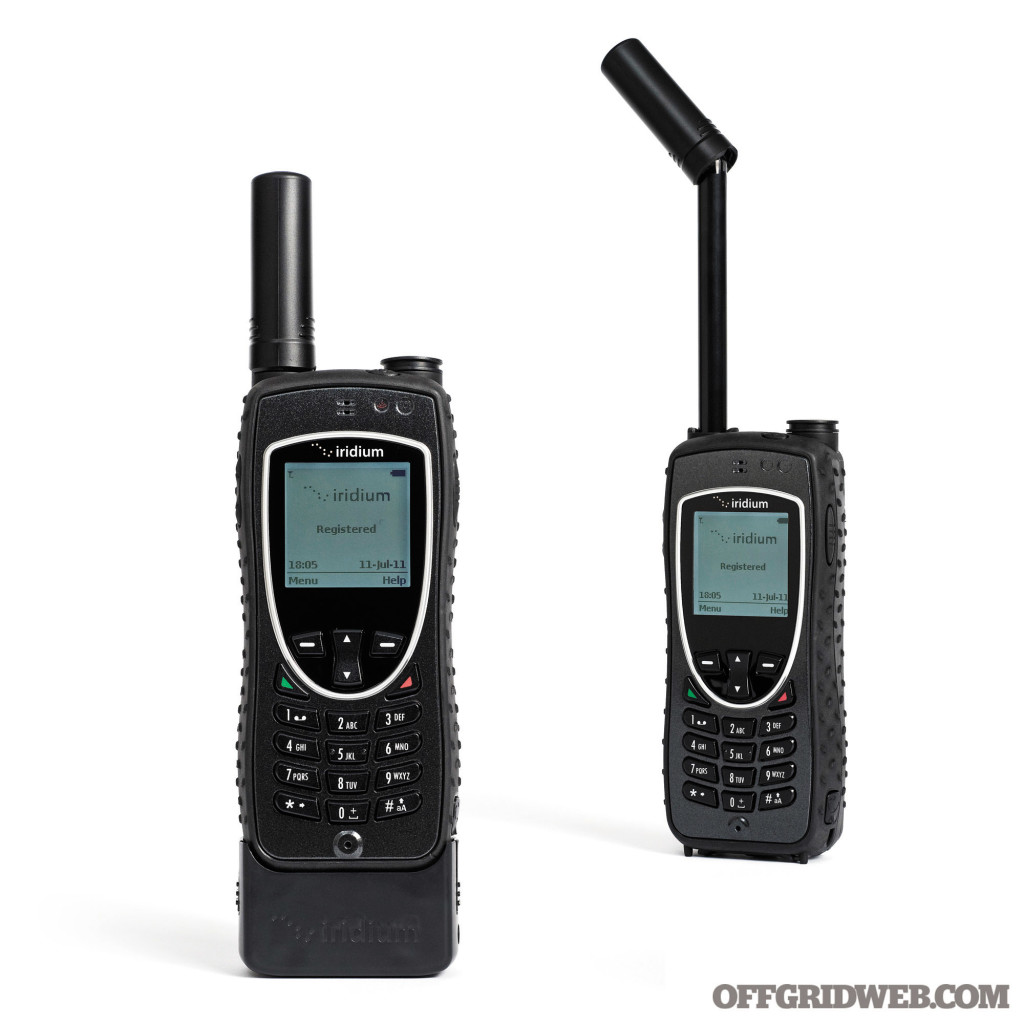
There are two variants: Army uses a heavy-duty 12,000-strike ferro rod; Scout (seen here) uses a lighter 3,000-strike rod. This particular model has handles made of polymer-encapsulated coconut shell fiber, contoured to nest side-by-side against each other. The FireSteel 2.0 makes starting a campfire or stove easy, thanks to the large shower of white-hot sparks produced with each strike.

Pros:

  • Excellent striker produces sparks with ease
  • Lanyard keeps rod tethered securely to striker

Cons:

  • Storage options are limited due to odd shape. A sheath, pocket clip, or fitted storage pouch would be beneficial.

Ultimate Survival Technologies (UST) BlastMatch

Fire starters matches bow drill fresnel lens lighter ferro rod magnesium tinder 8

Type
Ferro Rod

Dimensions
4.1 by 1.4 by 1 inches

Weight
2.3 ounces

Components
Orange plastic case, spring-loaded ferro rod, fixed carbide striker

Lifespan
4,000 strikes

Special Features
Locking protective cover

MSRP / Recurring Costs
$25 / N/A

URL
www.ustbrands.com

Fire starters matches bow drill fresnel lens lighter ferro rod magnesium tinder 7

Heralded as a revolutionary patented improvement on the basic ferrocerium rod, the UST BlastMatch uses a stationary striker blade and spring-loaded rod in a polymer body. To operate the device, just pop off the protective cover, place the rod against your tinder material, and maintain firm pressure on the striker plate with your thumb. A quick downward push throws sparks directly at the base of the rod.

Unfortunately, we found that the BlastMatch works a lot better in theory than it does in reality. The rod needs to be in contact with the base of your tinder pile, requiring a forceful pushing motion that can scatter carefully positioned shavings or fibers. The BlastMatch can be used one-handed, a major advantage, but in most cases we’d prefer the simplicity and consistency of an ordinary rod and striker.
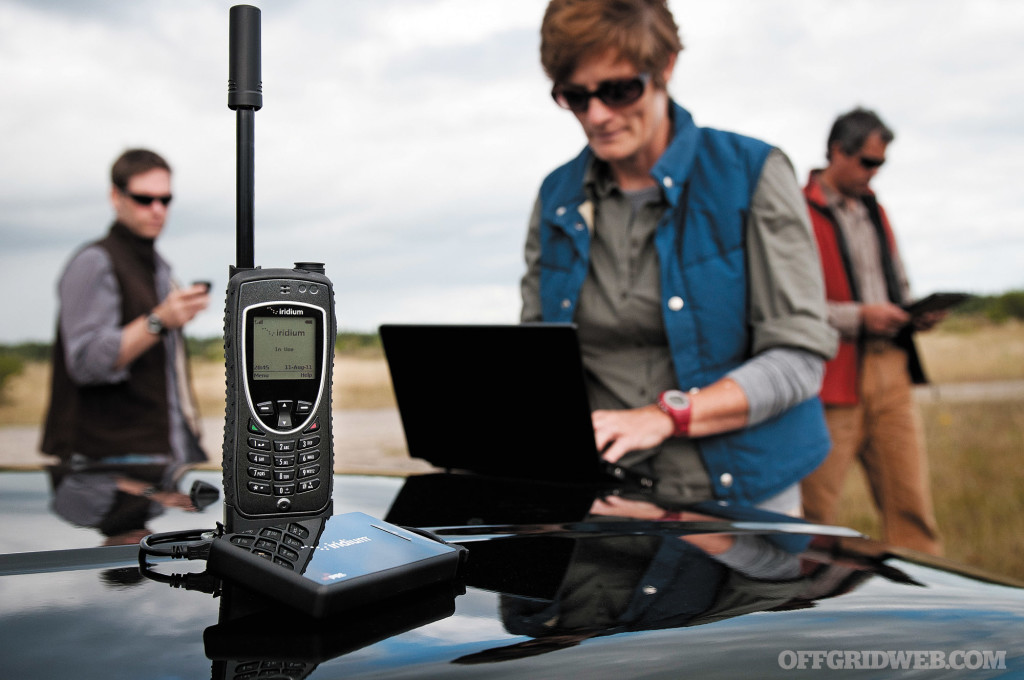
Pros:

  • One-handed operation
  • Large ferro rod can be struck manually with a blade.

Cons:

  • Pushing motion tends to disturb tinder pile
  • Hard plastic case with moving parts leads us to question durability

EmberLit / MerkWares Strike-a-Light Fire Starter Necklace

Fire starters matches bow drill fresnel lens lighter ferro rod magnesium tinder 9

Type
Flint & Steel

Dimensions
Striker: 2.5 by 0.6 by 0.1 inches / Lanyard: 16.5 inches long

Weight
1.3 ounces

Components
EmberLit pendant steel striker, ferrocerium toggle, 550 FireCord lanyard, quick-release clasp

Lifespan
N/A

Special Features
Mini 1-inch ferro rod, combustible tinder strand

MSRP / Recurring Costs
$30 / $15 replacement FireCord (25 ft.), $1 flint rocks

URL
www.emberlit.com

This may look like an ordinary necklace to the casual observer, but it’s actually an ingenious combination of modern and ancient fire-starting gear. First, there’s the pendant, which is cut from 1/8-inch-thick high-carbon steel, bearing a cutout of the “tooth and talon” MerkWares logo. Many alternative pendant shapes are available at no extra cost, ranging from animal silhouettes to a Thor’s hammer symbol. This steel provides sharp edges, which can produce sparks when struck rapidly against flint, agate, or other hard stones (sold separately). The pendant can also be used to strike the small ferro rod toggle on the necklace. Even the lanyard contributes to fire-starting — it’s actually 550 FireCord, with seven braided fibers plus a waxed tinder strand inside the nylon sheath. In an emergency, the wearer can cut off a segment of the lanyard, ignite the tinder strand, and reposition the clasp to keep the necklace intact. This necklace provides all the ingredients for a survival fire — and looks good doing it.

Pros:

  • Necklace configuration provides fast access to fire-starting tools.
  • Good value considering its many components and uses

Cons:

  • The flint/steel method requires serious patience and practice.
  • Flint rocks may be hard to find.

Zippo Emergency Fire Starter

Fire starters matches bow drill fresnel lens lighter ferro rod magnesium tinder 10

Dimensions
2.5 by 1.7 by 0.6 inches

Weight
1 ounce

Components
Orange plastic case, flint wheel igniter, 4 waxed tinder sticks

Lifespan
Approximately 1,500 strikes per replaceable flint

Special Features
Water-resistant seal, rotating directional flint wheel

MSRP / Recurring Costs
$15 / $0.80 replacement flints (6), $5 tinder sticks (8)

URL
www.zippo.com

Ever tried to light a fire with an empty lighter? Ever wished you could relive that same experience during a survival situation? If so, the Zippo Emergency Fire Starter is what you’re looking for. Seriously though, for better or for worse, this tool is simply the wheel igniter from a Zippo lighter turned 90 degrees and transplanted into a lightweight plastic case. The sparks it creates are minuscule.

One upside is that the water-resistant seal protects a small cavity that contains four waxed cotton tinder sticks. So, you’ll at least have some dry tinder at the ready. It appears that Zippo used to make a tougher metal-cased version of this firestarter, complete with a waterproof O-ring. But even with those features, it’s hard to overlook the realization that this tool is marginally more useful than an empty lighter and some cotton balls.

Pros:

  • One-handed operation
  • Water-resistant tinder container

Cons:

  • You might as well carry an empty Zippo lighter … or a full one.

Numyth Vulcan Fire Piston V2

Fire starters matches bow drill fresnel lens lighter ferro rod magnesium tinder 11

Type
Pressure / Friction

Dimensions
5 inches long by 0.7 inches diameter

Weight
1.8 ounces

Components
Anodized aluminum piston, cylinder, end cap, and tinder capsule; rubber O-ring seals

Lifespan
N/A

Special Features
Waterproof tinder container, replacement O-rings, gel lubricant

MSRP / Recurring Costs
$40 / N/A

URL
www.goinggear.com

Fire starters matches bow drill fresnel lens lighter ferro rod magnesium tinder 12

Sudden compression generates heat, forming an ember that can be nursed into a flame. In a nutshell, that’s how a fire piston works. The Numyth Vulcan consists of a machined aluminum piston and cylinder, sealed tightly with rubber O-rings and a light coat of lubricant. To use the firestarter, load a tiny pinch of tinder into the notch on the tip of the piston, then place it into the sealed cylinder. Slam the piston on a surface to compress it fully, and in a single swift movement, draw it out of the cylinder. If you’re fast enough, you’ll have a glowing ember to blow into a flame.
This requires practice, but most of all it requires a supply of specific tinder. Numyth recommends cotton char cloth or true tinder fungus. That’s the biggest drawback to the fire piston — you need to bring tinder, and if you run out, you’re in big trouble.

Pros:

  • Fits conveniently in pen organizers and shirt pockets
  • Waterproof tinder capsule

Cons:

  • Temperamental — only works with bone-dry highly-combustible tinder
  • Coordination and quick hands are mandatory

USAMM Scout Primitive Fire Bow Drill Kit with Upgraded Palm Rock

Fire starters matches bow drill fresnel lens lighter ferro rod magnesium tinder 13

Type
Pressure / Friction

Dimensions
Bow: 21.5 inches long by 0.7 inch diameter / Board: 8.8 by 2.4 by 0.6 inches

Weight
13.1 ounces

Components
Red oak bow with bowstring, spindle, palm rock, pre-notched hardwood fireboard, leather coal catcher

Lifespan
N/A

Special Features
Ceramic palm rock with glazed spindle hole, instruction sheet with color photos

MSRP / Recurring Costs
$30 / N/A

URL
www.amazon.com

Normally, a survivalist would craft a primitive bow drill from materials found in the field, plus a shoelace or some paracord as a bowstring. That’s a tough skill to learn from scratch, so bow drill kits make the process more approachable for first-timers. We found this USAMM kit on Amazon.com, and it contains everything you’ll need except tinder. To use the drill, the spindle is twisted through the bowstring and seated in a notch in the fireboard. The pointy end of the spindle is supported by the palm rock in one hand, while the other hand draws the bow back and forth. Eventually, friction from the spindle generates an ember, which falls into the leather coal catcher below the notch. The ember is tipped gently into a tinder pile, and — voilà — you have fire.

This USAMM bow drill is well-built and works flawlessly, although we had to loosen and re-tie the bowstring. We’d consider this more of an educational resource than an actual survival tool because it’s not exactly practical to shove this into your bug-out bag when there are more portable options, but it’s quite affordable and fun to use.

Pros:

  • Pre-assembled and tested
  • Made in the USA

Cons:

  • Larger and heavier than other firestarters
  • Guaranteed to give you a cardio workout

Doan Machinery & Equipment Magnesium Fire-Starting Tool

Fire starters matches bow drill fresnel lens lighter ferro rod magnesium tinder 14

Type
Magnesium Bar

Dimensions
3 by 1.1 by 0.3 inches

Weight
1.4 ounces

Components
Magnesium bar, ferro rod sparking insert

Lifespan
N/A

Special Features
Bead chain

MSRP / Recurring Costs
$10 / N/A

URL
www.doanfirestarter.com

The magnesium bar has been used extensively by the military and civilian survivalists due to its combination of a sparking edge and highly-combustible tinder source. Doan Machinery & Equipment has been producing these bars for decades with a simple formula: a bar of solid magnesium with a small ferro rod glued into a notch on the spine. To start a fire, use a knife to shave off a pile of magnesium about the size of a quarter. Then reverse the bar and use the knife to strike the ferro rod, generating sparks that ignite the pile. Magnesium burns with a white-hot flame, easily igniting nearby tinder.

Our main complaint with this tool is the lack of a dedicated striker. The spine on some knives works as a scraper and striker, but not all. If you can’t use your knife’s spine, you’ll be forced to dull a portion of your blade as a result of shaving and striking the bar. The shavings from this bar also seem harder to ignite than those from other bars we’ve used.

Pros:

  • Magnesium shavings burn energetically
  • Made in the USA

Cons:

  • Doesn’t include striker or scraper blade
  • Shavings seem reluctant to ignite.

My Crisis Gear Magnesium Fire Starter

Fire starters matches bow drill fresnel lens lighter ferro rod magnesium tinder 15

Dimensions
3 by 1.1 by 0.3 inches

Weight
1.8 ounces

Components
Magnesium bar, ferro rod sparking insert, scraper/striker

Lifespan
N/A

Special Features
Bead chain, hacksaw-style scraper/striker

MSRP / Recurring Costs
$8 / N/A

URL
www.amazon.com

Sold and packaged under the brand name My Crisis Gear, this magnesium bar has no identifiable markings. The company’s web site lists only seven products, and the magnesium bar is nowhere to be found — at the moment, it’s only available through Amazon.com.

Questionable origin aside, this firestarter is inexpensive and effective. While its dimensions are identical to the Doan bar, the material makeup is clearly different. The U.S.-made Doan bar is smooth and dense; this imported bar is rough and porous. This makes it easy to scrape off shavings, but we suspect the bar will have a shorter lifespan as a result. We greatly appreciate the inclusion of a steel scraper, flat on one side and serrated on the other. This eliminates the need to dull your knife blade and makes this an all-in-one fire-starting solution.

Pros:

  • Porous material is easy to shave and ignite
  • Magnesium shavings burn energetically

Cons:

  • Imported off-brand product with unknown quality control
  • Softer magnesium may lead to shorter lifespan

Coleman Waterproof Matches 4-Pack

Fire starters matches bow drill fresnel lens lighter ferro rod magnesium tinder 16

Type
Matches

Dimensions
2.3 by 1.4 by 0.6 inches per box

Weight
0.4 ounces per box

Components
Four match boxes

Lifespan
40 matches per box, 160 total

Match Burn Time
21 seconds

Special Features
Dual “waterproof” striking surfaces

MSRP / Recurring Costs
$3 / N/A

URL
www.coleman.com

We found these waterproof matches in the camping section at Walmart for a mere $3. Each of the four boxes contains 40 matches, featuring striking surfaces on both sides. The 1/16-inch-thick wood matchsticks aren’t prone to snapping, thankfully. We can confirm these matches are waterproof, as they lit easily even after soaking in water.

However, the striking surfaces are another story — despite claims that they’re waterproof, we couldn’t even light a bone-dry match on a damp box. While they may be “waterproof” in that they don’t turn to mush when wet, they certainly won’t help you light a match under those conditions. Ironically, the box even instructs users to “store in a cool dry place.” As long as you can keep the striking surfaces away from moisture, these matches are a good option.

Pros:

  • Matches light quickly, even when soaked
  • Good value for money

Cons:

  • Striking surfaces are useless when wet
  • Powerful flame burns out quickly

Diamond Greenlight Deluxe Match Books

Fire starters matches bow drill fresnel lens lighter ferro rod magnesium tinder 17

Type
Matches

Dimensions
1.5 by 1.8 by 0.3 inches per book

Weight
0.1 ounces per book

Components
50 match books

Lifespan
20 matches per book, 1,000 total

Match Burn Time
39 seconds

Special Features
Striking surface on each book

MSRP / Recurring Costs
$3 / N/A

URL
www.diamondbrands.com

If you want to remain eco-friendly as you survive, these Diamond Greenlight matches may seem appealing. They’re constructed from 100-percent recycled paperboard, with match heads that are literally green, so all your survival buddies can see how much you care about saving Mother Earth.

Sadly, these matches are truly awful. The paperboard bends, tears, or disintegrates if you look at it wrong. And don’t even think about getting it wet. Once you manage to ignite one of these matches, the flame is tiny and fragile, though this at least yields a long burn time. On the bright side, even if it takes you 15 matches to light a fire, you’ll have 985 to spare. These are barely passable for lighting scented candles at home, much less for creating flames in an inhospitable winter wilderness.

Pros:

  • Lots of matches for the money
  • Made in the USA

Cons:

  • Horrendous paperboard matchsticks
  • Small, weak flame

Diamond Large Kitchen Matches

Fire starters matches bow drill fresnel lens lighter ferro rod magnesium tinder 18

Type
Matches

Dimensions
4.8 by 2.6 by 1.5 inches

Weight
2.4 ounces

Components
N/A

Lifespan
250 matches

Match Burn Time
49 seconds

Special Features
Dual striking surfaces

MSRP / Recurring Costs
$1 / N/A

URL
www.diamondbrands.com

These are some of the most ubiquitous matches available, found for a dollar or less in retail stores throughout the country. Each box contains approximately 250 loose matches, with 2.3-inch-long wood sticks and small heads.

Despite being made in the USA, quality control appears to be an issue — our box contained several broken matchsticks, matches without heads, and heads of inconsistent sizes. Nevertheless, the matches light easily on the box and burn steadily. As you might expect, any amount of moisture will render these matches useless. They’re fine for home use, but we wouldn’t recommend them for survival situations.

Pros:

  • Long burn time
  • Made in the USA

Cons:

  • Poor quality control
  • Highly sensitive to moisture

UCO Titan Stormproof Match Kit

Fire starters matches bow drill fresnel lens lighter ferro rod magnesium tinder 19

Type
Matches

Dimensions
4.5 inches long by 1.5 inches diameter

Weight
2.7 ounces

Components
Titan stormproof matches, 3 striker inserts

Lifespan
12 matches

Match Burn Time
32 seconds

Special Features
Waterproof case with striker slot, high-visibility lanyard, cotton tinder inside cap

MSRP / Recurring Costs
$10 / $10 Titan stormproof matches (box of 25)

URL
www.ucogear.com

We have a slight problem with the nomenclature of this product. It uses the term “match,” but that name fails to adequately prepare the user for what happens after striking. Titan stormproof matches seem to have more in common with Fourth of July sparklers than kitchen matches. These 4.3-inch-long mega-matches don’t just burst into flames, they ignite with an audible crackle and intense jet of white-hot fire.

Surprisingly, a lit match can be fully submerged in water and, upon removal, still sputter back to life like a novelty birthday candle. If you can’t light a fire with one of these, you’re doing something very wrong. We wish the cardboard-backed striker inserts were a bit tougher; a minor nitpick on an otherwise superb survival firestarter.

Pros:

  • Violently powerful flame
  • Extremely difficult to extinguish

Cons:

  • Cardboard striker inserts could be more resilient
  • Short lifespan with only 12 matches

BreaDeep 5x Pocket Magnifying Lens (Set of 2)

Fire starters matches bow drill fresnel lens lighter ferro rod magnesium tinder 20

Type
Solar

Dimensions
2.8 by 2.2 by 0.3 inches per lens

Weight
1 ounce per lens

Components
1.8-inch glass lens with plastic rim

Lifespan
N/A

Special Features
Polyurethane “leather” carrying case

MSRP / Recurring Costs
$10 per pair / N/A

URL
www.amazon.com

This generic magnifying glass set came to us from China, by way of Amazon.com. Strangely, the boxes are labeled “Pocket Spiegel” in a combination of English and German. We paid $10 for two lenses, though they can be bought individually for $6. Each lens consists of convex glass with a 5x magnification factor, contained in a plastic rim with a rotating cover. The cover is marketed as “leather” but is actually thin pleather with a velvety inner layer. If you’re patient enough, the sun is shining brightly, and conditions are dry, this glass can be used to start a fire by harnessing the power of the sun into a concentrated beam onto some tinder. Its low price and compact size could make this a good addition to your tinder box. However, we’d recommend this as a backup option rather than a standalone tool.

Pros:

  • Small and lightweight
  • Affordable

Cons:

  • Requires bright sunlight, steady hands, and patience
  • “Leather” case feels cheap

EmberLit / MerkWares Solar Fire Lens

Fire starters matches bow drill fresnel lens lighter ferro rod magnesium tinder 21

Type
Solar

Dimensions
2.3 by 3.4 inches including sleeve

Weight
0.1 ounces

Components
Flexible plastic Fresnel lens

Lifespan
N/A

Special Features
Plastic storage sleeve

MSRP / Recurring Costs
Included in $30 EmberLit Fire Starting Kit; not sold separately / N/A

URL
www.emberlit.com

While a conventional lens requires large curved surfaces to bend light, a Fresnel lens accomplishes the same goal through the use of dozens of tiny ridged sections. This creates a paper-thin profile that can remain flexible. This plastic Fresnel lens from EmberLit is included as part of the company’s Fire Starting Kit, along with a steel striker, flint rock, jute twine, cotton rope, hinged metal container, and canvas storage bag.

The lens is the same size as a standard business card, fitting easily into a wallet. The magnification factor isn’t advertised by EmberLit, but we’d estimate it’s about 3x — more than enough to get a fire going or char some tinder in bright sunlight. We love that this tool weighs virtually nothing and retains the fire-starting benefits of a traditional lens. The other items in the Fire Starting Kit add even more value to this solar firestarter.

Pros:

  • Flexible and durable
  • Weighs as much as a business card

Cons:

  • Accumulates fine scratches easily
  • Only sold as part of the EmberLit fire-starting kit

UEB Outdoor Emergency Cigar Starter

Fire starters matches bow drill fresnel lens lighter ferro rod magnesium tinder 22

Type
Solar

Dimensions
4.5 by 3.8 by 0.5 inches folded flat

Weight
0.8 ounces

Components
“Waterproof and windproof” plastic mirror lens, aluminum tinder holder

Lifespan
N/A

Special Features
Folds flat for storage

MSRP / Recurring Costs
$8 / N/A

URL
www.amazon.com

Need to light a stogie in the backwoods, but forgot your matches? UEB Outdoors has the solution with this so-called “Emergency Cigar Starter,” which we found on Amazon. The seller also says it works “as a make-up mirror for ladies” — just don’t set fire to your face. Despite those ludicrous uses, the only thing we care about is if it can start a fire in a survival setting. Fortunately, it can.
The curved mirror focuses light at the metal tinder holder, provided you can position the mirror at the right angle in bright sunlight. When not in use, the tinder holder can be folded flat and clipped onto a tab on the mirror. Although we don’t plan to use it for lighting cigars, this tool works well for igniting tinder or as an emergency signal mirror.

Pros:

  • Lightweight
  • Doubles as an emergency signal mirror

Cons:

  • Plastic chrome is susceptible to scratching or cracking
  • Marketed as a cigar lighter, but it’s barely big enough to hold a cigarette

More From Issue 18

Don’t miss essential survival insights—sign up for Recoil Offgrid's free newsletter today!

Read articles from the next issue of Recoil Offgrid: Issue 19

Read articles from the previous issue of Recoil Offgrid: Issue 17

Check out our other publications on the web: Recoil | Gun Digest | Blade | RecoilTV | RECOILtv (YouTube)

Editor's Note: This article has been modified from its original version for the web.


Covering Your Assets: Legal & Financial Prepping

WARNING: This story provided is for informational purposes only and is not, nor is it intended to provide, legal and/or financial advice. The reader should consult with an appropriate professional in their particular jurisdiction regarding their individual situation. Any use of the information contained in this article shall be solely at the reader’s risk. No attorney-client relationship is created by the use of the information in this publication.

You’ve got the survival basics covered: food, water, first aid/medical, sanitation/hygiene, security and self-defense — heck, you even have a fully stocked retreat in an “undisclosed” location. This is a great start, considering that the vast majority of the population doesn’t have a clue. But, you still have a nagging feeling that something’s missing.

While some preppers place much of their focus on buying cool stuff, stocking up on long-term food rations, and getting that very latest bug-out bag, some of us realize that a viable survival plan has to be much more than just having awesome gear. A survival plan must protect you and your loved ones in a comprehensive manner, including the most likely scenarios which fall short of complete societal collapse. Specifically, it needs to address your legal and financial vulnerabilities.

Imagine that a crisis strikes, and someone in your family is seriously injured, incapacitated, or even killed. What then? None of us like to think about these things ­— they’re just too depressing, and discussing them can feel quite morbid. But, if that nightmare scenario happened, would you be prepared for what comes next?

Would you have the legal means to act on that family member’s behalf, or even to satisfy their final wishes in the event of their death? Just when you thought it couldn’t possibly get any worse, it does.

In this article we examine how everyday people can plan to protect themselves and their loved ones against the legal and financial devastation that can often accompany natural or man-made disasters. Whether you’re a prepper looking to expand your knowledge, or a concerned spouse or parent curious to learn more, we help you explore some of the most common legal and financial preps (in plain English) and how they can help you when the unthinkable occurs.

Last Will and Testament

A will, often referred to as a “last will and testament,” is simply a legal document that lets you tell the world your final wishes regarding the distribution of your assets, the care of your minor children, and who will manage your estate. The estate can consist of big, expensive things like real estate and vehicles, but also smaller items like jewelry and family heirlooms. Some assets, including bank accounts and certain insurance policies, may not be covered by the will, since they will usually have named beneficiaries.

Financial prepping legal attorney law covering assets prepper finance disaster emergency 2

A compressive estate planning package can include a will, a living will, and a power of attorney.

If you die without a will, however, the state in which you reside will usually determine the distribution of your assets, and many of these other issues, according to applicable state statutes. In the absence of a valid will, total strangers will most likely be making all these important decisions for you. Reread that last sentence and let it sink in.

The requirements for creating a will differ from state to state and can get quite complicated. Get it right and you can rest assured that you have relieved your survivors of a major burden. Getting it wrong, however, can prove to be very costly, resulting in many unintended consequences. Even though you aren’t required to have an attorney prepare your will, most people will absolutely benefit from an attorney’s experience, expertise, and estate-planning advice.

Hiring an attorney can help you avoid many potential pitfalls of the do-it-yourself will. If you have assets, minor children, or just want to make sure that your wishes are carried out, you should consider creating a will. (See the sidebar for tips on finding and hiring the right attorney for your needs.)

Power of Attorney

A power of attorney (POA) is a legal document that allows you to appoint an individual or entity to act, make decisions, and handle your affairs while you’re unable to do so. With a POA you can grant legal authority to a capable adult to handle all your personal and financial matters (general) or to deal with one particular matter (specific). Normally, a POA will only be effective as long as you’re alive and competent to make decisions. Some POAs, however, are “durable” — it’ll still be effective even if you become disabled or mentally incapacitated.

Although a POA can be revoked, you’ll mostly likely be bound by any actions taken by the person you appoint, so you should only consider individuals you trust completely with this responsibility. Establishing a POA as part of your overall estate plan makes sense, and is a powerful instrument to protect yourself and your family.

The laws for creating a POA vary from state to state, so as with a last will and testament, to be effective, you need to get it right. It’s best to consult a qualified professional in your area concerning applicable laws and regulations.

Living Will/Advance Directives

A living will, also called an “advance directive,” or a “health care declaration,” is not really a will, but rather written legal instructions detailing a person’s end-of-life medical treatment preferences in the event they become unable to communicate. In many instances, a living will is used to affirmatively state what life-prolonging care the person may, or may not, want.

Imagine that a loved one is seriously injured and unable to communicate. By planning ahead and preparing a living will, that individual can get the medical treatment they want, avoiding unnecessary suffering and medical procedures they didn’t want. Advance directives also relieve family members and other caregivers of the heavy burden and difficult decisions often encountered during these moments.

A living will allows your loved ones and caregivers to be assured that your personal choices are respected, even if at that moment you’re unable to personally communicate those preferences. Living wills are typically prepared as part of a more comprehensive estate planning package including a will and a POA. The authority granted by a living will has no effect after death.

Adults of all ages should consider making a living will since life is unpredictable, and there’s no way for any of us to know when tragedy will strike.

Asset Inventory

Assembling a comprehensive inventory of all your personal assets can be tedious and time-consuming; it’ll never be as much fun as putting together that killer bug-out bag. But the effort will pay huge dividends the day someone, acting on your behalf, needs to file an insurance claim or to submit any of your information to a court of law.

Preparing an asset inventory will require time and effort, but this is certainly a project most people can accomplish on their own — and the benefits are huge.

Preparing an asset inventory will require time and effort, but this is certainly a project most people can accomplish...

The idea of having an asset inventory is to organize all of your important information in one easily accessible document. This will potentially make things far easier for those tasked with handling your affairs in your absence. Imagine someone trying to compile all the most intimate key pieces of information about your personal circumstances, without you there to guide them. Where would they start, and how long would it take them? Creating an asset inventory now will save those you love a great deal of grief later on.

Begin by gathering all your important documents and preparing a list. Whenever possible, try to attach copies of statements and other documentation providing account numbers, contact information, beneficiaries, etc. Include all information you think might be helpful, but focus special attention on the general categories listed below:

  • Life insurance policies and annuities
  • Deeds to real property
  • Partnership and business agreements
  • Retirement and pension plans/employment benefits
  • Brokerage, investment, and bank accounts
  • Stocks, bonds, and mutual funds
  • Personal property and safe deposit box
  • Name(s) and contact information for all beneficiaries
  • Pre-paid funeral arrangements/contracts

Your list should also document all your personal information, including:

  • Full legal name, social security number, date of birth, and passport number
  • Contact information for your attorney, banker, accountant, and financial planner
  • Location of your will, POA, and living will

Note: Make copies of at least three years of income tax returns and attach them to the back of your asset inventory. Also include birth and marriage certificates. Keep a copy of your asset inventory in a safe place and make sure that at least two trusted people know where to find it.

How to Find (and Hire) the Right Attorney

Locating the right attorney is like finding the right dentist, mechanic, or firearms instructor. It requires some legwork, but considering what’s at stake, it’s well worth the effort. Here are some tips to help you get started.

Do Your Research: Start with friends and relatives who have experienced similar circumstances. They can point you in the right direction and maybe even make a recommendation. You can also call your state’s bar association and ask for a referral.

Consider a Specialist: Consider using an attorney who specializes in estate planning and probate law. These attorneys are familiar with the process and the latest changes in the law.

Do Your Homework: Many attorneys have a strong online presence and comprehensive websites that provide lots of information and background, saving you time and effort. But also do your own research. The more informed you are, the more likely you’ll get the results you want. Google is a really good place to start your research.

The Interview: Narrow your search down to a few possible attorneys, call their office, and ask if they’ll provide a free consultation. This will give you an opportunity to meet the attorney in person, ask your questions, and get answers in plain English. (Remember to write out a list of questions before your meeting to avoid forgetting important issues.) It may seem like a lot of work, but these are essential steps to help you end up with the right person and, more importantly, with the results you want.

Fees and Costs: Always negotiate fees in advance. Some attorneys charge by the hour, while others may offer you a fixed fee (also known as a flat fee), which may save you big money in the long run. For routine matters, such as a will or power of attorney, a flat fee is more common. You should also request an estimate of anticipated costs and expenses.

Closing the Deal: Before you sign any papers, carefully read the engagement letter or retainer agreement. These documents set out the terms of the attorney-client relationship, the services to be performed, the applicable deadlines, and fees/costs. All these terms and conditions should be clearly stated in plain English. If you can’t understand what you’re being asked to sign, this might be a good time to take a step back. If you have any questions or concerns, get those issues cleared up before signing anything.

Rookie Mistakes to Avoid

“I can prepare my own legal docs to save money”
That $10.99 do-it-yourself power of attorney or will may seem like a tremendous bargain … until you try to use it and find it’s legally deficient. This nightmare scenario usually unfolds at the worst possible moment.

“There’s no rush, I can do this later”
None of us knows what tomorrow will bring, and there can be serious consequences for even short delays. Failure to plan may one day result in strangers making important decisions for you. Not having your affairs in order can bring about severe financial and emotional strain for a family already suffering from a crisis or disaster.

“Only rich people need a will, power of attorney, etc.”
While creating a will is a relatively inexpensive process, more than half of Americans don’t have a will. Even people with limited assets will benefit from having their final wishes properly documented.

Conclusion

Securing the survival basics will put you light-years ahead of the unprepared masses, but that’s not enough. Forward thinking, preparing for the unexpected, and contingency planning is what prepping is all about. But a successful survival plan must address all your needs and vulnerabilities — and this includes your legal and financial matters. Fail to get this one thing right and you’ll leave yourself exposed in ways you can’t possibly imagine.

Now is the time to calmly sit down and make all the necessary preparations — before the poop starts flying in all directions.

Take the time to examine your options, make the difficult decisions, and document your wishes. But as with all your other preps, having them brings you, and those you love, peace of mind and significantly improves your chances no matter what calamity comes your way. Stay safe, and be prepared.

About the Author

Richard Duarte is a practicing attorney, an urban survival consultant, writer, and firearms enthusiast. He’s the author of Surviving Doomsday: A Guide for Surviving an Urban Disaster and The Quick Start Guide for Urban Preparedness. For the latest preparedness news and updates, connect with Richard on www.quickstartsurvival.com and on Facebook at www.facebook.com/survivingdoomsdaythebook.

More From Issue 18

Don’t miss essential survival insights—sign up for Recoil Offgrid's free newsletter today!

Read articles from the next issue of Recoil Offgrid: Issue 19

Read articles from the previous issue of Recoil Offgrid: Issue 17

Check out our other publications on the web: Recoil | Gun Digest | Blade | RecoilTV | RECOILtv (YouTube)

Editor's Note: This article has been modified from its original version for the web.