In the HighLights flashlight buyer’s guide in Issue 17 of our printed magazine, we reviewed nine miniature flashlights. These lights are designed to fit in the palm of your hand, in your pocket, or on a keychain. Rather than rely on your smartphone’s built-in LED, you can have significantly brighter light on demand, plus other useful features such as waterproofing and adjustable brightness modes. To read our full thoughts on the nine mini flashlights, pick up a copy of Issue 17, on shelves starting December 2nd, 2016.
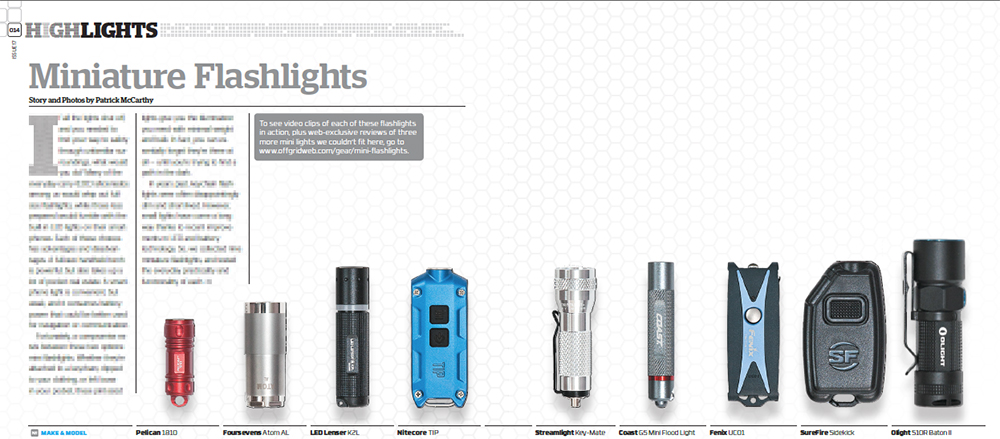
As we were finishing up the print article, we came across three additional lights that fit this theme. We didn’t have room to include them in the print article, so we’ll share our thoughts on these three mini flashlights here on the web. We also recorded short video clips of all 12 flashlights, so you can get a feel for the physical size and controls.
Bonus: LRI Photon II
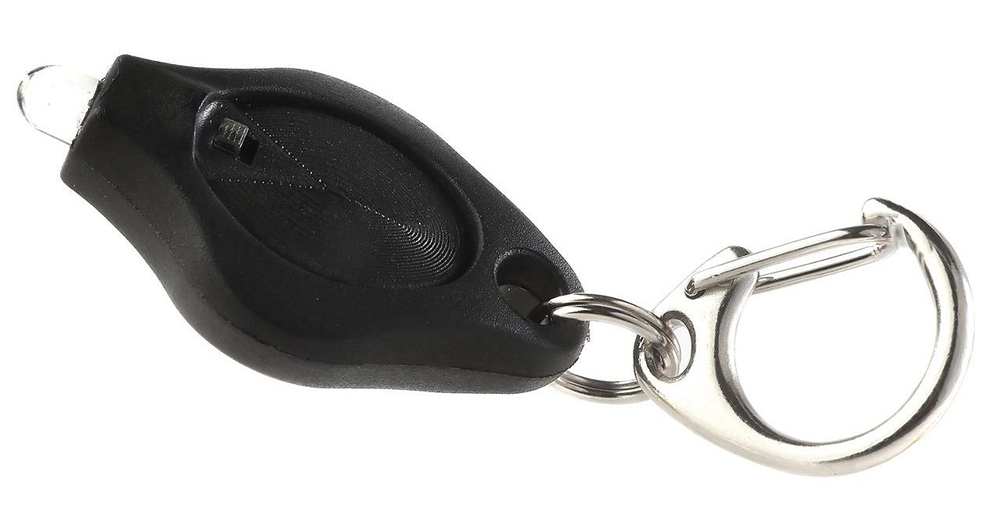
We’ve had this Photon II keychain light for several years, and it has served us well despite its diminutive size. It’s extremely compact — about the size of a quarter. The thumb pressure pad is great for quick momentary activation, and there is a tiny switch for constant-on mode if you’d prefer to leave the light running. The output is focused in a soft spotlight pattern. Although it’s rated at only 4.5 lumens, the manufacturer states it hasn’t been tested to official ANSI standards, and it appears closer to 10 or 15 lumens. That’s still not a lot of power, but the Photon II is a good choice for an ultra-small keychain light.
Max Lumen Output: 4.5
Max Runtime: 18 hrs.
Overall Length: 1.6 in.
Weight with Batteries: 0.2 oz.
Battery Type: CR2016 (two, included)
Controls: Pressure pad, small constant-on switch
Output Modes: N/A
Special Features: Quick-release keyring, small split ring
MSRP: $12
URL: www.photonlight.com
Bonus: Nitecore Tube
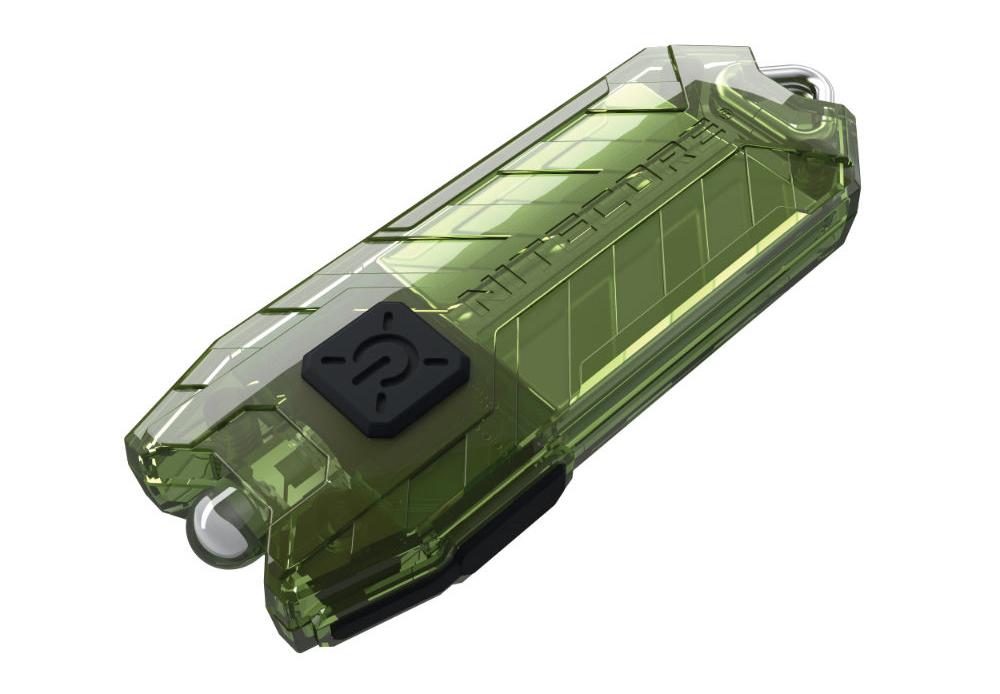
Despite being called the Tube, this Nitecore light is not cylindrical. It’s actually thin and flat, comparable in size to a mini Bic lighter. It offers two brightness modes, selectable by the power button on top of the light — press once for 1-lumen moonlight mode, and double-tap for full 45-lumen power. The button can also be held down for momentary full-power mode. Rather than replaceable batteries, this light uses an integrated li-ion battery with micro-USB charging. The beam pattern is a wide and soft flood light, ideal for illuminating a workspace or reading a map, but not ideal for focused directional output. We like the Tube a lot, but we still prefer the new Nitecore TIP for its higher output and tough aluminum body.
Max Lumen Output: 45
Max Runtime: 48 hrs.
Overall Length: 2.2 in.
Weight with Batteries: 0.3 oz.
Battery Type: Built-in lithium-ion battery with micro-USB charging
Controls: Push-button power switch with momentary mode
Output Modes: High, low
Special Features: Stainless steel keyring connector, micro-USB port with dust cover, charging indicator LED
MSRP: $10
URL: www.nitecore.com
Bonus: OLIGHT S1 Baton
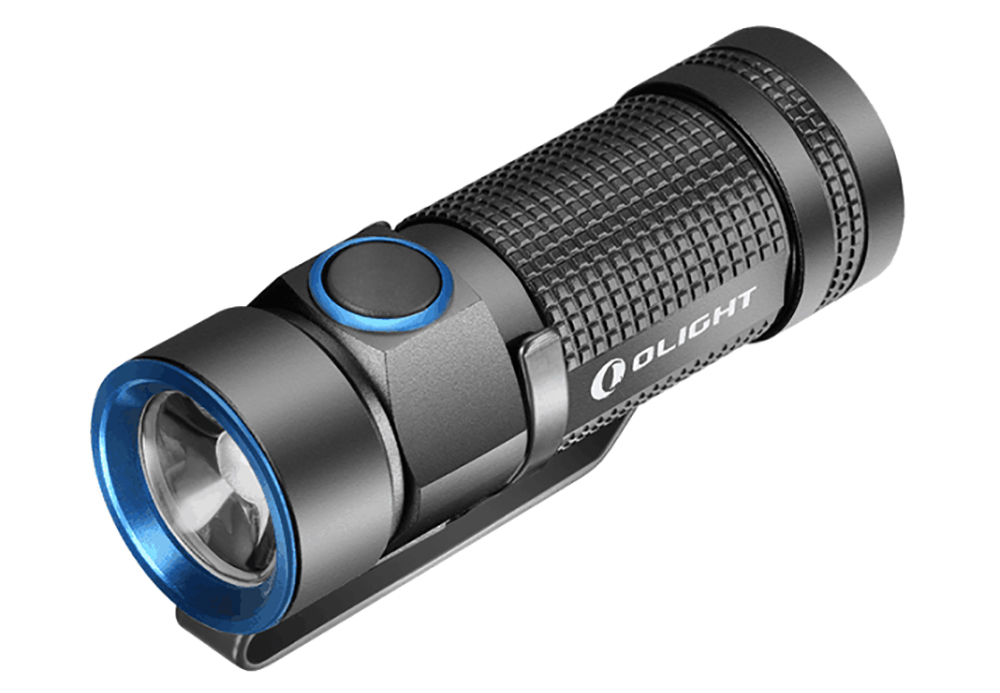
The OLIGHT S1 Baton is an updated version of the S10R Baton II we reviewed in the magazine article. It looks similar to the S10R, but there are several key differences. First, the business end of the light uses a TIR optic lens rather than the older light’s basic reflector. This makes the beam softer and more even, a significant improvement. This S1 Baton is a non-rechargeable model, so it lacks the charging dock compatibility of the R-series lights (although the tail cap is still magnetic). A rechargeable S1R model is available for $15 extra ($65 MSRP), but we haven’t tested it yet.
The S1 shares the same 500-lumen brightness as the old S10, but extends run time to a claimed 600 hours. It’s also smaller and lighter than the S10R, and it’s even IPX8 waterproof. This is a truly superb EDC flashlight, and a nice improvement on the S10 series.
Max Lumen Output: 500
Max Runtime: 600 hrs.
Overall Length: 2.4 in.
Weight with Batteries: 1.7 oz.
Battery Type: CR123 (one, included)
Controls: Push-button power switch with momentary mode
Output Modes: Turbo, high, low, moonlight, strobe
Special Features: Magnetic tail cap, pocket clip, wrist lanyard, IPX8 waterproof
MSRP: $50
URL: www.olightworld.com
Coast G5
Max Lumen Output: 18
Max Runtime: 45 min.
Overall Length: 2.5 in.
Weight with Batteries: 0.5 oz.
Battery Type: AG5 (four, included)
Controls: Push-button tail cap with on-off and momentary modes
Output Modes: N/A
Special Features: Large split ring, small split ring, swivel
MSRP: $6
URL: www.coastportland.com
Fenix UC01
Max Lumen Output: 45
Max Runtime: 50 hrs.
Overall Length: 2.5 in.
Weight with Batteries: 0.5 oz.
Battery Type: Built-in lithium-polymer with micro-USB charging
Controls: Push-button switch with 0.5-second lockout delay
Output Modes: High, medium, low
Special Features: Carabiner, small split ring, battery indicator LED, micro- USB port with dust cover
MSRP: $12
URL: www.fenixlight.com
FourSevens Atom AL
Max Lumen Output: 110
Max Runtime: 40 hrs.
Overall Length: 1.8 in.
Weight with Batteries: 1.6 oz.
Battery Type: CR123 (one, included)
Controls: Twist-on bezel
Output Modes: Low, high
Special Features: Magnetic tail cap, glow-inthe- dark LED backing, IPX8 waterproof, wrist lanyard
MSRP: $40
URL: www.foursevens.com
LED Lenser K2L
Max Lumen Output: 25
Max Runtime: 5 hrs.
Overall Length: 2.4 in.
Weight with Batteries: 0.6 oz.
Battery Type: AG13 (four, included)
Controls: Twist-on bezel
Output Modes: N/A
Special Features: Large split ring, small split ring, swivel, clear Magic Light Ring behind bezel
MSRP: $10
URL: www.ledlenserusa.com
Nitecore TIP
Max Lumen Output: 360
Max Runtime: 46 hrs.
Overall Length: 2.4 in.
Weight with Batteries: 0.8 oz.
Battery Type: Built-in lithium-ion with micro-USB charging
Controls: Push-button power switch with lockout function, push-button mode selector
Output Modes: Turbo, high, medium, low
Special Features: Large split ring, battery indicator LED, micro-USB port
MSRP: $30
URL: www.nitecore.com
OLIGHT S10R Baton II
Max Lumen Output: 500
Max Runtime: 168 hrs.
Overall Length: 2.9 in.
Weight with Batteries: 2.2 oz.
Battery Type: Rechargeable CR123 (one, included) or standard CR123 (not included)
Controls: Push-button power switch
Output Modes: High, medium, low, moonlight, strobe
Special Features: Magnetic tail cap, pocket clip, battery indicator LED, magnetic USB charging dock, wrist lanyard
MSRP: $66
URL: www.olightworld.com
Pelican 1810
Max Lumen Output: 16
Max Runtime: 8.75 hrs.
Overall Length: 1.5 in.
Weight with Batteries: 0.4 oz.
Battery Type: LR41 (four, included)
Controls: Twist-on bezel
Output Modes: N/A
Special Features: Carabiner, small split ring, metal Pelican logo tag
MSRP: $13
URL: www.pelican.com
Streamlight Key-Mate
Max Lumen Output: 10
Max Runtime: 96 hrs.
Overall Length: 2.4 in.
Weight with Batteries: 0.8 oz.
Battery Type: LR44 (four, included)
Controls: Twist-on bezel
Output Modes: N/A
Special Features: Small split ring, swivel, carabiner, pocket clip, neck lanyard
MSRP: $17
URL: www.streamlight.com
SureFire Sidekick
Max Lumen Output: 300
Max Runtime: 45 hrs.
Overall Length: 2.5 in.
Weight with Batteries: 1.4 oz.
Battery Type: Built-in lithium-ion battery with micro-USB charging
Controls: Push-button power switch
Output Modes: High, medium, low
Special Features: Large split ring, carabiner,
micro-USB port
MSRP: $80
URL: www.surefire.com