Most of our gadgets today rely on some sort of battery. But how do you power them if the grid’s down? And even if there’s electricity, how do you know you’re charging them correctly? Proper charging and maintenance is key to assuring your rechargeable batteries maintain a long and useful lifespan.
So, we’re taking an in-depth look at some of today’s most popular battery types, including an analysis of shelf life, capacity, charging methods, and the best uses suited to each type.
All rechargeable batteries are rated for capacity (C) and nominal voltage (V). Their capacity is usually measured in amp hours (Ah) in larger batteries, such as lead acid types, or in milliamp hours (mAh) for smaller cells. Capacity is defined by the battery’s ability to supply the specified current for one hour of time. For example, a battery with a rating of 12V 7Ah will supply 7 amps (A) of current for 1 hour before being fully discharged, meaning the battery’s voltage will drop to a point where it should be charged before further use — lest you risk damaging the battery.
Why get into the science of it? Understanding the capacity/time rating can greatly aid in planning an off-grid power solution, as well as not over/undercharging your batteries.
Since most rechargeable batteries are capable of high current delivery, many can deliver currents that will damage the cell from the temperature rise associated with a high rate of discharge. For example, the 12V 7Ah battery used to power a 35W spotlight should not be used to power 600 watts of lighting. A good rule of thumb for sizing most rechargeables to their task is that the current draw in A shouldn’t exceed the battery’s capacity rating (irrespective of hour rating) by more than three to five times, or a 3 C to 5 C discharge rate. Using our example battery to power 600 watts worth of lighting would draw 50 A (over 7 C) from the battery, potentially overheating and causing permanent damage.
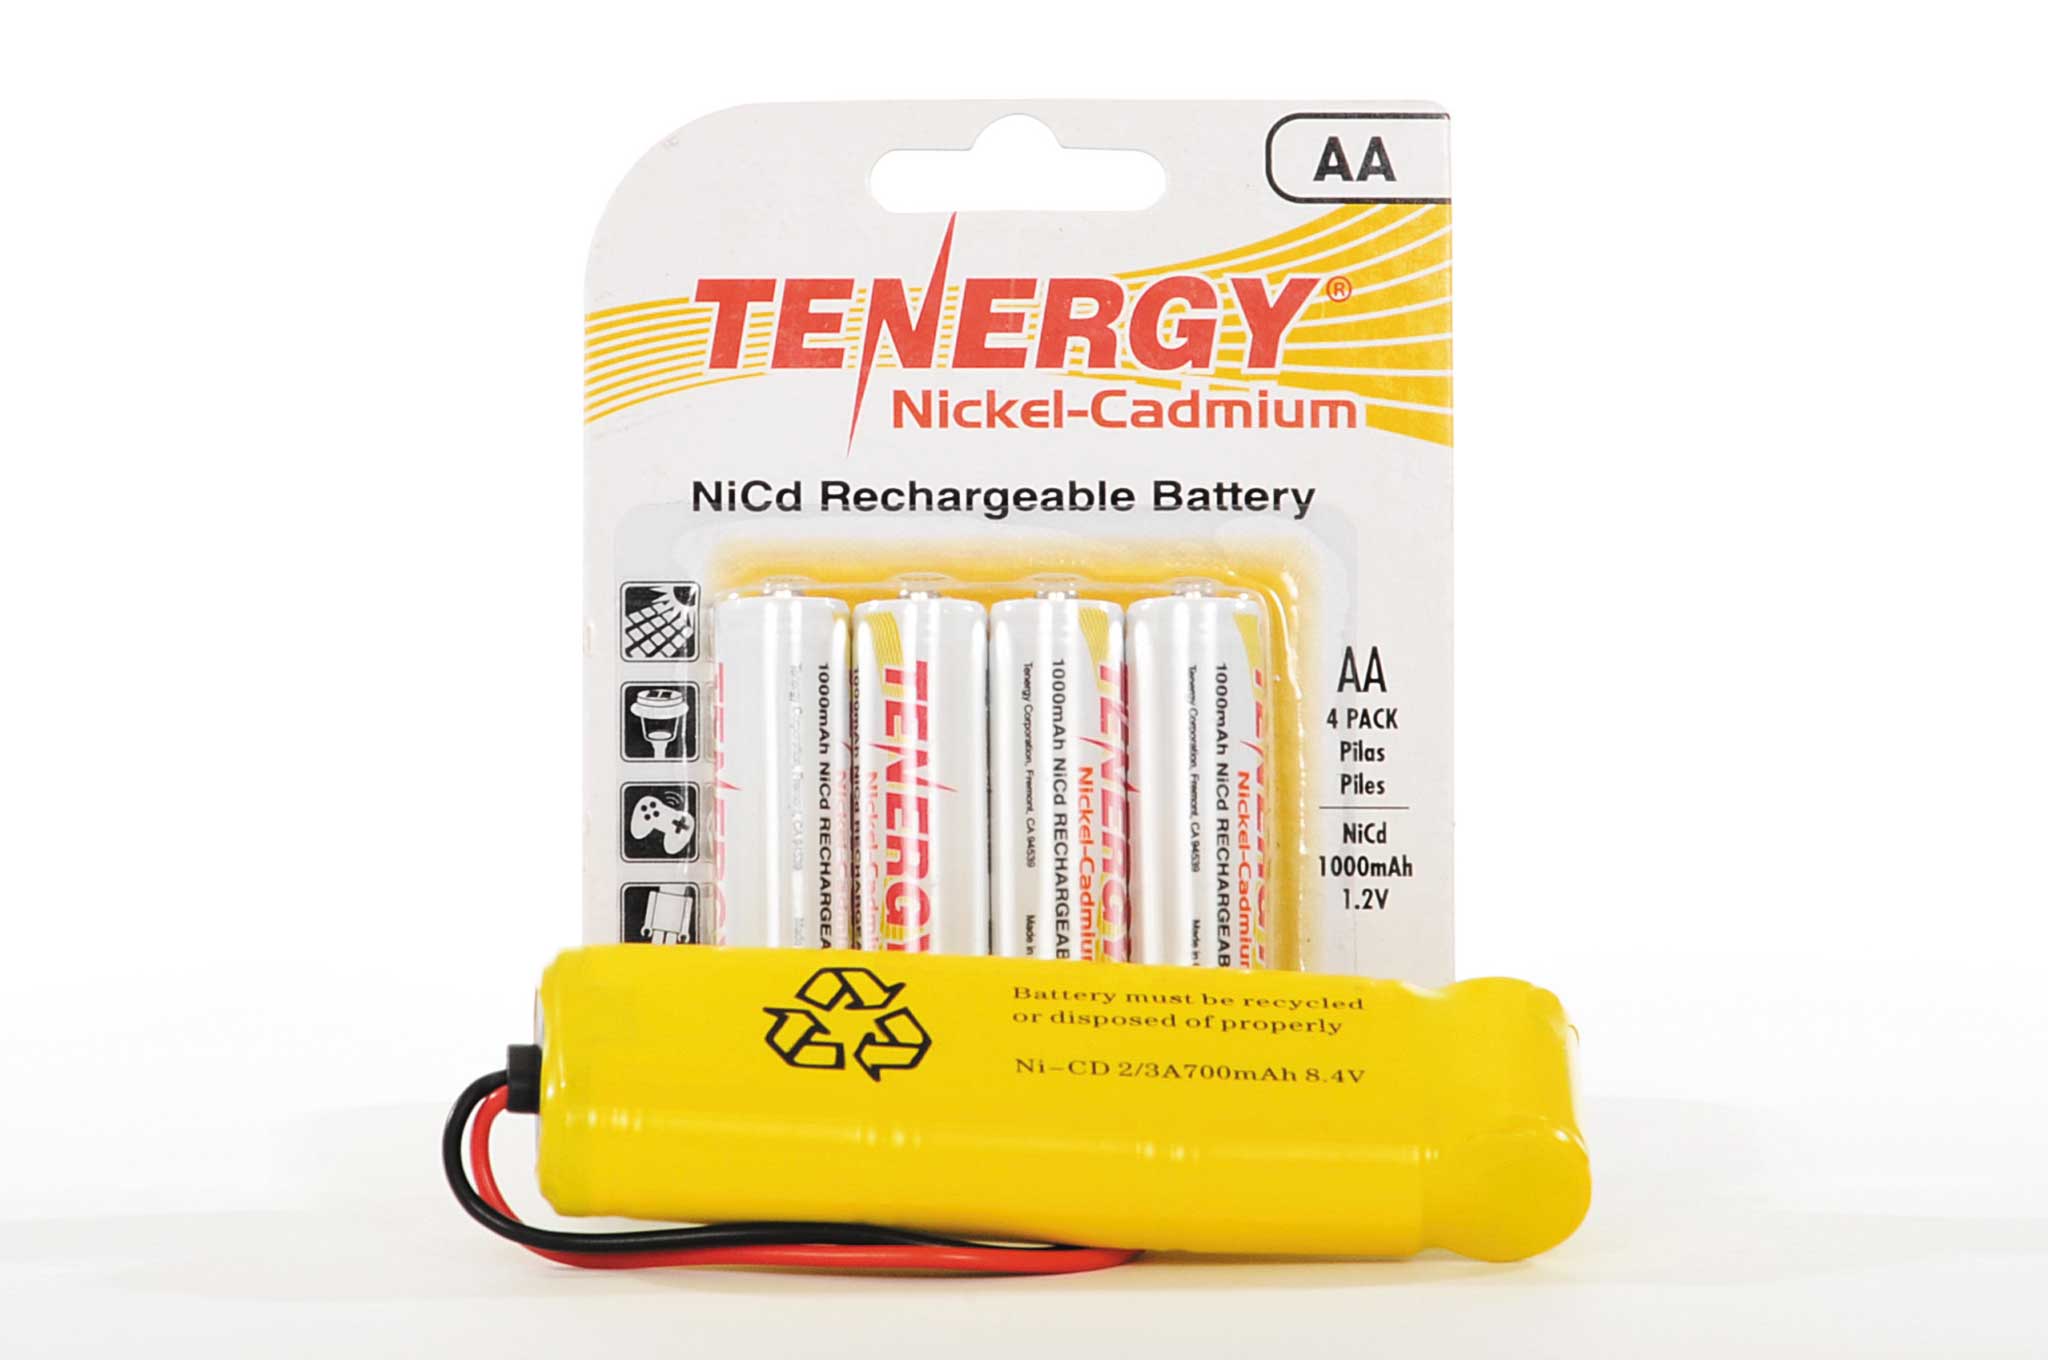
NiCad
411: Nickel cadmium, or NiCad, are one of the most popular rechargeable batteries in use today. Almost everyone uses them. Used in everything from cordless phones to power tools, NiCads supply very high peak currents if needed (discharging more than 5 C in some applications and with specially designed cells) while being rechargeable roughly 1,000 times.
Form: NiCad batteries are available in many common sizes, such as AAA, AA, C, and D. A NiCad cell in these sizes are rated at 1.2V nominal. Capacity varies with cell size; however, the AA samples we used were rated at 1,000 mAh.

Shelf Life: Typical shelf storage losses are approximately 10 percent per month. They should be stored in cool, dry places (not to exceed 85 degrees F). For extended or long-term storage, they should be stored fully discharged. Cells or battery packs left to self-discharge will eventually suffer from the dreaded “memory effect” known as voltage depression due to crystal formation on the cell’s electrodes. Anyone old enough to remember MySpace will have used a cordless phone that showed a full charge but, once removed from the charger, immediately died.
Recharging: Proper cycling is important for long cell life. Without getting too technical, this means simply running the pack to a discharged state before recharging again. It’s best to fully use a NiCad pack’s capacity completely before recharging to ensure the longest pack or cell life.
Crisis Capable?: Because NiCad cells can tolerate a large range of input currents and less-than-ideal charge methods, the ubiquitous “wall wart” household power transformer can accommodate if there’s no other option. Practically every household has a few of them sitting in a junk drawer, legacies to devices that no longer work or were long since thrown out. These simple DC power sources can be wired to a simple battery holder available at electronics stores or, if total improvisation is needed, the leads simply taped or held to the batteries themselves.
NiMH
411: Like NiCad cells, nickel metal hydride (or NiMH) is ubiquitous in today’s high power electronics, such as two-way radios, professional-grade flashlights, and toys. They’re capable of high discharge rates like the NiCad, but not to the same extent. They are capable of rapid charging with proper equipment, and are gradually overtaking NiCad in terms of popularity. Quality NiMH cells are typically good for 500-plus recharge cycles.
Form: Like NiCad, NiMH batteries are available in the typical consumer sizes and at a 1.2V nominal rating. One of the primary differences between NiMH and NiCad cells is the capacity of a NiMH cell of a given size is roughly double. The NiMH AA we tested had a capacity of 2,000 mAh, while the NiCad was only 1,000 mAh.
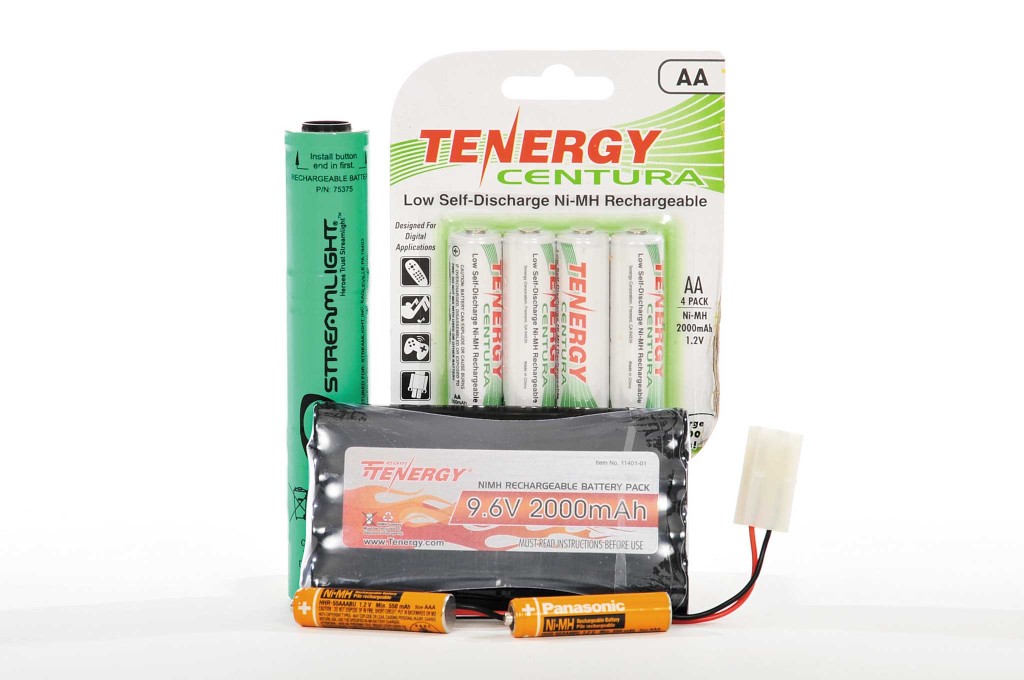
Shelf Life: NiMH cells generally don’t last as long as NiCad. Typically, charge drops off rapidly after the first day, sometimes 5 to 20 percent, then gradually drops to somewhere between 0.5 and 4 percent per day at room temperature. However, there are new NiMH cells out there that claim to be low self-discharge (like the Tenergy cells we sampled) and can maintain a large majority of their charge for over a year. Discharge rates vary greatly with temperature, and if they need to be stored fully charged for long periods. Long-term storage of fully charged packs or cells can be done in the refrigerator, but must be kept in airtight containers to prevent condensation from forming when brought back up to room temperature. These cells are best discharged to 0.9V per cell for long-term storage.
Recharging: It’s best to cycle on a monthly basis if stored. If NiMH cells are stored for long periods of time without charge, they may need to be charged at a 1/10C rate and discharged a few times to regain nominal capacity. NiMH have less tendency to develop voltage depression with improper handling, and cycling can reverse this effect to a greater extent than in the NiCad. Note: Generally, it’s not ideal to charge NiMH or NiCad cells longer than 24 hours and doing so can promote crystal growth and voltage depression.
Crisis Capable?: There are some inexpensive and unique ways to charge both NiCad and NiMH even with no electricity available. We used the low-cost Sunjack 4 AAA/AA charger that plugs into your USB battery or a small solar charger like the SunTactics Scharger-14 Solar Charger. The Suntactics 14W panel can top off a high-capacity USB battery and charge four AAA batteries at the same time. The AAA batteries take about two to four hours to charge, depending if they are NiCad or NiMH.
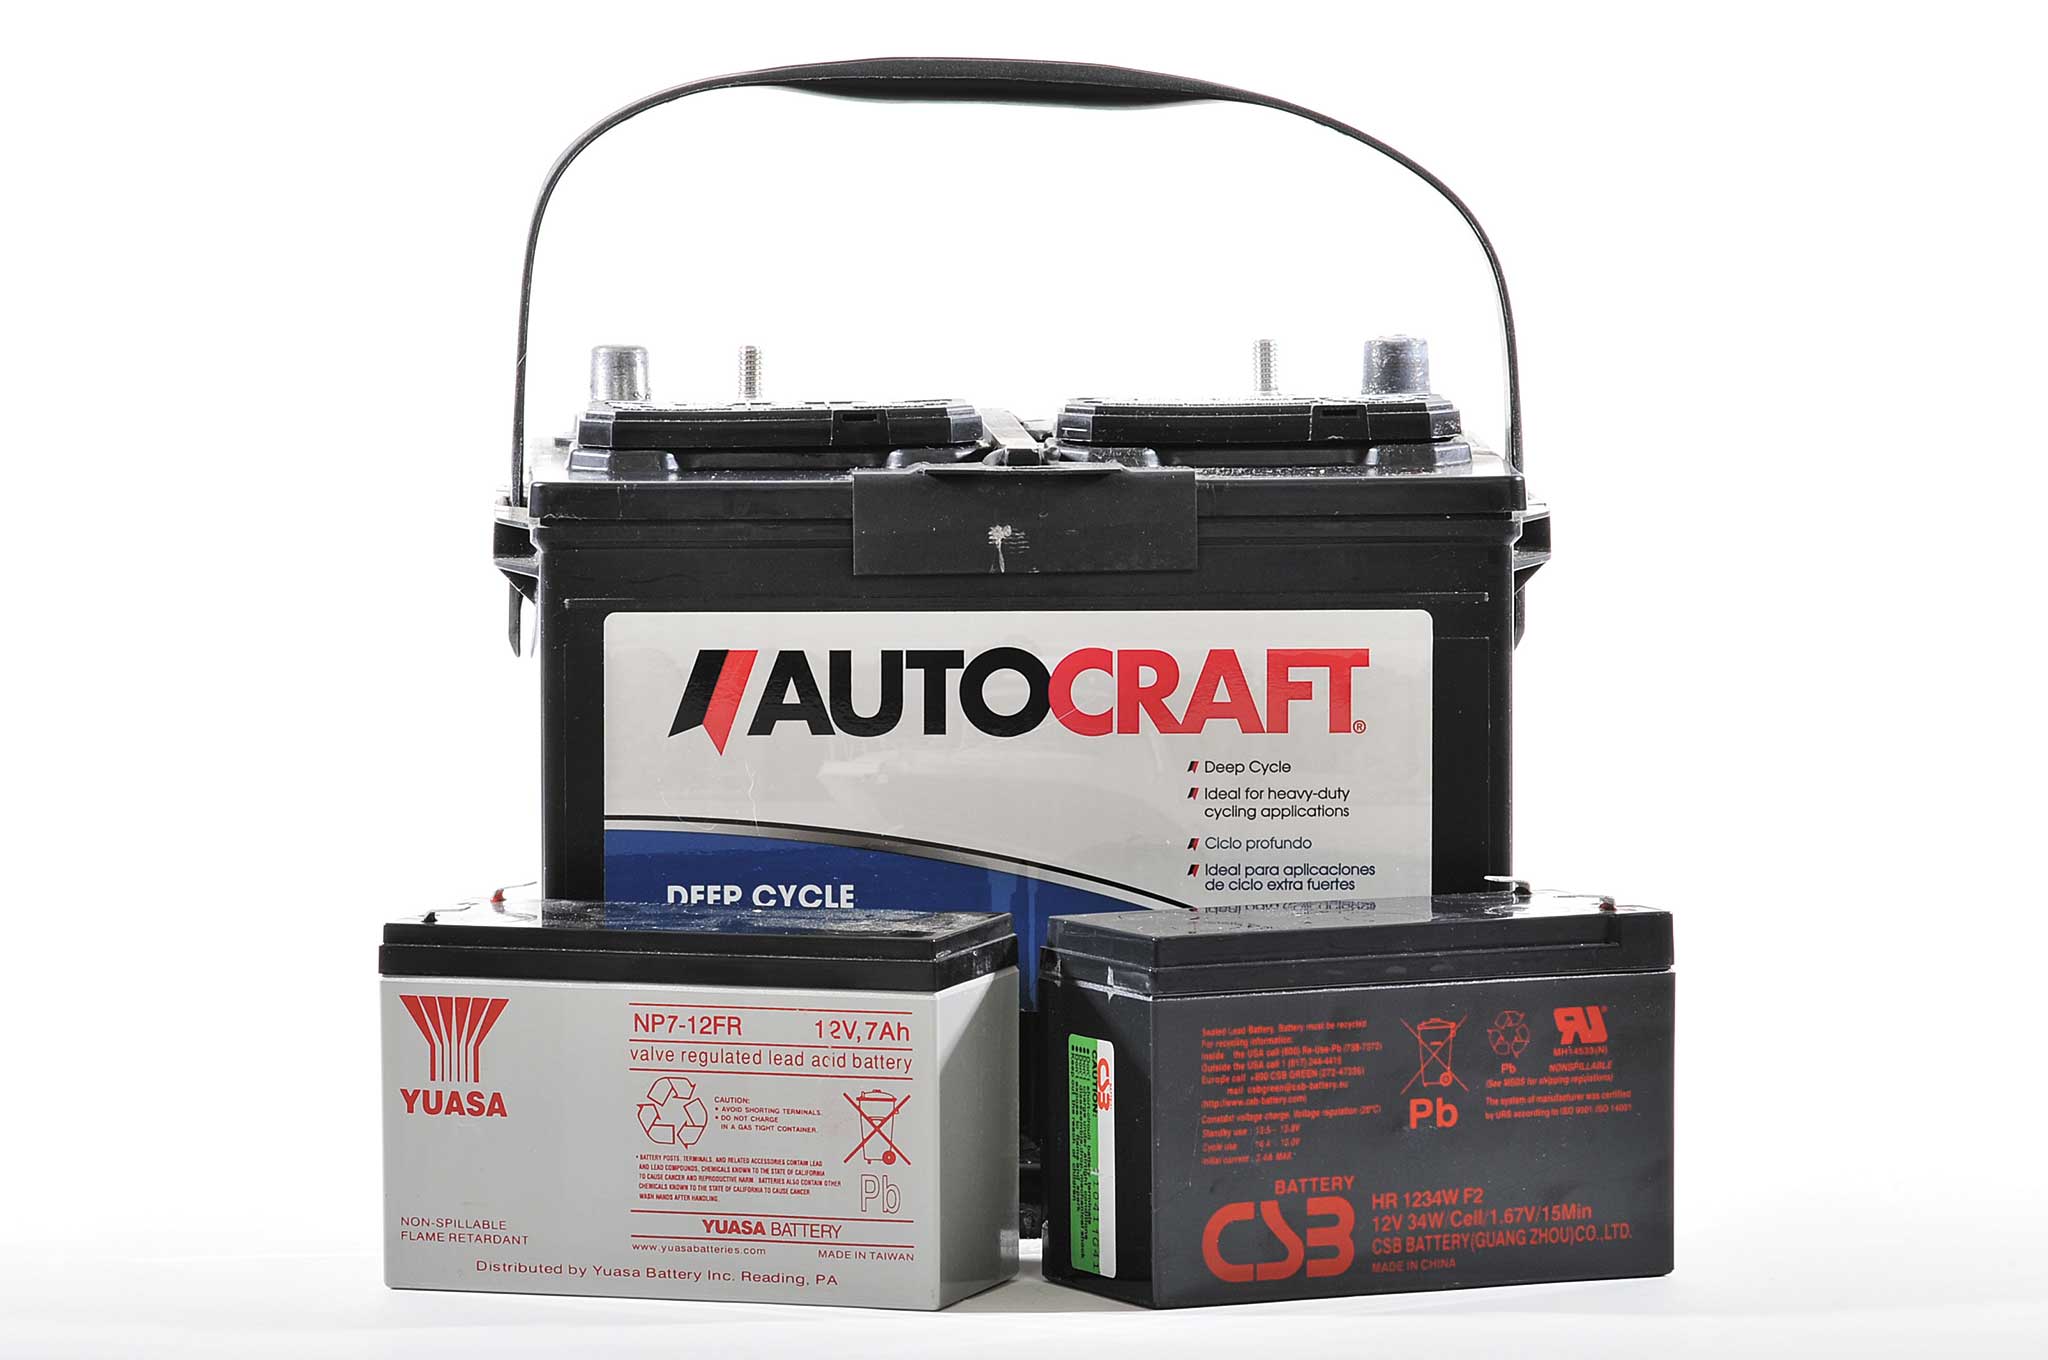
Lead Acid/Gel Cell
411: These batteries are the heavy hitters of energy storage. They can be found in everything from handheld spotlights to batteries that run off-grid homes at night. Their ratings are usually in amp-hours (Ah) or reserve capacity (RC) and usually rated nominally at 6 V or 12 V. They’re not particularly portable — unless you’ve won a Strongman Competition or two.
Form: Available in various sizes and capacities. They’re capable of sustained moderate current discharge and deep cycling (full discharge) and not to be confused with automotive batteries, which are capable of high current and very intolerant to deep discharge.

Shelf Life: Lead acid batteries have moderate shelf life and, depending on quality and age of the battery, a self-discharge rate of 3 to 20 percent a month. Overall lifespan seems to be approximately three to five years when properly cared for. Generally, 500 to 800 charge cycles can be obtained within that time. Left discharged for long periods of time they can undergo sulfation, or the crystallization of lead sulfate on the battery’s plates. Early on, it can be reversible, but continued neglect can cause this to become permanent, and the battery’s capacity will degrade over time.
If storing a lead acid battery for extended periods, it’s best to keep it on a trickle (float) charger. A simple DC power adapter rated at 12V would be sufficient to tend a fully charged battery. Even an adapter capable of only a couple hundred milliamps can offset the discharge rate of a large battery, provided the adapter never exceeds approximately 14.5 V — higher than that and electrolyte boiling/gassing can occur. In a gel cell and VRLA (valve regulated lead acid battery), this can cause the battery to swell or explode. It’s always best to use a proper float charger for long-term storage of this battery type and store in a cool dry place.
Recharging: Charging can be done with a small taper charger. Since lead acid batteries vary so greatly in size and can be quite large, it’s important to match charger current to battery. Generally, deep cycle batteries should only be fast charged with a proper tapering current charger. Gel cells are best charged at a 1/10C rate or in some cases slightly faster.
One question that people ask all the time is, “How do I know my battery is charged? I have it hooked up to my generator for 12 hours, and I’m not quite sure.” A deep cycle battery is usually fully charged with a voltage of around 13 V and completely discharged around 12 V.
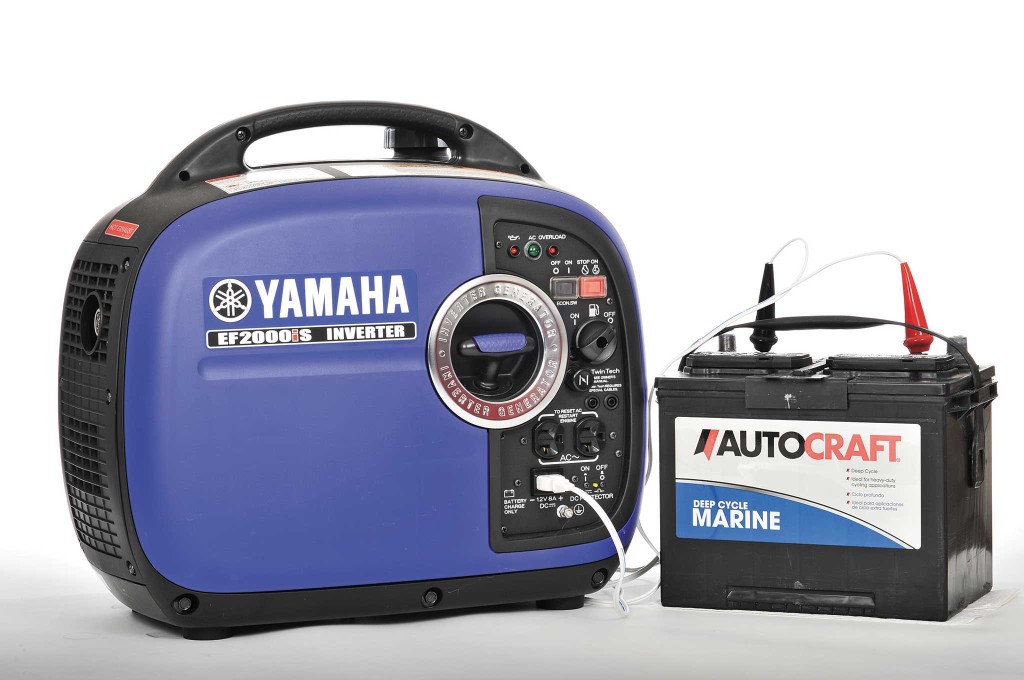
It’s also vital to know approximately how long it’ll take to conserve fuel. Deep cycle batteries are usually rated in RC instead of Ah. Reserve capacity is the number of minutes a battery can maintain a useful voltage under a 25 A discharge. Our test battery had an RC of 140. This means it can deliver 25 A at a useful voltage for 140 minutes. To get a more useful number, we convert to seconds and multiply by 25 A. The resulting number is the charge in ampere-seconds. Then, we divide by 3,600 to get hours, giving us 58.3 Ah. Therefore, if the charge output of our Yamaha EF2000iS generator is 8 A (58.3 divided by 8), we get almost 7.5 hours of solid power.
Crisis Capable?: If power isn’t available, they can be easily charged with a generator’s secondary DC output, which is usually around 8 A for most manufacturers. There are also many solar charge options available that combine a 50 to 100W panel and small charge controller, such as those manufactured by Renology Solar Suitcase RNG-F-2X50D.
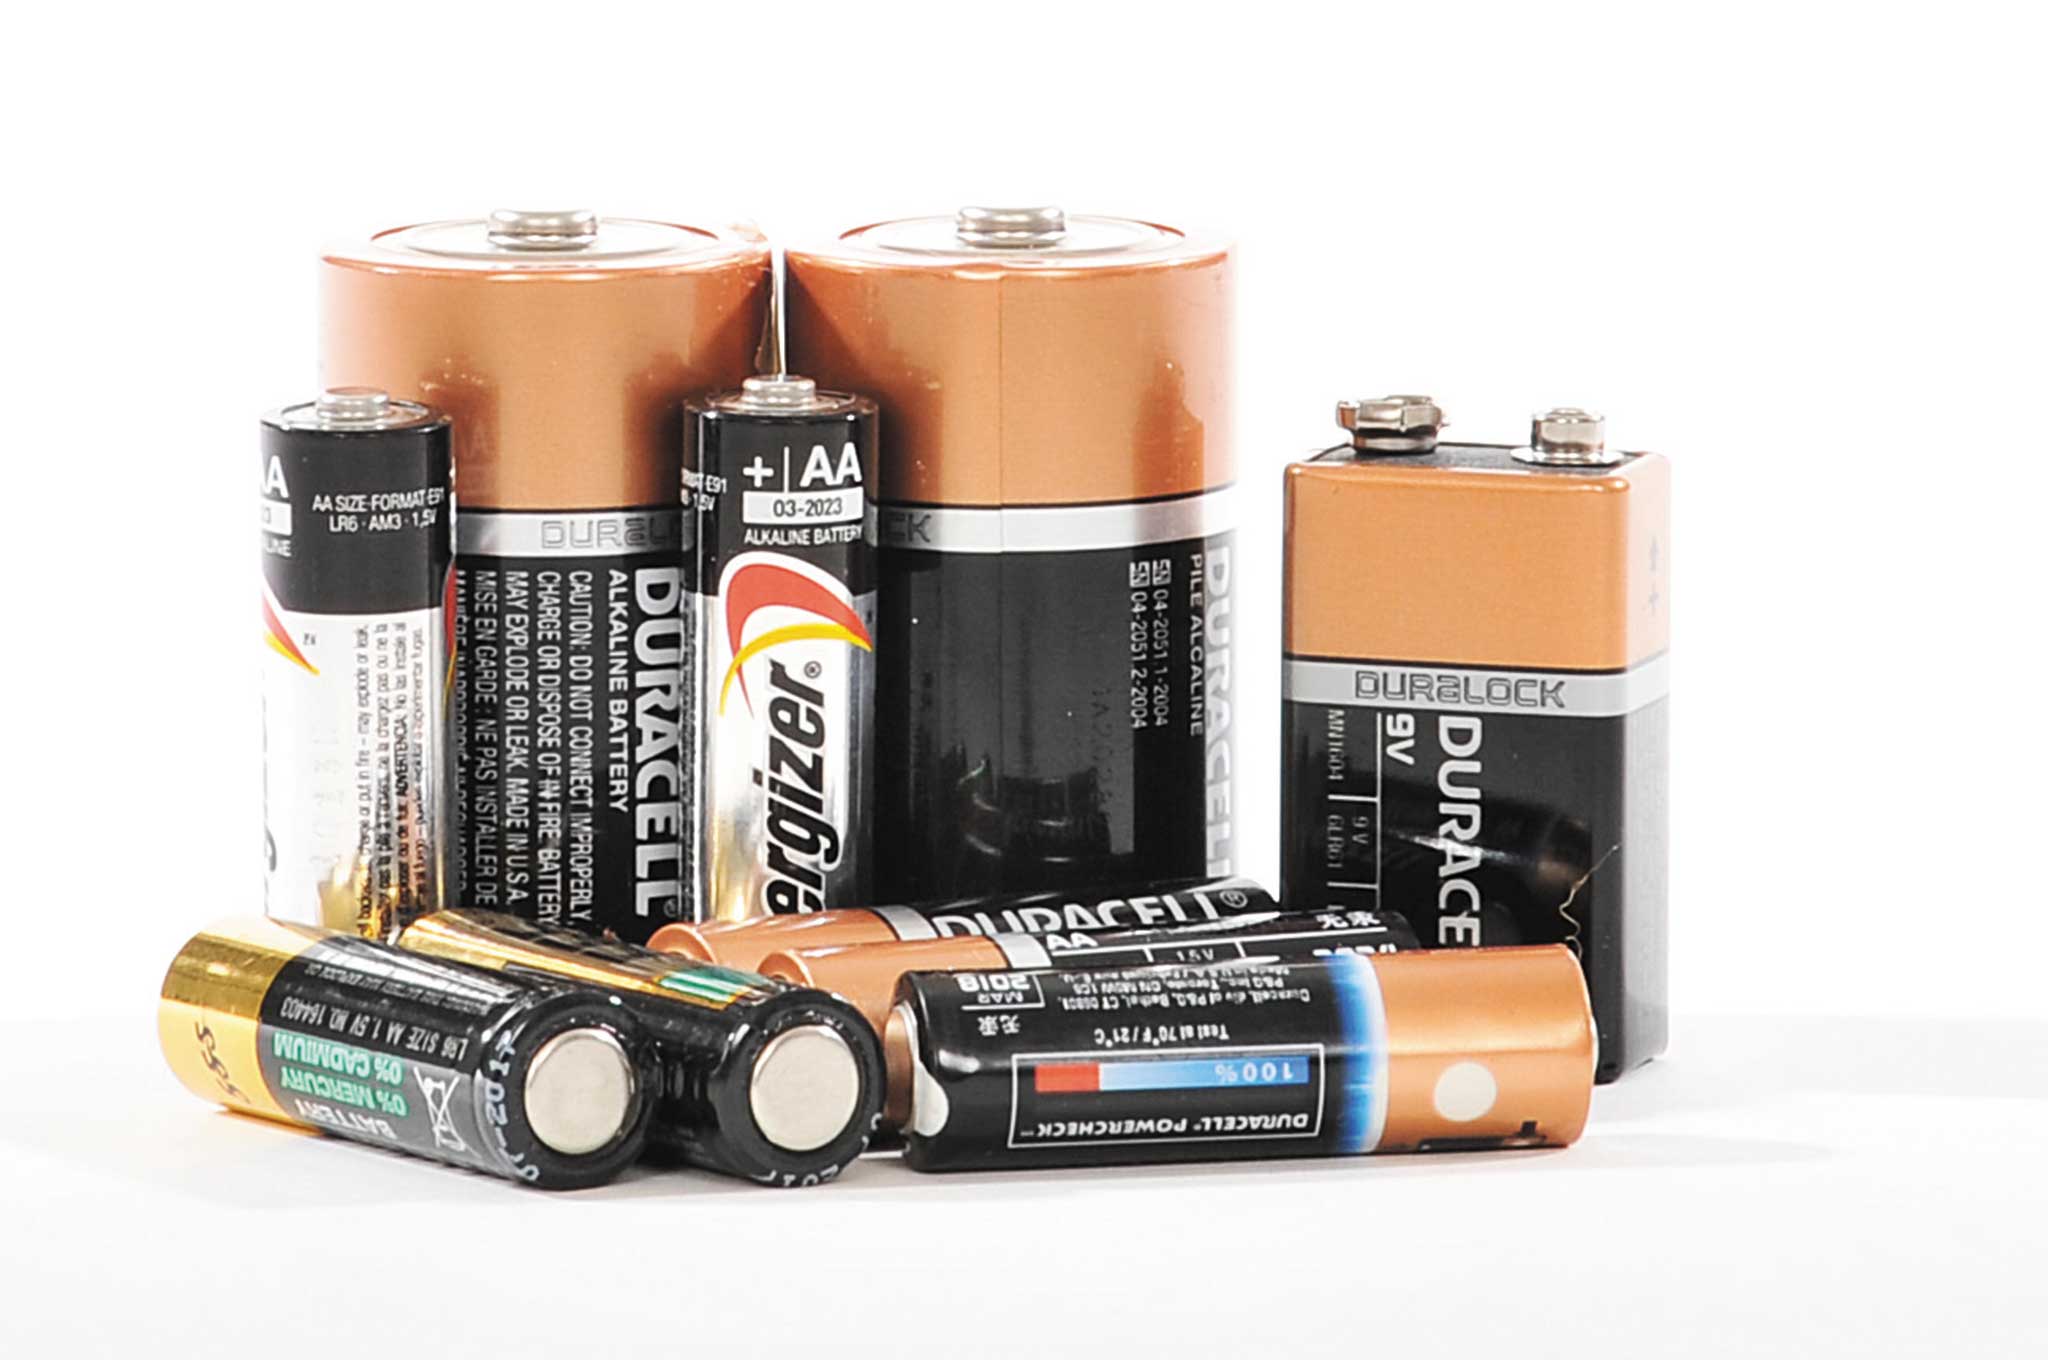
Alkaline Batteries
411: The most common battery for all electronic appliances. Available everywhere, and most people have dozens on hand. Low to very moderate current capability. While most manufacturers won’t label the capacity of their cells, their capacity is around 3,000 mAh-plus for quality brands. However, it’s important to note that their capacity varies greatly with load. At a 1A draw they may only provide 700 mAh.

Shelf Life: For top quality brands, they could last 10 years or so. It’s best to store alkaline batteries in a cool place, but keeping them in the fridge like mom did isn’t necessary with today’s construction. They self-discharge at a rate of less than 2 percent per year at room temperature. Shelf life will degrade in high temps, though. At 85 degrees F they only lose about 5 percent per year, but at 100 degrees they lose 25 percent per year.
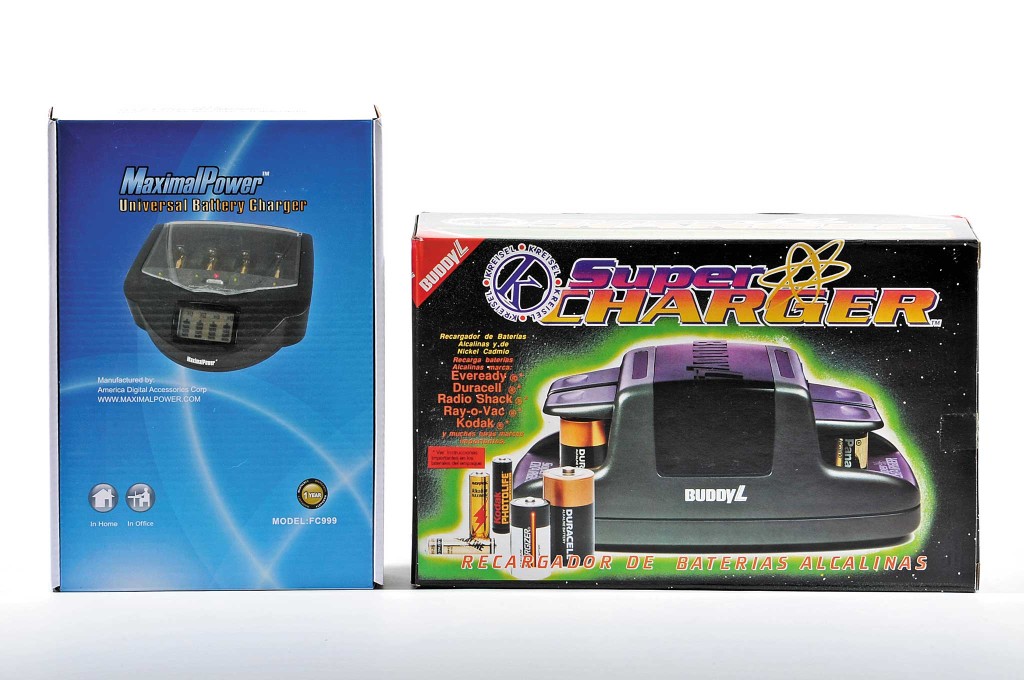
Recharging: Many people don’t know that an alkaline battery can actually be recharged. This should be carried out only with a specialized charger. We sampled the Maximal Power FC999 Universal Rapid Charger, which is capable of recharging alkalines. Charging works best if the batteries aren’t completely dead. We first saw this type of charger emerge in the mid ’80s by a long-gone toy manufacturer. It was the Buddy L Super Charger #8000, which this author still has to this day. While there’s little data on how many recharge cycles the batteries can take, it seems to range from a handful of times to a couple dozen depending on use and load. We advise recharging at your own risk and only with brands recommended by the charger’s manufacturer or top-quality brands.
Crisis Capable?: Extending your disposable battery supply 10 or more times, and combined with how readily available alkaline batteries are, these specialized chargers are definitely worth considering. In desperate times, you could take other people’s dead alkalines and give “good ones” in exchange for other necessities.
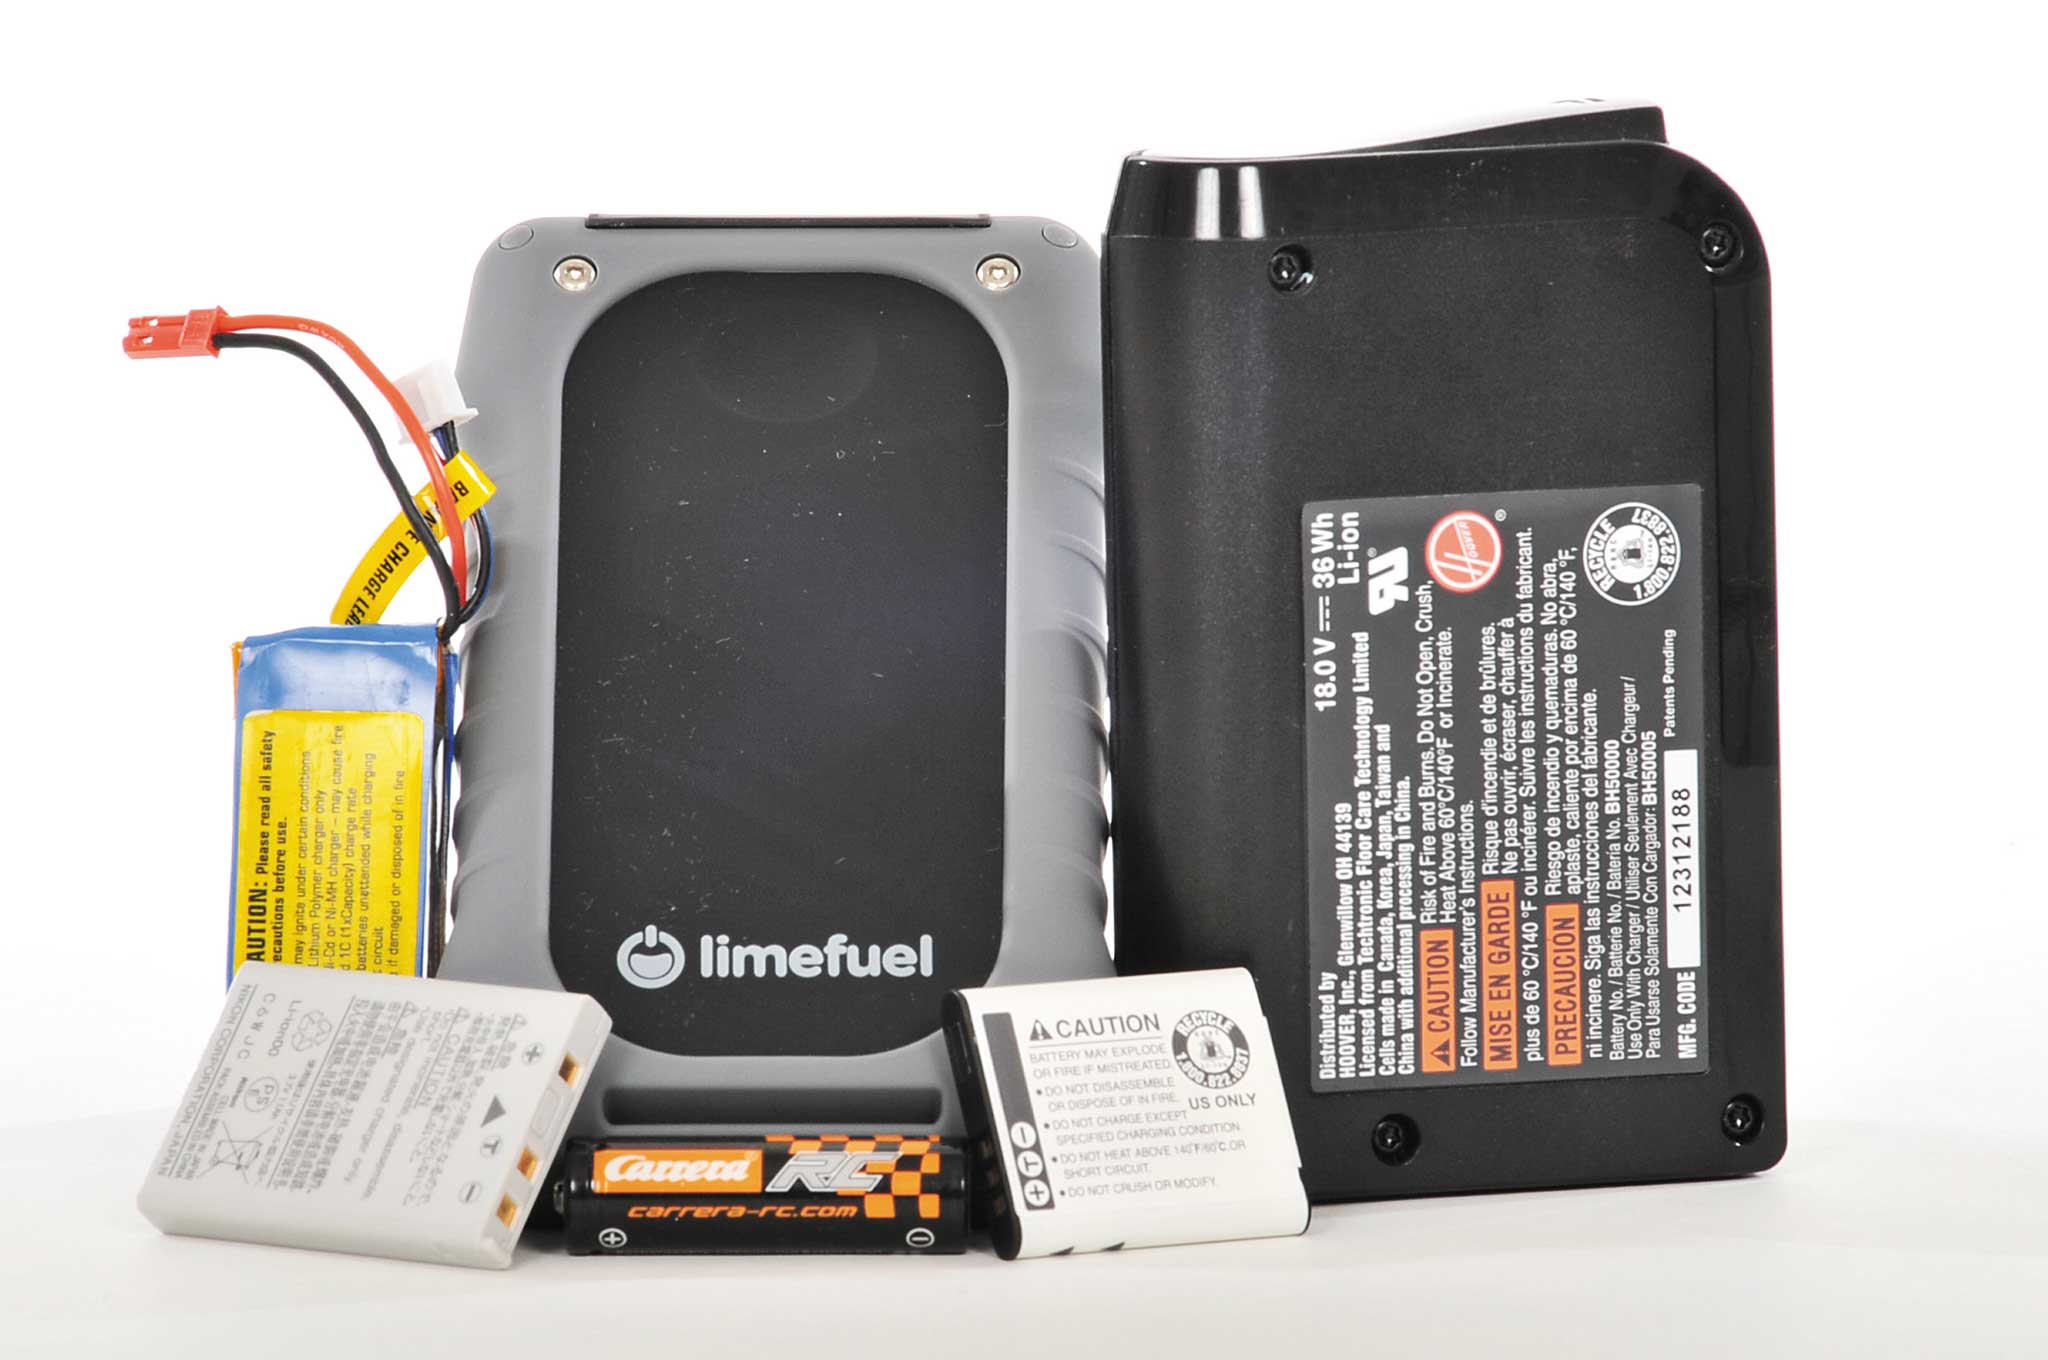
Li-Ion (Polymer)
411: While Li-ion batteries are the stuff of science fiction with energy densities that make grown product engineers weep for joy, they must be properly handled, charged, and protected. Please don’t use any of the aforementioned charge methods unless you have a proper charger suited specifically to Li-ion batteries. Found in smartphones and other high-tech consumer electronics, they commonly require a constant-current, constant-voltage (CCCV) type of charging algorithm and are not compatible with standard constant-current type methods that the other battery types require. Most of the time, you can’t even open a device to access the battery to service it.
Shelf Life: The Li-ion has excellent shelf life. If stored, it should be done so in a partially charged state. Partially discharge a battery to around 50 percent life (usually indicated by the device it’s installed in). Depending on battery quality, they can be stored this way for up to a year.

Recharging: Li-ion doesn’t suffer from a memory effect as with NiMH and NiCad, and can be recharged up to 1,000 full cycles. It’s OK to use a device and recharge the battery even when not completely discharged. These smaller micro cycles do not count as full charge cycles and will not degrade or diminish the battery’s charge cycles significantly. A rough example would be if the battery is only brought to 50 percent every use and then recharged, there may be closer to 2,000 recharge cycles available.
If batteries are stored for long periods of time in a discharged state and look as if they have swelled up don’t attempt to recharge. This could cause a fire or explosion.
Crisis Capable?: While they probably fare the best for holding a charge over long periods of time and potentially have a thousand more charge cycles compared to other battery types, Li-ion aren’t rugged enough or versatile enough to count on during an emergency situation. However, an excellent device to add to your off-grid lifestyle is a ruggedized Li-ion battery that can power USB devices. We used the Limefuel L150XR that includes a 15,000-mAh battery housed in an IP66 water-resistant case and can charge two USB devices at once. The capacity is roughly 10 times that of an average smartphone. Using the SunTactics solar charger we could achieve full charge in a little over 10 hours. This makes a super lightweight rugged power solution for indefinite communications off-grid.
No Li-Ion King
While lithium-ion (Li-ion) batteries are excellent batteries, their physical and electrical characteristics make them a tough choice in a grid-down situation. Why? Here’s a brief look.
Fragile: You can bend them by hand or easily puncture them, potentially causing a “thermal runaway,” or fire. Water can also permanently damage them or cause a fire.
Size Limit: They’re usually designed with a specific product in mind, so they don’t power other products they weren’t designed for — think batteries for smartphones or certain flashlights. I can still use my 1980s electronics today because they run on AA or C batteries. I can’t use my first-gen iPad with a dead battery that’s barely five years old.
Cell Blocked: Each individual cell is rated at 3.7 V, making combinations less available to power most other electronics. For example, you shouldn’t use a 7.2V 2-cell pack to power your 6V (four-AAA-powered) radio.
Tricky Charges: If a Li-ion is even removable from a device (such as with a digital SLR camera), you will notice there are multiple contacts and not just the usual positive and negative. This is because chargers are also specific to each battery and requires cells to be balanced — the extra contact(s) allow each cell to be charged individually. Overcharging can cause immediate damage or fire.
Discharge Distress: Like a maxed-out credit card that’s never repaid, a Li-ion battery that’s been over-discharged can be ruined. This can occur even after just a couple of times. Fortunately, most electronics designed for these batteries have protection circuitry designed to prevent over-discharge, i.e. The latest smartphones.
About the Author
Robert Swenson is the owner of Mission Technical Services, an IT company specializing computing, networking, and large-scale battery backup/uninterruptible power systems. He studied electrical engineering at Cal State Long Beach. He has built several electric vehicles and has a lifetime of experience with electric radio control modeling.
More From Issue 12
Don’t miss essential survival insights—sign up for Recoil Offgrid’s free newsletter today.
Read articles from the next issue of Recoil Offgrid: Issue 13
Read articles from the previous issue of Recoil Offgrid: Issue 11
Editor’s Note: This article has been modified from its original print version for the web.