Alan Turing, the legendary World War II cryptographer, creator of the conceptual computer, and codebreaker of the infamous Enigma cryptography machine once said, “Those who can imagine anything can create the impossible.” While it may not have been in the same light then as it’s taken now, he was absolutely correct. In fact, this statement, when being applied to quantum computing, mathematics, cryptography, and technology becomes a little terrifying when applied to the current state of cyber and information security. Now more than ever, we have nefarious actors thinking outside the box, and acting on what used to be known as the impossible. Around each corner is a new risk to be managed, and even more malicious “black hats” willing to come up with an exploit. In this article, we’ll take a look at how to prepare for a cyberattack on the grid, based on real-world examples of attacks on critical infrastructure.
Cyberattacks Can Affect Your Daily Life

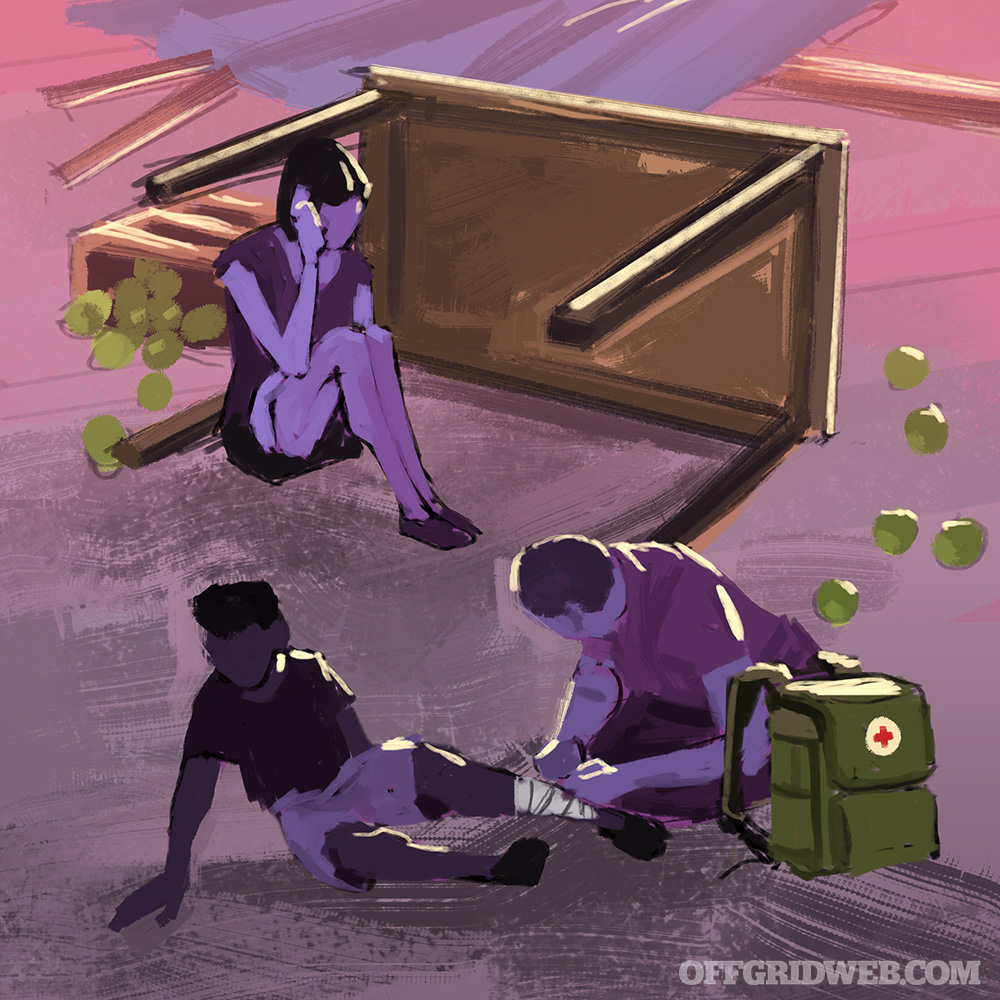
Above: Hackers become more persistent and more sophisticated every day, threatening the lives of nations and individual citizens.
With new developments every day in the cyber arena, whether positive or negative, your information alone is no longer the highest-value chip on the table. Breaches happen every single day in the thousands. There are amateurs stealing information over Wi-Fi, skimming credit cards at the pump, and utilizing social engineering to collect personally identifiable information (PII). Ransomware, identity theft, data leaks, and “script kiddie” DDoS (distributed-denial-of-service) attacks all suck, sure, but what about the things that could really affect our day-to-day life? Picking up groceries, paying your bills, keeping the lights on, potable water, and functioning hospitals are all critical parts of society and all vulnerable points in the threat landscape. Even worse, the likelihood of a threat acting upon these vulnerabilities is higher than ever.
But before we start talking about the future and how cyberattacks impact the physical world, let’s take a brief look into the past. It’s a quiet Sunday in March 2007 in Idaho Falls, Idaho, and a 2.25-megawatt green maritime generator sits on a cement pad at the U.S Department of Energy’s Idaho National Lab. The DOE, at the time, partnered with other government agencies to explore possible exploits for the modbus communications protocol, widely (still, even) used in industrial control systems. Ahead of the curve for the time period, DOE had the wherewithal to know that backup generators, largely used for telecommunications and the electrical grid, were very susceptible to cyberattack.
With these ideas in mind, a few crafty computer scientists discovered that, if on the same network as an industrial piece of equipment, the modbus protocol and its vulnerabilities could be exploited through programmable interfaces on the equipment. A few scripts later, they targeted relays meant to protect breakers on the equipment, and the generator began bucking like a bronco, spewing smoke, and shaking violently. Less than a minute later, shrapnel was shooting from the generator, some pieces landing as far as 30 yards away — then all of a sudden, it was over. What the researchers understood after that day was that systems could now be hacked to cause physical damage, not just to compromise information. If the target has any communications protocols connected, such as those in supervisory control and data acquisition (SCADA) systems or programmable logic controllers (PLCs), they can be exploited, controlled, and ultimately, destroyed from anywhere in the world.
Taking the Aurora test into consideration, we’ll explore more recent, real-life examples throughout this article with the goal to demonstrate why it’s imperative to plan and prepare countermeasures against scenarios that leave your household vulnerable to the outcome of infrastructure attacks. Of course, there’s no foolproof way to stand up against someone bringing down the entire electrical grid, but just like anything else, you can certainly soften the blow of the immediate impact while things recover.
Calculate Risk Like the Pros
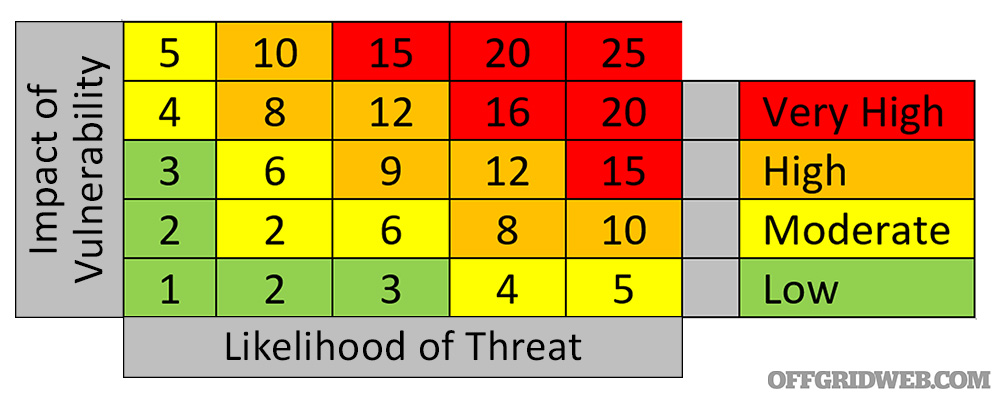
You’ll notice that we’ve used a 1-5 scale on each threat and vulnerability in order to assess two things: 1. The impact of the vulnerability itself, if actioned, and 2. The likelihood of the threat to be exploited. These values are then multiplied to determine overall risk.
Using this simple formula, and the below 5×5 risk matrix, one can quickly determine what the overall risk of the scenario might be. This semi-quantitative risk score is ubiquitous in information security and business continuity circles throughout both the private sector and public sector, including three-letter and other government agencies. If the simple 1-5 scale doesn’t tickle your fancy and guessing isn’t good enough, both NIST and ISO have methods of determining what exactly makes a 1 as opposed to a 4 or 5.
The Electrical Grid
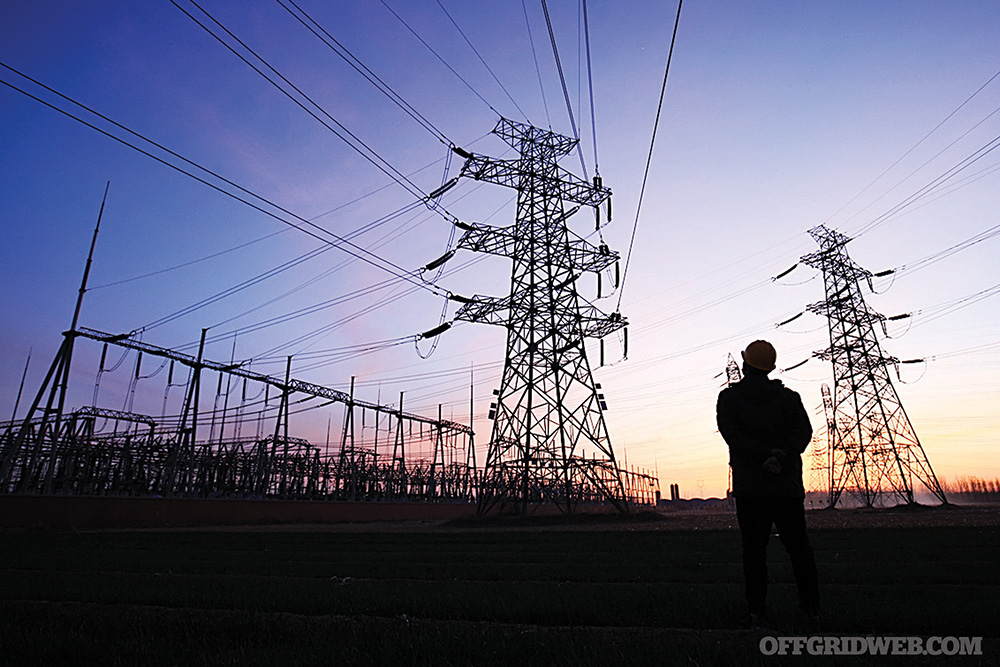
Above: The 2015 Ukrainian grid hack demonstrated that, with the click of a mouse, all power can be knocked out, leaving even governments helpless.
What we’ve already seen: Roughly eight years after the Aurora test, another first-of-its-kind attack was carried out, but this time, it wasn’t a test. On that very cold day in Western Ukraine, the Prykarpattyaoblenergo power and control station was hacked by a group of Russian state-sponsored hackers. The threat actors targeted breakers on power substations, opening the circuits and shutting the power off, bringing a quarter-million citizens into the dark. After discovering the problem at the various substations, power companies and government officials traveled site-to-site closing the breakers and restoring most of the power in roughly three to five hours. While no long-term damage was done, after-action summaries determined that the actors could’ve done much worse due to the degree of control they achieved. This cyberattack foreshadowed Russia’s move to occupy power stations, such as the Kyiv hydroelectric plant and Zaporizhzhia nuclear plant, during their 2022 invasion of Ukraine.
Threat Likelihood: As recently as in 2020, U.S. officials have publicly stated that nefarious actors have already gained access to the national power grid via the private companies that manage various segments of that spiderweb. However, the U.S government has reinforced that material attacks on the grid would be seen as an act of war, if carried out by another nation (assuming that could be proven). Still, this doesn’t rule out a nation-state attack, with full resources behind their power — this is our biggest threat.
Foreign state-sponsored hackers aren’t the only individuals motivated to shut the lights off. Radical groups within the U.S. have also expressed interest in attacks against parts of the grid. However, their resources aren’t as rich, so the likelihood of a long-lasting attack from a rogue group is fairly low.
Threat Likelihood Score: 4
Vulnerability Impact: Much of the power grid runs on outdated infrastructure, which is easily exploited. However, more and more providers are learning to “air gap” systems — in other words, they intend to make sure that they aren’t connected to the internet. Believe it or not, firewalls barely matter anymore if a threat actor is motivated enough.
While the systems might be old, that sometimes tends to be a countermeasure of its own. Exploits for legacy outdated systems require tailored approaches and specific exploits that take time and are one-offs. But with that said, if actioned, usually these systems are toast if the hacker wants to cause permanent damage. All in all, vulnerabilities here are endless.

Vulnerability Impact Score: 5
Overall Risk Score: 4×5= 20
Taking all of the above into consideration, the likelihood of a cyberattack on the power grid and the overall impact based on threats and vulnerabilities is moderate. While the grid and its supporting systems are largely old, the sheer consequence of bringing down a significant portion is enough to scare even the likes of North Korea and China away. The more brazen Russian hackers lurking in the systems, however, may be conducting long-term reconnaissance for the “big bang,” or for leverage against the U.S. at a later date. But for now, we haven’t seen too much in the wild, outside of the Ukraine attacks.
How to Prepare for an Electrical Grid Cyberattack
So, what can you do about it? Well, given what we know above, if you’re impacted by a “grid-down” type of attack, it’s going to be either long term or short term. In the short term, the no-brainer is to have a backup power source. Generators work great, but they’re pricey, require diesel or natural gas, and may not be an option for folks living in apartments. If you’re strapped for cash or restricted for space, an alternative power option is a good stock of backup batteries or power banks.
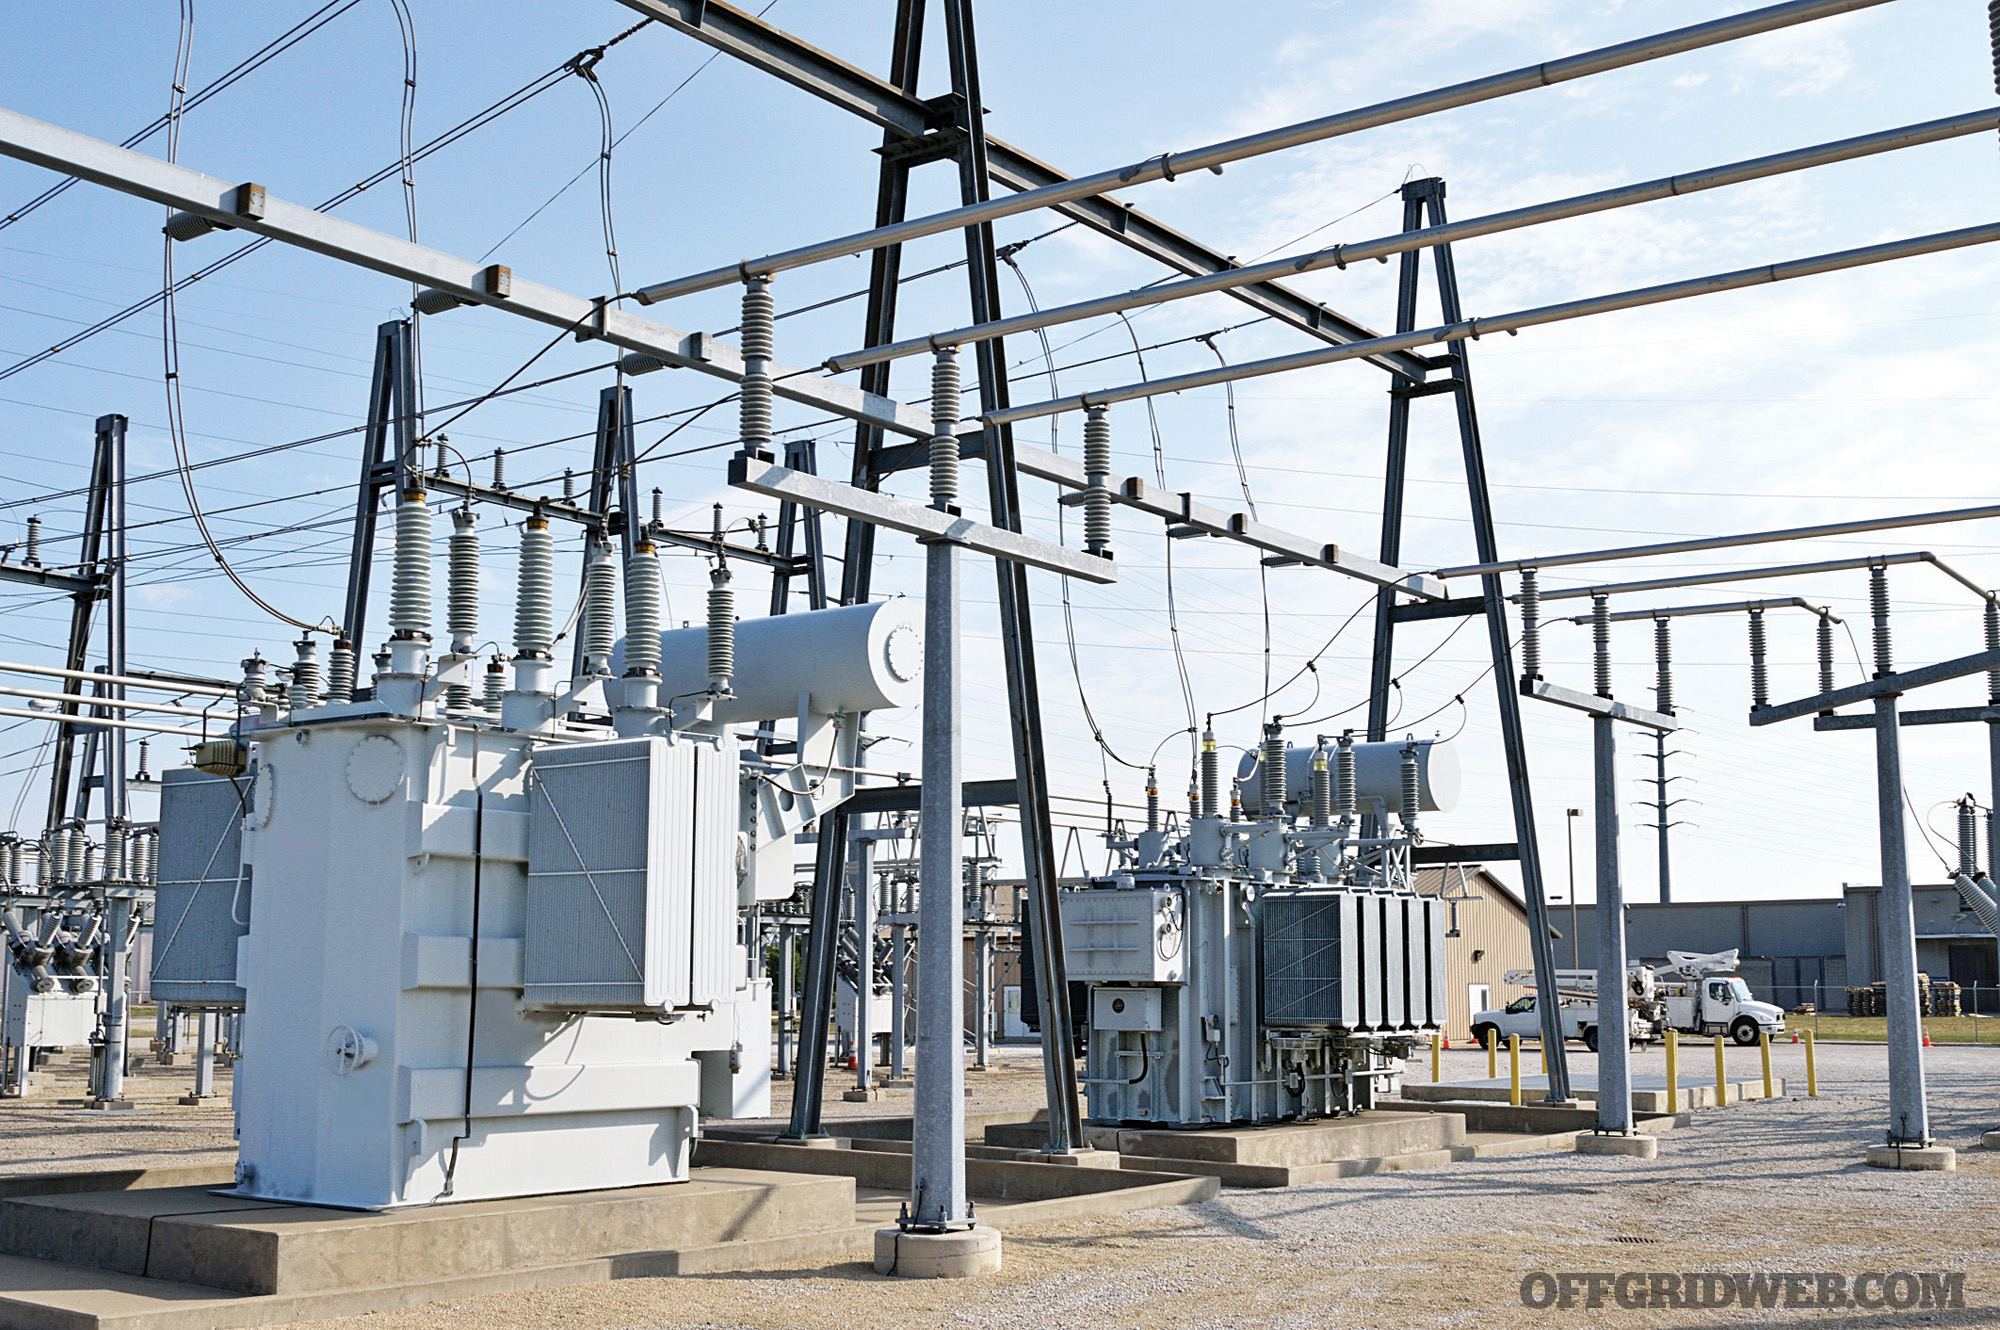
Above: Power stations have always been vulnerable, but the risk of a sophisticated, state-sponsored attack is beginning to reveal just how fragile the grid might be.
Additionally, power tool batteries and inverters are a smart choice, as they offer long-term, low-voltage power for simple devices like household medical equipment, lights, and heated blankets. Lastly, marine and car batteries are a solid choice that can be recharged with solar panels in the long term, and offer a decent amount of power if you happen to run out of gas in your vehicle to charge them. Solar panels for residential homes are becoming more inexpensive every year, and can supply a refreshing amount of electricity if the energy can be stored in moderately sized battery banks. Of course, the best option is all of the above, but given that most people won’t take these steps to prepare, long-term power outages would drive many urbanites into a state of utter chaos.
The Water Supply

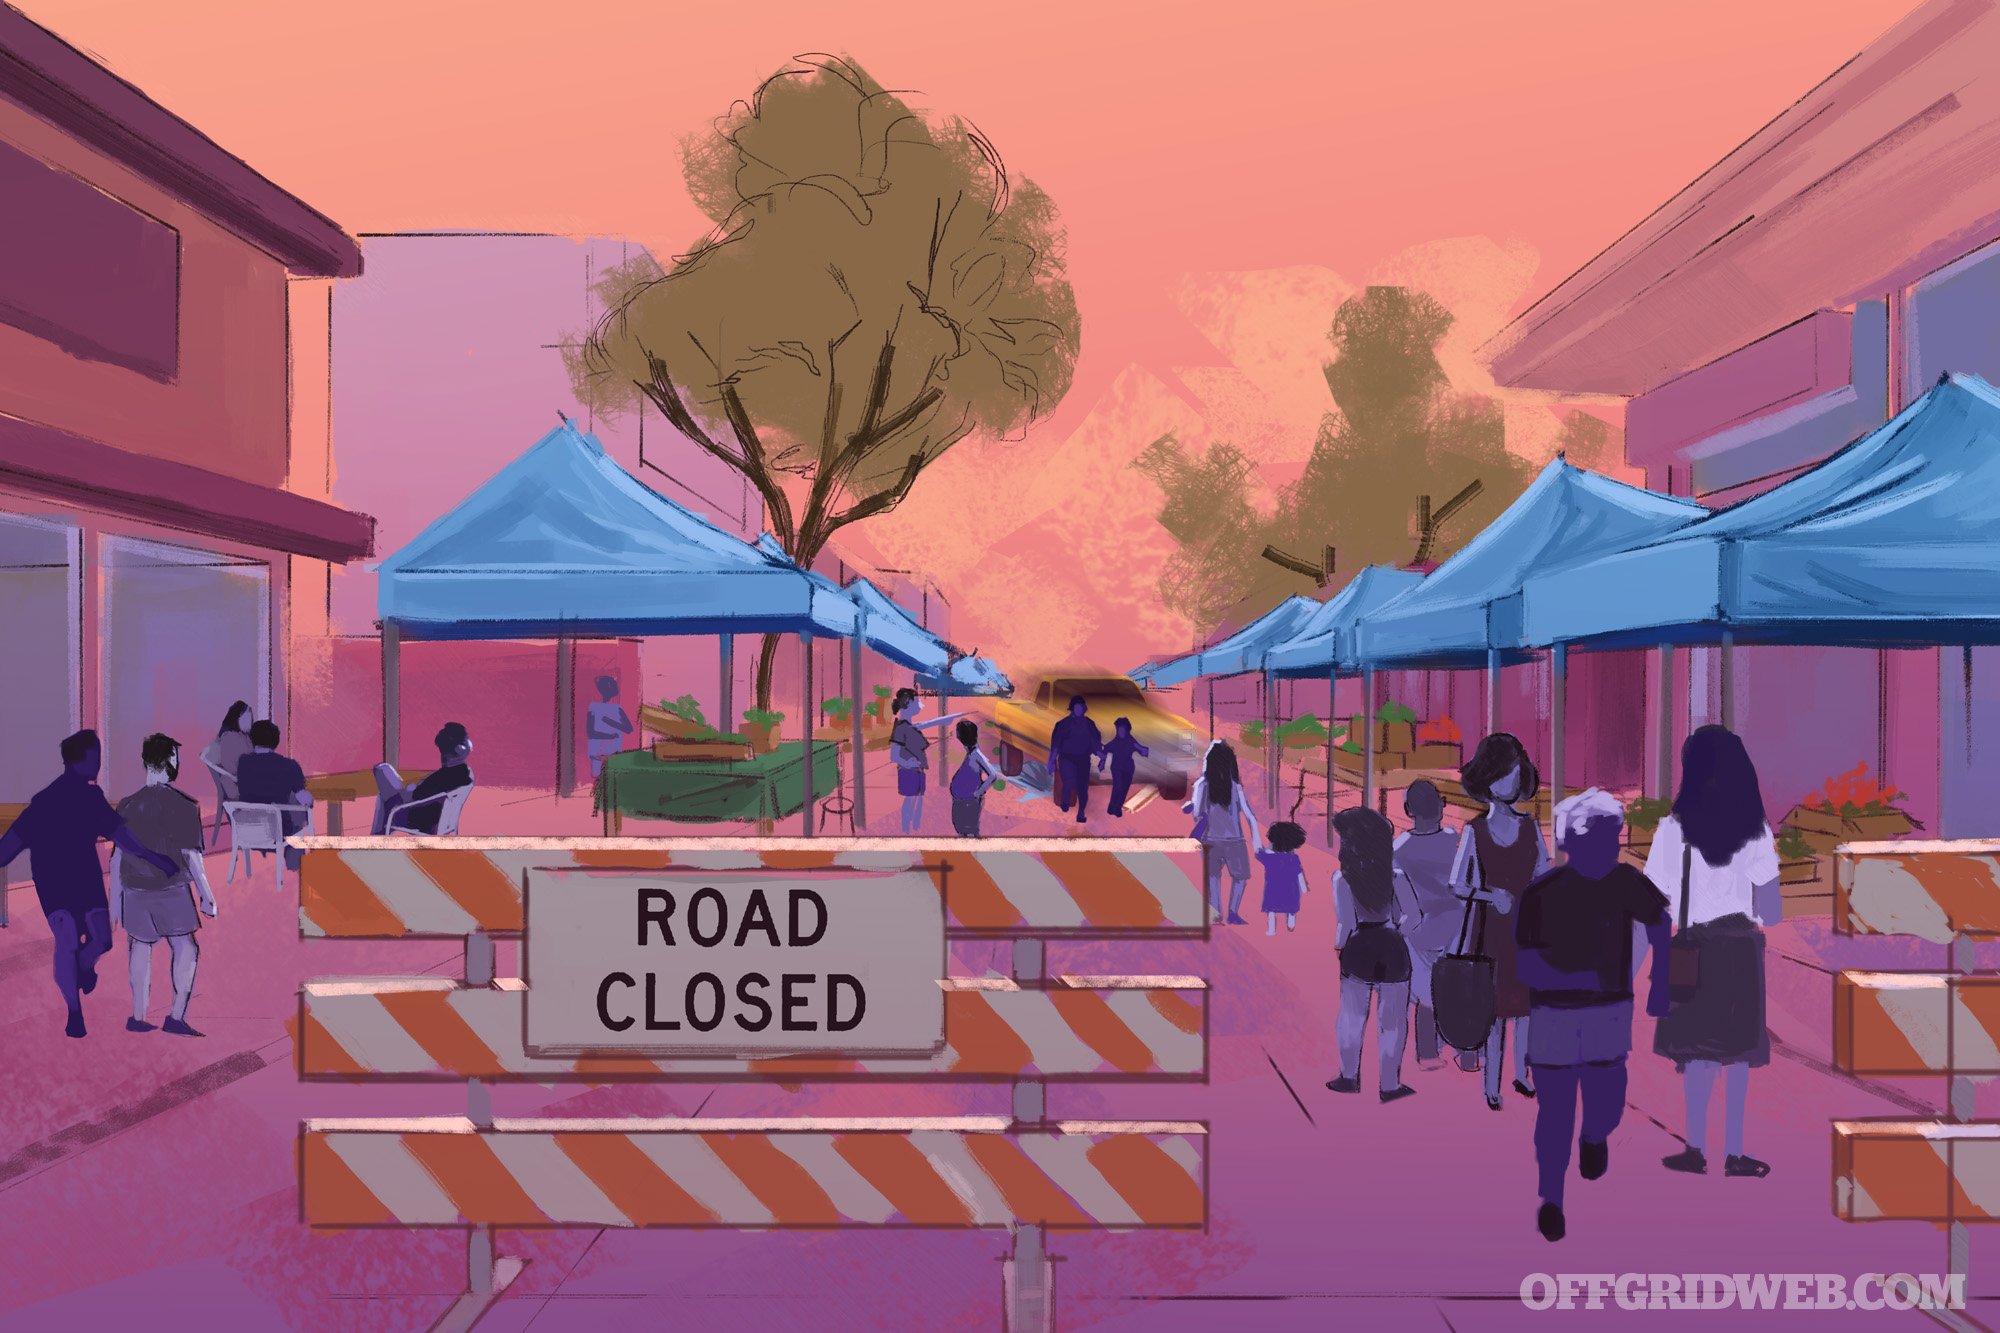
Above: Attacks to water treatment can not only impact the supply itself, but also render thousands of people sick from possible contamination. Some attacks would’ve led to loss of innocent lives if they hadn’t been stopped early on.
What we’ve already seen: As if 2020 wasn’t enough with the COVID-19 pandemic, it did bring something startling a few months after the year closed. In early 2021, rogue actors were able to gain access to the internal network and management systems of a water treatment plant in Oldsmar, Florida. Through a very simple and amateur exploit of remote desktop protocol, the bad folks were about to completely take over a workstation, almost as if a ghost was controlling the mouse and keyboard. Due to basic reconnaissance conducted by the actors ahead of the exploit, they were able to easily navigate the SCADA system and begin manipulating chemical mix levels in the water treatment cycles. They raised sodium hydroxide content from 100 ppm to 11,100 ppm — essentially turning the drinking water into poison. Luckily, an observant employee reverted the setting before anyone was harmed.
Threat Likelihood: Similar to the electrical grid, this area of critical infrastructure is a major target for nefarious actors. Water is a precious resource, and one that needs to be kept reasonably clean when it comes to potable sources. Aside from drinking water, sewer systems and “city water” for other community supporting functions (such as building HVAC) also require high availability to keep our offices, hospitals, and telecommunications hubs up and running.
Another important note is that these threats are not new and come from various sources. In 2016, an Australian wastewater treatment plant was hacked, but not from the outside. The threat actor, a disgruntled former employee, took action on the SCADA system via pirated software that matched that of the building management system. Additionally, even though the hacker wasn’t inside the building, he had been changing pump and equipment settings via the wireless network — not exactly a sophisticated technique. All in all, what’s known as the Maroochy Incident brought light to malicious actors otherwise known as “Insider Threat.” For the most part, these are lone-wolf current or former employees who still want to do damage to critical parts of everyday life, but may not necessarily bring the entire Eastern Seaboard down with them.
Threat Likelihood Score: 3
Vulnerability Impact: It’s fairly clear to see from the water treatment plant hack that the extent of vulnerabilities is vast. Critical infrastructure for the target was running on outdated, unpatched Windows 7 with remote desktop protocols enabled, and Teamviewer (screen sharing software) right in front of the actors for use. Unfortunately, with SCADA systems being exposed to the internet, coupled with aged and unprotected software, it’s a target-rich environment for those wishing to exploit a vulnerability. “Air gapping” the systems, in this case, is one of the only ways to protect outdated, unpatched software, and is the best practice nowadays regardless.

Above: Water supply sources are a target for hackers. Whether it’s contaminating water or stopping it entirely, both have dire consequences.
To compound the aforementioned issues, unfortunately, it’s easy to conclude that the local municipalities that manage water and wastewater treatment plants don’t have the budget for systems hardening that electricity providers boast. This tight budget renders much of their information security investment useless against threat actors. If you thought attacking the power grid was like shooting fish in a barrel with a .22, attacking water infrastructure is akin to using a 12 gauge.
Vulnerability Impact Score: 3
Overall Risk: 4×3= 9
How to Prepare for a Water Supply Cyberattack

Above: Storing water on your own is sometimes legally challenging, but does yield a safety net if the water supply is compromised.
With regard to water, it might seem simple. If the water doesn’t turn on, then have some stored, right? Not so fast. Certainly, rain capture (where permitted), water storage, and water purification systems are all solutions. The real dependency and danger here lives with waste and hygiene. Anyone can store extra water for drinking, but it’s important to highlight the reality of not having a flushing toilet. If possible, having a portable or “bug-out” toilet is a wise move, best incorporated with a reasonably sanitary way to dispose of the waste. Simple measures such as this, coupled with potable drinking water, and purification methods such as bleach, iodine tablets, or boiling, will surely prepare the average person, or small family for an uncomfortable, but survivable period without running water from the utility.
Internet and Telecommunications
What we’ve already seen: Although (to the public’s knowledge) hackers haven’t performed a large-scale disruption to traditional POTS (plain old telephone system) lines that allow for landline phone comms, it’s certain that many telecommunications providers are attractive targets. They control other communications methods that the public and private industry rely on each day. Most recently, the SUNBURST vulnerability that utilized network monitoring giant Solarwinds as the attack surface provided nefarious actors — allegedly sponsored by the Russian government — with a stepladder to the network of many other large tech firms, government agencies, and telco/managed service providers.

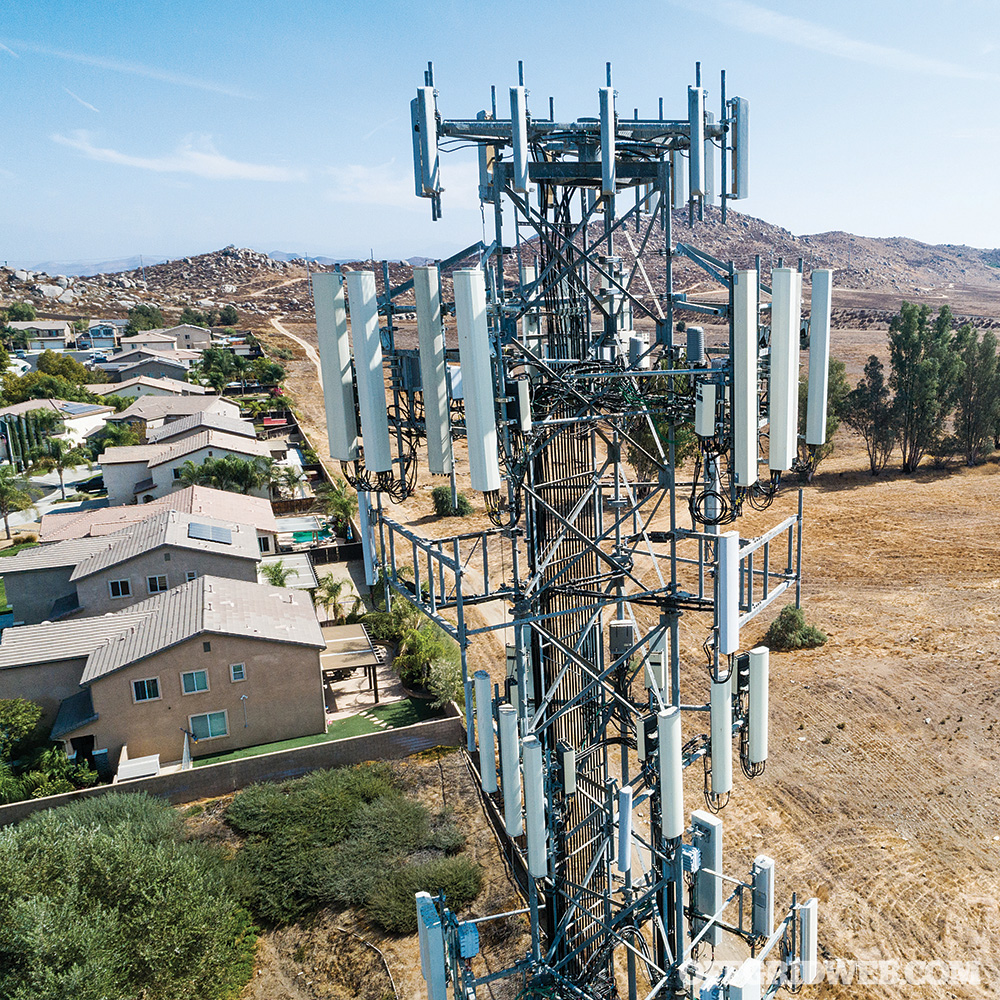
Above: Telecommunication hubs and communications towers are key physical pieces of infrastructure that allow our virtual world to operate, making both cybersecurity and physical security of telecommunications infrastructure incredibly important.
What the Solarwinds hack taught us was that there’s a huge risk involved with many of the third-party contracted firms who partner with large corporations. Even though many of the impacted organizations may have had their shops in order, someone was coming straight through the back door with contractors. With that said, telecommunications providers that supply industry and citizens with internet access, phone coverage, and GPS capability are big red targets. So far, ransomware and data theft (leaks) have been the biggest interruptions for telco firms, but this certainly doesn’t discount the bigger risk of taking down a giant. Most recently, we have seen DDoS attacks flooding ISPs (internet service providers) and slowing things down to a snail’s pace, which almost serves as a warning of things that could come.
Threat Likelihood: Taking the internet down may seem like an attractive option for amateur hackers or “hacktivist” groups, but in reality, the large-scale impact is incredibly complicated to quantify. That may be why professionals have stayed away from toying with worldwide telecom. This may very well be due to the interconnected nature of infrastructure that has been built out to house the worldwide web since the early ’90s by companies that are now data and telco giants. Though ISPs can ultimately be hacked, the interconnect paths are so widely distributed that routing and failovers can naturally handle massive outages, since carriers can also rely on other carriers. Overall, the worldwide web is pretty robust.

For telecommunications and the internet, stepping away from the cyber world and into the physical world actually isn’t that out of scope, or not as much as it might seem. Ultimately, our lines of communication — similar to the early AT&T Mid-Atlantic carrier network, if you want some neat legacy telco reading material — and “the cloud” physically live somewhere, despite popular opinion. Credible threats to this landscape exist and have been actioned. In fact, December 2020 brought us one of the most brazen attacks on telecommunications infrastructure when a lone-wolf suicide bomber detonated his RV outside of an AT&T telco and data carrier hotel in Nashville, Tennessee. This particular attack took down large parts of the Southeastern U.S.’s telephone network, as well as local 9-1-1 services, and internet access for many surrounding states. It just goes to show that even if remote cyberattacks aren’t possible, low-tech physical attacks on infrastructure can be extremely damaging.
Threat Likelihood Score: 4
Vulnerabilities: Telecommunications providers are certainly in the tech business, but don’t let that fool you about their information security posture. While not everyone has great IT security hygiene, the industry is taking steps to be more secure and more responsible when it comes to protecting the integrity of their systems and functions. With all of that said, the largest vulnerability that was exploited in recent years has focused on vendors and suppliers. Why hack a robust, mature organization when a weaker, more vulnerable one is a large supplier of theirs? This is your answer, and it’s more ubiquitous now than ever.
Vulnerability Impact Score: 3
Overall Risk: 4×3= 12
How to Prepare for an Internet & Telecommunications Cyberattack
Our reliance as a society on internet and telecommunications is impossible to deny. A never-ending thirst for instant gratification, as well as instant communication, has been the impetus for much of the infrastructure reliability that telecommunications carriers are building out nowadays. So, naturally, the first countermeasure would be not relying on the internet for everything.
There are many best practices for this, including turning to good old radio for your news and weather. A fantastic (and interesting) way to get local weather is by tuning into local NOAA frequencies on a shortwave receiver — this will yield things such as storm warnings, weather reports, forecasts, as well as emergency information during less than favorable events. Additionally, shortwave listening (aka SWL’ing) can warrant some pretty great local, national, and world news no matter your location. Investing in a single sideband (SSB) shortwave receiver can bring you the likes of Voice of America, BBC News, other national news broadcasts, emergency communications traffic, and even interesting broadcasts like Voice of Russia, and Voice of North Korea. All you need is a simple wire antenna to start hearing signals way outside of your location, or QTH.

Above: Ham radio is becoming increasingly popular amongst the survival and prepping community due to the ease of use when traditional comms are down.
To piggyback on radio, receiving is great, but what about talking? What if it’s an emergency and you need to get information into the airwaves? A great first start is a basic ham radio handheld and a technician’s license (for folks in the U.S.). However, during an actual emergency, no license would be required. Anyone whose life, wellbeing, or property is in danger can reach out for help on the amateur radio bands. If you’re not keen on the radio comms, there’s always the option of a satellite phone. Brands such as Iridium and Inmarsat have great options for phones with plans for text messaging, calls, and basic internet, which will serve nicely in a pinch, but radio is almost always a reliable means of communications during an emergency. Just be aware that in the unlikely event of some sort of electromagnetic pulse, your comms will be severely compromised due to the impact on all signals traversing the lower atmospheric layers.
Global Supply Chain
What we’ve already seen: Global supply chain is pretty broad; of course, this can apply to manufacturing, the service industry, or even the logistics that work behind the scenes to deliver … well, everything. Due to circumstances unrelated to malice, we’ve seen massive shipping routes blocked, like in 2021 with the Suez Canal. This incident alone provided a look into the physical logistics that can quite literally jam up the international supply chain. Further, the COVID-19 pandemic has certainly flexed its muscles with regard to supply chain disruption, halting food production, electronics manufacturing, and even raw materials, steel, and wood production.
Threat Likelihood: The most interesting perspective regarding supply chain risk may in fact be the threats. Variations of cyberattacks have rattled cages in the last few years. The most brazen and successful attack was the propagation of a cyber weapon called NotPetya, an eraserware distribution disguised as ransomware. This attack impacted Maersk, the global shipping giant, and took them down for days until a mistakenly out-of-band database copy was located in South Africa, allowing them to slowly rebuild their systems infrastructure. This attack interrupted information required at ports for coordinating pickups and shipment drop-offs, as well as seafaring information for ships coming into port.

Above: Cyberattacks can slow down the web and the physical world too. Logistics and shipping are major victims of cyberattacks and are targeted every minute of the day.
Ultimately, Maersk had to do its best to run operations manually for the time being, as their systems were being brought back up to speed. Aside from the logistics side of the house, supply chain of software has also been damaged in the previously mentioned attack on network monitoring software provider Solarwinds. This 2020/2021 attack proved that most of the Fortune 100, as well as the U.S. government, put many of their eggs in one basket that became heavily compromised. In the end, the application was exploited to such a degree that all impacted firms essentially gave up their most sensitive network and traffic information and, even perhaps, backdoors into their systems. The moral of the story here is that supply chain can be disrupted in almost any imaginable way, so due diligence on where your “stuff” is coming from should be thorough.
Threat Likelihood Score: 5
Vulnerability Impact: Like any aspect of the broader cybersecurity and risk domain, vulnerabilities here are endless, because truly anything can be exploited. Whether it’s industrial control systems, logistics networks, or software and applications, they’re all inherently vulnerable by nature. And while vulnerability is mostly independent of being influenced by threats, the vast number of threats here flips the script a bit, making the vulnerability landscape virtually endless.
Vulnerability Impact Score: 4
Overall Risk: 4×5= 20
How to Prepare for a Supply Chain Cyberattack

It seems a little quixotic to say, “Be more self-sufficient, and the supply chain won’t affect you.” The truth is, it’s both correct and incorrect — having a solid stock of items from the store is prudent, as demonstrated earlier with water. Food stockpiles such as canned goods, frozen foods, and other necessities for personal health, such as medicine and hygiene products, are basic items to have around. The real question is, what else might you need? Well, being self-sufficient goes a lot farther beyond keeping some cans of soup in a root cellar. Think about some of the critical things you own and rely on. How about spare parts for your vehicle? Are you able to repair things, and are some of your most commonly used items serviceable? If so, it’s super important to stock up on these types of supplies. Having not only the knowledge, but also the equipment and parts necessary for keeping things running goes a long way, especially when things aren’t as easy as being able to run to the local big-box store or hit “Buy Now” on Amazon.
Items to Stockpile for Servicing Your Gear

16AWG Wire and Soldering Equipment
You can never have enough wire. Additionally, knowing how to solder and diagnose basic electrical circuits can go a long way if you have electronics that need repair during a supply chain disruption. Other components such as diodes, transistors, resistors, capacitors, and LEDs are also handy to keep around.
Lumber, PVC/Copper Pipe, and Building Supplies
In the event of a natural disaster stemming from an infrastructure attack, whether energy-impacting or not, the ability to capture rainwater and repair your home is an advantage. Stocking up on general building supplies can mean the difference between a critical repair and a negatively impacting survival situation.
Batteries and Inverters
Having a car is great in the event of a power outage, but if you don’t have an inverter of some type, utilizing its 12V power for other things may be a challenge, whether it’s charging a power tool or using a soldering iron. Inverters and battery power sources are critical for providing AC and DC power to make things easier when you’re aiming to repair things in a grid-down or disaster situation.
Spare Parts/Supplies for Your Vehicle
Now, we don’t mean having every part in the Chilton manual. Have the most commonly failing parts handy — regardless of a disaster, they may come in handy. Stocking up on things like thermostats, sensors, belts, and other parts is a best practice that should be more common since the supply chain mainly comes from outside of the U.S. for all manufacturers. Additionally, it should go without saying that servicing your vehicle requires oil, coolant, and transmission fluid — small items like these can go a long way if you’re in an extended period of chaos.
More Articles on Cybersecurity