Gear Up Issue 35

5.11 Tactical Icon Pant

Colors
Black, Dark Navy, Flint, Kangaroo, Khaki, Ranger Green

MSRP
$75

URL
511tactical.com

Notes
While wearing these slacks isn’t the same as humping a three-day pack, the Icon Pant does offer a lot more carrying capacity than your average pair of skinny jeans. It has a whopping 12 pockets, including front utility pockets and two cargo pockets with internal dividers. Plus, with knee articulation, gusset construction, and Flex-Tac mechanical stretch ripstop, this 5.11 pant provides an excellent blend of mobility and durability that few competitors can match, if at all. The 6.8-ounce fabric is made of 80-percent polyester and 20-percent cotton with a Teflon finish, keeping spills and stains at bay.

Outdoor Vitals Dominion 1P Ultralight Backpacking Tent

Pack Size
20 by 5 by 5 inches

MSRP
$200

URL
outdoorvitals.com

Notes
If you’re looking for a compact, lightweight shelter for a solo adventure or bug-out scenario, Outdoor Vitals offers the Dominion. It’s aimed at backpackers and others who want to keep their gear as light as possible. The Dominion features DAC Featherlite aluminum poles and ultralight 15-denier siliconized fabrics. And if you want to shave more off the 2-pound, 9-ounce trail weight, its modular design lets you leave the tent body behind so you can go in ultralight mode (just rainfly, poles, and footprint) at 2 pounds flat. The Dominion has two storage pockets, a ventilated double-wall construction, tie-outs and guy-outs for windy conditions, and an easy-to-use storage compression bag.

First Lite Men’s Wick Long Boxer Brief

Colors
Black, Conifer, Dry Earth, First Lite Cipher, and First Lite Fusion

MSRP
$45

URL
firstlite.com

Notes
Don’t let the camo pattern fool you; you’re not meant to wear only these skivvies when stalking your next meal in the backcountry. But you could certainly wear this as a baselayer for pretty much anything you set out to do — be it hunting, running, camping, or web surfing. Why? Because it’s made from First Lite’s wool blend called Aerowool. And as we mentioned in the description for the Varusteleka jacket on this page, sheep’s fleece is one of the best materials to wear for outdoor adventuring. Moisture-wicking, odor-resistant, insulating — wool will almost always outperform any fabric humans can create. This boxer brief features a 10-inch inseam with a next-to-skin fit to prevent the legs from riding up, while the jacquard waistband provides a comfortable mix of tautness and flexibility.

Varusteleka Sarma TST Woolshell Jacket

Colors
Green, Grey, Woodland Camo

MSRP
$186

URL
varusteleka.com

Notes
Varusteleka might be the best gear and apparel company you’ve never heard of. Started in 2003, this Finnish firm has since became the biggest military supply store in Europe and has even created its own lineup of clothes, packs, and more. The Sarma TST Woolshell Jacket is one such example. It looks like a tactical softshell jacket, but is made of a wool blend. Why wool? Because it’s Mother Nature’s super material, it breathes (unlike some synthetic fabrics), is naturally flame- and odor-resistant (making it great for active pursuits), and continues to provide insulation even when wet (unlike cotton). This jacket is loaded with user-friendly features, including an adjustable hood, hook-and-loop cuffs, underarm ventilation zippers, and elbow reinforcements with pockets for pads (not included). Plus, there are two upper-arm zippered pockets and two side pockets, both of which sit at rib height, so they don’t get in the way of your backpack’s waist belt.

HOKA ONE ONE Kaha GTX

Sizes
Men’s 7 to 14
Women’s 5 to 11

MSRP
$220

URL
hokaoneone.com

Notes
The appropriately titled Kaha GTX (the word “kaha” means strength in Maori) provides some serious support for backpackers carrying heavy loads across long distances. This means these hiking boots are primed for preppers and survivalists who might need to trek with their bugout bags through harsh conditions. Inside, the EVA top layer provides a comfy bed for your foot while the Rangi bottom foam offers both durable cushioning and responsiveness. Moreover, the Vibram Megagrip outsole has 5mm multidirectional lugs for superior traction in all sorts of terrain. While not meant specifically for frigid temps, the Kaha GTX does feature a Gore-Tex waterproof bootie and a full-grain waterproof leather upper to keep your feet dry and comfortable.

Ruffwear Climate Changer Pullover

Colors
Canyonlands Orange, Blossom and Cedar Green

MSRP
$50

URL
ruffwear.com

Notes
If you’re forced to flee a disaster in winter, you’ll want to make sure your canine sidekick can make the journey out of Dodge, too. For a smaller dog or a breed that doesn’t do as well in cold weather, this pullover sweater from Ruffwear adds an extra layer without restricting movement. Made of a nylon-spandex blend and a water-repellent finish, the lower panel retains body heat, sheds rain, snow, and dirt, and stretches to conform to various chest sizes. On top, the upper panel is made of polyester fleece that dries quickly and captures warmth without the bulk. The cap sleeves allow for a greater range of motion while fitting dogs with broad shoulders and thick chests. For added safety, there’s a loop for attaching a small light and reflective trim for visibility in dark conditions.

Gerber Gear Freescape Camp Saw

Frame Steel
2Cr13 stainless steel

MSRP
$58

URL
gerbergear.com

Notes
There’s no denying that, in the hands of a skilled woodsman, a two-handed ax can do some serious damage to a tree. But there’s also no denying that for the average Joe, a saw is a much more precise tool at cutting a thick branch. The only problem with both of these tools is that they can often be too cumbersome to pack when cargo space is at a premium. Enter the Freescape Camp Saw. This innovative tool looks similar to a hacksaw but folds down flat into a baton-like object that’s just a little over a foot long — and without any additional tool or disassembly. When opened, it has four pivot points to effectively cut larger diameter wood using the full length of its 12-inch blade, which can be easily replaced if needed. And its handle is textured for added “grippyness” and accented with bright green so it’s easy to spot amongst your other tools.

Aclim8 COMBAR Pro

OAL
15.75 inches

MSRP
$600

URL
aclim8.com

Notes
The COMBAR combines an ax, saw, knife, spade, and hammer — all housed in a single grip that’s roughly the size and weight of a pipe wrench. While the hammer is always at the ready, the ax and spade are easy to deploy — just lift the safety lever and rotate whichever tool you need. The knife and saw, however, are stored inside the hollow handle and require a few more steps to get to. A basic version without the latter two tools runs for $425. If you’re on a budget, both the basic and this Pro version shown here will be cost prohibitive. Still, if you have the dough, it’s an innovative multi-tool worth considering. Created by two former Israeli special operations officers, the COMBAR is meant to withstand tough conditions — whether you’re a soldier, survivalist, or outdoor adventurer. A holster ($45) and an overbuilt soft case ($95) are available for it, both sold separately.

Midland USA X-Talker T290VP4

Range
Up to 40 miles

MSRP
$90

URL
midlandusa.com

Notes
In some survival scenarios, communication is life. Whether you need to find a lost member of your party or you need to signal that danger’s approaching basecamp, a pair of two-way radios can be key. The X-Talker T290VP4 is a GMRS radio that has Midland’s trademark Weather Scan + Alert Technology — which cycles through 10 available weather band channels and locks onto the one with the stronger signal — alerting you of severe conditions in your area. It features 22 channels, 14 extra privacy code channels, 121 privacy codes, and a range of up to 40 miles. This set comes with two radios, belt clips, a pair of headsets, and rechargeable batteries. Unfortunately, it’s not USB compatible, but it does come with a desktop charger.

Hunter’s Blend Coffee Black Powder Roast

Weight
12 ounces

MSRP
$15

URL
huntersblendcoffee.com

Notes
For many, coffee is life. For those who don’t get it, don’t worry. Just stock up on coffee anyway, because in a post-apocalyptic scenario, it’ll become a valuable commodity that you can use to trade for food, supplies, or your drink of choice. Until then, enjoy the Black Powder Roast from Hunter’s Blend Coffee. This mix of beans from Central America and east Asia will help fire up your morning, bringing that invigorating aroma and caffeine without the burnt taste that many other dark roasts have. Hunter’s Blend ethically acquires its beans via direct trade — cutting out the middle men and lobbyists who might not support the hunting and Second Amendment lifestyle — then has them roasted in small batches in Ohio.

Thyrm DarkVault Critical Gear Case

Dimensions
7.2 by 5.43 by 1.67 inches

MSRP
$90

URL
thyrm.com

Notes
The DarkVault was created with active-duty military and federal law enforcement in mind as a means to keep communication devices immediately accessible, thoroughly protected, and yet undetectable by blocking radio frequency signals. Sure, it’s not a true Faraday cage, which would require the case to be extremely large or quite metallic. But Thyrm says it’s been tested to block normal cellphone calls and data, as well as GPS signals, meeting the requirements of its government customers. Each case is made of battlefield-grade polymer with a gasket seal to keep out dirt, dust, and moisture. It also has a lockable latch, interior and external Velcro panels, and a quick-detach system that’s MOLLE compatible. The DarkVault Comms, the non-blocking version, is available for $60. Both made in the USA.

Ruike Knives P127-CB

OAL
8.46 inches

MSRP
$55

URL
shop.gearforlife.com

Notes
The P127-CB is a kwaiken-style folding knife with the business end made of 14C28N, a Swedish stainless steel that offers toughness, long-lasting sharpness, and strong corrosion resistance. We also like that the tanto profile is more functional and less angular than many popular tanto blades. It opens quickly and smoothly thanks to the high-carbon chromium ball bearings and has Ruike’s Thumb Up Safety Lock (similar to CRKT’s locking liner safety), which can lock the blade closed if you don’t want it to accidentally open or lock it open if you want to make it a virtual fixed blade. The slim handle has G10 scales with a carbon-fiber overlay and a tungsten glass-breaker on the end for emergency rescues or improvised pummeling. A model with only G10 scales is available for $50.


RECOILtv: Home Defense Strong Points

You awake in the middle of the night to the sound of breaking glass and footsteps in your house. You know that you may be facing a home intruder, or possibly even multiple intruders. As you slip out of bed and grab your gun from the nightstand, your wife looks to you for instruction. What do you say? Obviously, it's a good idea to have her call the police immediately, but what else should she do to maximize her safety while you clear the house? This scenario is the subject of the most recent RECOILtv Training Tune Ups video with Dan Brokos.

A typical untrained intruder will enter the door as it opens, creating a blind spot you can exploit.

Remaining in a defensible static position seems easy enough — just find some cover or concealment in the room, and keep a gun at the ready in the direction of the door. However, some parts of the room are preferable for this tactic, which Brokos calls strong-pointing. Specifically, most homes have push doors that swing into the room. This means that the intruder, who probably won't be trained in CQB tactics, is likely to enter the room without checking this blind spot first.

Again, all of this may sound obvious to you, but it's worth communicating this information to family members ahead of time. This will ensure they're prepared for a home intruder situation, rather than looking to you for instructions. This advice is also useful for kids — they can be taught to hide on the inside of the door hinge until the all-clear is given. If they're old enough to be armed and defend themselves from that position, that's even better.

For more of Dan Brokos' tips for home defense and CQB tactics, check out the RECOILtv Training Tune Ups channel.


Cold Open – Part 2: Cold-Weather Clothing Buyer’s Guide

Winter Eyewear

ESS Influx Cold Weather Goggle


MSRP
$135

URL
www.esseyepro.com

Notes: ESS is a subsidiary of Oakley and focuses specifically on eyewear. Their Influx Cold Weather Goggles are geared toward tactical use. We felt they were a great value and never fogged up on us. Shooters will be happy to know they meet U.S. Mil-spec MIL-PRF-32432, ANSI Z87.1-2015, OSHA and CE EN166 ballistic protection standards. They come with three 3mm polycarbonate lens choices, which we found easy to remove and switch out. The headband has a sliding sleeve on it to keep the lens protected when not in use, and it also comes with a carrying case that has Velcro attachments to hook it onto your belt or backpack. The fleece-lined face foam was comfortable and did a great job wicking away moisture. Although we appreciated how form fitting they were, anyone wearing corrective lenses might have to switch to contacts, as the goggles might be too narrow to wear with most eyeglasses. Made in the USA.

Pros:

  • Comes with clear, smoke gray, and alpenglow (amber) lenses
  • Headband is removable
  • Lens cleaner included

Cons:

  • Only available in white
  • A bit too narrow to wear with corrective lenses

Oakley Line Miner Snow Goggle

MSRP
$120 to $150

URL
www.oakley.com

Notes: The Line Miner from Oakley provided impressive forward and peripheral vision with wide, high lenses. They meet the ANSI Z87.1 and EN 166 standards for goggle impact protection, but are intended more for outdoor activity than military “ballistic” standards. These goggles were wide enough to accommodate corrective lenses, and we never had an issue with fogging or moisture evaporation. According to the manufacturer, the injection-molded Plutonite lenses provide 100-percent protection against UVA/UVB/UVC and harmful blue light up to 400nm. Other lens options are sold separately, though changing them out is a little tricky till you get the hang of it. Lens thickness is 2.34mm. Made in China.

Pros:

  • Numerous goggle and lens color combos
  • “Asian Fit” sizes available
  • Shape is compatible with most helmets

Cons:

  • Headband not removable
  • No carrying case; microbag only provides minimal protection
  • Only comes with one lens

Winter Outerwear

Eddie Bauer Vinson Down Parka

MSRP
$299 to $317

URL
www.eddiebauer.com

Notes: You definitely feel like you’re getting a lot of value for this parka. It’s machine washable and the Velcro wrist closures, elasticized cuffs, drawstrings on the waist and hood, and zipper/button front closure ensure that cold had a hard time getting through. With all the extra storage, fasteners for the openings, and full-bodied lining, you certainly know you’re wearing a jacket intended for harsh weather — in other words, it’s not light. We loved the abundance of large pockets with Velcro or zippered closures. Even though we’re fairly sure firearms weren’t a consideration in the design, a pass-through on one of the external pockets would enable the wearer to retrieve something of the concealed persuasion much more discretely. The parka had an expected low waist to it. Combined with the Cordura/nylon material, it held up very well in winter weather. Made in Bangladesh.

Pros:

  • Faux fur is removable
  • Comes with a balaclava
  • Storage galore with nine pockets

Cons:

  • Hood itself can’t be removed
  • Only comes in two colors

Eddie Bauer Powder Search 2.0 Insulated Pants

MSRP
$113 to $125

URL
www.eddiebauer.com

Pros:

  • Tall sizes available
  • Inexpensive
  • Two zippered thigh vents

Cons:

  • No full-length leg zippers for fast removal

Notes: The Powder Search 2.0 Insulated Pants also provide quite a bit of value for a comparatively low cost with features absent on other brands we tested. The pants were very comfortable and the polyester/nylon materials worked well to insulate for warmth. Their StormRepel Super DWR finish repelled rainwater effectively and the elasticized ankles on the lining performed well to keep snow from creeping into footwear. Although these pants don’t have zippers along the legs to be donned quickly, they do have an elasticized waist with Velcro cinch straps to adjust to your liking. The addition of belt loops and a D-ring attachment were nice touches. Two zippered hip pockets, along with two Velcro flap-closure thigh pockets, allow for plenty of storage. Made in Vietnam.

Arc’teryx Camosun Parka

MSRP
$649

URL
www.arcteryx.com

Notes: Although this parka can definitely hold its own keeping you warm, it doesn’t feel heavy or cumbersome. The Gore-Tex material is light but robust enough to repel the elements. Its design is simple and practical for winter sports and extended outdoor activity. It ‘s stylish enough for urban wear and could even pass for a raincoat since the waist is higher than most parkas. The hood can be removed via snap-button attachments if desired and pulled snug with drawstrings if you’re getting hit hard by the wind. Two external hand pockets and one internal pocket with zippered closures are sufficient for a decent amount of storage. The sleeves were fairly snug with internal cuffs, but we were surprised there aren’t any drawstrings to make the waist a bit tighter. Made in China.

Pros:

  • Practical for a variety of uses
  • Feels much lighter than it looks
  • Arc’teryx branding visibility is subtle, unlike some companies that add huge logos everywhere

Cons:

  • Price is quite a bit higher than many of its competitors
  • Only three colors

Arc’teryx LEAF Cold WX Pant SV Men’s

MSRP
$89

URL
www.arcteryx.com

Notes: When it comes to cold-weather clothing, the LEAF line from Arc’teryx is well known for its quality. The level of thermal protection against both wind and direct contact with snow you’ll get from the Gore-Tex material and Climashield lining is top notch. These pants are surprisingly comfortable and maneuverable for how well-insulated they are. Unless cold-weather work and exposure is a regular occurrence for you, the price might be discouraging. Although the pants are high-waisted, the integrated belt doesn’t really allow for the attachment of any accessories you might like to carry. We’d have to liked to see these in other colors than the two offered, but we really can’t complain about the fit and finish, and have confidence these will hold up to the elements for a long time. Made in Canada.

Pros:

  • Drawstrings on pantleg bottoms are a plus when walking through deep snow
  • Can be easily layered over other clothing and removed quickly with the full-length zippers on each leg
  • Plenty of sizes to choose from

Cons:

  • Only two pockets
  • Beltloops would’ve been a plus in case you’d like to carry more equipment

Varusteleka Särmä TST L7 Camouflage Trousers; Särmä TST L7 Camouflage Anorak

MSRP
$93 (trousers); $140 (anorak)

URL
www.varusteleka.com

Notes: This snow-camo suit is intended to be worn in conjunction with the L5 Thermal Trousers and Anorak for adaptability to environmental changes. They basically have the same zippered vent locations as the L5 combo, and the entire suit is very lightweight. According to the manufacturer, an old trick is to use snow-camo trousers with the “frozen” pattern jacket to mimic the snow on the ground as well as the winter foliage. While the system is very modular, not everyone needs camo, so your color options are confined to those patterns. We’d have liked a pass-through sleeve on the front of the anorak for storage or as a handwarmer. The quality is robust since it’s intended for law enforcement and military, but lack of storage may be an issue for hunters or others who desire this type of clothing. Bottoms have loops for M1950-style suspenders; Varusteleka carries such options. Anorak has drawstrings on hood and waist with Velcro wrist closures, but unfortunately not on the trousers. Made in Estonia.

Pros:

  • Easily to put on and take off over other clothing
  • Surprisingly good insulation for how thin it is
  • Takes up minimal space if packed for impromptu use

Cons:

  • Elasticized waist, but no drawstrings or belt loops
  • No non-camo colors
  • Limited practicality

Varusteleka Särmä TST L3 Loft Jacket; Särmä TST L3 Loft Trousers

MSRP
$75 to $93 (jacket); $93 (pants)

URL
www.varusteleka.com

Notes: The Särmä TST L3 jacket and pants are thin enough to be worn as midlayers, but warm enough to be worn as outer layers. Both items are exceptionally priced for the quality you get. We’d have liked to see more than one pocket on the jacket (and any pockets at all on the pants), but appreciated the drawstrings on the collar and waist. Both are lightweight, breathable, and made from 100-percent polyamide with Climashield insulation. Pants can be removed easily with full-length zippers on each leg, but we were surprised that no drawstrings are on the waist or ankle. Jacket has elasticized wrists. Both items are warrantied for 12 months and worked well to repel cold and wind. Made in Estonia.

Pros:

  • Great value
  • 12-month warranty
  • Lots of size options

Cons:

  • Color options are limited to larger jackets; only one color on pants
  • Pants don’t have belt loops

Varusteleka Särmä TST L5 Thermal Trousers; Särmä TST L5 Thermal Anorak

MSRP
$149 (trousers); $186 (anorak)

URL
www.varusteleka.com

Notes: If you’re looking for camouflage winter clothing options, Varusteleka’s TST line is both a highly affordable and practical option. The “frozen” pattern is intended to mimic winter foliage patterns before snowfall. The fit was exceptional, and both items were comfortable in all the right areas, while keeping us well protected from the elements. Material is 100% PA ripstop, with shin, knee, butt, and waist areas reinforced with 500D Cordura. Abundance of sizes would work for practically anyone. Elasticized ankles on trousers, wrists, and waist on the anorak kept snow from creeping in. Since these are more for tactical use, our main complaint was lack of pockets. The zippered vents on the anorak worked well to access your inner layers, although we wondered why the zippers didn’t run the full length of the pantleg. Also, the buckled crotch strap on the anorak was an interesting way to keep your top from riding up if you’re crawling or prone for long periods of time, but might take some getting used to. Made in Estonia.

Pros:

  • Price is exceptional for the quality
  • Fleece-lined hood large enough to accommodate a helmet
  • Thick enough to repel elements without being bulky

Cons:

  • Only two pockets on trousers; none on pull-over anorak
  • No belt loops

Winter Baselayers

Varusteleka Särmä TST L2 Turtleneck Shirt; Särmä TST L1 Liner Gloves; Särmä TST L1 Balaclava

MSRP
$42 to $56 (top); $19 (balaclava); $24 (gloves)

URL
www.varusteleka.com

Notes: Varusteleka is a military and outdoor company from Finland, so we knew they spoke fluent cold-weather clothing. They sent us an assortment of baselayers, and we were pleased with how the items performed. They were thin enough to be worn in with other baselayers if desired. The 80/20 merino wool/polyester combo kept us sufficiently warm and were very comfortable. They’re machine washable, but air-drying is recommended. The zippered turtleneck shirt is practical even as an outer layer in the right environment. Gloves repelled cold and moisture penetration very well. Balaclava can be worn as a cap, tube scarf, or full facemask. Made in Lithuania.

Pros:

  • Cheaper than many American brands using the same material combinations
  • 12-month warranty
  • Material is very form-fitting

Cons:

  • Crotch opening would be nice
  • Only item with color options is the balaclava

Eddie Bauer Heavyweight FreeDry Merino Hybrid Baselayer Pants

MSRP
$63

URL
www.eddiebauer.com

Notes: Merino wool is definitely the way to go on baselayers. The Heavyweight FreeDry Merino Hybrid Baselayer Pants fit snugly without being constricting or itchy. They made of 50-percent merino wool/50-percent polyester, so these bottoms can be machine washed and dried delicately. Breathability, heat retention, and moisture wicking worked well, and we were pleasantly surprised to find these bottoms longer in the legs than expected. We did, however, wish there was crotch opening, since sometimes nature calls when you’re actually out in nature. Made in China.

Pros:

  • Very light and comfortable
  • Legs stayed snug and didn’t ride up the calf after hours of use

Cons:

  • Crotch opening would be nice
  • A bit pricey

Winter Footwear

Lowa Renegade Evo Ice GTX

MSRP
$295

URL
www.lowaboots.com

Notes: Even when walking through knee-deep snow, we were pleased how well these boots kept it from creeping inside and getting our feet soaking wet. The Gore-Tex and leather provided great insulation from the elements, heat retention, and were comfortable to wear. We’d have wished for a bit more padding in the very front, as we got a bit of toe-slam walking downhill. The aggressive traction was great on snow, especially going uphill, but was a bit dodgy at times on ice. All in all, we felt they were a good investment that could be worn in a variety of muddy, slushy, and snowy environments to keep your feet protected. Made in Slovakia.

Pros:

  • Larger sizes available
  • Three neutral color options

Cons:

  • Padding could be improved in toe area
  • Consider wearing crampons with these if you’re walking on ice

Cold Open – Part 1: Cold-Weather Survival Tips & Techniques

Every year, we hear about cold-weather-related fatalities that could’ve easily been avoided with the right training and supplies. As winter is upon us once again, we felt it prudent to raise awareness of situations that commonly lead to injuries or worse during the cold months, as well as some myths that are continually perpetuated about cold-weather survival. With a résumé that includes instructing Marines at the Mountain Warfare Training Center, we tapped survival instructor Thomas Coyne, whom we profiled in RECOIL OFFGRID Issue 27, for tips to keep you safe this winter. In addition, we asked director of training for Sierra Element and former Marine scout sniper Victor Lopez to provide recommendations on best practices for firearms use in cold weather.

RECOIL OFFGRID: A quinzhee is one of the best shelters you can make using snow. For those unfamiliar with how to build one, what are the steps involved?

Thomas Coyne: All you do is pile snow, preferably the freshest snow, into a dome shape big enough to leave 18-inch walls all around you and dig out a living space for you to lay down or sit up in. You can make them fairly large for a whole group of people or just one person. After you pile the snow, pack it down with your feet or a shovel to compact it enough to solidify, and let it sit for at least 30 minutes. It’s good if it’s in the sun to help it fuse together a bit. Then you can dig out a living space at the base that’s big enough to lay down in that’s in the shape you want. Before you dig out the opening, in order to make sure you don’t go too shallow, break off a bunch of sticks that are at least 18 inches long and jam them into the top all around and all the way to the top. That way you know if you hit the stick not to go any farther. If you’re building one for yourself, as long as it’s big enough for you to lay down in that’s a good rule of thumb for how wide and high you need to make it.

Above: Thomas Coyne teaching a cold-weather survival class in Alaska.

What do you think some of the most common misconceptions are about cold-weather survival?

TC: One thing people never talk about is hydration in the cold. People talk about how you shouldn’t drink cold water, but you need to stay as hydrated as you can in extreme cold — it’s just as important as hydrating in extreme heat. Blood regulates body temperature. When you’re too hot, it takes the heat from your organs; your blood vessels dilate and radiate that heat off the surface of the skin. When you’re too cold, it constricts on the surface of the skin and to the extremities like your ears, nose, and fingers, which is why your hands get cold first. The body restricts blood flow to those areas when you’re cold and focuses it on the internal organs so you don’t get hypothermia. If you’re dehydrated at all, you’re going to get colder faster and have much less blood on the surface of your skin, so you’ll be much more prone to frostbite. Pre-hydrate for a few days before you go on any cold-weather expeditions as if you’re going on a hot-weather expedition.

The quickest way to absorb water is if it’s at room temperature and an isotonic solution, which is 0.9-percent salt. Your body works on what’s called the sodium-potassium-electrolyte pump. We don’t run out of potassium the way we do salt, because we don’t sweat it out like salt. Salt opens the door to the cell to let water in, so if your drink is too salty it pulls water out of the cell. If it’s just salty enough it lets it into the cell. An isotonic solution matches the salinity of our body’s cells naturally so you can hydrate the quickest and safest. When you get an IV of saline, that’s what they’re giving you.

Caffeine dehydrates you, and it’s a vasodilator, so it affects your blood pressure. When you’re really red-lining, like when I was a firefighter and working on the fire line, it’s not a good idea to have caffeine. What we’d do is after we drank 2 liters of water, our third liter would always have an electrolyte replacement in it. That’s so we don’t become hyponatremic. If the salt level in your body gets too low, that’s called hyponatremia and it can kill you. That means your body can’t absorb water anymore. You’ll drink a liter of water, and urinate it right out. If you’re hyponatremic and drink water without salt, you’re hurting yourself. Avoid caffeine and alcohol. There’s that old belief that drinking alcohol makes you warmer, but that’s because it makes the blood vessels on the surface of your skin dilate and is radiating away heat.

What should people know about cold-weather clothing?

TC: A lot of people don’t know how to dress for the cold. There’s a proper three-layer clothing system that all your military, cold-weather mountaineers, arctic expedition, and pipeline guys are wearing. There’s your performance baselayer; that’s your thermal underwear, which should be tight-fitting against the body. These items should also be rapid drying and insulate when wet. It’s not just about warming you, but for active and extreme cold, it needs to serve as a sweat management system.

When you’re more active, you build up sweat; being sweaty in extreme cold can cause you to freeze to death. When you have material that insulates when wet, no matter how sweaty you get, as long as it’s up against your body as an insulation layer, your body heat will keep it warm. It needs to be rapid drying because once you stop sweating and sit down, you want it to dry well even though it’s underneath the other layers. That’s why you should only use certain materials like wool and polypropylene. Those two have the best warmth-to-weight ratio, insulate when wet, and dry rapidly. We call cotton the death fabric. We don’t use it in the cold because it loses all insulation capabilities when wet and dries very slow.

The next layer is your insulation layer; it keeps you warm but isn’t skin tight. It’s not really the clothing that keeps you warm, it’s your body heat and your clothing should trap that. When you have an insulation layer, it should be a little loose to give you a little room for your body heat and trap that around you. If you’re in cold and wet weather, again, you want something that insulates when wet and dries rapidly, like fleece. If you’re in weather where it’s below freezing 24 hours a day where you’re not going to get wet, down is a great material because it’s very light. Down has a tendency to absorb a lot of water, it doesn’t insulate, and will never dry in the field, so that’s why we don’t wear it when it’s both cold and wet.

Your third layer should be a waterproof, breathable layer. You want that to be an outer shell. The colder it is, the more breathable it has to be. If you’re going below zero you need a highly breathable jacket. What people don’t realize about breathability in the cold is that in extreme cold your jacket will begin to condensate if it’s not breathable enough. For instance, if you just wear a rubber rain slicker, it condensates inside. If the material isn’t breathable enough, it’ll get soaking wet inside.

For footwear, avoid cotton socks. In extreme cold weather, your boot should have a removable insulator. If you’re hiking all day and build up a lot of sweat, you want to take that out to give it time to dry. You want a three-layer system for your feet as well. You have the sock, which is your performance baselayer, the boot insulator, and then the boot itself so you can manage the moisture in your boot. Trench foot indications are like when you sit in the bath too long and your skin gets wrinkly. When you keep grinding on that layer of wet skin over and over again, it just comes off. When you’re post-holing through 2- to 3-foot snow without proper footwear, your feet will get soaking wet and frostbite or trench foot is likely to set in.

What tools do you think are over and underrated for cold weather?

TC: One thing that many survival guys will disagree with me about are fire steels. They’re just a bushcraft play tool and a poor option for emergency circumstances. If you’re injured, hypothermic, or have a little frostbite, it’s easier to light a match when you’re having trouble feeling your hands than to spark a fire using a steel. A match you can strike and just toss it into the fuel. With a steel, you have to prepare the fuel a particular way and shave it up into little bits. If you’re using something natural, it won’t work on anything moist at all. You generally have to use both hands and be very precise with your sparks. Any thermal emergency attacks the brain and makes it hard to think. You don’t want to carve down shavings of bark in that condition. You get ataxia, which is a loss of coordination, so they’re not good when you’re hypothermic, cold, and wet.

Matches are easier to use and light more materials. The primary fire-starting material should be a proper storm match. It can burn in the water, in mud, and in crazy winds, so it’s very hard to put out. You should also have an accelerant like solid fuel cubes. There are lots of brands out there for like 50 cents a piece. They’ll burn for over 10 minutes at over 1,000 degrees. Forget the cotton balls and Vaseline. In cold weather, it’s likely going to be wet as well, so all the small stuff that might light easily like pine needles, bark, and grass are all affected by the moisture so they’re going to be hard to light. You need a good flame length and a very hot flame. All the cubes like WetFire, Duraflame, Weber, and Fast Fire will give you at least a 4- to 6-inch flame length. Just throw your match on the cube and warm your hands up to get them working again, then light your second cube to get your fire going. You can get emergency heat from just the cube. The No. 1 reason we’d have to rescue people off trails is because they fell and hurt their leg, so if you’re injured you want it to be as easy as possible.

A catalytic heater and 24-hour hot packs are great for vehicles. Every winter you read articles about people who took a wrong turn down a road or ended up stuck in the snow somehow. They end up freezing to death in their vehicles because they run out of gas, and the car is useless. Catalytic heaters are like little propane heaters. You can use little $5 propane tanks, but it can be used indoors — since it’s catalytic it uses platinum in the device to purify the emissions. Some will run on a tank for eight hours on low, but you can also make a tank last for like three nights if you just run it for a half hour to stay warm as needed. If you need to build a quinzhee, you can pop some hot packs and put them in your clothing or wrap them in your e-blanket to stay warm.

What should people know about using electronics in cold weather, particularly stuff powered by lithium-ion batteries?

TC: Cold weather zaps the batteries a lot quicker, so you have to protect your devices from the cold, which is another thing you can use hot packs for. Also, if I’m bringing a water filter, you’ve got to make sure they don’t freeze overnight, so you can pop a hot pack and put it in the compartment with those materials. For whatever mustn’t freeze, you need to have some kind of insulation. You’re going to have to charge more and bring more batteries since the cold drains it faster.

What are some medical conditions cold weather causes that don’t get enough attention?

TC: Snow-blindness is one. If you get a stuck in a snowy area without the right eye protection, you can go snow-blind in less than one day. In addition to goggles, they make emergency snow glasses. Many of them are rolled up in little containers like the Survival Metrics i-Shield. They’re one-size-fits-all. You can make improvised versions from birch bark or a piece of cardboard. You can cut thin slits in it just big enough to see out of. They have to stick out at least ½ inch off your face and have to cover the sides and bottom to keep light from getting in, so you have to fold it a bit to look a little like Geordi from Star Trek.

What should people know about getting lost in snowy weather in a vehicle?

TC: Stay with the vehicle, because it’s easier to spot than you are. One mistake is when people stay with the vehicle when it’s very cold and succumb to falling asleep. That’ll easily lead to becoming hypothermic and dying. I call it the Freddy Krueger rule of cold-weather survival. If you’re experiencing symptoms of hypothermia, you have to stay awake. Try and do some kind of physical activity in place. Tense your muscles as hard as you can and do little isometric exercises and whatever you can to stay awake and warm.

If you can clear away any branches or foliage so the sun can get to your car easier, do it. The sunlight will create that greenhouse effect in your vehicle and help warm it. You can turn your car into a quinzhee too, but you need to have a ventilation hole and a way to mark the outside so people can see there’s a car under there if it’s continuing to snow. Try to make a signal. A really good tip I learned is to use Kool-Aid packets because they’re very bright colors and you can use them to spell out SOS — and it’s a lot cheaper than dye.

What are some of the biggest considerations to keep in mind when using firearms in cold weather?

Above: Magpul Core Quick Reference Rifle Cards are good reference materials to have on hand when shooting in extreme weather.

Victor Lopez: Clothing can affect the way you present the weapon, jackets and gloves in particular. You should practice with the equipment you’re going to be wearing prior to going out. A lot of people think it’s cool to wear gloves when they go out, but like on a Glock, it has that extra safety on the trigger. A lot of times I see people who never really trained with it and go on training evolutions in mountainous areas where they have gloves on and can’t find that nub on the trigger.

If you’re using gloves, make sure they have good dexterity in the fingers; train with your gloves before you go out so you can have that tactile feel on the trigger and use them to try reloads as well. With jackets, try them on and present the draw — see how it’ll feel when prone and any other positions you anticipate being in. Sometimes with shoulder-fired weapons, materials like certain fleeces will feel different than just wearing a cotton shirt and can actually slip easier.

For changing temperatures, I’ve seen guys go from cold weather training and then put the gun in their sleeping bag, where it collects condensation. Overnight, you can see rust start to form on some weapons because of the body heat trapped in a sleeping bag. You want to keep it close to the ambient temperature. Keep snow out. If it gets in there, it’s going to cause rust. Barrel caps are fine, but putting plastic on will collect condensation when it warms up with the sun, like when you put a plastic tarp out to collect moisture in a survival situation; it’s the same type of principle.

What are some myths you hear getting perpetuated about using firearms in cold weather?

VL: A myth I hear is if you’re above freezing that it’ll completely shift your zero on something like a bolt gun. Another I hear is that the trigger won’t freeze up. I have seen, when it’s truly cold, swelling of the bolts in rifles, and you can feel it get sluggish so it will respond differently than in warm weather. I’ve also heard people say you don’t need that much lubrication on your guns because it’s cold so it’s not evaporating. In altitude it can still be cold and dry, so your lubrication is
still dissipating.

For lubricants, I’ve seen guys use paste type stuff. Avoid grease and paste lubrications. Just go with a CLP or oil-based lubricant. When you return home, always make sure you completely dry and lubricate your weapon before you store it.

The air is less dense in altitude and cold weather. Temperature, air pressure, and humidity affect your impacts; increased muzzle velocity results in higher impacts on your targets. Magpul has some cheat sheets with the computations to keep in mind. Devices like a Kestrel can also provide info for your weather data.

Sources:


New: CRKT Provoke Imperial White Edition

From the first day we saw it, we always thought the CRKT Provoke karambit looked futuristic, perhaps even a bit otherworldly. However, we didn't suspect that this Oregon-based knifemaker would release a new special edition to further accentuate that theme. Specifically, it's tied in to a sci-fi franchise that everyone will recognize — one that's going to rise back into the public eye later this month. For obvious legal reasons, CRKT delicately avoids mentioning the franchise by name, but says the new Imperial White Provoke is “perfectly suited for a galaxy far, far away.” We suspect the Mouse Emperor and his lawyer legions might not look kindly upon it if they were any more specific.

This knife features an “Imperial White” scheme with black accents. The finish is achieved with a Cerakote H series coating, appropriately known as H-297 Stormtrooper White. CRKT calls it “the brightest white in the ceramic coatings industry” and says it exhibits the hardness, abrasion-resistance, and lubricity you'd expect from classic Cerakote.

Mechanically, the Imperial White Provoke remains unchanged from the standard version. It's made from D2 steel with 6061-T6 aluminum crossbars, and its Kinematic opening mechanism allows the 2.4-inch curved blade to slide forward in a snap. The handle ring features an integrated, spring-loaded pocket clip that sits flush when it's not in use.

MSRP for the Imperial White Provoke is $200. For more information, go to CRKT.com. For a video demonstration of how the mechanism works, check out self-defense instructor Patrick Vuong's review here.


Review: 7 Multipurpose Bushcraft Knives

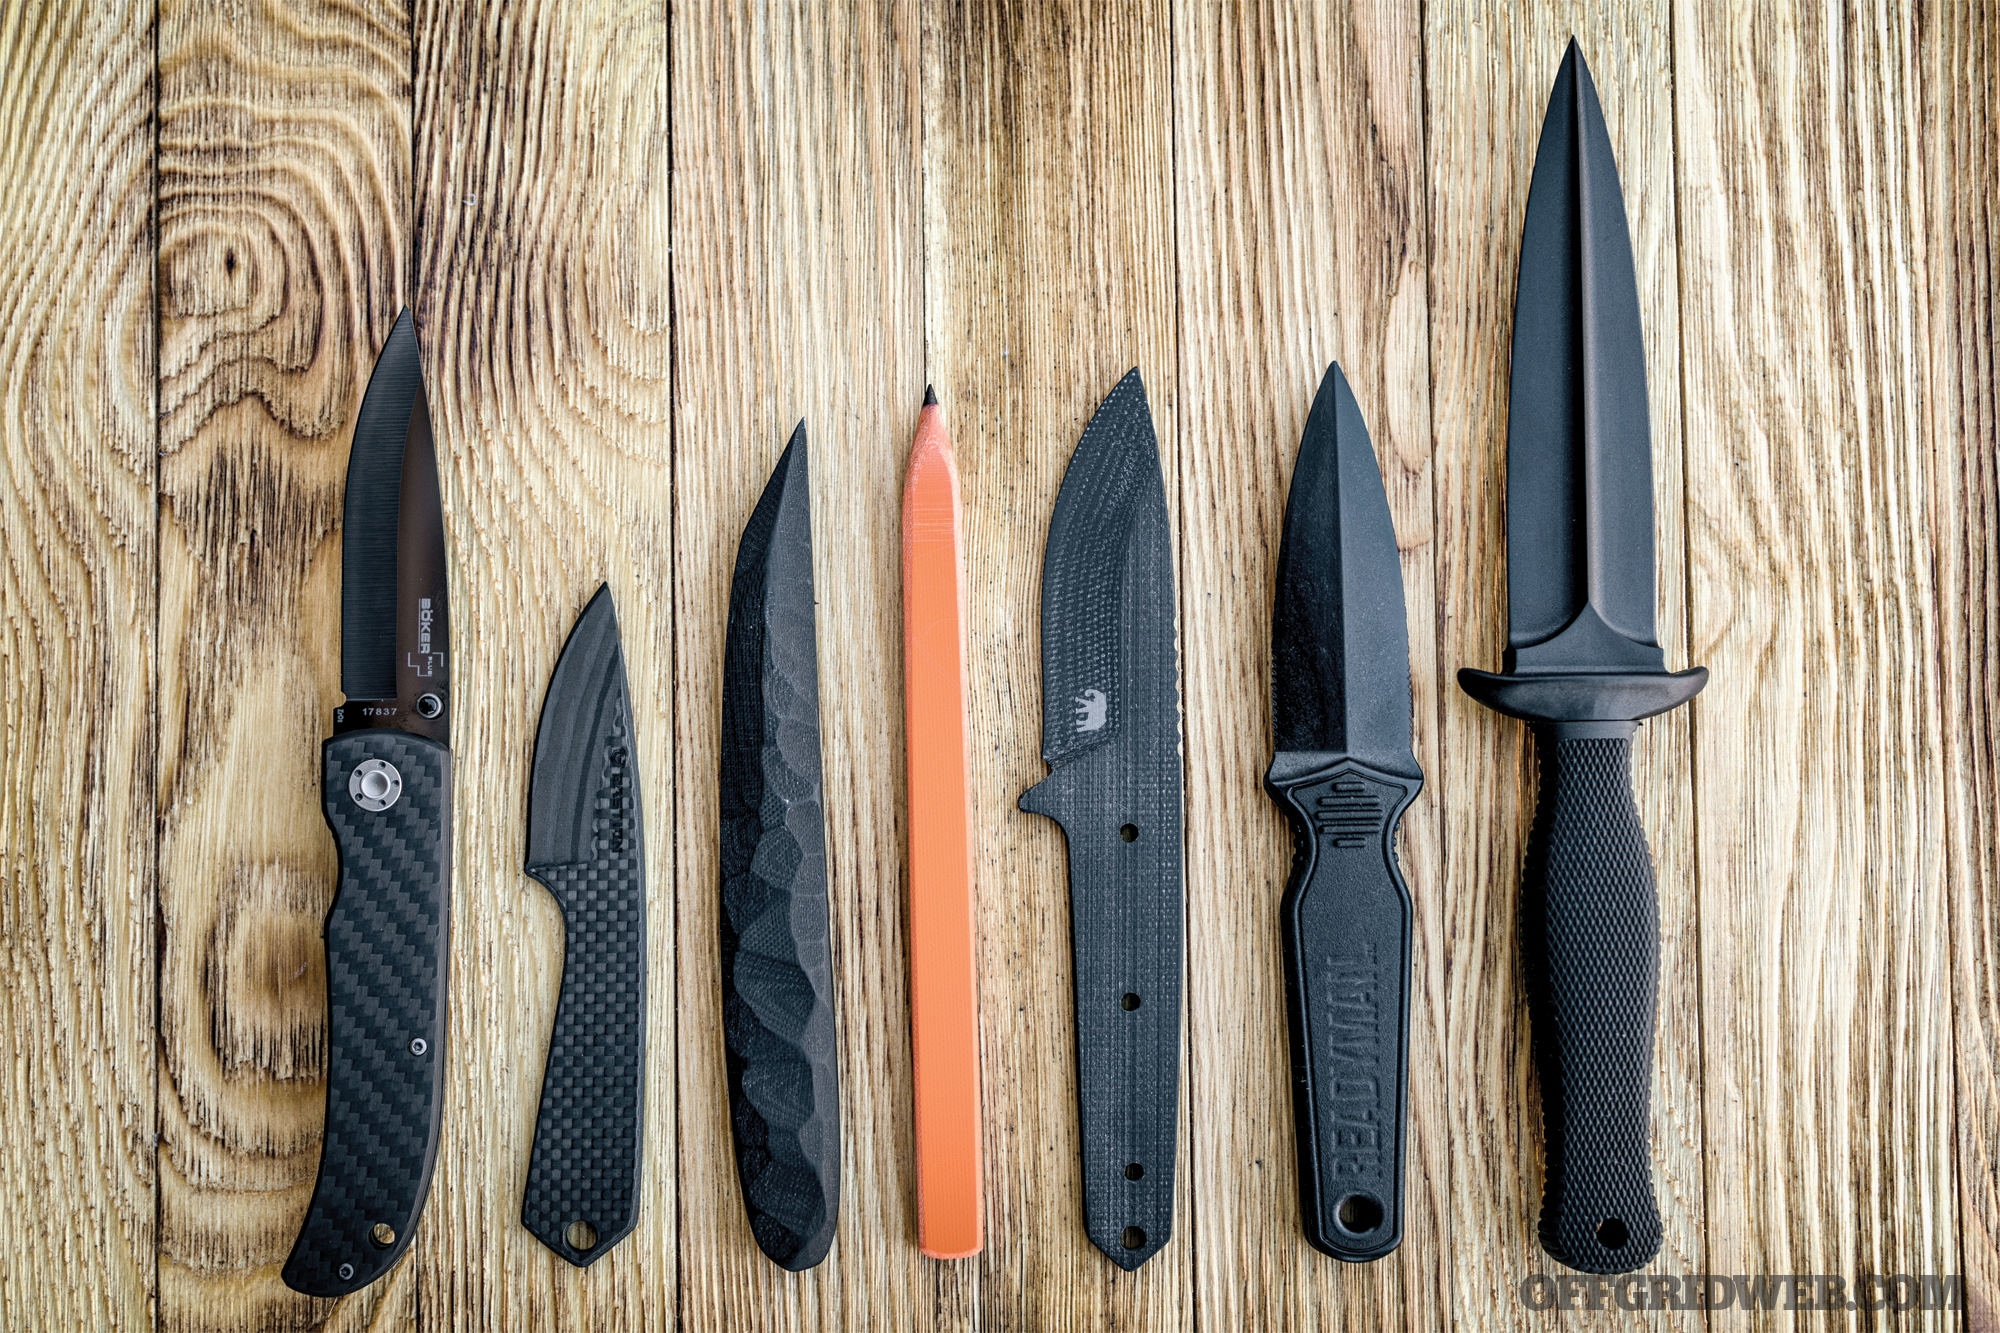
The terms bushcraft and survival have developed two distinct connotations as a result of their portrayals in various forms of media. If you think of a survivalist, you’ll probably envision someone who takes a modern approach to preparedness, often using contemporary weapons and tactical gear in an urban environment. On the other hand, bushcrafter usually evokes images of a seasoned outdoorsman clad in wool and leather, honing primitive skills at a remote campsite in the backcountry. Bushcraft is clearly linked with an emphasis on perfecting traditional techniques as opposed to relying on store-bought gear — as legendary Canadian outdoorsman Mors Kochanski put it, “the more you know, the less you carry.” (See The Last Page in Issue 31 for our review of Kochanski’s eponymous book, Bushcraft.)

If you tend to fall into the survivalist camp and can’t imagine willingly leaving behind any of your modern gear, it’s easy to write off the concept of bushcraft as one that’s outdated or irrelevant. However, we’d argue that bushcraft and survivalism go hand in hand. By learning primitive skills such as friction fire-starting and improvised shelter construction, you’ll become less dependent on the lighter and tent in your pack. As your abilities improve, you’ll be able to confidently head into almost any situation with only a handful of critical tools — even if you choose to keep carrying all your modern gear as an added advantage.

Even for the most ascetic bushcraft practitioners, there’s one tool that’s considered irreplaceable: a knife. It’ll be used to whittle trap triggers, shave feather sticks, baton firewood, gut fish, carve notches for bow drills, and countless other tasks. Given the wide variety of roles they must fulfill, bushcraft knives must be exceptionally versatile, durable, and comfortable. For this reason, they're equally effective for anything from camping trips to disaster scenarios.

We selected seven bushcraft knives, and studied each to gauge its adaptivity and effectiveness. Read on for our thoughts on each of these multipurpose tools.

Elk Ridge ER-555

Overall Length
10.5 inches

Blade Length
5.3 inches

Weight
8.5 ounces

MSRP
$17

URL
www.amazon.com

Notes
With dozens of five-star reviews and a sub-$20 price on Amazon, how could we lose? As it turns out, we got what we paid for. The plasticky Pakkawood scales were loosely installed, and the nylon sheath’s retention strap was barely held together. We found no mention of steel type, aside from “stainless steel” on the blade. Our best guess is that it’s 440A, a soft, low-carbon material. Thankfully, a sharpening stone is included. The knife’s shape and dimensions are great — a classic drop point with full-tang construction and a comfortable handle. Two screws can be removed to reveal a small storage cavity with needles, thread, and matches in the handle. A ferro rod and striker are also included.

Pros:

  • While the design is undeniably generic, it’s also fairly versatile.
  • Grind is surprisingly even and clean for a blade at this price point.

Cons:

  • Questionable steel quality — when a manufacturer won’t mention the specific steel they used, that’s a cause for concern.
  • Aggressive hollow grind also reduces strength, as does the hollowed-out handle

Emerson HUCK

Overall Length
8.6 inches

Blade Length
4.3 inches

Weight
4.6 ounces

MSRP
$318

URL
www.emersonknives.com

Notes
From a company that built its reputation on tactical folding knives, a bushcraft fixed blade might seem like a departure. But the HUCK — short for Hard Use Camp Knife — is a simple, well-made tool that’s clearly an Emerson. Its S35VN blade is hardened to a durable 57-59 HRC and features a wide primary bevel with the company’s signature single-edge grind — a feature some love and others hate. The full-tang handle is exceptionally comfortable, with a large palm swell and thick Richlite scales. Black G10 scales are also available and reduce price by $60. The included, veteran-made RK LeatherWorks sheath looks classy and fits like a glove.

Pros:

  • Both the knife and its leather sheath are made in the USA and display outstanding quality.
  • S35VN is one of our favorite varieties of stainless for multipurpose knives. It stays sharp under heavy use and isn’t hard to maintain.

Cons:

  • Asymmetrical single-edge grind is a strange choice here — great for shaving feather sticks, but difficult to control during precise right-angle or reverse cuts.
  • Rather pricey considering its features. Richlite scales look nice, but G10 offers better value.

Mora Companion Spark

Overall Length
8.8 inches

Blade Length
4.1 inches

Weight
3.2 ounces

MSRP
$35

URL
www.moraknivusa.com

Notes
Mora is a name that has become synonymous with this category, thanks to testimony from bushcraft godfather Mors Kochanski and other instructors. The Companion is one of this Swedish knifemaker’s most popular models, with a slim 12C27 stainless drop-point blade, classic Scandi grind, and 90-degree spine that’s perfect for striking a ferrocerium fire-starter. This new Spark version makes the latter feature more useful by integrating a ferro rod, which locks into a slot in the rubberized handle. The polymer sheath is nothing to write home about, but has good retention and a thumb ramp for added leverage. Put simply, at this price point, it’s tough to beat a Mora.

Pros:

  • Impressive value for the money
  • The addition of a ferro rod is a nice upgrade to this popular Mora design.

Cons:

  • The website and packaging advertise an included reflective lanyard, but it was missing from our early production sample.
  • Mora says the holes in the handle were meant to make it lighter; they mostly serve to show off the ferro rod and collect dirt. We’d prefer if they were filled for added strength.

Ontario Knife Company Robeson Heirloom Drop Point

Overall Length
9.1 inches

Blade Length
4.2 inches

Weight
4.8 ounces

MSRP
$230

URL
www.ontarioknife.com

Notes
As the name implies, OKC intended the Heirloom to be a trustworthy tool that can be passed down through generations. The tough D2 steel blade is hardened to 57-59 HRC, and flat-ground with a secondary edge bevel. Most of the spine is ground to a false edge that improves piercing effectiveness, but we were glad to also find a 90-degree section that can be used on a ferro rod. The handle is clad in laminated hardwood scales and features a comfortable contour and large forefinger notch. Drawing the knife from its soft leather sheath is easy thanks to the extended tab on its retention snap.

Pros:

  • Made in the USA with nice materials and workmanship (aside from the grind issue). We can see this knife living up to its Heirloom name.
  • Also available as a Trailing Point model with an upswept tip that’s better-suited to skinning

Cons:

  • Our sample had a noticeably lopsided edge grind — it’s easy enough to fix, but disappointing for a knife that costs this much.
  • We would’ve preferred solid hardwood over laminate.

Ruger Knives Powder-Keg Drop Point

Overall Length
9.5 inches

Blade Length
4.6 inches

Weight
7.7 ounces

MSRP
$100

URL
www.crkt.com

Notes
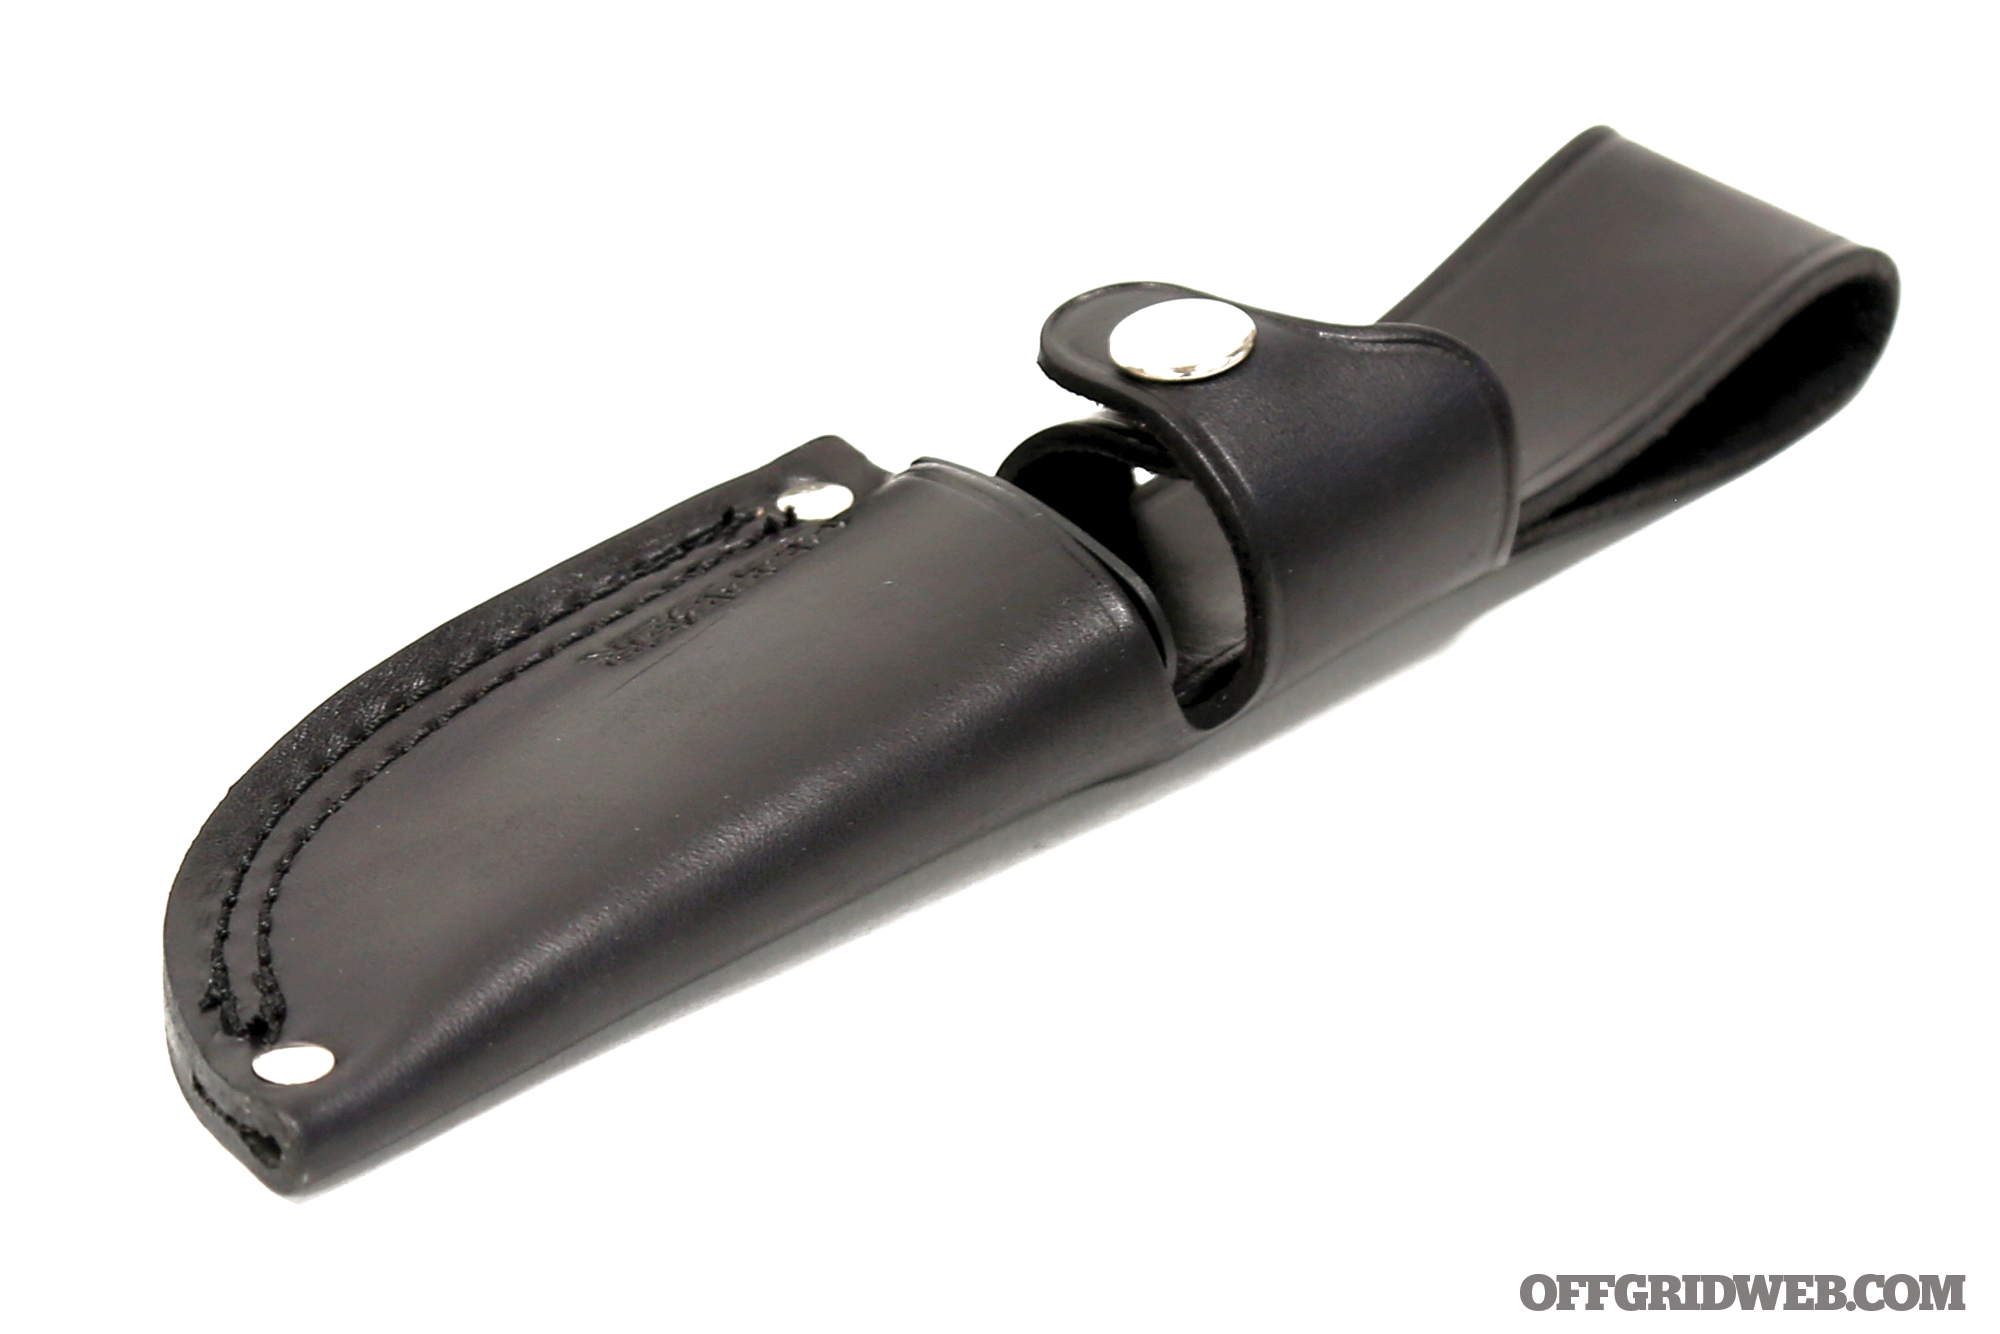
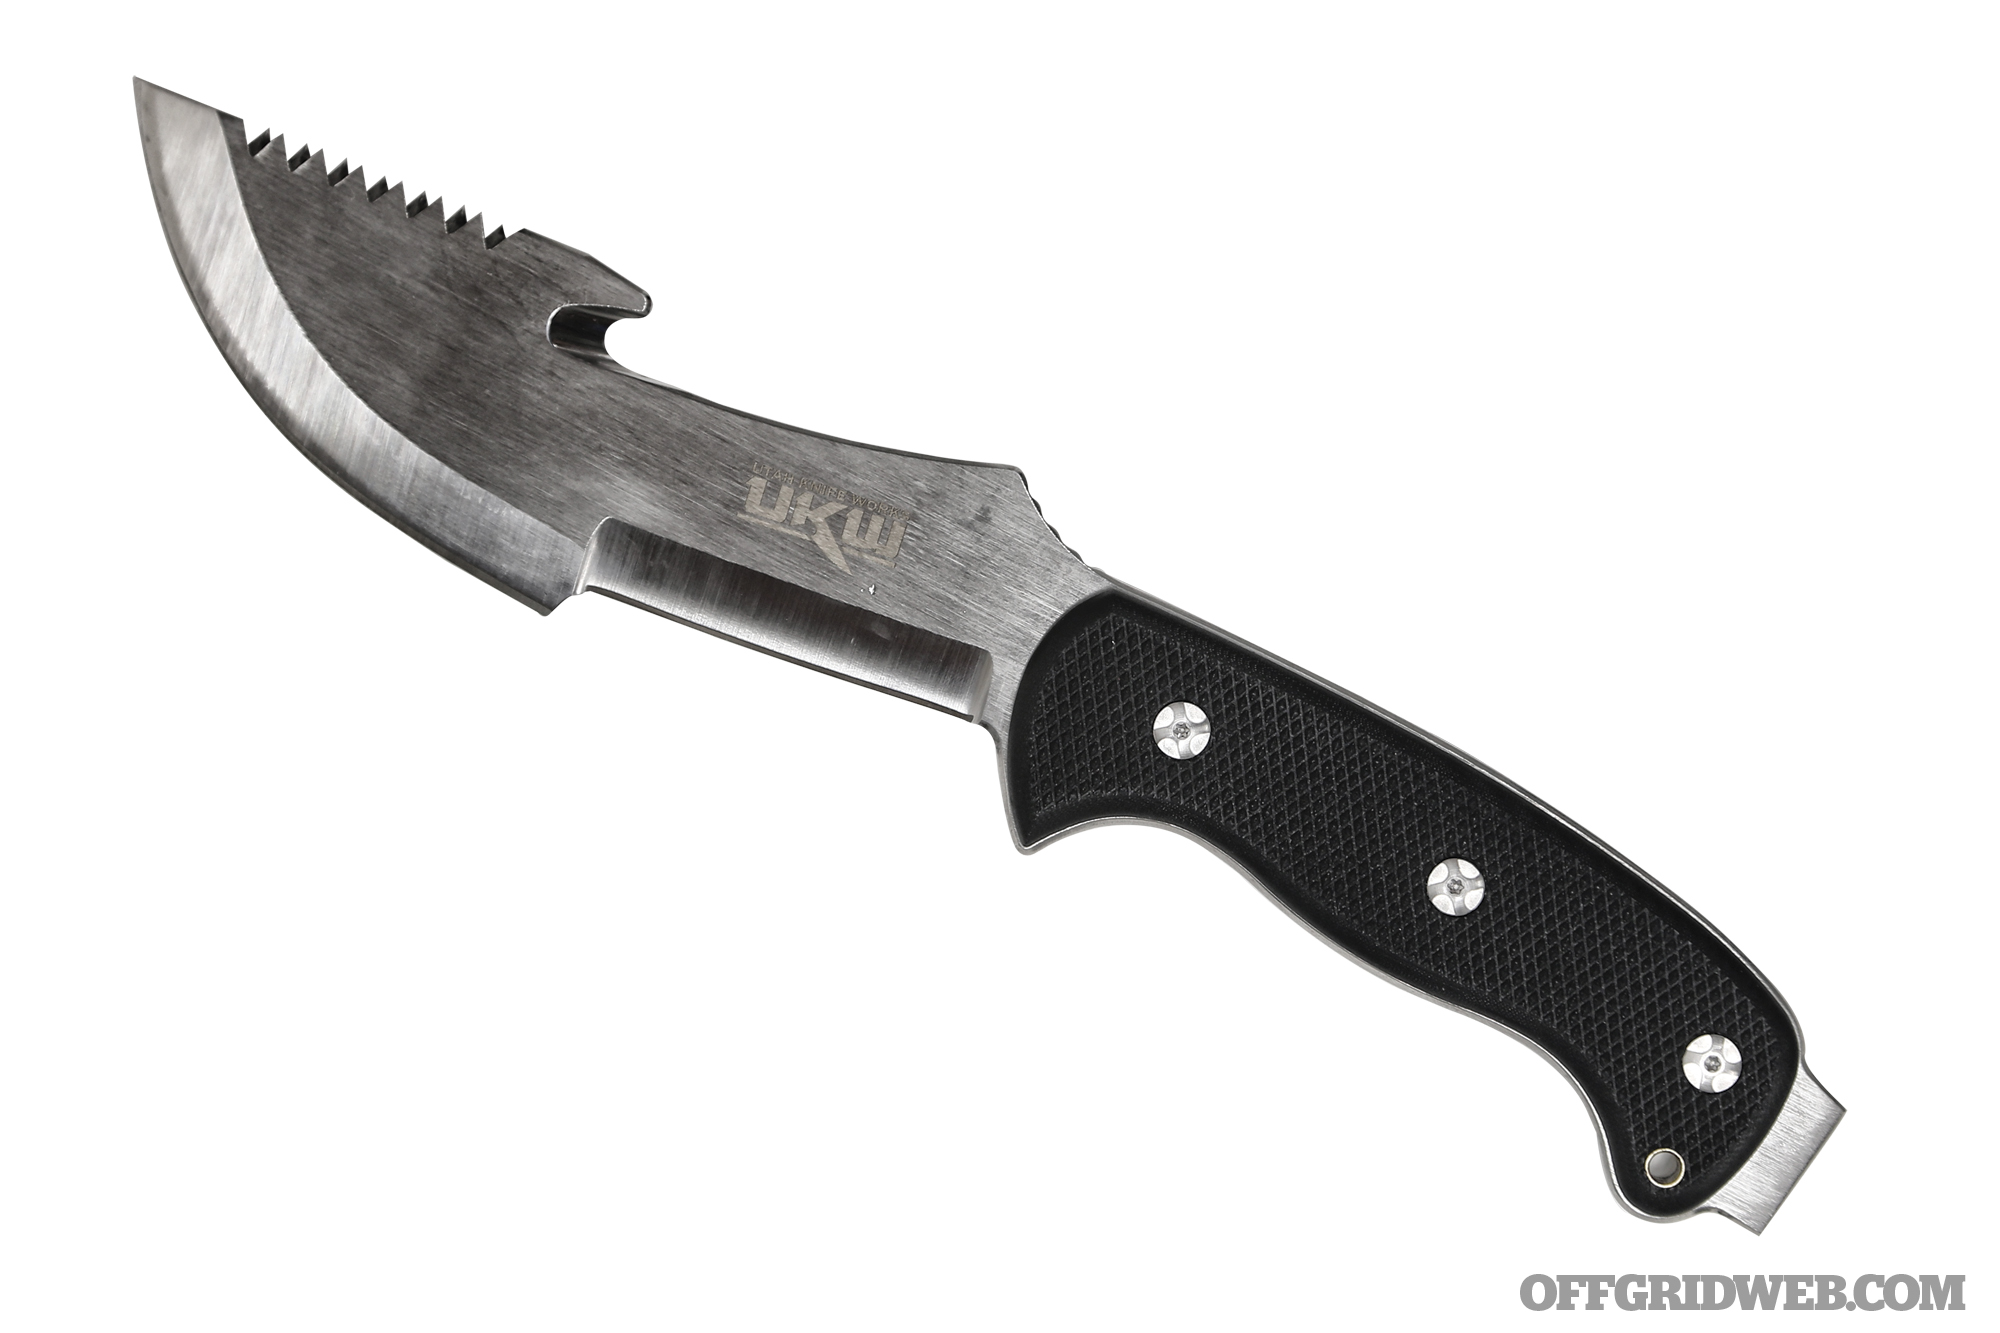
This full-tang fixed blade is marketed under the Ruger Knives brand and features the iconic logo on its handle, but it was primarily a collaboration between two big names in the knife industry: CRKT and Ryan Johnson of RMJ Tactical. Johnson devised the knife’s design, and CRKT manufactured it. Clip-point and drop-point variants are available; we chose the latter for its simplicity and practicality. The knife is constructed from 8Cr13MoV stainless steel with a dark stonewashed finish and two-tone thermoplastic resin (TPR) handle scales. It comes with a basic leather belt sheath — this accessory serves its purpose to protect the edge, but feels cheaply made.

Pros:

  • Simple design emphasizes functionality over style
  • The butt of the handle makes a nice hammer or, with a little filing, a ferro rod striker.

Cons:

  • 8Cr13MoV is a Chinese-made stainless with so-so edge retention. It’s fine for light use, but not ideal for harsher tasks like batoning.
  • Good leatherwork is costly, and this sheath was clearly made on a budget. We’d take a plain, durable Kydex sheath instead any day.

Spyderco Proficient Carbon Fiber

Overall Length
8.8 inches

Blade Length
4 inches

Weight
6.3 ounces

MSRP
$490

URL
www.spyderco.com

Notes
This knife was developed in collaboration with Bushcraft UK instructor Chris Claycomb and bears a clear resemblance to the original Spyderco Bushcraft (now discontinued). While its predecessor featured a single-bevel Scandi grind, the Proficient has a full-flat grind with secondary edge bevel. Top-shelf materials were used, including carbon fiber and CPM S90V — a “super-steel” with high levels of vanadium for immense wear resistance. The contours of the handle are supremely comfortable, though it wouldn’t be our first choice for wet and slippery conditions. An elegant black leather sheath is included; passing some paracord through its grommets can easily set it up for scout carry or attachment to a pack.

Pros:

  • A functional work of art with no expense spared on materials or craftsmanship
  • Photos cannot convey how comfortable this handle is. It’s among the best we’ve ever used.

Cons:

  • The quality is undeniable, but $490 is really tough to justify for any production fixed blade — especially one from Taiwan. Street prices are closer to $315, but even that’s a chunk of change.
  • S90V’s extreme toughness makes it difficult to sharpen in the field

Wander Tactical Lynx

Overall Length
9.4 inches

Blade Length
4.3 inches

Weight
11.4 ounces

MSRP
$267

URL
www.wandertactical.com

Notes
The slogan “they don’t shine, they work” conveys the philosophy of Italian knifemaker Wander Tactical. This knife was meant to take a beating, and it shows. The D2 tool steel blade is 1/4-inch thick, cryogenically hardened to 59-61 HRC, and fitted with deeply textured Micarta handle scales. While no knife should be used as a prybar, this one certainly could be. The broad skinner-style blade curves steeply at the tip and includes aggressive thumb jimping, as well as a 90-degree spine. There’s also a large choil that accommodates a choked-up grip for extra control. The Lynx comes standard with a leather sheath and belt loop, ferro rod holder, and straps for scout carry.

Pros:

  • Built like a tank — you’d have to be trying to split a boulder to substantially damage this blade.
  • Many options are available, including two-tone blade finishes, black or brown handle scales, and leather or Kydex sheaths in several colors.

Cons:

  • Although the extreme thickness inspires confidence in durability, it also adds a lot of weight and makes the blade feel less precise.
  • Tip geometry doesn’t make this a good choice for piercing tasks.

Review: SureFire E2D LED Defender Ultra

What's the most-used tool in your every-day carry gear loadout? Ruling out bare essentials such as keys, cell phone, and wallet, your answer is probably one of two tools. The first is a pocket knife. It's beneficial to have a sharp blade at the ready at all times, despite fearmongering campaigns that claim the opposite. The second is a flashlight. Much like a knife, the more you carry this tool, the more you'll find yourself appreciating its importance. Rather than peering into the darkness or hoping the tiny LED on your cell phone will provide sufficient illumination, a dedicated EDC flashlight will allow you to perform countless low-light tasks more safely and easily.

Over the years, we've gone through quite a few different flashlights. We've reviewed and compared dozens of them in our HighLights and Pocket Preps columns, and have included one as a fundamental component of our EDC for many years. As a result of this, we've become what some might call picky, rarely settling down on a single light for long. We're always on the lookout for new options to add to the rotation — our latest acquisition is a revised variant of a classic design from SureFire.

Above: The SureFire E2DLU-A (top) next to a few of the other lights we've frequently carried — SureFire EDCL1-T (review), Fenix UC35 (review), and an old Streamlight ProTac 2L.

SureFire E2D LED Defender Ultra

The SureFire Defender line of flashlights has been around for more than a decade, and the inclusion of the term “LED” in its name is an indicator of this fact. This light's predecessor, the E2D Executive Defender used a high-pressure xenon lamp that produced 60 lumens. No, we didn't forget a zero. Sixty. Thankfully, that technology has now been surpassed by more powerful, efficient, and reliable light-emitting diodes.

Executive Defender (top) and LED Defender (bottom)

After that, output increased to 200 lumens with the introduction of the E2D LED Defender, and then increased again to 600 lumens with the E2D LED Defender Ultra. Finally, there's the latest iteration, which is (somewhat confusingly) still referred to as the E2D LED Defender Ultra. This model — which can be identified by the smooth ring around its head, as opposed to the last model's anti-roll ring — now offers a maximum output of 1,000 lumens. Lighting performance has come a long way since the 60-lumen Executive Defender, to say the least.

The 600-lumen LED Defender Ultra (top) featured an anti-roll ring. The 1,000-lumen version (bottom) does not.

The 1,000-lumen Defender Ultra is available in two variants: E2DLU-A and E2DLU-T. The former is what we chose, and offers dual outputs of 5 lumens or 1,000 lumens. The light must be cycled on and off rapidly to switch between the two modes. The latter Tactical model offers a single output of 1,000 lumens.

This light is constructed from hard-anodized aluminum with a knurled texture, crenelated striking bezel, scalloped tail cap, and dual-direction stainless pocket clip. It uses two CR123A batteries, and a TIR lens design that focuses light into a versatile blend of long-distance throw and peripheral visibility. Advertised runtime is 2.75 hours on high, or 63 hours on low.

Our Impressions

After carrying the E2D LED Defender Ultra daily and using it extensively over the last few months, we found a lot of things we liked, and a couple we didn't.

Right off the bat, the light feels great in hand. If you need this light to live up to its defender name and use it as an impact weapon, the size is perfect for that task. The knurled texture and flared ends lock into your fist, ensuring the light won't slip as you hammer it into an attacker. And that crenelated bezel is sharp enough to do damage, but not ringed with mall-ninja-grade razor-sharp spikes like some lights we've seen. In the interest of being able to carry our flashlight everywhere we go, including through airports, we prefer this more-subdued appearance.

The stainless pocket clip allows the light to be carried tip-up or tip-down, but the former will cause the bezel to stick up prominently above the pocket hem. We noticed that this particular clip felt a bit looser than other SureFire clips we've used, but not to the degree that we worried about the light slipping out of a pocket.

We have mixed feelings about the scalloped tail cap. On one hand, it's helpful for the defensive function of the light, and prevents accidental button presses. On the other hand, it makes the recessed button a little harder to click, and prevents the addition of a Thyrm Switchback ring (if that's something you're into).

Lighting performance is outstanding. The 1,000-lumen, 10,600-candela beam cuts through darkness in open spaces, and provides a 200-meter reach. We were able to clearly illuminate trees on the other side of a pitch-black field, and light up large rooms inside a house with its sheer power. The TIR lens and slightly warm color temperature contribute to this visual performance.

However, this is a dual-output light, and that's something we need to address. The 1,000-lumen high setting is great for open outdoor spaces, or defensive situations where you may need to disorient an intruder. For close-up tasks, it's simply too much. To address this and make the light more useful for EDC, SureFire offers the E2DLU-A model with a 5-lumen low setting. That's perfect for map reading, lighting up the inside of a backpack, or inspecting a car's engine bay. But beyond 20 or 30 feet, it starts to feel dim.

This led to our biggest gripe with the E2D LED Defender Ultra — you get two extremes to choose from. We frequently found ourselves in situations where 1,000 lumens was too much, but 5 lumens was not enough. Like Goldilocks, we were searching for the middle ground that felt just right.

That's not to say this light needs three brightness settings, since that would complicate the controls, and there are plenty of competitors' lights that are guilty of tacking on too many unnecessary modes. We just wish that the low mode was a bit brighter. Somewhere around 25 lumens would be enough to light up a garage or backyard, without feeling too bright for closer tasks. It'd also extend battery life, since we'd spend less time defaulting to the 1,000-lumen mode.

As it stands, it feels like SureFire kept increasing the E2D's maximum output across generations, but left the 5-lumen low mode untouched. It feels that way because that's exactly what happened. This series went from 5/200 to 5/600 to 5/1,000-lumen settings over the last three major revisions.

The SureFire EDCL series offers similar features, but only comes with a non-click “gas pedal” tail cap.

For comparison, the SureFire EDCL1-T we previously reviewed (pictured above) offers a 600-lumen high mode and 5-lumen low mode, and that spacing felt a bit more practical. We used that light at high output most of the time anyway, since the non-click tail cap lends itself more to short bursts of bright light. Compared to 5/600, the 5/1,000 gap feels huge. However, we definitely prefer click tail caps, so that's a subjective point in the Defender Ultra's favor.

MSRP is $199 for either the single- or dual-output Defender Ultra, although we found it through third-party retailers for about $170. As always, we appreciate that SureFire lights are designed and manufactured in the USA, and offer a lifetime no-hassle guarantee. SureFire reliability is rock-solid, and that's a critical factor for any EDC flashlight.

Closing Thoughts

Overall, the E2D LED Defender Ultra is, as expected from SureFire, a very solid flashlight. Its light output and quality are superb, and well-suited to the defensive applications its name indicates. It also fits the hand well, and makes an effective impact weapon without appearing overtly aggressive. The dual-output modes aren't ideal for every situation, and we'd prefer a brighter low setting, but they serve most purposes reasonably well. This light isn't the end-all be-all solution for every task, but it'll certainly remain in our everyday-carry rotation for the foreseeable future.

Pros:

  • Output is immense, but more importantly, distributed into a clear and versatile beam pattern
  • Grippy body and crenelated bezel make it a formidable impact weapon
  • SureFire's excellent build quality and warranty yield confidence that this light can take a beating

Cons:

  • Many applications require more than 5 lumens and less than 1,000. We wish the low-output mode was a little brighter to balance this out.
  • The pocket clip on our light isn't as firm as that of our EDCL1-T, and allows the light to move around in a pocket more than we'd like.
  • We're not sure why the anti-roll ring was removed from the head for this generation, and we see no compelling reason for its absence.

For more information on this and other SureFire flashlights, go to SureFire.com.


Video: Russian Jail Lifehacks

Survivalists often speak about austere environments where problems must be solved creatively with minimal resources. If you need a tool, you make the most of the gear you have, and think outside the box to improvise anything you don't have access to. In this regard, few environments are more challenging than a prison. Those of us who aren't behind bars can learn quite a bit from convicts' problem-solving strategies, even though they may not always be advisable.

The video shows this blade used to split matches, but its primary purpose is more obvious.

Although we've often poked fun at lifehack videos for their absurd, impractical, or outright dangerous techniques, we occasionally come across one that includes some good food for thought. The following video from SlivkiShow demonstrates a few techniques for making weapons and tools that are allegedly used in Russian jails.

As you might expect, some of these techniques are clearly dangerous, such as frying potatoes and meat in a mason jar using an exposed live wire — don't try that at home. Others probably wont last long, such as the improvised plastic screwdriver. However, as we said before, sometimes you've got to do the best you can with the tools you've got. We can certainly appreciate the level of ingenuity here, even though we're not forced to drink pruno or carry a melted toothbrush for self-defense.


News: Legendary Outdoorsman Mors Kochanski has Passed Away

If you've been visiting this site and reading our magazine, the name Mors Kochanski should need no introduction. This Canadian survival skills instructor has had a tremendous and lasting impact on so many of us in the survival community. Les Stroud called him “a legend;” Cody Lundin told us in an interview that Kochanski was “one of [his] greatest instructors.” The term bushcraft entered our common lexicon after being popularized in large part by Kochanski's eponymous book, Bushcraft: Outdoor Skills and Wilderness Survival.

We are therefore deeply saddened to hear of his passing earlier today, according to a Facebook post from his close friends and fellow educators at Karamat Wilderness Ways:

Mors Kochanski was born in Canada to Polish immigrant parents in 1940, and grew up on a remote farm in Saskatchewan with his five siblings. They spent their days working on the homestead and exploring the surrounding forest. This upbringing imbued Mors with a fervent appreciation for the wilderness, as well as a respect for the potential dangers it held. In 1968, he started his career as an outdoor educator, and went on to become an associate professor at the University of Alberta. He wrote several books, including the aforementioned Bushcraft, and contributed his knowledge to many other survival publications and courses.

Photo via MorsKochanski.com

Kochanski celebrated his 79th birthday in 2019. As a testament to his dedication, he was still making appearances at outdoor education events and sharing his knowledge until very recently. According to a post from his official Facebook page, he had been suffering from mesothelioma. He reportedly passed away early this morning, at home surrounded by his family.

“03 August 2019, Mors enjoying the summer sun in front of his home at Bear Lake, Alberta, Canada.”...

Rest in peace, Mors — we'll miss you.


Fit to Be Tied: How to Use Rope to Move Gear Safely

Whether you find yourself in the backcountry on a hiking trip, working on a home project, or standing in the wake of a natural disaster, you may encounter the need to move something heavier than you can safely move by yourself. In those situations, you can apply a few pieces of lightweight and relatively inexpensive equipment to take off some of the load.

Recalling a little grade school science, there are six types of simple machines: lever, wedge, screw, inclined plane, wheel and axle, and pulley. From this list, you can employ a pulley in the aforementioned scenarios to lighten your workload by half or more by utilizing mechanical advantage. Simply put, rope-based mechanical advantage is using ropes and pulleys to leverage force.

A haul system is the utilization of rope and a few basic components to create mechanical advantage in order to lift or move someone or something. You don’t have to be a rope expert to be able to construct a haul system. You can use a high-tech physics concept and make it low-tech, easy, and useful.

Using ropes to make difficult work easier has a variety of uses from the mundane to crucial. Rope-based mechanical advantage can be seen in use by landscapers and furniture movers. It can be used to hoist camping gear vertically to a higher elevation. Rescue teams use haul systems all the time to move patients in both the horizontal and vertical realms. Ropes and pulleys are also often seen in post-disaster conditions when large pieces of structure need to be moved off of people, or trees need to be moved out of the road. Mechanical advantage is used in a number of ways to accomplish what we can’t on our own.

Important Basics

Before diving into the construction of a haul system, there are some basic concepts and terminology that should be discussed. For those familiar with using rope and climbing gear, this may be familiar territory, but for those who aren’t, let’s discuss a few topics:

Kilonewtons: Because very few things can be universally easy, when you’re talking rope, rope gear, and rope-related mechanical advantage, all equipment is rated in kilonewtons (kN) rather than pounds. Just like pounds, a kilonewton is a measure of force. The purpose for using kilonewtons rather than pounds seems to be more historical and geographical than anything else. The history of the construction and use of rope dates back centuries, but modern rope craft and widespread knowledge and acceptance of mechanical advantage concepts trace back to European nautical origins.

The UK uses pounds to denote currency, so it wouldn’t make sense to measure equipment in pounds, just as Americans wouldn’t use dollars to refer to anything but money. So, rating by kilonewtons became the norm. Americans hold on tightly to our anti-metric roots and largely ignore the otherwise globally accepted International System of Units. Fortunately, the conversion isn’t difficult: 1 kilonewton equals 225 pounds (224.8 if you want to be exact). Although many companies are starting to list both pound and kilonewton ratings for their gear, you should expect to see kN a lot.

A Moment of Physics

Since the vast majority of us aren’t physics majors, I tend to keep things simplified. When you tie a rope to something and pull, you’re exerting 1 pound of force to move 1 pound of mass. In fact, it’s even more offset than that because of friction, so you’re actually having to pull harder than 1:1. The heavier the person or object, the more force will need to be applied. Once you factor in uneven terrain or the associated gravity that factor in to steep inclines or declines, it becomes virtually impossible and/or dangerous. By simply adding a few carabiners, Prusik loops, and pulleys, we can significantly decrease our workload, which might mean the difference between life and death in extreme circumstances.

Above: A 3:1 haul system can decrease your workload significantly when resources are limited.

In this article, we’ll discuss tipping the advantage in our favor by learning how to create a 2:1 and a 3:1 mechanical advantage. In those situations, you’re either exerting 1 pound of force to every 2 pounds of mass or, even better, 1 pound of force for every 3 pounds of mass respectively.

Equipment Needed

Any outdoor or disaster preparation gear should include a few basic pieces of equipment that can be used to create mechanical advantage. Most people carry some type of rope, which is always a good idea. The addition of two pulleys, a few Prusik cords, and a few carabiners, and you have the ability to decrease your workload by up to a third.

Above: Simply adding two carabiners, two pulleys, and two Prusik loops to your supplies offers you a variety of options to raise and lower people and equipment.

Rope: The rope you choose will depend solely on your personal preference and comfort level. While 11mm or 12mm (roughly ½-inch diameter) rope is pretty universally utilized in life safety applications, it can be heavy and take up a lot of space in your pack. I always recommend having 100 or 200 feet of 11mm or 12mm rope at home or accessible, but it’s not practical to carry that unless you’re exclusively carrying rope and rope gear for climbing or a haul system.

It may take a few visits to your local outdoor gear store and conversations with experienced climbers, but identify a section of rope that’ll meet your specific needs. Keep quantity in mind as well. A lot of rope is typically needed for building a haul system. You should have more than you think you’ll need. Even tying a single knot can occupy several feet of rope and few things are more frustrating than needing 1 or 2 more feet of rope and coming up short.

When it comes to rope, your life may literally be hanging from it, so don’t buy the cheap rope at the hardware store. Rope is constructed in a variety of ways and, although quality rope is a little bit more expensive, this is one situation where spending the money is 100 percent the right thing to do. Do your homework!

Pulley(s): Having a few pulleys with you is the first step (and a required one) to creating mechanical advantage. Carrying one pulley is the minimum, but at least two pulleys is recommended. First of all, having a backup is a good plan. Especially if you subscribe to the “two is one and one is none” school of thought. Secondly, the more pulleys you have, the greater the mechanical advantage you can create.

Above: Prusik minding pulleys can be a small, lightweight, and versatile addition to anyone’s supplies.

Pulleys can be purchased just about anywhere that sells tools or outdoor equipment. They come in a variety of strengths, sizes, and colors. Read the fine print on the pulleys and find the kN rating. The pulleys I selected for this article are 20 kN pulleys. Remember the conversion: 1kN = 225 pounds, so 20 x 225 = 4,500 pounds. That’s over 2 tons! One would think you could significantly downgrade and get cheaper equipment with less weight rating. The ratings on rope equipment are for static loads, but an important factor in rope dynamics lies in shock loading the rope (a sudden, weighted jerk) and swinging the rope. The weighted force changes significantly, so the stronger the equipment the better. Most would agree, though, that 20 kN is a pretty good starting point for basic mechanical advantage.

Above: A Prusik minding pulley is constructed with edged side plates whereas a traditional pulley has rounded side plates. The side plates don’t affect the strength, but the angled edges prevent Prusiks from being drawn into the pulley.

One recommendation that should be made, when utilizing pulleys to create haul systems, is to use “Prusik minding” pulleys. These will have cornered side plates rather than rounded (see picture below), which allows a Prusik to be drawn against a pulley without being pulled into the pulley.

Prusik(s): A “Prusik cord” or a “Prusik loop” is a small piece of looped rope, tied to itself by a double fisherman knot, used as a friction hitch. They’re often purchased premade with a shrink-wrapped end in varying lengths. Your Prusik options lie in diameter, length, and color. The vast majority of Prusik cordage you’ll find falls in the 3mm to 8mm range. As a general rule, you’ll want to use a diameter that’s in the range of 60 to 80 percent the diameter of your standing rope. If you use Prusik cordage that’s too thin, it’ll tighten easily on the rope and become a nuisance. If your cordage is too thick, it may not generate enough friction to tighten when you need it to.

The other major factor, assuming color doesn’t matter to you, is the length of your Prusiks. For building a mechanical advantage haul system, length isn’t a significant factor. Generally, the more compact, the better. But some rope enthusiasts prefer longer Prusiks for the options they provide in other areas of rope craft. In this demonstration, 12-inch 6mm Prusiks are used.

As with your standing rope, quality counts. Even high-quality Prusiks are inexpensive, so make sure you’re buying quality, highly rated Prusiks from a reputable source. Here’s how it works.

The use of Prusiks not only allow you to build a haul system to move heavy objects, but they also afford you the ability to ascend or descend a rope! In this particular instance, longer Prusiks (as shown) are needed. By simply wrapping the Prusiks around your main line, you can slide them up or down and literally climb a rope. In order to descend a rope using only Prusiks:

  1. Equipment: two Prusiks and one rope.
  2. Hold the Prusik perpendicular to the main rope.
  3. Wrap the Prusik around the main rope and then tuck one end through the other.
  4. Wrap two more times and pull tightly.
  5. Attach the second Prusik to the main rope the same way.
  6. Step into the Prusiks.
  7. Lower the bottom Prusik.
  8. Put your weight on the lower foot and then lower the top Prusik.
  9. Put your weight on the top Prusik.
  10. Repeat 7 – 9.

Carabiner(s): Carabiners can be found anywhere from high-end outfitter stores to plastic bins at the cash register at Walmart. A simple internet search can be overwhelming. Carabiners are the utility player of the outdoors/survivalist world. They’re used for a myriad of applications and are often found in bulk with preppers, hikers, bicyclers, and coffee shop backpacks.

Which carabiners you buy depends on your application and makes a huge difference in the result of your endeavor. Don’t assume all are alike and have the same weight rating. Some will say clearly on the side “not for climbing.” If you’re looking to be able to clip your car keys to your belt loop, an inexpensive generic carabiner will work just fine. If you’re a rock climber and need the carabiner to be lightweight enough to carry many of them without weighing you down, but strong enough to support your body weight, you step up in price and quality. For applications that include suspending heavy objects or people — such as life rescue scenarios — robust steel carabiners are used. For this application, high-strength aluminum carabiners seem to be the sweet spot, having a relatively high strength rating while remaining lightweight.

And finally, a locking system is important. Carabiners now have a variety of methods to secure the gate that prevents it from coming open and leading to possibly catastrophic results. You’ll find twist locks, screw locks, wire locks, and ball locks, among others. They all serve their purpose, and it really comes down to personal preference. Before buying, put your hands on them and see what works best for you (a breakdown of locking types can be found here: www.petzl.com/LU/en/Sport/Carabiner-locking-systems).
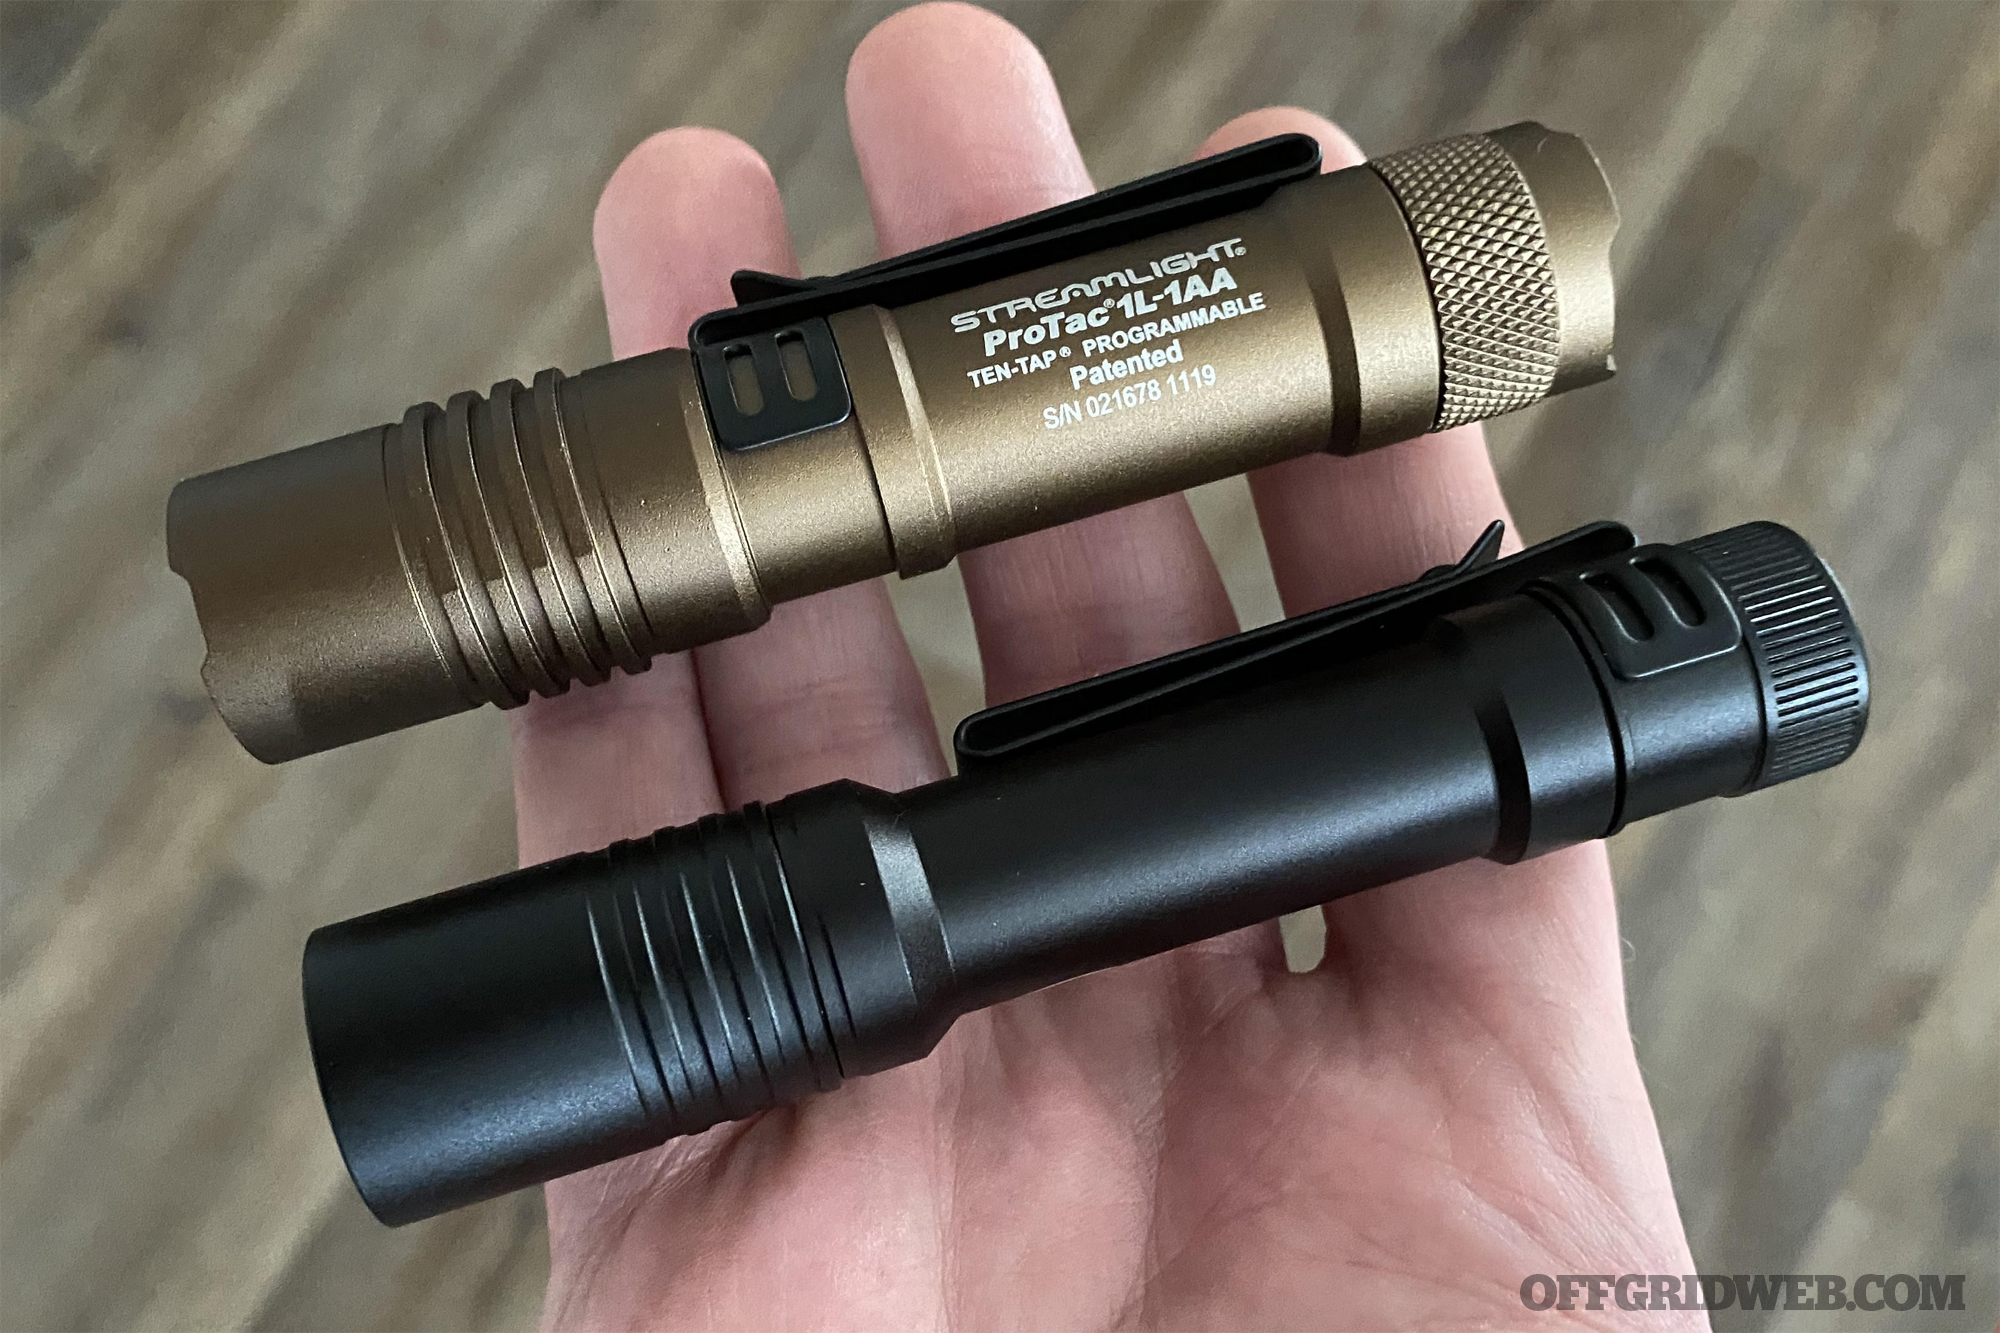
Bombproof Anchor

A “bombproof” anchor is the basis for a haul system and should be substantially solid. A bolted stair rail is a poor location to anchor your system. A concrete structural pillar, large, mature tree, or a vehicle can be considered a “bombproof” anchor.

Cost Breakdown

Given the ability to create simple mechanical advantage, two assumptions were made: that you already have a workable length of quality rope, and that you also have webbing or a second rope that’ll allow you to attach your system to an anchor. With those on hand, you simply need to bolster your gear a bit to include the ability to create 2:1 and 3:1 mechanical advantage. The minimal gear you’ll need to add is:
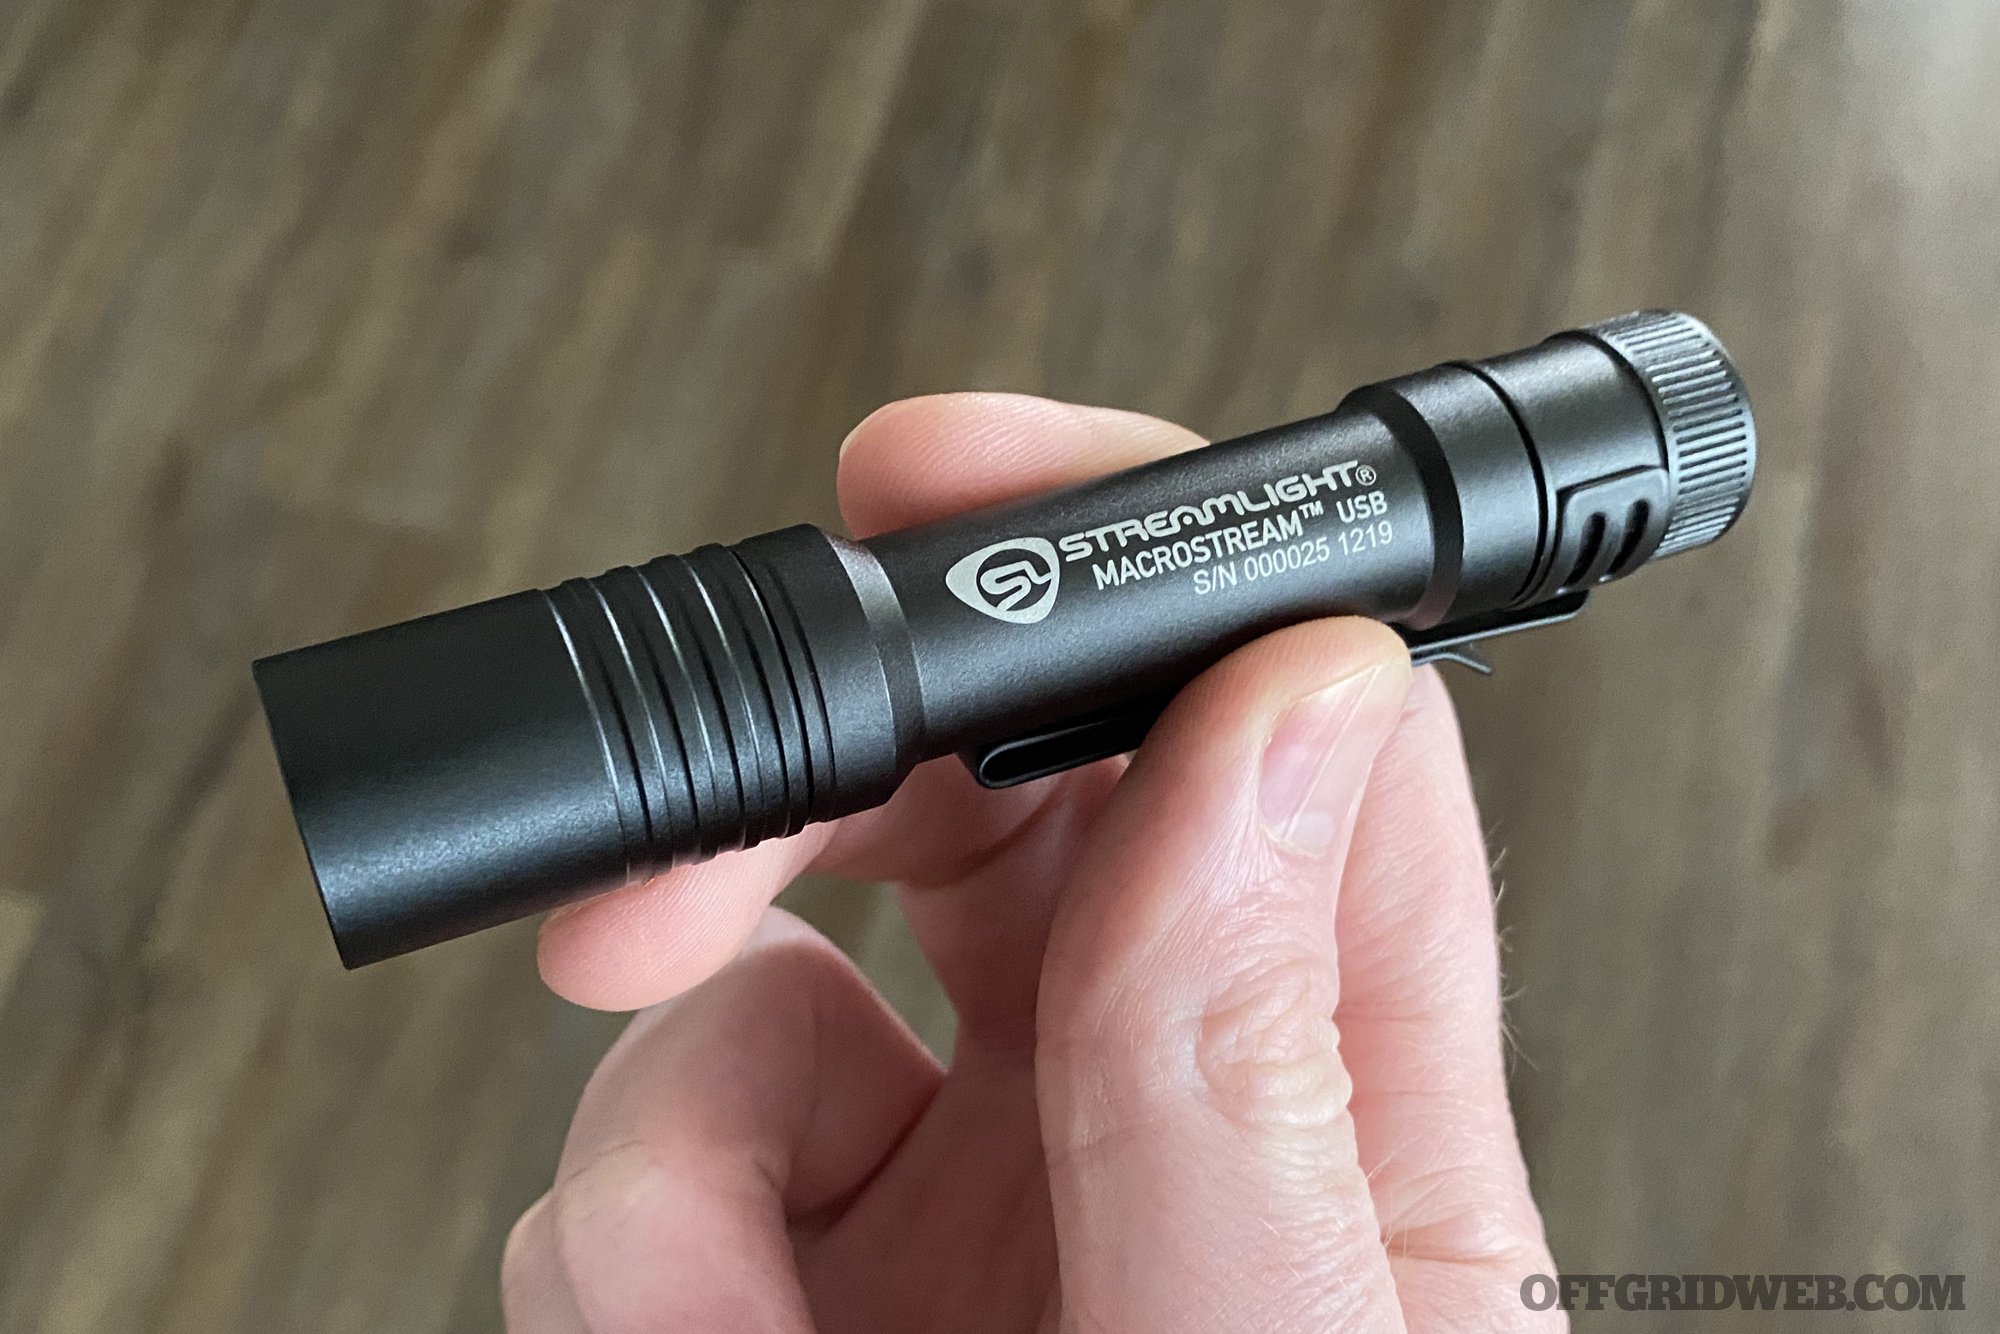
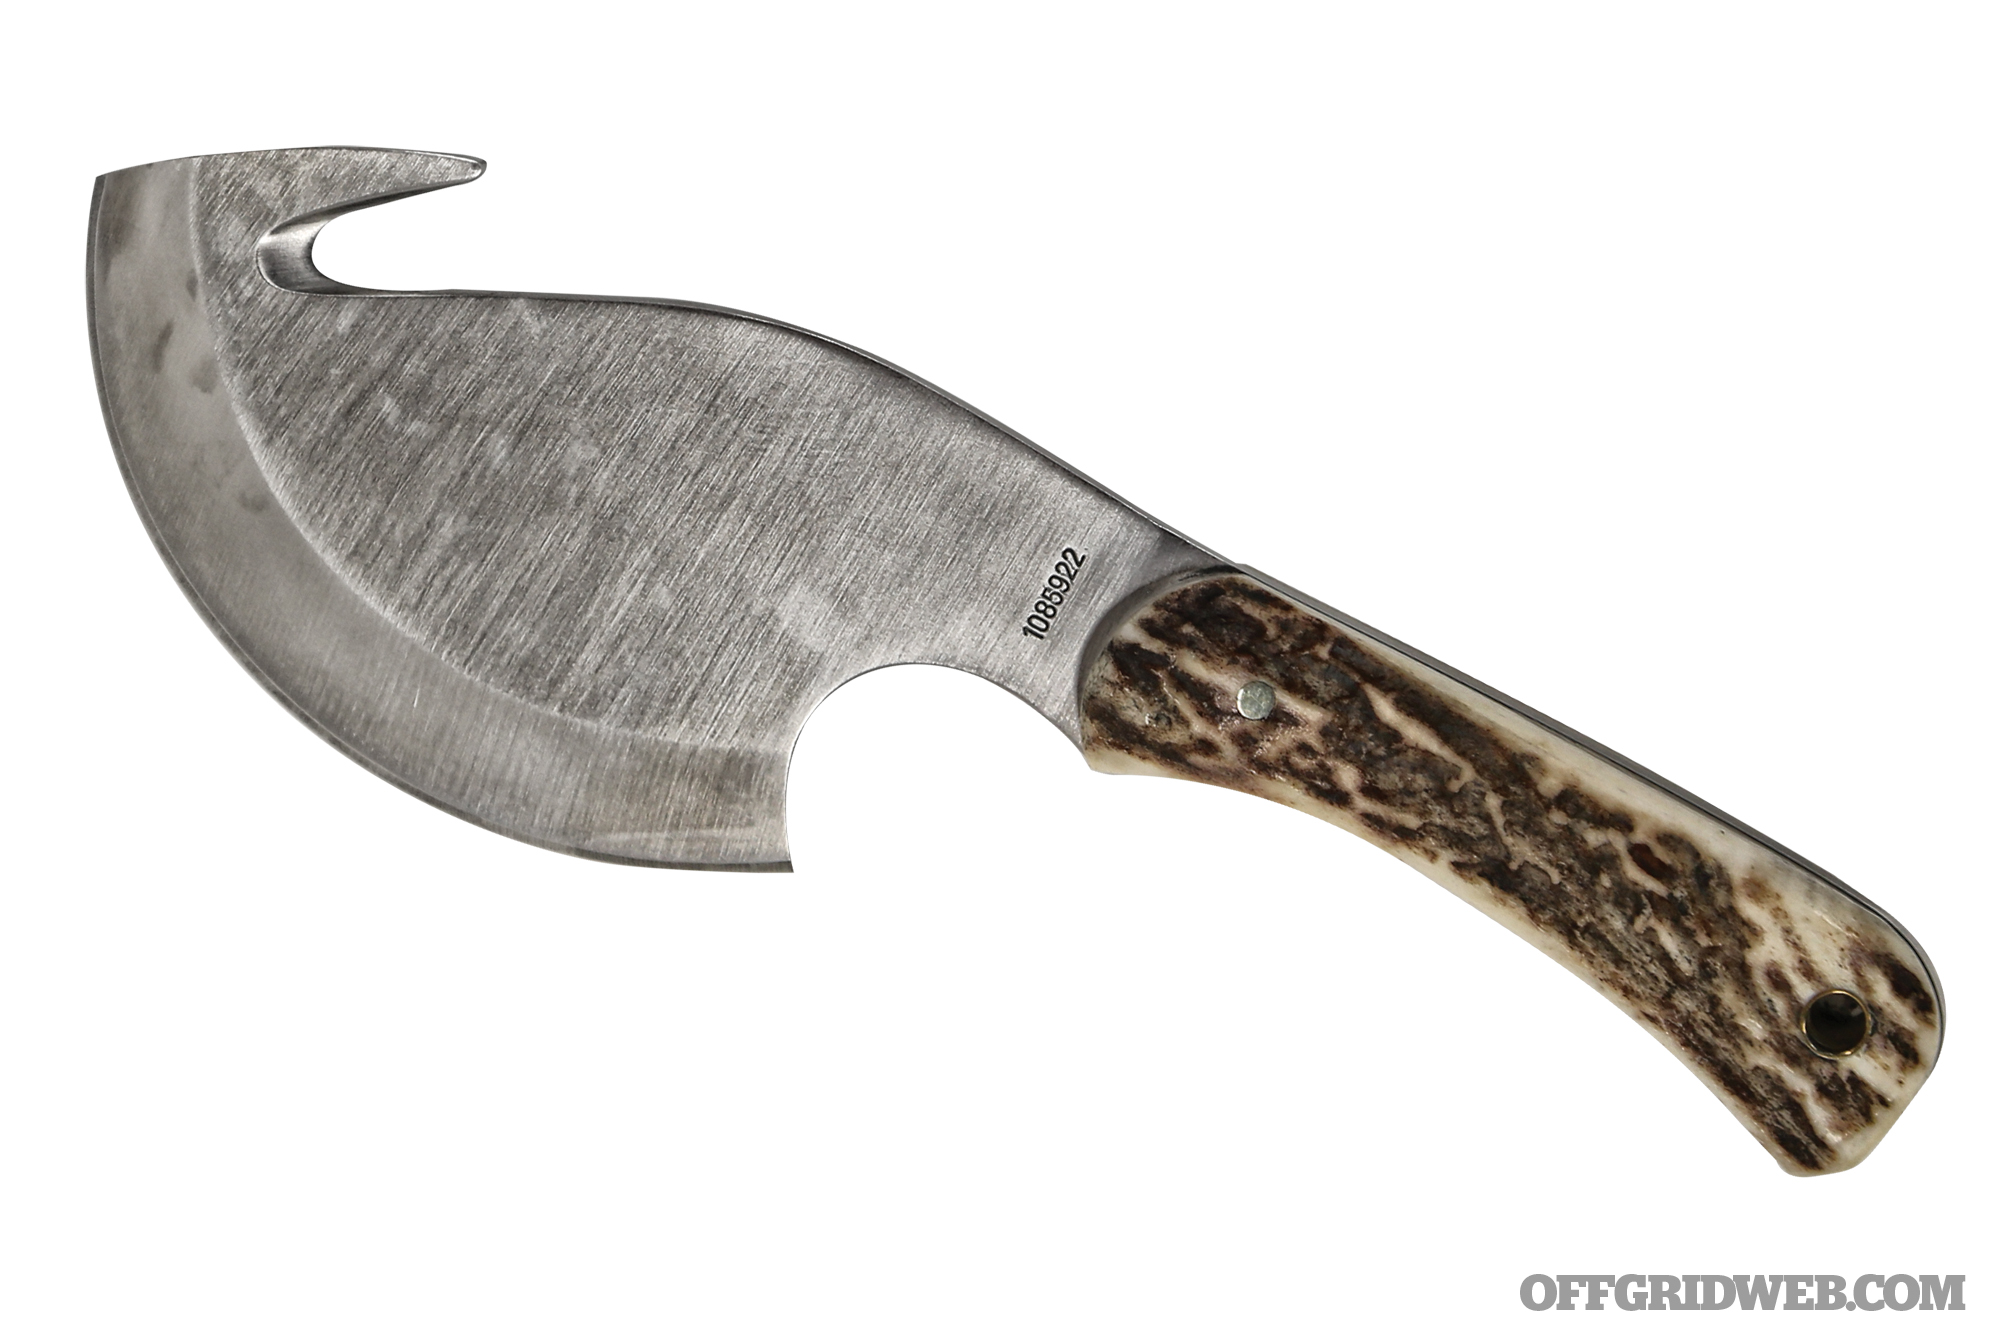
  • Two pulleys
  • Two Prusiks
  • Two carabiners

For this article, I purchased a two-pack of 20kN pulleys ($13), a three-pack of 12-inch 6mm Prusiks ($16), and a two-pack of 25kN carabiners ($17). All were purchased on Amazon Prime and each are highly rated with adequate strength ratings. The grand total for all equipment, with tax was about $61. There are countless options when it comes to buying this equipment, and it would be easy to spend considerably more money, but this is an example of what you can expect as a starting point for the purchase of safe, quality equipment to create rope-based mechanical advantage.

Useful Scenarios

1:1, 2:1, and 3:1 Mechanical Advantage

When discussing mechanical advantage, first we must identify what is not mechanical advantage. As previously mentioned, tying a rope to an object and pulling offers no mechanical advantage. Running a rope through an anchored pulley and pulling on the other side, despite what some may think, offers no mechanical advantage. That scenario is literally the same as the first with the added feature of the pulley, known as a “change of direction.” Mechanical advantage begins with 2:1 and 3:1 systems. Their beauty lies in both simplicity and effectiveness.

In order to achieve mechanical advantage, you’ll need to construct a haul system with a moving pulley. That begins with a 2:1 mechanical advantage. In a 2:1 haul system, a person is required to exert roughly half as much force as the weight of the object.

  • The rope is terminated with knot at a “bombproof” anchor (see sidebar).
  • Attach a pulley to the load.
  • Run rope through the pulley.
  • Haul on the other side.
  • Note: An additional pulley can be added as a change of direction. It offers no mechanical advantage, but in certain places improves your haul field.


A 3:1 mechanical advantage can be easily built with only a few more parts and can decrease your workload significantly. A 3:1 is commonly referred to as a “Z rig” because of its general shape when complete. To build a 3:1 haul system:

  • The rope is terminated at the load.
  • A pulley is attached to a “bombproof” anchor.
  • Run the rope from the load through the pulley.
  • Add a second pulley.
  • Attach a Prusik (minimum of two wraps) to the rope.
  • Attach the second pulley and the Prusik with a carabiner.

To take it one step further, if you’re utilizing a Z rig to raise a load vertically, your haul system will need to pass the “whistle test.” This means that if at any point during a haul, someone blows a whistle, you should be able to let go of the rope without a catastrophic failure. By adding a Prusik to a 3:1 as a “progress capture device” you prevent dropping the load if, mid-raise, a swarm of bees descends upon you and you let go of the rope and run away screaming. The Prusik is added to the load side of the Prusik minding pulley, which will allow you to freely pull at whatever speed you choose but allows you the opportunity to rest or let go of the rope. Progress is captured as the weight of the load goes straight up the rope, to the Prusik, and to your bombproof anchor.

Summary

Creating mechanical advantage is one of those topics that can seem complicated, but once you get your hands on the pieces and build 2:1 and 3:1’s a few times, it becomes quite easy and offers significant benefits when the need arises. There are many more options when it comes to haul systems, but these provide a strong foundation for your foray into rope craft. Obtaining the right equipment can be inexpensive and is a great way to shore up your supplies to ensure you’re prepared to help yourself or someone else in need. Once you have the right gear, select a solid anchor, and build the system correctly, you have just decreased your workload and increased your effective ability by using physics to your advantage.