As demonstrated by our recent article, Backcountry Cell Phone Land Navigation, a smartphone is an incredibly valuable resource. It provides communications, maps, a compass, a camera, a flashlight, and much more — even if the grid goes down and there’s no cellular connection, many of these tools are still usable if you plan ahead.
However, if your phone runs out of battery, gets smashed on a rock, or gets dropped into a creek, it’ll suddenly become an expensive paperweight. Therefore, it’s important to protect your phone with a sturdy case, and consider portable sources of backup power.
The SLX case for iPhone 7 was released in January 2017.
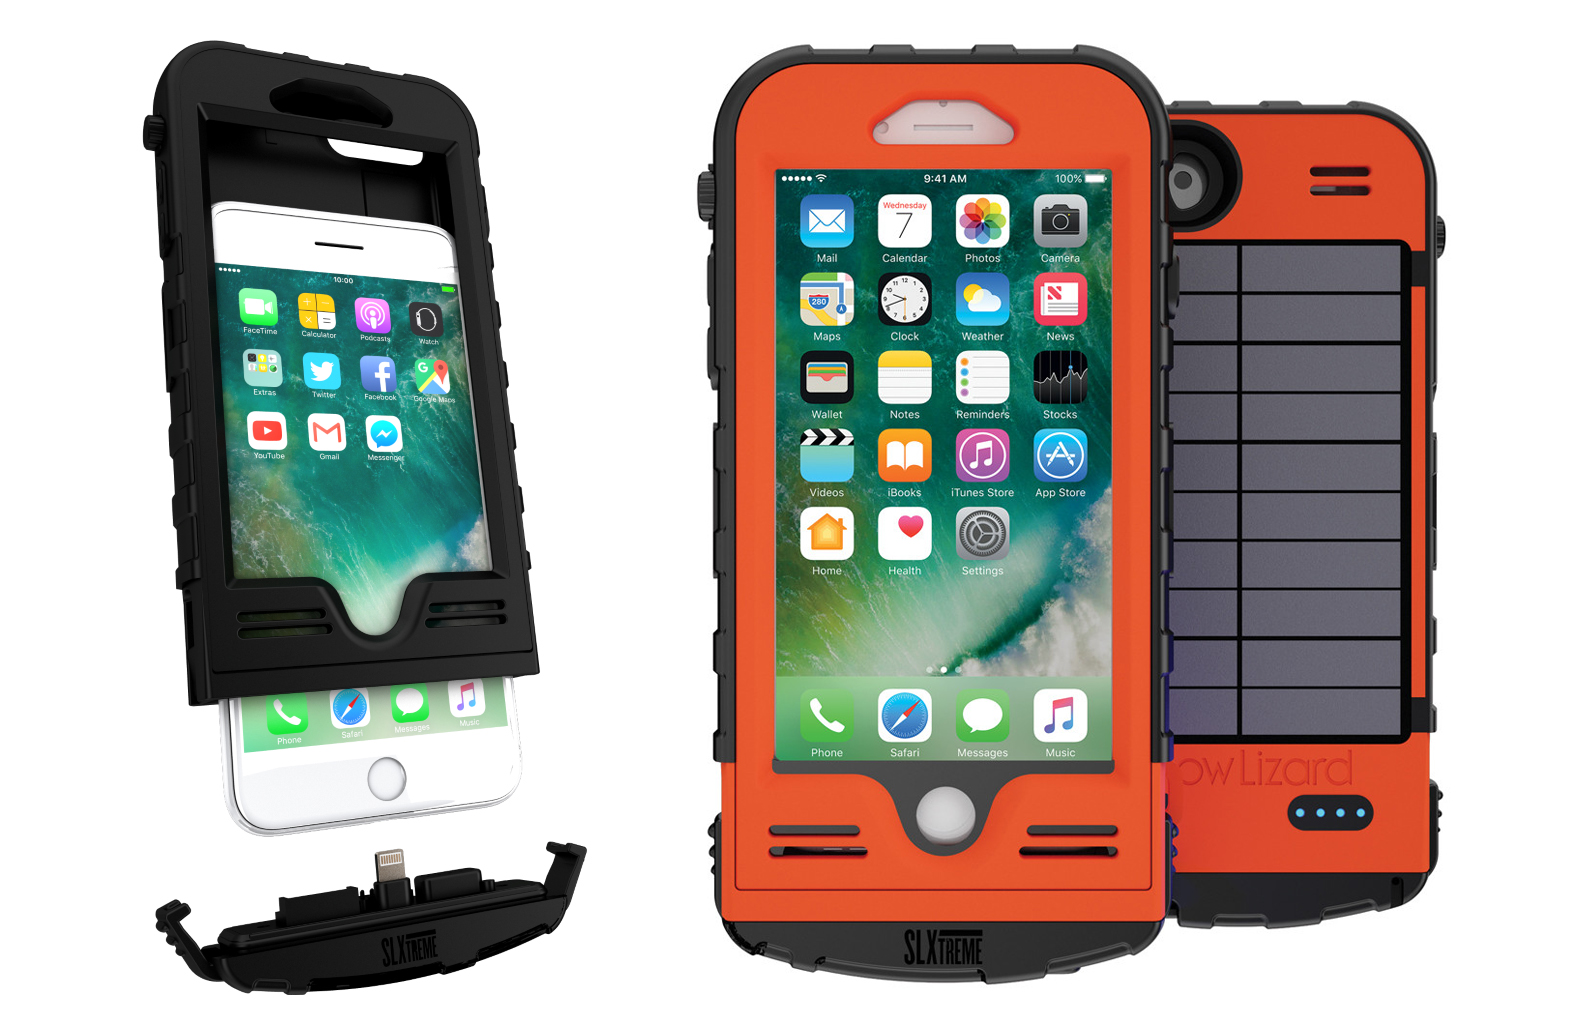
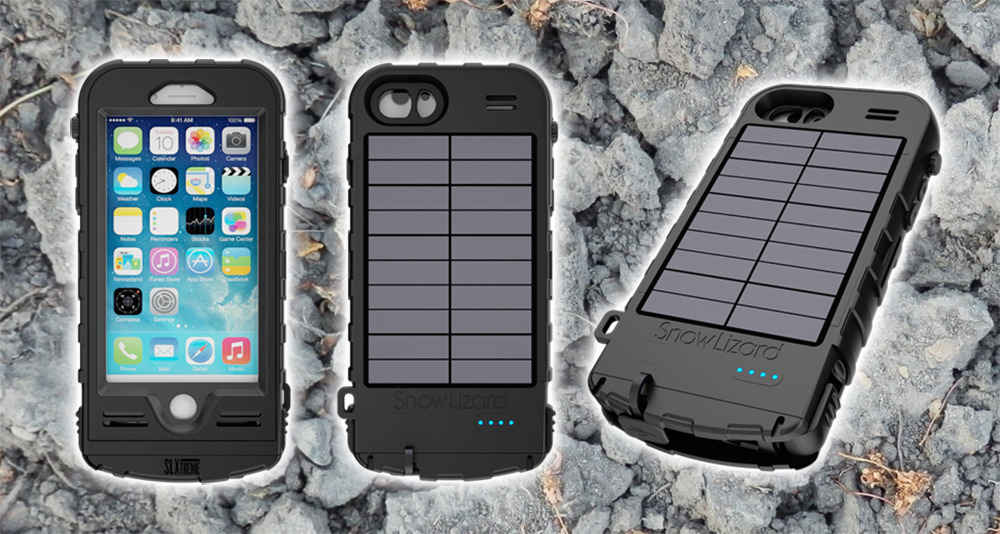
The SnowLizard SLXtreme case provides solutions to each of these issues, with a waterproof rugged exterior, a built-in auxiliary battery pack, and a large solar panel. The SLX case is already available for iPhone 6/6S and 7 models, but the company recently announced a model will soon be available for the iPhone 7 Plus.
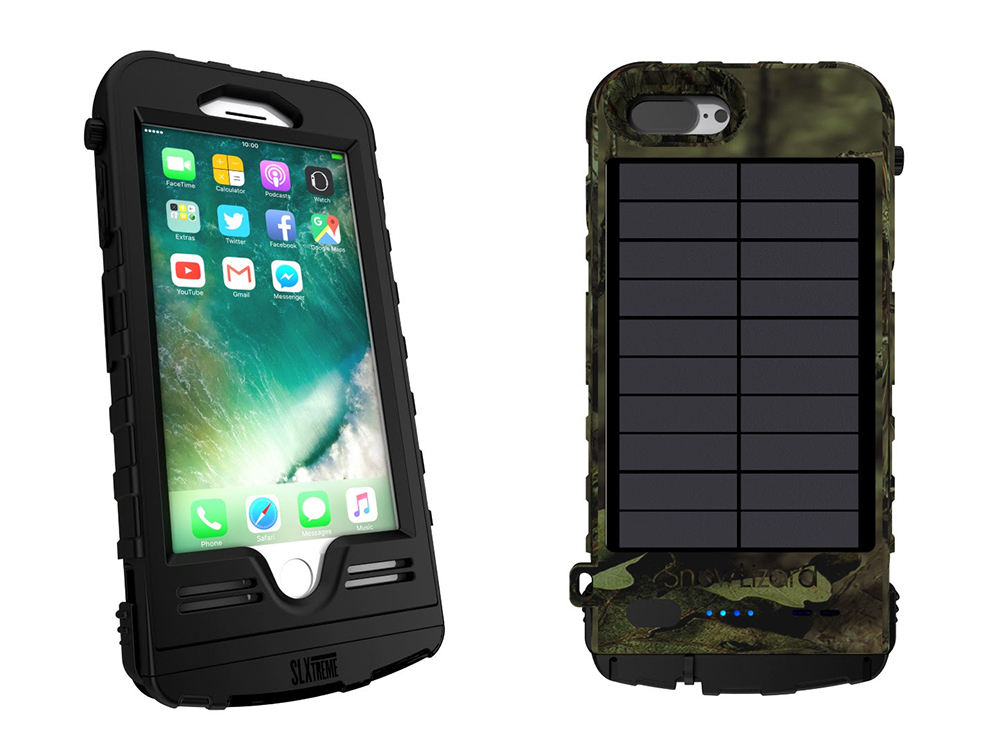
The new iPhone 7 Plus case will be available in Black or Mossy Oak camouflage.
This SLX iPhone 7 Plus case offers the following key features:
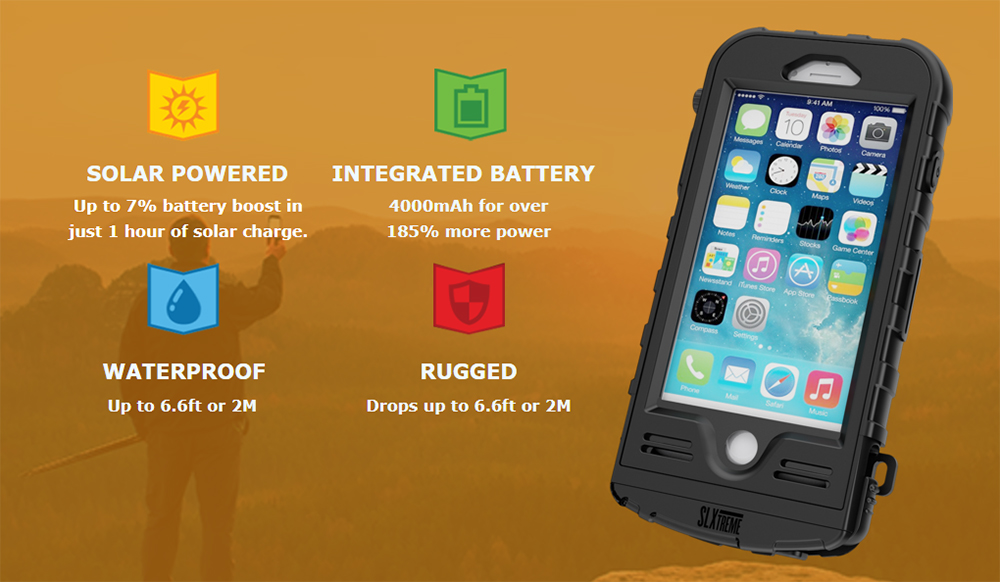
IP-68 protection against dust, dirt, and water (up to 6.6 feet immersion for 30 minutes)
MIL-STD 810G rated against shocks, vibrations, and falls from up to 6.6 feet
Integrated 4,000mAh battery with Lightning connector and micro-USB charging port
20% efficient mono-crystalline solar panel — 1 hour sun exposure equals approximately 10 minutes additional call time
QuickLatch system for easy phone removal; dual latch locks and integrated lanyard loop
The company also states that the iPhone 7 Plus case offers several improvements on the previous designs: more shock-absorbing material, a more efficient solar panel, and a new light intensity indicator so you can ensure it’s receiving maximum solar energy.
The new SnowLizard SLXtreme iPhone 7 Plus case will be available in black or Mossy Oak Break-Up Country camouflage. Once it’s released, you’ll be able to find it on SnowLizard.com and Amazon at an MSRP of $150.
Editor’s Note: This article was written exclusively for OFFGRIDweb.com by Jeff Dingle, a career security professional and former Special Agent with the National Security Agency (NSA). Jeff’s substantial expertise in the security field may help you reconsider possible flaws in your preparedness philosophy.
The clothes make the man — this old saying serves as a reminder that your outward appearance can give away who you really are. As a survival-minded individual, ignoring this principle can mean unintentionally broadcasting your preparedness to the world, and thus becoming vulnerable to attacks by sharp-eyed criminals.
Spotting Prepared Individuals
I recently traveled to a large International Association of Chiefs of Police (IACP) meeting, and I was surprised how easy it was to spot the IACP attendees on the plane. Without trying, I found myself taking mental notes of each law enforcement officer. It was a combination of cargo pants, 5.11 Tactical shirts, athletic shoes and close-cropped haircuts. Cops tend to look like cops, even in civilian guise. This is important because your outward appearance can influence bystanders’ opinion of you. While you may not care what people think of you, your appearance may have an impact on whether you appear to be a potential victim, a person to leave alone, or a threat to be dealt with immediately.
Photo by Rob Hogeslag / Flickr
Your appearance, including your clothing and your property, tells a stranger quite a bit about you. The question is, what do YOU want others to know? This gets tricky — the more prepared you appear, the less likely you are to be seen as a potential victim. In other words, the stronger you look, the less likely you are to be bothered. But it may not be wise to let others know you’re armed, or see the full extent of your preparedness. While preparedness can be a deterrent, it could also make you a target to eliminate ASAP before moving on to those more vulnerable. Either way, these unspoken statements are undeniably important to your survival philosophy.
Here are ten potential preparedness “dead giveaways” to consider:
1. Logos
There’s nothing wrong with wearing branded apparel, but be cautious about the message it sends in public.
Firearms manufacturers like Glock put a great deal of effort into promoting their products. Shirts, jackets, hats and gloves with the Glock logo are readily available on websites and at gun stores and gun shows. It’s not just logos, either — easily-identifiable images and graphic prints can have the same effect.
Don’t get us wrong, we strongly support gun rights, and enjoy shooting Glocks. But do you really want strangers to know you’re likely armed, you have a Glock, and you’re enough of a fan of your Glock to buy merchandise? This says a lot about you. And if you’re not armed, does wearing Glock apparel — or that of SIG, S&W, or any other weapon brand — suggest that you are armed? It’s something to think about.
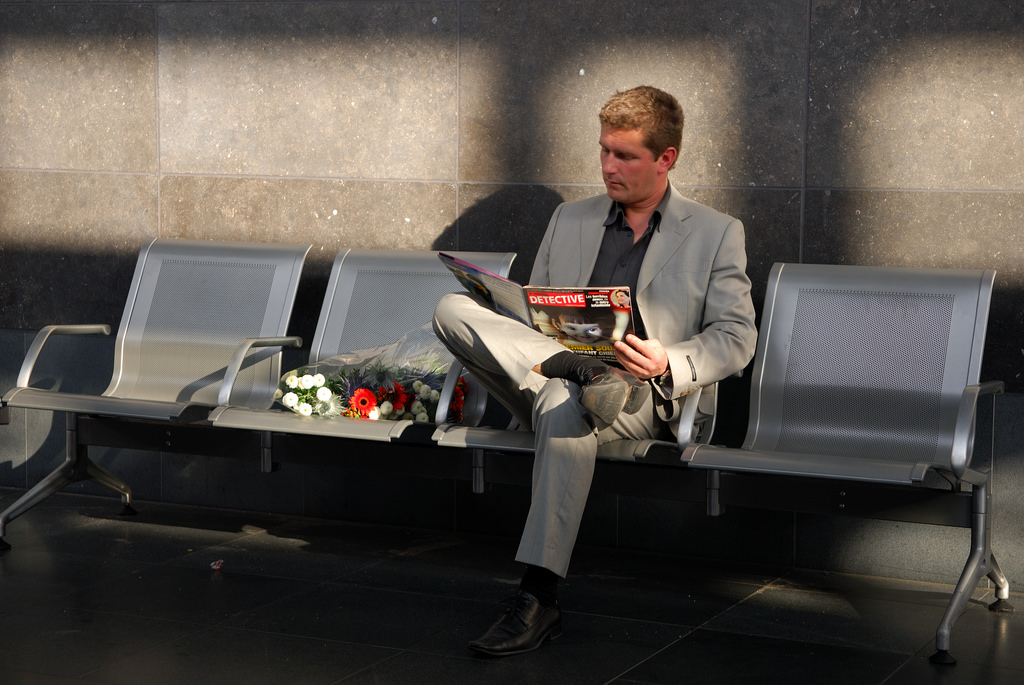
2. Clothes
Aside from the branding on your clothes, also consider the fit and style. If you carry a weapon, do you wear different clothes when you are armed or unarmed?
I have a friend who seriously works out (you know the type). When he is not carrying a weapon, he wears tight shirts, tucked in. This doesn’t work when he carries, so he wears popular fishing-type shirts that are loose-fitting and designed to be worn untucked. While this is a functional shirt to wear while carrying a weapon, it is a distinctly different look for him, and if you know his routine, it provides a clear tell that he is armed.
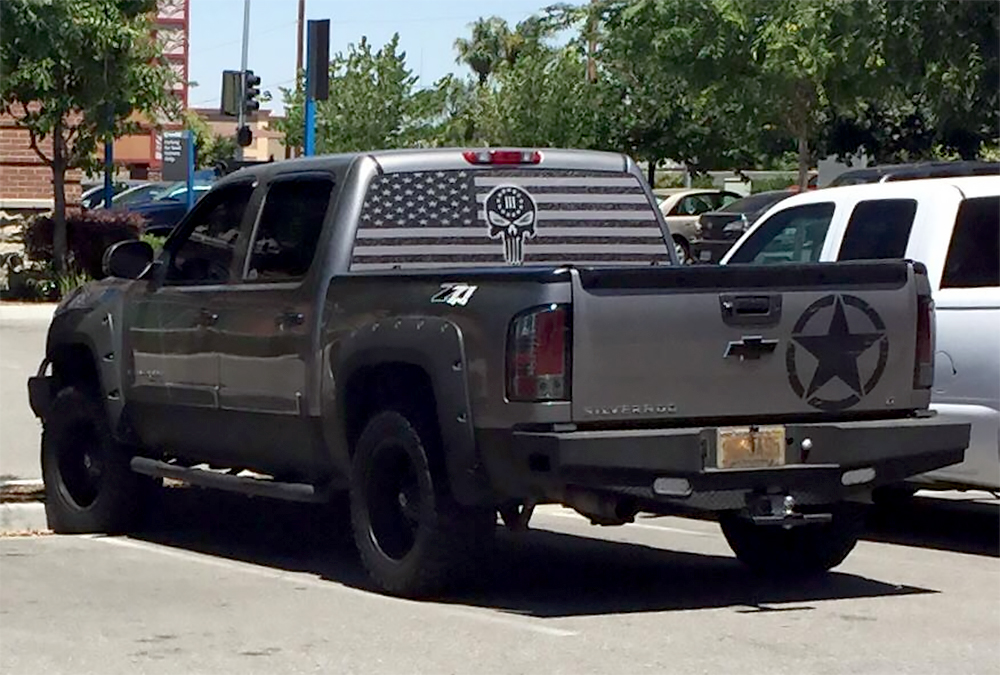
3. Vehicles
The same can be said for vehicles. Does your truck or SUV have a big push bar, a locking toolbox, mud tires, a winch, or additional LED lights? These upgrades may make your rig more capable as a bug-out platform, but they also make it stand out in traffic, and hint that it might not be just another grocery-getter.
The previous point about logos also applies here. Does your car have a Remington sticker on the window, a Second Amendment bumper sticker, a USMC sticker, or an NRA sticker? Again, we’re not saying you shouldn’t be proud of who you are, but consider what a Colt Firearms sticker on your back window says about you. Does it say I’m armed, stay away from me? Or does it say break into this truck, it probably has a quality weapon in it to steal? Consider that a bad guy might find it easier to snatch a weapon from your vehicle than to try to get a gun through legal means.
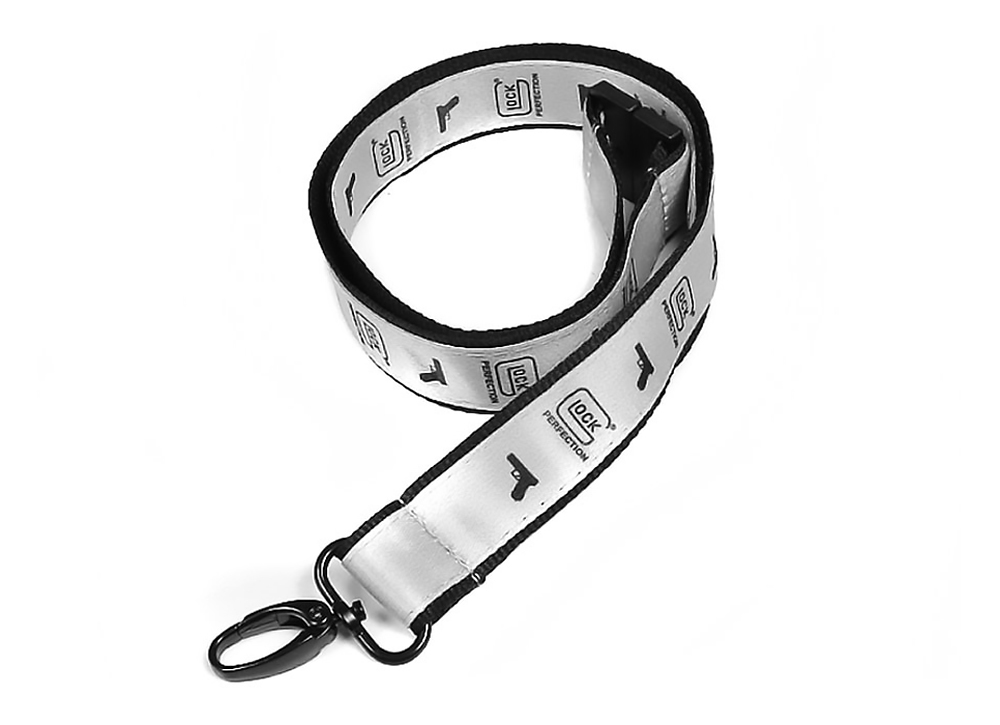
4. Accessories
Apparel doesn’t stop at shirts and pants. You might wear a firearm pin on your jacket or hat, or carry your keys on lanyard that bears the name of your martial arts training facility.
I was recently in line to get a seat assignment at a large and busy airport. I had been traveling for several days, and I was tired and bored. There was a pilot in line in front of me. His uniform told me that he worked for a cargo airline, and was obviously deadheading (i.e. catching a free flight) to another airport. I noticed he was a wearing a Federal Law Enforcement Training Center (FLETC) lanyard to display his credentials. As a former FLETC instructor, I asked him when he had been at FLETC. He responded angrily, “Who said I went to FLETC?”
It quickly became obvious that he had attended FLETC’s Federal Flight Deck Officer Program, a program used to train and arm pilots. He didn’t want others to know he was armed – but he clearly displayed that fact to anyone who looked and understood what he was wearing.
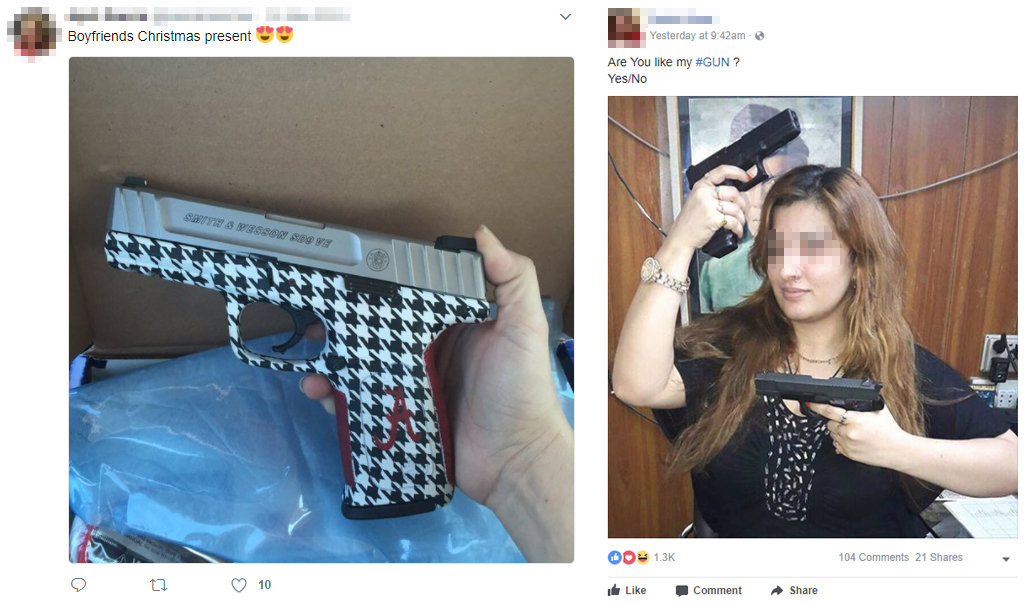
5. Social Media
These are actual public posts we found on Twitter (left) and Facebook (right).
Facebook, or any other social media site, is something you need to seriously consider. Many people put way too much information about themselves on social media. Discussing or showing photos of weapons that you own can make you a target for burglars. If you post photos, carefully consider what you show, and what’s in the background in your pictures.
Your status updates may unknowingly give away your home’s exterior appearance, its interior layout, security features, gun safe placement, the type of weapons you own, and the presence of other valuables like your new big-screen TV. Then all it takes is one innocuous post with photos from a vacation destination, and criminals have all the information they need for a smash-and-grab.
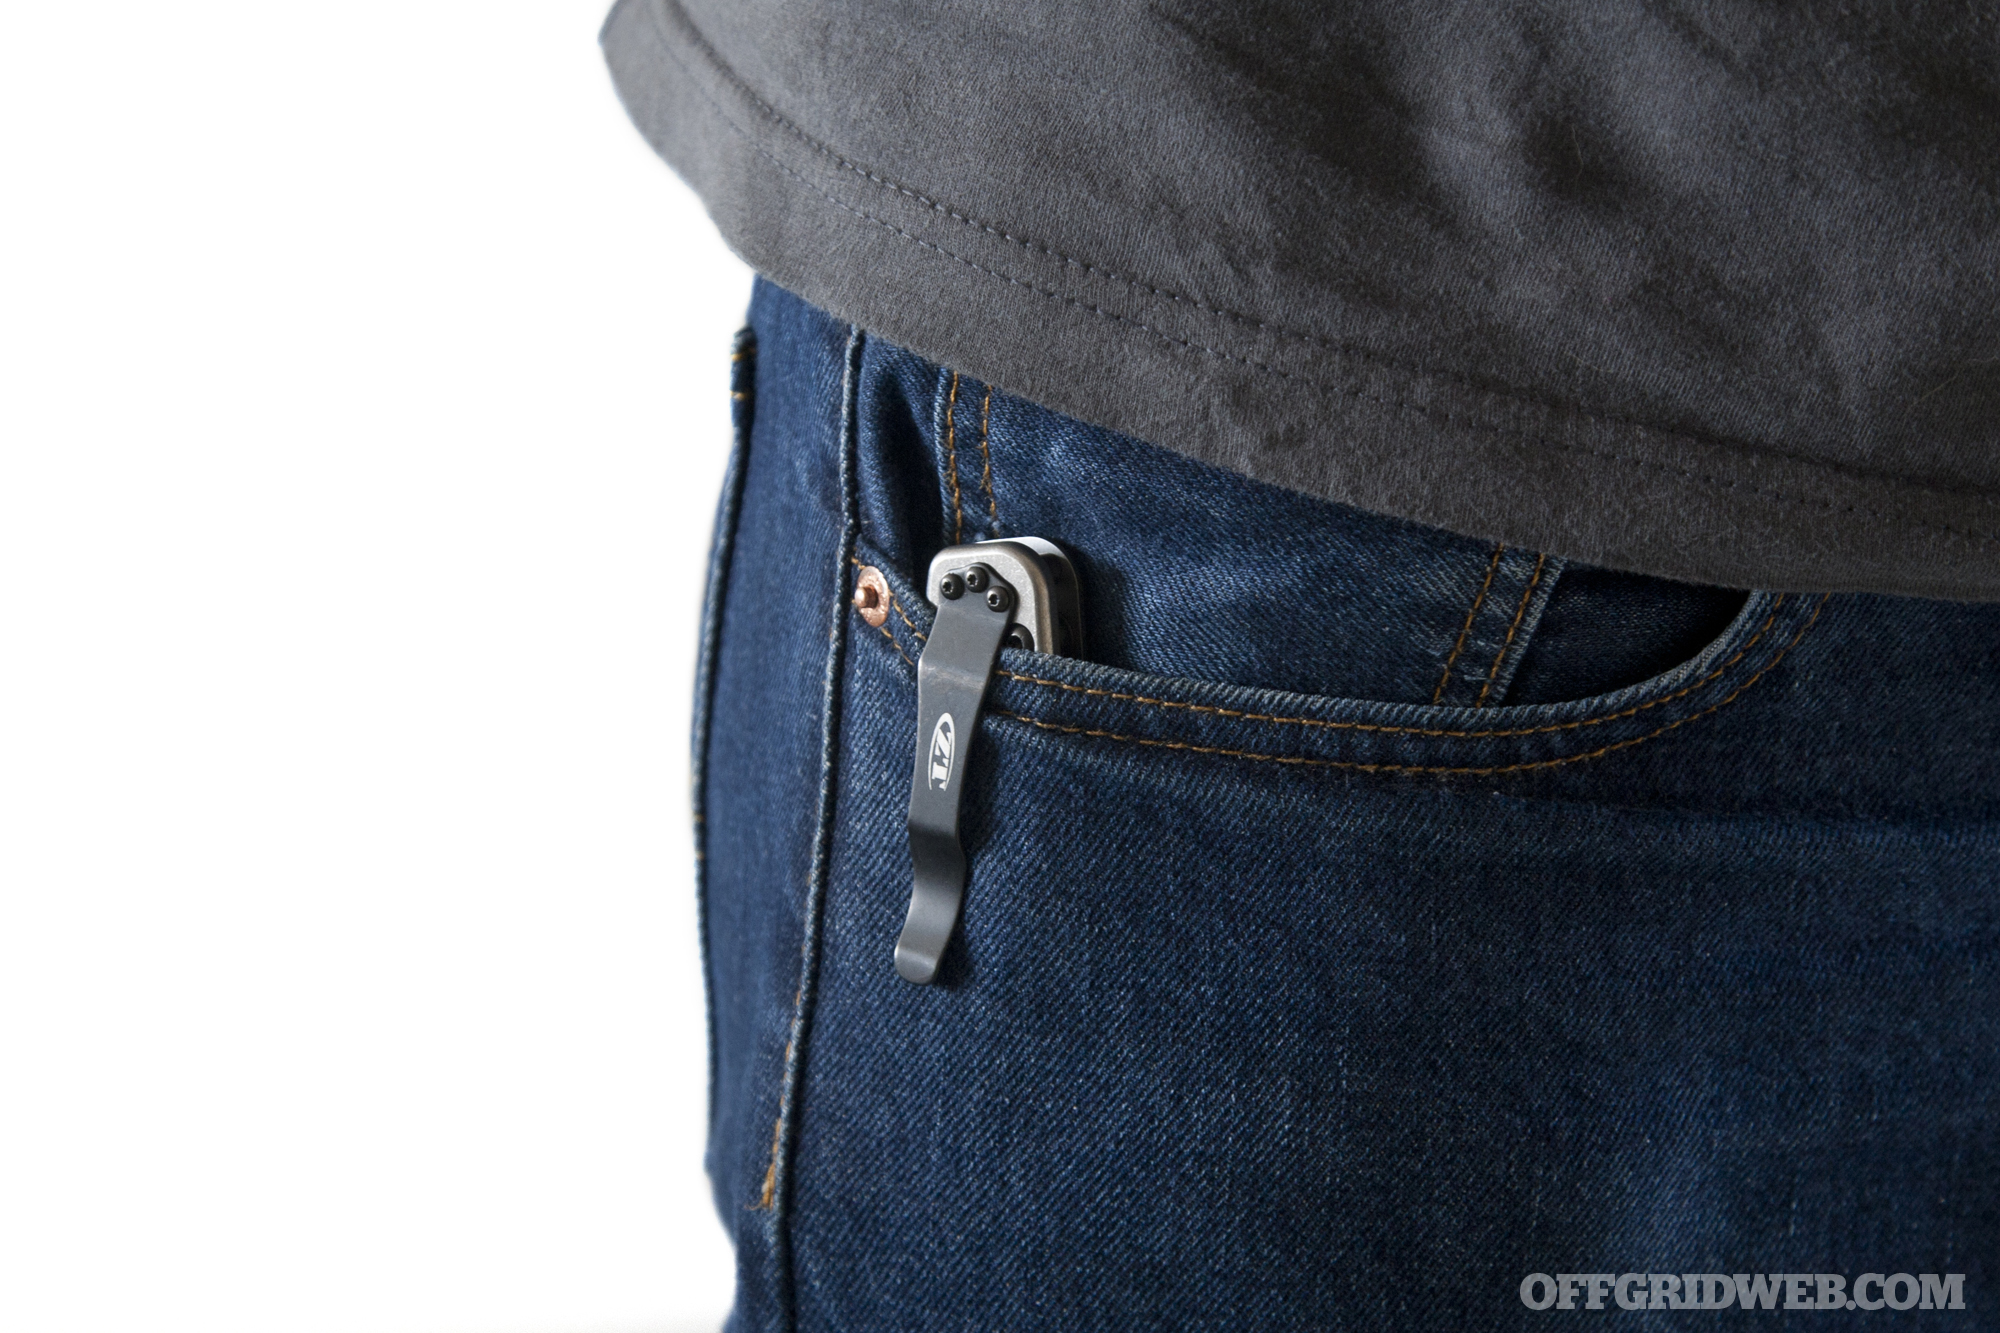
6. Pocket Clips & Belt Clips
If you carry a weapon — any weapon — there are additional points you need to consider.
Most gun holsters and knife sheaths have a clip. The clip often shows, even with an inside-the-waistband (IWB) holster. While you think that it might not be much, when someone knows what it is, it tells a lot about you! The folding knife in your side or back pocket exposes a very identifiable clip as well.
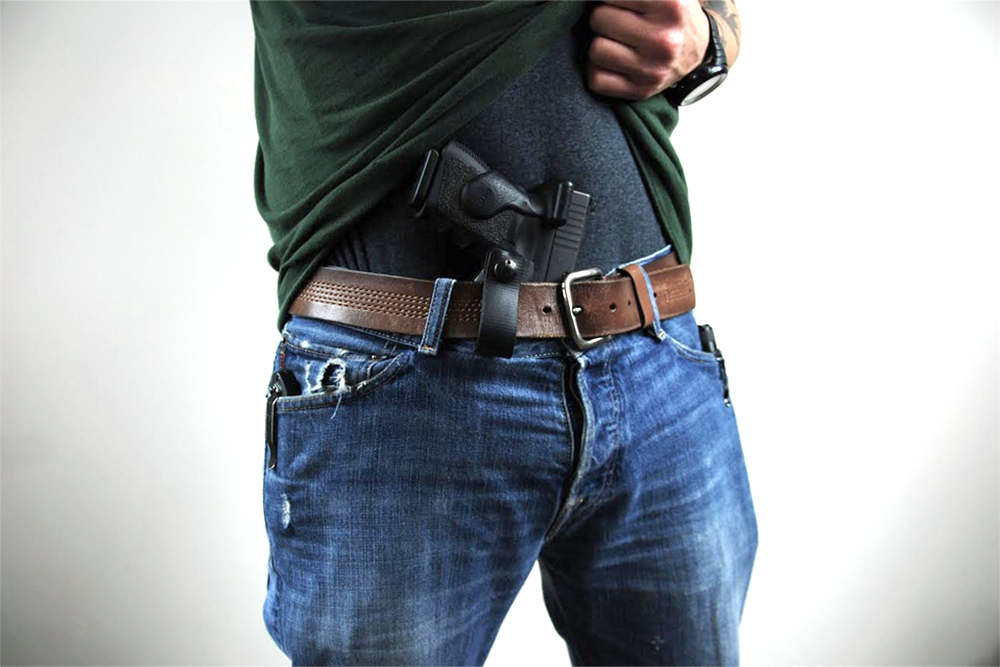
7. Exposing Your Weapon
Take care to never expose your weapon when you’re carrying concealed. You should already be aware of the serious ramifications of brandishing a weapon in public, especially if you may not be legally justified in doing so.
Also be aware of printing, i.e. showing an outline of your weapon through your clothing. In many states, the legal difference between concealed and open carry is that open carry must be done so that the firearm is completely and totally in plain sight at all times. Concealment often dictates that it be entirely covered or always hidden. If you’re carrying a concealed weapon, there is a reason it’s concealed. Keep it that way.
8. Touching Your Weapon
While touching your weapon is usually a subconscious behavior, armed people have a tendency to frequently adjust or feel around for the weapon. It’s a natural tendency to make sure your weapon is where it’s supposed to be, but it’s also a tell. You have to make a concerted effort to NOT touch your weapon. It can be difficult to overcome this subconscious habit, but it is extremely important for proper concealment.
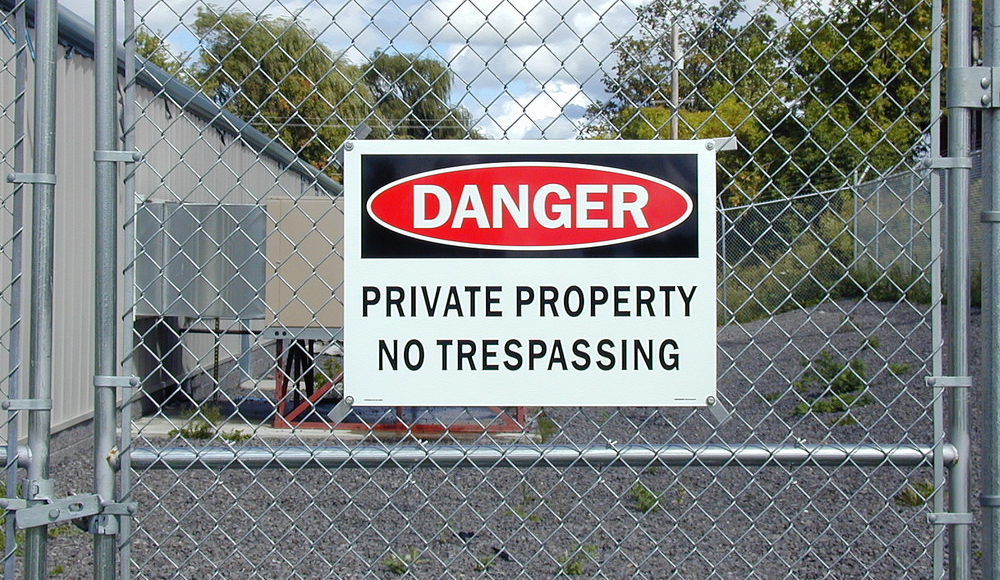
9. Prohibited Places
Photo by TSA.gov
If you go to so-called gun-free zones or places which clearly prohibit weapons (these vary by local ordinances, so know your local laws) it is obvious to others that you are not likely to be armed. “Be careful about ignoring these laws,” says consultant, attorney, and former FBI Agent Bobby Ricks, “Getting caught armed in a place that prohibits firearms can not only lead to criminal prosecution, but civil penalties as well. Getting caught can also lead to the permanent loss of your carry permit,” advises Ricks. Carefully choose where you go, and if you feel you need to be armed, you may be forced to consider avoiding these non-permissive environments.
10. Security Systems
Photo by MySecuritySign.com
One final issue we want to address: should you have a security system on your house? We can’t answer that question for you. However, the related issue is the security alarm company sign.
Telling potential intruders that your home has a security system can be a significant deterrent. But any sign that identifies the specific alarm company can work against you. If a criminal knows the adversary (in this case, the alarm company) that’s the first step in beating the system. Therefore, you may want to consider getting a sign whether you have an alarm system or not. Even if you don’t have an alarm system, the sign is a deterrent. However, if you have a system, do not use a sign from the company that provides the service. Get a different sign. Swap with someone who uses a different company, or purchase a competitor’s sign on Craigslist or eBay. This strategic misdirection may prove valuable.
Visible security cameras or motion sensors are another variable to consider. Their presence may serve as a tell about your preparedness, but might also be an effective deterrent.
How to Apply These Lessons
We’re not trying to definitively tell you the exact steps to take, but we want to remind you to carefully consider how you present yourself in public. Any indications that you are prepared can make a potential attacker more aware of you than if they had no information about you.
Personally, I’d rather have a potential adversary underestimate me than be prepared for me.
Photo by Alexander Baxevanis / Flickr
People use these basic skills to make judgments about you. You can use these to assess others too. Consider these ten issues, and think about what you want to make public, how you control what others know about you, and what you can do to be better prepared. In all of these cases, it’s not hard to know what to do – but it can be hard to do what you know.
No matter what hand you’re dealt in life, you get to choose which cards to show and which cards to keep concealed. Choose wisely.
About the Author
Jeff Dingle is a career security professional, working in the public and private sector to protect and to help others protect themselves and their property. He is a former Special Agent with the National Security Agency, and has held senior security positions with a FORTUNE 15 company, a former US President, and a casino/resort/hotel. A former Federal Law Enforcement Training Center (FLETC) Staff Instructor, he is also a competitive shooter. Jeff can be reached at Jeff@SecurityAdvisoryGroup.com.
Bobby Ricks is an expert in investigation, case preparation, and witness testimony. He specializes in developing and conducting training and education programs for law enforcement, physical security and emergency personnel. Bobby can be reached at Bobby@Ricks.Consulting.com.
This op-ed article was written by Jake Bush and originally published by our friends at Breach Bang Clear. It appears here in its entirety with their permission.
You should wear a watch. Cell phones as timepieces aren’t for people who do stuff. Dig in your pocket, pull out a phone and turn it on to check the time, and I’ll assume you can’t change a tire. Maybe you can… if you can find a YouTube video to show you how.
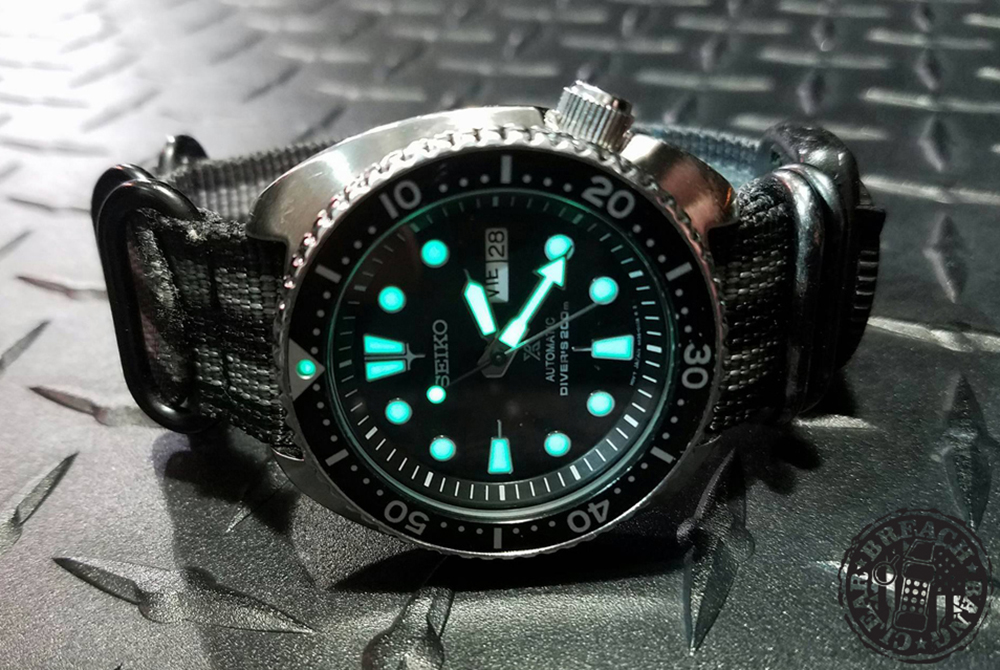
Dive watches are a great every-day-carry option for the following reasons:
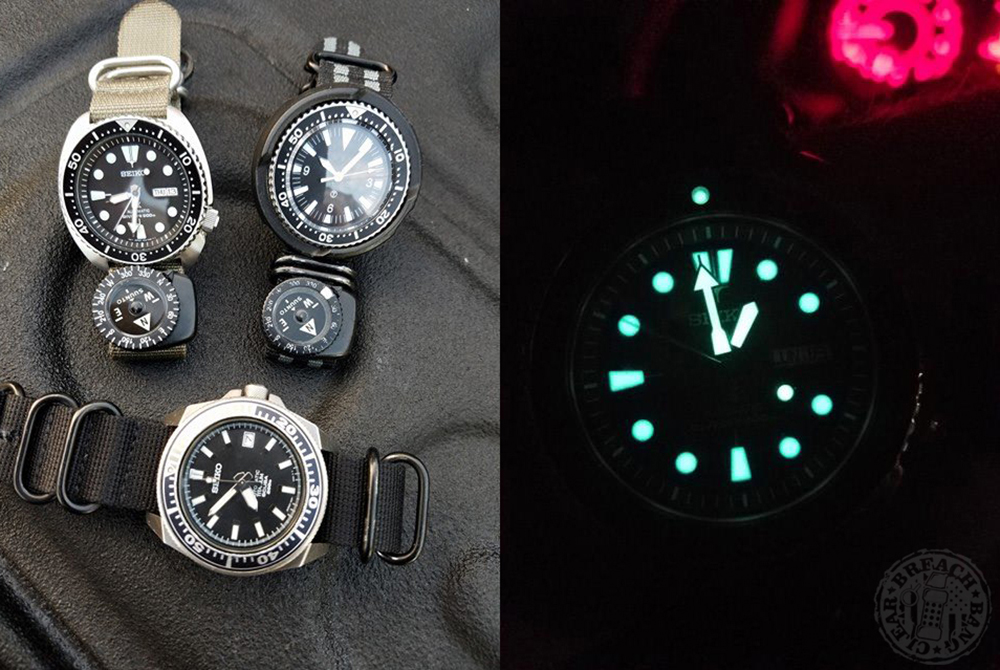
1. Dive watches are tough, water proof, glow well enough to see at night, can have a day/date function and a second hand. All you need to know.
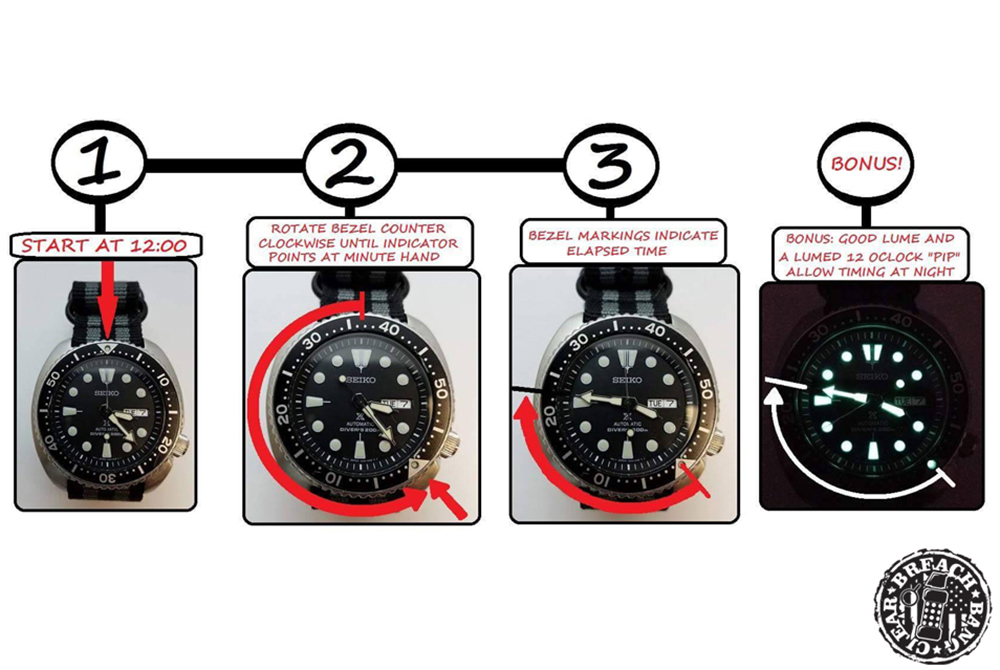
2. The dive timer is a heck of a tool. From timing how long you have been stuck alone in the woods at night with a corpse holding down a crime scene in the dark, or how long you have been waiting for a wrecker, to timing how long til you pick up pizza for the shift, once you know how to use it you’ll wonder how you ever did without.
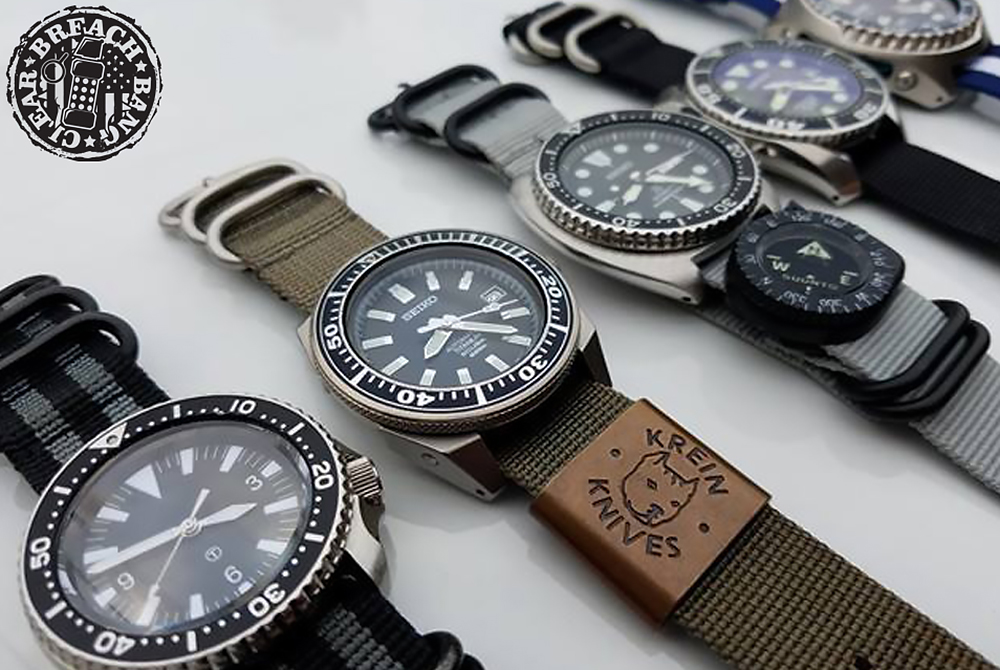
3. Seiko makes quality dive watches that can be had from $100 to $30K. In fact, a $100 second hand Seiko SKX007 is so awesome Stormin’ Norman Swartzkoff wore one on one wrist and a Rolex on the other when he was kicking ass and taking over whole countries.
That said Resco, Rolex, Sinn, Casio, and Citizen also make kick-ass watches.
4. An automatic winding mechanical Seiko isn’t gonna die on you because a battery went dead. How many times have you had a watch croak a few months after you bought it because it sat ticking on the shelf for three years before you bought it. Not saying there aren’t good options in the kinetic (electric driven, charged by motion), or solar, just saying batteries die. When a mechanical watch goes bad it gets fast or slow and usually you notice well before it screws you over.
5. It’s analog. Ever notice nurses, medics and some doctors wear analog watches? There’s a reason for that. The idea is when you are taking a pulse (count the beats over fifteen seconds and multiply times four), reading a digital watch and counting at the same time are two tasks that utilize the same part of the brain, making it easier to make a mistake. Which can be bad.
Don’t think so? Ever try to remember a number or count money when your buddy thinks its funny to yell out random numbers? Yeah… me too. I use mine for drug testing (Romberg), a lot. Works like a charm.
6. Slap it on a bracelet, NATO/ZULU strap, or rubber band and add a compass (Suunto Clipper or Prometheus Design Werx) and you have a tool that will help you master your world. Plus, you’ll look a little more like James Bond and a little less like the the hipster kid down the street who can’t change the tire on his Prius.
Editor’s Note: What’s your opinion about EDC timepieces? Let us know in the poll below.
An acorn is a nut that can be found in abundance in many regions, and can be a potential food source. Food provides calories, and calories provide the energy to keep your mind sharp and your muscles moving. If your supplies of food dwindle too far, your entire plan for survival can be derailed, so it’s essential to have backup calorie sources to rely on. If hunting, trapping, fishing, and gardening don’t produce enough food, foraging for wild edibles can provide a much-needed supplement to your diet.
Above: Acorns aren’t just food for squirrels, but you won’t want to eat them raw like this little guy is.
When we think of foraging for food in the woods, we often think of easy pickings like berries, roots, flowers, and mushrooms (although you’ll need to be careful with those). But there’s one food source that’s often overlooked — in fact, you’ve probably walked all over it without even noticing.
Why Acorns?
Acorns are an excellent survival food, as long as you know how to prepare them. Scientific American writes, “In general, acorns appear to be higher in caloric content per unit weight than cereal grains, a reliable source of vitamin C and starch, and high in magnesium, calcium and phosphorus.”
With a few exceptions, most acorns are not edible in raw form due to high tannin content. Tannins are chemicals which taste extremely bitter and can cause indigestion, so you’ll need to extract them from any acorns you gather through a process called leaching. Before leaching, it’s best to make sure your acorns are ripe and brown, not green. Also make sure the acorns have no holes or deformities, as this could mean they’ve been damaged by insects or animals. Fortunately, these ripe acorns can be collected easily from the ground beneath oak trees, especially in the fall.
Above: Avoid under-ripe green acorns, as ripe brown acorns will taste better and be easier to process.
Dry the acorns in the sun to remove moisture if necessary, then shuck them by striking them with with a hammer or rock. Peel off the cap and skin, and set aside the inner meat. Once the acorns have been shucked, leaching can begin.
Tannins can be leached from acorns by soaking the acorns in cold water, and repeatedly changing the water until it remains clear. This usually takes several days. Hot water is even more effective for leaching, and will require less time to extract the tannins. At this stage, the acorns are edible, so you can:
Eat them raw (after leaching)
Add them to a soup, stew, or any other recipe that calls for nuts
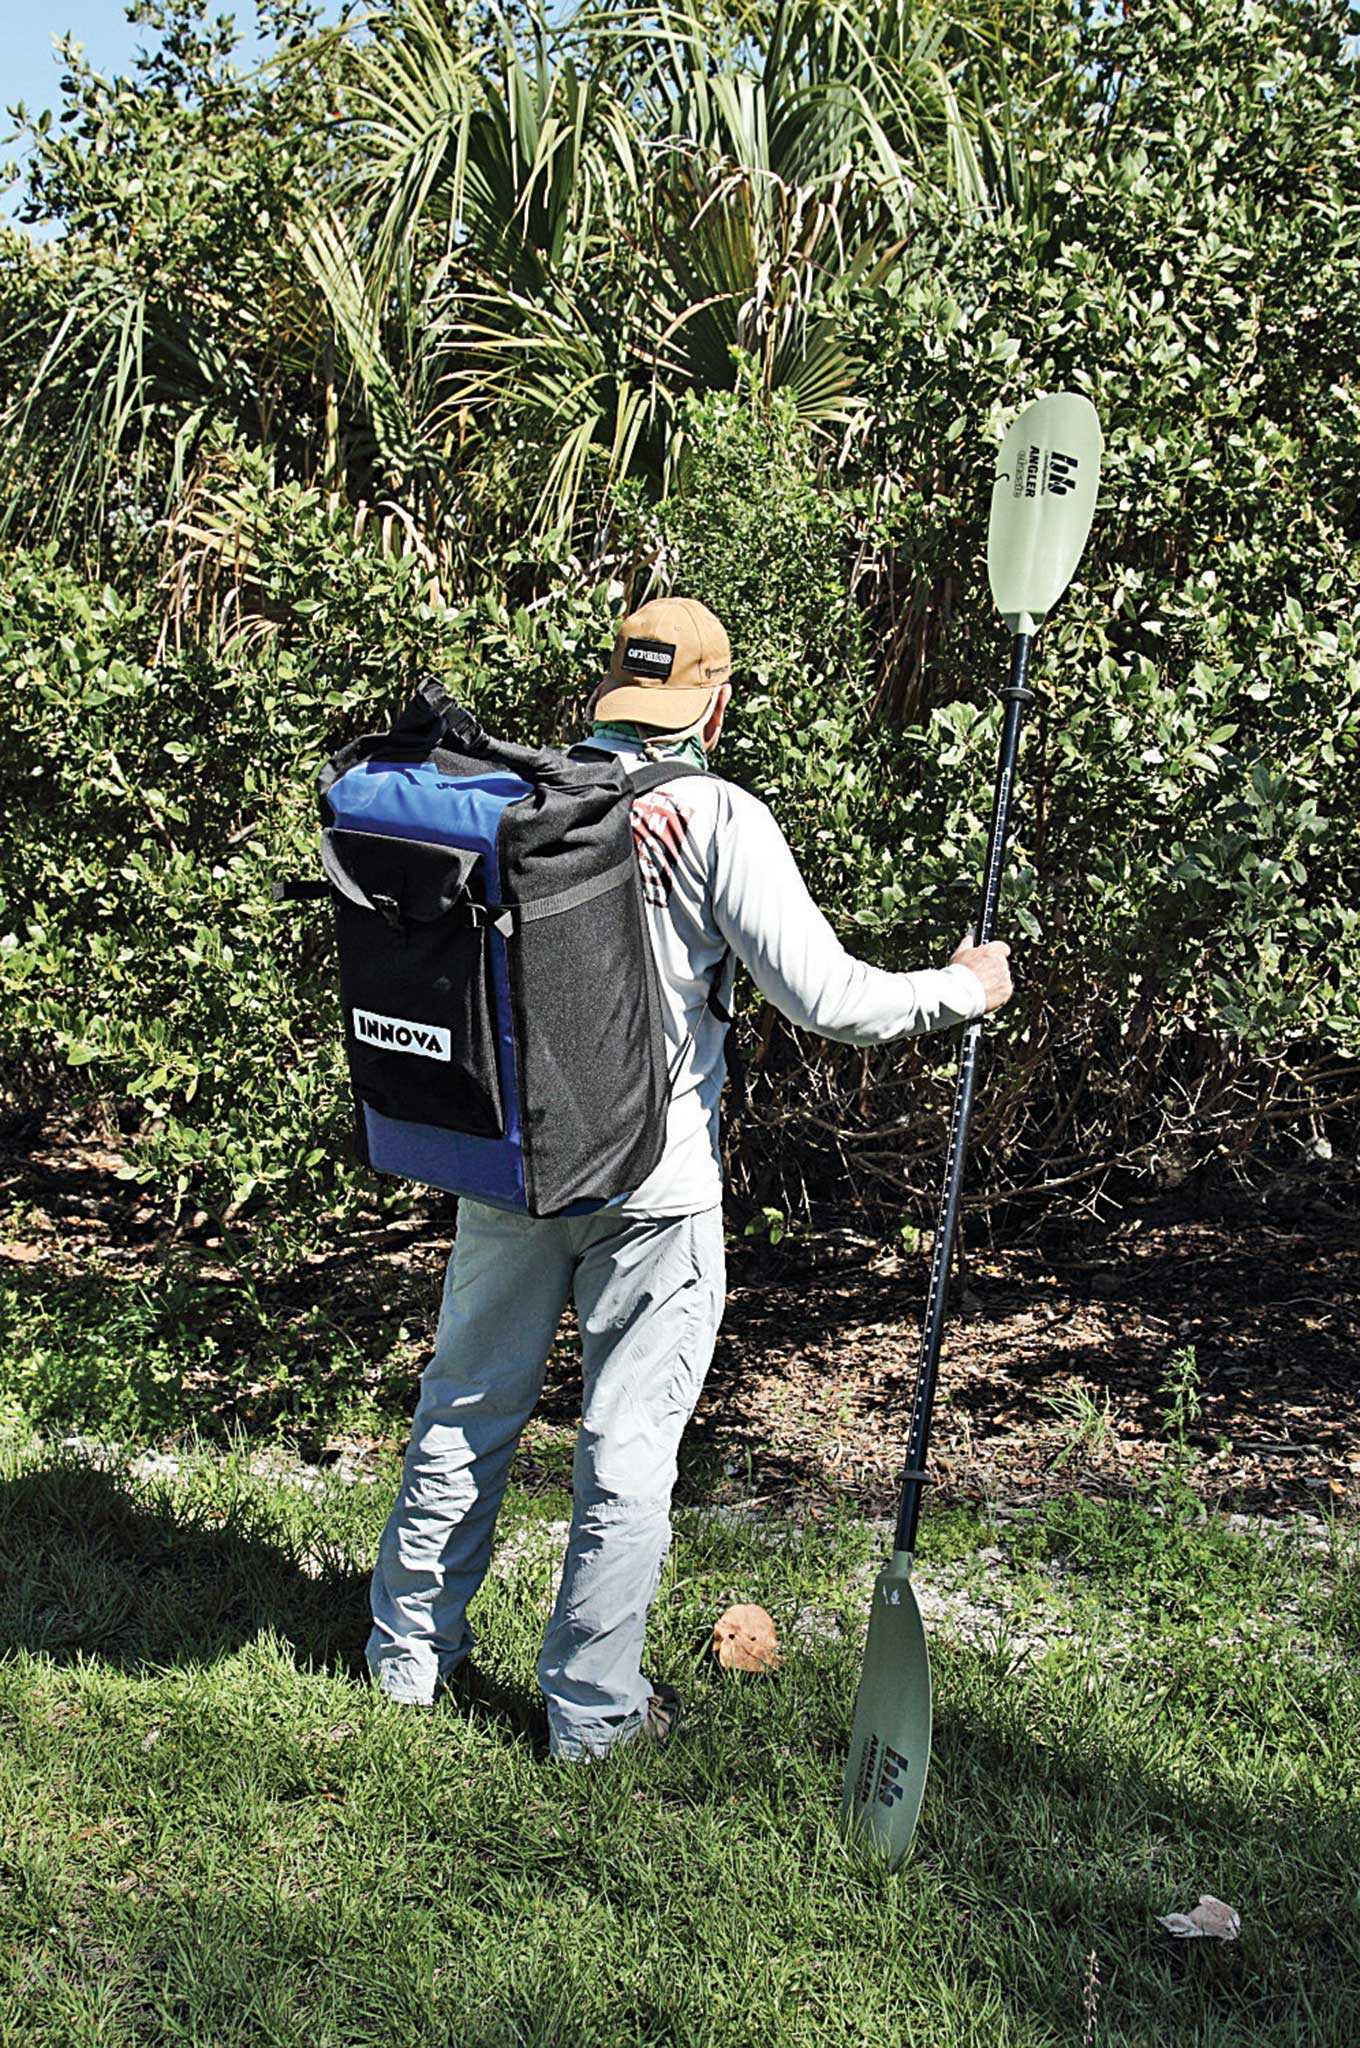
Using our double-bladed kayak paddle as a hiking staff, spider-web sweeper, and snake stick, we skirted thick coastal lowlands in Florida to strike a brackish creek flowing with the outgoing tide into a shallow bay. Halting to get his bearings, our hiker leaned forward on the paddle shaft in human tripod mode, shrugging the weight of his 50-pound backpack and speeding blood flow to his arms for awaiting mosquitoes.
No white lab coats and clipboards here. When launching into the wild with an inflatable kayak, why let crash-test dummies have all the fun?
Our aim: Test the Innova Halibut, a rugged fishing kayak designed for angling and adventure in remote, hard-to-reach, pack-in, paddle-out locations. Our eye was focused on its “wilderness worthiness” for emergency response scenarios and how an inflatable craft compares to a conventional canoe or kayak.
Staging Area
After hiking in a ways after parking our Suburban 4×4, we found an unmarked opening in the mangrove shoreline that shimmered like an oasis. This put-in spot was rife with barnacle-encrusted mangrove tree roots, submerged oyster bars sharp as broken glass beneath the surface glare, and toothy creatures upstream and down.
Based in Burlington, Washington, the folks at Innova supply each boat with a patch kit — although we weren’t looking to intentionally abuse the Halibut’s extremely stout, handsome gray-on-green rubberized fabric (called Nitrilon, similar to that used on inflatable runabouts and yacht tenders). But at the same time, we wouldn’t change our intended bug-out-by-water route for this review.
Each boat will last years with proper care, Innova says of its Czech-made boats. Touting the natural rubber-based elasticity of the boat material as preventing punctures, Innova advised that the material can absorb snags and snap back in place without tearing like lesser non-stretch poly materials. The Halibut was smooth to the touch and easily washed or wiped clean.
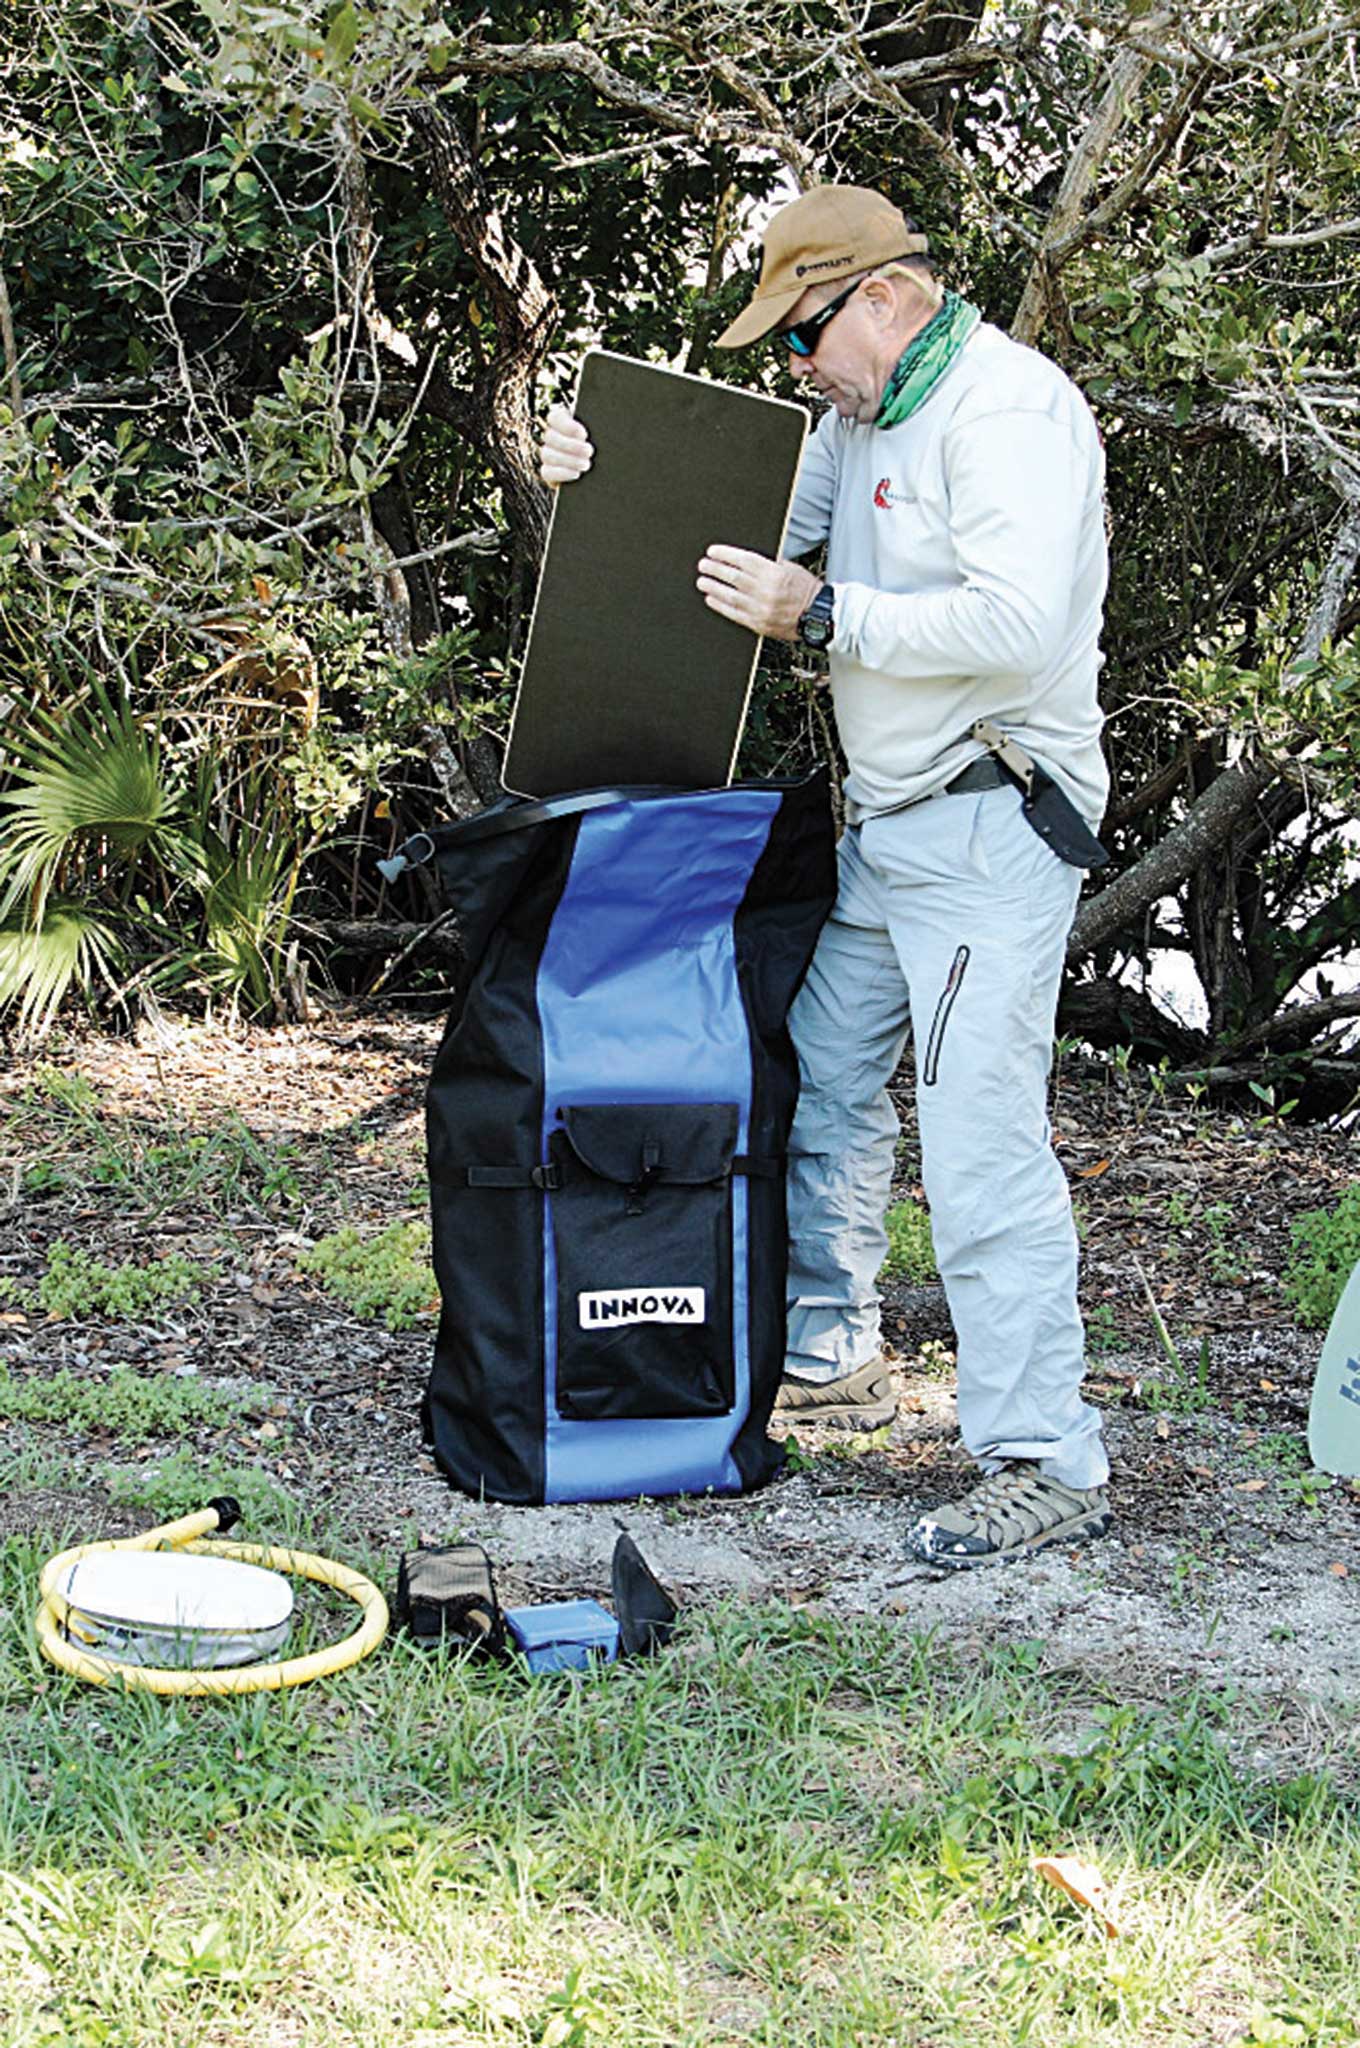
The Setup
Setting aside our gear and rod, we dropped the roll-top Halibut pack. Opening the small set of instructions made us wonder why we didn’t try it at home first. Unrolling the 12-foot-3-inch kayak immediately struck us as a somewhat more daunting task than simply shoving a canoe through the mangrove roots after a traditional Southeast portage.
We needed to lay out, organize, orient, partially inflate, and assemble the inflatable seat, not to mention set up the tracking fin and floorboards for standing. There was also the orientation of deck fittings; we secured two evenly spaced fore and aft deck boards for attaching a rod holder or optional navigational electronics.
Though we didn’t keep count, setup took longer than we expected. However, with a little pre-rigging, a practiced paddler with a pump could probably knock this out in 20 minutes. Something to consider if you plan to use this as a bug-out ‘yak.
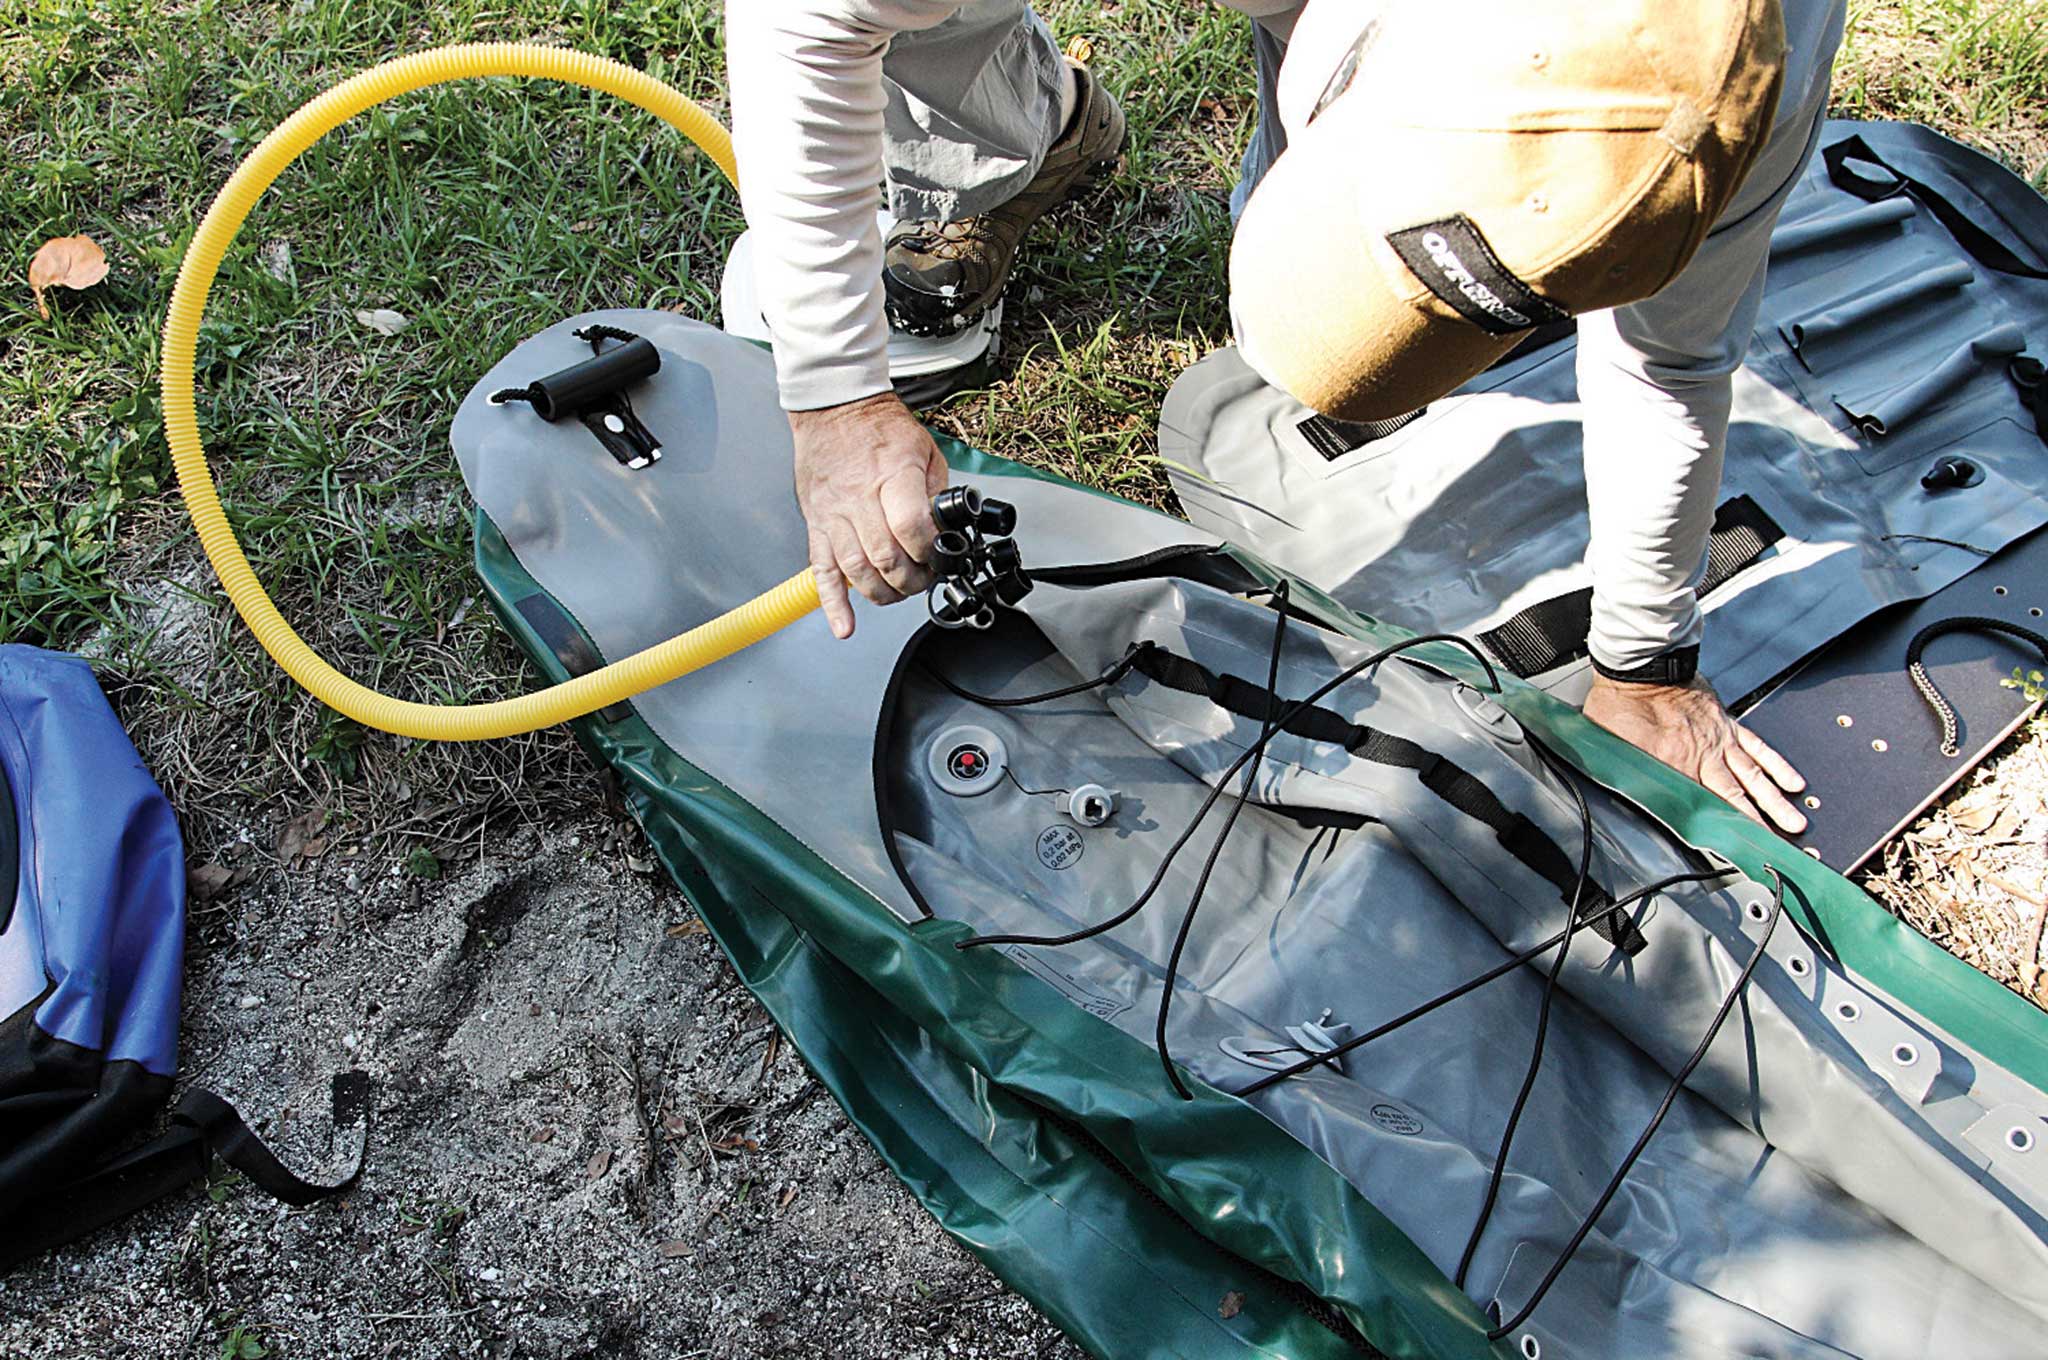
Air Superiority
The open cockpit kayak hull consisted of three inflatable air chambers, reinforced by chemically bonded, vulcanized seams. Air chamber No. 1 was a ribbed series of parallel tubes forming the deck. Air chambers two and three were the port and starboard kayak sides. Each air chamber inflated via a pop-up, spring-loaded locking air valve located inboard and close within the stern. When locked down, the air valves were capped flush with the inner surface of the kayak, preventing accidental loss of pressure or snagging while underway.
The boat featured a stern drainage opening for when you take on a little water or following a downpour. One separate removable, inflatable folding kayak seat was supplied with back support straps and rod holder tubes nicely fitted behind the paddler.
The Ride
The inflatable seat supported our butt and was surprisingly comfortable and high riding, thanks to a cross plank beneath the seat securely fastened to the port and starboard grommets by thumb-screwed fasteners. The cross plank suspended high enough above the kayak deck that we were able to stow our Pelican camera case beneath the seat bottom, with room fore or aft for the author’s favorite Watershed dry storage bags.
The paddler’s heels rested on the floorboards or decking planks, preventing abrasion of the kayak’s rubberized deck surface when wearing sandy dive booties. We attached a cross plank well forward of the paddler, providing a decent foot brace for each stroke.
The Czech List
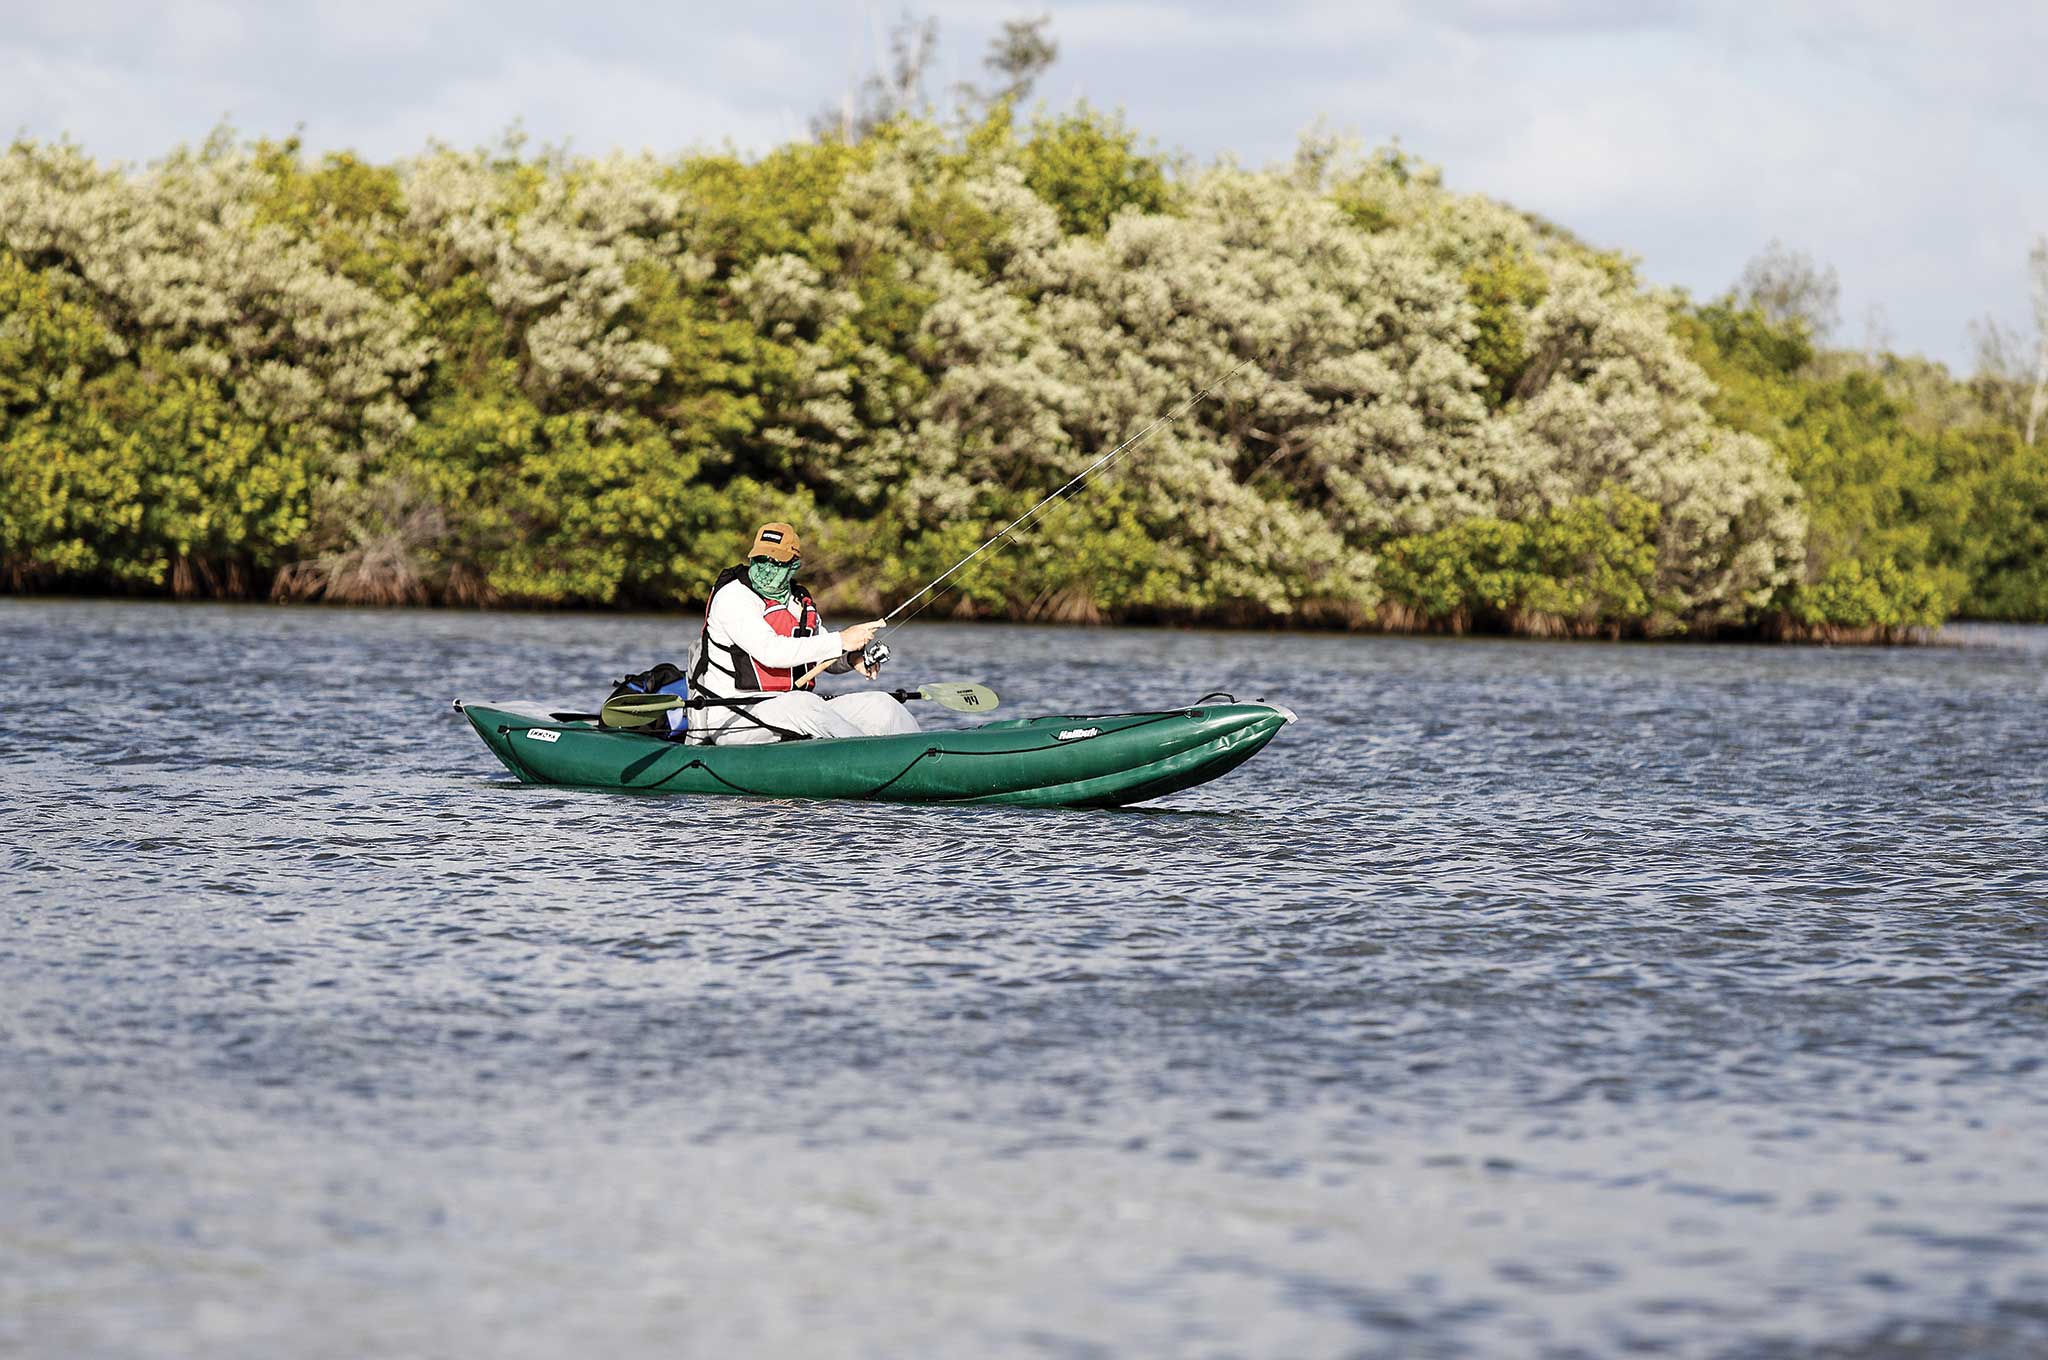
Maneuverability: Pivot maneuverability in tight quarters was a blast, from 180 to 360.
Even with the modest profile-tracking fin, she spun easily with forward and reverse sweep strokes, stopping and reversing just as quickly. Side-to-side draw strokes moved the boat easily.
Capacity: The 441-pound carrying capacity easily accommodated our 200-pound paddler, rivaling the capacity of similar size rigid hull kayaks. Naturally, extra weight will slow the boat.
Stability: Initial and secondary stability checks from the seated position felt safe and fairly predictable once firmly inflated. Even with winds gusting above 25 knots, the boat wasn’t tender and felt steady. Standing on the decking to route-scout or sight cast required care in the winds.
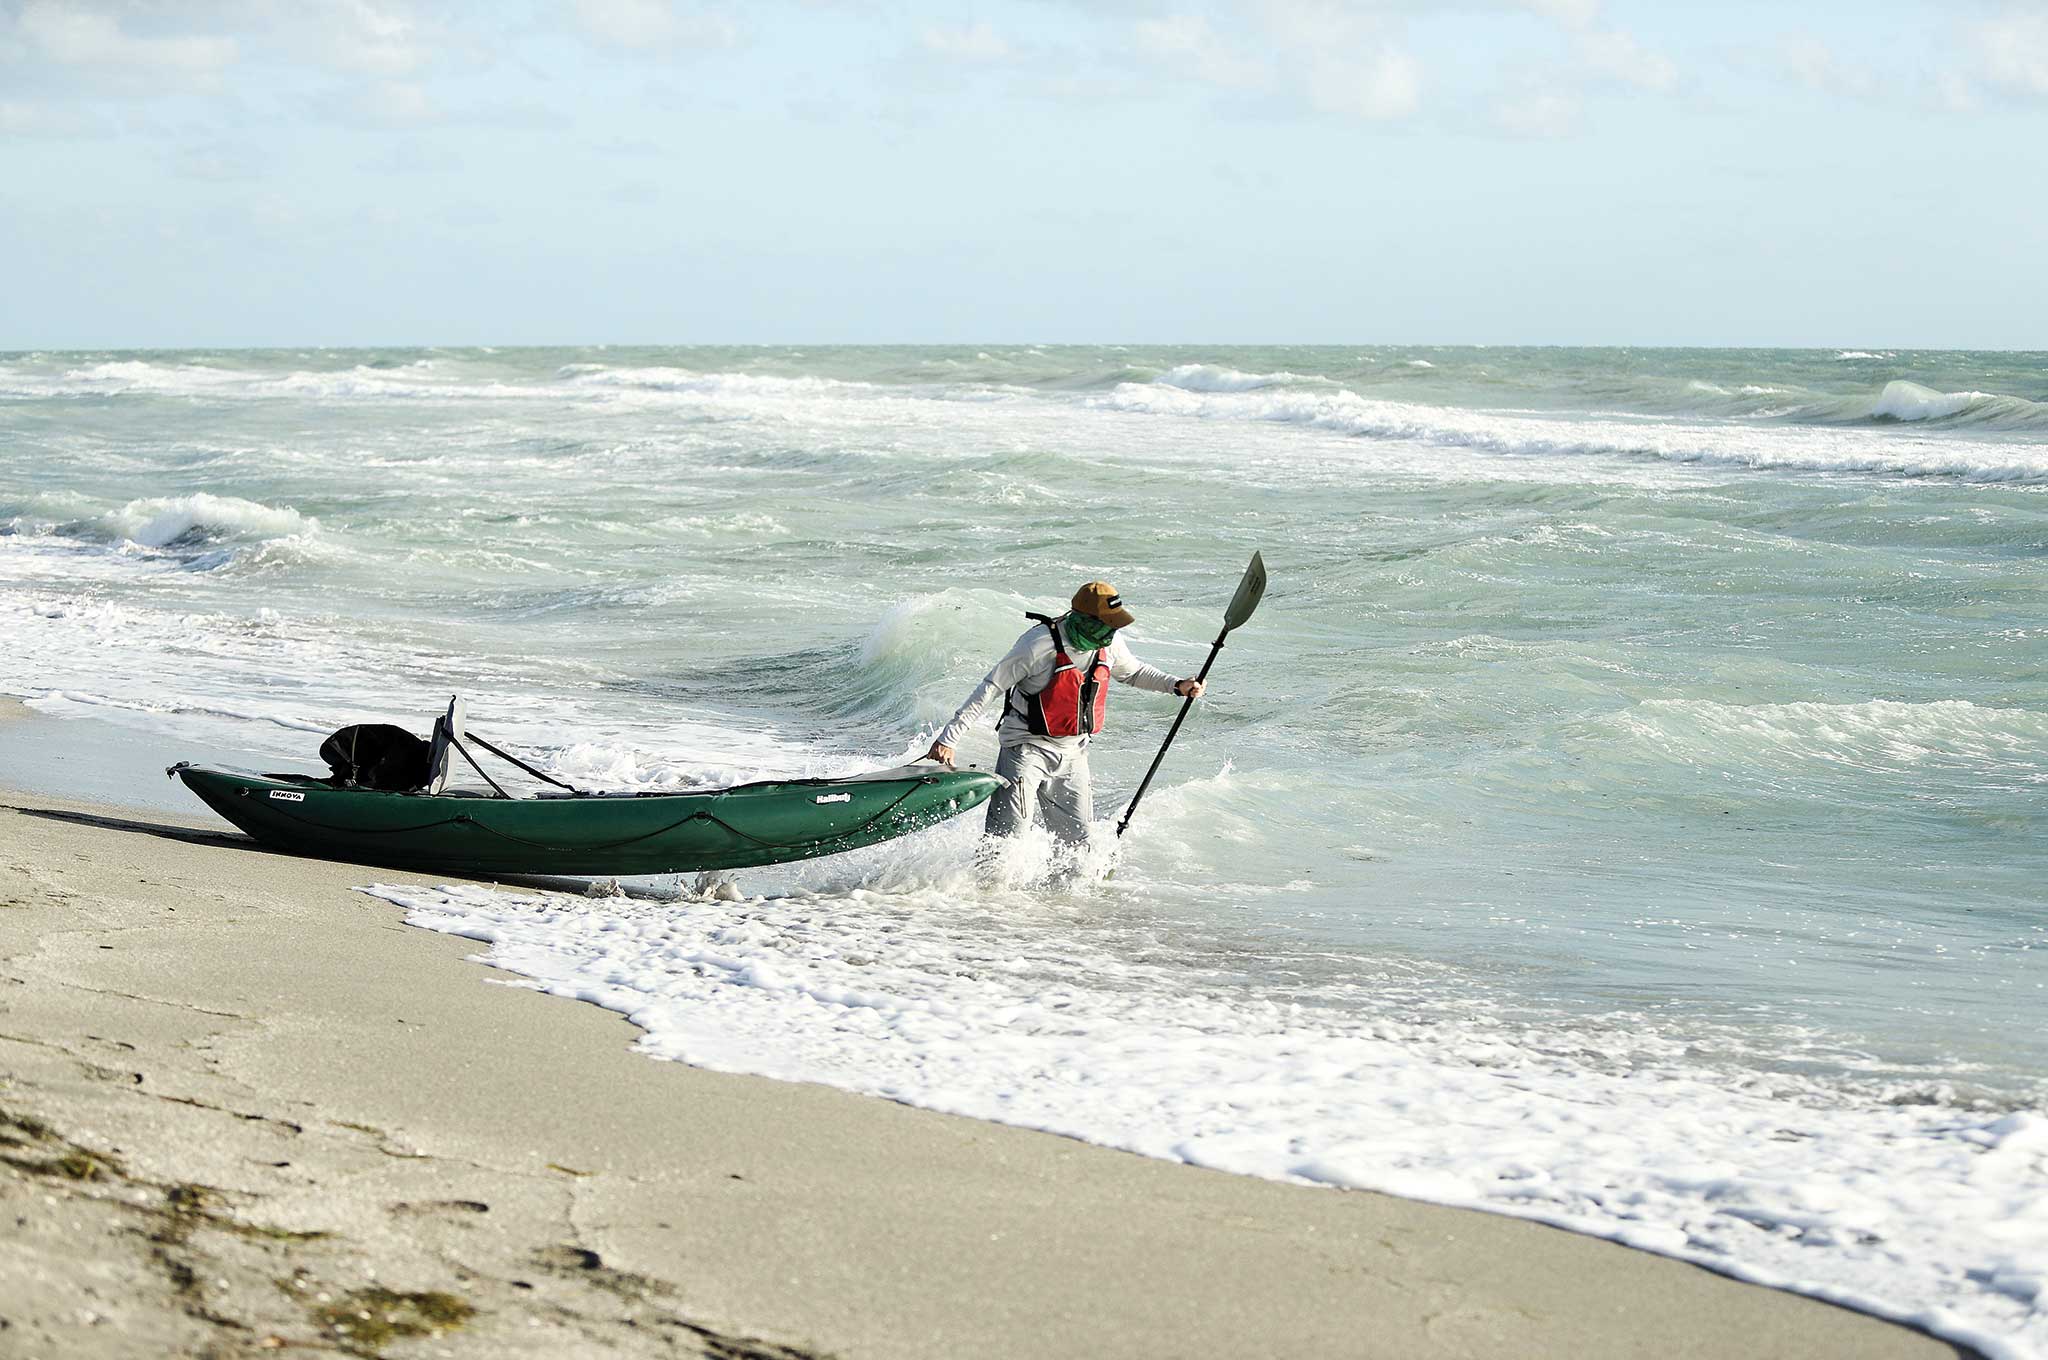
Seaworthiness: The roar of pounding surf tempted us to half drag, half carry the kayak over a sand dune to the Gulf of Mexico. We obliged. The inflatable hung tough, though.
Showing no worse-for-wear signs, the ‘yak had no loss of air pressure before we retreated into the protective mangroves to fish during the last light of day. With the upswept bow, the inflatable appeared capable of modest river currents for a hike-in, paddle-out trip. Still, our tidal currents didn’t remotely extend to Deliverance-level conditions.
The Verdict
Pros: Workmanship, quality materials, and a capable cockpit layout combine to inspire confidence in remote locations. Testing under rough conditions reveals a surprisingly resilient, capable, and buoyant vessel with excellent detail. When properly set up and fully inflated, the boat carries a solid load, with emphasis on trimming load and seat position for paddler weight and load distribution.
Cons: Our main complaint is the lack of a padded hip belt for bearing the load of this 50-pound package. A weight transfer to the hips could save some shoulder and spine stress and aid in paddling ability when under way, or allow for another 25 pounds of required secondary gear, including paddles, a pump, and some camp gear. If one can carry the kayak pack and another tote pack with supplies, a two-person team could make good use of this kayak for waterside camping or survival.
Overall: In an emergency situation, and allowing for inflation and setup time, the Halibut would serve any solo survivalist with kayaking experience when transportation and space storage requirements make it the best, or only, choice.
David H. Martin — a Southwest Florida-based fishing guide and NRA training counselor — first appeared in RECOIL OFFGRID’s Fall 2014 issue with a feature on using kayaks as bug-out transportation. He has since written about a range of water-related topics, from flooding and hurricane cover stories to a high-water military surplus vehicle and a two-wheel-drive floating motorcycle. Contact him at davidhmartin@me.com.
If you’ve read some of our previous knife reviews, such as the TOPS Hazen Legion 6.0 and the White River Firecraft FC5, you’ll probably recognize the word micarta. This term refers to a composite material that’s often used on knife handles and gun grips. Some types of micarta have a marbled appearance with light and dark layers, while others appear as a single solid color. Micarta is also known for its ability to absorb moisture, so it can provide a secure grip even if your hands are wet or sweaty. So, what exactly is this material?
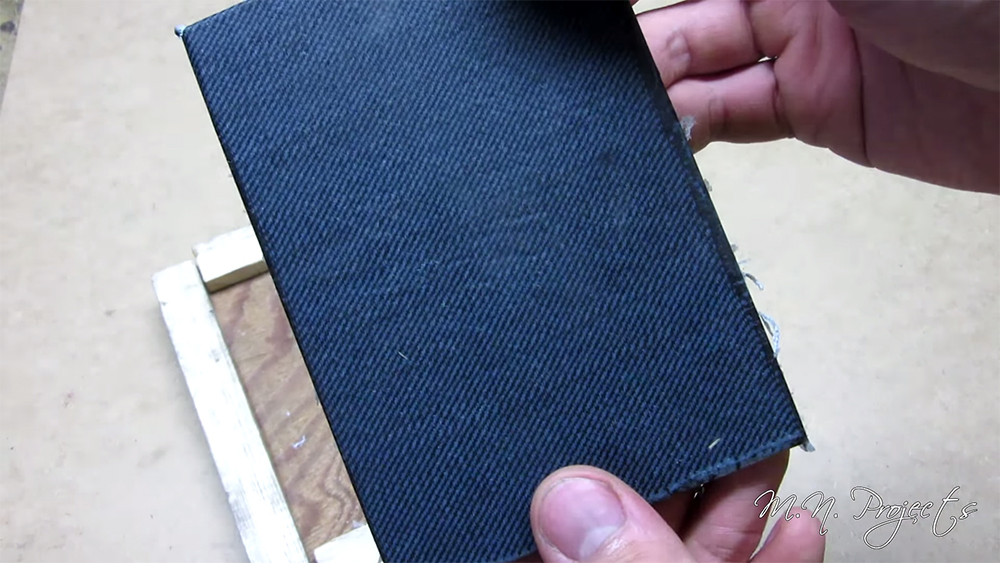
Micarta is technically a brand name and registered trademark of Norplex-Micarta, but much like Kleenex tissues and the Thermos insulated water bottle, it has sometimes been used in a generic sense to describe a category of composites. These composites are formed from densely-packed layers of fabric suspended in thermosetting plastic (a.k.a. resin or epoxy). Micarta can be made from linen, canvas, denim, paper, carbon fiber, or just about any other fabric by stacking multiple layers and using pressure to impregnate these layers with resin.
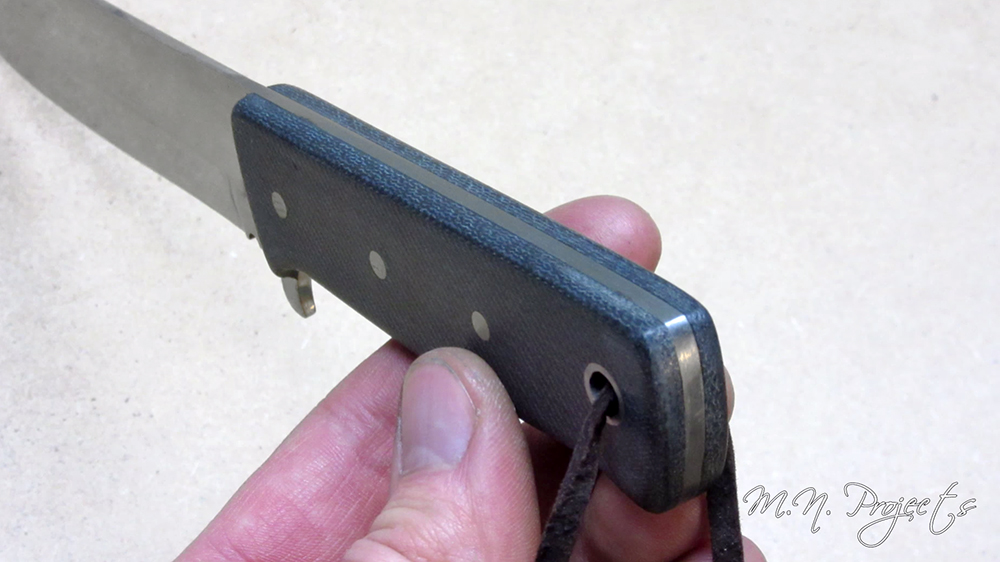
In the following video, YouTube channel M.N. Projects shows how to make a DIY fixed-blade knife with denim micarta handle scales. The scales are literally just a pair of old blue jeans, cut into rectangles, brushed with epoxy, and pressed into a wood form using a bench vise and C-clamps. These scales are then pinned onto the knife, and sanded down using a dremel and sandpaper. If you’ve got a workshop at home and some basic power tools, this is something that wouldn’t be too hard to accomplish — these scales could give your old knife a new look and improve grip in wet conditions.
The thirst is all-consuming as you lurch forward through the parched sand and loose rock of the desert canyon. You’re lost, having ventured off the hiking trail miles ago. You have only half of a bottle of water left. Stopping under the unmerciful sun, you examine the bottle as if you were studying some precious jewel. Your body knows what it needs. But your mind says, “No! I have to save it!” You’re not sure why, but somehow it seems too precious to waste, too valuable to use right now. So, you put the bottle back into your bag and continue stumbling forward, hoping to magically find a flowing stream in this barren land.
The Myth: We’re often told that if we’re out on a strenuous hike, holed up at home because of a storm, or stranded in the middle of nowhere, we should ration our water. But does that strategy hold water when you’re in a sweltering desert?
The Reality: Human beings are adaptable creatures. We’re capable of surviving on a lot less than you might expect, and there are plenty of examples of this. In 1981, a young sailor survived for 76 days in a small life raft in the Atlantic. During the final month of his ordeal, he carefully rationed his collected rain water — just one pint a day. He made it, surviving to tell his tale. And perhaps it’s because of stories like this one — tales that linger in the pop culture consciousness — that the notion of rationing water in all types of emergencies is so widespread.
But the physical needs of a sedentary sailor lying in a damp rubber raft and someone walking through a waterless desert are quite different indeed.
In comfortable surroundings, an inactive adult usually needs about 2 quarts a day. In a dry climate emergency that includes exertion, the need may jump from quarts to gallons. High heat, low humidity, and dry winds can steal the water from your body quickly and in a way you won’t really notice — until things get serious.
Dehydration can lead to diminished strength and motor skills, sluggish cognitive abilities, extreme tiredness, and ultimately death. We may need to be at peak performance to accomplish the tasks of survival in tough desert conditions, and we simply can’t afford to work at a diminished capacity. Take a lesson from the humble yet ornery camel. In these harsh situations, the best place to store your water is in your body, not in your canteen.
Alternative Uses: You may not be able to get more drinking water in a survival situation, but you can always take steps to limit your water loss. Consider these other techniques:
Dress the Part: When traveling through hot climates, wear light-colored shirts with long sleeves, long pants, and a wide hat. It might seem counterintuitive considering the heat, but keep as much skin covered as possible, even your face. This limits your skin exposure to the sun, keeping you cooler — and it helps to hold in moisture. Ideally, you should wear cotton clothing in the day time, as cotton fibers will hold your sweat longer than other fabrics and help to preserve any perspiration and the moisture in your skin. Just make sure you have a dry change of clothes for nighttime, as the temperature can plummet in the desert at night (and wet clothing can chill you).
Go With the Flow: If possible, limit or avoid activity at the hottest part of the day. Walk, climb, or work in the early morning or late evening (or at night, if you have a light source), and rest in a shady place during the heat of the day.
Get Radical: Save water early and often. Don’t wait until you’re almost dead from dehydration to start implementing water-saving survival techniques. Breathe only through your nose, since mouth breathing causes unnecessary water loss. And when things get really dire, pee on your clothing to cool yourself down and keep your skin hydrated. Don’t suck on buttons or stones to keep your mouth moist. There’s no water in them — duh! — and they represent a choking hazard if you lose consciousness.
The Premise: Want to learn how to defend yourself in unarmed combat? If this is the case, Krav Maga Tactical Survival: Personal Safety in Action might just be what the doctor ordered. This comprehensive volume delivers knowledge on surviving many violent situations — from barroom brawls to parking lot beat-downs (and many others in-between).
The 411: The author, Gershon Ben Keren, is a fifth-degree black belt in Krav Maga and a second-degree black belt in judo. He also holds a master’s degree in psychology and has performed academic research on violence against women. He currently runs Krav Maga Yashir Boston, a training facility in Massachusetts’ capital.
What’s Krav Maga? Is that what you dip into your hummus? Nope, it’s the official combatives system for the Israel Defense Forces. The techniques and concepts of this system have been pressure-tested again and again, on battlefields and in urban environments. Krav Maga (which translates to “contact combat”) was founded by Imi Lichtenfeld in the late ’30s. Today, Krav Maga incorporates elements of boxing, Thai boxing, jujutsu, aikido, judo, and good ol’ fashioned street fighting.
Krav Maga Tactical Survival is Keren’s second book. It’s broken down into four parts: strikes and blocks; weapons defense — namely against firearms and knives; unarmed assaults; and throws and takedowns. He promises no crossover techniques from his first book, Krav Maga: Real World Solutions to Real World Violence.
The Verdict: The pages are thick and the pictures colorful and clear. Unlike many martial arts how-to books photographed in a dojo, the pictures are staged at real locations, highlighting the gravity of close-quarter conflicts.
An exhaustive quantity of violent situations are covered. You could get into a fight every week for the rest of your life and still not encounter all the scenarios described.
Situational awareness is analyzed throughout the book. Awareness of your surroundings belongs in every personal protection manual because that skill, more than anything else, will save your hide. Improvised weapons are also examined, such as smashing a ceramic plate and using the jagged edges for cutting.
Another unique feature rarely seen in other self-defense books is how to employ situational awareness to spoil the assailant’s weapon draw. Why wait for the weapon to come out? Well Keren doesn’t. Instead he shows the steps to dish out punishment while keeping the attacker’s weapon sheathed.
Krav Maga Tactical Survival is first-class in its genre, so the following critiques are relatively minor.
As mentioned, the book presents numerous techniques, making it difficult for beginners to sort out common attacks from the less-likely assaults. As you train for self-defense, consider spending the majority of training time on common attack scenarios. For example, it doesn’t make sense to dedicate an equal amount of time drilling a common right haymaker attack as you would with an uncommon knife-threat-from-behind abduction scenario.
Also, many of the savage strikes shown in the first section are never seen again. The hammer fist, elbow strikes, cradle throat strike, and the humble bite are all proven techniques in street fights. Yet, they receive little page real estate during the force-on-force scenarios.
Despite the minor criticisms, Krav Maga Tactical Survival is hard to beat (pun intended). It represents a solid combatives manual and undoubtedly stands alone in a crowded genre. We bet reading Keren’s first book, along with this sequel, will give you more (self-defense) tools than your local Home Depot.
Krav Maga Tactical Survival: Personal Safety in Action
The Amazon rainforest is well-known as one of the last bastions of unexplored wilderness on earth. There are still regions of its deep jungle which harbor native tribes who have had little to no contact with the modern world. It’s also an incredibly difficult environment to survive in — millions of square miles of dense vegetation, harsh terrain, constant moisture, and countless poisonous or venomous species. Even for experienced survivalists, overcoming the Amazon is a serious challenge.
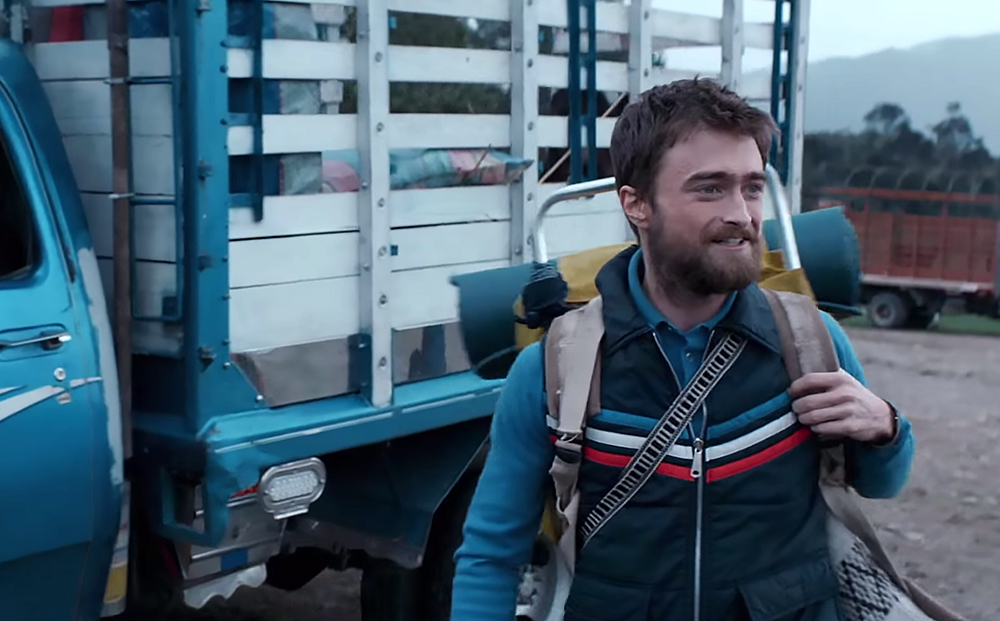
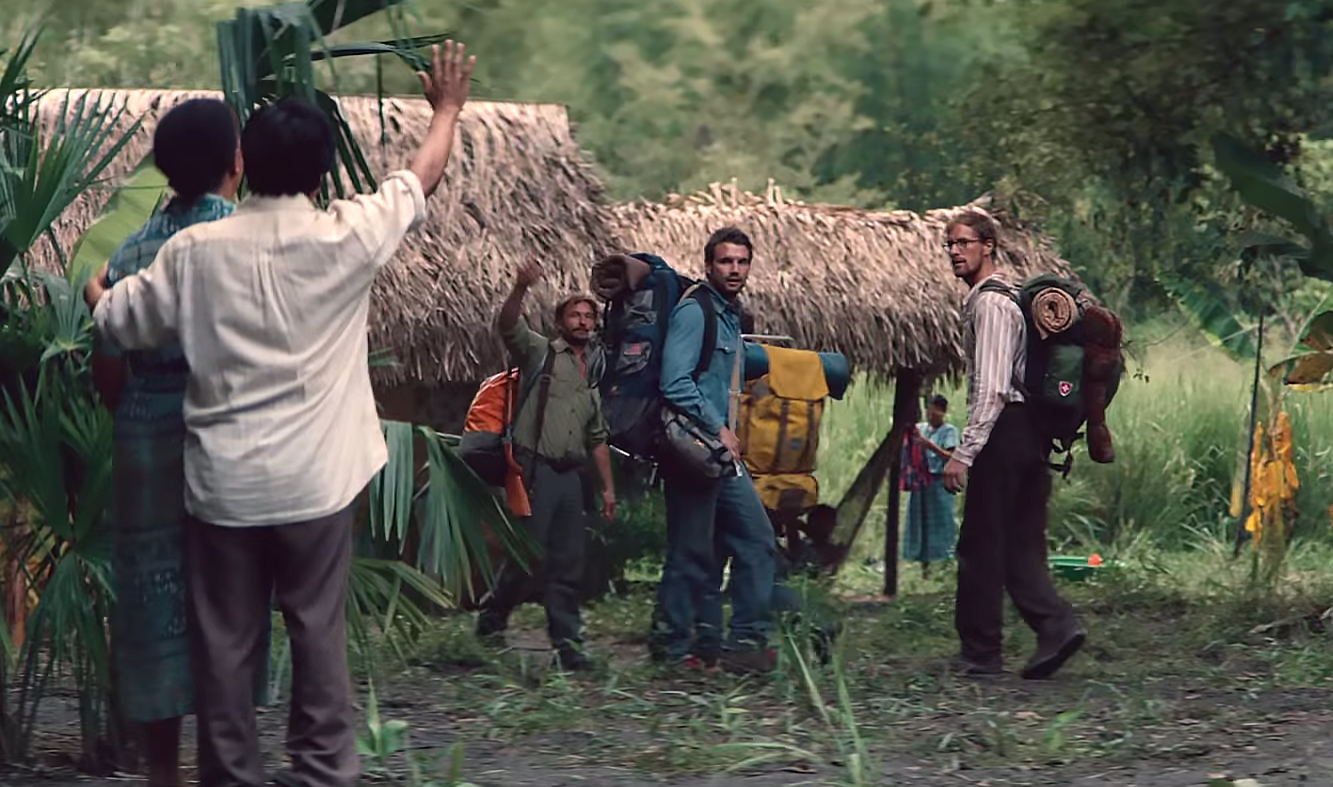
A new movie, Jungle with Daniel Radcliffe, tells the true story of four men who entered the Bolivian rainforest, only to learn firsthand how difficult it can be to survive there. The men remained in the jungle for three weeks with only basic supplies, and tragically, some of them never made it out.
Radcliffe plays the role of Yossi Ghinsberg, a 21-year-old adventurer who had decided to travel the world after serving in the Israeli military. The film is based on the book Ghinsberg wrote to tell how he escaped alive, Jungle: A Harrowing True Story of Survival. Check out the trailer for Jungle below:
If you’re interested in hearing more about this true survival story, watch the video below to hear it in Ghinsberg’s own words:
Even if you’re an expert hunter and have months of shelf-stable food reserves stockpiled for emergencies, it’s important to supplement your diet with freshly-grown fruits and vegetables. Home gardening is a great way to produce spinach, peas, tomatoes, herbs, or berries right in your own backyard. These items can add an immense amount of flavor and nutrients to your meals, whether you’re surviving the apocalypse or simply trying to make less trips to the grocery store.
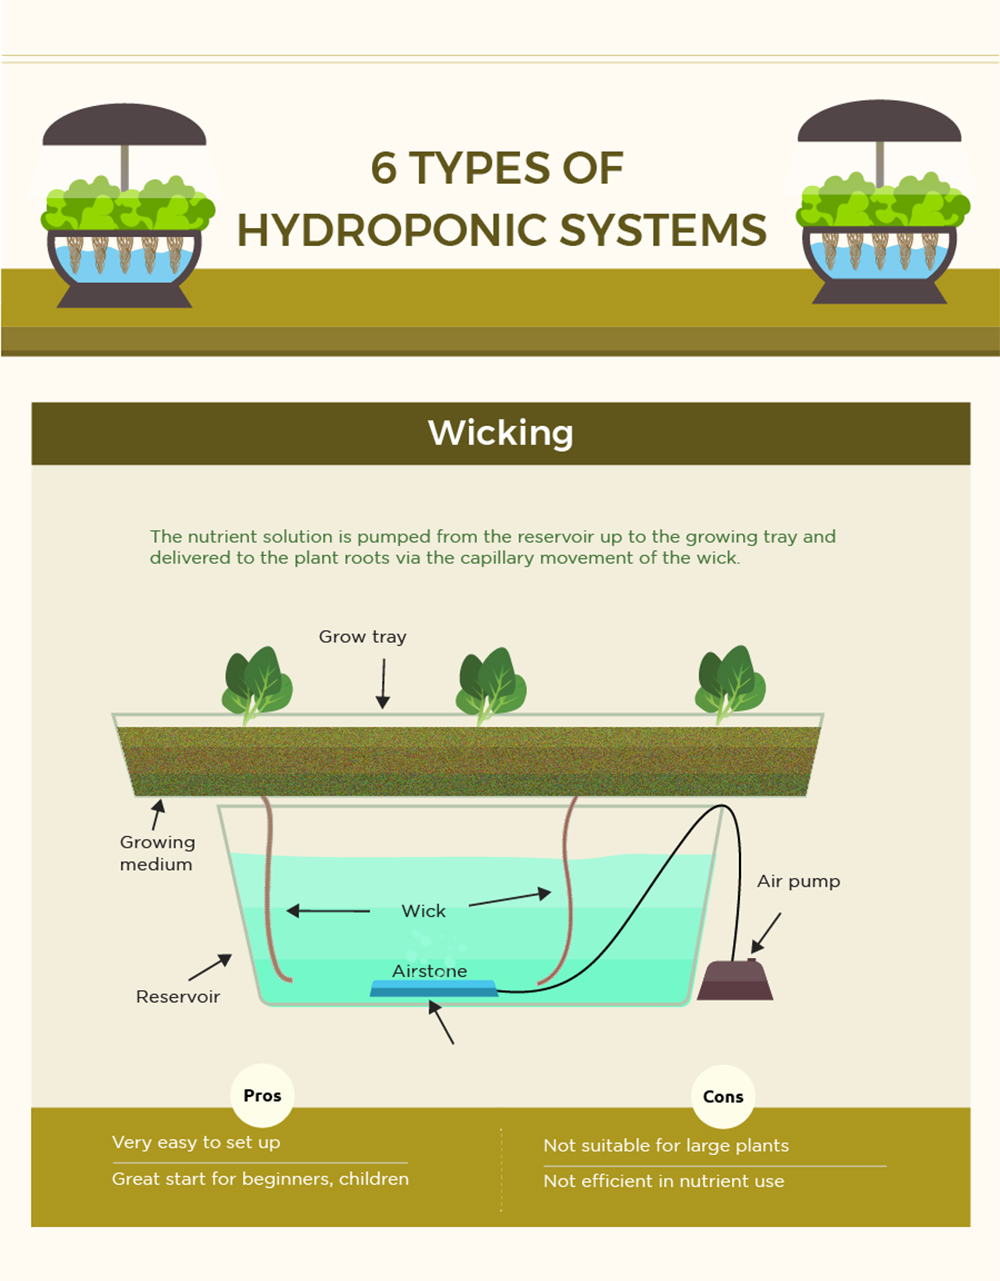
Some people assume home gardening requires a large plot of land, complex irrigation system, and expensive equipment for tilling the fields, but it’s nowhere near that difficult. In fact, one of the most effective methods for growing at home doesn’t even require any soil. Hydroponics uses a water reservoir, suspended grow tray, and low-energy circulation pump to grow fruits and vegetables in a controlled environment. When paired with grow lights, it can even be done indoors or in a dark garage or shed.