Our mission at RECOIL OFFGRID is simple to say and hard to fulfill. We pass along knowledge, wisdom, and experience from people who have done the work in real conditions. We do this to help you make better choices when the power fails, when a stranger tests a boundary, when the trail runs longer than planned, or when a storm changes your map. If one lesson in these pages shifts your mindset or your preparation in a way that protects your life or the life of someone you love, we call that success.
To honor that mission, we do more than write about challenge. We go where the learning happens. This year we launched Undisclosed, RECOIL OFFGRID’s first adventure training experience. We invited a small group of VIPs who met strict criteria. They entered a landscape of uncertainty by design. Time pressure forced clear thinking, misdirection probed their assumptions, and physical tasks exposed weak links and revealed strengths. Each graduate left with practical tools and a steadier mind. The gains looked different from person to person, but the common outcome was a commitment to keep training.
We also traveled deep into the Amazon to learn from the people who live there. Our indigenous guides taught with quiet precision. We learned how to move, how to listen, and how to let the jungle teach us. The lesson that stayed with us was humility. Mindset steers everything, and respect opens doors that force cannot. We returned with calloused hands, ruined socks, and pages of notes to share.
This issue gathers those efforts and turns them into something you can apply. You will find our Mission Ready Gear Up column, featuring a set of tools we trust because we tried to break them. A bevy of training is covered from a variety of instructors with diverse backgrounds. Our review of Fixing Your Feet is a guide we used during these experiences to ensure we could remain comfortably in motion.
All of this lives under the same idea. Challenge arrives on its own schedule, but preparation is a choice you make today. You can sign up for a class. You can practice in low light. You can walk in the rain and learn how your kit behaves. You can turn a list of gear into a set of tools you know well. You can learn one skill that closes a gap in your plan. None of this requires a grand moment. It requires intention.
Here is my ask as you read this issue. Pick one thing you can act on this week. Make an honest assessment of your physical capabilities and take steps to improve it. Build a foot care kit and put it where you can reach it. Run a dry practice session with a clear goal. Walk a new route home and note the blind corners. Write down a checklist for your family and tape it inside a cabinet. All of these small moves add up.
Thank you for trusting us with your time. We learn in the field so you can learn at home, on the trail, or at work. If one idea here gives you an edge when it matters, the mission holds. Read, train, share what you learn, and bring someone along. Capability spreads person to person. That is how resilient communities grow. See you out there!
In 2025, the simplicity of communication barely registers as a thought. Imagine your ancestors from a century ago learning about the information and communication potential of the phone in your pocket. The idea that global communication could be so effortless would leave them dumbfounded. These capabilities are easy to take for granted — right up until they’re gone.
As long as the cellular infrastructure holds, communication isn’t much of a concern. It remains the easiest and most widely accessible link to the outside world. But anyone who has lived through even a brief outage knows how fast things can go sideways. So, what happens when the usual networks go dark? Few places are safe from natural disasters, and even fewer could avoid the effects of a cyberattack, EMP, or solar flare, all capable of crippling modern communication. A little forethought and planning can make a big difference when the grid goes down.
Importance and Fundamentals
Think about all the ways you communicate in a single day. It’s mind-boggling — family group texts, work emails, social media, even ordering takeout — handled with almost no effort. Now take away your cell phone and landline. Add a disaster to the mix. What’s your plan?
Some basic forms of communication don’t require any technology, whistles, flares, a signaling mirror, or even pen and paper. Low-tech or no-tech methods have clear limitations, but for the sake of this article, let’s move beyond them. Let’s assume you have access to power, even if it’s through alternative sources like solar, wind, a generator, or a battery bank. That opens the door to radio communication.
Anyone familiar with radio comms knows there’s gear to buy, licenses to get, and rules to follow. Radios range from simple line-of-sight walkie-talkies to satellite rigs and everything in between. Generally, the more powerful the system, the more complex the equipment and licensing. That said, it is widely accepted and even stated by the FCC that in a true emergency, the rules no longer apply. If someone’s life or property is in danger, you can use whatever means you have to call for help. Still, it is not always as simple as flipping a switch and getting an immediate response. There are some basics worth knowing and plenty of ways to build comfort and capability before a crisis puts you to the test.
Weather radios, like the Midland ER50, provide critical alerts that go beyond weather. All Hazards alerts include Amber alerts, evacuation notices, and other civil emergencies.
Receive Only
Most people are familiar with weather radios. They’ve been a long-standing staple for disaster preparedness and staying aware of changing conditions. While many run on batteries, most also include solar charging or a hand crank, giving you the ability to stay informed when other communication methods stop working.
The National Oceanic and Atmospheric Administration (NOAA), through the NOAA Weather Radio All Hazards network, uses seven channels to broadcast continuous updates and alerts. These broadcasts are transmitted through more than 1,000 stations across all 50 states and beyond. Many weather radios include Specific Area Message Encoding, which lets you filter alerts to only those affecting your area. Even if you have other communication tools on hand, a reliable weather radio should still be considered essential.
Communities often band together and develop a communications plan using GMRS radios to coordinate notifications and needs.
2-Way Comms
The phone in your pocket is an unmatched tool for communication and information, as long as it has power and a signal. Lose either and its usefulness drops fast, especially for staying in touch. (We’ll cover the satellite communication options now appearing on some phones later.) Whether the towers are down, you’re outside of coverage, or the network is overloaded, you’ll need alternatives in your communications plan. If you’re not familiar with radio terminology, here are a few options worth knowing and what they actually mean.
Family Radio Service
Cost: $
Max Watts: 2
Range: 1 to 2 miles
License Required: No
The first level of two-way communication radios are Family Radio Service (FRS) radios. They’re simple and inexpensive. If you’re picturing your kid’s Spiderman walkie-talkies, you’re thinking of FRS radios. Some models look more tactical and less like toys, but they operate the same way.
A basic push-to-talk button lets you transmit on any of the 22 available channels. Because they have fixed antennas, FRS radios are short range with no real way to boost their reach. They’re mostly line-of-sight and are commonly used around the house, in neighborhoods, at festivals, or during events where organizers need direct communication.
The available channels give you some flexibility, but they use shared frequencies, which can get crowded if many people are transmitting nearby. One major advantage of FRS radios is that they require no license. They have a role in any communications plan as long as you understand their limitations.
Citizens Band
Cost: $$
Max Watts: 4 watts
Range: 3 to 7 miles
License Required: No
If you’re Gen X or familiar with big trucks, you probably know about a popular low-cost, low-power radio: the Citizens Band (CB) radio. CB radios are the Wild West of communication. Rules exist, but they’re rarely followed. Still, they offer a simple, mobile option for short-range comms and are especially appealing to those who want to avoid licensing.
The beauty of a CB is its simplicity — no network, no data, no text messaging, and no subscription. Just pick a channel and push to talk. Aside from the cost of the radio itself, they’re free to use. The downside is limited range. Depending on terrain and antenna setup, you can expect about three to seven miles. CBs are also known for static and crowded frequencies. While some see them as outdated, their proven reliability in short-range scenarios keeps them relevant.
General Mobile Radio Service
Portable
Cost: $
Max Watts: 5
Range: 3 to 5 miles
License Required: Yes
Mobile
Cost: $$
Max Watts: 50
Range: 5 to 35 miles
License Required: Yes
Overlanders, neighborhood response groups, radio hobbyists, and sometimes event staff or small businesses often rely on General Mobile Radio Service (GMRS) radios. While GMRS does require a license, getting one is easy and affordable. There’s no exam, the fee is $35, and the license is good for 10 years. Best of all, it covers your entire family.
GMRS radios are more powerful than FRS, with output up to 50 watts depending on your setup. They can also use repeaters, which significantly extend range. GMRS shares the same 22 channels as FRS, plus eight additional repeater channels. They’re versatile, useful in many situations, and can be surprisingly budget friendly.
It’s worth noting that GMRS is where things start to get a little more involved than just powering on and pressing a button. With more frequencies comes the challenge of finding someone to talk to. From this point forward, it helps to know how your radio works, where to listen, and to have a prearranged plan with others about how and when to make contact.
A mobile ham radio can be mounted inside a vehicle and used for short, medium, and long-range communication on the move during a disaster, cyberattack, or other event that cripples common communication methods.
Ham
Portable
Cost: $
Max Watts: 5
Range: 5 miles – global (depending on equipment)
License Required: Yes
Mobile
Cost: $$
Max Watts: 100
Range: 50 miles – global (depending on equipment)
License Required: Yes
Base Station
Cost: $$$
Max Watts: 1500
Range: Literally outer space
License Required: Yes
Some call it a hobby, others call it a lifestyle. Amateur radio, or ham radio, is where range, cost, licensing, and technical skill come together. These radios offer a serious upgrade across the board. Historically, ham radios have earned their reputation as a vital method of communication during large-scale disasters. When traditional infrastructure fails, ham operators have stepped in to transmit and receive crucial information.
Ham radios don’t rely on cell towers or the internet. They operate independently, used by individuals who are licensed through the Federal Communications Commission (FCC). That said, there’s a real learning curve. To pass the required exam, users must understand regulations, operating practices, and some electronics. Once licensed, operators can choose from a wide range of radios and antennas to tailor their setup to specific needs. These systems can use repeaters to send and receive signals across vast distances, sometimes even globally.
In a disaster, a ham radio may be your best shot at contacting someone outside your immediate area. The reach is impressive. Even if you don’t transmit, being able to receive information can make a huge difference in a critical situation. And you’re not alone. Once licensed, you can connect with organized groups that focus on emergency radio support. The Amateur Radio Emergency Service (ARES) is made up of volunteers who provide communications before, during, and after incidents, declared or not. Another option is the Radio Amateur Civil Emergency Service (RACES), which can be activated by government officials during a crisis. The key difference is that ARES operates year-round, while RACES is only active during officially declared emergencies.
There are several commercially available devices that utilize the Iridium satellite network, which utilizes 66 satellites to offer global coverage for communication, tracking, and SOS purposes.
Satellite Comms
Once reserved for the military or the ultra-wealthy, satellite communication (satcom) has evolved and is now edging into the mainstream. Those who travel off-grid have used satcom for years. With a subscription, companies like Garmin and ZOLEO offer GPS tracking, two-way messaging, and SOS features. Satellite phones are also widely available, though they tend to be expensive and require ongoing subscriptions. More recently, satcom capabilities have reached consumer smartphones. The iPhone 14 and newer, as well as some newer models of Google Pixel and Samsung Galaxy, now include basic satellite communication features.
A common misconception is that satcom systems work independently of ground infrastructure. In reality, most still rely on terrestrial ground stations to route signals to and from satellites. For example, Starlink operates through a growing network of more than 150 ground stations worldwide, with more in development.
Right now, satellite communication is the most geographically flexible option for those without a ham radio license who still need to reach help, update loved ones, or send critical information. These systems don’t rely on internet or cell service, so damaged or overloaded infrastructure won’t shut them down. Still, satcom signals can be disrupted by buildings, dense vegetation, or heavy cloud cover. Cost, subscription fees, and limited two-way functionality have been long-standing drawbacks, but those barriers are shrinking fast.
Mesh Networks
One form of communication that’s growing in popularity is the grassroots-style mesh network. A mesh network operates without cell towers or internet access. Instead, devices — or “nodes” — communicate peer-to-peer, passing messages from one device to another. A single transmission can hop across multiple nodes to reach its destination.
Aside from latency issues and the requirement that devices must be powered on to function as nodes, mesh networks have a lot going for them. They’re decentralized and self-healing, meaning if one node drops out, the message simply reroutes through others. Adding more devices doesn’t bog the system down — it actually extends its reach.
Cellular infrastructure has become so ubiquitous in the United States that we are often stunned when it goes down or becomes overwhelmed. Having alternative means of communicating with friends, family, or emergency personnel is one of the most important preps you can make.
Building Your Comms Plan
A communication plan should be proactive, not reactive. No matter the crisis scenario, your overall preparedness strategy needs to include communication tools beyond just a cell phone and a weather radio. While both are valuable, your toolkit should be broader and more adaptable.
One widely used method for building a solid communication plan comes from the military: the PACE model. PACE stands for Primary, Alternate, Contingency, and Emergency. If you’re unsure where to begin, use this as your framework. Within your own plan, determine what fits into each category and build from there.
Establish Goals
Obtain equipment to receive emergency alerts, weather updates, and have a backup power supply.
Determine ways to communicate with family, friends, neighbors, or emergency assistance.
Establish a plan and coordinate that plan with those you intend to communicate — locally, regionally, and nationally.
Practice that plan multiple times prior to a disaster to identify deficiencies. Disaster Comms Plan
Collect names, phone numbers, and addresses of family members, important friends, and critical facilities such as schools, medical offices/centers, etc. Laminate your contact list.
Begin adding communication layers. Purchase a NOAA weather radio, preferably one with a hand crank for an unlimited power supply.
FRS radios can be sold individually or in multi-packs. They are inexpensive and not difficult to find. Establish a cache of FRS radios (minimum of two) for short-range communication abilities.
Obtain a GMRS license and purchase radios (minimum of two). The more wattage and better the antenna, the further your reach. Learn your equipment and its limitations before the crisis.
A ham radio license may be beyond the comfort level of some. If it is in your plan, numerous groups would be more than happy to help you obtain a license and welcome you into the amateur radio fold. You will need to spend a fair amount of time gaining comfort and proficiency as a ham radio operator, so join a local club and practice.
Add a satcom option. Determine if your cell phone has satellite capabilities. If it does, learn them. If not, an upgrade may be in order or evaluate commercially available options such as the Garmin inReach.
If the mesh network piqued your interest, research the equipment and network availability in your area. For some, there aren’t enough devices on the network for it to be practical; for others, it could be a valuable resource.
Ensure you have alternative power sources for your communication options. Spare batteries, solar, and a hand-crank generator all make good options for power. Understand what best suits your needs and have those sources in place.
Establish a protocol for which radios to use and the procedure. For example, if your family is separated within the neighborhood, use FRS radios and attempt to call every 10 minutes using the family code word. If a local emergency happens, use the GMRS radios and coordinate a nightly check-in with neighbors to ensure safety and determine needs.
Document a communication plan for you and your family. This should include your established protocol, frequencies in which to locate each other, and a printed and laminated list of the plan and your contacts near your radios. Remember to practice often.
During the midst of a comms-down scenario is not the time to be coming up with a plan. Figure out what you’ll do when times are good, and you’ll have peace of mind when times get bad.
Licensure & Privacy
Both GMRS and ham radio licenses are issued by the FCC. If privacy is a priority to you, consider using a P.O. box when registering. Call signs are issued and required when communicating. All call signs are published and searchable on the FCC website, which means anyone who hears your call sign can discover your address.
Summary
We’re all tied to a fragile system of devices, towers, and frequencies. When the grid goes down — whether from a natural disaster, man-made event, or cyberattack — the ability to call for help or connect with those nearby can change the outcome. Fortunately, modern technology allows for contingencies. Understanding your options and the equipment involved takes a proactive mindset and a willingness to invest some time. The payoff is simple: staying connected when it matters most.
Imagine walking into a coffee shop, scanning the room, and instantly understanding who is engaged, who is uncomfortable, and who might be paying a little too much attention to you. This isn’t about mind-reading or gathering some sort of “energy.” It’s about recognizing the signals people give off and using that information to navigate the world more effectively.
Many people think of reading others as something reserved for law enforcement, security professionals, or criminal profilers. The reality is that anyone can develop this skill, and it has practical applications in everything from personal safety, business negotiations, and on to the simpler things in life like family relationships. The key is learning to observe and interpret behavioral cues in a way that helps you anticipate what’s coming next.
This ability doesn’t just keep you out of trouble. It can also help you recognize opportunities, build better relationships, and move through life with greater confidence.
Open-handed conversations can occur in virtual meetings as well.
Proxemics: Understanding Group Interactions
Proxemics is the study of how people use space and distance in relation to others. While it might sound abstract, proxemics is one of the most practical and observable tools you can use in public settings to read intent, dominance, or discomfort. This domain helps you assess relationships, social roles, and potential conflicts just by paying attention to how people position themselves and interact spatially. The following are several of what I think of as “low-hanging fruit” when it comes to this study. I have used these numerous times to determine who the “decision maker” is when it comes to business negotiations as well as recognizing when my wife and I are out of sync.
Covering of the head, crossed legs, and arms in front of torso likely indicates someone wishing to be closed off.
Push-&-Pull Movements
Push-and-pull movements are spatial indicators of comfort, trust, or disagreement. For example, when two people are engaged in conversation and face each other directly, they are likely in agreement. When one person begins to turn away or angle their body slightly to the side, they are “pushing” themselves out of the interaction. That physical withdrawal may indicate discomfort or disagreement. A pull, by contrast, might be seen when one person leans in, angles toward the other, or shortens the physical distance. This signals openness or trust.
Hands on the back of the neck can be an indicator of stress.
These signals happen naturally, and the average person notices them subconsciously. By bringing them into conscious awareness, you can make better decisions about how to respond to people in real time. This is one of the easiest to recall as well because there is such an obvious physical reaction to this. I just remember that the more someone’s back is toward me rather than their front, the more they are disconnected.
Open-hand conversation is one where the person is inviting you.
Identifying Leaders & Followers
Within a group, the leader is not always the loudest or the one who has formal authority. Often, they’re the person others look toward before speaking or acting. In group dynamics, people will often physically orient themselves with feet, torso, or even just a glance toward the person they subconsciously defer to. The leader may also use a tactic called “once removed” communication, giving orders only to a lieutenant or second-in-command, who then relays the message. This distancing elevates the leader’s social status within the group. Recognizing this can help you spot high value individuals (HVI) in security scenarios or decision-makers in business settings. For those reading who want to use this as a launching point for solid business negotiations with unknown parties, this is a critical observation to make. The decision maker is key, and you should focus your attention on working with them whenever possible. Or at least reading them to know when they are pleased or not. This may be obvious, but this is an excellent battlefield observation to make. Knowing who the leader is lets you know who the “head of the snake” is for battlefield tactics.
Upon sitting or standing, concealed carriers will often adjust their firearm.
Entourage, Mimicry & Adoration
Entourage is a formation in which one or more people follow another in a beta position. In these groupings, subordinates often show physical signs of deference. They may glance at the leader for approval, mimic their body posture, or show signs of adoration such as opening doors, standing when the leader enters, or bowing their head slightly during greetings.
Mimicry is a powerful sign of engagement. If a person crosses their legs and leans forward, and the other does the same shortly after, that is a sign of rapport. If one leans back and the other remains leaning forward, that could suggest disagreement or unease. Watch this play out at dinner tables, business meetings, or any casual social setting. The physical harmony or discord between people often mirrors their emotional states. Many years ago, when I first started into the practice of behavior analysis, I would do this sort of practice at restaurants regularly. It is a great way to people watch and see these things at play from one end of the spectrum to the other.
Scanning the environment especially at funnel spots, like common doors, is a sign of someone who is keyed into the awareness.
Cultural Considerations
Cultural norms affect proxemic cues. In North America, social distance tends to be greater than in places like the Middle East or Latin America. Knowing this can help you avoid misreading closeness as a sign of aggression or distance as a sign of disinterest.
In international contexts, be aware that certain gestures, like showing the bottom of your foot, can be deeply offensive. For many years I taught traditional martial arts and combatives. I will never forget training with an incredibly high-level Japanese instructor. I sat on the training mat with my legs outstretched and the bottom of my feet showing. A training partner, and good friend, quickly corrected me to tell me that it was rude in that setting. I should not have the bottom of my feet toward the instructor in that manner.
When one person in a conversation is not facing their partner directly it could, but not always, mean that they have mentally checked out of the convo.
Kinesics: What the Body Reveals
Kinesics refers to body language, facial expressions, posture, and gestures. This domain is rich in detail and layered with meaning, especially when observed over time or within familiar contexts. Often you will hear this referred to as “tells.”
Self-Soothing & Defensive Behavior
Self-soothing gestures are small, often unconscious movements that indicate a person is trying to calm themselves. Common examples include rubbing the neck, scratching the head, wringing hands, or covering parts of the face. These can indicate stress, confusion, nervousness, or even deception. However, context matters. Someone might be rubbing their neck because of a cramp, not because they’re lying. That’s why it’s important to observe patterns rather than isolated actions. A single gesture means little on its own. But several signs stacked together can paint a clearer picture.
I, personally, will often rub my beard from mustache down to chin when I am uncomfortable or in deep thought. Understanding this has helped me when I am in negotiations or do not want others to know I am uncomfortable. I give serious and focused conscious thought to not doing that, so as not to give my mindset away. I hope it is obvious, but I am discussing these things as it relates to assessing others, but that goes the other way too. People will be assessing you. So, it is best to assess ourselves and fix the issues that we recognize are problematic.
Don’t allow yourself to get focus locked on a book, phone or task while in public areas. Even if the magazine is a great one.
Eye Behavior & Blink Rate
Eye contact is often misunderstood. While prolonged eye contact can suggest confidence, it can also be an attempt to project control or dominance. Conversely, a lack of eye contact may not be dishonesty, it may be cultural or a sign of shyness.
One of the most objective cues is blink rate. Research shows that the blink rate increases under stress. If someone normally blinks 10 times per minute and suddenly increases to 40, something has changed. That shift could be anger, anxiety, or even an effort to maintain composure while lying. Establish a baseline whenever possible, then look for deviations. It is critical that you understand this is a baseline versus an anomaly sort of situation. There is no way to say what the average blink rate is for humans. We all have a blink rate that works for us. We must gather the baseline first, then recognize the change.
Wearing a heavy or long jacket when the temperature does not match the needs is an anomaly worth considering.
Toe & Hand Direction
Feet are honest. Unlike facial expressions, which we learn to control socially, the direction of our toes is involuntary. If someone’s feet are pointed toward the exit, even if they’re smiling and chatting with you, they’re mentally on their way out. Hands are another useful indicator. Open palms usually indicate honesty and a willingness to engage. Hands in pockets or hidden behind the back can suggest concealment, physical or emotional. If someone shows you their palms mid-sentence, especially with fingers splayed, they may be signaling you to stop, even if their words don’t say it directly.
Mimicry is when people in conversation get in the same body positions. This typically means they are in agreement during the discussion.
Biometrics: The Body Cannot Lie
Biometrics refers to involuntary physiological reactions. These include blushing, pupil dilation, facial tension, and other signs driven by the autonomic nervous system. Because people cannot easily control them, biometric cues are often the most reliable indicators of true emotional state. Stress & Hormonal Cues
When a person is embarrassed or under stress, adrenaline causes blood vessels to dilate, especially in the face, neck, and ears. This results in blushing. Flushing, which covers a larger area, may come from anger, arousal, or even alcohol.
Conversely, stress can also cause the body to pull blood away from the face, leading to paleness. This is another sign of the body preparing for fight or flight.
Nostrils flaring and bottom teeth showing are instinctual signs of agitation. These cues often precede aggressive action and should prompt you to raise your awareness. This all occurs because a person is trying to get more oxygen into their bloodstream preparing for a physical confrontation. Most of our interactions that involve this are those that end up in disagreement and don’t get physical. The beauty of this is — and I use this regularly — when you recognize this happening, you can begin moving out of position and/or using “verbal judo” to calm a possible heated situation before it gets physical.
Hands in pockets is a sign of closing in or possible deception. Always watch hands.
Pupil Dilation & Heat Signatures
Pupil dilation can be caused by low light, drug use, or emotional arousal. Sudden dilation in normal lighting might indicate attraction, fear, or rising tension. So, if you are having that convo at a bar trying to engage a date, that is a good thing. But if you find out that date already has a boyfriend, and he is doing this, it’s a problem. This spectrum of understanding is critical to putting this to good use.
Changes in body temperature can also be detected. If you’re physically close to someone, you may feel heat radiating off them during an adrenaline surge. From a distance, thermal optics can help identify elevated body heat, which is useful in tracking fugitives or locating someone hiding in a crowd. I have used this in leading man-tracking teams that have thermal optics. You leave your heat signature behind on the environment. It is rather wild to see how much heat you leave behind on the ground, touching a rock or tree, or similar. While all that technology is incredibly useful, most of us do not have it. But that does not mean we can’t see the increase in heat on a person. You can sense it, see it when a person begins to sweat.
Having a hat pulled down and avoiding eye contact could mean deception or simply someone who is shy. Behavior analysis is definitely not an exact science in most situations.
Sweating & Subtle Trauma
Sweating is a key stress indicator. If someone appears clammy or you notice sweat stains in inappropriate conditions, it may be a sign they are nervous, ill, or under emotional strain. Other biometric signs like bloodshot eyes, bruises, or nystagmus may indicate substance use, fatigue, or physical trauma. In tactical scenarios, be alert for pressure marks on shoulders or around the eyes; these could indicate concealed weapons, recent recoil, or gear straps. This sort of read helps to understand who is “packing” around you, so you can prepare accordingly.
Pointing during a conversation is often meant to talk down to a person. Avoid such practice unless it is absolutely necessary.
Vision & Perception: Knowing How You See
Being a good observer means understanding the mechanics of human vision. The eye is not a camera. It is a biological sensor full of limitations and bias.
Central & Peripheral Vision
The fovea, located in the center of the eye, is responsible for sharp, detailed vision. Everything outside that small central area falls under peripheral vision. While peripheral vision lacks detail, it is more sensitive to motion, especially biological motion. You might not clearly see someone walking behind a car, but your brain is tuned to notice the movement. When you’re purposely observing a person or situation, then make sure you turn your head and eyes to what you are looking at straight on. You will gather more information in that manner.
Peripheral vision is especially useful for spotting threats, but it is limited. Under stress, it narrows. This tunnel vision can make you miss critical information. Counter this by regularly scanning your environment and using deliberate head movement. This is also something that gives me a quick self-check. When I recognize my vision has narrowed, it begins the checklist toward letting me know I am overstressed and need to either step back and get a grip, or otherwise get over it with focus, breathing, or other things I have trained to calm myself.
Day, Night & Twilight Vision
Cone cells handle daytime (photopic) vision and are sensitive to color and detail. Rod cells, which support nighttime (scotopic) vision, are more sensitive to motion and light but not color. The Purkinje Shift causes reds to appear darker and blues to appear lighter in dim lighting. That is why it is easier to see blue objects at night than red ones. Twilight (mesopic) vision engages both rods and cones. During this time, depth and color perception can become unreliable. This is often the most vulnerable time for misreading your environment.
Instead of me just using a bunch of technical big words let’s make this more practical for all of us. The worst time of the day for clear vision is dawn or dusk. That is because our rods and cones are switching back and forth rapidly to deal with the increase and decrease of light due to shadows. When this occurs, our vision is poor. When I used to teach combatives, I was fond of telling runners to not run at those times, as it is hard to see threats. In addition to this, when it gets dark it takes a full 20 to 30 minutes for your eyes to completely adjust. Therefore, when you have the time, allow your eyes to adjust before you move around in the dark.
When talking, keeping your hands in front of your torso often indicates that your uncomfortable and protecting yourself.
The Rule of Three: Left of Bang Thinking
One of the most powerful tools in behavioral recognition is the Rule of Three. One anomaly may be coincidence. Two may be curiosity. Three should trigger action. Consider it in an equation: Baseline + Anomaly = Decision Making. But when you have three anomalies, it means you must prepare for action.
• A man enters wearing a hoodie. • He paces and scans the store but doesn’t shop. • He adjusts something in his waistband.
That third cue is your green light to prepare for action or remove yourself from the area. Cognitive Blind Spots
Even skilled observers are vulnerable to blind spots. These include:
• Change Blindness: The brain can ignore obvious changes in the environment when distracted. Combat this by scanning deliberately and pausing to reassess regularly. • Focus Lock: Fixating on a single threat, person, or thing (your phone) can cause you to miss the bigger picture. Force yourself to shift your gaze and reevaluate surroundings. • Assumptions and Bias: If you assume the person in a suit is safe and the person in a hoodie is dangerous, you may miss the real threat. Let behavior dictate your evaluation not stereotypes.
Ethics of Observation
Reading people comes with responsibility. Using this skill to protect yourself or de-escalate a tense situation is ethical. Using it to manipulate, deceive, or exploit others is not. When in doubt, ask yourself: Am I helping someone be safer or just trying to gain an advantage?
Final Thoughts
Reading people is not about paranoia. It is about awareness. It is about noticing small, reliable cues and layering them into a fuller picture. Anyone can do it. With practice, it becomes second nature. Start today. Observe group dynamics in a restaurant. Watch how people move in line at the store. Take note of blink rates, body posture, and spatial positioning. Over time, your awareness will sharpen, your instincts will refine, and you will be more prepared for both everyday life and high-risk moments.
About The Author
Craig Caudill is the director of Nature Reliance School, where he teaches outdoor safety, survival, and tracking skills to individuals and organizations. An accomplished author of several books on backcountry skills, Caudill is also a sought-after consultant for national television and media, including shows like Naked and Afraid and America’s Most Wanted. With decades of experience in wilderness education and situational awareness, Caudill combines practical expertise with a passion for helping others develop resilience and self-reliance. Learn more at www.naturereliance.org.
Electronics of all sorts are a fixture on the modern battlefield, just as they are in everyday life. While they can provide critical capabilities, such as communications and information gathering to combatants and civilians alike, abuse or misuse of your systems can also give away your position to those you may or may not want to have it. Conversely, should you find yourself in the position of a pursing force, whether to find and fix a hostile group, or locate someone’s emergency beacon in the wilderness, knowing how to home in on radio signals could prove crucial to the success of your mission and even save lives.
The technique of tracking down radio signals, generally known as radio direction finding (RDF) or simply direction finding (DF), can be done with surprisingly low-tech and cost-effective tools, or with highly complex and purpose-built systems that come with a much higher price tag. It’s important to note that it doesn’t matter if the transmission is encrypted or unencrypted — RDF focuses only on the presence of a signal, not its content.
In this article, I’ll briefly cover commercially available DF systems, but the main focus will be on the core skills needed to conduct manual RDF. I’ll also outline tactics, techniques, and procedures (TTPs) for mitigating RDF threats from hostile elements.
A commercially available fox hunt antenna helps you focus in on the direction of the weakest, rather than the strongest, signal strength, and is commonly used by ham radio operators to look for radio beacons in contests.
The Basics
At its core, RDF is a signals intelligence (SIGINT) tactic for identifying the physical source of a transmission once it has been detected. While this may sound complicated, it can be accomplished easily with basic equipment and skills in land navigation and communications.
The first step is recognizing that a transmission is taking place. This can be done through signal collection from a listening post or observation post, or through foreknowledge that a transmission is scheduled — such as when tracking a pirate radio station that broadcasts on a fixed timetable or known routine. The second step is to fix the transmission’s location in space. This can be done in a few ways. One method uses multiple direction-finding stations (either fixed, mobile, or man-portable) to receive the signal and plot relative bearings. These bearings can then be used to calculate an intersection point. Another method involves using one or more mobile or man-portable DF stations to actively track the transmitting source. These stations adjust course as needed, homing in on the origin of the signal until the source is identified or visually confirmed.
When using a single, mobile DF station, success rates are much higher when tracking a continuous transmission source — such as an emergency beacon — compared to tracking an ephemeral source that is intermittent, brief, or transmits at irregular intervals.
The Kraken SDR requires a set of precisely laid-out antennae to enable it to automatically pick up a signal and calculate a bearing to a signal. Here, the array is mounted to the top of a pickup truck cab.
Equipment
RDF equipment ranges from simple, cost-effective, and field-expedient tools that are highly manual but accessible on a budget, to purpose-built commercial off-the-shelf (COTS) systems and specialized gear developed for military and law enforcement use. For the prepared citizen, I’ll briefly touch on some commercial options, but the focus will be on manual and field-expedient techniques that can be learned and applied with minimal investment.
The RF Analyzer app, coupled with an RTL-SDR and a Yagi antenna can be used as a cost-effective, field-expedient platform for manual RDF. Here, we see we’re directly picking up on the target frequency at the highest relative signal strength.
COTS Solutions
If your budget allows, a purpose-built COTS direction finder might be the right choice. These systems use arrays of antennas — or sometimes a single rotating antenna — along with advanced mathematical methods such as Doppler, Watson-Watt, or correlative interferometry to determine the bearing to a signal source with a high degree of accuracy.
One such product available to the average citizen is the MFJ-5005, which is a Doppler-based system. At its heart, the MFJ-5005 is an OEM version of the KN2C DF2020T but Global TSCM Group, as their name indicates, provides a wide variety of technical surveillance countermeasure devices.
Without the antennas, the unit itself runs about $600 depending on the source. Direct from MFJ, you’re looking at $649, while Ham Radio Outlet lists it at $580 as of this writing. That may or may not sound like a lot, but keep in mind that by the time you’ve fully built out a station, you’ll be looking at around $1,000. And for best results, you’ll need at least two stations. That price point may be cost-prohibitive for many individuals or mutual assistance groups.
There are also SDR-based systems available. The KrakenSDR, when paired with open-source software like DF-aggregator, is designed to offer a cost-effective automated RDF solution. Complete with antennas, it can typically be had for around $600. However, as of this writing, the system is on backorder through all available outlets, making it a challenge to acquire despite its promising capabilities.
After marking the location of a team, select the point to draw a bearing line.
Manual Solutions
Due to the cost and limited availability of automated solutions, every prepared citizen should have the ability to conduct radio direction finding operations manually. To do this effectively, you’ll need a few basic tools. The following list outlines the essential equipment to get started:
• A radio receiver capable of receiving the type of signal you want to track • A directional, high-gain antenna • Land navigational tools and skills • The ability to communicate between two or more teams
The radio receiver doesn’t need to be overly complicated. At a minimum, you’re looking for a handheld transceiver (HT) capable of receiving on the bands you plan to track. Ideally, the radio should include a relative signal strength indicator to help gauge direction. For those wanting a more advanced option, devices like a HackRF with a PortaPack or a TinySA make excellent choices. These tools offer visual displays of received signals, which can greatly improve your ability to identify and follow transmissions. The best type of antenna for radio direction finding is the “Yagi” style. These can be purchased commercially at reasonable prices or built at home. The internet is full of tutorials for making Yagis using materials like PVC pipe and metal measuring tape, if you’re inclined to DIY. Another solid option is the “fox hunt loop” antenna, which can also be constructed quickly with minimal tools and materials, making it great for field-expedient setups.
Whether you choose a Yagi or a loop antenna, it’s important to know the beam width in degrees. The farther you are from the transmitting station, the wider the area your bearing will cover. Understanding your antenna’s beam width helps narrow the search area and improve accuracy.
For land navigation equipment, you’ll need at minimum a compass and a way to identify your current position — either a map, a GPS, or both, depending on your role. Maps should be as current as possible and include magnetic declination information. Your compass (my personal favorite is the Suunto MC-2) should be adjusted to reflect that offset for your Area of Operations, or as close as possible. I rely on the Garmin Instinct Solar 2 Tactical smartwatch, which includes a GPS receiver, so I always have positional awareness, even when I’m not carrying a separate GPS unit.
Next, you’ll need communications gear and the skills to use it. This means having a radio separate from the one you’re using for direction finding, or another method for staying in contact with other elements on your team. At minimum, you’ll have one other station, but in some cases, there may be three or more. More sophisticated groups using tools like ATAK and mesh networking may combine mapping, location, and communication capabilities into one system. Other options for building a common operating picture include software like CalTopo. However, it’s important to remember that in some scenarios, these tools may be unavailable. Always keep paper maps as a reliable backup in case digital systems fail.
Put in the details of the bearing and label it for future reference, especially if you’re on an active, maneuvering hunt.
Manual Direction Finding
Once you have the equipment, you need to know the skills. So, how does manual RDF work and what are the steps? To illustrate it, I’ll use the following scenario:
You’re part of a group with three separate elements operating together: two patrol units and one command unit. The command unit is in a fixed or semi-fixed position, possibly vehicle-mobile. From their location, they’re running a signals collection system using SDR receivers and a laptop. A digital common operating picture is not available, so CalTopo Desktop is being used locally at the command post. Each patrol unit has been issued paper maps generated from CalTopo to ensure navigation and coordination can continue without digital support in the field.
Command’s SIGINT station intercepts a transmission from an opposition force communicating with their own command element. You and your sister patrol element are alerted and instructed to take bearings from your respective positions to locate the transmitting station, which is broadcasting on a frequency of 147.250 MHz.
While one member of your team confirms your location using a GPS, you attach your Yagi antenna to an HT and tune to 147.250 MHz. With the antenna extended, you slowly rotate until you receive the strongest signal, focusing on maximum signal strength. You then identify a terrain feature in line with the antenna and use your compass to shoot a bearing. Your unit’s RTO reports both your position and the bearing to Command. Meanwhile, the other patrol element follows the same procedure from their location to help triangulate the signal source.
Command, now in possession of both patrols’ positions and their relative bearings to the signal source, can plot the intersection points. Is this the exact location of the transmitter? Maybe not. Remember beam width — a 20-degree beam may seem narrow at close range, but it widens significantly over distance. The result is a zone of probability, not a pinpoint. Gathering more readings from different positions improves accuracy and narrows the search area.
Once you have a reasonable idea of where the opposition is, command can direct the nearest team into the area to fix and finish the opposition.
Find the intersection of the bearing lines to start to get a general idea of where the source of the radio signal is.
Points of Failure
Before we get into TTPs for mitigating RDF being used against you, it’s important to cover a few environmental factors that can interfere with your ability to accurately direction find a transmitting station. First, there are basic radio propagation concerns. Not all DF stations may be able to receive the transmission at all, which makes fixing a position much more difficult. Propagation can be influenced by several variables, including temperature, terrain, and the amount of vegetation in the area — especially when working with VHF and UHF signals, which are more easily blocked or absorbed.
Second, and more common in urban or suburban environments, is signal reflection causing multi-path transmission. In these cases, DF stations may not be receiving the direct signal from the actual source but instead picking up a reflected signal. This can create a false bearing, as the radio waves bounce off buildings or other structures.
Knowing the beam width of the antenna, we can use sectors to give a better understanding of where the source of the radio signal could be.
Practicing RDF
Increasing your chances of success in any endeavor comes down to training for it. One effective method is participating in, or hosting, a fox hunt. Radio fox hunting, also known as radio orienteering, is a recreational event popular among amateur radio operators. The setup is similar to a land navigation course, but instead of navigating by terrain alone, participants must locate a series of waypoints by homing in on low-power radio beacons. It’s a fun and practical way to sharpen your manual RDF skills under realistic conditions.
Many of these events are open to the public and can be found listed on websites such as homingin.com. They’re a great way to practice the skills needed for manual radio direction finding. If you’re part of a mutual assistance or civil defense group, it’s also a good idea to run scenario-based exercises together. Integrating RDF TTPs into your group’s regular training helps ensure that everyone knows how to work as a team and effectively use all available resources when it matters most.
Using bearings to shoot a center line down the arc of the sector can help us narrow down the likely location inside the more general search area.
COMSEC: Defense Against the Dark Arts
In the preparedness community today, it’s become trendy to claim that using unencrypted civilian radios like a Baofeng will get you “killed in the streets” or targeted by an airstrike if SHTF. The usual solution offered? An expensive, digital, encrypted radio. But want to know a secret? If you abuse or misuse those tools, they’ll get you killed in the streets too, just with a higher price tag. At least you’ll have looked good on Instagram before things went sideways. Gear matters, but discipline, training, and smart use matter a whole lot more.
RDF is simply a form of traffic analysis, which means that even encrypted communications are not inherently secure. Encryption protects content, not presence. However, by applying proper radio field craft, you can significantly improve your communications security (COMSEC) and reduce the risk of detection or interception.
Avoid Detection
An ounce of prevention is worth a pound of cure. If your transmission isn’t detected in the first place, no one knows to come looking for you. You can reduce the chance of detection in several ways. Start by limiting your transmission power. Use only as much output as needed to complete the communication. For example, full-power VHF transmissions with full-size antennas are a poor choice for tactical comms between squad members. Instead, use low-power settings and stubby antennas to reduce signal range. This is especially effective in dense vegetation, where propagation is already naturally limited.
Selecting frequency bands based on their propagation weaknesses can also work in your favor. For example, VHF tends to refract more in urban environments, making it harder to pinpoint, while UHF is more easily absorbed in rural terrain and dense vegetation, limiting its range. When communicating over longer distances, such as back to a fixed base, use directional antennas. This requires solid land navigation skills, similar to RDF, but the narrower beam reduces the chance of interception. It also allows you to use less power to complete the transmission effectively.
If you have a general idea of where potential adversaries might be located, you can use key terrain features to your advantage. Vegetation, hills, and other natural barriers can help block or weaken line-of-sight transmissions, making it harder for others to receive your signal or determine your position. Tools like the Viewshed Analysis feature in CalTopo are excellent for planning this ahead of time and identifying terrain that can help shield your communications from unwanted direction-finding efforts.
Be Nimble
While avoiding detection is ideal, it’s not always practical. You may find yourself operating “behind the lines” during a civil disorder scenario, or up against an opponent with multiple fixed or mobile automated RDF systems. In these situations, time becomes your most critical asset. Staying on the move is key. Keep transmissions short and direct. Don’t linger on the air. Using pre-established code sheets for complex but commonly repeated messages can save valuable time. This applies even if you’re using encrypted radios, because the goal here isn’t just secrecy — it’s minimizing how long your signal is exposed to detection.
If you can communicate asymmetrically, even better. Digital modes like JS8Call allow you to transmit a text message that can be received and read later, giving you the advantage of minimizing transmission time. While often associated with HF radio, JS8Call can also be used on VHF and UHF bands with the right setup.
Once you’ve made your transmission, don’t stick around. Move away from your transmission point as quickly and quietly as possible to avoid detection and reduce the risk of being triangulated.
Be Pseudorandom
Even if you do everything else right, using a fixed check-in schedule increases the risk of being found. A consistent pattern gives your opposition a window to listen in, track, and eventually fix your position. Instead, use a check-in schedule that appears random to outsiders but follows a predictable pattern known only to your team. This adds a layer of unpredictability that helps keep you off the radar. Alternating both frequencies and times further reduces the likelihood of someone identifying you or locking onto your transmissions. Randomness, when done with intent, becomes a powerful form of security.
A homemade Yagi antenna can be created quickly and inexpensively. Paired with a TinySA, it becomes a good manual RDF platform without having to rely on a traditional receiver.
What About Technical Countermeasures?
When it comes to technical countermeasures, the most effective is frequency hopping. This technique uses two or more radios synced to the same clock and set to follow a shared schedule, automatically cycling through frequencies during transmission. To the operators, communication appears uninterrupted. But to anyone trying to listen in, they’ll only catch a fraction of a second on each frequency before the signal jumps. By randomly cycling through channels, the chance of a successful intercept or direction finding attempt is significantly reduced. It’s a highly effective method for staying one step ahead. While technologies like Frequency Hopping Spread Spectrum (FHSS) are common in military radios, they’re far less prevalent in the commercial and amateur radio world, though a few products exist. Unfortunately, no FCC-approved amateur radios currently support FHSS or Direct Sequence Spread Spectrum. Some commercial radios, like the Motorola DTR700, do offer these features, but they come with their own limitations and compatibility challenges. The next major technical countermeasure is the use of Near-Vertical Incident Skywave (NVIS) setups with HF. While it is technically possible for national-level intelligence agencies like the NSA or DIA to conduct RDF against NVIS transmissions, doing so requires a level of sophistication and infrastructure far beyond the reach of most non-state actors. This makes NVIS a solid choice for secure regional communication, though it does require more planning, gear, and setup than VHF or UHF systems.
Conclusion
With simple tools and consistent practice, anyone can learn to conduct radio direction finding operations. While those with greater resources may opt for purpose-built, automated RDF systems, even individuals with modest means can get the job done using basic gear like directional antennas, paper maps, and a reliable compass. Skill matters more than the price tag. Becoming proficient with your tools, along with the techniques, tactics, and procedures, takes time and consistent effort. Events like radio orienteering or fox hunting can help you build those skills more quickly in a controlled setting. Incorporating cat-and-mouse scenarios into your group training will strengthen your MAG’s ability to locate and fix transmitting stations. Just as important, it will help you develop the skills needed to protect your own communications against those trying to do the same to you.
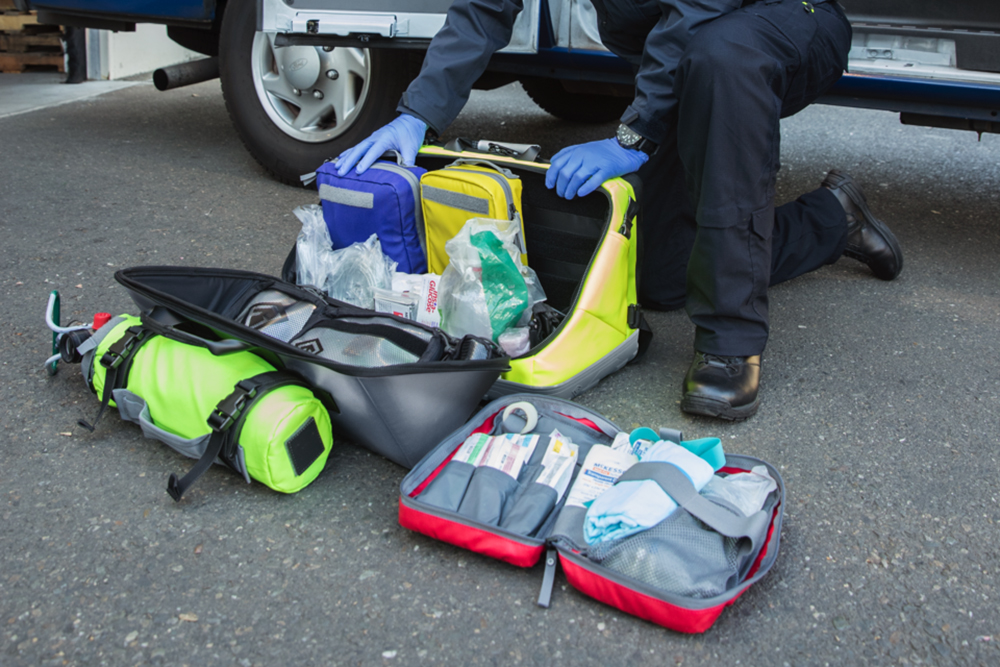
What do you do when you come across a medical emergency? If you’re like most bystanders, you watch and wait until someone else takes action. But for the few who step in, their response can mean the difference between life and death. On average, it takes first responders about seven minutes to arrive and begin care. In a high-traffic area, that wait could stretch longer. In remote areas with limited EMS coverage, you could be looking at 30 minutes or more before help arrives. That means you may be the only line of support during that critical window.
According to the American Heart Association, for every minute CPR is delayed, the chances of surviving a cardiac arrest drop by 10 percent. In this article, we’ll cover when to call 911, how to speak with the dispatcher, and what to expect when first responders arrive.
OPQRST Pain Assessment Mnemonic
O Onset: When did the pain start? Sudden or gradual?
P Provocation/Palliation: What makes it worse or better?
Q Quality:What does the pain feel like — sharp, dull, stabbing, throbbing?
R Radiation: Does the pain move or stay in one place?
S Severity: On a scale of 1 to 10, how bad is it?
T Time: How long has it been going on? Has it changed?
SAMPLE History Medical Assessment Mnemonic
S Signs/Symptoms: What can you see, and what is the patient feeling? A good place to use OPQRST for pain. A Allergies: To medications, foods, insects, or environmental factors? M Medications: What are they taking: prescription, over the counter, supplements? P Past Medical History: Any chronic conditions, recent surgeries, or major diagnoses? L Last Oral Intake: When and what did they last eat or drink? E Events Leading Up to the Injury or Illness: What was happening before the problem started?
Calling 911
What should you expect when calling 911? The dispatcher will ask for the nature of the emergency and the exact location, so take a moment to identify street signs or nearby landmarks before placing the call. They may also ask for your name and phone number in case the call is disconnected.
Stay on the line until the dispatcher says it’s OK to hang up. In most cases, they’ll stay with you until first responders arrive. If you’re assisting an injured person or handling a medical emergency, it’s fine to switch your phone to speaker or hand it off to someone else. You can also ask a bystander to call 911 while you focus on providing care.
As a general rule, if you’re calling about a police or fire emergency, it’s usually best not to rush in. Avoid putting yourself in harm’s way and becoming a second casualty. For medical emergencies, though, there are several ways you can help before EMS arrives.
If you have no medical training, stay on the line with the 911 dispatcher. They can walk you through what to do. At the very least, you can provide updates on any changes in the person’s condition. If you do have some training, offer help based on your comfort level. Even if you’re unsure, keeping the injured person calm by talking to them and distracting them from their condition can make a difference.
Have you considered what to do if 911 services aren’t available? An electromagnetic pulse or natural disaster could knock out all communication systems, including dispatch. In a fire emergency, you may need to send someone directly to the firehouse. That takes time, and time may not be on your side. Hopefully, the fire stays contained, and no one is trapped inside.
If it’s a police emergency, you’ll have to rely on verbal de-escalation and conflict management. With any luck, you won’t need to fall back on combatives or weapons training to stop the threat. In a medical emergency, you do what you can — keep the person stable, communicate with them, and wait for help to arrive. Training for all three scenarios — fire, law enforcement, and medical — should be a priority. It can make all the difference when systems fail.
YOU are the Pre-First Responder
There are many situations where medical or ambulance assistance might be needed. These range from individual emergencies — like chest pain, difficulty breathing, or signs of a stroke — to incidents involving multiple casualties, such as a vehicle pileup. If you’re first on the scene or simply the first willing to act, there are a few steps you can take to help.
Start by assessing the scene for safety. Make sure you aren’t putting yourself or others at further risk. Once the area is secure, begin evaluating each patient. In trauma situations, I prefer to use the MARCH mnemonic: Massive hemorrhage, Airway, Respirations, Circulation, Head/Hypothermia. Stop major bleeding with a tourniquet before moving on to other casualties. If you reach the circulation step and find an unconscious patient, direct a bystander to begin CPR if appropriate. While they focus on that patient, continue assessing others.
In mass casualty scenarios, I recommend using a triage system with color designations. Green is for the walking wounded. Yellow indicates delayed care — these patients need attention but can wait without serious harm. Red is for those needing immediate intervention, as they’re unlikely to survive without it. Black is for those who have already died or are expected not to survive. In these cases, instruct some of the green-coded individuals to stay with the black-coded patients and provide comfort care.
When EMS Arrives
Emergency medical teams will perform their own assessments upon arrival. In a mass casualty situation, direct them to the red triage group first, as those individuals need immediate transport by ambulance. One tool EMTs and paramedics often use is the SAMPLE mnemonic: Signs/Symptoms, Allergies, Medications, Past medical history, Last oral intake, and Events leading up to the injury or illness. This is especially useful for single-patient assessments, though it becomes harder to apply in large-scale incidents. If you’ve applied a tourniquet, record the time and location on the body. If CPR was started, note the time it began.
Another helpful tool is OPQRST, which is used to assess pain. It stands for Onset, Provocation/Palliation, Quality, Radiation, Severity, and Time. These questions can help paint a clearer picture of the patient’s condition and guide further care. Once first responders arrive, ask how you can assist. Step back when needed and always defer to those with greater training or medical authority.
When Law Enforcement Arrives
Reasons to call for police assistance can include an active crime, violence against an individual, a burglary, or a traffic accident. In situations where law enforcement is needed, it’s usually best not to get directly involved. Your role is to observe and report. If a crime has occurred, try to gather a detailed description of the offender. Note their approximate height, weight, skin tone, hair and eye color, clothing, and direction of travel. If a vehicle is involved, record the color, make, model, and license plate — including the issuing state. Count how many people were involved.
When you call 911, be ready to give your exact location, the nature of the emergency, your name, your phone number, and everything you’ve observed. Don’t be surprised if a responding officer follows up to include your statement in their report.
When the Fire Department Arrives
Fire departments typically respond to calls involving smoke, fire, gas leaks, or downed power lines. Many departments also have EMTs on staff who can assist with medical emergencies. If you’re inside a building where there’s smoke or fire, you might be tempted to grab a fire extinguisher or smother the flames yourself. But remember, a fire can double in size every minute. If it’s anything more than a small kitchen mishap, don’t try to fight it. Get out immediately. Don’t waste time gathering valuables. In the case of a gas leak, leave the building and move well away from the property. Stay out until officials say it’s safe to return.
When calling 911, be ready to give the exact address and describe the emergency — whether it’s smoke, visible fire, a gas leak, or something else. They may also ask about the fire’s location and whether anyone is trapped inside. After firefighters arrive, you may be asked for details about what happened. Above all, never re-enter a building that’s on fire or filled with smoke. Conditions change fast, and going back inside could cost you your life.
Color Code for Mass Casualty Triage
RED: (Immediate) Immediate care and transport (e.g., open fractures, chest wounds)
YELLOW: (Delayed) An injury that may need attention, but that can be delayed without significant harm to the patient (e.g., stable single organ wounds, CNS injuries)
BLACK: (Expectant) Deceased or those who are expected not to survive their injuries (e.g., unresponsive, high spinal cord injuries)
In Summary
Clear communication is critical when relaying information to first responders — EMS, police, or fire. The accuracy and detail you provide can literally be the difference between life and death. Never underestimate the value of your observations. Don’t stand by and watch. Help where you can. The best way to prepare is through training, especially in basic medical skills. There are courses available across the country and online that can give you the knowledge to act confidently when it counts. You might be the reason someone survives.
Grinding through a full week at the office or jobsite can wear anyone down, especially when you’re trying to stay motivated for long weekends in the wild. There’s nothing wrong with enjoying the A/C, kicking back by the pool, or cracking open a cold one when the workweek ends — you’ve earned it. But don’t lose sight of the bigger picture. Those 40-plus hours pay for something more: the freedom to pack up and get out there. We’ve put together a collection of gear to make the daily grind a little easier and help stoke your excitement for that next escape the moment you break away from the blacktop and return to real ground.
When you think of a hard-use or tactical watch, the first thing your mind’s eye conjures is probably something big and clunky. In reality, when you look at the men and women out in the field getting after it, you’ll often spot something much lower profile and more streamlined. The Jakkal takes inspiration from classic field watches of the 1950s through the 1970s, more specifically, those worn during the Rhodesian Bush Wars. Its tenacious 38mm PVD-coated case is made from 316L stainless steel for corrosion resistance and all-around resilience.
A screw-down crown ensures the entire package stays watertight. With a smaller case size, legibility becomes even more important, and the domed sapphire crystal delivers; it’s incredibly clear and nearly impossible to scratch. If you’re putting your gear through daily punishment on the job, you need a watch that stands up to recoil, impact, altitude, and submersion. That’s where quartz shines. When missing your mark isn’t an option, reliability matters. For that reason, the Swiss Ronda 713 quartz movement was chosen. Built for high-stress environments and trusted for its durability, the 713 feels right at home inside the Jakkal.
County Comm BIG – Industrial Strength Survival Food Grade Tin and Kydex Belt Holster
You can’t go wrong by starting with a topo design on the cover of your survival gear. Great for minimalist hiking or as an urban survival tin, the BIG Industrial Strength Survival Food Grade Tin is perfectly sized to keep your packing focused on what you need, not what you want. Use it as an escape and evasion kit, a fire-starting kit, a small ouch pouch, or just a Skittles stash. The crush-proof construction offers peace of mind, knowing your gear stays safe during rough travel or over rugged terrain.
Because it’s made with food-grade materials, you can store a compact cache of calorie-dense food or, in a pinch, boil small amounts of water for survival. One of our favorite field hacks is to drop in a couple of tea candles and use it to create a bit of warmth under a poncho while leaning against a tree on cold, rainy nights. The 4x4x2-inch tin fits securely in a handmade Kydex Belt Holster, which comes with a 1.5-inch removable belt clip. It’s simple, sturdy, and built with just the right amount of space to do the job without overcomplicating it.
We know. The coffee at work tastes like burnt garbage. But short of hauling in your own coffee pot from home, what are you supposed to do about it? You’re going to take our advice and get yourself an AeroPress Go. The AeroPress Go is about the size of a standard 12- to 15-ounce coffee mug and is completely self-contained inside its own cup, capped with a lid. Under that lid, you’ll find a scoop, a folding stir stick, paper filters in a clamshell case, the chamber, plunger, and cup.
All you need to provide is your favorite coffee and some hot water. This compact setup is perfect for brewing American or espresso-style coffee, and it can even handle cold brew. No more bitter, burnt-tasting sludge. You can now make great coffee one cup at a time, wherever you are. After a stretch of rigorous (and highly caffeinated) testing, we found that the quality of the brew led to a 30-percent reduction in our usual coffee intake, while keeping focus, energy, and morale high. Turns out, better coffee really does mean better performance.
Anthony Bourdain once said something along the lines of, “You don’t need a big knife, just a sharp one.” That’s exactly what you’re getting with the Mini Bugout 533SL-10. A sleek Woodland Green anodized aluminum handle is paired with a tight-fitting black oxide deep-carry ambi-pocket clip to always keep this trusty sidekick close. With an overall length of 6.49 inches and a blade length of 2.82 inches, you’ve got just enough real estate to stay in control during detailed tasks.
The Mini Bugout shines indoors for daily cutting jobs and holds its own outdoors making kindling, field dressing small game or fish, and handling carving work. Weighing just 2 ounces, it earns its name as a true lightweight companion. The CPM S90V clip-point blade offers plenty of utility across a range of tasks, though you won’t be striking a ferro rod with it — the Crushed Silver Cerakote coating prevents that. Benchmade offers the Mini Bugout in a variety of colors and handle materials, with prices ranging from $180 for the Grivory composite models to $320 for the premium carbon-fiber version.
This Australian import is packed with features you’d expect from a proper “do-it-all” bush knife. With an overall length of 11.22 inches, this thing is an absolute beast. Once your fingers wrap around the G10 grip scales, you’ll feel like you could kill a tank with it. The CPM 3V blade includes a generous amount of jimping, smartly placed at the thumb ramp and at both the top and bottom of the heel for added friction in a reverse grip. Halfbreed added a sizable fuller to help reduce blade friction and lighten the overall weight — a smart move, considering the LBK Gen-2 comes in at 17.46 ounces.
It rides in a Kydex sheath that can be worn either in a scout (parallel) or traditional (perpendicular) carry. It ships with two MOLLE clips to accommodate various mounting setups. The included ferro rod is noticeably small for a blade this size but stays tucked out of the way when you’re deep in the bush. After extended use in the field, we haven’t found the LBK Gen-2 to be lacking in any department. Cheers, mate!
Designed and manufactured from recycled materials in Montana, the Pack Table is a versatile addition to round out your pack loadout. We’ve found it does its best work fireside, keeping card games and meals out of the dirt and mud. Made from rugged polypropylene, the tabletop features a textured cement gray finish and is held together with a shock cord system like how tent poles are strung. Independently adjustable blaze orange legs move in 1-inch increments from 5 to 8 inches.
With stability in mind, Crazy Creek added a spring-assisted opening system to keep the legs locked open when under load. That means you’ll always have a stable surface for your late-night drinks or early morning coffee. To save space and weight, the table packs down to just 6 by 6 by 2 inches and tips the scale at only 19 ounces. For something so small, it pulls a lot of weight. You’ll have no trouble justifying its place in your kit.
Staying hydrated during strenuous activity is crucial, but so is ensuring your water is safe. The Grayl system makes this easy with a smart, streamlined design. Scoop water with the outer cup, keeping the lid and mouthpiece clean. The 24-ounce inner cup, fitted with a base filter, slides in. Just loosen the cap, press down, and clean water is ready in seconds.
It’s effective for everything from rivers to sketchy tap water, making it great for travel, backcountry trips, or emergency kits. Each filter lasts about 350 uses or 65 gallons.
LuminAID delivered big with their incredibly well-designed collapsible LED lantern. You can charge it via solar or plug it into the wall to make sure it’s ready when needed. The Titan uses air pressure to keep the package both collapsed and upright — a surprisingly clever design. The body of the lantern twists 90 degrees to either expand or collapse. To start the process, just pull the airtight, tethered plug on the bottom. This allows air to quickly fill the lens. Once inflated, replace the plug to keep the light standing.
To collapse it, simply reverse the process. Did we mention this device will also charge your phone? The Titan houses an extra-large 4000mAh battery capable of charging most phones two to three times. If your priority is seeing in the dark, you’re covered. The Titan runs up to 100 hours and pushes out as much as 300 lumens. It also features both red and white light modes, depending on your needs. Best of all, it holds a charge on the shelf for over two years, making it a solid option for everything from backpacking trips to blackout kits.
Built to meet the demands of the 18 Charlie — U.S. Special Forces Engineer Sergeants — this bag is ready for changing missions and tough conditions. The Charlie Load-Out Bag lays flat when opened, with loop Velcro throughout the interior to secure the included four 9×10-inch and two 15×7-inch hook-backed, windowed pouches.
It works well as checked luggage, for a shoot house class, or anything in between. At roughly 30 inches tall, 18 inches wide, and 16 inches deep, it holds a serious load, made manageable by integrated rollers. A removable admin pouch tops it off, ideal for small essentials. Available in Black, Coyote, and Multicam.
In the heat of a tragic event, you don’t want to be scrambling to come up with a potentially life-saving course of action. When the game is for all the marbles, you want a solid plan already in place and rehearsed. M.A.D. Gear has designed a well-thought-out Contingency Planner to help you think through multiple scenarios before they unfold. The planner walks you through building an exfil (escape) plan, using an authentication table, card of the day, cipher table, and other helpful references and checklists.
The pages are made from a proprietary synthetic material that’s extremely durable, waterproof, and easy to write, draw, or glue on. Not using a traditional three-ring binder — or worse, a spiral binding — is a smart move on M.A.D. Gear’s part. Three-ring binders tend to break, and spirals get crushed or make turning pages a pain. Instead, the pages are loose and held together with dual ring clips, making it easy to reorganize or remove what you need. These aren’t fragile sheets; they’re not even paper. They’re built to withstand use in the field when failure isn’t an option.
To keep your pistol out of the hands of people who shouldn’t have access, you could go with a giant safe if you wanted. But, in my opinion, the best place to store your handgun is in its holster and on your person. When that’s not ideal, especially when hanging around the house, I favor the StopBox. No batteries to die, no beeping to give you away, and no fumbling with keys or spinning dials while under stress. The StopBox uses a mechanical locking system operated by a combination of five ergonomically placed buttons, keeping curious fingers out while still giving you fast access.
The criteria for a good safe are simple: it needs to offer quick, repeatable access while keeping the contents secure. The StopBox checks both boxes. It’s built from a high-impact resistant, glass-reinforced polycarbonate-ABS blend and reinforced with steel where it counts. Lightweight, portable, and completely mechanical, the StopBox is a smart option when you want fast access without relying on electronics. Perfect for home, travel, or anywhere you might temporarily stage your handgun when it’s not riding on your belt.
It’s getting to be that time of year again. Time to hit the hillsides and open spaces to do a little scouting for your fall game of choice. Sure, you can glass with a solid pair of binoculars — and I often do — but for my money, nothing beats a quality angled spotting scope. Riton delivers the performance of larger, heavier scopes in a package that’s much lighter than you’d expect. Measuring approximately 12.7 inches in length and weighing just 2.75 pounds, this is an optic you won’t leave behind.
The adjustable zoom eyepiece provides solid eye relief, even at extended distances, and the focus stays steady as you increase magnification. The tripod mount uses a standard threaded base, the same commonly found on optics and cameras. That opens the door to a wide variety of mounting options, especially when paired with a conversion base. And when the sun threatens to cook you out of your perfect glassing spot, you won’t be out of luck. The 5 Primal comes with a built-in, twist-out sunshade that extends or retracts with ease. This is a well-balanced scope that’s ready to work when you are.
No matter how long you’ve been spending time in the field, you’re never going to enjoy sitting on cold, wet, or scorching ground. Taking a knee to start a fire or knock out a camp task is always better when you’ve got a little extra comfort. Tuff Possum delivered just that in a lightweight, waterproof, and rugged package. The Multipurpose Sit Pad (MSP) weighs only 4 ounces, including the closed-cell foam insert. With a surface area of 17.5 by 11 inches, and a half inch of thickness, the MSP offers just enough cushion to get the job done.
It doesn’t just keep you dry while sitting or kneeling, it also insulates against hot or cold surfaces. In a pinch, you could lay on it and keep your core off the ground, minimizing thermal loss. A Velcro closure seals the pad inside, but you can pull it out and use the cover as a stash bag, or stuff it with local vegetation to create a makeshift pillow. Every version includes a blaze orange panel on one side for signaling. Available in solid colors and patterns like Multicam, Nemesis Woodland Wolf, Ranger Green, and more.
Lightweight, flexible, breathable, wind-resistant, and quick to dry, the Incline Pants by Rab check all the right boxes. Built from midweight Matrix softshell fabric, they’re deceptively tough. We’ve put in long days wearing these in the field, doing hard work, and, so far, not a single rip or tear. All pockets are zippered with internal mesh to speed up drying. A long-gusseted crotch runs from knee to knee, helping you stay mobile, and drawstring cuffs let you cinch things down when the wind kicks up or when ticks are an issue.
Six belt loops spaced around the waistband accept belts up to 1.5 inches wide, just in case you forgot you’re not lounging in pajamas. The Inclines come in five solid colors: Army, Beluga, Deep Ink, Olive, and Tempest Blue. And thanks to a generous amount of built-in stretch, you don’t need to stress about a perfect fit. Available in sizes from small to XXL and three inseam options: short, regular, and long. They’re built to work, but comfortable enough to live in.
Over the course of the cold months, you got used to the comfort and utility of a hoodie. Just because the mercury is on the rise doesn’t mean that cozy feeling must come to an end. WETWRX has just released their Summer Combat Hoodie (SCH). It’s made from 250D polyester mesh, meaning the SCH holds in zero body heat, absorbs no water, and helps wick away moisture. In fact, the SCH is meant to be added over the top of a wicking system to keep you cool, while also keeping your skin covered, camouflaged, protected from biting insects, and shielded from UV exposure.
While the mesh grid is wide enough to provide plenty of air circulation, we also found it shines as the base for an impromptu ghillie suit by weaving in local vegetation or some jute if you’ve got it on hand. Since 250D poly mesh is tough enough to belly crawl across the forest floor, there is no stretch to this material. Make sure you order your sizing appropriately. At launch, WETWRX is offering the SCH in Coyote, Multicam, and Ranger Green. It’s a hoodie built for summer, not sweating.
But I don’t have any reason to camouflage my pack, you might be thinking. Well, think again. More people are carrying backpacks in public places. We’ve found scrims come in especially handy when needing to enter small, locally owned stores that don’t allow backpacks due to theft concerns. It’s easy to duck off somewhere, pull the scrim from your pack, cover it, and stash it in nearby vegetation, keeping it out of sight from passersby. In more rural settings, the Pack Husk does more than mute colors.
It breaks up the outline and shape of your pack and conceals those uniquely human forms that catch the eye, reducing your visual signature. OPE Gear laser-cuts 500D Cordura for their scrim products, making them tear-proof, uniform, lightweight, and tough. OPE Gear’s material is also NIR compliant, anti-glare and shine, UV resistant, and resistant to mold and water. The Pack Husk fits pack sizes from 10 to 30 liters, with a shock cord drawstring to keep things snug. Available in a dozen different camouflage patterns and three solid colors. Simple concept, clever execution.
“Bad for running. Worse for fighting.” That’s been the motto of Combat Flip Flops since day one, until now. The Shadow Ban breaks that mold. Don’t let the low-profile design fool you. These aren’t just lifestyle sneakers. They’re front-line capable footwear disguised as everyday lace-ups. What looks like an ordinary pair of casual high-tops is actually duty-grade workwear with attitude. It all starts with the proprietary “Sticky AF” outsole, delivering serious traction. That’s backed by a custom EVA midsole offering real arch support and lasting comfort. A reinforced leather toe cap and tongue give you the protection you need on the job or in the field. And the rugged canvas upper pulls it all together.
This is a door-kicker that doesn’t back down and doesn’t quit. Eight eyelets stretch from the forefoot to above the malleolus, creating a snug, even fit from top to bottom. It’s only available in whole sizes, but the updated design gives you extra room where it counts, especially in the toe box. If you’re between sizes, go up. You won’t regret it. A lifetime warranty backs the quality you’d expect from CFF. Right now, they’re only offered in black — just the way we like it.
Top Picks
As summer starts to wind down across much of the U.S., we can expect large swings in daily temperatures. With that in mind, we chose the Rab Incline Pants and WETWRX Summer Combat Hoodie as our two standout products. When it comes to spending long days outside, it’s critical to shield yourself from the elements and stay comfortable while doing it.
Rab’s Incline Pants are lightweight and highly functional. Just as comfortable navigating a crowded airport as they are moving along a ridgeline, they’re a versatile addition to any wardrobe or kit. The WETWRX Summer Combat Hoodie is equally impressive. Built from durable 250D mesh, it allows airflow to keep you cool while keeping the sun and biting insects off your skin. It doesn’t hold moisture, making it ideal for high-output activity. Its utility goes beyond personal wear — it can double as camouflage or be used to conceal gear from view. We’ve even tested it as the base for an improvised ghillie suit.
At the time the photos were taken for our “Top Two,” temps hit 93 degrees F with 67-percent humidity. The gear kept us comfortable and dry and, notably, bite-free. These two earn their place in the field.
Communicating during a disaster is incredibly challenging. Even in everyday situations, communication is a complex process for anyone involved in an exchange. Add the stress and urgency of a crisis, and things can go wrong quickly. In times of disaster, human beings often struggle to absorb life-saving information effectively. We process messages differently under pressure, retain little of it, and respond unpredictably. In fact, during such high-stress moments, people often revert to simpler levels of understanding, meaning the information shared must be clear and simple enough for a sixth-grader to grasp.
Crisis communication should be approached from both the perspective of the listener and the spokesperson. According to the latest Gallup Poll, only 20 percent of U.S. citizens expressed a fair amount of trust in the federal government, while others may feel completely neglected. For emergency responders, understanding these challenges is crucial in bridging communication gaps and building trust with the public. So, how can emergency response agencies effectively deliver life-saving information to their audiences? And equally important, how can those audiences remain open to receiving and acting on that information when their decisions may be a matter of life or death?
Community trust is vital in crisis communications; it helps ensure that the public follows safety instructions and cooperates with emergency responders. During a disaster, transparent, honest, and consistent messaging fosters trust, reducing panic and confusion, and empowering communities to stay resilient and respond effectively to the crisis.
Clear & Accurate Communication
Effective disaster communication is vital to ensuring the safety, well-being, and recovery of affected communities. When disaster strikes, it is the timely, clear, and accurate communication from response agencies that can mean the difference between life and death. The primary goal of disaster communication is to provide residents with the information they need to protect themselves and take appropriate action.
Clear communication is necessary to keep the public informed of risks and safety instructions such as evacuation orders as seen during Hurricane Katrina. In times of crisis, emotions are high, and the ability to quickly deliver concise and accurate messages helps prevent confusion and panic. Miscommunication or delays in disseminating information can have devastating effects, as people may not receive the necessary warnings to take life-saving measures in time.
STRAWBERRY, CALIFORNIA, UNITED STATES – 2021/08/26: View of burning trees as the Caldor Fire grows to the Tahoe basin. The Caldor fire has grown to over 130,000 acres and threatens to grow to the Tahoe basin. These images where taken at a backfire set by crews in an effort to gain control on the Caldor fire. Cause still unknown at this time. (Photo by Ty O’Neil/SOPA Images/LightRocket via Getty Images)
Risks of Poor Communication
The consequences of poor communication during a disaster are severe and multifaceted. Misinformation is one of the most dangerous byproducts of ineffective communication. During the 2004 Indian Ocean tsunami, rumors and contradictory information spread through the affected regions, leading to confusion about the scale of the disaster and evacuation plans. In some cases, local authorities were slow to issue clear warnings, and public confusion led to people being caught off-guard by the waves resulting in thousands of avoidable deaths.
Panic is another significant risk associated with poor communication. When people don’t receive accurate or timely information, they may make irrational decisions driven by fear, such as attempting to flee in an uncoordinated manner or ignoring evacuation orders altogether. This chaos not only jeopardizes their safety but also complicates the efforts of emergency responders who are trying to help. The good news is that panic is not as common as we may believe during a disaster. According to the American Psychological Association (APA), “Panic during disasters is much less common than people tend to believe.” The National Research Council report titled “Disaster and the Community” from 2011 confers with the APA and states that “studies of mass disasters consistently show that, rather than panic, most people exhibit calm, cooperative behavior.” While this is all good news, it is important for communicators to always hope for the best yet plan for the worst as they traverse down a potential rabbit hole of deep distress.
Adding to potential problems, delays in communication, or failure to relay clear instructions, can result in delayed responses to critical needs such as medical assistance. A lack of coherent information about where to find supplies or how to get to safety can leave people stranded or without resources, exacerbating the disaster’s impact. Past disasters provide ample evidence of how communication failures can amplify the devastation. Take, for example, Hurricane Katrina in 2005. Poor communication from government officials and agencies led to widespread confusion and inefficiencies in evacuations and rescue operations. Many people in New Orleans did not receive timely warnings about the severity of the storm or the need to evacuate, particularly in low income or predominantly African American neighborhoods. As a result, thousands were left stranded in dangerous conditions, with inadequate resources and no clear guidance on where to seek refuge. Recognizing the diverse needs of a community is essential for effective disaster communication. Communities are often made up of individuals from various cultural, demographic, and linguistic backgrounds. Understanding this diversity allows emergency responders to communicate in ways that resonate with all members, ensuring that life-saving information reaches everyone. Cultural norms and values can influence how people perceive authority figures or how they respond to directives. Some populations may have a mistrust of government agencies, while others may be more reliant on community leaders. By acknowledging these differences, emergency responders can tailor their messaging to increase receptivity and ensure a unified, effective response.
Crisis communication during a disaster is incredibly stressful as responders must balance the urgency of delivering accurate information with the need to manage public fear and confusion. The pressure to make quick decisions, handle misinformation, and coordinate with multiple agencies can be overwhelming. Clear, calm communication is essential to ensuring safety and maintaining public trust amid chaos.
Before the Disaster
Community engagement is critical for building a foundation of trust and preparedness before disaster strikes. Emergency responders should establish ongoing relationships with community organizations and residents, ensuring that they are well-informed about available resources and emergency procedures. Pre-disaster outreach, such as education campaigns, help to familiarize the public with the necessary actions they must take during a crisis while also reinforcing the credibility of emergency agencies.
The more involved and informed a community is ahead of time, the more likely individuals will feel prepared and empowered to respond effectively when disaster occurs. By prioritizing engagement, responders can also identify unique community needs or vulnerable populations such as the elderly. Tailored preparedness programs can then be developed to ensure that all residents are equipped with the right tools to protect themselves during a disaster.
Building Trust & Transparency
Trust is fundamental to disaster communication. If emergency responders have not established a strong, transparent relationship with the community before a crisis, their messages may not be taken seriously or followed. Building trust is a long-term effort that involves consistent, honest communication and active involvement in the community throughout normal times. Dr. Barbara Reynolds is a retired deputy director of external affairs with the Centers for Disease Control and Prevention (CDC) and wrote the book on Crisis & Emergency Risk Communications. She informs us that “it’s vital to make an emotional and psychological connection with your audience at the initial stages of the disaster that’s occurring, especially if you’re back at a headquarters doing something that’s got your attention focused elsewhere. It’s an investment in both your community and communication to make sure that you’re doing the best you can to keep them informed and develop that trust-based relationship with them.”
By engaging with local leaders, listening to the concerns of the public, and demonstrating a genuine commitment to residents’ well-being, responders can create an environment where the public is more likely to heed warnings and take the necessary steps for safety when a disaster occurs. Effective disaster communication is a critical element in saving lives and reducing the overall impact of a crisis. To ensure that people can make informed decisions, emergency responders must adhere to key principles that guide the way information is disseminated. The principles of timeliness, clarity, consistency, actionable information, credibility, and the use of multiple communication channels are essential for effective communication and community safety.
Timely and factual communication is essential during a disaster to provide clear guidance and ensure public safety. Accurate updates help people make informed decisions ultimately supporting an efficient and coordinated response.
Timeliness: Real-Time Updates
One of the most important aspects of disaster communication is timeliness. In emergencies, situations evolve rapidly, and residents need real-time updates to make informed decisions. Regardless of the disaster, timely communication allows people to understand the current situation and take immediate action. Delays in providing updates can cause unnecessary risks, as communities may not be able to prepare or evacuate in time. Providing constant updates through reliable channels, even when new information is minimal, helps reassure the community and encourages proactive safety measures.
Clarity: Simple, Clear Language
Clarity in communication is crucial, especially during a disaster when emotions are high, and people are under stress. Complex or technical language can confuse or overwhelm the audience, increasing the risk of individuals missing vital information or misinterpreting warnings. Emergency communication should be straightforward, avoiding jargon or unnecessarily complicated terminology. Instead of saying, “Evacuate to the designated shelter area,” a clearer message would be, “Go to the school gymnasium on Maple Street for shelter.” The use of simple, action-oriented language helps ensure that everyone, regardless of education level or background, understands the message and knows exactly what they need to do to stay safe.
Consistency: Avoiding Confusion
Consistency is another fundamental principle of effective disaster communication. During a crisis, conflicting messages from different authorities can lead to confusion and chaos. It is crucial that all sources (local, state, and federal agencies) deliver consistent and unified messages. This helps ensure that people are not receiving mixed signals, which can cause them to act in contradictory ways. If local government authorities issue an evacuation order while a federal agency reports that conditions are not yet dangerous, the public might be left unsure of how to respond. Having clear communication protocols in place and ensuring coordination between agencies is key to maintaining consistency during a disaster.
Actionable Info: Providing Practical Steps
Disaster communication should provide clear, actionable information that allows people to take the necessary steps to protect themselves. Warnings are important, but they need to be accompanied by specific instructions on what to do. Telling people to “evacuate immediately” or “take shelter” is not enough. Specifically telling your audience to “take shelter in an interior room away from windows” offers a very particular course of action that helps alleviate stress and gives the listener a sense of control and ownership often needed during times of disaster. The clearer the instructions, the less likely people are to hesitate or second-guess their actions during critical moments.
Credibility: Trustworthy Sources
In a crisis, misinformation spreads quickly, especially with the rise of social media. To prevent confusion and panic, it is essential that emergency communication comes from credible and trusted sources. Government agencies, local emergency response teams, and reliable news outlets should always seek to be trustworthy in the eyes of the public so that disaster recommendations are acted upon. Additionally, before disseminating any information, authorities should verify the facts to ensure accuracy. False or unverified information can result in widespread fear or, worse, dangerous actions taken based on incorrect assumptions.
From the viewpoint of the listener, this has become increasingly difficult, if not almost impossible, with political bias prevalent in news agencies today. Randy Retter, an elected sheriff from Wayne County, Indiana, and subject matter expert in safety, relates our need to gain trustworthy sources of information from multiple sources. “When we are encompassed in a digital world, we are only using two of senses, which are sight and sound. In a disaster, all our senses, including our sense to think logically, are available to us. If we’re faced with a situation where we need factual information, even if we’re not completely prepared for it, we’ve got to use most of our senses to often make the best decision on what to trust.
“We don’t always receive that, so we’re forced to make a potentially bad decision based on incomplete information. I’m afraid that’s what’s quickly happening to our nation today.” There may not be a concrete answer to uncover all the facts during a disaster. The most effective way to determine factual information is to perform your own research and get an overarching view of what all news agencies are saying. It’s not perfect, but at least you’re not being spoon-fed information the benefits television ratings and not yourself.
Multiple Channels: Reach a Broad Audience
Finally, leveraging multiple communication channels is essential for reaching as many people as possible. Reynolds continues that “there is an opportunity for us to do a better job of managing the communication loop. It’s important to understand that there are best practices, but there is not just one way to communicate.”
She’s right. In today’s digital age, relying on just one communication method, such as radio or TV, can leave certain segments of the population uninformed. Social media platforms, websites, emergency apps, text messages, and traditional media outlets all play an important role in disseminating information quickly and widely. Social media, for instance, allows emergency responders to post real-time updates, while mobile apps can send push notifications directly to people’s phones. Traditional media like radio and TV are still critical for reaching those without internet access. A multi-channel approach ensures emergency messages are reaching the widest possible audience, especially in communities with varying levels of access to technology.
The effectiveness of disaster communication lies in its timeliness, clarity, consistency, credibility, and actionability. By adhering to these key principles and utilizing multiple communication channels, emergency responders can ensure that their messages reach those in need of information, helping communities stay safe and recover more quickly during and after a crisis.
Post-Disaster & Recovery
Effective communication doesn’t end once the immediate disaster threat has passed. In fact, the recovery and rebuilding phases require just as much, if not more, attention to ensure that communities receive the support they need to heal and rebuild. Ongoing communication during recovery plays a critical role in maintaining public safety. During the recovery phase, it’s essential to continue providing clear and actionable information to the community.
This includes updates on available resources such as shelter, food distribution, financial aid, and mental health services. As communities begin rebuilding, regular communication is needed to share progress, outline safety precautions, and direct people to available resources. If your local road access to certain areas becomes clear, informing residents can help them return home safely. Emergency responders and local authorities must continue to be visible, accessible, and responsive to the evolving needs of the community.
Feedback & Lessons Learned
Another crucial component of post-disaster communication is gathering feedback from the community. After the disaster, emergency agencies should solicit input from residents about the effectiveness of the communication during and after the event. This feedback can be gathered through a variety of means such as surveys and town hall meetings. Analyzing this feedback helps identify areas for improvement, whether it’s the clarity of messaging or the accessibility of resources.
Incorporating lessons learned into future disaster communication plans ensures better preparedness for the next crisis. Post-disaster analysis offers valuable lessons. Past events, like Hurricane Katrina or the California wildfires, have highlighted the importance of timely, clear, and coordinated messaging. Agencies that communicate transparently and consistently build trust and reduce confusion during recovery.
Empowerment & Resilience
Proper communication can also empower individuals and communities to take control of their recovery. When people have access to accurate and timely information, they feel more confident in their ability to rebuild. Empowering the community with knowledge about available assistance fosters resilience. This enables them to recover more quickly and emerge stronger, both emotionally and practically, from the disaster. Effective post-disaster communication not only supports recovery but also helps to build a foundation for long-term resilience in the face of future challenges.
Getting it Right
Effective communication by emergency responders is crucial in ensuring a coordinated and successful response to disasters. When emergency situations arise, clear, accurate, and timely communication can mean the difference between life and death. It enables responders to quickly assess the situation, allocate resources efficiently, and relay critical information to the public and other agencies. Effective communication, however, goes beyond just relaying information.
Disaster communication establishes trust within the community and provides reassurance, thus ensuring that all parties involved are on the same page. This is why ongoing preparedness and training are essential. Responders must regularly engage in communication drills, improve their technical and interpersonal skills, and be committed to honest dialogue in both chaotic and calm times.
When responders communicate transparently and effectively, they build public confidence and facilitate smoother operations on the ground. Disaster communication, performed correctly, creates a foundation of trust that keeps us safe and informed during times of crisis. While not at the forefront of all emergency responders, communicators should fight to find a seat at the planning table. Emergency-based communication truly is the glue that holds disaster response efforts together, fostering a stronger, more prepared community ready to face whatever challenges may arise. When time is essential in saving lives, proper communication is indeed a vital step in getting emergency response right for our safety … and that is what truly matters.
Instructions like “evacuate immediately” or “take shelter” are too vague, and can unintentionally put people in harms way. Instead, “take shelter in an interior room away from windows” is much more precise and affords people a greater chance of survival.
Impact on Vulnerable Populations
Crisis communication is crucial in ensuring that all individuals, especially vulnerable populations, receive timely, accurate, and accessible information during disasters. Vulnerable groups, such as the elderly, individuals with disabilities, non-native speakers, and those with limited access to technology are at higher risk during emergencies, not only due to physical or situational limitations but also because they may face barriers in receiving critical updates.
Accessibility: Crisis communication must ensure that vulnerable populations, such as the elderly, disabled individuals, and non-native speakers, have access to critical information through multiple channels (e.g., radio, text, social media, in-person outreach).
Clear, Simple Messaging: Information should be straightforward, using simple language and visuals to make it easier for everyone to understand, especially those with limited literacy or cognitive abilities.
Language Support: Messages should be translated and include cultural considerations to accommodate non-English speakers or individuals with limited language proficiency. Technology Access: Recognize that some vulnerable individuals may lack access to modern technology, so traditional methods like printed materials or community-based announcements are essential.
Targeted Outreach: Engage with vulnerable populations directly through tailored outreach, such as providing sign language interpreters or dedicated helplines, to ensure they receive necessary guidance during a crisis.
About the Author
Mark Linderman is the owner of Disaster Initiatives, an online company that provides communication leaders with the tools needed to address their communities and the media throughout a crisis, teaching the communicator to approach crisis communication from the listener’s perspective. He is a certified emergency manager (CEM) and 19-year veteran of Public Health. He instructs Crisis & Risk Communication and Disaster Preparedness courses for seven universities, including Indiana University’s Fairbanks School of Public Health. Linderman is considered a subject matter expert in the field of disaster-based communication and is a widely received public speaker and advocate for disaster preparedness.
Modern technology has created numerous ways to keep lines of communication open. Cell phones and tablets keep us connected while on the go, and computers and smart devices make communicating with anyone in the world fast and efficient. All this can happen because of a complex infrastructure of cell phone towers, miles of cables, and submarine fiber connecting the continents.
Even with a vast infrastructure in place, those of us who spend time in the wilderness often encounter places where our mobile devices have no signal. Even many rural areas have spotty and limited coverage despite having an established population. The complex network that keeps our communications lines open is incredibly fragile. Natural disasters, human conflict, and sometimes the simple deterioration of equipment over time can all lead to mass outages of the communications networks we rely on to get in touch with others.
Staying connected is not just important for us socially or for business purposes, it also allows us to contact loved ones in an emergency and get aid from emergency services when needed. There are numerous communications solutions out there. Many require significant skills to use properly and often come with a hefty price tag, which can deter people from establishing vital backup communications.
Fortunately, ZOLEO has created an easy to use and cost-effective option to keep us in touch with not just our loved ones but also provides us access to emergency services and much more.
This palm-sized device packs a lot of power, providing a direct link to emergency personnel, and turns your phone into a satellite-powered text communicator.
What is ZOLEO?
Simply stated, ZOLEO is a text-based satellite communications device that was designed to provide users with the ability to contact others and get help in an emergency when off-grid. It was designed to provide the most vital function of contacting emergency services as a stand-alone device, but by connecting it to a smartphone, opens a wide range of communications services to allow users to connect with people when operating in areas that lack traditional cellular service.
How Does it Work?
ZOLEO operates on the Iridium Satellite Network. The Iridium network is a well-established network that covers 100 percent of the globe and is relied on by individuals, businesses, and governments all over the world. Iridium does not rely on any ground-based infrastructure, allowing connected devices to function in the wilderness, disaster areas, and conflict zones. Iridium’s satellites use low band L frequencies and maintain low earth orbit that continues to be reliable in harsh weather.
ZOLEO takes connection further by also allowing messages to be sent through Wi-Fi and cellular networks when connected to a smart device, allowing for messages to be transmitted in the fastest and most efficient way possible.
The SOS button is covered by a latch door to prevent accidental triggering.
Handling the Harshest Conditions
The ZOLEO is a tiny but mighty device. The durable outer body is designed to handle falls, wet weather, intense summer heat, and the harsh winter cold. It’s rated IP68, meaning it is completely sealed from dust entering the internal components and is rated to withstand water submersion at 1 meter for at least 30 minutes. No matter where you find yourself, the ZOLEO is capable of withstanding whatever challenges Mother Nature throws at it.
Utilizing an internal rechargeable battery, the device has enough juice to keep the device operating for up to eight days while off-grid. The internal battery is protected, minimizing battery power degradation from heat or cold.
ZOLEO devices, as expected, have internal radios to connect to the Iridium network. They also have GPS and GLONASS radios that are commonly found on navigation devices, providing accurate location data up to 8.2 feet under ideal conditions. The device also incorporates Bluetooth to connect to smart devices.
The check-in feature allows you to send a message to preselected individuals with your location.
Stand-Alone Use
Core emergency-use functions do not require a phone connection, meaning you can access help or check in with a loved one even if your phone is lost, damaged, or has no power. The ZOLEO will automatically send a message to preselected numbers, and an SOS button will send a message to emergency services. Thanks to the internal GPS and GLONASS, the device will transmit your location to the intended party via a push of the button.
The SOS button is protected by a small latch door that must be lifted before activation, helping prevent accidental use. Once pressed, the unit will emit a red LED light to confirm the message has been received by emergency services. If triggered unintentionally, the SOS can be canceled within the first 10 seconds by holding the button down for 5 seconds. A green LED will appear to indicate that the “all clear” signal has been sent.
When the SOS message is triggered, it connects with emergency services and sends location-based alerts to your preselected contacts. While staying put is usually best in a wilderness emergency, there are times — due to weather, flash flooding, or aggressive wildlife — when you may need to move. The ZOLEO team accounted for this in the SOS design, ensuring it continues to transmit updated location data every six minutes. This provides rescuers with real-time tracking, even if your situation forces you to relocate.
To facilitate SOS messages, ZOLEO partners with Global Rescue, an organization that operates in over 200 countries. When an SOS is triggered, Global Rescue communicates directly with the nearest emergency services or wilderness first responders in your area to coordinate and dispatch the help you need as quickly as possible.
The Medical Assist feature allows you to get in touch with medical professionals while off-grid. This feature comes as a standard part of all ZOLEO plans.
Smartphone Synergy
As a stand-alone device, ZOLEO gives you essential emergency communication and the ability to check in with preselected contacts. But when paired with a smartphone, it really shines. ZOLEO offers a free app for both Apple and Android devices that lets you adjust settings, install software updates, and send messages via satellite. The app also imports your phone’s contacts, allowing you to text directly from ZOLEO’s dedicated phone number or email from your customizable ZOLEO email address. This integration turns your phone into a full-featured satellite communicator while keeping you connected when cell service is unreliable or nonexistent.
The app also supports the SOS feature. Unlike stand-alone mode, it allows you to engage in text-based chat with Global Rescue personnel. Just like the device alone, accidental SOS activation can be canceled if triggered unintentionally, and your location will continue to update every six minutes. This ensures emergency services receive real-time tracking, whether you’re stationary or on the move.
Another valuable text-based feature is Medical Assist. This service connects you with doctors to discuss medical issues or injuries that don’t require an emergency extraction while off-grid. In my opinion, this is one of the most useful features available. I always recommend that anyone spending time in the outdoors pursue Wilderness First Aid or Wilderness First Responder training. But the reality is only a small percentage do. Even with training, situations can arise that go beyond what’s covered in those courses. Having 24/7 access to medical advice from licensed professionals can help manage everything from minor injuries to waterborne illnesses while you’re still in the field. Best of all, there’s no extra charge for this service. In some cases, it might even help you avoid unnecessary medical bills once you return to civilization. It’s peace of mind that pulls its weight.
The app also includes a section for weather information based on your current location. While this might be an afterthought in day-to-day life, in the wilderness, accurate local forecasts can be critical. Knowing what’s coming allows you to plan movements, avoid areas prone to flash flooding, and stay ahead of unexpected severe weather — all of which can make the difference between a smooth trip and a dangerous one.
Both the ZOLEO unit and app give you access to the SOS feature, but when using the app you can have text-based communication with emergency dispatch personnel.
Practical Uses
We covered how the ZOLEO works, but let’s cover a few of the practical applications of this versatile communications device:
In the Wilderness
The ZOLEO was built to be a reliable communication device when navigating the wilderness. Most remote areas have little or no cell service, and even smaller trail systems in rural regions can leave you disconnected fast. Staying in touch with family at home or members of your group while operating off-grid is important. ZOLEO provides that capability in a compact, nearly indestructible package.
Beyond basic communication, ZOLEO offers a lifeline to potentially lifesaving medical and emergency services. Emergencies are not limited to remote regions. They can just as easily happen in local state parks or small preserves. Two miles down, a trail can feel like a very long way if you or someone in your group can’t walk. ZOLEO helps bridge the gap between convenience and safety, offering peace of mind no matter how far you are from the nearest signal tower.
Not just for the wilderness, ZOLEO makes a great addition to an urban survival kit so that communication can continue if the grid is down.
The Concrete Jungle
The ZOLEO may have been built for the wilderness, but it’s just as useful during grid-down scenarios and other emergency situations in urban environments. We know our communication systems are fragile. Weather events and natural disasters can damage infrastructure and cut off traditional methods of communication. But if ZOLEO has a clear view of the sky, it can continue to transmit messages.
Access to medical professionals and the SOS feature can be lifesaving in an urban survival emergency, especially if you’re injured, trapped, or otherwise unable to move. ZOLEO gives you a direct line out when everything else goes dark.
Travel Safety & Security
Road trips can be fun, but an unexpected breakdown, medical emergency, or accident in a remote area becomes a serious problem if you don’t have cell service. Being able to contact others in these moments can save valuable time and help get the right services to your location quickly. Using your cell phone while traveling abroad can also be expensive. ZOLEO works in over 200 countries, giving users the ability to communicate without relying on an international cell plan. It also provides access to emergency services if needed, making it a smart travel companion no matter where you’re headed.
The charging port is protected by a durable sealed latch to keep water, dirt, and grime out.
Pricing & Additional Services
The MSRP of the ZOLEO is $199, placing it on the lower end of the cost spectrum for satellite communication devices. Like all reliable sat-com options, ZOLEO uses a tiered subscription plan. Pricing starts at $20 per month for users who plan to send 75 messages or fewer and goes up to $50 per month for those who need unlimited messaging. All plans include a dedicated phone number and email address, unlimited check-in messages, SOS services, and access to Medical Assist.
One optional add-on is Enhanced Check-In, which provides selected contacts with a breadcrumb trail of your movement. This service adds $6 per month to your subscription. Another optional feature is the Field Rescue Membership, which covers up to $50,000 of the cost of a single rescue and hospital transport. As with most insurance-type offerings, there are limitations and conditions in the fine print. However, the additional $40 per year is significantly cheaper than footing the bill for a wilderness extraction on your own.
The ZOLEO can be easily attached to your pack or gear, ensuring it is always in reach if you need it.
Final Thoughts
Cell phones have become the standard for communication around the world, but they’ve proven time and again to be unreliable in the wilderness and during emergency situations in urban areas. Having a backup communication method is essential for contacting others and reaching emergency services when it matters most. ZOLEO offers a durable, reliable, and easy-to-use platform for those who need basic messaging and access to emergency support. While the device does not support voice communication, it costs a fraction of what you’d pay for a satellite phone or for the training and equipment needed for more complex communication systems.
ZOLEO’s ability to function as a stand-alone device can be the difference between life and death in off-grid emergencies. Its capability to turn your smartphone into a satellite-based messaging system opens a wide range of practical and lifesaving uses. Even as modern smartphones begin offering limited satellite features, ZOLEO’s connection to the proven and stable Iridium satellite network makes it the more dependable and capable option.
In the follow-up to his #1 Amazon bestseller, The Guerilla’s Guide to the Baofeng Radio, which details the setup, programming, and use of the Baofeng radio, NC Scout dives into the next logical step of collecting signals intelligence (SIGINT) with common off-the-shelf equipment and how to exploit this information.
“We kill people based on metadata.” –General Michael Hayden, director, National Security Agency
The 411
As the popularity of the Baofeng radio has surged, Scout delivers a deep dive into the world of SIGINT. Communications are the lifeblood of any operation, and this manual lays out how to monitor, collect, and turn raw signals into usable intelligence. The guide is divided into five main sections and two appendices, exploring tools of the trade, targeting methods, collection strategies, and exploitation techniques. It opens with “A Crash Course in the Process of Intelligence,” introducing the concept of collecting information through patterns of life. While many think of these patterns as physical routines — wake times, habits, known associates — the electronic footprint tells just as much. Action indicators, such as unusual transmissions or irregular device usage, can reveal more than what’s visible on the surface.
The next section breaks down “Tools of the SIGINT Trade.” A simple setup can start with a compass, a basic receiver, and a Baofeng. Scaling up brings more capability but also requires more investment and skill. As the saying goes, “Speed costs money — how fast do you want to go?” The guide outlines gear such as spectrum analyzers, software-defined radios, and other advanced tools. The third segment zeroes in on what may be the most critical element of SIGINT: the antenna. It explains the different types, when to use them, and how to build improvised versions in the field. From there, the material moves into collection and targeting, emphasizing the importance of building a signals baseline before making any moves. The final section ties everything together with tactical signals exploitation. Once you’ve gathered your intelligence, it’s time to decide what to do with it. You can remain passive, take indirect action, or engage directly — either overtly or covertly.
The Verdict
The Guerilla’s Guide to Signals Intelligence is a must. Scout lays out the process in an understandable way to anyone without prior experience. SIGINT is a powerful weapon that has toppled numerous governments but is frequently misunderstood and, therefore, overlooked. I highly recommend this book. Scout is the pseudonym of a former member of one of the U.S. Army’s premier reconnaissance units with two combat deployments to Iraq and one to Afghanistan. He runs Brushbeater Training and Consulting, which teaches courses on small unit tactics, communications, and survival based on skills he learned while serving to prepare people for uncertain times ahead. He is the owner and senior editor of American Partisan and can be found on his podcast, Radio Contra.
About The Book
Book & Author: The Guerilla’s Guide to Signals Intelligence Written By: NC Scout Publisher: Independently published MSRP: $24.99, paperback Pages: 132 URL: brushbeater.store or amazon.com Rating: Thrive | Survive | Die
After I turned 50, I got it into my head that I wanted a brand-new vehicle, not used, just once in my life. Our minivan was about 22 years old and Midwestern winters had taken their toll on the body, so it was time for an upgrade.
We ended up buying a dealer’s demo model that had fewer than 2,000 miles on it. It has so many gadgets and gizmos, I feel like I’m piloting a spacecraft. While we’re still learning how everything works, I wanted to get the van outfitted properly for the numerous road trips we have planned. I think one of the best parts about getting a new-to-you vehicle is customizing it for your needs. Enter the AP Premium Bag from KY Handcrafted. AP stands for All-Purpose, and that’s precisely what this bag is. It’s the ideal size for any number of assignments. I picked one up a few months back without a specific use in mind. I just recognized that it would be great in several different roles.
Once we got the new van, the first thing I did was grab the AP Bag to build a small emergency kit. We’ve got a lot of travel lined up, including some multi-state trips where we’ll be away from home for a week or more. The goal for this kit is simple: keep essential emergency items close at hand and easy to find. This isn’t a doomsday setup — it’s for the curveballs, like an unexpected overnight in the middle of nowhere. An all-purpose bag for an all-purpose kit, right?
The AP Bag Premium edition features two Velcro panels on the inside, as well as a high-vis interior color to make it easier to find what you need.
The Bag
There are two models for the AP Bag, Basic and Premium. They’re both the same size, running 12 inches long, 8 inches tall, and 6 inches wide. Both are constructed from 1000D Cordura. They each have 1.5-inch carry handles as well as a 1.5-inch-wide shoulder strap. The carry handle straps go all the way around the bag, rather than just being stitched into place at the top. The shoulder strap attaches via G-hooks, so it’s easy enough to remove as needed.
The AP Bag, Basic or Premium, is available in Multicam, Multicam Black, Ranger Green, and Woodland Camo. The Basic is also available in straight black. I went with Multicam Black, simply because I wasn’t sure what role the bag was going to play at the time of purchase. I figured it was a good middle-of-the-road option between the available patterns.
Where the bags differ are with a few bells and whistles that are included at the Premium level, which is the bag we’re featuring here. The Premium’s interior is a high-vis color, and there are Velcro panels for attaching aftermarket pouches or pockets. The exterior has a zipper pocket on one side and an open top pocket on the other. There is also PALS webbing on one side so you can add an exterior pouch if desired.
Along the top is a Velcro strip where you can add a name tape. I ordered my name tape from an outfit called armynavywisconsin/CollarsUSA on Amazon. They did great work and only took a few days to get it shipped out to me.
What’s in the Bag?
The beauty of sticking to a smaller bag for a survival or emergency kit is that it forces you to think hard about each potential addition. You find yourself paring things down to the bare necessities, rather than filling it with a ton of luxuries right off the bat. The intention of this kit is to provide for our basic needs for a short period of time. This isn’t any sort of run to the woods to live off the land kit.
One of my primary goals as I put this together was to avoid buying anything special for the kit. I wanted to assemble it using only gear and supplies that I already had on hand. Fortunately, as a longtime preparedness author and instructor, I’ve accumulated quite a bit of miscellaneous stuff over the years.
After use, the Sawyer Mini water filter will dry nicely thanks to the mesh-sided Water Purification Kit Pouch from Tuff Possum Gear.
Water Filtration
Clean water is a critical survival need. We typically have at least one gallon of potable water in the van with us, along with a couple of refillable water bottles. But there’s always the possibility that we’d need more H2O in a bad situation. To that end, the first thing I put into this kit was a Sawyer Mini. I keep it in a Water Purification Kit Pouch from Tuff Possum Gear. It has a mesh front panel, allowing the contents to air dry between uses.
This Battarix Power Card is a last-ditch option to charge a cell phone or similar device if there are no other power sources available.
Battarix
In an ideal world, we’ll be able to charge our phones using the van. However, emergency kits are intended for less-than-ideal conditions. The Battarix is a small lithium battery that’s pre-charged and ready to go for either Android or iPhone. It has an eight-year shelf life and takes up very little space.
The Model 1 from White River Knives is perfect for a kit this size. The Victorinox Swiss Tool Spirit Plus has a small ratchet and bits secured in the leather pouch
Knife
This is the element of the kit where I struggled the most. As a certified knife nut, it was difficult for me to narrow down the choices. Whenever possible, I gravitate toward a fixed blade rather than a folder, simply because there aren’t any moving parts to get fouled. I eventually landed on the Model 1 from White River Knives. It’s on the smaller side, but with plenty of blade to get the job done.
The fire kit is contained in a Belt Pouch from Tuff Possum Gear. All of this and more can fit inside. The Pull Start Fire is the last resort option, because it’s a one-and-done item.
Fire Kit
This is another area where I have to be careful, as it’s easy for me to go overboard. I’m an admitted fire bug, and I tend to pack heavy for this category. I started with an Exotac titanLIGHT, as that provides immediate flame. For a secondary ignition source, I tossed in a ferrocerium rod from Black Beard Fire Starter, along with a Corona carbide sharpening tool, which generates massive sparks from the ferro rod. For tinder options, I included a tin of Fiber Light from Outdoor Element as well as a handful of Fire Plugs from Black Beard Fire Starter. Finally, as a Hail Mary fire starting option, I put in one Pull Start Fire fire starter. This is a self-contained unit that works amazingly well. You tie it to a log in your fire build, pull a cord, and the box ignites. I also have an extendable fire bellows to help nurse the fire along as needed.
Multi-Tool
A ton of great options are available. I went with the Victorinox Swiss Tool Spirit Plus with the ratchet accessory pack. It all fits into a nice leather pouch to keep it organized. I’ve used this model a fair bit over the last few years, and it’s always performed well.
Flashlight
I’ve been fairly brand loyal to Streamlight for about a decade now. Nothing against any other brands, of course, but I own 15 to 20 different Streamlight products and not a single one has let me down. For this kit, I went with the MegaStream USB. It features 1,800 lumens and 26,000 candela on the highest setting. I can crank that down to 150 lumens and 2,100 candela in situations where I don’t need to cast shadow puppets on the lunar surface. Being USB powered, I could use that Battarix lithium battery to charge it in a true emergency.
SnapLights
I tossed in a couple of Cyalume SnapLights to use for signaling for help after dark. They don’t require batteries or charging, last upward of 12 hours upon activation, and are plenty bright enough to get someone’s attention if I need to flag someone down.
First Aid
This is a weak spot for this kit. The first aid pouch has a random assortment of adhesive bandages, OTC meds, gauze, and such. I’m going to revamp this kit to be far more comprehensive, as well as better organized.
Cordage
This is always handy to have available. You never know when you’ll need to attach one thing to another thing. I have a couple of options available in that regard. A hank of paracord is great for so many applications. I also took some duct tape and wrapped it around an old gift card, then put that into a small Ziploc bag to keep the adhesive from picking up dirt or lint.
Shortcomings
As packed right now, I’ve not taken advantage of the interior Velcro panel. I should probably add a couple of pouches or pockets to the inside of the AP Bag, to provide for some organization to the contents. But as I stated at the outset, I wanted to put this kit together without buying anything extra. I only have a few Velcro pouches and they’re currently in use with other bags. I also need to up my game when it comes to the first aid kit. Admittedly, I went the lazy route with this one and plan to revisit it soon.
The kit has no food, but that’s by design. I live in an area that experiences very hot and humid summers as well as winters that are well below freezing. These conditions aren’t conducive to storing foods for any real length of time. However, given that this kit is just meant to get us through an overnight at best, I’m not too concerned about snacks. The AP Bag itself, though? Zero complaints, no notes. It’s aces all around.
Final Thoughts
I can wholeheartedly recommend the AP Bag. It’s made right here in the United States by a craftsman who genuinely cares about his product line. It’s a small outfit, but the quality is off the charts. I own several products from KY Handcrafted, and each one is the real deal.
Pack Stats
MAKE & MODEL: KY Handcrafted AP Bag
Dimensions: 12 by 6 by 8 inches
Material: 1000D Cordura
MSRP: $119
URL: kyhandcrafted.com
About The Author
Jim Cobb is a nationally recognized authority on disaster readiness. He has been involved with preparedness for nearly 40 years and has developed a reputation for his common-sense approach to the subject. In addition to his numerous books and several hundred magazine articles, Cobb is one of the cohosts of the How to Survive 2025 podcast. He offers a free weekly newsletter called The Survival Weekly Dispatch (jimcobb.substack.com/).