This weekend my wife and I will be road tripping 680 miles to attend Mountain Readiness Expo in Harmony, North Carolina. Mountain Readiness is dedicated to teaching people the skills to be prepared for emergencies and be more self-sufficient in their daily lives. The founder of Mountain Readiness, Bob “T” Toombs, understands that preparedness is more than mastering a single skillset and encompasses a broad spectrum knowledge and skills. This is why the Mountain Readiness expo features classes and demonstrations across a variety of skill sets including wilderness skills, austere medicine, off grid communications, self defense, homesteading and more. Each course and demonstration is led by skilled individuals with years of personal and professional experience to ensure attendees get the most out of the weekends events.

Mountain Readiness Expo: Location, Tickets, and Accommodations
Does this sound like something you would be into? If so the event is open to the public and is 100% family friendly!
The Mountain Readiness Expo Info:
- May 2-4 2025
- Van Hoy Campground, Harmony, NC
- Onsite Tent and RV Camping Available
- Local Hotel Accommodations Available
- Food Trucks on Sites
- Rest Rooms on Site
- Kid’s Section and Events
Grab your tickets at the Mountain Readiness Website

Gearing Up for Mountain Readiness
The tricky part about traveling is having the preparedness, survival, and EDC gear you need while away from home. To further complicate matters, our trip to the Mountain Readiness Expo is almost a 1400 mile round trip drive. Long drives mean we need even more equipment to account for travel related emergencies and adds additional preparation concerns. Since I spent the better part of a week planning and packing our gear and prepping our vehicle, I decided I would share the gear and bringing along and the steps I took to be prepared for potential emergencies while traveling.
Vehicle Preparedness
When on a road trip the most important tool we have is our vehicle itself! Our vehicle is not only our mode of transportation it is also what holds our equipment and is our primary shelter while on the road – making sure it is in tip top shape for a long trip is vital! In addition much of this gear fills the role of general emergency equipment reducing the need for redundancy.
Vehicle Maintenance
Before a long trip you should ensure all your basic maintenance is up to date. While many of these items can be taken care of while traveling it is safer and more cost effective to ensure this is done before the trip.
Before I travel I always check:
- Oil and Oil Filter
- Brakes
- Tires
- Fluids
- Battery
- Belts
- Wipers
- Lights
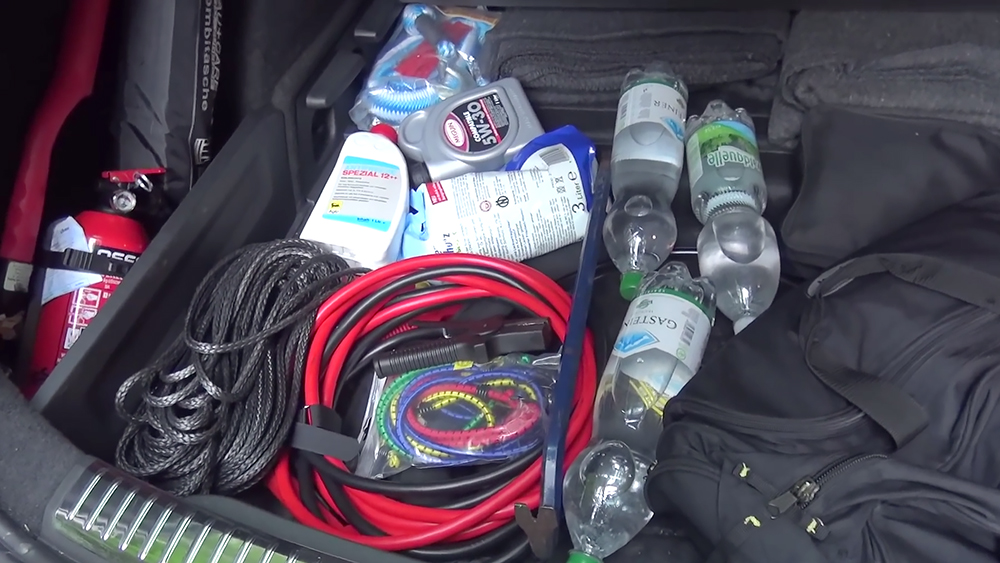
Vehicle Emergency Equipment
Every vehicle should have some basic vehicle maintenance and emergency tools, along with the knowledge and skills to use them if needed.
These tools include:
- Spare Tire
- Tire Repair Kit
- Jack
- Flares or Signaling Items
- Jump Cables
- Basic hand tools (i.e. screwdrivers, wrenches)
- Work Gloves
- Tow Strap
- Basic First Aid Kit
- Flashlight

In addition to the basics I keep some additional items in my vehicle:
- Pod Xtreme Jump Starter: Jump cables are great if there is another vehicle around to help us, but in the absence of another vehicle they won’t help get us get our vehicle started. The Pod Xtreme is designed to jump start both gas and diesel engines, this compact 12V unit produces over 1000 amps to get your vehicle started.
- Gerber E-Tool: This simple folding shovel and help if we get stuck by allowing us to dig snow, mud, sand, or underbrush away from our tires.
- Wool Blankets: While the weather is warming up, it is still dropping into the 30’s and 40’s at night here in New England. It is important to have something to help keep our bodies warm in the event of a breakdown away from civilization. While the risk of hypothermia is most prominent in temperature below freezing, exposure to wind and rain can increase the risk of hypothermia in temperature well above freezing.
- Custom Built Trauma Kit in Vanquest Fatpack: I always keep a custom built trauma kit in our vehicle to handle more significant injuries if needed. I build my own kits based on my skill level to ensure I am carrying equipment I am familiar with using. Advanced medical gear requires training to use effectively and safely.
- Stand Alone GPS Unit: Smart phones are great for the ability to help us navigate, but in areas where there is no cell reception your phone will not be able to connect to GPS. We have both onboard GPS and handheld GPS unit in our vehicle for both on road and off road navigation.
- Toilet Paper: While not truly an emergency item, having some TP in your car can go a long way for your personal comfort and hygiene if stranded on the road for an extended period of time.
- Weather Gear: I always account for a situation where we may need to travel on foot away from our vehicle. Having some disposable rain ponchos, water proof footwear, and other seasonable outerwear is essential in an emergency.
Additional Road Trip Related Items
While the above items make for a pretty comprehensive kit there are a few other considerations for a extended road trip from preparedness standpoint.
- Jackery Portable Generator: Portable generators, like the Jackery Explorer 300, can provide large amounts of back up power for all of our electronic devices and can ensure our emergency electronics like GPS units and Jump Start units can be charged should they run down.
- Solar Panel: While the portable generator should provide more than enough power for this trip, I have decided to pack foldable solar charging panels should we face some form of long term power outage situation. These panels can charge the Jackery as well as any other electronic devices if needed.
- Grayl Geopress: Grayl makes easy to use water filtration containers and the Geopress is capable of filtering and storing 24 ounces of water, making it ideal for filtering water in the wild in an emergency and tap water at our hotel.
- Food and Water: Driving requires focus and our bodies need fuel to do so! Keeping high-quality foods like nuts and protein bars will provide fuel and having an ample supply of water and electrolytes on hand will ensure proper hydration.
- Princeton Tech Helix LI Lantern: Flashlights are great for producing bright light, but most are not designed to produced area light or run for extended periods of time. The Apex lantern is compact, waterproof, produces 300 max lumens of area lighting and can run for up to 110 hours before a recharge. If stranded overnight or hands free light is needed a compact lantern is a good option to have on hand.

Travel Bag
Nemo Double Haul 30 Liter: Being that most of our emergency gear is covered in our vehicle prep our main travel bags don’t need to be all that large. While much of my emergency gear is designed to with stand the elements my computer and camera equipment are not.
The Nemo Double Haul has more then enough room to hold a weekends worth of clothing, toiletries, a small laptop, and my camera gear. The bag is made from water resistant nylon material and converts from a duffel bag to a backpack making it ideal should an emergency arise that requires us to leave our vehicle.
The Double Haul also converts to a tote style bag, so after arriving at the hotel and unpacking it, it can be used to transport items to and from the Mountain Readiness Expo.

EDC Bag: Vanquest Vert-7
Personally I like to keep my EDC light when traveling to events as I tend to spend a lot of time on my feet, and I’m sure there will be no shortage of emergency preparedness supplies at Mountain Readiness Expo! That being said, keeping it light does not mean unprepared.
The Vert-7 is a compact 7 liter EDC sling bag designed to keep all your essentials on hand without slowing you down. For comprehensive look at the Vert-7 check out our High-Tech EDC article.
Let’s take a look at some of the compact kits I have inside:
- Tuff Possum Nick and Scrapes Pouch: This 6×8 pouch is just large enough to hold my first aid and bleed kit essentials. Including quick clot and a TQ.
- Badger Claw Outfitters Scout EDC Pouch: This compact pouch contains a miniature field kit. which includes a Knives by Nuge Wicket, Wazoo Whetstone, Tuff Possum Entry Kit, and assorted survival essentials for fire starting, water purification, signaling, and quick shelter.
- PNWBUSHCRAFT EDC Travel Tray 3.0: The organizer is convertible into a tray and houses some basic EDC tools including a small Leatherman multi-tool, pen/pencil combo, Sharpie marker, and a small pry tool.
- Prepper Disk Kit: Another set of items you will find in the High-Tech EDC article, the Prepper Disk Unit has become an item I do not leave home without. Containing a ton of vital survival information for both short term and long term scenarios, this is an vital reference resource that gives you everything you need when an internet or cellular connection is not available!

Other in Bag Items
- Dark Energy Poseidon Pro: My go-to power bank. The Poseidon Pro is a rugged weather-proof power bank offering numerous advanced features including automatic shut off and trickle change options to ensure the most efficient use of power. I have included assorted charging chords for all my devices.
- Powertac SOL Keychain Light: This compact light offers free standing, clip, and magnetic placement options ensuring I can get hands free light anywhere I need it. The SOL produces 250 lumens, is rechargeable, and weighs next to nothing.
- Portable Hard Drive: I don’t like to keep sensitive data on my phone that can be potentially hacked. Having a small portable hard drive allows me to keep all my sensitive data and documents offline but accessible if needed. In addition it gives me a place to store photo and video files taken from events without bogging down my phone.

On-Body EDC
Having a bag with essentials is great, but I like having quick access to my most used items and any self-defense equipment I may be carrying. When traveling I try to keep my on body gear as minimalist as possible to ensure I can move quickly if needed and just for general comfort for long days on the road, taking classes, or at event like Mountain Readiness Expo.
For general utility purposes I will have:
- Zero Tolerance 0308 CF: The ZT0308 is a large robust folding knife that has been among my favorites for years. The CF is the latest production version featuring a carbon fiber handle scale. For more on the ZT0308 check out my full review.
- Knives by Nuge Bruin: The Bruin is a mid-sized outdoor fixed blade that is easily carried on your belt or in a deep pants pocket. The scandi grind makes it ideal for wood processing tasks and the blade shape lends to processing game. read more about the KBN Bruin here.
- Fenix PD25R: This compact yet powerful flashlight clips comfortable to my pocket and produces a maximum output of 800 lumens of white light. It is weather resistant, offers multiple intensity modes, and is rechargeable via a covered USB-C port.
- Outdoor Element Fire Sparky: I hang my keys off a carabineer, the Sparky adds utility by including a ferrocerium rod for starting fires.
- Wazoo Spark Necklace: This simple necklace on a leather cord not only looks cool, it can help you start a fire, break a window in an emergency, and hone your knife blade thanks to the tough zirconium ceramic striker.

For Self-Defense I will have:
- Auxiliary Manufacturing Karl Jr: This discreet compact fixed blade won’t let you down in high stress situations. Great ergonomics combined with a aggressive piercing tip, and multiple carry options make the Karl Jr and ideal self-defense tool. Read more about it in our review .
- ASP Defender: The Defender OC Spray is a regular part of my daily carry. The unique and compact nature of the Defender makes it easy to carry and use if needed. Read more about it here.

Offgrid Swag!
Yep, I’ll have a bag of swag! If you will be at the Mountain Readiness Expo, I will have some of our exclusive Recoil Offgrid patches and some copies of our SERE issue! so hunt me down for your chance to grab one while supplies last! Hope to see you there!
Read More
Don’t miss essential survival insights—sign up for Recoil Offgrid’s free newsletter today!
- Preparedness Essentials: Mini Survival Kit
- Winter Survival: Preparing Your Winter Car Emergency Kit
- Bag Drop: The Vehicle Bail-Out Bag
- Bug Out Bag List of Essentials
Check out our other publications on the web: Recoil | Gun Digest | Blade | RecoilTV | RECOILtv (YouTube)