Salt in a Wound: Is it Viable for Emergency Medicine?

Most of us have heard the common idiom “rub salt in a wound”. According to the Cambridge Dictionary, the phrase is used to describe making a bad situation even worse. For example, if you just lost your job and started clearing out your desk, only to have a coworker walk up and brag about his new promotion, he'd be rubbing salt in your metaphorical wound.

The origin of this idiom is easy enough to ascertain. If you've ever gotten seawater in a fresh cut, you'll know that literal salt in a wound can be physically painful. However, you may also recall that saline solution is used for wound irrigation in hospitals around the world. This got us thinking: it's obvious that rubbing salt in a real wound is painful, but is it really making a bad situation worse? Or could the salt make the situation better in the long term and prevent infection, becoming a viable technique for backcountry medicine?

Note: This article is not a comprehensive first-aid guide. Professional medical treatment should always be sought first before attempting any improvised treatments.

Ruck survival fitness backpack bag bugout medical 5

Historical linguists have indicated that the idiom came from a time when salt was used as an improvised antiseptic. “During the earlier centuries, when England was establishing its navy, most sailors were forced into service. While at sea, punishment was often lashes with a cat’o’nine tails. These whippings would almost always break the skin, and salt was rubbed into the wound to prevent infection. In this way, “salt in wound” was a very literal, stinging phrase.”

However, just because it was seen as a viable antiseptic back then doesn't mean it still is today. After all, we certainly don't use blood-letting, mercury, or lobotomies to cure our diseases these days.

Salt in a wound medical injury first aid food idiom 1

In our search for an answer to this question, we found the following statement from Walter Sipe, M.D. of the University of California, San Francisco. He wrote the following response in 2006 in an Ask a Scientist column for the Howard Hughes Medical Institute:

Let me start by saying: Do not put salt on your cut. The single most important aspect of wound care in the backcountry is vigorous and copious irrigation with clean water (filtered or chemically treated so it is drinkable). You can generate a high-pressure stream by filling a zip-top plastic bag with water, poking a tiny hole in a bottom corner of it with a needle, and then squeezing the bag so water comes out through the hole. For dirty wounds, vigorous scrubbing to remove foreign bodies is also important. Exposing wounds to iodine, alcohol, peroxide, and pure salt is no more effective than water irrigation at preventing infection and can potentially damage tissues. The safest way to slow bleeding is to hold direct pressure on the wound until the bleeding stops.

Desert island survival scenario shipwreck beach tool 6

Before you go thinking a dip in the ocean might be a better way of salting your wounds, scientists have found that rinsing a wound in seawater is harmful due to the presence of marine bacteria. Additionally, many dangerous bacteria have an extremely high salt tolerance and thrive in salty environments — Staphylococcus aureus, the bacteria behind potentially-deadly MRSA staph infections, is one notable example.

Finally, while it's true that sterile saline solution is used in many medical facilities, this solution contains a very small amount of dissolved salt for the purpose of mimicking your body's natural conditions. With regard to saline's antiseptic properties, multiple scientific studies have found that saline solution is no more effective for preventing infection than distilled water or even clean tap water. In fact, studies indicate that water may be preferable in some cases.

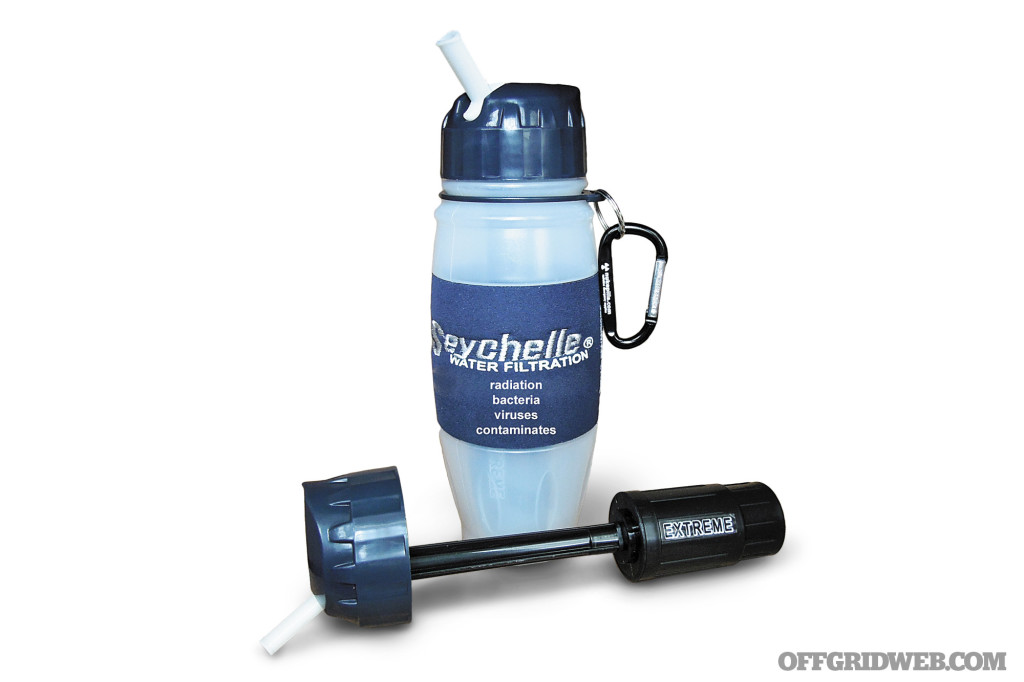
Distilled, boiled, or purified water can be used to irrigate wounds and reduce infection risk.

Distilled, boiled, or purified water can be used to irrigate wounds and reduce infection risk.

So, the conclusion is clear: next time you hear the phrase “rubbing salt in a wound”, remember that its metaphorical use of “making a bad situation worse” is also true in a medical context. It is not a viable technique for treating wounds in the backcountry. Doing so is likely to be very painful, may further irritate the wound, and it will not kill all the bacteria which might lead to a dangerous infection. Instead, keep the salt for your next meal, and irrigate your wounds thoroughly with clean purified or distilled water until you can seek professional medical treatment.


Crafting and Using a Survival Stick

Photos by Jake Brosnan

Warning!
The concepts shown here are for illustrative purposes only. Seek professional training from a reputable instructor before attempting any techniques discussed or shown in this story.

Sticks and stones may break your bones… period. Imagine a cataclysmic scenario — there's been a criminal or terrorist attack during your vacation, and you've been forced to flee into the wilderness before making your way to a safe zone. Or an electromagnetic pulse or act of God has put emergency services out of commission while you're away from home, and opportunist looters are on the street. Maybe it's something simpler — you've encountered trouble while out on a camping trip with your family.

Whatever the case, so long as there are branches, trees, timber, or bamboo-type grasses around, there will always be an effective weapon waiting to be recognized and formed.

Nature's Weapons

It's not much of a stretch to assume that a stick was likely the first weapon wielded by mankind. Even apes can be found smacking each other (and other animals) with them in the wild. The number of cultures that developed intricate fighting systems or martial arts throughout history to enhance their ability to defend and attack with sticks is staggering. These systems extend much further than East Asia, where most people typically associate martial arts of this kind.

Origins

As a young man growing up in New Zealand, I was fortunate to have had the opportunity to train in an age-old martial art developed by the native Maori people called Mau Rakau or “art of the wooden weapon.” The primary focus of this art is a medium-length wooden staff called Taiaha, which is typically 5 to 6 feet long. I also had the opportunity over two decades ago to spend two years living in the Philippines, where I discovered and began studying a Filipino martial art commonly called Kali.

Those familiar with the Filipino martial arts are aware that their training methodology starts with sticks and blades, as opposed to the initial empty-hand focus of most other martial arts. The arts that hail from areas of the Philippines where the Spanish once exercised greater control seem to put more focus on sticks, as their Spaniard overlords prohibited the practice of fighting arts with blades during much of their 300-year colonization.

The likes of Bruce Lee and Ed Parker found the Filipino stick fighting arts so effective that they not only trained in them, but assimilated elements of these arts into the fighting systems they developed during their lifetimes.

Categories

When procuring a good branch or piece of wood to form into a weapon, there are two categories that you can generally put stick weapons into, each with advantages and disadvantages: one-handed and two-handed weapons. Although long staffs can be found in some of their arts, the Filipinos found that the ideal length for a fighting stick was around 24 to 31 inches in length.

Much shorter than that and the stick begins to lose the torque that can be harnessed with a good one-arm swing. Much longer than that and the stick starts to become unwieldy as a one-handed weapon, requiring the use of two hands. For the purposes of this article we're going to focus on the strengths of using a stick that can be manipulated with one or two hands for survival.

It's very possible in a pinch that the old adage beggars can't be choosers may very well apply when choosing a branch or piece of wood to become your survival stick. For defensive purposes, any rigid stick you can hold and swing is better than empty hands. But if you are in an area where sticks are plentiful, you may be able to choose and shape your own ideal survival stick. So what should you look for when hand-crafting one of these implements?

What to Look for

The first step will be finding a stick that's as straight as possible, with a circumference that is close to matching your hand size. When gripping the stick, you will want the tip of your thumb to reach somewhere between the tip of the index finger and the first knuckle of the same finger. Wood can come in a variety of weights and densities. A heavier stick will be slower and more cumbersome to wield, while a lighter stick will transfer less kinetic energy on impact. Just imagine the chances of stopping a threat with a balsa wood staff.

You'll want to find some middle ground -— this will be different for everyone based on your size and strength. It's very possible that you'll need to remove twigs or other protrusions from a smaller branch. If a simple knife is available to utilize, you can shape your ideal stick from a larger stronger branch or piece of wood. The last thing to decide is the length. Again, people come in all shapes and sizes and so should your custom survival sticks.

As a good measuring reference, stretch your arm out directly to the side and place the stick in your armpit parallel to your arm. A good stick length will measure from the armpit to about the tip of your fingers or just a little beyond. At this length you can typically wield it with one hand comfortably, or can also put two hands on it for additional power if necessary. If you have a pocketknife and want to enhance the defensive capabilities of your stick, try sharpening the end of your stick into a point that can be used for thrusting.

As you train to use your stick defensively, keep it simple. Regardless of the grip you use, downward 45-degree-angled strikes from right and left in a figure-eight motion can be used offensively and defensively. Centerline thrusts can also be used preemptively or as quick counterattacks.

These three attacks are all you really need to build a solid foundation. If you have time to train you can get more elaborate than that in steady progressions, or seek out the instruction of a good Filipino martial arts instructor. At a fundamental level of defense, if you want to be able to stick it to 'em, it's best to stick to the basics.

DEFENSE SEQUENCE 1: One-Handed Combination

crafting-and-using-a-survival-stick-one-handed-combination-001

1. Defending against a shorter weapon such as a knife, keep your distance and use your reach to your advantage.
crafting-and-using-a-survival-stick-one-handed-combination-002

2. Aim to attack the weapon-bearing limb. This allows you to maintain the maximum distance possible while disrupting the assailant's ability to cause you harm.

crafting-and-using-a-survival-stick-one-handed-combination-003

3. Wind up for a follow-up strike. With a backhand strike, you can push to your wrist with your support hand to add power.

crafting-and-using-a-survival-stick-one-handed-combination-004

4. Aim for areas that have the highest probability of neutralizing the threat, as is reasonably necessary.

crafting-and-using-a-survival-stick-one-handed-combination-005

5. As necessary, follow backhand power strikes with forehand power strikes for economy of motion.

crafting-and-using-a-survival-stick-one-handed-combination-006

6. Continue targeting vital areas.

DEFENSE SEQUENCE 2: Over-Under Grip

crafting-and-using-a-survival-stick-over-under-grip-001

1. Hold the weapon in the rifle grip, with support hand forward of the strong hand.

crafting-and-using-a-survival-stick-over-under-grip-002

2. Quick straight-line thrusts can be used to preempt an attack.

crafting-and-using-a-survival-stick-over-under-grip-003

3. Use the forward end of the stick to parry an attack downward while positioning yourself to the outside line.

crafting-and-using-a-survival-stick-over-under-grip-004

4. Quickly change the support hand to the baseball bat grip while winding up for the coup de gras.

crafting-and-using-a-survival-stick-over-under-grip-005

5. Hit a home run to finish the fight.

DEFENSE SEQUENCE 3: Double-Over Grip

crafting-and-using-a-survival-stick-double-over-grip-001

1. Hold the stick in a kayak paddle grip, hands about shoulder-width apart.

crafting-and-using-a-survival-stick-double-over-grip-002

2. Use the end to strike inward, parrying the straight-line jab.

crafting-and-using-a-survival-stick-double-over-grip-003

3. Repeat on the other side to the straight-line cross.

crafting-and-using-a-survival-stick-double-over-grip-004

4. Use the center of the stick between your hands to deliver a power strike to the jaw line.

crafting-and-using-a-survival-stick-double-over-grip-005

5. If the assailant is taller than you, pull down to their collarbone area to bring them down a little. Reach over the top of your stick and behind their neck with your left hand. Grab the stick on the other side, leaving the stick under your left armpit.

crafting-and-using-a-survival-stick-double-over-grip-006

6. Control their arm with your free hand, and pull backward on their neck with the stick. Keeping the space small where their neck is will sink a choke in.

crafting-and-using-a-survival-stick-double-over-grip-007

7. Pivot your left leg back, go down to your left knee and pull them backward down to the ground.

crafting-and-using-a-survival-stick-double-over-grip-008

8. If the choke doesn't sink in fast enough, deliver a few strikes to disrupt any attempted counterattack.

About the Author

crafting-and-using-a-survival-stick-jared-wihongi

Jared Wihongi is a 16-year veteran law enforcement officer with considerable time serving in the SWAT community, a specialist in close-quarter combatives, and one of a handful of master-level instructors of the Filipino combat art Pekiti-Tirsia Kali. Moreover, Wihongi has more than a decade of experience instructing armed forces around the globe. He's the tactical consultant and frontman for Browning's Black Label line of knives. Learn more about him at www.jaredwihongi.com.

Pros and Cons of a One-Handed Survival Stick

PROS

  • Hand-free transport, it can easily be packed in a ruck or slung sword-style on your hip.
  • Non-cumbersome. Less likely to be snagging on branches or walls as your move from A to B.
  • Second hand can be free to grab, defend, attack, hold other equipment or wield a second weapon.
  • Easier and less clumsy to wield with little practice.
  • It's harder to enter inside the effective range of a shorter stick and better suited to close quarters.

CONS

  • Longer weapons give you a greater standoff distance. This is a good thing in an open space environment.
  • The power of a two-handed swing can be … you guessed it, about twice as strong as a one-handed swing.

More From Issue 23

Don’t miss essential survival insights—sign up for Recoil Offgrid's free newsletter today!

Read articles from the next issue of Recoil Offgrid: Issue 24

Read articles from the previous issue of Recoil Offgrid: Issue 22

Check out our other publications on the web: Recoil | Gun Digest | Blade | RecoilTV | RECOILtv (YouTube)

Editor's Note: This article has been modified from its original version for the web.


RECOILtv: Caribou Hunting in Alaska

Hunting provides a means of survival in emergency situations, but it's also more than that. It can be a catalyst for testing other survival skills, a powerful bonding experience between friends, and even a form of group therapy for individuals who have struggled to overcome difficult experiences. Iain Harrison, the editor of RECOIL Magazine, covered all these bases on a Caribou hunting trip last year.

RECOILtv caribou hunting alaska rifle aircraft game camping 1

Harrison teamed up with the non-profit organization Camp Patriot to bring a group of three wounded veterans on this hunting trip. The group traveled via small bush planes to a remote spot in Kotzebue, Alaska, only a few miles south of the Arctic Circle. After landing on a small gravel bar at the edge of a river, the men set up camp and started scouting for a nearby herd of caribou.

RECOILtv caribou hunting alaska rifle aircraft game camping 3

From a position on the mountainside, the men could see approximately 4,000 caribou — they just had to position themselves strategically and wait for a clear shot. Check out the full video below from RECOILtv. It discusses the results of the hunt, as well as the individual stories of each of the three veterans who joined Harrison on the trip.

For more details on the gear seen in this video, head to RECOILweb.com. For another one of Iain Harrison's hunting adventures, check out the RECOILtv Iguana Hunting with Air Rifles video.


Review: Benchmade Bugout Folding Knife

A knife is a tool, and like any other tool, it must be engineered from the outset to handle a specific set of tasks. Some knives are big, heavy, and overbuilt in order to withstand the rigors of hard outdoor use. Other knives are made of exotic materials and designed to be both functional and elegant, like a finely-crafted watch. There are small blades for opening packages, large blades designed for combat, and blades with blunt tips made for use in rescue situations.

The Benefits of Losing Weight

Benchmade Bugout review folding knife EDC ultralight tool blade 1

One knife category we feel doesn't get as much attention as it deserves is that of the lightweight knife. Knives in this category have a variety of useful applications. Steel is heavy, so a lightweight knife will go a long way to reduce the load in your pack — as the saying goes, ounces equal pounds, and pounds equal pain. Like a scalpel, a light blade also offers increased precision and maneuverability. And if you're heading out for a run or some other fast-paced physical activity, you don't want a heavy blade bouncing against your leg with each step.

Benchmade Bugout review folding knife EDC ultralight tool blade 3

As a general rule, people tend to associate the term lightweight with three others: small, fragile, and expensive. Admittedly, this is often the case — just put the word ultralight in front of any piece of gear you're looking to buy, then watch as prices increase and durability decreases. However, with the proper forethought and application of materials, this doesn't have to be the case.

Benchmade Bugout

Benchmade Bugout review folding knife EDC ultralight tool blade 9

Earlier this year, Benchmade set out to develop a folding knife that would remain as light as possible without substantially impacting durability or cost. The easy way to do this would be to simply make a very small knife, but that would limit its functionality, so Benchmade aimed for a much more practical 3+-inch blade. The end result of this challenging task was the new Benchmade Bugout.

Benchmade Bugout review folding knife EDC ultralight tool blade 16

The Bugout, also known as the 535, combines a slim steel blade with a tough polymer handle and Benchmade's signature AXIS lock mechanism. Every part of this formula was adjusted with lightness in mind, and examining the knife closely shows this attention to detail.

Benchmade Bugout review folding knife EDC ultralight tool blade 13

First and foremost, the blade had to be addressed. Benchmade's design team knew that using an exotic steel would lose some weight but also drive up the price. Instead, they stuck with the company's new mainstay, CPM S30V. The Bugout's satin-finished drop-point blade is 3.24 inches long, barely shorter than the company's popular Griptilian line, so that's not the source of the weight savings either.

Taking a look at the spine reveals the secret — it has been shaved down to just 0.09 inches thick (2.29mm). The blue anodized aluminum thumb studs are also shorter than other Benchmade knives, and match the width of the slim handle (more on that below). The blade is finished off with a high primary grind line and prominent swedge, further reducing its weight by removing more steel.

Benchmade Bugout review folding knife EDC ultralight tool blade 4

Moving to the pivot of the knife, anyone familiar with Benchmade will recognize the AXIS lock. In case you're unfamiliar, this sliding steel lock bar is held in place with a pair of tension springs. Pulling back on the bar allows the knife to swing open or shut freely with a flick of the wrist. A stop pin at the corner of the handle prevents vertical blade movement when the knife is open.

“Metal Replacement” Handle

One feature that's unique to the Benchmade Bugout is its lock housing. Like all AXIS-lock knives, the handle contains two metal plates that hold together the lock bar, springs, pivot washers, and stop pin. Other Benchmade knives integrate this lock housing into metal liners which run the entire length of the handle, providing a rigid structure and mounting points for handle scales. But the Bugout is different — it has no full-length metal liners.

The lock

Only part of the Bugout's handle is reinforced with metal, highlighted above. The rest is solid polymer.

The metal structure in the Bugout's handle runs from the stop pin and pivot point to a pair of screws near the mid-point of the handle. The remainder of the handle is constructed from Grivory, a type of fiberglass-reinforced nylon that is touted as a “metal replacement” polymer due to its extreme toughness.

Though this material is already light, Benchmade used as little as possible to construct the knife. Pockets were machined out from all along the inside of the handle, and a large lanyard hole was cut into the end. Overall thickness of the handle is just 0.42 inches.

Benchmade Bugout review folding knife EDC ultralight tool blade 7

Benchmade chose a distinctive shade of bright blue for the polymer material. Its color nicely matches the blue anodized aluminum thumb studs, as well as the two anodized standoffs that hold together the rear of the handle. The rest of the knife's hardware is black, including the pressed-in metal threads for the reversible pocket clip.

Benchmade Bugout review folding knife EDC ultralight tool blade 17

Speaking of the pocket clip, it too is unique to the Bugout. This deep-carry clip has been slotted and shortened to 1.6 inches in an effort to minimize its weight. Benchmade was serious when they said they took every opportunity to reduce the weight of this knife.

The end result is a folding knife that's 7.46 inches long but weighs an incredible 1.85 ounces. Most other folding knives this size weigh two or three times that much. For its size, the Bugout is easily one of the lightest folders on the market, and its $135 price makes it one of the least expensive Benchmade models available today.

Our Impressions

Benchmade Bugout review folding knife EDC ultralight tool blade 12

We first got our hands on a sample of the Bugout at the Outdoor Retailer Summer Market show in July. The name certainly caught our attention, and its lightweight design was appealing, so we eventually requested a sample to test out in the real world.

After a few months of using the Bugout regularly, we can say it's a solid little knife for EDC. The AXIS lock really lends itself to quick one-handed use — you can easily flick it open and flick it shut without placing a finger in the path of the blade. In that regard, it performs just as you'd expect a Benchmade folder to perform, and we consider that a good thing.

Benchmade Bugout review folding knife EDC ultralight tool blade 15

This knife is also incredibly light, almost to the point of feeling like a trainer or toy. You may end up forgetting it's clipped to your pocket, even if you're wearing light running shorts, and it's easy to manipulate for precise cuts. We can't imagine it getting much lighter than this, unless Benchmade skeletonized the entire handle to an uncomfortable degree.

Benchmade Bugout review folding knife EDC ultralight tool blade 8

The Bugout has held up well to normal use in an urban environment. It's great for cutting tape, zip ties, cordage, fruit, plastic packaging, and the like. The S30V has good edge retention, and despite being thin, showed no signs of chipping or deformation. Lockup is solid with little to no play.

That said, this clearly isn't the sort of knife you'd want to use for high-impact tasks like batoning wood, chopping through bone, or prying open a metal can. There are plenty of other knives better-suited for those tasks.

Benchmade Bugout review folding knife EDC ultralight tool blade 11

We appreciate the deep-carry clip which tucks the knife discreetly into your pocket — despite its short length, it feels quite secure. The lanyard hole is also a nice touch.

Unfortunately, if you don't like blue, you're out of luck for now. At the time of publication, the Bugout is only available in this blue color, though buyers can customize the knife with a plain or serrated edge and additional lasermarking on the blade.

Benchmade Bugout review folding knife EDC ultralight tool blade 14

While Bugout is a cool name for a knife, we're not entirely sure it's fitting for this particular design. It's appropriate in that it's not heavy enough to slow you down as you run for the hills — we get that. But when we think of a bugout knife, we think of something extremely rugged and durable that's ready for months of continuous abuse away from civilized society. Ironically, this Bugout seems more fitting for every-day carry than for long-term bugout.

Benchmade Bugout review folding knife EDC ultralight tool blade 6

Nomenclature nitpicks notwithstanding, the Benchmade Bugout is a seriously impressive featherweight knife, and one we wouldn't hesitate to carry regularly.


For more information on the Benchmade Bugout, go to Benchmade.com.


Mykel Hawke Spotlight – Wake-up Call

Photos by Q Concepts

Unapologetic for his views on survivalism and television executives alike, former U.S. Army Green Beret Mykel Hawke has cut a unique and wide-ranging path through life. He first became famous for his work on the TV show Man, Woman, Wild, which featured him and his wife, Ruth England, being dropped into various real-deal (and at times too real) survival scenarios. He's also taught survival classes for more than 20 years, earned the Combat Infantry Badge in Afghanistan following Sept. 11, was rated by the Army to speak seven different languages, and has somehow managed to stay humble about all of it.

“For me, the Green Berets was the poor man's passport to the world,” he says. “Some people join because it's a calling for them. For a lot of people the military is a way out of poverty. But people have to remember that it's all of America that makes America great — it's every teacher, every trash guy, everybody.”

We spoke with him in person at ALTAIR Training Solutions, an all-hazards tactical training compound located on the fringes of the Florida Everglades. We discussed how to introduce kids to survival skills, his thoughts on the recent Las Vegas shooting, and why one night a year spent camping in Ft. Living Room can make all the difference.

RECOIL OFFGRID: What was your childhood like?

Mykel Hawke: Sh*tty. You gotta remember, it's the Vietnam era. My father was a soldier, and my mother was a waitress. My dad went off to Vietnam, decided he liked it, stayed there for two more tours. My mom and dad split up, he married a Panamanian lady to give us some sort of mother, but she was evil as hell. She beat us all the time.

You mean like … all the time?

MH: Oh yeah. It was a turning point in my life. One Sunday morning, I was starving. She didn't feed us much. But she did beat us with boards she had cut holes into and then rub salt into our wounds. One Sunday I got up, went into the cabinet, and saw a package of Twinkies. I took one of those and I ate it. Well, of course, she found it — she must have had a Twinkie count or something. When I admitted it to her, she beat me, locked me in a closet, and said, “You're not gonna eat anything for 24 hours.”

So I'm locked in the closet; I'm crying because I got beat. Finally, in the evening I'm starving, saying please give me some food. So she knew I hated peas, and this … pleasant lady … opens up the closet. She says, “If you're really hungry you'll eat these peas.”

I looked at her, and in my mind I told myself that you will find my skeleton bones in this closet in the morning before I eat those peas. And I didn't. When she opened up the door in the morning I could see the shock on her face. I took a pride in that and from that point on I knew. I said to myself, I don't understand what she's doing to me, but I know it's wrong, and when I grow up I'm going to help other people who can't help themselves.

mykel-hawke-unit-photo

How did that influence you going forward?

MH: Two things. First, that pea incident means that to this day I don't eat peas, just as a personal political protest. Second, when I first learned about the Green Berets, I found out that their whole motto is De oppresso liber, “To free the oppressed.” And I decided, that's who I am, that's what I fight for. We fight bullies.

And that situation is what got me into survival. When I got to about 14 years old she tried to beat me again. By this time I was bigger, so I grabbed the belt and took it from her, and I told her, “No more.” So she threw me out. I ended up spending a whole winter as a teenager sleeping on the streets. Sleeping in stairwells, in dumpsters. I figured out that I could go behind grocery stores and sleep behind HVAC vents to get some heat. I learned they throw away a lot of good food in grocery stores every day. I learned all of this survival stuff because I had to.

Talk to us about your military background.

MH: I served for four years in the U.S. Army as an active duty soldier. After that I served in the reserves while putting myself through college. I served in Afghanistan, worked as a country manager for special operations medics in Iraq, and got shot at on deployment in El Salvador, Turkey, and Thailand. Eventually I became a private military contractor where I worked in Colombia, Haiti, Sierra Leone, and Azerbaijan. That's four more contracts, and all of them I got shot at and people were trying to kill me.

What's the difference between a soldier and a contractor?

MH: It's like comparing a security guard to a police officer. A contractor can pick what they want to do. They have a choice to quit. A contractor might have worked in a war zone — like they have Pizza Hut and Starbucks there now, but a soldier serves in combat by fighting. So for a military contractor to say he's a combat veteran like a soldier is, they can kiss my d*ck. I call myself a combat veteran only because of my combat experience serving as a soldier in Afghanistan — not because of my military contracting I did in other places, even though I got shot at.

Mykel as jungle doctor in El Salvador, circa 1993

Mykel as jungle doctor in El Salvador, circa 1993

How did you get into the military and survival?

MH: Well, I got shot and stabbed before I ever joined the army. I was an honor roll student, and I was in the chess club. But because I was so poor, no one would hang out with me, so I started hanging out with the gangsters. And I didn't do drugs, so it was real easy for me to just say, “Guys, if you just organize a little here and a little here, we can sell better here. So we started turning a profit, and we started kicking the other gang's butts because we were unified. So the stuff that we did, I hate to say it, but we did some pretty cool stuff.

But when I had a buddy who got killed, and another one who went to jail for killing someone, I said to myself, this cycle of poverty is a one-way street to death or jail. The only way I'm going to break this cycle is to get an education, and the only way for me to do that was to join the Army. That's why I joined — so I could go to college. So as soon as I turned 17 in 1982, they shipped me off to basic training and that led me to Special Forces.

As I got older in the military, I was really fascinated with all these old Vietnam-era guys who knew all these old survival things. But when I went into SERE (Survival, Evasion, Resistance, and Escape) School, we only spent three days on survival out of a three-week course. I said to myself, this is all we're going to learn? I realized that this is not enough. So what happens is that even the special ops guys don't know primitive survival skills in a lot of cases. People just don't know this stuff so I started teaching it to people. Long before it was a TV show, long before it was cool. I wasn't a weirdo, and I didn't want to teach weirdos. But things like medicine, first aid, survival — these are things everybody can use and they're applicable to everyday life. So it became my passion. One thing led to another, and I started a business doing it in 1994.

How did you get your start in TV?

MH: When Sept. 11 happened, I was living in L.A., still serving in the National Guard. So we watched those assholes fly the second plane into a building and I told my sons, “Hey, as a single father of two boys, I can get a compassionate reassignment and not go to war, or I can go to war because I'm Special Forces.” And they told me, “Dad, go over there and go kick some ass.”

So I mobilized, and I went to war for two years. When I came back the Green Berets were all in the news, because we went in there on horseback and all that kind of good stuff. All my media friends didn't really know any Green Berets except me. So they would ask me, “Myke, do you mind being a subject-matter expert on this or on that?” I thought sure, what the hell.

Then finally they asked me, if you had your own show what you would end up doing? I said well, I'd take my wife out surviving, and maybe do a special ops competition, and things went on from there. I looked at it like this: I didn't give a rat's ass about TV, but I liked teaching survival skills, and this was a way to reach more people.

Are survival shows education or entertainment? What are your general impressions?

MH: Networks think that people are stupid, and production companies only want money. It comes down to the people they feature and their core character. There are great folks like Ray Mears, Les Stroud, and Cody Lundin who care more about teaching. Then there are folks like Bear (Grylls) who favor entertainment, and then there are some who are just flat frauds and charlatans.

How about your experiences on the TV shows Man, Woman, Wild; One Man Army, and Lost Survivors. Does one stand out to you?

MH: We nearly died a bunch of times on Man, Woman, Wild. People don't realize how tough those shows were and how real they were. For the desert one, I told them, “Let's not film in the day. Let's film at dusk or at night with a full moon when we got better illumination.” But they made us film in the day, and they nearly killed us. My wife ended up getting heat stroke, and I grabbed the cameraman by the neck, looked into the camera because I knew the producers were watching from 1/2 mile away on their little screen, and I said, “If my wife does not leave this desert, none of you will.” That's when they called the medic in.

Hawke as combat commander in Afghanistan, circa 2003

Hawke as combat commander in Afghanistan, circa 2003

What do you think sets your shows apart from others?

MH: I feel as a Special Forces guy, I owe it to my brothers and to my people to be real about what I say and what I do. The networks will ask me, “Why don't you be more like Bear Grylls and jump off some cliffs and do backflips into the water?”

I tell them, “I won't do that because it's stupid and it's wrong, and it will get people killed. I will do stuff that is safe and has sound principles. I'm sure it's not as sexy and as cool as you would like it to be, but it's real.”

It's always a balance of trying to give the networks what they want versus doing what you believe is right for your teaching and your principles, and also for your brotherhood and your community. You're always going to have people you can't make happy, so I do what I believe is right. You can judge me all the f*ck you want. I live with myself, and I don't regret sh*t that I do because I do what I believe.

What do you have coming up?

MH: Besides the survival videos for kids we're planning, I just did an episode of ABC's The Bachelor, where my wife and I took them all out on a “survival date.” So Ruth and I taught these girls basic survival so The Bachelor could figure out which of the 12 girls he likes. Ruth and I taught them shelter, food, water, and navigation. Also, I just did an episode of Valor for CW, doing background acting as a mission control officer.

We're also creating an adventure race that incorporates not only obstacles, but also live-fire weapons and primitive weapons. So you're gonna get to shoot a pistol, rifle, shotgun, a sniper rifle, an automatic weapon, but also get to throw a spear, an atlatl, a blowdart, slingshot, hatchet, and a knife. So you're gonna run, do an obstacle, then do a target with a modern weapon, then use a primitive weapon. And it's for families as well as elite guys. We're doing it all at the main ALTAIR Training Solutions facility in Immokalee [Florida]. We'll break ground on the obstacle course in February and we hope to have it up and running by next fall.

But the coolest thing coming up right away is an eight-hour special for The History Channel called Frontiersmen. It's made by Leonardo DiCaprio's production company who made The Revenant. I think it will reinstall in America not only who we are, learning about our roots, but hopefully showing everyone that survival is in all of us. It's from our forefathers so get back to it. The more self-reliant you are, the better everybody is because there's one less body to be taken care of.

mykel-hawke-film-crew

Do you think that survivalism is a skillset or a mindset?

MH: Mindset is important; you can't do it without the mindset. But the mindset without the skillset will not serve you. Unless you practice survival you are not a survival guy. For example, I can carry a gun because I have the mindset to shoot it. But if I don't practice with the gun, I can't depend on hope and luck to see me through a firefight. Sorry, but that's poor planning. That's asking mostly to get killed with your own gun still in your hand, and how embarrassing is that?

The mindset is a crucial component, because if you don't have the will to live you're not going to make it. I get people in my survival classes all the time who want to quit. It usually happens in my Kill Class. We take a cute little bunny rabbit that sounds like a little baby when you kill it. It's horrible. But I tell them, you have to learn to kill it because you might have to eat it someday. You can get more energy and sustenance off this rabbit than off three days of foraging out there. It's easier to get your energy from animals than from plants, plain and simple.

So I tell these people, you've got to go through this once in your life, and hopefully never have to do it again. And people always want to say, “I'm not going to do it, I'm not going to kill anything.”

And I respond, “OK, here's a pen and paper. Think of who you love the most in this world. Write to them that, “I love you with all my heart, but I love this little bunny rabbit more than you, so I'm going to lay down and die so that this bunny rabbit can live, and I'm never going to see you again.” Usually at that point they say, “Give me the rabbit.”

What about teaching survival to kids?

MH: With my first boys I'd wake them up at 3 in the morning and do fire drills, make them crawl blindfolded on the floor to find the phone and dial 911, and get out to the middle of the yard. They hated me for it, but I taught them everything I could about survival. I was maybe too aggressive with them as a younger man, and I didn't make it fun. And now, I try to make it fun so I take my boy out camping once a year with a sole mission: to learn survival stuff. If you can bring in humor, that's where people's minds are open. That's why I don't bust people's asses in my class. I make it real easy and relaxed, and let them have fun.

So actually what I'm doing with my younger third son, because the internet is so different now, we plan to start making home videos where the wife and I are gonna teach him, and then he's gonna teach kids. That way he can explain how he's learned it from us and how thinks it would be better for kids to learn from him.

Are there any specific survival skills that are good to teach kids?

MH: Yeah, train your kids how to start a fire. It's not just as easy as lighting a match. You've gotta know how to make the tinder ball and then how to build it. I've seen people with fireplaces that don't know how to get a fire going because they don't know how to build it up from the base. If you can make it fun for your kids they will learn it, and they'll be so proud and confident. And then as a parent you'll be confident too. You don't have to be a weirdo prepper living in your basement and drinking your pee. The fact is that sh*t's gonna happen, and the government can't do everything for you, and it's gonna take them a while to get there and help you.

mykel-hawke-02

How can readers plan to take care of themselves before help arrives?

MH: You should carry 24 hours' worth of survival supplies on your body at all times. Carry three days' of survival stuff in your car or on your little pack, and keep seven days' worth in your office, in your plane, or your little log cabin. Last you need to have a 30-day supply of everything you need in your home.

I always tell people that, once a year, they should have an indoor campout using just their survival gear. Turn off your power. Don't run any water. Don't use any gas. Live in Ft. Living Room without any of those things. Then, open your sh*t. Play with it — let your family see where it's stored and how it works. You'll find that some stuff doesn't work! Some stuff breaks, erodes, or corrodes. Do you have a way to wash clothes for a month? Do you have a way to cook food, or get rid of your trash for a month? When you do your indoor campout, you'll figure lots of these things out.

Compared to the mental and physical aspects of preparedness, how important is your gear while you're out adventuring?

MH: I will kid you not, gear is key. The better it is, the better everything is. It's no substitute for skills, but without gear, skills can make substitutes! But too much gear can be as bad as too little — carrying too much can wear you down, and if you don't know how to use it all, it can cause you grief in a critical moment of need. Like they say, balance is the key in all things.

What would you say is the biggest mistake you see rookie survivalists make?

MH: Thinking that they can make a fire quickly or build a shelter easily, underestimating the need for water, and overestimating their physical abilities.

What lessons, if any, did you personally draw from the Las Vegas mass shooting?

MH: Man, that is just a sad tragedy with no just reason for it. But that aside, in my time as a military contractor as well as my service as a soldier, I've encountered many coups and rebel attacks. So, how I live and operate applies here too and maybe some can benefit from this.

First, I try to always pack heat and stay close to cover and an egress/exit whenever I go to public venues. I also try not to be in the middle or right on the edges — just close enough to escape, but not take the rounds if it comes from the edges. But in this case, my pistol would not have done anything to stop that guy from so high with long guns, so the best you can do is be calm, be brave, try to help others, and pray that God doesn't wanna call you home just yet.

I've saved so many lives under fire, at times I just knew my brains were gonna get popped any second. But it never came, and I just focused on saving one man at a time. We're all gonna die, so go out doing good, and if you survive, you survive with honor. Either way, you win, in my book anyway.

mykel-hawke-family

How can you tell when an individual you come in contact with is going to be a threat?

MH: Most threats are conveying their intentions long before they get to you. They are out hunting and targeting, so if you're alert, chances are you'll sense it and then gear up your guard a notch or two. Situational awareness is vital, and it sure helps to always be ready as you can't always sense it. Often we're so busy with other things in the moment that we might miss the vital clues, but they are usually there unless you have been pre-targeted.
And in that case, things are going either too well or too many odd things at once should cue you up. I'm the kinda guy who when I hear gun fire, I take a second to look for the immediate threat, but then instantly look around to see if that is only the distraction for an actual larger operation or the start of an ambush. Bottom line: train yourself to respond, and stay in response-on-tap mode with situational awareness as your trigger mechanism.

What threats do you prepare for?

MH: On a daily basis I prepare for the threats of robbery, travel breakdowns, and security and safety on air, land, and sea. Then in the bigger picture, I prepare for natural disasters, as those also cover warfare both large and small, and even terrorism.

I don't prepare for NBC (Nuclear, Biological, Chemical) attack for a reason. With nuclear either you're dead or not, ASAP from the blast or shortly after if you're in the gamma ray zone. The fallout zone can be minimized and, to a degree, avoided.

The idea of preparing for the biological and chemical is funny to me. I went to the chemical warfare school. I know that most of the things man can make to kill his fellow man, we have no protections against. The NBC/MOPP suits and gas masks only stop about 3 percent of all the hateful things out there so they're really just providing a false sense of comfort and confidence. If you are where they pop the canister, if it's the bad stuff — and that is cheap and easy to make — then you're nailed.

The hopeful part is this: Those things are hard to disperse on a wide scale, and we have amazing folks fighting to stop those buttheads from doing it every day. What we can't ever predict or stop, sadly, is the rare radical homegrown monster like the Las Vegas killer. Humans are humans and as such, some things will always be unpredictable. But that doesn't mean we should give up our rights or give up hope. The best way to win is live well and keep fighting.

mykel-hawke-spotlight-03

Mykel Hawke
Age: 52
Occupation: Teacher
Hometown: Louisville, KY
Base of Operations: Tropical Southern Florida
Family: Wife, three sons, two grandkids
Education: Master's Degree in Psychology for Family Counseling, Bachelor's Degree in Pre-Med Biology
Favorite Quote: “I may have been on the losing side, but I am not convinced it was the wrong side.” — Captain Reynolds in Myke's favorite TV series Firefly
Favorite TV Show: Firefly
Favorite Film: Serenity
Last Book Read: A Fire Upon the Deep by Vernor Vinge
Scars: Knife (left shoulder), bullet (right lower back), appendectomy scar
Favorite Knife: Sparrow Hawke
Favorite Firearm: Glock 26 and AK-47
Military Background: U.S. Army Special Forces, Green Beret Combat Commander
Martial Arts Background: Blackbelt in Judo and Aikido
URL: www.mykelhawke.com

Mykel Hawke's EDC

mykel-hawke-edc

Food: Breakfast bar, beef jerky, and vitamin pack
Water Storage: condom, Ziplock bag with purification tablets
Fire: Lighter and magnesium bar
Shelter: Trash bag
Signal: Dakota Watch Green Angler II Ana-Digi Clip Watch, phone
First Aid: Cravat bandage and medications
Multitools: Swiss Army SwissChamp Multi-tool (city), Leatherman Multi-tool (field), and Hawke Knives Tacti-Tool for EDC.
Navigation: Compass

More From Issue 23

Don’t miss essential survival insights—sign up for Recoil Offgrid's free newsletter today!

Read articles from the next issue of Recoil Offgrid: Issue 24

Read articles from the previous issue of Recoil Offgrid: Issue 22

Check out our other publications on the web: Recoil | Gun Digest | Blade | RecoilTV | RECOILtv (YouTube)

Editor's Note: This article has been modified from its original version for the web.


The Power of Survival Comes From Within

Illustrations by Joe Oesterle

When the proverbial excrement hits the fan, why might someone who's considered fragile or vulnerable survive, while the seemingly tougher one fails? Before training, gear, and prep, there's something more foundational to our survival. That foundation is our human spirit.

Nine-tenths of survival is psychological. If you don't have the willpower to persevere, all that great gear may as well be nonexistent. In reality, survival gear is meant to be an adjunct to your survival instincts. We're here to help you hone those—lest you be in a situation like the following one experienced by a young John F. Kennedy.

He led nine survivors on a 3-mile swim to landfall, while towing another who was badly burned using a strap between his teeth. Over the next six days, he swam dozens of miles to seek help. He sliced up his feet on coral reefs, risking death (or worse) by infection, currents, dehydration, capture, or attacks from oceanic predators.

Beyond physical and mental exhaustion, JFK said he drew on a spiritual strength, fed by his command responsibility for his crew. Eleven of his 13-member crew survived after a Japanese destroyer sliced his boat, PT 109, in half.

Warriors, artists, and healers have long recognized this power within ourselves. It's described in metaphoric, religious, ethical, and transcendent terms. At the cusp of life and death, the human spirit can make or break us.

Human Spirit

The spirit is the metaphoric stone tablet of the presuppositions of our being, and it drives our deepest emotional, ethical, societal, mental, theological, and physical responses. One might say the spirit is the foundation from which we make choices. It includes:

  • What drives us: our goals for this lifetime
  • What is most important to us: what we're willing to die for
  • Our convictions: what we'll live for
  • Our code: what we'll stand up for
  • Our sense of the transcendence: what we believe about “the big out there”

When our spirit is troubled and things happen that shake this foundation, it manifests itself in powerful emotions. For example, two police officers could be confronted with an armed suspect; identically trained, each officer draws their weapon and stops the threat, killing the suspect. In the aftermath, one officer processes the emotions, embraces the lessons learned, and moves forward. The other officer suppresses the emotion and begins to have recurring stress, bad dreams, and is eventually diagnosed with PTSD. This is deep emotional territory, life and death. If, in a survival situation, a life is taken and we come to terms with that choice, we can move forward. But if we get emotionally jacked up, we can suffer from an invisible injury that can make the rest of our life spiral out of control.

If, in the face of our own death, our certainty of life and survival rises up from the spirit of our being, we can do miraculous things. But if we believe it is our time to die, that the odds are too great, then they are … and we will. So, we must condition our spirit before the worst of the worst happens. In a SHTF situation we won't have time for hesitation, so it's important we map out our emotional wiring so we don't short circuit when we're under extreme stress.

The Importance of Spirit

The spirit is the place from which we'll decide to kill, and the place from which we choose to survive. Let's look at an example of someone put in this situation and the resolve they willfully demonstrated.

finding-spiritual-strength-aron-ralston

In 2003 Aron Ralston fell and his arm became inextricably lodged between boulders in the canyon he was exploring while hiking in Utah. With no expectation of rescue, he cut off his own forearm using the knifeblade in a cheap multi-tool and hiked to safety. He demonstrated a will to survive. At his spiritual foundation, Aron Ralston's desire to live outweighed the cost of an arm, and the excruciating pain of its removal.

The spiritual strength to kill is harder to illustrate. Imagine a Marine Corps sniper looking down his scope at a 12-year-old headed for his buddies with a bomb strapped to her body. Imagine if, after SHTF, we were looking through the scope and our families were at risk. There's a lot to work through in order to be OK with taking a life that may jeopardize our loved ones.

When these situations rear their ugly heads, there won't be time for these questions. Will we kill or be killed and how will we live with the consequences?

We live in a democratic republic that affords due process, and other protections provided by the U.S. Constitution and the Bill of Rights. These are the conditions we operate under in a stable American society. The spirit has adapted to these norms.

Here are two exercises to prepare: the first is called pre-flection, a visualization exercise of ethical consequences.

The second is called emotional self-aid. Spiritual trauma, moral injury, and traumatic stress disorders manifest with emotional outbursts. This is an exercise to deal with those emotional flare-ups instead of suppressing them.

Pre-flection

One could call this exercise spiritual stress inoculation. It plays out the ethical consequences of a life-and-death decision before being faced with this kind of reality. It prepares the spirit for what follows such an event.

Outline a mock scenario where you have to kill someone to protect yourself or others. Write it in sort of a classroom assignment format as a logical exercise.

Example: You're forced to shoot a poacher who is stealing a deer on land you'd planned to use to feed your family. Choose a quiet time where you can focus your thoughts and recall this scenario with a focus on what you may feel in that situation, moment by moment.

finding-spiritual-strength-poacher

Visualize the scenario step-by-step, imparting as much realism as possible. The key is to feel the reality as if you're watching it unfold. Make the people authentic, not like comic book villains. Be vivid in your description. What do people look like? What time of day is it? Where are you living? What are the thoughts racing through your head as you make this decision? Write it as if you're a novelist.

Imagine the aftermath: the shooting, the body, the surroundings, how your family might react. Imagine it until you feel it, the anger that forced you to pull the trigger, or the anguish that you took a life, or the sheer disbelief—whatever comes to your heart and mind. The intent is to shake your spiritual foundation, to make yourself painfully uncomfortable with what happened.

Now back off the image and work through the feelings. What did it feel like? Could you do it? Would you do it again? Write down the results, date them, and file it.

Run the exercise several times, leaving days or weeks between. After four or five repetitions of this exercise, go back and see the progress that has been made.

Pre-flectioning the scenario aligns spiritual issues of what we should do and what we will do. This will be the time to uncover and, as necessary, change the deep truths of what we believe and are willing to do.

Emotional Self-Aid

Pain, injury, death – and life, in general – can raise unfamiliar or undesired emotions as the spirit adapts to new circumstances. When we shove those emotions into a box, it's inevitable that the contents of that box will eventually permeate other aspects of our life.

While in seminary, I traveled to Israel for a short-term study. During that time, we witnessed a protest of the recent death of a young Palestinian man taking place at the Church of the Nativity. This protest was surrounded by the Israeli military. When a young Palestinian woman thanked us for being there, because the Israelis were “less likely” to fire with American tourists present, it affected me much more deeply than I realized at the moment. In that instant, I simply packed all my conflicting emotions into a box and tried to leave the area as quickly as possible. It wasn't until we returned home that the shame of what might have been seeped into my consciousness.

Survival in a SHTF situation will leave us tired and distracted enough. Adding the burden of emotional turmoil on top of a disaster scenario is nearly guaranteed to overwhelm. Training our coping mechanisms ahead of time will lessen the blow of any circumstance we might not have prepared for. Unlike going to the range, one doesn't simply sit and practice anger. This exercise is practiced in real life.

Prepare a list of emotional identifiers. An easy system is “glad, sad, mad, bad, and afraid.” Name the emotions as they come to mind as you walk through a variety of events in your memory that span the emotional spectrum. It'll be very clunky at first.

Expand and adapt your own vocabulary through real-life experience. For example, your kid crashes and totals your new pickup—mad doesn't begin to describe it. Build the vocabulary. The more descriptive or colorful the language, the more it'll make sense to you.

Your brain only works as far as the words you have to describe what's in it. Writing down your emotions as you experience different events helps you handle difficult experiences and identify your emotions better.

Your brain only works as far as the words you have to describe what's in it. Writing down your emotions as you...

Be aware of involuntary physical reactions. Elevated heart rate, jitters, sweating, shallow breathing, etc.—maybe anger triggers a freeze because you fear lashing out. When these physical manifestations of emotion happen, calm can be achieved with tactical breathing. Lt. Col. David Grossman explains this process in his lectures to law enforcement officers—using both our voluntary and involuntary physical reactions as handles to regain self-control.

Tactical breathing (breathing in, holding, breathing out each for a count of four) will calm the physical processes and eventually ease those emotional triggers. As you work it through, catalogue the physical reactions. Learn to recognize when yours are coming to the surface.

Ultimately, this is an exercise in self-awareness. Practiced in the relative safety of everyday life, it provides tools to work through the potentially overwhelming emotions that'll come when the world is turned upside down.

Spiritual Fortitude

There's a sign in a law enforcement training facility that says, “In times of trouble, we do not rise to the occasion, but fall back to our level of training.” This includes the human spirit. It's one thing to claim we would kill to protect our families. It's quite another to actually do so. It's one thing to declare that if caught in a bear trap, we'd hack off a leg to survive. It's quite another to have the spiritual power to actually cut into your own flesh if the need calls for it.

Most of the time, the human spirit doesn't manifest itself. Our conscious mind is adequate to deal with the choices of normal life. When we go off the cliff of proper behavior to behavior to contemplate what's worth dying for and what's worth killing for, the spiritual trauma will manifest as powerful emotions.

In that moment, when we have to decide to live rather than die, no matter how grim the odds may be that choice is a spiritual one. From the spirit flows a wellspring of strength when all else has failed. Spiritual strength allows us to transcend limitations.

About the Author

Peter Hofstra is a law enforcement, fire department, and emergency management chaplain. He works actively at developing the skills of these heroes to better prepare himself to survive and be more effective working alongside these first and second responders. His pastoral work has been in the understanding, development, and strengthening of the human spirit as a creation of the Almighty in every person. He resides in central New Jersey with his wife, Lynn, and their two children.

More From Issue 23

Don’t miss essential survival insights—sign up for Recoil Offgrid's free newsletter today!

Read articles from the next issue of Recoil Offgrid: Issue 24

Read articles from the previous issue of Recoil Offgrid: Issue 22

Check out our other publications on the web: Recoil | Gun Digest | Blade | RecoilTV | RECOILtv (YouTube)

Editor's Note: This article has been modified from its original version for the web.


A Guide to Portable Solar Charger Kits

At more than 100 times the diameter and over 300,000 times the mass of the Earth, that enormous ball of plasma at the center of our solar system is the primary energy source for our planet. Without the sun, life on Earth wouldn't be possible, and George Hamilton wouldn't know what to do with himself. According to NASA, the sun produces about 500,000,000,000,000,000,000,000 horsepower worth of energy per second. That's a lot of damn zeroes. It's no surprise that sun deities permeate ancient cultures and mythologies.

With so much energy beaming down from the heavens, free and clear, it's also no surprise that mankind has looked to harness the sun's power by devising various technologies to convert sunlight into electricity. The first photovoltaic cell, which generates electric current when exposed to light, was developed in the 1880s. Photovoltaic technology has continued to improve, with industrial, commercial, and residential installations becoming more common over the past several decades. Solar installations around the globe represented a total capacity of about 177 gigawatts in 2014, according to the renewable energy association REN21.

As with so many kinds of technology, end users benefit as they're productized and miniaturized. From solar-charged watches to sun-powered radios, small and increasingly efficient solar cells have made their way into consumer products. And with so many battery-powered devices proliferating across people's lives, solar chargers are coming of age.

Juice ‘Em Up

Portable solar charger kits are essentially compact solar cells that output electricity via USB or other jacks. The solar cells might be composed of rigid crystalline panels or flexible thin films; the former tend to be more efficient and rugged while the latter are more compact. The larger the panels, the greater the potential power output. The panels are packaged for convenience (e.g. folded up like a pamphlet) and may also feature electronics to detect the appropriate protocols for charging different types of devices, deal with dips in power output from passing clouds, and so forth. Some have integrated batteries — so the panels charge the battery pack, which then provides power to your devices, rather than routing power directly to your iThingies. More on this later.

solar-panel-charger-soaking-up-sun

The general concept is to place your solar charger in direct sunlight and enjoy the resulting electricity to charge your devices. However, the blunt truth is that if you have consistent access to the power grid, using now-ubiquitous rechargeable battery packs to juice up is generally a better solution than solar chargers. Getting the most from solar chargers can be a fussy and frustrating process.

For example, there's an optimum angle to position solar panels to maximize energy collection from the sun, depending on your geographic location, time of year, and time of day. Our product testing was done in the winter, and based on our location, the proper tilt was approximately 32 degrees from vertical. In our unscientific testing, placing panels completely flat (90 degrees from vertical) versus at the optimal angle resulted in up to a 42-percent decrease in power production. Cloud cover, objects blocking the sun, and precipitation can all significantly reduce power output as well. Trying to ensure proper exposure to the sun for several hours (or all day) in a static position can be challenging enough, much less when you're on the move.

Furthermore, some devices (such as iPhones and iPads) may stop charging if the power input drops temporarily due to shade or a passing cloud. What a waste that would be if you left it unattended to charge or didn't realize it had stopped. Numerous chargers have circuitry to deal with this exact problem so that devices will start charging again once the power level creeps back up.

So why bother with solar chargers? As a prepared individual and/or outdoorsman, you know that you won't always have access to power. The grid may go down for extended periods in an emergency, and there aren't any outlets in the wilderness (much to the chagrin of smartphone-obsessed teenagers everywhere) or often at the range, where we've used solar to charge our cameras, which are more power-hungry than a politician. Solar chargers are perfect for those situations, and if you're a reader of this magazine, no doubt you've said this before: “Better to have and not need …”

One more thing: Given the challenges we've described, we highly recommend using rechargeable battery packs in conjunction with your solar charger rather than connecting your devices directly. This allows you to capture all of the power generated by your panels, and you'll always have the power stored in your battery packs on tap to use no matter the weather conditions. Some products shown in this article have integrated batteries, but you can easily use one or more separate battery packs with stand-alone solar chargers. This will result in having a few more doodads to keep track of, but pay off in a lot more convenience and versatility. Cobbling together your own kit is also a lot cheaper, as pricing on stand-alone rechargeable battery packs has dropped faster than a Forever 21 dress on prom night.

solar-panel-close-up

Considerations

What you should look for in a solar charger kit?

Power Output (rated): The higher the maximum power output of your solar charger, the more you can make use of each minute of sunlight. The larger panels can charge two devices or two battery packs at the same time. Power output is usually expressed in watts, which equals voltage multiplied by current (amps). Tablets and large phones guzzle down 2 amps for optimum charging — at the USB standard of 5 volts that translates to 10 watts of power. More is definitely better here, but there's a trade-off in portability from necessitating larger solar panels. Additionally, while many products tout 2 amps of power output, our measured results often fell short.

Portability: With an intended use for emergencies and while on the go, size and weight matters, especially if you're on foot. None of the chargers in this article are particularly heavy — but some are lighter than others and the larger panels can get a bit bulky. If you carry multiple battery packs, the weight can also start to add up.

Usability: All the products in this guide have some sort of carrying case, often with pockets to store accessories and devices as well as eyelets and carabiners or other methods of attaching the solar panels to backpacks or other objects. Many have multiple rigid panels that fold up for storage. A pocket is useful to hold your device or battery pack, so that they aren't exposed to direct sunlight while charging.

Features: Solar charger kits can be packed with features — smart charging controllers, clever packaging, integrated or included battery packs, accessory cables and adapters, methods to tie them down (we'd suggest packing some paracord with your charger), and more. Some have more weatherproofing than others, which may be important depending on your climate. Also, if you plan to charge devices directly, take note of those that recover from drops in sunlight.

You don't have to drive a Nissan Leaf, wear a man bun, or protest BP to take advantage of solar chargers. Following is a representative selection of solar charger kits, one of which is bound to meet your particular needs.

A Guide to Portable Solar Charger Kits

  • Anker PowerPort Solar

    Power Output (rated) - 21 watts
    Integrated Battery / Outputs - No / 2 USB (2.4 amps each, 3 amps total)
    Weight - 17.6 ounces
    Dimensions (Folded/Open) - 11.1 x 6.2 x 1.1 / 26.25 x 11.1 x 0.2 inches
    MSRP - $100
    URL - http://www.ianker.com

    The inexpensive (at street prices) and high-output Anker performed well in our testing, maxing out with an iPad and supplying a full 2 amps for 10 watts of total power output.

  • Bushnell PowerSync SolarWrap Mini-MAX

    Power Output (rated) - 13 watts from integrated battery
    Integated Battery / Outputs - Yes (2,600 mAh) / 1 USB (2.6 amps)
    Weight - 5.2 ounces
    Dimensions (Folded/Open) - 7.8 x 1.3 x 1.3 / 18 x 7.8 x 1.3 inches
    MSRP - $120
    URL - http://www.bushnell.com

    The Mini-MAX is very convenient and svelte, utilizing a flexible thin film solar panel that rolls up and secures with Velcro.

  • Goal Zero Venture 30 Solar Recharging Kit

    Power Output (rated) - 7 watts from solar panel, 12 watts from battery
    Integrated Battery / Outputs - Separate battery included (7,800 mAh) / Panel: USB (1 amp), 12V (0.3 amp), mini port; Battery: 2 USB (2.4 amps each, 4.8 amps total)
    Weight - 16.3 ounces (panel), 8.9 ounces (battery)
    Dimensions (Folded/Open) - 9 x 1.5 x 6.5 / 9 x 1.5 x 17 inches
    MSRP - $170
    URL - http://www.goalzero.com

    The Venture 30 Solar Kit bundles Goal Zero's Nomad 7 solar charger with its Venture 30 rechargeable battery pack.

  • PowerTraveller SolarMonkey Adventurer

    Power Output (rated) - 10 watts from integrated battery
    Integrated Battery / Outputs - Yes (3,500 mAh) / USB (2 amps)
    Weight - 13.1 ounces
    Dimensions (Folded/Open) - 8 x 4.5 x 1.5 / 15.5 x 4.5 x 1.5 inches (including case)
    MSRP - $130
    URL - http://www.powertraveller.com

    The handy SolarMonkey has a clamshell design with two solar panels and an integrated battery.

  • RAVPower 15-Watt Foldable Dual-Port Solar Charger

    Power Output (rated) - 15 watts
    Integrated Battery / Outputs - No / 2 USB (3 amps total)
    Weight - 27.1 ounces
    Dimensions (Folded/Open) - 7.5 x 10.1 x 1.3 / 31.25 x 10.1 x 0.6 inches
    MSRP - $53
    URL - http://www.ravpower.com

    The RAVPower offering is powerful and very affordable.

  • StrongVolt Solar12

    Power Output (rated) - 12 watts
    Integrated Battery / Outputs - No / USB
    Weight - 16.1 ounces
    Dimensions (Folded/Open) - 7.6 x 10.1 x 0.8 / 21.8 x 10.1 x .25 inches
    MSRP - $120
    URL - http://www.strongvolt.com

    A mid-line 12-watt unit, the Solar12 has a unique charge controller.

  • Voltaic Fuse 6W Solar Charger

    Power Output (rated) - 6 watts from panel, 5 watts from battery
    Integrated Battery / Outputs - Included separate battery (4,000 mAh) / USB (1 amp)
    Weight - 18.5 ounces (panel), 4.1 ounces (battery)
    Dimensions (Folded/Open) - 11 x 8.8 x 1 inches
    MSRP - $129
    URL - www.voltaicsystems.com

    This kit bundles a 6W solar panel, 4,000-mAh battery, and custom carrying case.

More From Issue 13

Don’t miss essential survival insights—sign up for Recoil Offgrid's free newsletter today.

Read articles from the next issue of Recoil Offgrid: Issue 14

Read articles from the previous issue of Recoil Offgrid: Issue 12

Editor's Note: This article has been modified from its original print version for the web.


Curated Offers: This Tactical Flashlight Is An Emergency Kit Essential

Just because the sun has set doesn't mean your adventure has to come to an end. With a flashlight, we can light our path while deterring any assailants or hostile wildlife. But when you're out in the thick of the night, you can't trust your run-of-the-mill, convenience store flashlight. You need more power. Enter the Army Gear Z9 Tactical Military Flashlight, a tactical flashlight used by the likes of the Army Rangers and the Marine Corp.

Composed of aircraft grade aluminum, this flashlight is powered by an impressive 500 lumen LED light that can be seen from over a mile away. Additionally, it's capable of five different modes, from strength adjustments to an SOS mode, helping keep you safe in an emergency situation. During the daytime, you can easily tote this flashlight in its complimentary padded case, complete with a charger and a rechargeable battery, so you don't have to worry about it losing power when you need it. It's an all-in-one flashlight that packs enough light for any situation you find yourself in. Plus, this tactical flashlight is dressed in infantry camo print, allowing you to blend into the scenery.

If you're headed out on an adventure anytime soon, you're going to want to make sure you have an Army Gear Z9 Tactical Military Flashlight in tow. And you can pick one up for $19.99, which is 86% off the original price.


Video: Living Out of a Storage Unit

In dense urban areas around the world, housing costs can be extremely high. Paying several thousand dollars each month for a one-bedroom flat isn't unheard of in many cities, and in Manhattan, the average apartment price has reached $2.19 million. Yes, you read that right. This fact has led some city-dwellers to come up with creative ways to live independently and dodge these extreme rent costs. Take, for example, the Google employee who lived in a box truck in his employer's parking lot. By doing so, he managed to avoid the area's exorbitant housing prices and save 90% of his income.

A 23-year-old Google employee named Brandon lived in this repurposed Ford box truck.

A 23-year-old Google employee named Brandon lived in this repurposed Ford box truck.

We recently came across another fascinating (and very strange) example of what some might call unconventional urban housing — others might call it illegal squatting. A YouTuber known as 007craft posted the following video of his tiny home inside a rented 10′ by 10′ storage unit. He says in the description that the unit costs him $205 per month, as opposed to the “$1,000+ a month” for a small apartment in the area.

Storage unit locker tiny home apartment urban house 3

As you might expect, it's generally a breach of the rental agreement to live inside these units under normal circumstances, so we'd advise against trying any of this unless the complex has been abandoned during some kind of SHTF scenario.

Since that's not the case for this video, 007craft has taken some steps to conceal his presence — he says “you have to be a ghost… if anybody finds out you're here, that's when you start running into trouble”. However, the taped-up extension cord running from the complex's outlet into the door frame remains laughably conspicuous. This seems like a fast way to get caught, evicted, and hit with a trespassing notice, but he doesn't seem too concerned.

Storage unit locker tiny home apartment urban house 4

He then proceeds to give a tour of his abode, like an ultra-low-budget version of MTV's Cribs. He has a full-size bed, couch, big-screen TV, stereo system, mini-fridge, microwave, hot plate, sink with clean water and grey water tanks, and even centrally-controlled lighting. You may wonder how he can afford all this but not an apartment… but that's besides the point.

“I even have a paper towel holder, I have all the amenities you'd find in an apartment.”

Using some 2x4s and angle brackets, he built compartments down from the unit's ceiling to house essential items like footwear, a snowboard, and his nunchucks (you just can't make this stuff up). Hey, you never know when he might need to defend himself against marauding ninjas.

Storage unit locker tiny home apartment urban house 5

Near the end of the video, 007craft shows how he refills his water tanks using a plastic jug, a hose, a funnel, and the nearby drinking fountain. There's no mention of a bathroom, but we imagine he uses the complex's facilities for that, too. Otherwise, it might involve more 2x4s, funnels, and plastic jugs, so we're not sure we want to know the details.

Storage unit locker tiny home apartment urban house 6

After about two months, 007craft says he moved into an actual apartment. So, even if you're dedicated to flying under the radar, living out of a storage unit in an active complex clearly isn't a long-term solution. And although many aspects of this video seem unintentionally humorous, we've got to give the guy kudos for making a 10×10′ room into a pretty efficient tiny home. Watch the full video below, and for more on unconventional off-grid housing, check out our previous articles on the DIY box truck RV and Sara Liberte's Battle Van build.


Improvised Knife Sharpening Methods

A knife is the most quintessential of all survival tools. Whether you're stranded in a desert, inundated by floods, caught in a snowstorm, or stuck in any other potentially life-threatening situation, having a reliable cutting tool is a must.

While opinions on what constitutes a proper “survival knife” will always vary greatly, the defining quality that makes a knife a knife remains the same: it must cut. It must also continue to cut until your emergency situation is over and life as you know it returns to normal. To make sure it does that, you need to know how to sharpen your knife, if necessary, with improvised means.

Cutting-Edge Basics

A knife essentially functions as a miniature saw or a miniature ax. When properly sharpened, its cutting edge terminates at an acute V-shaped angle. Depending upon the grit size of the abrasive used to finish the edge, the size of its microscopic teeth varies from relatively coarse (great for cutting rope and other fibrous materials) to extremely fine and polished (for scalpel-like cutting, usually in softer materials).

In its saw-like mode, the edge cuts when it's drawn longitudinally through the material while constant pressure is applied. This slicing style of cutting takes full advantage of the edge's tooth pattern and typically cuts with maximum efficiency.

As an ax, a knife's cutting edge works like a pure wedge. Rather than drawing the length of the edge through the material, it meets it at a right angle. The force of that contact — either ballistic (chopping or batoning) or sustained pressure (whittling) — sinks the edge into the material to separate it.

Either way, the key to a knife edge's performance is the acute V shape at its terminus. The exact angle of the V depends upon the blade's grind (i.e. flat, hollow, saber, convex, Scandi), its thickness at the beginning of the terminal cutting edge, the steel the blade is made from, and the hardness of that steel at the edge.

When a knife gets dull, the tiny teeth at the edge become mangled and ultimately the acute point of the edge's V is worn away, broken off, or bent over. When this happens, the cross-section of the edge looks more like a U than a V and your knife's defining function — cutting — is compromised until you sharpen it again.

Staying Sharp

In simplest terms, sharpening is the process of maintaining or, when necessary, recreating the V shape of your knife's edge. Since prevention is always better than a cure, let's start with keeping your knife sharp.

First of all, let's assume that when your specific balloon went up, you started the party with a sharp knife. Sharp, unlike pregnant, is a relative term, and some knife geeks have taken its meaning to crazy extremes. Assuming you have a life and don't spend all your time literally splitting hairs with your EDC folder, let's set a simple baseline. If you can cleanly slice a piece of typing paper with your knife, it's got a sharp, utilitarian edge suitable for most survival applications.

Based on that standard, let's say you've cut a few things and you notice that your knife's not as keen as it was when the emergency started. Rather than waiting for it to get duller, it's much easier to restore the edge by stropping it.

Have you ever seen an old-school barber run a straight razor against a piece of leather? That's stropping. It's basically the action of drawing your edge across a mildly abrasive surface to realign the terminal portion of the V.

Like a barber's straight razor, knife edges can be touched up to cut more smoothly by stropping on a piece of leather — like this gun belt.

Like a barber's straight razor, knife edges can be touched up to cut more smoothly by stropping on a piece of...

To strop a knife, hold it in a normal grip and place the blade flat on the stropping medium. Ideally, do this with an overhead light source so you can clearly see the shadow under the edge. Now, raise the back of the blade until the shadow disappears and the bevel of the terminal cutting edge is flat on the strop. Maintaining that angle and moderate downward pressure, wipe the blade across the strop, leading with the spine of the blade so the edge trails behind (just like spreading butter on toast). Flip your hand over and repeat the process on the other side of the edge. Work from the “heel” of the edge (closest to the handle) to the tip so you strop its entire length.

Initially, maintaining the proper angle throughout each stroke will be tough, but with practice you'll get more consistent. That muscle memory and understanding of angles will also come in handy when learning other improvised sharpening methods.

What materials make good improvised strops? The easiest and most practical is the stout leather belt that may already be part of your EDC kit. Take the belt off, hook the buckle to something or step on one end, hold the other end taut, and strop away. Purpose-designed leather strops are usually rubbed with jeweler's rouge or polishing compound before they're used. Doing the same with the inside surface of your leather belt ensures that you've always got a way to touch up your knife edge at all times. If you want to be an overachiever, you could even consider sticking a patch of fine (about 240-grit) adhesive-backed sandpaper to the inside of your belt for more serious improvised sharpening.

In addition to belts, heavy cardboard also makes a great improvised strop. Lay a piece of dry corrugated cardboard on a flat surface and use the same technique to touch up your edge. Ideally, it should be about twice the length of your blade to make it easy to hold as you sharpen. Sprinkling a little dry dirt or fine sand on it can replicate the abrasive quality of polishing compound and give even better results.

Stropping is very easy to learn, and keeping a knife sharp is simpler than making it sharp once it's dull.

Iron Sharpeneth Iron

If you watch a good butcher or chef in action, you'll notice that he regularly touches up the edge of his knife with a long, wand-like thing called a steel. Drawing the edge along the hard, grooved surface of a butcher's steel realigns its teeth and keeps it sharper longer. Like stropping, steeling is a maintenance strategy and won't restore a very dull edge, but it's still worth adding to your bag of tricks.

To steel one knife on the spine of another, draw the edge from heel to tip while maintaining the proper angle, then alternate sides.

To steel one knife on the spine of another, draw the edge from heel to tip while maintaining the proper angle, then...

So where do you find a hard piece of steel with fine longitudinal grooves in it in the field? How about the spine of your other knife? In a survival situation, two is one and one is none. Carrying two or more knives allows you to have different tools for different jobs (i.e. one for tough jobs and one for fine work) and can allow you to use the back of one blade to steel the edge of the other. If your knives don't naturally have a longitudinal groove pattern in the spine, create that pattern before you go afield by draw-filing the blade spine with 150-grit sandpaper.

To steel your edge, use the same overhead light and shadow method described earlier to determine the sharpening angle of your knife. However, instead of wiping the edge as if spreading butter, lead with the edge — as if trying to slice a thin layer off the spine of the blade you're using as a steel. Use light pressure, work from the heel to the tip, and alternate sides with every stroke.

Back to the Grind

Sooner or later, your edge is going to get dull enough that stropping or steeling it won't be enough to keep it sharp. In simple terms, the acute V shape of your edge has been dulled to a rounded U shape. To restore its sharpness, you've got to grind away steel on both sides of the edge to turn the U back into a V. Doing that requires two things: 1) an abrasive hard enough to grind steel yet fine enough to leave an acute edge angle, and 2) a steady enough hand to maintain a consistent angle as you remove steel on both sides of the edge. Let's tackle the hard part first: skill.

Like using turn signals and saying please and thank you, knowing how to sharpen a knife on a flat stone used to be a common skill. However, as fewer people carry knives and old-school Arkansas stones are replaced by motors, angle jigs, and weird Rube Goldberg, crew-served sharpening contraptions, freehand sharpening is becoming a lost art. Well, if you have visions of yourself bringing your knife to hair-popping sharpness on a river rock, I strongly suggest you find that lost art. Invest in a good bench stone at least as long as your longest EDC blade, break out your knives, and spend some time learning how to sharpen.

If you want to have any hope of sharpening a knife on an improvised abrasive, first learn how to do it with a traditional flat stone. After determining the proper angle, start with the heel of the edge closest to the handle and draw the entire edge across the stone as if trying to slice off a thin layer. Repeat on the other side and keep going until you've achieved the desired degree of sharpness.

If you want to have any hope of sharpening a knife on an improvised abrasive, first learn how to do it with a...

The basic technique, as described previously, is to lay your blade flat on the stone. With a light source directly overhead, raise the spine of the blade until the shadow under the edge just disappears. For most knives, this happens when the blade-to-stone angle gets to about 20 degrees. Do this repeatedly until you start to get a tactile feel for the proper angle. Then, maintaining that angle and applying firm (but not hard) downward pressure, draw the edge across the stone from heel to tip. If your blade has belly (i.e. upward curvature) near the tip, you'll have to raise your hand a bit to maintain a constant edge angle.

To see if you're doing it right, get a Sharpie marker and a magnifying glass. Color both sides of the edge bevel with the marker and take a few passes on a dry stone. Then, examine your work with the magnifying glass. If your angle is correct, you should be removing steel right near the edge. If your angle is off or inconsistent, the shiny spots where the marker is scraped away will let you know and help you adjust your technique. Once you get the hang of it, follow the stone manufacturer's directions, using oil or water as necessary to keep the stone's pores clean.

When You Can't Get Stoned

Armed with the skill to sharpen on a proper stone, you can now apply that skill to less proper, field-expedient abrasives. The exact abrasives you choose will depend upon your environment, but anything that's hard enough to scratch your knife blade can work. In general, you want to look for relatively smooth materials that allow you to achieve finer teeth and a sharper edge. Light-colored materials are also preferred as they provide visible evidence that they're actually removing steel.

The rounded, frosted edge at the top of a car's side window is an excellent improvised abrasive for knife sharpening. If you learn proper technique on a traditional stone, translating it to the car window should be no problem.

The rounded, frosted edge at the top of a car's side window is an excellent improvised abrasive for knife...

In an urban environment, one of the best expedient abrasives is the top edge of a car's side window. Glass is extremely hard and, when properly textured, will readily grind steel. The rounded, somewhat frosted surface at the top edge of a car window is just about perfect for this. Just roll the window down partway and use the same technique you use with a stone.

Many old-school knife users sharpened their knives on the rims of crocks, bowls, mugs, or other ceramic vessels. The exposed rim of the bottom of a coffee cup, which isn't covered by smooth glaze, will easily sharpen knife edges. Note the darkened area, which displays steel that's been removed from the edge.

Many old-school knife users sharpened their knives on the rims of crocks, bowls, mugs, or other ceramic vessels. The...

Many modern sharpening systems use ceramic abrasives. The very first modern sharpener of this type, the Crock Stick, got its name from the traditional method of honing knives on the rim or bottom of a ceramic crock. A modern expedient for this is the slightly rough bottom rim of a coffee cup or bowl. Use the same stone technique, pay attention to your angles, and you'll be cutting stuff in no time.

When all else fails, even a smooth, reasonably flat rock can be used to sharpen a knife. Light-colored rocks allow you to easily see when you're removing steel.

When all else fails, even a smooth, reasonably flat rock can be used to sharpen a knife. Light-colored rocks allow you...

In wilderness environments, even ordinary stones can be used as improvised sharpeners. Smooth, flat, river rocks work very well, especially if they're lighter colored so you can see the steel coming off and confirm your progress. Larger stones are easier to hold or brace than smaller stones, and once your knife is reasonably sharp, you can always follow up by steeling and stropping the edge to refine it.

The only good knife is a sharp one. With the right skills and knowledge, you and your knife can stay sharp anywhere.

Knife Sharpenability Factors

One aspect of knife selection that has a tremendous impact on “sharpenability” is blade steel. In recent years, the development of steels suitable for or specifically geared toward cutlery applications has exploded. The carbon steels and relatively simple stainless steels that used to dominate the production knife world have now been superseded by exotic, powder-metallurgy steels packed with ultrahigh levels of carbon, as well as vanadium, molybdenum, cobalt, niobium, and other elements. These alloys can greatly enhance the wear resistance and toughness of blade steels, allowing them to hold an edge better than ever.

Remember, though, that there are tradeoffs to everything. Blades that are resistant to dulling in use are also notoriously hard to grind and therefore more resistant to your efforts to sharpen them. Some high-performance alloys refuse to yield to anything less than diamond abrasives, so you'd be hard pressed to sharpen them with improvised means.

Simple, traditional blade shapes are also much easier to sharpen than blades with complex grinds and multiple bevels. In most cases, they cut better and offer greater versatility, too. Don't be fooled by hype or looks; focus on knives that look like knives, not something out of Star Wars.

Sharp is a relative term, but in general, an edge that's keen enough to slice typing paper is sharp enough for most chores. The challenge is how to get it that way and keep it that way without purpose-designed sharpening tools.

Sharp is a relative term, but in general, an edge that's keen enough to slice typing paper is sharp enough for...

Serrations are another controversial topic when it comes to survival knife selection. While well-designed serrations will hold an edge longer than a conventional plain edge and absolutely devour fibrous materials like rope and webbing, they are considerably more difficult to sharpen than straight edges and exceedingly difficult to sharpen with makeshift tools.

If you have to sharpen a serrated blade in the field, your best bet is to use a rock or other abrasive to work the edge on the side opposite the grind of the serration teeth (serrations are typically beveled only on one side of the blade). This method restores the sharpness of the serration points and edge without trying to reach down into the concave of every tooth. Depending upon the size of your blade's serrations, the rounded surface on the top of a car window may be able to fit the recesses, but it's still simpler and quicker to sharpen the non-bevel side.

Bushcrafters and other survivalists have always preferred simple carbon-steel blades with zero-ground “Scandi” (short for “Scandinavian”) grinds that are easy to sharpen with any available abrasive. While modern steels, serrations, and other high-tech features may offer high-performance in some circumstances, it often comes at the price of being high-maintenance — perhaps too high for SHTF-style sharpening.

More From Issue 23

Don’t miss essential survival insights—sign up for Recoil Offgrid's free newsletter today!

Read articles from the next issue of Recoil Offgrid: Issue 24

Read articles from the previous issue of Recoil Offgrid: Issue 22

Check out our other publications on the web: Recoil | Gun Digest | Blade | RecoilTV | RECOILtv (YouTube)

Editor's Note: This article has been modified from its original version for the web.