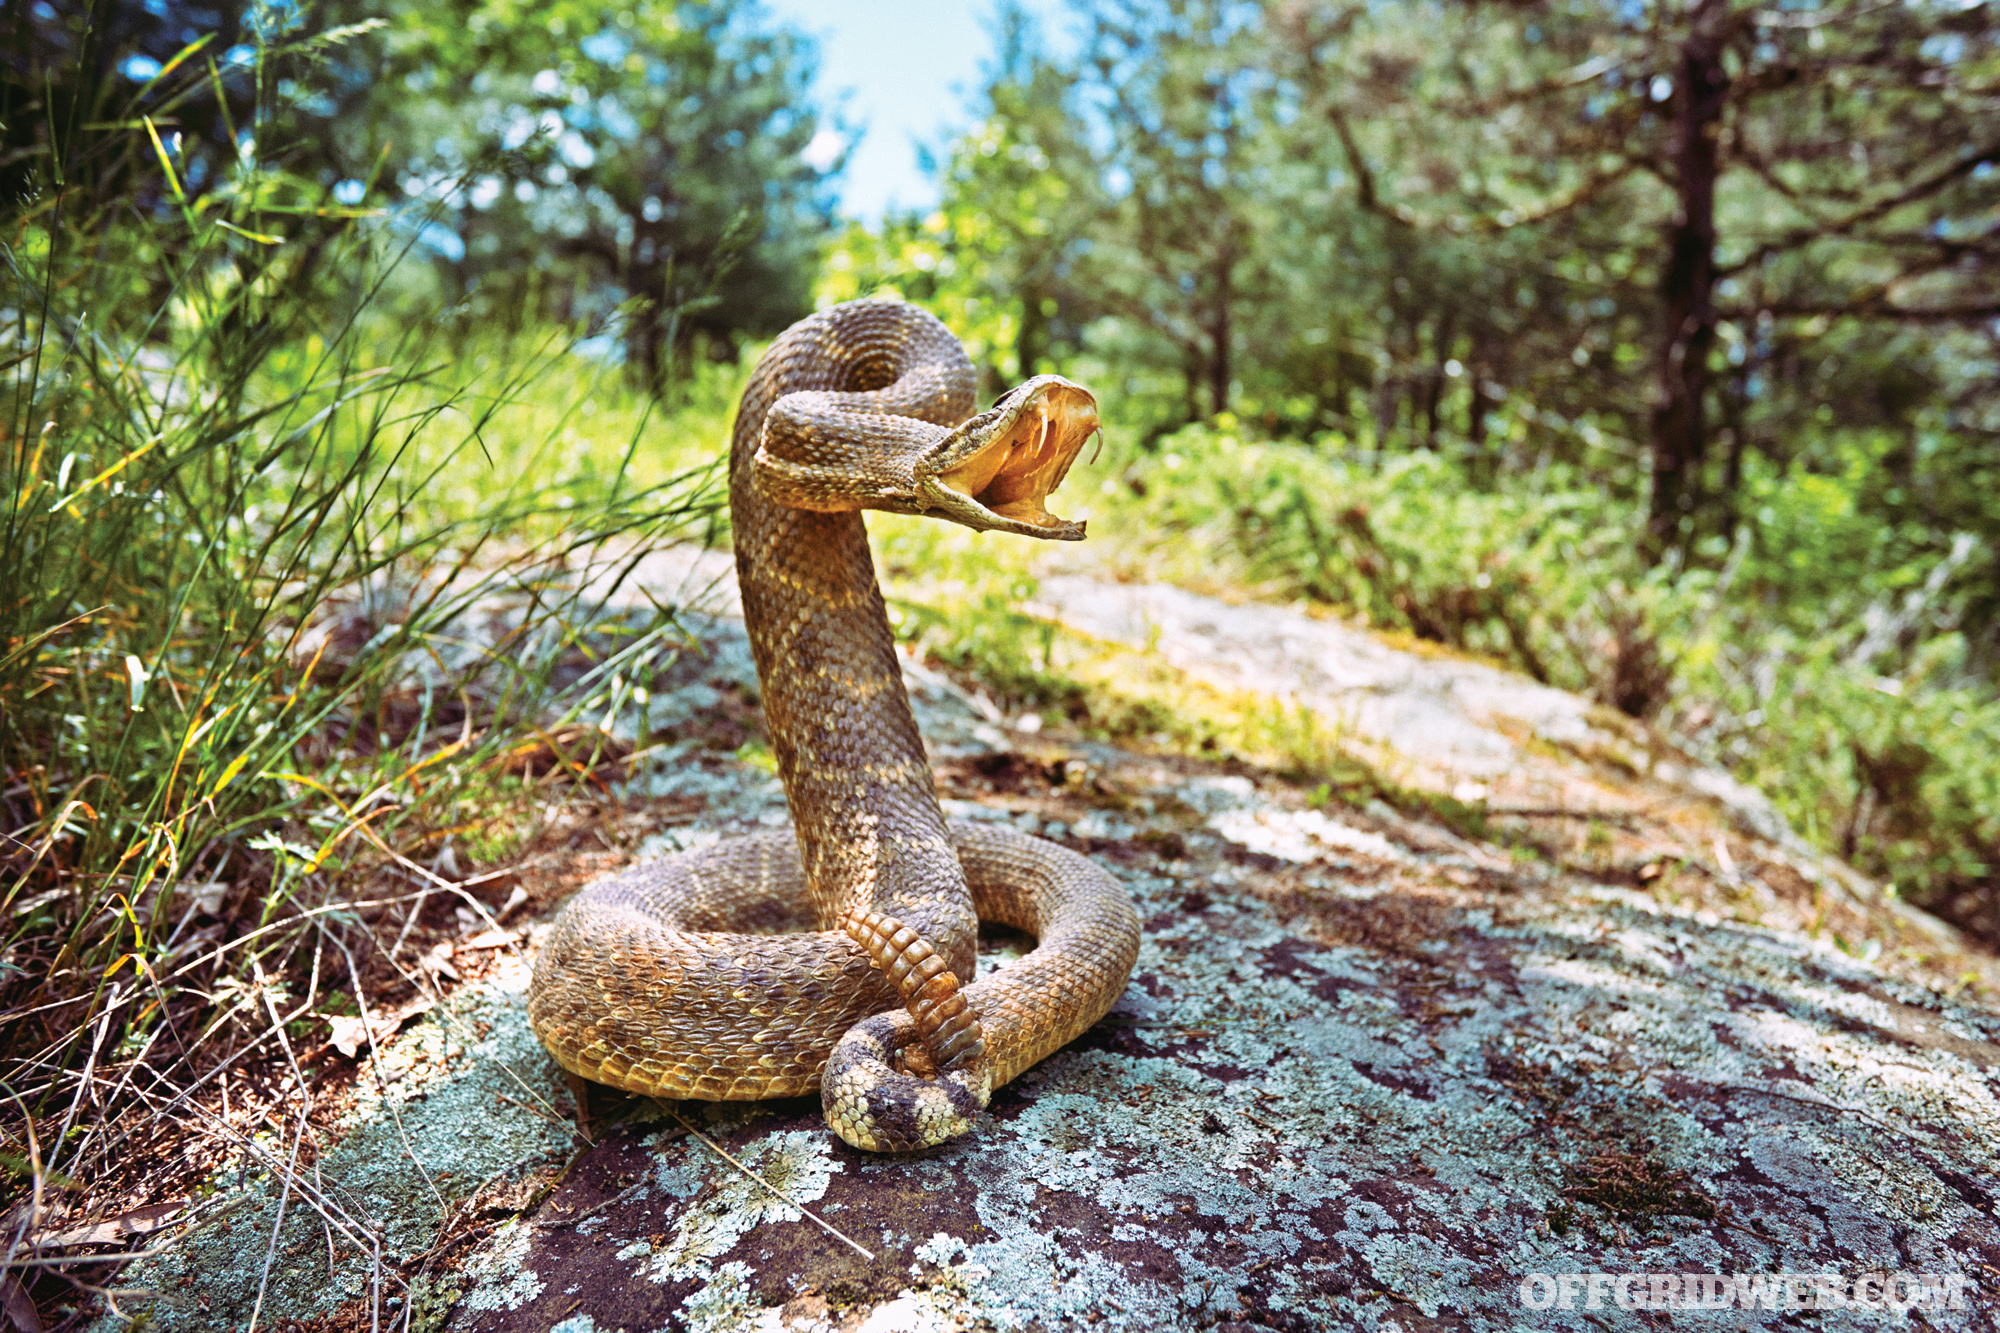
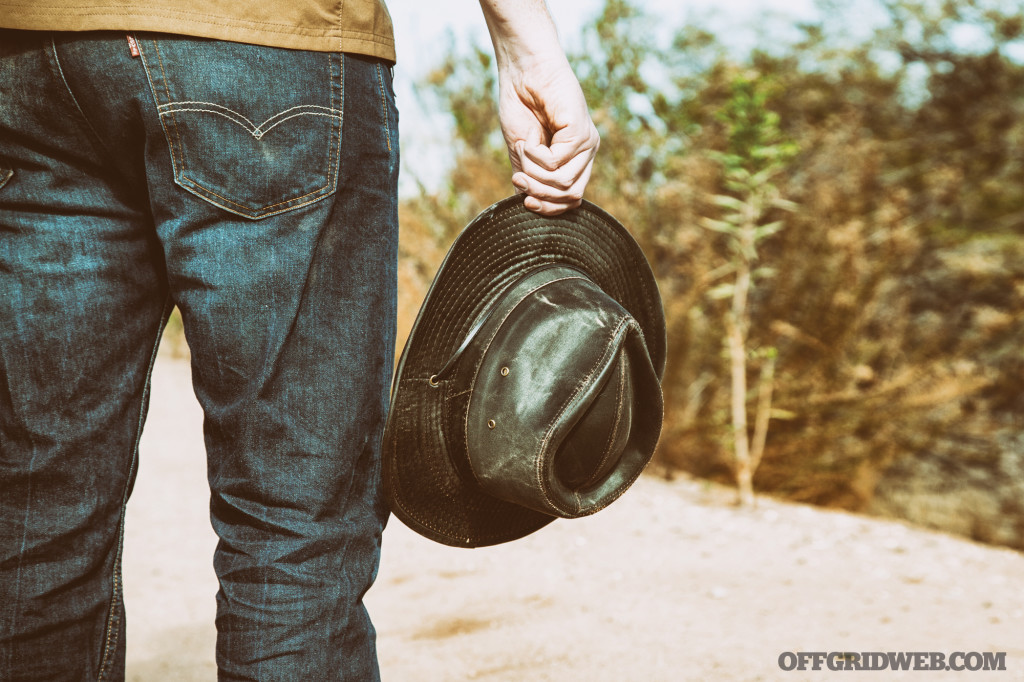
Basking in the warm sunlight on a cool day is a pleasant feeling. But when temperatures continue to climb and you can’t avoid its merciless heat and blinding glare, that same sunlight quickly becomes a source of frustration.
Even if you’re wearing polarized glasses to protect your eyes, the skin on your face and neck will be left wide open to ultraviolet radiation that can eventually lead to painful sunburns or skin cancer. Well, I’ll just wear sunscreen, you may think — but that’s also fraught with flaws. It’s an expensive consumable that’ll eventually run out in a survival situation, and sweating from heavy exertion can cause it to wash away and run into your eyes. On top of all this, an unprotected head will inevitably get hot in direct sunlight — in extreme climates, this can result in an elevated core temperature and heat stroke.

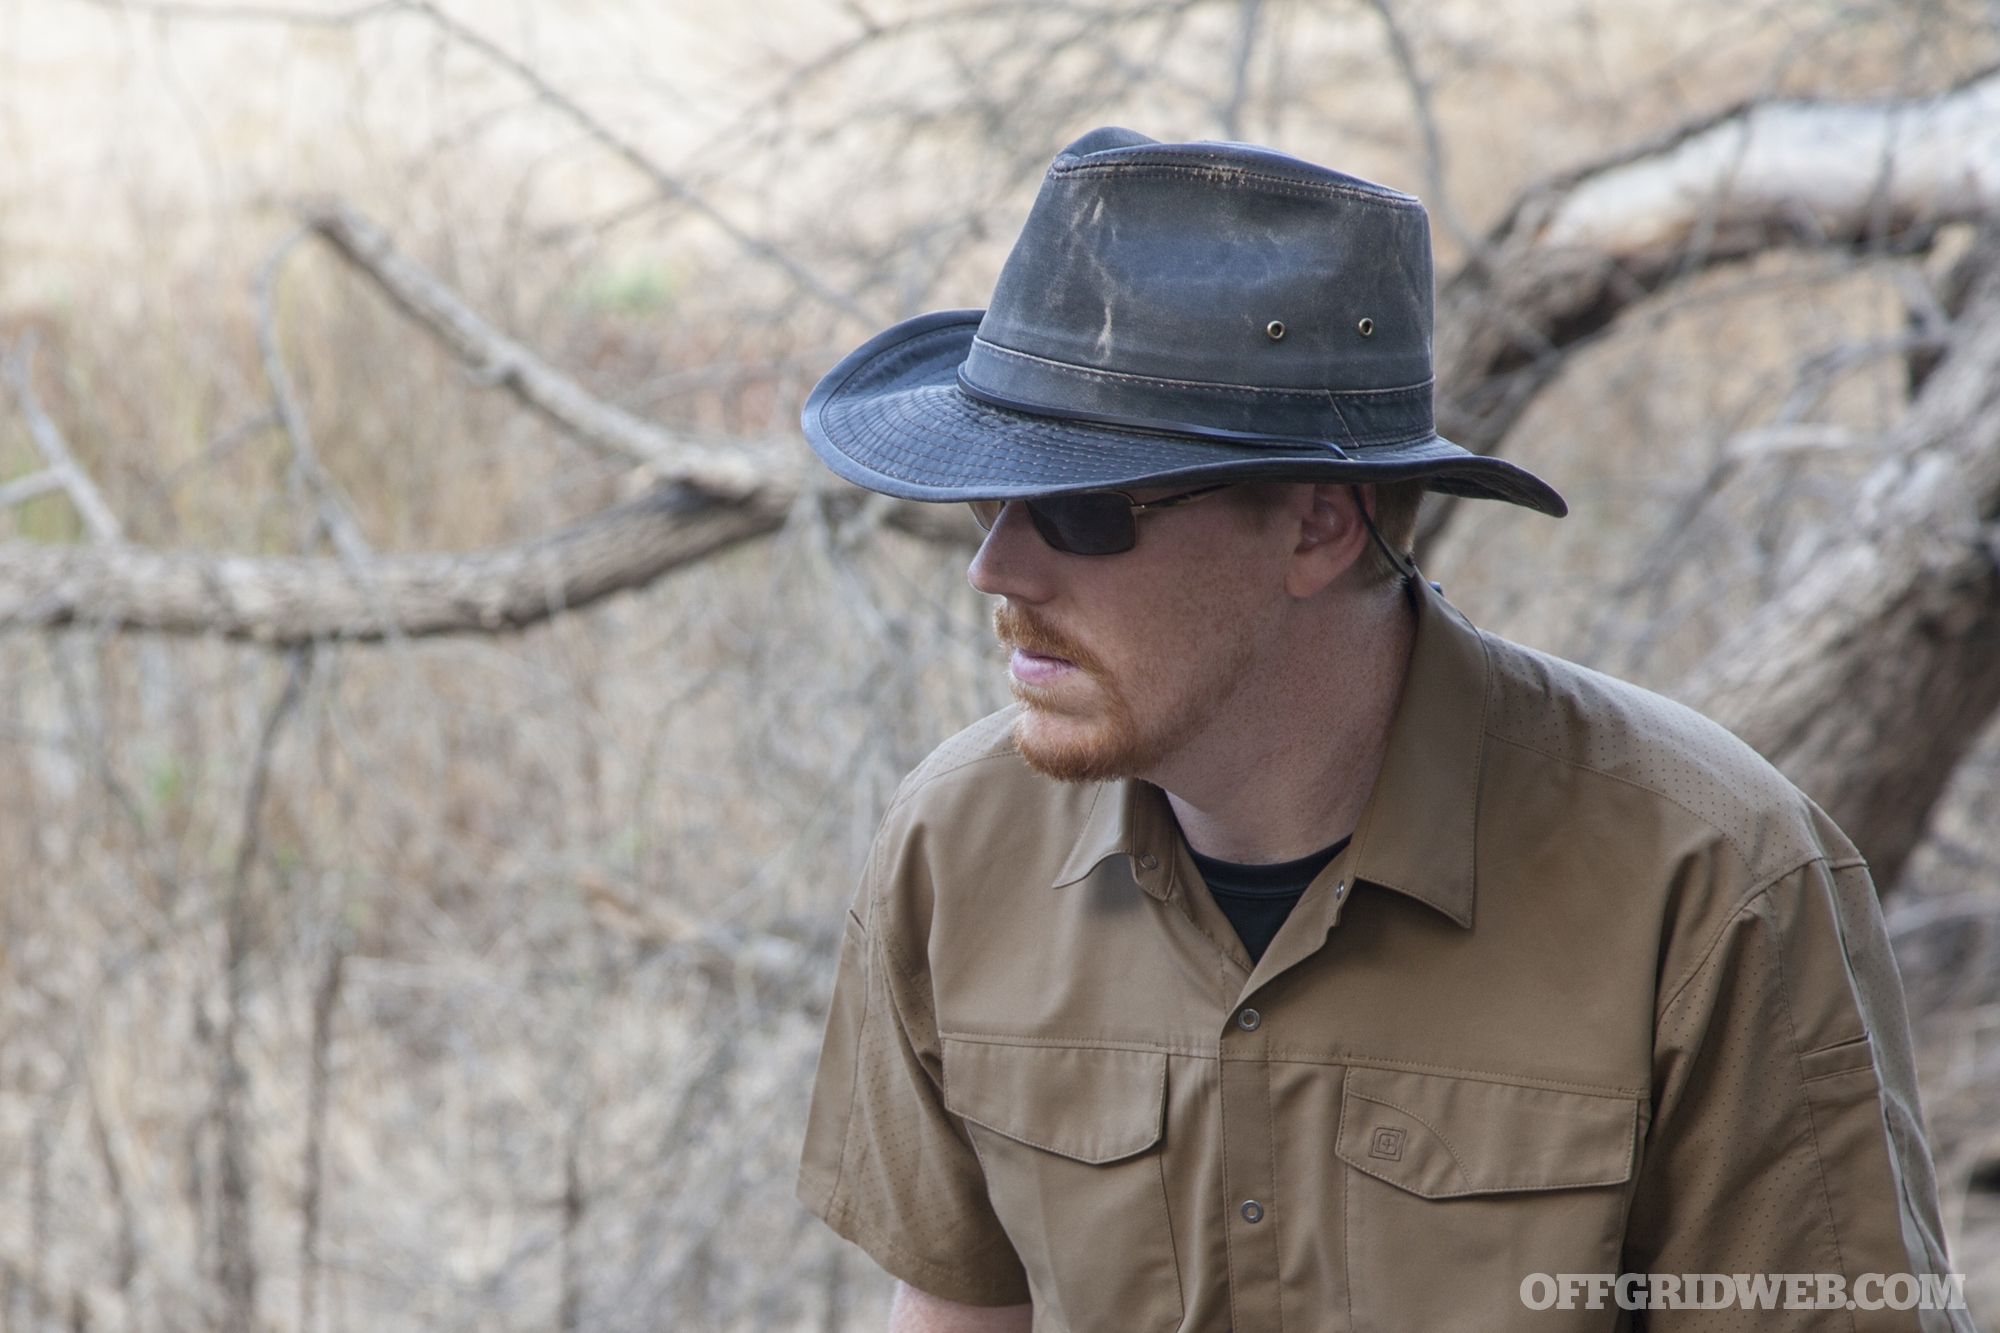
Fortunately, there’s a simple solution to all these problems: Physically block the sunlight with a wide brim hat. Unlike a ball cap, this type of hat offers 360-degree protection for your head and neck. All of the hats in this guide are also rated with an Ultraviolet Protection Factor (UPF) of 50+, which is the highest available rating for UV protection and indicates blockage of about 98 percent of these sunburn-causing rays. Additionally, many of these hats offer water-resistance to keep you dry and insulated from spring and summer rainstorms.
We selected and evaluated eight wide brim hats that’ll let you keep a cool head, no matter the situation. Read on to hear our thoughts on each.
Understanding Wide Brim Hat Sizes
It’s important to select a hat design that meets your needs, but it’s equally necessary to order your chosen hat in the correct size. A hat that’s too small will feel constricting and can cause headaches, while a hat that’s too large will constantly shift on your head and might fall off or blow away.
Unfortunately, manufacturers use several different forms of measurement: inches, centimeters, letter size (e.g. S/M/L/XL), and U.S. hat size (a fractional number between 6 ½ and 8). Adding to the confusion, some manufacturers don’t transition between sizes at the same points — a 23 ½-inch head may be considered large by some manufacturers, but an X-large by others.
For the purposes of this article, we have converted all hat sizes to inches. To determine your size, simply wrap a tape measure or string around your head at the level where you’d normally wear a hat, keeping it snug (but not excessively tight). The resulting measurement can be converted to any other hat size using the size charts available on each manufacturer’s website. If you’re on the fence between sizes, we’d recommend going with the larger of the two — you can often add padding inside the sweatband or cinch it down to fit more securely.
Web-Exclusive: Boonie Hats
One well-known category of wide brim hats is the boonie hat. These hats gained popularity among members of the U.S. Special Forces during the Vietnam War, and are still frequently worn by members of military and law enforcement organizations around the world.

Boonie hats offer several distinctive features other wide-brim hats may lack. They’re usually available in muted colors or camouflage patterns, and their soft, wavy brim is designed to crumple and pack down into a pocket or rucksack. Most notably, boonie hats have a foliage ring around the crown, which can be stuffed with vegetation to conceal the wearer’s silhouette in dense jungles or tall grass.
As a web-exclusive supplement to this article, we reviewed three boonie hats from 5.11 Tactical, Propper, and Rothco. Click here to read our complete Boonie Hat Buyer’s Guide online.
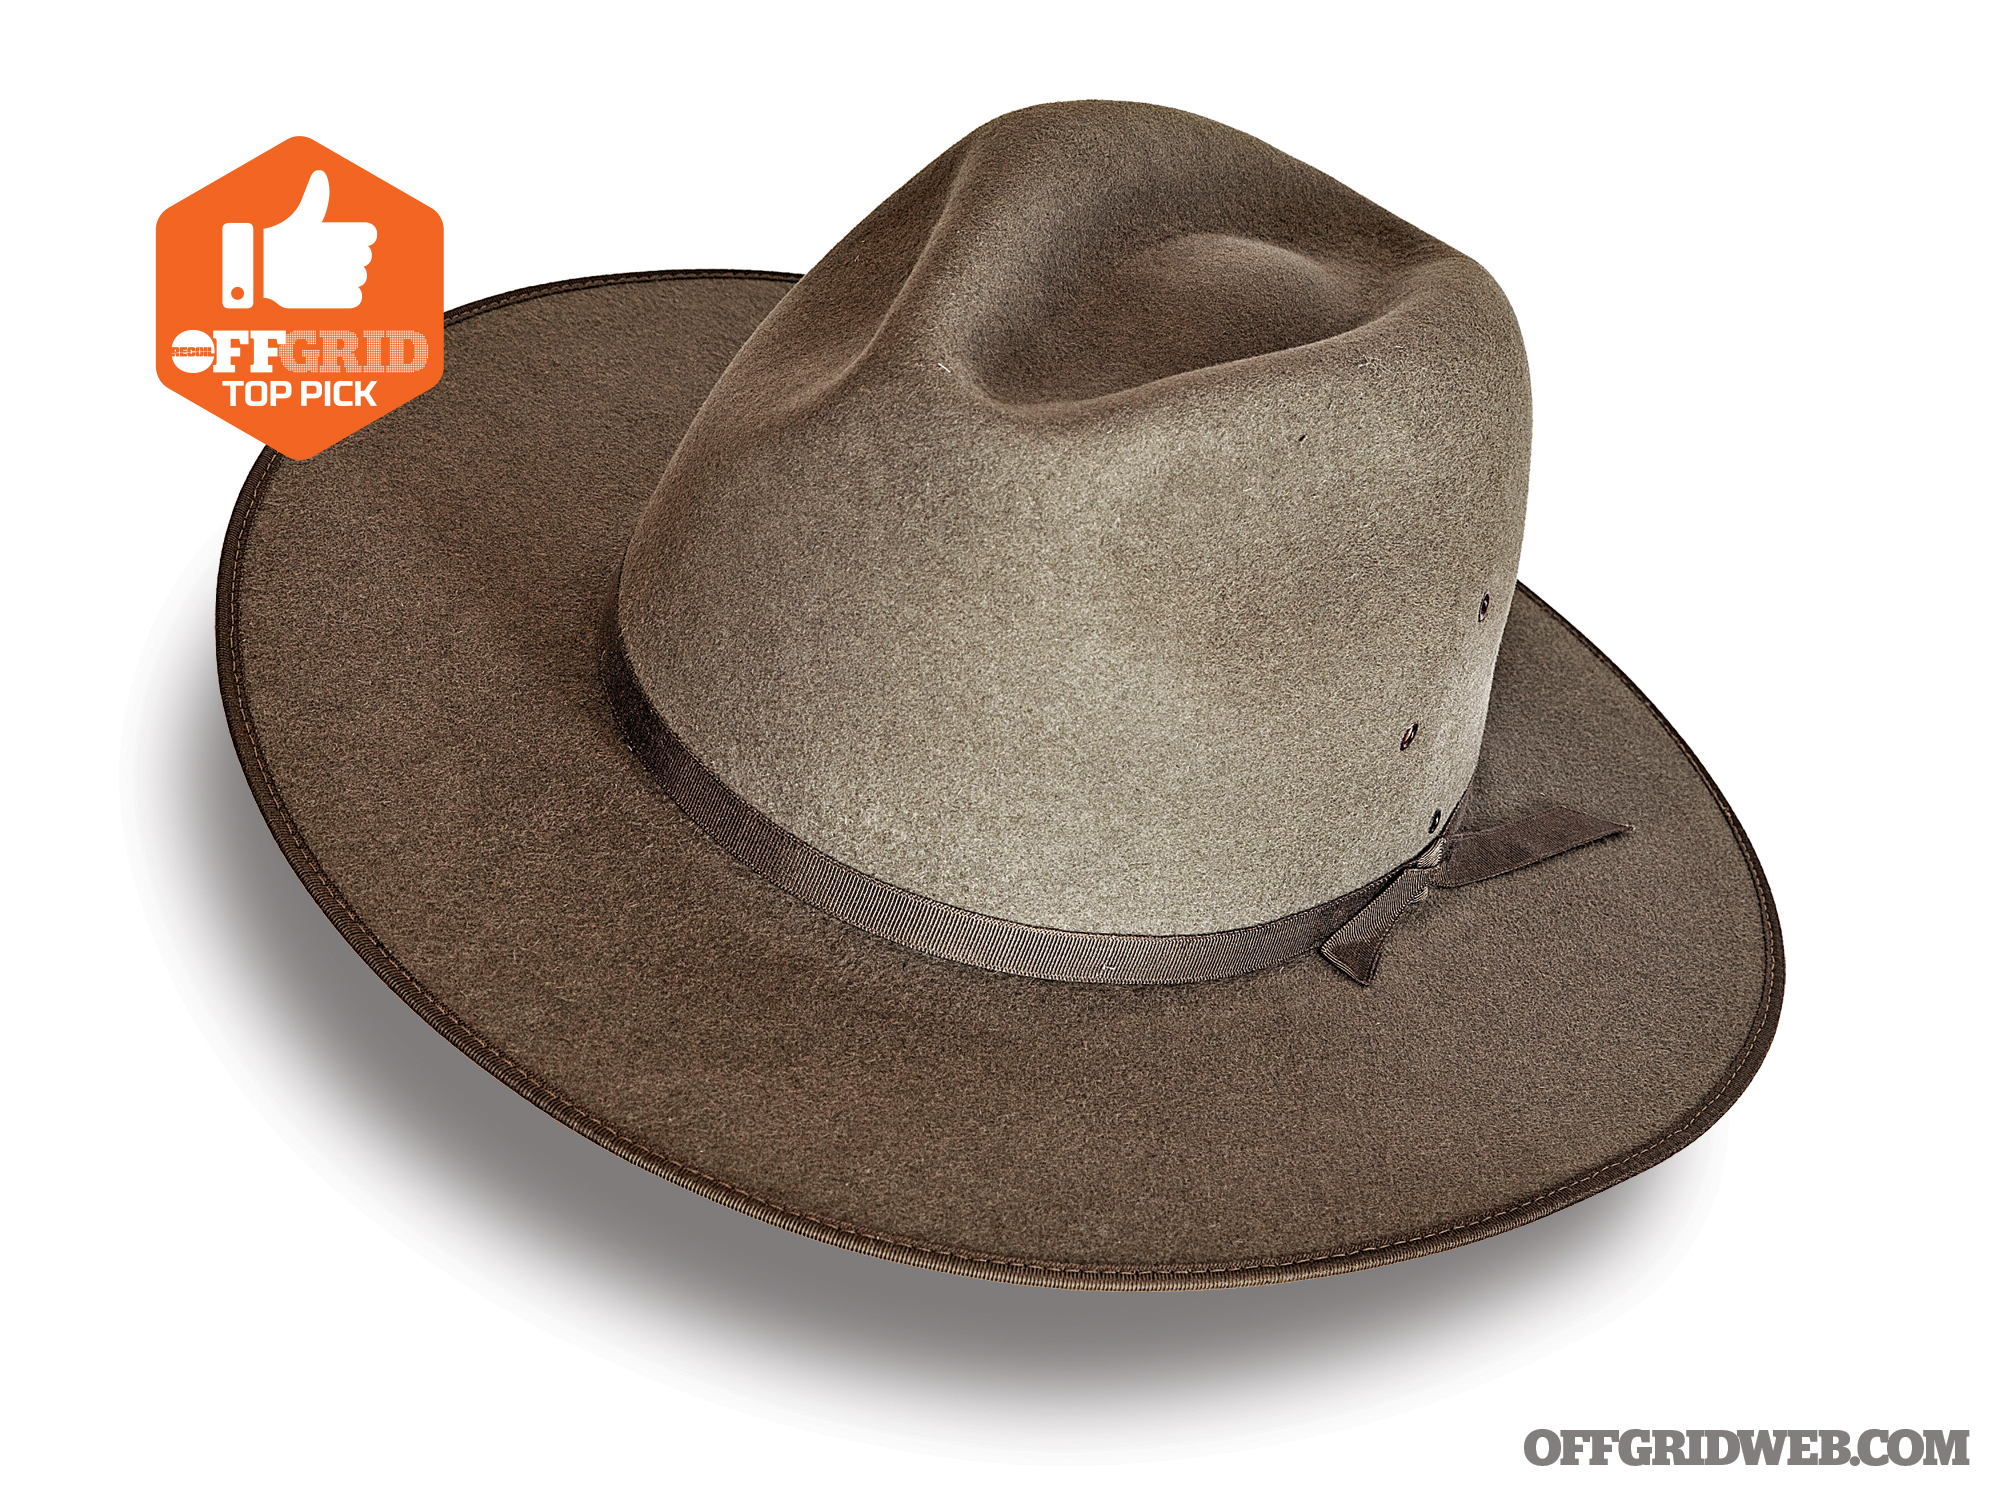
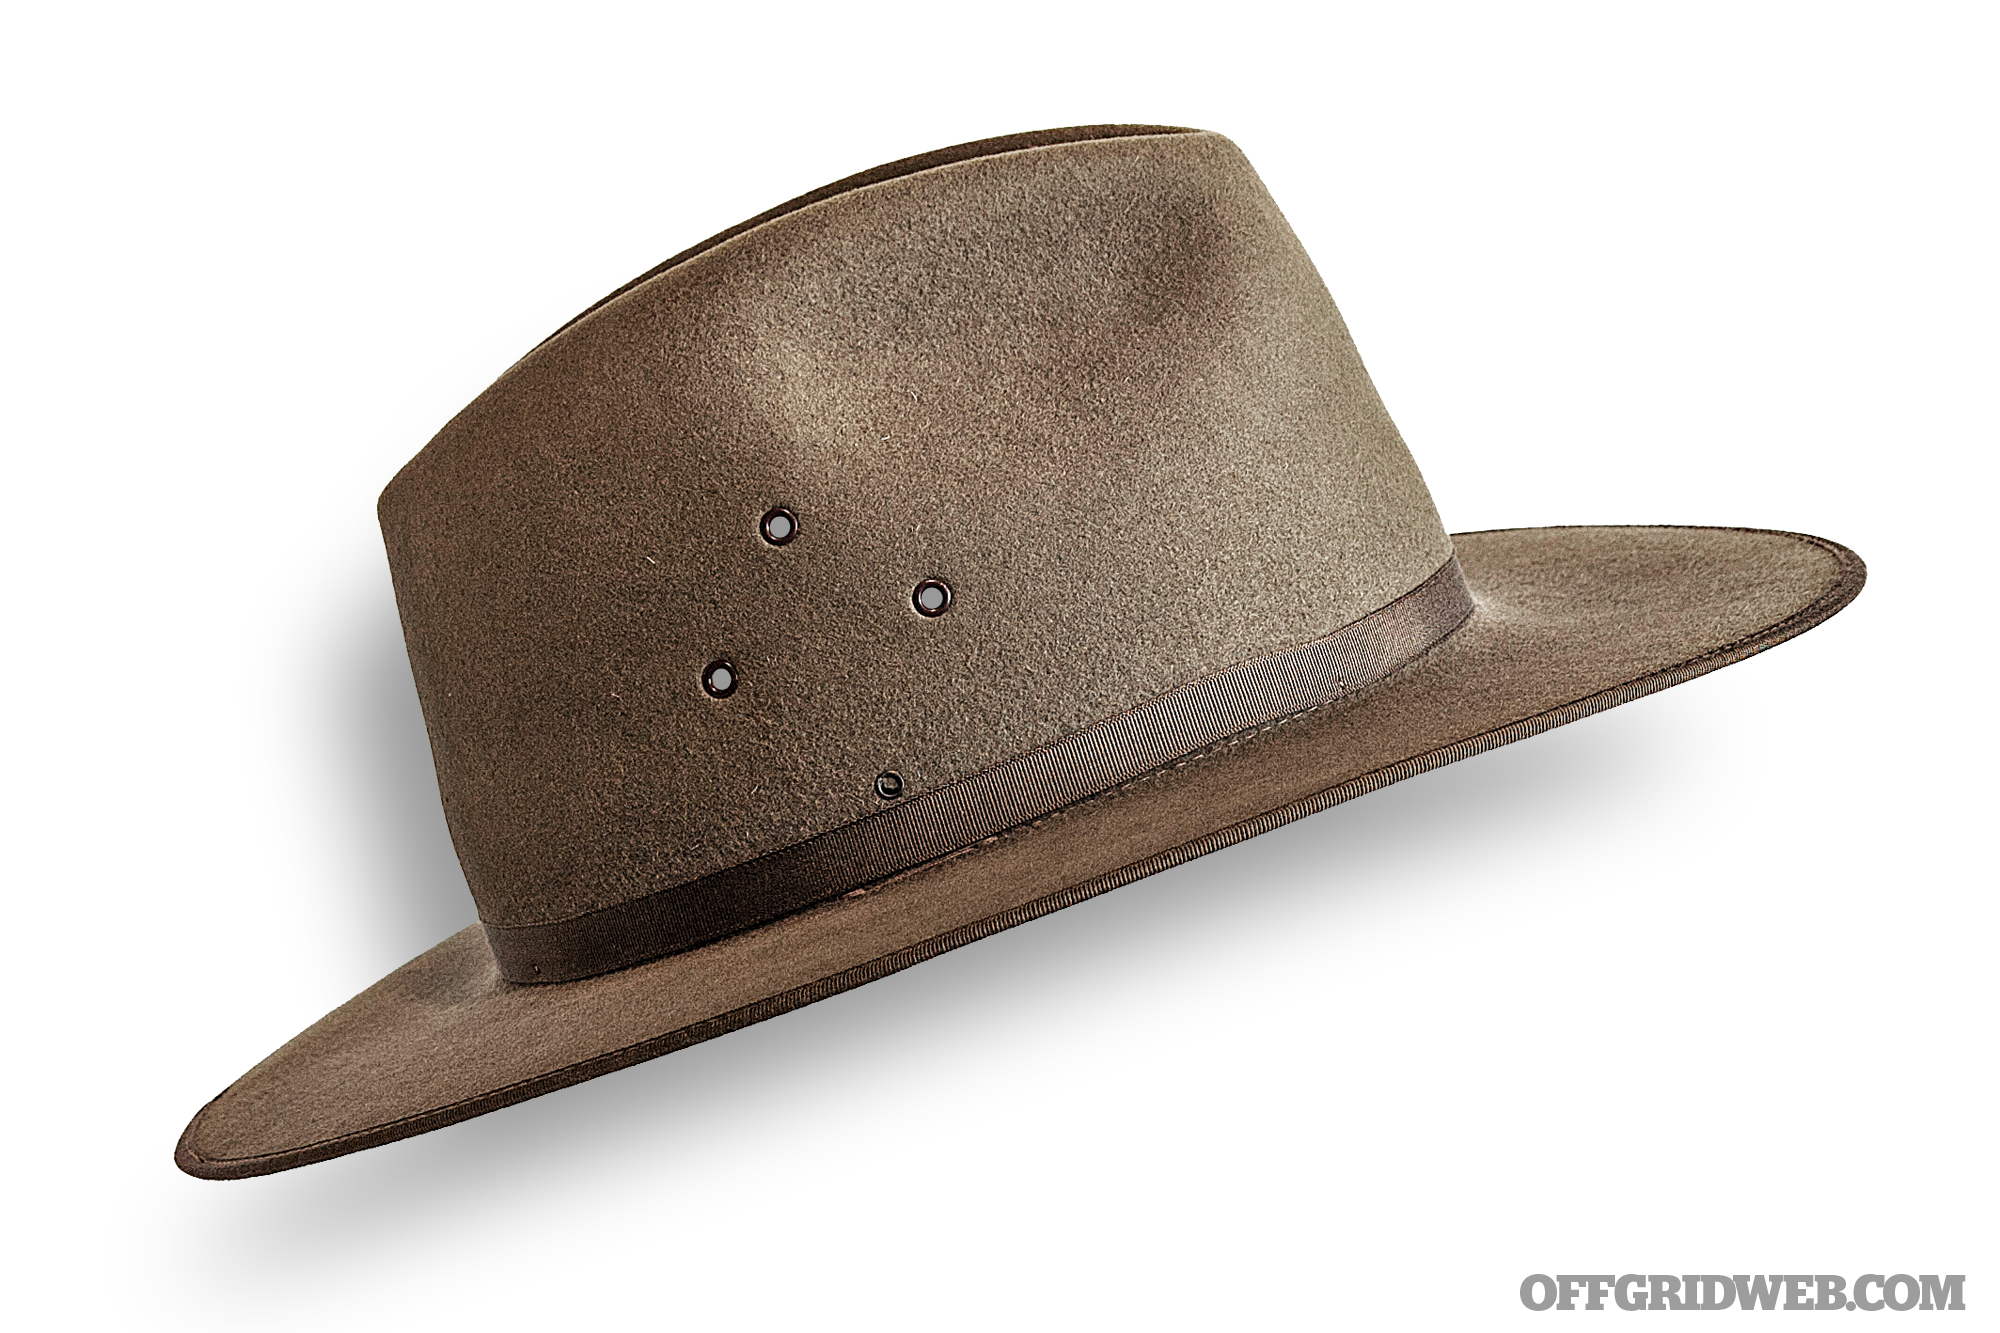
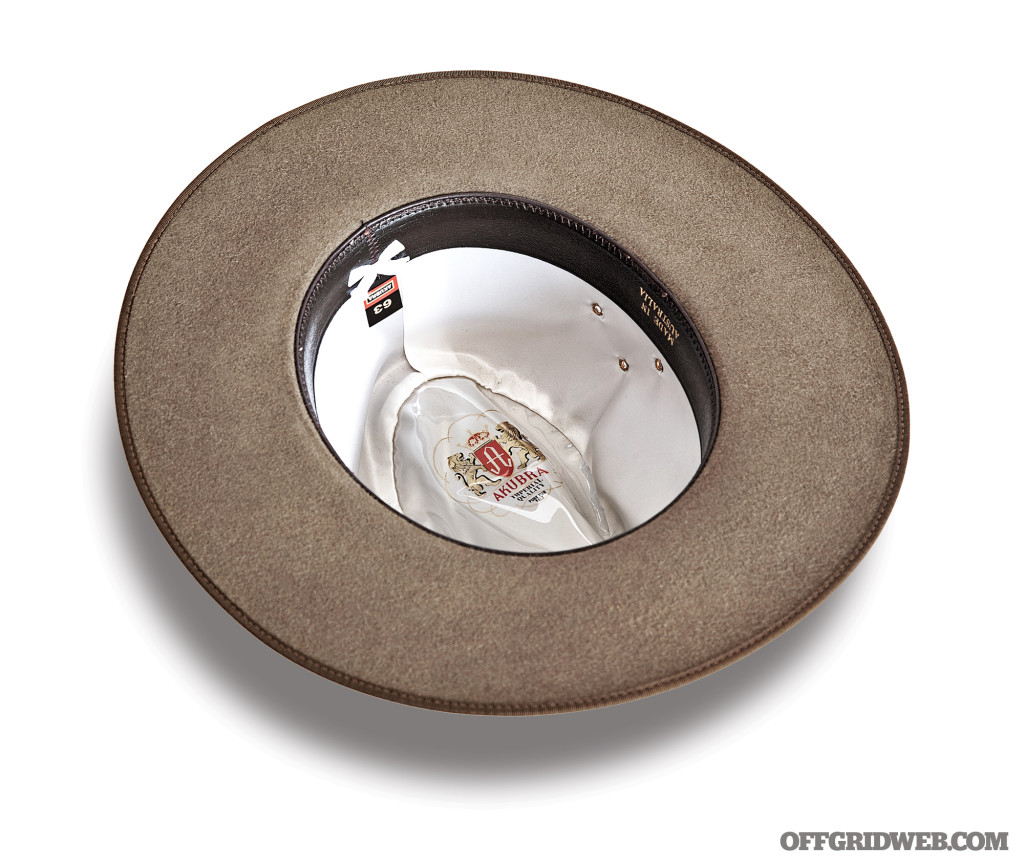
Akubra Coober Pedy
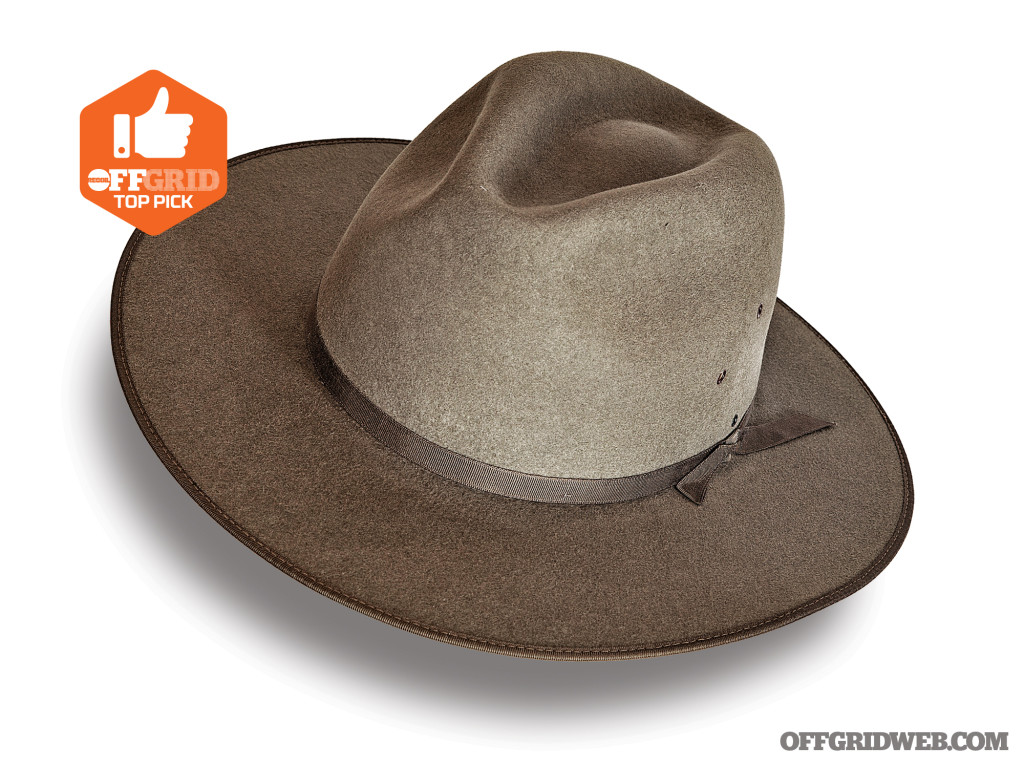
Materials
Imperial Quality rabbit fur felt, satin lining, vent eyelets, reeded roan sheepskin leather sweatband, ribbon band
Colors
Moss Green, Santone Fawn
Sizes
21 1⁄8 to 25 inches
MSRP
$145
URL
davidmorgan.com

Notes:
The roots of Australian hatmaker Akubra can be traced all the way back to 1874, when founder Benjamin Dunkerley moved from England to Tasmania and opened a small fur felt hat business. Since then, the company has flourished into an Aussie staple, producing iconic designs such as the slouch hats used by the country’s military since the early 1900s. All Akubra hats are made in Australia to this day, and exported to distributors around the world. The Coober Pedy is a classic outback-style hat, named after the remote desert mining town. It features a high-pre-creased crown and stiff 3 1⁄4-inch brim that’s turned down in front and rear for sun and rain protection. As with most fur felt hats, the Coober Pedy can be reshaped and contoured to the wearer’s preference using steam and gradual pressure.
Pros:
- Top-shelf materials and outstanding build quality
- Brim and crown shape can be precisely adjusted by applying steam from a teakettle.
- Thin fur felt is light and breathable enough to wear in hot weather
Cons:
- Storage is a problem — the firm brim and crown cannot be crushed or packed.
- Lacks a chin strap, although one can be purchased separately and attached to built-in hooks
- The Australian-market version of this hat gets a cool kangaroo leather band, while the U.S.-market hat comes with a simple ribbon.
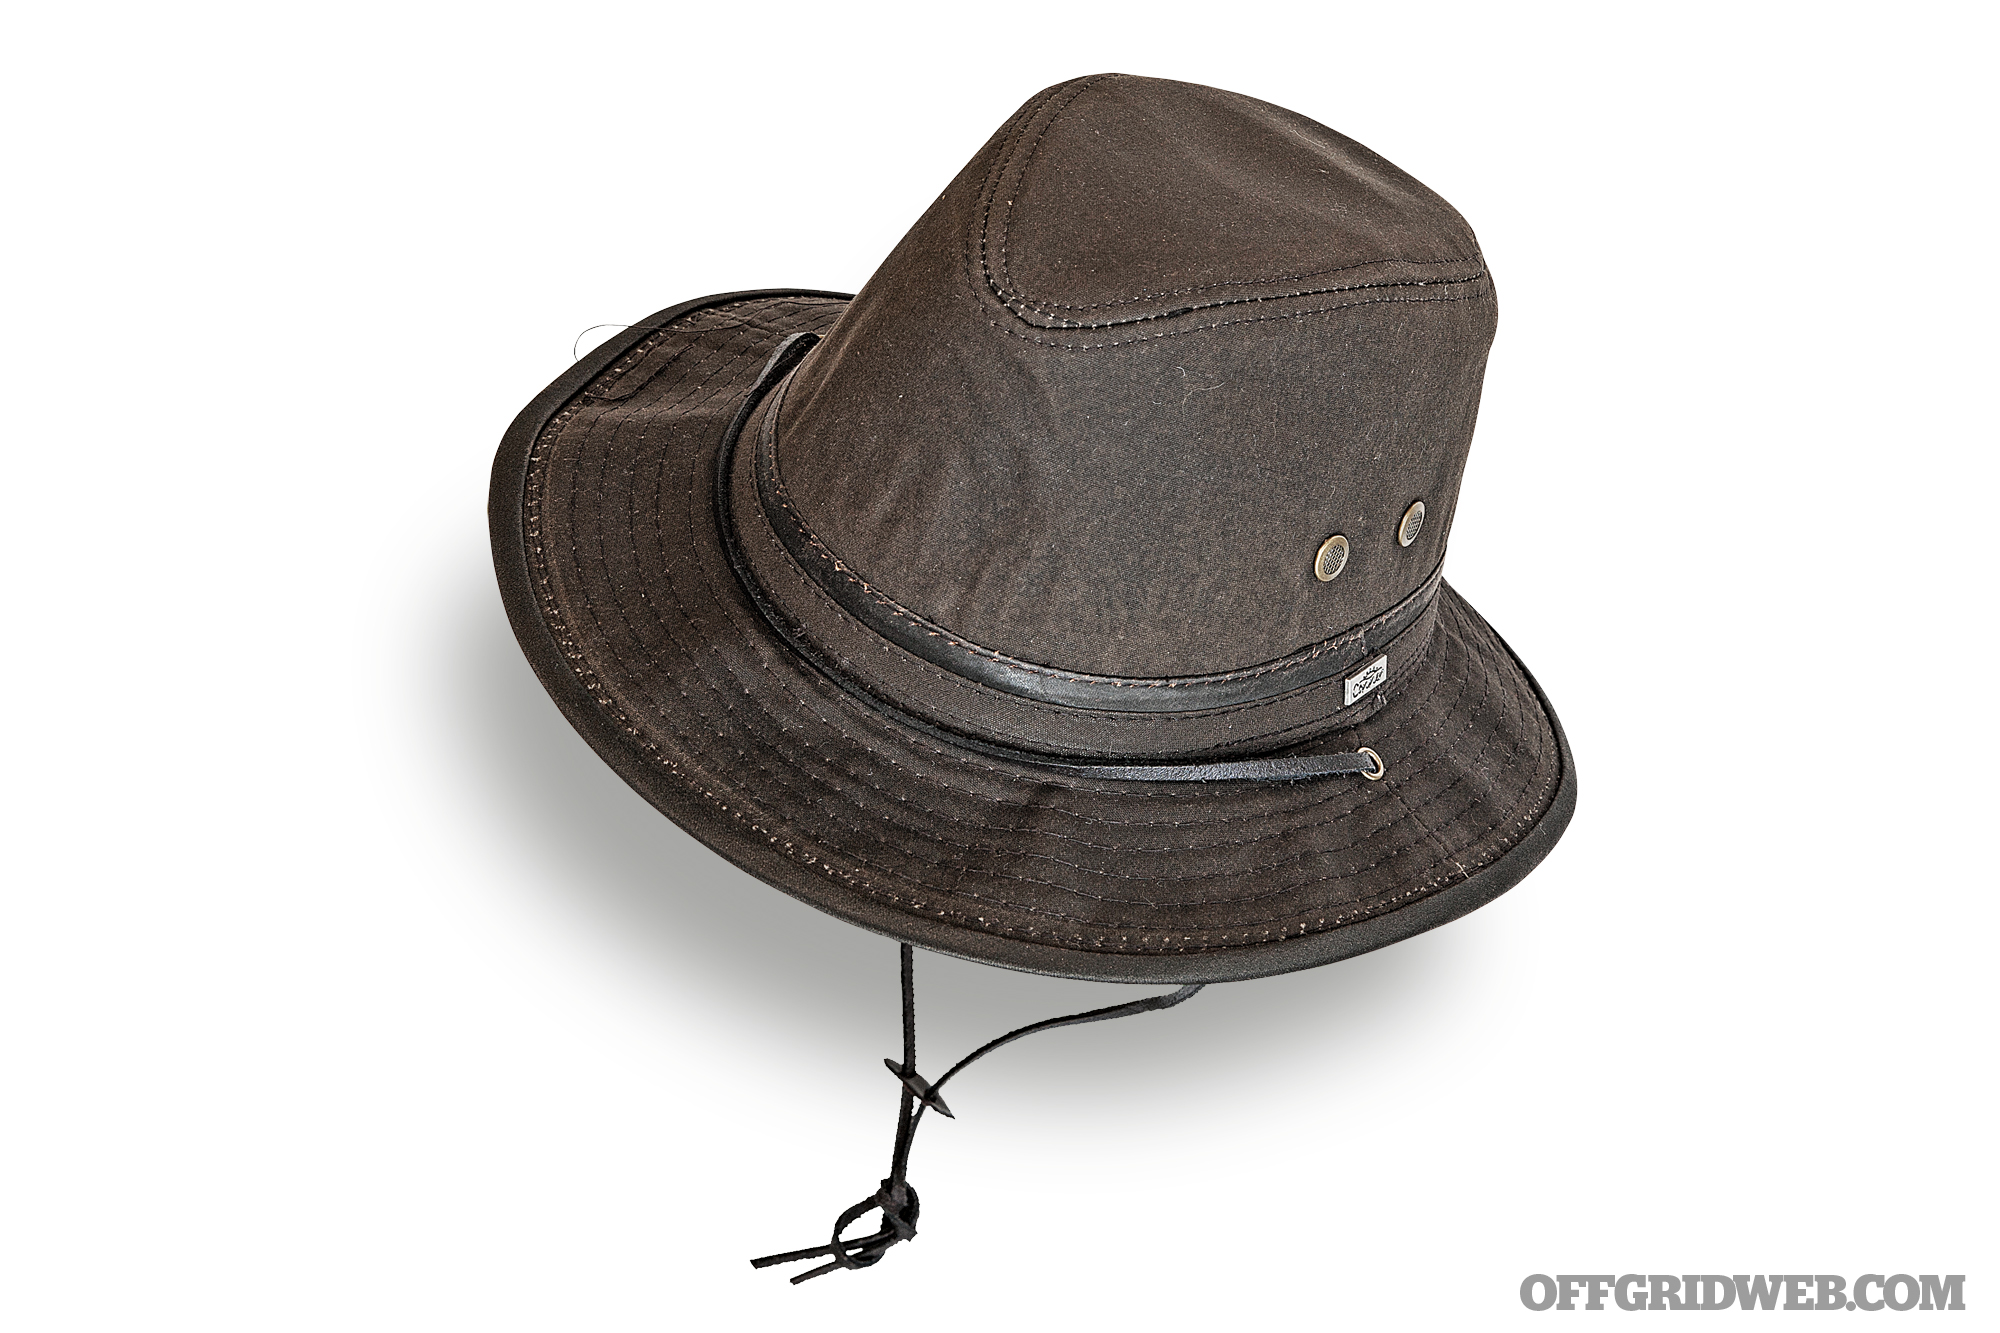
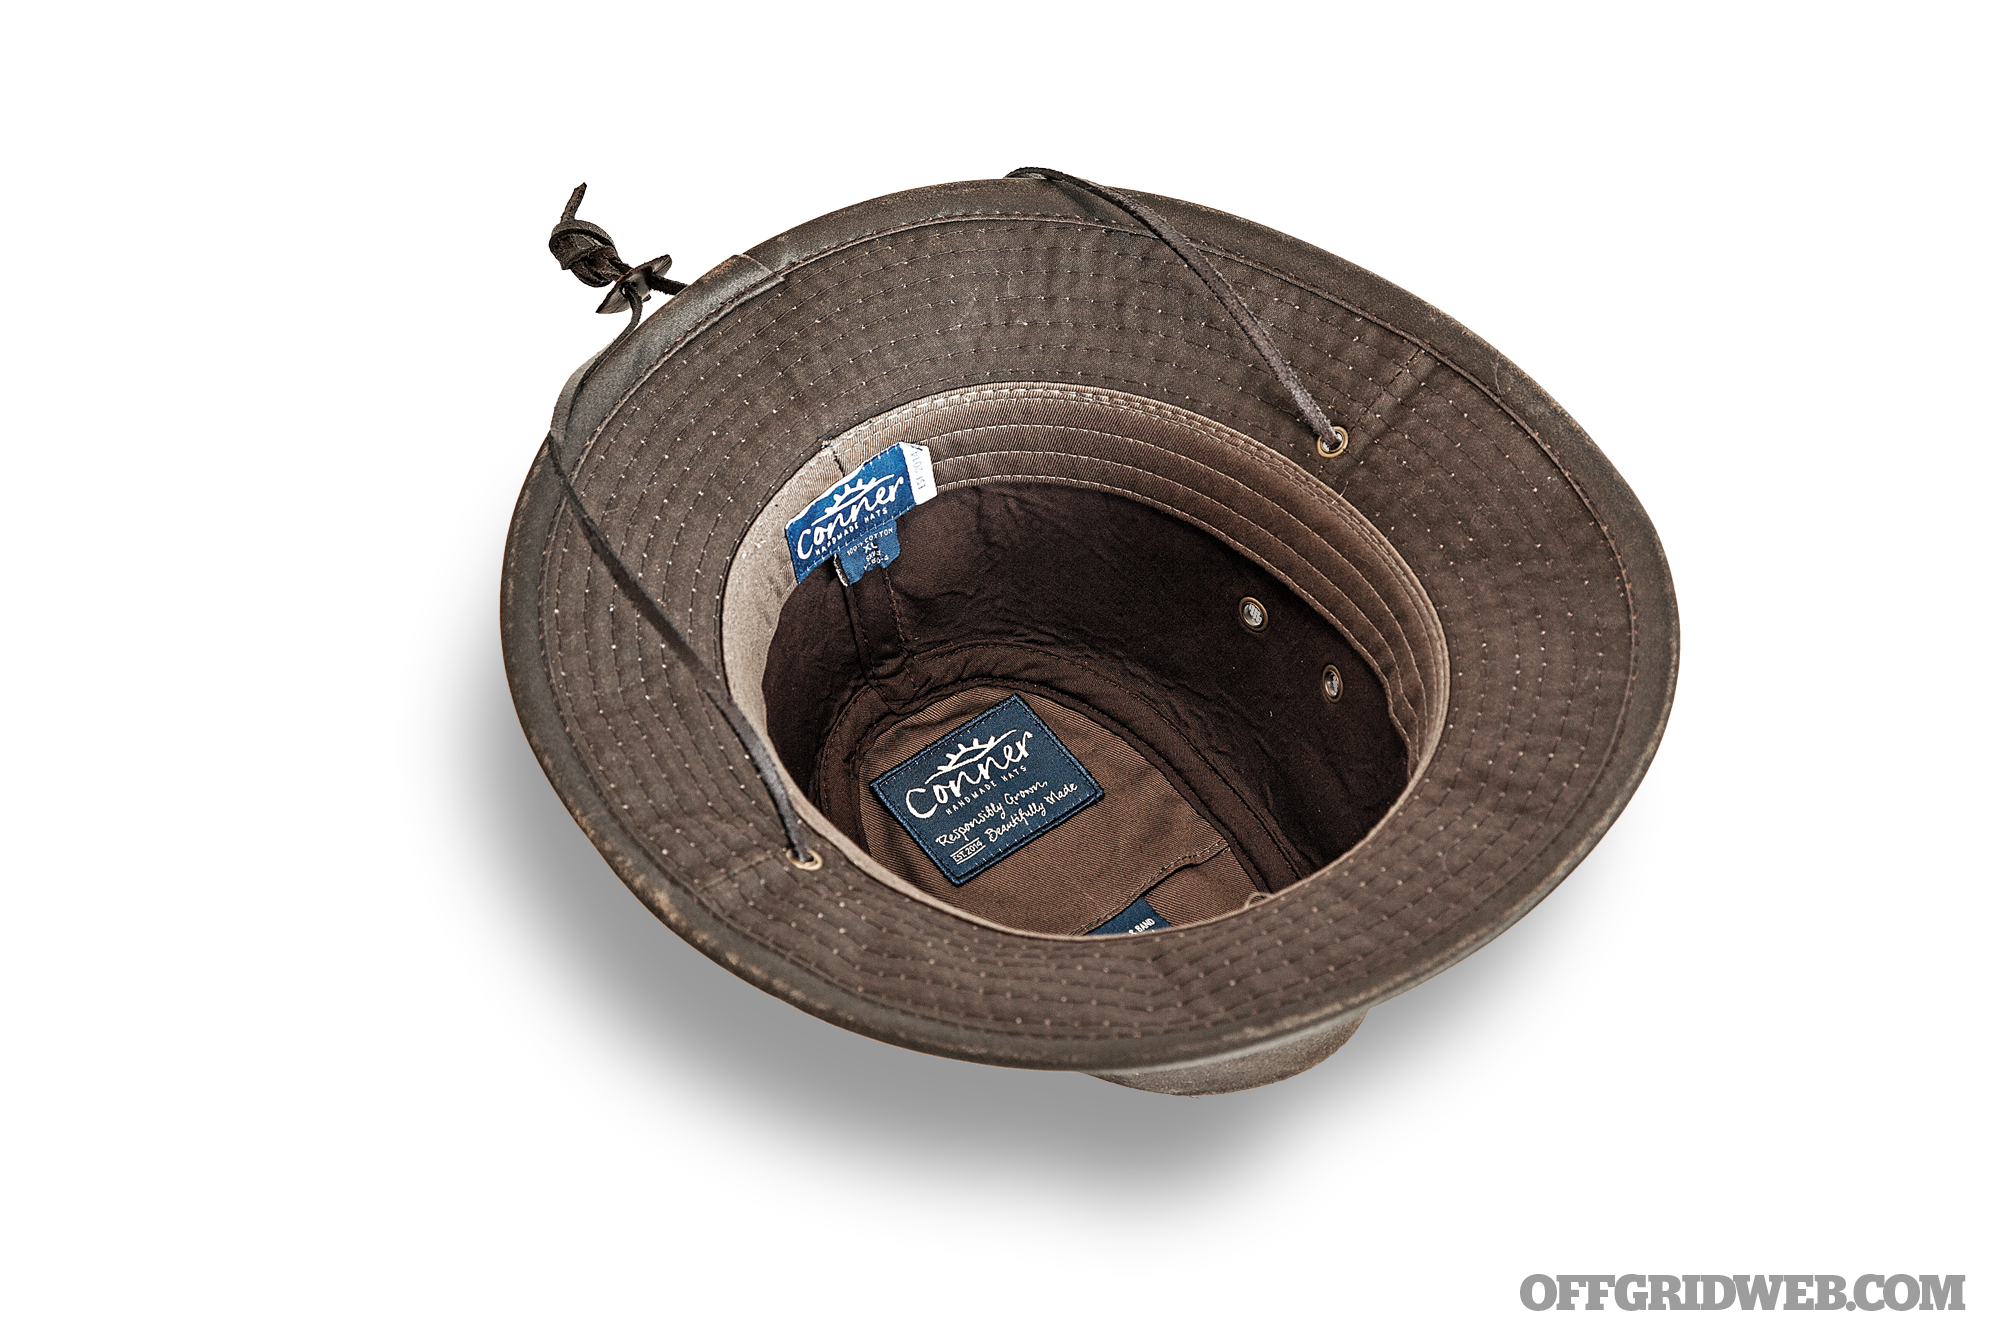
Conner Mountain Trail

Materials
Waxed cotton, organic cotton sweatband, mesh vent eyelets, removable leather chin strap
Colors
Brown
Sizes
21 1⁄4 to 24 inches
MSRP
$51
URL
connerhats.com

Notes:
With an emphasis on responsibly sourced materials and environmentally friendly manufacturing, Conner aims to make the world a better place one hat at a time. The Mountain Trail hat is made in Sri Lanka from waxed cotton, a treated material that sheds water quickly to keep your head dry in the rain. Its 2 1⁄2-inch brim shields the wearer’s eyes from the sun, but is compact enough to avoid feeling cumbersome in tight spaces. A leather chin strap with cinch slider keeps the hat firmly in place in high winds, and a hidden pocket in the liner is big enough to conceal a spare key, cash, or other small valuables. Four large eyelets provide ventilation to the wearer’s head. Unfortunately, we noticed several long stray threads on our sample hat’s brim and liner, leading to some concern about the long-term durability of its stitching.
Pros:
- Waxed cotton construction provides a waterproof exterior
- Compact design won’t snag on nearby objects while hiking through dense brush
- Hidden inner pocket is useful for emergency items
Cons:
- Lacking in quality control — our hat arrived with many loose threads, some of which were nearly a foot long.
- Bucket-style brim is angled downward, providing less sun coverage than we’d like
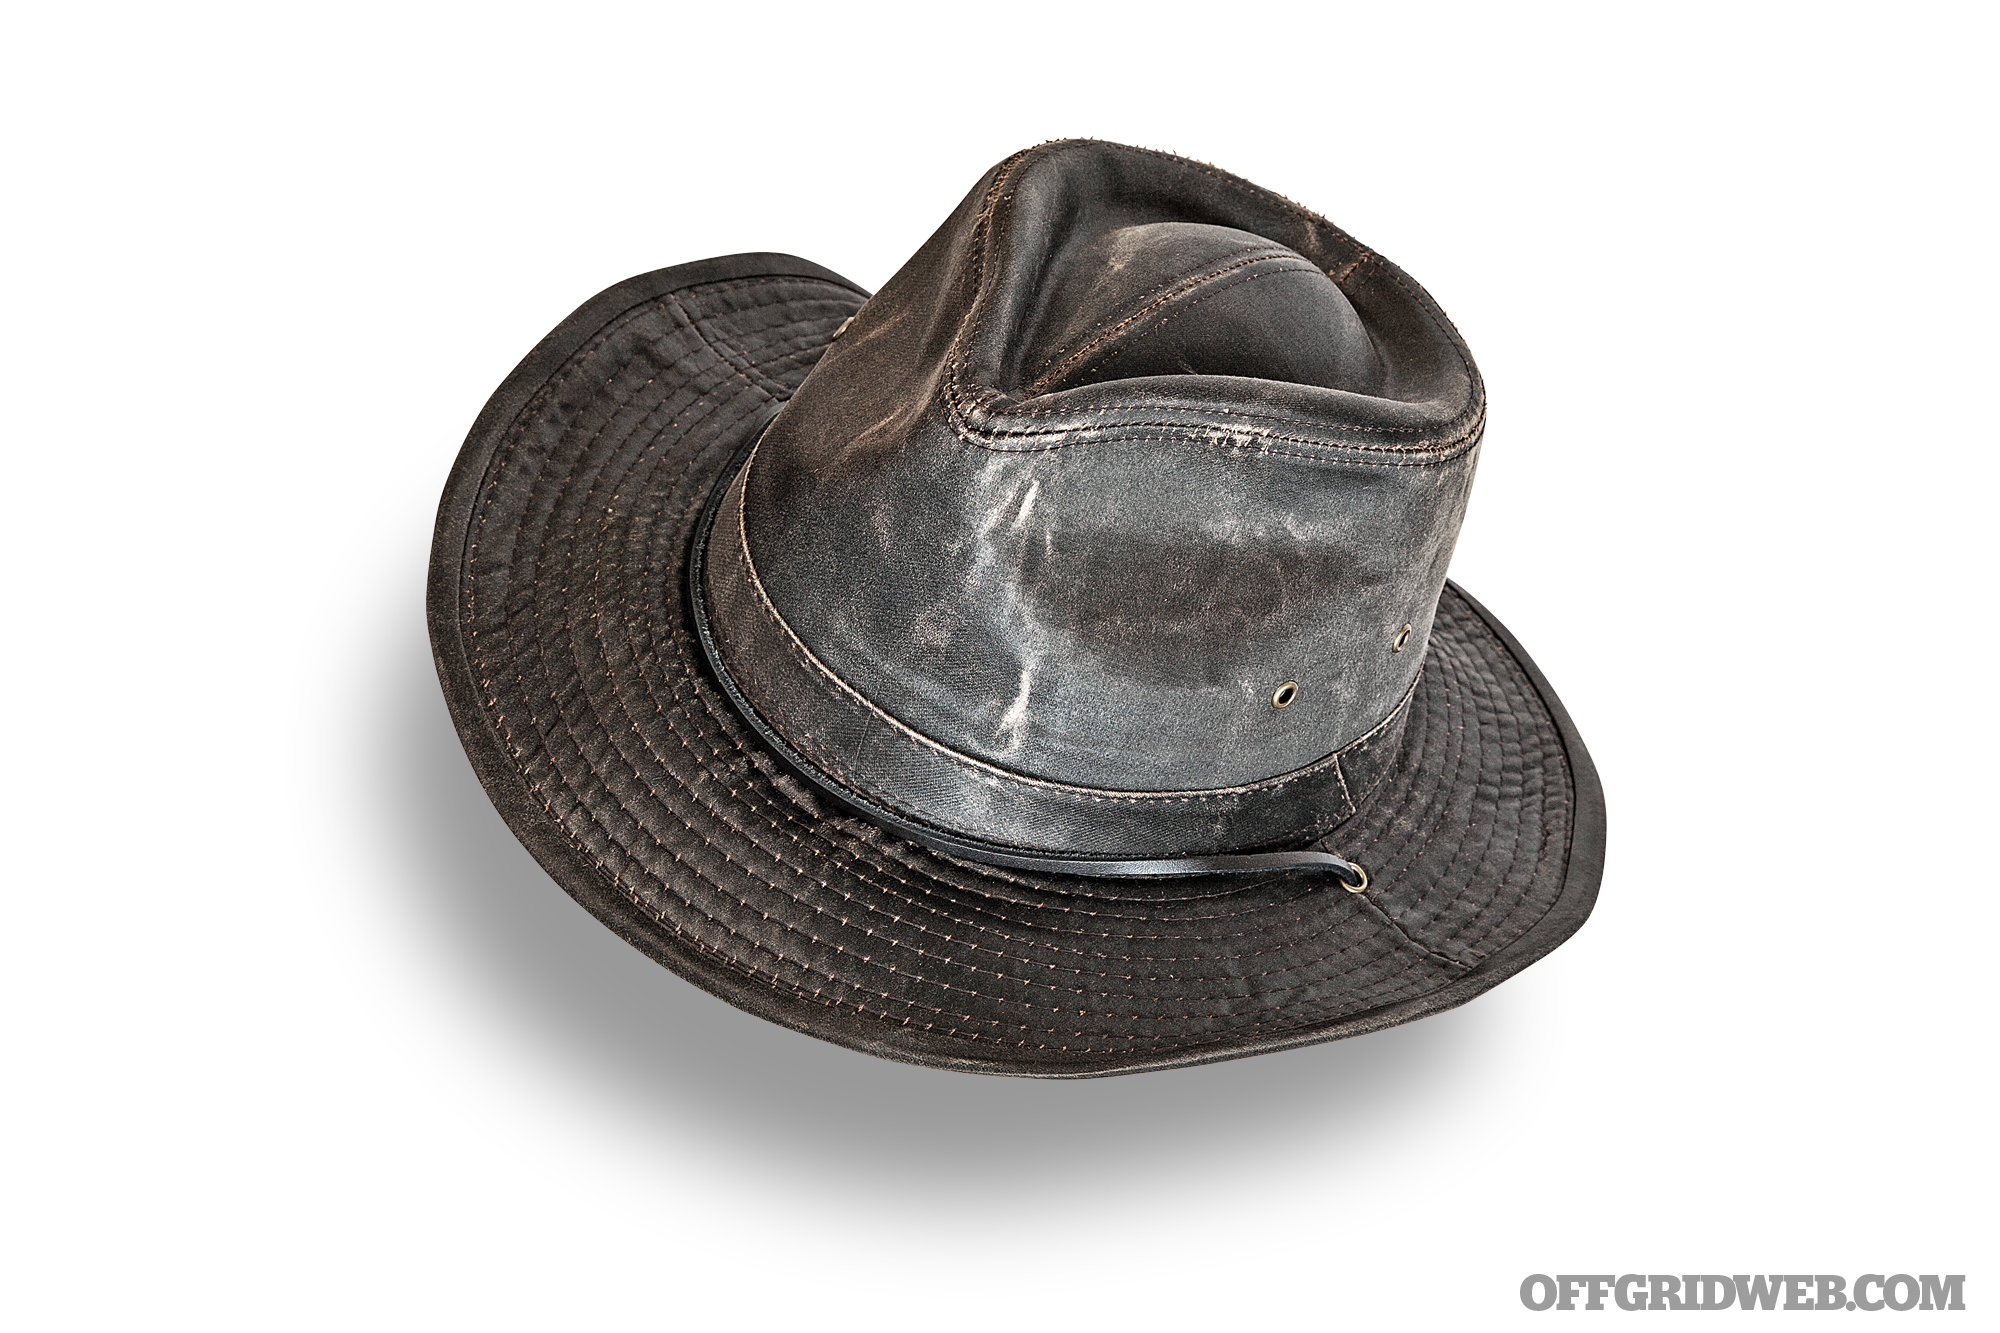
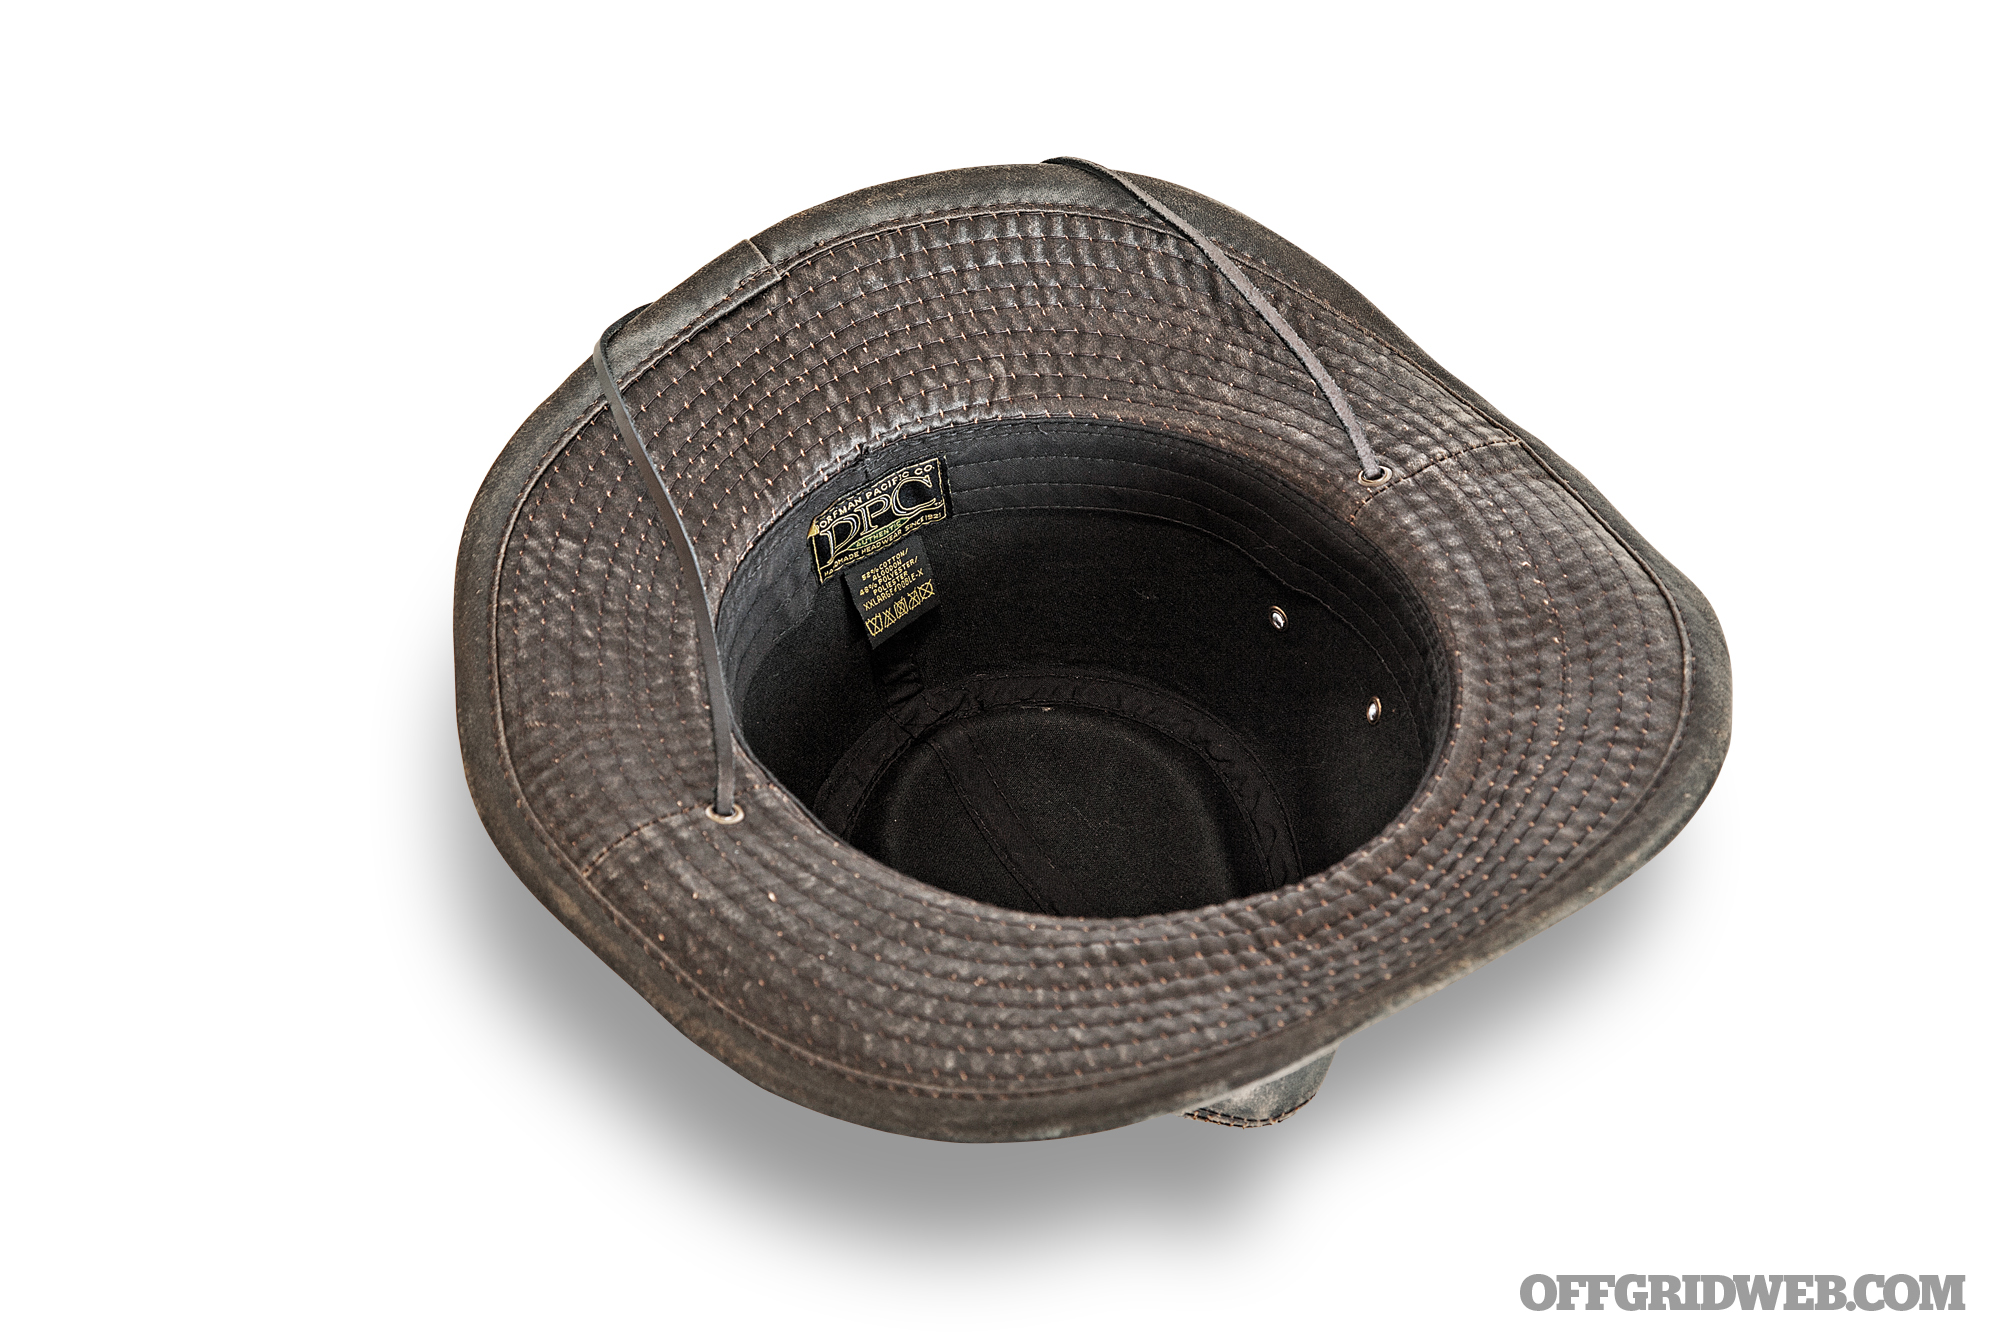
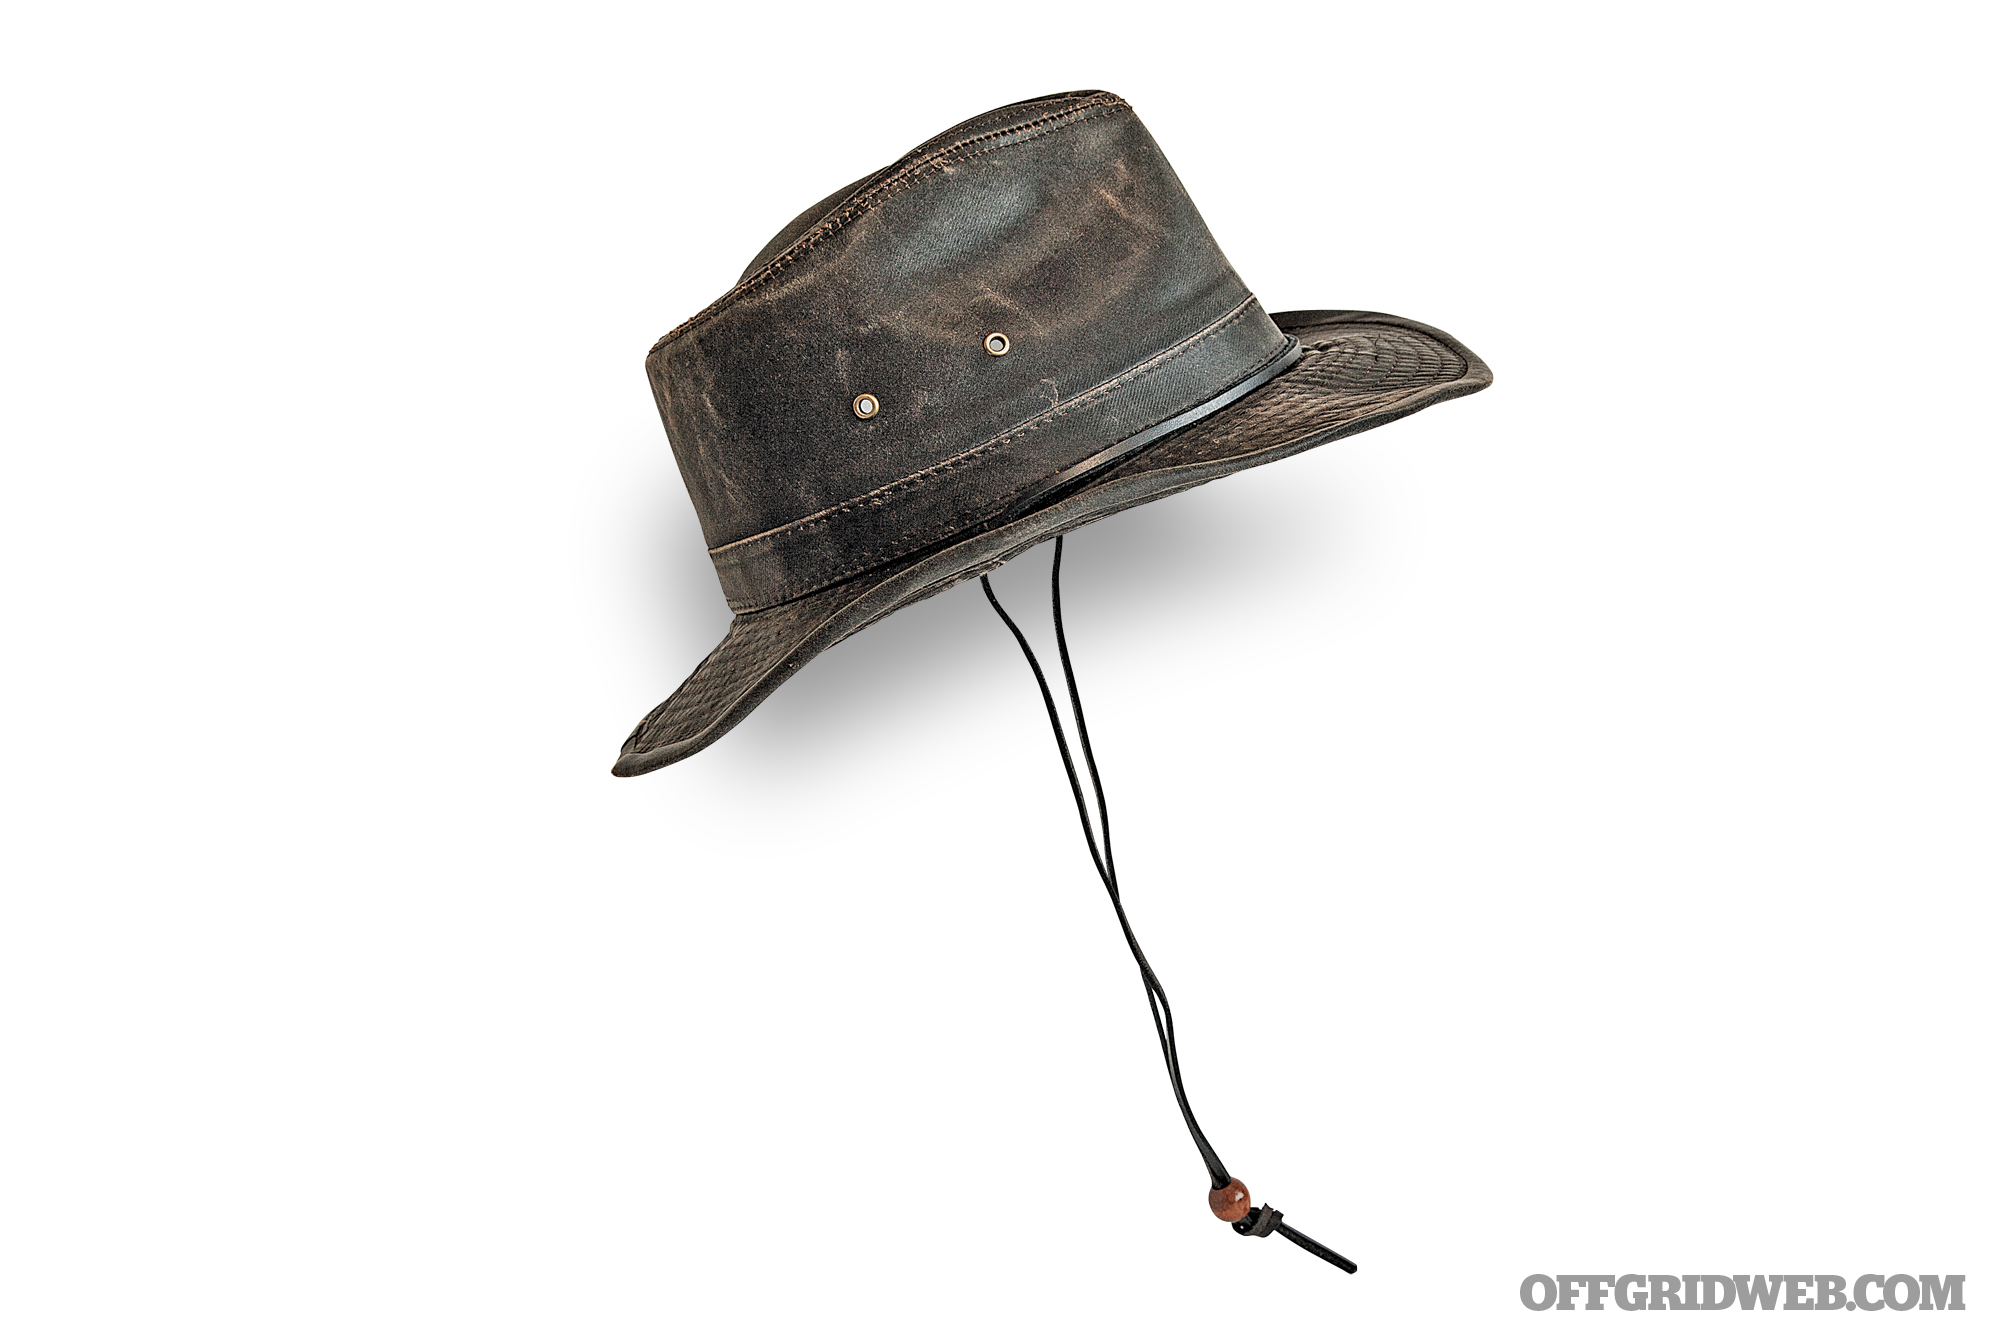
DPC Outdoor Design Outback

Materials
Weathered cotton, shapeable brim, vent eyelets, removable leather chin strap
Colors
Black, Brown
Sizes
21 1⁄4 to 25 1⁄4 inches
MSRP
$50
URL
tenthstreethats.com
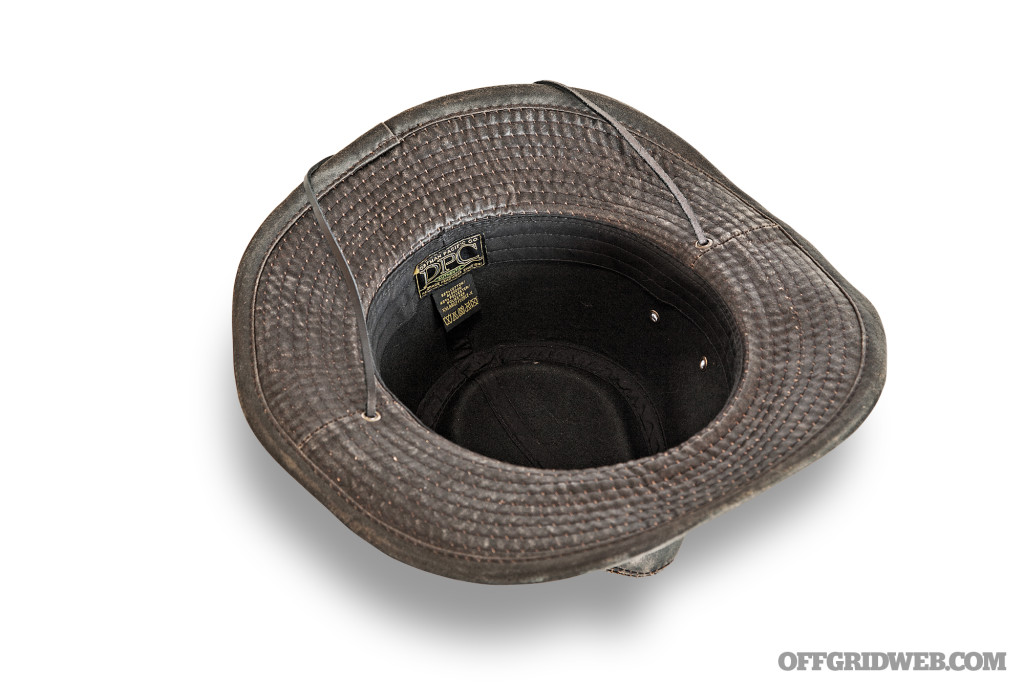
Notes:
With an uneven weathered appearance out of the box, this Outback hat from DPC Outdoor Design looks right at home on a backwoods trail. It also won’t leave you worrying about scuffing up or discoloring the finish if it gets dropped in the dirt or mud — that just adds character. This hat’s material feels slightly waxy to the touch and has no trouble shedding light rain, although heavier precipitation may eventually seep through the stitching. The 2 3⁄4-inch brim includes a flexible wire at the edge that can be easily shaped into a cowboy-style curve or a more subdued flat profile. A simple chin cord is cut from a strip of leather, and includes a wood bead to keep the hat in place if the wind picks up.

Pros:
- Weathered appearance gives it a unique look and eliminates the awkward break-in period of other fresh-looking new hats
- Shapeable brim lets you contour the hat to your exact preference in seconds
- Available in a large range of sizes
Cons:
- Black cotton/polyester sweatband isn’t soft or moisture-wicking.
- Rigid crown can’t be crushed and packed away, so you’ll need to hang the hat outside your bag.
Outdoor Research Ghost Rain
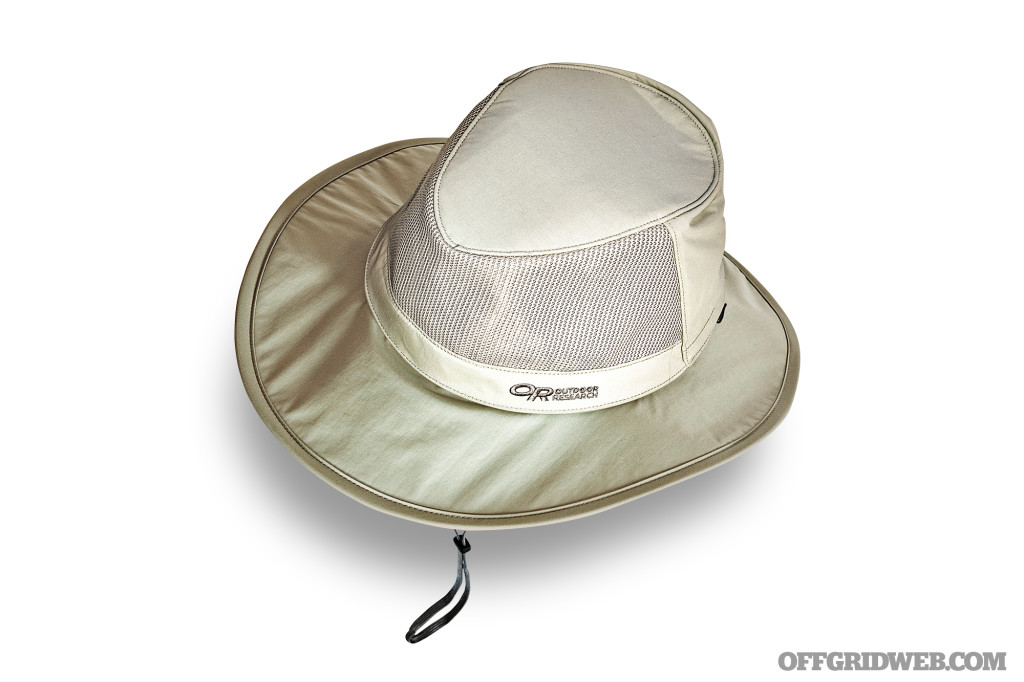
Materials
70-denier PU-coated nylon main shell, GORE-TEX Paclite stowable rain cover, Supplex nylon underside, mesh crown, hook-and-loop cinch strap, removable chin cord
Colors
Charcoal, Khaki
Sizes
21 1⁄4 to 24 inches
MSRP
$79
URL
outdoorresearch.com
Notes:
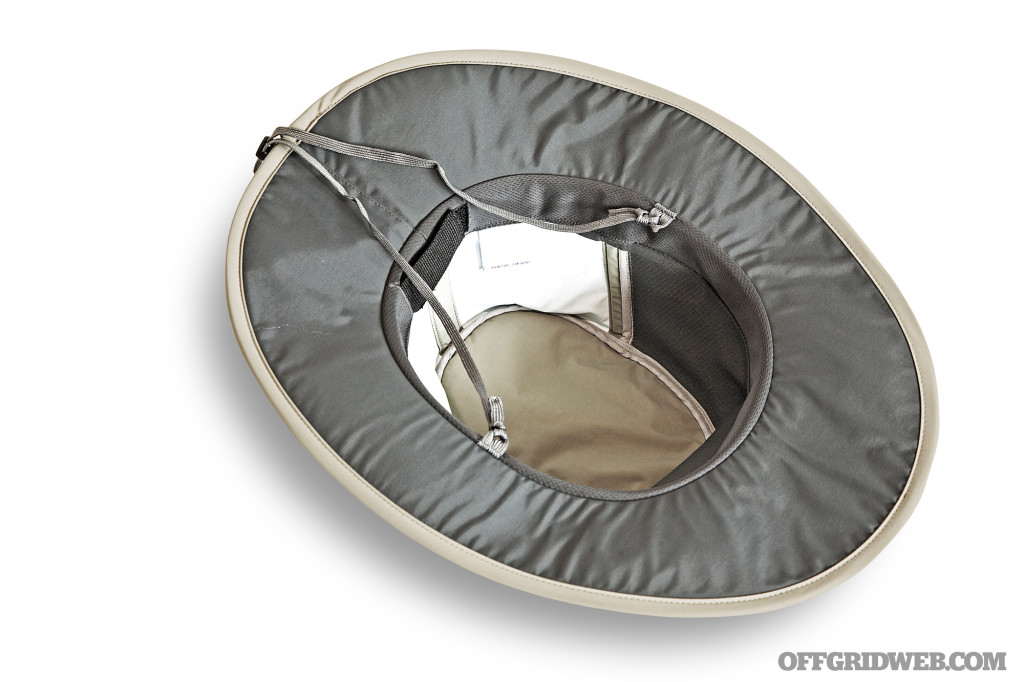
When the weather forecast is uncertain, it’s wise to prepare for all eventualities. Knowing the compromises necessary to design apparel that’s functional in both scorching heat and pouring rain, Outdoor Research developed a hat that converts from ventilated warm-weather mode to downpour-shedding waterproof mode. The Ghost Rain hat features a GORE-TEX crown cover, which is held in place by a magnet at the front of the crown. In warm and dry weather, this cover can be peeled back, rolled up, and stowed in a hidden pocket at the rear of the crown, revealing a large section of breathable mesh that helps keep the wearer’s head cool. The hat also includes a cinch strap inside the sweatband and a removable chin strap to ensure a snug fit in all weather conditions.
Pros:
- Opening the convertible crown yields excellent breathability in dry weather
- As the name indicates, this hat offers very good water-resistance due to the polyurethane-coated nylon and GORE-TEX materials
Cons:
- Brim is 3-5⁄8 inches front and rear, but 2 1⁄2 inches on the sides, resulting in less sun coverage for parts of the head and neck
- OR doesn’t recommend packing or crushing this hat, since the flexible plastic at the edge of the brim may become bent or deformed in storage
Pantropic Logan
Materials
LiteFelt, leather chin strap, tagua slider
Colors
Black, Burnt Orange, Cranberry, Dijon, Green Mix, Heather, Rust, Toffee
Sizes
21 to 24 inches
MSRP
$75
URL
pantropic.biz
Notes:
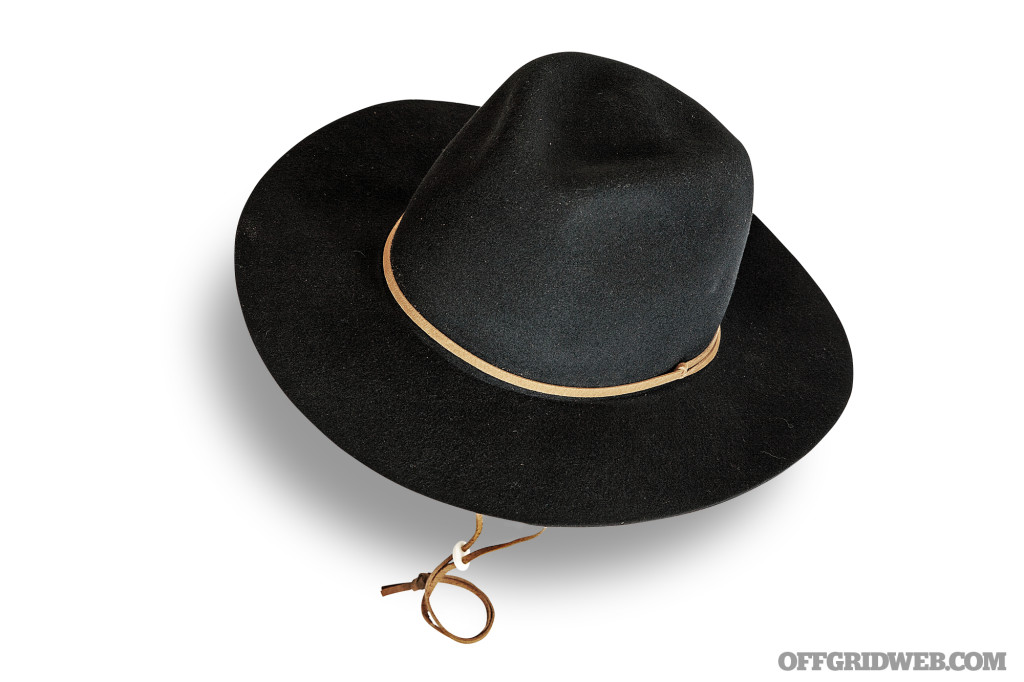
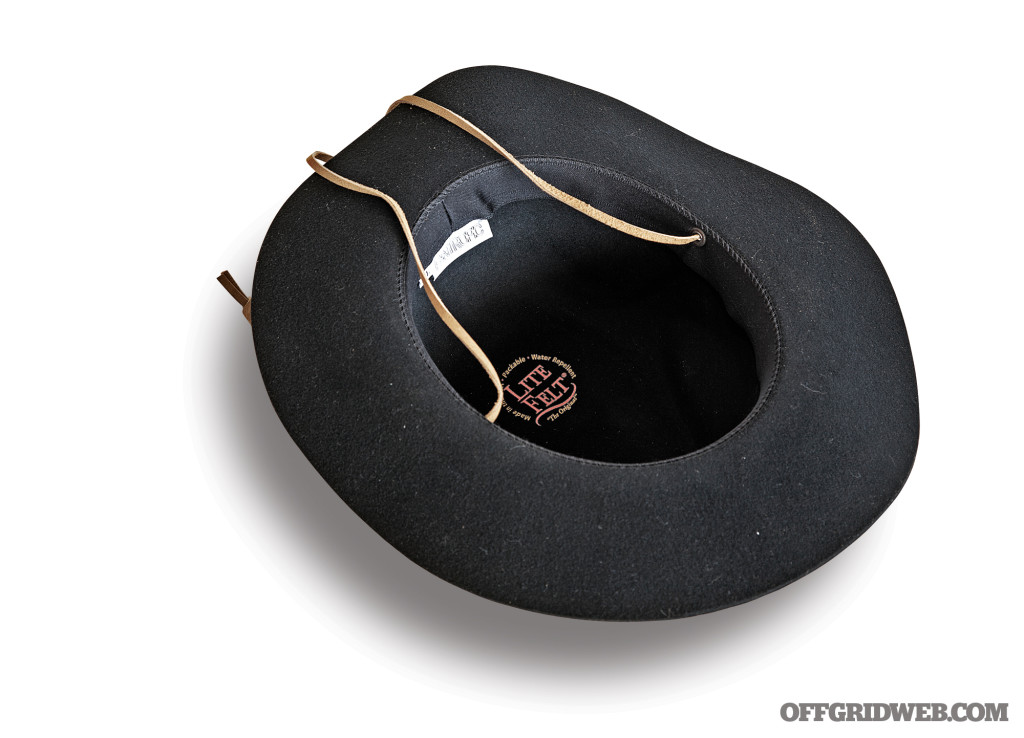
This hat is made in the USA from 100-percent wool LiteFelt, a material that’s soft and flexible enough to be crushed or packed in a suitcase without damage. If you read our wool baselayer guide last issue, you’ll recall it excels at moisture management, repelling water from its surface and insulating your skin — the Pantropic Logan offers those same benefits. Its 3-inch brim can be steamed into a slight contour, but remains floppy when worn. The high-quality leather chin cord continues up to wrap around the crown, forming a simple but elegant band. It’s topped off with a slider made from tagua, the hard white “vegetable ivory” produced by South-American palm trees.
Pros:
Retains the classic look and beneficial properties of wool felt, but in a soft
packable form
Several colors available, ranging from bright to subdued
Cons:
The 1/8-inch-thick felt material is comfy in fall, winter, and spring, but may feel a bit stifling in warm summer months.
While steaming the hat can add a slight contour to the brim, it’s too soft to hold it for long.
Sun Day Afternoons Charter
Materials
Nylon with buoyant foam core, mesh crown, wicking sweatband, cinch strap with buckle, chin cord
Colors
Chaparral, Cream, Sand
Sizes
22 to 24 1⁄4 inches
MSRP
$52
URL
sundayafternoons.com
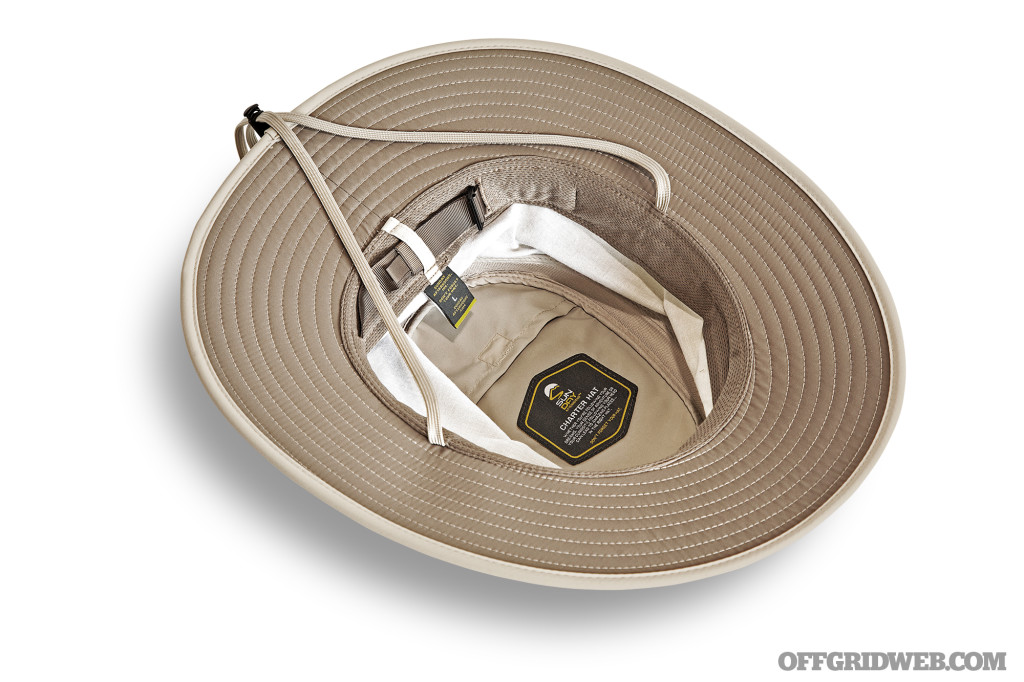
Notes:
The Charter hat offers a 3 1⁄4-inch brim that tapers down to 2 3⁄4 inches at the sides, and contains a layer of foam that’ll keep your hat from sinking if you drop it in a body of water. Examining the base of the crown reveals Sunglass Lock slits, which can retain your shades when you’re not wearing them, provided the earpieces are straight. The inside of the Charter hat contains a soft moisture-wicking sweatband, an adjustable cinch strap to tighten the fit, and a pocket that spans the entire length of the crown. Although the chin strap is sewn into the sweatband and cannot be removed, it can be tucked into this pocket when it’s not needed — along with any other valuables you may want to conceal.
Pros:
- The large hidden pocket provides plenty of room for cash, documents, or even a small map
- If you store your shades on your head, the Sunglass Lock will stop them from sliding off during strenuous activities
Cons:
- Sides of the crown don’t offer much breathability
- Chin strap can’t be removed, but can be tucked away in the hidden pocket
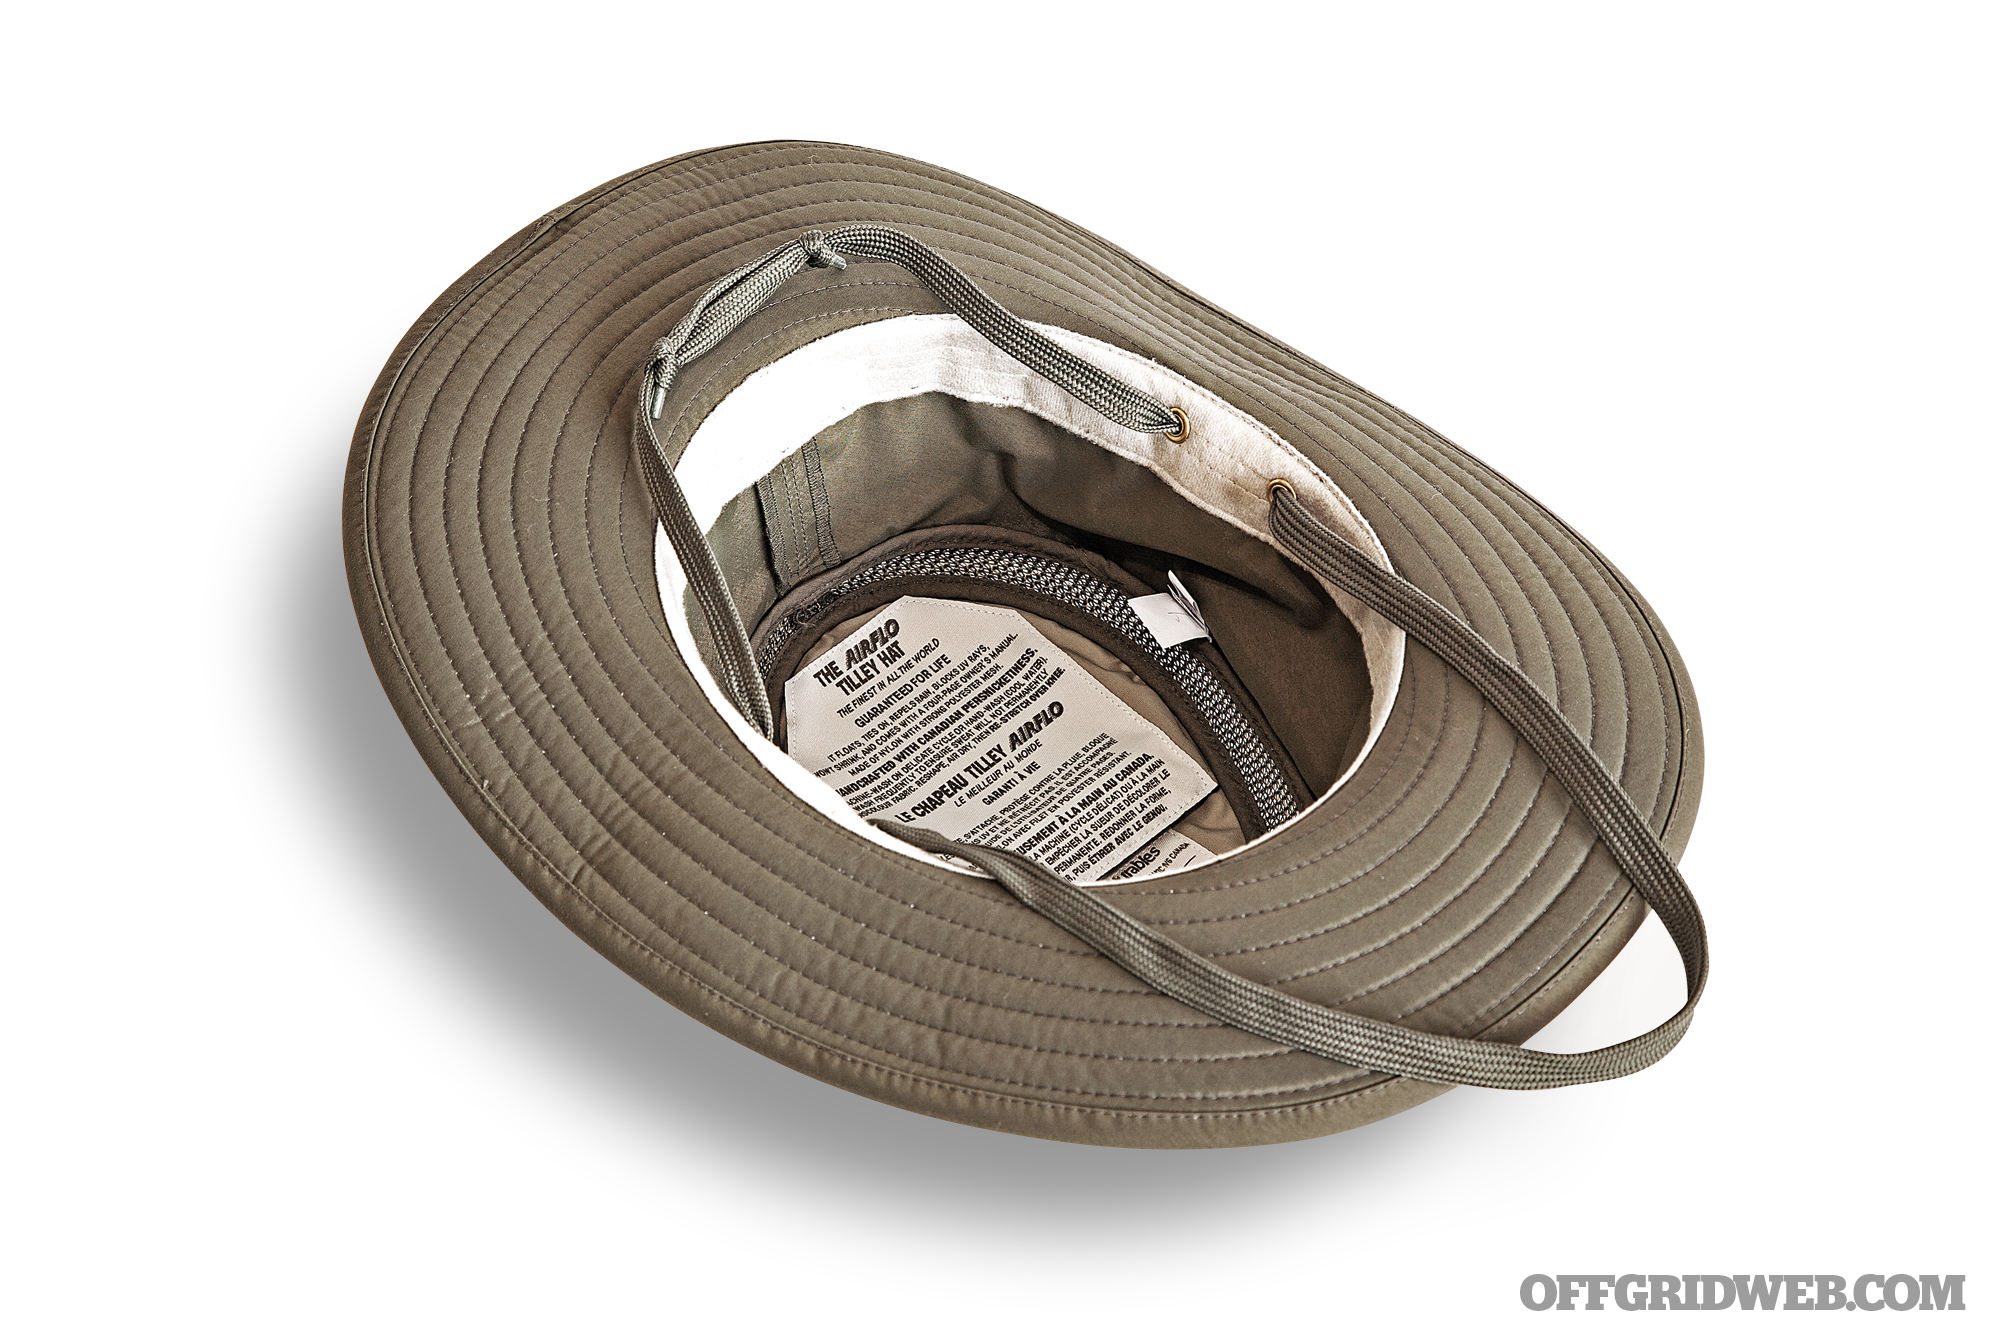
Tilley LTM6 Airflo
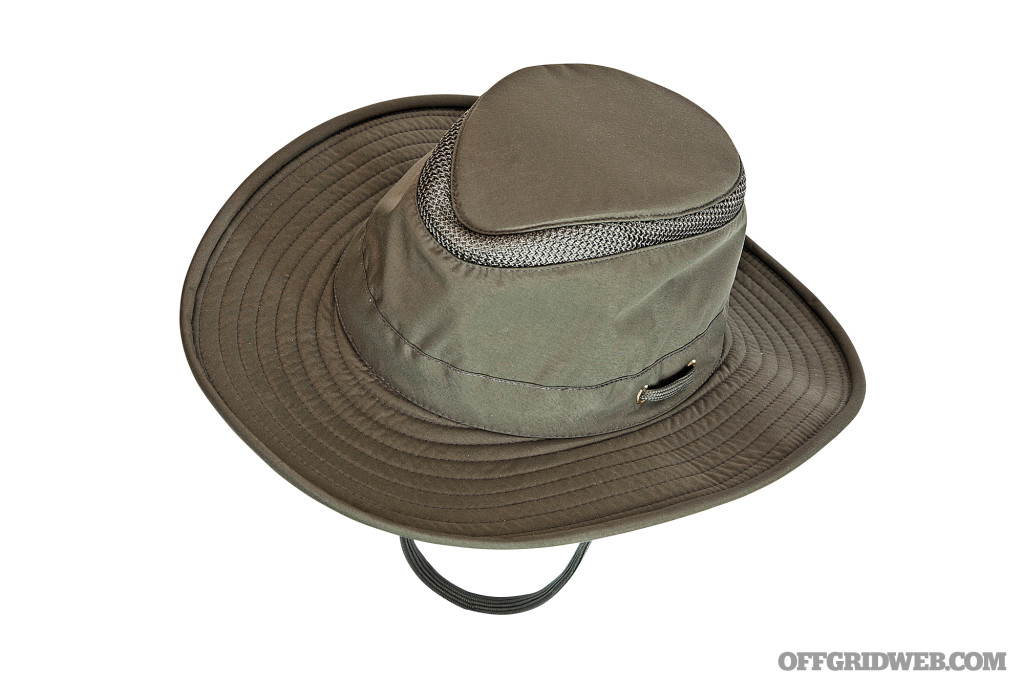
Materials
Supplex nylon with buoyant foam core, polyester mesh crown, wicking sweatband, removable front and back wind cords
Colors
Black, Brown, Green, Khaki, Natural, Navy, Olive, Red, Wine
Sizes
21 5⁄8 to 26 1⁄2 inches
MSRP
$85
URL
tilley.com
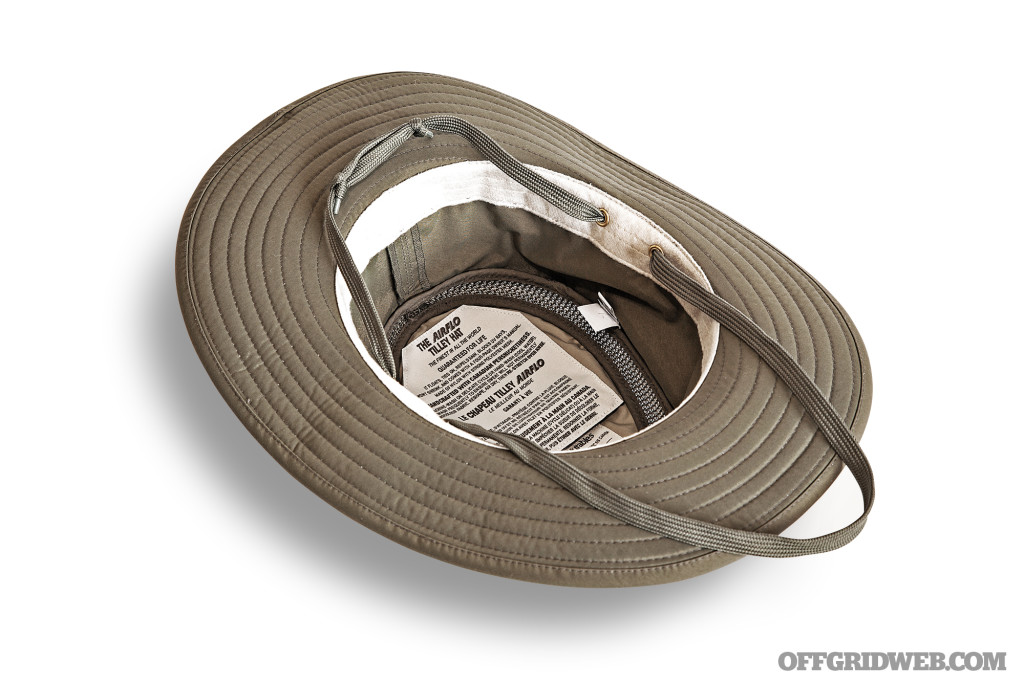
Notes:
Canadian apparel manufacturer Tilley is well-known for its hats, and has been making them since 1984. Each hat’s label bears the phrase “handcrafted with Canadian persnicketiness” alongside a lifetime guarantee. The LTM6 Airflo is Tilley’s best-selling model. It features breathable and water-resistant Supplex nylon fabric, plus a 3⁄4-inch polyester mesh around the crown for additional ventilation. The brim is 3 1⁄2 inches at front and rear, with 2 1⁄2-inch sides and a foam core that allows the hat to float on water. We found the sweatband on this hat to be particularly soft and comfortable, as well as moisture-wicking. The front and rear wind cords are a clever touch, and they can be tightened against the head by sliding the fisherman’s knot tied on the rear cord to remove slack.
Pros:
- Dual wind cords keep the hat from shifting during strong gusts
- Secure hook-and-loop closure on the large hidden pocket keeps valuables from sliding out
- Huge range of sizes and colors to choose from
Cons:
- The brim on our sample seems to be a few degrees off-center from the crown, causing the hat to appear slightly crooked no matter how much we adjust its position.
- Shorter brim sides limit sun protection from certain angles
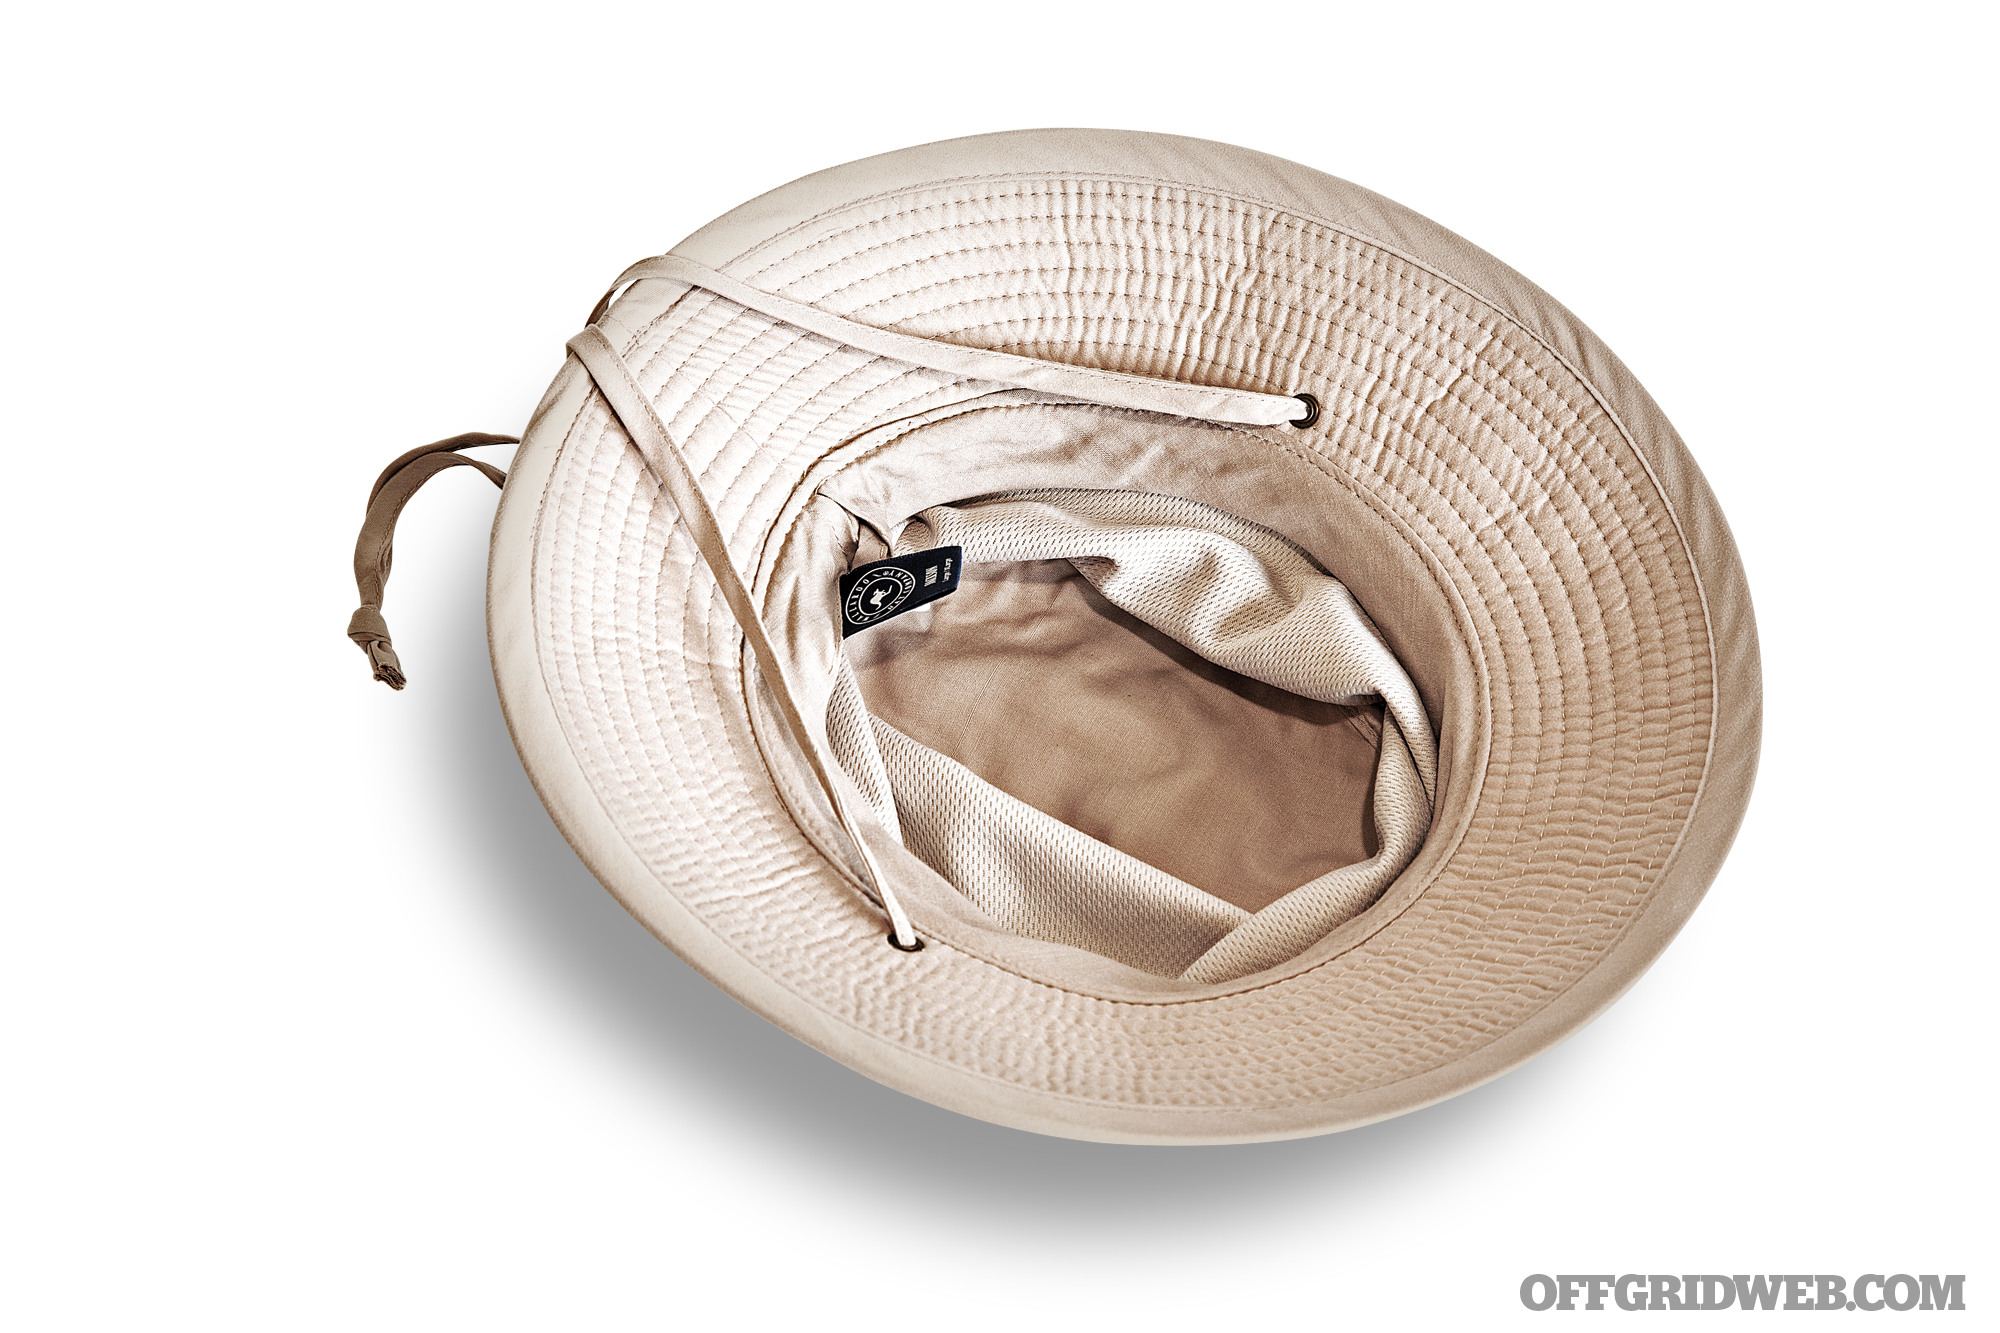
Wallaroo Jackson
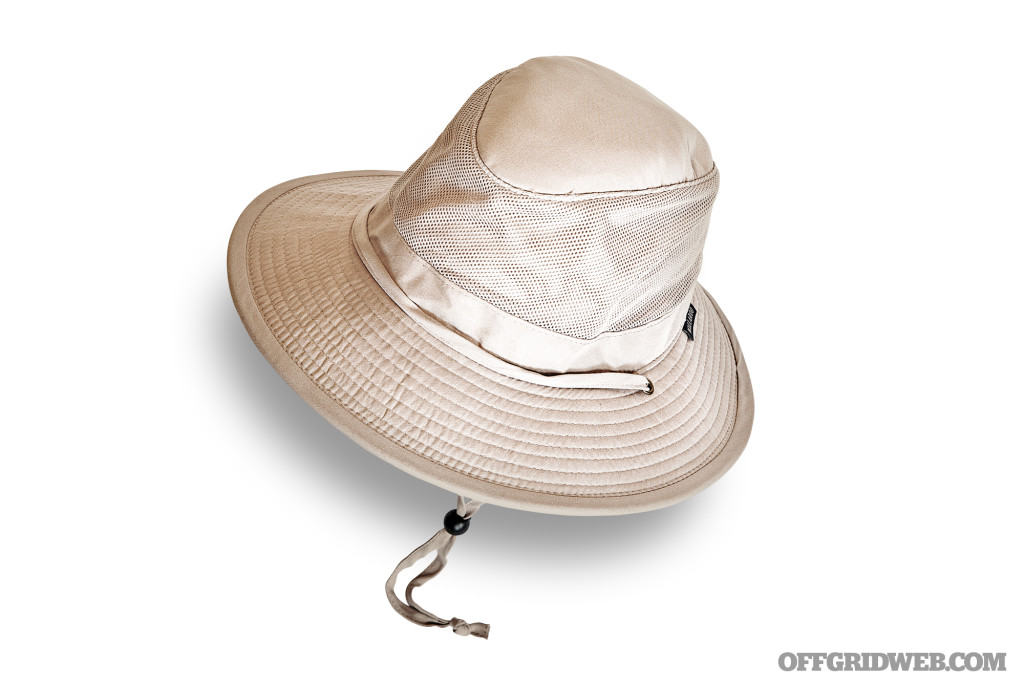
Materials
Microfiber, ventilated mesh crown, drawstring cinch, removable chin cord
Colors
Camel
Sizes
23 to 23 7⁄8 inches
MSRP
$40
URL
wallaroohats.com

Notes:
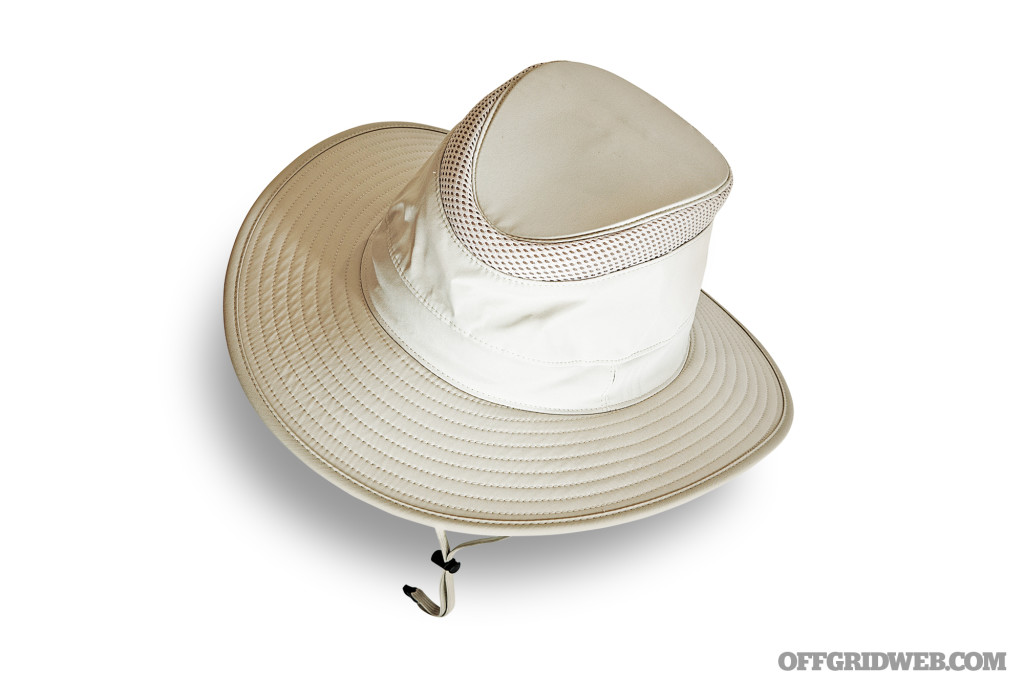
As the most affordable hat in our guide, the Jackson avoids high-tech synthetic fabrics, instead opting for a soft microfiber shell with a tall 3 3⁄4 -inch mesh window that spans the entire circumference of the crown. This provides superb breathability for warm-weather use. Unfortunately, it’s not well-suited for rainy climates, as water absorbs rather than beading up on its surface. The 3-inch brim slopes downward in a cone, shielding the wearer’s face from all sides. Fit is adjustable via a simple drawstring in the sweatband, and a long chin cord with cinch prevents it from blowing away in the wind.
Pros:
- Excellent ventilation for hot climates
- Thin and lightweight material naturally collapses into a flat shape for packing
Cons:
- About as water-resistant as a sponge with holes punched in it. A sudden rainstorm will leave your head cold and wet.
- Cinches down easily to fit smaller heads, but the largest size may feel tight if you have a very large head.
- Only available in one color
More From Issue 26
Don’t miss essential survival insights—sign up for Recoil Offgrid’s free newsletter today!
Read articles from the next issue of Recoil Offgrid: Issue 27
Read articles from the previous issue of Recoil Offgrid: Issue 25
Check out our other publications on the web: Recoil | Gun Digest | Blade | RecoilTV | RECOILtv (YouTube)
Editor’s Note: This article has been modified from its original version for the web.