In This Article
- Prometheus Design Werx Ti-Signal Whistle
- Mustang Survival Highwater 22L Day Pack
- Kershaw Knives Epistle
- PSE Archery Warhammer
- 5.11 Tactical 5.11 1AA Headlamp
- Diamond Performance Diamondgrip High Performance Starter Grip
- Gosun SolarPanel 10
- Sparrows Lock Picks Challenge Vault
- WOOX AX1
- Kill Cliff Recover Drink
- Emergency Prep Club 3-Day Gluten-Free Emergency Food Kit
Whether you’re a self-proclaimed gear junkie or a minimalist, it’s hard not to appreciate all of the innovative products that are being released in the world of survival and preparation. We check out several fresh items on the market to consider.
Prometheus Design Werx Ti-Signal Whistle
LENGTH: 2.19 inches
MSRP: $29
URL: prometheusdesignwerx.com
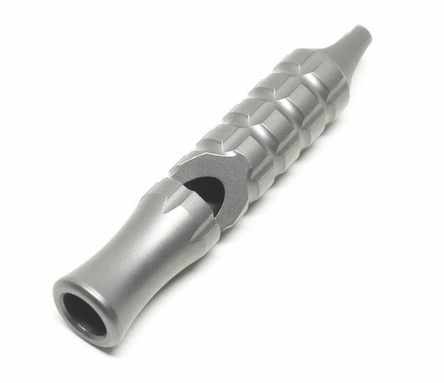
NOTES: One thing’s for sure: This ain’t your granddaddy’s survival whistle. Machined from 6AL-4V titanium billet, the Ti-Signal Whistle is lightweight, corrosion resistant, and almost indestructible. It can emit a piercing, high-pitch sound to alert others of your location. This makes it a potentially life-saving device — whether you’re injured and in need of a search- and-rescue team or just trying to reconnect with your friends after getting separated in the backcountry. And as with every- thing Prometheus Design Werx makes, the Ti-Signal Whistle exists at that intersection between aesthetics and functionality. It features a Mk2-style pineapple pattern and comes packed in a tin with form-fitting foam for long-term storage. It comes with a stainless steel ball chain or can be clipped to a keyring.
Mustang Survival Highwater 22L Day Pack
MATERIAL: 70-denier PVC-free ripstop nylon fabric shell
MSRP: $100
URL: mustangsurvival.com
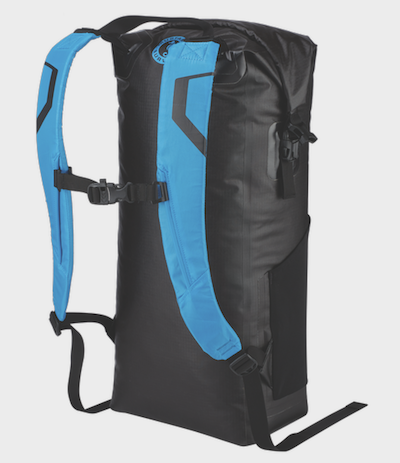
NOTES: Whether you’re heading out on a fishing trip or bugging out during the rainy season, getting wet can be a strong possibility depending on your destination or mission. So, keeping your vital gear dry will be, well, vital. If you want something more durable than wrapping your daypack in a garbage bag, consider a waterproof backpack like the Highwater. Aside from the waterproof ripstop nylon fab- ric shell, its zipper-less roll-top design ensures that the main chamber stays moisture free. Plus, there are three external mesh pockets for drop-in items like water bottles or larger flashlights. For comfort on a long haul, there are slim but padded shoulder straps and a removable back pad with its own inner storage sleeve.
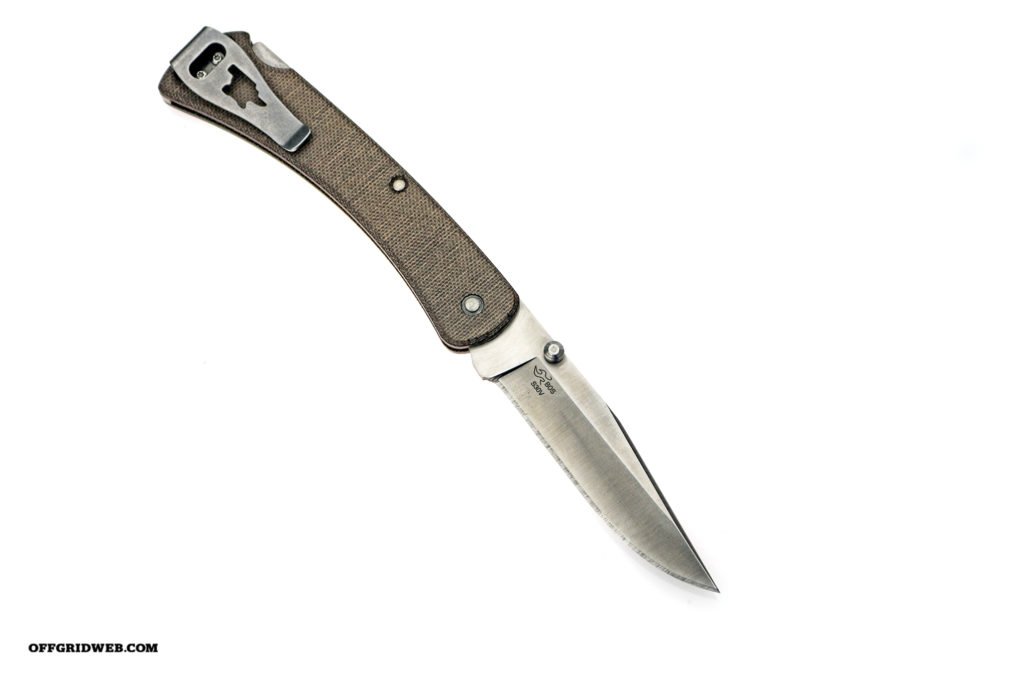
Kershaw Knives Epistle
OAL: 7 inches
MSRP: $49
URL: kershawknives.com
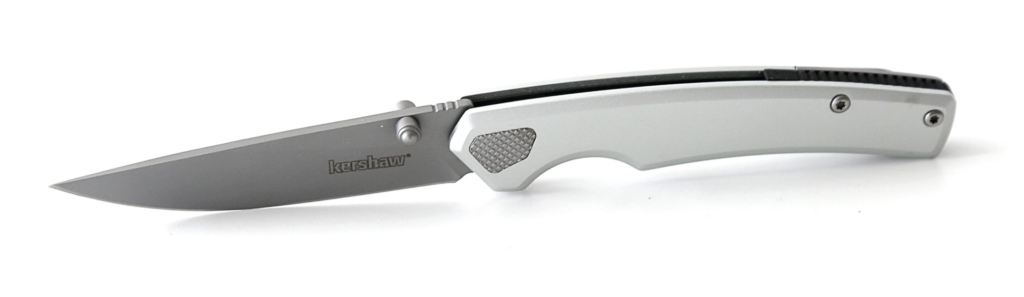
NOTES:You might be wary of carrying around a $200 blade as your everyday-carry knife for fear of losing it. After all, not all pocket clips are made equal. That’s why we’re fond of the Epistle. This folding knife performs reliably, won’t weigh you down, and looks sexy in a minimalistic way — all without breaking the bank. The 3-inch drop-point blade provides a versatile cutting edge that slices and thrusts with serious power. The aluminum handle features sleek lines, a liner lock, and a lightweight chassis. One notable drawback? It’s for righties only. Still, at less than $50, the Epistle works great in the field — and you won’t cry if you break or lose it.
PSE Archery Warhammer
WEIGHT:7.6 pounds
MSRP: Starting from $1,499
URL: psearchery.com
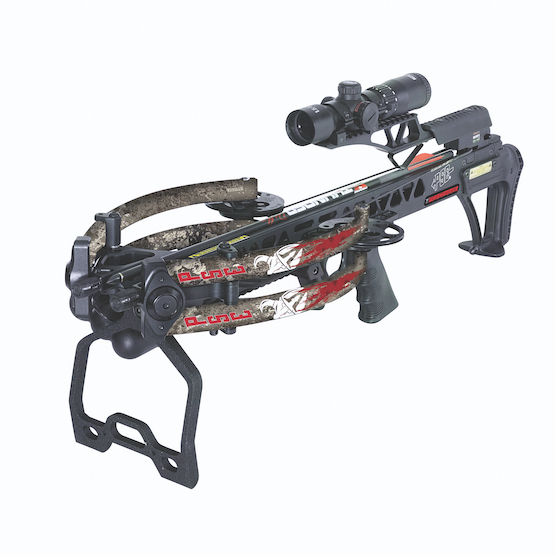
NOTES: PSE Archery has teamed up with TrueTimber to offer its Warhammer crossbow in Strata Camo, giving hunters more options for natural-looking concealment while in the field. Made in the USA, the Warhammer is a relatively compact crossbow (at 29 by 14.125 inches) that can deliver 400 feet per second when firing a 400-grain bolt, thanks to its powerful 142 foot-pounds of kinetic energy. Some folks might balk at the price tag, but there are times when a crossbow could be more advantageous than its powder-burning descendent. How? If you fire a cartridge and miss, you not only lose dinner but you’ll scare off other game in the area.
5.11 Tactical 5.11 1AA Headlamp
WEIGHT: 4.4 ounces (with batteries)
MSRP:$50
URL: 511tactical.com
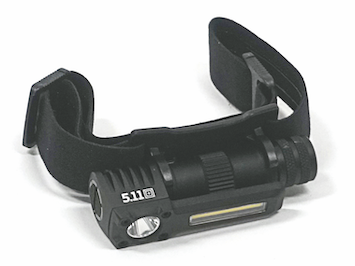
NOTES: Whether you’re going on a hike or just wrenching under the hood,
a headlamp lets you see things clearly while also keeping your hands free. That’s why we’re digging the Rapid 1AA Headlamp. For increased versatility, it has five modes, including a flood light that’s separate from the spotlight and can run for up to 6 hours. The spotlight can put out 200 lumens with the included AA battery or a max of 330 lumens in peak spot mode if you use a 14500 lithium rechargeable cell (sold separately). It also has an integrated clip if you prefer to at- tach it to a pocket instead of us- ing the woven elastic headband. The Rapid 1AA has an IP54 rating, meaning it’s resistant to dust, impact, and water.
Diamond Performance Diamondgrip High Performance Starter Grip
SIZES: 40 inches by 2.8mm (small grip) 92 inches by 3.2mm (large grip)
MSRP: $9 (40 inches), $15 (92 inches)
URL :www.diamond-performance.com
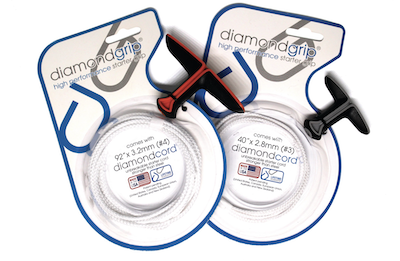
NOTES: Let’s face it, many of the starter cords your machinery comes with are made of questionable materials. You find that out the hard way when you’re trying to start a generator, boat motor, snowmobile, or chainsaw and it snaps. If you have no replacement on hand, you may be cursing the day you were born. While most store-bought replacements are of inferior quality with a finite lifespan, the diamondgrip high-performance starter grip is made to outlast the lifespan of your equipment. Backed by a lifetime guarantee, diamondgrip features corrosion-resistant engineering for harsh environments. The small diamondgrip is designed for smaller power tools, such as saws and blowers, while its larger cousin is suited for larger engines, such as lawn mowers, generators, and pumps.
Gosun SolarPanel 10
DIMENSIONS: 10.5 by 7 inches (open) 5.25 by 7 inches (closed)
MSRP: $99
URL: gosun.com
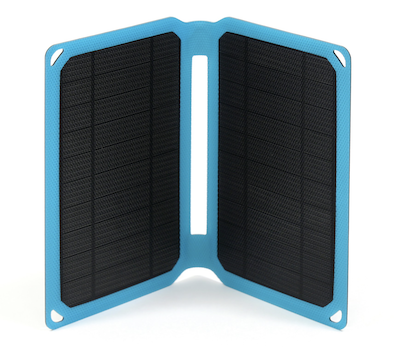
NOTES:Whether using your smartphone for navigation or recording a stunning sunset during a road trip, there’s no reason electronics and Mother Nature can’t mix. That’s why we carry the SolarPanel 10. Thanks to rapidly advancing solar-powered technology, this portable panel puts out 10W in ideal weather conditions so you can charge your mobile device almost as fast as an average wallet outlet. Made of monocrystalline silicone and water-resistant polymer, this lightweight GoSun device is about the size of an iPad mini when closed, making it conveniently portable. And it has holes in the corners so you can strap it open to a backpack as you’re out and about. It’s a convenient way to stay powered when you’re far from the grid.
Sparrows Lock Picks Challenge Vault
DIMENSIONS:6.25 by 6.25 by 4 inches (approx.)
MSRP:$129
URL: sparrowslockpicks.com
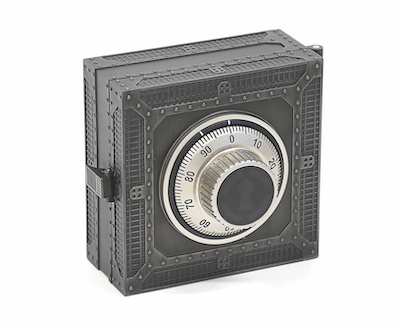
NOTES: Whether it’s studying lockpicking so you can find the flaws in your own security or something as mundane as getting back into your house after accidentally locking yourself out, knowing covert methods of entry are invaluable. That’s why we’ve become obsessed with the Challenge Vault from Sparrows Lock Picks. As the name implies, the Challenge Vault is a professional-grade three-wheel lock and safe dial mounted onto a desktop case. The idea is to teach yourself how to open the case by spinning the dial and feeling and listening to the clicks of the wheels. If you can crack it, you’ll find tools and parts inside to change the combination and make it progressively harder to open. It’s a puzzle that can keep on challenging you.
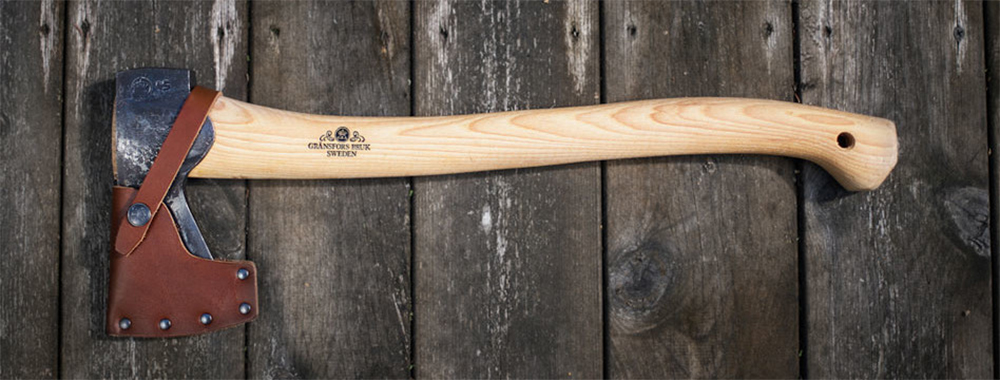
WOOX AX1
OAL:15.7 inches
MSRP: $199
URL: wooxstore.com
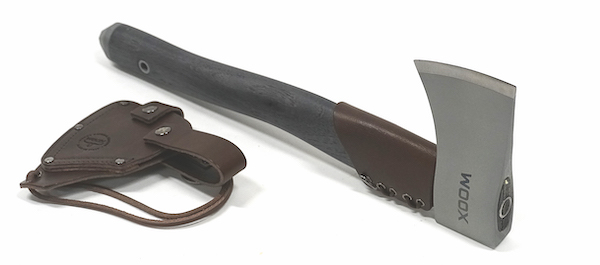
NOTES:The first word that comes to mind when we grasp the AX1 is “classy.” Its old-school aesthetics are balanced beautifully with modern manufacturing, resulting in an ax that you can both abuse and admire. The handle is made of Appalachian hickory and features an octagonal shape for better ergonomics and a heavy- duty steel diamond pommel for hammering. On the business end, the 1045 carbon steel head is super sharp yet incredibly strong. Though it’s not stainless and will require maintenance, it does have a gray Cerakote to boost wear and weather resistance. And when it’s not in use, you can protect the AX1 with the included leather sheath and collar.
Kill Cliff Recover Drink
WEIGHT: 12 fluid ounces per can
MSRP: $50 per 24-pack
URL: killcliff.com
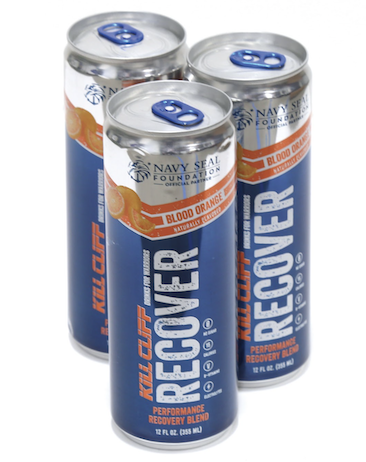
NOTES: When someone mentions the term “sports drinks,” we picture slick marketing videos of ripped, sweaty athletes dousing them- selves with colorful beverages. We also think of all the sugar and questionable ingredients they contain. Fortunately, Kill Cliff Recover doesn’t contain any of that garbage. Instead, each can of Recover is made from a non-GMO and naturally sweetened mix of plant extracts, enzymes, and electrolytes. While not every flavor is delicious, most are enjoyable beverages that provide post-workout hydration — not to mention B vitamins. Plus, it’s sweetened with stevia and erythritol so it’s keto-friendly. Founded by a former U.S. Navy SEAL, Kill Cliff has become popular in fitness circles and sponsors an assortment of athletes, from MMA fighters to skateboarders.
Emergency Prep Club 3-Day Gluten-Free Emergency Food Kit
CONTAINS:6,000 calories worth of food
MSRP: $75
URL: emergencyprepclub.com

NOTES: Alkaline this and carb-friendly that — if you’re like us, you’re pretty tired of all the marketing buzz- words. But for those with Celiac dis- ease, gluten-free food is essential for avoiding long-term damage to the small intestine. That’s why the Emergency Prep Club was started. It provides three-day, seven-day, and 14-day emergency food kits for preppers with gluten allergies. The kits contain everything from Epic turkey jerky to Mount Hagen Organ- ic Instant Coffee. While it’s usually cheaper and better to personalize your food cache, the Emergency Prep Club is a great starting point if you’re new to prepping or just looking for a convenient resupply option. You can also subscribe for a fresh kit every six months at a 5-percent discount.


 Photo credit: MSVG (
 Photo credit: landrovermena (
 Photo credit: Neal Herbert (
 Photo credit: Bold Frontiers (
 Photo credit: Bob n Renee (
 Photo credit: Markus Spike (
 Photo credit: Ell Brown (
 Photo credit: dlg_images (
 Photo credit: NCRS Montana
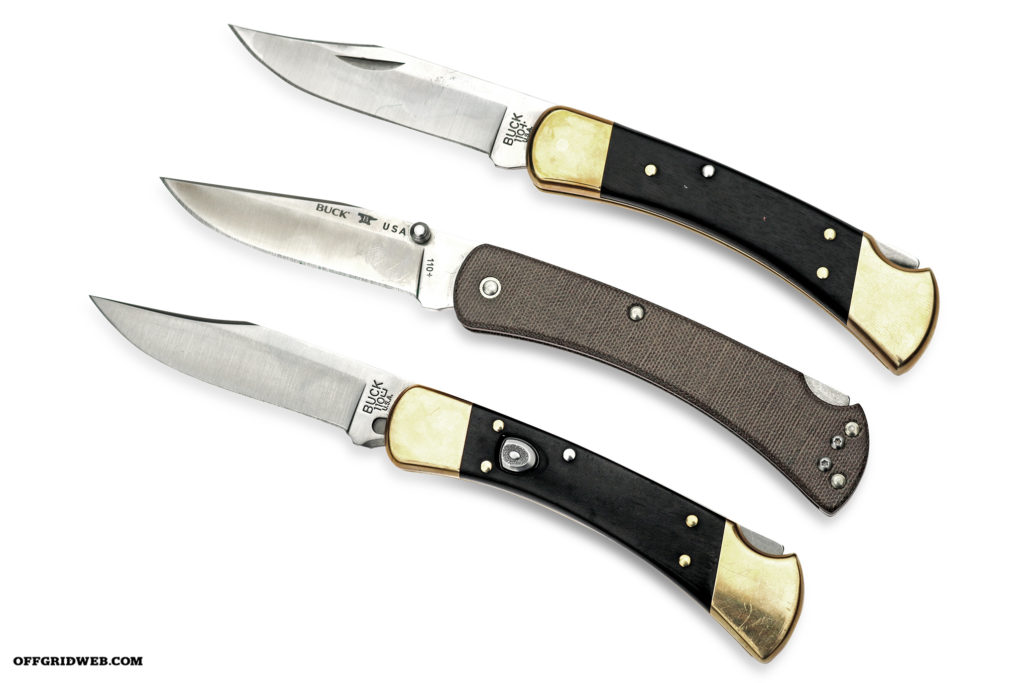
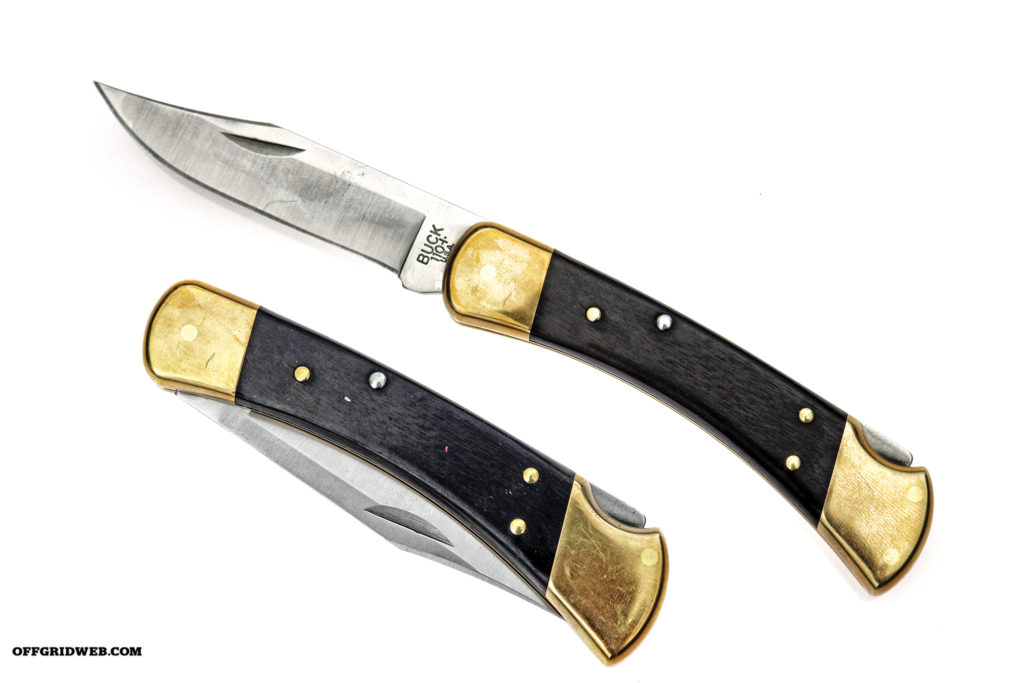
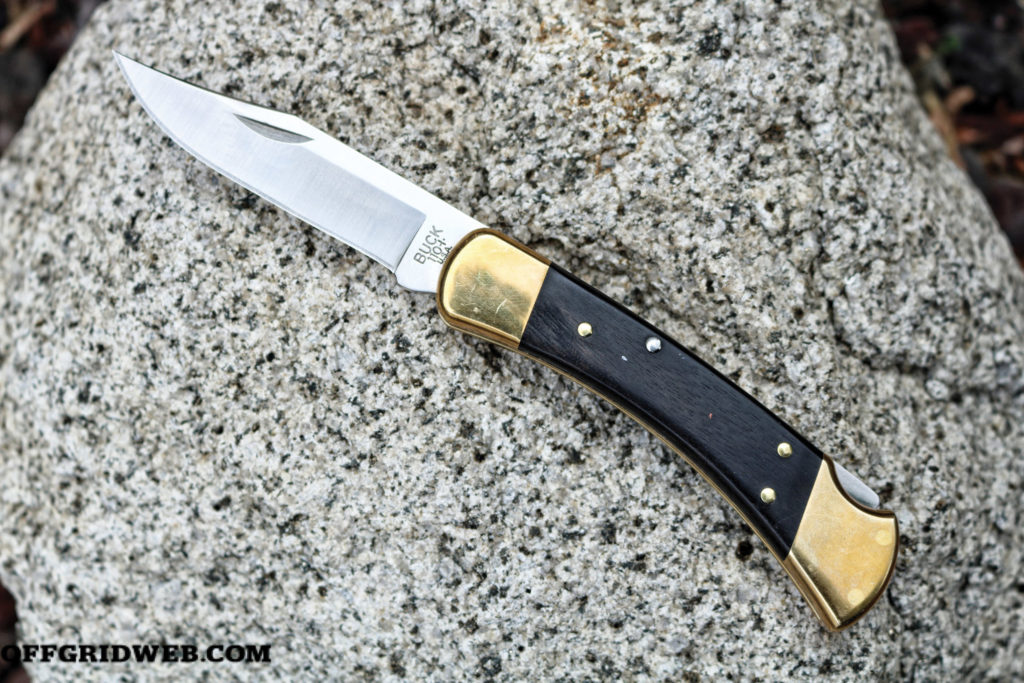

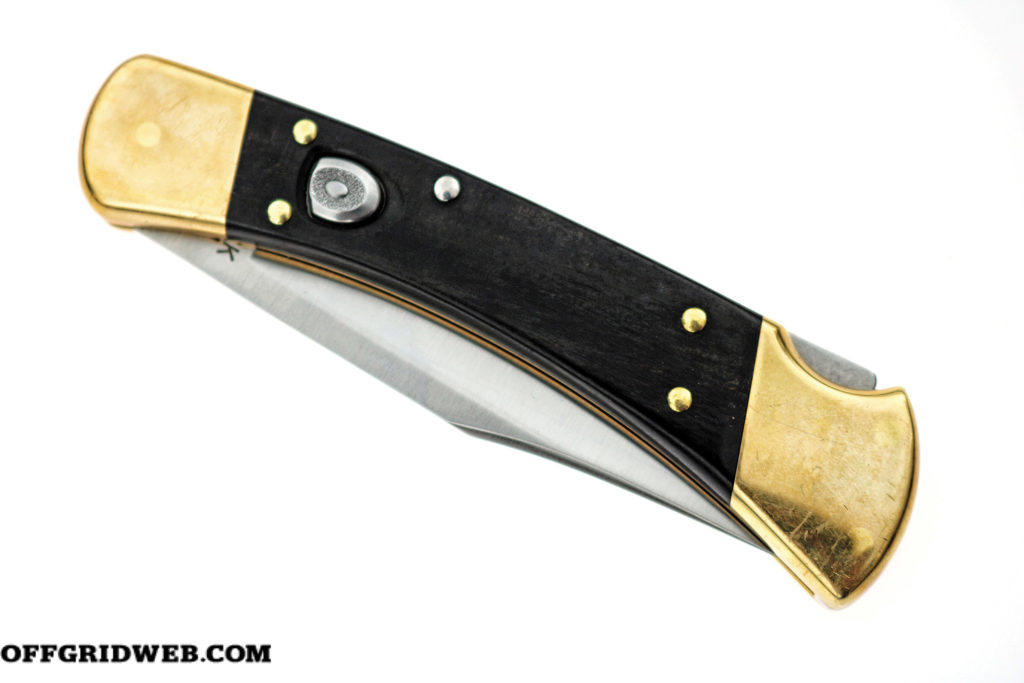
 Above: The lighter weight of the 110 Slim Pro means that it can be carried via pocket clip as opposed to being worn in a belt sheath.