If you own a truck, SUV, or Jeep, there’s a pretty good chance you’ve also installed larger-diameter tires and a leveling kit or lift kit. These modifications increase ground clearance and improve off-road capabilities, but they also present some issues you may not have considered. That taller ride height means the barebones scissor jack that came with your vehicle might no longer provide enough elevation to change a tire. Regular floor jacks from the local auto parts store will do a little better, but what happens if you have a problem somewhere other than your driveway? Pro Eagle jacks are specifically built to provide an off-the-grid solution to this dilemma.
Compare modern trucks to those from 20 or 30 years ago, and you’ll realize how much bigger, taller, and more off-road-capable new vehicles have become from the factory. However, jack design hasn’t changed much in recent decades. Pro Eagle saw this as an opportunity to improve upon the conventional floor jack design, and make something specifically for those of us who like to get out and explore.
As seen in the video above, these jacks are used extensively by off-road racers, and feature several distinguishing features that improve their capabilities on surfaces other than pavement. The large non-pneumatic tires are designed to roll easily through dirt, gravel, rocks, and most other surfaces. The solid steel axles offer increased strength for lifting heavier rigs. Each jack comes with a built-in skid plate to keep it from sinking in soft dirt, sand, or mud. There’s also an adjustable extension that provides an extra 8 inches of lift height when needed. Of course, the company says its jacks will also work just as well for regular maintenance in the garage.
Pro Eagle offers jacks ranging from 2-ton standard to 2-ton big wheel and 3-ton big wheel. All jacks come with the aforementioned off-grid-worthy features, and they are backed up by a 2-year full replacement warranty. You can even purchase 90% of the parts and pieces separately, if the need should arise. Each jack has an available mounting kit to keep it secured and locked in place while you are on the go.
In addition to floor jacks, Pro Eagle also offers an ultra-portable CO2 air jack that’s designed for lighter vehicles such as UTVs and side-by-sides.
Buy It On Amazon:
Also Handy:
For more information on these off-road jacks, go to ProEagle.com.
At SHOT Show 2020, we got our hands on the latest every-day carry flashlight from Streamlight: the MacroStream USB. This light is the big brother to the popular MicroStream USB, and offers a bigger aluminum body, higher-capacity battery, and increased lumen output. After the show, we were excited to try out this flashlight in the real world, so we requested a sample from Streamlight. The company kindly sent us one of the pre-production models so we could familiarize ourselves with the light. Read on as we share some of our first impressions.
Compared to the MicroStream, the MacroStream’s dimensions are noticeably bigger. It measures 4.5 inches in length and 0.8 inches in diameter, as opposed to the Micro’s 3.9 inches and 0.6 inches. Weight is up by a full ounce, but this light still weighs only 2.2 ounces including the battery.
Speaking of the battery, it’s powered by an included 3.7V 800mAh Lithium-ion cell. Like the MicroStream, this flashlight’s housing fits a standard alkaline battery (AA for the Macro and AAA for the Micro) but the light can only be used with the included Li-ion battery. This is unfortunate — we know the USB functionality won’t work with an alkaline battery, but it would’ve been nice to be able to use one as an emergency power source.
The Macrostream’s blue lithium-ion cell next to a standard CR123 and 18650.
The micro-USB charging port is hidden under a sliding, O-ring-sealed metal shroud around the light’s head. Pushing the shroud forward reveals the port, which lights up red (charging) or green (full) when the light is plugged in. Streamlight says the battery can be fully charged in about four hours.
Functionally, the MacroStream USB should feel familiar to anyone who has used a Streamlight handheld in the past. Rapid half-presses of the power button toggle between 500-lumen high mode and 50-lumen low mode. However, unlike similarly-sized ProTac models, this light does not have a strobe function or the ability to change mode order with Streamlight’s Ten-Tap system. It also doesn’t have a crenelated bezel or shrouded tail cap switch.
Size comparison between the Streamlight ProTac 1L-1AA and MacroStream USB.
The MacroStream USB is rated IPX4 water-resistant, which means that it should hold up fine to rain and occasional splashes, but should not be submerged or heavily soaked. It’s also impact-resistant against drops up to 1 meter. The light includes a removable, bi-directional pocket clip that can be used to attach the light to apparel, packs, or the brim of a hat for hands-free use.
As usual with Streamlight products, street prices are far below the official MSRP. In this case, MSRP is $90, but this light can be pre-ordered from various online retailers for roughly $50.
Overall, the MacroStream USB feels great in the hand, is easy to operate, and offers two useful brightness levels. We also appreciate the convenience of onboard USB charging. However, due to the non-standard battery type and inability to accept off-the-shelf batteries in a pinch, we prefer the versatility of the ProTac 1L-1AA from an emergency preparedness standpoint. That said, the MacroStream USB is great as an EDC utility light, and a nice complement to the smaller MicroStream USB.
Buy Related Product – Microstream:
For more information on the new MacroStream USB, go to Streamlight.com.
Humans have field dressed four-legged sustenance since that first caveman chiseled a pointy tip on a downed tree branch. Did he, or the millions of hunters who came after, have a gut hook knife? Nope. Not for many millennia, until it showed up in the mid 20th century.
Its origin story is murky. Many folks say custom knifemaker Merle Seguine added a hook to his knife to lift a pot from a campfire, and later sharpened the hook for field dressing. Others say the gut hook was invented for hunting by Sid Bell (a silversmith, geologist, and outdoorsman), who gave a wooden prototype to Seguine to produce.
Regardless, the gut hook is used today to “unzip” a downed animal’s hide without piercing muscles or intestines.
Many designers misinterpret the gut hook knife by sharpening its top or messing up the geometry of its C-shaped opening. This can result in unintended cutting and difficulty in sharpening after use. Also, most gut hooks are on a blade’s spine, meaning the primary edge must face you as you split the hide; like a gun’s muzzle, it’s not ideal to have the business end pointing at you.
So, in this issue, we take a stab at gut hook knives to see if they’re something preppers should add to our tool kits.
If the SwingBlade is the oddball of folding gut hooks, then this Uncle Henry model is the nonconformist among the fixed blades in this buyer’s guide. It’s a hybrid of sorts, combining elements of the gut hook, a trailing-point fixed blade, and the Inuit blade called an ulu to produce a tool that’s made specifically for field dressing medium to large game. Old-school aesthetics in a unique package, it offers solid slicing abilities.
Though popular, D2 isn’t our favorite blade steel; it’s hard to sharpen and isn’t a stainless steel.
Sheath can only be worn vertically and — if the knife is pulled up slightly while holstered — can expose the sharp bottom corner of the skinning blade.
Outdoor Edge is a Colorado-based company that makes a wide range of innovative knives and tools, and its SwingBlade is one such model. As the oddity of the bunch, it’s not a true gut hook knife. Instead, it’s a skinning blade that flips around to reveal a slightly curved gutting blade on the other end. Part folding knife, part straight razor, this two-in-one design frees up space in your kit while offering superior in-the-field performance.
Pros:
Both the gutting and skinning blades slice like precise lasers.
Outside-the-box design
Nylon sheath has plastic liner and provides the best no-rattle lockup of all the sheaths in this buyer’s guide.
Cons:
Opening the SwingBlade requires two hands and extra effort to keep your fingers out of the path of whichever blade is closing.
Despite being made in China, this is a robust multi-tool consisting of three folding stainless steel blades: a gut hook, a bone saw, and a drop-point. Each are secured with a sturdy lockback and housed in a wide handle with grippy injection-molded scales. The gut hook’s tip is rounded to prevent accidental punctures. The saw has two rows of staggered teeth for effective sawing, while the drop-point blade is sharp and versatile.
Pros:
Saw and drop-point blade offer multiple bushcraft uses
Multi-tool design means you’ll haul fewer tools
Comes with a well-made nylon sheath
Cons:
Gut hook doesn’t so much slice as it does pull.
Handle will be a tad too fat for those with medium to small paws.
Handle’s finger grooves are pointless, considering the closed blades always protrude out; your fingers will always be gripping two uncomfortable blade spines as you use the third blade.
Buck Knives 660 Folding Pursuit Large Guthook Knife
Designed as a midrange hunting knife, the 660 features a smartly designed gut hook on the spine of its folding drop-point blade. The gut hook’s opening is wider than most, and its sharpened edge is almost rectangular, allowing for a smooth slicing motion. Thanks to its performance, lightweight frame, durability, and portability, this U.S.-made folder is a serious contender. But we’d expect nothing less from the iconic Buck Knives.
Pros:
Gut hook’s superior edge geometry
Thumbstud opening and lockback mechanism provide safe operation
Ergonomic handle
Nylon sheath can be carried vertically or horizontally
Cons:
Though well made, the handle scales are made of glass-filled nylon and VersaFlex synthetic rubber. We’d prefer Micarta or G10.
Knife snobs might scoff at the 444’s Kraton (polymer) handle and 440 stainless steel blade, but both have proven themselves in real-world applications. Once upon a time, 440 was considered a super steel; even though other fancy steels have come along, it still provides strong rust resistance and edge retention. Speaking of which, both the gut hook and the primary cutting edge are crazy sharp. Made in the USA.
Pros:
Affordable
Ergonomic and comfy Kraton handle
440 stainless steel blade and gut hook perform well
Cons:
The blade shaves off tiny bits of leather from the sheath every time you pull out the knife. The sheath could use a plastic liner to prevent this annoyance.
The sheath’s snap-button strap rotates too much, making opening and closing a pain.
Some longtime fans have lamented that the quality control on Gerber knives have dropped in recent years. You won’t have that fear with the Gator Premium. From the S30V stainless steel of its full-tang blade and integrated gut hook to the comfy, rubberized Gator Grip handle that inspires its name, this 21st century reincarnation of Gerber’s bestselling lineup elevates this genre in aesthetics, performance, and craftsmanship. It has Best in Class written all over it.
Pros:
Both the primary edge and the gut hook cut like lightsabers.
Gator Grip handle offers traction and comfort.
Quality sheath has plastic liner to protect the leather.
Utah Knife Works owner Mark Russon says his father, Robb, came up with the design for what would eventually become the Tom Brown Tracker knife, but never got credit for it. So, 40 years later, the younger Russon gave his dad’s model a modern makeover. Every section of this jack-of-all-trades blade has a different survival function, including the utility hook that’s promoted as being capable of processing game, among other uses.
Pros:
In spite of the Chinese steel, the blade is durable and its many edges are razor sharp, including the hook.
Feels good in the hand
This tracker knife is a sturdy bushcraft multi-tool.
Cons:
Unfortunately, if you use the gut hook for game, the saw teeth on top of the knife’s spine will rip into the guts you’re trying to avoid. (As a consolation, the hook can be used on sticks to shave off tinder or to craft arrow heads.)
While well crafted, the leather sheath is vertical-carry only.
COVID-19, commonly known as Coronavirus, is the topic on everyone’s mind right now for obvious reasons. With most of the U.S. in damage-control mode, many individual states and cities on lockdown, and the entire world reacting to the spread of this ongoing pandemic, we’re living through an event that has reached an almost-unprecedented scale and severity.
As you’ve probably noticed, RECOIL OFFGRID is not looking to sensationalize or exaggerate the situation — that’s why you haven’t seen us running round-the-clock coverage or touting this as the imminent apocalypse, as many other media outlets have. Instead, we’ve chosen to defer to true experts who can speak about the situation in a realistic and practical manner. This was the impetus behind our first ever OFFGRID Live panel discussion, which occurred today (3/26/20) at noon Pacific time.
Our OFFGRID Live video stream brought together three experts from the front lines of the COVID-19 pandemic: global risk and financial analyst Dennis Santiago, of California, retired NYPD detective and active fire chief Joey Nickischer, of New York, and cardiothoracic surgeon Dr. Robert Riley, of Arizona. A fourth panelist, fire captain and medical first-responder Aaron Adams, was unable to attend as planned because he was called in to an emergency. Staff members Tom Marshall and Dave Merrill hosted the discussion and read questions from the audience to the panelists.
For those of you who missed the 1-hour OFFGRID Live stream, you can watch it in its entirety using the embedded player at the top of this post.
After the discussion ended, Nickischer reached out to us to share the following links, which provide some useful additional information.
Nickischer also said, “I should have mentioned blood donation. Blood donations are way down as most local community blood donation events have been cancelled. We do need blood, so please encourage others to go to the local blood bank and donate.” On RedCrossBlood.org, you can find local blood banks and make a donation appointment.
A basic understanding of lockpicking is one of the most valuable urban survival skills one can have in their arsenal. For many, the idea of lockpicking may be relegated to the realm of criminals and hackers, but there are many legitimate legal uses for these skills.
A locksmith can be an expensive solution to regaining entry into your own home, automobile, or safe when your keys are locked inside. Under such circumstances, a basic knowledge of lockpicking might save you a good chunk of cash. If ever the day should come that you’re the victim of an unlawful custody situation, a solid foundation of lockpicking skills and an understanding of the inner workings of the most popular lock designs could likely aid in your escape. And in a worst-case, end-of-the-world scenario, lockpicking could enable you to scavenge medications or other necessary items from places that may have been passed over by opportunistic looters.
In this article, we examine the anatomy of a lock, how lockpicking works, basic lockpicking tools, and the most popular lockpicking techniques.
Pin Tumbler Lock Anatomy
The pin tumbler lock is one of the most basic and commonly used lock designs. This type of lock can be found on virtually every doorknob, deadbolt, and padlock. Even many high-security doors have a pin tumbler lock as a backup.
The mechanics of these locks are very simple and easy to understand. Once you have a firm grasp on how these locks work, they’re relatively easy to pick. Even some of the highest-security locks on the market are just creative alterations of the pin tumbler design.
Housing: The housing is the outer shell that holds all the internal lock components together.
Cylinder: The cylinder sits inside the housing and rotates freely when the proper key is inserted. It’s kept in place by a series of pins and springs that protrude into the cylinder and housing. These pins prevent the cylinder from turning until the key is inserted.
Shear Line: The shear line is the space between the cylinder and housing. When the key is inserted and all components are aligned properly, the gap between the driver pins and the key pins align perfectly with the shear line.
Driver Pins: The driver pins are essentially the locking pins, which sit between the cylinder and housing to prevent the cylinder from turning. When the correct key is inserted into the lock, these pins are pushed above the shear line to release the cylinder, which can then rotate freely within the housing. Driver pins are located on top of the key pins.
Key Pins: The key pins sit below the driver pins. Key pins are called such because these provide the coding system for the lock. They vary in length to match the cut on the appropriate key. These pins contact the key and press against the driver pins to push them above the shear line.
Springs: Each set of pins has a tension spring located at the top, which forces the pins downward into the cylinder.
The Concept of Lockpicking
When a key is inserted into a pin and tumbler lock, the cuts on the key contact the key pins and lift the pins upward to the correct height. This positions the driver pins above the shear line and the key pins below the shear line, allowing the cylinder to rotate.
The idea behind pin and tumbler lockpicking is to replicate the key’s function by elevating the driver pins above the shear line so the cylinder can be turned within the housing to unlock the lock. The tricky part is aligning all the pins, so they don’t bind against the lock. If a key pin isn’t pressed high enough, the driver pin will continue to bind against the cylinder, preventing it from rotating. If a key pin is pressed too high, the key pin itself will bind against the cylinder. There are several techniques for accomplishing this goal, which we’ll discuss later, but first we need to understand what makes lockpicking possible.
Lock Tolerances & Binding Order
Most locks have very slight tolerance flaws in the alignment of the pin holes. It’s actually these imperfections that allow these locks to be picked. In lockpicking, there’s an order in which each pin will clear the shear line based on the offset of the pin holes. The pin located in the hole that has the greatest deviation from the centerline toward the direction of the cylinder is turning will be the first pin that has to clear the shear line and so on. This is referred to as the binding order.
When tension is placed on the cylinder with a tension wrench, and the first driver pin clears the shear line, the cylinder will rotate ever so slightly and trap the bottom of the driver pin above the cylinder. This process continues until all the driver pins have cleared the shear line and the lock is opened. Setting the pins out of order will result in a failed attempt, since the cylinder will have rotated past one or more pins. It’s also important to know the binding order can change depending on where the tension wrench is placed and the direction of force of the wrench..
Tools
A 14-piece Southord kit, a Southord jackknife pick set, and a Serepick Bogota Titan covert pick set.
Tension Wrench: The tension wrench is the most important piece of lockpicking equipment, or at least the most important piece of equipment to master. The tension wrench acts like the key in that it allows the user to turn the plug. It also places tension on the pins, so that when the driver pins clear the shear line, the cylinder will rotate just enough to bind it above the shear line. Tension wrenches are pretty basic with little variance between them. Wrenches come in different thicknesses to accommodate different sizes of keyways. Most are designed to slide into the bottom of the keyway (side opposite the pins), but some have very short necks and are intended for use at the top of the keyway, just in front of the pins.
Hook Picks: There are many variations of the hook pick, but the purpose is the same. The hook is used for single-pin picking to lift the pins above the shear line. As a rule, the simpler the better when it comes to hooks. Small hooks are the go-to for most pin and tumbler locks. Large hooks are reserved for reaching the back pins on locks with long cylinders.
Half-Diamond Picks: Half-diamond picks are used for locks whose key pins are similar in length. The half-diamond is usually a good pick to start with, since many cheaper locks have little variation in key-pin length. The half-diamond can be used with all three picking techniques described later in this article.
Rake Picks: There are a few different rake designs, but most rakes are some variation of a “snake,” “W,” or “Running W” pattern. The purpose of a rake pick is to set multiple pins simultaneously.
Ball Picks: Ball picks aren’t used for pin and tumbler lockpicking, but they’re commonly included in lockpick sets, so we’ll touch on them very quickly. Ball picks are used for picking wafer locks, which function differently than pin and tumbler locks. These locks are found on filing cabinets, desks, and small lock boxes. The techniques for picking these types of locks are like the ones discussed in this article, so the skills will easily transition with a basic understanding of the wafer lock design.
The most commonly used picks (left to right): Hooks, Half-Diamond, and Rakes.
Techniques
There are several techniques for picking pin and tumbler locks. Each has its place. Here we’ll look at the three most popular methods. Keep in mind that each of these techniques has several variations, but we’re just covering the basic concepts.
Single Pin Picking: Single-pin picking is the most precise method for picking pin and tumbler locks, but it also requires the most skill and time on target. As the name implies, with single pin picking you’re setting each individual pin above the shear line. This is where binding order becomes an important topic, because each pin must be set in the correct binding order.
It’ll take a lot of trial and error to figure out which pins to set in which order. To do so, place a light amount of tension on the tension wrench and probe each pin until you find the one with the most amount of resistance. This will likely be the first binding pin and the one you should work on setting.
Continue this process until all the pins are set. If you reach a point where a pin will not move, it’s likely that it was set out of order and no longer has the clearance to move through the pin hole. If the cylinder will not turn, it’s a likely indication that either a driver pin or one or more key pins are caught midway between the shear line.
Raking: Raking is a picking method that attempts to set all the pins virtually simultaneously with a single, rapid action. This is done by inserting the pick (typically a rake or half-diamond) and extracting it quickly while placing light tension on the tension wrench. The tension on the tension wrench is released after each failed attempt to allow the pins to reset.
Professional Lockpicking Set:
More Detailed Lockpicking Manual:
The raking technique works by bumping the pins far enough above the shear line that the key pins are able to fall below the shear line before the driver pins do, thus creating a momentary void at the shear line to allow the cylinder to turn freely. Raking takes the least amount of skill and is a quick way to pick a lock when the lock cooperates.
Scrubbing: Scrubbing is sort of a blend between single pin picking and raking. The wrench is inserted into the keyway, and light tension is placed on the tension wrench. An elliptical “scrubbing” motion is used against the pins, working from back to front, or front to back. The half-diamond pick works well with the scrubbing technique, but a rake or hook can be used.
Above: Lockpicking is a simple skillset to learn, but a difficult one to master. Practicing with a variety of tools and lock configurations will enhance your ability to adapt and improvise in a real-world survival situation.
Legal Considerations
Know your local statutes before you run out and purchase a lockpicking kit. In Colombia, for example, the mere possession of lockpicking tools is a felony. Here in the States, lockpicks are legal to own and carry in most jurisdictions. Even where the possession of lockpicks can be considered a crime, such as in California, the law usually requires that it be coupled with felonious or malicious intent to be considered illegal possession. Stay out of places you’re not supposed to be, and you shouldn’t have any legal problems.
Conclusion
Lockpicking is a skill that requires patience and tactile sensitivity, but it can be learned by anyone in a relatively short amount of time. With a good working knowledge of lockpicking tools and the principles behind their use, a person can easily create makeshift tools in a survival situation, making lockpicking a practical and potentially life-saving skill.
Responsible preparation for urban emergencies or disasters in a major city requires thoughtful consideration of the illumination tools you will use. From an every-day carry (EDC) perspective, your ability to draw attention to your location can have critical consequences. The flashlight or signal light you choose must be durable, lightweight, simple to use, and most importantly, bright enough to alert your colleagues, search and rescue personnel, or law enforcement to your location.
Nitecore entered the illumination device and battery charger market in 2007 and produces a wide range of popular LED headlamps, weapon lights, flashlights, and power supplies.
The Original Nitecore NU05
The company got the attention of the biking and trekking communities in 2018 when it introduced the NU05 signal light, a miniaturized strobe light which punches well above its weight class with its low-profile dimensions (1.16” x 1.19” x .64” and 0.37 ounces) and MOLLE compatibility. It’s a great signal light for strapping to the pig snout on a backpack via the MOLLE-compatible clip that’s molded to the light’s transparent housing, or for attaching to a bike stem to alert vehicles of your presence. The clip is thoughtfully-designed and also allows the light to be attached to just about any piece of survival gear with a zip tie. If you are completely down on your luck, a re-purposed bread bag twist tie would do just fine.
As soon as I heard of the NU05’s USB-rechargeable red/white strobing and steady white light capability, I purchased the light and headlamp kit (essentially an adjustable elastic strap), charged it up in under two hours, and attached it to the Pouch Attachment Ladder System (PALS) webbing on my go-bag.
More Capabilities with the NU05 LE
Nitecore subsequently advanced the technology with its June 2019 release of the NU05 LE (Law Enforcement) model. This variant expands the basic NU05’s capability as a safety strobe by utilizing four independent colors (green, blue, red, white) and an alternating red-blue emergency cycle. Nitecore graciously provided a test and evaluation sample of this new model for a thorough shakedown.
The original NU05 and LE model appear almost identical, and aren’t much larger than a quarter.
Both lights ship with a 3-foot length micro-USB cable that plugs into the impact-resistant housing through a weatherproof, covered port, allowing the 3.7v 120mAh Li-ion battery to reach a full charge in approximately 1.5 hrs. That full charge gives the unit an advertised “standby” life of 12 months, so it can be stored until needed, a critical element to any EDC item.
Illumination Options
Once initiated, the LE version’s LEDs produce a varied lumen level (12 lumens for red, 17 for green, 2 for blue, and a maximum of 20 lumens for the white LED), with a frequency of about one second between flashes. The red-blue cycle strobes at a half-second interval. Maximum runtime in single LED mode is listed at 18 hours for white and 15 hours for all other colors, with 18 hours for the red-blue cycle.
The basic NU05 uses a special “blip” sequence to indicate the available power level in the unit, and utilizes the two paired red and two paired white LEDs to strobe with a slow blink, rapid blink, or illuminate with steady white light. It is suitable for those emergency situations when you’ve become lost or separated from the rest of your party and do not need to remain covert.
Although the white LED lockout function of the basic NU05 only allows the two white LEDs to operate for a maximum of 20 hours, they do so at an impressive 35 lumens. This provides enough light to change a tire, track down and retrieve recently-shot game, navigate an unlit stairwell, or complete a number of similar critical tasks.
The use of a green LED and unique emergency red-blue LED strobe cycle in the LE version are what really distinguish it from competitor lights of similar size and weight. In urban environments that contain a significant amount of red/white/blue artificial light cluttering the visual spectrum from streetlights, car headlamps and digital marketing, the green strobe stands out. When the red-blue emergency strobing cycle is activated, the device emits a very-distinct repeating signal that is immediately distinguishable from other light sources. You won’t be mistaken for the light bar on a police vehicle, but you will be highly visible.
It is important to note that the LE version ships with an additional mounting bracket designed to affix the strobe to the curved surface of a helmet. Users can attach a piece of loop Velcro to their helmet of choice and secure the light by the bracket’s hook Velcro. If the light is attached by just the integrated clip to the PALS webbing of a vest or pack, it should be backed up with a zip tie to guard against inadvertent knocks when donning or doffing your equipment.
Operating the NU05 Series
A central push button switch allows the user to cycle through the four single-color strobing functions and fifth emergency cycle. Mode memory resumes strobing in the color which was in operation when the unit was turned off. There is no steady lockout mode similar to the original NU05; strobing is the only capability.
I found the push buttons of both models to require a surprising amount of pressure to cycle through the modes. It was a bit difficult manipulating it with gloved fingers until I got the hang of the process. It’s also not easy to switch through the various modes if you have the light affixed to your helmet or backpack, but the mode memory will at least get you back to the last cycle in use before the light was put into standby mode. The light was designed to be turned on and left in a designated mode until deliberately turned off.
In a way this is a good thing, as you do not want an accidental discharge of light when your strobe experiences rough handling or rubs up against debris or brush.
Closing Thoughts
These were never designed to be a long-duration emergency solution on par with an S&S Precision Manta strobe. However, they can be attached to a number of surfaces and very small items, making them flexible and ready for use at a moment’s notice, and at a fraction of the price. Emergency equipment is of no use if it isn’t at hand when you need it, and the NU05 series of lights provides that capability.
Both the NU05 headlamp kit and LE version with tactical mount retail at Amazon.com for $19.95. Their low price could allow for the prepared individual to outfit every go bag, vehicle, bicycle and even key fob if desired, adding an extra measure of security and safety without breaking the bank.
You’ve probably seen a survival-themed movie or TV show where the protagonist dramatically fights a grizzly bear or pack of wolves while lightning streaks across the sky and tense music swells. Although that might make for an entertaining scene, it’s anything but realistic. In contrast to these fictional portrayals, “Survivorman” Les Stroud explained: “Real survival is really boring. You hardly do anything… It’s not wham-bam thank you ma’am, full of packed action.” He recently sat down with GQ for a new episode of the popular YouTube series, The Breakdown, and analyzed a series of clips from famous silver-screen survival scenes.
Stroud’s favorite movie, Jeremiah Johnson, offers a more realistic portrayal of wilderness survival.
Specifically, Les Stroud discusses his reactions to scenes from Into the Wild, The Edge, The Office, 127 Hours, Life of Pi, Open Water, Alive, and his personal favorite film of all time, Jeremiah Johnson. These include a variety of environments and scenarios, some much more realistic than others. Stroud points out aspects of these survival scenes that strike him as true-to-life, and often compares them to his experiences while filming his own reality series, Survivorman.
Check out the full 26-minute episode of The Breakdown below:
“We think we can just go up there and be Jeremiah Johnson, but you have to train, you have to learn these skills.” This interview does a great job of reinforcing the fact that survival usually isn’t easy, glamorous, or even dramatic. And although we can certainly enjoy movies for their entertainment value, very few offer a truly accurate portrayal of survival.
Editor’s Note: The following article was originally published by our sister publication RECOIL, and appears here in its entirety with permission. For more articles on guns, training, and gear, go to RECOILweb.com.
*Note: as of 4/15 these online retailers still have ammunition available:
As if shortages of toilet paper, bottled water and hand sanitizer were not enough; shooters are reporting ammunition shortages amid the 2020 COVID-19 outbreak. The response to the virus seems to be responsible for the next nationwide shortage of ammunition and possibly firearms.
The ever prescient Alexander Crown, recently penned an article for RECOIL, When the Brass Dries Up and lays out some of the more recent ammunition shortages and how to cope with them. It seems very timely amid reports we have been hearing since early February.
We’ve seen subtle signs of a panic buying here and there the past few weeks but it looks like the lid is about to blow off.
Looming Shortage of Firearms and Ammo
A reader from Arizona, Brent Stuart, tried to purchase two cases of pistol primers last week from Sportsman’s Warehouse in Phoenix, AZ, this afternoon and was told he could only purchase one case. The clerk at the counter told him there was a new corporate policy limiting the amounts of firearms, ammunition and reloading components purchased in a single day. According to the employee, he had received a copy of a memo from corporate headquarters that morning limiting firearm, reloading components and ammunition purchases temporarily.
The memo states:
With increased demand and limited supply on select items, Sportsman’s Warehouse has implemented the following purchase limits to ensure our product reaches as many of our customers as possible.
Firearm Limits:
Handguns (any type): 2 per customer per day.
Modern Sporting Rifles: 1 per customer per day.
Ammunition and Reloading Components Limits:
All Bulk Handgun and Centerfire Rifle Ammunition (100 rd + count box): 1 Per caliber, per customer per day.
Bulk Rimfire (200 rd + count box): 1 per customer per day.
All Handgun, Rimfire and Rifle hunting ammunition: 3 boxes per customer per day.
All 25 ct. shotgun shells: 10 boxes per gauge per day.
All primers: 1k per day.
Keg powder (4,5,8): 1 per day.
All 1lb powder cans: 1 per day.
We tried contacting Sportsman’s directly Friday 3/13 and our call was placed on hold for more than 30 minutes. So, we took the liberty of calling a few of the local stores in Reno and Carson City, Nevada. Both stores reported no limits on anything, but said ammunition was flying off the shelves. One employee reported a 75% decrease in stock on the shelves within the two hours he had been there. The other stated that it would not surprise him if such a policy would be put into place soon as a measure to stop ammunition and firearm shortages due to COVID-19.
Online Retailer Blames COVID-19 for Surge
Online ammunition retailer, Ammo.com, reports a significant increase in sales since February 23, 2020. The company believes that this surge corresponds with the public concern regarding the COVID-19 virus.
When compared to the 11 days before February 23 (February 12 to 22), in the 11 days after (February 23 to March 4), Ammo.com’s number of transactions increased 68%.
Alex Horsman, the marketing manager at Ammo.com, said of the surge, “We know certain things impact ammo sales, mostly political events or economic instability when people feel their rights may end up infringed, but this is our first experience with a virus leading to such a boost in sales.” Horsman continued, “But it makes sense. A lot of our customers like to be prepared. And for many of them, it’s not just facemasks and Thera-Flu. It’s knowing that no matter what happens, they can keep themselves and their families safe.”
We queried another big box store, Cabela’s and Bass Pro-Shops, who reported that ammunition is selling at a record pace. Week to date tallies for Herter’s 9mm 115-grain FMJ ammunition is 5,589 boxes. That’s 279,450 rounds and it’s not even Saturday. Month to date sales are 40,152 boxes for 2,007,600 rounds and we are not even halfway through March for just that one type and brand of 9mm ammo.
Cabela’s had no plans to limit purchases at this time.
Firearm Sales and COVID-19
Firearm sales numbers are always difficult to nail down definitively, but at least in Nevada, calls into the state’s background check system have been taking in excess of 2 hours. At certain times after waiting for 30 minutes or more a message tells the dealer that the queue is full and disconnects the line, causing them to call back in and having to wait again.
We’ve witnessed that happening while in several different gun shops and ranges over the past several weeks. It appears more people are buying firearms than usual.
Firearm and ammunition sales in California are reported to be five times above normal due to COVID-19.
“I’ve sold 12 handguns in two hours,” said Gabriel Vaughn, owner of the Sportman’s Arms in Petaluma, told KTVU. “Any time people are uneasy, sales go up, and it’s always the same, guns and ammo.”
A shooting range in Clovis, California, had to stop customers from buying ammunition to take home because they were running out of ammunition for the range. The Firing Line owner Jake Belemjian says people are stocking up on ammunition because of COVID-19 and the shop can’t keep up with the demand.
Political Fears
If this were not bad enough, the NRA is reporting that today, an ordinance has passed in Champaign, IL, to empower the mayor to “[o]rder the discontinuance of selling, distributing, dispensing or giving away of … firearms or ammunition of any character whatsoever.”
Apparently, politicians want to fan fears of limiting access to firearms and ammunition, leading more people into panic and creating more shortfalls in supply. We have speculated that the State of Nevada’s background check system’s extensive hold times may be the work of an anti-gun governor ordering staff cuts or allocating personnel elsewhere, but it seems coincidental with the timing of COVID-19.
The fact that it is an election year with an outspoken anti-gun candidate on the presidential ticket could add fuel to this fire and spur along potential ammunition and firearm shortages even without COVID-19, but probably not this early in the cycle.
Is This a Nationwide Shortage?
Dealers and distributors who have maintained good inventory should be able to continue to service customers. Most shooters who’ve gone through these shortages before have learned from the past and planned accordingly.
We aren’t yet seeing a firearm shortage due to COVID-19 in our neighborhood, but there may be an extended ammunition shortage on the way if it is not here already. In 2014, it was 22 LR, according to Ammo.com that caliber is moving a lot, but the surprise we found topping their list of most in-demand ammunition for the past few weeks was 40 S&W.
40 S&W: 410%
223: 194%
7.62×39: 114%
9mm: 101%
12 gauge: 95%
5.56×45: 69%
380 ACP: 43%
45 ACP: 35%
308 Winchester: 32%
22 LR: 29%
We would never tell anyone to not buy ammunition. Just don’t act all panicky and act like the folks who are building toilet paper forts in their garages.
Speaking of which, Franklin Armory has a smoking deal on Government issue “MRE” toilet paper and it comes with a free BFS-III binary trigger. Of course, that means that you will probably need to buy more ammunition.
Backpacks are a topic of endless debate and speculation within the survivalist community. What’s in your bug-out bag? Do you have a go-bag in your car? What about a get-home bag at the office? Is your every-day carry bag stocked with survival gear? These are all questions we’ve heard discussed ad infinitum on blogs, forums, social media pages, and at in-person gatherings. There’s nothing wrong with this line of thinking — we’ve written plenty of articles about packs, and even established our Bag Drop column as a recurring feature to delve further into various configurations. However, it’s easy for a laser-like focus on this subset of load-bearing gear to distract us from the fact that there are other viable options for carrying supplies.
It’s no secret that many common practices in the civilian preparedness realm have been derived from the armed forces. Here, too, there’s a lesson we can learn. Take a look at military loadouts around the world, and you’ll notice a common theme — operators aren’t rushing into dangerous environments with nothing but a weapon on a sling and a backpack crammed with all their remaining gear. In a high-intensity battlefield setting, it’s more than a little impractical to take a knee, unshoulder a pack, and dig around for a full magazine, tourniquet, or radio. When those items are necessary, they’re necessary immediately.
Backpacks are great for long-term sustainment gear, but the most critical items in any loadout are always worn on the chest, flanks, and waistband for immediate accessibility. This is a universal constant in military units because of its proven effectiveness, and you’d be remiss to overlook its relevance to emergency preparedness, even in non-combat situations. Carrying gear on the waist via a battle belt will be discussed in a future issue, but for now we’ll focus on the upper body.
There are three subcategories of load-bearing gear to consider: plate carriers, vests, and chest rigs. Read on as we take a look at some examples and discuss each system’s pros and cons from a survivalist perspective.
Plate Carriers
We’re about to blow your mind. Plate carriers are designed to … wait for it … carry plates. Their core purpose is to serve as a container for armor, whether it’s hard rifle plates, soft Kevlar inserts, or a combination thereof. If you’re in a situation where you’re going to be shot at, especially by rifle rounds, you’re absolutely going to want to be wearing some form of plate carrier. But most PCs are designed to carry far more than armor — they’re a modular host for a full array of combat and survival gear.
Generally, PCs will consist of front and rear plate sleeves that fit one or more of the standard plate sizes. The most common of these is approximately 10 by 12 inches, a commercial approximation of the military-spec Small Arms Protective Insert (SAPI) medium size (9.5 by 12.5 inches). There are many larger and smaller options available, as well as variations in cut (shape), profile (curvature), and thickness. Be sure to get a carrier that fits the plates you select if you buy these items separately. The plate sleeves are connected by an adjustable cummerbund that fits around the torso, as well as adjustable shoulder straps.
Many plate carriers come with built-in pockets and pouches for magazines, comms gear, and other small items. Virtually all feature PALS webbing, allowing the user to achieve a near-infinite array of configurations by adding MOLLE-compatible accessories. Think of a PC as a blank canvas — the front can be used for gear you need in a fight, while the back can house items for your companions to grab, such as signaling devices or spare medical gear. You can even set it up with a hydration system or attached backpack, but keep in mind that extra weight adds up fast.
Pros:
Offers a means of carrying gear, but more importantly, a means of protecting your vital organs
Most systems are highly modular and expandable, adapting easily to various tasks and weapon platforms.
Cons:
Protection comes at a cost — prices range from several hundred dollars to several thousand, depending on the features, armor, and accessories you select.
Weight adds up quickly and can seriously impact your mobility and endurance.
Depending on the plate size and cut, it may become more difficult to shoulder a rifle comfortably.
We sourced a pair of plate carriers from TYR Tactical that demonstrate the range of variation within this category.
EPIC: 360-Degree Protection
On one end of the spectrum, there’s the EPIC, a comprehensive system that’s a hybrid between a ballistic vest and a traditional plate carrier. It comes standard with TYR T52/SP soft armor that meets NIJ Level II specifications and can be worn without plates for protection against handgun calibers. This soft armor extends from the collarbone area down the torso and through the cummerbund, encircling the wearer on both sides.
Sleeves on the front and rear can accommodate various styles of rifle plates atop the soft armor — the pictured carrier is set up for 11×14 TYR HA3/7 dual-curve ceramic plates. These plates meet NIJ Level III specs when worn in conjunction with the soft armor, but the company labels them “Level III+” and says they’ve been proven to defeat 5.56x45mm M855 steel-core rounds at 3,051 feet per second.
Above: A central cutaway buckle pulls four wires that decouple the shoulder and side buckles for one-handed removal.
The TYR Tactical EPIC plate carrier features a Ballistic Vein that provides rigid structure and support for this dual-armor system, as well as antimicrobial spacer mesh to maintain airflow to the wearer’s skin. In the event of a medical emergency, there’s also a four-point cutaway feature that simultaneously releases the shoulder and cummerbund buckles to remove the carrier in seconds — just pull up and then down on the tab at the sternum. The chest, cummerbund, and replaceable Zip-On back panel are all coated in generous amounts of PALS webbing. Every piece of this carrier, including the soft and hard armor, is made in the USA by TYR Tactical using domestically sourced materials.
Above: To close the cummerbund, pull up the cover flap to reveal the side buckle, then pull firmly forward on the thumb loop until the buckle clicks into place. Hidden elastic in the lower back area lets the cummerbund expand and contract.
Given the massive amount of Kevlar integrated into the EPIC and the extra large 11×14-inch plates in this sample, we were surprised by how easy it is to wear. The weight is certainly noticeable, but the Ballistic Vein distributes it well. The most prominent drawback we noticed is that the soft armor and large shoulder buckles tend to interfere with shouldering a rifle. We feel this setup would be best-suited to defending a static position, or other relatively sedentary uses where protection is crucial and fatigue is less of a concern. Regardless of application, if maximum protection and heavy load carriage are priorities for you, the EPIC or similar system provides a comprehensive answer.
Above: Zippers on the back panel allow for the installation of modular Zip-On panels, backpacks, or hydration carriers.
TYR Tactical EPIC Plate Carrier Specs
Soft Armor T52/SP Level II (pictured) or TXP3A Level IIIA ($100 option)
Hard Plates TYR HA3/7 Level III+ (pictured); can also be configured for 9×12 to 11×14 SAPI/ESAPI or Cercom/Ceradyne plates
Expansion Points PALS webbing, two side pockets with hook and loop closure, Zip-On back accessory platform
Colors MultiCam, Coyote Brown, Ranger Green, Black
Weight 19.2 pounds (XL carrier with 11×14 plates and soft armor, no accessories)
MSRP $2,593 as tested ($1,496 for carrier with Level II armor, $496 per Level III+ plate, $35 per TYR Tactical Happy Mag pouch)
Toward the other side of the plate carrier spectrum, there’s the PICO-DS. This PC is considerably smaller and lighter than the EPIC, and forgoes the ballistic-vest-fusion concept to focus on simplicity and weight reduction. It can be configured with sleeves that accommodate hard armor plates ranging from small (9.75 by 12 inches) to extra large (11.75 by 14.65 inches) in several profiles/thicknesses. The breathable poly mesh cummerbund provides more airflow to the sides, and features a simple hook and loop closure under the front panel. Low-profile shoulder pads increase comfort during long periods of wear. In addition to PALS webbing on the front, back, and sides, four Quick Attach Surface Mount (QASM) buckles make the carrier directly compatible with TYR Tactical Chest Racks — as well as those from a number of other companies. These chest rigs can be disconnected from their shoulder straps and clipped onto the plate carrier, making it possible to quickly transition from chest rig to PC if a scenario dictates a need for armor. Likewise, different removable front flaps can be set up dedicated to different purposes or weapons. You could swap your loadout from AR mags and med kit to pouches full of food and fire-starting supplies, with just the two buckles and some Velcro required to change.
The pictured PICO-DS is configured with a pair of 10×13 TYR HA3/7 plates and T52/SP soft ballistic inserts to achieve the same Level III+ rating as the EPIC, albeit with a smaller coverage area. It has also been outfitted with three Combat Adjustable mag pouches and a Lower Abdomen Platform, offering additional soft armor and gear storage space. As with the EPIC, the PICO-DS carrier, armor, and accessories are made in the USA.
We found the PICO-DS to be exceptionally comfortable, offering a good balance between protection and weight. Although the large 10×13 plates are arguably on the small side for this author’s 6-foot-5 frame, they’re far easier to wear while sprinting or shouldering a rifle. This carrier would be ideal for high-intensity scenarios where increased agility and endurance may be worth the trade-off in armor coverage.
TYR Tactical PICO-DS Plate Carrier Specs
Soft Armor T52/SP Level II (pictured)
Hard Plates TYR HA3/7 Level III+ (pictured); can also be configured for 9.75×12 to 11.75×14.65 SAPI/ESAPI or Morgan Level III plates
Expansion Points PALS webbing; QASM buckles; Zip-On back accessory platform; front and rear lower attachment points for pouches, belts, or abdomen/groin panels
Colors MultiCam, Coyote Brown, Ranger Green, Black
Weight 13 pounds (Large carrier with 10×13 plates and soft armor, no accessories)
MSRP $1,969 as tested ($696 for carrier with Level II armor, $496 per Level III+ plate, $37 per TYR Tactical Combat Adjustable mag pouch, $170 for lower abdomen armor)
While the protection offered by rifle plates is undeniable, so are their inherent compromises — high cost, added weight, and reduced mobility. These factors can be diminished, but never fully eliminated. Survival is always a matter of calculated risk, so it’s essential to carefully consider the realistic likelihood of facing a scenario where hard armor is a necessity. If that likelihood is low for you, it’s worthwhile to take a look at some alternative options.
Like a plate carrier, a vest offers considerable load-bearing capacity on the front, sides, and back of the torso. Many are preconfigured with an array of pockets and pouches; some offer partial or complete coverage in PALS webbing to allow for individualized setups. Since there’s no thick rifle plate on the back, vests can also usually be worn with a backpack or while seated in a vehicle without discomfort.
Although a true vest won’t offer pockets for rifle plates, it may feature integrated soft armor — this would be considered a ballistic vest, sometimes improperly called a “bulletproof” vest. Even if they’re not lined with Kevlar, the majority of tactical vests can be worn over separate soft armor for protection against handgun calibers, shrapnel, and sharp objects. This is common for law enforcement officers who need a quick way to put on additional load-bearing gear atop their everyday equipment.
Keep in mind that vests aren’t just relegated to the tactical market. They’re also common among fly fishermen, photographers, construction workers, and countless other hobbies and professions. See Issue 30 for Tom Marshall’s review of the Klim Arsenal vest, which was designed for endurance motorcycle racers. Depending on your needs, one of these designs may be a better fit.
Pros:
Offers similar or even greater gear carrying capacity than a plate carrier
Available in a wide range of styles and configurations, including many outside the tactical realm
Generally affordable, especially in non-ballistic configurations
Cons:
Many are loaded with non-removable pockets and pouches that may not fit your needs, or floppy straps and buckles that get in the way
Can become nearly as bulky and cumbersome as a plate carrier without the advantage of hard armor
Blackhawk Omega Elite
This tactical vest is constructed from heavy-duty nylon mesh with a solid back panel covered in PALS webbing, padded shoulders, and a zip-up front with dual buckles. It features a total of 10 pockets — two internal zippered document pockets, two chest pockets for accessories, and six large magazine pockets. The mag pockets will each hold two 30-round AR magazines with room to spare. Length and girth are adjustable to accommodate a range of torso sizes.
Above: The front pouches can contain up to two 30-round magazines apiece.
Blackhawk designed the vest to be worn with a web belt, and it has a series of belt loops along its base for this purpose. These could be attached to a wearer’s existing belt, but adjusting all six hook-and-loop strips would make that a time-consuming process. It’s preferable to pair the vest with its own belt, such as this matching Blackhawk Military Web Belt made from 2.25-inch-wide nylon.
Above: One of the top pockets features a hook-and-loop area with a removable shot shell holder.
Although this vest is made from a mesh base, its large coverage area and many solid portions — including the entire back panel — caused it to feel stifling during heavy physical activity. Despite Blackhawk’s statement that it was “designed with input from elite operators,” several elements felt awkward, such as the overly long cinch straps dangling from the sides, the permanently attached belt loops, and the front buckles that can’t be pulled tight enough to sit flush. Blackhawk has apparently acknowledged these issues, since this vest is no longer listed on the company’s website.
Above: There’s tons of real estate on the back panel for attachment of MOLLE-compatible accessories.
Blackhawk Omega Elite Vest Specs
Expansion Points Six double mag pouches, two chest pockets, two inner document pockets, belt loops, PALS webbing on back panel
For the ultimate in high-speed-low-drag mobility, you’ll want to pare down your gear to the core essentials. Depending on your circumstances, that might mean spare magazines, medical trauma gear, radio equipment, navigational tools, and/or other defensive items such as pepper spray — items you’ll be using frequently while on the move, or those you might need at a moment’s notice. The minimalist solution for carrying this gear is known as a chest rig.
Some chest rigs sit closer to the sternum and others are designed to fit around the midsection, but the common theme is that they’re lightweight and one-sided. Chest rigs generally feature a simple yoke around the neck and shoulder blades, and a second strap around the back. Most modern rigs include a mixture of built-in pouches and PALS webbing, but the earliest designs were solely composed of magazine and/or grenade pouches. Chest rigs gained popularity during the Vietnam War, where Chinese Type 56 magazine carriers were used extensively by Vietnamese troops and often commandeered by U.S. special operations units such as MACV-SOG.
One of the biggest advantages of a chest rig is most noticeable when it’s not in use. These systems can be easily stowed in a backpack, complete with all the gear they contain — not such an easy task with a fully loaded vest or plate carrier. As a result, many users will pair a stripped-down plate carrier and a chest rig. If the risk of incoming fire is low and mobility is of utmost importance, such as during long-distance scouting missions, the chest rig can be worn alone. If a need for armor arises, the rig can be strapped on over the plate carrier or, as with the TYR Tactical QASM system, attached directly to the carrier itself.
Pros:
A minimalist choice that won’t impede your ability to run, climb, and shoot
Packs down for quick access during an emergency
Can be worn with other load-bearing gear, such as backpacks or plate carriers
Cons:
BYO armor — these are solely a load-bearing tool
Expansion options are the most limited of any of the three categories. Some rigs are single-purpose, with no expansion capability whatsoever.
Blue Force Gear Ten-Speed M4
Above: Strong elastic holds magazines and other odd-shaped accessories in place.
In the already minimalist realm of chest rigs, the Ten-Speed M4 from Blue Force Gear still manages to stand out as one of the most stripped-down options. The company calls it an “ultralight fighting load,” and for good reason — unloaded, it weighs less than three quarters of a pound. It comes with four built-in Ten-Speed pouches composed of durable stretch fabric that tightly grips anything they contain, whether that’s an AR magazine, a tourniquet, a radio, or a multi-tool. When these pouches are empty, they sit almost completely flat against the chest rig. Even if they’re fully loaded with 30-round mags, the entire carrier rolls up to fit into a small backpack with ease.
Above: At the top of the shoulder yoke, this hook-and-loop section can be used for ID patches or as a drag handle for casualties.
The shoulder harness and back strap are plain nylon webbing without any form of padding, but they’re wide enough to be worn comfortably without digging in. The chest rig also features a map/document pouch sealed by a hook and loop closure at the top, as well as two fields of additional PALS webbing for expansion. We used these regions to add two more MOLLE-compatible Ten-Speed M4 pouches, bringing carrying capacity up to six 30-round mags (or four mags, a radio, and a tourniquet). Even then, there’s still one open column of PALS webbing at each end for small items like a knife, pen, or flashlight.
Above: The Ten-Speed M4 chest rig easily fits into a range bag or backpack.
The entire purpose of a chest rig is to serve as a lighter, lower-profile alternative to a full-featured plate carrier or vest. If not for those advantages, you might as well go for more gear capacity and armor. In this regard, the Ten-Speed M4 excels. The only notable downsides are related to the elastic pouches — it’s challenging to load them one-handed, and they’re not as durable as traditional pouches made from thick Kydex-reinforced nylon.
After reading all this you may be thinking, I’ll just strap on head-to-toe tactical gear to maximize my preparedness if a bug-out situation arises. There’s an obvious problem with this — you aren’t the only person on Earth. Like it or not, it’s wise to remember that others’ perception of your gear may have just as much of an impact on your safety as the gear itself. Backpacks are common and socially acceptable in most environments — you might assume someone passing through a city with a large backpack is a through-hiker or homeless person. But how would you perceive someone moving through that same environment with a kitted-out plate carrier, chest rig, or tactical vest? And how might first responders or law enforcement personnel perceive this, especially during an unfolding disaster? Even if that individual isn’t carrying a visible weapon, there’s no denying that it paints a totally different picture than a typical rucksack or satchel.
As Ed Calderon wrote in his article on gray man principles in Issue 35, “If your clothing is going to be a conversation starter, you’d better have good answers at the ready.” This is a critical point you must consider as you approach this category of load-bearing gear. In a sparsely populated wilderness setting, your appearance may not matter much; in densely populated suburbia, it may quickly earn you the label of a “suspicious person” or vigilante. Of course, if society has collapsed and anyone you encounter is likely to be a murderous cannibal, an innocuous appearance no longer matters. But if that’s your primary consideration, you’re in dire need of a reality check.
Fortunately, there are some steps you can take to lessen concerns about outward appearance. The first course of action is to look at concealable, low-profile setups that can be worn under a baggy shirt or jacket. Many companies offer plate carriers and chest rigs that fit this description, although you’ll be limited as to how much gear you can carry while keeping them concealed.
Another option would be to choose an innocuous-looking setup that doesn’t appear overtly tactical — the Hill People Gear Runner’s Kit Bag is a great example of this. With a teal exterior, it looks like something you might find at REI. Lastly, as mentioned earlier, you can carry a backpack or duffel bag and stow your load-bearing gear inside, but that’s only viable if you’re moving through an environment where you’ll have a few seconds to put it on before SHTF.
Conclusion
We often think of the gear we carry as a critical variable in survival situations, yet overlook the importance of the way we carry that gear. No matter what type of load-bearing system you choose — be it a backpack, satchel, plate carrier, vest, chest rig, or stylish fanny pack — don’t forget its impact on the accessibility and organization of your gear. The last thing you need in an emergency is to be unable to access life-saving tools because they’re buried, scattered, or hard to find.
Also, take the time to test your load-bearing gear during intense physical activity. Go for a run, practice rifle and pistol drills at the range, scale a wall, crawl on your belly, sit in your car. These actions will provide a realistic assessment of how comfortable your gear is, as well as confirmation that you’re physically fit enough to make it work during a real emergency.
Knife fighting, or edged weapons defense, has always been a weak spot for me. Coming from a background where firearms were the default mode of combat, sharp and pointy implements always seemed to be relegated to shop duty. Cutting open MREs or prying lids off crates of ammo were probably the most common tasks I used my knives for overseas. But as a civilian, the likelihood of using a knife in a self-defense scenario is probably higher than it was in Iraq or Afghanistan. I’ve known and worked with people who are lifelong students of the blade, who’ve literally travelled the world just to learn different ways of fighting with knives and swords. Most of those folks have a style they prefer, or have synthesized their own over the years. At Ed Calderon’s Weaponology, we were about to dive into his own style.
Once, when asked what my preferred knife-fighting style was, I said, “Imagine an orangutan, high on PCP, in a prison rec yard with a screwdriver.” The bottom line is I had no prepackaged answer. I’ve dabbled in various styles over the years, never found one I liked, and still don’t have a methodology or system that I’m comfortable with. But now I know that’s OK and am much more confident in my abilities behind a blade than I’ve ever been.
The difference is two blocks of instruction put on by RECOIL OFFGRID alumni Ed Calderon: Weaponology and Organic Medium Entry. Perhaps best known for his Counter-Custody curriculum — as seen in our article “Vanishing Act” in Issue 29 — Ed’s knowledge of knife fighting is gritty, practical, and not for the faint of stomach. He doesn’t teach a system. You can’t earn a black belt. There’s not even a course certificate. What you do get is a ruggedly simple mindset and series of lessons that have been learned at the expense of people’s lives. Here are a few of those lessons that have stuck with me in the weeks and months since taking these courses.
The Way to a Man’s Heart
If you’re fortunate enough to take an Ed Calderon Weaponology class, you may want to consider a light breakfast that morning, because the ugly truth is you’re going to watch a lot of people get murdered. Ed’s introduction to knife fighting has nothing to do with the cultural history of ancient sword-swinging warriors and everything to do with exactly how modern human beings hurt each other with edged or pointed weapons. He illustrates his points with a grim highlight reel of videos taken from crime scenes around the world. Some of these clips are sure to make you gasp, cringe, cover your eyes, or feel guilty for watching. But this grim exposure is a necessary part of the learning process, and one we understand wholly.
The takeaway from this block of playback and talk-through is two-fold. One is to serve as a powerful and nearly instantaneous de-programming of any preconceived notions. Fortunately for most of us, the closest we’ll ever come to a knife fight is watching one on TV. Hollywood has turned the mano-a-mano knife duel into a quirky plot device — with opponents circling each other for minutes on end while delivering monologues or punchy one-liners. Blades clang and sparks fly, and there’s an occasional cut on the forearm or cheek for dramatic effect before the hero rallies his will and delivers a flurry of slashes and pokes that save the day with little serious injury inflicted. Spoiler alert: You won’t see any of that in the Weaponology movie medley.
The other major learning point is that many of the key components in a street-level knife attack are universal. These videos come from multiple countries with multiple cultures, showing a wide range of age, physical strength, and skill level of both victim and attacker. Most of them don’t have sound, allowing an intense focus on body language and movement flow. None of the attackers are professional martial artists or military special operators. They’re not carrying $400 custom combat daggers. They don’t talk or slash the air around them before pouncing. Attacks last seconds, not minutes.
Above: Attack angle #1: tip-down stab from the top to reach the subclavian artery
In every single one, the attack consisted of a brief but frenzied flurry of stabs to the upper portion of the torso. In every single one, the attacker held their knife in a “reverse-edge ice pick” grip — point down, blade facing inward. In the small number of cases where an attacker did slash, it was still with this grip. Slashes were delivered in a plunging, ripping fashion as opposed to the long arc, baseball bat-style swings you see in silver screen knife fights. Many times, the weapon wasn’t a blade or knife of any kind, so the attack was delivered exclusively through stabs into the upper chest.
Above: Attack angle #2: tip-down stab from the side into the aorta.
Through this systematic analysis, Weaponology focuses primarily on targeting the heart with a stabbing blow. Ed teaches only three angles of attack — greatly simplified from the nine-angle diagram we’d been exposed to in previous edged weapons classes. Angle one is from the top down, angle two from the side, and angle three from underneath. The first two are meant for that point-down ice pick grip. The last is for a point-up grip. That’s it.
Above: Attack angle #3: tip-up stab into the chest with a “saber” grip.
A Good Offense
Most of the rest of day one was spent rehearsing these three strikes with sparring partners, from various angles of approach and with various tricks and force multipliers built in. One of my favorite tricks was the foot trap. As the name implies, this technique involves simply stepping on one of your opponent’s feet and giving them a shove. The idea is that, once thrown off balance by the shove, your opponent stumbles back but can’t take a full step due to the foot trap. So they wind up in a very wide, bladed stance. If you can’t reach the chest cavity with your blade, this exposes the inside thigh of the trapped leg for a strike to the femoral artery.
Another dirty knife trick, which may come off as blasphemy for traditional practitioners of edged-weapons martial arts, is passing the blade. If you make an attempt at a stab, and your opponent grabs the knife wrist with one or both hands (even better for you if they block you with both hands), simply reach your hand between their two arms and pass the blade. This bucks much of the conventional wisdom we’ve learned from edged-weapons experts over the years. To those of us with combative firearms backgrounds, who place weapons retention at a premium, said conventional wisdom makes a lot of sense. But when you watch surveillance camera footage of a teenager, with no military or martial arts training whatsoever, executing multiple successful hand changes while the victim is literally fighting for their life … well, it’s hard to argue with results, as it were.
This is perhaps a good time to talk about mindset. Many of the other edged-weapons classes we’ve been exposed to go out of their way to market themselves as defensive systems. They’re often more focused on blocking and countering than they are on striking. This may be a matter of personal philosophy, or perceived liability on the part of the instructors. Either way, the Ed’s Manifesto method of edge work is grounded in the belief that the best defense is a counter-offense.
Above: Letting go of your blade to switch hands is disparaged in many formalized edged weapon systems, but Ed was able to execute it repeatedly and consistently under pressure from an attacker.
What’s made brutally plain by the video case studies is that knife-wielding assailants are full of hate and free of mercy. More so than hand-to-hand combat, or even maybe gunfights, knife attacks are executed with a level of primal brutality that’s likely to shock the psyche of most well-adjusted members of society. But it’s possible to circumvent the psycho-emotional overload that comes with the panic and surprise of a sudden onset, life-or-death encounter.
In the military, it’s sometimes referred to as stress inoculation. An appropriate term, since just like with a medical inoculation, participants are dosed with “weakened” (non-lethal) versions of the actual scenarios they’re likely to encounter. The result is that when they are faced with a full-strength street fight, their body and mind have some resistance to shock through programmed familiarity. This is why things like viewing and talking through photo or video case studies is so important. On the surface, such immersion may be dismissed as hedonistic “gore porn,” but we strongly assert that there’s a real, sound, well-grounded logic to it.
Dress Rehearsals
Watching, listening, and discussing incident playback is an excellent tool, but it’s one tool. Practice or rehearsal is the next step, and a vital one in the progression of preparation for worst-case survival scenarios. In the Weaponology/Organic Medium course, Ed builds in two very effective types of rehearsal.
The first one occurred toward the end of day one. After several hours of rehearsing a couple of simple moves one-on-one with a sparring partner, students were broken into groups of three. Once divided, each group of three was placed inside a boxing ring, complete with ropes. Ed designated one student as the defender and his two cohorts as attackers. The defender was given a foam training knife. No rules or restrictions were placed on the participants, other than to stay inside the ring. What resulted looked very much like that hypothetical drugged-out orangutan in a prison brawl. Fast footwork, managing space and unbridled aggression reigned supreme for both the attackers and defenders.
Above: Stepping onto an opponent’s foot and giving them a shove can throw them off-balance.
Every so often, Ed would step in, pluck the training knife out of a student’s hand, and hand it to one of his partners — often without uttering a word. Schoolyard rules were quite clear that he (or she) with the knife was to be the target of all frustrations. While several students reported taking edged-weapons training in the past (myself included), all notions of “proper technique” evaporated almost immediately.
Survival seemed to boil down to three simple principles: 1) Keep moving; 2) Try to stack your attackers in a line, so that they don’t flank you; and 3) Don’t stop fighting. Striking angles, blade orientation, and which hand you gripped with were all subject to change on a moment-to-moment to basis. Hit whatever vital targets you could hit however you could reach them. I was surprised to find that, even under the pressure of two opponents who each outweighed me by at least 50 pounds, I was able to switch my training blade between hands as necessary without losing it once.
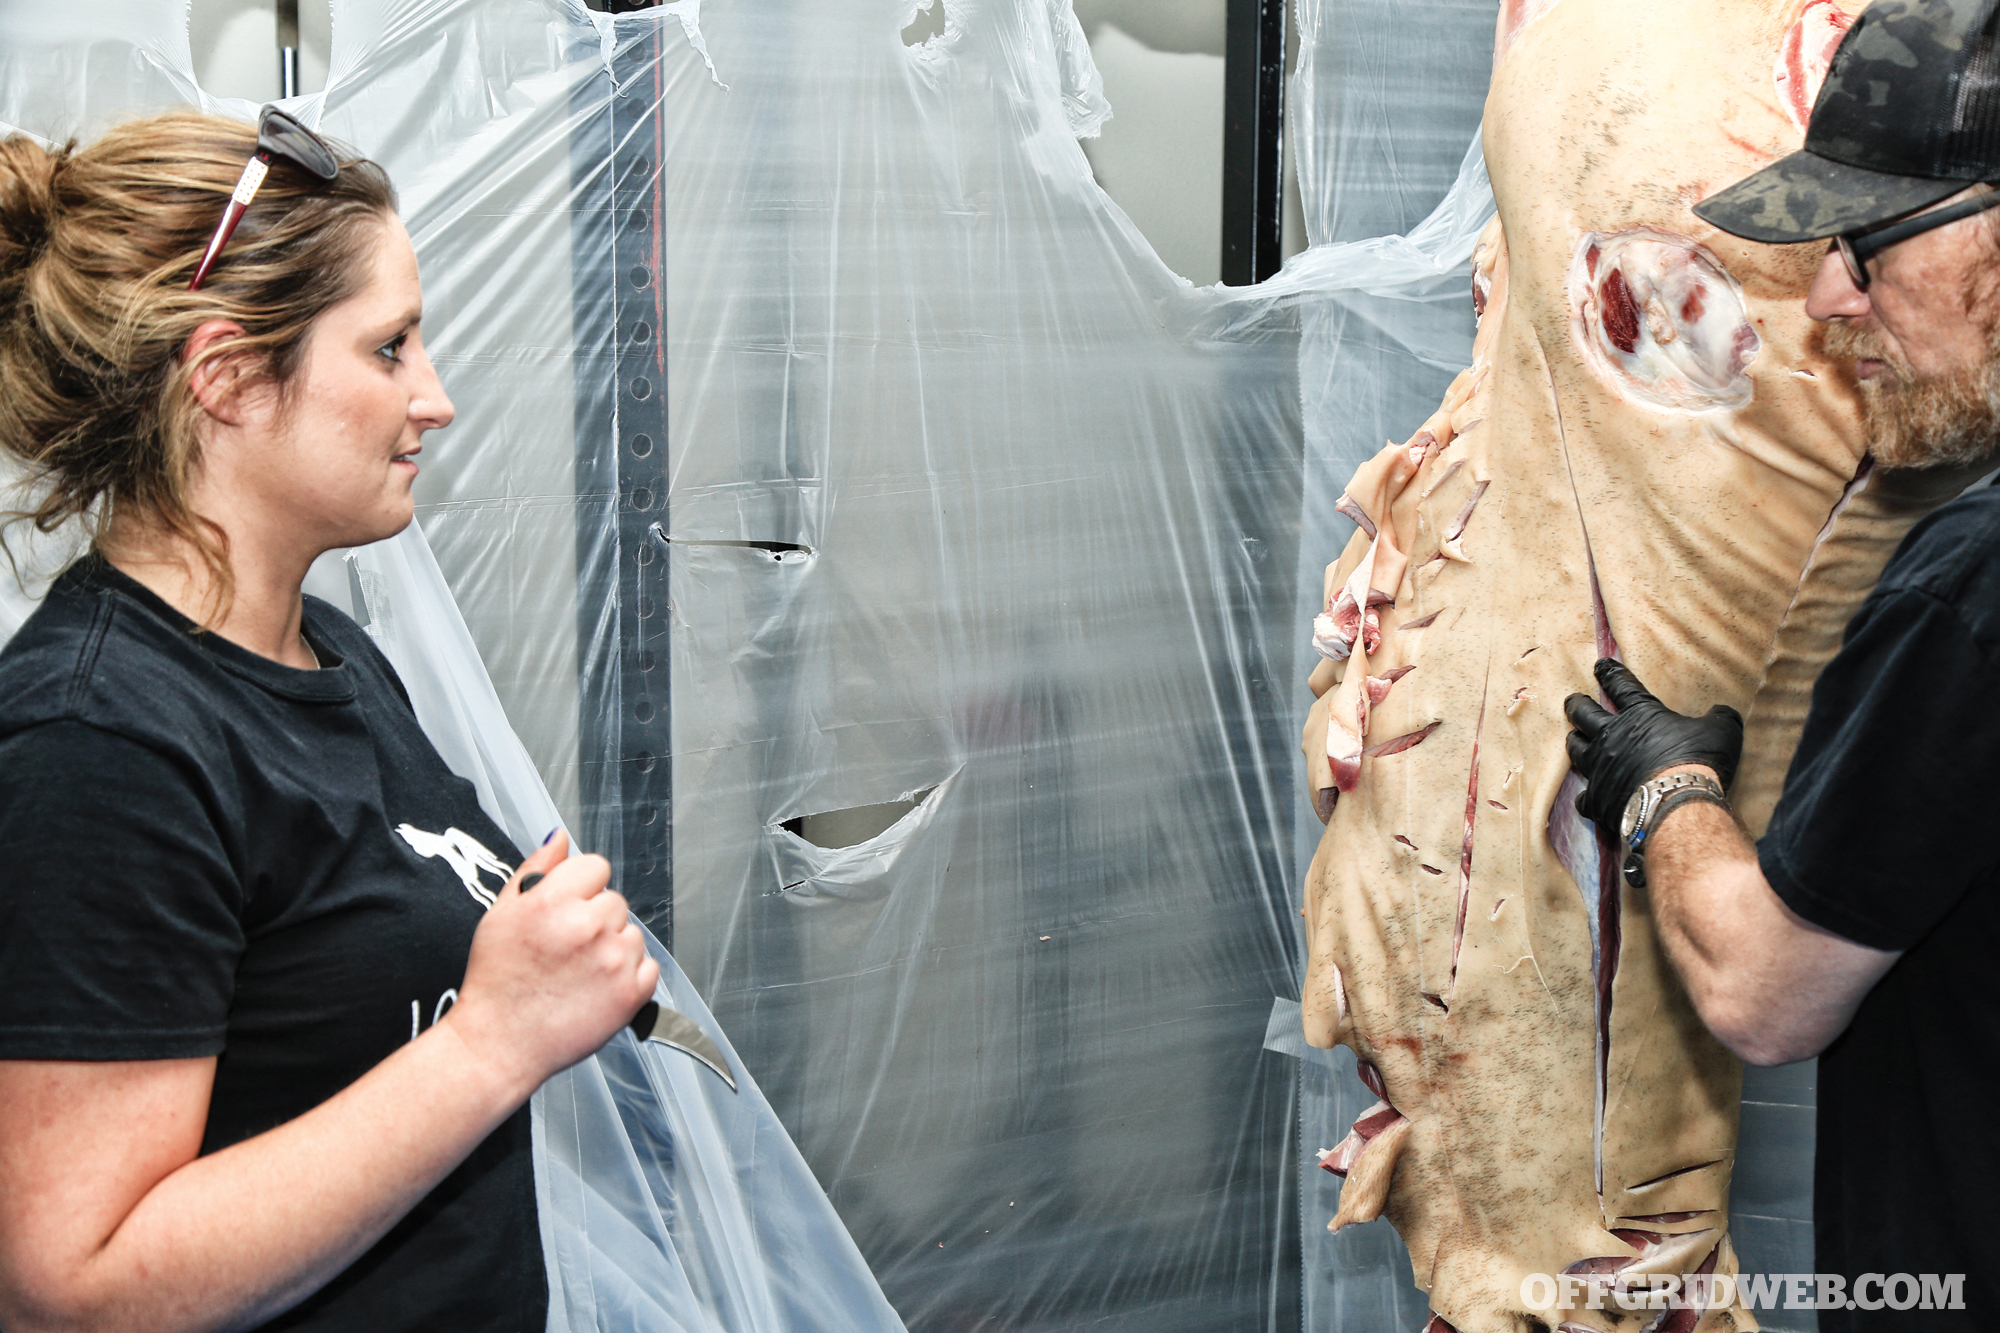
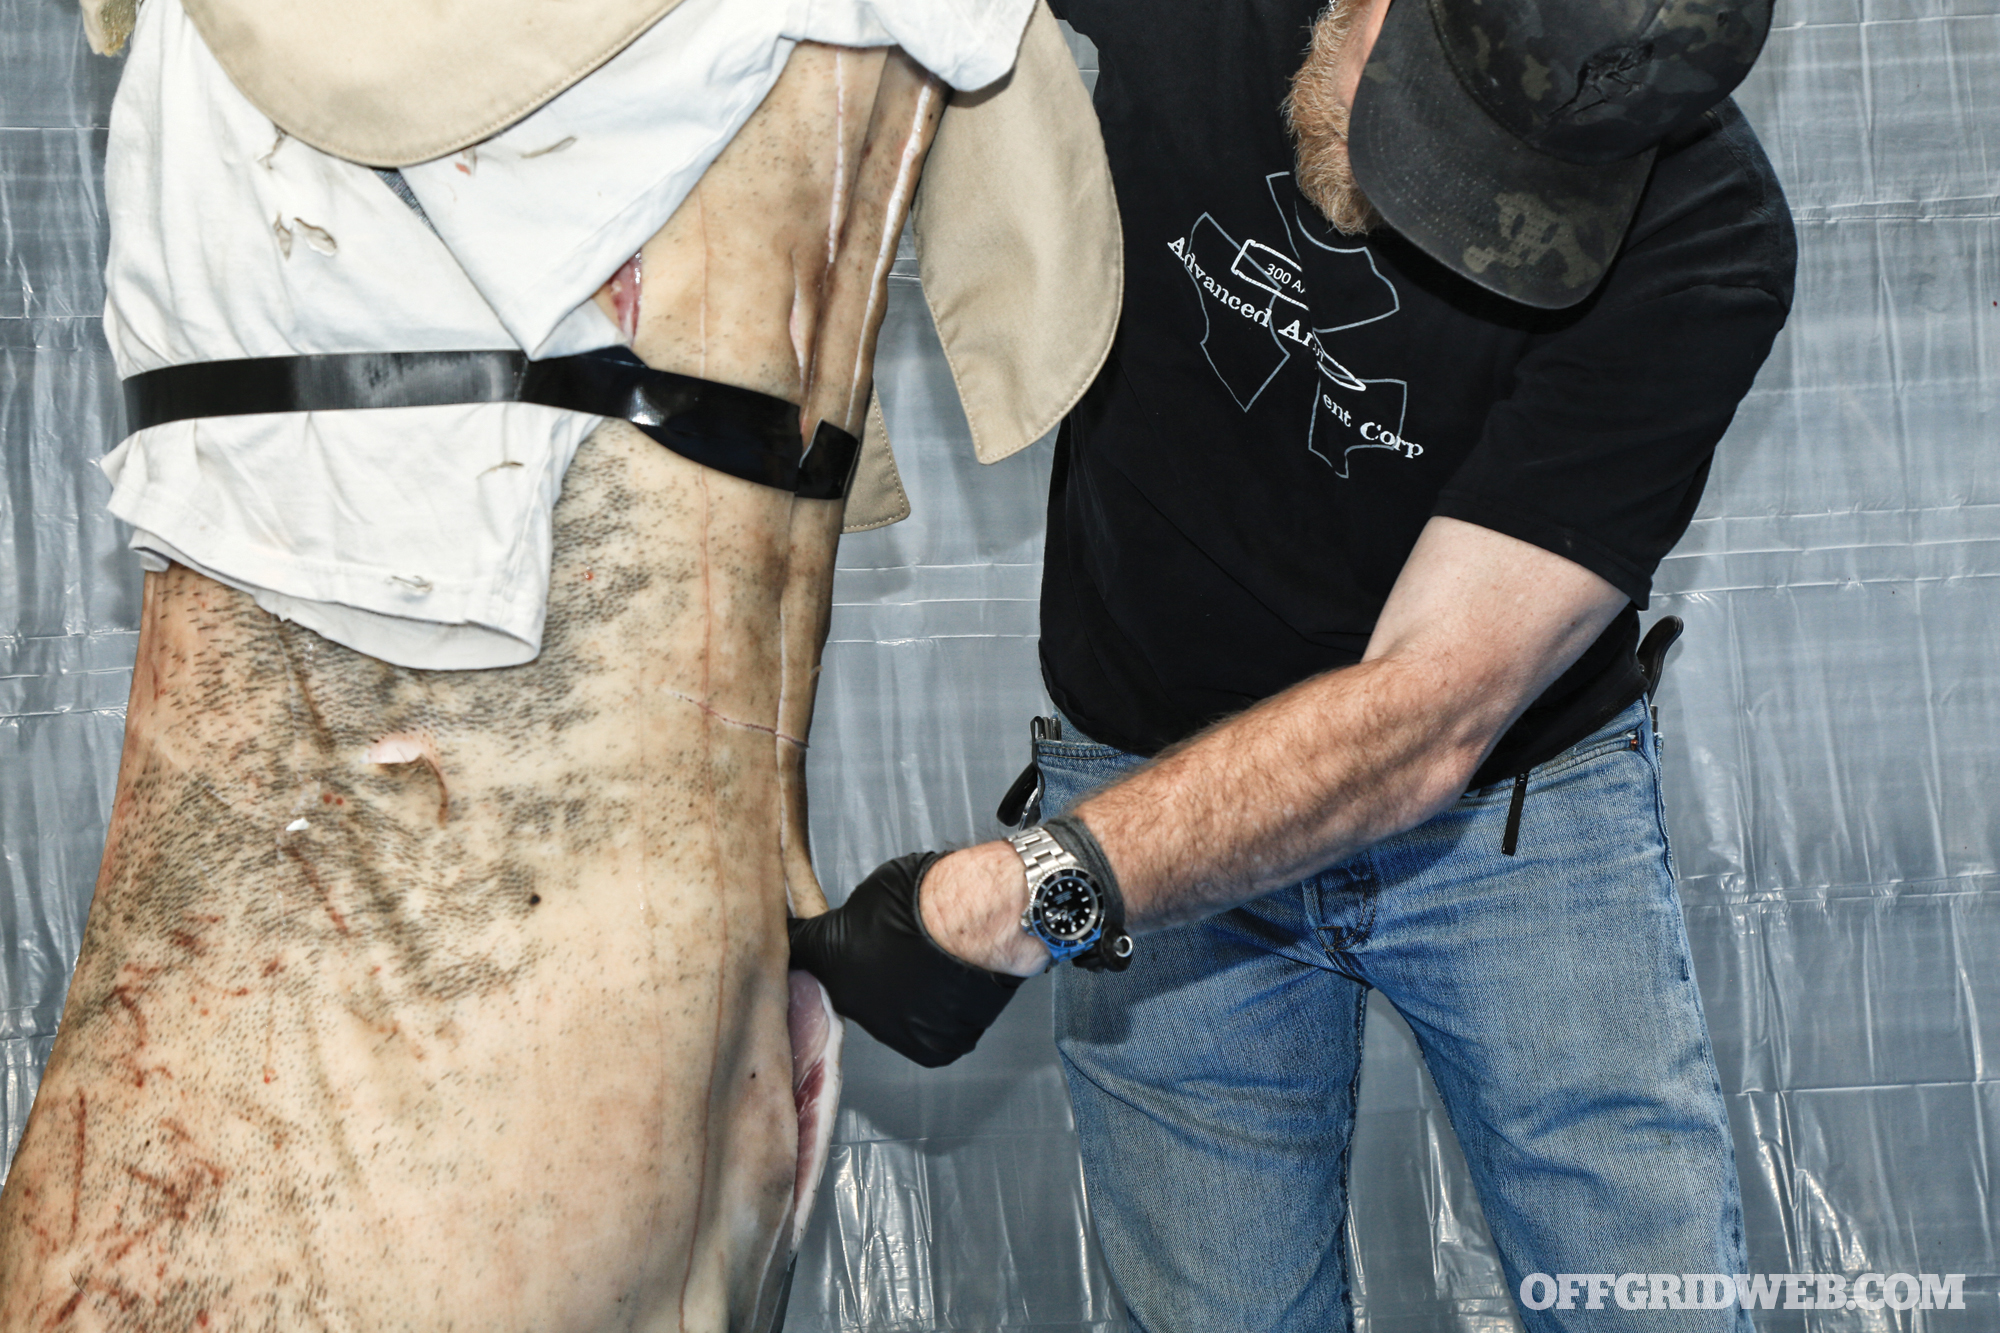
The other highly effective rehearsal technique came on day two, through the Organic Medium Entry module. As opposed to Weaponology, the Organic Medium class had essentially no formal instruction. Instead, it’s set up as a trial-and-error learning lab. The primary goal is to allow students to experience, first hand, the experience of putting a knife or pointed weapon to flesh and bone. In case you haven’t seen it on social media, Ed accomplishes this by procuring a whole pig carcass for students to practice on — internal organs are removed to minimize cleanup, but all meat and bone are still intact including skull and eyeballs, which do get used.
Above: The eclectic and mischievous collection of tools put to the test during Organic Medium Entry.
Students are encouraged to bring in whatever slashing or stabbing instruments they wish. The only guideline was that everyone had to bring in one proper knife and one improvised shank that “costs you nothing to make.” So, no late-night trips to the hardware store to build a reinforced Shank-Master 3000 before class. What appeared the next morning was an eclectic array of knives and tools. We saw everything from $400 to $500 custom knives to screwdrivers, butter knives, and bent forks “acquired” from unsuspecting diners and restaurants around the training venue. One student even brought in a set of knuckle dusters, which he tested in a stellar channeling of his inner Rocky Balboa.
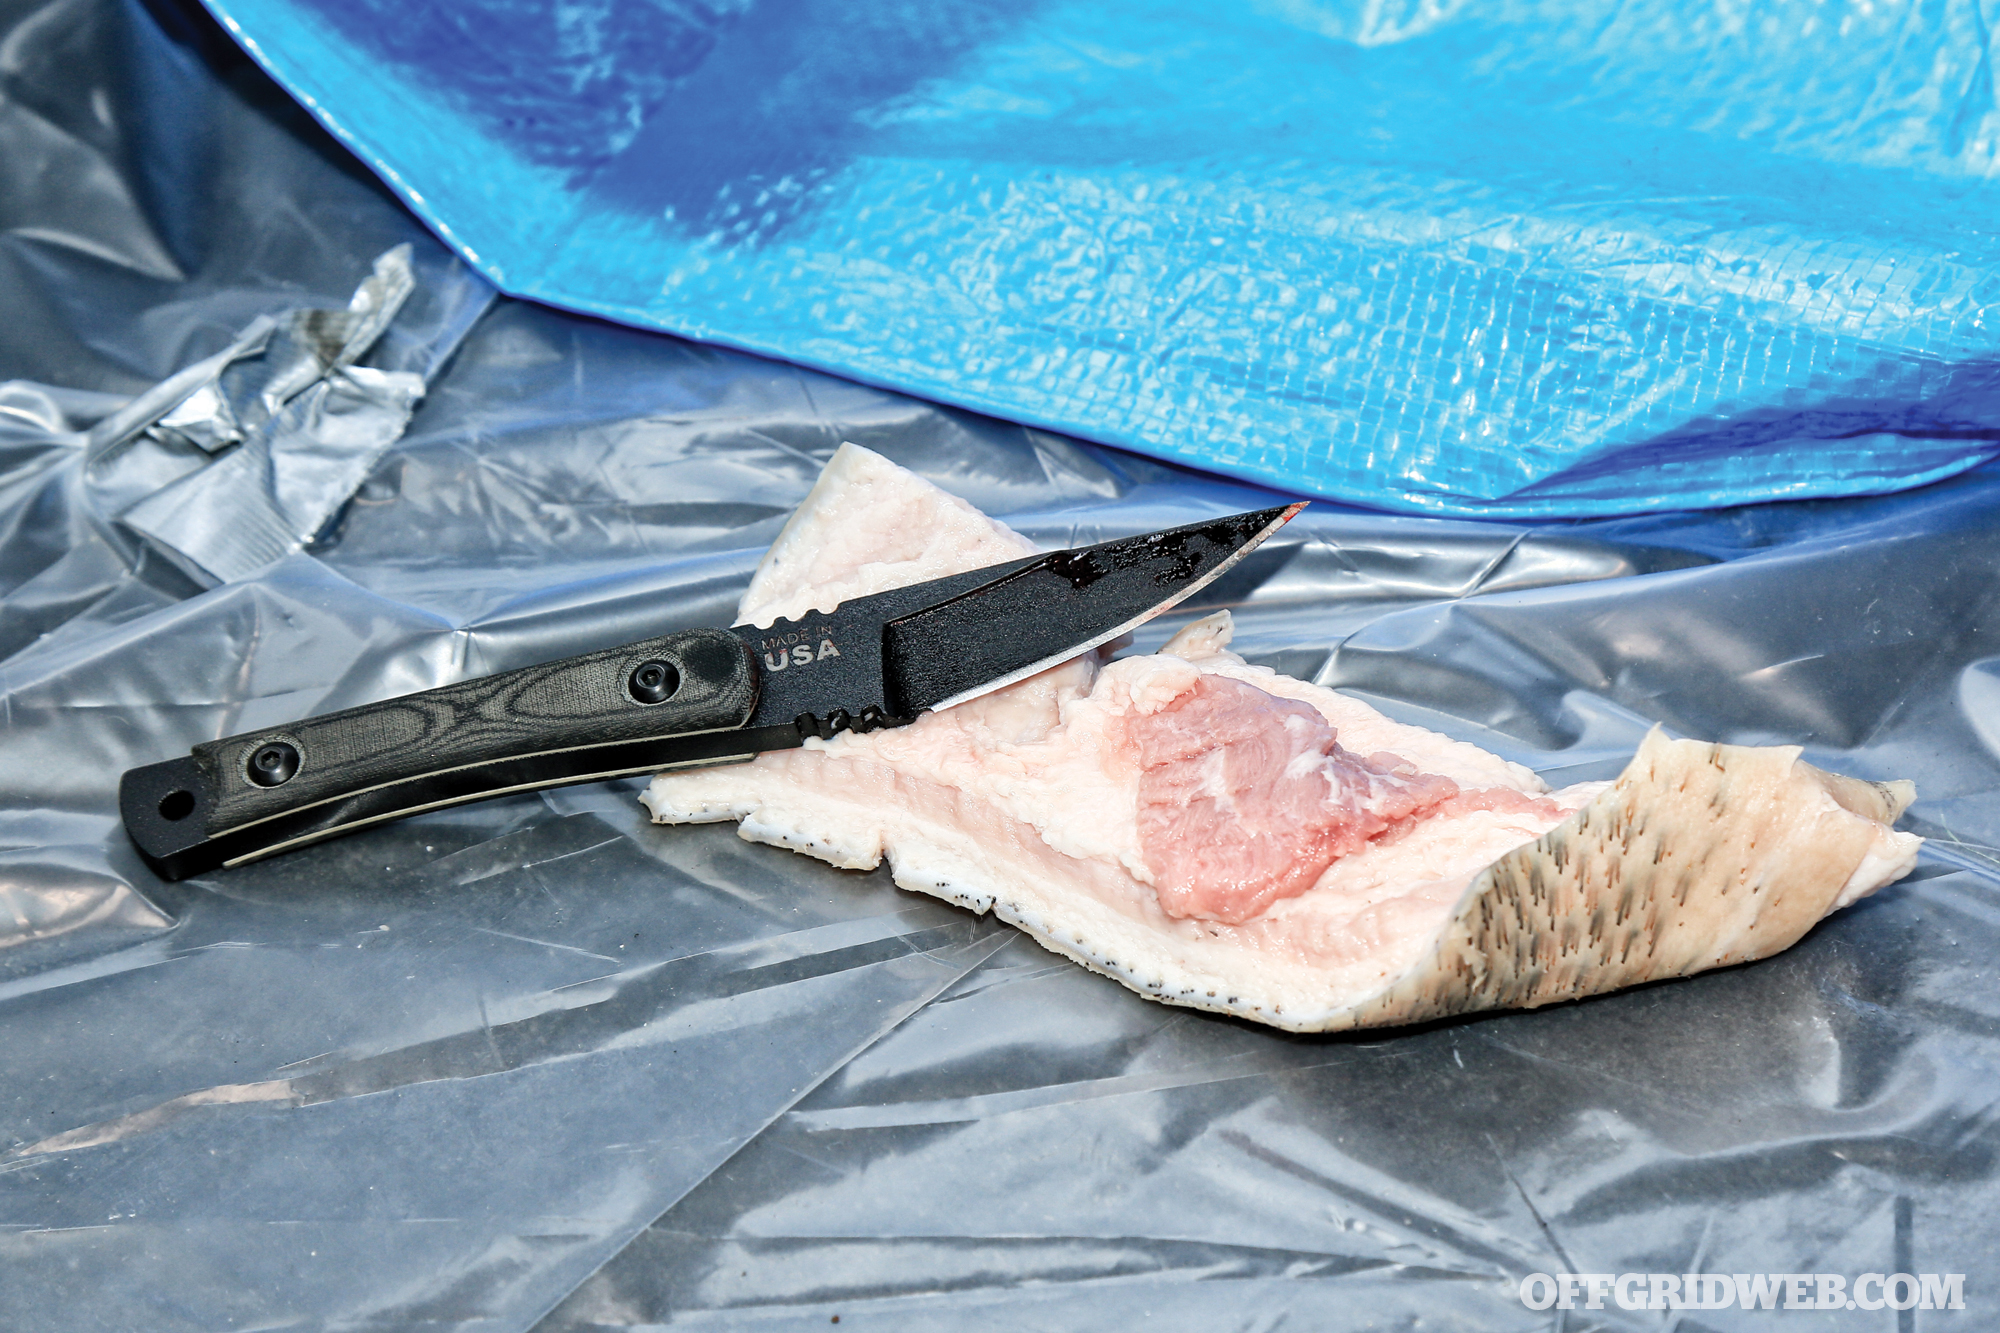
Above: Instructor Jeyr reviews the results of a processing cut our camerawoman made with a prototype of the Kopis Designs L-Via field knife.
We took the opportunity to test three blades: a G10 Executive Dagger from VZ Grips, a TOPS Knives Street Scalpel, and a Ditch Pik from JB Knife & Tool. All performed admirably. The G10 dagger punched through pig meat all the way to the top of our hand. There was some deformation of the tip after we were done. We suspect this came from torso stabs that caused the tip to impact and glance off of rib bones. But even with the tip slightly mashed, it was still able to penetrate to damaging depth.
Above: The TOPS Street Scalpel is both highly concealable and razor sharp, cutting nice, bacon-like strips off the pig carcass after penetrating the front part of the skull repeatedly.
The TOPS Street Scalpel performed flawlessly, and its short, razor-sharp blade was perfect for processing cuts — a type of blow that involves sinking the blade in and then dropping your body weight down on the handle. This causes the blade to drag through meat, flaying open large tracts of muscle. Our camerawoman personally tested the Street Scalpel with several hard stabs directly into the thickest portion of the pig’s skull, just above the brow line. She was met with a satisfying, stomach-churning crunch each time, and the blade was no worse for wear.
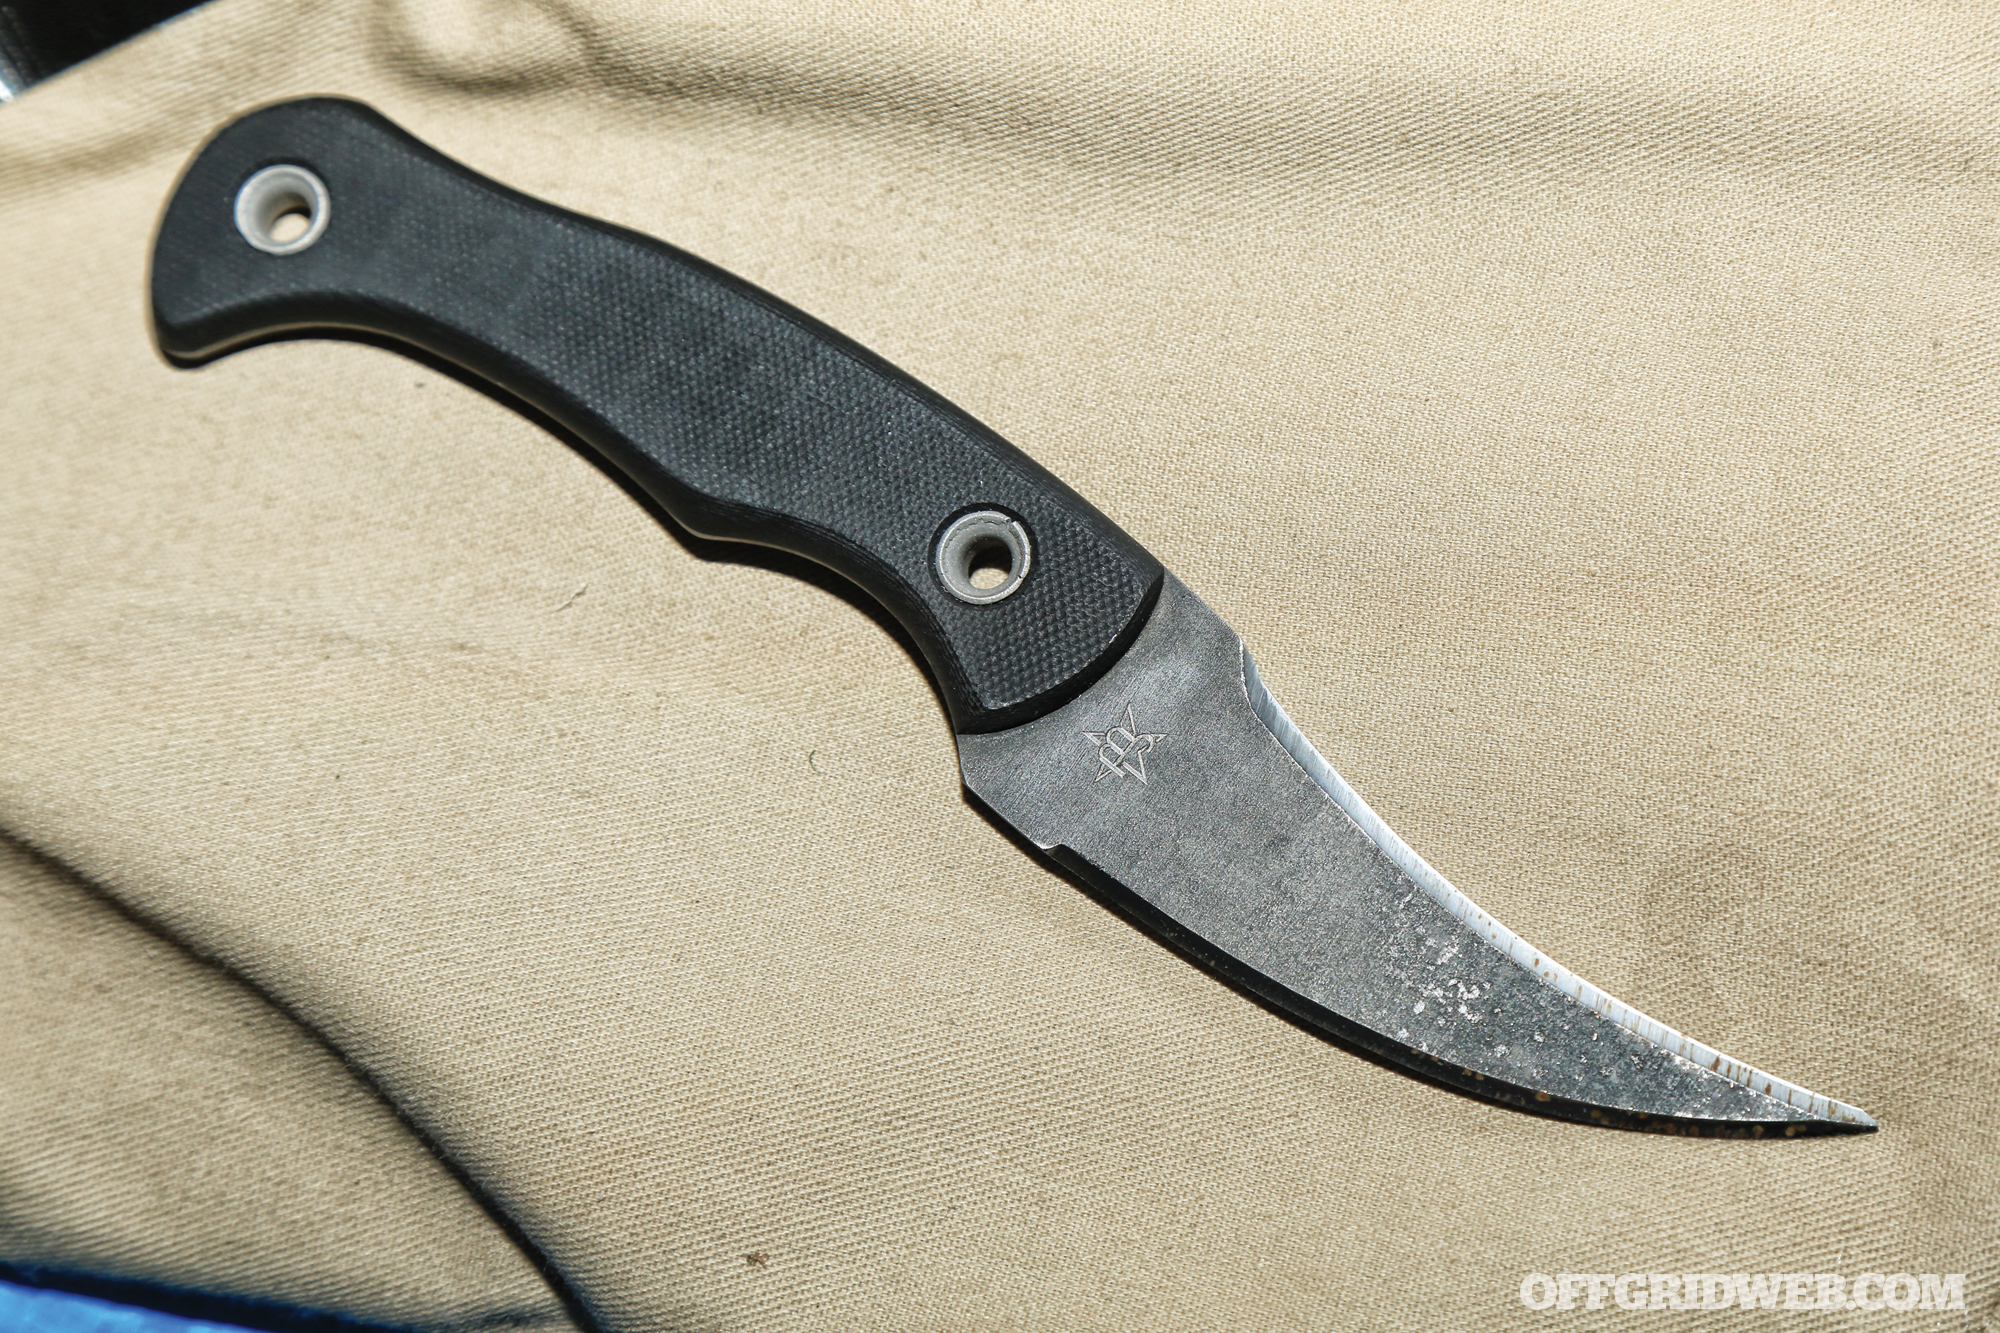
After wiping off the blood, it still could’ve passed for brand new. Finally, my personal favorite, the JB Ditch Pik. This blade is actually a collaboration between Ed and JB. It features a curved, double-edged blade and G10 handle scales. It’s simple, sharp, and efficient. We put this one to the unique test of stabbing through a Level IIIA soft armor panel that was duct-taped to one side of the pork torso. The Pik passed through Kevlar and rib bone without a hitch, opening up a 3-inch wound channel each time. There was some damage to the tip and a little bit of surface corrosion evident at the end of class, but the folks at JB advised me that this can be removed at home with some WD-40 and #000 steel wool. To top it off, they offered to re-hone the tip as well. The point and edges on this blade are so finely ground that we genuinely couldn’t tell the difference between stabbing through the armor versus stabbing through bare torso.
While all three test blades held up admirably, the JB Ditch Pik is what has taken over as my EDC fixed blade. Its double edge, slim body, and low-profile factory sheath gave us that Goldilocks fit that keeps it on our belt more often than not.
The Knife Makes the Man?
Above: An assortment of the author’s EDC gear, as outlined in this article.
At the end of the day, as with concealed-carry pistols, the best knife to use is the one you have on you. An aggressive survival mindset, smart movement, and high school-level knowledge of human anatomy will carry you much farther than that one-off custom blade. Interpersonal combat with stabbing weapons is an absolute, winner-takes-all sport in which violence must be overcome with violence to ensure your survival. It’s a worst-day-of-your-life disaster we hope you never have to face. But if you have an opportunity to take Ed Calderon’s Weaponolgy and Organic Medium courses, you’ll emerge better prepared to prevail if an uncertain world decides to touch your life with violence.

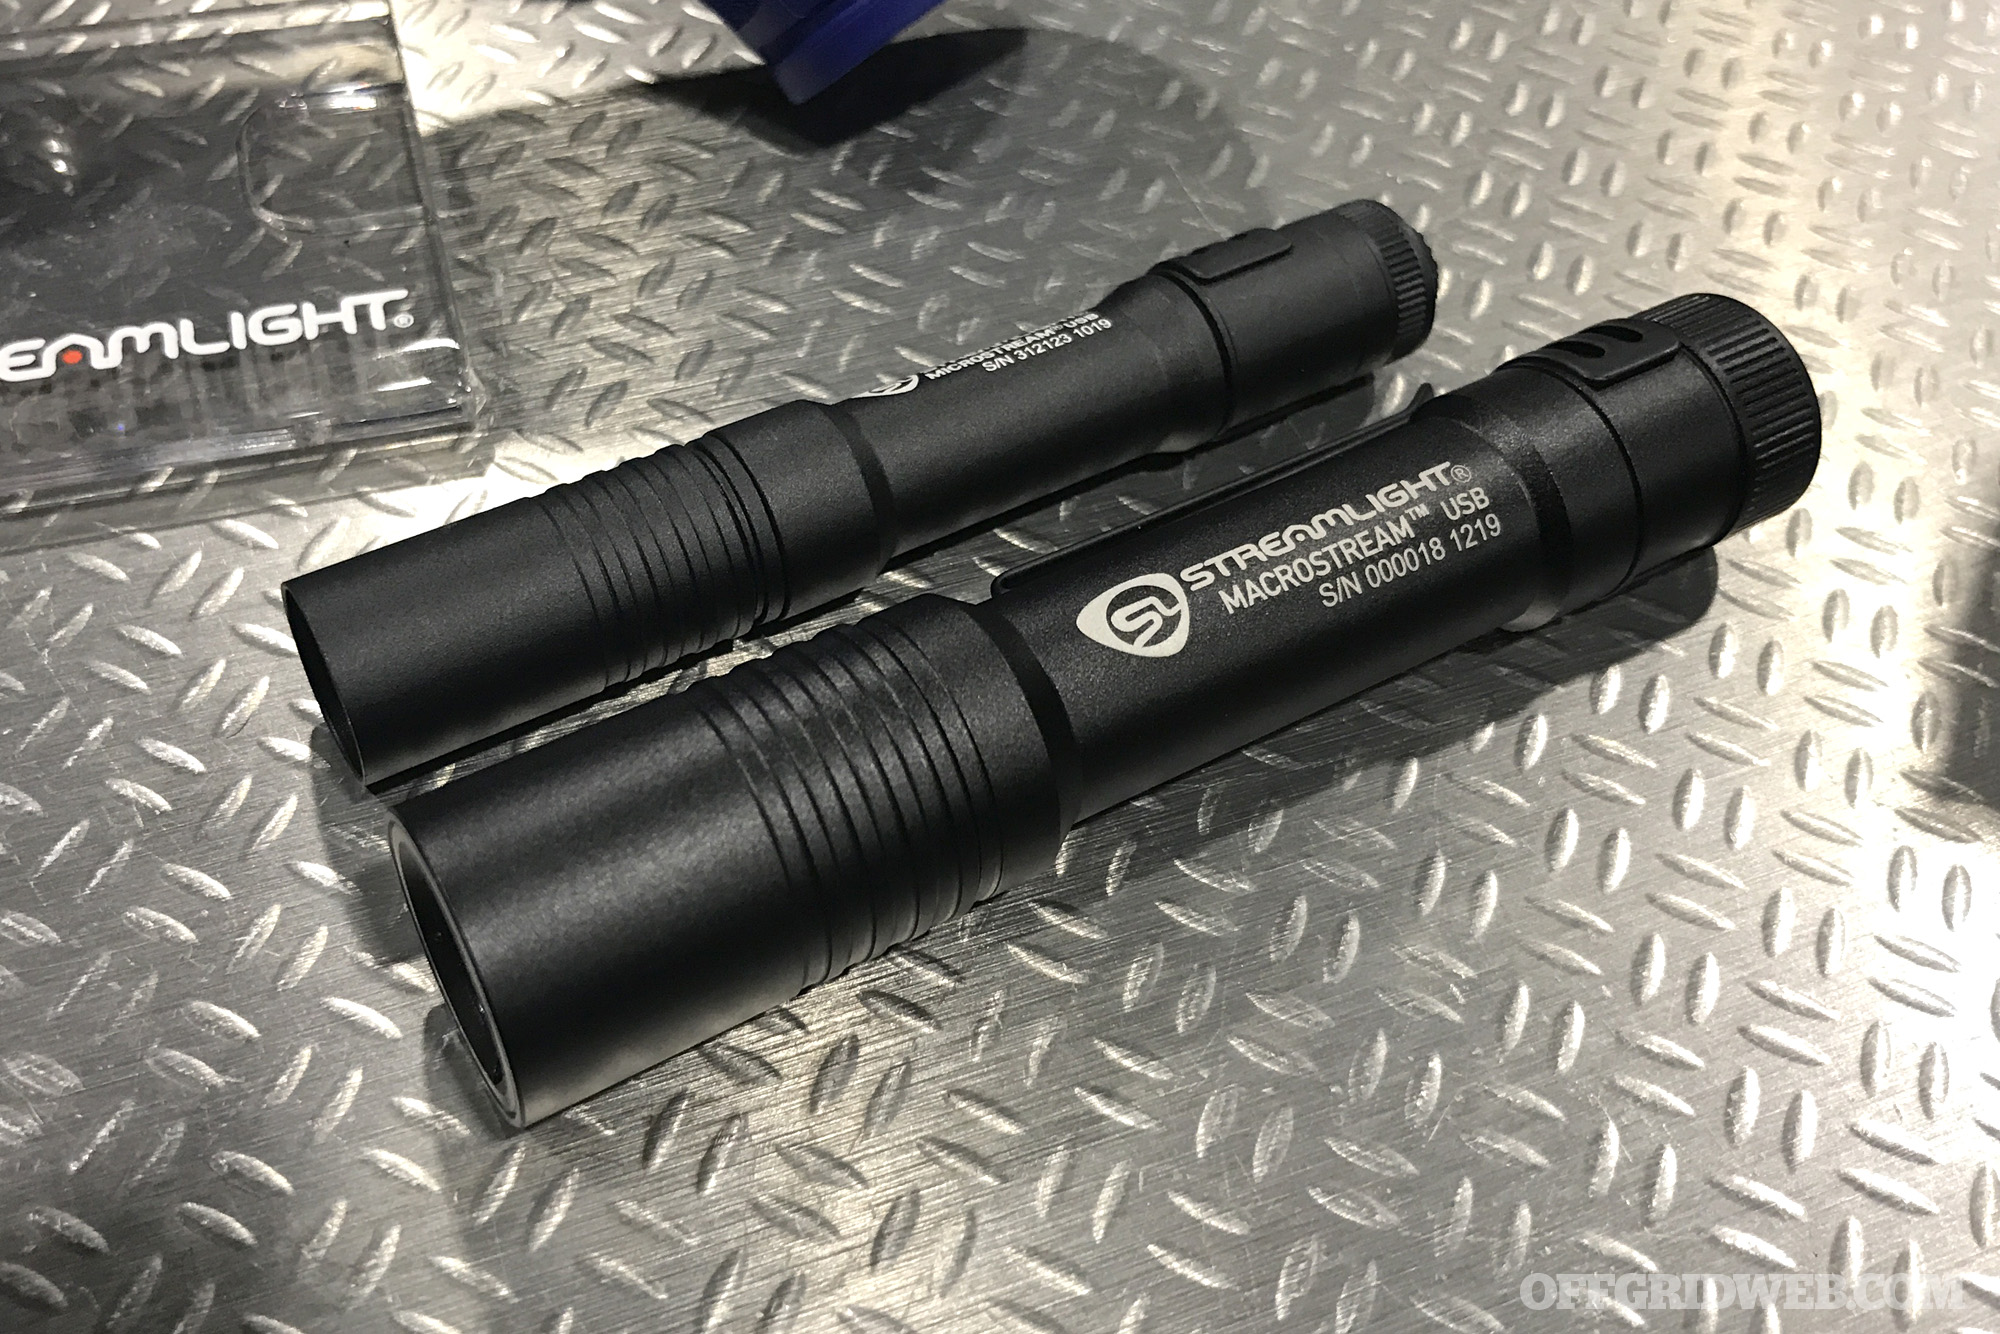
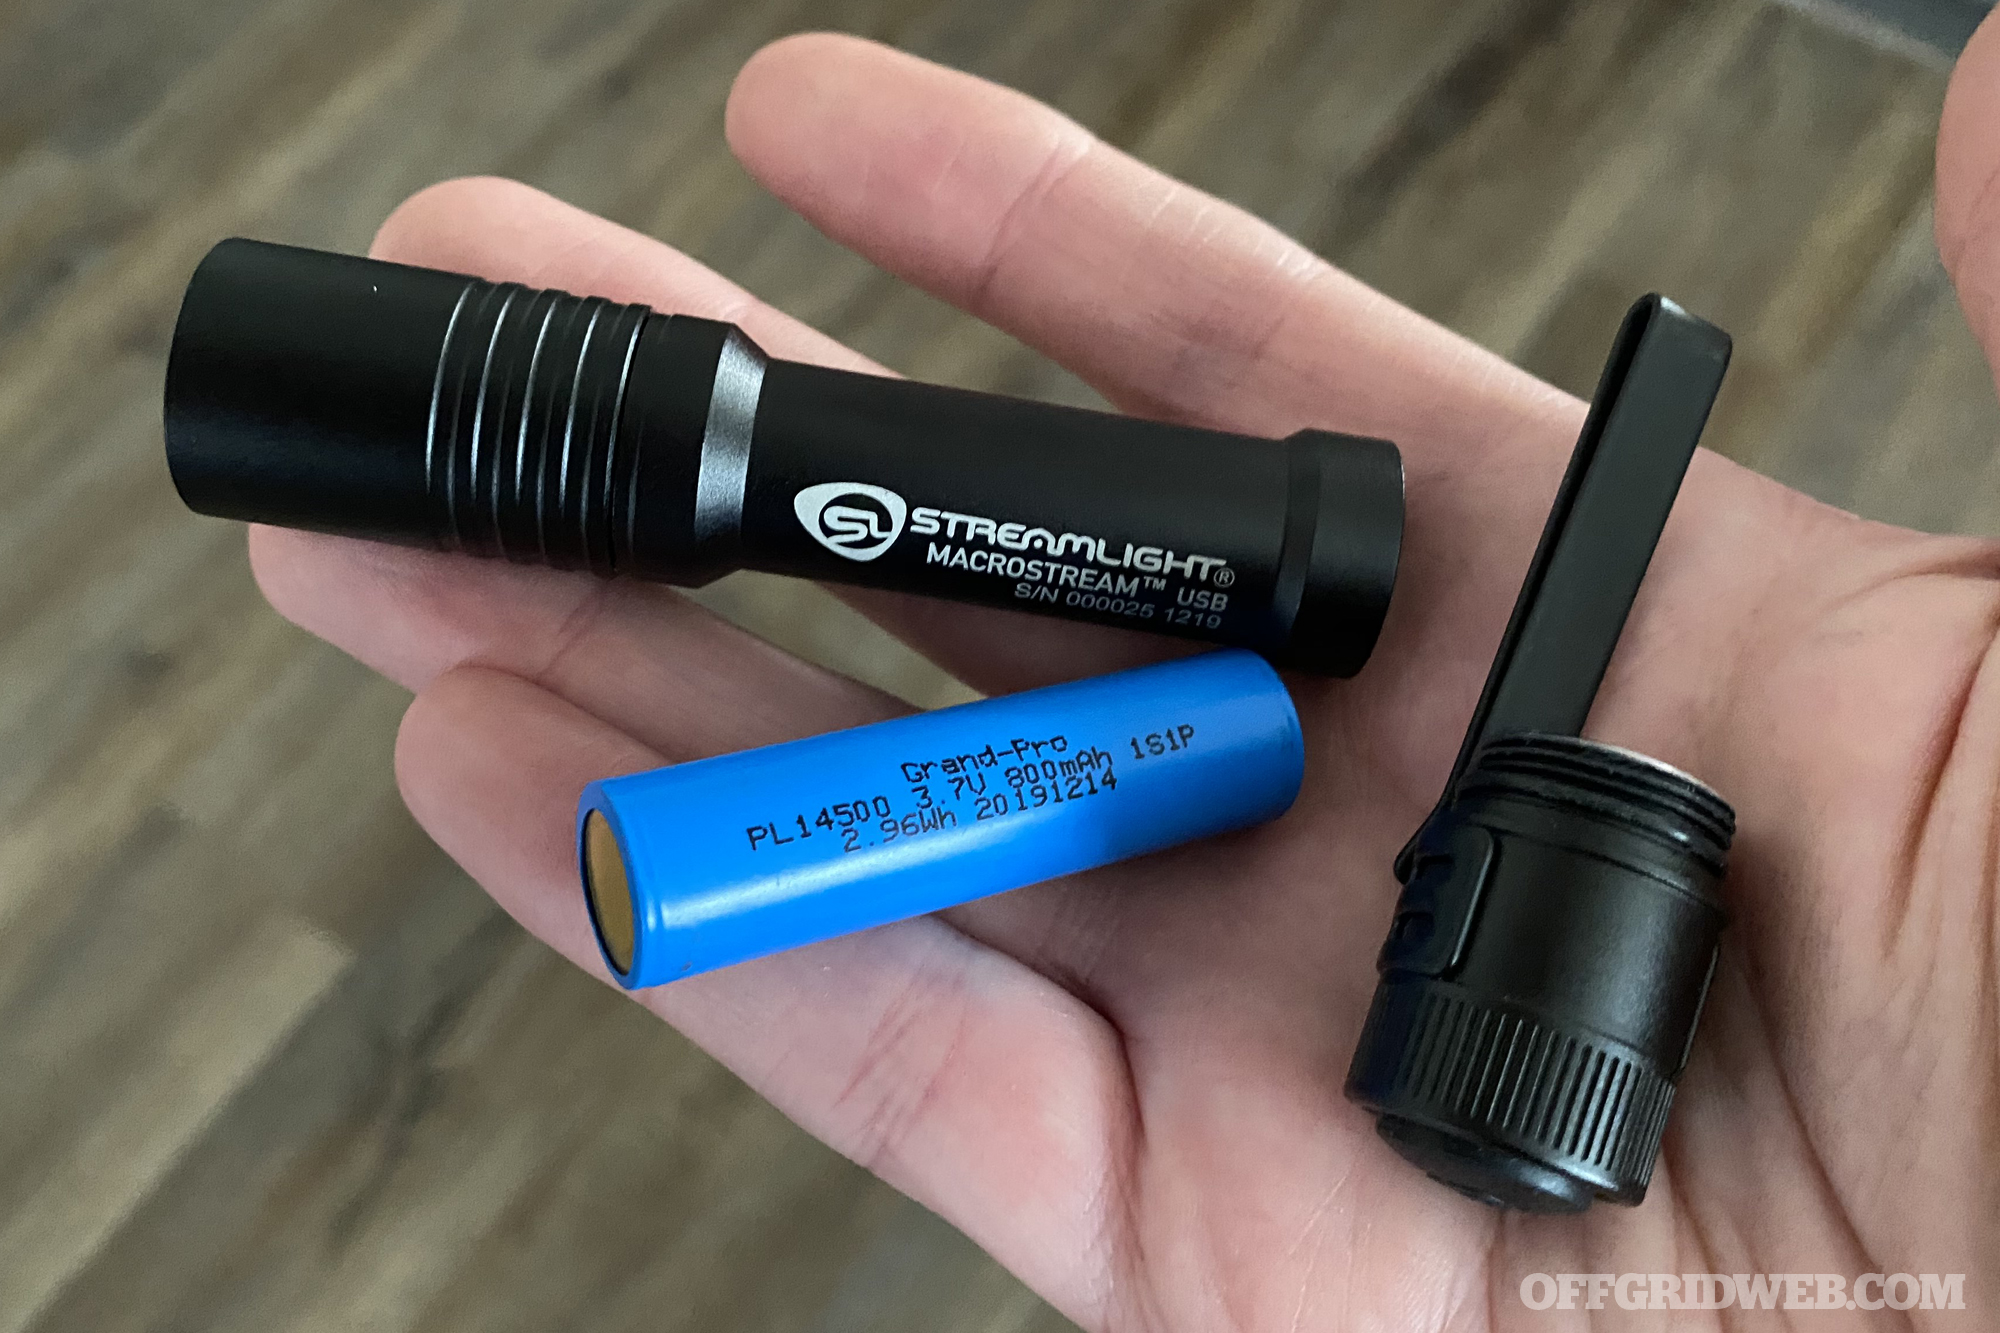
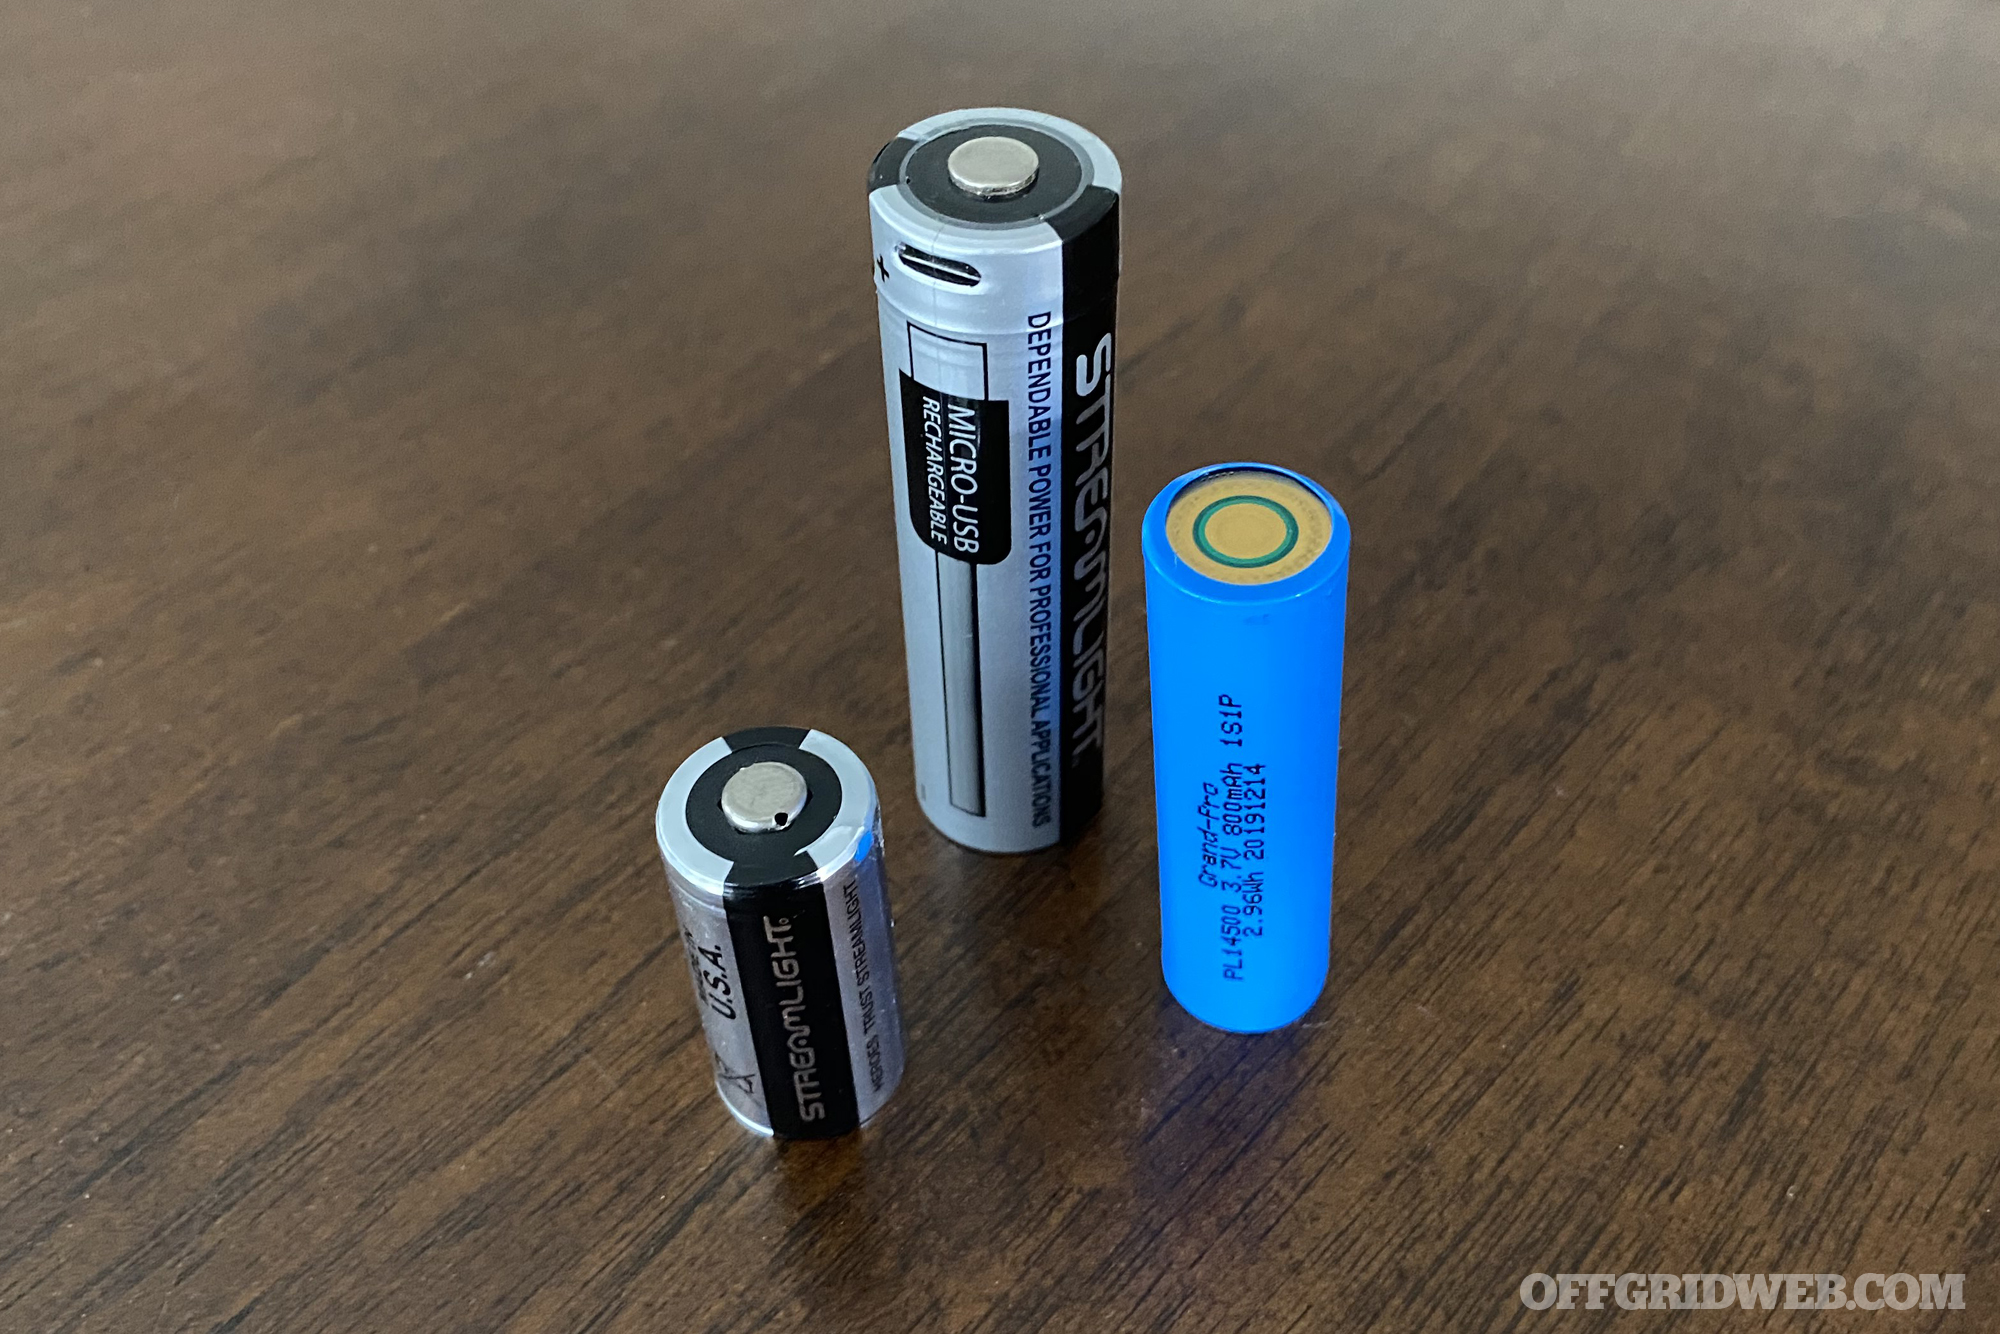
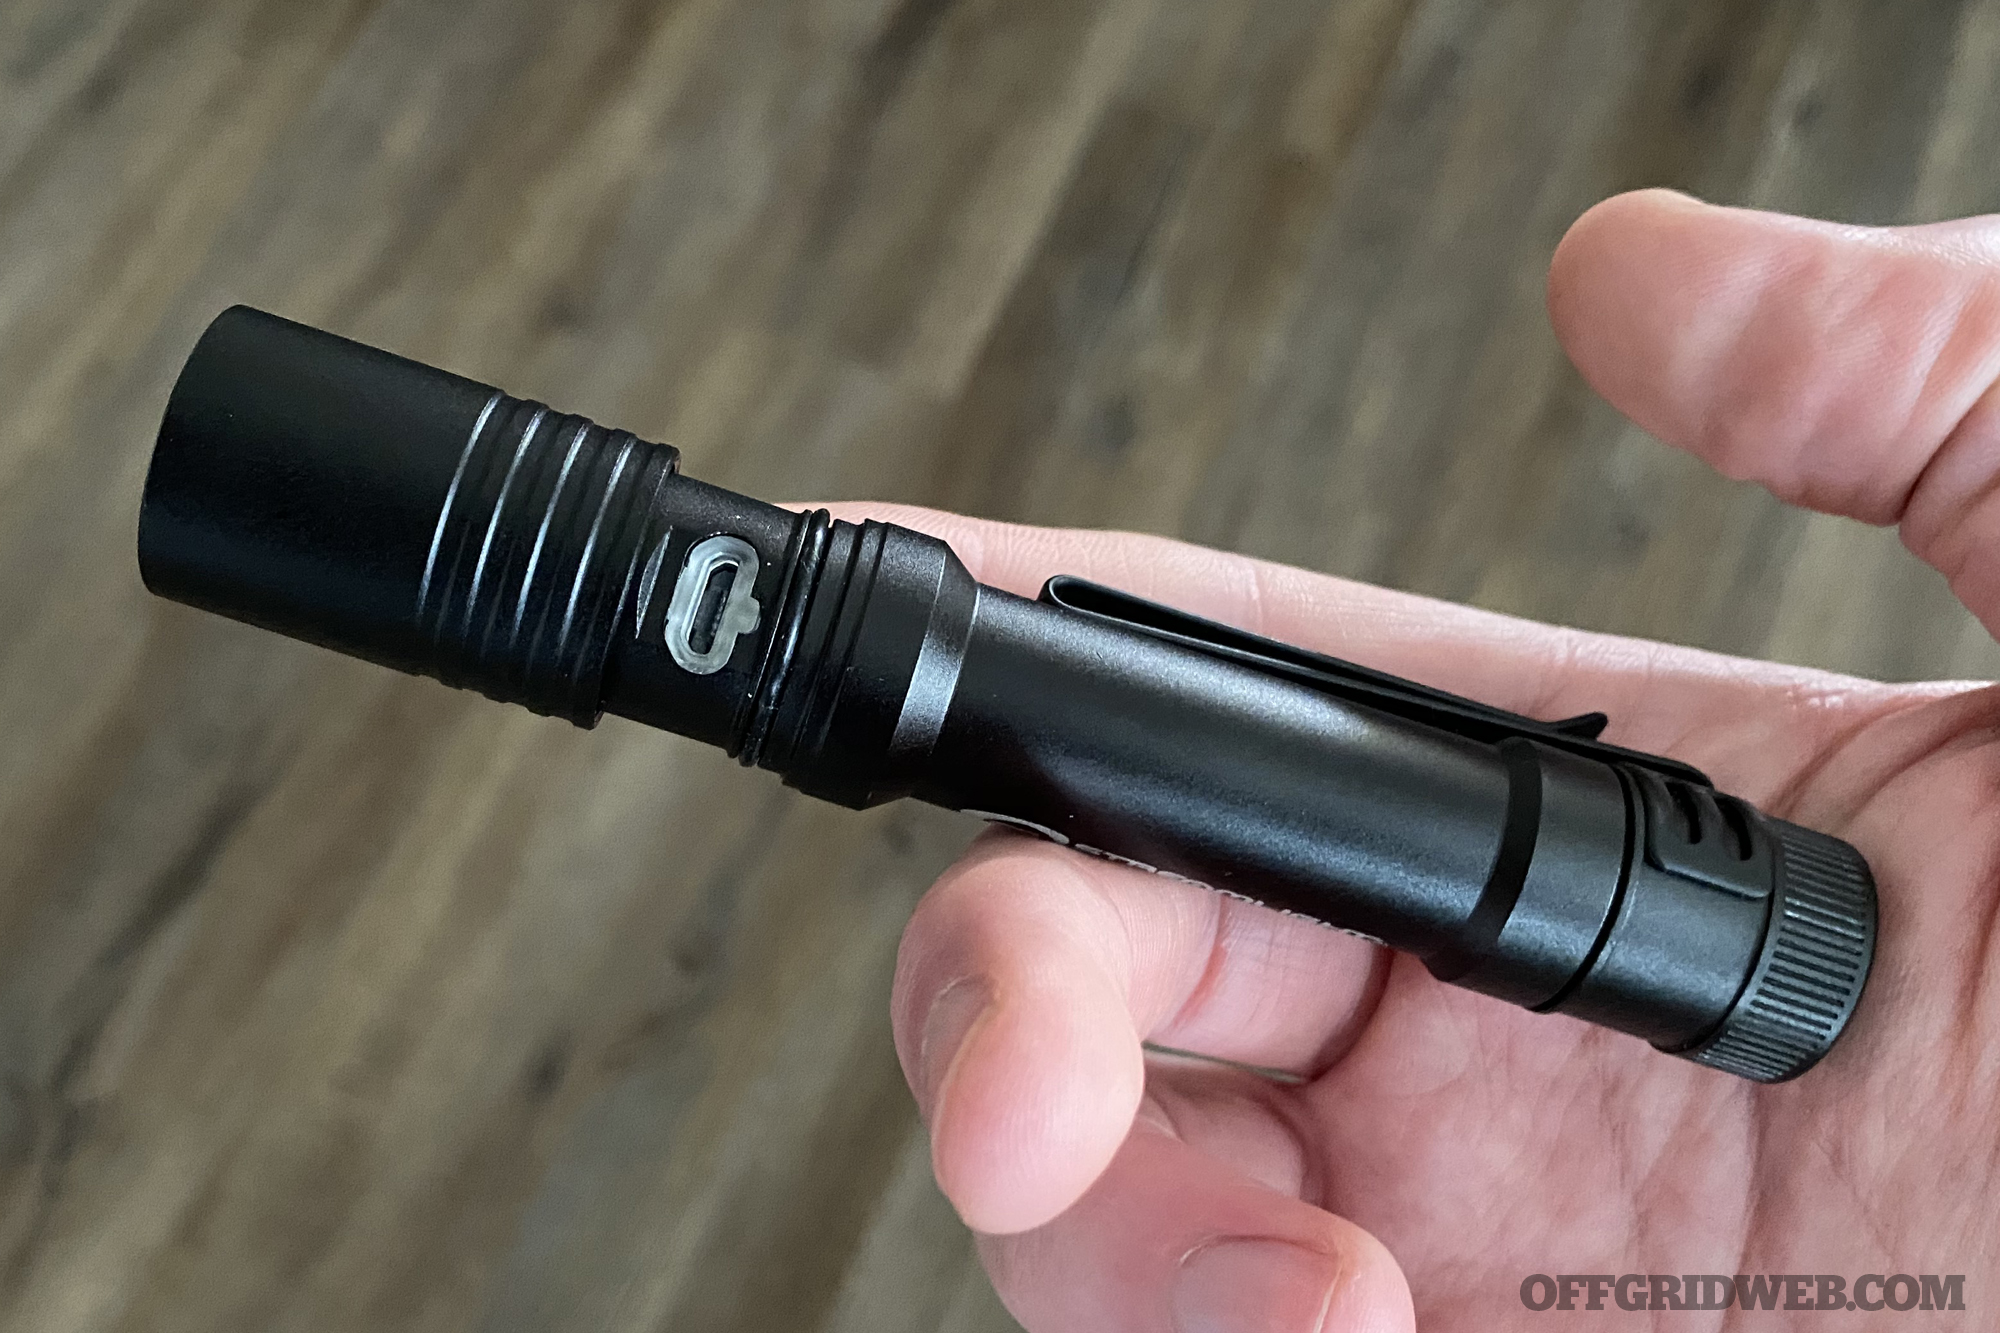
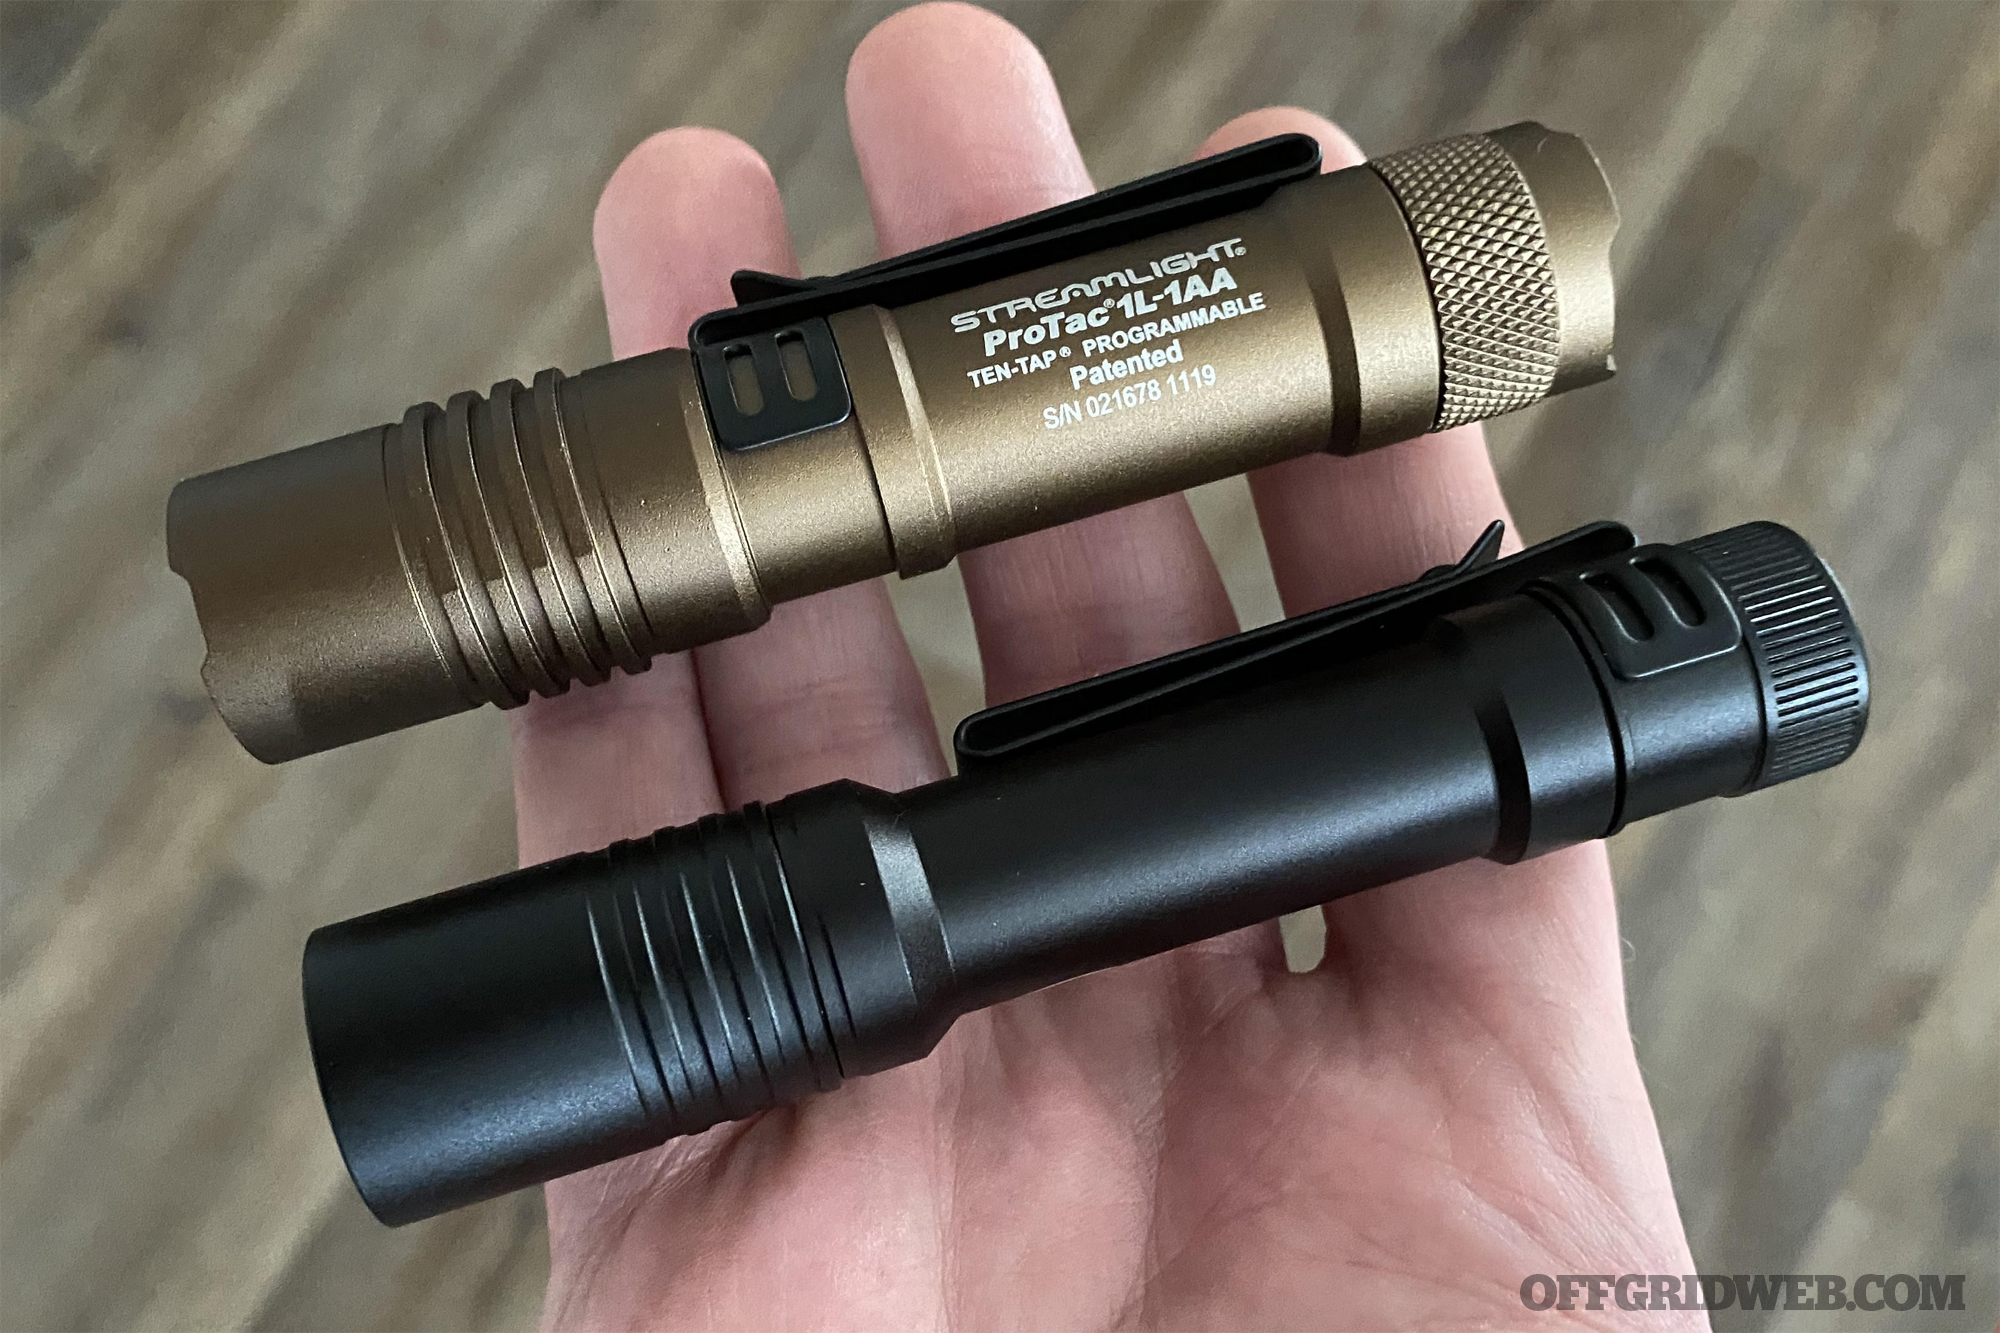

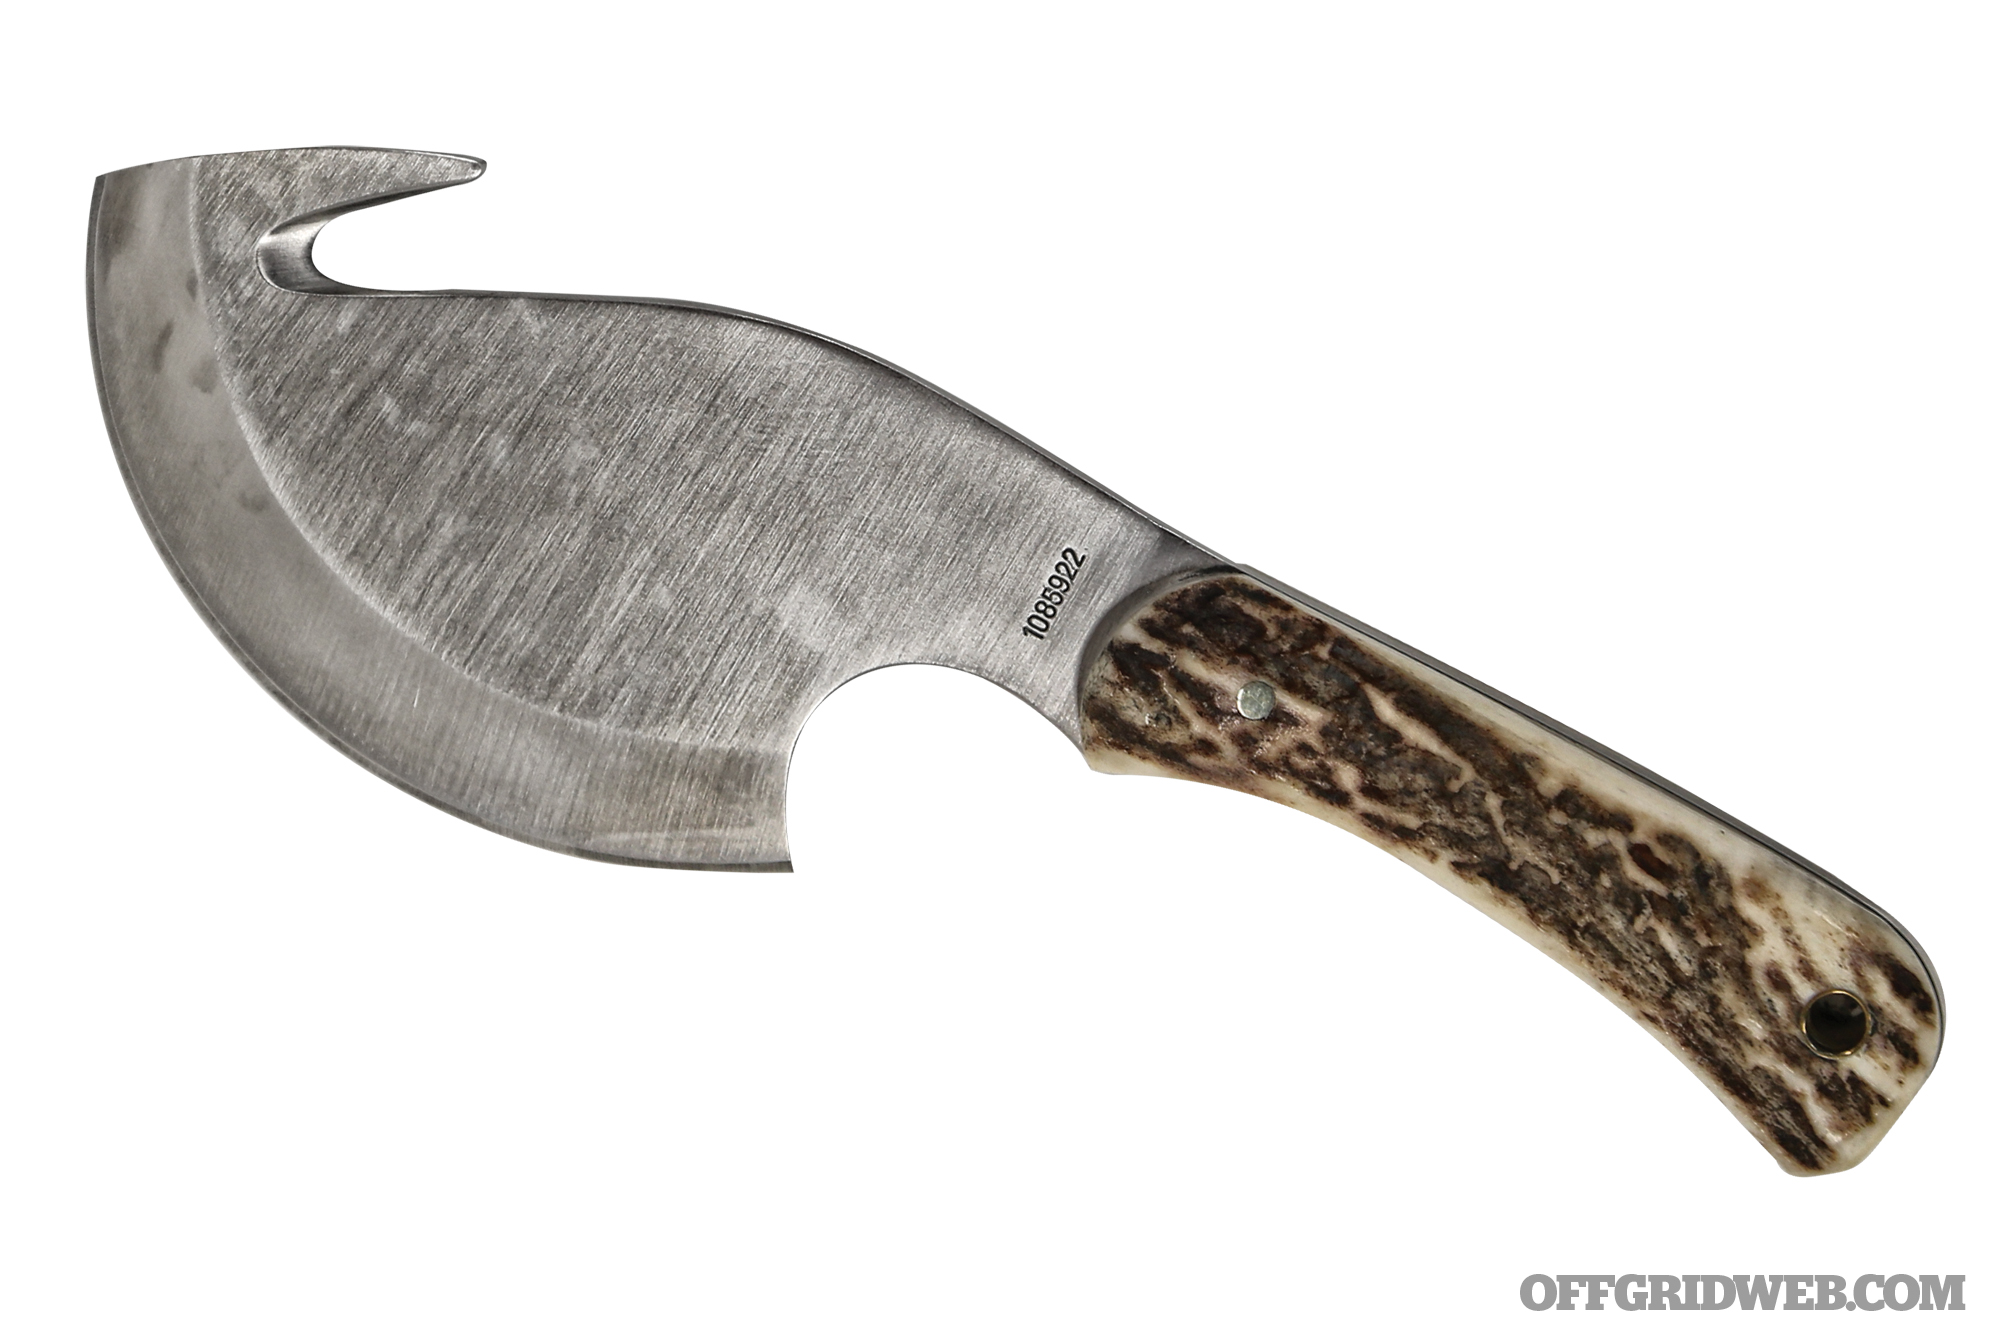
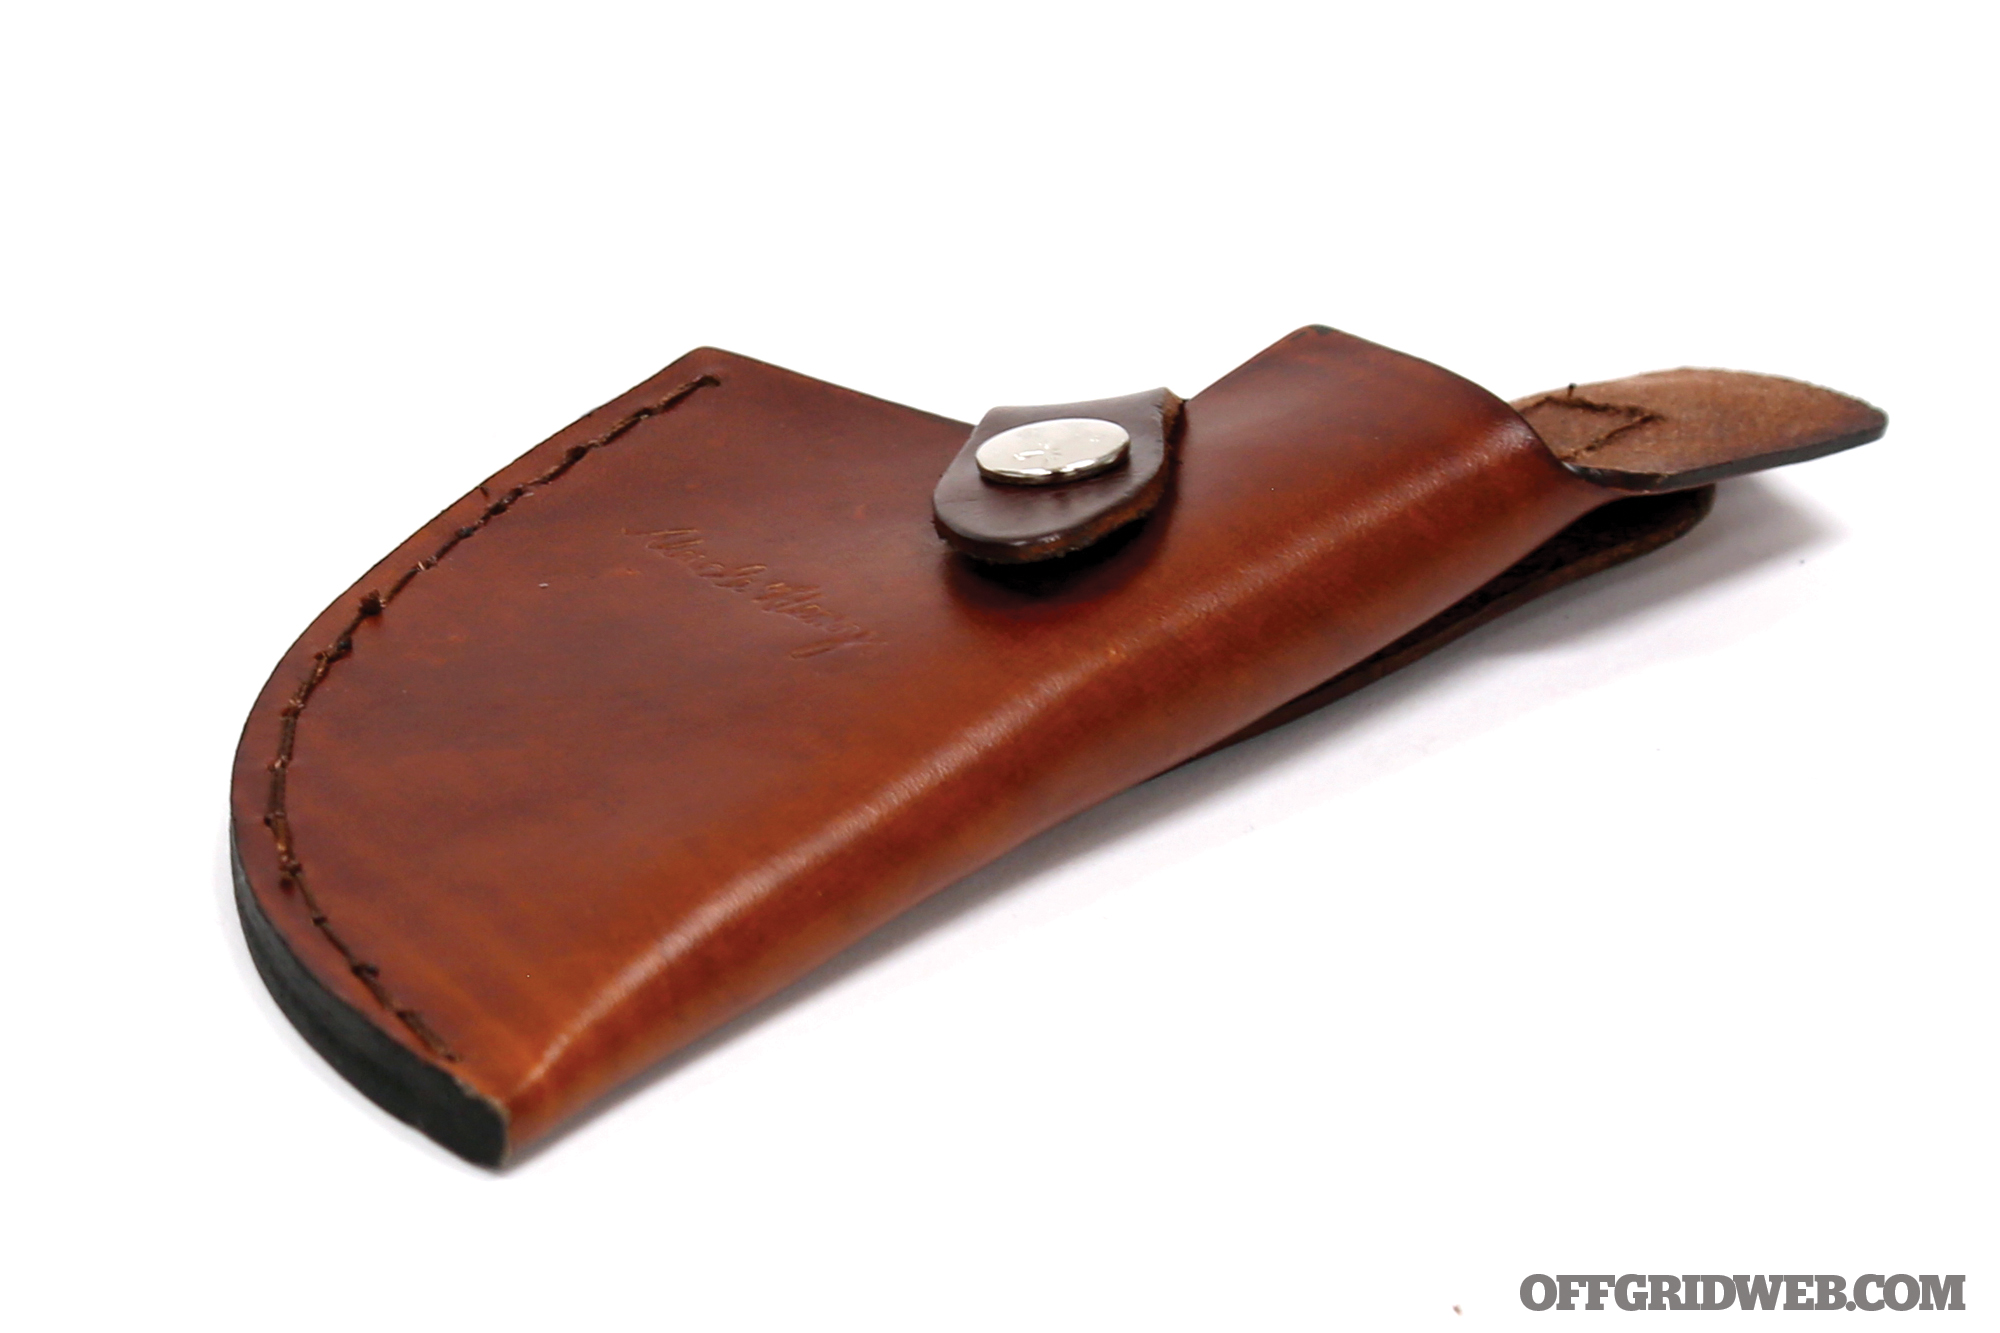
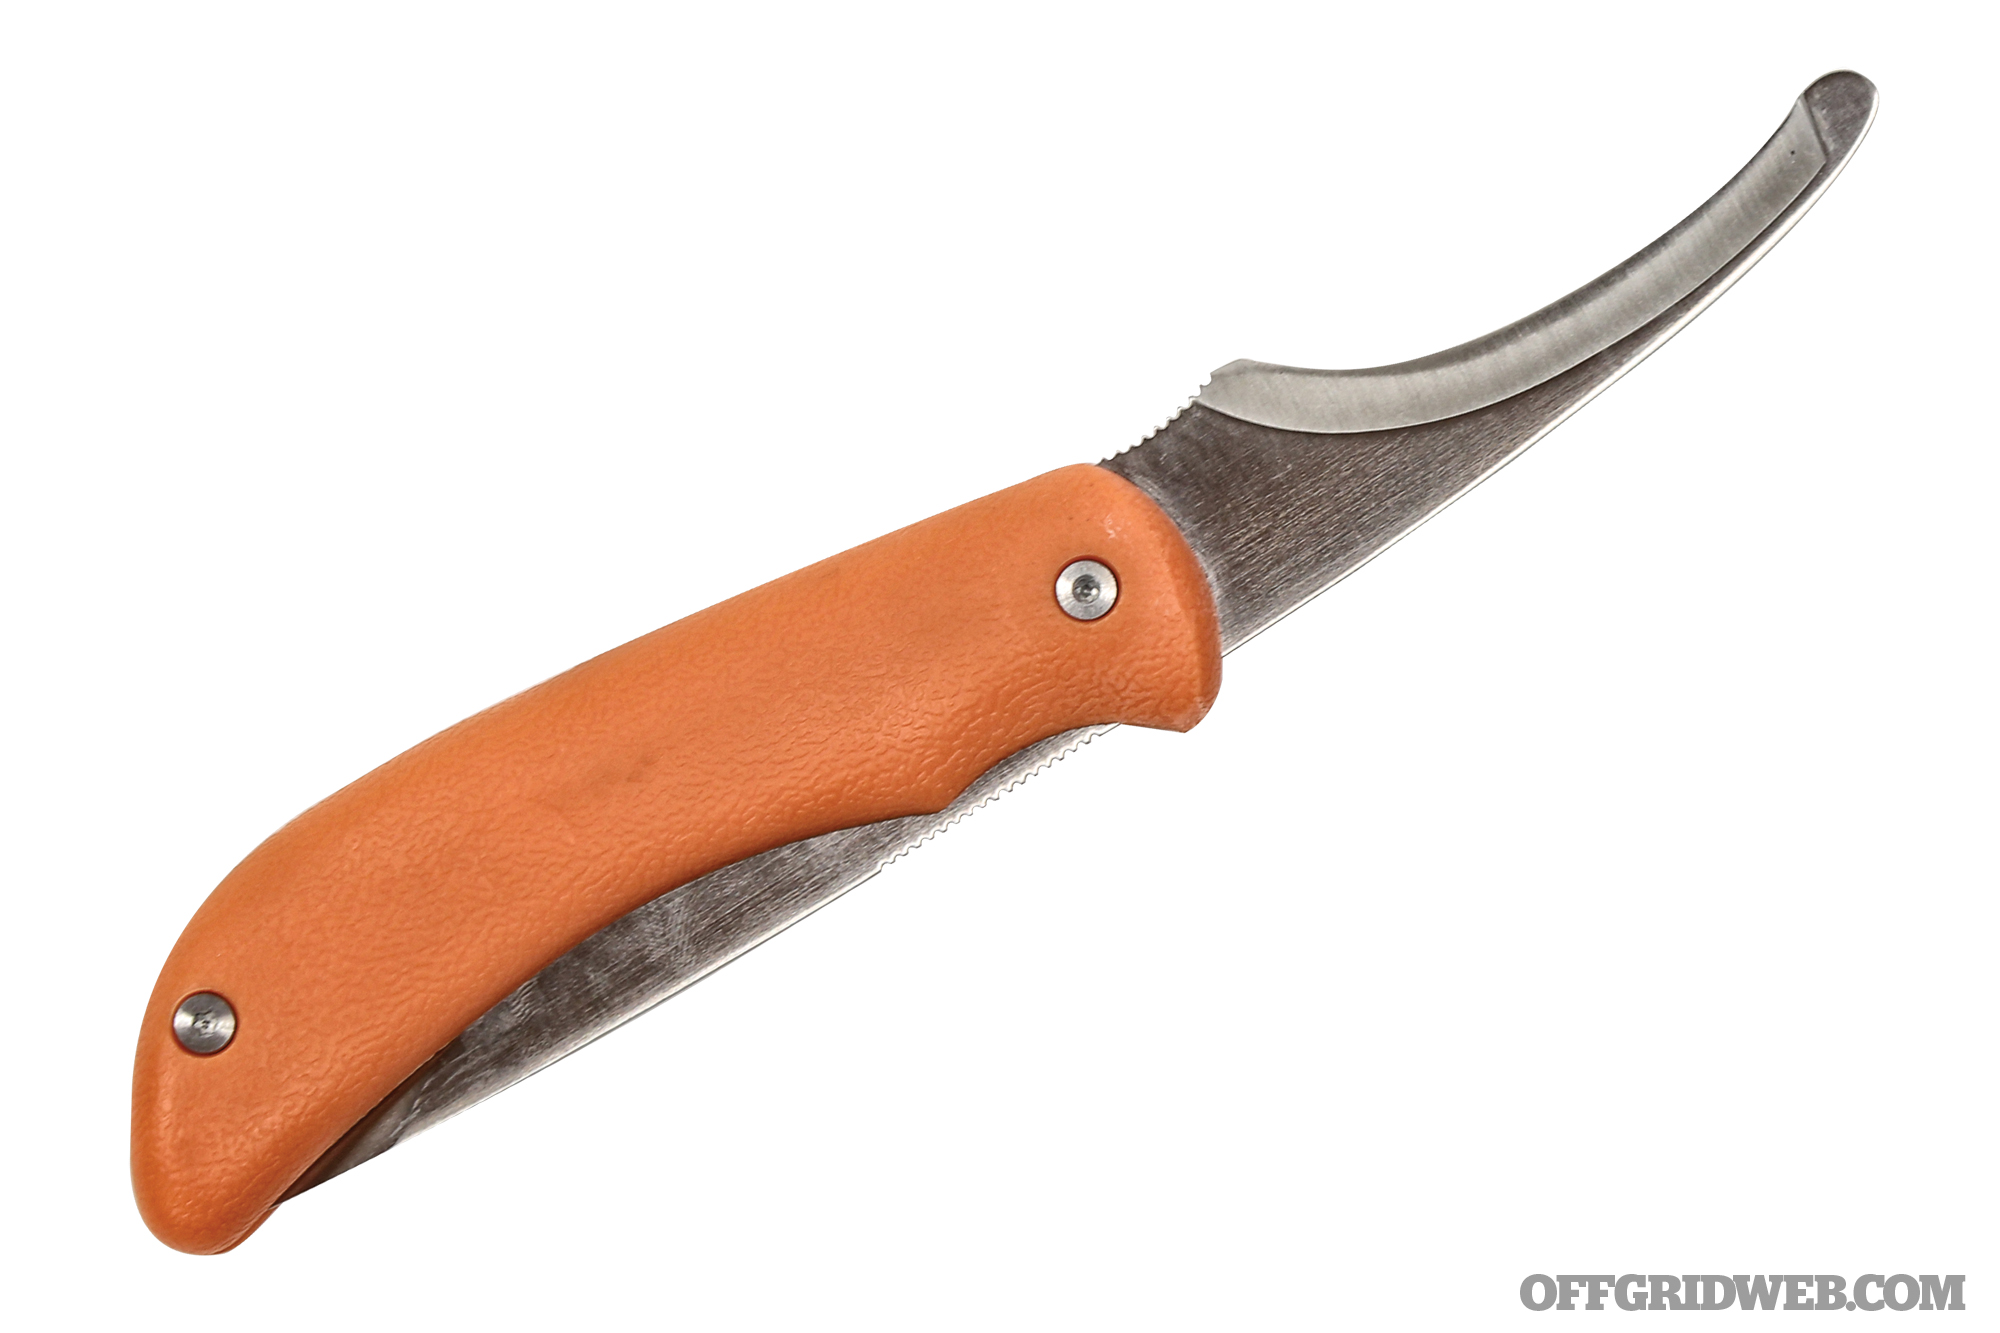
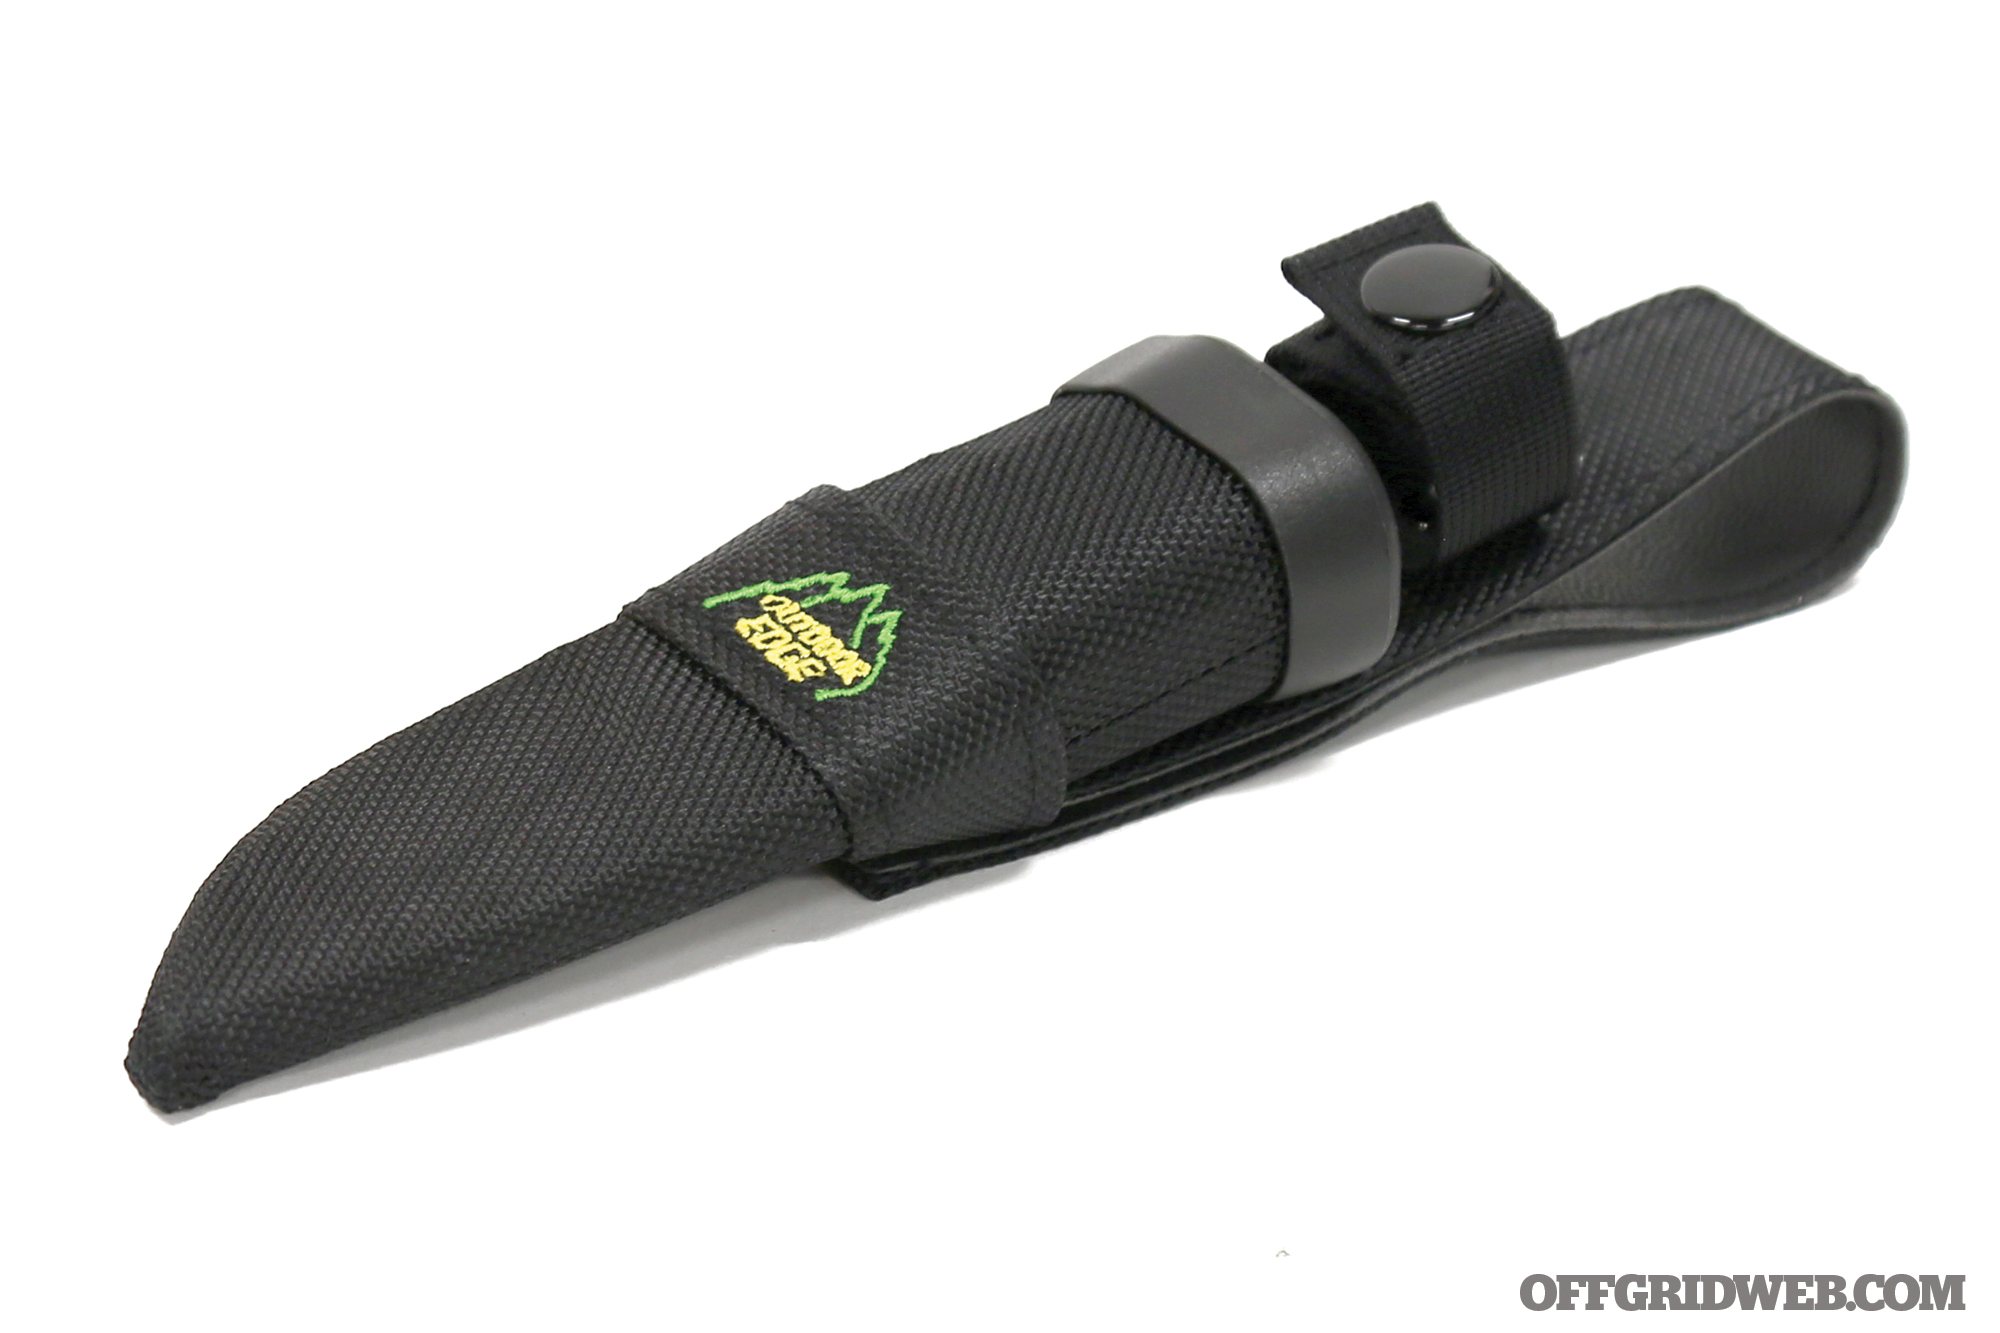
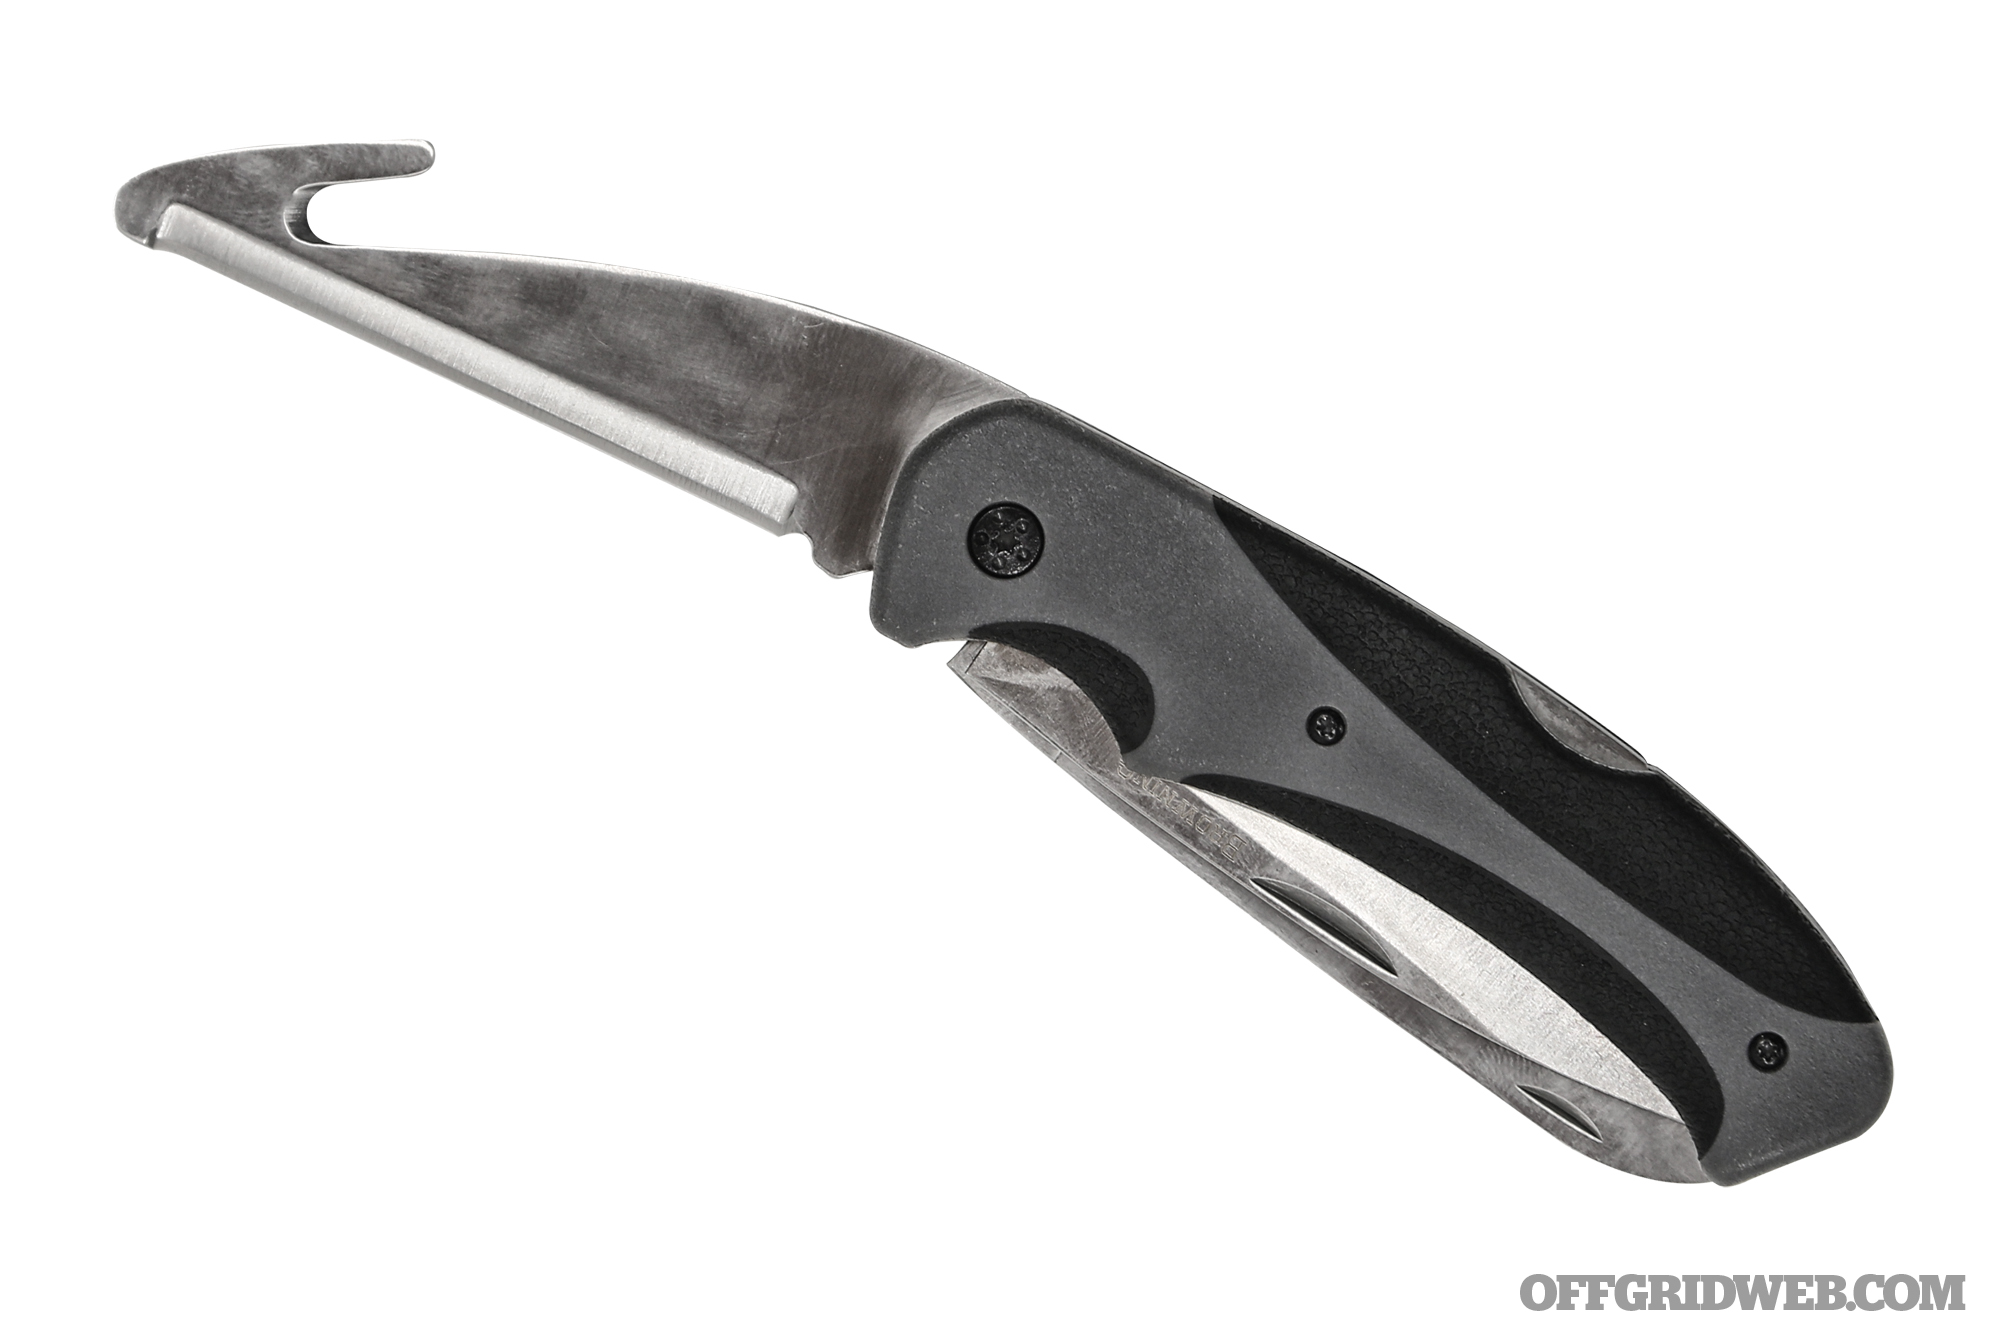
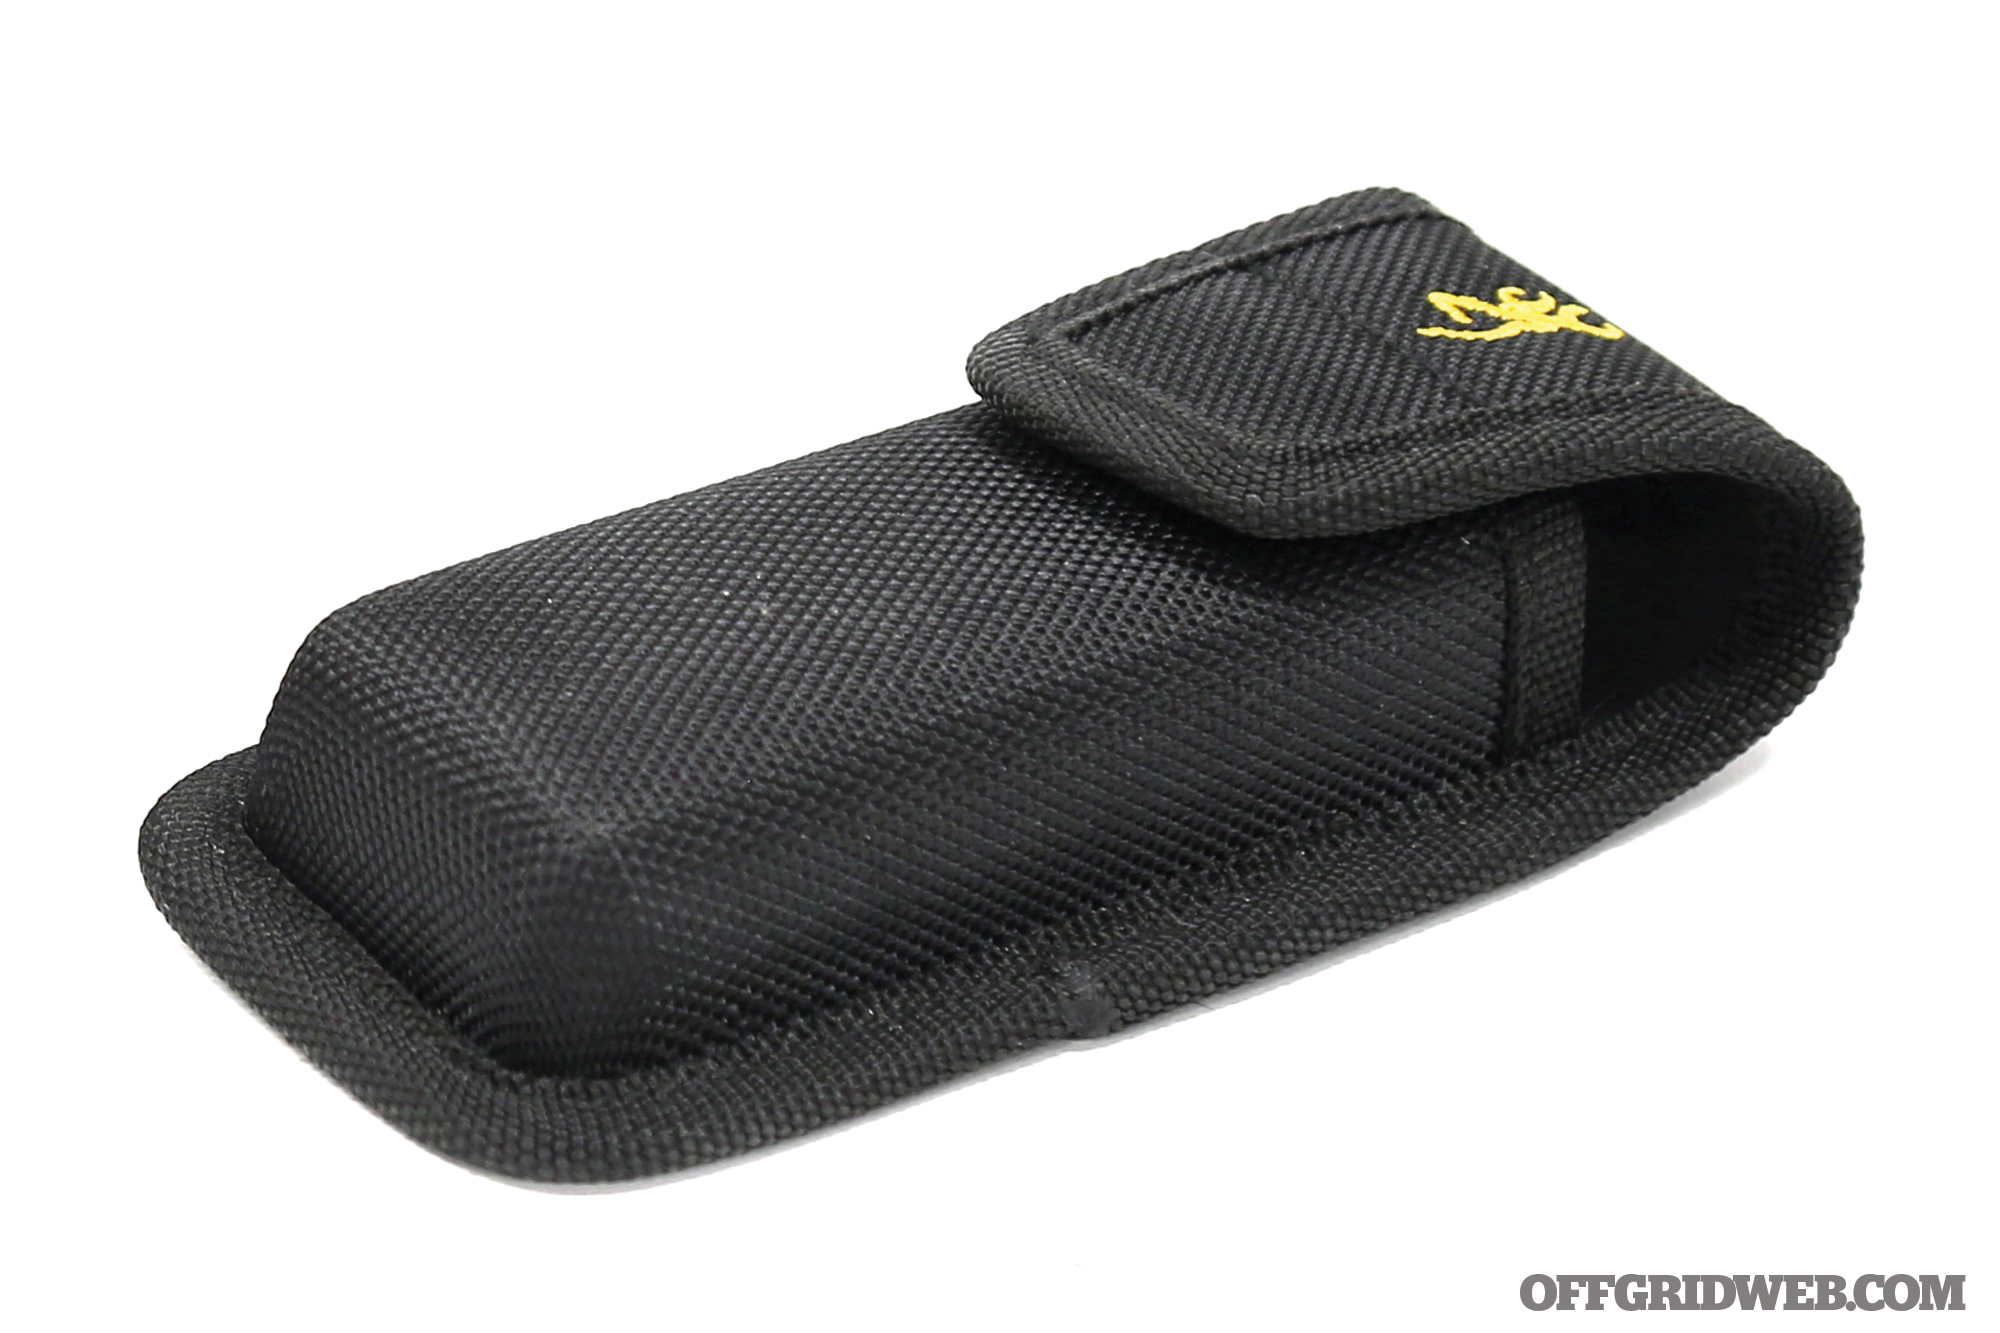
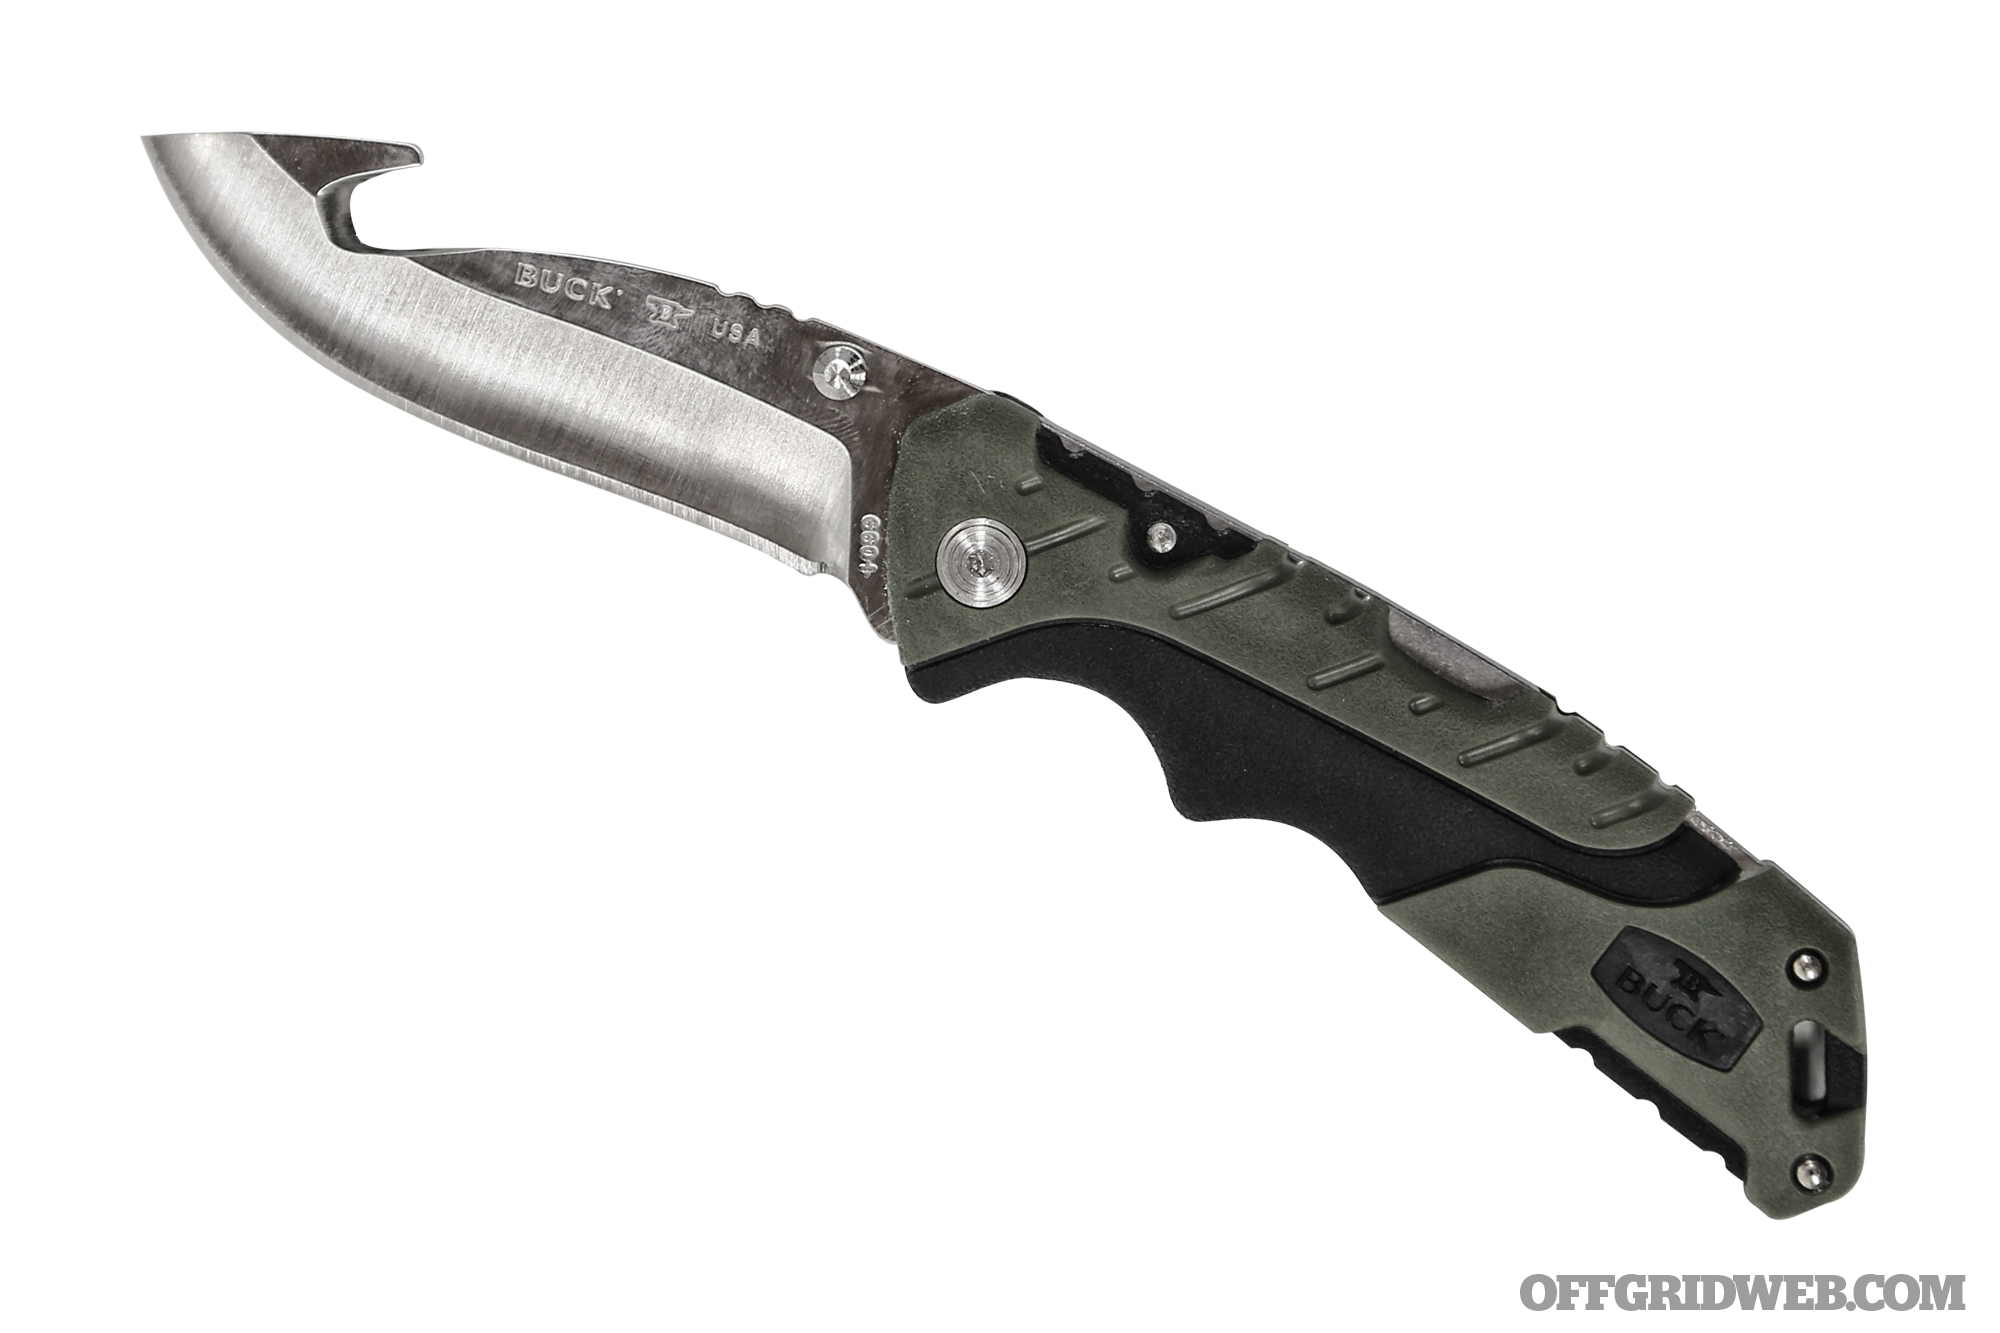
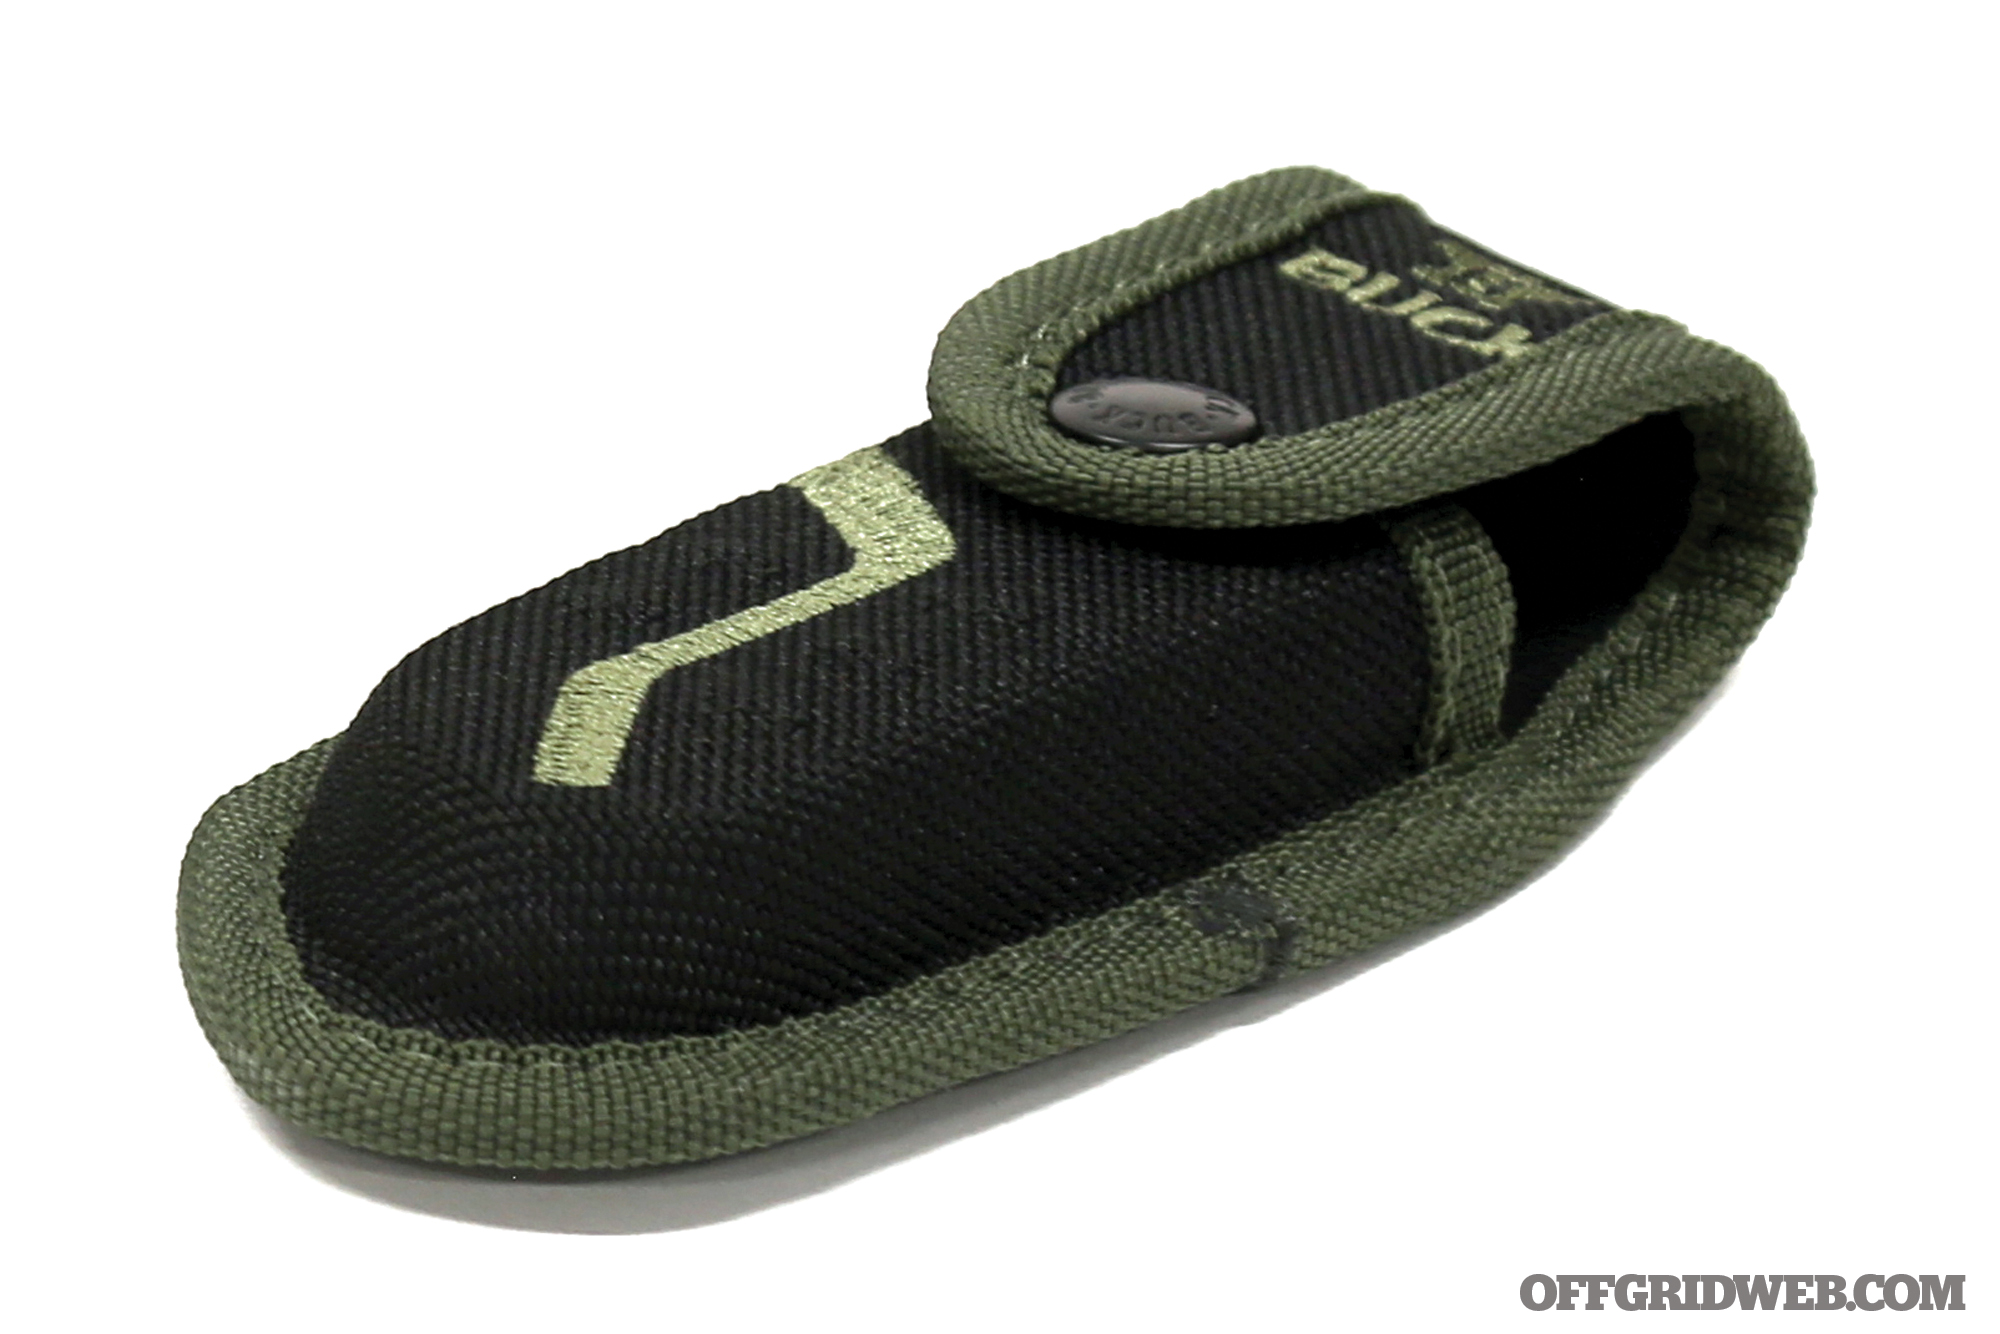
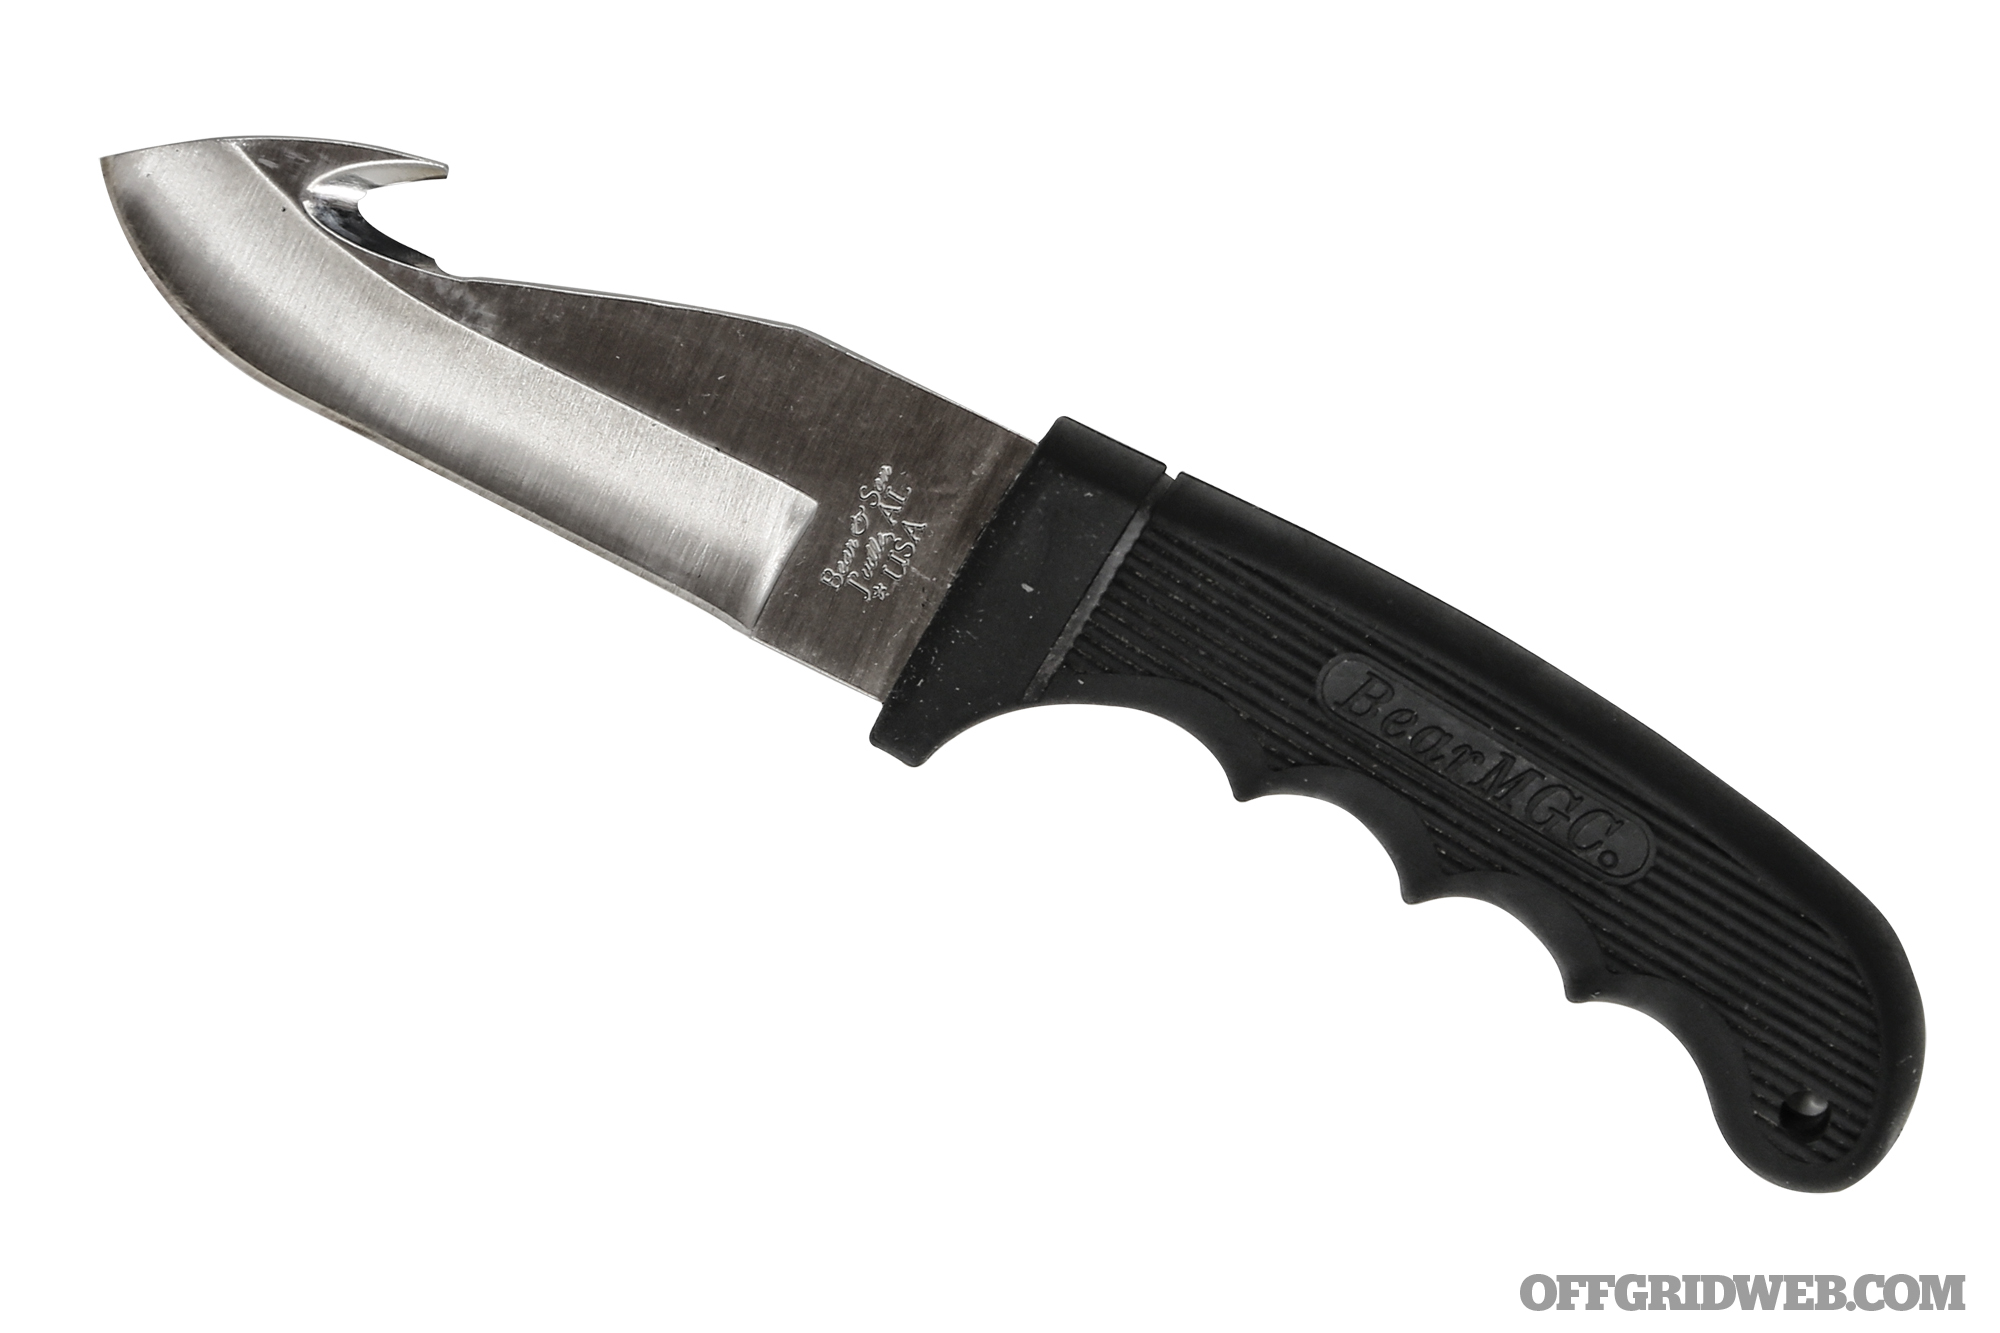
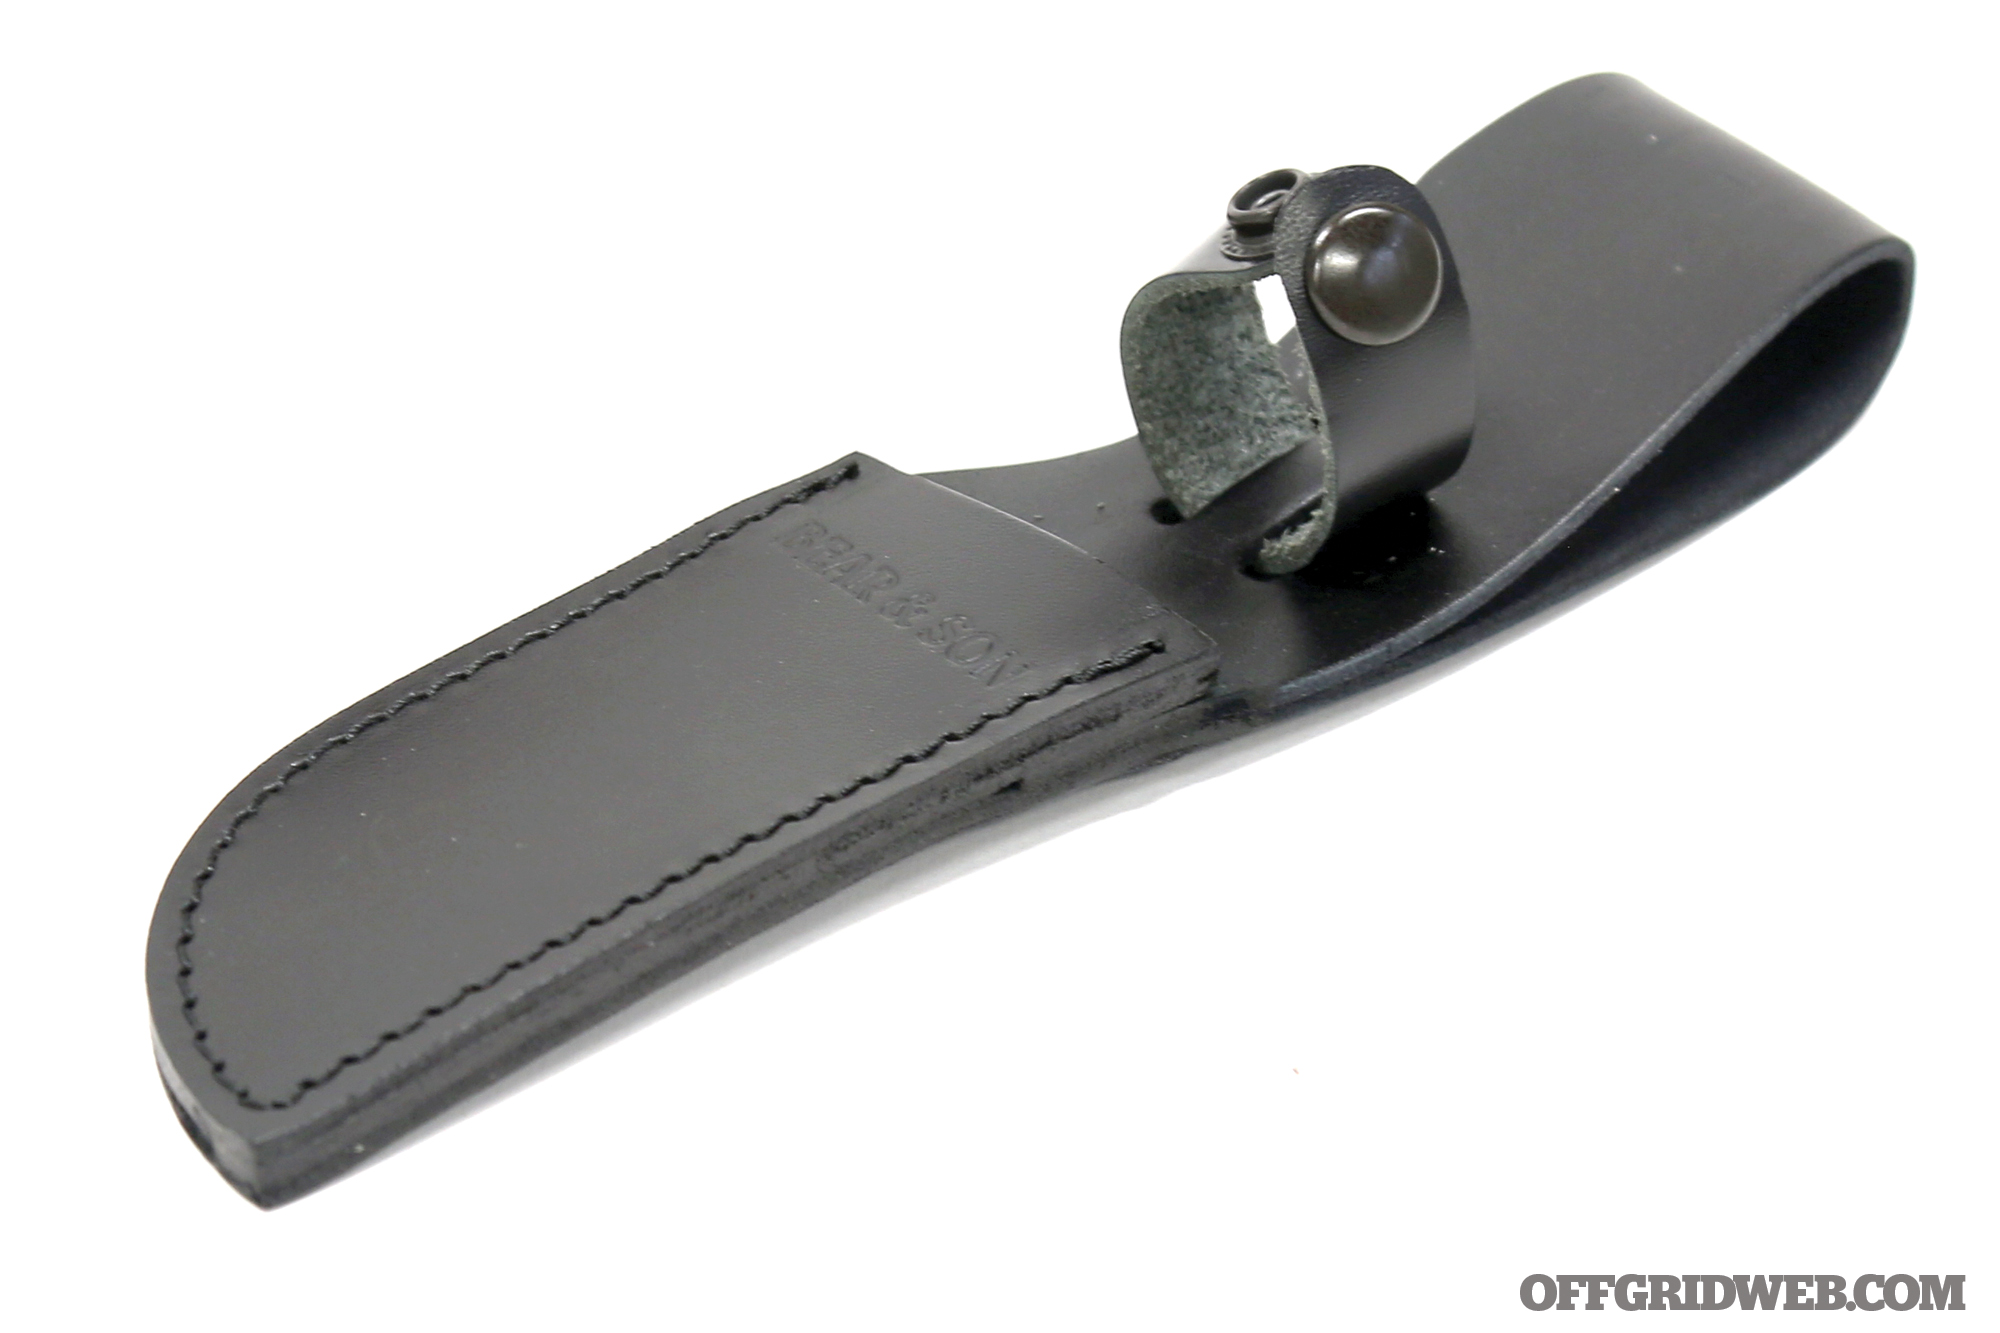
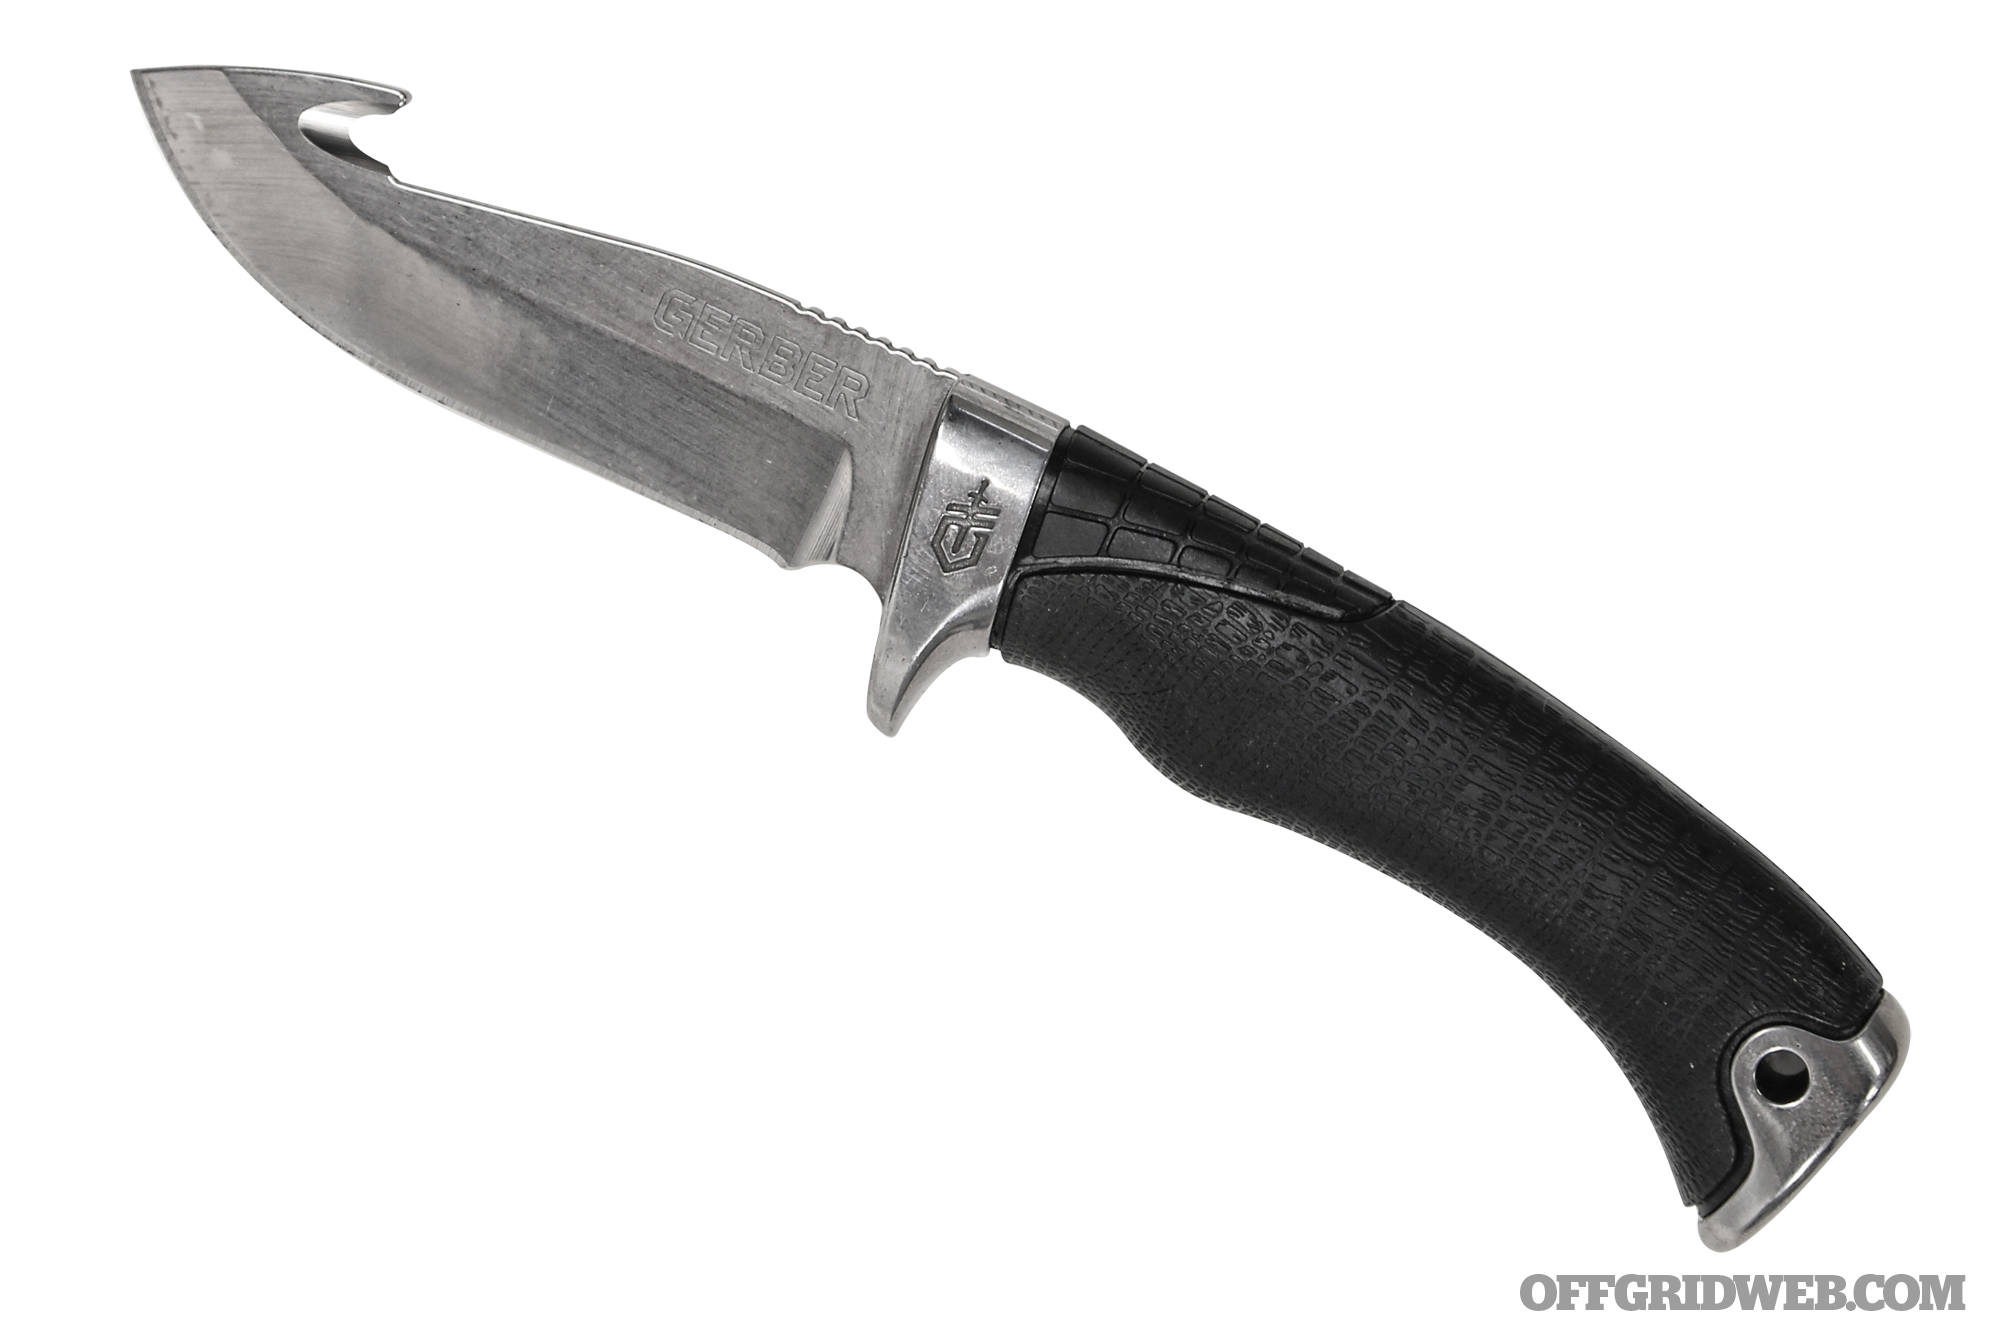
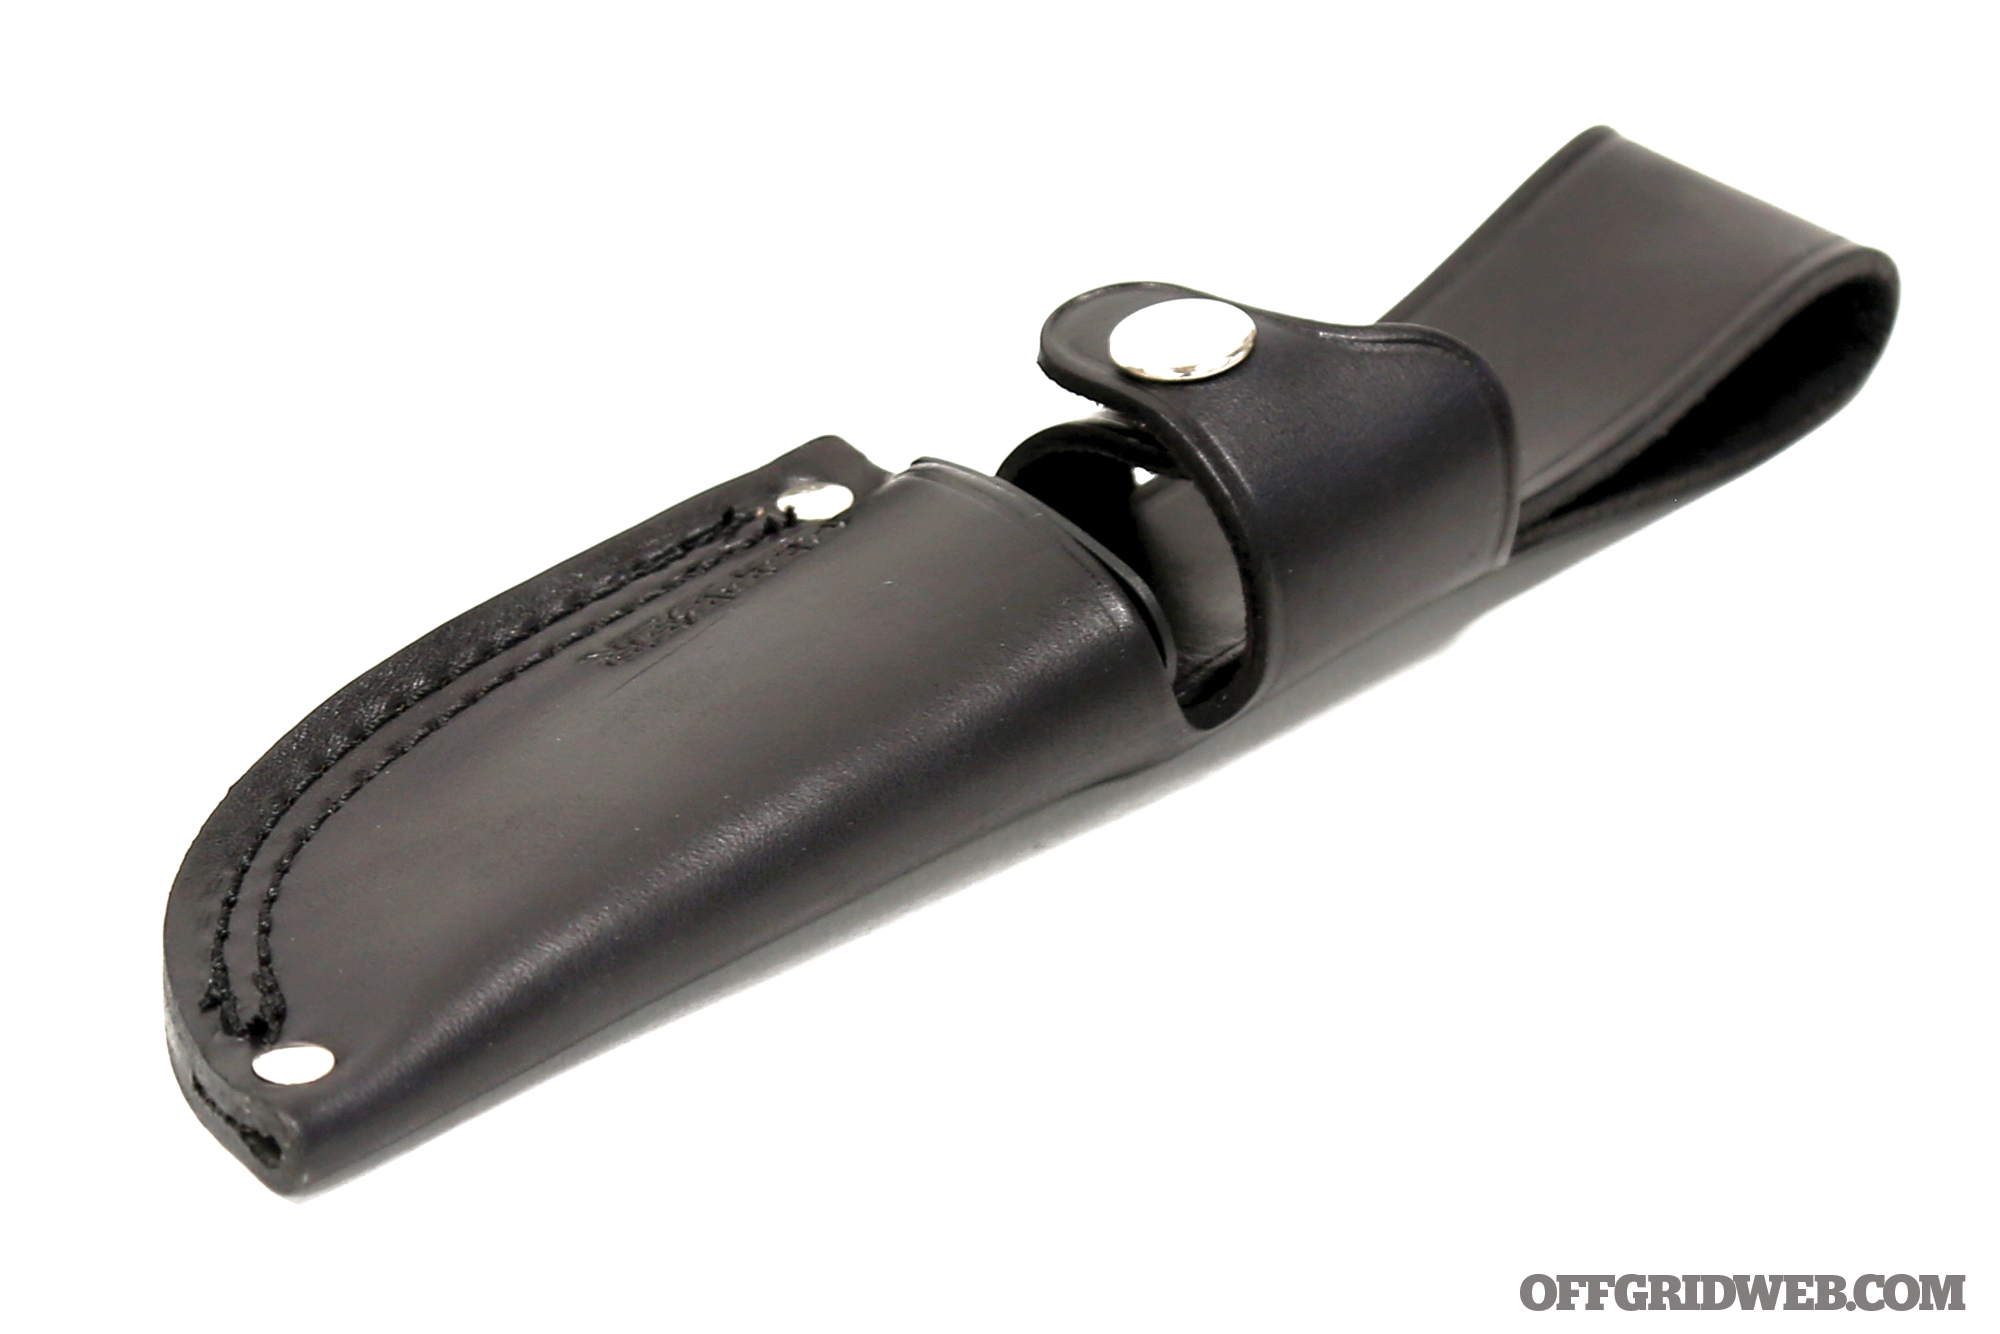
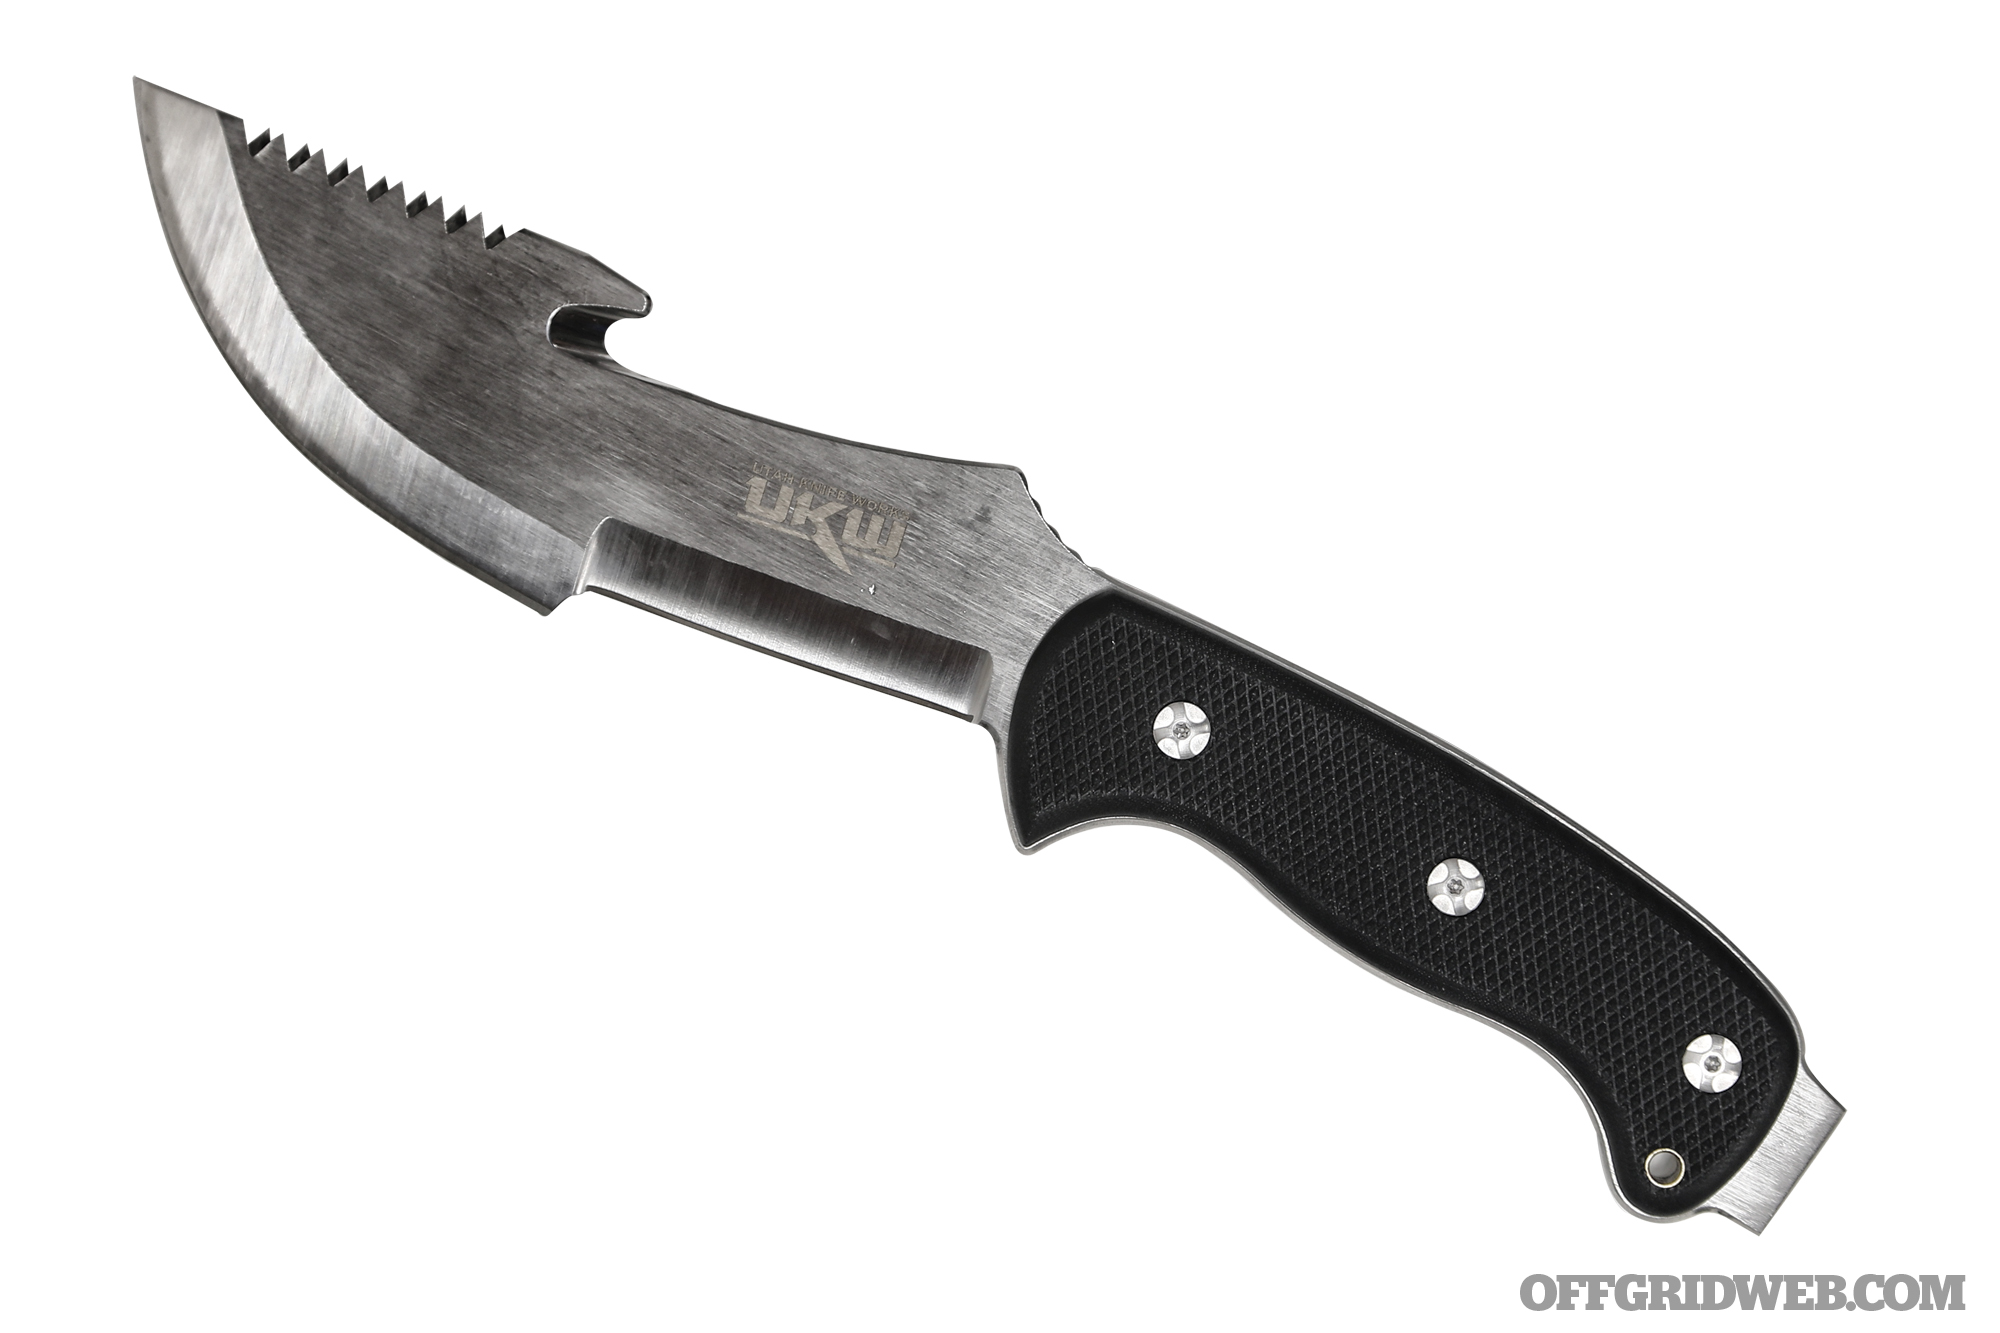
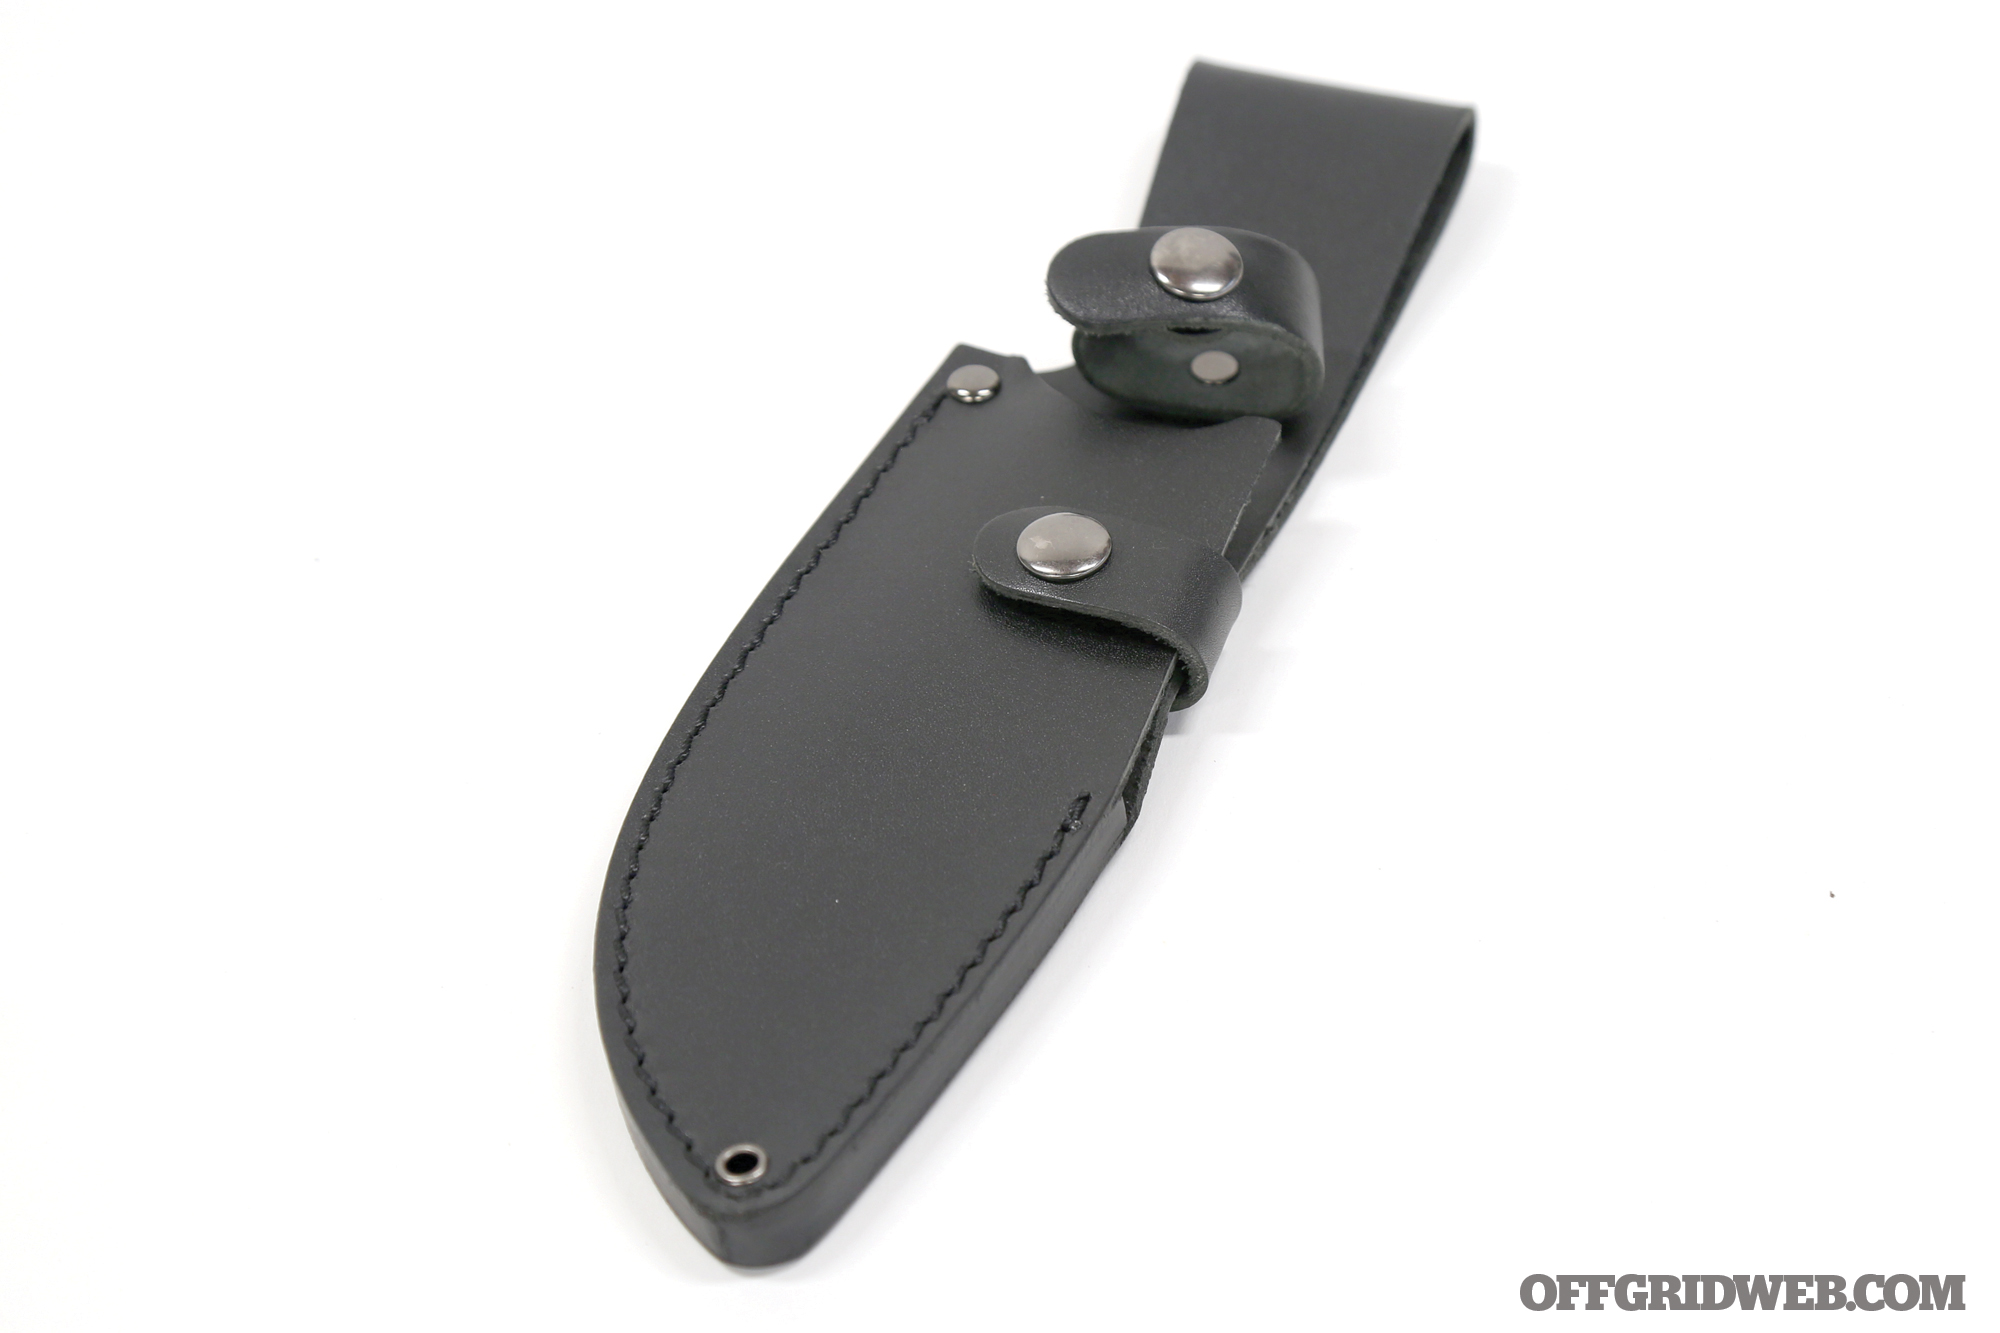

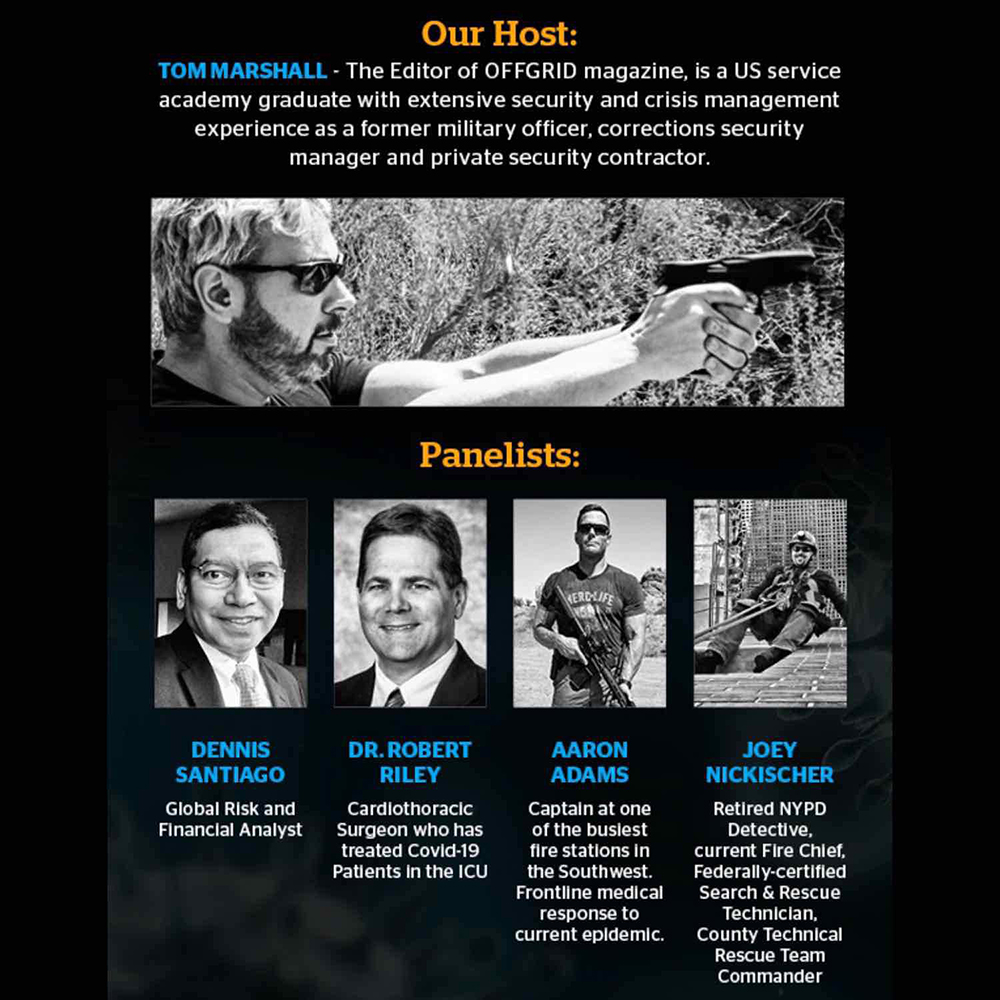

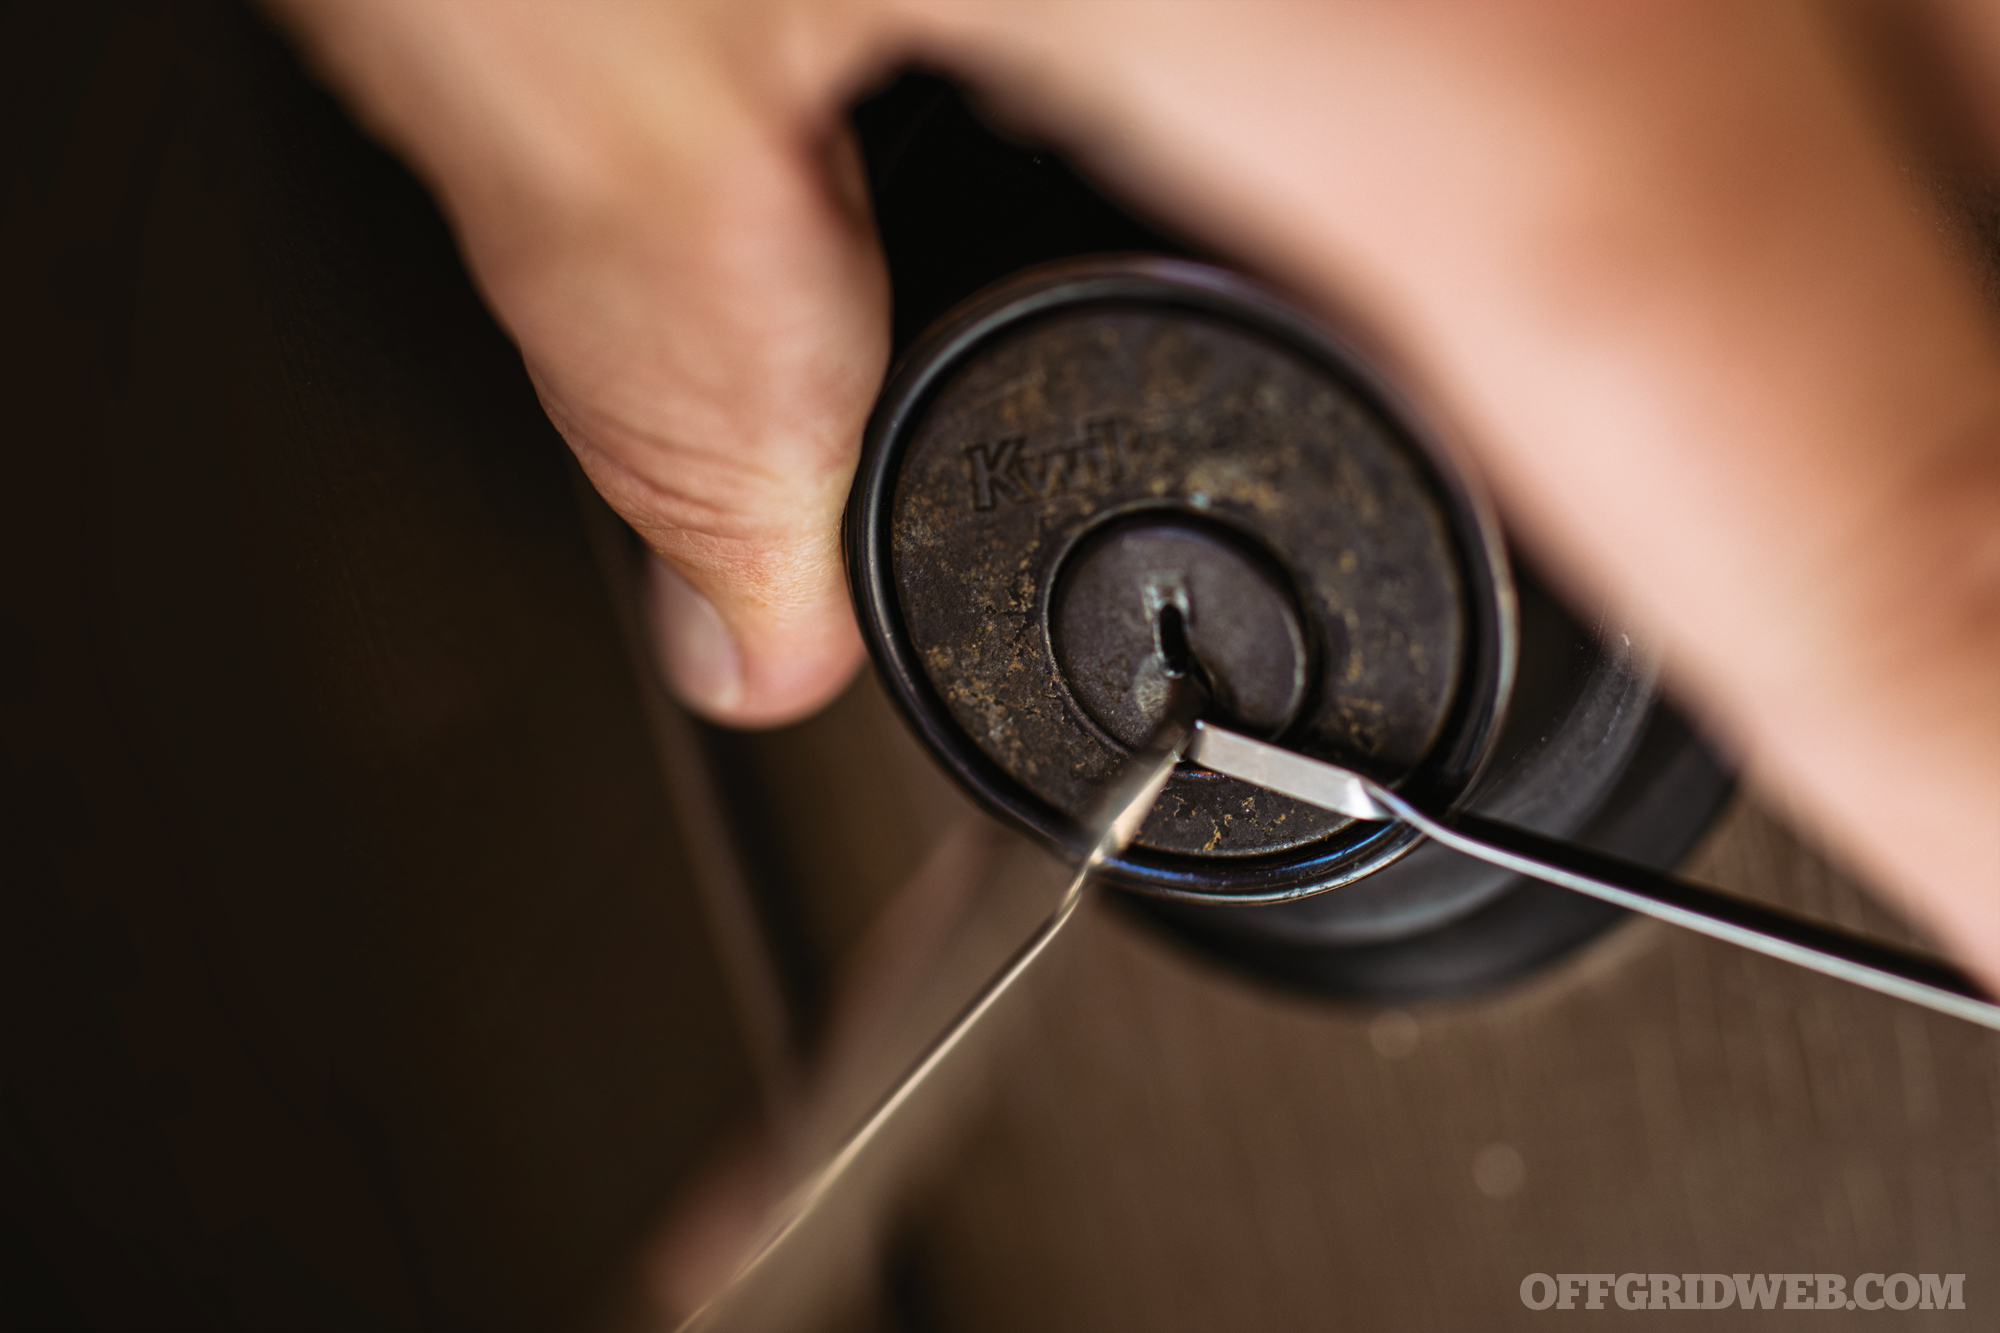
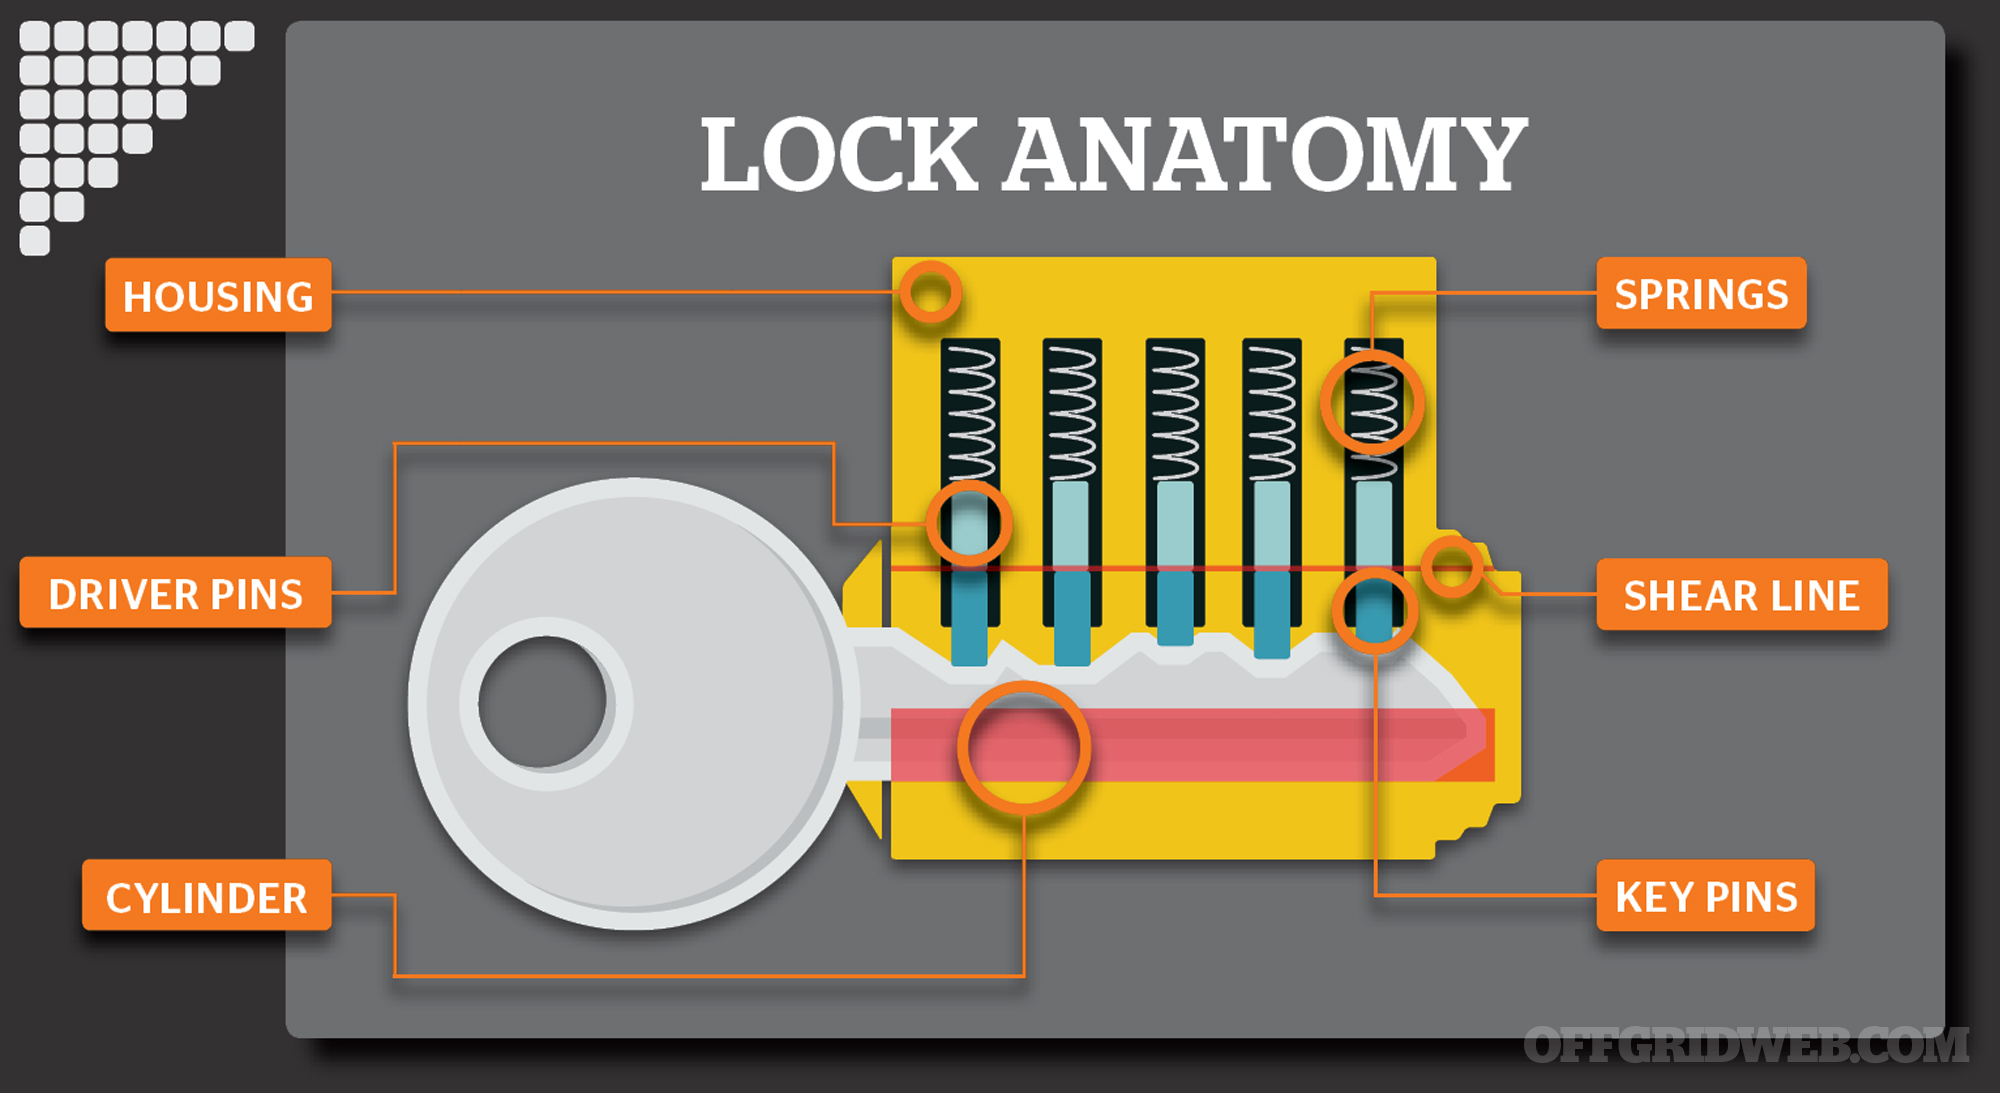

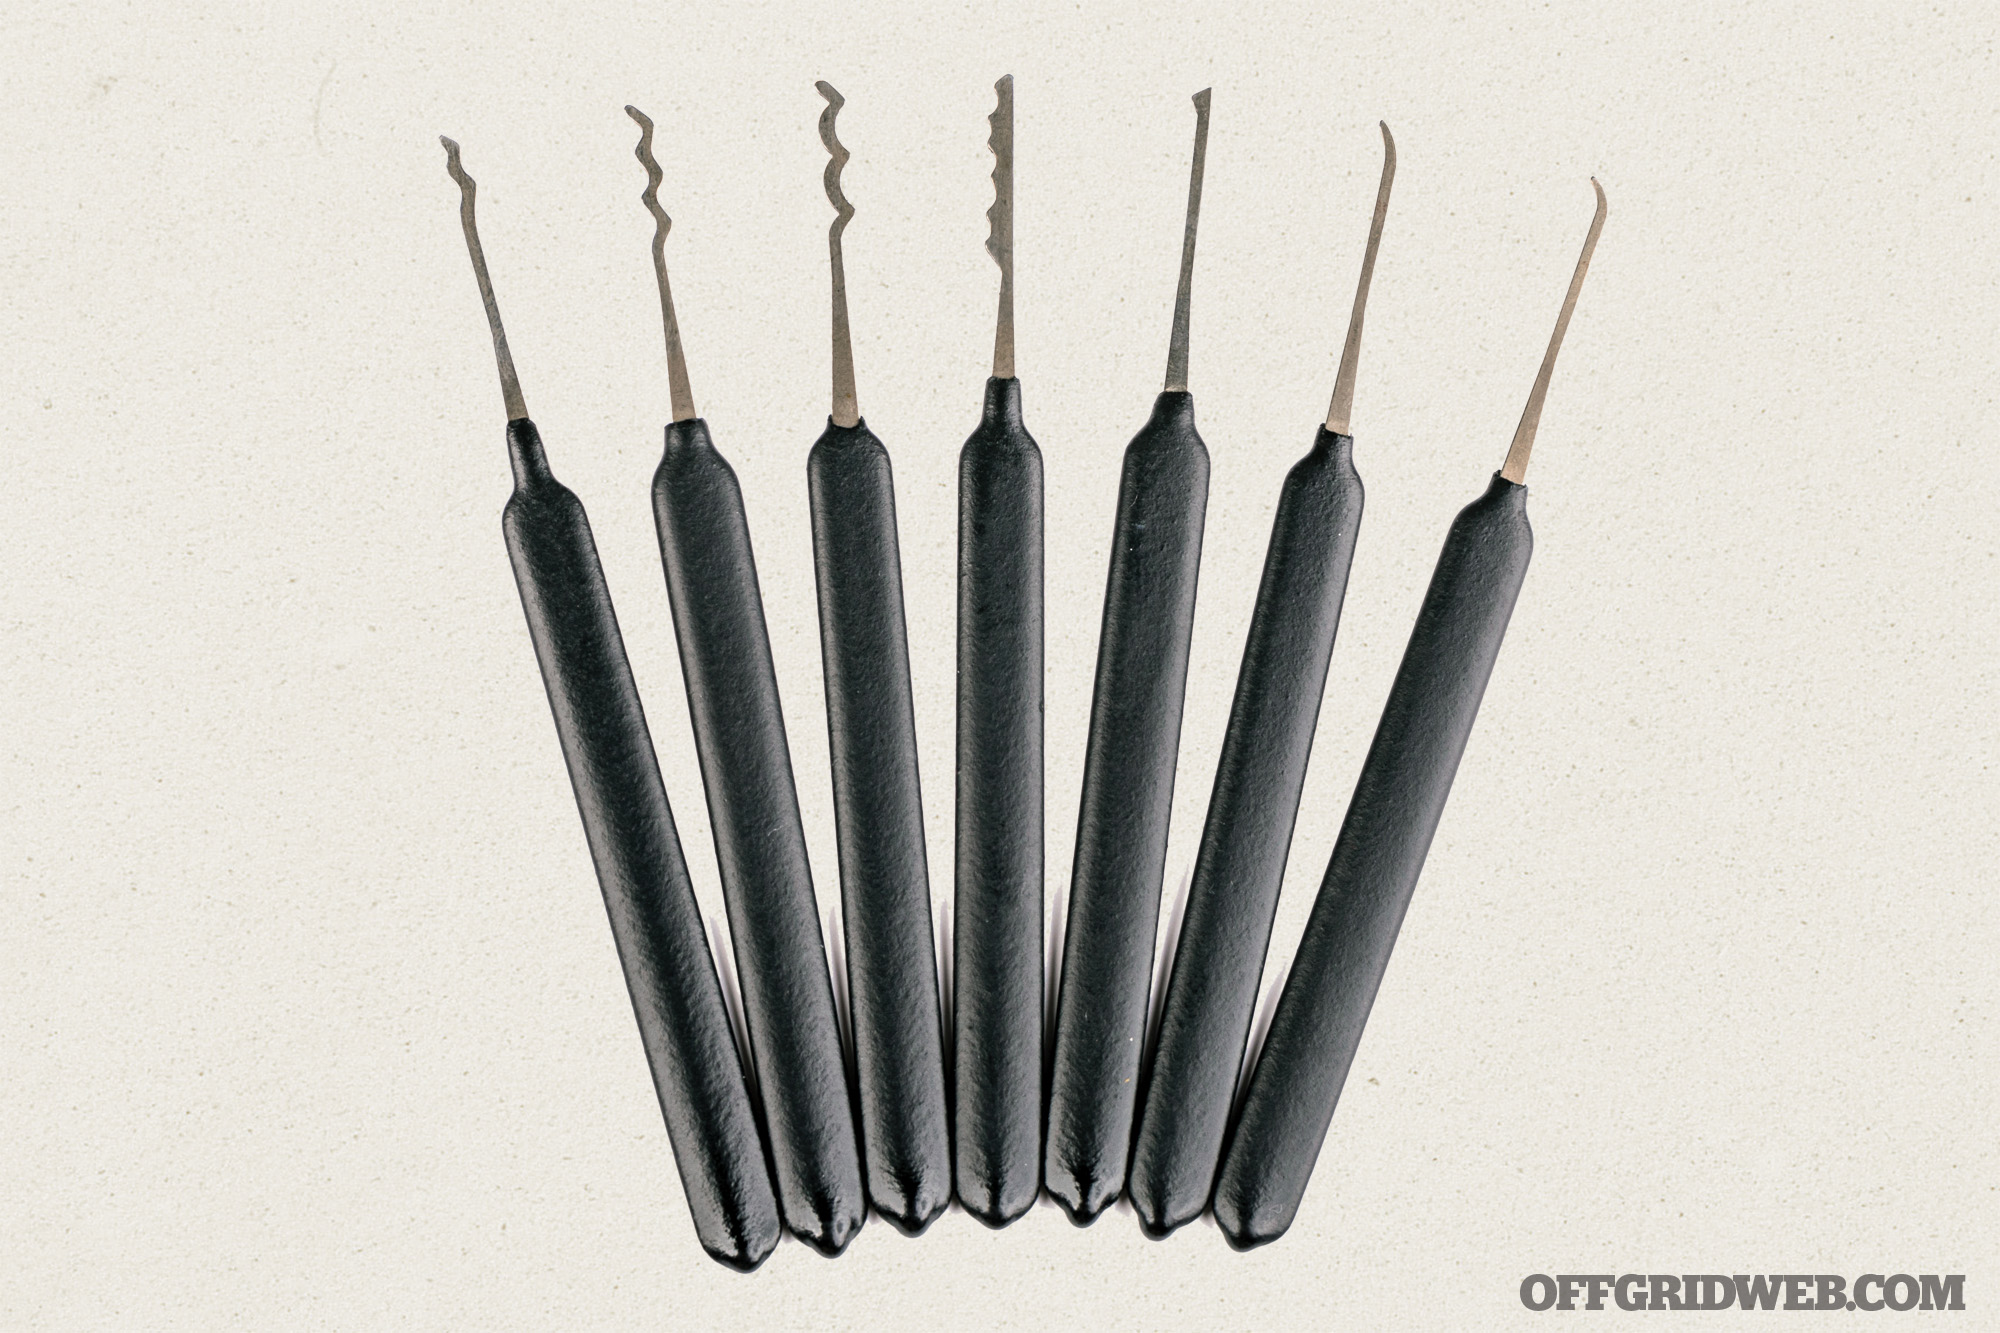
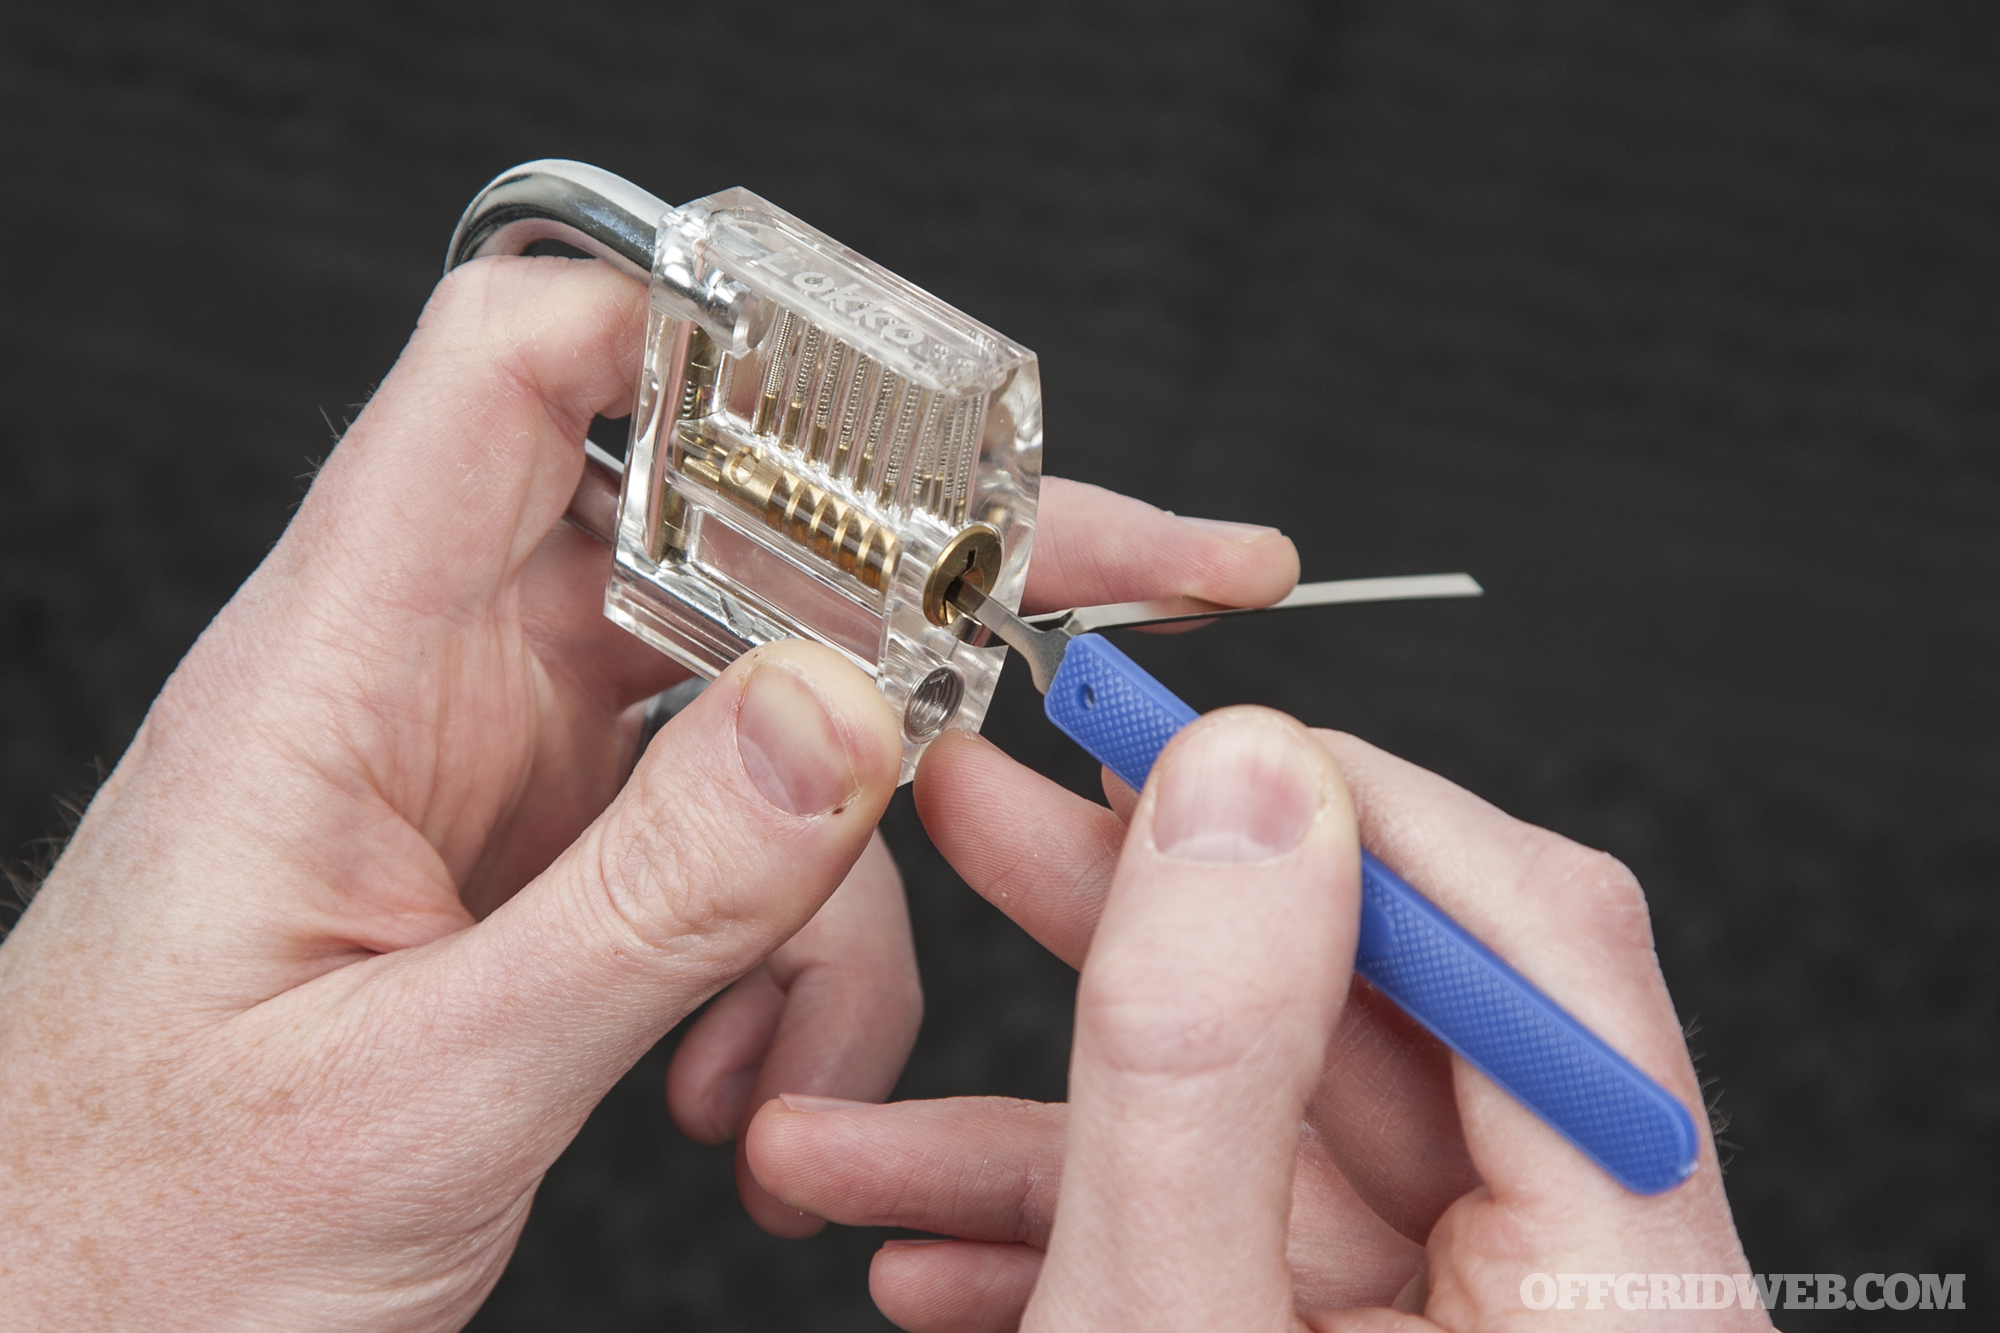


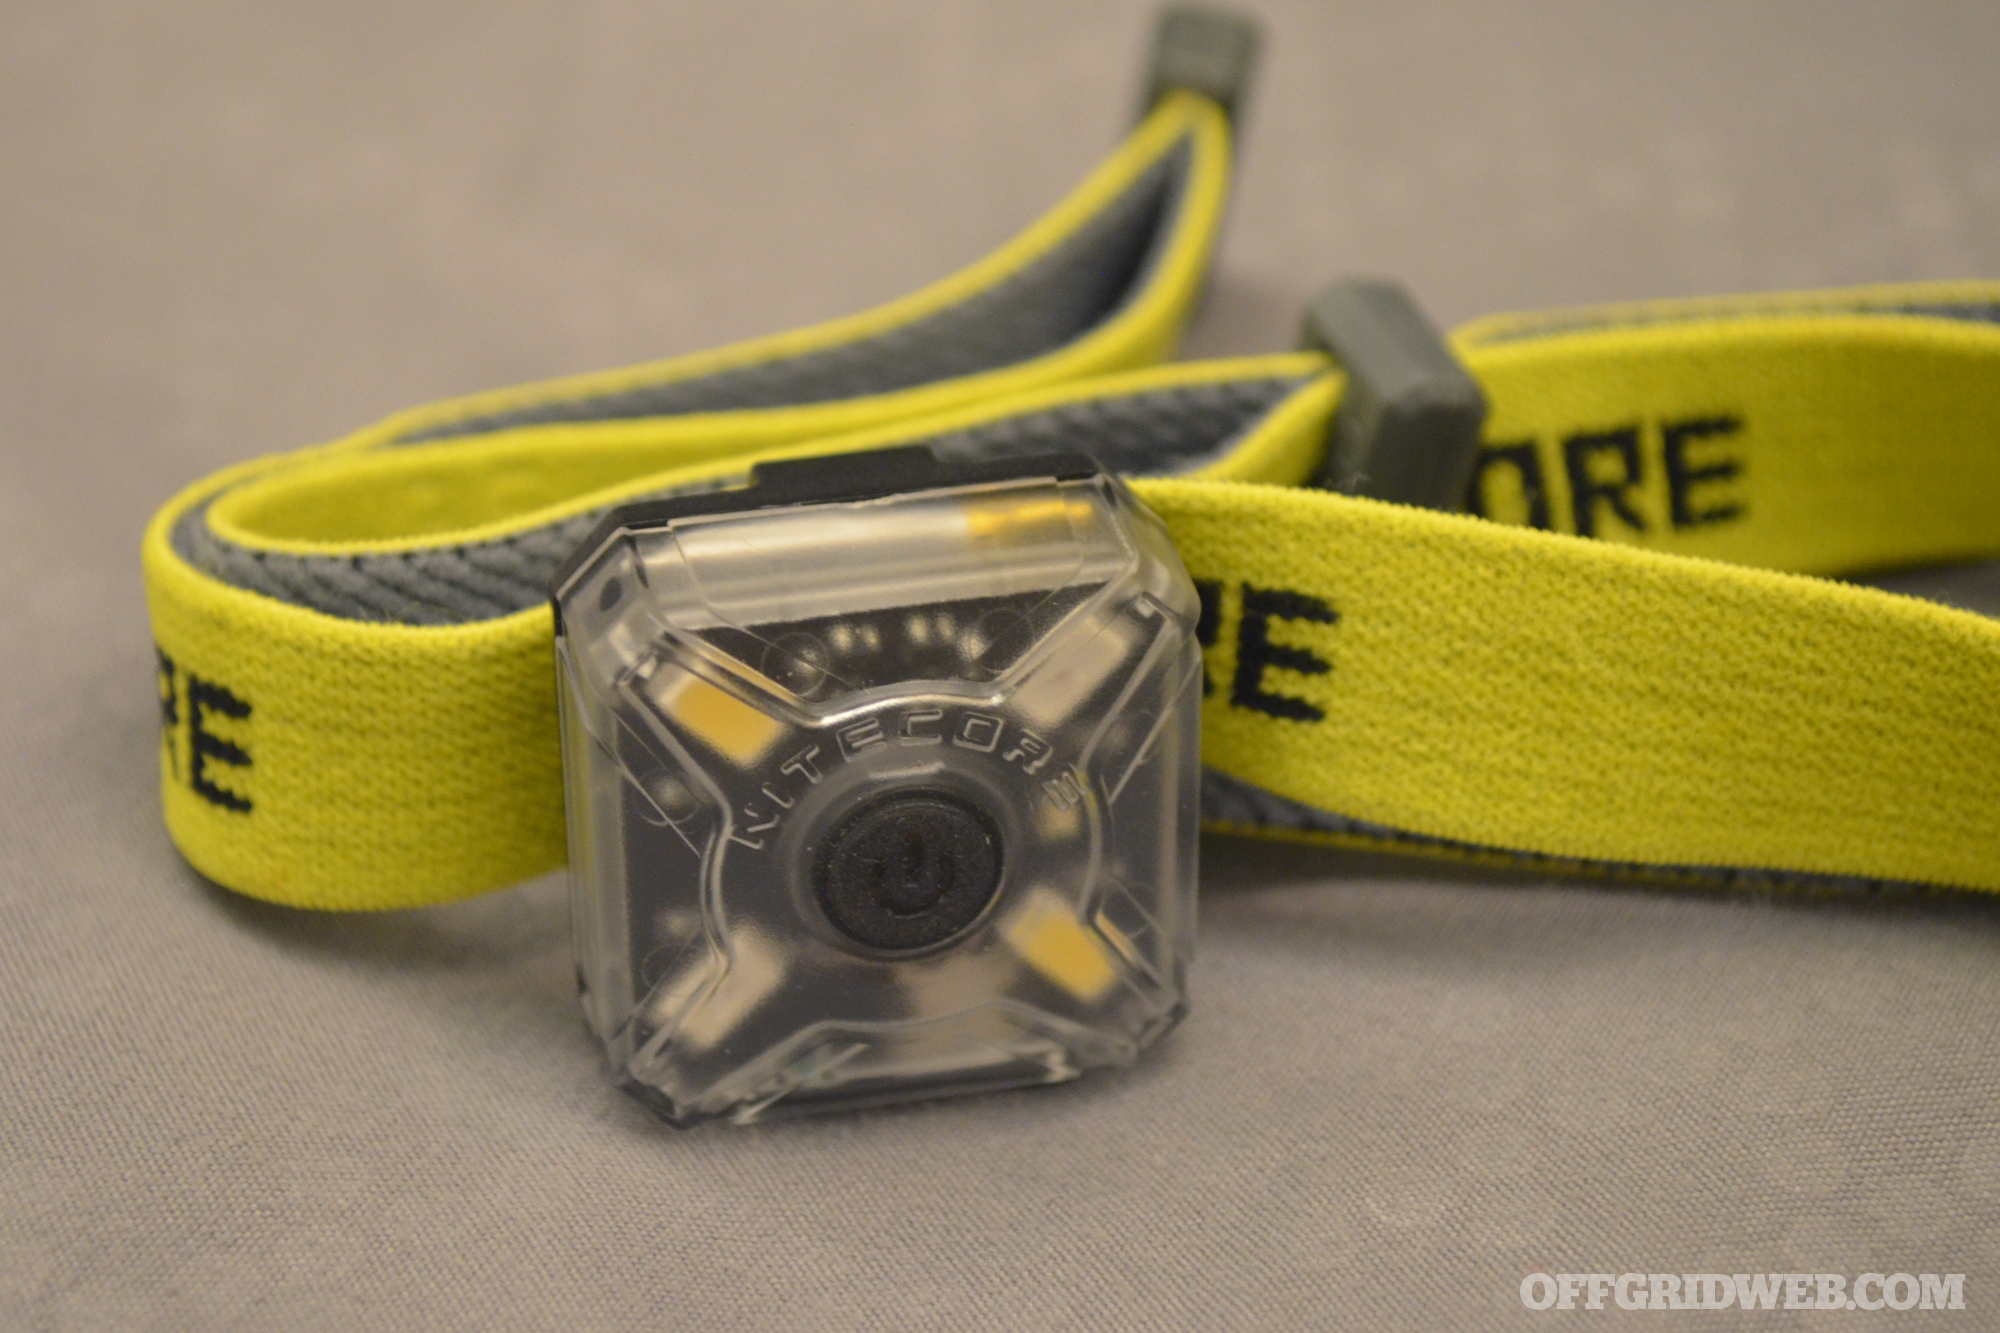
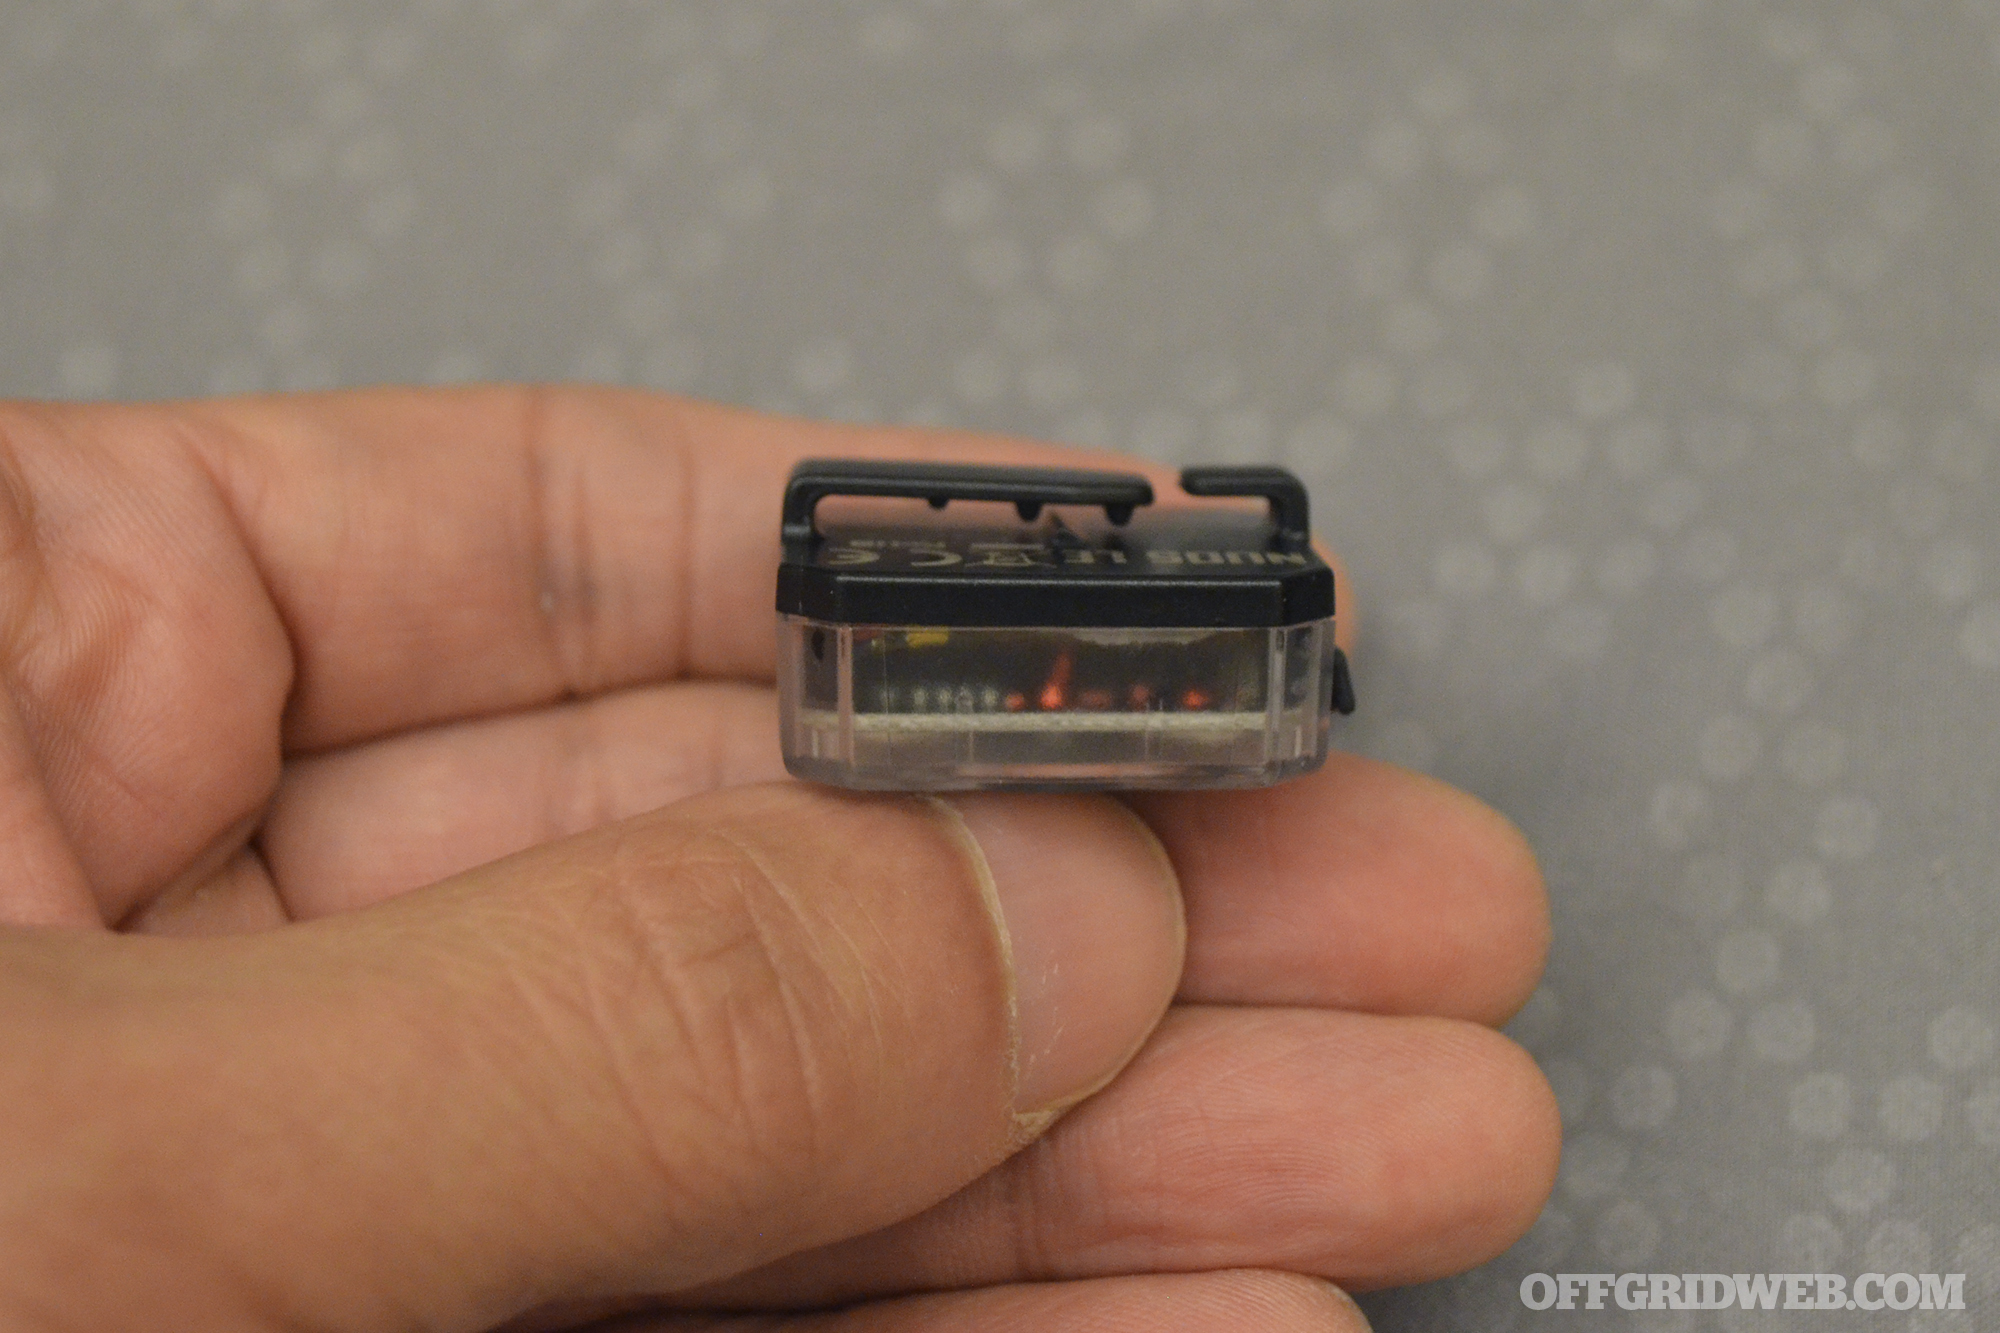
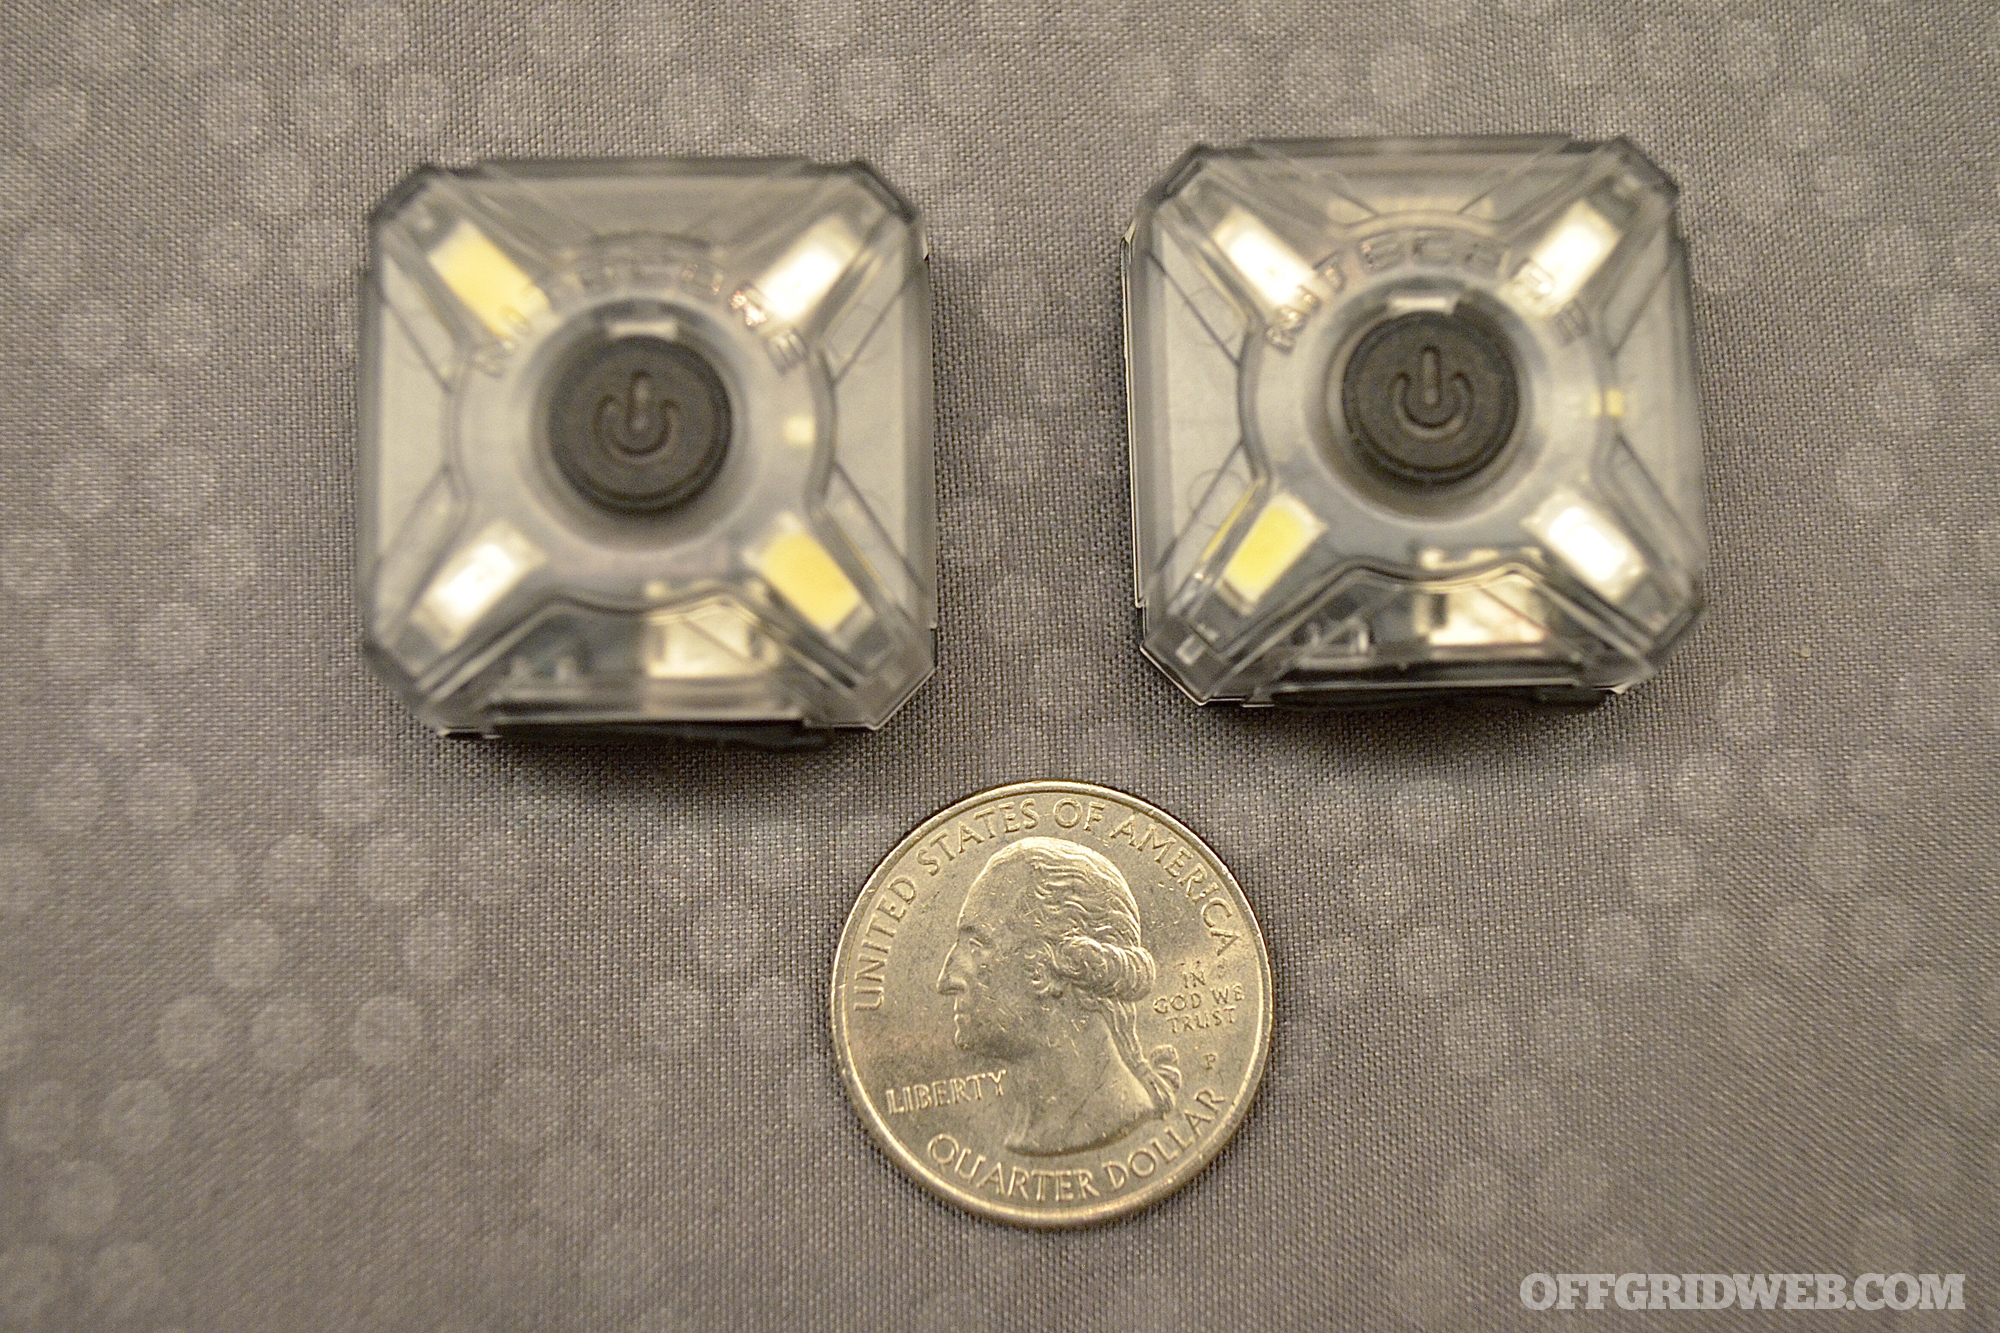
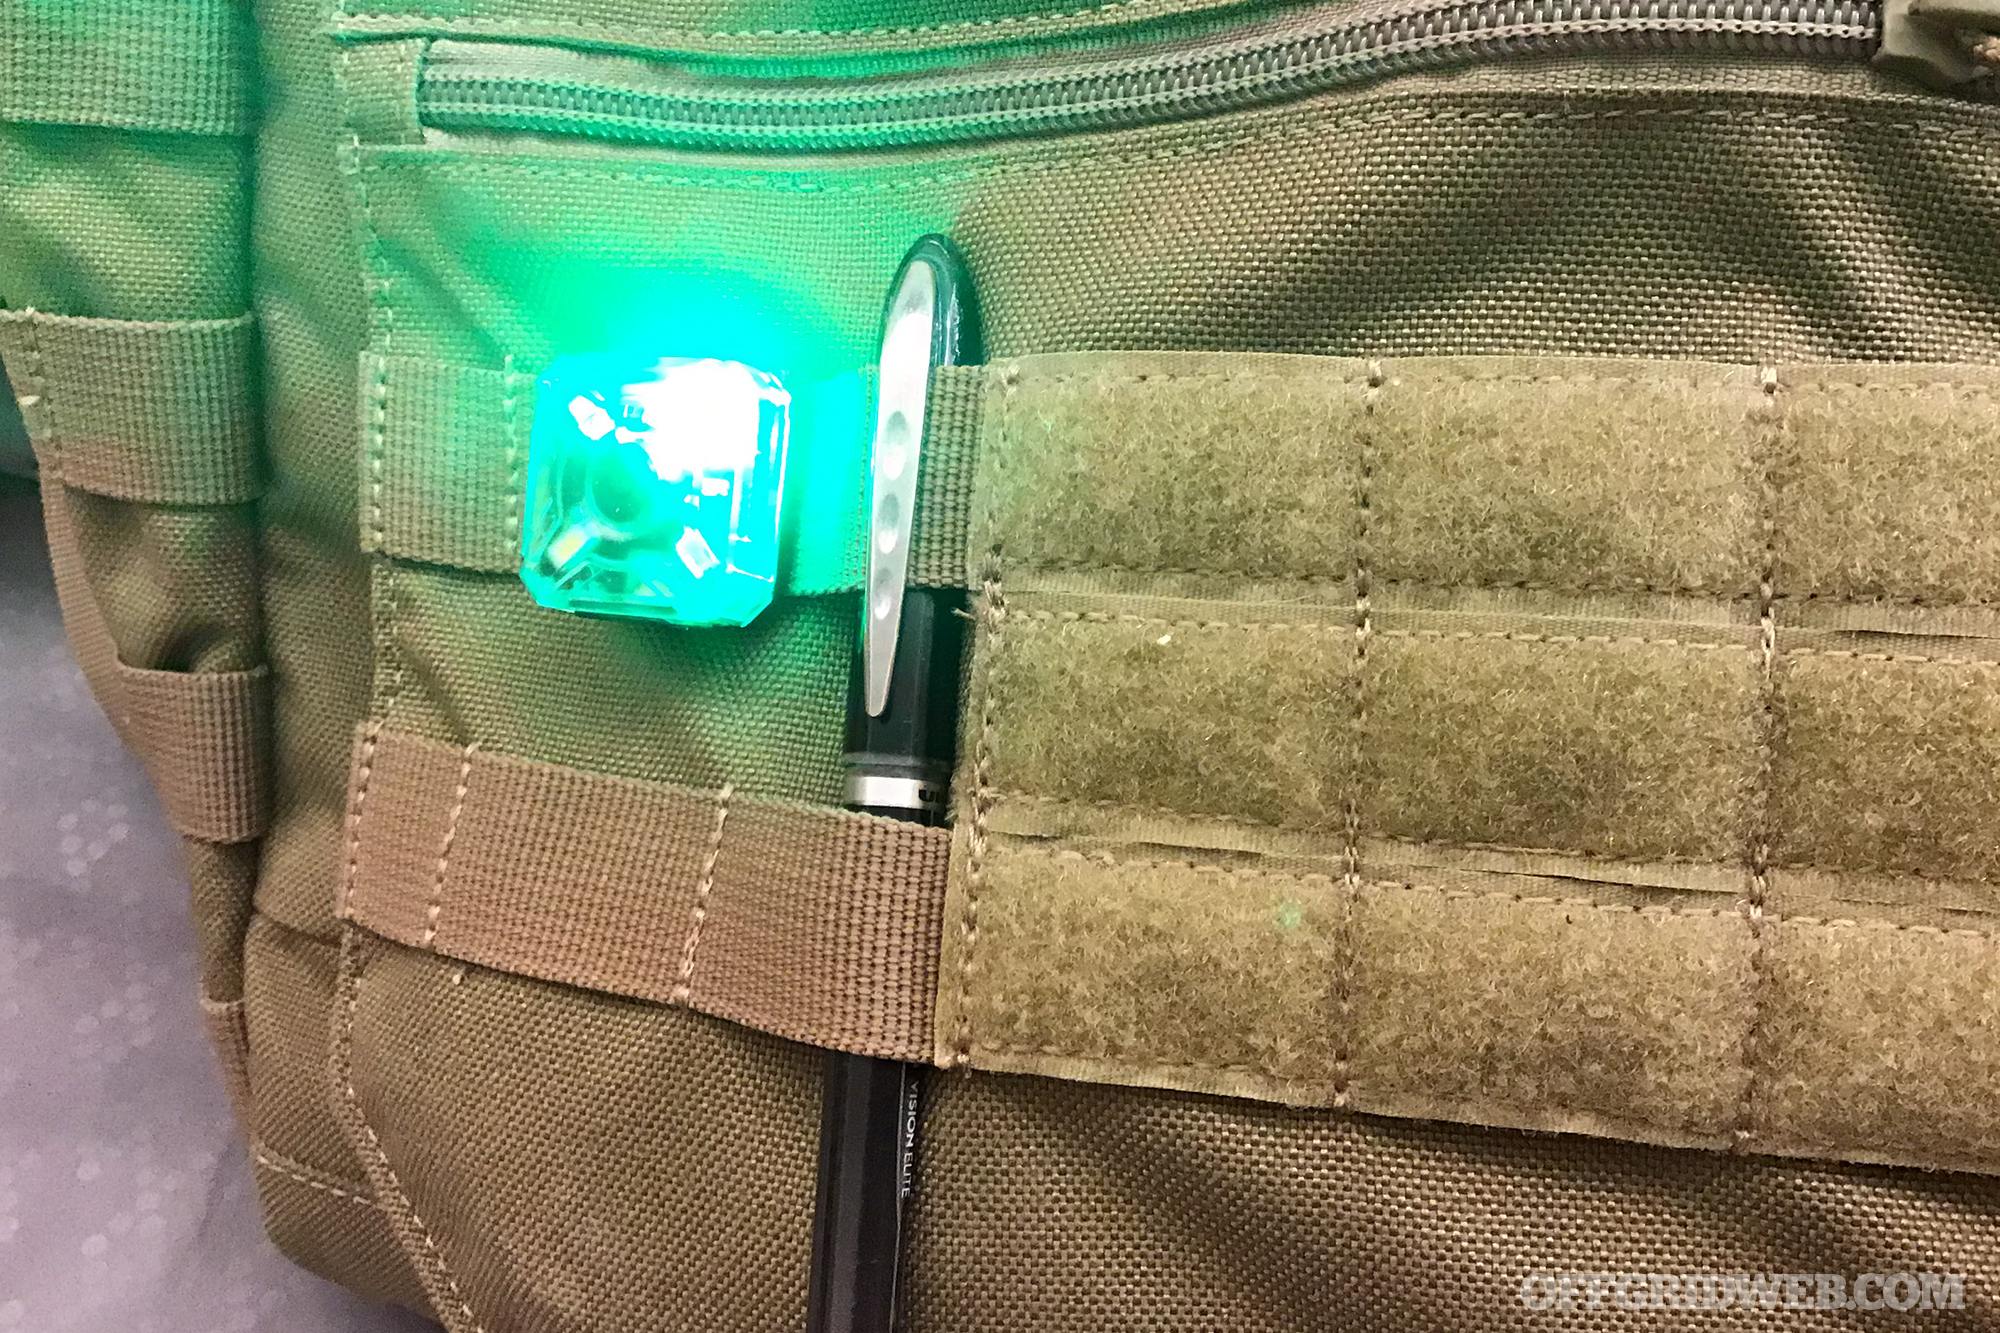
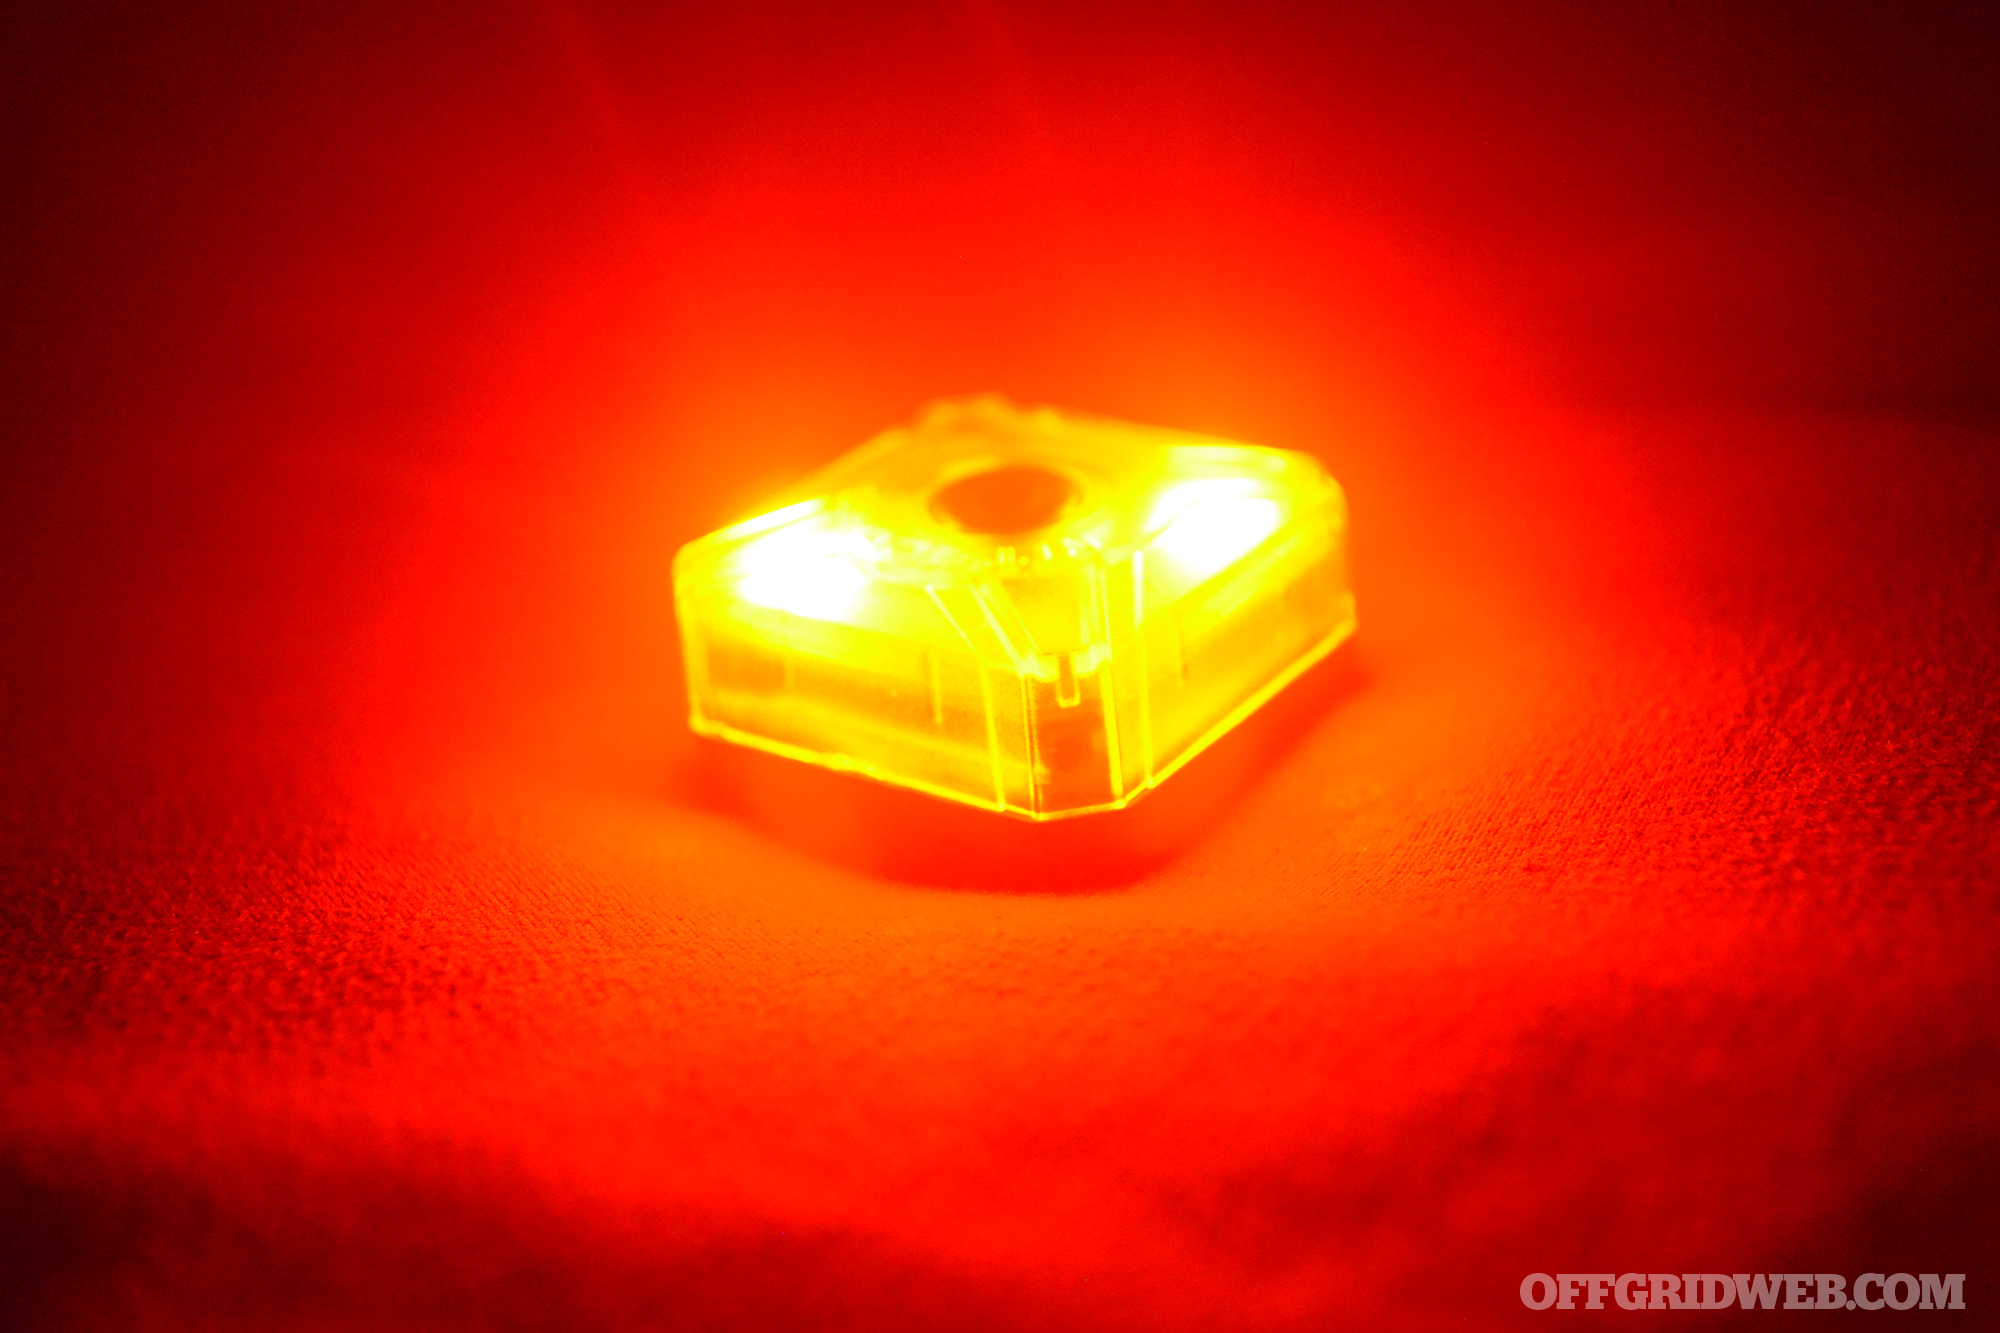
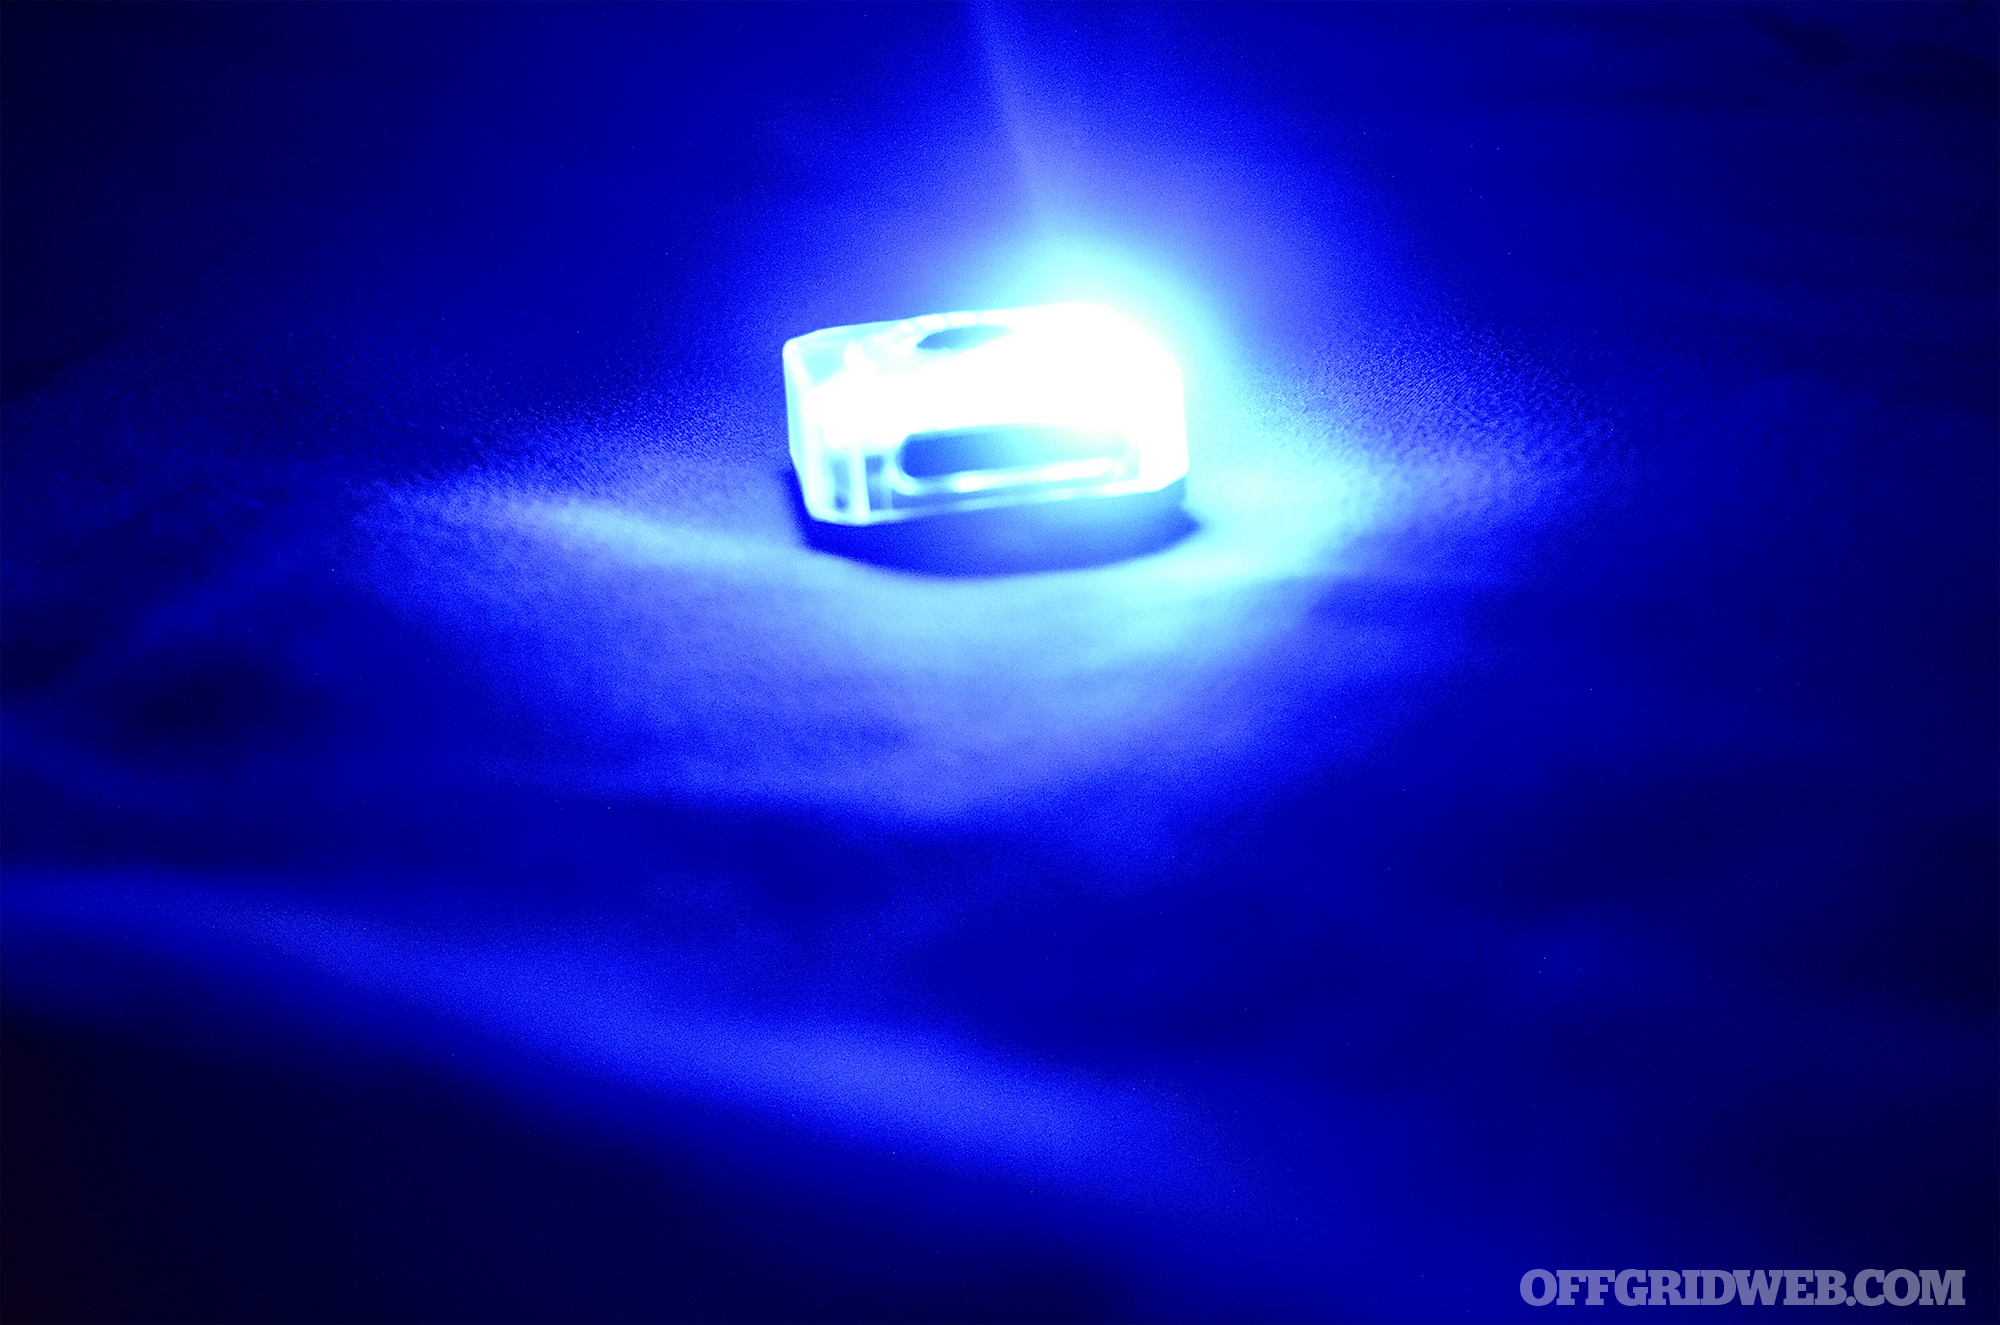
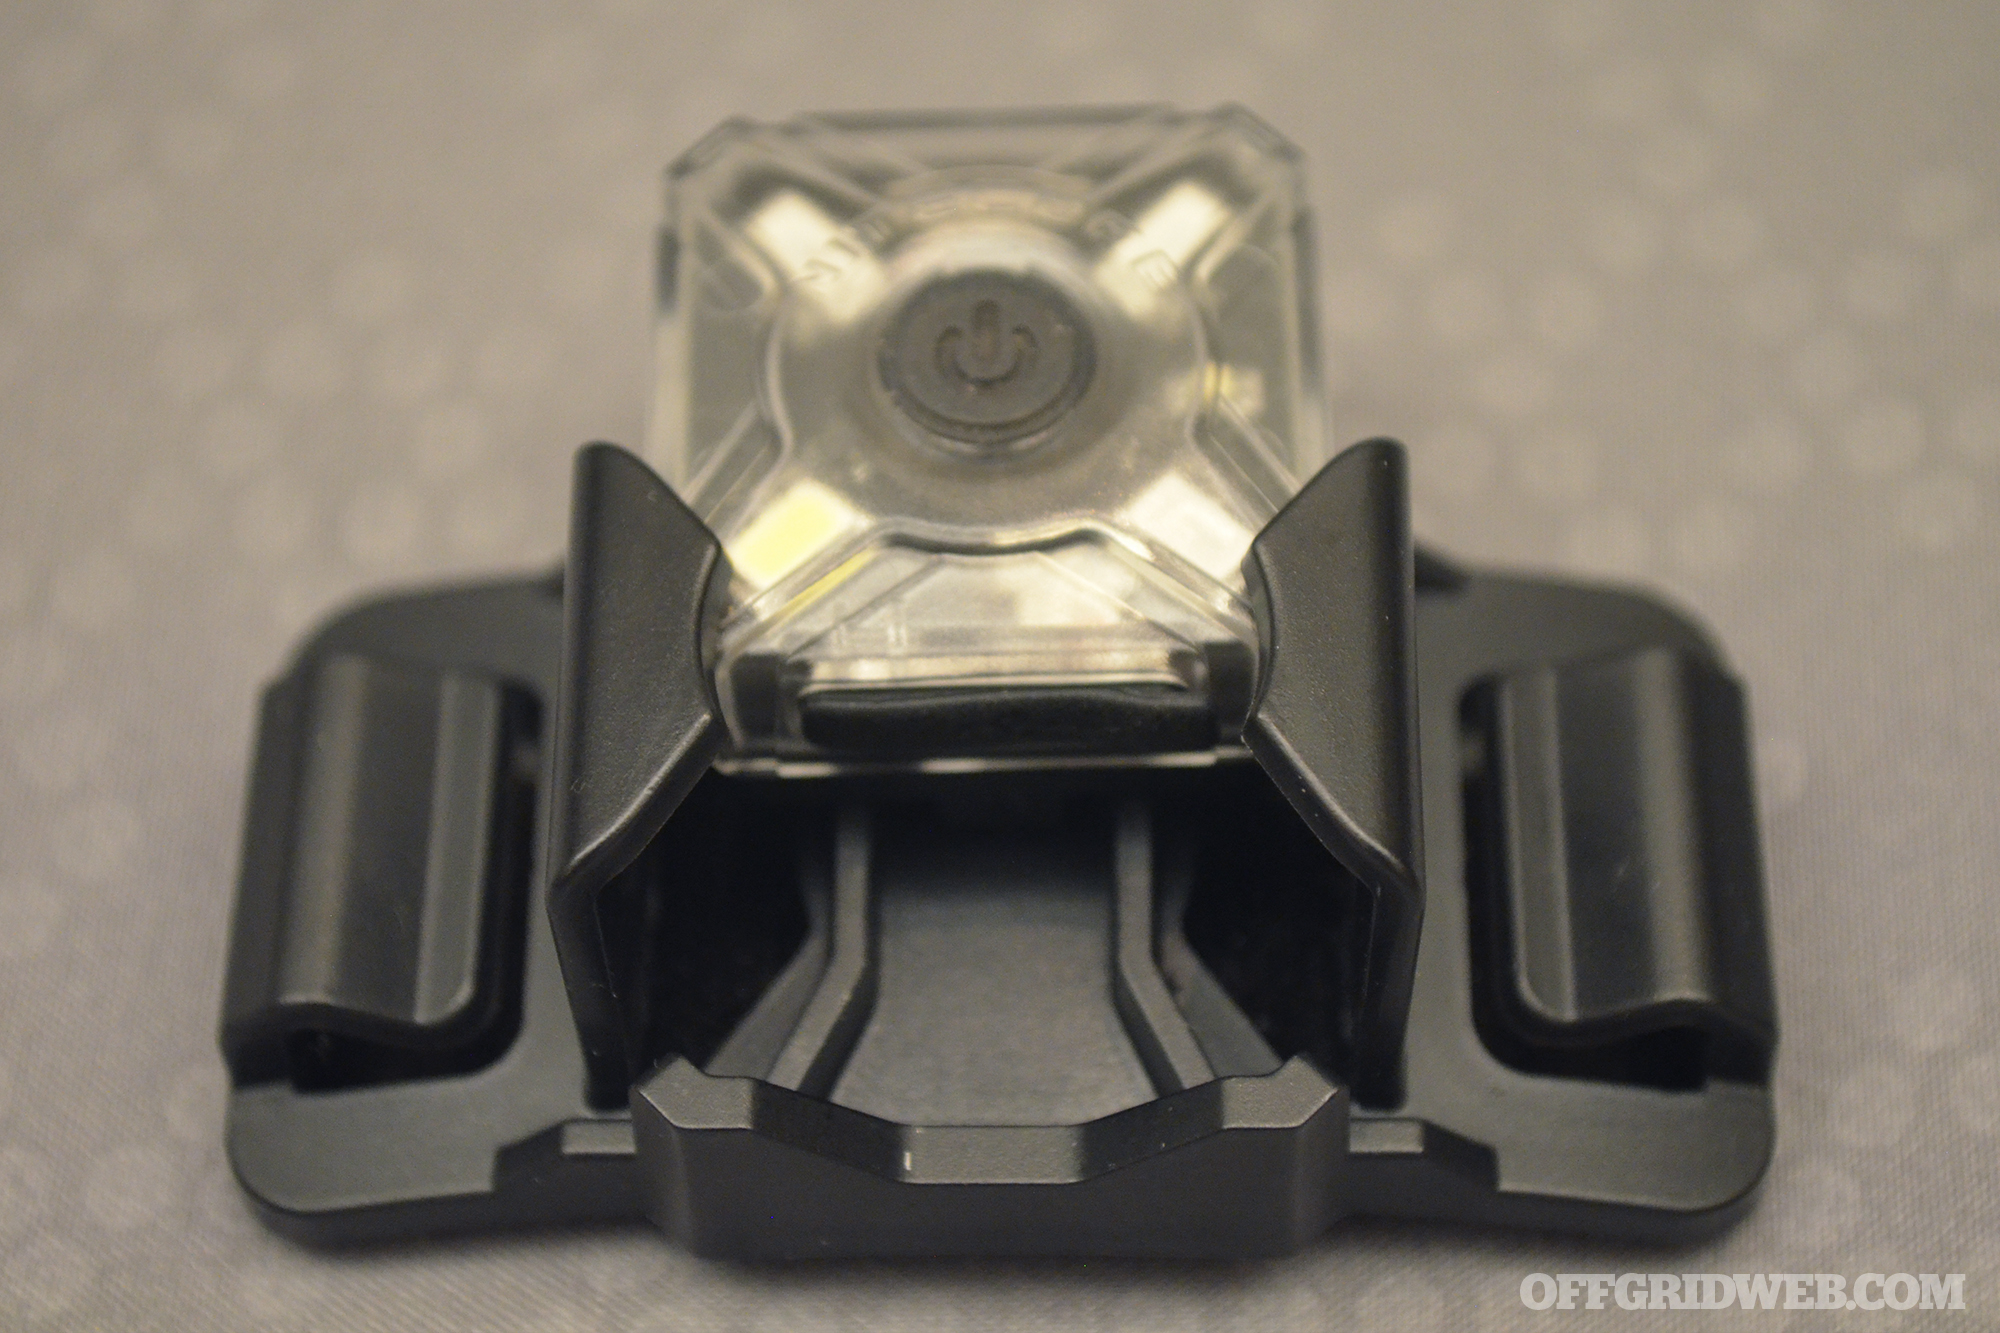
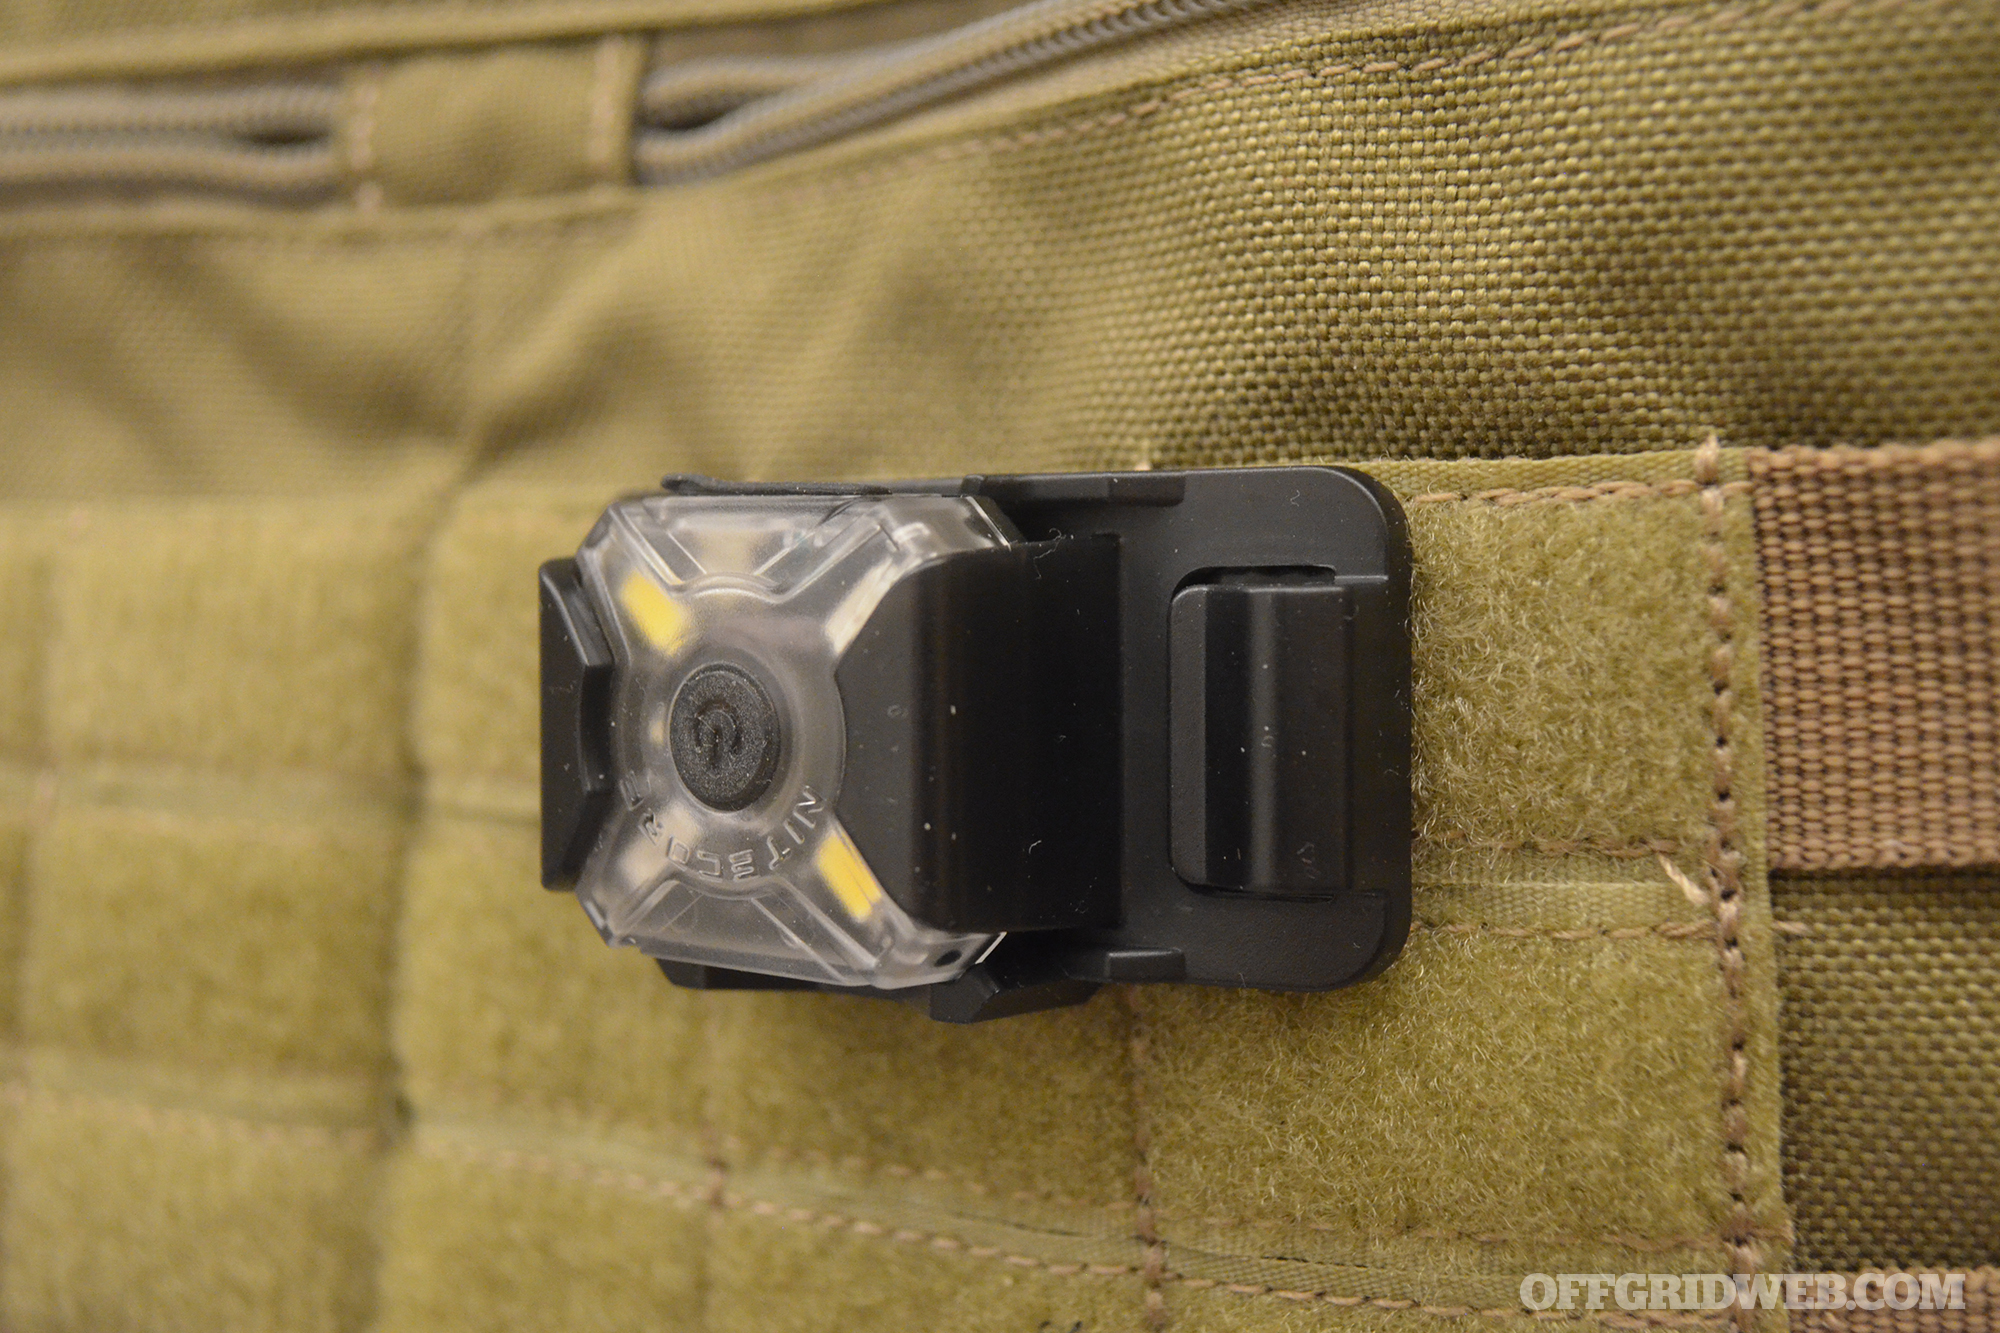
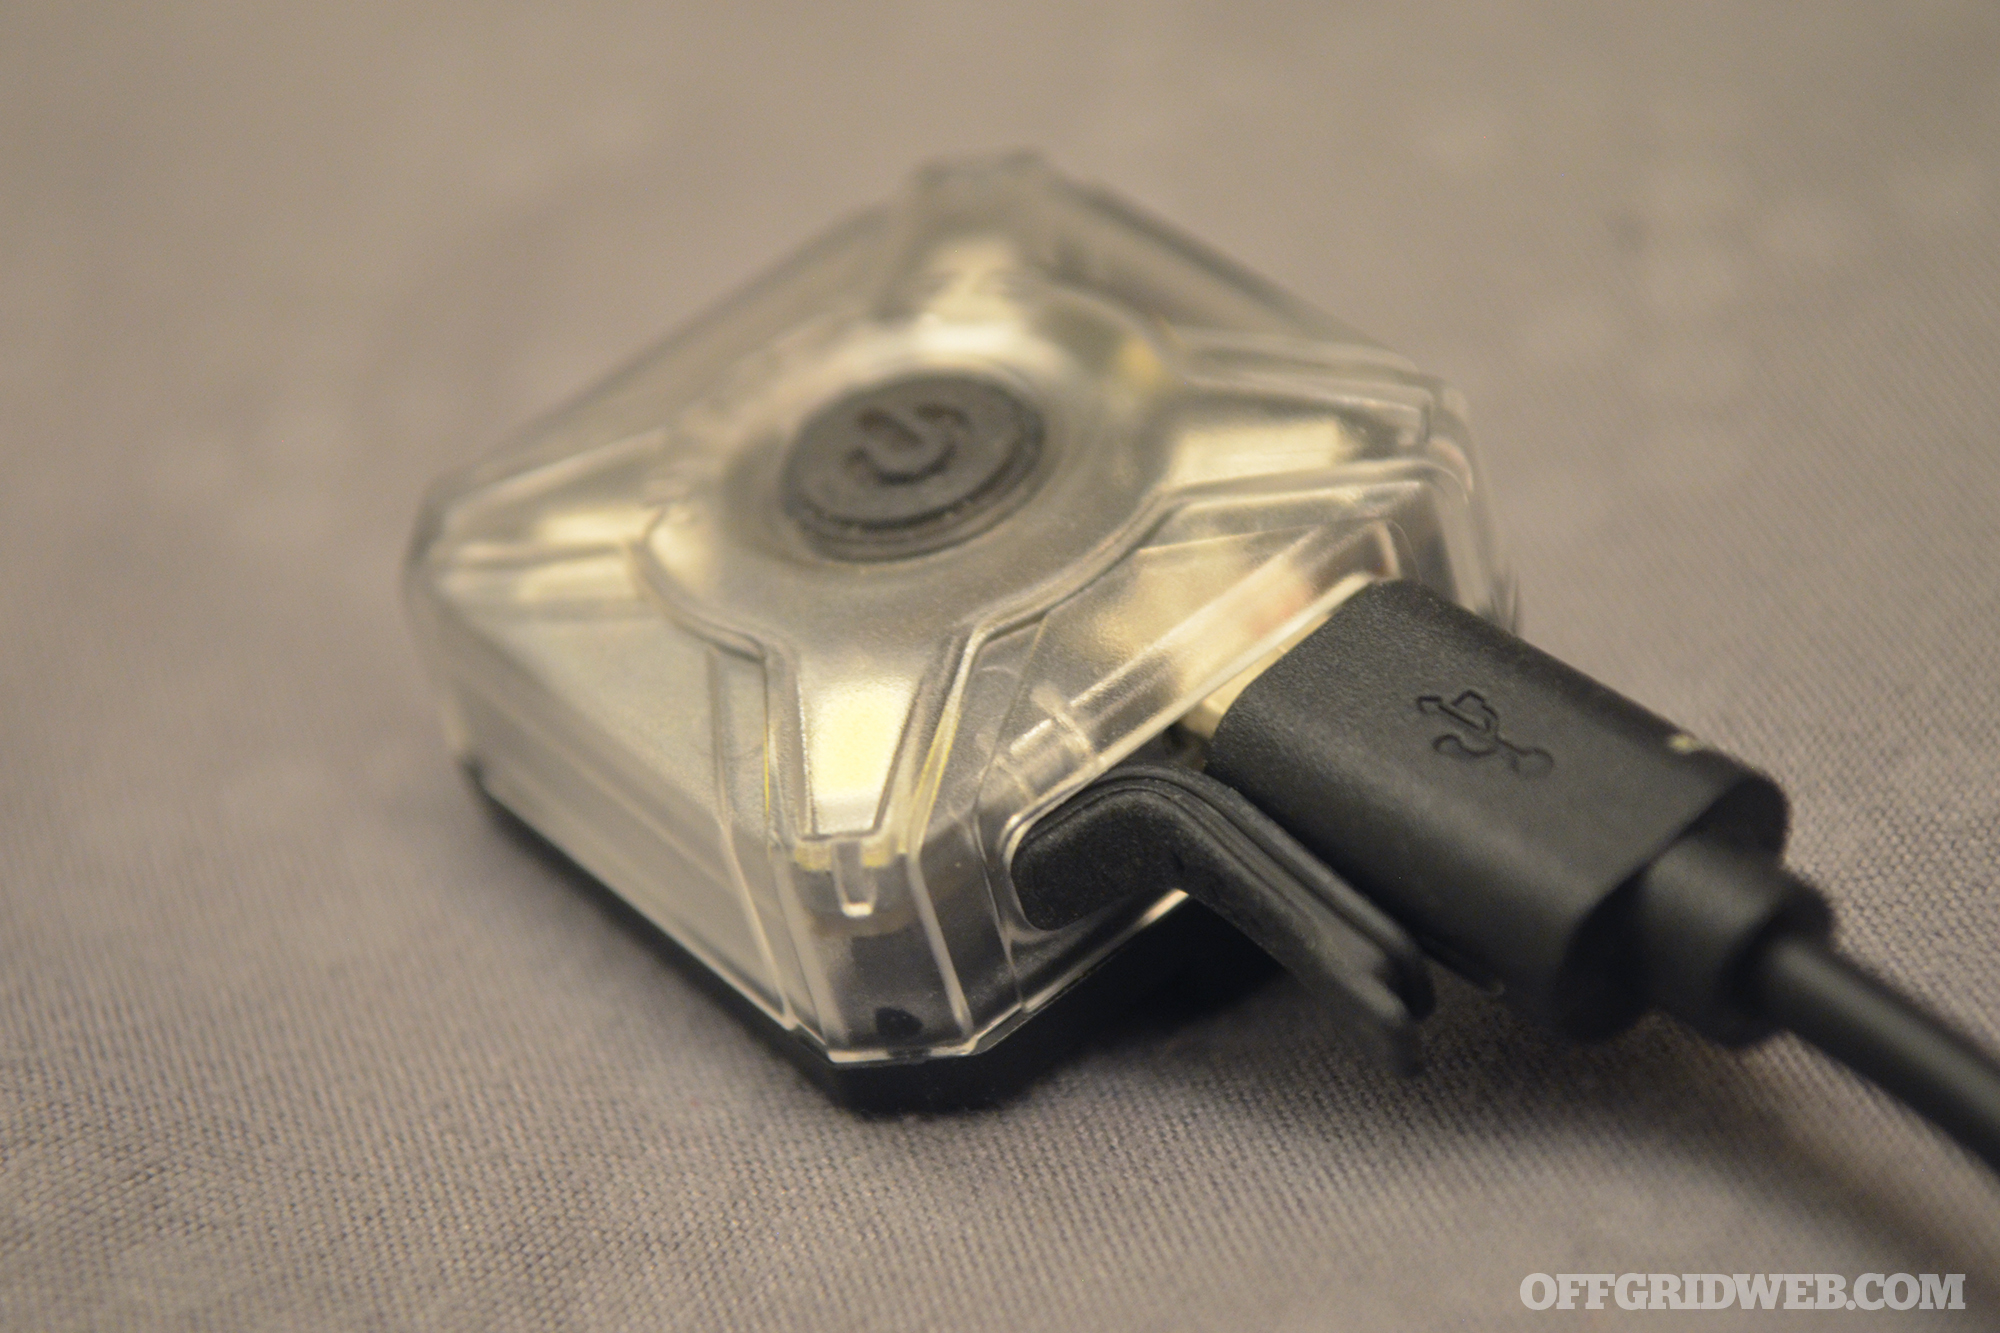
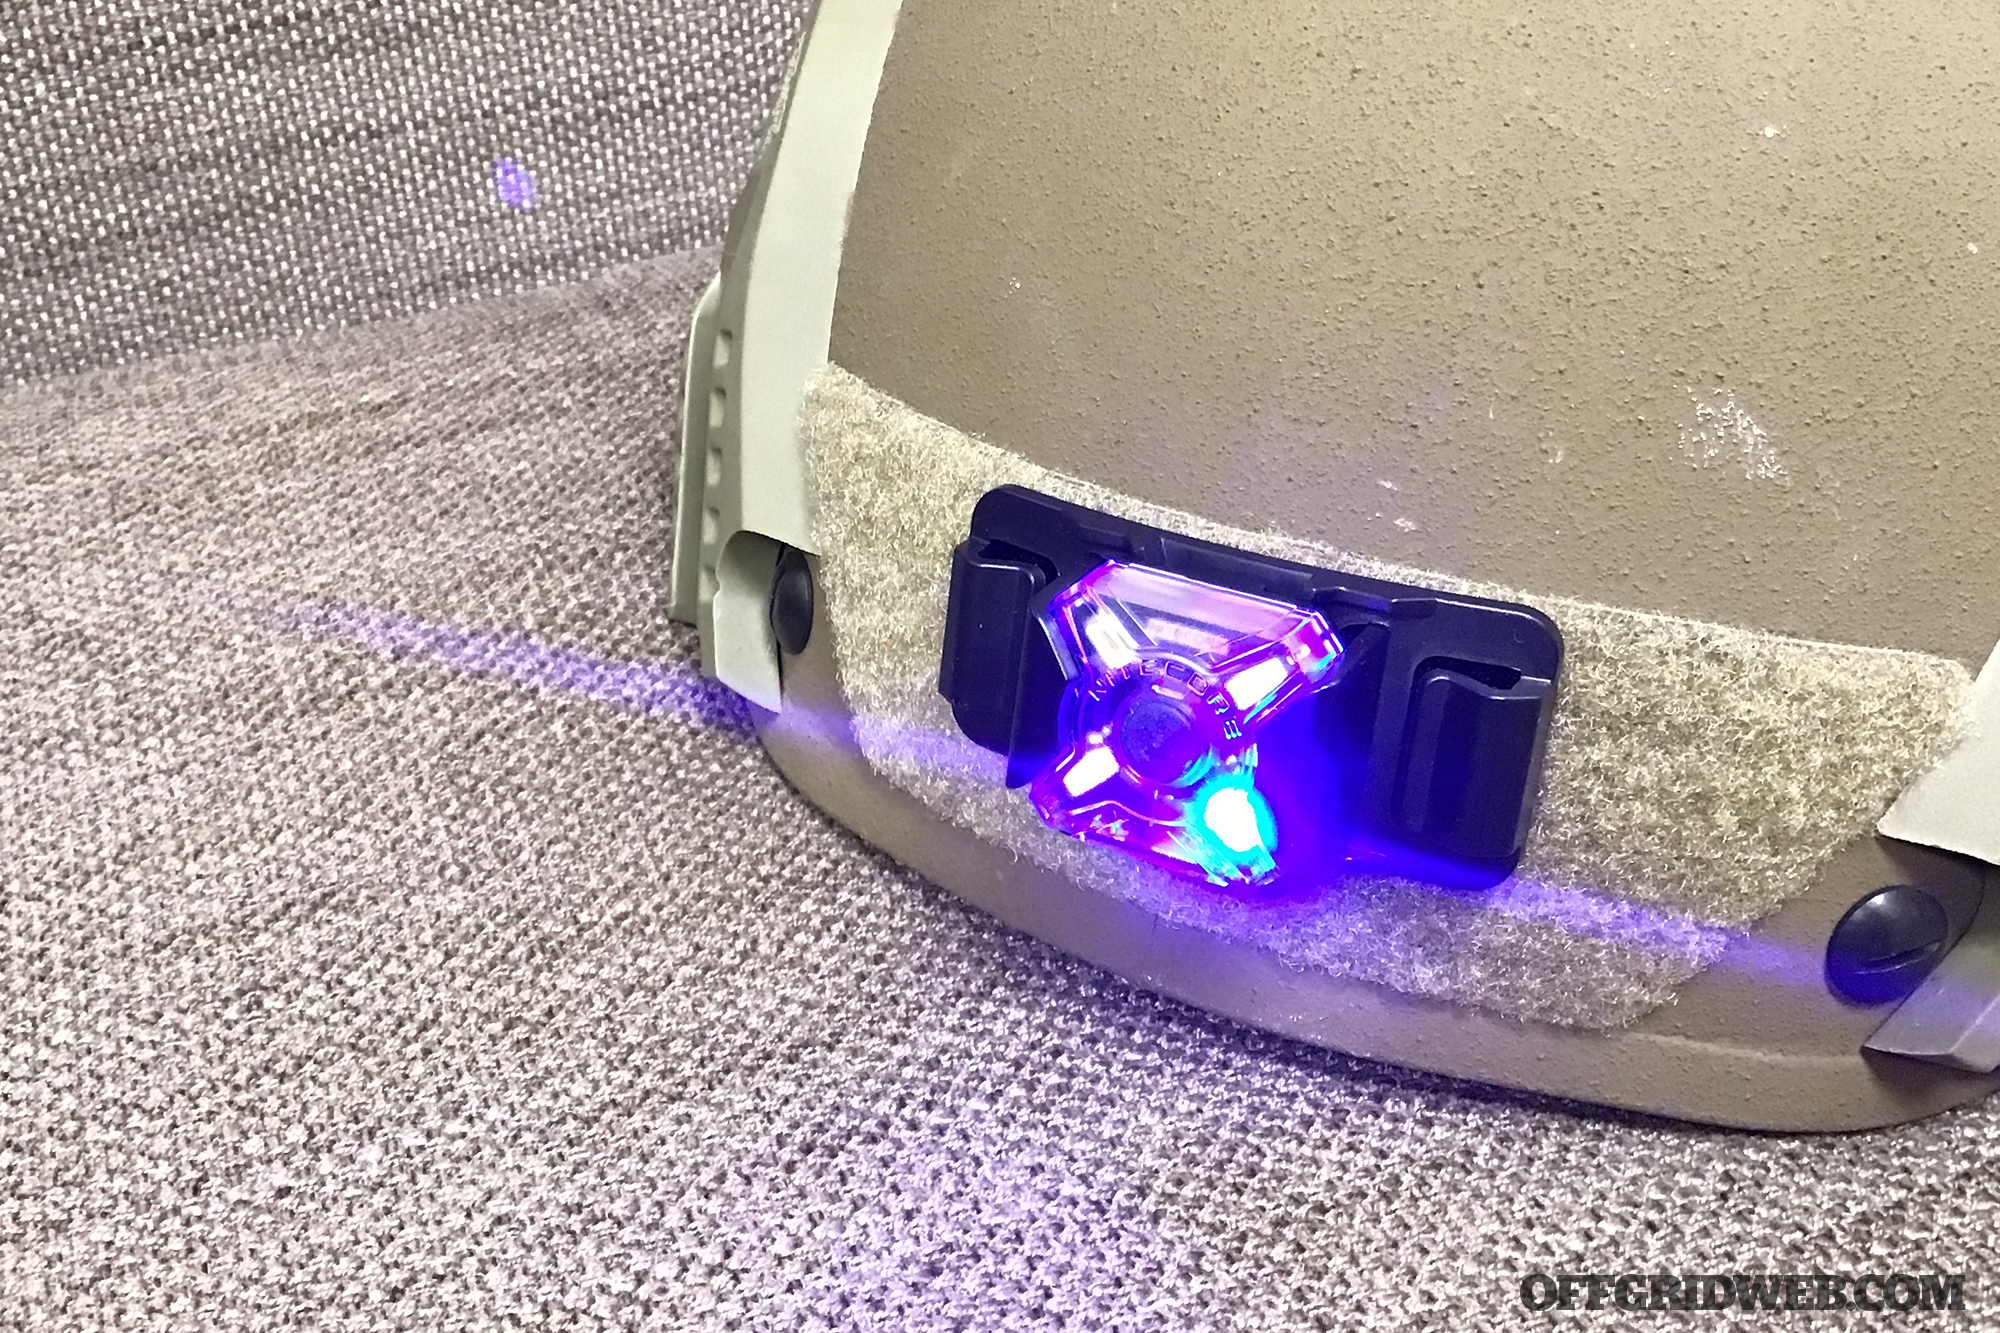
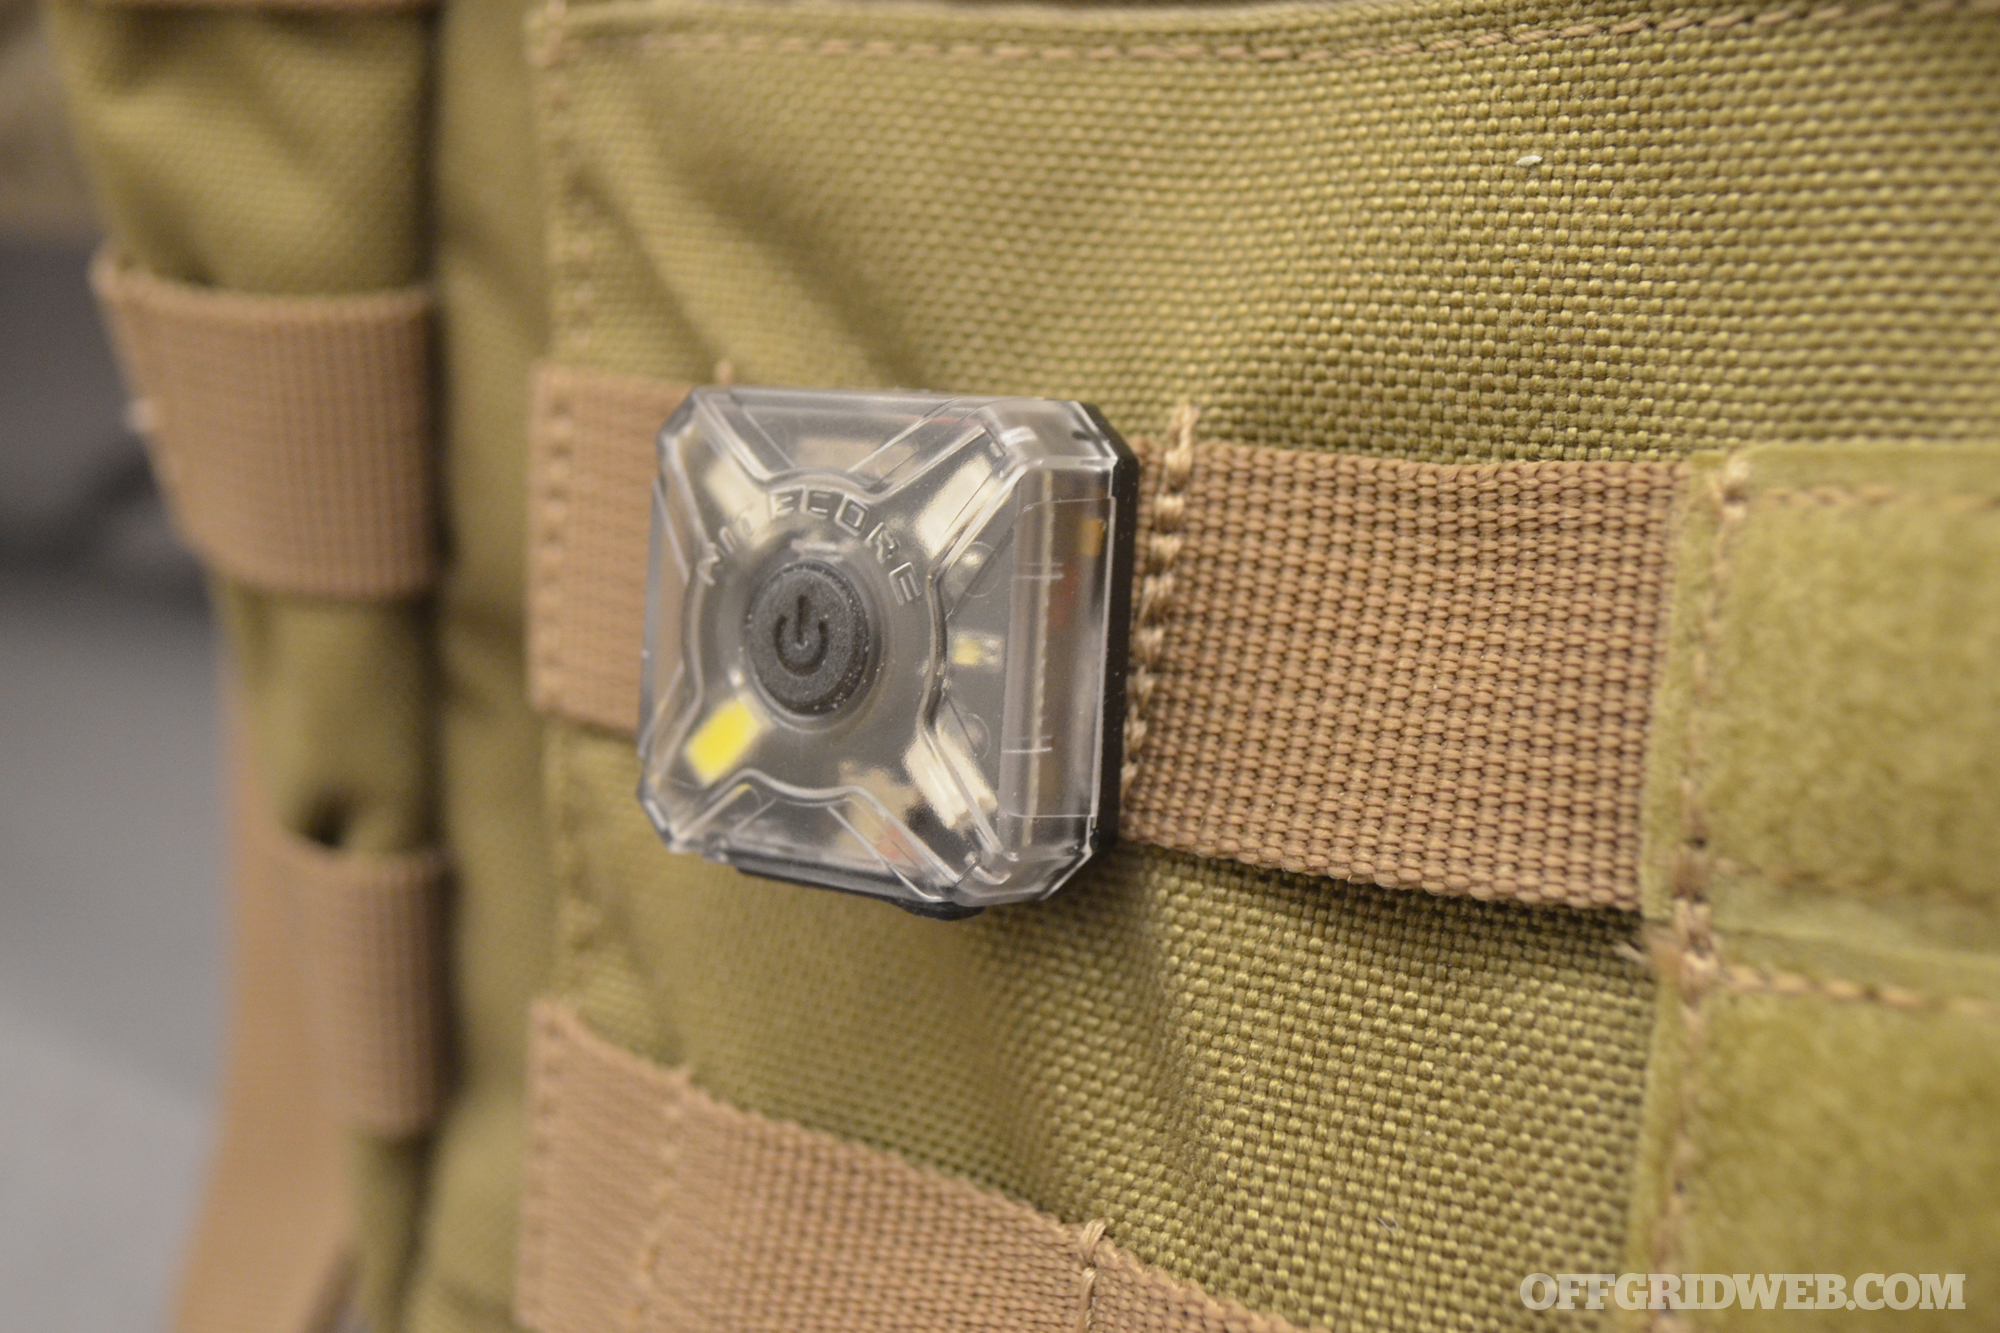


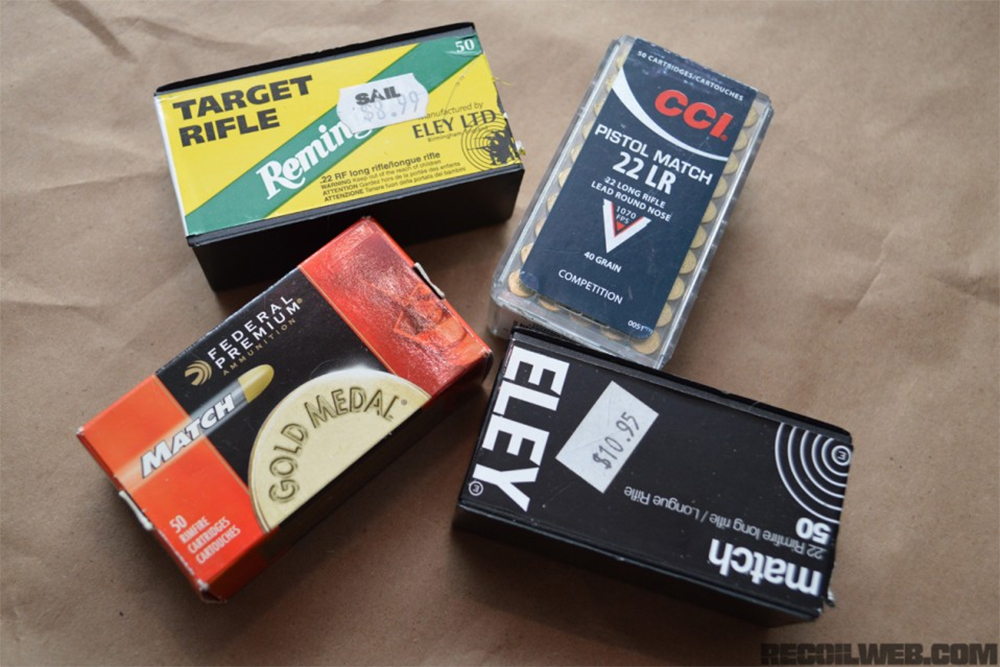
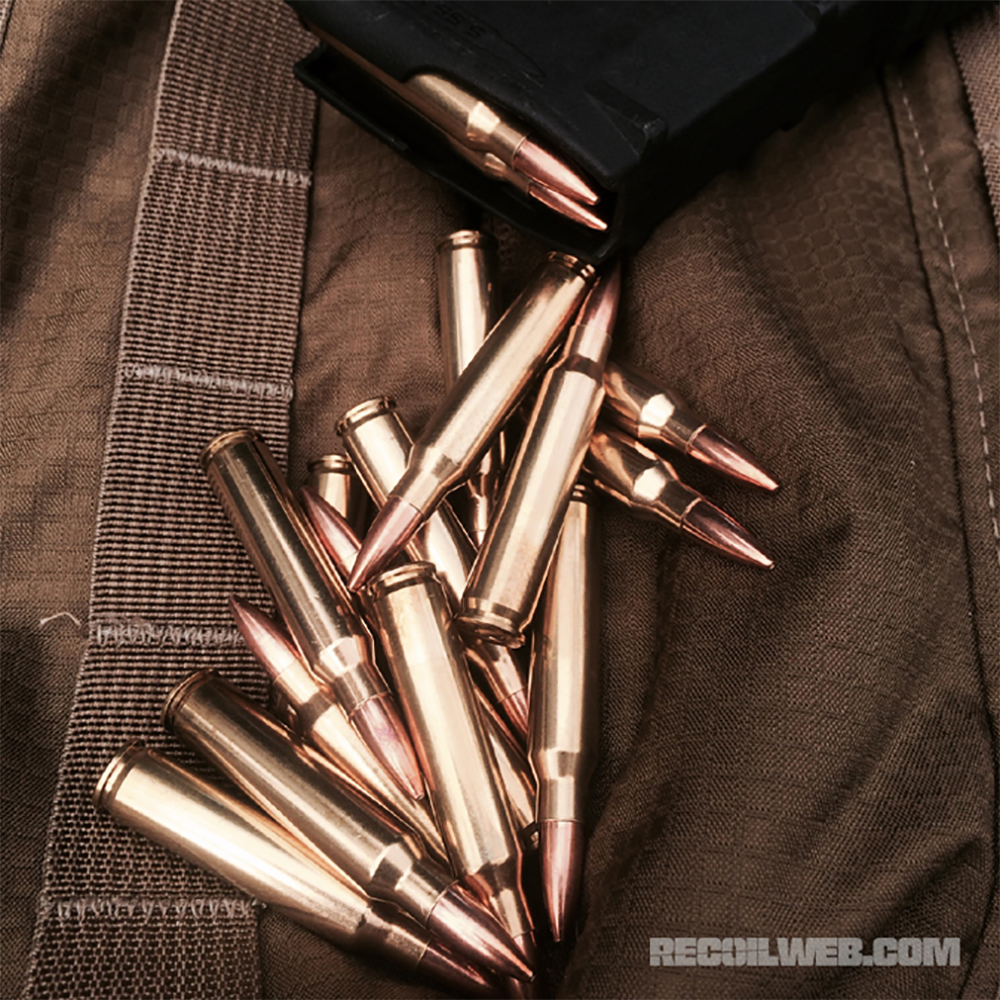
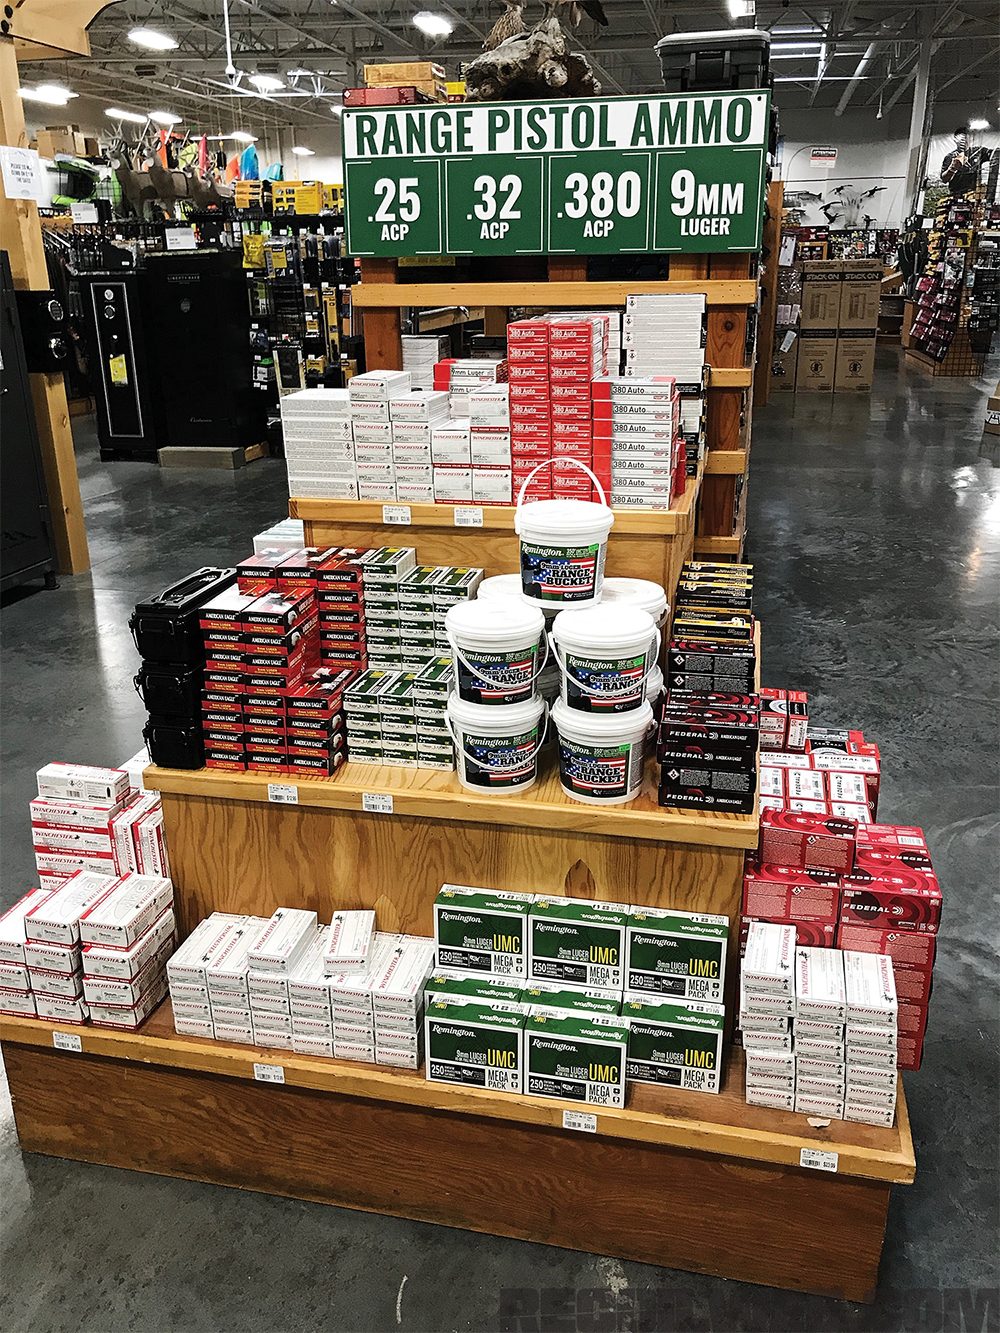

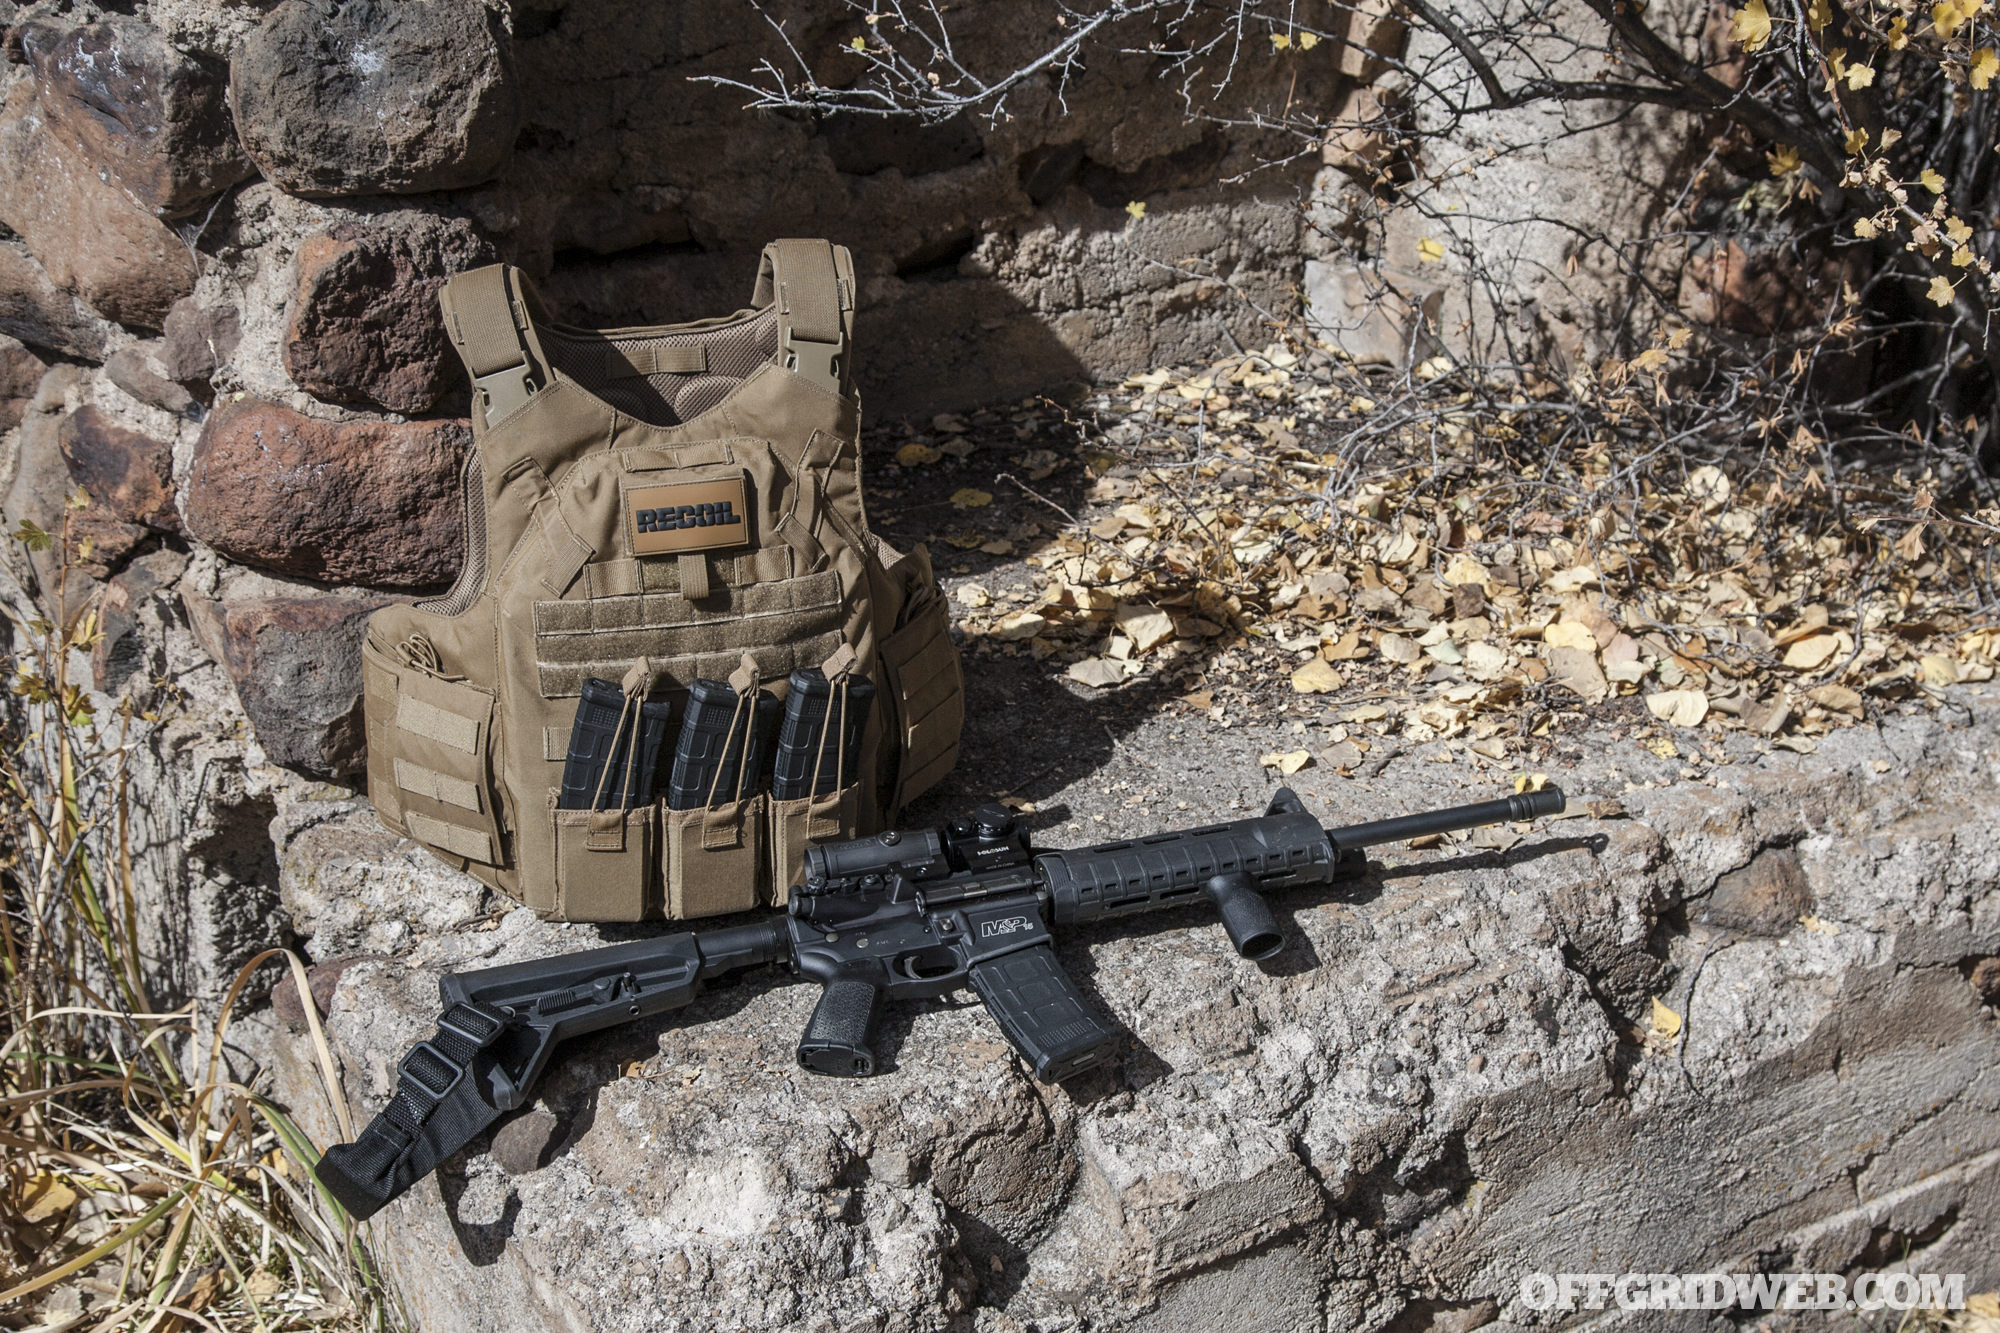
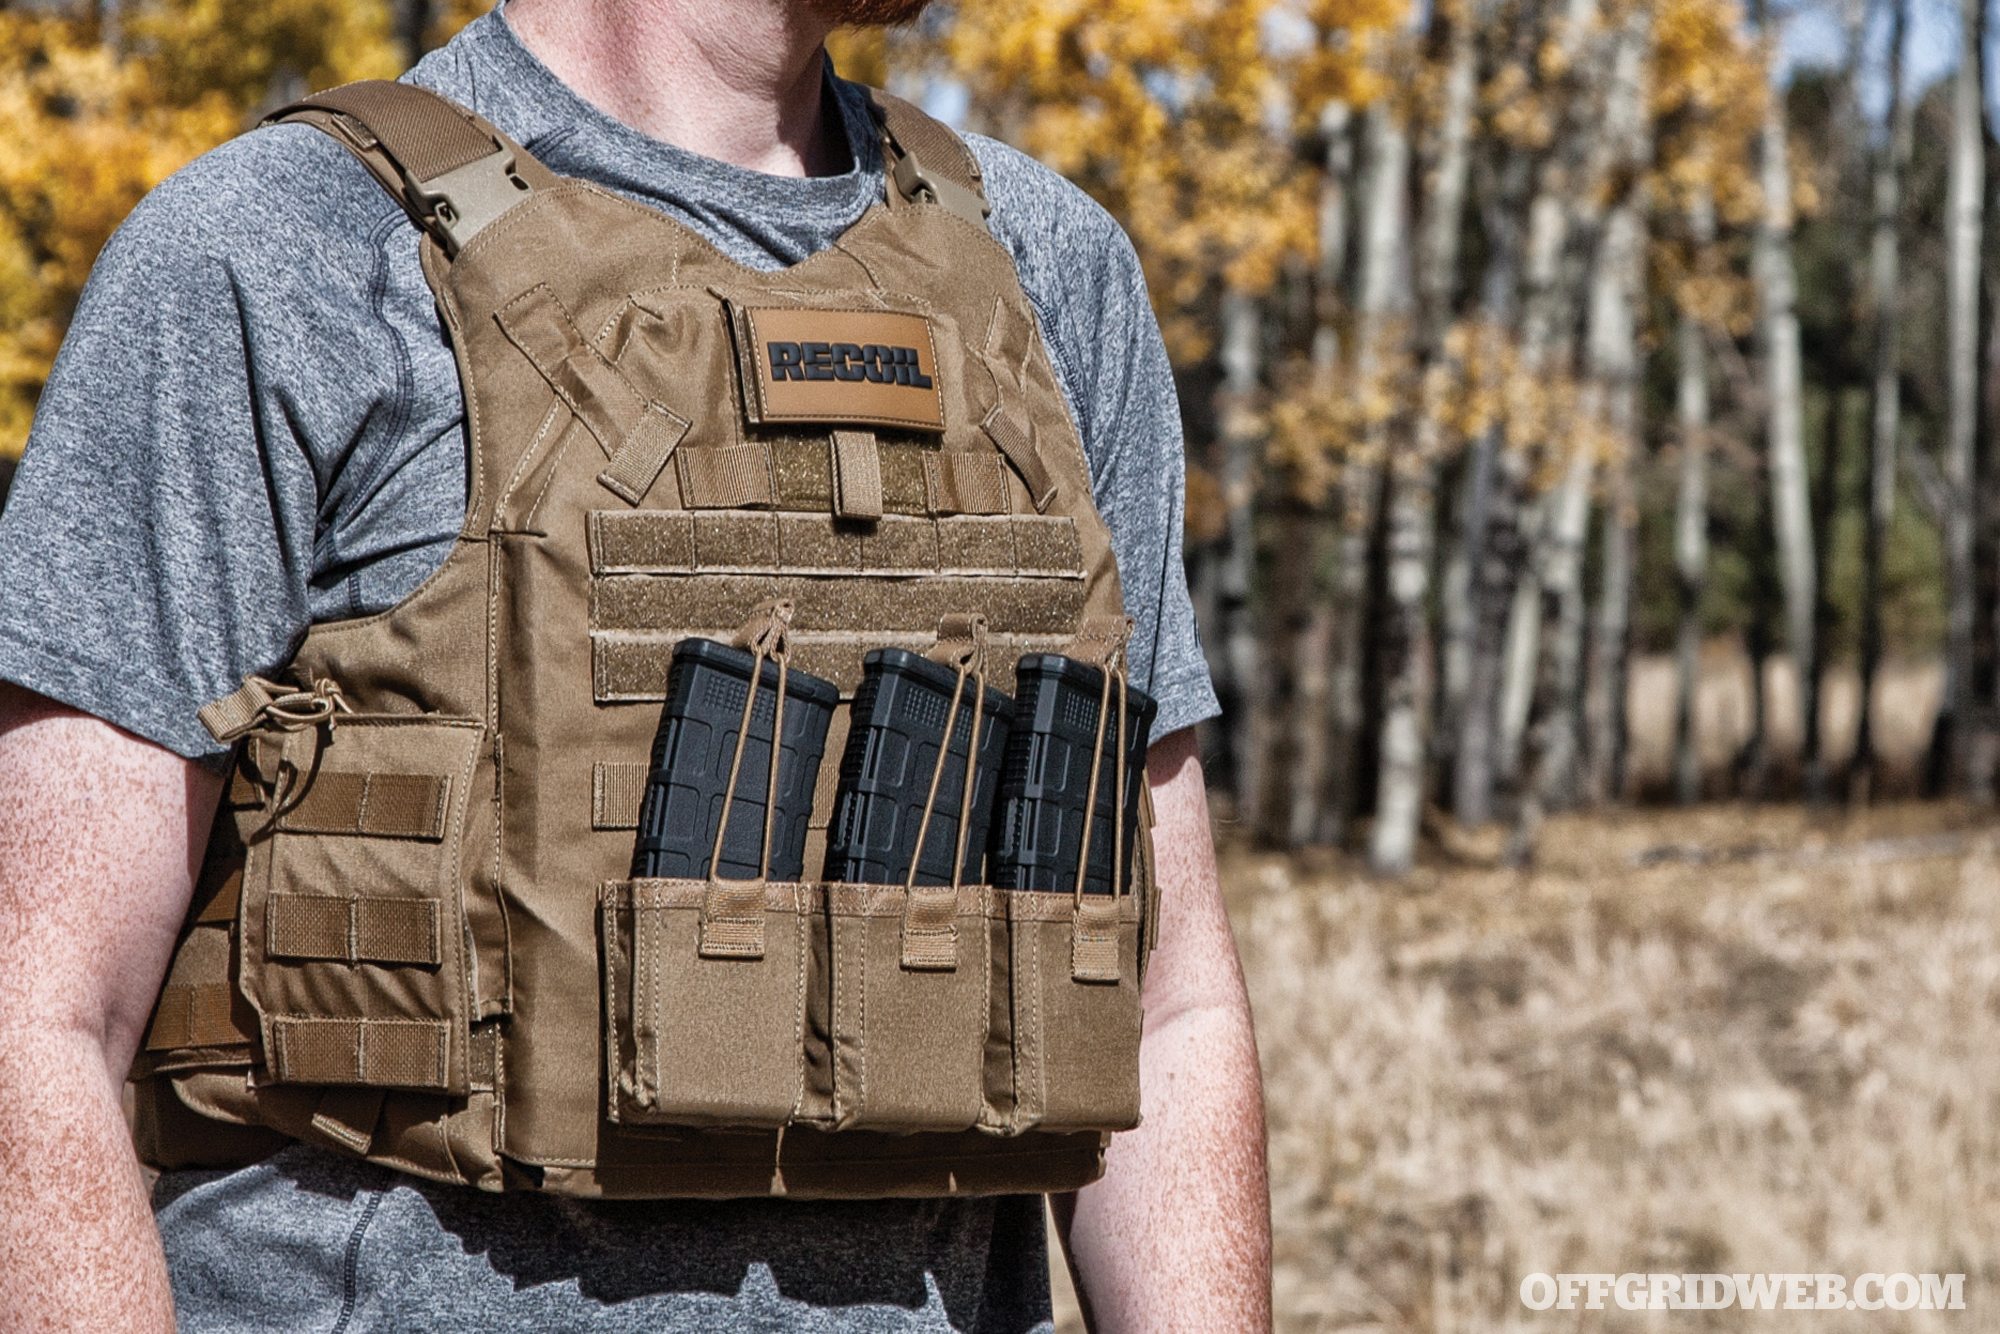

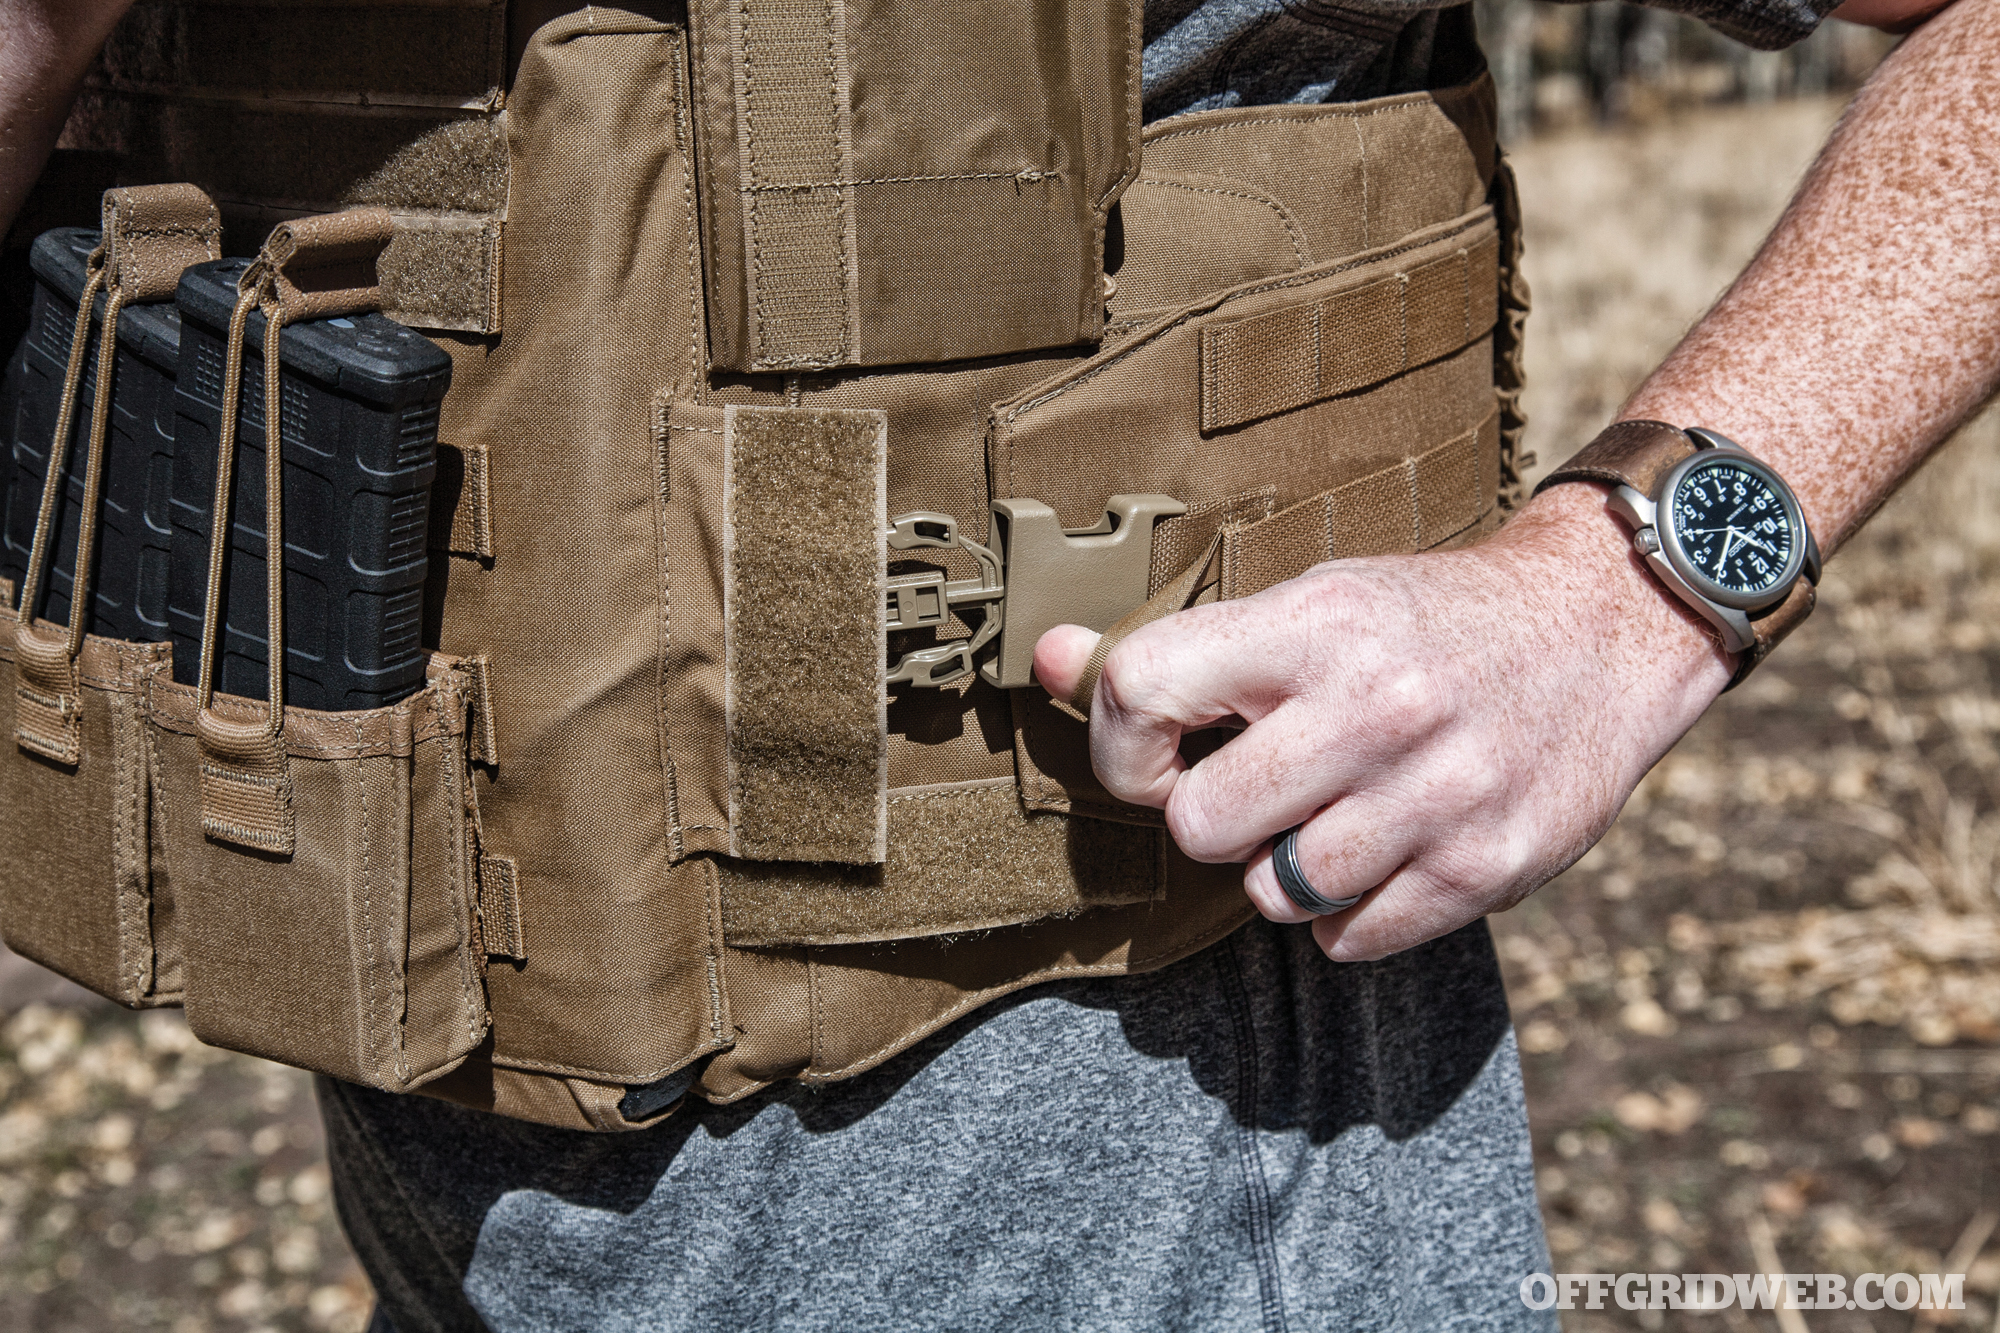
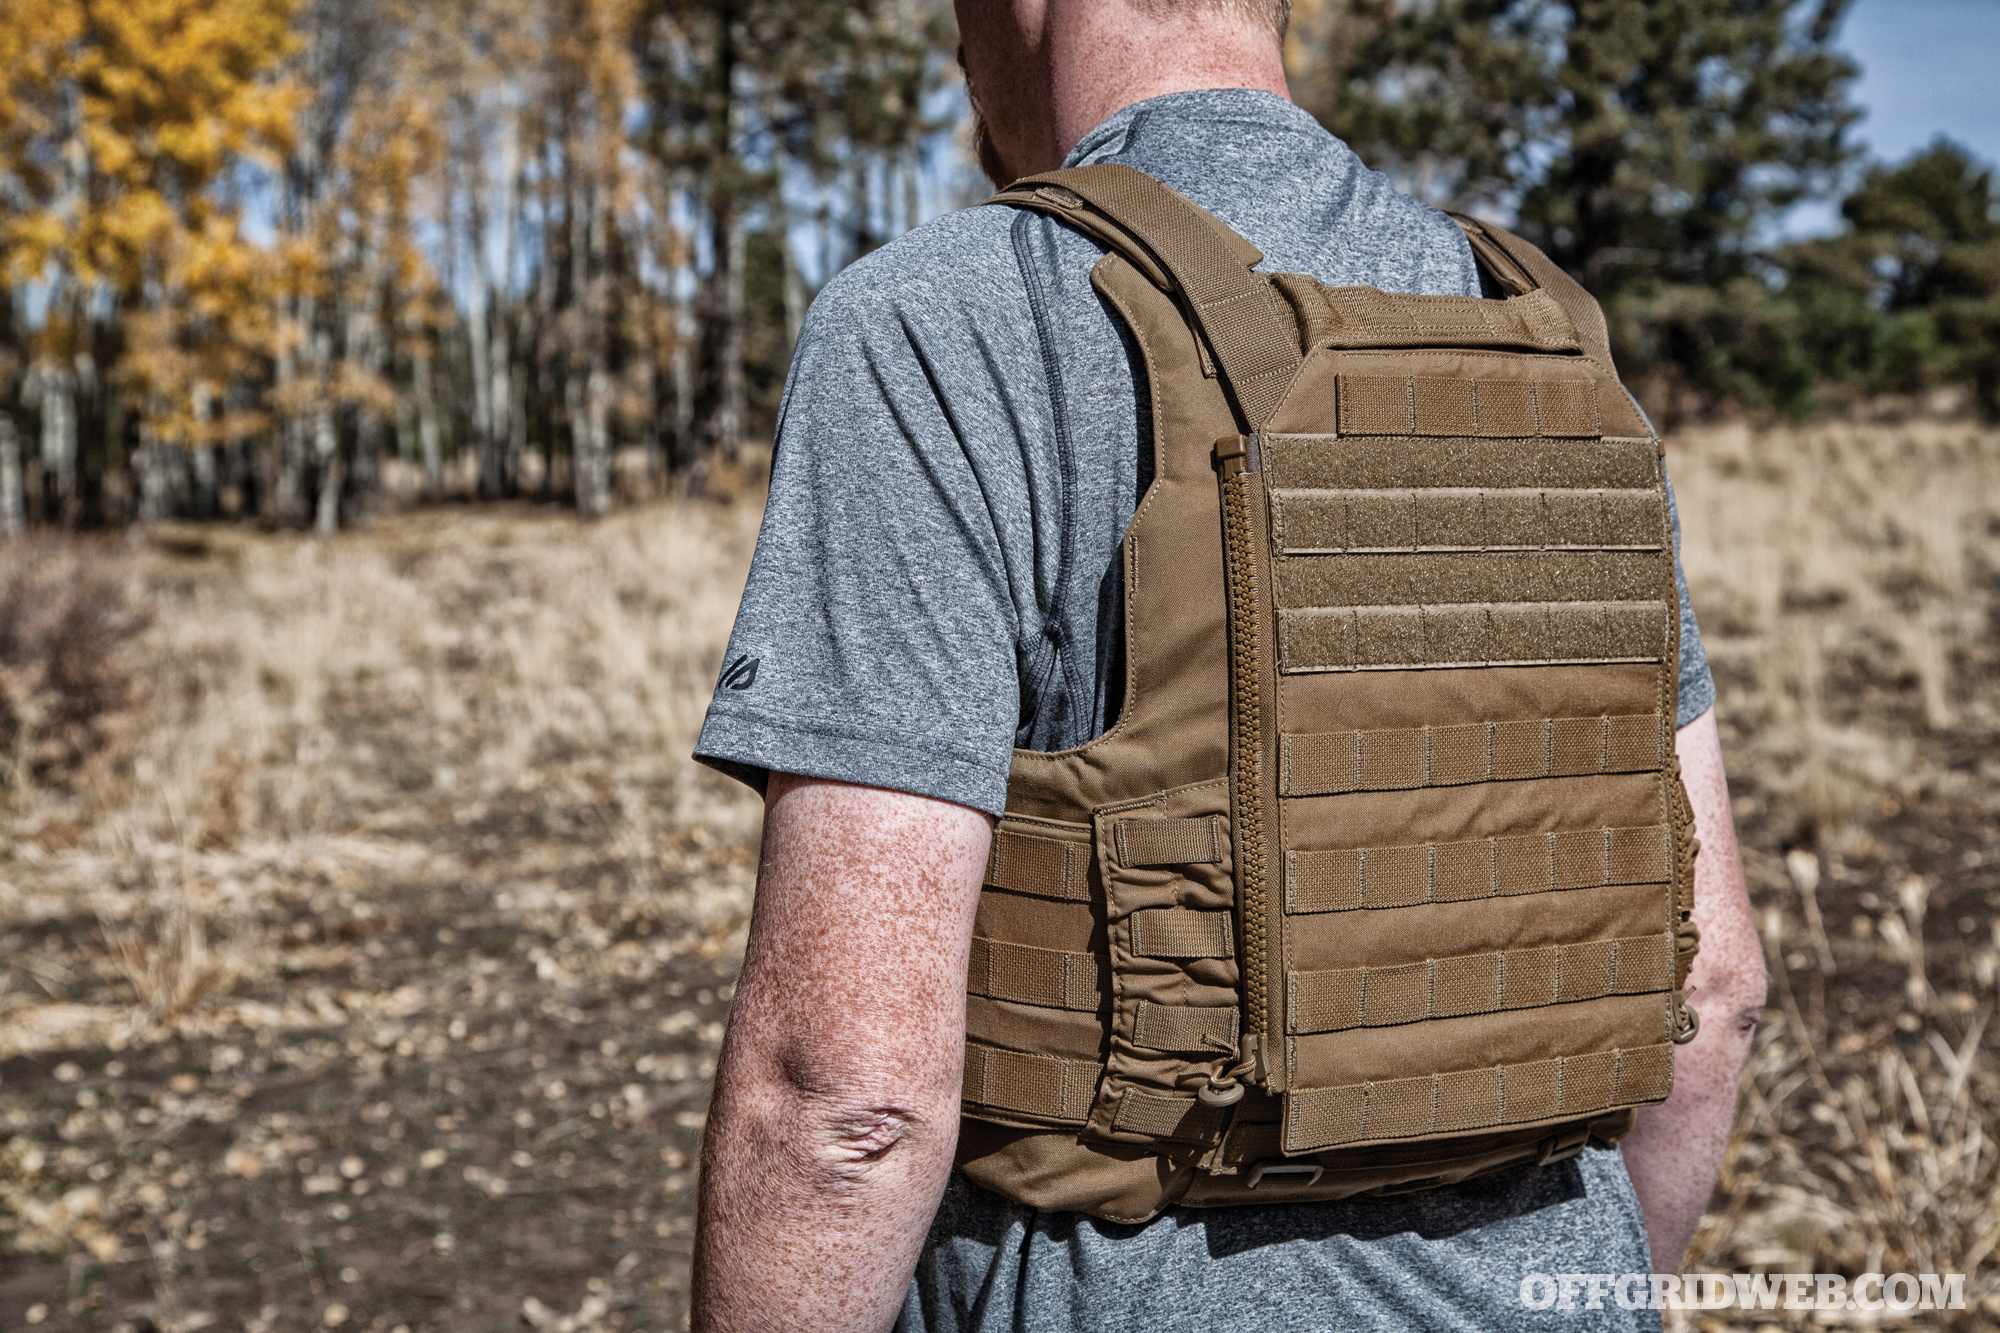

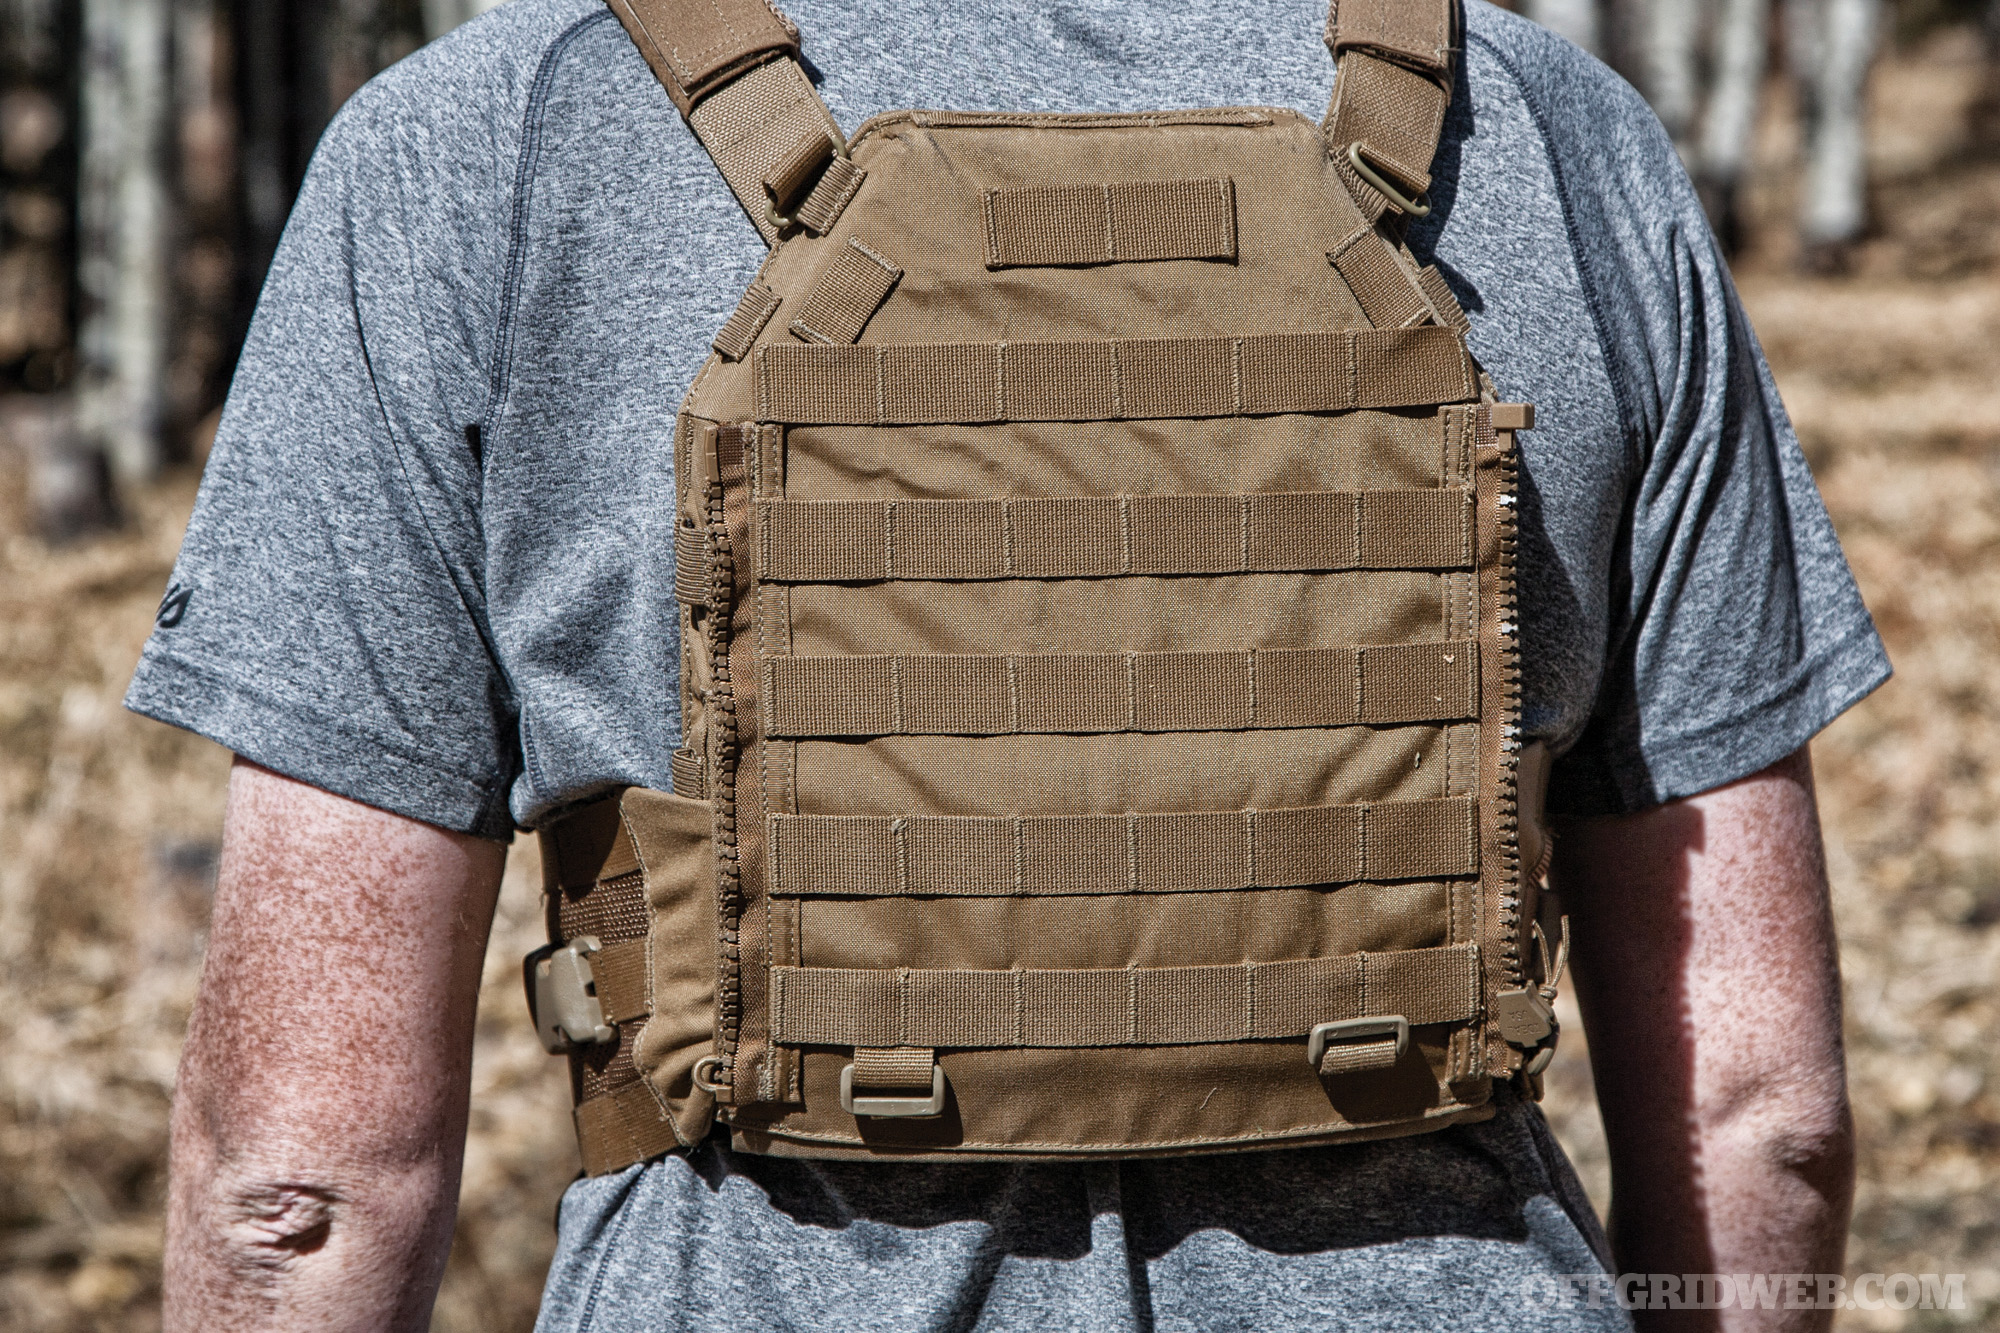
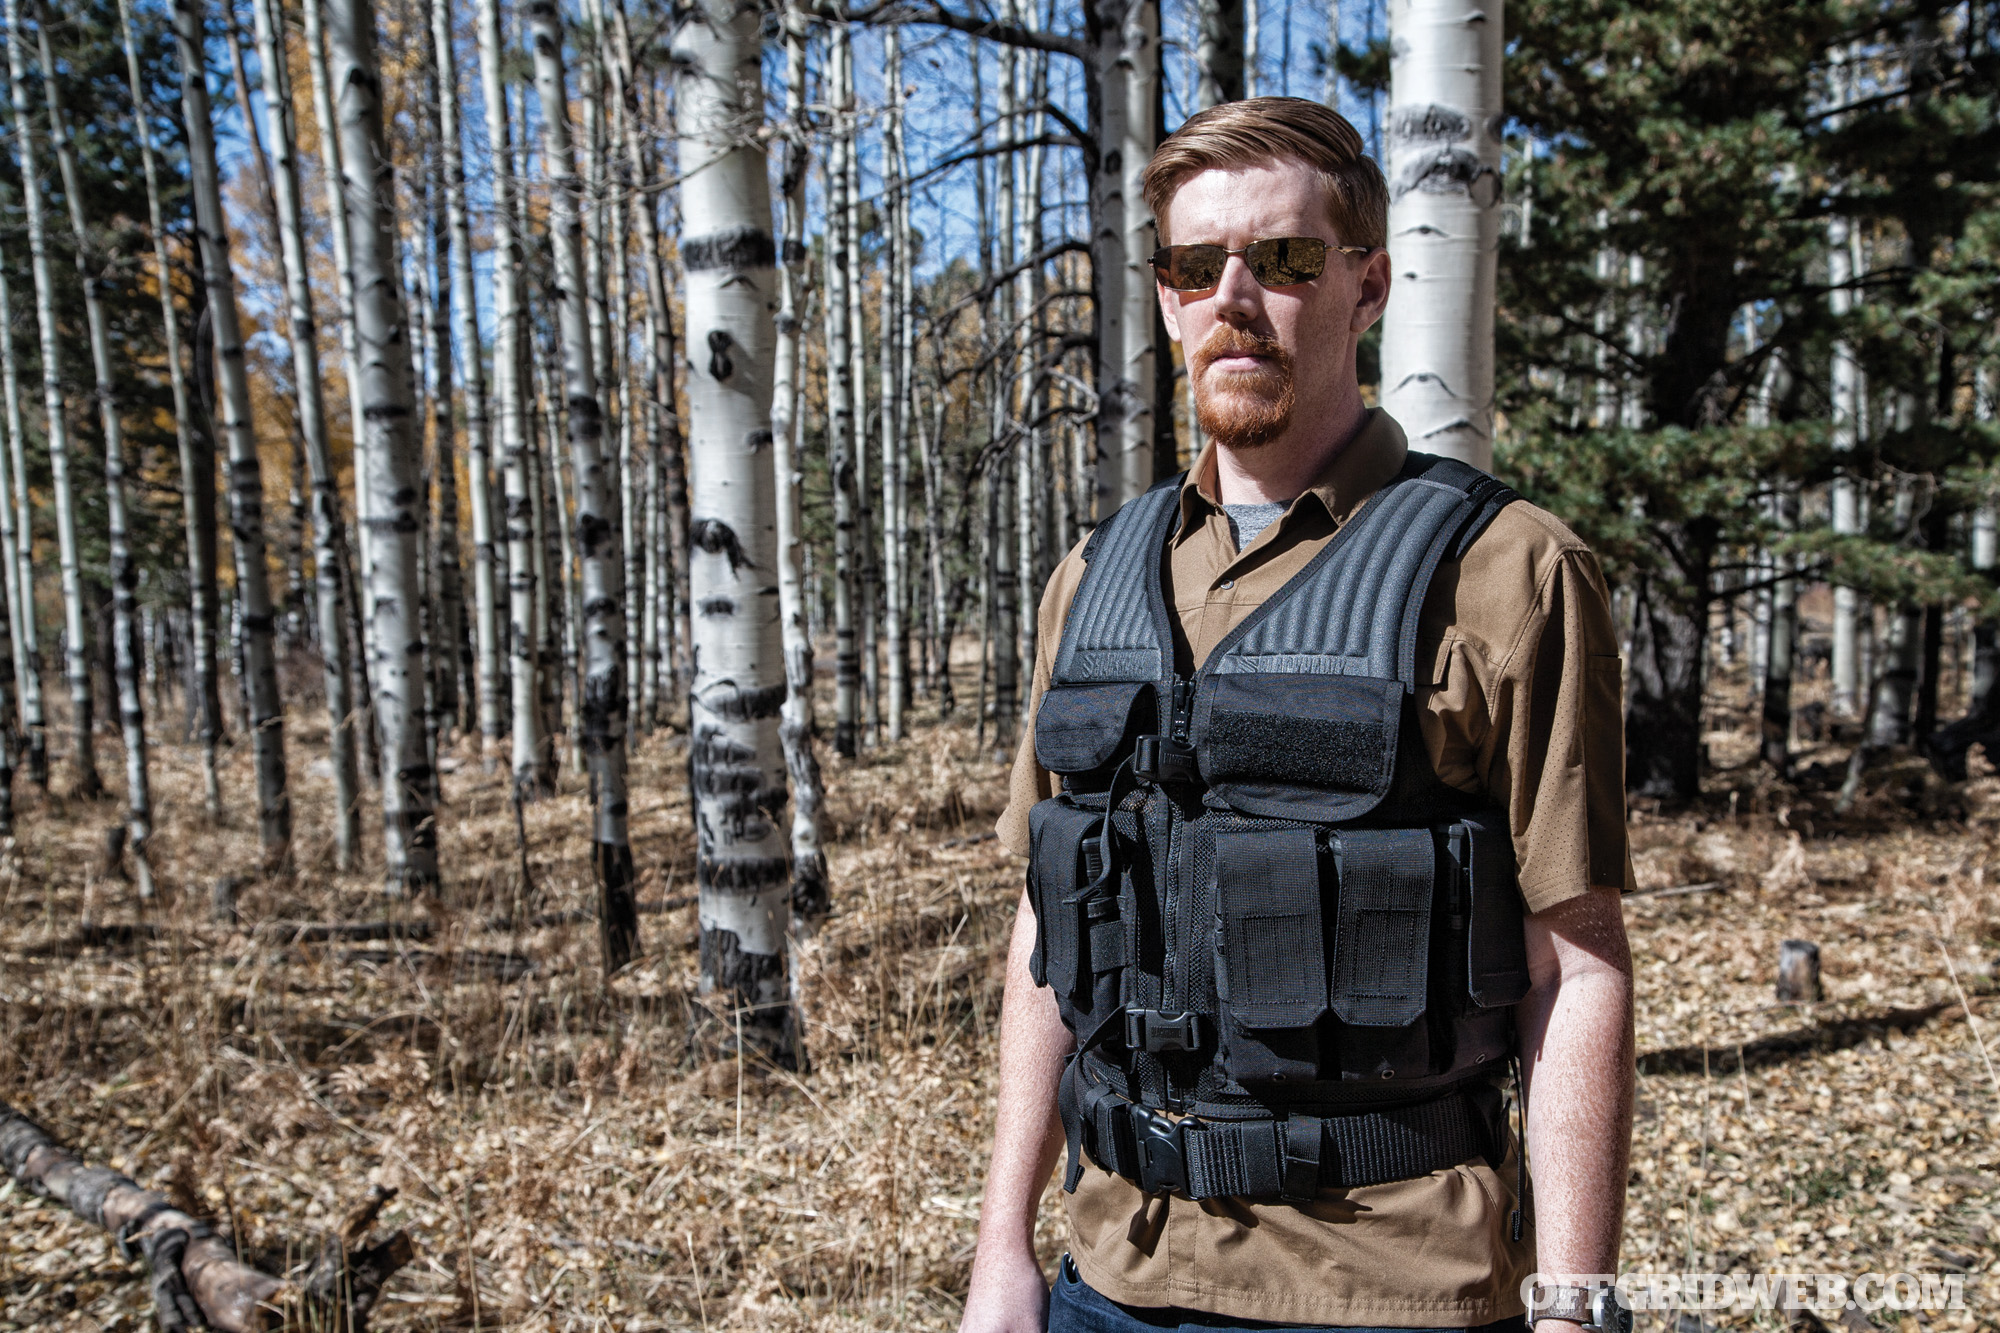
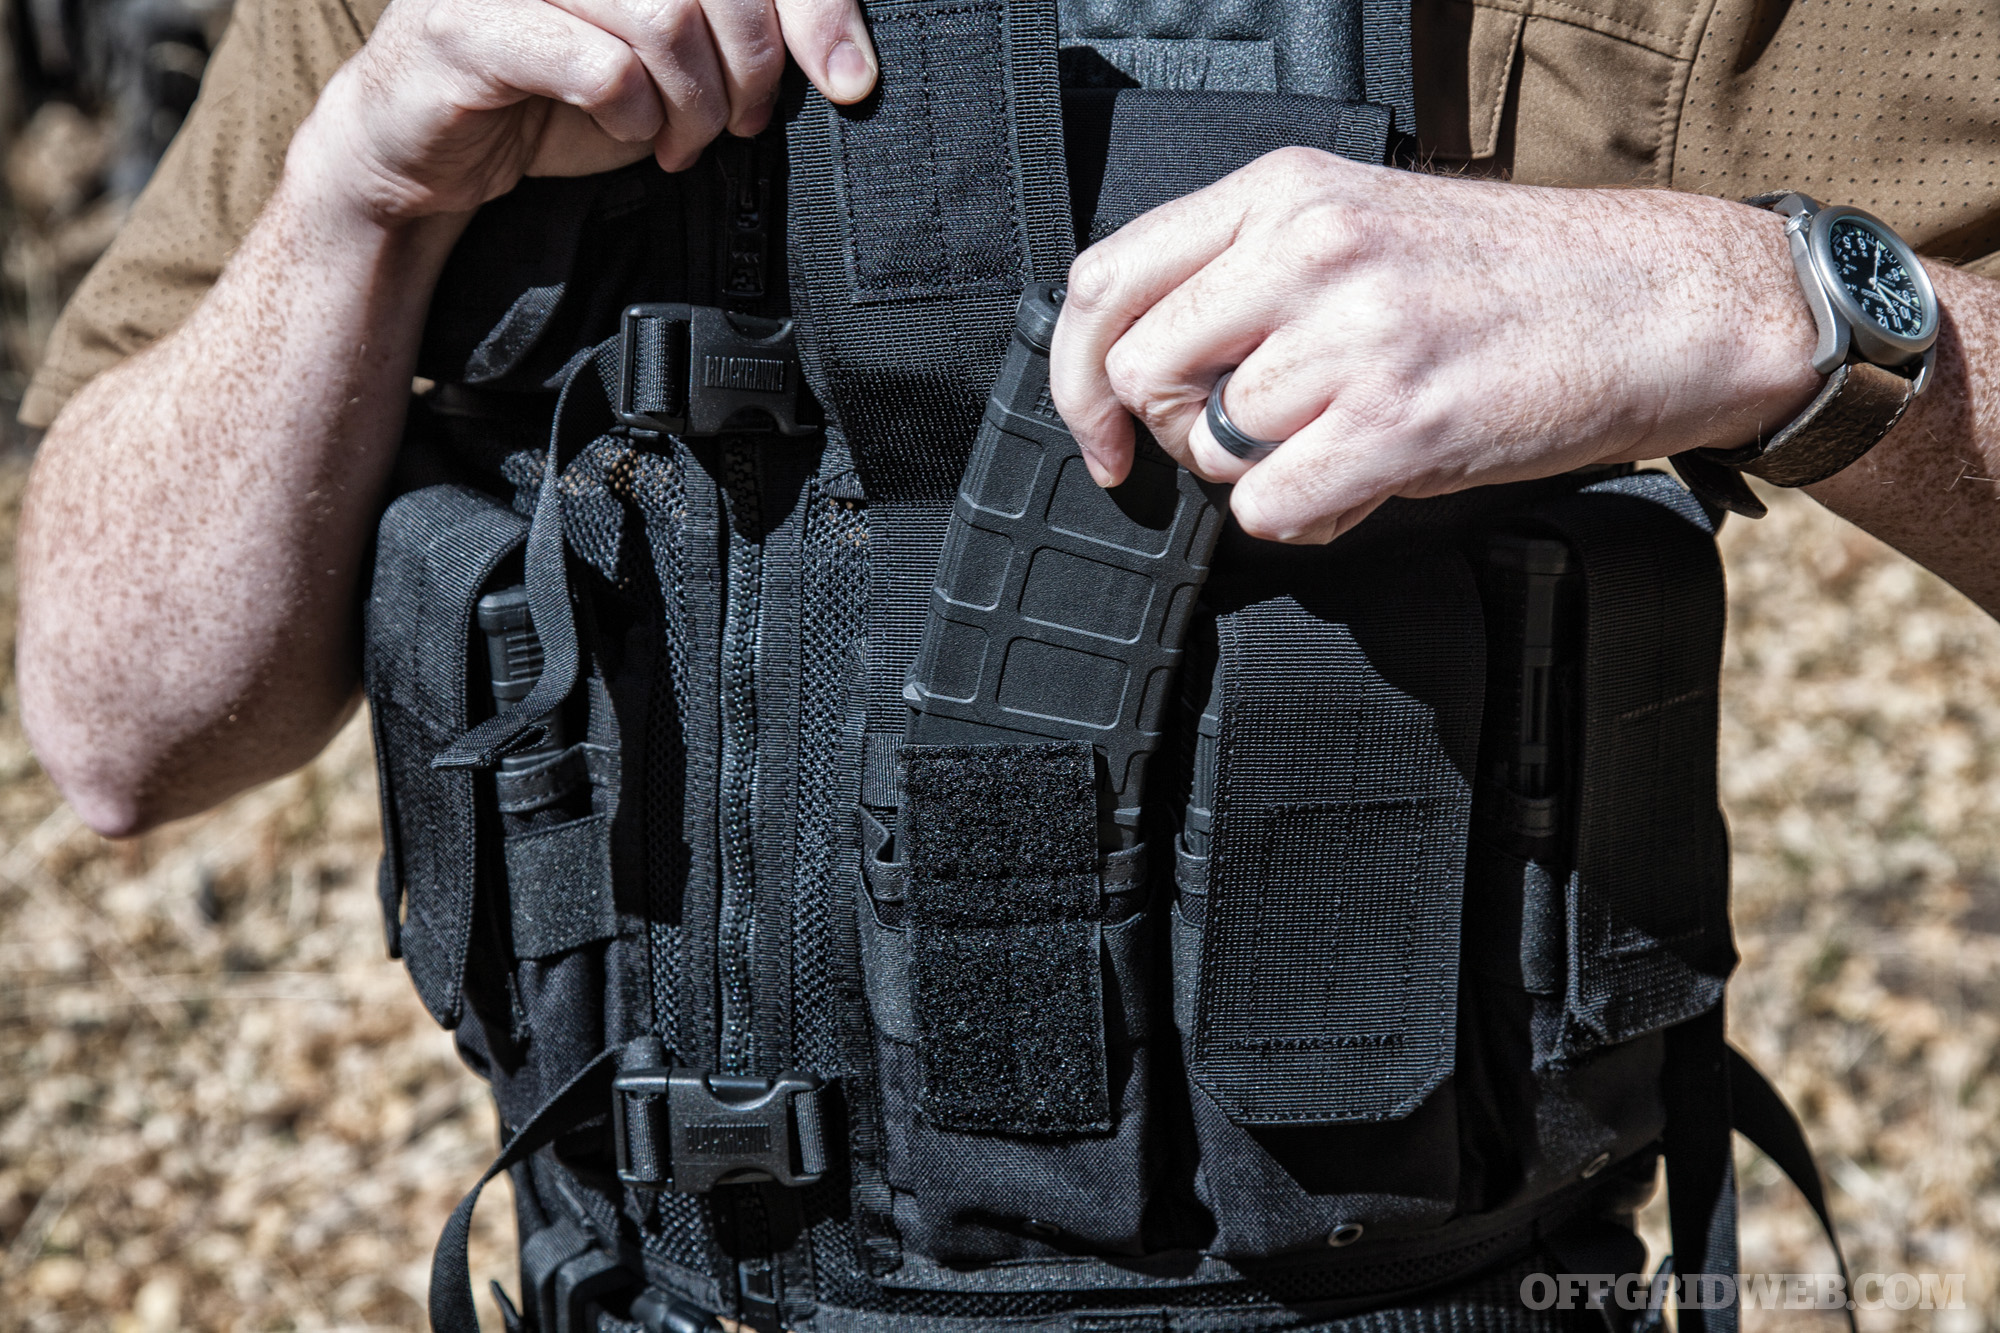
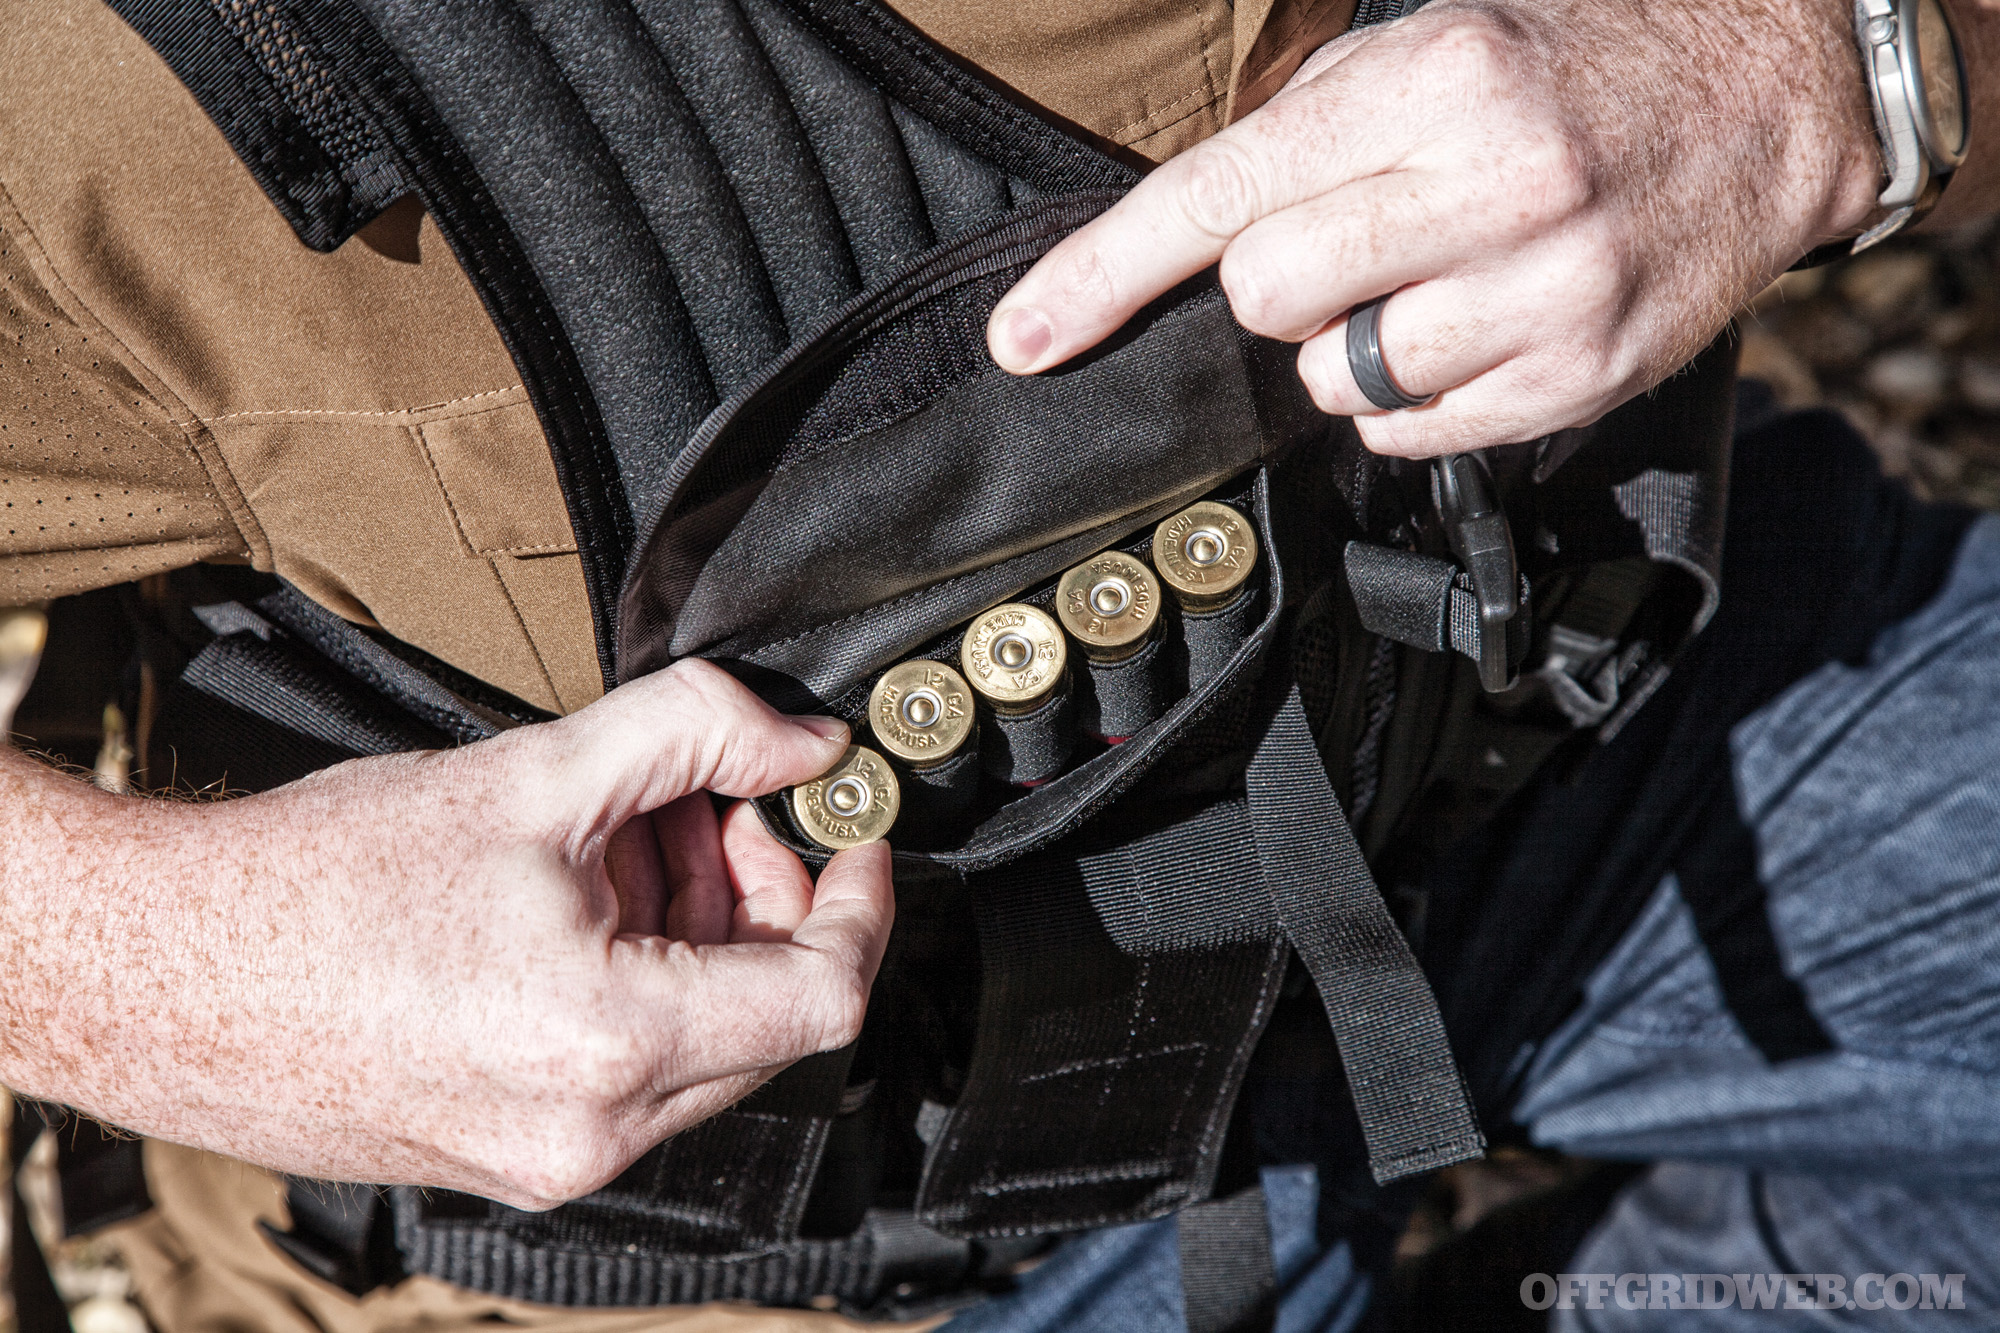
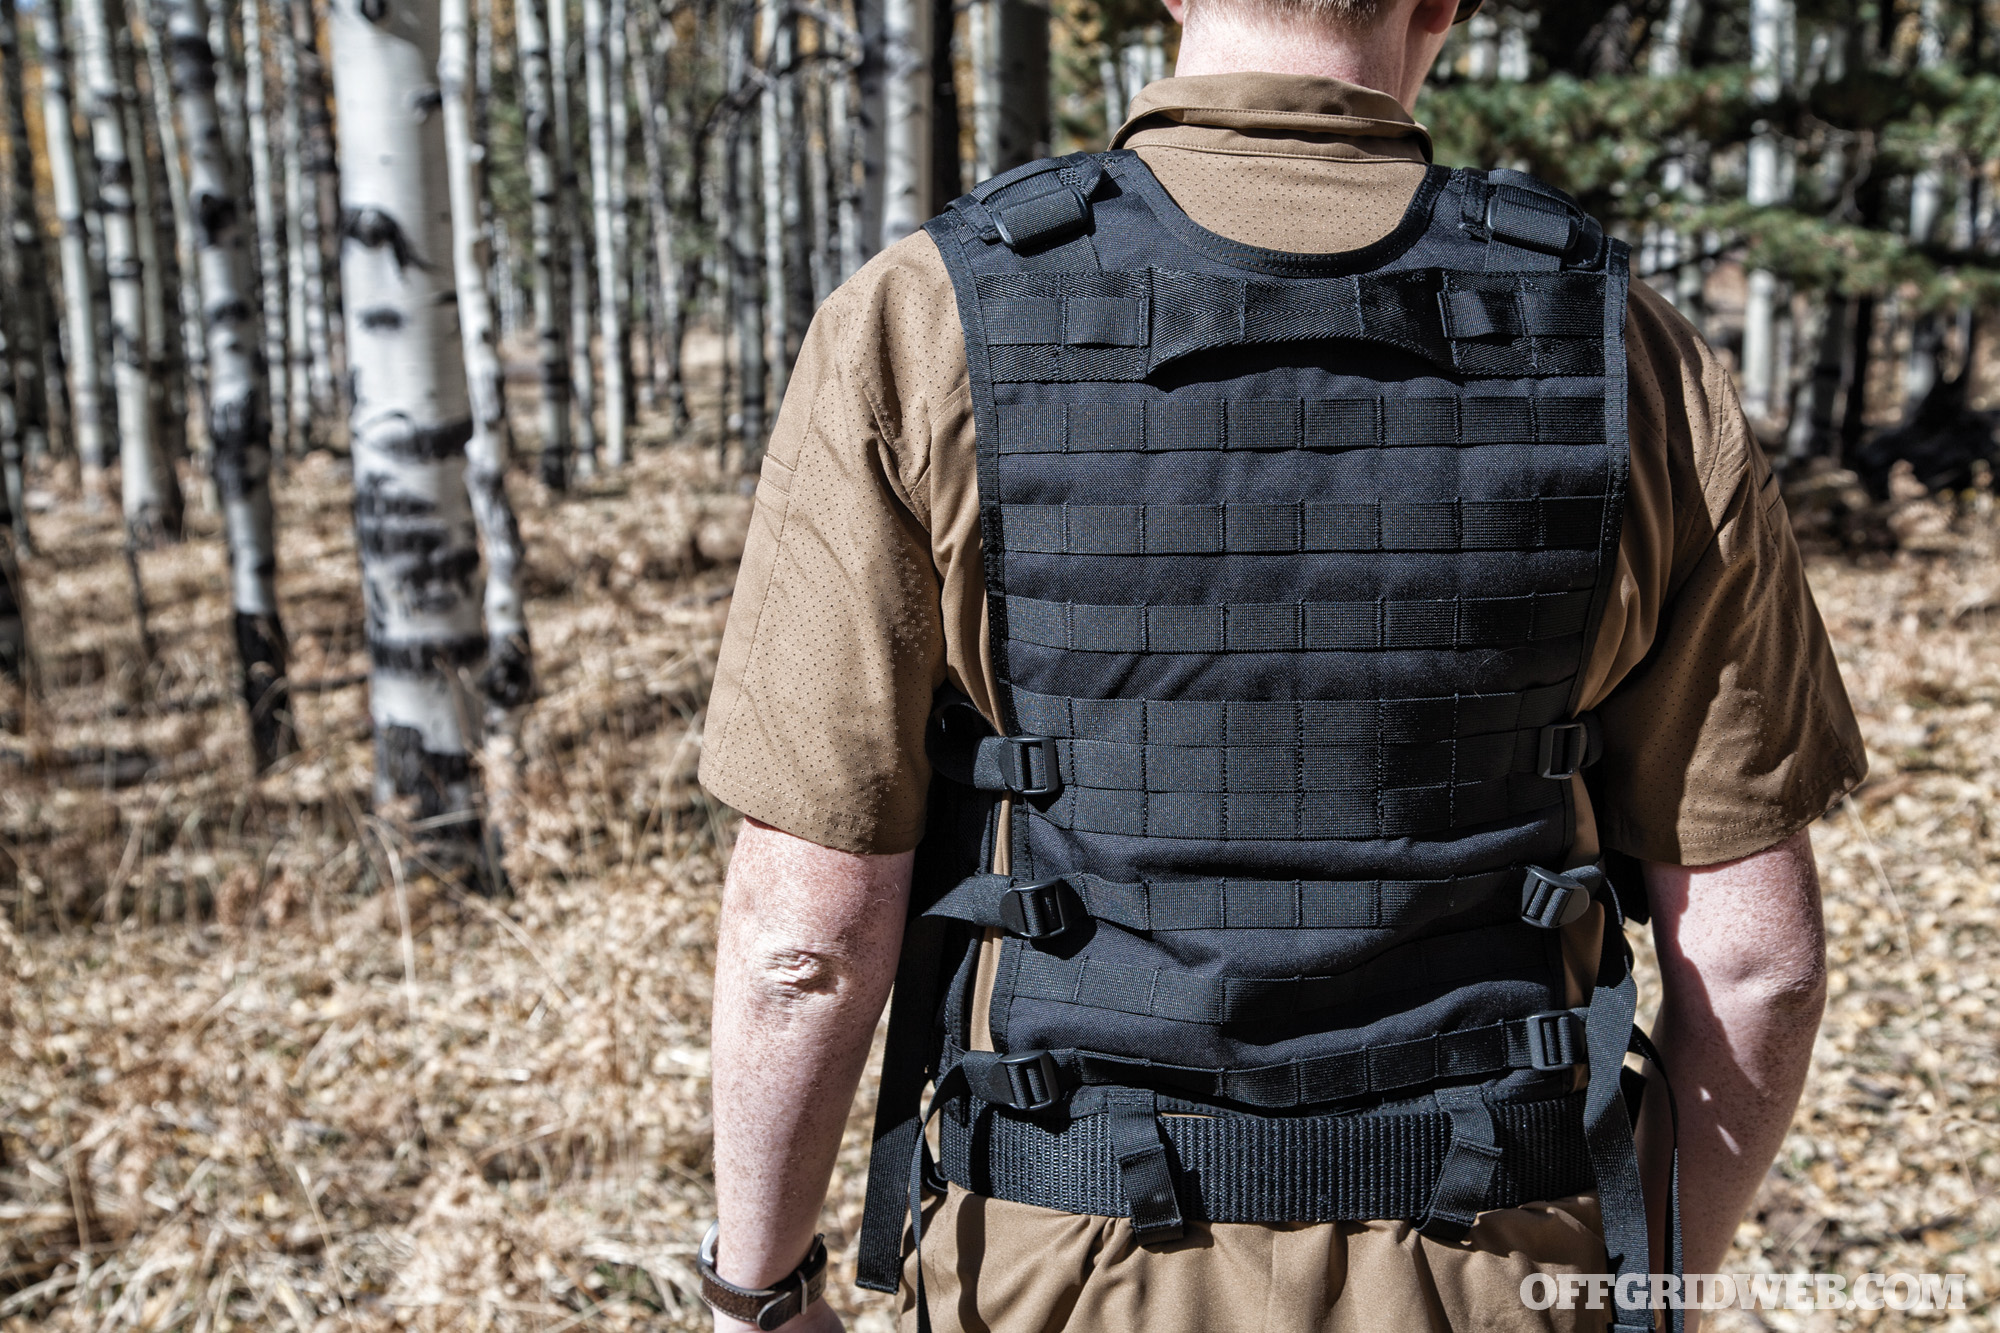
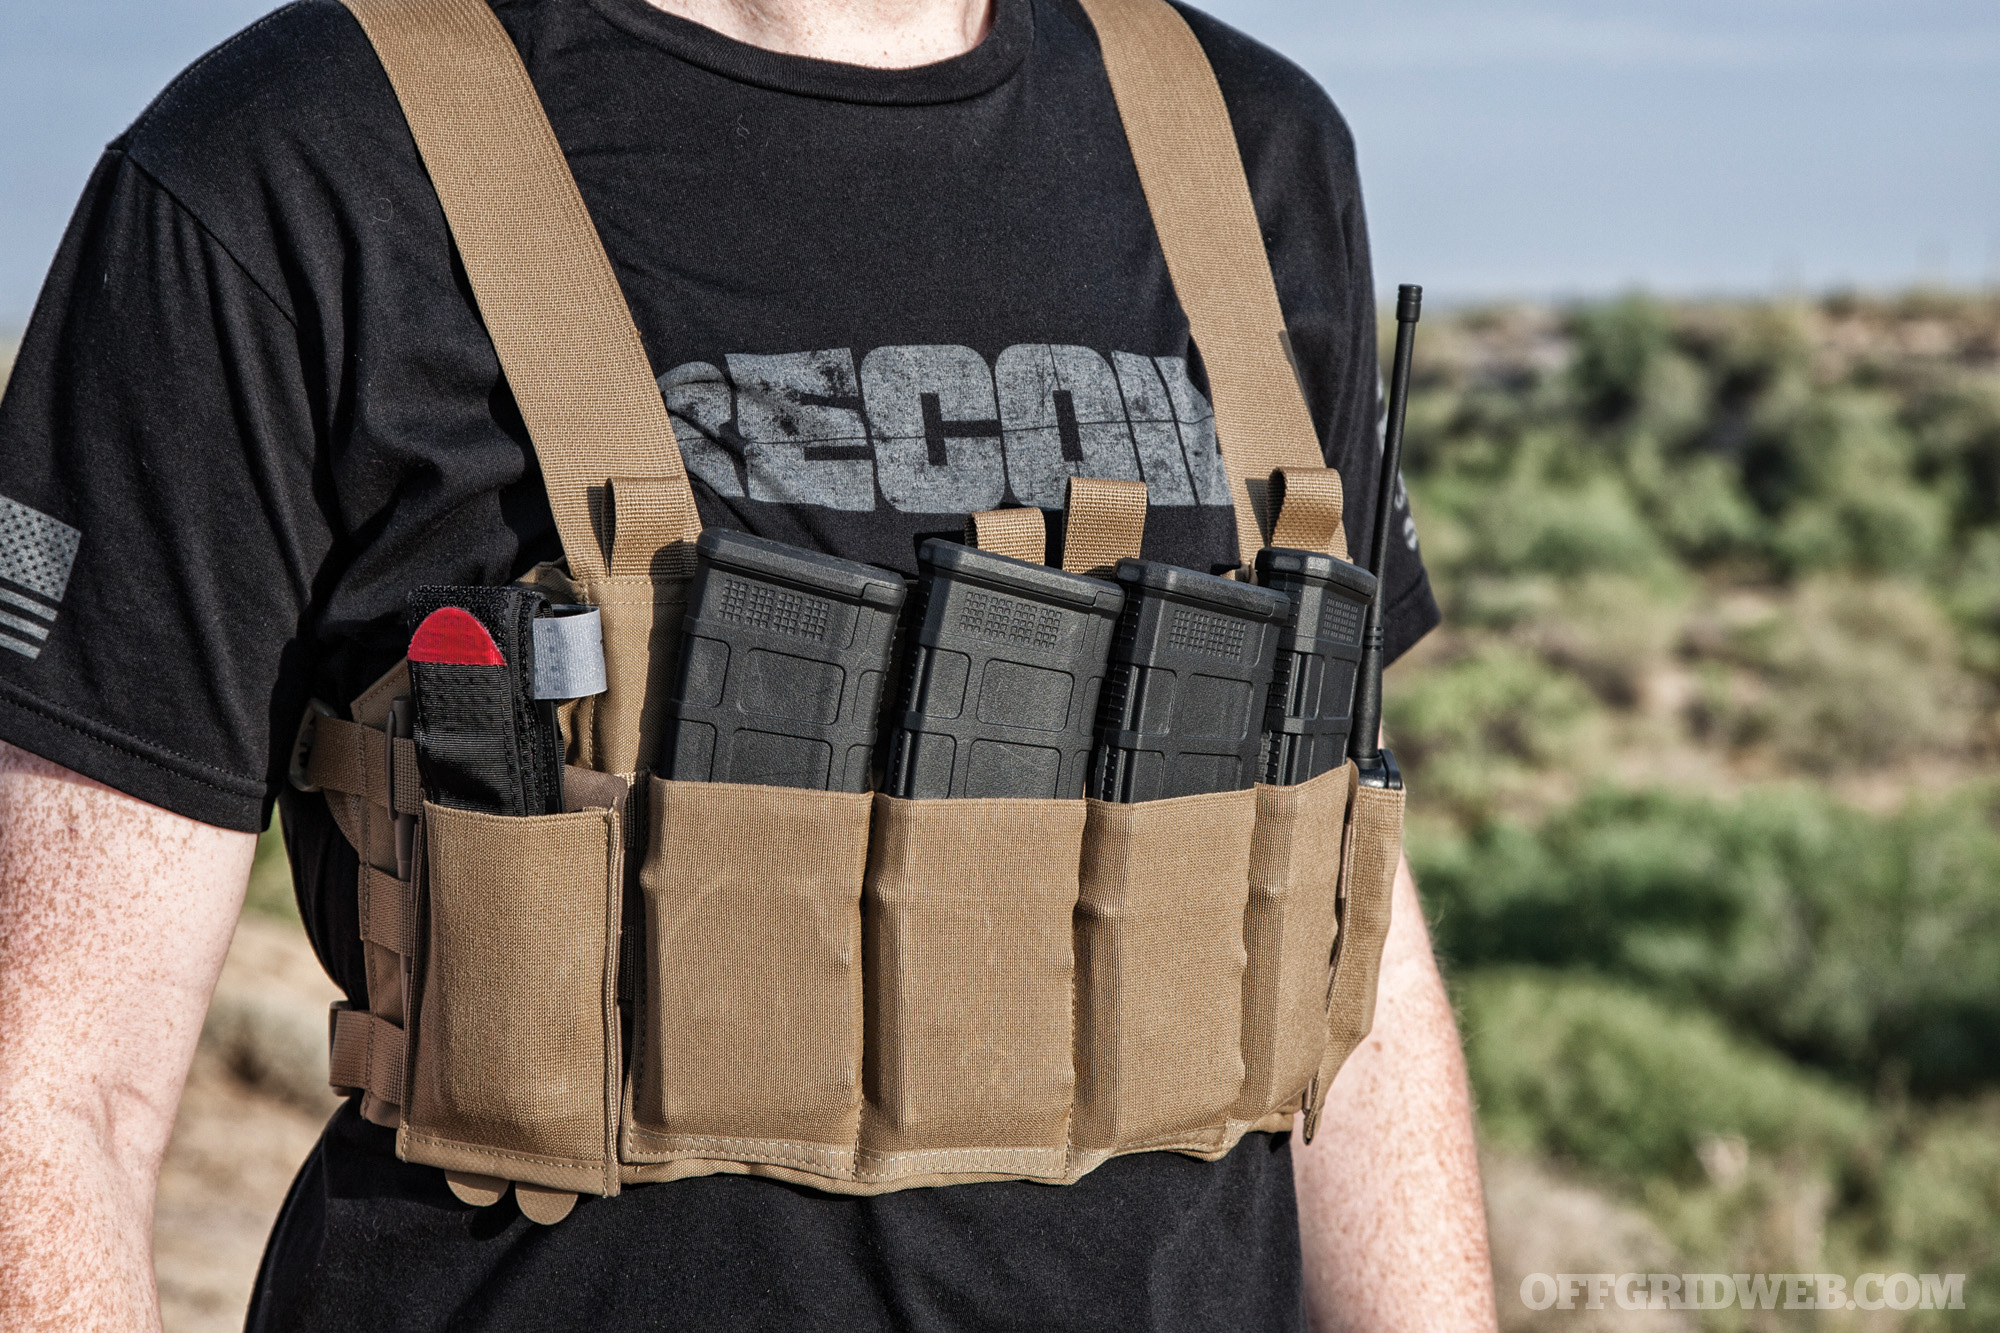
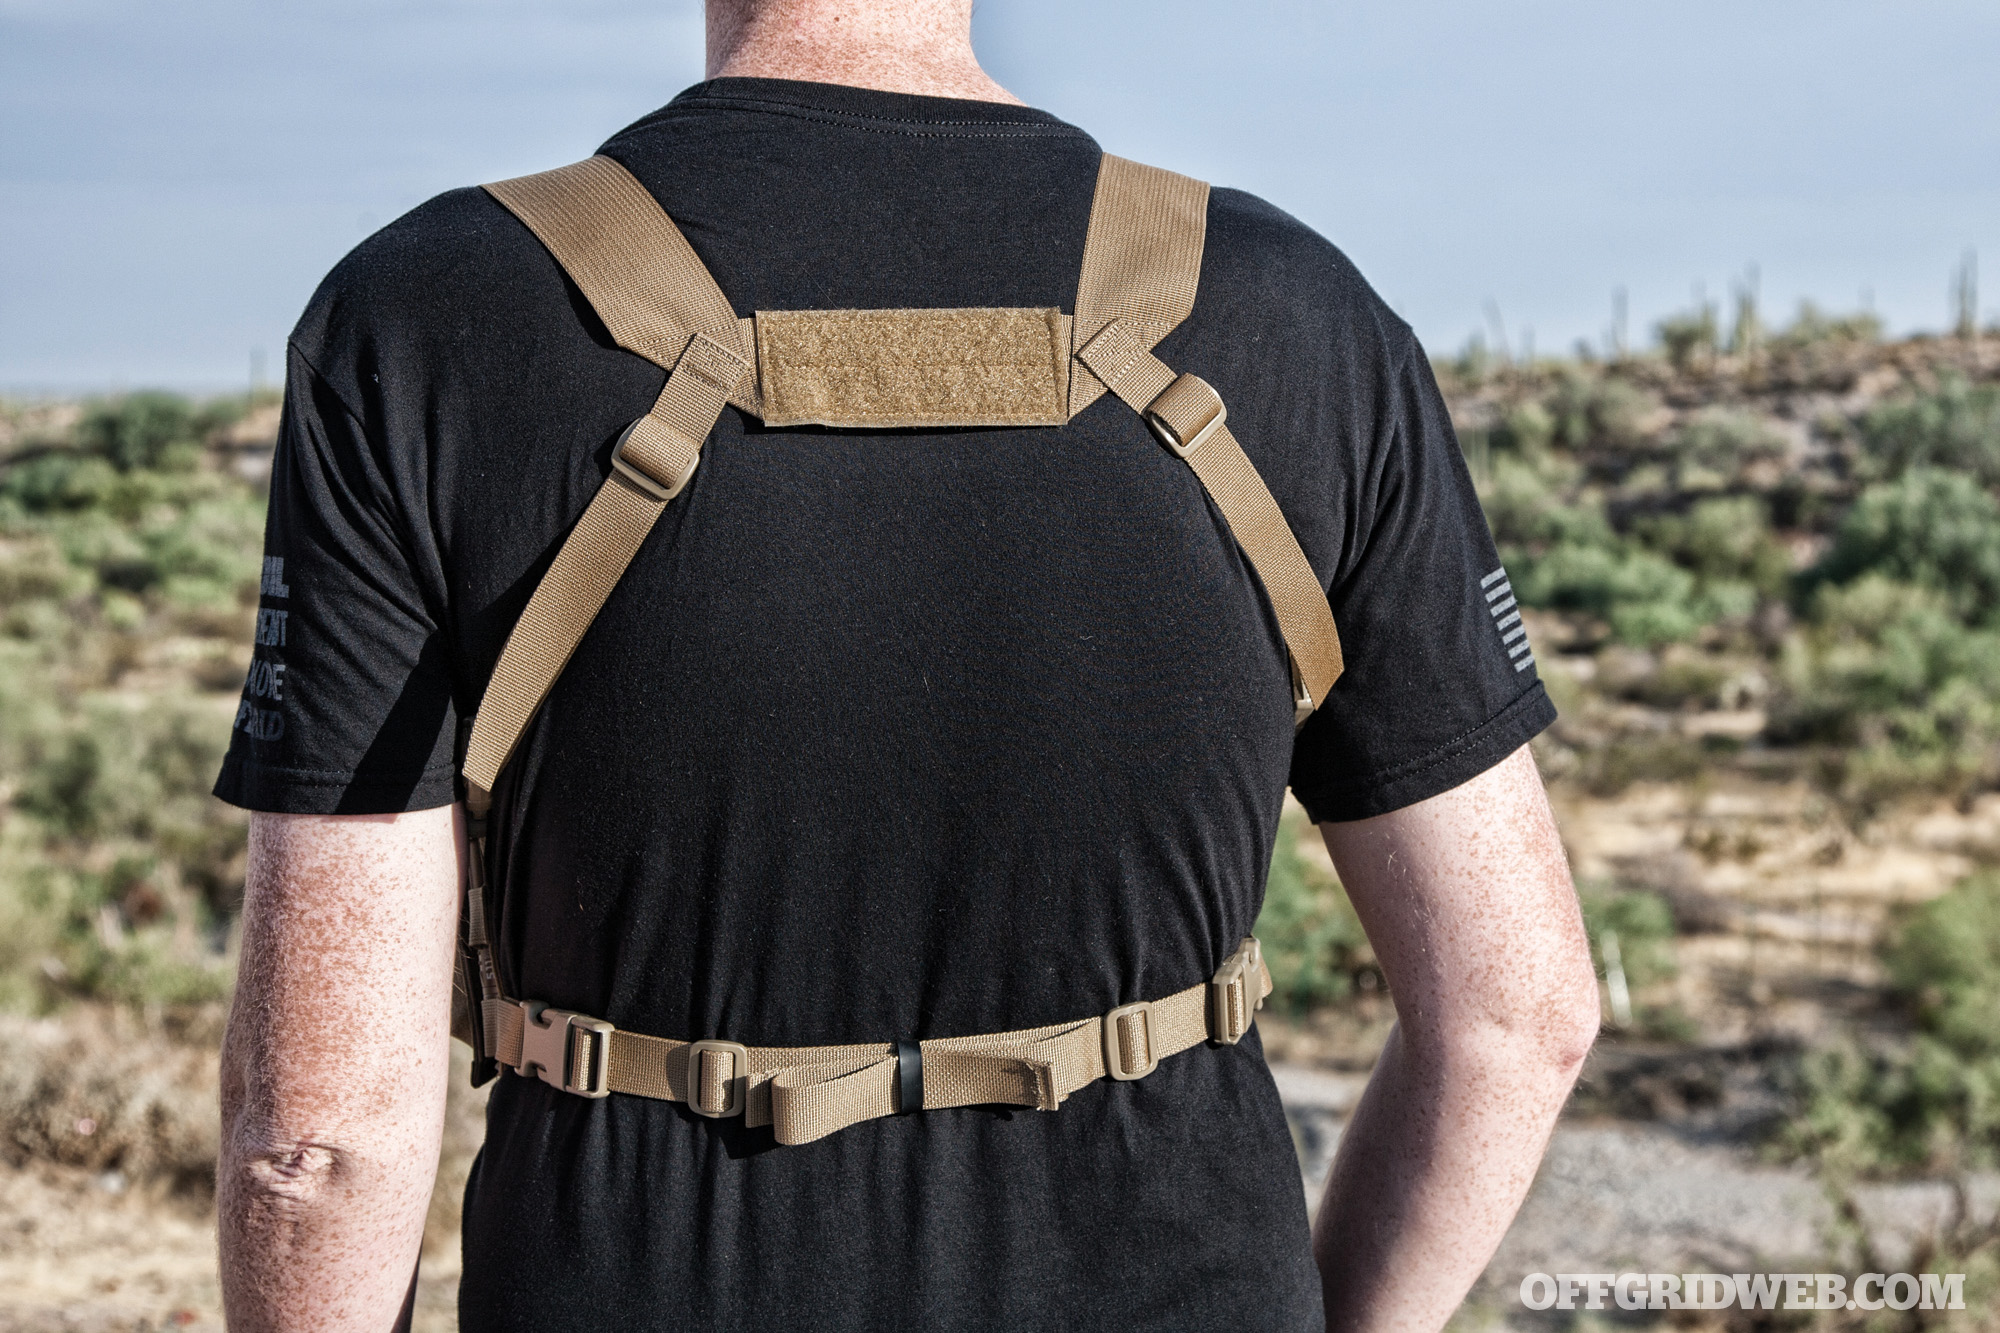
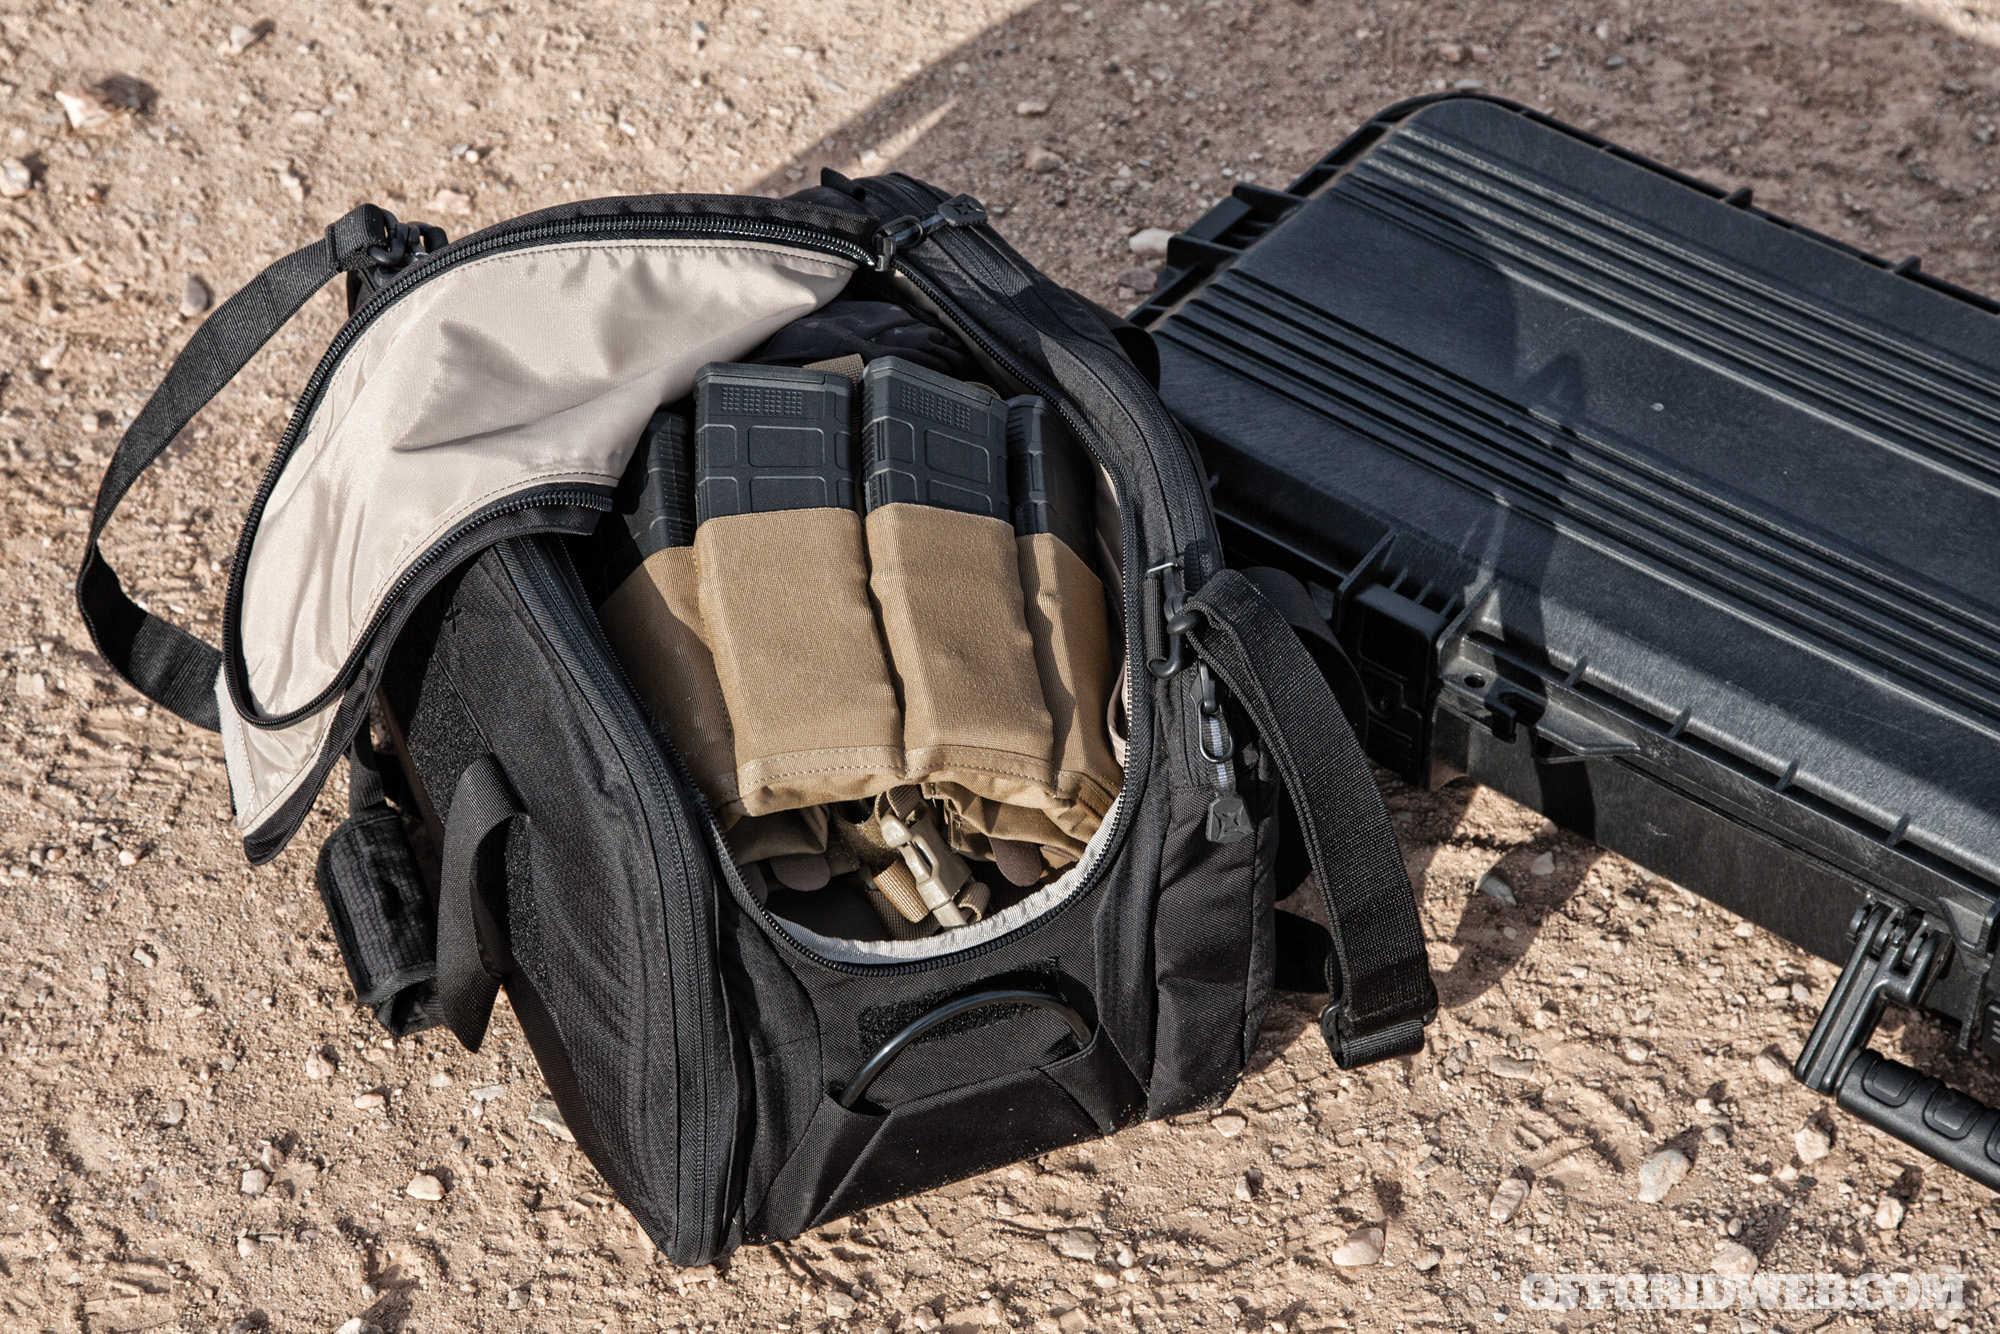
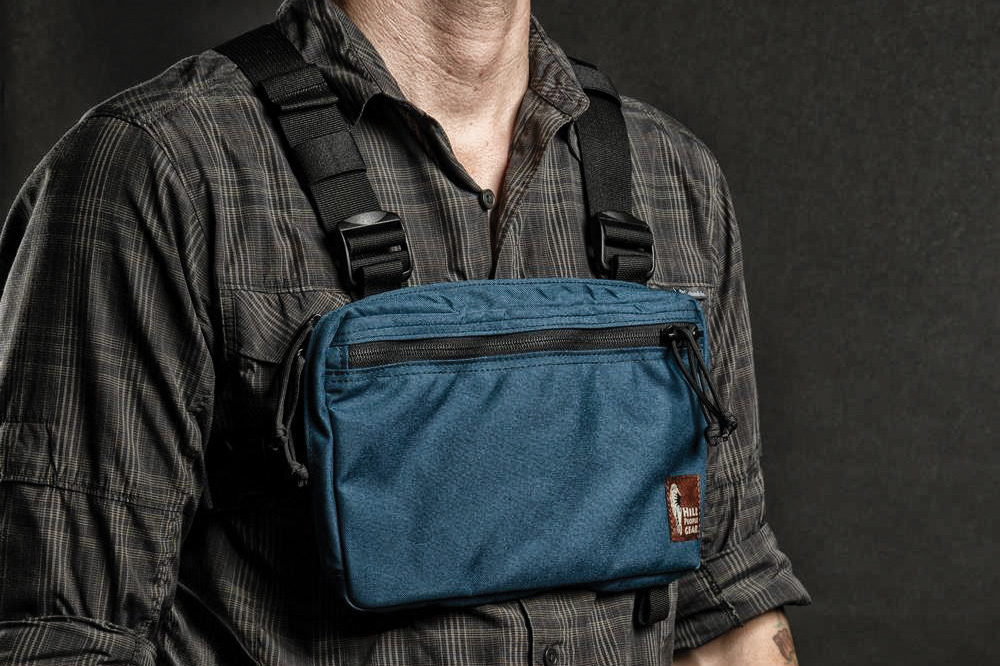
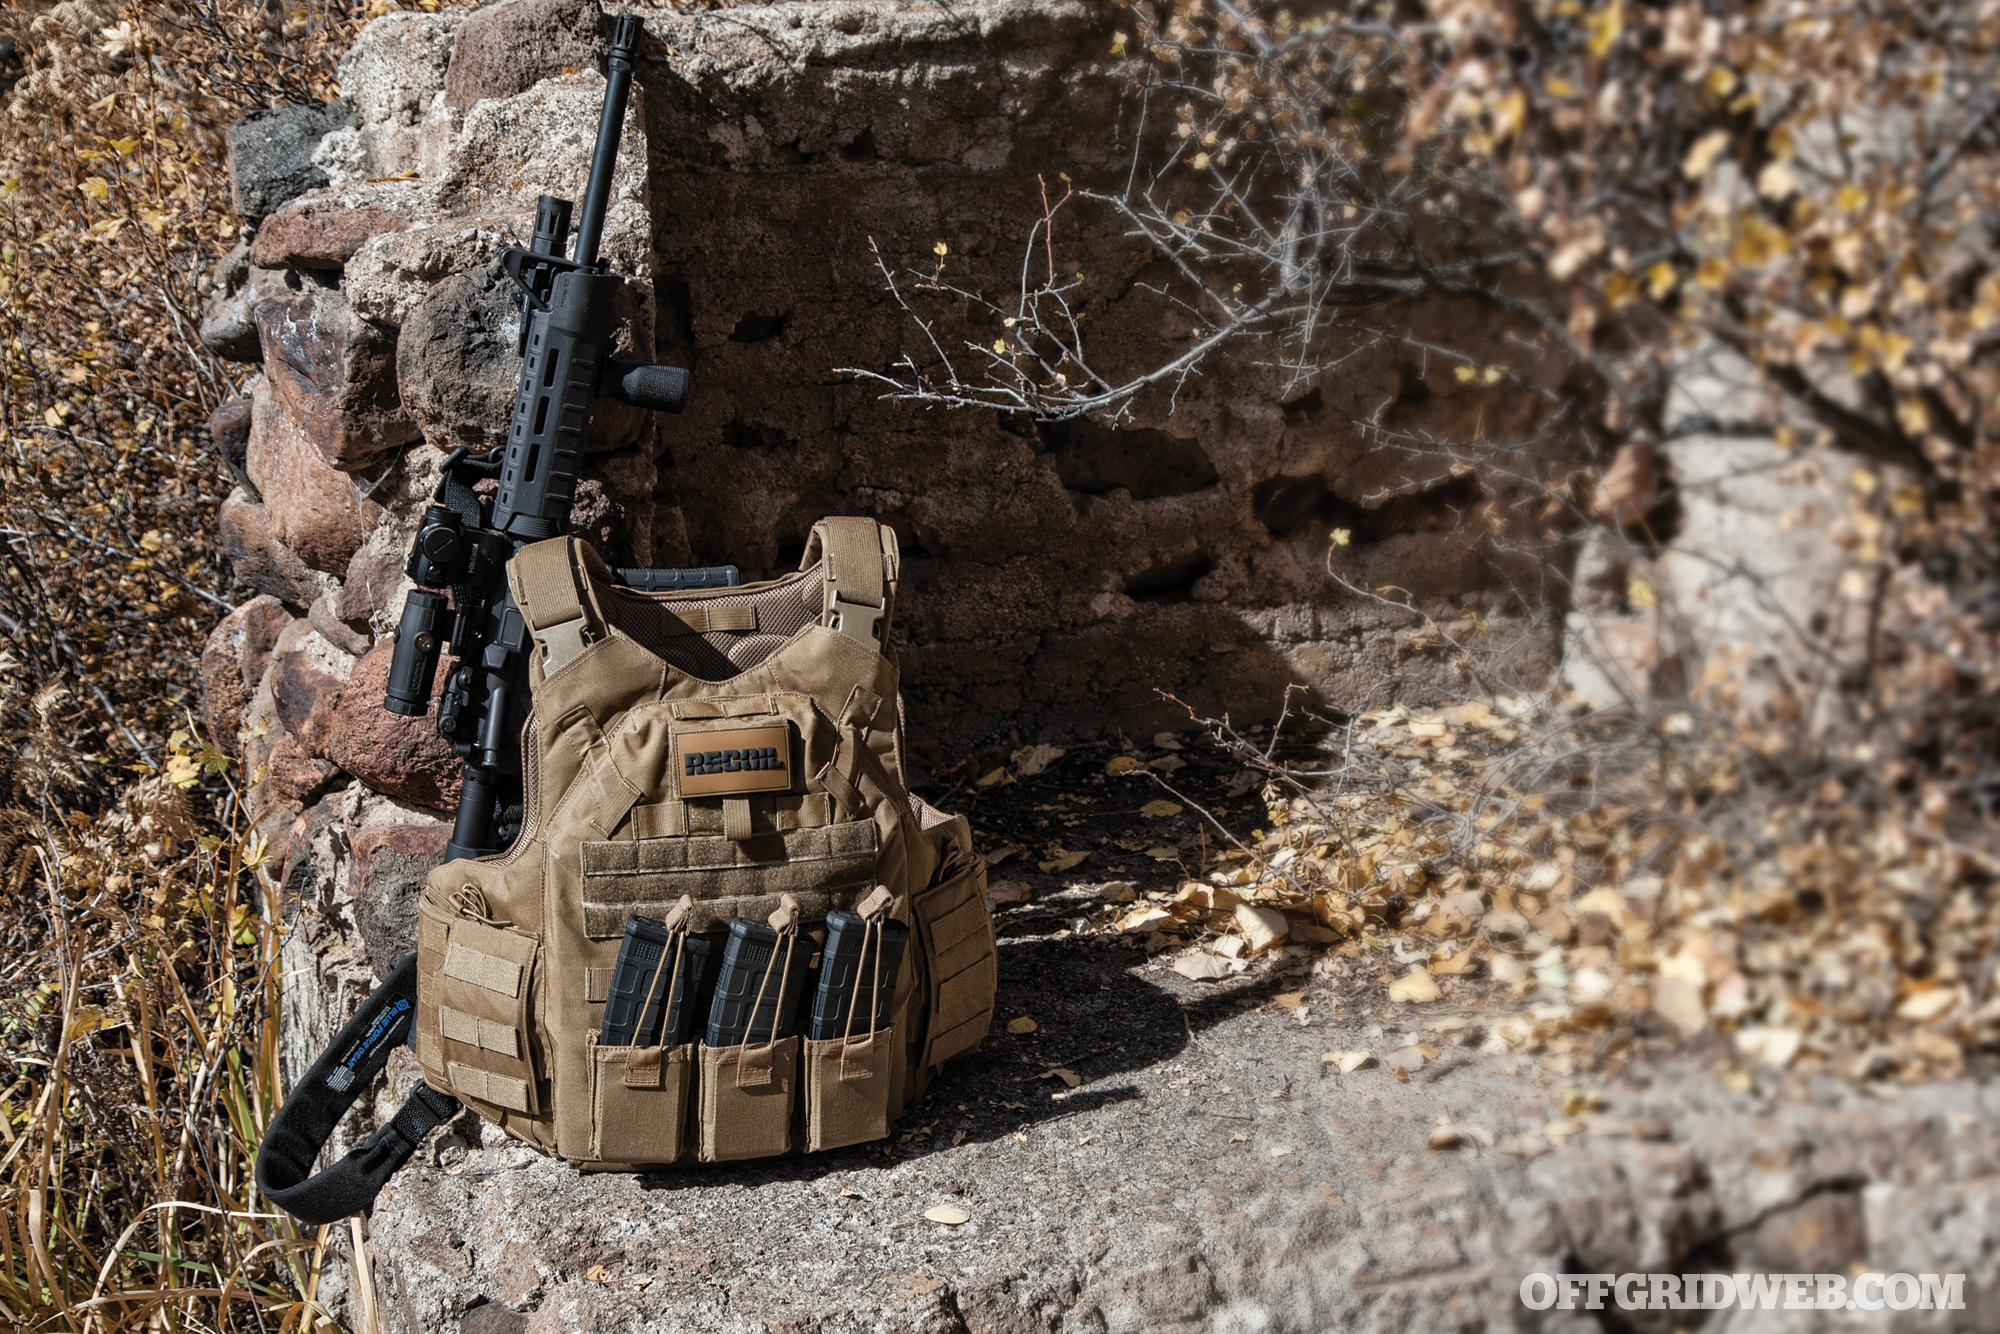

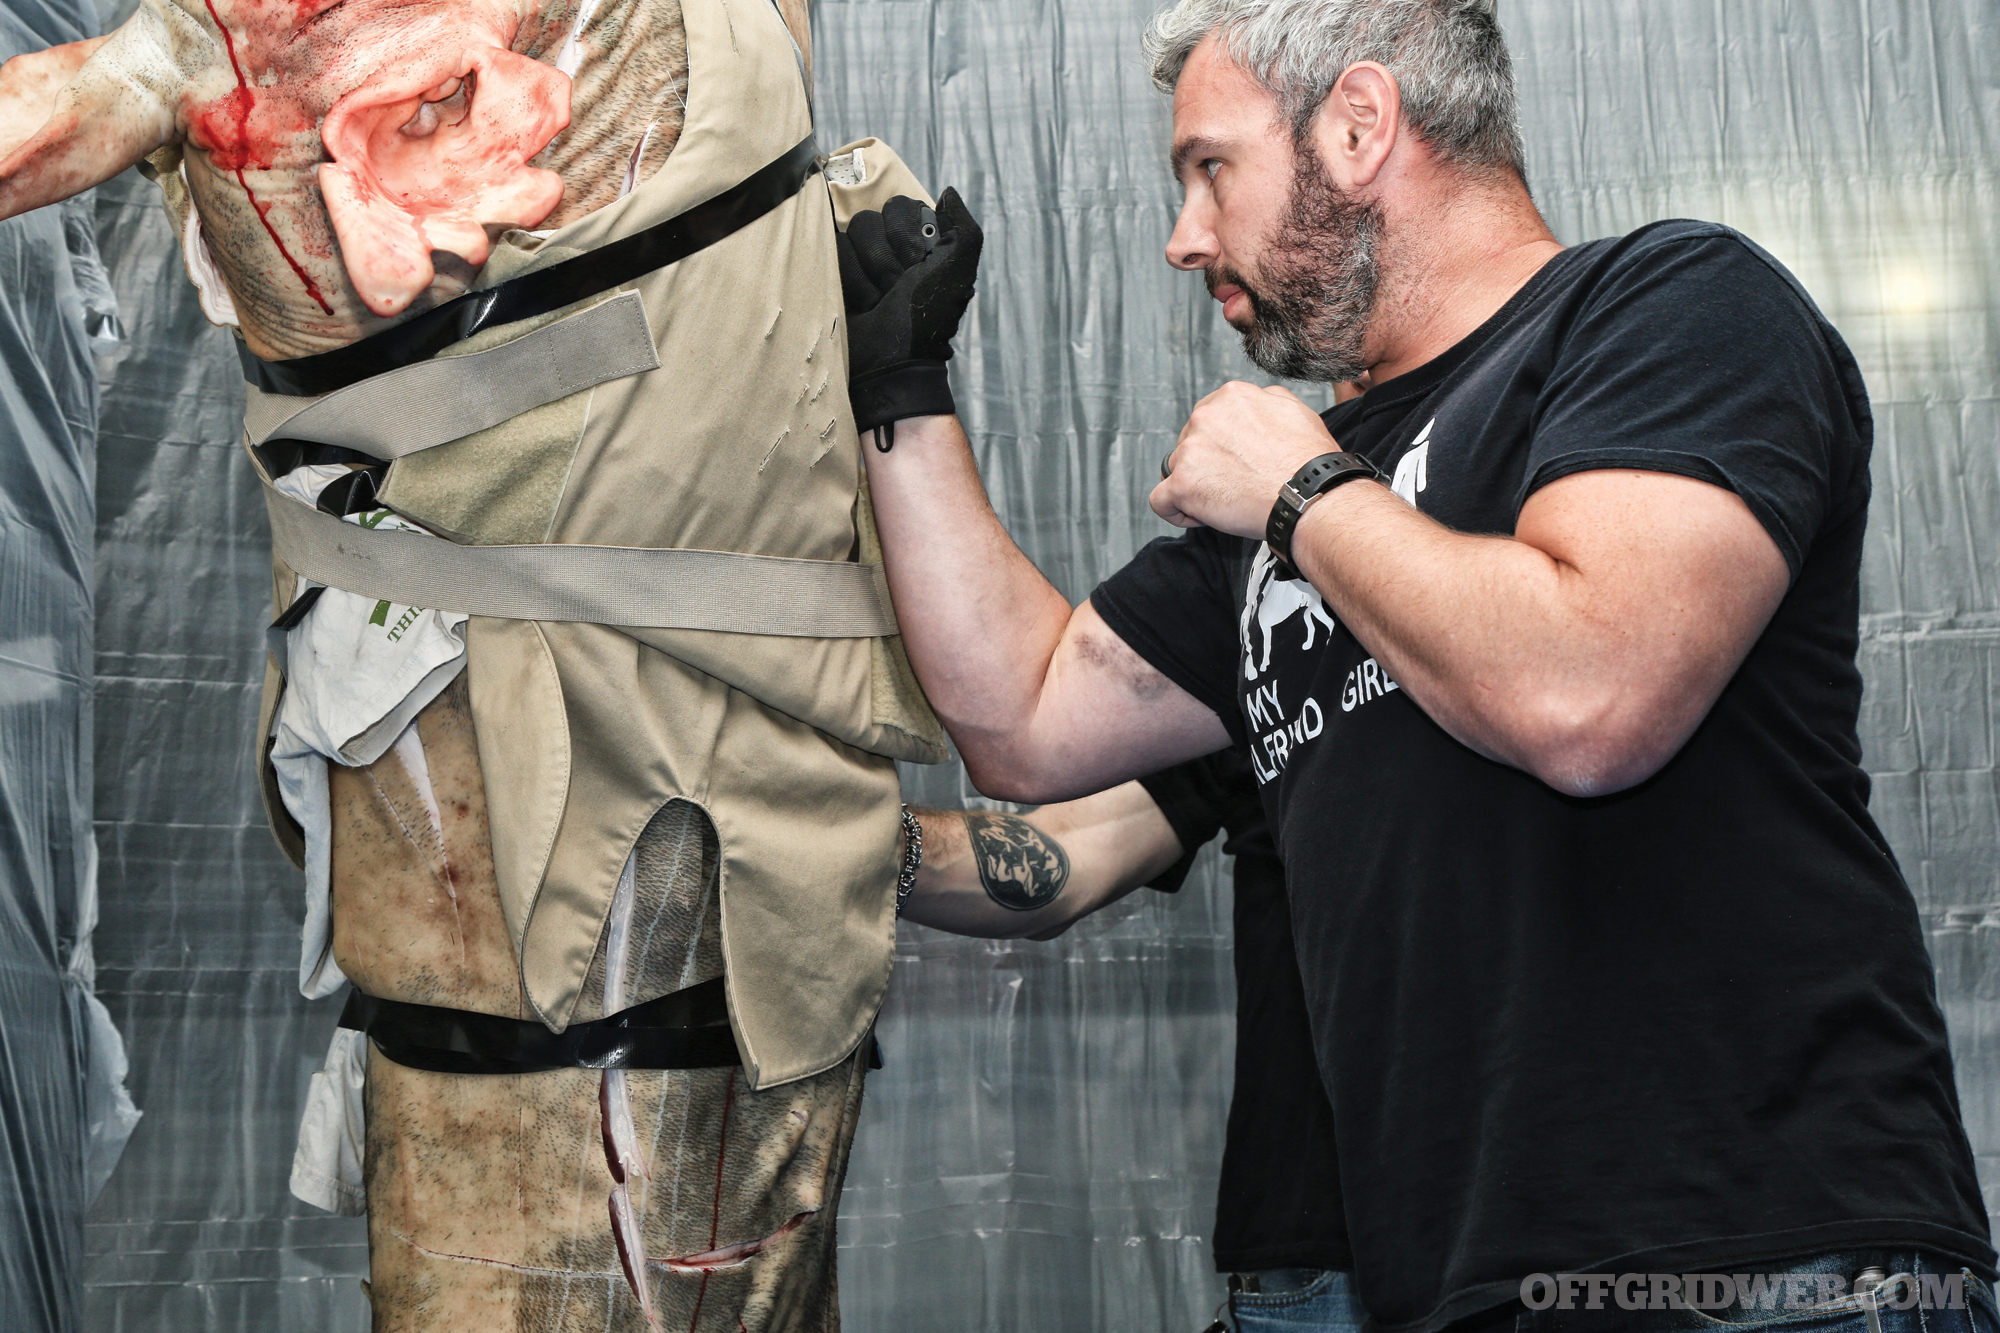
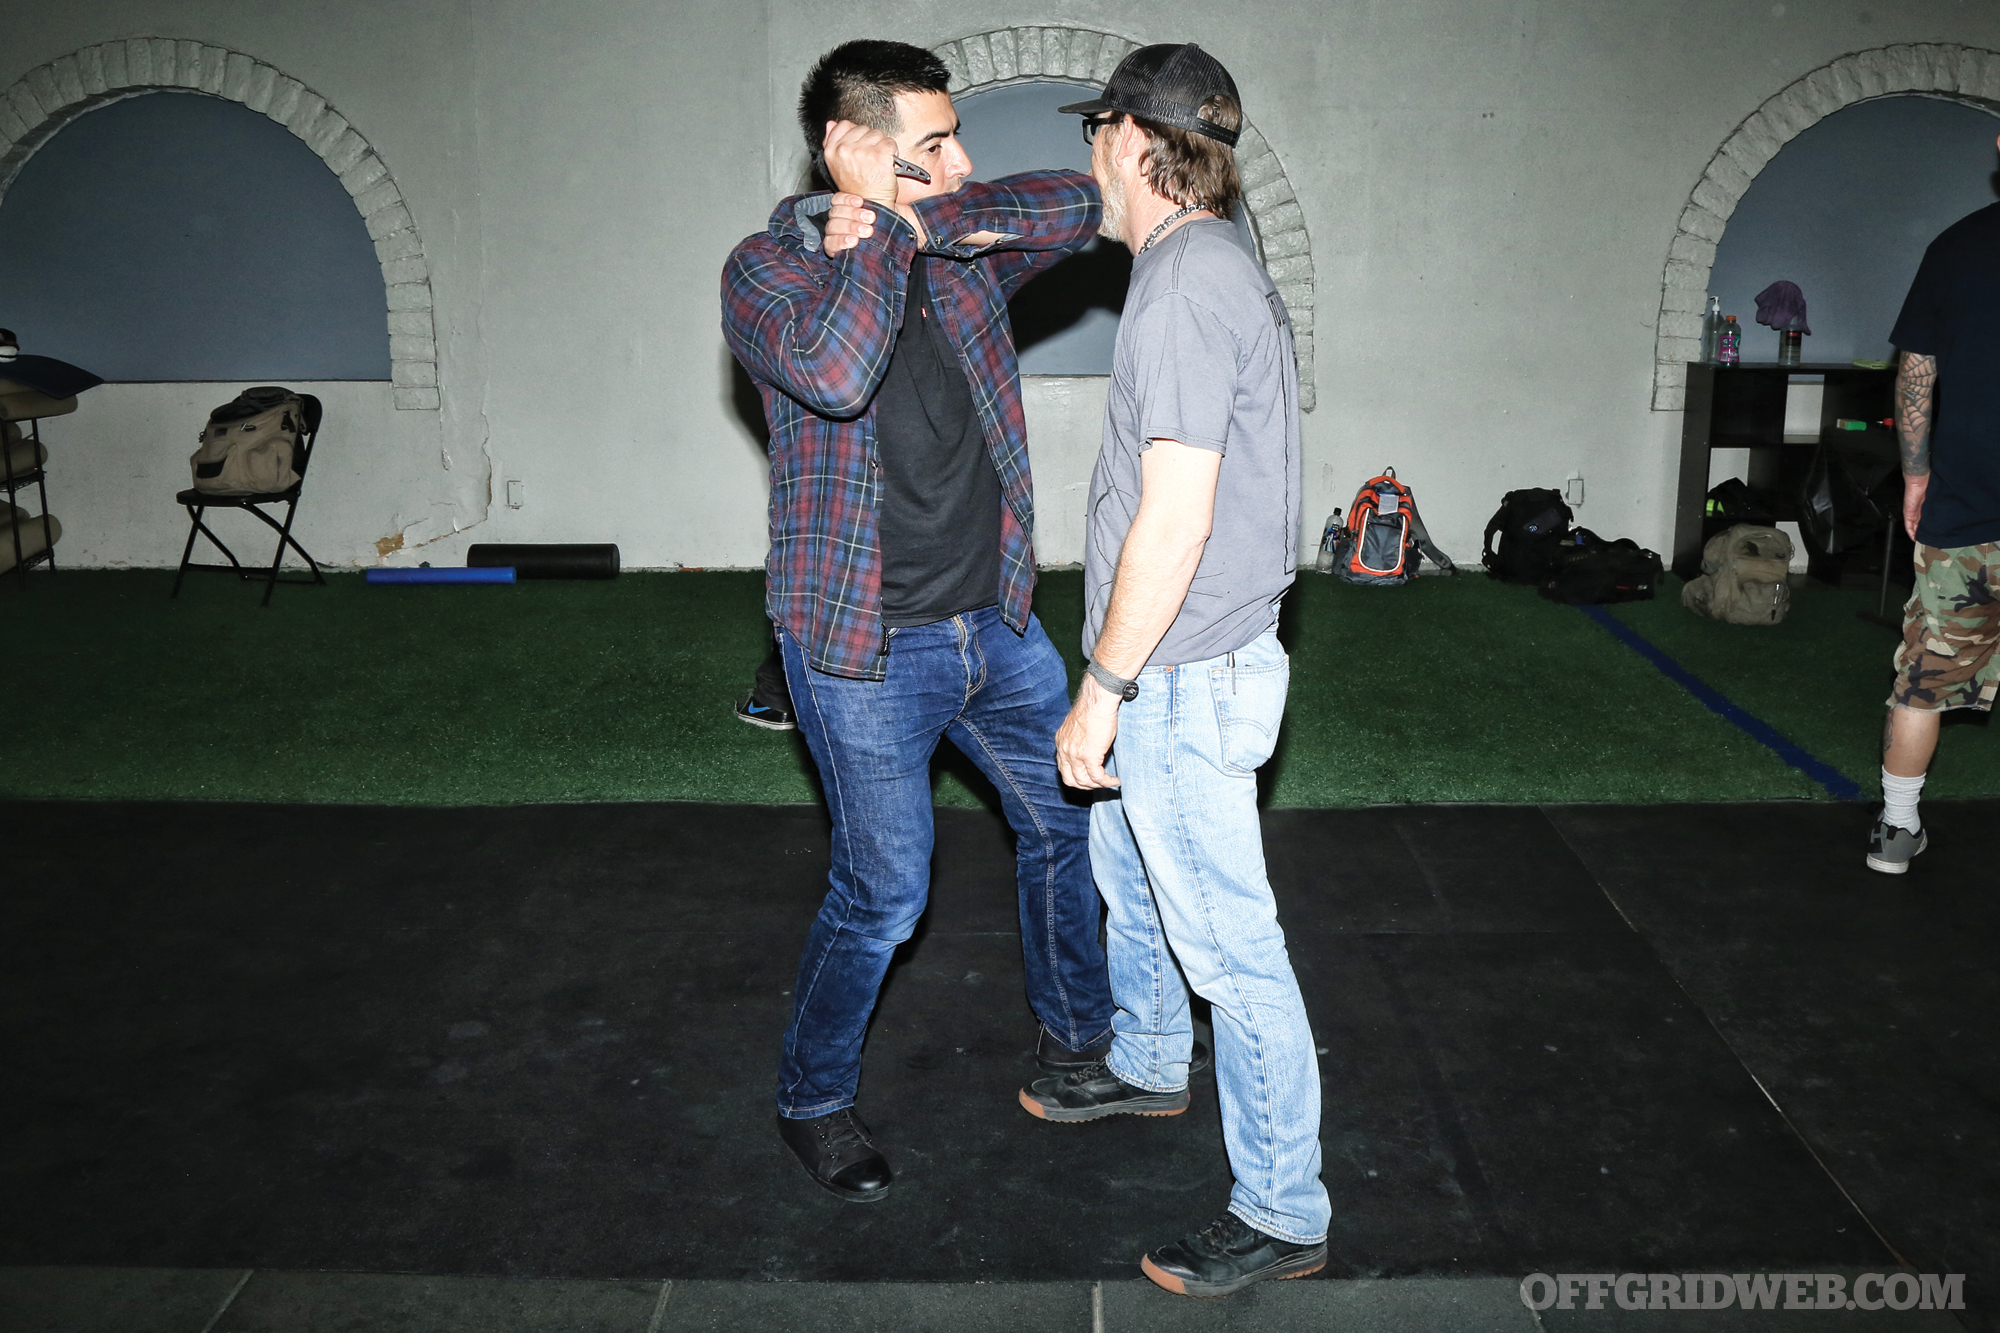 Above: Attack angle #1: tip-down stab from the top to reach the subclavian artery
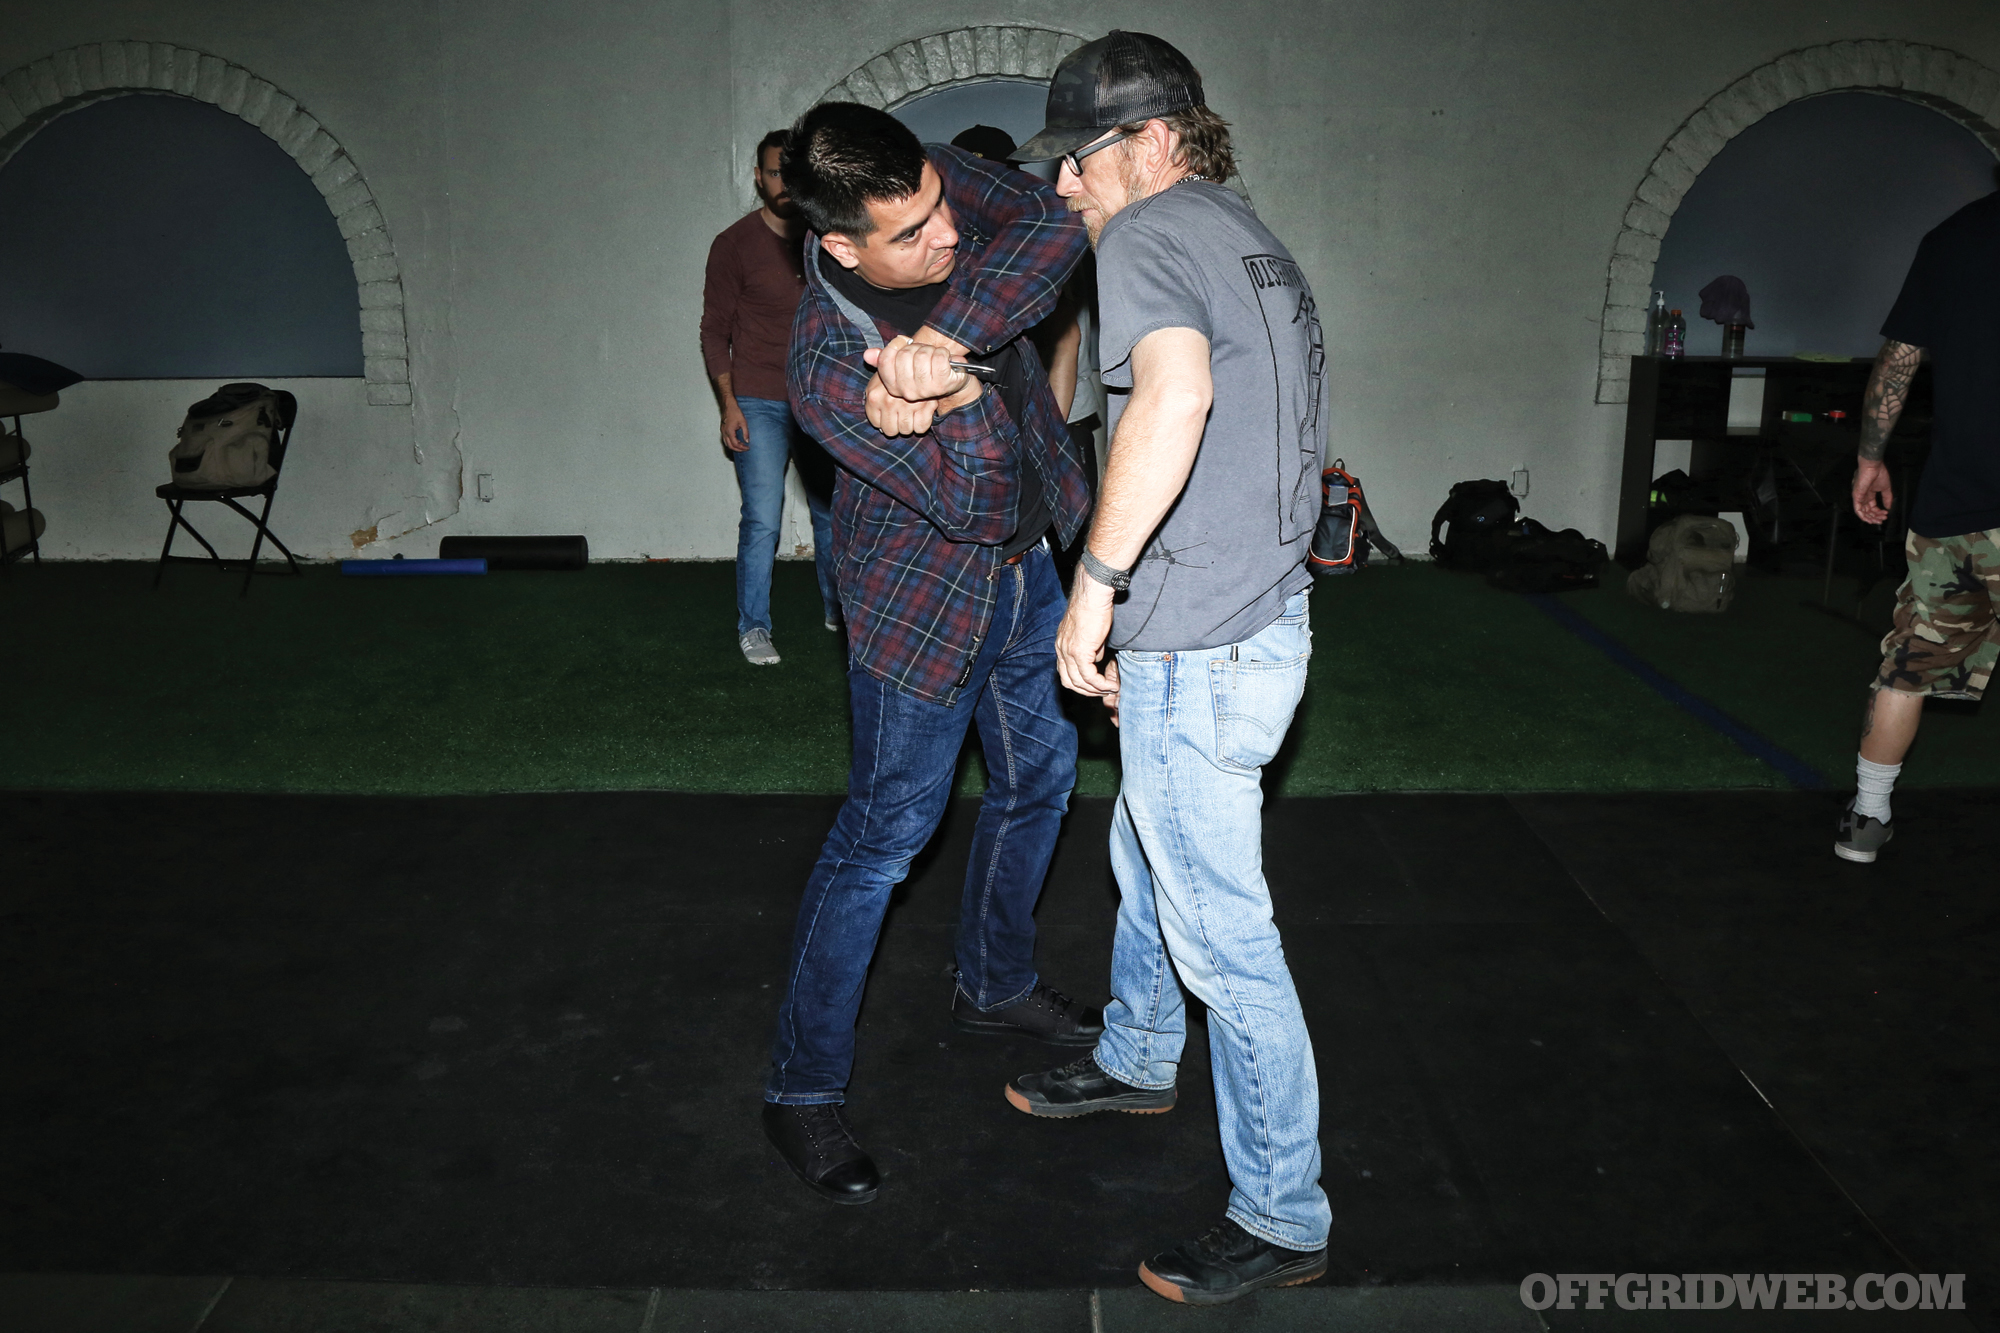
 Above: The eclectic and mischievous collection of tools put to the test during Organic Medium Entry.